How to cut the ceiling plinth in the corners?
Proper design of the ceiling makes almost any repair beautiful and neat. Corners of baseboards carry a large load in the decoration of any room and create a general impression of the interior.
Special features
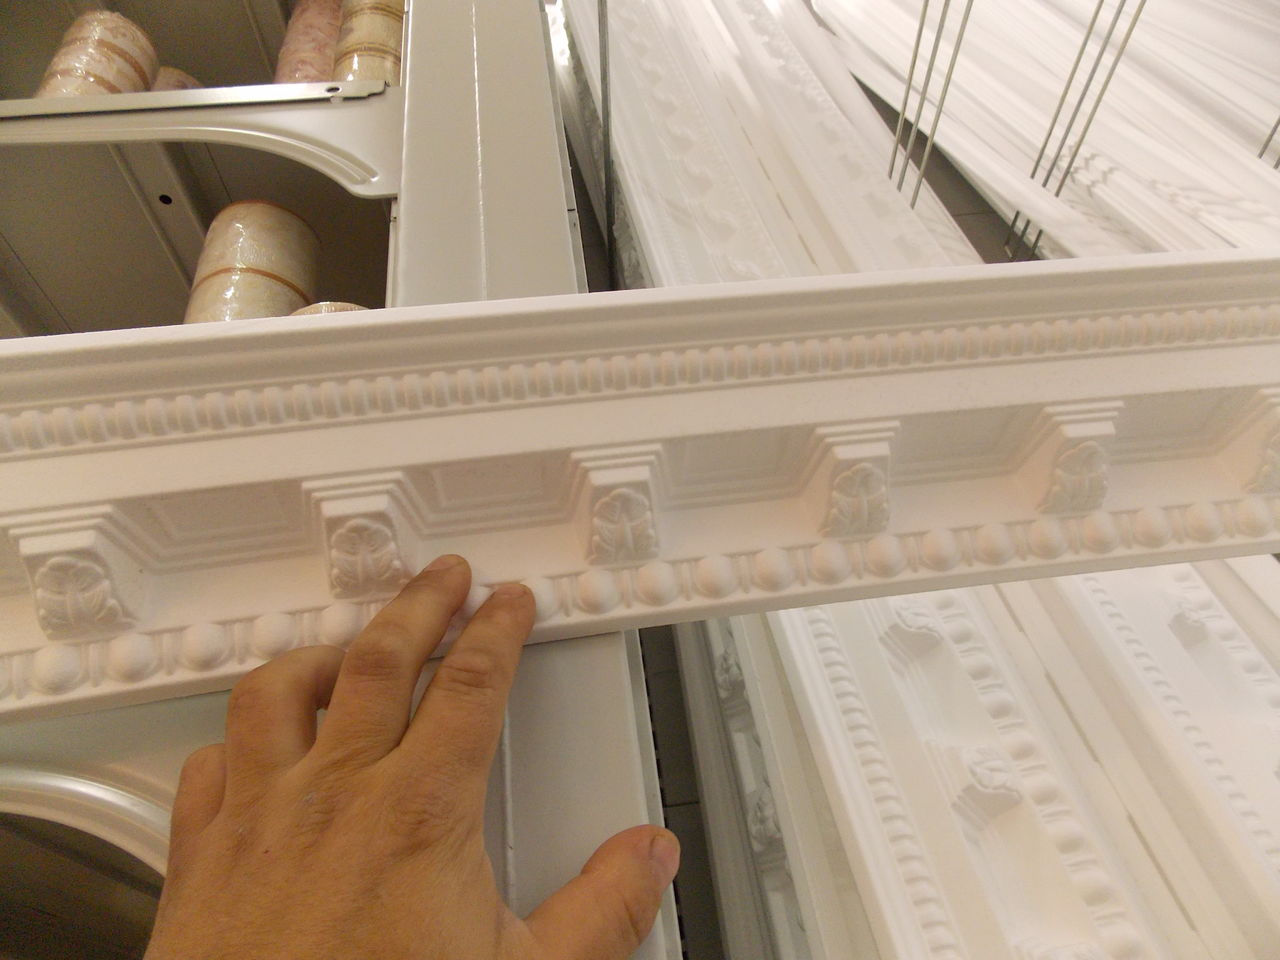
The first plinths that people invented were made of plaster. In order to make them, plaster was poured into special forms. Then they were fixed to the ceiling. Such jewelry had the name of fillet. Currently, they are not popular, not so easy to manufacture, they are not budget. Currently, this name almost does not pop up.
What to cut?
To understand how to cut the tool, you need to understand what the plinth is made of.
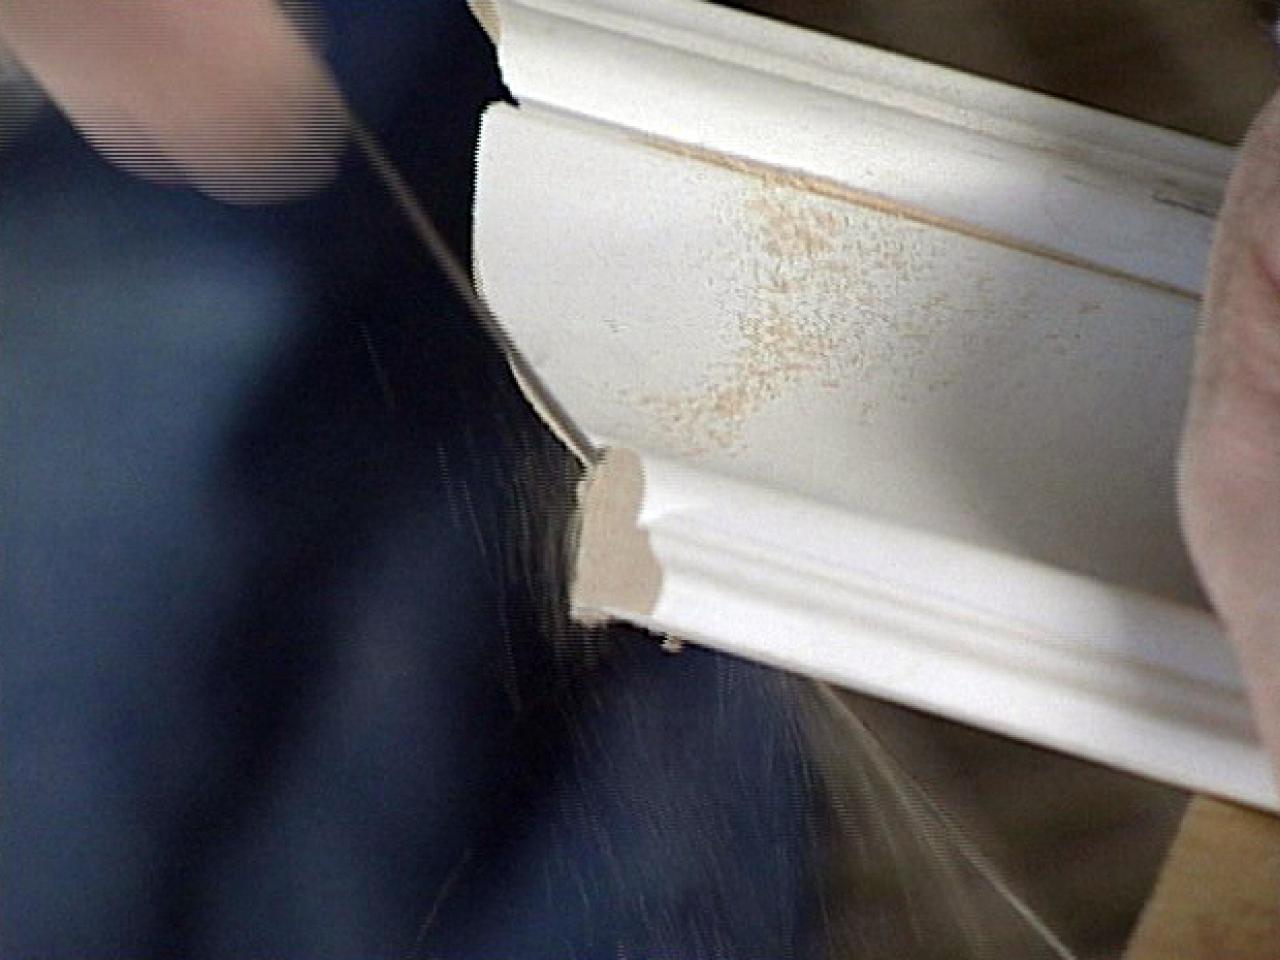
- PVC ceiling plinth. It is one of the cheapest.The drawbacks of such baseboards are many, one of them is that these products are quite fragile, after damage they almost do not recover. This is due to the lack of plasticity of this structure. PVC products are electrostatic, which means they attract dirt and dust. Cut such skirtings can be a hacksaw for wood, construction or sharp kitchen knife.
- Skirting for the ceiling, made of expanded polystyrene. This option is also considered inexpensive. The downside is high brittleness, if handled the wrong way, it starts to crumble. It is better to cut with a sharpened knife or a hacksaw for metal, and you shouldn’t put much effort into it.
- Skirting for extruded polystyrene ceiling. It is more expensive than conventional baseboards of polystyrene foam. It has a more rigid structure, which allows less crumbling, on the one hand, but, on the other hand, they are cut harder. It is better to cut this material with a construction-type knife or a hacksaw.
- Plinth for the ceiling of polyurethane. This type of plinth is considered one of the most expensive at the moment, they have a large margin of safety,possesses elastic qualities and is steady against moisture. The disadvantage of such plinths is that they are sensitive to temperature changes. In places where the temperature changes frequently, it is better not to install them, otherwise deformation may occur.
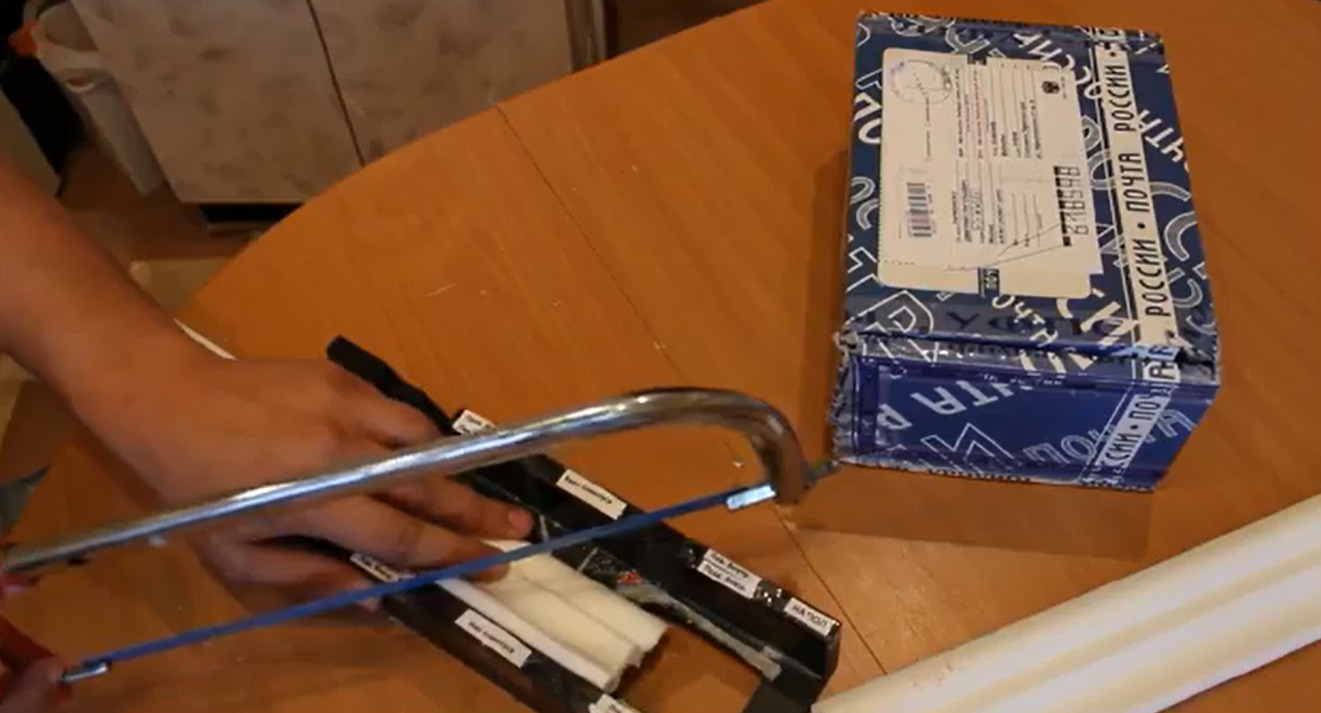
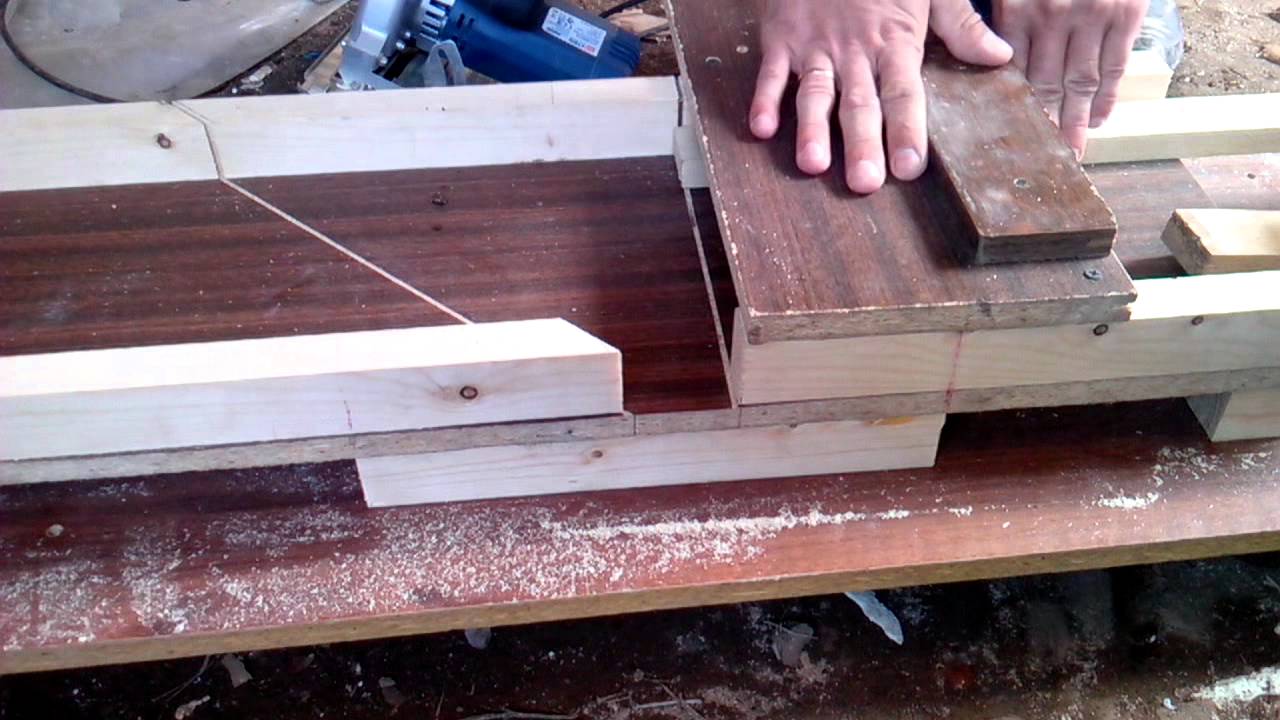
- Plinth made of wood. Convenient to use because of its practicality and resistance to the external environment. These plinths are quite expensive. You can cut them with a saw or a hacksaw, since wood is a heavy material.
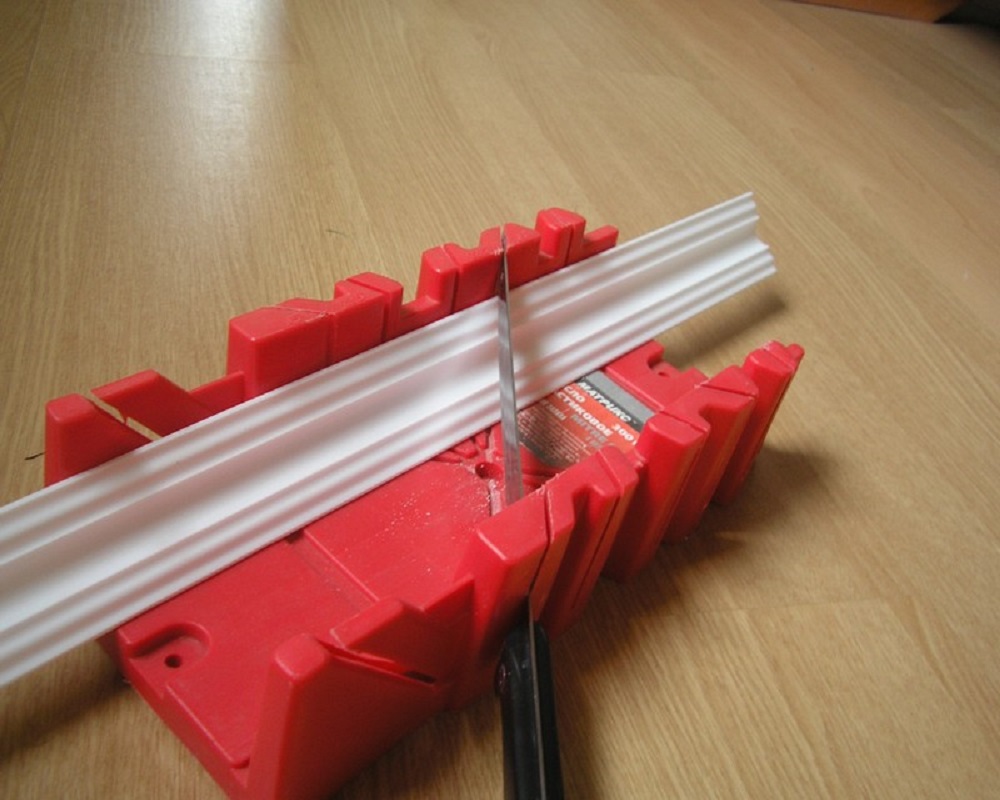
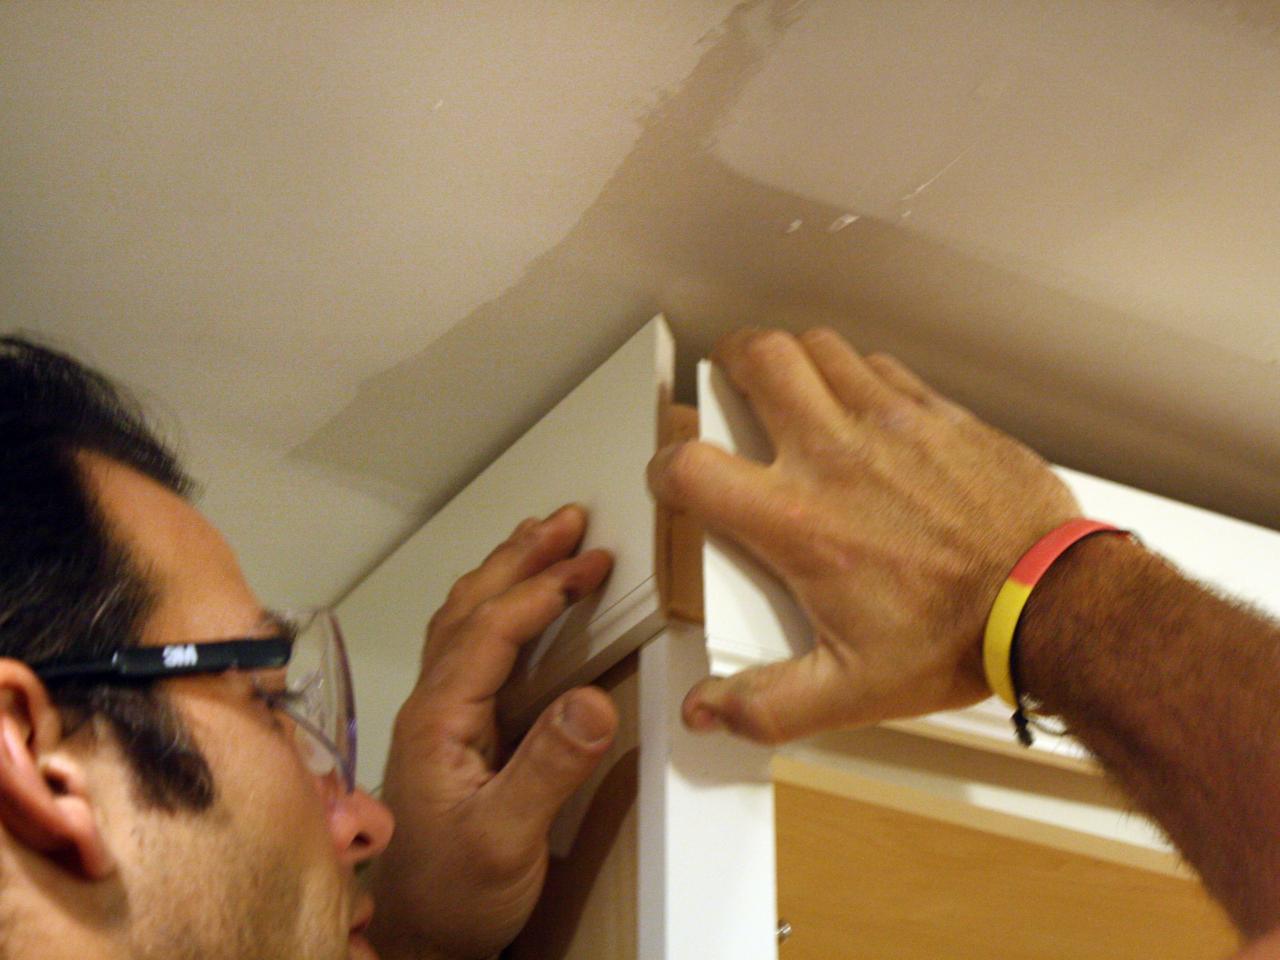
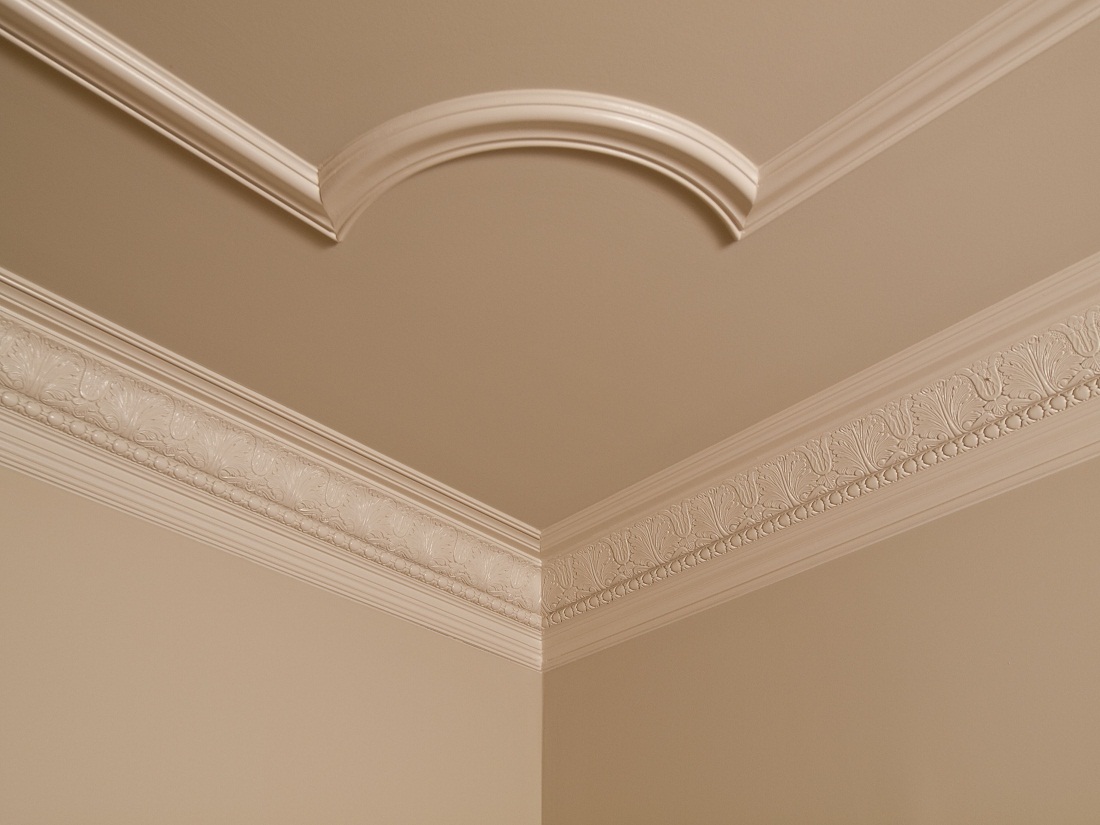
Inner corner
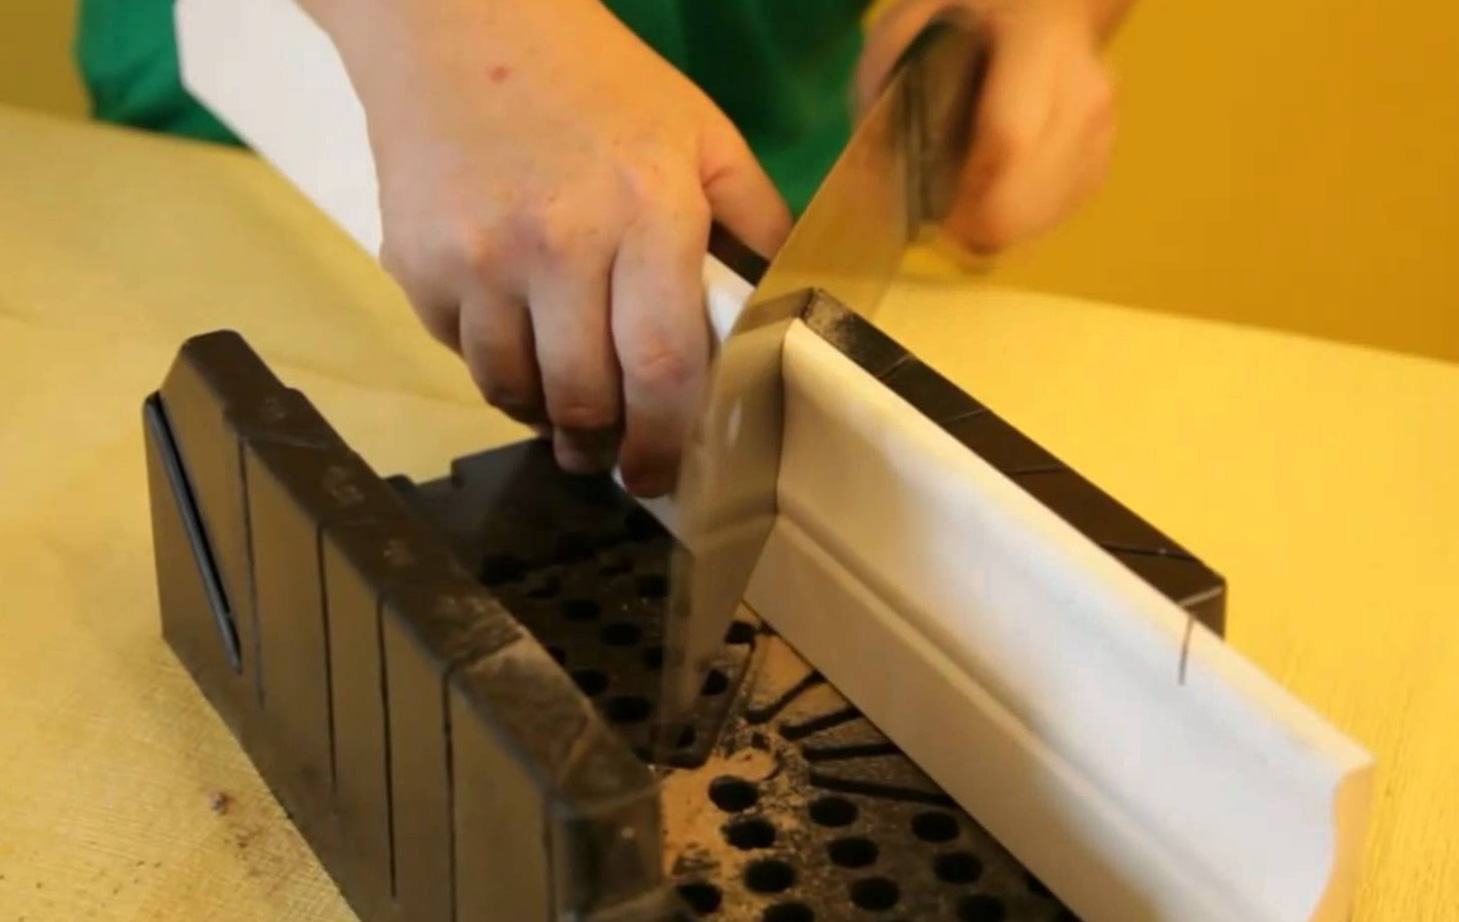
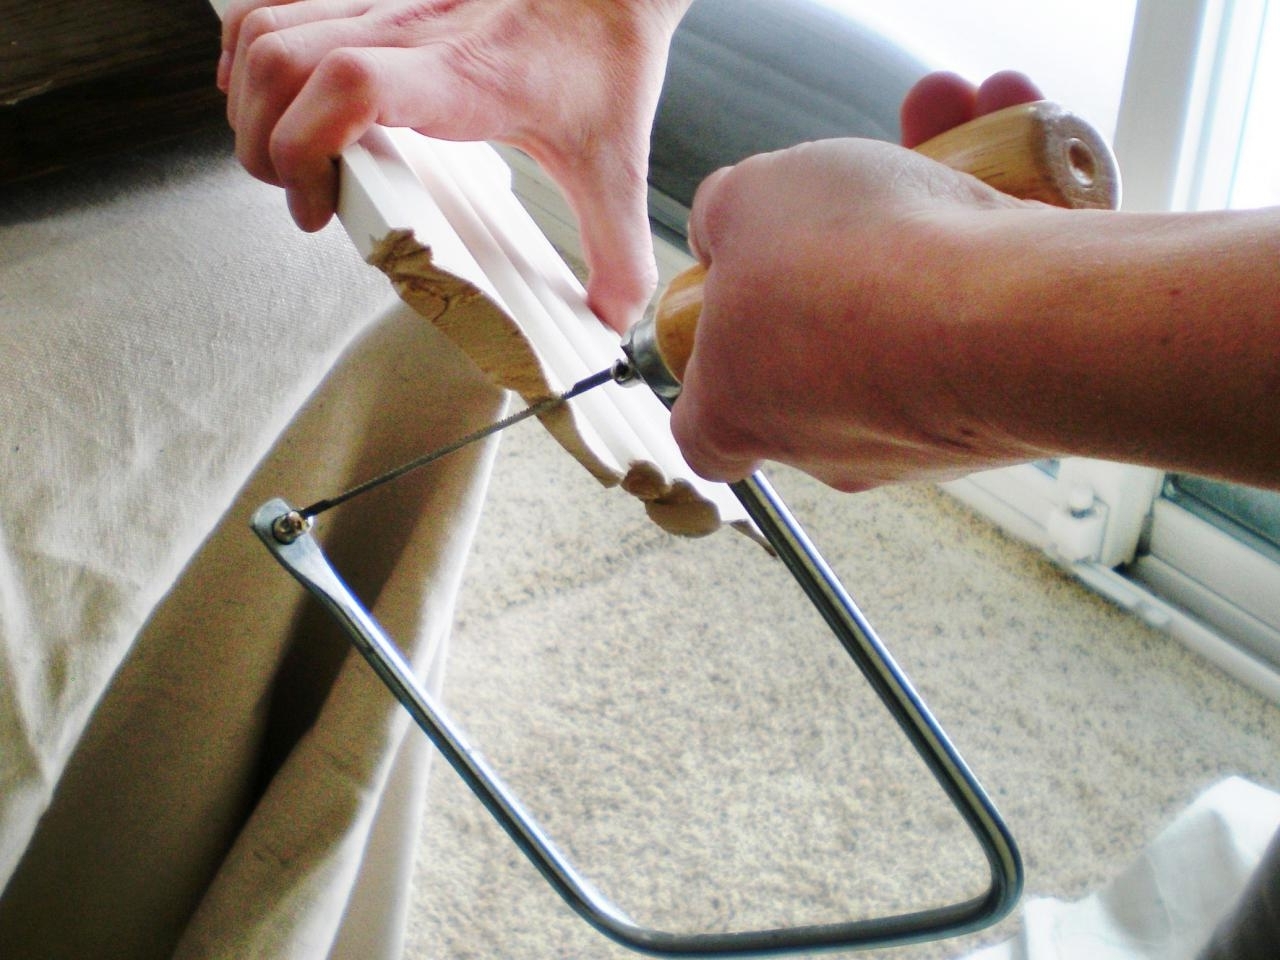
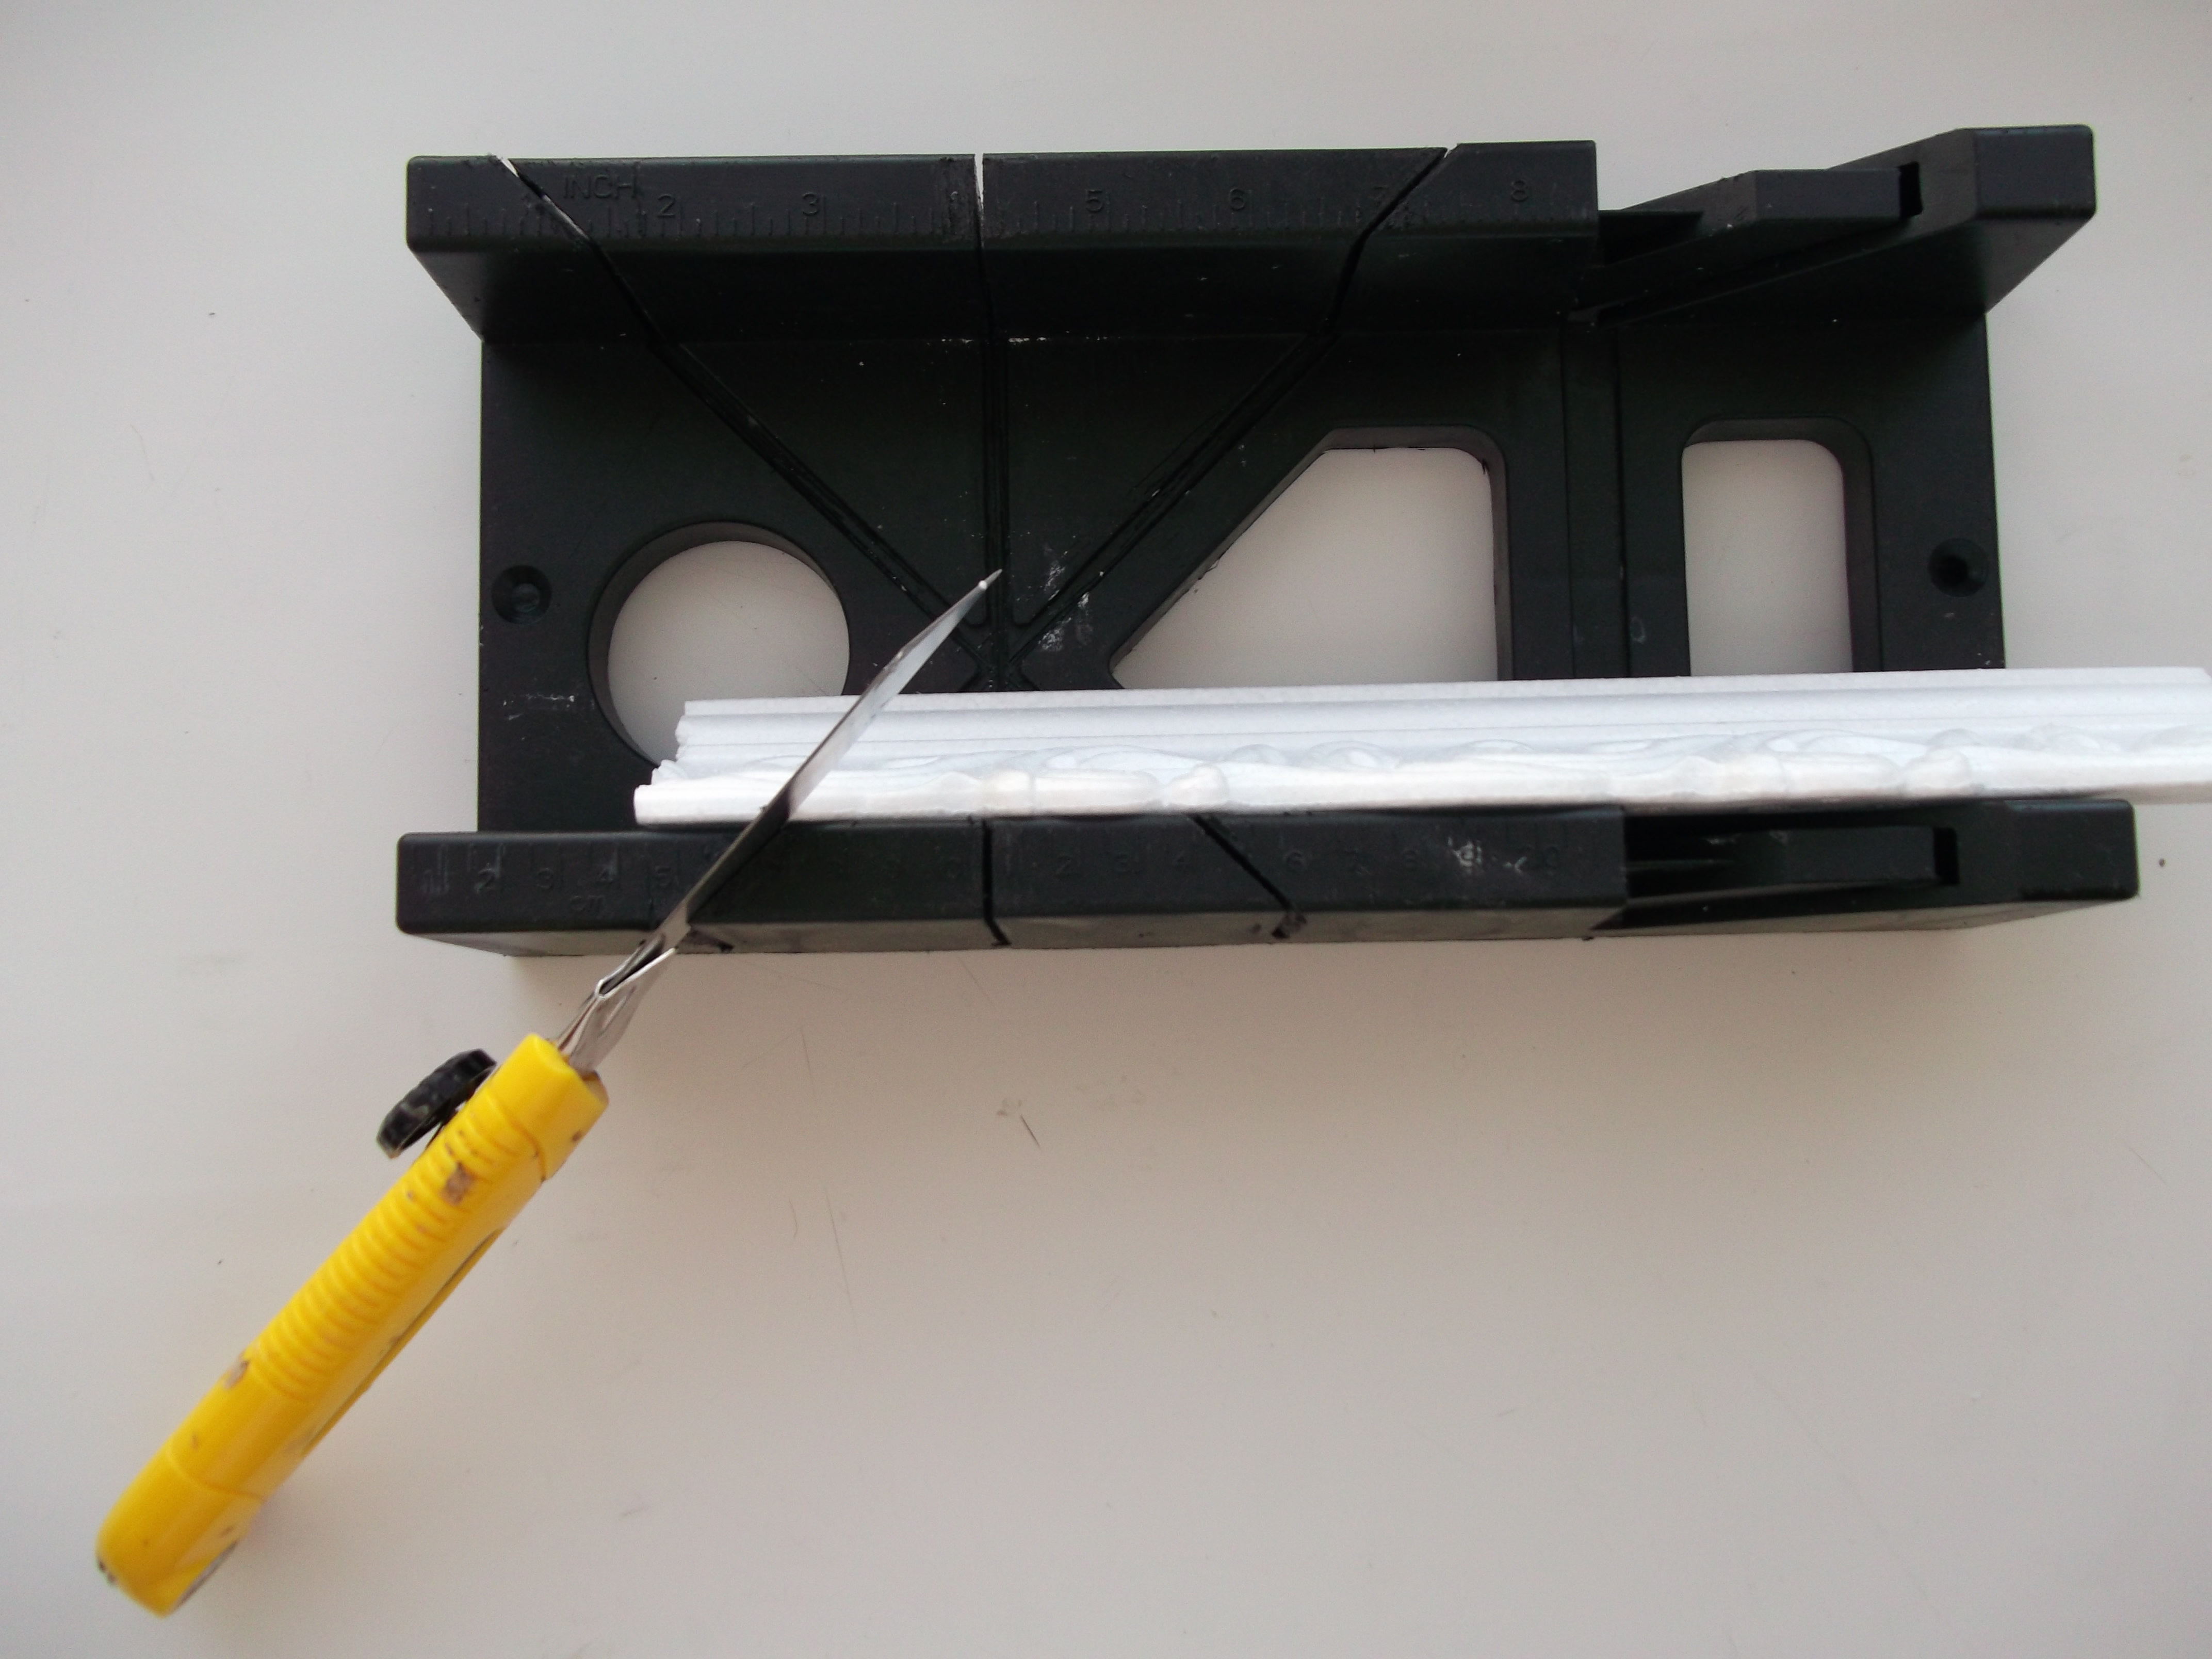
One of the easiest ways to get the inside corner right is to use a mess.
- Preparation of plinth should be attached to the ceiling and measure the required length. It is better to leave a place with a margin.
- The plinth should be installed in the trunk so that it will stand in it just as it will be mounted on the ceiling in the future.
- The baseboard itself must be carefully leaned against the opposite wall of the device.
- You need to hold the baseboard with your left hand for easy trimming.
- To cut smoothly and with the correct angle, you need to choose an angle of 45 degrees. The holder of the working tool should be as close as possible to the left hand.
- Cutting the bar should be without extra effort, so as not to damage it.
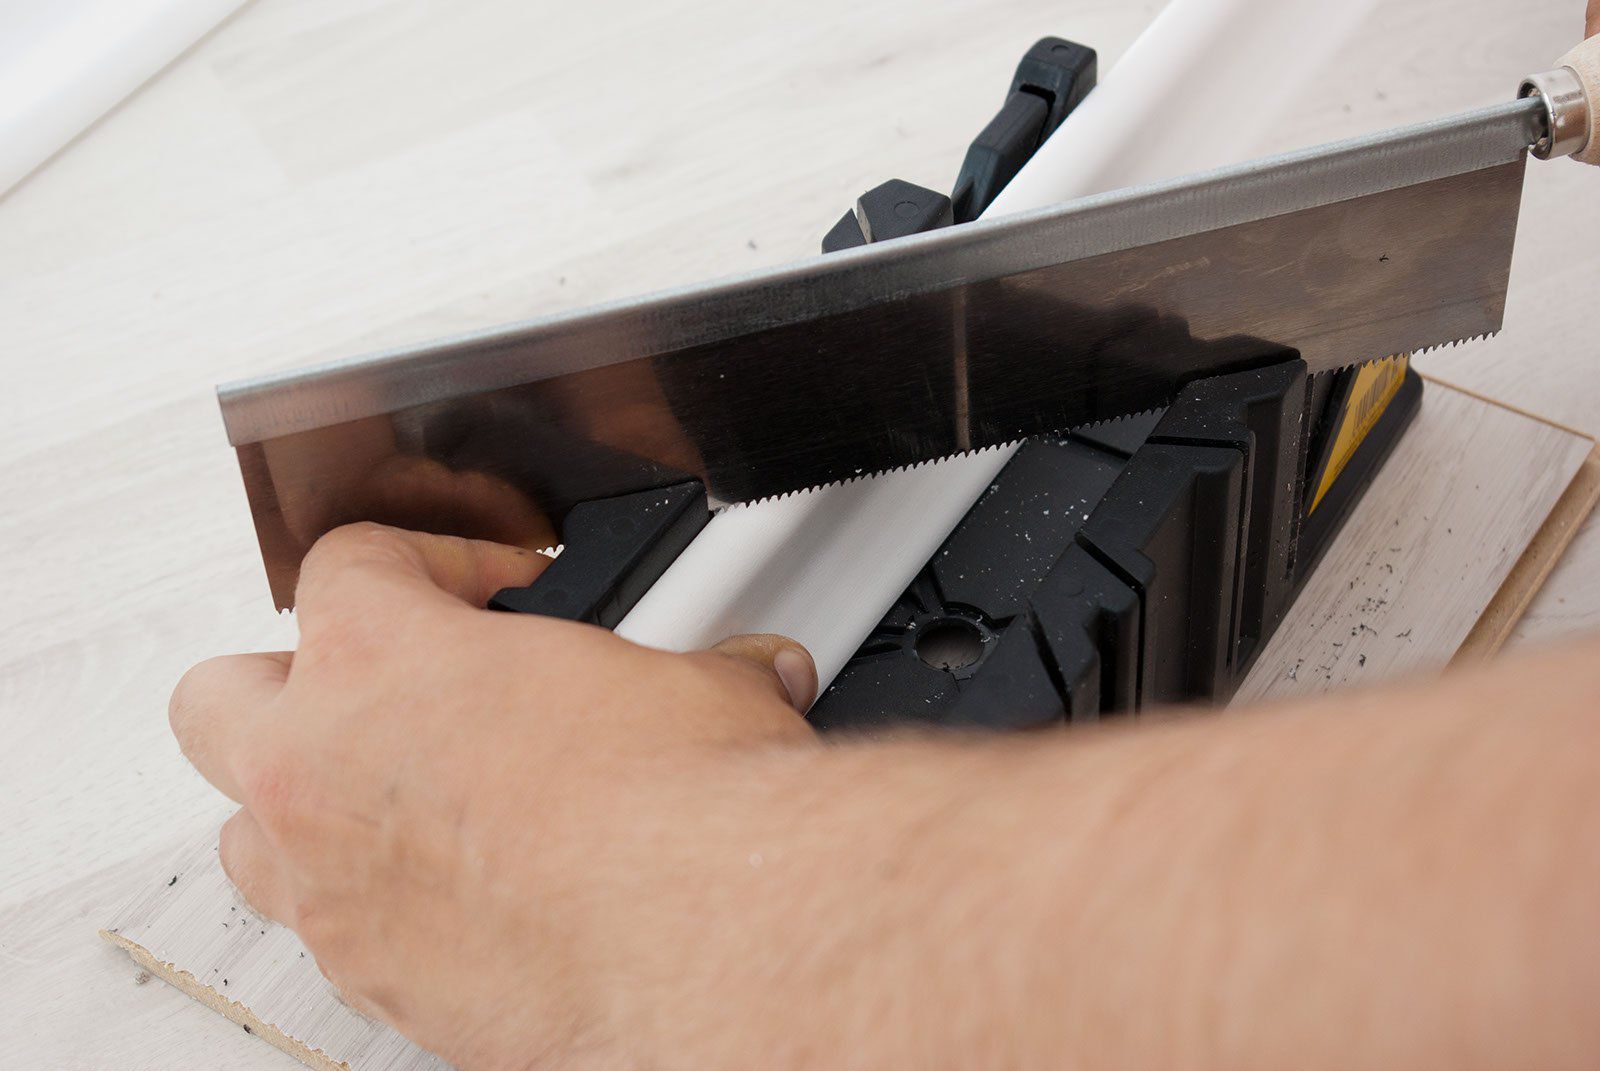
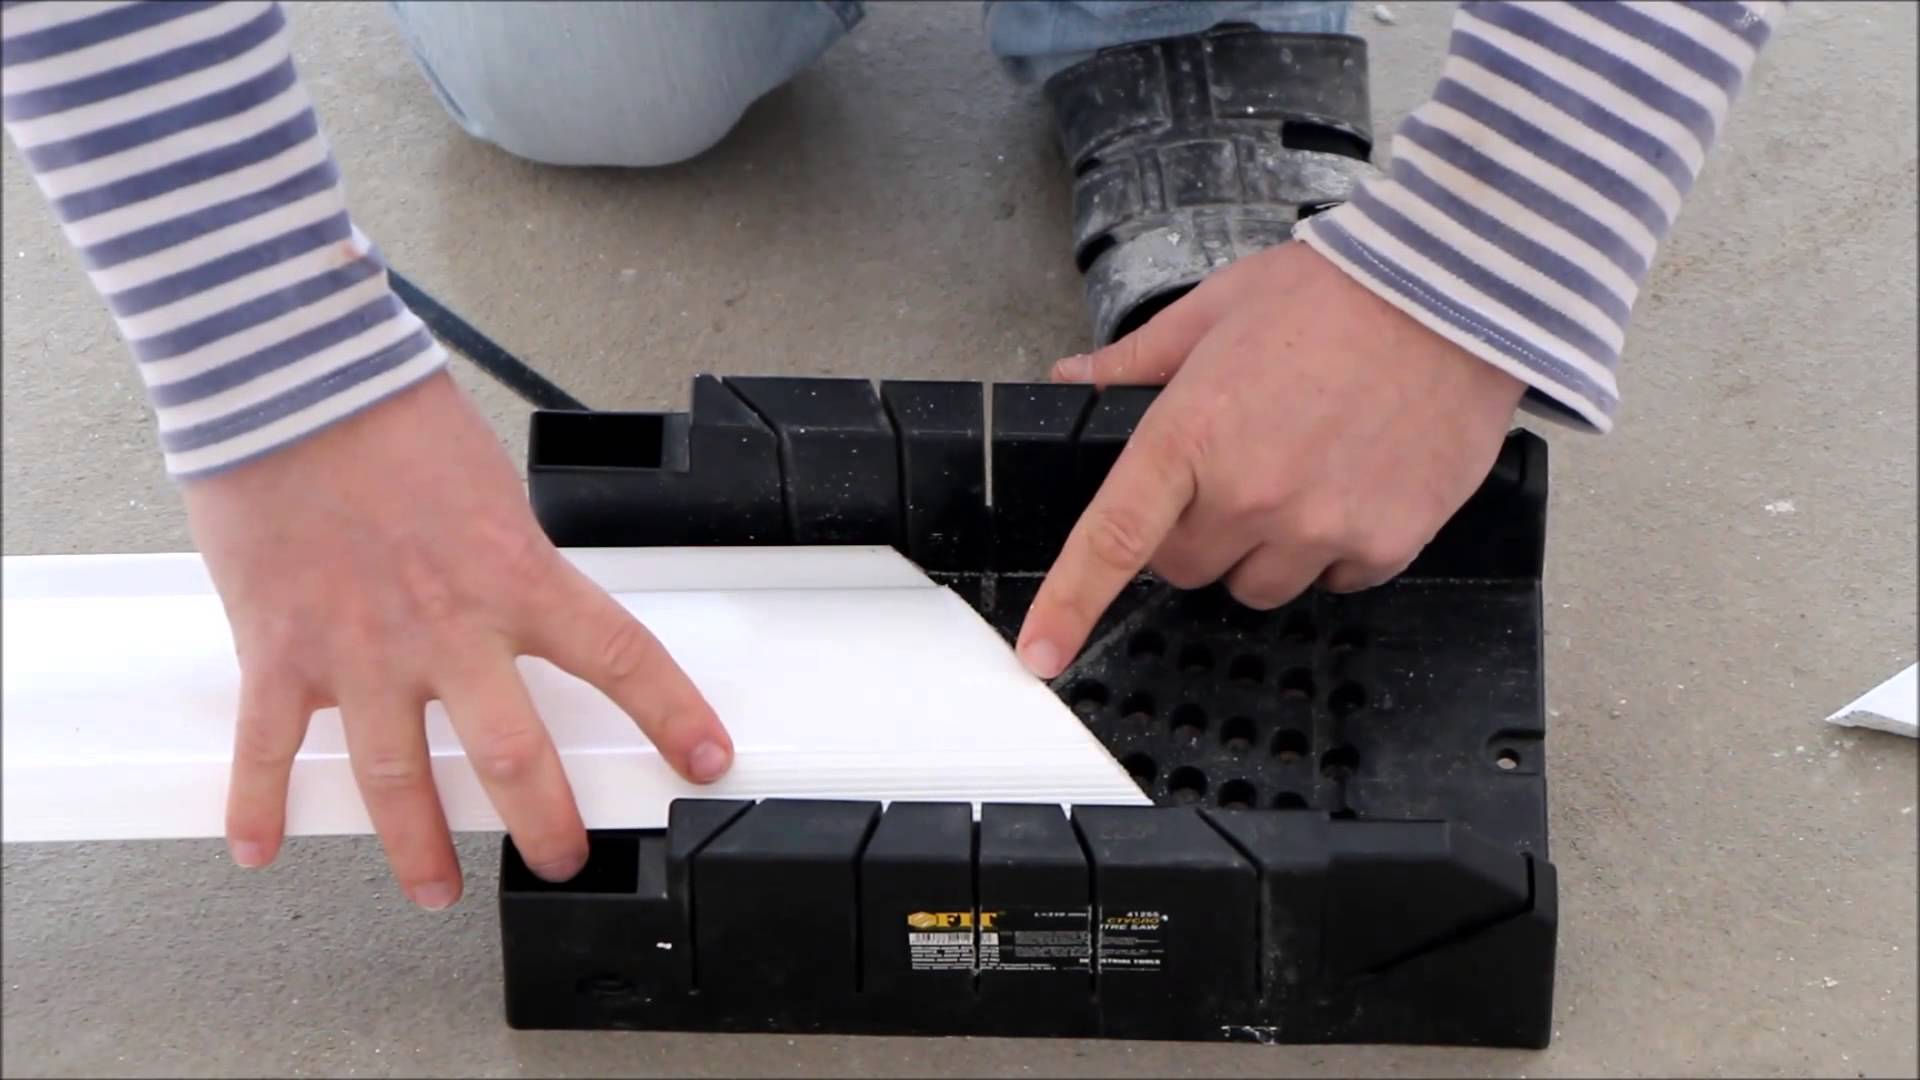
- Then you need to carry out the same manipulations with another strap.
- The bar should be as close as possible to the right hand.
- The bar itself must be in contact with the far wall of the device.
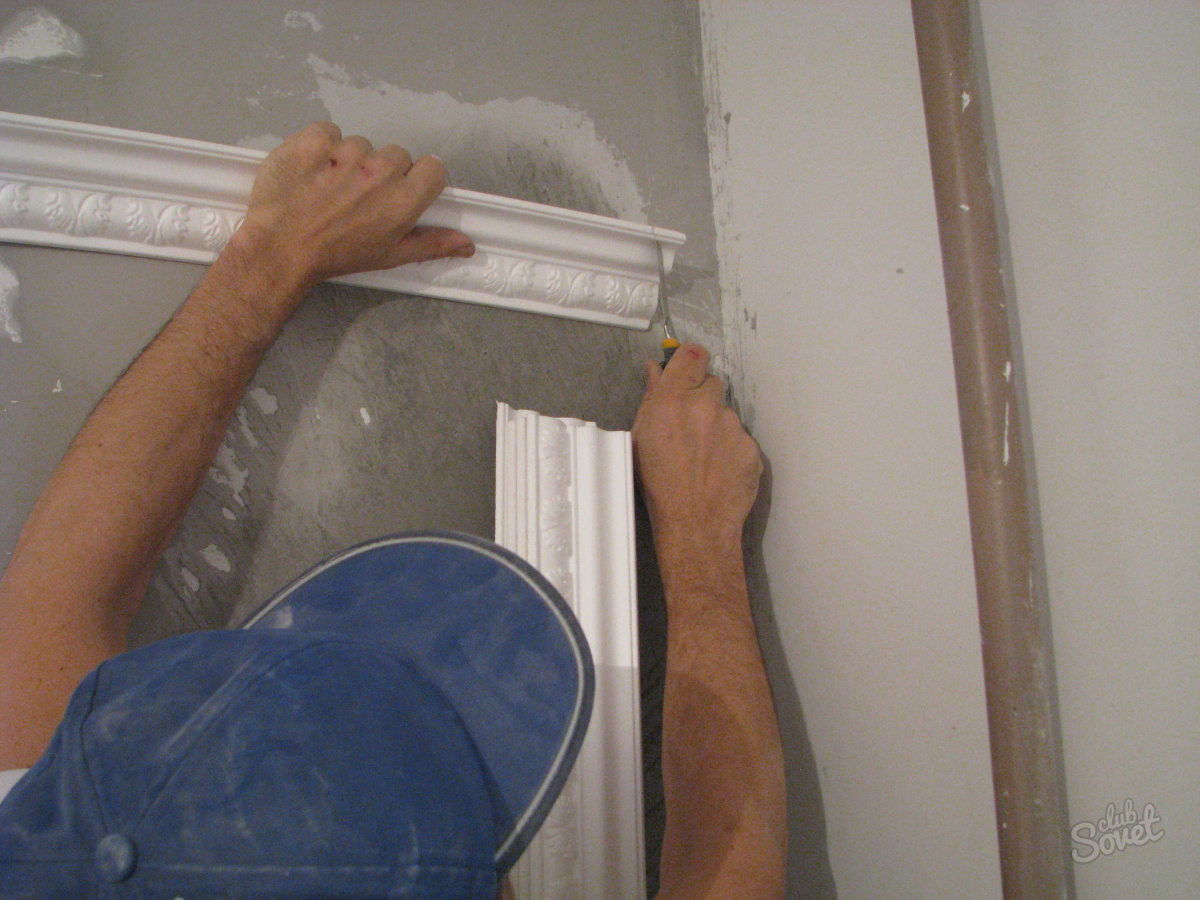
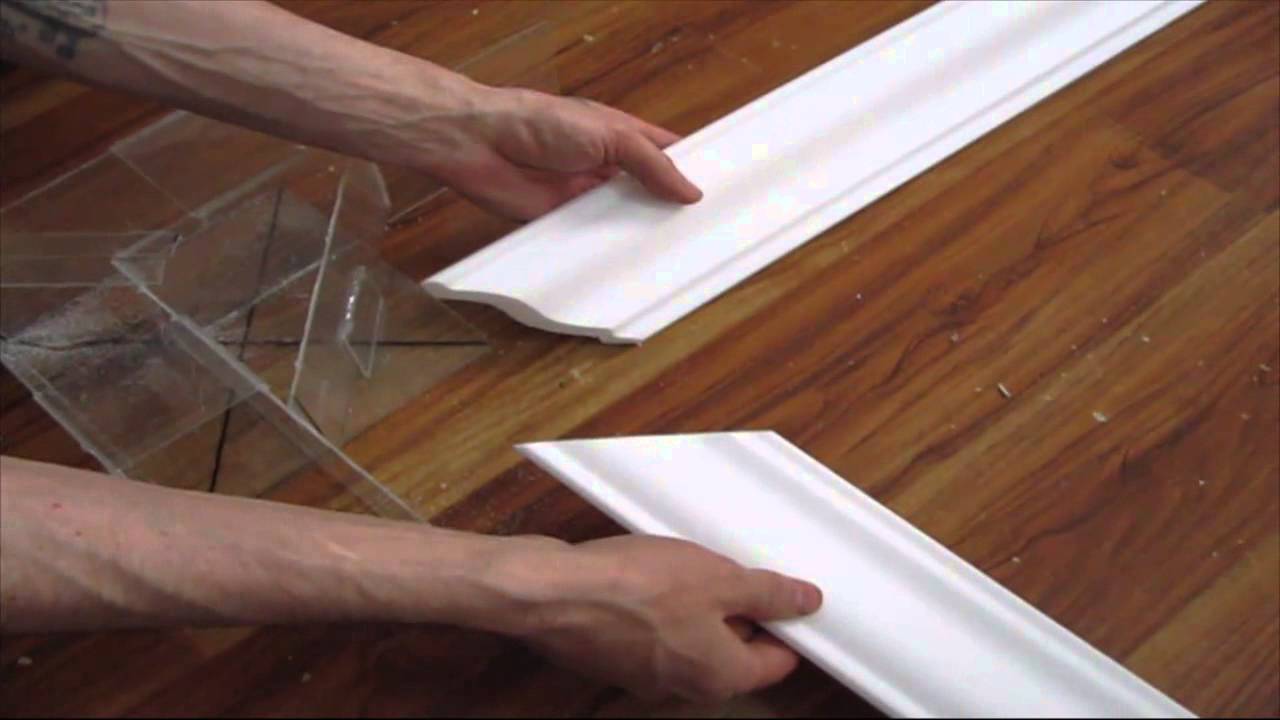
- The plinth should be trimmed without much pressure, after which the two parts should be joined. If they do not fit perfectly, then it is easy to finish the defects with a knife.
- The corner is attached to the wall without glue and if everything looks good, then it is attached to the mortar.

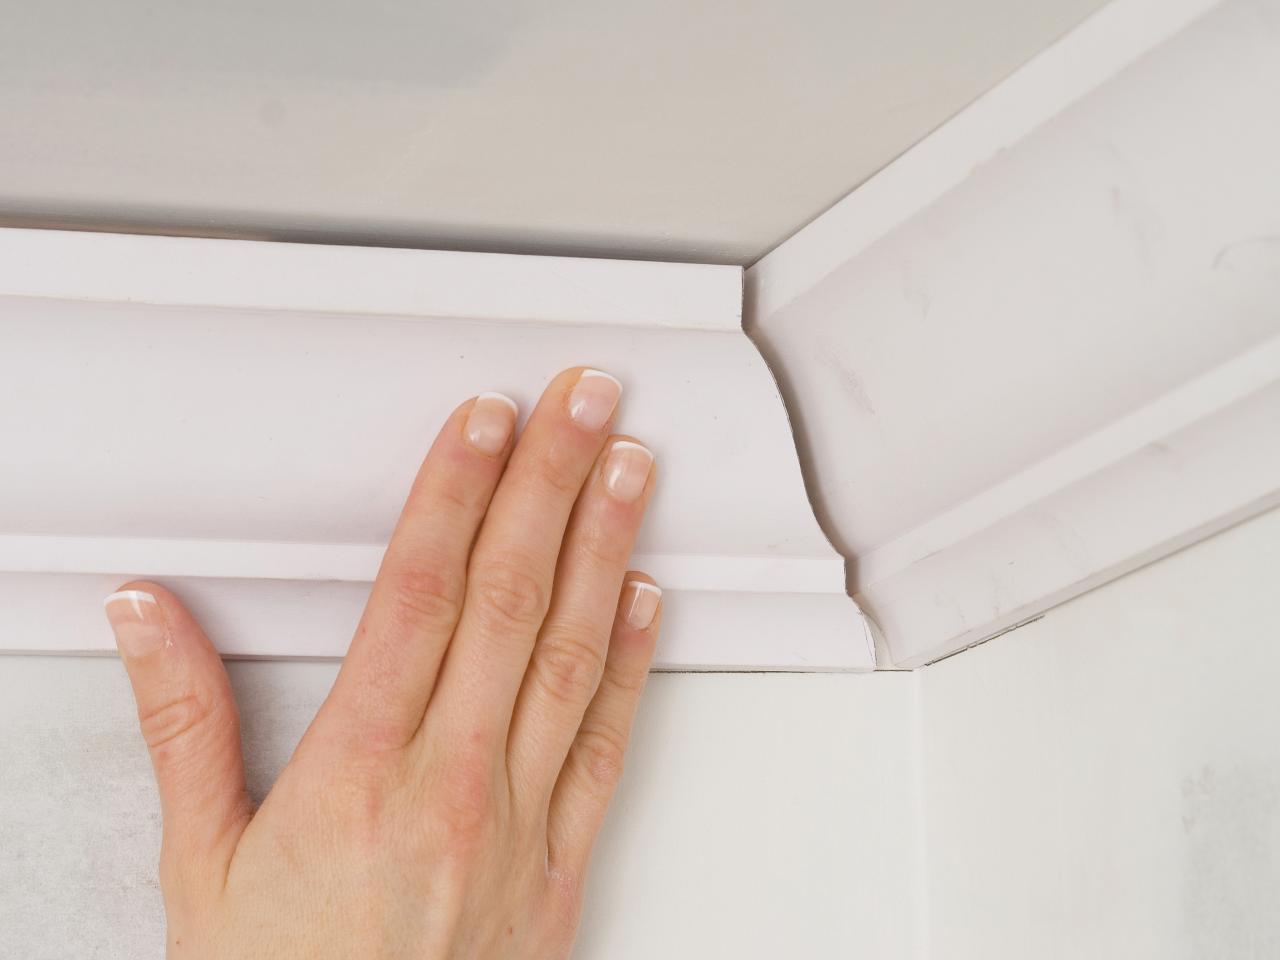
If small errors remain, they can easily be sealed with a special solution.
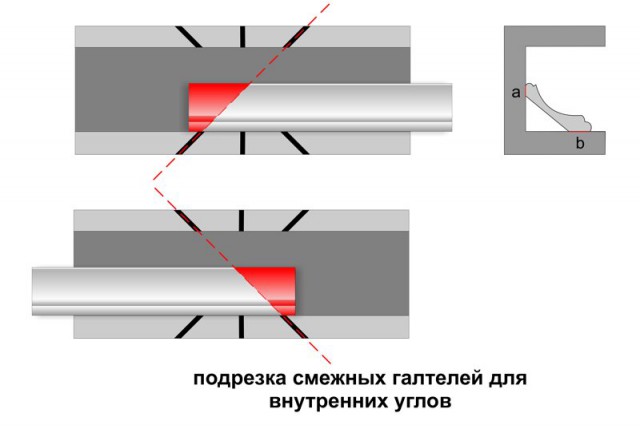
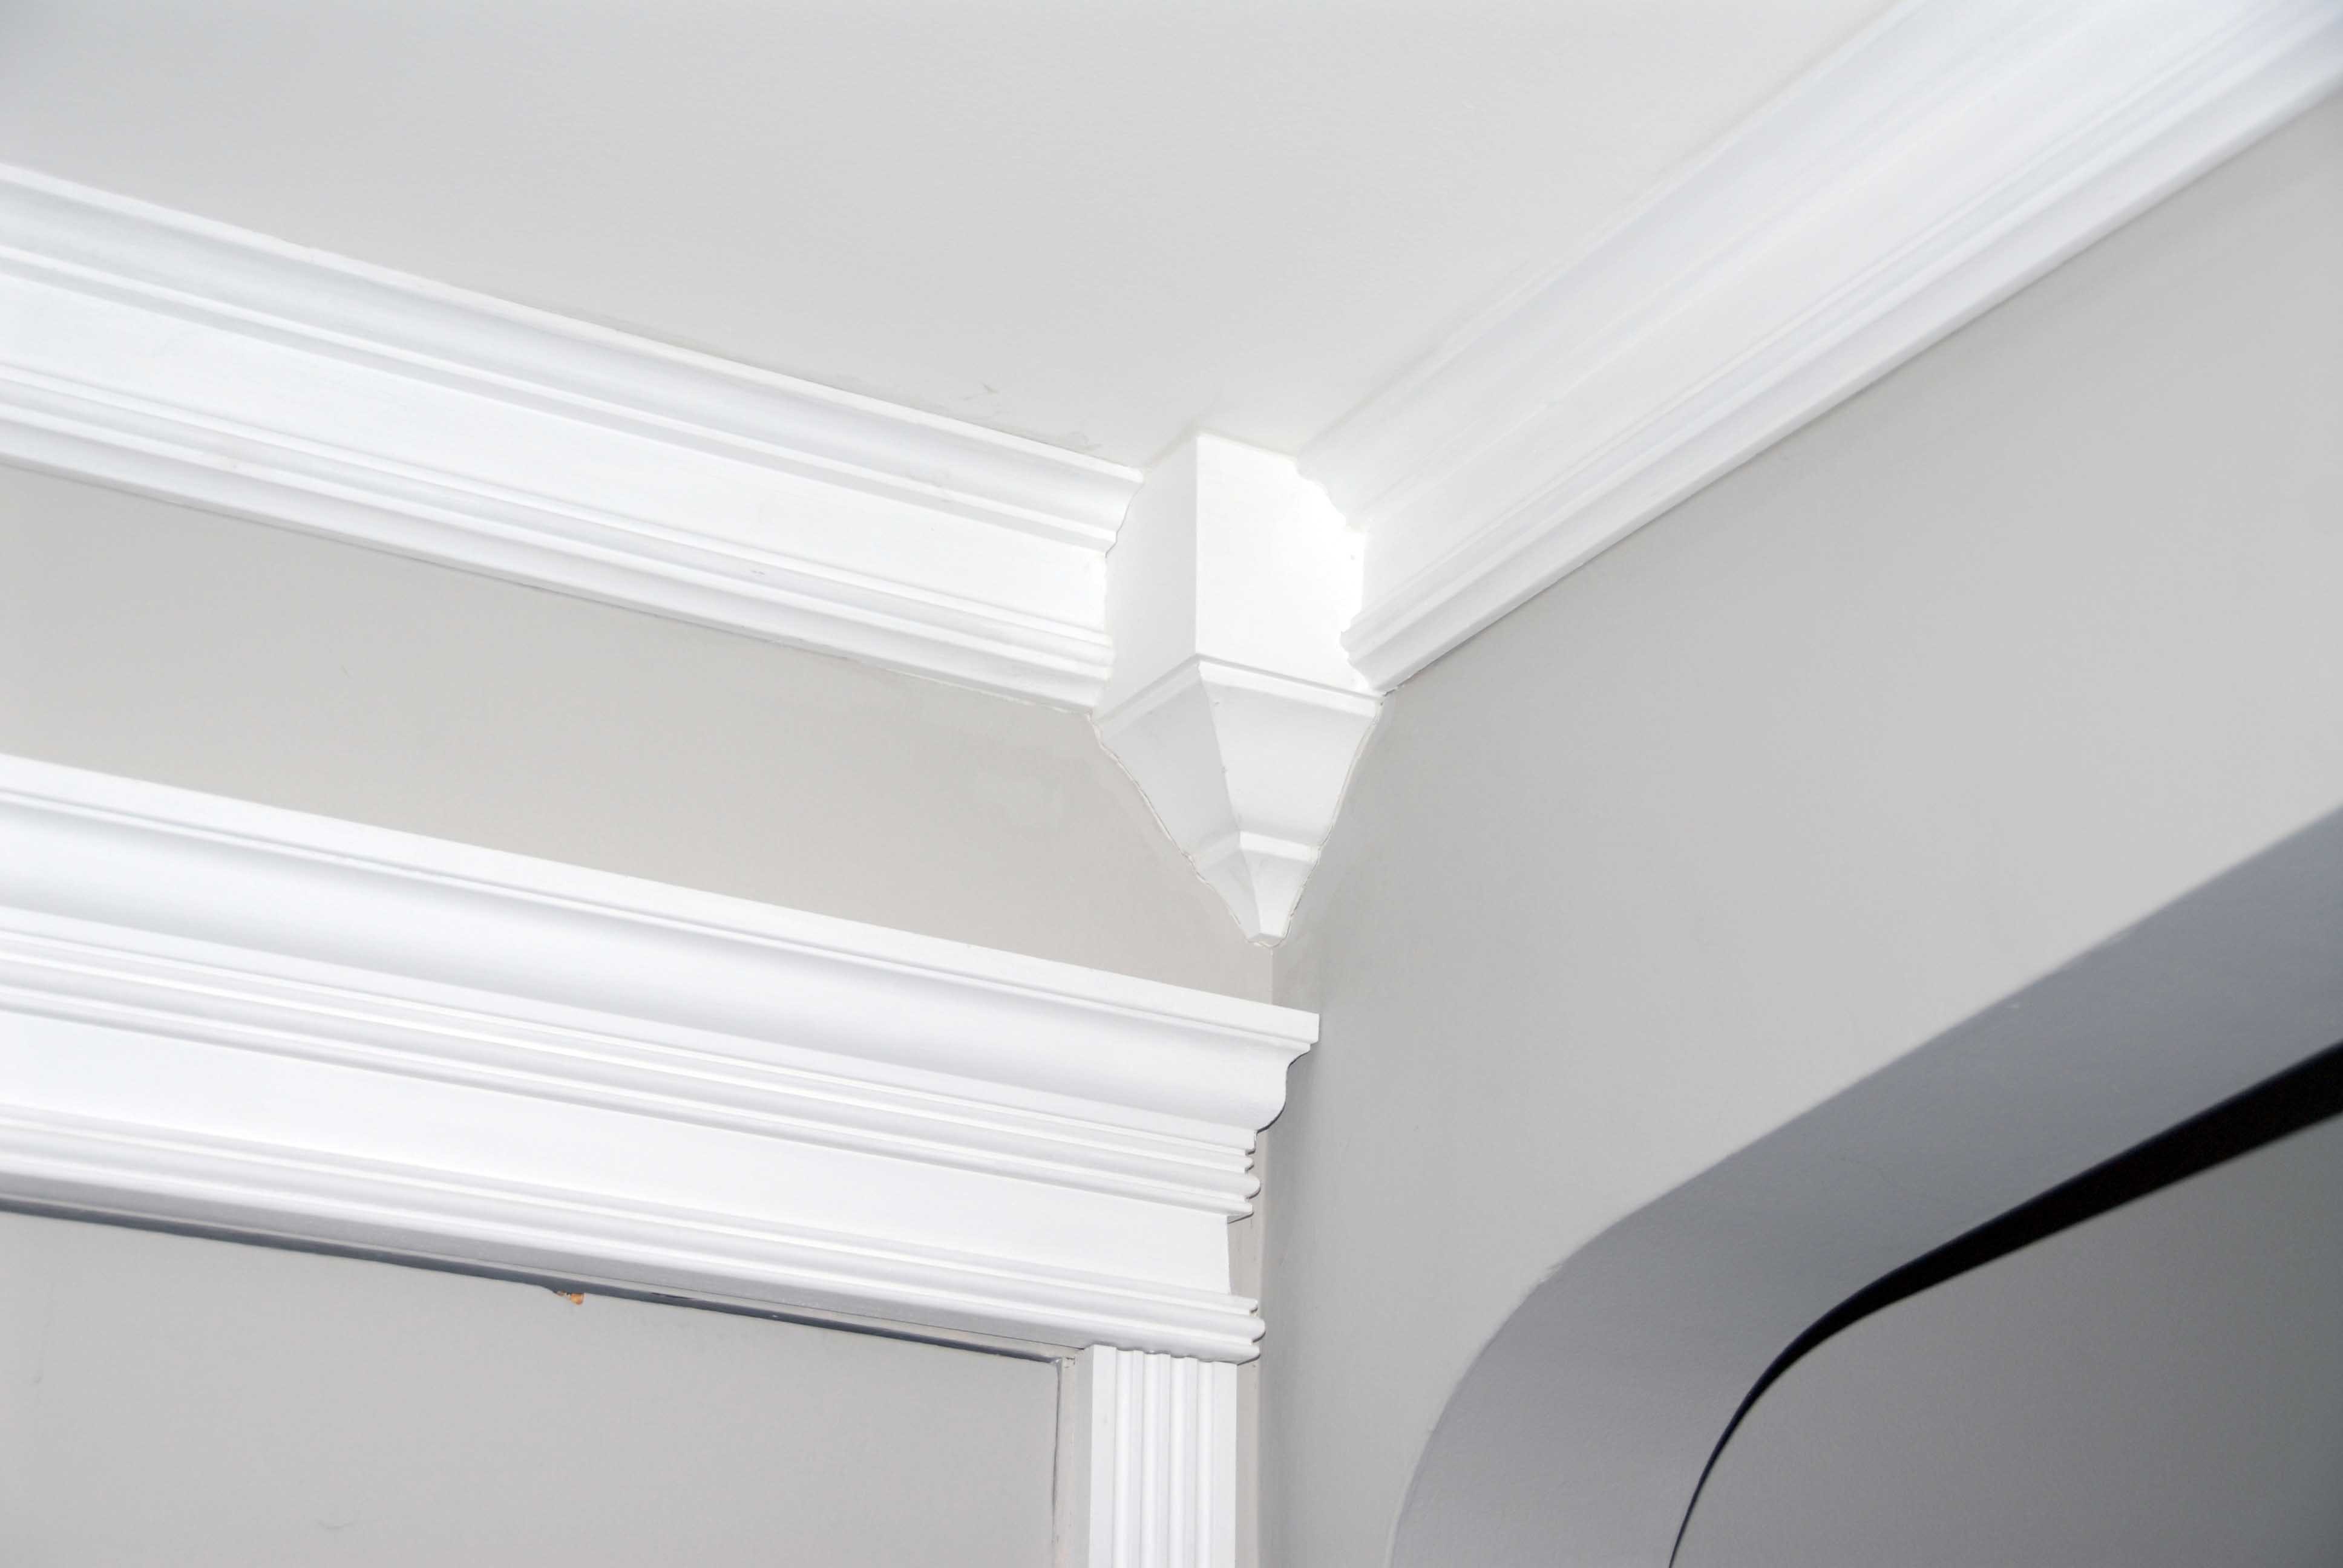
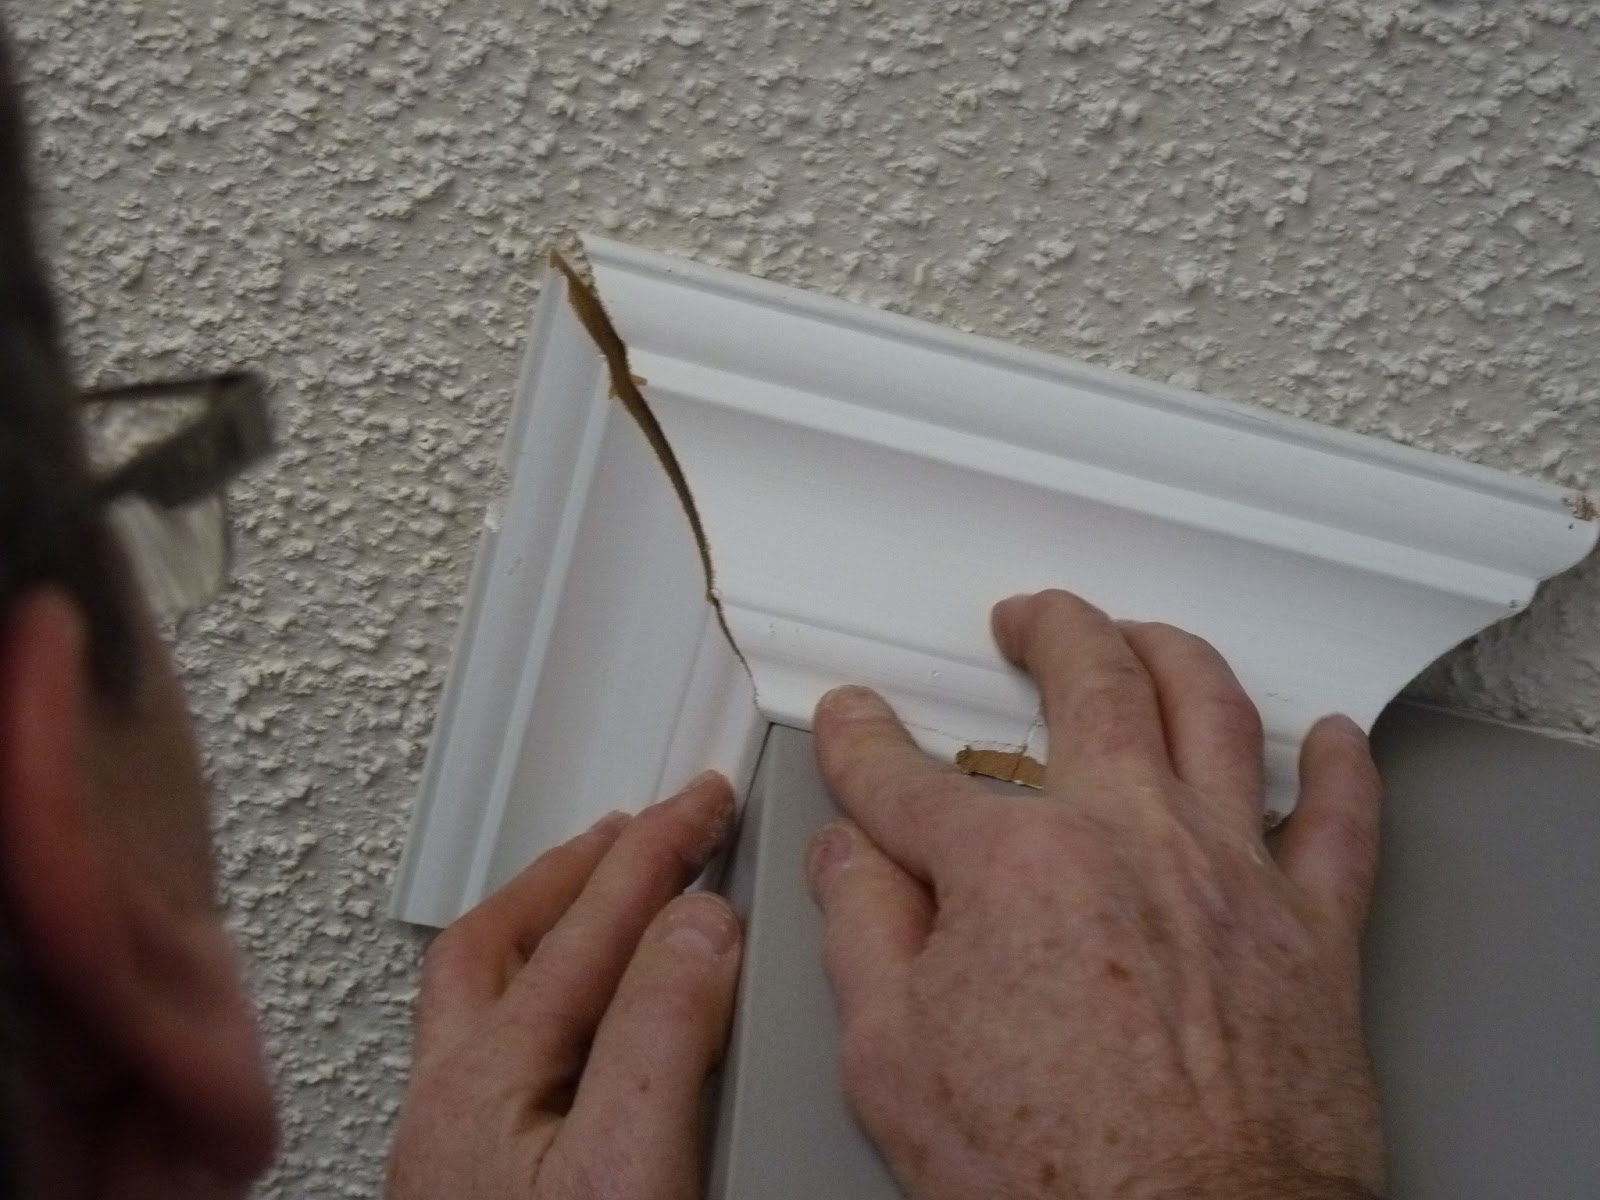
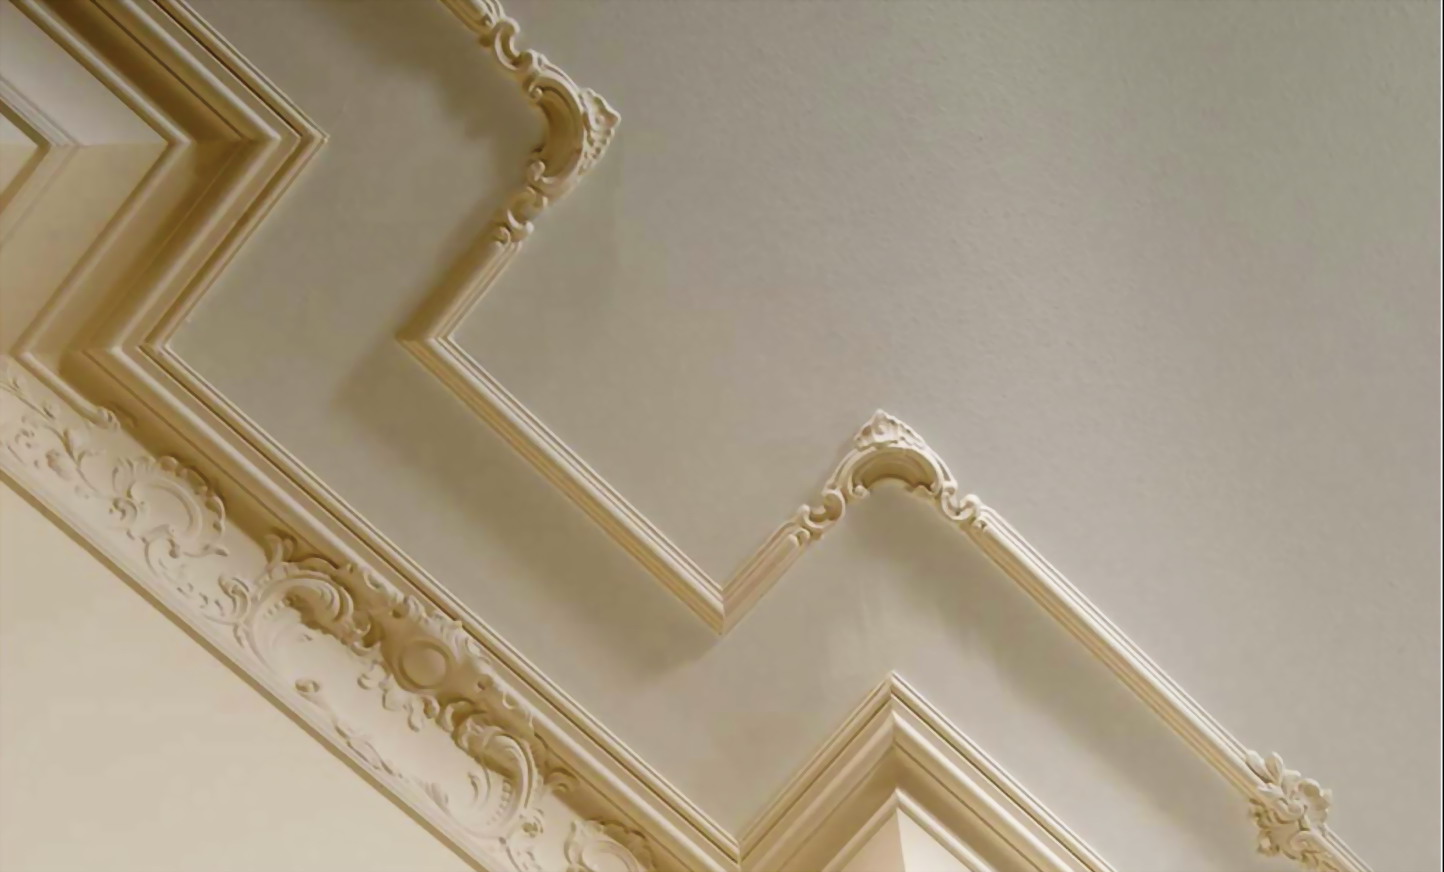
Outer corner
Often in the premises, in addition to the inner corner, there is an outer corner, which is also subject to special treatment.
In order not to overshoot the determination of the size, you first need to prepare the inner corner, and then start to work on the outside.
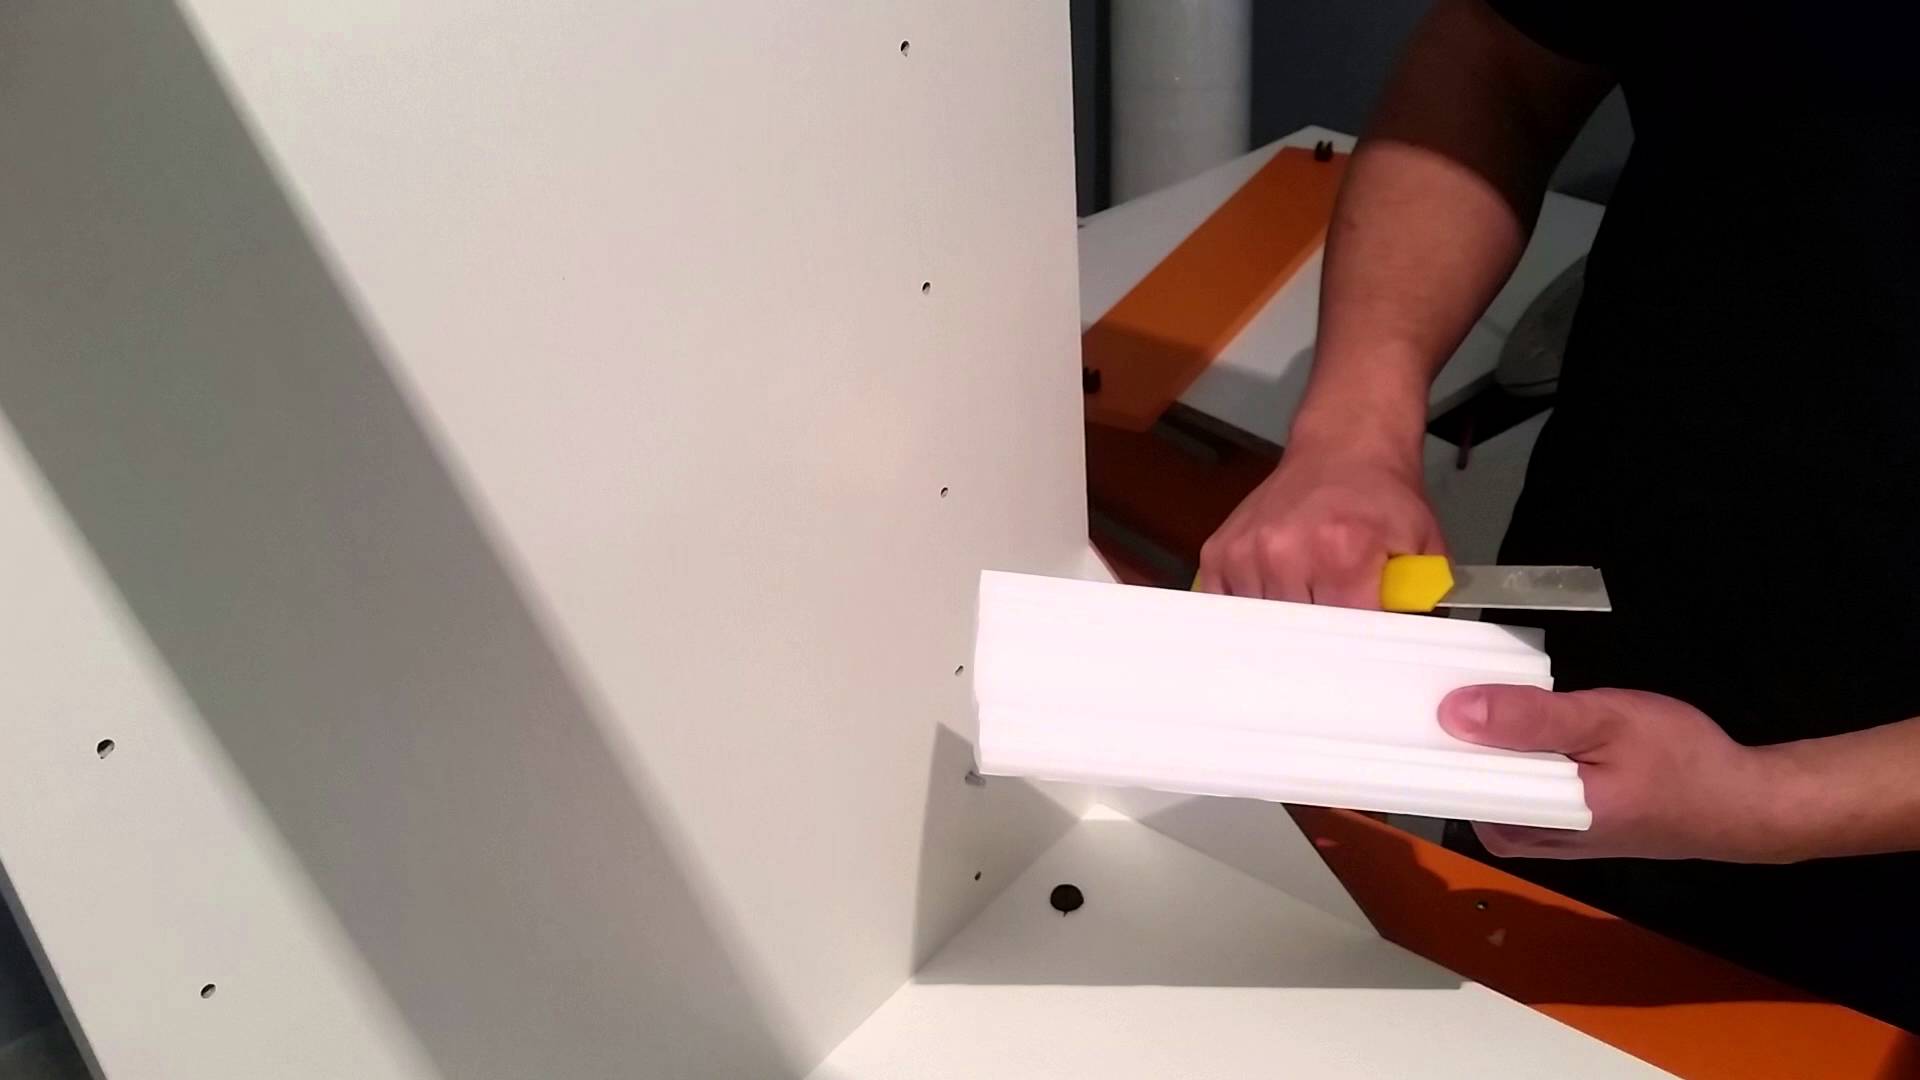
- The ceiling bar is pressed against the ceiling, and the dimensions are marked gash.
- The bar is placed in the device and pressed against the nearest wall.
- Without strong pressure, the workpiece is cut off, the main thing is to leave extra space.
- The other strip is processed in exactly the same way.
- In this case, the bar should be placed closer to the right hand.
- She is obliged to come into contact with the wall of the device, which is located further.
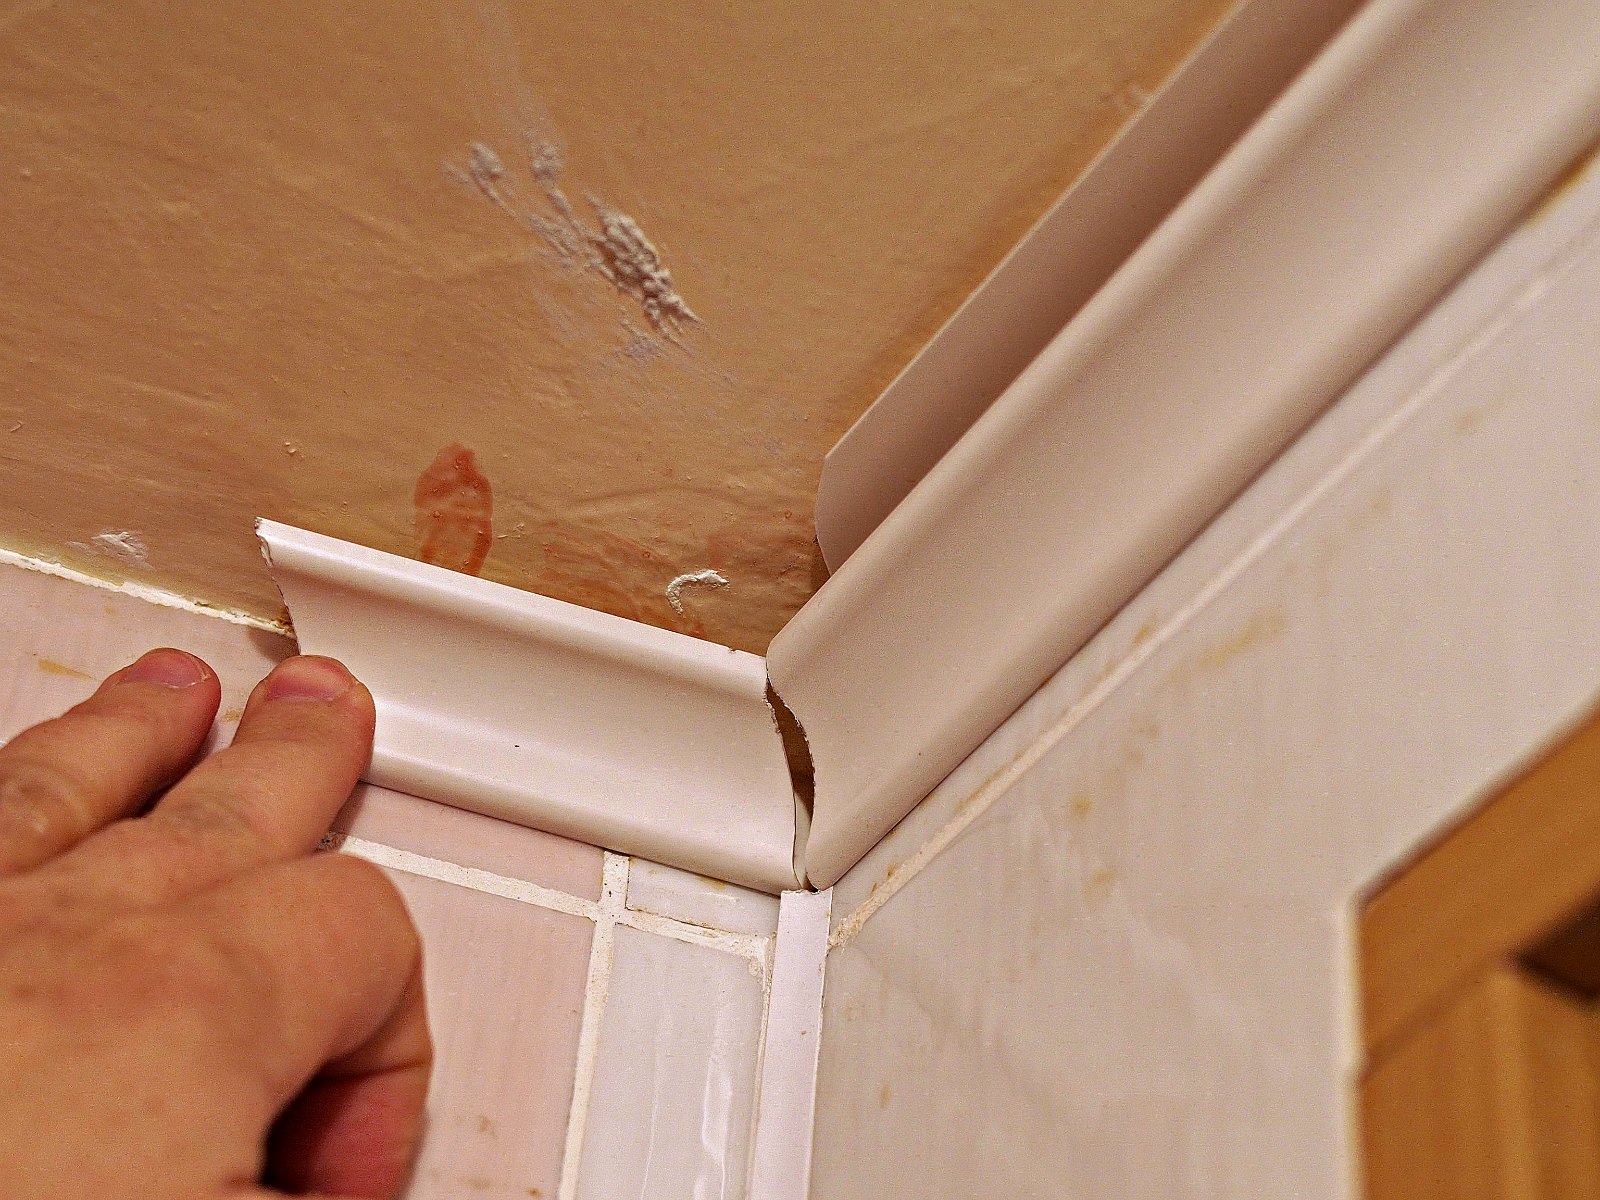
- The plinth is cut without much pressure, after which the two parts need to be joined. They need to dock perfectly, if it is not, you can adjust the slats with a knife.
- If, when trying on without glue, everything is fine, you can attach it to glue or mortar,
- Minor bugs are easily fixed with a special solution.

You can trim the plinth with the help of the sheet only in a situation, if the angle is 90 degrees, if it is larger or smaller, you will have to trim it manually.
Ways of circumcision
There are other options for cutting skirting without the use of the body.
If it is not possible to make a block manually, you can use the method of marking the place, and the corner plinth will look perfect.
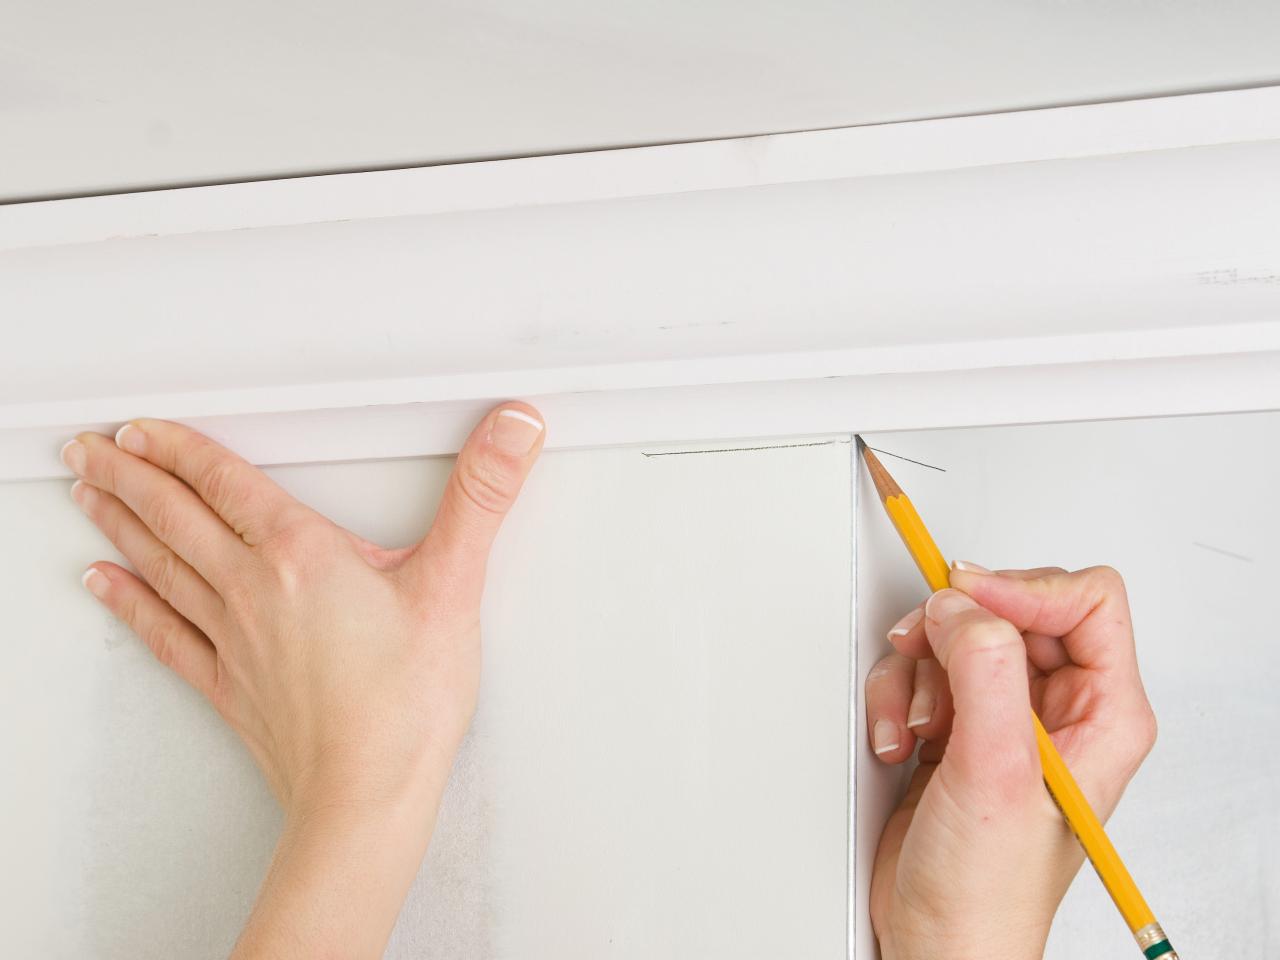
- The first thing to do is properly trim the workpiece.
- First you need to attach one bar to the wall of the opposite side, then make a mark on the surface. To do this, outline the entire skirting board.
- Where the lines will intersect - there will be a place where planks are connected.
- In the future, you need to transfer the sign to the plinth.
- It is necessary to draw a line from the point to the end of the plinth.
- Cutting takes place strictly on the intended lines. You do not need to do a lot of pressure during this procedure. After that, without the use of glue, it is worth comparing strips so that they fit perfectly with each other.
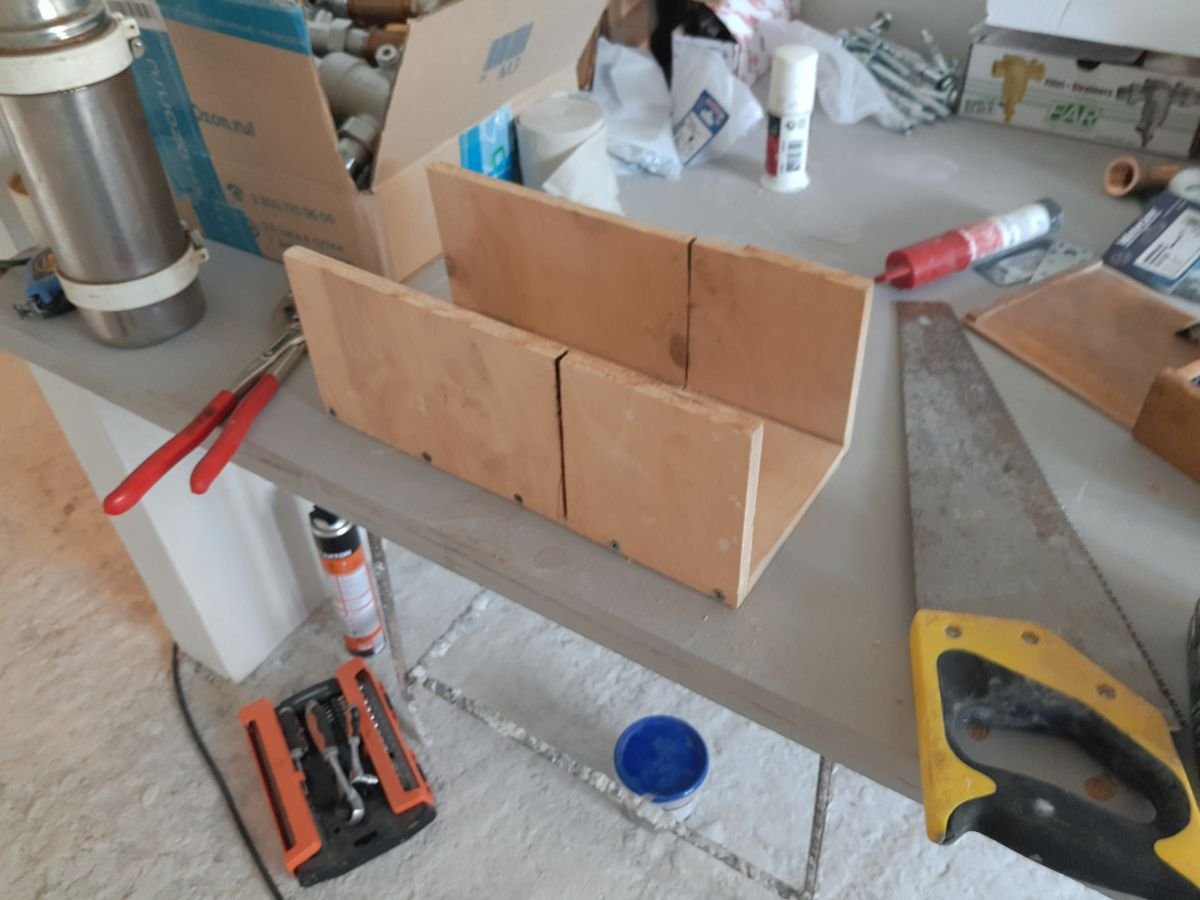
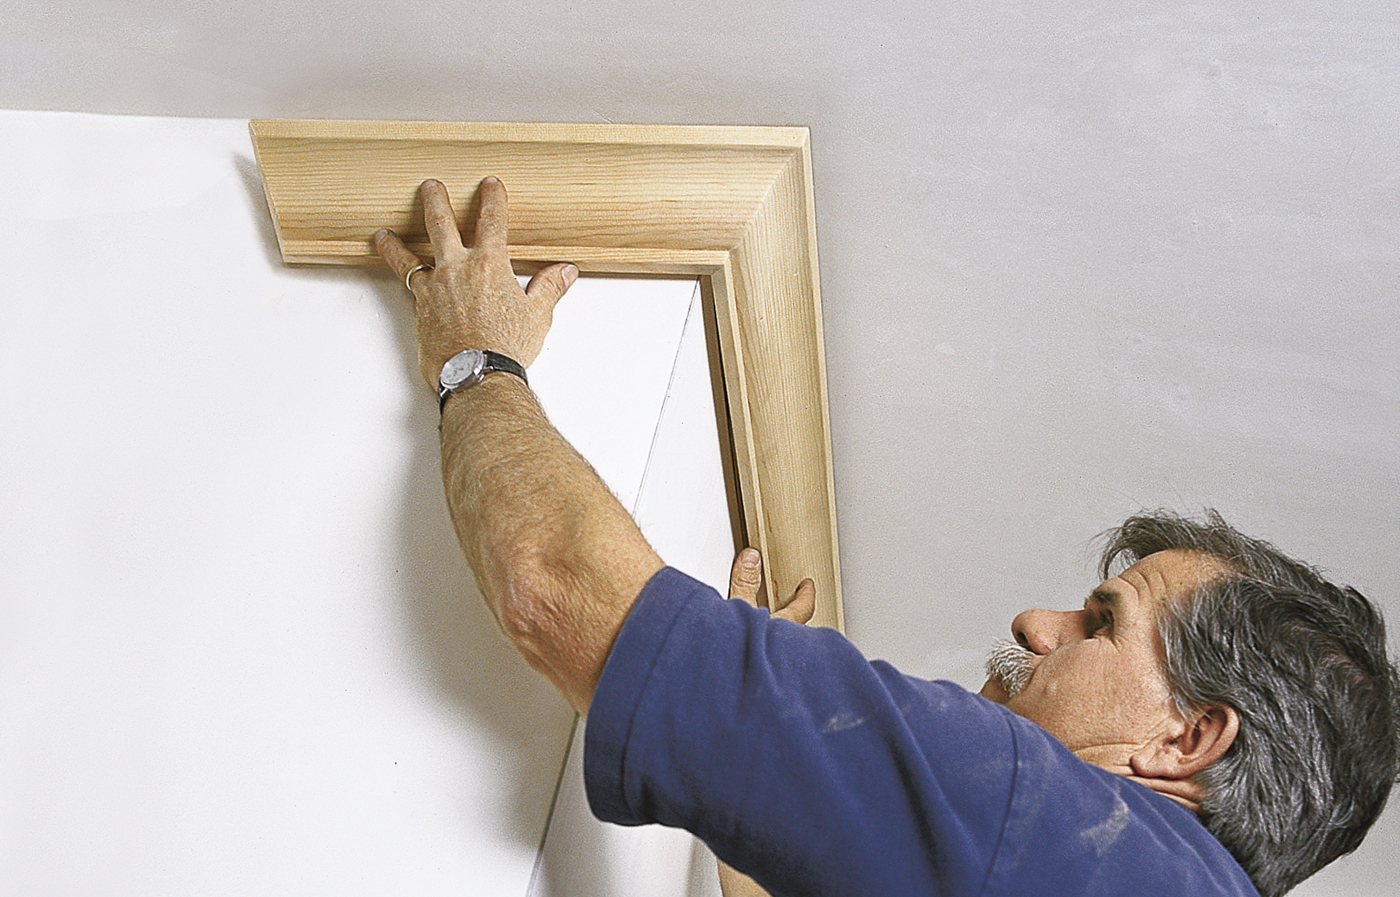
How to make a block with your own hands?
To make a block independently, you need two boards. The blanks should be connected with each other in the shape of the letter P. In the future, markups are made on it, using which cuts will be made as a result, into which the plinths will be inserted for cutting. The markings themselves are made at an angle, under which the baseboard will be trimmed. It is important to understand that the cuts themselves must be small, because the main thing that is needed from the miter box is fixing the board.
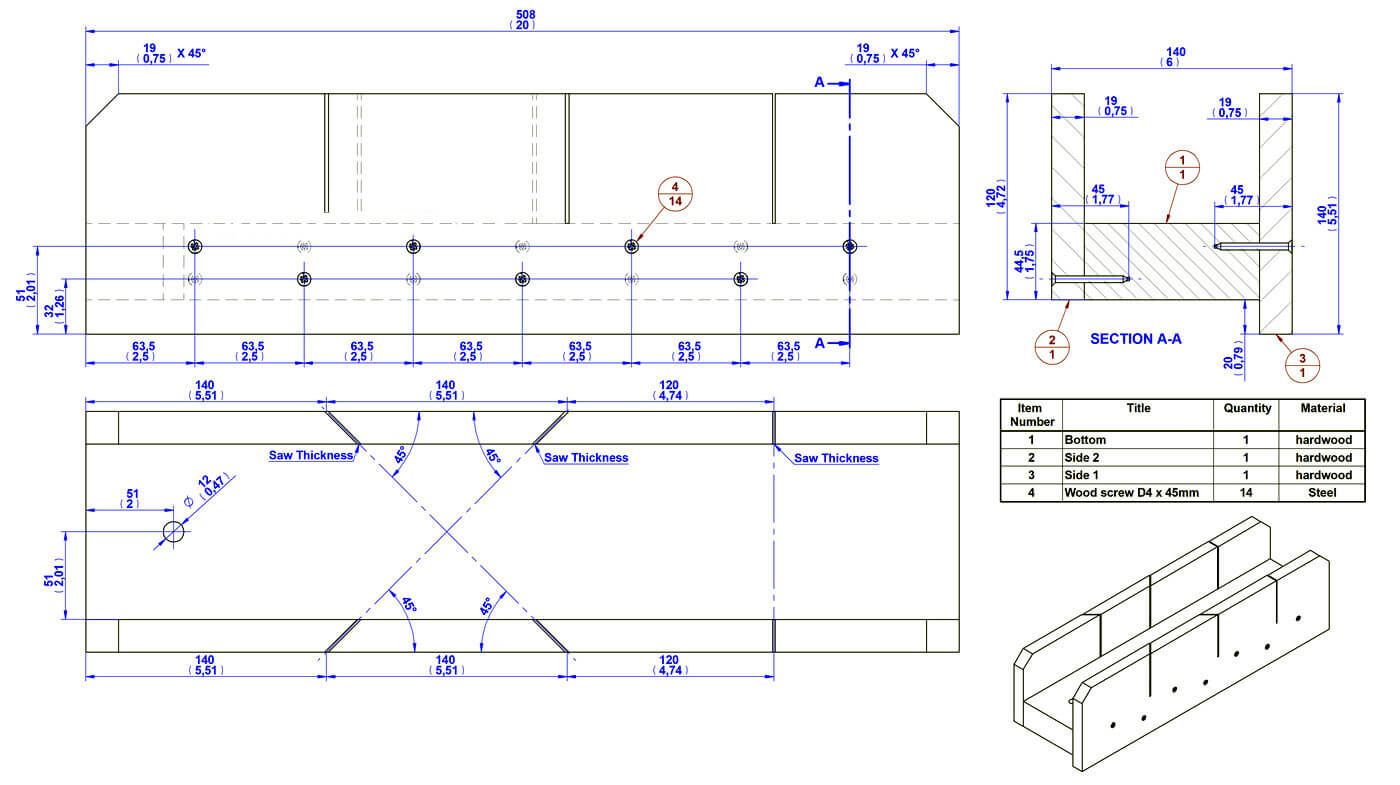
Another way to make a block is to connect the block and the template of the block. In order to cut the baseboard was convenient, you need to make a blank that will be easy to use and will not require work on weight. You can make a corner of two unnecessary boards. Take a sheet of paper and draw a 45 degree angle on it. Plinth should be attached to the corner, putting the side that should be sawed.The markup that is made on paper must be moved to the cutting place, and a piece of it must be cut off according to it.
How to trim using a template?
If it is not possible to make a full-fledged block, then you can use a template that is made on paper.
To do this, draw and then cut through small holes in cardboard or heavy paper. First, the corners are drawn on the paper, under which the plinth should be trimmed. After this point connect. Then holes are made at the point. The slotted paper is applied to the baseboard and transferred to the notation on it. Skirting should be cut by markup. In the case when the perfect plinth cut did not work, it is easy to adjust with a knife.
Tips and tricks
There is a situation when you need to make repairs very quickly, but unfortunately, there is not very much time. In such a situation, you can use the method of orientation on the terrain, but it must also be literate for the joint to be ideal.
A protractor is taken and angles in the room are measured. It is a good situation if it turns out that the angle is 90 degrees or 45. Unfortunately, this is not always the case. If the angle is correct, then the block is used.If not, the markup goes on the spot. When marking in place it often happens that even after the treatment with a knife the corner does not fit perfectly.

In such a situation, it is necessary to cut a piece from the first plinth, which will be able to close up the gap that has formed, so that the angle is perfect. This strip is inserted into the slot and gently closes it. And also this method will help to round out the corner of the plinth, which is often required during repairs.

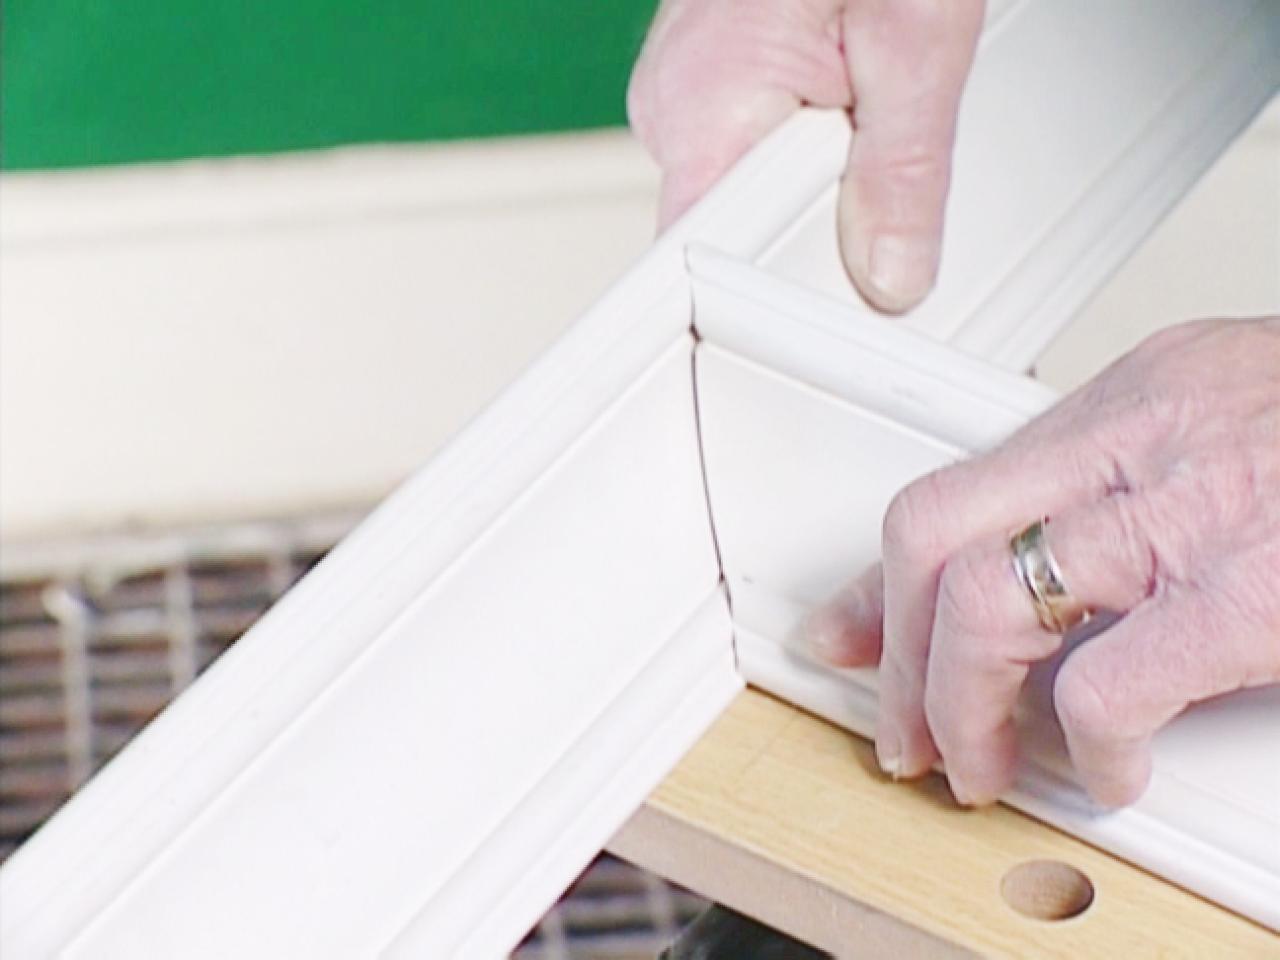
Plinth installation
Cutting the plinth is over, finally, the moment of installation. This process is no less important than just trimming baseboards. In order to glue the plinth to the ceiling, it is worth using glue or sealant.
For baseboards that are made of polyester and materials similar to it, it is quite suitable special glue. For wood and semi-synthetic materials it is better to use a sealant.
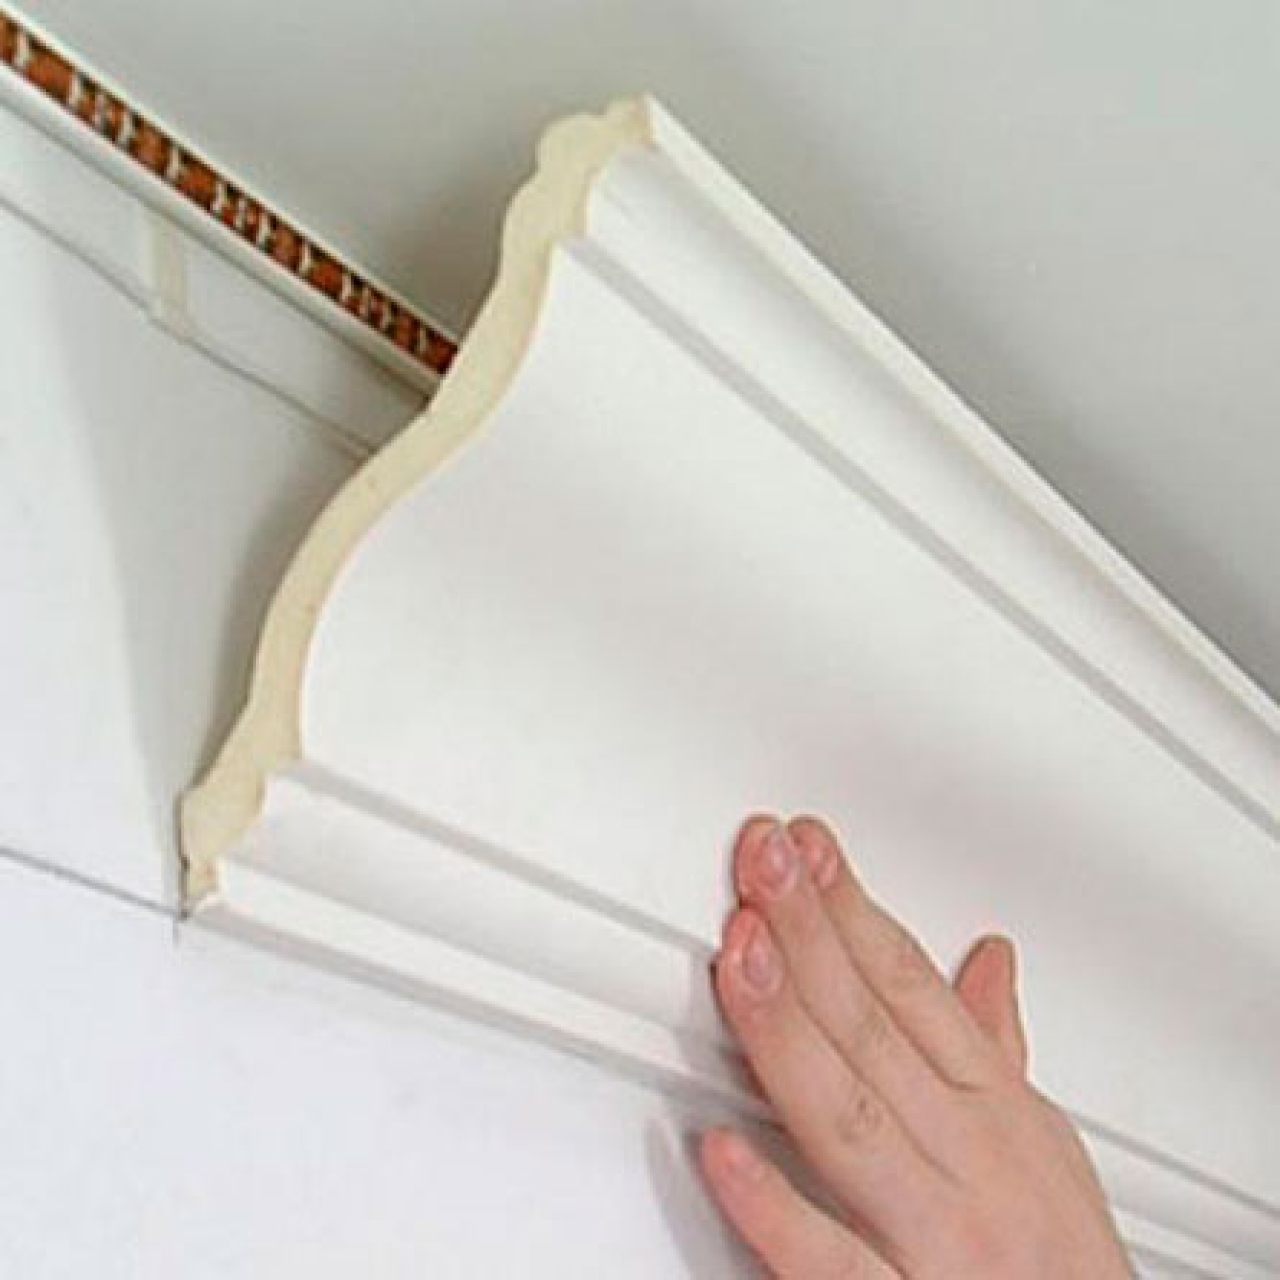
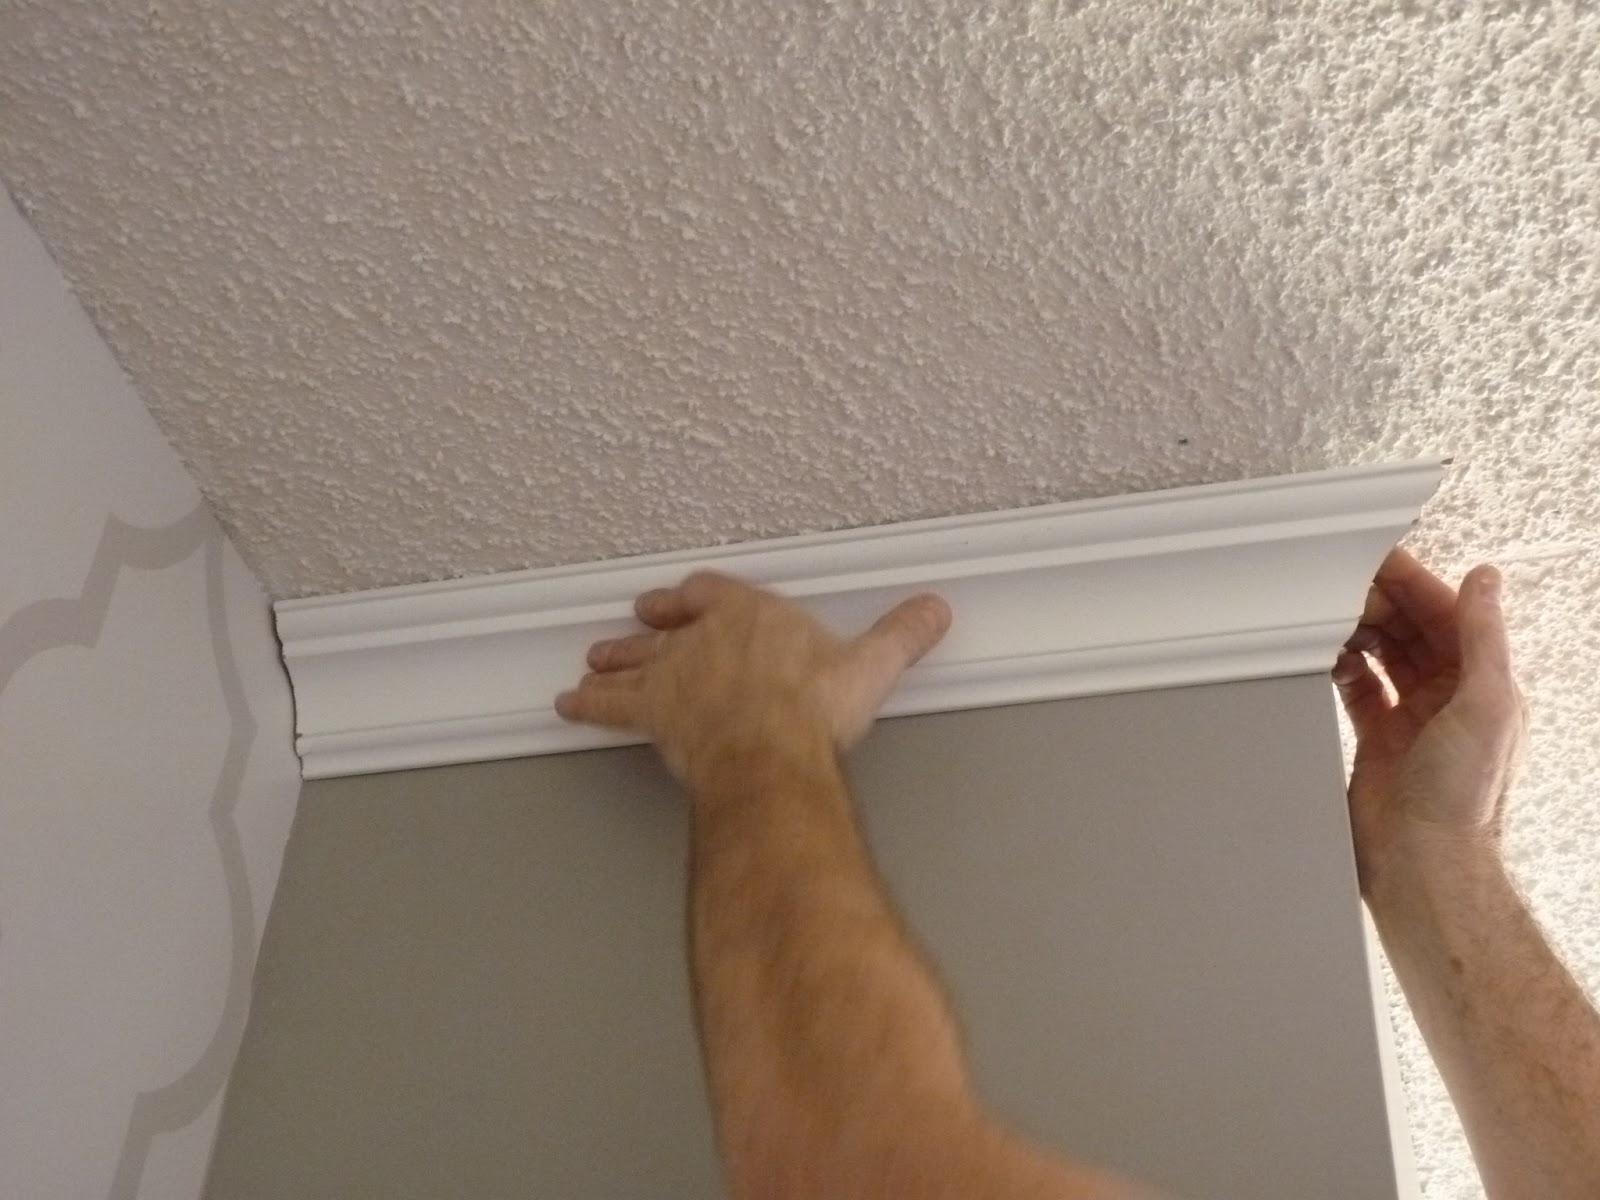
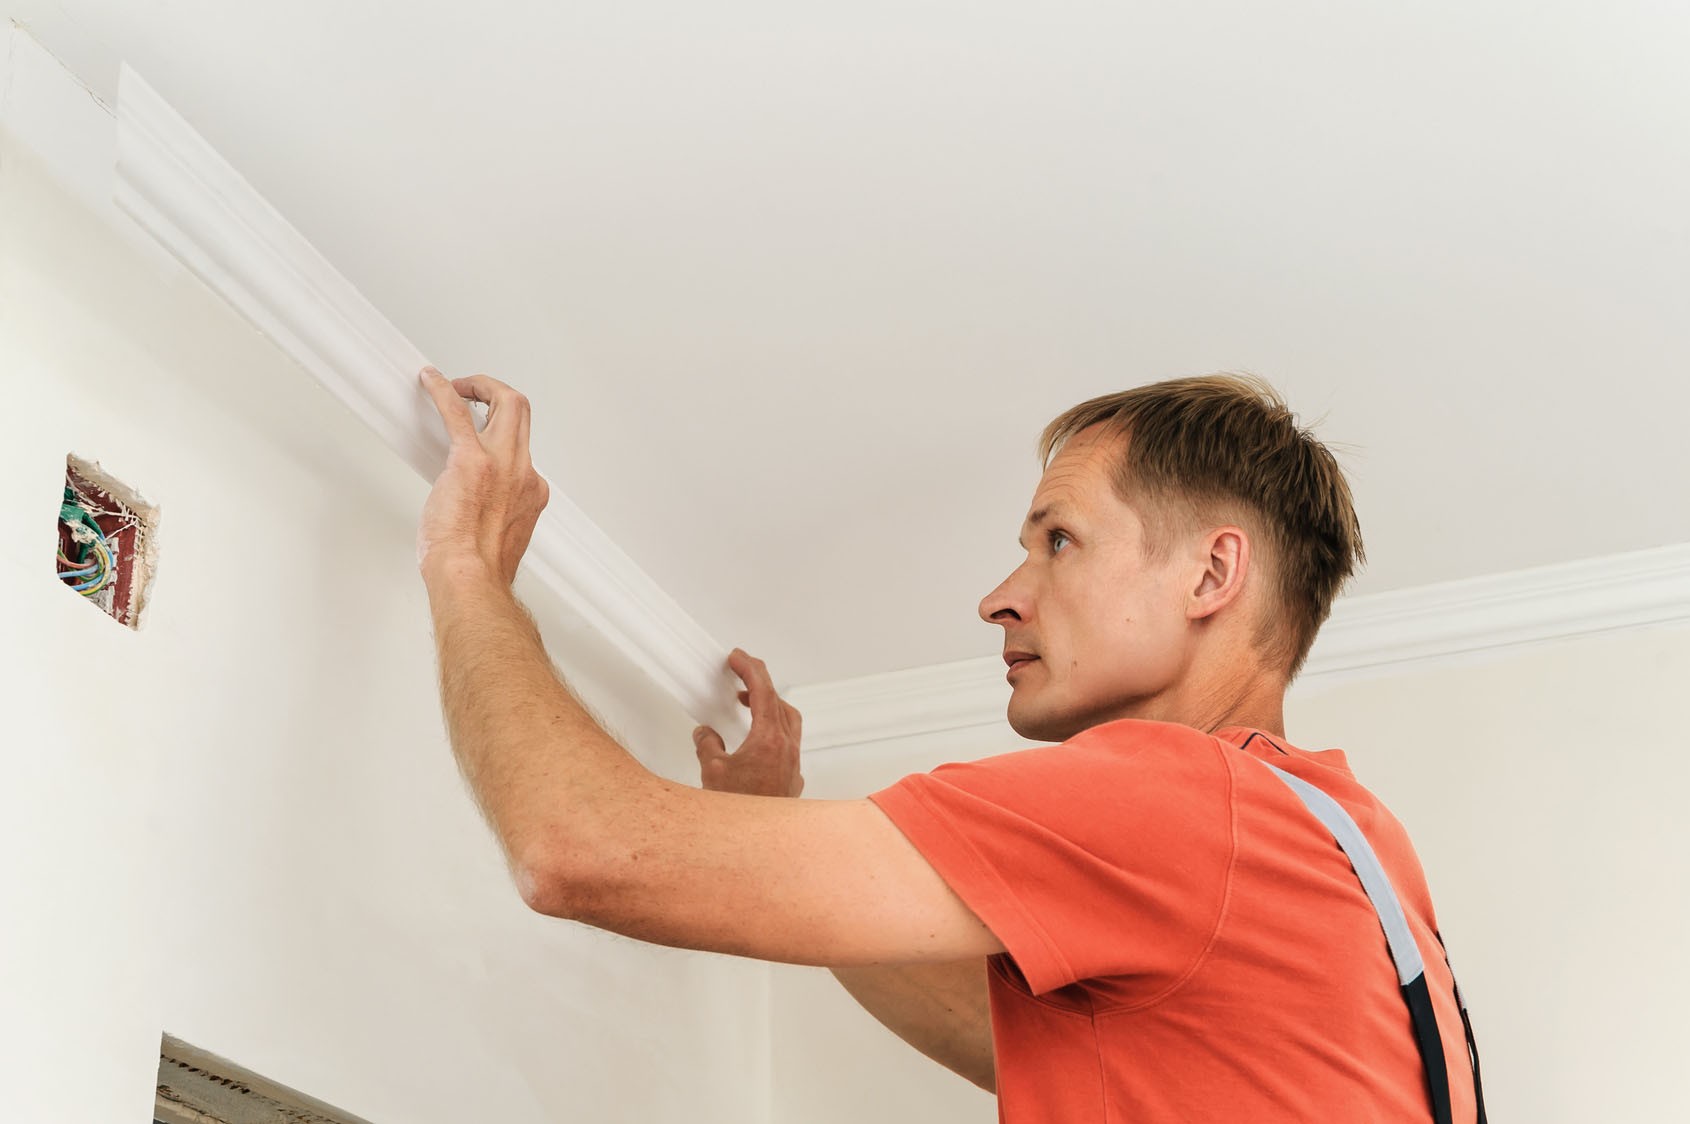
Having passed that moment, when the slats will be put in place, their final fit begins. It is worth remembering that before sticking plinths, they should first be tried on at the place where the ceiling joins the walls.
Last but not least, cosmetic work.With the help of special putty, the gaps, minor damages and irregularities are repaired. Thanks to the putty it is possible to level and finally adjust the angle.
It is better to use acrylic putty, rather than plaster. Acrylic putty unlike gypsum easily withstands moisture. If you use plaster, then in the bathroom at some point you can see that her pieces will begin to crumble directly on the floor. To apply the putty, you first need to grind everything, but such manipulations can damage the baseboard.
Another noticeable difference is that the gypsum plaster needs to be diluted independently, acrylic can be bought in finished form. Someone may say that it is not a problem to dissolve, but this is not quite so, because in order for the putty result to be of high quality, the putty must be made in the correct proportions. Otherwise, it will begin to crumble. Acrylic putty is a bit more expensive, but has several advantages, so the price is quite justified. The disadvantage of acrylic putty is that in the situation. when the layer must be greater than 10 mm, it will not be used, but in the situation with baseboards such problems should not be.
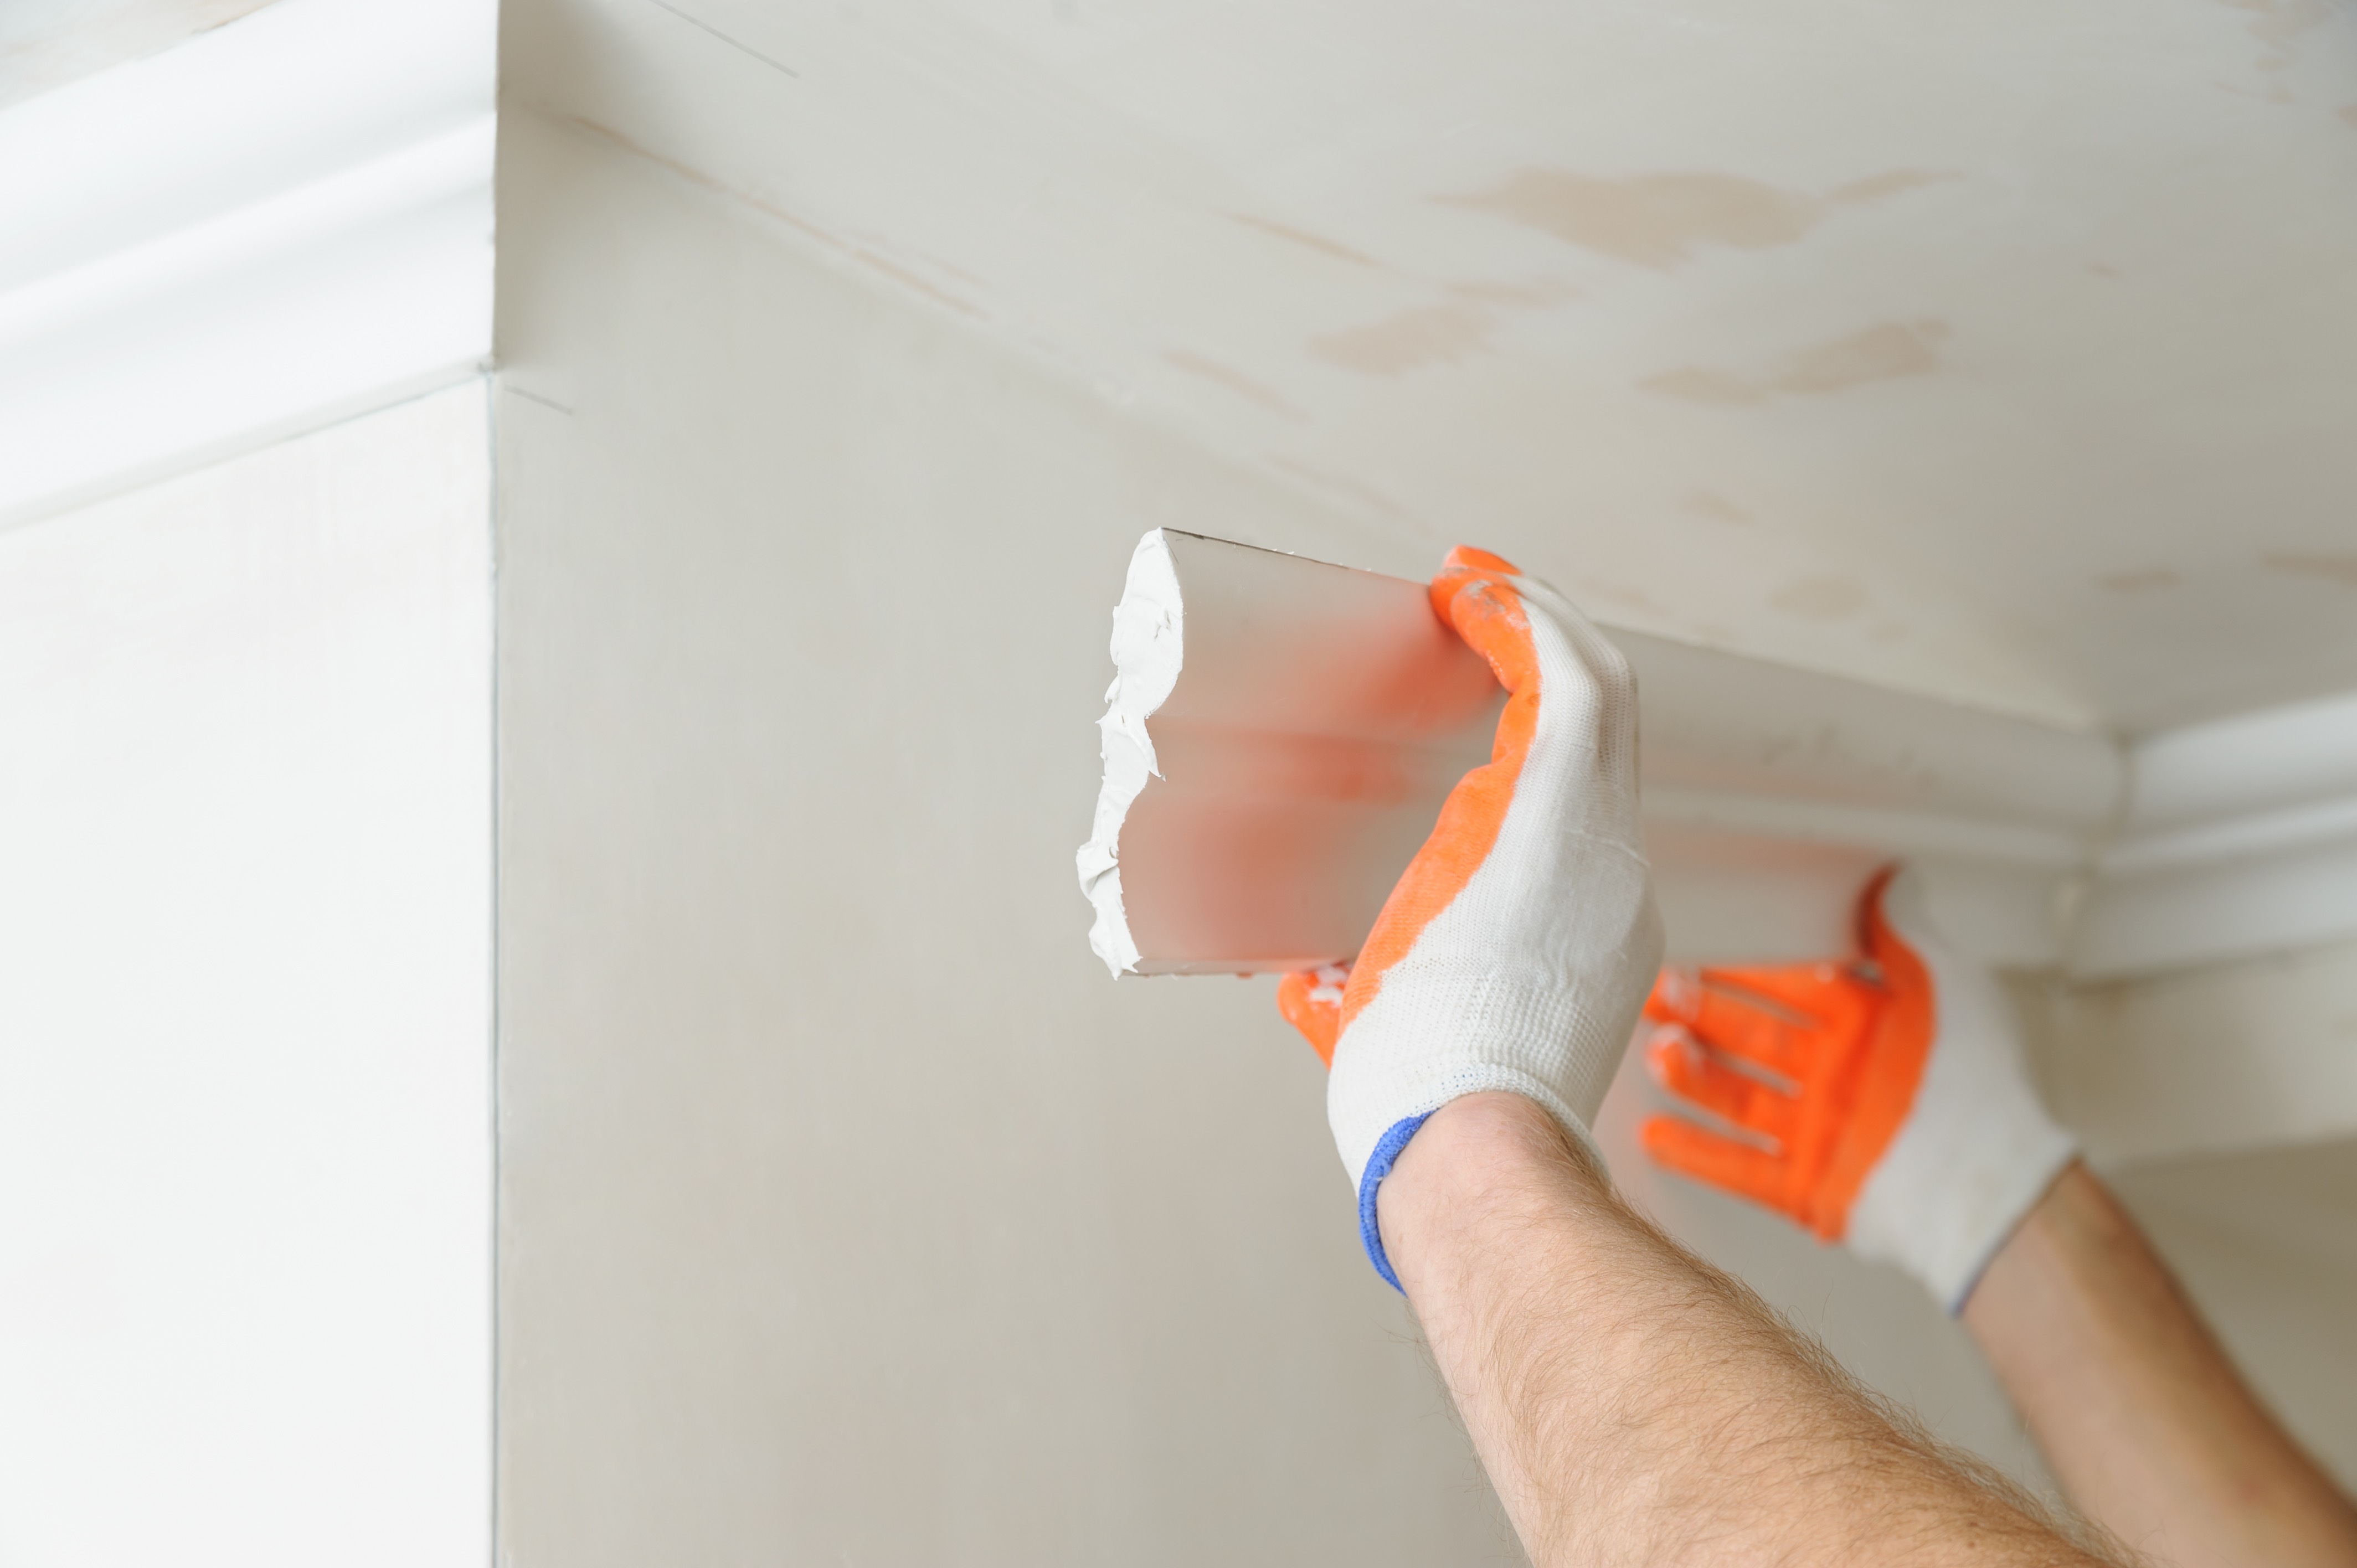
After the question of what kind of putty is better to use, decided, you can get to work. Putty must be applied over the entire baseboard and adjacent walls, in a thin, even layer. After the first layer has dried, a second is usually required to secure the result. It is necessary to apply carefully in order not to stain the walls and ceiling.
Use of finished corners
For people who do not want to engage in cutting, joining corners, there is an alternative solution to the problem. You can come to the store and buy ready-made corners. There are pros and cons of such a decision.
Plus, of course, more:
- When buying ready-made corners, the plinth can be simply measured and cut off in the usual way, without thinking about whether or not it fits at a specific angle;
- variants of corners in large quantities, they are from almost any material, many are beautifully decorated, differ in great variety.
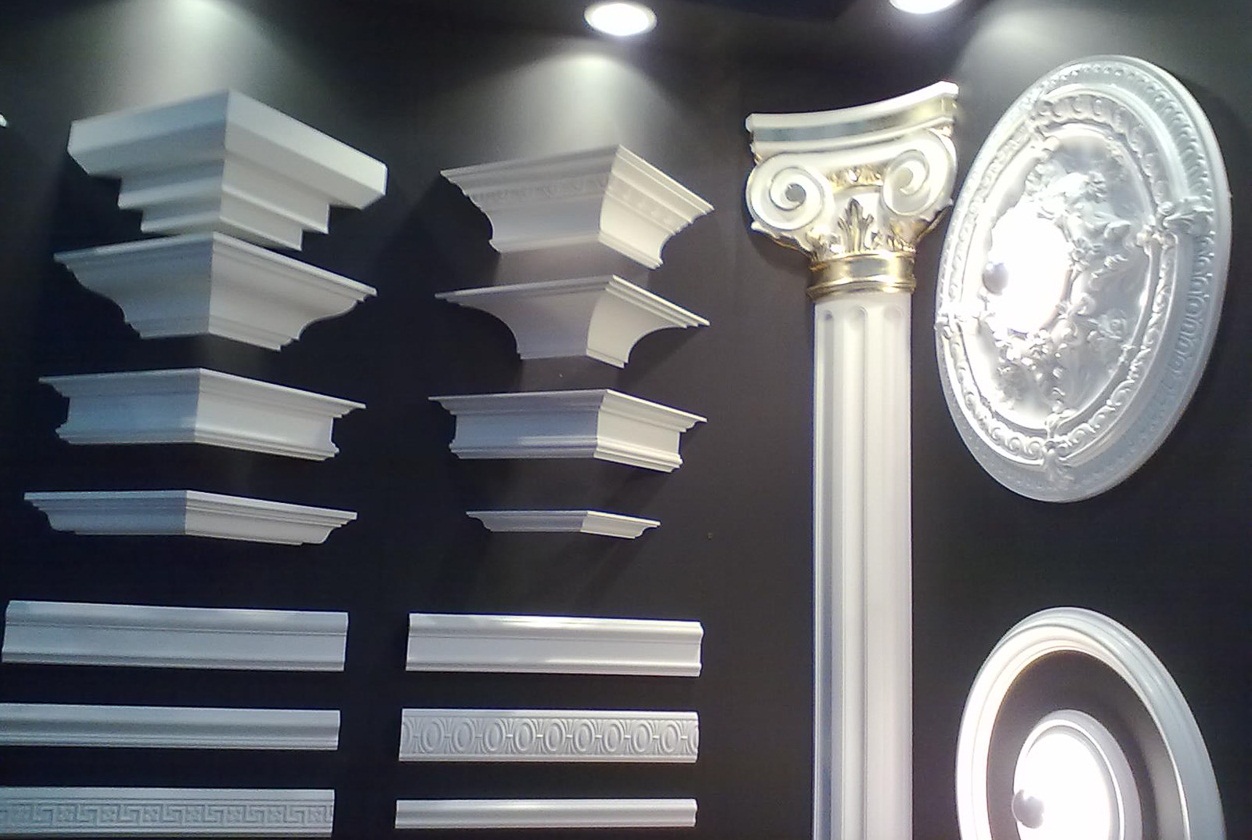
The main disadvantage of this decision is that since they are not tailored specifically for a particular apartment, they will most likely act prominently, which also will not be a sufficient advantage. Not all apartments can come up with such repairs.
Another disadvantage may be that a corner with high humidity may simply fall off or break. But such phenomena are rare.
Non-standard angles, their causes
In an ideal situation, the corners in the room should be straight, but this is not always the case. Most often this happens through the fault of the builders, who unfairly built the house. Another reason may be that the house was built on land that is subject to a drawdown.
Most often the wrong angles can be found in country houses and villages. After all, many houses are built according to individual projects, and not all proportions are made professionally.
Another option, and perhaps the most unpleasant, may be that the house may begin to curl. Be sure to check this aspect, because living in such a room is dangerous. If such a problem appears, you should not despair, the angle can be made in one of the ways of marking on the spot, as described above.
Summing up, with full confidence we can say that making beautiful corners in the room is not a problem. There are several ways. The procedure itself does not require a large number of tools or special skills, the main thing is to strictly follow the instructions.
To learn how to cut the ceiling plinth in the corners, see the following video.


