Arbor made of wood: how to do it yourself?

Any summer resident on your site wants to have a beautiful spacious arbor. It is possible to have a tea party, invite guests to a summer barbecue, read your favorite book or just relax after a busy day, enjoying nature.
It is easy to build a wooden gazebo with your own hands on your own land, the main thing is to stock up on the necessary materials and follow the technology clearly.
Features and benefits
For any arbor is characterized by a number of utilitarian and decorative properties. The practical function of the canopy is to save from rain and scorching sunlight. The decorative qualities include a delicate appearance, a harmonious combination with landscape design and other buildings.Building a tree gazebo with your own hands is worth it, considering all the above.
When choosing a building material for the construction of an object, it is worth considering the positive and negative sides of this or that material. So, the tree and the arbor of it have several advantages:
- simplicity of design and ease of processing allow you to build a canopy or a more complex object alone;
- You can choose different projects in terms of style and execution;
- environmentally friendly material, safe for human health;
- compared to brick, wood is a budget and affordable material;
- lightweight construction does not require a reinforced foundation;
- with proper care for wood, the gazebo will last for many years;
- any building of wood has a delicate appearance and fits perfectly into any landscape design, combined with other materials (brick, stone, iron).
But this material has drawbacks. It is unlikely that their list can force you to abandon the construction of a wooden gazebo, but these features should be considered when building and caring for the building:
- The tree is easily rotten, mold is often bred, especially in humid climates.To avoid material destruction, even before the start of construction work, each wooden element is treated with antiseptics and special impregnations.
- This material is highly flammable and supports fire. Equipping an outdoor fireplace or a brazier next to the gazebo, it is important to follow the fire safety regulations in the area: do not leave open fire unattended, always put out the coals after cooking, limit the possibility of sparks on the wood at the construction stage.

Kinds
There are various types of arbors. They differ in functionality and design. From a practical point of view, a gazebo can be endowed with various additional options, which will expand the functionality of the building.
A summer house and a summer kitchen in the same building are real, because a spacious shed can be equipped with a real kitchen.
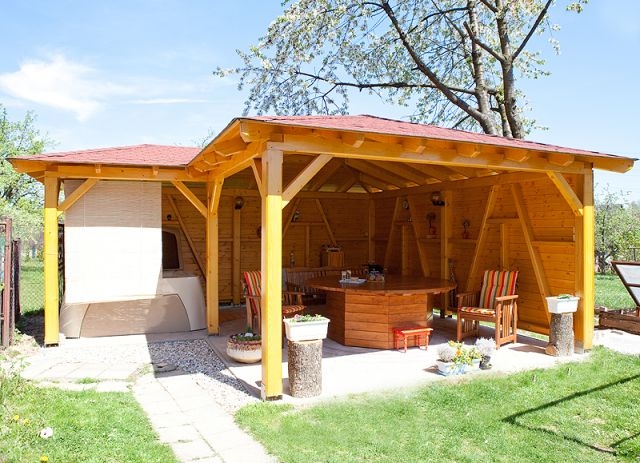
A cooking table, an electric stove, a sink and a refrigerator are the attributes necessary for the arrangement. Directly for the feast you will need a dining group, which is better to choose from the options of garden furniture. Such a building will provide comfortable cooking in the open air, and you can immediately gather a family at the table.This option is perfect for those who do not like to stand at the stove in the stuffy kitchen in the house.

In advance, care should be taken to lead to the construction of communication: light, water, drain for washing. Such an object is quite massive, so you will need to build a fortified foundation.

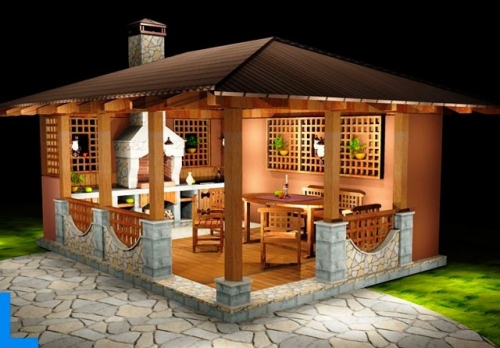
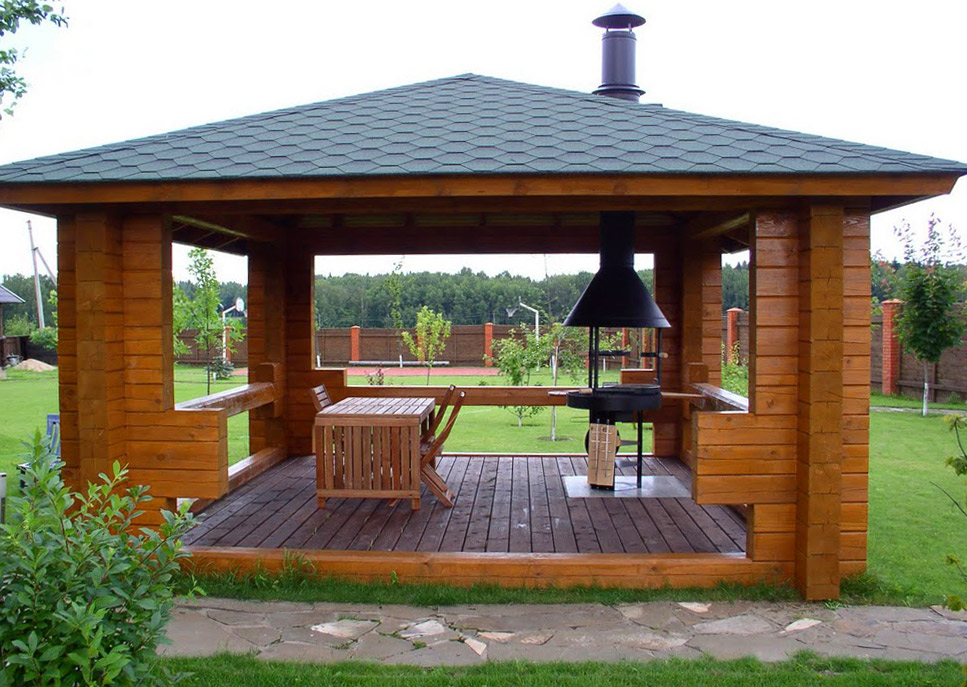
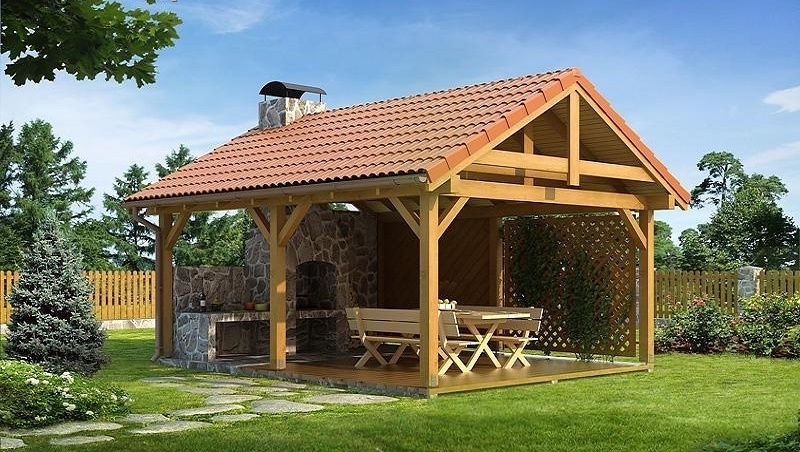
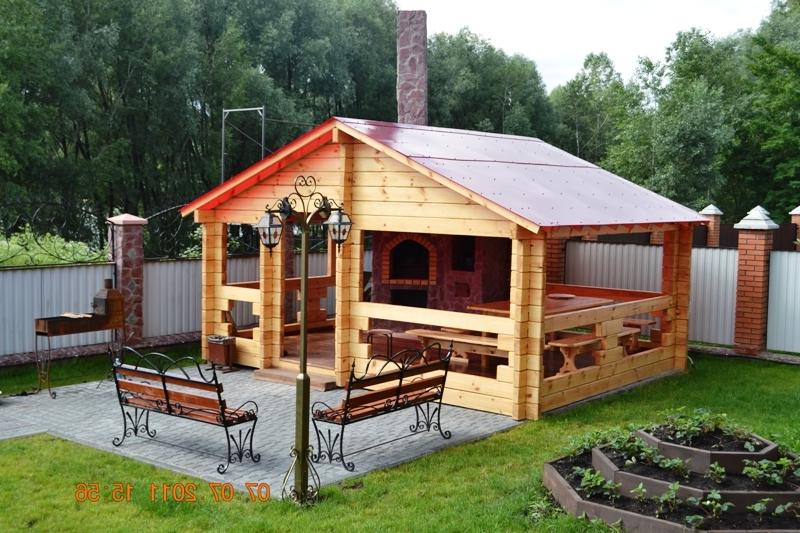
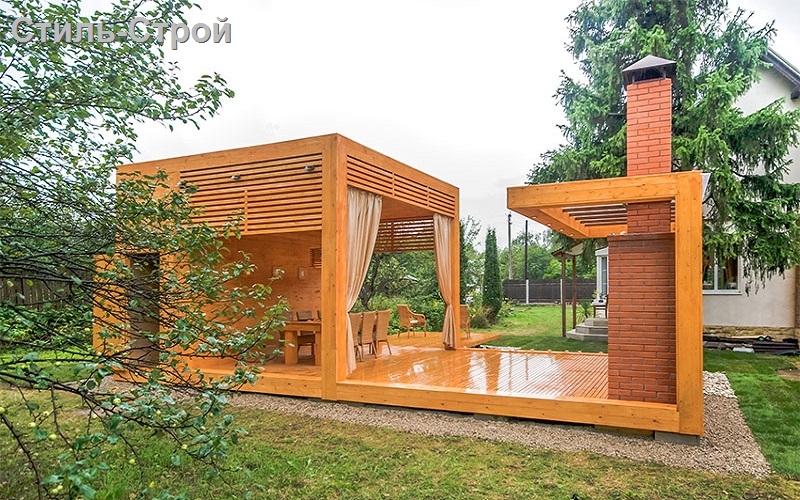
Another option for comfortable outdoor cooking - shed with outdoor stove or fireplace. For those who like to organize a barbecue in any weather, this option will be most welcome. The center itself, of course, is laid out of refractory, heat-resistant bricks, but a canopy in the form of a gazebo can be made of a wooden structure. For this type of building a common reinforced foundation is desirable.
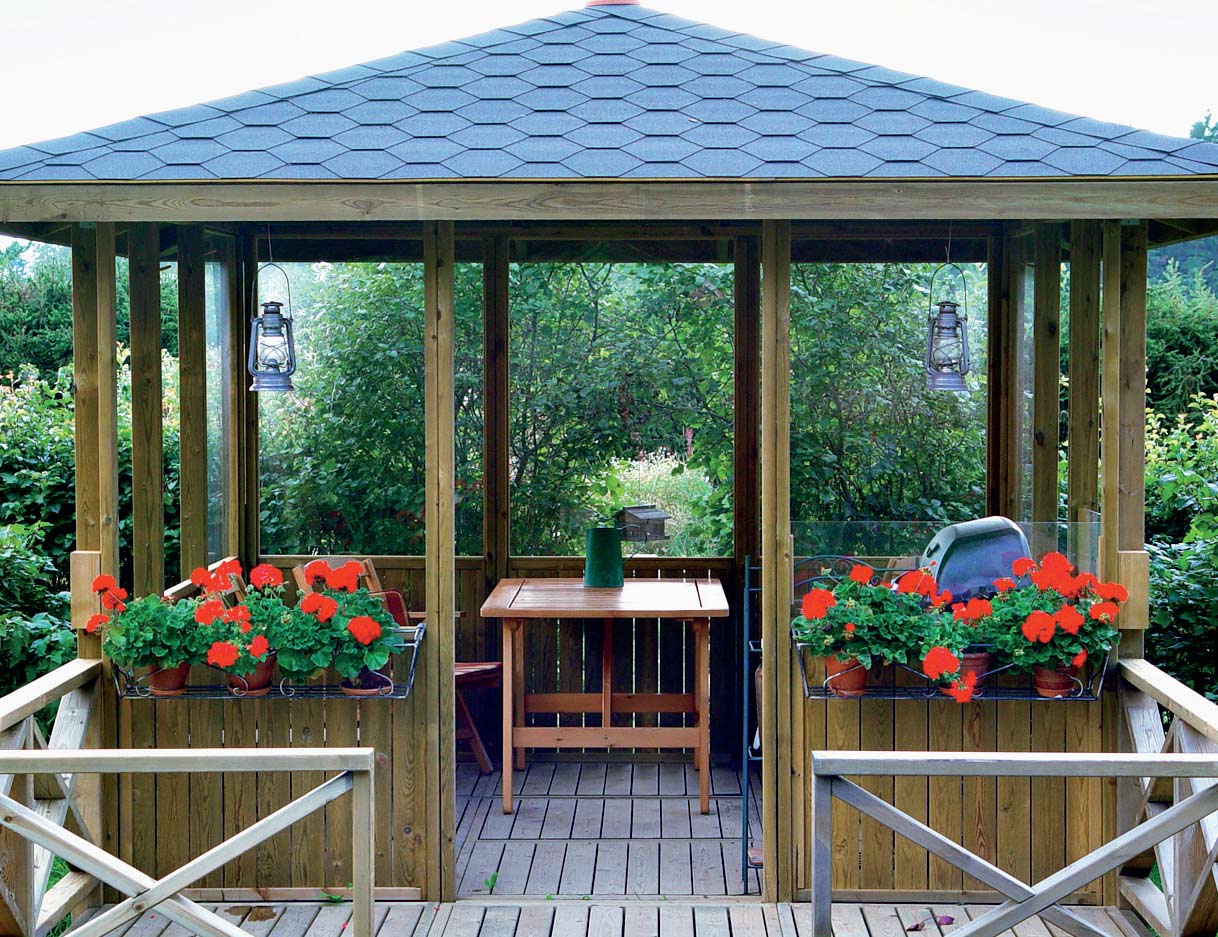
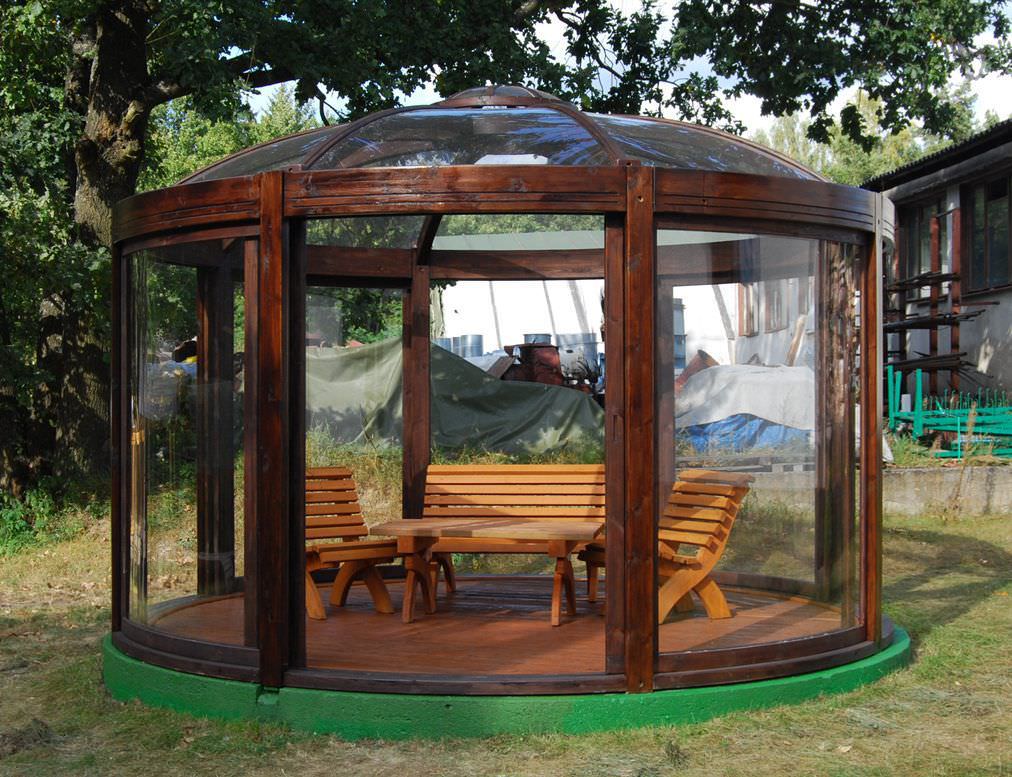
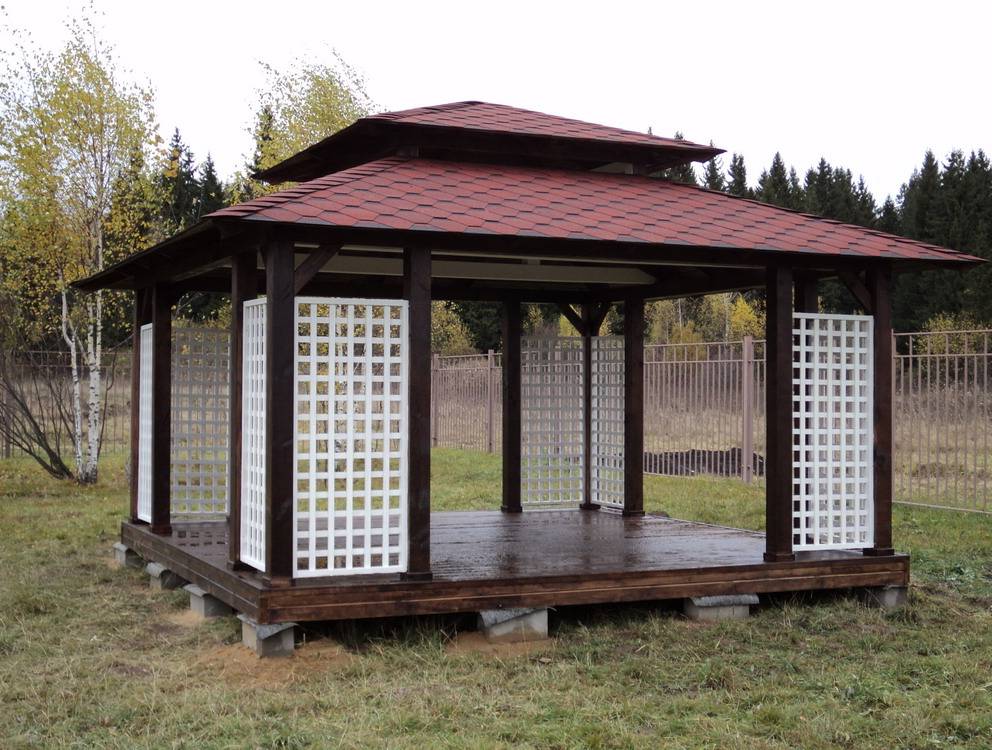
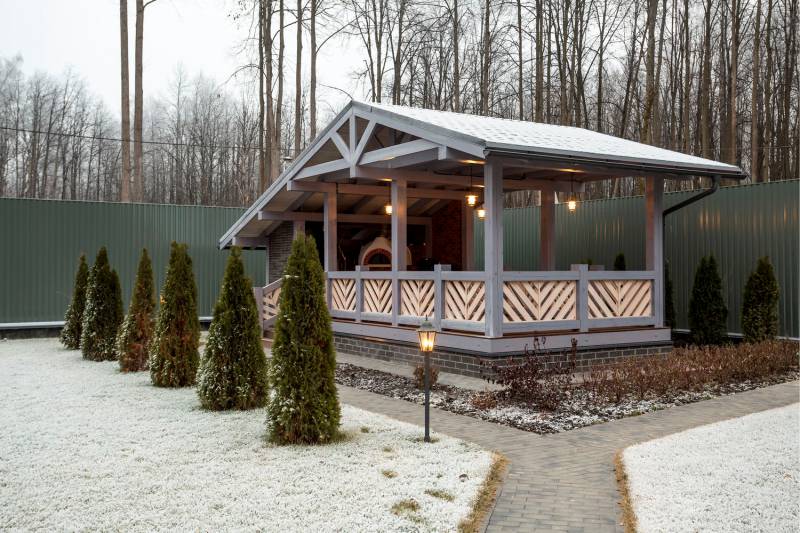
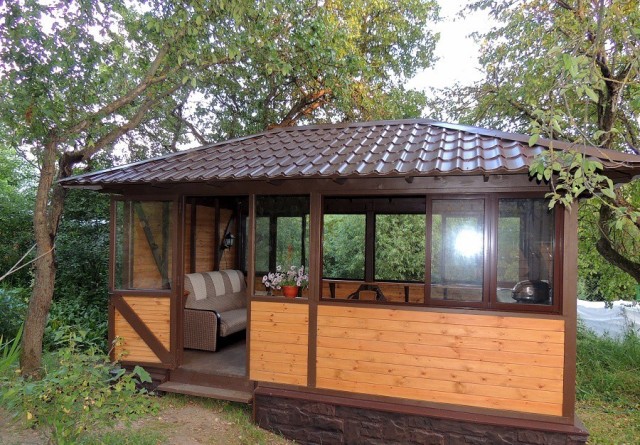
Get together in the winter on a barbecue in nature - what could be more tempting? Insulated building with barbecue grill inside will help to realize the idea in warmth and comfort, while remaining in the fresh air. The extensive glazing of a winter arbor will help to merge with the nature. Typically, such buildings have a hexagonal or octagonal structure, in the center of the brazier erected of bricks or stone, equipped with a pipe in the roof for exhaust.Guests sit around the hearth, roast meat, chat and warm up.

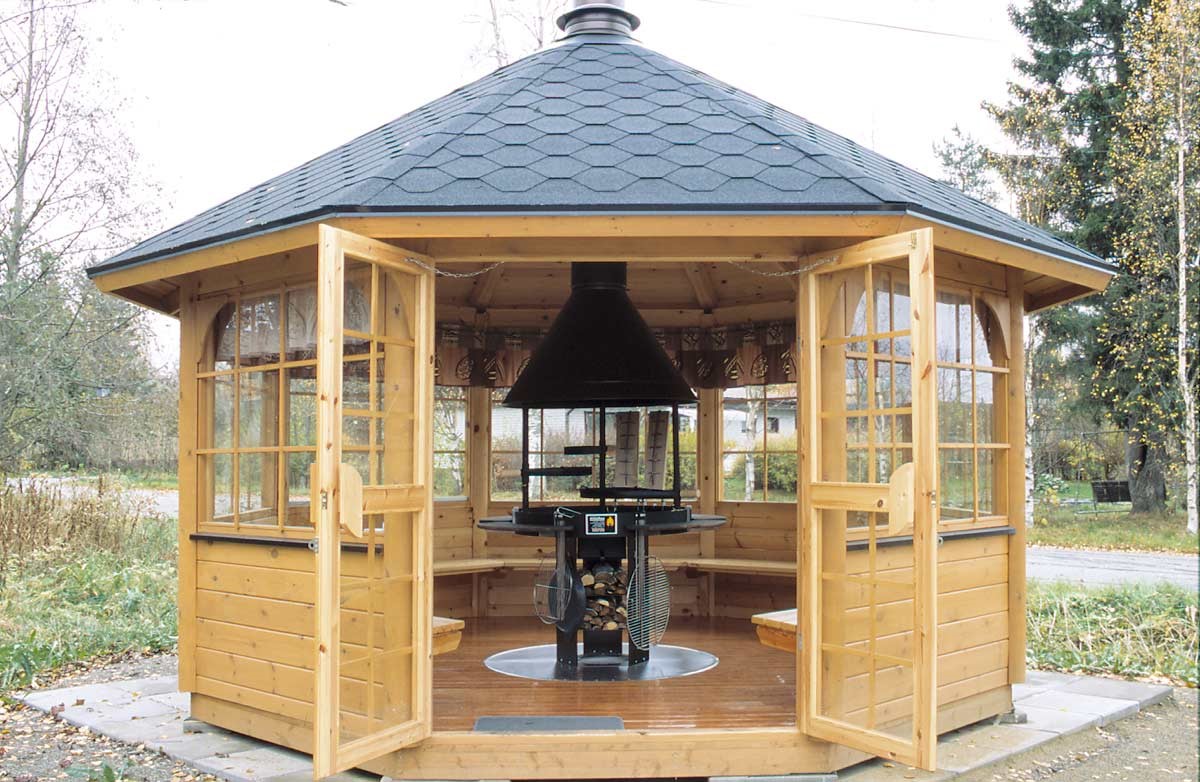
For such an object, a reinforced, insulated and hydro-insulated foundation is required. Warm mineral wool should be the wall with a roof. The arbor is designed for use all year round. In the warmer months, you can open the windows and enjoy nature. Mosquito nets eliminate mosquitoes and flies.
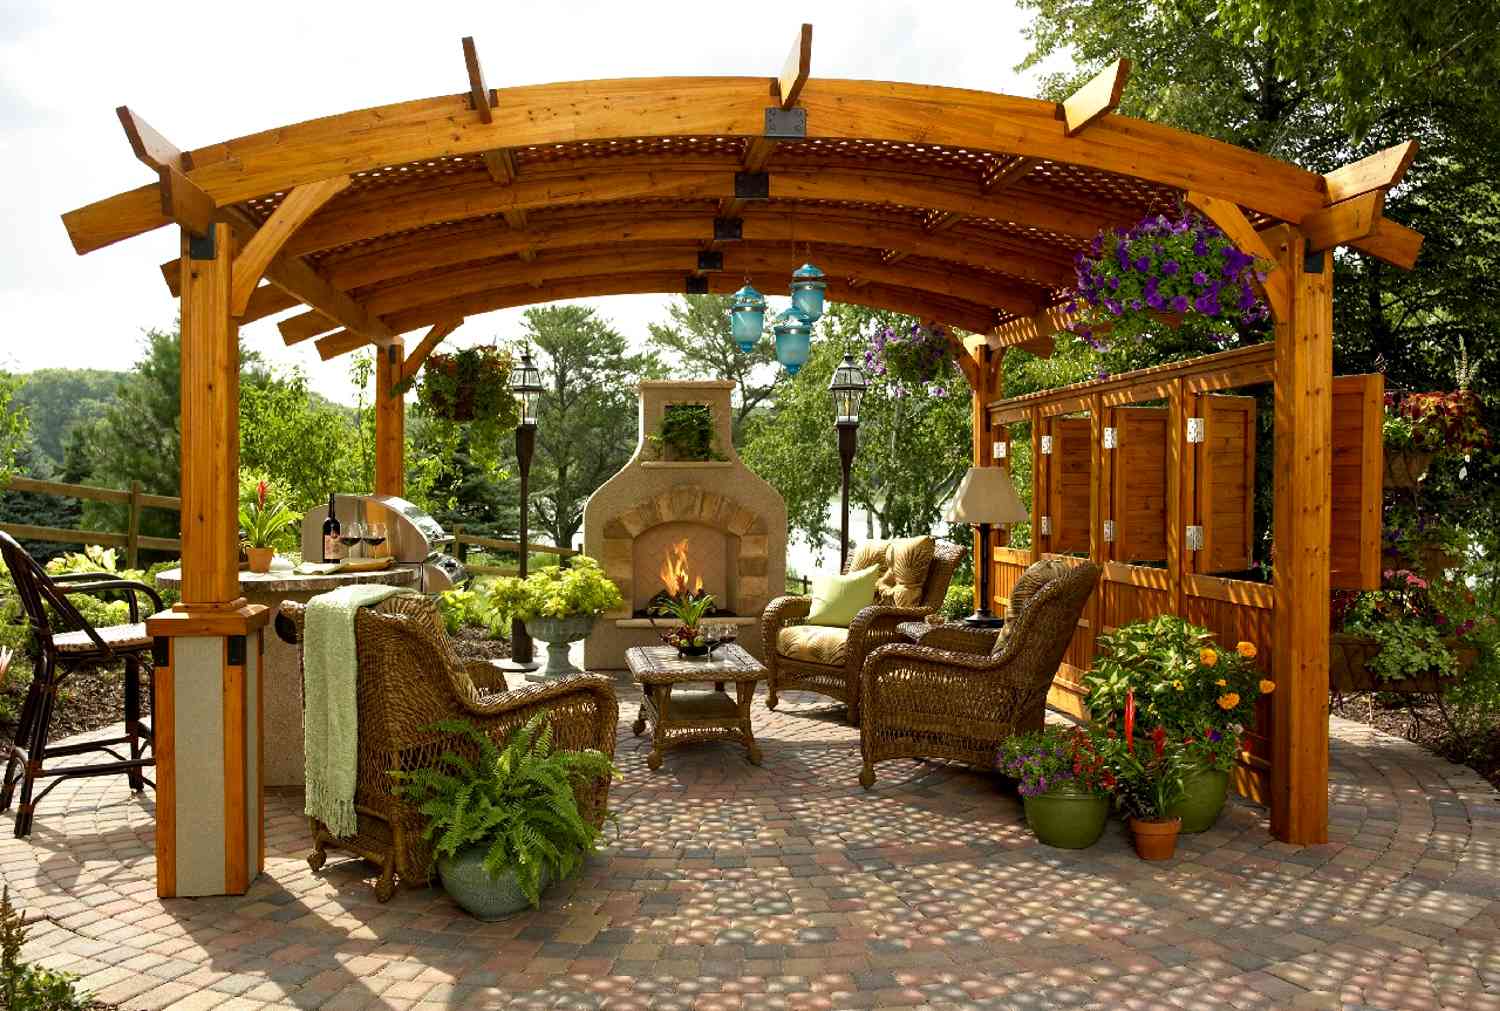
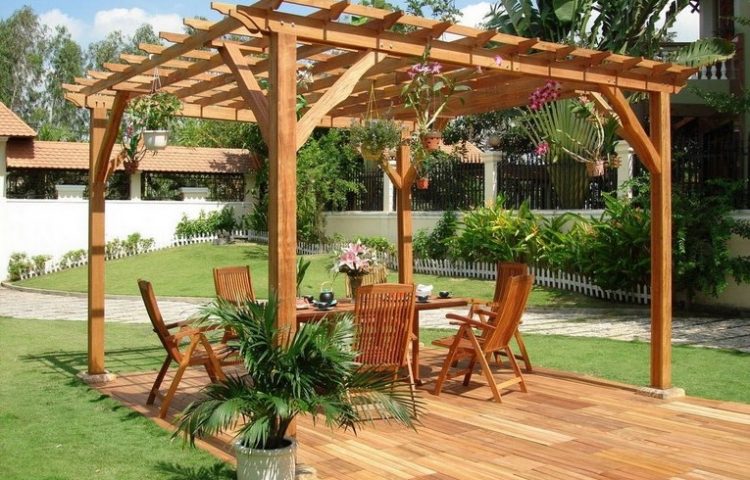
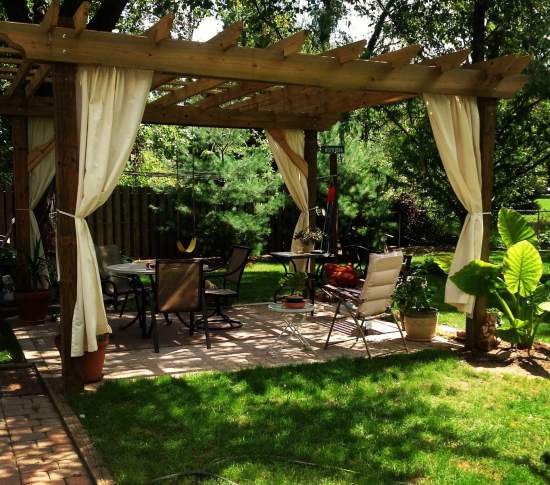
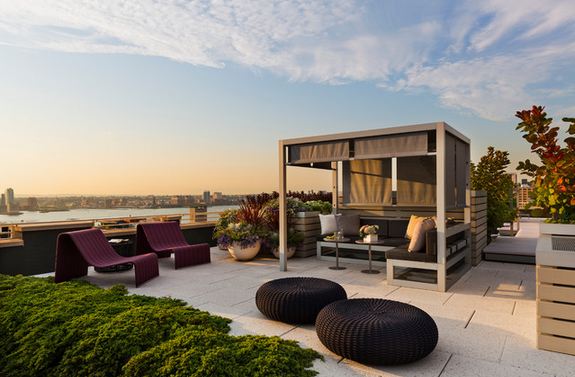
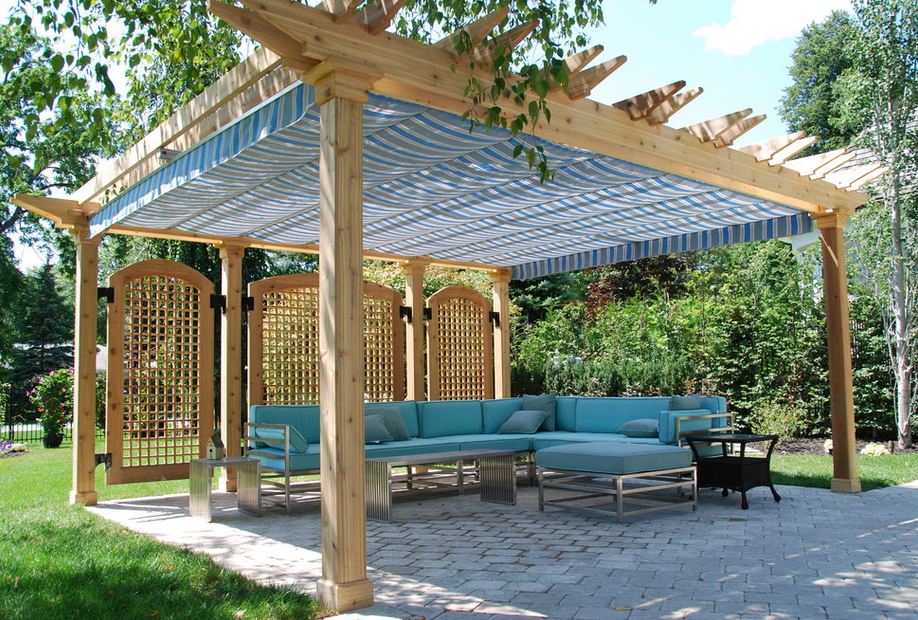
Arbor-solarium is a semi-enclosed summer garden space. The most popular type of such arbors is pergolas. Such solariums first appeared in the south of France as supports for vines, thus they served as peculiar corridors on plantations for farmers. The shade of abundant foliage created a pleasant coolness, and, thanks to the ease of construction, pergolas have spread throughout the world.
There are other types of tanning beds.
Penumbra can be created by additional draperies from fabric or with the help of climbing plants - roses, hop, girlish grapes, honeysuckle, clematis and others will help.


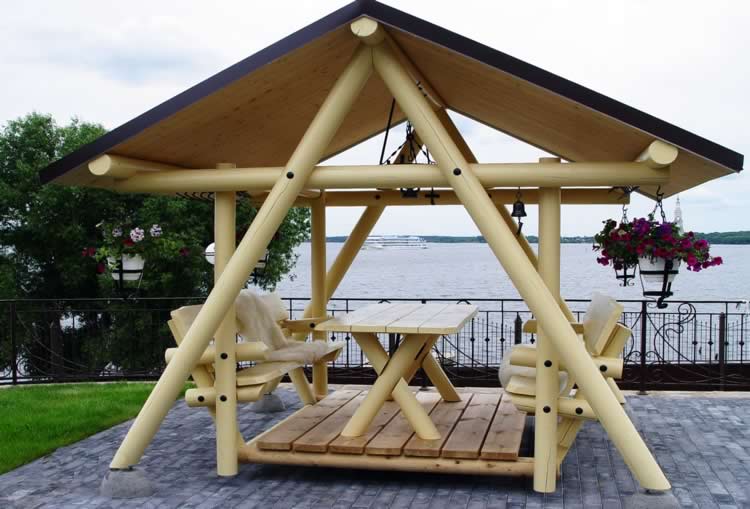
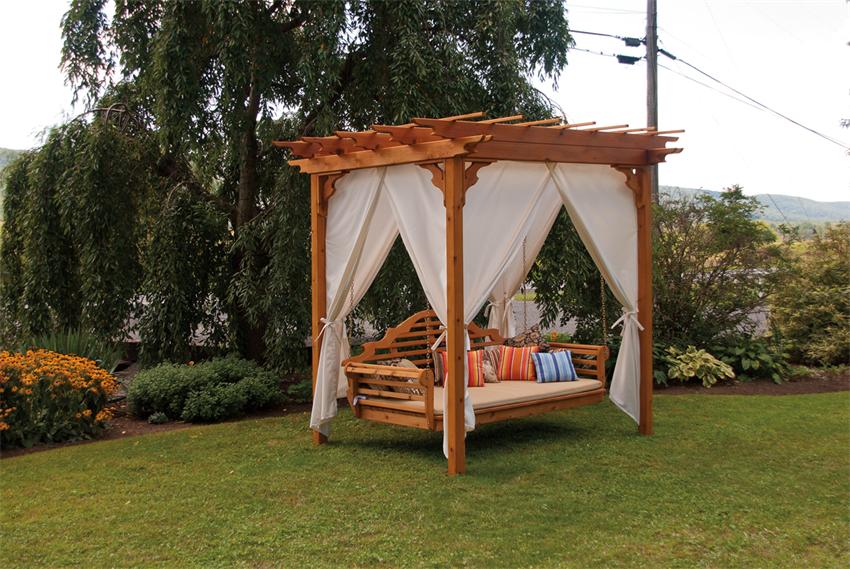
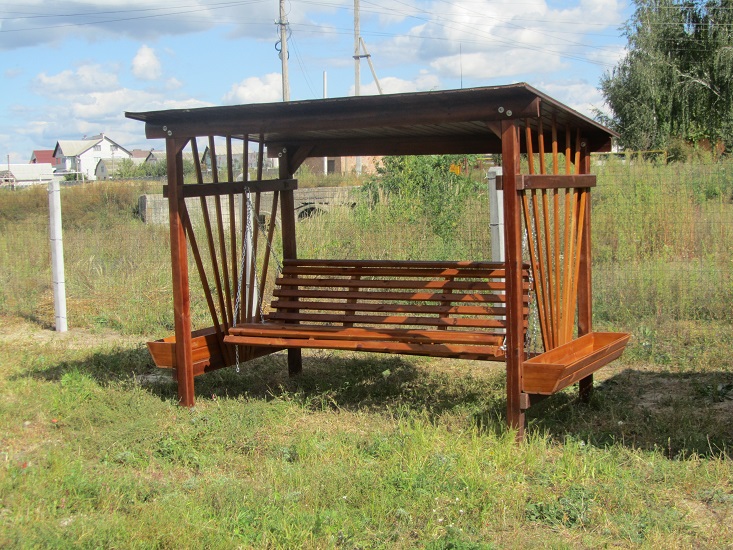
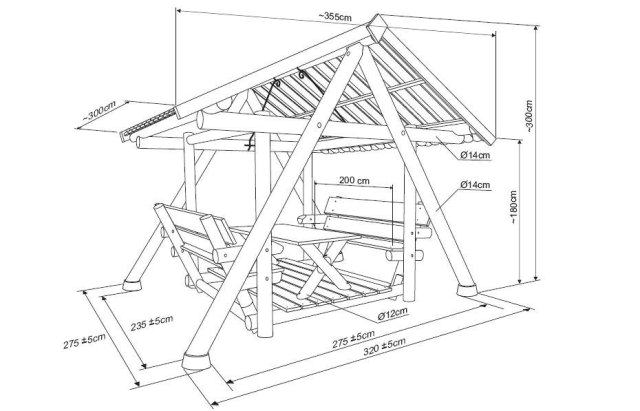
Arbor swing - This is a small architectural form with a narrow functionality, but, anyway, every guest, and the owners will be pleased to swing on a homemade wooden attraction.The canopy will protect from direct sunlight and light rain, pillows and mattress will give a gazebo, a swing of coziness and comfort.
Form of construction
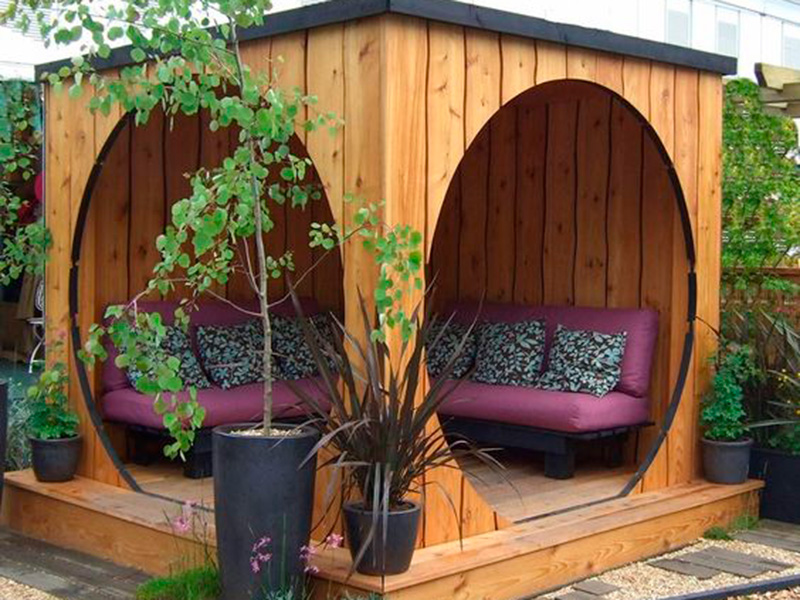
In addition to the functional variety of buildings, there are different types of arbors in style and shape. This may include objects made of wood, which was processed in different ways, and the possibility of design of the roof or structural features of the frame.
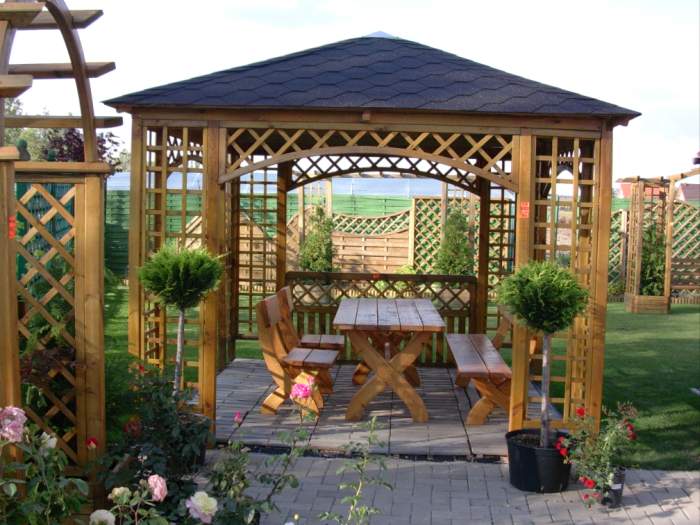
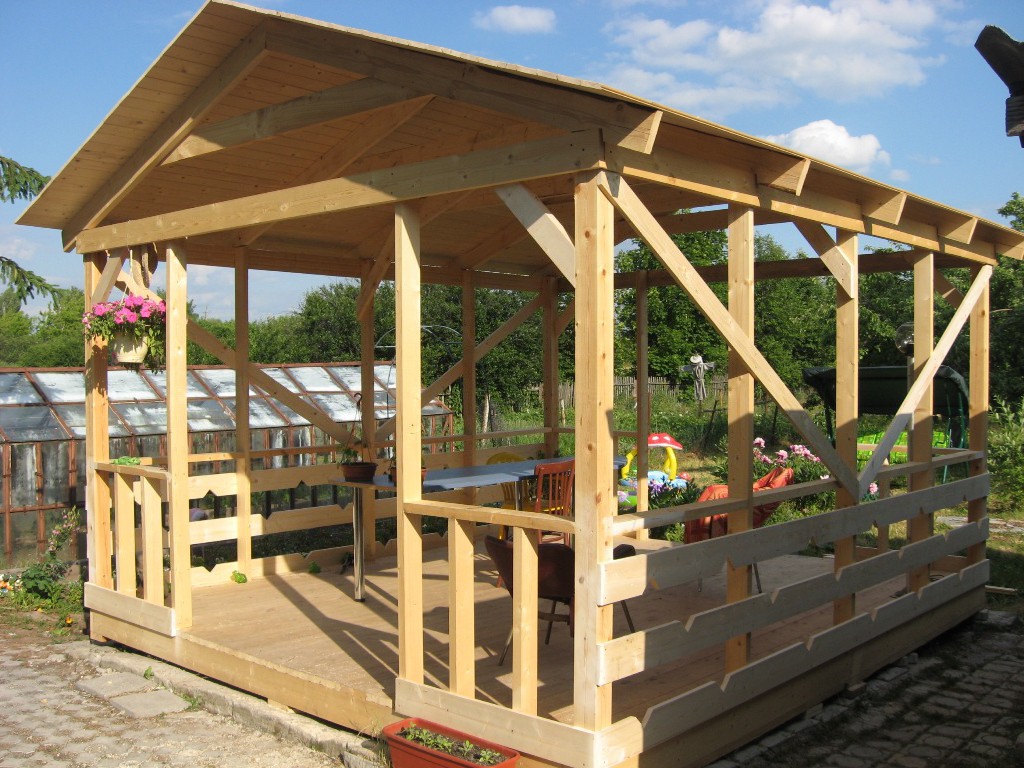
Square and rectangular arbors are the simplest forms. Such a construction can be performed as an elementary shed, without railings and cladding, and even without a floor covering - it is enough to dig in resistant pillars, fill them with concrete, build a roof. The construction looks almost transparent and weightless, but it also saves from rain and sunlight.
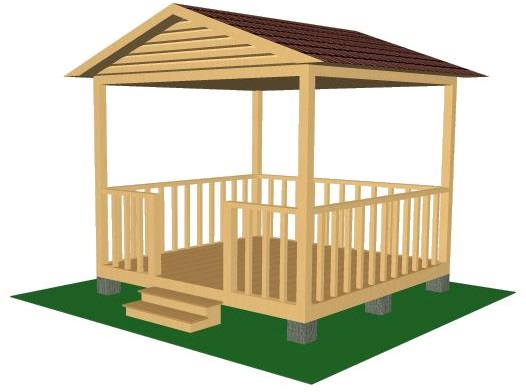
It is better to build a spacious square or rectangular gazebo in a classic view - on the foundation, with floor and railings. Then it will have a finished look, as well as meet all the requirements from the practical side of the question.

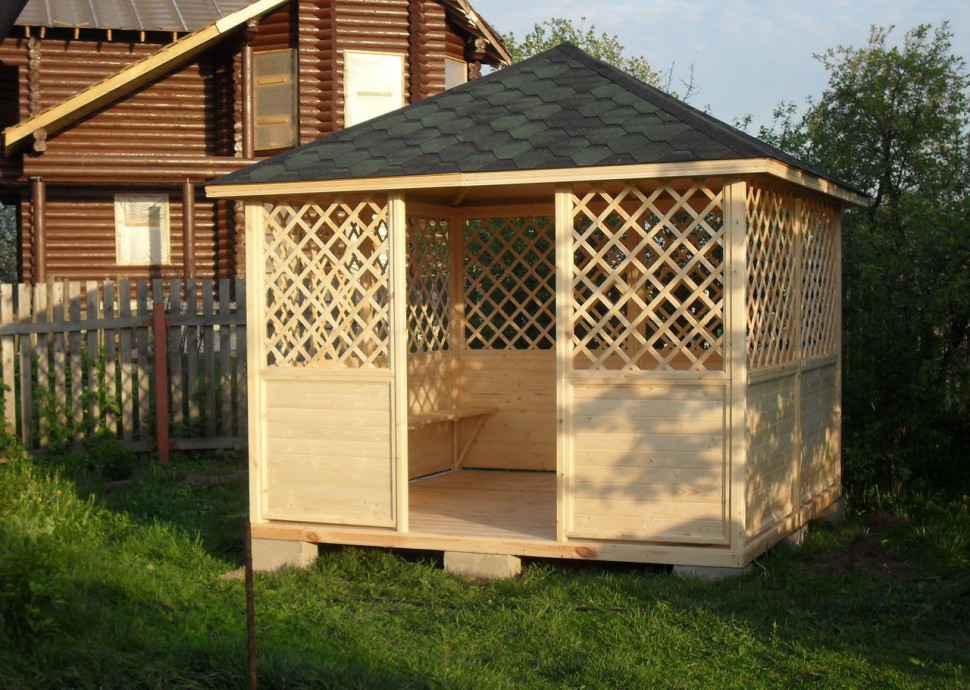
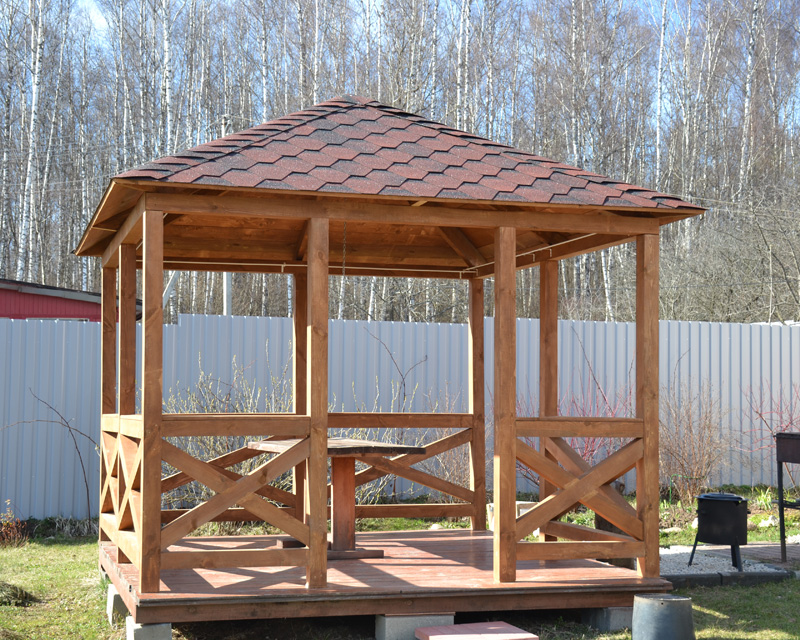
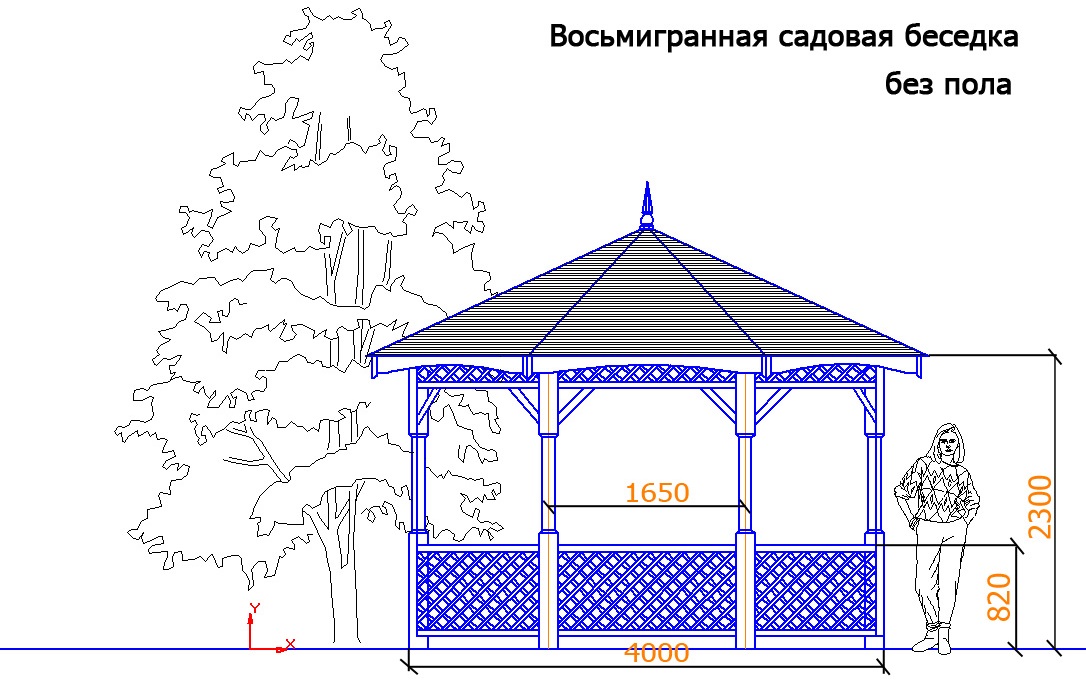
Frame hex or octahedral gazebos more durable than the simplest forms, because it is able to withstand the thickness of snow and winter glazing.Moreover, this space is much more spacious. Arbor looks easy and relaxed. However, a large amount of material goes to waste, so this type of construction will be more expensive.

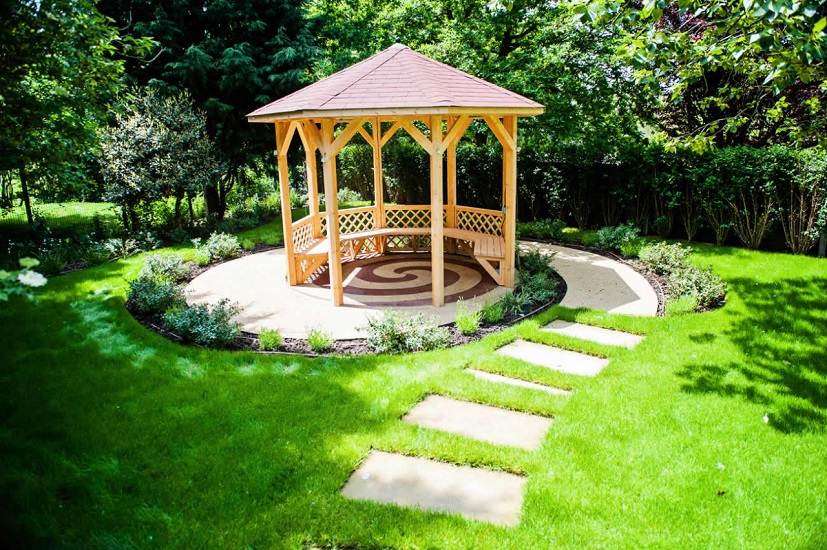
Pergolas Rotunda round shape look luxurious, often unusual. Due to the roof structure, they have a rather complicated roof covering technology. A real wooden arbor in the shape of a circle is not easy to meet at the dacha plots, mostly craftsmen make six-sided or octahedral canopies.

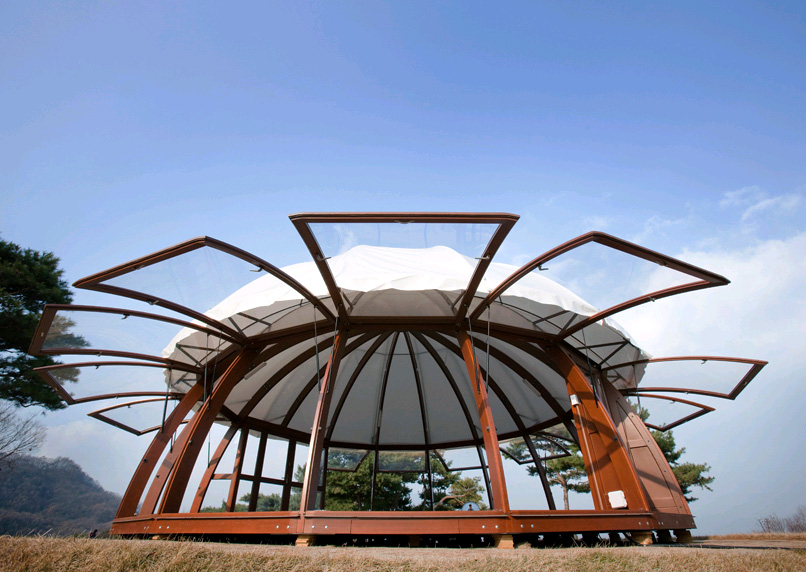
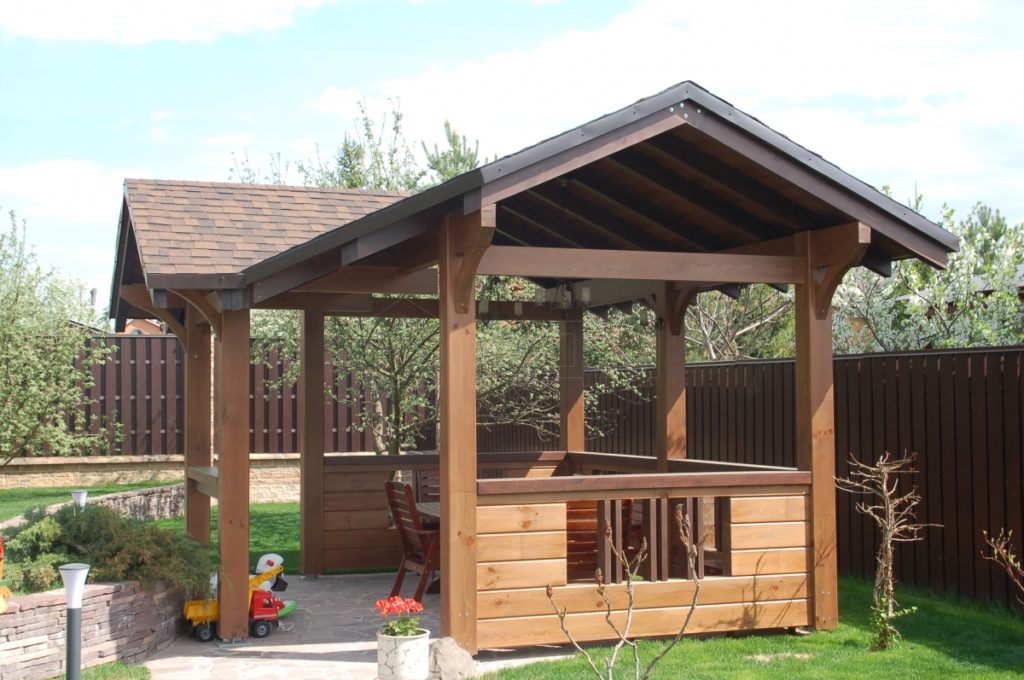
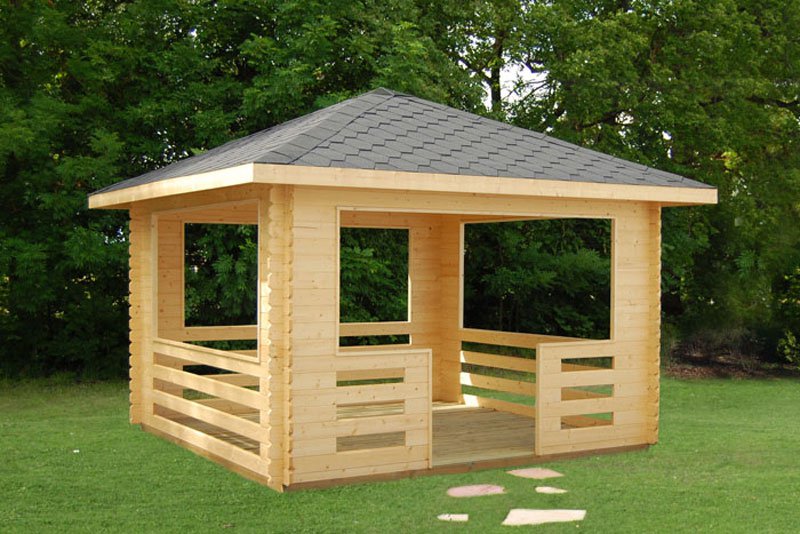
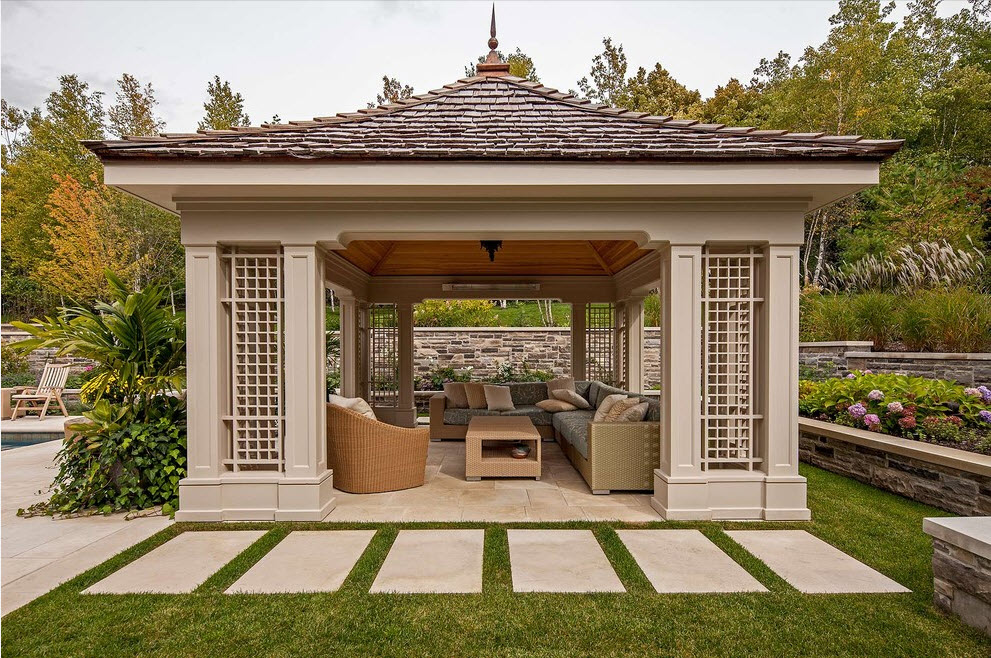
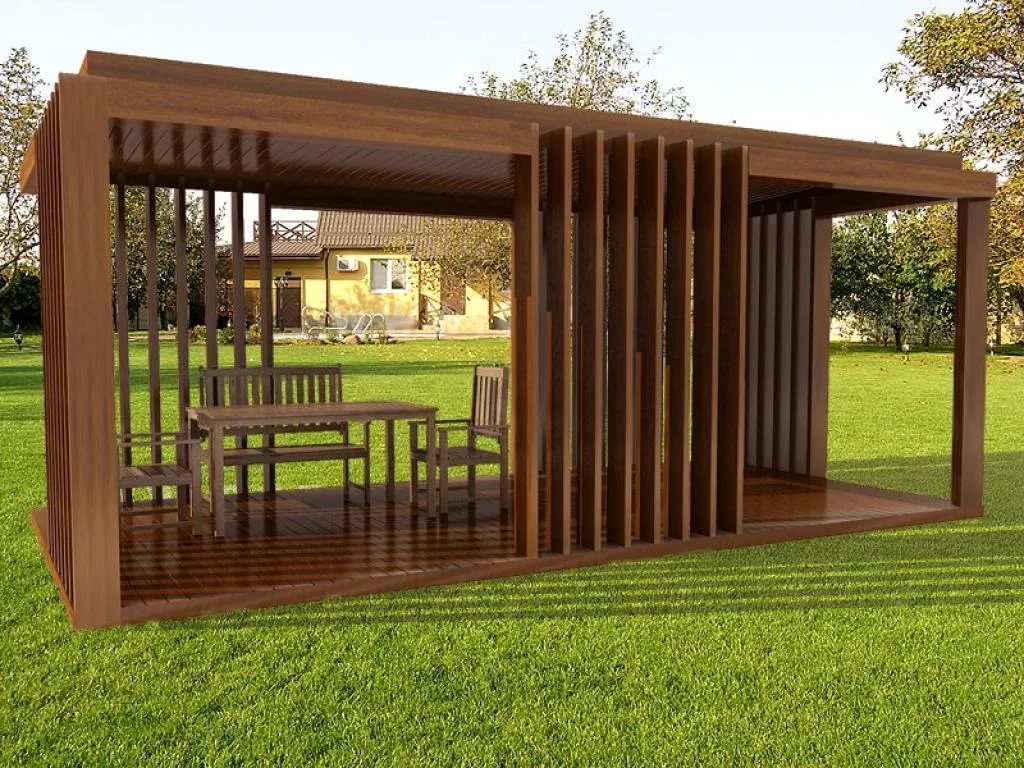
Wood is a universal material for supporting any stylistic idea of landscape design. Various ways of wood processing and the ability to use paintwork coatings will help to create an object on the site in a classic or any modern style, for example, high-tech, minimalism, country or rustic. In addition, you can build an object with a different design of the roof frame - with a lean-to roof, flat, duo-pitch, hip, dome, conical, hipped roof, or polychip.
Pergolas can be fully open or half open.
Thus, part of the walls or one wall of the shed can be closed, and the rest can be left open. It is important to first track the wind rose, and then install a blank wall from the windward side. So it will be possible to avoid drafts.
Independent production
Many companies carry out their own production of wooden arbors. The finished structure is installed by the company's employees at the cottage or on the site of a country house. But it is not difficult to make a wooden arbor with one's own hand, the main thing is to follow the technology step by step, without neglecting individual items. A considerable part of the important work falls on the stages that must be performed before the direct construction of the object.
Training
As soon as an idea about the construction of an arbor appears, it is necessary to determine its type, functionality, style, place on the site. For such a recreation area is better to choose a picturesque corner of the garden to be able to enjoy nature. In this case, the building may have a free style design. However, if the object is located in close proximity to a residential house, the buildings should be in harmony with each other, creating a single architectural ensemble.

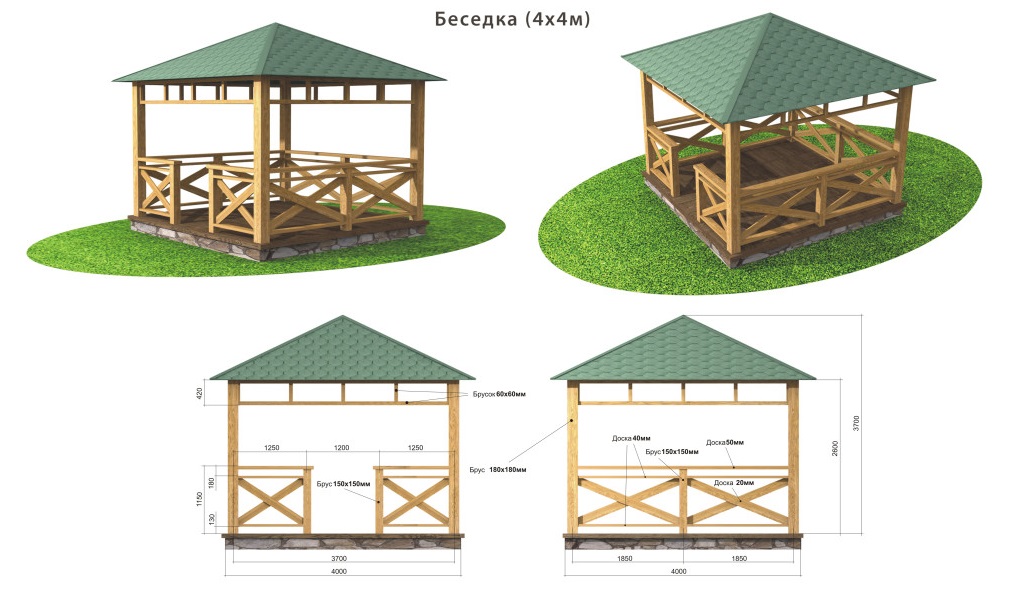
The size of the arbor is determined by its functionality.For a short rest in the shade, you can limit yourself to miniature forms, for example, 1x1.5 m. The interior can be equipped with a bench, mounted on vertical supports, with a small table. For feasts with family and friends, it is worth thinking about a spacious building of about 3x3 m. It is important that the dining group was placed under the shed, and the guests had the opportunity to freely leave the table without disturbing anyone.
Options with oven and kitchen should be even more. It is necessary to ensure safety - do not place the table and chairs too close to the red-hot stove, so as not to create a fire-hazardous environment, and also so that no one could get burned. Size approximately 4x4 m and more will be optimal.
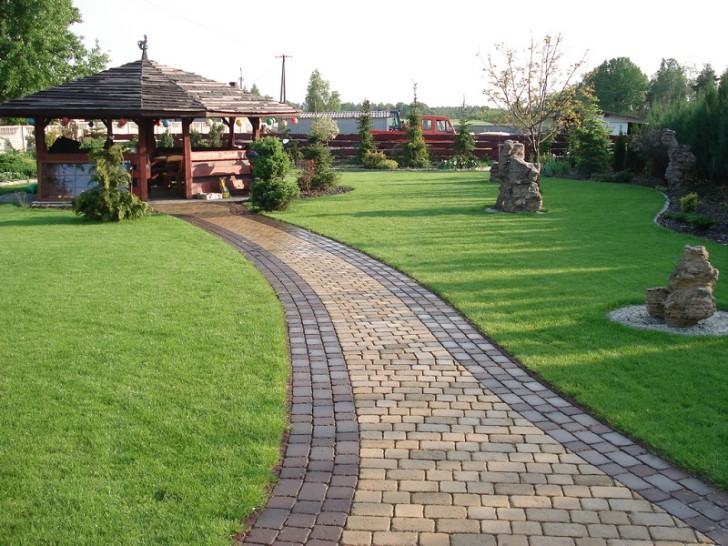
For buildings with increased functionality, all communications should be laid in advance. For any gazebo should consider an organized version of the garden path. In the event that, according to the project, the object does not involve its own flooring, its replacement may be the continuation of the path.
So you can create unity on the site.

Selection of materials
Arbor from the tree can be done in different ways. Each of them involves a variety of wood processing options.There are several types of treated wood from which arbors can be built:
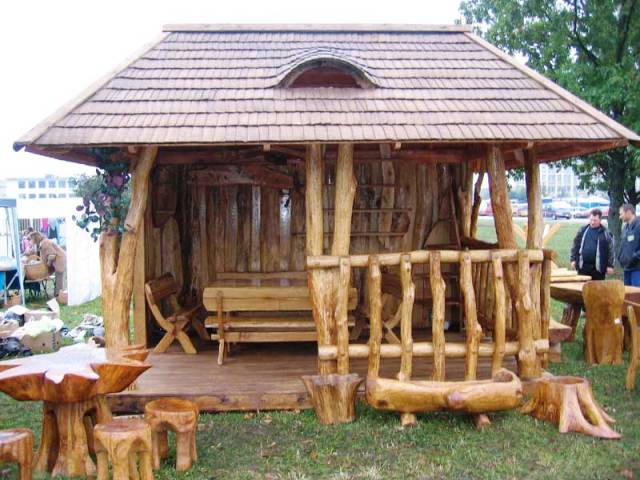
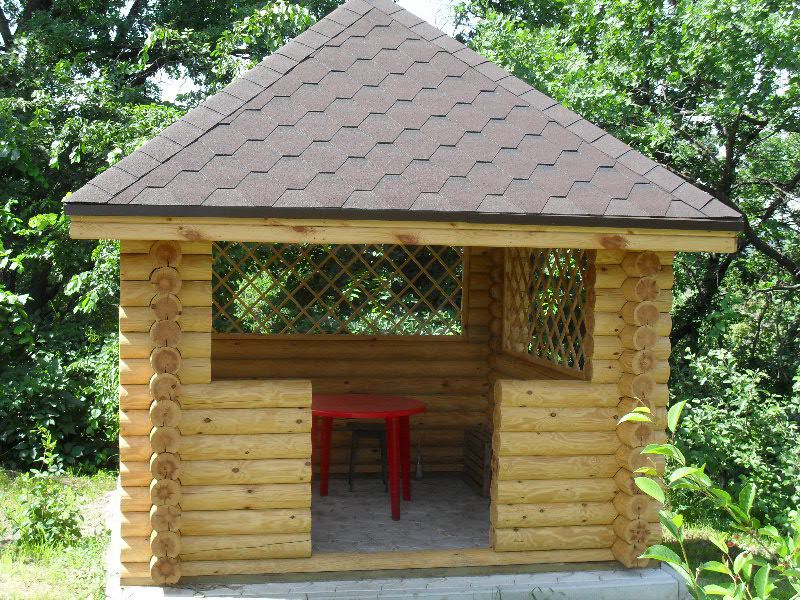
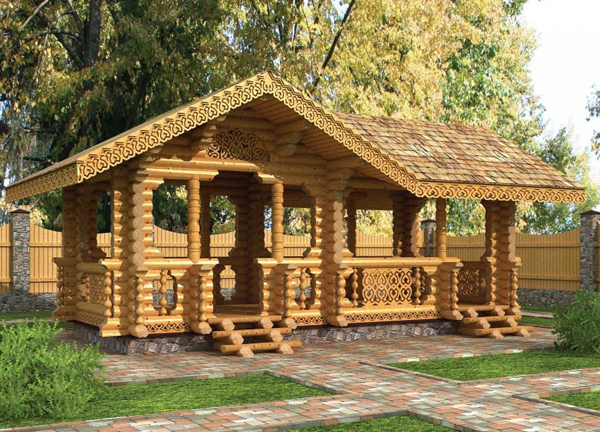
- From the log. It is a massive structure made of thick and durable pine or birch trunks. Chopped pavilions look fundamentally, they can become the basis of the rustic or country style. Jewelery in the form of carvings on the fairway, valance, railing, and bottom plating will give a Russian flavor. Best of all, such structures look in simple forms - square, rectangular.
- Arbor from a bar built on frame technology. Such a building is much more weightless, moreover, cheaper. Economy Option - instead of ready-made boards, use for cutting the bottom of unedged material that can be processed independently, or used in the original, as is, as a stylistic device.
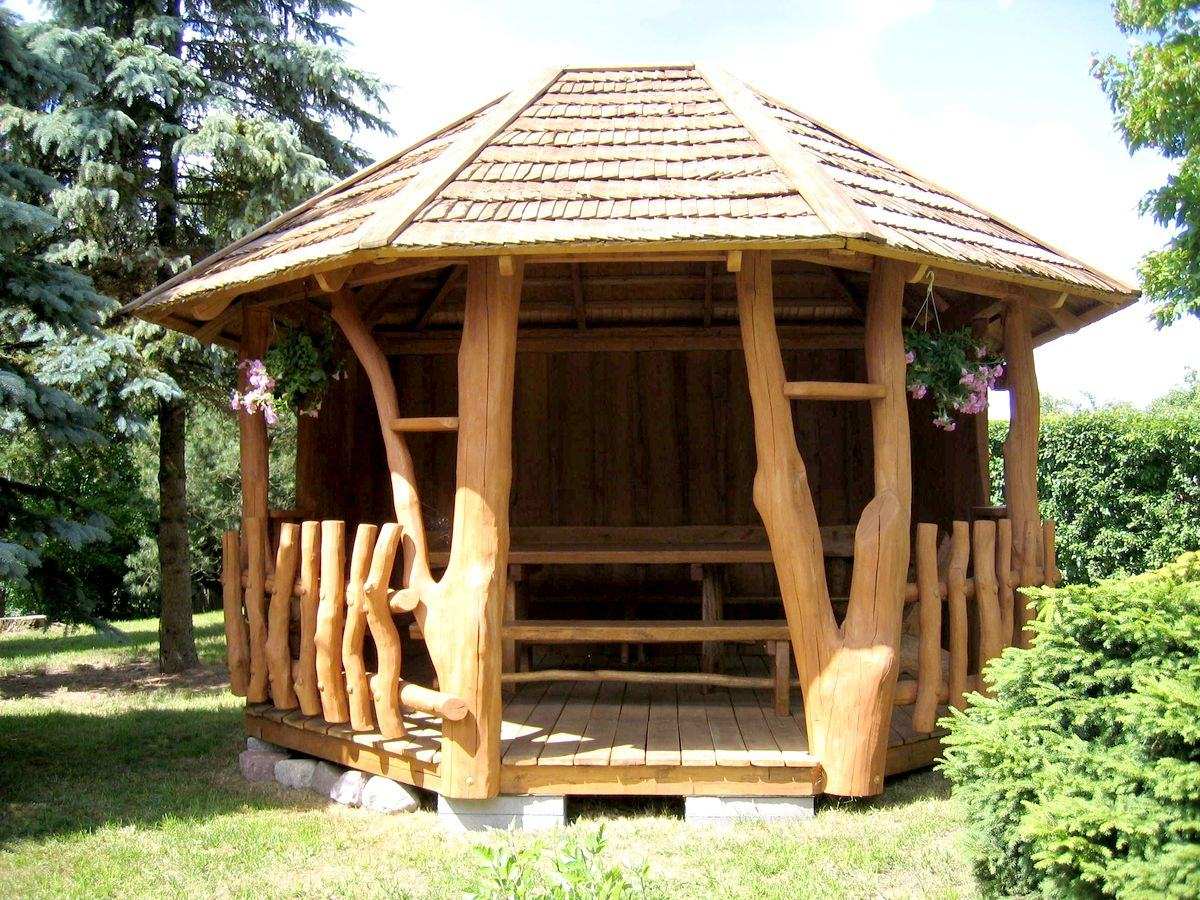
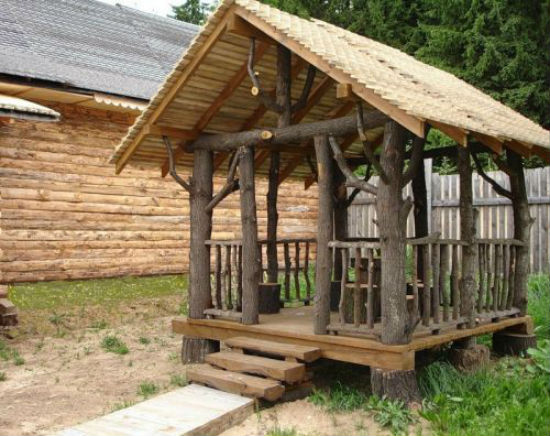
- Out of trunks. Unusual alternative to arbors from a felling. The difference is that the knots are left on the material, they do not tend to process the tree to the state of an ideal cylinder. Sometimes trunks are used without removing the bark of the tree, or they choose a material of a deliberately curved shape. Forest style can be massive, if you choose bulk trees for the construction of arbor supports, but the building can be elegant and thin, if made of young plants.


Calculations
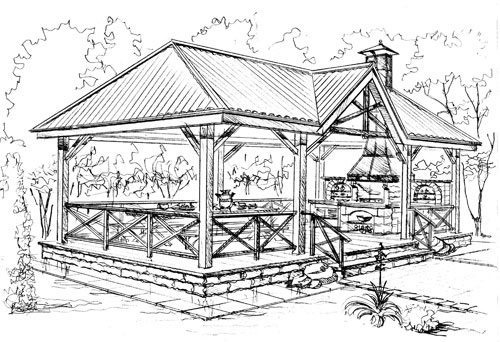
Before making calculations and being taken for construction, it is necessary to draw up a project in the form of a drawing of a future object. A schematic drawing should reflect the size of the future building on a scale. On separate drawings it is necessary to depict in more detail complex construction works, for example, on the installation of supports for the roof. If the gazebo is with an outdoor fireplace, the device of the chimney, firebox, foundation is also depicted separately with careful drawing.

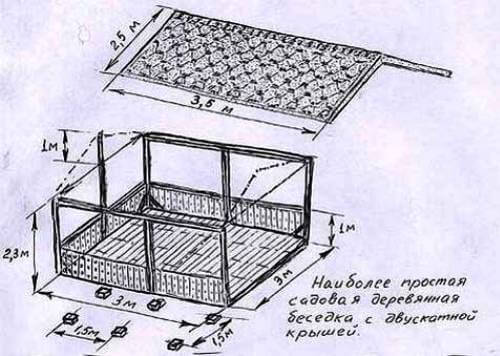
Consider the example of drawing up a drawing for a 3x3 arbor frame, and also make calculations of the required amount of building material.
Such a building is a budget option for a country house or a summer cottage, while it looks simple and beautiful.
So, the main technical features of the object:
- size - 3 by 3 meters;
- height - not less than 2 meters, optimally 2.10– 2.30 m;
- lightweight columnar foundation on brick or concrete blocks;
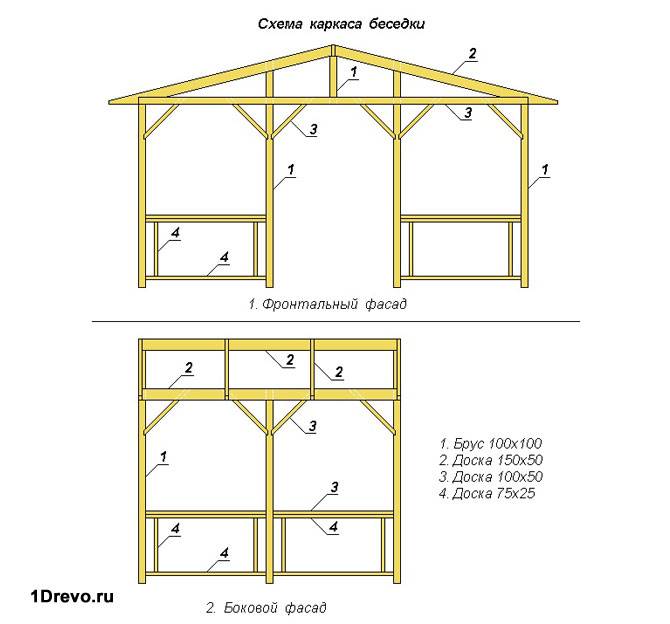
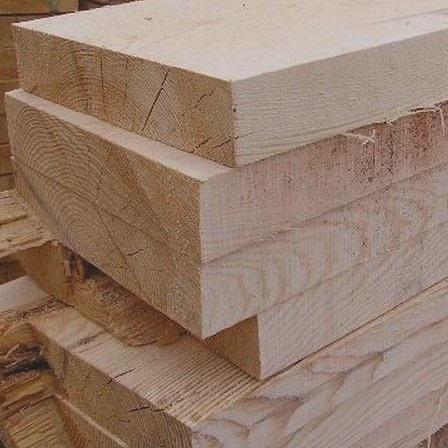
- for the frame it is used: as a vertical corner support - a bar of 150x150 mm in an amount of 4 pieces, as a central support along the perimeter - a bar of 150x100 mm in an amount of 5 pieces;
- roof - hip chetyrehskatnaya, fit on rafters;
- as the roof - soft tile;
- the floor is wooden (27 boards 6 meters each, size 25x150 mm), it is laid on logs, a ladder can be installed;
- for flooring logs, rafters, railings and straps, you will need 25 boards of 6 meters 50 x 150 mm each.

The cost estimate for the estimate also includes construction attributes such as screws, nails, corners, antiseptic impregnation for wood, terraced oil, costs for cement, sand, and the transportation of all materials.

Building
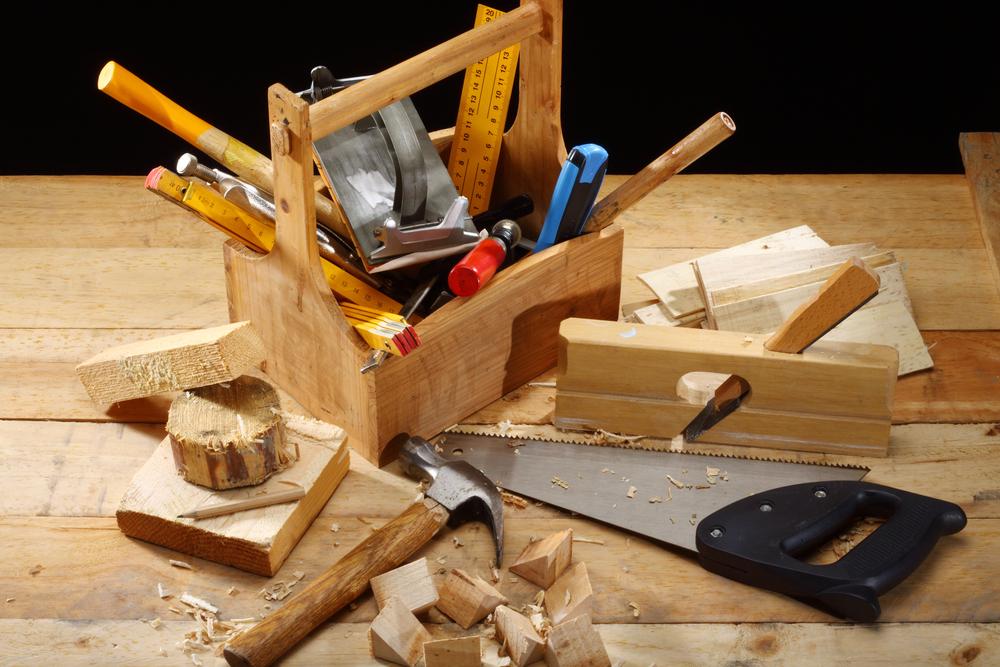
Before proceeding with the direct construction of the object, it is necessary to prepare the necessary during the work woodworking construction tools:
- Circular electric saw, which will help to cut the tree so that the cuts will be smooth and beautiful;
- jigsaw and hacksaw come in handy for small cuts;
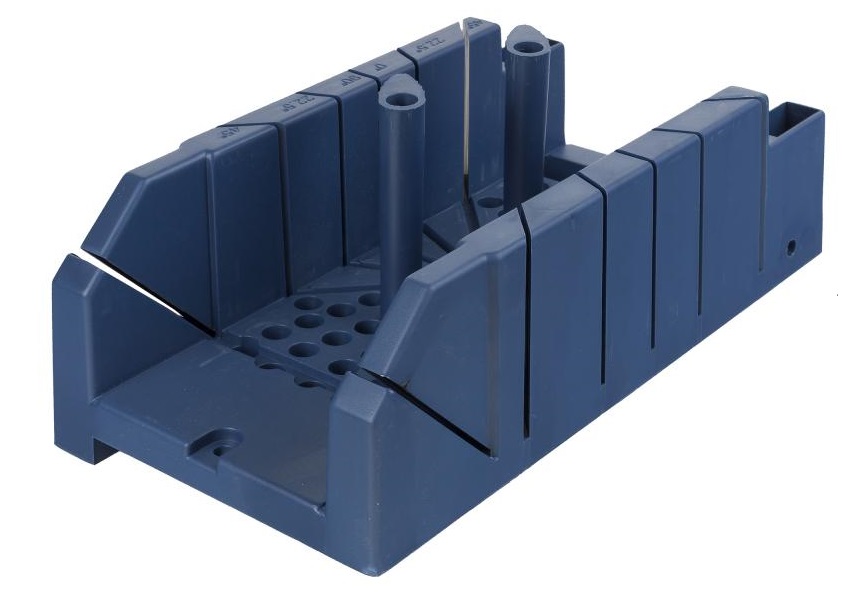
- The miter box will help to cut the tree at the right angle evenly and accurately (the circular saw makes only straight cuts);
- electric drill and drill bit to it;

- screwdriver;
- hammer;
- construction tape and level, plumb;
- pliers, nippers;
- spade;
- stepladder or ladder.
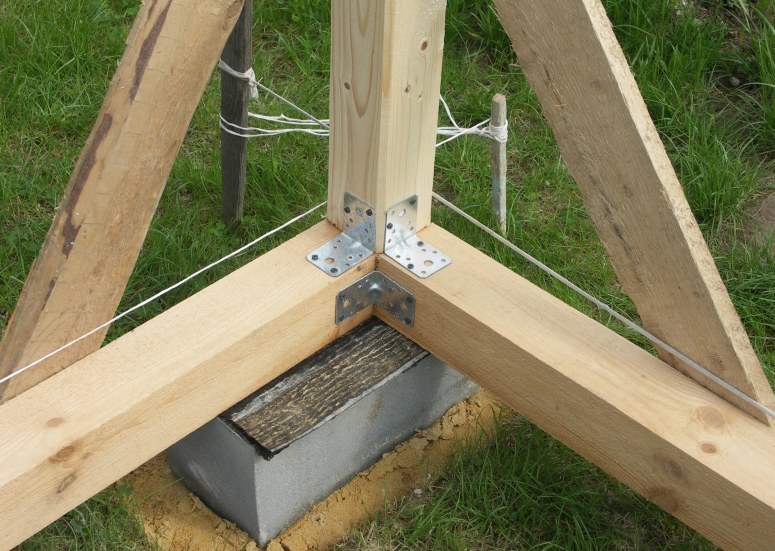
Foundation building
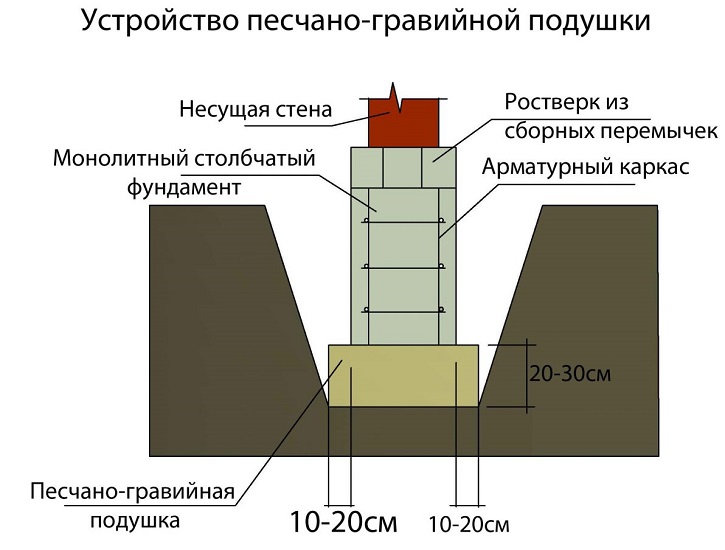
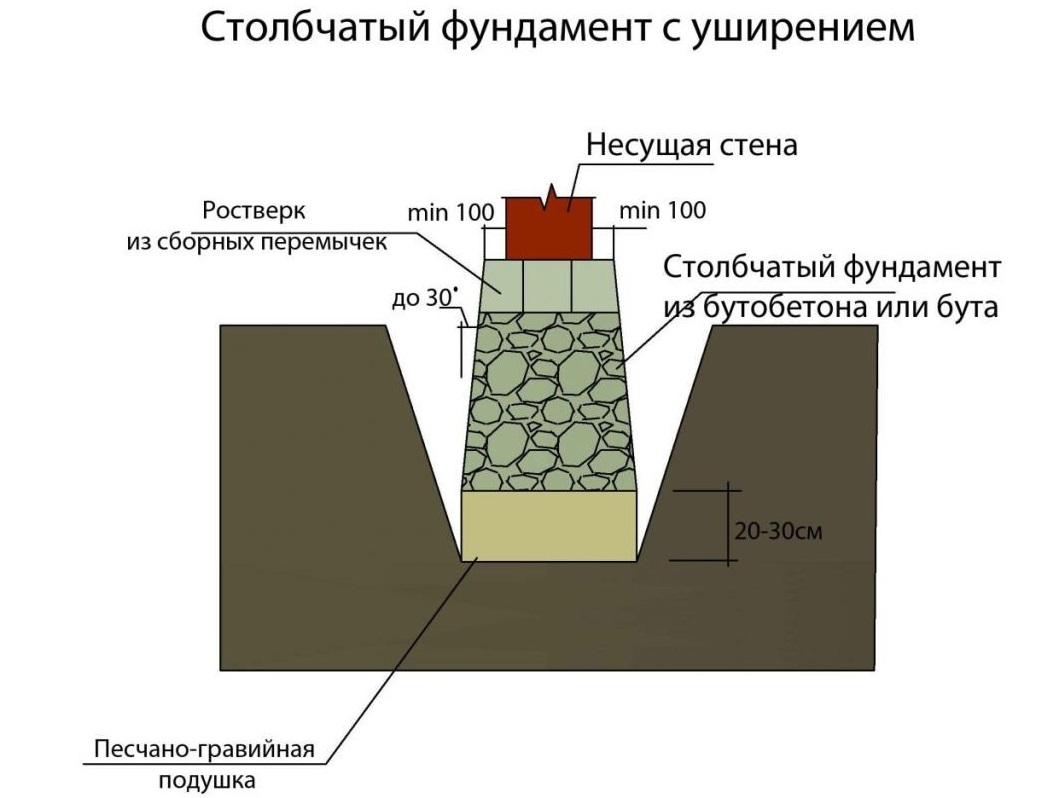
For spacious, heavy buildings, for example, winter pavilions with insulation and glazing, a reinforced foundation is best suited. The most common type is tape. If the future gazebo is also equipped with a stove or an outdoor fireplace for a barbecue, this type of base should be considered. For a lightweight arbor on frame technology, a column foundation is more appropriate.
It is less expensive and easy to install, does not require formwork, allows for easy repair of the flooring.


The installation manual contains the following important points:
- On the site of the future construction is made by the size of the object. To do this, you need to drive 4 pegs and pull a thick thread between them.
- Along the perimeter, at equal distance from each other, 8 square holes are dug out in the form of a square, and 1 hole - in the middle, to the depth of the spade bayonet. In the center of each hole, except the middle one, a long reinforcing bar is installed, which will interlock the structure of the building with the foundation.
- The pits are filled with sand and gravel, moistened and thoroughly rammed.
- Next, laid out brick pillars, the elements of which are held together with cement mortar and aligned relative to each other. It is important that the surfaces of the supports be laid flush regardless of the relief of the site, because it is only in this way that the flooring can continue to be even.
- On each pillar is laid sheet of roofing material for waterproofing.

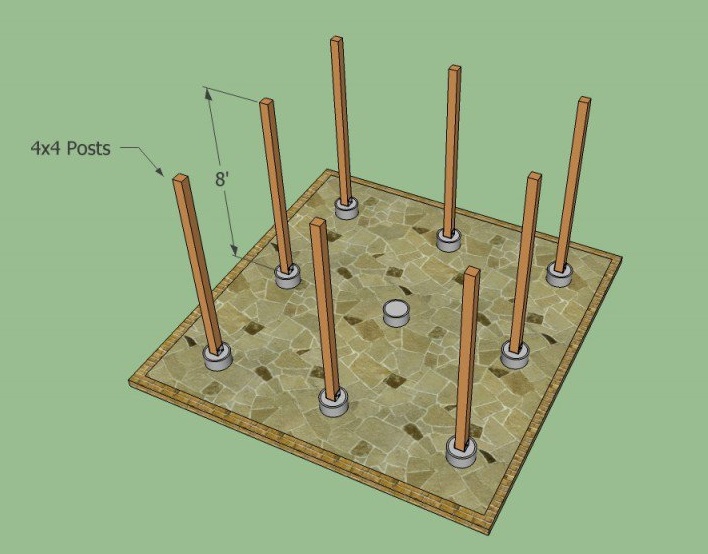
The height of the columns depends on the topography of the dacha. Somewhere it is necessary to build a pole of 4 bricks, and somewhere 2 elements can suffice. You should also consider the desire and the possibility of making the ladder.
It is important not to neglect the arrangement of the sand-gravel cushion - this stage will allow the building not to settle. Worst of all, if the subsidence is uneven, this is why it is important to properly tamp the pillow.
Wood preparation
While the cement is hardening, it is necessary to prepare the wood. Using a circular saw and a molded piece according to the drawn pattern, we saw wood according to the required dimensions. Further, it should be treated with special antiseptics, which prevent the occurrence of mold, and impregnation from rotting.

If the building has additional options in the form of an outdoor fireplace, you should not choose oil-based antiseptics - such a composition is more flammable, but the solution with fire retardants will protect against fire. If the tree is wet, recently felled, better suited means, as part of which there is alcohol. You should also consider that there are antiseptics with pigments that can change the color of the tree. Compositions, depending on the manufacturer, are applied with a brush, spray, some elements can be soaked in solution.

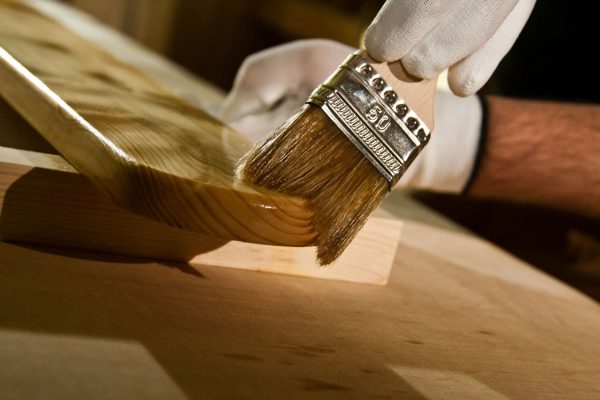
Impregnation is applied with a special brush according to the arrangement of wood fibers. It is important that at the time of application there was no strong wind, rain, scorching sun.
The weather should be moderate, then the solution will not dry prematurely and not be washed off.
Neglecting the work of protecting the wood, you can wait until the gazebo begins to rot, collapse, the tree can begin to swell, paint or varnish on the surface can peel off and peel off. To the building served longer, it is better to take care of this in advance.

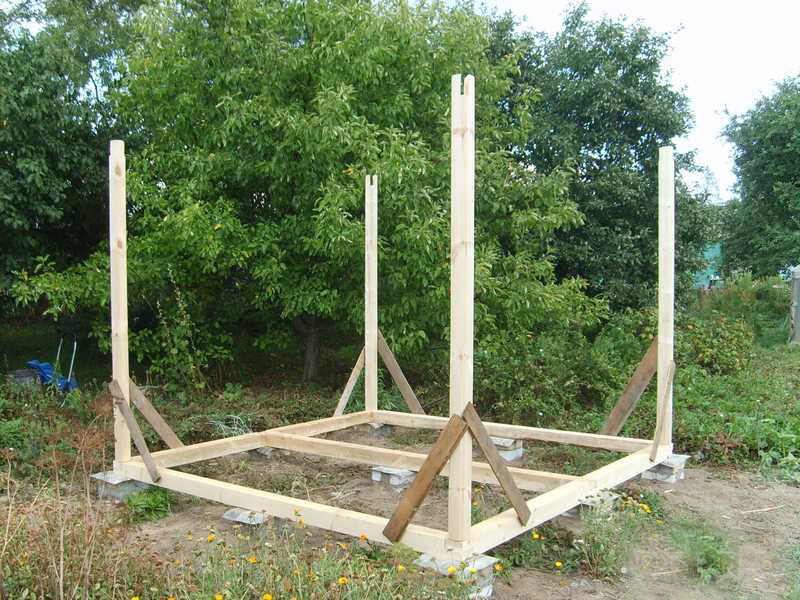
Lower strapping
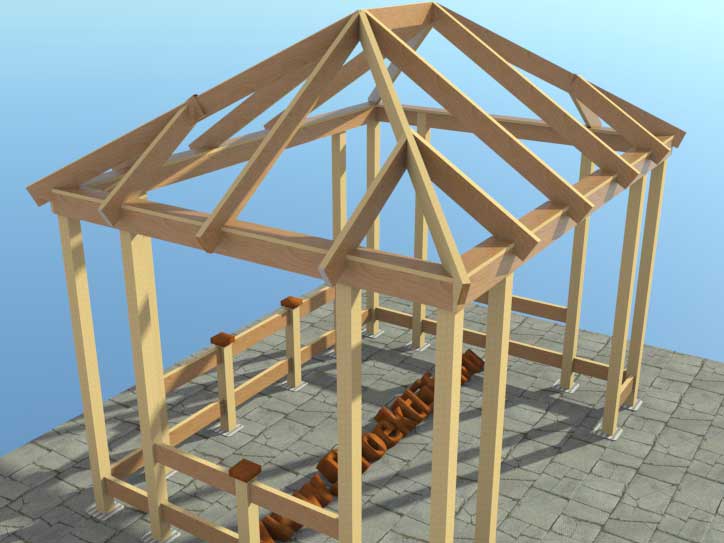
It takes 3-4 days to harden the column foundation, and 1-2 days to dry the impregnations and antiseptics.After that, you can begin to create the bottom strapping.
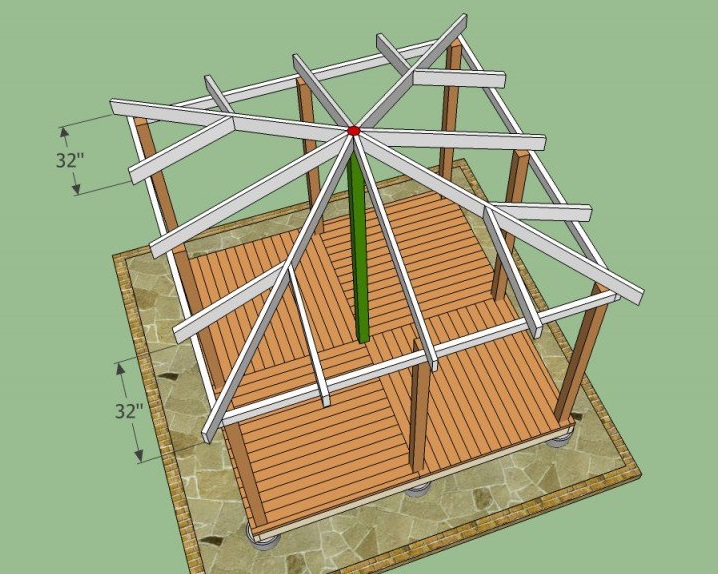
For the bottom strapping four bars are needed 150x150 mm, three meters long. At the end of each beam a slot is cut, approximately 75 mm in size, for fastening the elements between themselves in a half-tree type. The bars are stacked on each other around the perimeter and are placed on reinforcing bayonets, fastened with screws or nails.
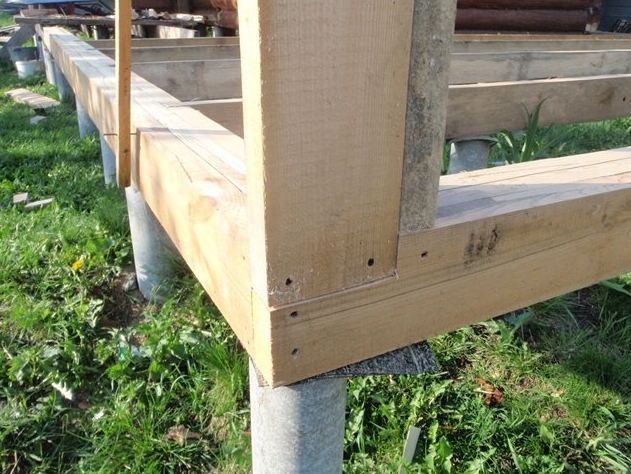
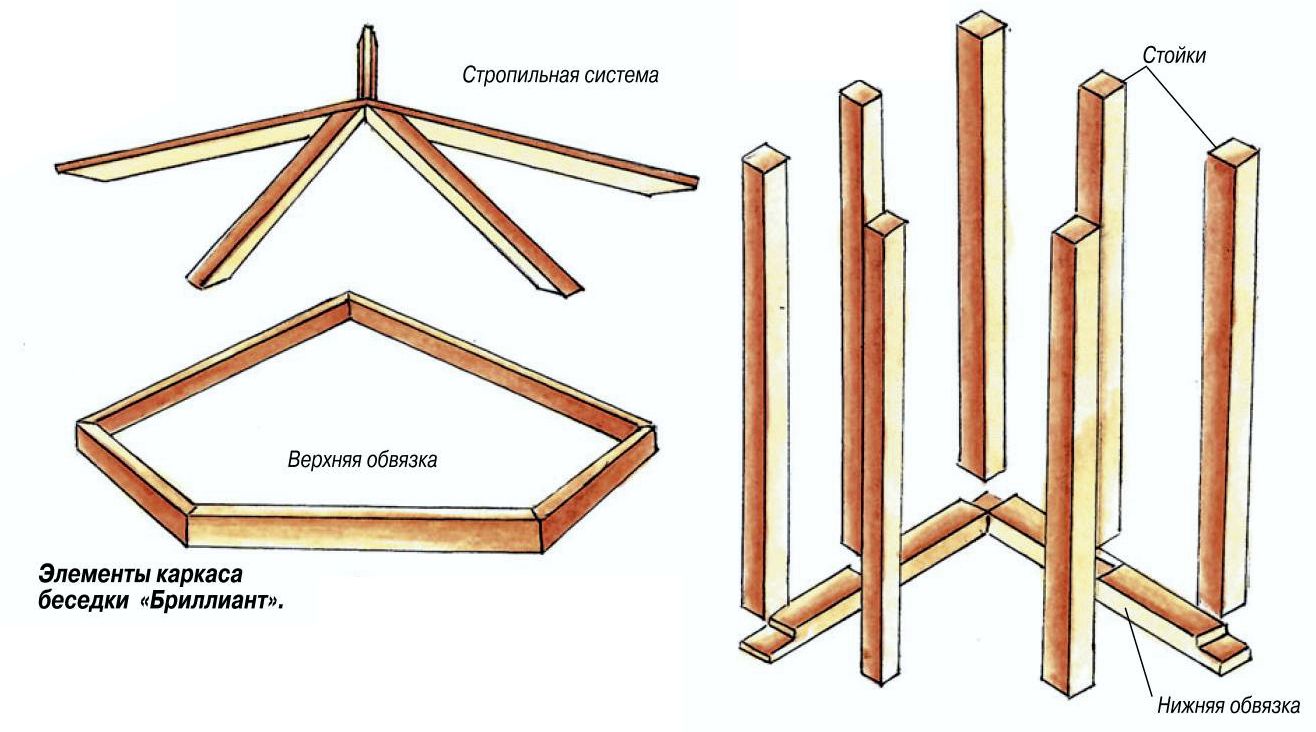
Frame and top trim
In the center of the base of the bars intended for the framework, with an end face, holes are made for the rebar with the help of a drill and a thick drill. At the corners, more massive bars (4 pcs.) Are installed, along the perimeter - thinner bars (5 pcs.). On the front of the gazebo should think about the entrance to the entrance. It is formed with the help of two bars at a convenient distance from each other. Therefore, on the frame around the perimeter stands 5 pillars, and not 4.
Vertical frame elements are aligned with the construction level and secured with wood scraps. This is a temporary measure, because the trimming is removed after the installation of the top trim. The latter is installed on top of the vertical overlapping supports of 150x100 mm bars, by analogy with the bottom strapping.All elements are fastened with screws or nails.
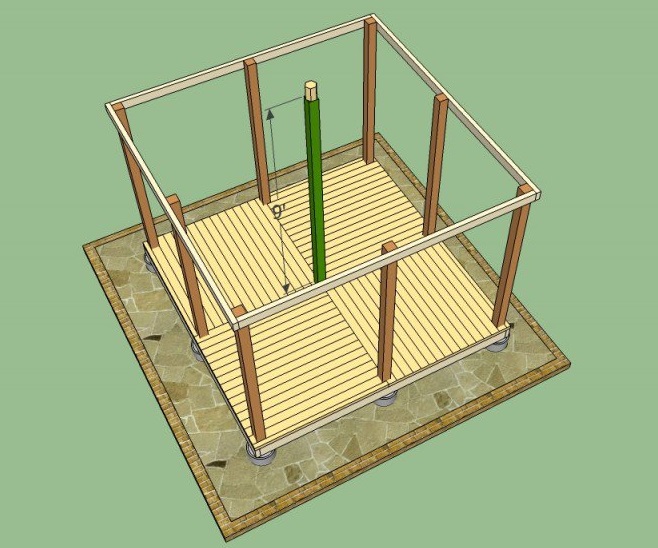
Floor
To install the lag will need bars 150 by 50 mm in an amount of 5 pieces. They are set flush with the bottom strapping using special angles. Directly the floor surface is covered with boards 150 by 50 mm. It is important that between the elements there remain small gaps of 2-3 mm in size for water flow. At the junction of the floor with vertical supports, it is necessary to make cuts so that the surface becomes uniform.
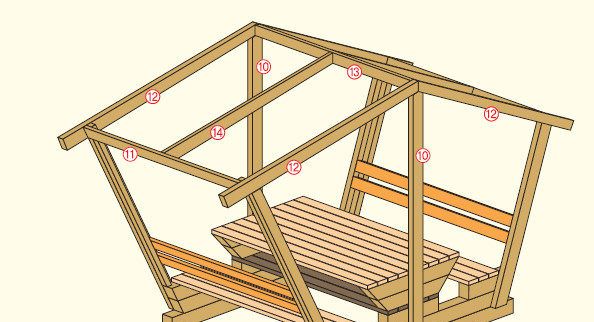
Roof
For the roof it is necessary to prepare a separate sketch, which will help to create a reliable, stable construction. The frame of the roof is a classic truss hip chetyrehskatnuyu system. For rafters it is necessary to prepare bars 150 by 50 mm.
The structure should be assembled in advance, on the ground, and only then lifted onto the top trim and secure. The roof frame should be assembled immediately after the installation of the bottom trim.
Due to the fact that the lower strapping is identical to the upper one, it is possible to make the necessary cuts in the rafters, guided by the dimensions of the finished structure.

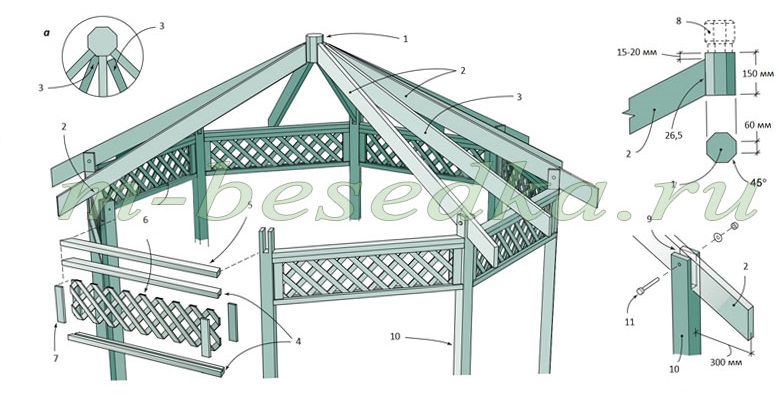
Four logs come together to form 4 triangles of the hip roof.Each triangle is divided into three parts from top to bottom by three additional boards, which are necessary for laying roofing material. In places where the rafters intersect with the strapping, grooves are made, which help to set the structure to the upper level of the strapping. The design is mounted upward.
After fixing the roof frame triangles are sheathed with boards. For soft tiles, lining should be done tightly, for a lighter material, significant gaps can be left, but note that the roof must fit snugly to the rafters.

Then you can cover the roof frame with membrane material that prevents moisture from seeping inside the object. You can attach it to the rafters with a furniture stapler. Installation of roofing material depends on its type. The tile is laid out from the bottom up, the joints are covered with spinal tile.
Decorative trim
The frame, roof and floor are ready. It is already possible to use such a shed, but in order to complete the work and achieve external attractiveness and completeness of the object, it is necessary to install a railing, a fence, perhaps, to make a crate and a ladder.
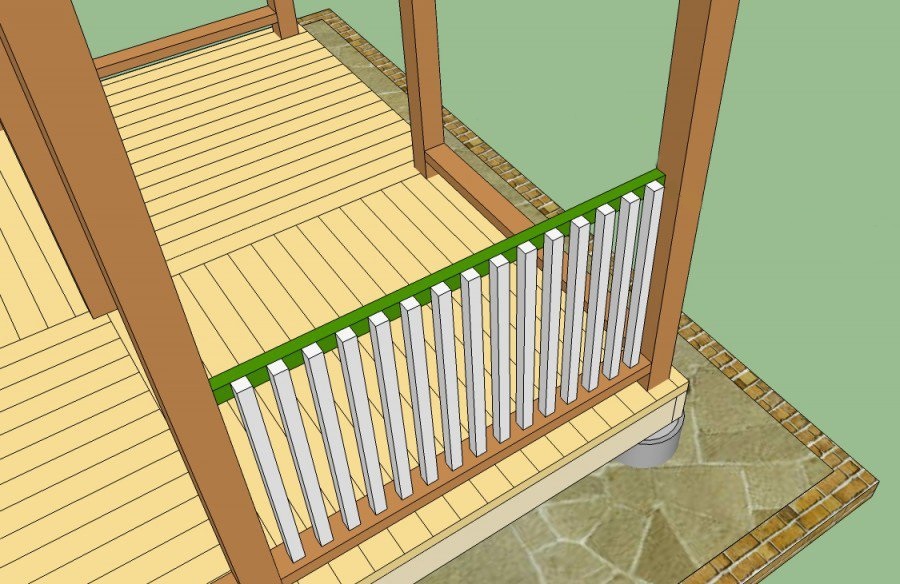
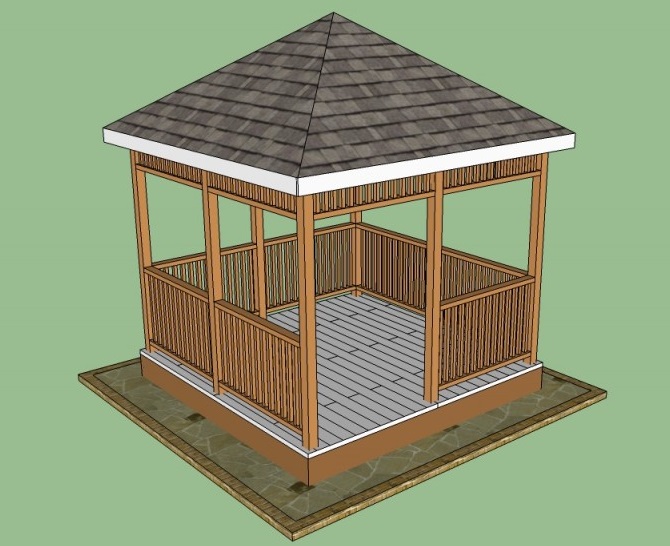
Railings are made of thin boards that can be cut to a round or unusual shape, and are installed below the middle of the frame. As fences, slats are also used, which can be laid out in classic patterns - rectangle, flower, triangle, pigtail. The railing can be tightly sewn with clapboard or have a combined pattern.
If the arbor is high, then the foundation should be hidden with boards, and a ladder should be attached to the entrance. Comfort will add garden furniture and textiles. Curtains, pillows and even a rug in dry weather will be an excellent addition to outdoor recreation in such an arbor.


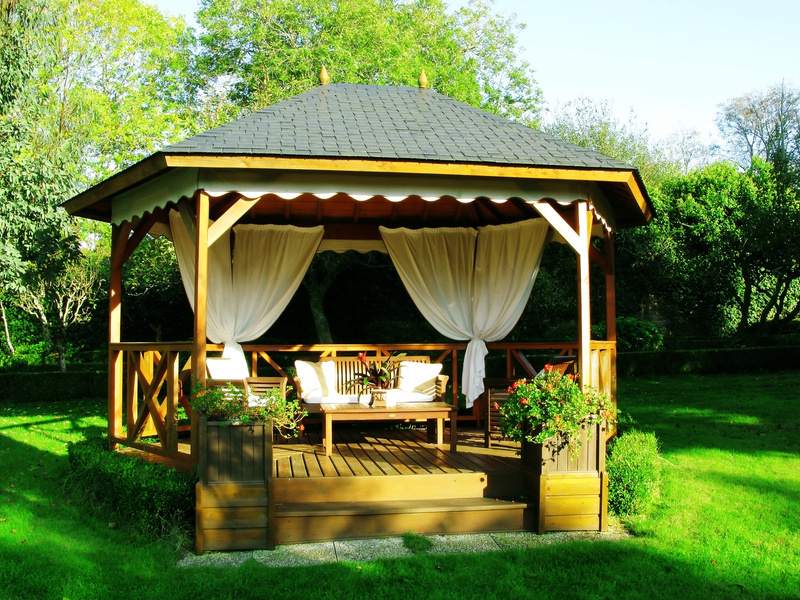
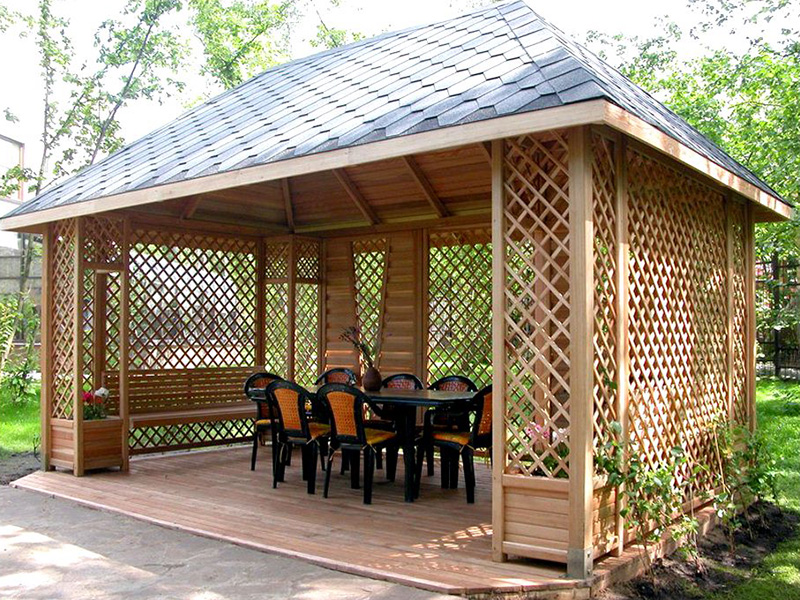
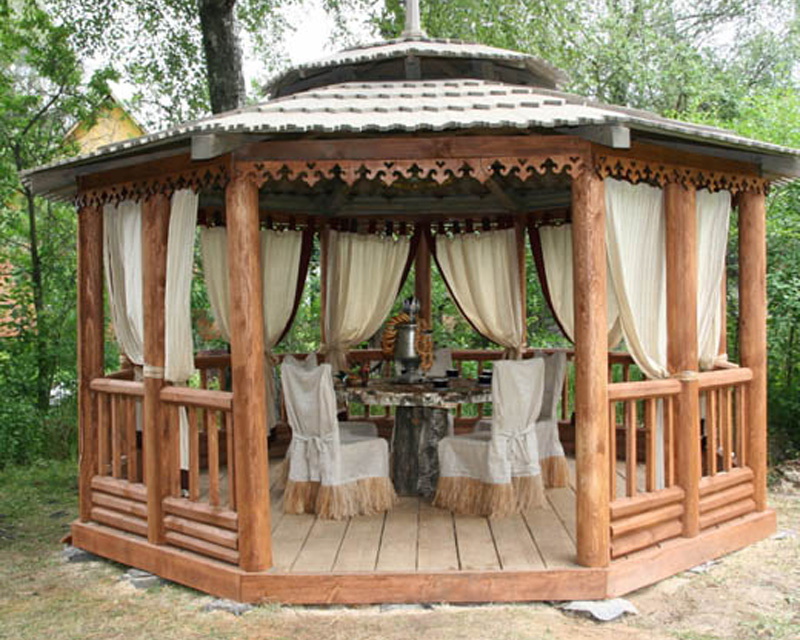
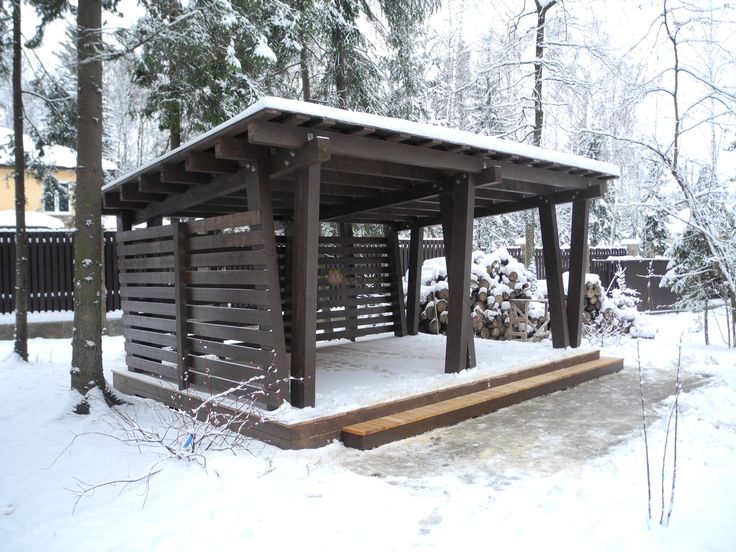
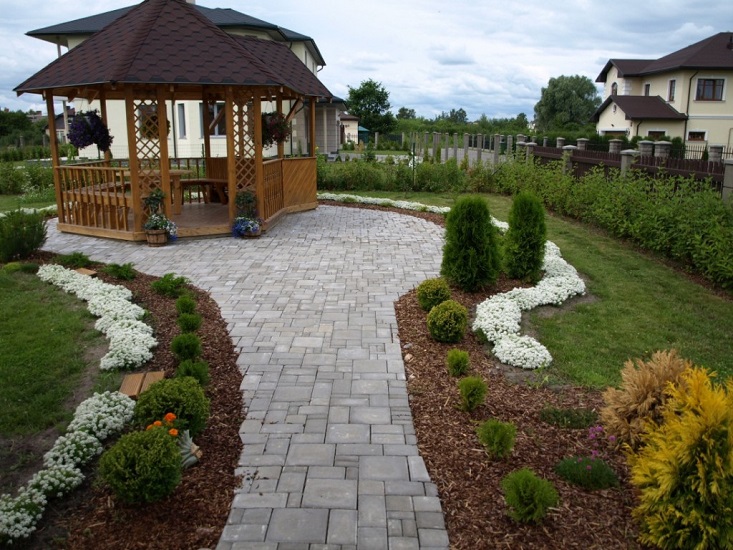
Beautiful examples for inspiration.
Wooden pergolas with solariums look elegant and weightless. You can use textiles to create a shadow. The Mediterranean style in the garden of a country house inspires pleasant thoughts about the sea, gives a feeling of complete relaxation and bliss.
Oriental style is too demanding to design. For example, a Chinese gazebo should stand in a garden that will fully comply with all Eastern traditions - these are rock gardens that support the idea, paths paved according to all the rules of the East, and the soothing surface of artificial water bodies.
But it is possible to add an oriental flavor to the European country estate: it is worth a little bit to modify the roof structure and raise the lower parts of the rafters upwards according to the type of pagoda.
Arbor in the forest style appears as a kind of shelter for a real hunter. For such a construction, you can really use materials from the forest without buying ready-made bars or round timber. This construction looks unusual and authentic.

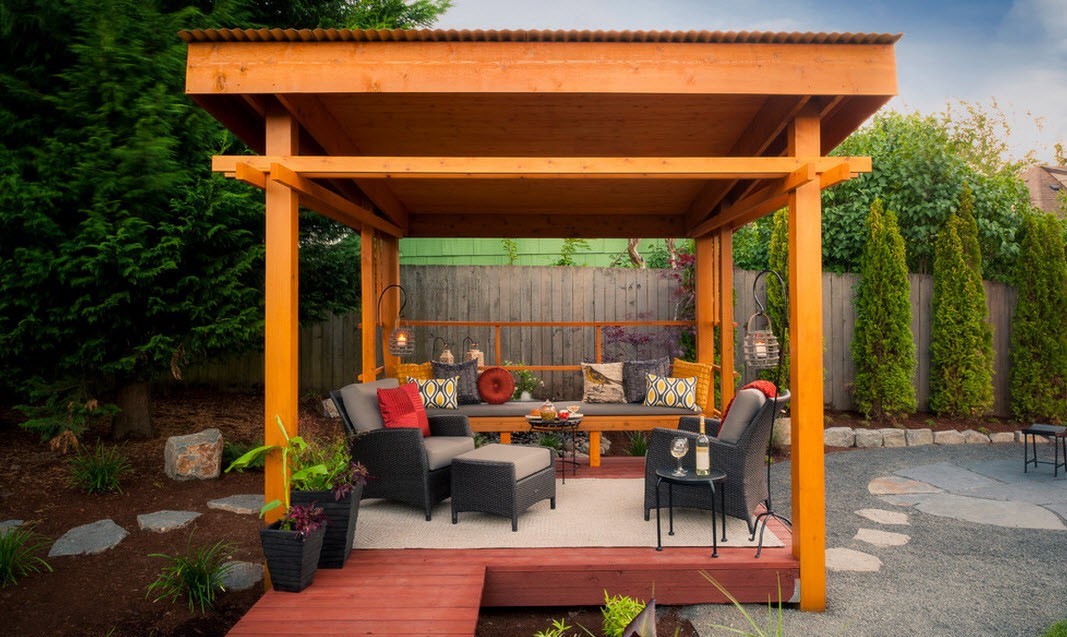
Even making your site in a modern style, for example, hi-tech or minimalism, you can use wood material. The main thing - to properly handle the tree and find the necessary form of future construction.
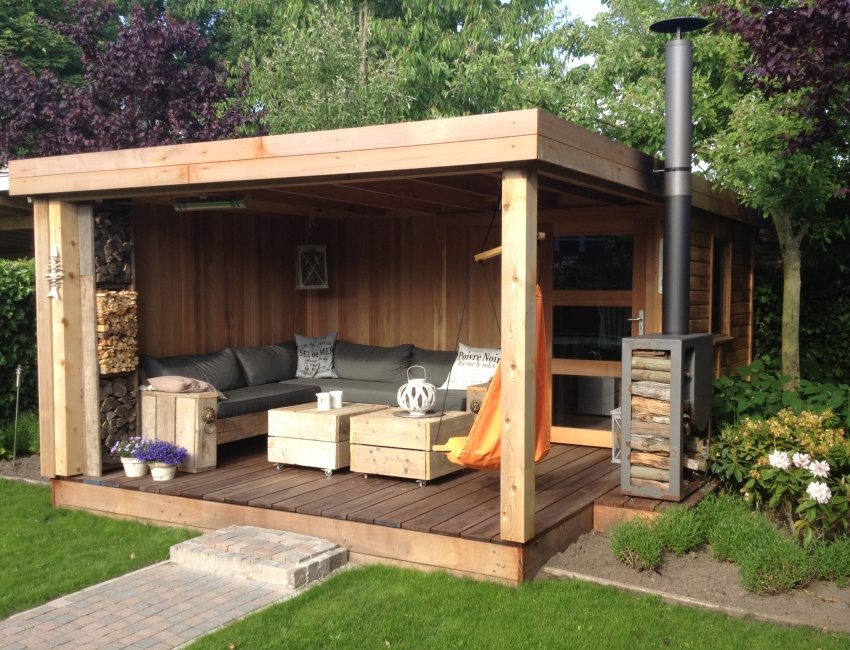
Pavilions-canopies made of wood with a stove look very comfortable. The combination of wood and stone is the main feature of the rustic style. Natural coarse materials look very harmoniously together.

How to build a tree gazebo with your own hands, see the next video.


