Making Christmas decorations out of paper with your own hands
The New Year is perhaps the most important holiday for adults and children! People are getting ready for it for a long time: they decorate the house, decorate a Christmas tree, buy gifts. And celebrate on a grand scale - the whole big country and even abroad. Children love to create jewelry on their own or with adults. In this article we will try to disassemble the most simple and interesting ways of making jewelry from the simplest material that is in every home - from paper.
Making decorations for the Christmas tree
Making jewelery with your own hands is not only an exciting activity - joint work brings parents and children together.Christmas toys made of paper are good for their ease: under their weight will not sag even the thinnest twigs!
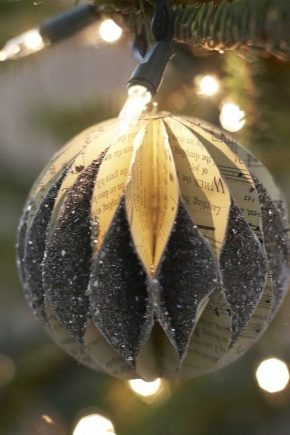
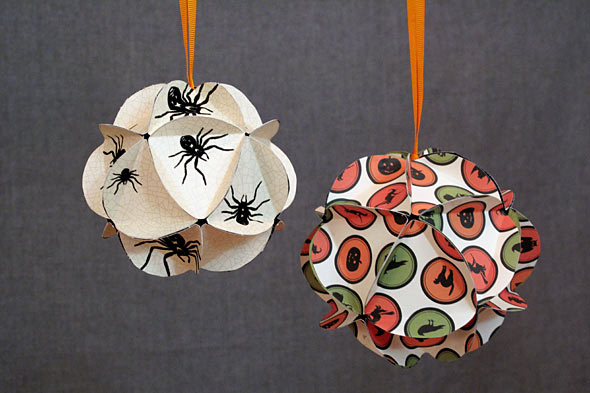
The most suitable jewelry for fluffy New Year's beauty is volumetric balls. It is easy and simple to make them, and under the guidance of adults this will be possible even for the youngest family members. For this you will need:
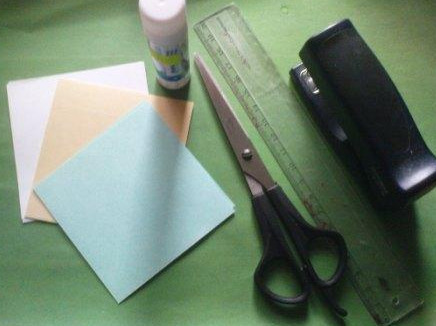
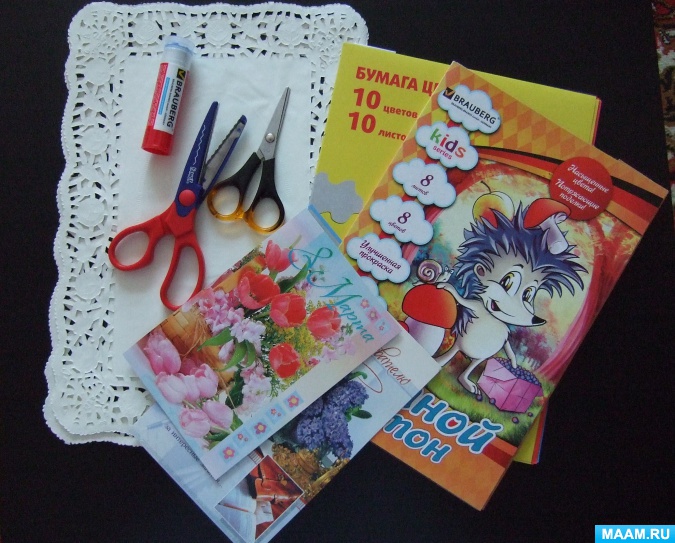
- thick paper (you can use watercolor paper, cardboard, colored paper, white, even old postcards);
- office glue or glue stick;
- ruler;
- scissors;
- compasses or a circle pattern (you can simply circle a cup or a round lid).
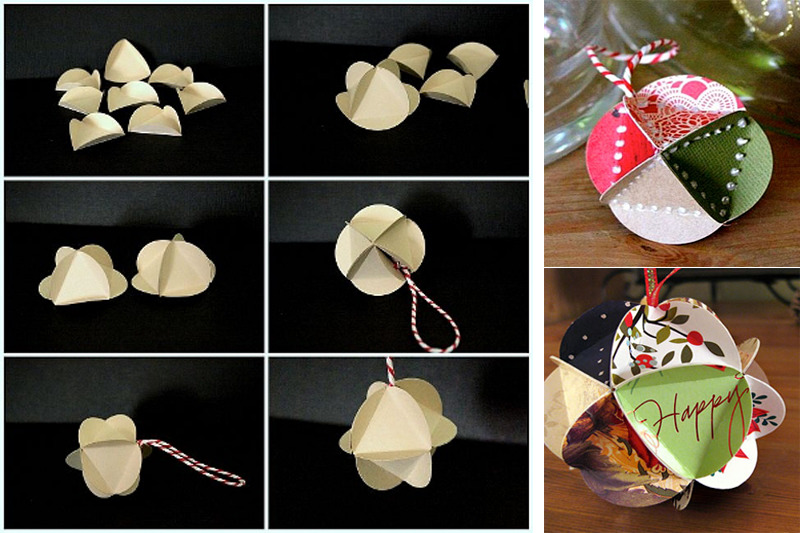
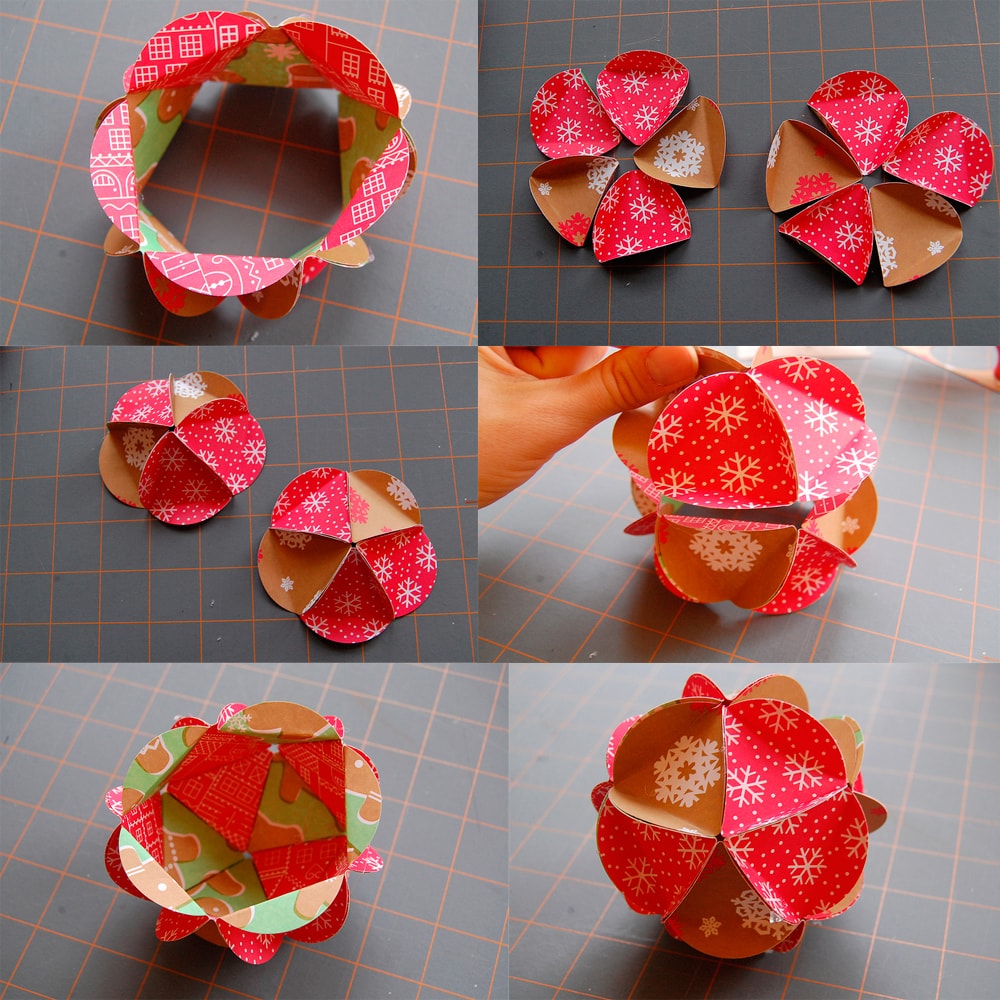
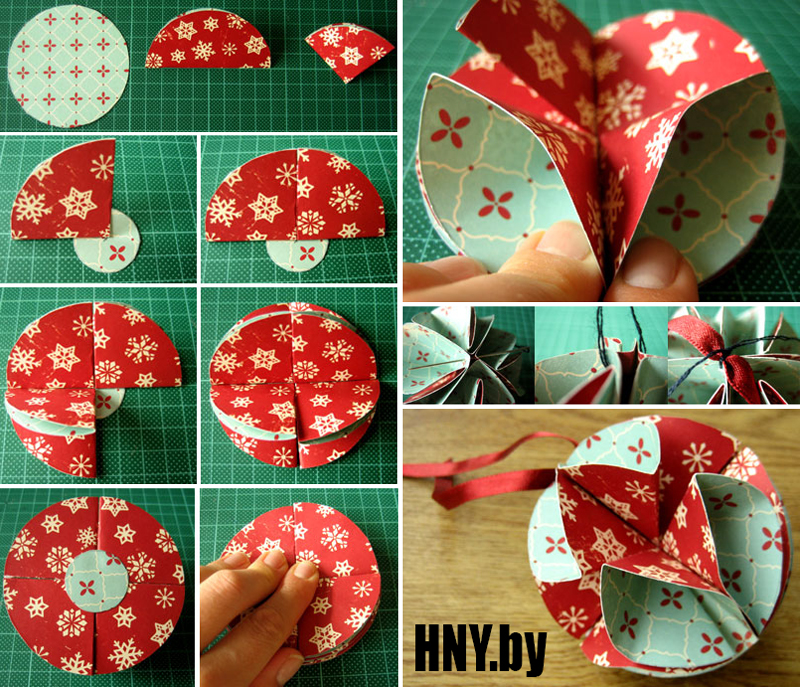
First you need to cut out of paper 20 circles. The size of the future toy will depend on their size. Inside each circle, draw an equilateral triangle, the corners of which should touch the sides of the circle. We make the folds along the lines of the triangle - these will be the “edges” of our volume ball.
The next stage is the build. Take five blanks and fold them with the sharp ends of the triangles to the center - you get a circle. Immediately we place a loop-thread on the center, on which we will hang our ornament later, glue the blanks with “ribs” to the outside - the tip is obtained.Similarly, the bottom of the ball is made. The remaining 10 blanks are glued into a strip, we join it into a ring, from the top and bottom we glue the already dried parts of the top and bottom.
So, it turned out a great volumetric ribbed ball! By changing the size of the blanks, the color and texture of the paper, you can get a lot of unique toys for decorating the Christmas tree and the interior. Inside the ball, it is easy to hide a small souvenir or gift, give balloons to guests or arrange a fun game.
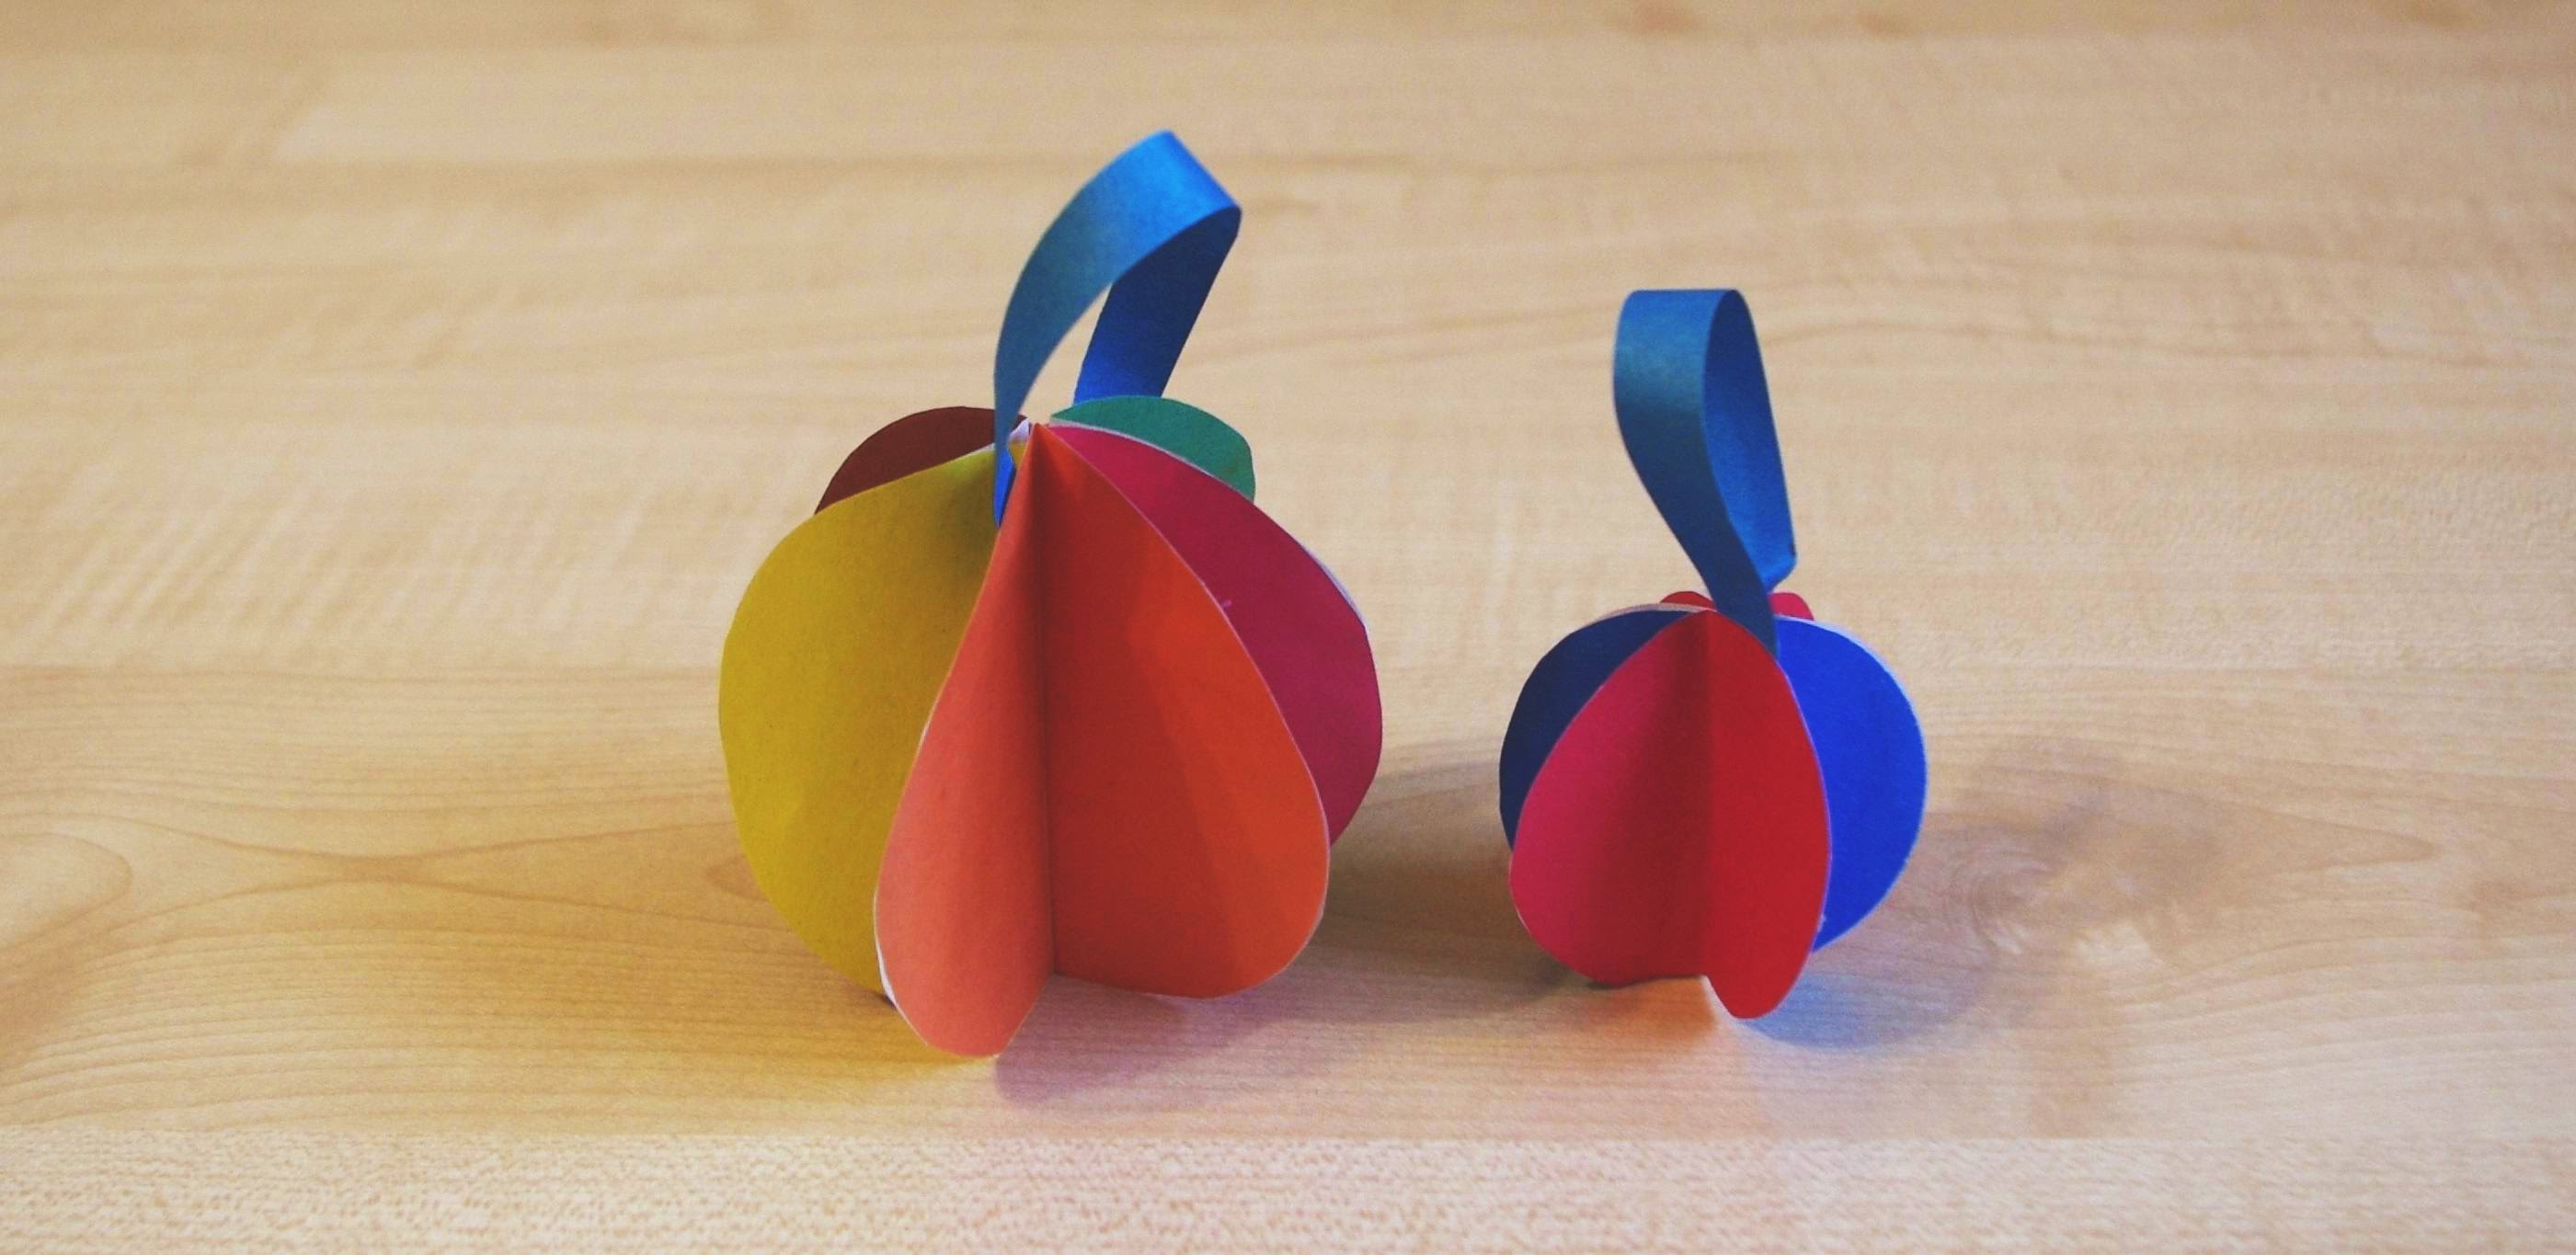
Another way to make a volumetric ball is similar to the previous one, but much simpler. We cut several circles out of paper or cardboard or any other shapes, for example, stars, hearts, Christmas trees. The figures must be identical and symmetrical. You can print them on a printer or use a template. Bend the figure in half exactly in the center, doing the manipulation with the rest of the details. It remains to glue, for which we apply half of each blank with glue and join it with the other half. Thus we glue all the figures. The latter connects with the first, and the result is a voluminous toy.

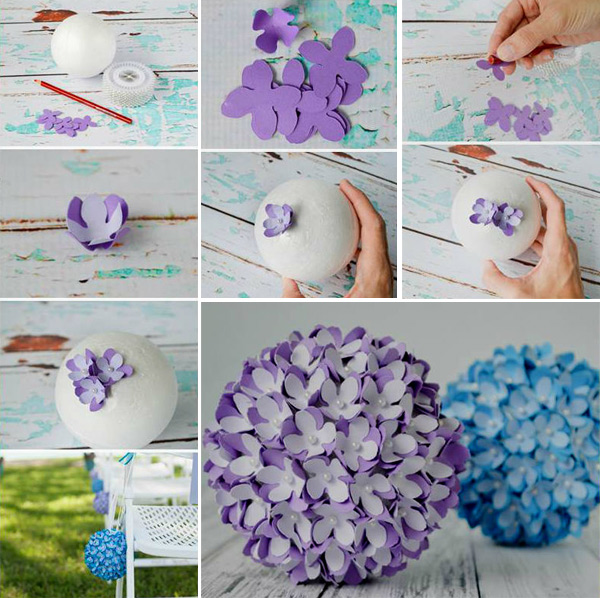
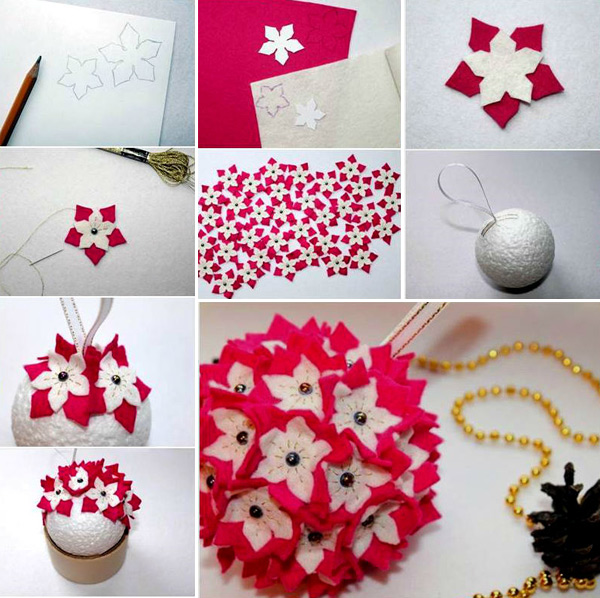
Refined decoration can be made using foam blanks. You will need the following tools and materials:
- coated pastel paper;
- curly hole punch "Flowers" in two sizes: one is bigger, the other is smaller;
- beaded head pins.
If you do not have punchers - it does not matter! Draw on the cardboard patterns of four-leaf flowers and cut them. The flowers should be folded in pairs (from the bottom a larger blank, and from the top - small), pierced in the center with a pin and attached to the foam ball. Repeat until the entire surface of the foam sphere is covered with flowers. Then glue the loop and hang on the Christmas tree.
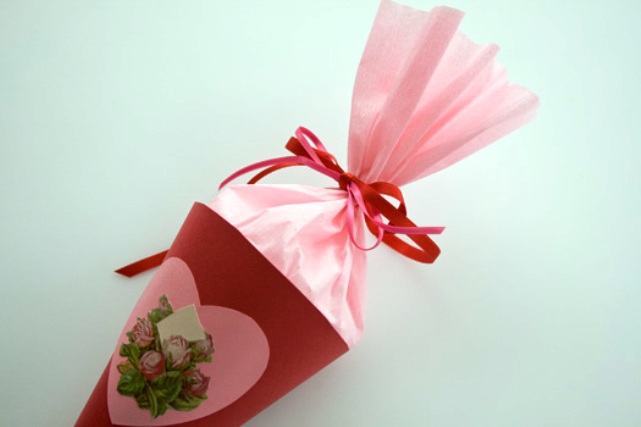
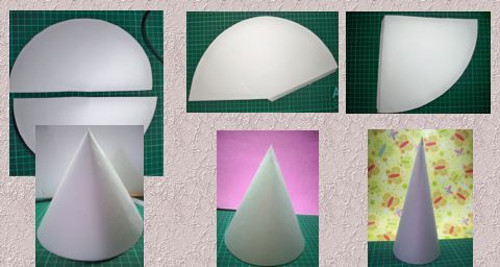
The decor for the Christmas tree, which children will certainly like, is cones with gifts. Making them is simple, but exciting. From a beautiful double-sided paper, for example, origami paper, we cut a smooth circle, find its center and cut a small wedge. The resulting part is rolled up in the shape of a cone and neatly glued. With a hole punch we make two holes on the sides opposite each other (they are needed to secure the thread).
It turned out a cone with a handle for mounting, shaped like a fire bucket. The possibilities of its decoration are literally endless: lace on the edge, beads, sequins, openwork border and much more.Inside you can put a small souvenir or candy and hang it on the Christmas tree! It should not be placed very high so that the little guests can get a treat or a gift.

New Year's paper heroes
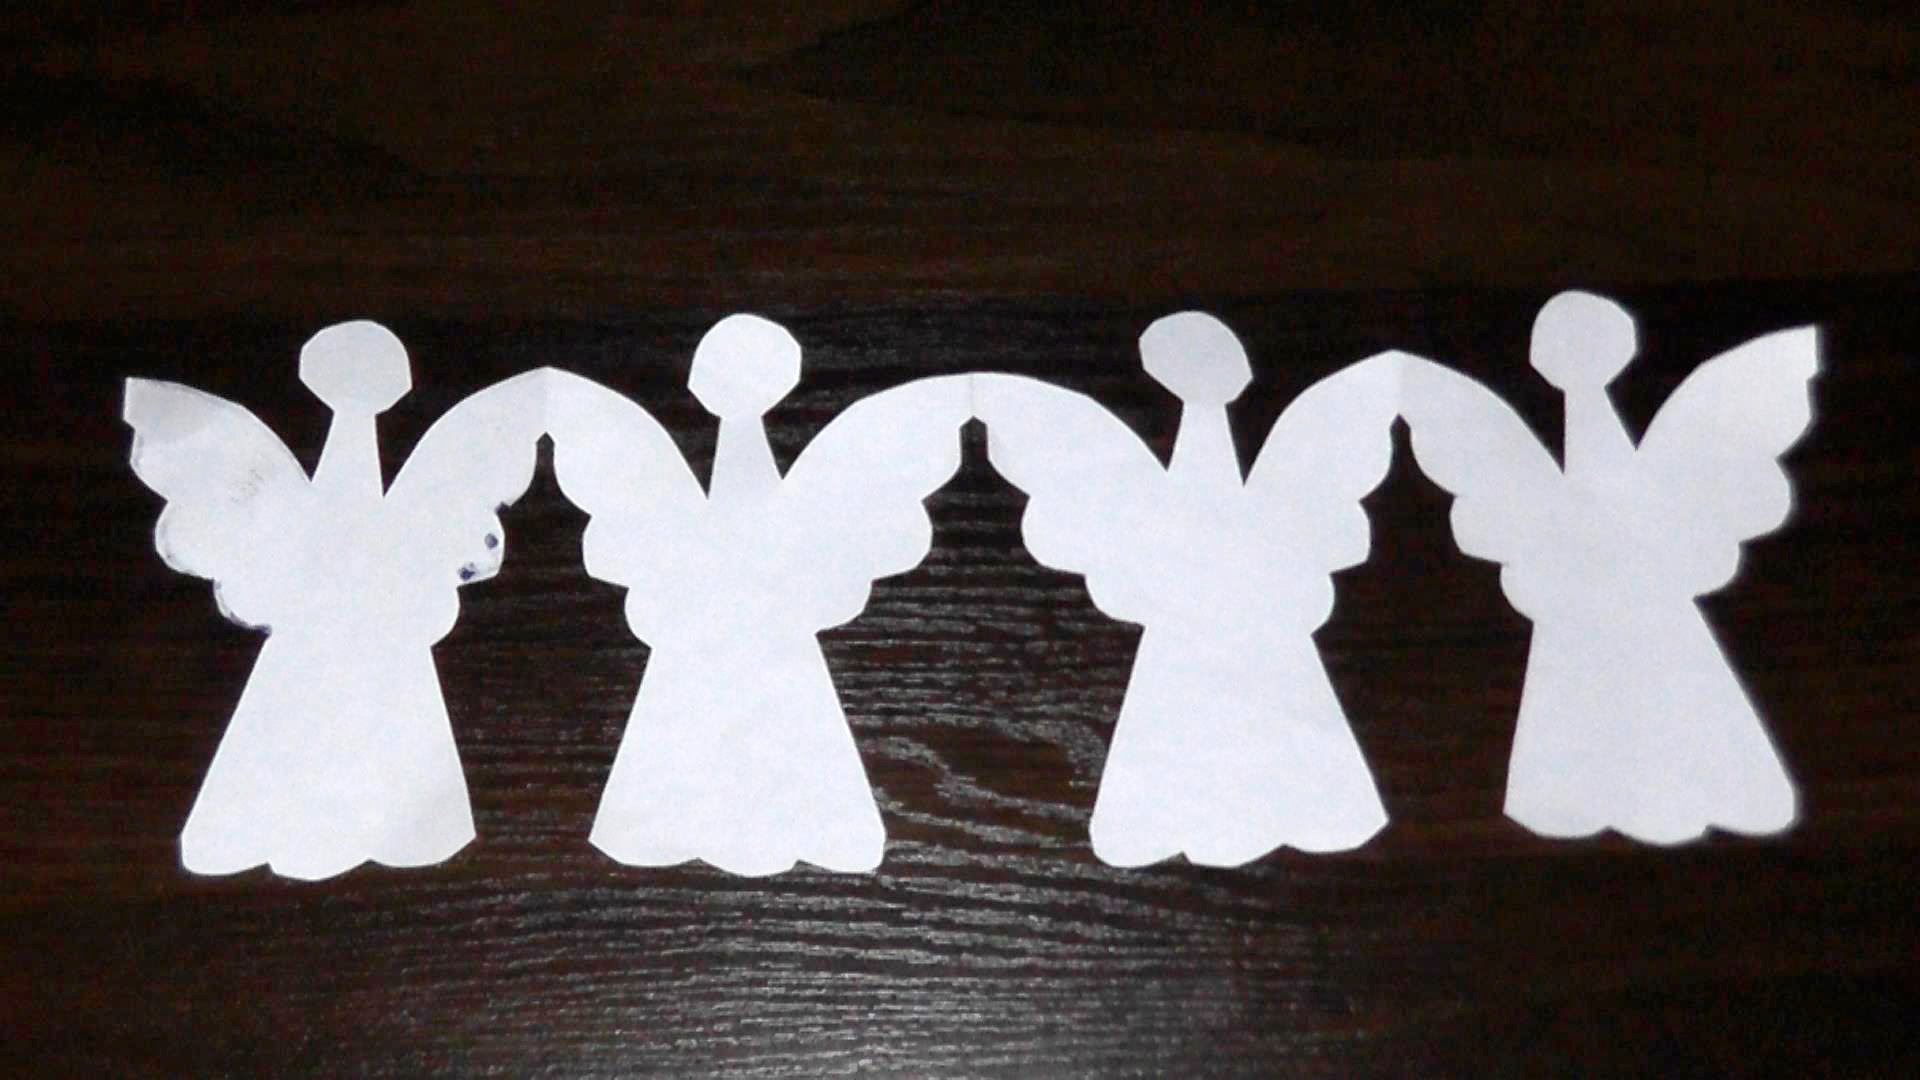
One of the simplest decorations of the New Year’s hall or apartment is a paper garland. For New Year and Christmas, it will be important to perform it in the form of angels, deer, snowmen, Santa Claus, Christmas trees or snowflakes. The classic option - holding hands little men. Very beautiful garlands come out of colored and corrugated paper, but for angels and snowflakes, simple white is also suitable.
We will need:
- paper of selected color or white;
- scissors;
- pencil;
- glue.
We glue several sheets of paper together to get a long strip. The longer the strip, the longer the garland will be, but it’s not worth doing too long a strip - it will be difficult to cut out the shapes. Then we fold the paper strip with an accordion and draw the selected character on the top sheet (you can use a stencil). Next, cut the figure, but not completely, but leaving left and right in places bends uncut areas at least 5 millimeters wide.
Now it remains to unfold the harmonica and fix the ends of the garland in the chosen place. And now, fluttering under the ceiling, touching wings, angels or snowmen dance!

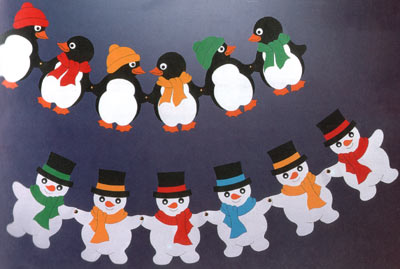
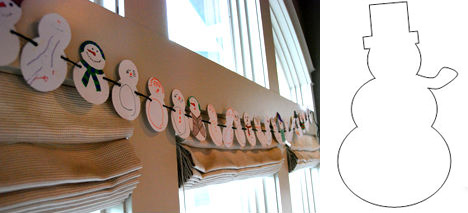
It is also easy to make unusual toys from paper strips, for example, a snowman. We cut 10 equal strips 15–20 centimeters long and 1–2 cm wide and lay them out in the form of sunlight, and fasten them in the middle with a stapler. We collect the free ends in a similar way and also fasten with a bracket or glue - it turns out a sphere. We make one more smaller - it will be the head of a snowman. We combine parts and decorate to taste: we glue eyes out of paper or beads, put on a hat or glue small paper mittens to the body of a snowman.


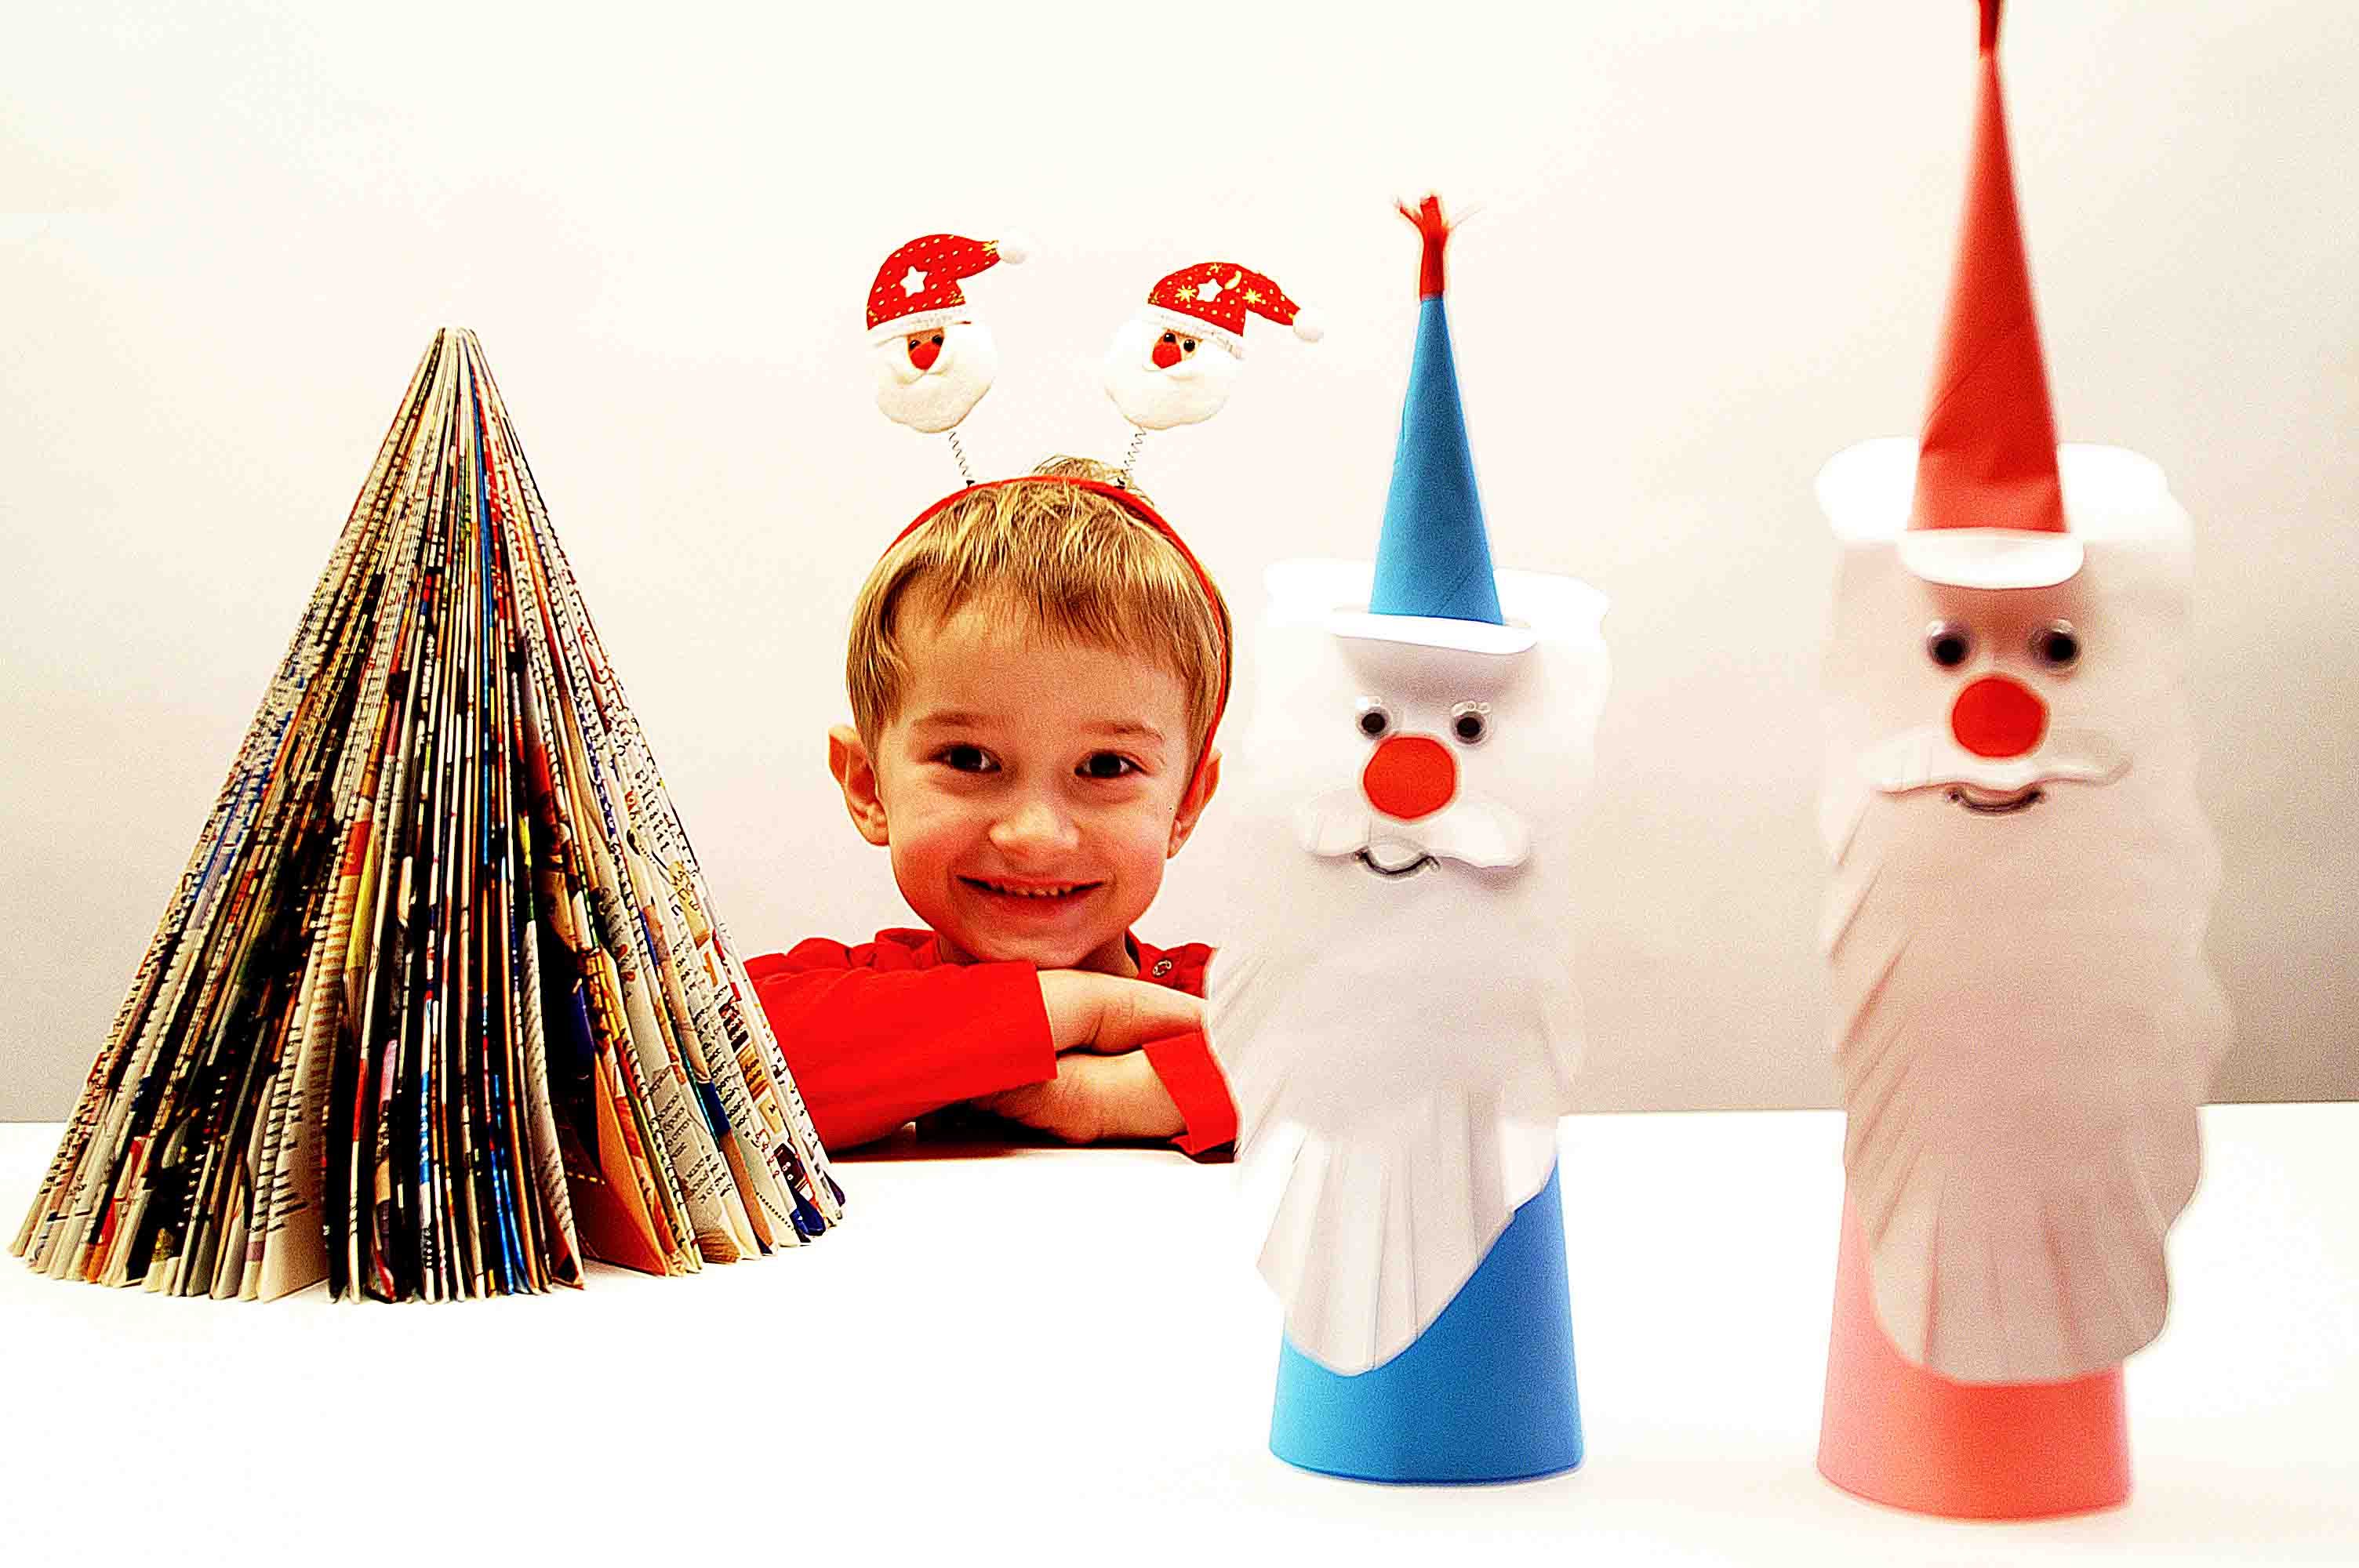
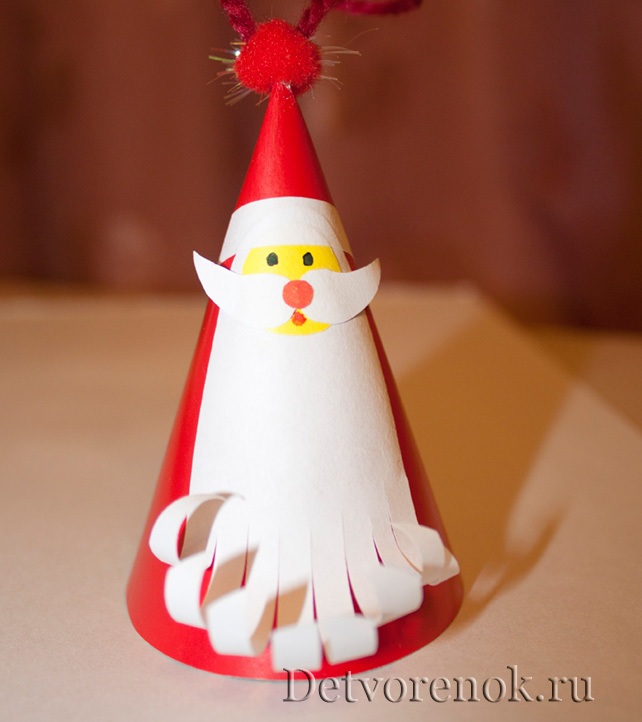
You can also make Santa Claus out of paper. For this red cardboard is necessary to make a cone - this will be the body of our hero. Then cut out two small ovals from white paper and glue the cones underneath - we get our feet. A circle of white or cream paper is glued on top of the cone; we draw or glue the eyes, nose, and beard of white paper strips curled with scissors. Next, add the details: hands, buttons on a fur coat, a cap on his head.
So the main character of children's winter fairy tales is ready - Grandfather Frost.
Festive snowflakes
The new year is primarily associated with snow. Decorate the room for the New Year's holiday taken snowflakes. Making the window of a house is easy to make: we cut out a snowflake stencil from a sheet of office paper, apply it to the window and spray it with artificial snow. The stencil can be used several times, artificial snow after holidays is easily washed off the window glass.
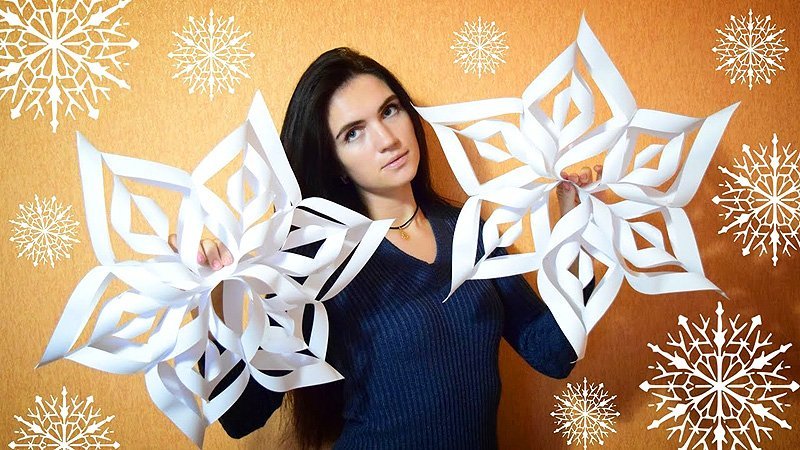
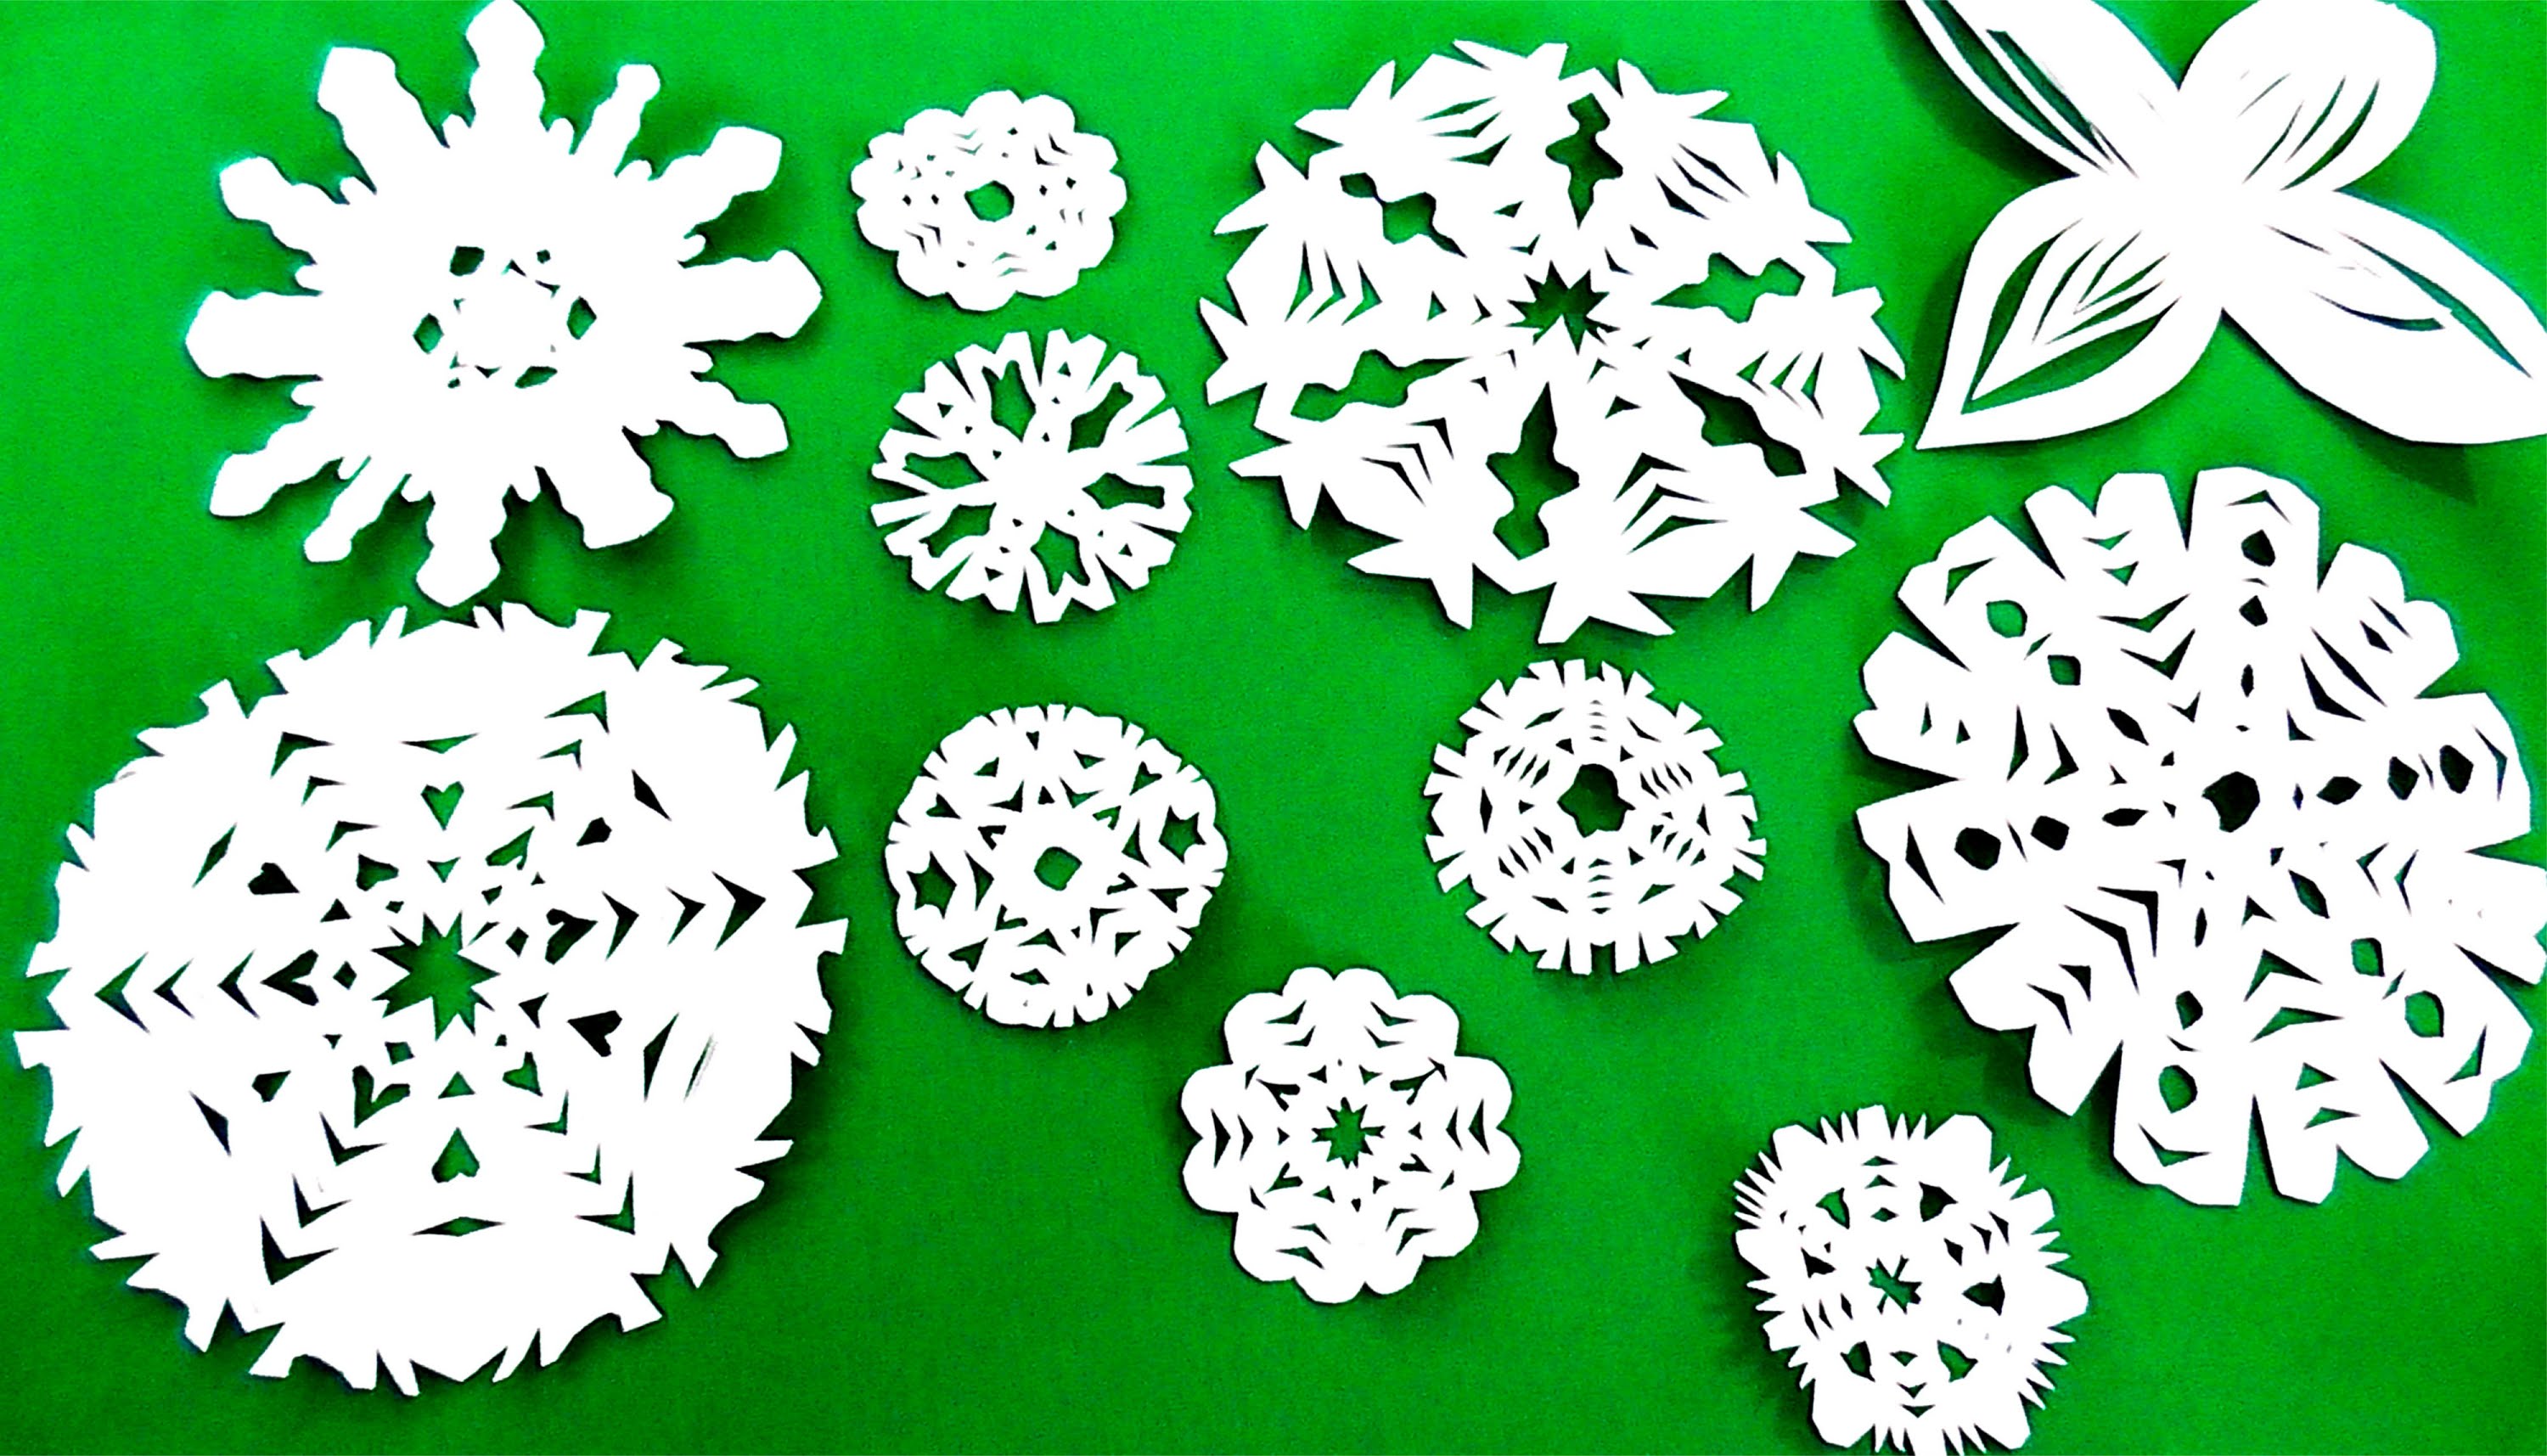
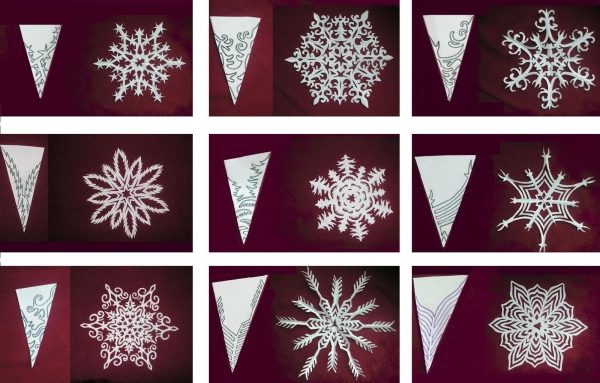
Familiar from childhood and beloved by all the way to decorate a house - cut snowflakes from a napkin or thin paper. To do this, square sheets should be folded in half so that a triangle is formed. Repeat the manipulation two more times. Figure out the sharp top, and to the left and right arbitrarily cut curved lines, without cutting the folds to the end. When unfolding it turns out fancy snowflake with a unique pattern.
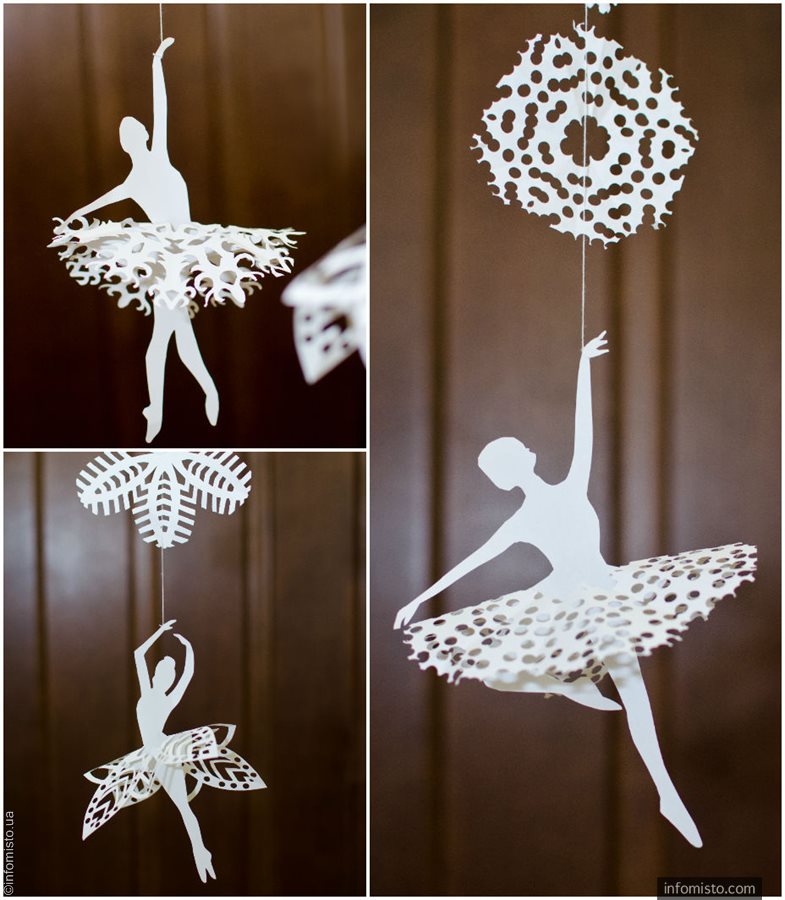
An ordinary paper snowflake can be easily turned into something special if you wear it on a template in the form of a ballerina figurine. We draw on a sheet of A4 silhouette of a dancer, cut it.In the center of the pre-made snowflake should make a hole into which to thread the pattern. The result was a ballerina in a snowy openwork tutu!
If you hang it from the ceiling, it will rotate with every movement of air.


How to make a garland?
Make a Christmas garland is a snap. For the simplest classic method, you will need:
- color paper;
- glue stick;
- ruler;
- ordinary pencil;
- scissors.
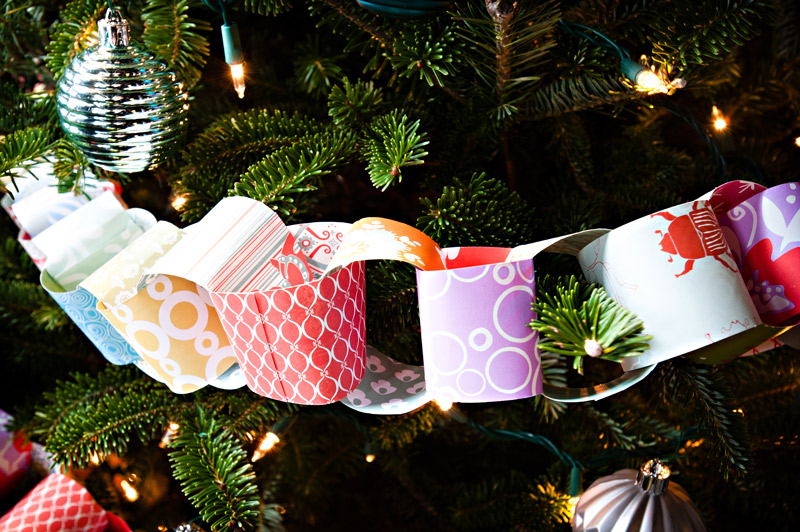
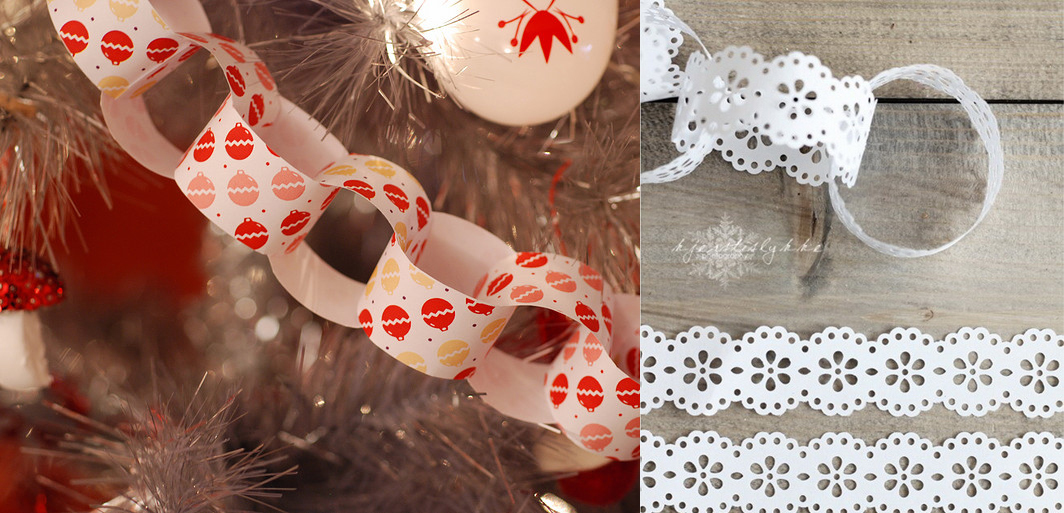
The paper is cut into strips with a width of 2 centimeters. We close the first strip into the ring and glue it together - it turned out the first link of the chain. The next strip we pass into the resulting link and also glue. We perform these simple steps in stages, alternating various colored stripes until the chain reaches the desired length. The resulting garland decorate the Christmas tree.
Craftsmen engaged in scrapbooking offer to diversify the “old-fashioned way” using modern tools for working with paper: cut paper with curly scissors, and make holes in the stripes in the form of snowflakes with a special hole punch.

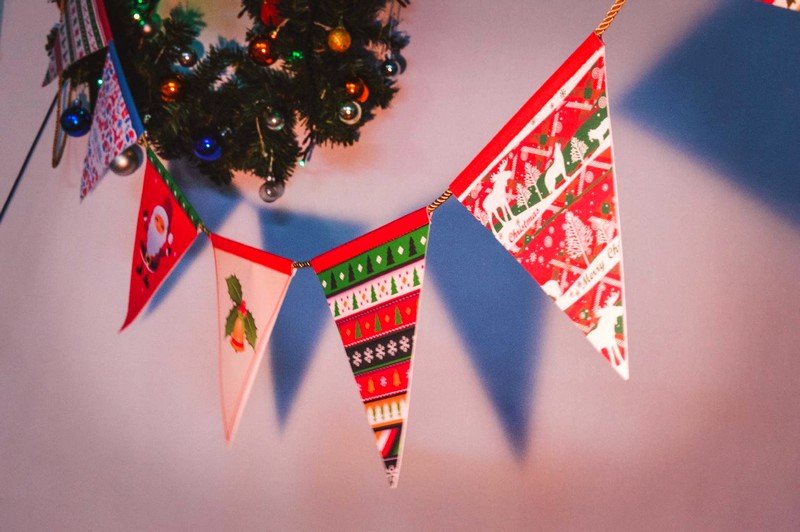
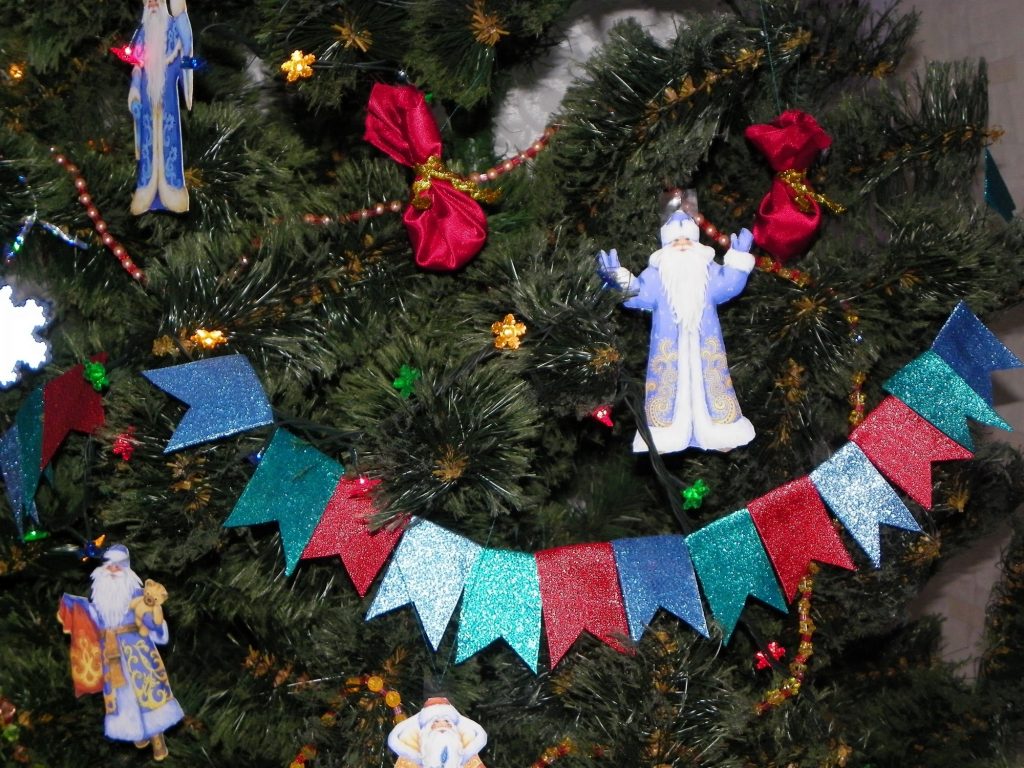
There is a second way. With the help of a color printer we print New Year prints on ordinary office paper.Cut diamonds and fold in half, resulting in a triangular flags. Next you need to tighten a strong thin thread in the place where you would like to place a garland. Each diamond we coat the inside of the bend with glue and hang it on a string - the garland is ready!
This is a wonderful, fast and easy way to decorate an office space, but you can also use it for festive decor of an apartment.
The third way for ladies who love to sew. You will need:
- thick double-sided paper with a pattern or just colored;
- sewing machine;
- threads;
- scissors.
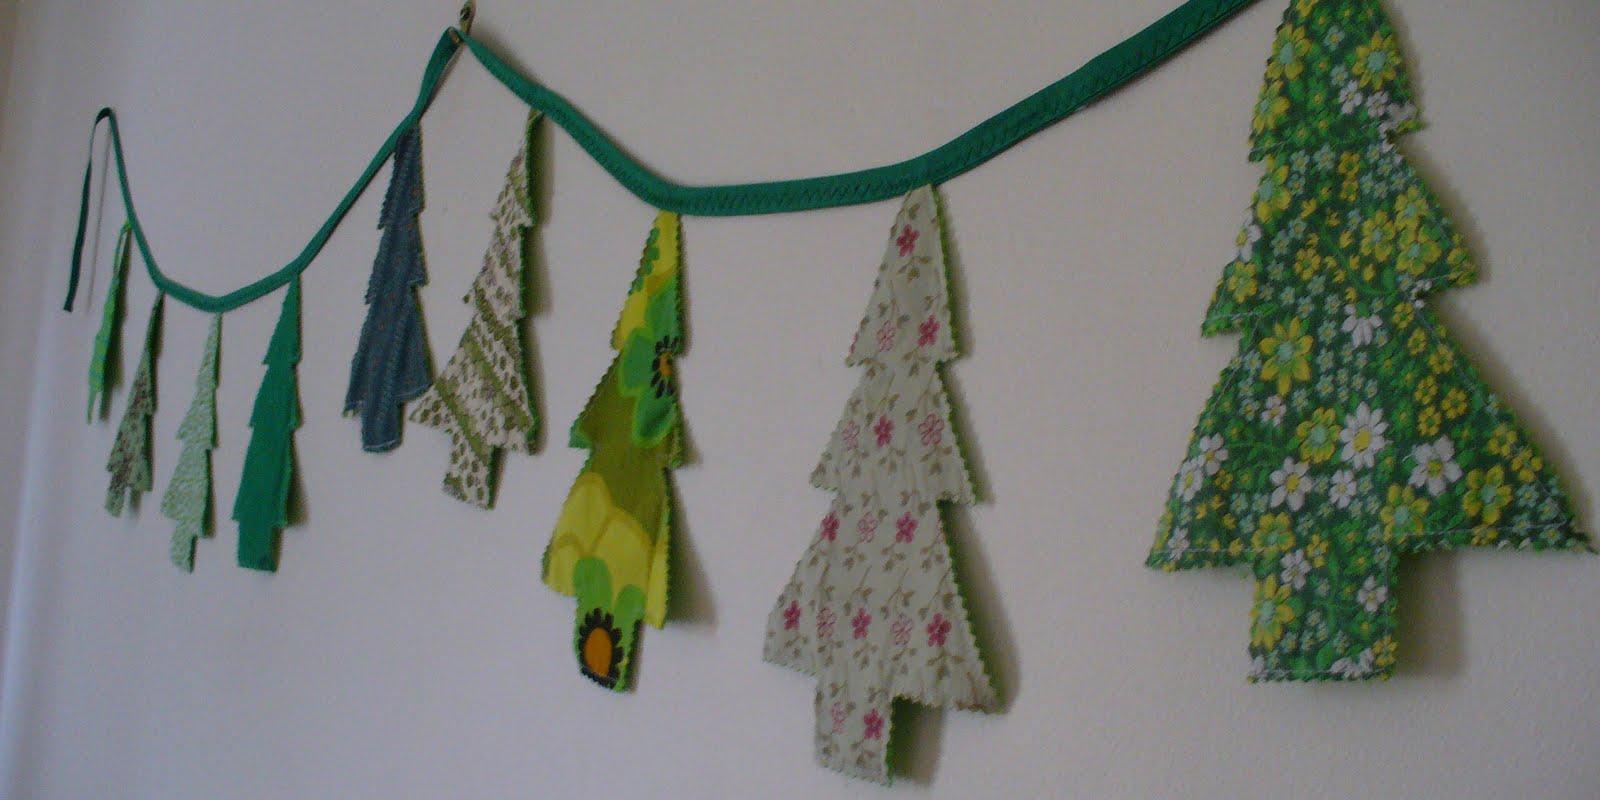
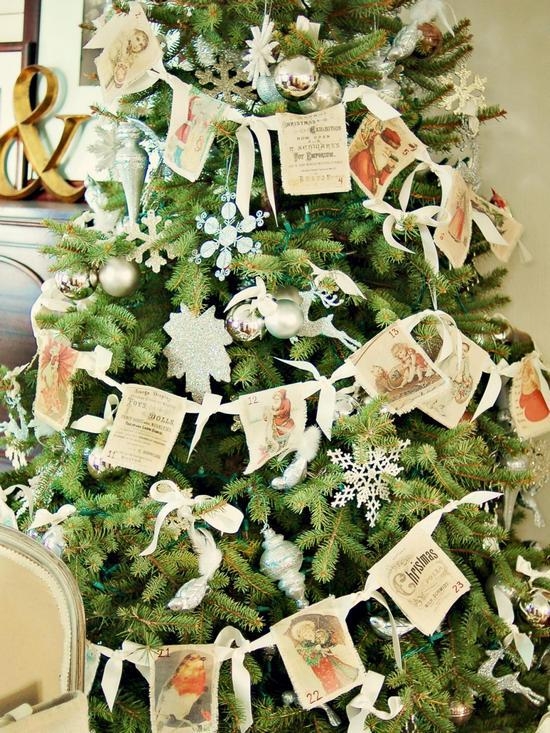
From paper we cut out the silhouettes of the Christmas tree (you can be the same, but you can be different). On the sewing machine you need to install the largest stitch. We sew the first figure in the center. Without cutting the thread, we also sew the next Christmas tree in the center and continue until the garland reaches the desired length. It turns out very original and stylish decoration!

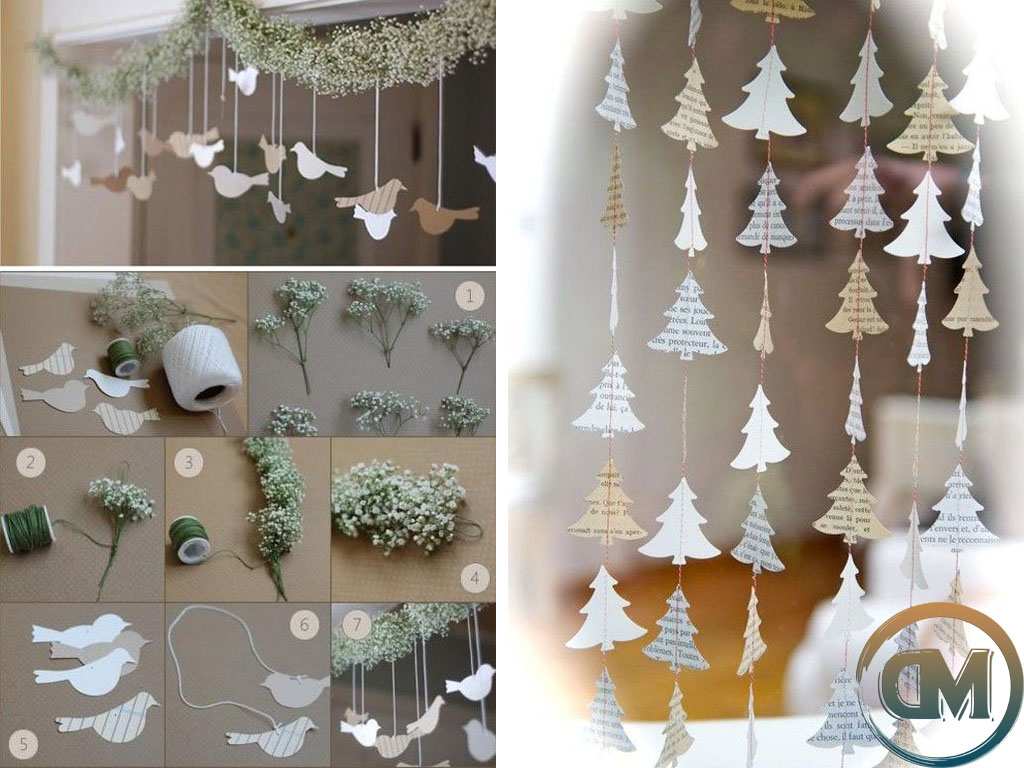
To make another type of garland, we need:
- strong thread equal to the length of the garland (you can also use fishing line or yarn for knitting without a pile);
- glue;
- thick colored paper or cardboard.
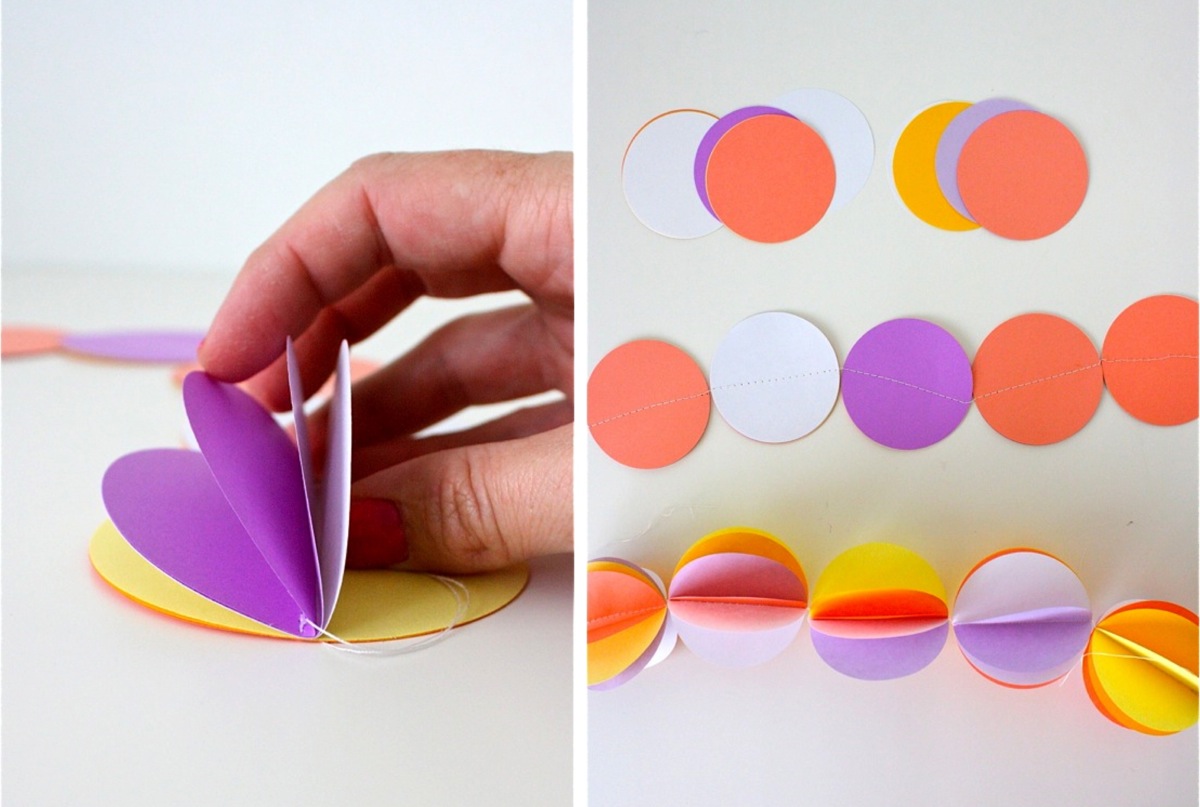
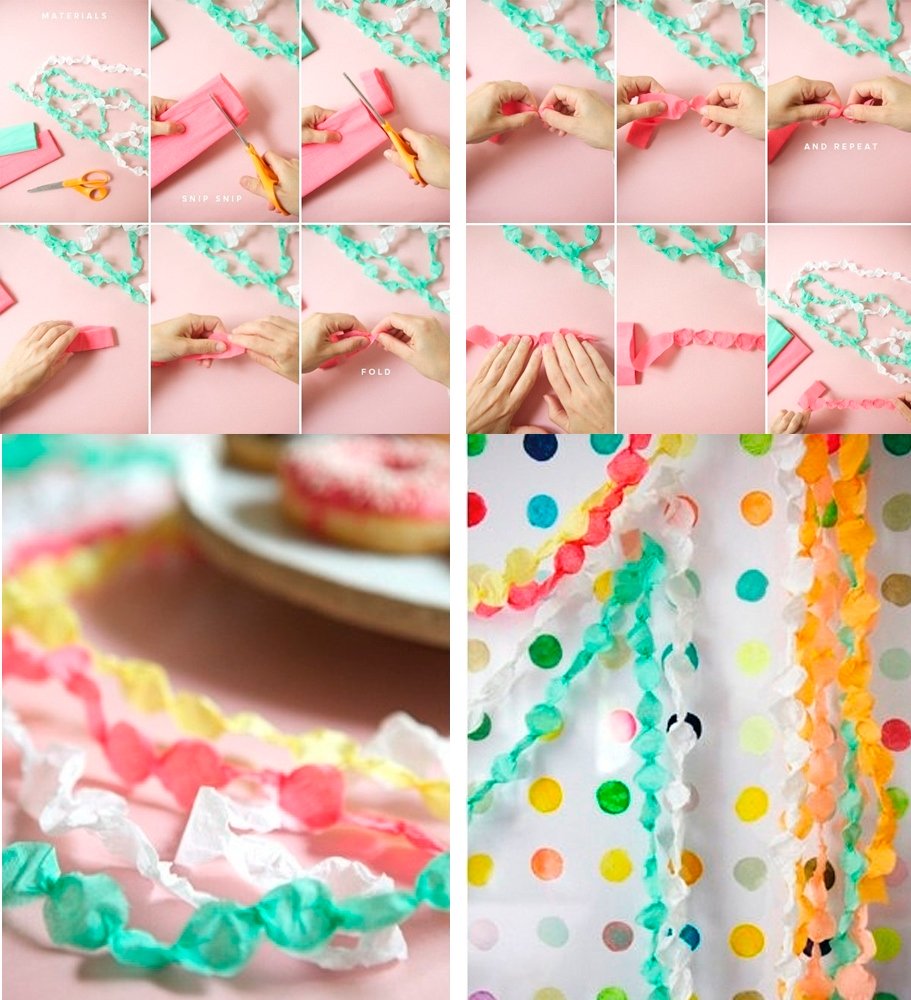
A hole punch or by hand should be made of thick paper or thin cardboard with a diameter of 5–7 centimeters. Each circle is bent in half and put on a thread, glue the edges. The next element is glued in a similar way so that the semicircles are located close to each other. Garland can be hung!

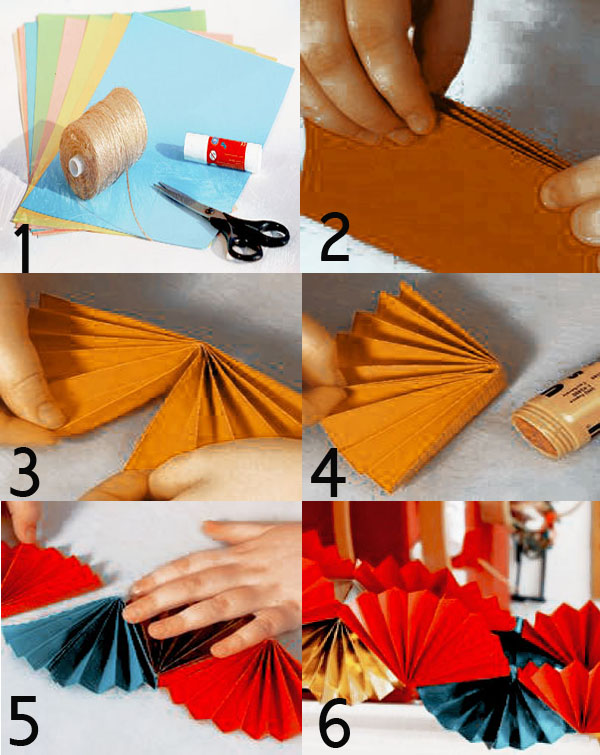
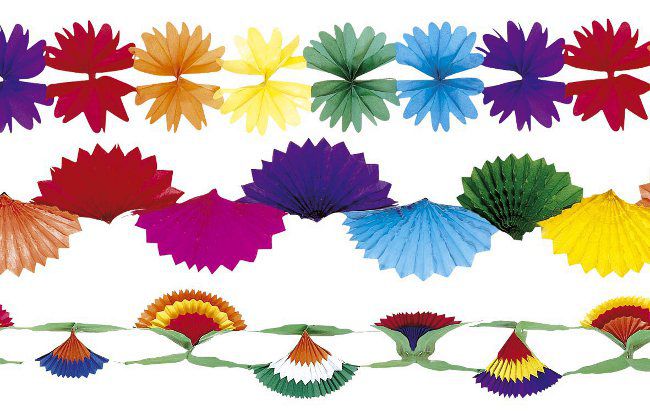
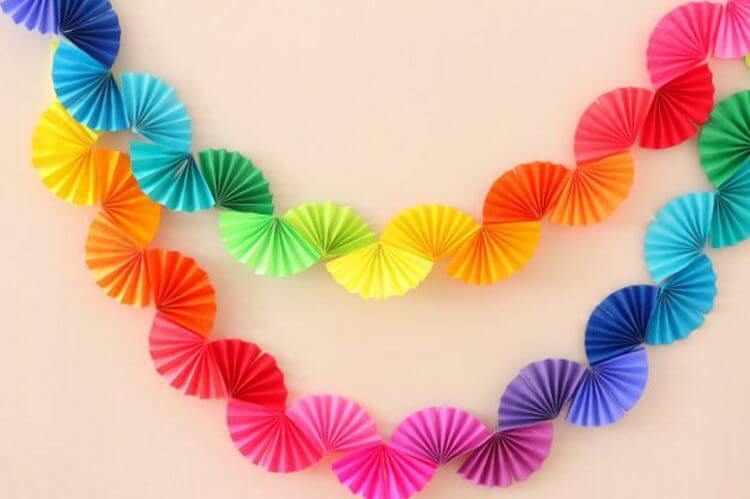
The next idea for making a garland is a fan! To fold a rectangular strip by an accordion, to bend in half and to connect by means of glue or the stapler - at blooming the semicircular fan turns out. We assemble a circle from two such fans, glue them together, make the necessary number of such fan circles. We connect circles with each other with a stapler or fasten on a thread. Magic decoration can be used!

And one more simple garland of corrugated paper. To make it, we fold wide strips of corrugated paper and cut thin fringe on the sides. Twist the strip slightly in a spiral, and the delicate paper decoration is ready!


Beautiful examples in the interior
So, you have mastered the technique of working with paper and made a lot of beautiful and unusual decor for the interior, in which you are going to celebrate the holiday.However, this work is not finished! After all, you do not want the site for a holiday like a waste paper collection warehouse? Now all the elements - garlands, balls and other decorations - should be correctly placed in space.
Let's start with the decoration of the main element of the celebration - Christmas fir. One of the most successful methods is to place balls of the same type in a spiral, starting from the top. The gap is filled with a garland with flags.
Do not forget about the color scheme! The interior is very stylish, decorated in certain colors.
It is also quite an interesting variant of placing toys in a checkerboard pattern, alternating large and small decorations or Christmas balls of different colors. In this case, designers recommend hanging the garlands right from the top of the tree to its bottom, without twisting it in a spiral.
Try to place the pendants in such a way that they are located above the level of the heads of the guests, otherwise in the midst of the fun they may just fall off from an accidental touch. The same applies to the placement of garlands.

If your prickly beauty is below the height of an adult and is standing in a corner of the room, it is advisable to place the garlands just above it.In such a situation, flags and chains are placed in rows, one above the other, from one wall of the corner to the other.
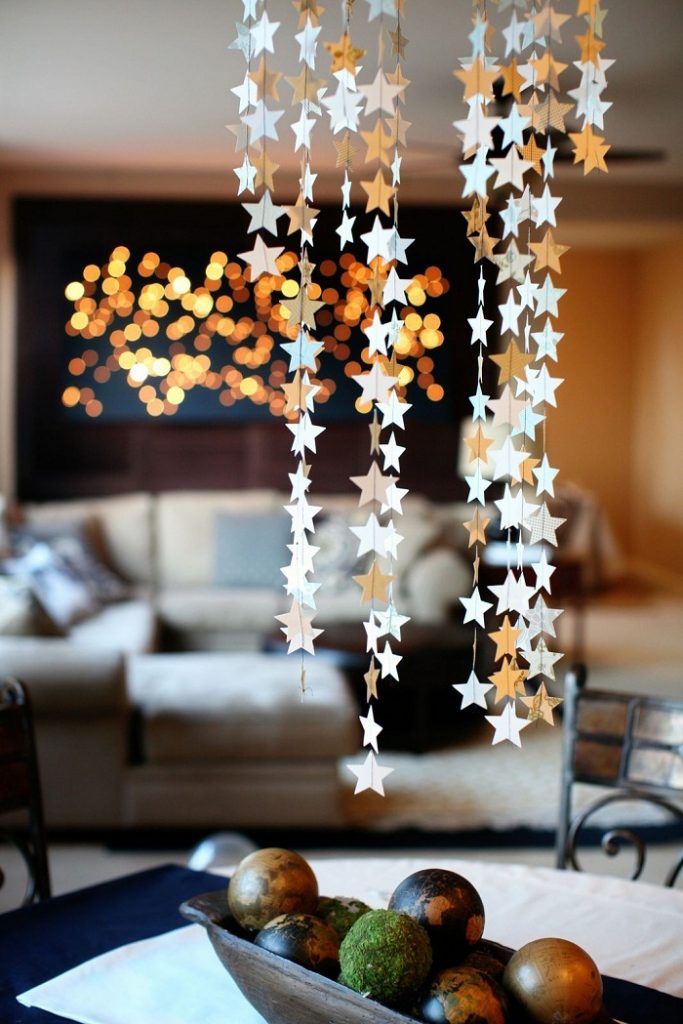
Garlands can be hung under the ceiling of the room. Make sure that they do not overlap and do not lie one above the other: it looks sloppy and tasteless.


Do not forget that the decoration of the room should be kept in one color or in several (it is better to take no more than 3), combined with each other.
How to make Christmas toys with their own hands, see the next video.


