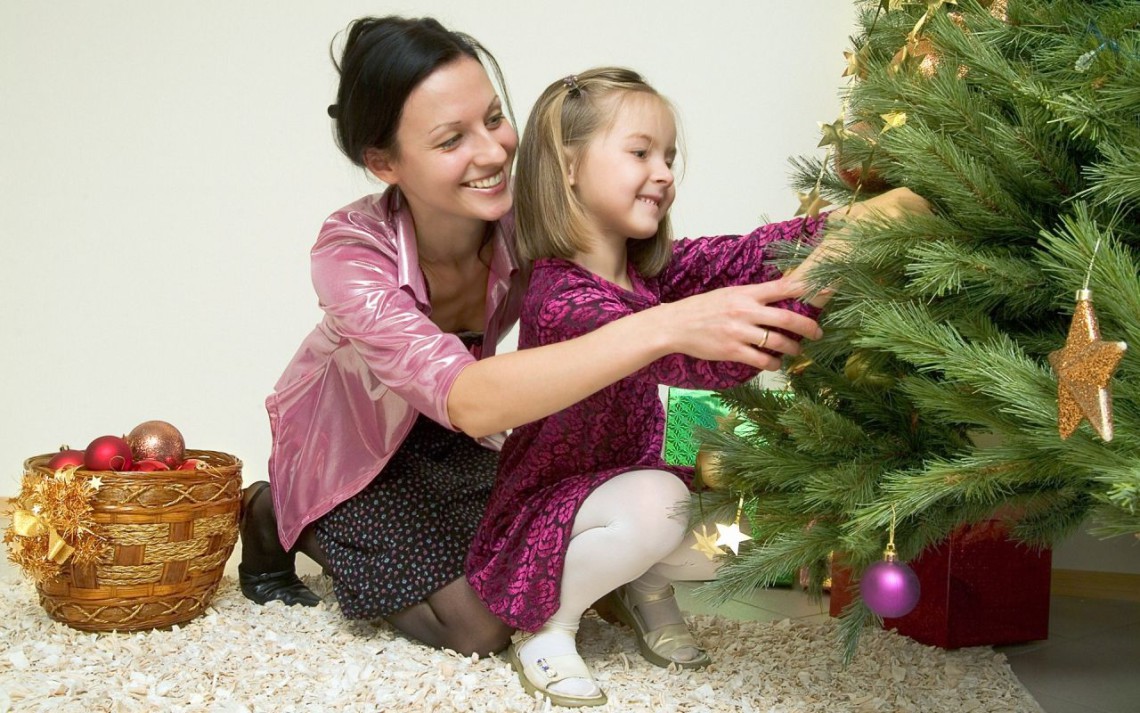
Making and decorating Christmas balls with your own hands
The toy on the Christmas tree, made in the shape of a ball, is the most ancient and beloved by many Christmas decoration of a fluffy beauty. Toys can be the same size or different, monophonic or colored. Today the trend is to make Christmas balls with your own hands.


Making balls of beads, buttons, sequins and threads
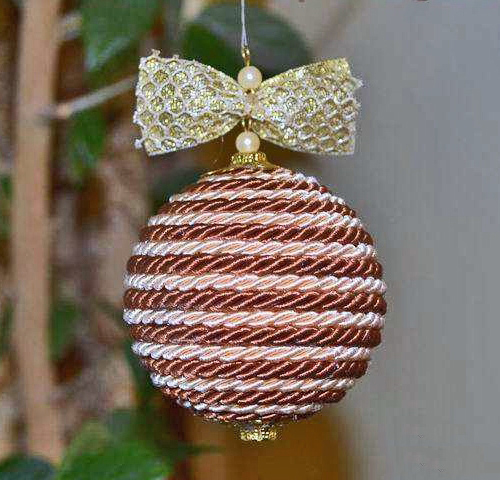
The easiest way to decorate Christmas balls is to cover with decorative threads or bundles. To make the toy festive, you can take harnesses of different colors (pink, burgundy) and complement the winding with a thread of beads. It is recommended to hang the ball on a thread of rain or a thread with Lurex.So that the thread does not look too simple, you can also decorate the upper part of the toy. Attach a cream-colored bead to the base of the thread, then place a small fabric bow of a golden hue decorated with lace. On top of the bow to place the second similar bead.
A Christmas tree toy entwined with a maroon rope with two wide strips of mother-of-pearl beads and rhinestone will look gorgeous. This step is done with your own hands is very simple. First, the harness is fixed on the toy with the help of a transparent glue (such as “Moment”), then a pearl thread is laid over it. The decoration is crowned with a golden silk thread.
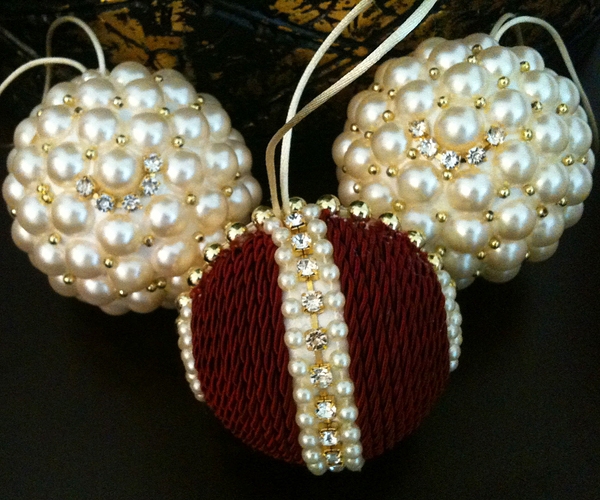
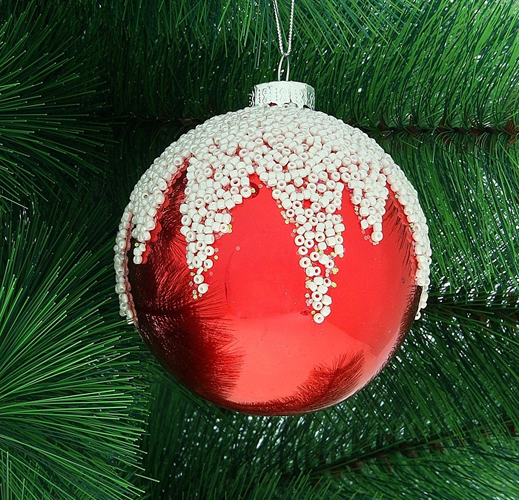
Make an exclusive Christmas decoration using beads is a snap.
Only needles with a decorative hat and beads will be needed (materials from old beads that have torn can be used). String the required number of beads on each needle and fasten it on the ball. It is desirable that the toy was made in the same color scheme: pale pink, creamy white or blue-green. A string-pendant must be made on the toy before the start of beadwork.
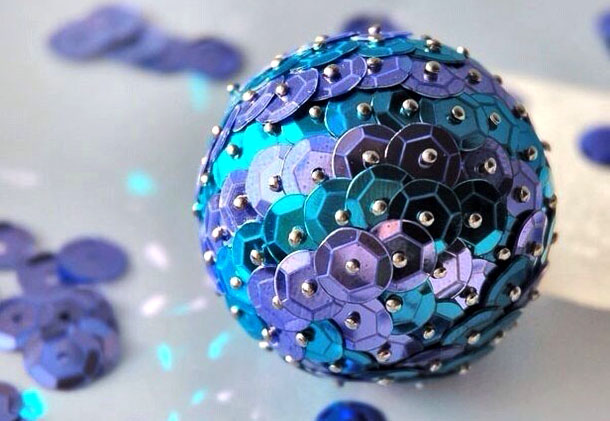
To decorate the ball with sequins, you will need sewing pins and a foam base in the shape of a ball. No schemes for creating a ball with sequins are required. It is important to correctly identify the top of the toy, from which the decoration will begin. Then, starting from this point, as from the center, pin all the sequins in a circle overlap.

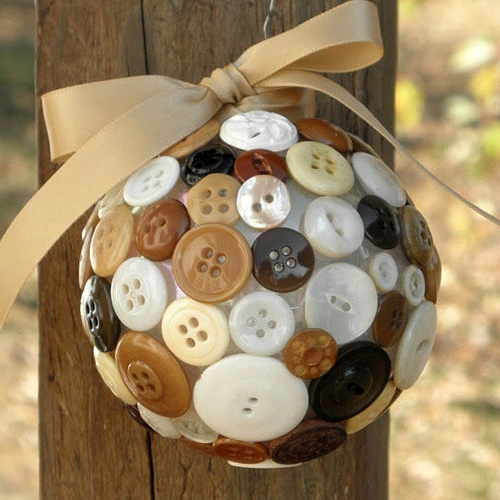
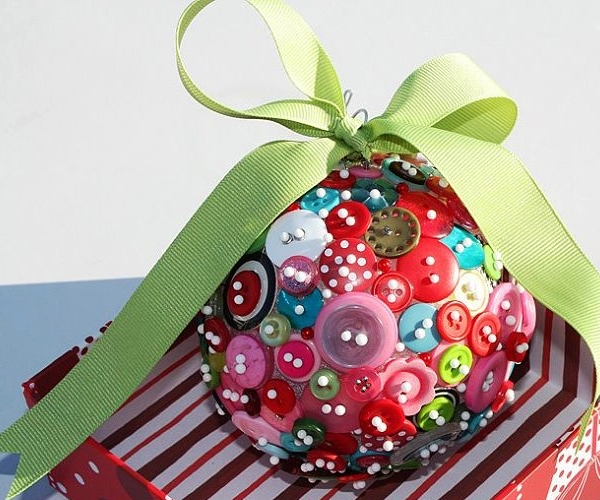
Making balls out of buttons is easy. Buttons can be taken in one color scale (from snow-white and dairy to coffee and chestnut) or be contrasted to each other (red, pink, green, blue). In addition, if you think that the holes-gaps look not very elegant, you can drown them with small needles with decorative tips. The latter will add a certain charm to the general view of the Christmas-tree decoration.
If in your box from under toys an old ball was lying around, which is very much loved by households, but acquired an unpresentable appearance, you can restore it and give it a new life. To do this, it is only necessary to wrap knitting threads. Mini-knitting needles made from two toothpicks and two wooden balls will help add exclusivity to the toy.
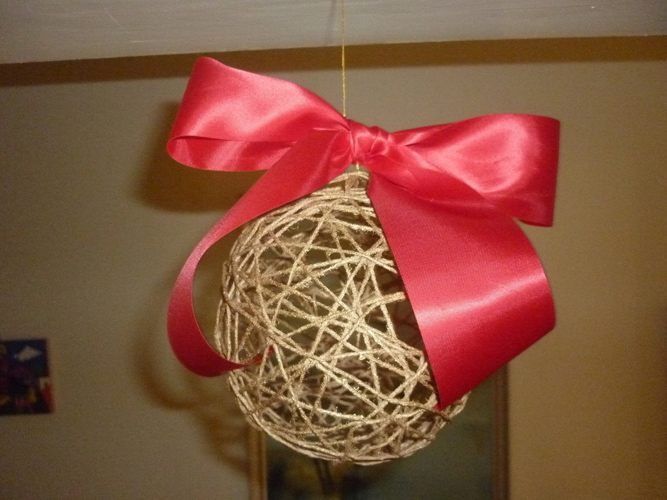
As a basis for creating a toy, you can use a small balloon. It should be wrapped with threads (preferably those that keep their shape well, for example, with fine twine), pre-treated with PVA. On top of the whole ball once again carefully fluff glue. After the substance dries, pierce the ball and remove, attach a shiny thread to the toy, decorated with a bow in tone.

Paper application
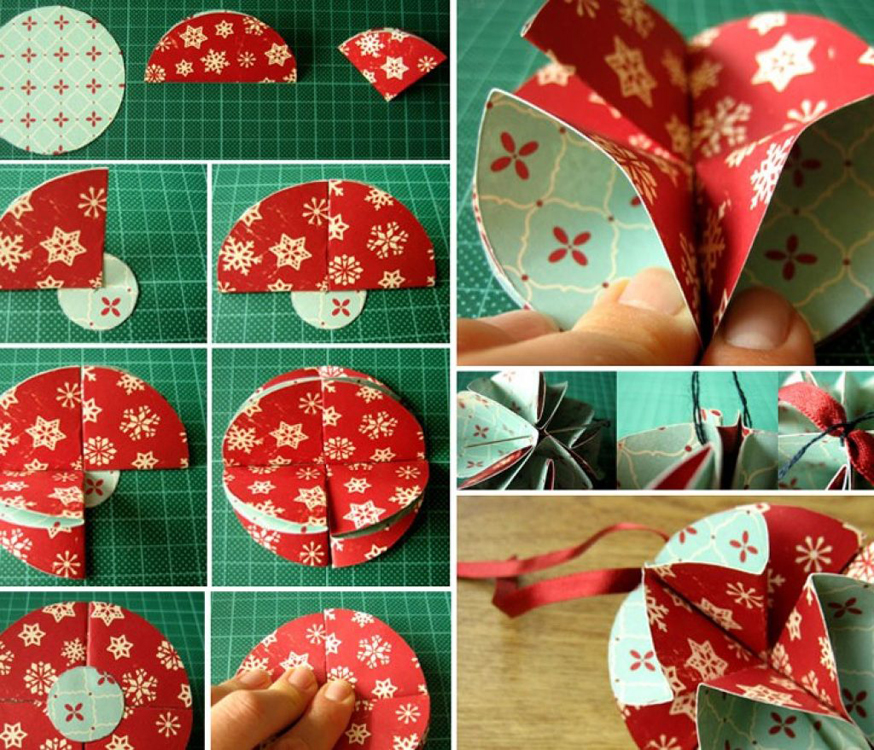
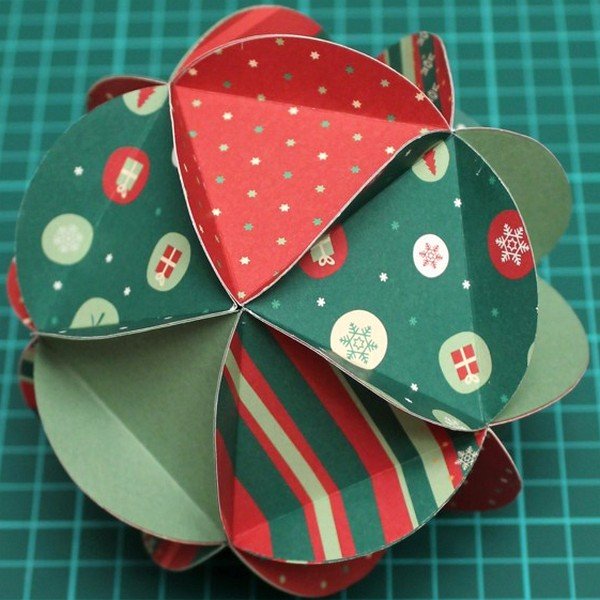
To create a handmade paper Christmas ball, you only need scrapbooking paper and transparent glue. It is necessary to cut 8 circles of the same size and two slightly smaller ones. Large circles fold 4 times and fix them in small circles of 4 pieces each. The lower and upper edges of quarters glue together.
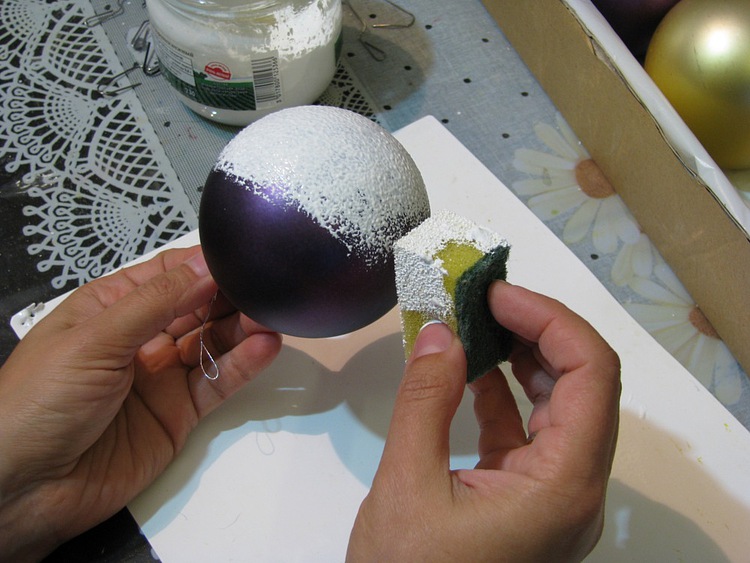
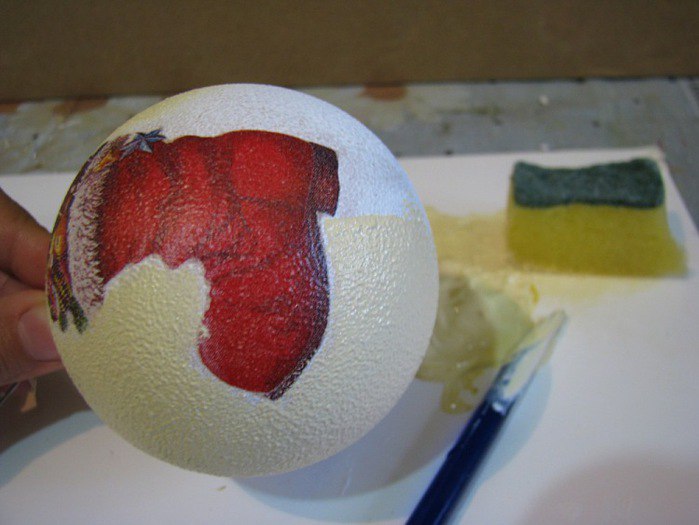
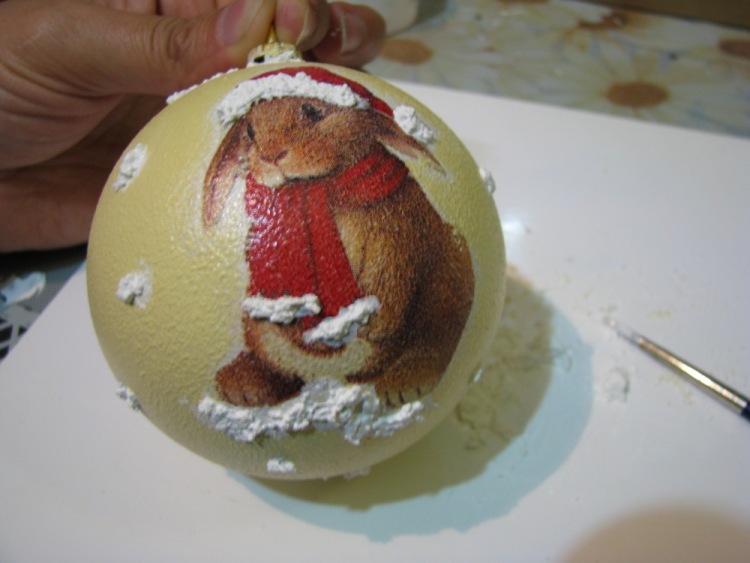
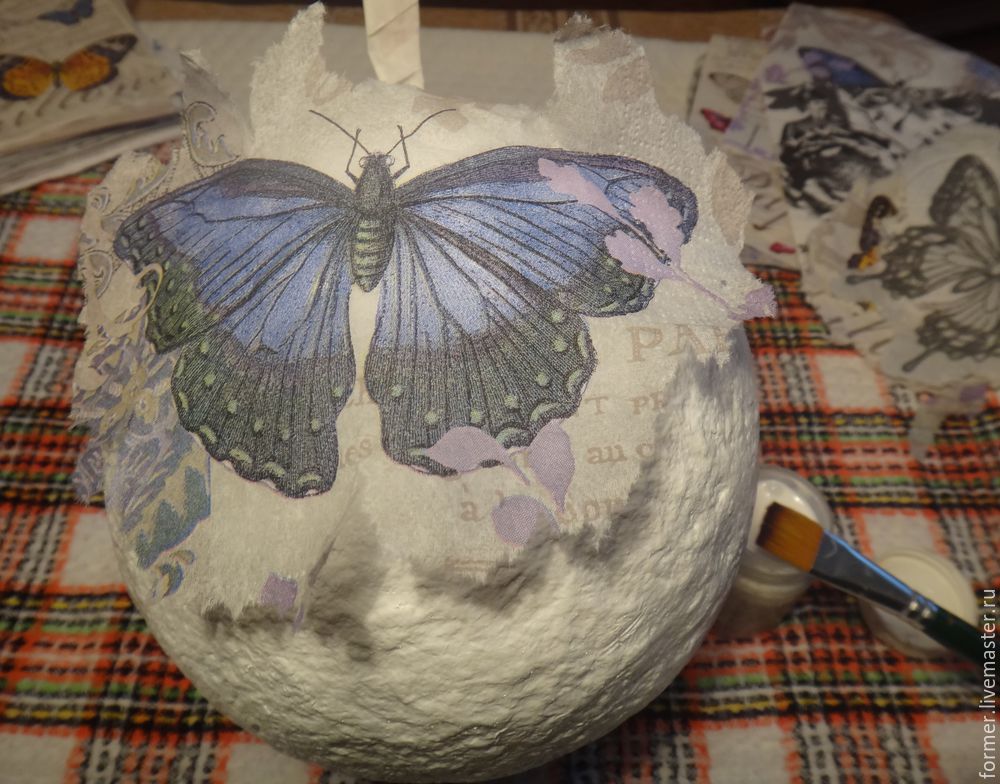
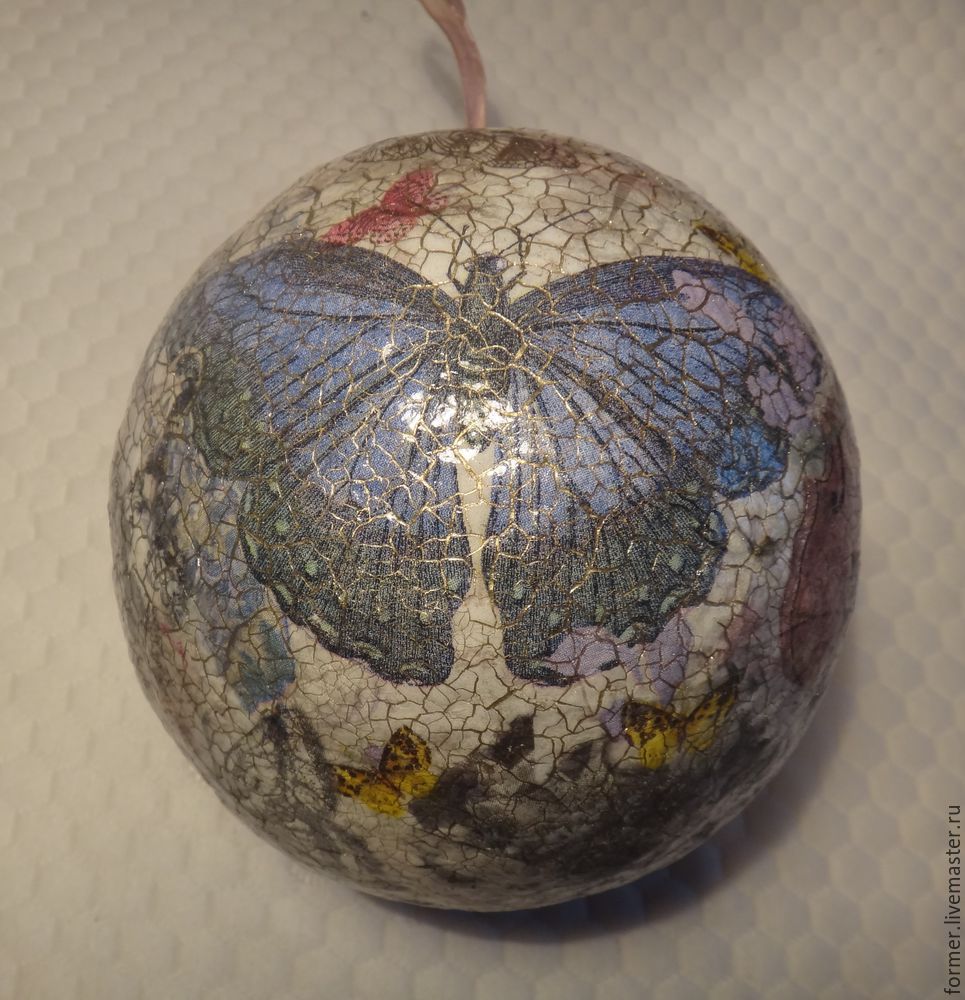
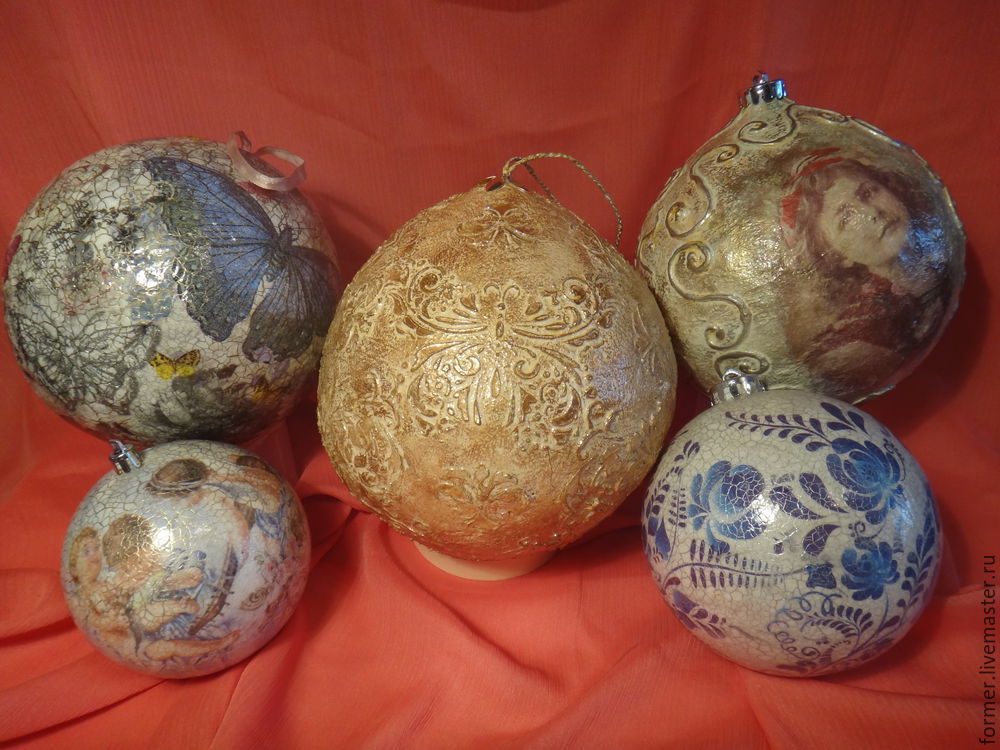
Christmas balls made using decoupage technique look very nice.
Initially, the ball is covered with white acrylic paint. Then glued decorative elements, carved from napkins. However, if you want the ball to be in color, all the steps must be performed in reverse. That is, first stick the paper pieces, and then apply the paint. Winter mood toy will add artificial snow. It is created by adding decoys to paint.You can decorate toys with paintings and 3D elements.
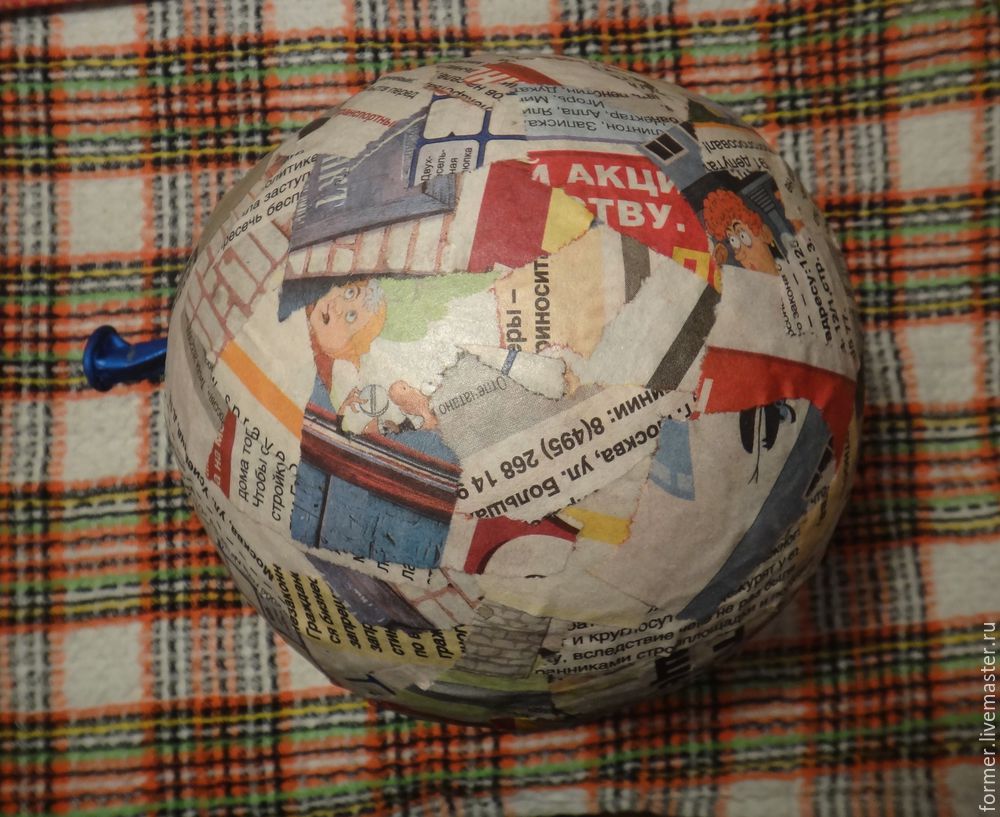
Interestingly, papier-mâché toys will look on the Christmas tree. Materials will be needed:
- newspapers;
- flour - 1 cup;
- water - 5 glasses;
- polyethylene film.
Initially, you need to cook a paste. Its consistency should resemble liquid sour cream. A plastic ball is taken as the base. Wrapping cling film as evenly as possible, without wrinkles. The newspaper will have to pick into pieces. The newspaper pieces moistened in paste paste on a sphere. Make 10 layers. After each layer of newspaper pieces, once again pass with paste and press tightly to the surface. After application of the layers, leave the ball until completely dry. Cut a paper surface with a stationery knife in half and remove the plastic ball.
The resulting incision is closed with the same newspaper pieces dipped in paste. It is enough to make 2-3 layers. The bottom is also covered with newspapers. For additional fixation, you can glue a piece of cardboard there. After complete drying, you need to go over the surface of the ball with sandpaper. Then the toy can be painted and decorated.
From newspaper tubes
As a basis taken from the pages of a glossy magazine. Each page is folded into a long bundle. If you can not roll a long tube, you can make a few short ones, and then dock them with glue. The ball of foam gradually glue the harness in a circle, from the top to the base. Spread each layer of colorless glue.


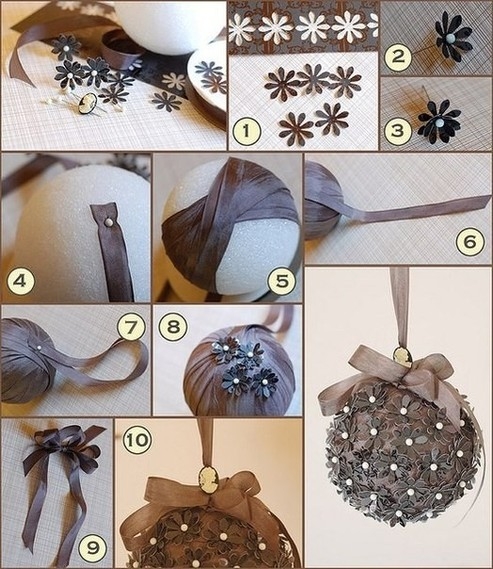
From paper flowers
To create these balls will need:
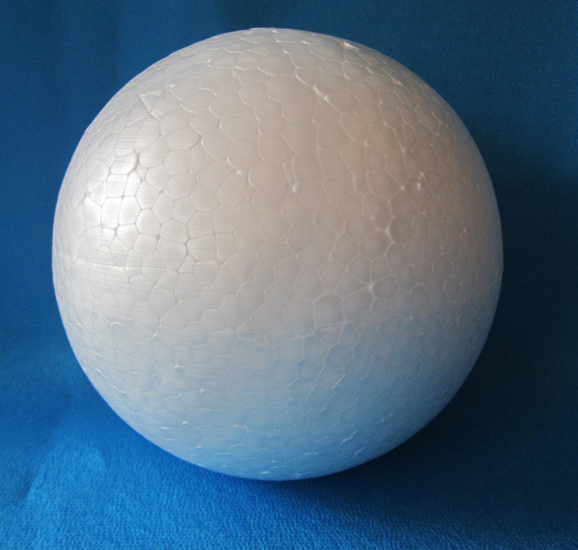
- polystyrene balls;
- satin ribbon;
- paper to match;
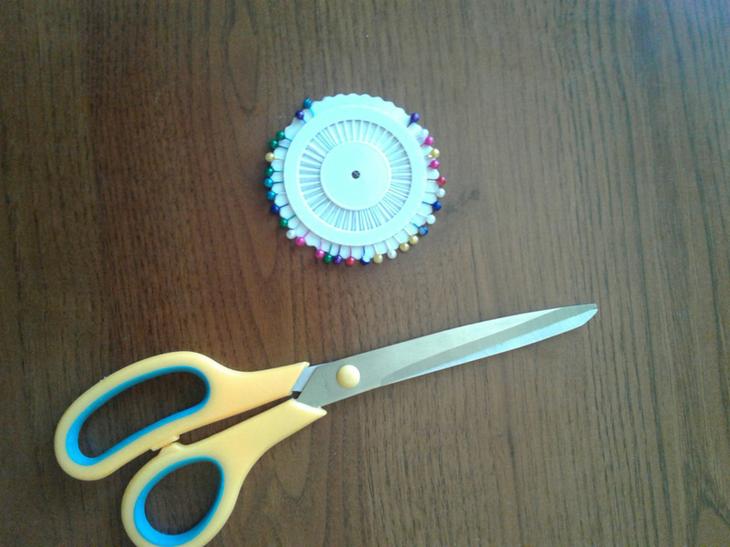
- decorative pins;
- figured hole punch.
Tape the ball with tape, fix with glue. At the same time, form a thread for hanging toys. Puncher cut flowers. Using pins to fix them on the ball. To make the ball more festive, you can make the flowers of two contrasting shades. For example, white and purple.
In this case, the flowers will be attached by inserting into each other.

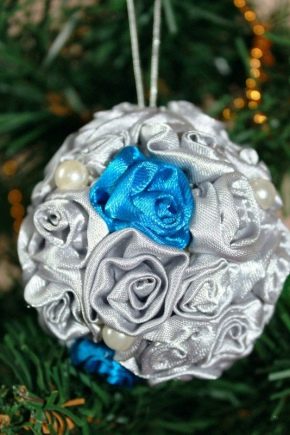
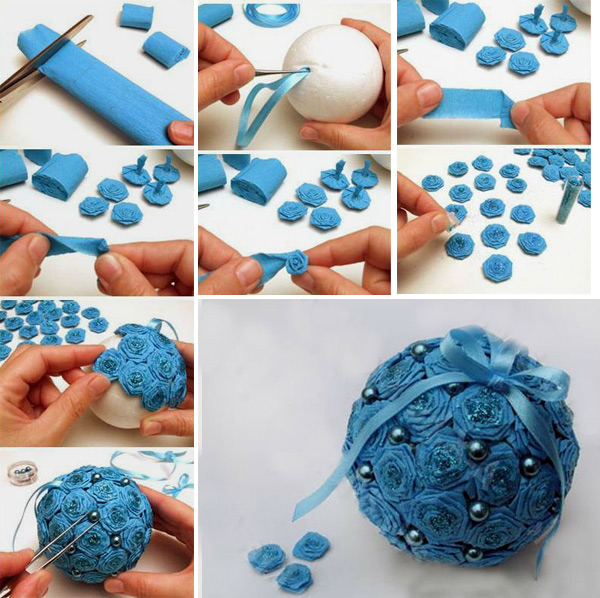
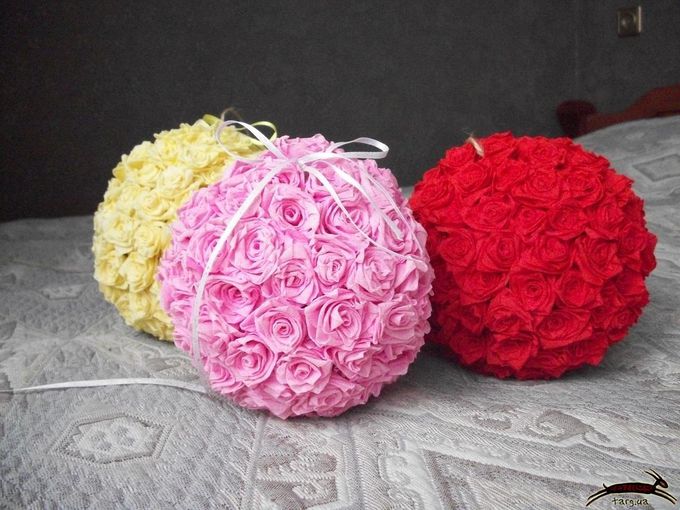
Corrugated paper
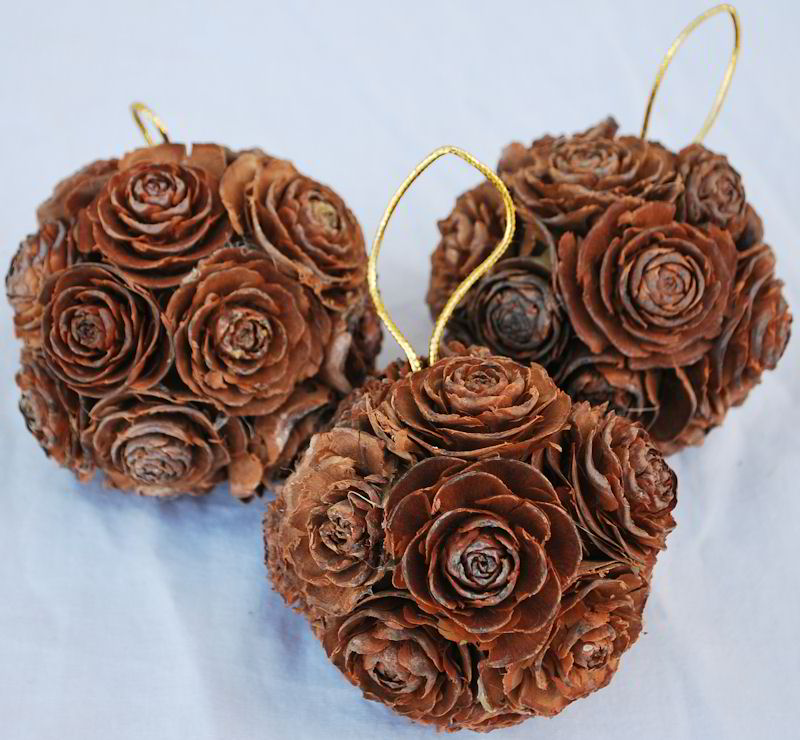
A beautiful Christmas ball can be made from miniature roses, for the manufacture of which corrugated paper is taken. HTo make flowers, you need to adhere to the following sequence of actions.
- Corrugated paper folded in several layers and cut into small rectangles.
- Using a needle on the top of the foam ball, make a thread for which the toy can be hung on the Christmas tree.
- Spiral up the rosette from each rectangle, fasten it at the base with a thread.
- Cut the flower legs before sticking on the ball.
- In the gaps between the flowers to stick large beads in tone paper.
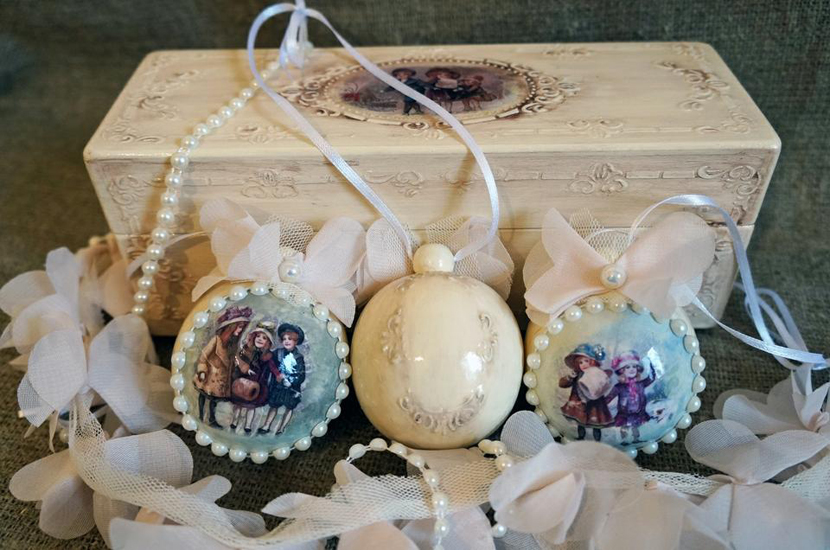
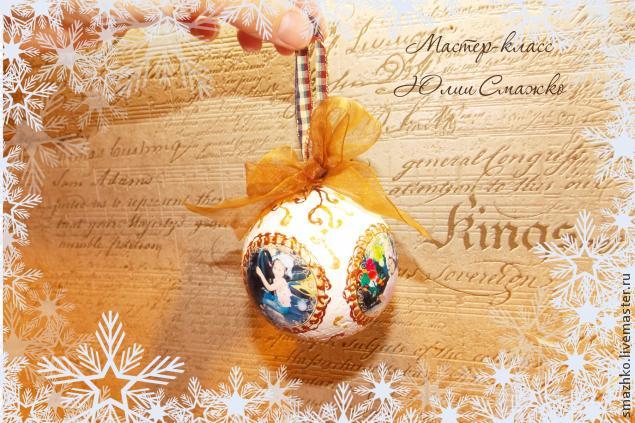
With photo
To make a ball with a photo, you will need:
- ball of foam;
- photo (maximum - 4 pieces);
- Pva;
- white water-based paint;
- tassel;
- special contours of gold and bronze color;
- acrylic lacquer;
- foam rubber;
- scissors;
- clippers;
- water;
- needle;
- hairpin;
- decorative tape.


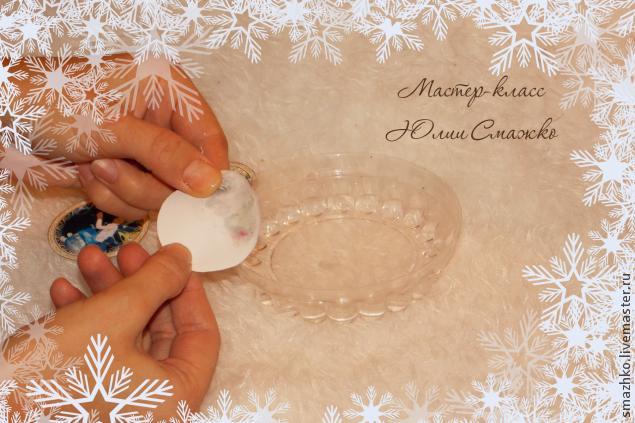
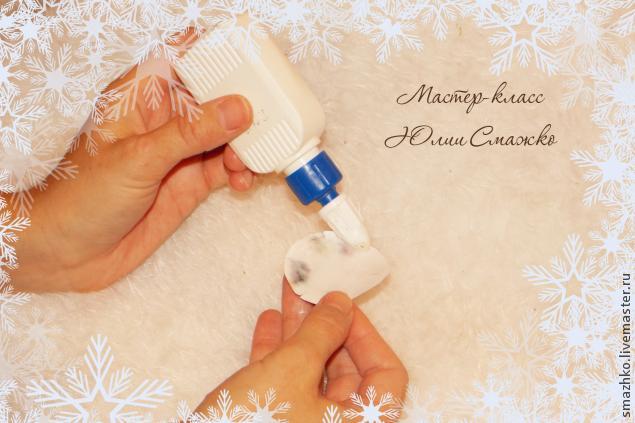
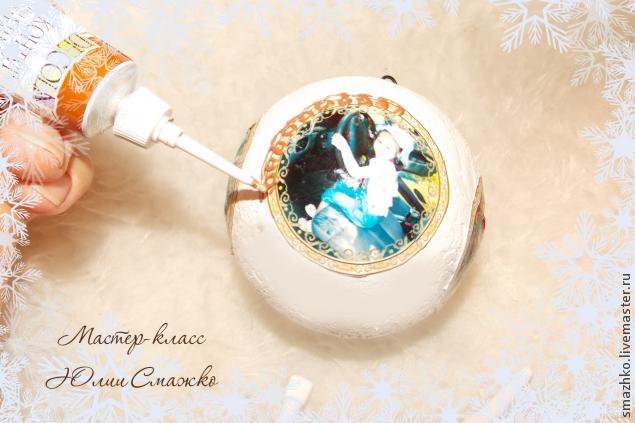
In Photoshop, edit the photo, create the desired size. If desired, decorate photos with frames, snowflakes and other elements. Print pictures on photo paper. Using a foam, stumbled on a needle, prime the ball with white paint. Let it dry. Photos cut. Wet hands to remove the white surface of the paper from the wrong side.
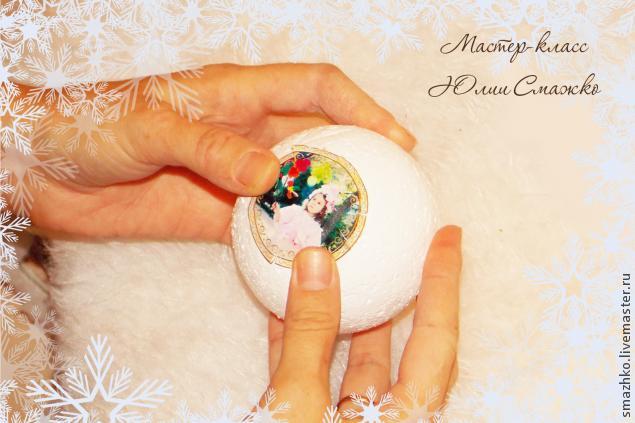
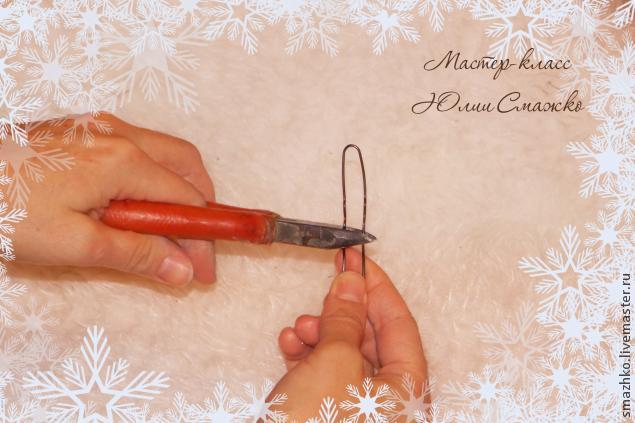
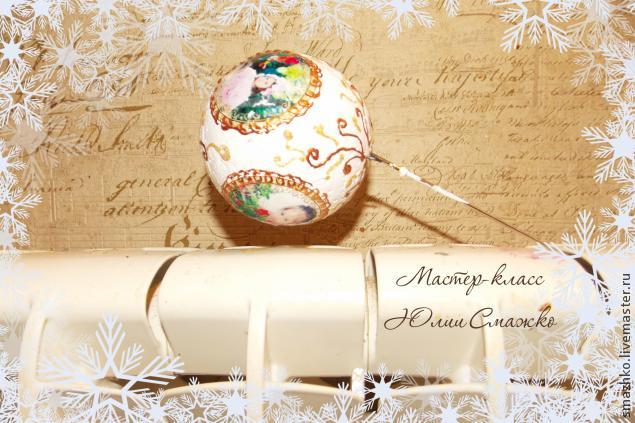
There should be only a thin film with an image. In order for the photo to tightly clasp the ball, small cuts are made around the edges. Apply glue, diluted in water, on the reverse side of the photo. Leave for a few minutes to soak. Glue the photo lightly with foam. Make a rope-suspension. Pinch off half of the studs with the pliers. Lubricate one side of the PVA and insert into the ball.
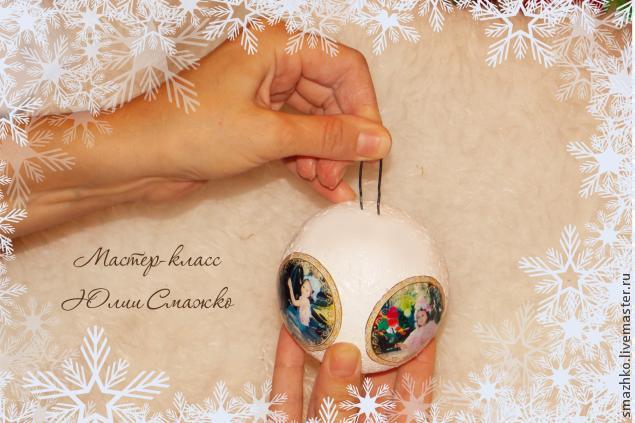
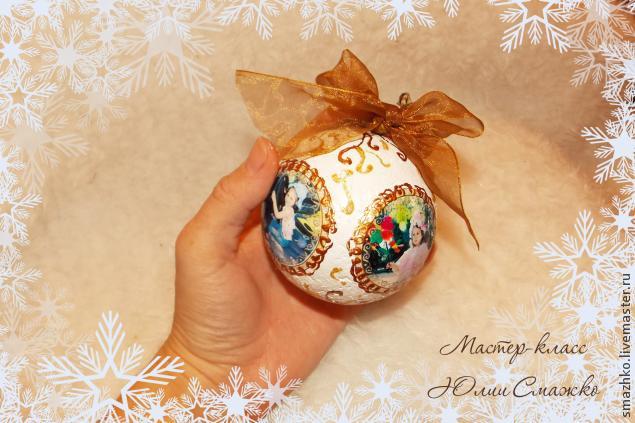
Places where there are no images, fill in the contours in the form of any curlicues, flowers, and so on. In order for the ball with the applied decorations to dry faster, you can put it on the battery.
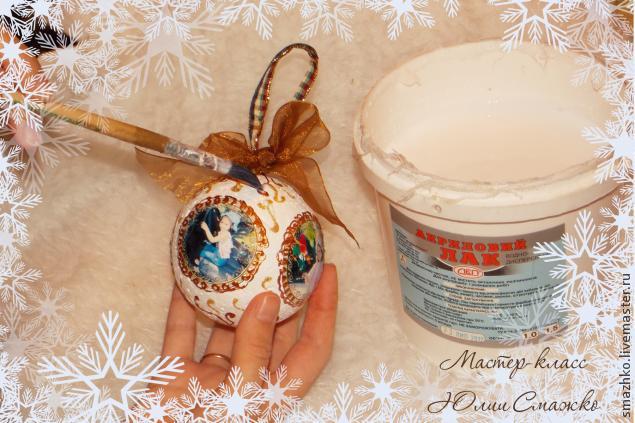
To decorate a hairpin with a beautiful bow. To varnish a toy, to suspend up to full drying.


Textile decoration
From fabric
Lovers of home comfort will love Christmas balls covered with a cloth. The material may be dense or translucent. In the latter case, it is recommended to paint the foam base of the toy first in red or white. The huge Christmas balls made using the patchwork technique look gorgeous.
For their manufacture will need:
- ball of foam;
- wide satin ribbon in white and orange;
- silver brocade;
- pins;
- scissors.

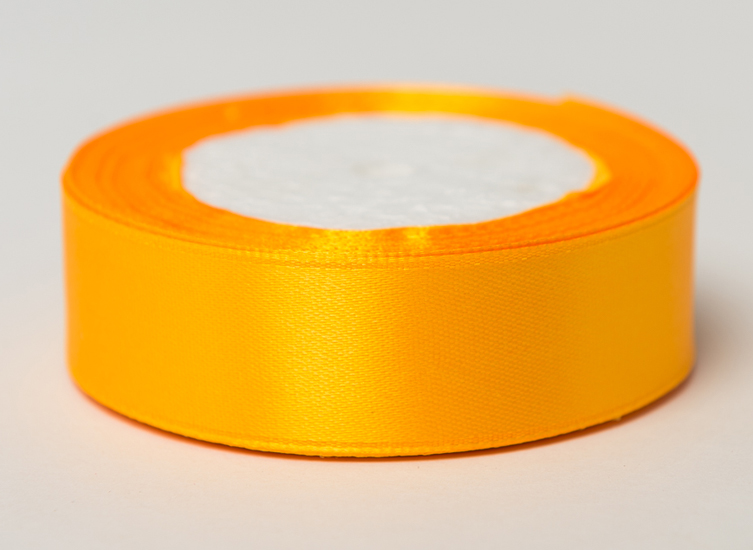

Ribbons cut into squares.White square fix on the toy with a pin. The orange square should be folded in four and fixed on the white square strictly in the middle. Fold the orange square in half again, and fold the “ears” on the right and left sides to the center and fix them with pins. In the same way, three more orange squares are attached, forming the top of a Christmas tree toy.
Fix a silver square with a pin on the bottom edge of one of the orange squares. Fold in half, turn the corners to the center and fix so that a triangle is obtained. In a similar way, we attach other silver squares along the orange ones in a circle. After a layer of silver squares go white, and then orange. So it turned out filling half the ball. The second half of the toy is decorated in the same way. The joint is closed with silver brocade tape. At the very last turn, an orange buttonhole is made, for which the toy can be hung on the Christmas tree.
Felt roses will be the original decoration of the New Year's ball. Refined products will give curly edges. To create colors it is better to take blue and white material. The basis is a circle of felt, the diameter of which is 10 centimeters.Semicircular petals are spirally cut out from it. Roll up the central part to obtain the core of the flower, fasten with a pin and transparent glue. After the glue dries, it is necessary to wrap the remaining material around the core. Fix the flower at the bottom. You can make not only flowers from felt, but also charming Christmas trees.
By adding these white figures of different sizes with beads, satin bows, lace and rhinestones at the base of the toy, you can get a magnificent festive ball.

See the following video for a master class on creating patchwork Christmas balls.
With embroidery
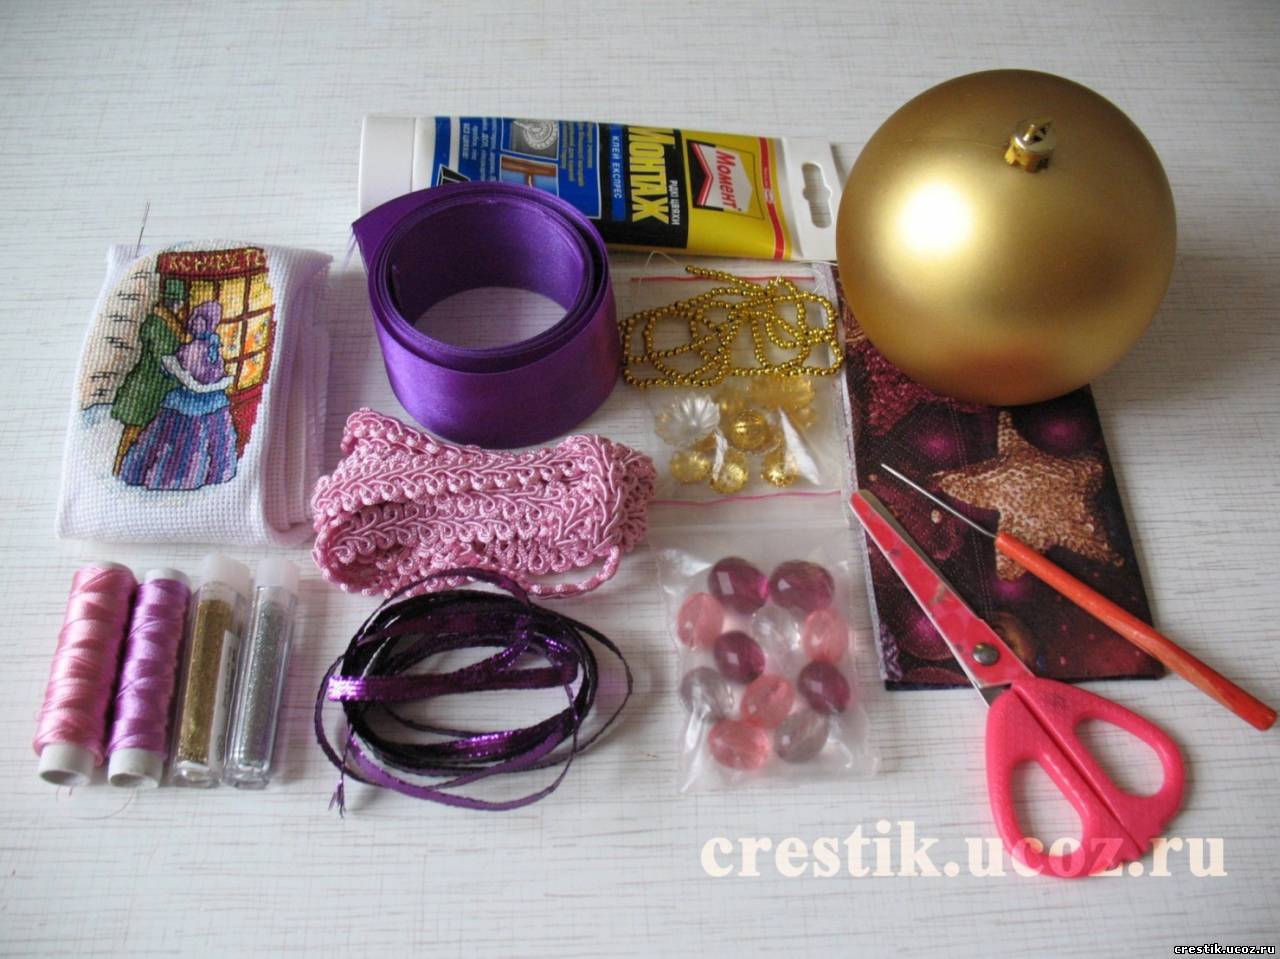
To create a ball with embroidery you will need:
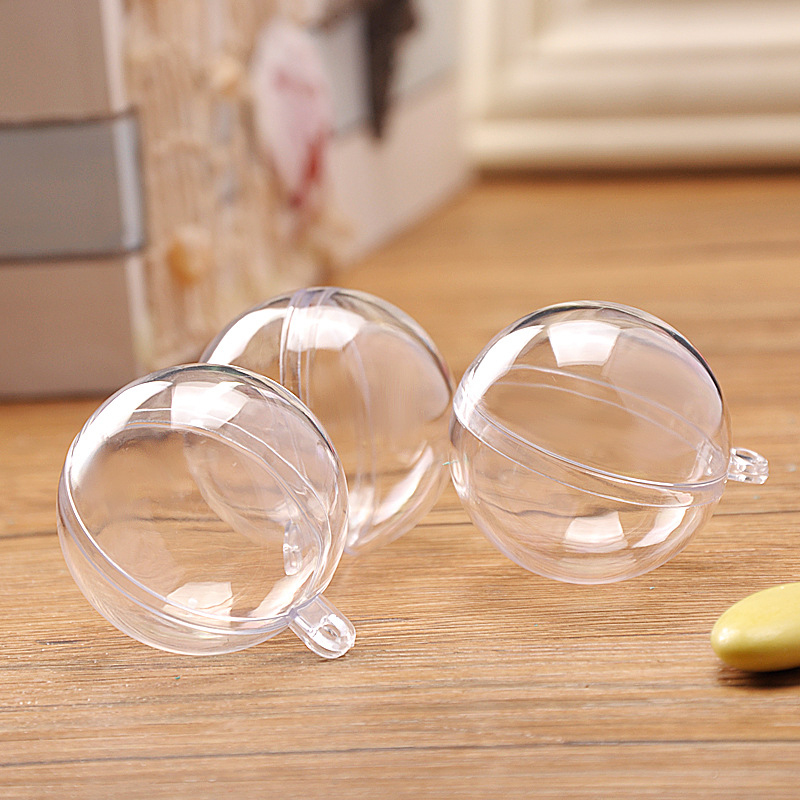
- plastic base in the form of a ball;
- embroidered 9x6 picture (preferably for a New Year or Christmas theme);
- braid - 1.5 meters;
- satin ribbon - 1.5 meters;
- transparent glue;
- scissors;
- crochet hook;
- decorative elements: beads, silk threads, shiny powder.
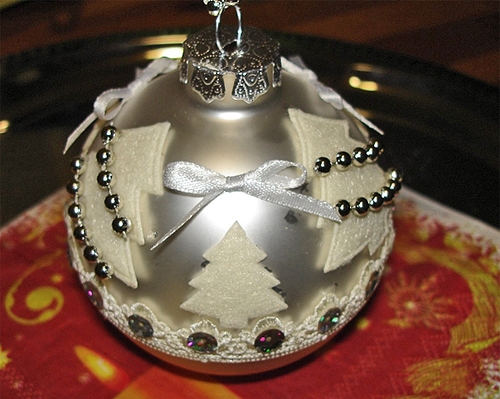
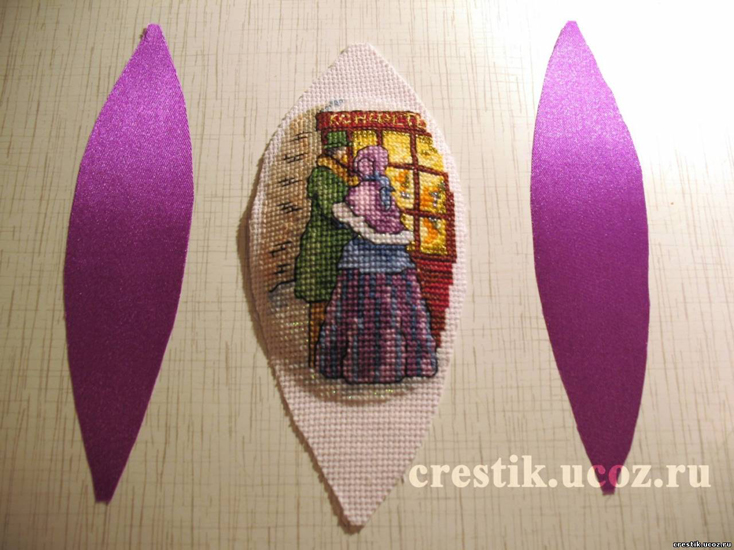
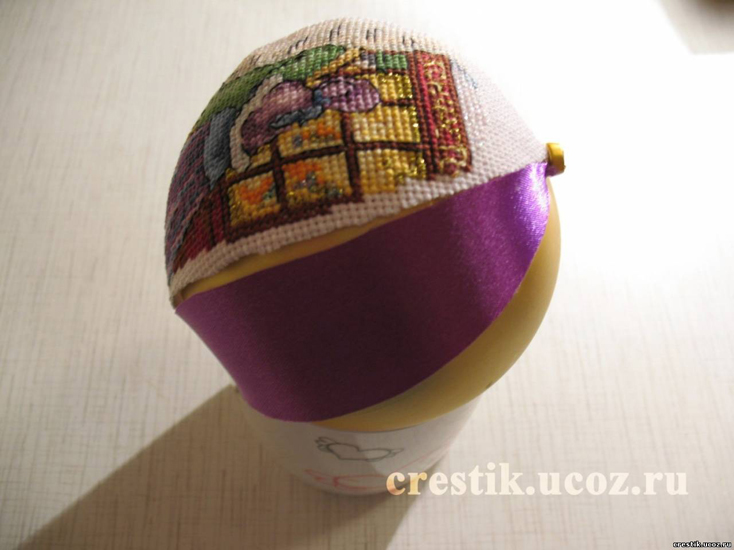
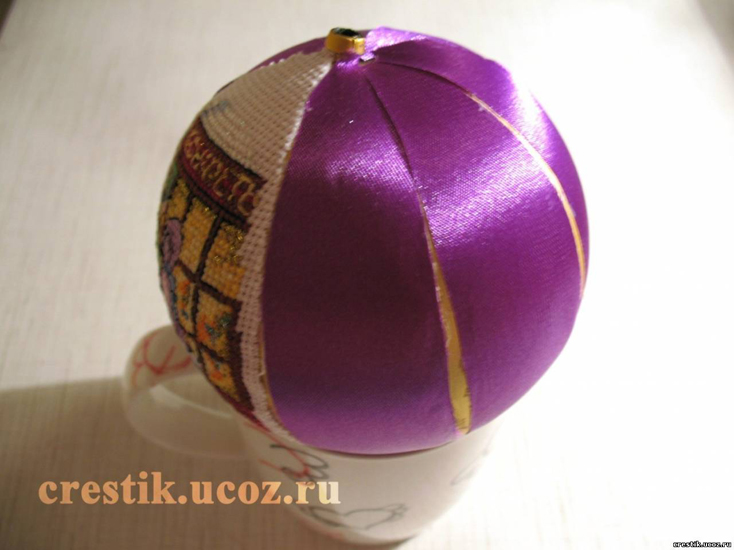
The finished embroidered picture must be washed and stroked from the wrong side so that the fabric remains slightly damp. Then we impose a picture on the ball, fix it with a ribbon. Cut out the dried image in the form of a leaflet.Similar leaves cut out of satin ribbons. Grease the lower and upper ends with glue and fix on the ball so that the drawing is in the middle, and the satin pieces are on the edges.
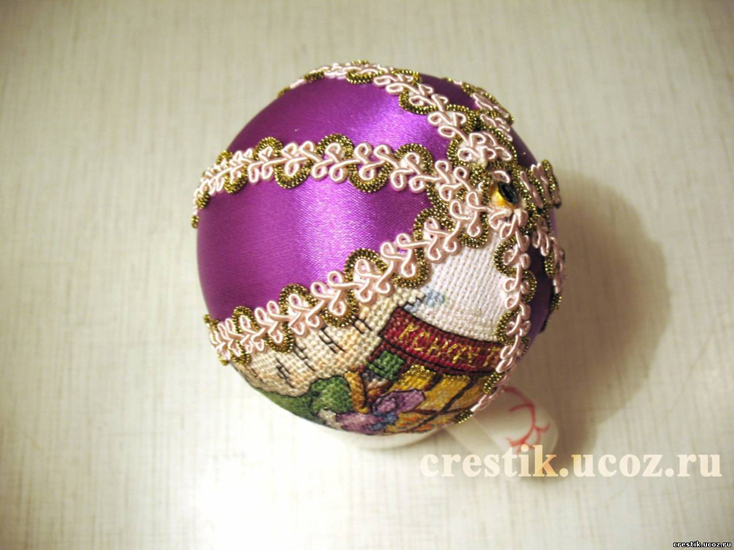
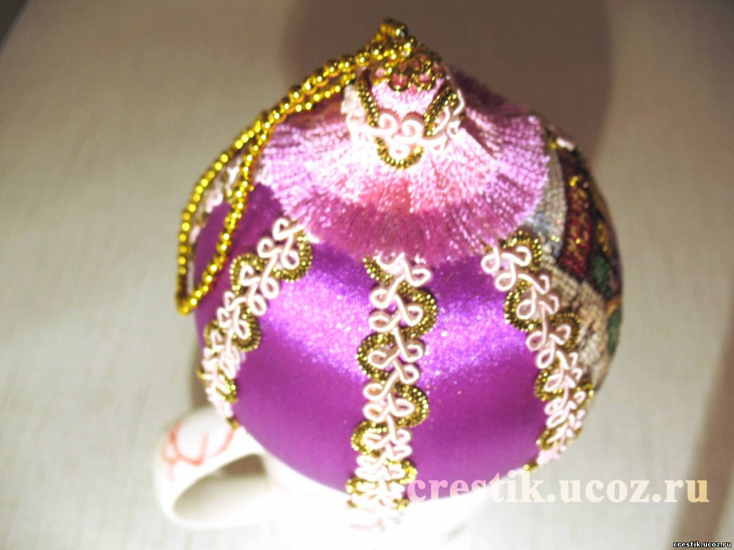
In places where the slices bristle, you can gently apply glue with a hook and press the fabric to the base. The rest of the surface of the ball is covered with similar segments of atlas. Joints close the ribbon. The surface of the embroidery is sprinkled with sequins. The top and bottom of the toy are decorated with silk tassels and beads.


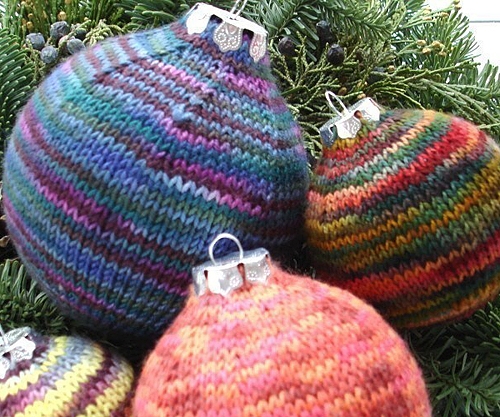
Tied up
Truly New Year's comfort will create toys tied with knitting needles. You can make a beautiful knitted toy by following the pattern. Need four needles. For a start, 12 loops are recruited and 3 are distributed to each knitting needle.
- The 1st and 2nd rows are knitted with face loops.
- In the 3rd row - 3 facial, 1 nakid. Repeat 3 more times.
- 4th row - facial.
- 5th row - nakid, 4 front, nakid. Repeat 3 more times.
- 6th row - facial.
- 7th row - nakid, 6 front, nakid. Repeat 3 more times.
- 8th row - facial.

Subsequent rows are performed in a similar pattern: even rows are knotted with facial ones, and in odd rows one is added one by one on the jacket from both sides.The 15th row is the same as all the odd rows, but the front loops are knitted according to the pattern, with alternating threads of different colors. From the 16th row, knitting comes only with facial loops. Thread colors vary according to the scheme. Starting from the 28th row in the even rows, there is a reduction in the number of loops by tying 2 faces together. The 41st row is the last. In it, the remaining 3 loops are knitted together with the face, the thread is tightened, the ends are hidden.
The foam ball is inserted into the knitted product at the beginning of the mating of the 29th row, that is, before the loop is lowered.
If vyvyazyvanie pattern is difficult, you can take melange. As a result, the ball will turn out colorful and festive. Needlewomen with considerable experience in crocheting can strapping toys by choosing a scheme on the Internet or creating their own.

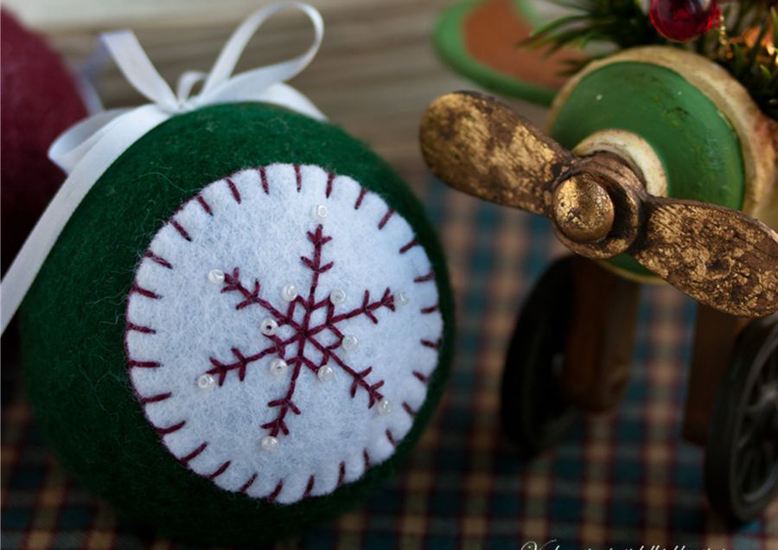
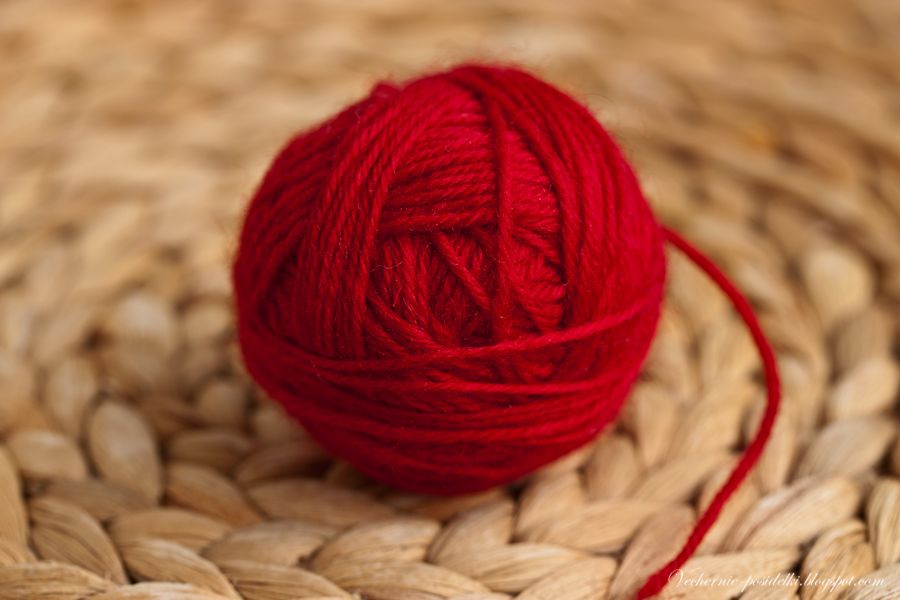
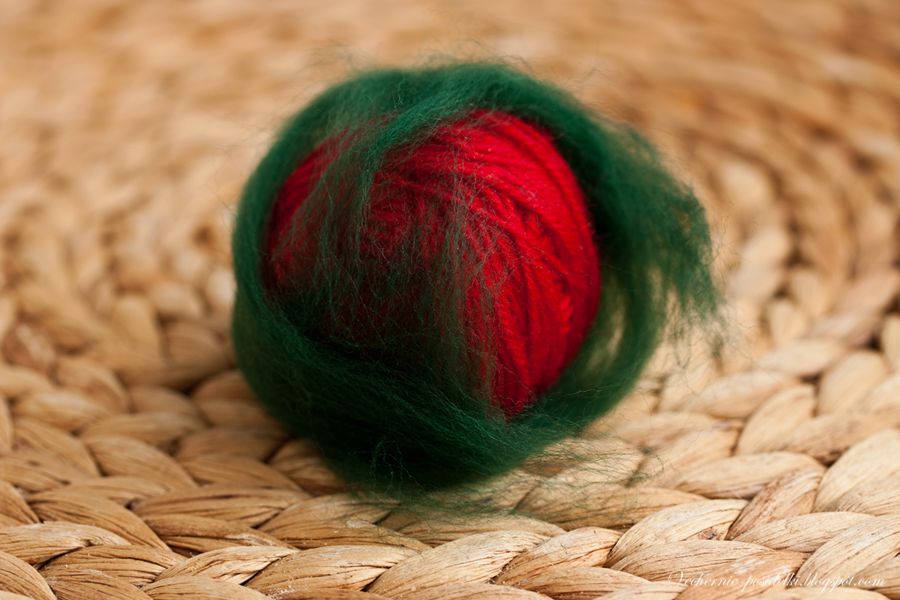
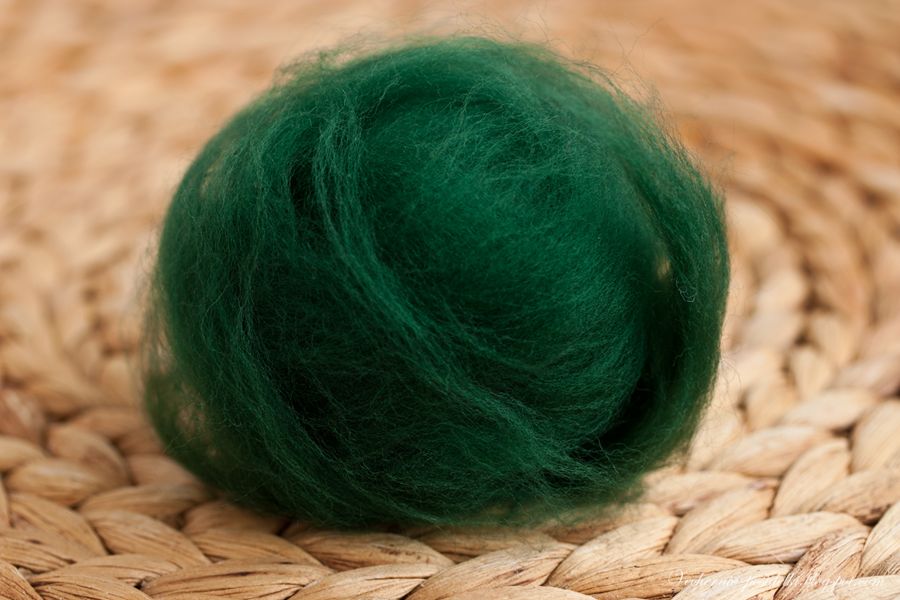
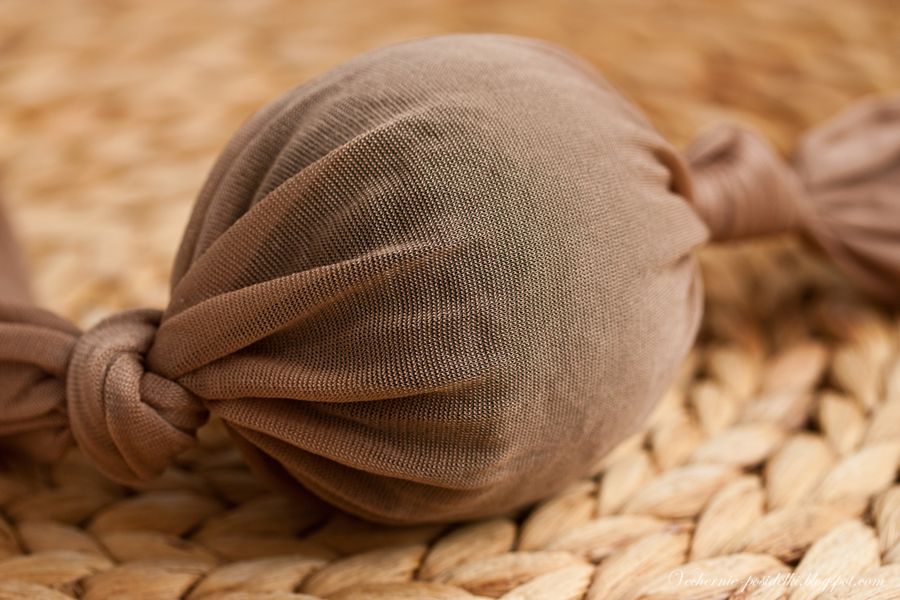
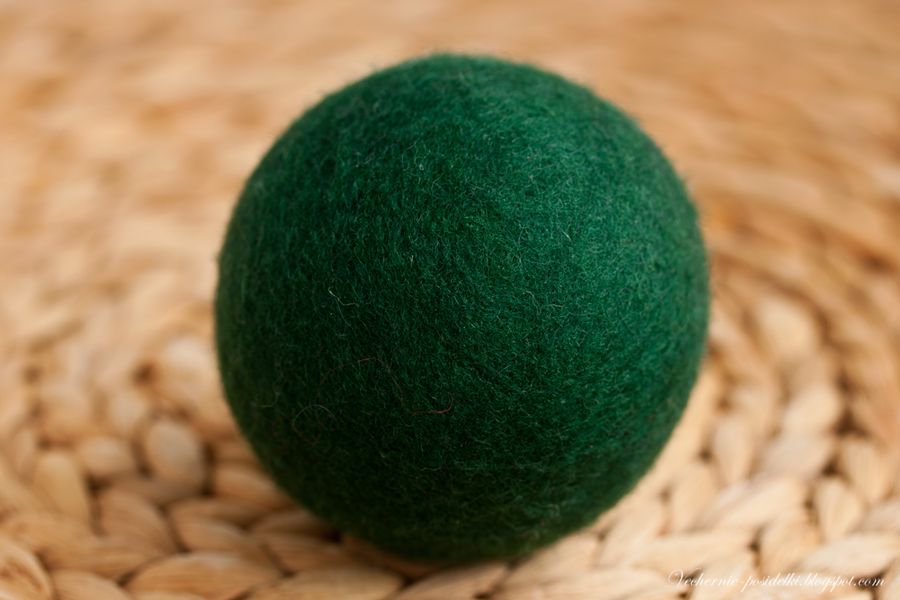
With wool
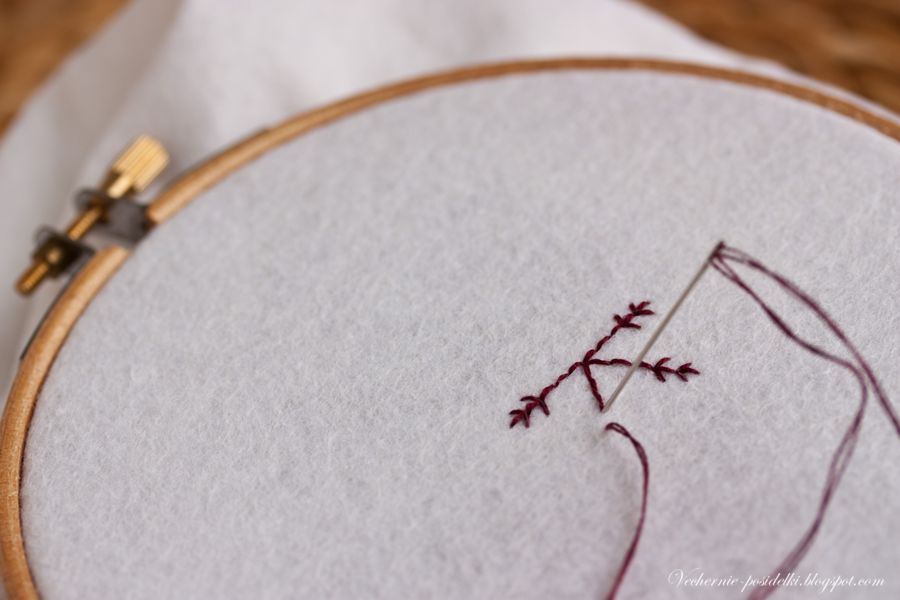
Making your own woolen Christmas ball is not difficult at all. For this purpose, wool for felting is applied to the knitting ball. Then the future toy is placed in a nylon sock, which is tied with knots on both sides. The sock should be washed in an automatic machine with the addition of detergent at a temperature of 60 degrees.After the ball dries, its surface will become even and dense. It is recommended to decorate a woolen Christmas-tree toy with an embroidery made on a piece of felt and needles with decorative tips.
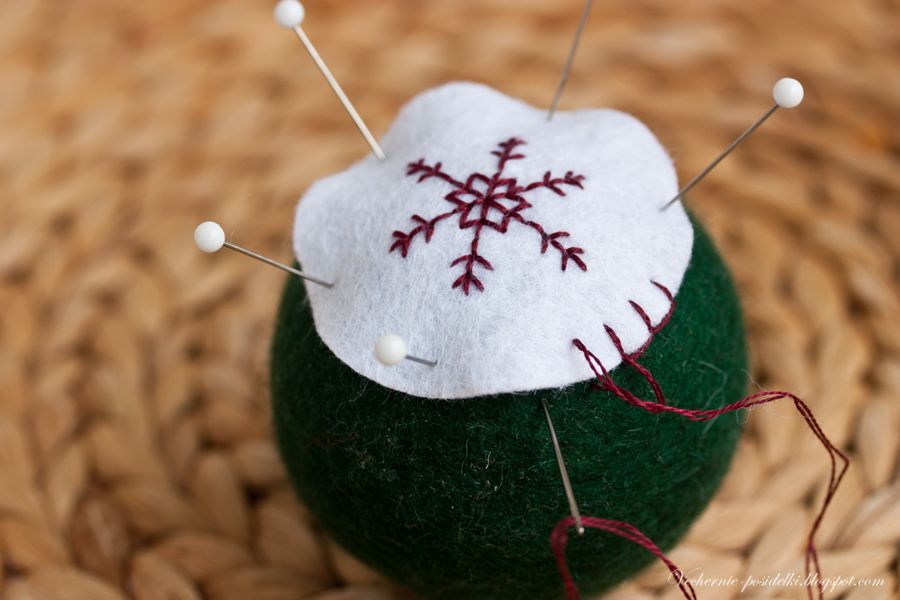
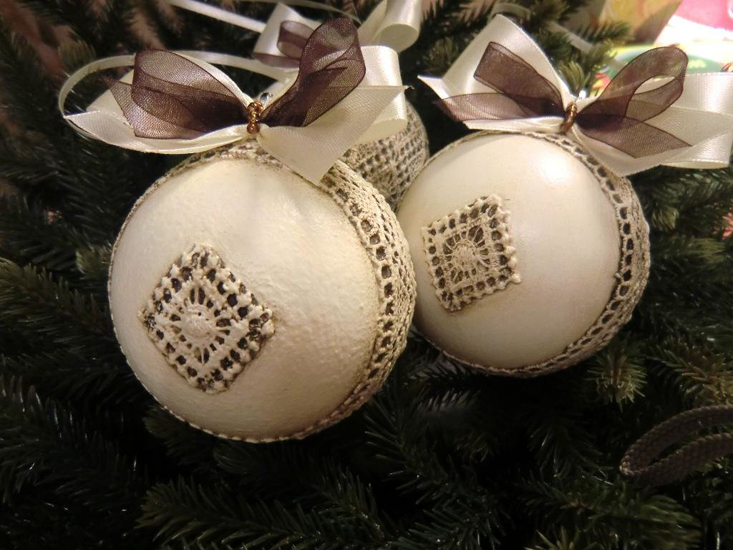
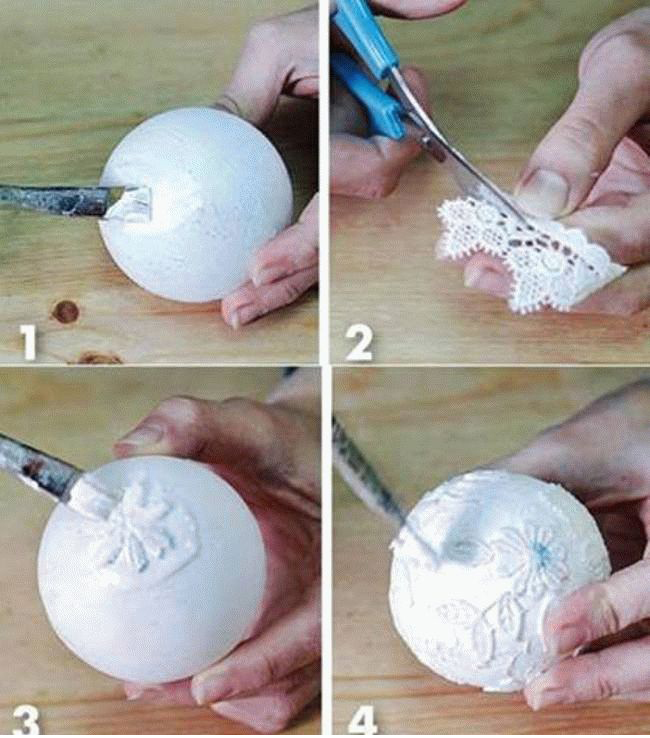
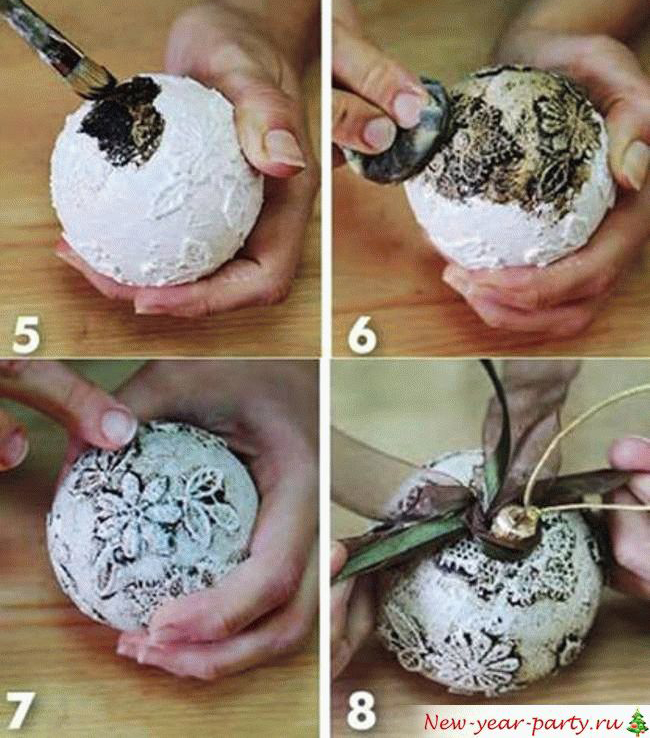
With lace
The basis for the creation of the toy is white lace fabric. Various elements are cut out of it: flowers, petals. With the help of PVA, fabric figures are attached to the ball. Then the toy is covered with white acrylic paint, the second layer is paint “under bronze”. With the help of a sponge, walk in circular motions across the entire surface of the ball. Get the effect of antiquity. At the end, a pendant ribbon decorated with a satin and organza bow is attached to the toy.
Toys from natural materials
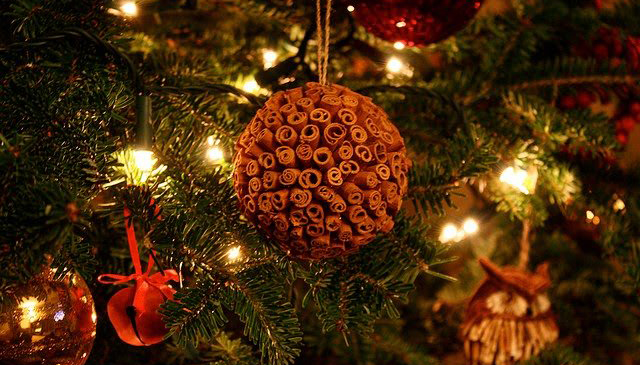
Cinnamon
Cinnamon sticks (the amount is determined based on the size of the ball) cut into the same length tubes. Apply transparent glue to the surface of the foam ball.
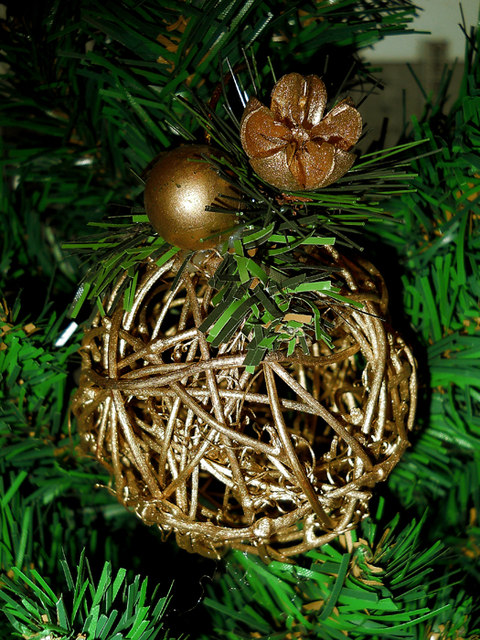
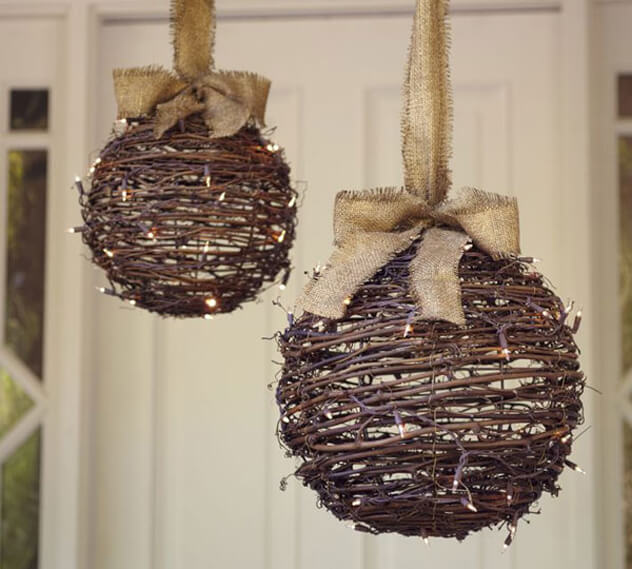
From branches
This Christmas-tree decoration is created by analogy with a toy made of threads. It will take a small balloon. Dry branches are cut into small fragments and fixed with a glue gun on the base.As soon as the glue dries, the ball is punctured and removed through a hole in the branches.
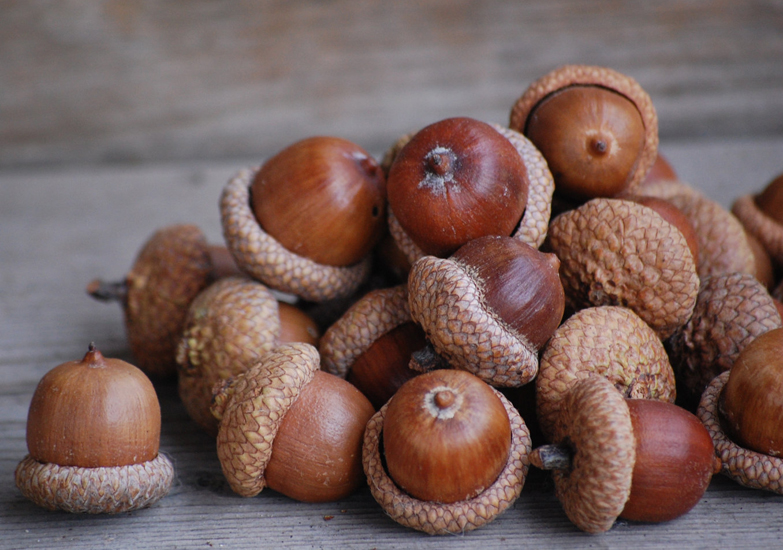
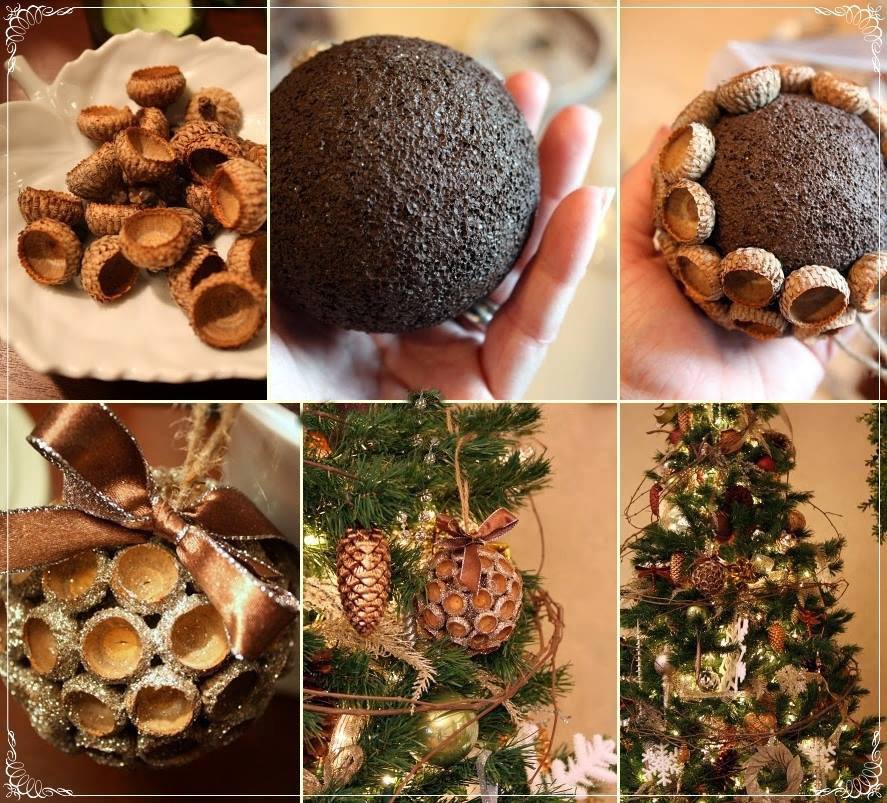
From acorns
An unusual decoration for the Christmas tree for the New Year will be a ball decorated with acorn hats.
To make such a beautiful Christmas tree decoration you will need:
- ball of foam;
- chestnut-colored acrylic;
- transparent glue;
- acorn caps;
- brilliant powder;
- beads.
On the ball to apply acrylic. After the paint dries, grease each cap abundantly with glue and fix it on the ball. In the resulting gaps to glue the beads.
On the edges of each cap, apply a few drops of glue and sprinkle with sequins.
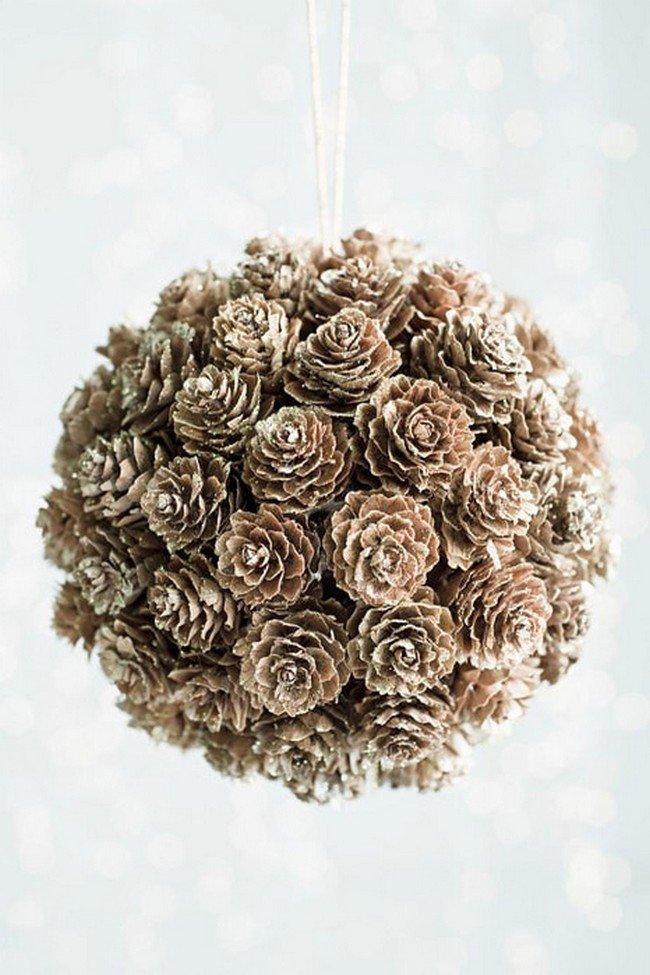
Of cones
A trash bag of thick film stuffed with cotton. Tie to get a tight ball. Stick the bumps on the base. You can use a glue gun or a colorless glue base of the “moment” type. Perhaps the design of the toy is not whole cones, and scales. To do this, using nippers to cut the cones into pieces. The resulting scales paste a foam ball around the perimeter. Such toys will create a warm and cozy atmosphere in the house not only for the New Year, but also for Christmas.
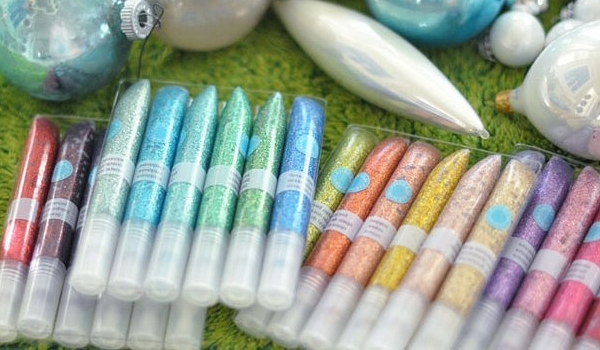
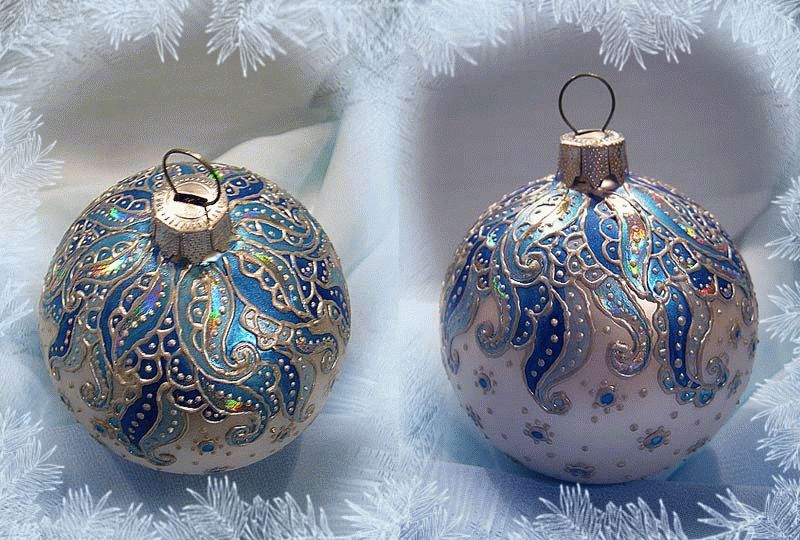
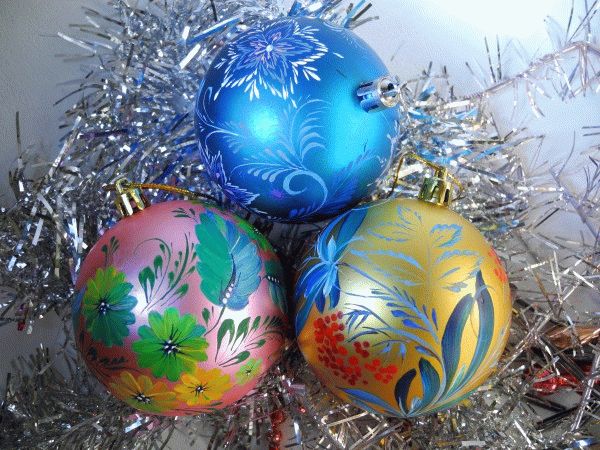
Painting
The painting of the balls is made with orange, violet, black or transparent gel with the addition of spangles (other colors can be used). You can draw absolutely anything you want. Children who dream of realizing their talent in this field will be interested in the artistic painting of toys.
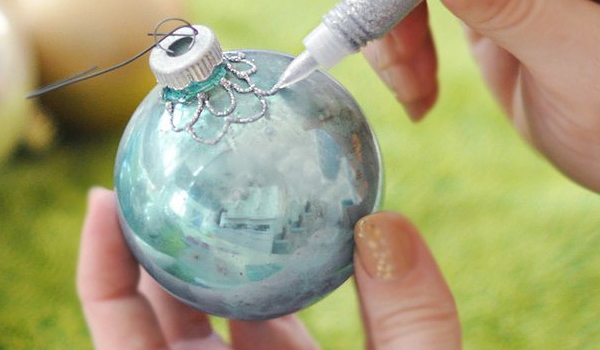
The simplest option is a dot painting on a solid ball. Fir-tree ornament turns out bright and original. As a basis, you can use a wooden, plastic or glass billet in the shape of a ball. Plastic surface, you must first clean the sandpaper, and wipe the glass with alcohol for better adhesion to the paint.
The toy is covered with two layers of paint, and then varnish. Before applying the next layer, you need to wait until the previous one is completely dry. Further decoration depends on the flight of your imagination. Always relevant toys with the symbol of the year. It is advisable to carry them with metallic paints and decorate with sequins, then in the light of Christmas lights they will shimmer beautifully.
On how to make beautiful Christmas balls with your own hands, see the next video.


