How to hit the lock in a wooden door?
Reliability of metal doors will never replace the beauty and environmental friendliness of wooden analogues. However, these products have their own characteristics, and they concern including the installation of locks. You can even do this kind of work with your own hands, if you know how to do it.
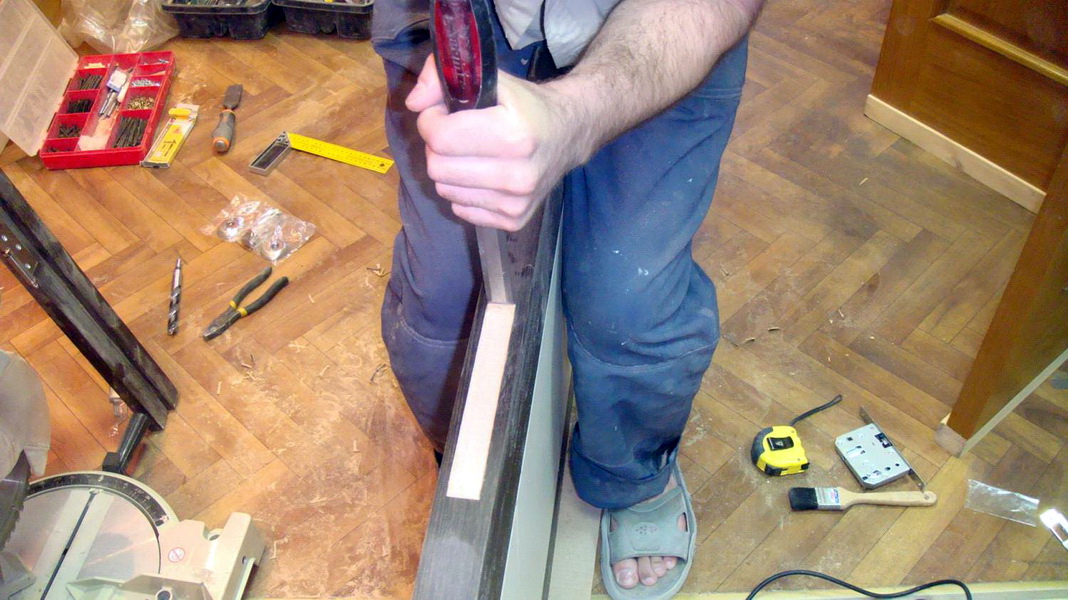
Required tools and accessories
Insertion of locks in wood canvases requires the use of:
- wood drills;
- set of steel crowns;
- set of chisels;
- roulettes;
- construction pencil;
- screwdrivers - slotted and cross;
- drills;
- screwdrivers;
- hammer
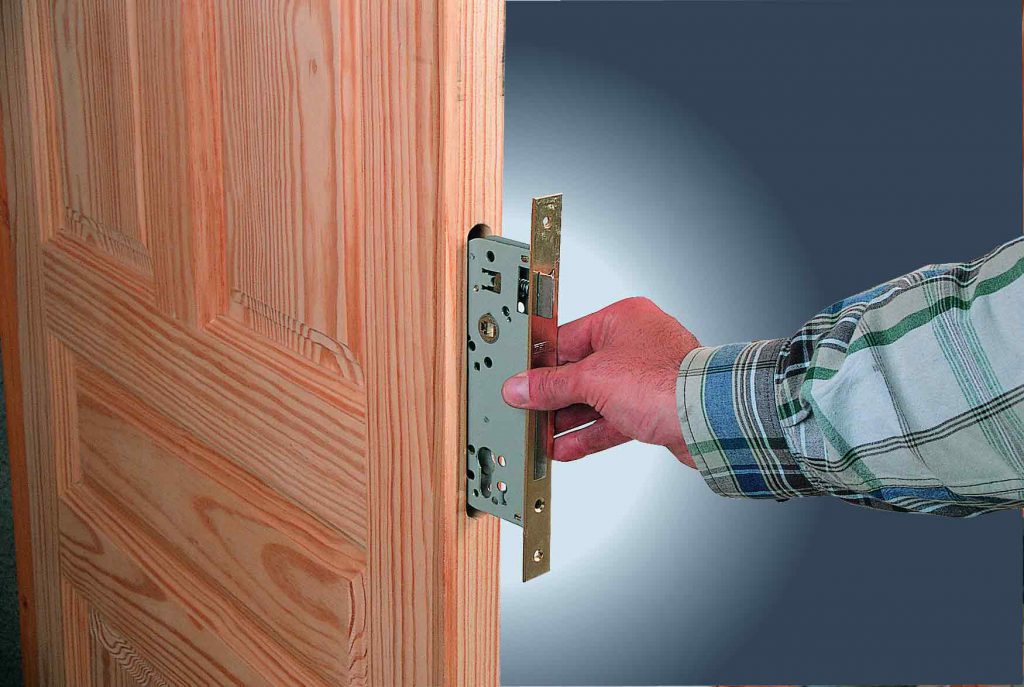
A very important role is played by the selection of the castle. At the same time they are guided by the size of the structure.Excessively thick constipation will not provide the necessary mass of wood on the left and right side. If less than 1 cm of wood remains there, the door will not be strong enough. Enough of a kick, so that the whole canvas is cracked.
Additionally required to control the depth of the entrance of the castle. Some of the canvases outside are thicker than in the center. Glazed part may also present difficulties. If you have to prepare a place to insert a large lock, it is easy to deform the material. As for fasteners, they must be selected in accordance with the instructions from manufacturers.
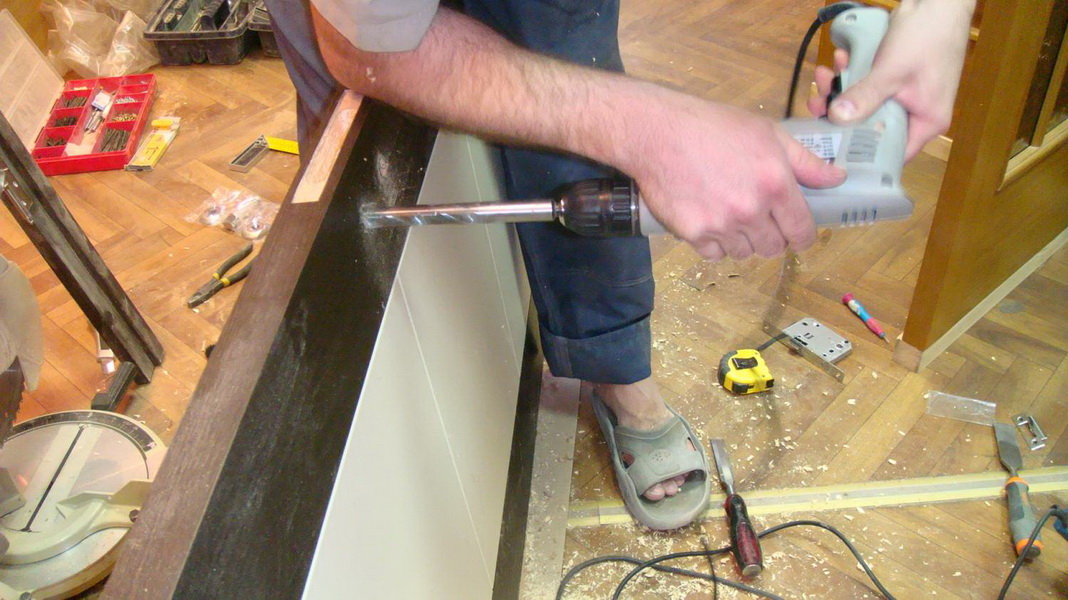
Often do with a drill or angle grinder fails. The best tool when inserting locks in doors made of solid wood or other wooden materials is a hand mill. Although the “almost ready” lock sets are relatively inexpensive, professionals advise choosing each tool separately. This allows you to finally verify its quality (both when buying and when renting). In addition, this solution helps to save money.
Sequence of work
If the product is selected properly, you need to correctly lock the lock into the wooden door.Begin by applying constipation to one of the sides, in the right place. With the help of a construction marker, one traces the part - it is possible to determine definitively from the drawn lines whether the choice of constipation and location is correct. If there are no errors, the position is marked on the end face of the door. When there is a special paper pattern in the set, use it.
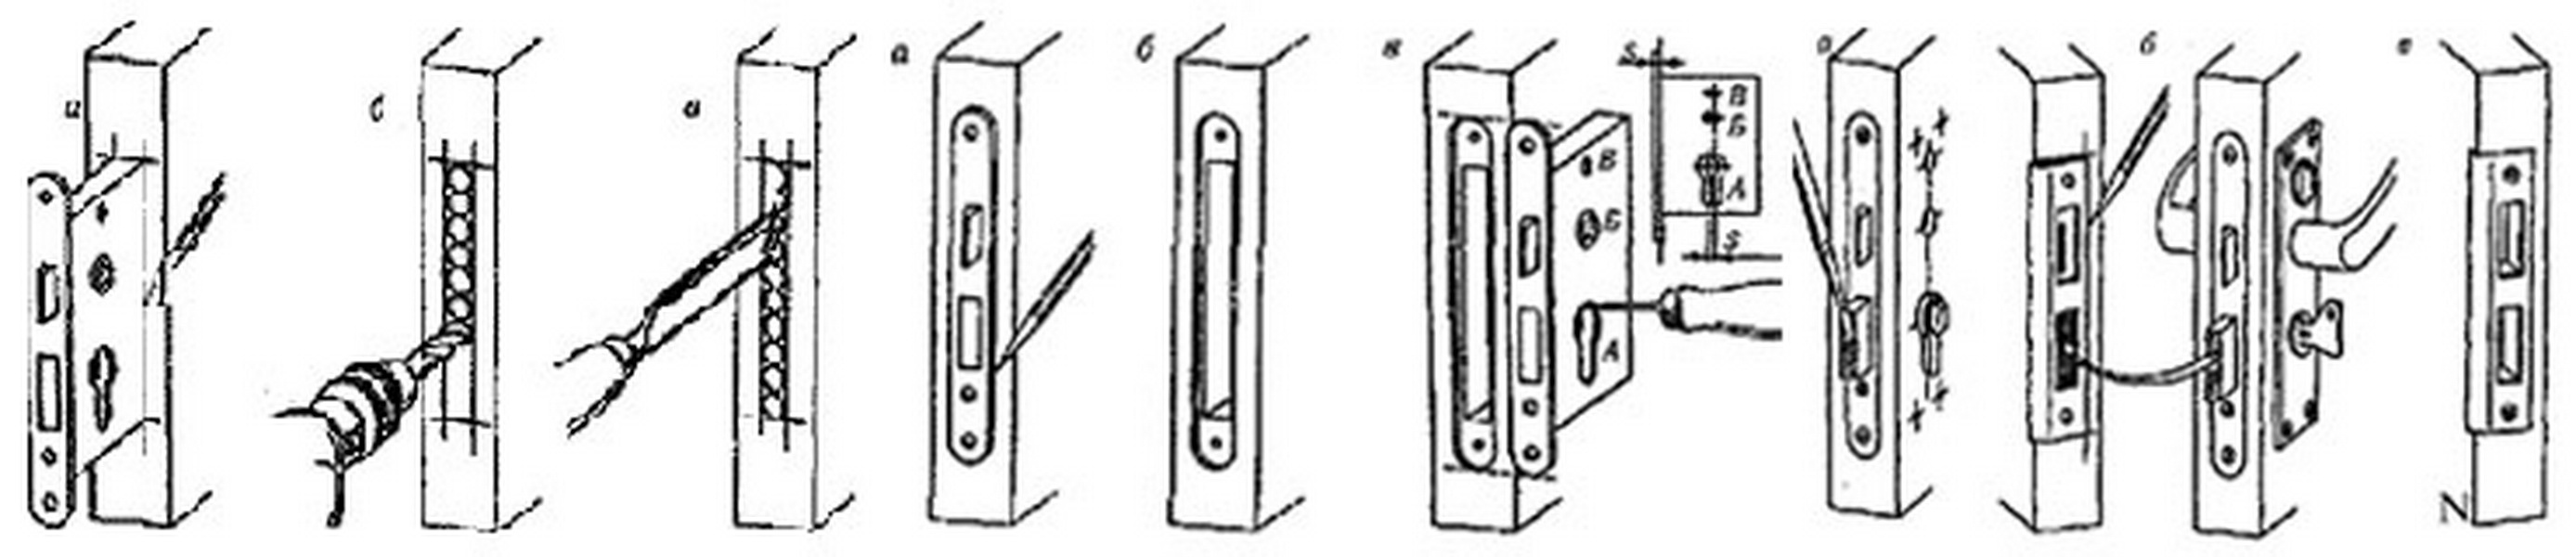
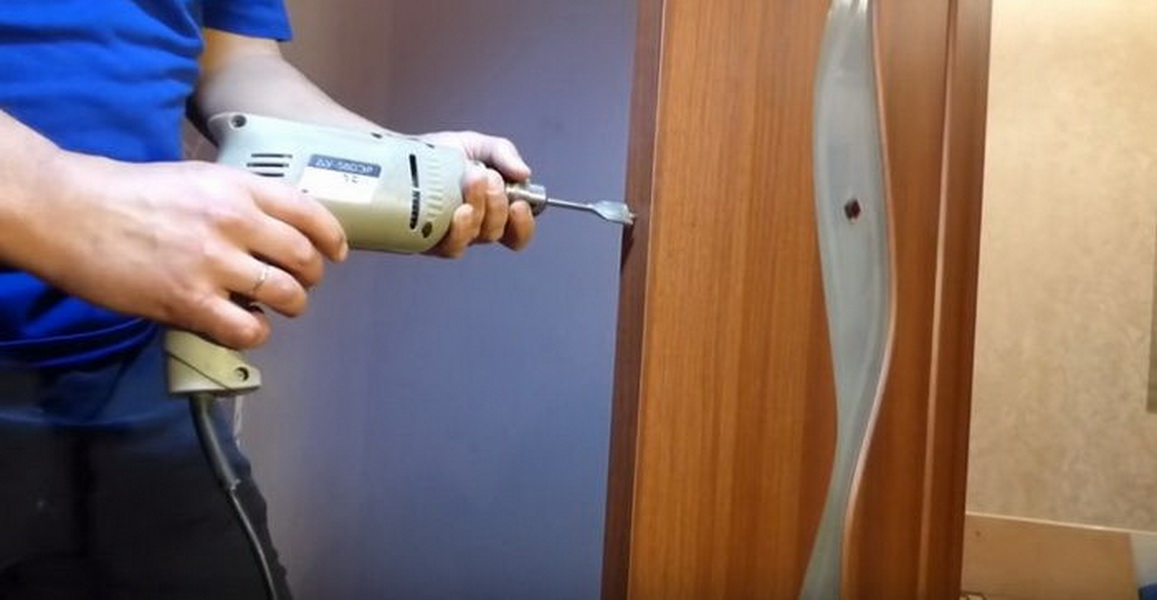
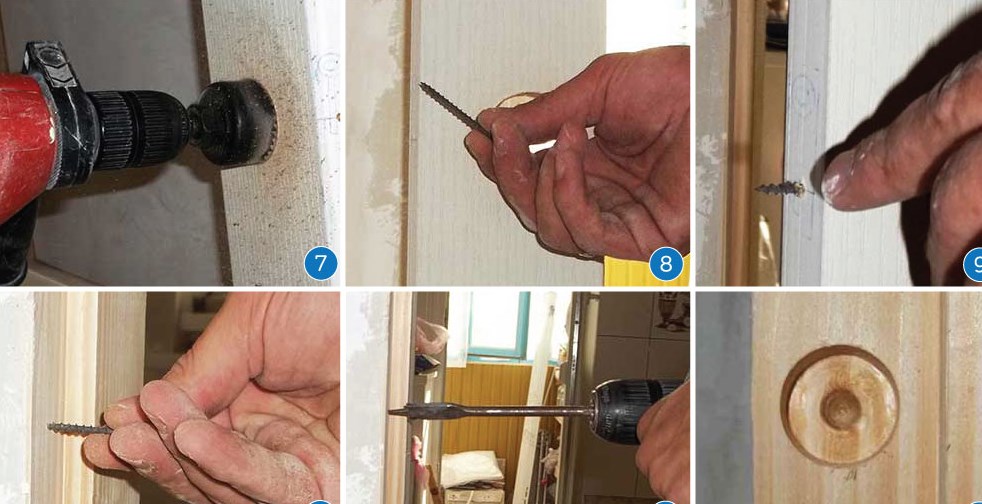
Take a drill bit, the thickness of which is chosen very carefully. Then using a screwdriver prepare passages that form a vertically running line. The outer faces of the holes should be mutually abutted. In the absence of the necessary drill, the use of smaller drills is allowed. They place holes in 2 or 3 tiers.
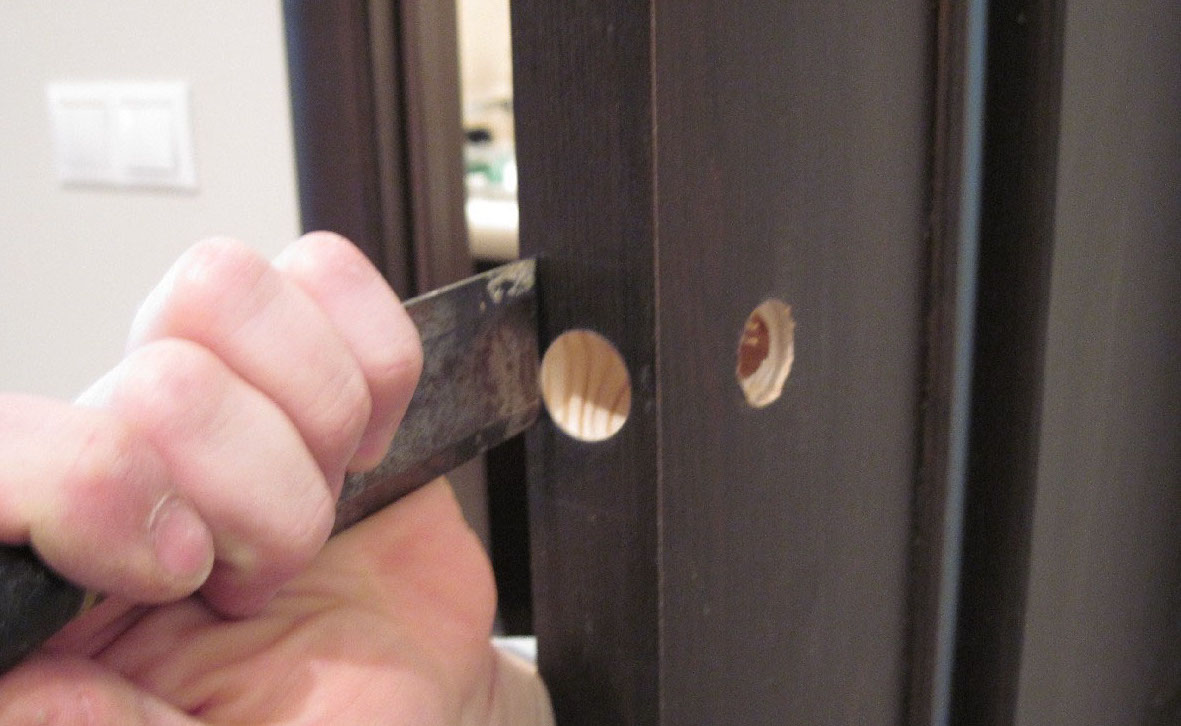
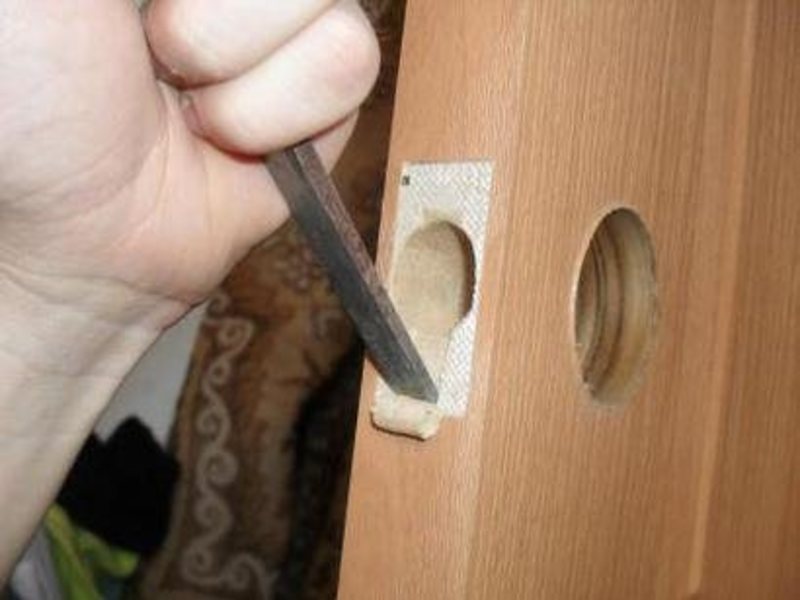
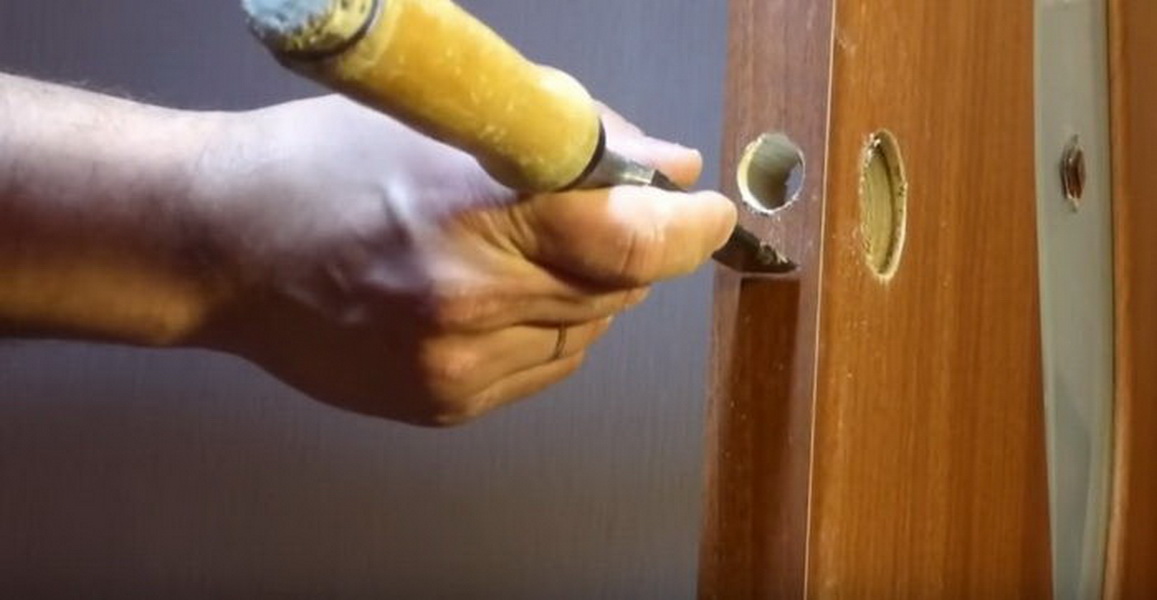
Now you need to take a chisel, which allows you to remove extra wood. Replacing the chisel protrudes slotted screwdriver, but such a tool is not convenient enough. Then insert the product into the prepared place, circle the end plate with a marker and pull out the closing part. Strictly along the line clean 0.2 - 0.3 cm of wood. This will deepen the lock on the door by setting the bar flush.
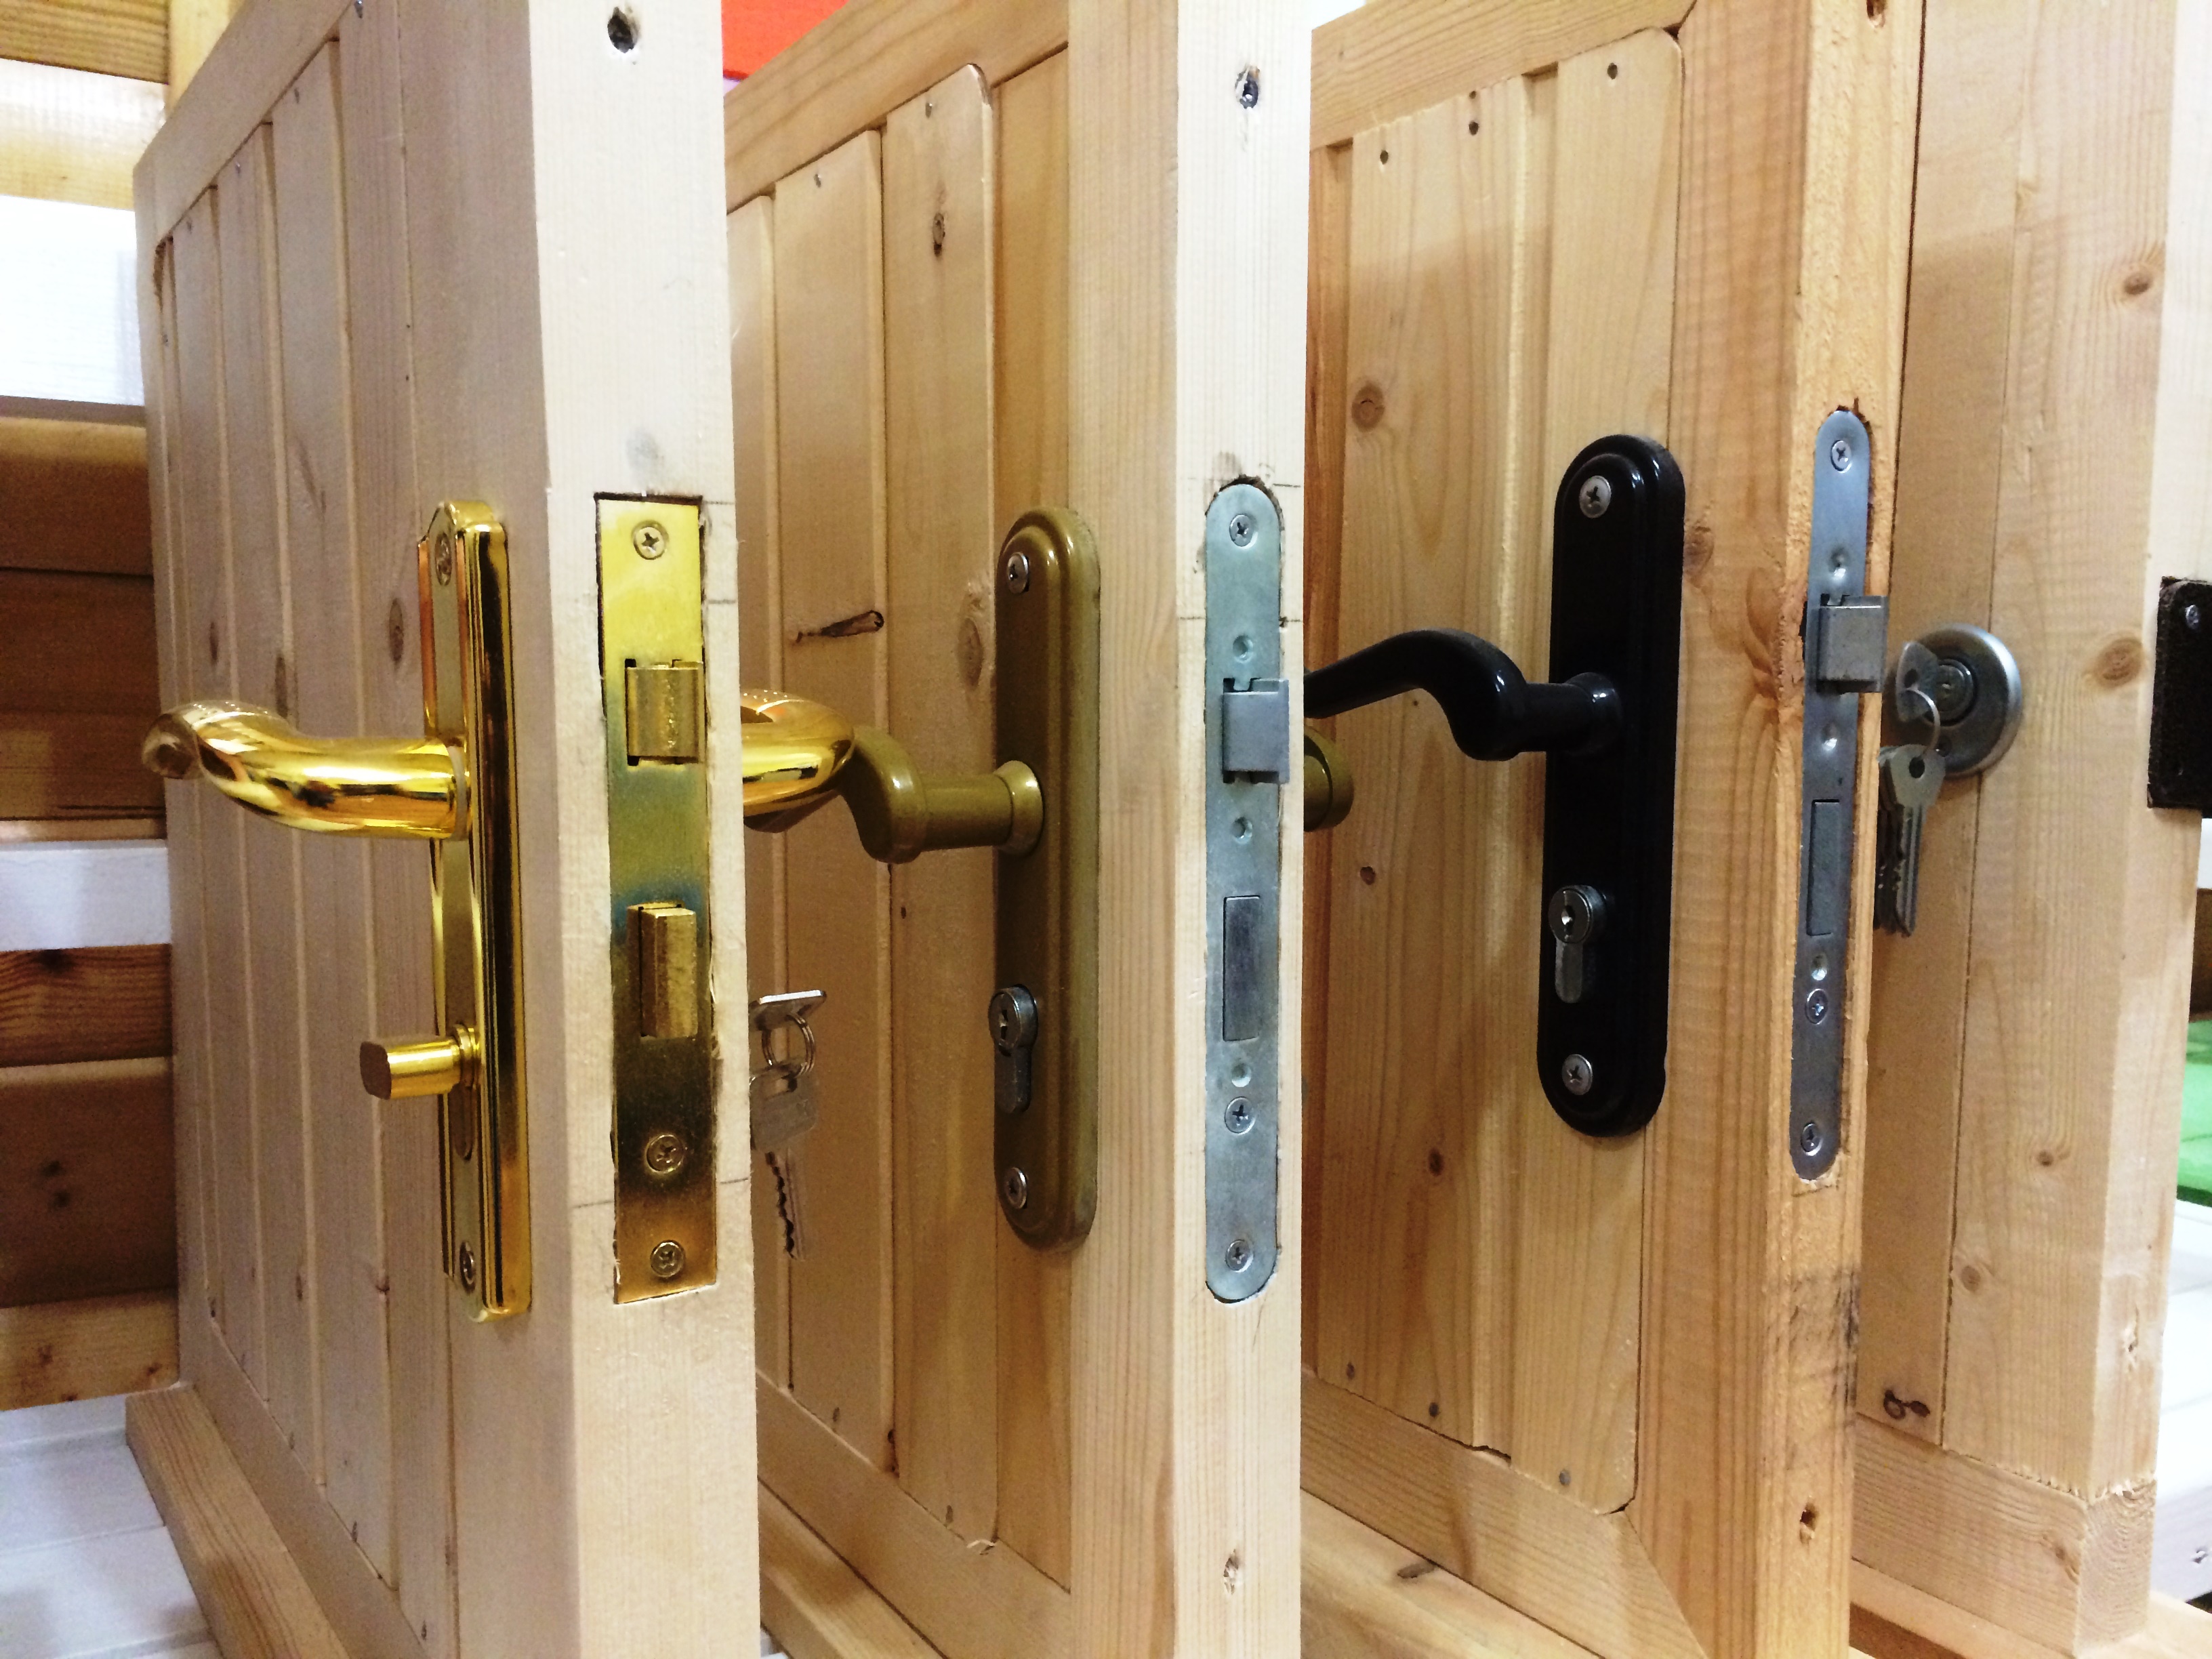
Such a technique when installing locks is practiced in order to avoid beating the bar on the surface of the box.If the gap is large enough, you can skip this stage. The next step is to mark on both sides of the place for the key hole or under the lock cylinder. If the structure has handles, marks are also made for them. The lock is pulled out, drilled in the marked places.
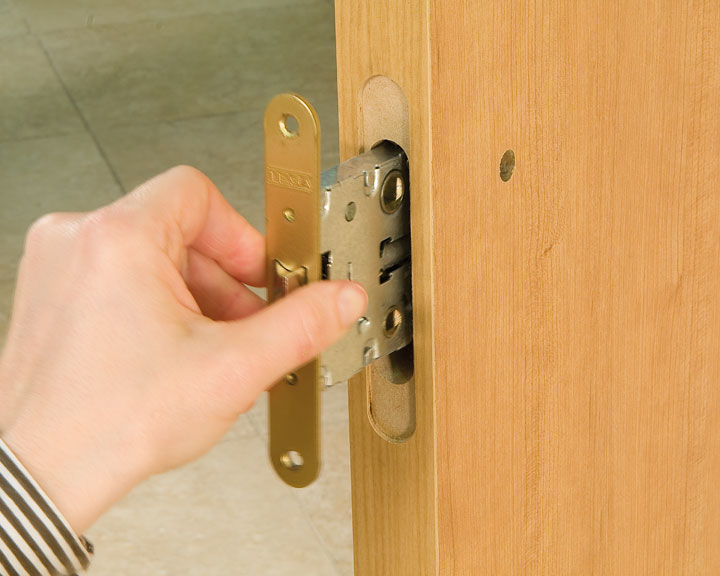
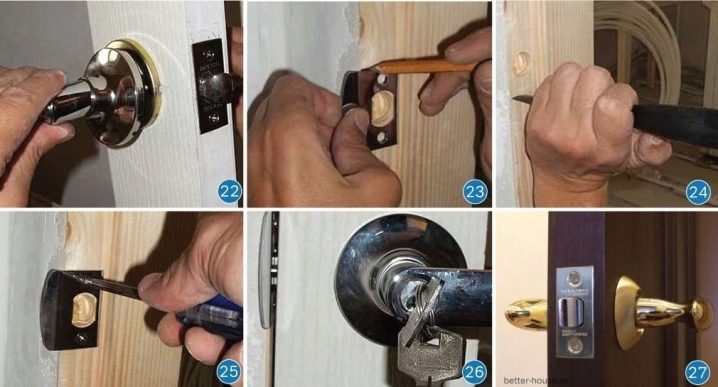
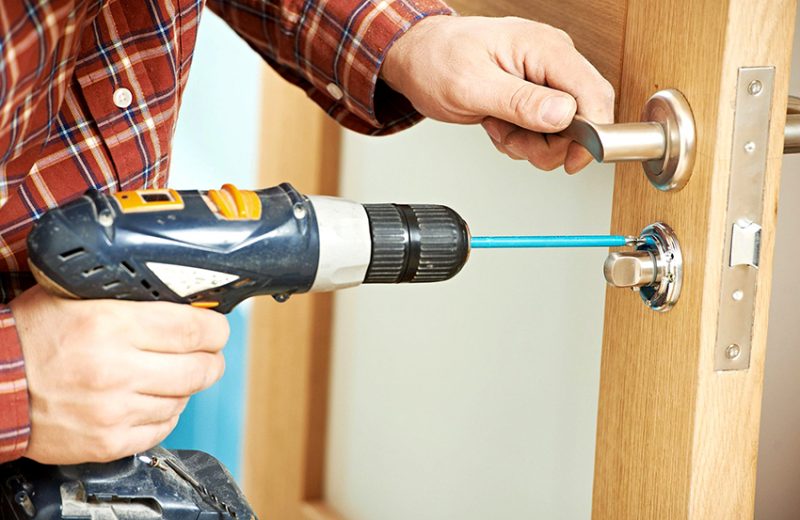
Now you can insert the lock back, assess the correctness of the prepared holes. The larva (if available) is fixed with a screw from the end. Next, insert a square base from the handles, fasten the handles themselves. The key is inserted, check immediately the work of the lock. Opening and closing should be easy, without rubbing the key against the tree.
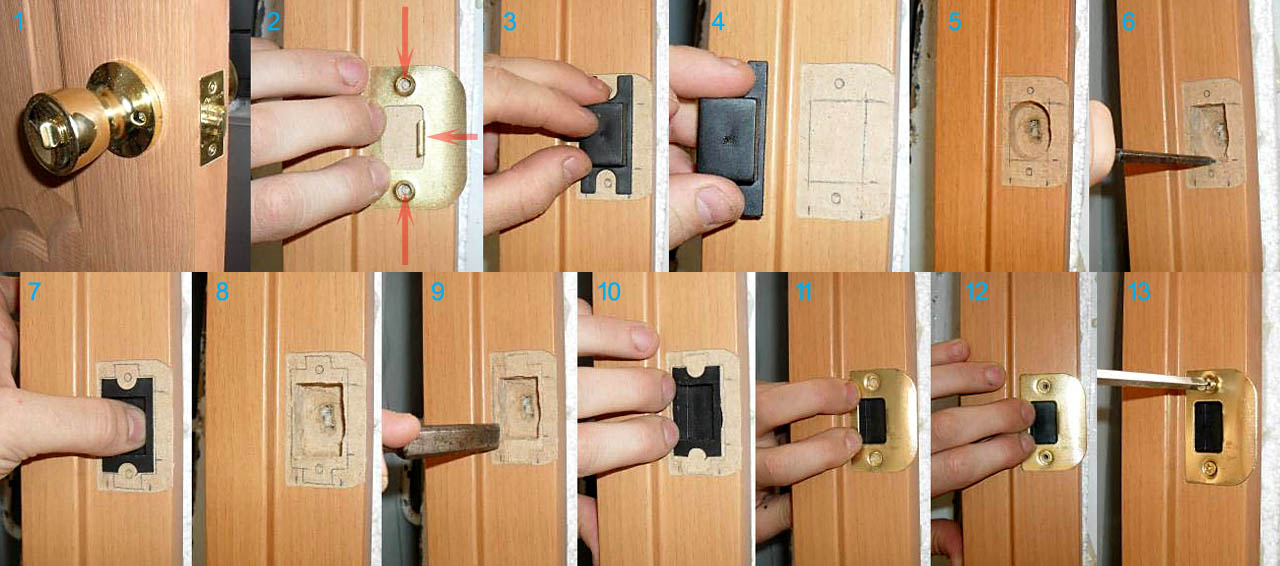
Then comes the time to mark the holes for the bolt elements and the strike plate. The easiest way to do it yourself is using pasta. When the door is fully opened, the lock is locked, and the end part of one or several bolts is greased. Next, you need to open the bolt, close the door, lock the lock. Normally, it will not lock, however, there will be tracks from the paste. They will indicate how and where to make holes for the response block. They are drilled immediately to eliminate errors.
Apply a reciprocal bar to the holes, make a mark on its contour with a pencil. With the help of chisels clean part of the wood. This will deepen the bar. It remains to fix it.Now the door is closed, once again check the operation of the lock. When everything works fine, put decorative plates. Everything, you can enjoy a great result. There is nothing complicated about it.
Additional information and recommendations
In order to ensure that the actual and planned depth of the holes match, electrical tape is stuck on the drill bit. You can select the residual tree with a chisel. Later the walls are aligned with a chisel. We must strive for such dimensions of the groove, which will allow the inserted lock to coincide with the front face of the door. This means that when gouging the nest requires periodic fitting of the product.
To make a shaped groove under the keyhole, you need to use a hacksaw. The edges are adjusted to perfect shape with sandpaper. Since it’s not comfortable enough to work manually, you can attach the paper to a screwdriver. Using a thin drill is best. Mounting mounting plates for mortise and overhead mechanisms is no different.
It is recommended to choose a drill that is thicker than a lock. Usually, several notches are drilled so that the web filler can be removed. When the drilling is completed, with the help of chisels and chisels choose the excess dust.But all these rules may turn out to be useless if one more principle is not followed: as soon as something is measured by a tape measure, you should immediately put a mark in pencil or marker. Relying on your memory in such an important matter is extremely frivolous.
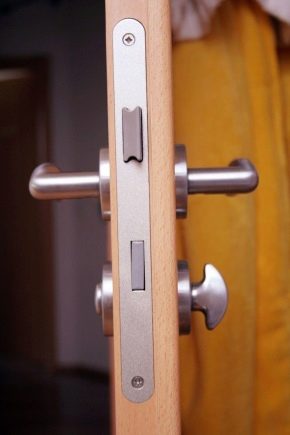
Insert lock type "pen"
This manipulation definitely deserves a separate analysis. Experts recommend to be safe and seal the end of the door, as well as its plane with masking tape. This should be done to prevent possible damage. As practice has shown, it is much more convenient to put individual marks on the tape. And it will also serve as a well-marked border, which it is absolutely impossible to pass when working.
It is recommended to put the locking knobs at a height of strictly 100 cm above the floor. This kind of constipation should always come with the template. Because of the special problems in the markup does not occur. Since cylinder mechanisms can be different in size, you need to look for a suitable crown only after purchasing a lock. When a pattern is used, do this:
- bend it gently along the projection of the door;
- applied from the front side;
- make tags showing the centers of the holes.
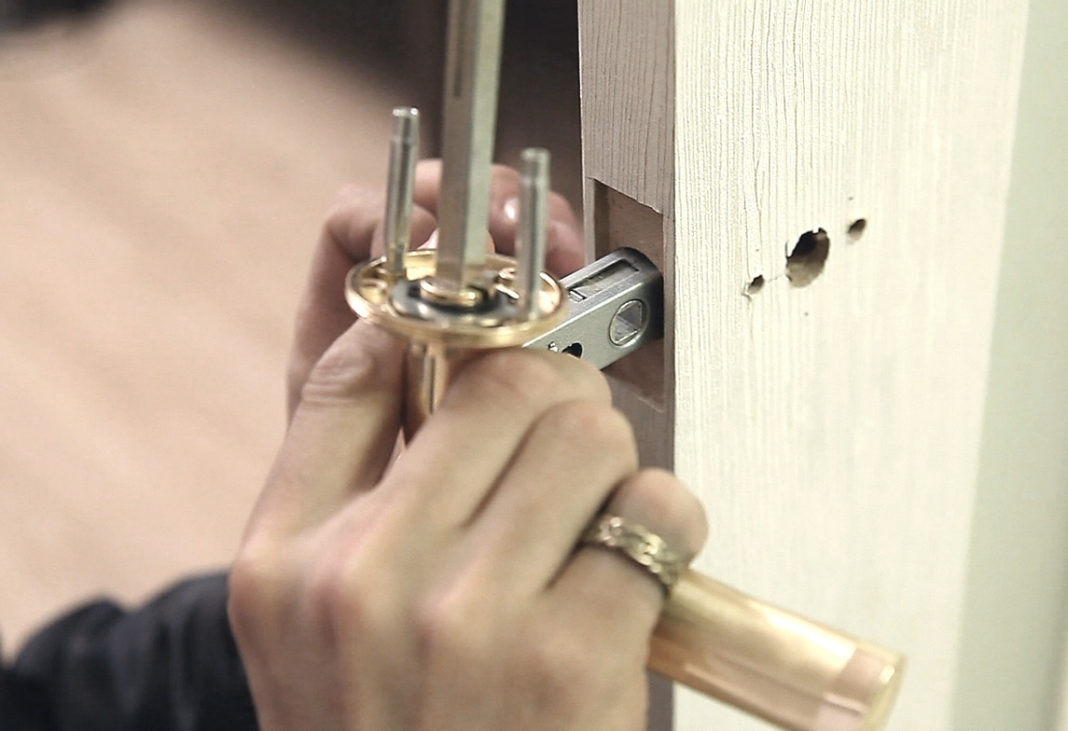
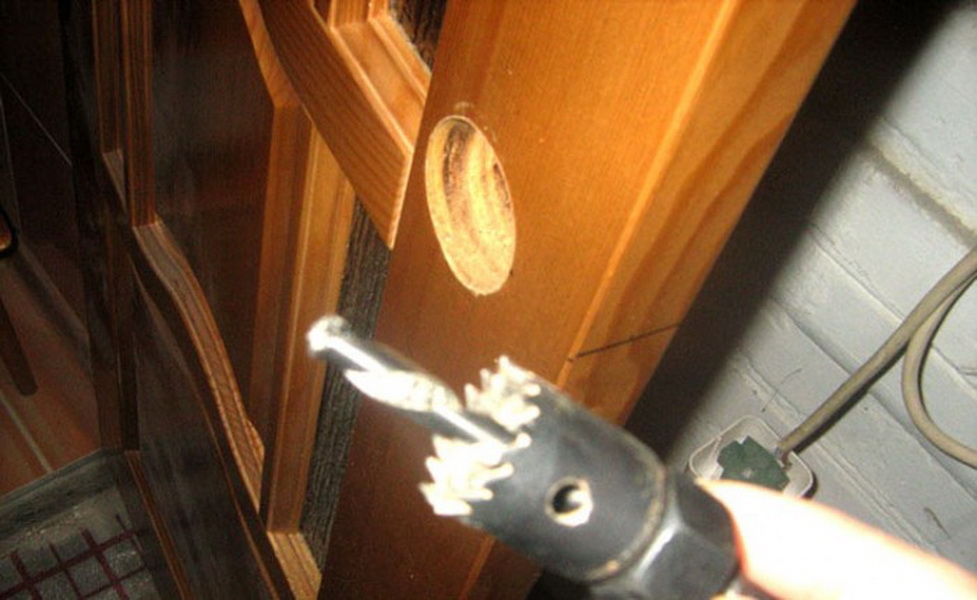
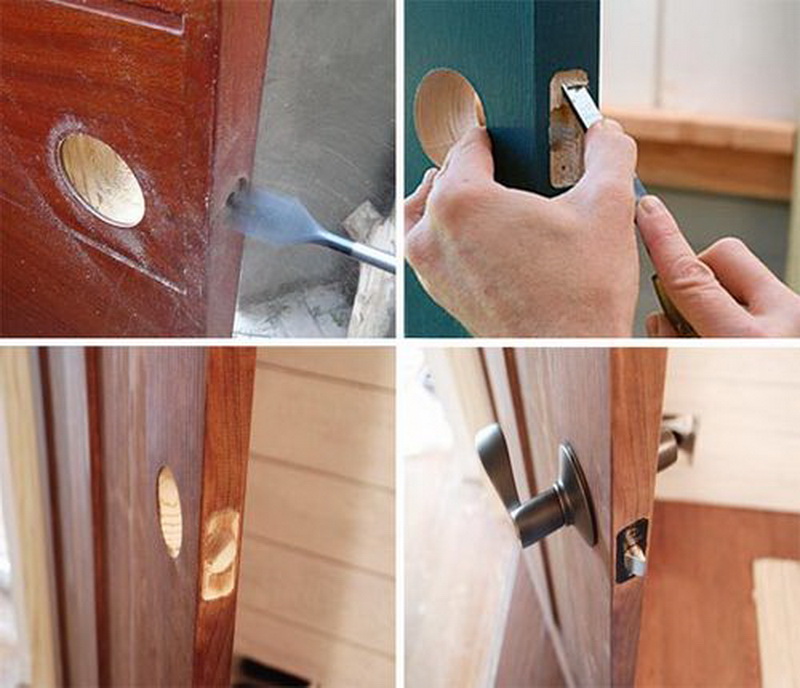
In these places, drill a hole in the plane of the door. It is impractical to pierce it through. As soon as the guide drill comes out on the opposite side, they pause and begin to drill the crown from the inside out. This approach is really professional and allows you to avoid splitting wood. Then it is time to make the holes for the latch.
At the same time, in marked places they work with a 2.3 mm drill bit. Pass through to the previous hole. The drill is kept strictly at an angle of 90 degrees to the door. Otherwise there is a risk that the latch will jam and work poorly. When the passage is ready, a latch is inserted into it.
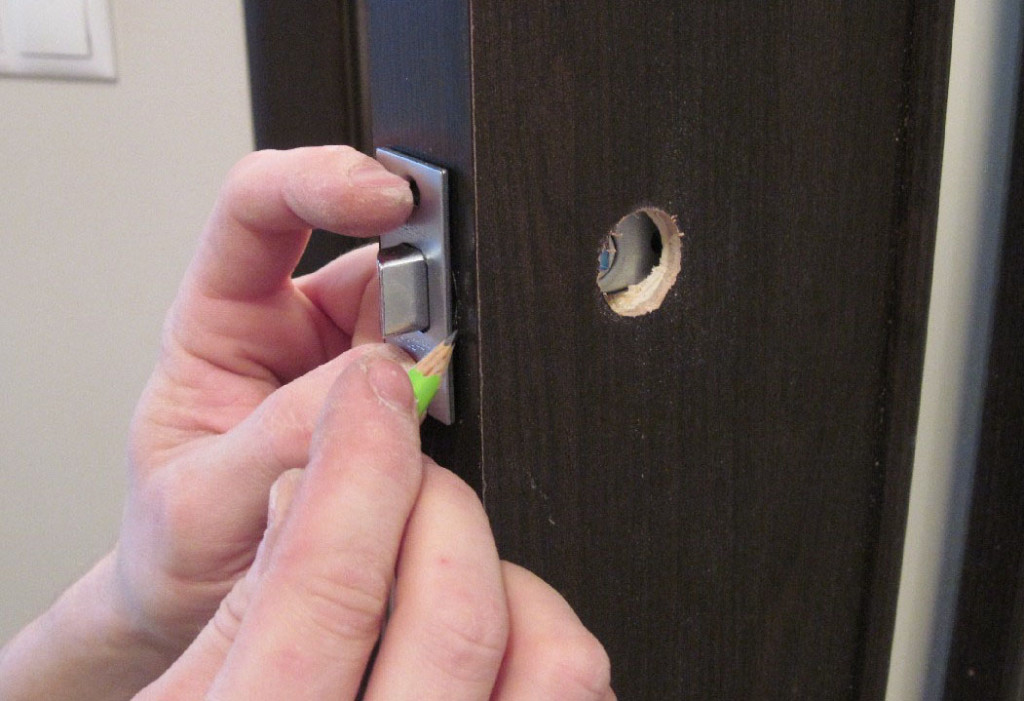
Now you need to align the location of the element with respect to the edge. The pencil will help to circle the outline of the decorative frame. Next, removing the latch with a knife for clerical work, along this line cut the canvas. When this work is done, use a chisel to choose a secret cavity, which should be slightly smaller in size than the latch frame. You can not initially clean the cavity, this can result in damage to the film with a chisel.

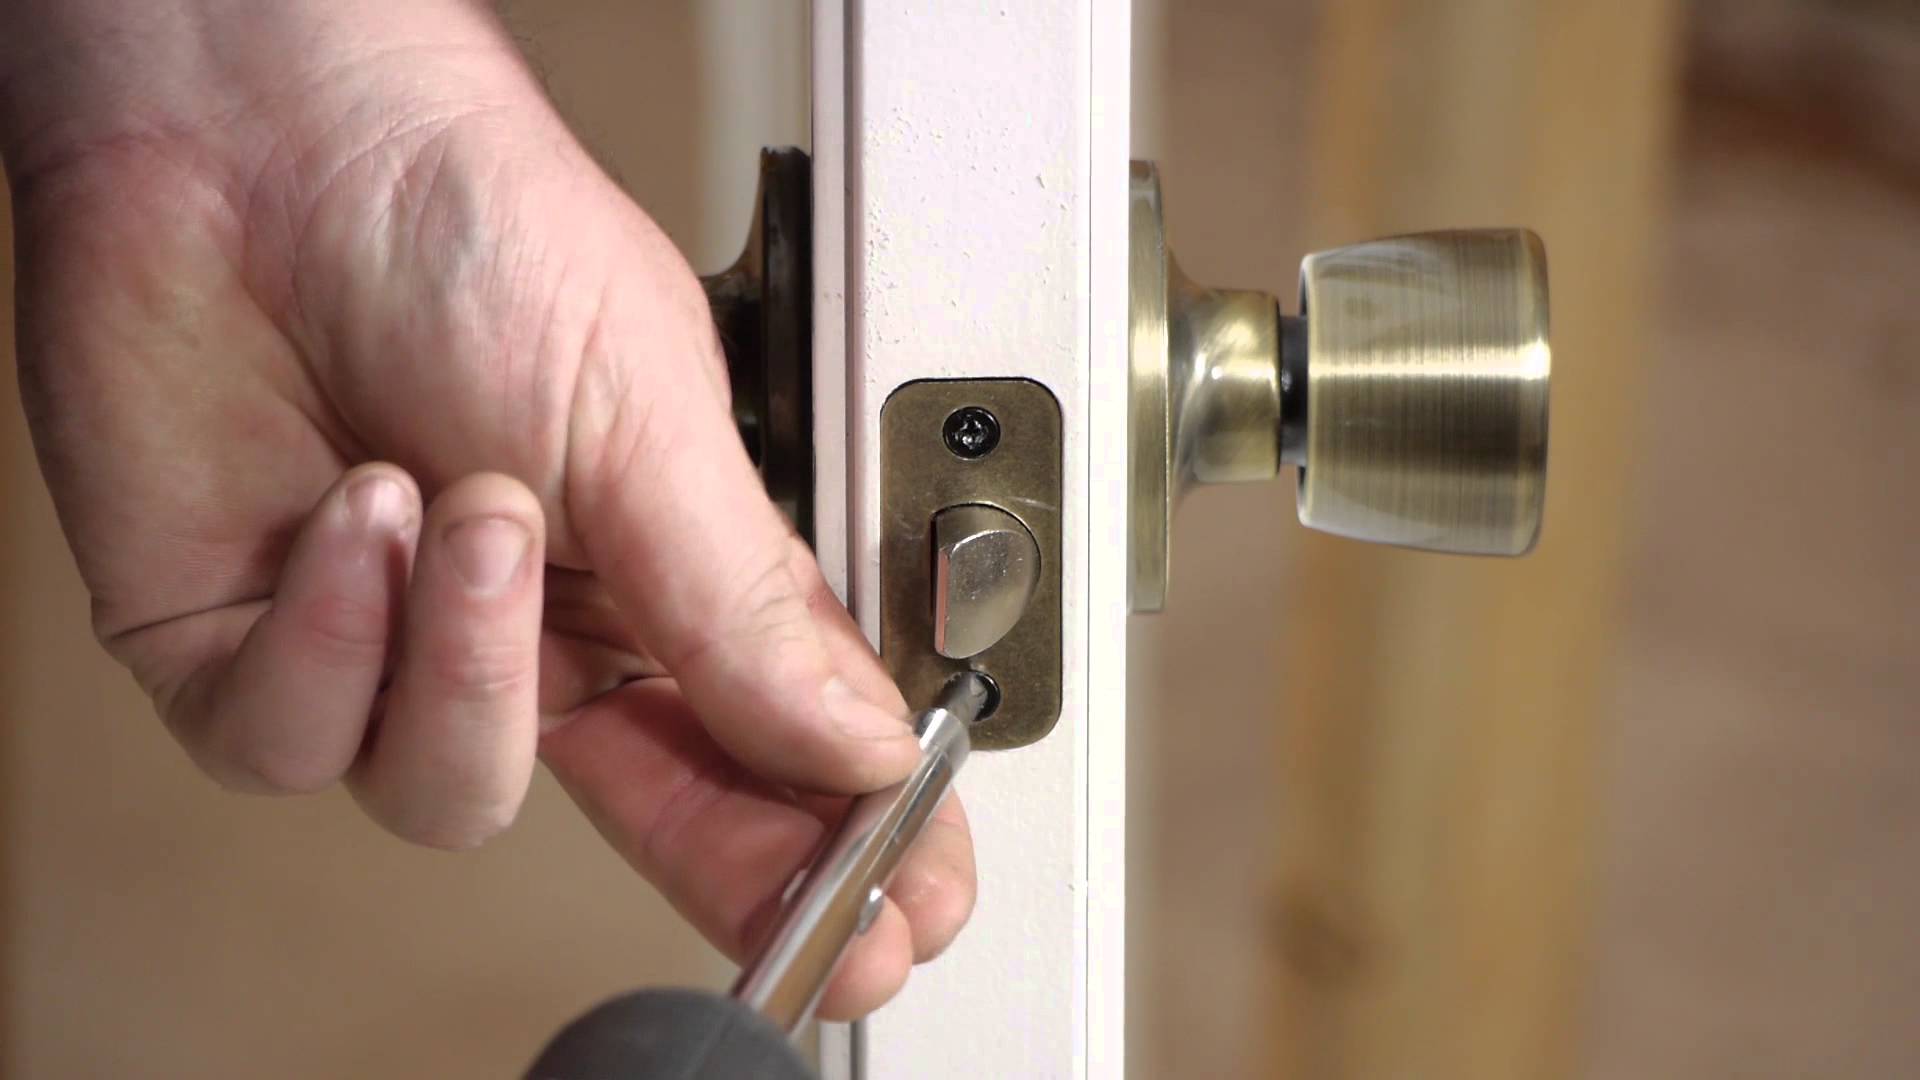
Having prepared the groove, return the product into place, pulling the latch with screws.Holes for them are drilled in advance with a 2 mm drill. If the part is moving tight, it is necessary to chop up the contacting places. The assembly of the handle itself is done according to the manufacturer’s instructions. It is necessary to pay attention to how the tongue is located (normally it always looks inside the room).
How to embed the lock in a wooden door with your own hands, see the next video.


