Laying tiles on the floor diagonally
The uniqueness of ceramic tiles is that it can be used to create beautiful and durable interiors. To do this, when laying elements use several approaches.
It should be understood that it is rather difficult to choose the tile layout correctly, if you have no experience at all, but if you are not afraid to experiment, you will be able to get a quality result that will appeal to everyone around you.

Advantages and disadvantages
Diagonal installation is often done on the floor, since working with the flooring is a little easier and more practical. This technology has several advantages:
- diagonal laid tile visually expands the space. To achieve this effect, you should also specifically select the color and pattern of floor materials.
- Originality. Everyone is accustomed to the fact that tiles are laid only along the walls. After completing such an installation, you can get a beautiful design that is difficult to repeat with the help of the classical approach. Please note that the surface can be supplemented with various decors that will give the interior a distinctive character.
- The diagonal layout hides the unevenness of the base. This is especially true of the floor on which they are highly visible.
This approach is not universal, as it has some significant drawbacks:
- complicated installation. Not every specialist will be able to lay tiles in this way. The process is complicated by the lack of visible lines that can be oriented during installation.
- Large consumption of materials. This is due to the fact that when docked with the walls you will need to use irregularly shaped tiles. Cut pieces will not be applicable.
- Processing complexity. To give the tile the desired geometric shape, you will need to constantly cut it. This is fraught with large amounts of work, in addition, you need to know the exact dimensions. The diagonal styling process is much easier for rooms with regular geometry (rectangle and square).

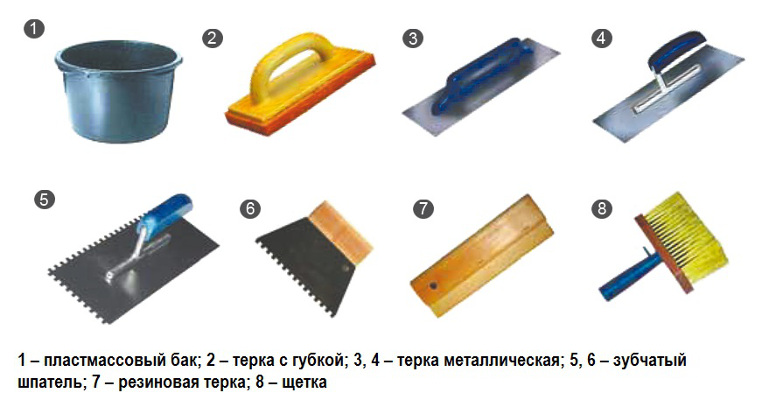
Required tools
Before laying the tile, prepare the auxiliary tools. They will facilitate the work and allow you to get a better result. So, you should purchase:
- notched and flat spatulas;
- tile mix;
- laser level;
- tile cutter;
- rubber mallet.
At this stage, it is also desirable to calculate the tiles. There is no universal algorithm that will help to do this correctly and accurately. The best option is a schematic calculation. To do this, on paper in a certain scale to display the size of the room. Then on the plan draw the number of whole tiles that fit in the room, and add a volume of material for trimming.
An alternative method of calculation is the use of online calculators, as well as specialized construction programs.
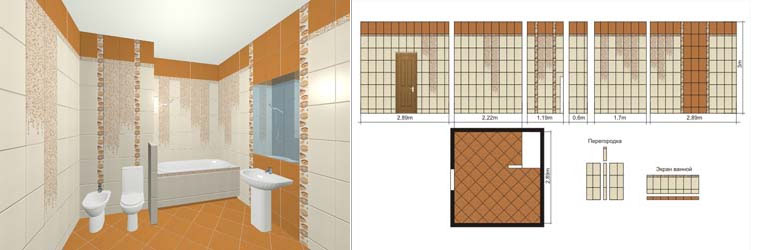
Please note that it is important to take into account the size and shape of the elements, since diagonal installation can be performed with both square and rectangular products.
Experts recommend that the amount obtained be increased by about 10%. This stock is necessary, because during work you can incorrectly cut off the element or just damage the tile.
Foundation preparation
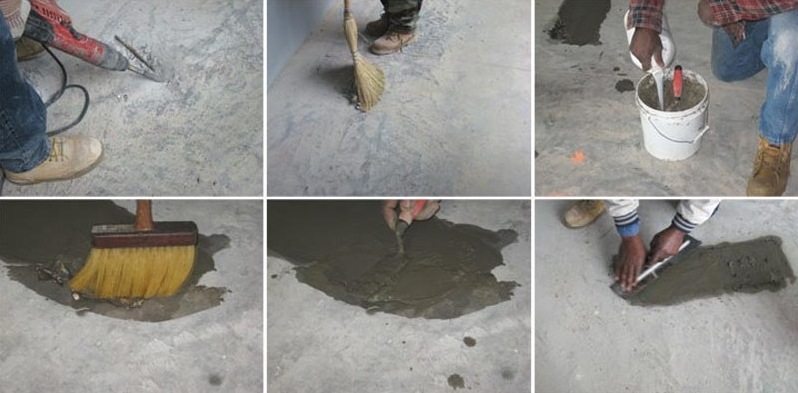
Lay tile preferably on a clean surface with minimal damage. Step-by-step instructions for the preparation of the base are presented below.
- Alignment. This step involves the removal of protruding cement particles from the surface. If they are small and practically do not affect the height of the floor, then they can be left.
- Sealing. It is advisable to install the tile only where there are no cracks and large tears. If such defects are present, it is advisable to seal them with cement or glue. To simplify installation, the base can be prepared using a cement screed. Solutions of this type are self-leveling and are applied in a layer with a thickness of up to 10-20 mm.
- Primer. Impregnation of the floor with special solutions allows you to increase adhesion, as well as reduce the risk of fungus under the tile. There are several types of such mixtures. They can be purchased at any hardware store.
Before priming, it is desirable to remove dirt and dust from the floor, because they can increase fluid consumption.
Marking
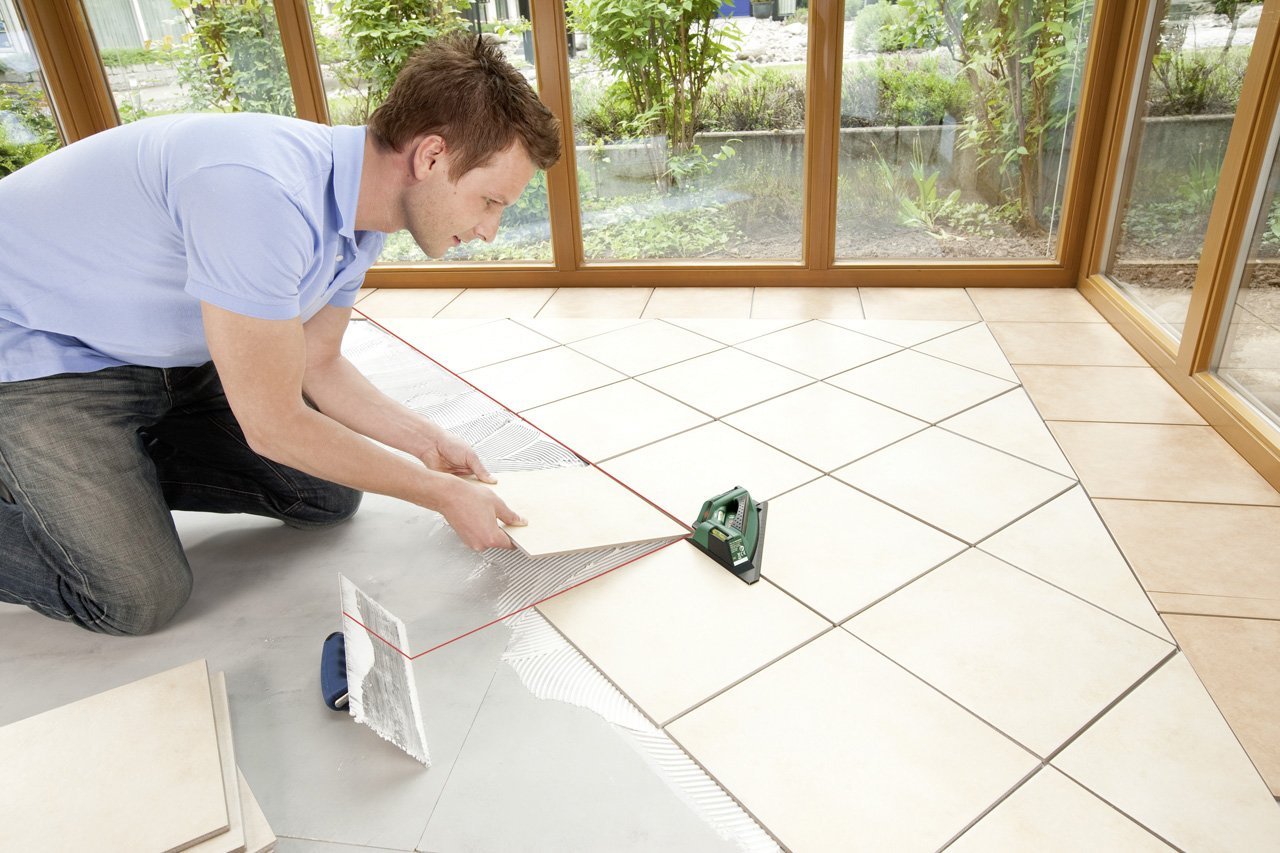
To lay the tile smoothly, you must first take care of the grid, on which the installation will be performed.Theoretically, you can start laying from any point, on any wall, placing the element relative to it at a certain angle. Often, all rows are located in a room at an angle of 45 degrees relative to one of the supporting walls.
You can markup using several approaches:
- Square rooms. In square rooms should be guided by the diagonal. It can be done with a twine or laser level. The latter option is preferable, as it takes less time.
It is important not only to mark the intersection point of the diagonals (that is, the center of the room), but also to mark this place with chalk. Pay attention that the diagonals should intersect with each other at right angles.
If this is not the case, then align the rows with one of the walls.

- Rectangular and non-standard rooms. If in such rooms to hold the diagonal, then they will intersect with each other not at an angle of 45 degrees. Theoretically, stacking on these lines can be done, but it will look ugly.
To get a 45 degree angle, draw an isosceles triangle.It is quite simple to do this: straight lines are drawn from one of the corners of the room to the sides.
If one wall is shorter, then you can take its dimensions for the main ones, and fit longer sections for them. After that, the points are simply connected. This allows you to get a long line, along which the tile will be installed.

Material laying
Working with ceramic tiles in a diagonal arrangement involves choosing one of the mounting methods:
- Mount from the corner. To do this, the material is cut in such a way that a triangle is formed, which is subsequently installed in the corner. Please note that the item should be located along the line you received. The main difficulty of this method is the installation of the first element.
You can begin installation without trimming: you only need to move the whole tile along the line so that it stands exactly with the marked sector.
- Mount from the center of the room. This approach is relevant for large rooms where the central zone is clearly visible. Begin laying at the intersection of the diagonals or along the longest marked lines.Fastening is carried out alternately in different directions, and it turns out that the tile seems to diverge. Trimming occurs at the very end.

The technology of fastening material is quite simple. It involves the following operations:
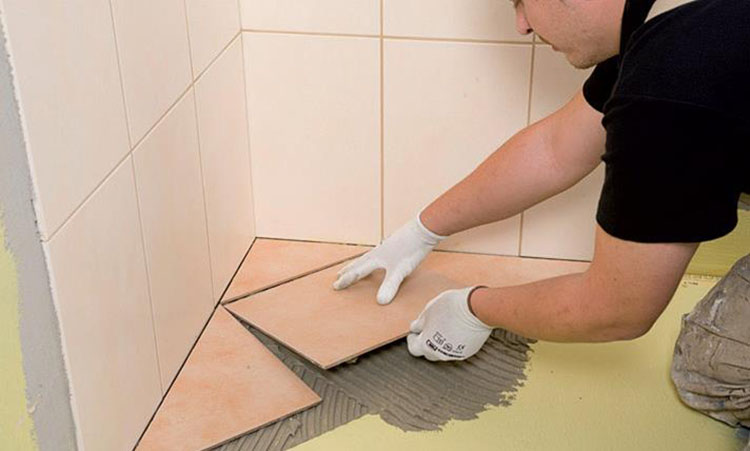
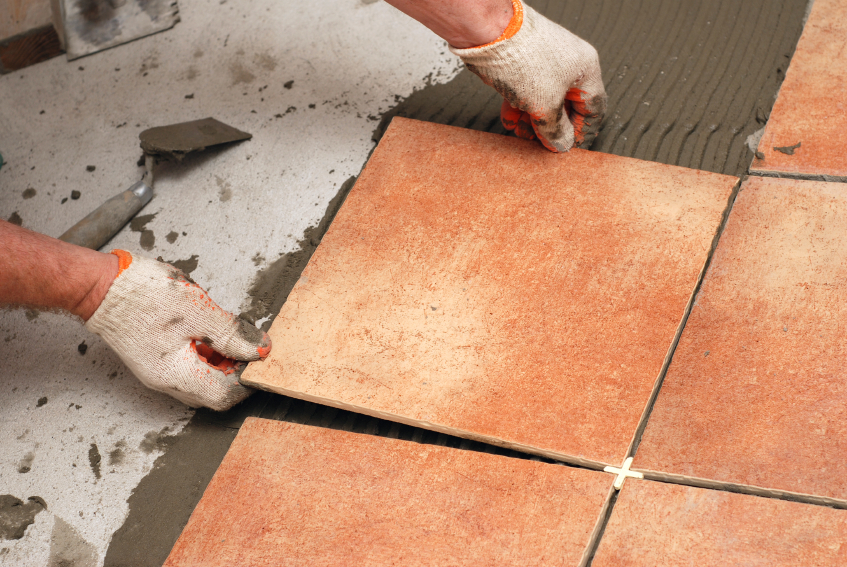
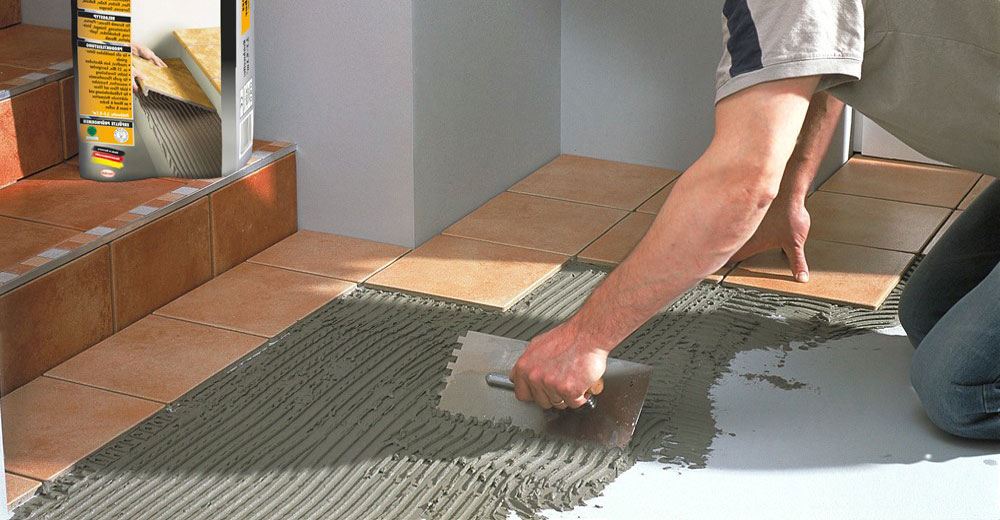
- Cooked glue is applied to the floor with a notched trowel. If you do not have experience in carrying out such work, then it is advisable to cover an area that is sufficient for fixing one tile.

- Tile mounting. To do this, it is simply applied to the place treated with glue and leveled relative to the diagonal line, and attention is also paid to the floor level. It is advisable to slightly press the tile into the glue in order to increase the adhesion between them. The next element is mounted on the same principle. It is important to align the tiles and relative elements.
In order to make the seams even, special plastic struts are inserted between the products, which after complete drying of the coating are removed.


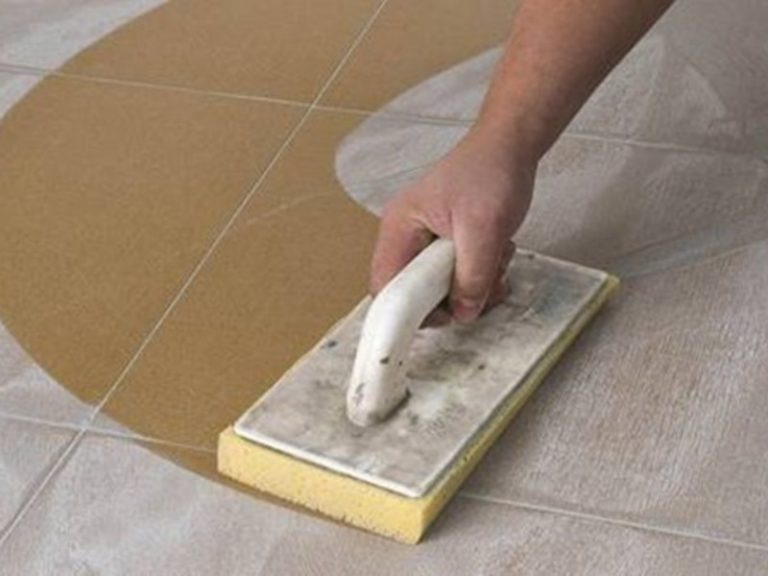
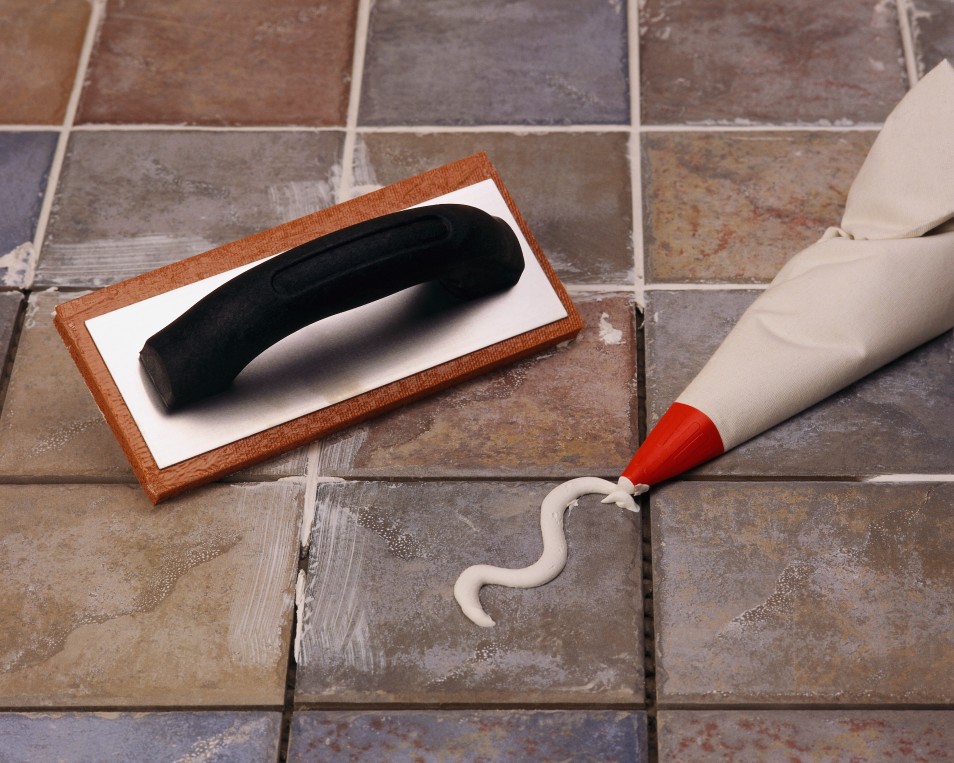
- Grouting joints. This procedure is performed after the glue dries. For grouting use special mixtures that match the color of the surface. It is possible to wipe the seams both manually and with the help of special tools.
Diagonal tile laying practically does not differ from the classical method, but here it is necessary to correctly mark the surface, and also to choose a beautiful pattern on the material itself, which will fit into the overall design of the room.
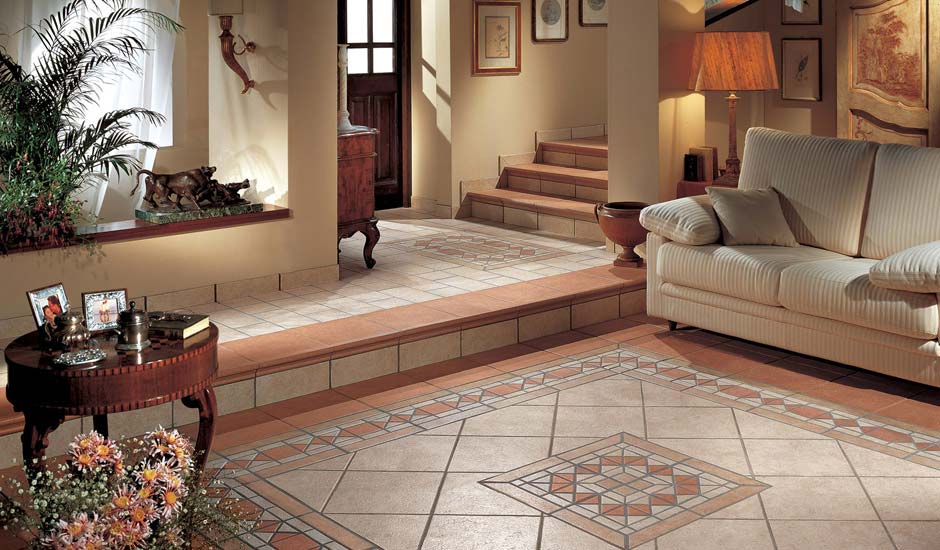
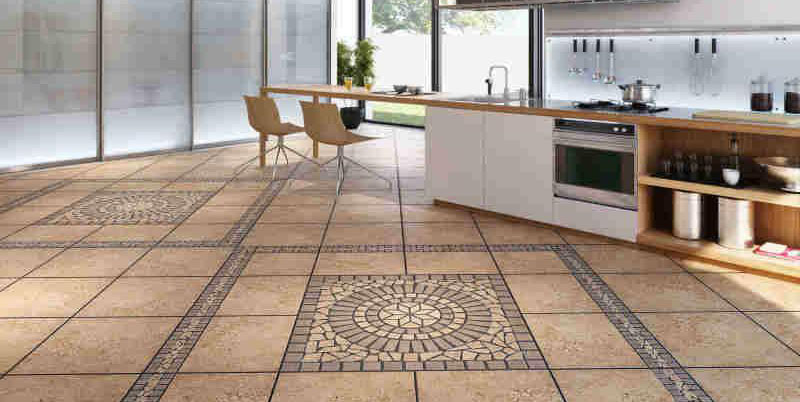
Examples in the interior
This image shows a great way of laying black and white tiles diagonally in the hall. The resulting chess pattern decorates the room, giving it a special atmosphere, complemented by an old but stylish leather sofa. In the same way, the flooring was laid in the kitchen, which also looks win-win.


How to lay tiles on the floor diagonally - the following video.


