Installation of heating radiators: strapping options and phased installation
Comfortable air temperature inside the premises provide a variety of heating systems. The basis of the overwhelming majority of heating concepts is made up of special devices for heat transfer, commonly called batteries in everyday life.
Features and rules of placement
Any heating equipment is a complex system, where each component has its own role.The most important part of the whole system is considered to be heat transfer units, which are the final link in the transfer of heat energy in the house. They are usually radiators, convection devices of open or closed type, water-floor heating devices, which are profiles of pipes laid on the basis of certain rules.

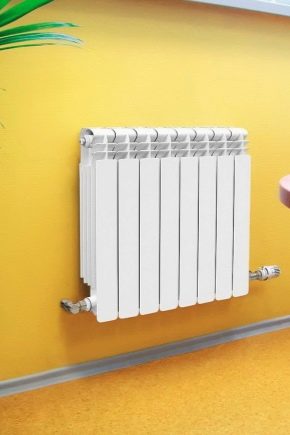
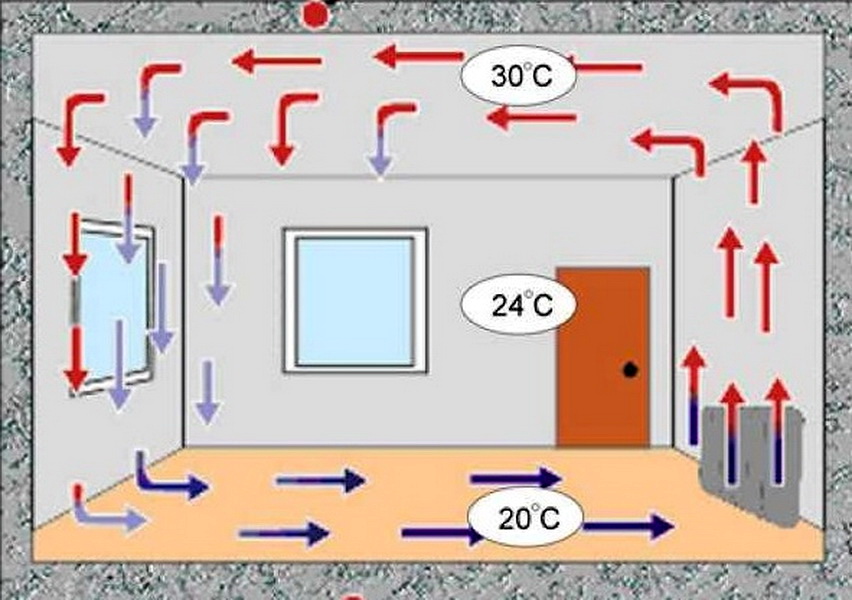
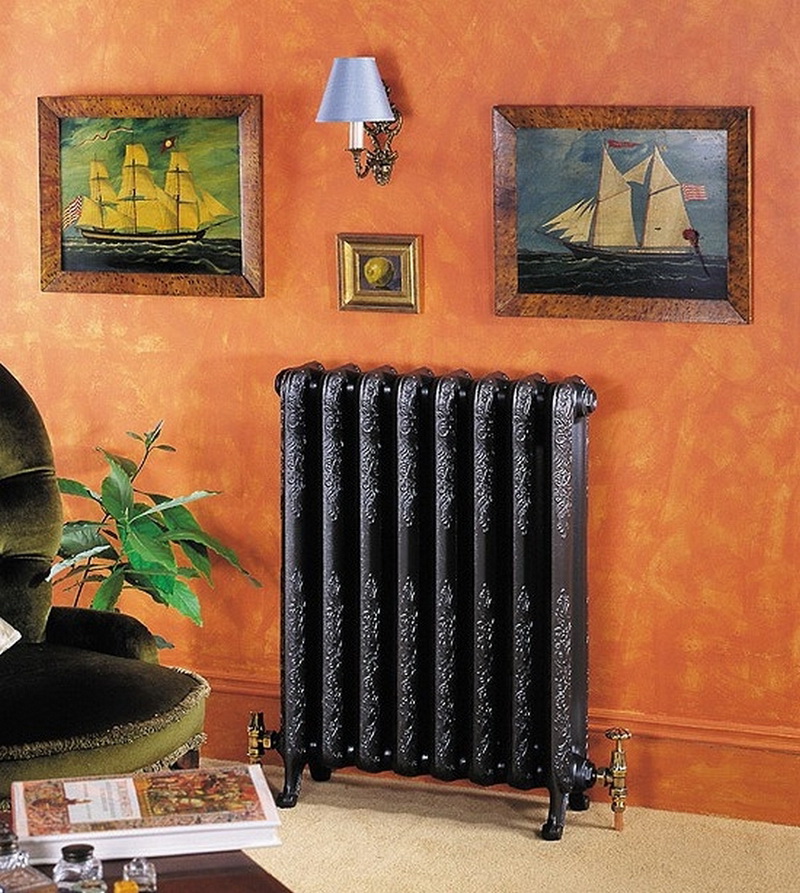
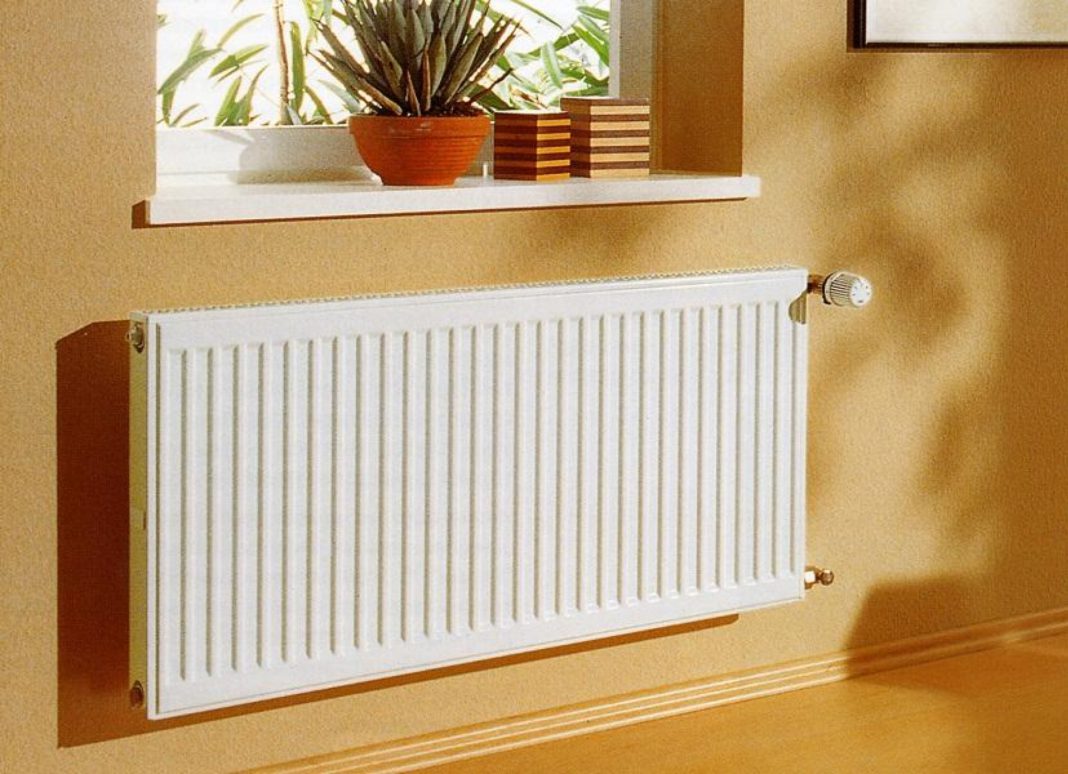
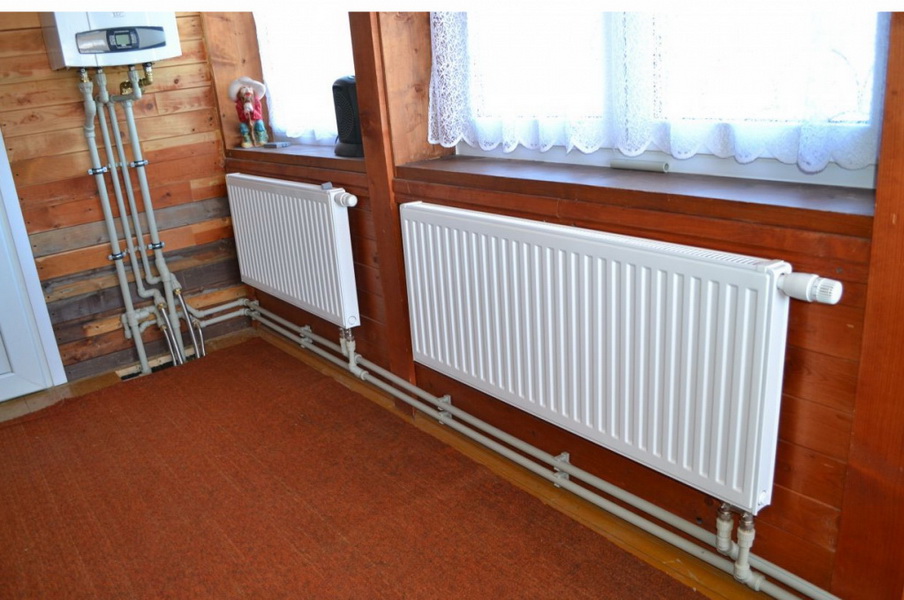
Any kind of radiator is installed in the premises according to the general rules. There is a specific installation procedure that must be followed. The installation procedure will not cause any special difficulties, however, there are many nuances in this matter. So, first of all they affect the installation site. In most cases, the heating installation is placed in areas of the most significant heat loss, for example, under the window openings. Even modern energy-saving windows can not hold the warm air in the room. Old wooden frames can not be mentioned.

In the absence of radiator construction under the windows, cold air masses are lowered along the wall and spread along the floor. The situation changes after installation of the battery: the warm air rising to the ceiling does not allow the cold to go down.Remember that the effectiveness of such protection depends on the size of the heating device: it must be at least 70% of the width of the window. For this reason, small-sized radiators will not give an appropriate degree of comfort. In the side zones there will be areas with a cool air mass descending to the lower level. You can see the "sweating" of glasses and walls. The points of collision of heated and cold air will be covered with condensate, dampness will form in the room.
Therefore, do not try to get a sample that has the highest heat transfer. They are suitable for areas with harsh climatic conditions. In this case, it will not be out of place to install a heat curtain at the entrance door. This is the second problem area in private residential buildings. Often, it faces tenants of the first floors of apartment buildings. The principles of placement of the heater are simple: installation is carried out near the entrance. Determine the site based on the features of the layout and the possibility of laying the pipe.
In addition to the recommendations regarding the length of the installation, experts advise to adhere to the standards for location under the window frames in relation to the floor, window sills and walls.
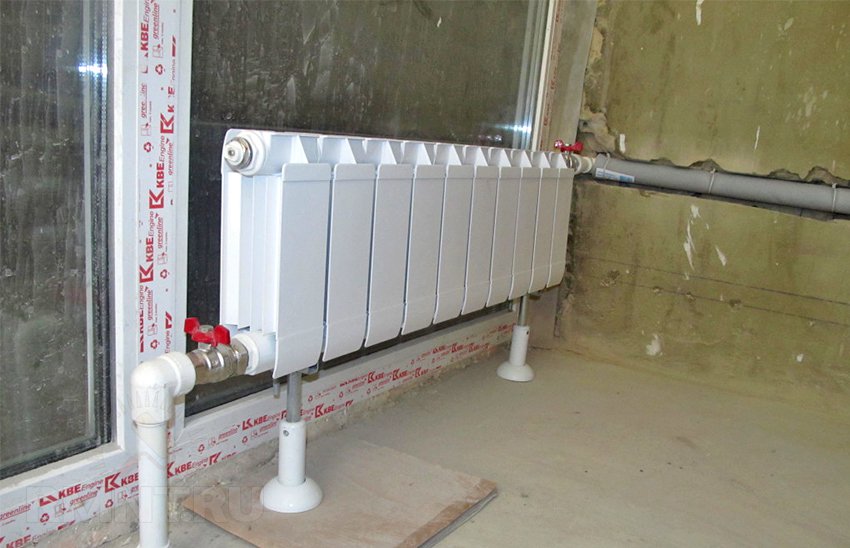
The heating installation must be located exactly in the center of the window. Find the center before installing it, mark it. Then in both directions, calculate the spacing to the points of fasteners. The gap between the product and the floor should be from 8 to 14 centimeters. If it is made smaller, cleaning under the radiator will be difficult, the greater distance will cause the formation of zones with cool air.
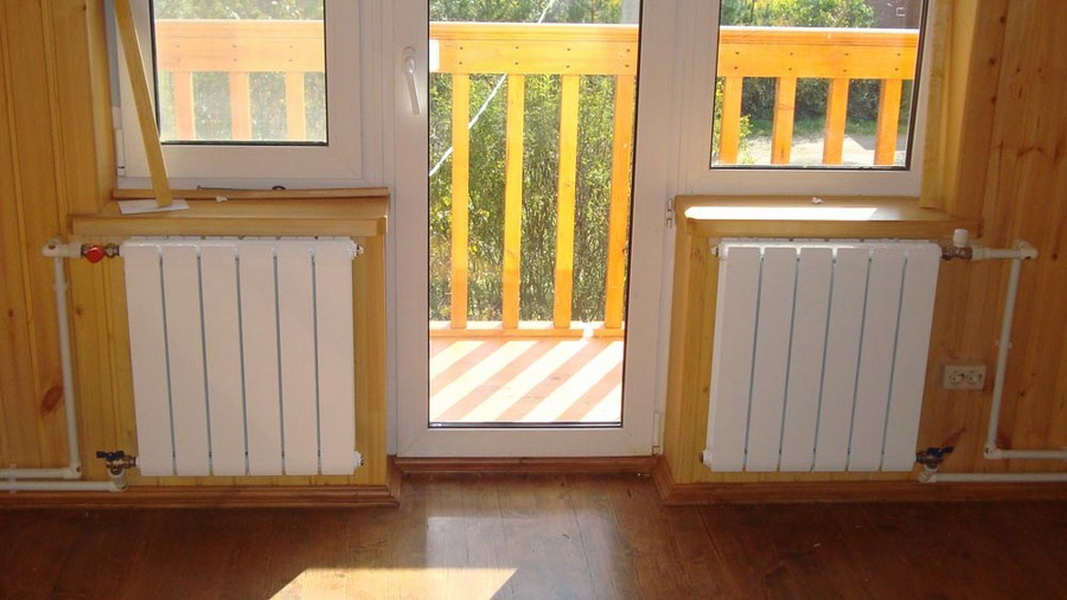
Measure 10 to 12 centimeters between the window sill and the radiator and begin installation. Closer location will worsen convection and reduce heat output. 3-5 centimeters is the distance between the wall and the back wall of the device. This gap will ensure normal convection and heat distribution. A shorter distance will cause dust to settle on the wall.
In addition, batteries can be installed in:
- extended interwindow spaces - a popular alternative;
- corners and "blind" walls of corner rooms - they increase the heating of spaces characterized by increased heat loss due to the increased impact of the wind;
- bathrooms, pantries, bathrooms, in which one or two sides are connected by a supporting wall;
- not heated entrances, halls of private houses;
- apartment corridors of the first floors of high-rise buildings.


Modern samples of heating devices can be installed under the balcony door or above the entrance to the balcony.
Heating devices
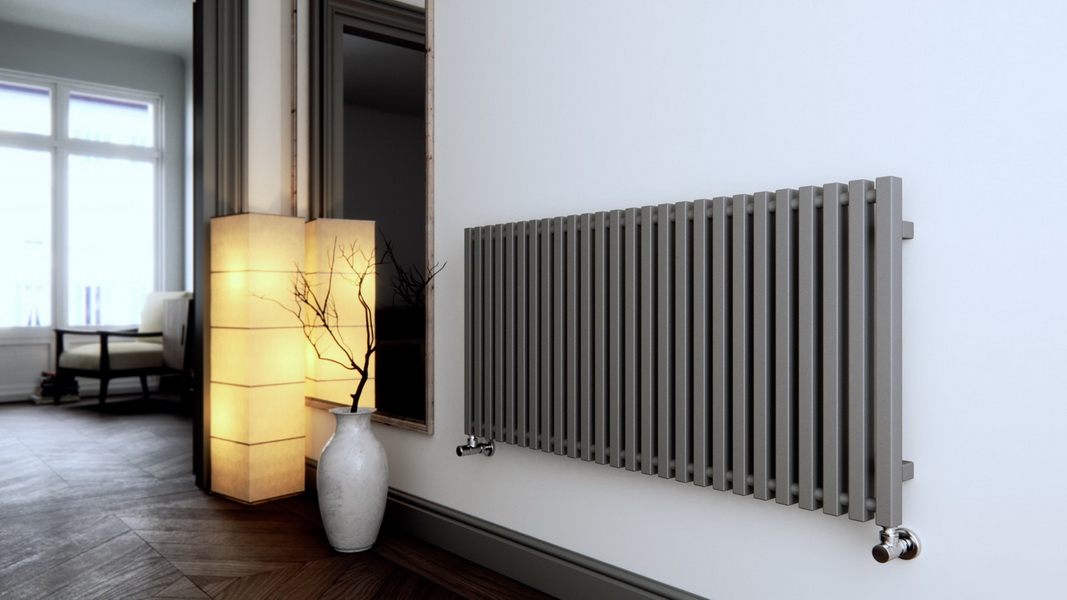
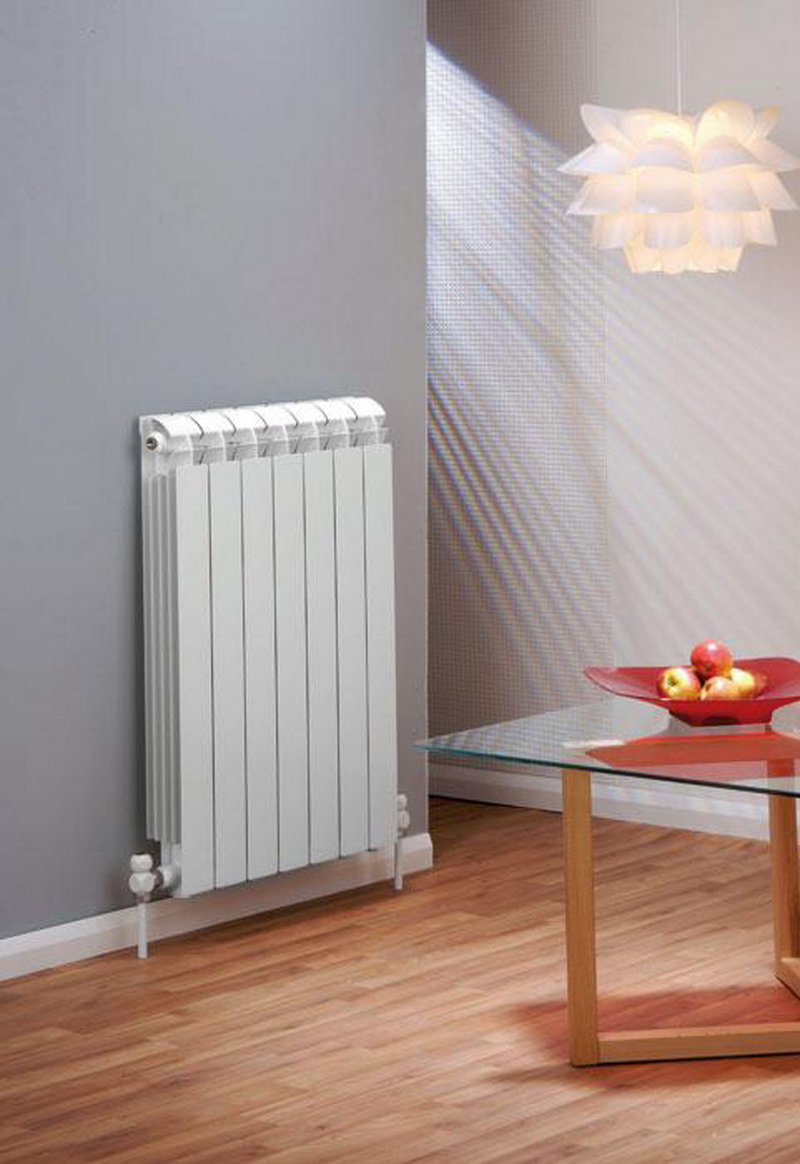
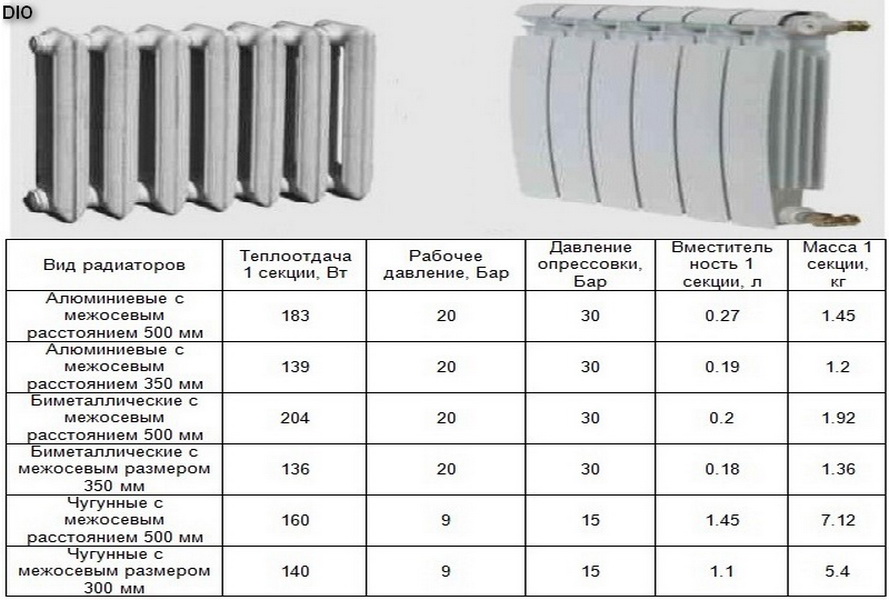
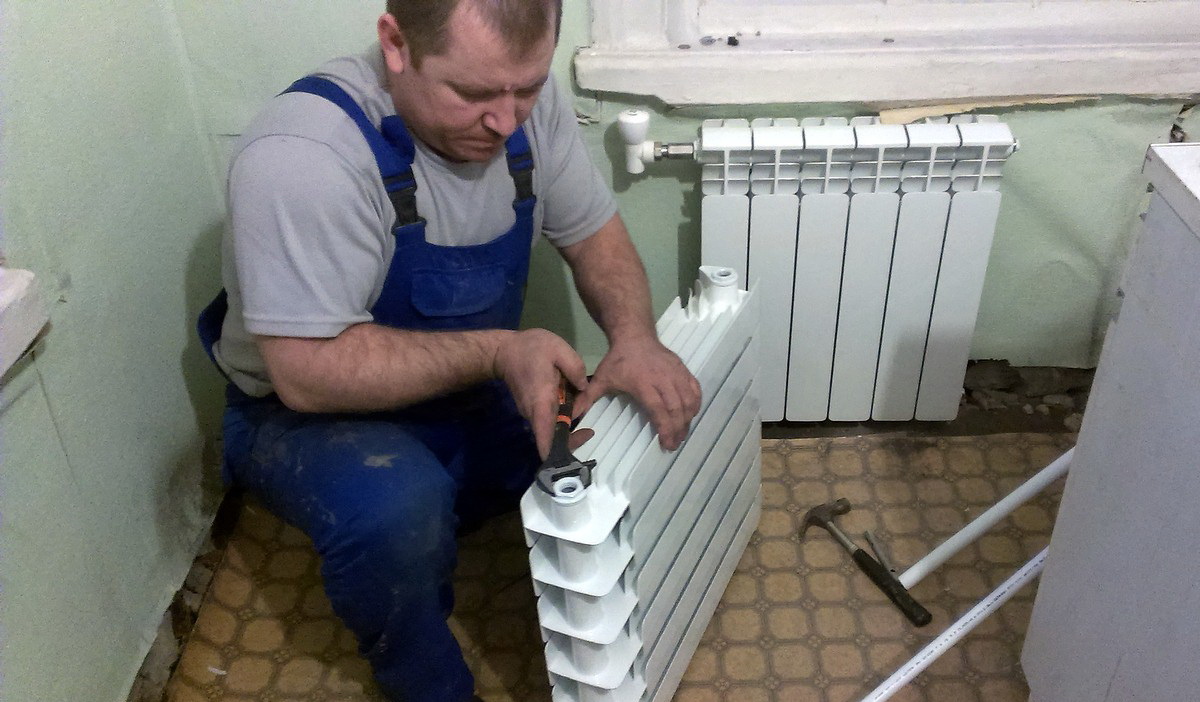
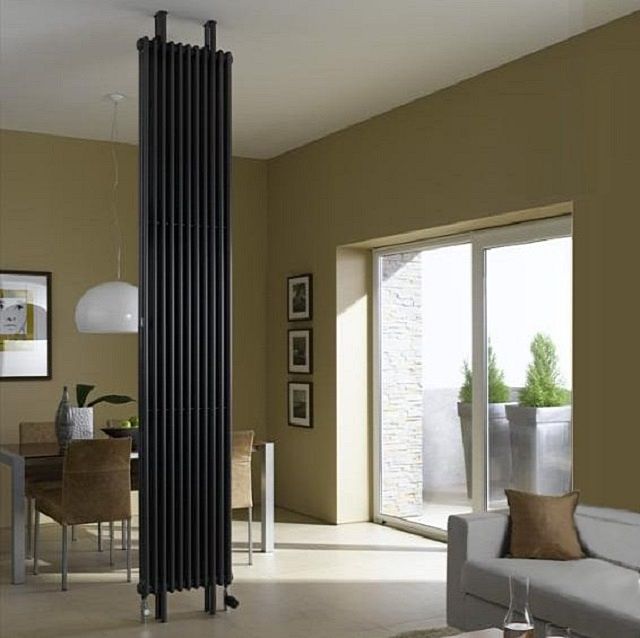
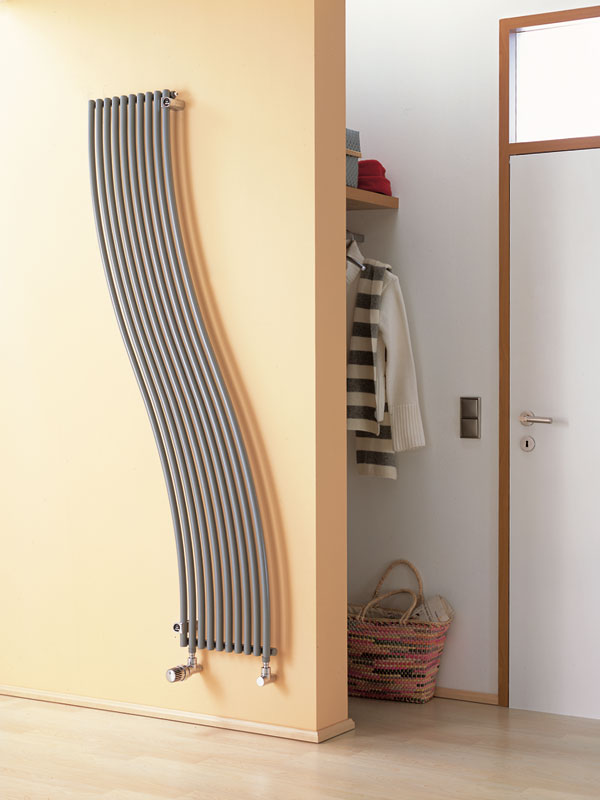
Batteries are divided into several groups: radiators, convectors, registers. Radiators are the most common variety. The basis of the radiators are vertical separate compartments-sections. They are combined in the right quantity using threaded internal connections. This type of battery installation makes them versatile.
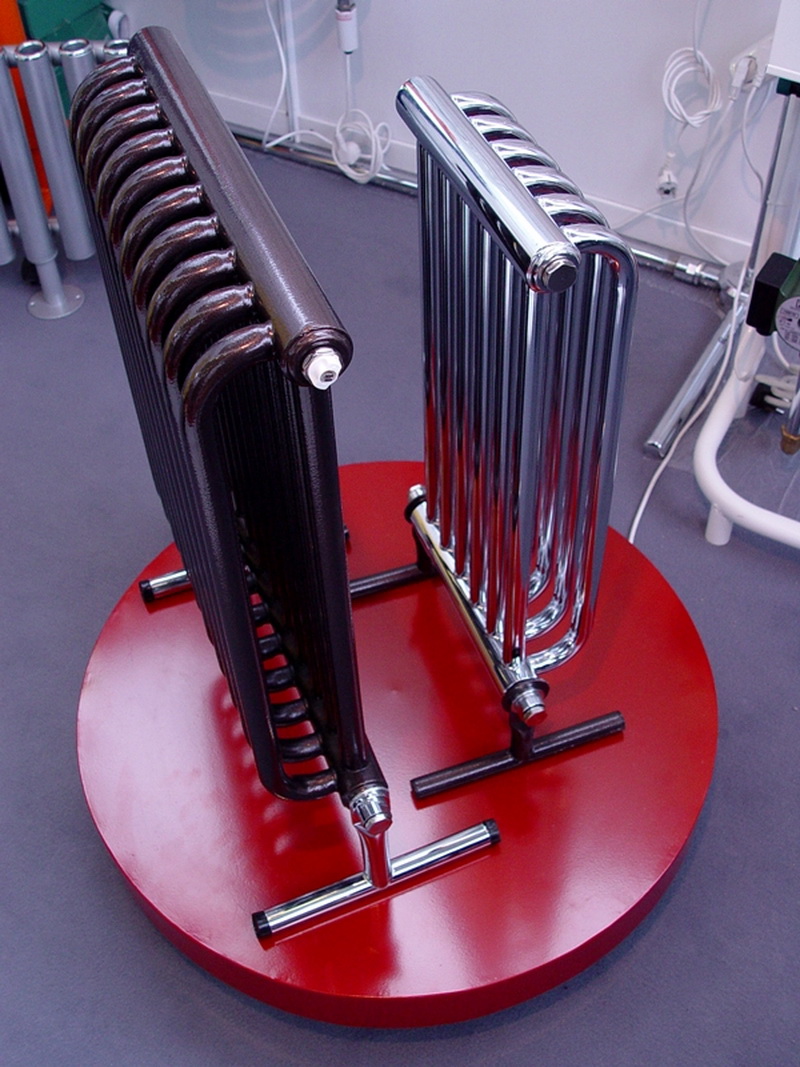
Before installing this equipment, determine the required number of sections to obtain the required amount of heat. The horizontal cavity of the radiator, which is formed by connecting blocks, is called a collector. With the help of modern developments, less universal but more qualitative nonseparable structures using welding and solid casting methods are being produced today. There are no joints and seals characteristic of collapsible counterparts.
Battery Overview
Convectors - one of the integral types of heating units, made of tubular or cavity heat exchangers with rows of heat-removing fins.
They are:
- Wall mounted. The raw material for their production is steel, which explains the small price. These models will not be able to withstand hydraulic shocks, for this reason they are unsuitable for the heating line. Samples made in the likeness of a pipe, bristling with the help of plates, are installed in utility rooms.
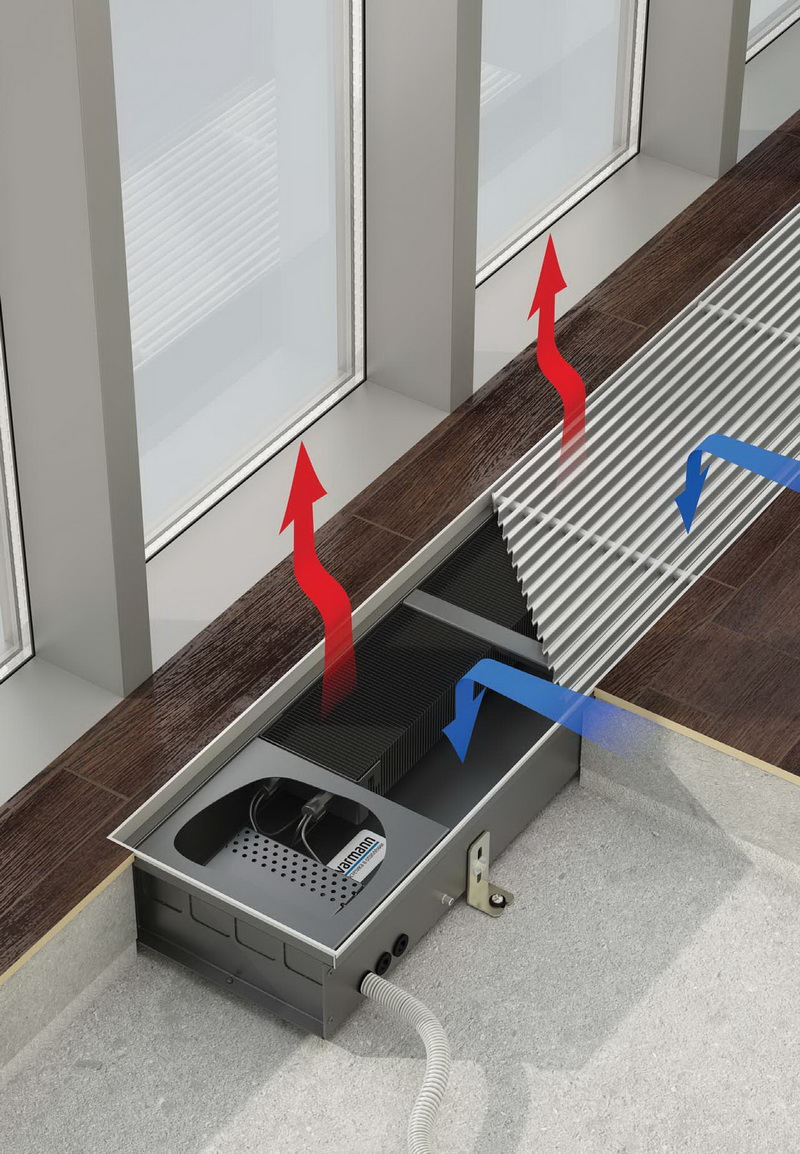
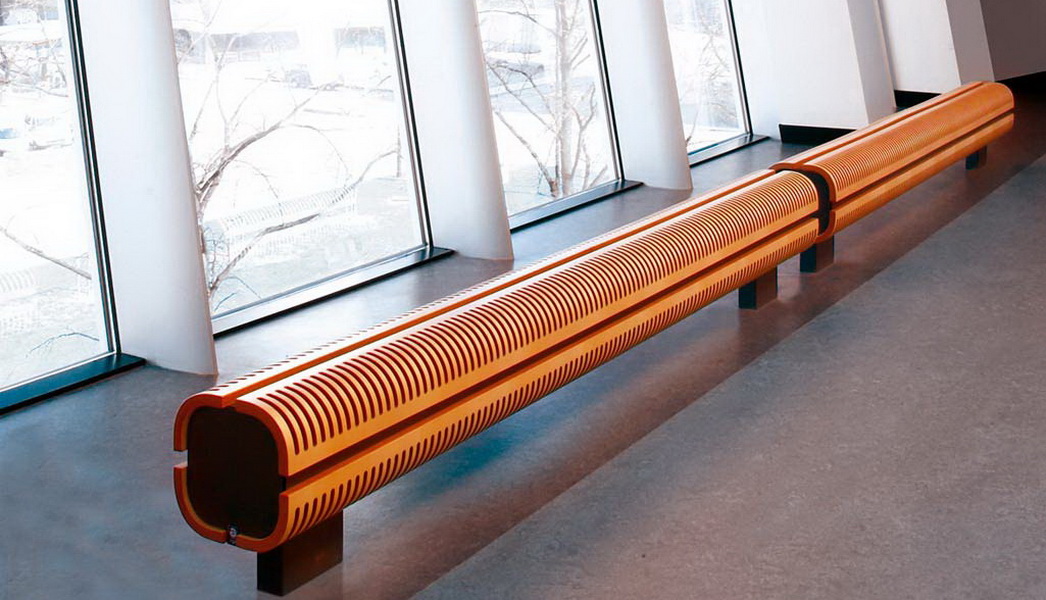
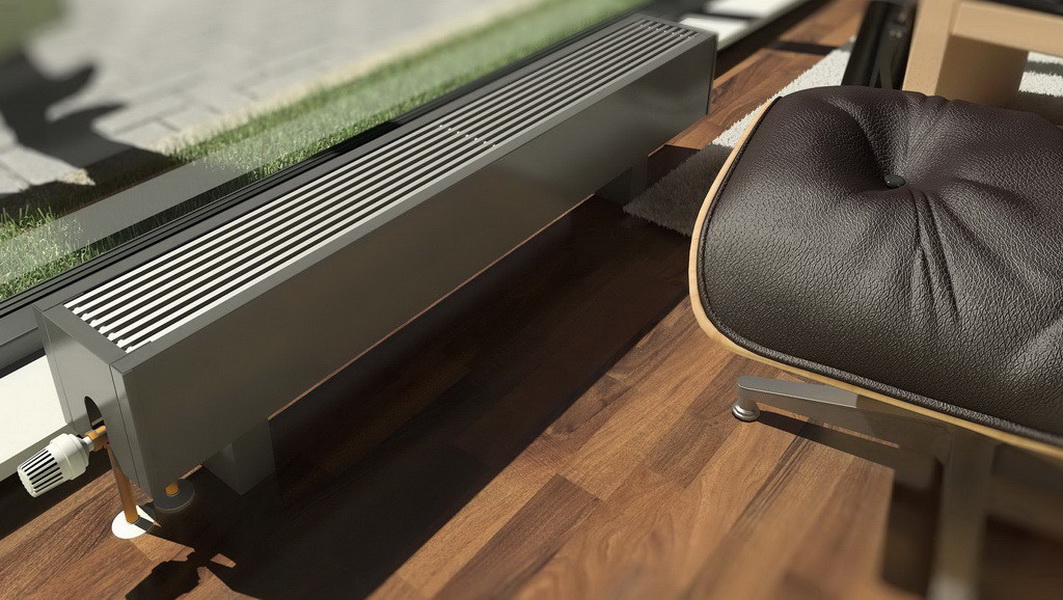
- Floor (channel). Suitable for warming spaces near balcony doors or loggias. Due to their robust, corrosion-resistant basis, these batteries do not require special care.
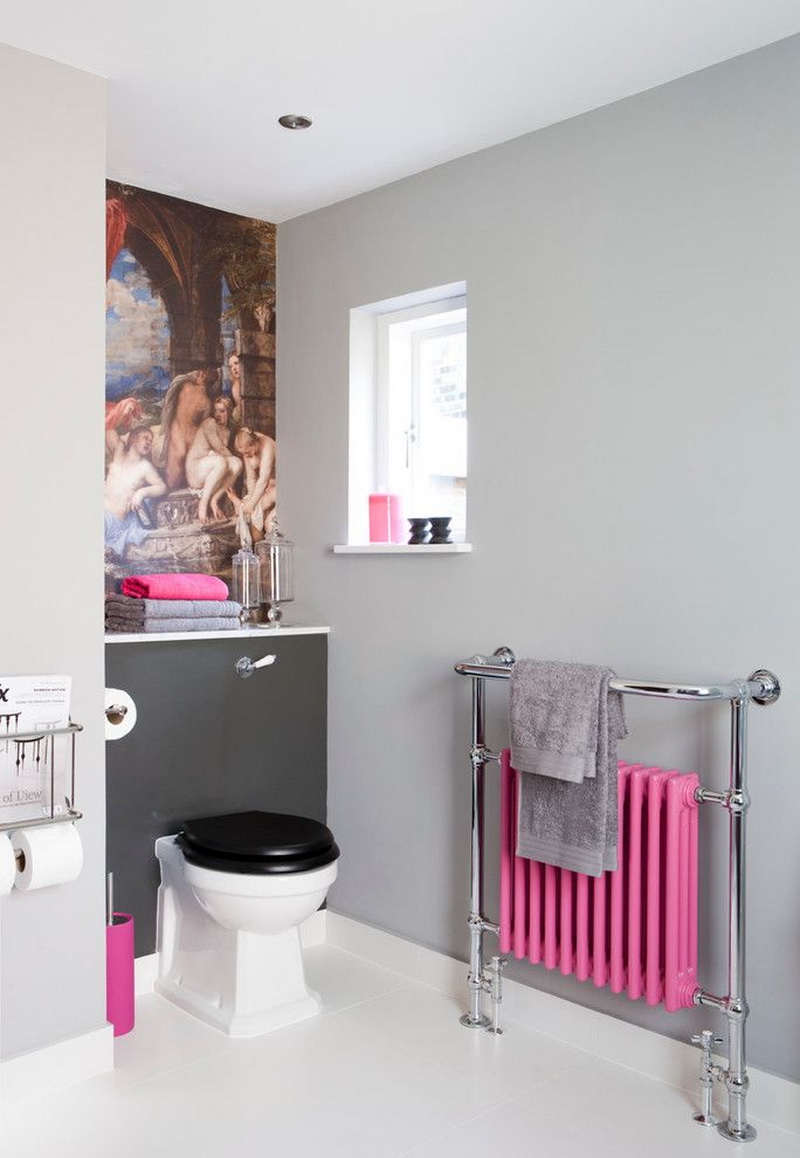
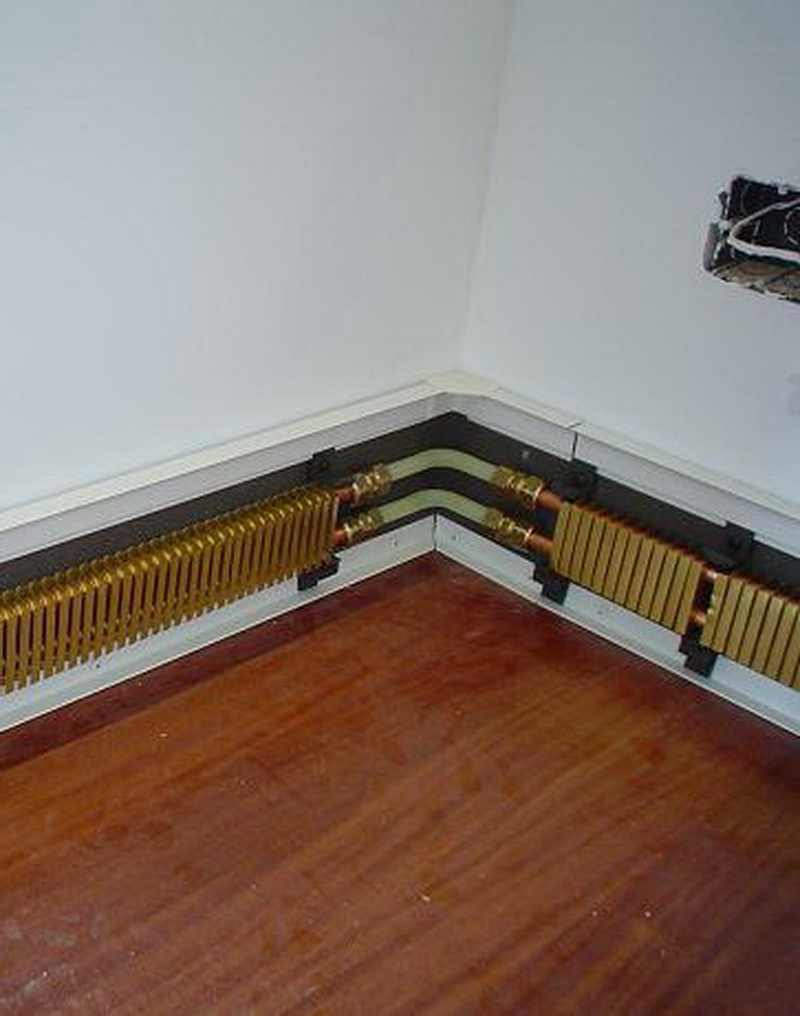
- Plinth. Can function under any conditions and modes. Ideal for creating a microclimate in areas where other heating equipment will look impressive. They are suitable for installation in the bathroom, pantry, which is adjacent to a cold street wall or unheated staircase.


The register is a one-piece heating installation, which is built from several smooth horizontal pipes arranged and assembled in a specific order. Unaesthetic appearance was the reason that they heat, mainly, ancillary facilities: garages, basements, storerooms, porches of some old high-rise buildings.
Radiator devices are divided into groups based on the production material:
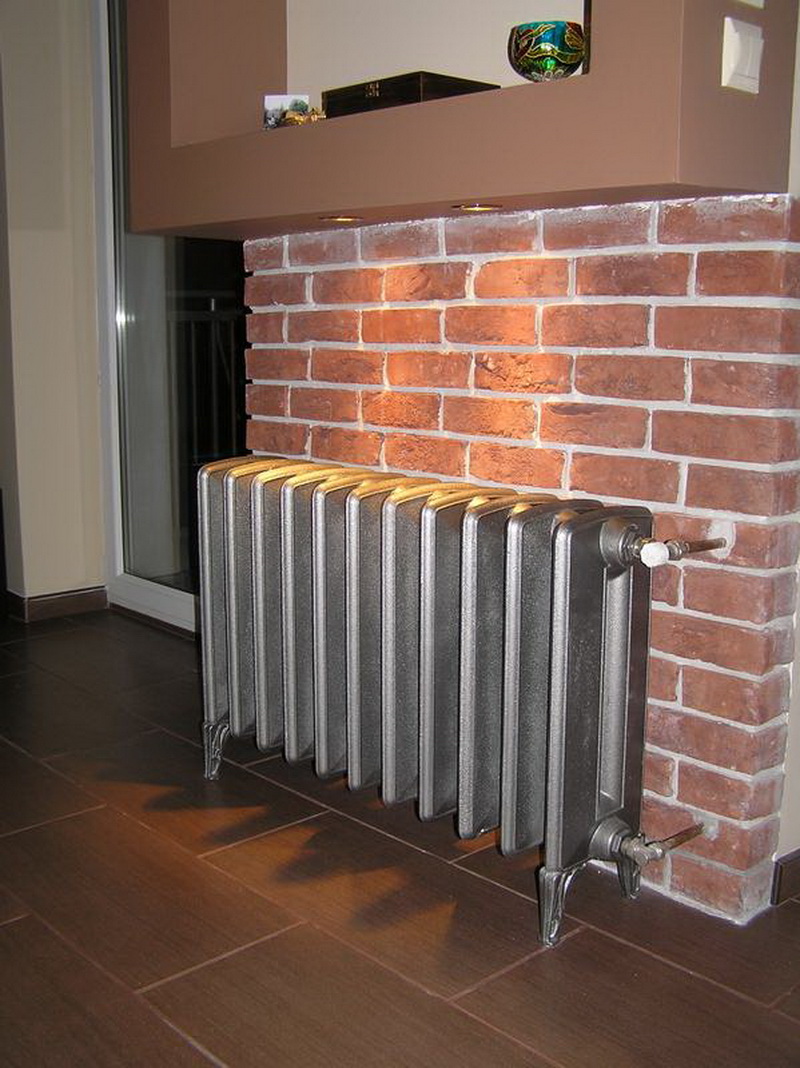
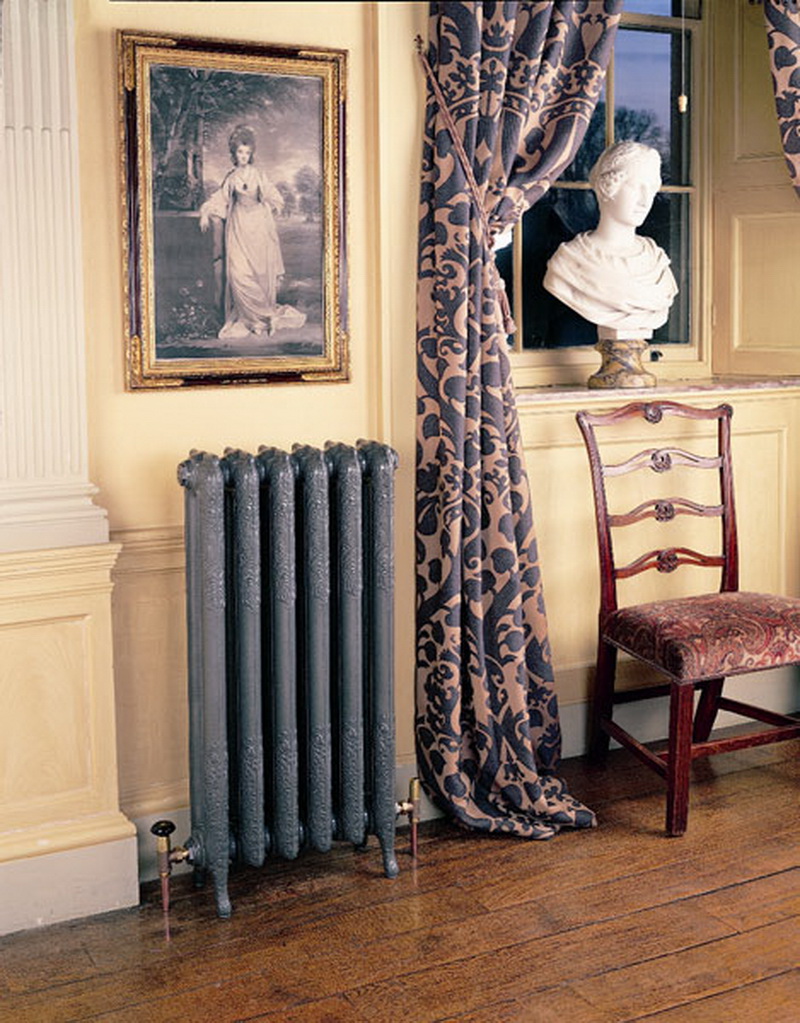
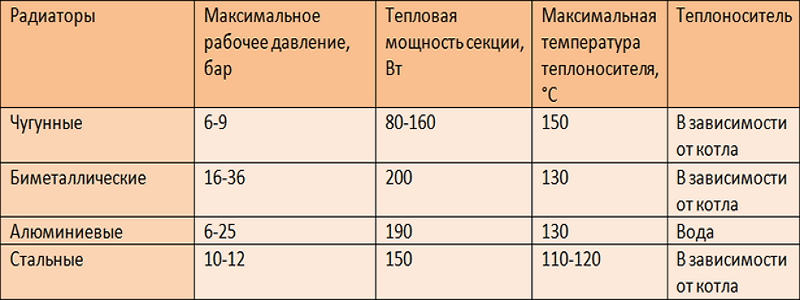
- Cast iron model. Implemented at a low price. Able to withstand all modes of operation. Service life is 50 years. Their only drawback is the large weight, which, nevertheless, contributes to the long-term retention of heat after turning off the heating.
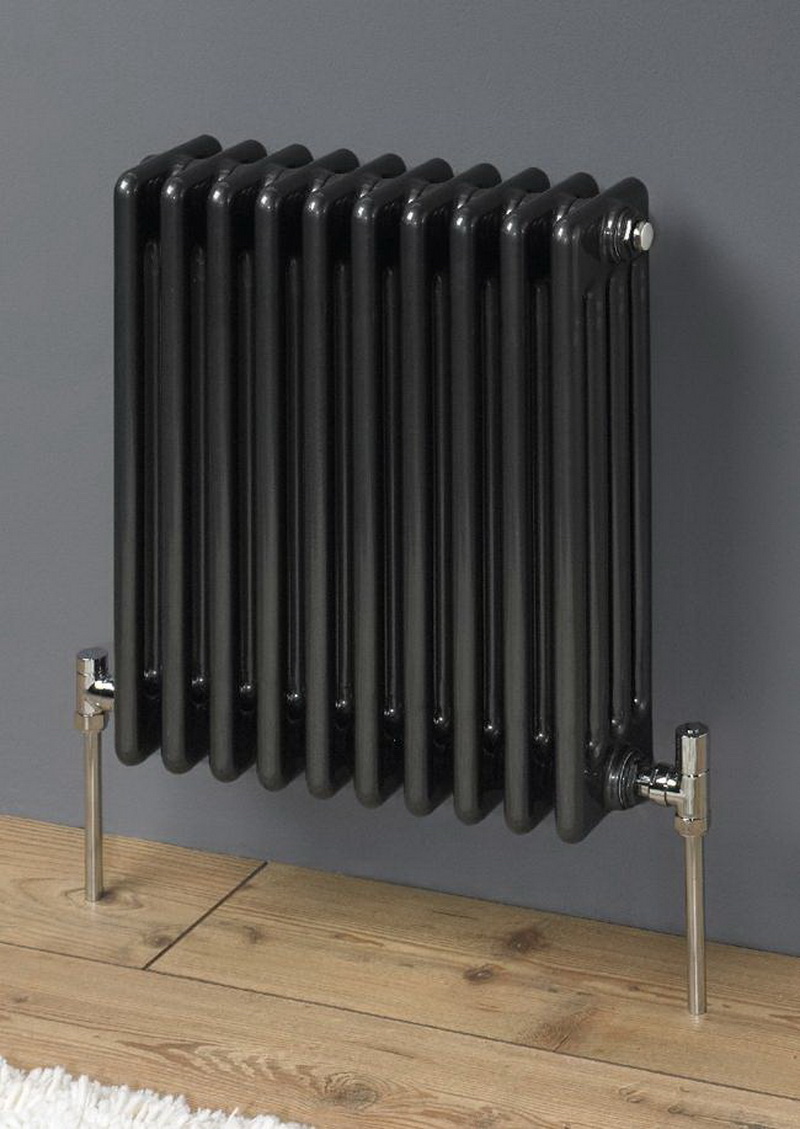
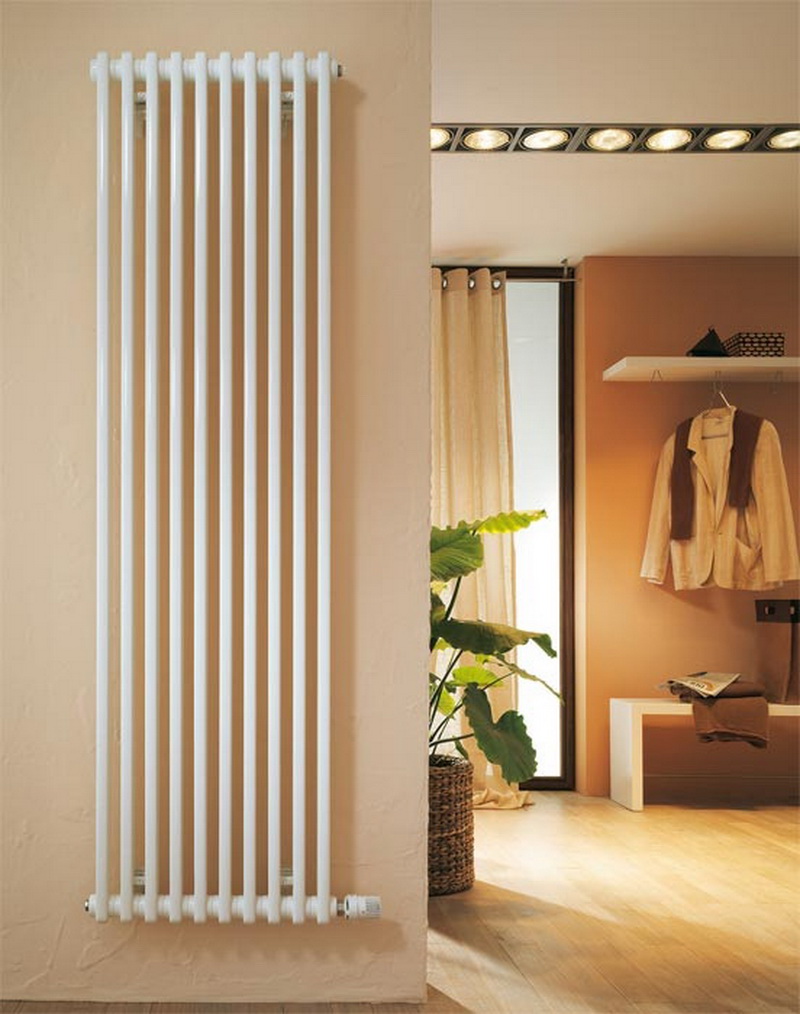
- Steel. They are structures of connected steel pipes. Withstand any conditions, however, the service life is less than that of cast iron. Characterized by a small heat dissipation.
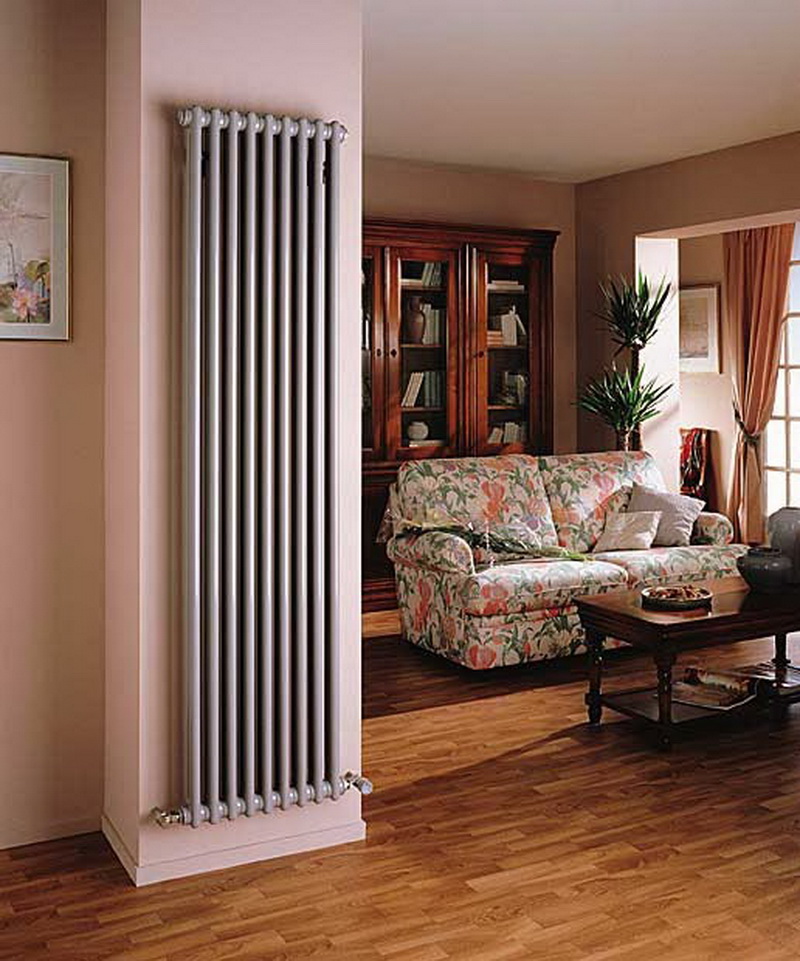
- Aluminum. This type of construction is made of light metal. Stand out the best heat dissipation. Serve 15 years. They are installed only in the schemes of autonomous heating. They function in all operating temperature conditions, however, they will not withstand hydraulic shocks.
- Bimetallic. Made on the basis of steel internals, which are covered with an aluminum shell. Characteristics are similar to steel, the level of heat transfer is close to an aluminum radiator. Distinguished by high cost.
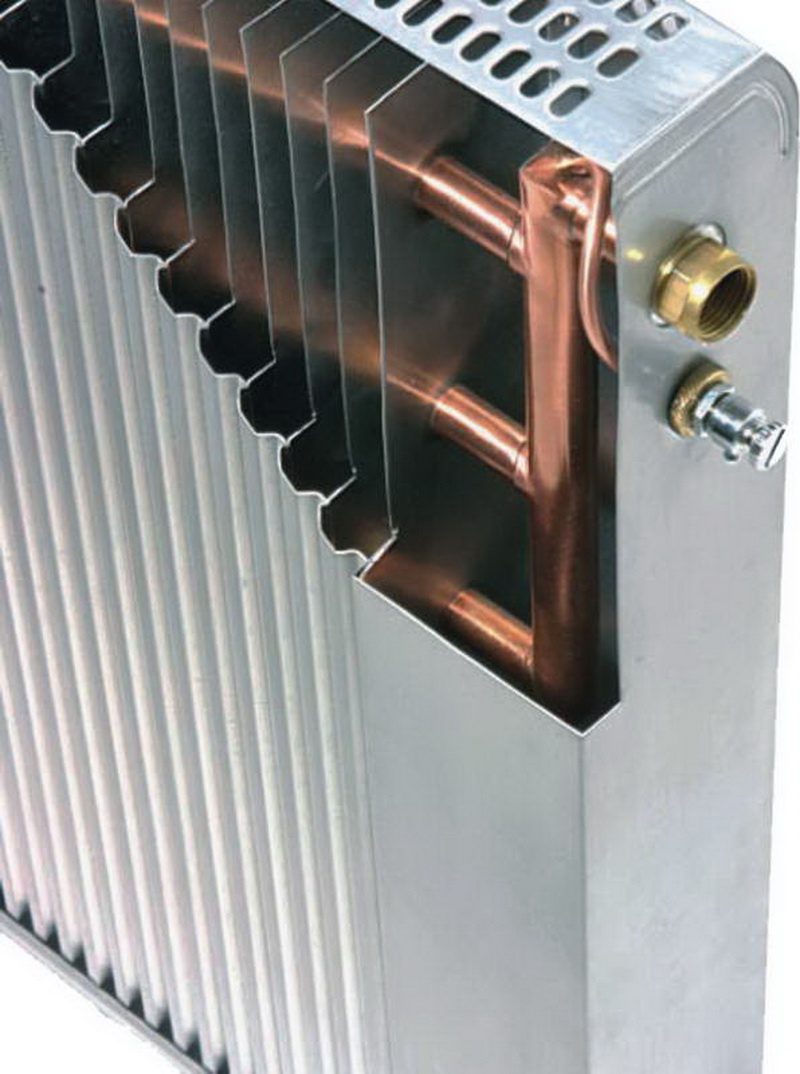
- From copper. They are considered "eternal" sources of heat for any room. But have a very high price.
- Plastic. New family of radiator designs. Today, they are suitable only for schemes for autonomous heating of private residential buildings with heat carriers heated to 80 degrees.
The main criterion for choosing the type of radiator is compatibility with the heating structures of a residential building.
It is determined by the following specifications:
- The temperature of the equipment. It can be found in the installation certificate. Thus, panel types of aluminum raw materials with andoriated coating are used in the case of high pressure in the installation. It is important to pay attention to the level of the working temperature indicator for which the pressure value is indicated in the technical documentation. Most foreign manufacturers indicate the maximum level of pressure in the structure based on a temperature reading of 60 degrees.
- Operating pressure. This indicator is different for each installation. Thus, aluminum representatives function at pressures from 6 to 16 atmospheres, steel produce heat at 9-10 atmospheres, bimetallic - 20-35 atmospheres.
- The size of the internal section of the radiator tube. It is recommended to give preference to models that have a large diameter of the internal duct. This will prevent blockage and breakage as a result of finding large particles in the fluid of the heating system (in particular, corrosion).
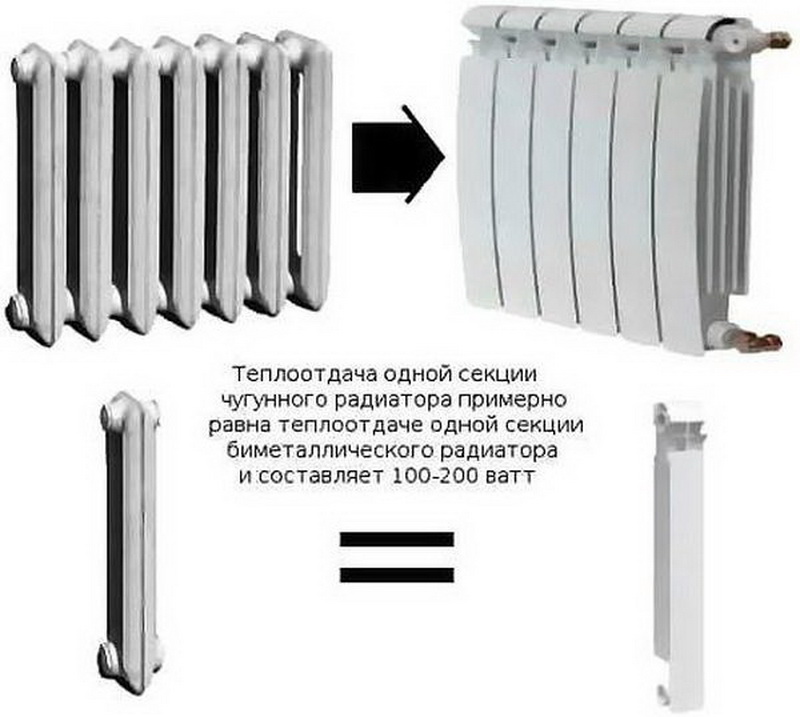
- Heat transfer. It depends on the performance of heat, the time of heating the air in the room. Heat transfer is influenced by the production material of the radiator installation. The best indicators show copper and cast iron samples. In the third place are aluminum counterparts. Steel products are characterized by the lowest level.
- Heating the room. An important role is also assigned to the total surface area of the heating structure: the larger it is, the better the heating is performed. In this case, refers to the size and number of nodes of the device. On the dimensions of the battery affects the size of the window opening of the room. Since the main purpose of the radiator is to create a thermal curtain, its width should be 60% of the analogous parameter of the window.
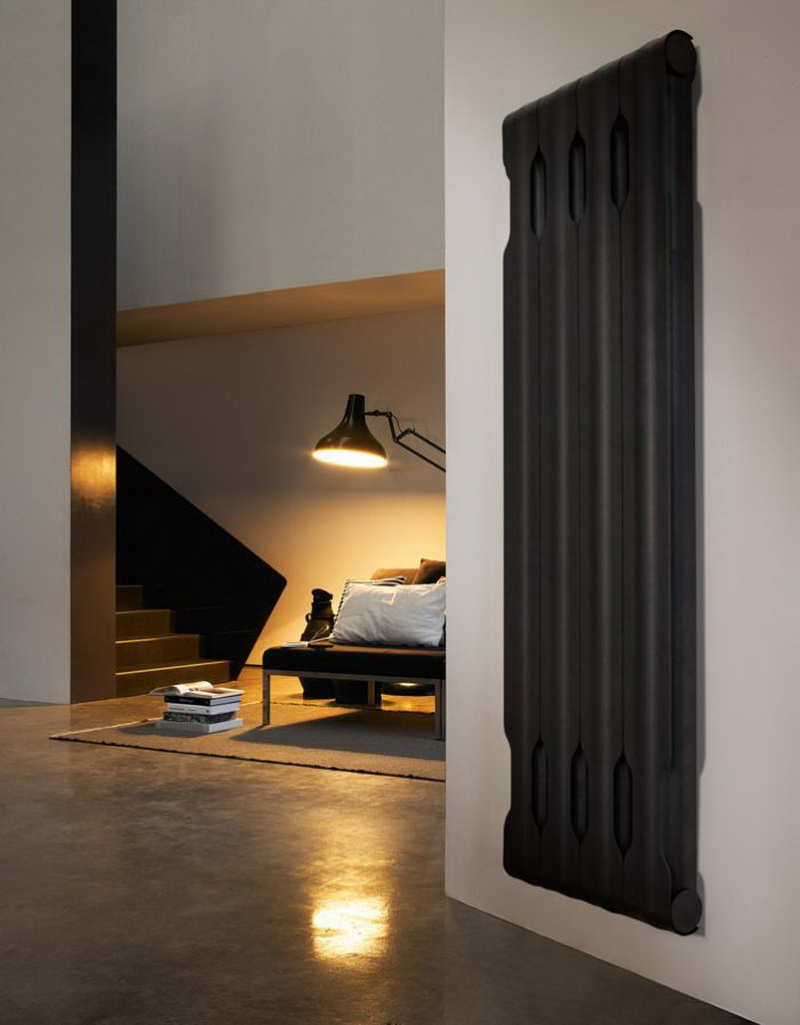
- Appearance. Manufacturers offer a large range of heating products of different colors, textures and configurations, so that the technical device can harmoniously fit into the overall interior design.
- Different dimensions of batteries in height from 200 to 600 millimeters. Medium models are made of steel base, while the high ones are represented by cast iron samples. Choose appropriate ones based on the distance between the floor surface and the window.
Power calculation
To correctly determine the power of the batteries and their required number, a special formula should be applied: Q = k * A * T
In this case, Q is the device power, k is the heat transfer rate of the radiator, A is the surface area of the heating device, presented in m², T is the temperature of the heat transfer media. Using this mathematical expression, it is possible to determine any of the values if there are other indicators. As a result, you will get the maximum efficiency of the radiator, and the number of sections required for heating a specific room based on its size and other parameters.
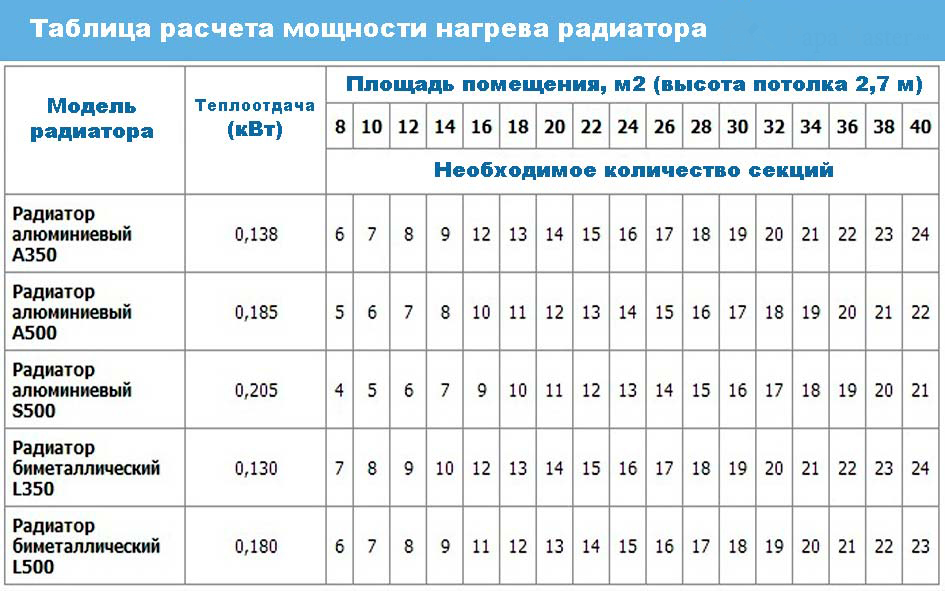
Sample calculation of indicators.
Suppose we need to purchase a device to maintain a comfortable temperature in a 15m² room. Perform the following calculations - 1.5 * 1.15 = 1.725 kW. Then go shopping to find the best look. Determine the size corresponding to the desired room. In addition, do not forget about the level of product performance.If the technical documents for the installation indicate that k * A = 31.75 W per 1, and if it is assumed that the head is 35, then Q = 35 * 31.75 = 1111.75 W. The result was less than 1.725, calculated previously for the desired room.
If only this device is installed in a 15-meter room, the heat generated will not be able to heat the room.
As a solution, you can:
- buy additional radiators (for example, 2);
- add more sections to the existing installation;
- purchase another device.
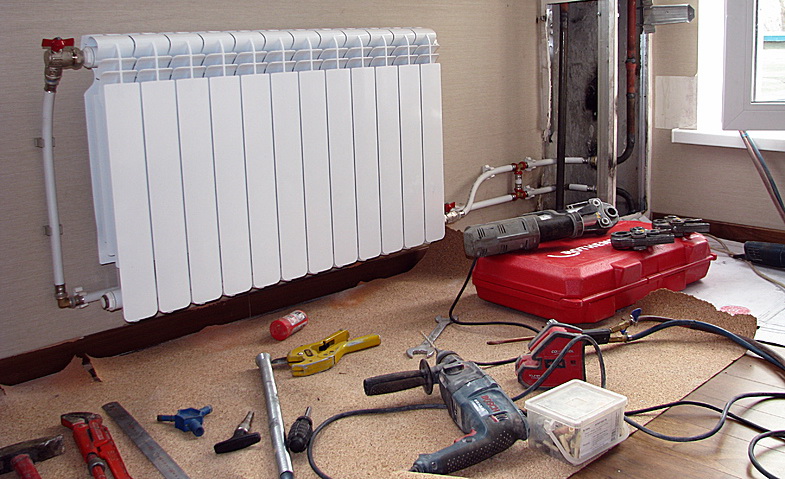
Materials and tools
Installation of radiator installation is possible in the presence of the necessary components. So, the collector of any block of the product is made with a female thread G1 (1 inch), in addition on the left side there is a left-hand thread and the right-hand one on the right. Such a counter direction of the coils serves to combine the nodes into one battery through the use of a nipple. Consequently, it will take several adapters to allow the transition to standard right-side cutting, which in most cases is used for liner sizes 1⁄2 or 3⁄4 inches. Differently they are called futorki or transitional traffic jams. The size of the internal connecting diameter depends on the tubular product that will be used for the liner.
Basically, only two inputs work, and the remaining 2 should be plugged. For this purpose, a standard plug (plug) with an external thread, which corresponds to this adapter, is suitable. The best option stub will be a sample with a strong o-ring seal that does not require additional winding. It is possible to replace the “kit” of fittings and caps with a standard blind plug with a suitable left or right 1G thread.
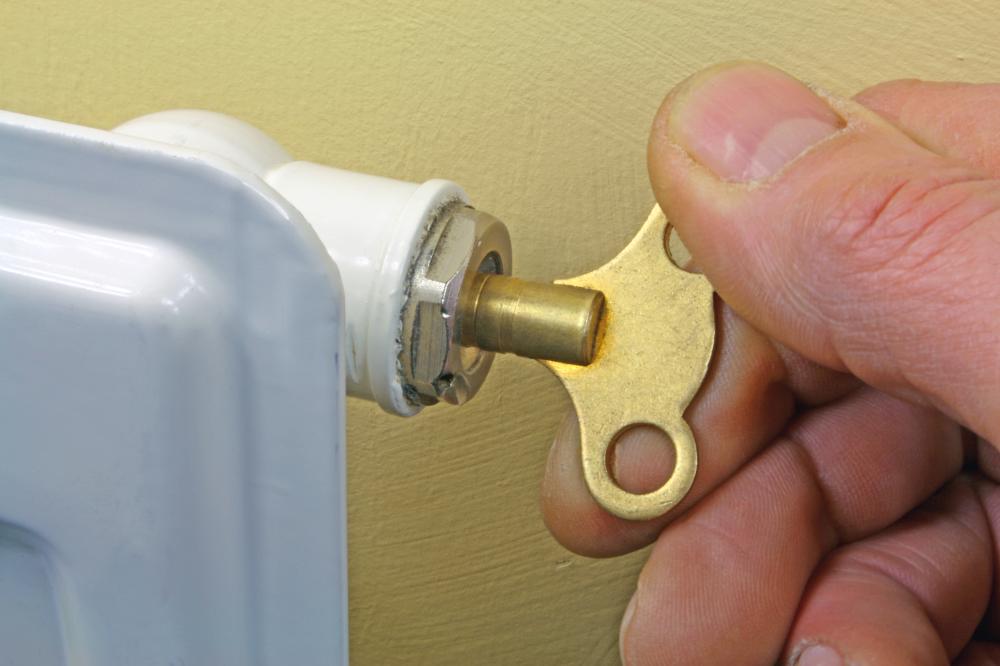
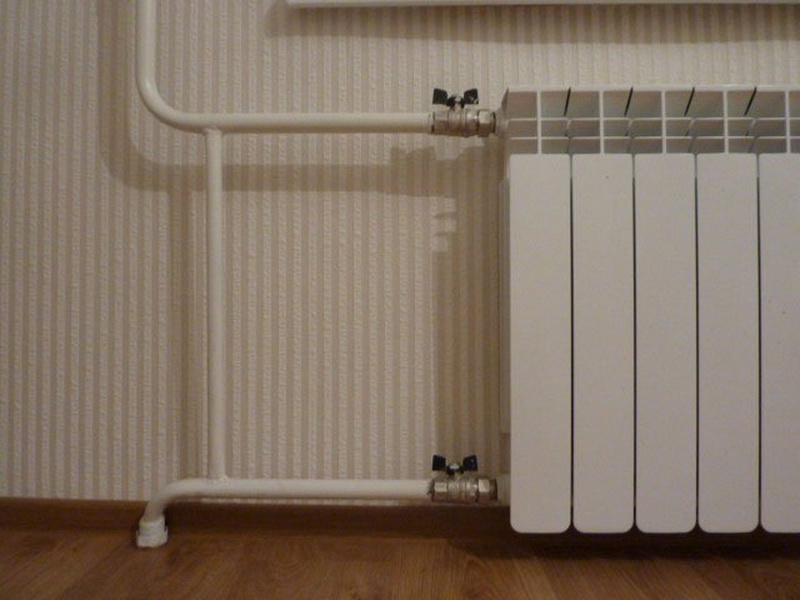
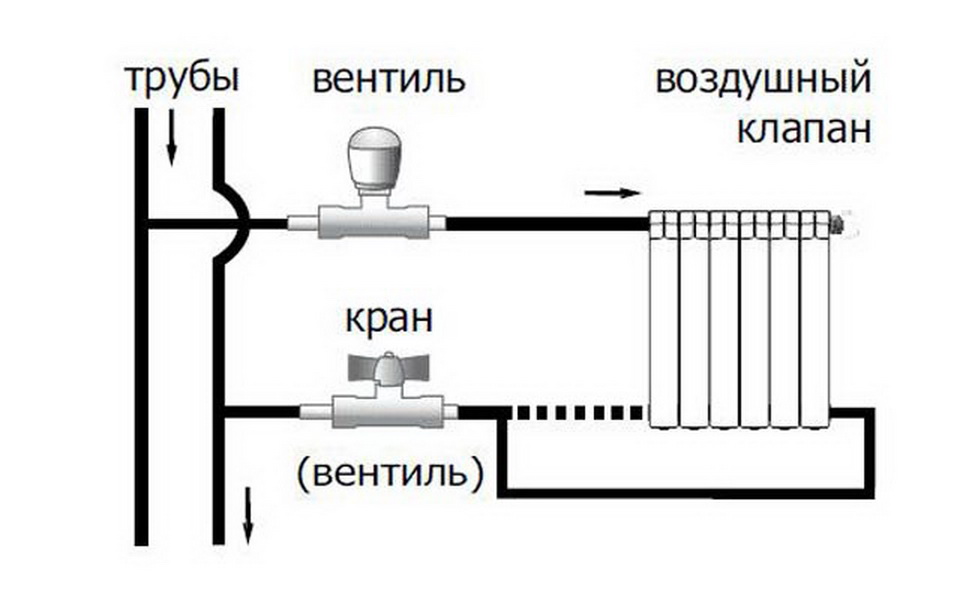
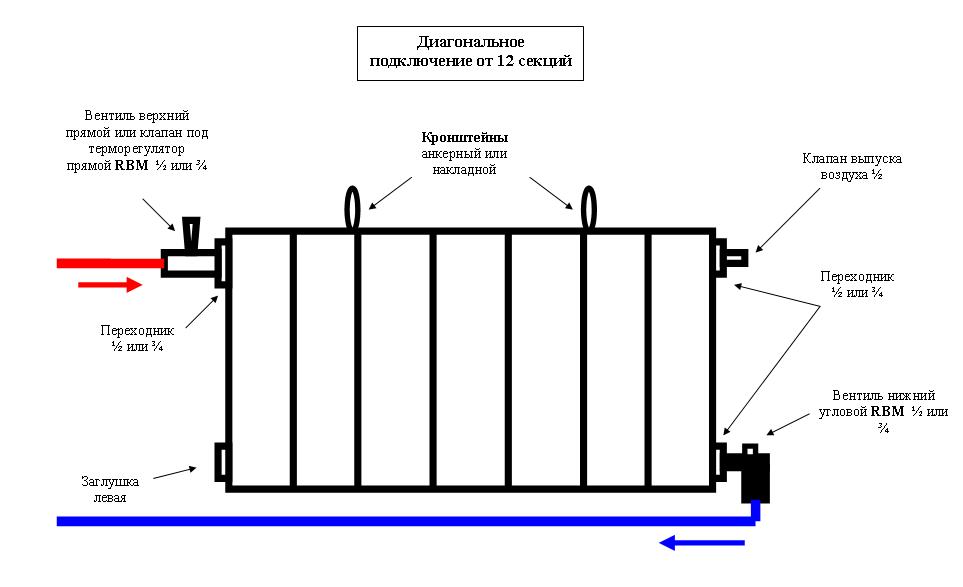
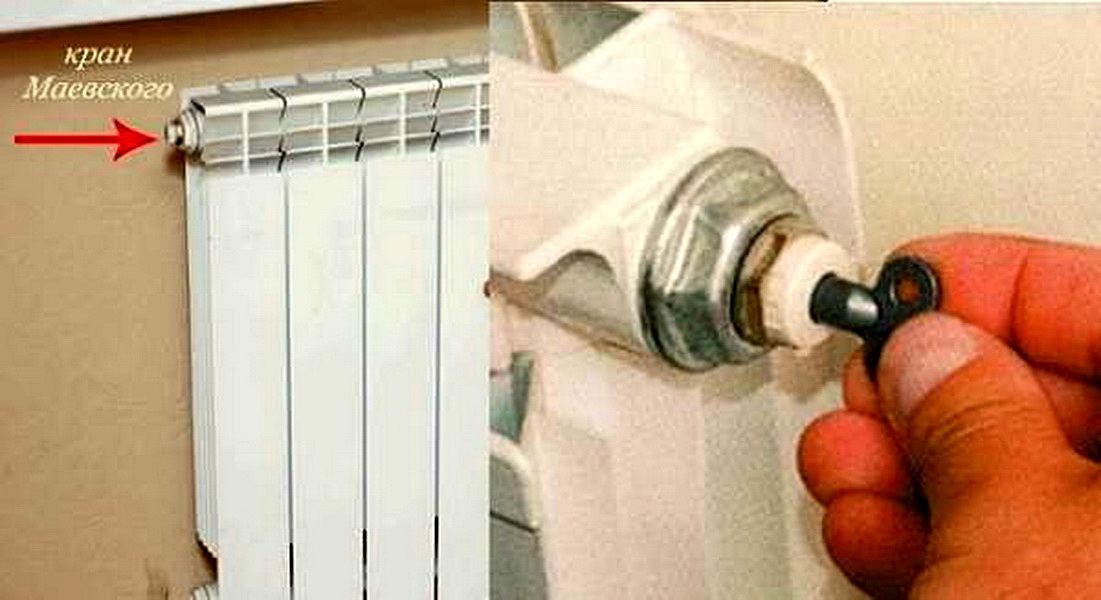
One pair of plugs (4 in total), as a rule, is not installed. Experts recommend replacing the top manifold plug with a Mayevsky valve, which is a simple device that will help free the battery from accumulated air before the heating season or during the course of prophylaxis. This device is located diagonally to the supply pipe, in the case of two-way bottom connection. Attach a key to the tap in the kit, which helps to release air. This component is necessary for security reasons, so that a small child could not unwind the tap and flood the apartment.
These materials are sold both separately and as ready-made mounting kits. This set consists of two pairs of feedthroughs, one cap, a Mayevsky crane with a key. Additionally, in some sets, brackets can be found to hang the installation on the wall (3 medium batteries with up to 10 units will require three brackets). Components sell for 1⁄2 and 3⁄4 inch pipes. Installation measures, performed in accordance with all requirements, provide for the device to be disconnected from centralized heating for preventive, repair and replacement purposes. Therefore, you should buy two standard ball valves of the union nut with an “American” coupling that will facilitate future procedures associated with servicing the device.
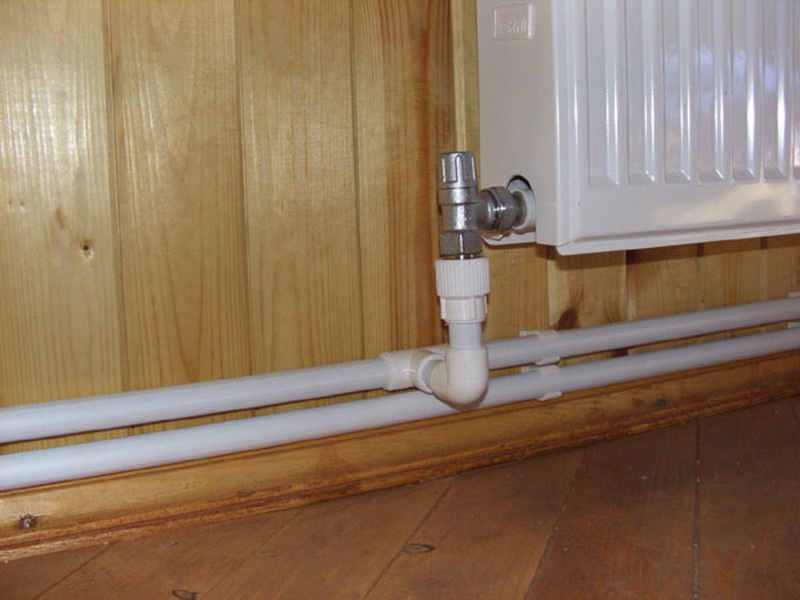
A fitting that has a flare nut will be packed into the adapter tube of the structure, a crane will be packed onto the liner tube, then the coupling of the knot will not cause unnecessary trouble.
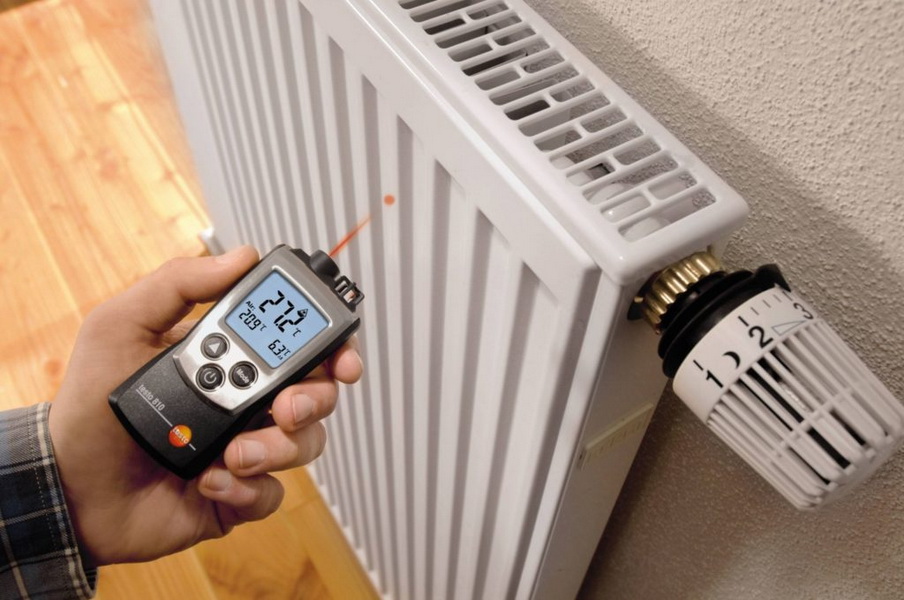
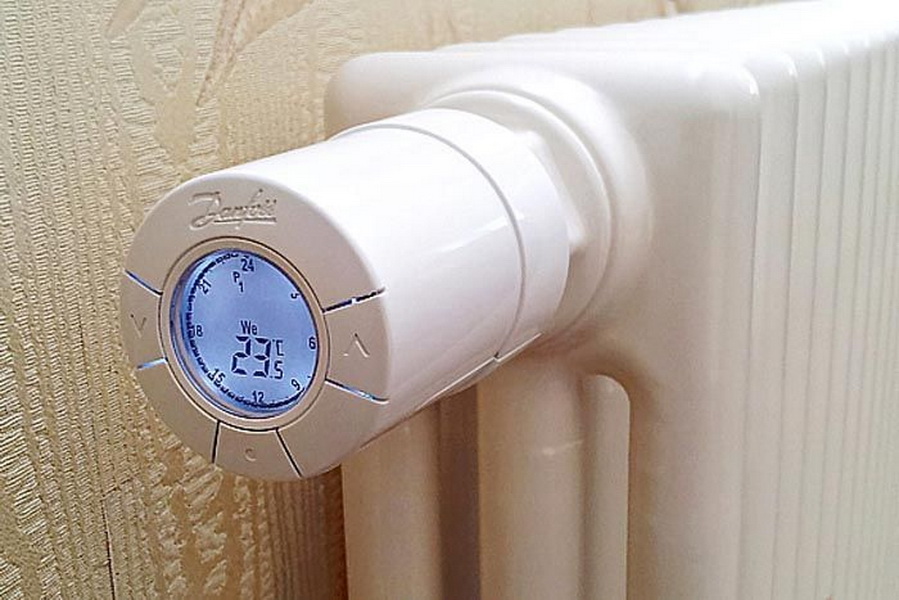
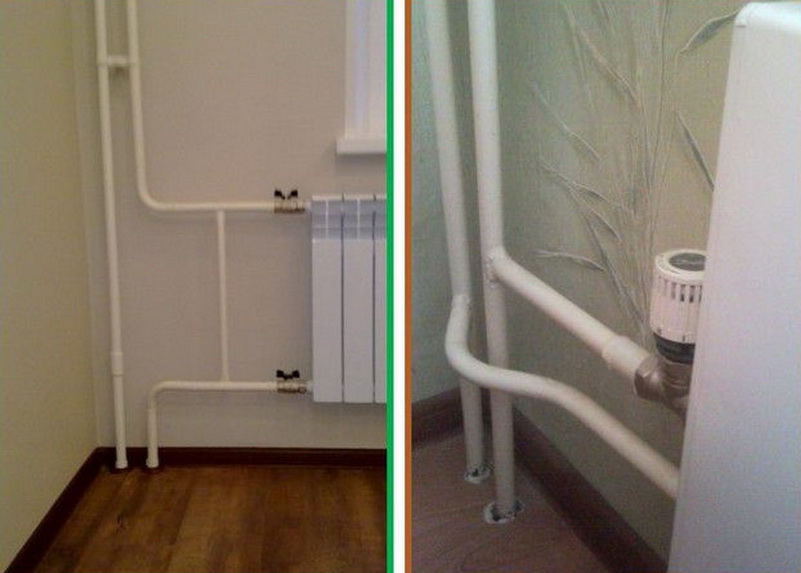
With special features of the heating scheme, consisting in the possibility of installing control devices (with excessive thermal performance of the centralized heating system or the need to fine-tune autonomous devices), standard ball valves are replaced with other elements.For example, a thermal valve with a thermostatic head can be adapted to the supply pipes. They are produced by straight and angular models, depending on the method of connecting pipe fittings to the heating structure.
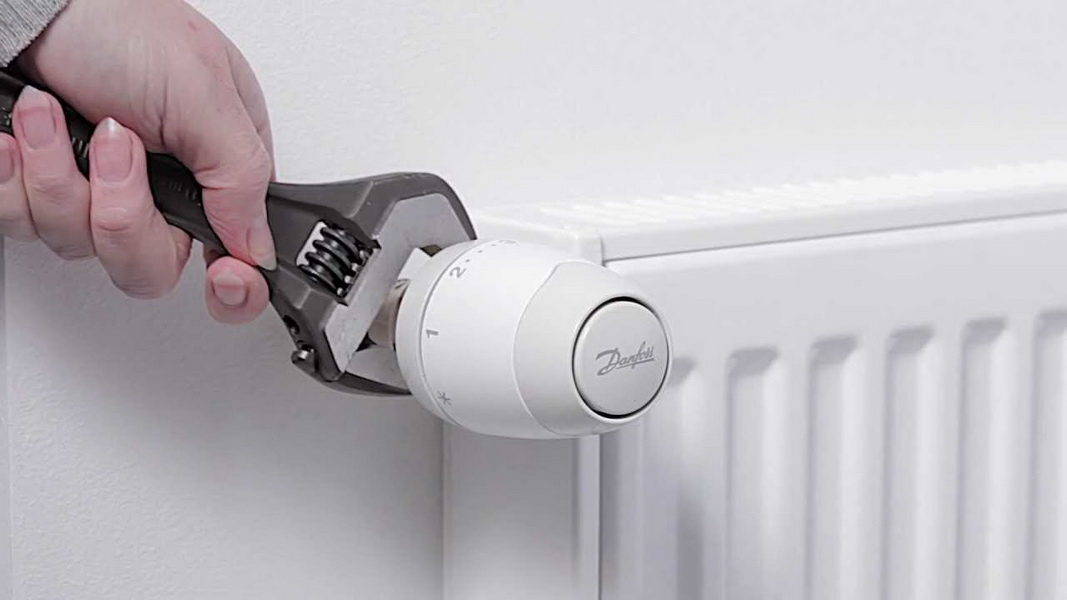
The correct balancing and the maximum return of the heat generated will be ensured by a control valve installed at the outlet. To preserve the established settings, install a block valve, the adjusting screw (for a screwdriver or hexagon) which is closed with a stopper. Add that you can use a ready-made thermostatic kit, suitable for installation with a thermal valve, a balancing valve, a thermostatic head.
Mounting methods
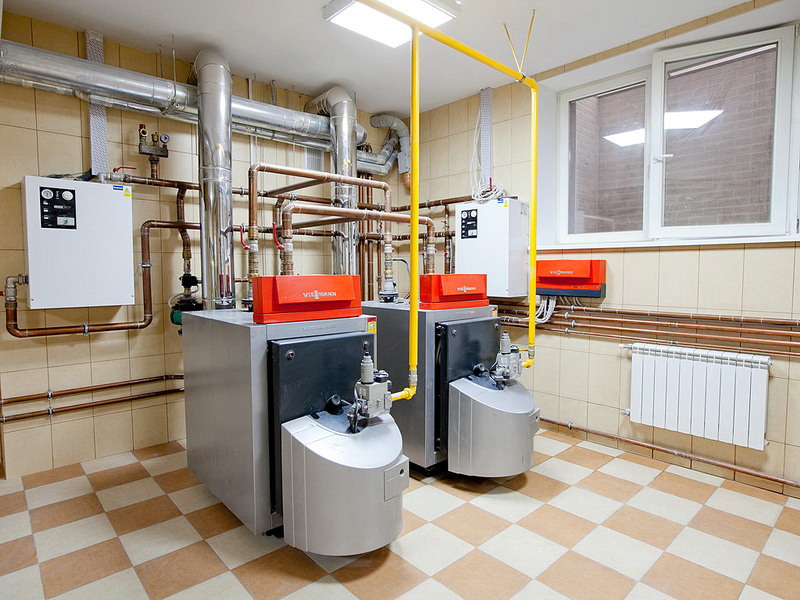
Basically, the heating equipment is attached to the wall. It is installed under the windows to create a thermal obstacle that does not allow the cold air masses that pass through the glass. Wall mounting of the device should be carried out taking into account the weight and material of the wall. Samples from cast iron have the greatest weight. Brick and concrete walls are able to withstand them. Installation must be done using standard dowels.Wooden or drywall walls will require a special base. This support will have the main weight. The use of a wall holder is required to keep the radiator case in a vertical state.
Bimetallic radiators also need to carefully select fasteners. Despite the lower weight compared with cast-iron samples, the load they create on the wall will be impressive. In this case, you may need to install a floor support component. The small weight of aluminum models allows you to install them on any wall.

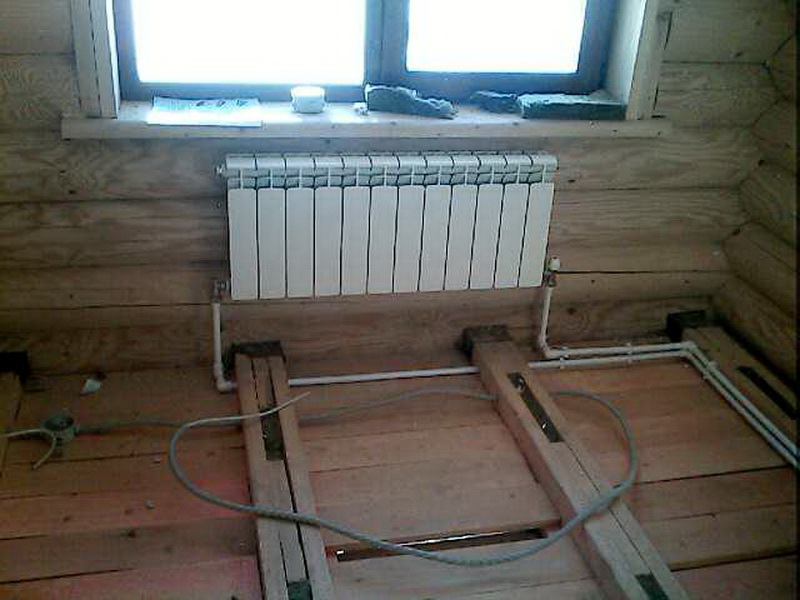
Floor mounting has a number of advantages, such as reliability, speed and the ability to accommodate any different-sized heating devices. The procedure for installing the device to the floor surface is identical to the wall. Since the floor is a hard and hard surface, you will not have difficulty choosing materials. You can apply the usual mounting system.
The only exception is wood flooring in a country cottage. Here for heavy installations it is recommended to use a wall bracket for safety,to reduce the load on the coating. Decide on the area for each of the floor brackets before starting the installation. Then firmly fix each holder. With a small weight of the device in the set are compact legs, fasteners of elements is carried out in a similar way.
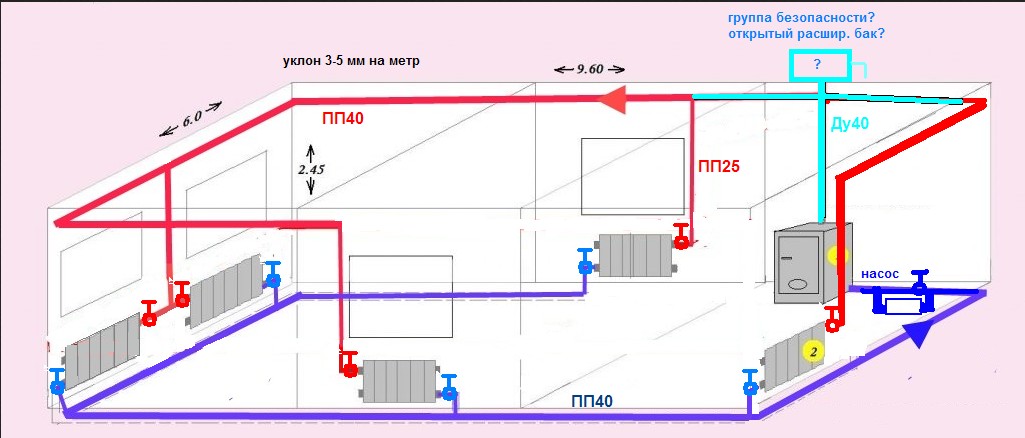
For the design and installation of heating structures used single-tube or two-tube heating circuits. They are vertical and horizontal, and to the two-pipe collector types.
The vertical one-pipe system is considered the most popular and installed throughout high-rise and multi-apartment buildings. The horizontal one-tube method is rarely used in private buildings. Most often it is used to heat buildings with a huge territory. In this case, the pipe that supplies the liquid, in turn, passes through all heating installations located on the same level. The liquid is alternately cooled in each node and to the latter is fed largely cooled.
The one-pipe version allows to reduce the cost of the acquisition, installation and further use of the pipeline.
Despite its excellent technical characteristics, it may not fit into the overall interior of the room, as it has two main disadvantages:
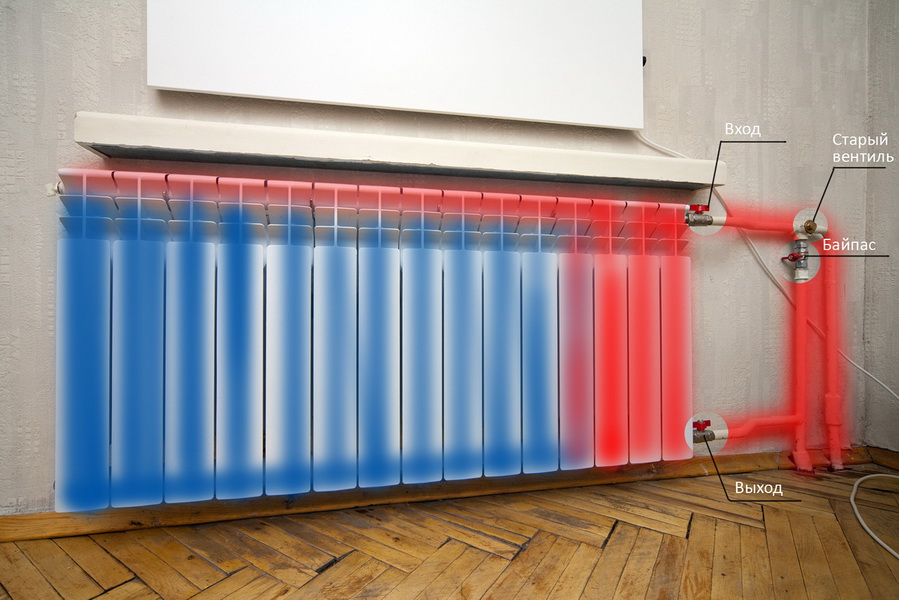
- Frequent problems with adjusting the heat generated in a single device. It is impossible to reduce, increase the degree of heat transfer, or turn off the entire radiator circuit. During installation, you can use a special jumper, which is called the "bypass". With its help, the radiator device can be turned off without a complete shutdown. Heating at the same time will be made by backing through the feed tubes or standpipe.
- Another disadvantage is the use of devices of various sizes. In order to expose approximately the same level of heat output in the entire chain of devices, it is necessary that the device standing in the chain be the first to have small dimensions, and the latter, on the contrary, should be distinguished by large dimensions. Naturally, this will negatively affect the appearance of the entire room.
The two-pipe version is a variant of the docking of a pair of pipelines to the heating devices: direct and reverse. The liquid cooled in each node will not flow to any of the parts, but will be redirected to the boiler for return flow.The result of this connection will be almost identical to the input fluid temperature. This allows the use of installations of similar sizes.
Heating schemes based on two-pipe connection usually have no drawbacks. The diameter of the flow and return pipe lines and connections are much smaller than single-pipe counterparts. In this regard, such structures look more aesthetic when installed by an open method, and are also more suitable for concealed installation of reinforcement in a concrete floor screed or in a “shter” (small recess in the wall for installation and installation of pipes, further hidden by a layer of plaster).
The main advantage of two-pipe systems is the ability to regulate the heat release in the room by installing an automatic thermostatic valve on each part. The installation of the horizontal two-pipe circuit can be carried out with the upper and lower wiring. Bottom wiring has one distinctive feature - the possibility of a phased connection of individual sections of the structure. For example, it will be needed during the construction of the floors of the building.
The collector two-pipe version due to the presence of engineering features differs from others. It is constructed where no pipeline is needed. Here, each radiator is joined to the distribution manifold by individual supply and return lines, which allows connecting different heating devices in one circuit and introducing “secondary” heating structures (“warm floor” lines, etc.).

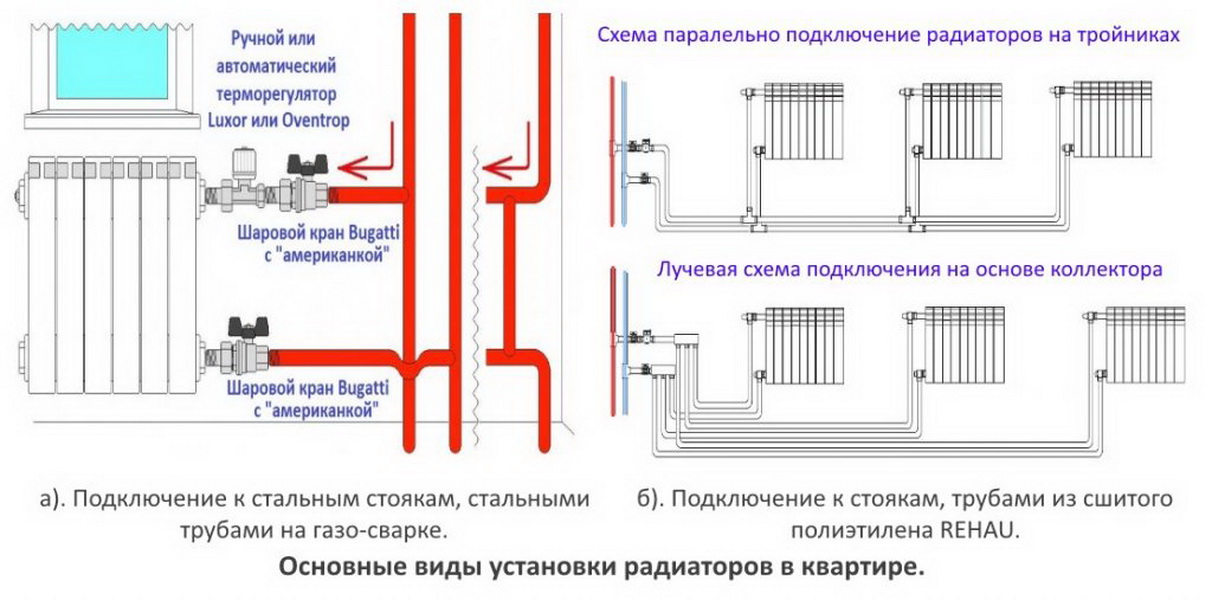
Wiring diagrams
Before starting self-installation of heating radiators, you should choose one of several options for connecting to the central system. The side (one-sided) installation method is based on the fact that the tubular product that supplies the hot heat carrier is connected to the upper pipe of the heating system. The outlet pipe is joined to the bottom, due to which a high heat transfer is obtained. The reverse order of connection (the feed element is connected to the bottom, and the discharge element - to the top) will reduce the return of the generated heat. A similar method of connection in a one-pipe scheme is carried out by mounting jumpers, which will facilitate the functioning of the structure.If after applying this option for strapping a multi-block system, the extreme parts do not get enough warm, then install a liquid duct extension.
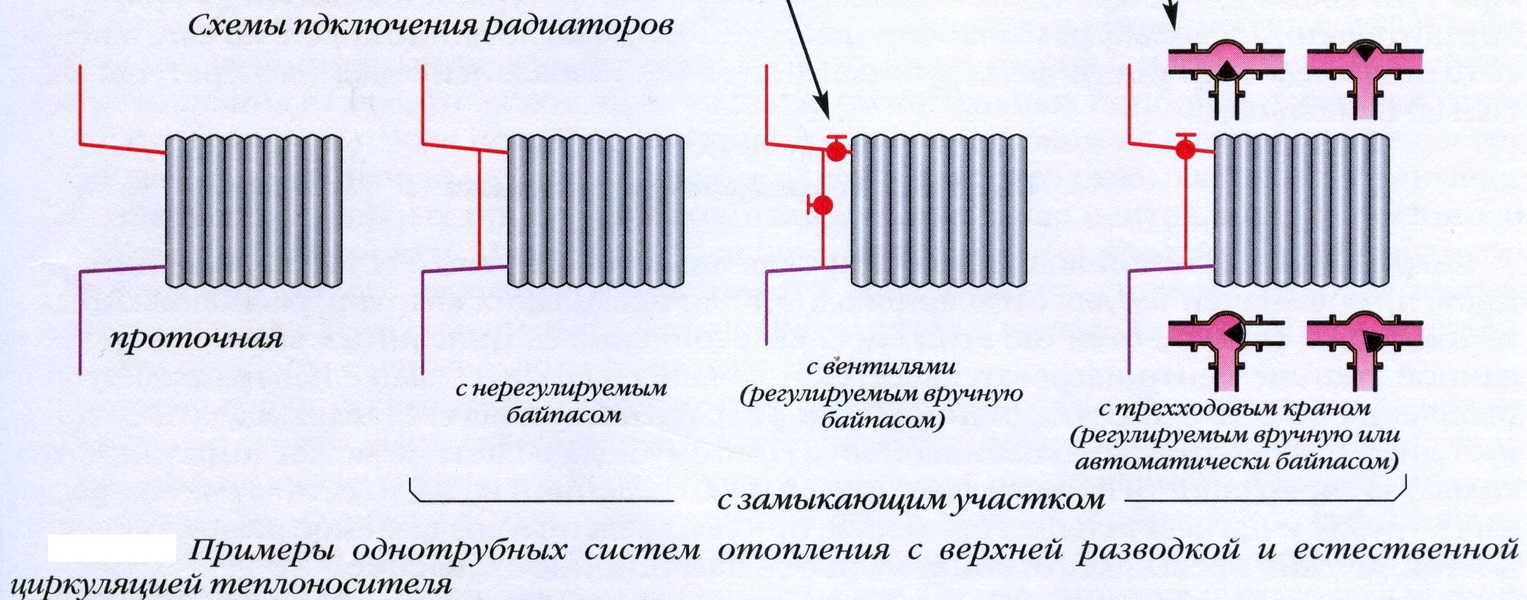
The diagonal installation method is based on the fact that the pipe fittings that supply the heat transfer fluid are connected to the upper branch pipe of the batteries, the “return pipe” is connected below on the parallel side of the installation. Suitable for long batteries and a large number of nodes. The similar option provides a maximum level of a thermolysis. When connecting the supply element at the bottom, and the outlet - at the top, the level of heat generated will decrease by 6-10%.
The bottom option is suitable in cases where the heating pipes are laid under the surface of the floor or plinth. It is considered the most aesthetic. The supply and return pipes are located below and at right angles to the floor. Sequential connection involves the movement of the coolant under the action of pressure generated inside the system. Excess air is removed by the Mayevsky valve mounted on the radiator. The disadvantage of this method is that the work on the replacement, repair or elimination of accidents will be possible with full heating shutdown, which is impossible in the winter cold.
Parallel connection is based on the wiring, where the coolants pass through the heat pipe, which is embedded in the heating structure. In a similar way, and conduct a challenge. The taps at the entrance and exit allow changing the radiator device without turning off the centralized heating circuit. The disadvantage of the method is the insufficient degree of heating of the installation of the structure in the case of low pressure.
Work order
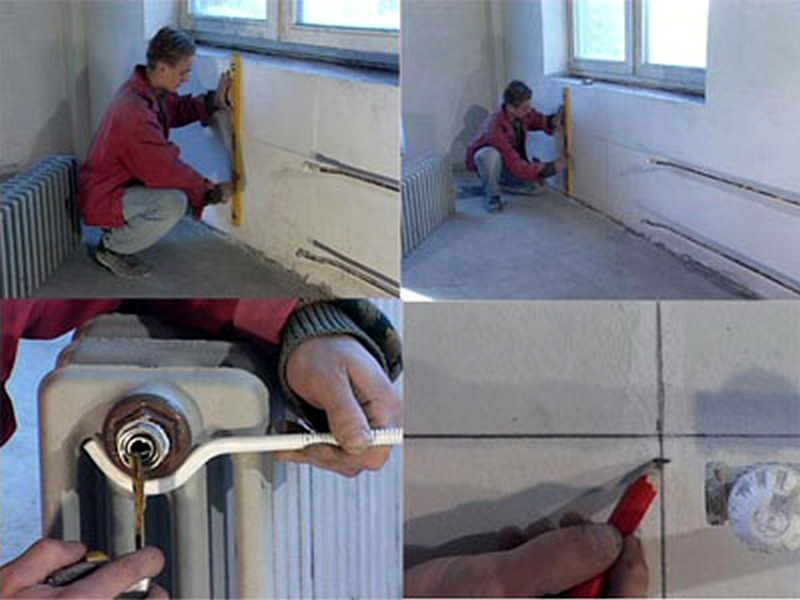
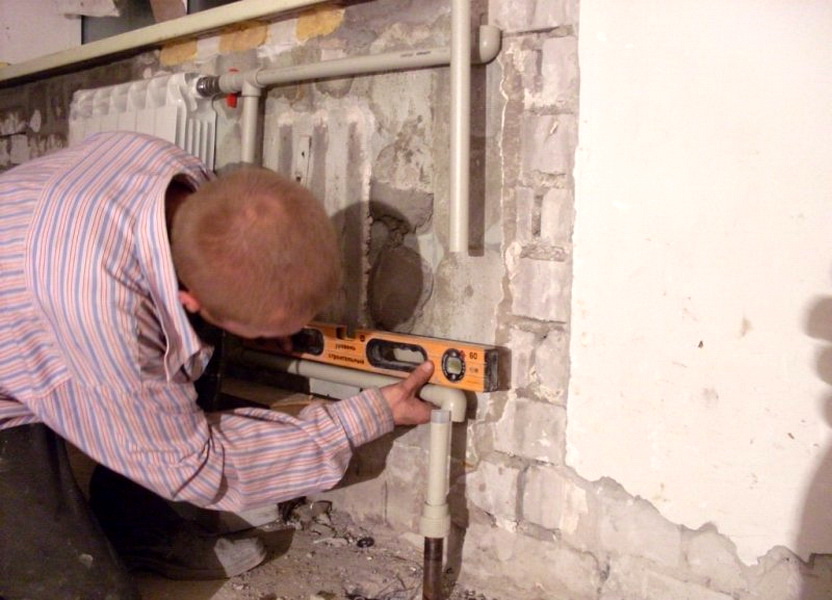
Proper and high-quality installation of heating equipment with your own hands is possible with a set of necessary tools: roulettes, thermostats or adjusting valves, drills, level, radiator holders, drills, pencil, flax with sealant, gas welding, gas wrench, angle grinder, dowel, protective points. It is necessary to make the necessary marks and grooves of the appropriate diameter. First of all, determine the level suitable for mounting the device.
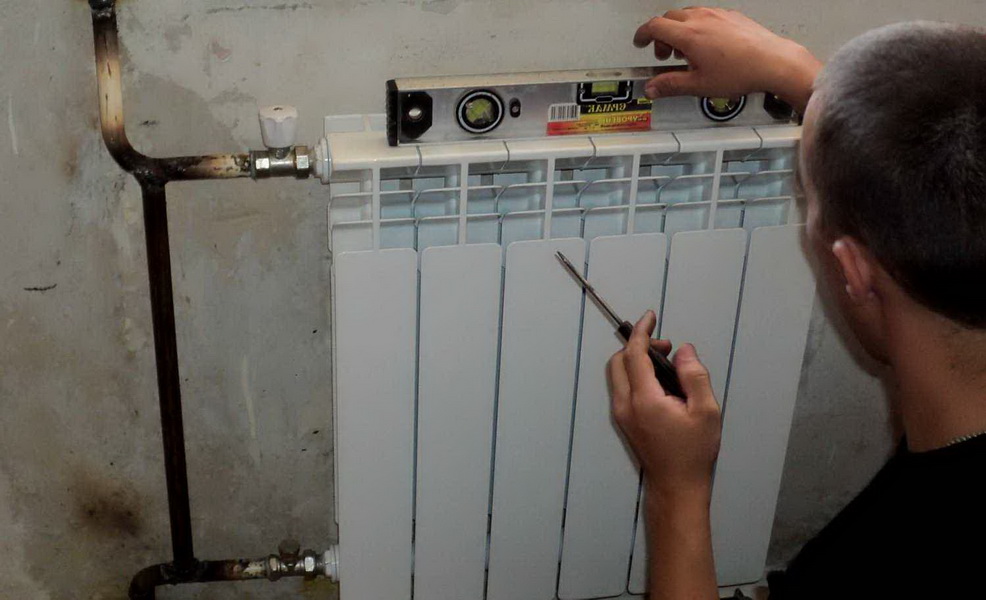
The distance from the floor to the radiator should be not less than 10 centimeters, between the central points of the outlet - 50 cm, add 5 cm of space from the middle of the sections, as a result you will calculate the mounting height of the upper mounting parts.Then you should measure 65 centimeters and, using a level, draw a horizontal line or mark the points of approximate installation of the holders. On the resulting line, determine the distance between the two fasteners. Based on the type of heating batteries, it can be calculated both by the staples on the reverse side and by the intervals between the units.
Then move the position of the attachment points or holders 50 cm below. Using a level, draw two straight lines 50 centimeters long from the fixing points of the upper brackets. As a result, all the attachment points will be obtained, where using a hammer drill, drill holes, insert plastic plugs with brackets and screw in the fasteners. Upon completion of this stage, you can install a radiator, not forgetting to check its level, and begin the process of connecting it.
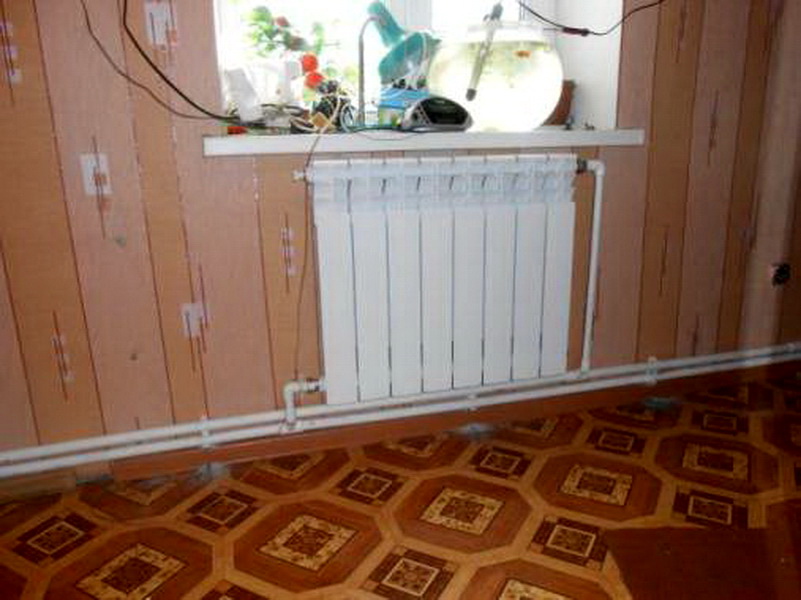
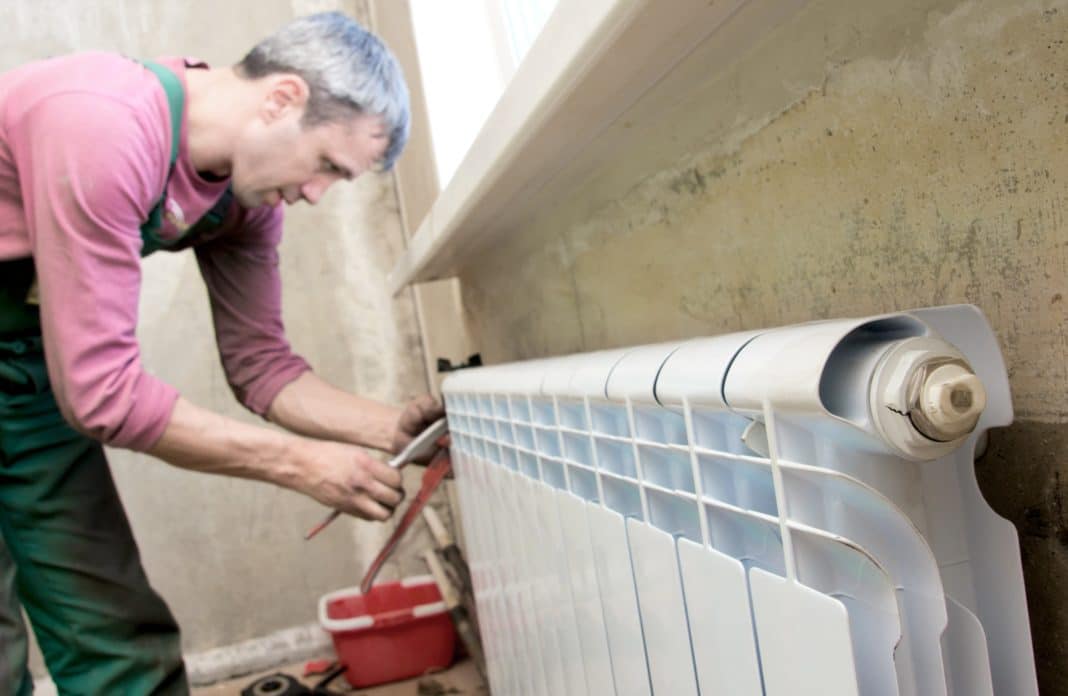
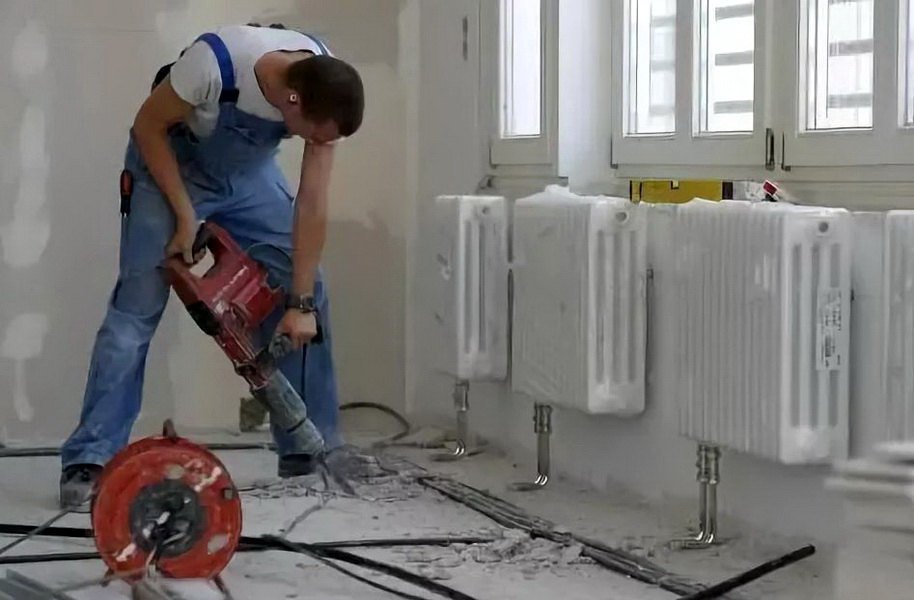
Connecting devices to a centralized highway is based on the materials used. Different types of pipeline are characterized by their subtleties and rules of installation, mandatory in the course of the work. First of all, equip a radiator or a battery with detachable elements, a Mayevsky tap, as well as a plug for air release.Typically, the taps of detachable components or "American" are installed on the lower liner, and on the top - Mayevsky's tap with a plug.
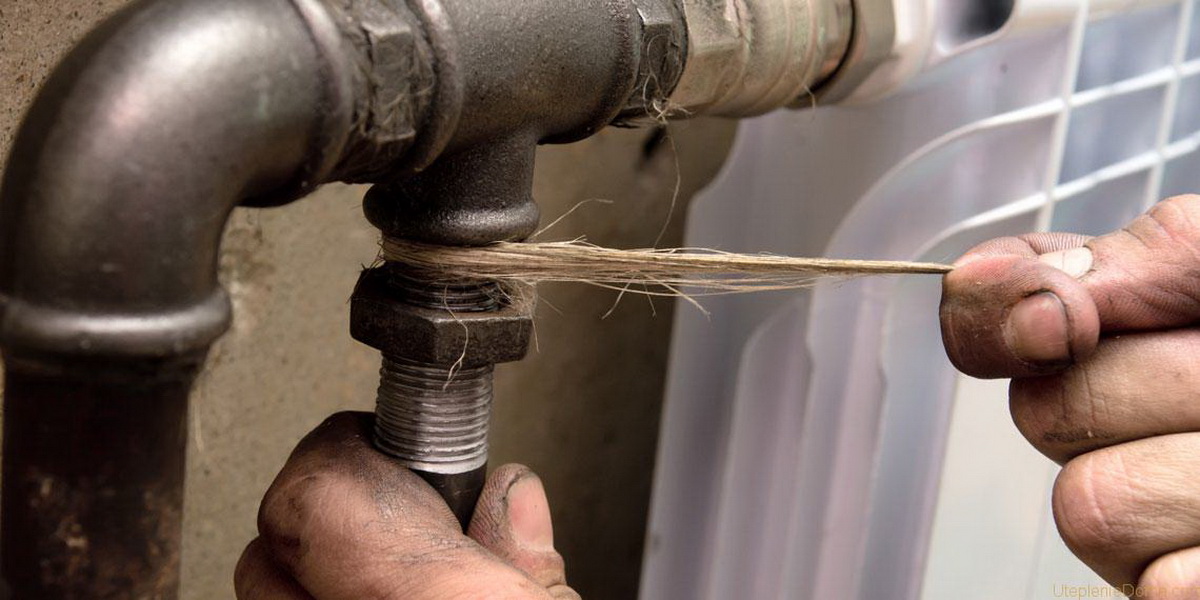
To ensure the strength and integrity of the above parts in the system, use tow. For the convenience of this procedure, remove the product from the wall. Then reattach all equipment to the right place. The next stage is the docking itself with the central highway. Basically, the connection and installation of radiators is carried out using a polypropylene pipe, which is joined with a special soldering device.
Plug it in, wait for it to heat up, and start working. The first step is to assemble the eyeliner by soldering the threaded adapter to the piece of tube and screwing a part of the American into it. After that, adjust the dimensions of the liner to the required ones, connect it by welding to the tee located on the central pipeline.
Recommendations of specialists
A distance of 3-4 centimeters between the internal surface insulation material and sections will ensure the high-quality passage of air mass near the heating device.If this digital indicator decreases, there will be a difficulty in the movement of air, a violation of convective exchange and a decrease in the efficiency of the heating device. Attach the foil to the inner surface of the wall if it is not possible to insulate the wall using a special heat insulating agent.
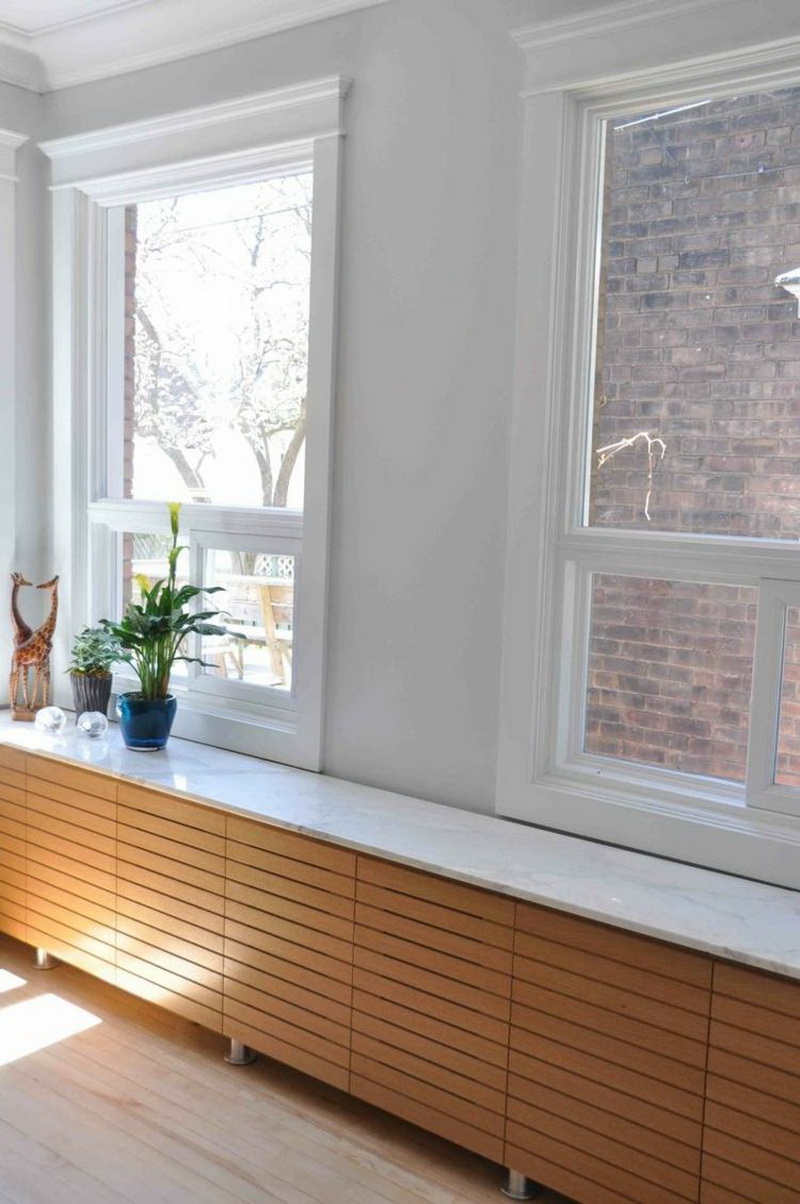
In order that the design does not spoil the appearance of the room, it is often hidden behind a decorative panel. However, it does not allow heat to enter the room. The result will be a reduction in design efficiency.
How to install a radiator with your own hands, see the following video.


