Subtleties of installation of a two-level stretch ceiling
Two-level stretch ceilings are a modern type of decorative finish, which is very popular when creating design projects. Thanks to the elegant assortment of textures and colors, these designs fit well into any style and allow you to create an unusual interior in the rooms, filling them with the atmosphere of home comfort and warmth. For self-installation of such ceilings, it is enough to choose the necessary building materials, tools and master the minimum knowledge of installation.

Special features
The two-level hinged ceiling consists of a polyvinyl chloride film, which is fixed to the frame profile, after which the canvases make the surface ideal.Such designs are in great demand in the decoration, as they are characterized not only by an aesthetic look, but also allow to visually increase the space. Depending on the desired effect and the height of the room, you can choose a canvas with a glossy or matte surface.
Before you start installing a two-level stretch ceiling, it is important to consider the following features:
- Location In the event that the canvas is planned to hang in a room with high humidity, then you will need to purchase moisture-resistant drywall. For rooms where there is no accumulation of condensate, and there is always a normal temperature, normal sheets of drywall will do.
- Form of construction. At first, it is recommended to create a projection of the future view, and only after it will fit all sizes, you can begin to make two-tier compositions, which often consist of arcuate contours.
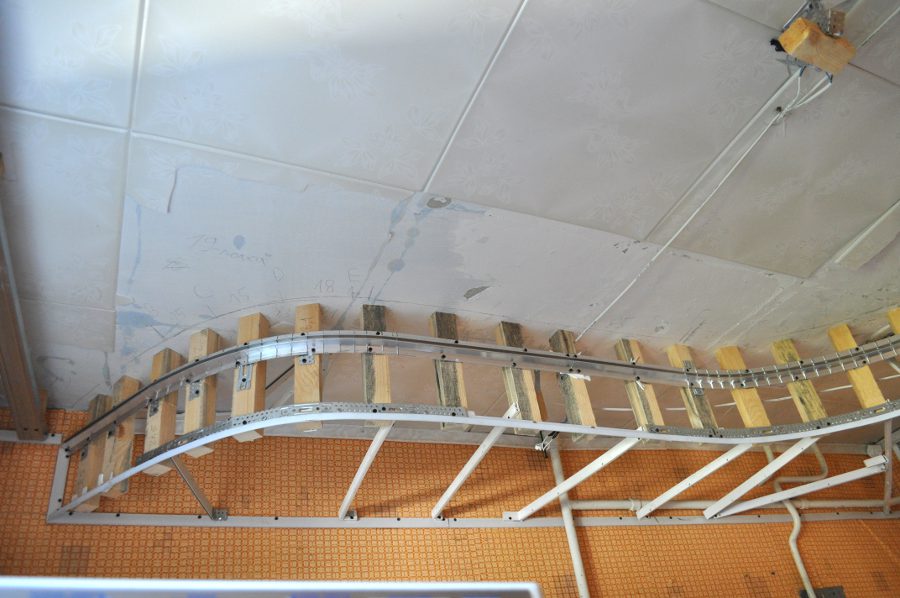
- Type of frame. For its installation choose both wooden beams and metal profiles. The latter allow you to create any form, bend easily and are characterized by high wear resistance.
It is also worth noting that bunk ceilings have many advantages, among which are:
- installation speed;
- providing a perfectly flat surface;
- beautiful appearance;
- protection of premises from flooding.
As for the shortcomings, then they include the fragility of the canvas and the high price.
Therefore, during operation, punctures and scratches should be avoided; installation should not be carried out in rooms that are not heated in winter, since under the influence of low temperature the product will lose its original structure and collapse.
Types of designs
Two-level compositions are a special type of construction, which is made of two stages and has a different configuration. Compositions can be made from any canvases, and the combination of several textures and colors in the interior looks unusual. Before you make such a ceiling, you first need to build a frame with a base coating. Depending on the model of construction, various materials can be used: plywood, wooden bars, profiles and metal tires are most often used for this purpose.
Bunk ceilings are of the following types:
- The usual.Represent a surface consisting of a tension material laid out in two tiers.
- Combined. Designs are made of drywall boxes and canvases.
- Backlit. They can be installed as one stretched fabric or supplemented with drywall inserts.

For the installation of each type of ceiling, a scheme is first drawn up, according to which an accurate measurement is made, and all necessary components are calculated.
Therefore, it is important to correctly measure the surface area and draw a drawing, where the material of the frame and canvases will be indicated.
Conventional designs, as a rule, are made from a profiled, plywood or wooden frame. Combined compositions need a solid foundation, so they choose a reliable framework that could withstand drywall boxes. Steel profiles are excellent for this.
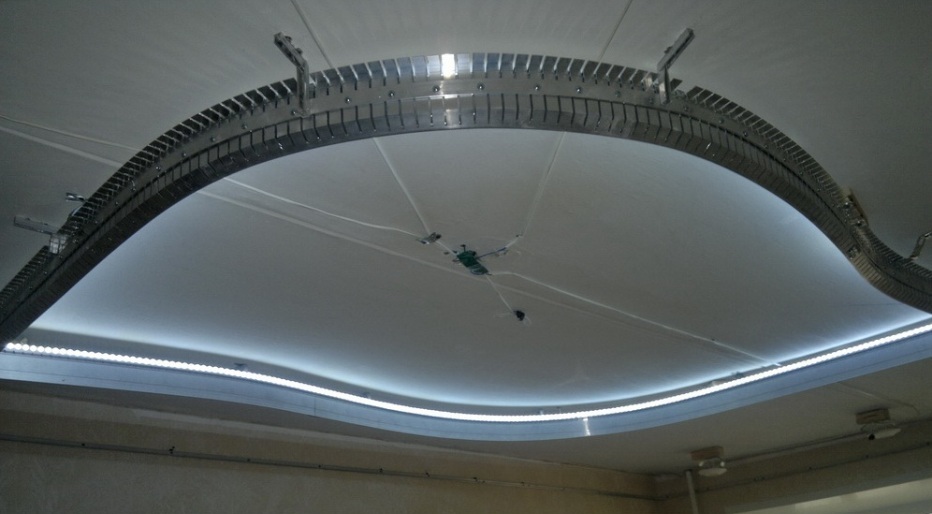
As for the two-level ceilings with lighting, their base is made of metal corners and tires. At the same time, the installation must be calculated in such a way that the frame has got a free space for laying the hidden lighting and cords.For such an installation, a special instruction is used to avoid errors.

Subtleties of installation
Installing bunk ceilings is not particularly difficult, but it should be carried out, following certain rules. All work and assembly require a sequence of execution. Therefore, for beginners who want to hang the structure with their own hands, it is first recommended to make sketches of the ceiling, and only then proceed to the installation. Usually the installation consists of the following steps:
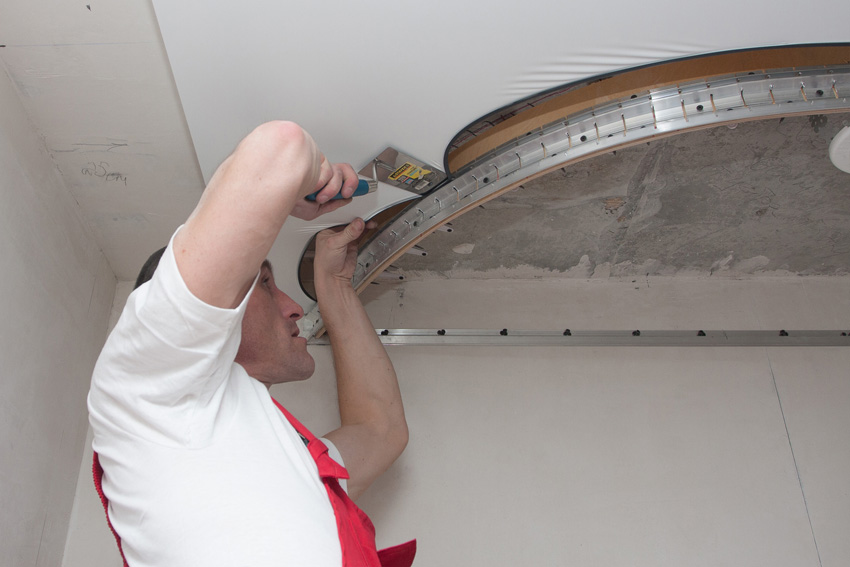
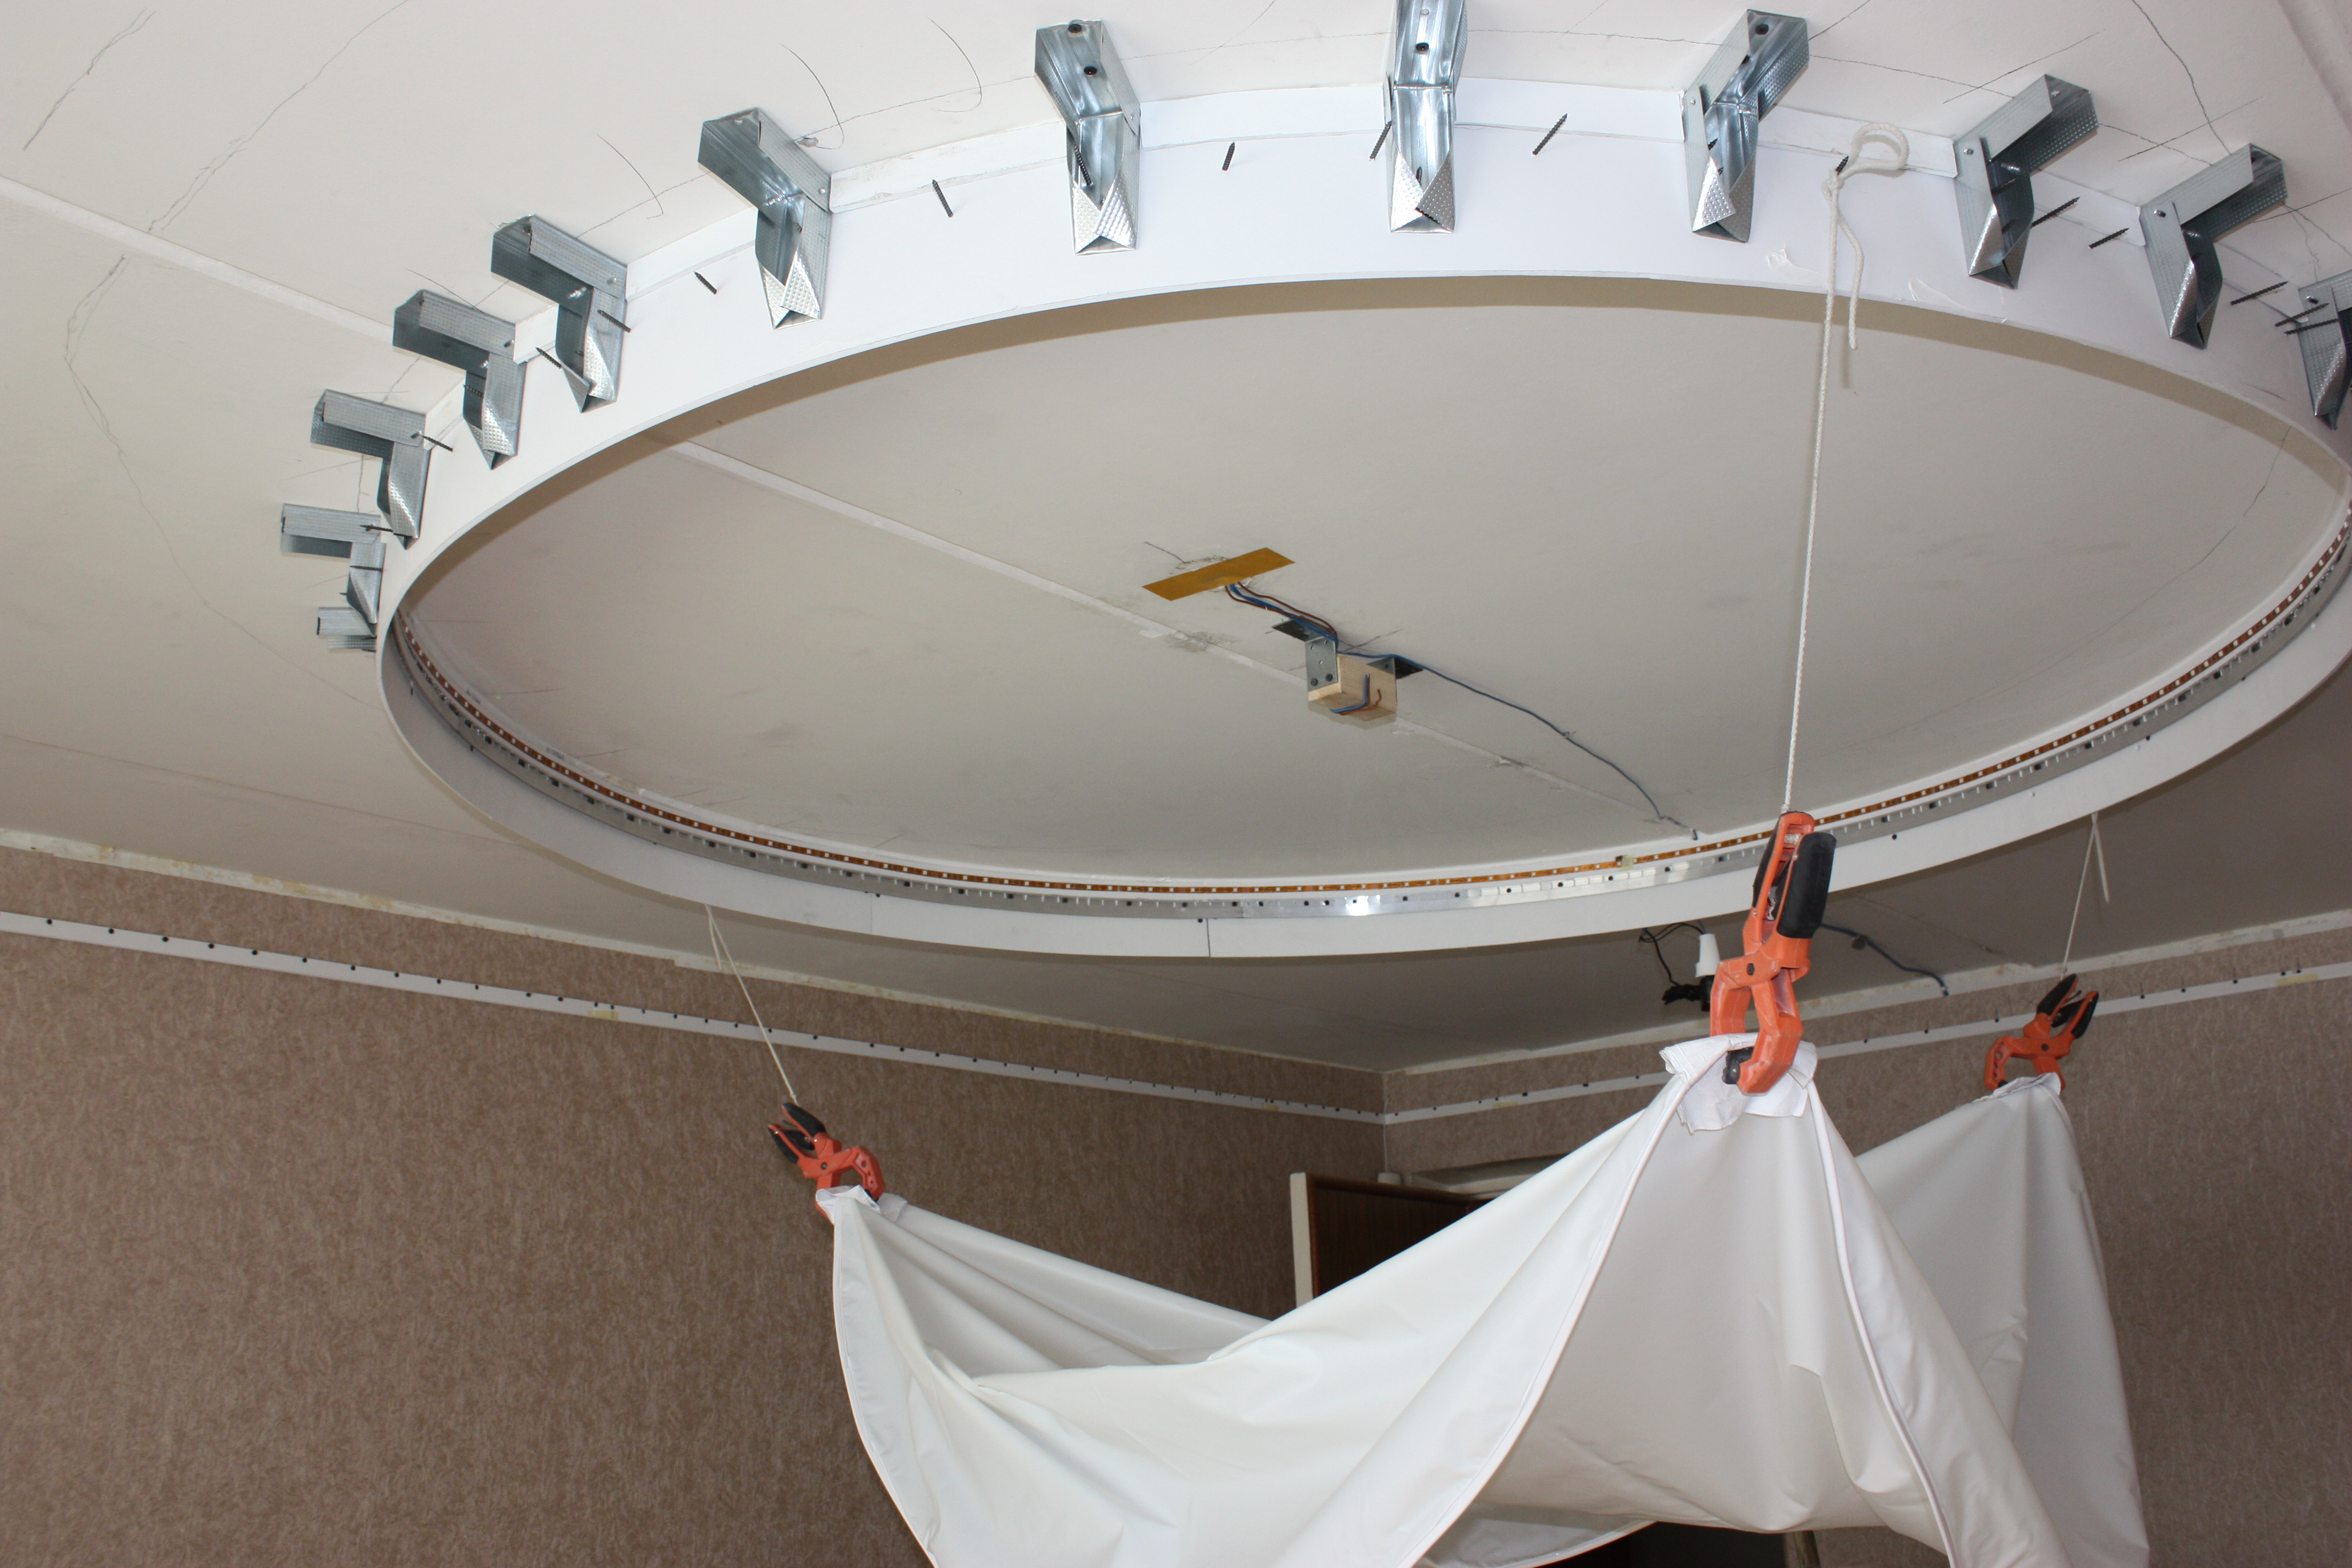
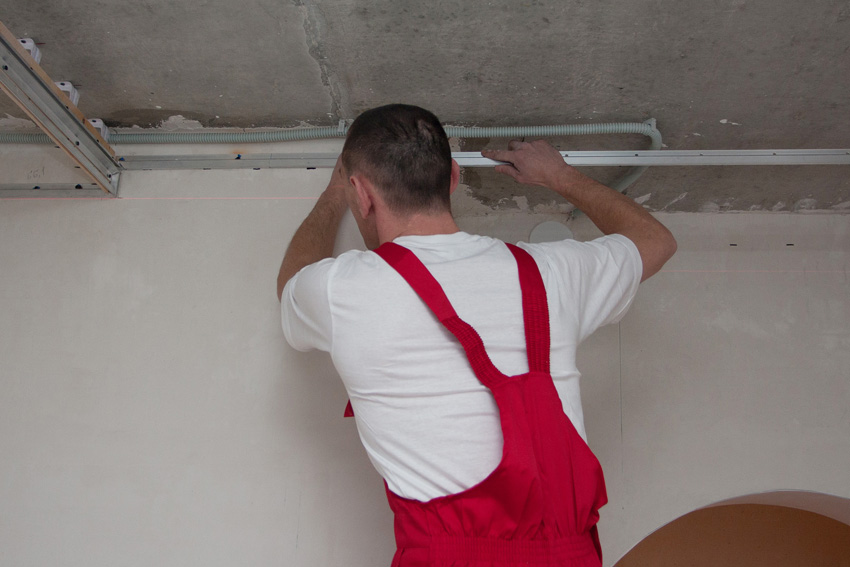
- Build the frame. To do this, choose the shape of the structure, make rough sketches and fix the elements to the main ceiling. In order for the two tiers to overlap correctly, they are joined one by one and exactly all are measured out. The frame must be durable in operation, so often choose an aluminum profile for it. The fastening technology is simple: guides are fixed, and then profiles are attached to them using self-tapping screws.

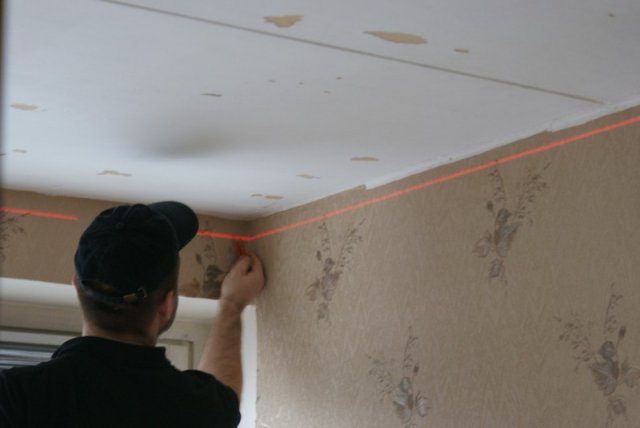
- Fastening the upper tier. Along the perimeter of the room outlines are outlined, along which it will be possible to see the intended installation site of the ceiling. The plane should turn out to be horizontal, and in order to simplify the marking process, it is recommended to use a laser level.In this case, regulating suspensions allow you to set the profiles strictly level, they need to be mounted at a distance of 0.5 m from each other. For profiles, a distance of 30 cm is observed. Then sheets of plasterboard are laid: they are fixed to the frame with self-tapping screws.
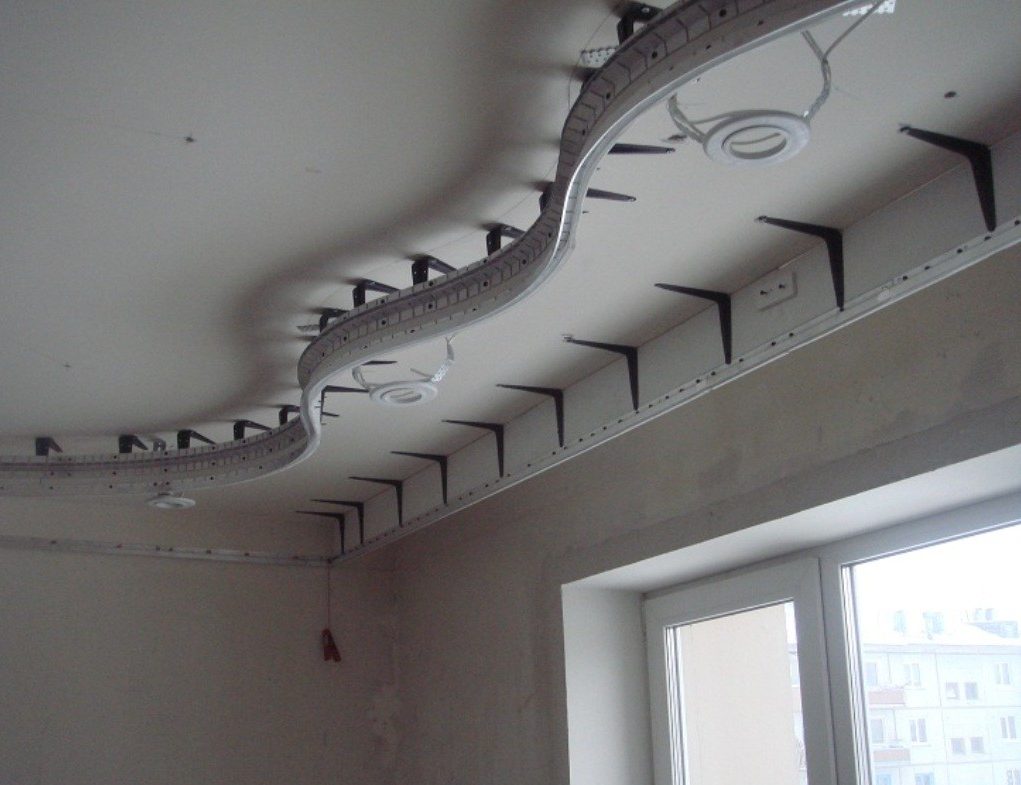
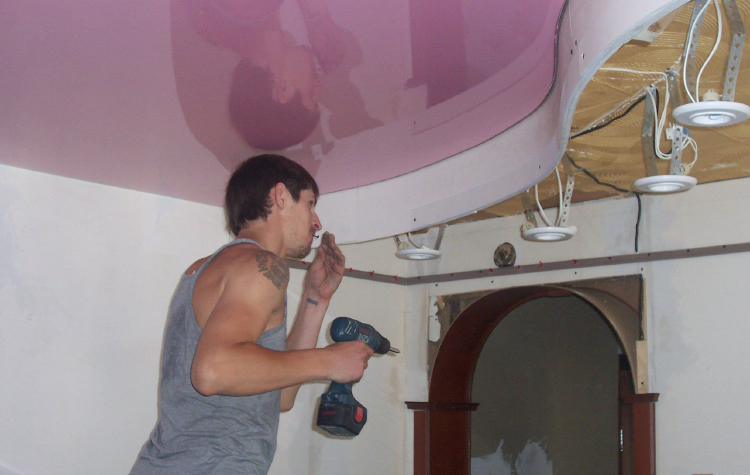
- Fastening the second tier. When installing it is important to consider the location of the first level. If the design consists of straight parts, then the work will not be difficult, and for the design of curvilinear figures you will need to “fit” the profile to the shape. To do this, they are simultaneously pruned in several places and bent along the lines. Fixing profiles start from the wall, with the guides must be placed in the center, thus, the frame will be stronger. At the end of the work, it will remain to sheathe the structure with drywall and stretch the canvas.


In addition, it is important to pay attention to the distances between the tiers, as there can often be problems with plating.
In order to make the installation without errors, it is recommended to cut strips according to the sketches from whole sheets of drywall and then moisten them with water and make the desired shape.Thus, the material becomes flexible and simplifies installation work. When drywall dries, it will gain strength, and it can be fixed to the surface with screws. At the end of the work, it is worth sealing the joints between the sheets and installing the lighting system; It is also necessary to apply a primer on the base of the structure and lay a topcoat on it.
Useful recommendations
Two-tiered stretch ceilings are considered to be the ideal decoration for any interior, therefore, the question of their installation must be taken with full responsibility, especially the installation of structures that are made independently. In order for the ceiling to acquire an aesthetic appearance and to complement the overall design of the room in an original way, it is necessary to choose not only the material, but also the form and color of the future composition, which are directly dependent on the style of the decoration.
Therefore, experienced craftsmen when installing such ceilings recommend:
- Use combinations of different shades. This will allow to emphasize the shape of the structure.
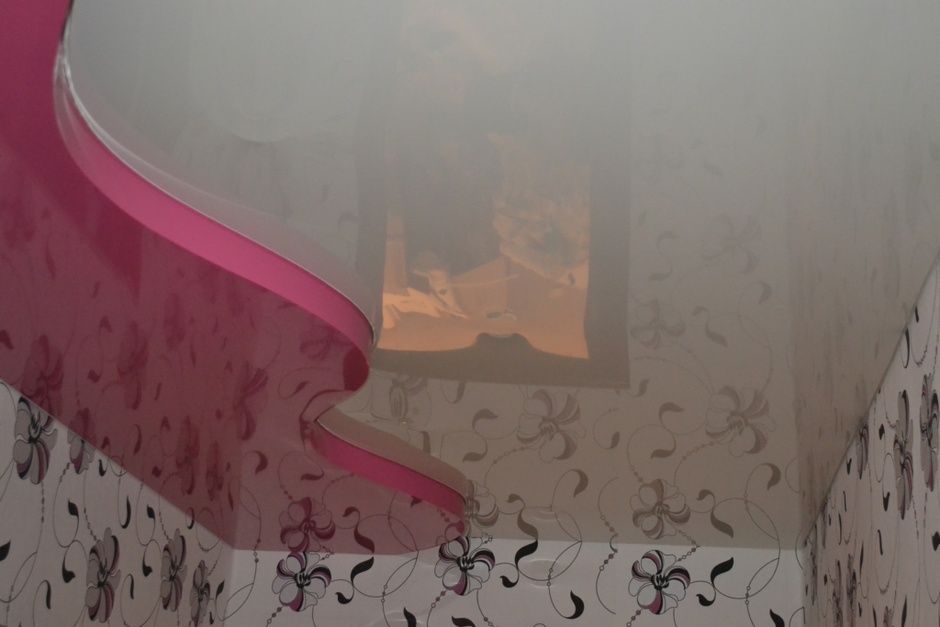
- Combine matte and glossy canvas.
- Supplement tiers with drywall fragments.
- Apply original patterns, drawings, ornaments and photo printing.
- Choose unusual shapes in the form of waves, straight lines, circles, cones and ovals.
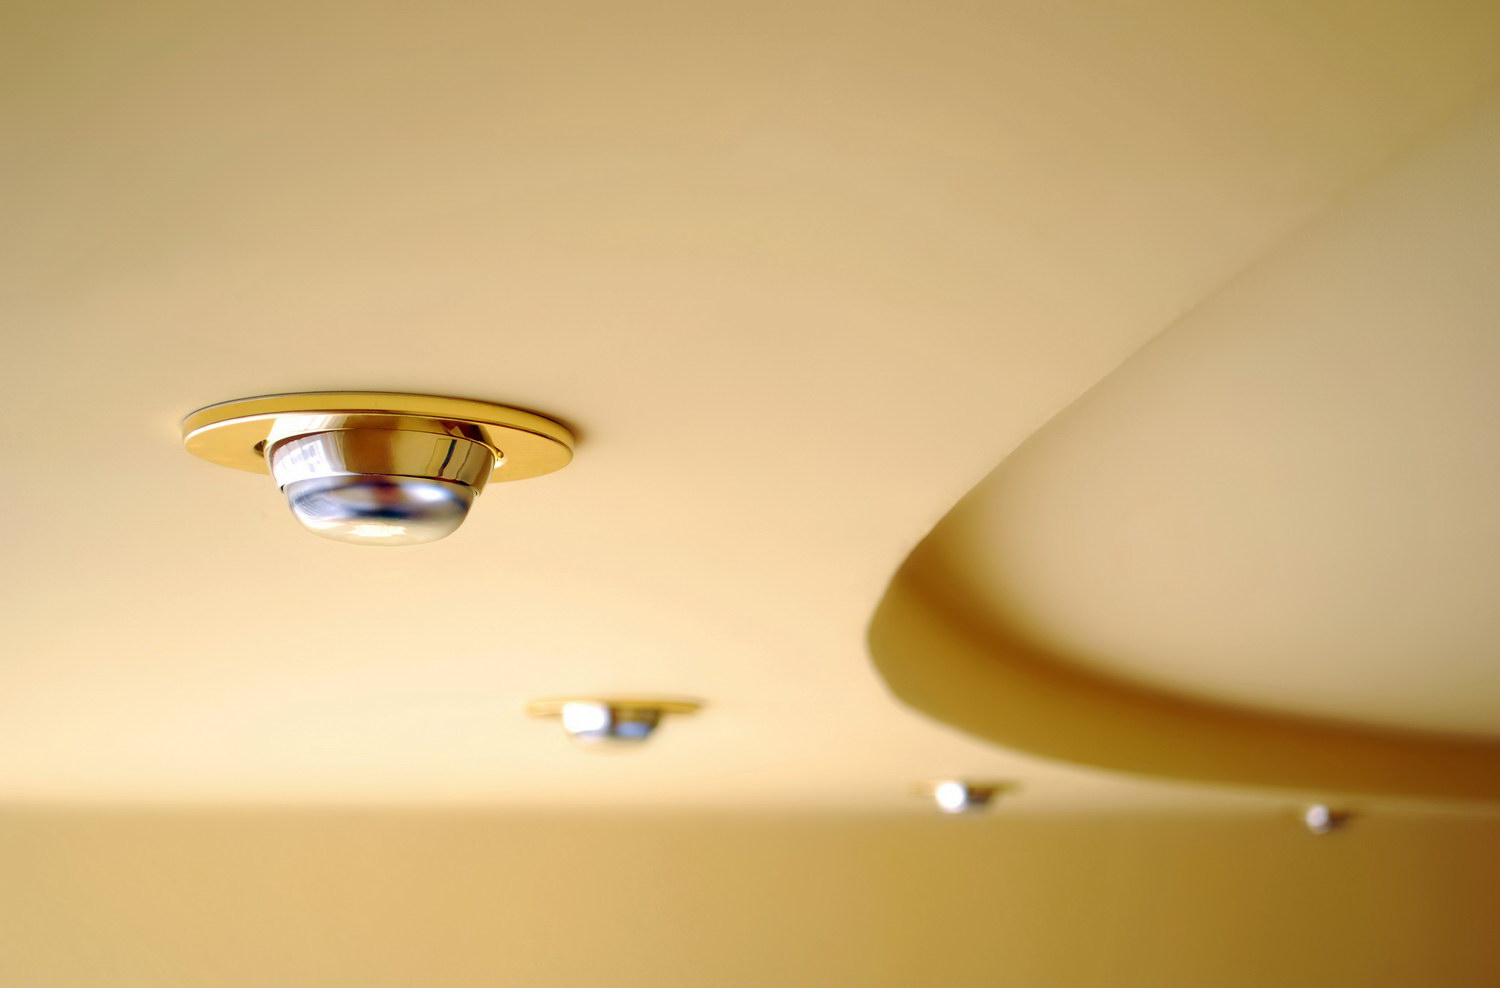
- Separate the ceiling tiers with different inserts and colored lamps.
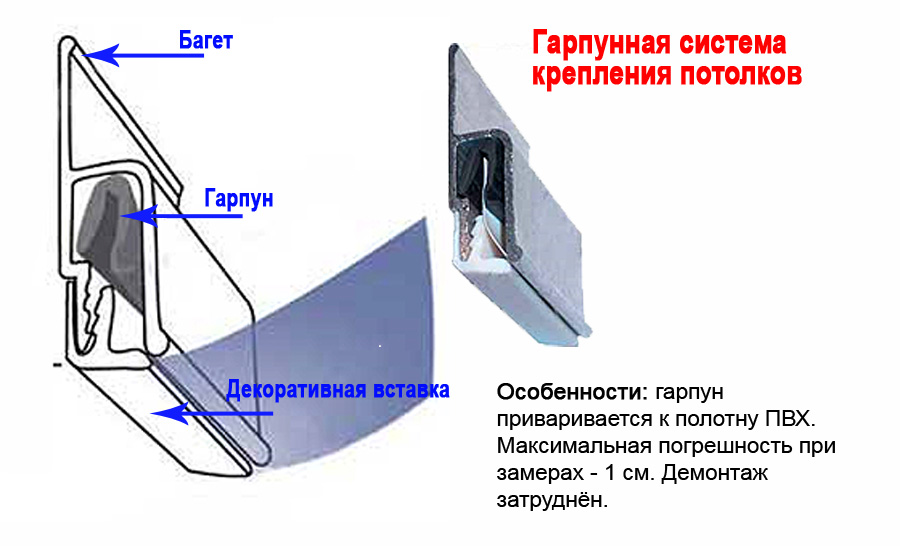
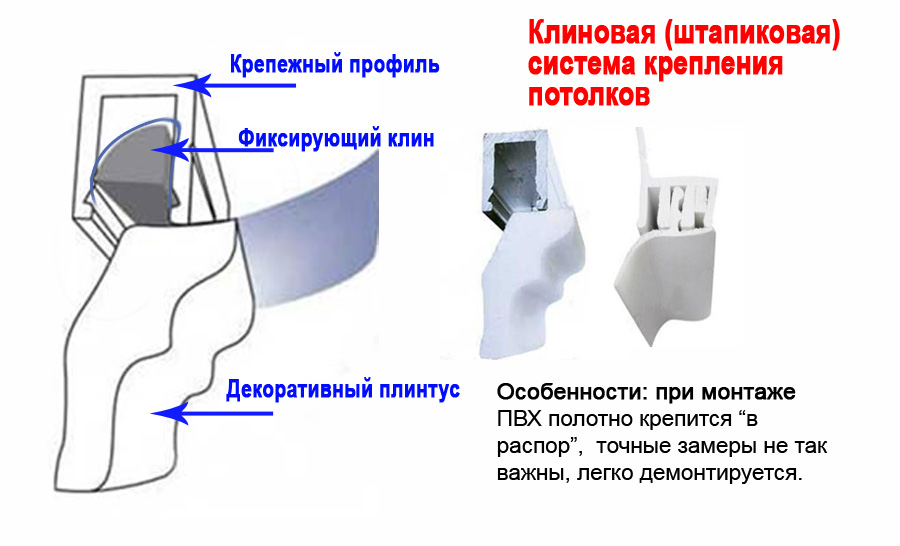
Installation of structures carried out in one of two ways: harpoon or wedge. Harpoon installation is recommended for beginners and is characterized by its simplicity. All that is required is to correctly measure the edging of the ceiling and connect all the parts as closely as possible. If in the levels it is planned to make large differences, then it is best to choose the wedge method. In this case, the canvas is heated and strictly on the markup is clamped under the baguette.
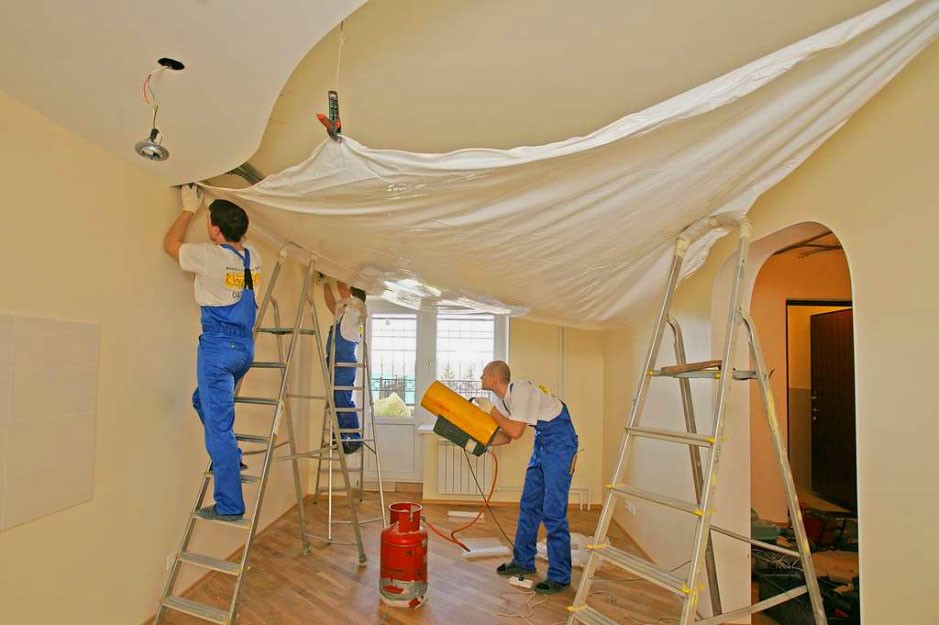
In addition, before the film stretching begins, it is recommended to warm the room to a temperature of 40 degrees - this will make the material more pliable for installation, and it will quickly become fixed on the profiles.
In order to make the web easy to even, you should use a construction hairdryer during installation - it will help to smooth the material and the ceiling will get perfect smoothness.
Beautiful examples in the interior
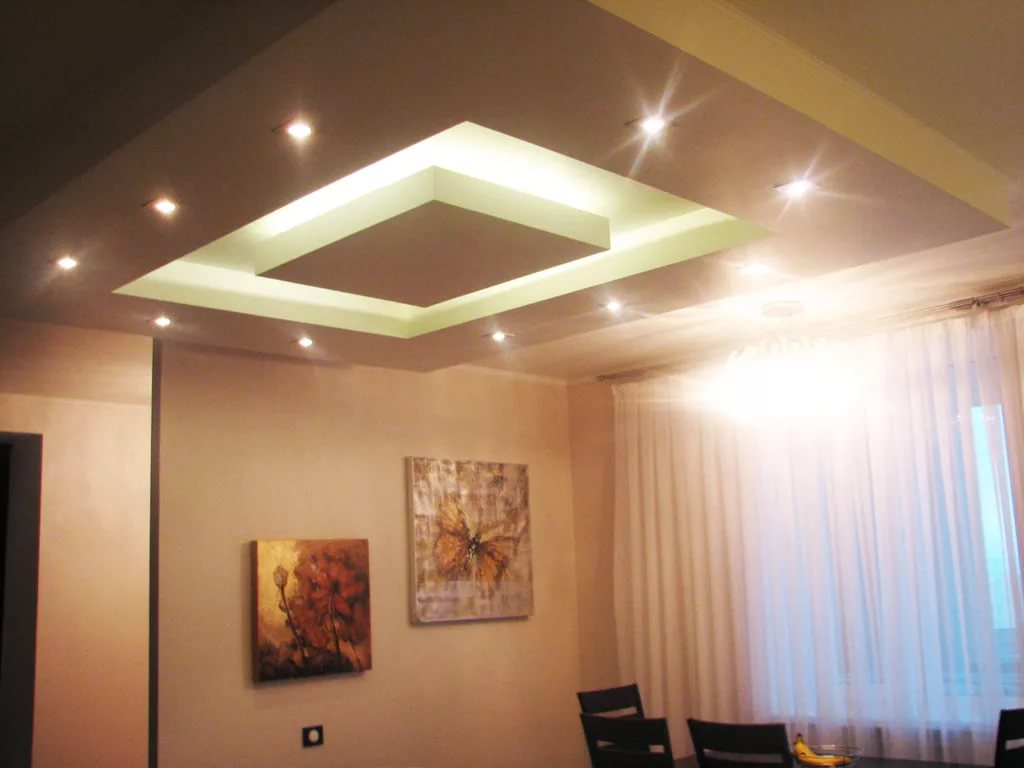
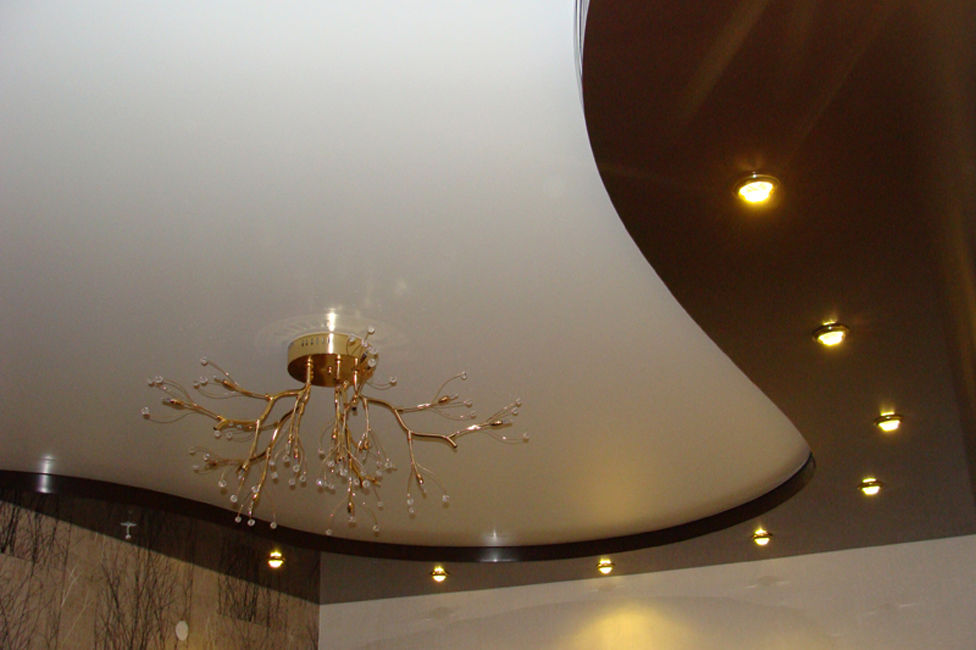
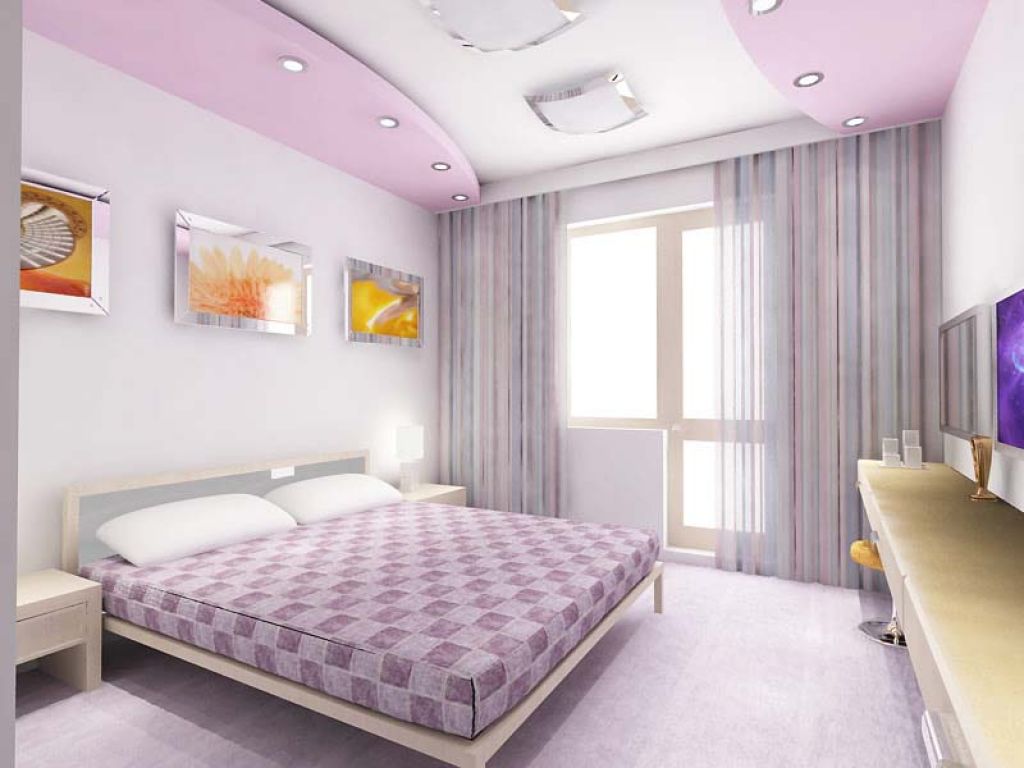
Two-level stretch ceilings look good in any design, they are often chosen for decoration of large and small rooms.At the same time for small rooms you need to choose white color - it will visually expand the space and make the room cozy. For a small bedroom to liven up and fill with the atmosphere of romance, for it you need to choose a light scale. It is best to make two tiers of the ceiling in one white color and install a hidden backlight. The lines of the structure should smoothly pass into the walls, which are also desirable to decorate with pastel colors.
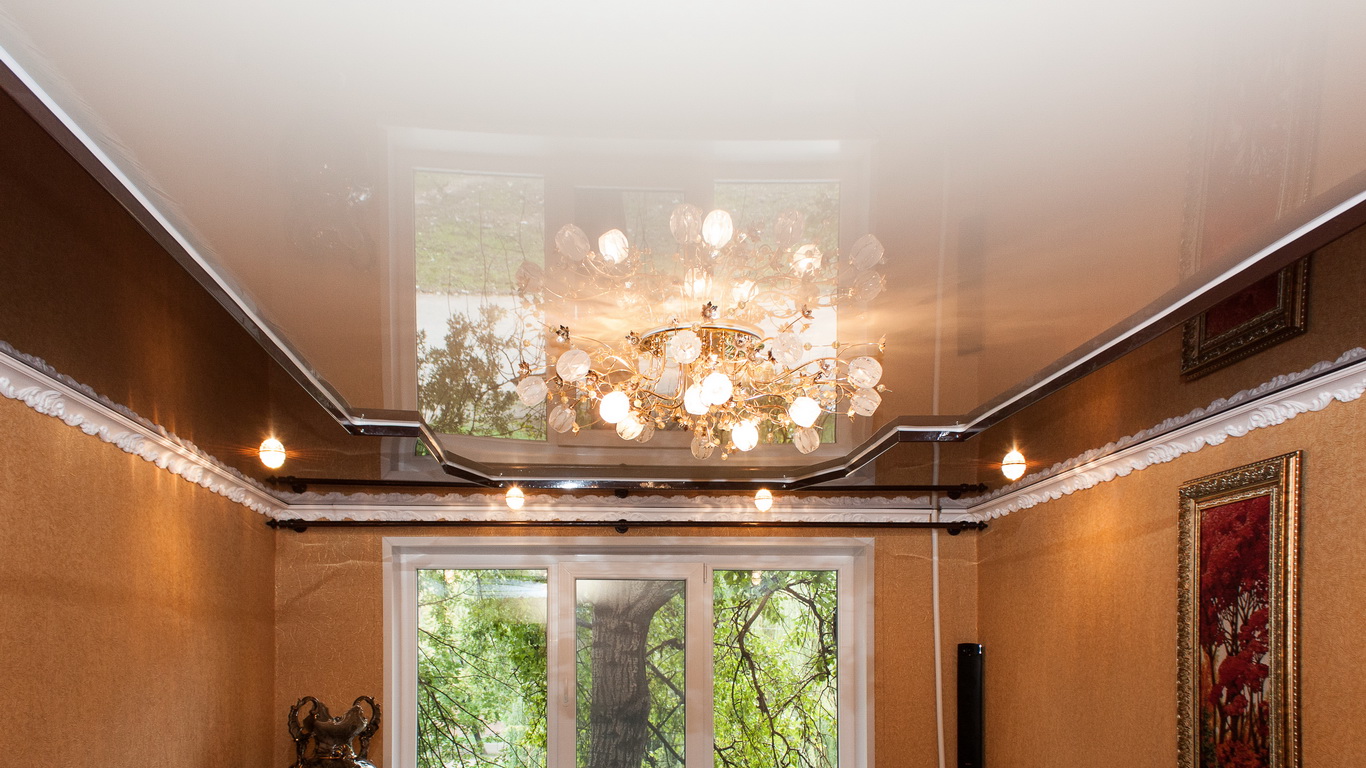


Especially in small bedrooms look ceilings with a glossy surface, but if the bright light will interfere with rest, you can install matte canvas. It is undesirable to install compositions of complex shapes in such rooms, since the details of irregular textures “steal” the area of space. For spacious bedrooms, you can choose a beige scale, as it originally looks on a glossy surface. The center of the ceiling is best distinguished by a dark shade, a continuation of which will be furniture and other decorative objects.

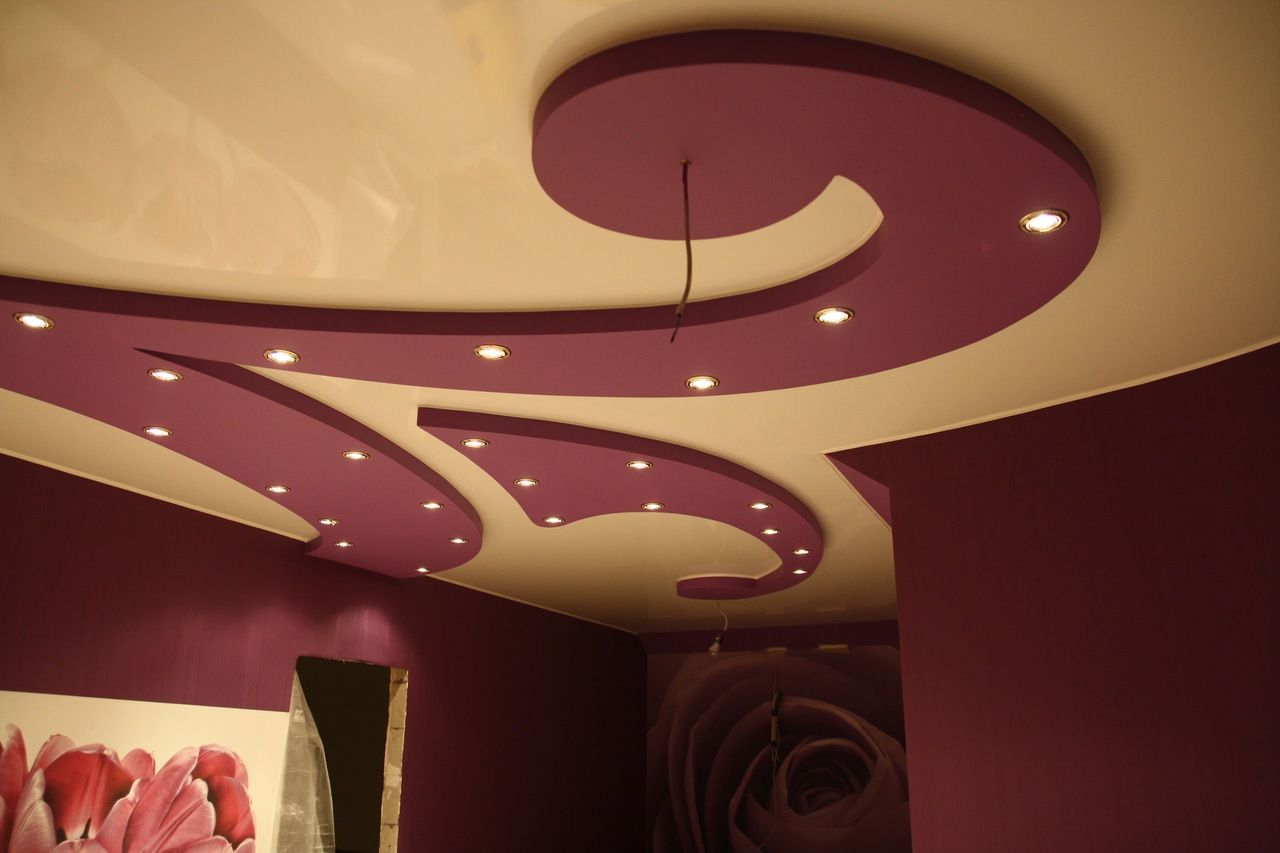
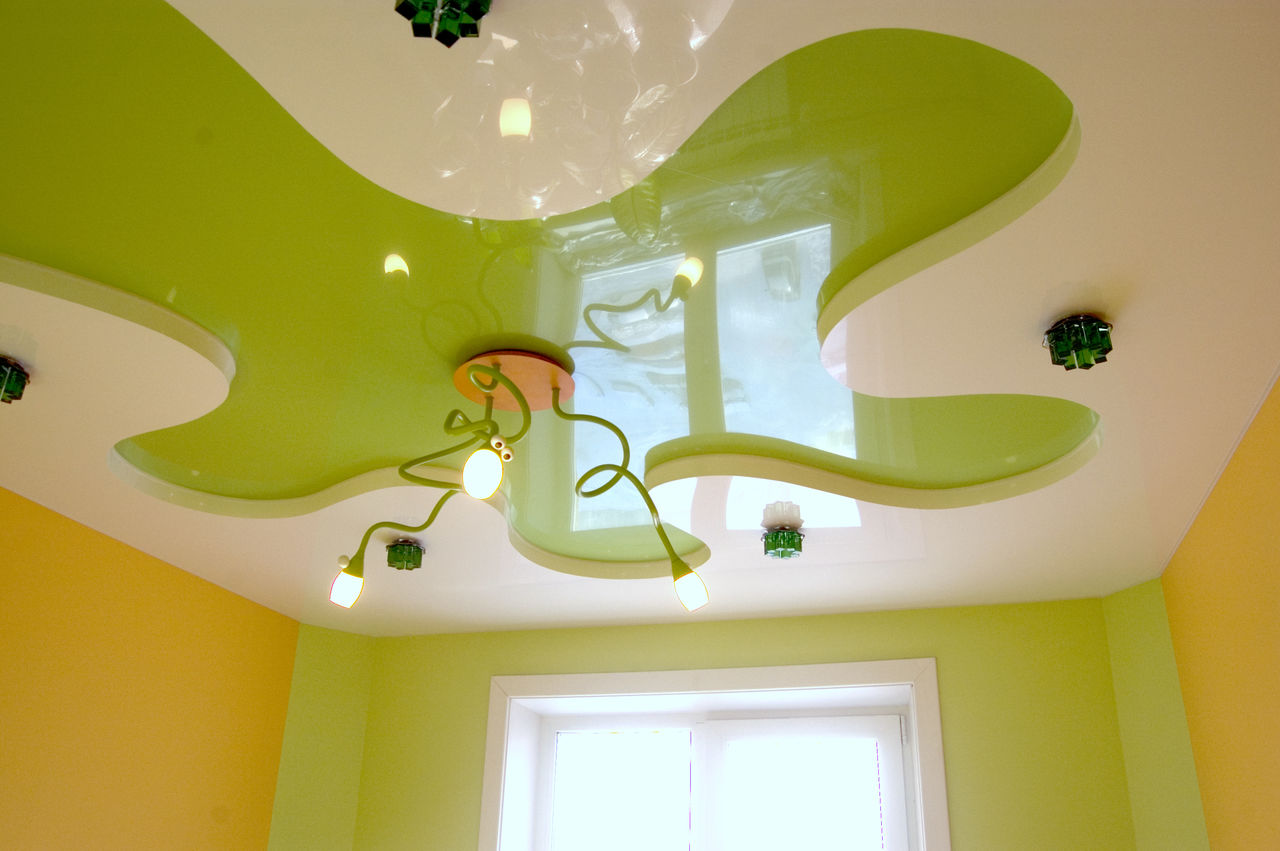
Two-level ceilings offer great opportunities in the interior design of children's rooms. Thanks to the beautiful colors and drywall you can translate into reality a variety of creative ideas.The unusual design of the ceiling can be done independently. In addition, the designs in the children's room can harmoniously combine all types of lighting: from chandeliers to spotlights. Thanks to the two lighted tiers, it is possible to fill the room with light as much as possible and zoning beautifully, dividing the room into a place to sleep, play and relax.

For small fidget compositions are selected depending on personal preference. For the boys are well suited inserts with a photo, which depicts your favorite cartoon characters. You can make various shapes in the form of birds, butterflies, flowers and airplanes from sheets of drywall.
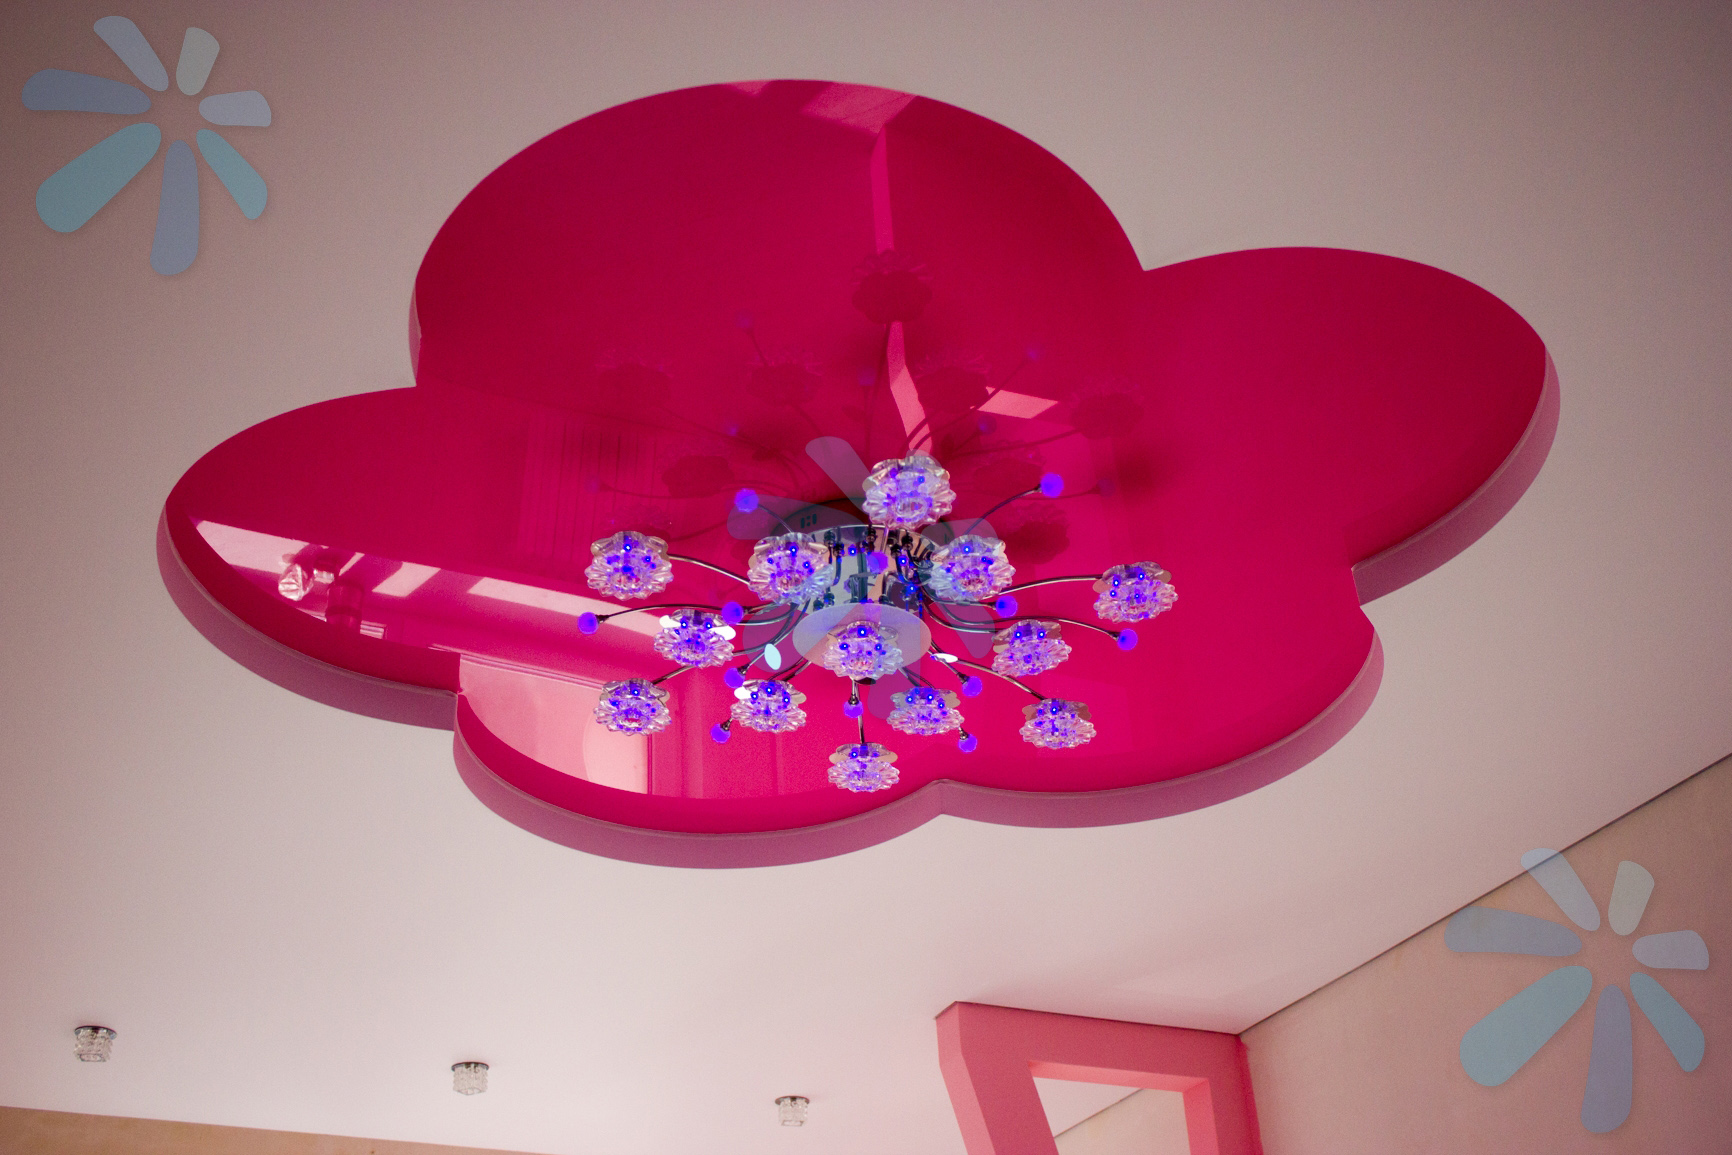
Ceiling colors are also recommended to be performed in various shades.
For girls, soft pink compositions should be set, for boys - light blue. If you plan to design the interior room of a teenager, then you can opt for neutral colors.
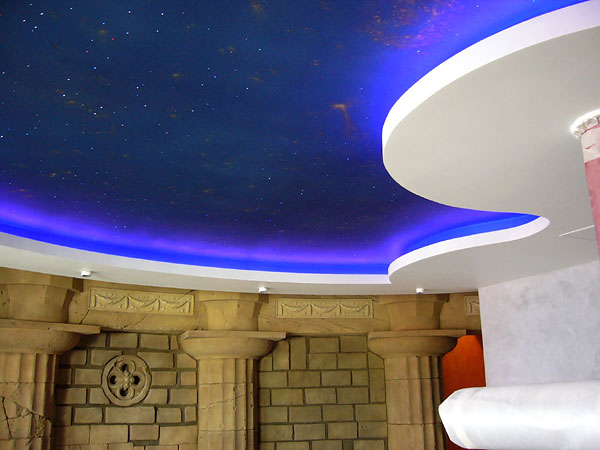
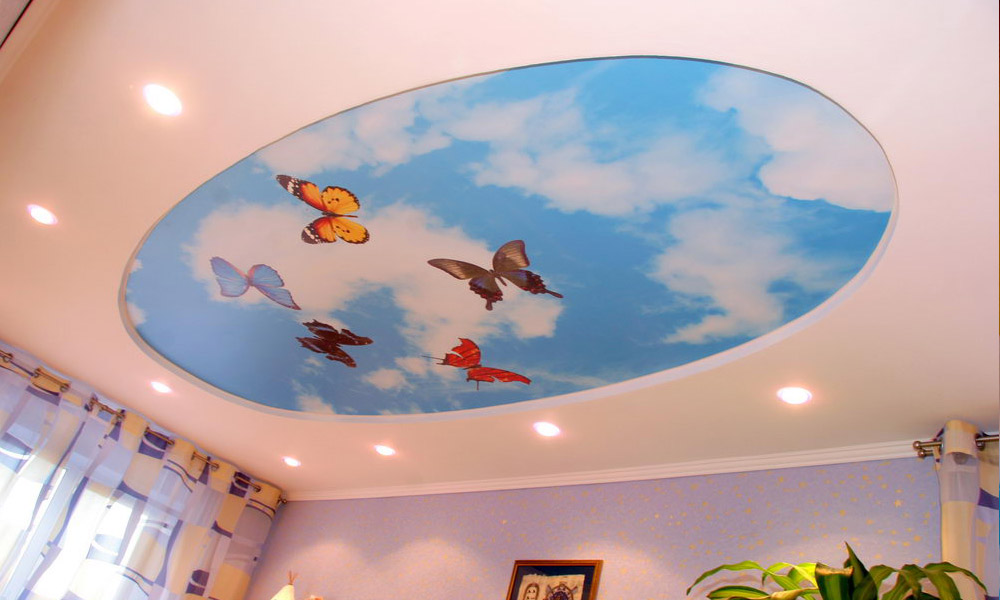
Stretch ceilings of simple forms with inserts of canvases, which depict the sky, are very popular in children's rooms.They not only visually increase the area of the room, but also fill it with a sense of freedom and weightlessness. In this case, the ceiling must necessarily be in harmony with the general interior in the room, not be too bright or, conversely, dim. It is allowed to install ceilings of several inserts, which will differ in texture and color. But we must not forget about the rules of the combination of shades.

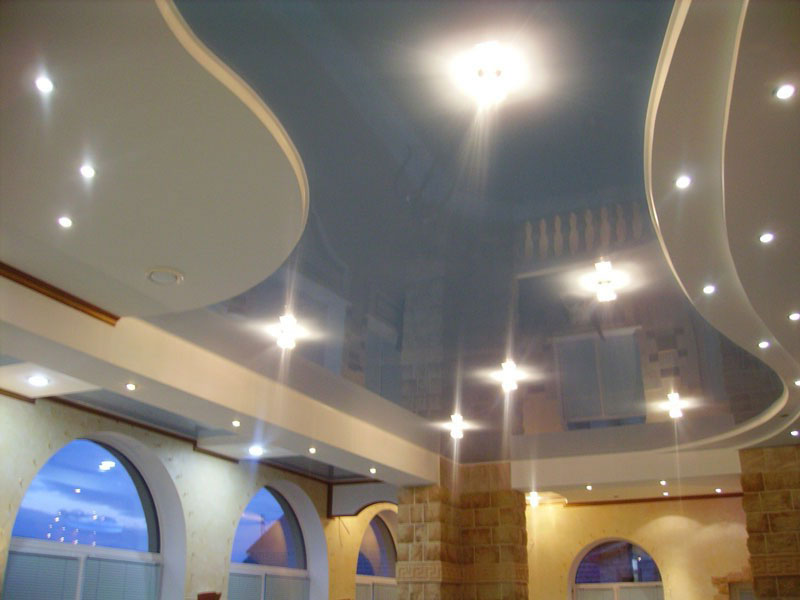
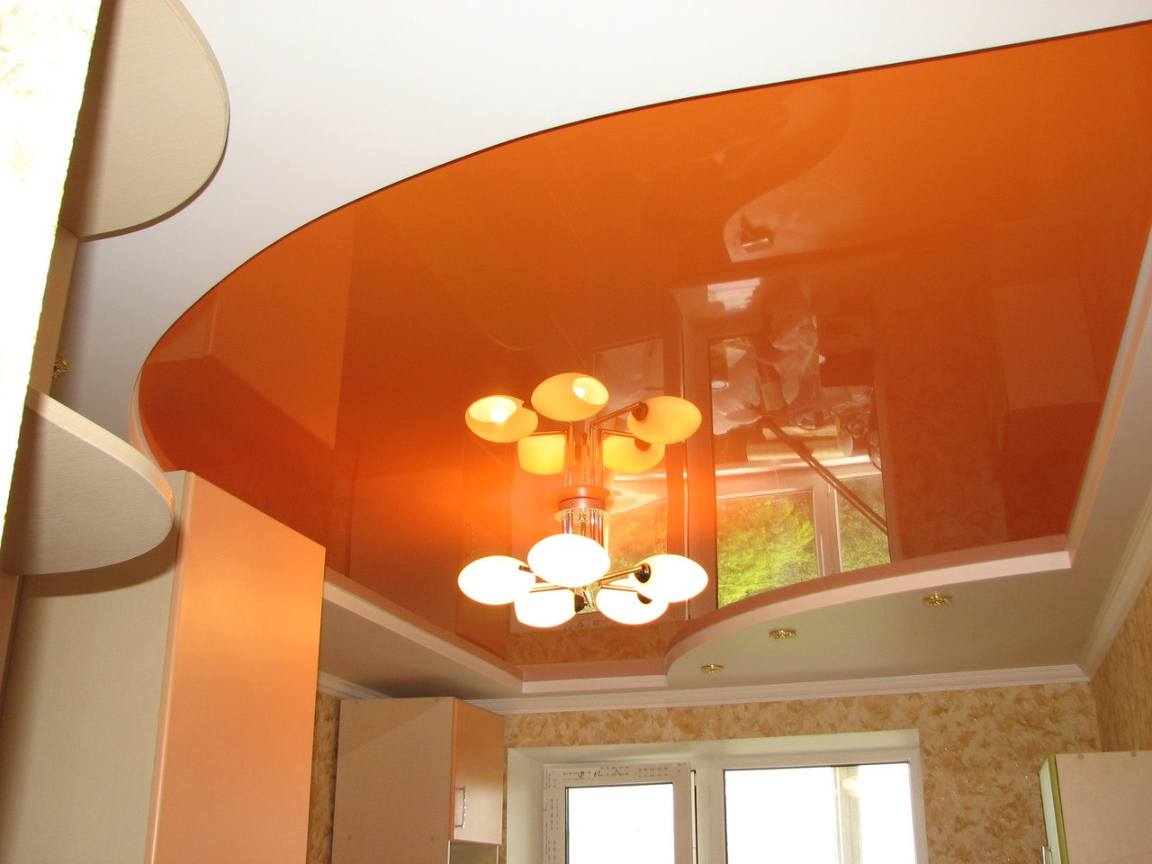
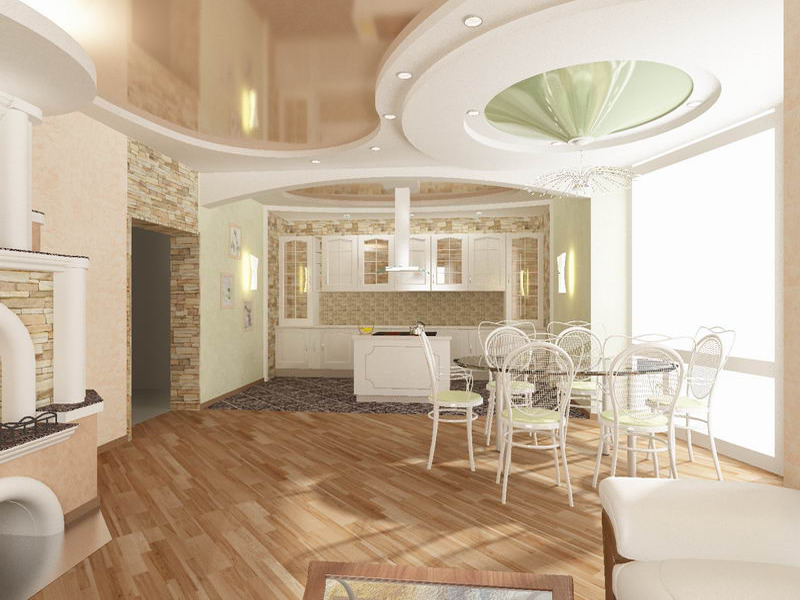
Often in small apartments the kitchen is combined with the living room - a similar design option looks modern and original. In order for the room to harmoniously combine a place to rest and eat, designers recommend dividing the space into zones using two-level stretch ceilings. To do this, in the constructions it is necessary to apply the installation of various geometric parts and to make a distinction using straight lines.
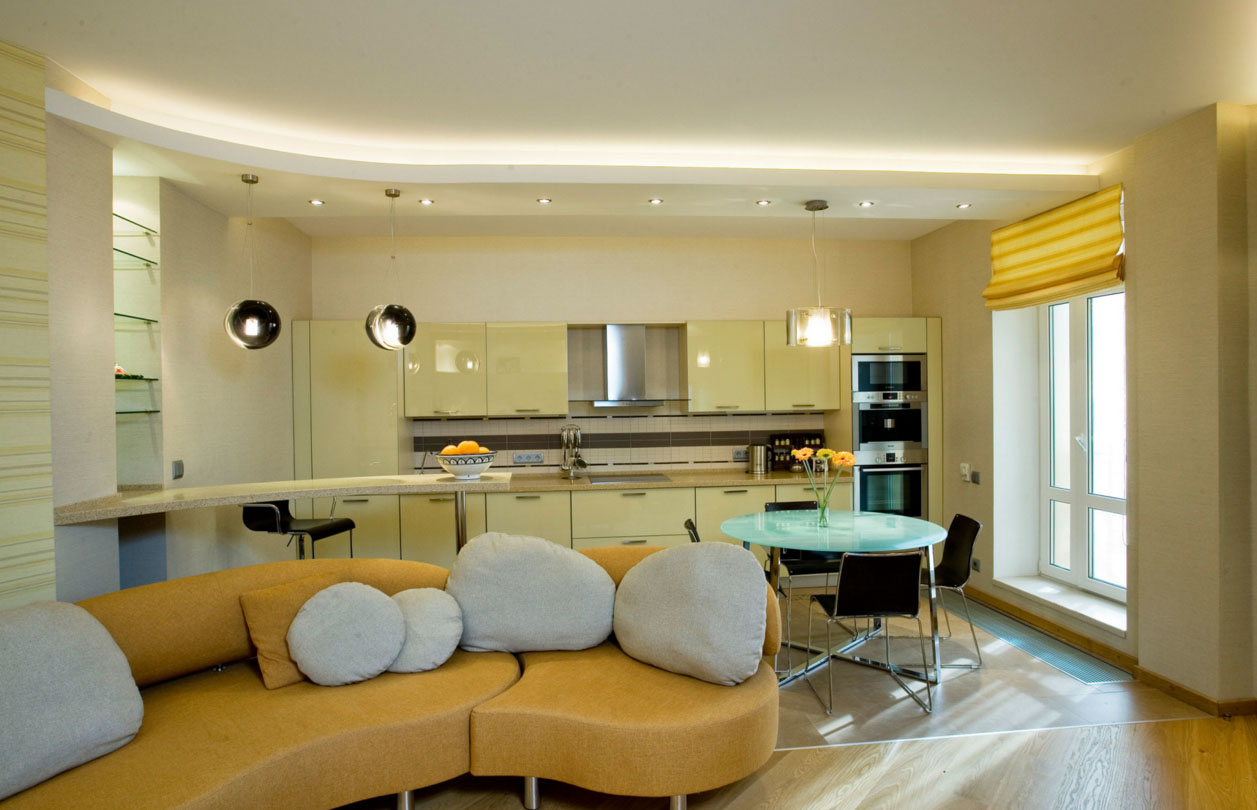
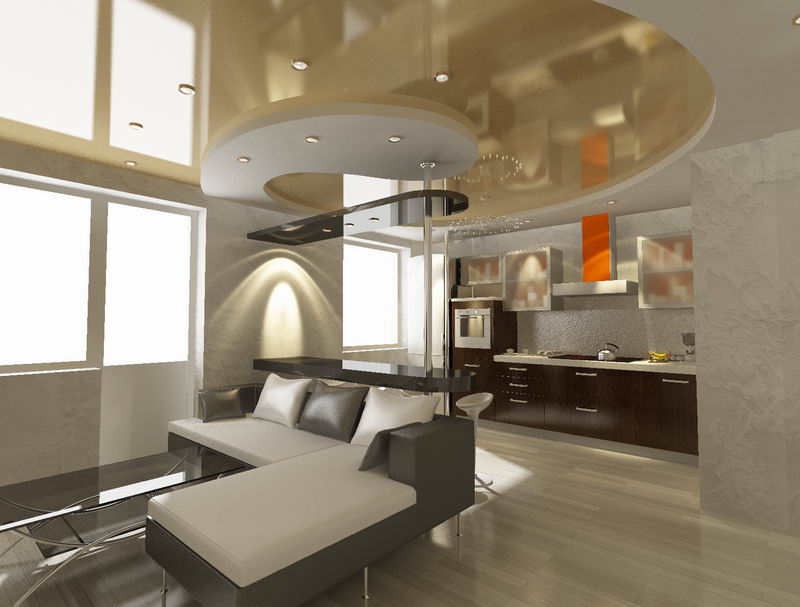
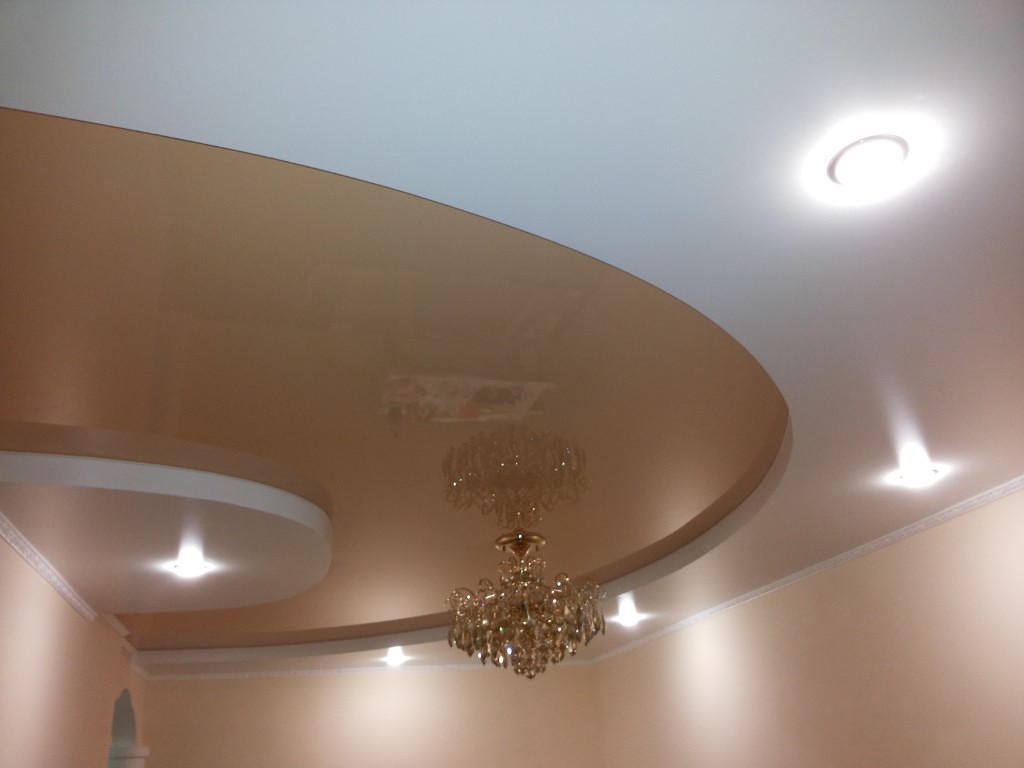
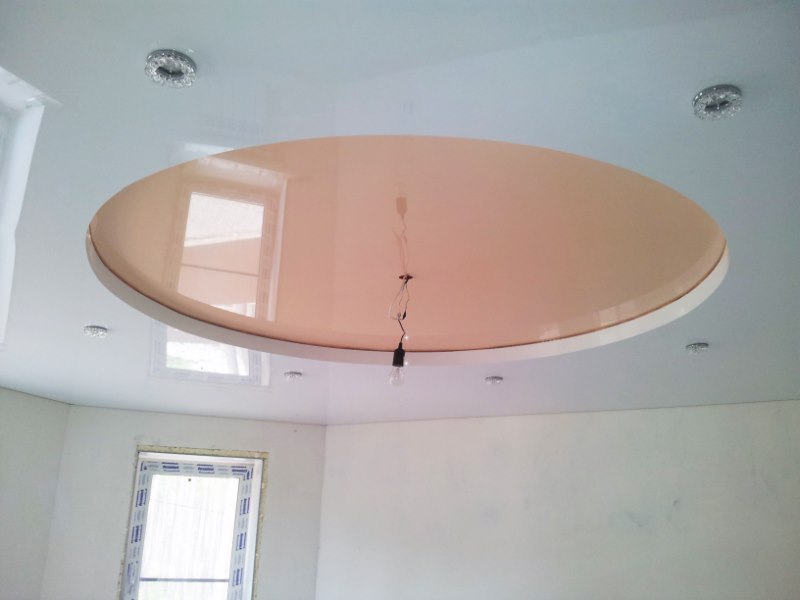
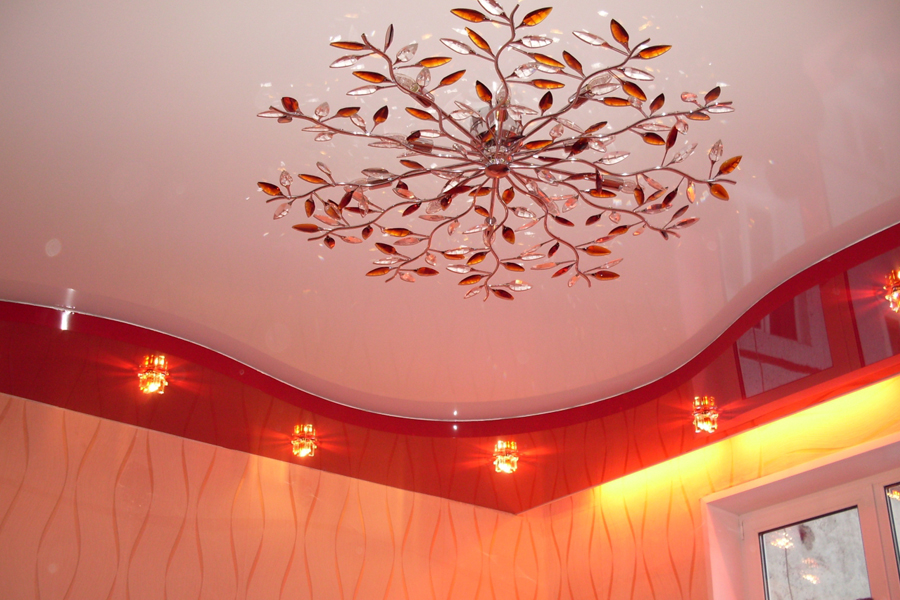
In order for the kitchen-living room to have a festive look, it is best to decorate it with white bunk compositions, and to install a glass chandelier and spotlights as lighting. For the forms of the ceiling fit round and oval inserts. A good option would also be the installation of the ceiling, combining white and light beige color.In this case, the two tiers are superimposed around the perimeter of the room, forming a volume square. At the edges of the design set the lamp, the brightness of which can be adjusted.
For information on how to install a two-level stretch ceiling yourself, see the video below.


