Do-it-yourself ceiling installation
Stretch ceilings designed in Europe for interior decoration are currently in fashion. Multicolored, glossy, matte, fabric or PVC film - they can really decorate the room. Moreover, in the modern world, any person can do the installation of stretch ceilings with his own hands in a matter of hours.
Features and benefits
Stretch ceilings - this is a combination of materials from fabric or vinyl cloth and metal profiles, which adorns the ceiling, hides all the bumps and other defects made during the construction phase. Stretch these ceilings can be in the premises for any purpose: living room, kitchen, bathroom, hallway or office work.
Stretch ceilings have their undeniable advantages:
- they will help create a perfect and even ceiling of all sorts of colors and textures in a very small amount of time;
- huge spaces for imagination and design approaches;
- strength, resistance to moisture and dust, environmental friendliness of materials;
- no need for a long time to clean the room after installation;
- they give a chance to experiment with the lighting of the dwelling;
- the ability to additional sound insulation and improve acoustics.
However, these paintings have some drawbacks:
- ceilings can break when a point mechanical impact, therefore, require careful use and maintenance;
- can lower the ceiling level by at least 3-5 cm or more;
- if temperature fluctuations occur in an apartment, such ceilings (most often polymer) will sag or grimace - this fact is especially noticeable in places where there is a draft.

Also, these ceilings have other properties that depend on the used fabric and their design, which is very important to consider when creating a project, ordering and installing the ceiling. Therefore, it is necessary to disassemble what types of ceiling structures are.
Types of designs
There are several types of stretch fabric designs:
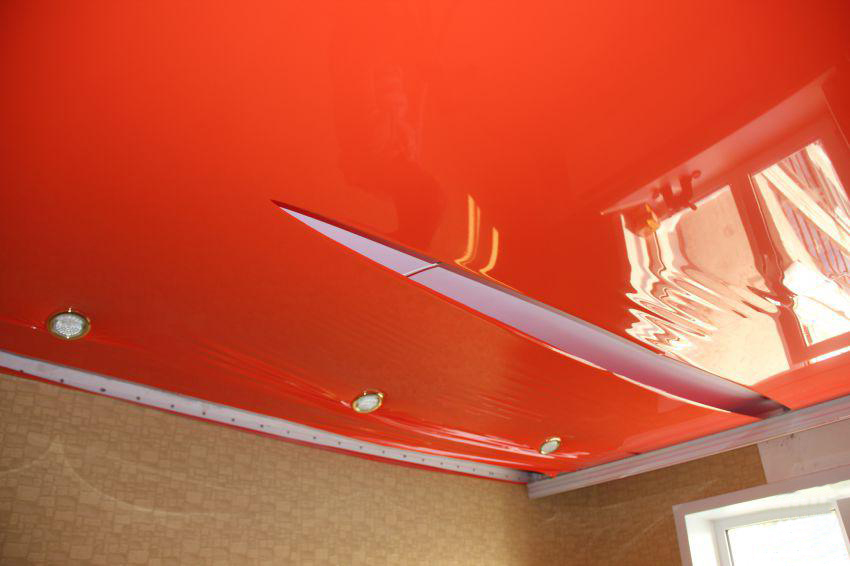
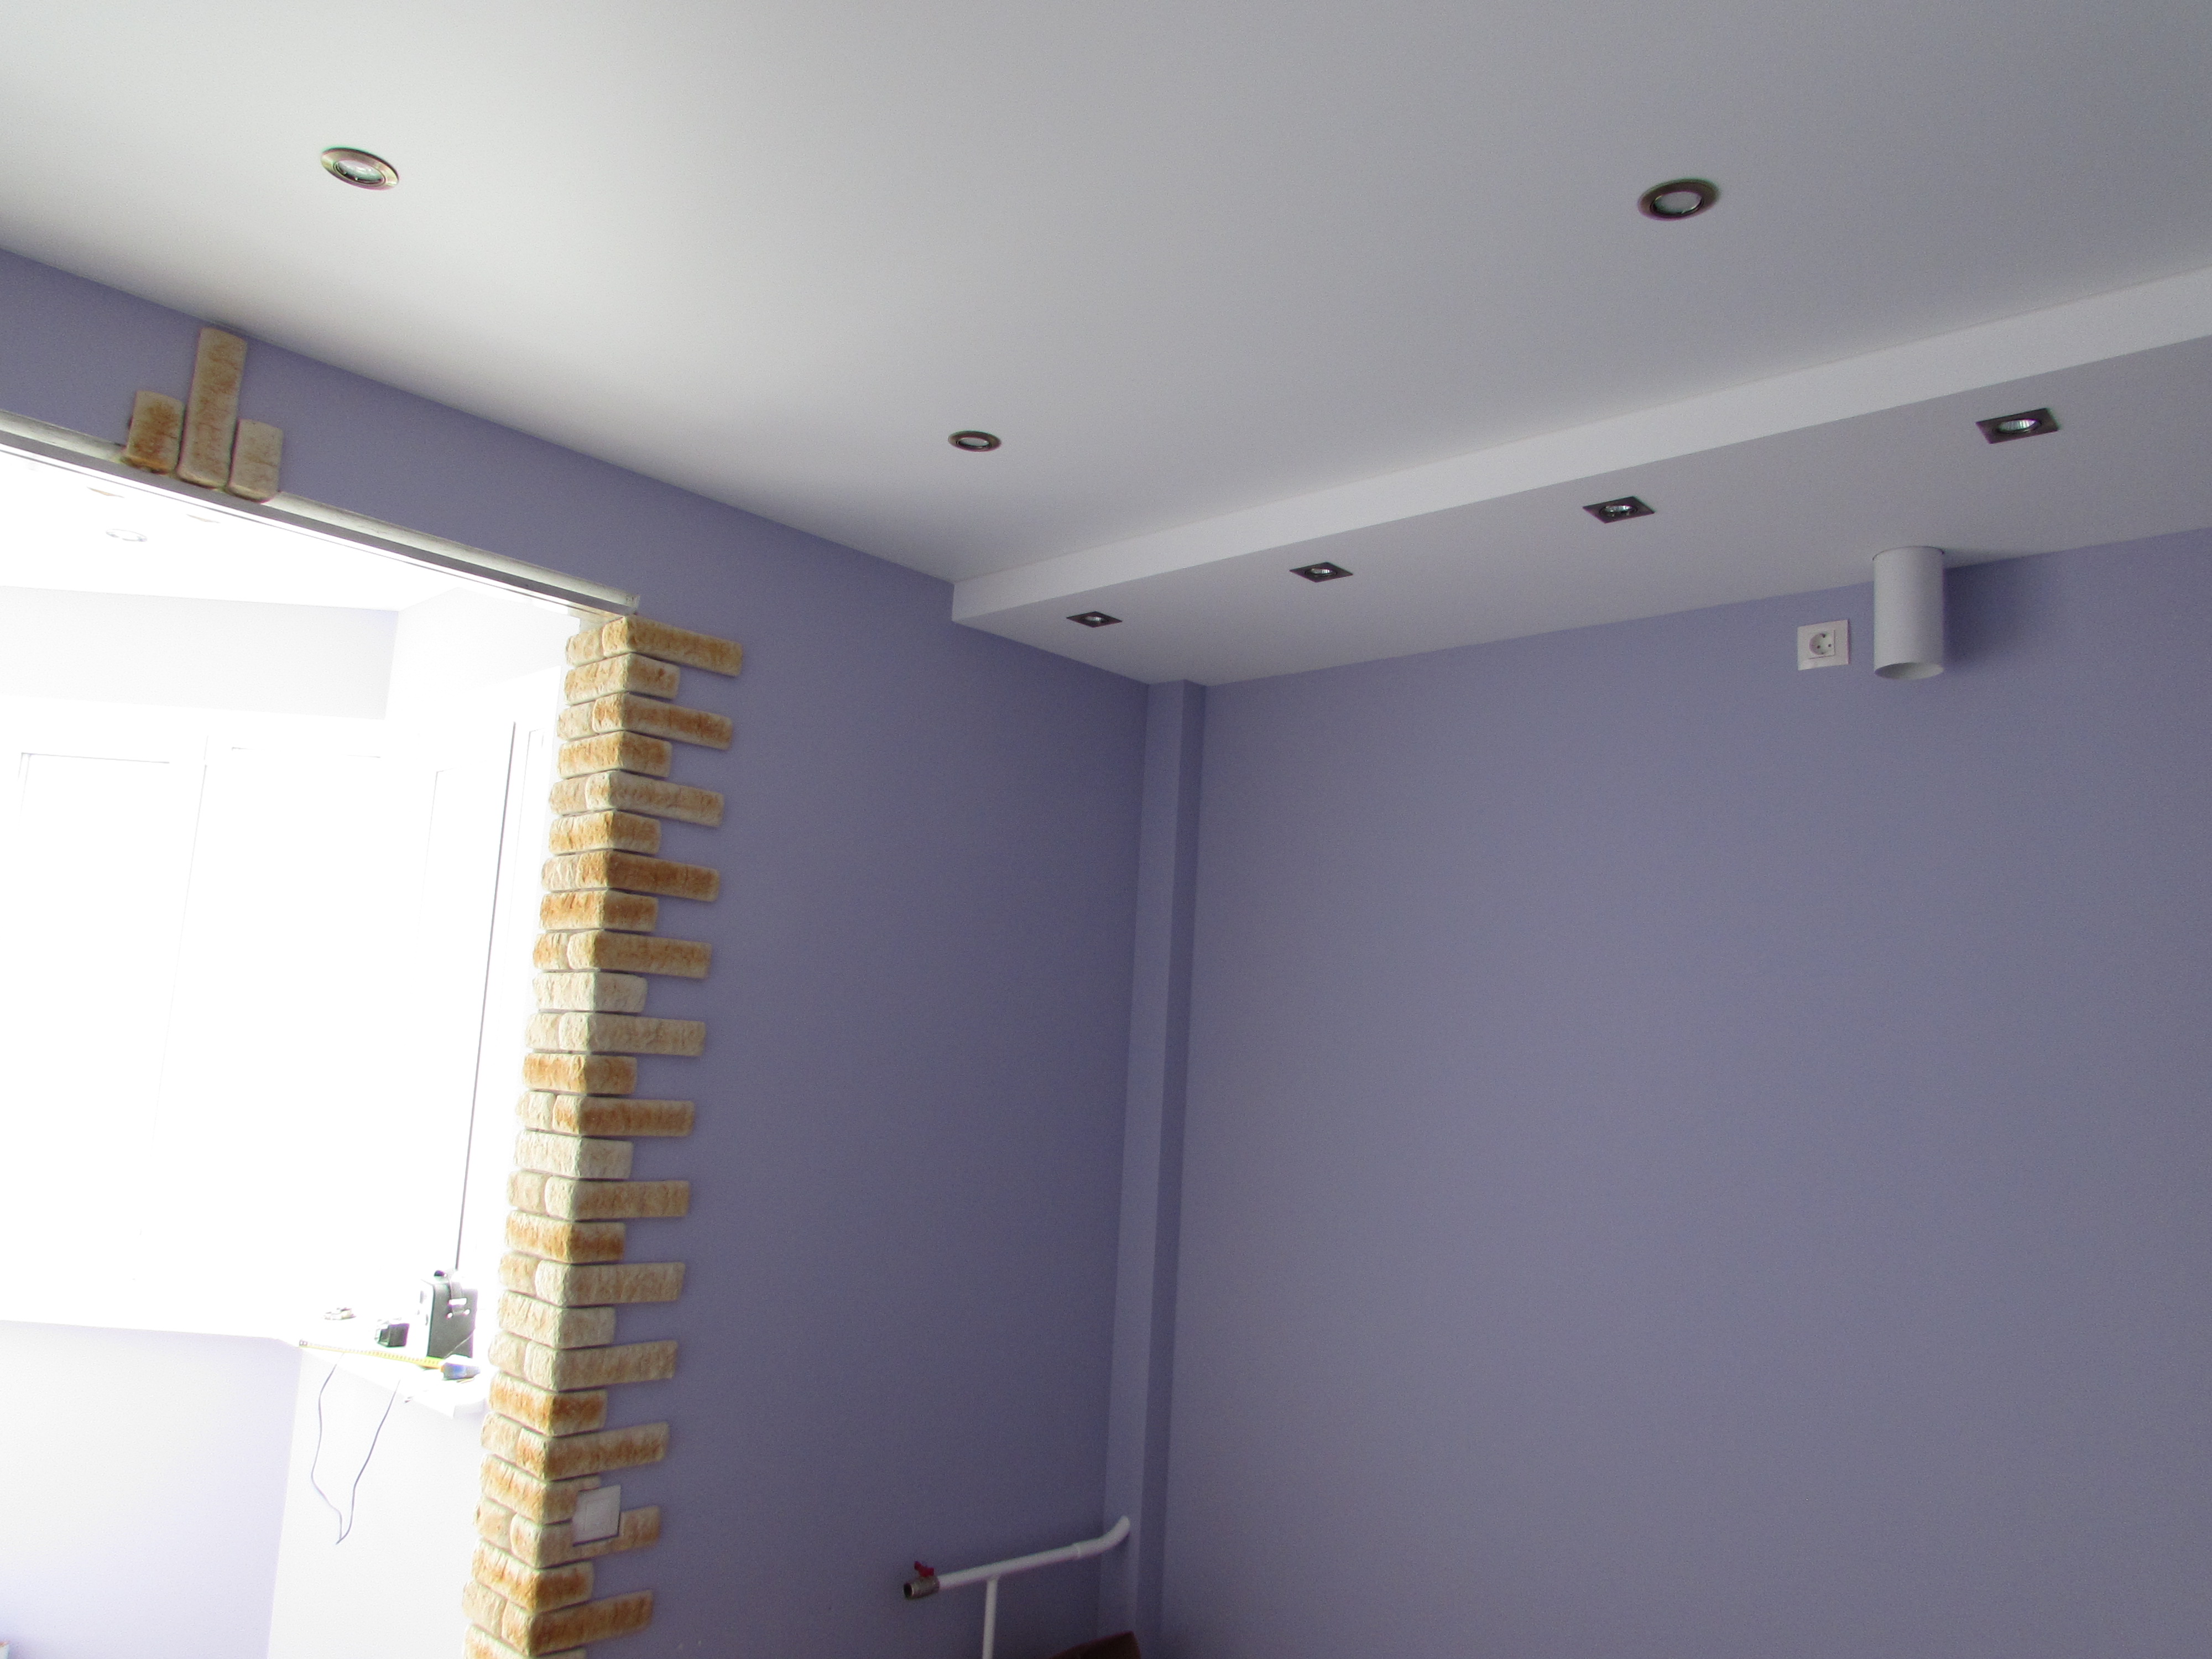
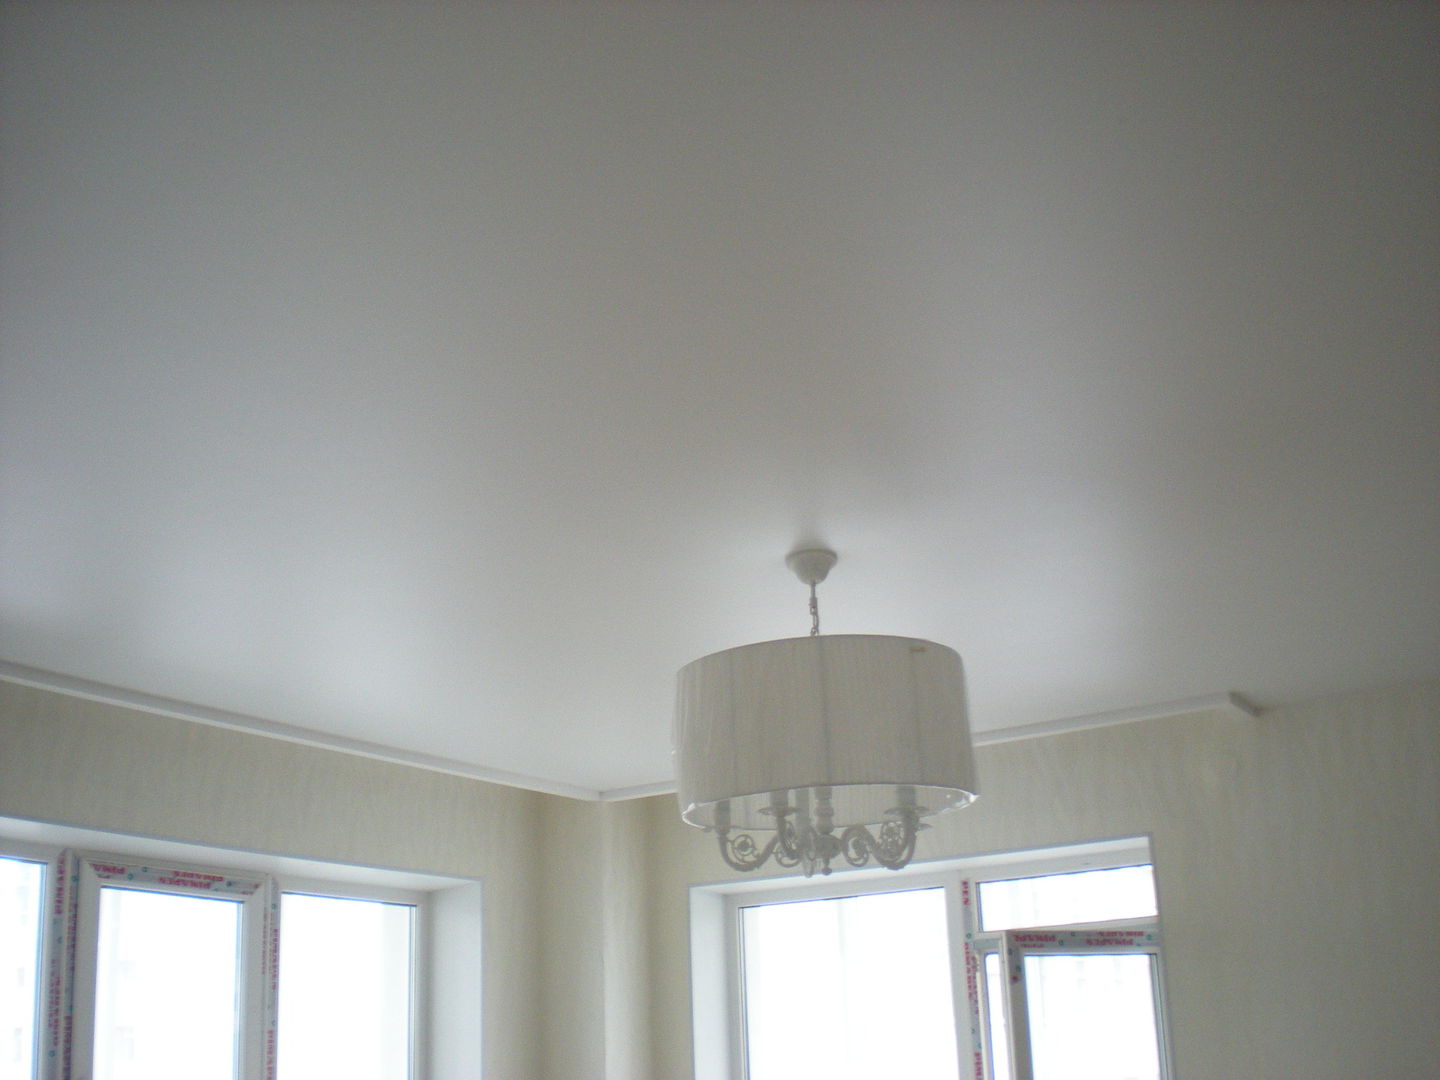
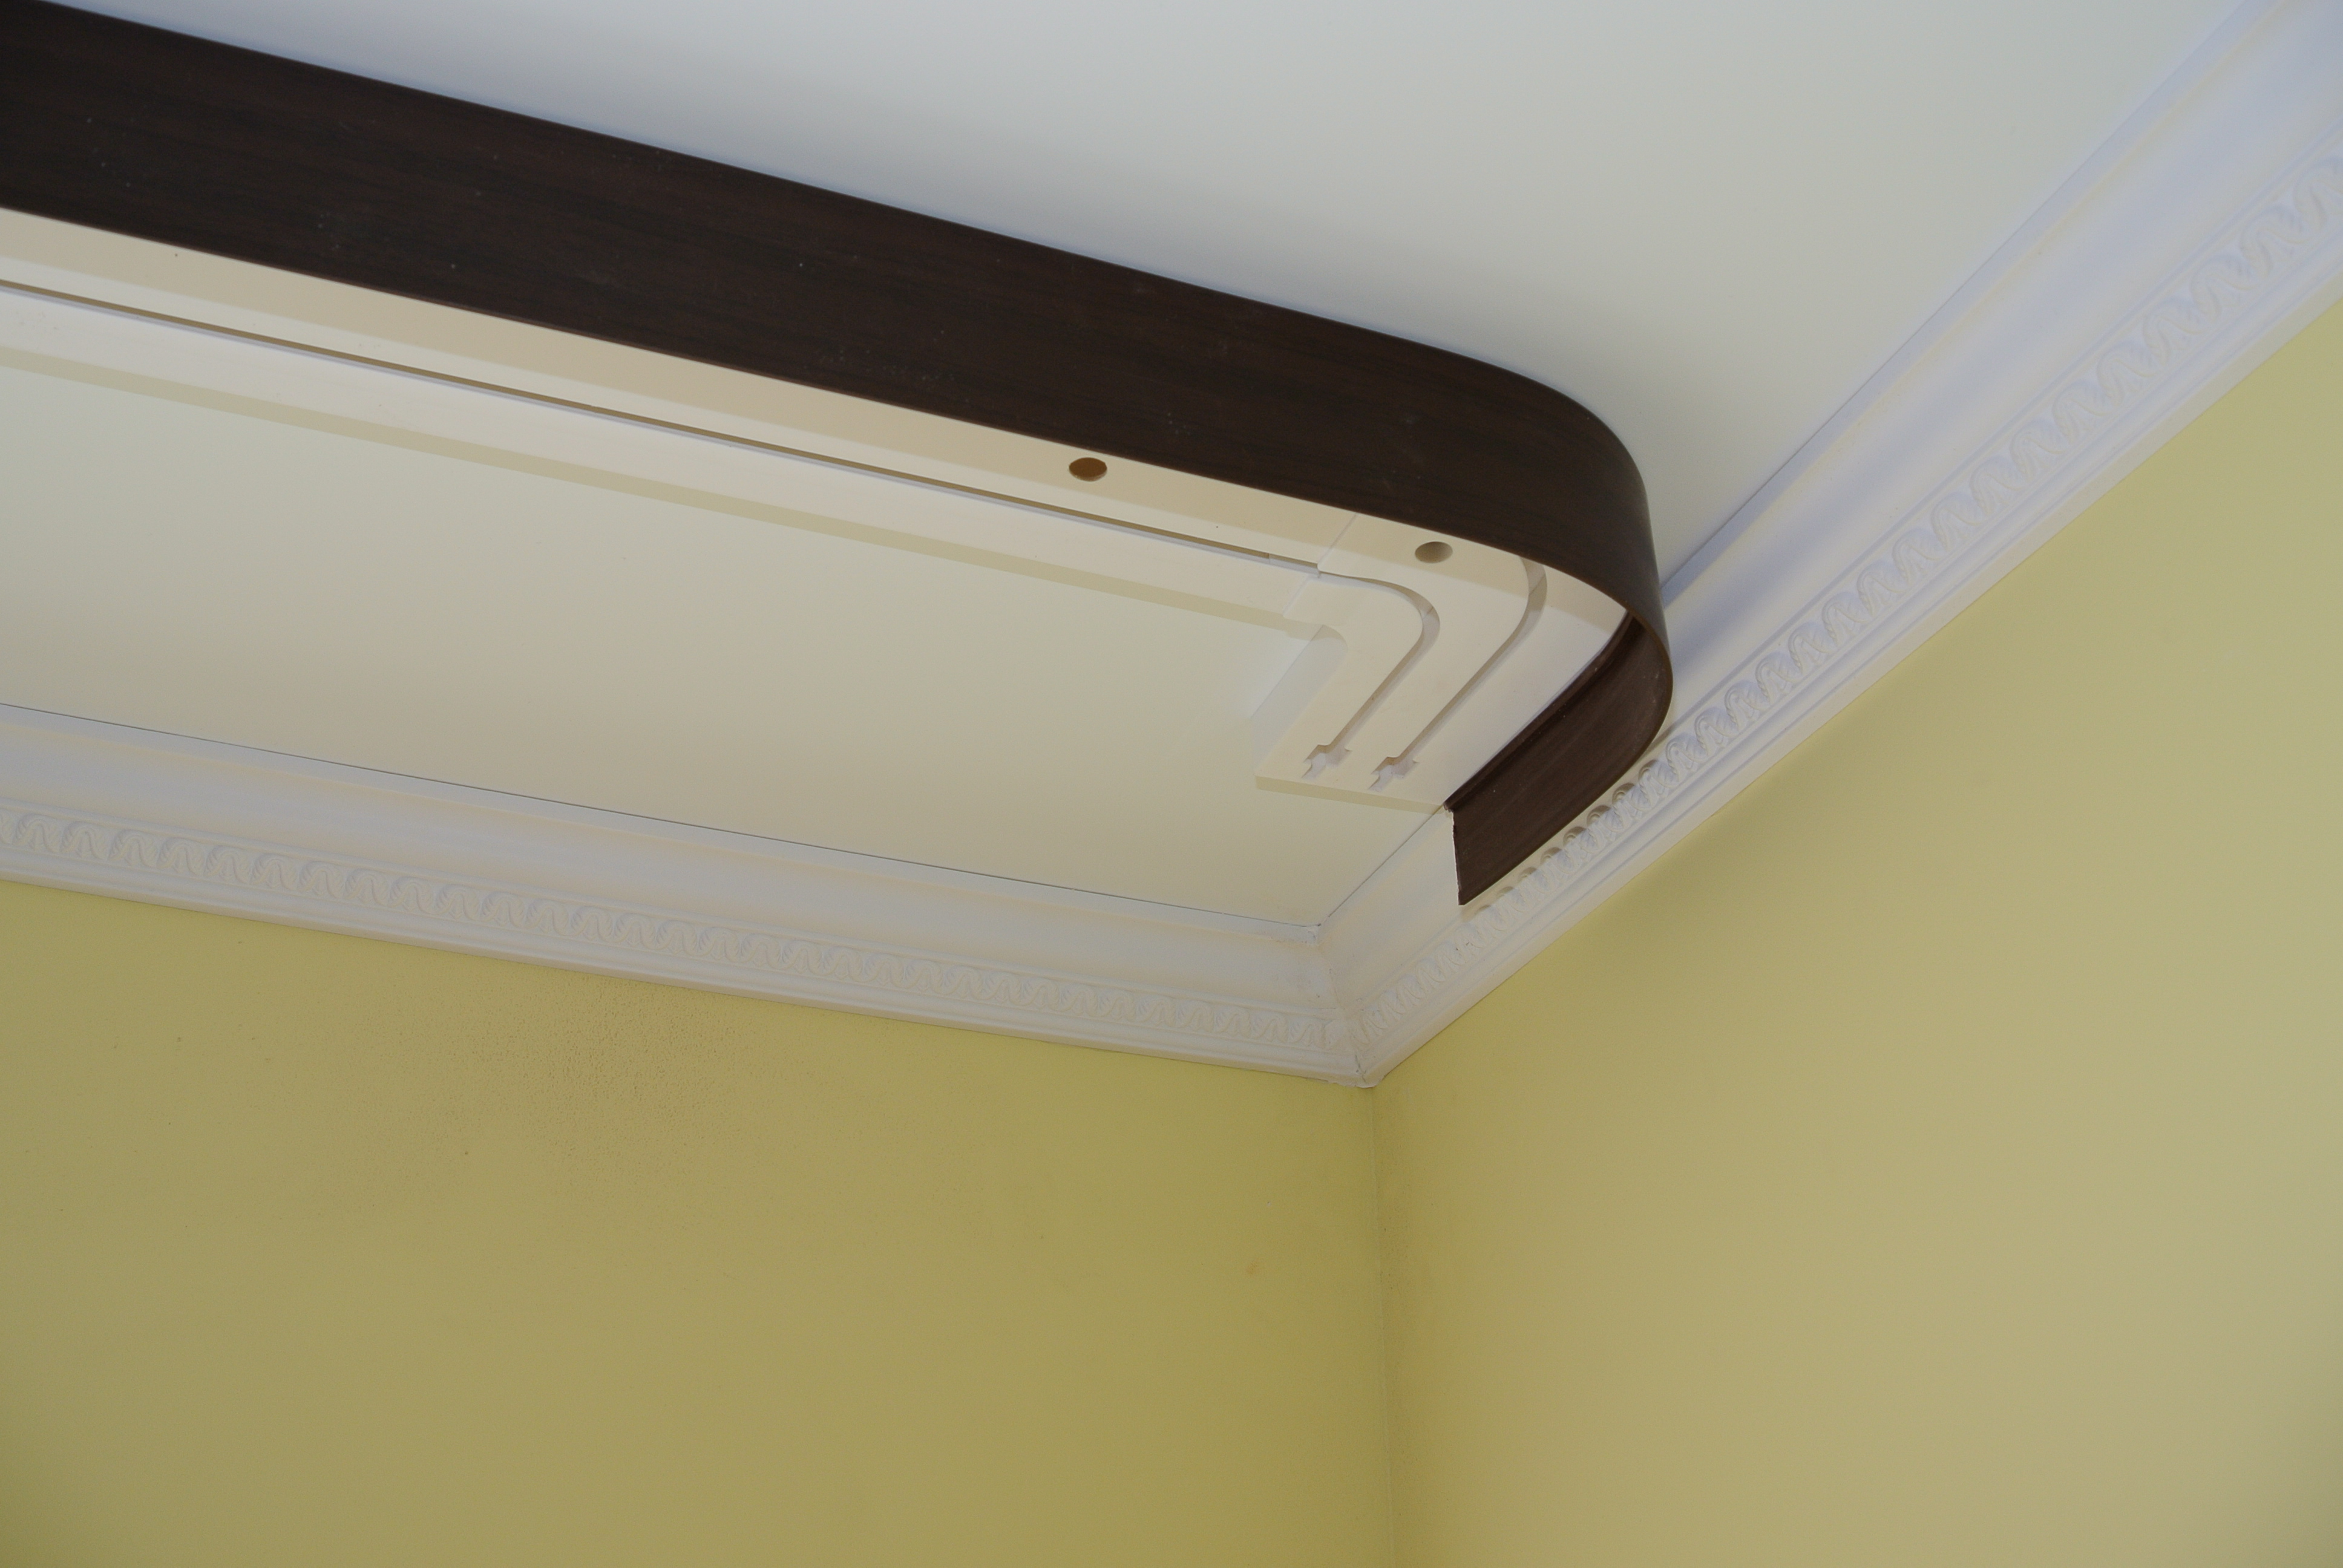
- Single level. This is a classic look. They are very economical and suitable for both large and small rooms. To connect several webs at the same height, there are dividing profiles that have an intermediate decorative cap or backlight.

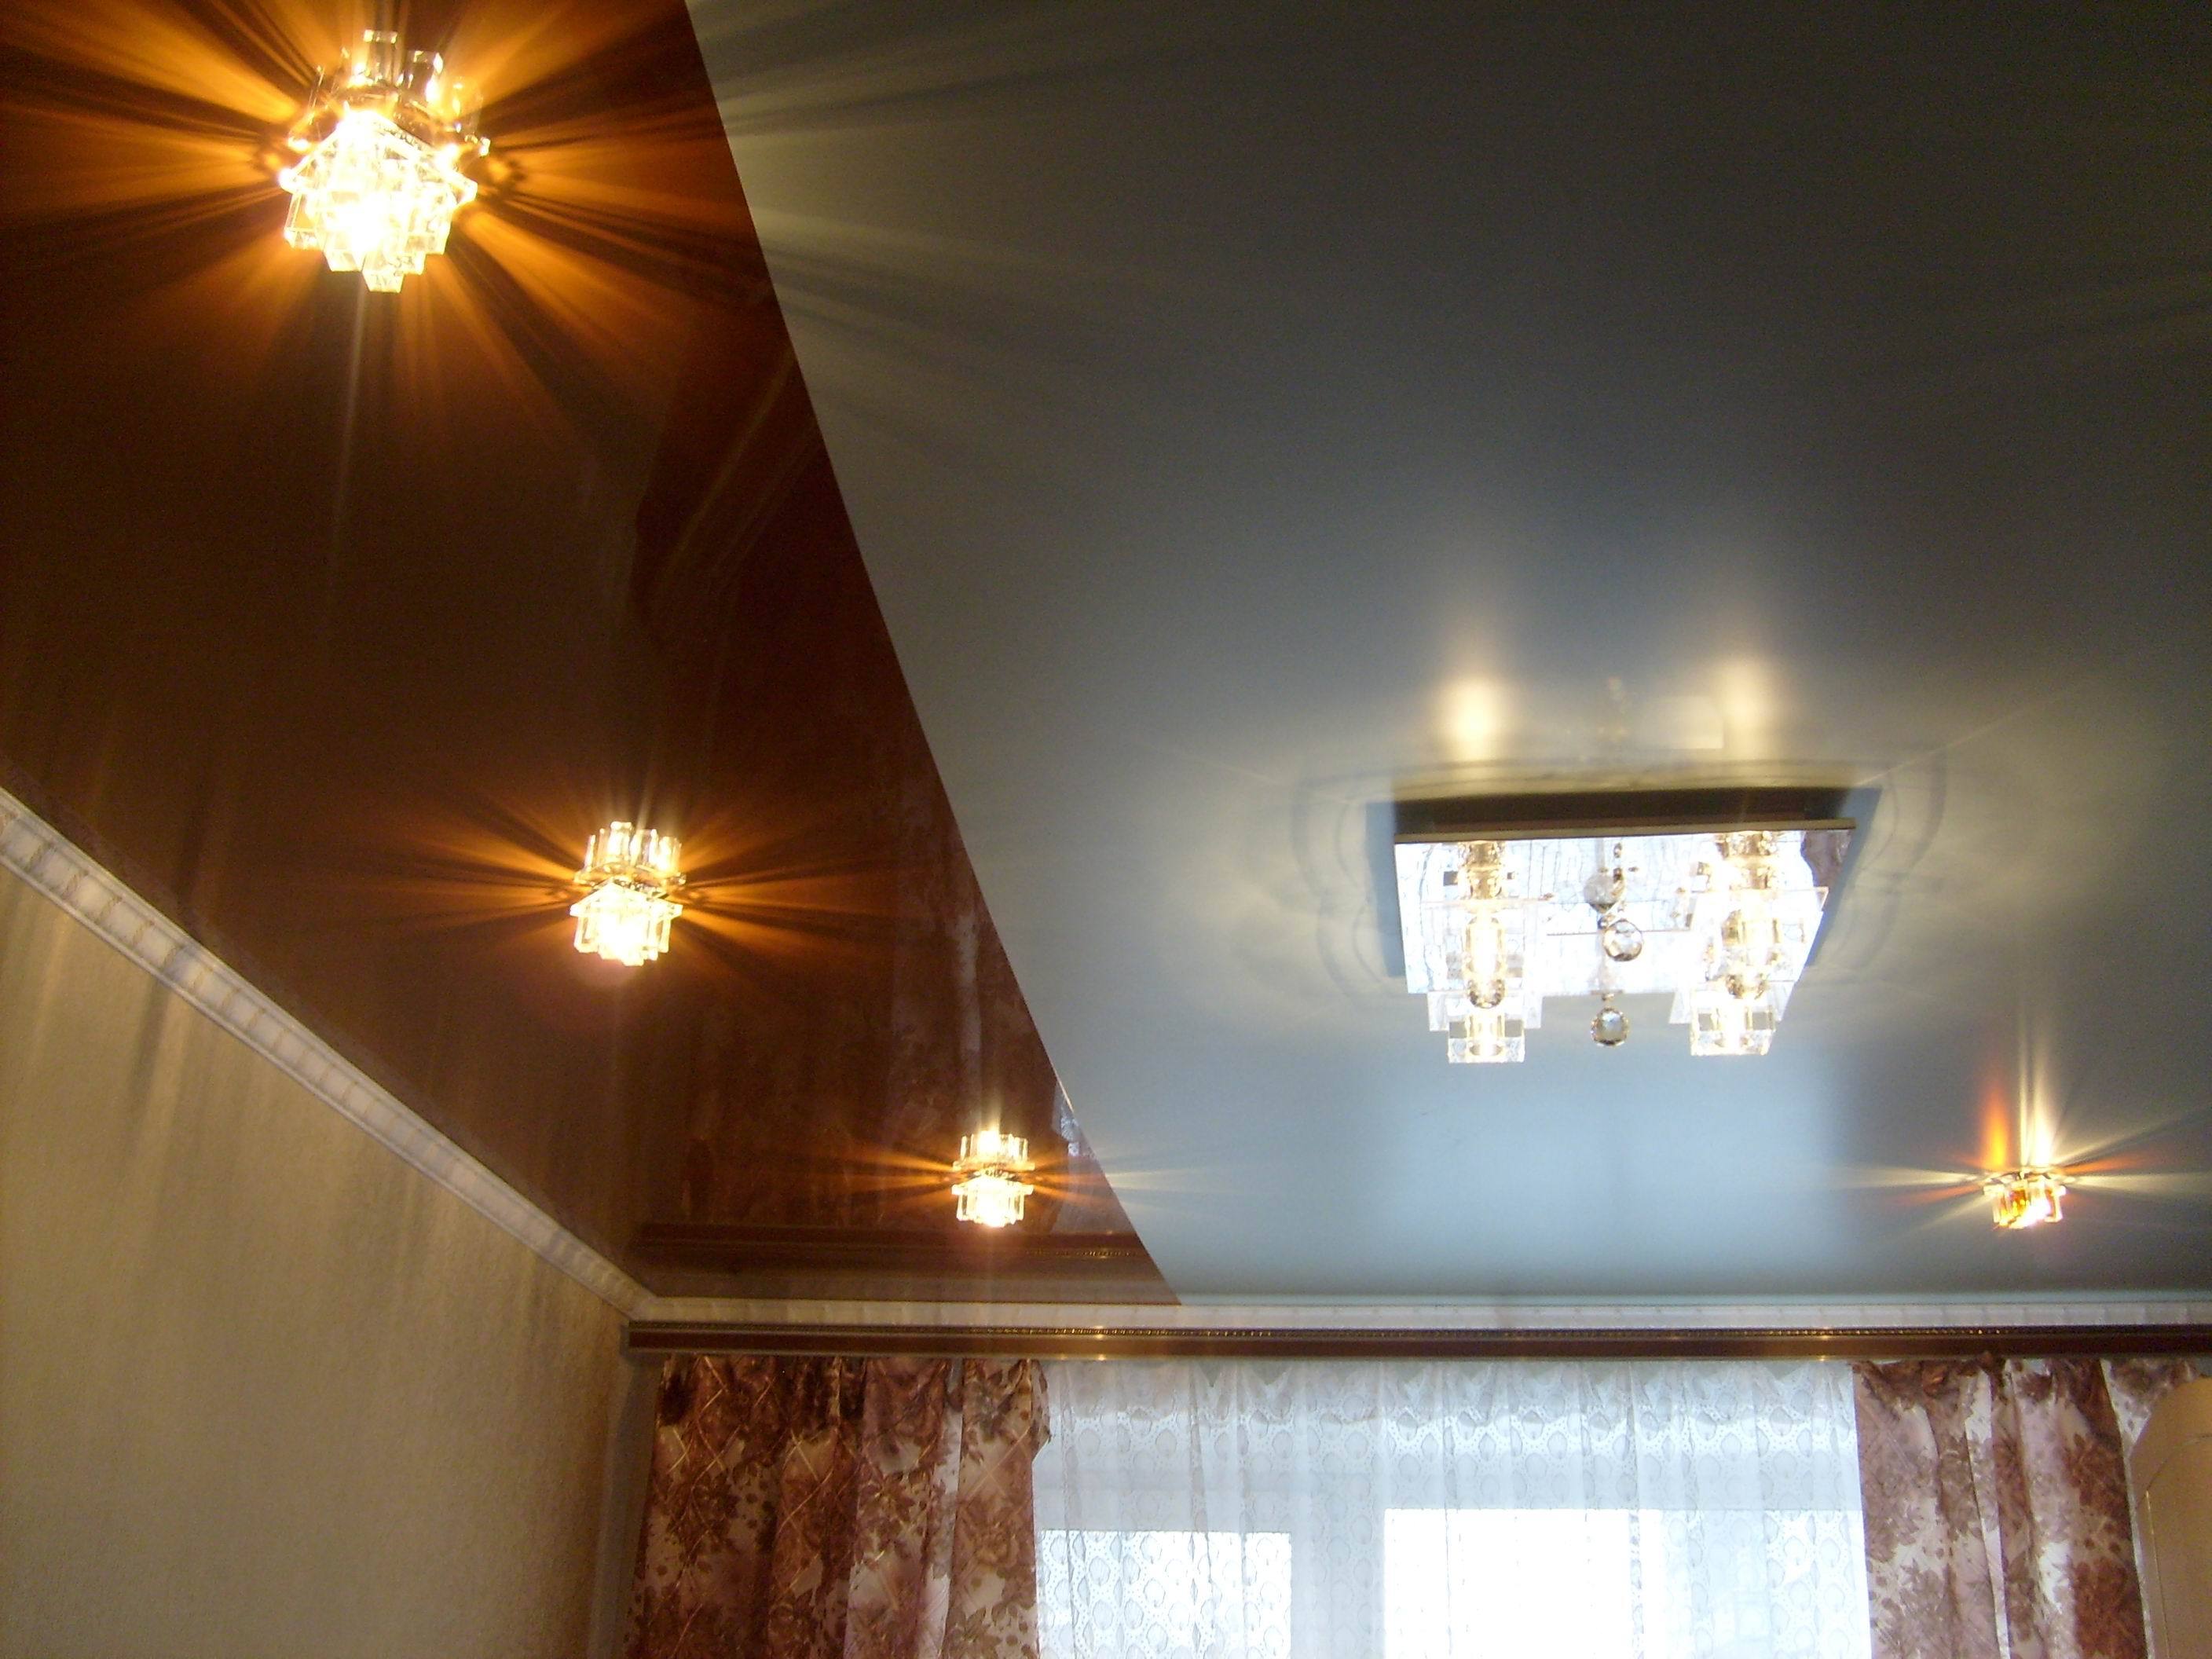
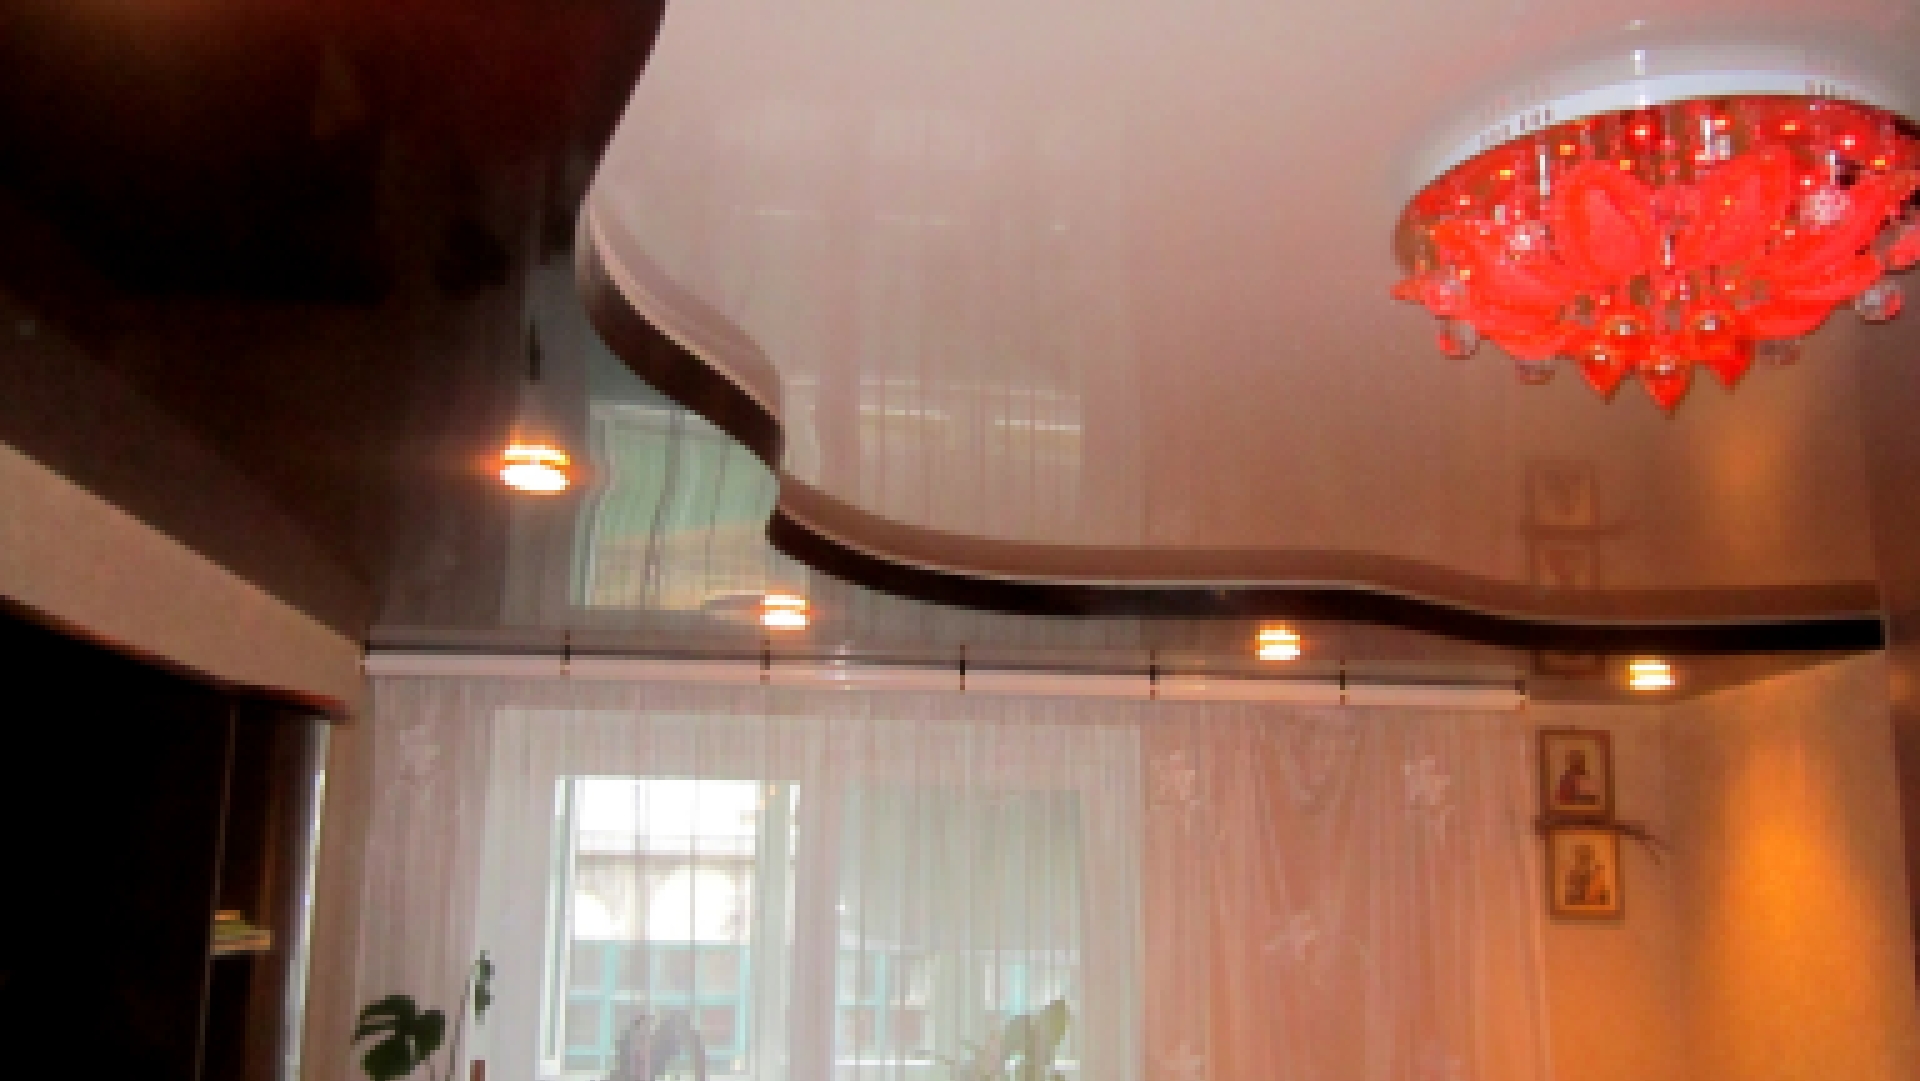
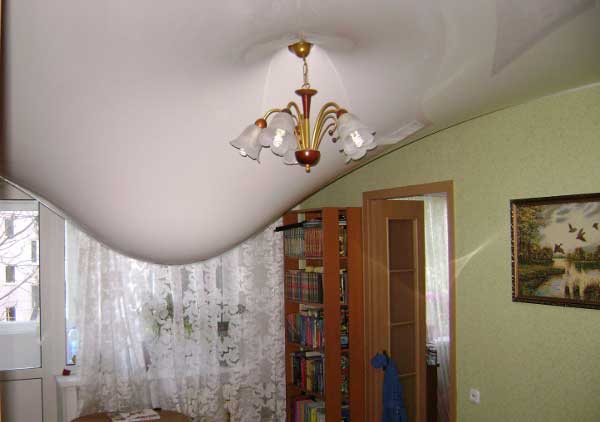
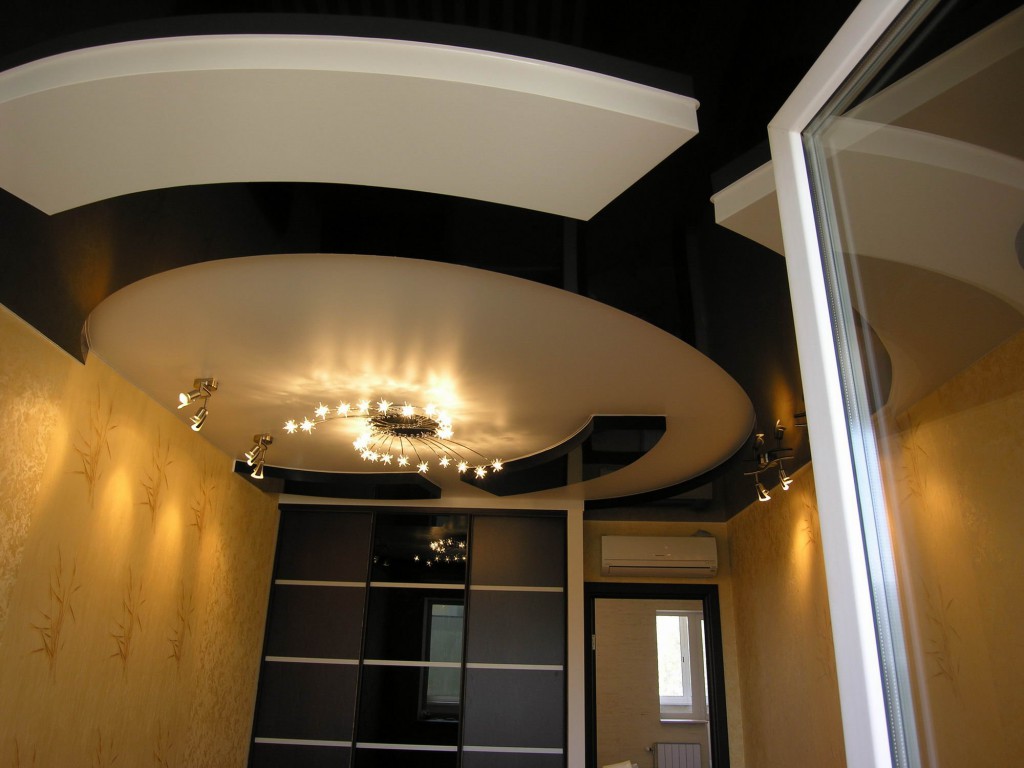
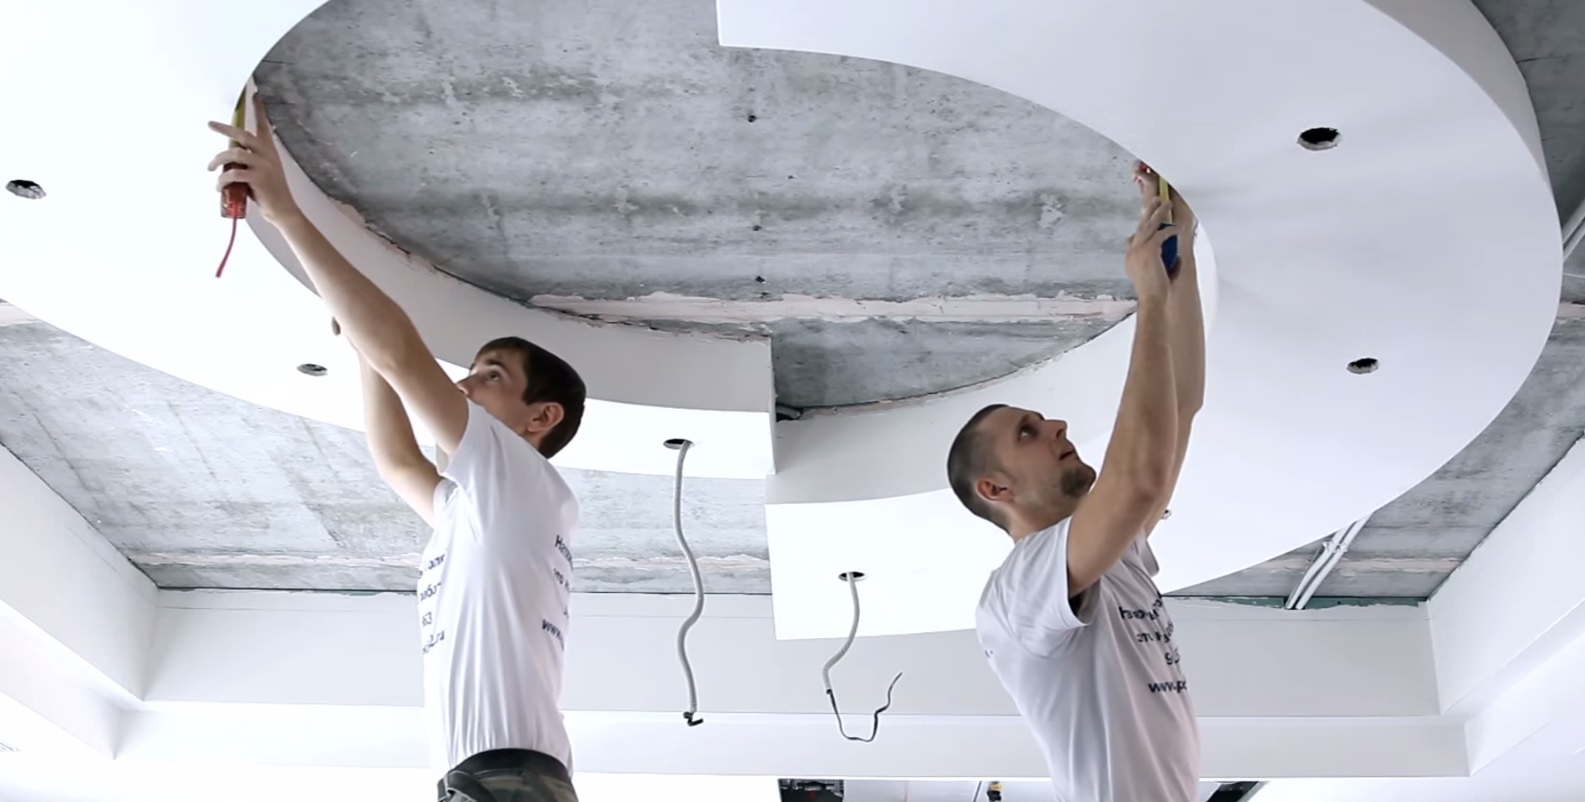
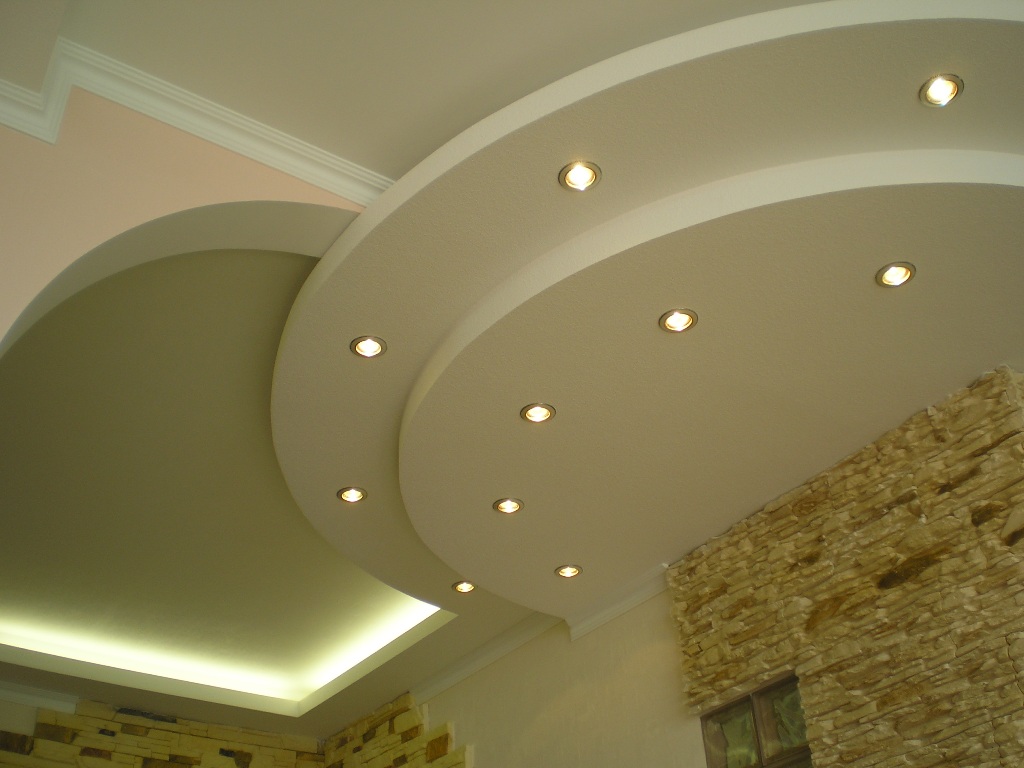
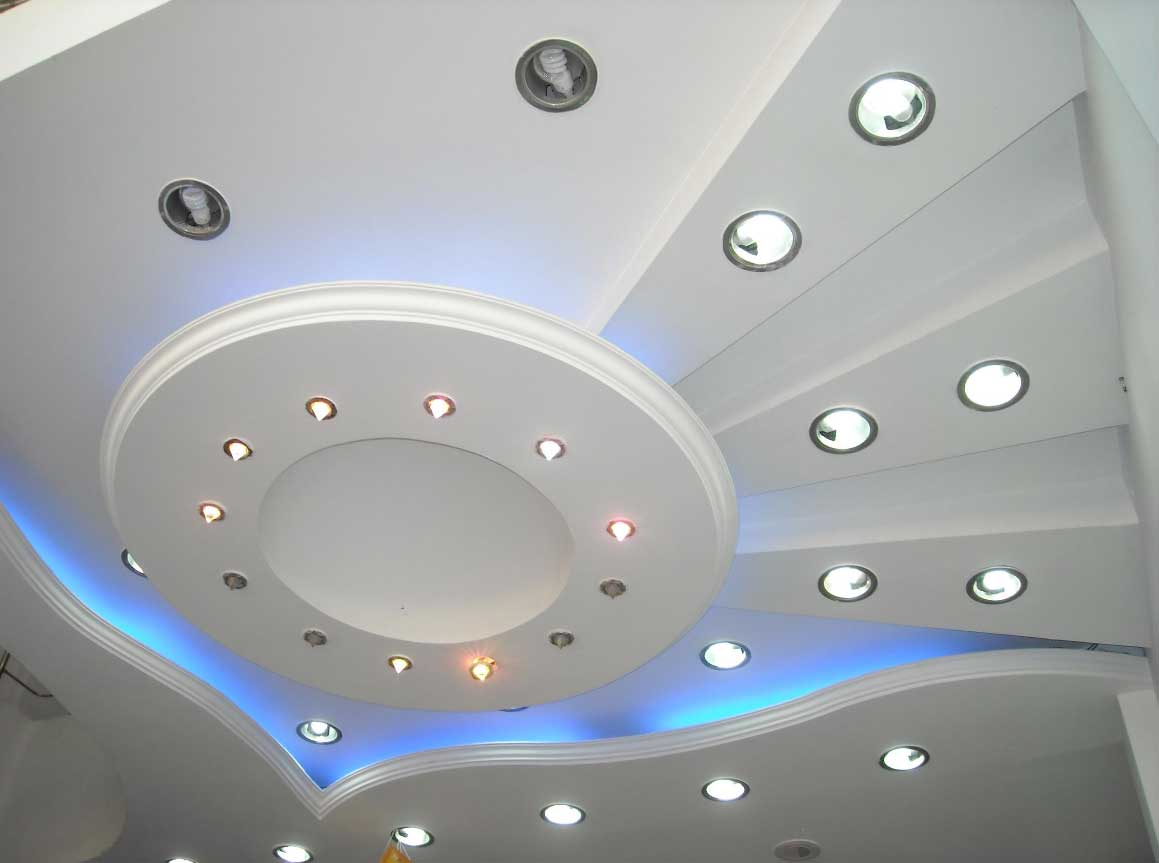
- Multi-level. They are used to create several different areas in the room or to close obvious ceiling irregularities. They can also give room for design creativity. But multi-layered canvases are only suitable for spacious rooms with high ceilings, and installing them is several times more complicated than the above described option. For them, it is better to use transition level profiles that will help ensure a smooth joint and height difference. Do not forget that the staple mounting system when installing structures with multiple levels is not used.
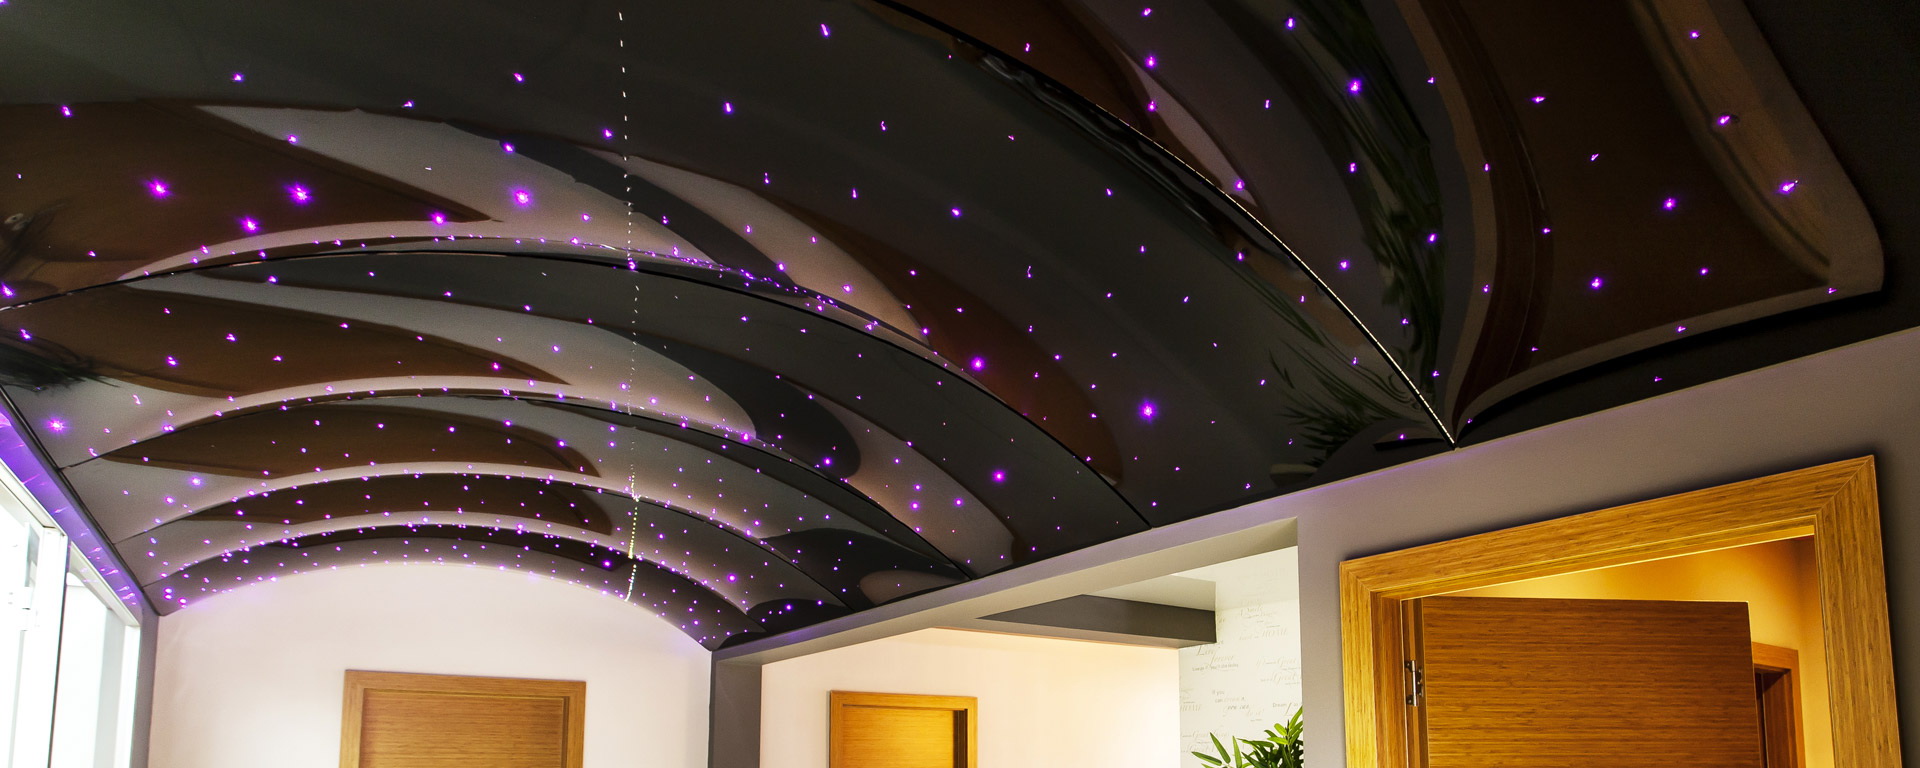
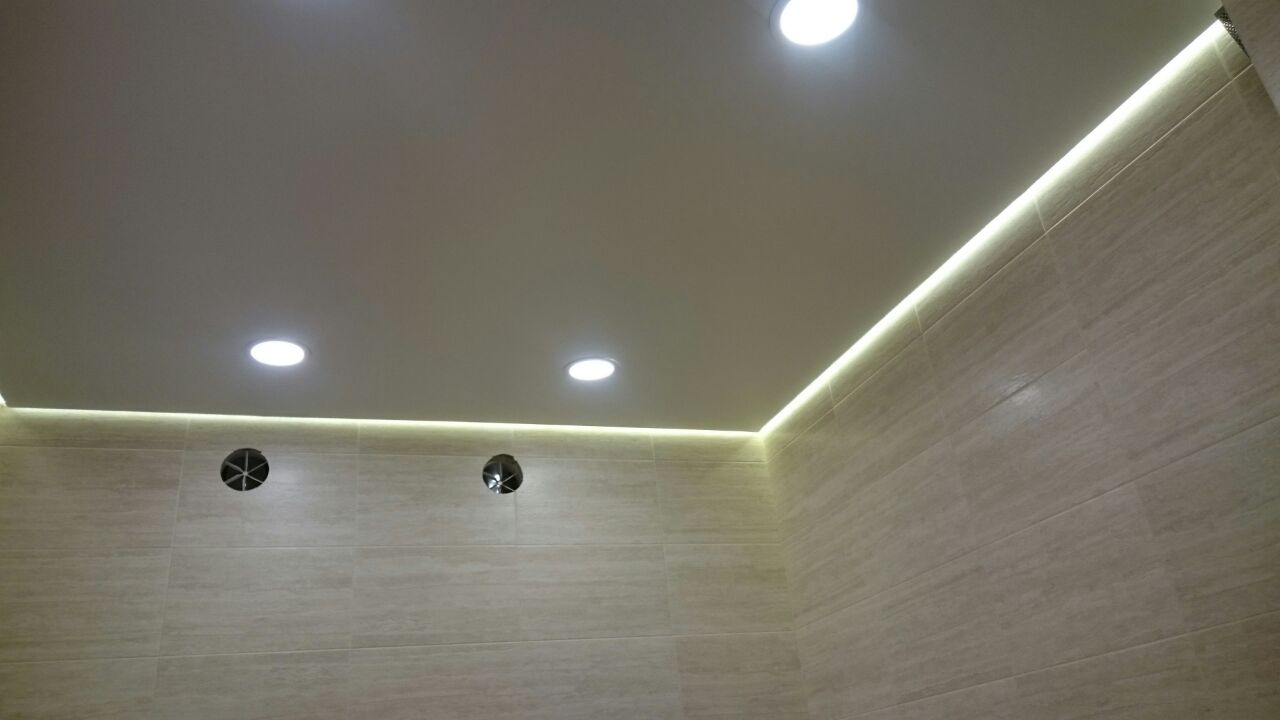
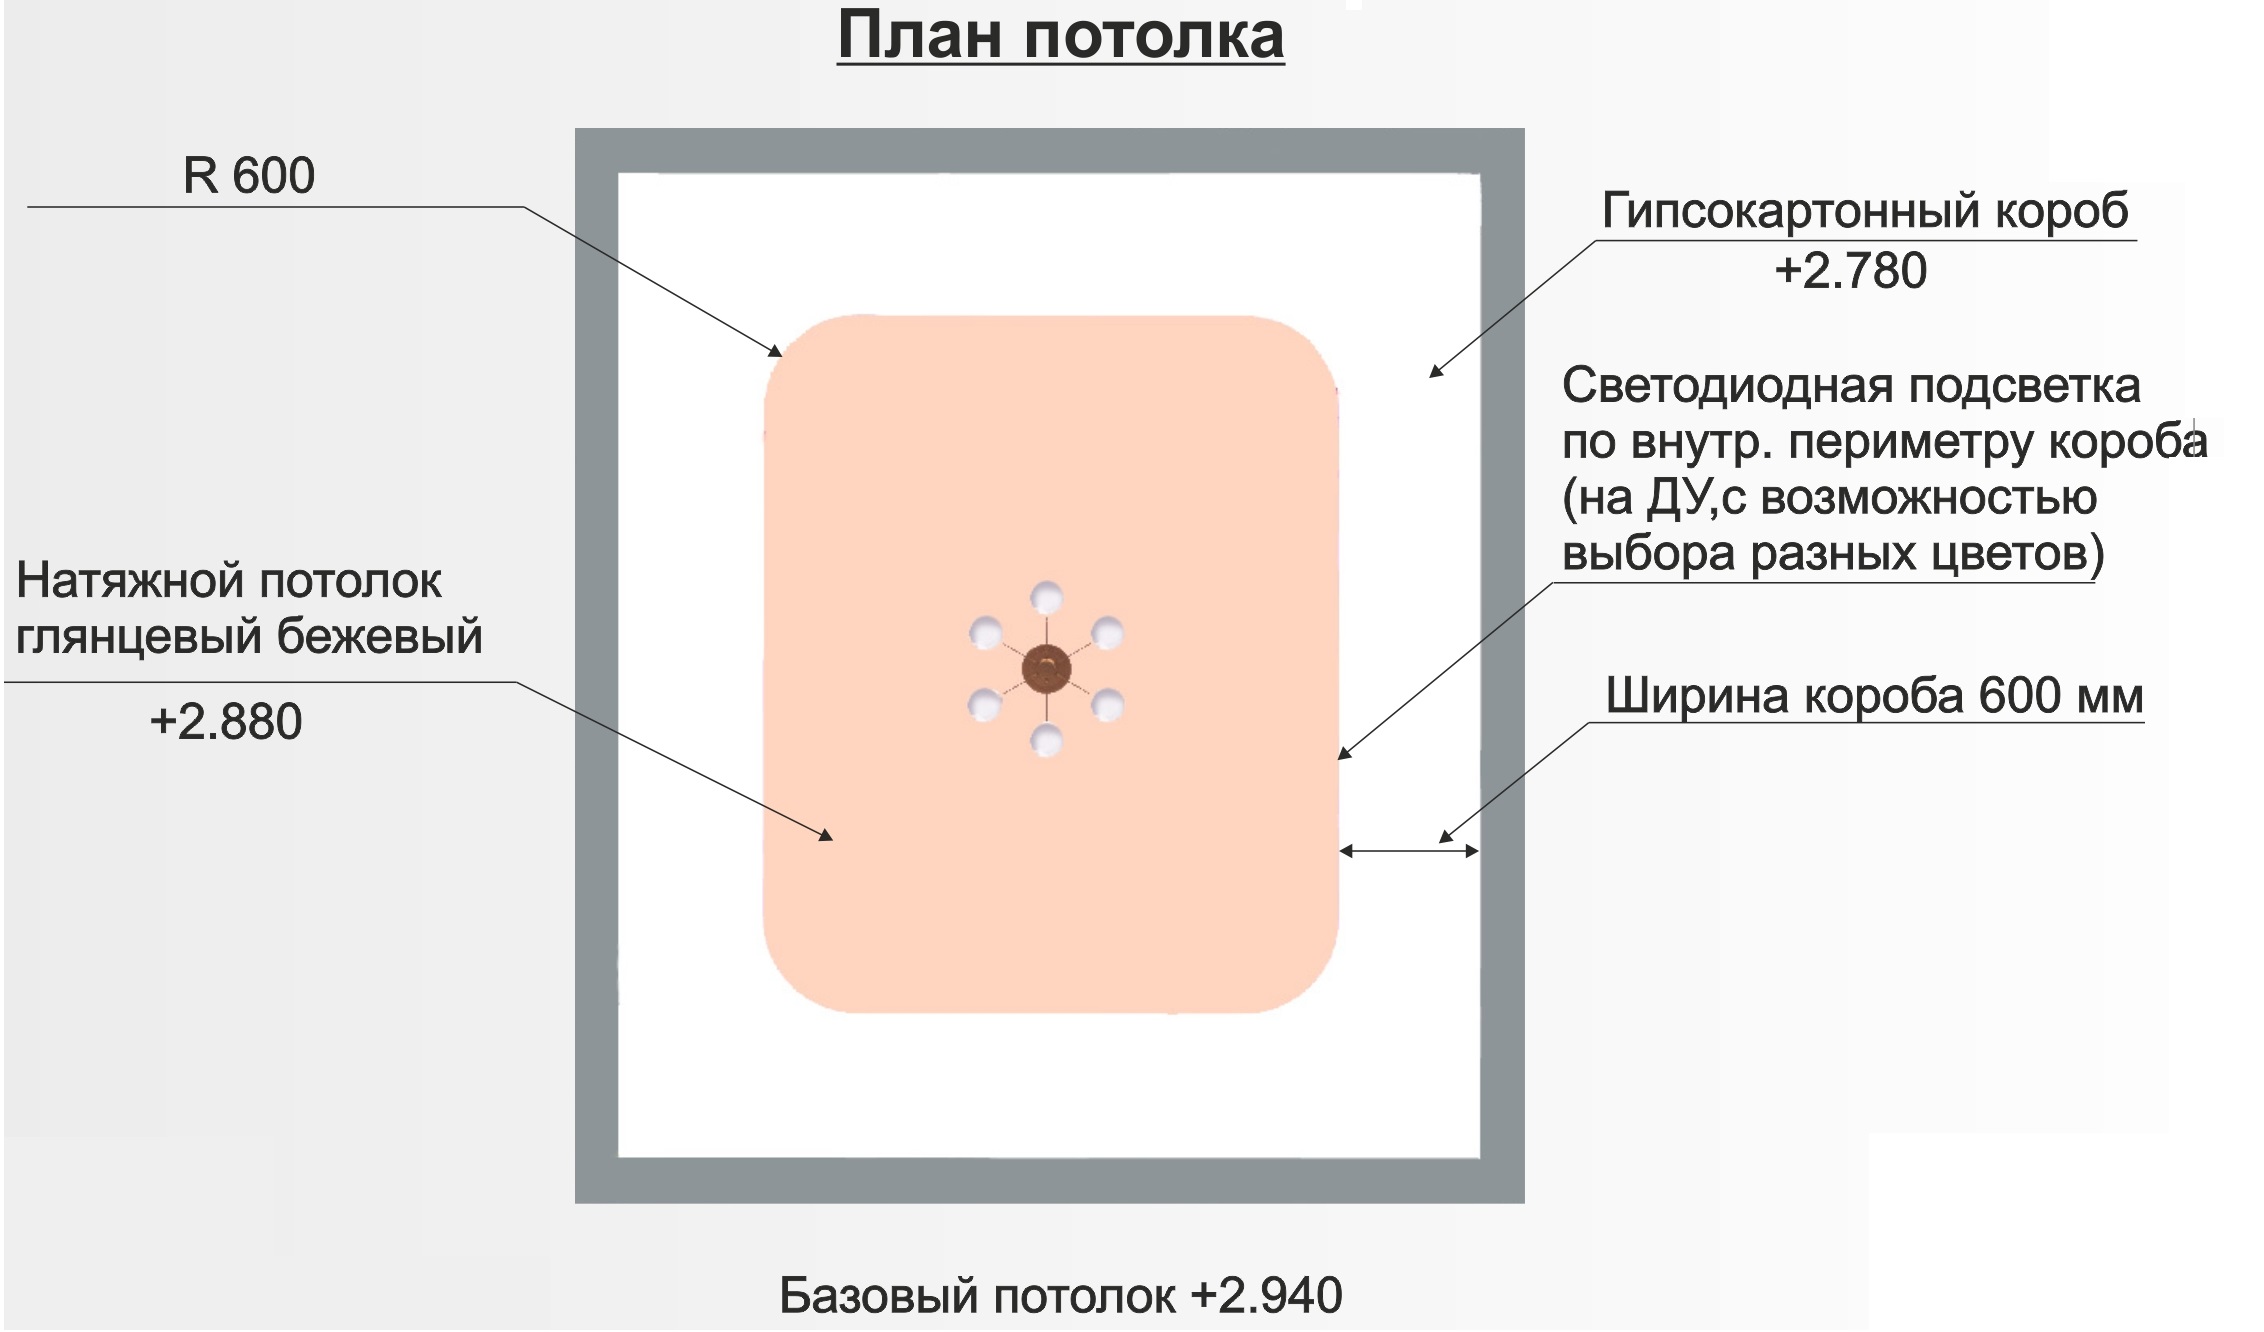
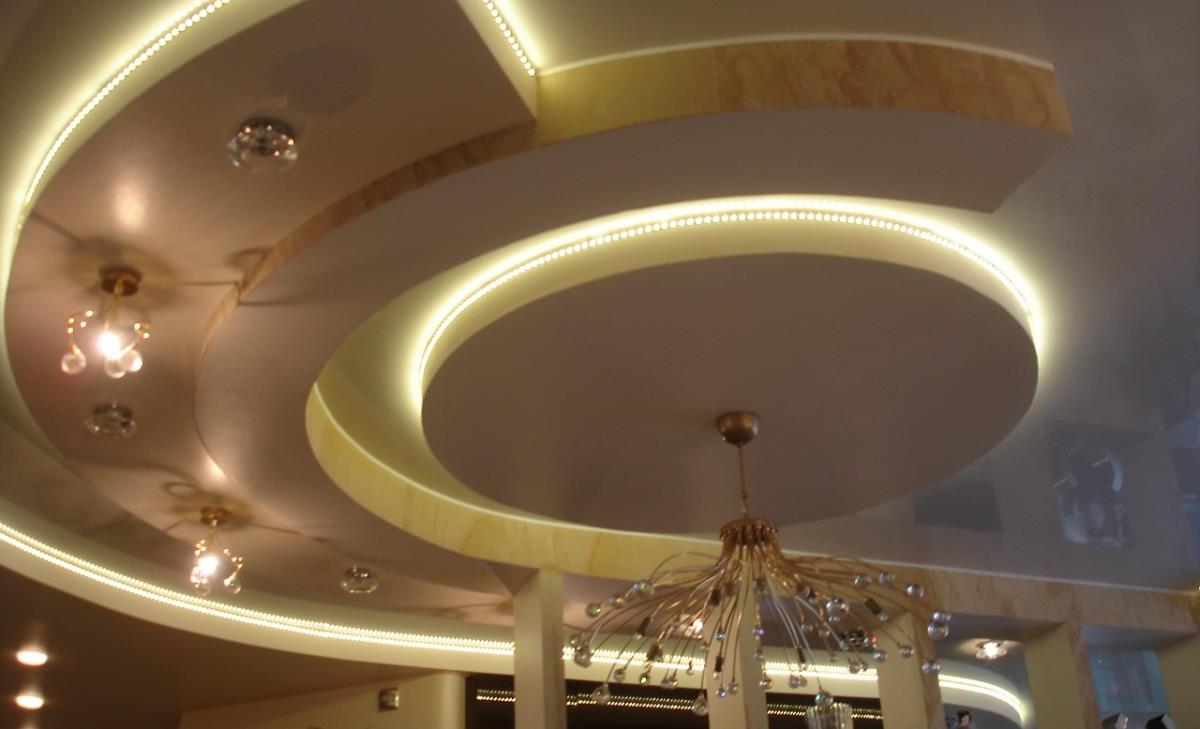
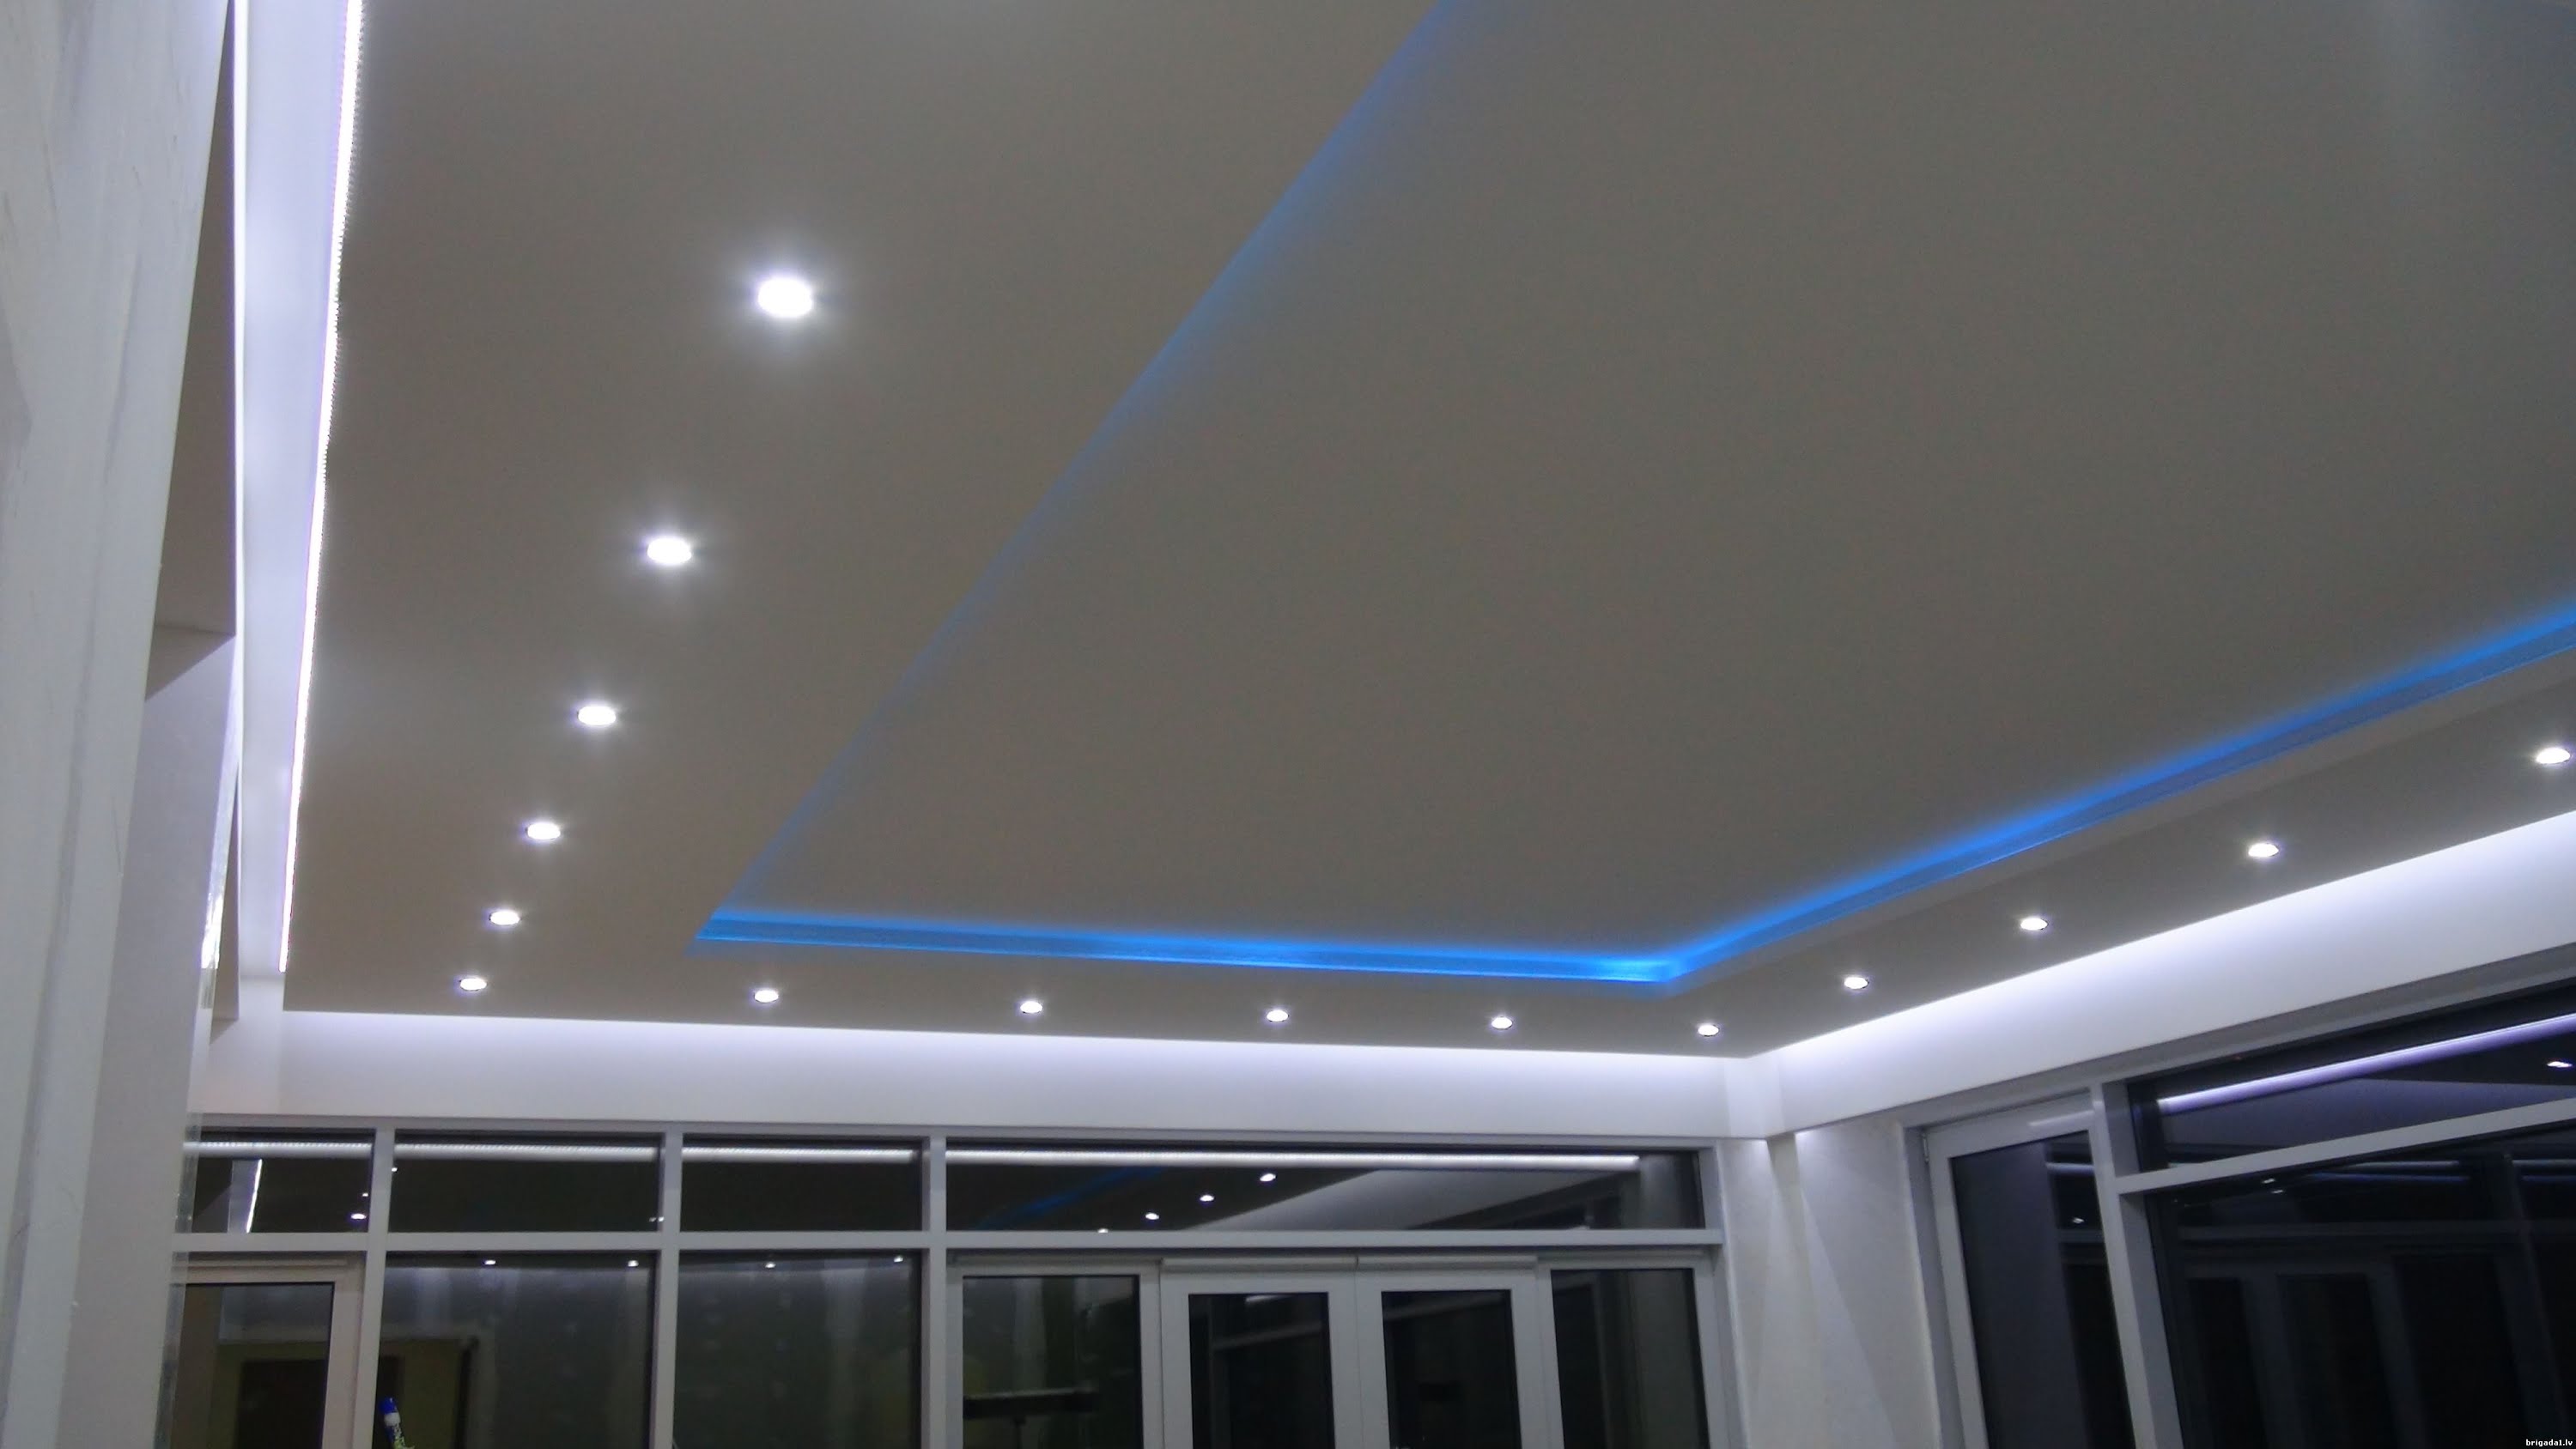
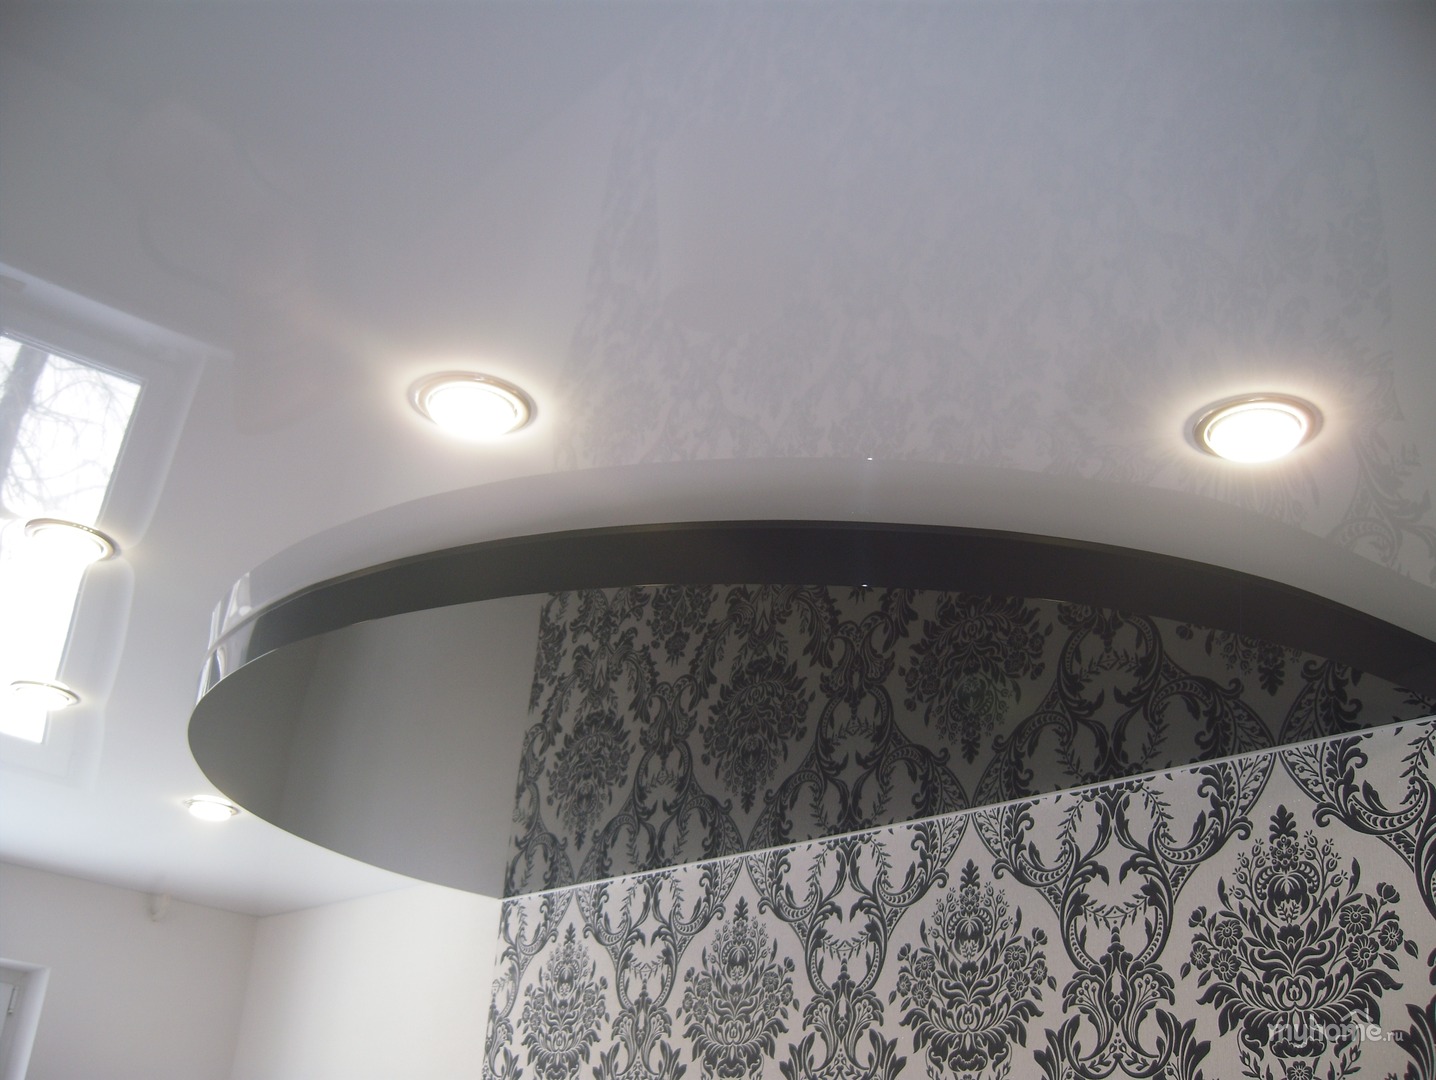
- Soaring ceilings. They represent a kind of modification of suspended structures with an integrated ribbon of LEDs, the light from which is soft and distracted, which creates the effect of a "floating" ceiling.In such cases, the backlight is placed on one wall, along the entire perimeter of the ceiling or enveloped its individual parts. The creation of soaring ceilings requires special baguettes, which, in addition to the grooves for mounting fabric, have a special niche for LED strip. Also, this kind of needs special profiles: wall and ceiling, dividing and to move a level, because they can make the layout of the backlight more convenient.

Training
This is the first and very important stage, without which it is impossible to install the tensioning sheet by yourself. It is divided into several mandatory points.
First of all, remove all furniture and equipment from the room.where it is supposed to stretch the ceilings, since the space should be as free as possible so that the installation can be carried out quickly and without the possibility of mechanical damage to the fabric. If it is impossible to take out any objects from the room, then they should be moved to the center of the room and covered with a protective film.

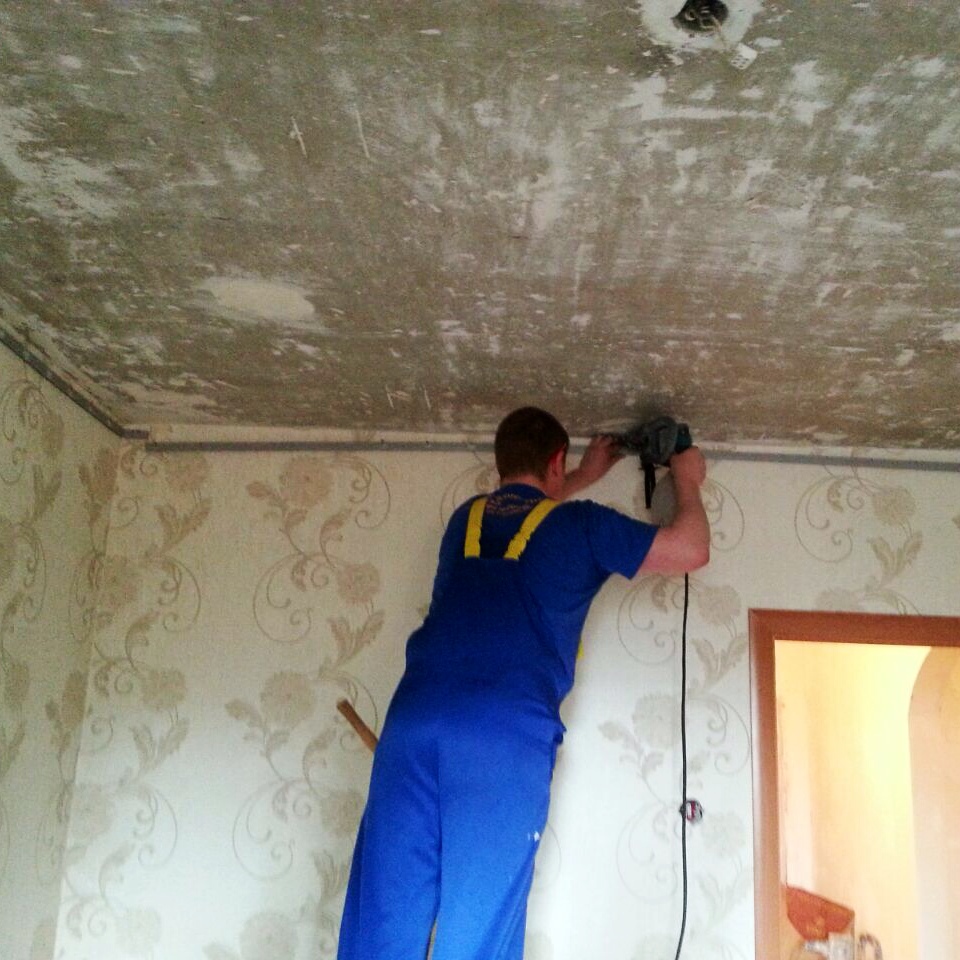
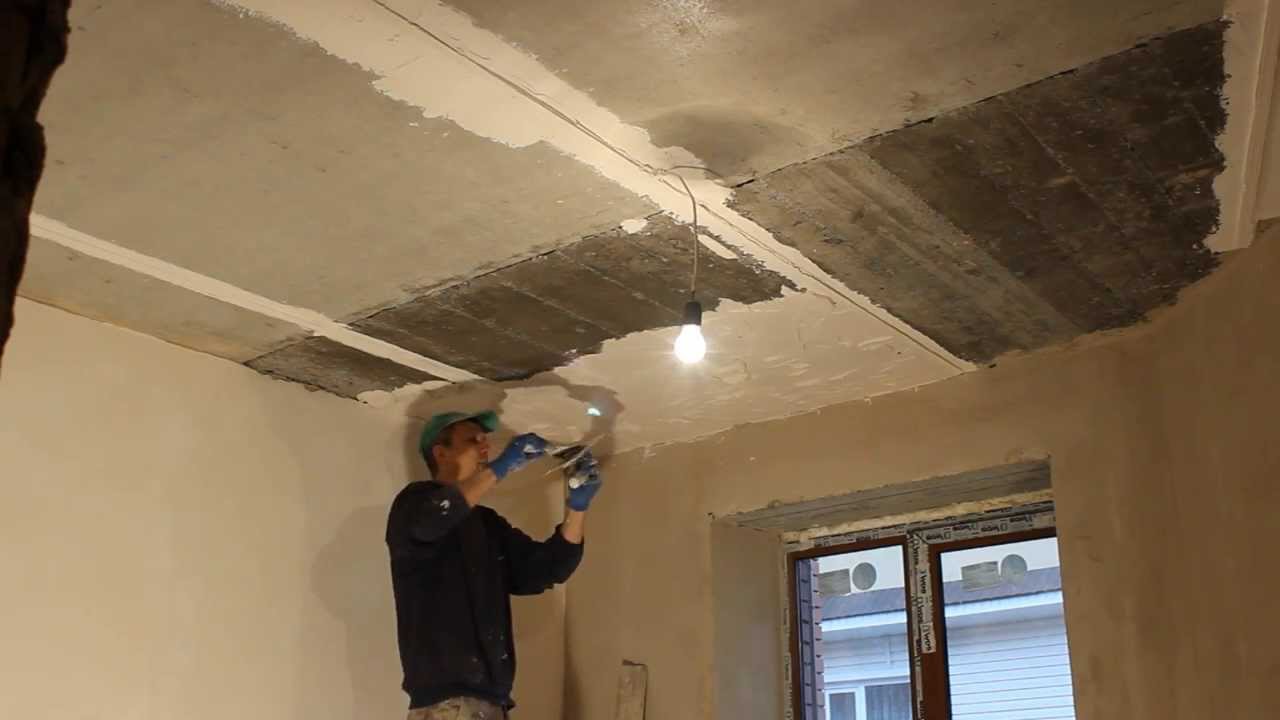
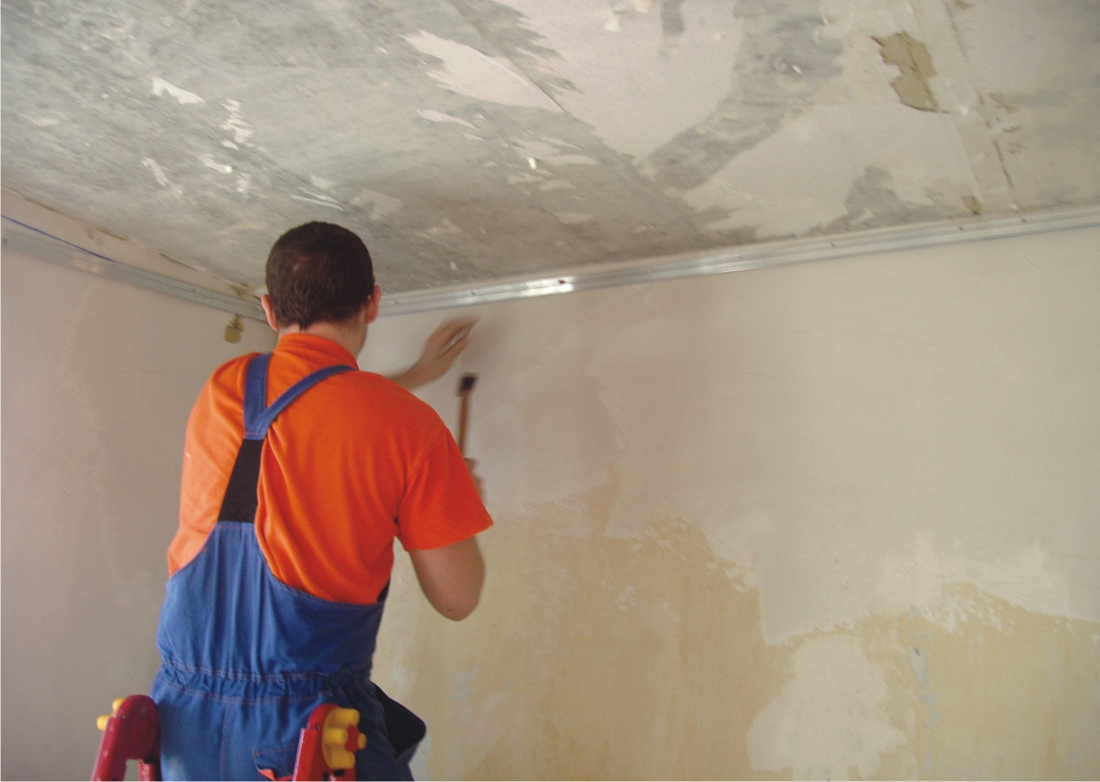
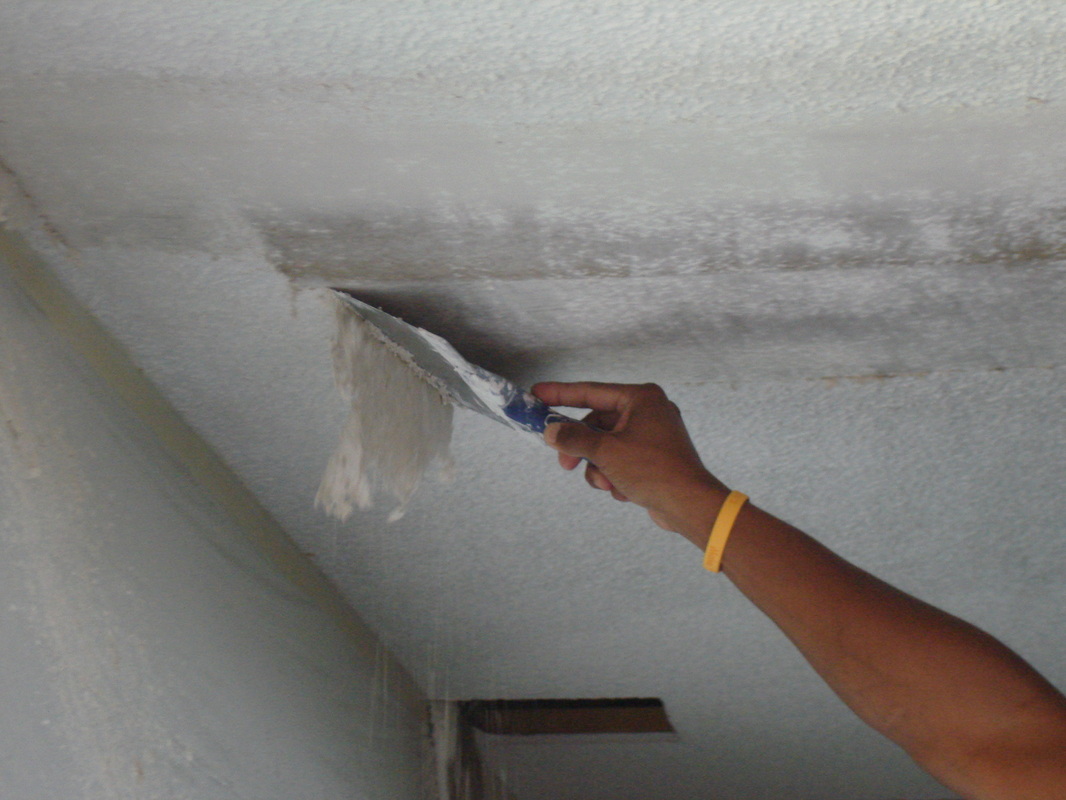
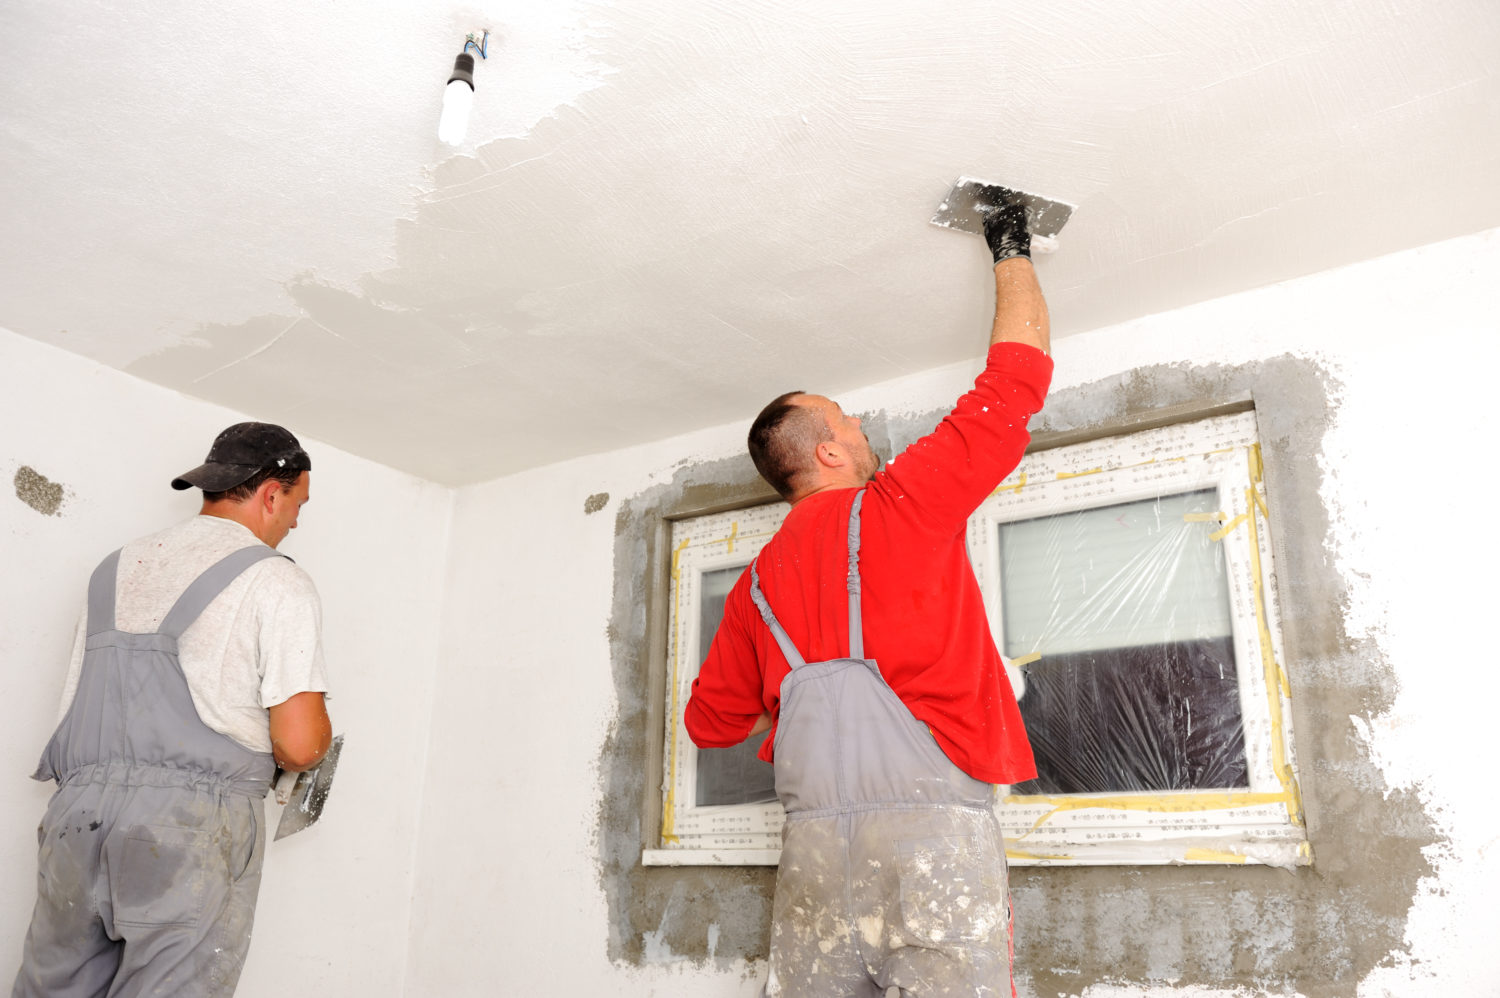
Then you need to remove the old plaster from the ceiling, as it may fall off and leave ugly marks on the canvas.
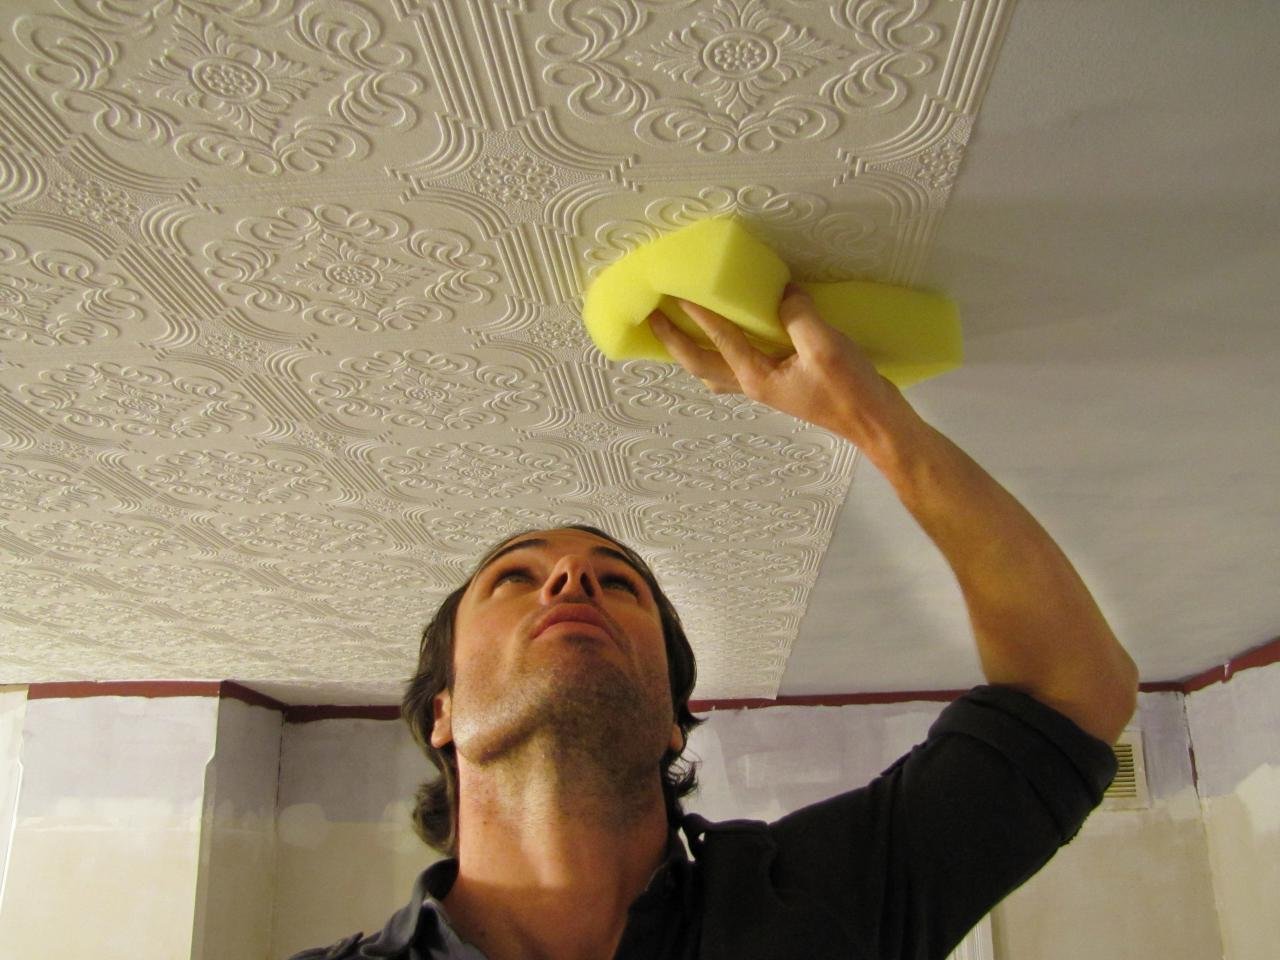
Pre-treat the walls and ceiling with a disinfecting and antiseptic agent to avoid the appearance of mold, mildew and unpleasant smell after installation of the structure. Also, the surface on which the fabric will stretch must be coated with a primer, preferably in several layers.
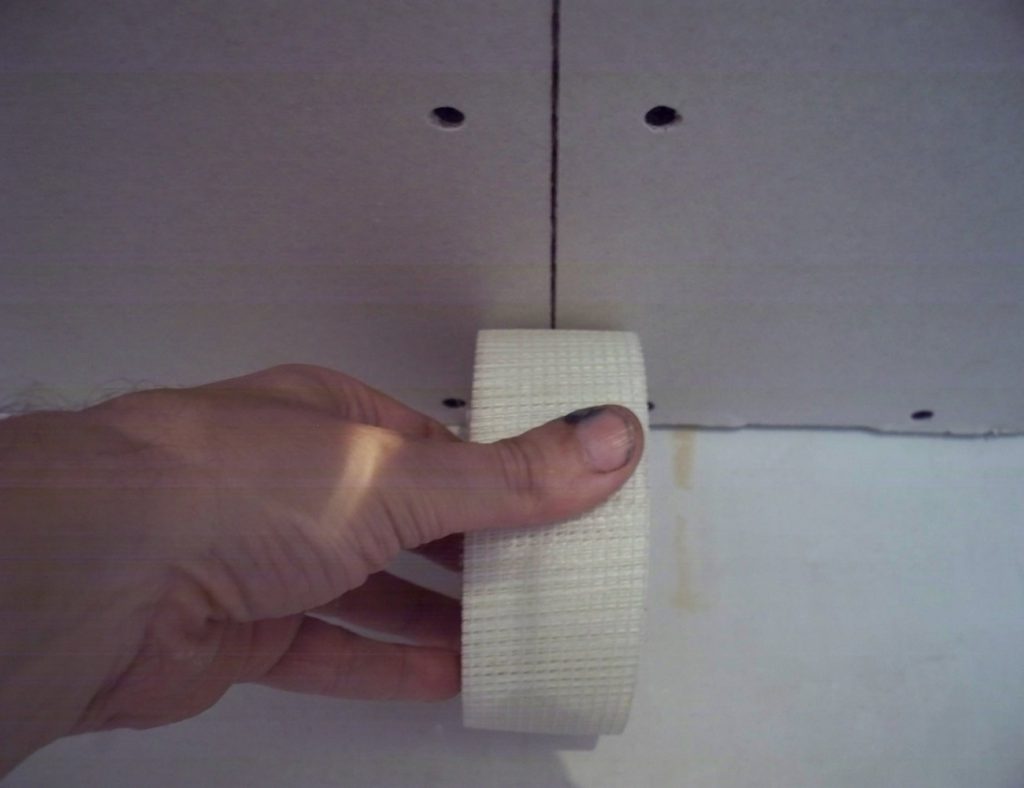
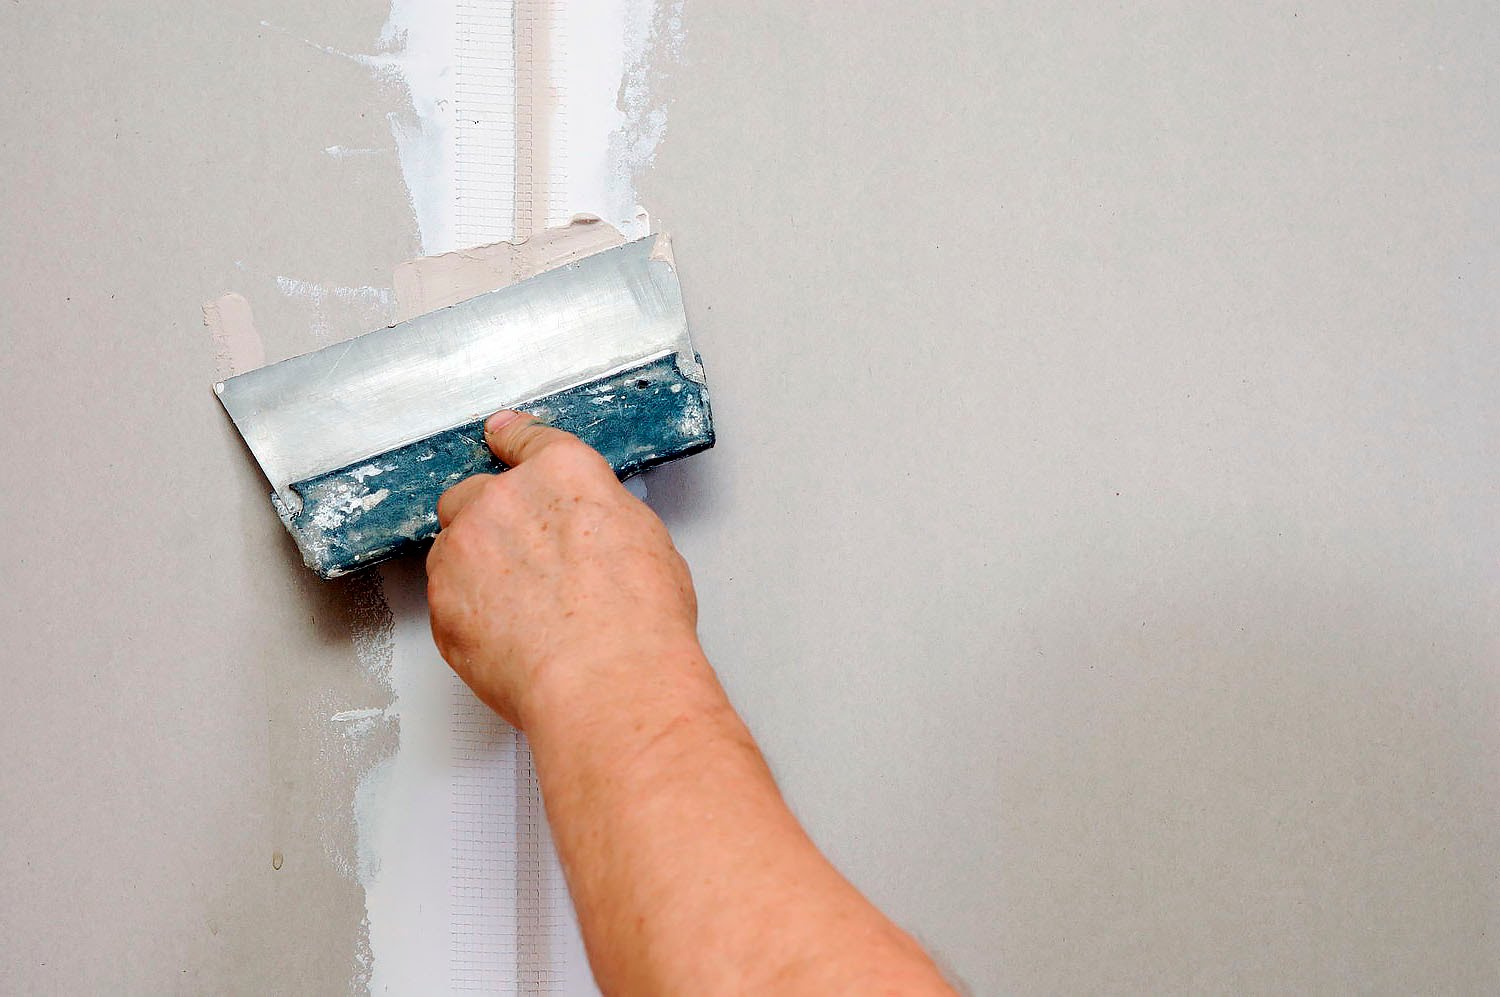
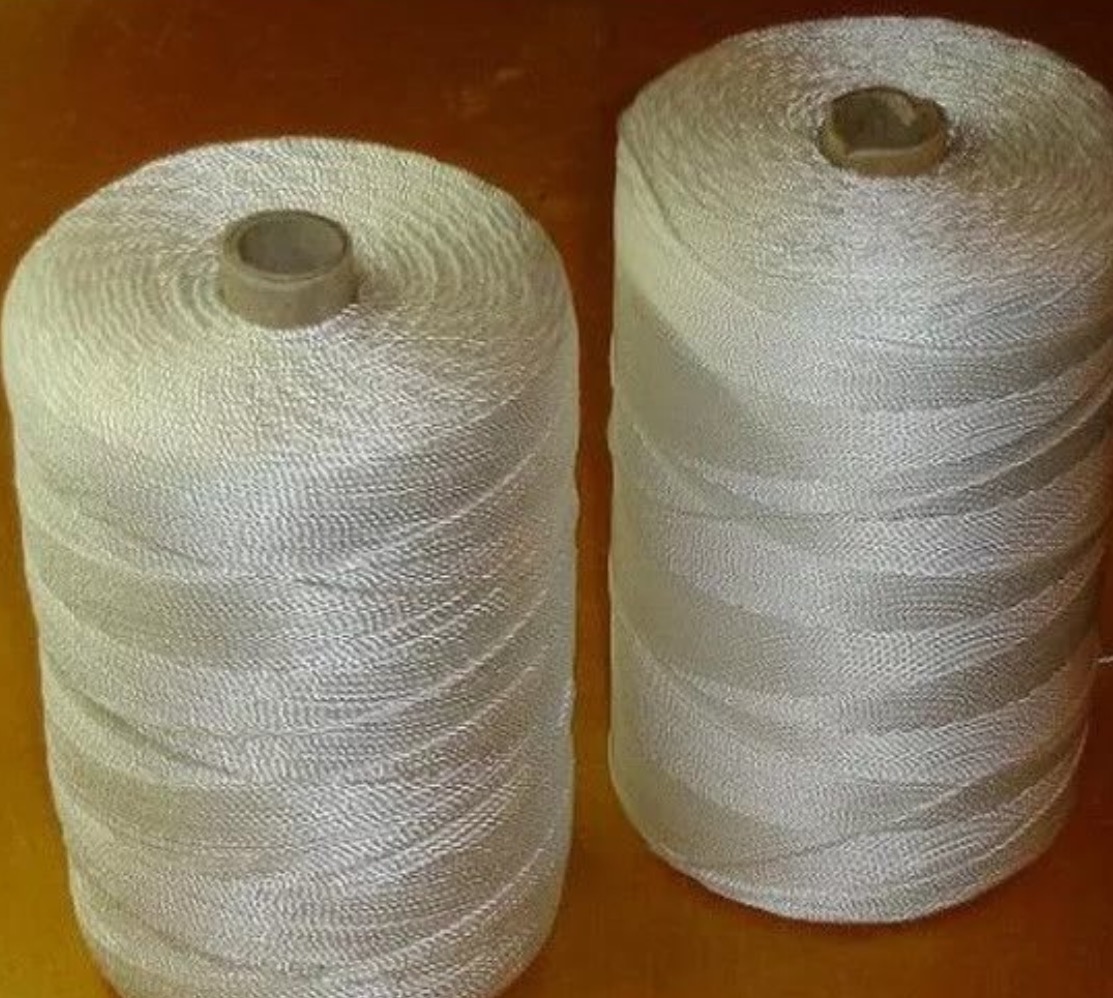
It is best to glue the joints between the concrete walls with fiberglass tape together with white glue. If there are already cracks in the ceiling, they can be filled and leveled with cement mortar, and for large cavities - with foam or gypsum. This is necessary so that there are no pits on the canvas after shrinkage.
Laminate or parquet should be laid only after the installation of the ceiling surface. But if such delicate flooring is already installed, they need to be covered with thick cardboard so as not to damage them with a stepladder.

It is necessary to prepare the walls before installation of the canvas: plaster, glue the wallpaper - to do all the "dirty work". After installing the stretch ceiling, it is undesirable to do this - dust can settle on the fabric.
Select the number of levels, pre-identify the number and location of lamps.
Calculations
After preliminary preparation, it is necessary to calculate and mark the lowest point of the structure, because it is from it that the installation of the profile will begin, with the help of which the canvas will be fixed. It is necessary to set aside about 6 cm from the base - this distance will be considered the minimum height of the tension structure.
If the ceilings have many levels, it is best to calculate and markup for each position individually. It is very important to observe the strict geometry of the room and its plan, as this is a crucial and difficult point at the marking stage. During the installation of the ceiling with several levels, the distance from the initial base should increase.
In addition to designating the lowest point of the cladding material, it is necessary to calculate the size of the tension fabric.
There are several important tips with which the ceiling can be made even by a beginner.
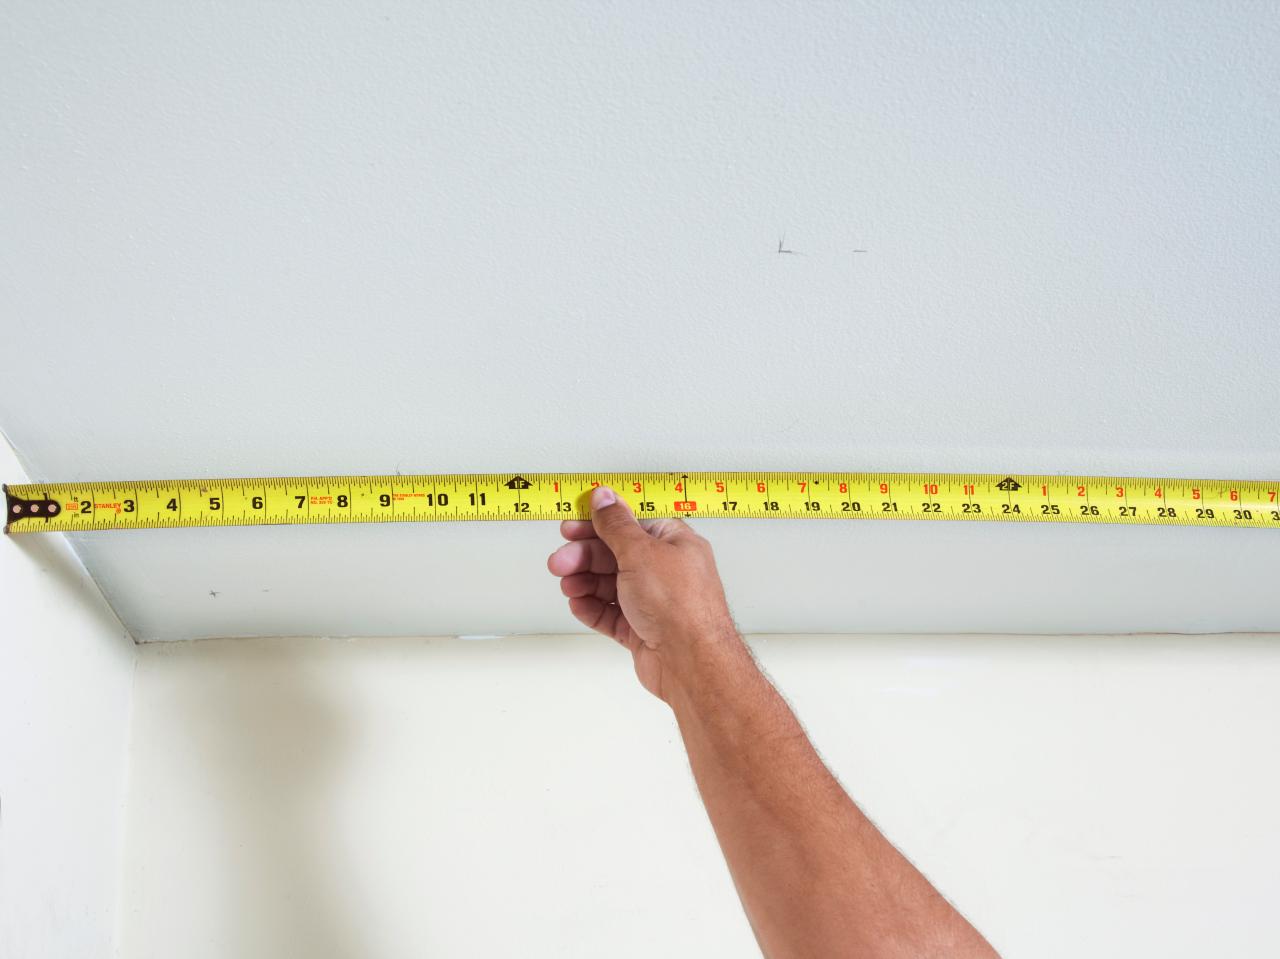
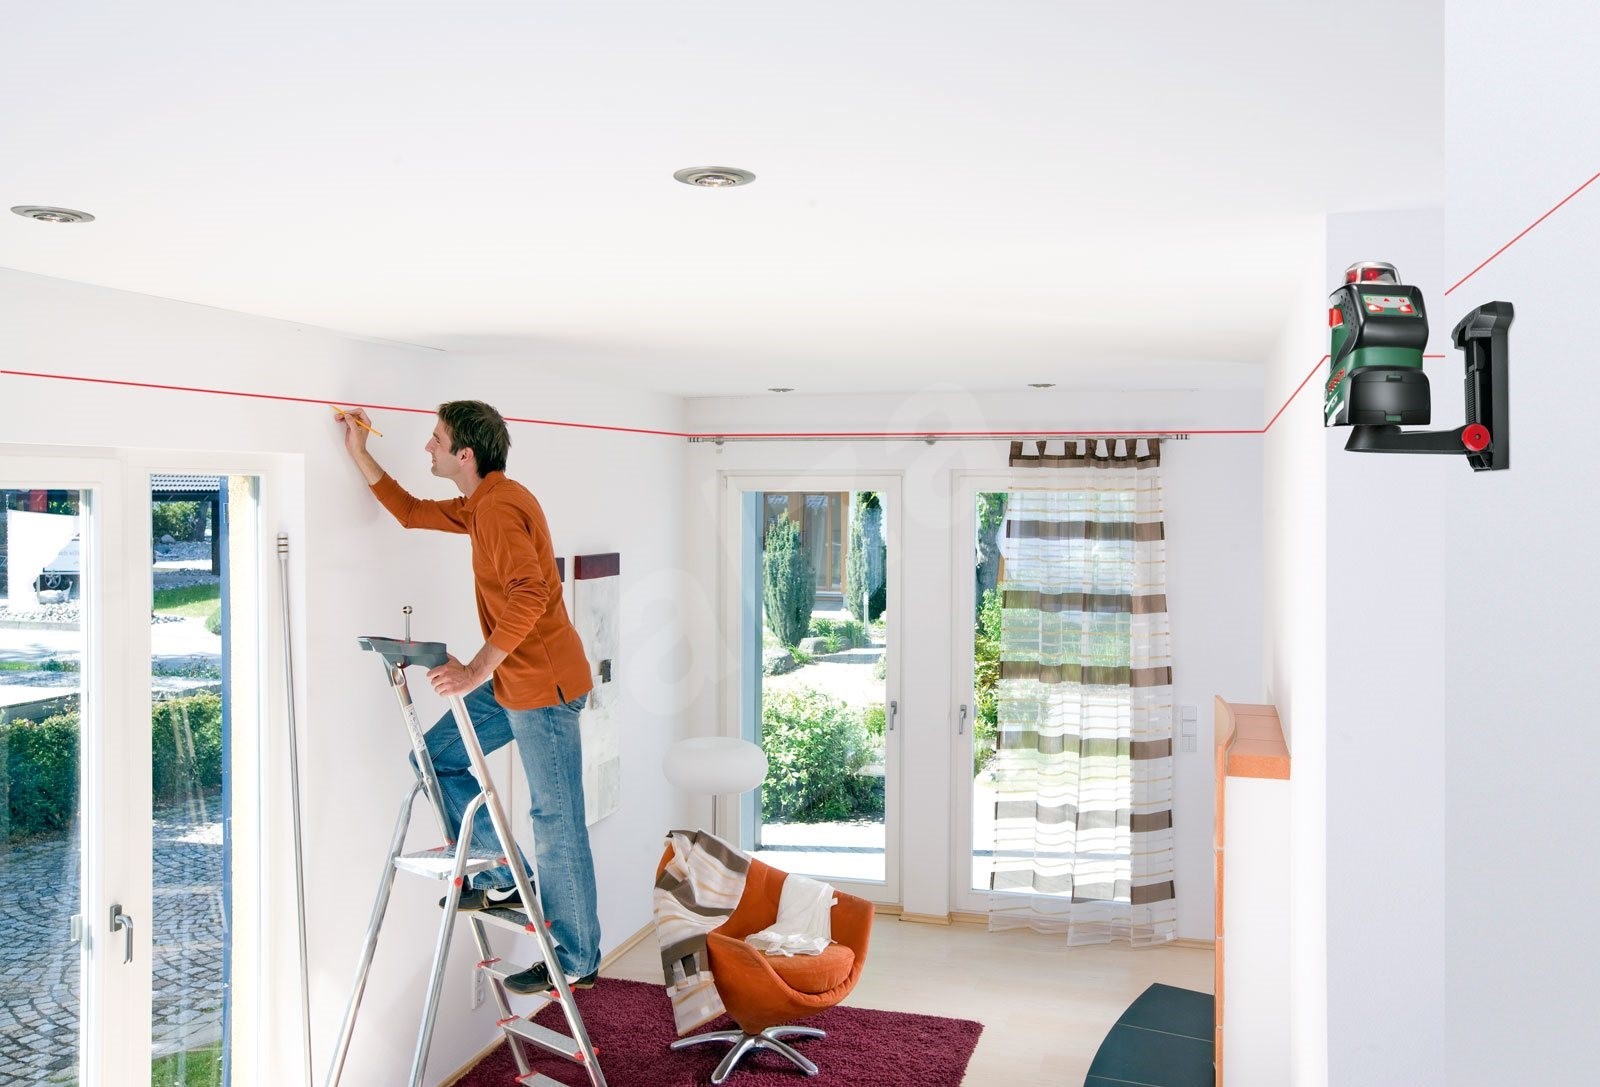
- You need to measure only with the help of tools that give the most accurate result. A laser meter or tape measure is well suited for this.
- Measurements need to be displayed on the drawing, which will show the room on top and have a convenient scale reflecting the proportions of the room in centimeters in the figure.
- Mark the corners of the room on the drawing and call them understandable and simple symbols, for example, in Latin letters.
- Perimeter and diagonal should be measured as close as possible to the ceiling and fix these results in the figure.
Only after the actions taken should go for the purchase of canvas.
Materials
Stretch ceilings can be divided into two categories depending on the type of material used.
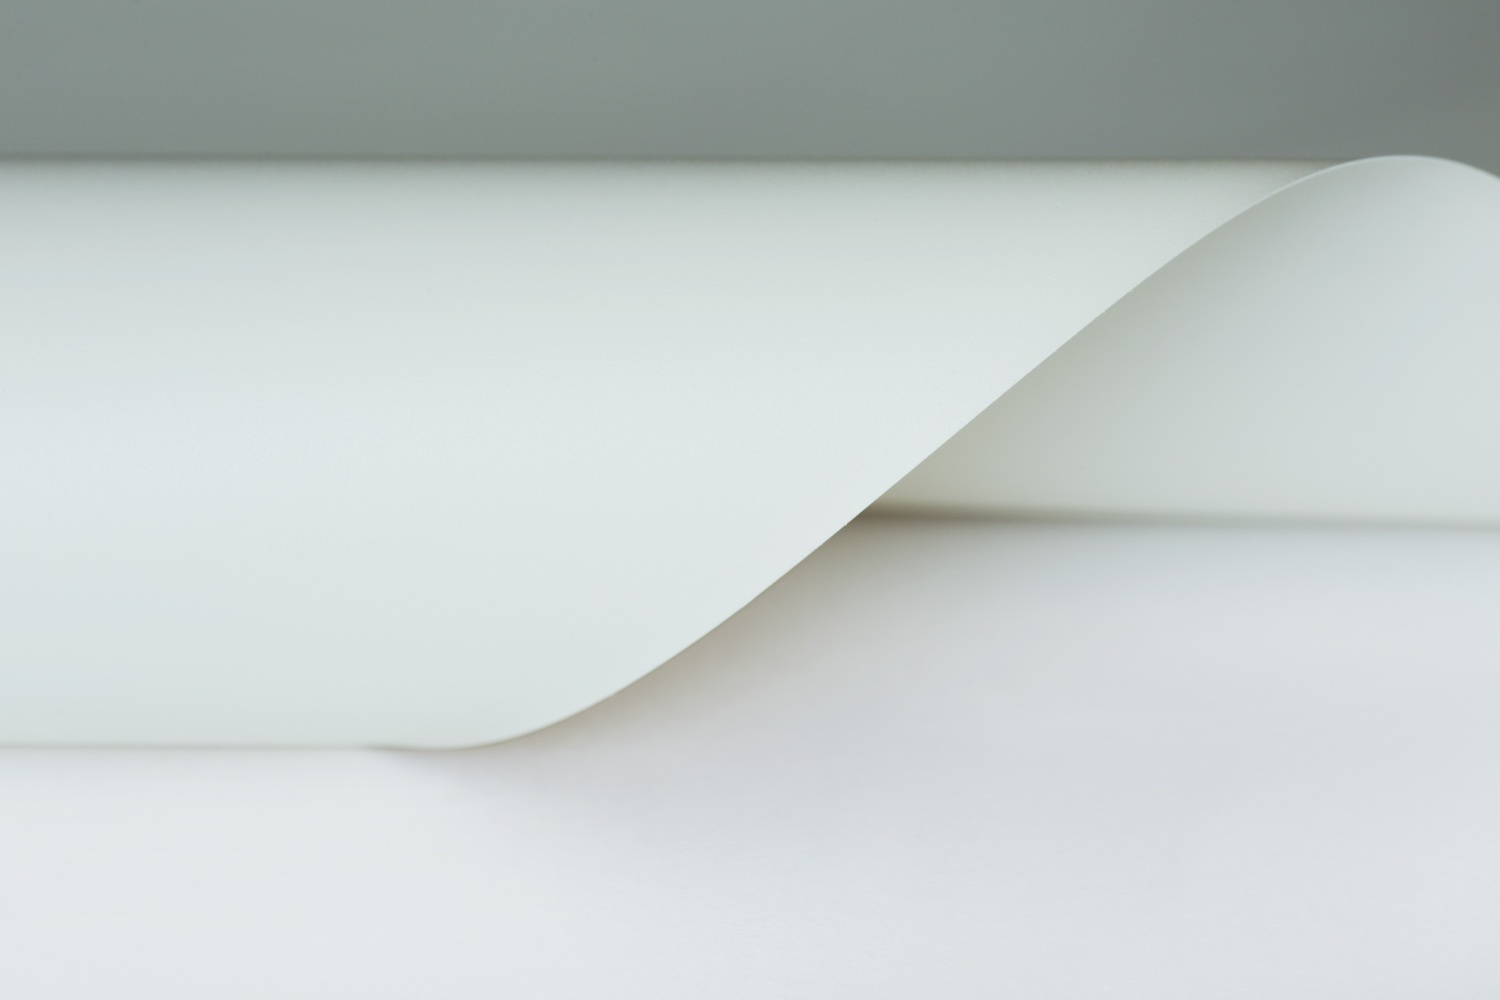
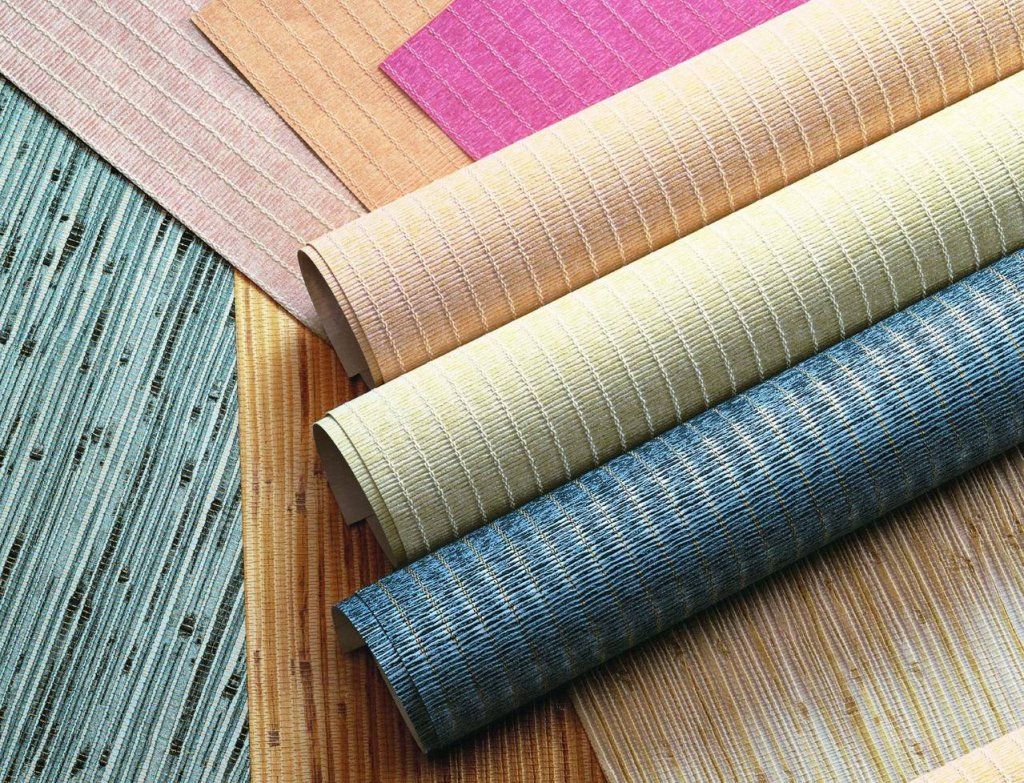
- Fabric seamless. These ceilings are made of polyester. The canvas is not quite dense, and the structure resembles a grid. Because of this, such ceilings can "breathe", that is, they let air through themselves, thereby creating a cozy microclimate in the room. In order to keep the canvas in good shape, it is impregnated with a mixture of polyurethane at the production stage. Such a canvas is made with 5-meter rolls - for this reason, during installation there is no need to fasten the canvas with each other.
- Vinyl. Stretch PVC ceilings are made on special machines with cloths up to three meters wide. They are waterproof, very cheap and easy to clean. However, they have some drawbacks: they can be damaged by any pointed object, and they are also unstable to cold.
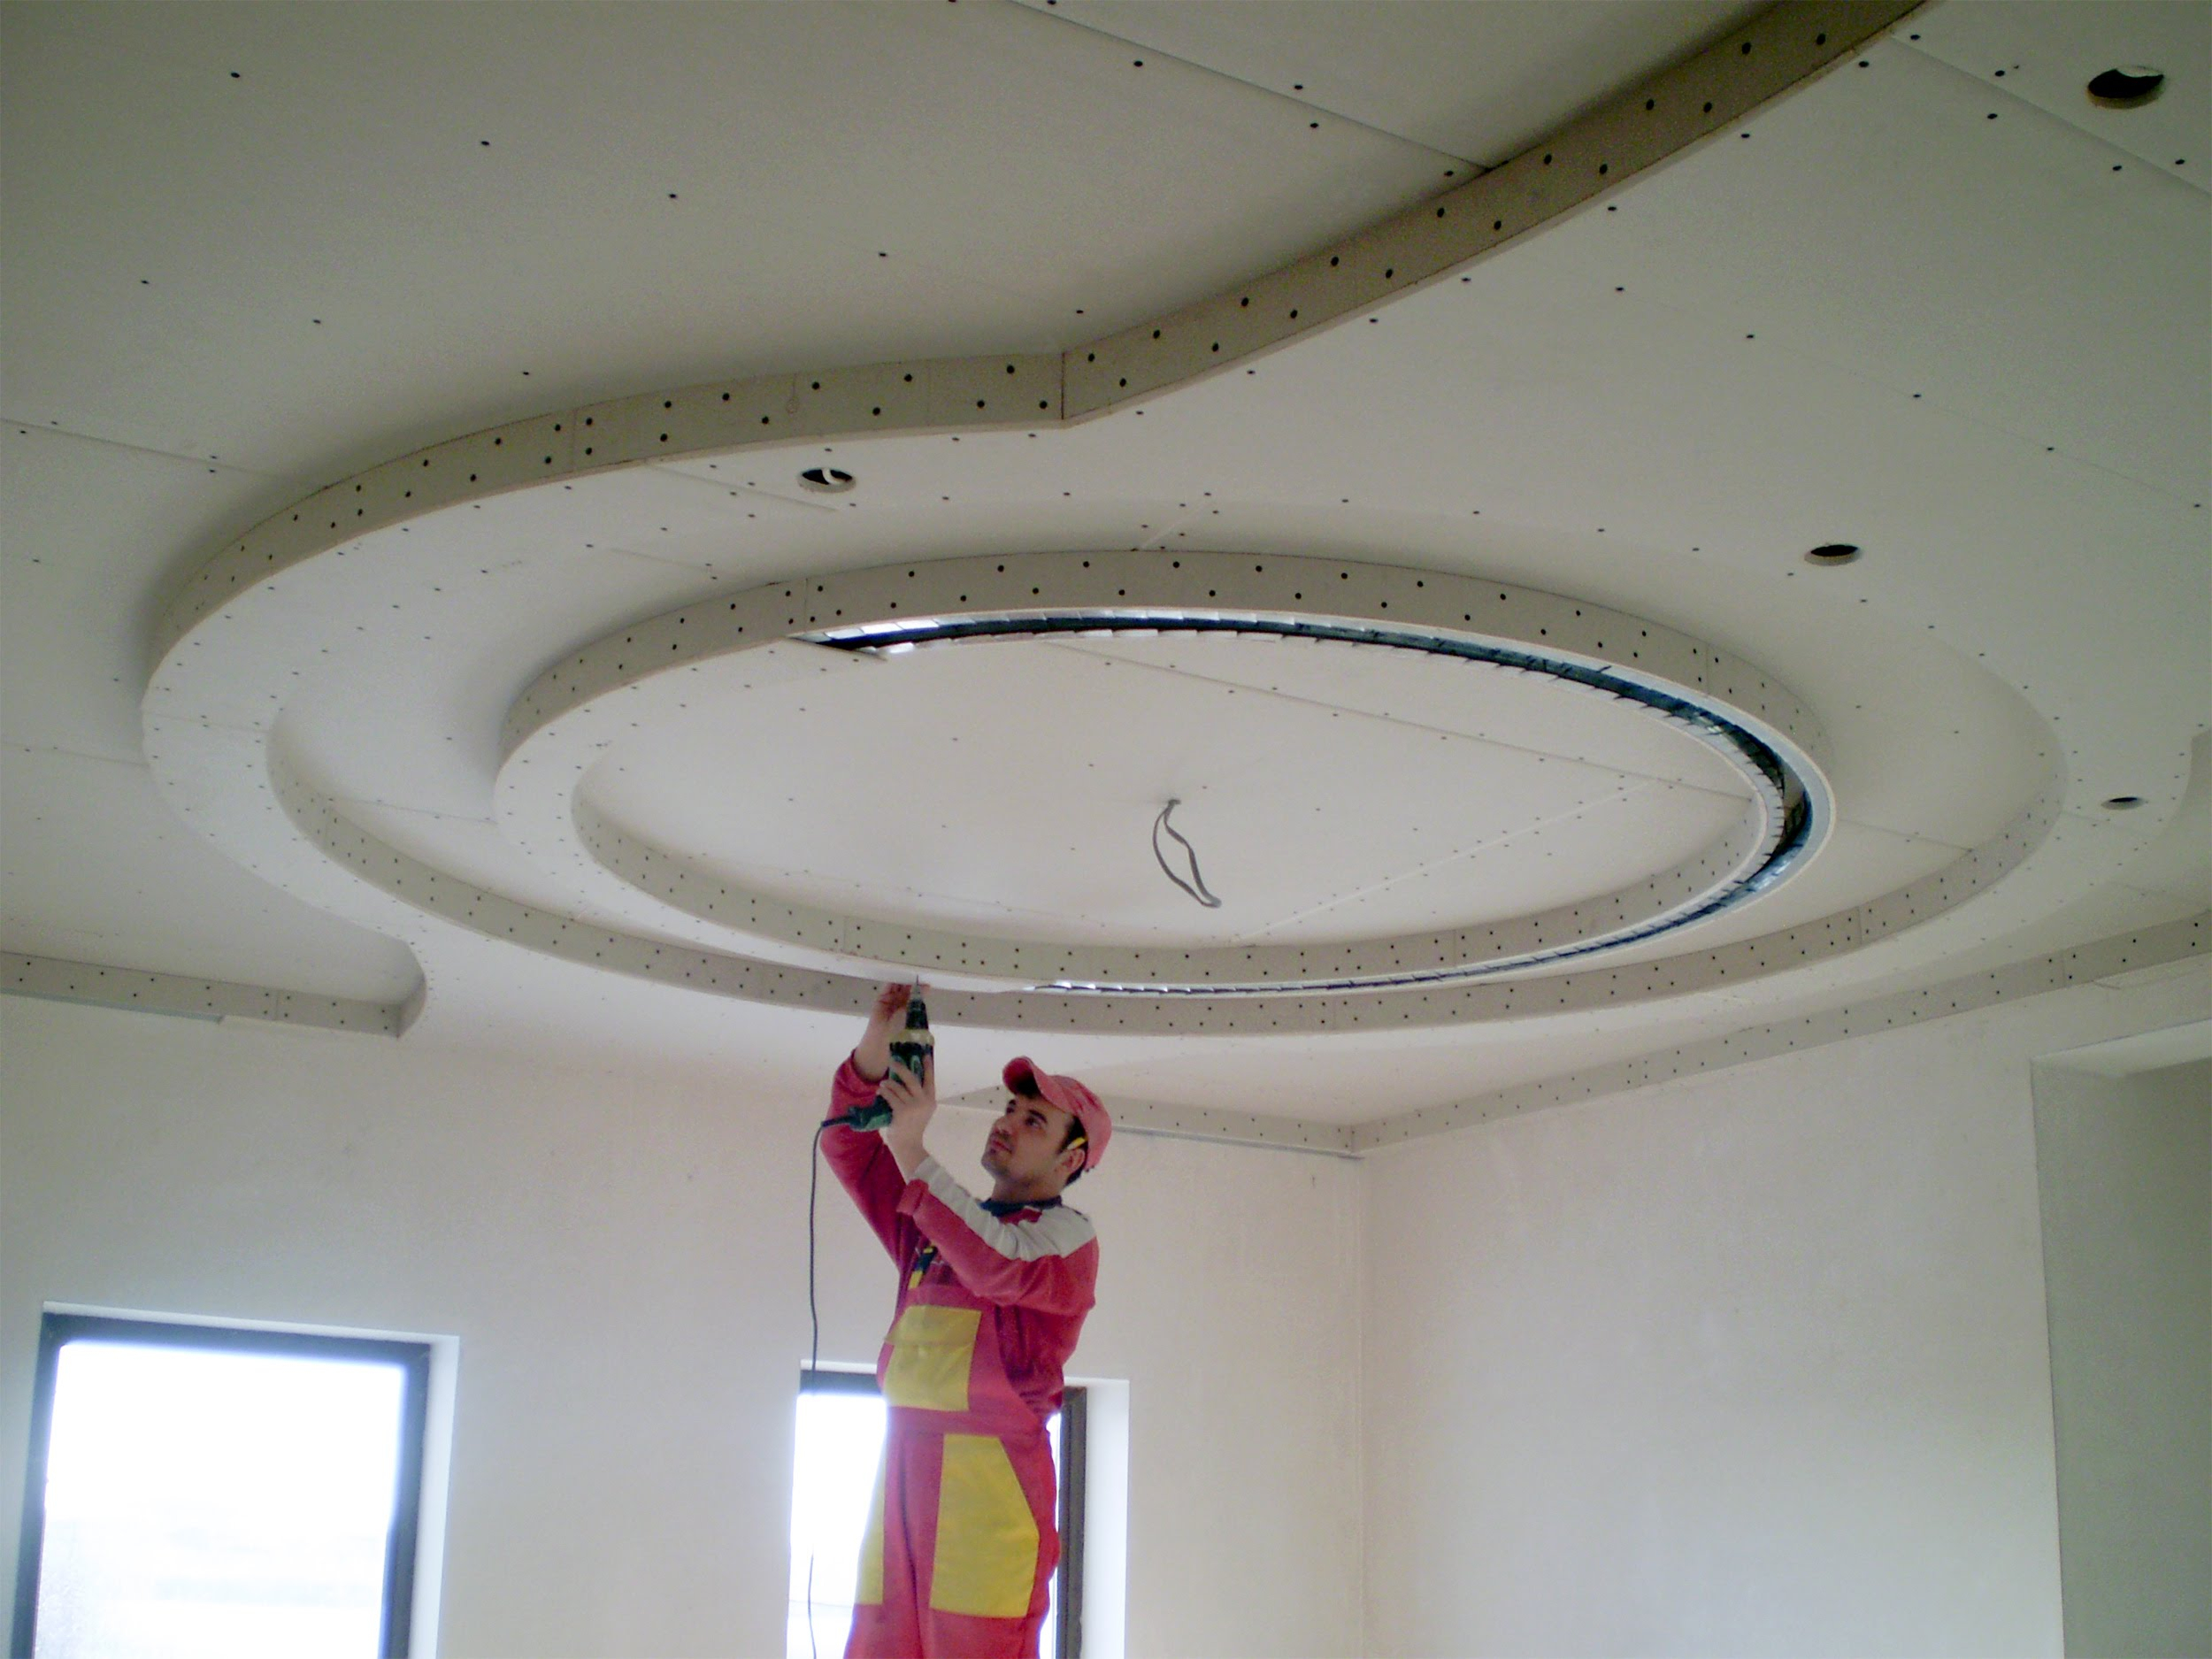
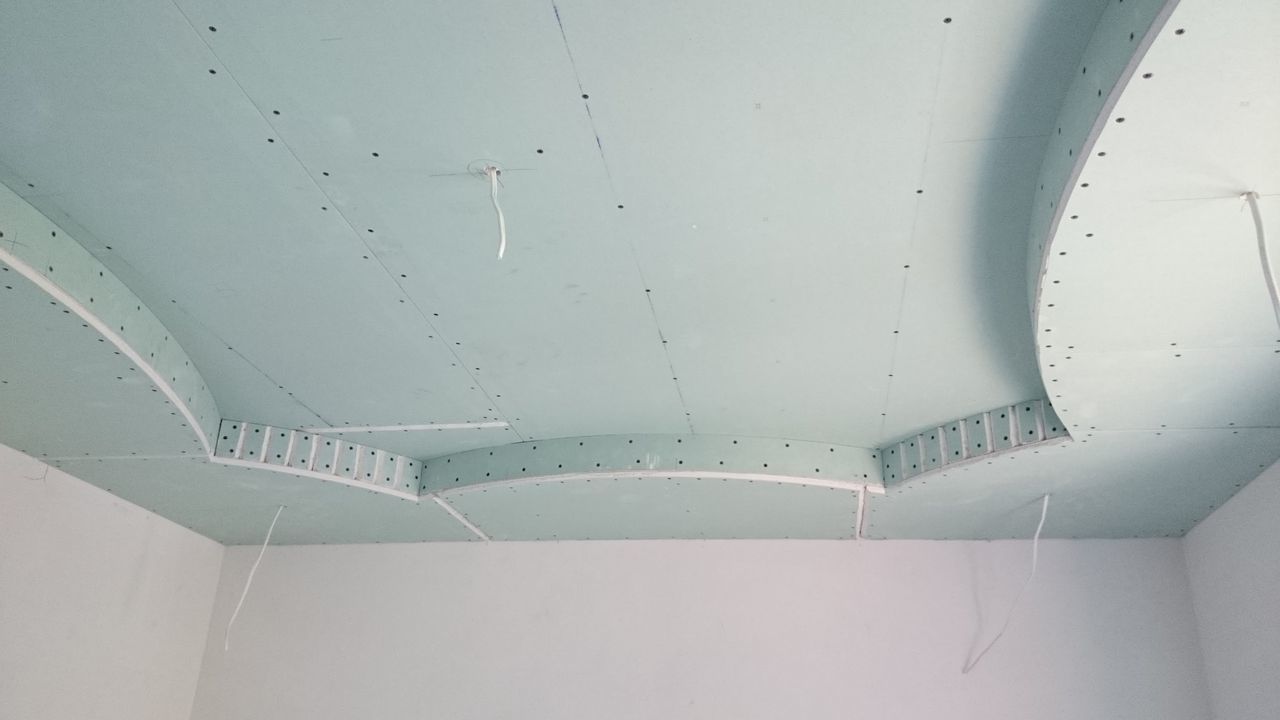
Some people prefer to install plasterboard ceilings, but they, unlike stretch, have a number of drawbacks.
- To achieve the desired color of the ceiling, drywall must be painted independently.
- In the ceiling of plasterboard there are much more noticeable joints, unpleasant for an aesthetic look, than in the stretched canvas.
- Drywall is not a moisture-proof material, so it will not save from the flood, which may accidentally be arranged by neighbors from above.
- Stretch ceilings are treated with antistatic agent, so dust does not settle on them. They are also able to repel grease and do not absorb odors, and gypsum ceilings do not have such properties.
- Standard drywall does not have good sound insulation that stretch fabrics can offer.
- Installation of drywall is a very complex and time-consuming process that can take more time, involving several people and special expensive tools. This can not be said about the stretched canvas. Such ceilings can be installed by one person, and the installation procedure takes only about 2 hours. In addition, complete with a fabric, you can get a set for self-installation of a stretch ceiling.
Instruments
Professionals in the field of decorating, having a set of special tools, can stretch ceilings in just a few hours. But this does not mean that the installation of paintings can not do an ordinary person who does not have the specific skills of the repairman.
To do this, you just need to have to work a set of certain tools.
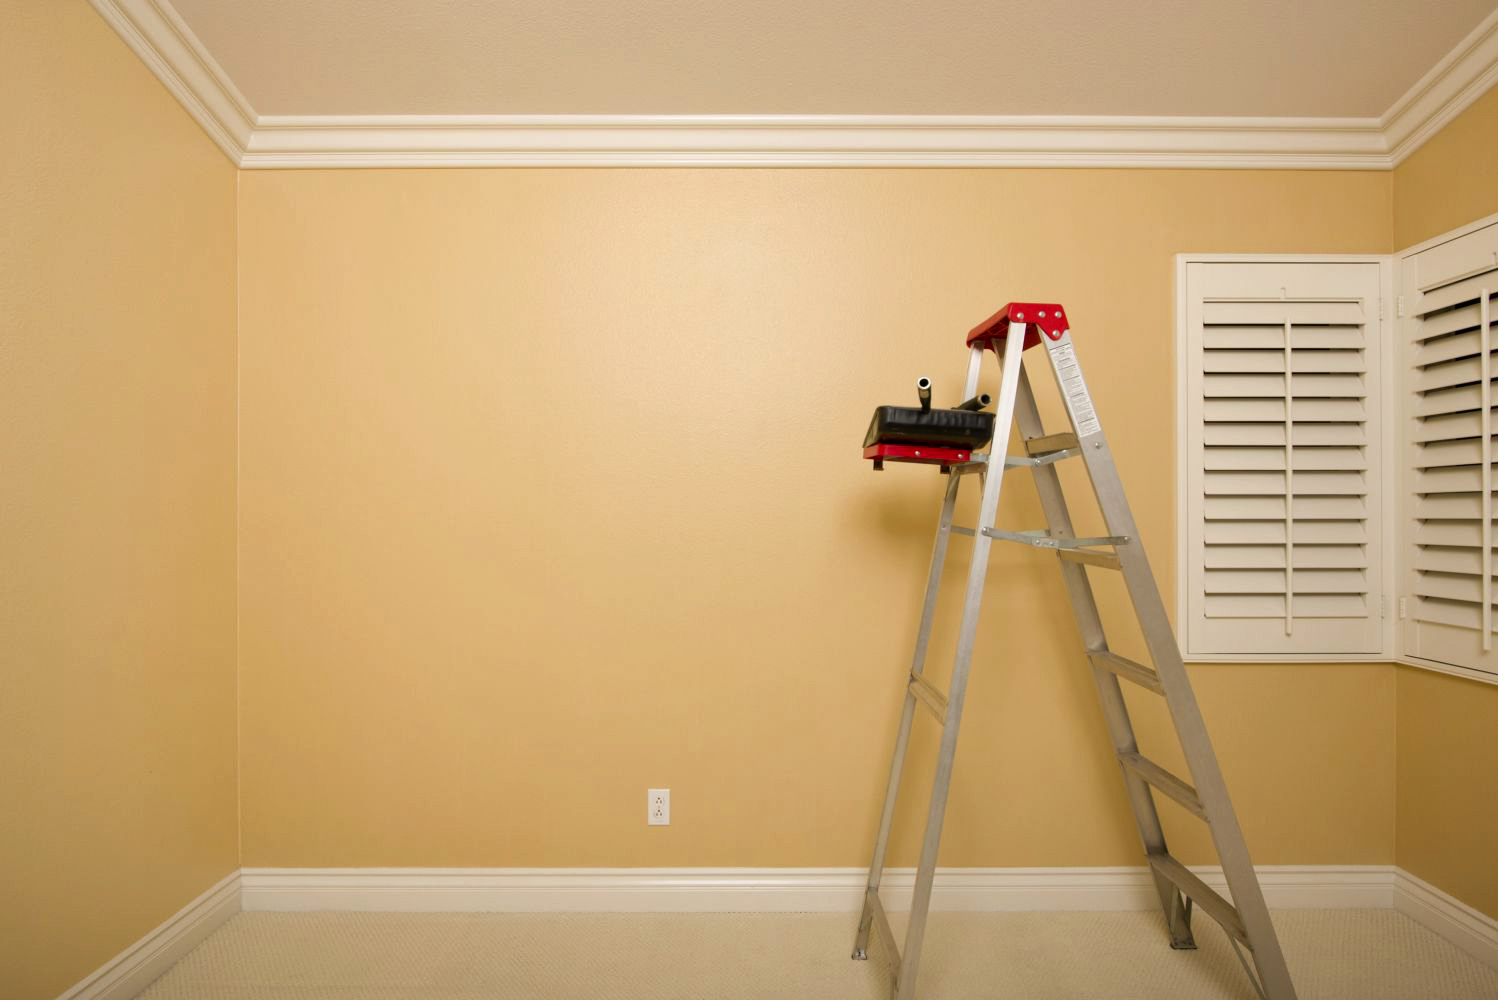
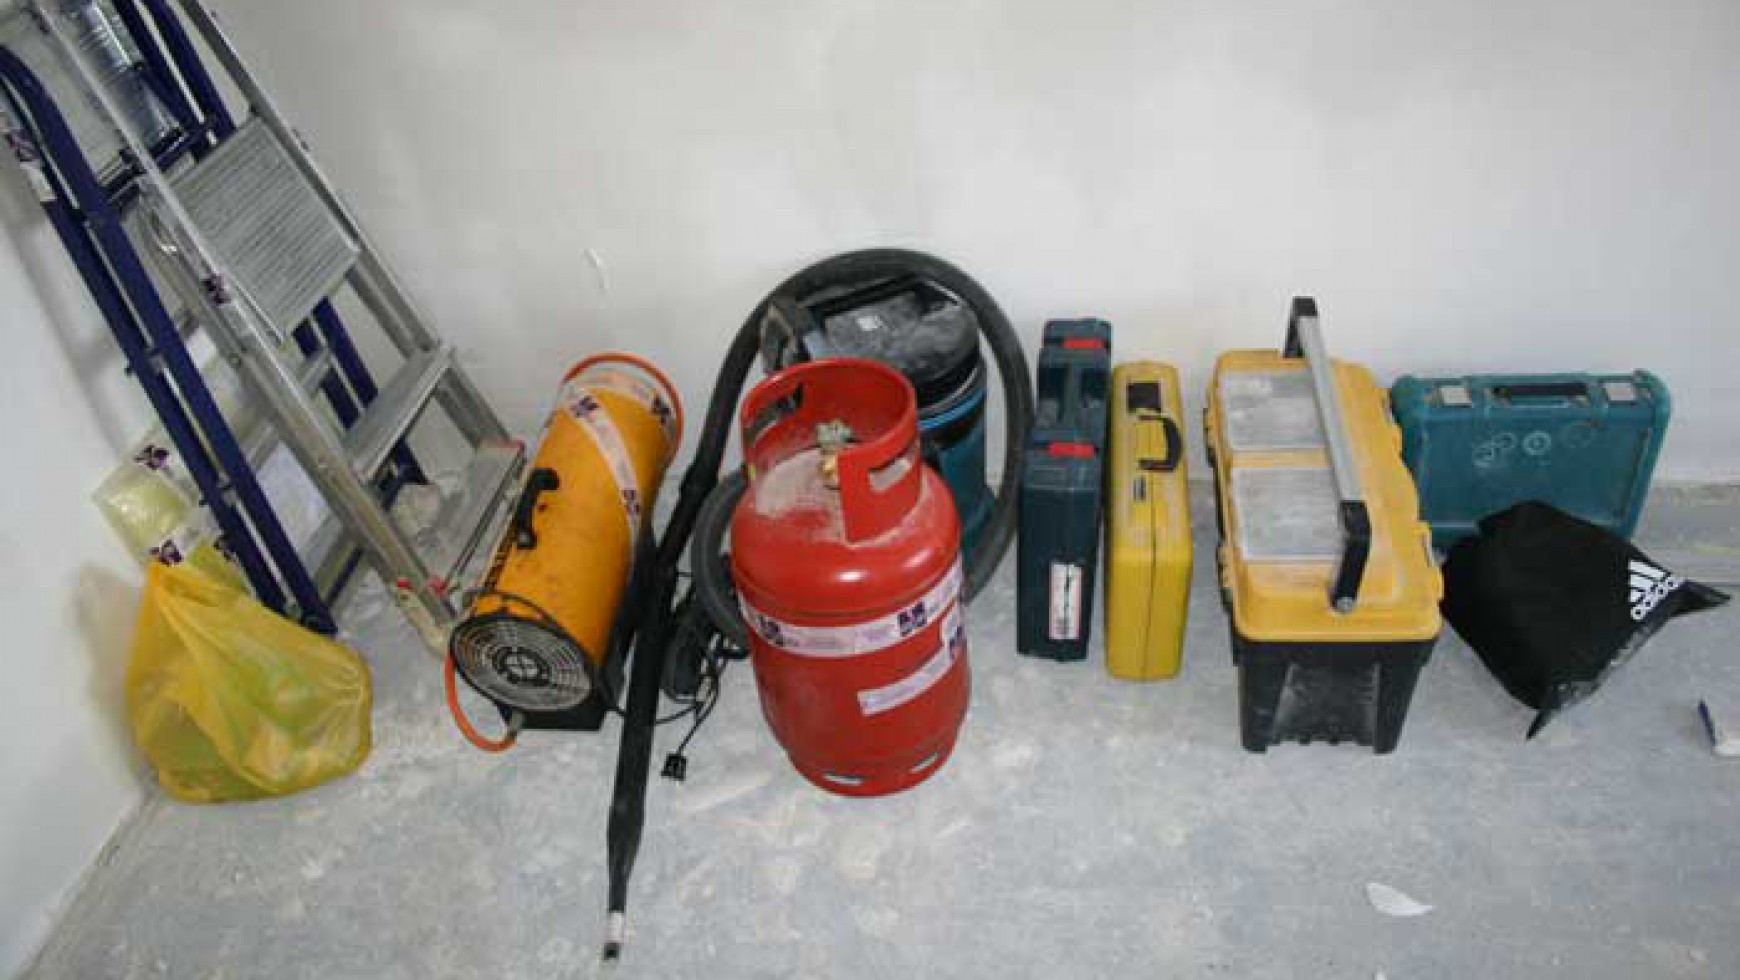
- One or two ladders. They are very convenient to use when you need to perform work at height. In addition, it has a small platform that allows you to keep the necessary tools at hand.
- Extension. It is used when you need to connect the tool in a convenient place, far from the outlet.
- Perforator. Required when preparing holes for dowels. It is important to remember that the holes in the brick wall are made with a hammer drill, and the concrete can only be drilled with a perforator.
- Laser Roulette. It is needed for accurate measurements.
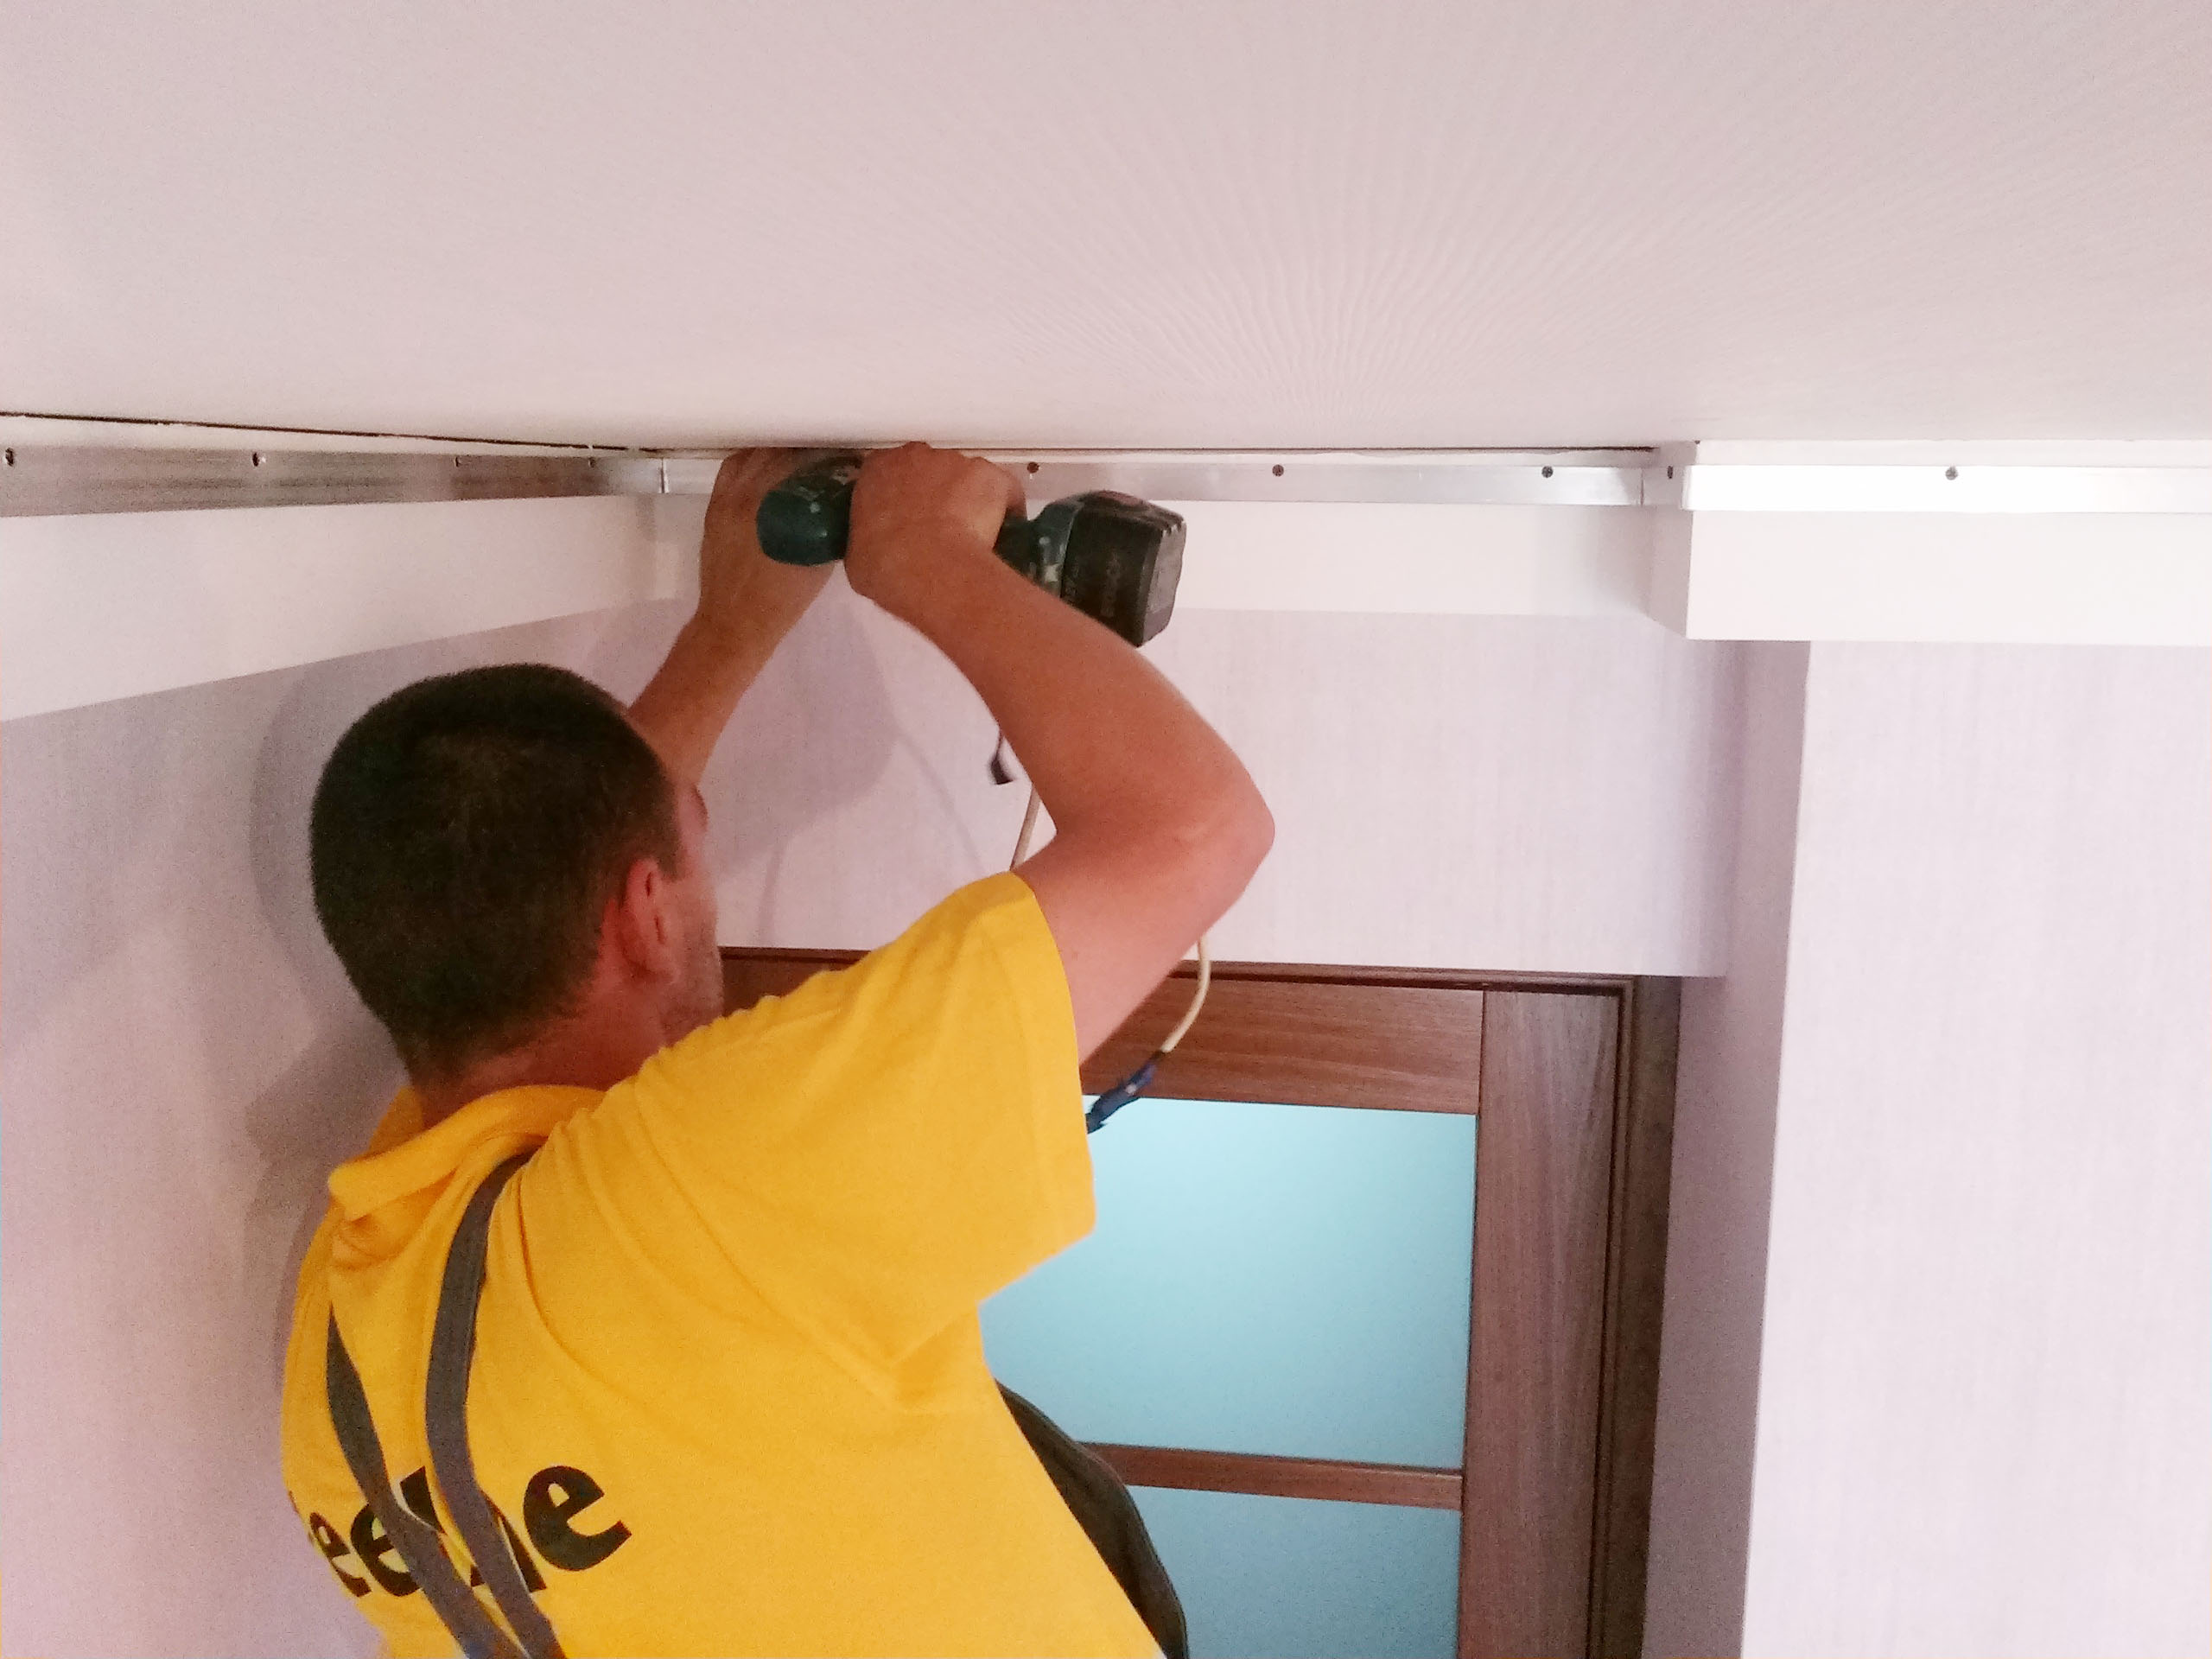
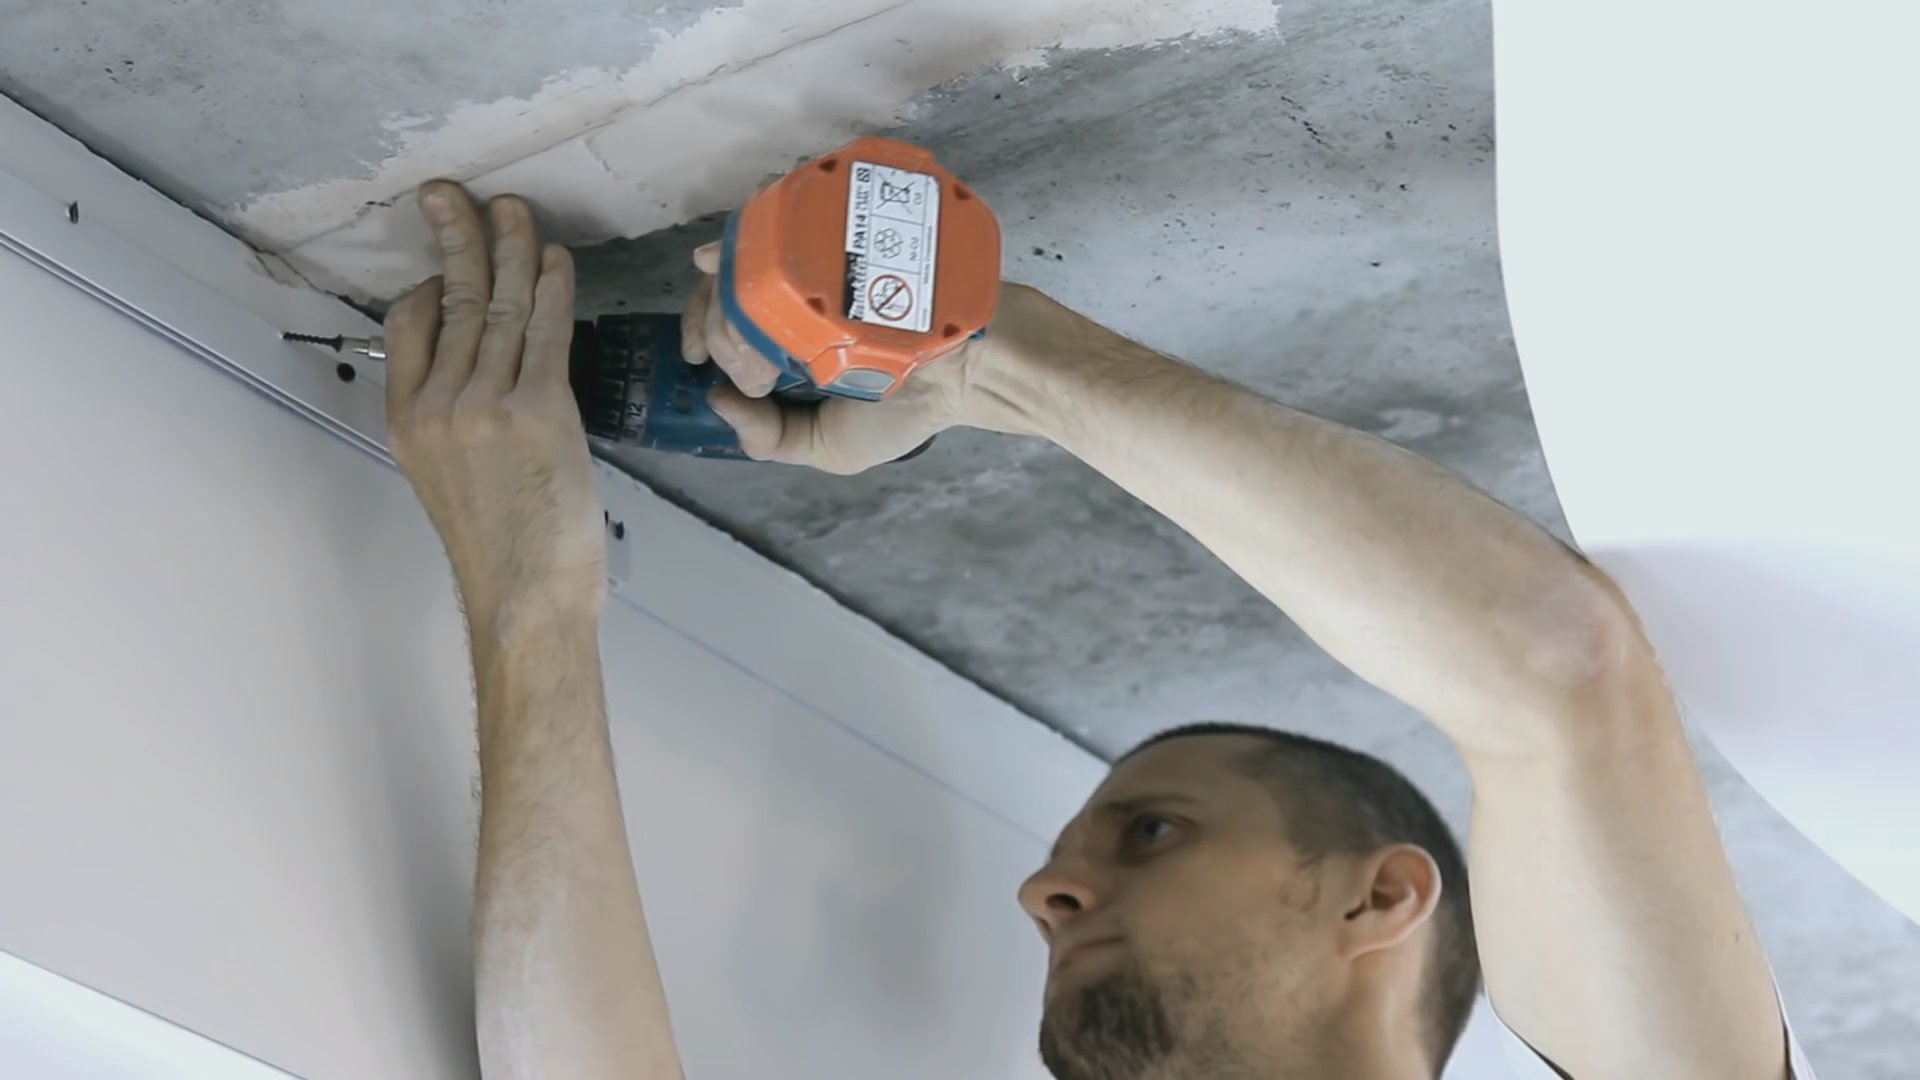
- Cordless screwdriver. It is used when you need to screw the screws, and they are used for installation in large quantities.
- Special blade for mounting canvases. The raw material for it is usually stainless steel.These spatulas have different shapes, lengths and angles of inclination to the rod. They are also very durable and do not bend under mechanical stress. It is worth noting that ordinary spatulas in such an important matter will not work.
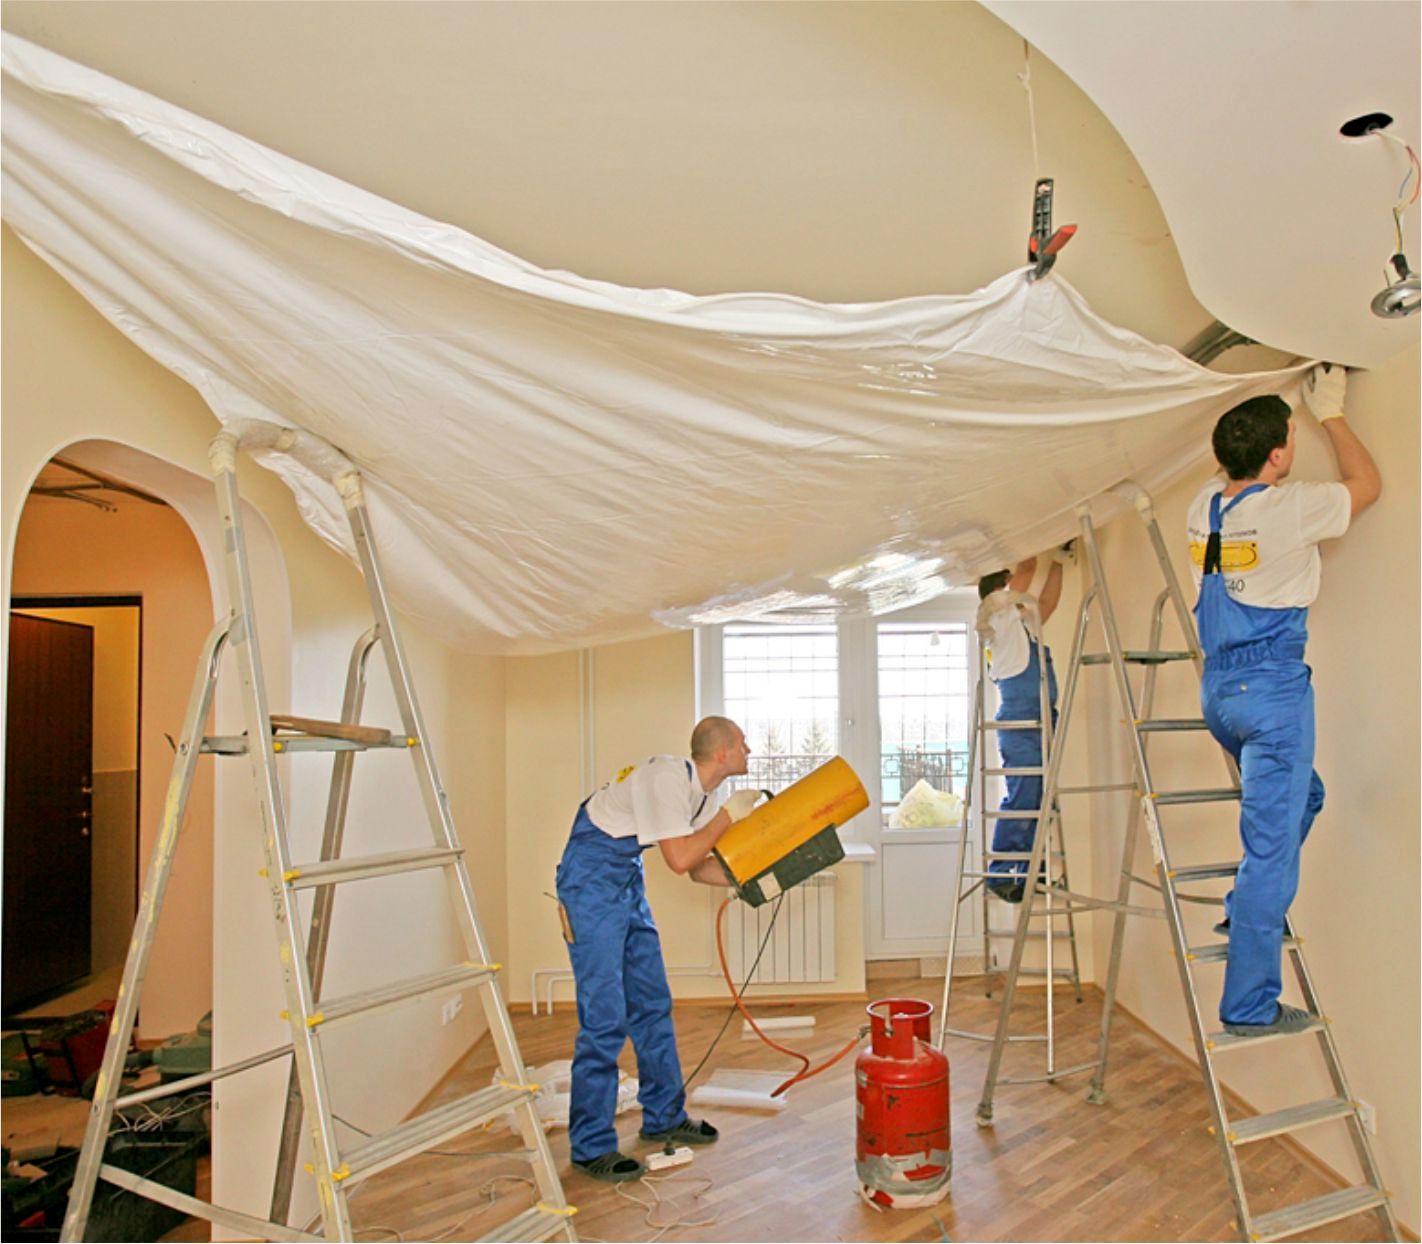
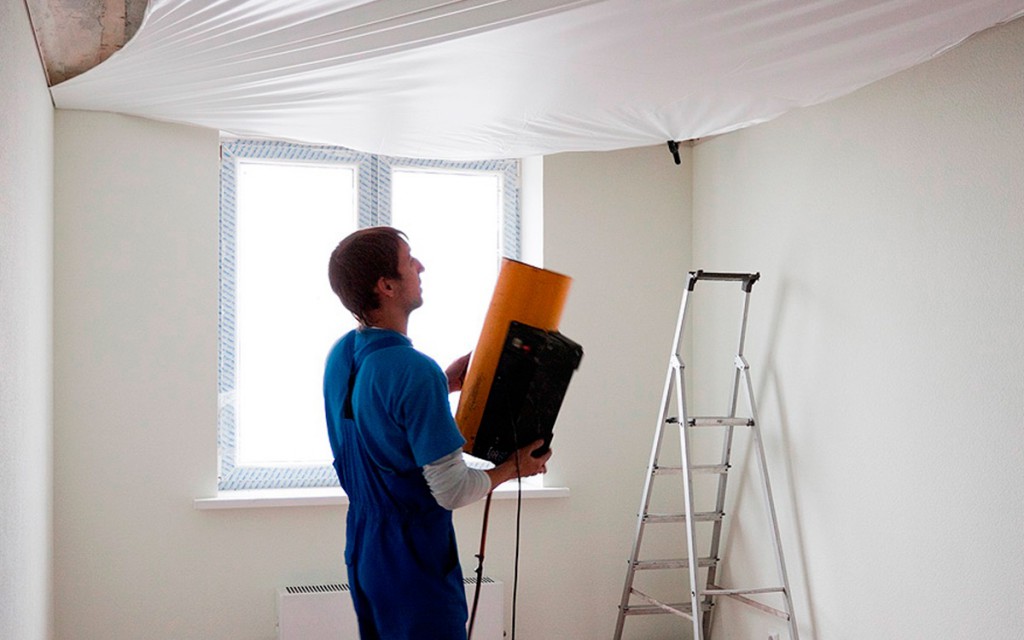
- The presence of heat gas gun and the balloon to it is a very important moment in the tension of the canvases. Without this tool to make the installation of vinyl canvas is impossible. The price of the device is extremely high, so it is best to rent this device.
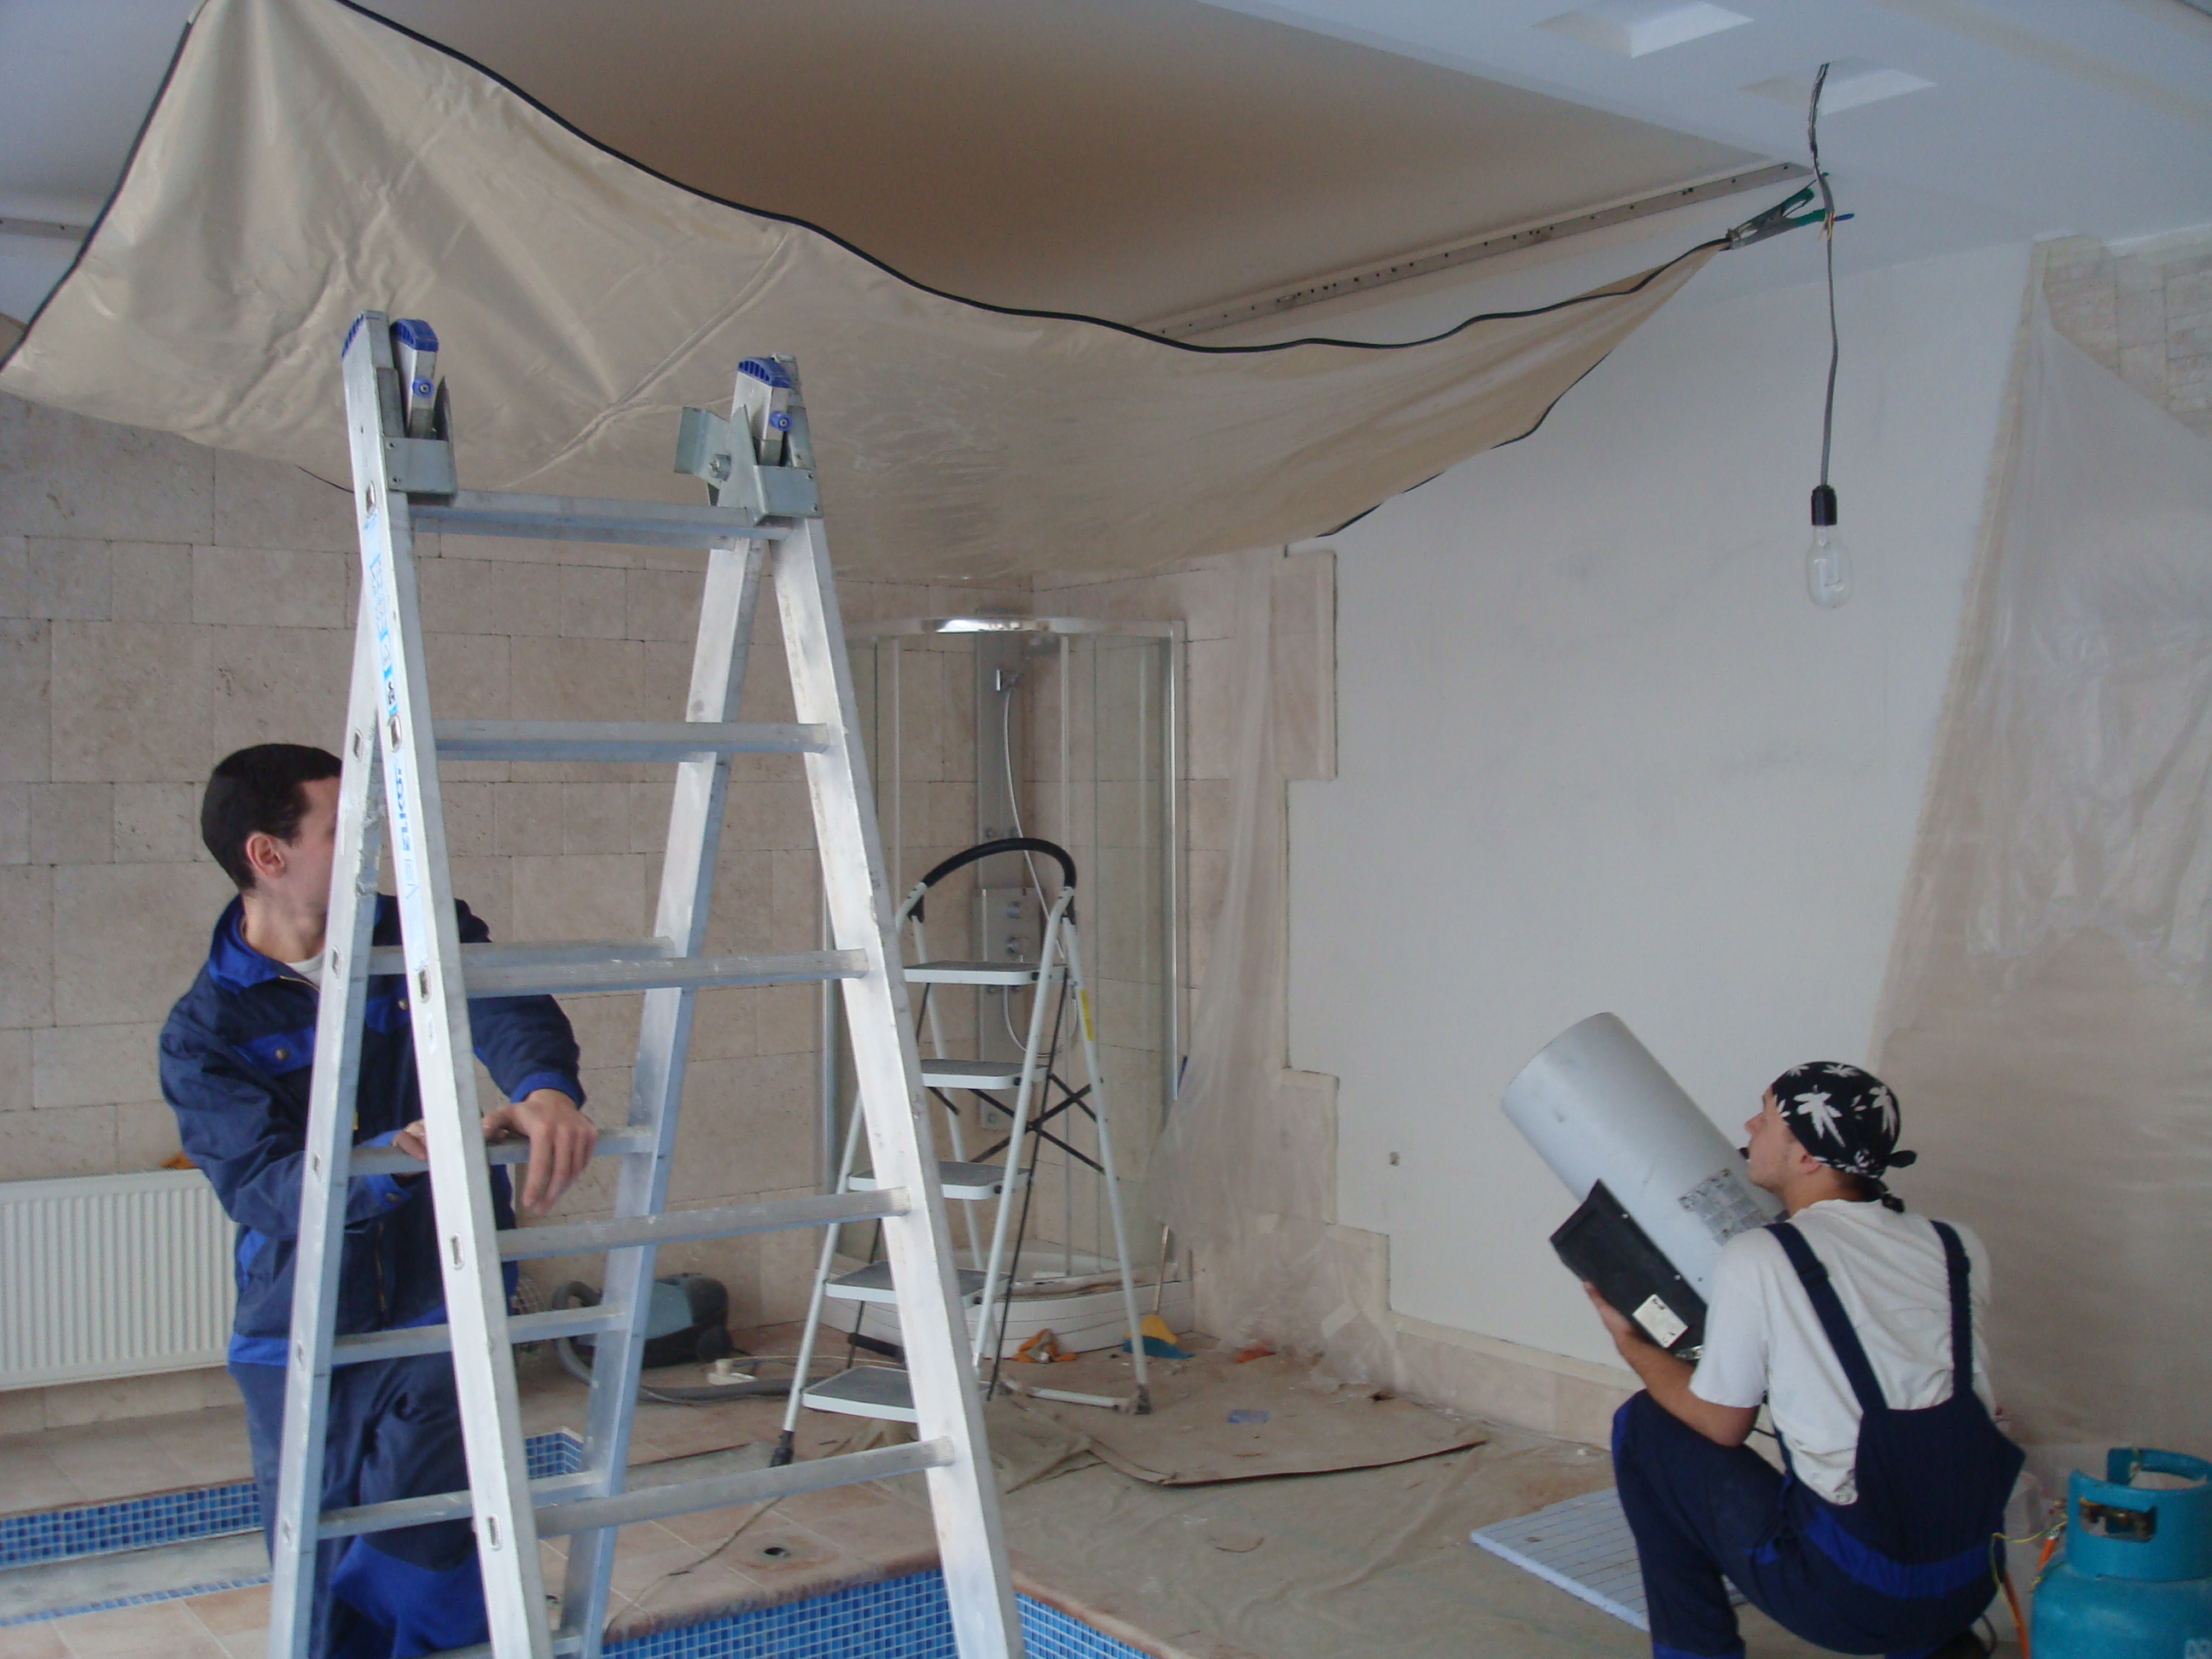
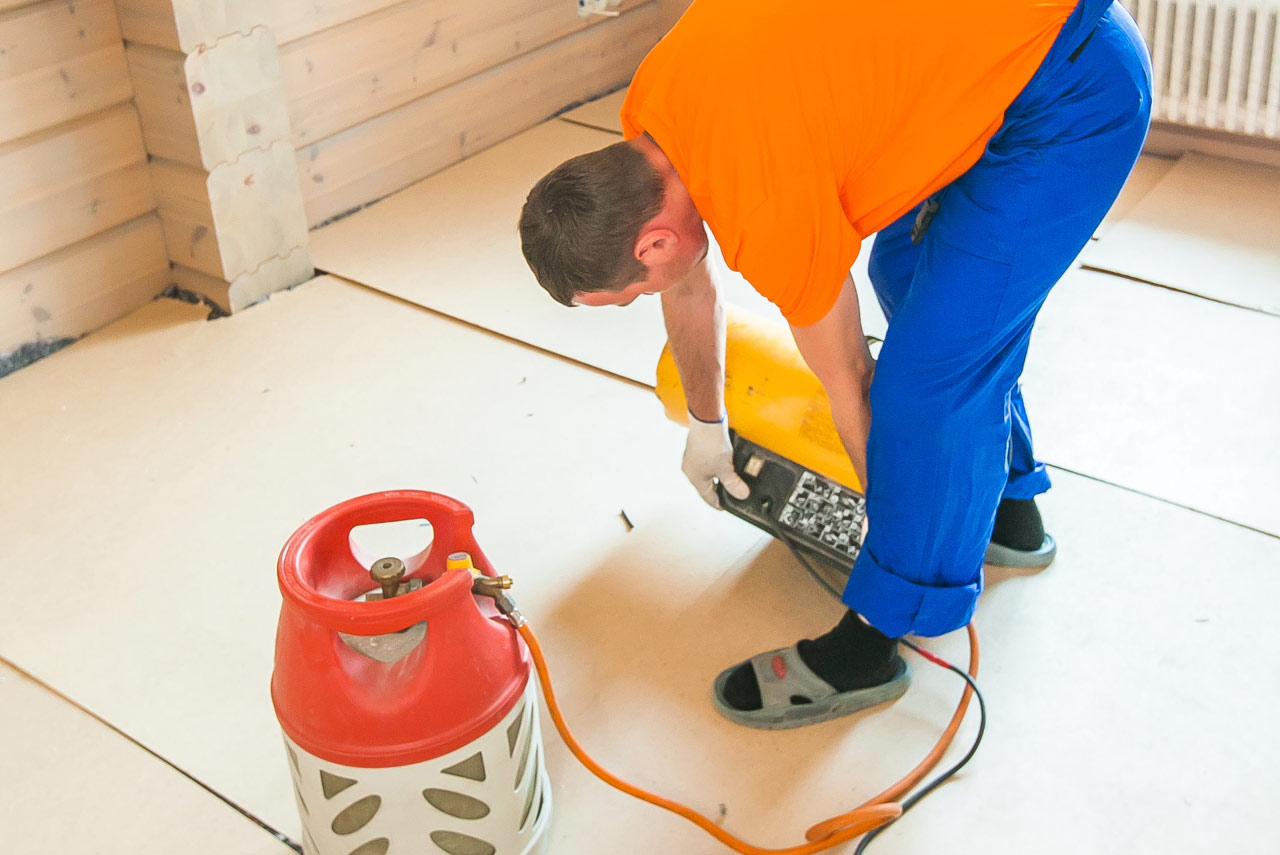
Most often during the installation of ceilings use special guns with a capacity of about 10 kW or more. They are fed with liquefied gas from a cylinder. Also during the self-installation of tensioning cloths, a room heater is used in order to heat the space, and a hot-air dryer is used to smooth wrinkles and folds in the canvas. It should be noted that the soldering of cloths, even a gas gun at home is impossible. This process is carried out exclusively in a production environment with special equipment.


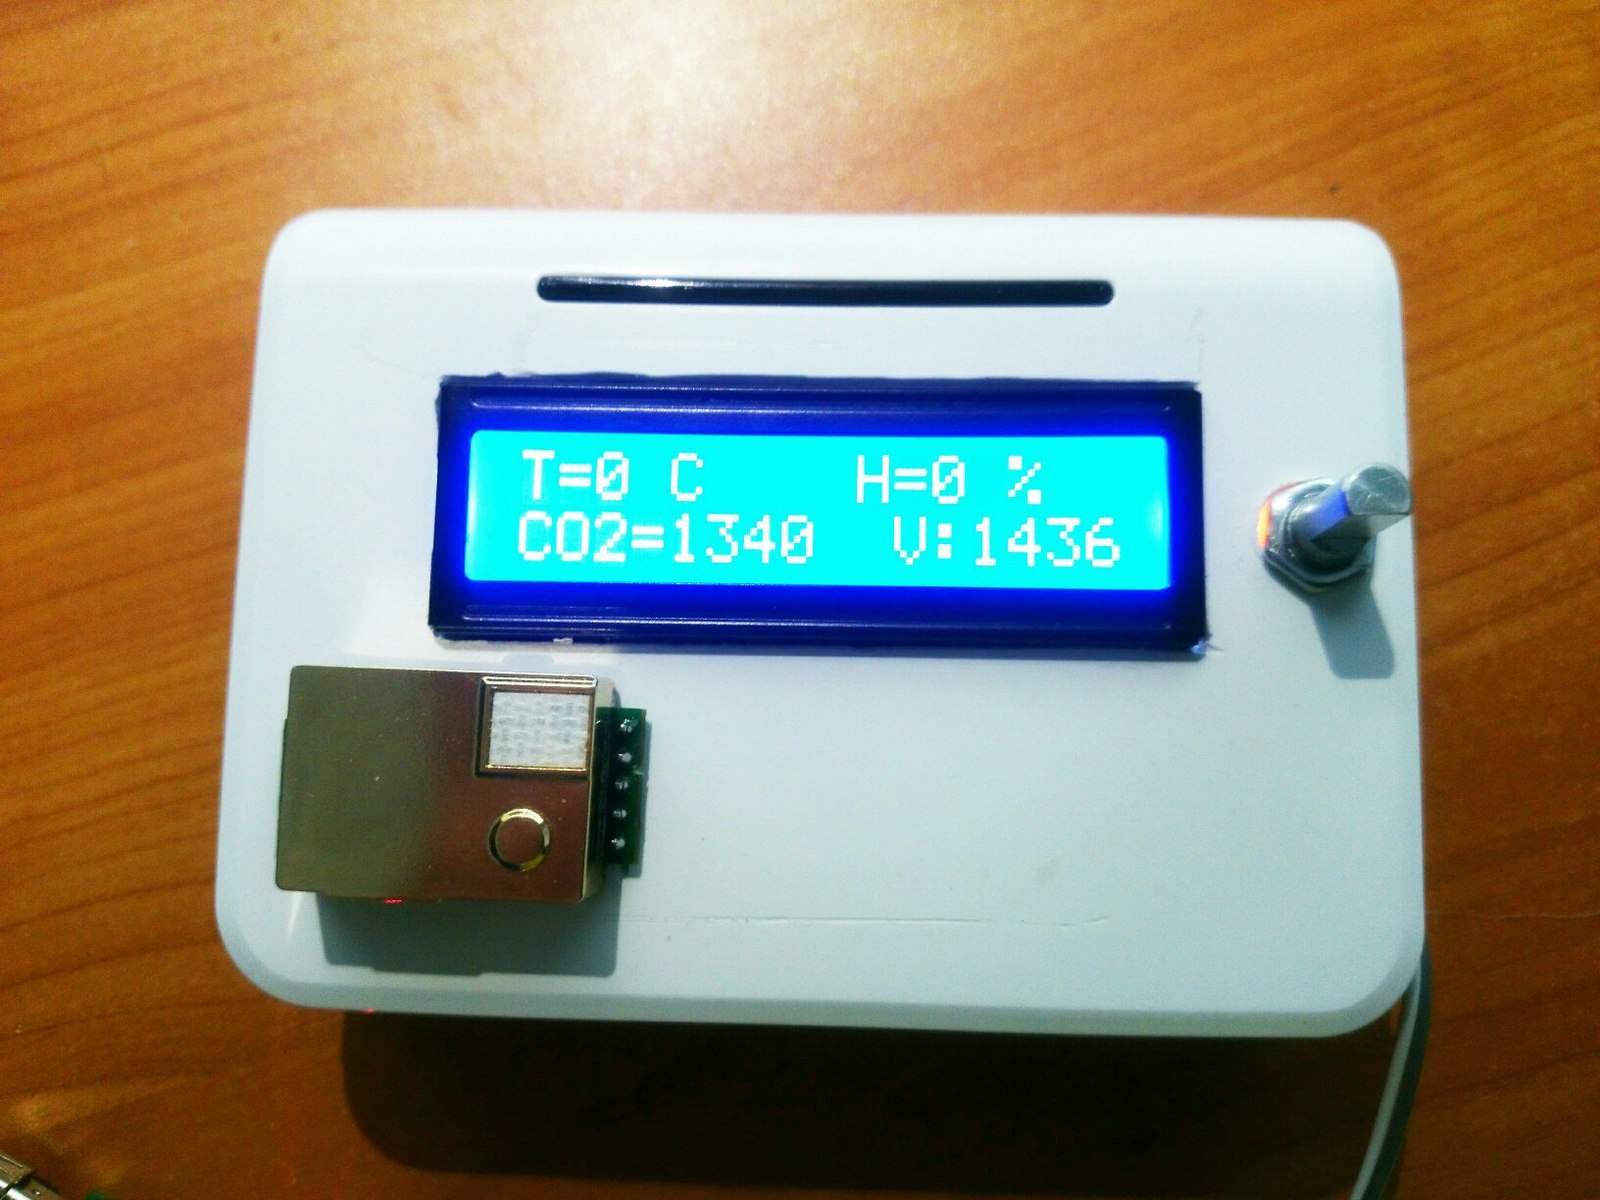
- The detector for measuring the level of gas. It is used to control the level of gas in the room during operation of the heat gun.You must follow the rules to maintain your own safety when using devices powered by gas, as it can leak from a cylinder through a damaged hose.
- Metal detector Used to search for electrical wires, metal profiles and extracts that may be damaged during drilling.
- Breaking thread or cord. It is used when it is necessary to mark the lines along which the guide profiles should be fixed. It is a small box of paint that needs to be applied to the thread. Then the thread is washed out and fixed at the required level.
- Clamps - Mounts for fixing the canvas. They help to temporarily fix the canvas in the desired position. Such devices are most useful when a person works alone.


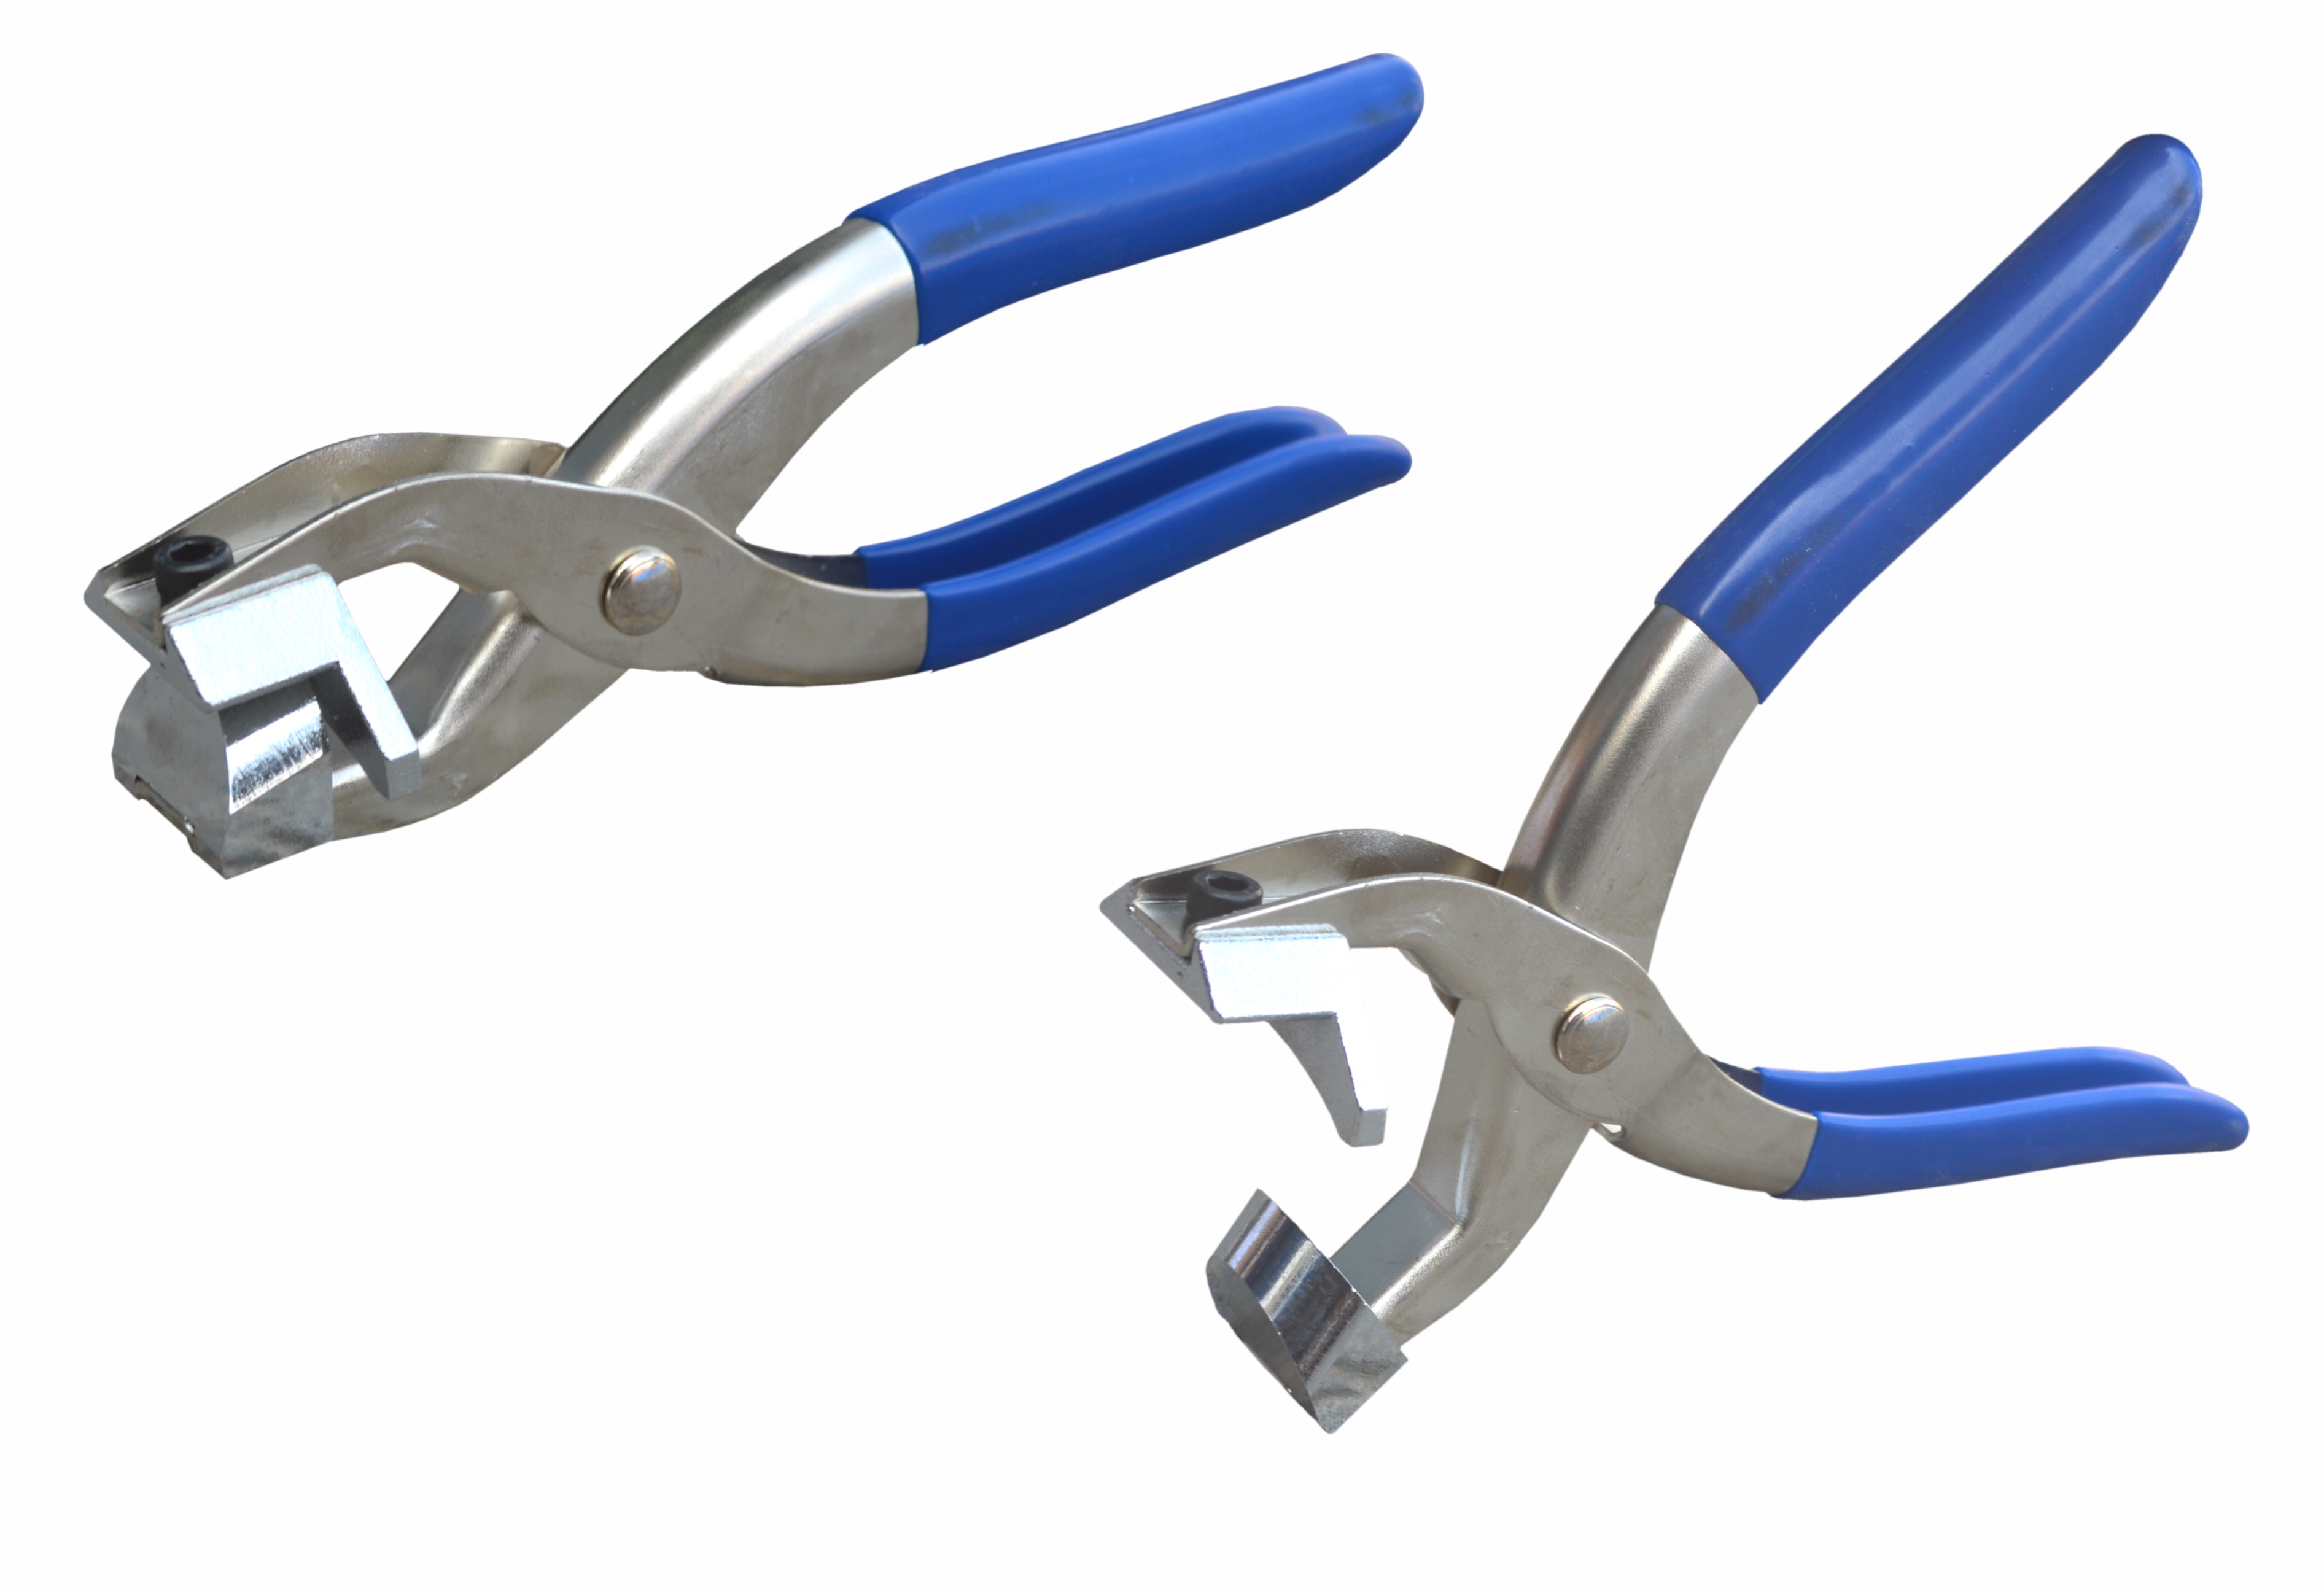
- Hand hole punch The tool is designed to punch holes in aluminum baguettes. Holes can be made with a drill, but they will have burrs and look completely careless, and you can make punctures of the same type and accurate punctures with a hole punch.
- Stouslo - This device is necessary for cutting baguettes at an angle of 45 degrees for their docking in the corners of the room.
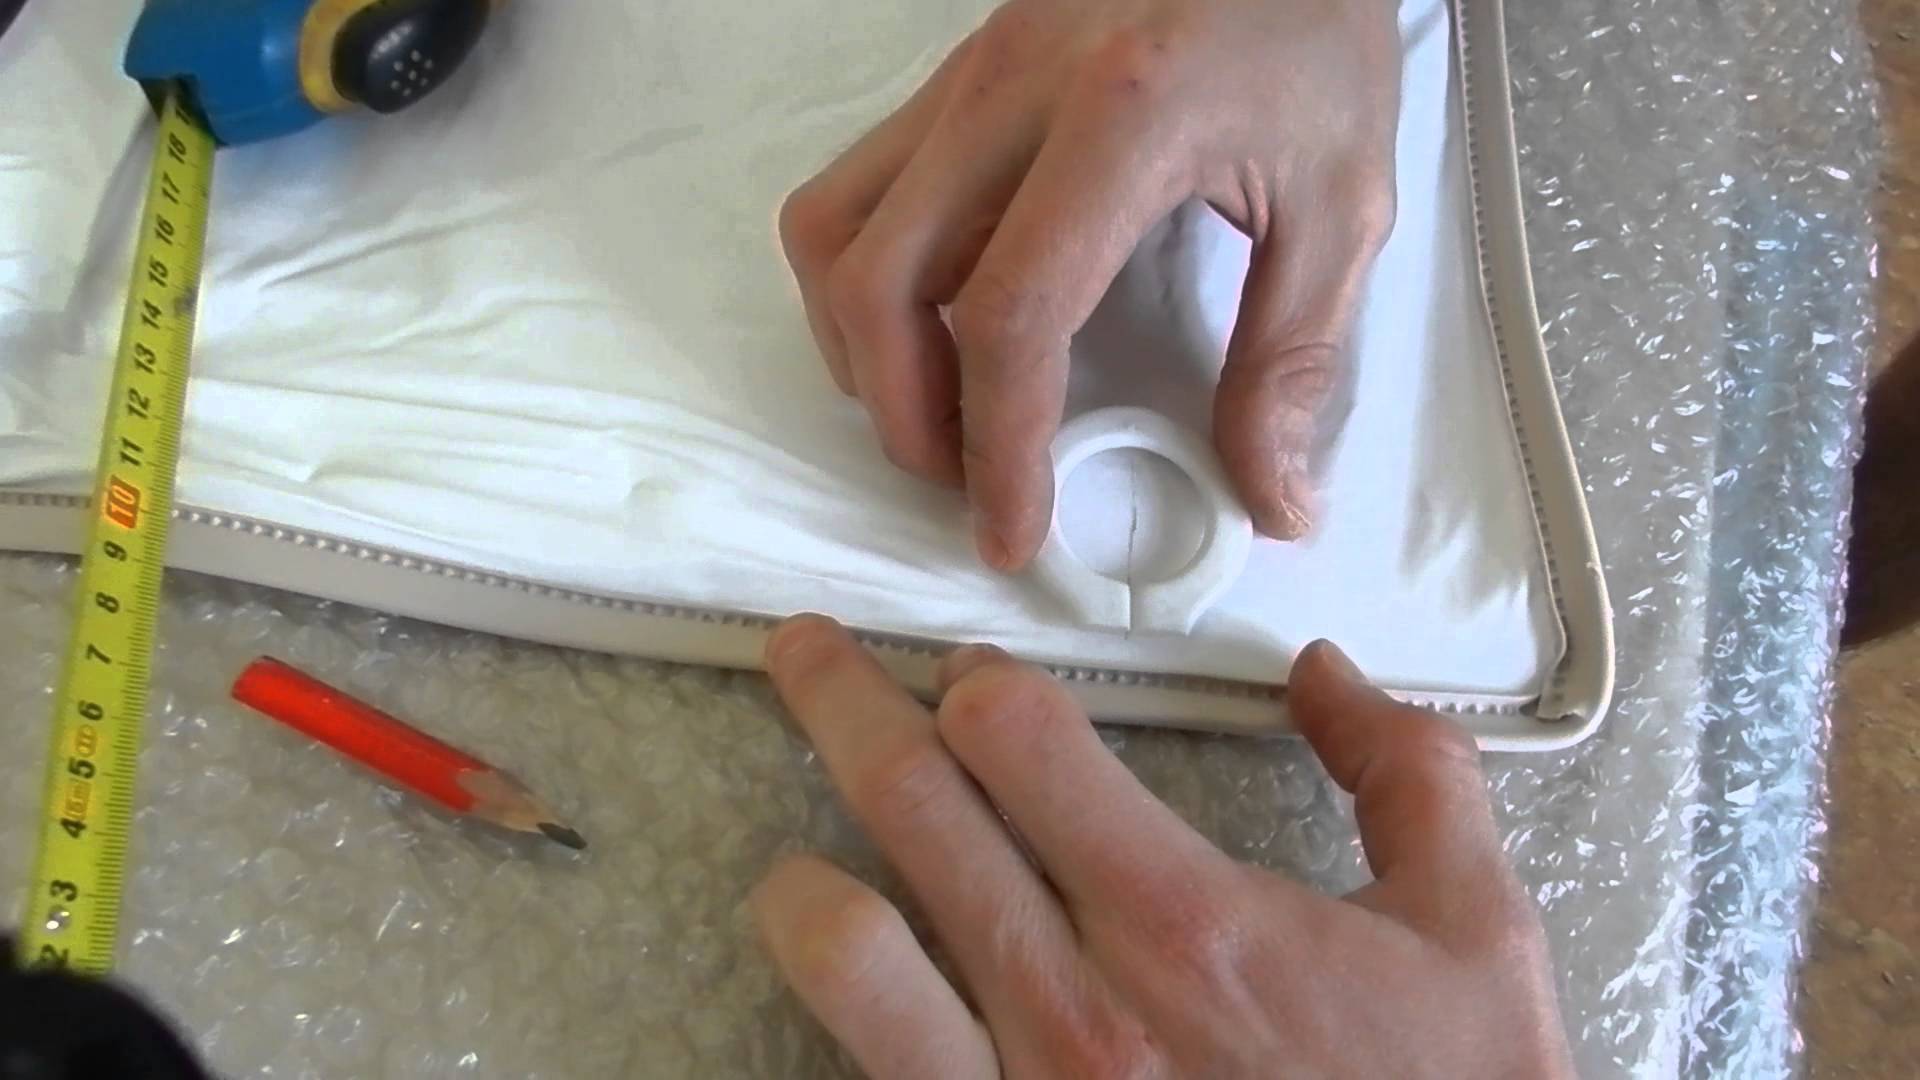
- PVC mounting rings or mortgages. They have high heat resistance.They are used to strengthen canvases around pipes, lamps and other utilities. Also make special mortgages under the eaves.
- Also for stretching the ceiling is necessary the presence of pliers, a good hammer, high-quality laser or water level, circular saws, masking tape, files for metal and wood, drill bits for drills or drills with a diameter of 3 to 6 millimeters, self-adhesive insulation, electrical tape and diamond file.


Installation
The procedure of stretching the ceiling is quite a difficult task, but if you follow all the rules, you can install the canvases with your own hands.
First you need to understand what are the methods of fastening panels.
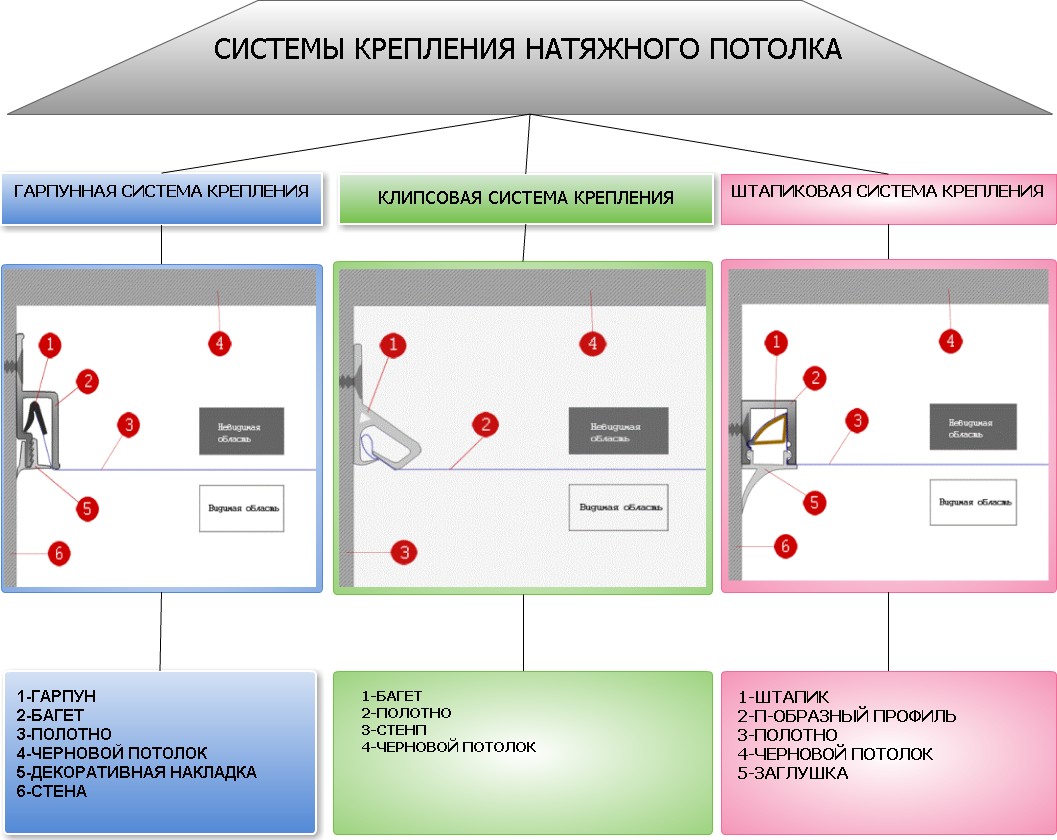
Mounting method with bead. This type of installation was invented by Russian masters and is used most often in Russia, as well as in neighboring countries. This is a very economical method of installing a stretch ceiling, as it does not require any special production or special technical devices. With this installation, the distance from the ceiling to the canvas itself will be the minimum and will be about 1.5 cm.In addition, the use of fasteners of this type eliminates the need to make accurate calculations.

There are a large number of minuses in such a system for fastening tension fabrics:
- after inserting the glass bead, the canvas undergoes deformation, and after that the fabric cannot be dismantled and hung again;
- the ceiling can sag heavily, and the seams can be curved, because the installation itself is performed only approximately, without accurate measurements;
- after a while, the beadings may begin to dry out and fall out of the structure.
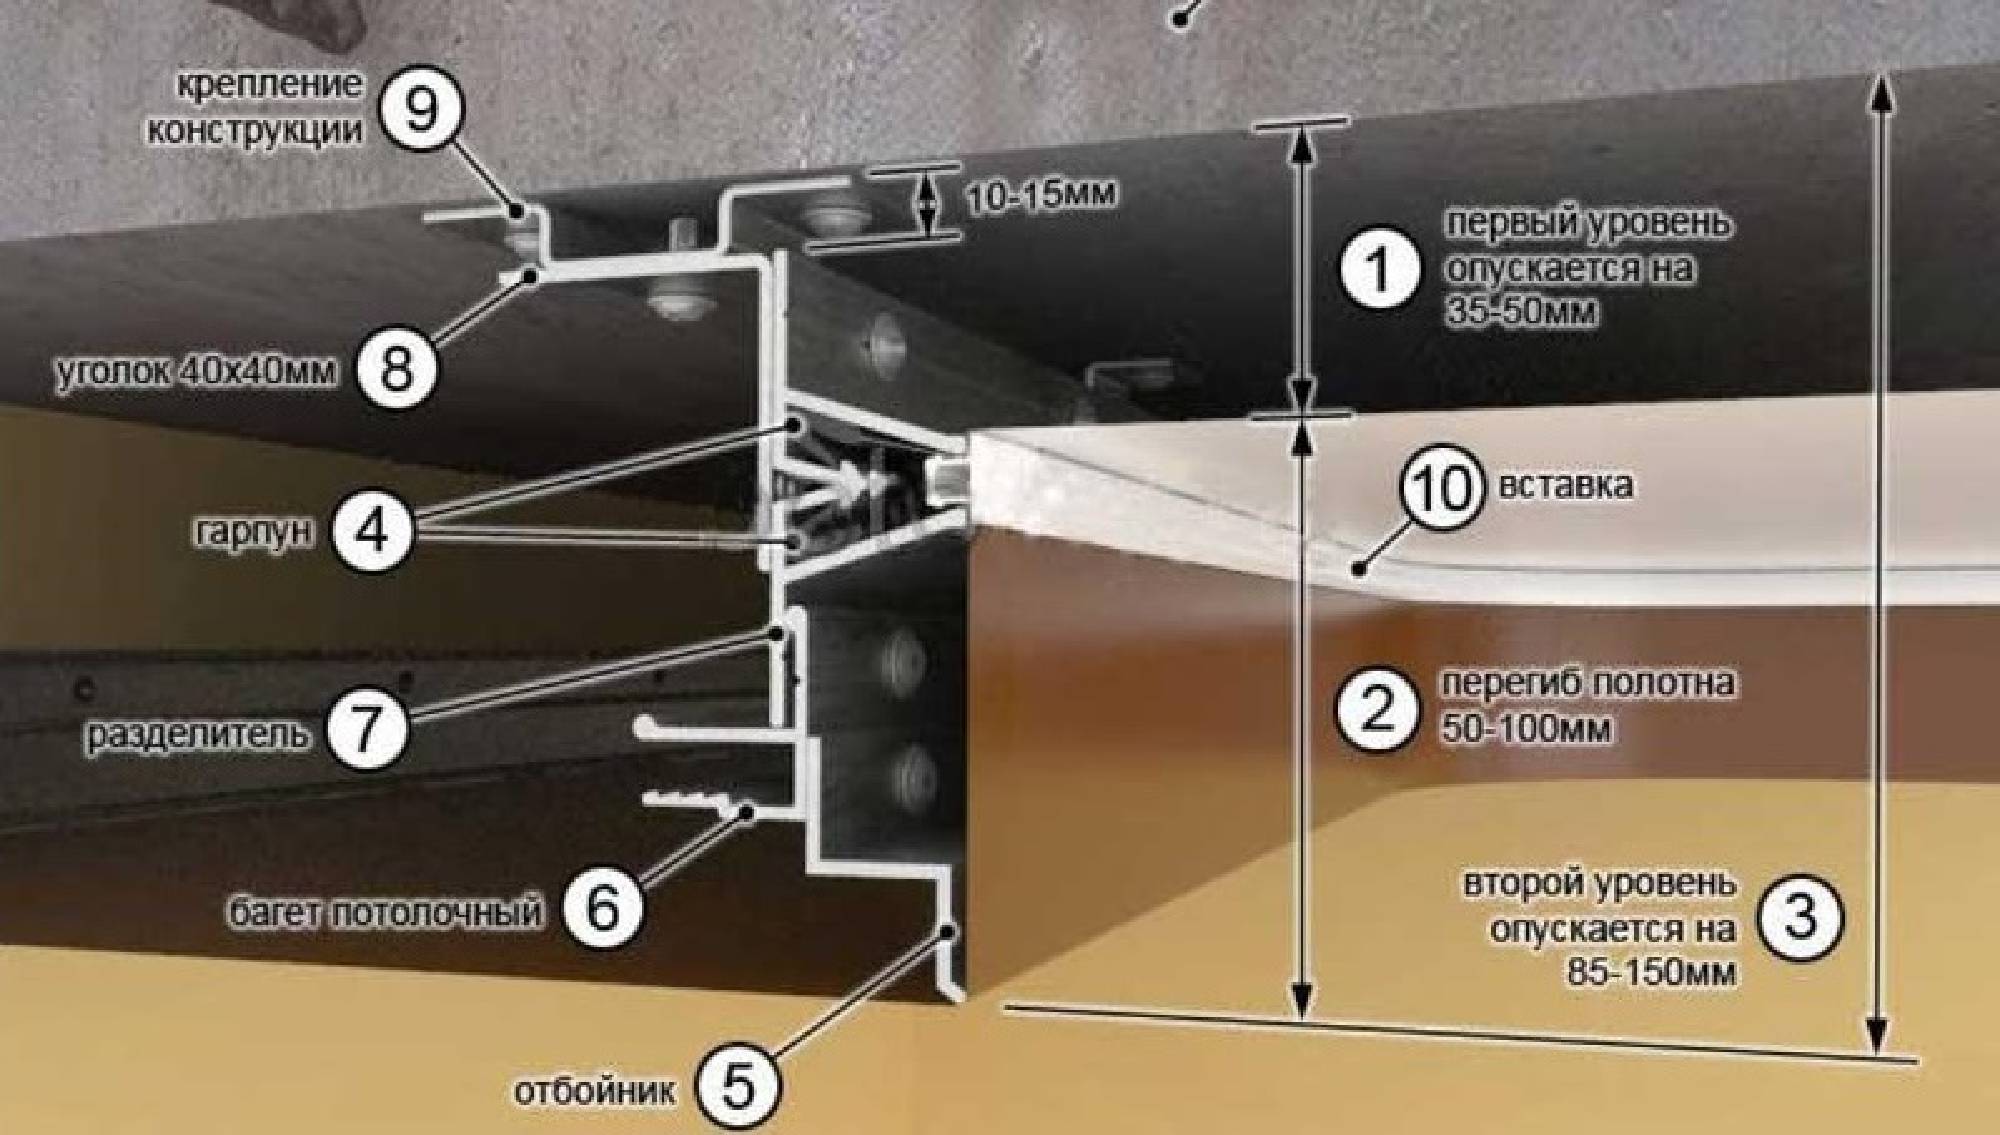
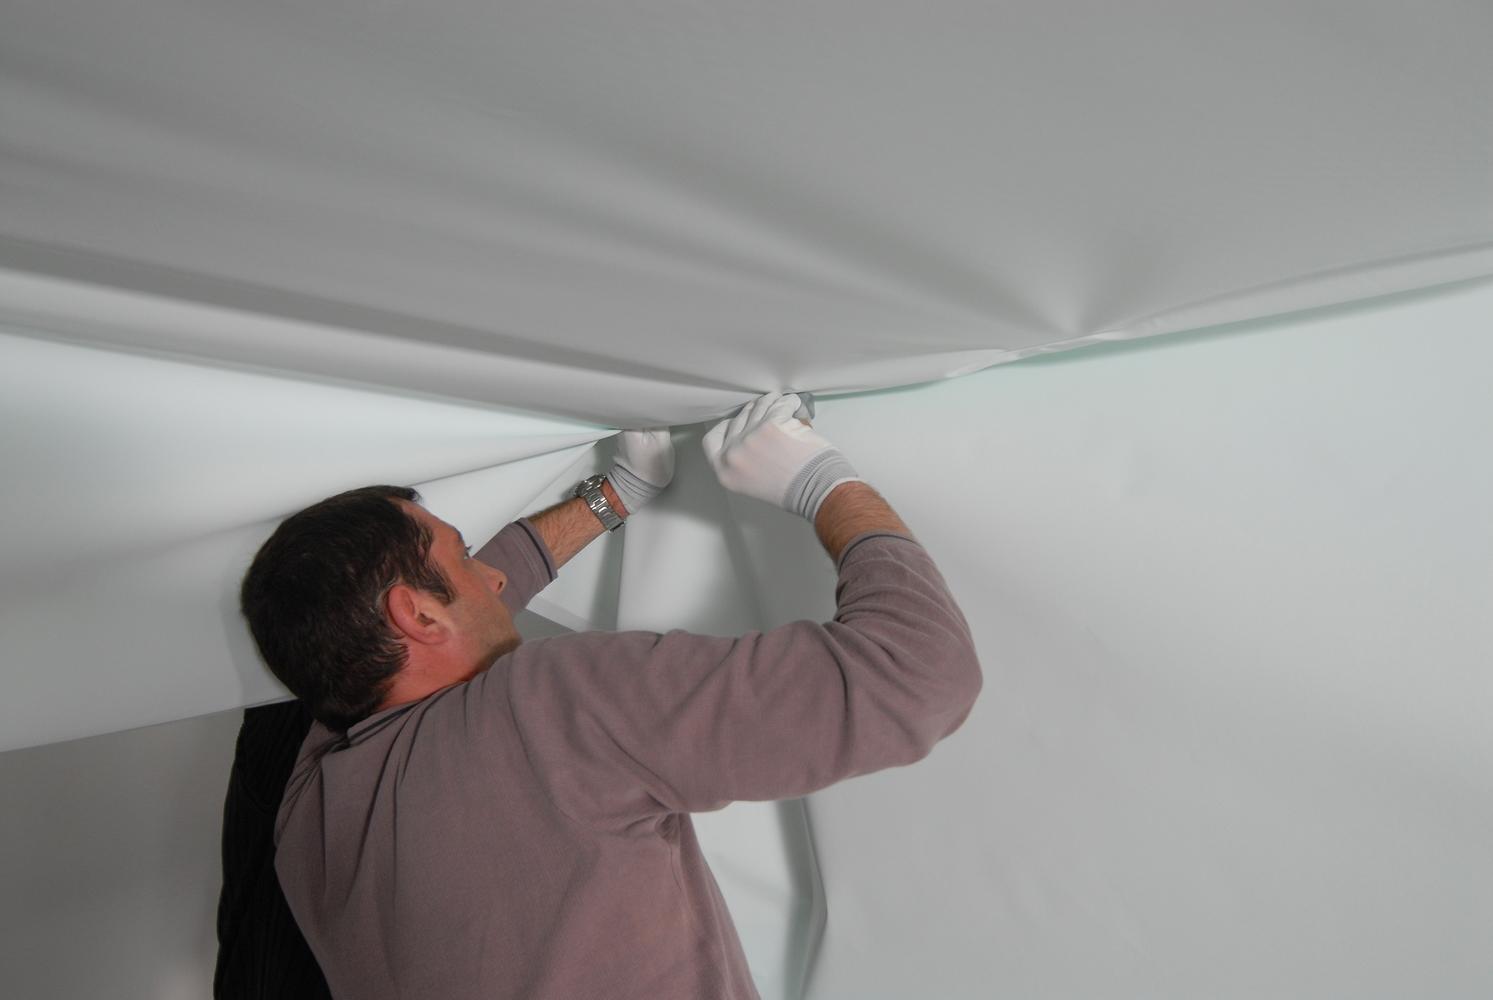
You can also make installation of stretch ceilings with a harpoon. At first, the canvas is cut out exactly according to the size of the room, but 7-10% smaller than the ceiling area. In this case, it is very important to make measurements correctly. After that you need to weld a harpoon to it. HDTV machines are designed specifically for such purposes.
The assembly is carried out using a specific spatula or blade for mounting. The construction begins to be assembled from the ceiling corners: one corner is inserted, after that the one that lies on the opposite wall diagonally, and so is the same with all the others. At that moment, when all the corners are filled with baguettes, the middle of the walls are put. After stretching, you just need to install a decorative insert, and the ceiling will be ready.
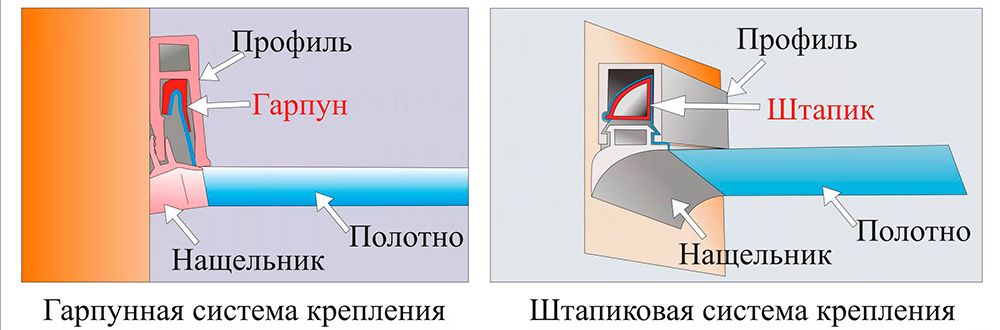
In case of using this system of fastening, the canvas will sag minimally, since it is already initially cut out a little less than the area of the room. It should be noted that the fabric can be repaired in contrast to the one where beadings are used. However, this pleasure will cost more.
In addition to the above two methods, there is a third one - this is a clip-on fastening system, which is used only for fabric ceilings. The difference is that in this case it is not necessary to make a decorative insert and use a gas gun. Cloths of cloth are inserted into the baguette on the principle of "clothespins". Baguette for fabric is made of durable and strong plastic so that the clip is reliable.
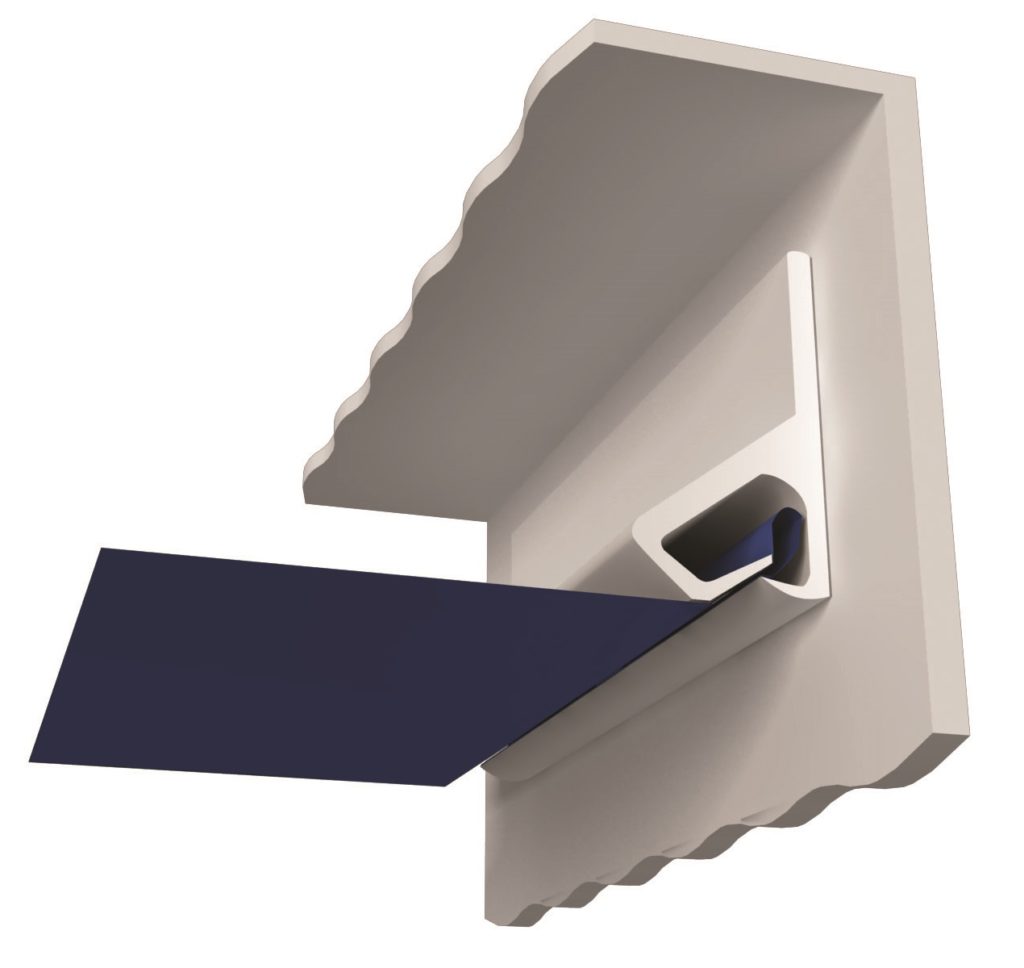

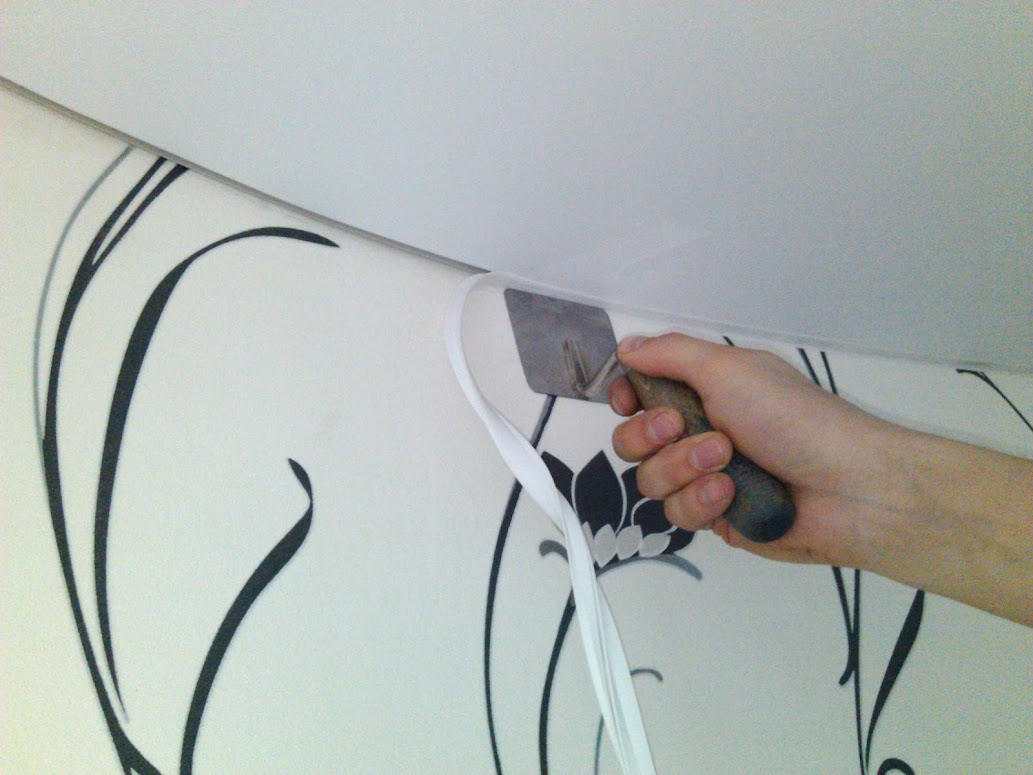
Here, too, there is no need for accuracy in measuring the dimensions of the ceiling, because the canvas is cut out with a margin of 20-30 cm. The canvas is tucked into the baguette with a spatula for mounting. The fabric is inserted and the excess sticking pieces are cut off - now the ceiling is ready. A nice bonus is the fact that in this mounting system, as in the first case, there is a minimum distance between the ceiling and the canvas directly.But all the disadvantages of the staple mounting method for a clip system are also present.
Below is a step-by-step instruction that tells you how to properly tension the canvas. Observing a strict sequence and sequence in the steps, you can come to a successful result - a perfectly stretched ceiling.

Step # 1
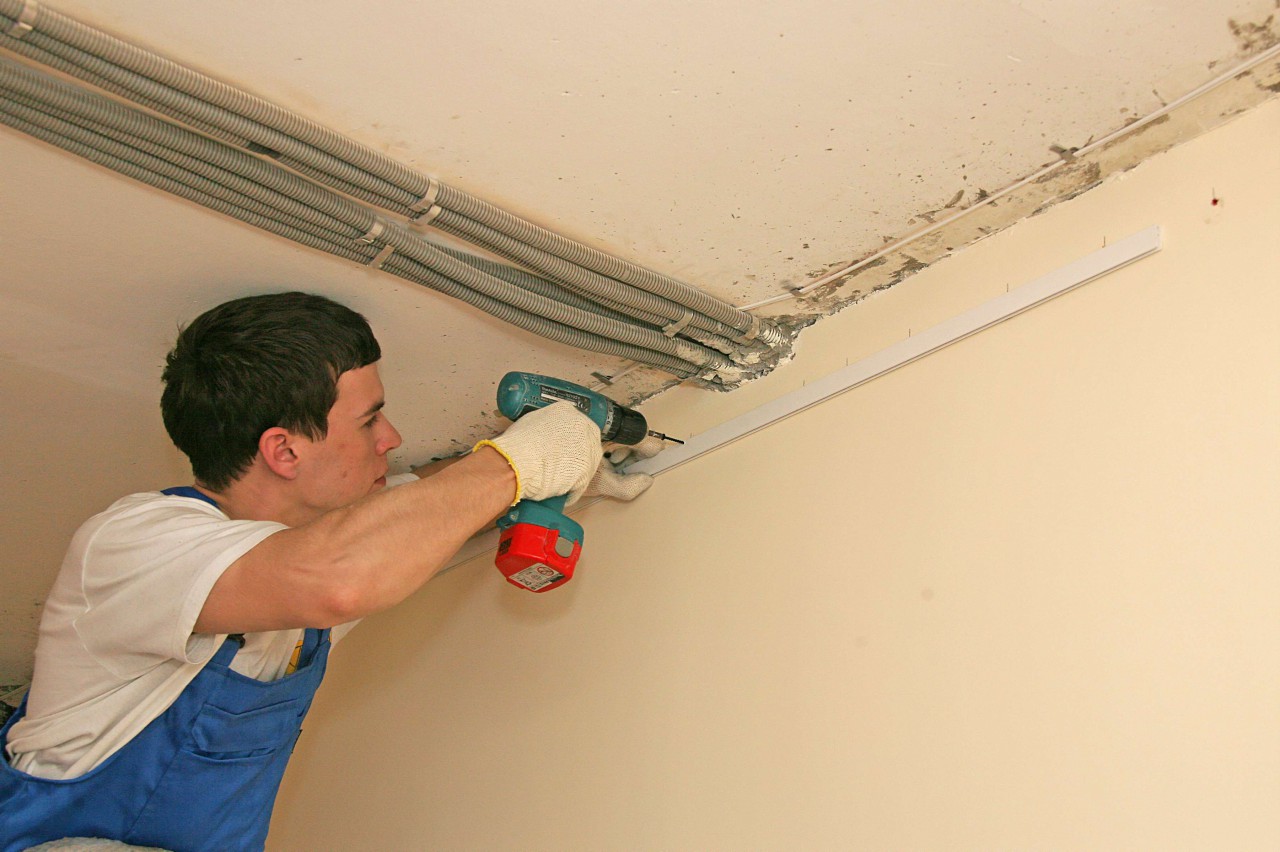
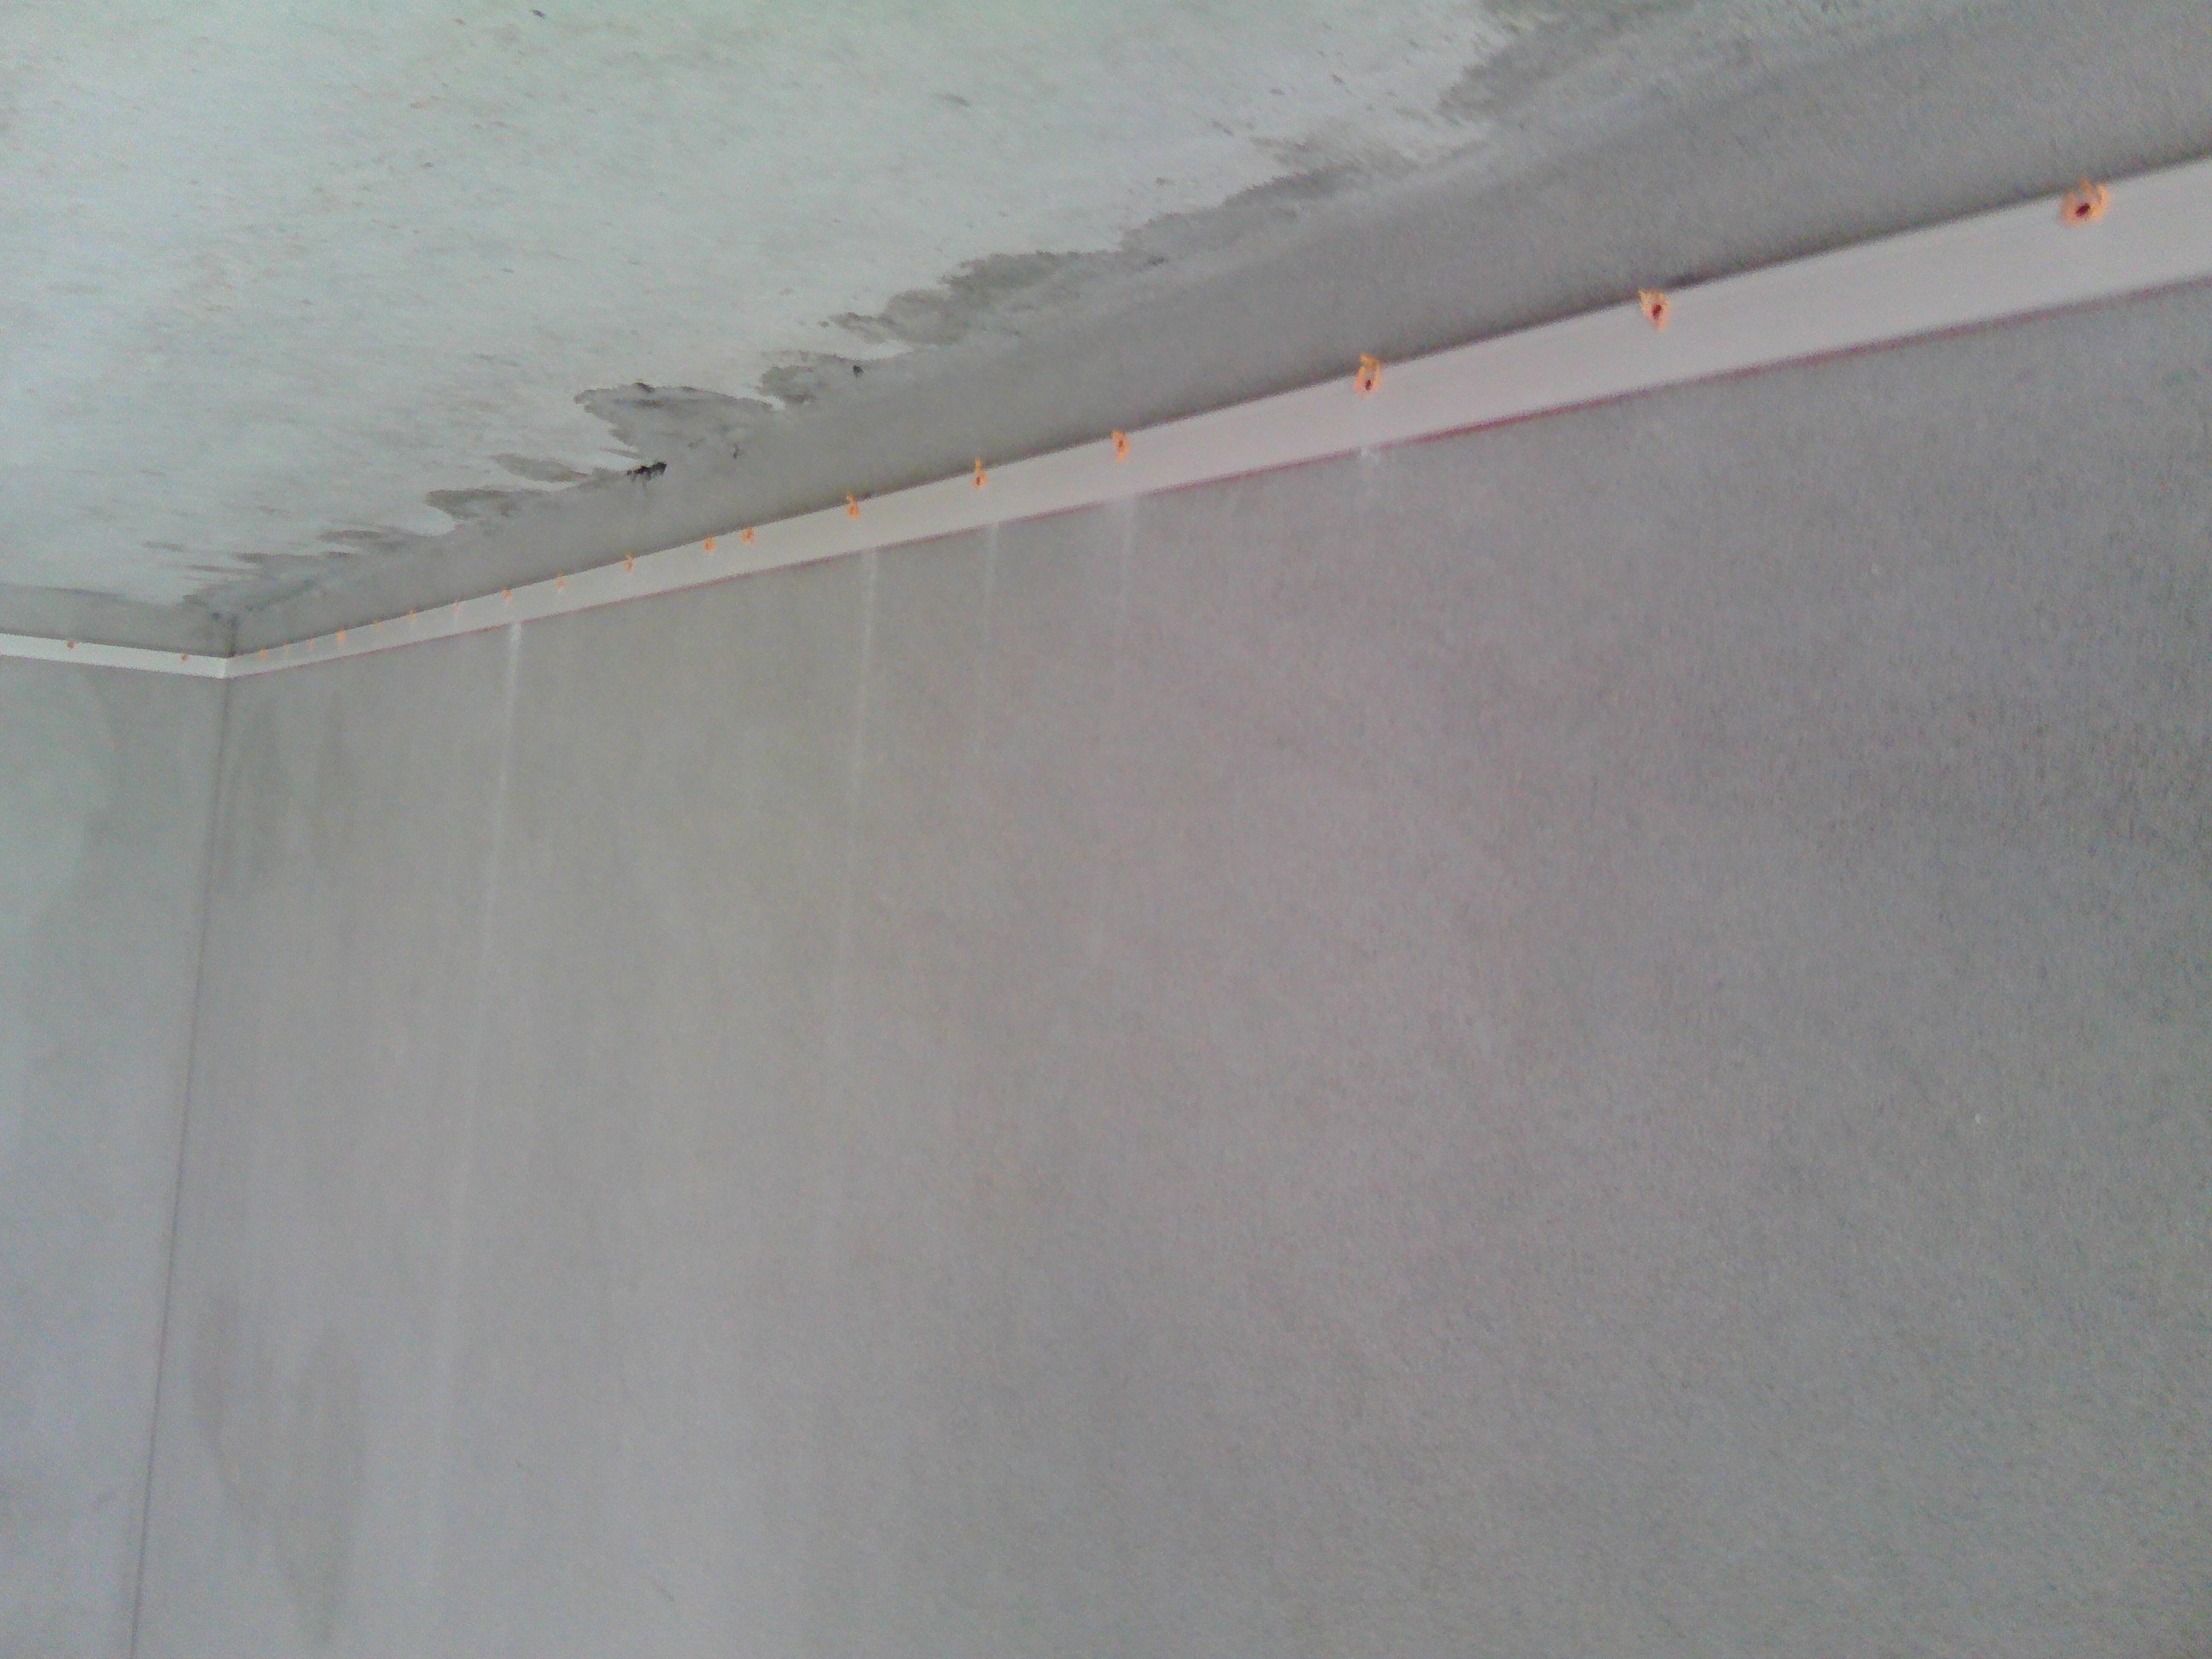
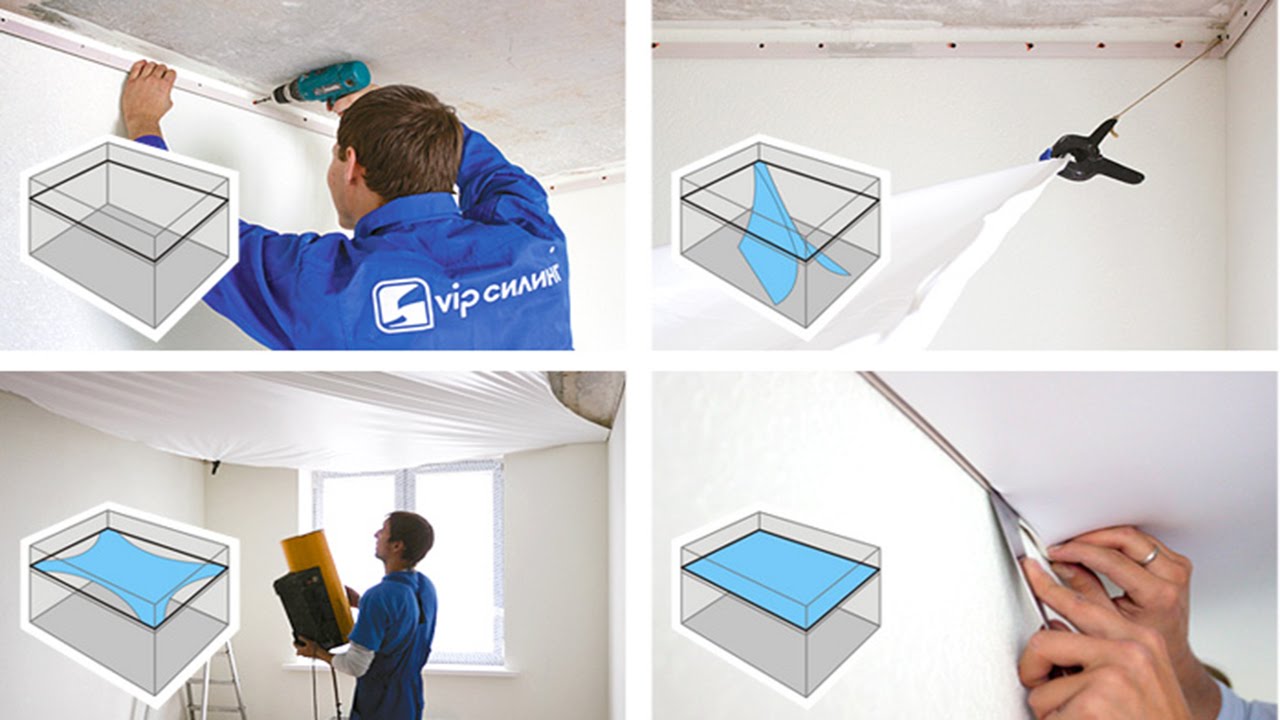
It is necessary to find the location of the lowest point of the stretch ceiling, and then calculate the necessary level at which it will be convenient to install the light bulbs. Then you should mark the height line with a pencil or a sheer lace. After this baguette must be fixed.
On the other hand, the baguette needs to be cut at the points where it should come into contact with the corners. After that, fix the screws, after having hammered plastic dowels into the walls near the ceiling, with an interval of 20 cm from each other - if the walls are strong, or from 8 to 10 cm - when the walls are unstable. The joints should be patched with masking tape.

Step 2
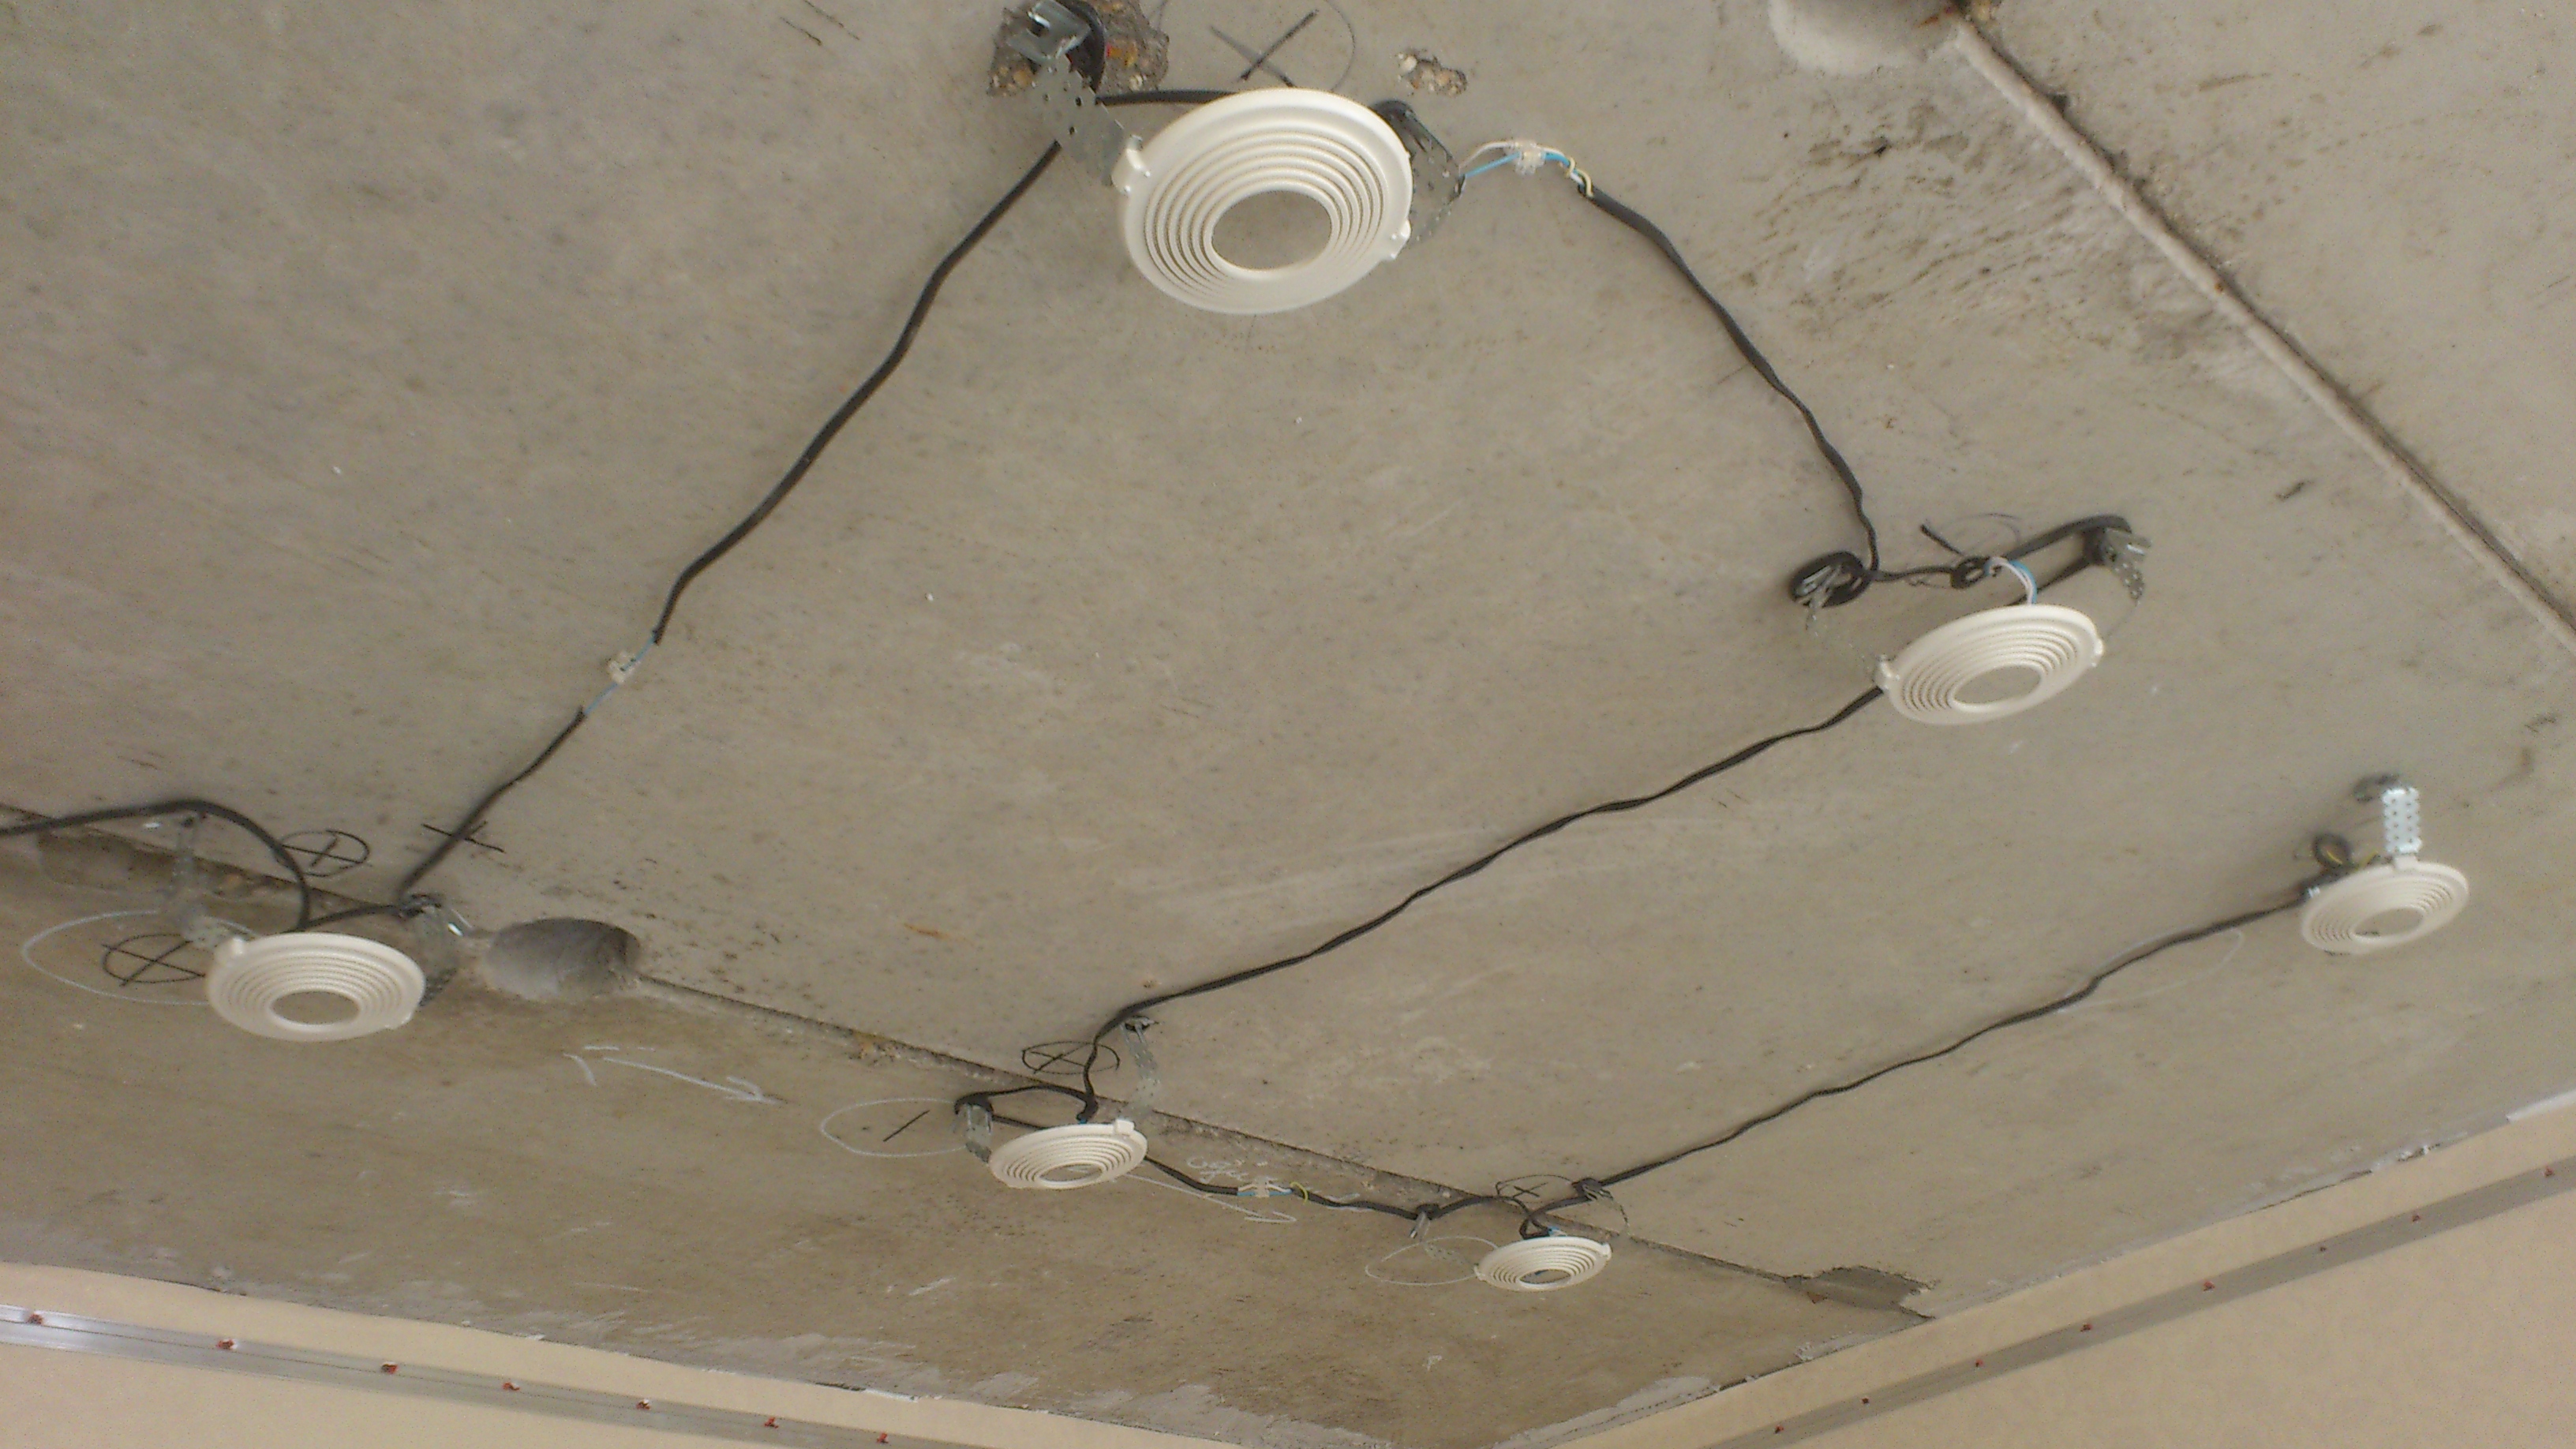
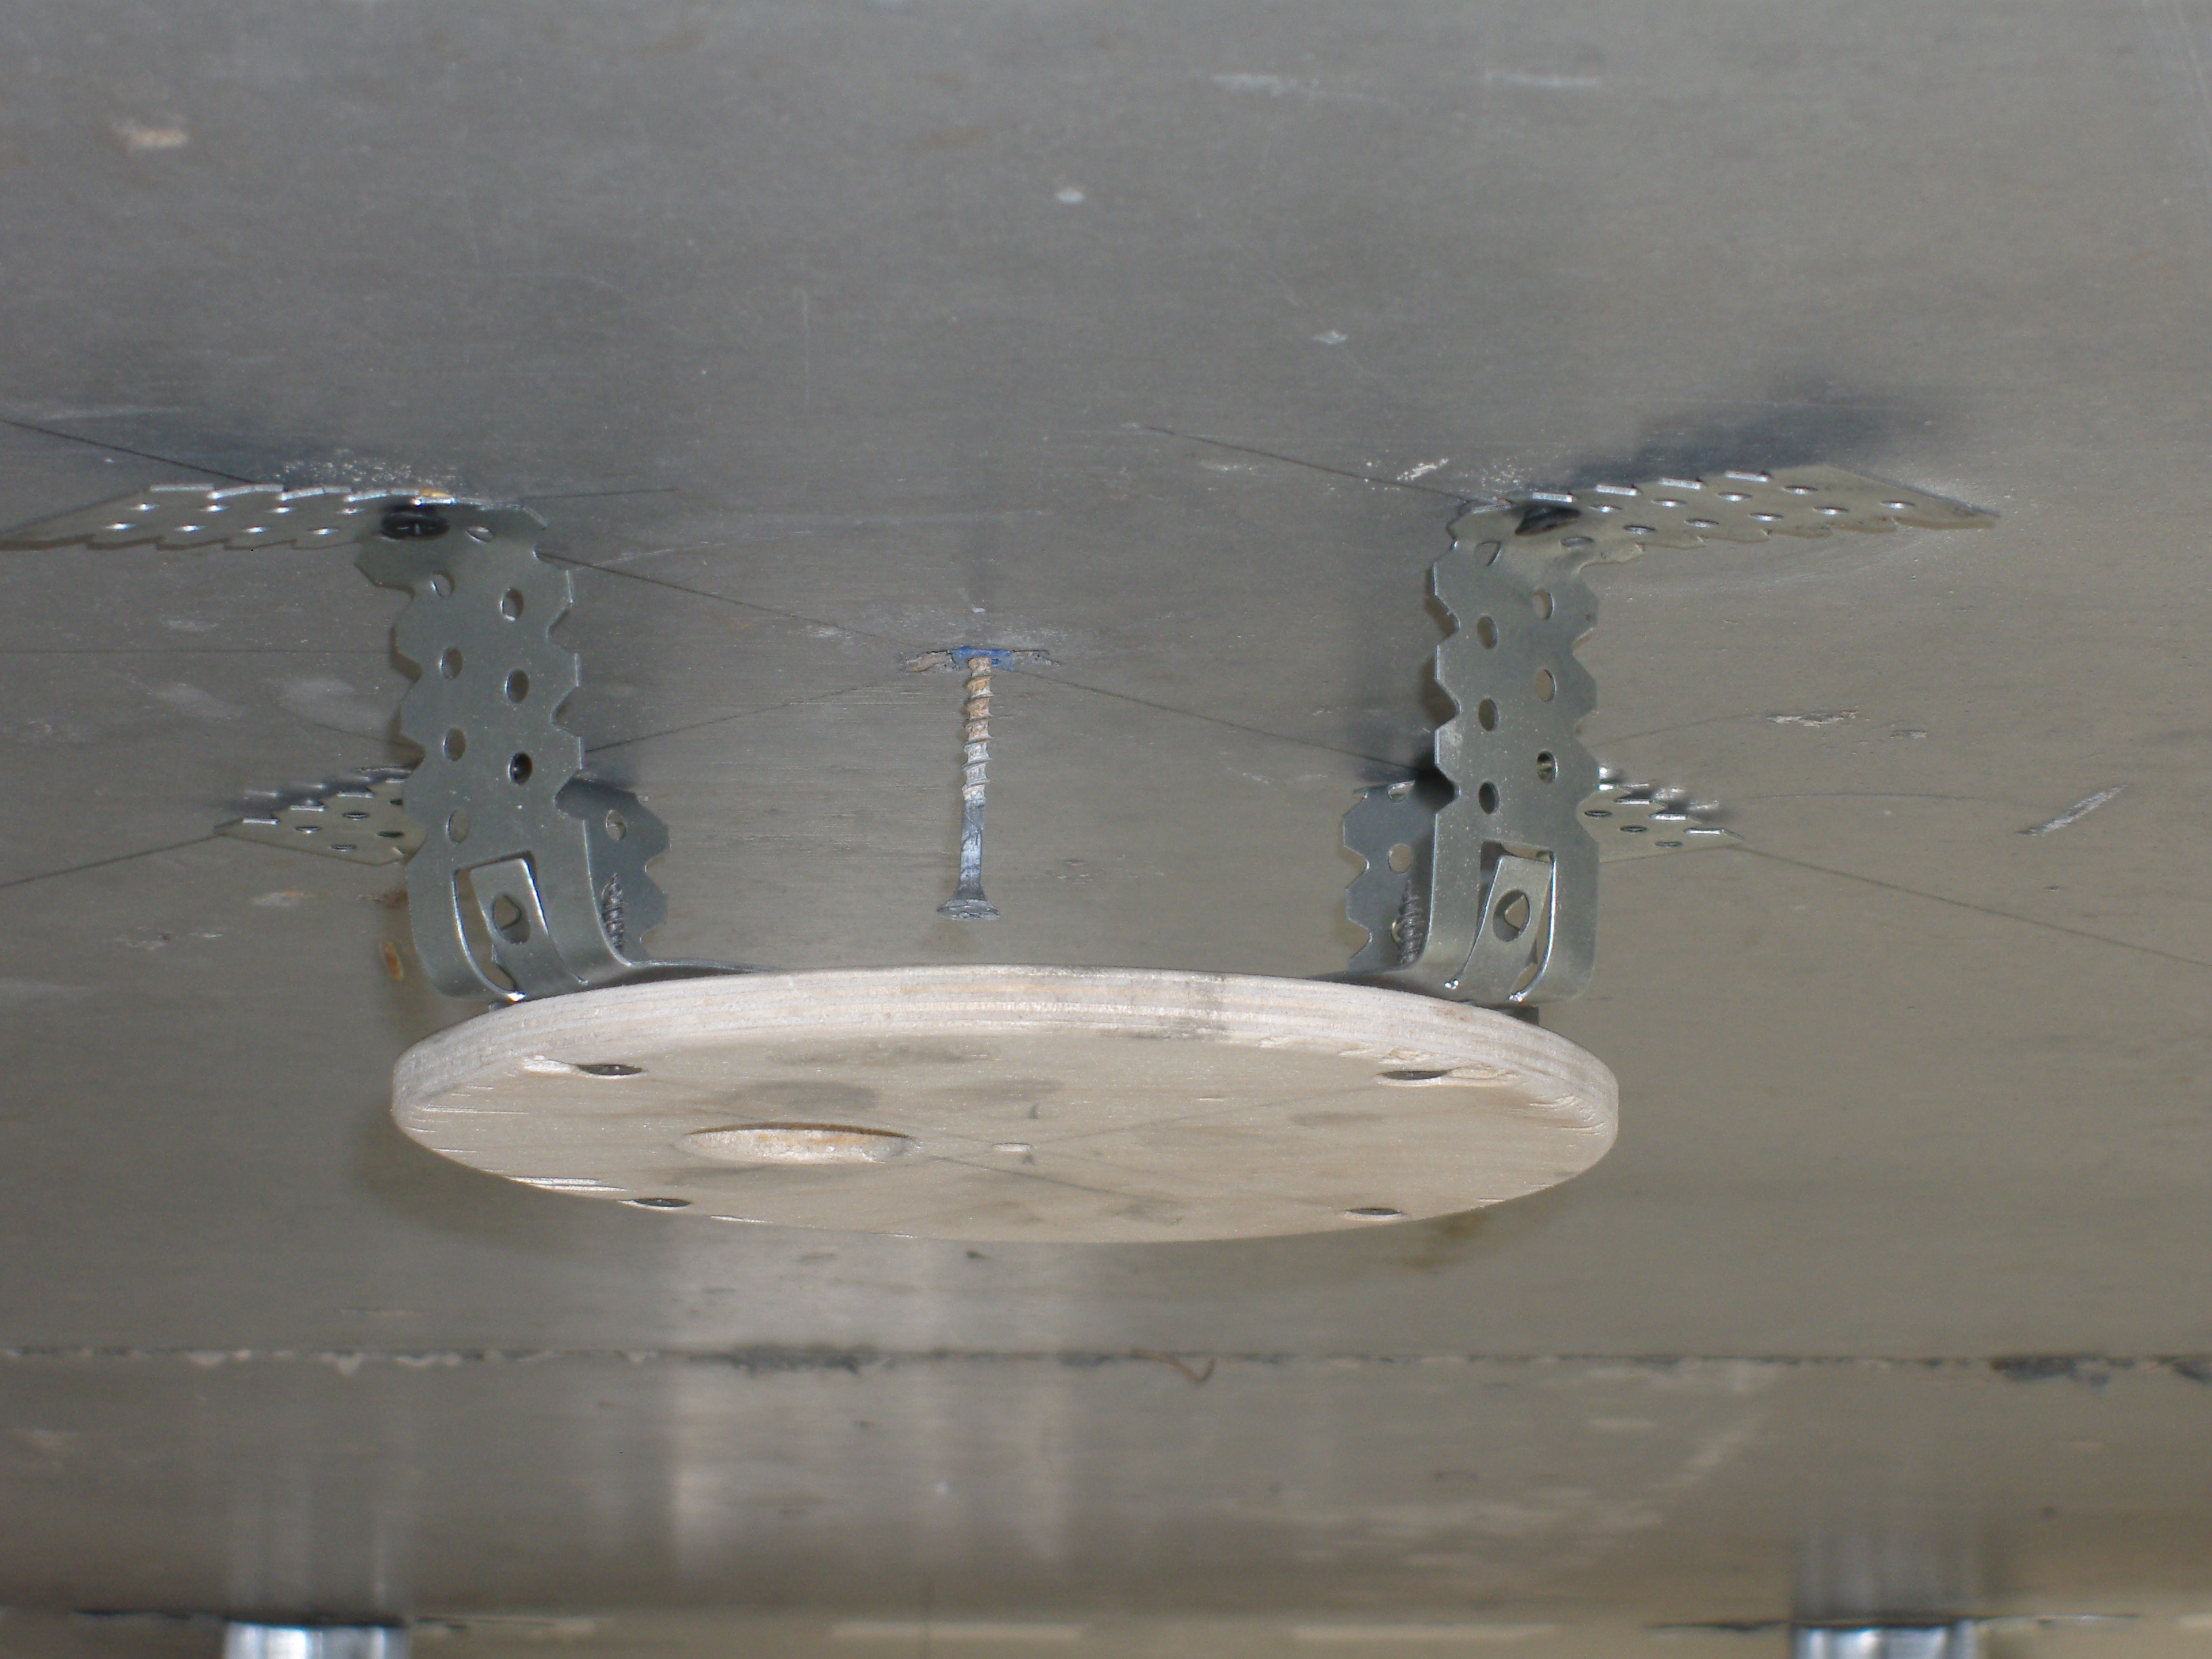
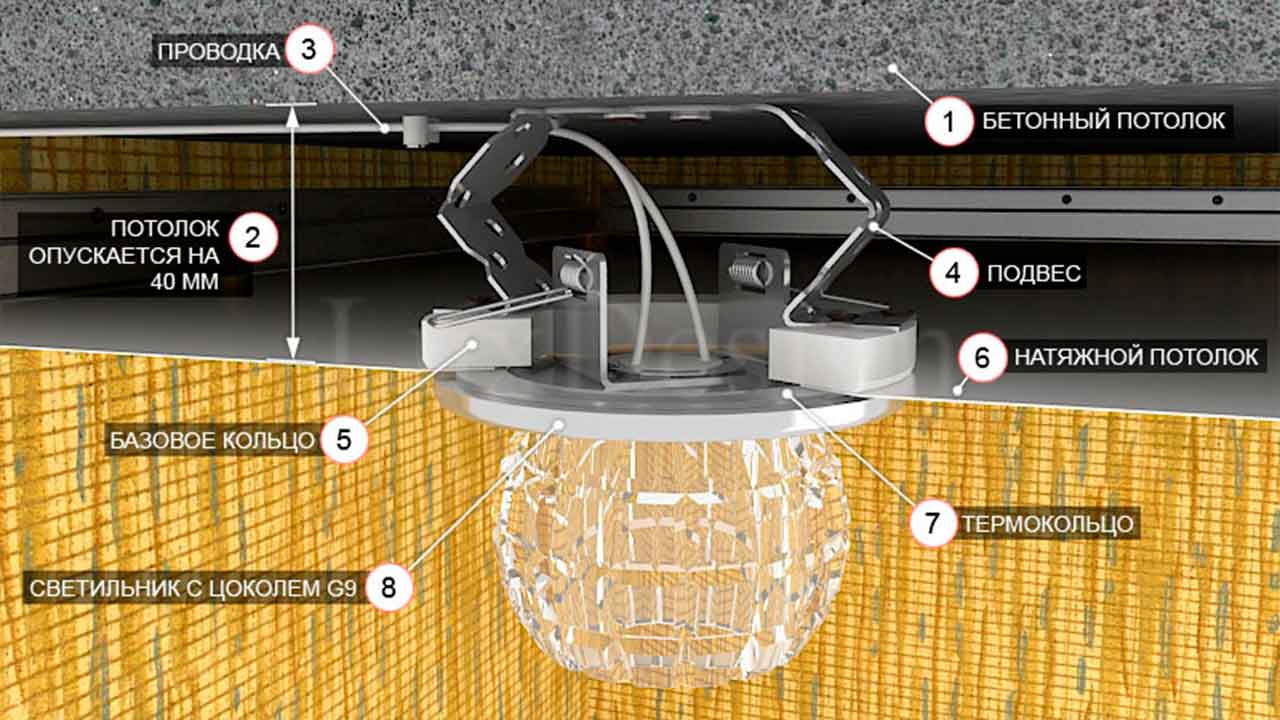
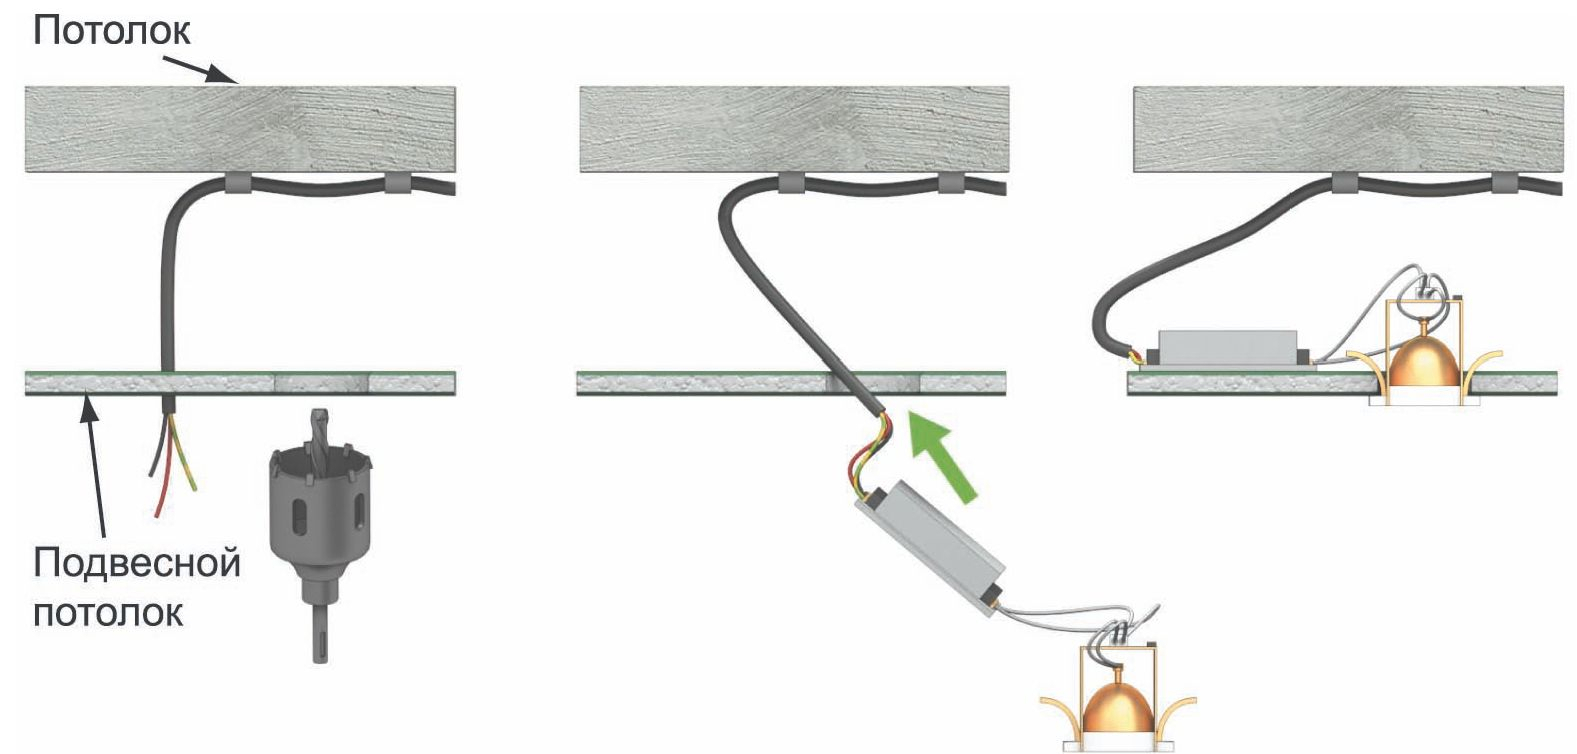
At this stage, set the wiring and mortgages for single lamps. To fix the mounting rings to the ceiling it is necessary to use metal suspensions, they are also used during the preparation of a frame construction for gypsum cardboard ceilings.After that, you need to mark the location of the lamps on the ceiling, install the boxes for branching and draw the wires.
So that the wires do not rub against each other, and there is no short circuit, you need to stretch them through the corrugated tube. After that, the mortgages along with the wires should be attached to the ceiling, having previously hammered holes into the holes and securing the suspensions from the second edge. The height of the bottom line of the suspension should correspond to the level of the stretch ceiling.
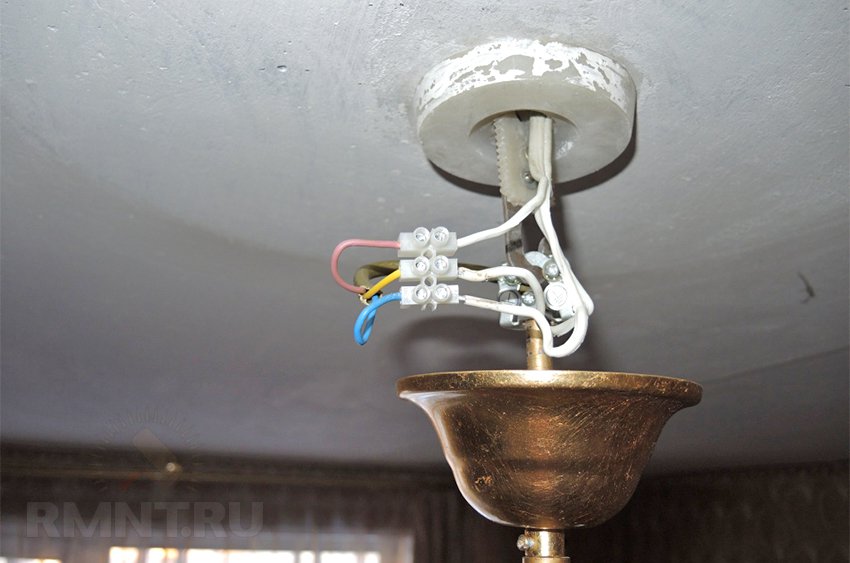
Then the wires should be placed in the loop just below the mortgage platform by 10-15 cm, make a cut from the bottom, which will divide it into two equal parts. Then you need to clean, isolate the wires from each other and sort by color. Before this you need to install the terminal blocks. You need to do this so that the insulation is slightly covered by a plastic platform, and there is no short circuit. Then you should put the wires with the terminal blocks on the mounting ring - after this manipulation it will not interfere with the tension of the cloths.
Step number 3
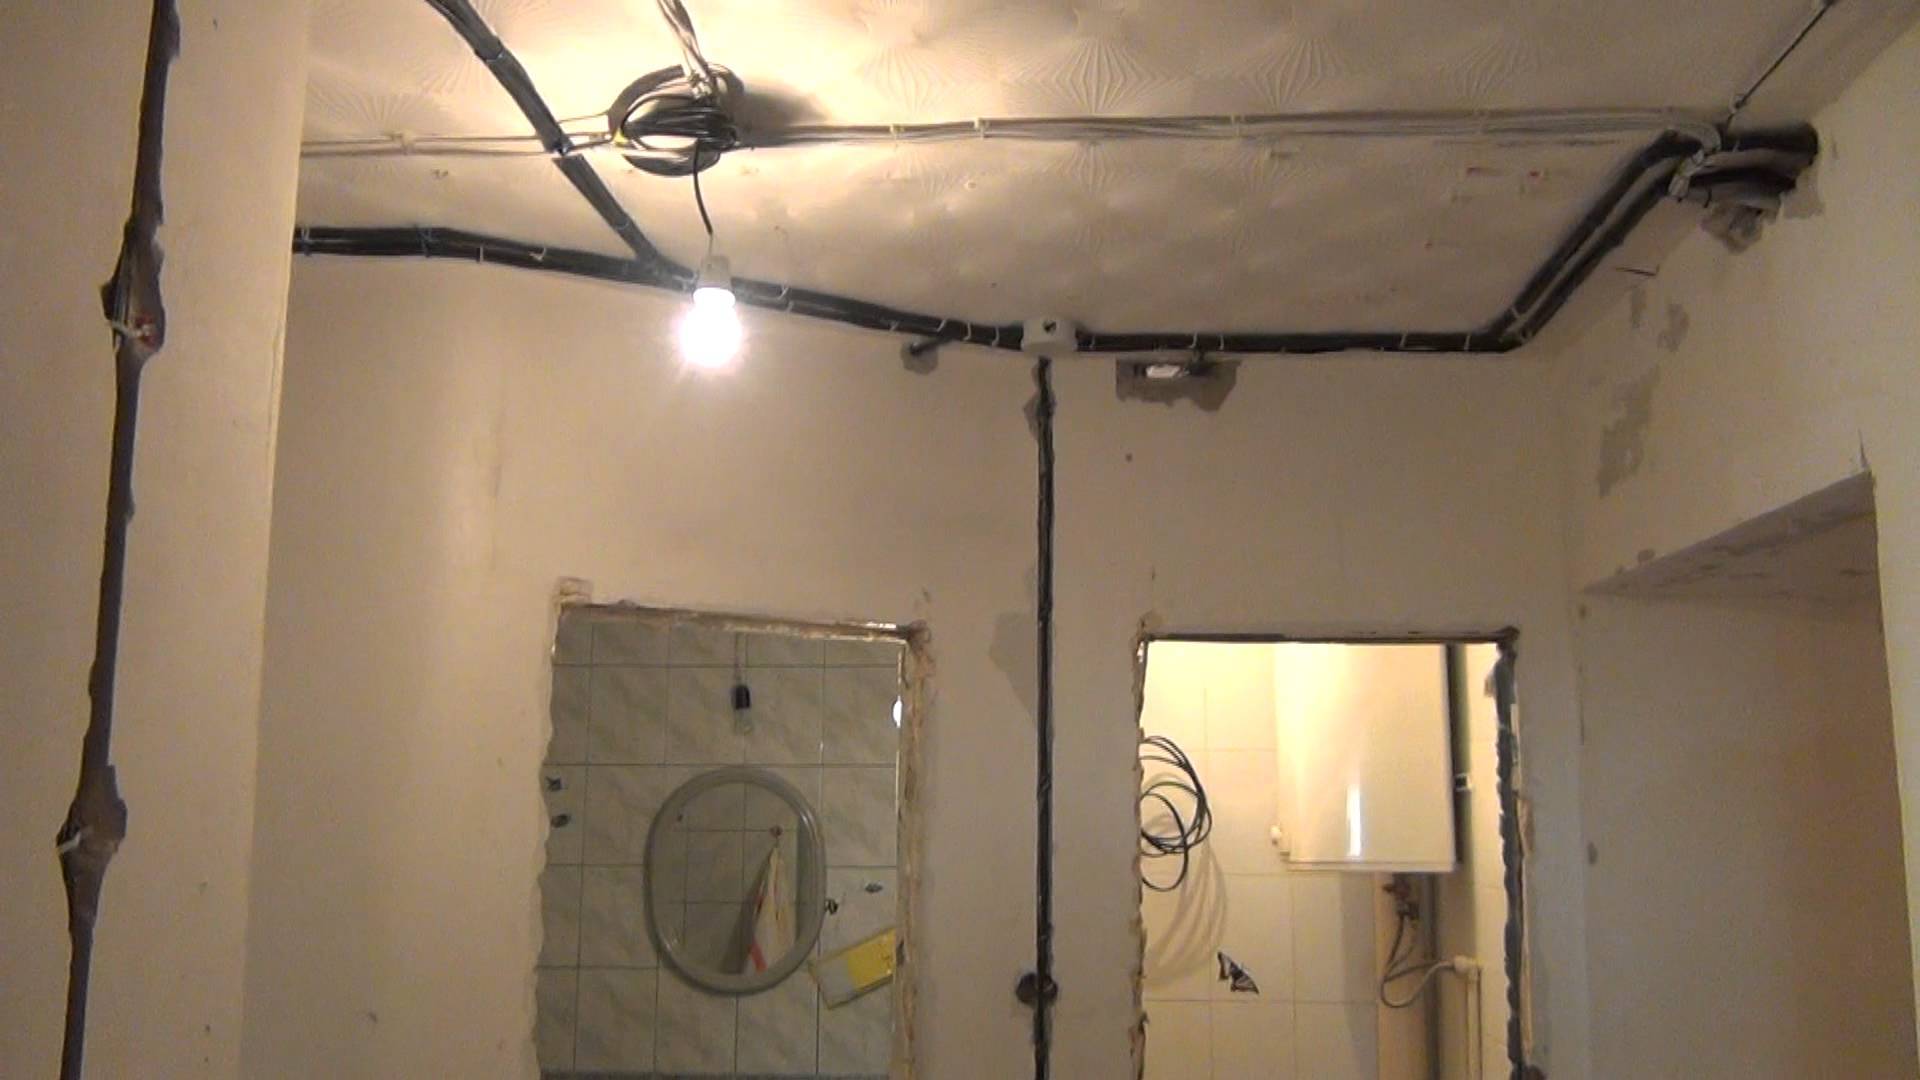
In the center you need to mount a chandelier. To install it, you need a mortgage of a large size, as well as metal screws and screws.We must not forget about the height of the structure - it must coincide with the level of the stretch ceiling. Then it should be noted the future location of the chandelier, hold the wire from the junction box and stretch it through a corrugated pipe. After this procedure, you need to strip and wrap the ends of the wire with insulating tape.
Step 4
Now you need to install the eaves. For this, it is worth preparing mortgages in advance.
You can do this as follows:
- Drill holes and insert dowels;
- Self-tapping screws secure direct suspensions;
- Pull the sheer cord from one wall to another so that it corresponds to the height of the stretch ceiling;
- Measure the required length of the timber from the tree and build it in according to the location of the cord, fix it with metal hangers. In order for wood to last a long time, it is recommended to pre-impregnate it with a composition that repels moisture.
Step number 5
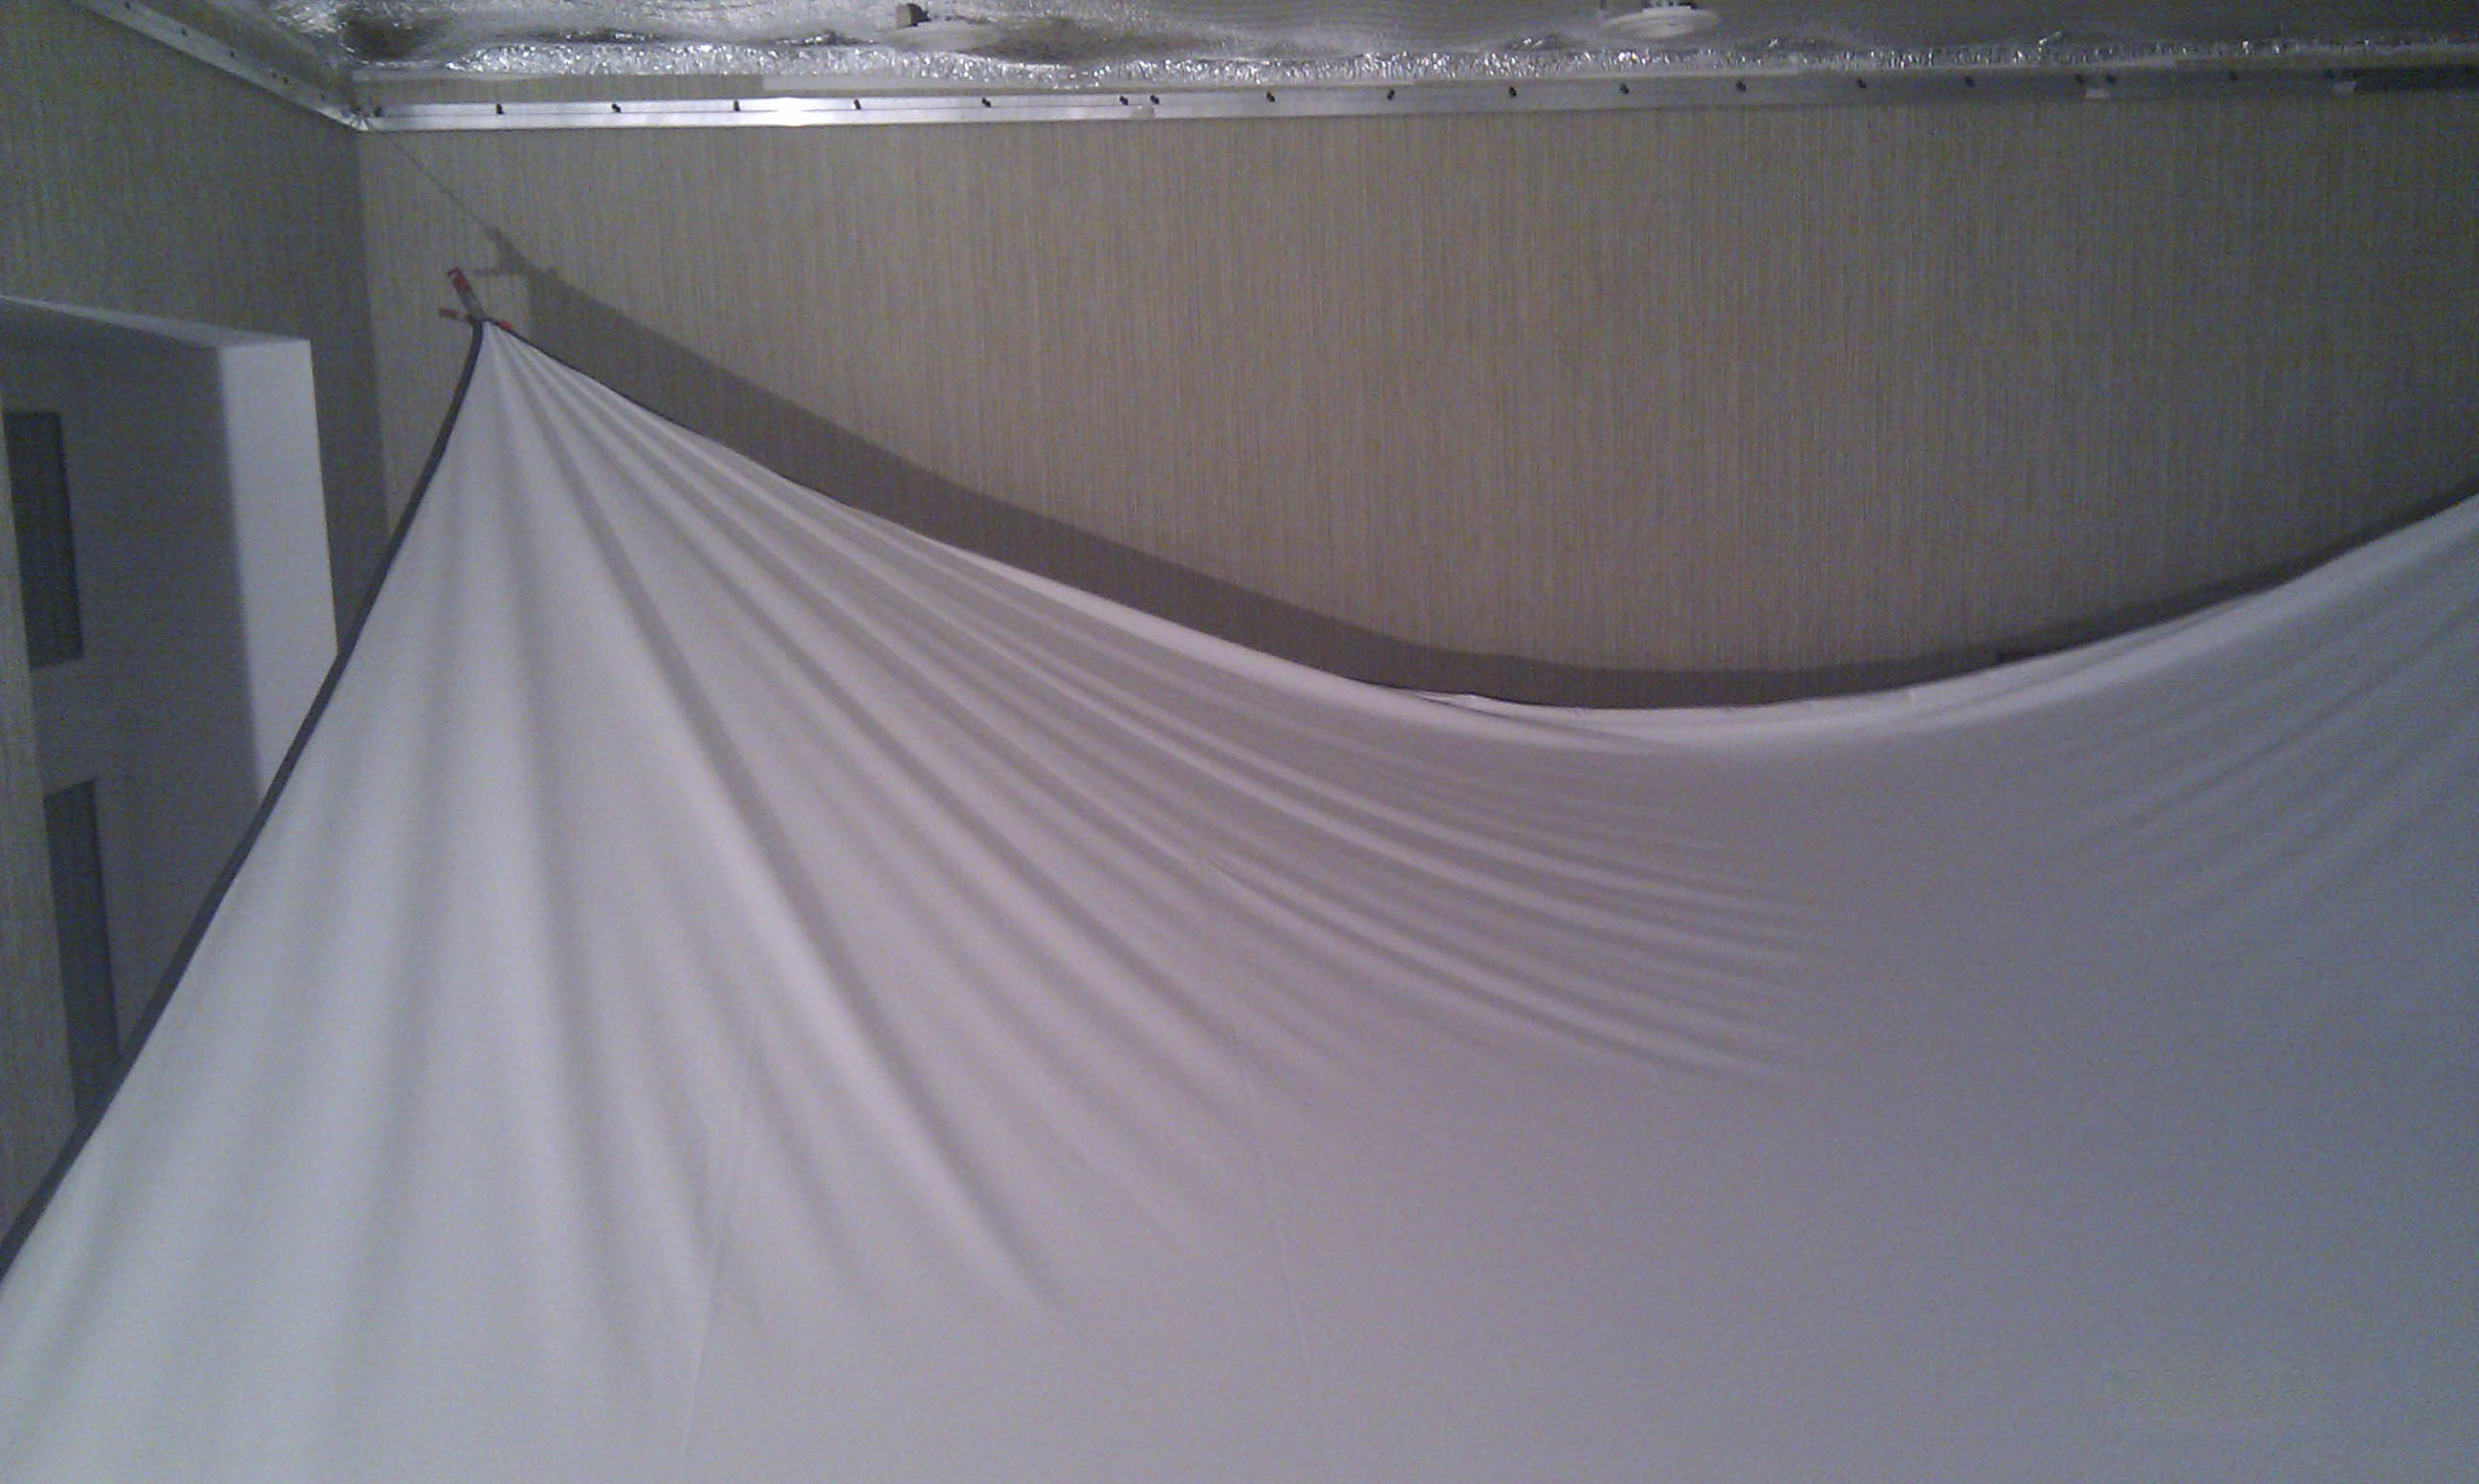
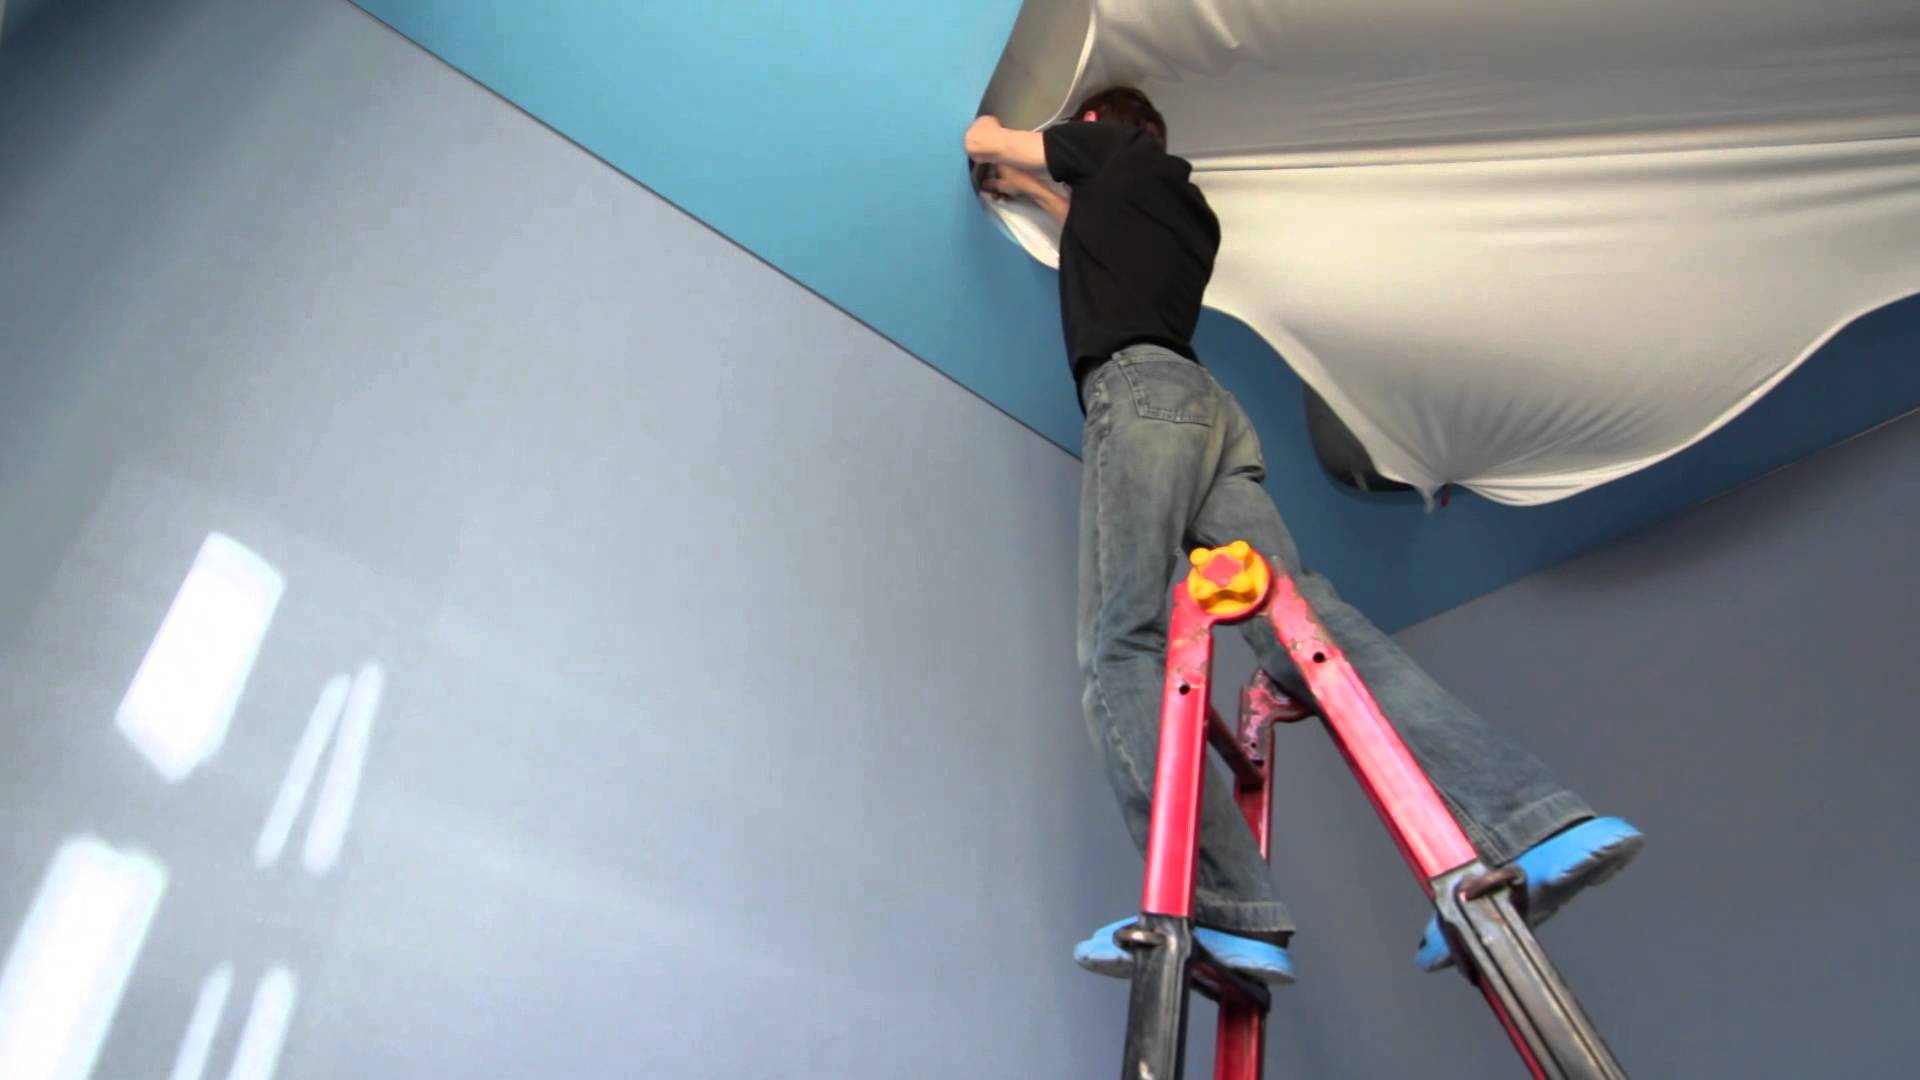
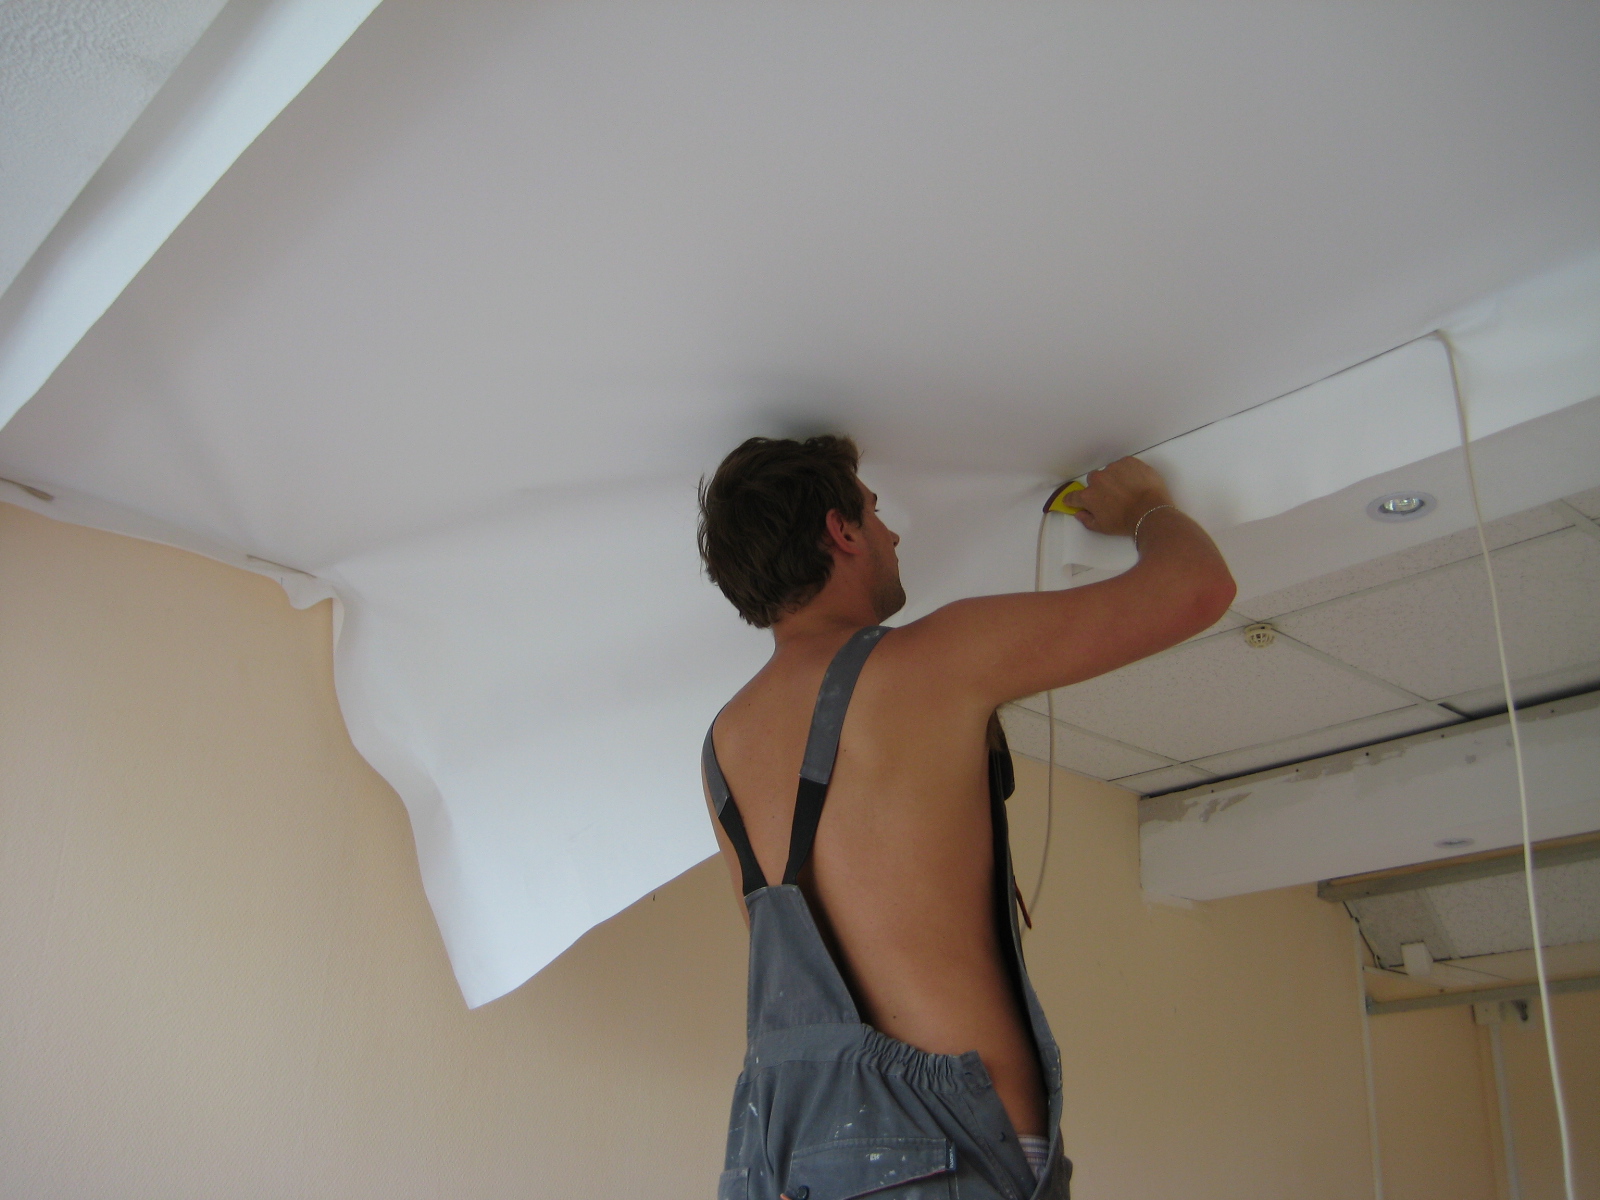
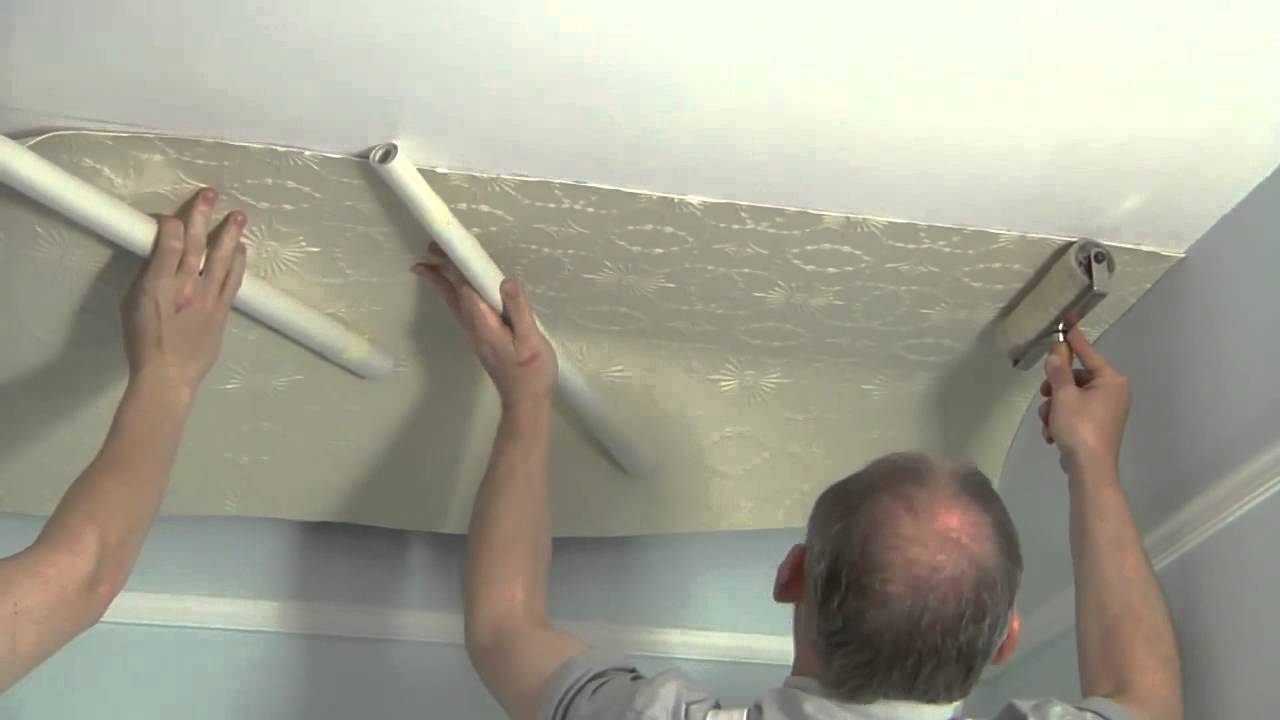
After mounting the suspension for the curtains, it is worthwhile to proceed to stretching the fabric. Before that, it is necessary to hang in the corners clips specifically designed for such purposes. Due to this, the canvas will not slip off at the time of installation, and a special gasket will protect it from defects.After performing these steps, it is worthwhile to place a heat gun in the room and prepare a spatula with rounded corners in order to push the canvas into the groove. Then you need to unwind the sleeve of the burner and connect to electricity.
Step number 6
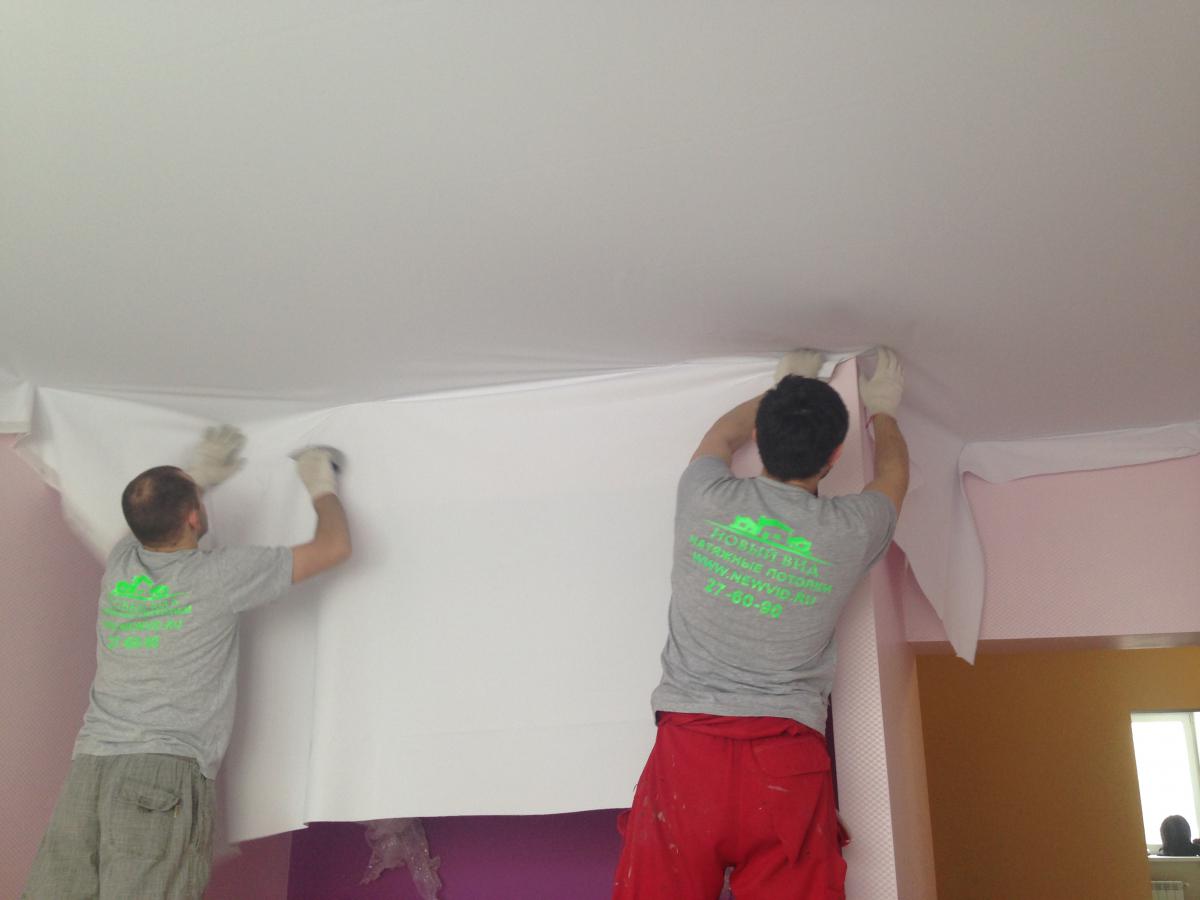
Unpack the canvas and inspect it from all sides - it is important to ensure that it is completely whole, without cracks and gaps. Then you need to attach the edges of the fabric on clothespins, pre-fixed in the corners. Fix the canvas at some points with clothespins and insert it with a rounded spatula into a baguette. Fill the cloth, strictly following from the periphery to the middle of the ceiling, and continue to heat it with a heat gun.
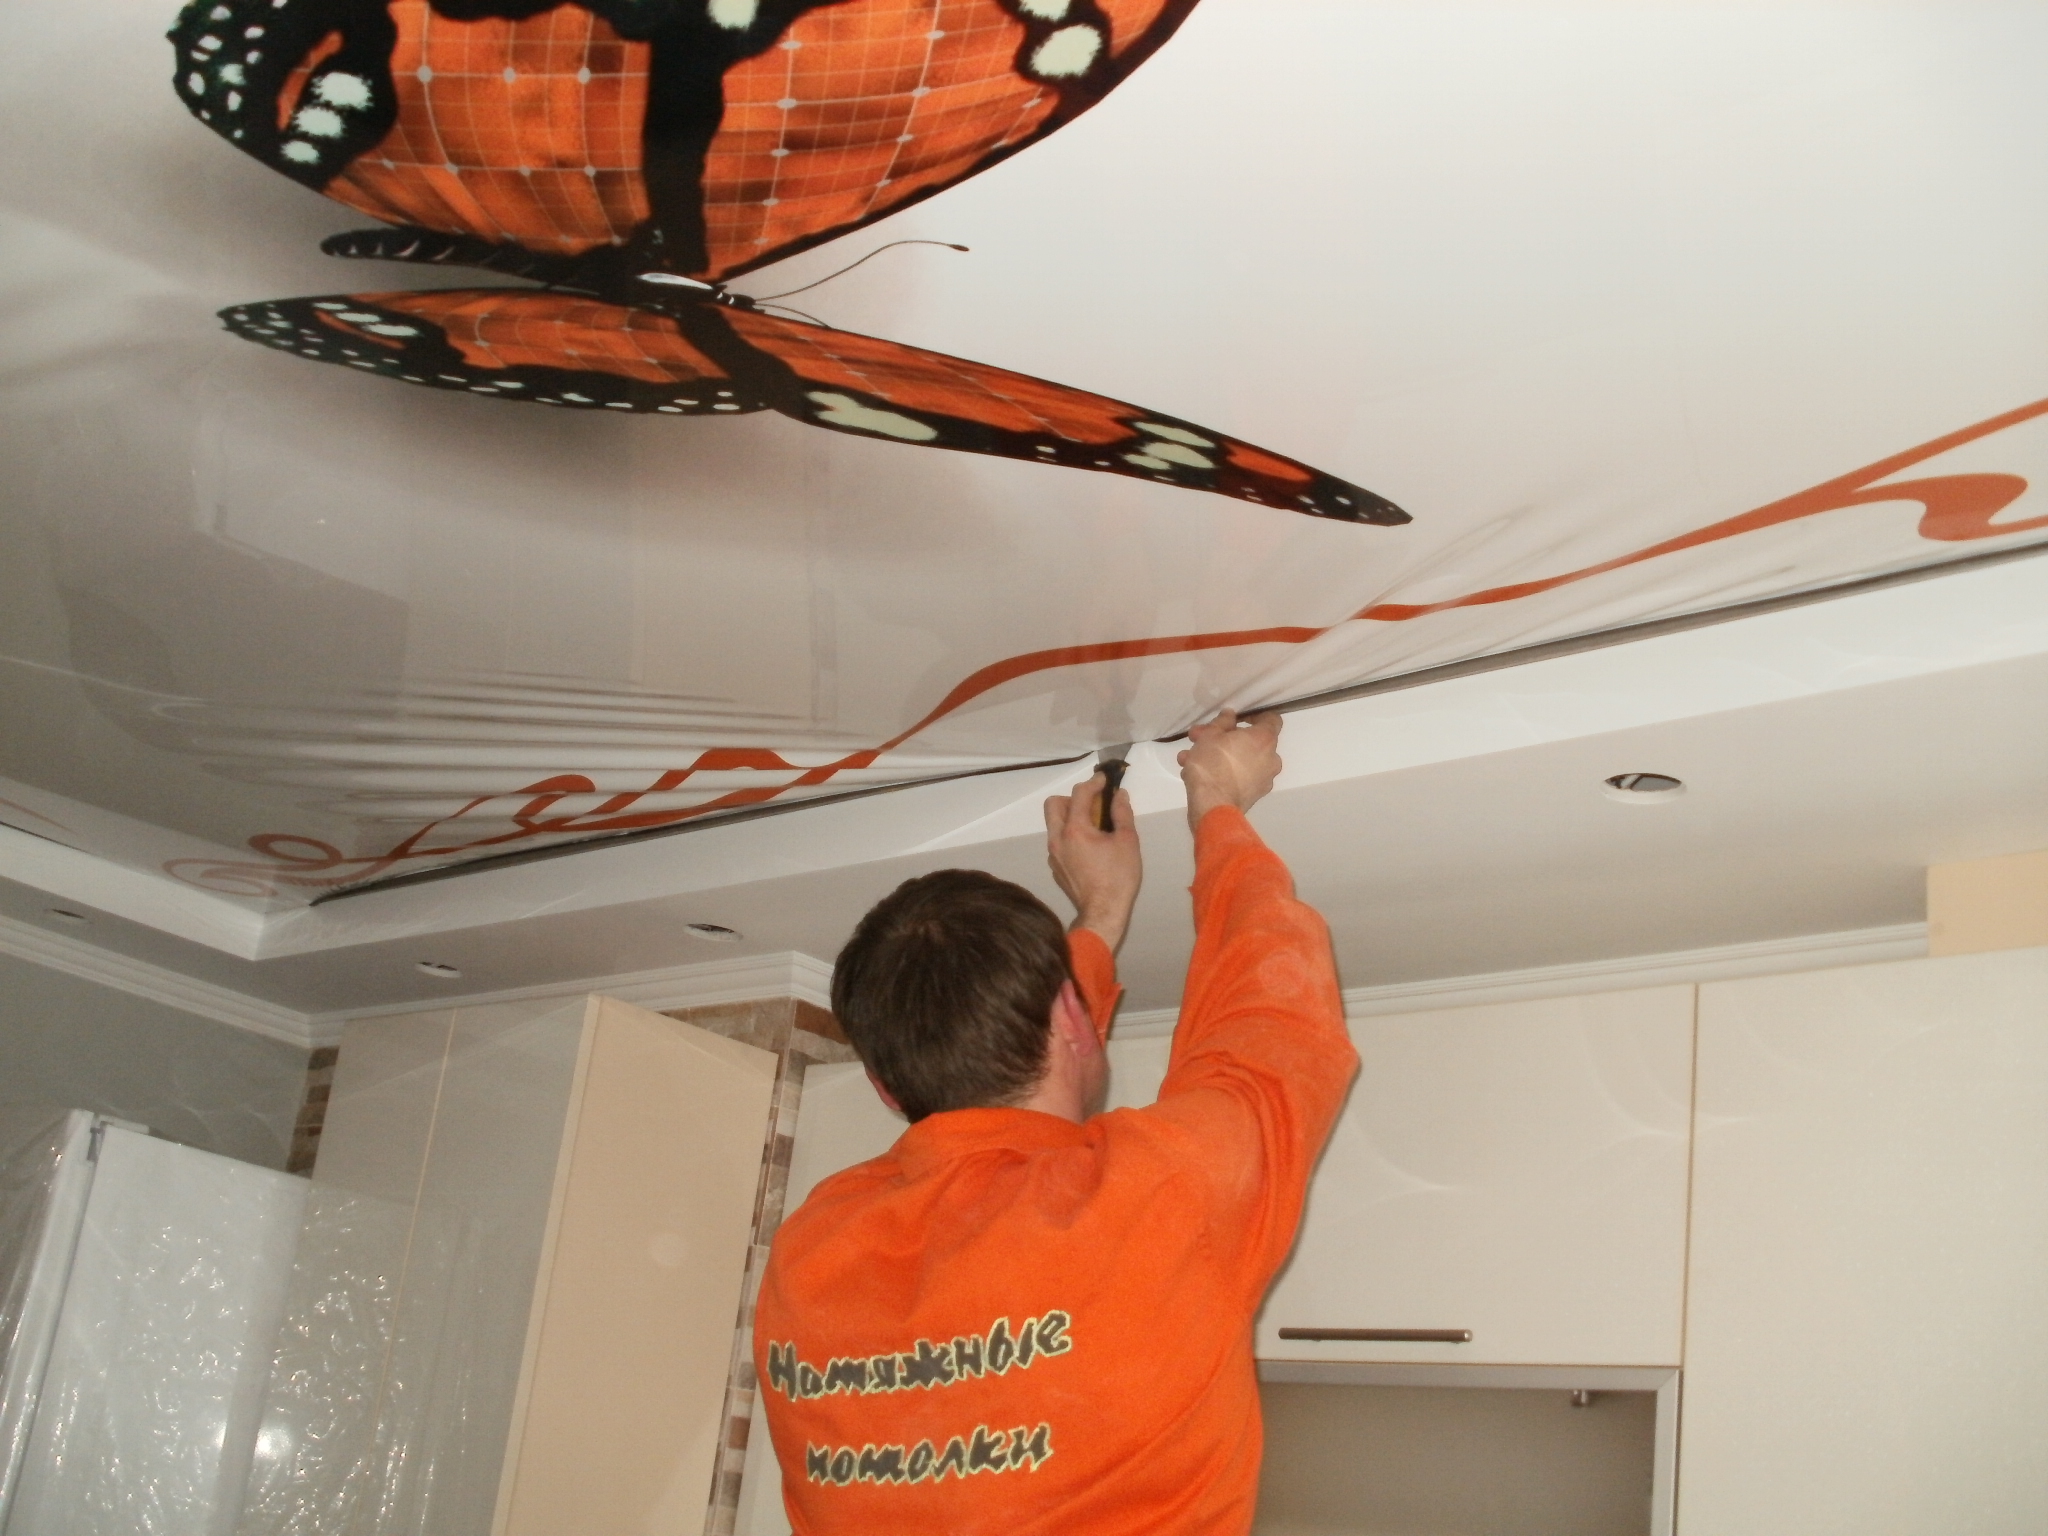
The strips of fabric that will hang should be carefully separated with a sharpened knife. Before this, it is better to once again make sure that the suspensions are firmly fixed.
After successful filling in the corners, it is worth warming up the canvas and filling the middle. At this time, the temperature in the heat gun should reach 60 ° C. It should be brought to the cloth at a sufficient distance. After some time, the clamps need to be removed. When mounting, one should hold the canvas with one hand while filling it in a baguette to avoid slipping.It is also best to attract an assistant - so you can quickly and efficiently cope with the task.
After stretching and fixing the canvas with baguettes, you need to go around the pipe, if it is on the ceiling.
This happens as follows:
- First indicate the place where the incision will be located. To do this, select a point where the pipe passes through the ceiling. The canvas is very tightly pressed to it without the formation of folds.
- Notch, following the direction where the pipe is closest to the wall. It is better to make an incision with scissors or a knife.
- After that, useless pieces of fabric to hide behind the stretch ceiling and fill the ends, heading toward the pipe.
- Then, in the place where the pipe is visible, a decorative plastic cover is put in, which can hide these small defects, and make this fragment of the ceiling a pleasant look.
Step number 7
On the cloth it is necessary to find the points where the mortgages for future fixtures are installed. It is necessary to take rings that are resistant to high temperature (they are also called thermal rings), specially designed for these purposes, and to lubricate them with strong glue used in installation works.The use of simple glue can make the fabric unusable. Thermal rings are inserted into the designated points, the glue sets and locks the rings in the right places.
After that, the fabric should be cut with a construction knife so that round holes appear on the inside of the ring. Do this procedure is also with other future light bulbs. Then you need to pull out the insulated wires connecting to lighting devices. Do the same with the lamp cord in the center.

Step 8
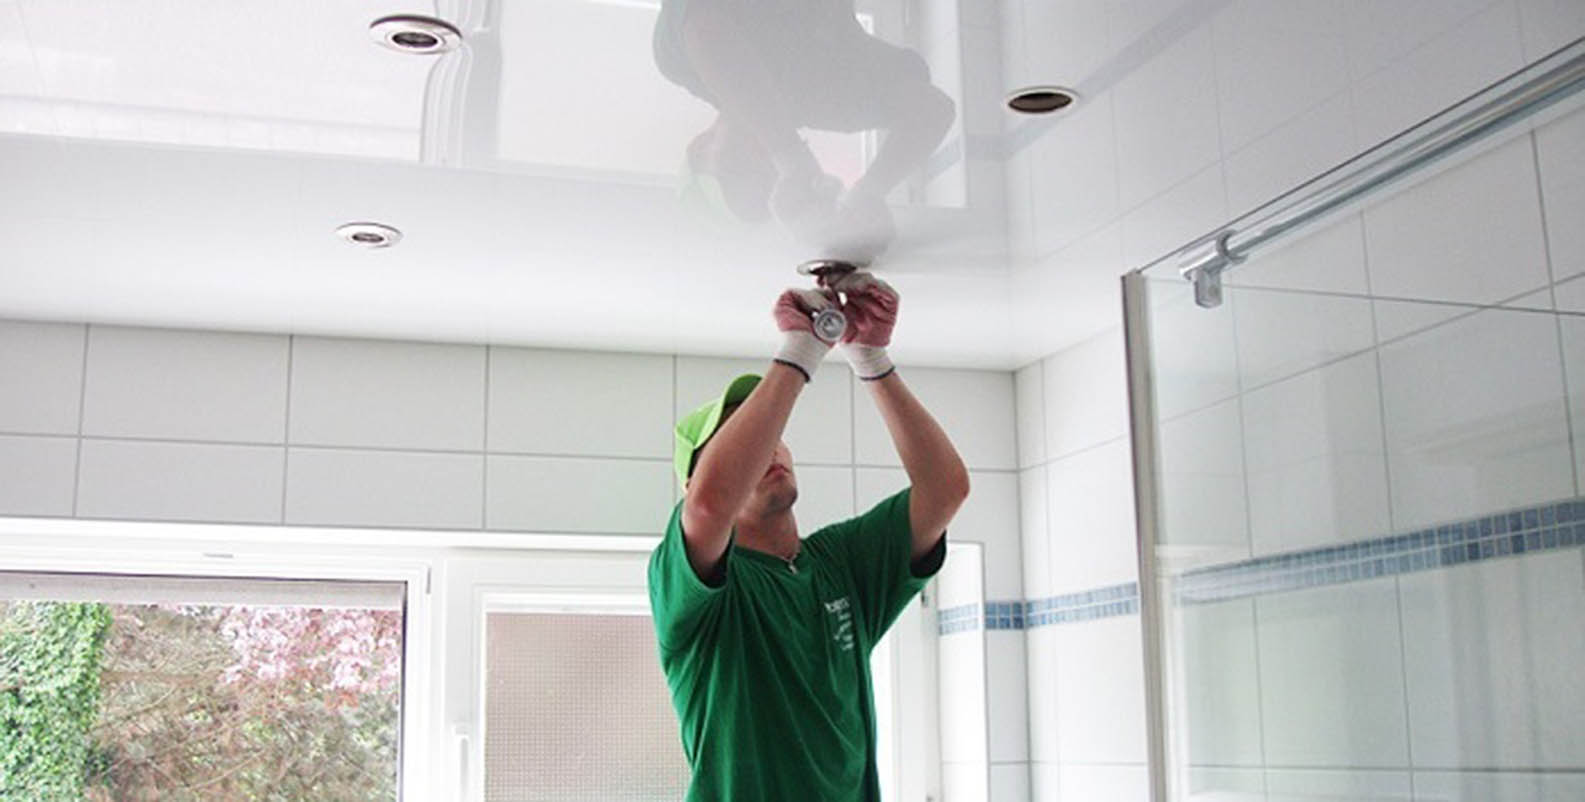
After that you should install lighting devices. For a stretched ceiling, they can be LED, energy-saving or halogen bulbs. It is useful to follow the following recommendations.
Lamps should not be more powerful than 40 watts, because otherwise the cloth will become unusable in a year due to overheating. Single lighting devices must have a bezel made of plastic or metal and cover the thermal ring. It is best to buy LED bulbs with a small ledge that goes beyond the edges of the bulb and has a wide angle of illumination.When selecting light bulbs for a tensioning structure, it is important to focus on the presence of a grill, which helps cool and preserve radiator durability. At the end of the installation of all fixtures should check them in their work.

Step number 9
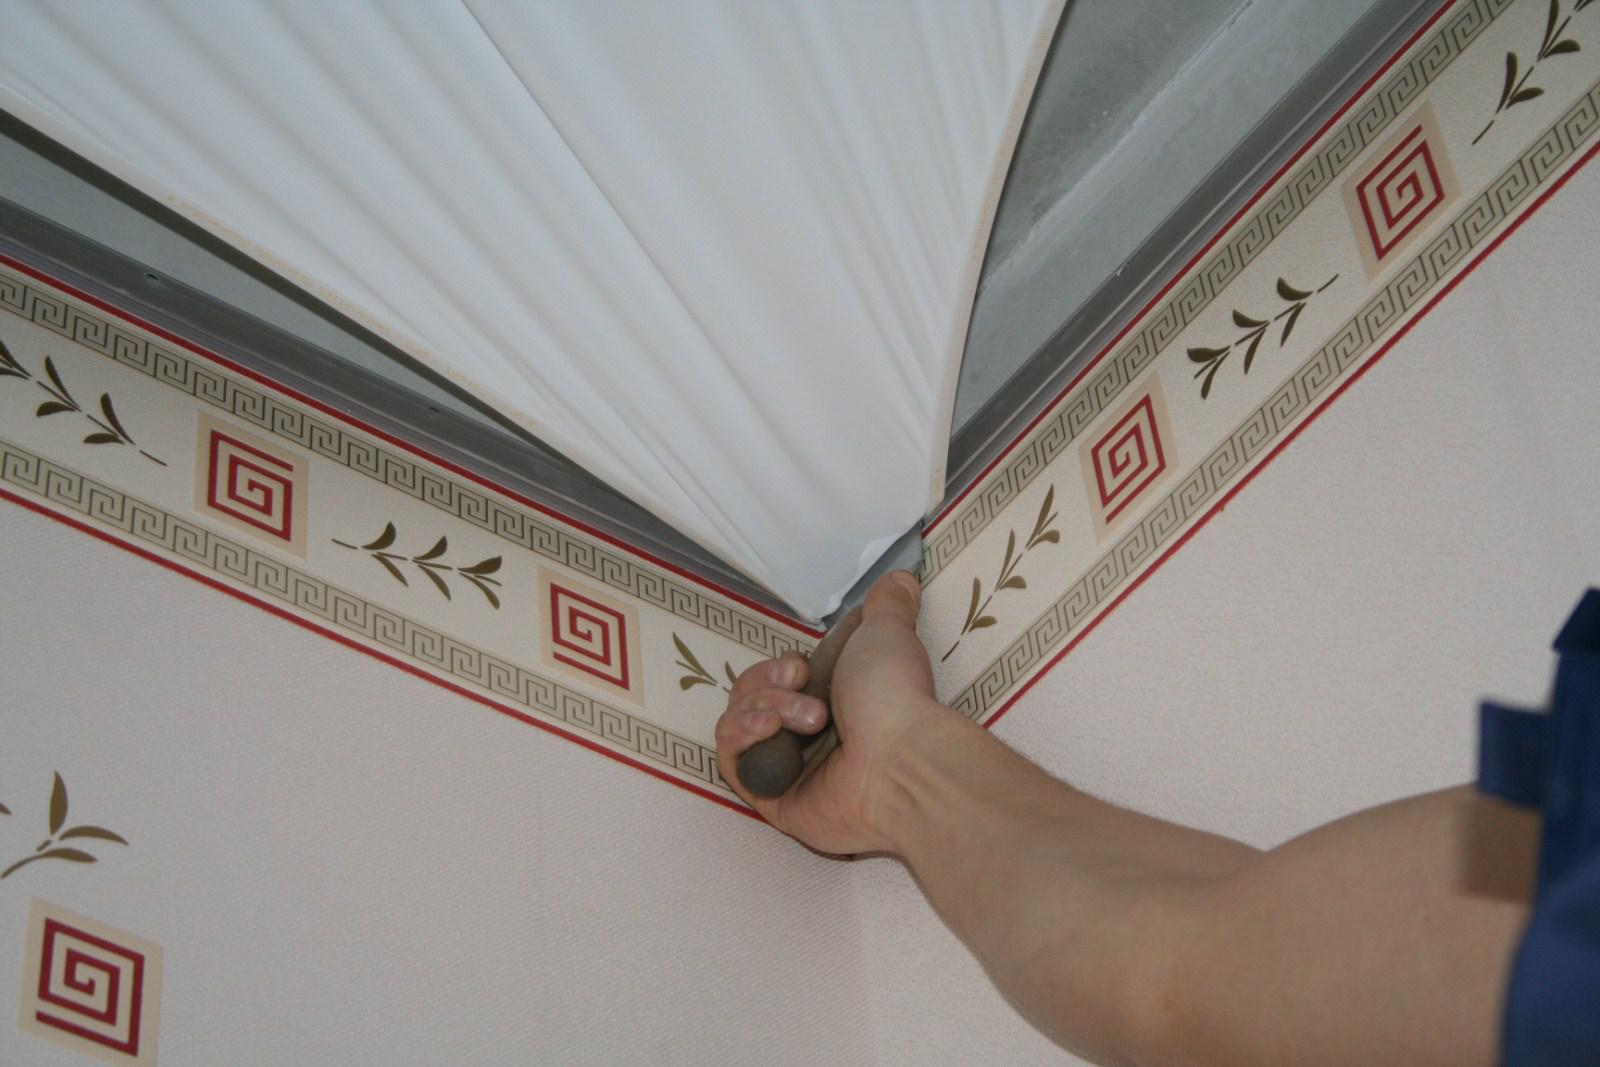
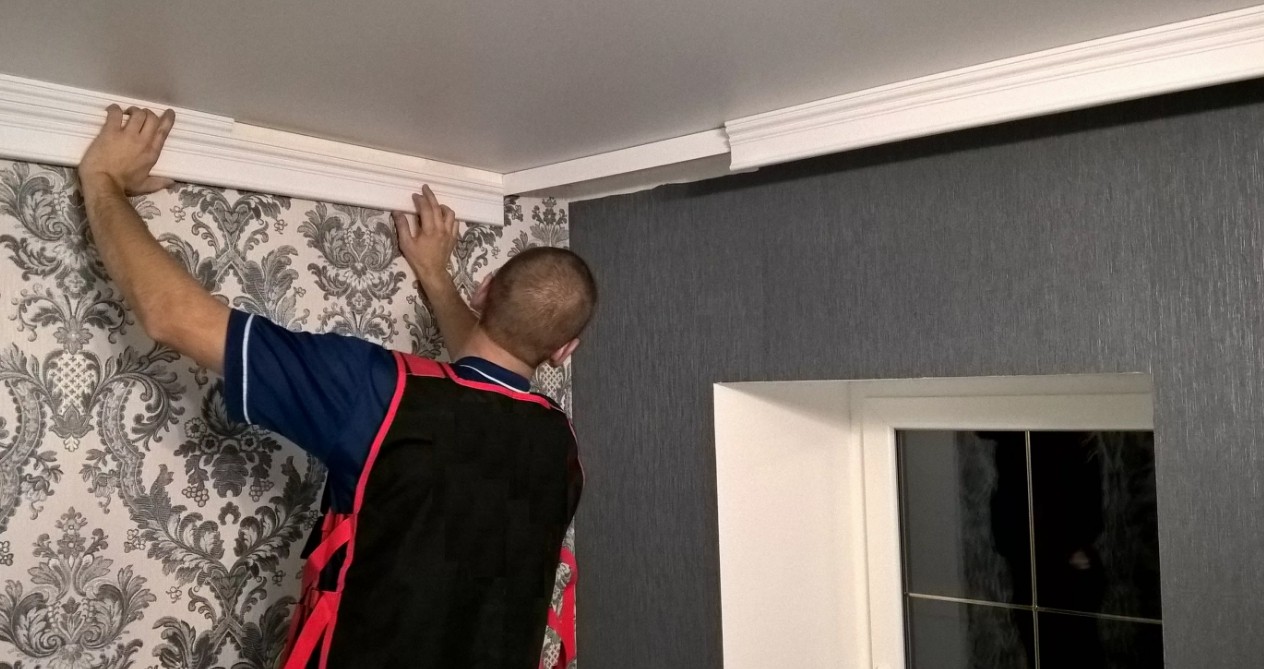
The last stage of the work is the embedding of a ledge for curtains and decorative inserts. Masking the gap, which can be formed between the wall panels and stretched canvases, is using a plinth for the ceiling. It will ideally look in rooms with any layout. It is necessary to fix the plinth only along the walls of the room, and not towards the stretched canvases, otherwise screeds may form on the fabric, which are unpleasant to the eye.
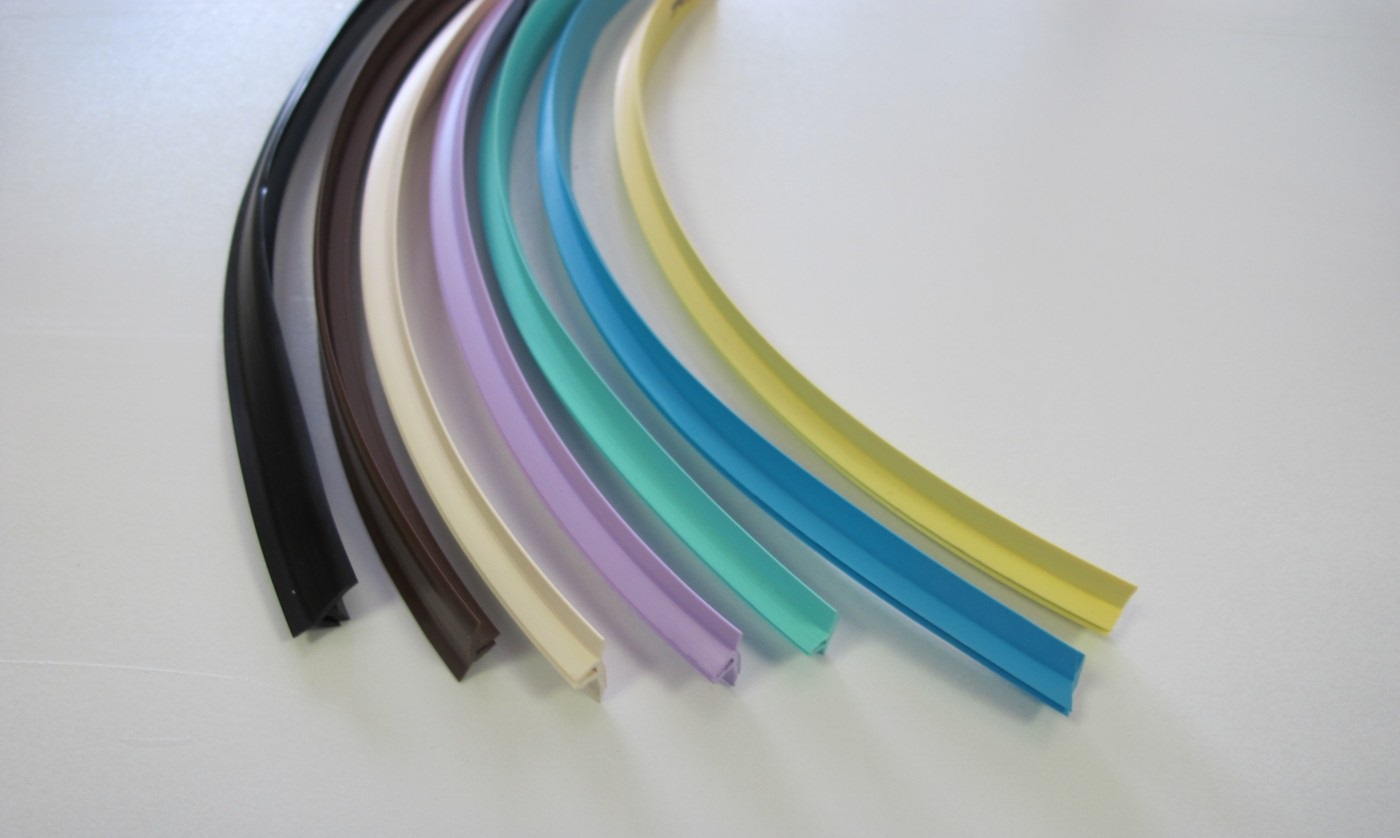
In addition to the plinth, a flexible tape is glued to the ceiling to mask the seams. This device can be simply inserted and removed from the slot. Also, masking tapes have a large number of color options, so they can satisfy anyone, even the most captious person. Additionally, you can insert the cornice on the wooden bar prepared in advance, hang the curtains and enjoy your own achievements.
At this point, the installation of stretch canvases with their hands ended.
Frequently asked questions
Are ceilings installed before wallpapering or after? This problem has an optimal solution - it is best to carry out joint rough work on both wallpaper sticking and ceiling tensioning.
This work is divided into several stages:
- Elimination of previous finishing materials;
- Surface treatment of the ceiling and walls with a mixture that prevents the appearance of fungus;
- Sealing cracks, holes and other damage;
- Leveling the surface with plaster;

- Implementation of simultaneous measurements for the future stretched ceiling, as well as the calculation of the required number of rolls of wallpaper for gluing in the room;
- Attaching baguettes to the bases of the future stretched ceiling, mounting the structure made of metal, laying sound insulation;
- When the walls are completely dry, you should stick the wallpaper. The edges that are under the baguettes, before installing the tension fabric, it is better to cut off with a stationery knife, so that you can’t accidentally ruin it. Walls after gluing must be left to dry completely;
- Implementation directly mounting tension structure.Installation of lamps, after which a canvas is attached to a pre-fabricated structure.
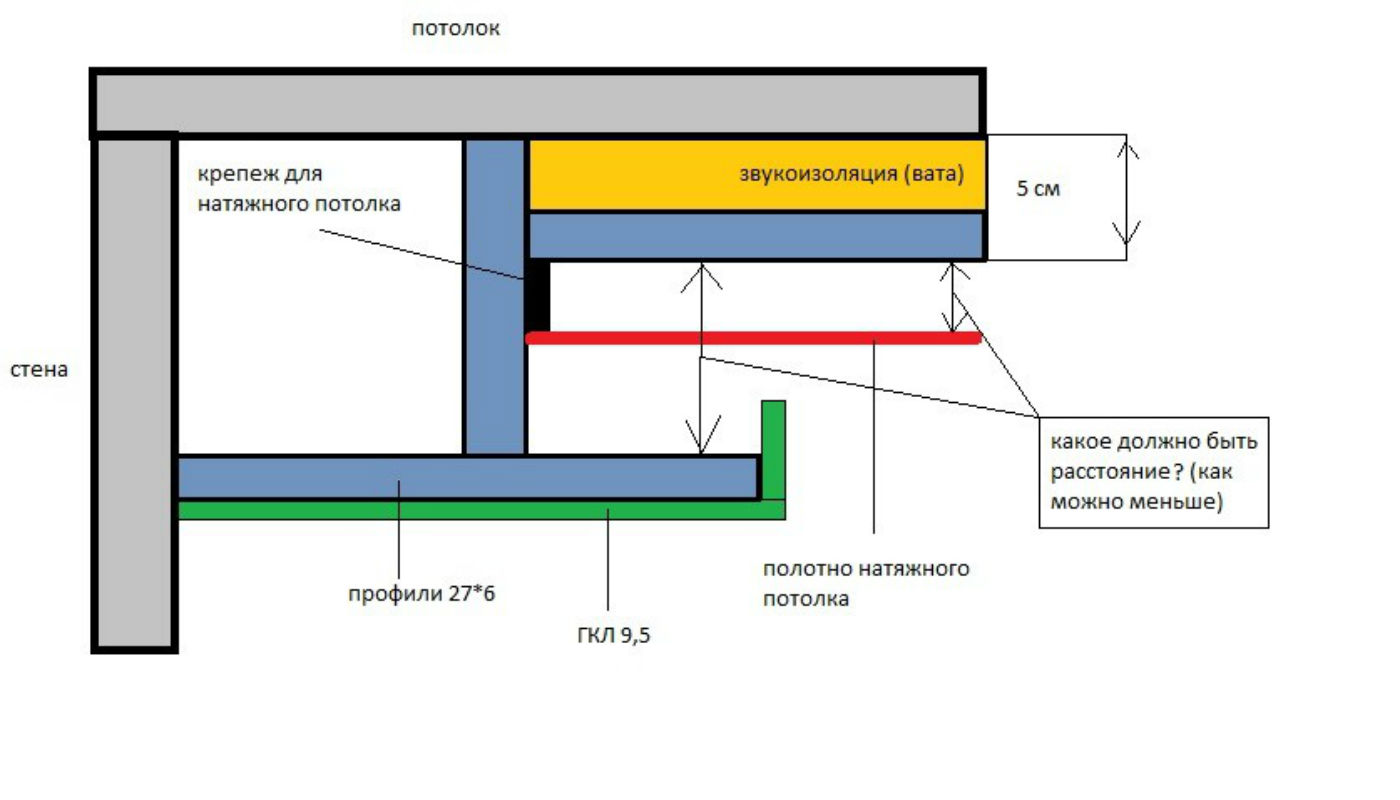
What should be the minimum distance? There is no definite answer to the question of how far the tensioning system should fall. In this problem, you need to take into account many points, as well as pay attention to a number of aspects during work planning. In theory, the distance between the canvas and the ceiling itself — the distance from the initial surface of the ceiling to the tensioned canvases — tends to vary from 2 to 30 cm.
Some reasons influence the change in the size of this gap:
- difference of the heights which are available in overlappings;
- location and form of communications on the ceiling of the room;
- the structure and types of light bulbs;
- in a suspension system, its structure and shape are important.
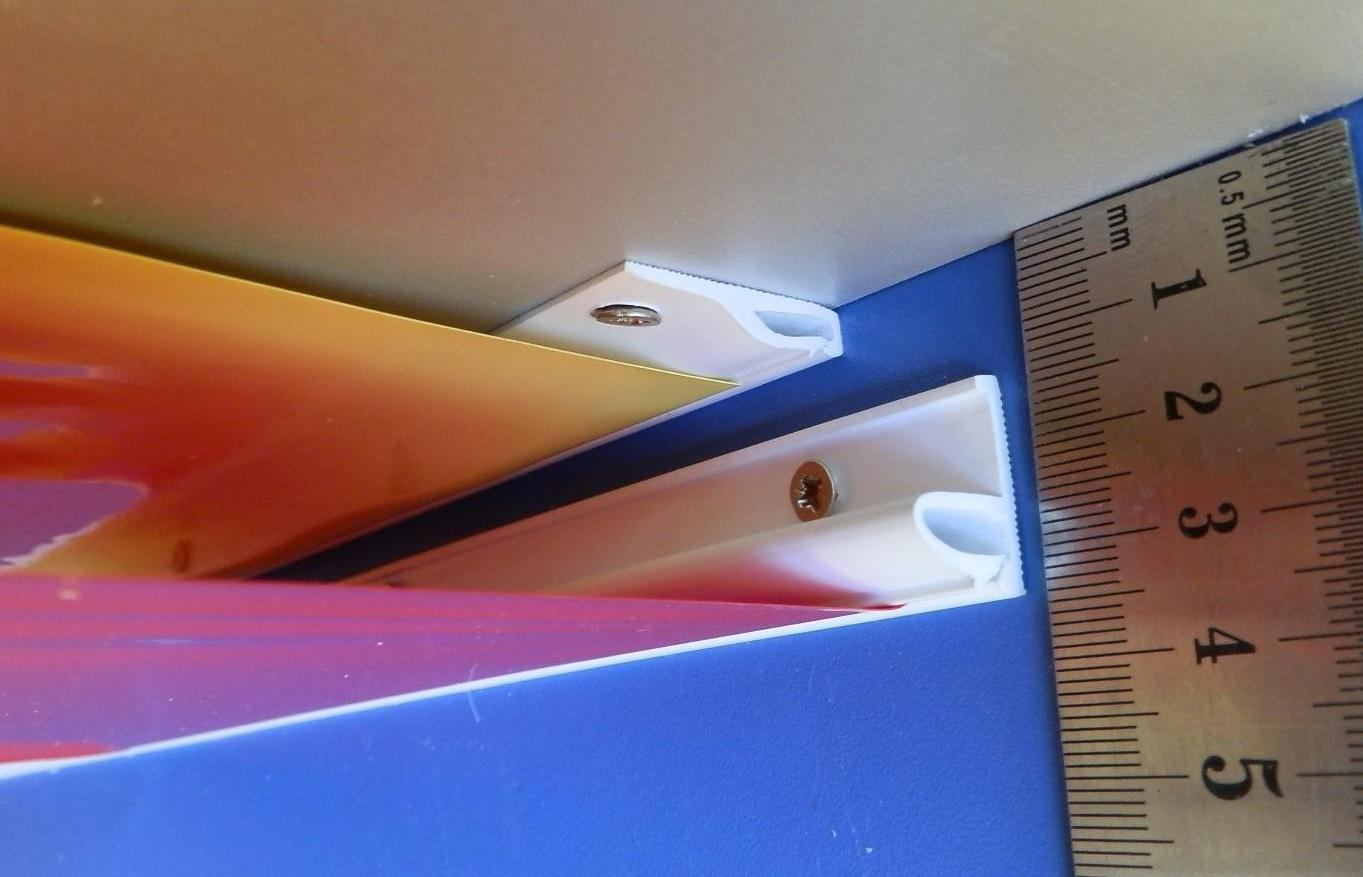
However, to install a simple single-tier ceiling, everything can be easily calculated. Using a level, it is necessary to determine a point on the ceiling surface, which is at the bottom of the proposed structure, and move down a few centimeters from it, for example, 5 or 10. But it is important to remember that the minimum distance from the point should be 3.5 cm.Since this value is the width of the mounting profile, it is to him fix the entire ceiling structure.
How long will it take to install? It all depends on how professional the person involved in this work is. But if a person does not have skills on this subject, then, observing the technology, it is possible to easily and fairly quickly deal with the device for tensioning canvases.
In addition, there is a universal formula for calculating the time spent on the installation of paintings. For example, if the ceilings without built-in lights, then on the canvas in 20 square meters. m will take about 3-4 hours. However, if it is planned to embed a spotlight in the ceiling, then it will take 1-2 hours more for the same meters.
What is better to fix to the wall of plasterboard? Before fixing the stretch ceilings to the wall of plasterboard, you need to follow some rules: check the reliability and quality of the wall of plasterboard, and how well it rests on the main wall, especially at the top around the perimeter of the room. Plasterboard surface should not have any deflections, cracks, delaminations and make rattles. Only after such a test is it worth starting the installation of a stretch ceiling.At that moment, when the sheets are mounted on drywall, only expansion or anchors made of plastic or metal are used.
How to make a hole in the stretch ceiling? In the suspended ceiling there are many features. One of these properties is the difference in how to make holes in the canvas. And it follows from the purpose of the hole.

If you need to make a hole for the pipe, you must do the following:
- take a plastic about 2 mm thick and make a rectangle slightly larger than the diameter of the hole;
- in the middle make a hole with a diameter of 7 mm, preferably with a margin;
- stretch the canvas throughout the room, but do not drag it to the pipe;
- cut in the center of the pipe and fill the profile;
- cut a piece of material to mask the circle;
- hide the edges behind the canvas.

The process of creating holes for lighting devices is slightly different:
- markup;
- paste exactly on this markup mortgages;
- adjust rings on suspensions;
- conduct the wiring to the hole, but before that test the health of light bulbs;
- stretch the cloth and touch the point;
- grease with soft plastic rings and hang them in places where there are marks;
- install light sources.
Spectacular examples for inspiration
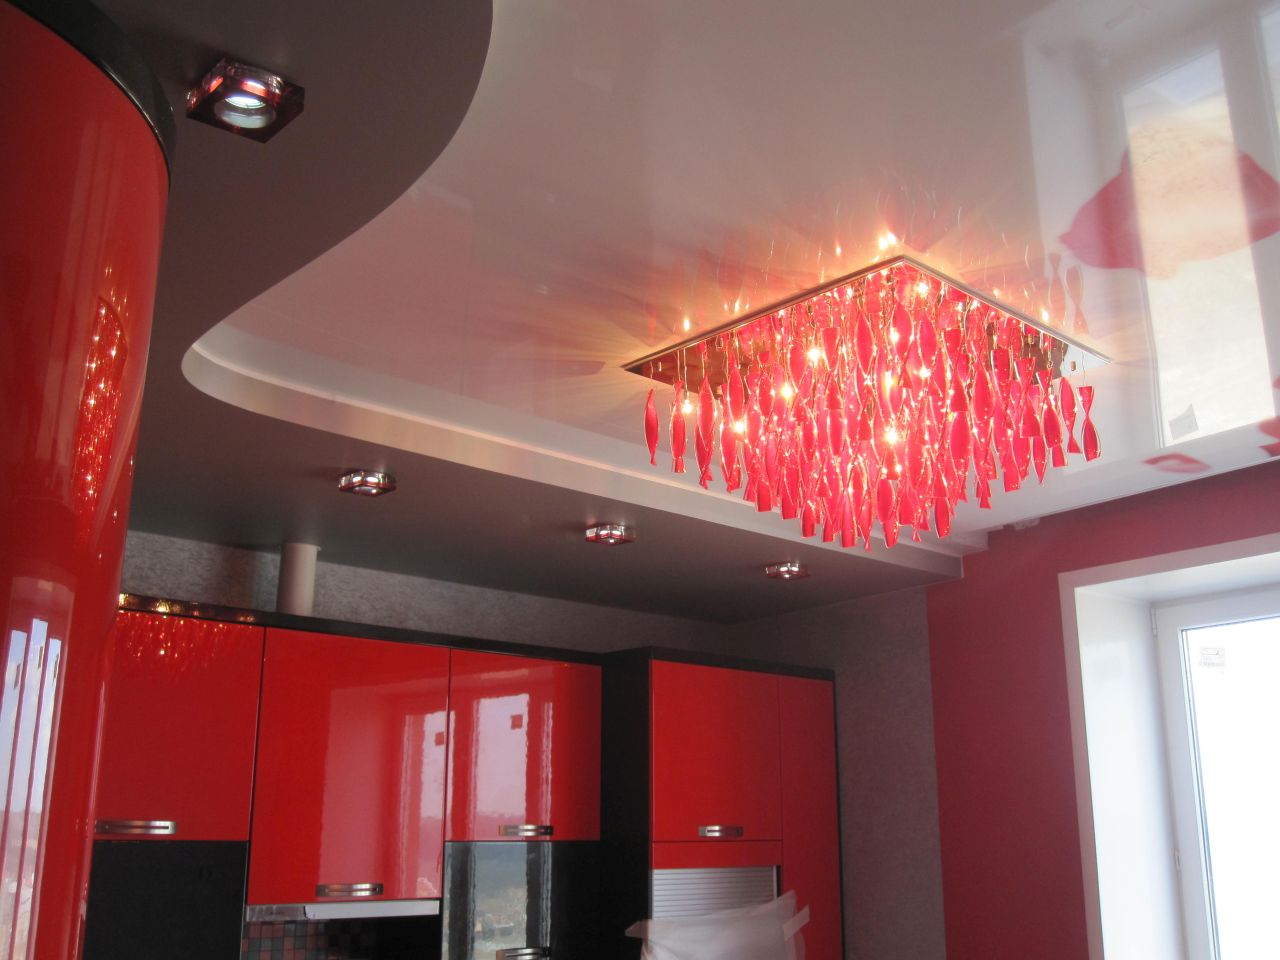
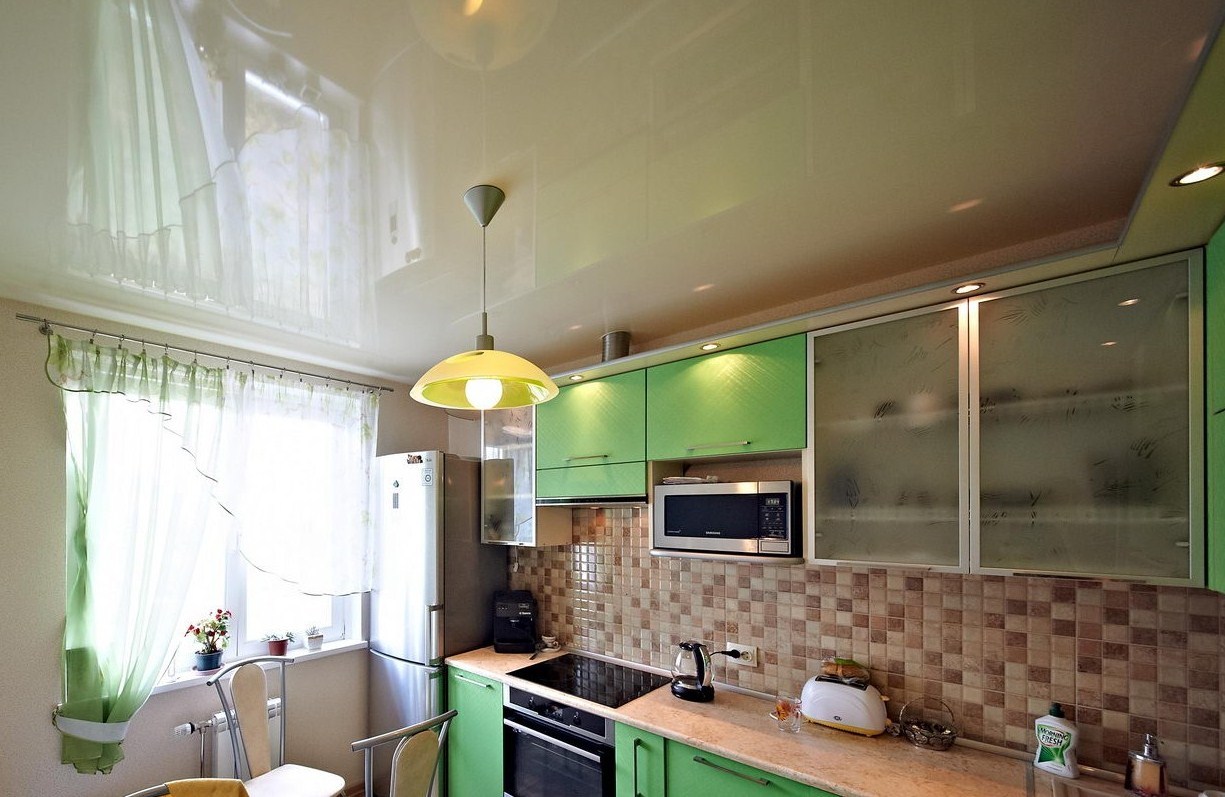
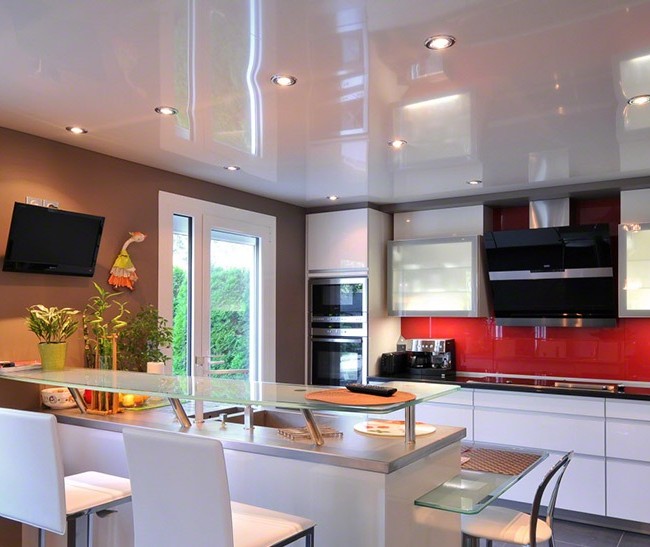
- Glossy canvas with spotlights harmoniously fits into the design of the kitchen, creating an atmosphere of cleanliness and comfort.
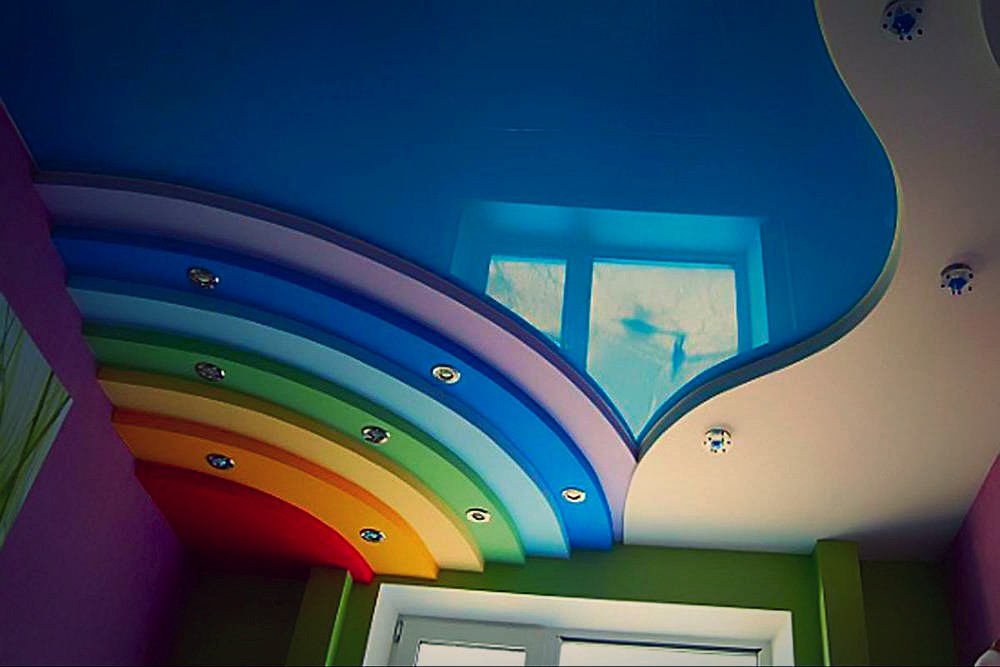
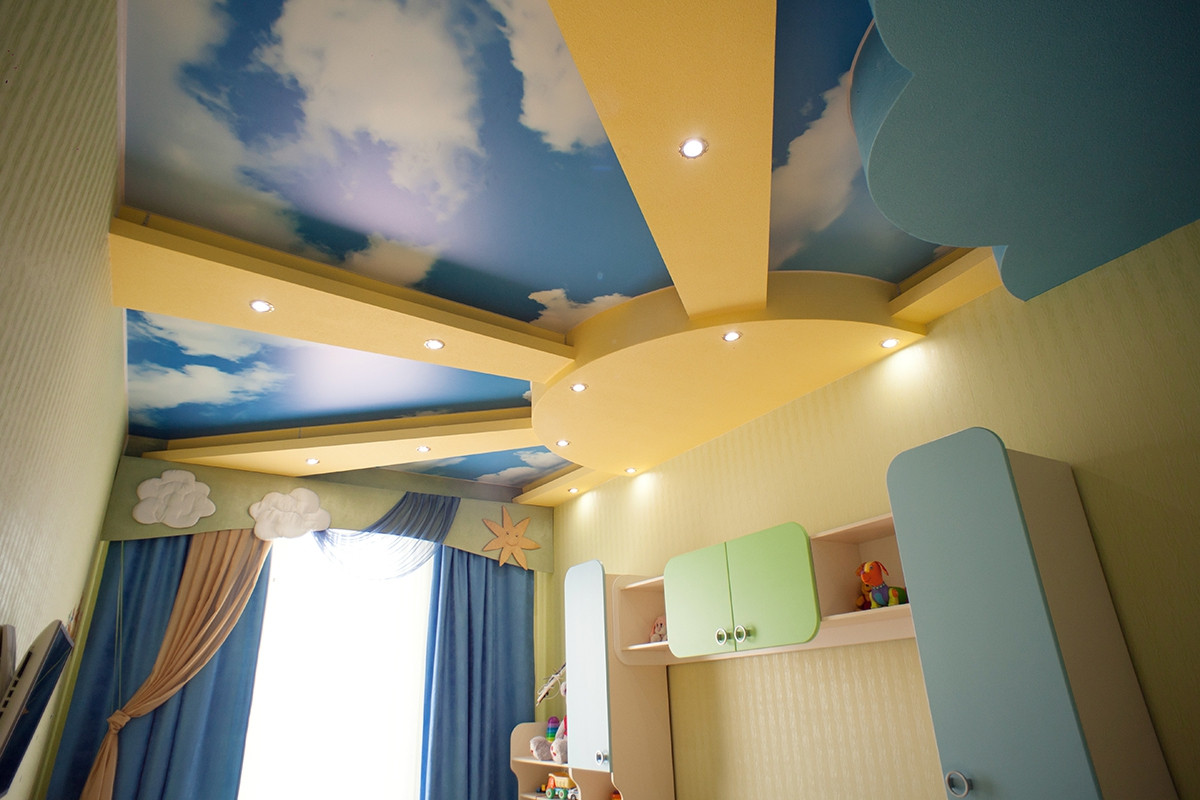
- The children's room, decorated in yellow and blue colors, gives the child a summer mood, and the bright sun on the stretch ceiling adds a breath of fresh air.
How to install a suspended ceiling with your own hands, see the following video.


