Rules for the installation and repair of toilet cistern
The tank is a cumulative tank, where fluid is collected, in order to flush out unnecessary substances from the toilet bowl vessel to the sewer system at the required moment. The biggest problem with the design of the toilet bowl is the breakdown of the device, which is called the trigger tank.

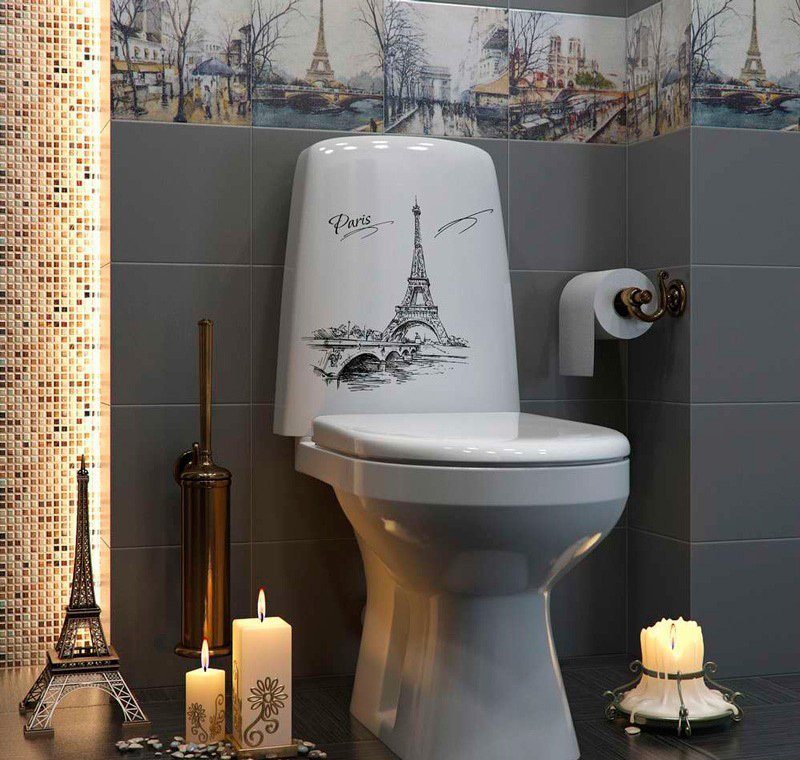
The structure of the toilet
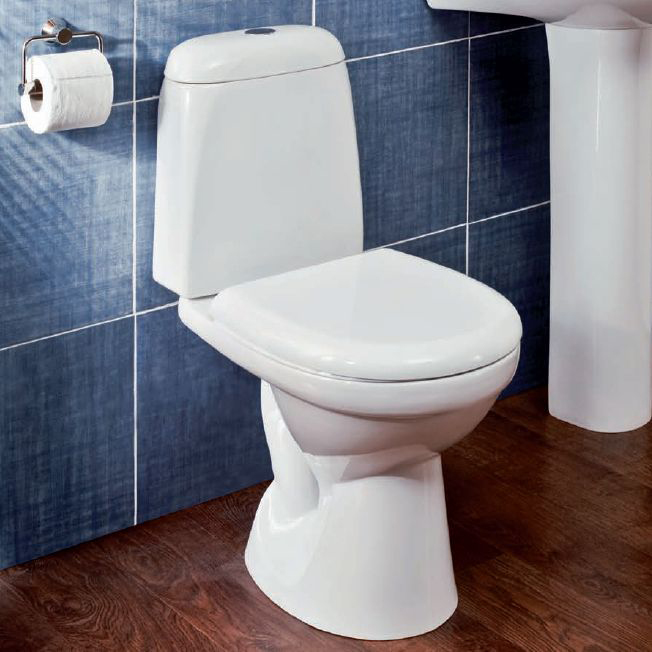
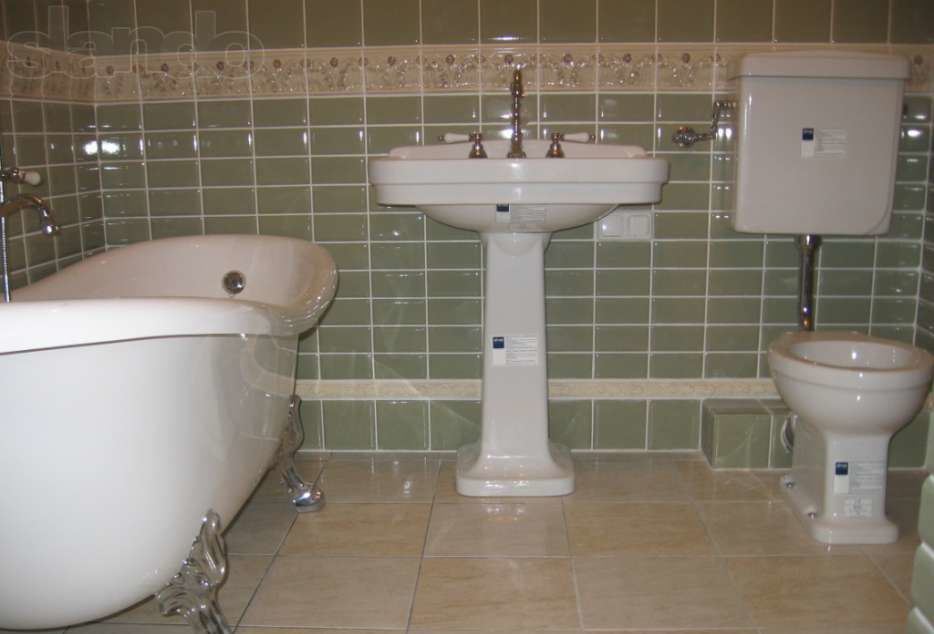
As a rule, the toilet consists of two main parts: the drain bowl and the drain tank. The latter has a device for draining water, it can be a button, a rope or a chain, a pedal or a lever. In the bowl itself, there is nothing special, except for the device of the partition from below. It blocks the return path to sewage. This occurs because of the water vortex in the drain moment.
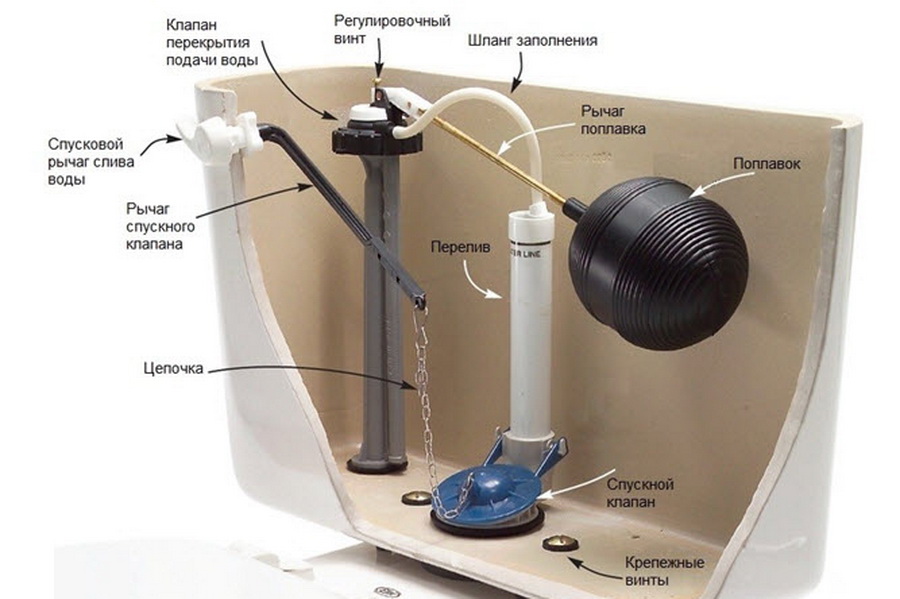
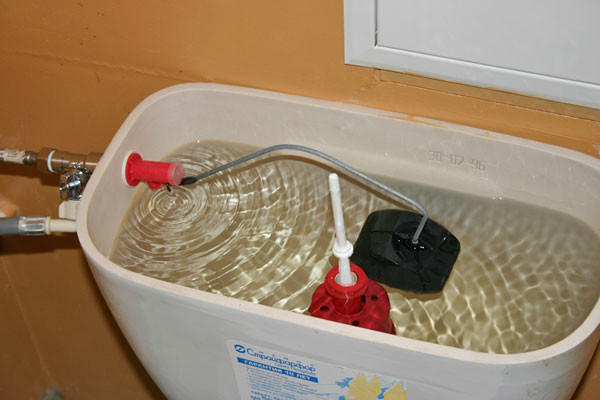
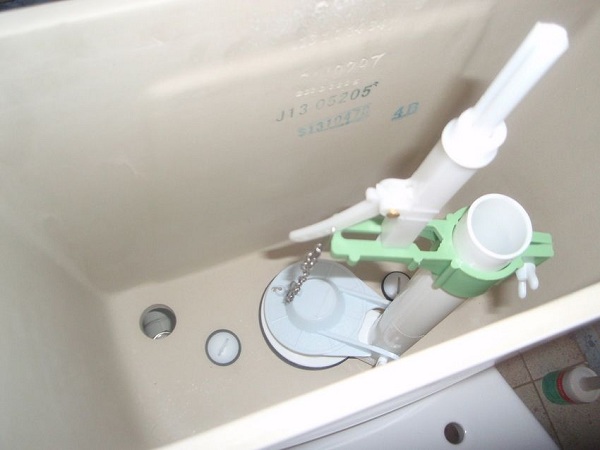
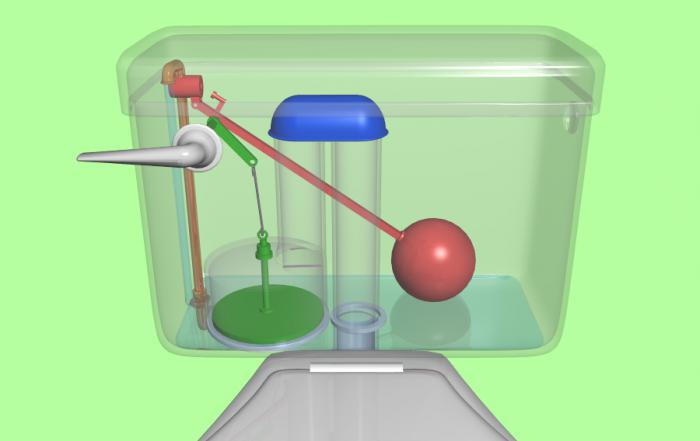
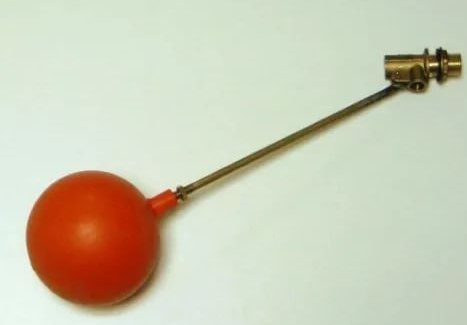
The most difficult is the insides of the tank. They are equipped with a float that falls when water is drained. When it reaches the very bottom, the valve mechanism is activated and the descent of the fluid is blocked, it is recruited. In order to avoid tank overflow, there is also a valve on top, similar to the first one. When the water reaches it, it stops gathering.
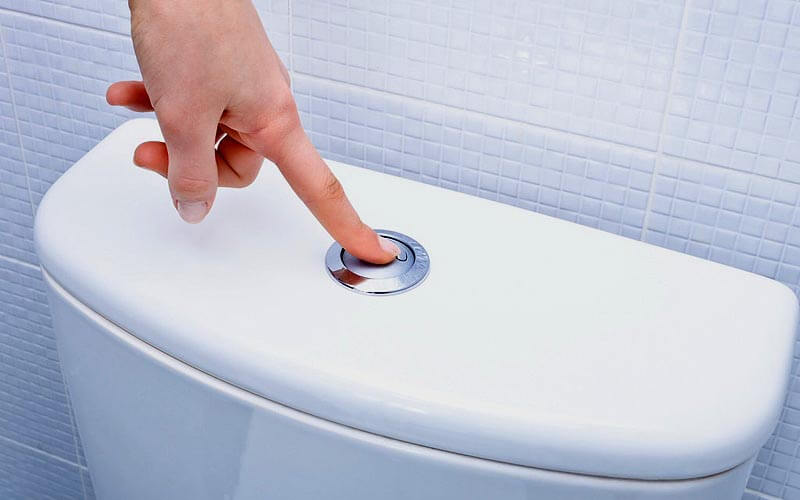
The toilet cistern is designed in such a way that it works well if it has the toilet inlet valve set correctly. For the flush tank it is quite important.
Installation
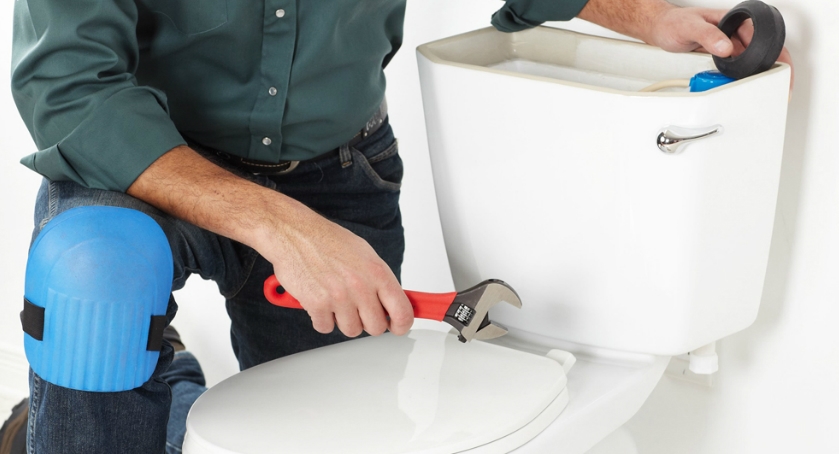
To make the installation of the toilet necessary tools and equipment.
Equipment
Before you figure out how to install a toilet tank to the toilet, you need to acquire the necessary equipment. Choose it by the following parameters:
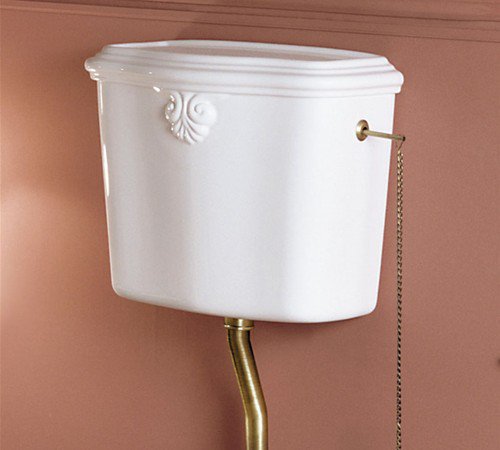
By fastening the tank. Can be merged with the bowl, hung on the wall or installed hidden.


On the water supply to the tank. The supply may be at the back, side or bottom. Side most common supply. Bottom liner allows you to neatly revet the pipe, but makes it difficult to install. Rear feed is almost never used.
By type of fittings. There is equipment with a lever, a button.The latter type is used most often, it helps to save water consumption.
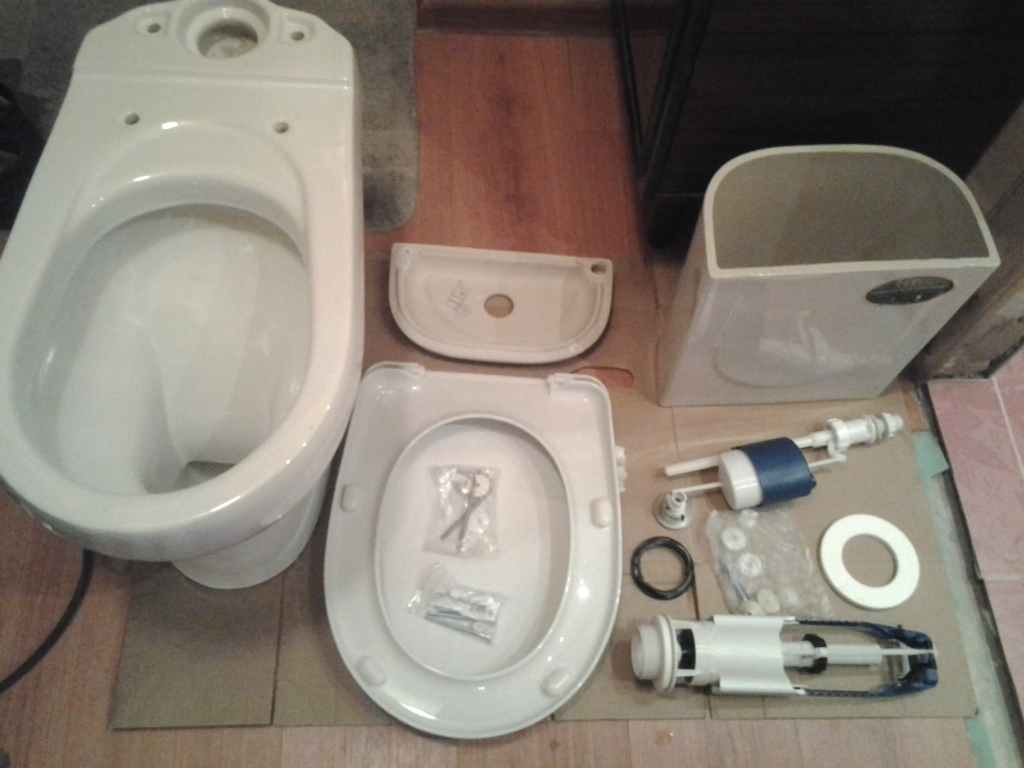
Also for installation will need:
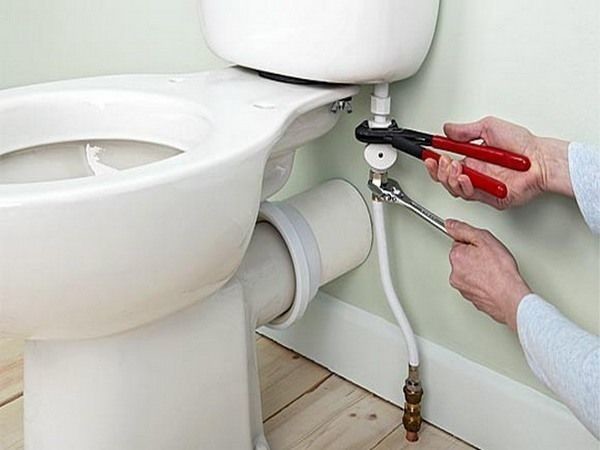
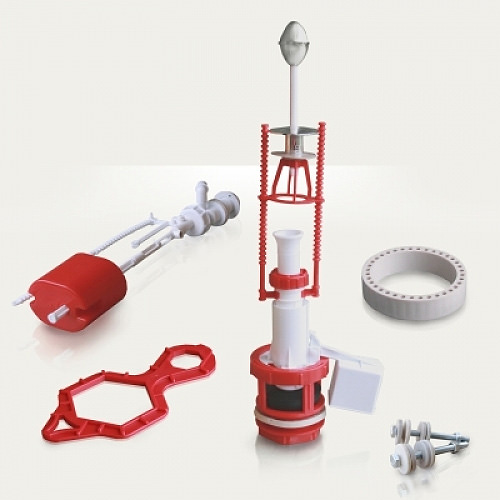
- the locking mechanism is mounted on the water supply system; it can be used to shut off the water entering the tank from the common water supply network;
- eyeliner - connects to the inlet, can be steel, copper or rubber;
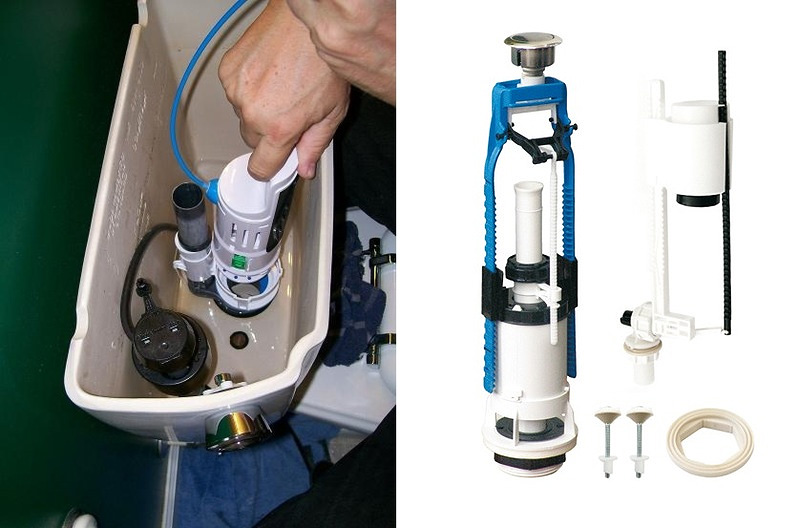
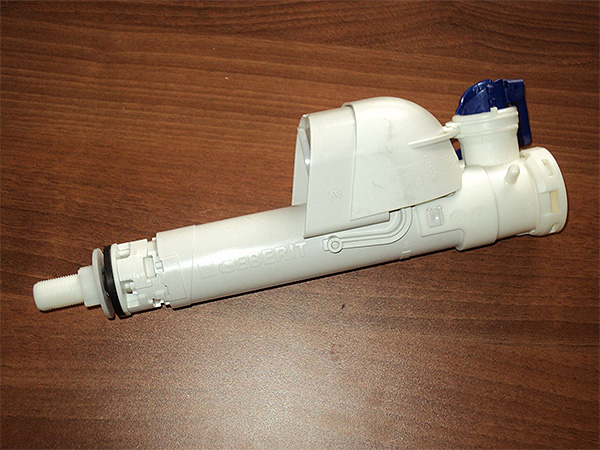
- drain mechanism - mounted inside the tank to regulate the drain and set water;
- sealing tape - used for sealing joints.

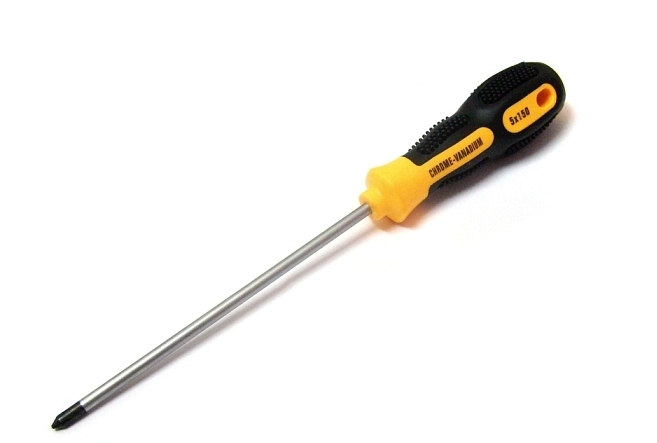
Instruments
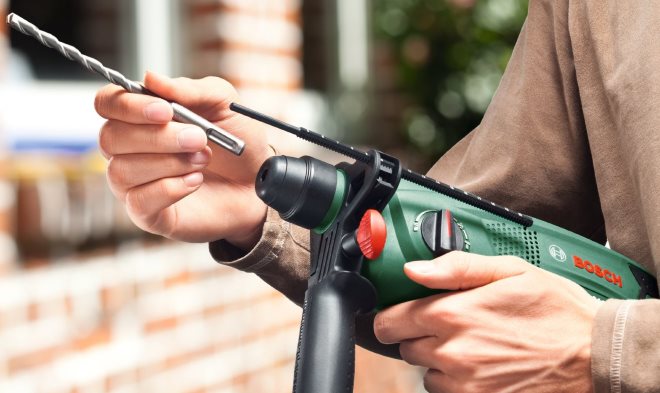
- drill and drill bits (one for ceramics, second for concrete);
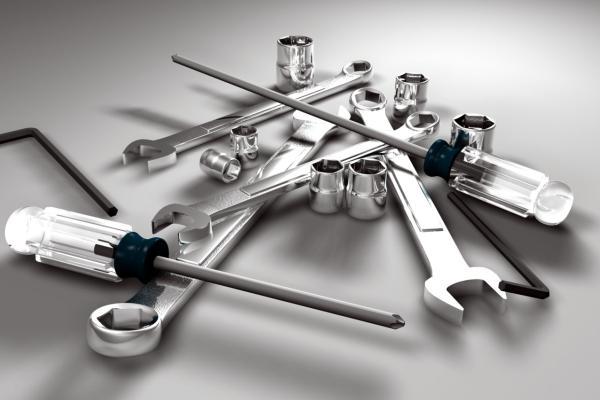
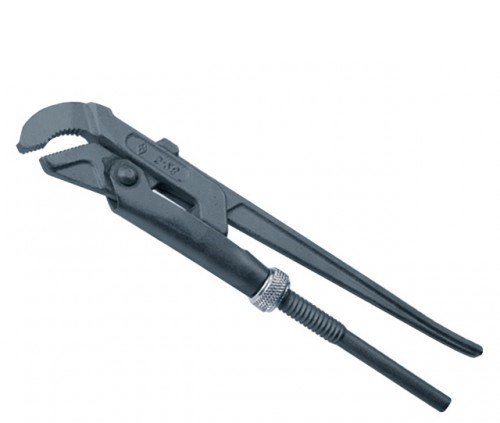
- spanner for connecting plumbing;
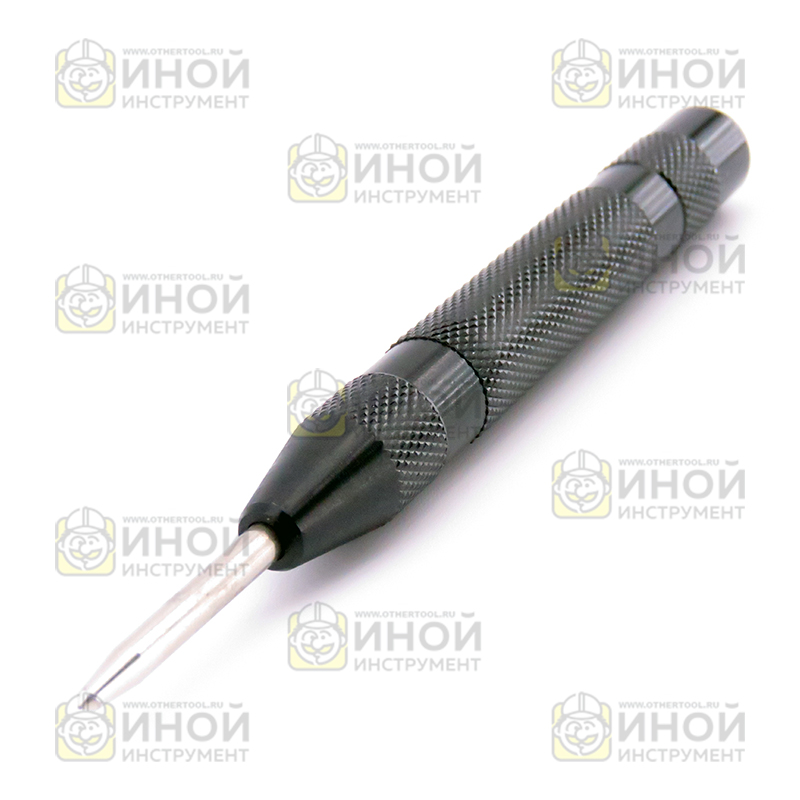
- core, for drilling marks, in order to avoid a drill slip on the plane;
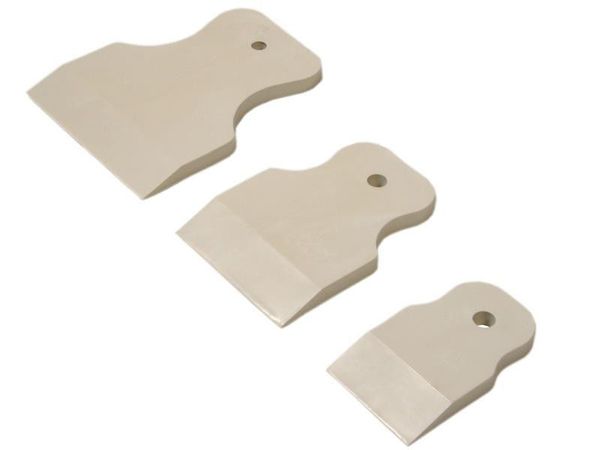
- rubber spatula to remove sealant residue;
- pencil for marking.

How to install?
The type of equipment depends on its installation. There are three main ways:
First way
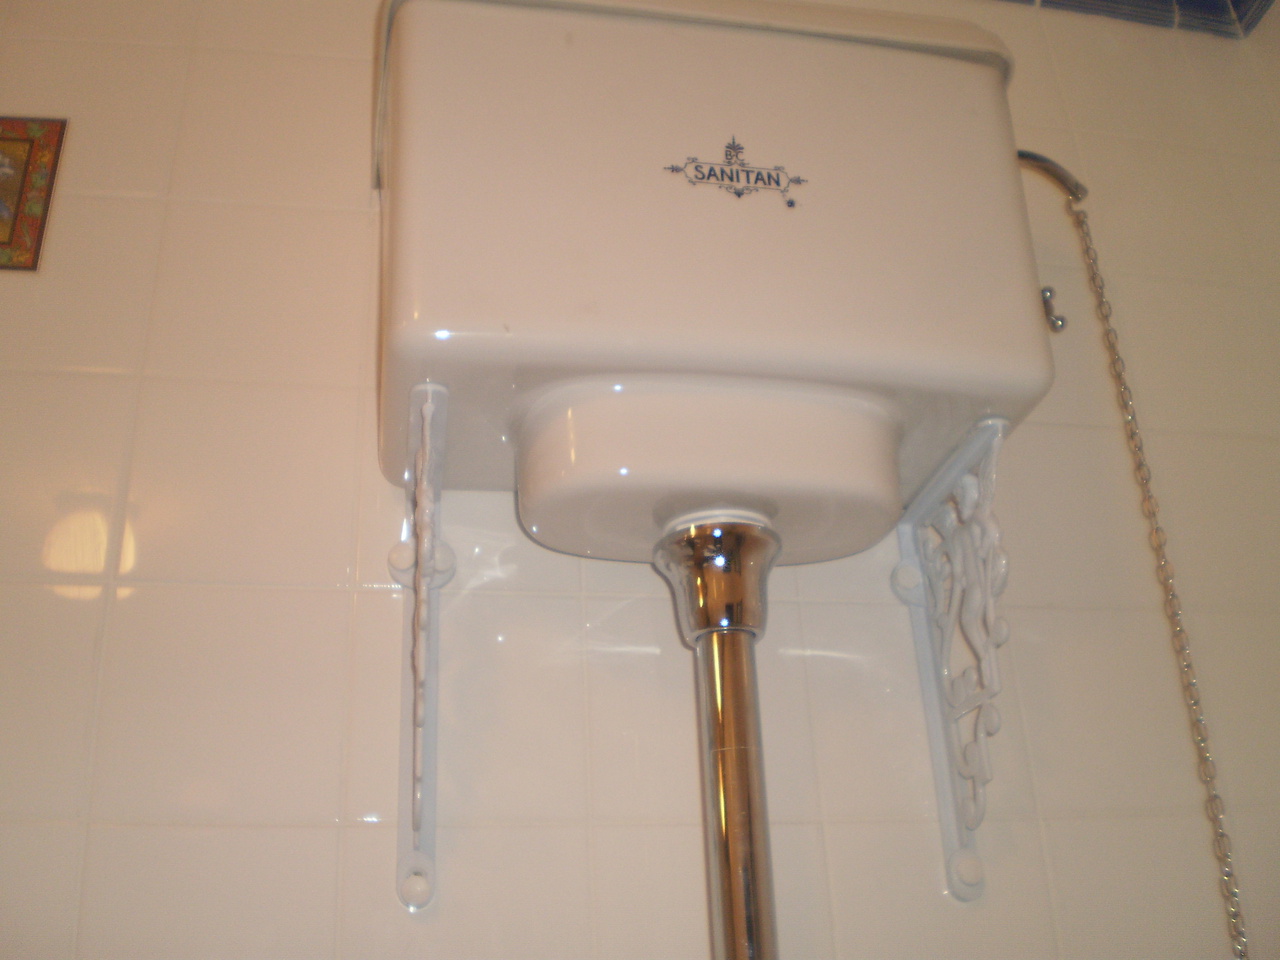
Placement of a cistern is rarely used, but you still need to know about it.
Produced fasteners as follows:
- The drain pipe is attached to the bottom of the container to the hole provided for this.

- Then markup is made. The tank is positioned so that the lower part of the pipe is at the level of the inlet pipe of the toilet bowl itself. After that, the marking is made on the surface of the wall.
- Holes for brackets are drilled. For this it is better to use a punch. Drills need to pick the appropriate diameter, suitable for the size of the mounting bolts.
- Then install the brackets and the water tank on them.

Second way
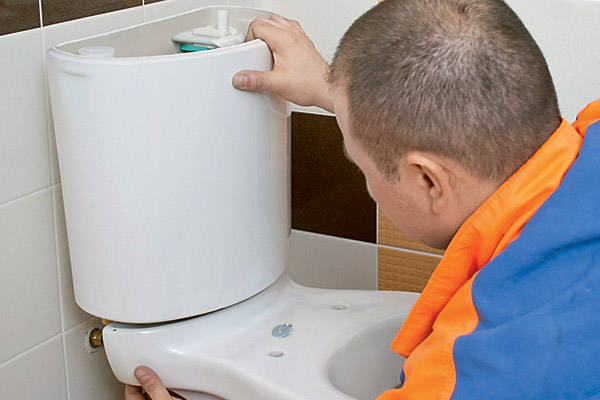
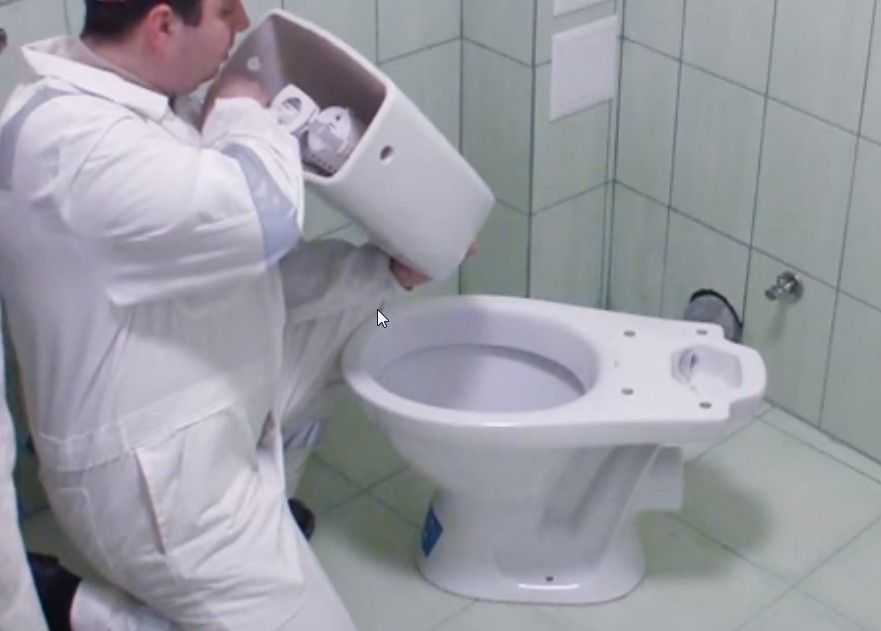
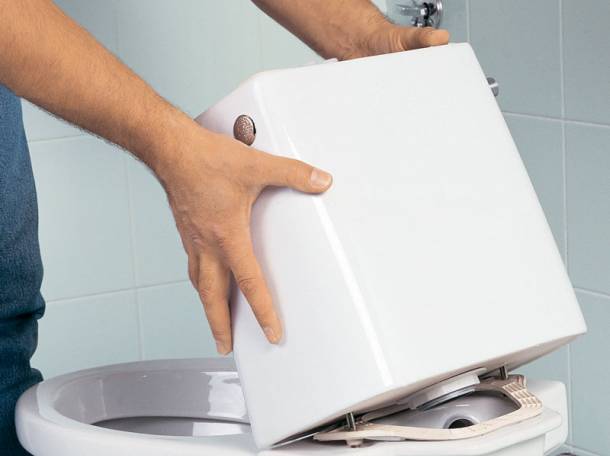
Here the tank is installed directly to the drain bowl.
A sealing gasket is installed on the toilet bowl capacity. The glue structure applied on it will serve as its fixer. If the composition is absent, you need to separately purchase a sealant and fix the gasket on it. It is necessary to coat it on both sides, as the tank will be installed on the second side.
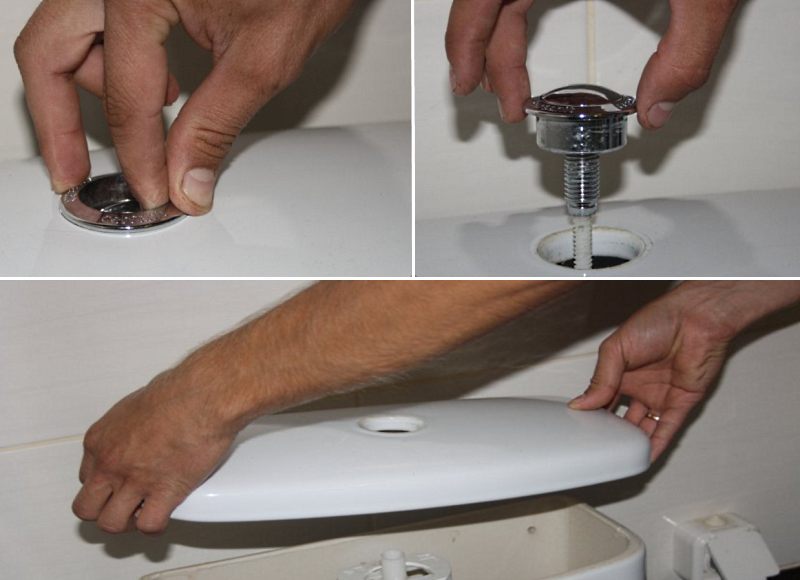
To install the tank on the bowl used bolts with rubber cones for sealing. After inserting them into the holes provided, it is necessary to tighten them with nuts at the bottom, and you should not overtighten them, otherwise damage to ceramic products cannot be avoided.
All other openings are jammed with special rubber plugs, lubricated with a sealant.
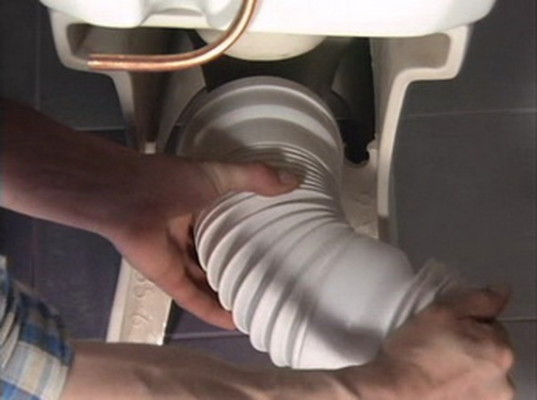
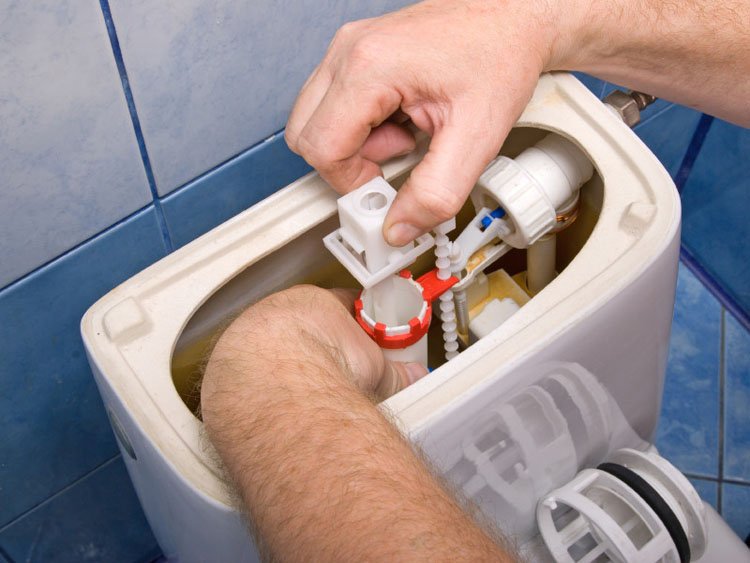
Next, install all internal fittings and supply water. But before that you need to make sure that all seals are installed where necessary. The sealing tape is wound on the threaded parts.
The final stage is to conduct a test: open the tap, shutting off the water supply. Fluid level adjust float. Before these works let the sealant dry for two hours, and only then collect the water.

Third way
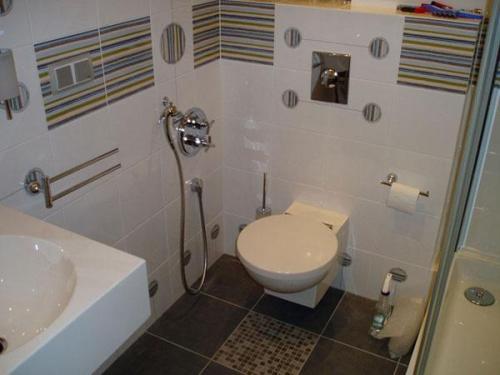
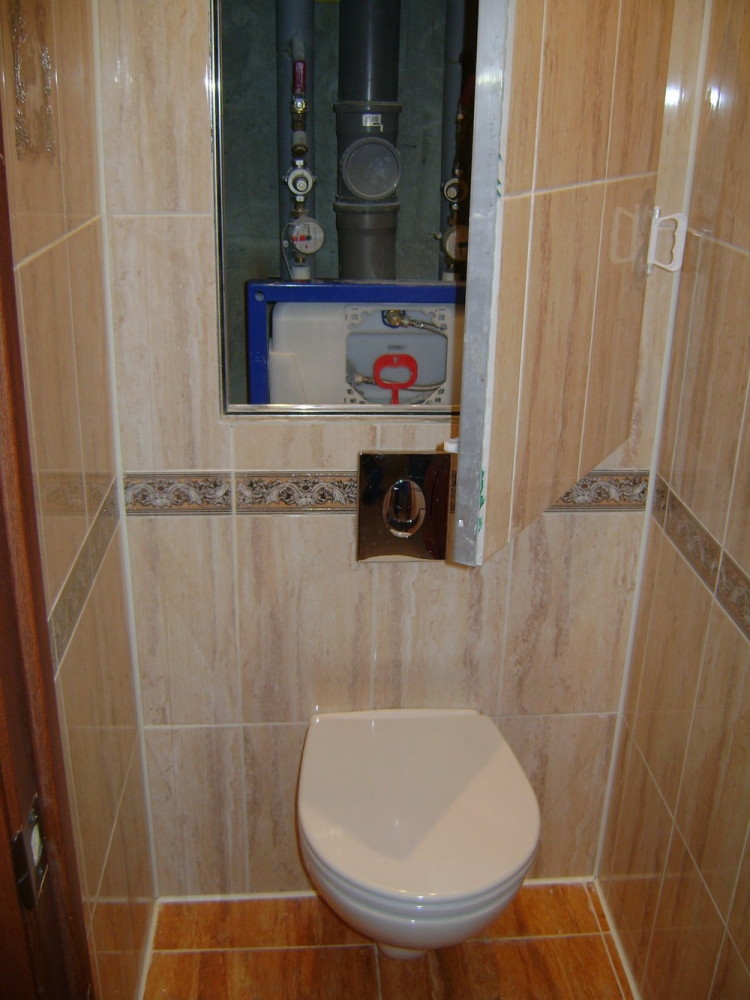
The hidden type of equipment saves a lot of space in the restroom, and the construction is protected from damage.
This type is different from other models:
- their thick walls are made of durable materials;
- in shape they are tall and wide, in order not to make a deep niche in the wall;
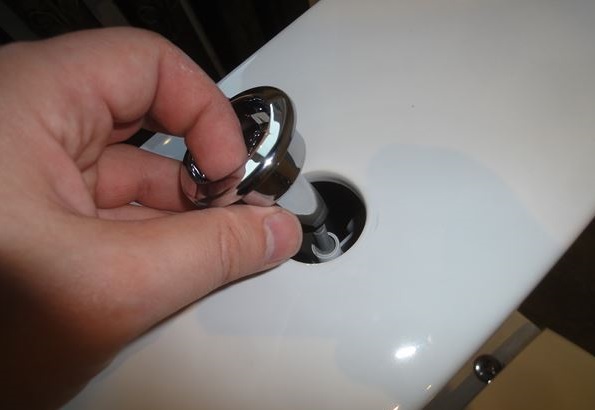
- the drain button is located in front of the tank.
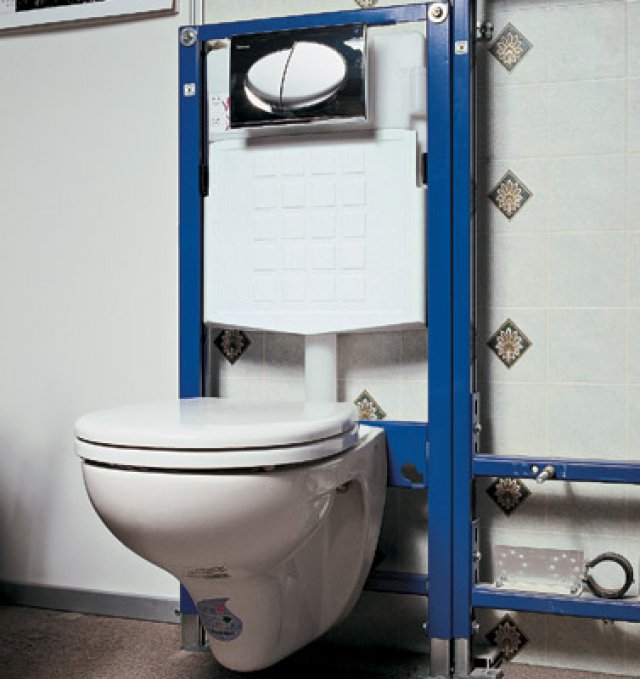
Installation is also done in a special way:
- A metal frame is mounted in the place prepared for installation, for fastening all the equipment. At the same time, it is necessary to strictly observe the horizontal and vertical level of the structure.
- The tank is mounted on the frame, and the water supply is connected. For the supply it is desirable to use reliable tubes. Since after finishing the repair work will be difficult.
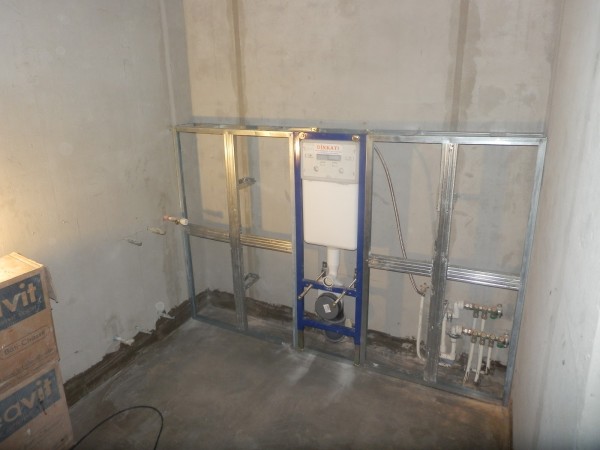
- Connect the supply pipe through the locking mechanism.
- After starting work on the sewage system, the metal frame should be finished with waterproof gypsum plasterboard,from above to revet with finishing material.
- Set the drain button. It is advisable to make a separate drain, which will help to save water.


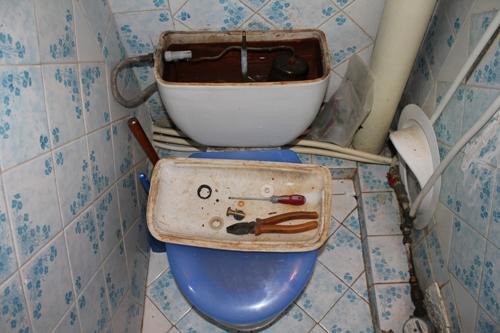
Repair work
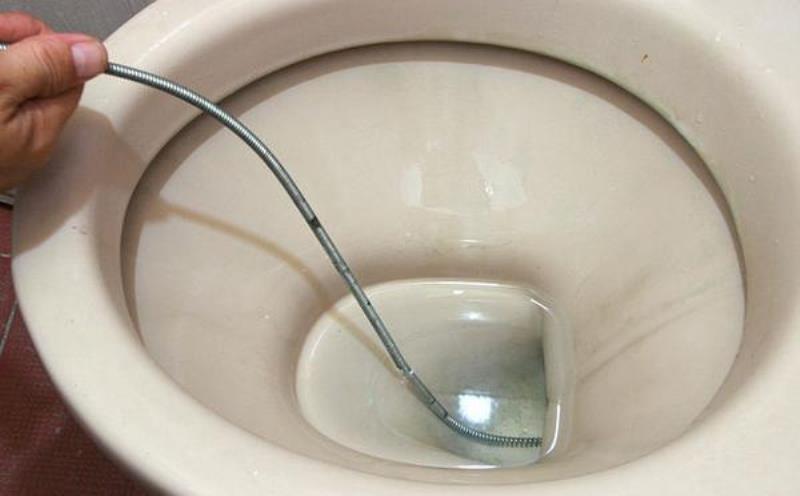
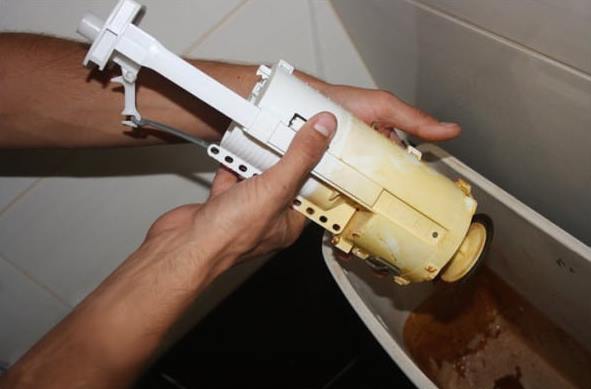
No matter how strong the construction of the toilet, but sooner or later, any in need of repair. Mostly any part of the tank fittings fails. Often the diaphragm is made of rubber material, and a leak is formed as a result. In this case, it is necessary to dismantle the siphon and change the worn part. If the diaphragm is clogged, you can simply clean it. In any case, you must turn off the access of water and remove the drain tank.
Incorrect fluid intake into the container may be due to the curved position of the float. To fix this, open the tank lid and adjust this assembly so that the seal is tight to the drain hole. There is nothing complicated in this and such an action does not require a special tool. It is only necessary to determine the correct location of the float by bending its mounting. You can adjust so that the drain will occur when the tank is incomplete, thereby saving water.

It turns out that any repair of the drain tank is associated with its disassembly and removal of the upper part of the drain tank. In order to remove the lid of the tank you need to familiarize yourself with its design, and understand the mechanism of its work. Professional advice and repair instructions will also make troubleshooting much easier. The principle of operation of all models of toilet bowls is the same, so it is enough to study any one to avoid mistakes during the repair.
Open double tank
To open the top of the old-style toilet bowl, you first need to prepare the necessary fixtures for this.
The main list of them is as follows:
- tubular wrench;
- lever amplifier for the key, for highly tightened fasteners;
- pliers;
- screwdriver.


Experts advise you to find the most illuminated place for repairs so that you can see all the details.
When unscrewing the nuts from the earthenware equipment, you must be extremely careful not to damage the fragile body. Screw the supply tap in advance to prevent flooding. If the faucet is rusted, it is best to ask for help in replacing the professionals.Attempting to open the valve yourself may result in breakage.
Having made sure that the valve is overlapped, all the water from the tank should be drained. Now you can proceed to removing the cover. There are variations of the toilet lid with one and two buttons, the removal of the top of the container of these types are slightly different from each other.
Take off
Before work it is necessary to prepare all fittings and adapters, as well as other tools. At this stage, the shelf must also be removed.
Before removing the top of the toilet on the model with one button, you must rotate the ring located around the drain button. If this fails, you can resort to using pliers, but do it through some matter. In order not to scratch the ring. As soon as it moves from its place, continue unscrewing. This procedure must be performed in the opposite direction of the clockwise, otherwise the thread will be tightened even more, and you can completely tear it off. Having unscrewed, in order not to damage the appearance of the container, a round element, you can begin work on removing the top of the tank.

The mechanism is attached to the button with a special clip with peculiar hooks on both sides. Therefore, it is necessary to slightly raise and turn the lid ninety degrees. So you can get to the latches. Everything should be done carefully, so as not to break something accidentally.
Then, taking hold of both sides of the clothespin, unwind the mechanism, rotating it in opposite directions. A special click will make it clear that the fastener is released and you can safely remove the upper part of the tank.
The cover on the model with two buttons is removed by another method. First you need to press one of the buttons. On the side of the other key is a small depression. If you catch it with a screwdriver, you can reach the key case. The same procedure with the first button. There will be an open access to the mount with slots, fixing the cover. Carefully, without damaging the thread, you need to unscrew the screw.
Just as in the case of a single-button version, we rotate the upper part ninety degrees. Clothespin also spins in the same way. After the characteristic sound, remove the cover.
Knowing how to remove the upper part of the cistern of the toilet bowl, you can do repair work. You also need to remember that the described methods of removing the top of the tank are suitable for products with lateral water supply.In other cases, it is necessary to carefully inspect the cover, possibly the existence of auxiliary mounts. If any, you need to dismantle them.
Fluid triggering system also has its own characteristics in different versions. In some cases, it is unscrewed, and there are models where the upper part rises, inside there is a fastening screw.
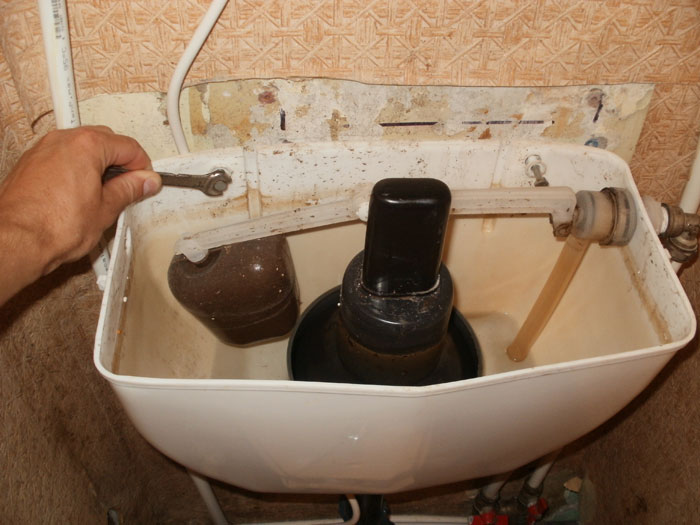
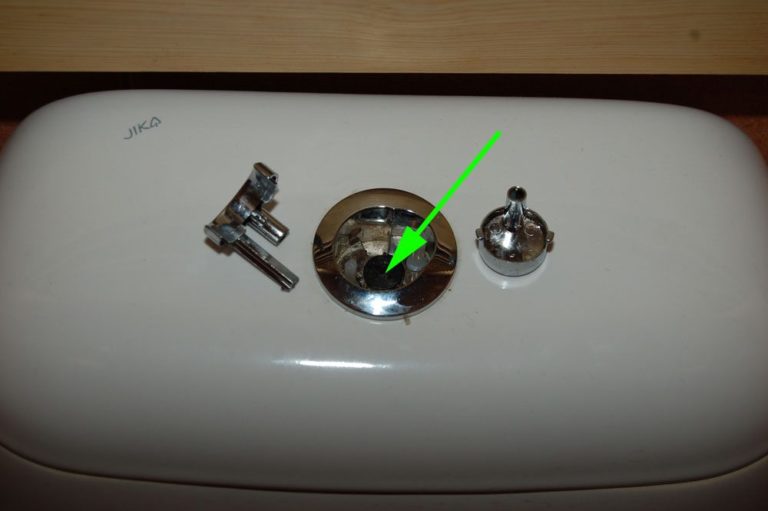
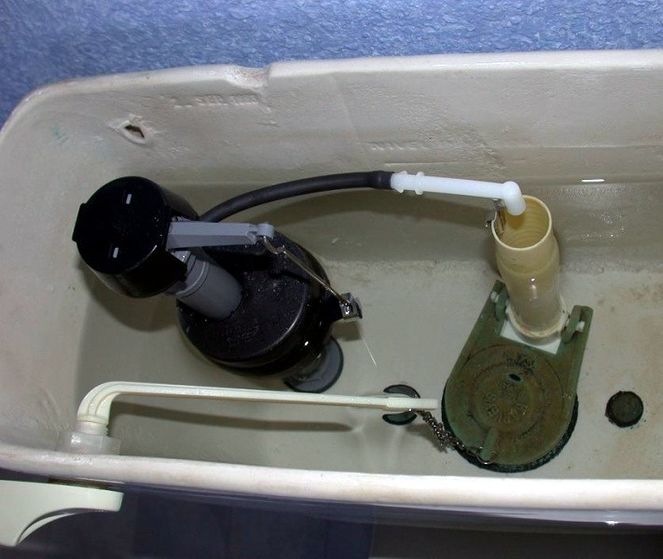
To repair some faults, it is not enough just to remove the cover. If there is a need to dismantle the valve supplying fluid to the tank, you need to provide access to it. In order to produce this, it is necessary to unscrew the nuts fastening it; they are located on the liquid supply pipe. In many models, it fits the side of the tank. This can be done with a tubular key and pliers.
The drain knot is removed by carefully unscrewing it. Since most of the elements of the tank are plastic, you should not use great effort when working with them. Having unscrewed the assembly, it is necessary to remove it and remove the seals securing the mechanism to the container.
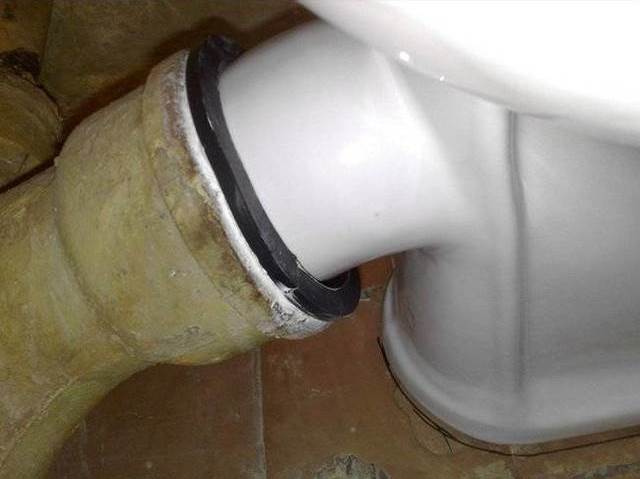
If there is a need to remove the tank completely, you need to unscrew it from the drain bowl and remove the rubber seal.
One of the most frequent malfunctions is the constant filling of the tank, as well as the leakage of liquid from it into the drain bowl. The continuous flow of fluid can be for several reasons. The wrong position of the float, it just needs a little adjustment. And maybe the reason is a locking device, which in the event of a malfunction allows water to penetrate the float. To fix this problem you need to replace the check valve. Drain all filling from the tank, then unscrew the coupling connecting the valve and the water supply. After it is necessary to disconnect the mounting of the float and unscrew the nuts fixing, get the defective and install a new valve. Put everything right in its place.
A leaky float can also cause this problem, in which case it is necessary to replace it. You can temporarily put a non-water bag on it or solder a damaged place. But this method will not provide long-term work, so it is used in cases where the necessary details are not at hand. To replace the float, it is necessary to unscrew the fluid supply hose with a wrench and remove the damaged element.After that, you can install a new part, repeating all previous steps in the reverse order.
In many cases, the deterioration of the float membrane can be the cause of regular water drainage. To replace it you need to fix the float lever to something and drain all the liquid. Then unscrew the drain tube nut and disconnect the siphon. Then the membrane changes.
It happens that the tank leaks in the place of its fastening with the toilet bowl. To eliminate this malfunction it is necessary to tighten the mounting bolts. But it must be done carefully, as overtightened bolts can cause cracks in the equipment. The cuff in the attachment point must be smeared with sealant.
The most annoying malfunction is loud noise during the recruitment of fluid into the tank. This is resolved in two ways. You can install a special tube on the float valve that muffles the noise. It is mounted vertically on the mechanism so that its lower part is above the liquid level, and the upper one below it. Such a simple device allows you to reduce the noise of the recruited water. Another way to overcome annoying sound is to install a stabilizing valve,which is put in place of the usual option.

Hinged
To repair a mounted drainage tank, the first thing to do is to dismantle it. To do this, unscrew the supply hose before shutting off the fluid supply valve. Then disconnect the drain pipe from the bottom of the tank. Carefully remove the tank from the brackets and place it in a convenient place for repair. Next, all the necessary actions are performed to remove the upper part of the tank and inspect the elements of the valve, it turns out the causes of failure.
Hidden
This type of equipment is the most difficult to dismantle. Here it is necessary to disassemble the wall cladding that hides the product. As in the first case, unscrew the supply and drain pipelines. Then disconnect the equipment from the frame on which it is installed. The final step is to remove the container from the niche, identify the problem and eliminate it.
Built
This equipment can be dismantled best, since it is installed directly on the drainage basin. It is enough to block the access of water, disconnect the supply hose and unscrew the bolts. After you need to remove the seal between the discharge vessel and the tank.Next should carry out repairs.
Useful tips
Considering the materials from which all the equipment is made, the work must be done with utmost care. This is especially true of parts made of ceramics and plastics. Any careless action can lead to malfunction or loss of appearance of the product. The tank filling detail must be protected from any damage in order to prolong its service life.
It must be remembered that you need to buy a cover only with the tank. Having damaged one of the parts, you will have to purchase a completely new set.

All the work done is simple, but it is still recommended to memorize or record their sequence. After all, disassembling devices is always easier than assembling. When repairing it is recommended to maintain order in order not to get lost in the spare parts, not to damage or lose them.
Before you start repairing yourself, you should understand the device of the necessary mechanism. We must not forget to block access to water when performing any actions with the equipment. When assembling equipment, it is recommended to lubricate all seals with sealant, and to wrap the threaded connections with FUM tape.Careful and diligent care of the sanitary fixture will ensure the durability of this product and an attractive appearance.
Repair of the toilet cistern, replacement and installation of the filling valve are shown in the following video.


