What is a “smart home” based on the Arduino?
Recently, more and more innovative technologies penetrate into various spheres of our life. Their use can significantly improve comfort and saves a person’s time on various tasks. Today we will touch on the topic of so-called “smart houses” and tell about their features, advantages, disadvantages and technology of creation.
System description
If you understand the term "smart home", then the closest analogue, which will be clear to most people, is the phrase "home automation".The meaning of such things is to ensure the automatic implementation of various processes that occur in the room. Such a mechanism can be used not only in residential buildings, but also in offices, as well as at various specialized facilities.
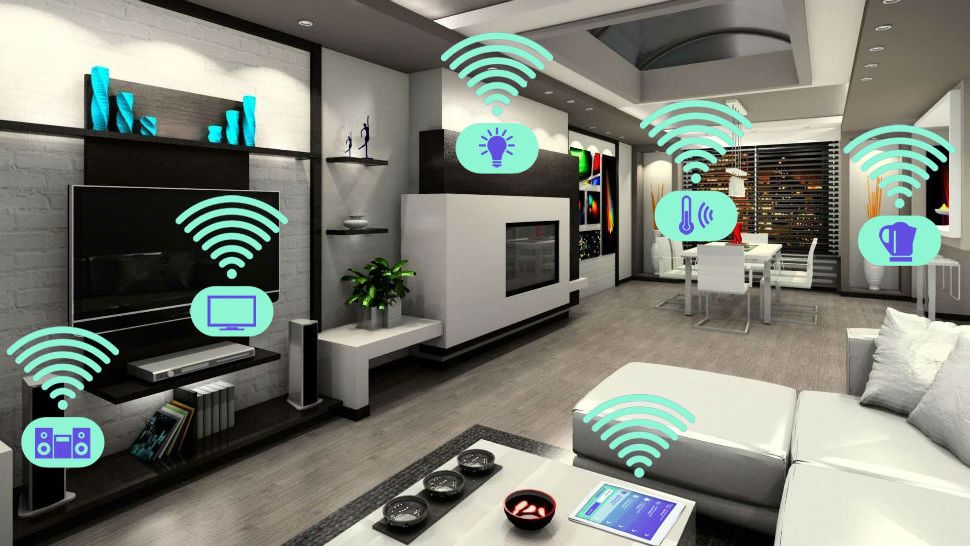
If we talk specifically about such processes, then we can give an example of automatic switching on the lighting at the moment when someone enters the room. Now let's talk more about the features of such a system.
Special features
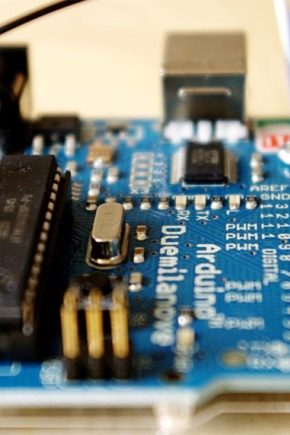
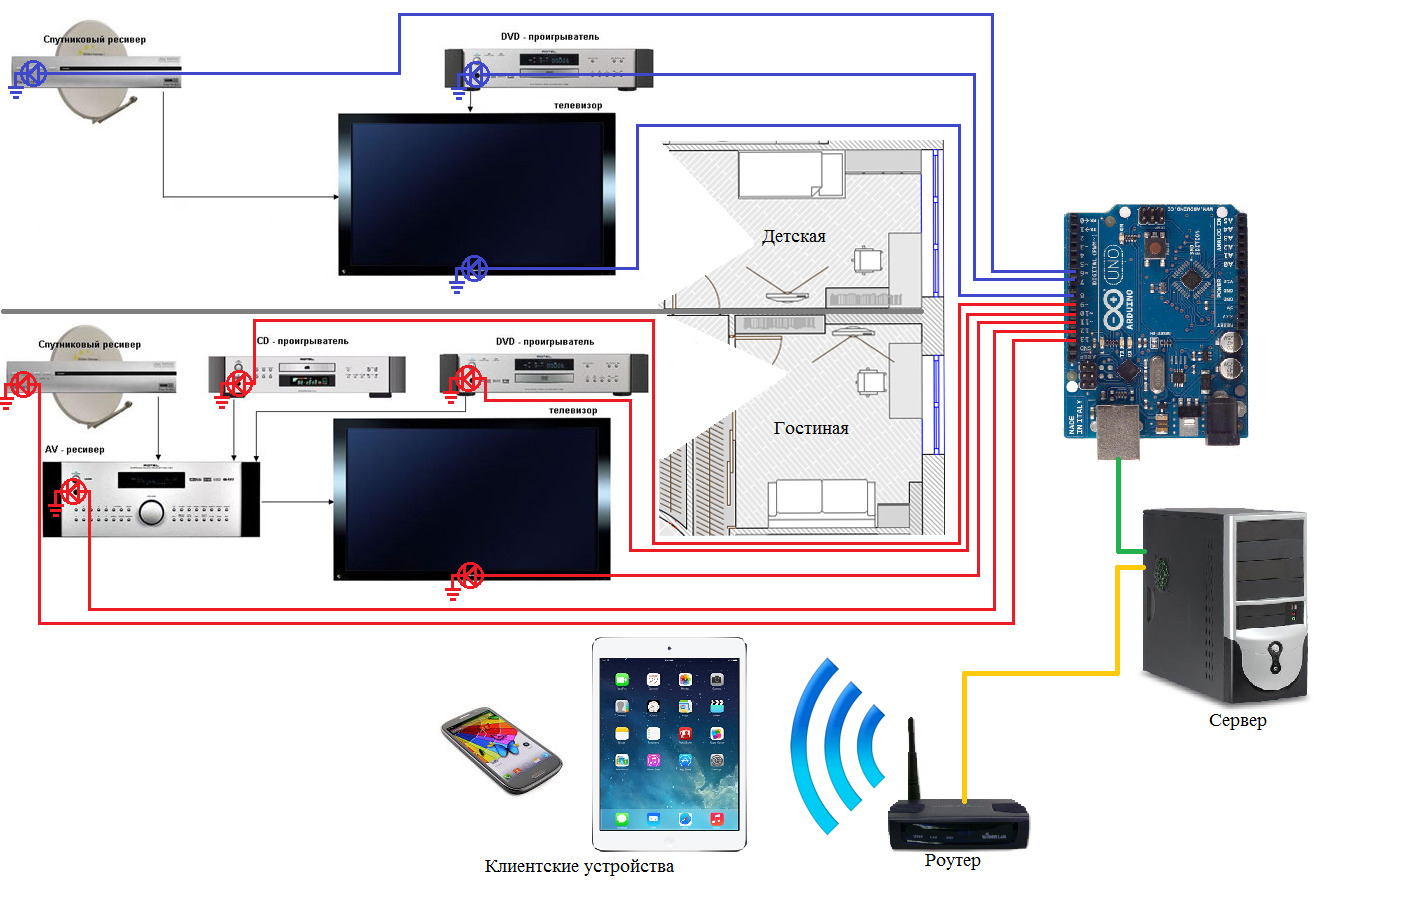
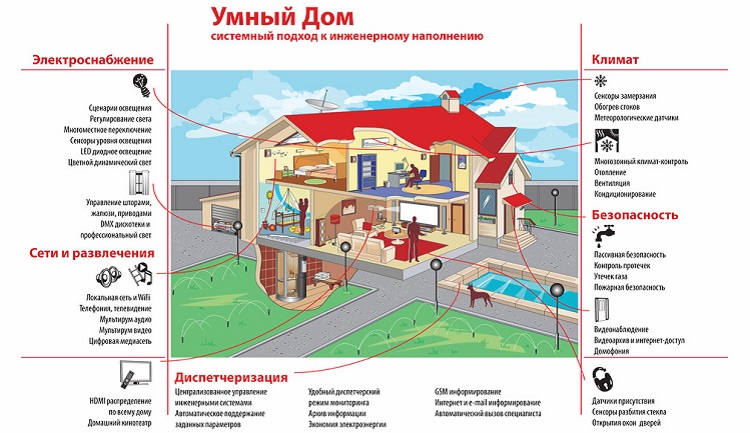
The first feature that should be mentioned will be the possibility of collecting a system like a designer. It represents the presence of a central element on the Arduino platform, represented by a central controller, where all the information from the various systems installed in the house flows. And as far as possible, it is permissible to add new components to the system - to control the light in different rooms, notify the owner about the occurrence of various unforeseen situations, monitor climatic conditions, monitor engineering mechanisms.
But it should be understood that there are no clear ideas, what components and mechanisms should be in such a system. That is, it is a concept, not a specific product. If necessary, you can put some one system, and the rest do not. That is, we start with something small and, as necessary, we increase the functionality of the house, gaining new opportunities in the field of housing management. One of the most significant features is the ability to intelligently control lighting. The use of such a system in everyday life can seriously save resources, because the lighting is turned on only when a person is in a room.
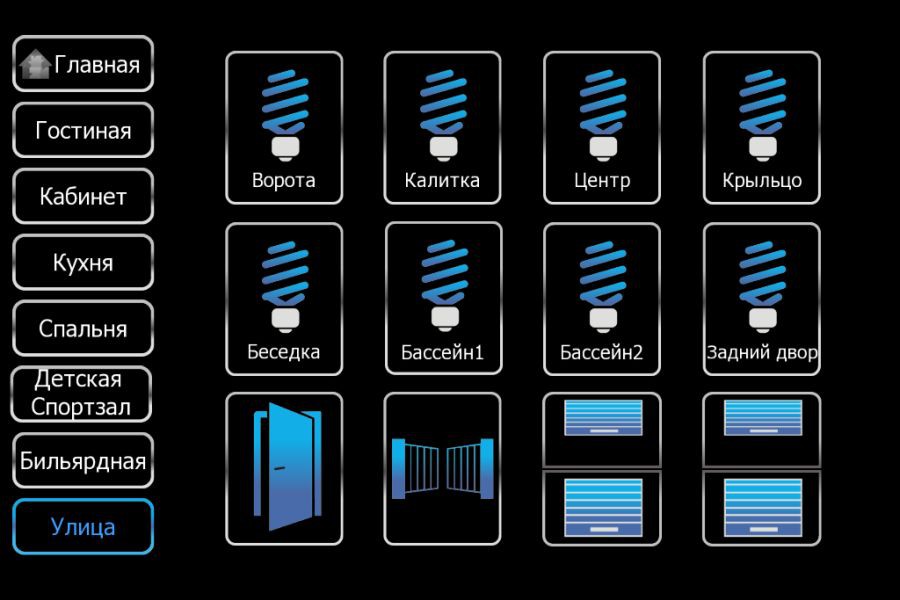
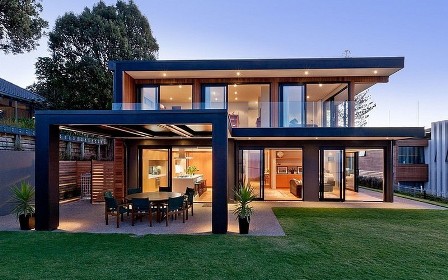
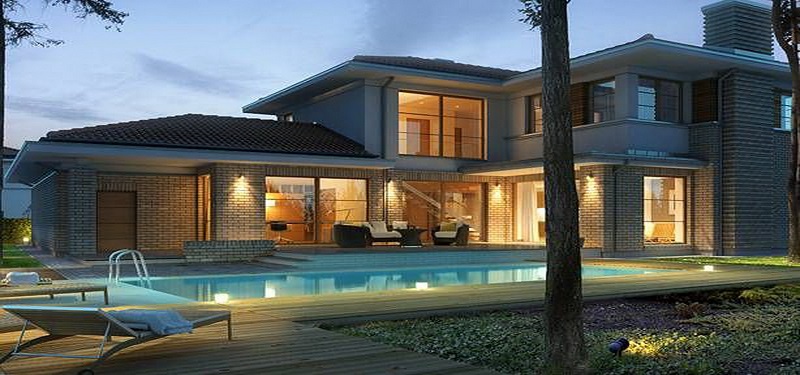
And given that most Europeans live in cottages, where light sources should be significantly more than in an apartment, this issue is extremely important. And it will not be superfluous to have control over all light devices in the house from any of its points.
The next feature is indoor climate control. The described mechanism is equally important. For example, the automation of heating will be extremely important not only to save in the cold season, but also to turn on the heating at the right time, because it is not always possible to make it active with a sharp decrease in temperature.If you have autonomous heating on the basis of the boiler, then if there are thermal sensors and a gas flow monitoring mechanism in the event of an emergency, the owner will be notified and will be able to respond quickly to it in real time.
Another advantage is the technical equipment of various systems. With the installation of automation, the owner of the house gets the opportunity to perform various actions: lower the blinds, turn on the TV screen or media player. By connecting these and other systems to a common mechanism, you can actually create the conditions for activating a device by pressing just one key.
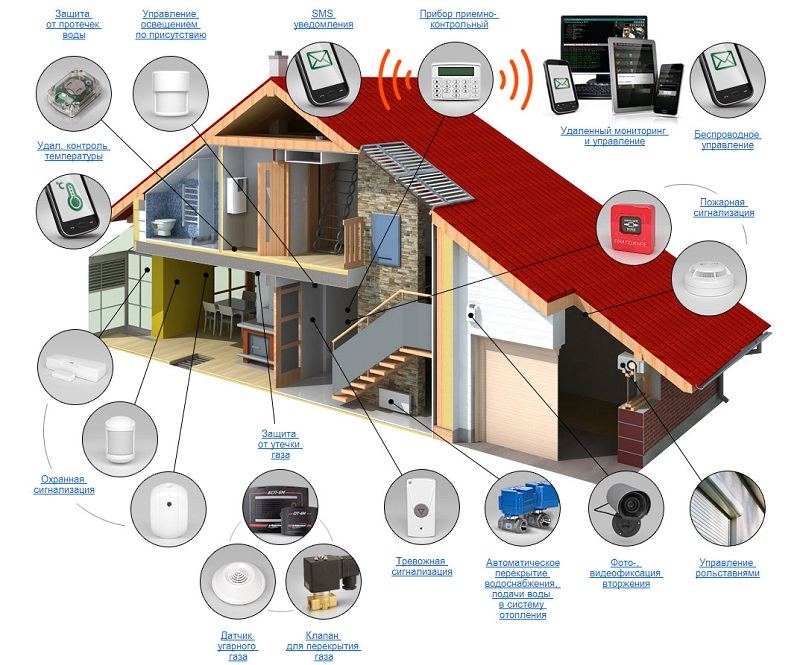
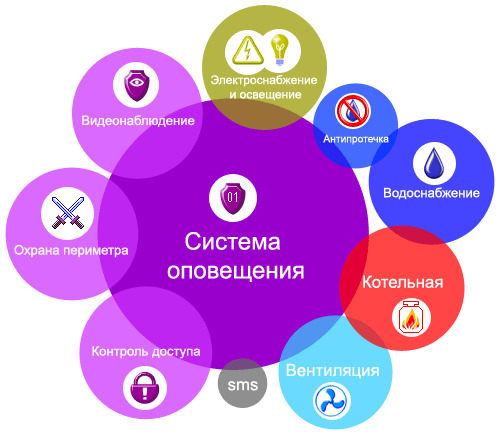
The next feature is the security system. The mechanism of "smart home" raises to a new level protection against intrusion into the house of uninvited guests in the absence of the owners. The house is simply transformed into almost impregnable object. Moreover, the system can mimic the effect of being in the house by turning the light on and off, and the surveillance cameras transmit to the owner up-to-date information about the activity in the house or the surrounding area, which saves on protection.The system has a number of other means that will neutralize the offender, if necessary.
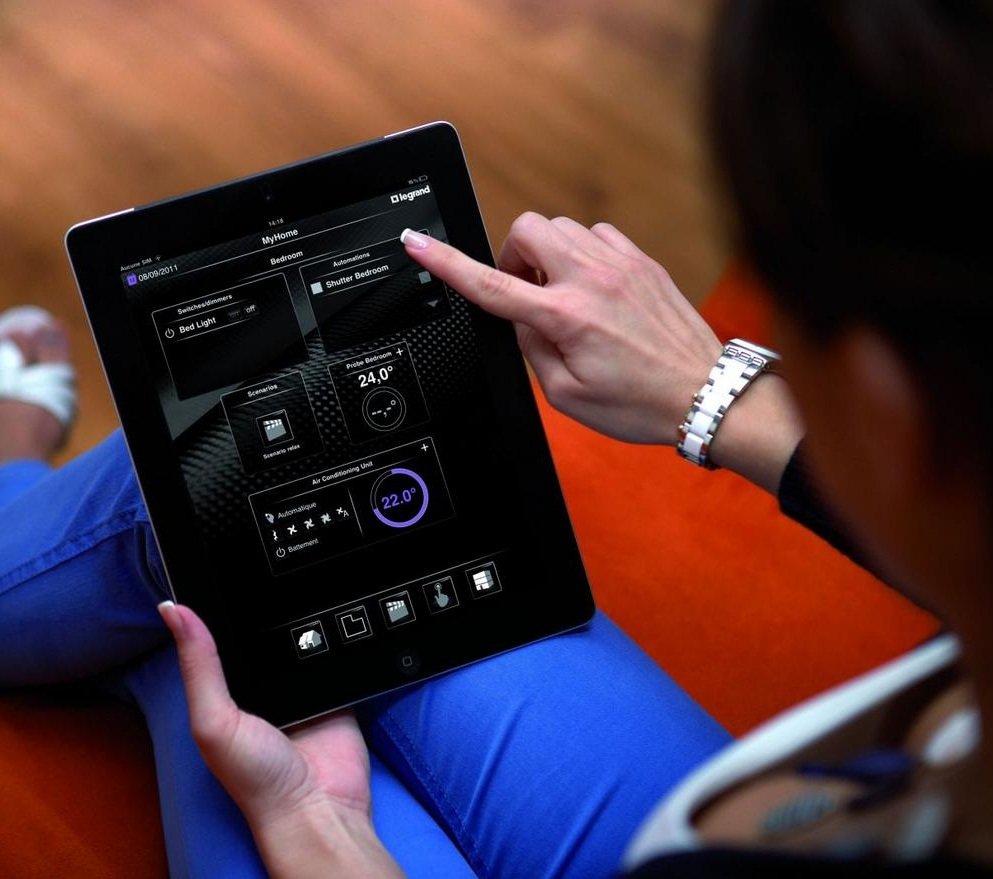
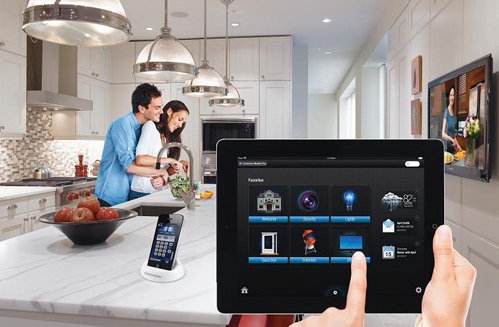
And the last feature that I want to say about is simple and affordable control. Despite its huge functionality, the described system can be controlled even by a child. Usually a small remote control with traditional switches and special panels is used for this. In addition, the mechanisms can be controlled from a PC or mobile device. And in recent years, solutions are being introduced as well as voice control. As you can see, such a system has a lot of features that make it an excellent integrated solution for the home or any other object.

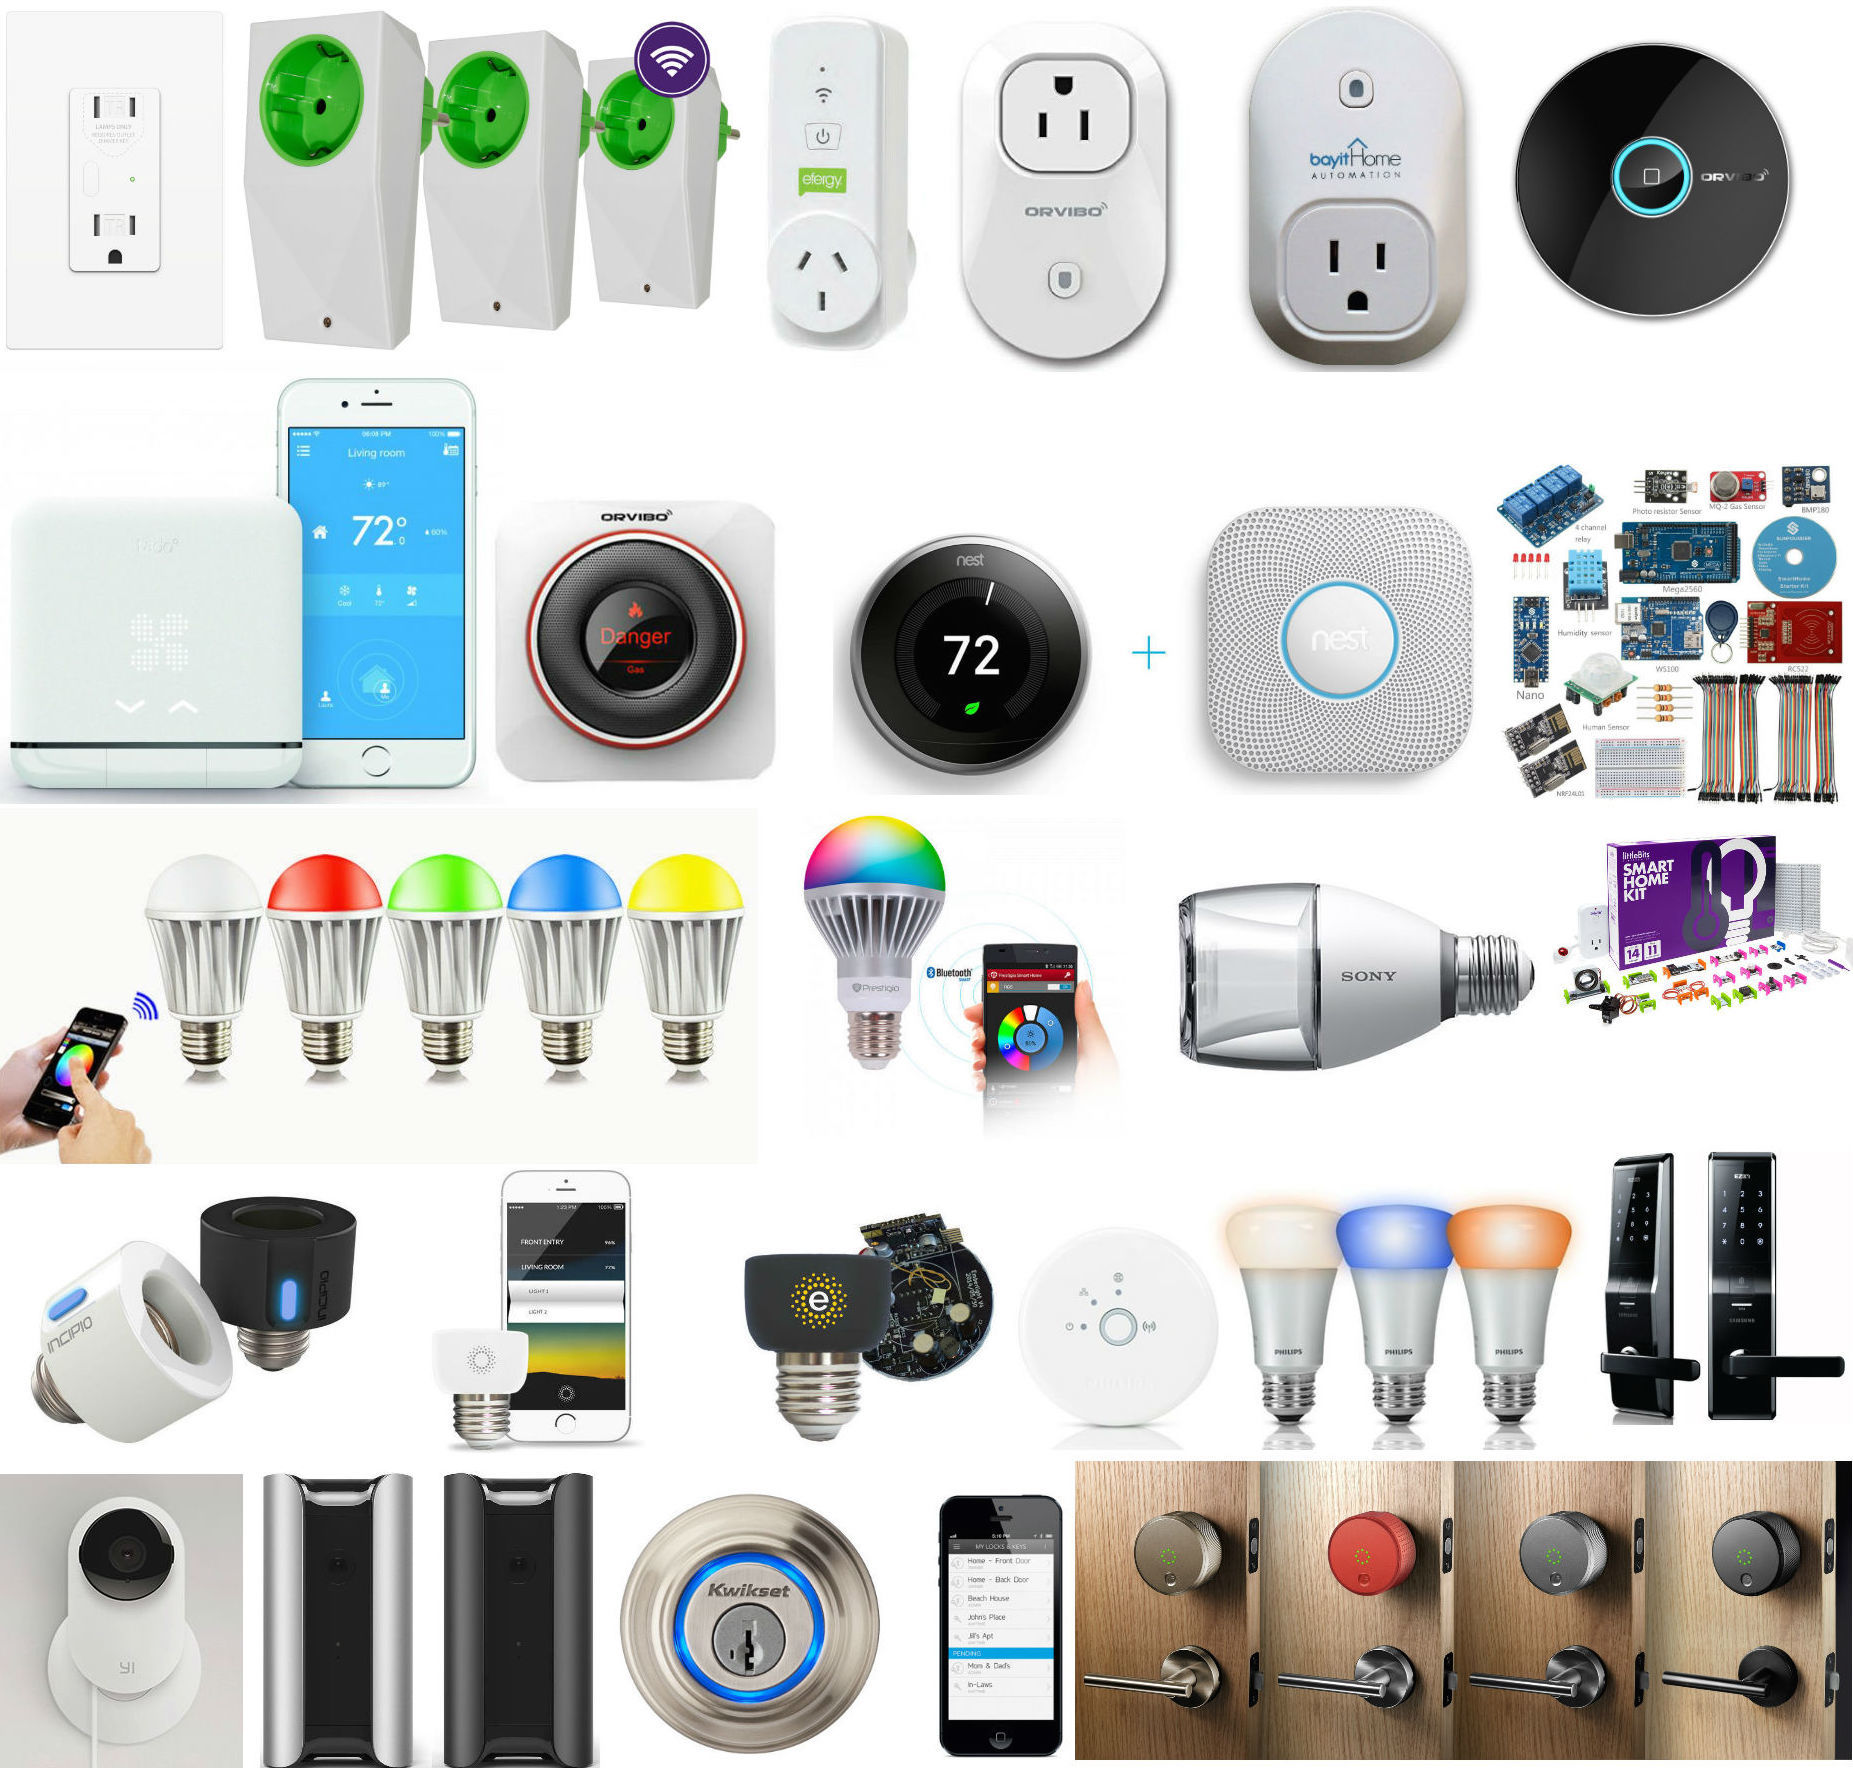
Components
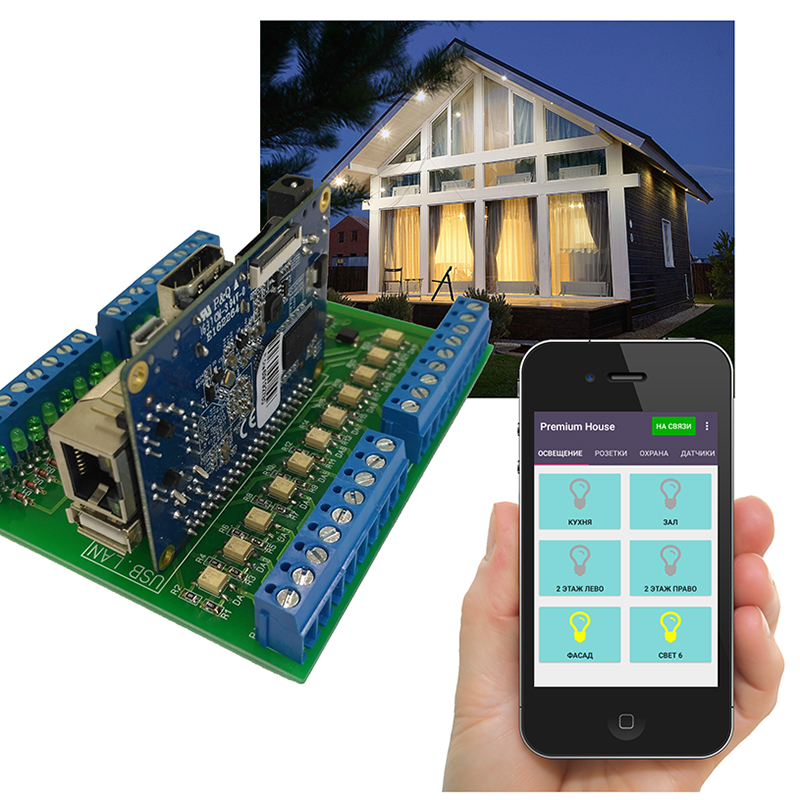
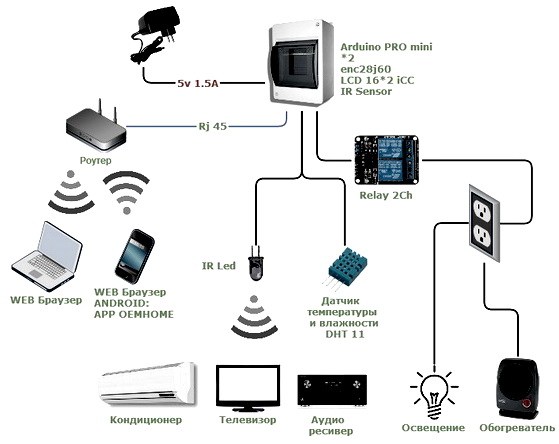
Today, a large number of modifications and complete sets based on Arduino, where the system in question can be implemented. A large number of companies producing such mechanisms make controllers already with built-in Wi-Fi and Bluetooth systems, which makes it possible to control the system within the premises through a mobile one. There are also solutions where management is carried out via an Ethernet-type interface; it is a wired method using fiber-optic cables through a local-area home network.Switches are commonly added to such solutions, as well as Wi-Fi routers, which allows wireless connection, unless otherwise provided by the controller itself.
The connection of conventional manual switches can be carried out on the central controller by two methods:
- using electrical wiring;
- by wireless technology.
As you can see, there are a large number of components of the "smart home".
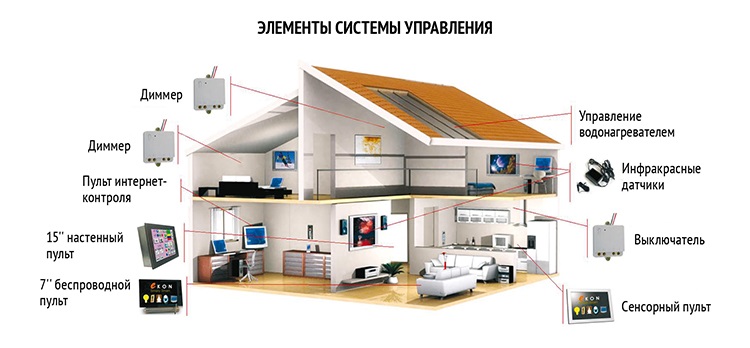
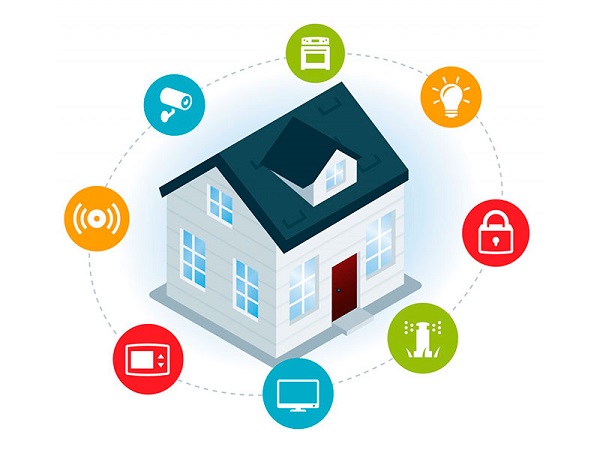
Usually the system consists of the following nodes, which can be represented by various kinds of devices:
- a central system controller, usually represented by a master node, as well as discrete output-input modulators;
- Expansion and communication devices, which include routers, various switches, as well as GPS and GPRS modules;
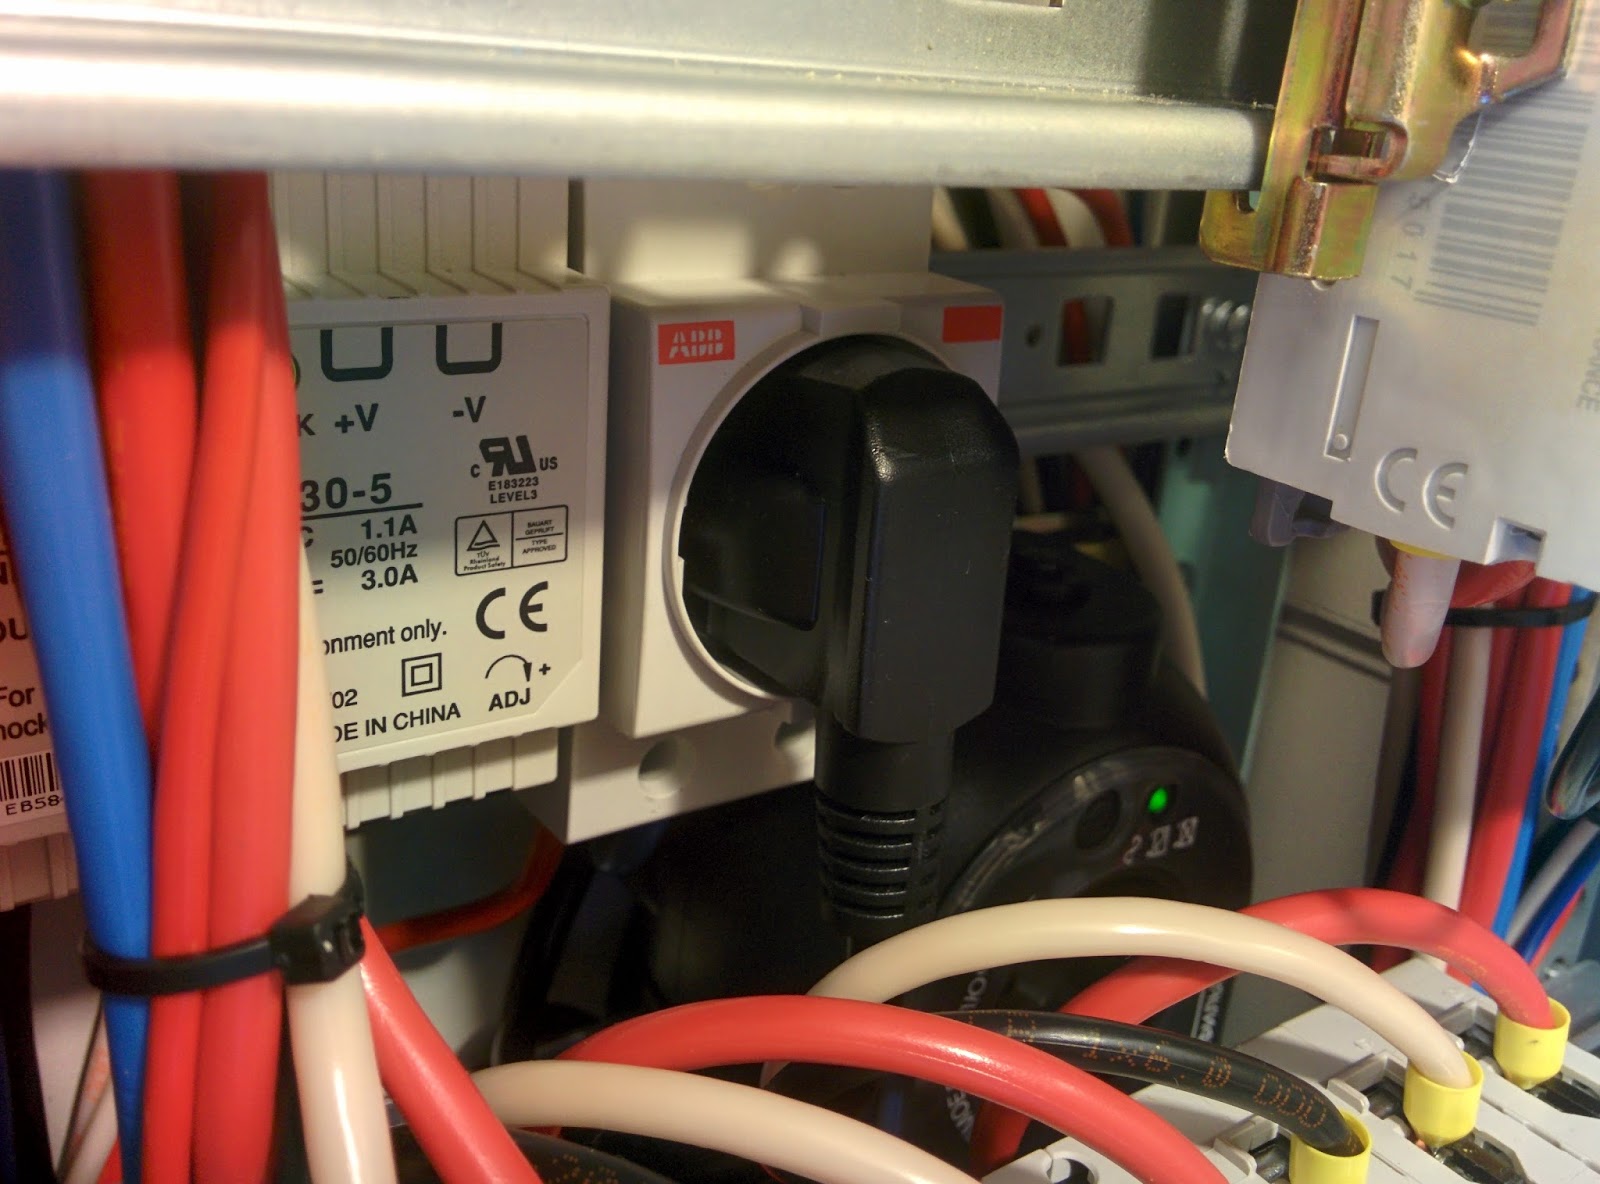
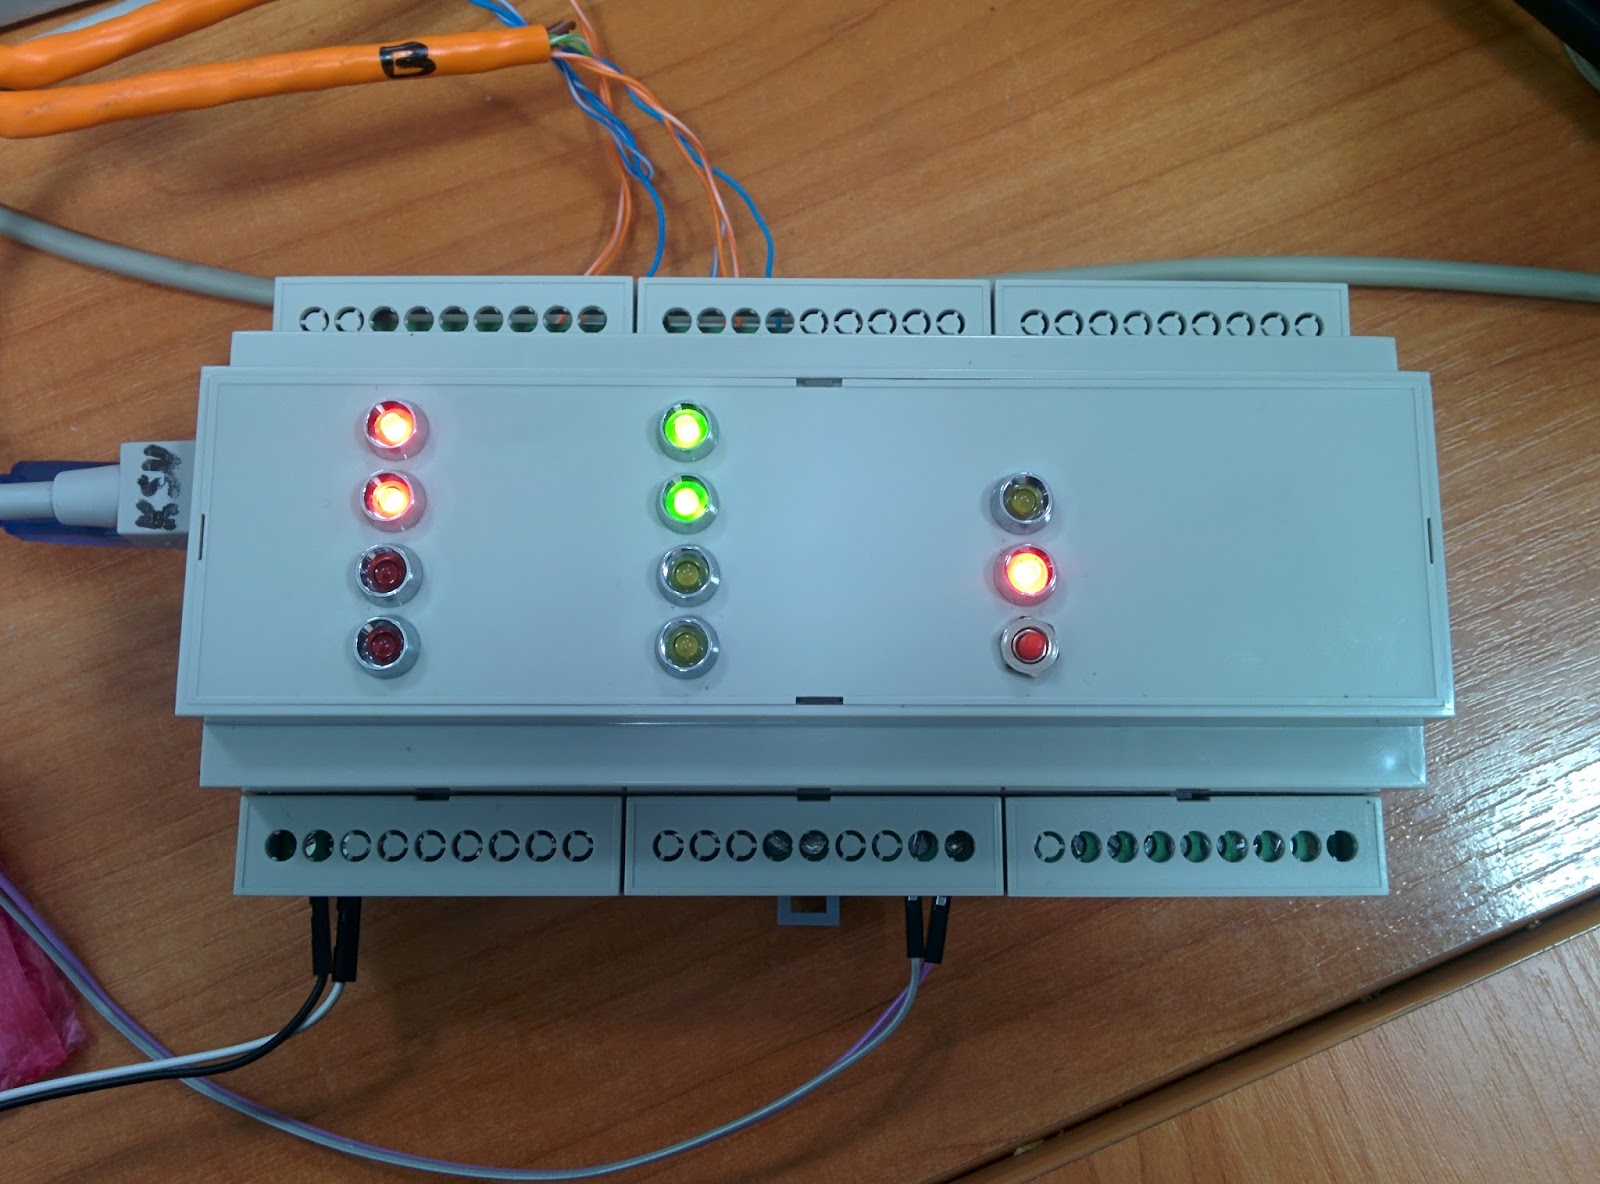
- devices responsible for electrical circuit switching - relays, dimmers and power supplies;
- performance devices - various types of valves (water, gas);
- system management parts - touch panels, tablets, personal digital assistants, and consoles;
- various measuring parts - devices, sensors and sensors (we are talking about sensors of light, temperature and movement).
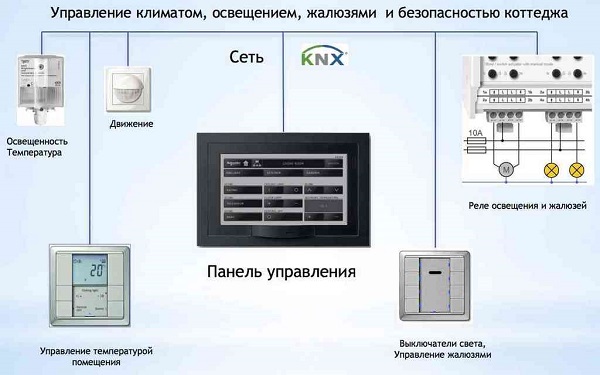
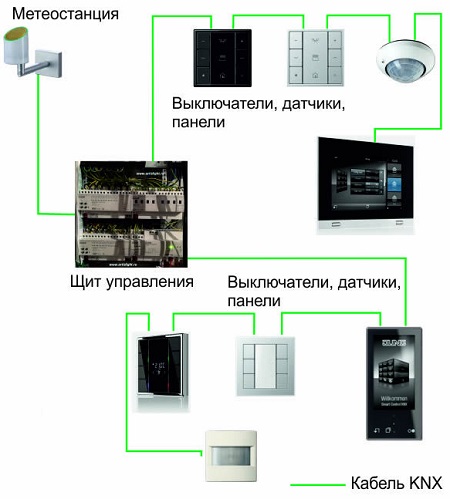
When selecting equipment for an Arduino-based mechanism, it is necessary to take into account which method of information transfer the particular system will use. As an example, it is possible to give a fairly common standard EIB \ KNX. Here are usually used power network, computer networks, as well as radio channels. At the same time, there is a standard X10, where ordinary ordinary AC mains with a voltage of 230 volts are used to transmit information.
Here the signal is simply exchanged, which is usually supplied when a variable-type current passes through the zero variant. Such variants are usually represented by radio frequency pulses at a frequency of 120 kilohertz with a duration of 1 millisecond.
Merits
Speaking of the virtues of an Arduino-based smart home, The following points should be noted.
- Great opportunities in terms of setting up the work of the whole mechanism. That is, the user can independently write a program that can execute algorithms of various levels of complexity.
- If desired, the system can operate autonomously due to the presence of its own controller.
- Downloading a program is easy becausethat the programmer is not needed for this, but everything is done using a USB interface, since the bootloader is simply being installed in the microcontroller.
- Pretty low price components of the system. This is due to the fact that different manufacturers do not have exclusive rights. For this reason, the Arduino architecture is classified as open.
- The presence of open source code, which allows the user to directly control the mechanism of a smart home.
- Accessibility is that the user chooses which sensors and mechanisms he needs.
- Versatility and the ability to implement the most interesting ideas. There are no instructions or standards for what should be an Arduino-based smart home. This means that the user can make the system the way he wants, since the owner is not limited to anything in terms of installing sensors in the bedroom or kitchen.
- The possibility of self-firmware loader.
- The presence of a pin connector on the Arduino processor boards, which allows programming within the system.
disadvantages
Like any mechanism, this system has some drawbacks.
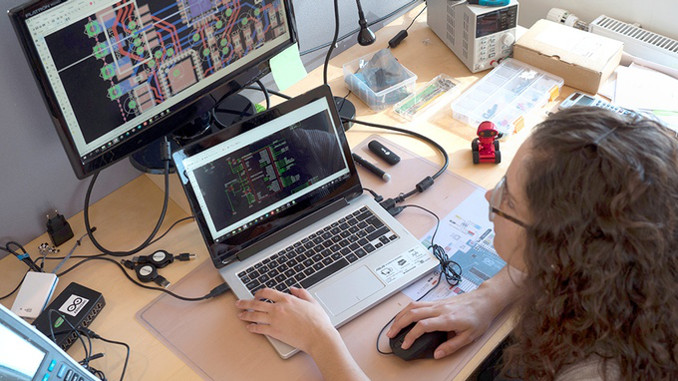
- Despite the openness of the system, in order to master it and successfully use it, you will need knowledge from a number of specific areas, including programming, repair and electronics.
- The need to spend a considerable amount of time to implement and customize your own project, since each project is inherently unique and can do little more than others.
- Difficulties in direct configuration of Arduino due to the fact that this mechanism works with only a small number of operating systems.
- The existence of the likelihood of software failures, which can lead to problems or inoperability of a team. For this reason, it is necessary from time to time to make a diagnosis of the health of the equipment.
- Radiation of various types, which are inevitable with this control algorithm.
- The need to allocate space for a special cabinet where additional equipment and wires will be located.
- If the control is carried out using the Internet, then the data that is transmitted between the components of the mechanism can be intercepted by intruders.A partial solution to the problem will be an exclusively secure connection. But to ensure it will require a lot of money invested in the modernization of equipment.
The Arduino smart home system, like any mechanism, has its drawbacks. But their number is rather small, if we take into account all the advantages and opportunities offered by such equipment.
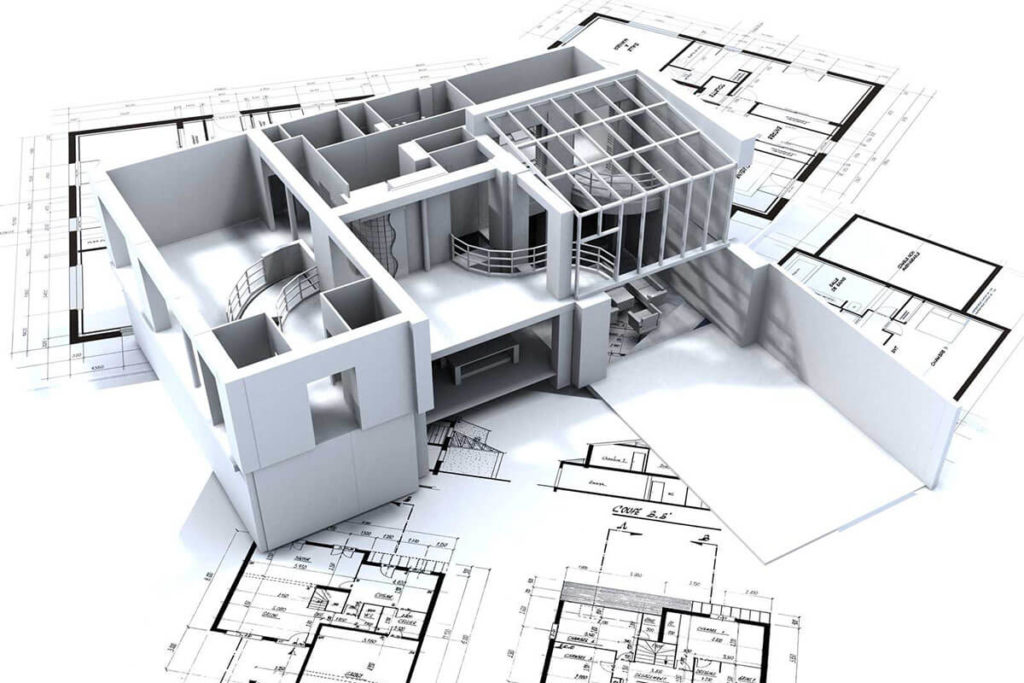
Design
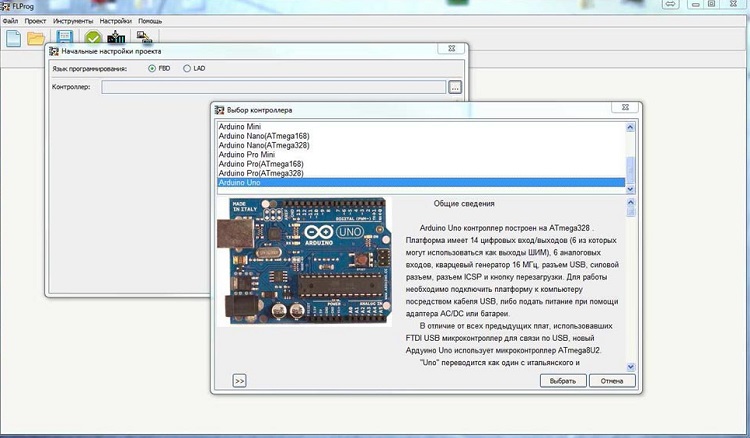
Creating any system of smart home based on Arduino starts with the creation of the project. When developing it, you should understand exactly what functions and tasks the system should perform.
Usually a project based on the Arduino Uno solution involves the following tasks.
- Monitoring the weather conditions outside the window and the room temperature and, as a result, an adequate response to their change. The device usually becomes an element of a unified system together with heating, ventilation devices and other devices.
- Monitoring the state of windows and doors - they are closed or open.
- Generate a sound when the motion sensor is activated, if the alarm function is active.
- Automatic control of household appliances.
- Control of electricity consumption, thanks to the automatic connection and shutdown of lighting equipment.
- Fire safety.The mechanism gives the owner a signal about the presence of fire or smoke in the room. If a sophisticated system is developed, it can even call firefighters in place.
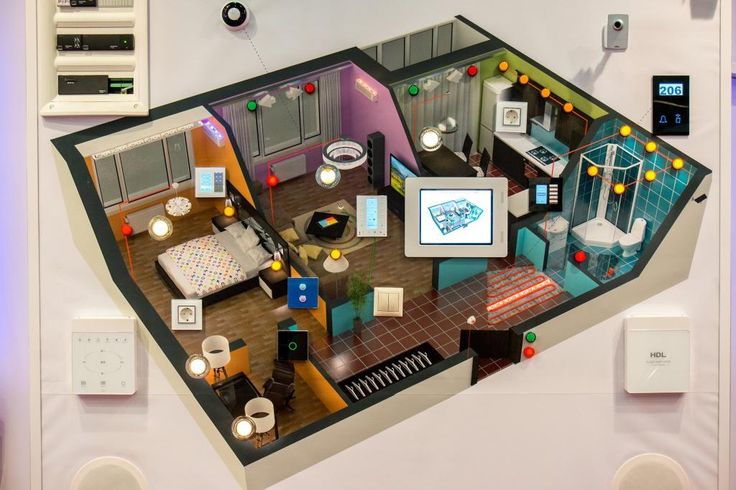
When developing a project according to the standard, the house is immediately divided into 5 main sectors - kitchen, bathroom, street, hallway, bedroom. When forming a project of such a system, the following points should be taken into account.
- The entrance hall. It is necessary to automatically turn on the light when it becomes dark outside, as well as the creation of a motion detection mechanism. At night, the average power light is usually activated, which should not cause discomfort for family members.
- Kitchen. The activation and deactivation of lighting in the kitchen is usually done manually. Disconnection can be automatic if no one has been walking around the room for a long time. If the system detects that a person starts cooking, the hood automatically turns on.
- Porch. The activation of lighting devices can be carried out either when the door is opened when a person leaves the building, or when the owner approaches the house if it is already dark outside.
- Room. The inclusion of light devices is carried out manually, although if necessary, and the presence of a motion sensor, activation can be made in auto mode.
- Bathroom. Speaking about this room, let's say that here it usually comes down to managing a boiler. It itself has a power switch when the device turns off when it reaches a certain water temperature. Management of the heater will be carried out depending on the automation that is available. Also, at the entrance to the bathroom, you can turn on the light and activate the exhaust.
After all the points described above have become as clear as possible, the technical task is being prepared, where the customer makes any changes. When the final version is made, it will be the basis for the formation of the estimate documentation for the project type works.
Properly executed terms of reference is an important step in the creation of project documentation. Already on the basis of the above-mentioned document a project will be created for all the systems of the “smart home”.
Usually the project consists of the following components:
- an explanatory document describing the various subsystems;
- layout of control devices;
- schematic plan of cable runs;
- the project of placing devices in the lockers of automation;
- basic options for connecting appliances in such cabinets;
- connection plans;
- cable magazine;
- various specifications.
In addition, at the stage of the formation of the project, the price of the “smart home” is calculated.
The price will depend on such factors:
- number of devices;
- selected equipment and subsystems.
Stages of creation
It should be said that the stages of creating a “smart home” system with the involvement of specialists or with their own hands will be the same. However, in the latter case, the ready-made version as a whole will cost significantly less than if it attracts specialists who are already lacking in the market. For this reason, their salaries will be appropriate, which means that if you do not want to spend extra money, you can do it on your own. So, let's start with the components for this system, if you decided to create it yourself after all.
Equipment
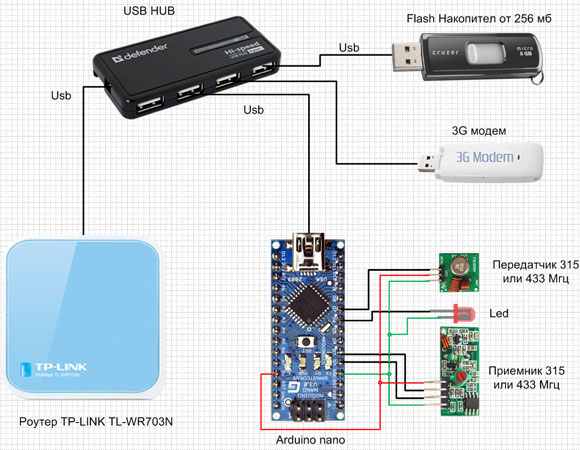
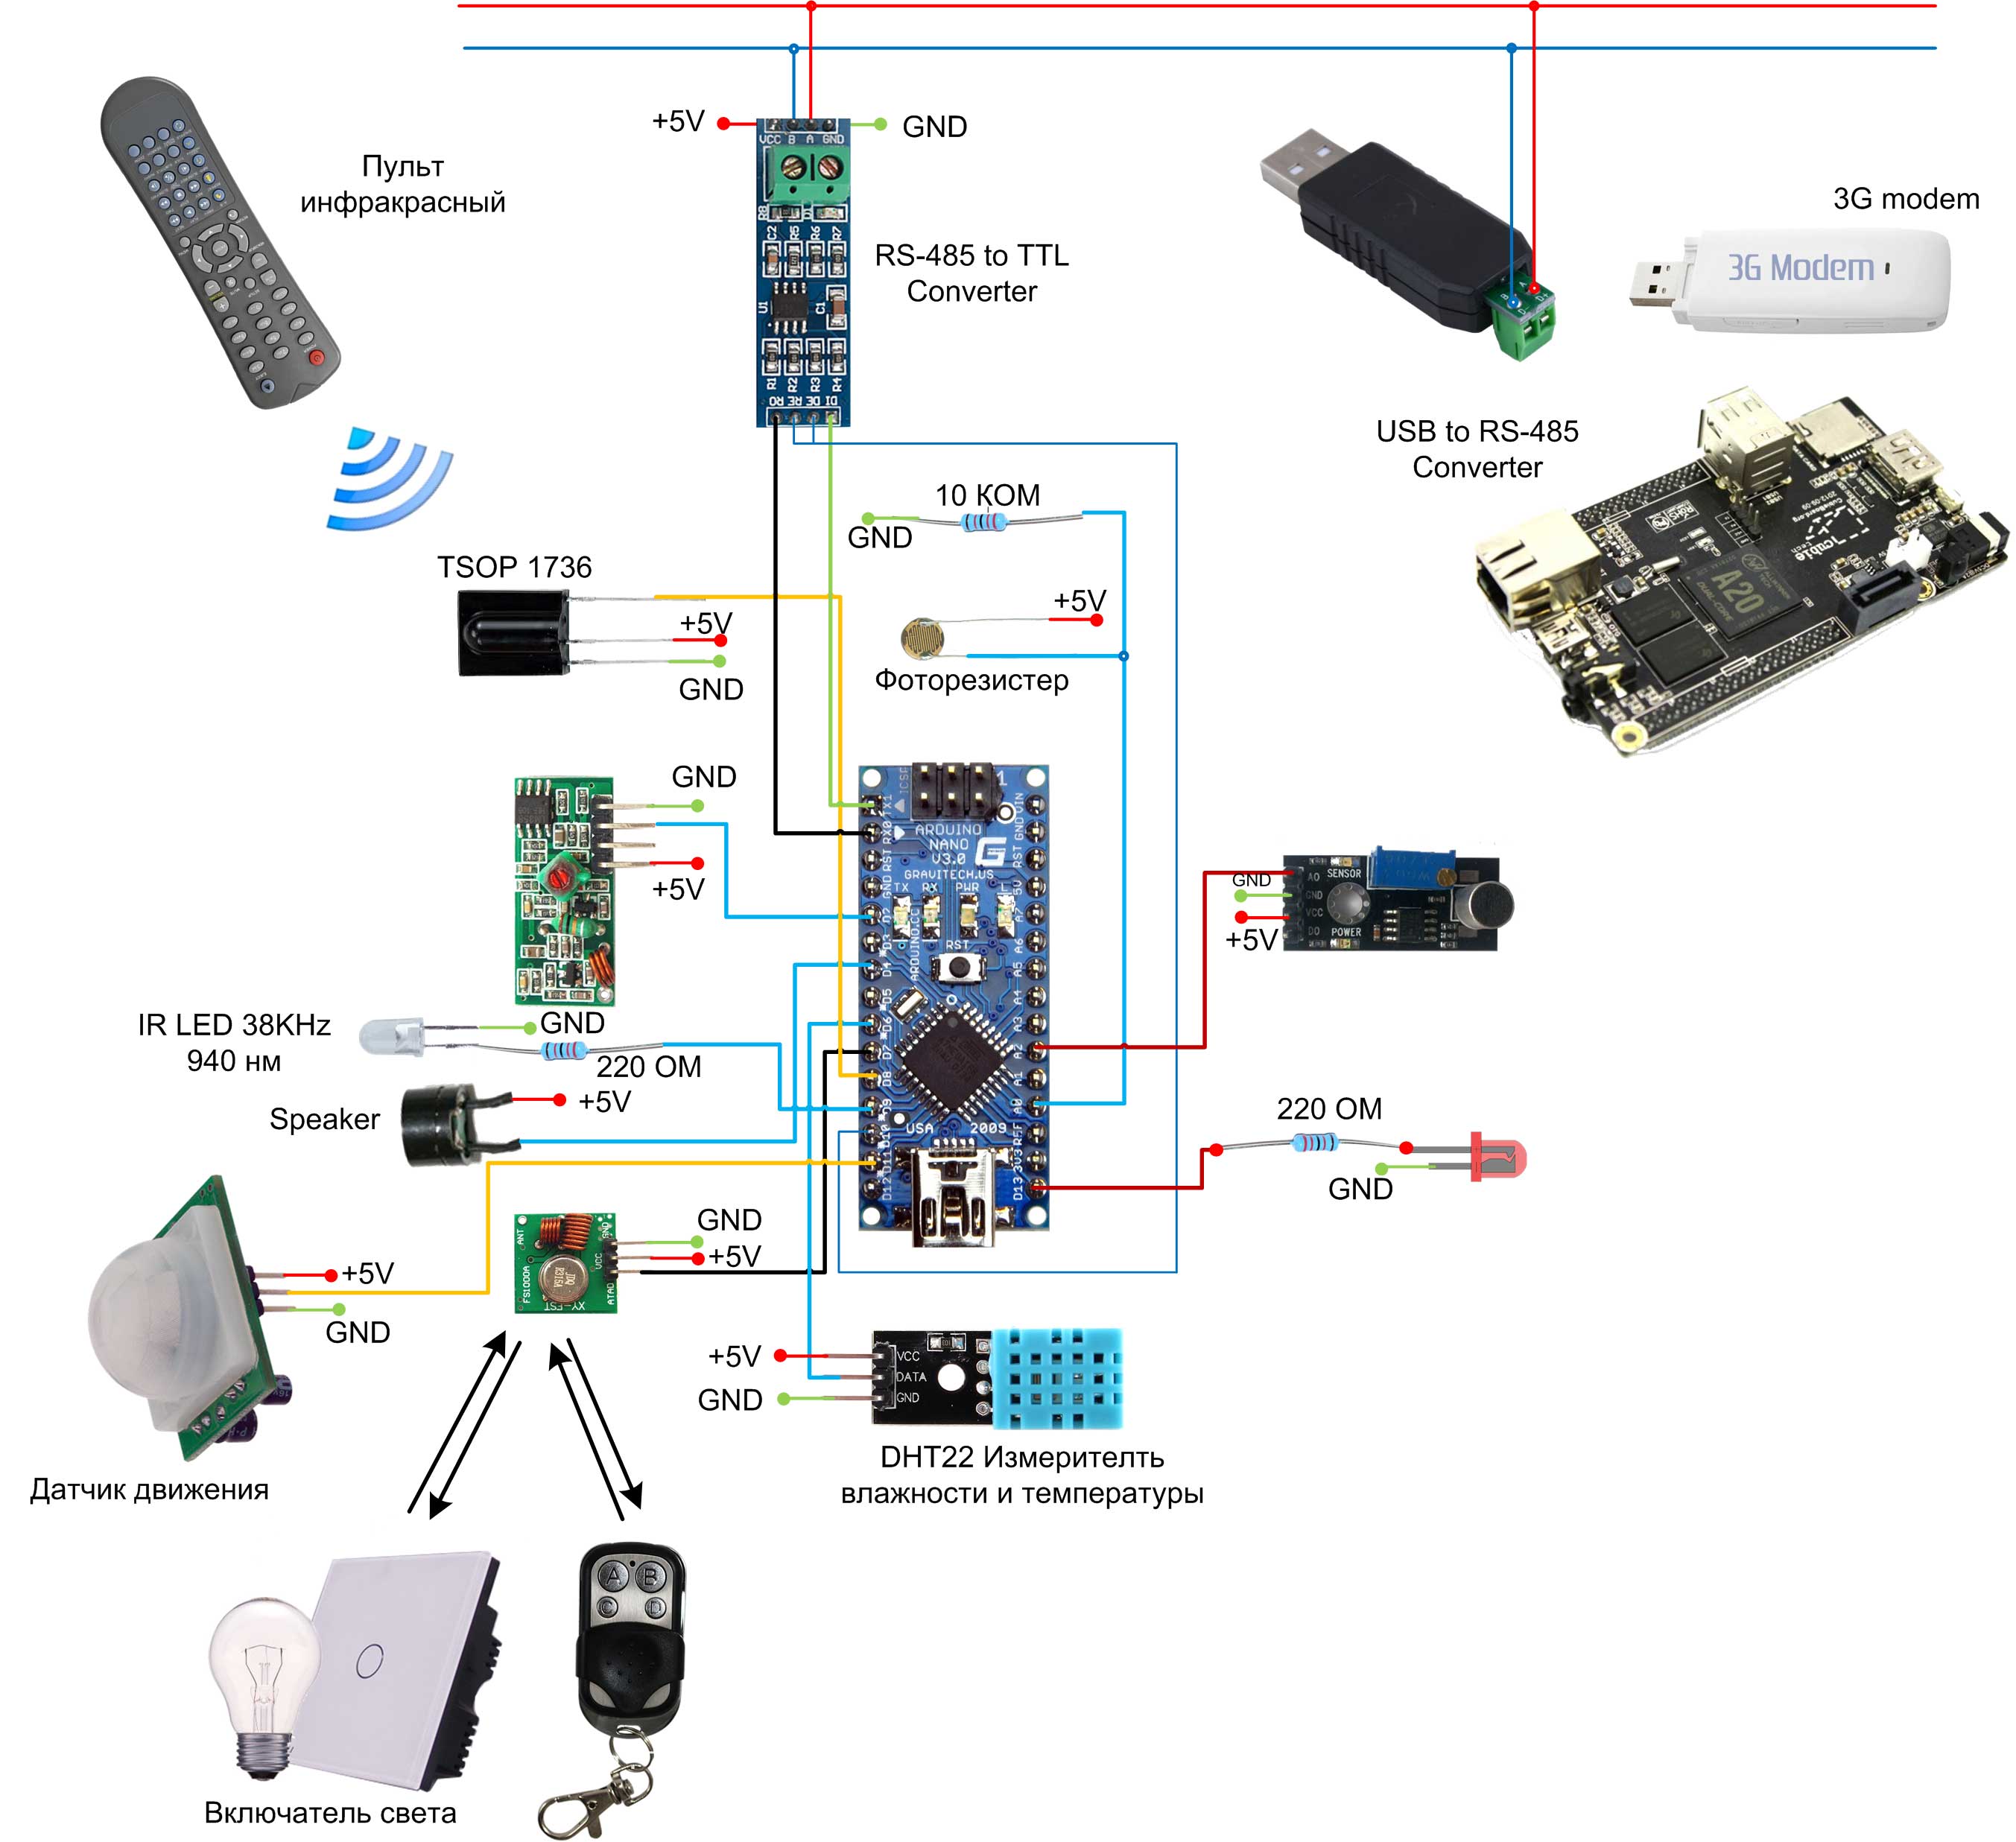
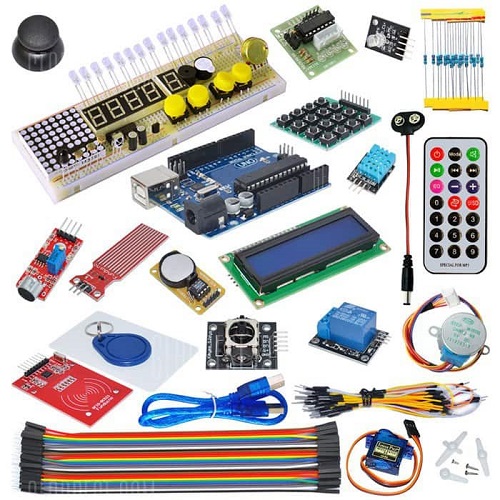
If we talk about the system configuration, The technology will include the following set of components:
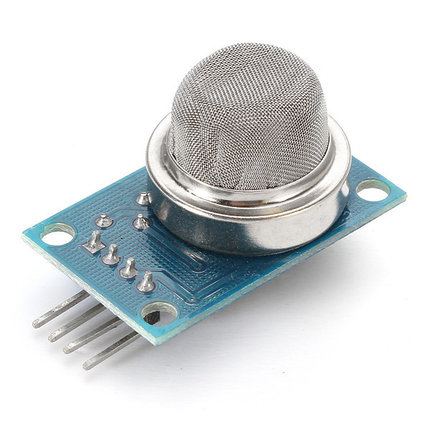
- Motion Sensor;
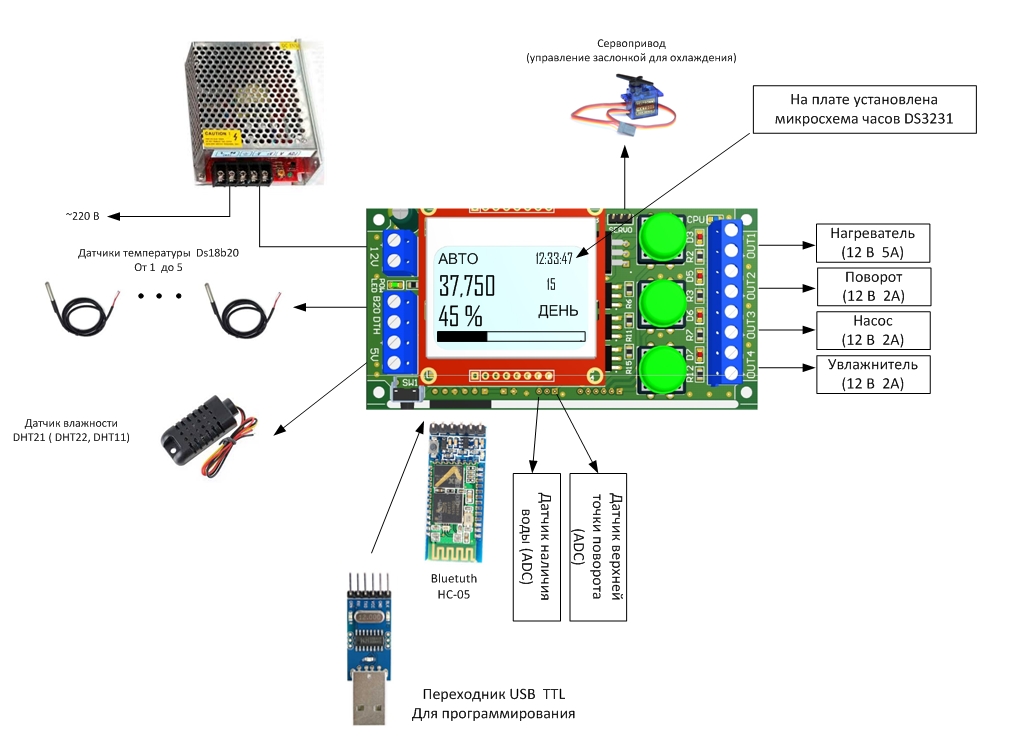
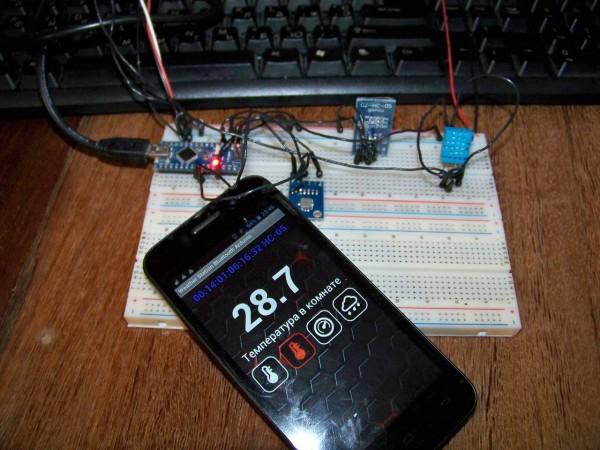
- temperature and humidity sensor;
- light sensor;
- a pair of temperature sensors with DS18B20 marking;
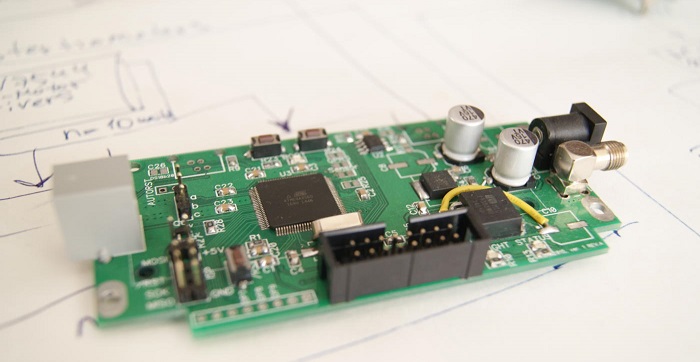
- Ethernet module brand ENC28J60;
- microphone;
- reed switch;
- relay;
- twisted pair cable;
- Ethernet cable;
- a resistor having a resistance of 4.7 kilo;
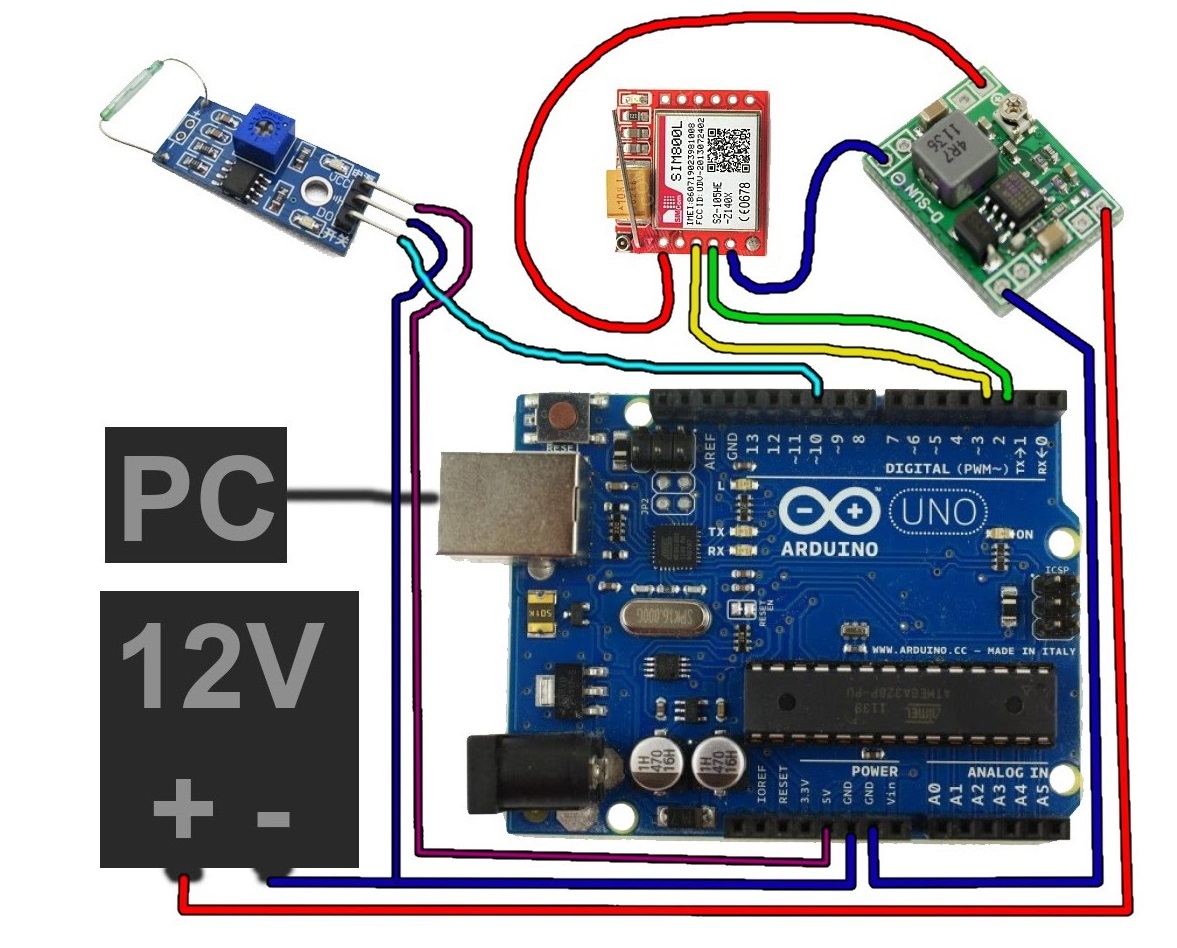
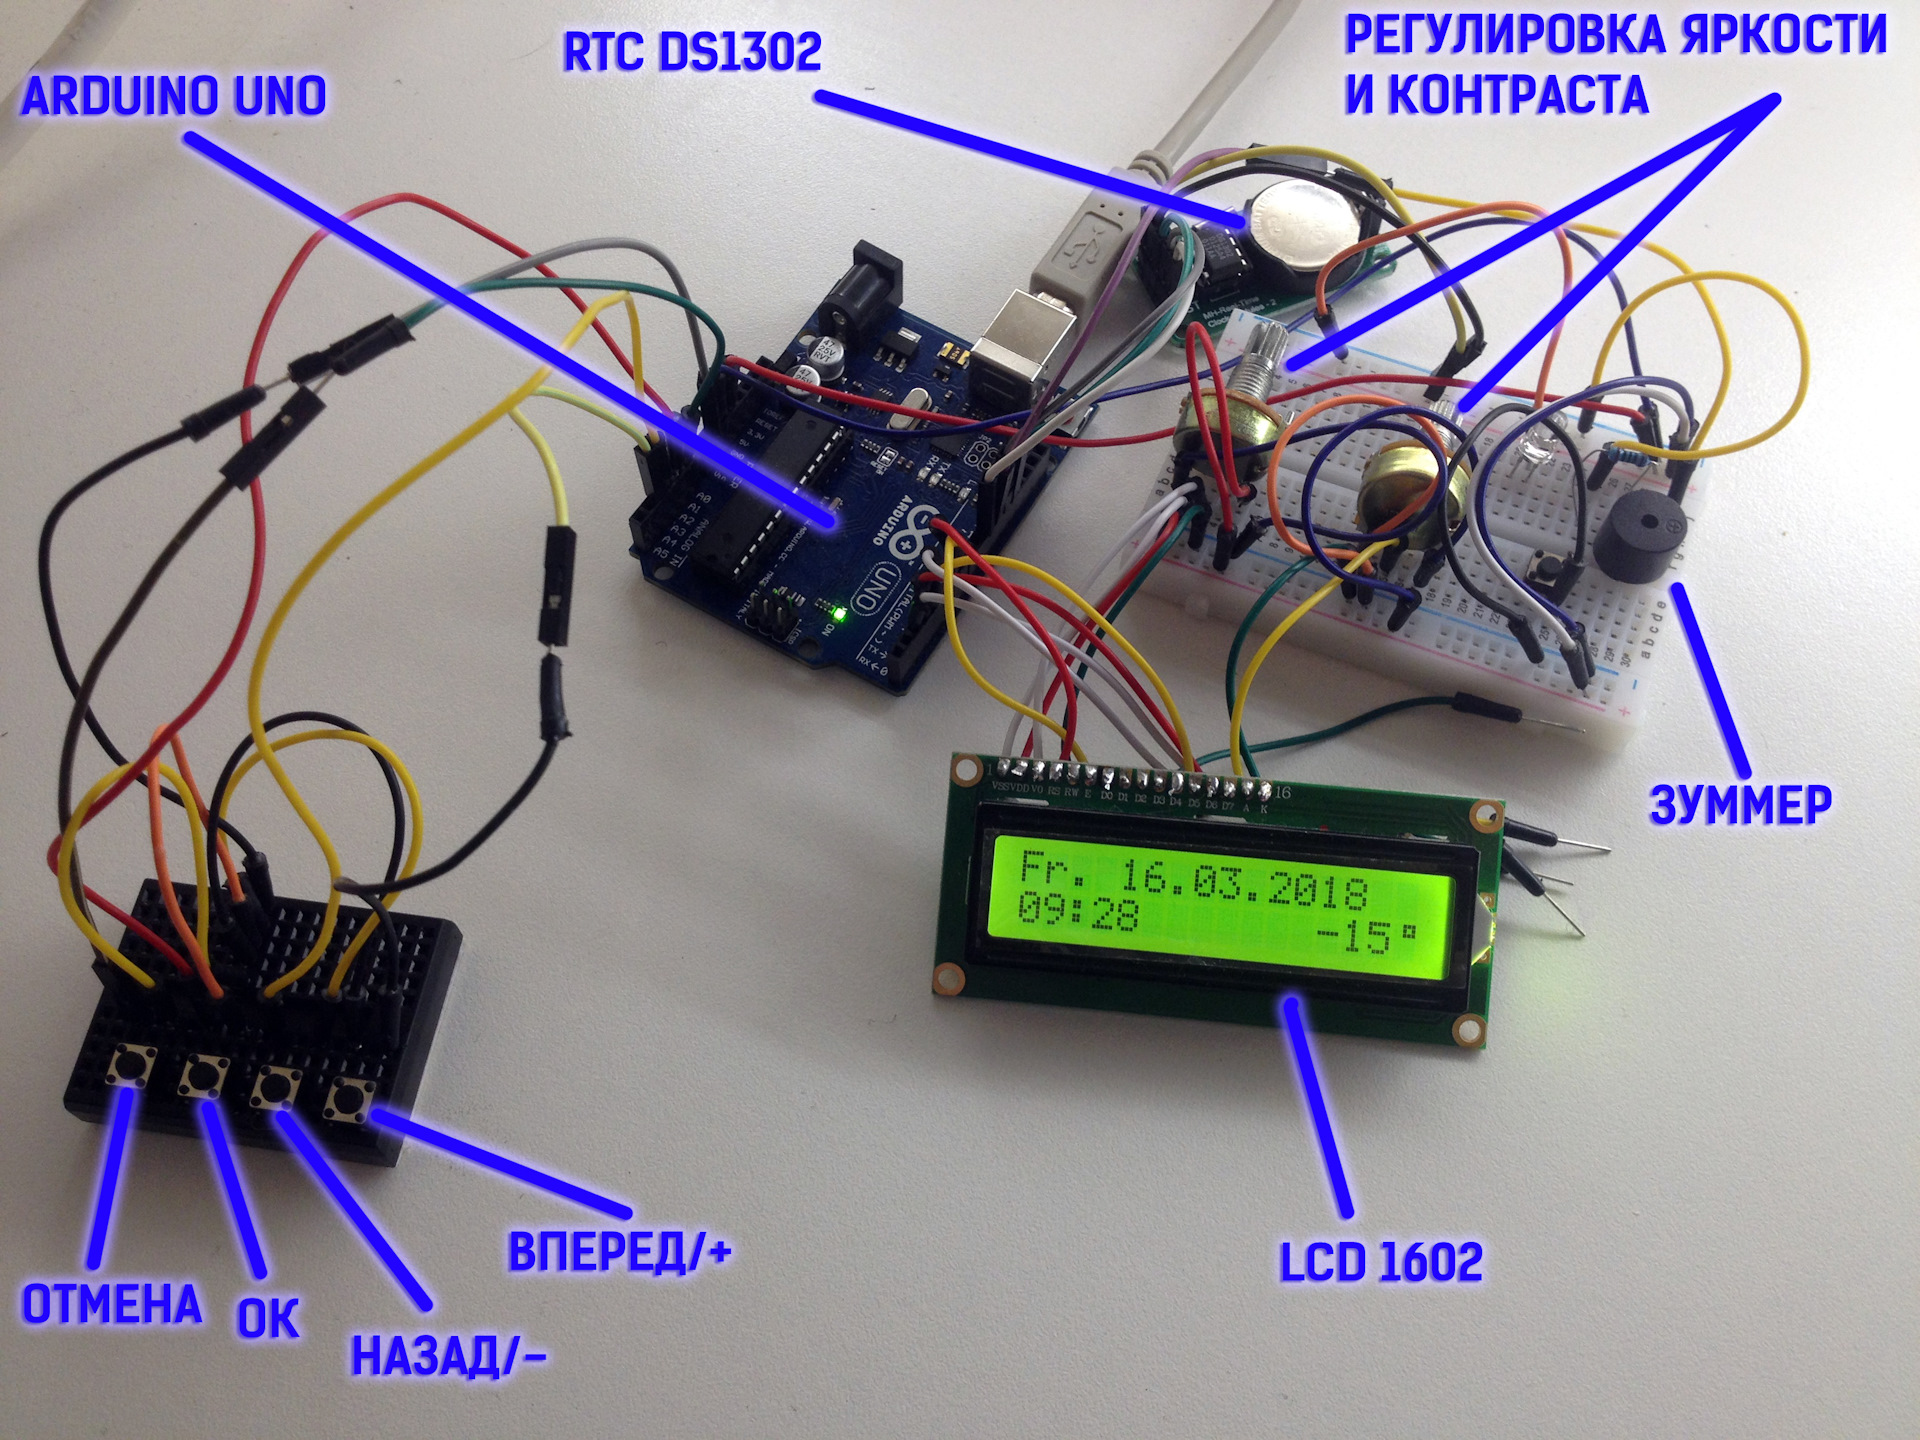
- microprocessor board arduino.
Here it should be said that the presented list may be supplemented and differ depending on the project, as well as the user's needs, the need for certain functions.
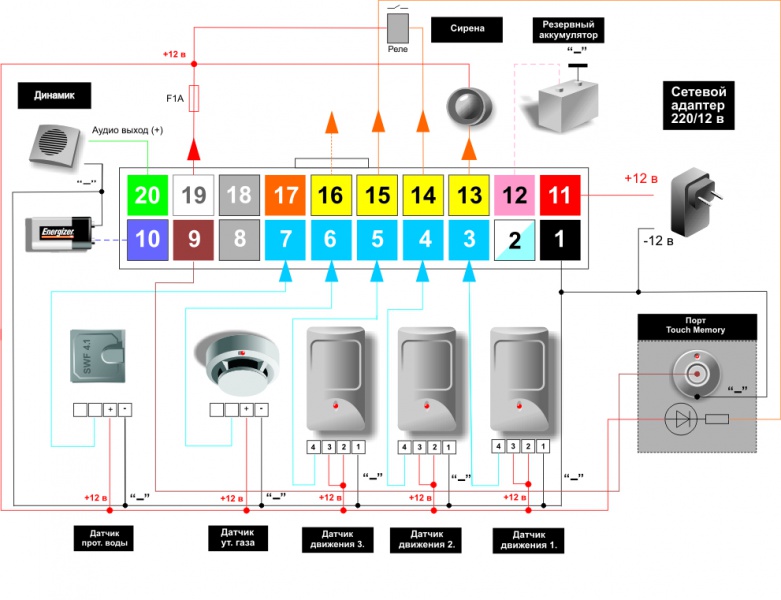
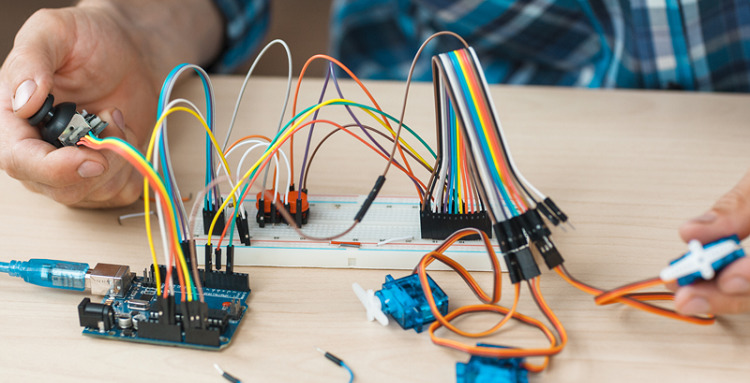
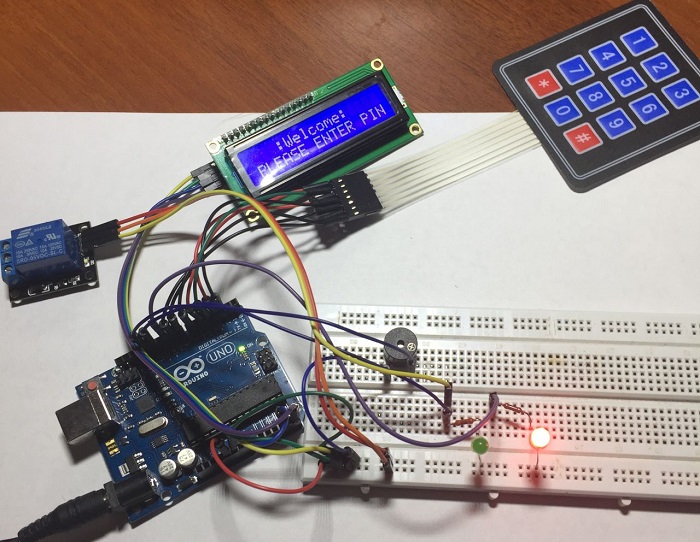
Connection algorithm
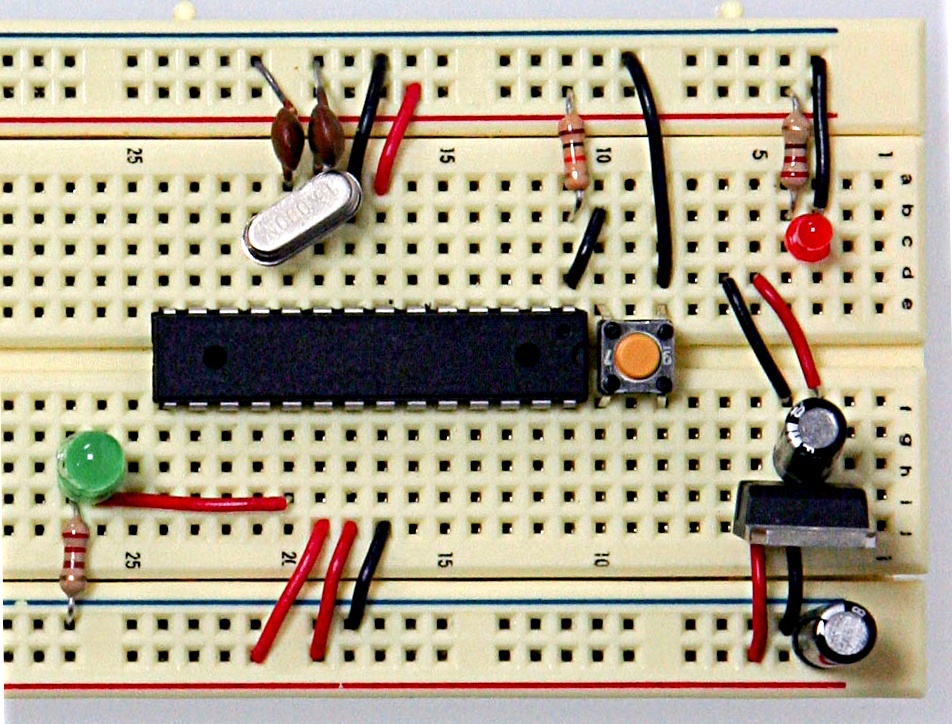
It should be said that the smart home should be equipped exclusively with LED lights, since the usual options can simply not withstand a lot of voltage. When the project is ready, and all the necessary parts have already been purchased, you should start connecting sensors and controllers. This should be done exclusively according to the scheme created earlier. Contacts must be fully insulated.
In short, step by step the connection algorithm will look like this:
- installation code;
- setting up an application for PC or mobile;
- port forwarding;
- implementation of software testing and sensors;
- troubleshooting if they were detected during testing.

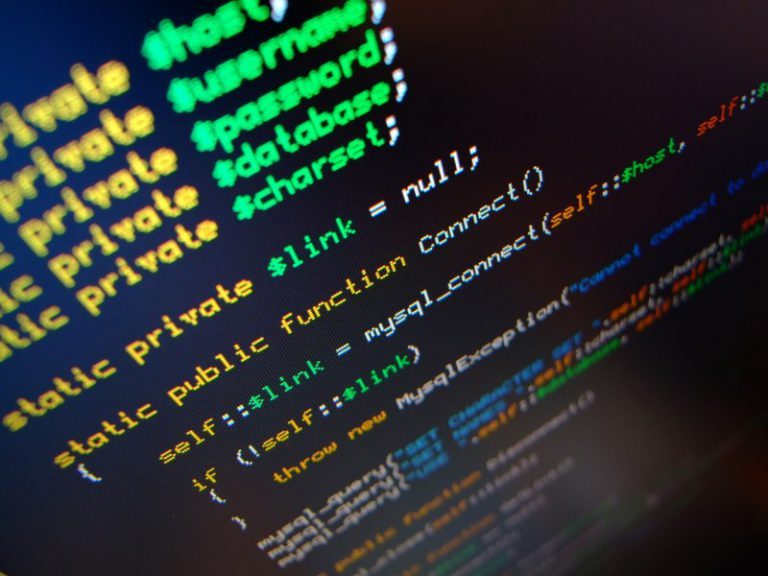
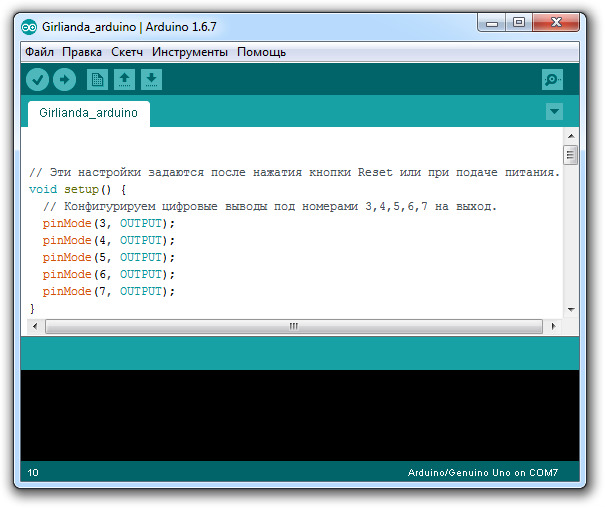
So let's start by installing the code.
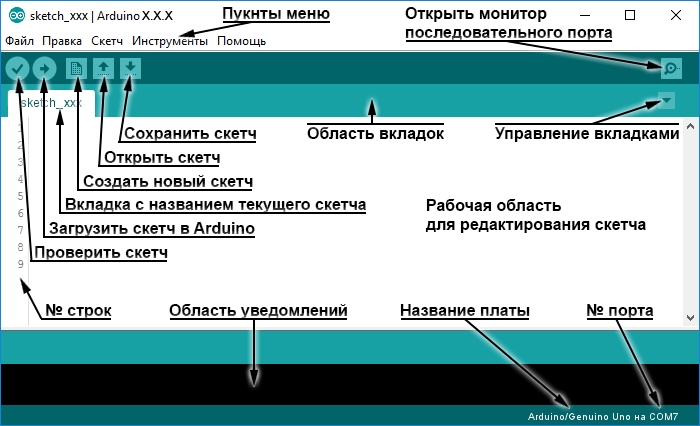
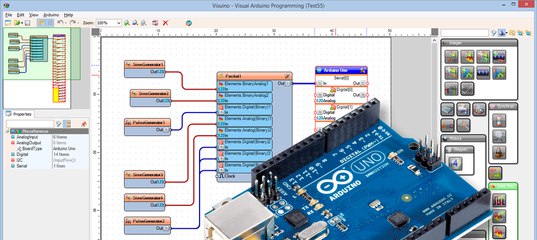
First, the user should write the software in the Arduino IDE. It presents:
- text editor;
- project creator;
- compilation program;
- preprocessor;
- tool for downloading software to the Arduino mini-processor.
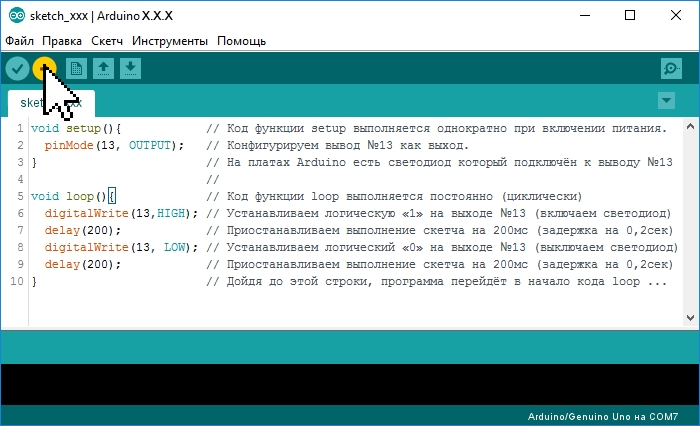
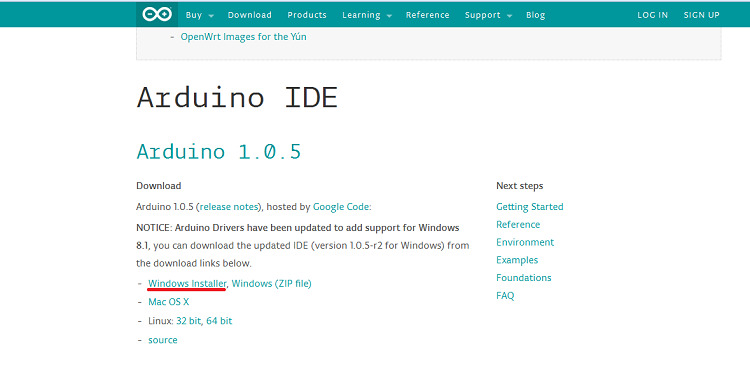
It should be said that there are software versions for the main computer operating systems - Windows, Linux, Mac OS X. If we talk about the programming language used, then this is C ++ with a number of simplifications. Programs written by users for Arduino are commonly referred to as sketches. The system creates a number of functions automatically and the user does not need to understand their writing, prescribing a list of common actions. Also, there is no need to add files of the header type of ordinary libraries. But custom embed is necessary.
You can add libraries to the project IDE manager using various methods. In the form of source codes, written in C ++, is being added to a separate directory on the working directory of the IDE shell. Now the names of the required libraries appear in a specific IDE menu. Those that you mark will be included in the compilation list. The IDE has a small number of settings, and there is no possibility to set the compiler subtleties at all. This is done so that an unknowing person does not make any mistakes.
But today the user does not always need to create a program on his own - on the Internet you can find a large number of sketches and ready-made libraries.
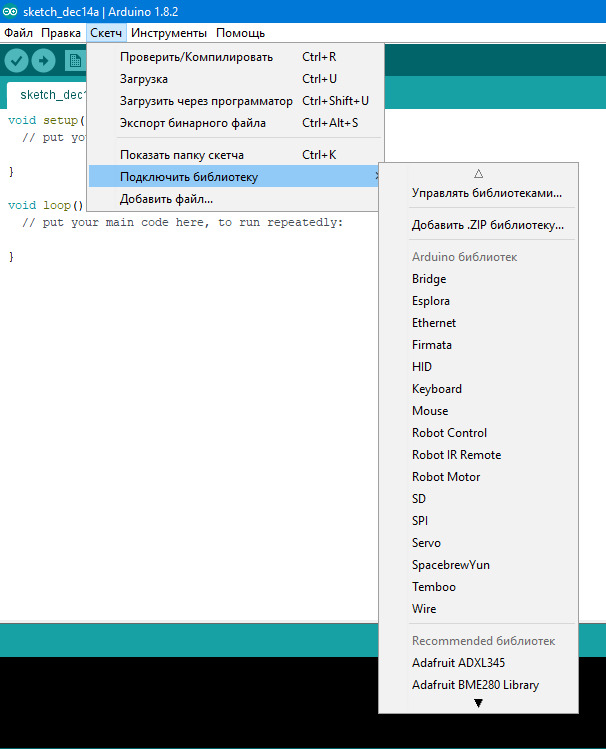
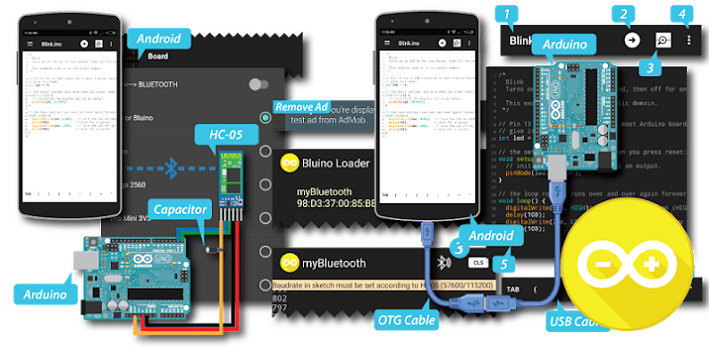
If you downloaded the library, then it must be unpacked and simply inserted into the IDE. In the program text there are comments that explain the principle of its work. It should be noted that all applications on the Arduino work on the same technology: the user sends a request to the processor, and he, in turn, downloads the necessary code on the device screen. When a person presses the Refresh key, the microcontroller sends information. With each of the pages with a specific designation is a program code that will be displayed on the screen.
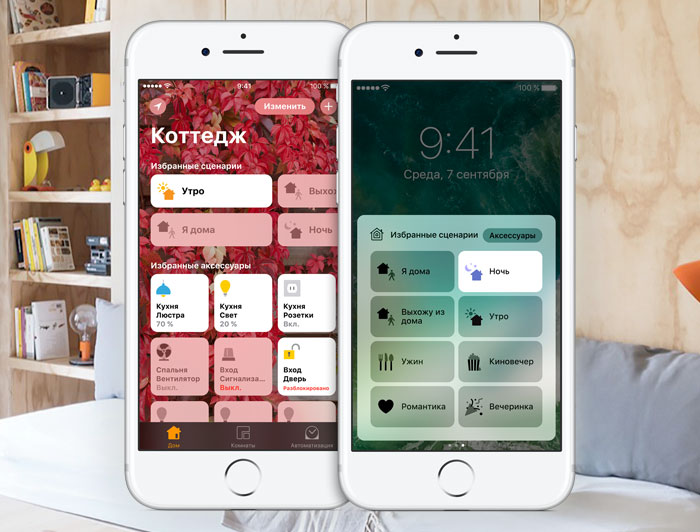
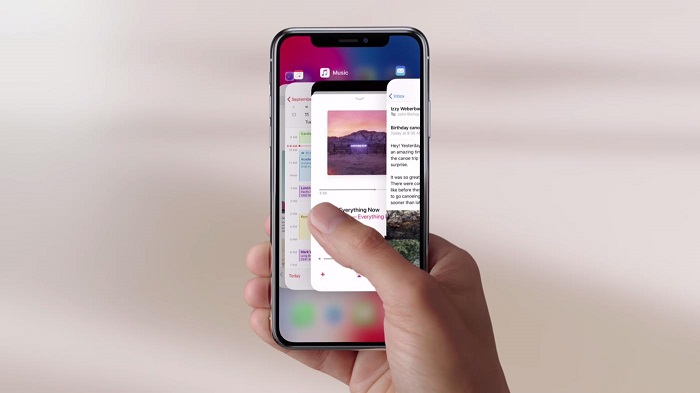
The next set of actions is to install the client on a personal computer or smartphone. You can download it on the Internet, on Google Play Market or from another source. In order to do this, you need to open the file on the phone that you downloaded, then click on it and in the appeared window click on the “Install” button. At the same time, you should know that for this purpose the option should be activated, which allows to install software not from the Google Play service. To enable this option, you must enter the settings section and select the “Security” item there.This is the way to activate the corresponding option. When the installation is complete, it will be possible to activate the application and configure it.

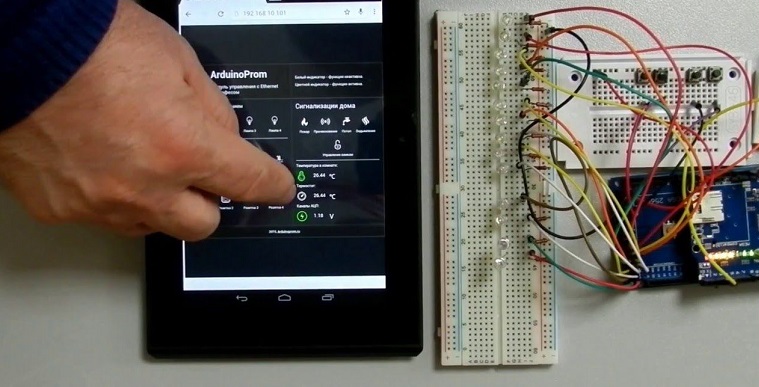
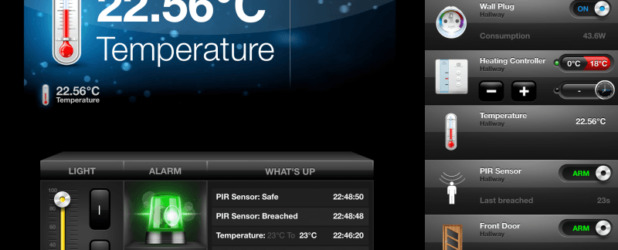
Control
Using this software, you can not only receive information from the system, but also manage - for example, activate and deactivate the alarm. If the option is active, then when the motion sensor is activated, the program will receive the appropriate information. Note that the Arduino polls the program to activate the motion sensor at intervals of 60 seconds.
The next stage of connection is setting up the browser program for use with the “smart home”. In the address line, you need to enter a specific sequence, which will be the IP address of your computer. After the implementation of this action, the user will be able to receive information from the “smart home” and the ability to manage it.
After that, you can proceed to work with the router. It should open the port.
You can do this using the following algorithm:
- open settings;
- register the address of the Arduino microcontroller;
- open eightieth port.
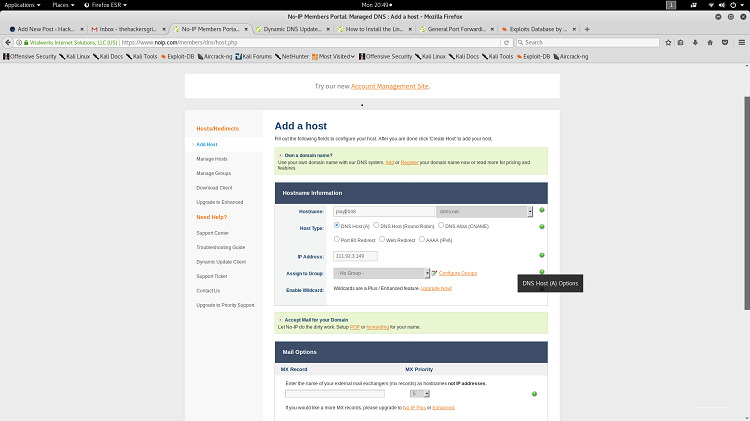
Now you need to set up an account on the Noip portal. com.Although this step is optional, there is a need for it if the address needs to be given a domain name. You need to go through the registration process on the portal www. noip. com, then go to the Add host category and specify the IP system. After going through this procedure, it will be possible to get access not only by IP, but also by domain. At this the formation of the project is completed and you can check the system for its performance.
Features of the use of a number of hardware parts
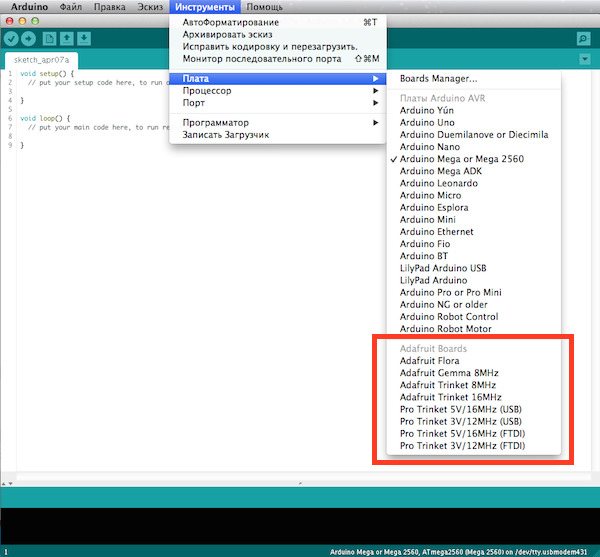
Given that components compatible with Arduino are produced by a large number of manufacturers, and Arduino itself cannot control products, the user is faced with the probability of acquiring a component that will work, to put it mildly, incorrectly. In general, this situation already exists in the segment of the creation of personal computers. A long time ago, IBM made the architecture of its personal computers open, which is why various companies began to produce compatible computers.
At the same time, the quality of parts and the degree of compatibility have fallen. In contrast, this is Apple’s policy, which significantly limited the number of developers who had access to its architecture.
The same goes for software development.This was the reason that the products of the American company are much less common and have a higher price. But the quality here is significantly higher and cannot be compared with devices that run under Windows.

Users noted the following features in the operation of a number of Adruino components.
- On a number of Arduino microprocessor solutions, when a relay is closed that is connected to them, a COM-type port breaks. For this reason, the microcontroller cannot load the sketch. When you start this procedure, the equipment goes to reboot. The most interesting thing is that the relay makes a click, the COM port is turned off, and the sketch does not load.
- In case of a malfunction of the microcontroller or the occurrence of a code error, it is better to use well-closed relays to which hand-operated switches are connected in series.
- The door closing sensor can sometimes act falsely. For this reason, the sketch is created so that the system performs the desired action when receiving a couple of signals at once.
- For a device that is responsible for fire alarm, it is best to use a smoke detector, rather than a fire detector.The latter has a flaw - it detects fire no further than thirty centimeters from itself.
- The temperature sensor model DHT11, which comes in the so-called standard set, gives a serious error at the level of two to three degrees. In the construction is better to use the model DHT22, which is much more accurate. And outside the window is better to use DHT21. It can work even at sub-zero temperatures and is resistant to mechanical damage.
- To configure process control using claps, a number of users unknowingly take a sound detector instead of a microphone, where there is a manual-type threshold setting. For such purposes, this device is not suitable due to the fact that it has a relatively small radius of action. Yes, and the sensor transmits signals with small time pulses. In the presence of a large-sized sketch, the processing of which takes time, the microcontroller simply does not capture the signals.
To avoid buying low-quality parts, experienced users recommend reading reviews on the Internet before purchasing. Available sensors can be purchased in several variations to personally check which one will work more efficiently.
Visualization of the system and increasing its capacity
It should be said that for the visualization of processes in the system under consideration, digital display boards or a liquid crystal display can be used. But this is not the best option in this case. Using a separate state processing server for visualization will be most effective. It can be implemented on Node. js, which allows you to implement any server. Naturally, we are talking about processing the states of the Adruino board.
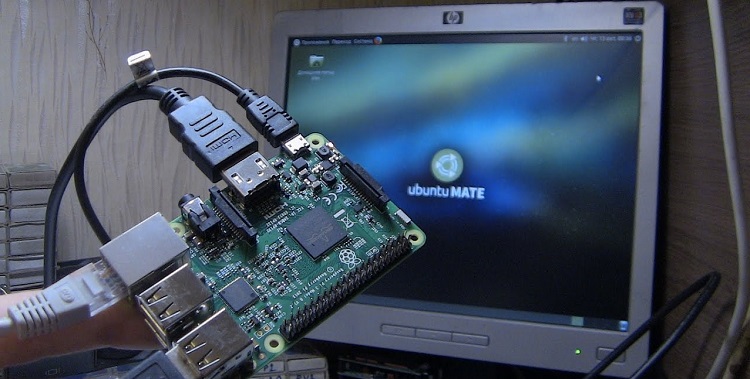
This technology is used to perform the tasks of the so-called Internet of Things, which is why it is suitable for visualizing system automation. You just need to create a server and handler in JavaScript, then it will be easy to display the total in the browser of any device. As a hardware basis, you can use the same microcomputer Raspberry Pi or PC. But the possibilities of the automation mechanism will increase significantly. For example, on the server the amount of memory is unlimited, and the server program can be created in such a way that it manages everything.
With this type of server you can even link things together. The idea is to visualize the automatic processes at home using cloud services.Another option is to receive information and control the system via SMS.
In general, as you can see, this type of system on the Arduino is a great solution for those who want to make their home technologically advanced and comfortable.
The fact that such a "smart home" based on the Arduino, see the following video.


