Installing vertical blinds

Installation of vertical blinds can be done independently, if you follow the step-by-step installation instructions. It is also important to know how to look after the blinds and what types of windows are meant for.
Kinds
Vertical blinds are divided into the following types: classical, inclined, corrugated, arched, "day-night" and an accordion. When installing vertical curtains, it is important to know which view fits which window and interior:
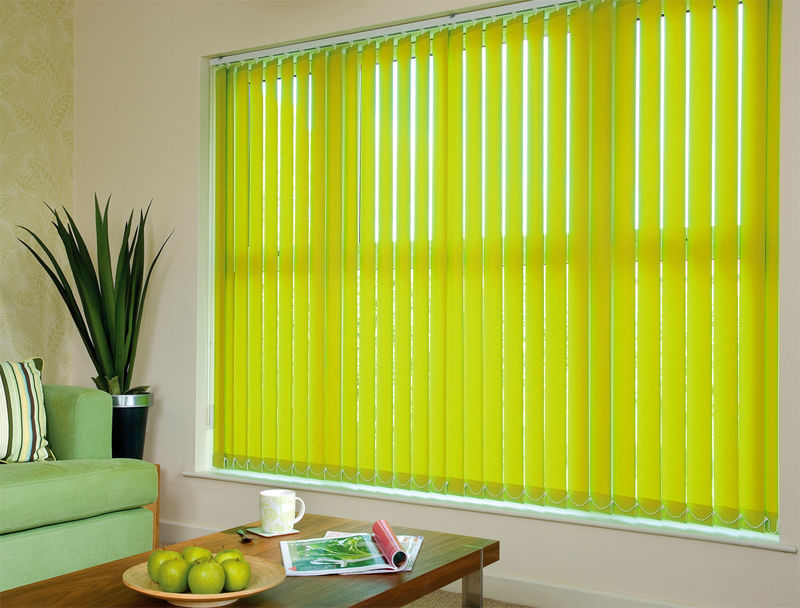
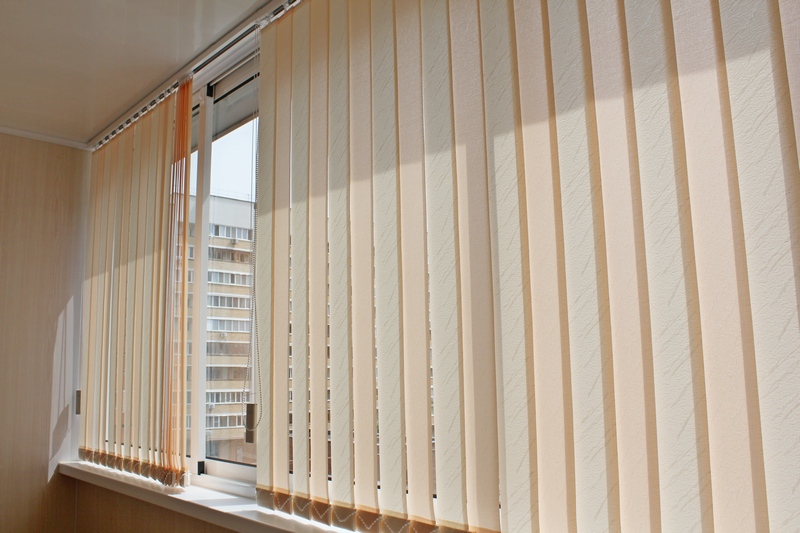
- Classic. Made from fabric, paper or plastic. Designed to darken the room, protect against heat from the sun, zoning the interior of the room.
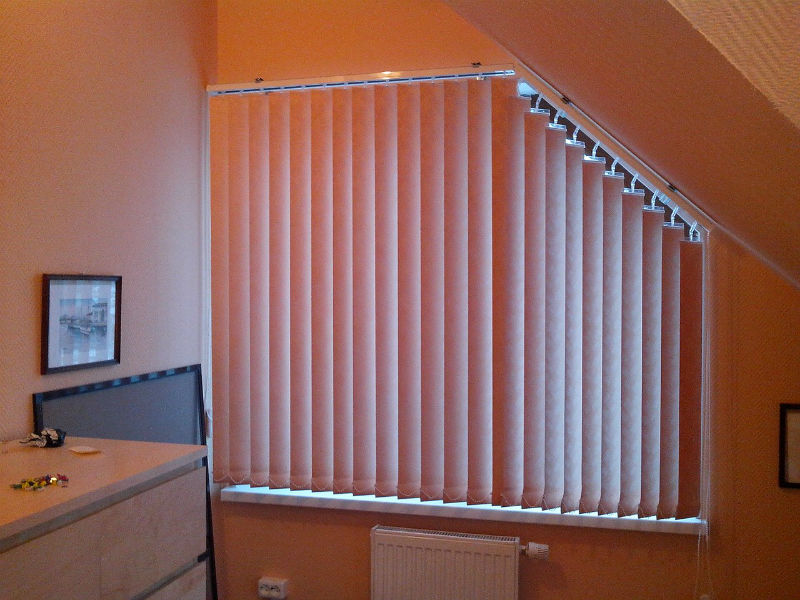
- Inclined. A kind of plisse specifically for windows that are angled in the attic or ceiling. Their feature in a specific assembly system, which does not allow the web of any material to sag, being at an angle. Mostly inclined models are available with electronic control.
- Corrugated. This type is a vertical and horizontal double pleating. As a result, the folds look smoother, neat and dense. A corrugated model of plastic and paper in this design absorbs a significant portion of the heat and protects the room from bright light.
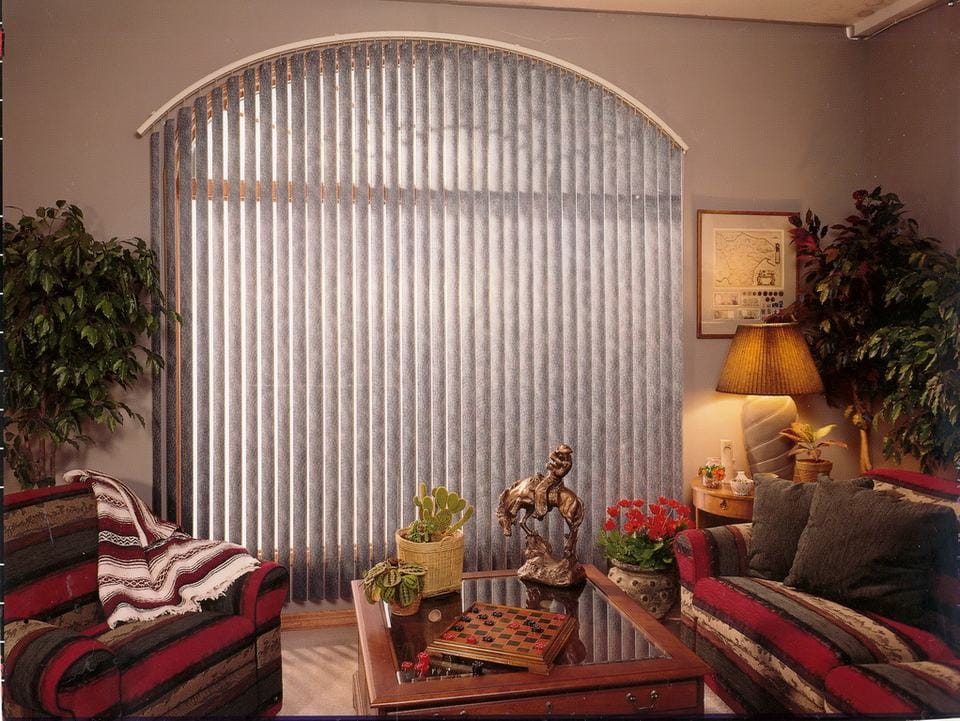
- Arched. The most flexible fabric canvases that take any form, like a paper fan. The successful solution for rooms with a non-standard window shape (arches, trapezoids, triangles, beveled windows).
- "Day Night". The fabric of such blinds consists of two layers of fabric: a light fabric that allows a large amount of light to pass through for daytime use and is dense, dark for protection from the bright sun during the day and prying eyes in the evening.
- Harmonic. The design consists of a control mechanism (chain or electric drive), weighting, pleated fabric, which resembles an accordion. The range of material, colors and textures is very diverse.
Special features
This product has a number of distinctive features:
- They are closed from top to bottom (classic canvases), from bottom to top or from both sides at the same time. At the same time, the degree of density of the “accordion” can be adjusted: by closing either the upper, or the lower, or the central part of the window.
- Suitable for curling irregularly shaped windows.
- The optimal solution for roof windows, attic, ceiling and sloped windows.
- Opening, the cloth compactly gathers in a fold and hides in the eaves.
- Convenient for installation on all types of windows.
- Various mounting methods and control mechanisms (manual and electric).
- The cloth from woven material can be erased.
- The curtain can be made of two types of fabric at the same time, which makes it possible to adjust the degree of transparency, darkness, protection from the sun.
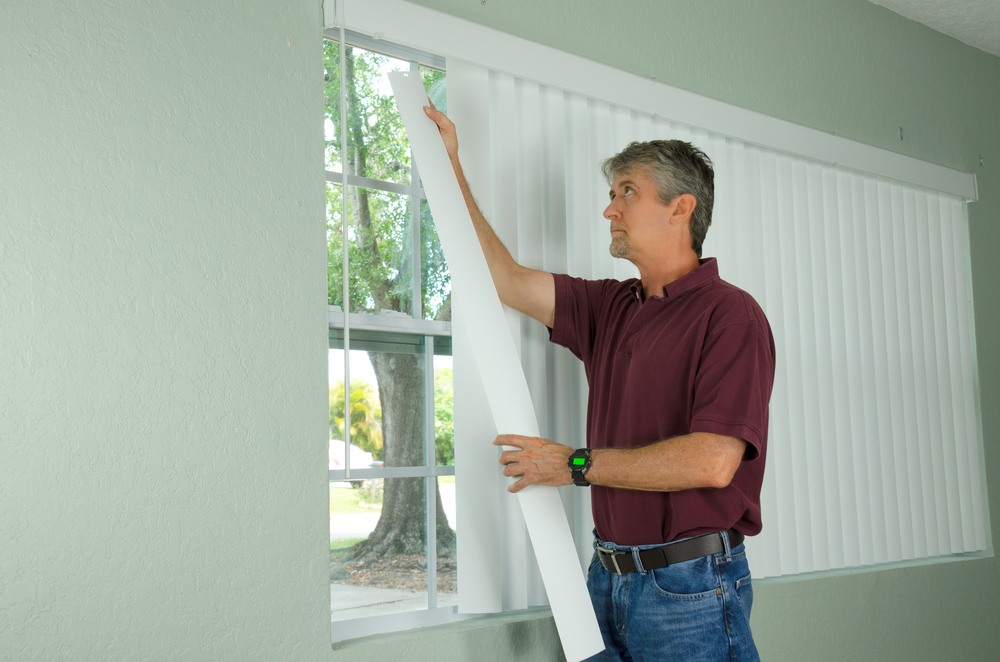
- Easy installation can be done by hand.
Benefits
There are the following:
- Compactness. Blinds occupy a minimum of space, allowing owners to show imagination and organize additional window decoration or leave the sill with a functional surface.
- Simple and intuitive type of management.
- Long service life.Special impregnation protects the canvas from dust, grease, dirt, moisture, abrasion.
- Ease of hygiene. Do not require special care. Their small surface area is enough to wipe with a damp sponge with a soap solution every few months.
- A variety of design for the interior in any style.
- The tight adhesion of the web to the glass surface protects equally well from heat and cold.
- The ability to mount the system yourself.
- A variety of materials: from easy window decoration to total blackout protection.
- An opportunity to combine blinds with portieres, tulle, lambrequin.

Required tools
To install vertical curtains are not too many tools and need. You will need: a stepladder, a set of self-tapping screws, a building level and drawing accessories, a drill, a screwdriver.
Be sure to come in handy: bracket for the ceiling and for the groove, fasteners, corners, latches, monofilament, stoppers and c-clips, rings for the rod, chain locks, replacement parts. Each instruction contains a detailed list of necessary components.

How to make a measurement
On how well the measurements are made, the final result depends.Even expensive beautiful models will not look good on the window, if there are gaps in the opening or the edges of the slats are rubbed against the wall.
It is important to pay attention to the following points:
- For the most accurate indicators used steel tape.
- It is impossible to round the received figures, accuracy has to be observed to millimeters.
- When ordering blinds width parameter is indicated first, length - the second.
- Not a single window opening has absolutely perfect geometrical shapes, therefore measurements upwards and outwards must be made at least at two points.
When installing in the window opening, you need to determine the width at the top of the arch and subtract 20 mm. To determine the height, compare the height of the left and right side of the arch, subtract 1 cm from the smaller value. For wall mounting, you should add at least 10 cm to the wide side of the slope. The length of the slats can be any, but it is recommended to retreat 2 cm from the edge of the blinds to the floor. Ceiling mounting involves determining the height (up to the floor or window sill) minus 2 cm, the width of the arch is recommended to increase by 100+ mm.

Fastening options on plastic windows
There are several mounting options: with and without screws.
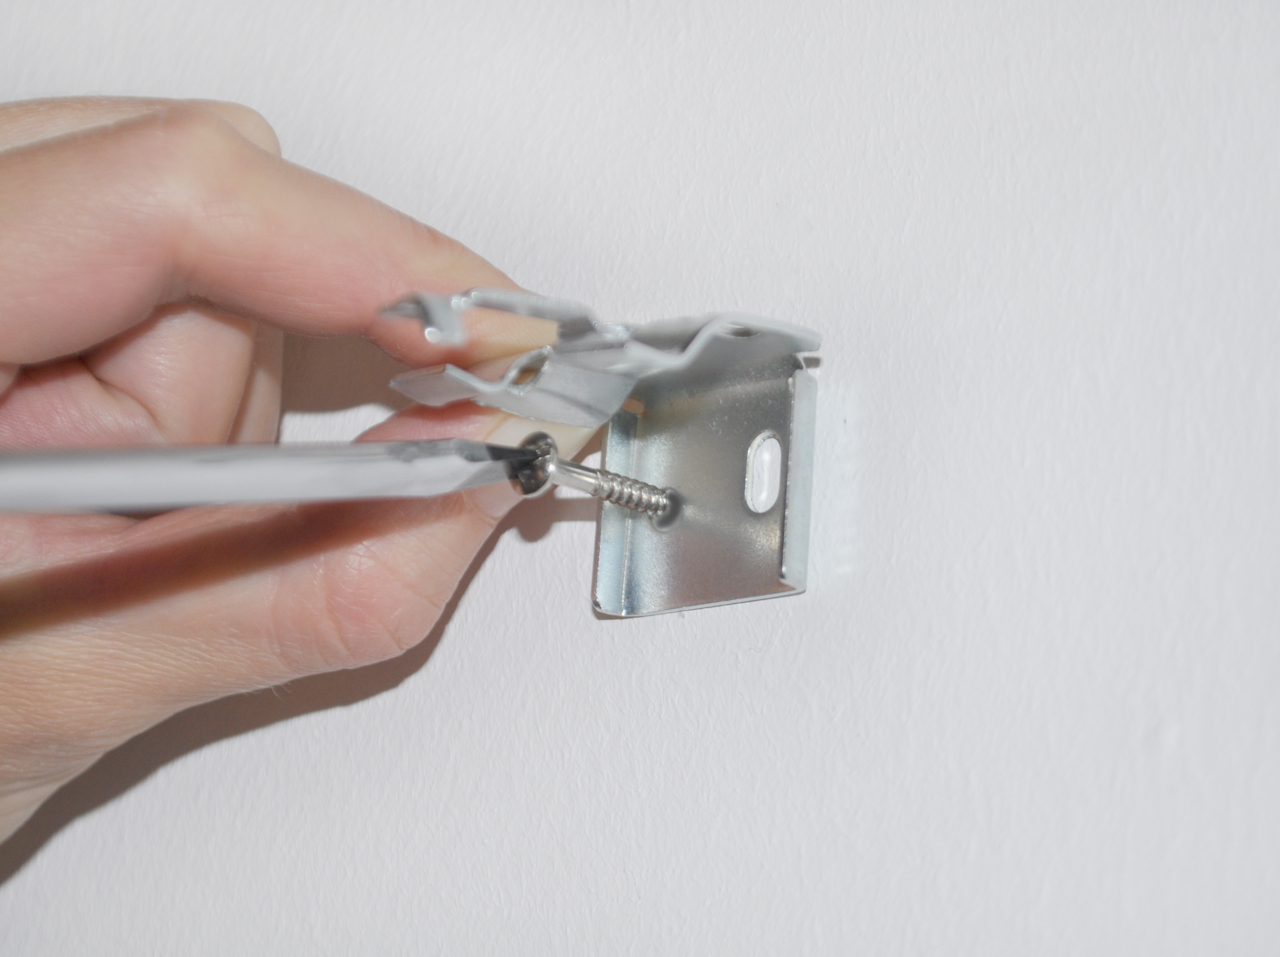
With screws:
- It should be noted where they will be located.
- Then make holes, attach brackets.
- Fasten the blinds.
- At the bottom also make two holes.
- The ends of the blinds fix with plugs.
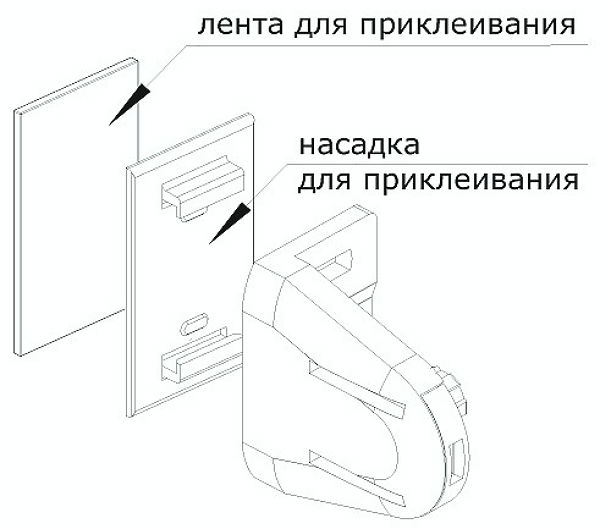
Without screws. First of all, you need to mount the curtain, assemble the brackets and install them on the bobbin. Then this structure must be fixed on the window in order to perform markings for fastening. The second step is to mount the brackets on the adhesive tape at the top of the frame and the tensioner for the string at the bottom. Pre-attach them with tape is not necessary, but it is desirable to eliminate problems with the subsequent drilling of holes for screws. After installing the guide string, the curtain itself is mounted in the mechanisms.
How to care
Due to the peculiarities of the composition, the materials from which the blinds are made do not require specific care. Once a month, these blinds can be subjected to dry cleaning, every few months - wet. A good addition will be the treatment of sprays from burnout, moisture and dust.
If there is a need, then such blinds can be washed on a gentle washing mode or manually.

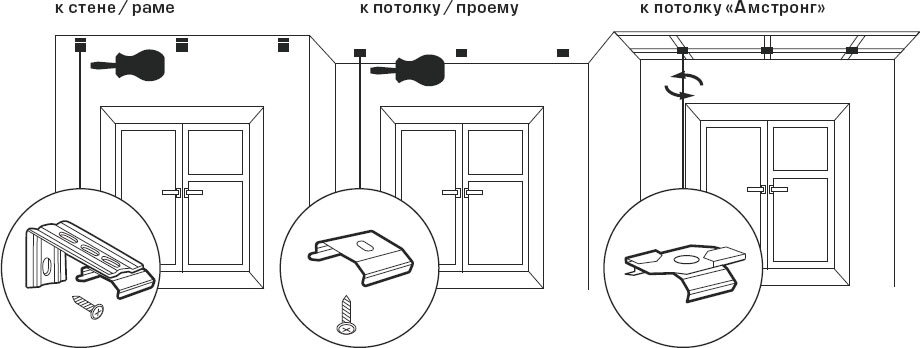
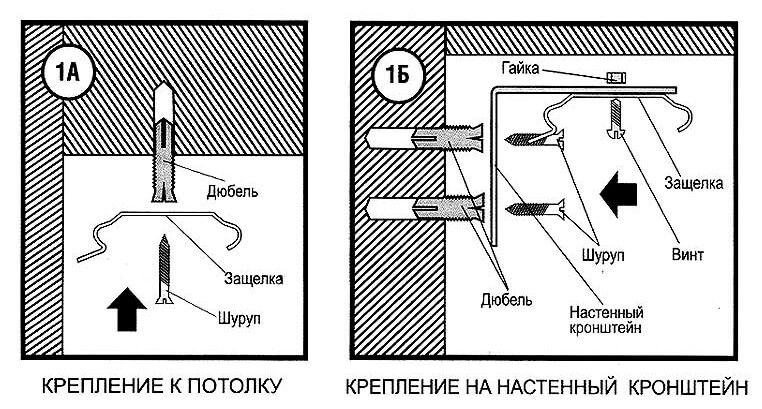
How to fix to the ceiling
Vertical curtains are attached in three ways: to the ceiling, to the frame with drilling, to the frame without drilling.
In all cases, the fastener is a cornice with or without a decorative facade. The brackets on which the structure rests are fastened with screws, hung or glued to double-sided tape. Special tape seems rather impractical, however, it is fixed very firmly, so it is important to correctly mark up to install the brackets. After they are glued, it will be quite difficult to move them.
Installation procedure for vertical blinds:
- Preparation tools.
- Drawing a pencil marking for installation of arms. For reliable fixation of fasteners it is recommended to drill holes for self-tapping screws at the same stage.
- Mounting brackets in a suitable way (with or without drilling).
- Installation of the eaves.
- Install slats. To do this, you need to pull the control cord, with lamella mounts on it, so that they are in the desired position.
- Then fix all the slats on the hooks of the mountings.
Wall mounting
Installation works on the design of the wall require certain skills and experience, it is necessary to take into account some of the nuances and features. Installation of blinds begins long before the preparation of the working surface and a set of tools:
- The first step of this process is a weighted decision about the type and type of blinds, material, color and texture depending on the functionality of the room.
- The second important point is the correct markup. Much if not everything depends on it, including how easy the installation process will be. If all the features of the architecture of window openings will be taken into account by experts when ordering blinds from them, everything will go smoothly and easily without the help of professional installers.
- It is also important to consider whether it will be possible to open the window after installation, how light-protective devices will work, and whether there is a risk of deformation for them.
- Installing blinds. It must be made exactly with the markup and subsequent verification of the functionality of the structure. Here the most important point is the choice between the mount with drilling and the mount without it.
How to hang on the balcony
To install, you must follow these steps:
- Degrease parts of the balcony and fasteners that will be connected with adhesive tape.
- Install the blinds.
- Assemble the brackets.
- Mark out the mounting brackets. To do this, you need to attach the brackets to the assembled blinds, install them on the window without fastening, mark the places for the adhesive tape with a pencil, remove the curtain.
- Install the string guide against sagging. Attach to the “ear” of the upper bracket and weighting curtains, at the bottom to fix in the tensioner, which is mounted on the frame.
Ideas in the interior
Vertical blinds add even more space to high windows and doors. Because of this, they are often placed on balcony doors. It is possible to choose both in fabric, and in vinyl material. Vertical blinds block light well, especially dark-colored blinds.

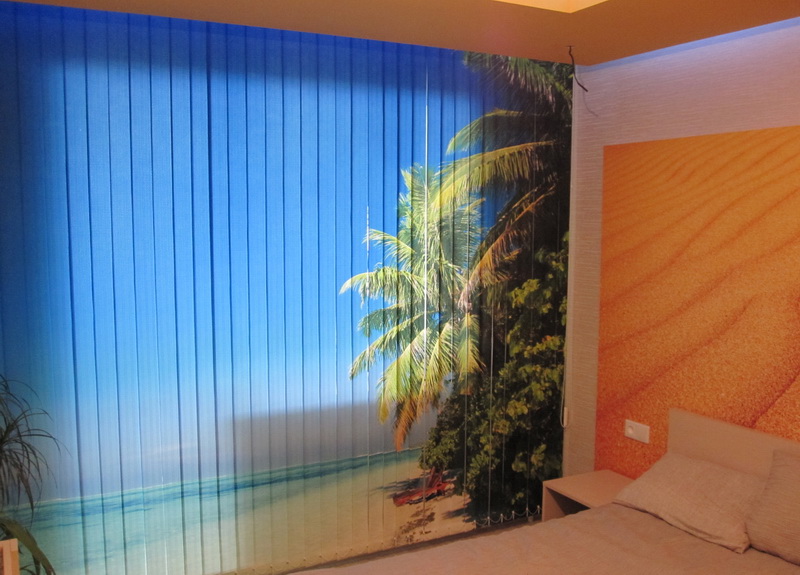
Modern vertical blinds allow everyone to become a real designer in his apartment. You can create your own unique options using photo blinds.
You can install vertical blinds in the children's room. They can be combined with curtains or colored tulle.

How to install vertical blinds, see the following video.


