Installation of curtain rods for curtains
In any room there are windows that need beautiful design. At home, the windows are decorated with the help of textile cloths, which are hung on a special fixture-eaves.
Types of window curtain
Modern types of cornices, in addition to performing a functional task, are also an element of decor. Classification of the eaves is carried out on several grounds. These include: type of material used, type of construction, method of attachment.
Any type of cornice, regardless of the material and type of fastening, is divided into single-row, double-row and three-row structures:
- The easiest option is a single row, designed for one curtain.
- The more common option is the double row version.This design is designed to hang two types of textile fabrics, most often used dense curtains in combination with light curtains.
- The three-row version is necessary if, in addition to curtains and curtains, a lambrequin is hung out or this design is used to create a multi-layer composition of textile cloths of various densities.


According to the material, the cornices are divided into wooden, metal and plastic (PVC) products:
- Wooden eaves refer to the classic versions and are suitable for almost any interior. Deciduous, coniferous and exotic tree species are used for their manufacture. Any wood material is treated with special means by which the processes of decay are not terrible for finished products. The processed eaves have durability and durability. As a rule, wooden types of products belong to rod types.
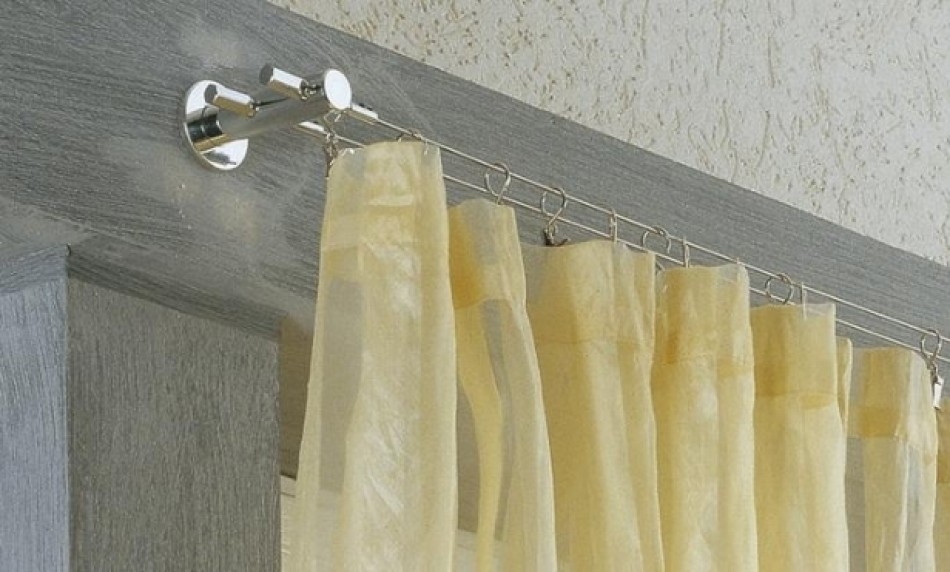
- Metal curtain rods no less popular. Their design can be made of aluminum, stainless steel, brass, chromium, nickel, iron and copper. Metal products can have a different shape.The classic options include rod models consisting of one or several pipes with a circular cross section and two or three brackets necessary for fastening the base.


Manufacturers produce different types of rods. Their surface can have a smooth surface, and can be decorated with various ornate patterns of various shapes. Very often, the ends of the rod eaves are decorated with tips, which have not only a diverse shape, but can also be made of a variety of materials.
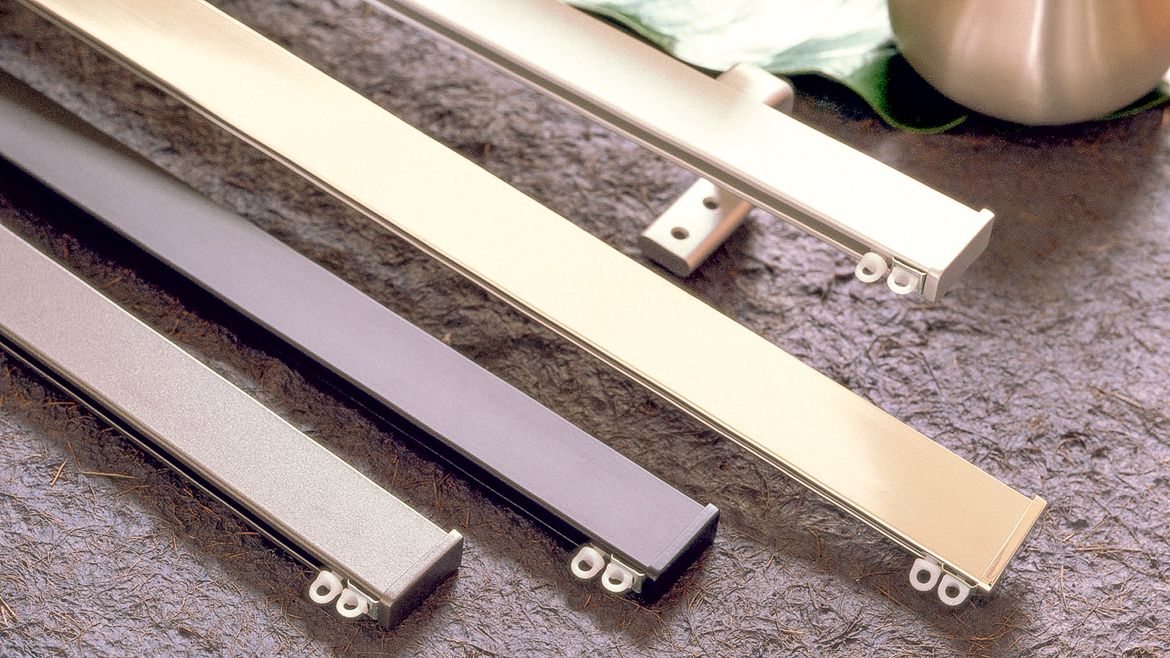
To more modern models include tubular metal profile cornices. They are based on round or rectangular pipes. Rail mechanisms, consisting of two or more grooves, are the tracks along which the hooks move.
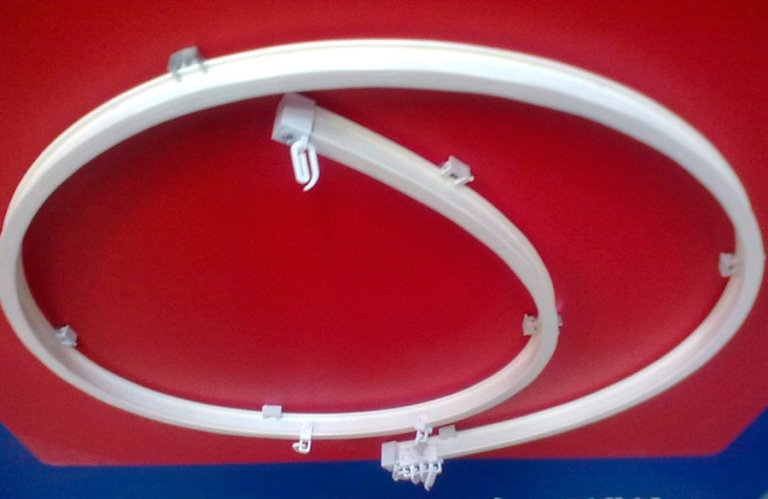
On the background of classic metal models stand out flexible curtain rodswhich can be made of aluminum or plastic. They, as a rule, are used not only for finishing windows that have uneven outlines, but also decorate various openings with their help. Flexible options, without exaggeration, can be attributed to the universal models.
Due to their plastic construction, they can be installed not only in rooms with a favorable microclimate, but also in rooms with high humidity, which include bathrooms.
A variety of metal rod eaves are mini options. The design of these models consists of a single rod and two brackets. The principal difference of this type is the presence of a sliding mechanism in the rod. Thanks to this telescopic device, you can change the length of the product, depending on the width of the window opening. The length of the rod, depending on the model, varies in the range of 40-135 cm. With the help of universal mini-variants, you can decorate not only the window opening, but also a niche, a door opening.

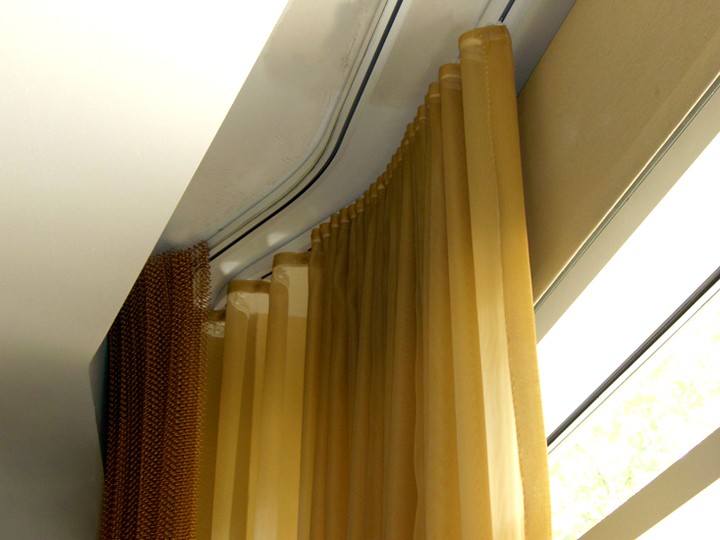
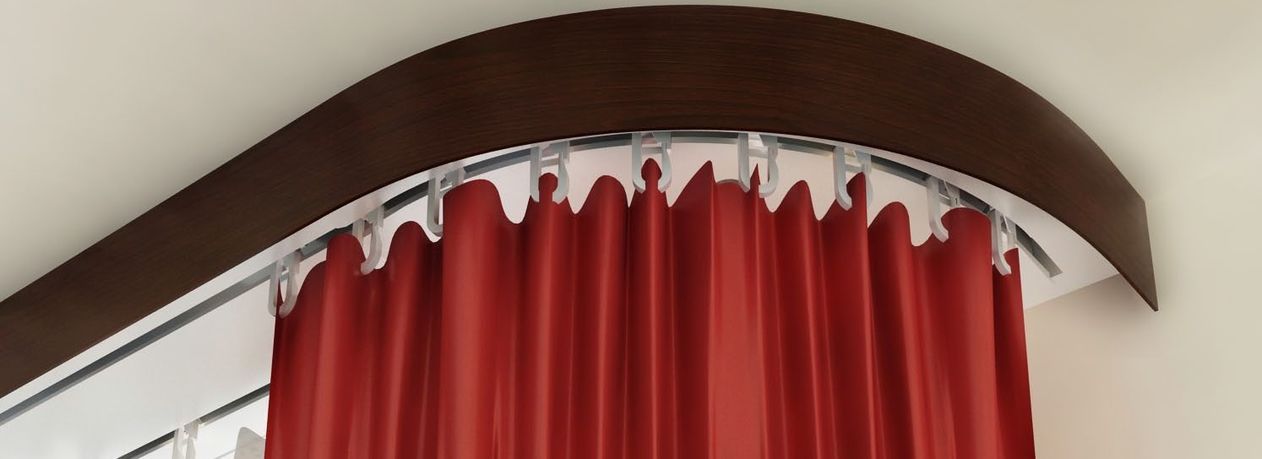
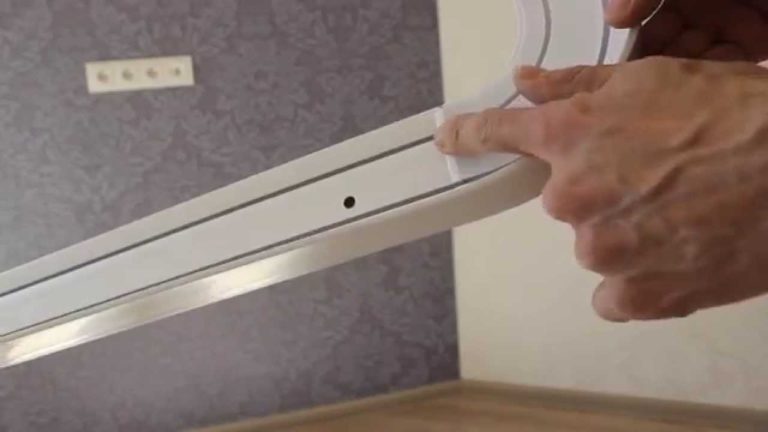
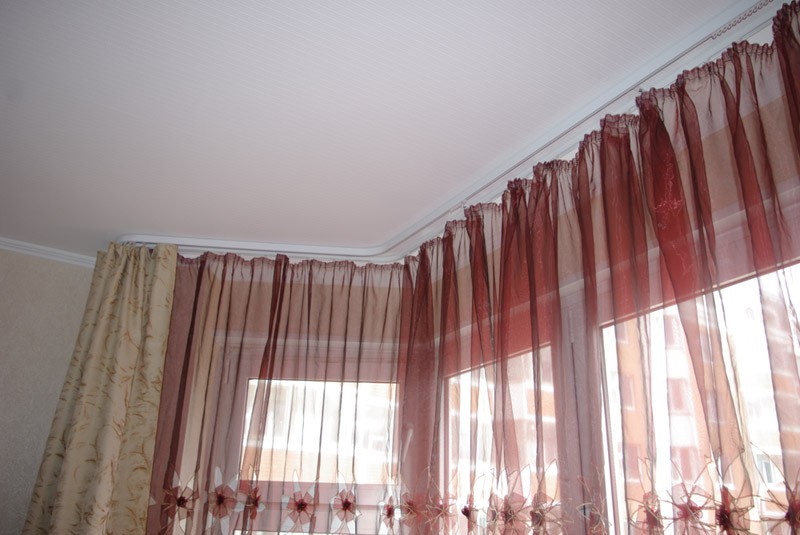
Tire profile cornice has a rectangular shape. Any model of this type is supplied with two turning elements, thanks to which the curtains diverge beautifully on different sides, forming an elegant semicircle. Very often, the tire version is decorated with a baguette bar, which is inserted into a special groove. Baguette cornice looks very organic. The plank itself hides the hooks, it creates a feeling of floating curtains, especially if the color of the plank coincides with the tone of the ceiling.
Plastic models are a kind of profile options, have light weight, attractive appearance and affordable price. In shape, they resemble a flat profile (tire) with 2, 3, and sometimes 4 slots for hooks. Tire or rack option, as a rule, is attached to the ceiling.
Required tools
To install any model of the eaves, a certain set of tools is required, without them a high-quality installation will be impossible. As a rule, manufacturers supply each product with a special set of fasteners that will be needed during installation. But additional fasteners will never be superfluous, as during the installation process sudden breakdowns of fasteners are possible.
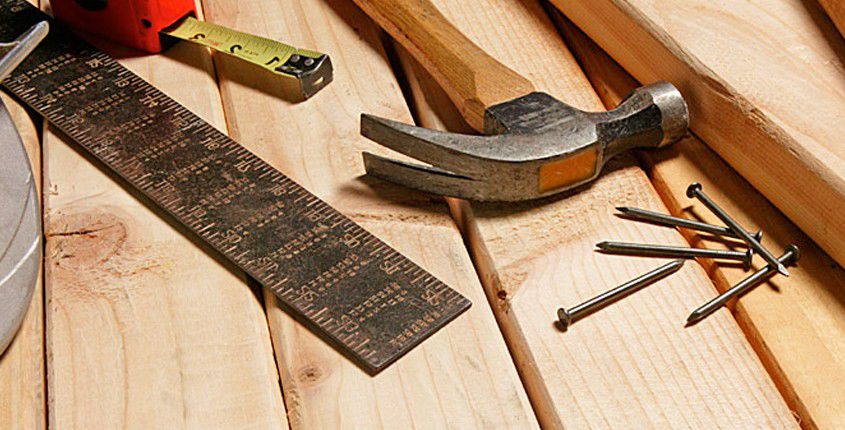
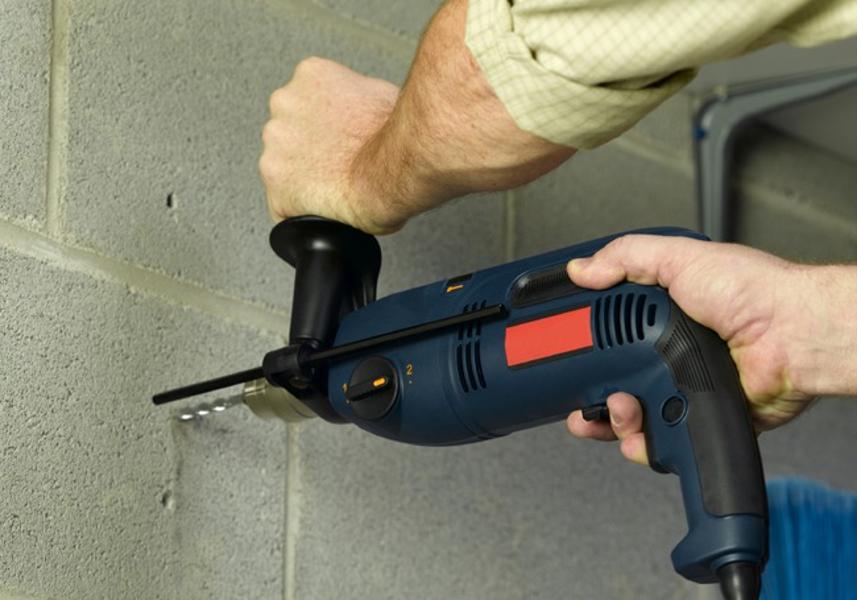
In order to hang the eaves, it is necessary to rise to a certain height. This can be done using a ladder. The puncher is the main tool, without it it is impossible to drill holes, especially if the wall is concrete. Tape measure and pencil will be needed to mark the holes. Dowels are used as the basis for self-tapping screws, they are necessary for a more durable mounting structure. For an even installation of the eaves, you need a building level, with its help you can hang the selected model as accurately as possible.
Installation Preparation Rules
In order to properly install any model of the eaves, you must first carry out a series of preparatory measurements and only then acquire the desired structure:
- To begin with, we measure the width of the wall and window opening. As a rule, the eaves should be larger than the width of the window opening. The minimum stock on each side varies between 15-25 cm. Due to this reserve, the curtains will not block the window opening when opening.
- Sometimes eaves set from wall to wall. With this installation, you need to leave a few centimeters for decorative elements of products (tips).
- With proper installation, it is necessary to consider the protruding part of the window sill and the heating system. The minimum distance from the wall to the arm of the bracket should be at least 15 cm. This stock ensures that the curtains are evenly positioned; it will not rest on the projecting part of the window sill.

How to collect?
In order to properly assemble the eaves, it is necessary to consider the design features.
Each model has its own assembly details:
- Before assembling the wall-type suction rod, it is necessary to first determine the required length of the rod.A regular bar is trimmed to the desired length if necessary. Sliding option extends a certain length.
- Then you need to prepare fixtures for curtains. As a rule, rings with hooks are used as fasteners, which are strung on the barbell in the required quantity. One ring should be between the cap and the bracket, due to this arrangement the curtain does not slip to the center. If two brackets are used, then all the rings can be put on at once; if three brackets are used, then half of the total is better. Once the rings are on the bar, you can put a cap.
- Now you can begin to fix the rod to the bracket. First, on the one hand, and then on the other, the rod is tightly fixed with the help of screws.
- If there are several rows, the process is repeated in the same way. After that, you can attach the bracket with the design to the wall.
At what height should be mounted?
The choice of height is of great importance when installing wall eaves. The visual perception of the interior as a whole depends on the height at which the structure is fixed.The higher the setting, the larger and more spacious the room seems. This statement is especially true for rooms with a small area and low ceilings.
The height of the installation also depends on the length of the curtains. The minimum gap between the window and the eaves bar should be at least 5 cm. Determining the level of the eaves suspension depends on the method of fastening the canvases. If the grommets are selected as the fastener for curtains, you need to leave the minimum gap between the bar and the ceiling (5-7 cm). This must be done for the free movement of curtains fitted with eyelets.

How to hang wall models correctly and evenly?
Most often round tubular and stringed cornices are hung on the wall.
Operating procedure:
- In order for the wall construction to hang smoothly, it is necessary to mark the brackets on the wall. For a model of less than 2.4 m in length, two brackets are sufficient, and for longer structures it is necessary to install a third bracket, placing it in the center.
- For proper marking it is necessary to first set aside 15-25 cm on each side of the window opening and draw a straight line with a pencil perpendicular to the ceiling.
- Then from the middle of the upper part of the window opening, set aside the desired value and put a full stop.
- From it we draw a line with the help of a construction level and a ruler to the intersection with the side lines. The points of intersection of the two lines are places for mounting brackets.
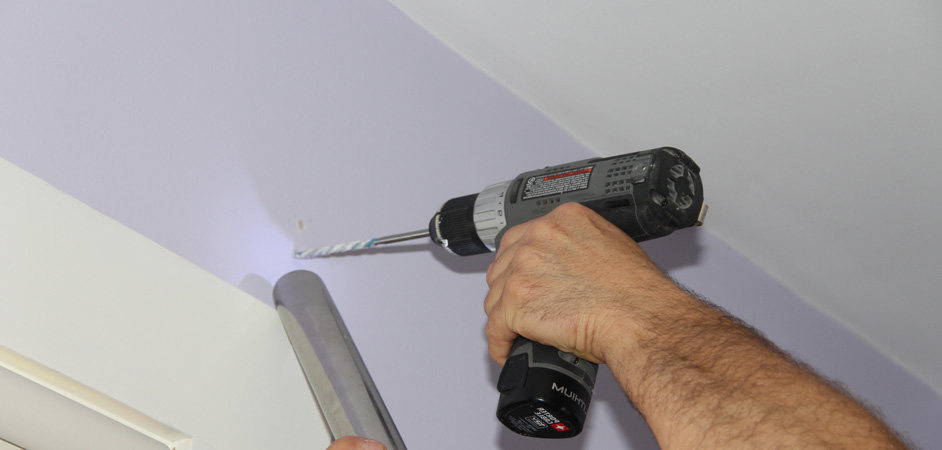
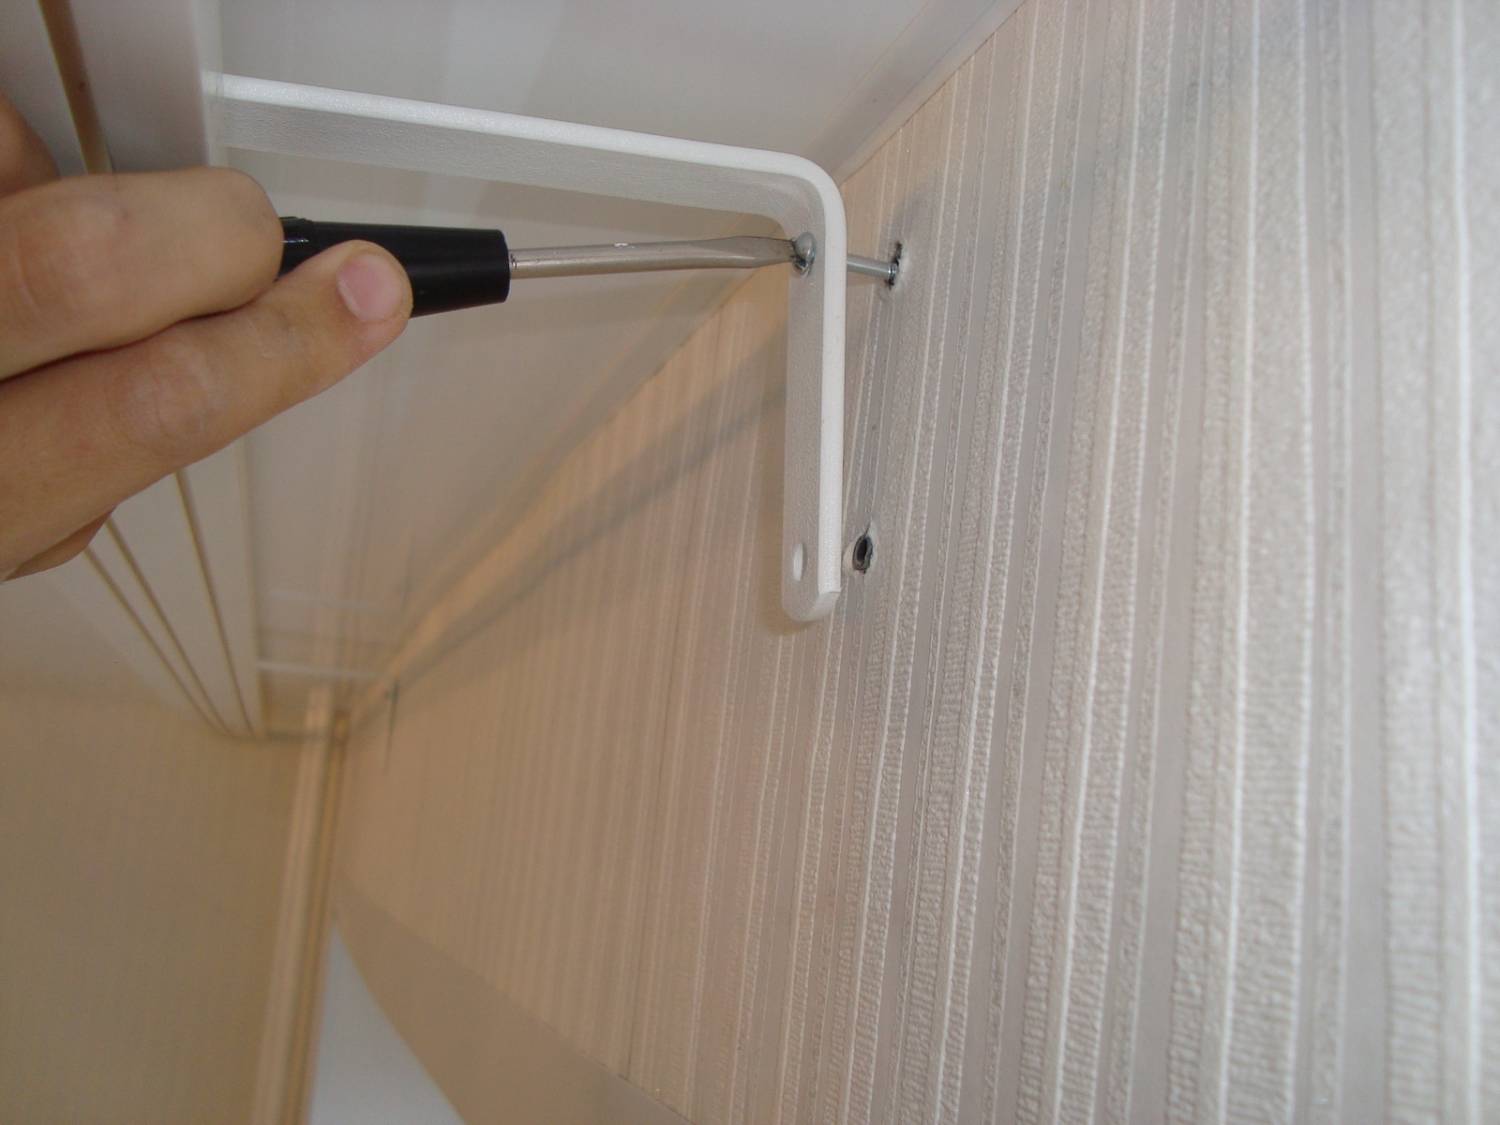
- Now we attach the bracket fixing element to the wall and make marks for the holes.
- Using a perforator, drill holes and insert dowels. After installing the dowels, you can fix the fixing element of the bracket and hang the eaves.

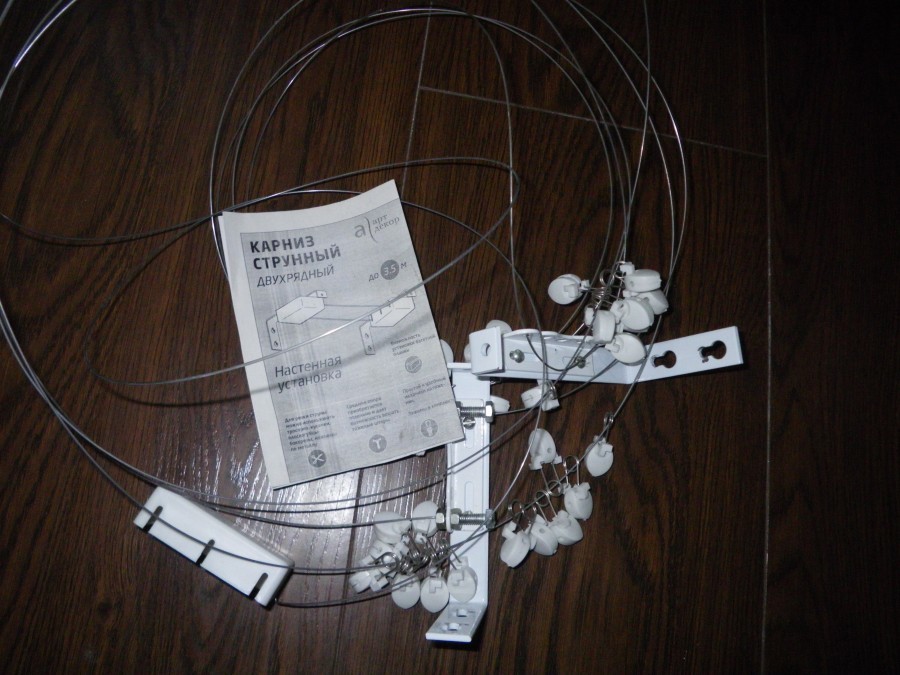
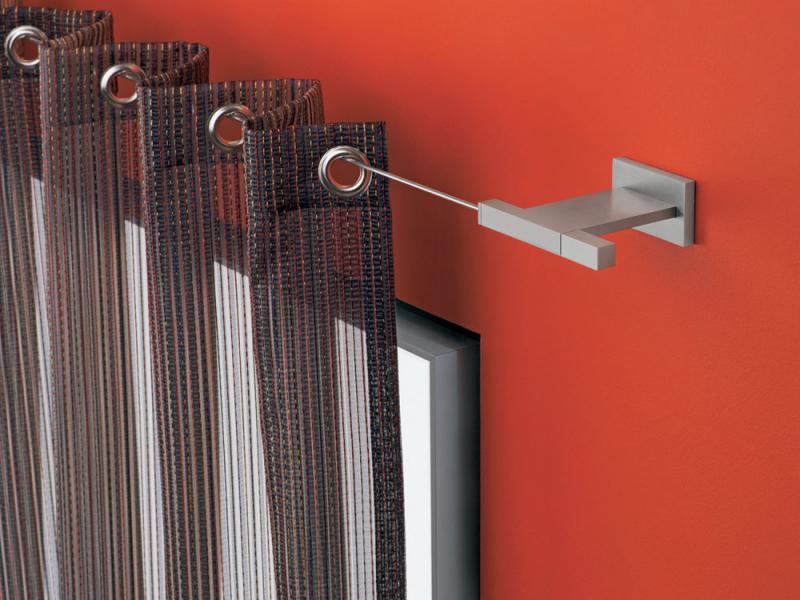
The stringed eaves consist of one or two strings, brackets and boxes, with the help of which the tension of the strings occurs. After marking and fixing the bases of the brackets, you can proceed to string tension.
- One end of the string is passed through a hole in the mount and secured with screws. Then the bracket is screwed to the base on the wall. Similarly, the string is fixed on the other side and attached to the base. After installation, a final adjustment is made.
- In order to tighten the string of the old sample, open the box to find the bolt and use special tools to tighten the washer on the bolt on each side.
Installation of ceiling models and installation of the plug
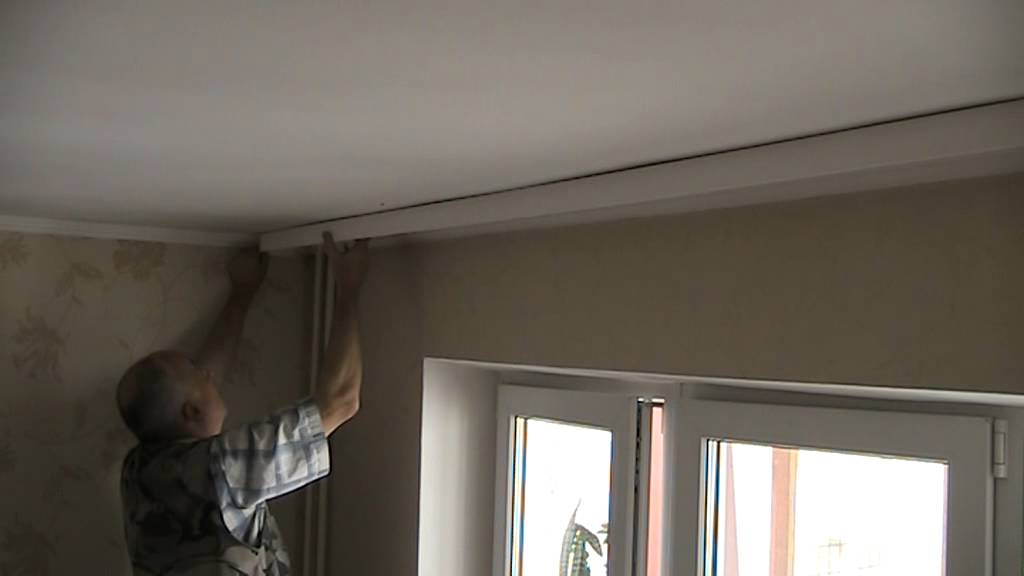
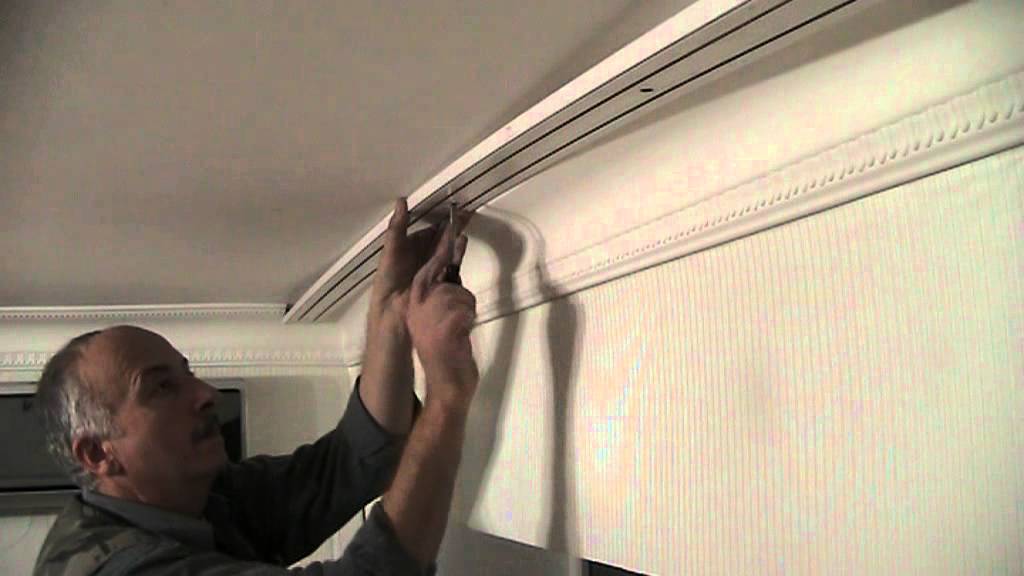
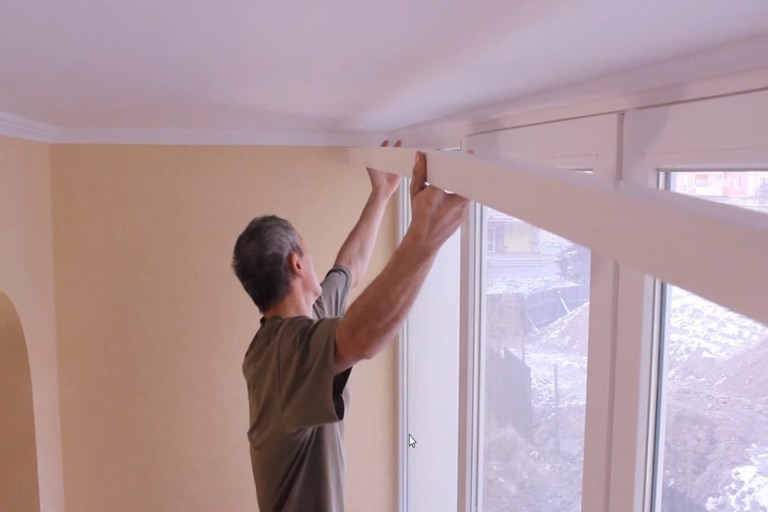
After trimming the profile to the required length, holes are drilled through it every 50-60 cm. Then it is applied to the ceiling, retreating 10–15 cm from the wall, in order to make marks. A smaller drill drills a hole in the center in which to insert the dowel. After that, you can attach the profile to the ceiling and fix it with a central screw.
After that, the profile is aligned in the desired position, and the remaining markings are made. Now you can drill the remaining holes and insert dowels. We fix the finished structure with inserted hooks and caps on both sides on the ceiling with self-tapping screws.

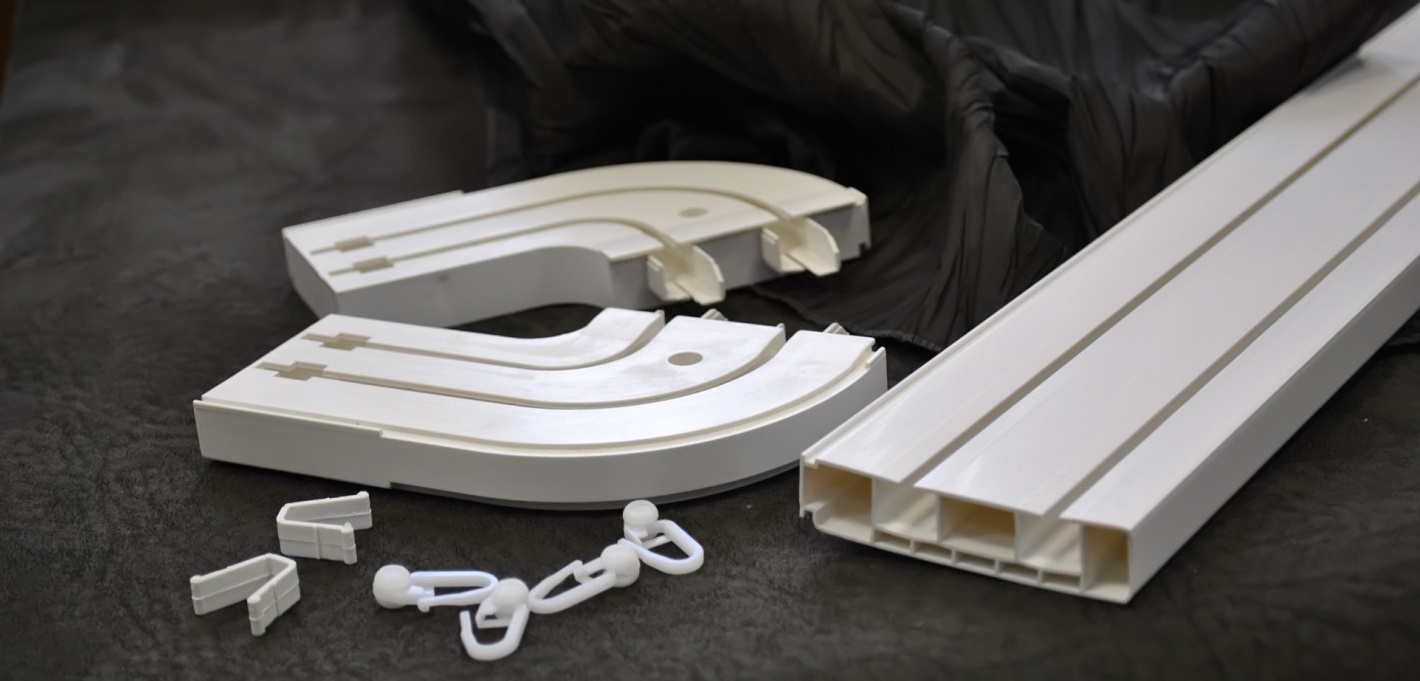
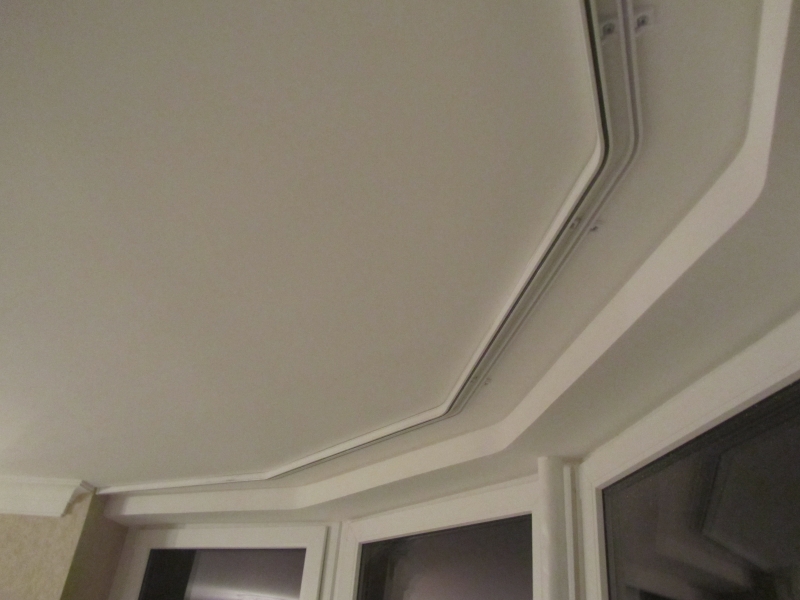
Install the cornice on the bay window
For bay windows it is better to use flexible curtain rods installed on the ceiling:
- Before installing the profile must be turned out. To do this, with one hand hold the end of the profile, and with the other hand, draw along it, bending it in the opposite direction. For a better adjustment, these actions should be repeated 2-3 times. After that, you can make markup for the brackets, retreating from the wall to the desired value.
- Brackets must be attached at two points. The distance between the brackets should be in the range of 35-40 cm, it is necessary for a more even fixation of the profile. To form the corners it is necessary to place the brackets at a distance of 6-8 cm from the corner.
The shape of the eaves must be given on the floor, and a small adjustment can be carried out directly on the spot.
- We attach the finished cornice to the brackets, install the plugs and attach the hooks.
How to fix on drywall and plastic panels?
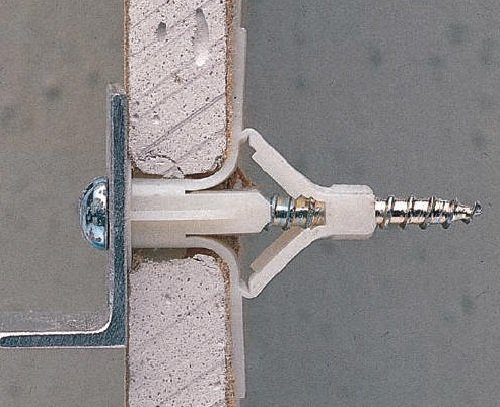
In order to install the eaves on the plasterboard surface, it is necessary to stock up on special fasteners. Reliable fixation of the design will provide a dowel butterflies. When they are screwed in, expansion side planes are opened, due to which the adhesion to the drywall surface becomes more durable.
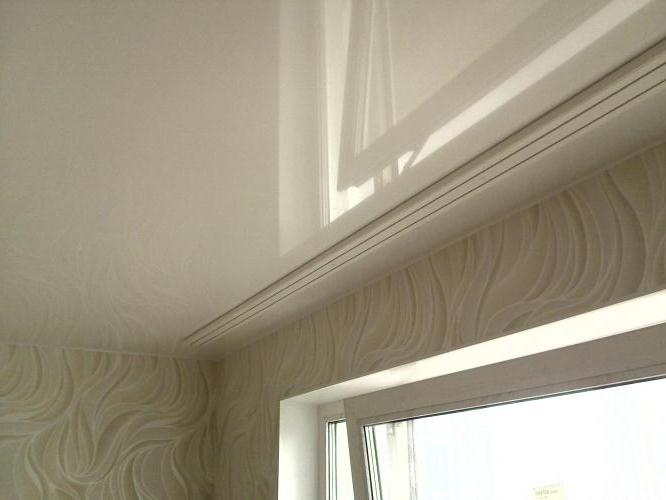
Installation in the cavities of the stretch ceiling
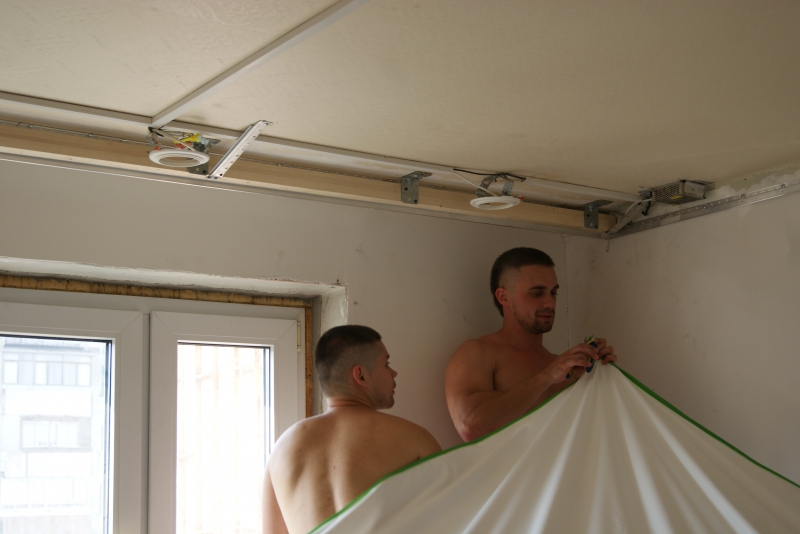
To hang the cornice in the cavity of the stretch ceiling, you must first install the beam. It should have the same size as the chosen model of the cornice, but slightly less than the level of the stretch ceiling. The bar is attached to the ceiling surface with dowels.
After the web is stretched, it is necessary to make marks and install special rings to prevent tearing of the web. After this hole gently burn through and proceed to the installation of the eaves.
Fastening curtains
There are different types of curtain mounts, which are selected depending on the model design, fabric density and design ideas:
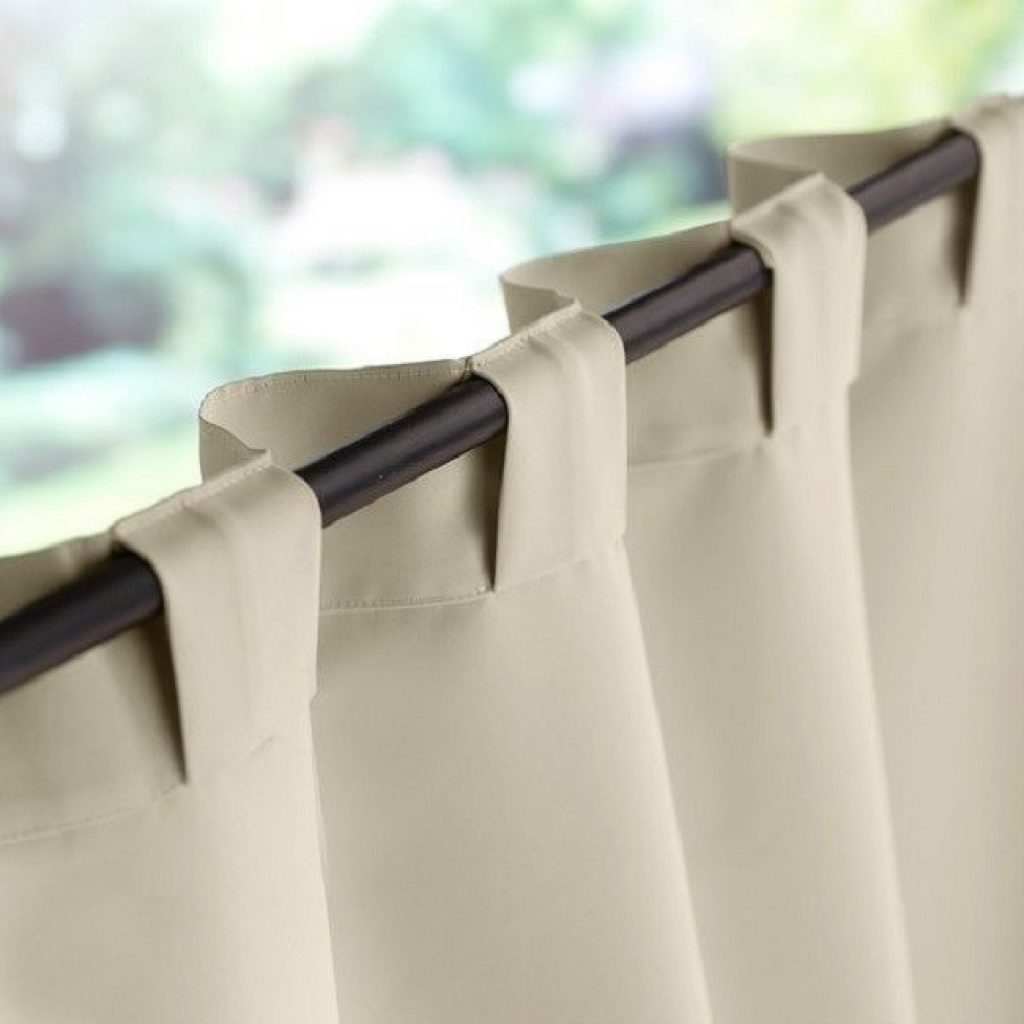
- The most traditional and familiar are hooksmade of durable flexible plastic. To date, there are many of them. With their help, you can hang curtains in various ways. There are models that are attached at one end to the curtain tape, while the other are inserted into the groove of the profile construction. The rod models have a slightly different mount. One end of the hook is connected to the ring, which is put on the bar, and the other to the curtain tape.
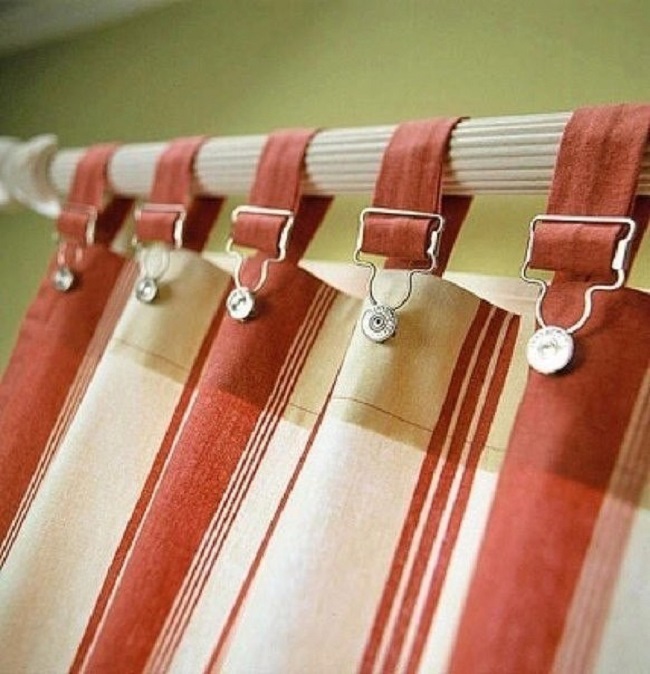
- Unlike hooks, clothespins hold the curtain with teeth, providing a tight grip with the canvas. They join the cornice with the help of rings.
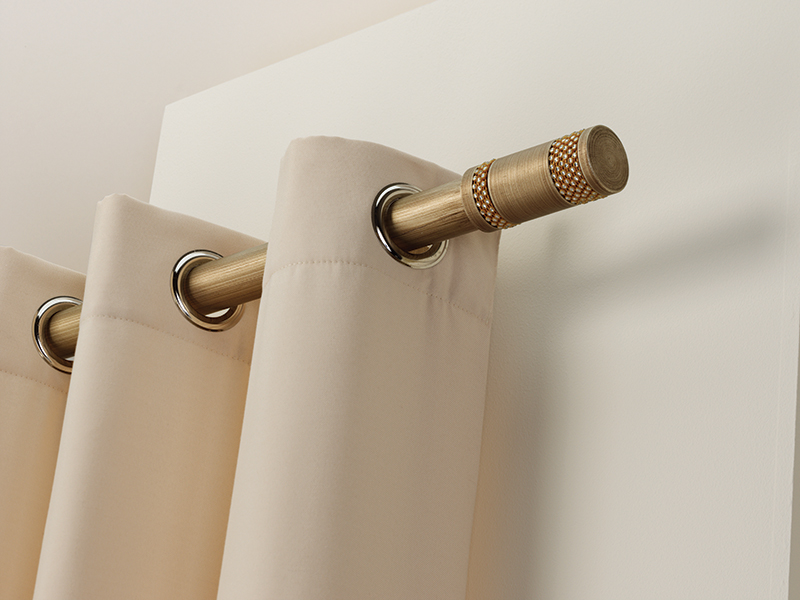
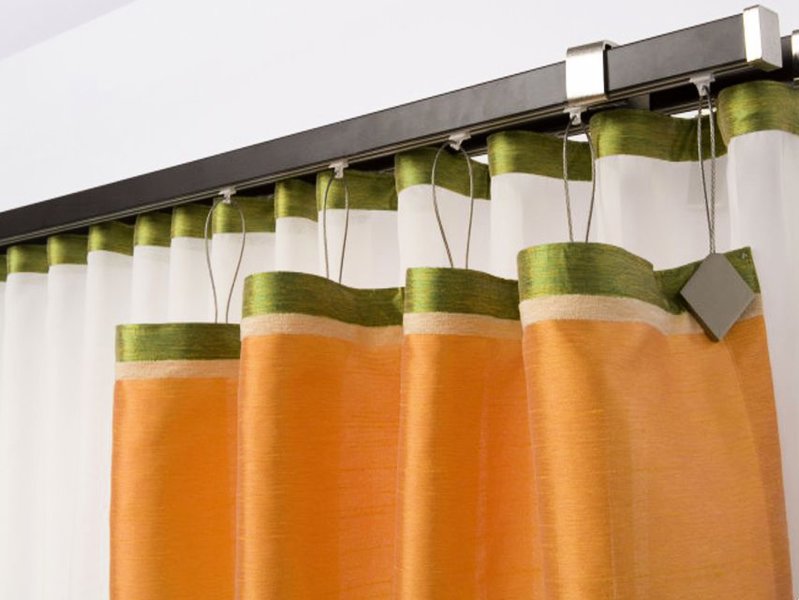
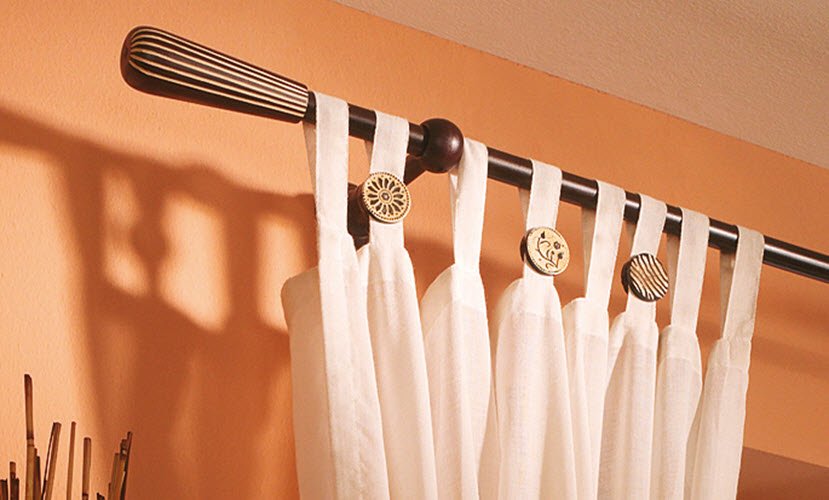
- Curtains can also be attached using eyelets, loops, strings and drawstrings.
Beautiful ideas in the interior
The eaves in any room can be both an attention-emphasizing detail and an invisible element of the interior.
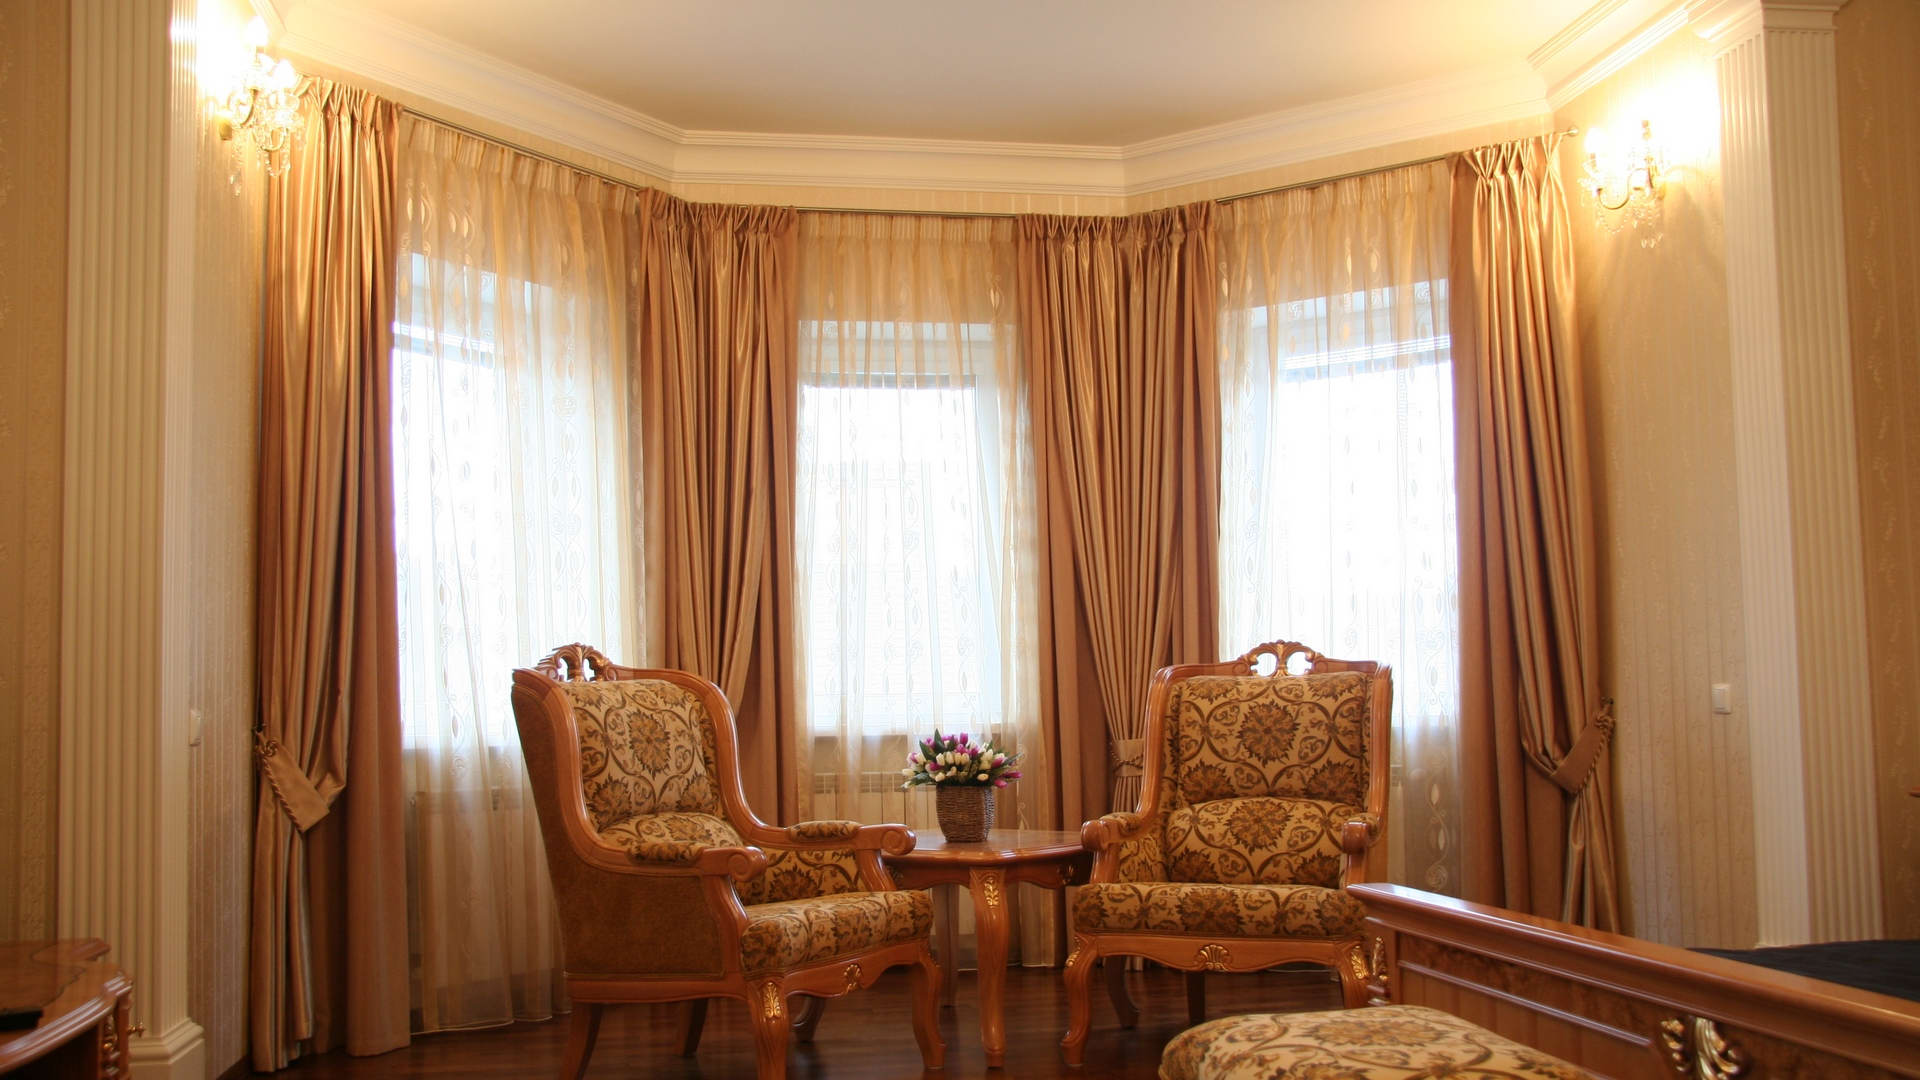
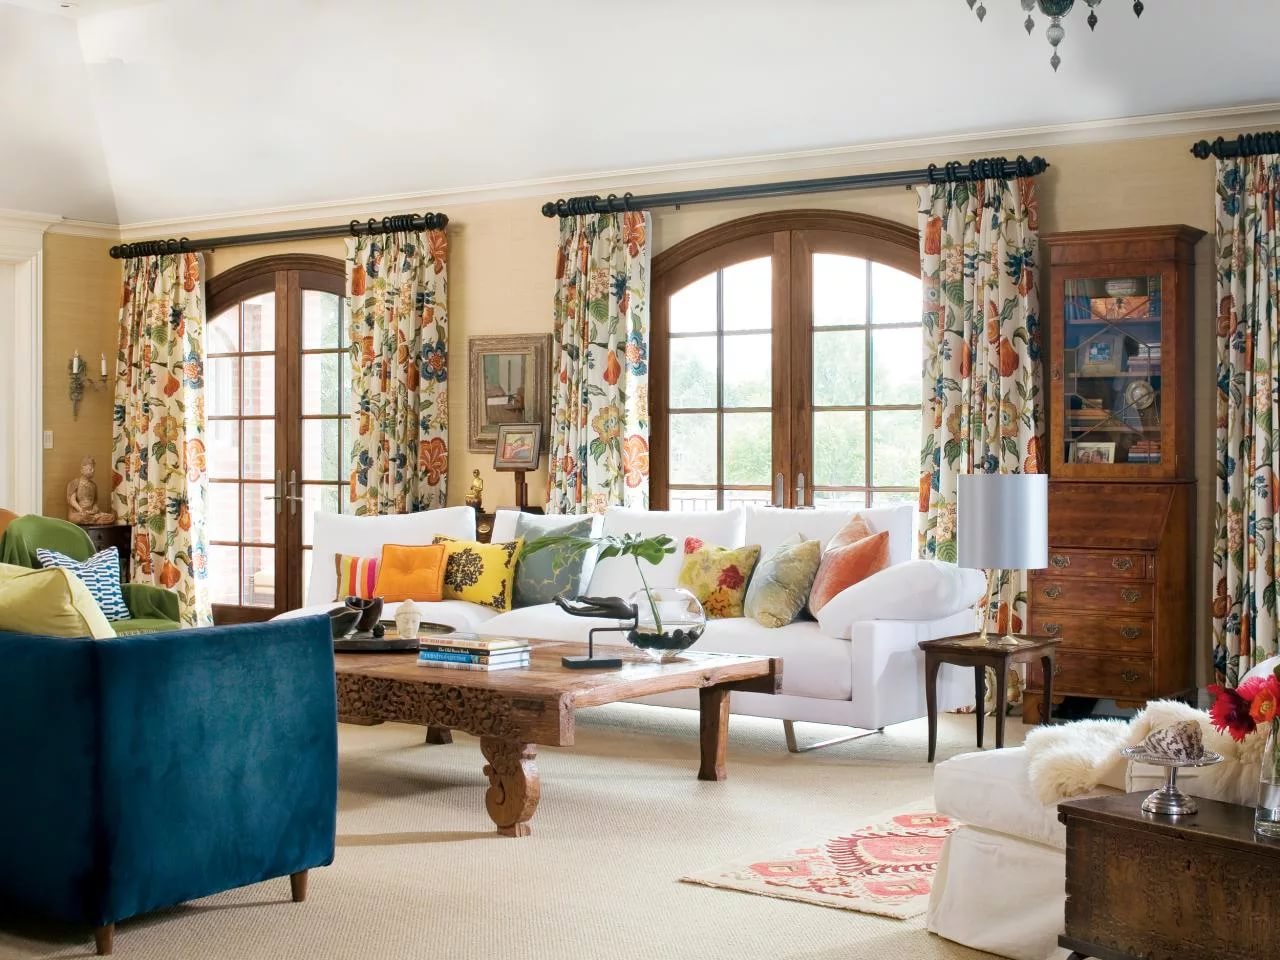
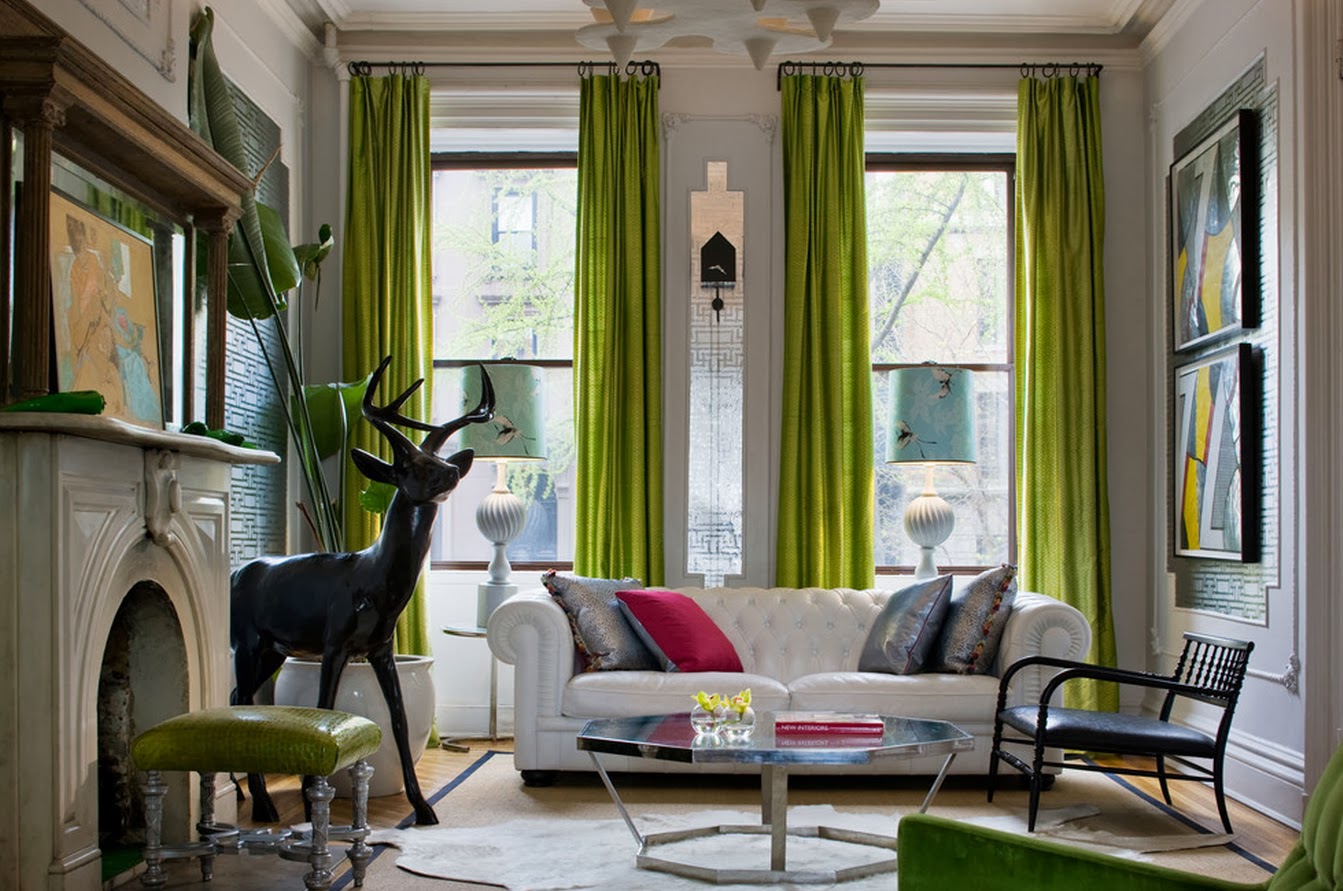
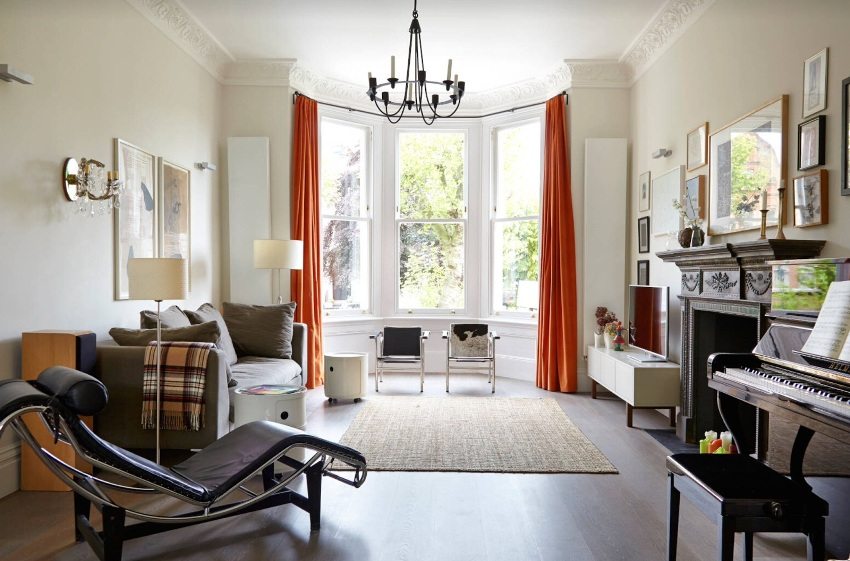
In the living room will be appropriate any version of the eaves. His choice depends on the area of the room, the shape of the windows, the style of design and the taste preferences of the owners. Framing curtain rods are suitable for classic interiors. Rods are suitable for almost any style. Flexible will be appropriate in the living room with bay windows.
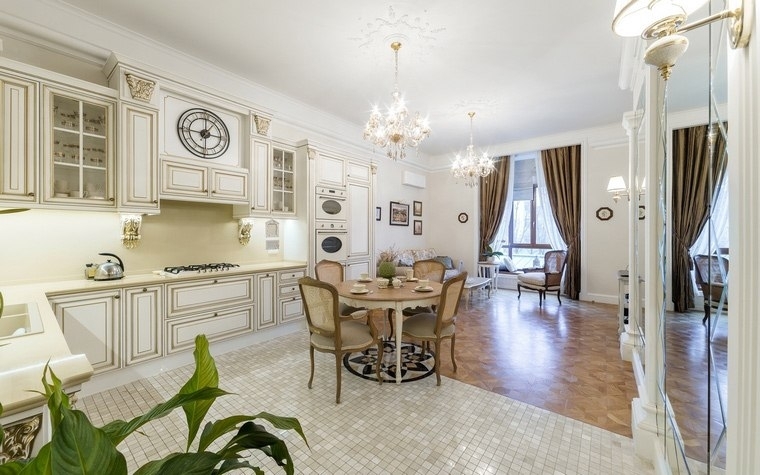
The kitchen will look great metal tubular curtain rods with different fastening curtains. Their length depends on the size and shape of the window.

On the balcony or loggia will look good flexible aluminum or plastic cornices. But also sliding mini-eaves are also good option for these rooms, small on the area.

How to install a curtain rail for curtains - the following video.


