House covering siding with insulation do it yourself
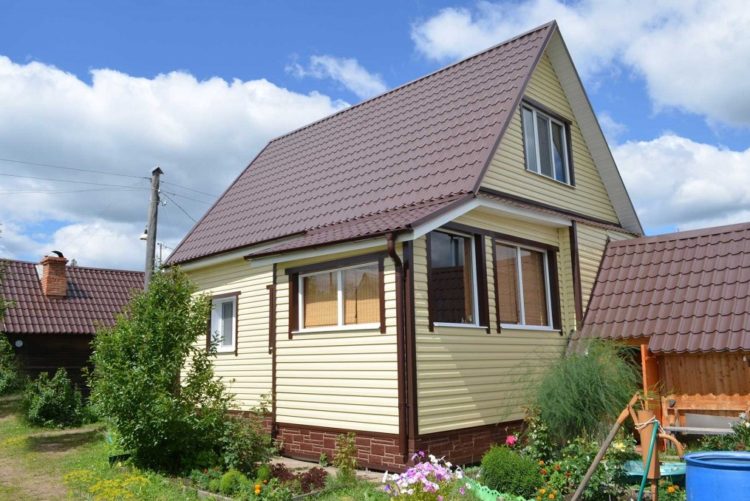
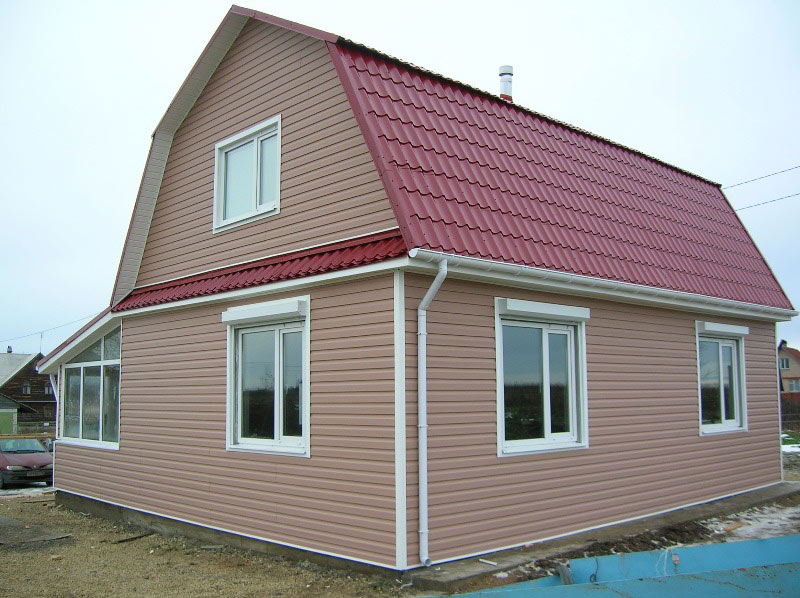
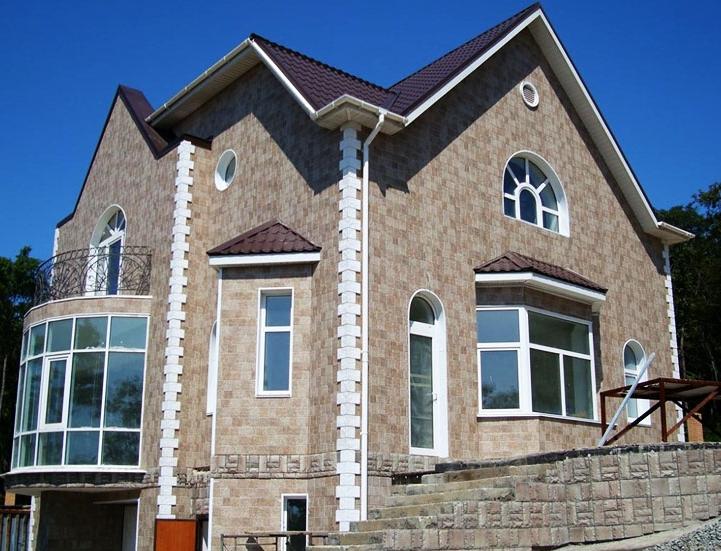
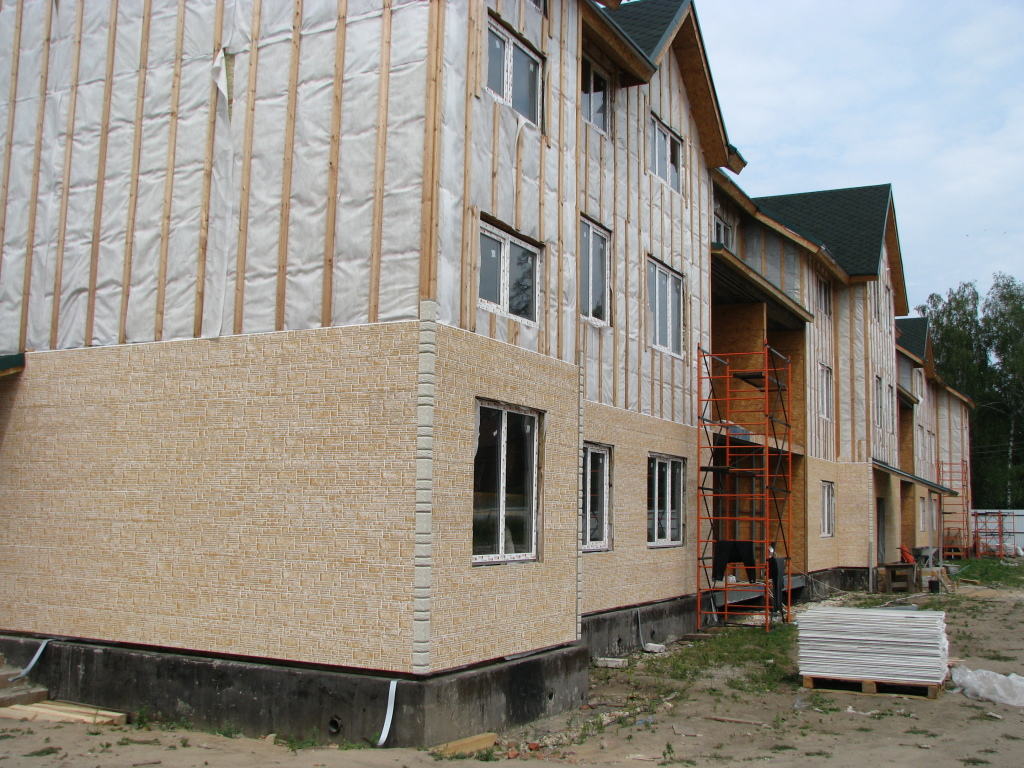
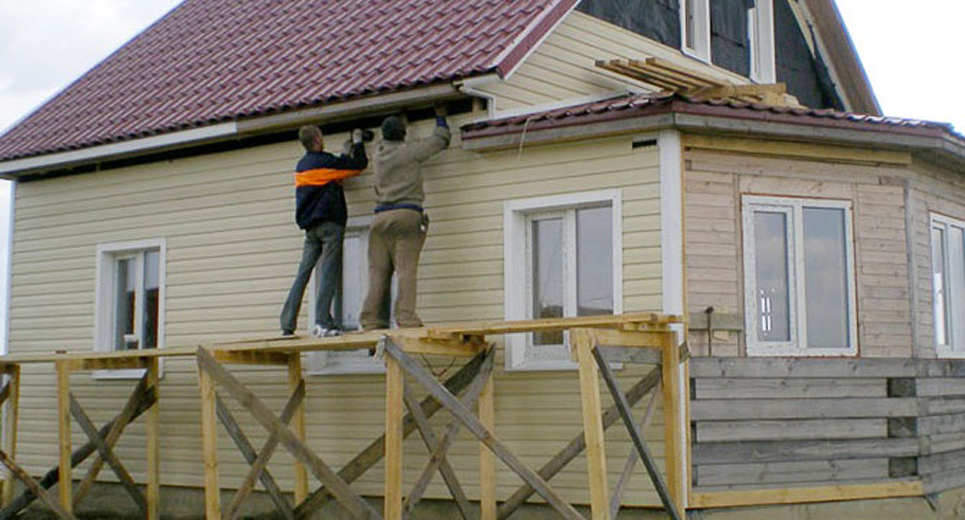
The most common material for covering the house is siding. With its help it is very easy to insulate and protect the walls of the building with our own efforts. If you do everything right, then this design will last a very long time, and will also delight for many years.
Special features
Independent house siding with insulation is a difficult and lengthy process. First of all, you need to decide on the material. It is necessary to choose a suitable insulation for siding sheets (mineral wool, foam, etc.), as well as to choose the cladding material itself.
After the owner of the house has decided on this, it is necessary to calculate the amount of material that will be needed for work based on the surface area and consumption for errors.
It is very important to prepare the necessary tools in advance. Otherwise, the work will not be done at the highest level.
If this procedure will be carried out for the first time, it is necessary to consult with a specialist in advance to avoid unpleasant consequences.
The most important thing when self-laying insulation and plating - do not rush and follow instructions strictly.

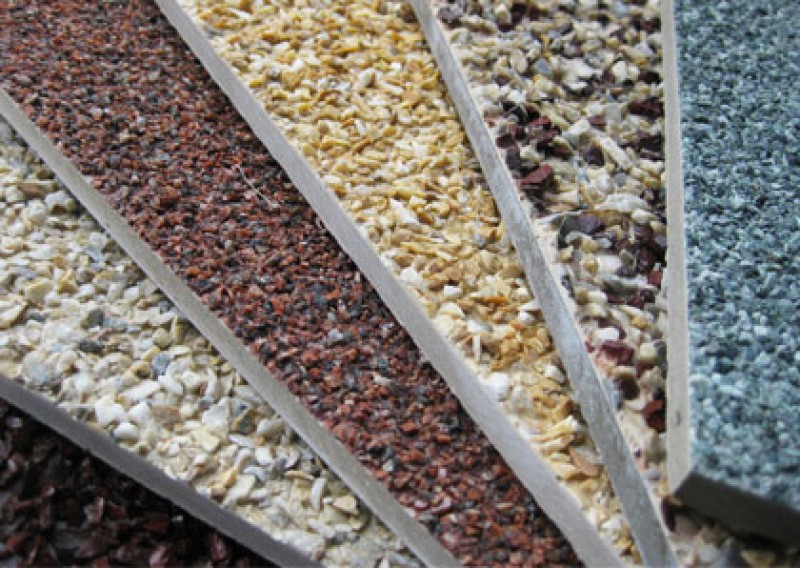
Varieties of material
The sphere of production of building materials has long gone far ahead. Today, there is more species diversity of materials from which siding panels are made to sheathe a house.
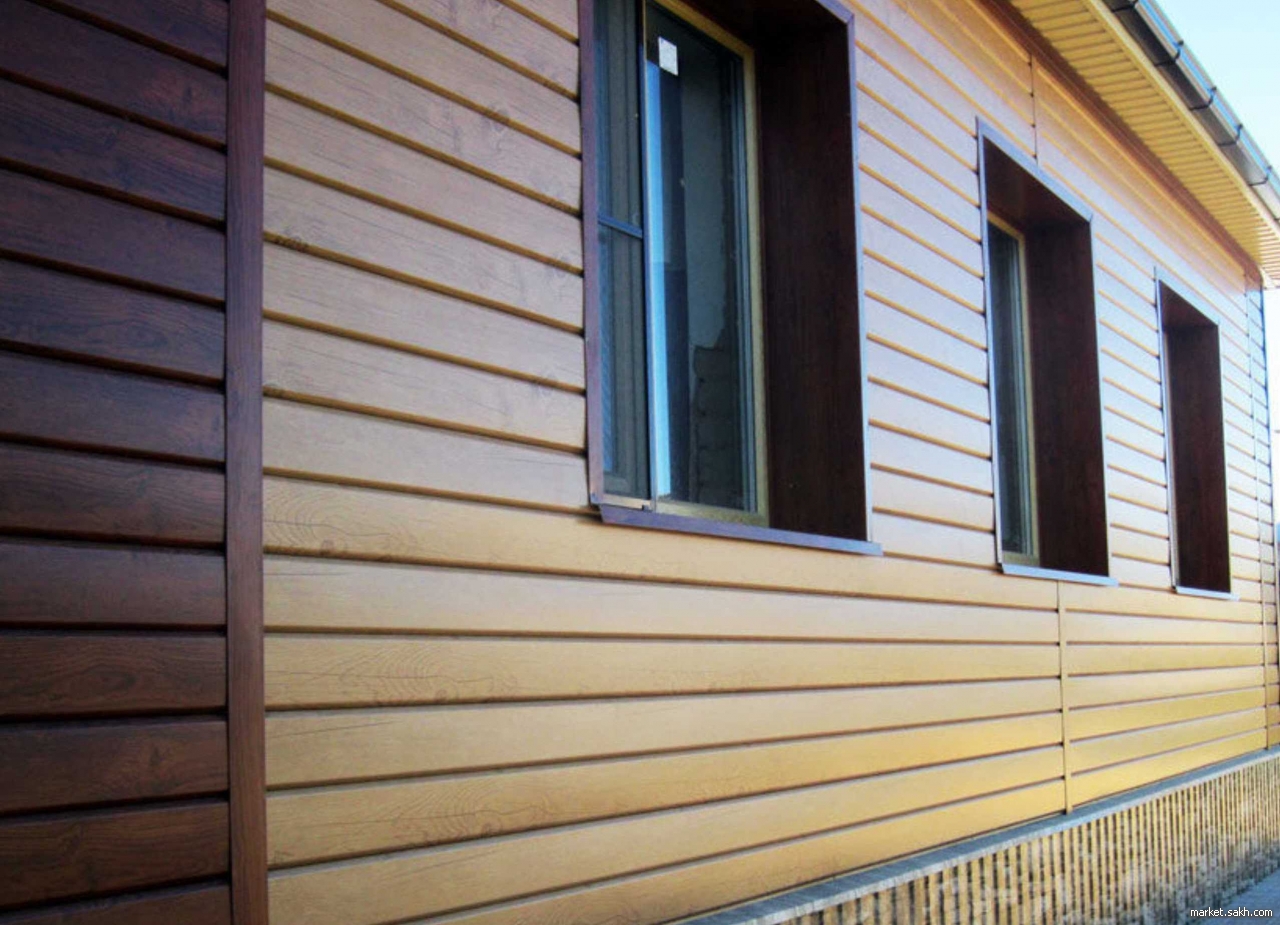
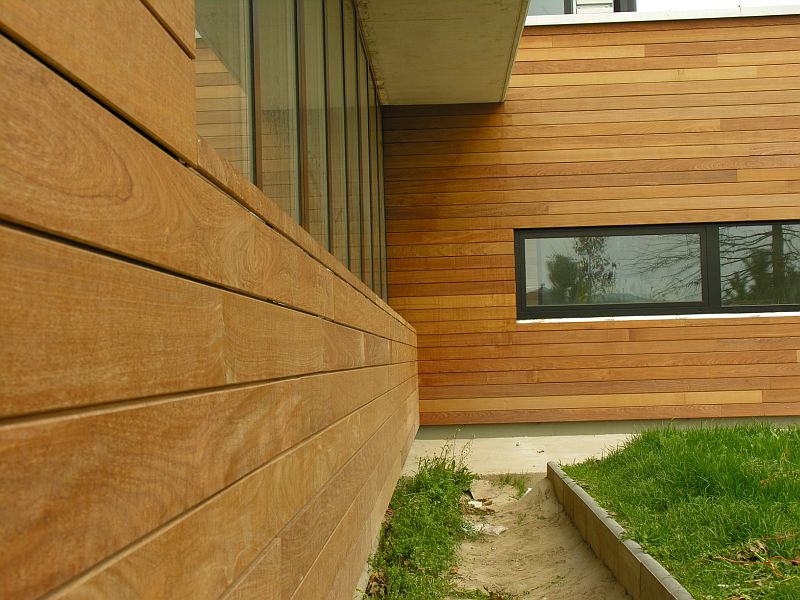
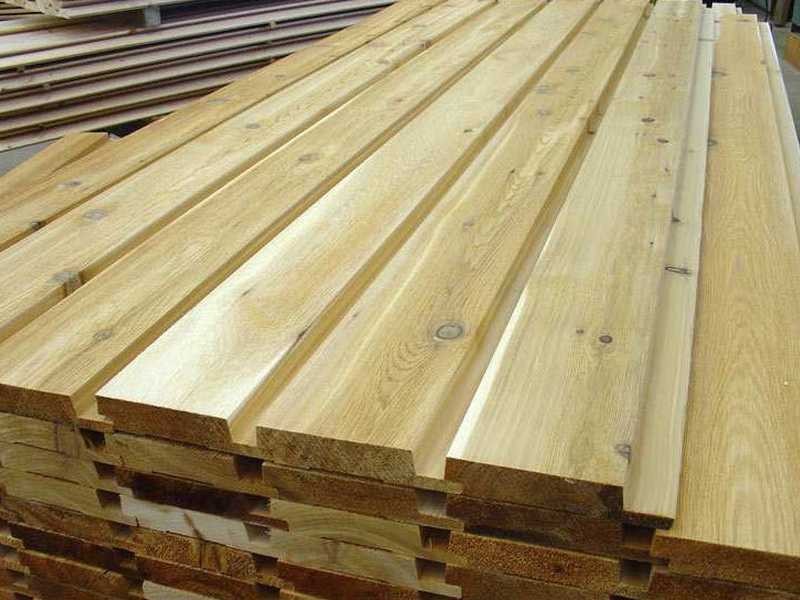
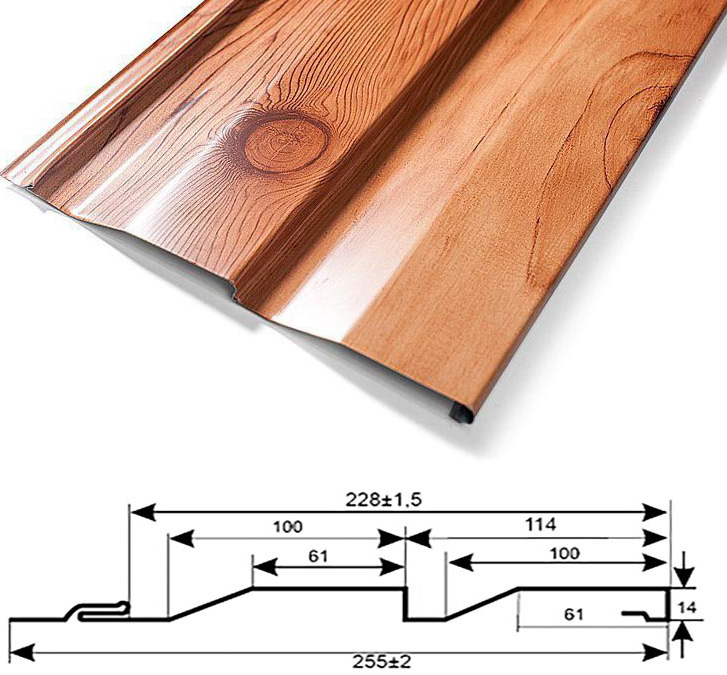
Tree
From time immemorial, wood was used in construction and facing works. Also, siding panels can be made of pine, spruce, oak, etc. Initially, they had the form of a conventional board, which was treated with a special solution to prevent mold and rot. Then the manufacturers began to produce ready-made panels that are easy to mount to the wall. The advantage of this material is that it is environmentally friendly, has a low cost, is easy to use, and is able to withstand low temperatures.
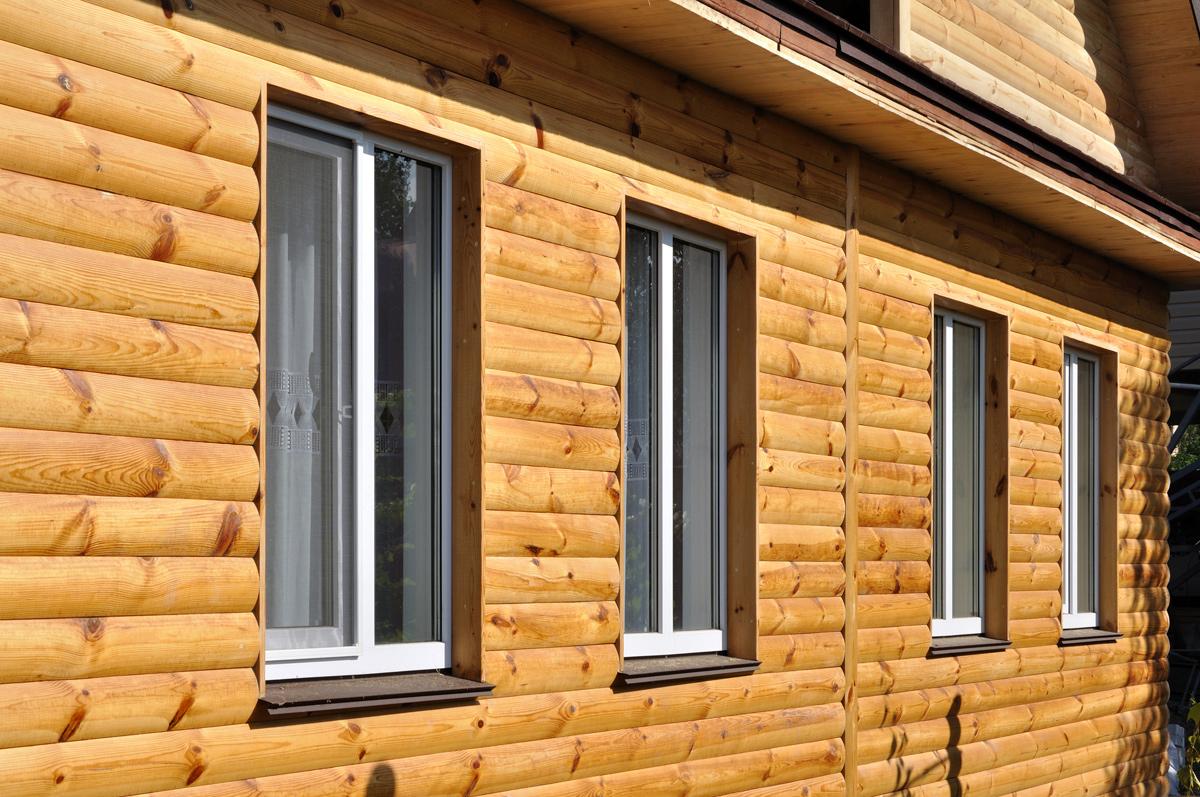


The disadvantages include flammability and susceptibility to moisture. But these shortcomings are repairable. Now there is a wide variety of coatings that prevent wood from burning, and also prevent water from entering the wood fibers.

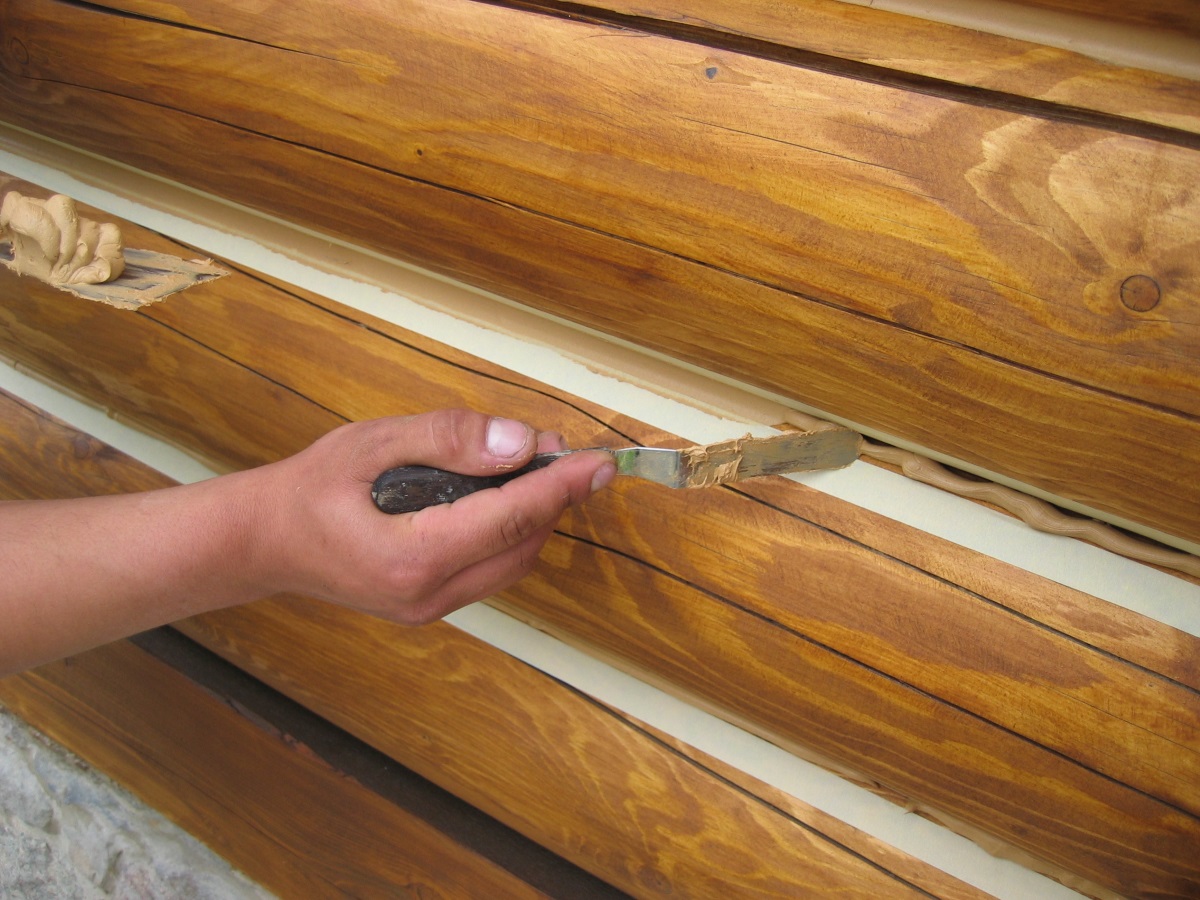
It should be noted that such a cladding material requires care: timely painting, chips treatment (if they appear), filling with putty of cracks formed (usually they appear when the board is very dry).
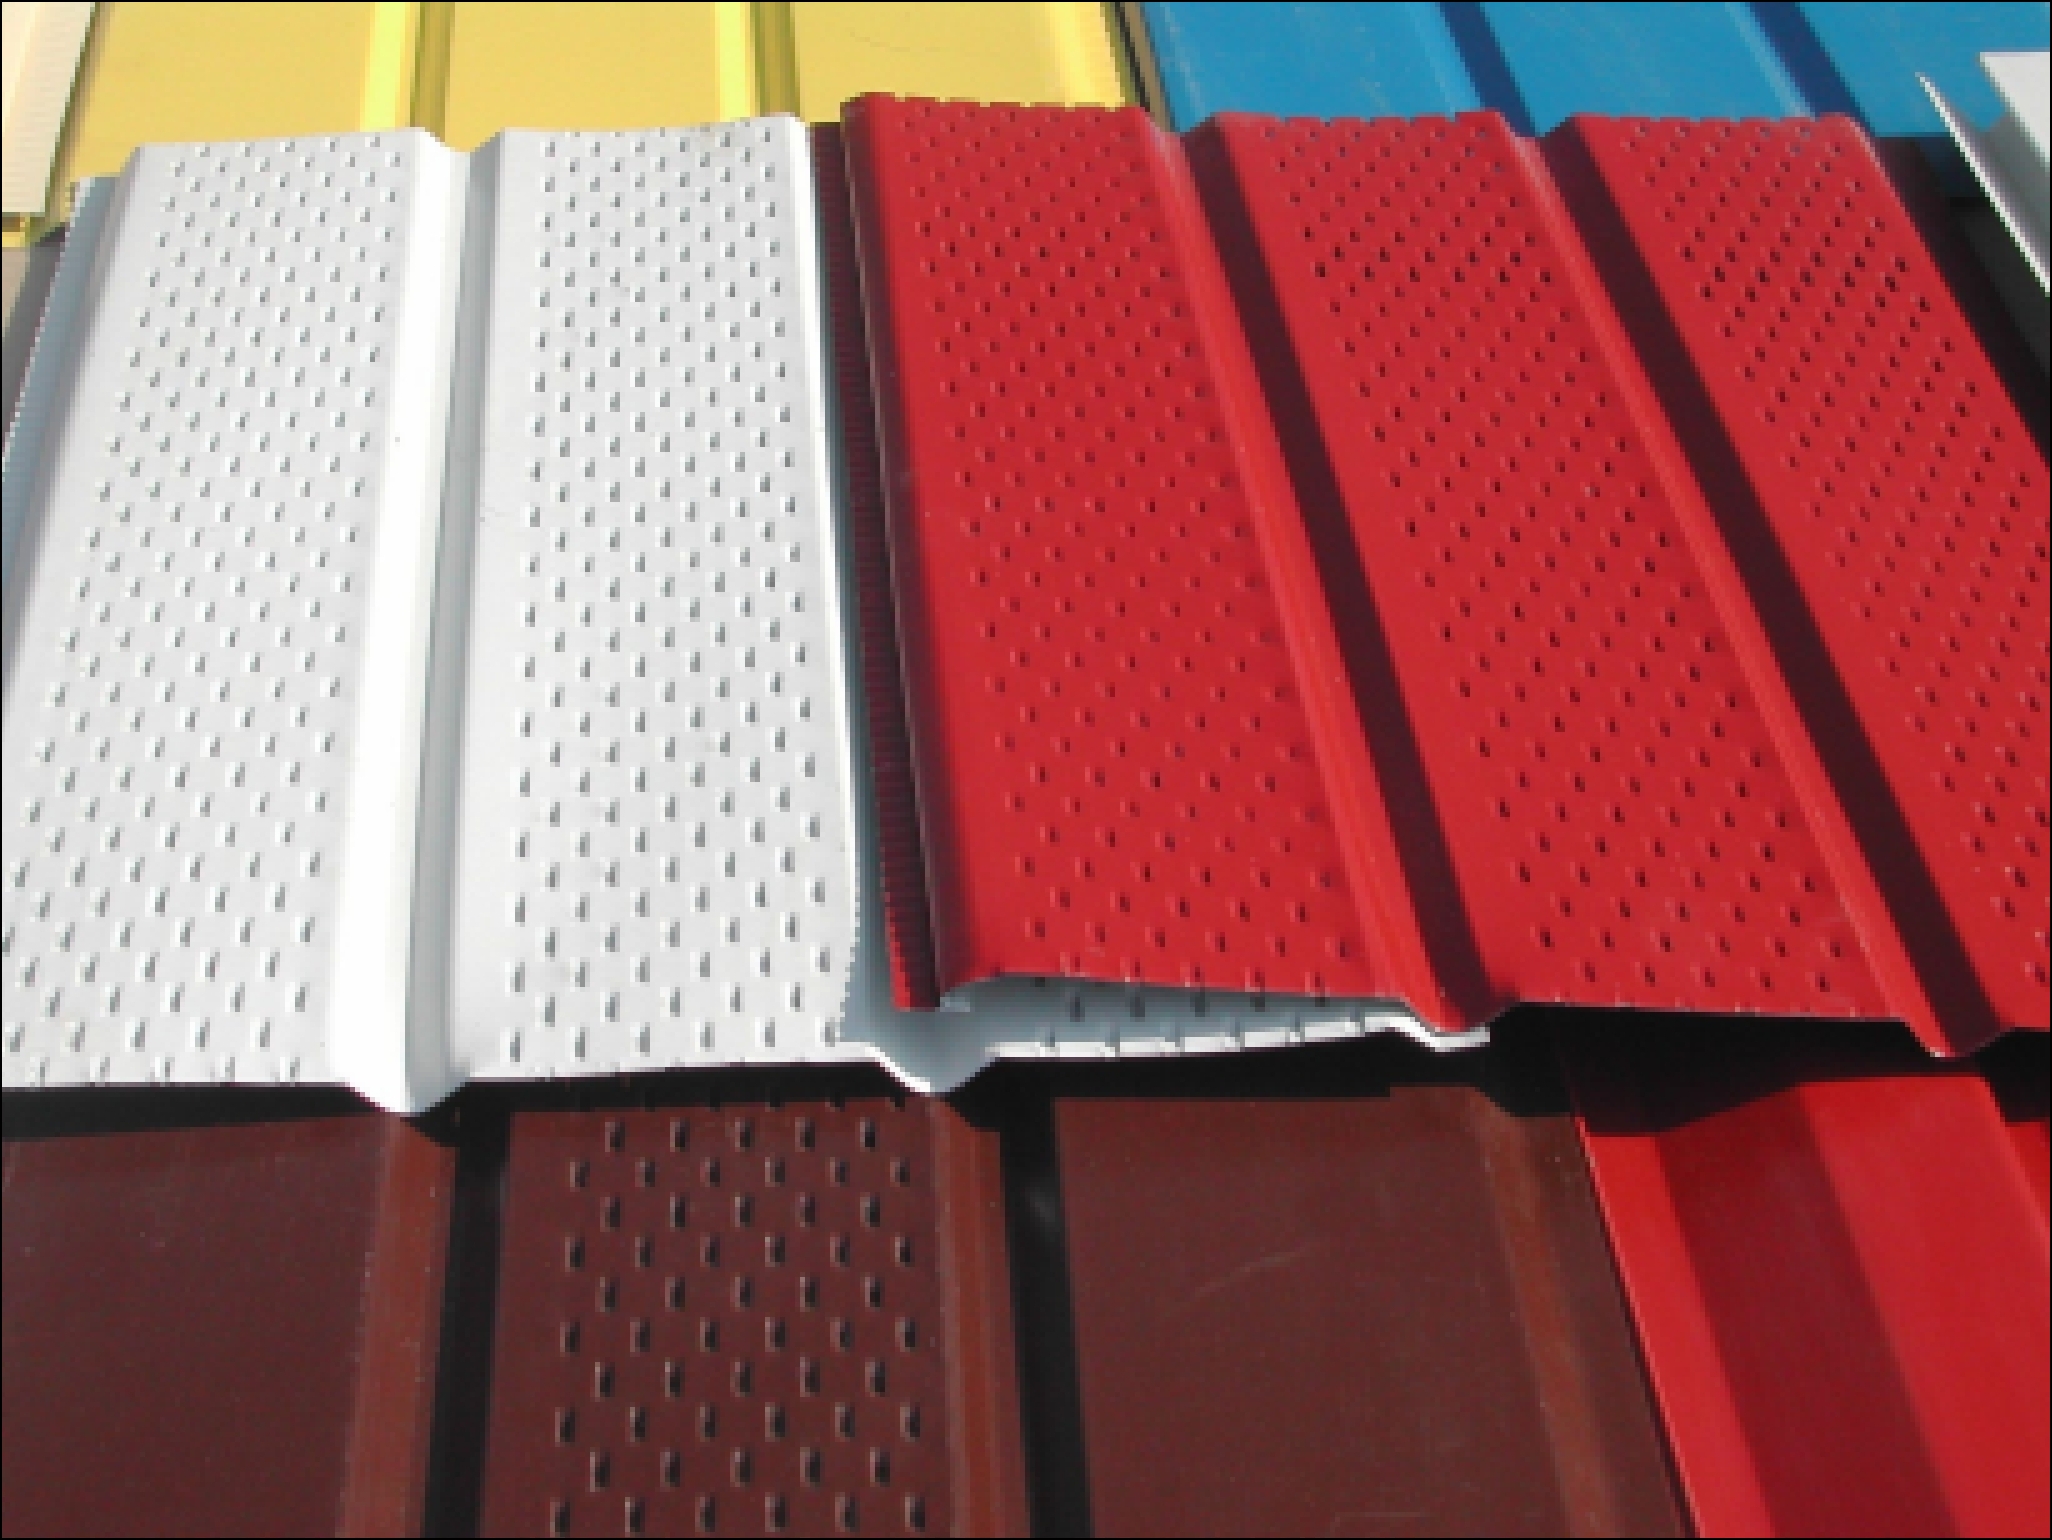
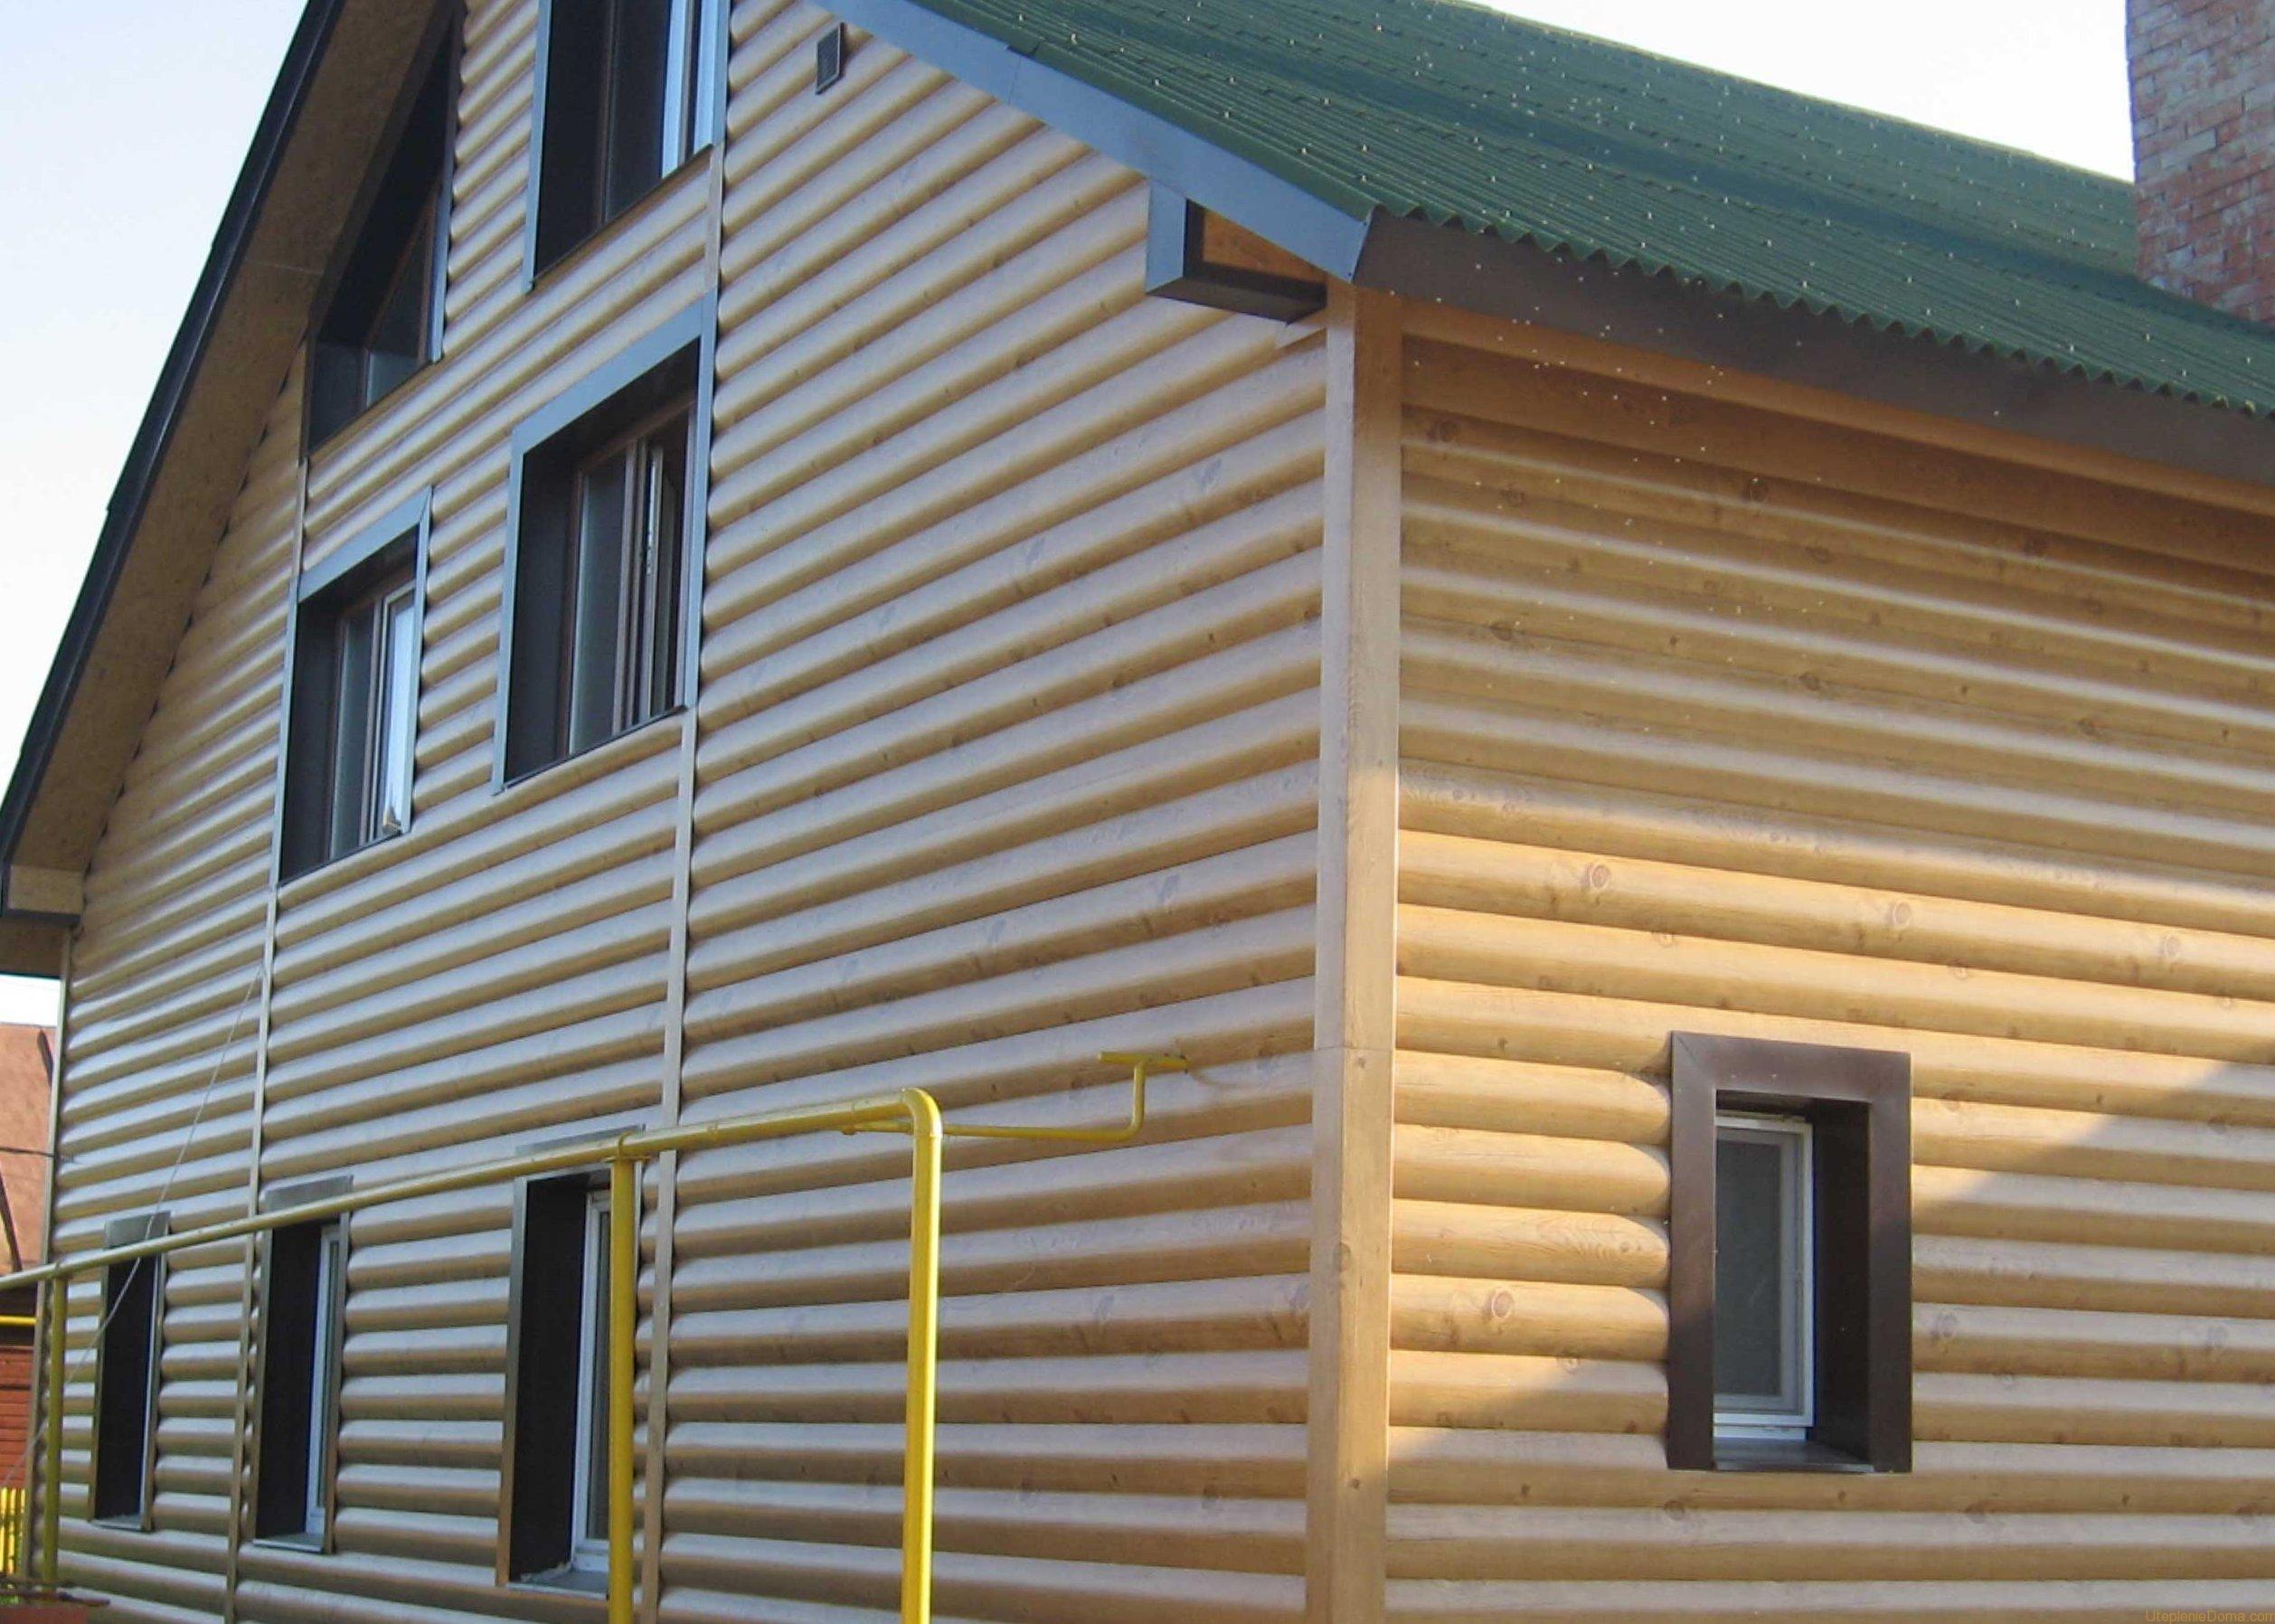
Metal
An alternative option could be a metal version of the house trim. Such siding panel has a thickness of about 0.7 mm, metal itself is in layers (as a rule, it is aluminum), a primer and a polymer coating (it can imitate the structure of wood).
Such material is very practical and durable to use. It does not give in to burning, has good durability, is steady against corrosion at the correct processing.

If the siding is made of aluminum, then it is easy to crease, and the dent is almost impossible to fix. In this regard, it is better to give preference to galvanized steel. This kind of skin is durableIt has good elasticity (therefore, it is easier to transport it to its destination and not to bend it), it tolerates temperature fluctuations perfectly, is not afraid of moisture and direct sunlight. However, if they are chipped, they must be eliminated urgently, as rust may occur.
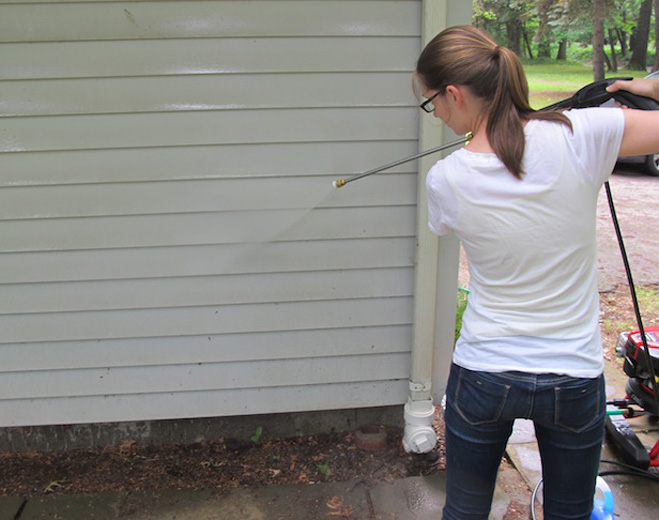
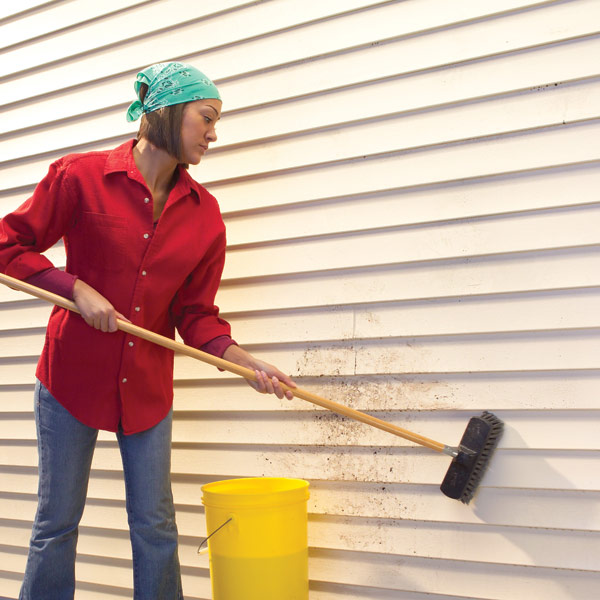
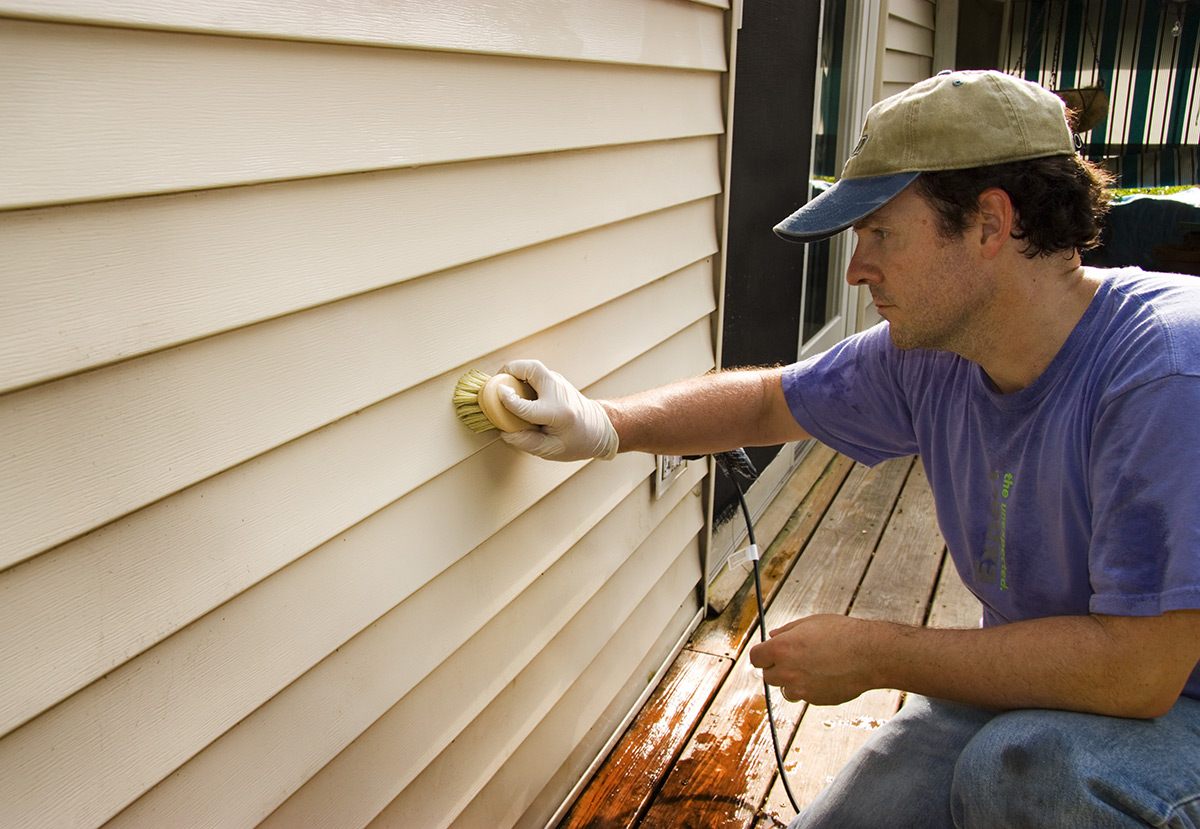
Such covering panels do not require any special care. They are easy to wash with ordinary water from a hose, if necessary.
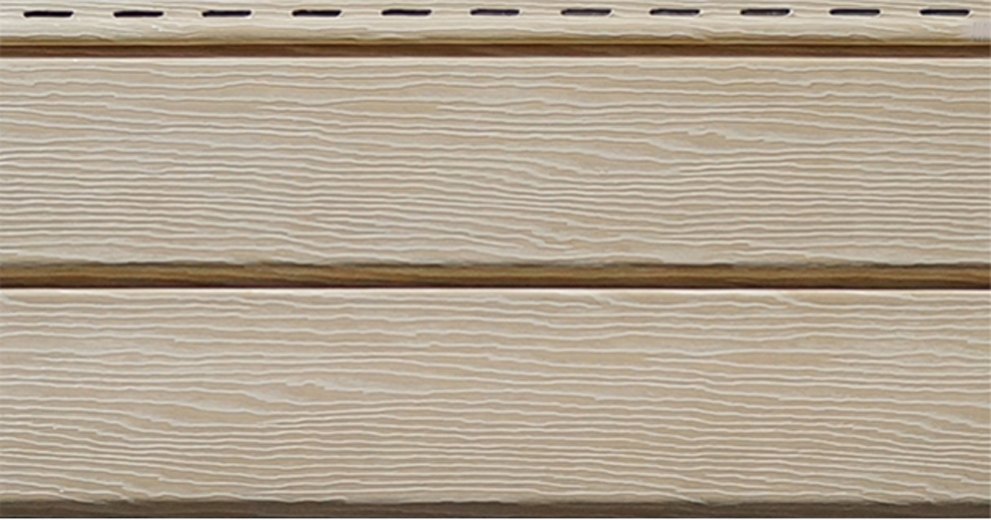
Vinyl
Vinyl siding panels have a rich texture and color spectrum. According to their characteristics, they are not inferior to their rivals: they are not susceptible to burning, have a solid body, are not susceptible to weather conditions (rain, sun, temperature changes). Also, masters point out that vinyl siding is non-toxic, has an affordable price, low weight, and a service life of up to 40 years. With the help of such plating is easy to create a beautiful and aesthetic appearance of the house.
This material has few minuses: at high temperatures (+ 40o) it may lose its shape and melt, does not hold heat, and therefore requires insulation when installing into a house.
As such, care is not required. Vinyl siding panels should not be washed using abrasives, and the use of actively acting (aggressive) detergent chemicals is unacceptable.

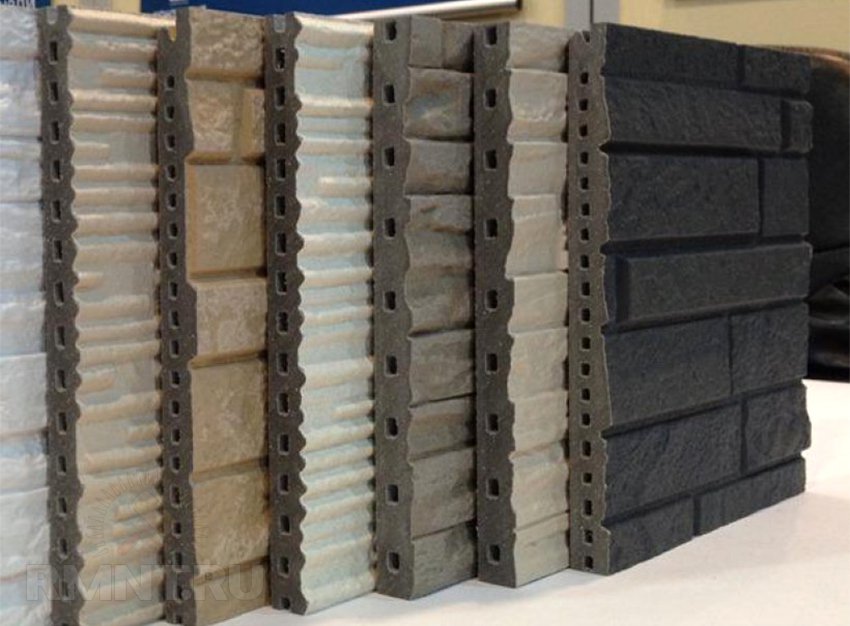
Cement (fiber cement)
This material appeared relatively recently. Such cladding plates are obtained by pressing cellulose fibers with cement.
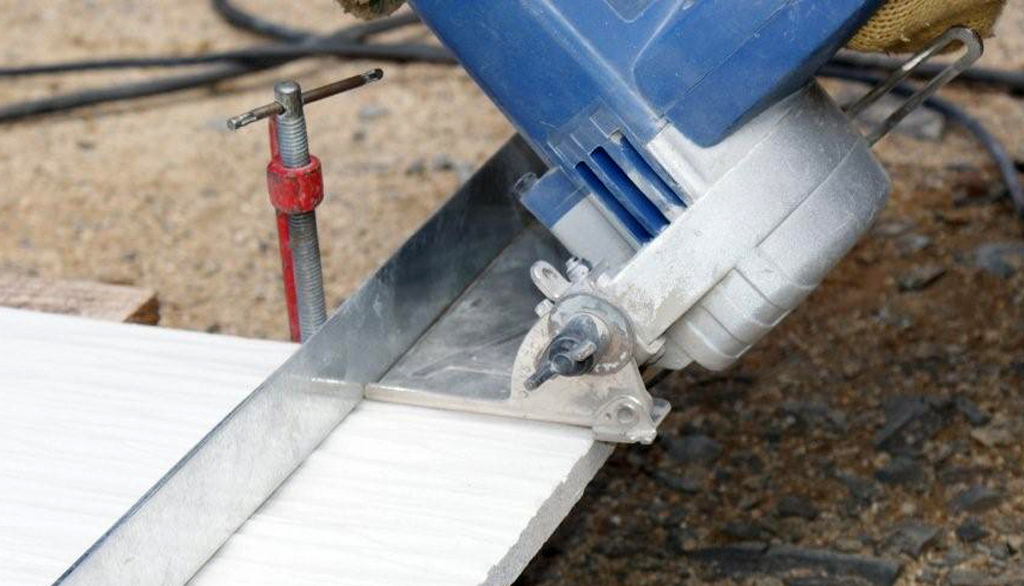
The thickness of one panel is about 9-11 mm, which ensures sufficient strength and reliability of the coating, but at the same time makes it very heavy. Therefore, a special frame is required for installation, which complicates the work.

Fiber cement does not burn, easily tolerates temperature drops of 50 degrees, and does not rot and rust. What is especially nice - does not require additional care.
The disadvantages of this skin can be attributed to a fairly high price., a small selection of colors. Due to the fact that the panel has such a thickness, it can not be cut without special tools. You should know that during the cutting dust is formed, which can not be inhaled. Therefore, the masters strongly recommend the use of protective masks during the work.
Ceramiding
This species is the youngest. Specialists from Japan have come up with a mix of cement, cellulose and clay. The result is a high-quality, durable and durable material. This veneer is environmentally friendly, does not burn, absorbs noise and has an aesthetic appearance.
How to warm?
After the choice of siding panels has been made, it is necessary to think about the choice of insulation. Its species diversity is also large, and each of them has its advantages, disadvantages and features.
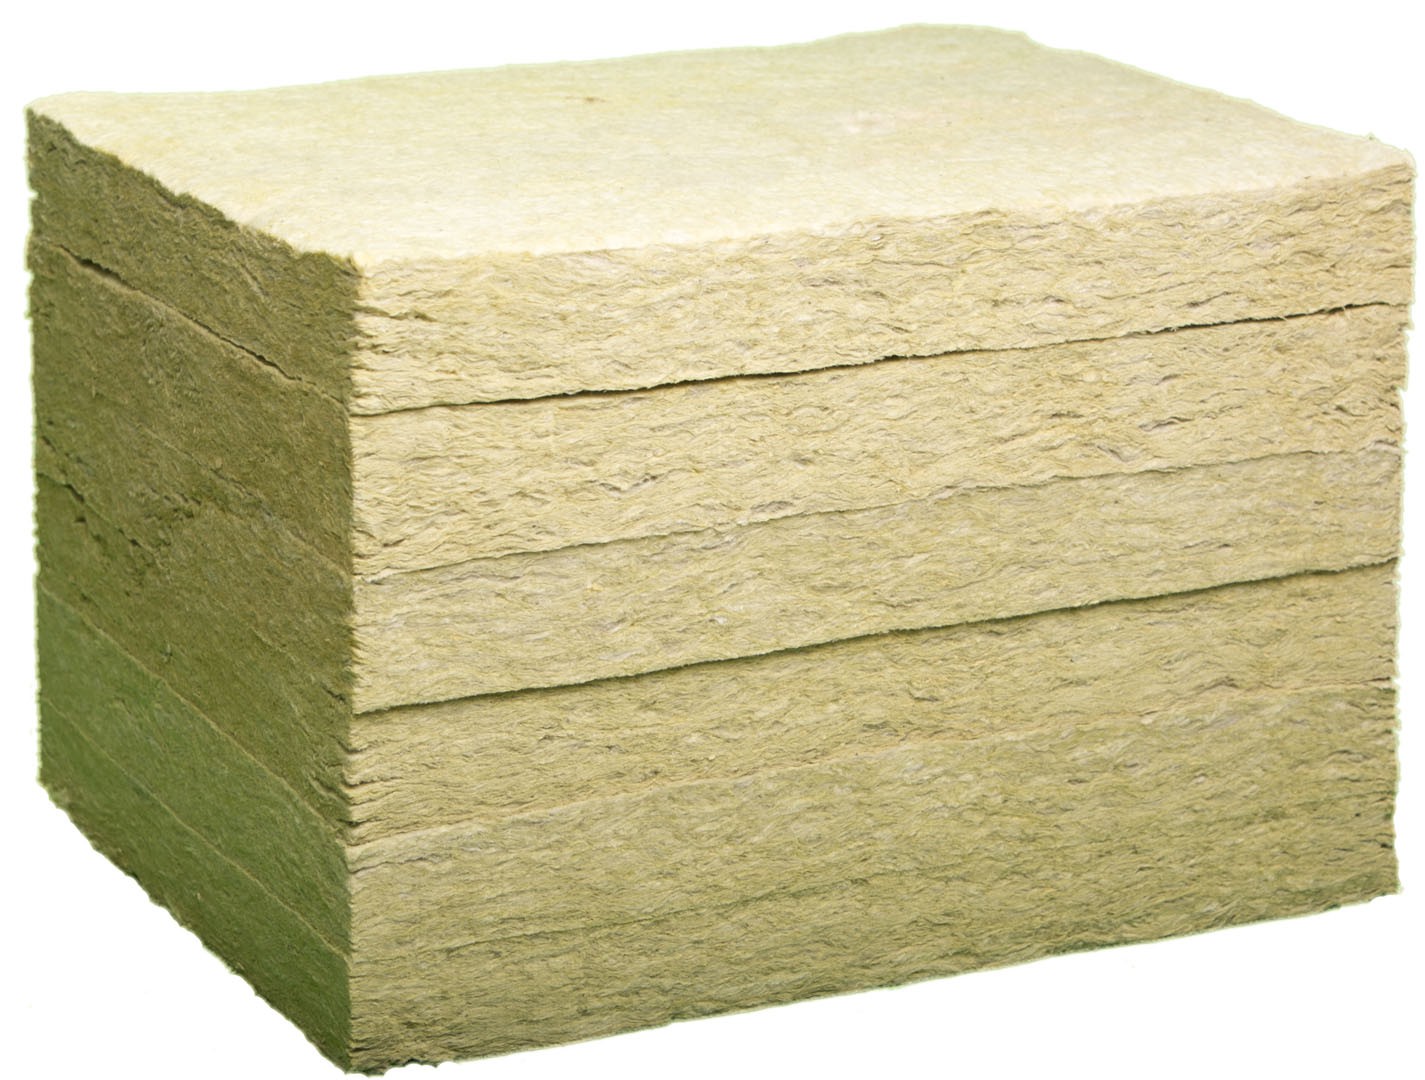
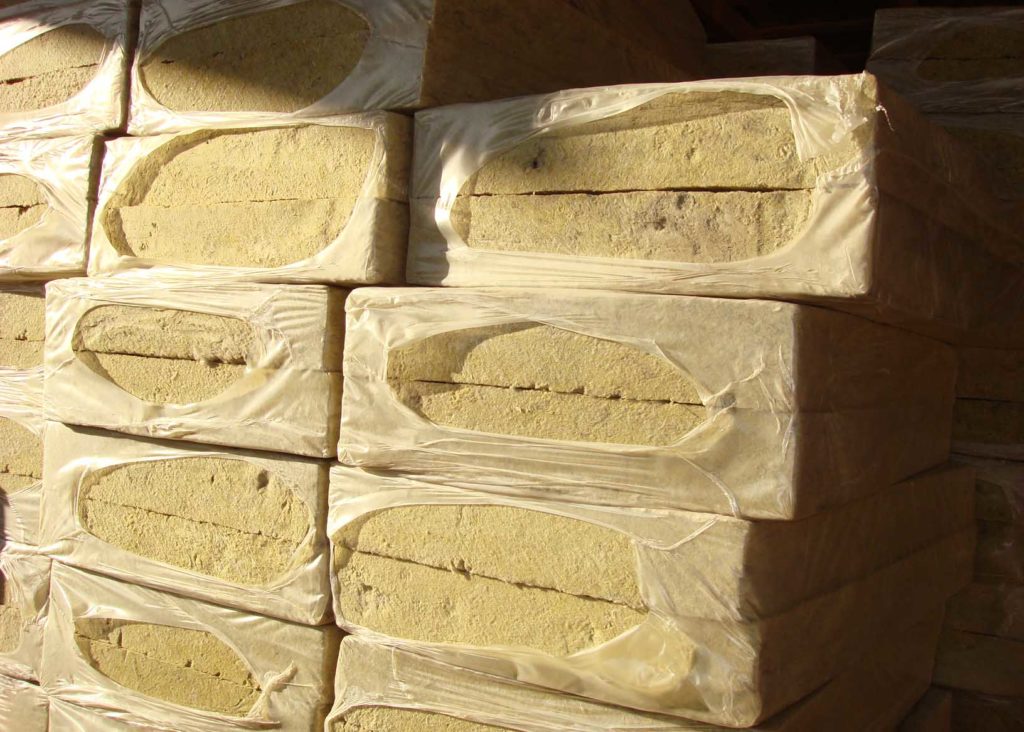
Mineral wool
This insulation can have several forms. These can be regular rolls, plates, or larger cuts in the form of a mat. Its production occurs in several ways. The first is the smelting of waste glassware, glass trim, etc., from which fiberglass or glass wool is made. The second option is the processing of basalt. The end product is so-called stone wool.

The third method is pressing wood fiber and paper waste. It turns out environmentally friendly insulation.
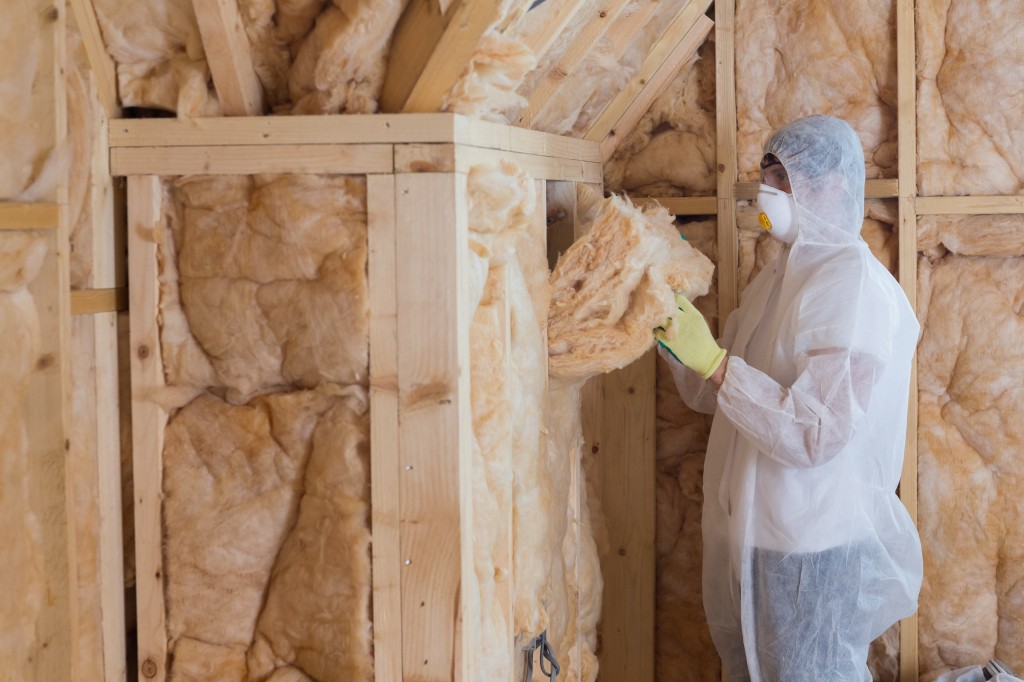
Minvat is convenient in work, but incorporates substances harmful to respiratory organs. In this regard, it is recommended to protect the respiratory tract mask. It is also important to understand that this material absorbs moisture well, therefore it requires additional waterproofing.
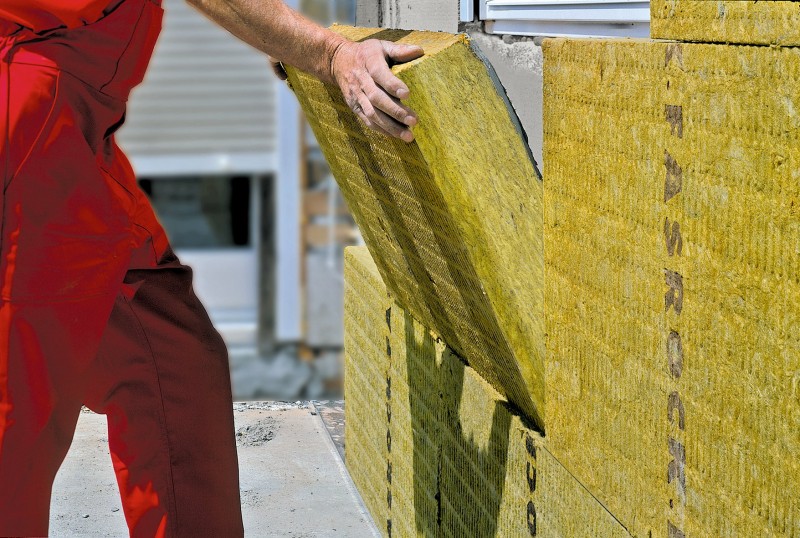
Mineral wool tiles (minplit) are made on the basis of mineral wool. Manufacturers add a synthetic component,which makes insulation more durable and functional. It does not burn, does not absorb moisture, and also has a long service life - more than 25 years.
Styrofoam
This insulation is one of the cheapest. It has an average level of heat and noise insulation. For these reasons, it is laid in several layers. The foam does not tolerate direct sunlight and is approximately 10-13 years.
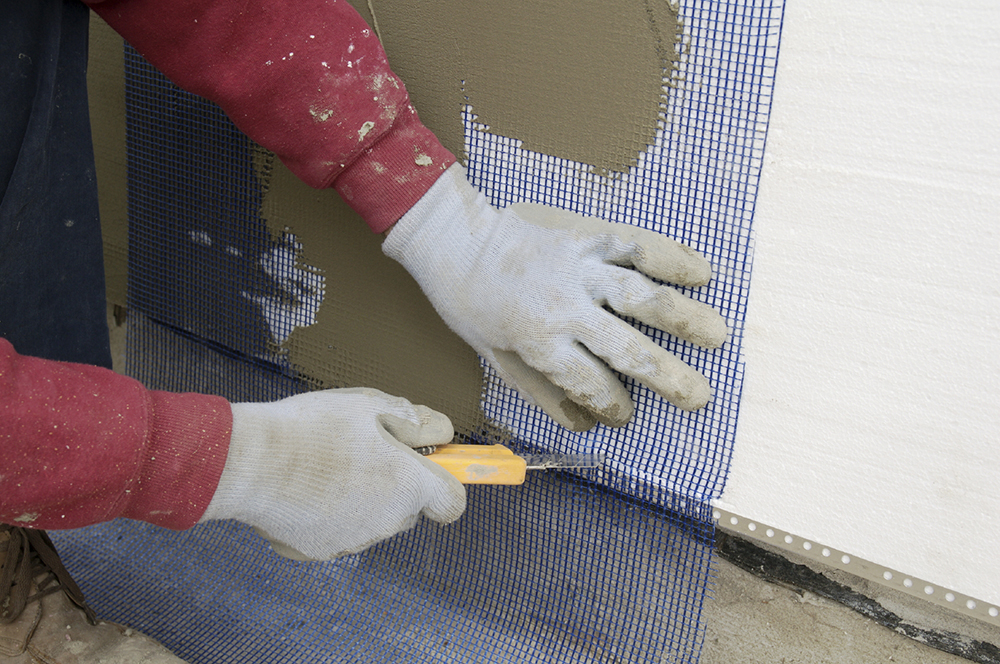
He is very fond of gnawing rats and mice. To protect it, a protective mesh is superimposed on top.
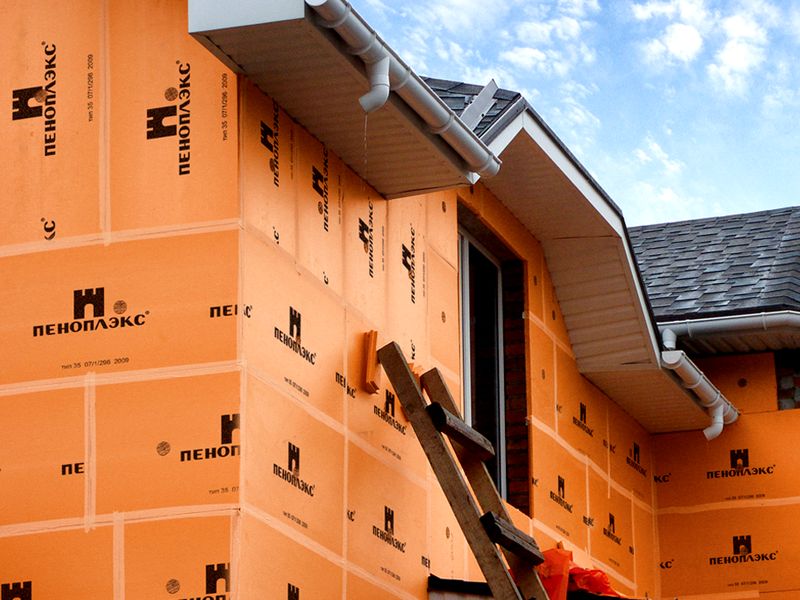
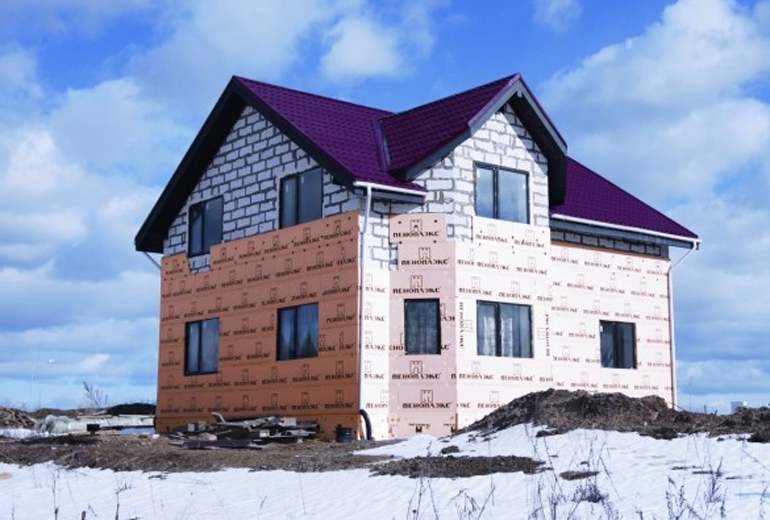
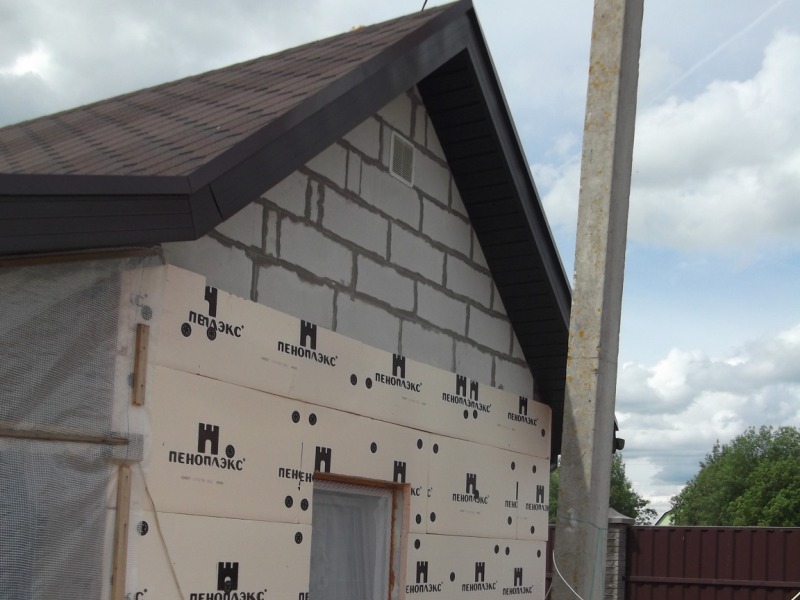
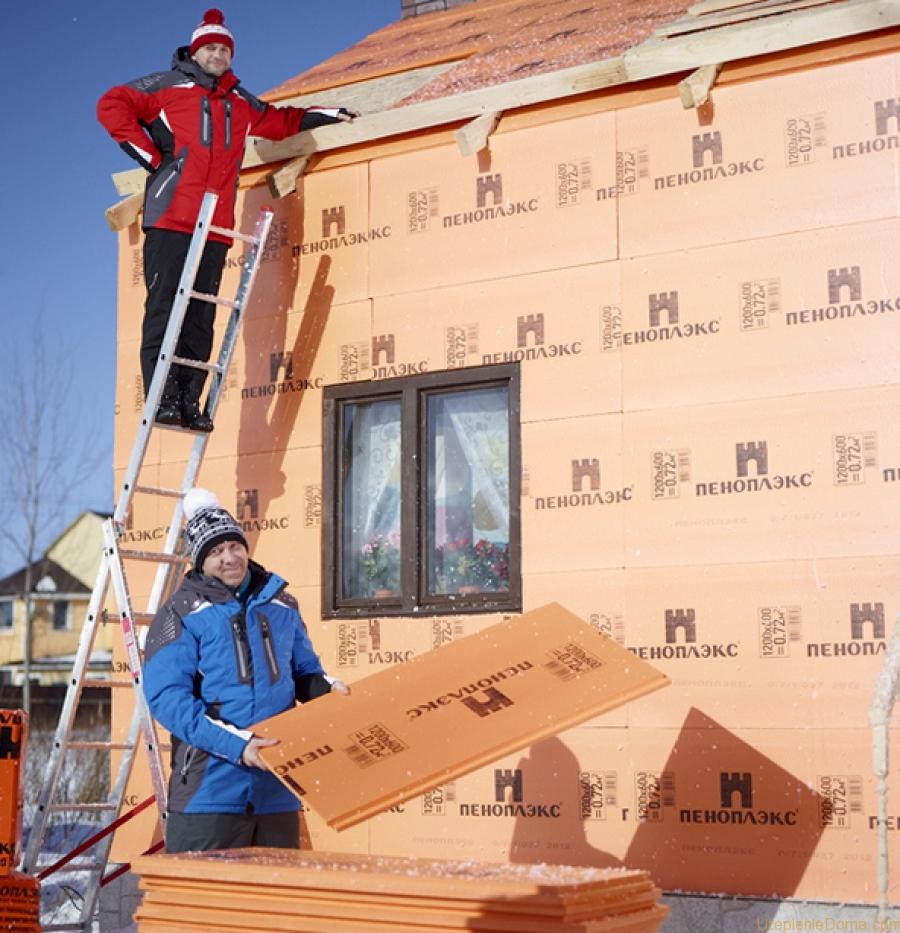
Penoplex
Insulation appeared about 50 years ago and managed to establish itself well in the market. It is obtained by mixing polystyrene granules with a foaming reagent. The result is durable and dense membranes.
The material perfectly keeps heat in the house, does not rot and, accordingly, does not absorb moisture. It can shrink well without loss of properties, and also withstands large temperature drops, does not crack and does not crack.
Polyurethane foam
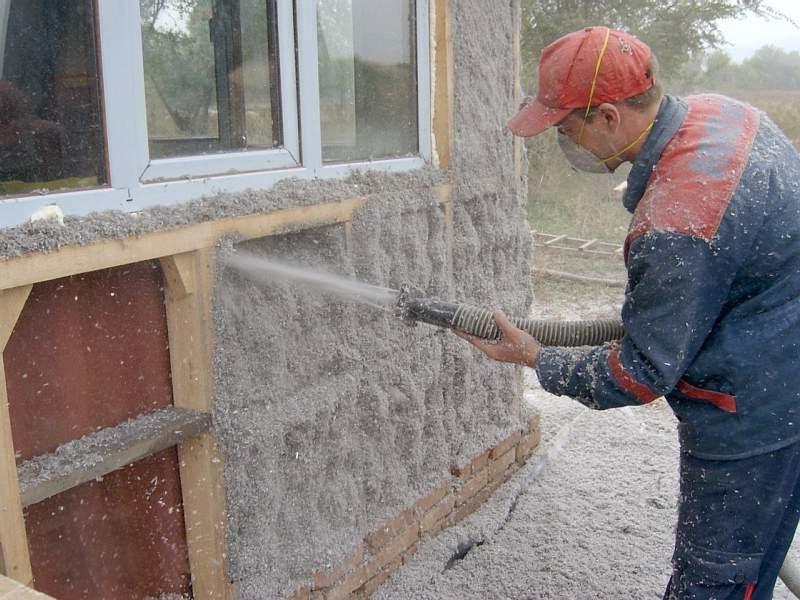
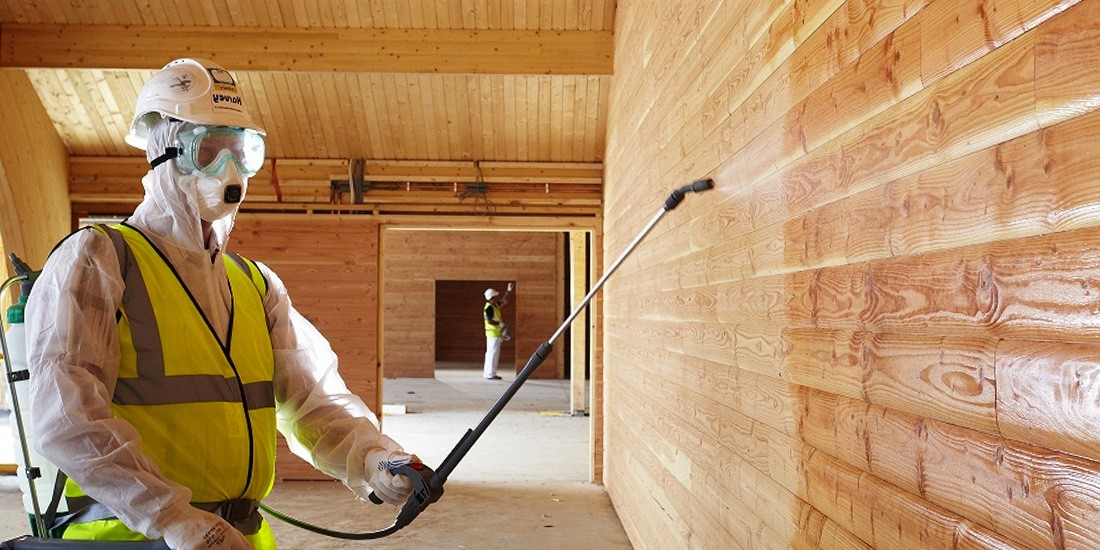
This product is a foam mass. Initially it is a liquid that is sprayed onto the walls. Due to this application, the insulation is evenly distributed over the surface without seams and joints.
Polyurethane foam has a high price and requires special equipment for "styling", therefore, for hand-covering and insulation it is suitable only for experienced craftsmen. Special attention should be paid to the protection of the respiratory tract.

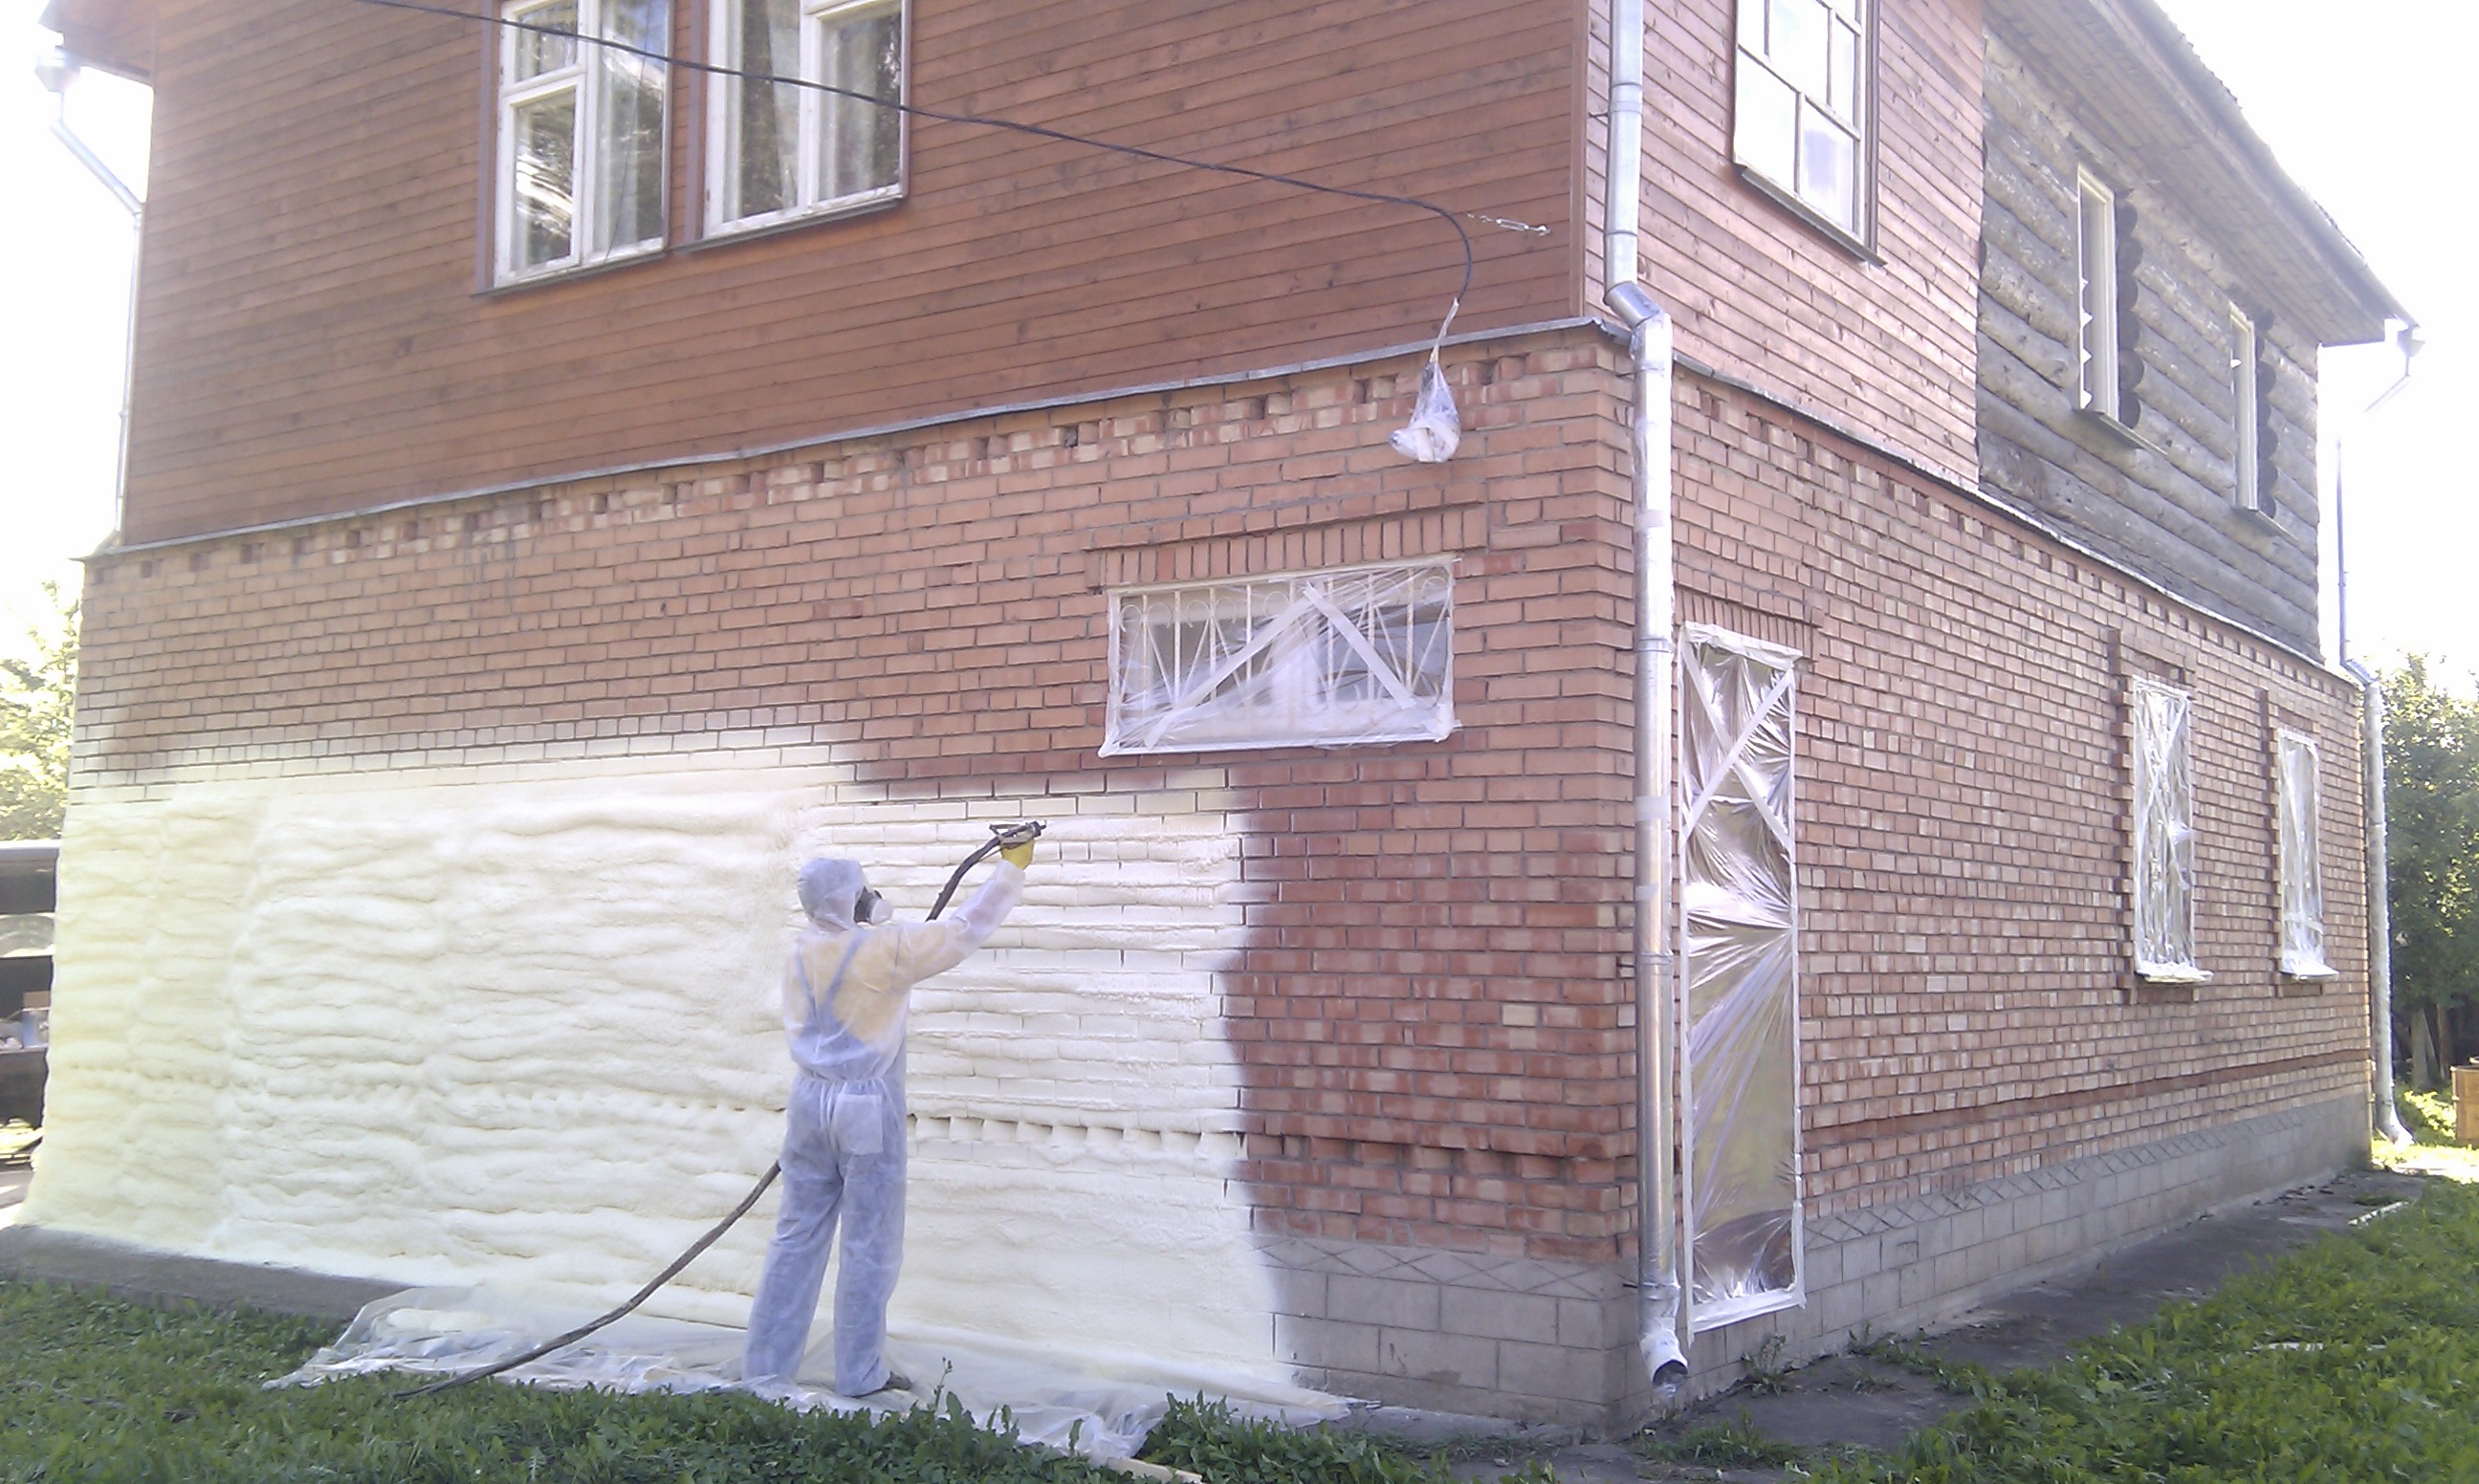
Notwithstanding the foregoing, this heater has excellent qualities and has a long operational life. It is an excellent heat insulator, absorbs noise, is water-resistant and is not amenable to burning (but at a temperature of 600 degrees it can release carbon dioxide and carbon monoxide gases).

How to choose?
The parameters of each house are unique and require special attention. Installation work will vary depending on what kind of building it is: a country house among a large blown space or a building among similar-type houses where there is no free running of air currents.
Proper selection of the necessary materials is one of the most difficult issues in case of handwriting and insulation. In many ways, the choice depends on the building material of which the house is made. For example, for the construction of solid wooden timber, mineral wool is preferable, and for brick or cinder block almost all types of insulation.

For timber frame houses it is also recommended to use mineral wool. This is due to the fact that it is the most fireproof material for wooden buildings.
As for the external walls of aerated concrete, experts advise to warm them with penoplex.
In turn, professionals in the field of construction and installation identified a number of qualities that must be insulated.
Being guided by these norms, it will be much easier to make a choice:
- the most important quality is low thermal conductivity;
- insulation must be hydrophobic or absorb moisture in meager amounts;
- he must “maintain the form” (not crumble, not crawl, not flow, not change the shape of the temperature);
- It is especially necessary to emphasize its safety for humans; also, the material must be fire resistant, not emit caustic odors when heated;
- it is unacceptable content of substances that will promote the growth of bacteria, fungi and mold.
Siding also requires attention. His choice must be approached wisely, as it is affected by natural phenomena (wind, rain, snow, temperature drops, etc.).Each type of cladding has its pros and cons, but among a large variety of most preferred siding vinyl panels. Due to its properties, it tolerates “outdoor conditions”, does not fade in the sun for a long time, and is also a “breathing” and safe material.
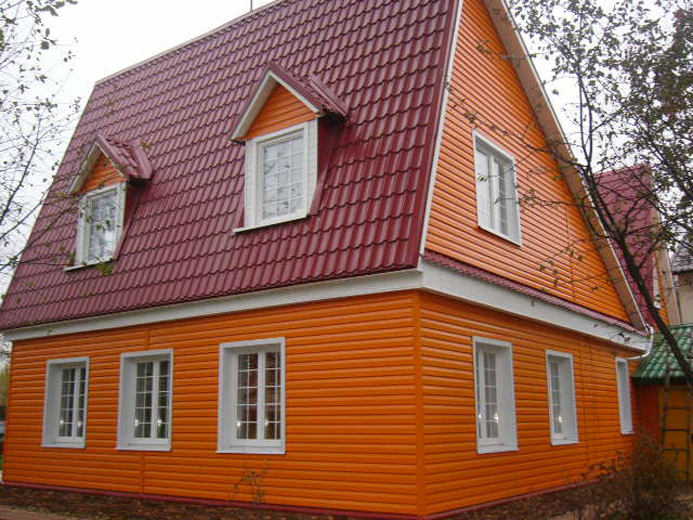
Today in the market you can find ground siding. It is made of PVC with additional processing. It is specially created in order to endure all weather adversities, thanks to which it will serve a very long time. It is very easy and quick to install. This can be done at any time of the year, which is its greatest advantage.

If you choose metal panels, then you should think about the level of their mounting. A newcomer in this business alone can not cope. As for their characteristics, you should not forget about the exposure to corrosion. Plus, when it rains obliquely, water drops beat against the walls and create a high noise level.
If, after all, there are doubts in the choice, then real consumers will be the best prompter in this matter. It is best to talk with homeowners. From them you can find out what advantages and disadvantages they have revealed during operation.
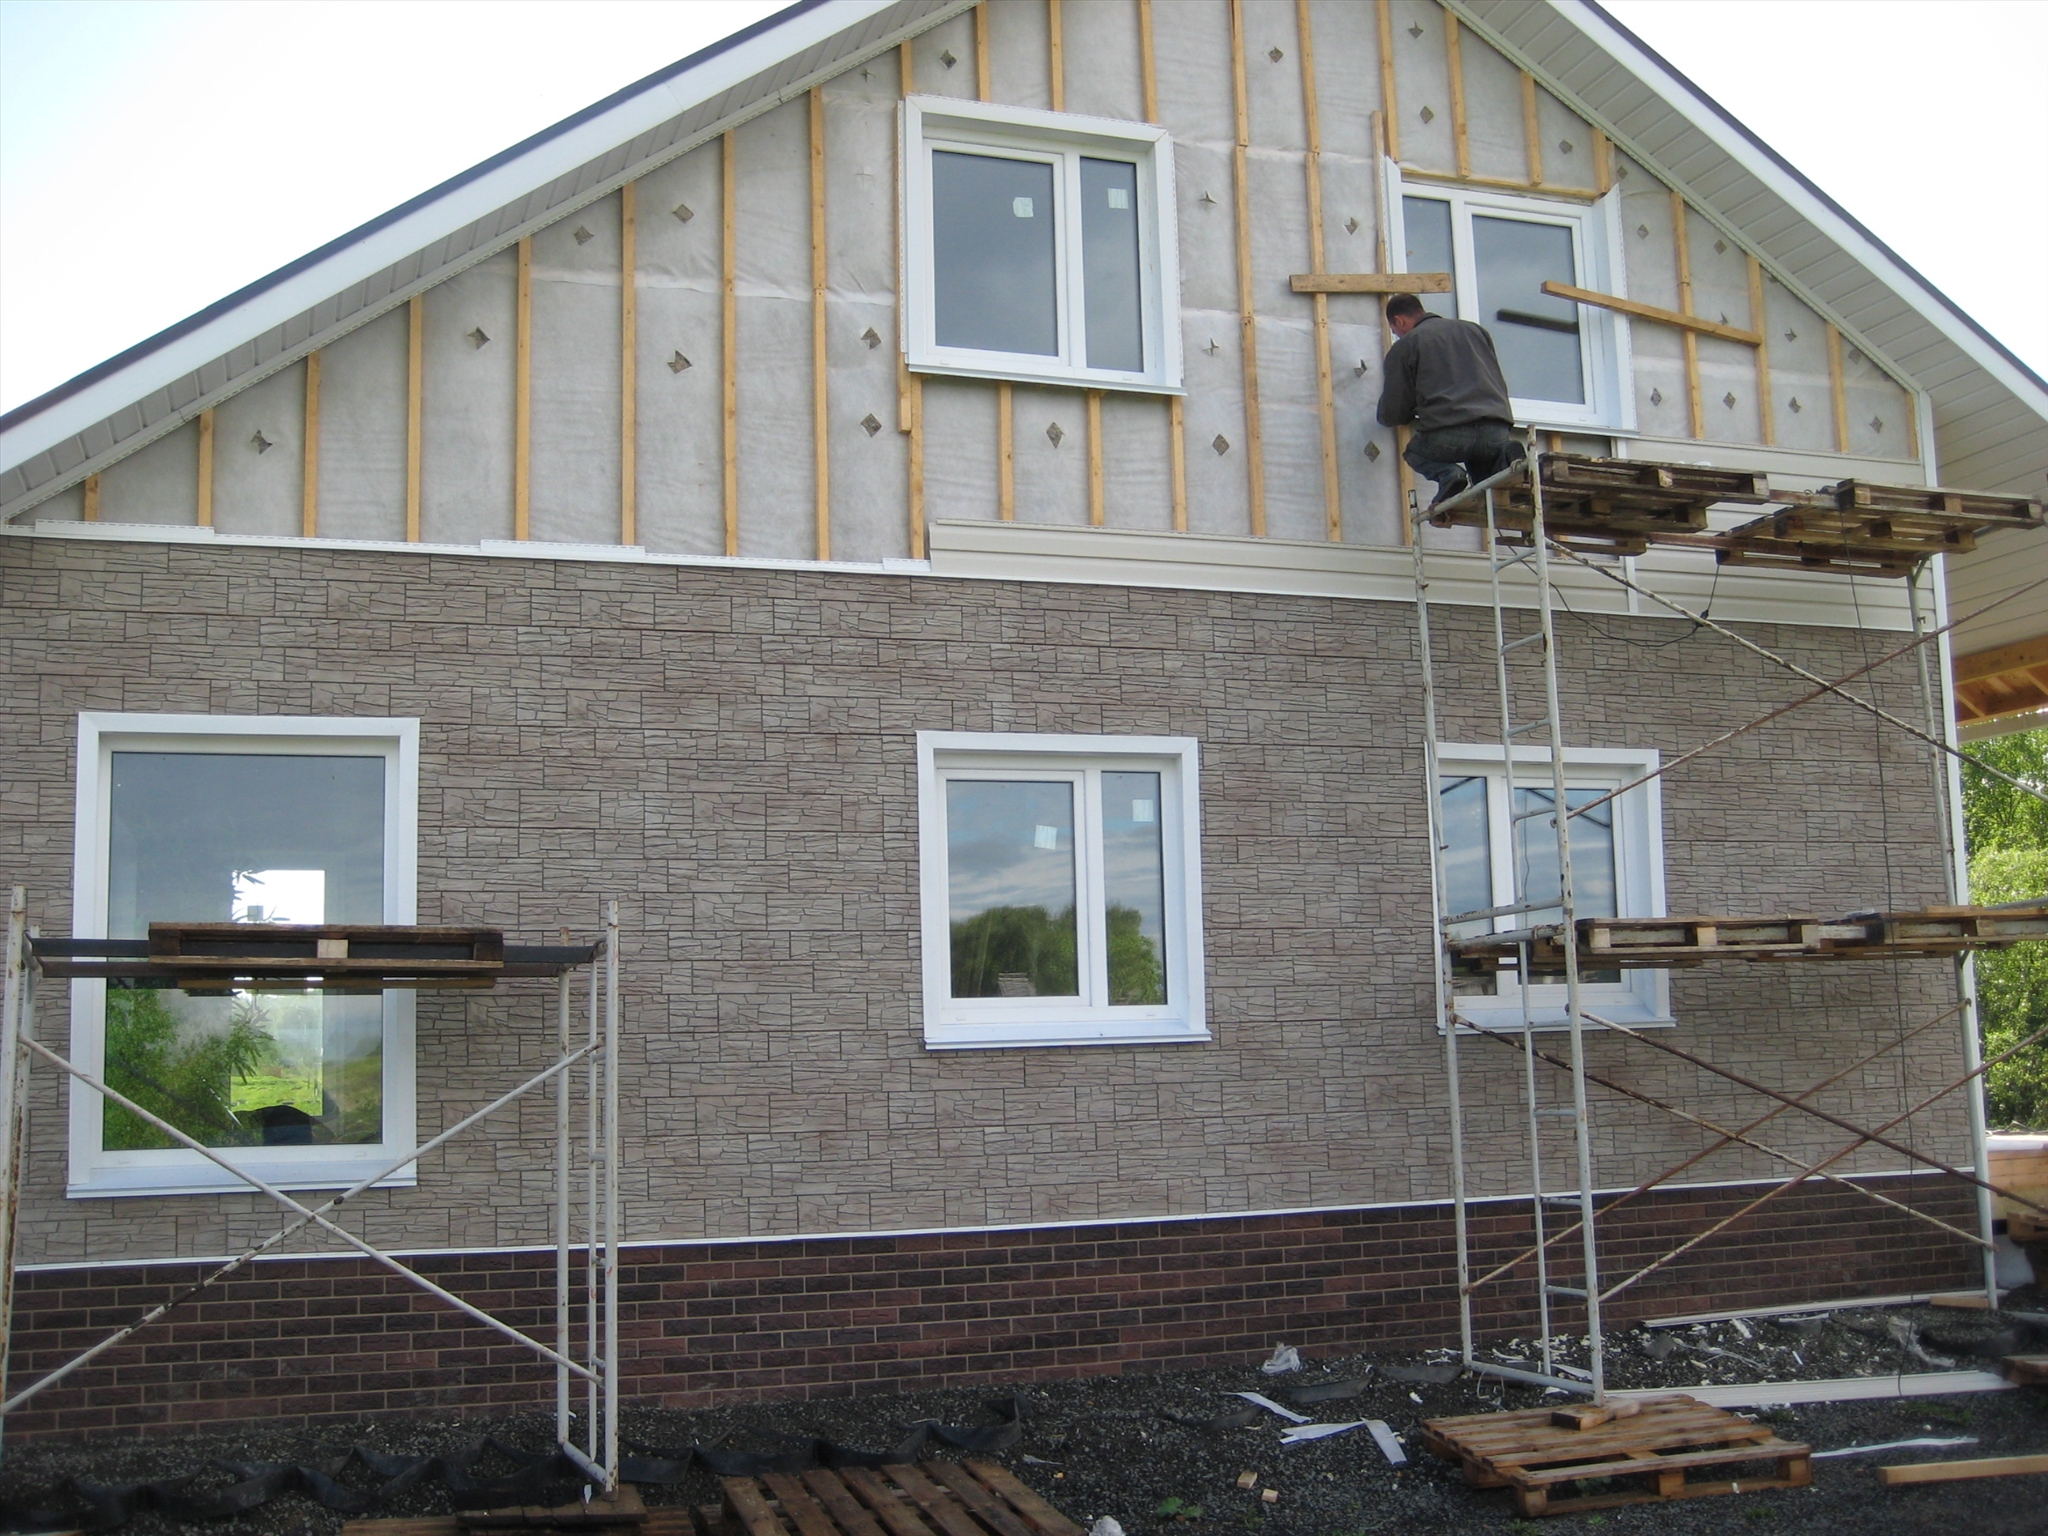
Mounting technology
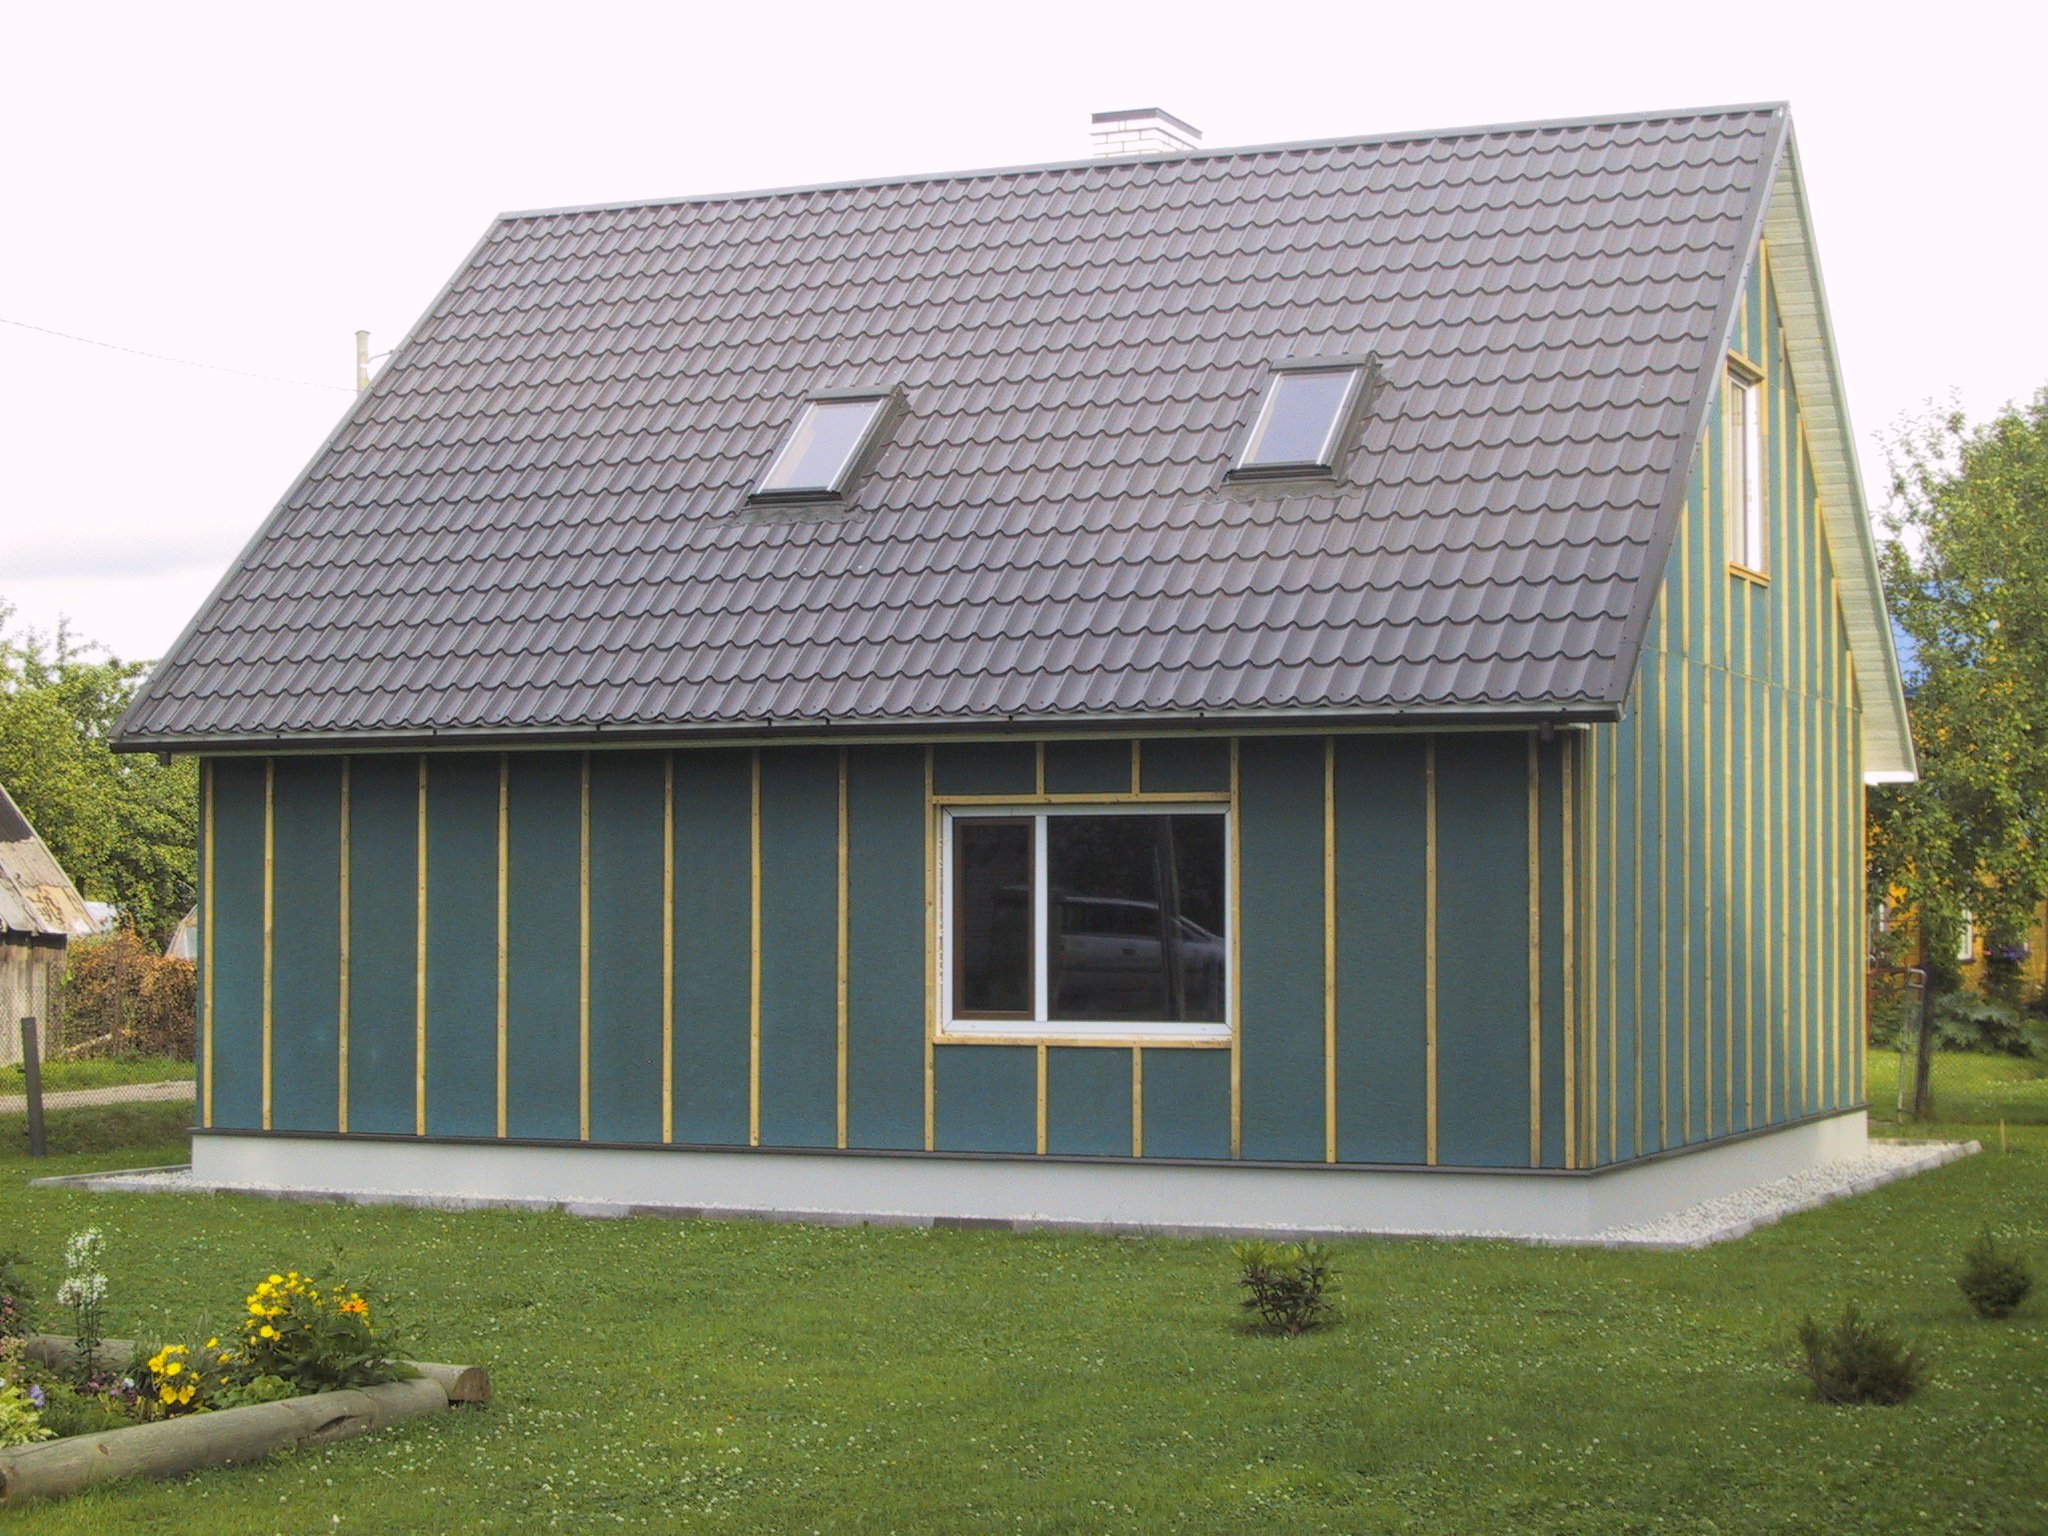
In the field of repair and construction, to get an excellent result, you must follow the step by step instructions. This also applies to cladding with insulation of the facade of the building. Each structure is unique and has its own characteristics. Its outer part is as important as the inner.
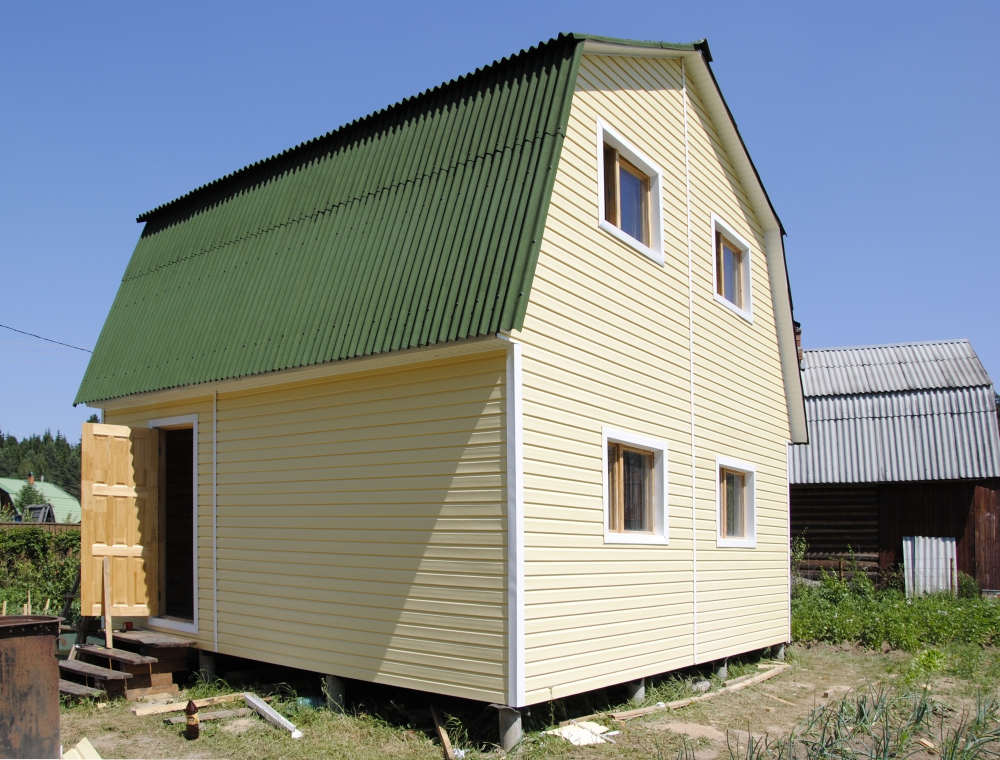
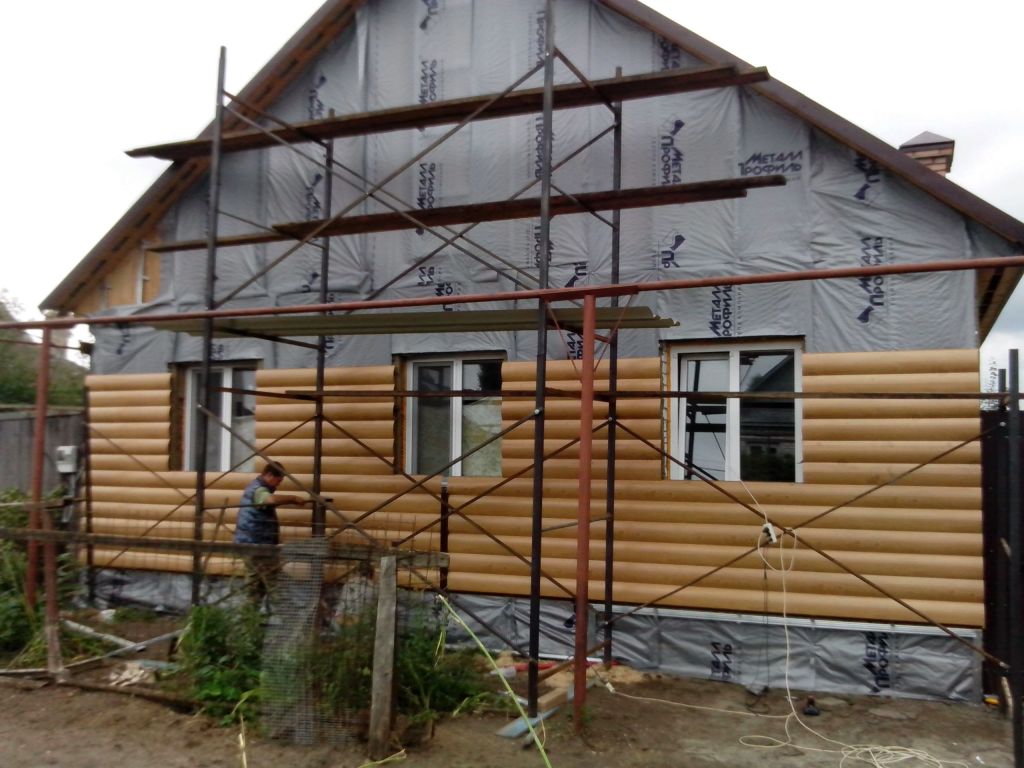
Properly insulated house with your own hands will always please with its comfort and atmosphere. It is very important to understand that if facing will be carried out, then we should not forget about the pediment (upper part). It is also necessary to warm.

The sequence of works on finishing the outer facade directly depends on the material from which the object is built. If the house is made of solid wood frame, then initially it is necessary to seal all the chips and cracks so that the moisture could not get there. And if the house is of the shield type, then, naturally, it is much easier and faster to decorate it.

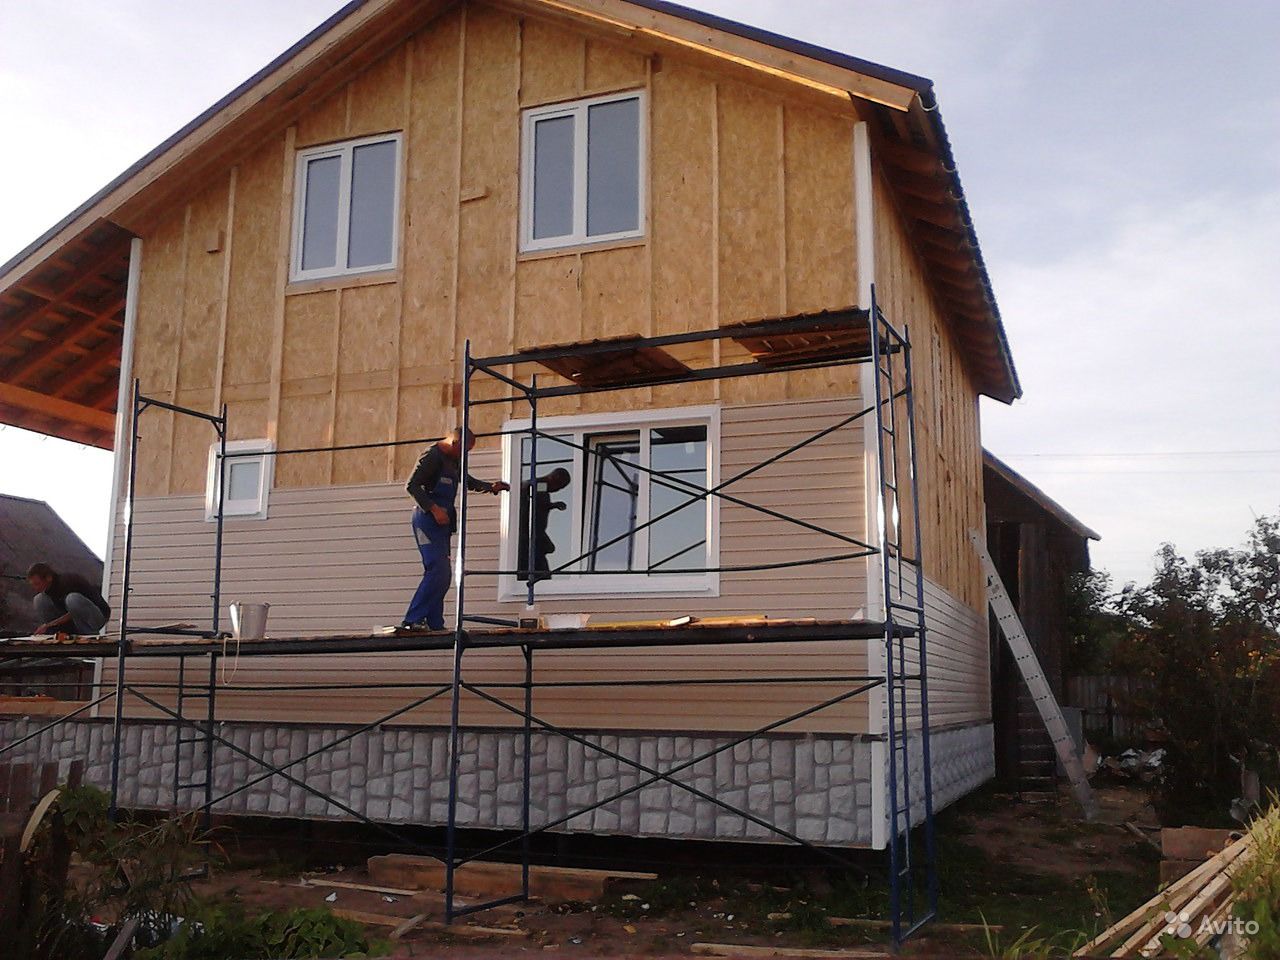
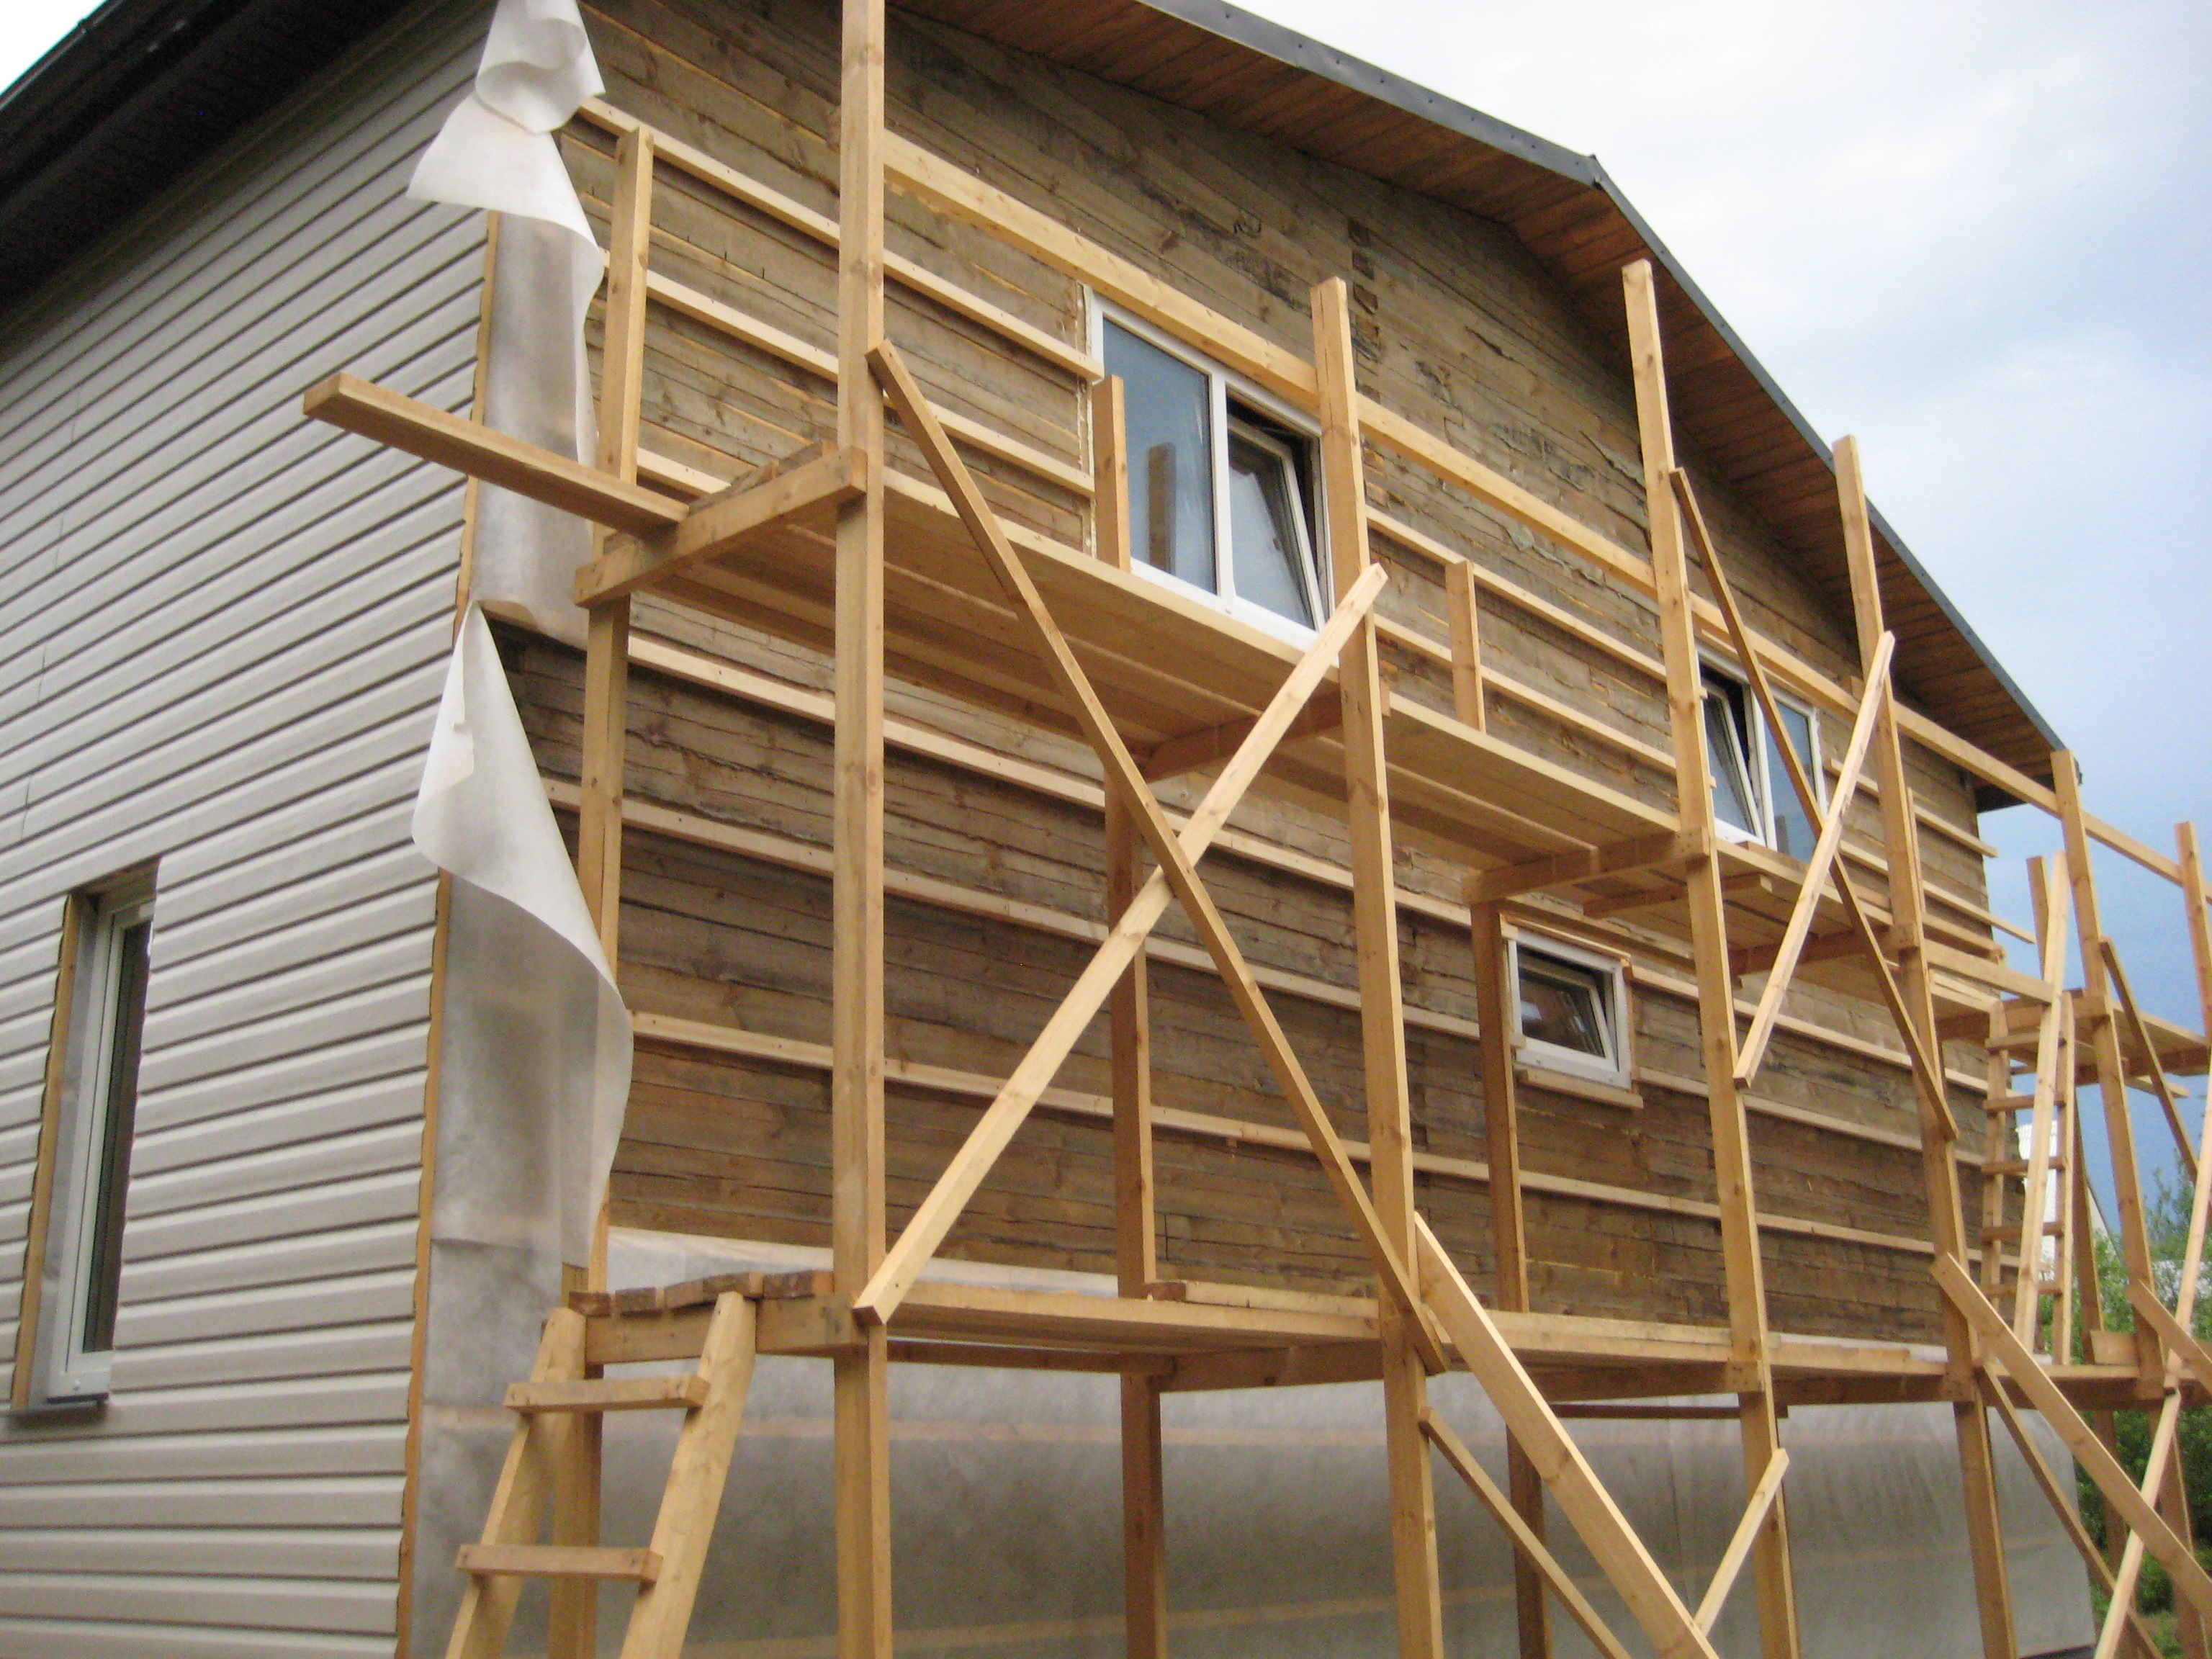
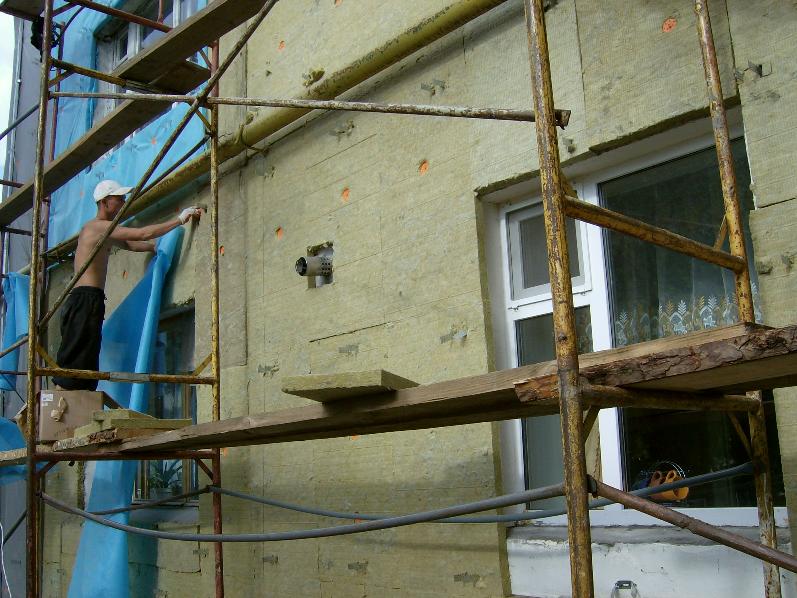
Initially, masters recommend installing scaffolding. So it will be much easier to clean the entire surface of the house from foreign elements (outdoor lamp, window sill, etc.).
Next, remove all holes, flaws in the walls. After that, the surface can be dubbed and proceed to the installation of the batten, on which the siding panels will be mounted.But before installing them, it is necessary to lay insulation with the obligatory waterproofing in the apiaries that have been formed.
This is just a general DIY installation technology. Each item requires more detailed consideration.
Wall preparation
The end result depends on how carefully the walls are prepared for installation. This issue should be given a large amount of attention and strength.
It is necessary to determine what the walls are built from: brick, wood, concrete blocks, etc.
If the house is made of solid logs, the preparation will be as follows:
- As mentioned earlier, the walls are cleaned of all the excess and extraneous that will interfere during the work.
- Cracks in the wood are sewn and cleared of debris and shavings. Particularly carefully treated places where the tree is in a mold or there are places of decay.
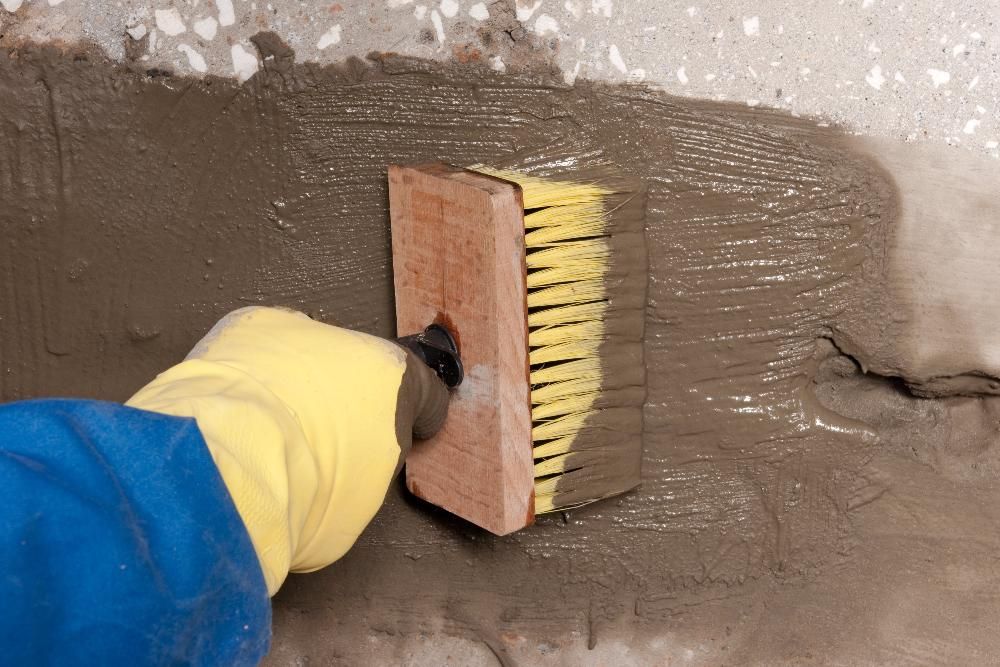
- All wood must be carefully treated with an antiseptic solution, especially in grooves and cracks.
- Further, all the holes and irregularities are coated with a special putty for wood.
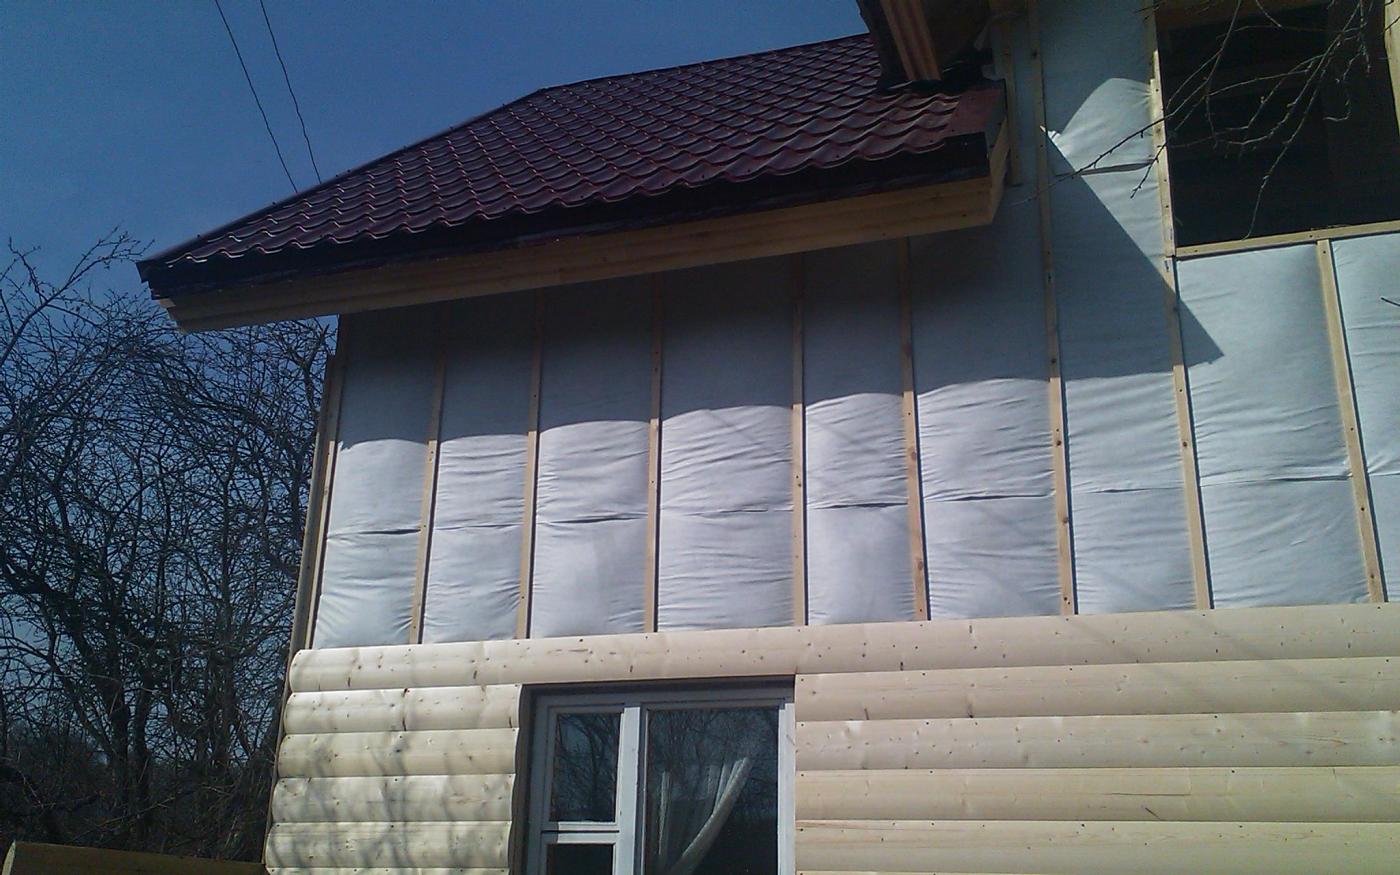
- After everything is dry, the waterproofing film is applied. This must be done in dry and warm weather.

Similar actions are performed in the case when the house is made of wooden panels.
In the case when the building is made of brick, the preparation is a little faster.
The following series of actions should be performed:
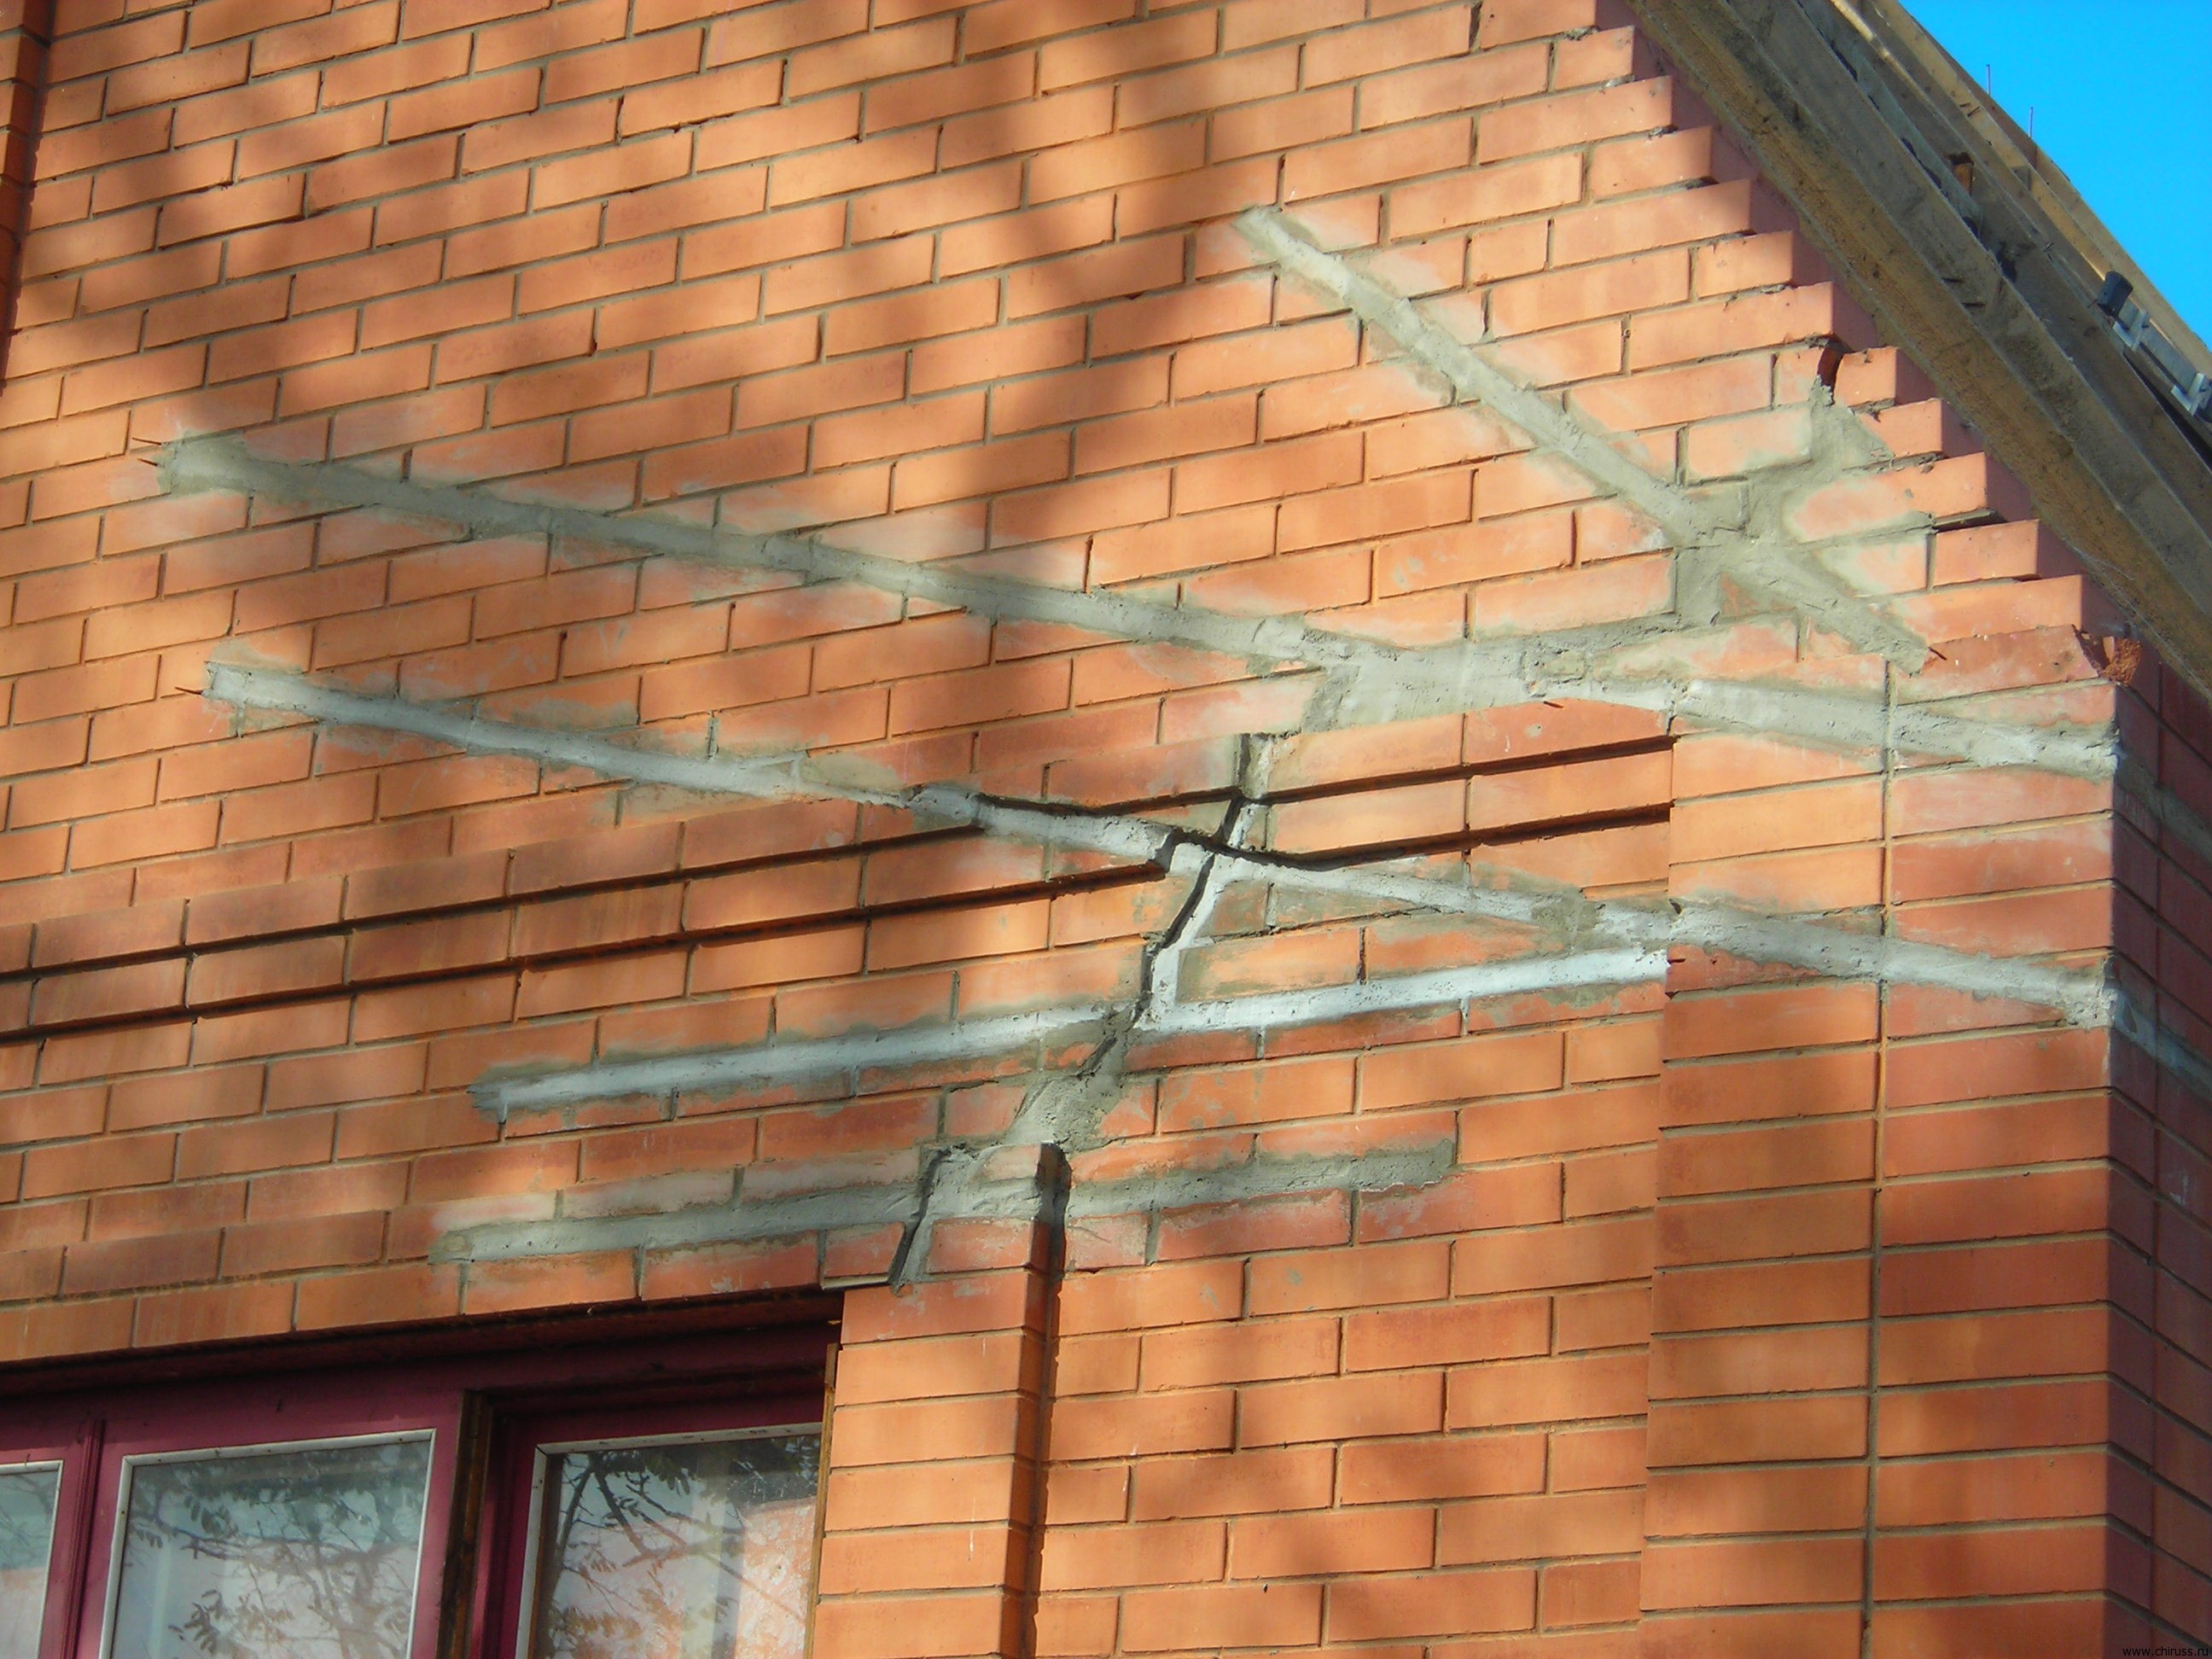
- It is necessary to review the entire brickwork and identify the flaws (cracked cement composition, loose bricks). Further, all the flaws are cleaned using foam or the same cement mortar.
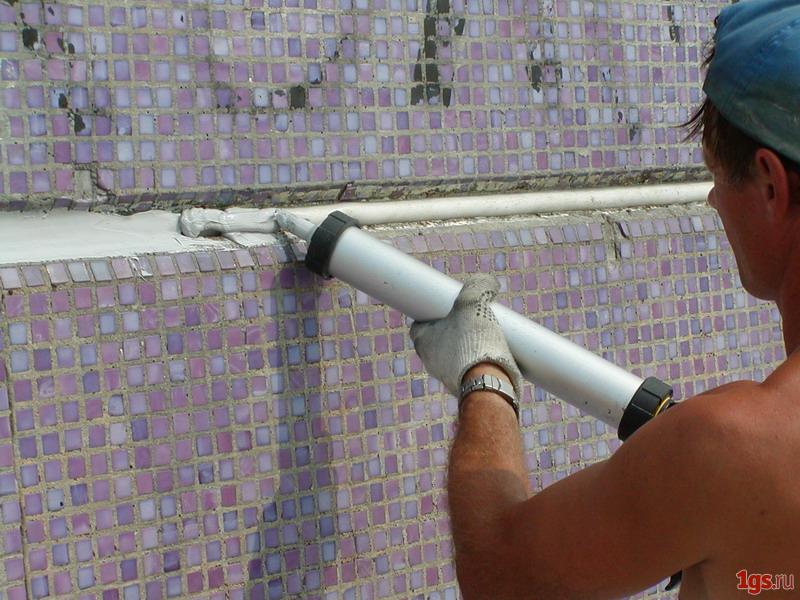
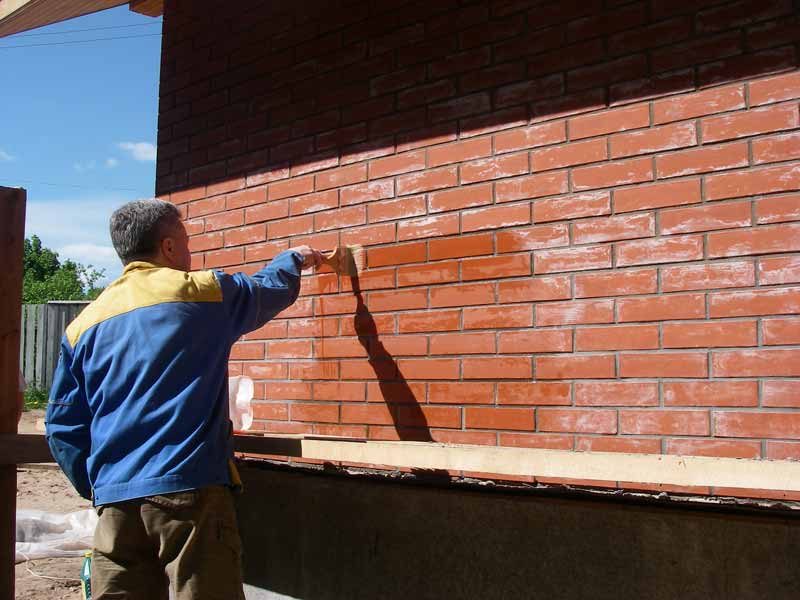
- All joints and seams are treated with a solution of mold and mildew. It is worth making it even for prevention purposes, as the dark and damp space is a beneficial environment for the growth and development of microorganisms.
- Cracks resulting from shrinkage of the house, you must thoroughly fluff putty.
- The foundation of the house is covered with waterproofing (film, solution).
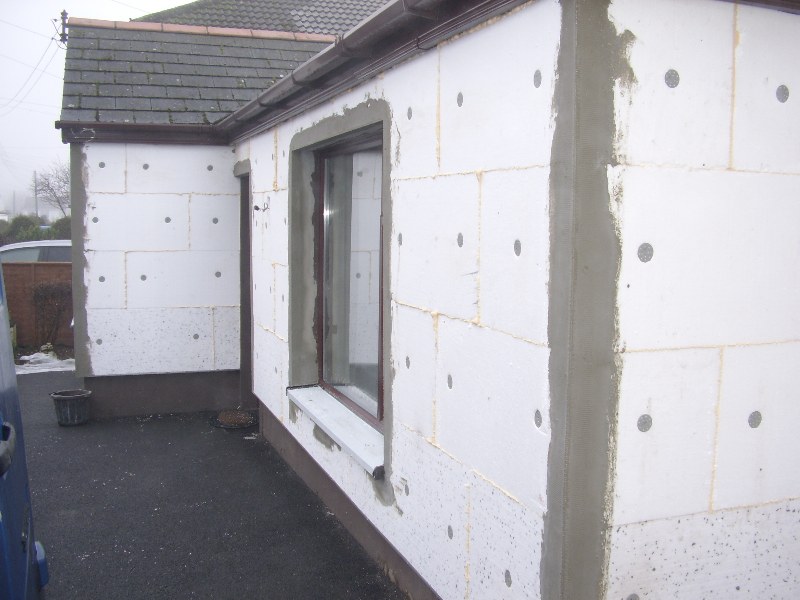
- If the insulation is glued to the wall, then its pre-primed.

A similar procedure is carried out for houses built of concrete blocks.
After the preparatory work, you should visually be convinced of the quality of the work performed, and then proceed to the installation of the batten.

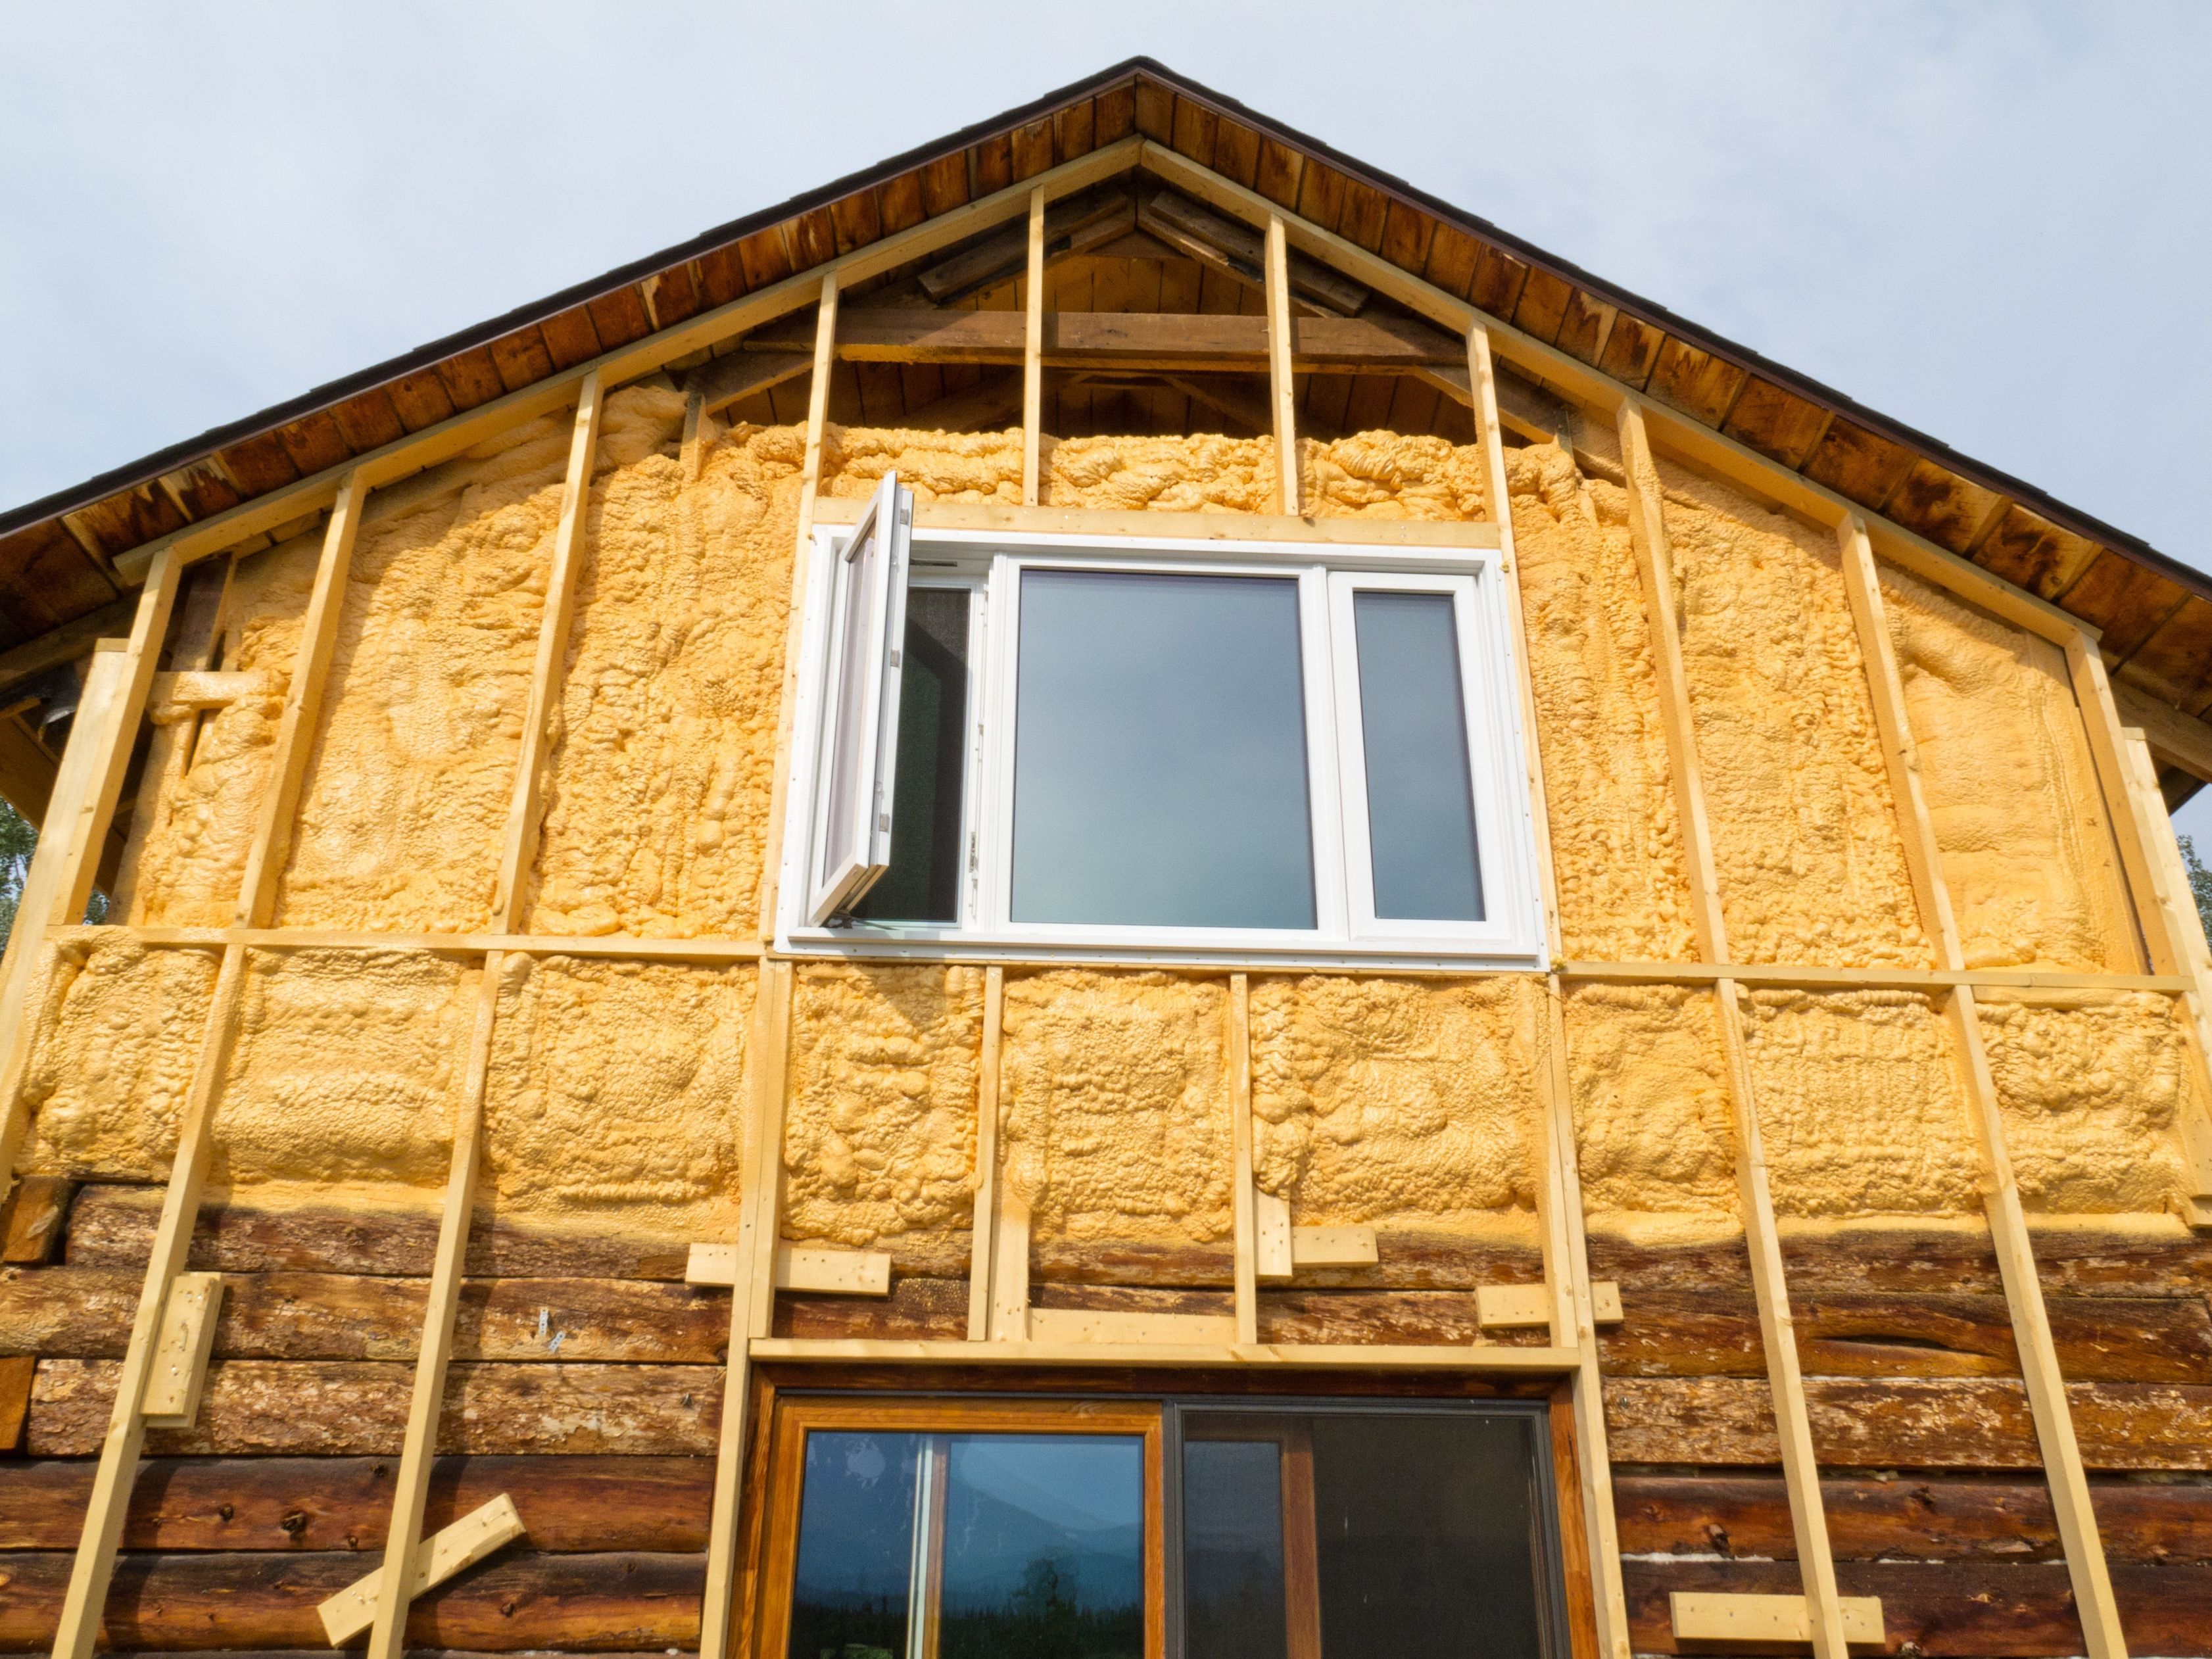
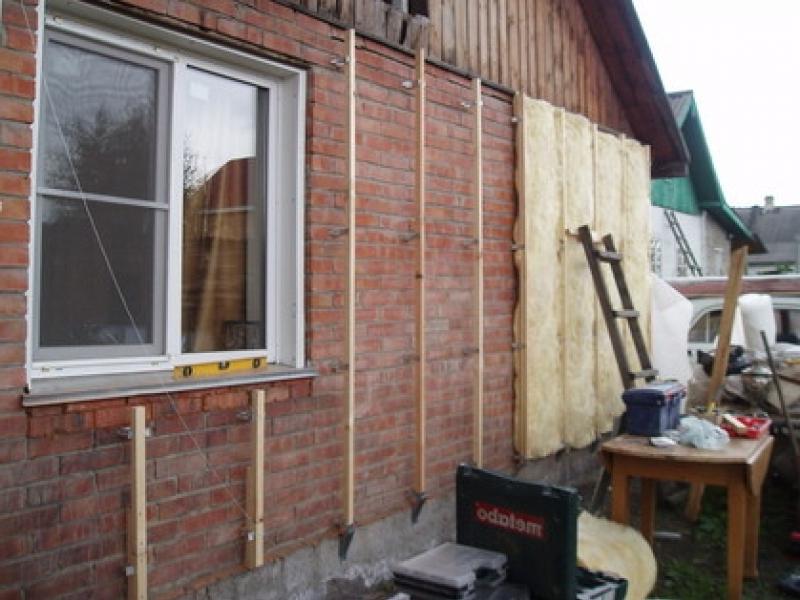
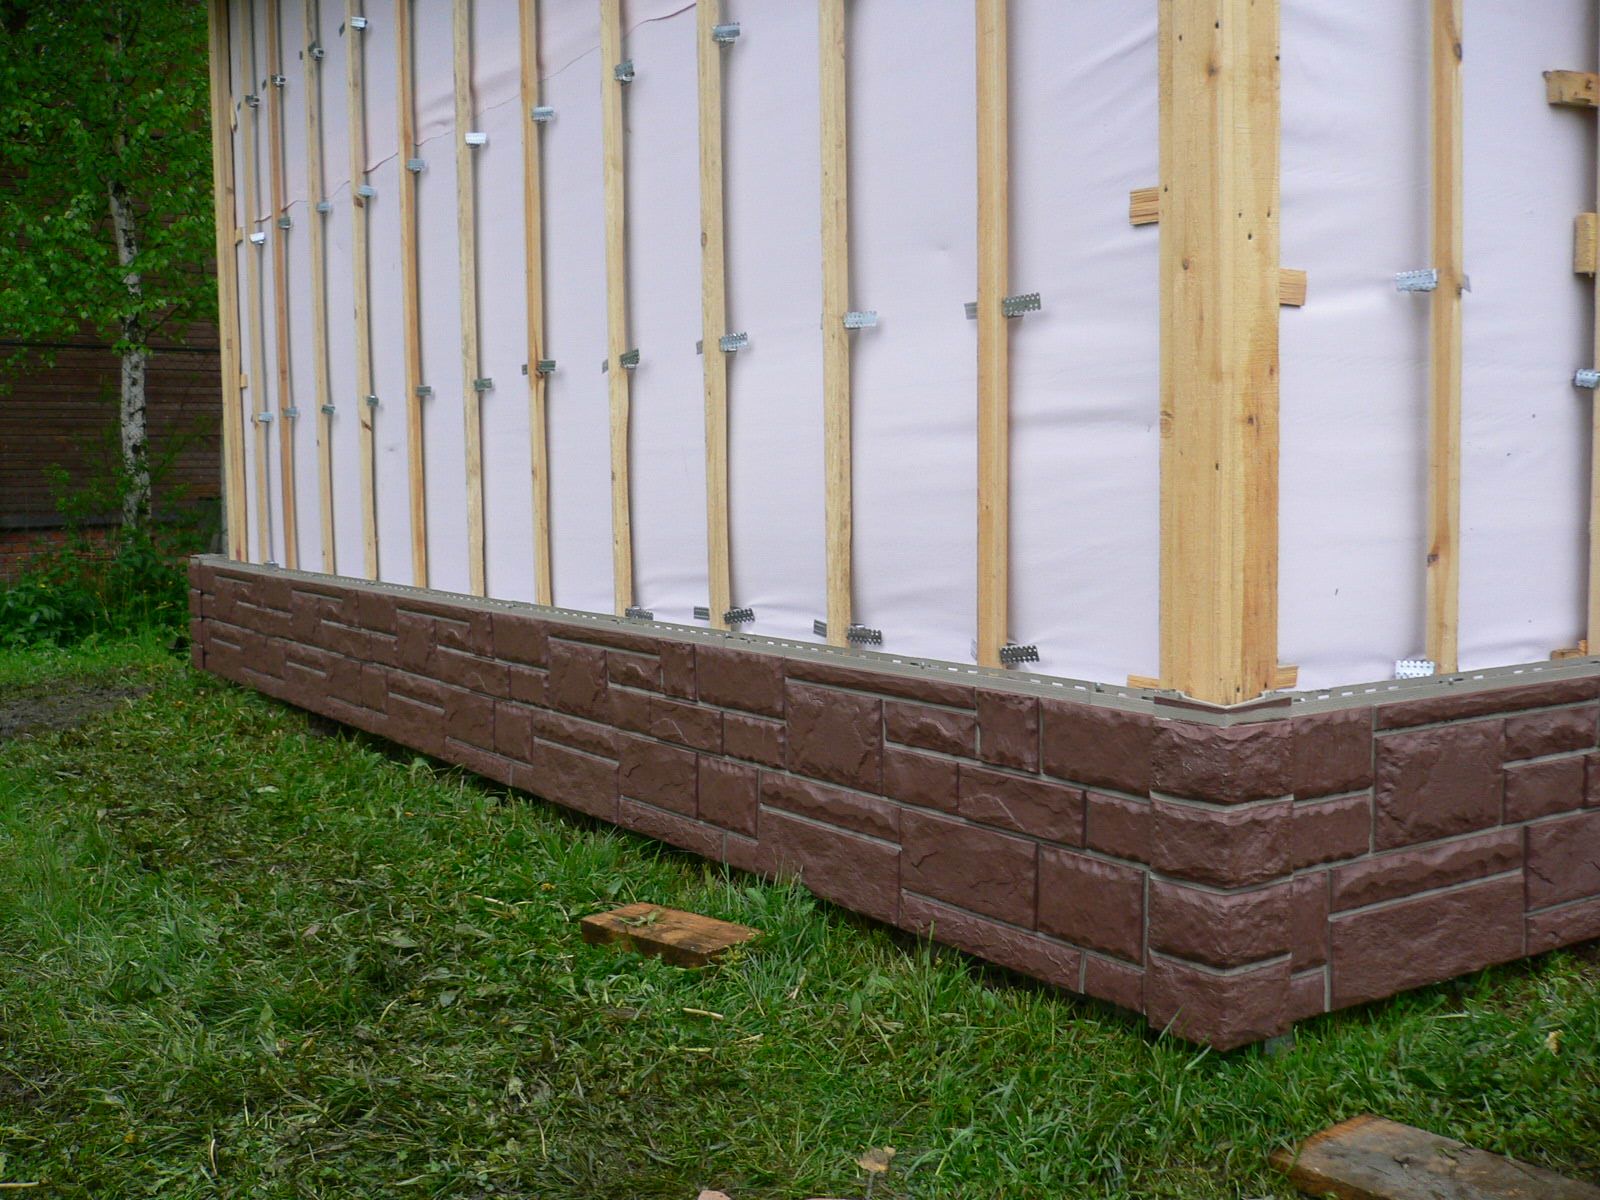
How to fix the crate and insulation?
The crate is necessary in order to create a basis for securing the siding, as well as for the convenience of the distribution of insulation material. She also helps to create a small air gap between the insulation and skin. Thus, there will be no condensation, and later fungus and mold.
Such frames are of two types: wooden and metal. It is preferable to lay a crate of metal on a brick base, and of boards on a wooden one.
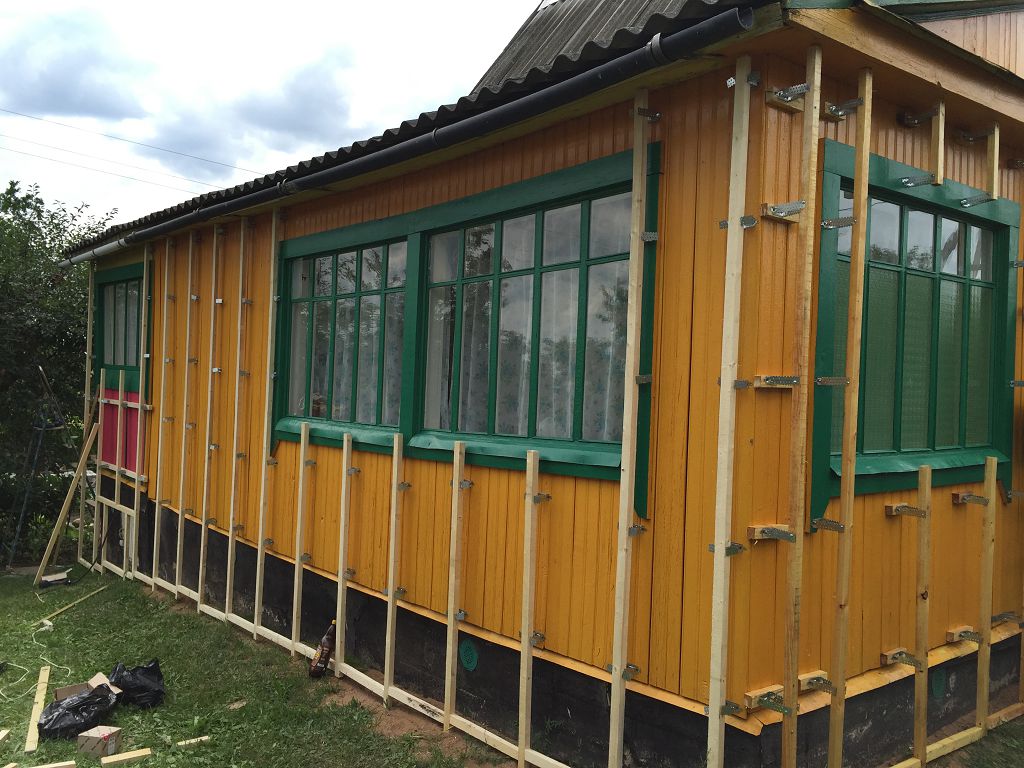
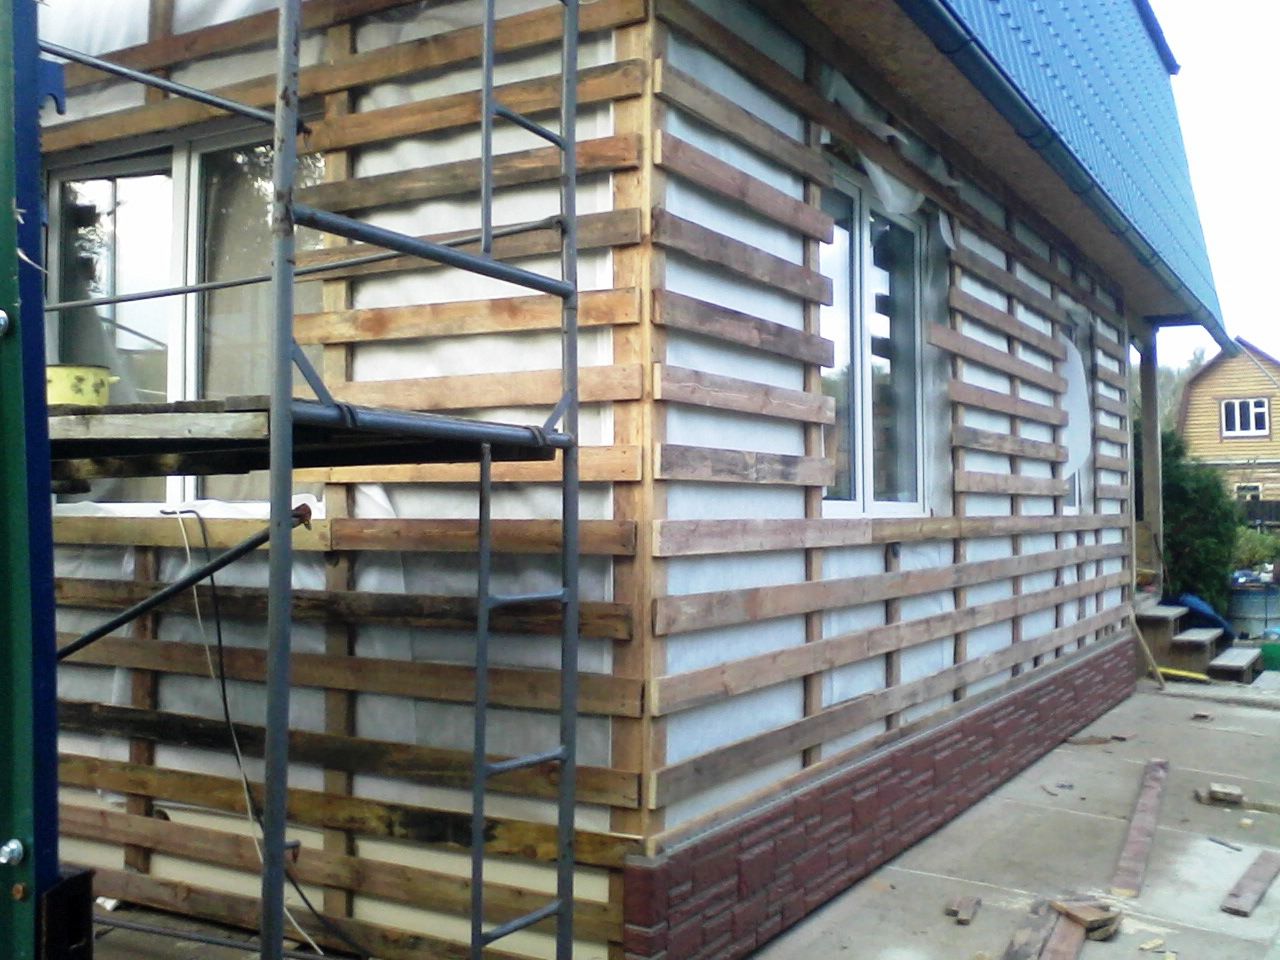
Wooden crate is installed as follows.
- Over the entire area of the walls need to make markup The bars should be separated from each other at a certain distance of 45-55 cm. Their location should be strictly perpendicular to the future covering material.
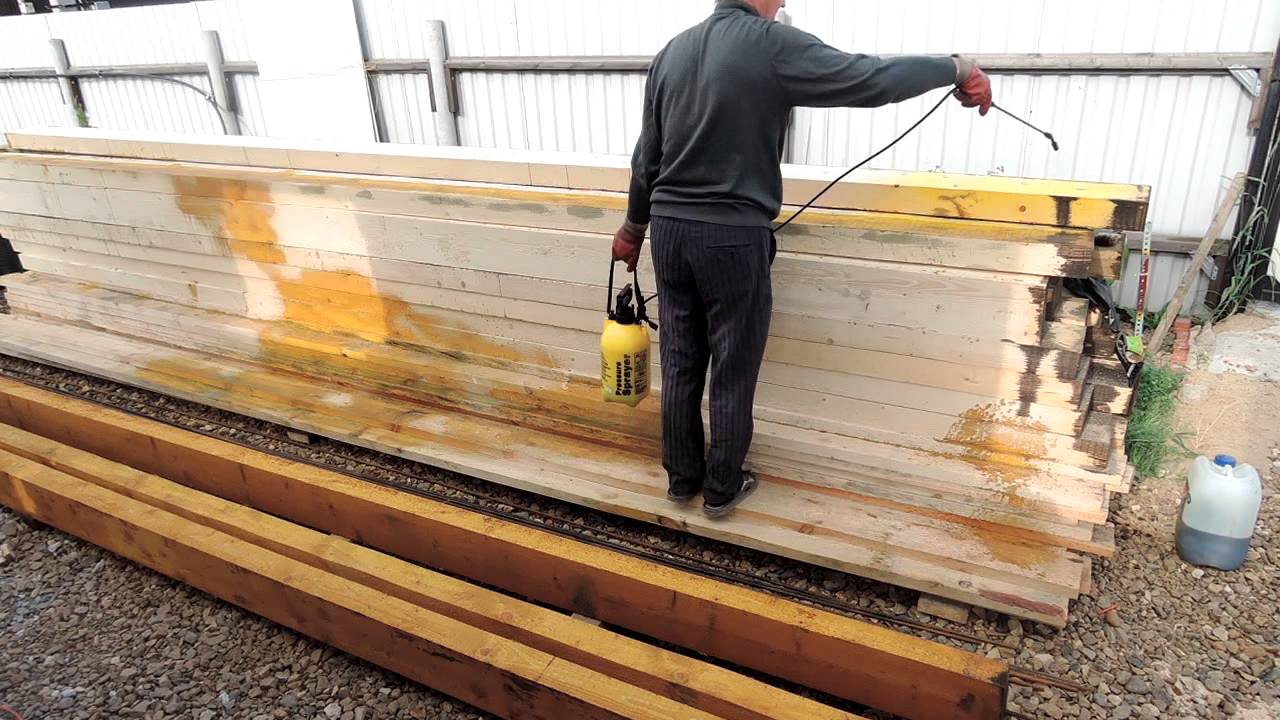
- All wooden boards are treated with a special compound that protects against fire, moisture and rot.
- The timber itself should have a width and thickness of 50 to 50 mm.
- At the marked points pre-drilled holes for mounting on the wall.
- Rack beams are mounted on top of vertically installed. First, holes are also drilled in them and plastic dowels are hammered for future fastening, and then they are screwed with ordinary screws. The result is a wooden frame grille.
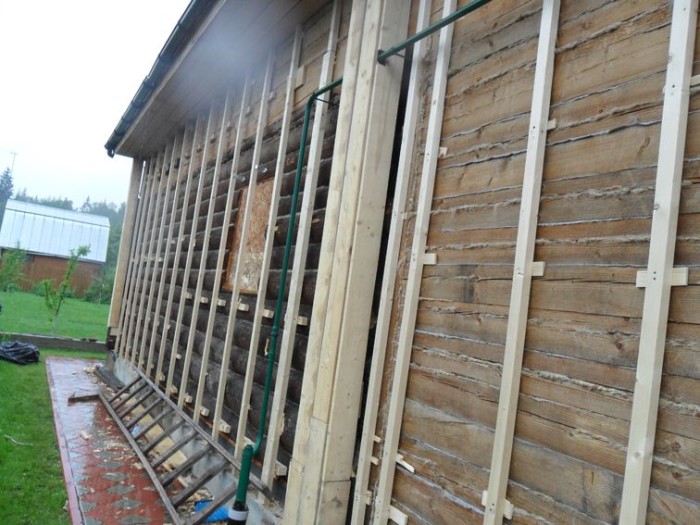
The most important thing is that the resulting structure is rigid and durable, otherwise under the weight of the siding it can squint or even fall.
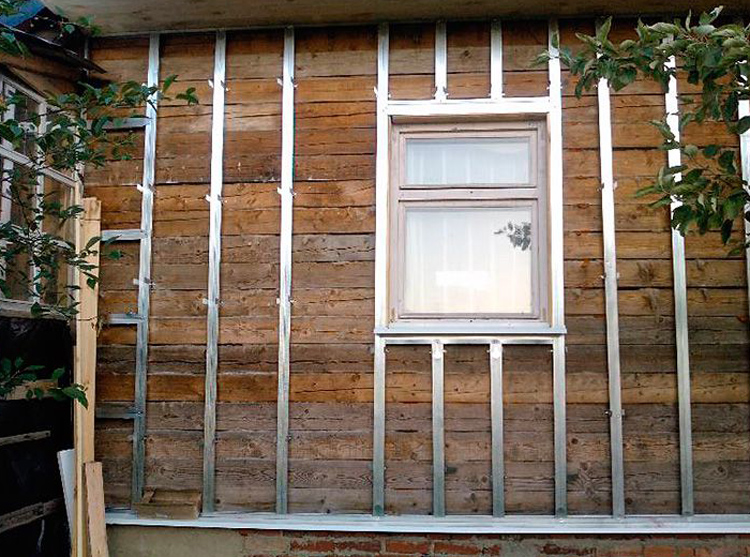
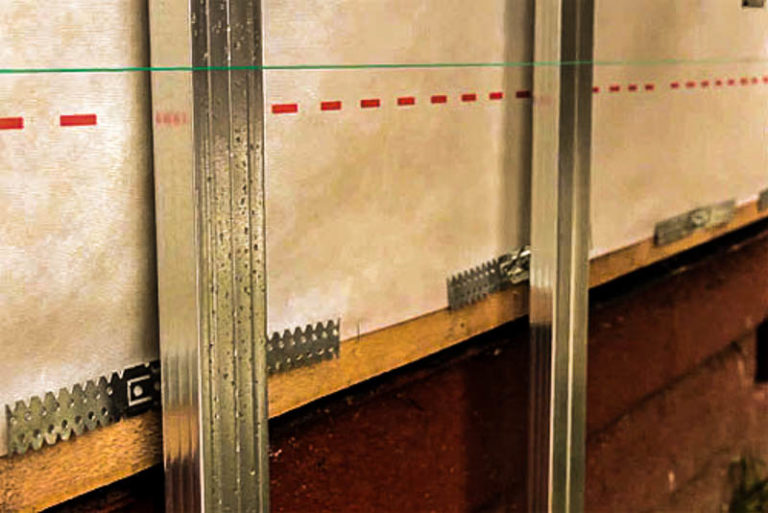
To install a metal crate, you need to do the following steps:
- As with the wooden structure, marking is done first.
- Holes are made on the outer facade, the dowels are hammered and U-shaped suspensions are mounted.
- Then metal profiles are attached perpendicular to the suspensions. For the "hard" connection profiles used "crab". This is a plate that helps fix the crate.
- Additional suspensions are attached to the wall. On them the heater will be "strung" and fixed.
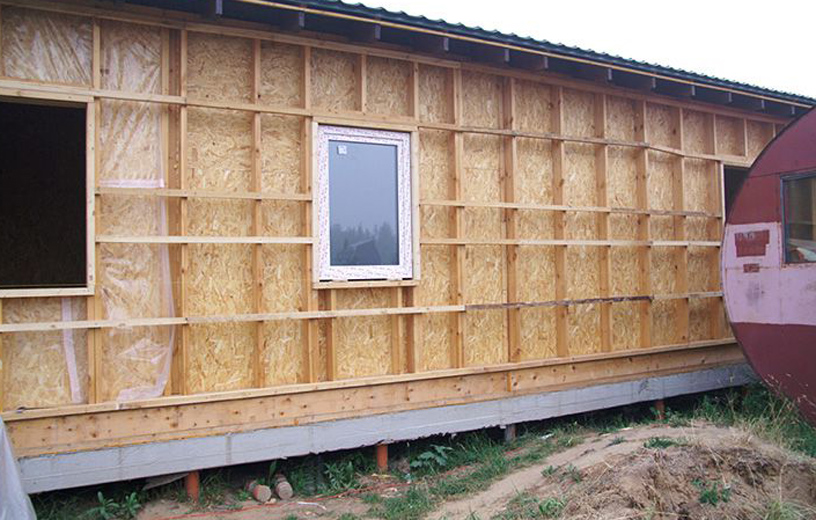
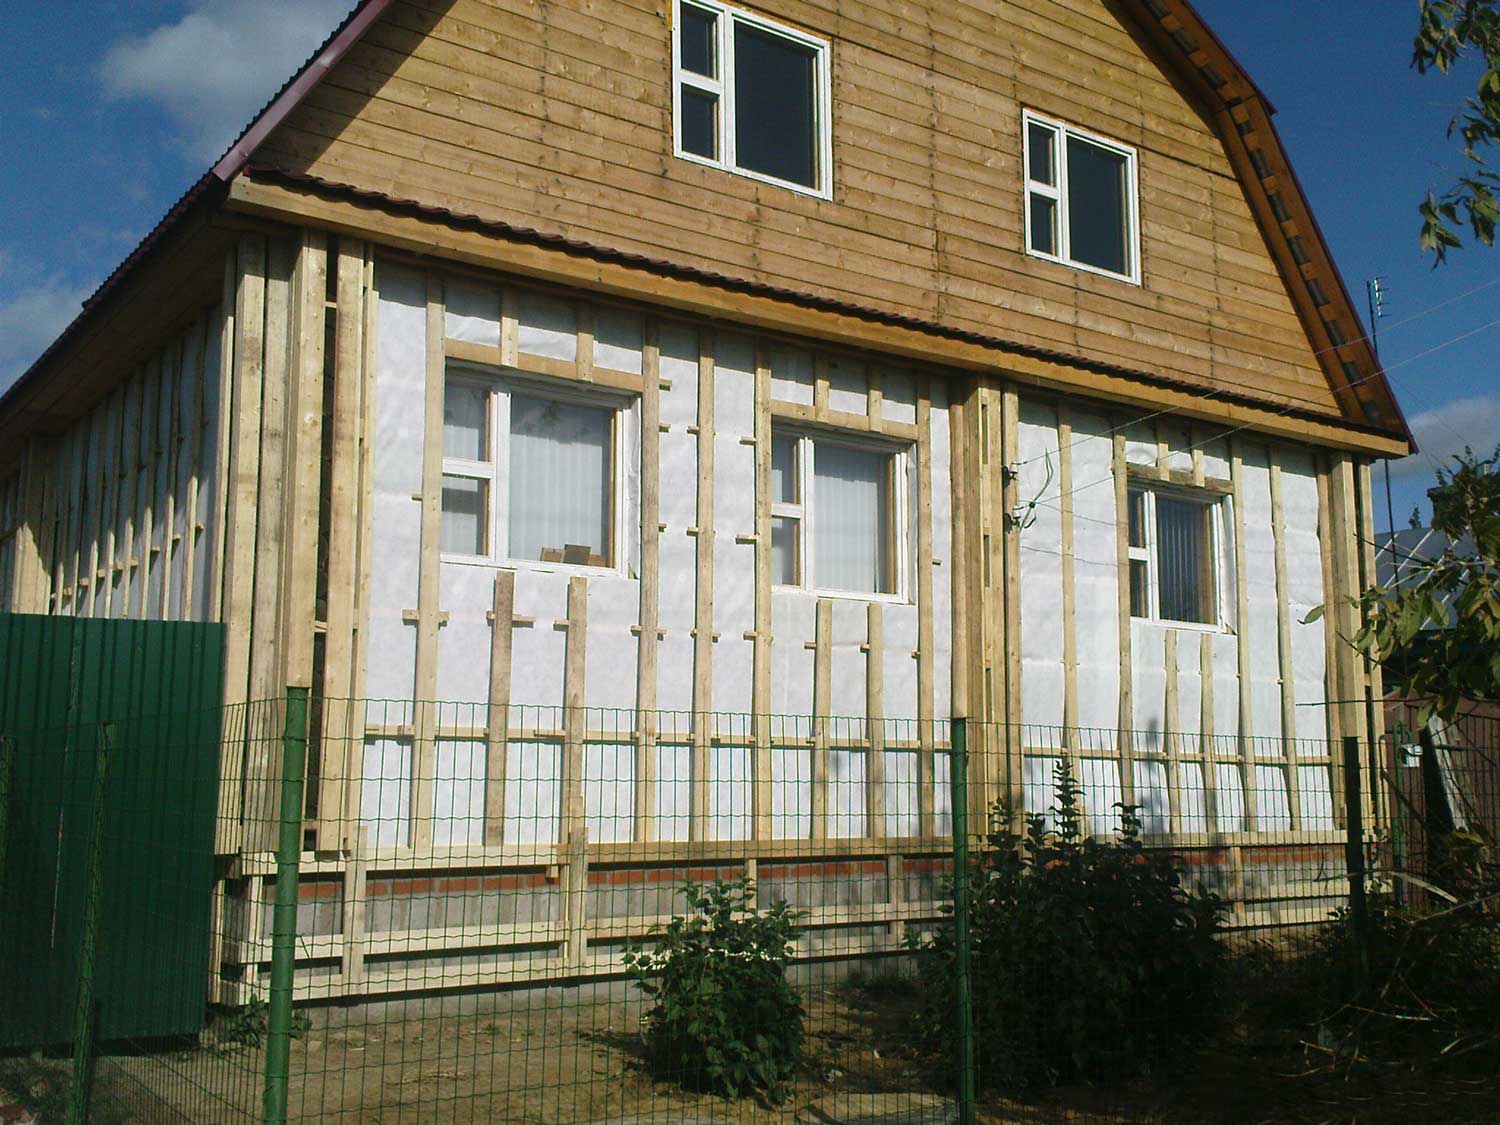
Regardless of the type of lathing, window and door openings are lined with it around the perimeter. After installing this design, you can proceed to the next step - laying insulation.
The specifics of the installation work on laying insulation material will depend on its type.
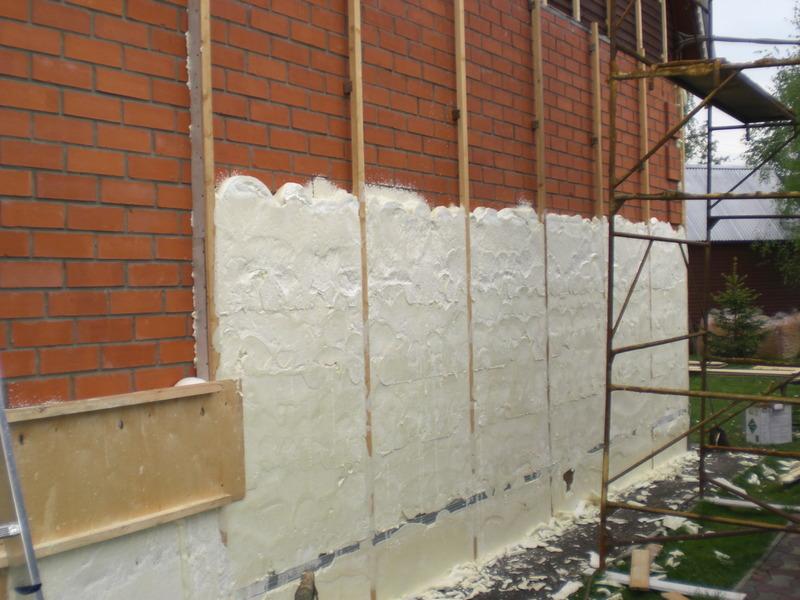
Polyurethane foam
With the help of a sprayer, the insulation is uniformly applied along the entire perimeter of the walls. Particular attention should be paid to the slots and joints between the slats. If necessary, apply a second layer.
After everything is dry, all protruding surpluses should be cut with a clerical knife. It is very important that all layers dry well, otherwise the insulation will be bad to cut.

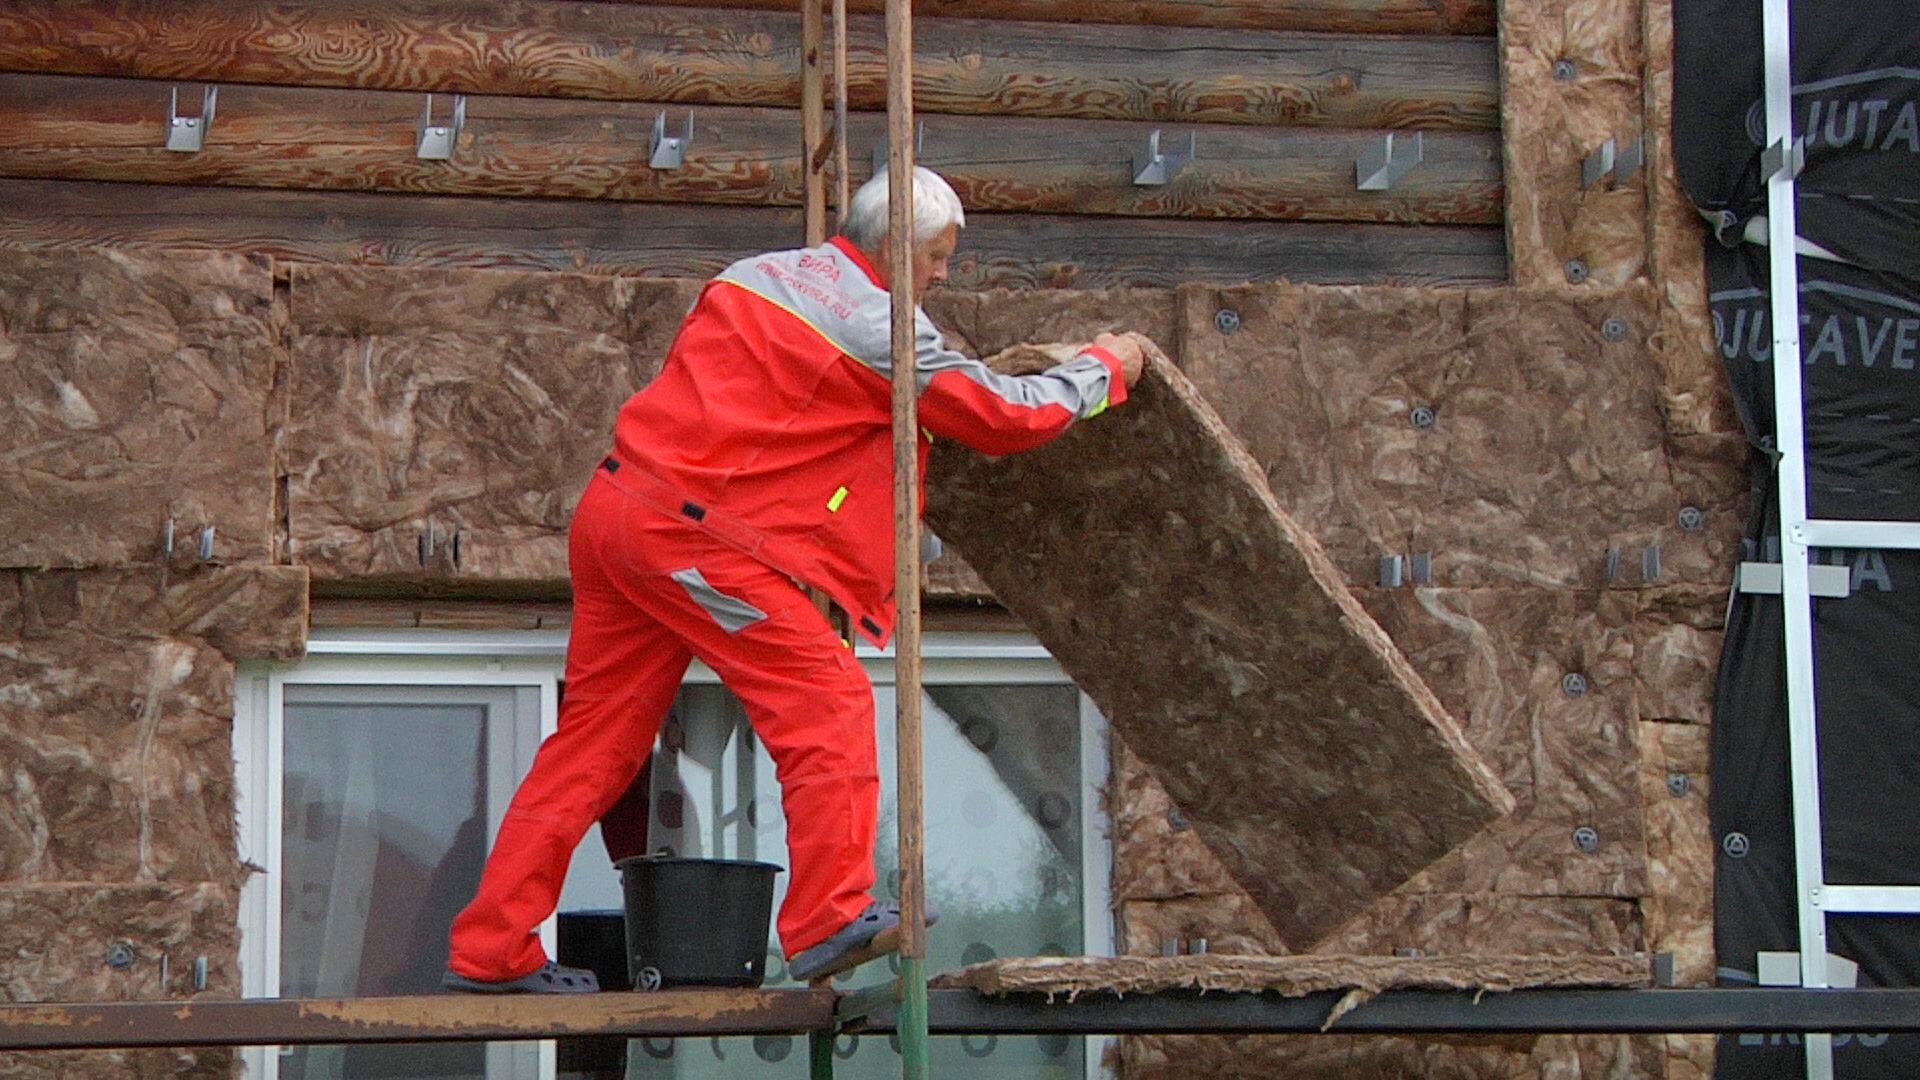
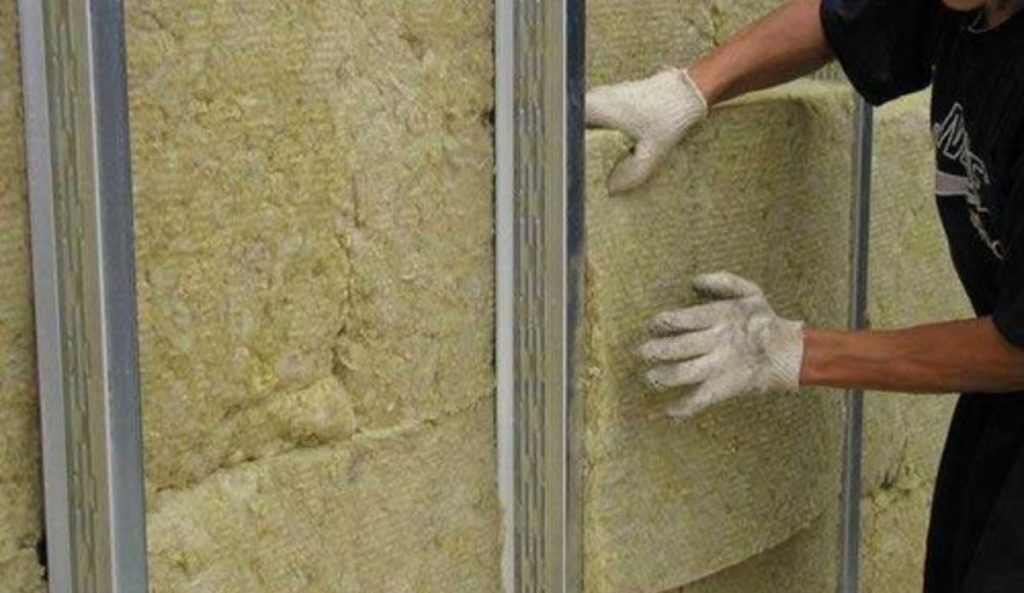
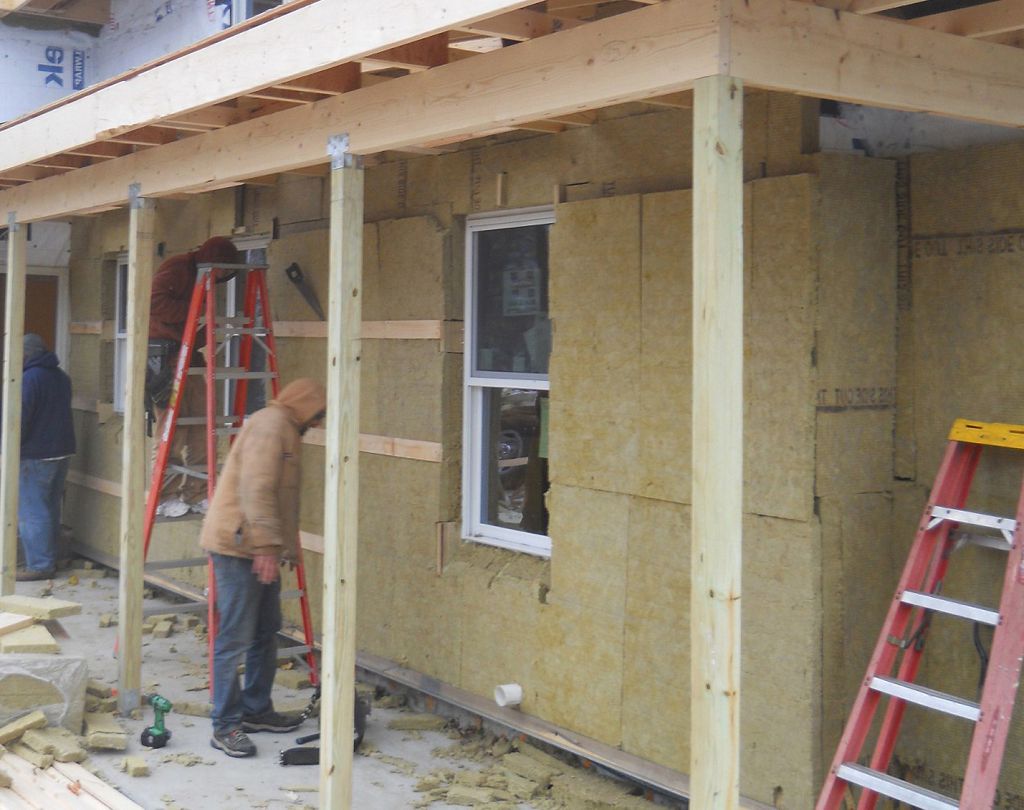
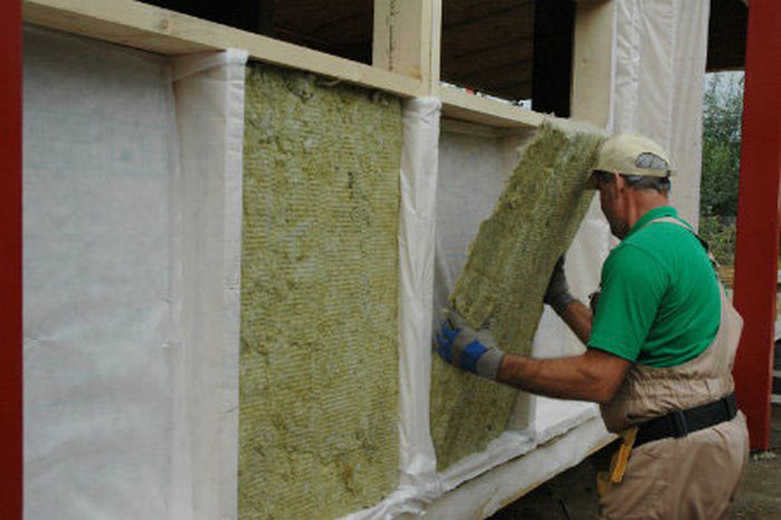
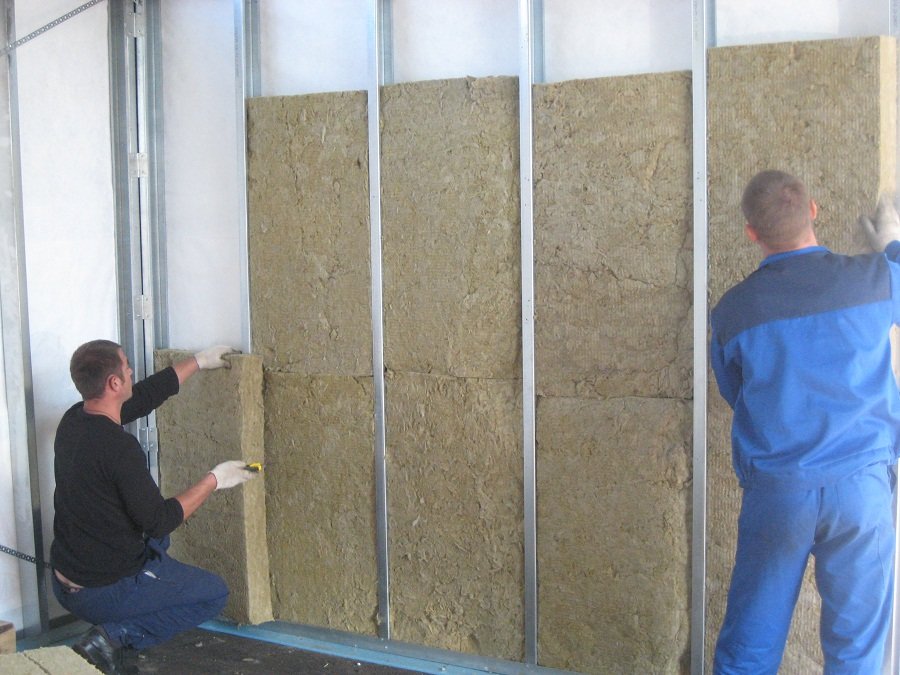
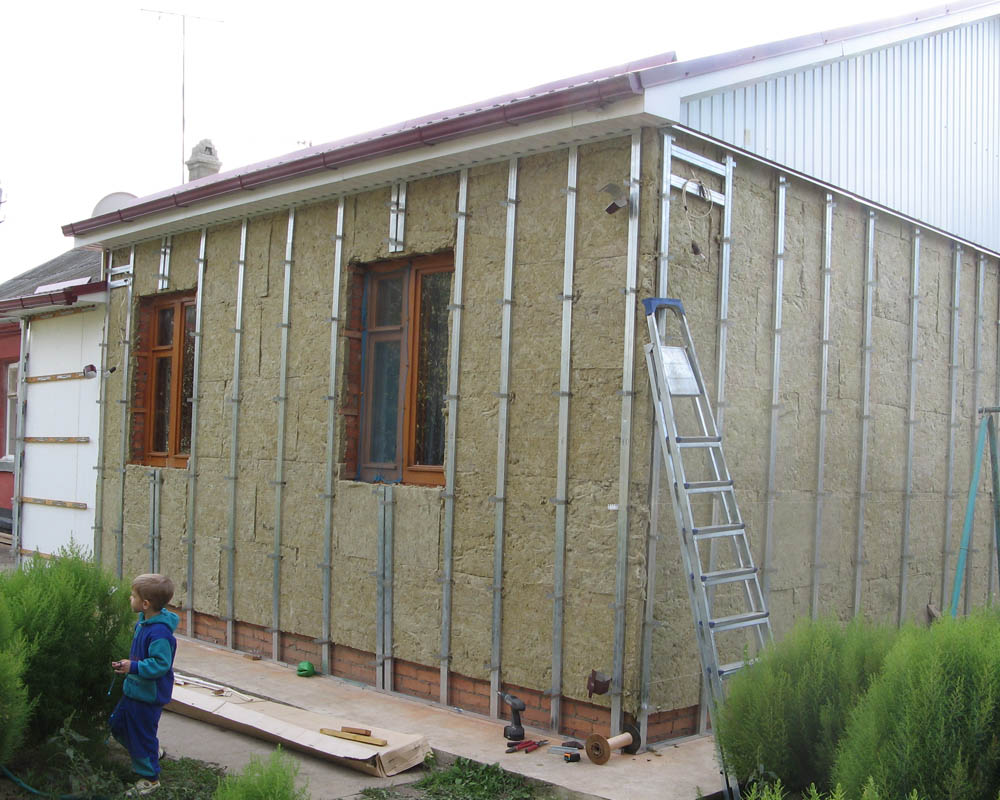
Mineral wool
Mineral seams are perfect for wooden crates. It can be laid in 1 or 2 layers, it all depends on the thickness of the insulation and the distance of the wooden beam from the wall. Sheets are inserted quite simply. To fix them in place on top of the rake is applied. After everything is laid, the windproof layer is stretched from above with the rough side inwards.
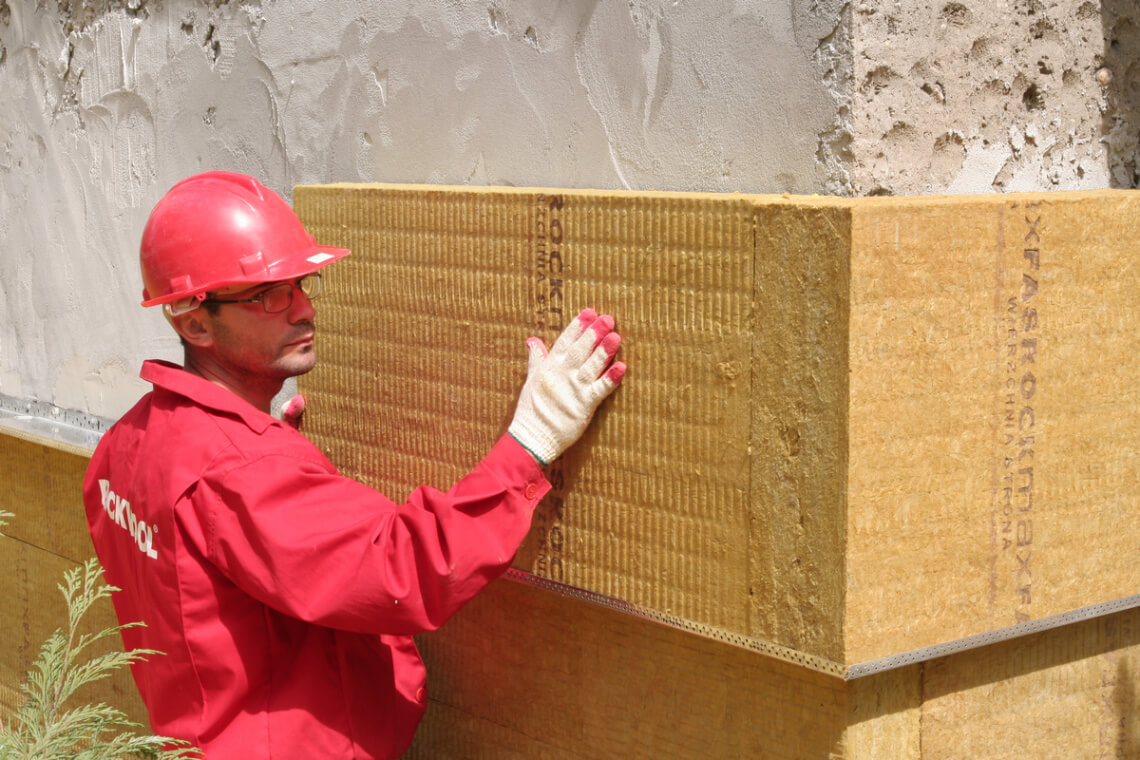
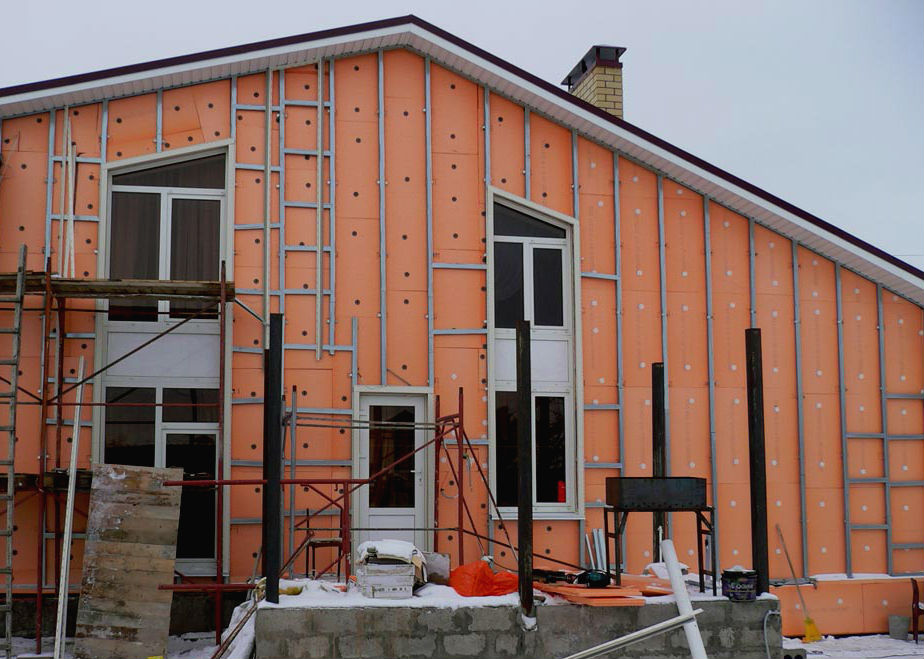
Penoplex
Its installation is also easy. It is used where the metal frame is installed. This material is laid butt joint by "stringing" on the prepared suspensions in advance. They bend and tightly pull insulation to themselves.
If, as a result of laying, small cracks appear, then they must be removed with the help of assembly foam (it is necessary to cut off the excess). A protective wind-proof film is also applied over the laid insulation.
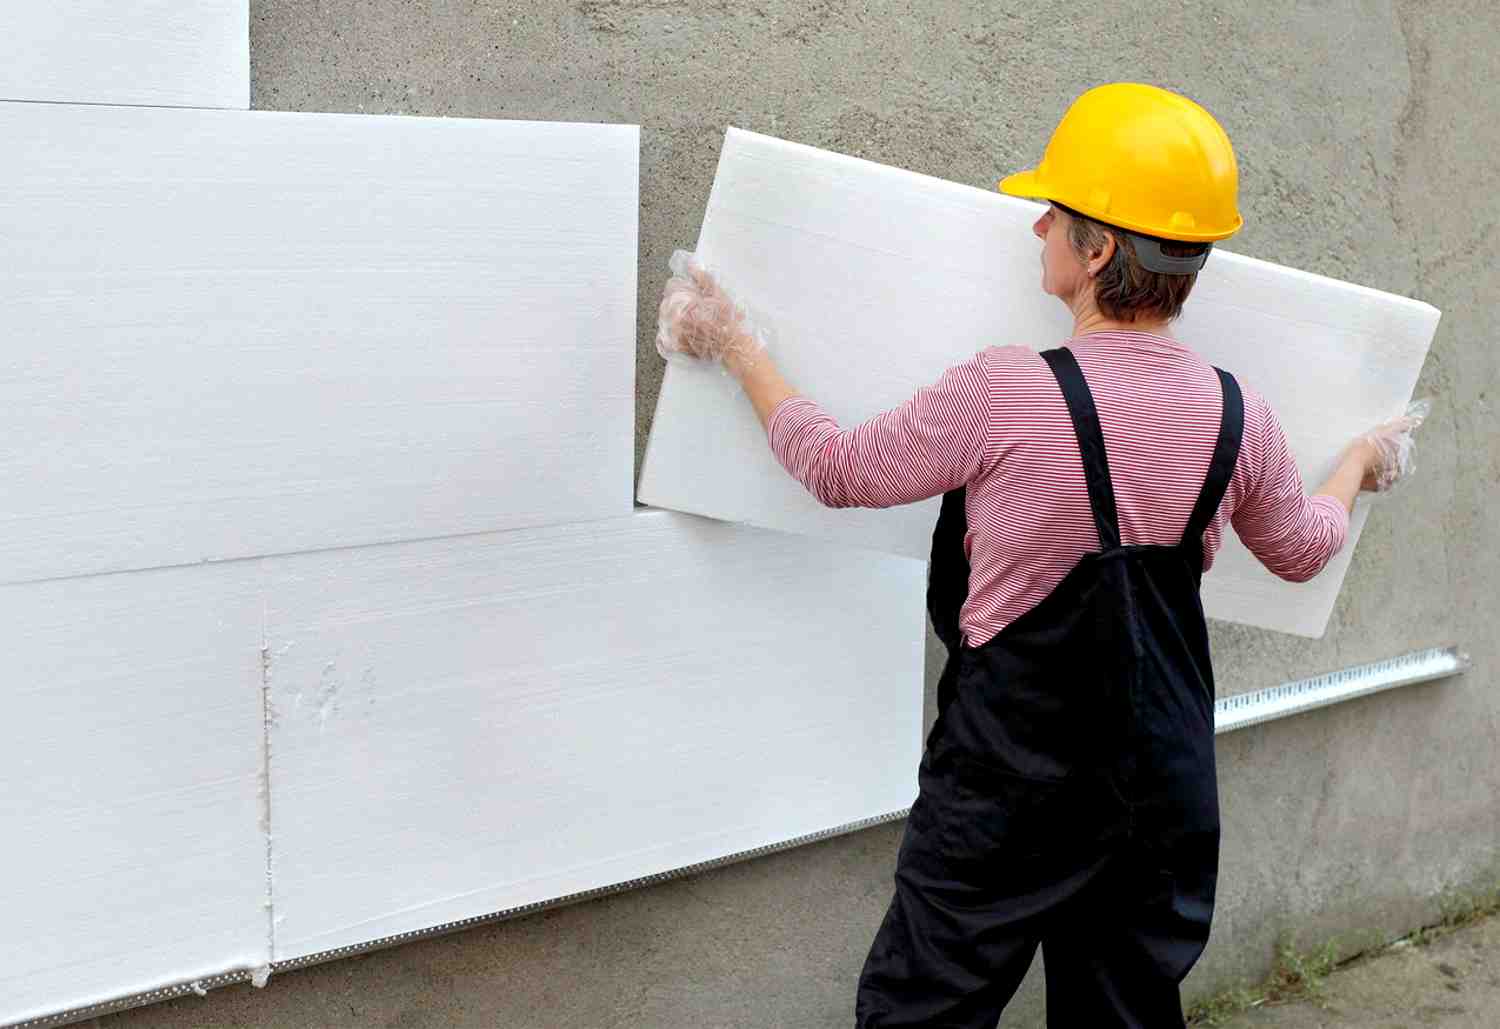
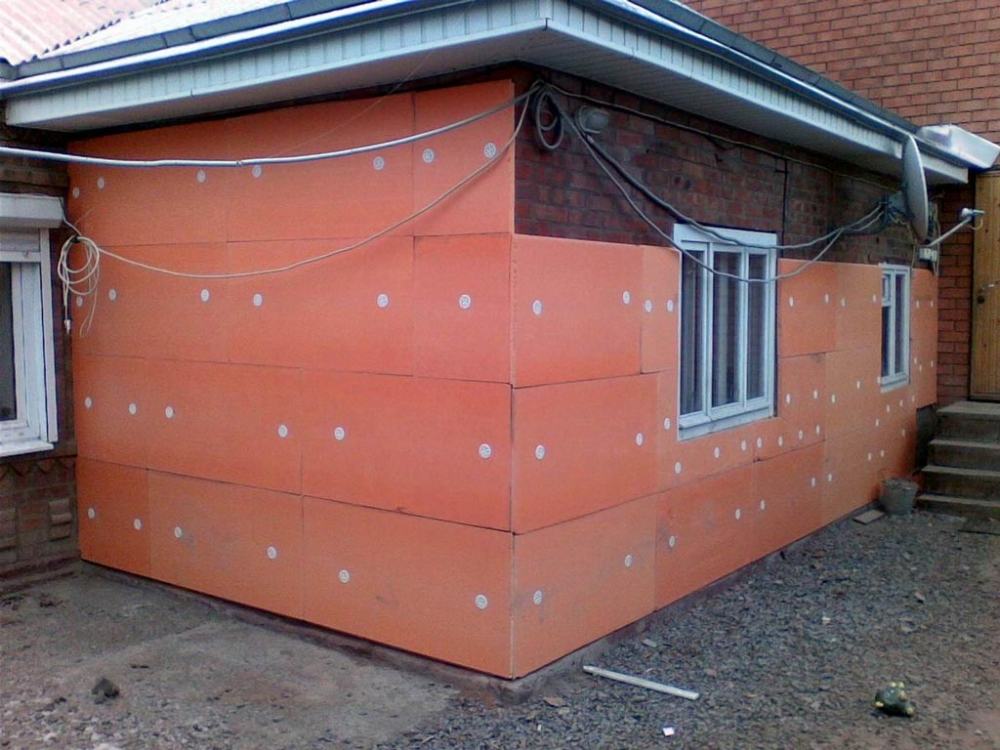
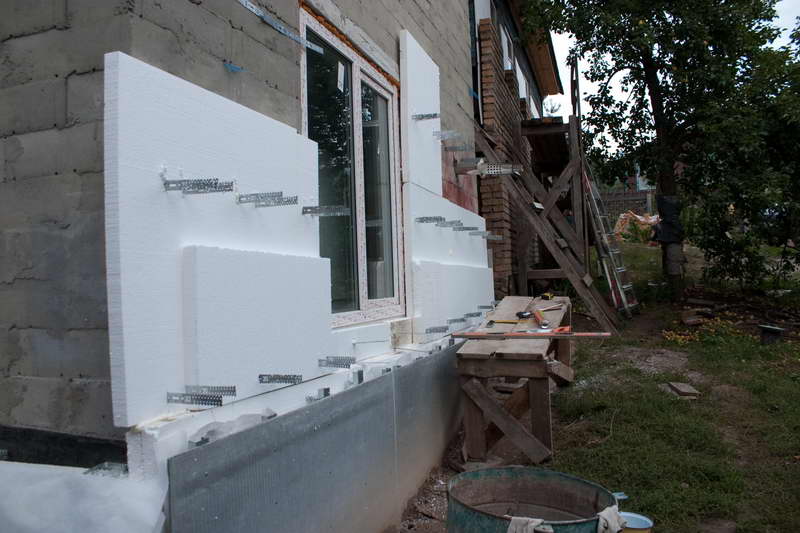
Styrofoam
Wall insulation using foam sheets is one of the cheapest ways to date. It is mounted quite simply and quickly.It is placed in the openings between the frame slats. Preliminary, the surface of the foam sheet is coated with construction glue, and then for reliability it is fixed with screws using “umbrellas” (at the end there is a circle with a diameter up to 5 cm, so the screw will not slip through the canvas, but on the contrary, keep it tightly in a given position).
The joints between the sheets are coated with either foam or mortar. From above all the same protective film from the wind is laid. It is worth noting the fact that it is easily flammable.
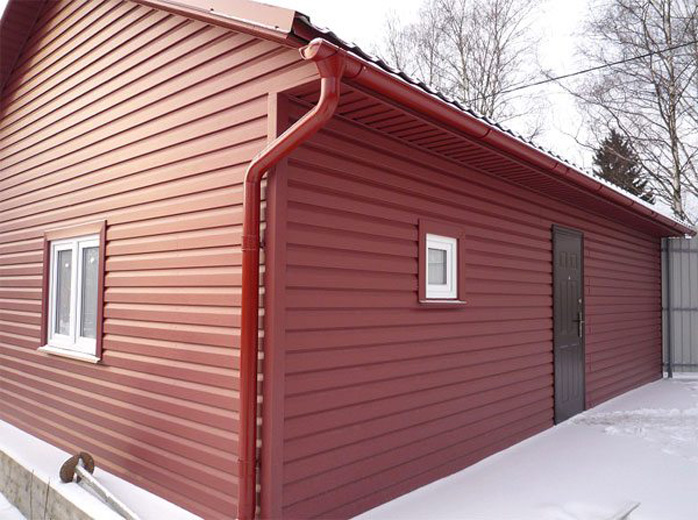
When the crate is securely installed, the insulation is laid, and all the joints are missed and sealed, you can proceed to the final stage - the installation of siding panels.
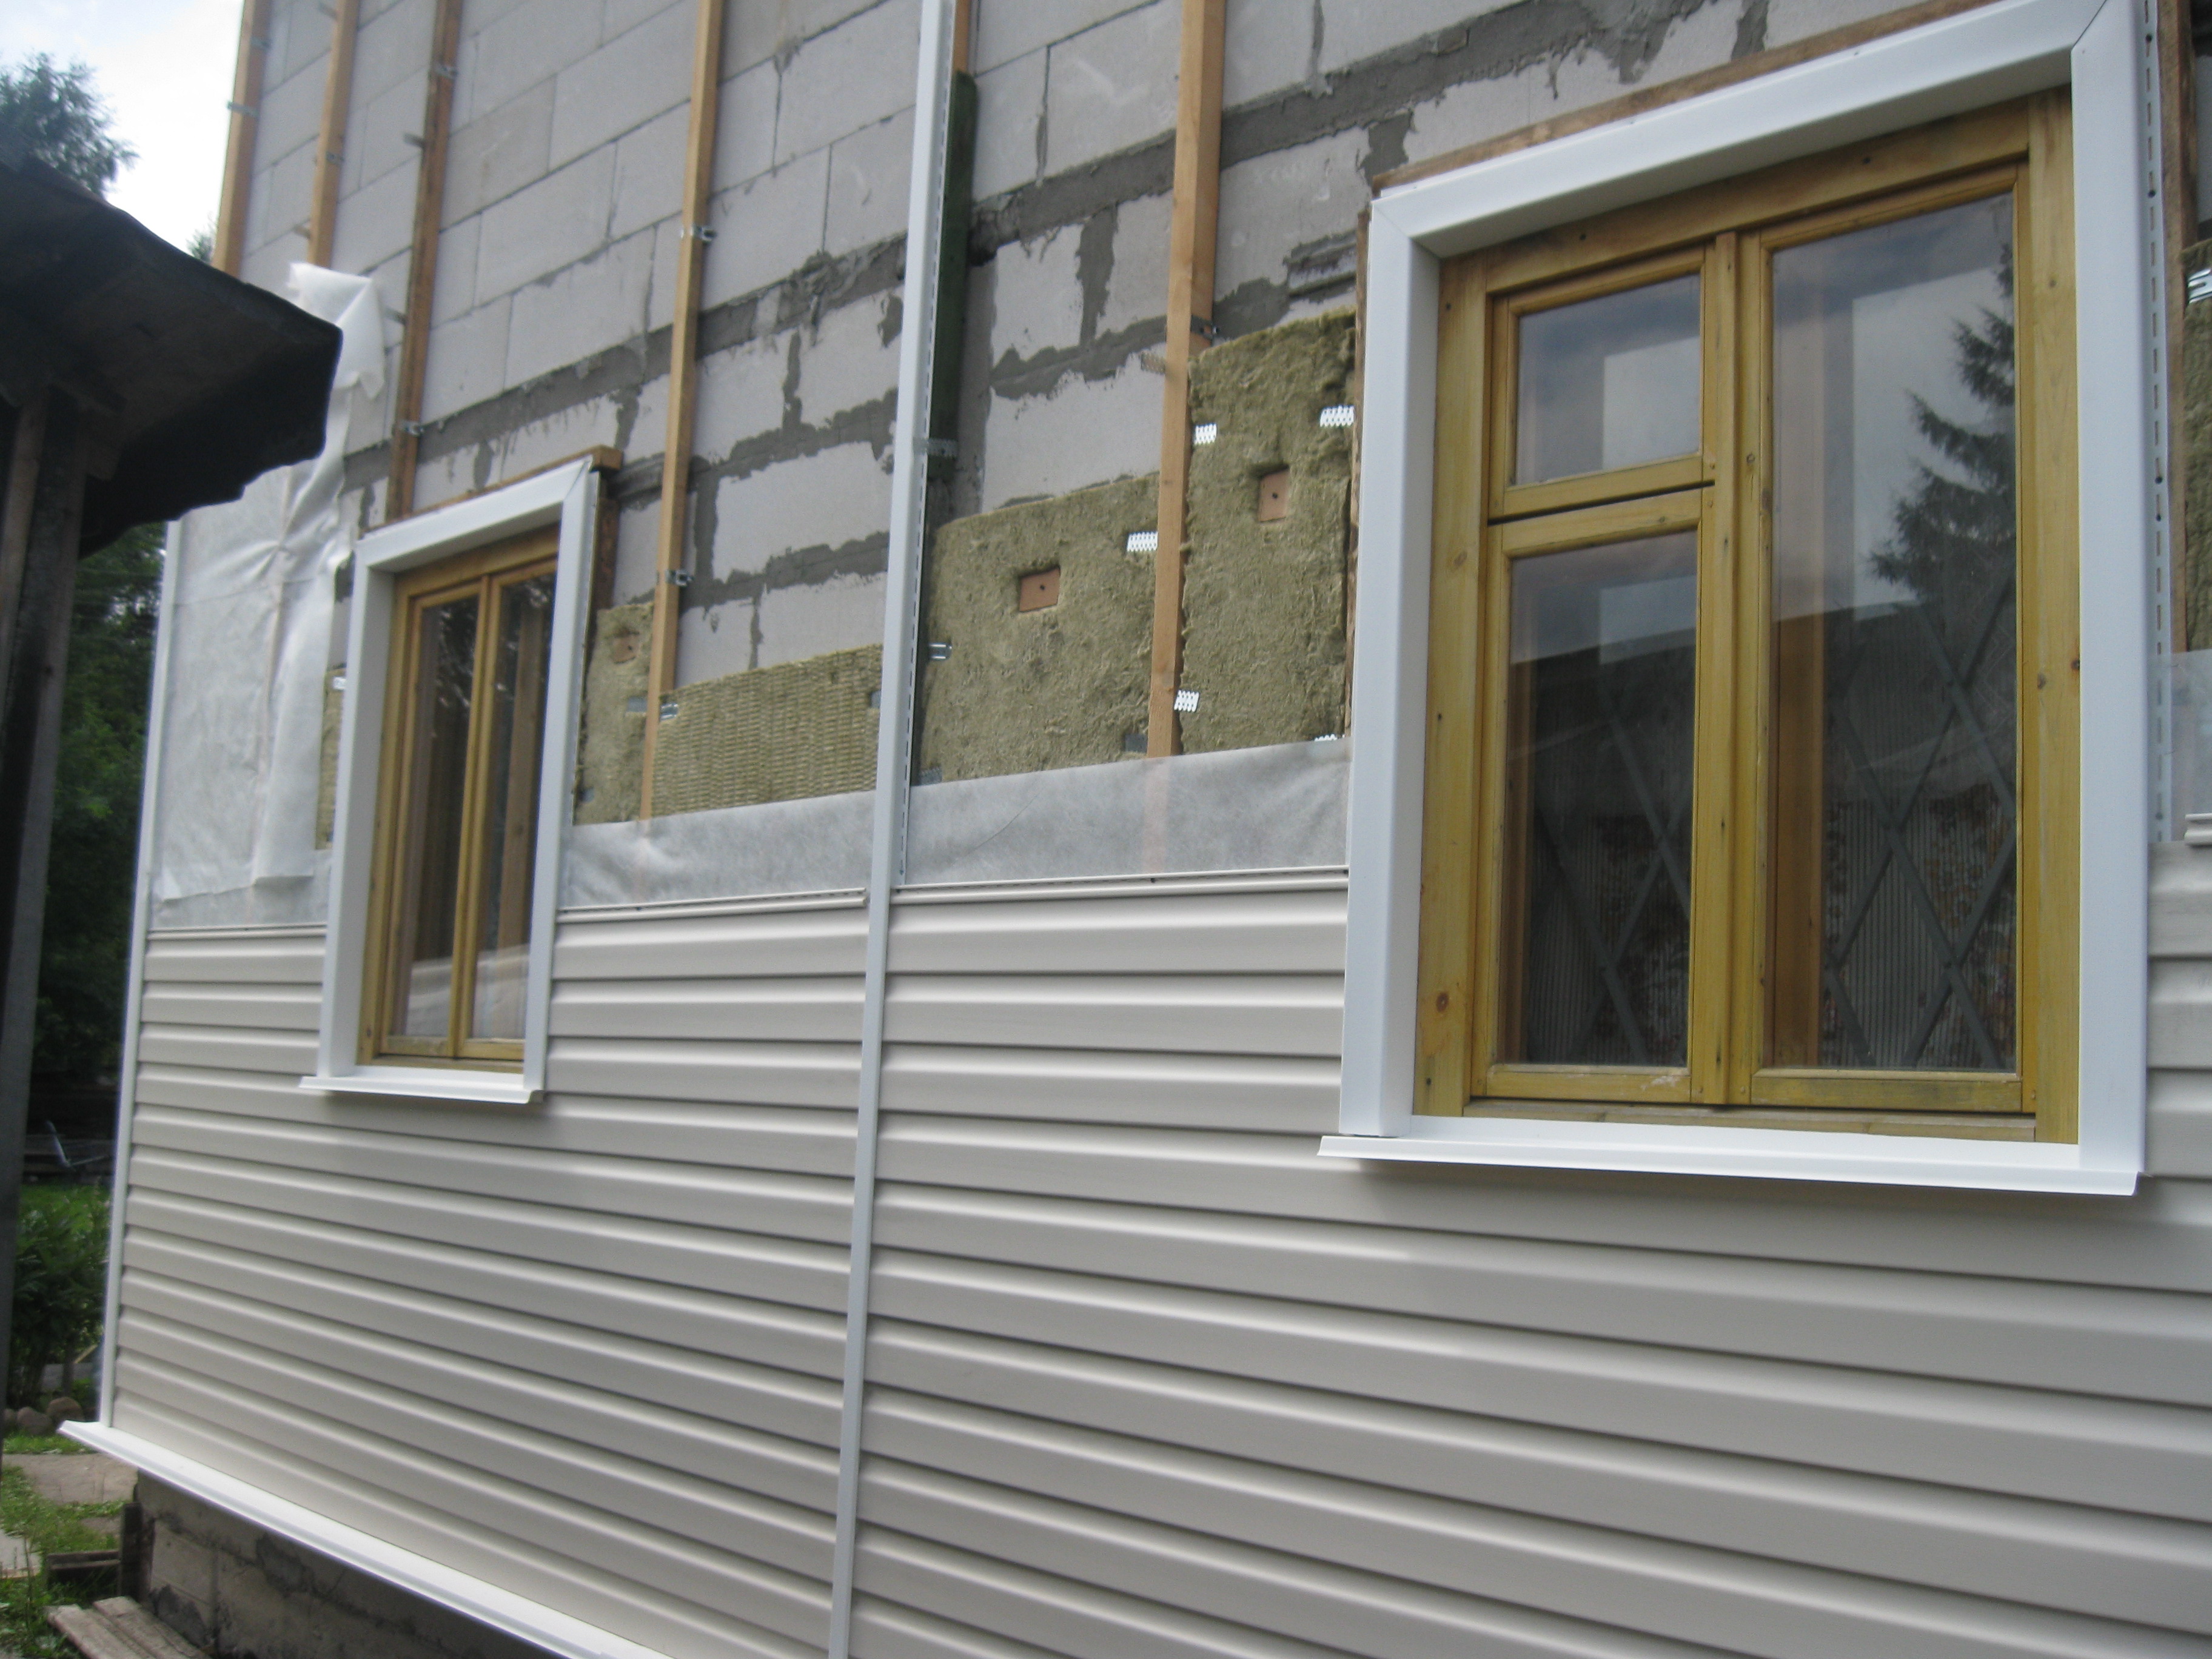
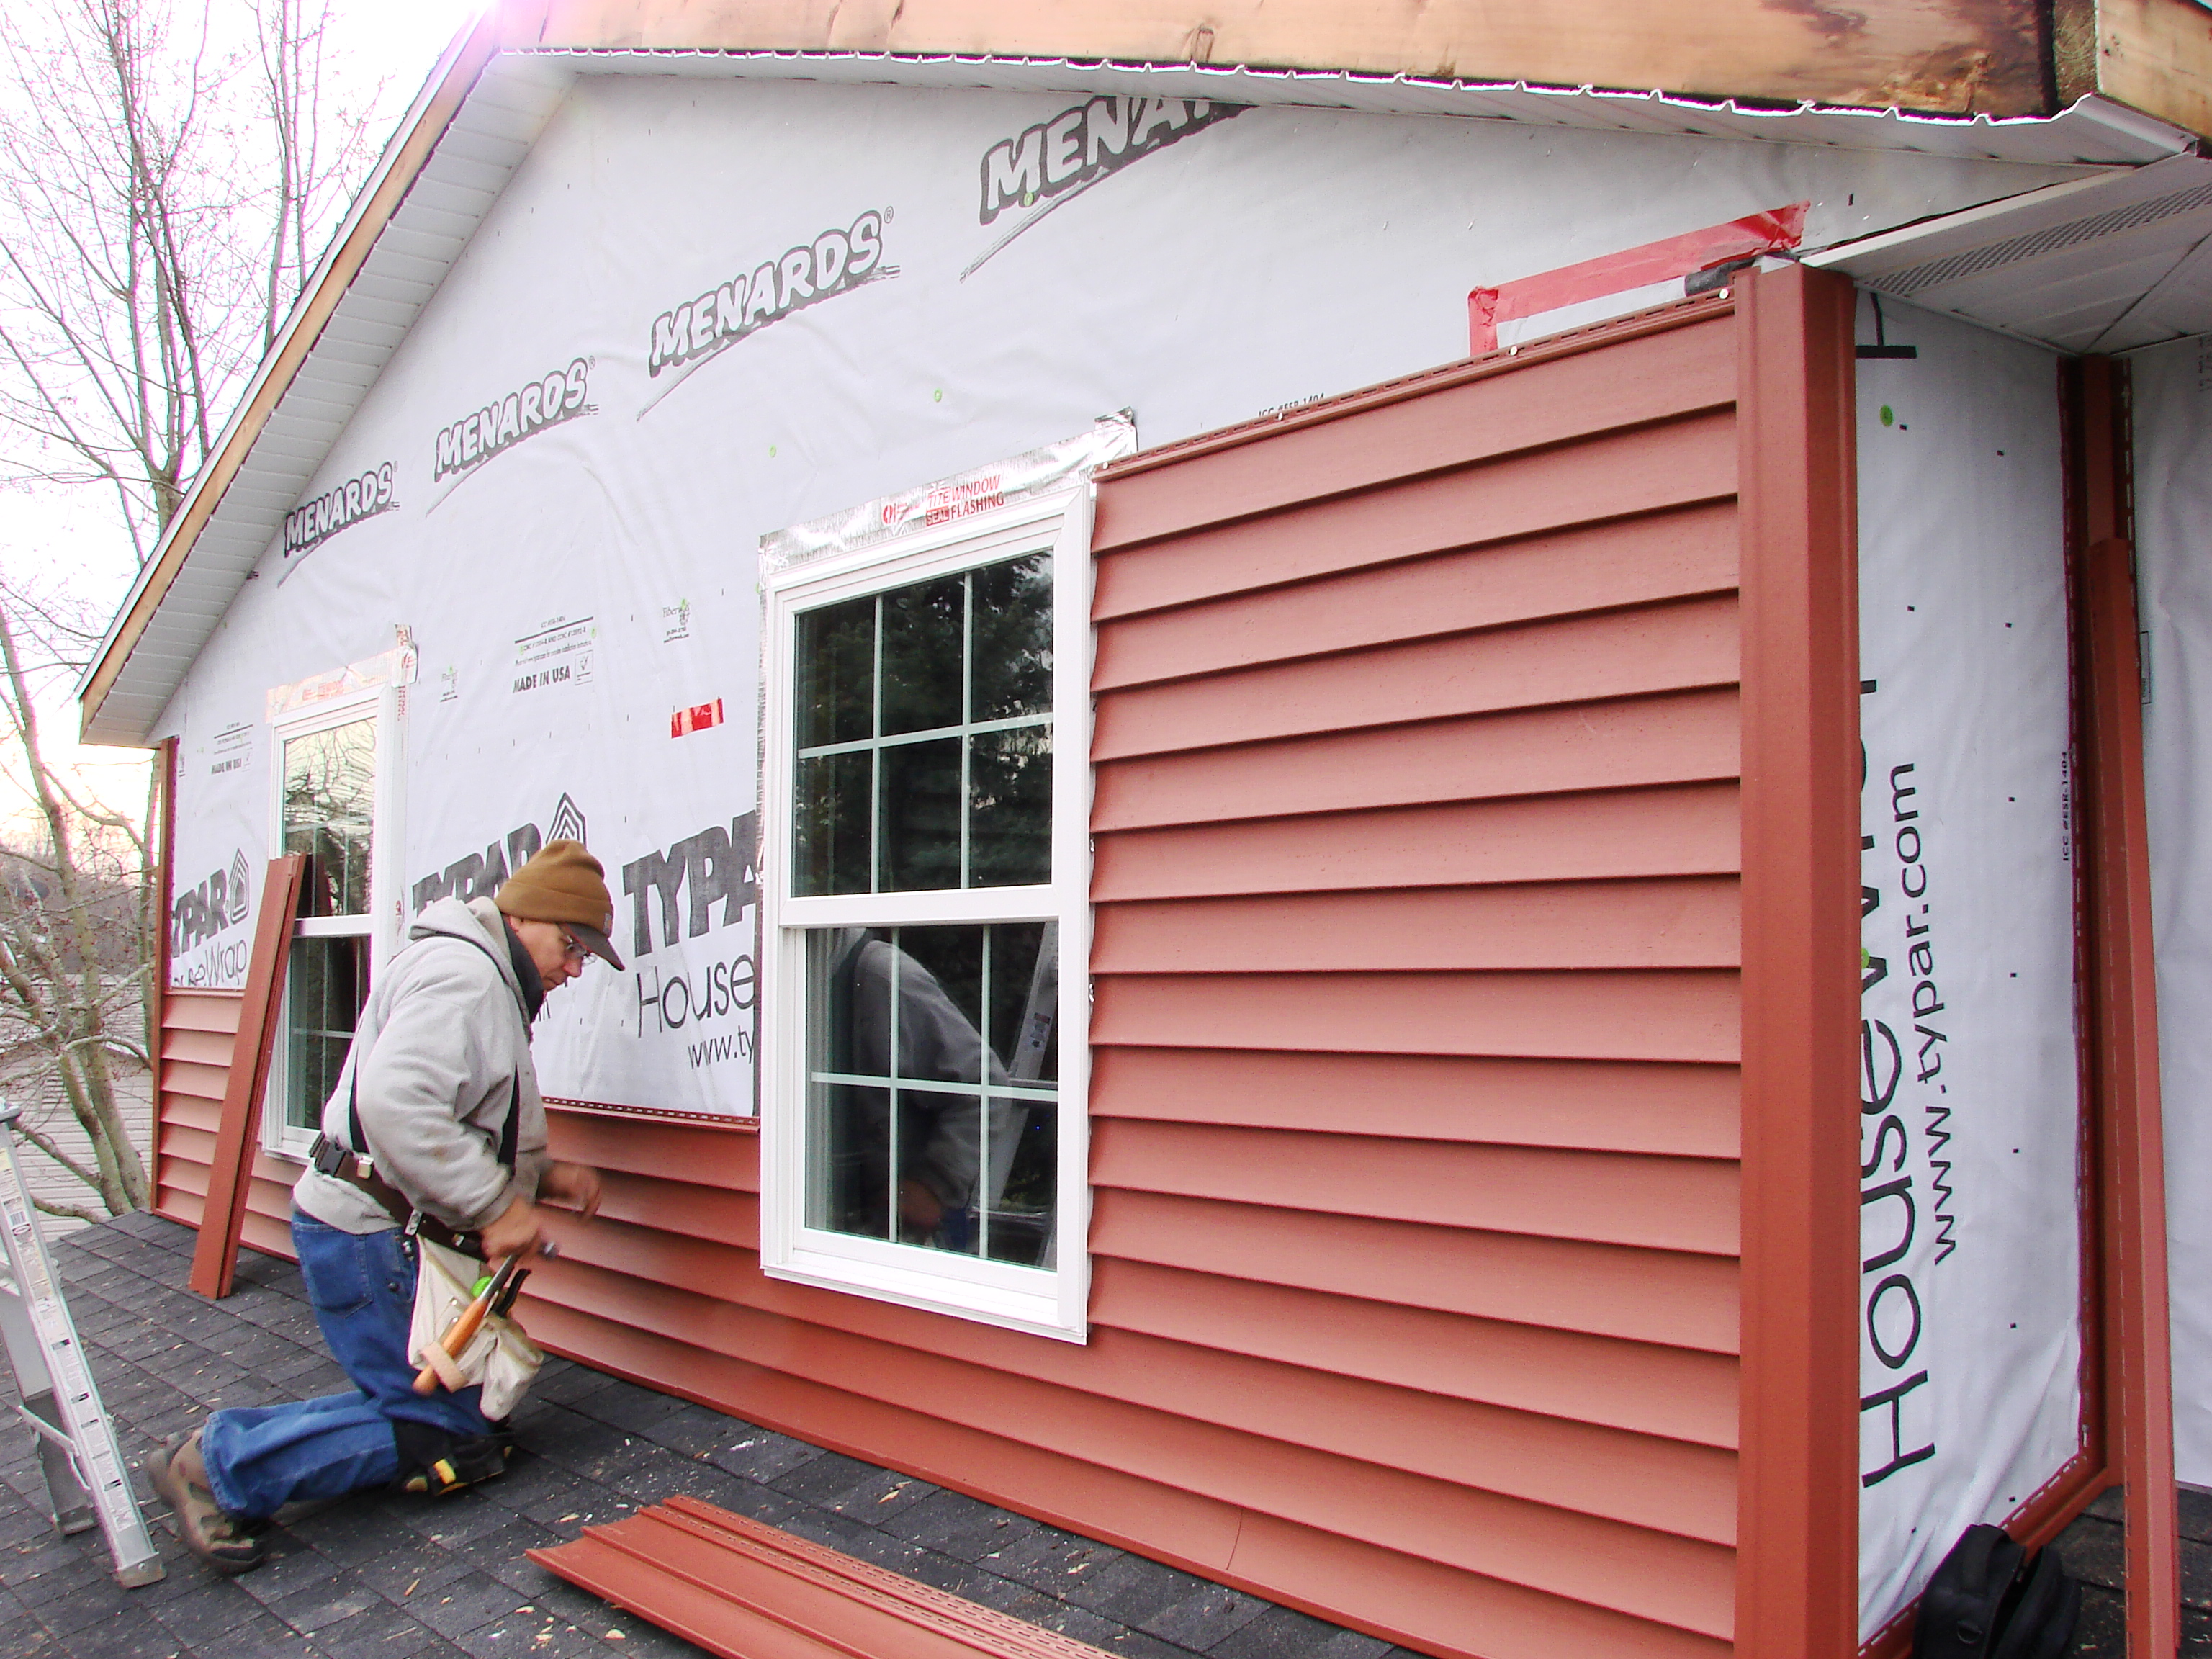
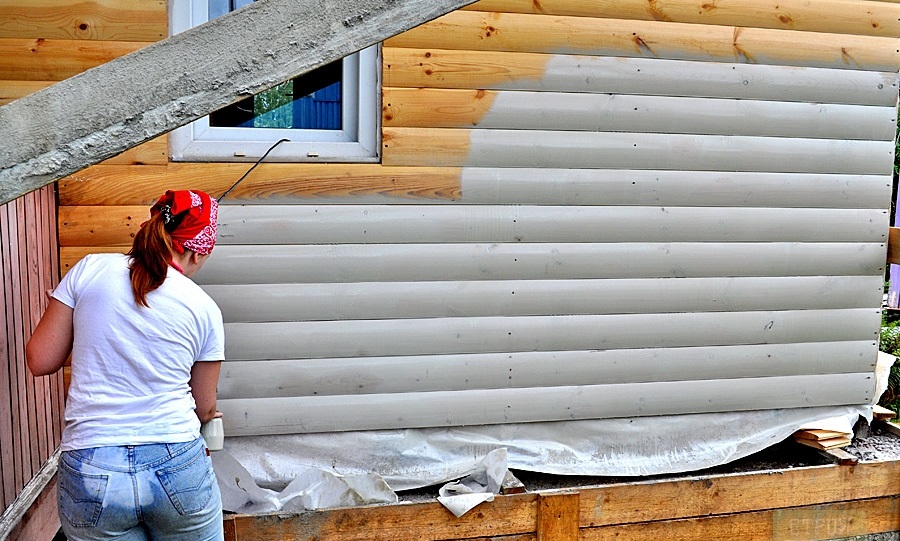
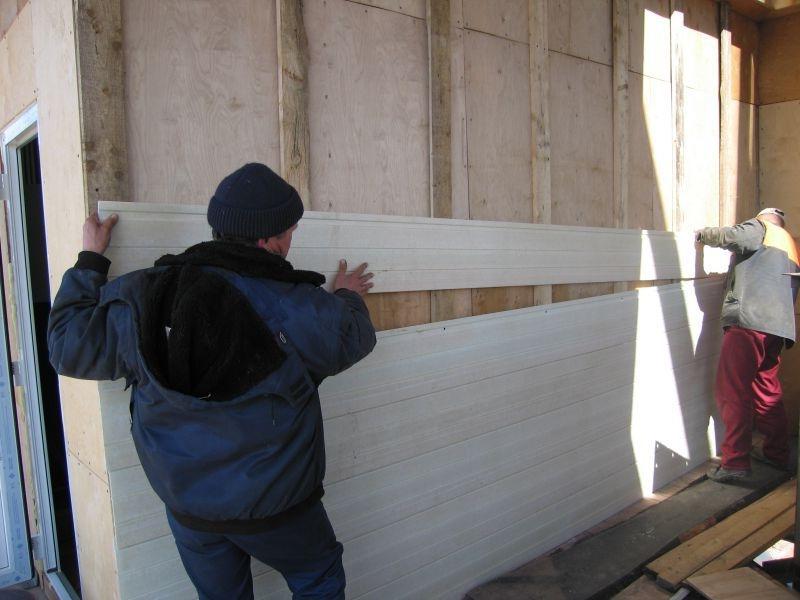
Sheathing
Work on the installation of cladding material is always from the bottom up. As mentioned earlier, the panels are mounted on a frame grid. Bottom from one edge of the house on the crate, you must put at least 5 -7 cm and put a mark there. As a rule, masters hammer a nail in there or screw in a screw. Then, on the other end of the wall, a similar work is being done.
Next, the thread is pulled on the tags, which will serve as a visual level. Below it can not go.It is very important that the level was as smooth as possible. Otherwise, all panels will be crooked over each other.
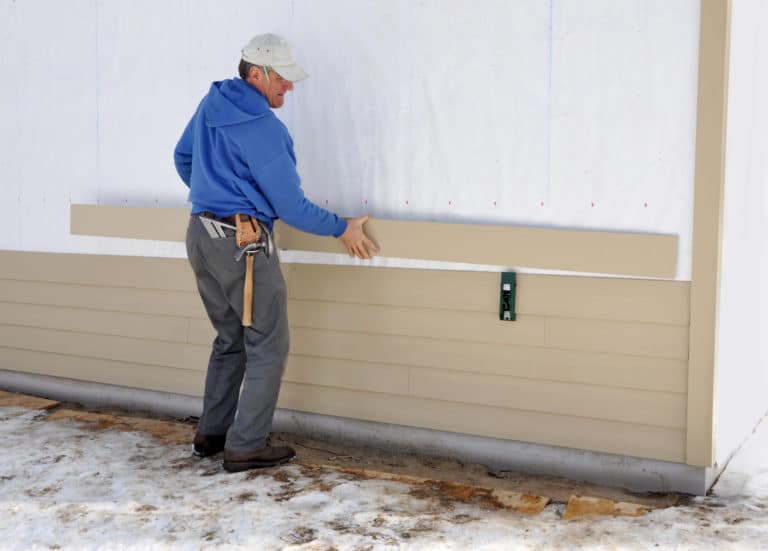
After that the initial level is nailed. Professionals are advised not to nail it too tightly, because of the high temperature materials tend to expand slightly (cracks and kinks may appear). Subsequent sections of this strap are mounted with a gap between them of 4-7 mm. Further, an external and internal angle is established on all joints of the walls. Each time, when one row is completely mounted, it is necessary to check the level of evenness of the mounted slats and panels. This is done so that in the future there is no curvature.
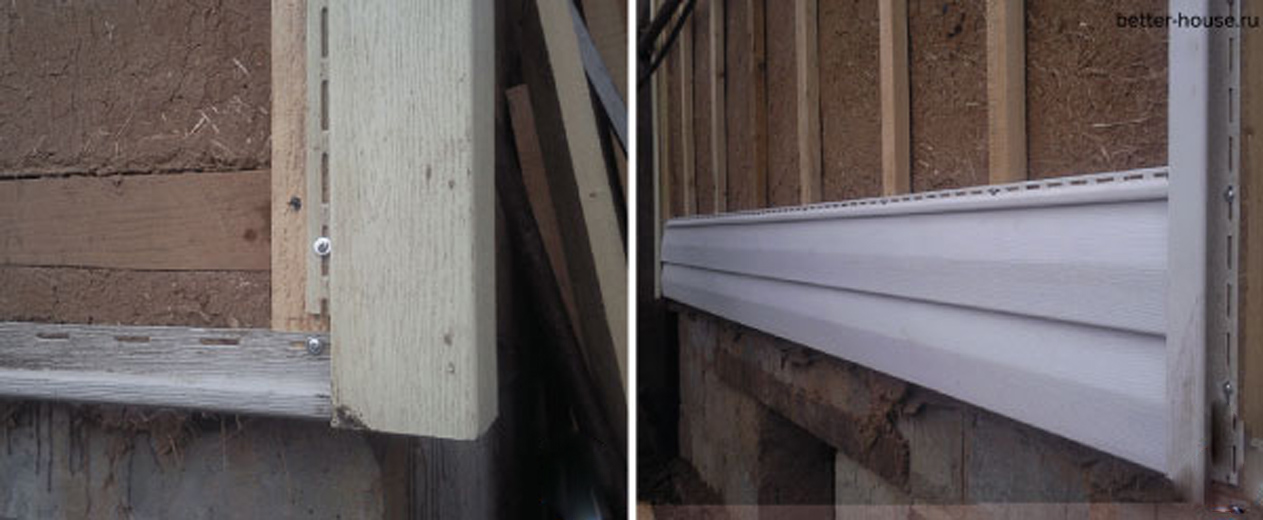
Then slats are mounted around all windows and doorways. At this stage, the preparatory work ends. You should proceed with the installation of the plating.
The first sheet of siding is inserted into the starting plate and secured. To do this, use all the same nails or screws. Further installation is carried out from places with "heavy traffic": doors, windows. All panels are superimposed bottom-up in a circle. This means that you can not first install all the sheets on one side of the wall, and then take up the other.Circular installation will allow to maintain a clear level without curvature. Masters advise to conduct work from left to right.
Special accuracy should be shown when mounting siding under the window opening. Since it does not always match the size of the butt joint, it must be cut to fit the window. On the sheet of plating mark the place for a cut. You should know that you need to cut to 5 -8 mm wider, so that there is a free passage of the resulting panel.
Excess material is cut off along the intended line. (first make vertical cuts, and then horizontal). After that it is inserted as usual.

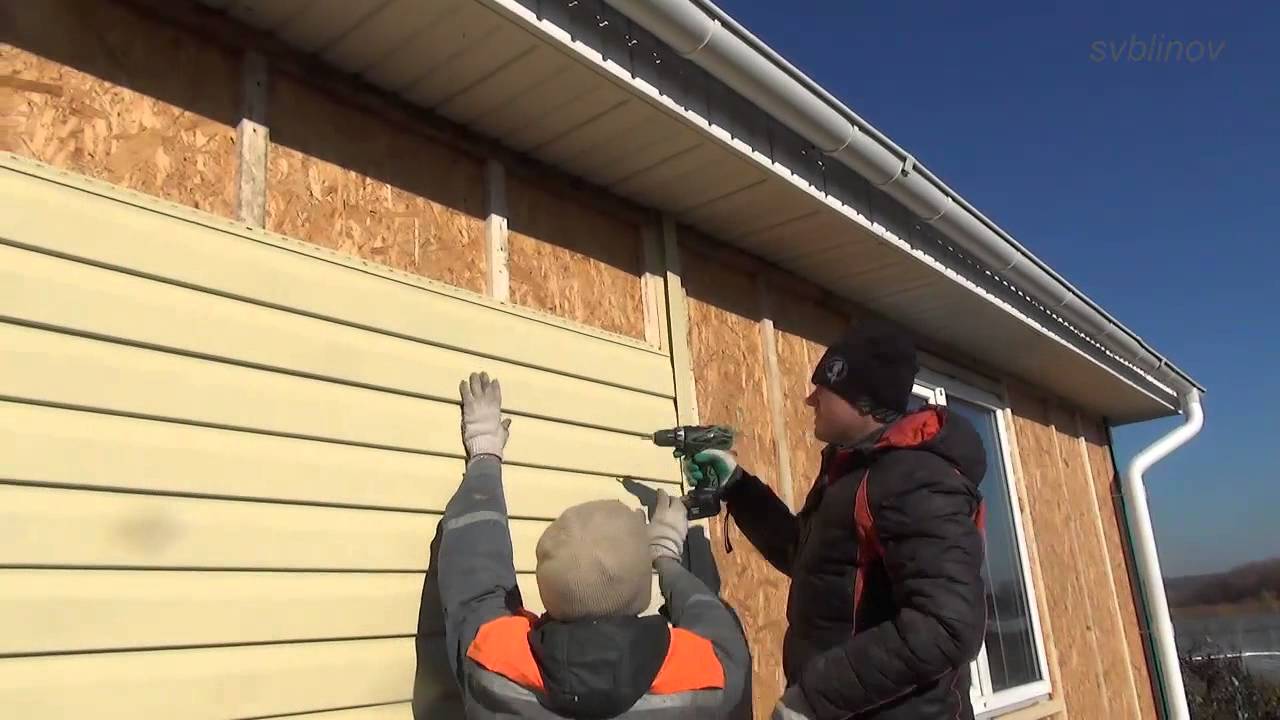
The final row at the eaves is mounted only after the installation of the finishing bar. It is attached with nails flush to the eaves. Next, you need to connect the last panel of the siding with the previous one and click on it to a characteristic click. The last part of the panel connects to the finishing rail and snaps into place.
During installation, it is necessary to check each time whether the panels are evenly fastened. This is very hard work, but the result will speak for itself.

Recommendations
When a person does some work for the first time, he will always make mistakes.In the field of construction it is undesirable to allow them, since any mistake can cost the owner dearly - you will need to purchase new material, redo work, spend more time.
In this regard, experts give a small number of recommendations that will help avoid gross errors:
- Masters advise not to "smother" insulation and siding panels. They should fit snugly to the wall, but at the same time have a small gap in the fastener.
- All nails, screws and screws must be screwed and hammered, not reaching the base of 1 mm. It is necessary that the material was where to expand on hot summer days.
- It is impossible to hammer nails at an angle of 45 degrees, otherwise they will quickly loosen and the siding will “crawl”. This also applies to screws.
- If a wooden crate is installed outside, then only galvanized brackets and other metal parts should come into contact with it. Otherwise, rust may give rise to rotting.
- Installation work is best done in the summer when the weather is dry and clear. In the rest of the year there is a risk that all the applied solutions and putties for cracks will not dry out completely.Consequently, there is a risk of mold and mildew. To eliminate them, it is necessary to dismantle all the structures and re-clean all the walls.
- Not all buildings have perfectly flat walls. Therefore, when installing wooden or metal crates, you need to use a plumb and install everything under one level. If this is not done, then the siding will not lie flat and beautiful, but will only emphasize the external flaws of the house. Also, due to the correctly installed frame, it is not necessary to level the surface of the walls, they will be aligned due to the layer of insulation and plating.

Reading how to do the job correctly and do it yourself is not the same thing. But the correct theoretical preparation is the key to the success of any business.
Warming of the house with a facade of siding, see below in the video instructions.


