Choosing the right fittings for the toilet in the side water supply
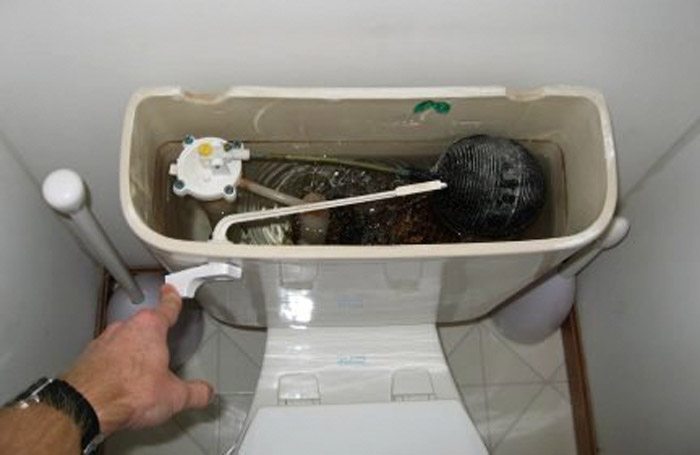
A toilet with a cistern is a familiar and simple at first glance device. In case of its breakage, it is necessary to repair it urgently, it is not always possible to wait for the master or consult with him. In some cases, you can do it yourself, for example, if the drain mechanism breaks near the tank with side water supply. It is quite simple to select and replace fittings for it; in any plumbing shop you can find a huge selection in various designs and variations. This is what will be discussed further.
Kinds
There are several varieties of drain tanks.
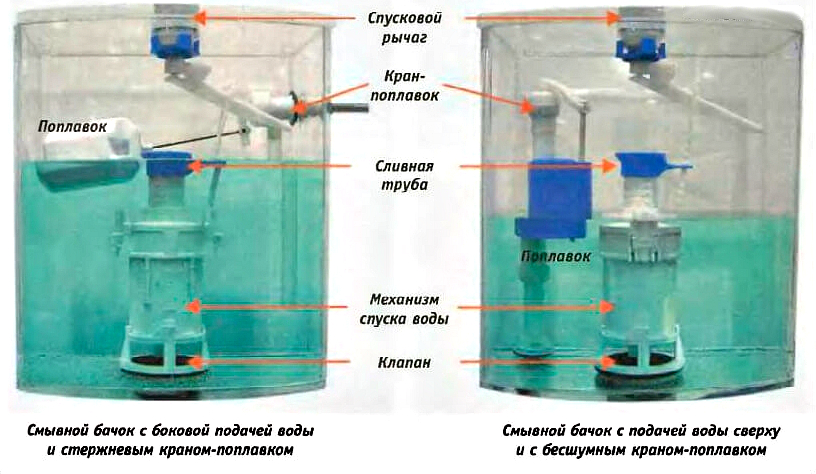
Depending on where the water comes from, there are tanks:
- with the lower eyeliner (a hose with underwater water is mounted on the bottom of the drain tank);
- with a lateral eyeliner (the hose is mounted above the water level of the filled tank).
Each of them has its advantages and disadvantages.
One of the advantages of the bottom liner is the noiseless filling. In addition, fittings for such tanks allows you to give it an unusual shape, it makes the design of the bathroom unique. Of the downsides of such a system, the complexity of installation and repair should be highlighted. Dense completeness of valves requires certain skills to work with it.
The main advantages of barrels with side liner:
- low cost;
- simplicity of design;
- no need to seal the junction of the inlet hose.
Of the minuses can be noted only the noise of filling the tank. Some manufacturers, to eliminate noise, extend the water supply hose so that water flows from the bottom, not from the side. The simplicity of the design of the fittings of flush cisterns with side connection allows them to be installed and repaired even by a non-specialist. But before starting work, it is necessary to understand how the drain tank itself and its mechanism are arranged.
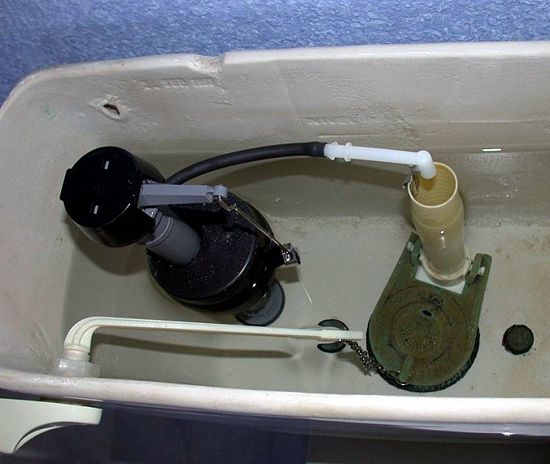
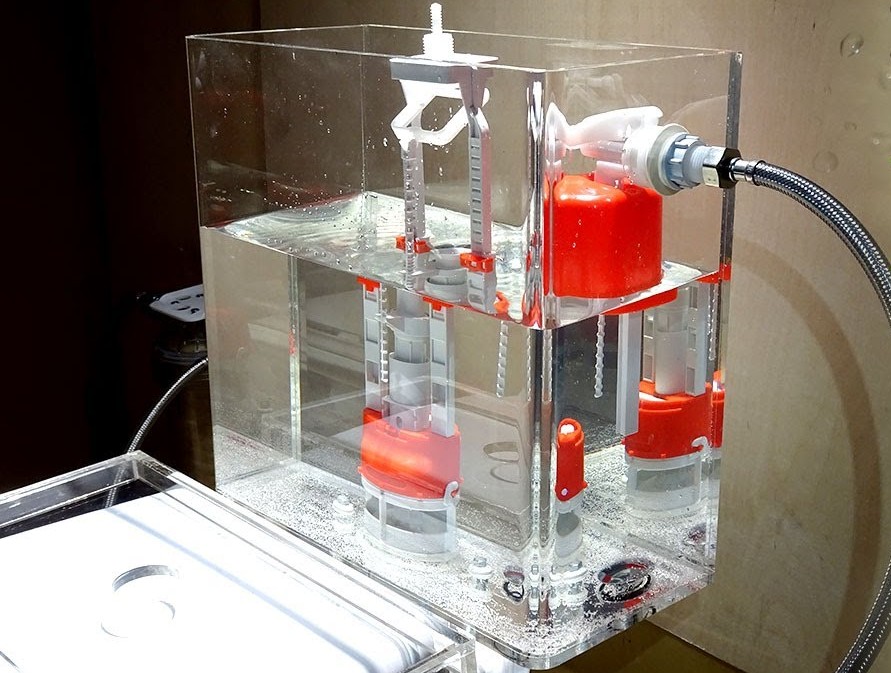
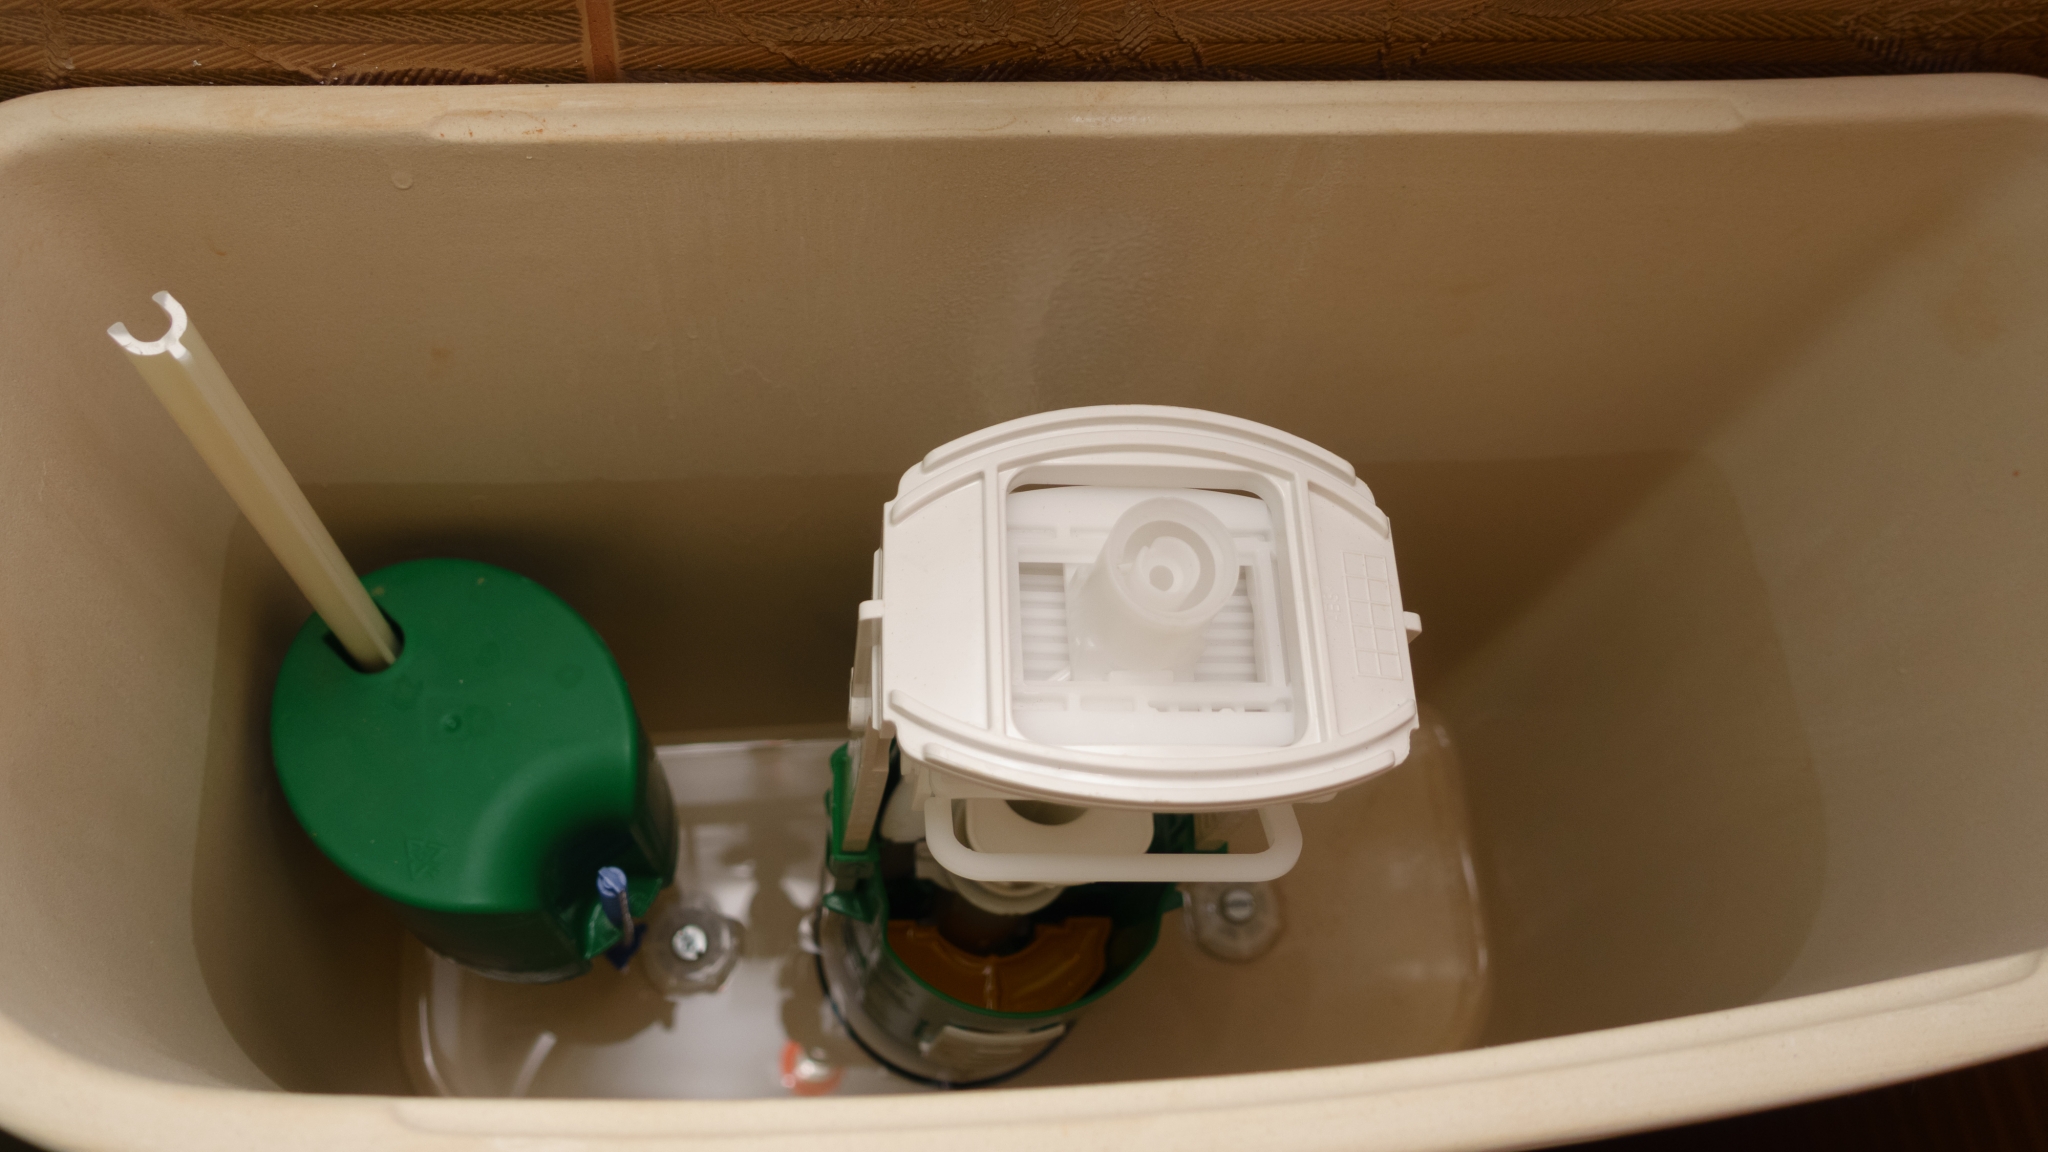
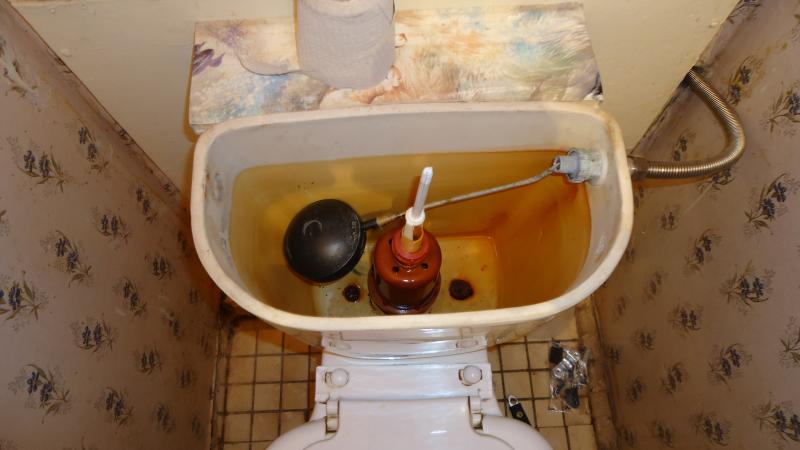
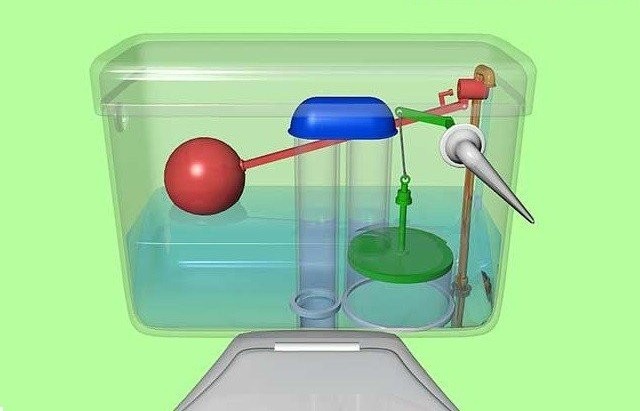
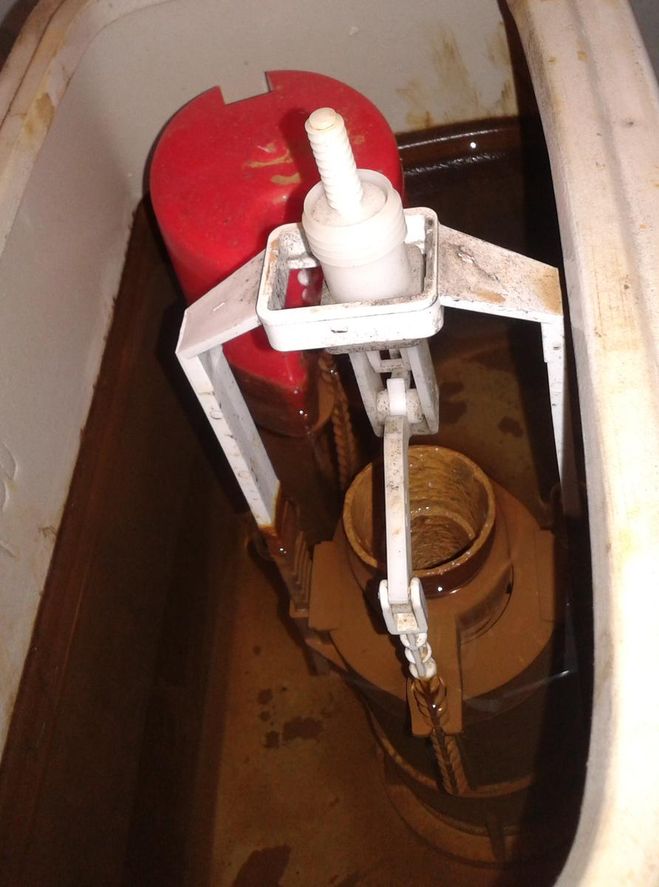
Flush tank device
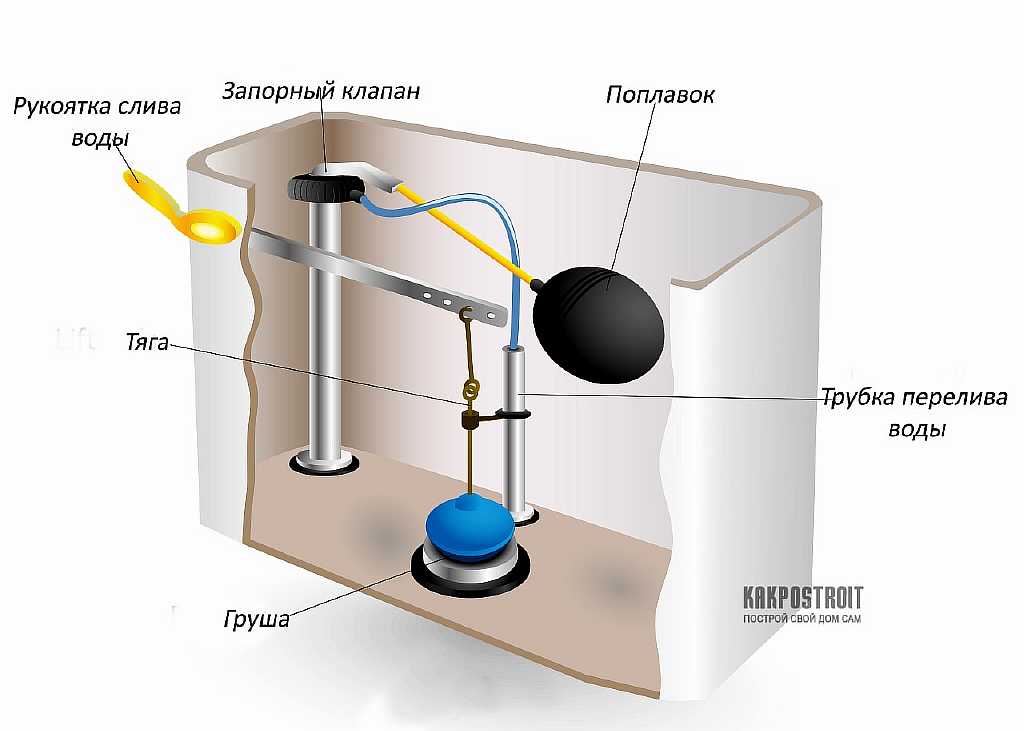
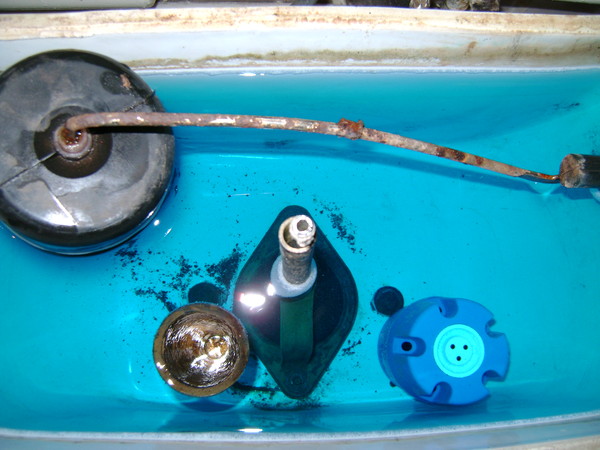
Drain tank is a vessel filled with water, which contains:
- two holes on the sides for fittings;
- two openings for connection to the toilet;
- armhole for the drain fitting itself.
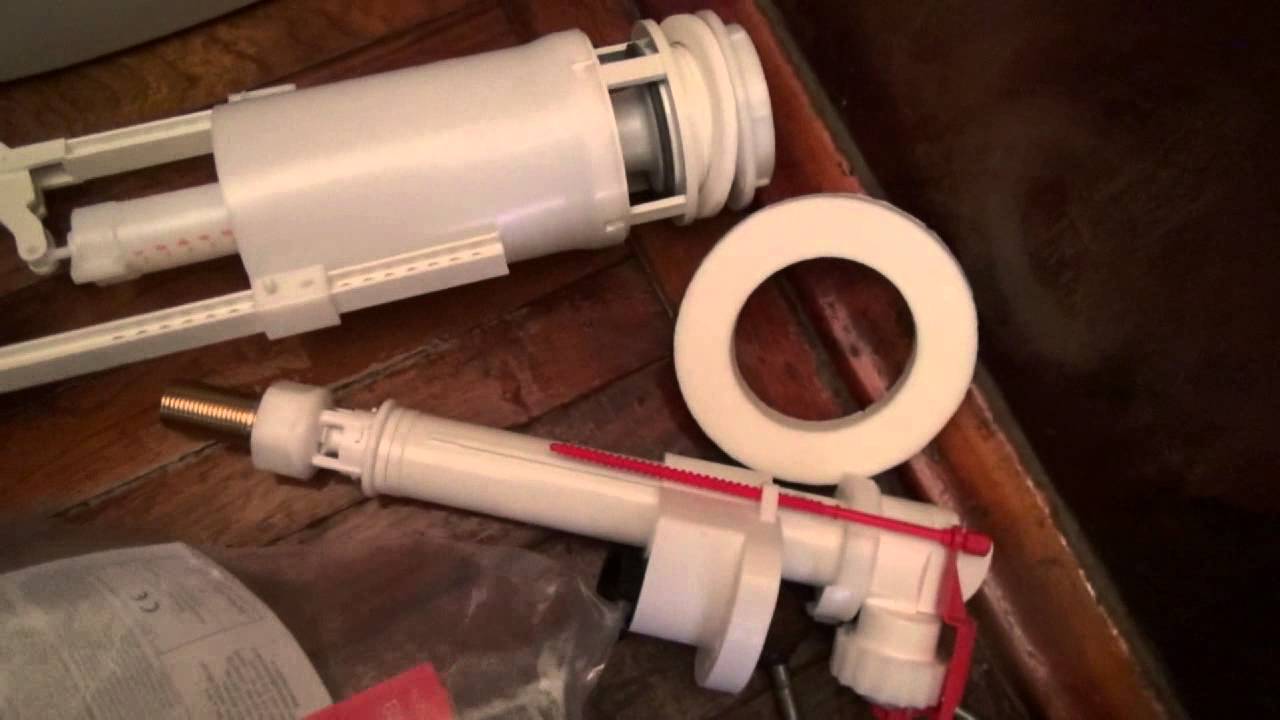
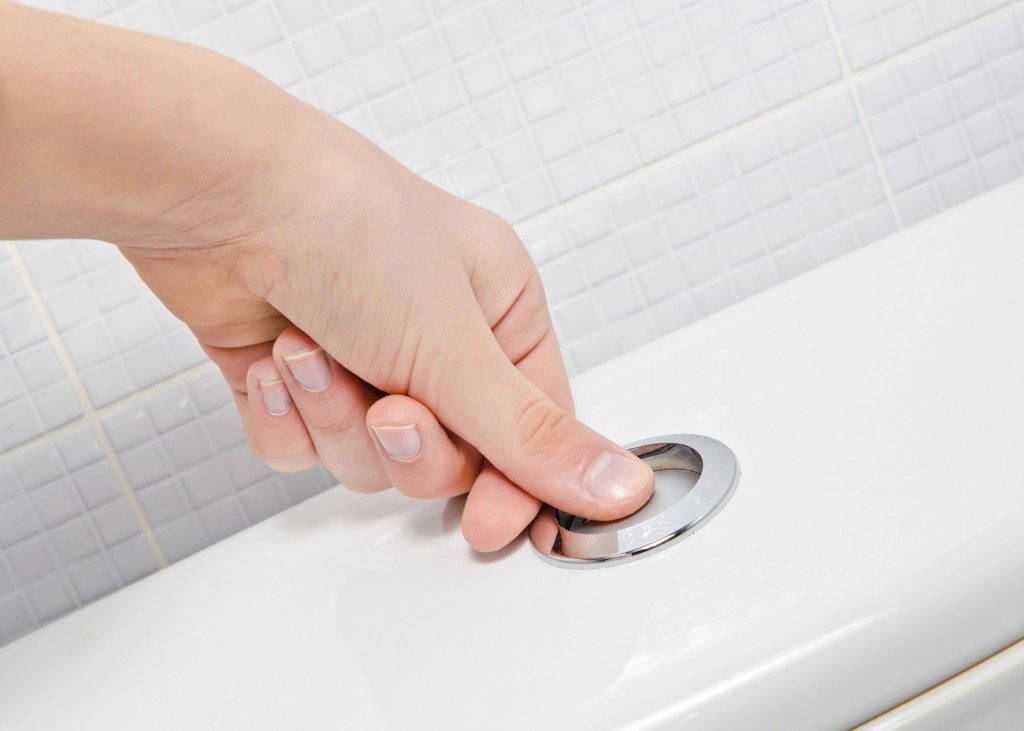
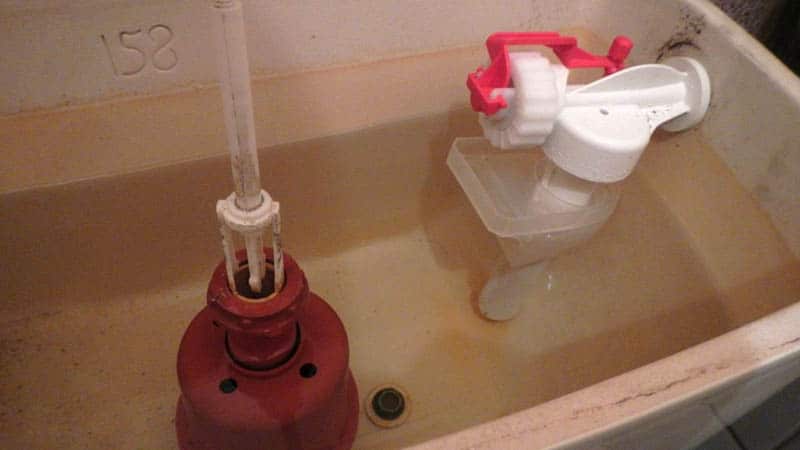
The basis of the drain construction is the drain device and filling fittings. The bleeder may be loosened. In addition, it can be mounted on the power cord. In the second case, when lifting the tank cover, the button is raised. With the help of filling fittings, the tank is dialed, the water level in it is set.
A properly working tank should not only drain the water, but also discharge it in the event of a system breakdown.
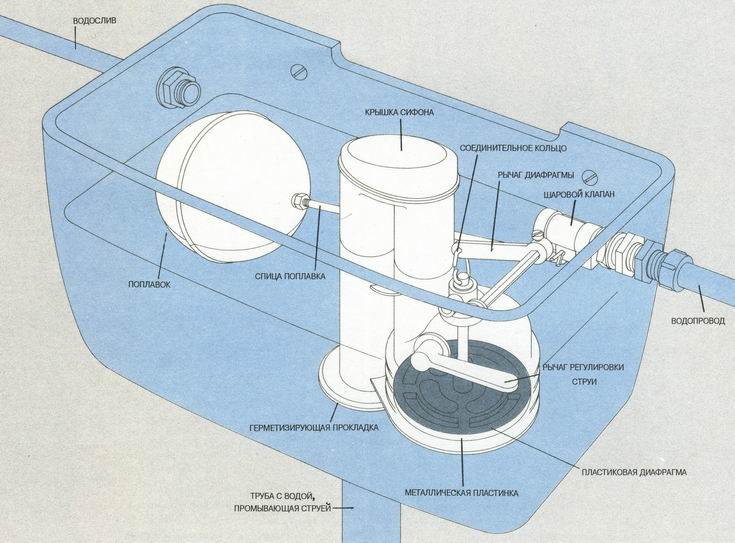
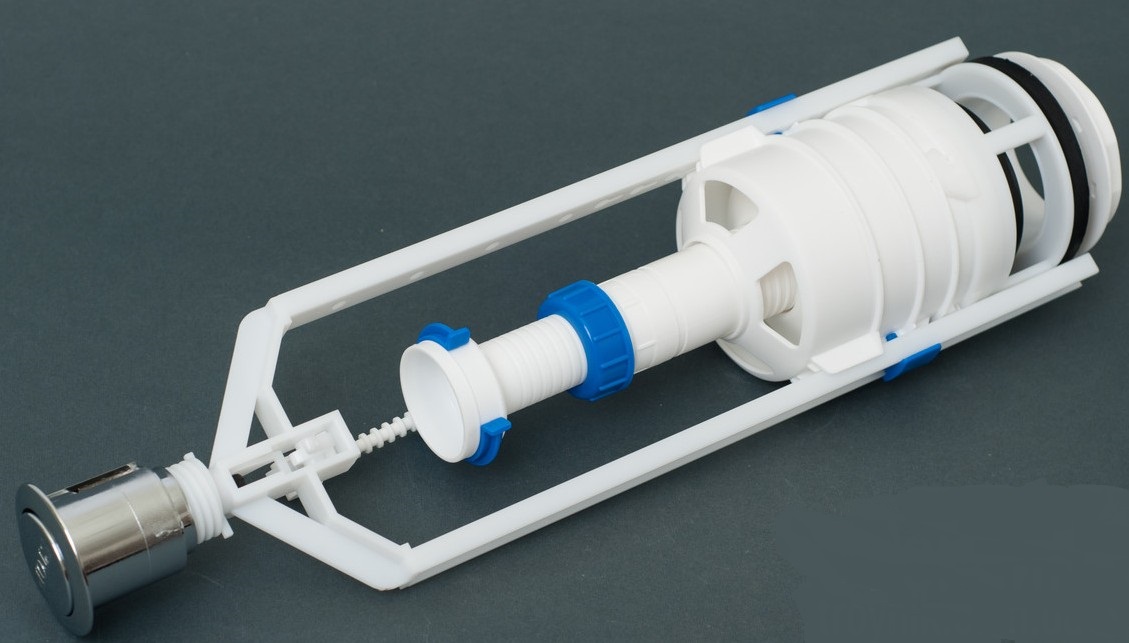
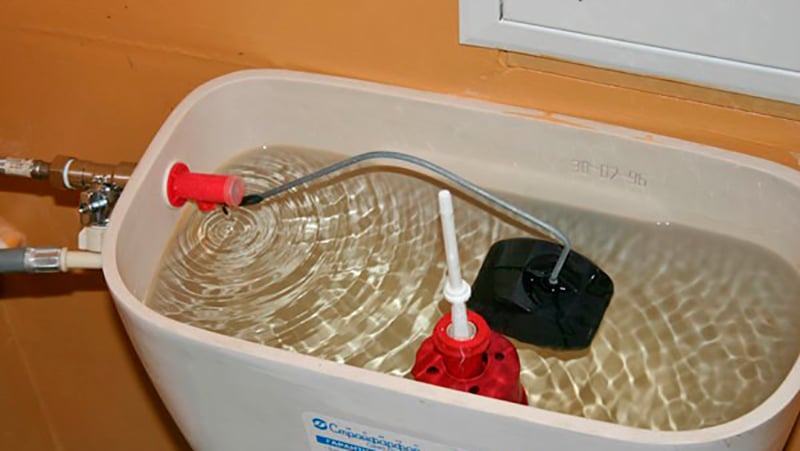
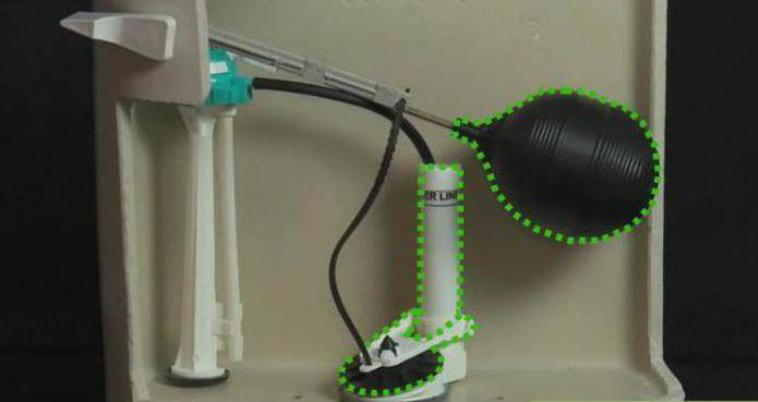
Components of side-mounted valves
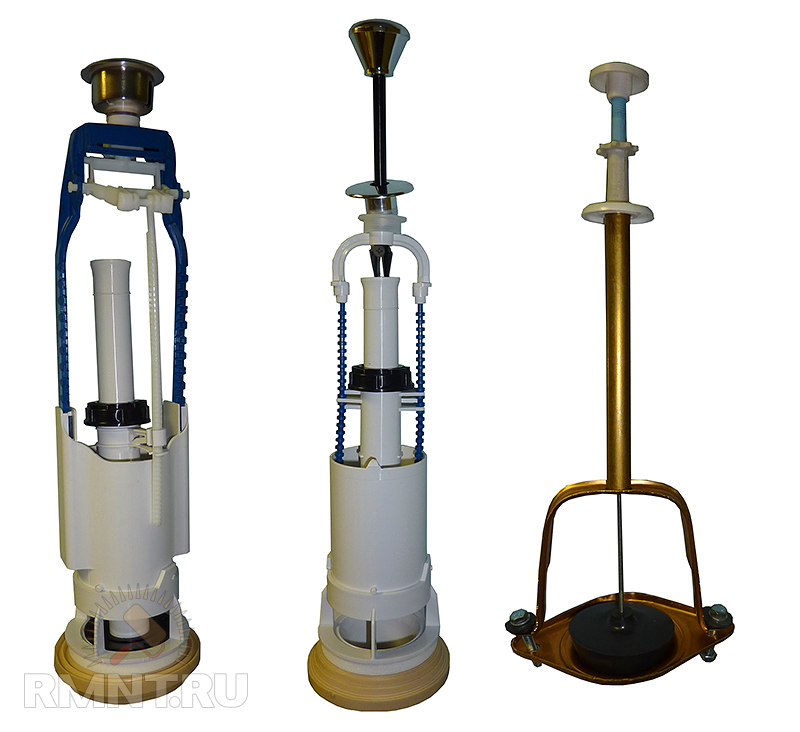
There are several types of valves:
- stock device (liquid is lowered by lifting the handle on the tank lid);
- push-button mechanism (draining occurs by pressing the button).

Today, the last option is mainly used. He will be considered in more detail.
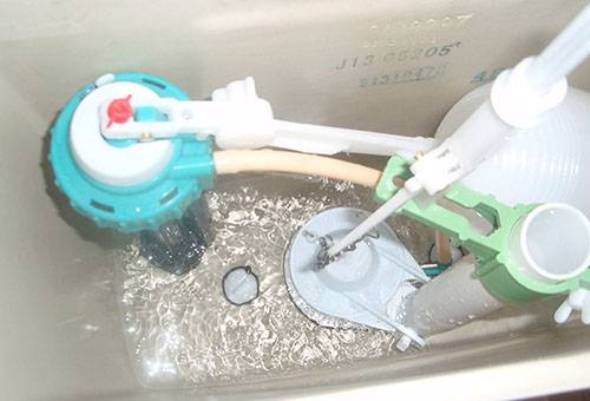
Let us examine the components of the design drain.
- inlet valve;
- lever with float;
- trigger device;
- filler tank;
- trigger control lever.
The simplicity of this design guarantees its durability on the condition of good quality parts.
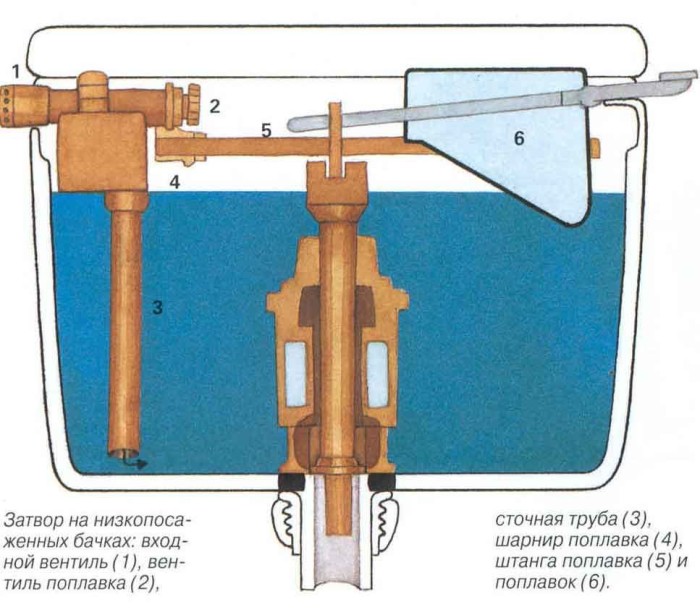
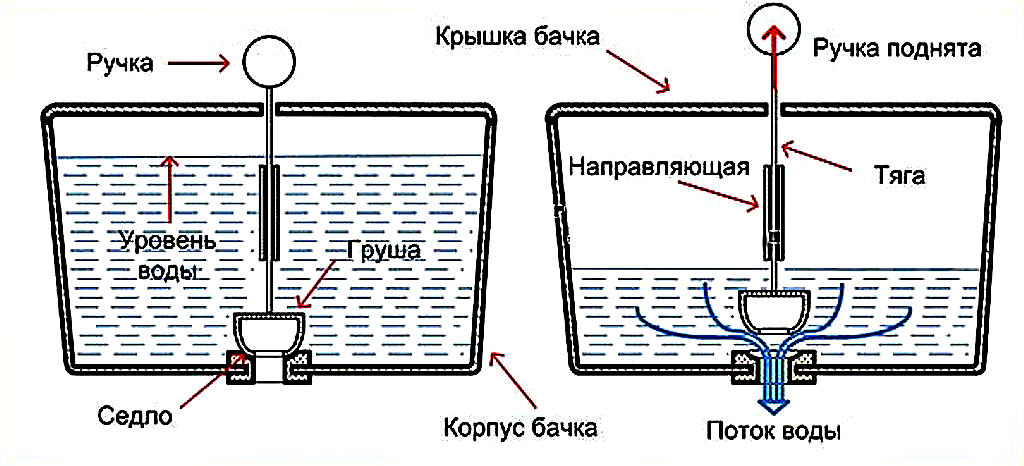
Work principles
For proper installation of valves and repairs in the event of a breakdown, it is important to understand how the discharge mechanism itself works.
Consider it in more detail:
- When you press the button drain appears thrust, under the action of which opens the drain valve.
- When this overlaps the drain in the drain mechanism, there is a drain.
- When the water in the tank reaches a minimum, the discharge mechanism closes, blocking the drain.
- After that the float hole opens.
- The vertical valve is in place, blocking the passage for the descent.
- When the water level decreases, the float descends, opening the passage through which the drain tank fills.
- When the water level reaches a maximum, and with it the float rises, the float valve closes, restricting the flow of water.
The device drain mechanism is quite simple to understand. For clarity, you can remove the lid of the tank.
Valve Selection Aspects
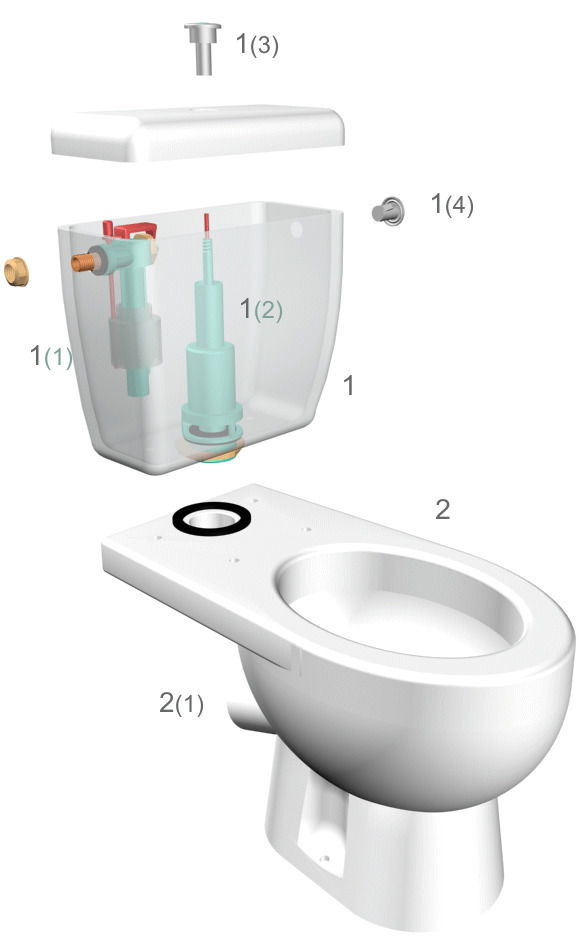
In the event of a breakdown, it becomes necessary to replace the drain device.At the same time, a new one should be chosen carefully enough for the mechanism to last for many years. Purchase must be carried out in a trusted store. If you are doing the installation yourself, you must correctly determine the diameter of the tank.
When choosing a manufacturer, preference should be given to domestic brands. These devices are adapted to the properties of water and its quality. Goods of foreign production (especially European) are designed for better water. As a result, they fail faster.

The fitting itself can be plastic or brass. The service life of the latter is higher, but its cost is more. When choosing a plastic construction, preference should be given to polypropylene or made from low-pressure polyethylene.
Also pay attention to a few nuances:
- All reinforcement elements should be smooth, without deformation or burrs.
- All seals should have the correct shape, softness, visible cracks under tension are excluded.
- The fasteners should have two or more seals. The elements themselves can be plastic or brass.
- The trigger cock should walk gently (without jerking).
- Components must be tightly attached to each other, free play is excluded.
- You should carefully check the completeness of the mechanism according to the instructions, you need to make sure that all the elements, gaskets and nuts are in place, and the equipment corresponds to the one specified in the installation instructions.
- Rebar should be purchased if it meets all of the above requirements. Otherwise, it will not last long.
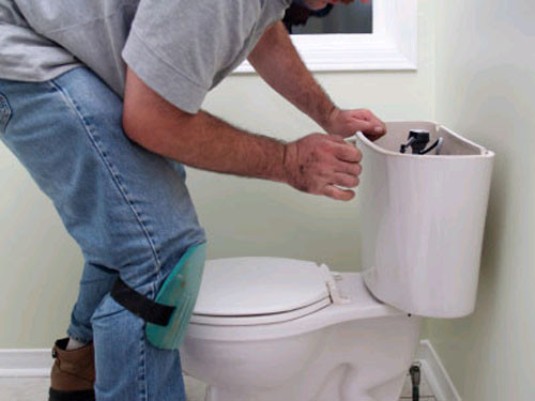
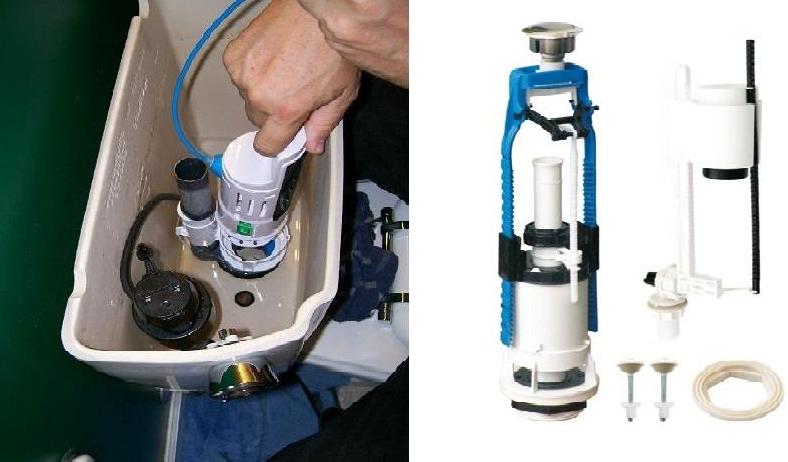
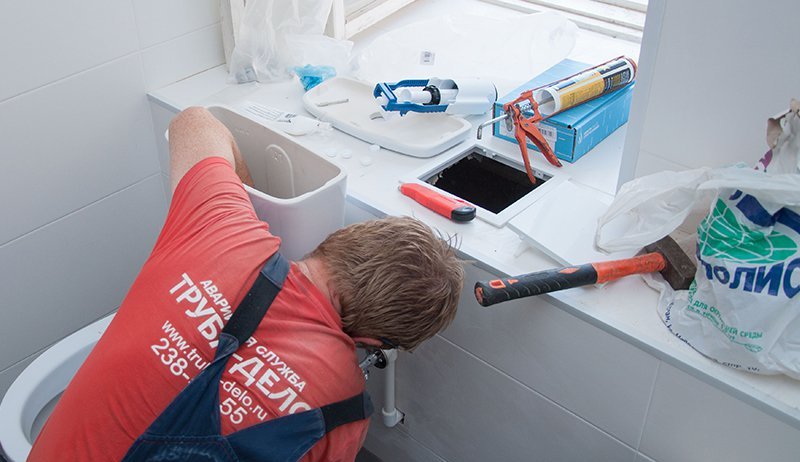
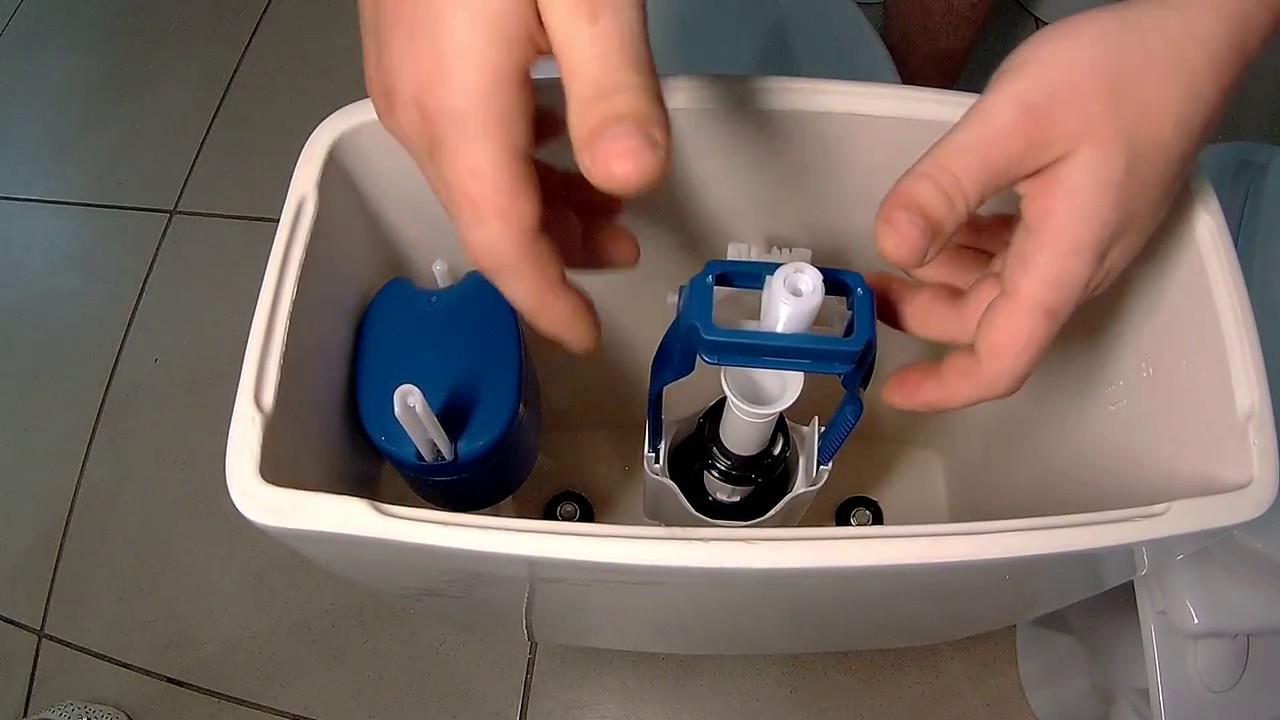
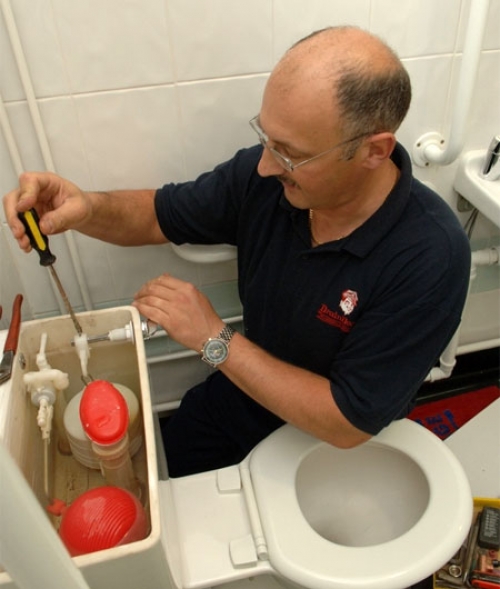
Self install
To begin to follow carefully study the instructions attached to the valve. Let us consider in detail the general scheme of its installation.
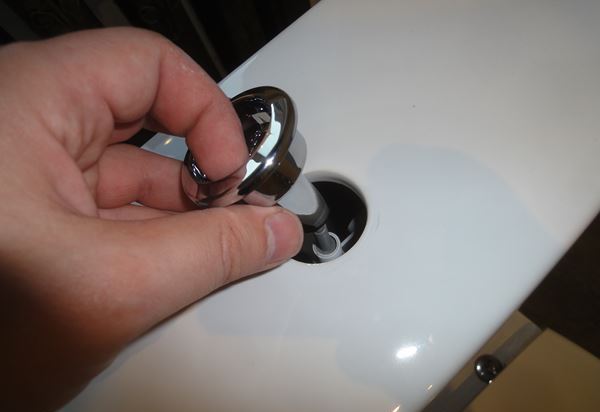
- The first step is to unscrew the nut of the release structure.
- Then you need to put the gasket on the bottom of the tank, with a nut on it to fix the drain mechanism.
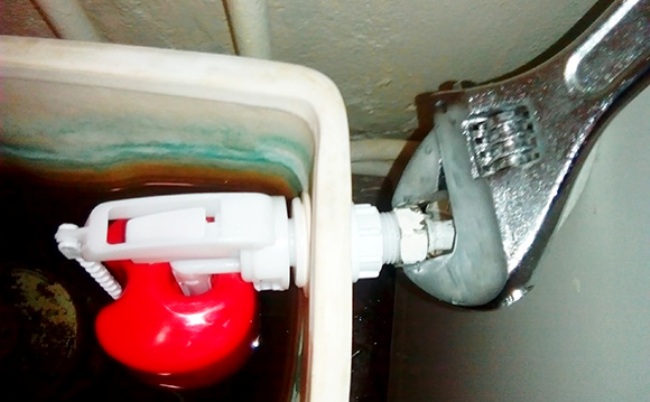
- After that, you need to remove the locking nut from the intake valve located on the side.
- Apply a rubber gasket to the hole where the fixture is installed.
- It is necessary to install a filling valve inside the tank and fix it with a nut. At this stage, tighten the nut is not worth much.


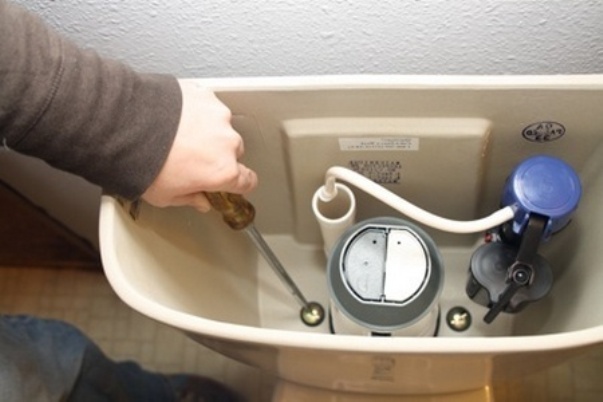
Making sure that the intake and exhaust mechanisms do not touch each other and do not touch the tank walls, fasten the nuts.
If they touch each other, they should first be deployed in different sides:
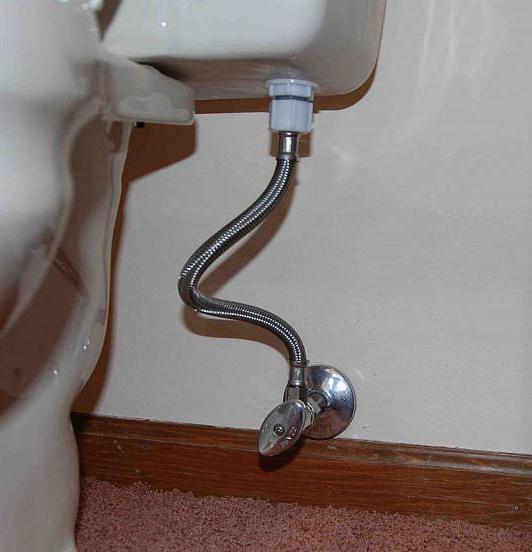
- Then set the eyeliner for water. Always keep in mind the presence and proper positioning of the sealing rings.
- After this you should check the operation of the drain mechanism.
- The last step is to install the release button on the tank lid.
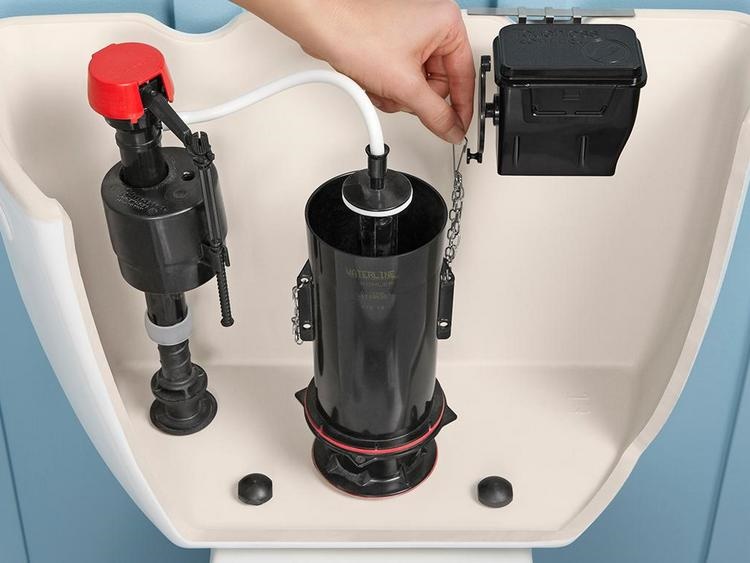

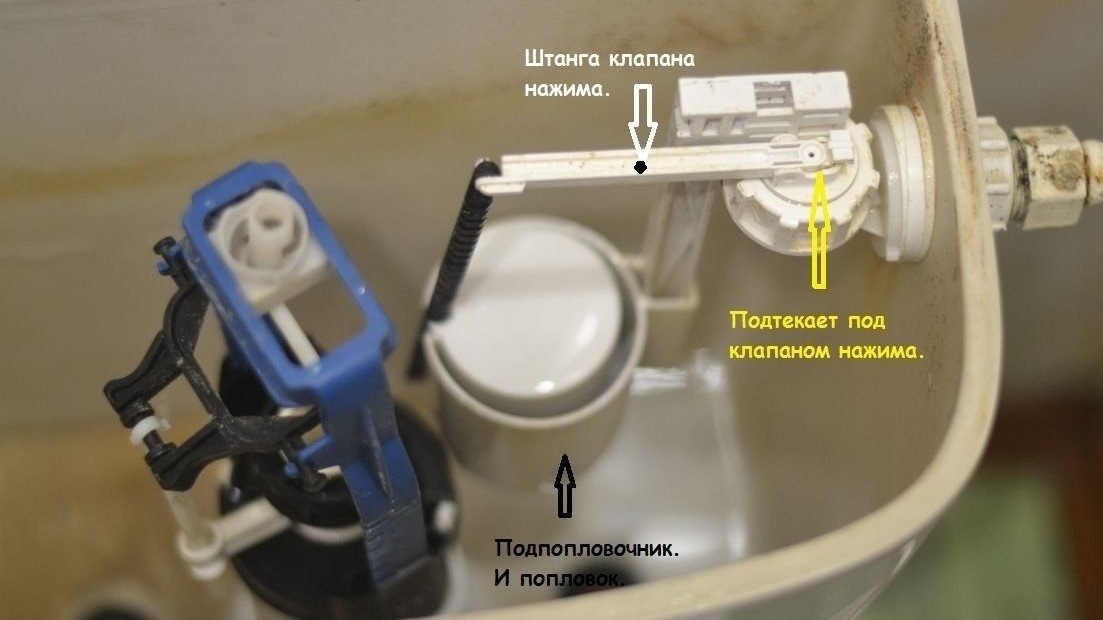
When adjusting the drain valve, it is important to adjust the maximum water level. It should be 5 cm below the edge of the tank. To adjust it, the float moves along the guide. The float must be fixed in such a way that from the upper edge of the float to the edge of the tank was at least 40 mm. After that you should check the location of the overflow pipe.
It should not look out from under the water for more than 2 cm with a full tank.
Failure and solutions
Not always a small breakdown requires the complete replacement of drain fittings. Sometimes it is enough to have a small setup and partial replacement of elements for troubleshooting. When partially replacing parts or mechanisms, it is important that the new parts are similar in shape, material and size. Only in this case, the valve will function correctly and will last a long time.Consider common problems.
Tank leakage
If the tank is constantly heard the murmur, leaking water, this indicates a leakage of the drain tank. To eliminate this problem, first reduce the drain rate. To do this, adjust the damper. You can bend the lever a little, if its material allows, while controlling the position of the flap. The plastic locking elements of the latest models have a special regulator that regulates the draining force.
If these measures have not been successful, the cause of breakage may be the abrasion of the pear. You can try to add the weight of the pear so that it fits more tightly to the locking hole. But it is better to replace it. The overall condition of the drain system should be evaluated. Sometimes it is enough to replace gaskets, remove rust, adjust the position of the drain and exhaust mechanisms. If these measures did not help, it makes sense to replace the drain mechanism.

Water is filled, but not accumulated in the tank.
When the water in the drain tank enters, but is not collected, the cause of failure lies in the float. To eliminate the problem, it is necessary to adjust the water level in the tank by moving it along the guide.Or you can replace the entire node, including the lever.

Water overflows the edge of the barrel
This is due to poorly regulated water levels. How to set it up, described in detail above.
Water is not filled
The cause of the malfunction is a blockage between the nozzle and the exhaust mechanism. To eliminate it, it is enough to replace the float valve.
The drain button does not work or it works tight
First you should try to tighten the driving lever. If this does not help, it means that the leaf valve has failed, it must be replaced.
Inlet valve not fully closed
To eliminate the need to disassemble the intake mechanism and remove rust or dirt in the valve. If this measure did not help, then it makes sense to replace the rubber gasket blocking the pressure of water from the connecting hose.

How to fix the toilet with their own hands, see the next video.


