Device and options for the manufacture of shower
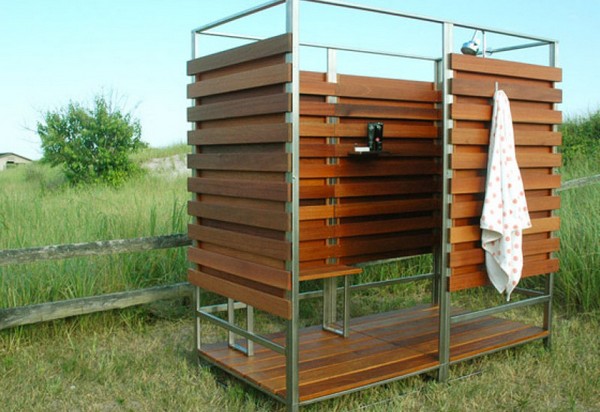
The shower stall fits perfectly into the interior of the apartment and serves as an excellent alternative to the bathroom. It takes not much space, saves time for bathing. But often the boxes offered for purchase do not meet all the requirements that are so necessary - either too small, or the design and functionality are not satisfied. In order not to waste time searching for the desired model, you can make a shower stall yourself.
Device and benefits
A self-made shower stall may be almost the same as a purchased design. However, such a hydrobox will already meet all the requirements of its owner and perfectly fit into the room. And besides, if something suddenly goes wrong and a breakdown occurs, it will be clear what happened and what exactly broke, because the whole construction, each bolt was selected and mounted by hand.
The decision to create a shower stall is usually due to the fact that:
there is not enough space in the apartment, or rather, the bathroom is small, and a huge bathroom is an unaffordable luxury;
the house has a complex architecture with corners, which can be so "beat" and equip a full washing place;
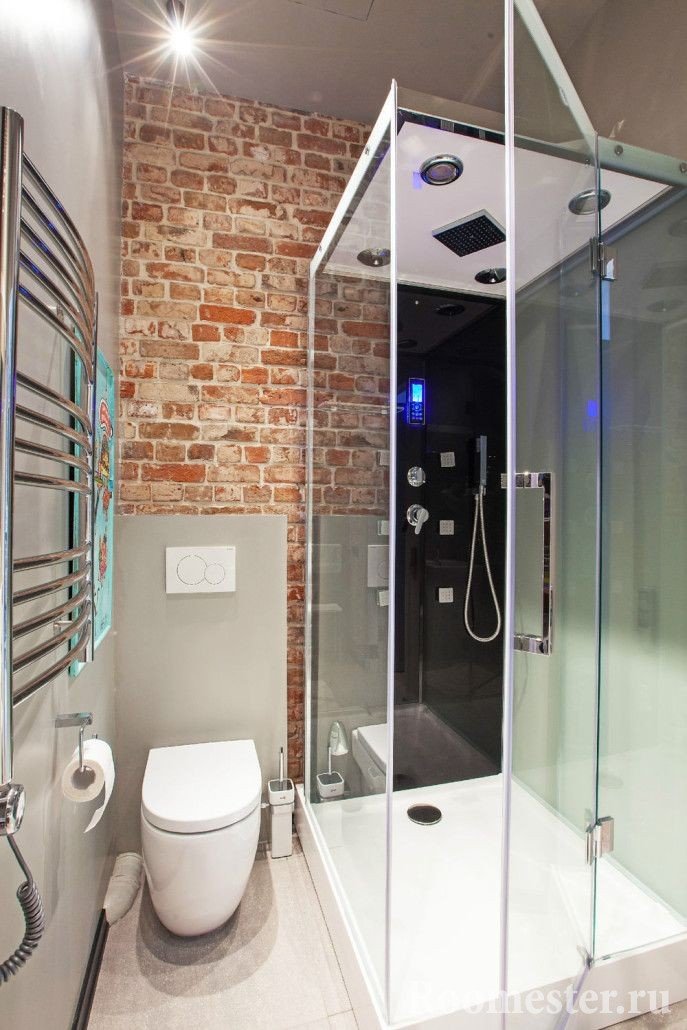
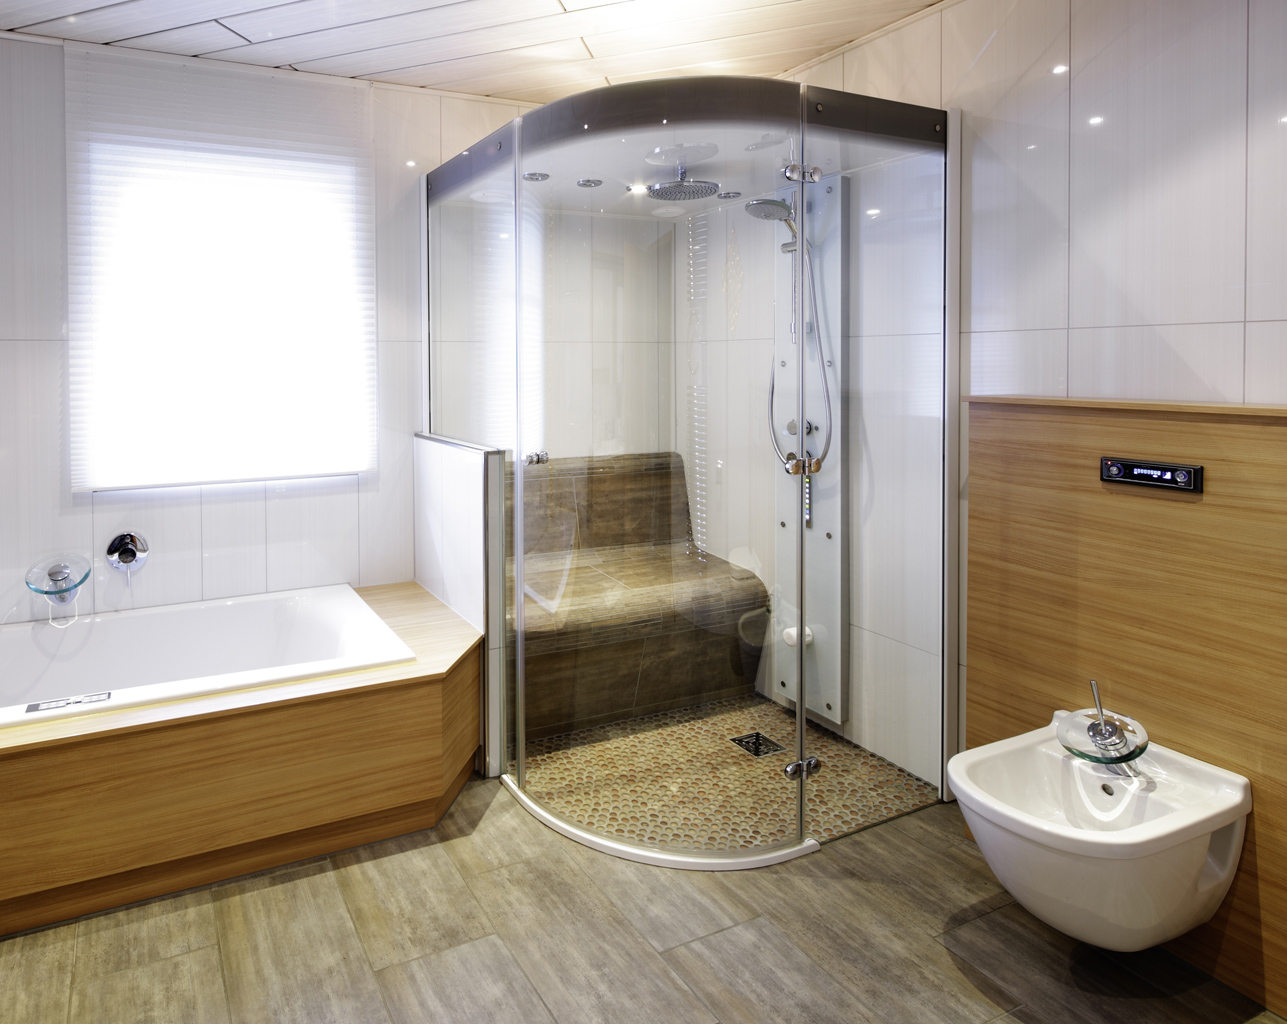
in a private house you want to create an ideal corner with a "tropical rain", hydromassage and other technical innovations;
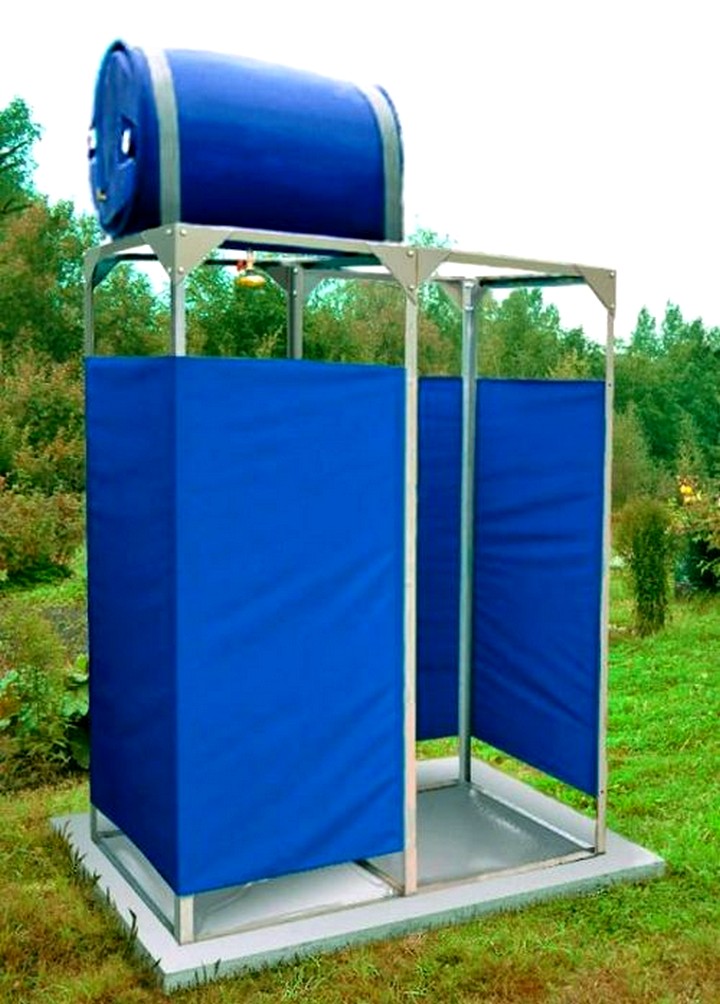
in the country or in the garden you need a place where you can wash.
The very shower cabin can be done by a person who understands plumbing and has made major repairs at least once. When arranging the box, you can cheat and install a part of fully finished parts: whether it be a pallet or walls with doors.Ready-made purchased structural elements will greatly simplify the entire assembly process, but the decision to install them will slightly limit the possibilities of an individual project, adjust it to a certain frame, because the ready-made elements have a strictly adjusted standard size.
There are several options for the construction of hydrobox:
Assembling a ready-made kit - just buy and assemble a shower on the spot without any preparatory work.
Installation of the cabin on the finished tray or bath. Here walls are selected and made out, sanitary equipment is installed. There is no need to prepare the floor (leveling is performed only with obvious defects and differences in height).
Construction of hydrobox based on a homemade pallet. At the beginning, the corresponding pedestal with sides is made, and then the walls are being assembled and decorated. Walls and doors are made either by individual sizes, or bought ready-made.
Complete self-assembly of hydrobox, all parts are unique and self-made.
The construction of a shower structure without a pallet with ready-made doors and walls.
The construction of the hydrobox without a pallet with unique partitions and doors, made to order or with his own.
The independent device of a cabin will not save from money expenses. If you choose low-quality and cheap materials, then maybe it will be possible to save, but this money will still be spent on repairs anyway.
Often, self-assembly can be even a little more expensive than the purchase option. But it is worth it, as the finished set will be fully functional, unique and practical.
The process of assembling a homemade shower stall will take place in several stages:
erection and preparation of walls; if the box is placed in the finished room, then this stage can be skipped;
construction of a wall and pallet barrier;
creation of a water drain system with the ability to service all hidden plumbing;

laying communications;
purchase of finishing materials and further wall cladding;
installation of walls and doors.
Wall requirements
The washing area where the cabin will be installed is a very wet place. Accordingly, the internal walls and corners will be a big load.Mold, fungus, leaks (and, as a result, flooding) - those troubles that threaten the owners of homemade shower enclosures who have not taken care of the protection of the walls.
Theoretically (and practically too) hydroboxing can be installed on any walls. Even wood. But they must be protected from moisture. Not all wood species are water resistant.
One of the ways to protect the walls is an additional covering of their moisture-resistant plasterboard. Of course, additional treatment with water-repellent compositions also does not hurt.
In addition, good water-repellent properties have:
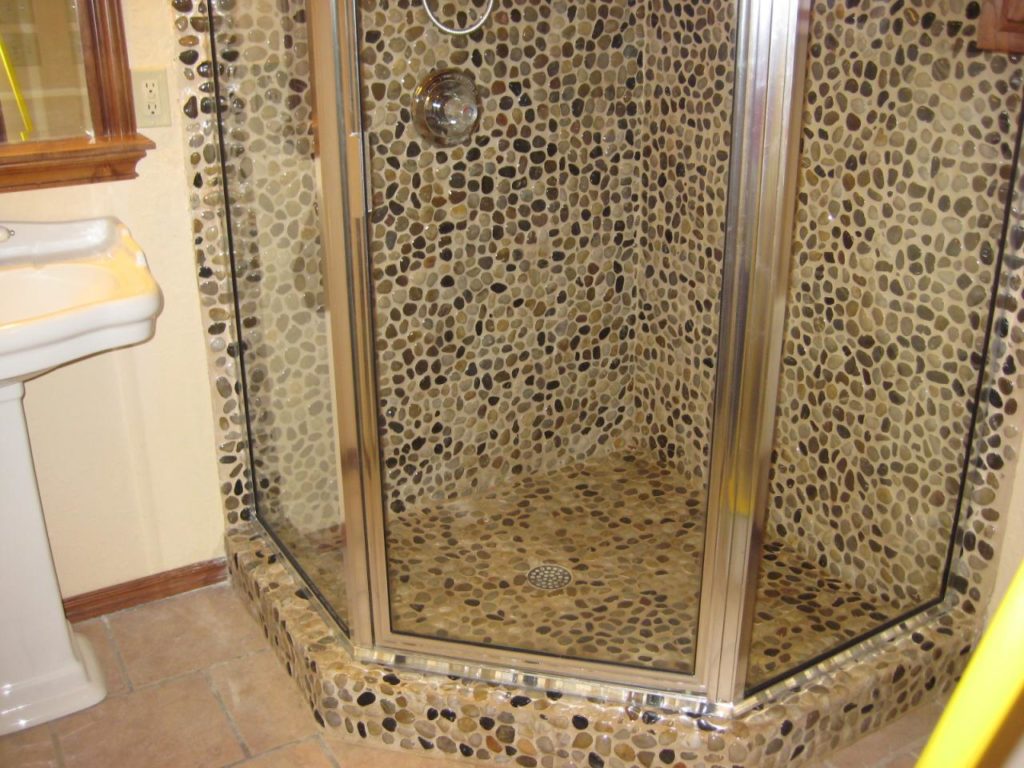
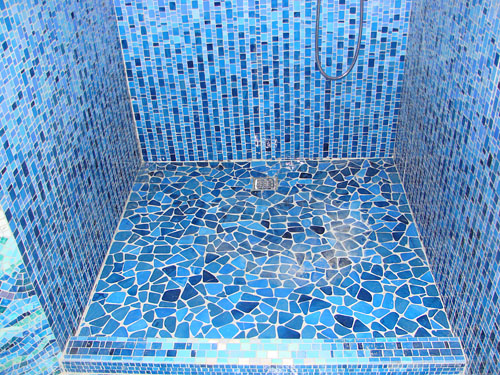
walls lined with tiles (tiles or mosaics) and if they are fixed to the appropriate compositions that are resistant to high humidity;
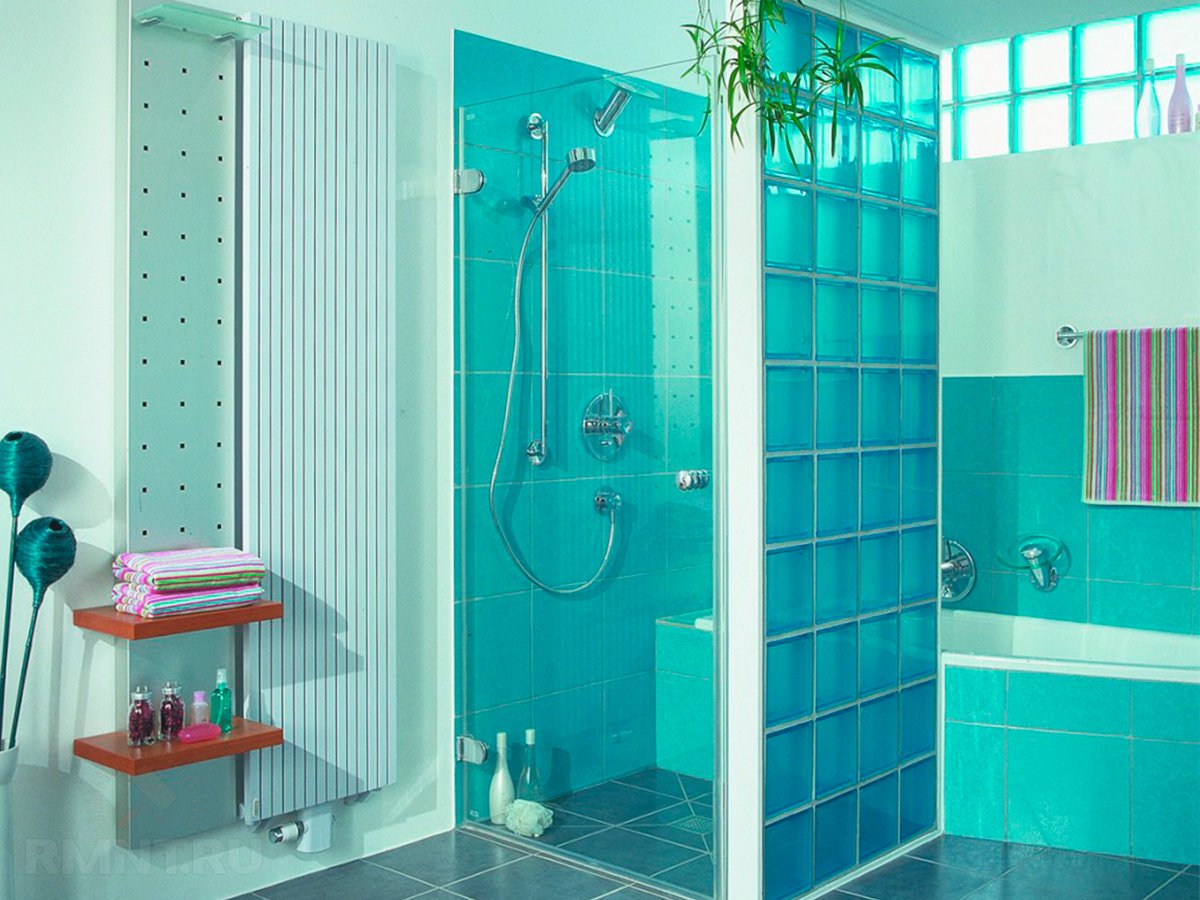
PVC paneled walls;
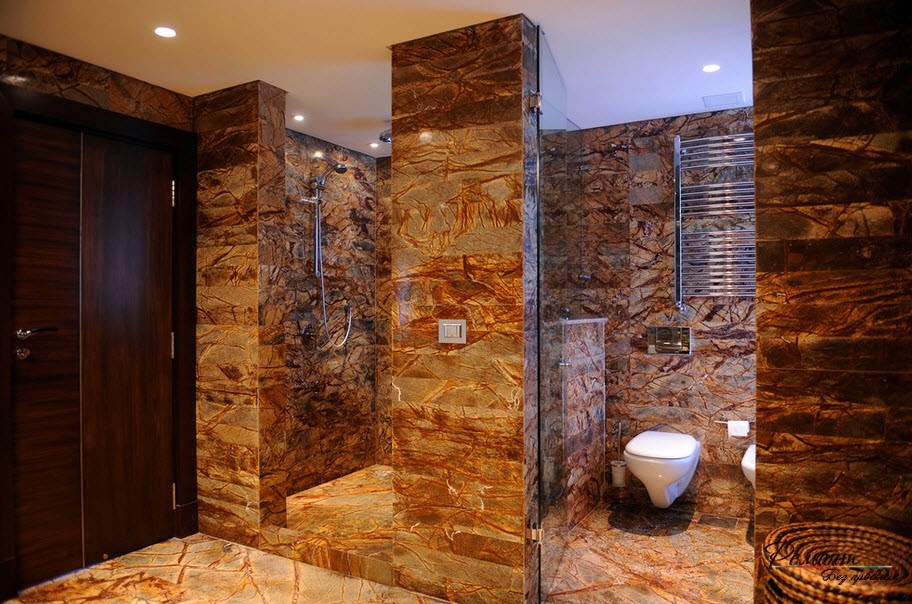
walls made of glass, brick, stone.
In addition, you need to take care of the ceiling, ventilation system, electricity. The top can be sewn with panels or tiles, covered with plaster, which has protective components.
Electricity is desirable to conduct outside the zone in which high humidity. The best solution would be to install 12W LED bulbs.They do not heat very much, they are economical, but at the same time they illuminate space well.
It is also worth considering that very often after taking a shower there remains a soap and lime scale on the surfaces of the walls. Choosing materials for their finishing, you need to understand that you have to wash them often.
Materials
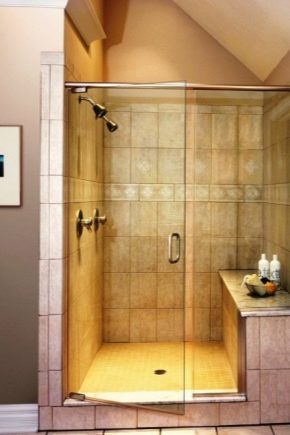
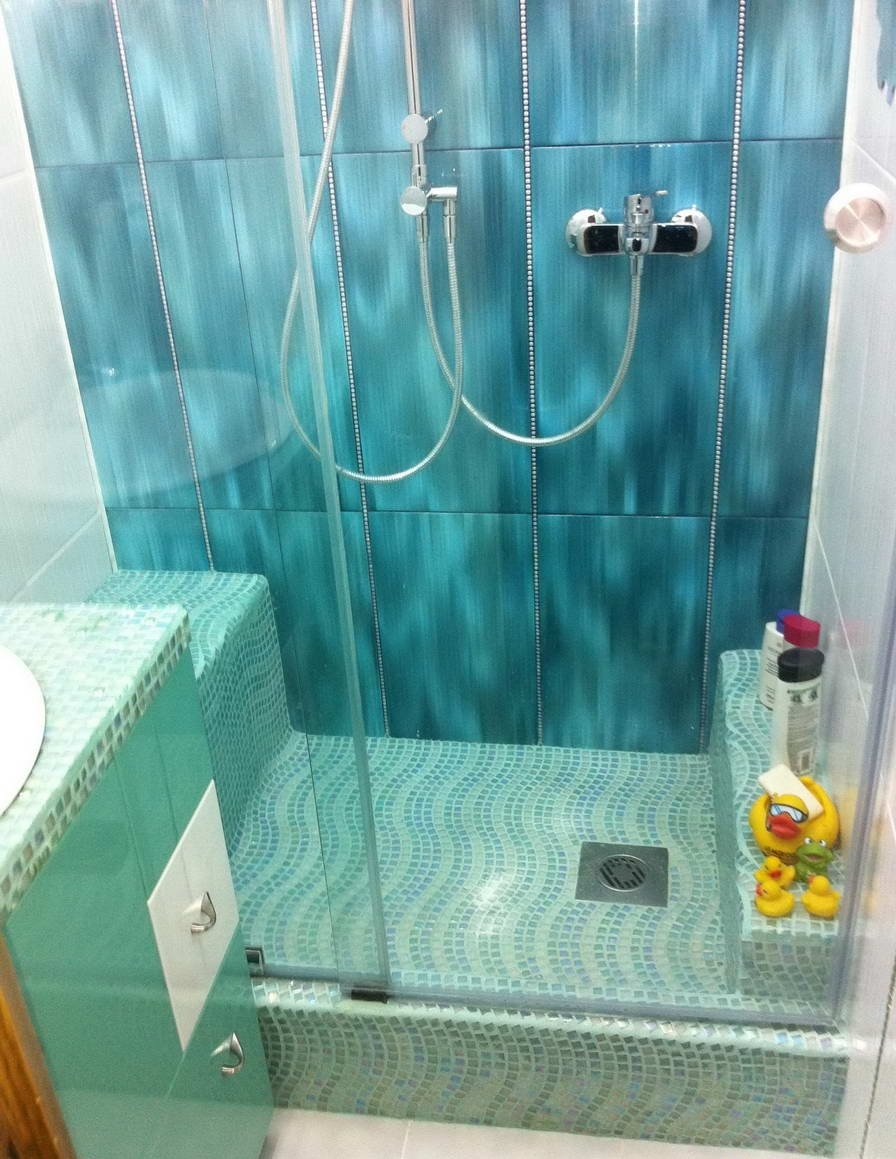
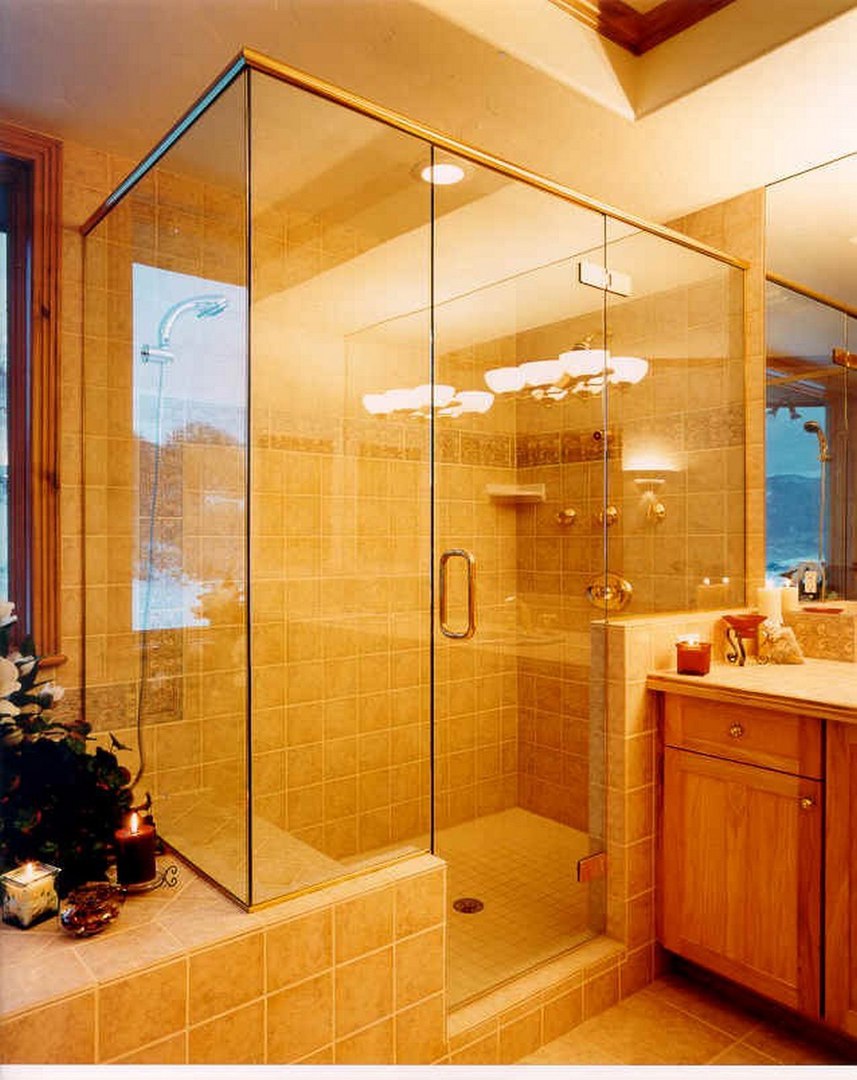
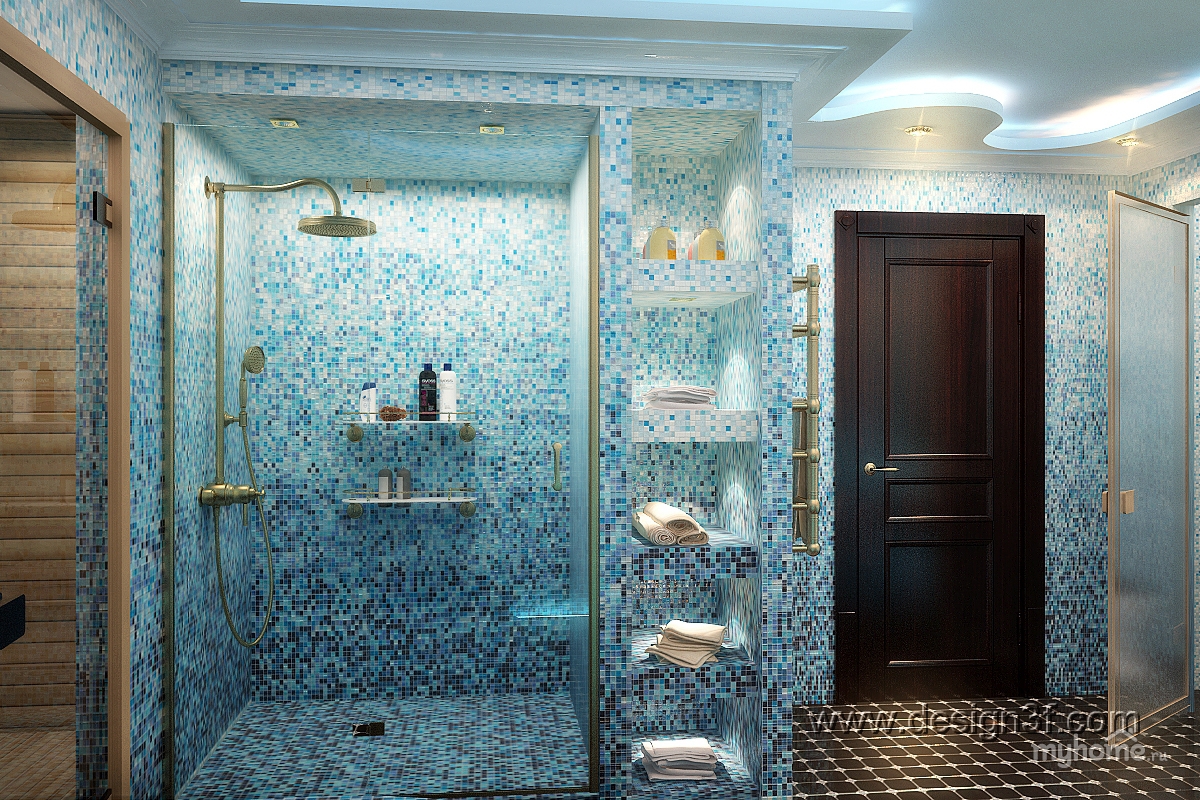
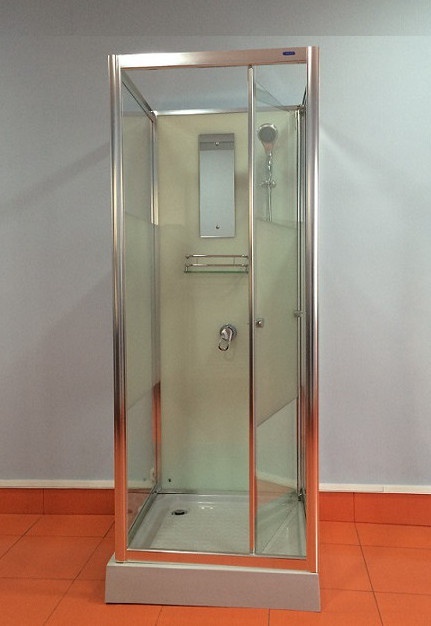
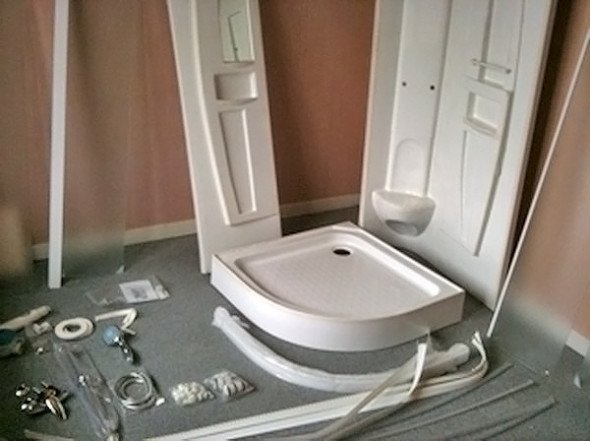
Any shower cabin consists of several parts: internal walls and ceiling, external doors, partitions, a pallet (or a specially prepared floor area), and also plumbing fixtures.
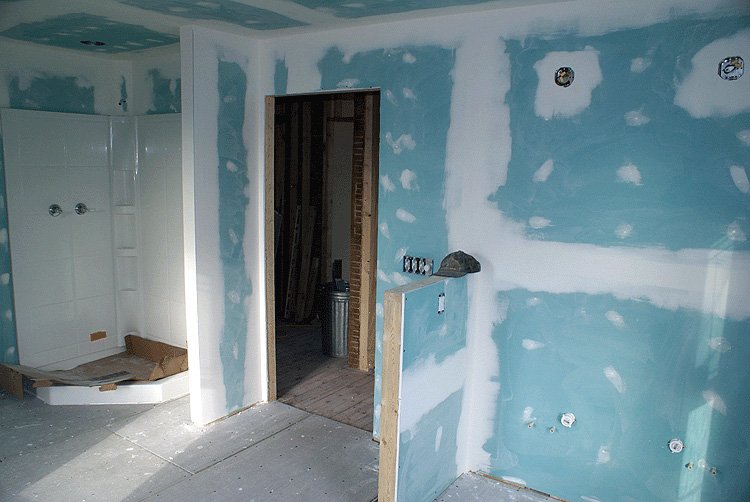
Walls can be built from any building material., but if they are made of wood (or other material unstable to moisture), it is advisable to cover them with water-repellent compounds. Better yet, sheathe a special drywall. And then it to glue tiles (mosaic) or install plastic panels to make a decorative plan and more protection.
You can also build walls of glass blocks. Such a solution will create a warm and bright space.
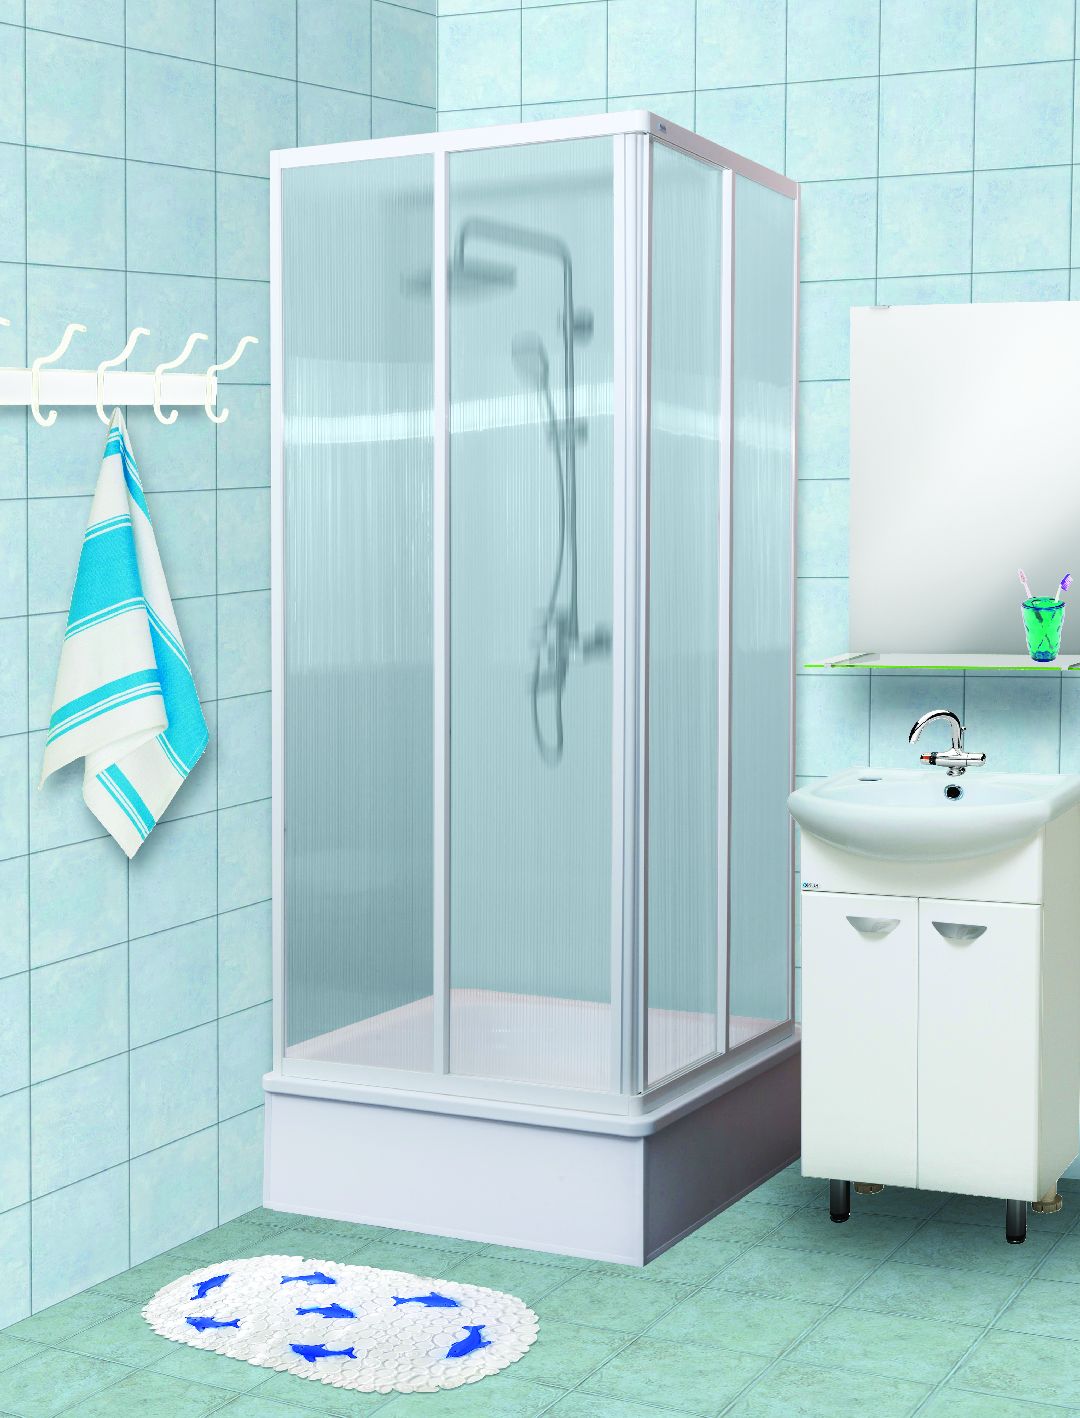
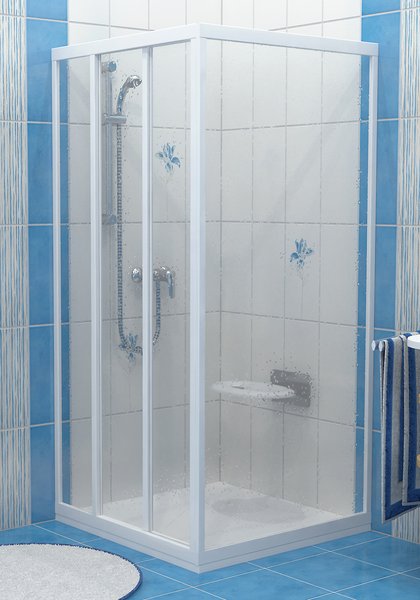
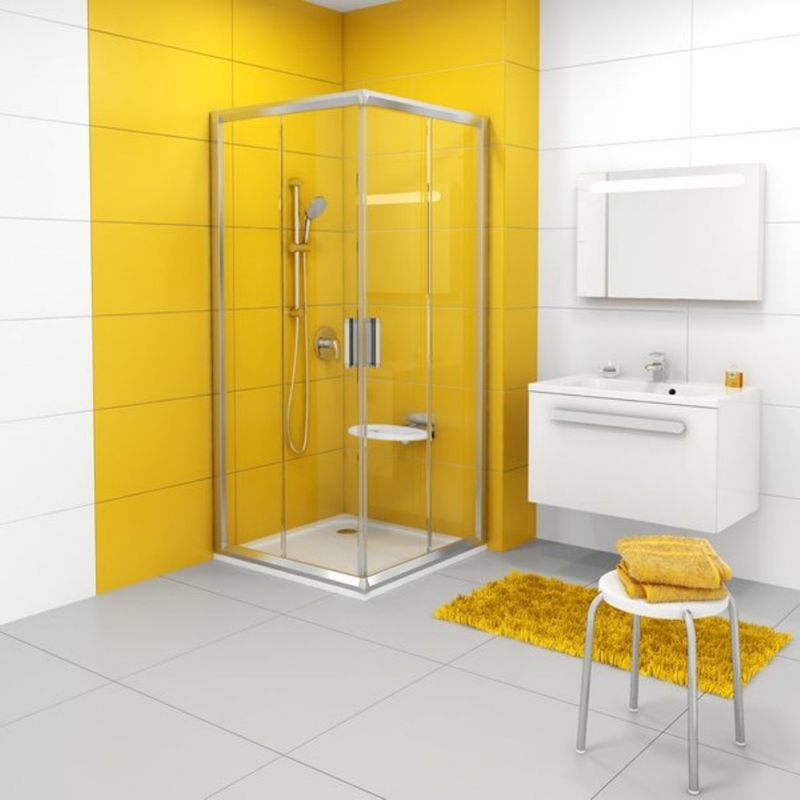
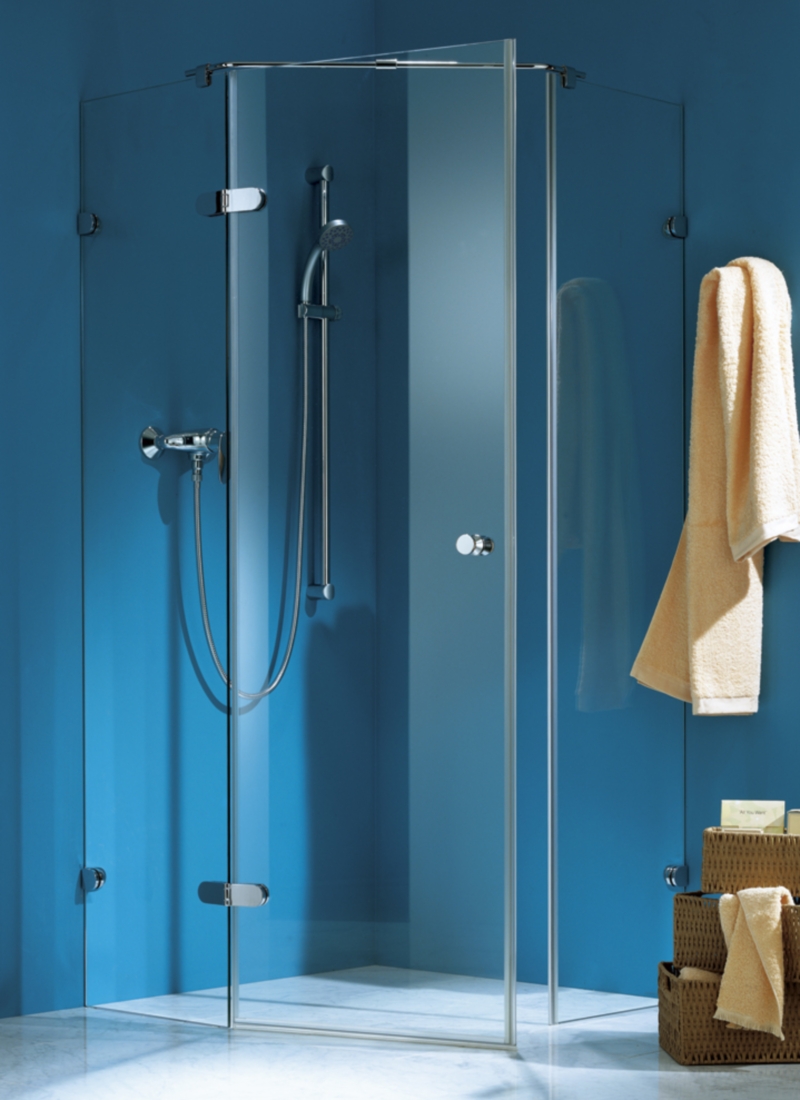
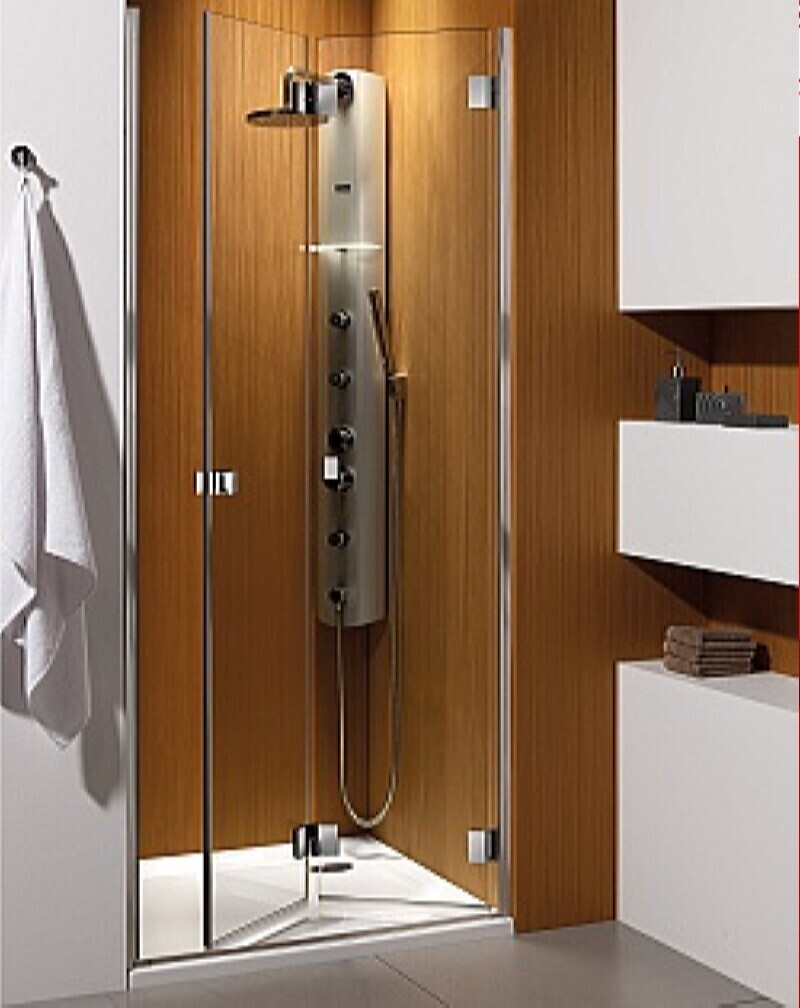
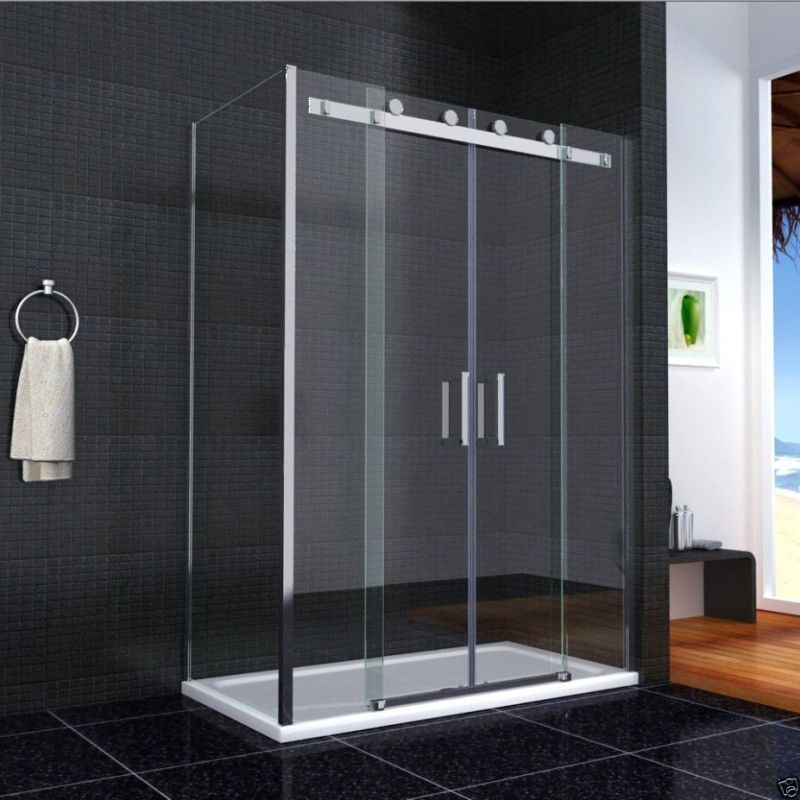
When arranging a cabin-corner, the external walls can be made of polycarbonate, plastic, glass.Doors of the same materials can be made (both swing and sliding).
The walls and partitions of the shower cabin can be made of several types of materials at once. For example, they may be half brick, and the second part will be of glass.
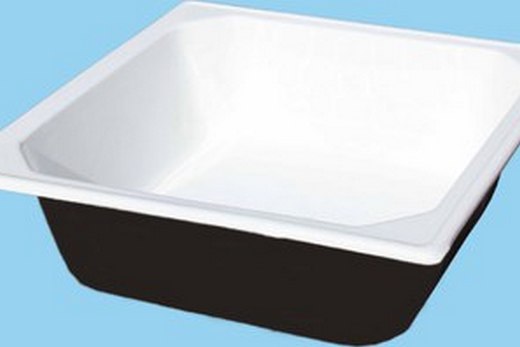
The pallet is usually manufactured from acrylic or enamel in the factory. For a homemade pallet use bricks (and, of course, cement composition, screeds, as well as waterproofing - for example, bitumen mastic), but it is possible to use other materials (construction of plasterboard, wooden formwork and solid concrete). In addition, in the homemade pallet can be provided and a layer of insulation - polystyrene foam.
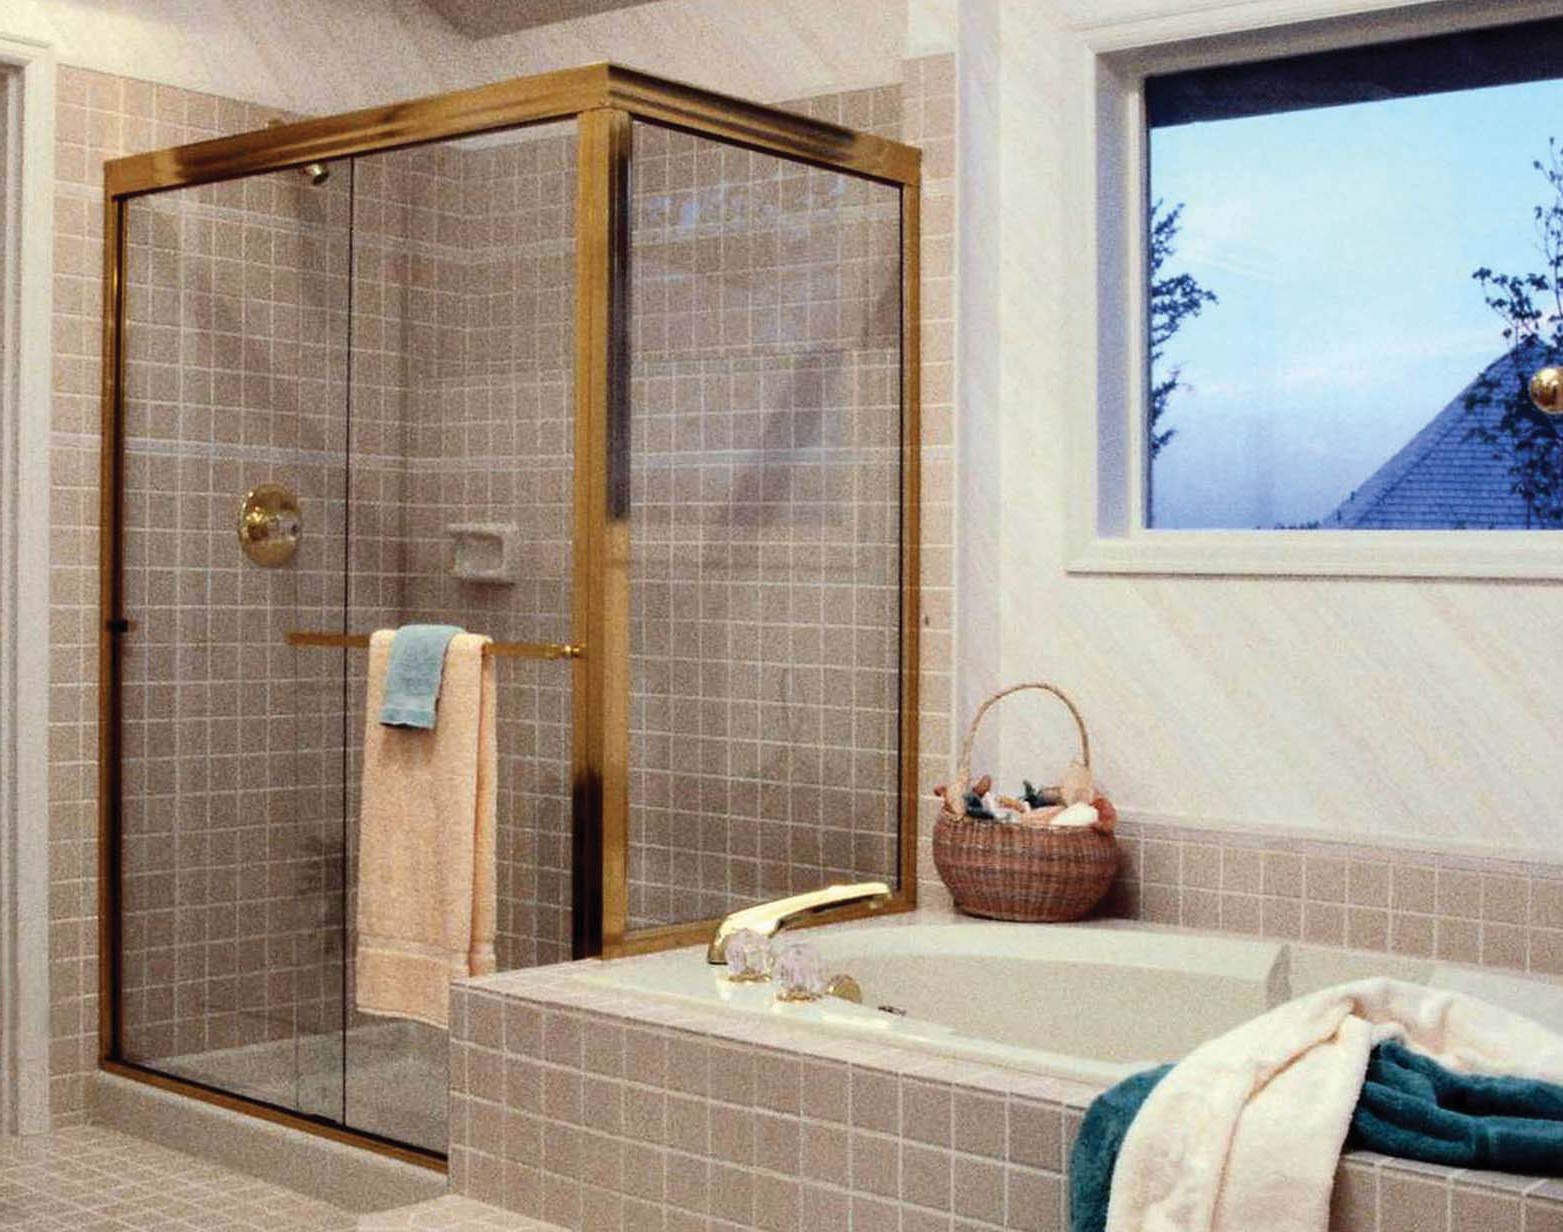
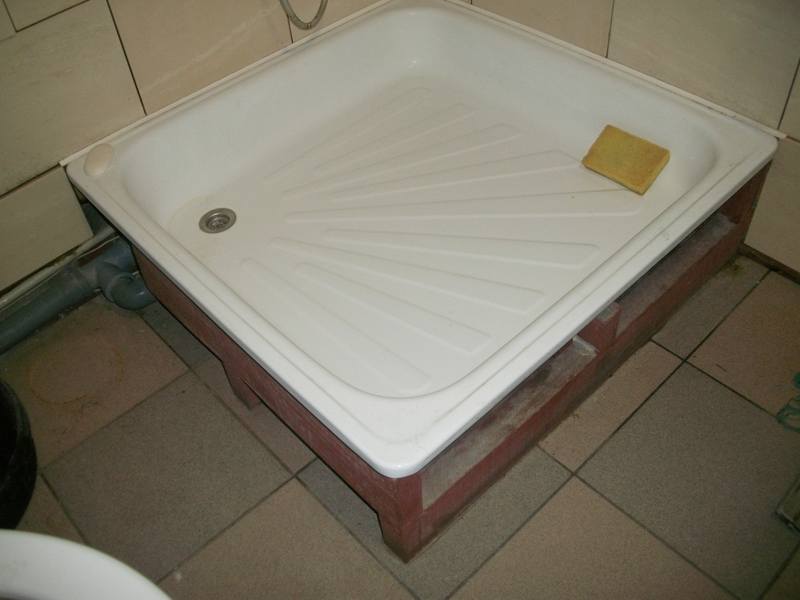
If the cabin is constructed on the basis of a bath, then only doors and partition walls will be needed, which will serve as a “curtain”.
There is the option of building a hydrobox without any doors and external walls. Walls and doors, on the contrary, are replaced with a water-repellent fabric, a curtain.
Choosing building materials, you need to give preference to those solutions and mixtures,as part of which there are special additives that increase the resistance to high humidity, the formation of mold and fungi.
Models and forms
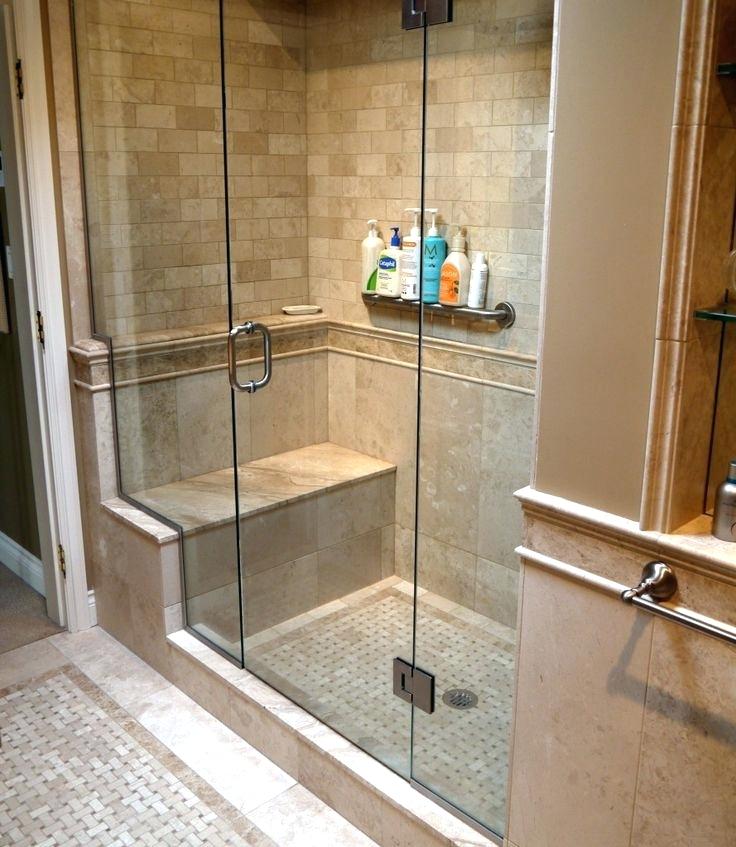
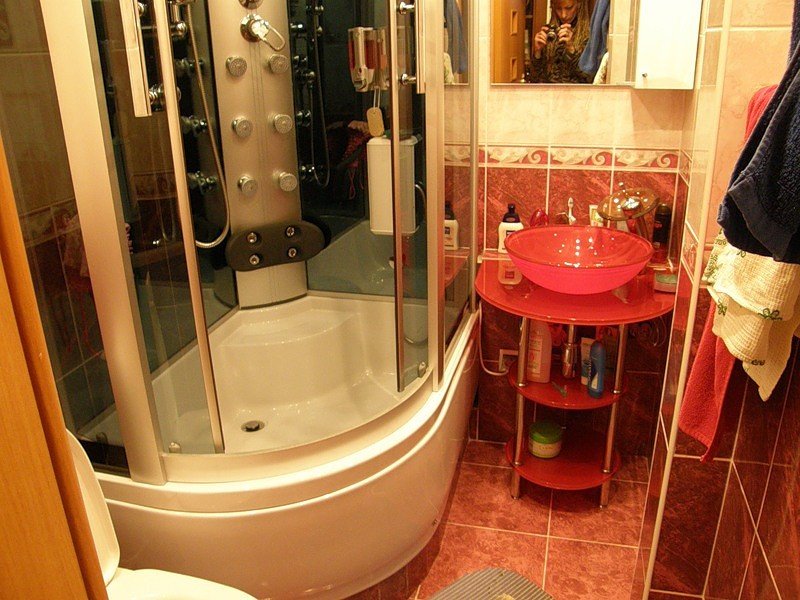
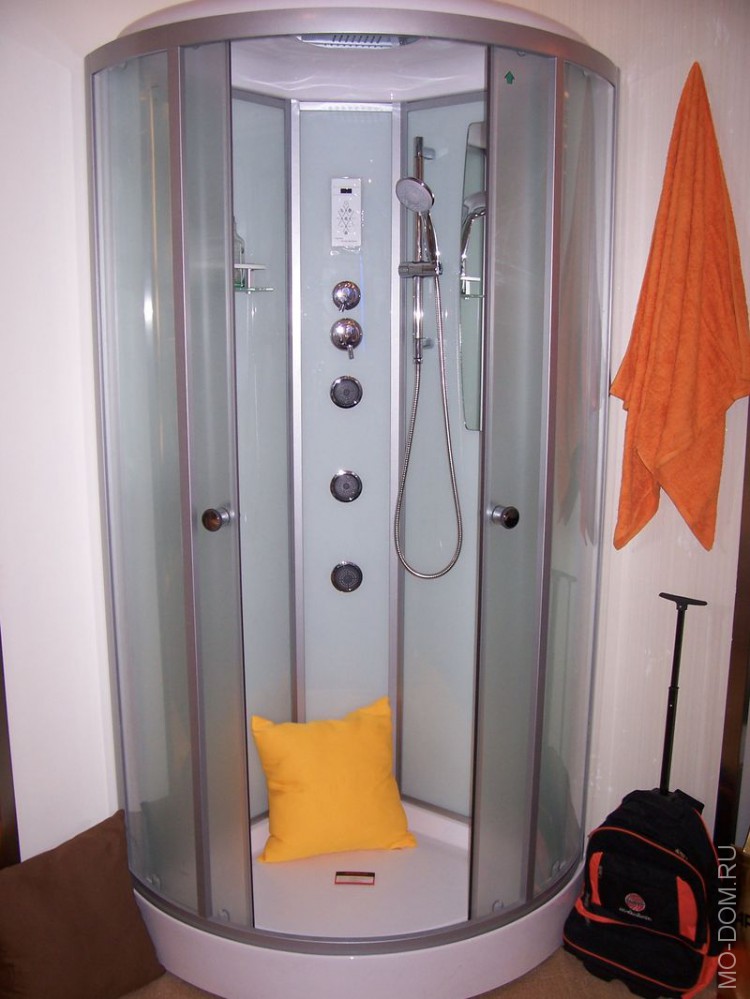
Standard hydrobox sizes vary from 80 cm to 1 m wide. In the first there is very little space and quite uncomfortable. In meter booths already roomier, so you can not worry that some awkward movement accidentally knock makeup or shelves.
The advantages of self-made cabins are that they can be made of almost any size in length and width, height. But if the dimensions are still small, then it is worth striving for a figure of at least 90 cm. In such a hydro box you can comfortably wash yourself, but there will be nowhere to turn around.
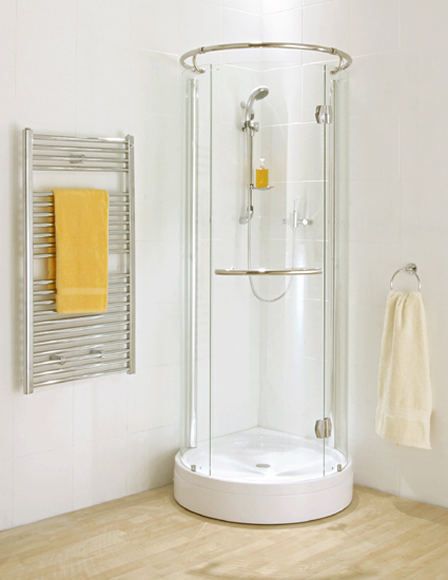
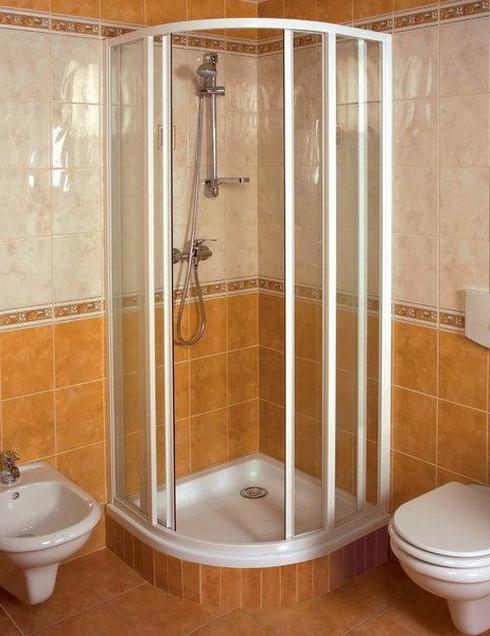
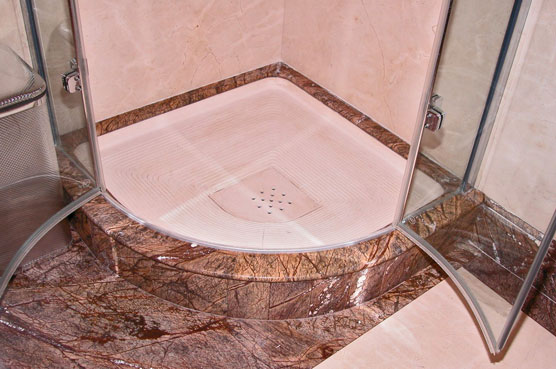
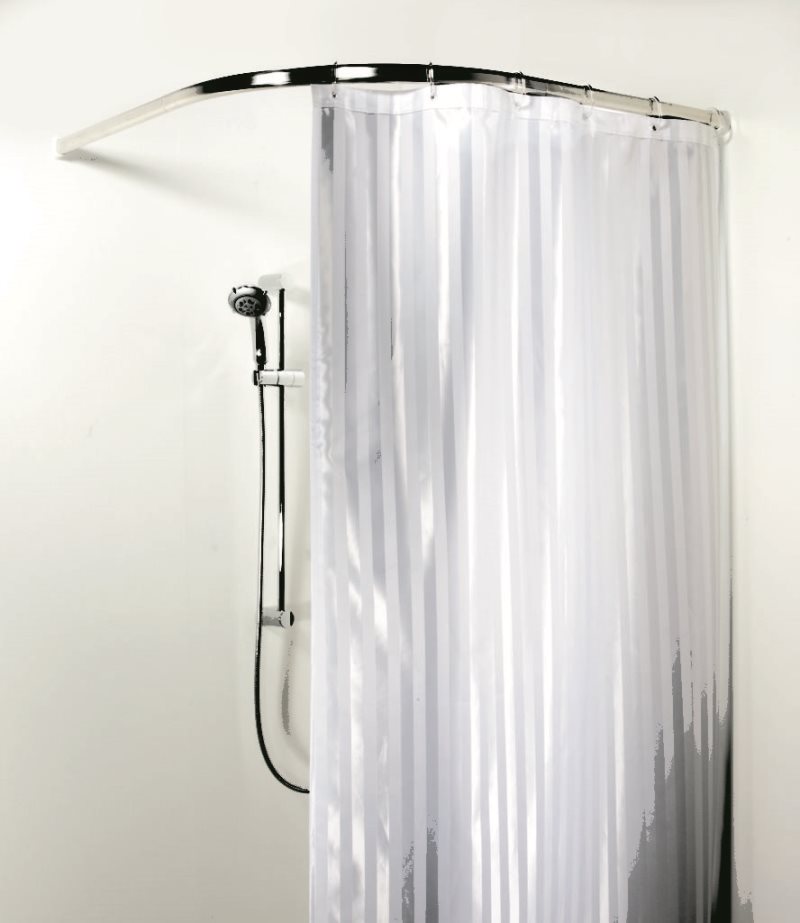
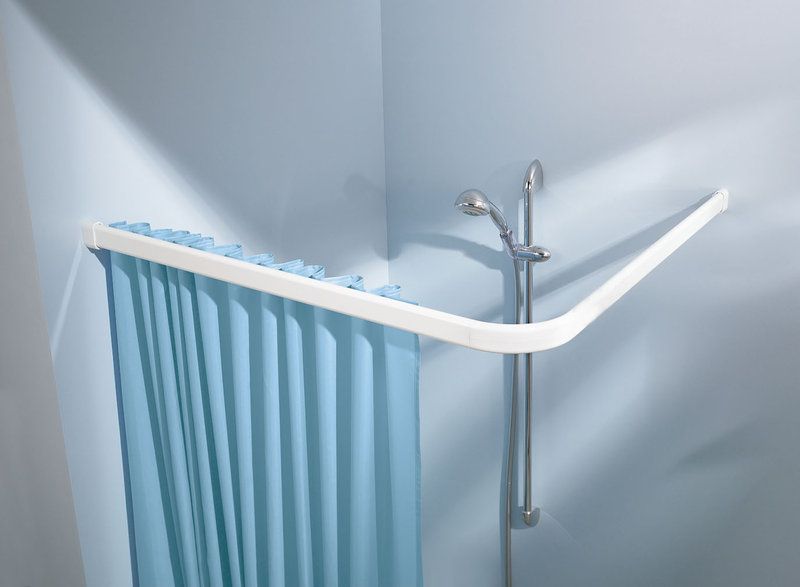
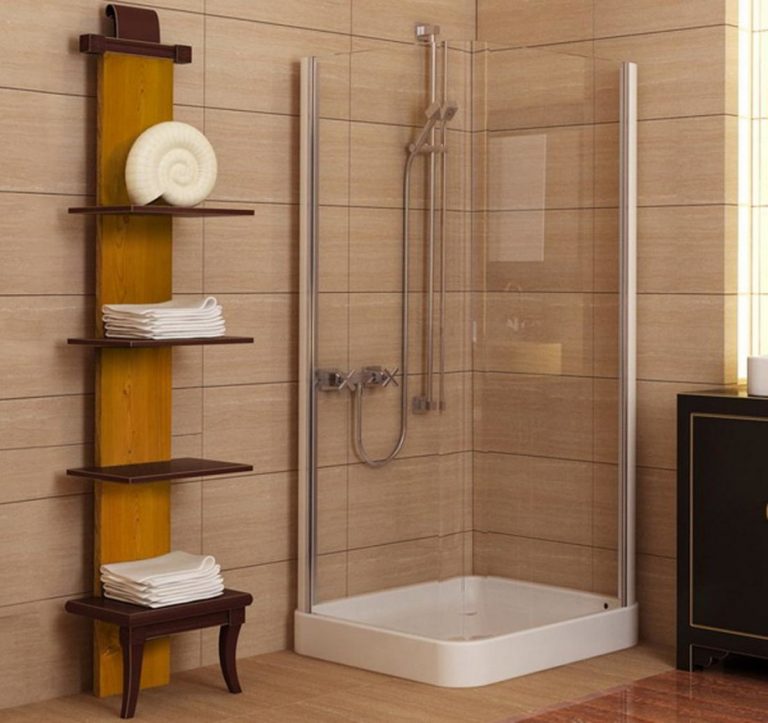
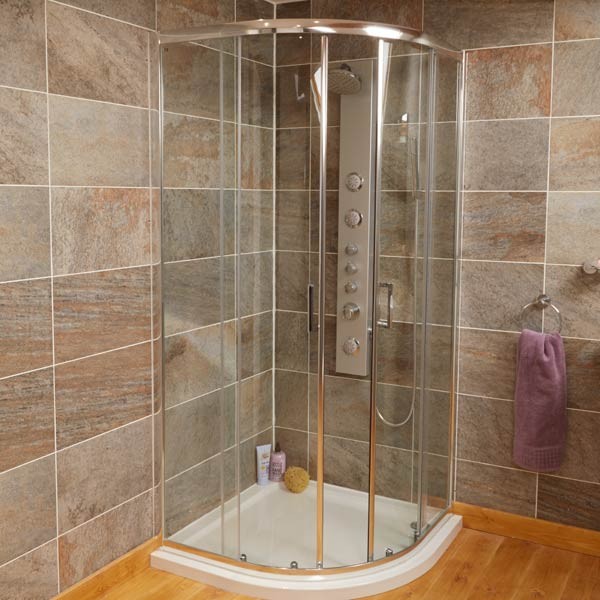
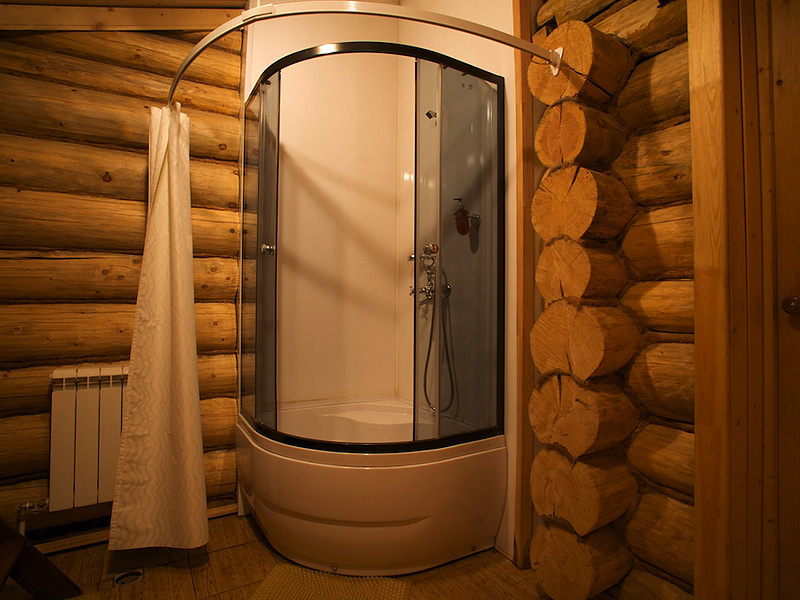
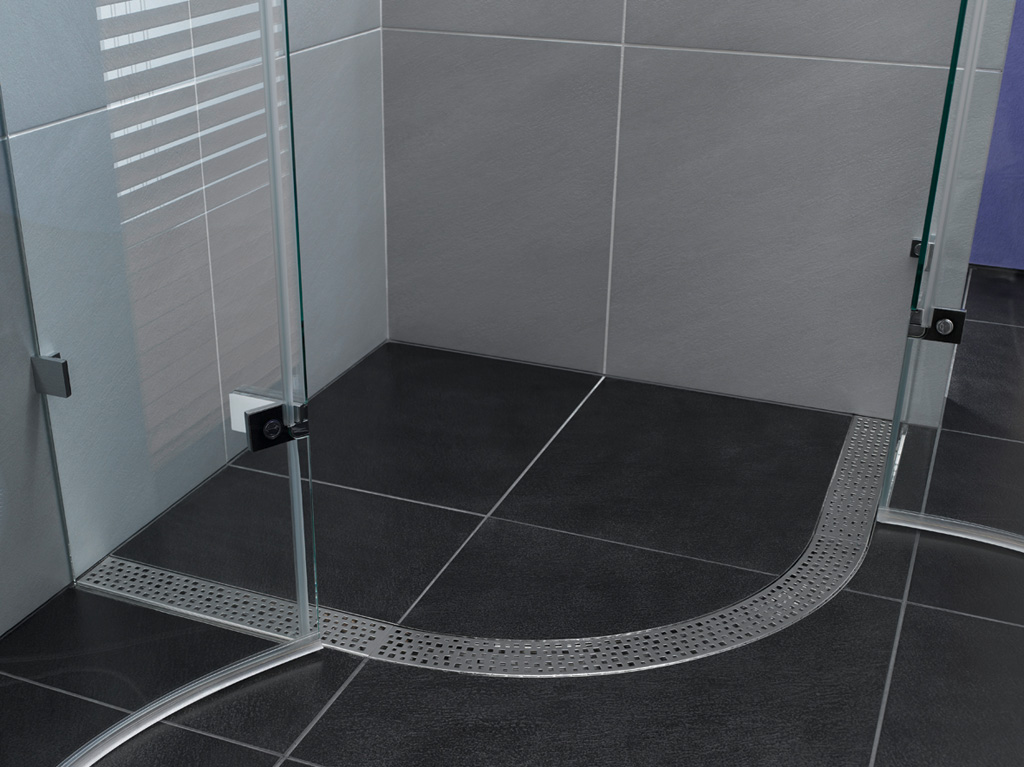
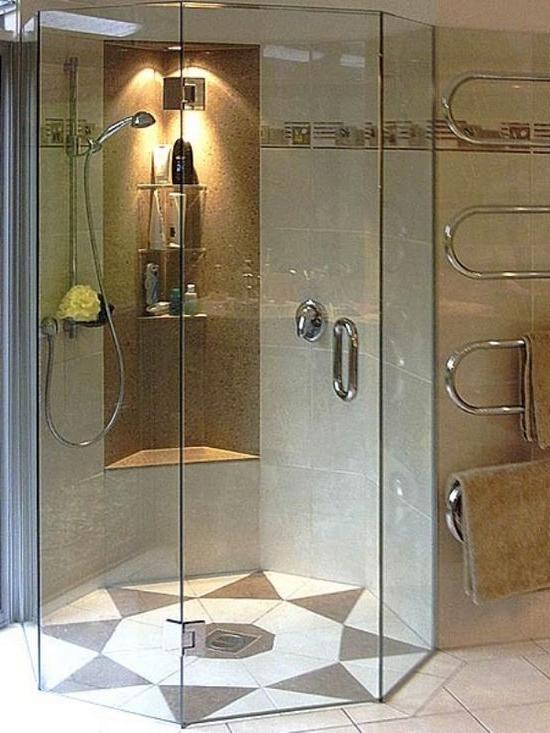
In their form, booths can be both rectangular and square, as well as rounded. A rectangle and a square are fairly easy to reproduce when building a hydrobox independently, unlike rounded versions. To recreate the semicircle of the house, you need polycarbonate, which will need to bend.
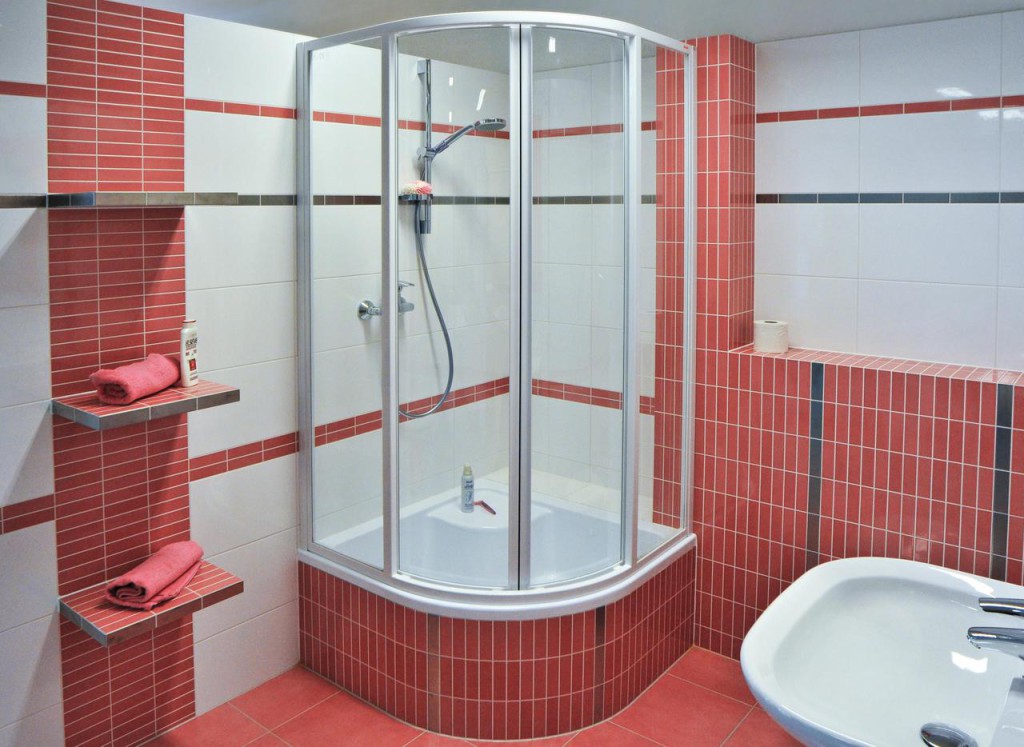
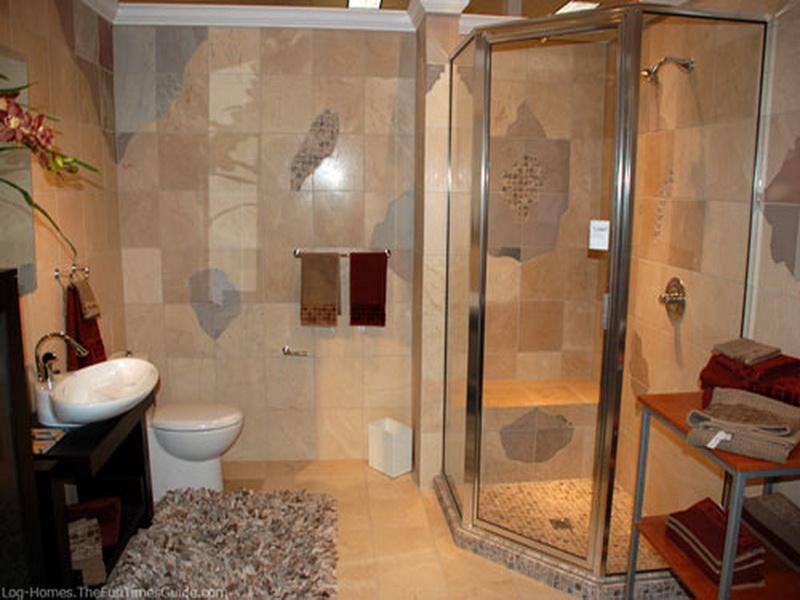
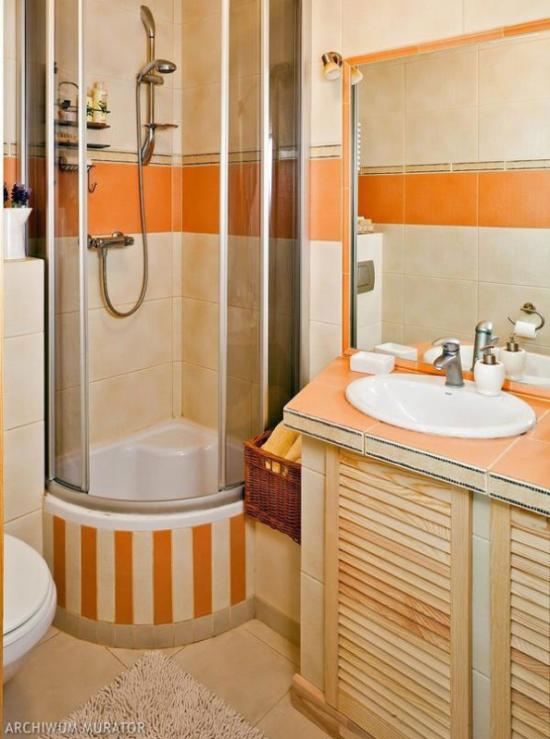
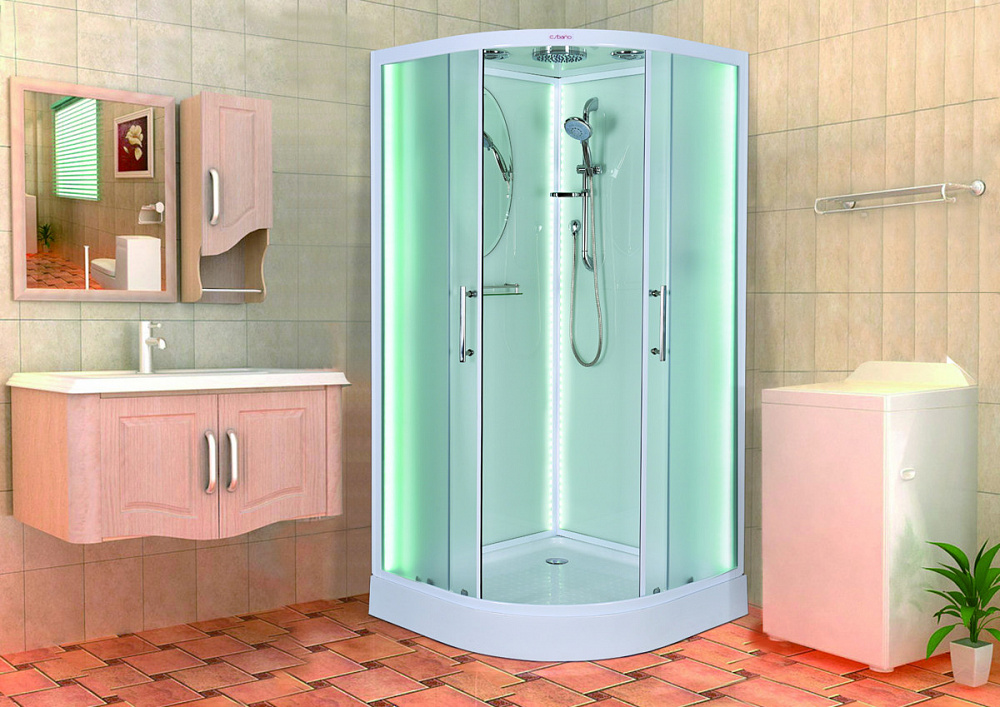
Determining the location in the room, very often resort to this option booths, like a corner. It is built into the corner of the room, so the manufacture of internal walls is out of the question.They are ready. The angle can be arranged in a semicircle, trapezoid or at a right angle.
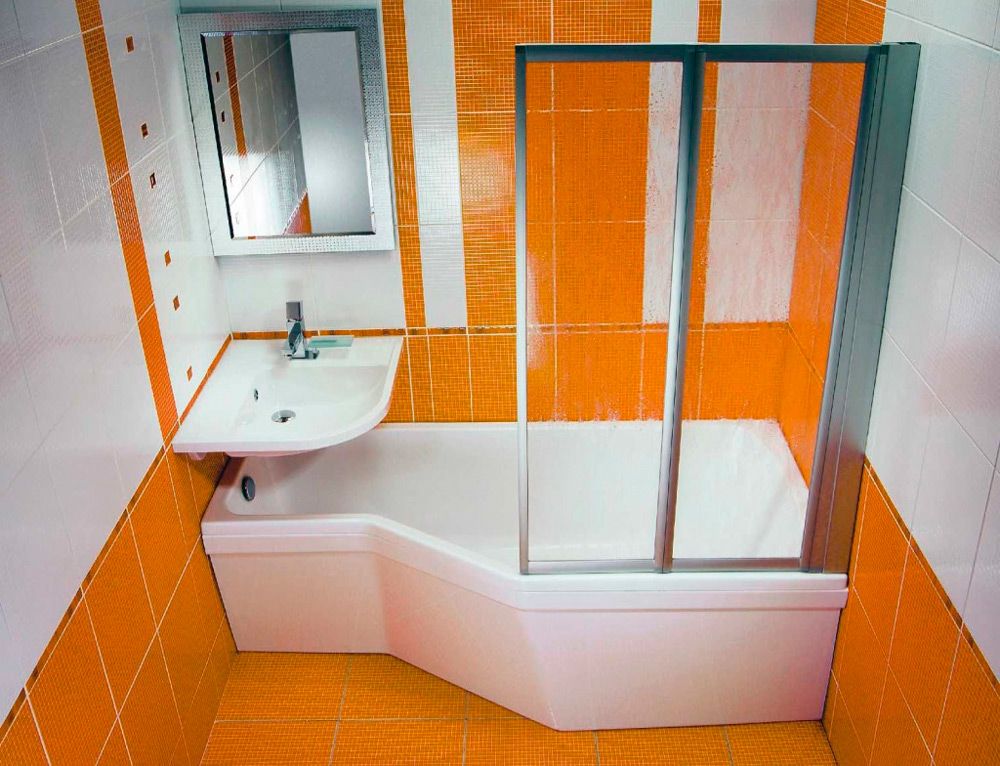
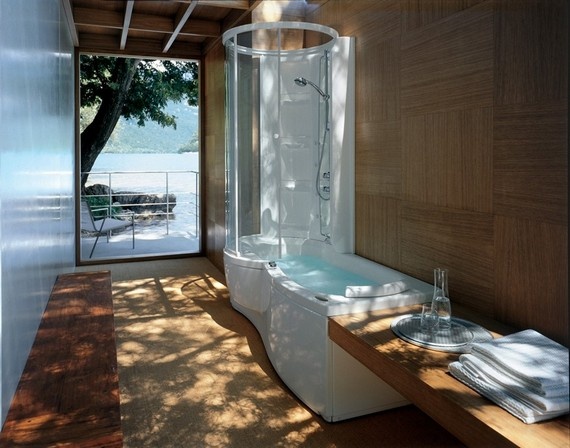
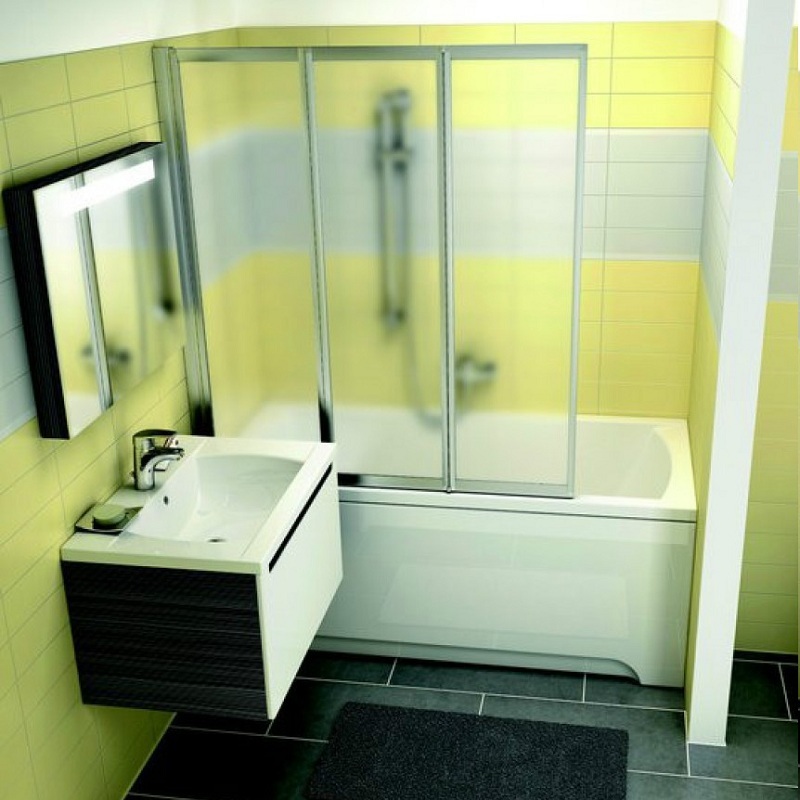
You can arrange a bath in the form of a shower. For this you need only partitions and doors. As a result, there will be a space in which you can not only take a shower, but also soak in the bathroom.
Determine the place
In a small apartment every meter counts. Therefore, the decision to put hydroboxing is justified. The bath is removed, the place for the washing machine is freed up and there is a space where you can change clothes. It is important to take into account that the box should not interfere with movement around the room, create inconvenience when using other interior items (sink, washing machine).
In a private house there is much more space for installing a stall. In addition, the place under the box can be thought out at the design stage of the house. But if this was not done, then it is quite possible to build it after.
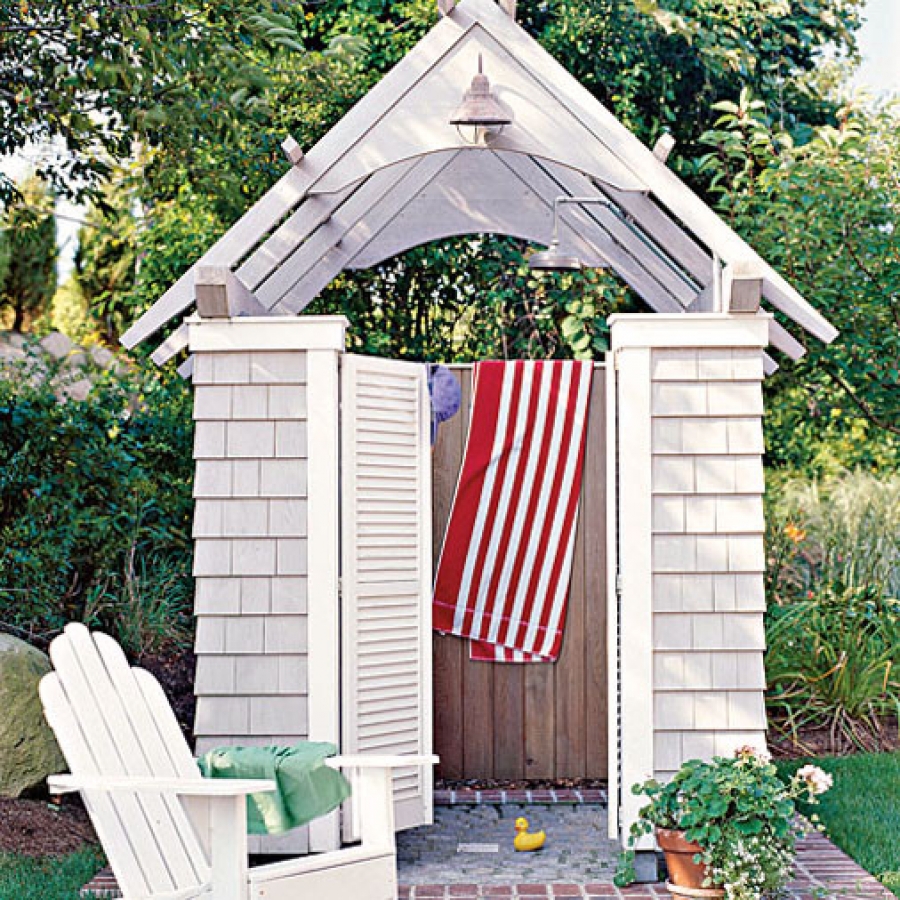
If the cabin is installed in the country or in the garden, then it can be located where there is free space and access to water.
Choose a base and drain system
The fundamental decision in self-assembly of a shower cabin is the use or non-use of a pallet. It is from the foundation that all the work on the creation of a hydraulic structure begins.
The choice of the base also determines which drain system will be installed. Deep pallet, both self-made and finished, provides for the laying of pipes without walling up.
The bottomless version implies a hole in the floor and a well-sanded canal into which the water will go.
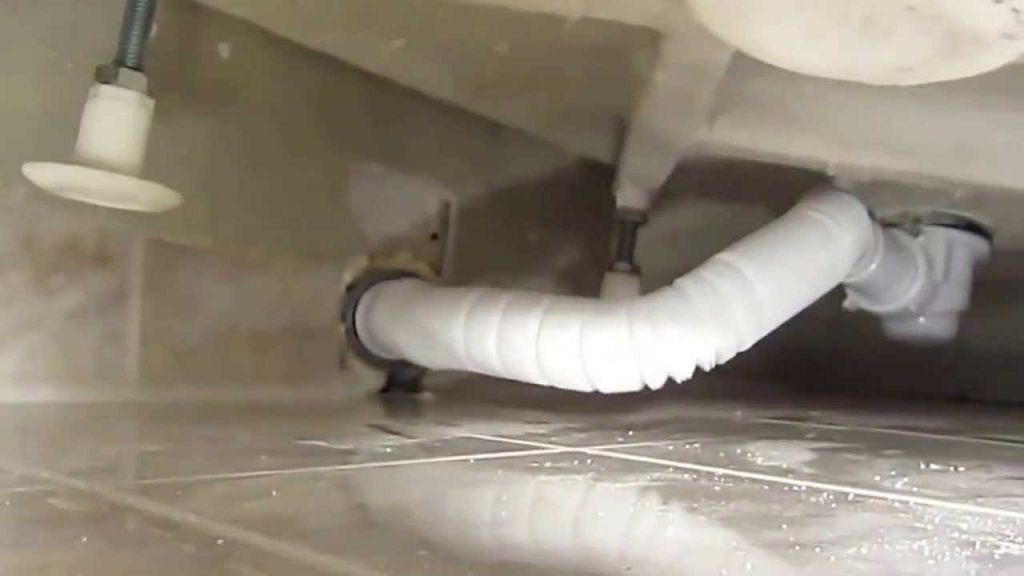
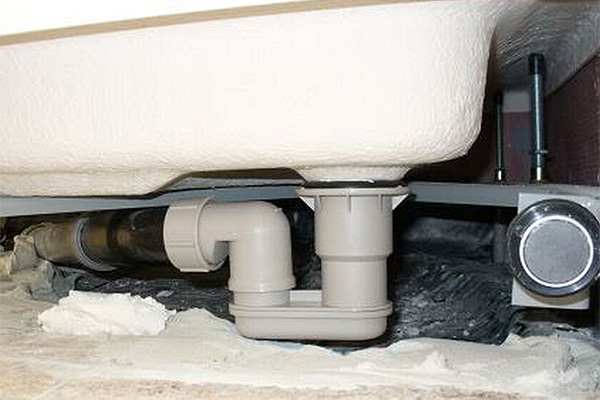
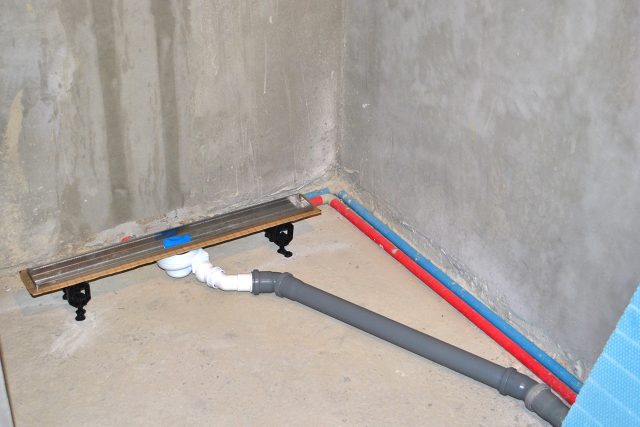
The use of a siphon is the easiest and most affordable solution for collecting and draining water. When using a pallet, the main thing is to provide access to the structure. Pipe laying should be at an angle of 30-45 degrees. The slope of sewer pipes, which will help avoid stagnation of water, is two degrees per meter.
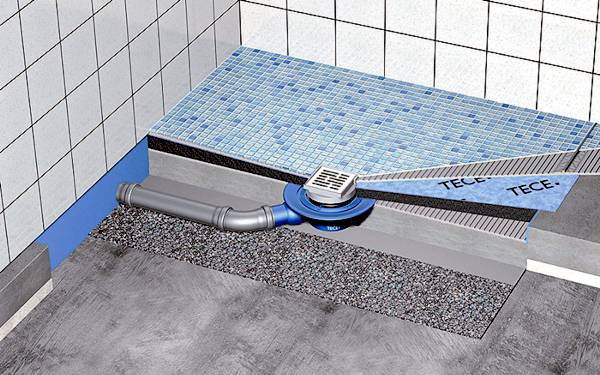
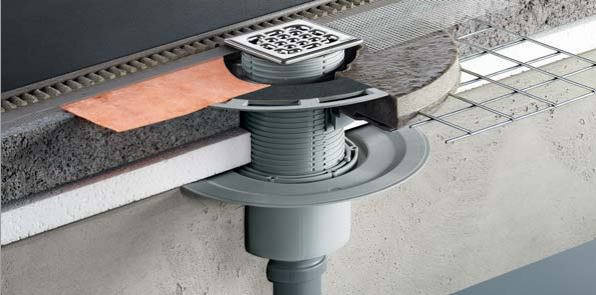
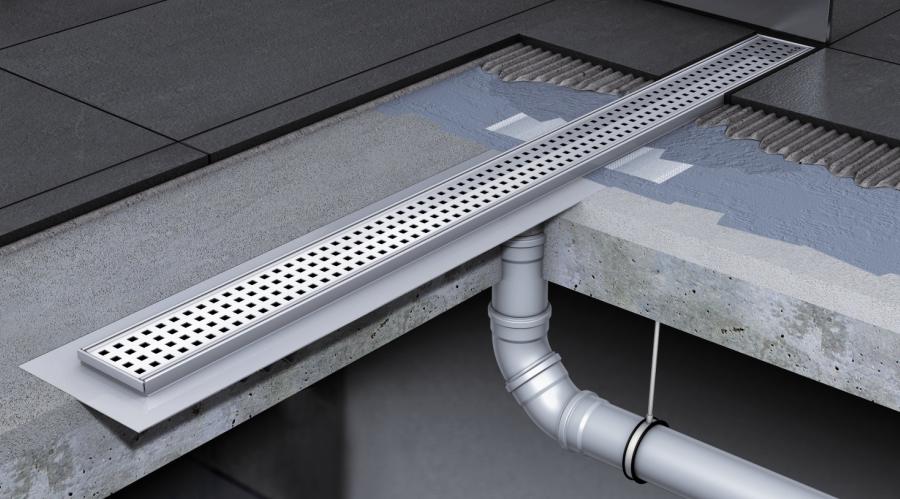
Arrangement of the ladder is considered a more reliable system of water drainage. And besides, this system takes up less space in height. When installing the ladder, it is also necessary to create a water seal that will protect against reverse flow of water and drains.

The easiest ladder consists of several parts: lattice, glass and the base itself with a hole to connect the structure with a sewer pipe. Thanks to this structure, the possibility of blockage is minimized.Due to the fact that the grille is removed, there is access to the internal parts of the device. If you make timely cleaning of parts, then you can not think about clogs. The shower stall is not a room where a lot of garbage accumulates in the drain. But if a blockage did occur, for example, at the entrance to the pipe, then it is enough to simply push it inside the pipe. When it is laid correctly, then the blockage will pass through it.
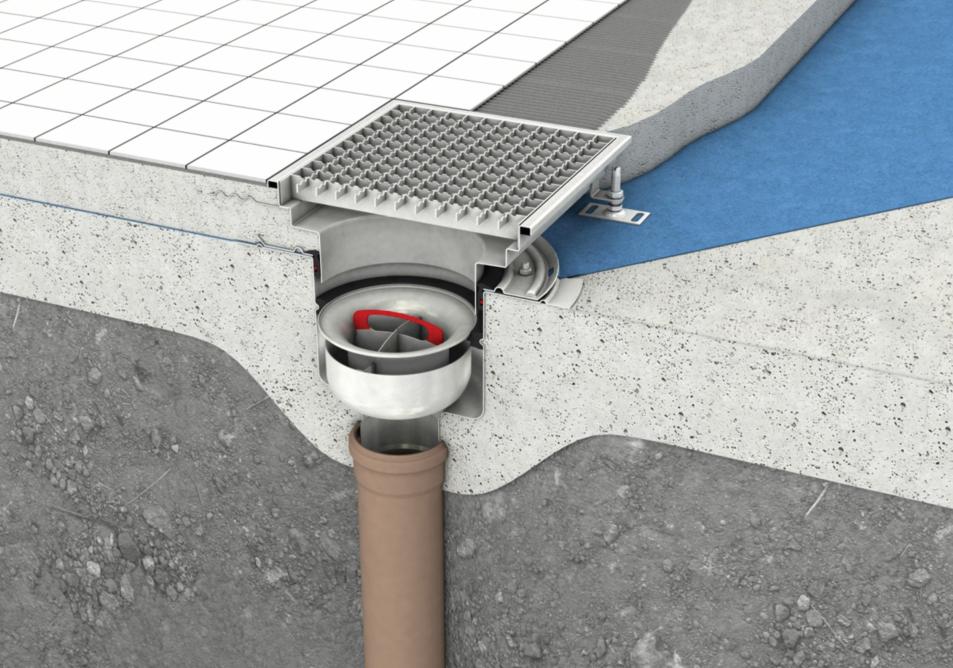
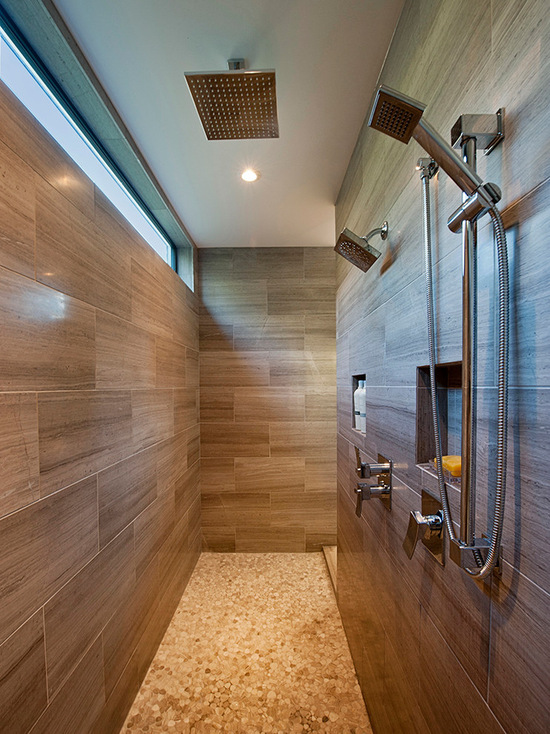
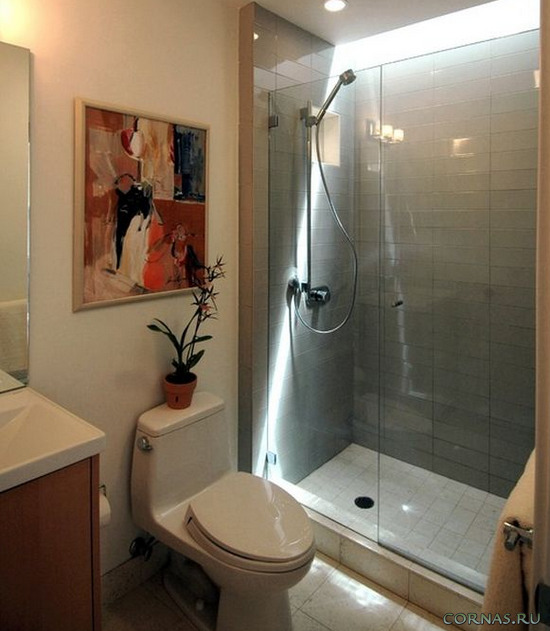
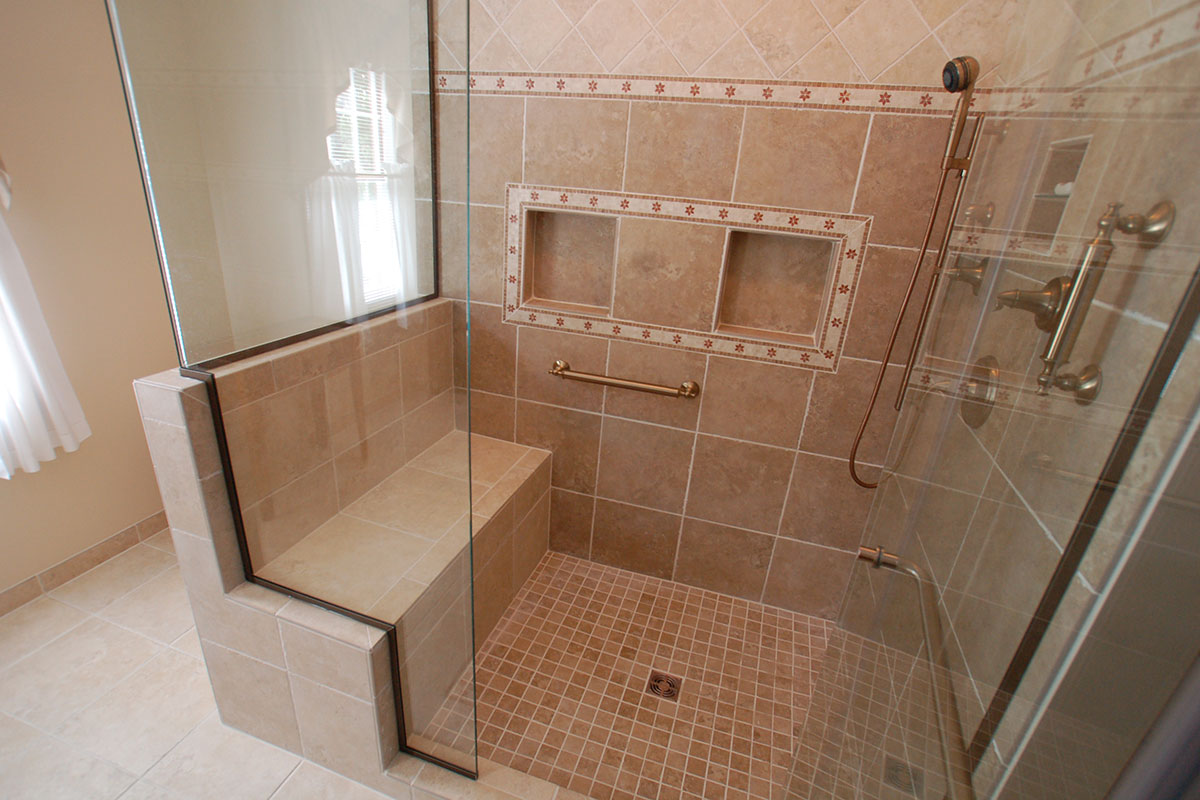
Installing a drainage channel is considered a more difficult task. But it has a large area for collecting water. The drainage channel can be mounted in walls, and also in a floor.
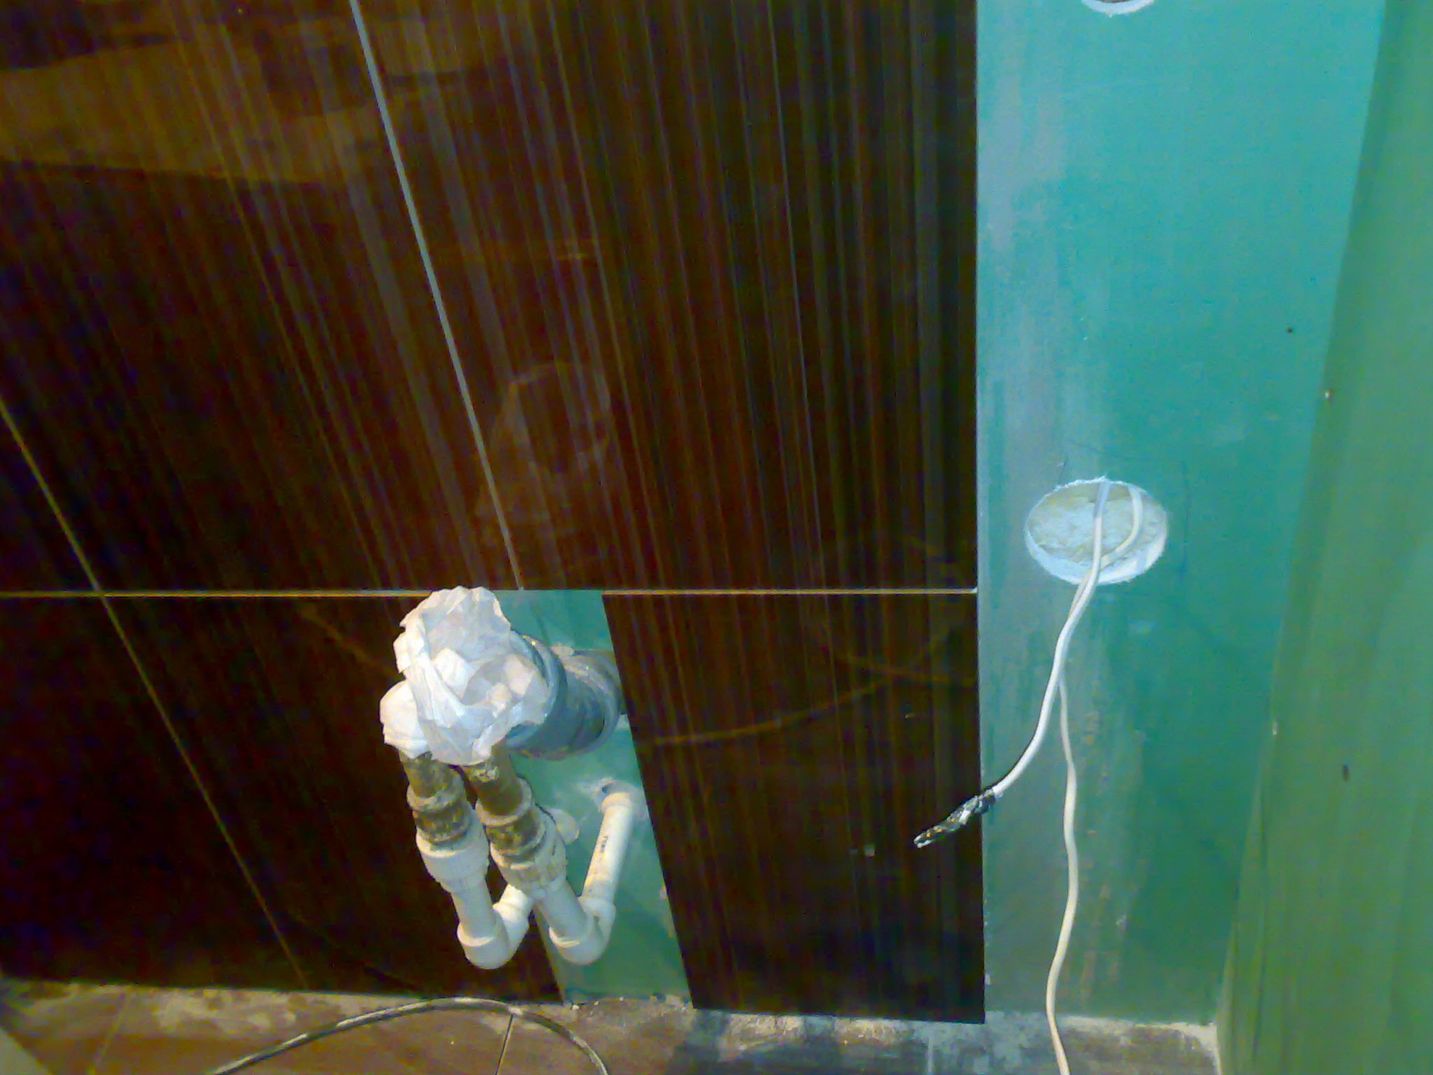
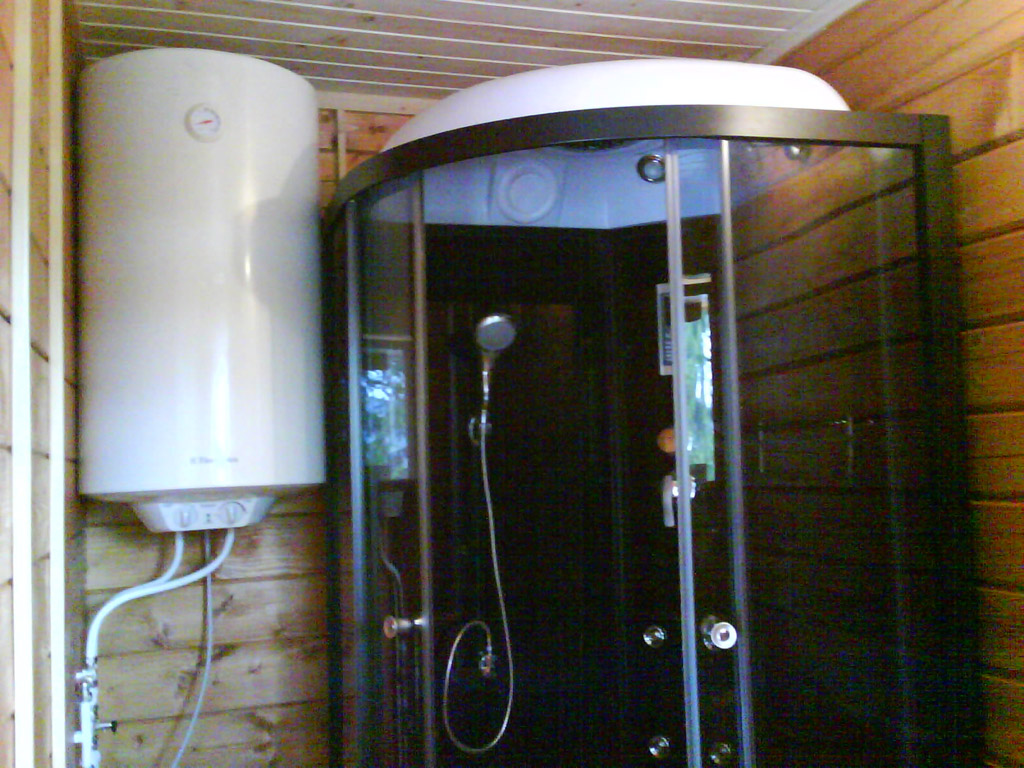
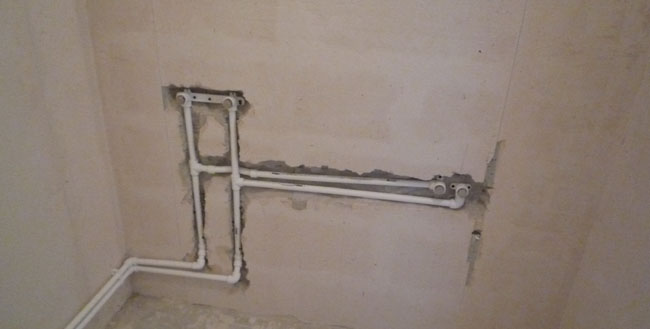
The full functioning of the shower is impossible without a specially equipped water supply. From an aesthetic point of view it is better to hide. Shut-off valves will be located away from the box in a separate niche. But nevertheless it is not necessary to wall pipes in a wall. It is best to make a strobe in a wall and, having laid pipes in it, fill it with cellulose insulation (ecowool).
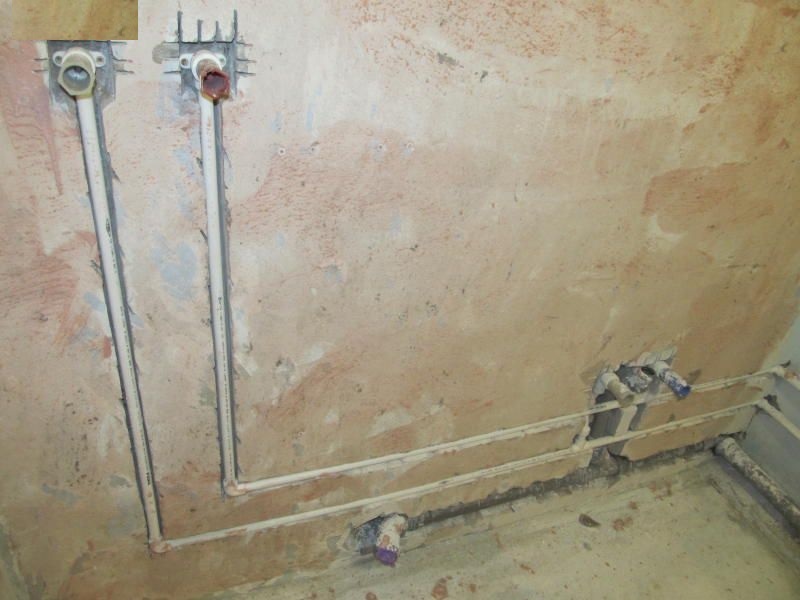
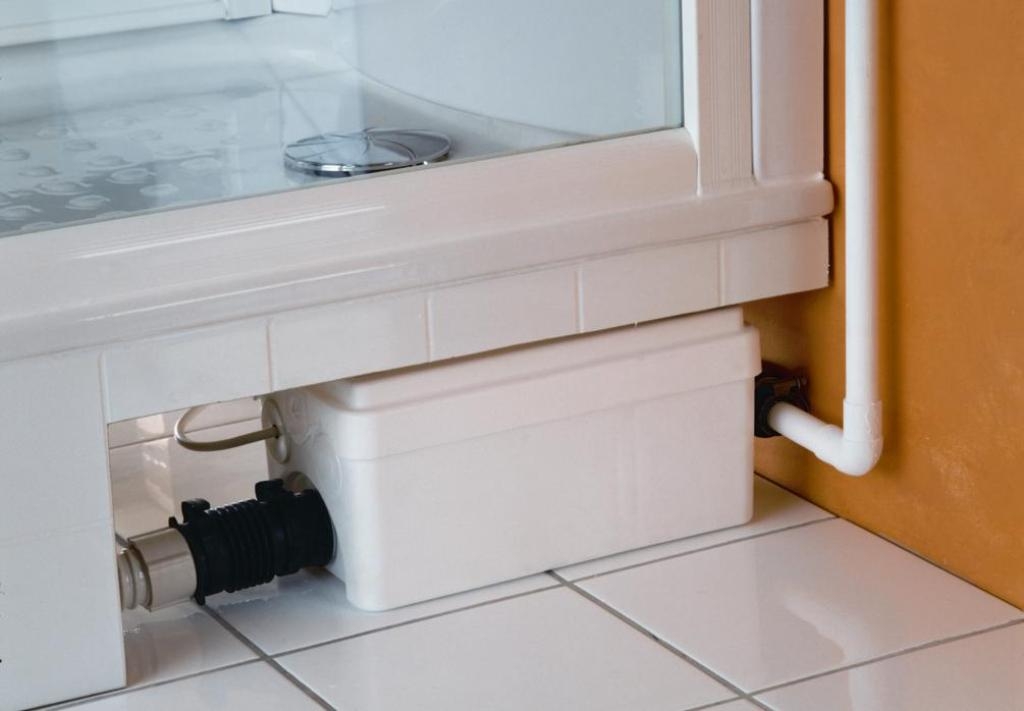
If the cabin is far from the sewer riser, then you need to take care of the sewage pump. It is advisable to install pumps with solenoid valves.
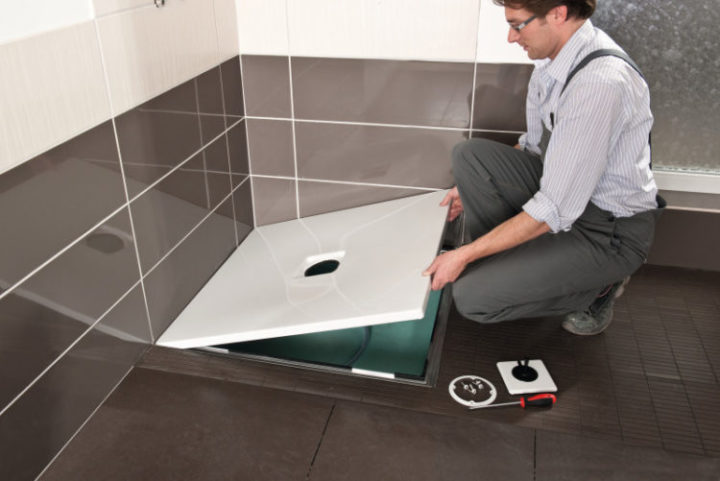
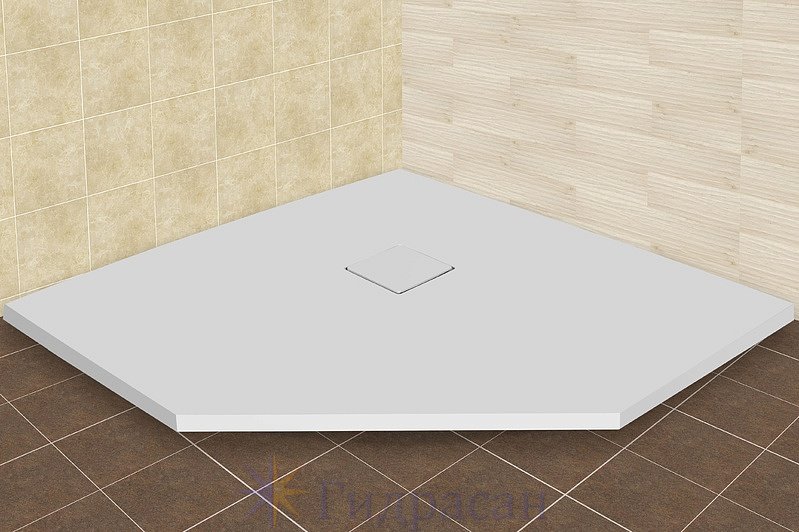
Ready pallet
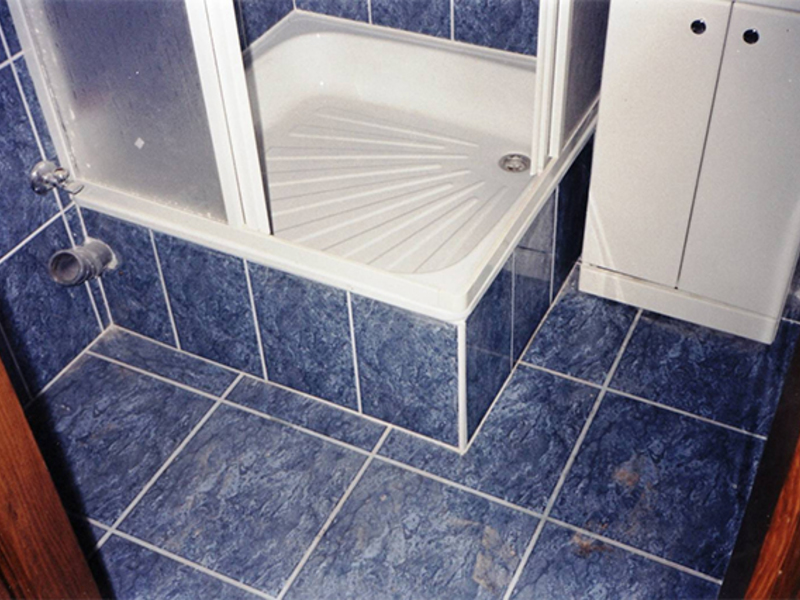
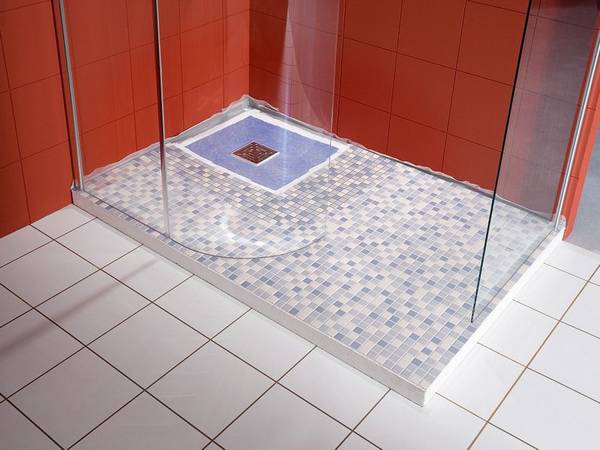
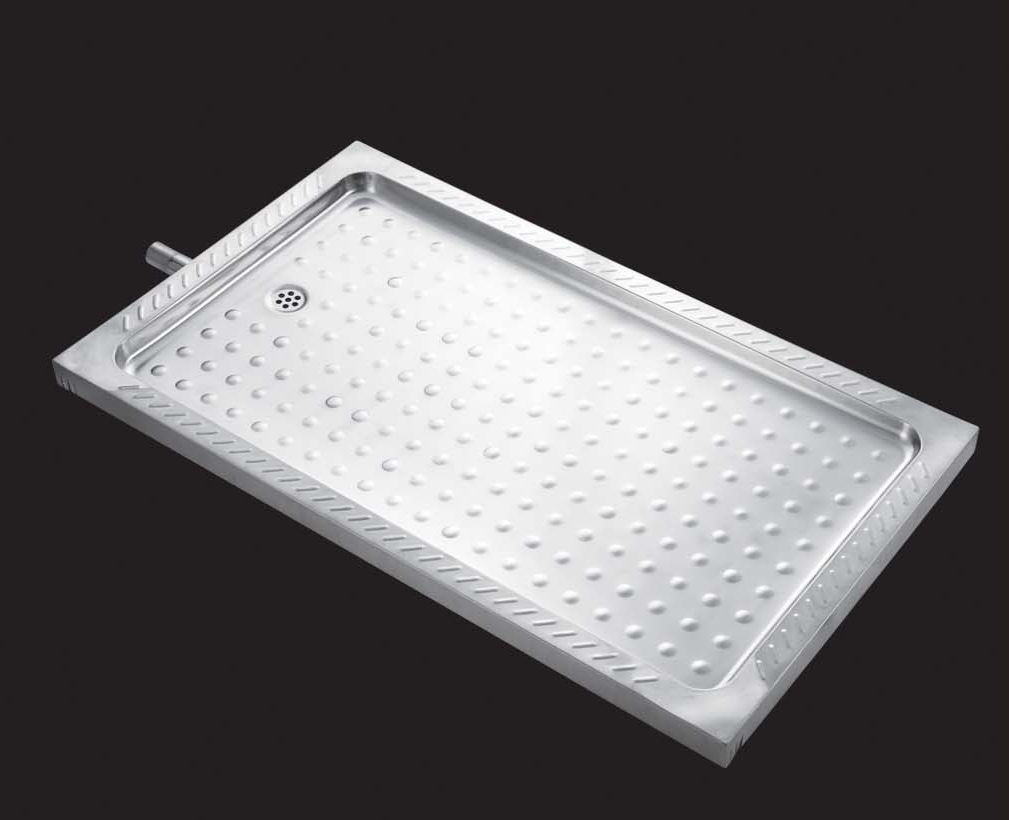
The use of the finished pallet greatly simplifies the process of building the box. It can be acrylic or enamel. Each of them has its own advantages and disadvantages. So, the acrylic tray feels warmer. But enamel - non-slip.
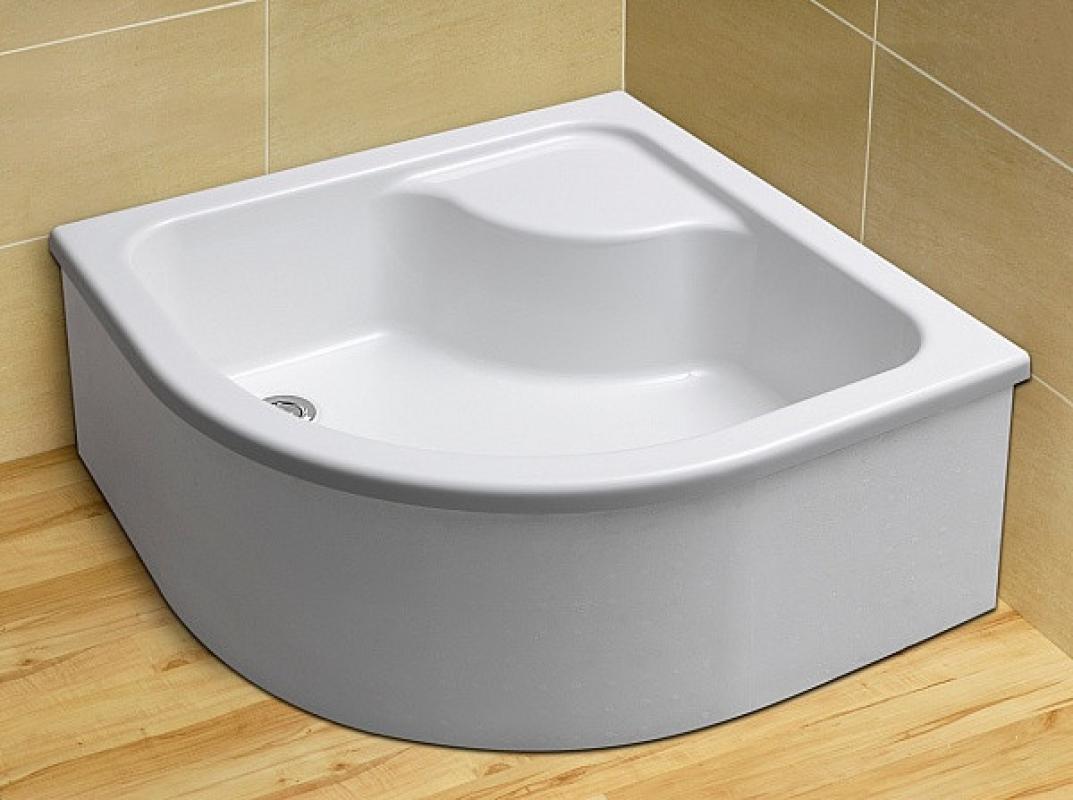
In addition, there are also pallets made of copper, ceramics, glass. But such options are quite expensive, although they have several advantages.
The main disadvantage of any pallet is its standard. It is difficult to choose the finished product on its own individual sizes.
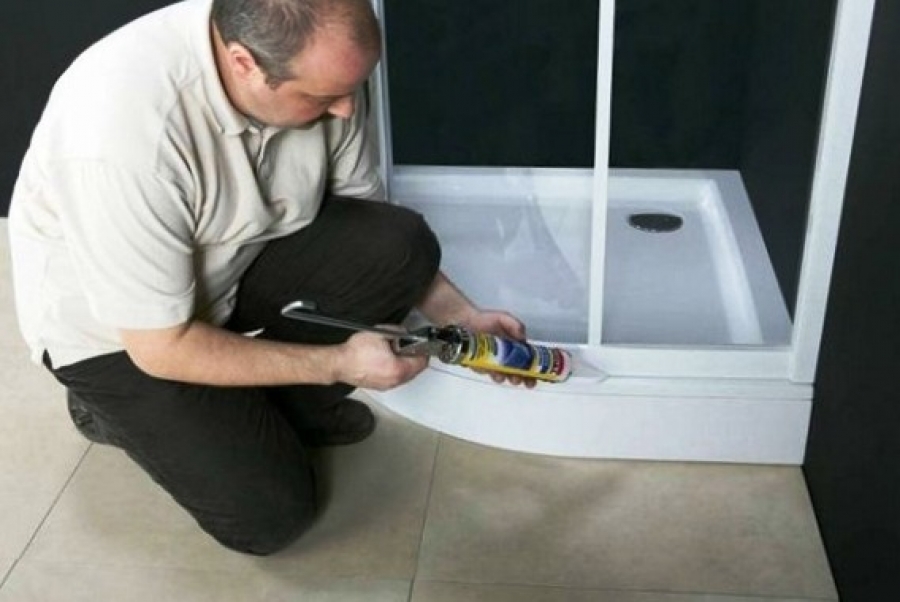
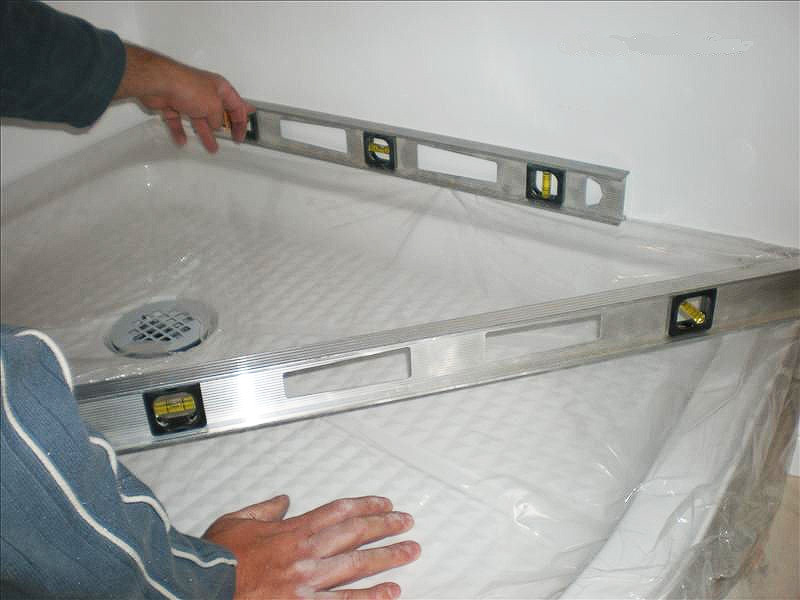
Installation of the finished pallet is as follows:
the first step is to level the base on which the container will be placed, and a roughing screed is made;
pipes are laid and plumbing is installed (ladder or siphon);
the finished product is installed and fastened.
Do it yourself
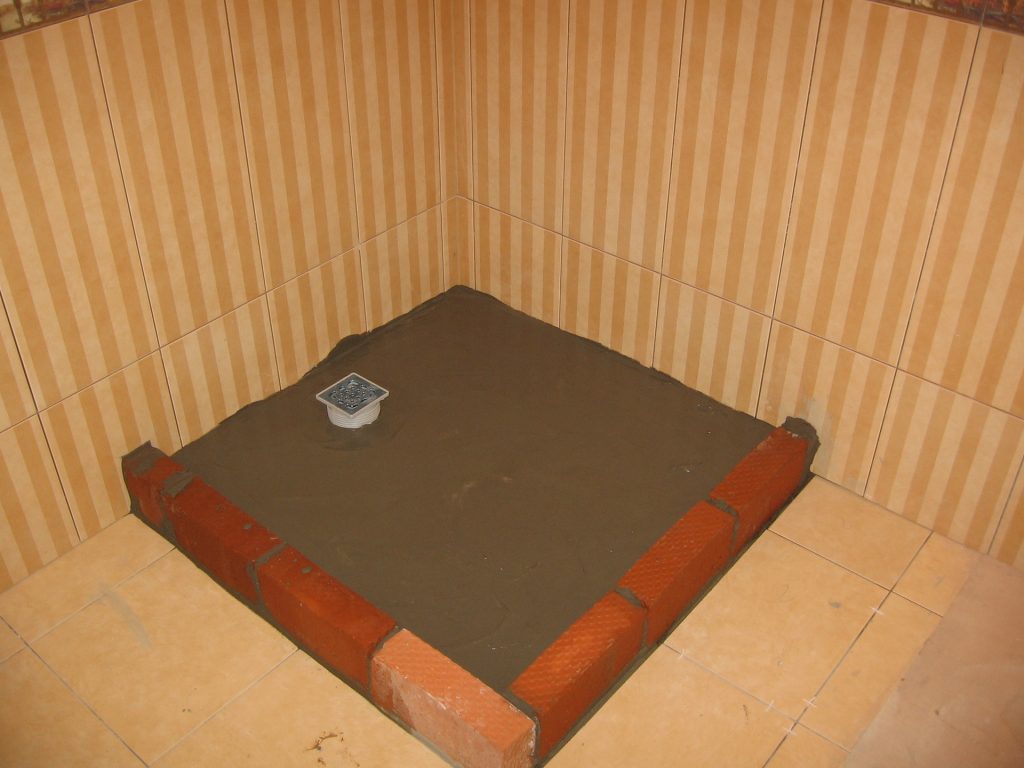
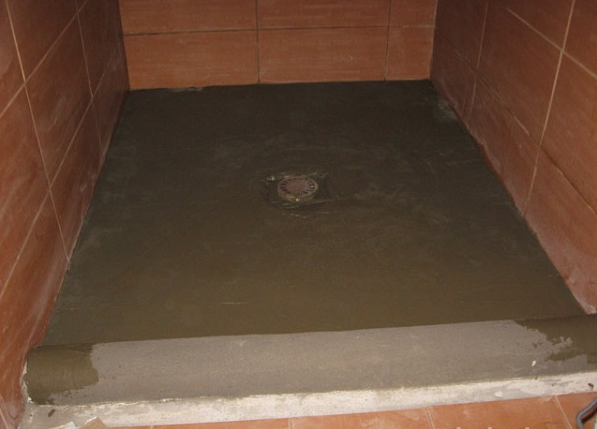
The self-made pallet is made of bricks. It is also possible the construction of the frame and its further plasterboard plasterboard. But the use of bricks is safer. For his laying use cement with special additives.If such additives are not at hand, you can add PVA glue or water glass to the solution.
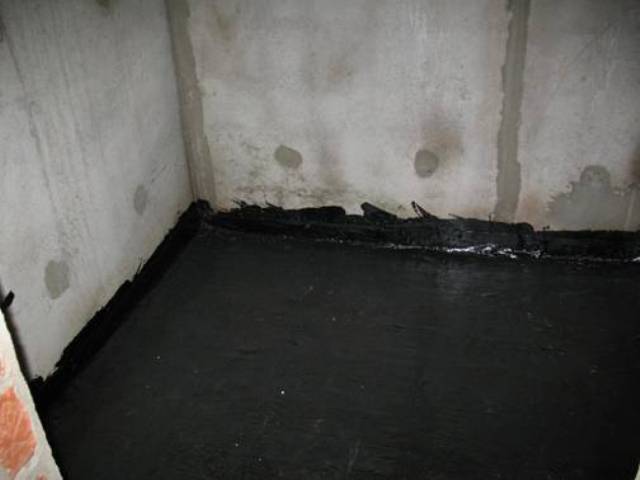
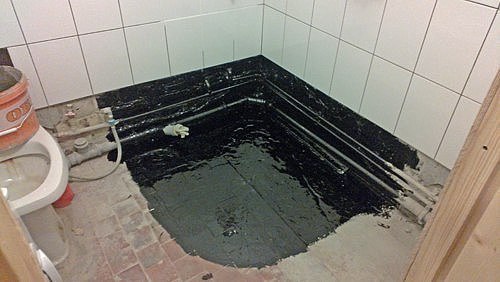
When the contour is laid out, you can take care of the draft screed. After that, cover waterproofing in several layers. For these purposes, usually used bitumen mastic. If you need insulation, the screed is placed in several layers - a small layer of cement mortar, insulation, screed, it is necessary to smear each layer with waterproofing.
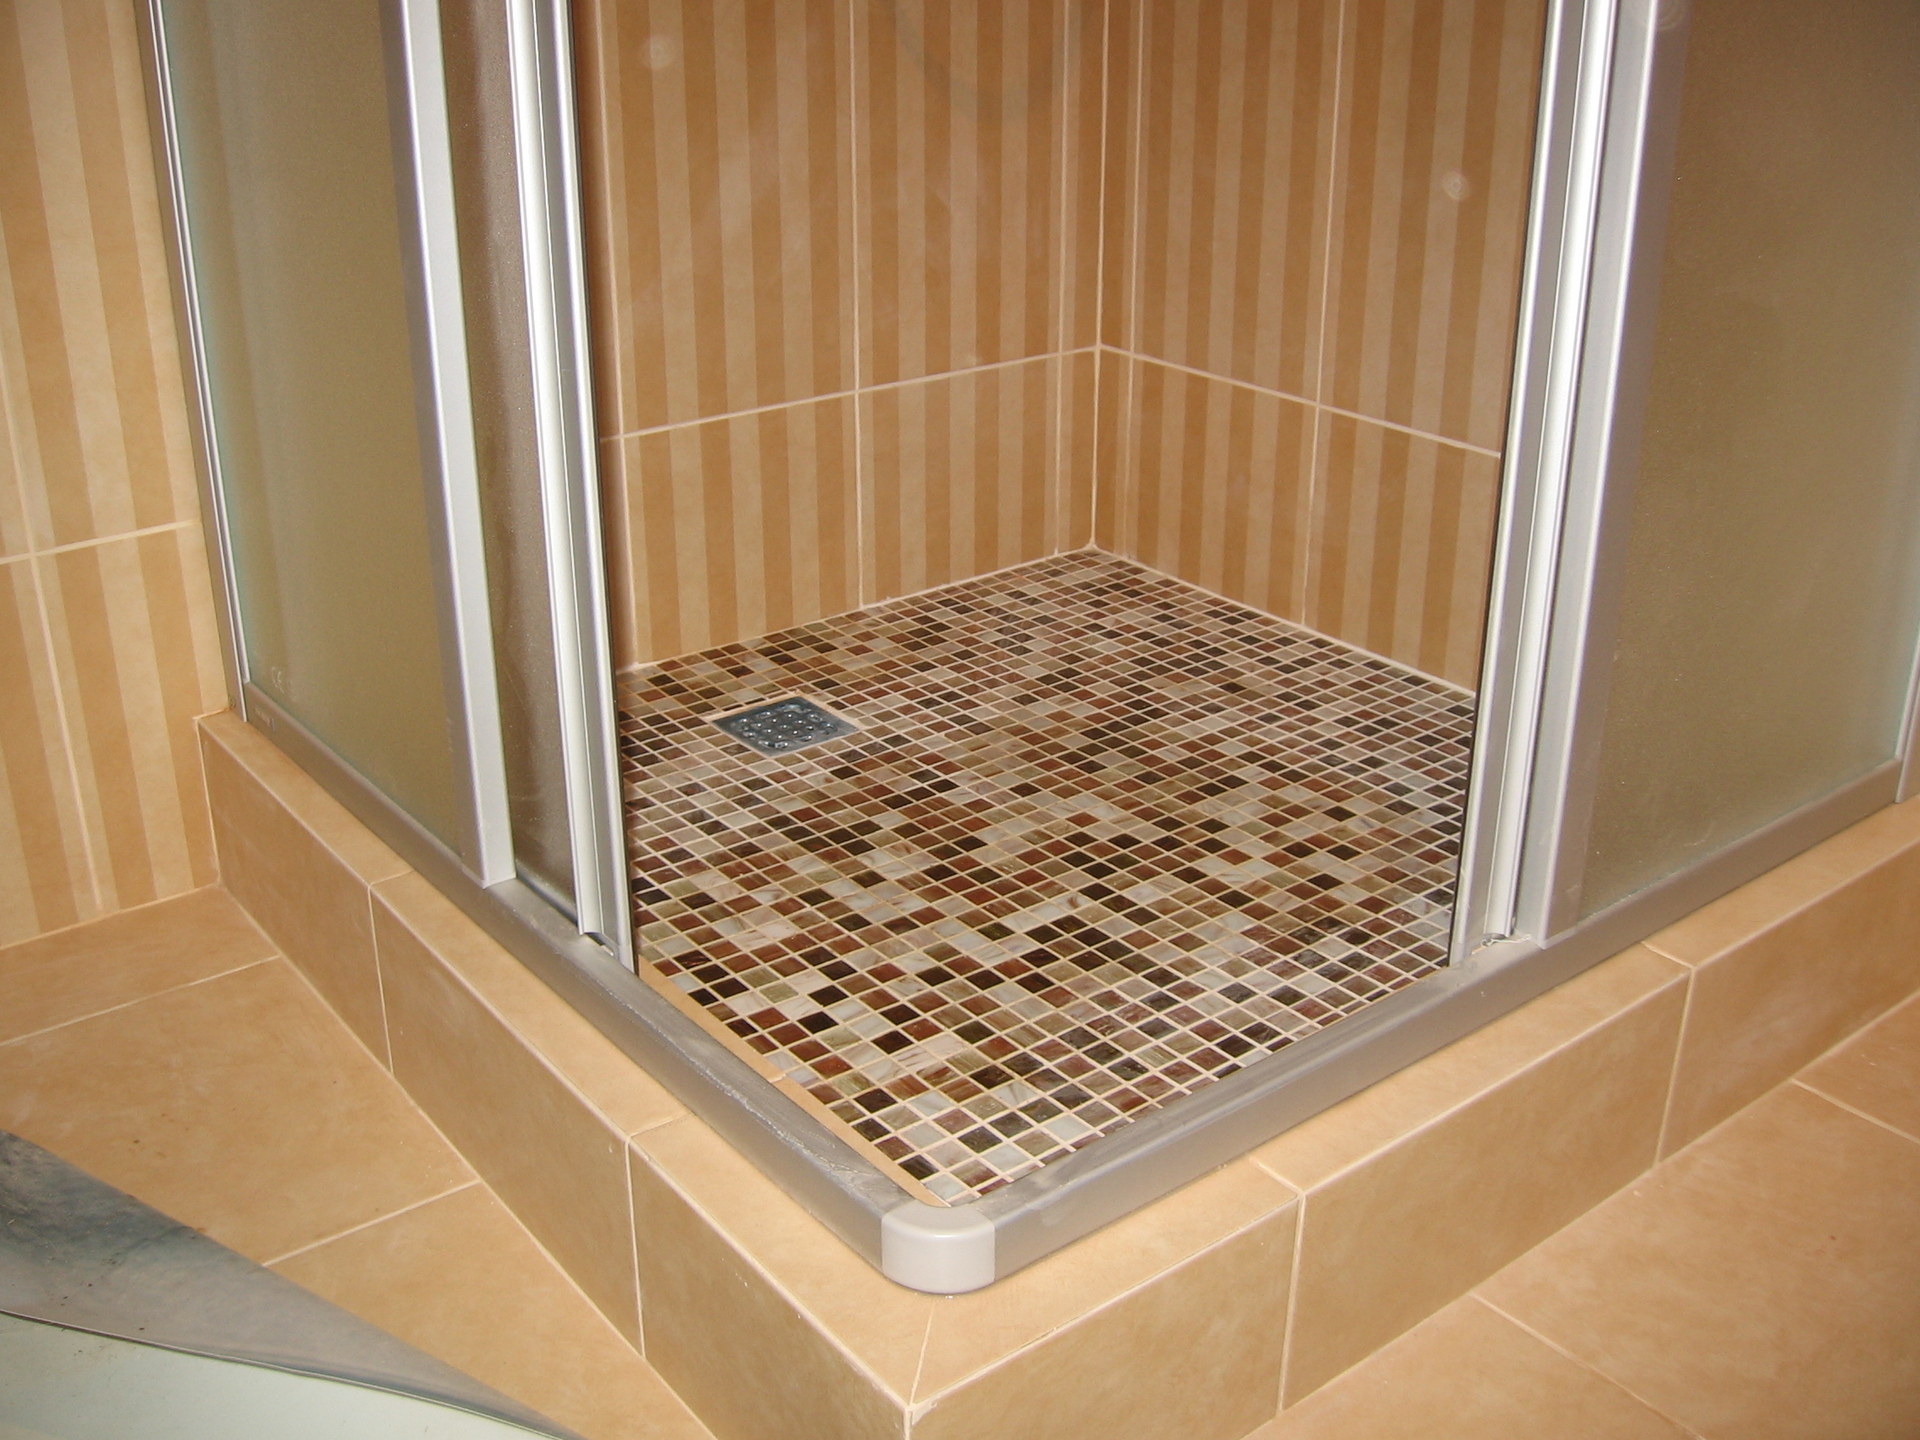
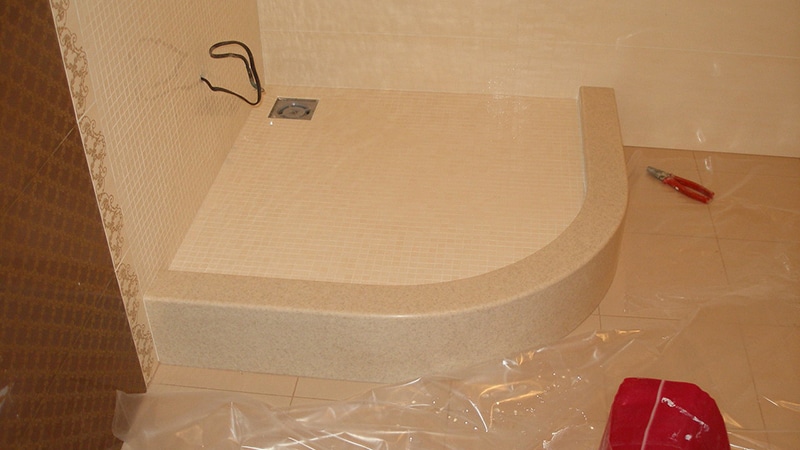
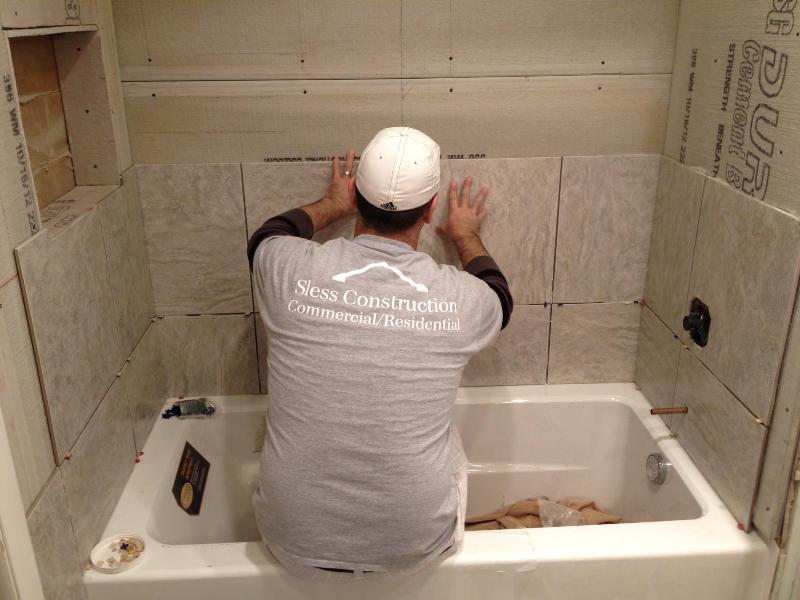
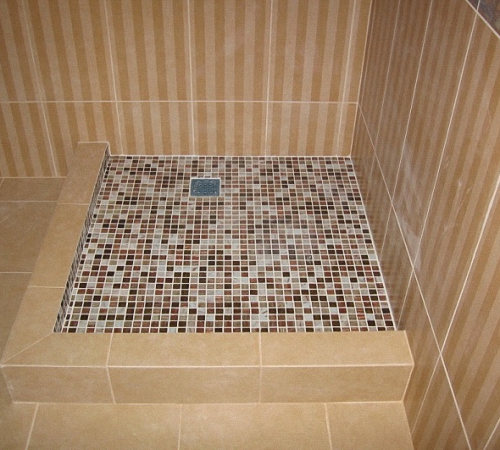
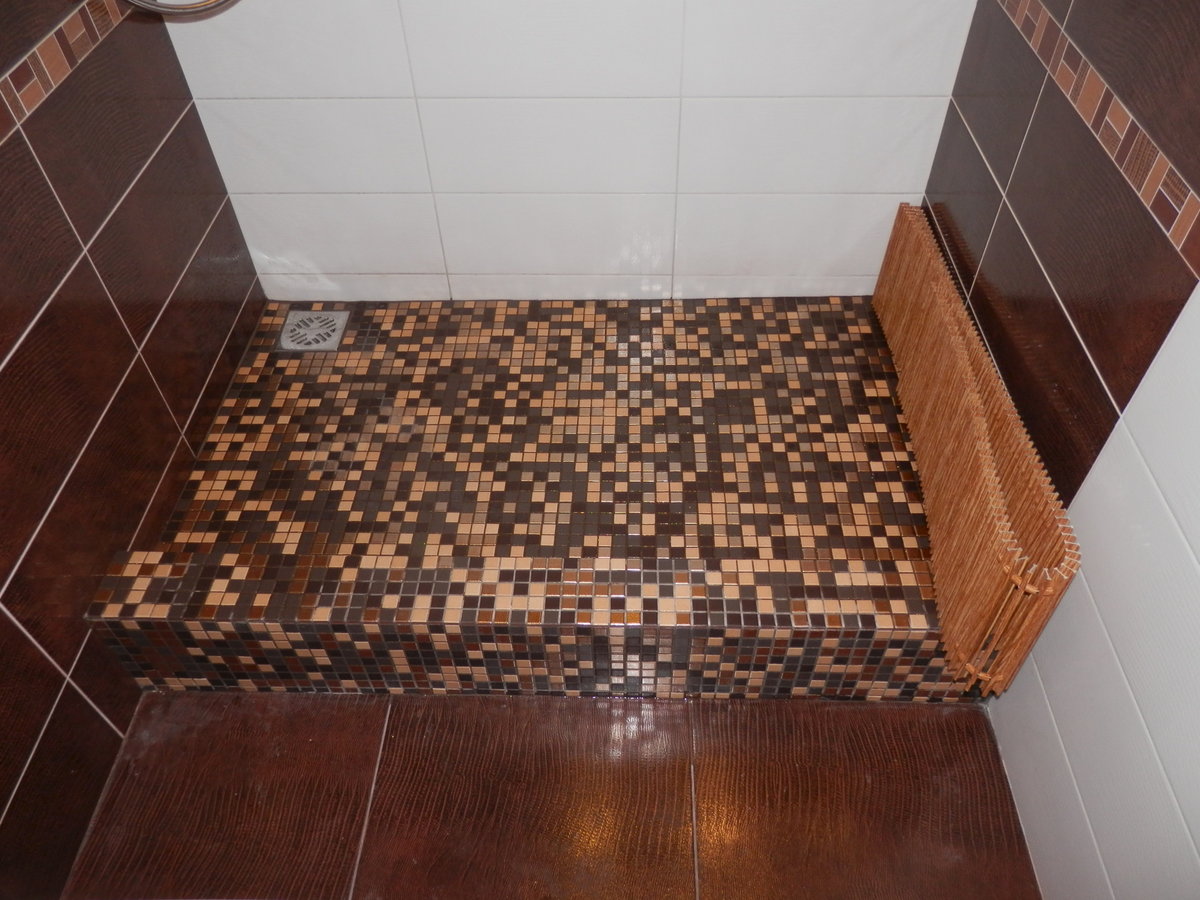
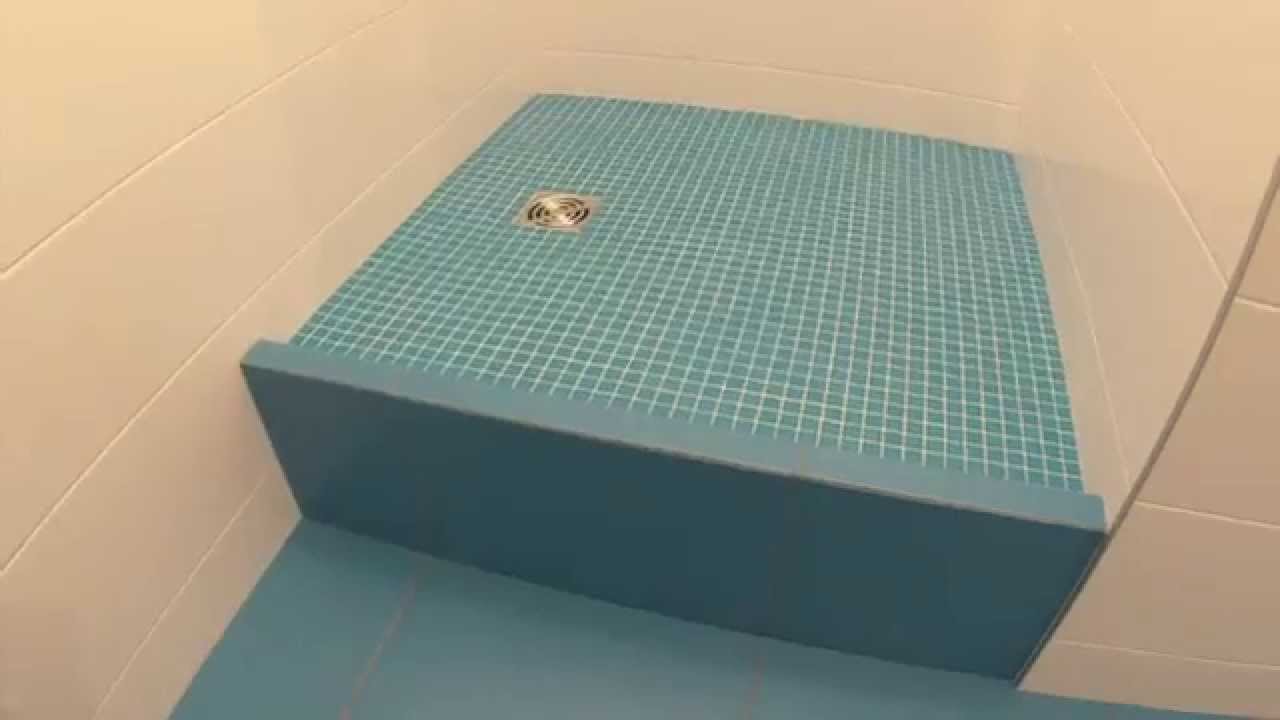
The final layer will be tiled - tile or mosaic. They provide anti-slip coating. The layer of adhesive should be small and in its composition, of course, should be additives that increase the resistance to moisture.
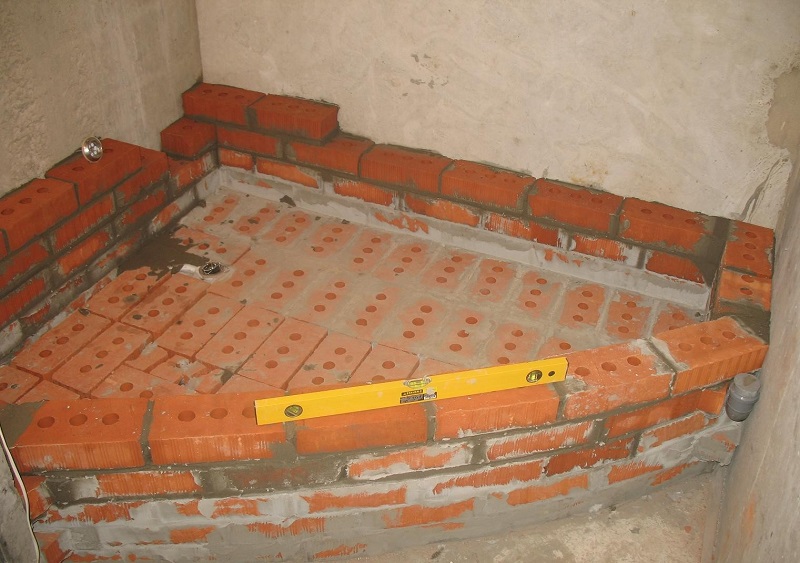
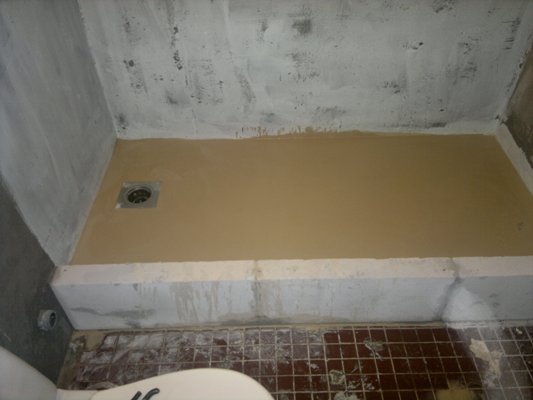
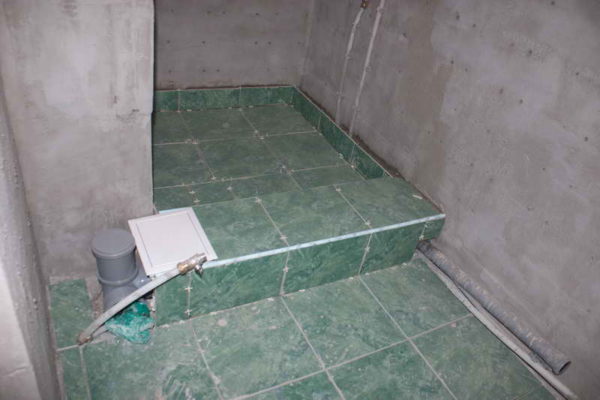
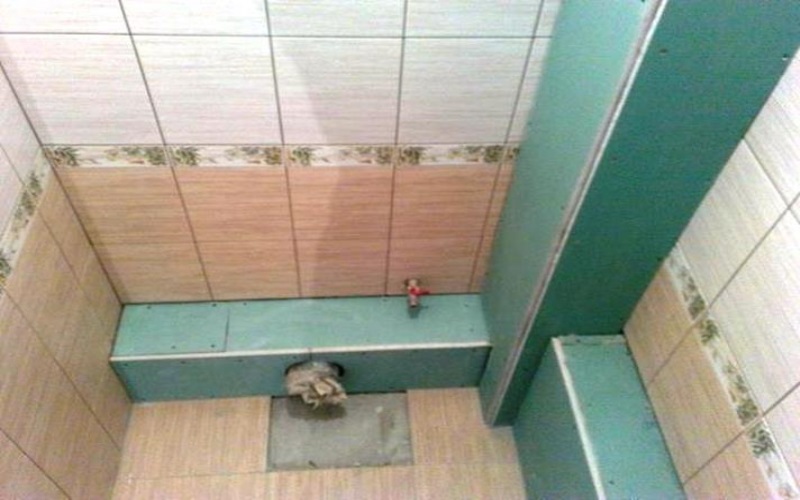
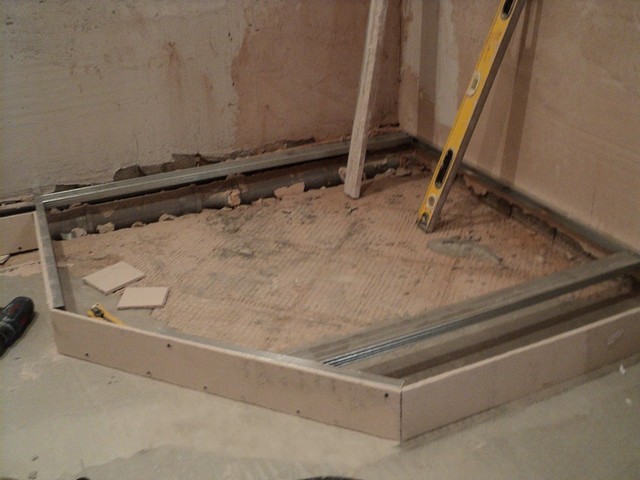
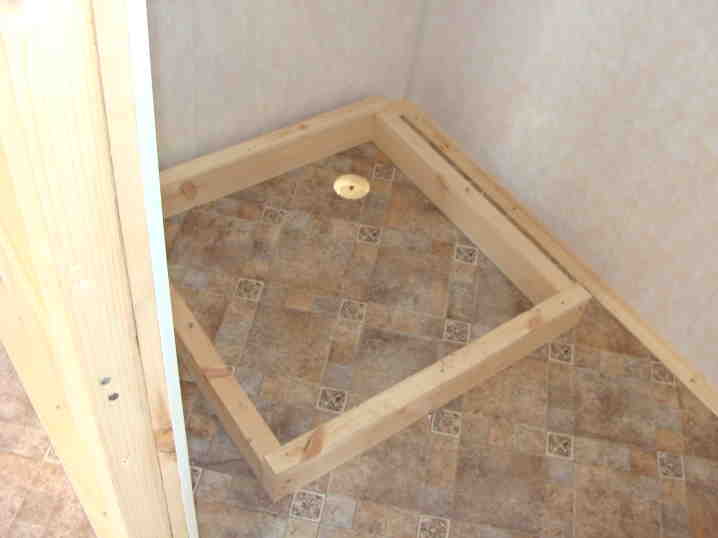
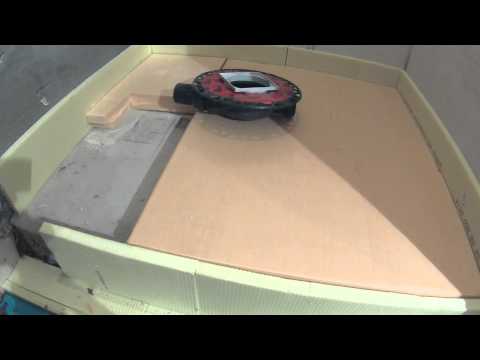
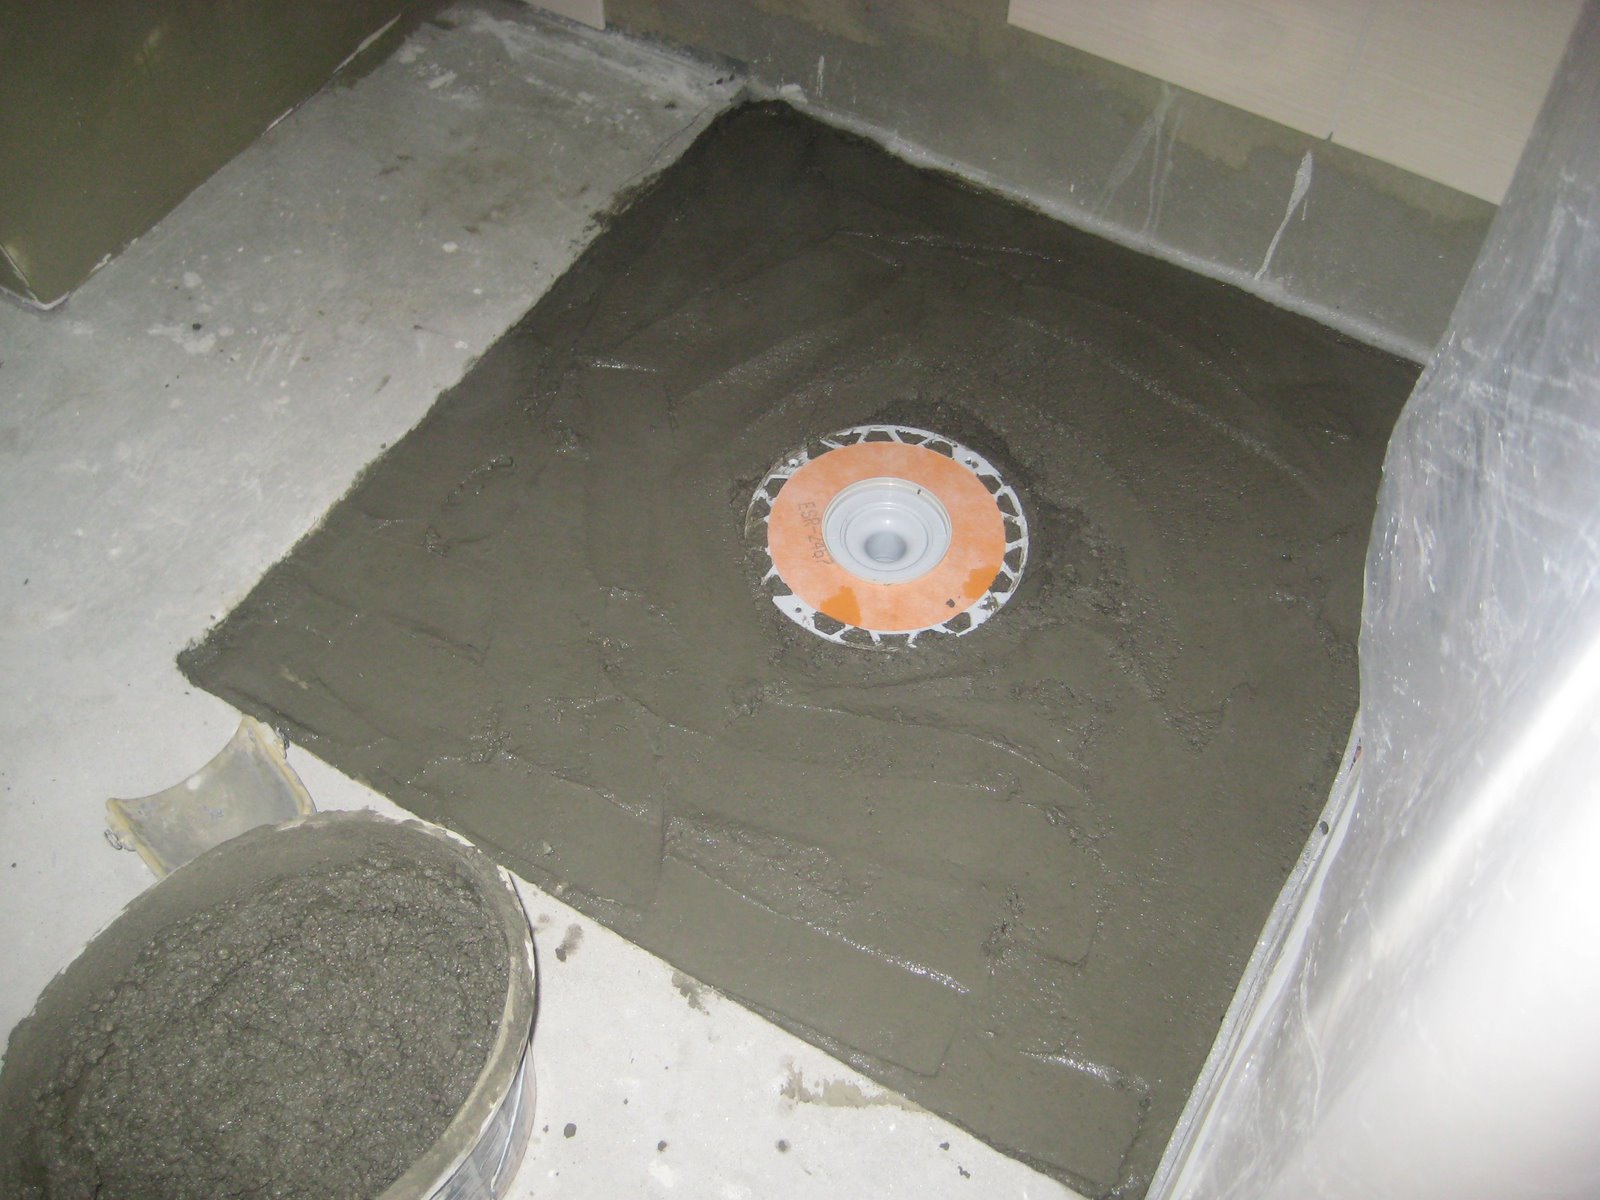
The construction of a homemade pallet begins with the manufacture of a frame, formwork or a small brickwork. A ladder, a funnel and pipes are installed in this space. For your information: the height of the wall of the pallet must be such that after it is faced, the drain knee and concrete screed can fit there and at the same time observe the slope. During the work it is necessary to protect plumbing and the ladder as much as possible from falling into the building debris.At the time of work, you can plug it with a newspaper or other paper. You should not neglect the waterproofing and, having built a formwork or a brick side, it is necessary to walk it in several layers along the walls to the height of the future screed. In the brickwork it is worth laying mounts for racks if glass (plastic) fences inscribed in a metal frame are planned.
When the concrete screed has dried, you can proceed to facing the sides and the floor. And if up to this point has not been provided with a slope for water, then it can be done through finishing work. It is necessary to reduce the thickness of the tile adhesive. The closer to the funnel, the smaller the layer.
Some points regarding a homemade monolithic concrete tray:
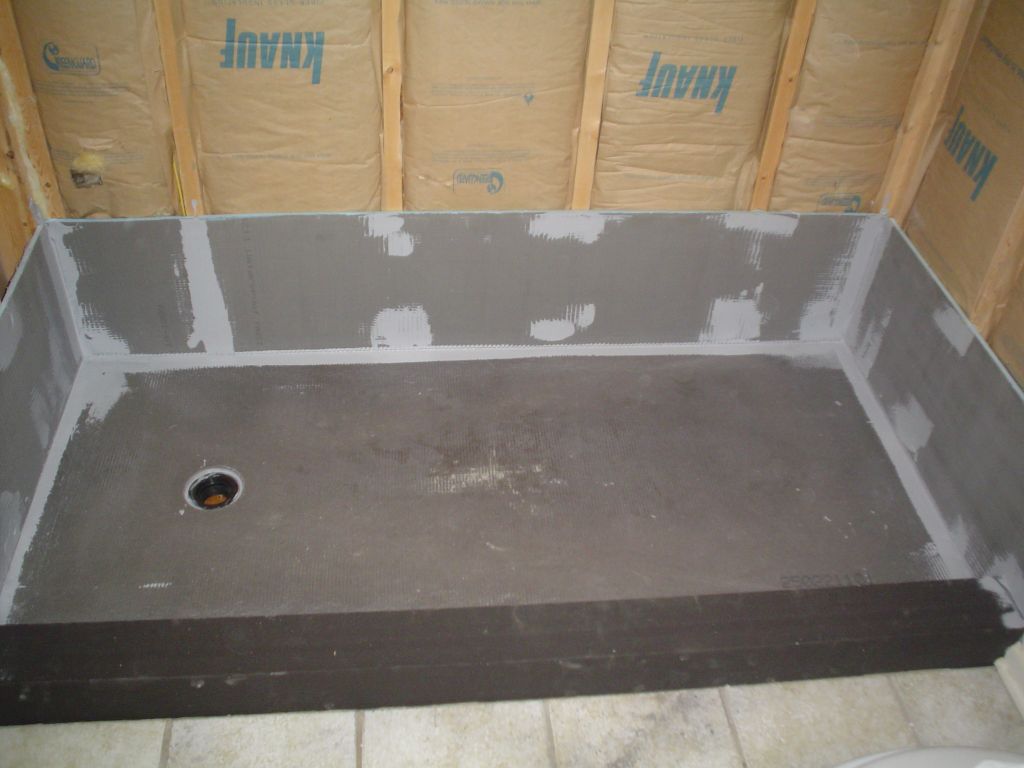
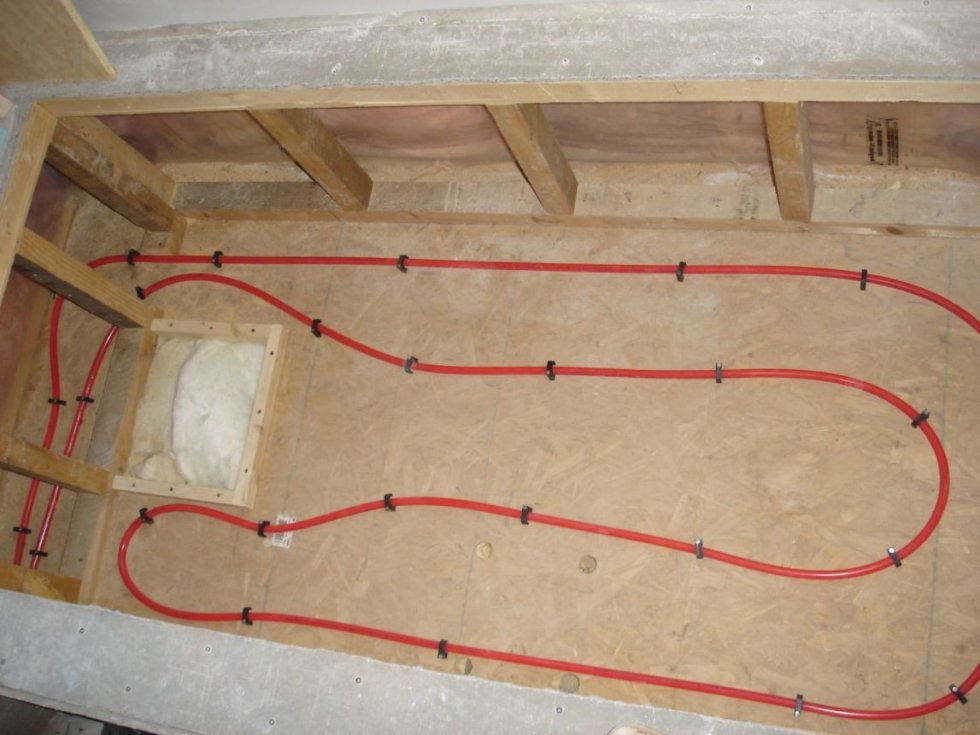
For the concrete tray, insulation is simply necessary, you can also make floor heating (but this is a matter of taste and individual preferences).
In the process of creating such a pallet, waterproofing in several layers and with sizing around the perimeter of a waterproofing tape is also necessary.
After the waterproofing layer is a layer of insulation along the walls. In addition, a damping tape is also laid along the perimeter.
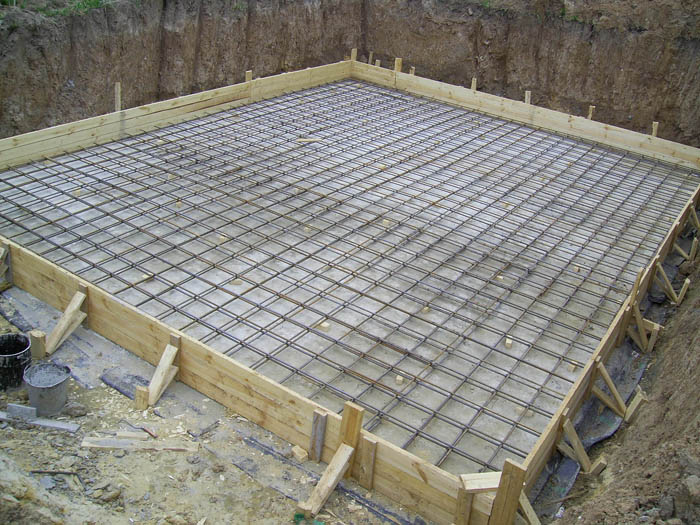
Next, polystyrene is laid, the thickness of which is more than 5 cm. Joints must be connected with reinforced tape.
This is followed by a metal grid with a 1 cm cell.
After the beacons are set, the slope is being formed, first half of the mortar half the height of the screed. Moreover, the solution itself should contain a minimum of water. After that, the second half of the solution, which is prepared according to all the rules, is placed. It can be leveled by the rule.
When everything grasps, there is a layer of coating waterproofing, and then lining ceramics. When constructing a hydrobox in a multi-storey building, it is worth splitting the tie layer into two, and waterproofing each layer.
On how to make a homemade shower tray, you will see in the next video.
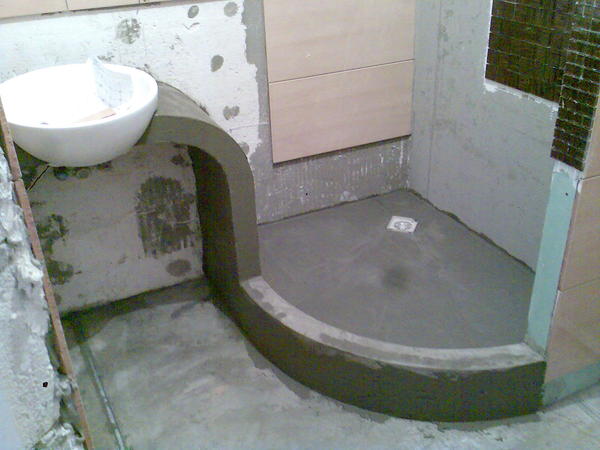
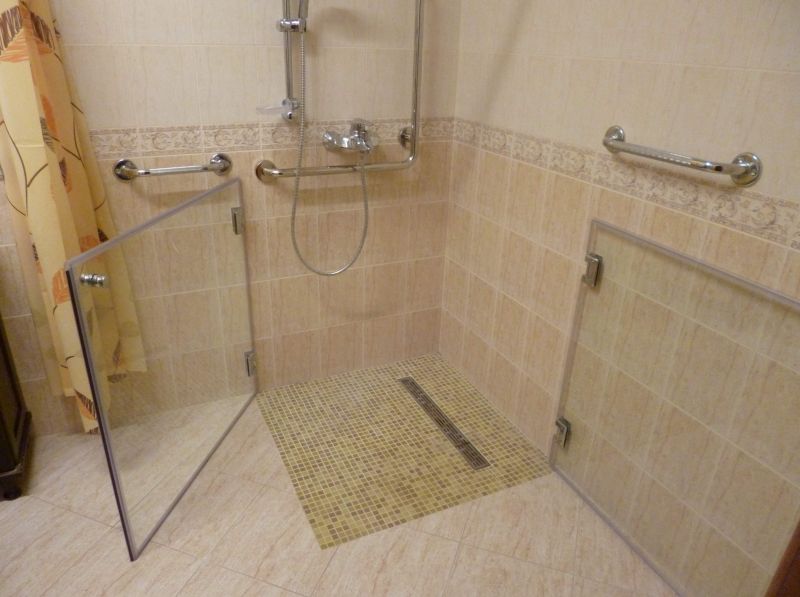
Without foundation
The construction of the correct space for a shower stall without a tray begins with the construction of the field. The main thing with its arrangement is to provide a small bias, literally a couple of three degrees, not more. The drain system will be hidden. But it is worth remembering that it is necessary to form a chute with a grating with the ability to access it.
The design of a barrier-free space is best done when a screed is formed in the room. It is easier to determine the height around the perimeter of the room.
The first steps in this direction will be the installation of sewage and communications.
After is the design of the perimeter of the washing area. A dividing box is being constructed at this site. With it, it will be much easier to bring the level of the main floor to 0 degrees. The basis for the booth can be done when the main screed of the room has completely dried and grabbed. The slope angle in the wet zone is small - by 1-2 degrees. It is worth considering that when arranging a warm floor screed is created in two steps. The first layer is reinforced, waiting for setting, and then heating mats are placed on it. On these mats is applied a second thin layer of solution suitable for this purpose.
When the rough floor is ready, it is necessary to make a waterproofing. After it is already possible to proceed to the finishing work.
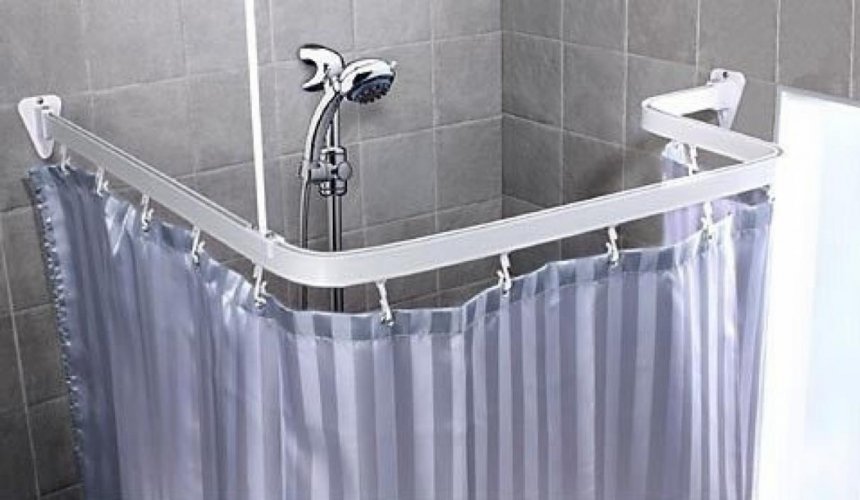
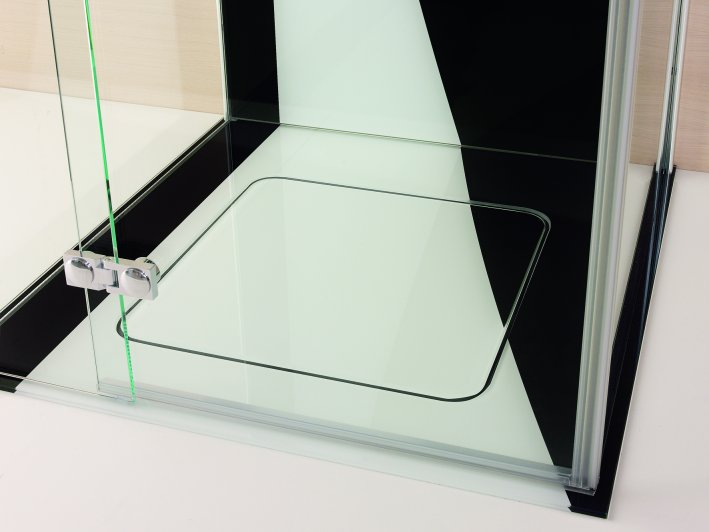
Making a corner and installing fences
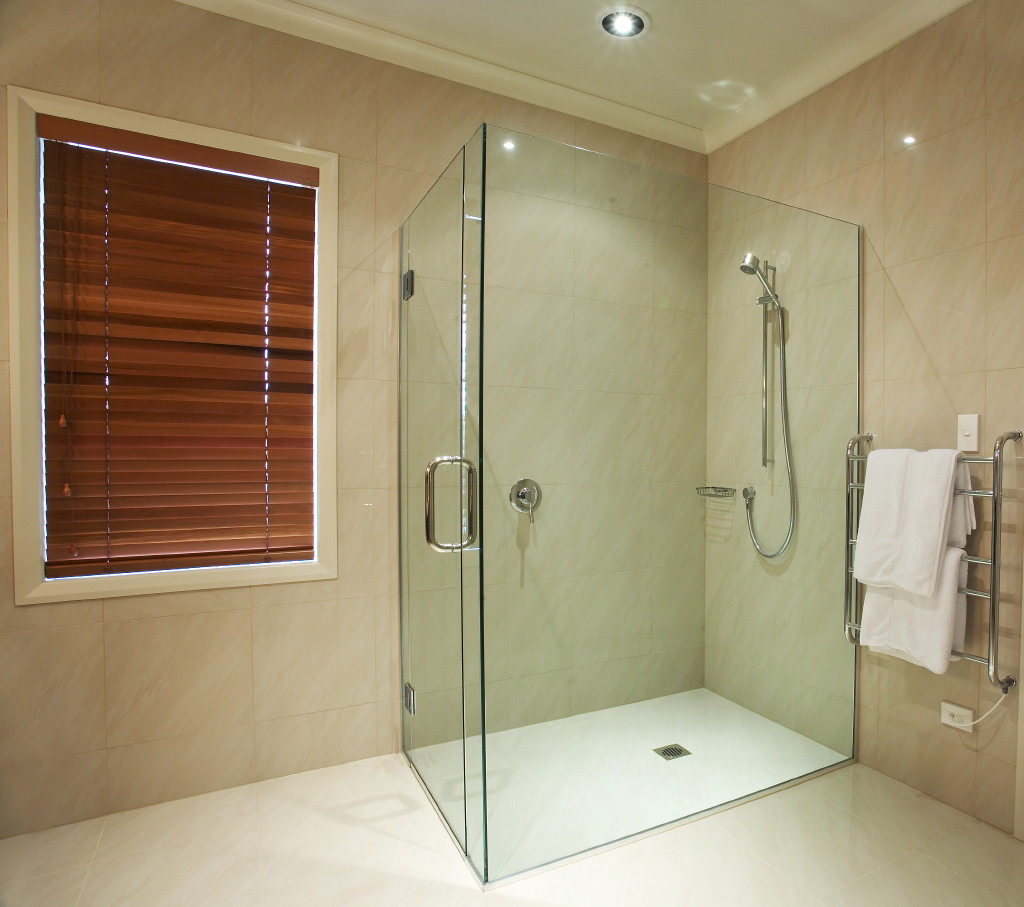
Shower cubicle in terms of construction of the most simple. In fact, it is built into the corner, that is, the erection of the inner walls is not required. You only need to think about where to place the hood. As a rule, it is made on the inner walls.
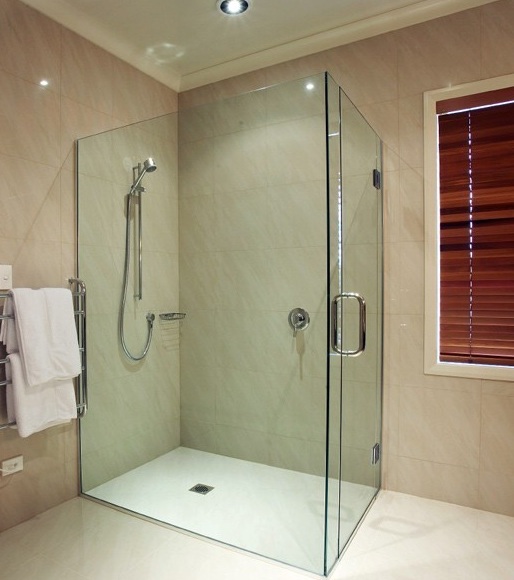
Usually the walls are made of tempered glass, covered with a special film, which protects against splinters. In a private house or on the street, the option of erecting glass fencing is quite acceptable. They are made of glass, which means they will transmit light, but they will not shine through.
Even as a material for the construction of partitions and fences, polycarbonate has proven itself well. His undeniable advantage is that he can be given even the most intricate curved shape. With it, the corner booth can be framed in a semicircle.
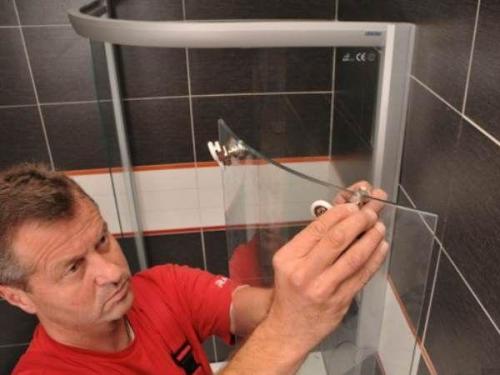
A glass cabin is unthinkable without doors. Built-in doors can be swinging, sliding, and there are options with the installation of door-accordion. To install them, a certain set of fittings is required, which is attached to the frame.
All of these materials have good performance and can provide decent waterproofing.
To build fences, you need to build a frame into which the main materials will be embedded - glass or plastic.
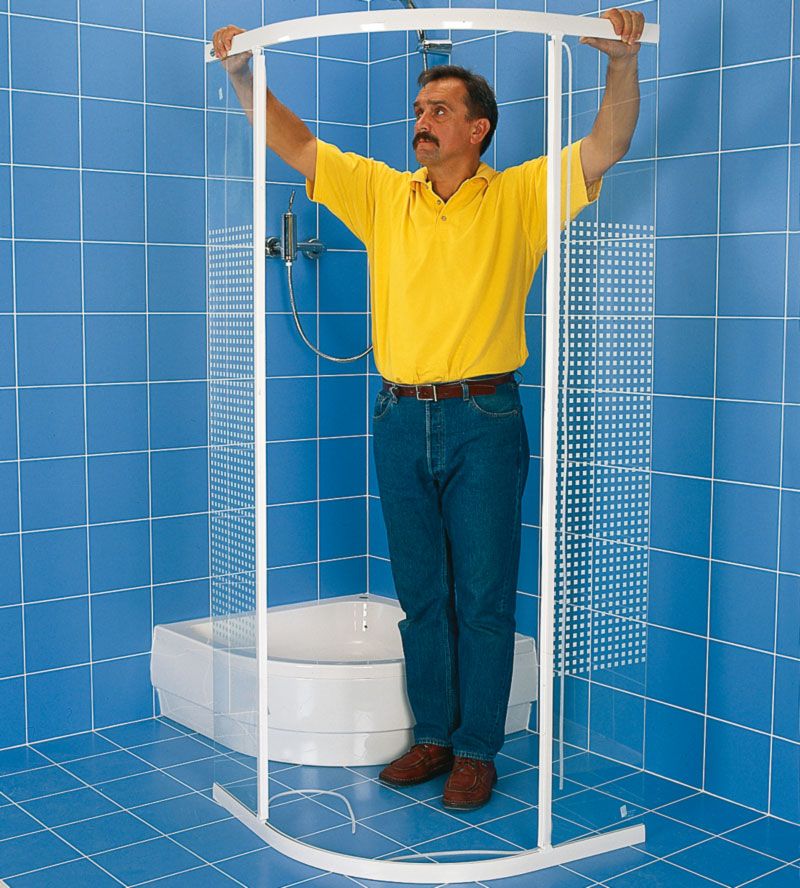
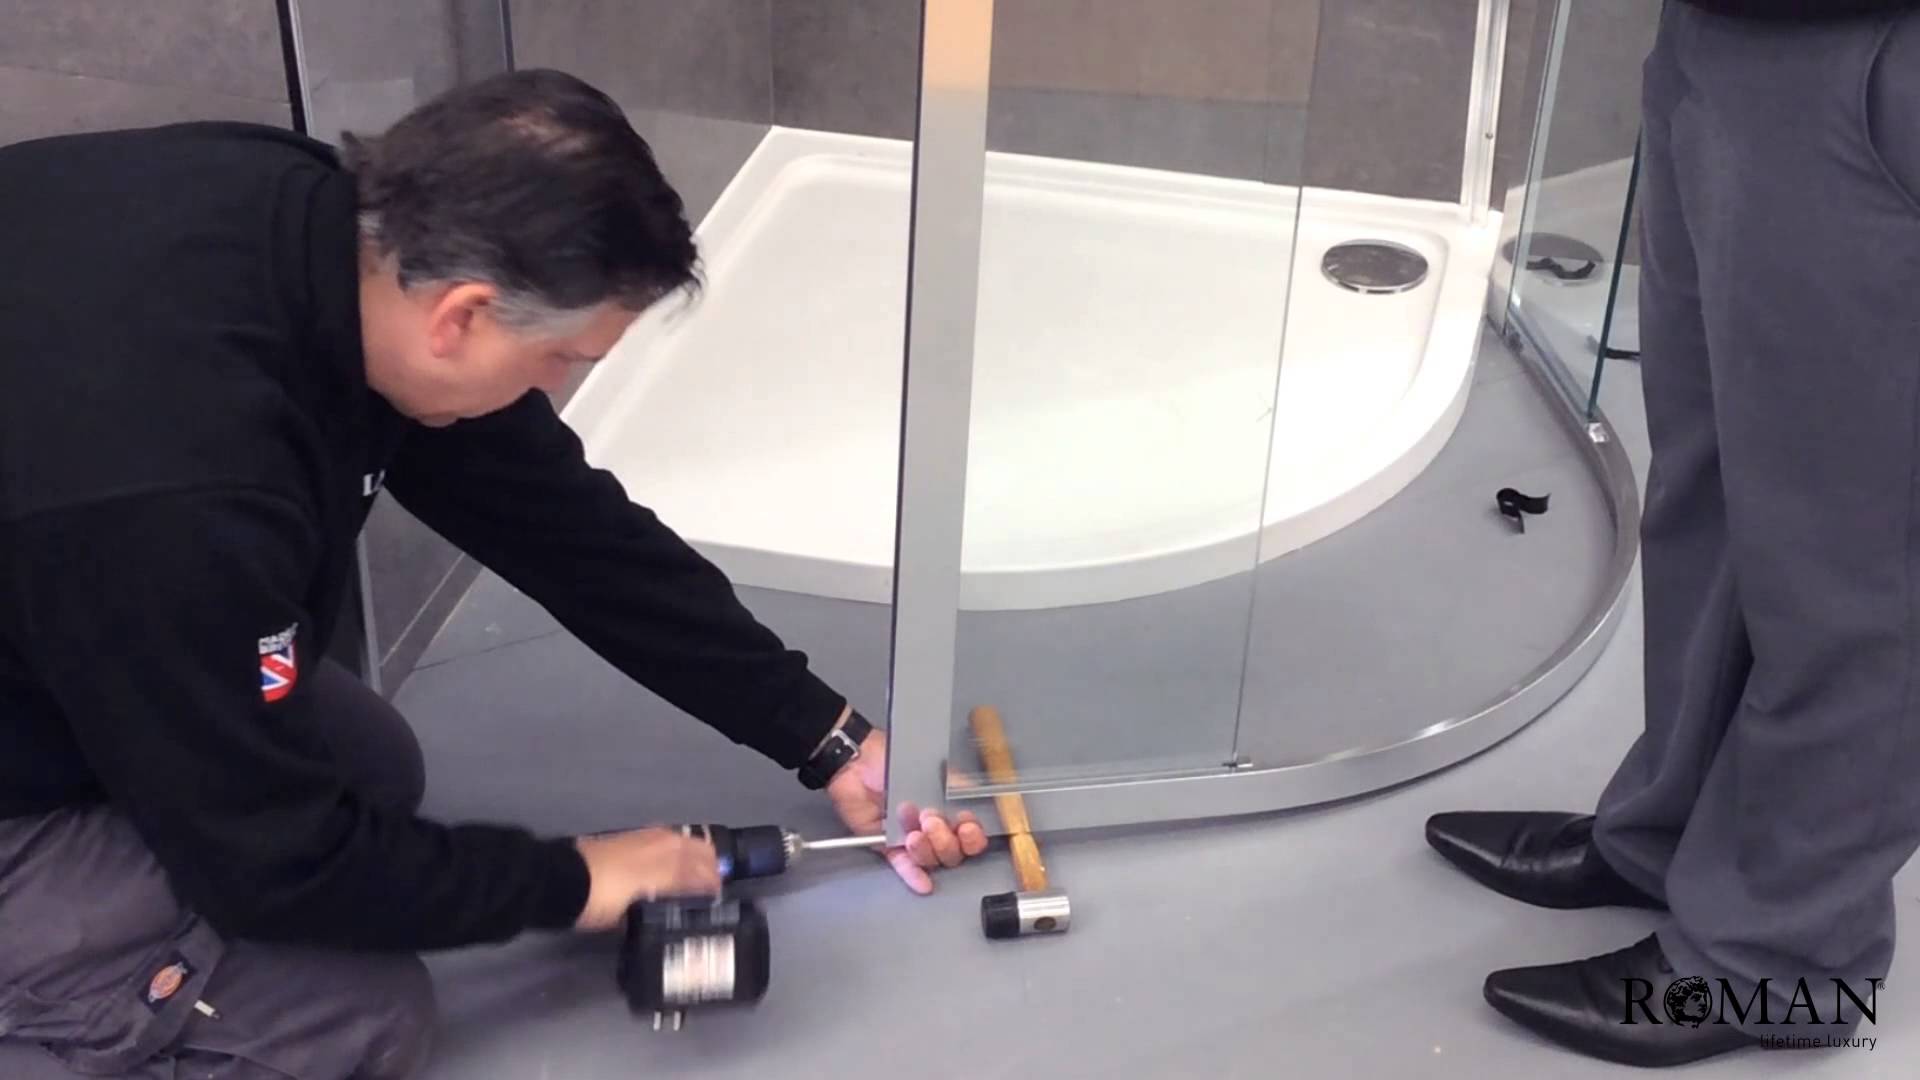
You can assemble a corner or a simple cabin with a pallet as follows:
First make the frame. As a rule, such a structure is made of metal profiles, angles, guides. It will securely hold a fairly heavy glass or plastic. But if there is no need for a heavy frame and a light material is used, then its analogue can be made, for example, from nickel pipes.
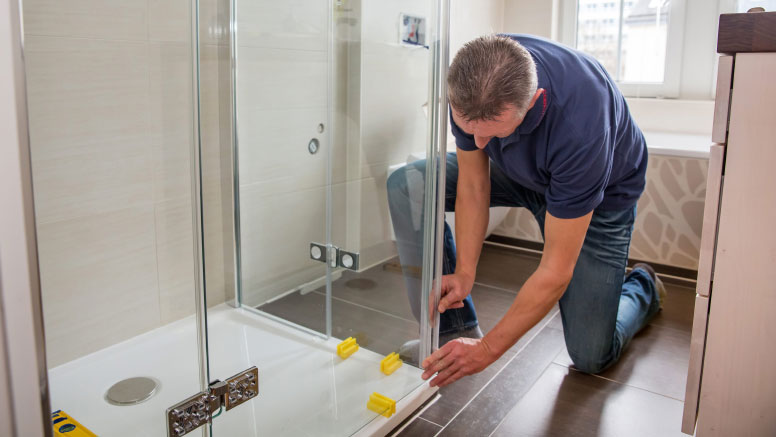
Install the wall profile on the edge of the pallet, align it vertically. Mark drilling points for subsequent profile fixing.
In the hammerless mode of drilling to make the required holes. Install the dowels in the holes and mount the profile.
Hang the wall panels. The seal should not interfere with the free closing, but at the same time it should fit well to the base.
Fix the doors and walls.
If you need to build a barrier-free space, then you need to know that to do it right is not an easy task. The main thing here - the installation and installation of the floor. But on the other hand, such a booth will for a long time please with its modern design. In it you can conveniently arrange the shelves, equip with a seat, put a good shower with the effect of massage.
The sequence of works is as follows:
drill holes for mounting frame parts;
secure profiles;
install partition walls with seals;
next is the fastening of the door frame;
installation of special fittings and installation of the door (s);
sealing the booth - all seams are treated with silicone sealant.
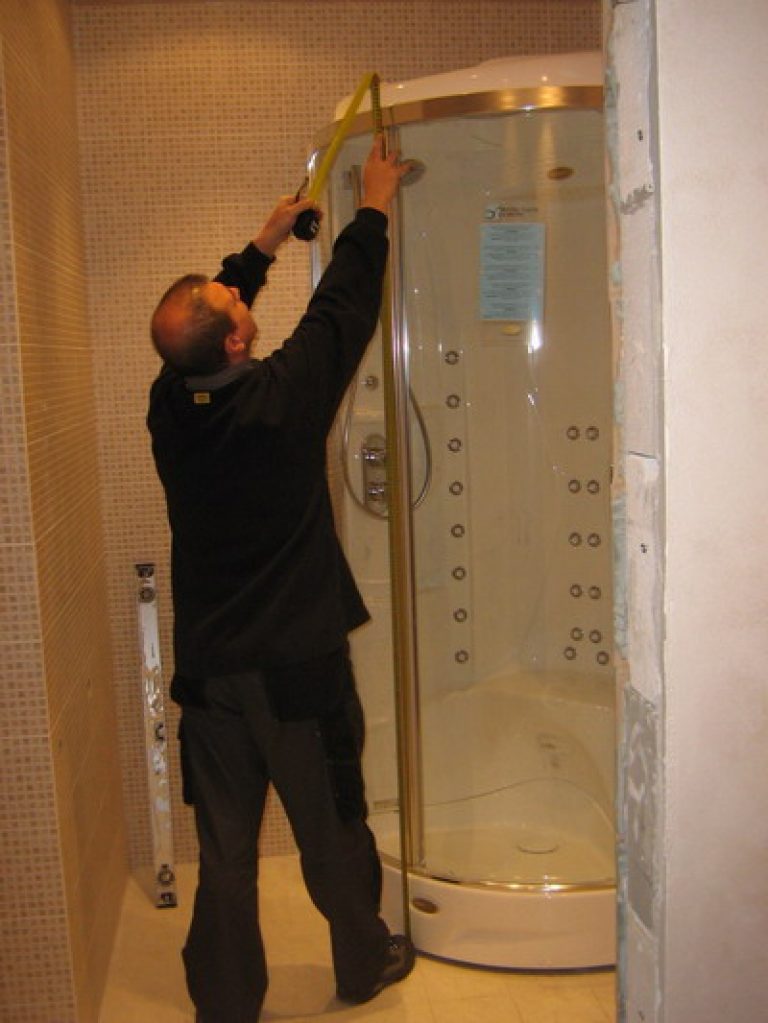
When the shower enclosure is fully assembled, you can take care of installing the remaining plumbing: faucets, faucets, shower heads. Soap dishes, handles, holders, mirrors and other accessories are attached through seals. And finally, you can connect the water supply, check everything for leaks, the presence of leaks. If the latter is not available, then we can say that the hydrobox has been finally assembled.
Recommendations for use
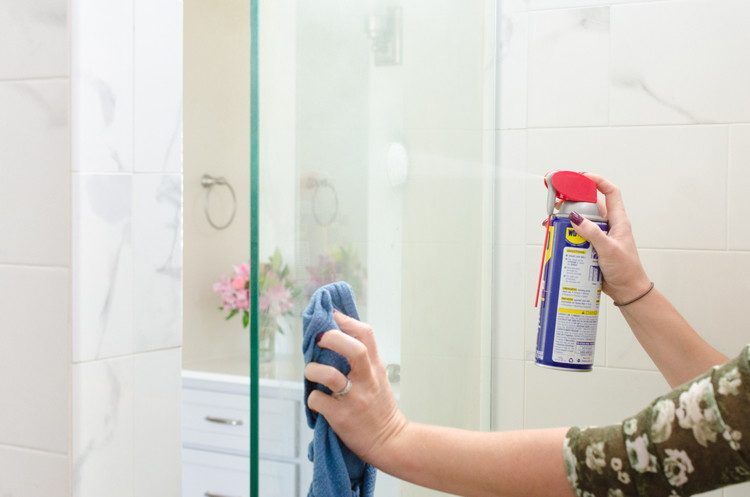
In order to serve the shower for a long time, it is necessary to take care of it - regularly wash and clean, air, and then there will be no plaque and musty smell of stagnant water. It will not be superfluous to periodically check the performance of all hidden and obvious plumbing parts of the structure.
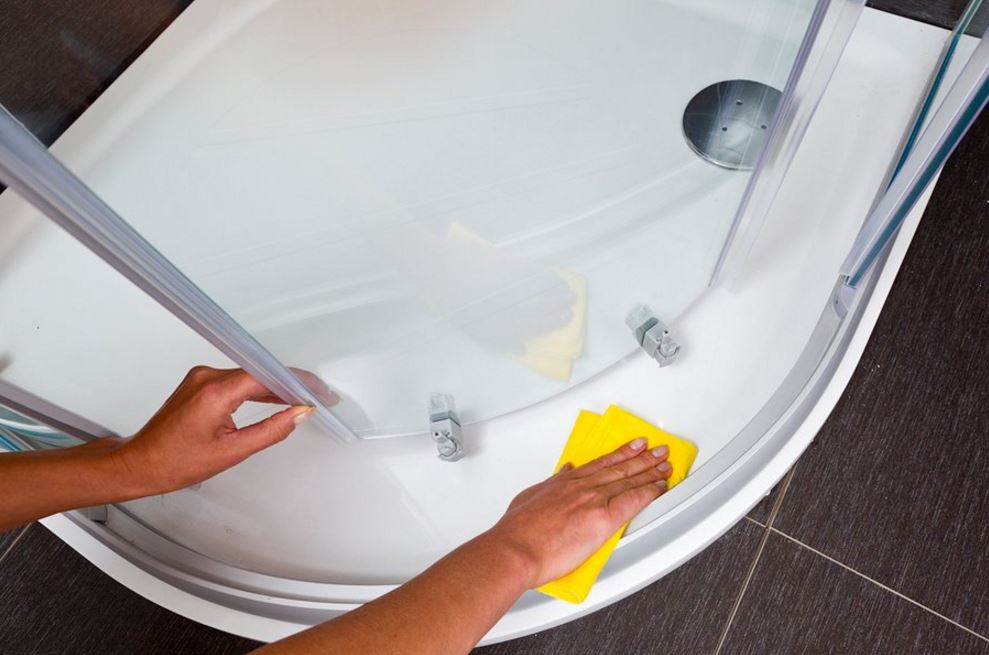
Special treatment of the seams between the tiles will protect against the occurrence of such unpleasant phenomena as the appearance of black stains, mold, fungus.It is also desirable that after each wash the cabin is cleaned. It is enough to rinse the surfaces first with warm and then cold water, wipe dry with a towel or napkin. The main thing is to regularly inspect and general cleaning of the structure.
When cleaning plastic and chrome-plated surfaces you should not use active chemicals, coarse brushes and sponges. For glass surfaces suitable means for cleaning mirrors and glasses. But for the acrylic pallet, a special tool will be useful. In the absence of such, a soap solution will help to cope with the dirt. The enamel tray is more resistant to potent agents. Self-made tray, lined with tiles, can also be cleaned with strong and even abrasive substances, but the latter is better to use only in extreme cases.

Keep your shower stall clean and tidy. Change plumbing in time, and then an improvised hydraulic structure will last more than one decade.


