Installation of sinks: types of designs and step by step instructions
The sink is considered one of the important accessories, without which it is impossible to imagine the furnishings of the kitchen and bathroom. Due to the huge choice of models, these designs are presented in various shapes and colors, therefore they harmoniously fit into any interior of the premises. Although the installation of sinks is not particularly difficult and it is often performed independently, in order to properly carry out the installation, certain skills are required. Therefore, before starting work, it is necessary to study not only the principles of fixing the sinks, but also to know how the mixer is connected, since the slightest inaccuracy in the installation can lead to leakage and other problems.

Special features
The shell is a unique type of construction that in modern life performs both functional and aesthetic properties. Despite the fact that the shells are of different sizes and appearance, they all share one feature - the need for quality installation. In order for the accessory to look beautiful in design and reliably serve for many years, you need to comply with all installation standards, correctly calculate the size and choose the place where you can put it. Therefore, at first, the space reserved for the sink is precisely measured, its width can be from 60 to 250 cm. In addition, the installation of the sink depends on the design features of the product, as there are models with and without a mixer.
Before installation, it is also important to determine the shape of the sink, and it is desirable to do this even at the stage of repair or construction of the room, otherwise it will be difficult to “fit” the product to the finished plumbing and sewer connections.
To date, there are several types of shells, for each of which the installation is characterized by its own characteristics.
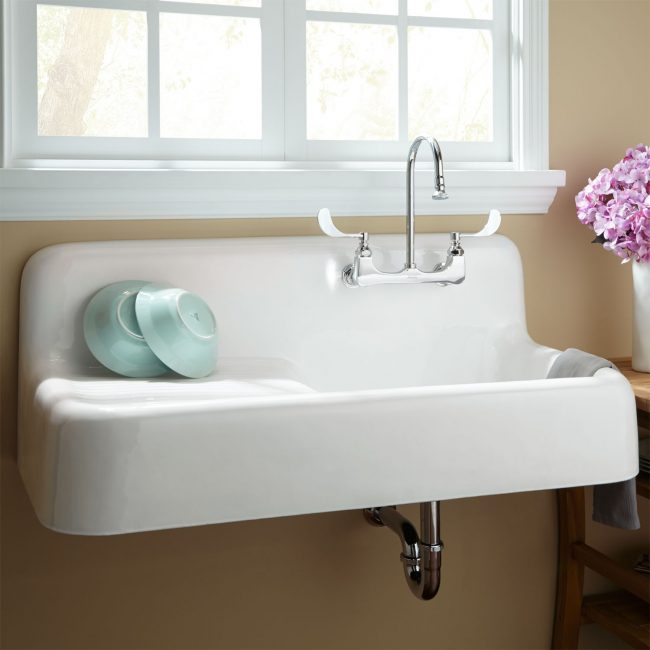
- Suspended. The accessory is attached to the wall with the help of brackets; as for the mixer, it can be located both on the product itself and on the wall. Such models perfectly save space, but they need to be supplemented with a small pedestal, where they usually hide all communications.
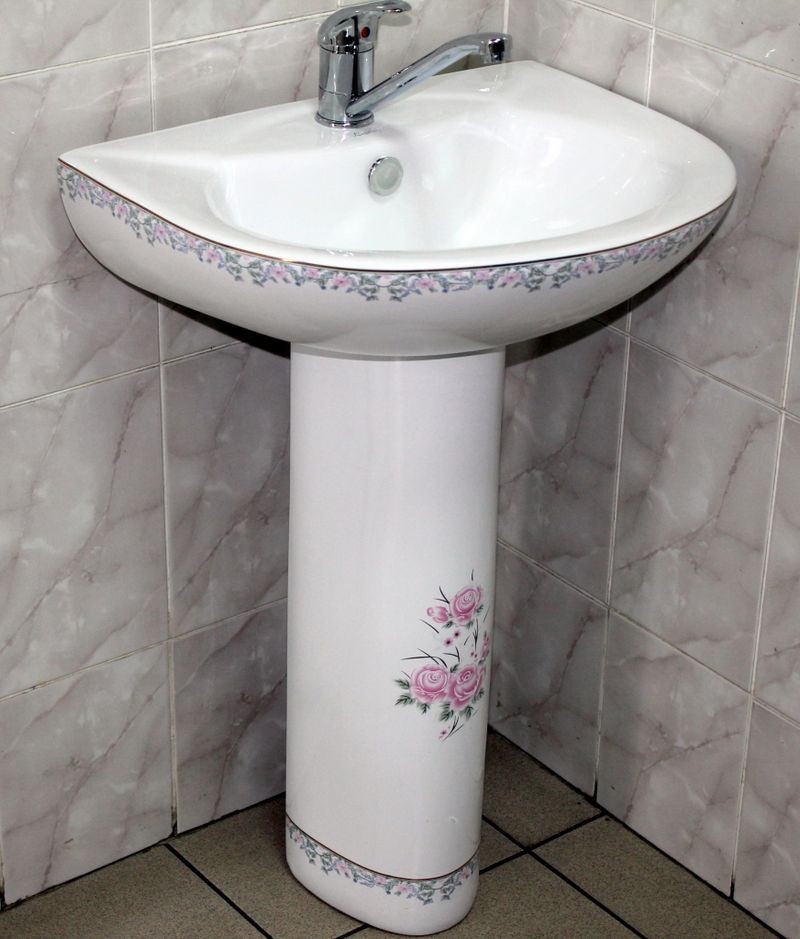
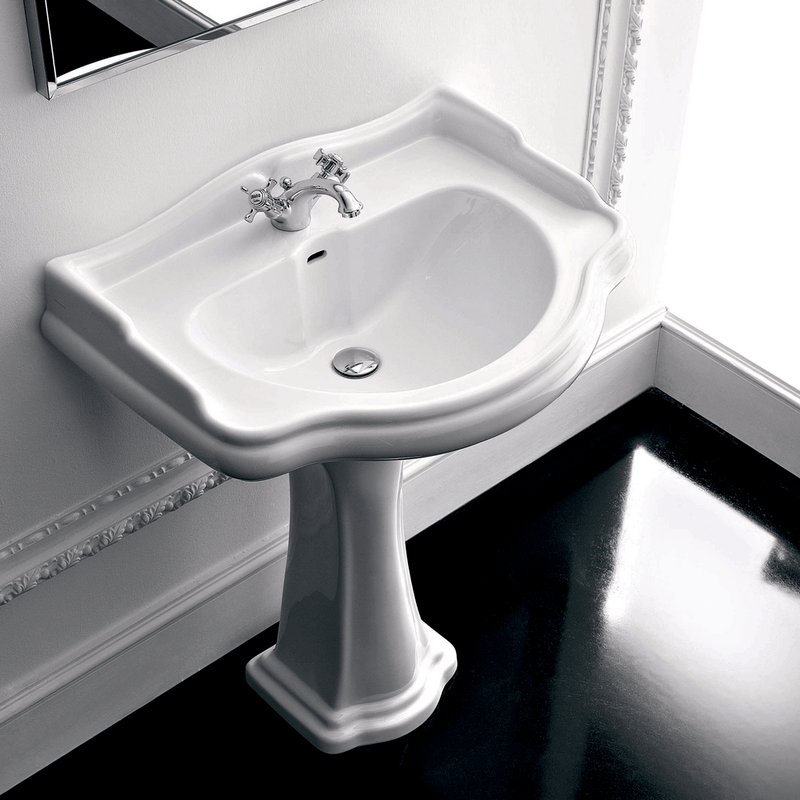
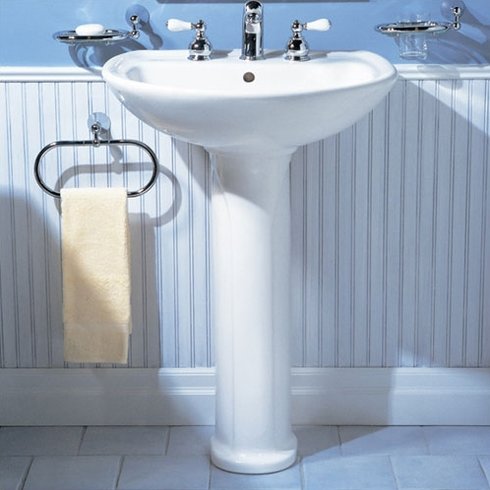
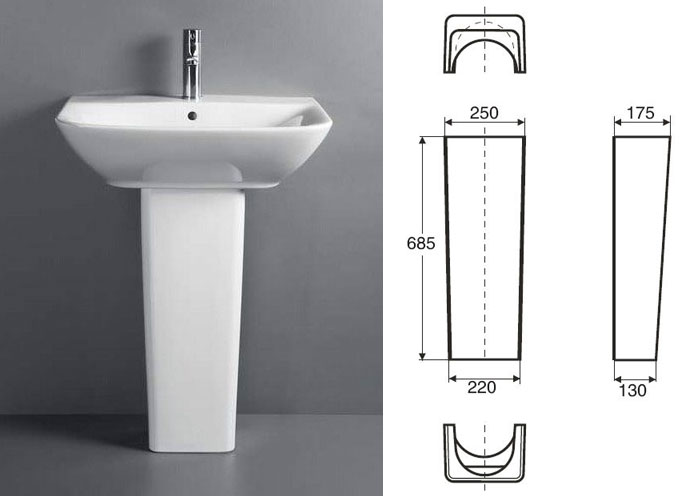
- On a pedestal. The installation of the sink is carried out directly to the wall with the use of brackets, but in contrast to the suspended version of the communication system, they are hidden under a special design - a pedestal. There are accessories with partial and full pedestal, their only drawback is the height limit, which can not exceed 80 cm.
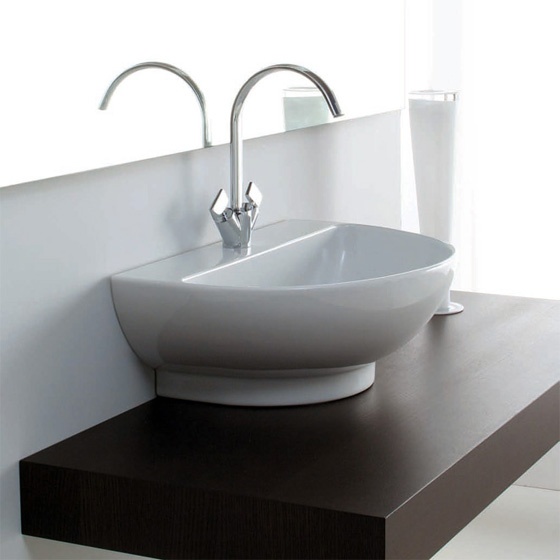
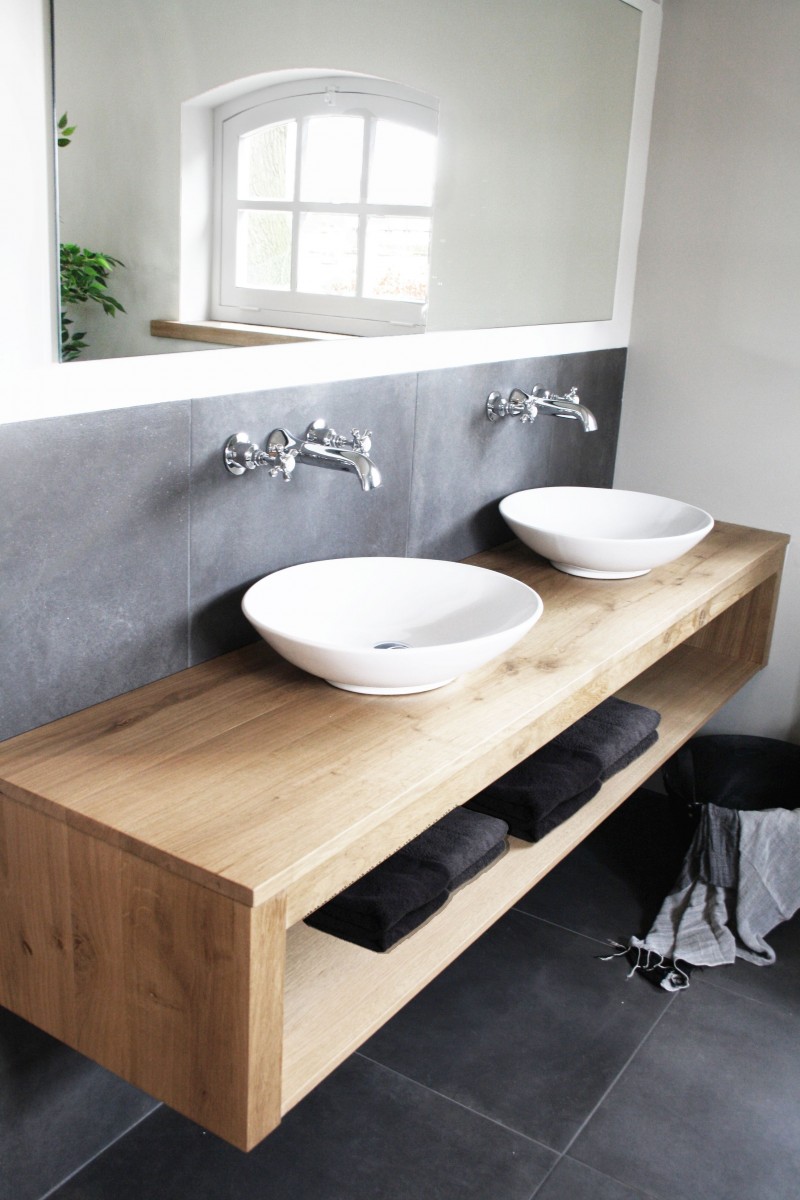
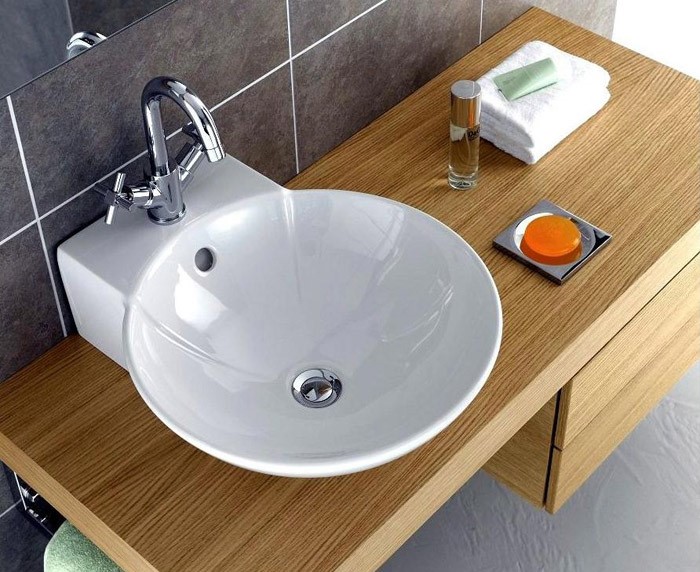
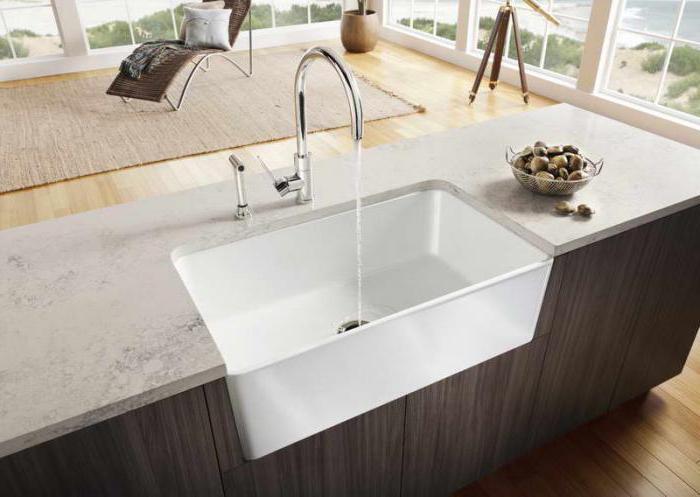
- Inline. Such sinks are installed in bedside tables and countertops by insertion or attachment to the frame. This type of products is characterized by a beautiful design, but they take up a lot of space, so they are not suitable for rooms with a small area.
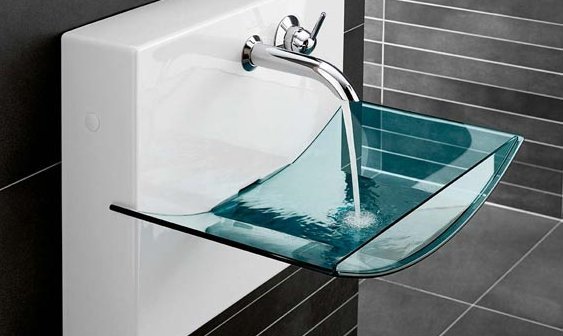
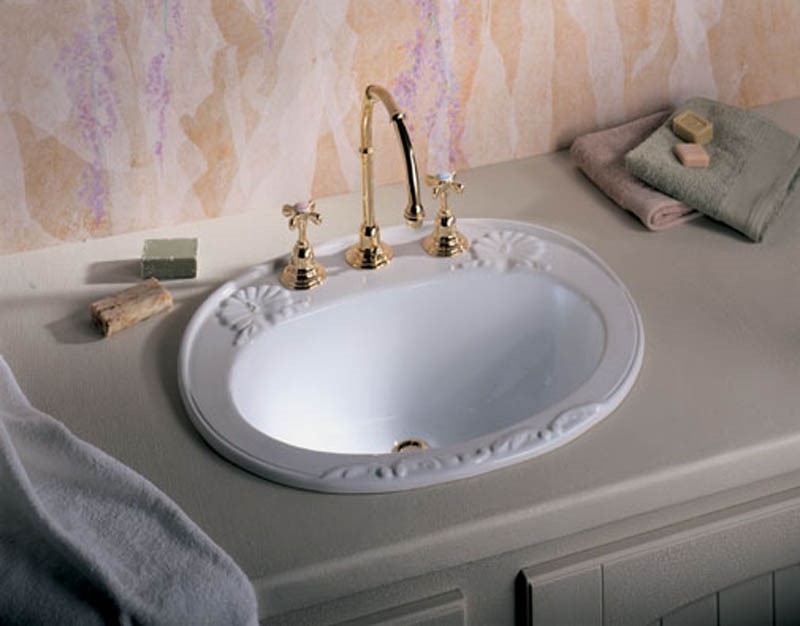
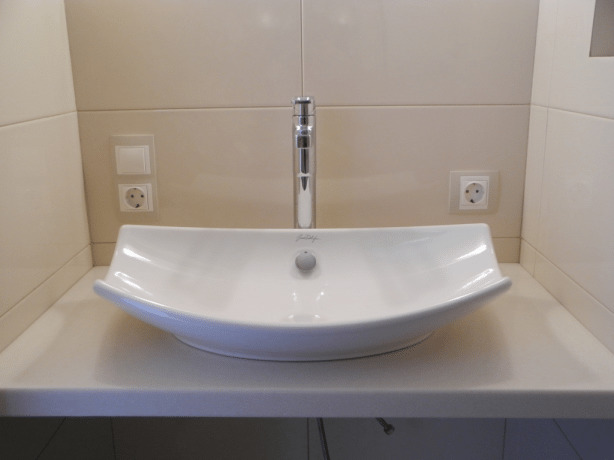
In addition, the shells are different and material manufacturingwhich also requires a special approach and installation technology. The most popular products are made of porcelain, ceramics and earthenware, they are expensive, but have high quality.Marble models are also found on the market, they look respectable, but difficult to install and maintain, the material has a porous structure that can collect dirt and dust. Special attention is given to glass shells made of ultrastrong raw materials. Their mounting should be done carefully, so as not to damage the appearance.
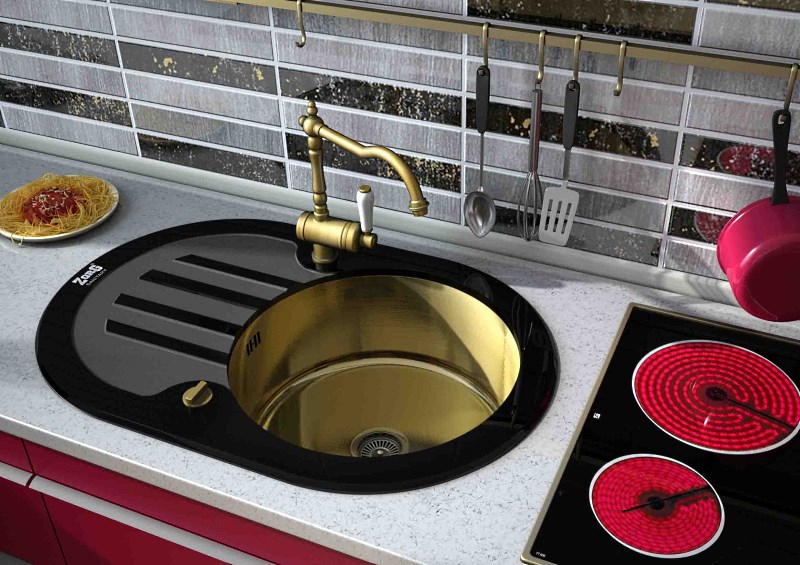
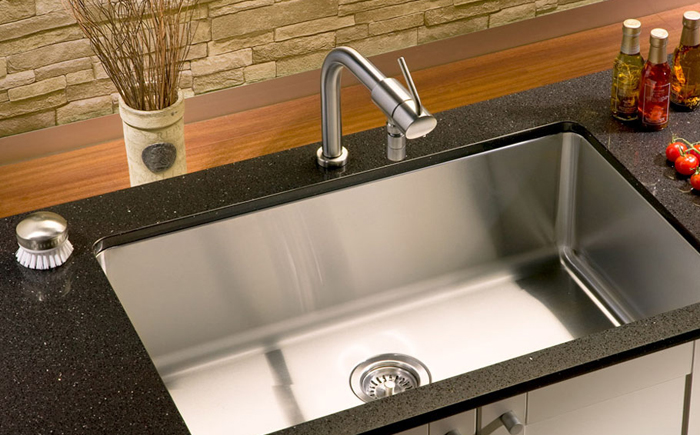
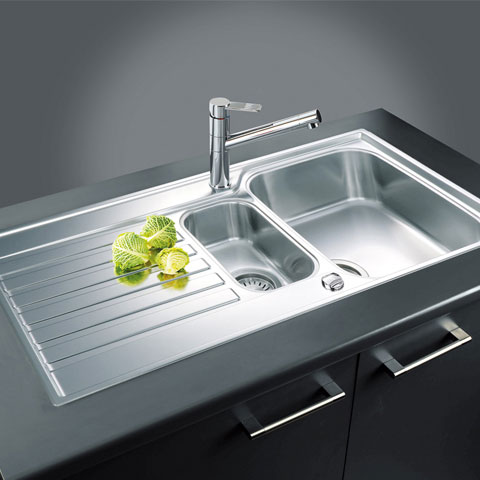
Kitchens are usually purchased stainless steel sinks, they are easy to install, are inexpensive and durable. Their only drawback is considered to be unstable to abrasives, in addition, they create noise from the water. Such shells are simple and twin forms. These models can be embedded in countertops and cabinets, installation takes a minimum of time, and it is quite possible to implement it with your own hands.
Install by hand
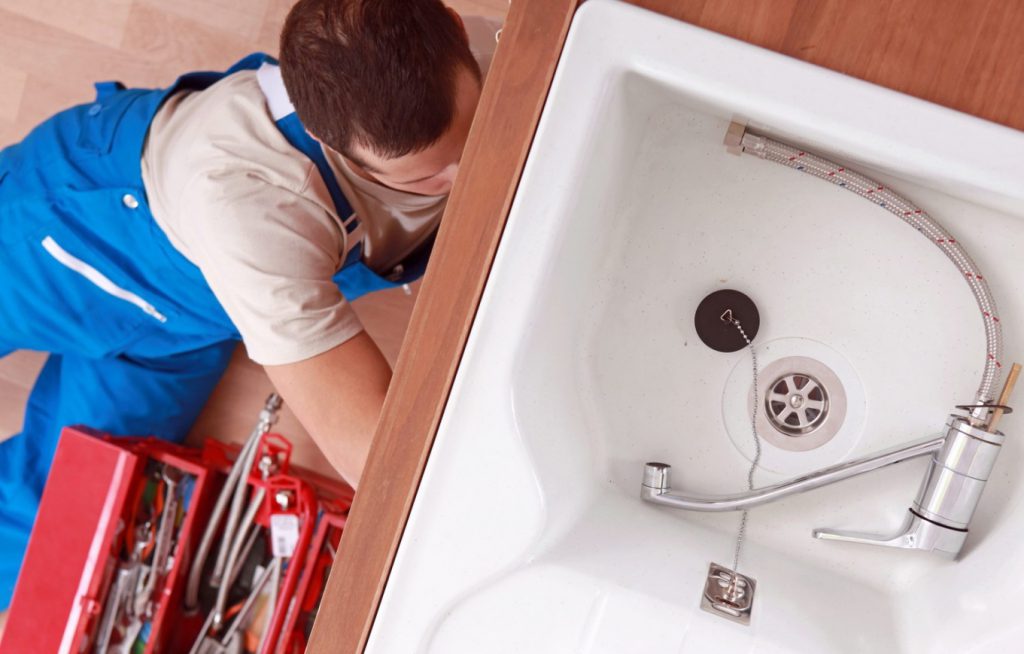
The main step in the construction work is the installation of the sink, it provides not only a reliable fastening of the structure, but also the connection of communications. The aesthetic appearance of the washbasin and its usability will depend on the correct installation. Therefore, first dismantling of the old sink is done, and a place is prepared for a new accessory.
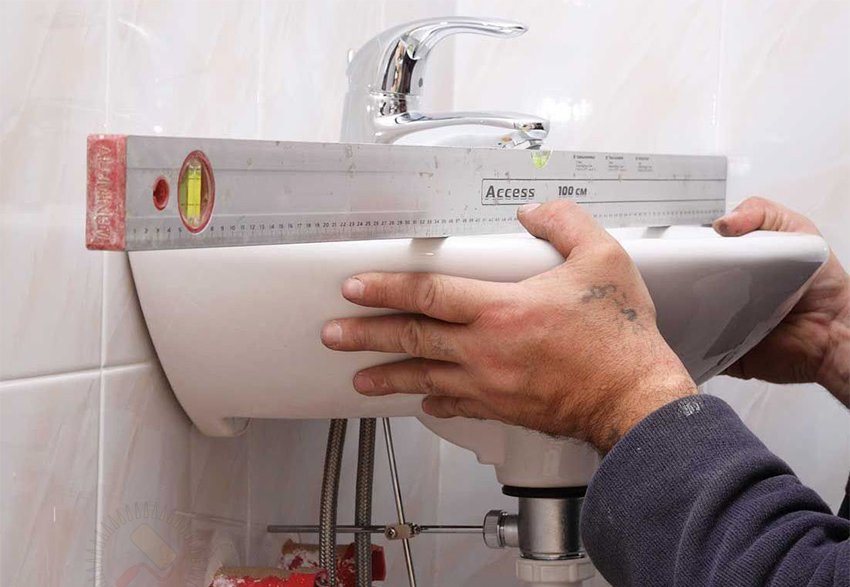
It is also important to determine at what height the washbasin bowl will be placed. If you hang the washbasin too high or low, it will be inconvenient to perform hygiene procedures, as you will have to bend down or rise. Therefore, you should choose a standard in which all members of the family height will be comfortable.
As fixing systems for both the kitchen and the bathroom, they choose supporting brackets, they fit any model of sinks and fix them securely. Some masters prefer to use anchor elements that firmly attach the sinks to the walls and greatly simplify installation. In addition to the bowl itself, you must also install additional parts that are included in its package. It can be tabletops, bollards or supports, closing communications.
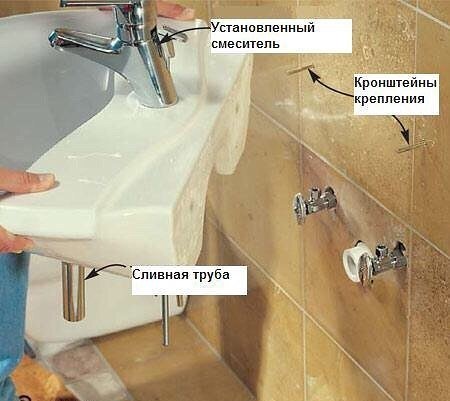
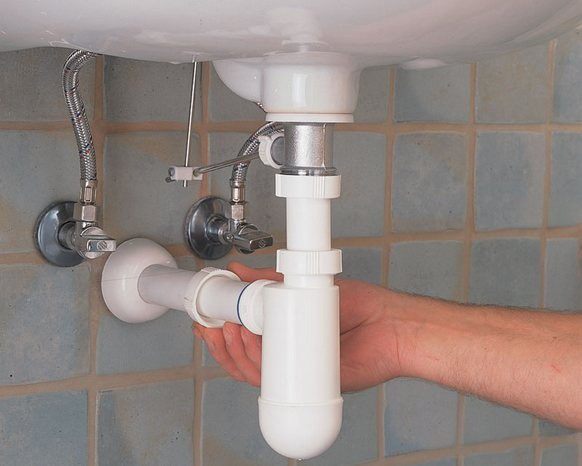
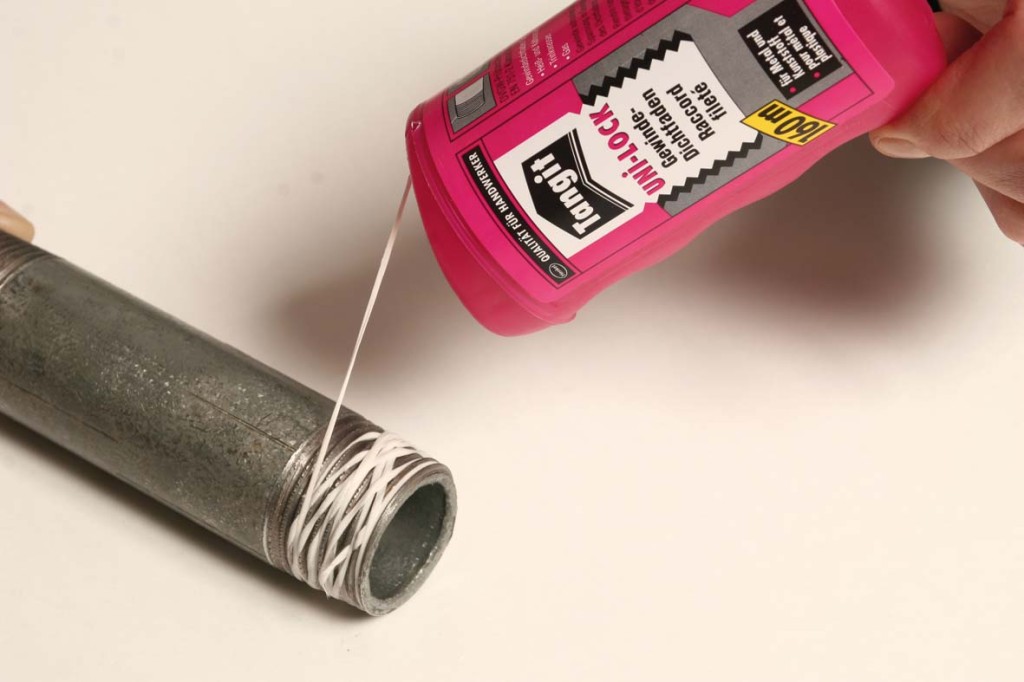
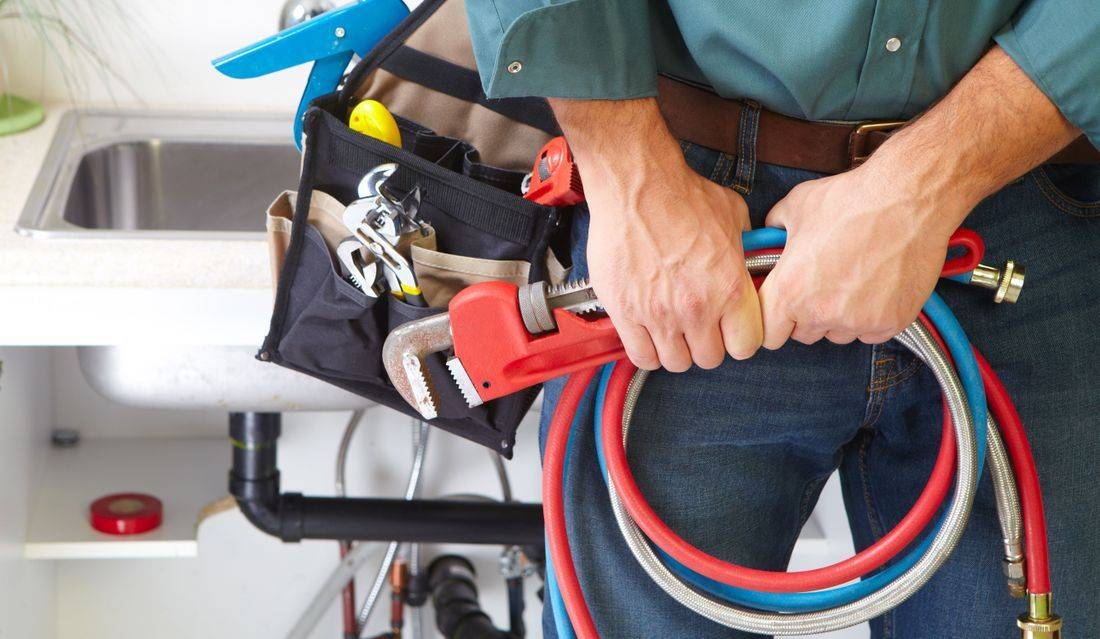
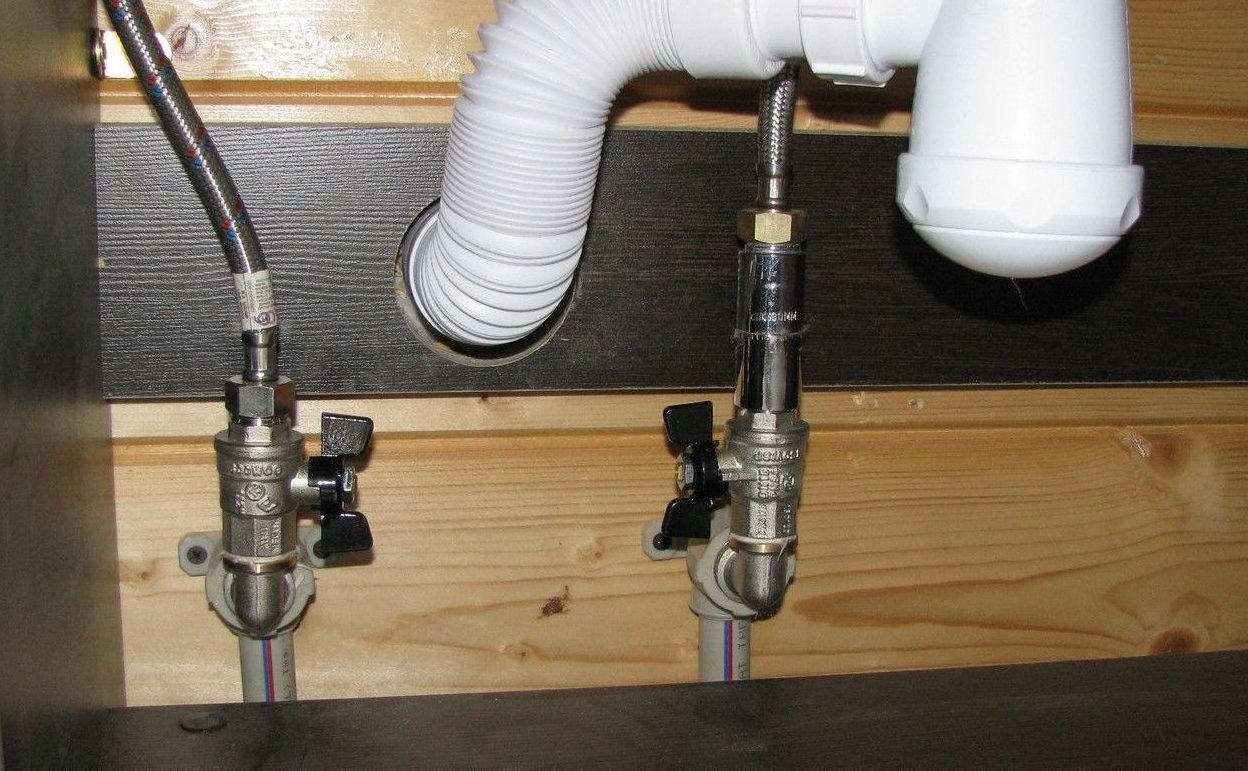
You should first consider the location of the sewage system and water supply system. To do this, make special schemes and calculate the level of the drain, which should have a slight slope from the clean floor. In this case, the distance between the siphon and pipes is recommended to be minimal. All protruding mounting surfaces need to be hidden in thumbs or behindspecial racks. It is possible to connect communications only in the case when control of the bottom valve is made. We should not forget about sealing parts, for this there is a certain order of installation of gaskets, they should be fixed according to the instructions indicated on the shell packaging.


In the bathroom
When creating a new interior in the bathroom, it is necessary not only to replace the finish of the coatings, but also to install a new sink that would fit the size of the room and harmoniously combined with the design. For many, the installation process may seem complicated, in fact it is not, even an beginner master can easily cope with it. First of all, you should make measurements of the room, plan the space and determine a suitable place for a washbasin and hygienic shower.
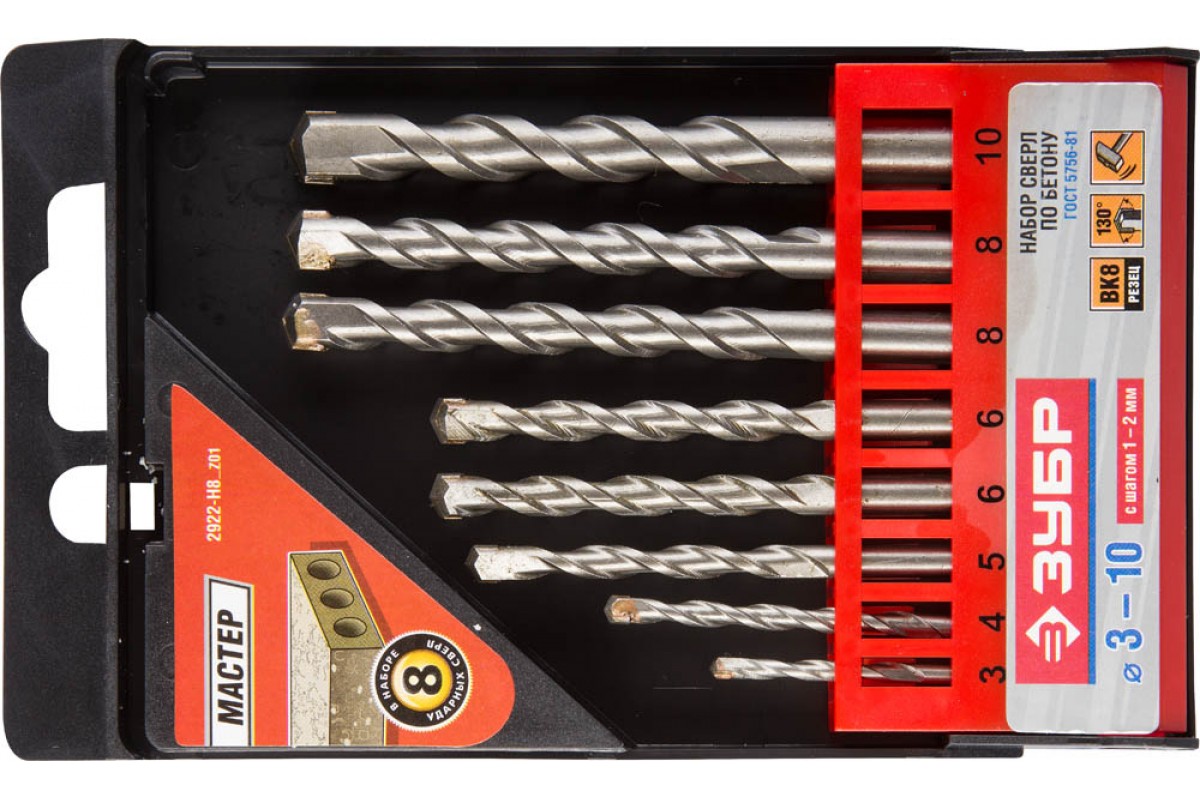
To install the accessory you will also need to prepare the following tools:
- perforator;
- a set of drills for working with concrete;
- a set of screwdrivers and wrenches;
- dowels, screws;
- winding and sealant.


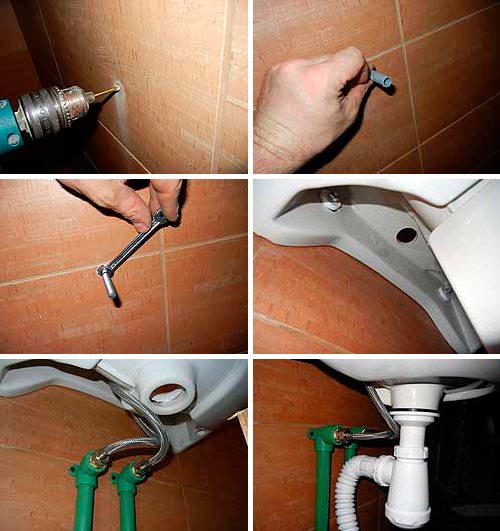
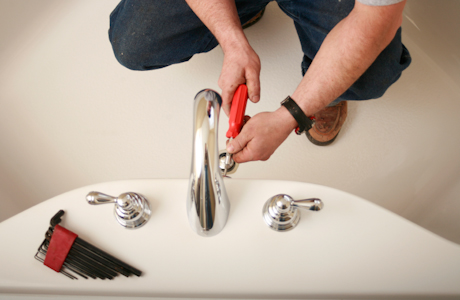
Before installation, it is imperative to shut off water in the system. At the first stage, dismantling of the old structure is done.To do this, unscrew the nut on the mixer and disconnect the flexible and rigid liner. The ends of the removed pipes should be placed in a container, since water may remain in them. Then the tap itself and the siphon are dismantled. Then you can proceed to the immediate installation of the sink. It should be noted that each model of washbasins is characterized by a special installation technology, therefore, depending on the device sink work is carried out differently for different designs.
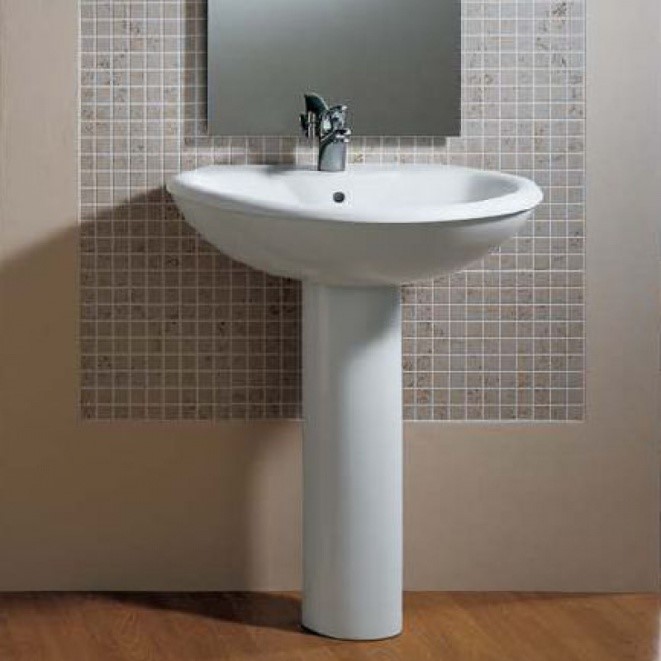
On a pedestal
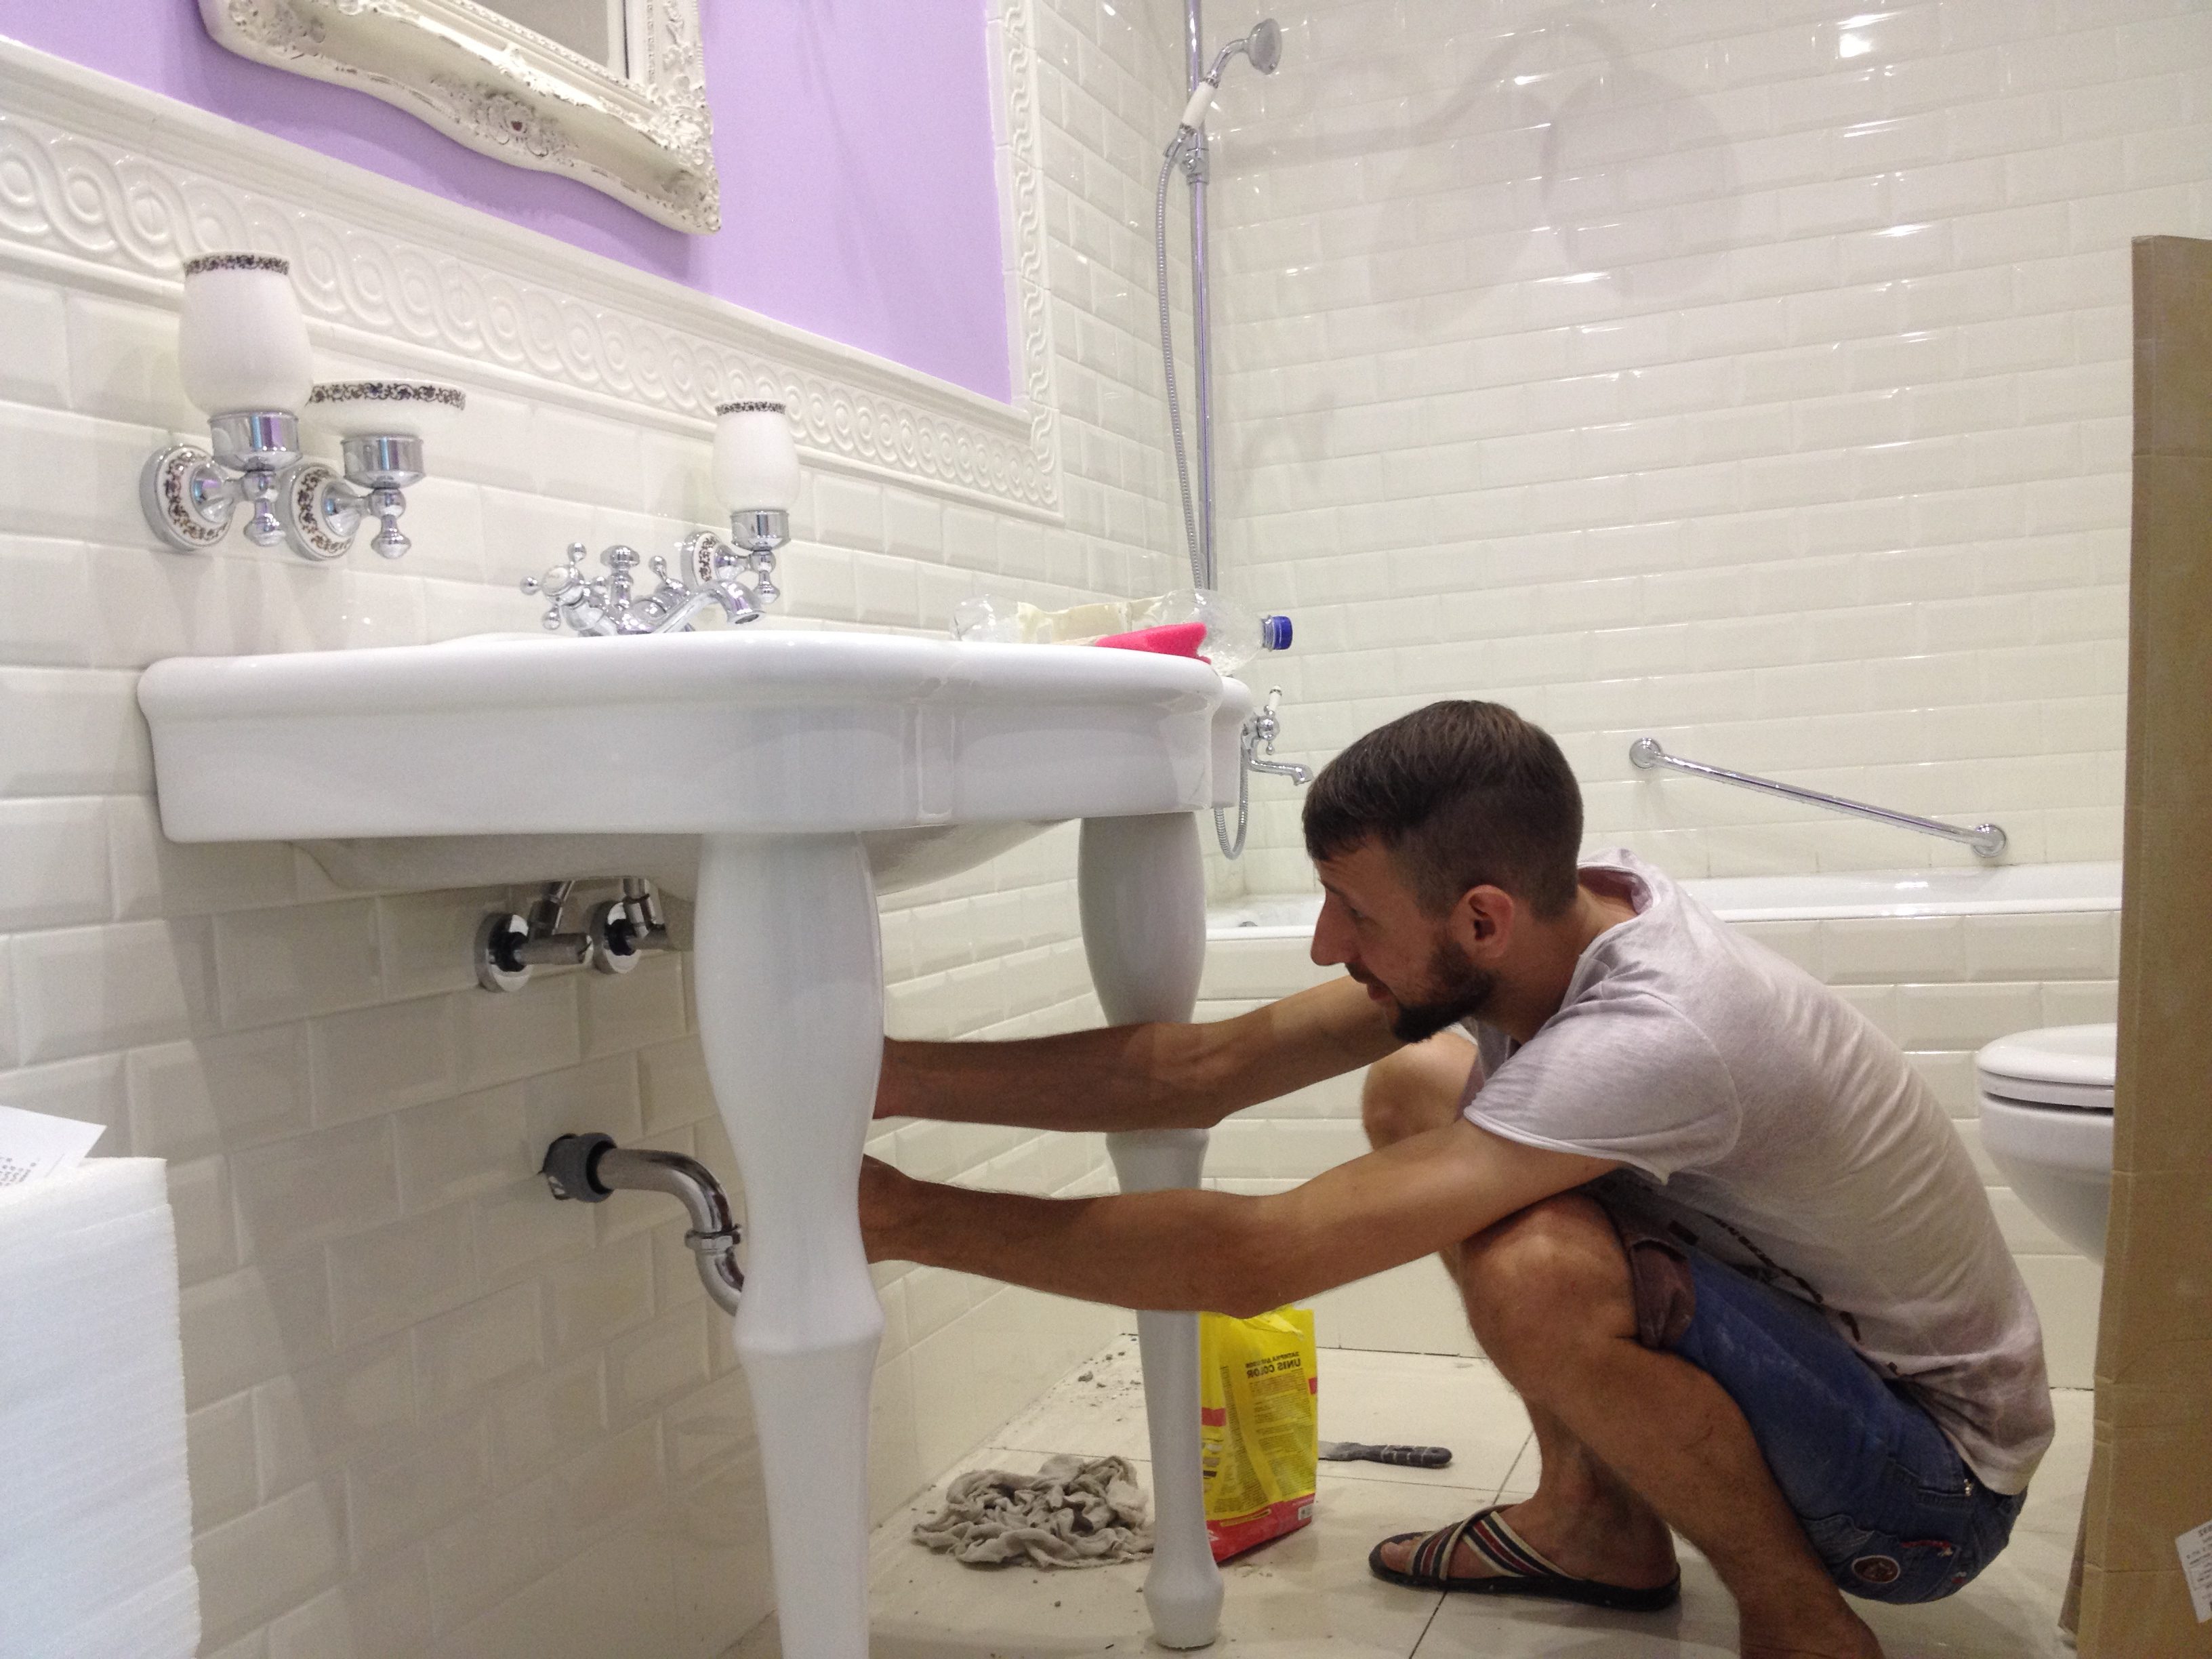
The height of the washbasin is selected along the length of the lower leg, after which the bowl is fixed and the siphon with the mixer is fixed. To hang the sink on the wall, use special brackets. Since the drain in this case will be located inside the leg structure, special attention should be paid to the insulation of the parts in order to avoid leakage during operation. Installation of this design is possible only after all types of finishes. First you need to mark the place of attachment, and then proceed to the direct installation. To do this, a horizontal line is drawn, its height from the floor covering should not exceed the size of the leg and a small distance is left,which is equal to the thickness of the accessory.

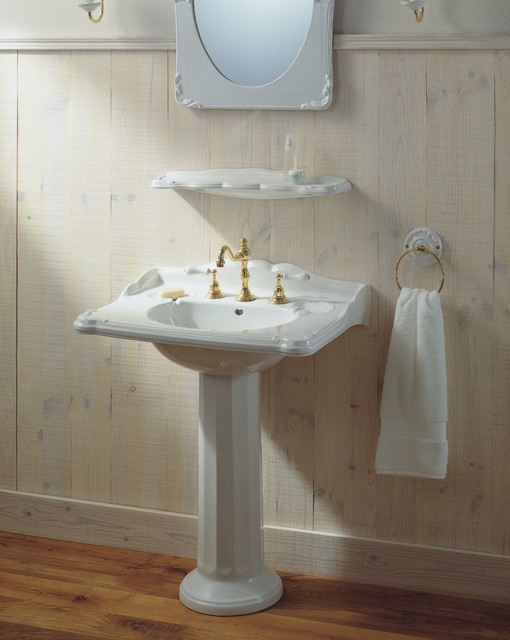
The brackets apply to the surface of the wall and drill holes for dowels. In the end, fasten the parts and put the bowl, it must be sustainable. After the washbasin is set in the correct position and fits snugly to the wall, you can connect a drain and faucet.
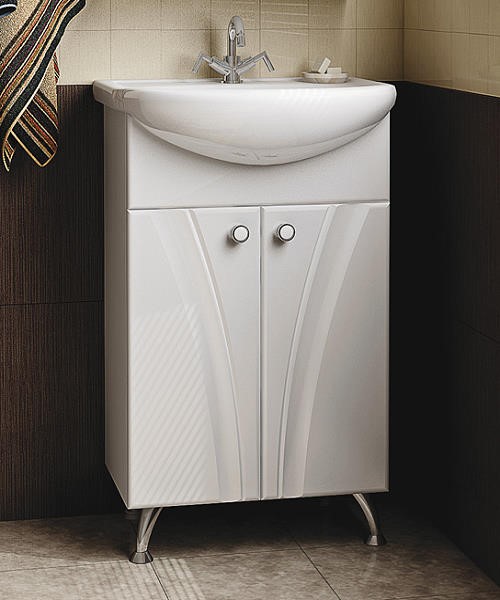
On the cabinet or hanging shelf
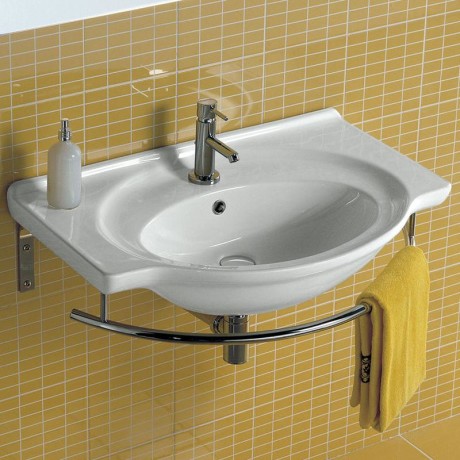
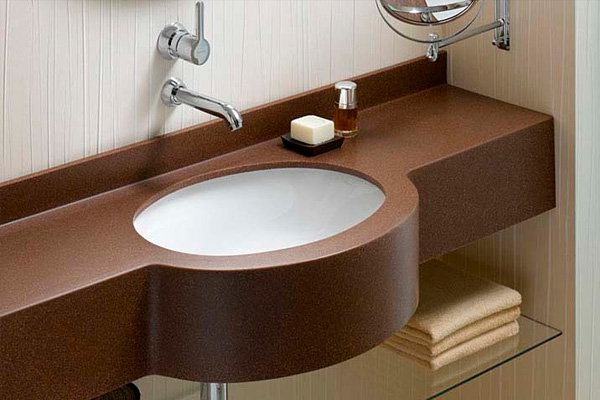
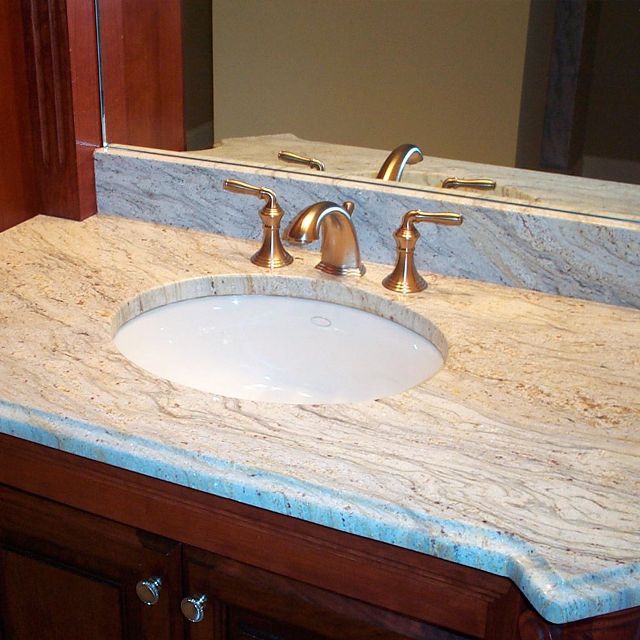
In this version, the table top will simultaneously act as a holder and decorative element of the sink. The washbasin can be either embedded in the hole or placed on top of the pedestal; for the sub-table space you need to use durable material. Regardless of the type of installation chosen, the drain will in any case be hidden under the shelf. To give the sink a sophisticated look, it is recommended to choose a cabinet from glass or artificial stone. Externally, the bowl may be different, but it is best to give preference to the round and cubic shape.
For mortise construction
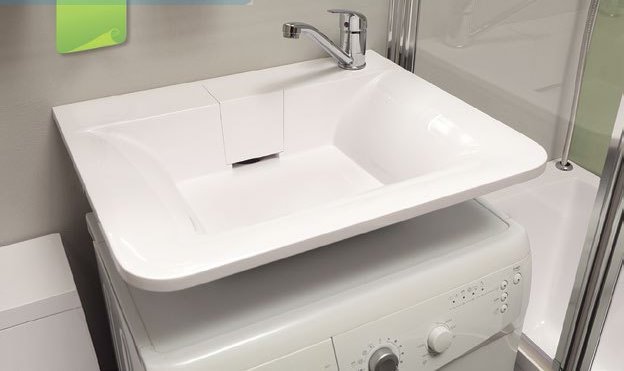
As a rule, a cast-iron bowl or steel products is chosen for installation, the sink is placed inside the bollard, for this it is cut into. Under this model, you can put a washing machine. If the layout also provides for the installation of a water heater, it should be suspended at a distance that would not interfere with free access to the washbasin.It is also important to ensure the safe operation of electrical engineering and to install water sockets. A great addition to the design of such sinks will be mirrors.
In the kitchen
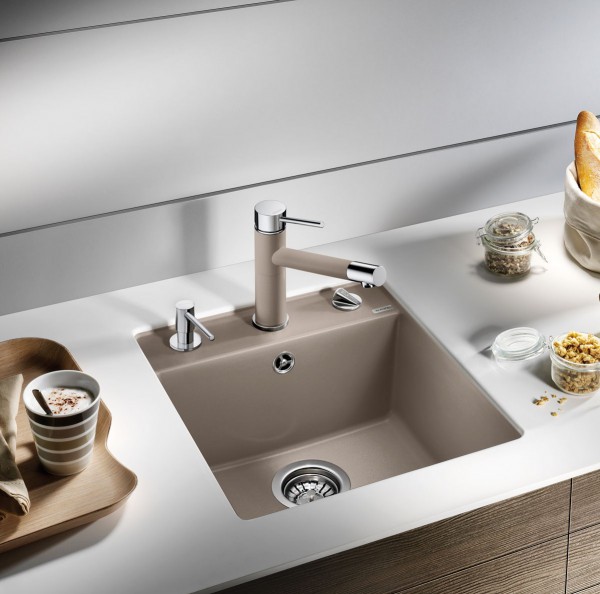
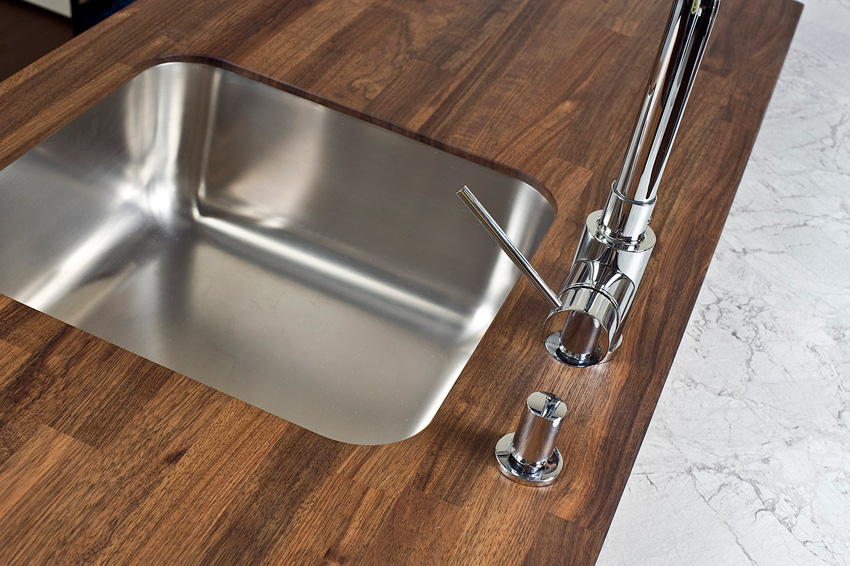
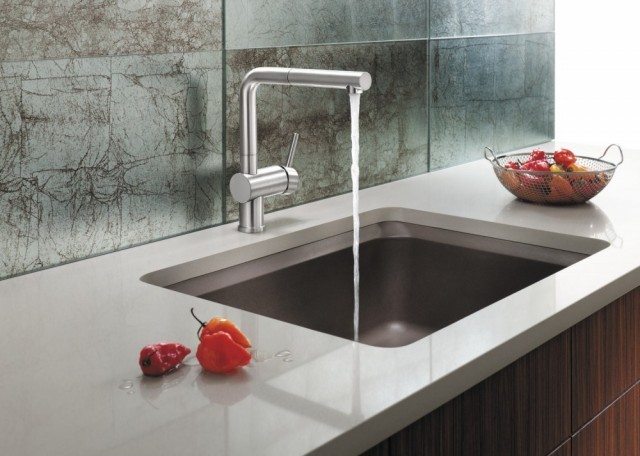
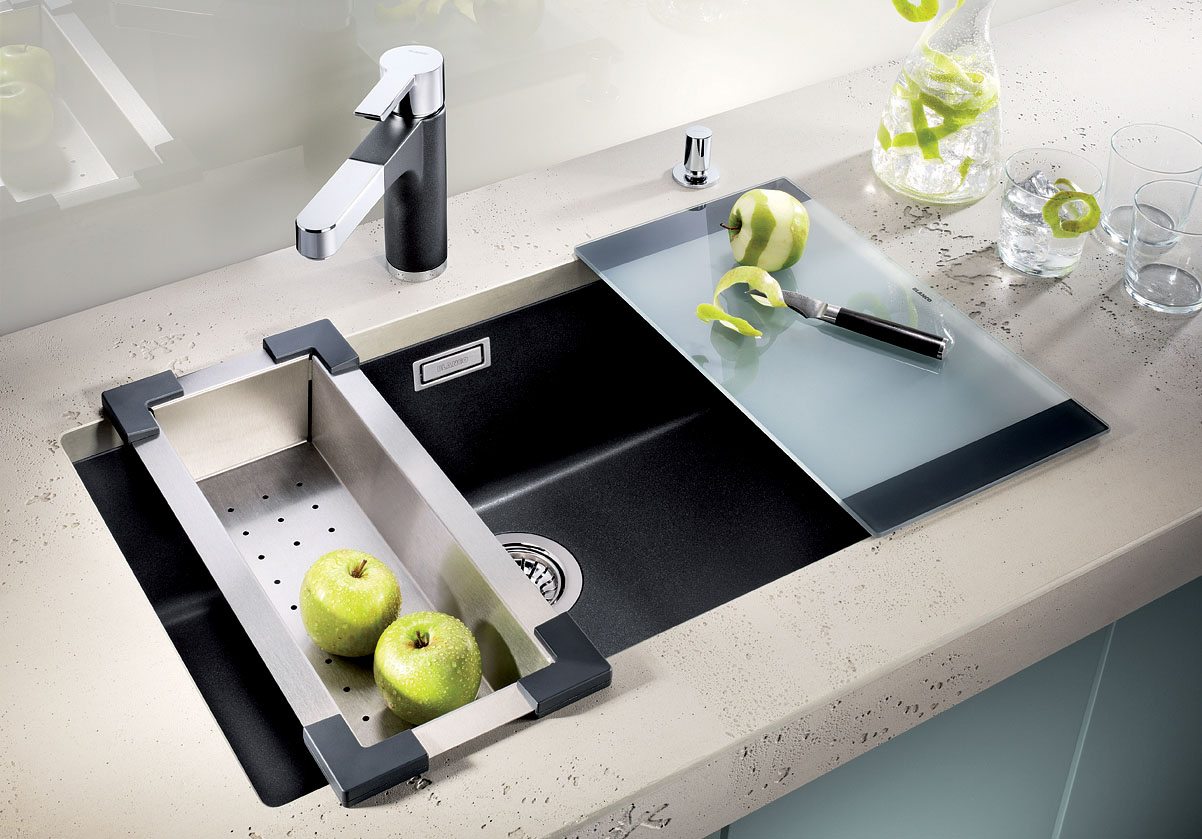
When in the kitchen there is a question of replacing the sink, then they mostly choose a mortise or flush-mounted sink. Before starting the installation, it is necessary to choose the right place for the installation, as it is impossible to place the sink near the stove and the working area. That is, the sink must be installed in such a way that it can be used for dirty work and serving. The corner version of the sink is considered to be good and convenient. The embedded sinks are built directly into the kitchen set, which is usually made of chipboard or wood. They are made of various materials. The stainless steel sinks are considered the cheapest type, there are also models with a ceramic shell.
For the installation of this design will require:
- electric drill;
- jigsaw;
- drill;
- set of screwdrivers;
- ruler;
- masking tape;
- silicone sealant;
- passatizhi.
Standard equipment of modern sinks contains not only fasteners, but also cardboard templates, which simplify the installation process.
Installation is carried out step by step according to the instructions.
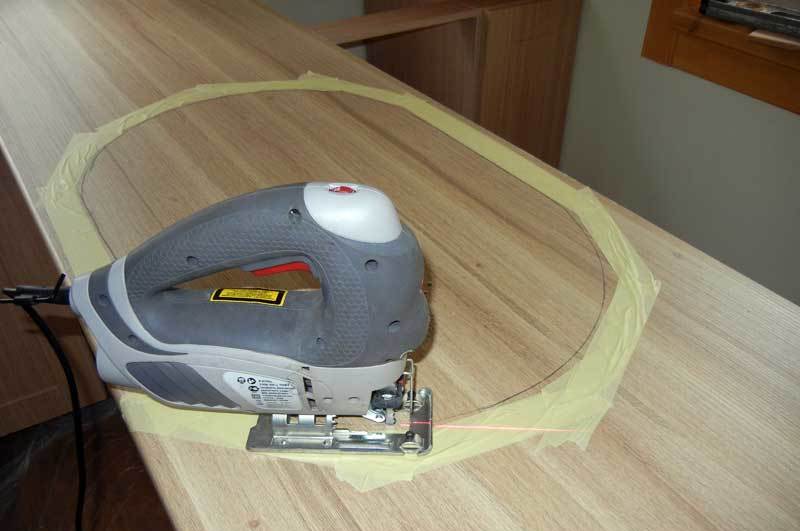
- At the first stage, a hole is prepared for washing. To do this, in the tabletop make a cutout. According to the pattern on the table top, the chosen place is leveled and the cardboard file is temporarily fixed with masking tape. It is worth paying attention to the fact that the lower part of the sink does not come into contact with the inside of the cabinet. After this, the outline of the contour rotates, it is necessary to retreat 1.5 cm from it and apply a second contour, along which the hole is cut.
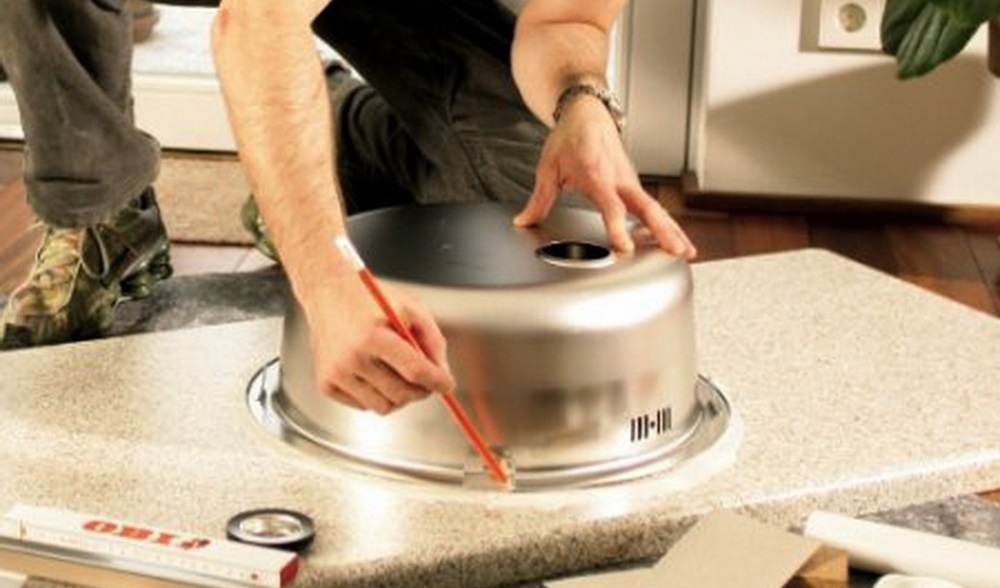
- In the second stage, using the jigsaw make an opening. Work should be done slowly, because you can not go beyond the boundaries of the contour. The resulting hole in the ground sawed carefully cleaned with emery paper.
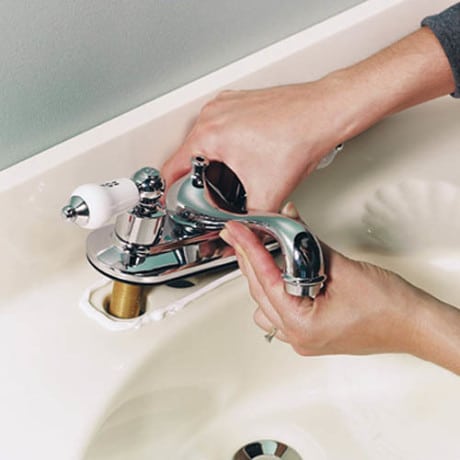
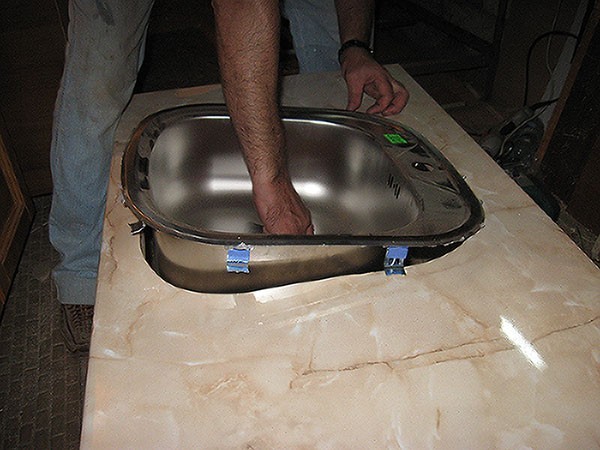
- The next step will be processing the worktop with a sealant. When the sealant is completely dry, it is checked how the faucet and hoses are installed, because after fixing the sink, it will be difficult to change the location of the communications.
- The completion of the work is the fixation of the shell itself. It is inserted into the hole, tightly pressed along the edges and all formed voids are additionally filled with sealant. Bottom sink sink with special fasteners.At the same time, they first tighten the corners diagonally, then fix the middle.
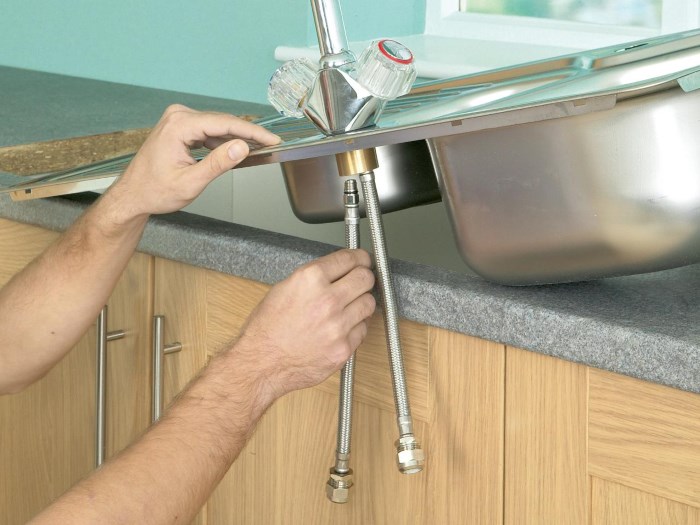
- The installed sink will only be connected to the hot and cold water system. Between the tap and the nut put a rubber gasket and attach the water supply hoses. The sink should also be connected to the sewer. For this purpose, a siphon is inserted and fixed into the sink. For the kitchen, it is best to use an S-shaped siphon; it is much more practical and does not clog up as quickly as bottle siphons.
- Then the pipe is launched into the sewer opening. It is important to pay attention to the fact that the diameter of the pipe corresponds to the size of the pipe coming from the siphon. If there are minor discrepancies, they can be corrected with a special sealing cuff, which acts as an adapter. If the work is done correctly, the sink will last reliably for a long time, and the connections will not leak.
Installation errors
Many apartment owners prefer to install sinks with their own hands, since this process is not considered difficult and allows you to save money on hiring plumbers.
When self-assembly, it is important to adhere to all the technologies and not allow somemistakes.
- All openings for fixings must be made exactly according to the size of the new washbasin. Do not re-insert dowels in old holes.

- When installing the bowl, excessive forceful movements should be avoided, since they can lead to the formation of cracks and fragments on the material surface. This also applies to the connection of the water supply and drainage system, in which it is possible to damage the connecting thread.
- The siphon in the “tulip” models is built in before mounting the bowl on the wall.
- Before fixing the pedestal sink, you should carefully check the flatness of the floor covering. In the event that there are discrepancies in the levels, the structure will be unstable and will be able to flow.

Reviews
Today, the plumbing market is represented by a chic assortment of sinks from foreign and domestic manufacturers. Well-proven and received positive feedback from the trademarks Roca, Sanita, Cersanit, Vitra and Aquaton. They produce not only metal, but also marble, concrete products that are resistant to mechanical damage and easy to install. In addition, modern sinks are characterized by a protective surface, thanks to which they are not afraid of exposure to acids, abrasive solutions and cleaning products.
And also all products are made by individual orders and can have different sizes and non-standard forms. As a rule, foreign manufacturers make sinks with a length of at least 150 cm, there are also models with a length of up to 260 cm, they are popular in the interior, as they fit beautifully into the modern style.
Successful examples and options
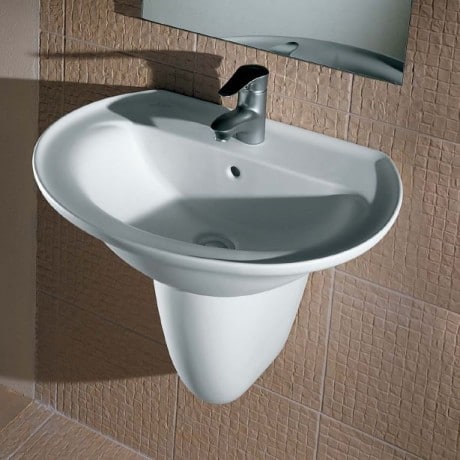
The bathroom has a special place in the interior of the dwelling, as it is considered a place for privacy, where you can not only take a shower, but also perform a number of cosmetic procedures. Therefore, in its setting it is important to provide all the details, starting from the surface finishing and ending with the installation of plumbing. A special place in the design of the bathroom occupy the sink. For modern decor it is recommended to choose models of shells, which are called "tulip". They are easy to install, easy to use and harmonize perfectly with the decor elements in any style.
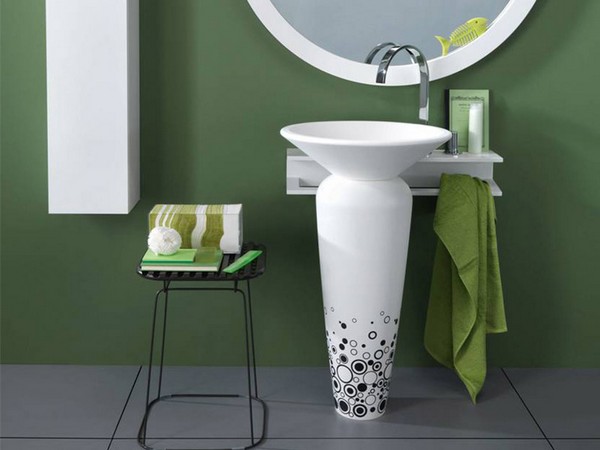
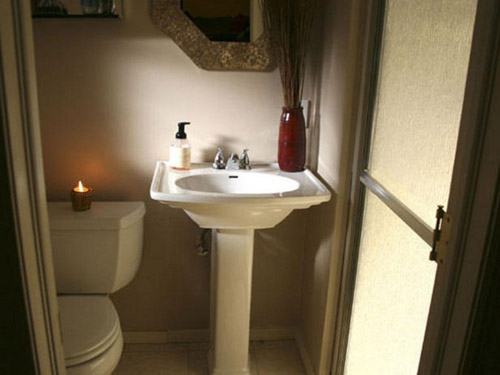
A distinctive feature of this type of sinks is that their liner to the sewage system and the mixer is hidden in special ceramic parts “leg”. Therefore, the interior of the room acquires elegance. Due to the fact that the "tulips" are available in various colors and sizes, they can be placed in bathrooms, regardless of the size of the space.Such sinks for the combined bathroom are a good option, but in this case their “leg” should freely rest on the floor.
A perfect solution for the bathroom will be the sink-lily. It looks like a "tulip", but is installed without additional support. This model is best to choose for those rooms in which pipes are laid below and are an obstacle to the installation of thumbs. Suitable "water lily" and for the bathroom, where the washing machine. The technique is installed under the sink and thus saves space in the room.
How to install a washbasin with a cabinet with their own hands, shown in the next video.


