Installation of windows: rules and methods of installation
Occasionally, living space needs repairs. Sometimes these are just “cosmetic procedures” for renovating the interior, and sometimes serious changes in the layout and functional elements of the room.
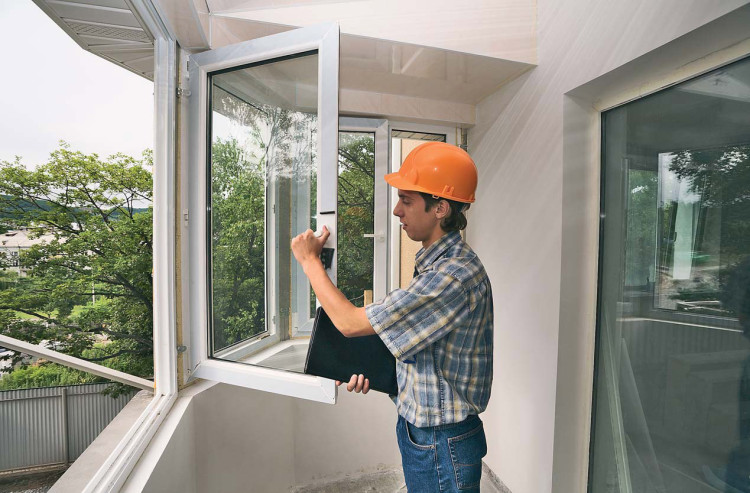
One of the common tasks of repair is installing windows. As a rule, this is the replacement of the old type windows with modern glass packs.
Modern methods of installation of double-glazed windows are clear and accessible for installing windows by hand.
Special features
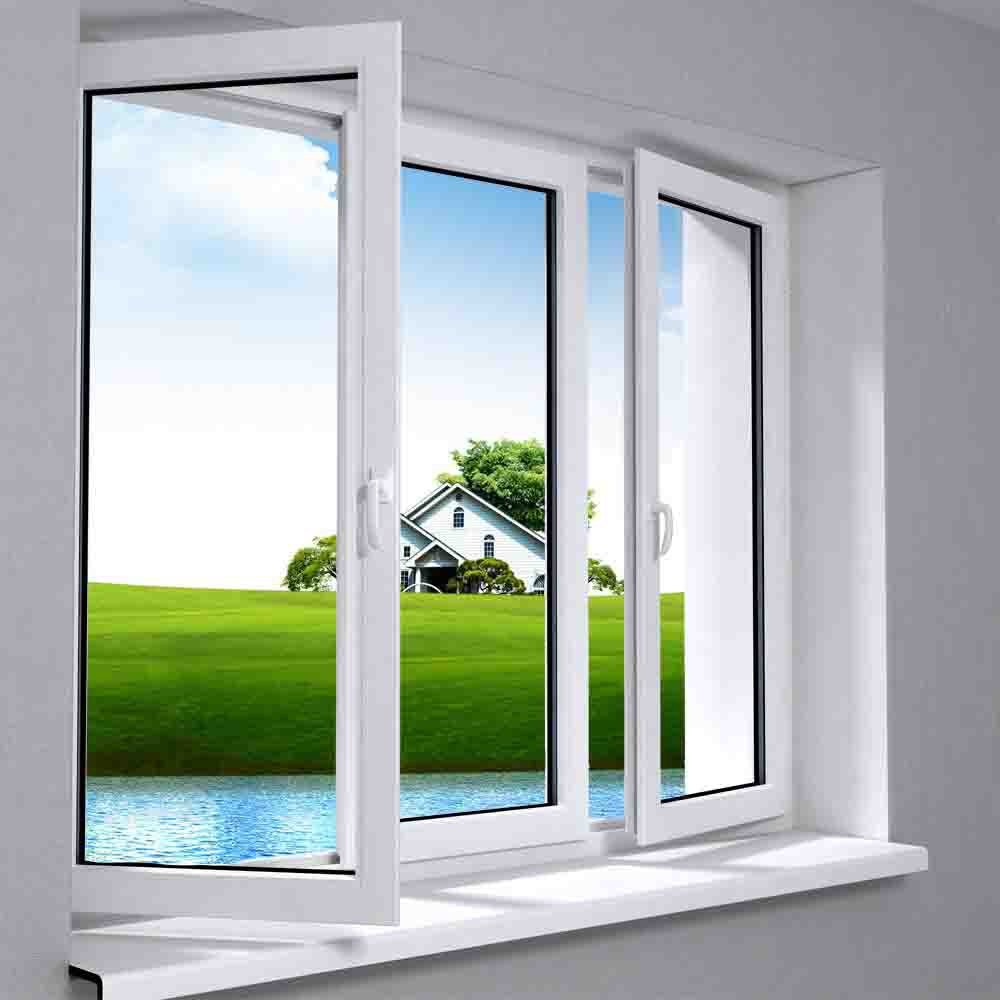
PVC windows, plastic windows and eurowindows are synonymous names. In practice, this is the same product, which uses an advanced type of glass. It is called a double-glazed window.
This name is true for plastic windows of domestic production, and for products of foreign manufacturers.And if 20 years ago the prefix "euro" could indicate the foreign origin of the product and its best quality, in the last ten years it is used only by marketers to increase sales.
Domestic manufacturers have long succeeded in the production of windows, so it is pointless to overpay for European double-glazed windows.
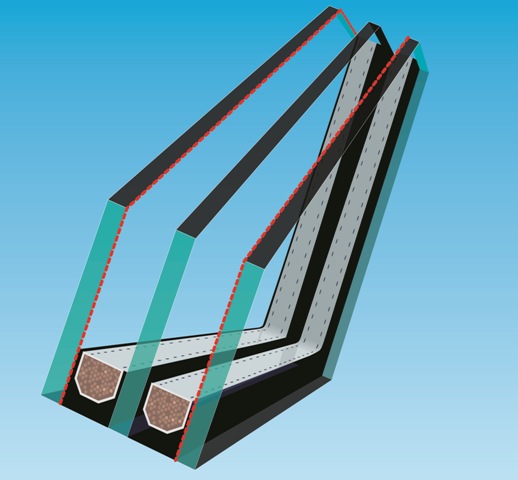
The double-glazed window is a multilayered design of construction appointment. It consists of several sheets of glass in a protective shell (2 or more), between which there are air gaps.
Between themselves, the glass plates are glued with a sealant and spacers. This allows you to leave a gap between them, which plays the role of thermal insulation.
Double-glazed windows became popular due to the impressive list of advantages:
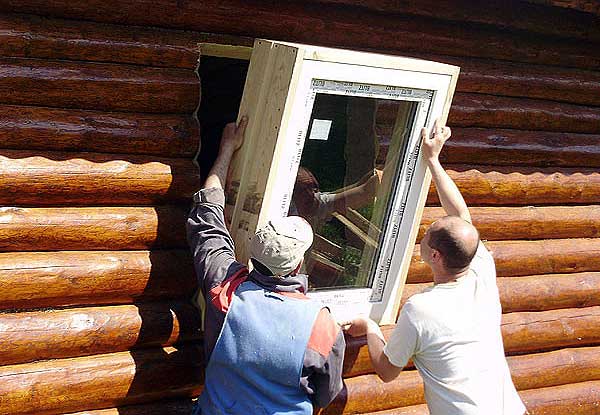
- Versatility. Installation of multi-chamber glass is possible in a country cottage or apartment building. Building materials from which the building was erected do not play a special role. Installation in the wooden, gas-concrete, arbolitovy, brick or frame house is possible. In relation to high rises too, there are no restrictions. Installation of double-glazed windows is permissible both in the panel, and in the monolithic-frame, and in the brick house.
- Tightness. The system of windows with double glazing and installation features provide protection from precipitation, dust and wind.
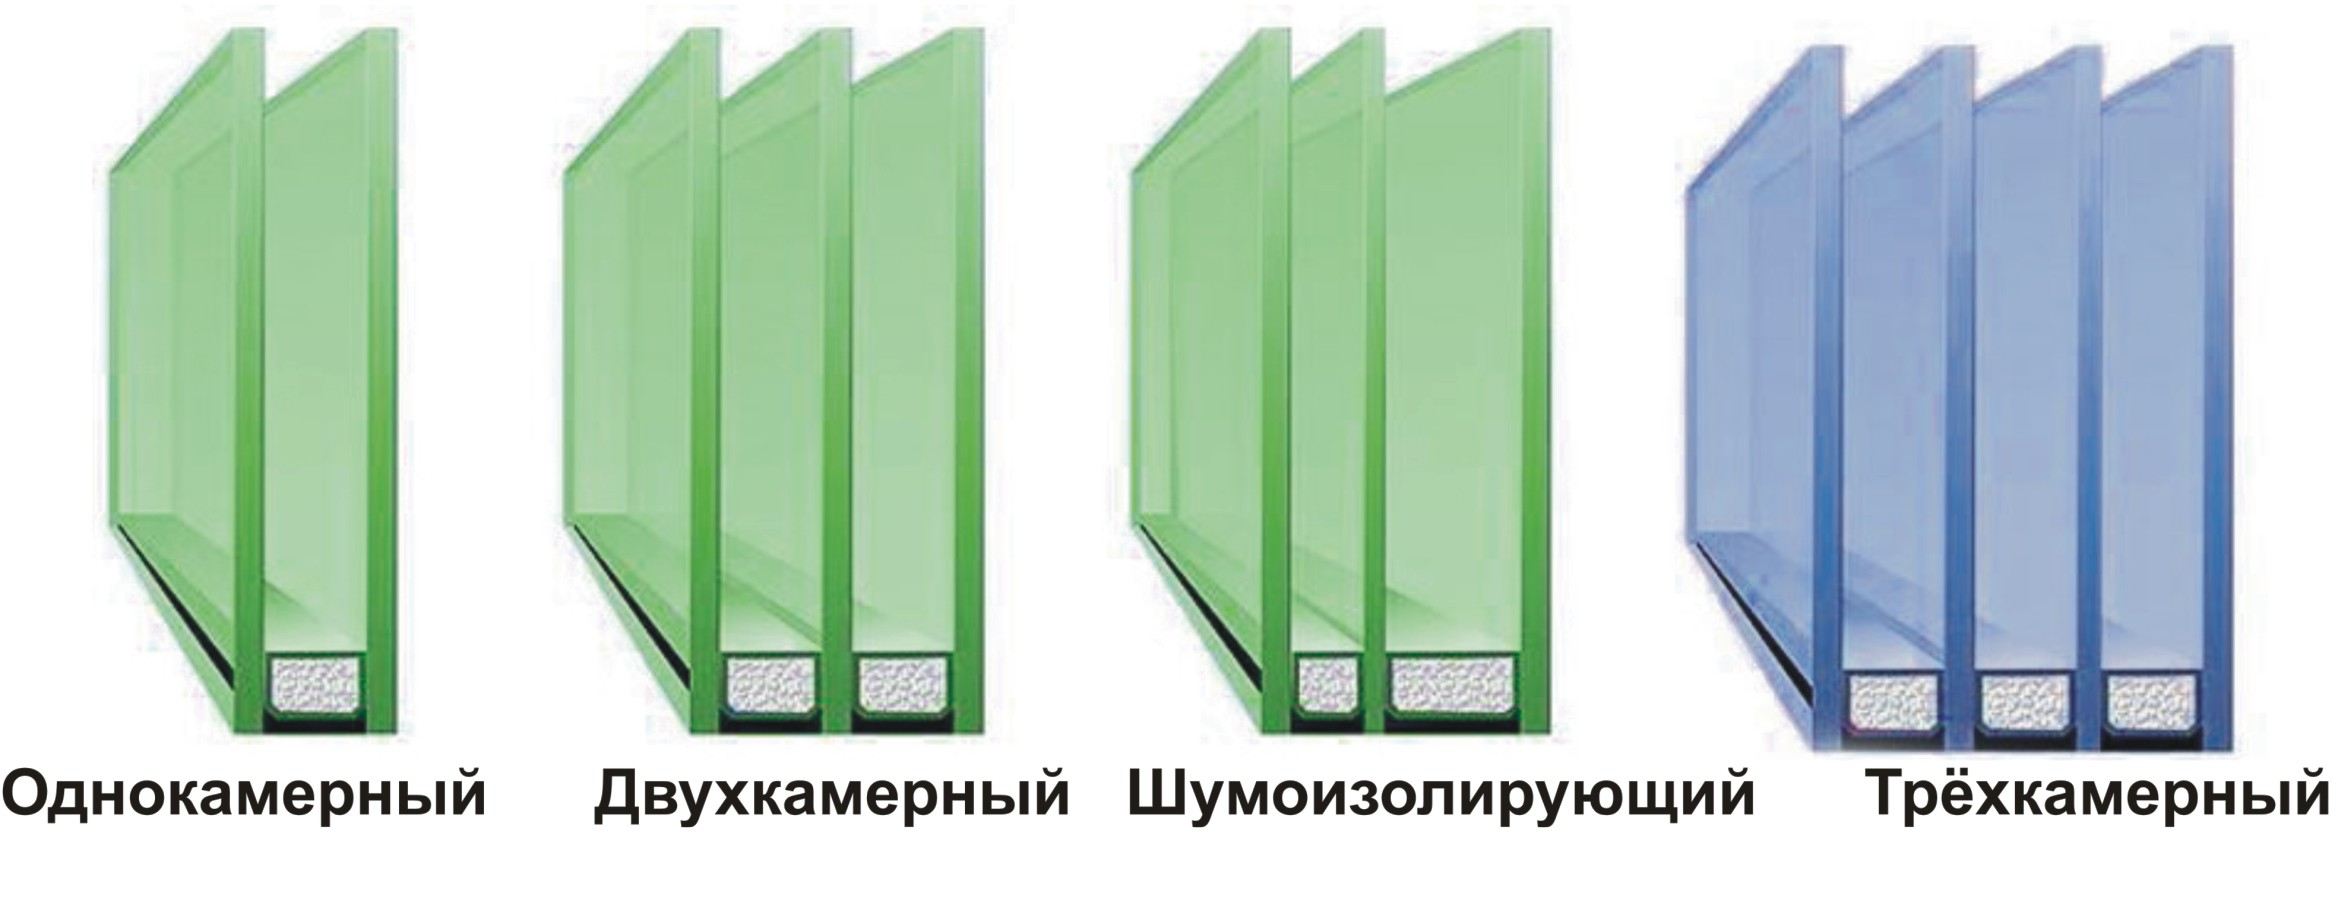
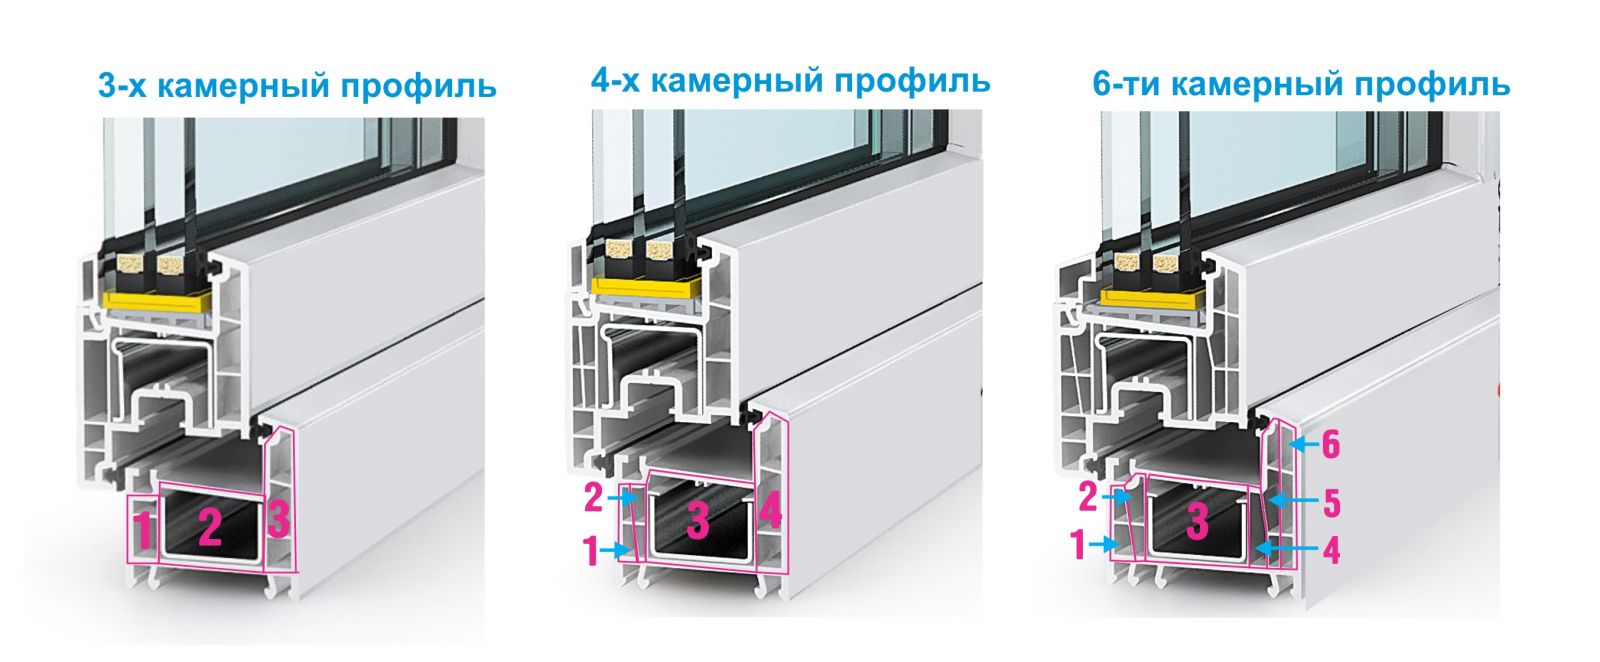
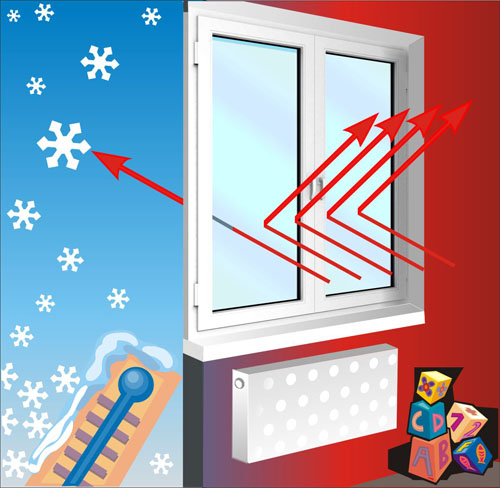
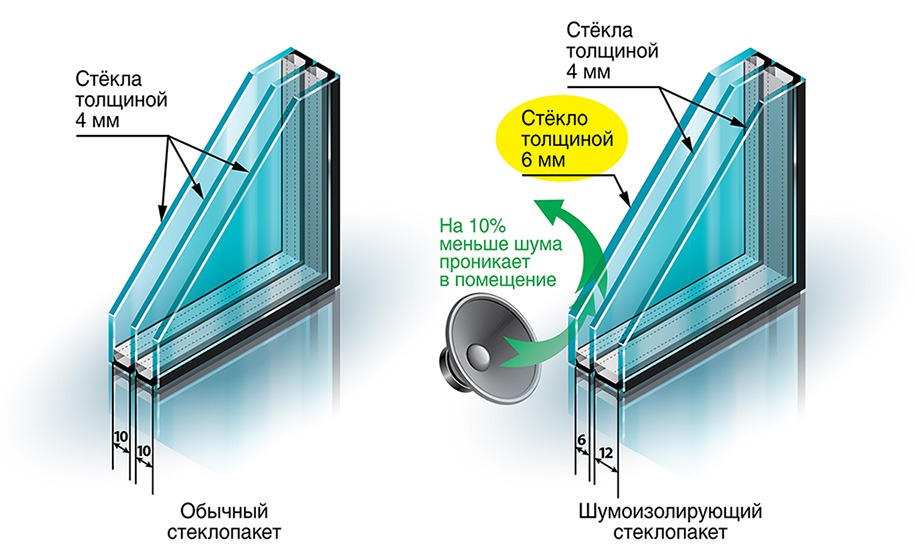
- Good thermal insulation and sound insulation. It provides a layer of air between the plates of glass. The greater the number of cameras in the structure, the less heat loss through the surface of the glass and less noise from the street penetrates.
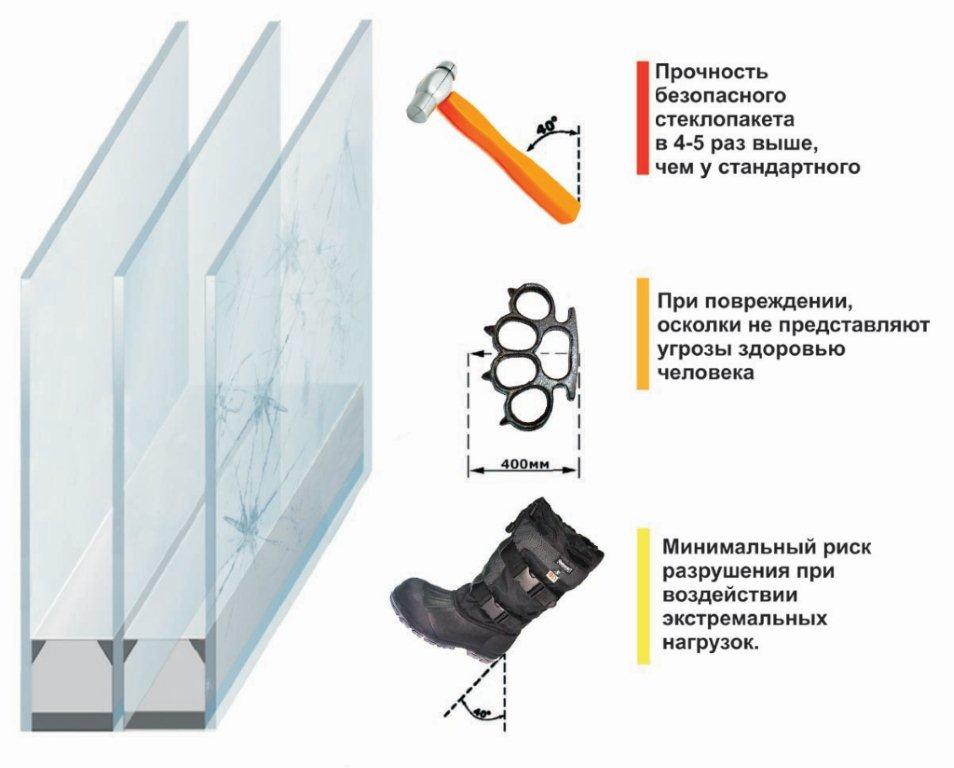
- Security. Unlike the old type of glass, in the design of glass units there is a durable film coating on top. It does not affect the aesthetic qualities, because it is completely transparent. If the glass breaks, the fragments will remain inside the film shell, and not scatter on the floor.


- Additional functions. Double-glazed windows are shock-resistant, heat-reflecting, sun-protection, mirror, with enhanced sound insulation.
- Heat reflecting the glasses are equipped with a film layer that shields the heat back into the room, reducing heat loss to a minimum.
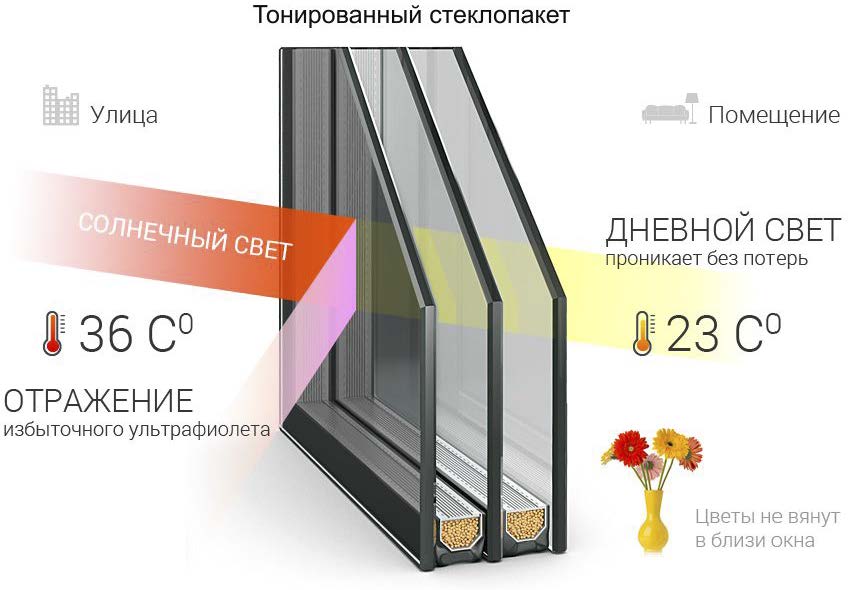
- Sunscreen models can be tinted or UV protected.
- SLR the surfaces are transparent from the side of the room and protected by a reflective film on the outside.They protect not only from the bright sun, but also from prying eyes.
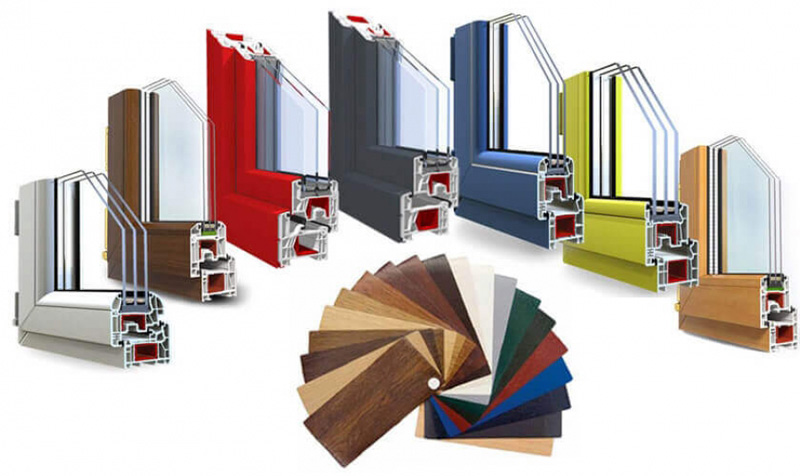
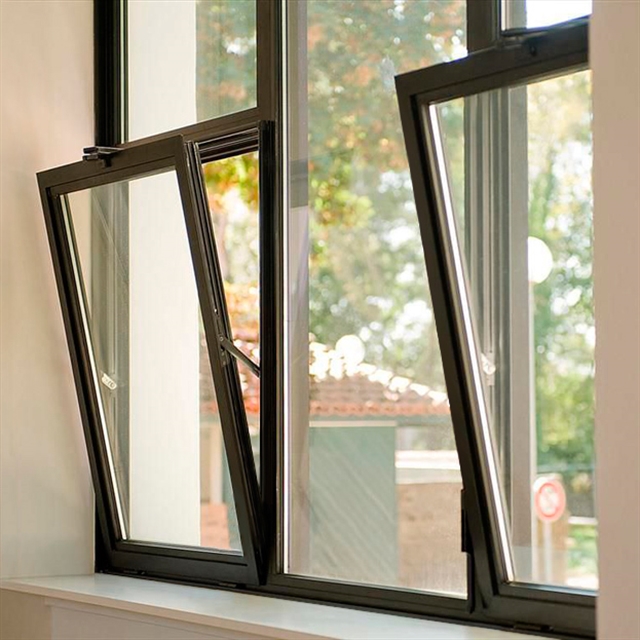
- Different types of profile. Double-glazed windows and plastic windows are not the same thing. Plastic in the design of the window only the profile, into which the double-glazed windows are inserted. The very first products were only made of PVC, but modern manufacturers offer an alternative - aluminum or wooden profile.
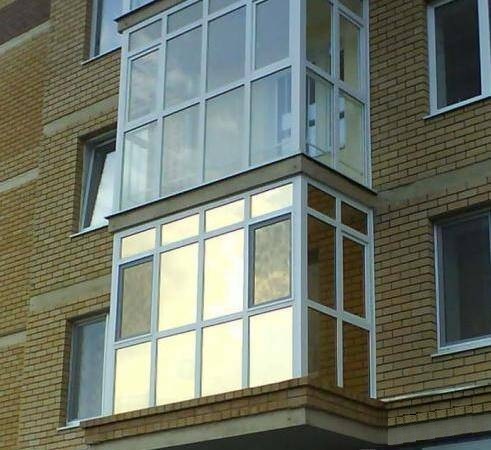
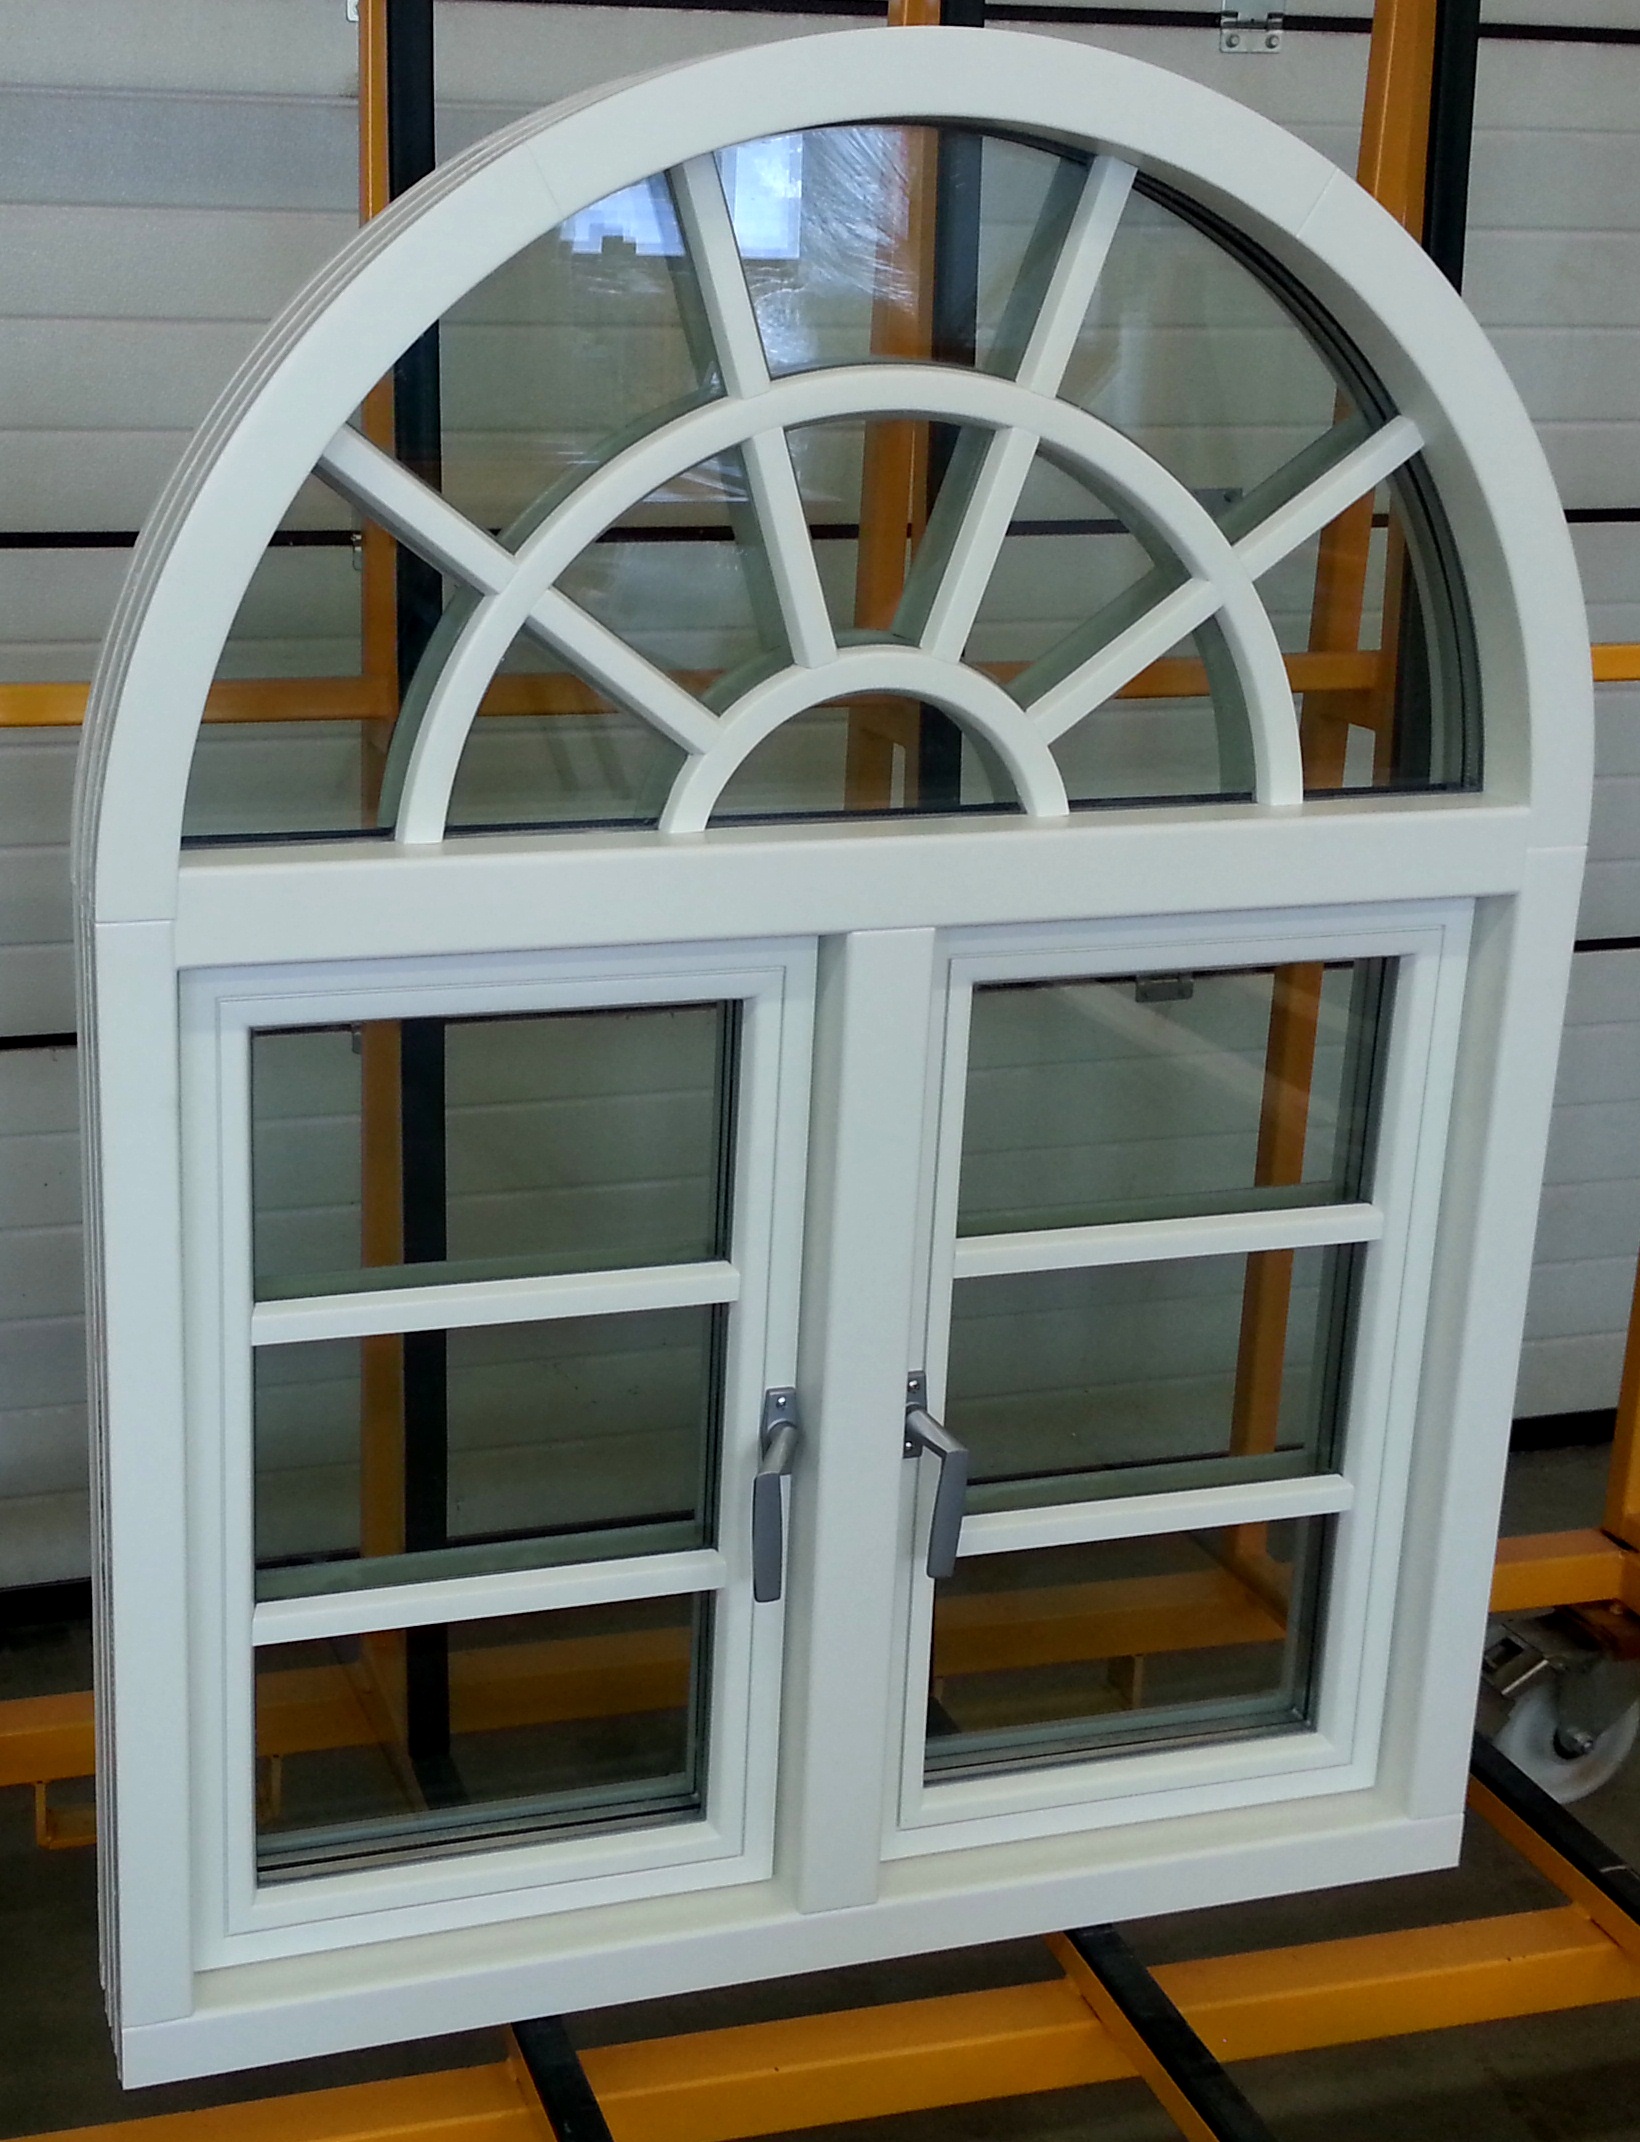
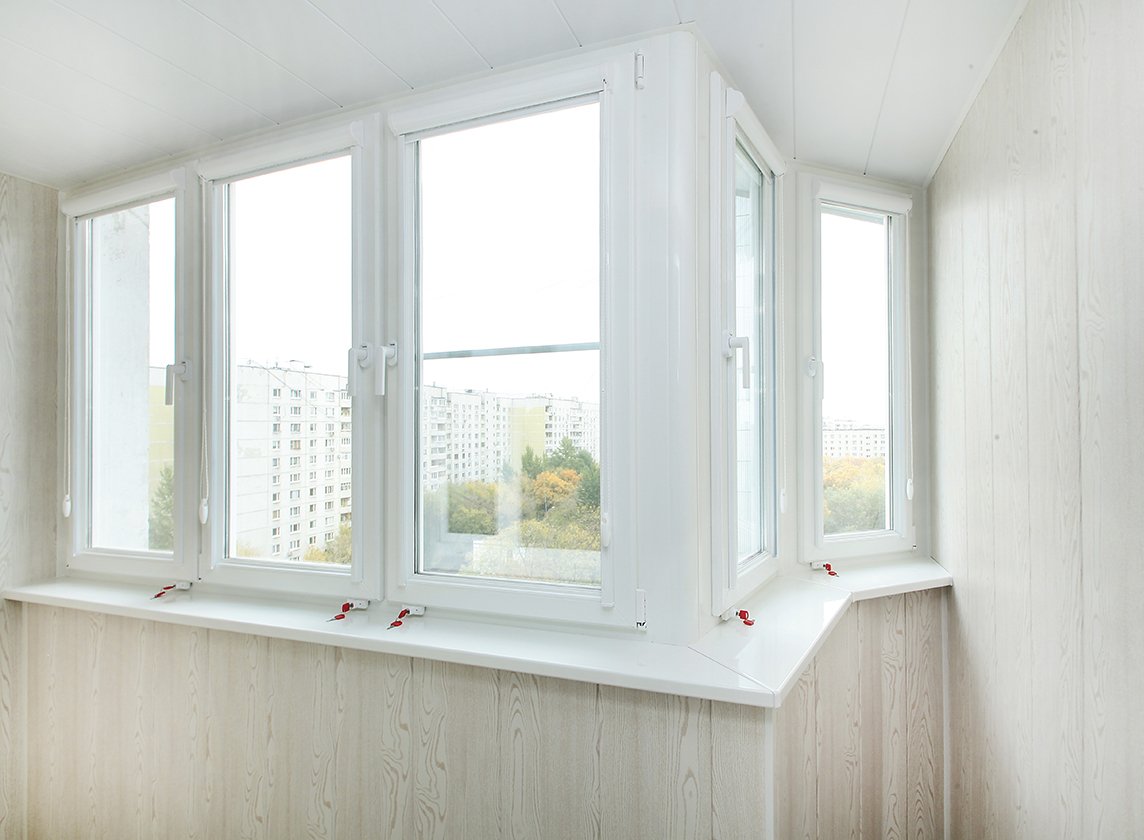
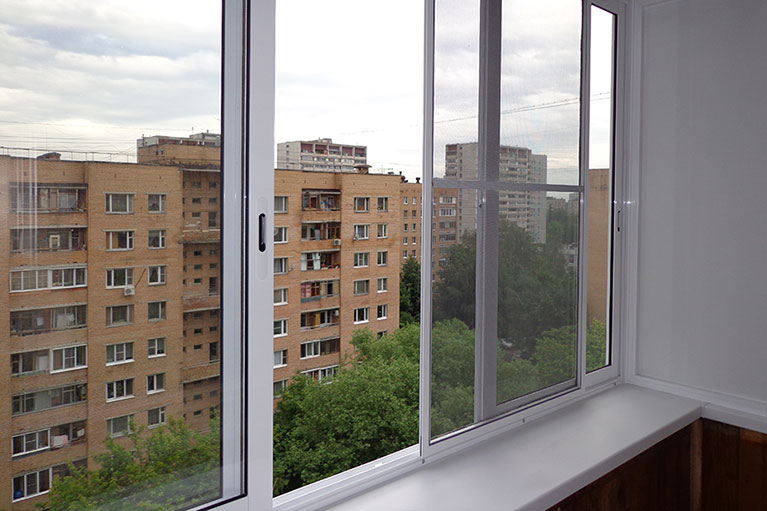
- Fit for windows of different shapes: penile, bay, arched, panoramic, balconies and loggias.
- Installation under the power of a novice or a person without experience.

- Beautiful and modern design. The profile can be not only white, but also colored, with the texture of wood, matte and glossy, with and without decor.
- Poor burning.
- Do not require complex care.
- The service life is on average 15-20 years.


The list of shortcomings is much shorter, but still they are:
- Conventionally budget price. Yes, one small window is inexpensive, but the cost of an entire window system with additional materials and installation costs can be unpleasantly surprising. And the combination of a wooden profile with double-glazed windows can not be called cheap.


- Aluminum - cold material. To insulate it, you need to mount the profile with a thermal break.This entails additional costs. The plastic profile is unstable to scratches and mechanical damage and eventually grows cloudy. Yellowish or grayish bloom is no longer washed off, the frame looks dirty.
- The design of a window with a double-glazed window does not by itself ensure maximum tightness; high-quality installation.

Norms
The reliability of the window system is provided by high-quality materials and proper installation.
Quality windows are made according to the standard. There is also a standard for installation and building codes.

Production GOST
GOST regulates such product characteristics as parameters or dimensions, types of glass, materials used, technical requirements. In addition, it specifies the methods of testing, conditions of transportation and storage of products.
The main parameter is the number of cameras. There are three types:
- JV single chamber. Consist of two layers of glass and one layer for thermal insulation.
- JV two-chamber. In their structure one layer of glass is more.
- JV multichamber. By agreement of the manufacturer with the customer, it is allowed to build a joint venture with three or more cameras.
The use of decorative elements is allowed between the glass sheets inside the joint venture.
Cameras is the space between two plates of glass. It is not necessarily filled with air. The standard allows three types of filling:
- drained air;
- inert gases (argon, krypton and related gases);
- six-sulfur
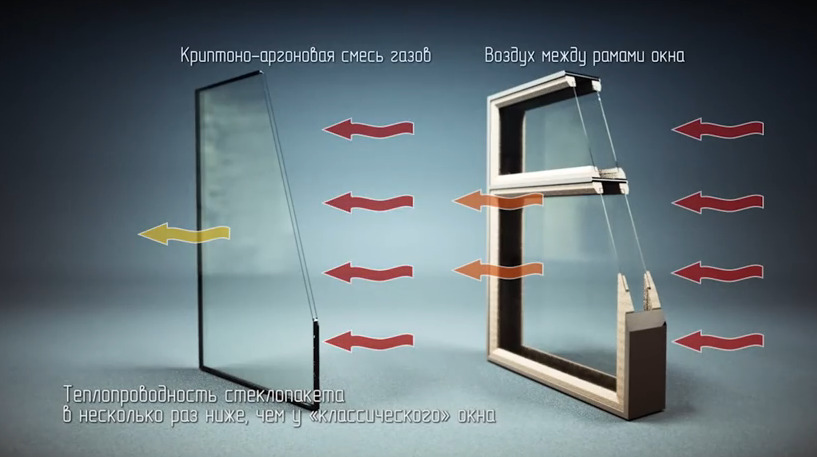
Without in-depth knowledge it is difficult to understand what the type of filling is. To delve into these details is optional. Just need to check the product data sheet. All types of gases are harmless to humans and do an excellent job with the function of the insulating layer.
The overall parameters of glass packs do not have strict limitations. They are prescribed in the supply contract. For float glass larger than 600 by 320 cm, individual requirements apply. A deviation in length and width of ± 0.5-50 mm is possible.
Also GOST establishes the nominal thickness of the joint venture. Recommended thickness - 14-60 mm. A tolerance of ± 1-1.5 mm is acceptable.


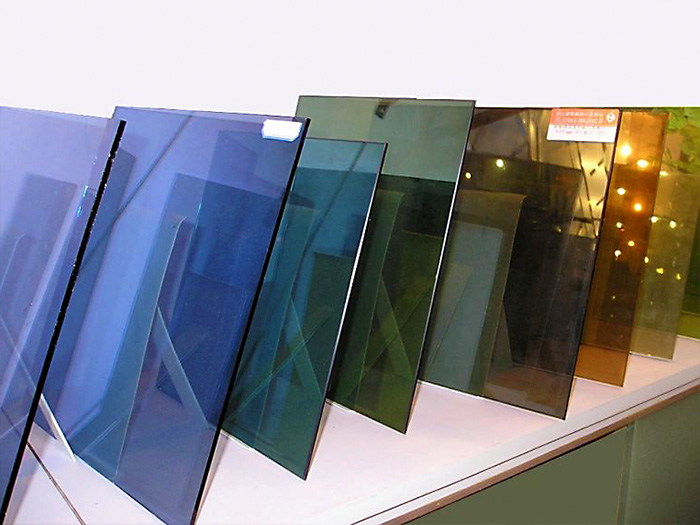
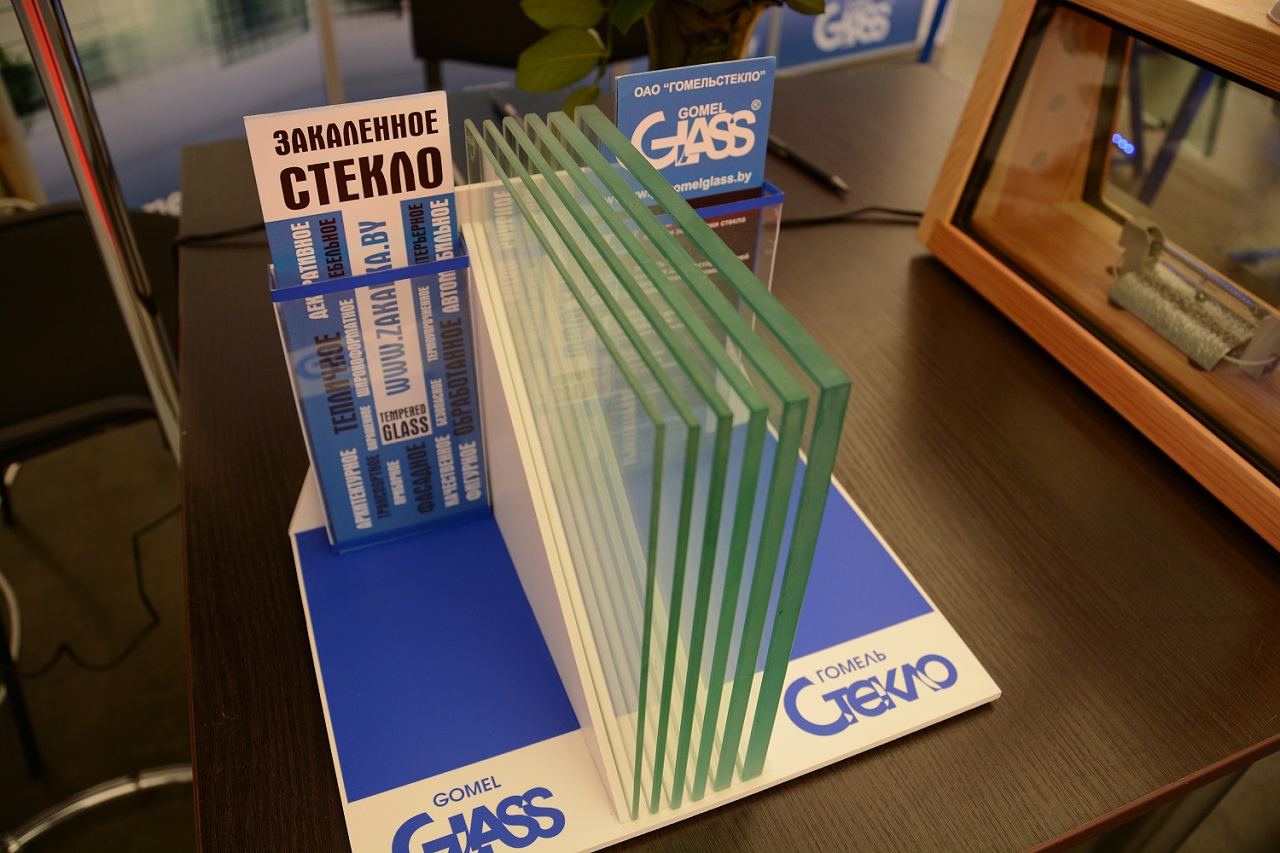
Types of glass:
- leaf colorless;
- reinforced (with polishing and without);
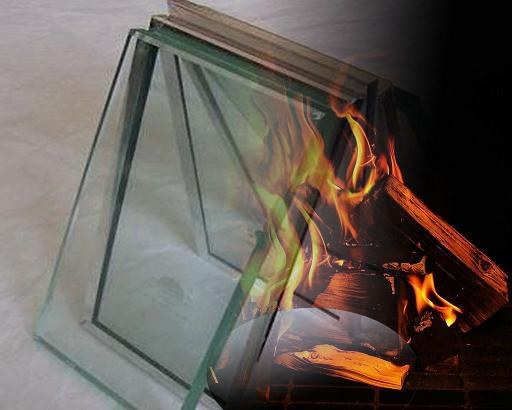
- multi-layered (shock resistant, burglar-resistant, bullet-proof, non-explosive);
- fireproof;

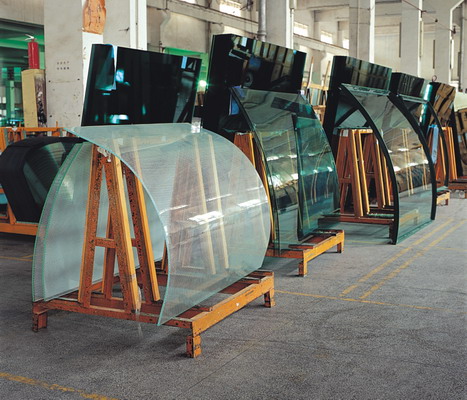
- molded (curved, convex or concave);
- high strength (resistant to chemicals, fire and mechanical damage);
- sunscreen;
- decorative.

Specifications:
- Smooth and smooth edges, sharp corners. Chips, chinks and irregularities are unacceptable.
- Finished edge. Untreated is acceptable, but the first option is safer to install.
- On the inner side of the glass sheets there should be no dust, lint, condensate, fingerprints, or other contaminants. Such material can be safely returned to the exchange to the manufacturer.
- Tightness.
- Soundproofing.
- Durability.

The last three points of each manufacturer are different.
It is important to bear in mind that changes in legal documents since 2014 allow manufacturers to prescribe their own standards. If the product complies with them, it will go on sale. For unscrupulous manufacturers, the technical parameters may differ greatly from the generally accepted ones not for the better.
Double-glazed windows can be installed in accordance with several standards. Some of them are optional.
GOST is desirable to observe when installing windows in an apartment and residential building in the city,and installation in the country implies voluntary use of recommendations.
General recommendations of installation according to the standard:
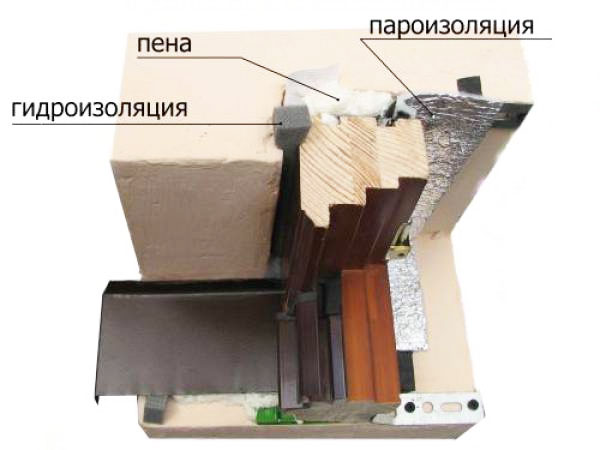
- Filling assembly seams. They must have three layers:
- external (ensures the tightness of the system);
- intermediate (responsible for insulating quality);
- internal (protects against condensation inside the glass package).
At elevated wind loads, sealing tapes are used.

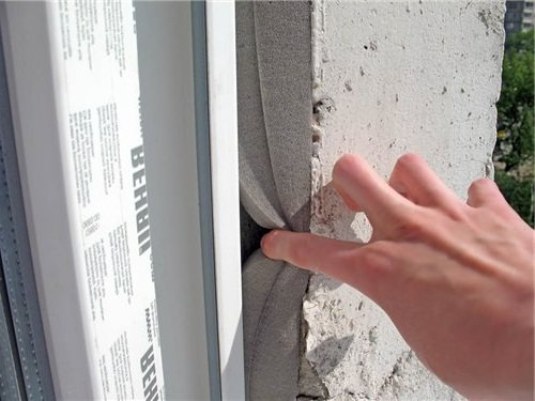
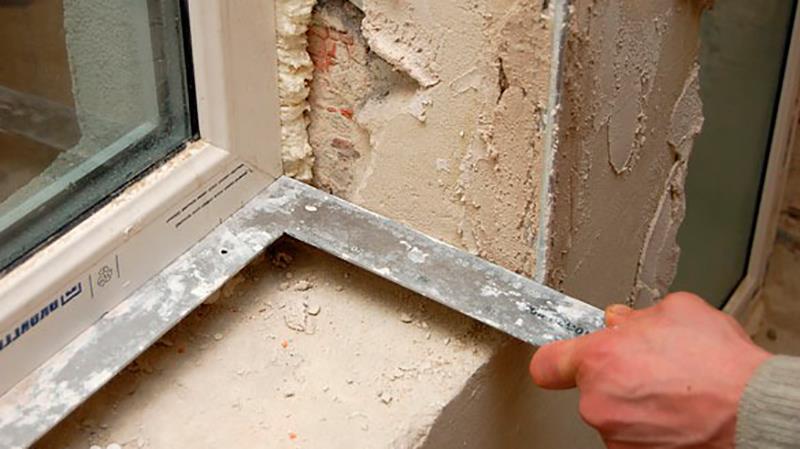
- Width of mounting clearances. This is the distance between the edge of the window frame and the wall before filling with sealant. The standard allows for gaps no more than 3 mm per 1 m. If the distance is longer, the wall should be leveled.
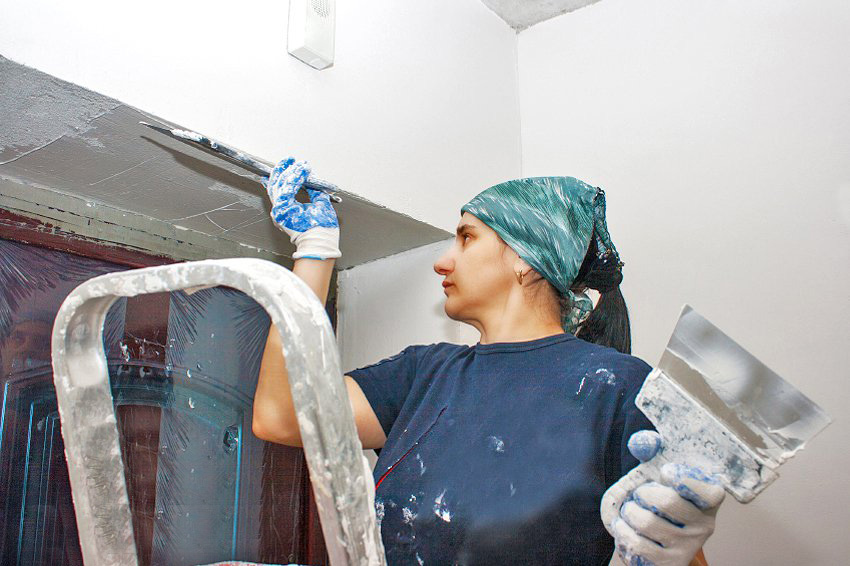
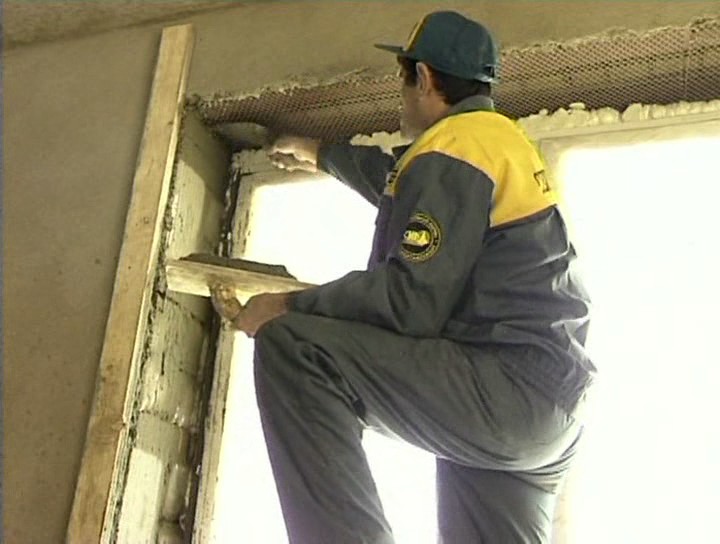
- The state of the window opening. Its surfaces must be smooth, without chips and crumbs. If the brick (aerated concrete, cinder block, wood) in the opening is uneven, they are leveled with plaster.
Before opening the windows, it is recommended to treat the window opening with a primer (primer) for better adhesion of the sealing materials to the surface.

- Fastening the window system. Here the number and location of anchors (fasteners) is important. For a double window in a typical house, 12-14 anchors are recommended.
The distance between fasteners should not exceed 70 cm.
The depth at which the fastener (dowel or screw) enters the opening is at least 40 mm.
The location of the window unit in the opening is controlled by the level. If necessary, materials with low thermal conductivity can be used for leveling.
- Window configuration The new window should match the size and shape of the outer frame to the old. If instead of a three-leaved window the installation of a bay window is planned, it should be added to the floor plan, since this is already a change in the design of the building.

Building regulations
SNiP - supporting documentation when installing windows. Building codes regulate the installation work, focusing on the insulation of the window system.
This means that the most important criterion for selection and installation is compliance with the climatic conditions of the region.
For regions with a warm climate, where the temperature of the air in frost does not fall below -20 degrees, windows with 2-3 cameras are suitable. For regions with a harsh climate, where the air temperature can drop to -30 not only in winter, but also in spring or autumn, 4-chamber double-glazed windows are recommended.
In the Siberian climate, where the temperature in winter reaches the lowest possible levels, only 5-chamber double-glazed windows are effective.
Technology installation of windows, depending on the height of the floor and the dimensions of the opening.
There are two ways: mounting a solid window or disassembling.
The whole window can be installed with the standard dimensions of the opening and at a height of up to 10 floors. If the width of the opening is more than 3 meters, the height from the floor is more than 2 meters, and installation work takes place at the level above the 10th floor, the window is installed with disassembly.
The requirements of SNiP and GOST are not difficult to observe in practice, and the effectiveness of the window system will only benefit from this.
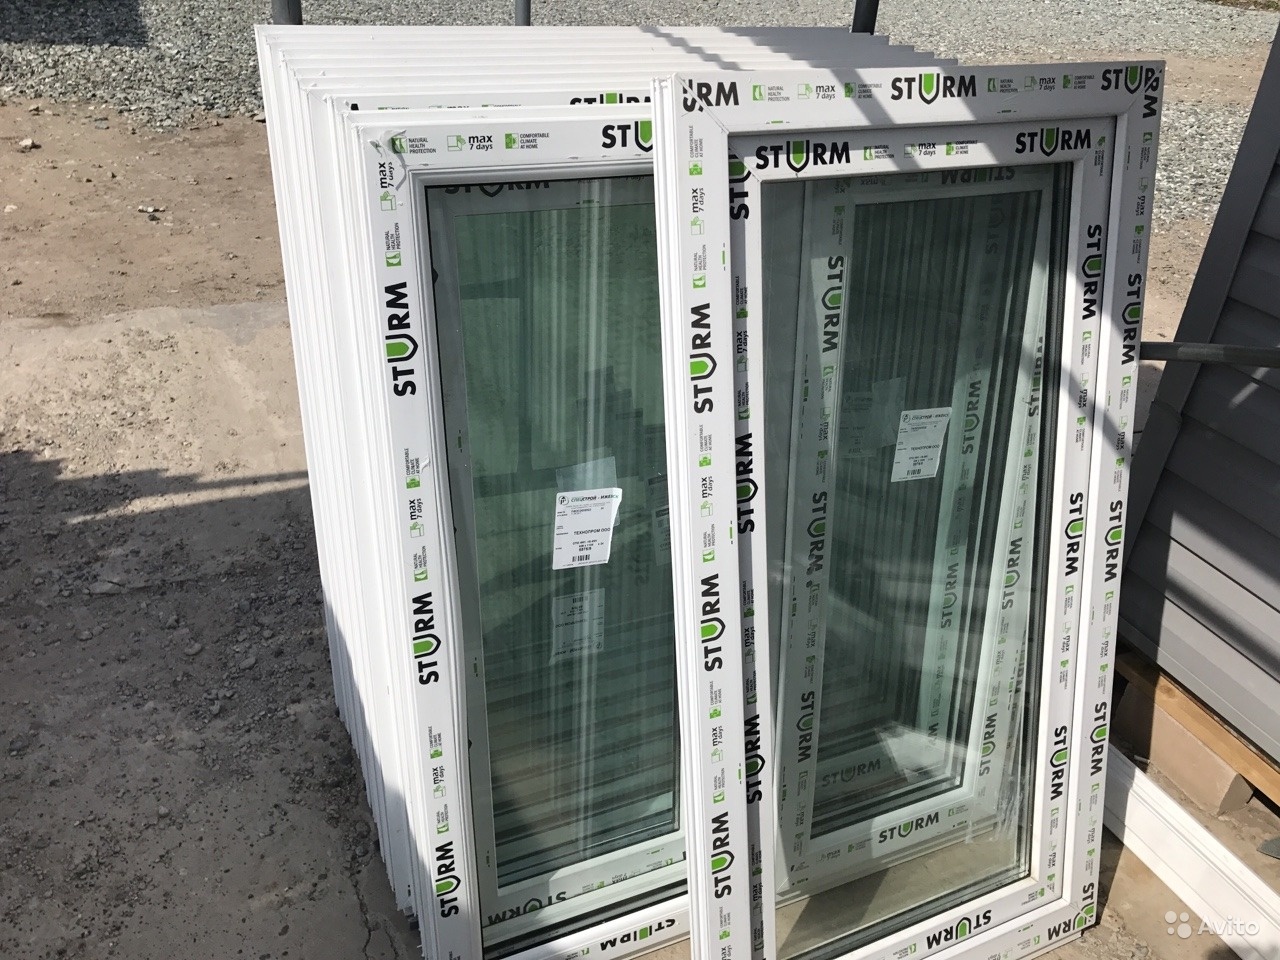
Material selection
The window system consists of double-glazed windows, profiles, auxiliary materials that are used during installation. It is important to choose the optimal solution for a particular type of room and the dimensions of the window opening.
Types of double-glazed windows (SP) differ in the number of chambers, glass blocks, the presence of additional protective layers.

The main types are six:
- JV general purpose. There are single-chamber and two-chamber. Most often filled with dried air. They have the lowest coefficient of heat transfer resistance (0.32), the highest light transmittance, minimum sound insulation (25 dB) and fire resistance class.Resistant to frost down to -40 degrees.
- Impact resistant SP or triplex. From 1 to 3 chambers, identical with the first type of insulation, better protect against directional light and ambient noise (26-28 dB), resistant to mechanical damage and shock.
- Sunscreen Sp. 1-3 chambers, higher heat loss resistance, 100% UV protection, standard sound insulation (25-26 dB).
- Energy Saving JV. 1-3 cameras. Due to the additional protective layer, they are as resistant to heat loss as possible, transmit up to 70% of directed beams, sound insulation 28 dB.
- Frost-resistant sp. 1-5 cameras. Well kept warm, better protect from noise, resistant to freezing at a temperature of -55 degrees.
- Soundproofing joint venture. 1-4 cameras, good thermal protection, sound insulation 34-35 dB, frost resistance up to -45.
- Multifunctional SP. Combine the advantages of all other species.


Double-glazed windows may vary in appearance. External differences depend on what type of decoration is used and whether it is at all. By this criterion, windows are divided into models with and without decor.
Models without decor - ordinary transparent windows. May be straight or molded (convex).
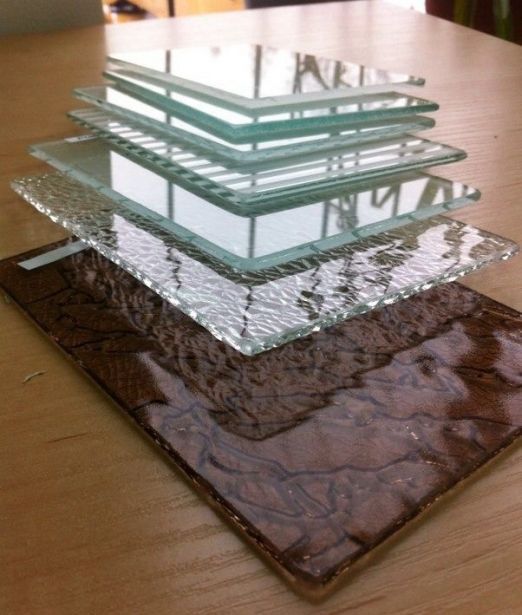
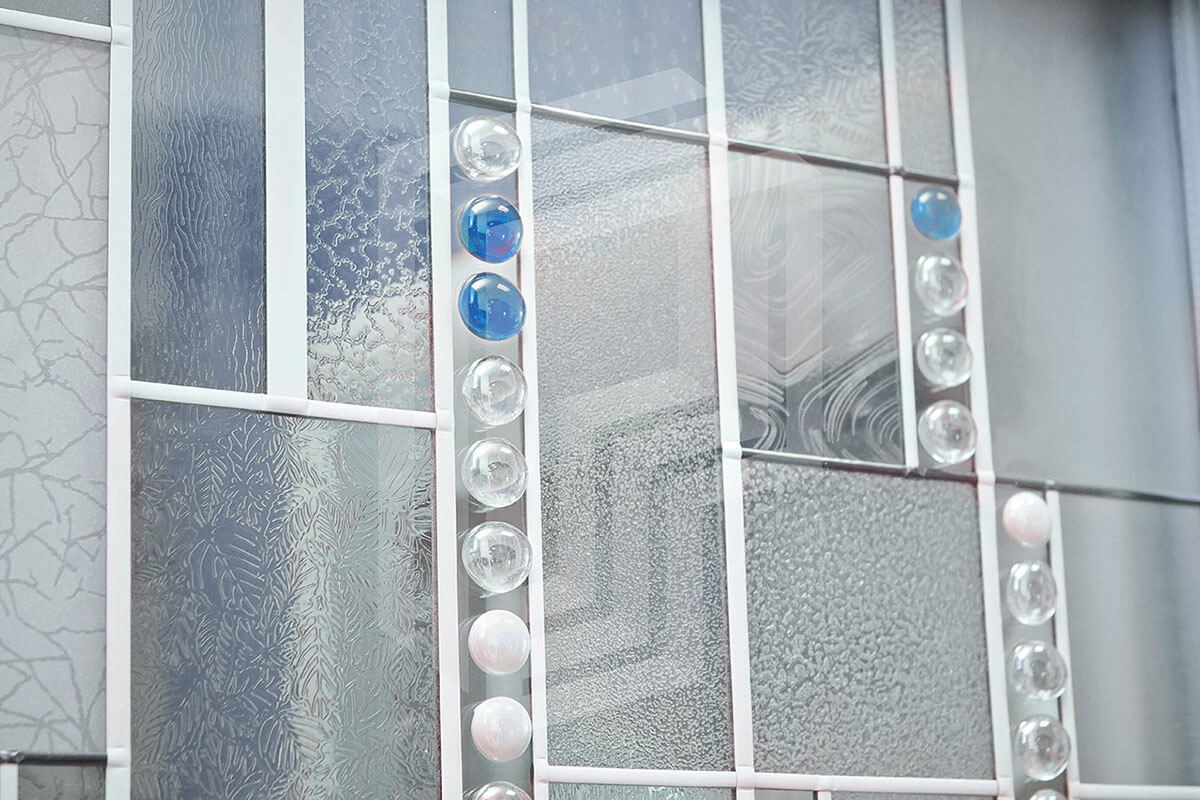
Decorative windows are decorated in different ways. Five common ways to decorate glass packs:
- Texturing. The outer and inner surfaces of the glass during manufacture are given a relief shape. This is beautiful, but impractical - nothing is visible through the textured glass panes. They are used indoors, for example, between the bathroom and toilet.
- Application of the film. Self-adhesive film for the joint venture is divided into several types: tinted, mirrored, art-tinted, decorative. The decorative film, as a rule, imitates sprasy of various shapes or turns. These stained glass windows are practically not made because of the high cost of work.
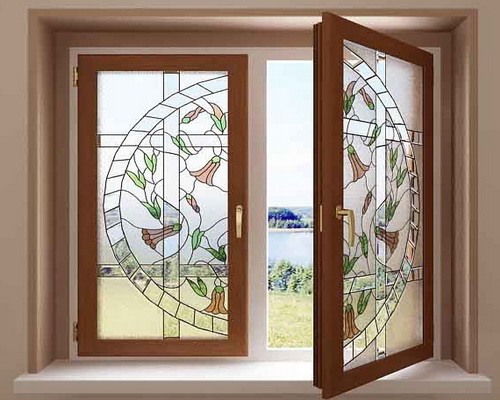
- Internal spros. This is a drawing made on glass using a profile made of different materials. They are transparent, gold, silver, white and in a few more palettes of more vivid shades.
Inside the window, usually used contrasting draws for a bright pattern, and outside - in tone with the profile.
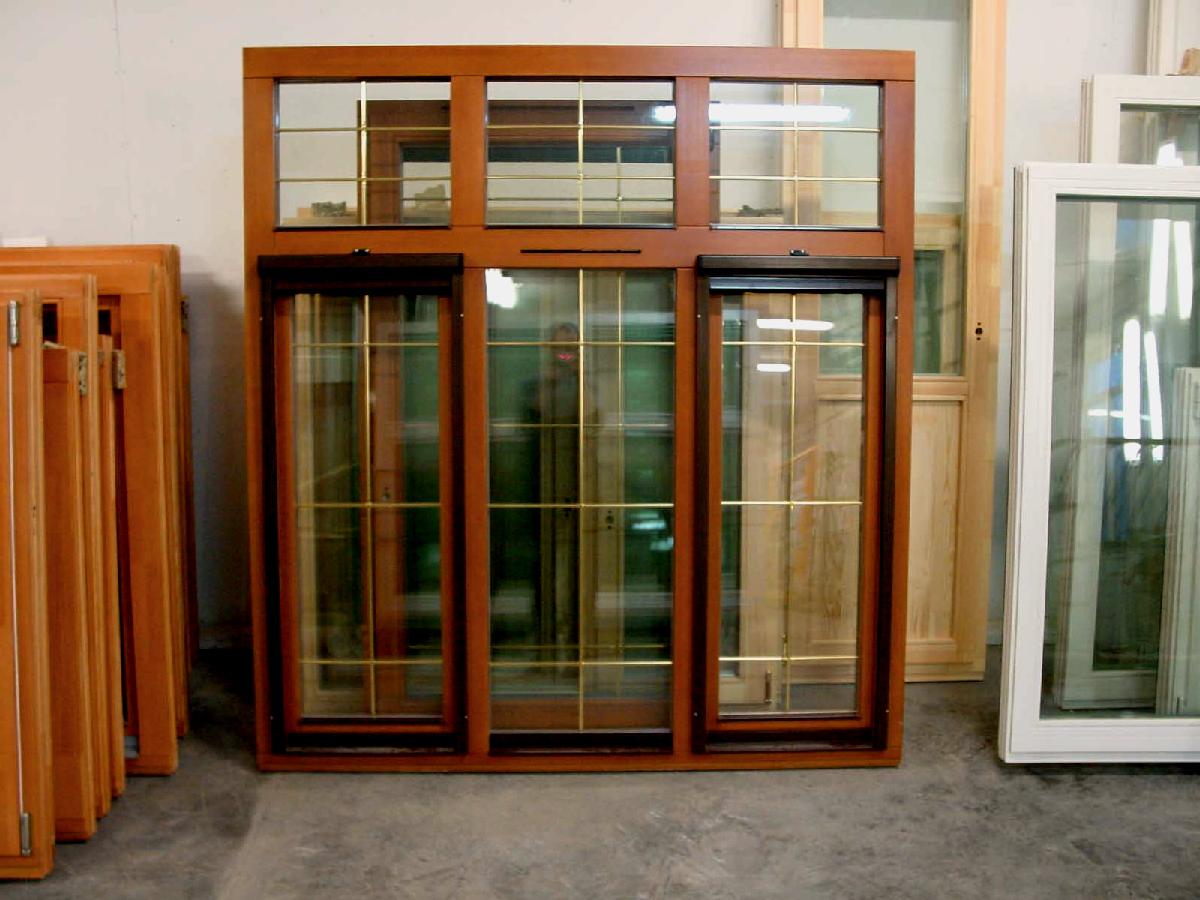
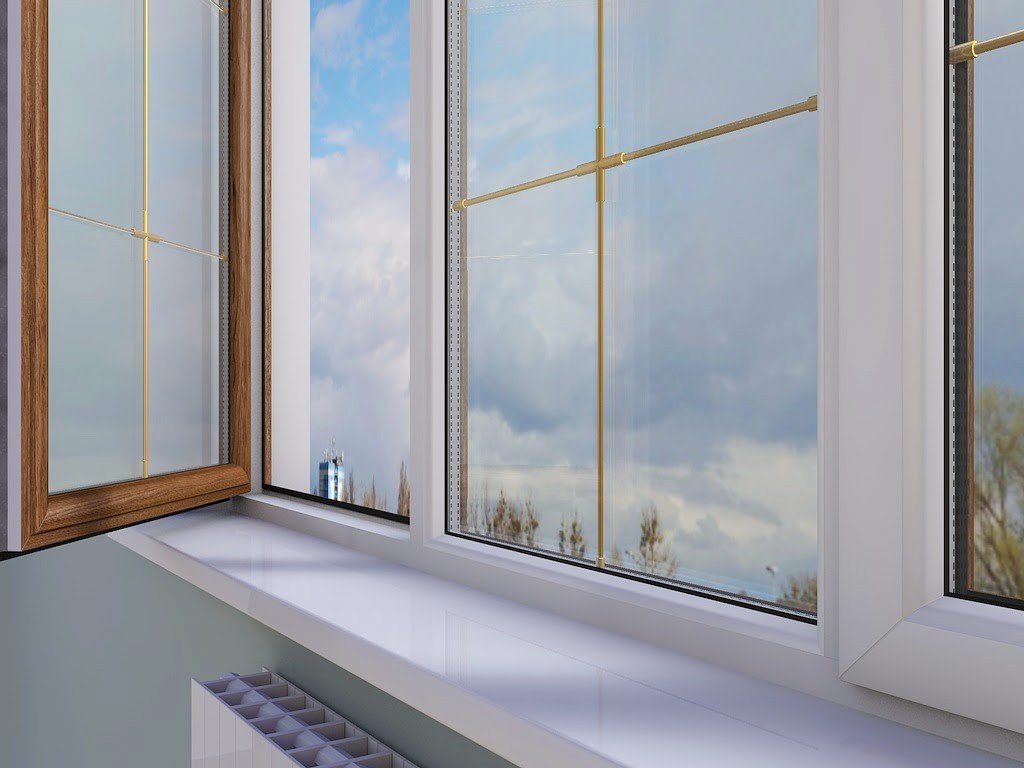
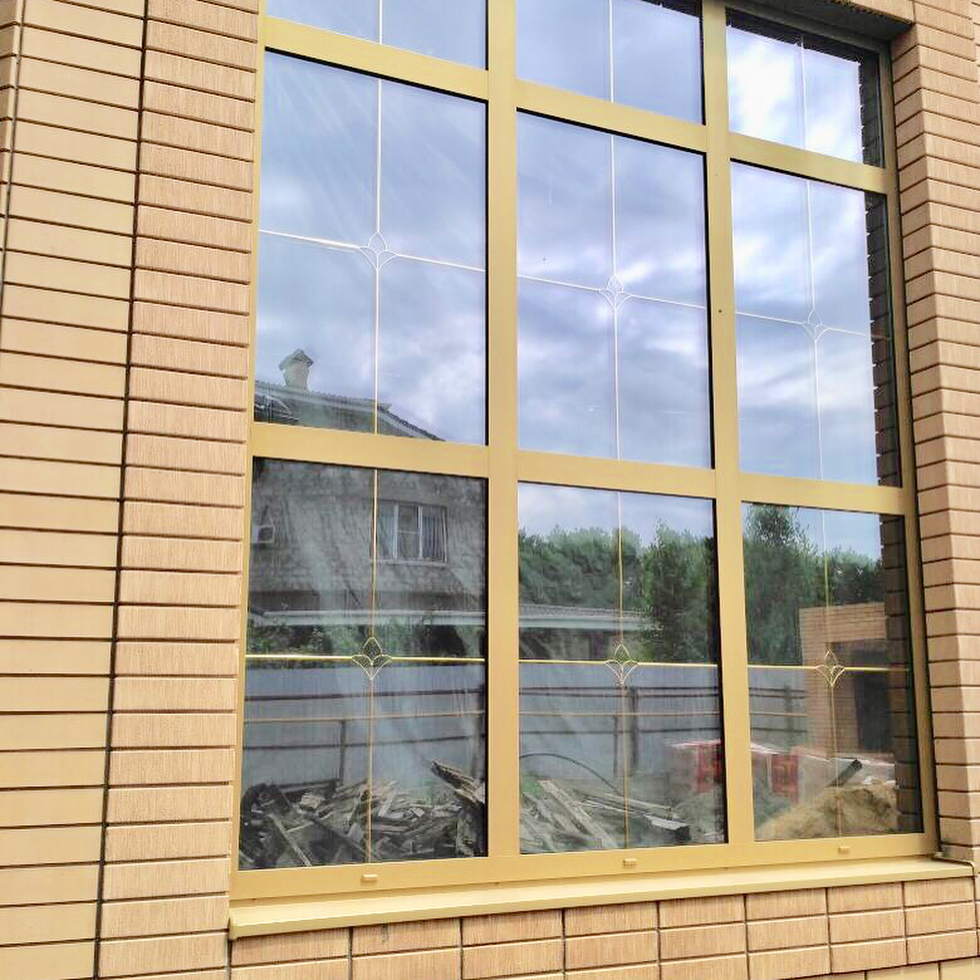
- External spros. They are glued to the glass outside, have the same thickness as the part of the profile protruding above the window and the same color. Because of this, the design looks solid and original, as if the profile has a complex carved shape.
- Profile decor. It is diverse and depends on the material from which the profile is made.

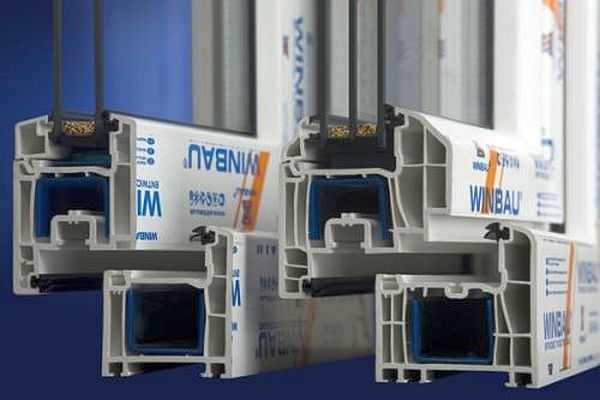
PVC, wood and metal are used as the material for making the profile.
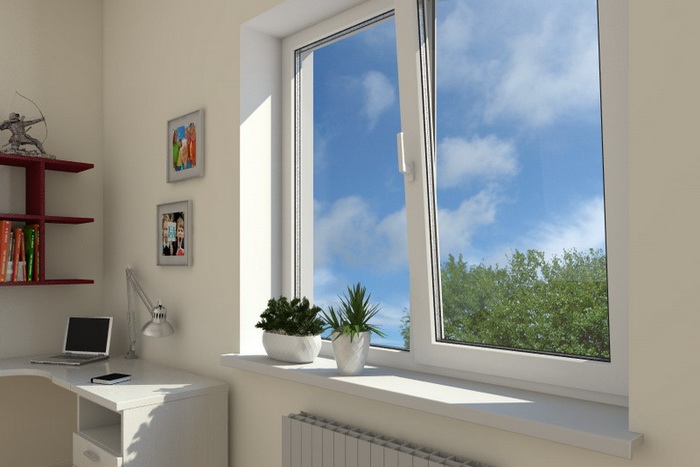
Plastic profile The most common. It looks concise and modern, does not require special care, does not lose its attractive appearance for a long time. The price of PVC profiles is lower than that of wooden or aluminum frames. Plastic has suitable weight for window frames.
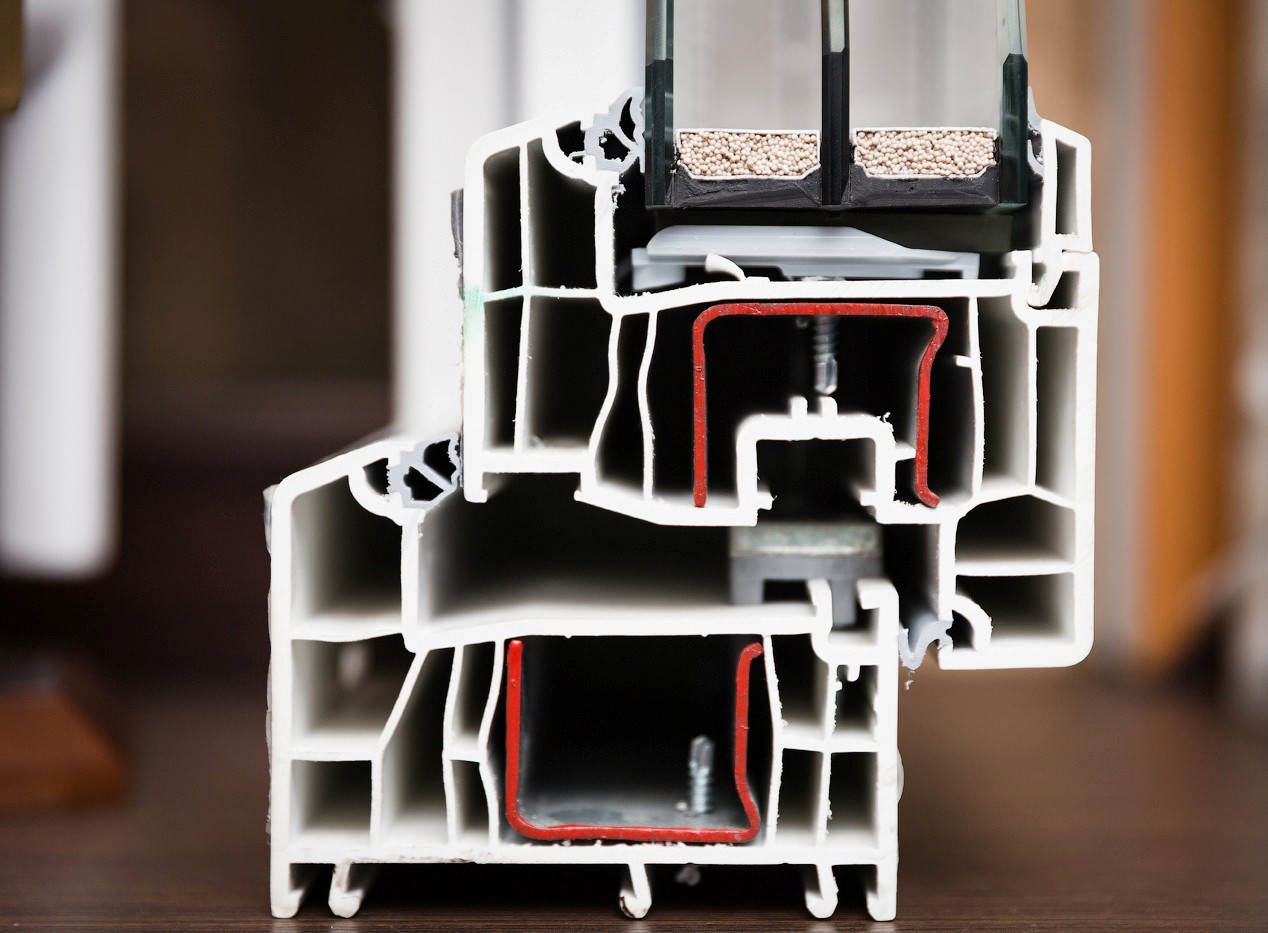
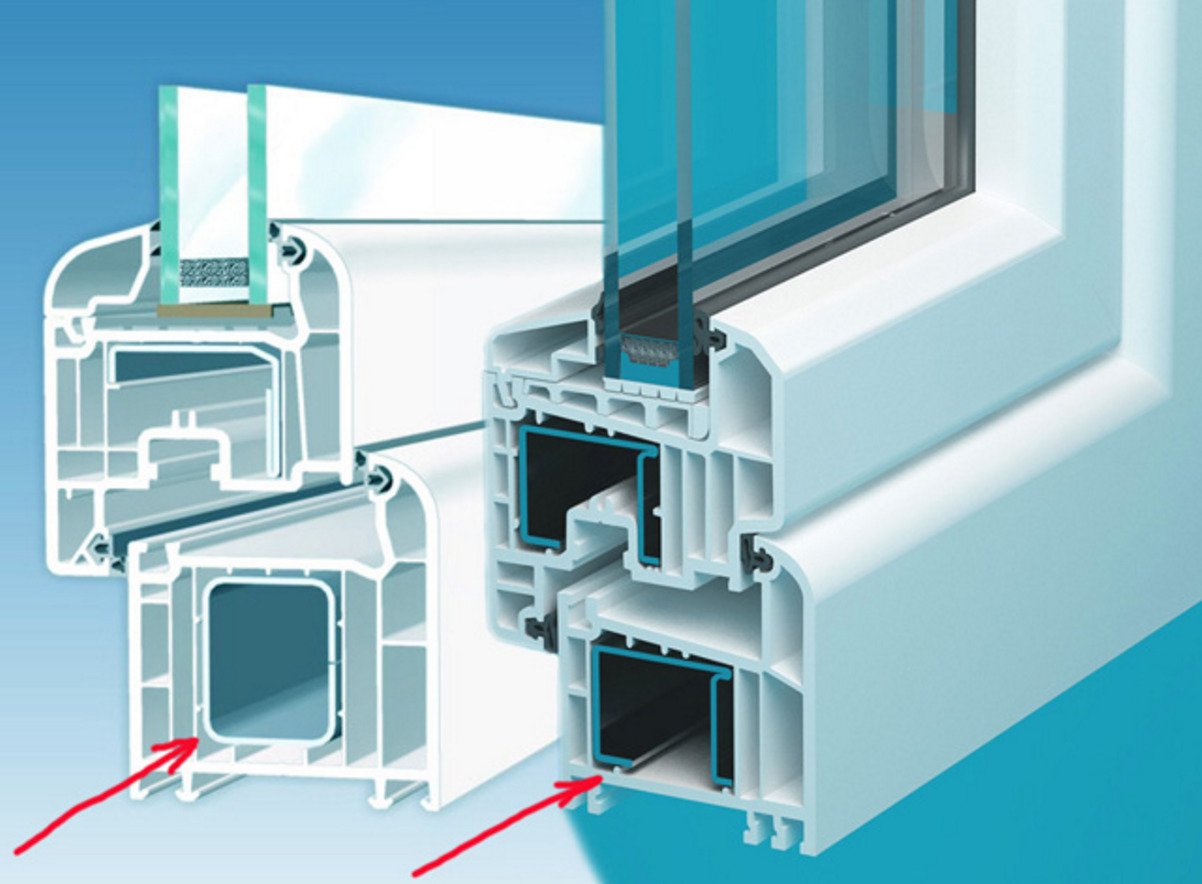
Another important characteristic of PVC profile is its internal structure. Inside the frame is divided into many small sections, which are filled with air. This makes the frame warm and durable. The walls of small compartments inside play the role of stiffeners and do not allow the frame to deform under the weight of glass and wind loads.
PVC profile is versatile in terms of design. Plastic frames can be absolutely any color: white, brown, red, green, yellow, and other colors. Also, a film or polymer coating on top can imitate metal or wood frames.
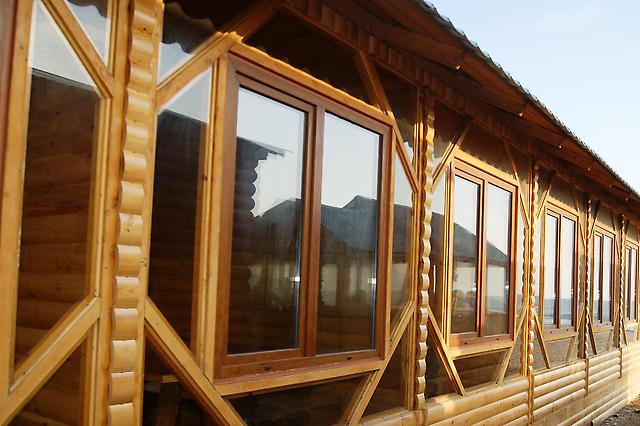
Wooden profile loses plastic in many ways. It is much more expensive, heavier, requires careful maintenance and fewer features in the design.
Its service life is less than plastic.If you do not handle it with protective agents, the tree will begin to darken and crumble. Over time, small gaps will appear between the frame and the glass, which will affect the insulation and sound insulation of the room.

However, there are pluses: the material is natural and harmless, and wood in the interior and exterior will always look expensive and of high quality. In any case, it will last 15–20 years, and with good care it’s longer.
Glass is perfectly combined with plastic frames with textural elements, decor, painted or film stained glass pattern.
Aluminum profile also used less plastic. It is more expensive and at the same time colder. Of the advantages: corrosion resistance, durability, low weight.
The low weight of aluminum is important in that it provides more options during installation work.
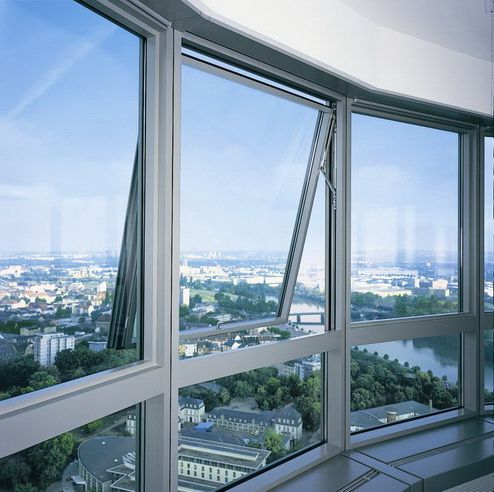
Such a profile is durable, but does not load window openings in a deplorable operational condition. It is less wide and massive, therefore it is suitable for installation in openings of any size, and even on small balconies. Due to the fact that the frame will be narrow, the space will visually expand, and the lighting in the room will be better.
Finally, due to the fact that the metal frames are many times lighter than wooden and plastic, it is possible to install a window profile with removal from aluminum: bay windows and balconies.
This will not be considered a redevelopment and will give a tangible visual effect in a small room.
Important additions
Here we are not talking about a set of tools for installation, but about those elements that become an integral part of the design when installing windows.
First of all it is a plaster mix. It is not necessary to use it to install windows for the first time, in an even opening. But after dismantling the old frame, the surface of the opening usually needs to be redecorated. If you do not make it as flat as possible, there will be large gaps between the frame and the wall. This affects the integrity and insulation qualities of the window system.
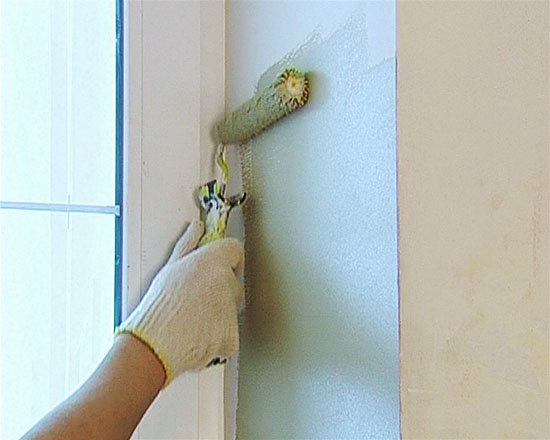
Next is the primer or priming composition. The most convenient way to use a primer in an aerosol can. It is sprayed onto the surface of the opening for better adhesion of the mounting foam with the plastering layer.
After the primer and just before applying the foam, the opening can be treated with water from a spray bottle. This will accelerate the polymerization process (solidification) of the foam.
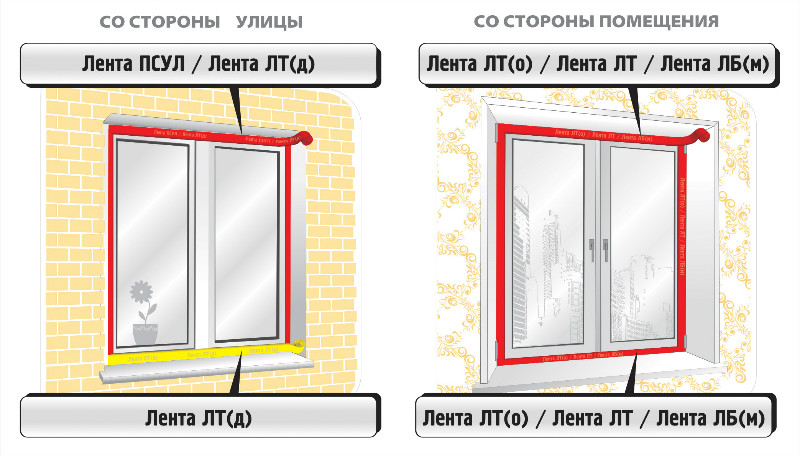
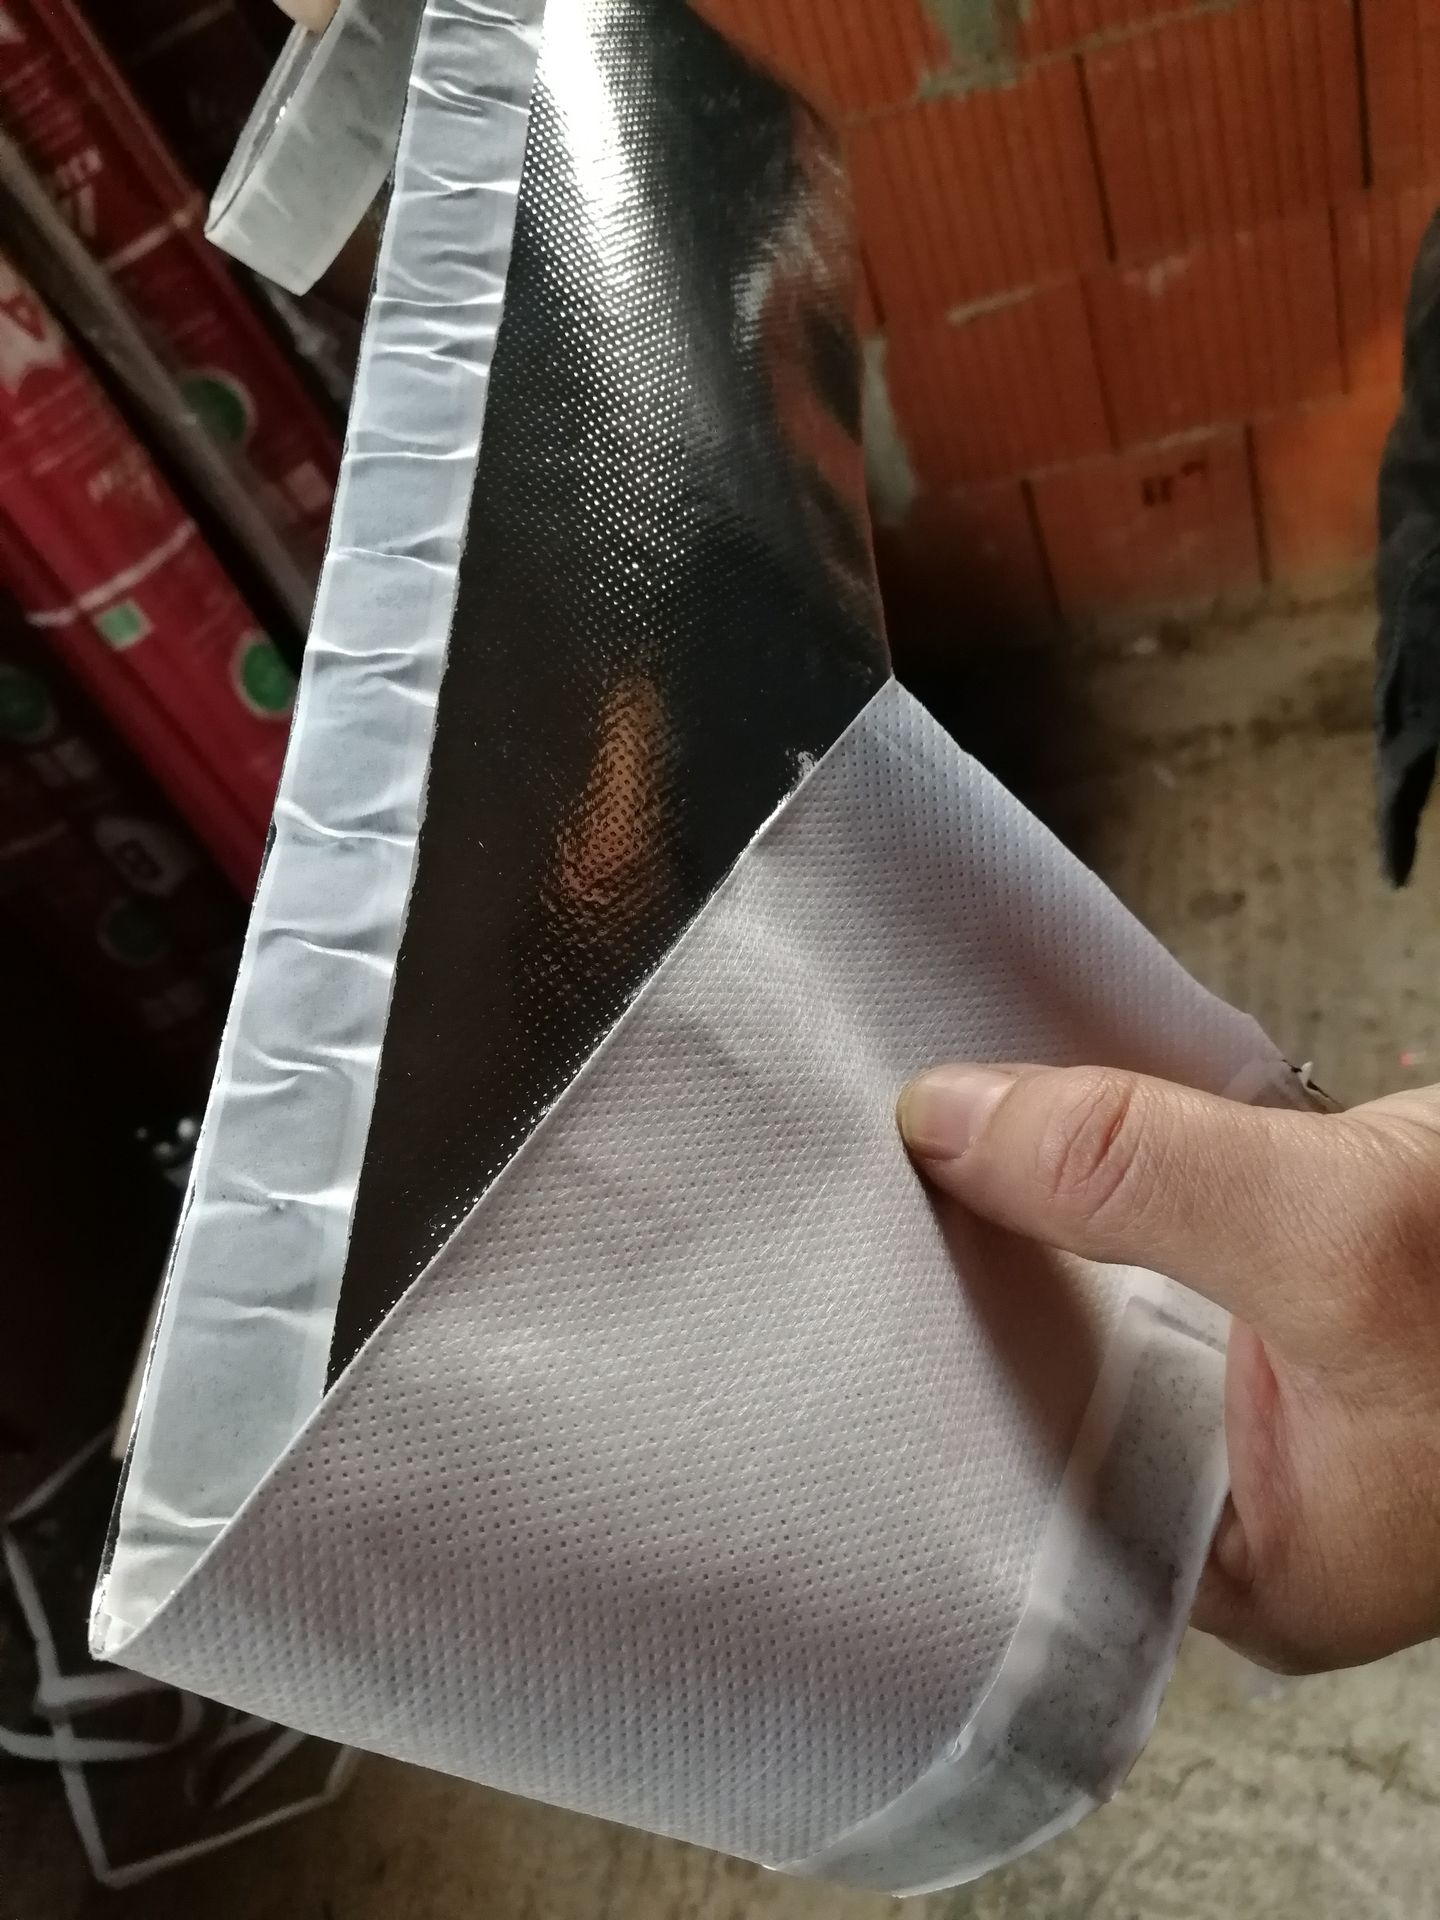
To fill the mounting joints, you need a vapor barrier metallized tape, double-sided vapor barrier tape, a self-expanding sealing tape (PSUL) and mounting foam.


It is important to choose a mounting foam according to the season and weather conditions. There are three types of foam: summer, winter and all-season.
Summer is permissible to use at a temperature not lower than 20 degrees indoors and outside the window. Winter and all-season retain their properties when installing up to -18 degrees.
After polymerization, they behave in the same way, ensuring tightness and preventing heat loss. However, the use of foam, unsuitable for the season, can reduce the effectiveness of the seams to zero.
It is advisable to purchase all these materials from the same manufacturer, since their compositions are as close as possible to each other.

Tools and accessories
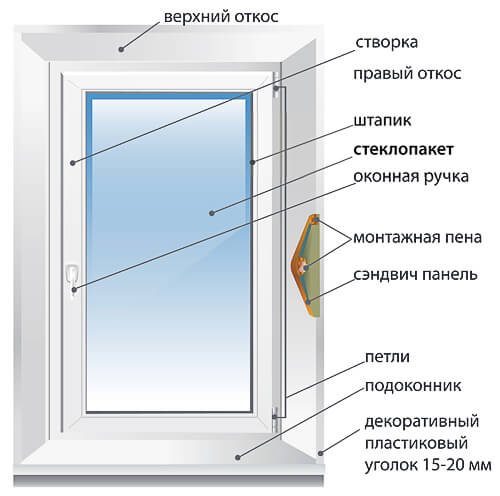
The window system is not only a profile and double-glazed windows. The window should open to ventilate and adjust the heat transfer at different times of the year, any window has a window sill, elements of internal and external decoration.
A part of additional elements is included in the package of the window system, and a part must be purchased separately.
The mandatory components of the kit are all functional parts of the system. As a rule, they are included in the price of the profile with double-glazed windows and are selected with maximum accuracy.
It is recommended to purchase components and windows of the same manufacturer so that the parts are manufactured according to one standard.

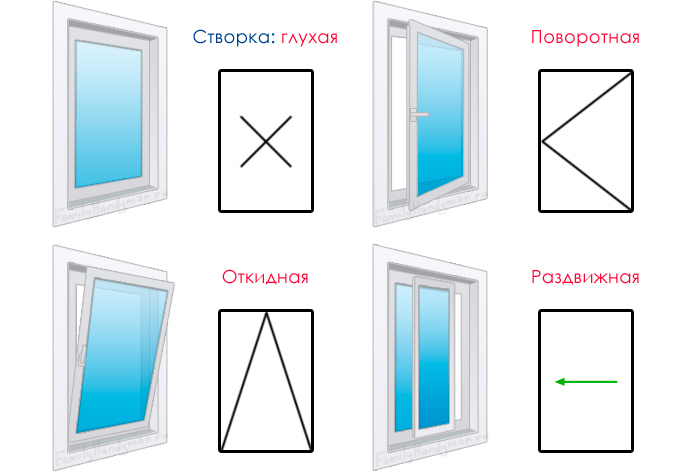
The window system consists of a frame, sashes (in the amount of 1 or more), double-glazed windows and hinges. This minimum kit is supplemented with fasteners. And, of course, it is necessary to have accessories: locking mechanisms and handles that regulate the position of the valves.
Fittings can perform more functions. There is a swivel and folding, combined accessories, fittings-locking window sash for ventilation, protection against burglary and accidental rotation of the handle.
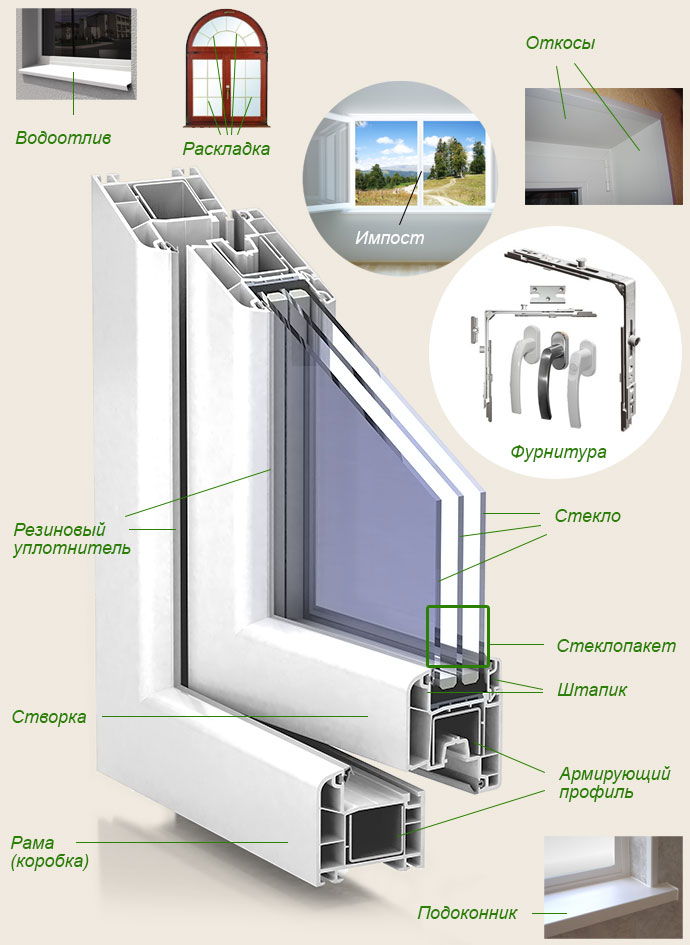
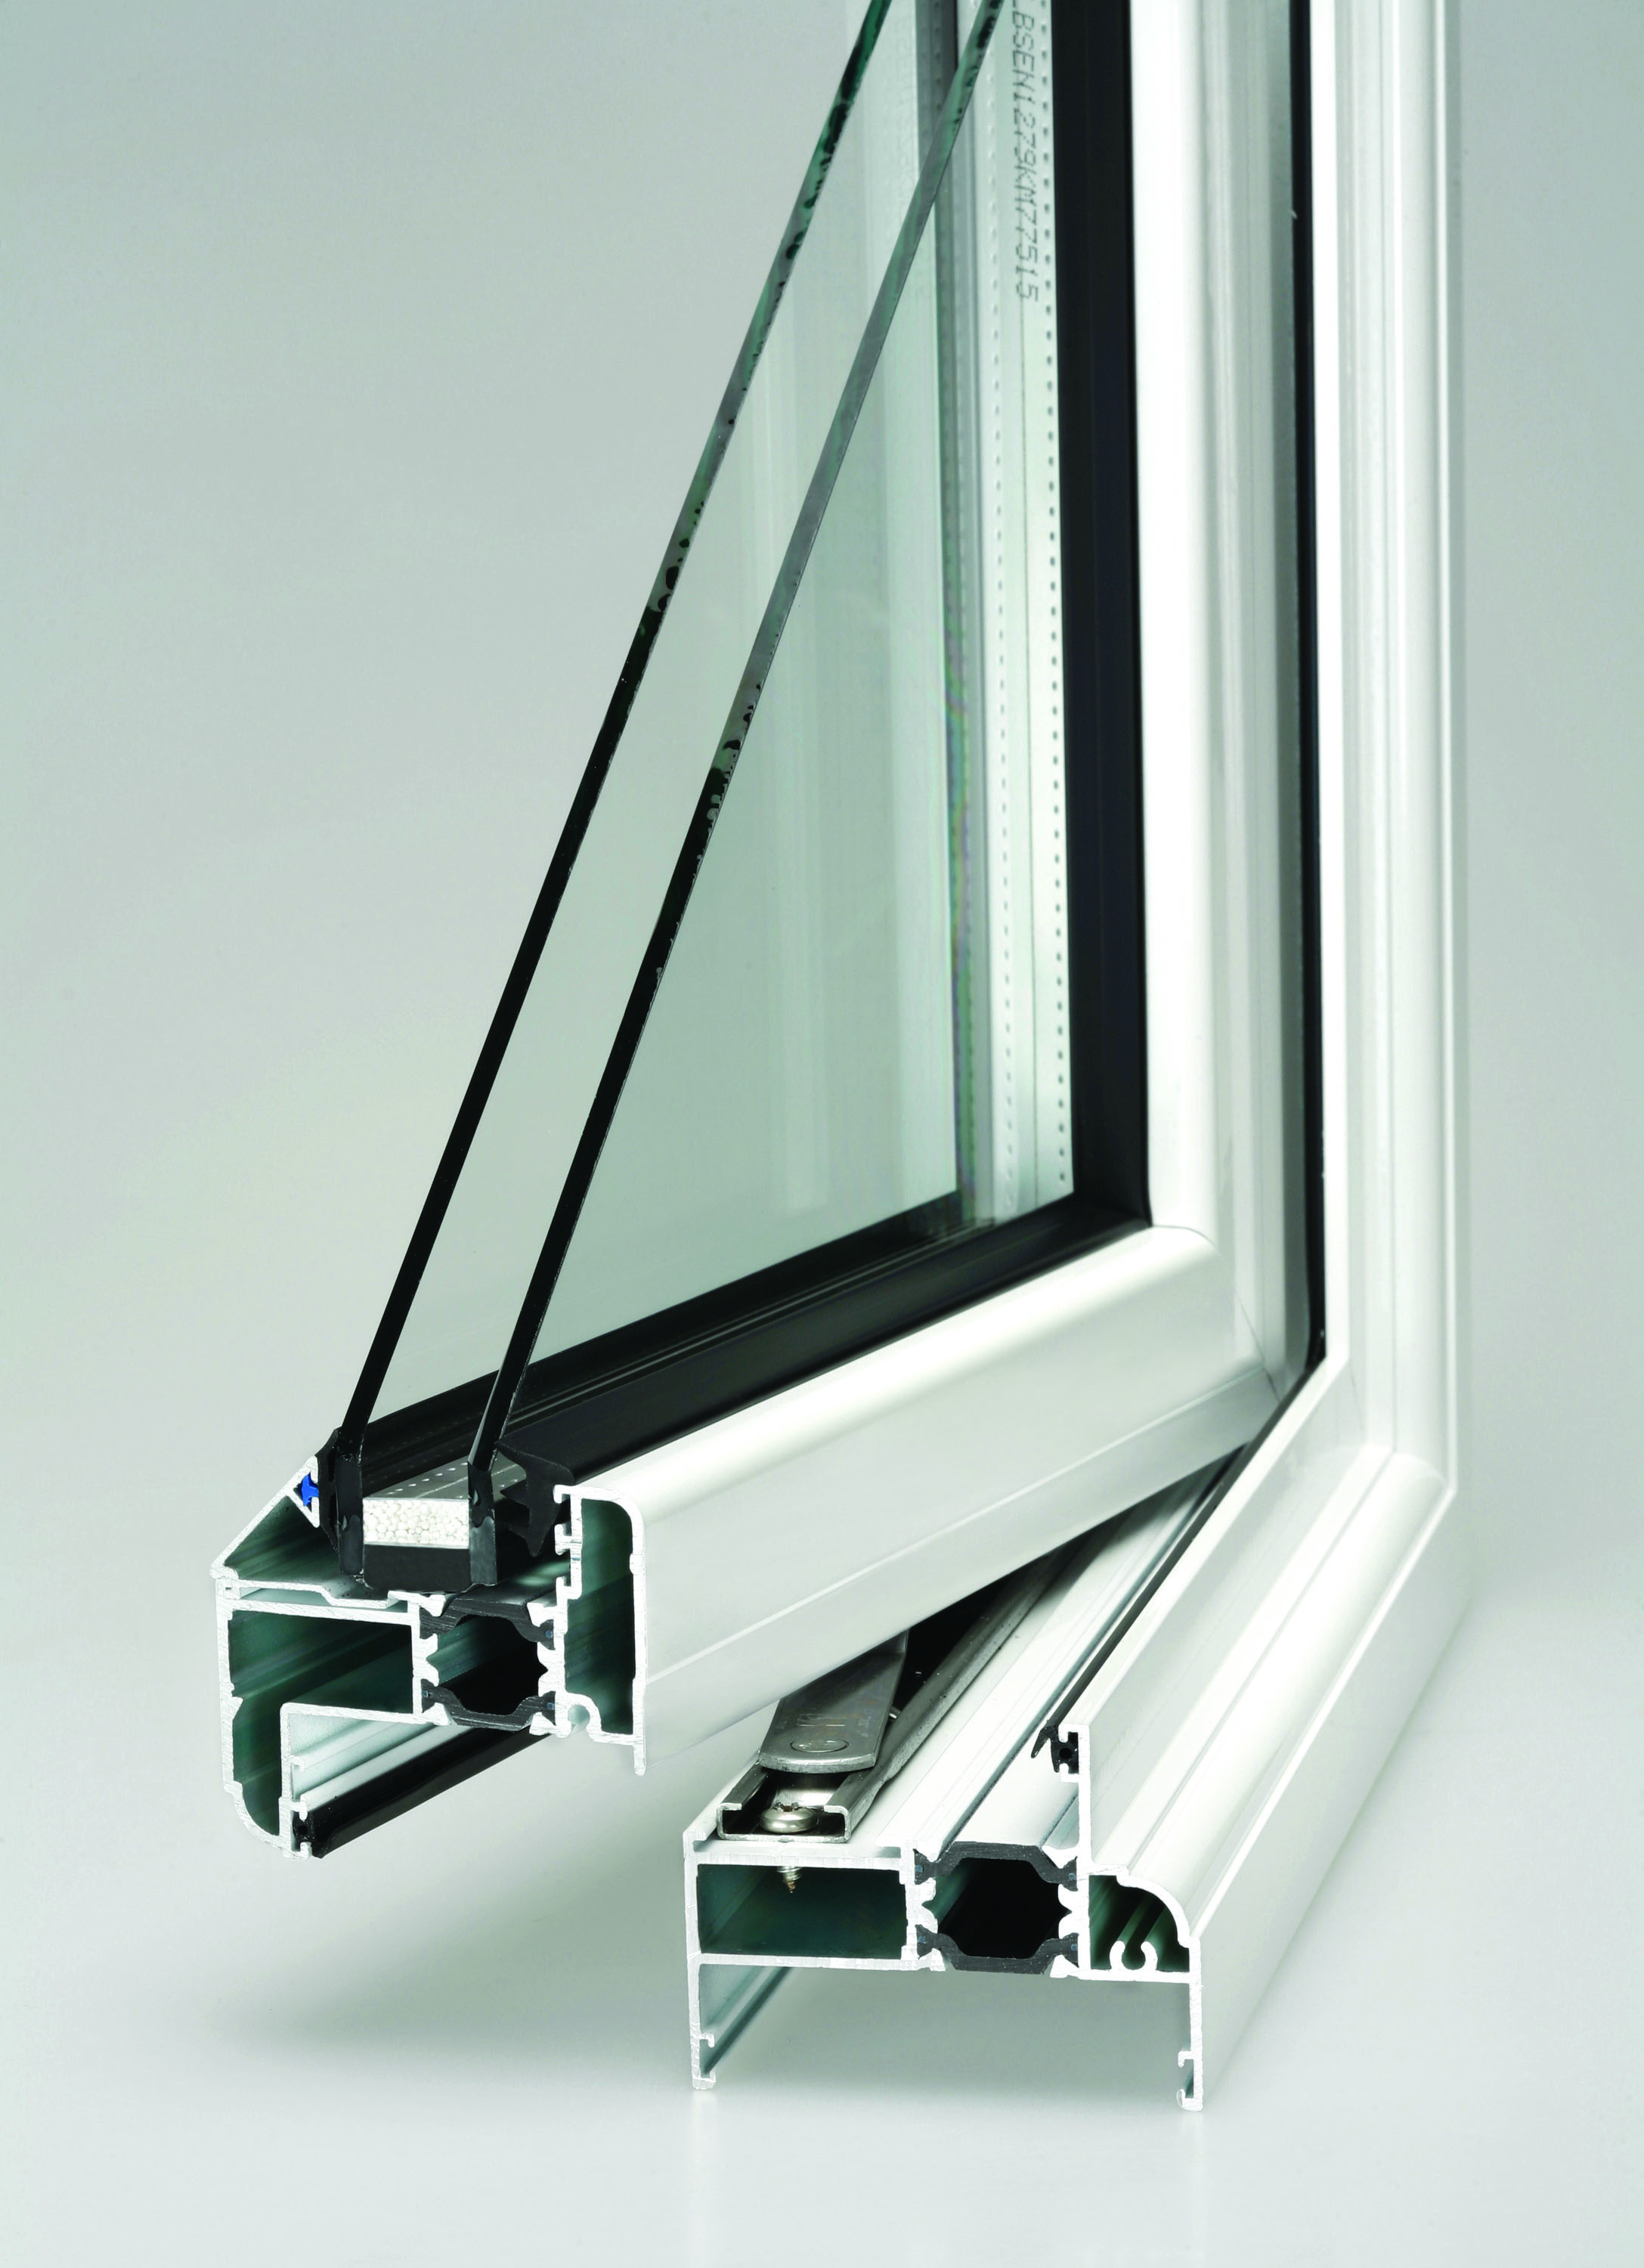
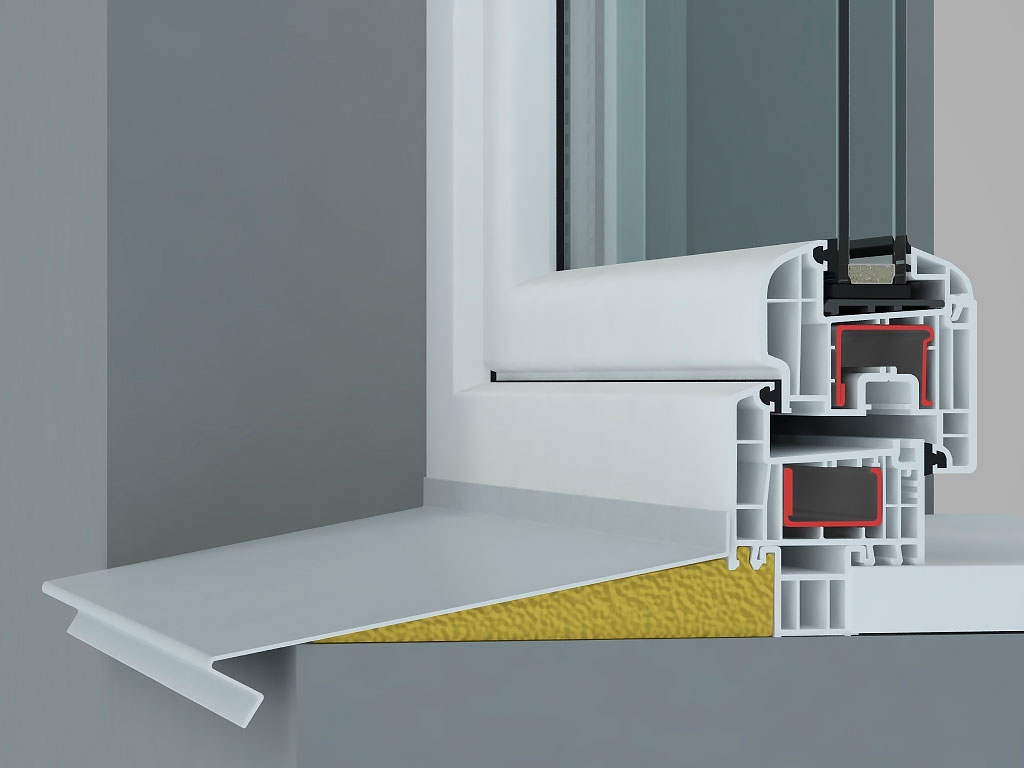
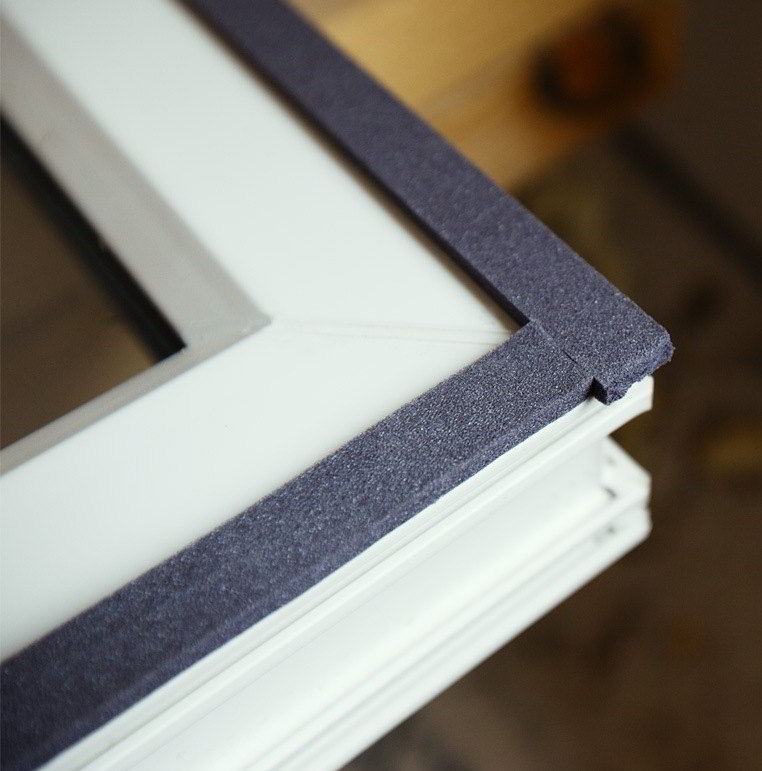
The frame has a complicated device. Inside it are air compartments, stiffening ribs, reinforcing plates, drainage holes, insulation. The outer edge of the sash is called a bead, and the area where the frame is divided in half vertically or horizontally is an impost.
The bead is located on the line of contact between the sash and the double-glazed window. His appointment - to fix the glass in place.
Double-glazed window is the most voluminous window surface. It takes at least 80% of the area.
Also, assembly foam, vapor barrier and sealing tapes are becoming one with the design.

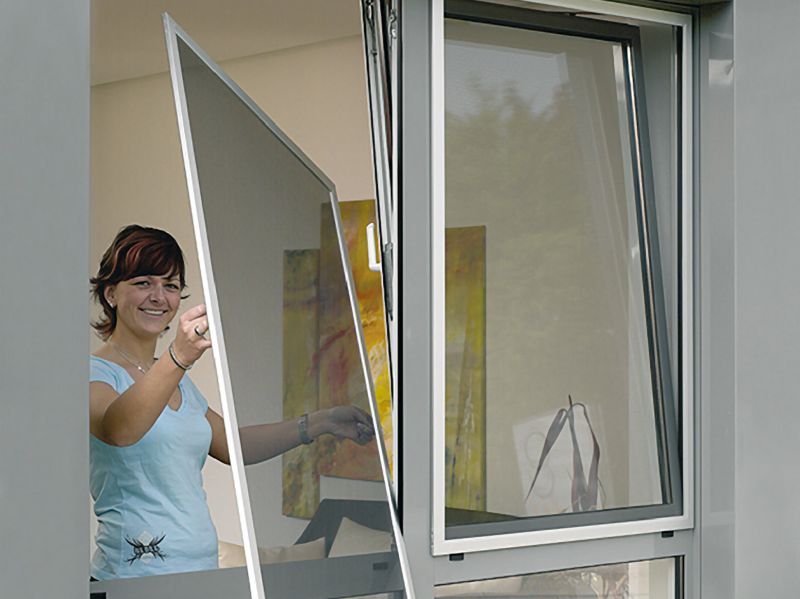
Often used, but not necessary mosquito nets and decorative elements - false planks or curtains.
In modern models of windows "Mosquito" nets - just a conventional name. They can have the function of protecting against dust, penetration of a cat, have a flat or corrugated canvas, fasten on velcro, move apart and be fixed.
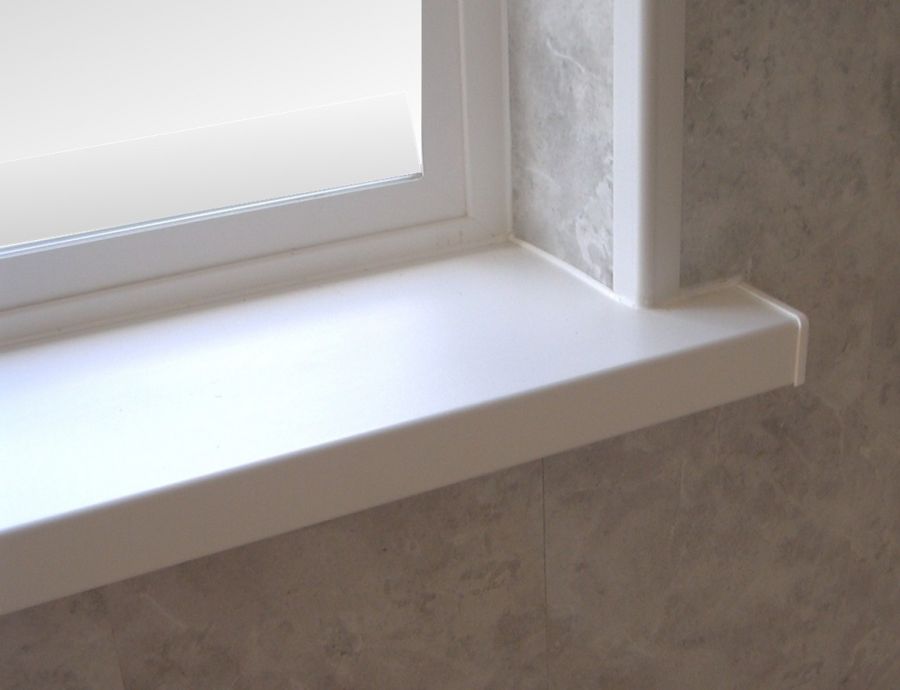
Items that are not in the basic set - sill, slopes, ebbs.

Window sill and slopes are important elements in the aesthetic appearance of the window. They are chosen not only for practicality, but also for the appearance of the material. The window sill can be wooden or plastic, as a profile, acrylic, marble, quartz, from natural or artificial stone,
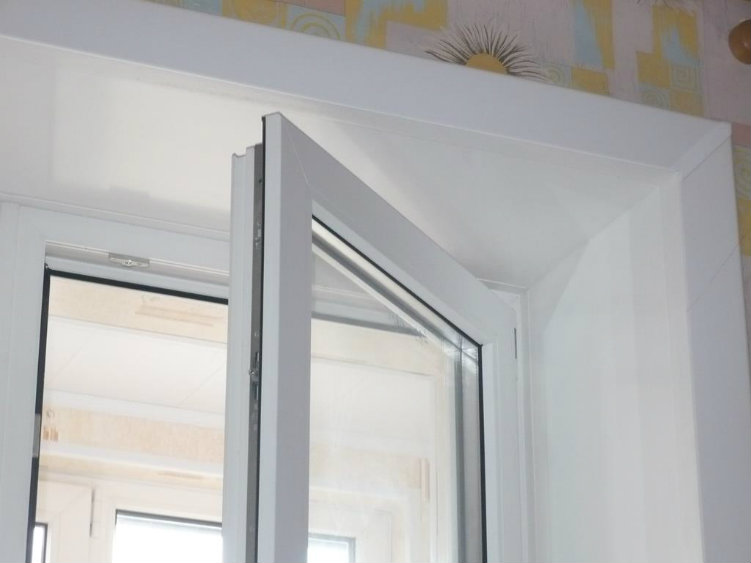
The slopes can also be made of wood, acrylic, plastic, plaster, paint. Indirectly involved in thermal insulation, therefore, when choosing a method of finishing, it is important to consider how effective they will be with this or that material.
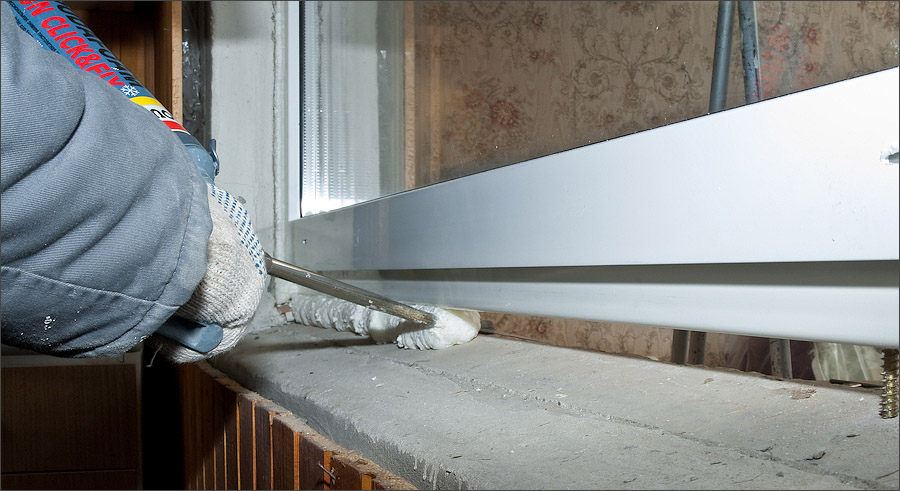
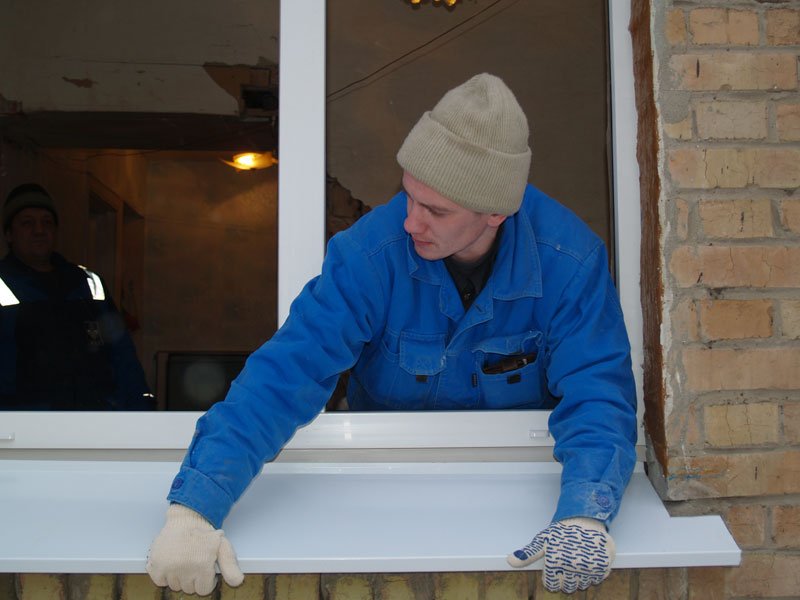
Low tide - an external element of the system.Designed to drain rainwater from the window system. Made of aluminum, plastic, copper and other metals. Best suitable material that does not corrode or with a protective coating.
To assemble a window system from all the components mentioned, need 5 groups of tools.
The first group - tools for dismantling the old window.
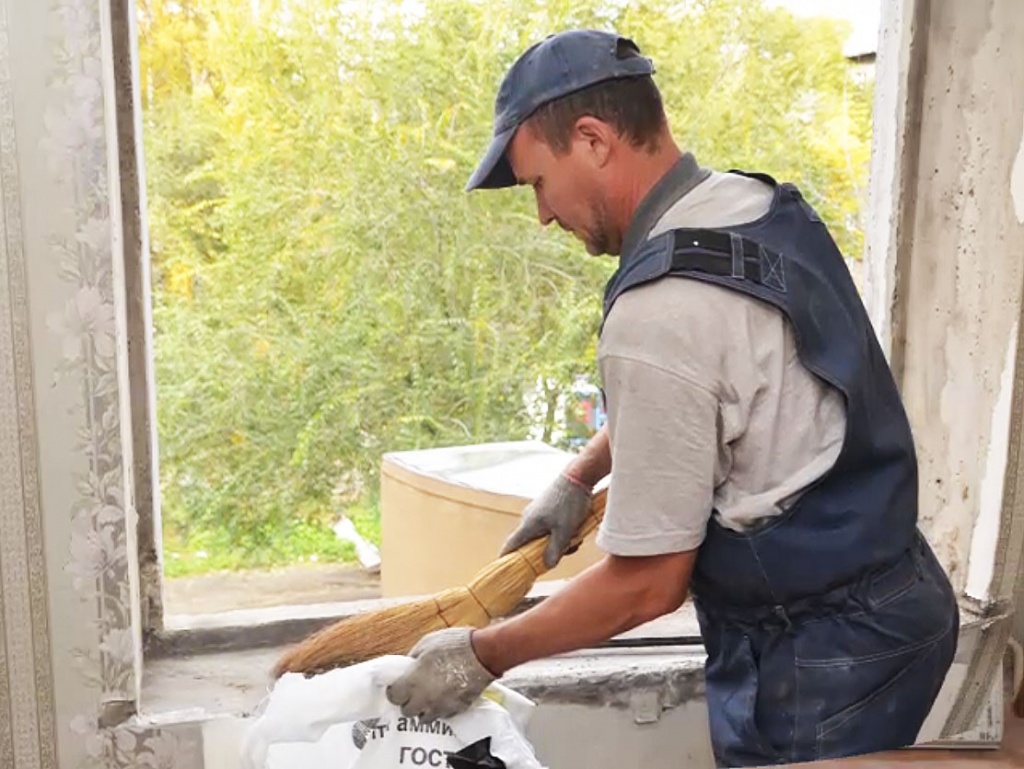
The second group - tools for the preparation of the opening for installation. A complete list of tools depends on the state of the opening after dismantling old windows.
If the surface of the opening from all sides is flat, without chipping, dents and cracks, it is enough to clean it of construction debris and dust, and then primed.
To do this, you need a vacuum cleaner, equipment for wet cleaning, a brush for the soil or an aerosol can with a primer.

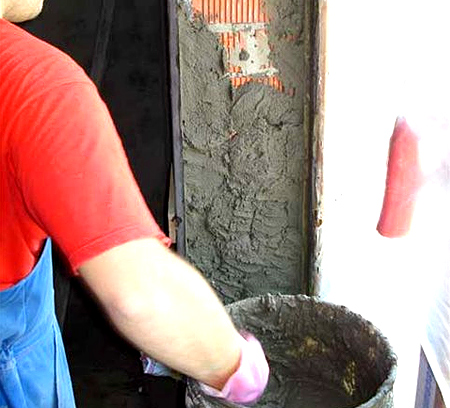
But the surface of the opening rarely remains flat after dismantling. It needs to be leveled with a plaster mix and primed on top. For this we need:
- ready plaster;
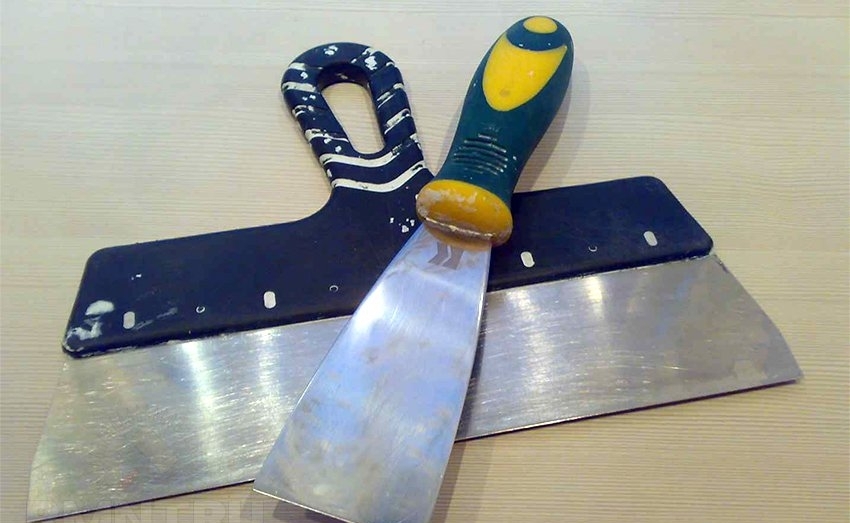
- spatulas;
- small aluminum rule;
- grater and sack;
- tassels;
- skin with coarse and fine grain.

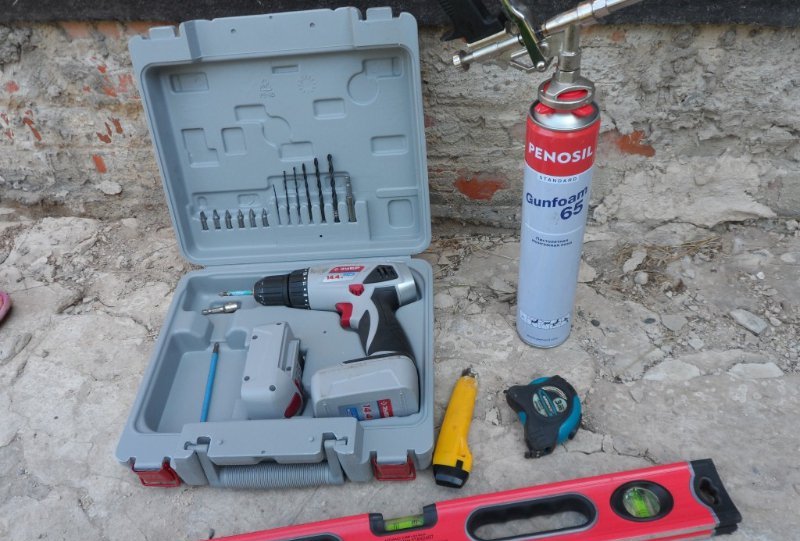
The third group - tools for installing windows:
- building roulette;
- water level;
- marker;
- perforator or drill with nozzles (drills) of different diameters and different shapes;
- for fixing the window box to the anchor, deeper holes are needed (by 10 cm), and for mounting on the plates, a depth of 5-6 cm is sufficient;
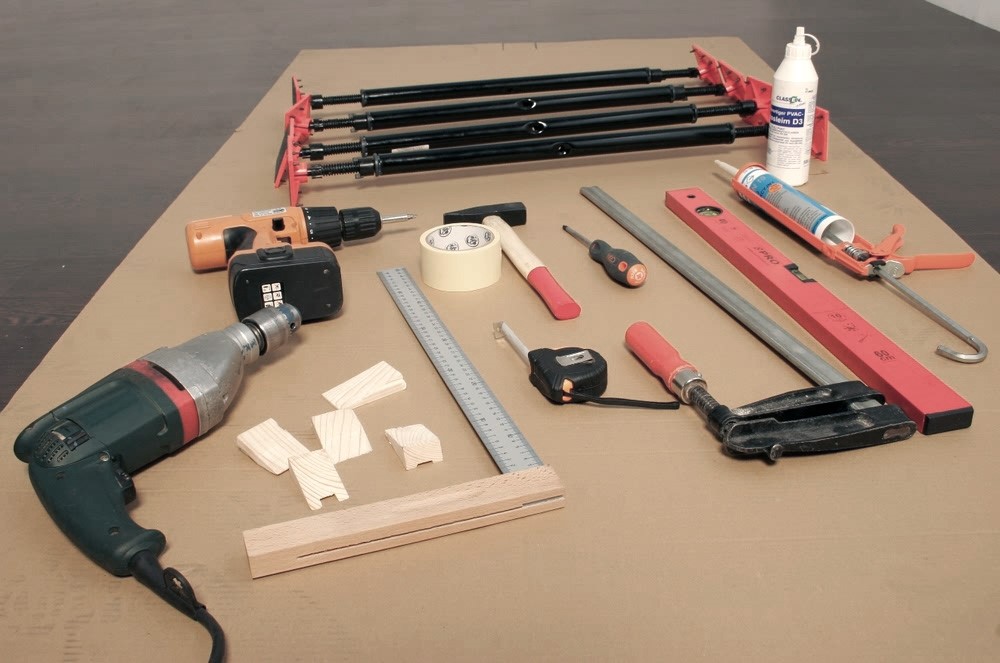

- screwdriver;
- gun - a device for filling the seams with foam;
- sharp knife and scissors for metal;
- set of screwdrivers;
- rubber hammer (usual can damage the profile);
- chisel.


For mounting slopes may need:
- sheets of drywall, if the slopes are trimmed with it, and a sharp knife;
- Bulgarian for cutting wood panels;
- jigsaw, if the slopes of PVC;
- finished plaster mixture or cooking facilities with your own hands, if the slopes will be leveled with plaster;
- to work with plaster need a low-speed drill, a set of spatulas, pelts, masking tape, brushes and rollers for painting slopes in the desired color.
When installing a windowsill, it will be useful to have a saw or electric jigsaw on hand.
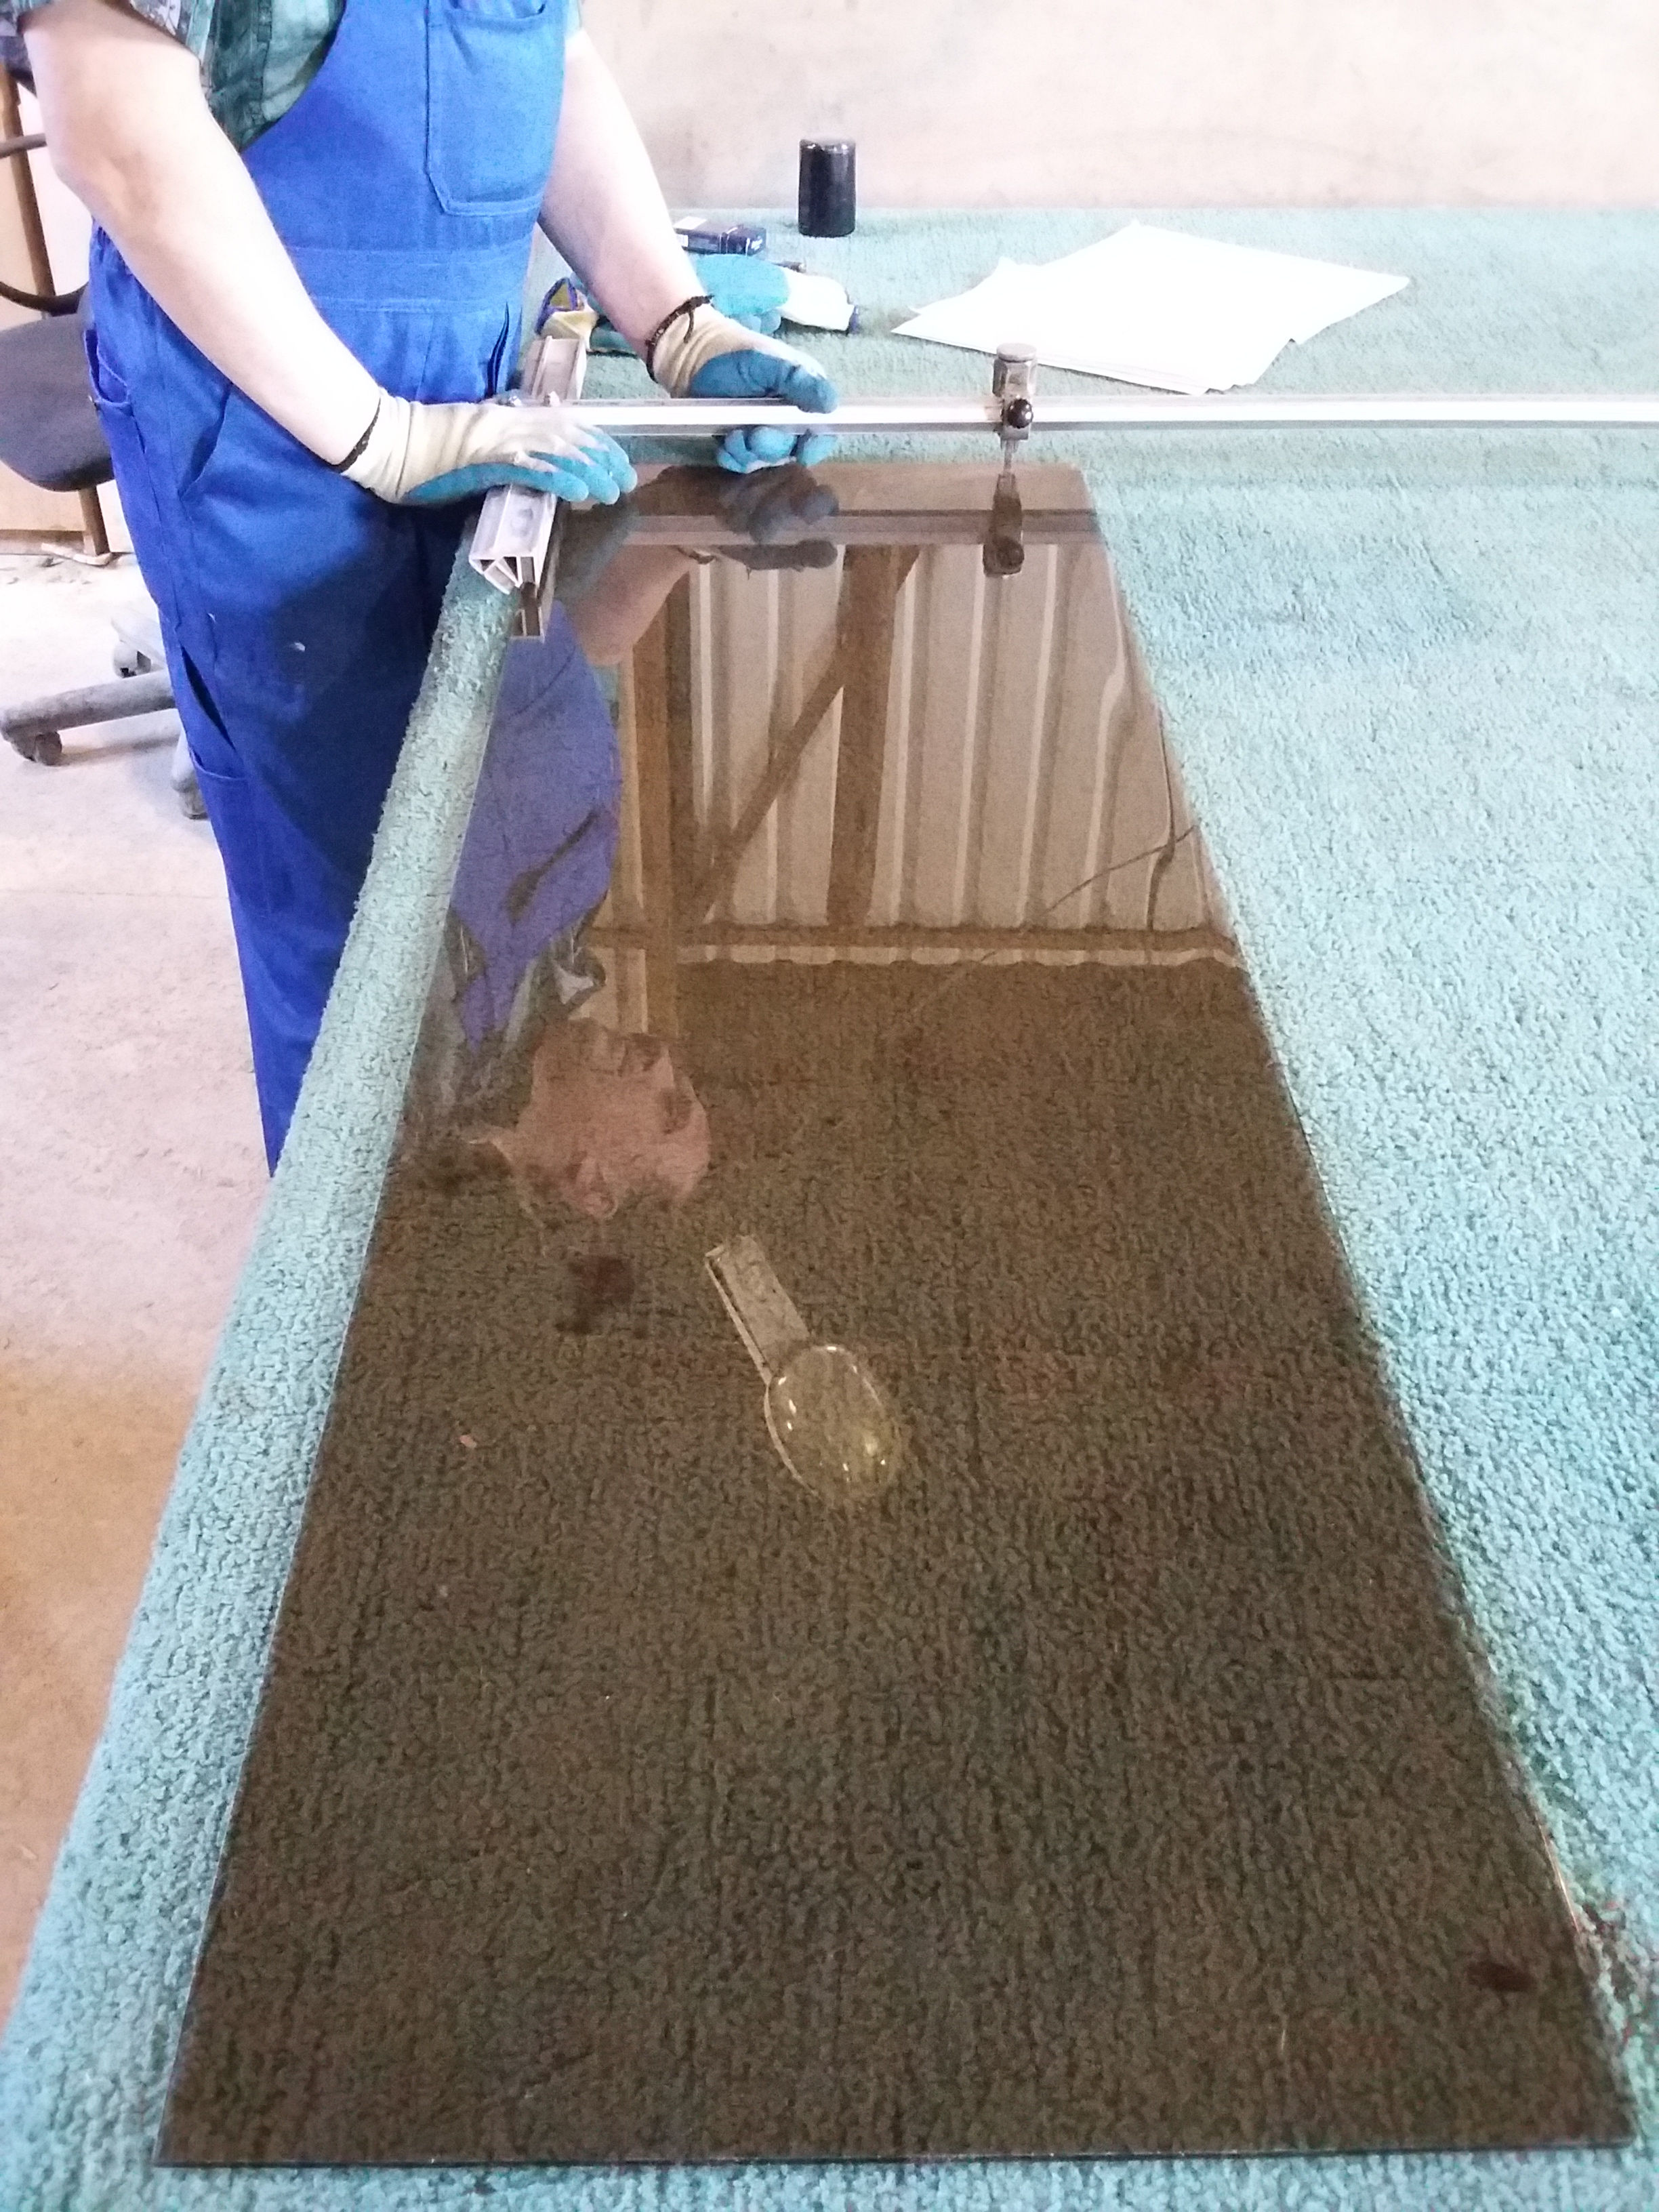
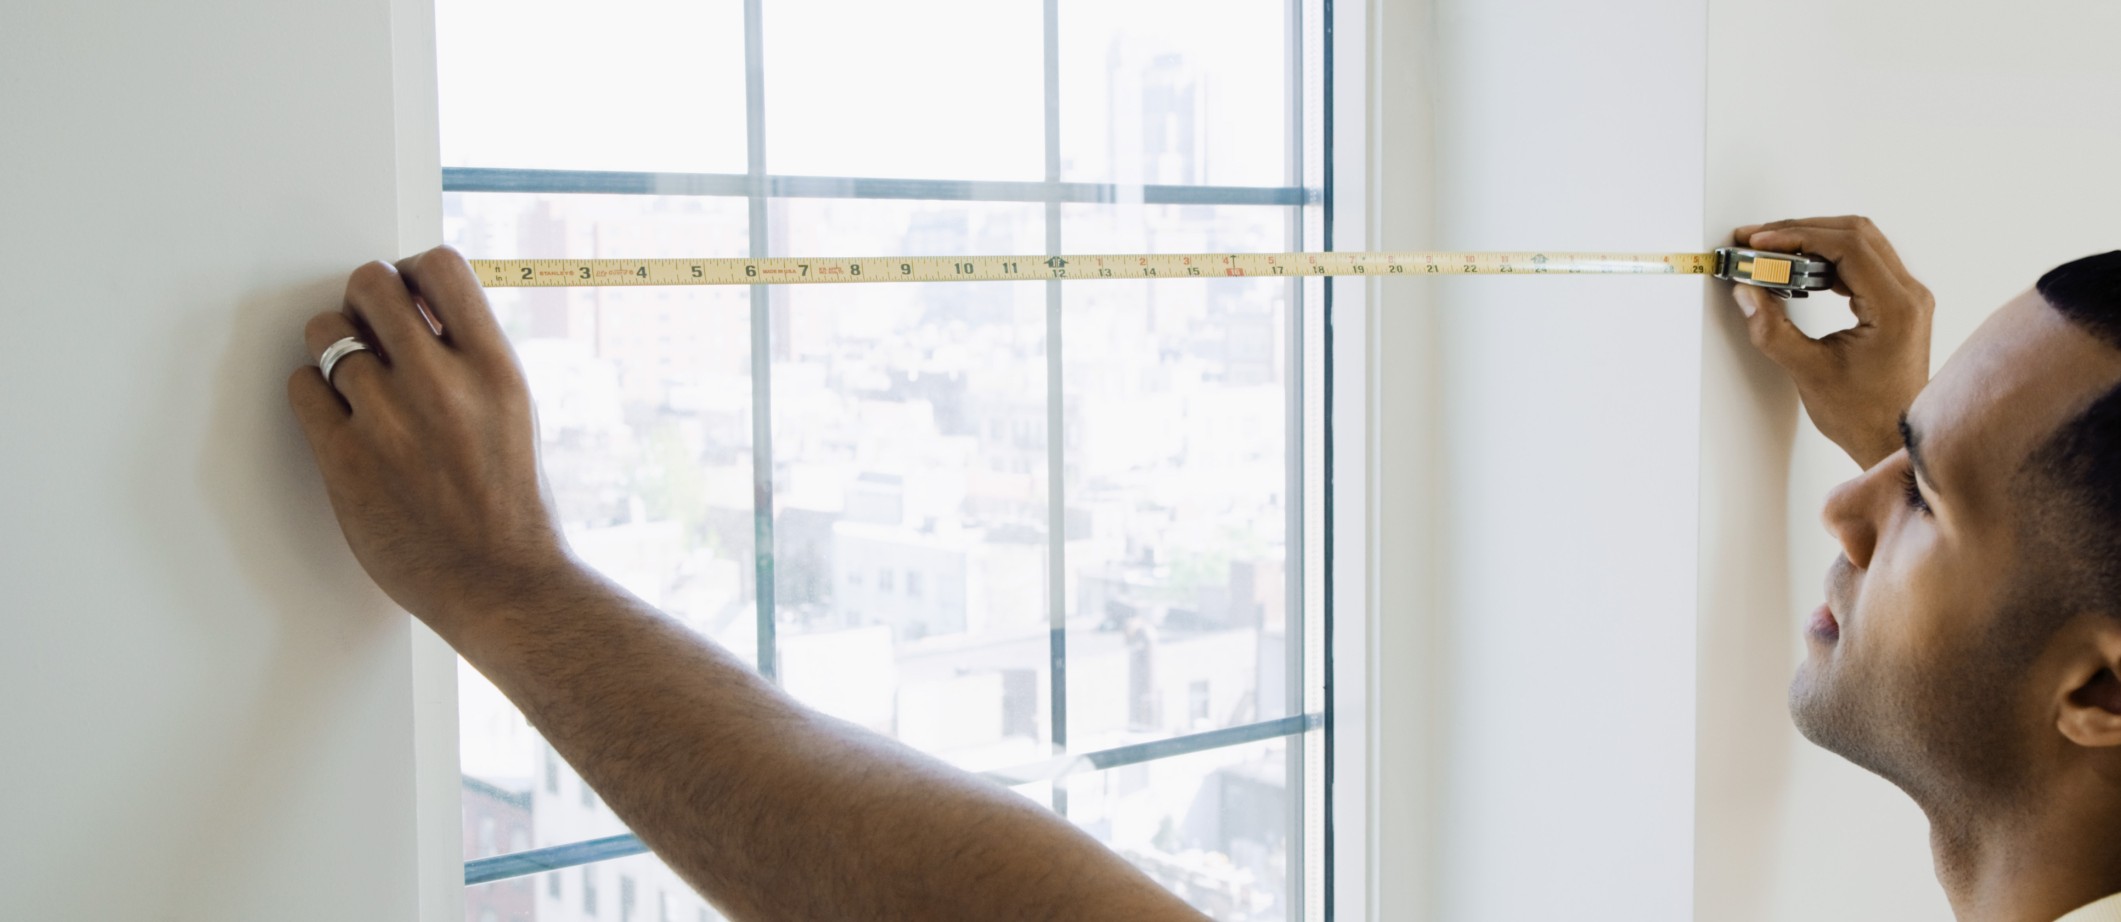
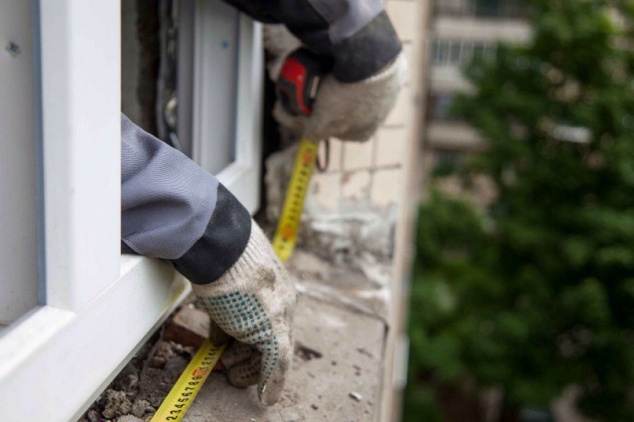
Measurements
Making measurements of the window opening correctly is half the success of the event. It is impossible to make a mistake, otherwise it will be difficult to install the window, if at all possible. It is necessary to take into account many features with different designs of the aperture and the window itself, so specialists should work at the measurement stage.
For those who are confident in their abilities, the correct measurement instructions are intended.
Advice from professional installers: the measurement data should be applied to the schematic drawing of the window, and not just to the piece of paper. This will give a visual representation of how some parameters relate and how they affect each other.
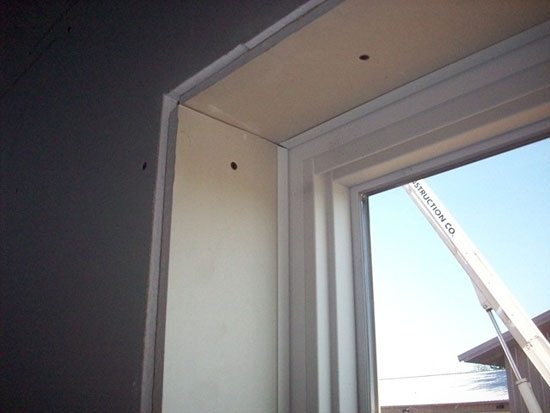
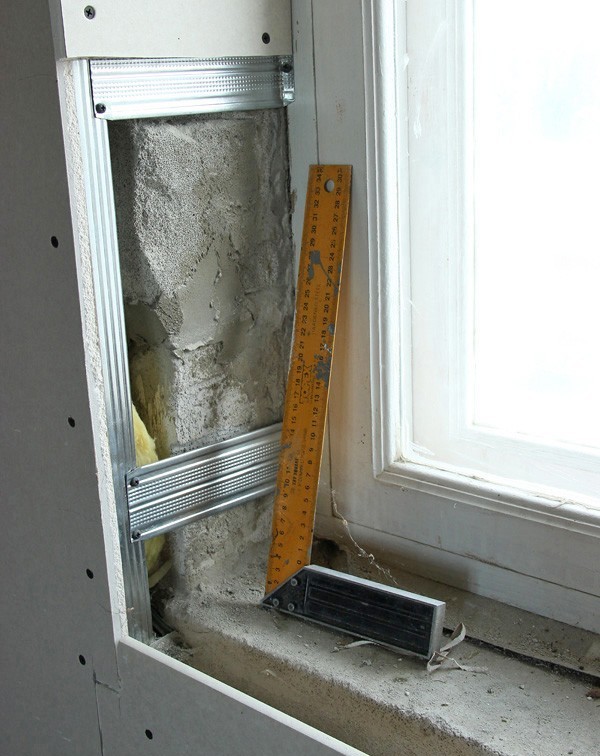
There are two measurement schemes: for openings with a quarter and without it.
A quarter is a protrusion 4-6 cm wide, protecting the windows from falling out. 4-6 cm is a quarter of the width of a brick, hence the name. In some houses it is 10 cm wide.
For security reasons, most high-rise buildings have quarters in window openings, which may not be in the cottage.
Determining the size and presence of a quarter is easy. After dismantling the old window, it will be seen if the opening has an outer frame. Then you need to make measurements on the width and height of the opening from the side of the room and from the outside.


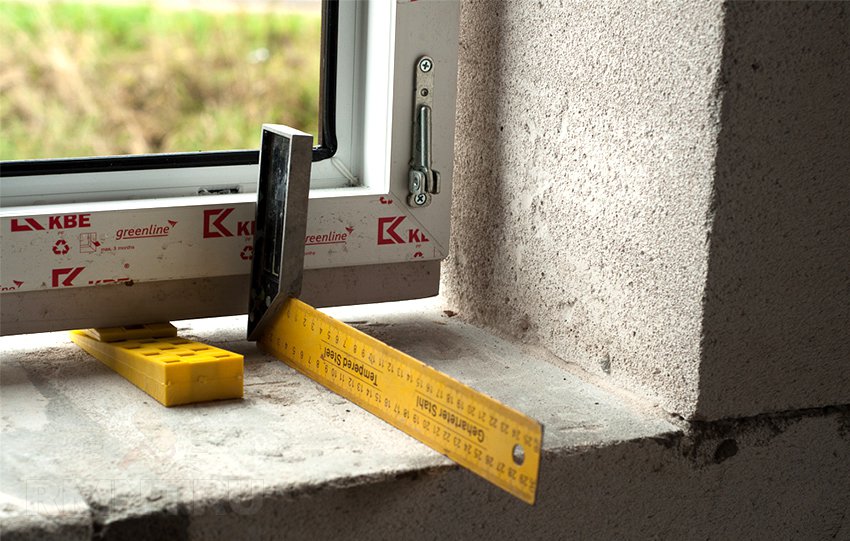
Measurement tools:
- construction level (it is convenient to use water);
- tape measure or telescopic ruler;
- sheet of paper with a window pattern;
- pencil;
- colored pens.


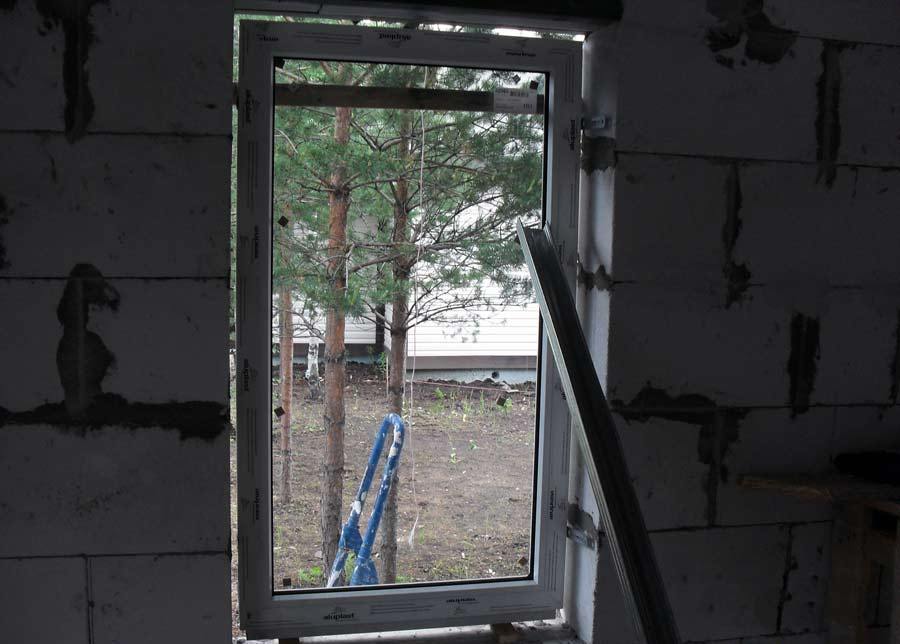
Plastic window, ideal by the sizes:
- From the side of the room comes on the side quarters by 2-4 cm.
- Comes on the top edge of a quarter by 15-20 mm.
- Rises above the edge of the lower quarter by 20-40 cm. The exact figure depends on the height (thickness) of the window sill.
- Between the frame and the opening at any point there is a gap of 2-5 cm (depending on the size of the window) for filling with mounting foam.


At windows and a quarter there are at least two pluses: the construction is protected from falling out, the mounting foam from the outside does not need to be covered with platbands. It is easier to make measurements of a quarter opening, but accuracy is crucial.
The window must be additionally secured with several pairs of anchors and calculate the size so that the gap is not too big and not too small.
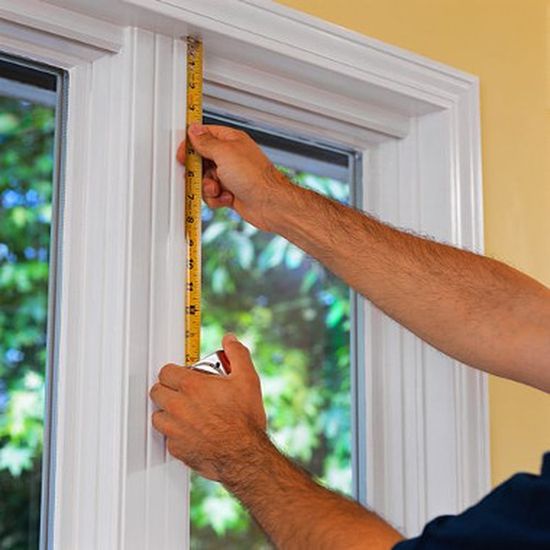
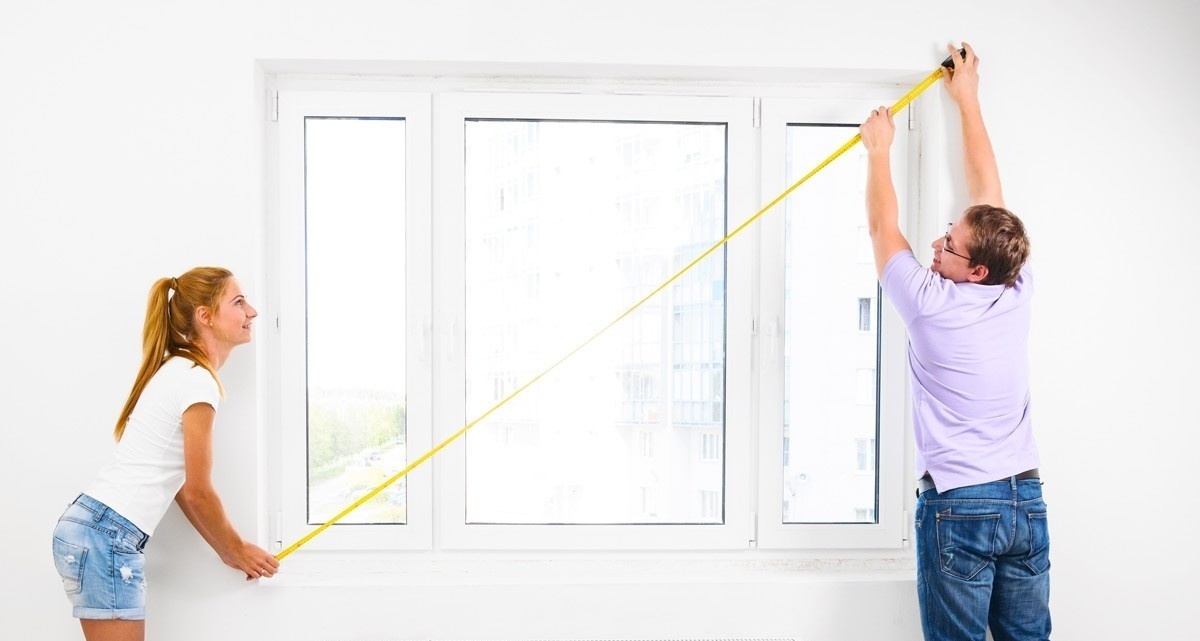
Measurements take place step by step:
- Measure the height of the opening. Height is considered the entire distance from the angle to the angle vertically. It is measured at the left and right edges at two points: closer to the outer contour of the opening and closer to the inner. Preliminary results should be noted in the figure. Sometimes the window opening is so irregularly shaped that the defect is visible to the naked eye. It is necessary to calculate it as accurately as possible so that the window during installation does not get stuck with opposite corners in the curved opening.
This is done with the help of two plumb lines.They are hung from the top of the aperture to the window sill at two points. The first point is the top corner (left or right). The second point is the bottom corner (opposite to the one that is involved at the top). There should be two parallel lines. They form a flat rectangle or square, which calculates the "useful" width of the opening between the upper and lower points horizontally.
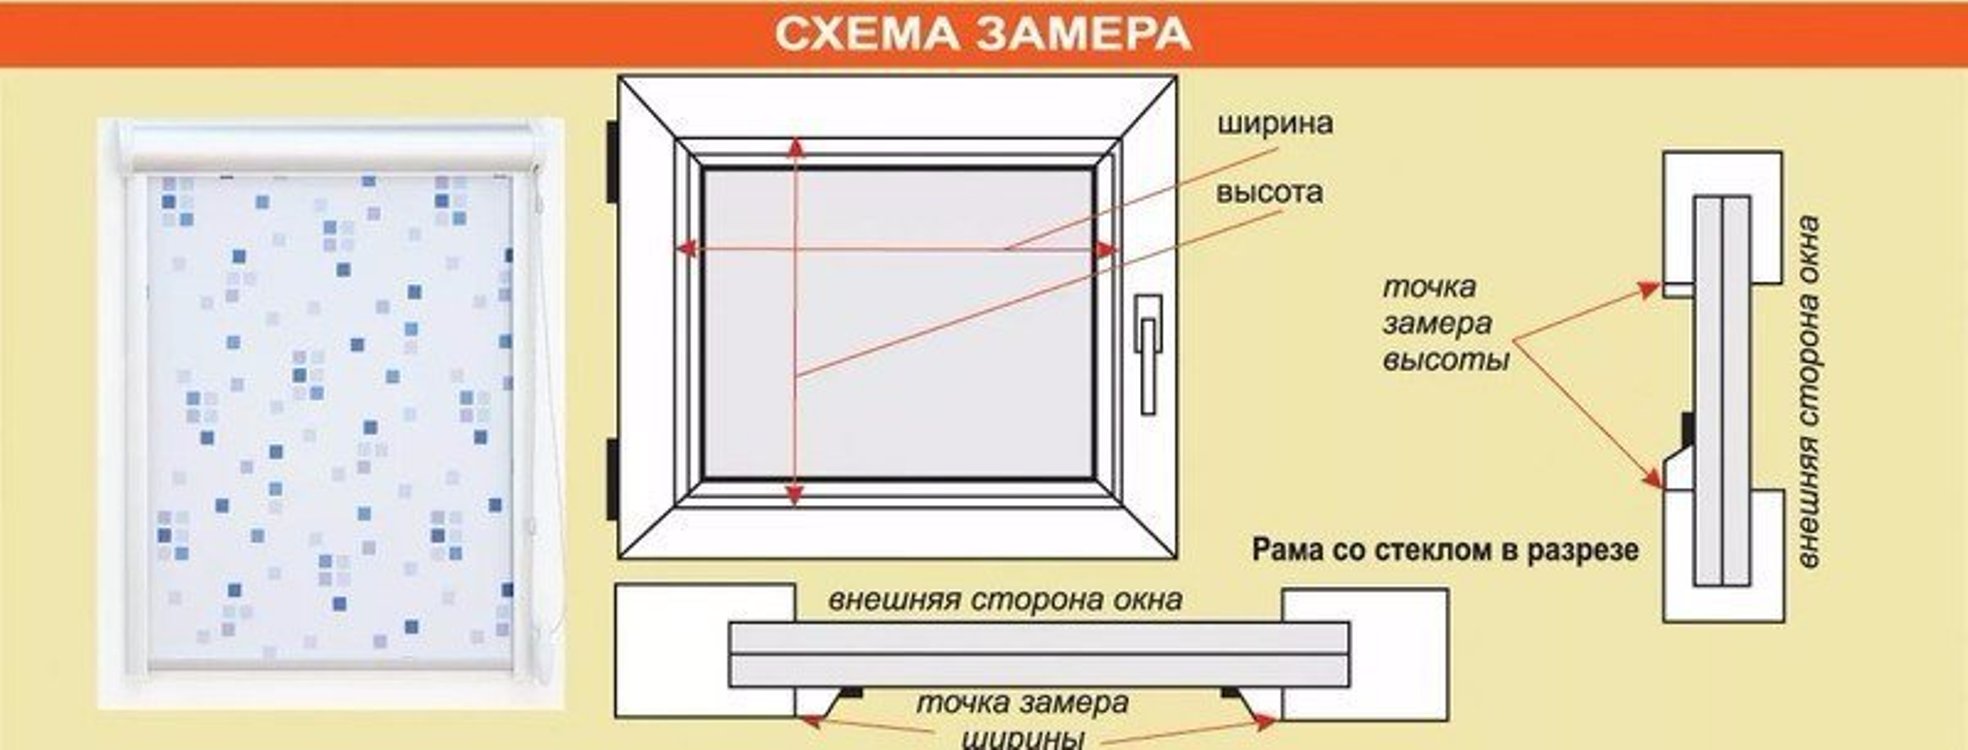
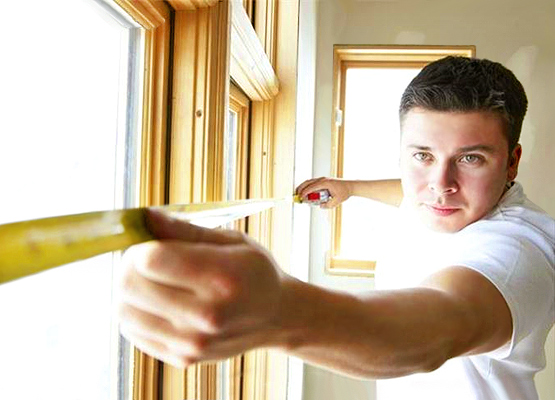
- Aperture width measurements. It is measured from angle to horizontal angle, at least in two points. If the difference between the indicators is large, the guideline is a smaller value. Also entered in the picture.
- Calculation of mounting clearances. From the data in the figure you need to subtract 2-4 cm above, left and right, and the thickness of the window sill below. If you plan to mount a stand profile, its thickness is added to the thickness of the sill and subtracted.
The resulting numbers are needed to calculate the size and cost of the system.

The window and quarter measurements are made in the same way, but have a few differences:
- measuring the height of the window from the inside, that is, closer to the outer edge of the slopes;
- height measurements from the quarter;
- width measurements from the inside;
- width measurements from the quarter.In practice, all measurements, except for the width of the tide, are taken indoors. Outside are those that are closer to the outer edge.
- subtracting the width of the assembly seams in height and width of the opening from the quarter;
- subtraction of the mounting seams along the internal contour of the opening.
It is important that the parameters set by the quarter fit into the inner contour of the window as well. That is, no less than 20 mm should be preserved from the opening surface to the frame in order to fill the joints with foam.
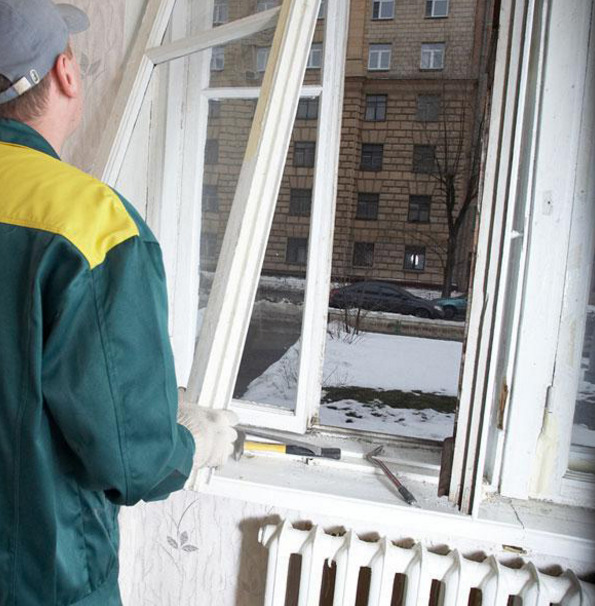
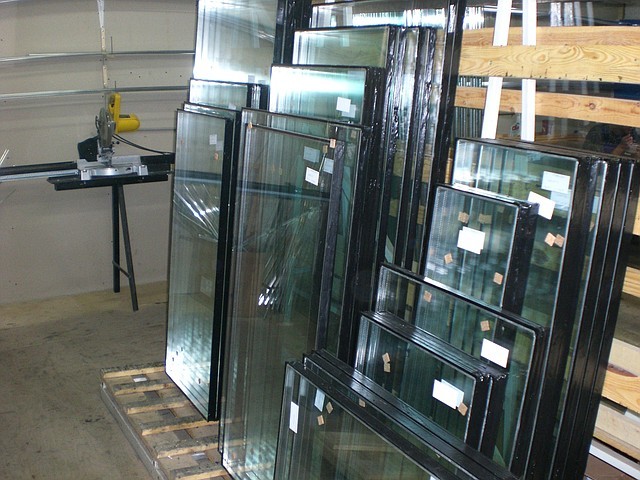
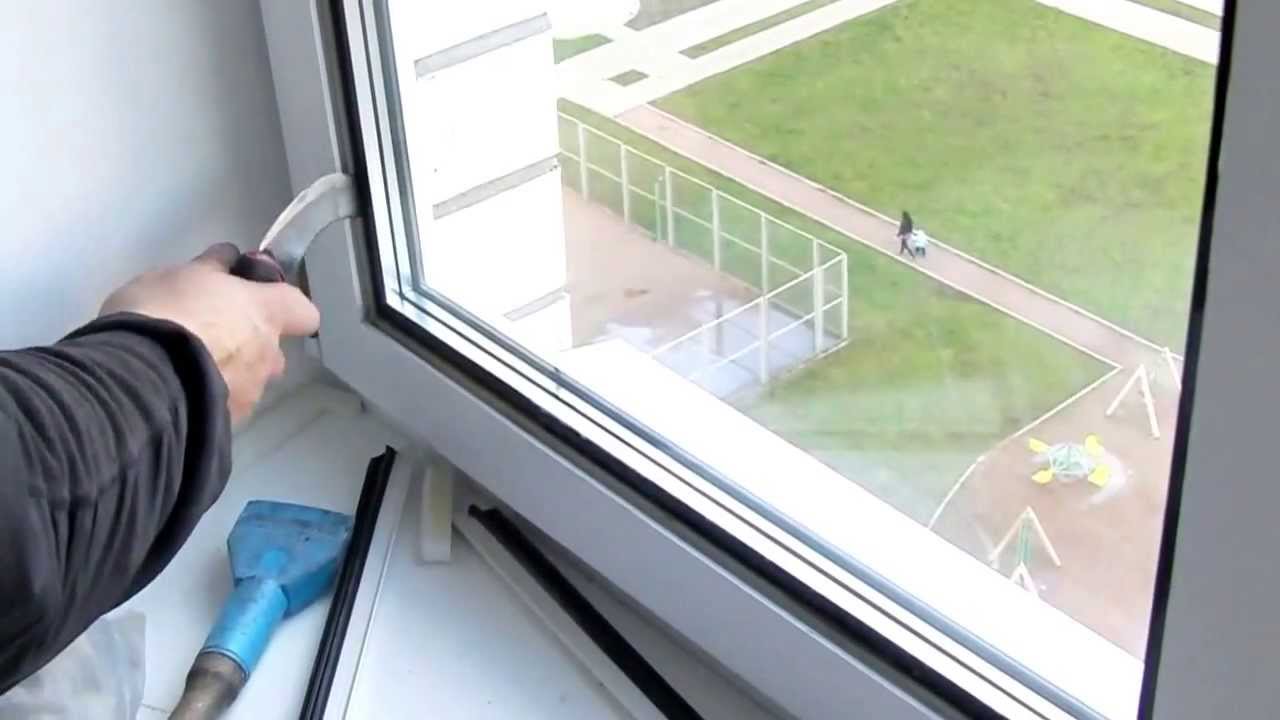
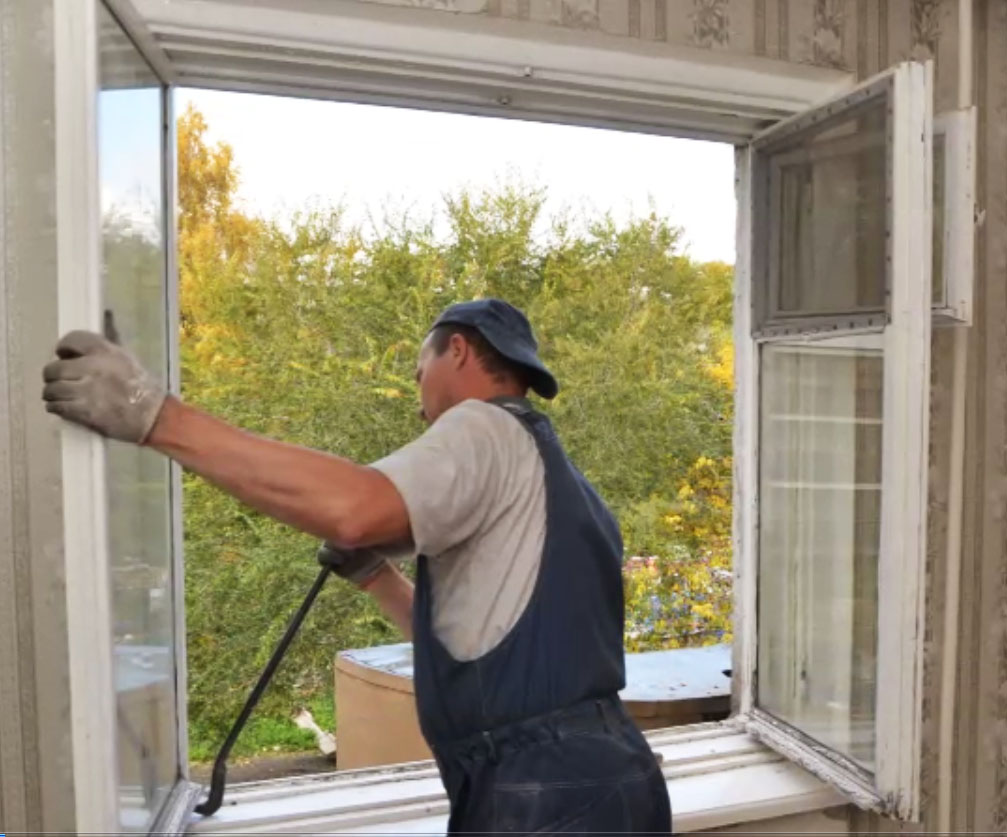
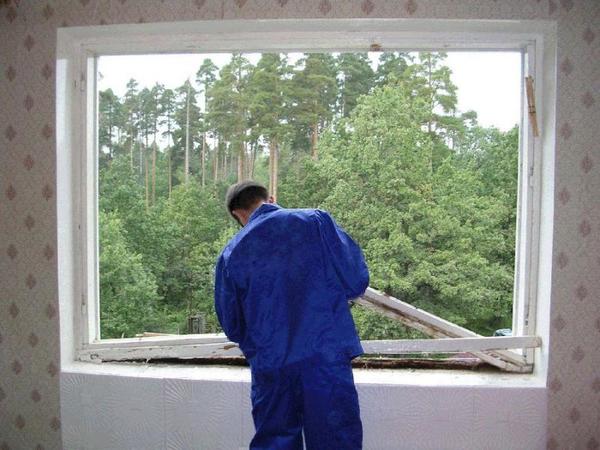
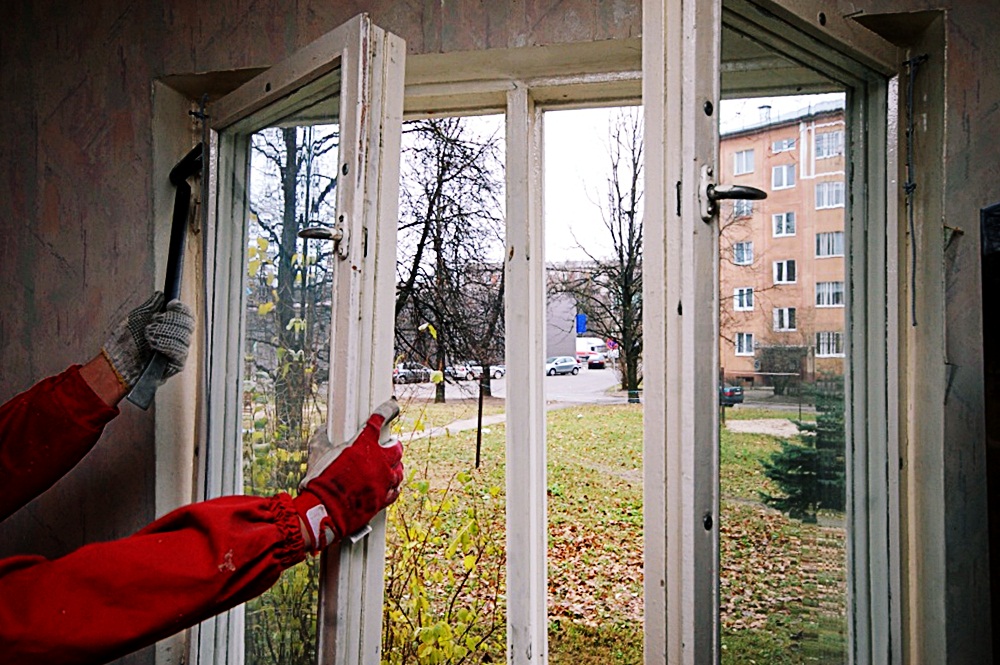
Dismantling the old glass
Eurowindows, or simply double-glazed windows, appeared in Russia several decades ago. During this time, the first models could already become obsolete and become unusable. And in most cases it is required to dismantle the window with double-glazed windows. And it has its own characteristics.
Disassembly tools:
- crowbar or chisel in order to remove the sash from the hinges;
- electric jigsaw to cut the box into pieces and easily removed from the window opening;
- narrow spatula with rounded edges;
- perforator with interchangeable nozzles to remove slopes and clean the opening;
- a sharp knife or saw to cut off the remains of foam;
- pliers;
- screwdrivers.


The most important thing in the process of disassembling a window system with double-glazed windows is not to damage the integrity of the elements. Frames and double-glazed windows can then be used separately from each other or reassembled into a complete system. For example, old windows function perfectly in the country. You can assemble a greenhouse from the double-glazed windows (you will have to search for more used parts from your friends). Due to its insulating qualities, it will be effective.
PVC profile can also be given a new life. Plastic produces excellent parts for country furniture, elements of shelving in the garage and even decorations.
If the construction was dismantled as accurately as possible, and the window did not become unusable, it can be reassembled and installed in a summer house in the country house.
To get the most out of used glass packs, they need to be carefully dismantled:
- Prepare an adjacent space. Around the window you need to free up space to put shutters removed from the hinges and the double-glazed windows removed. Furniture that can not be removed, you need to cover the film - the dismantling of the box will be dusty.
- Remove the sash. For adjustable and unregulated loops, different ways:
- Remove the pads from the adjustable hinges, remove the stem with a screwdriver, disconnect the top loop (it consists of two halves) and remove it with pliers. Open the sash. Lift up and remove from hinges.
- With unregulated loops it is faster, but caution is required. It is necessary to knock out the pins from the bottom up and remove the sash.
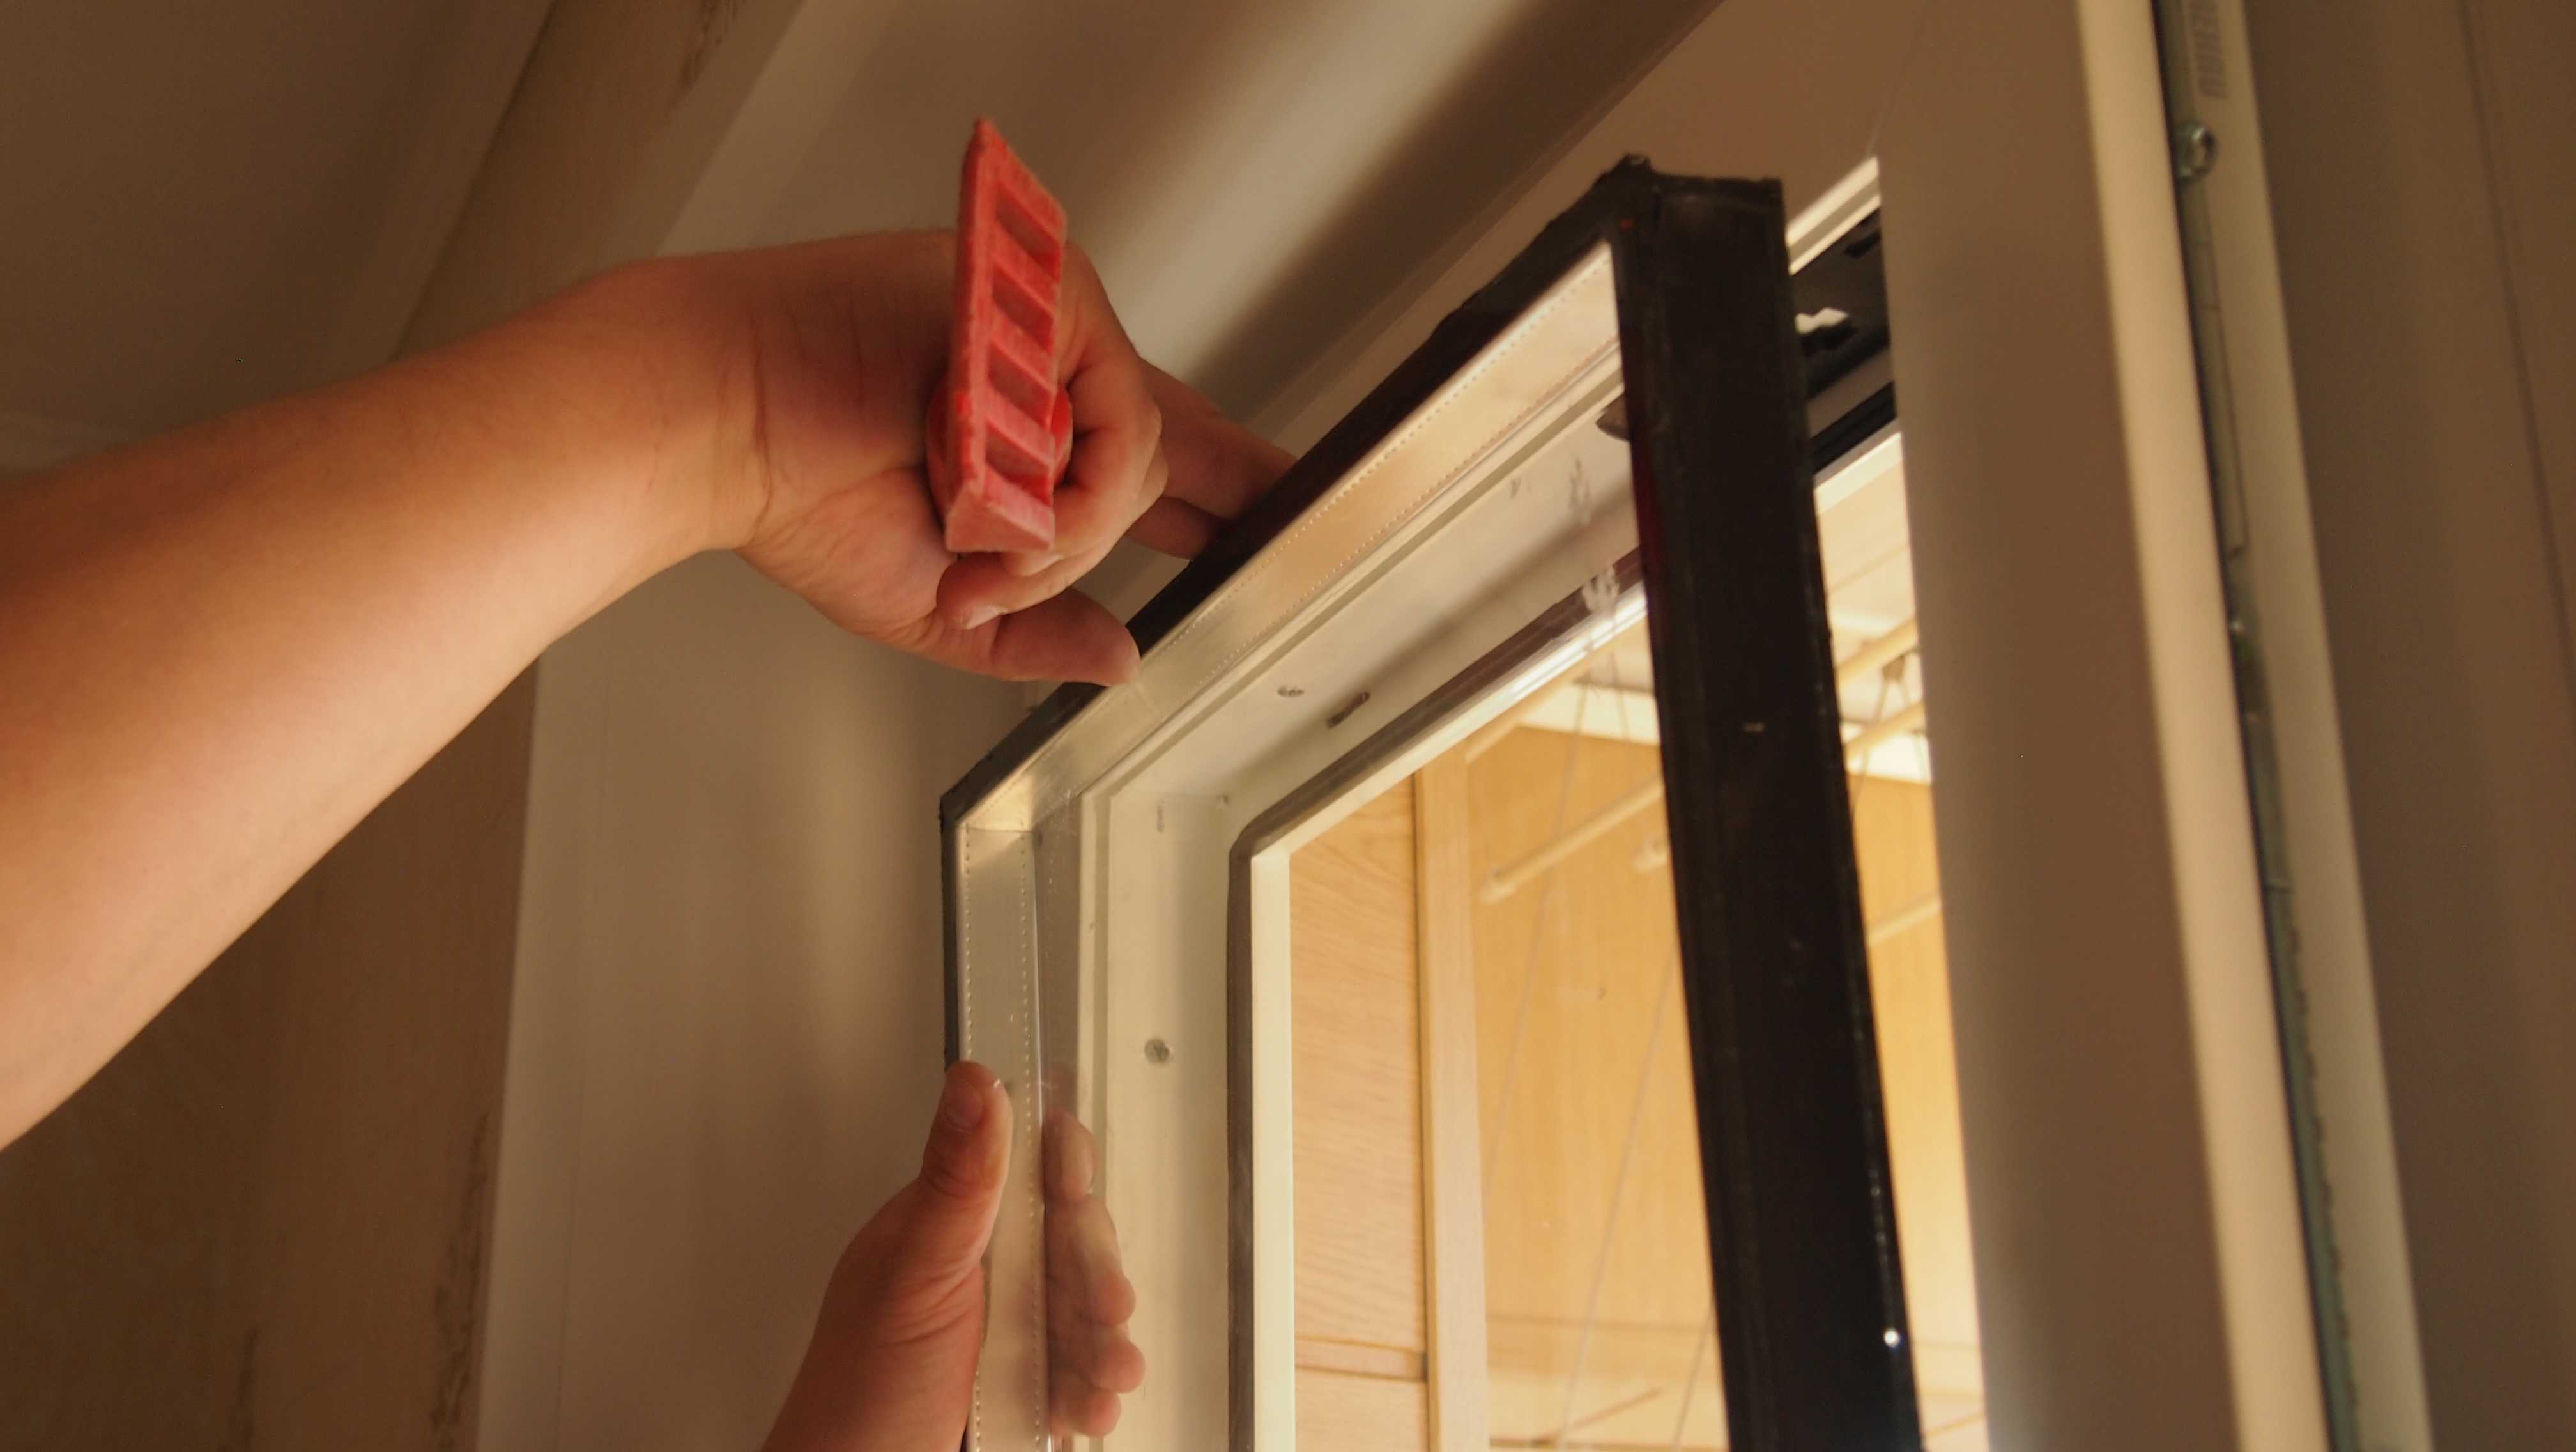
- Remove the glass from the frame. To do this, remove the beadings. Each bead "sits" in the landing groove, there is a small gap on the line of joint of the parts. It is necessary to insert a corner of the spatula into it, press it inwards to the full width of the front face and loosen the attachments of the glazing bead with up and down movements. After a clear gap has appeared on the joint line, the bead is easily removed.
You need to be careful when the queue reaches the last upper bead. You will need an assistant to keep the glass, otherwise it will fall out as soon as the bead is removed. If there is no assistant, you can fix the glass with masking tape and then remove it.
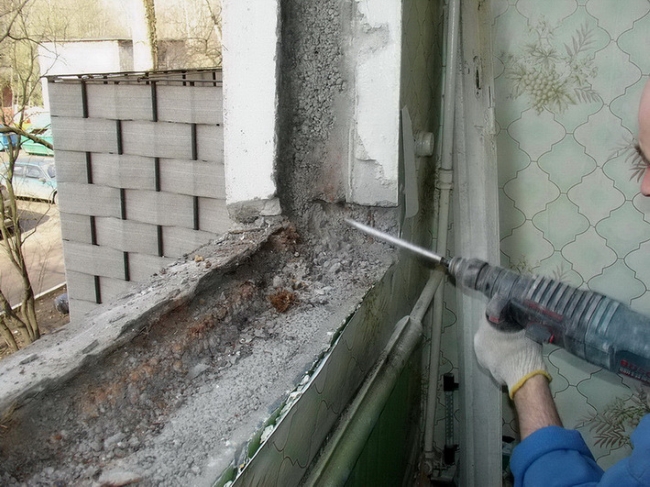
- Remove the slopes. If they are decorative, made of PVC or other materials, then they are removed as easily as beadings. But with the plaster will have to work hard.It should be removed with a thin layer using a punch with a nozzle in the form of a scapula.
- Remove the window sill. As a rule, it "sits" on the mounting foam. It is necessary to lift it up with an effort, and then towards yourself.
If it is connected to the frame with self-tapping screws, they must be unscrewed and only then removed the window sill.


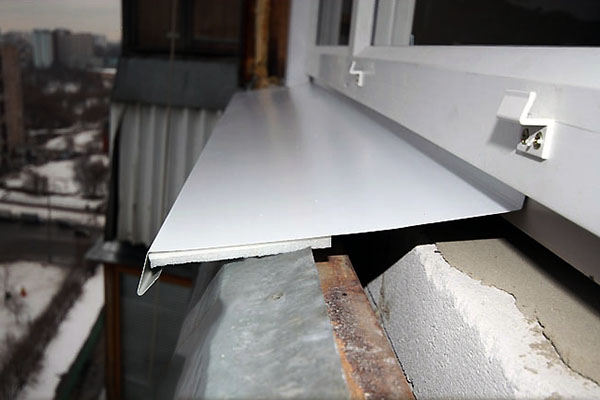
- Dismantle the ebb. It is necessary to unscrew the screws and remove the caps from the drainage holes. Low tide can be removed.
- Remove fasteners: dowels, anchors, plates, wedges. These elements are not always reused, so you can delete in any convenient way. The main thing is not to damage the surface of the opening.
- Remove foam, vapor barrier tape and completely clean the gap between the opening and the frame.
- Take out the window unit (frame) from the opening. Disassembly successfully completed.
The work is simple, but requires accuracy and time. For security reasons, it’s better to do it together.
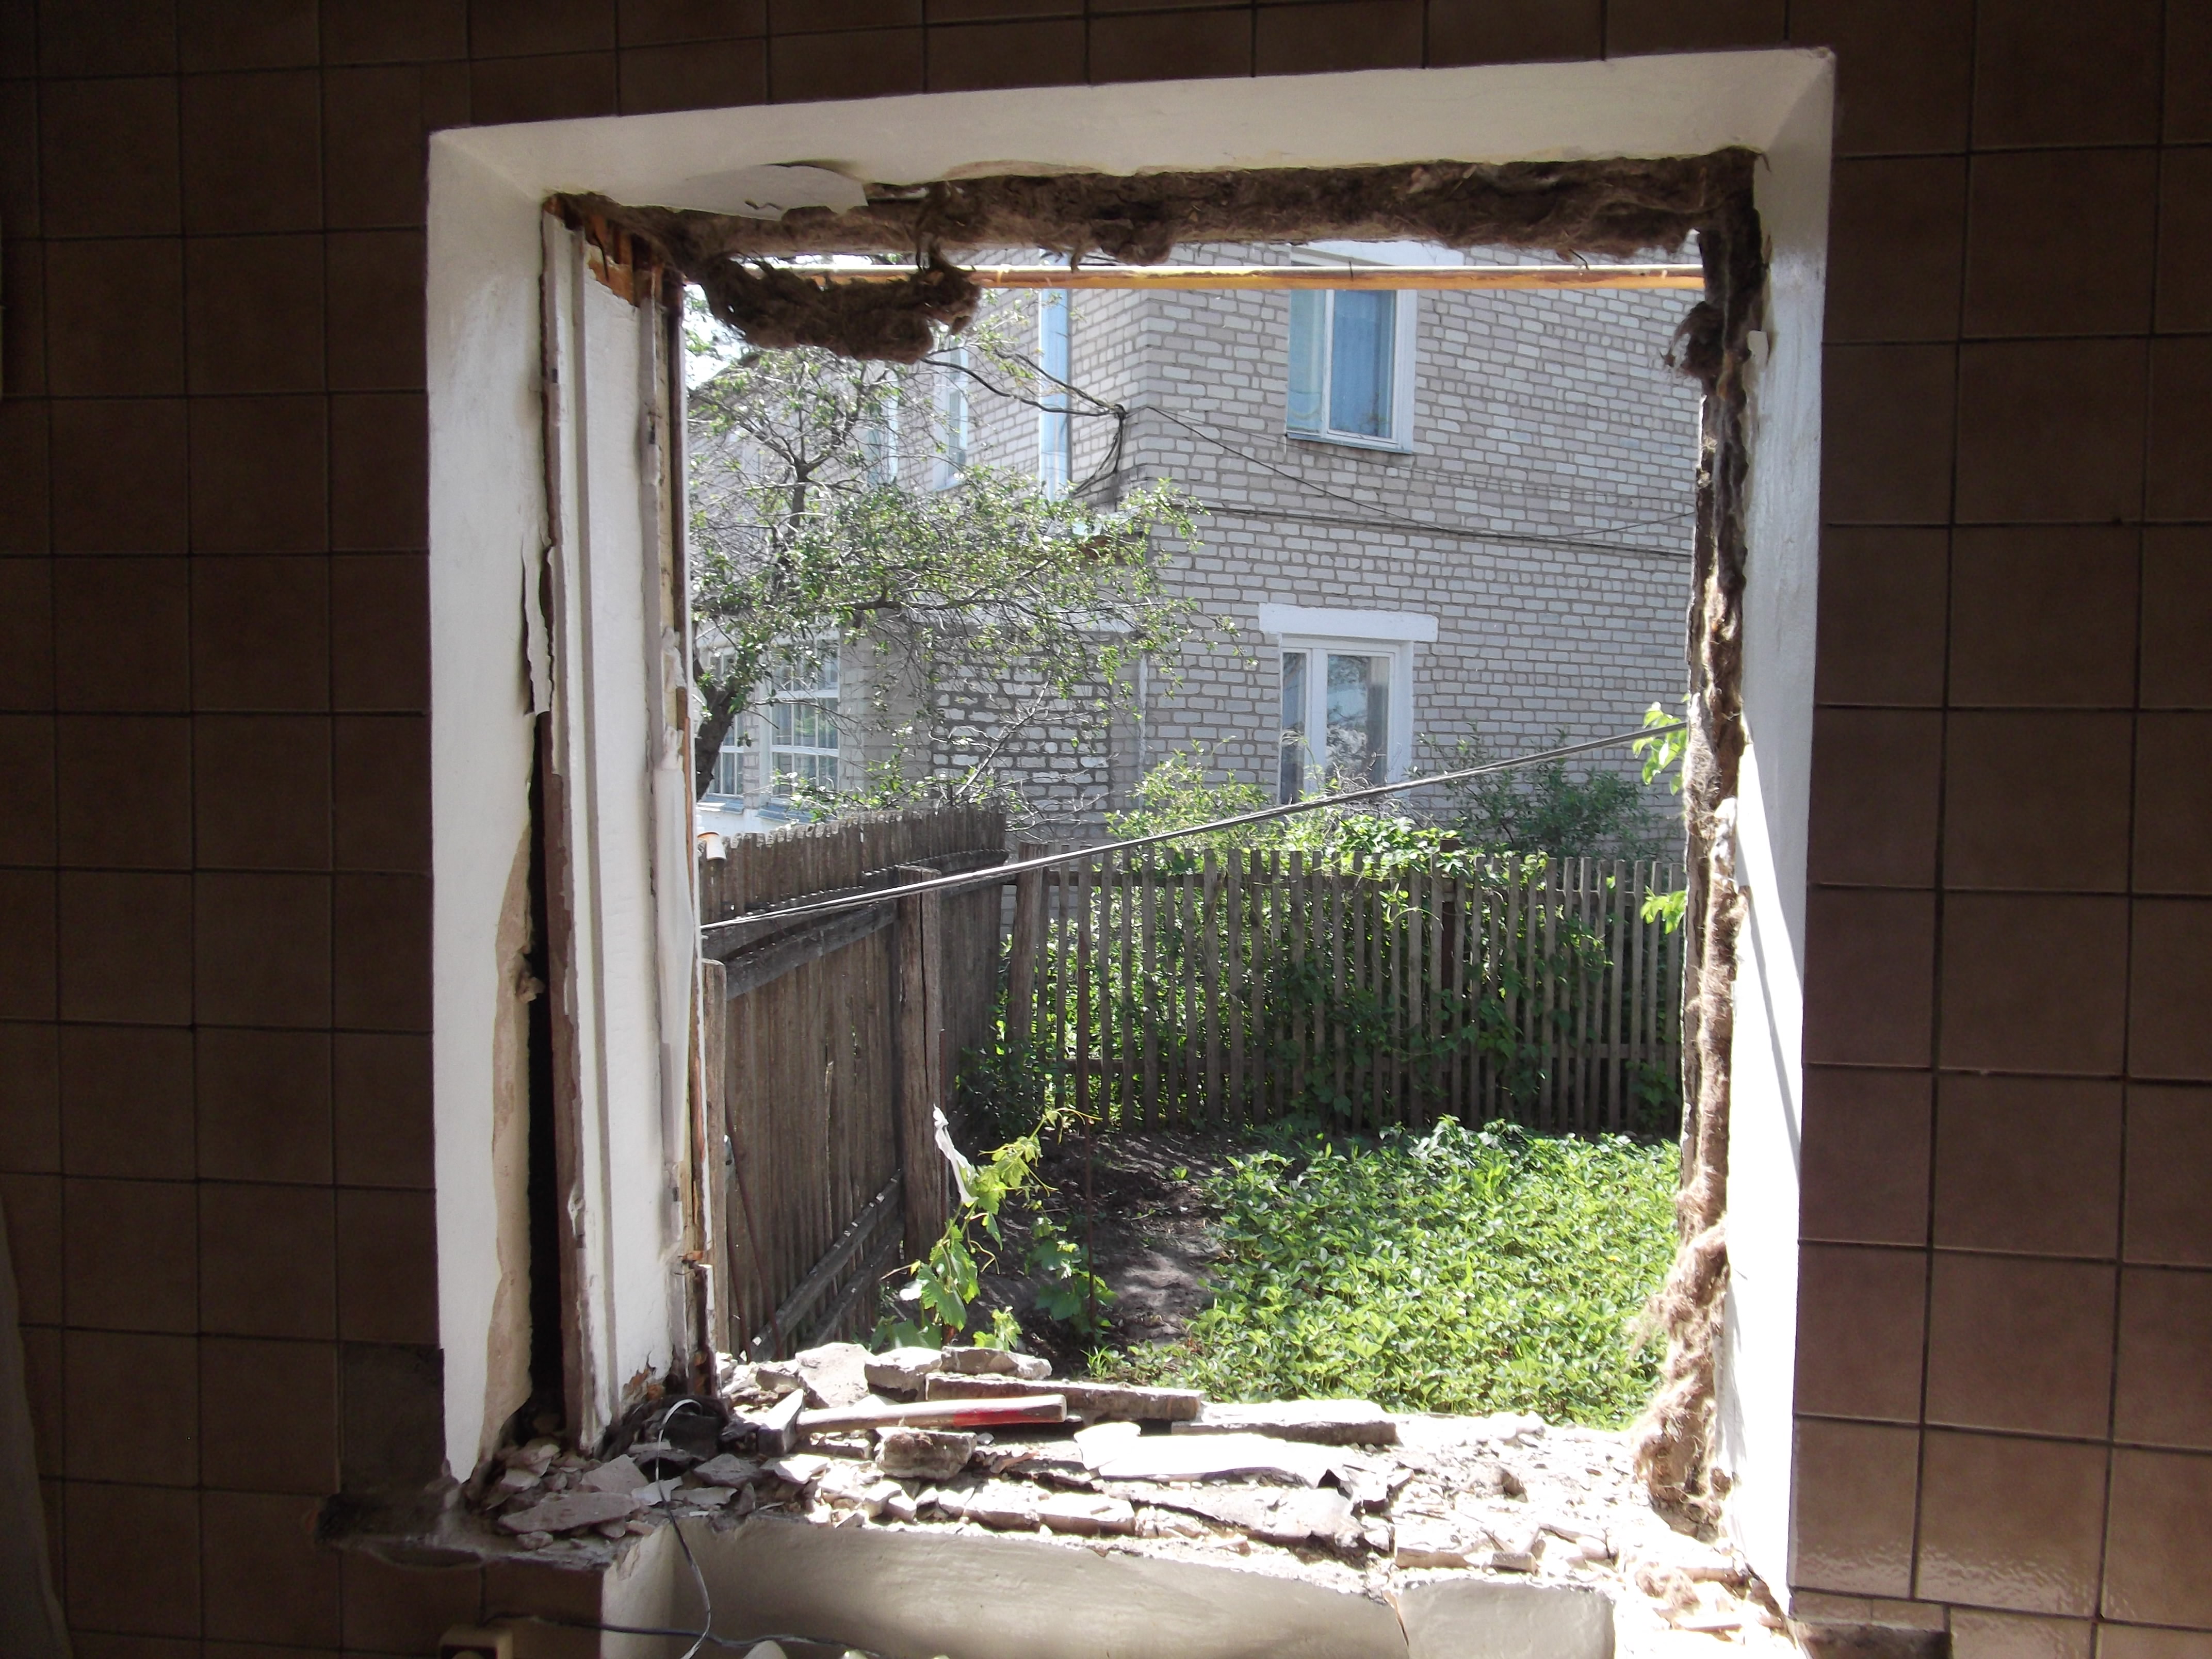
Window block among non-professional window installers has acquired a dual meaning. So called and the entire window system (frame, sash and translucent elements), and the window opening in the broad sense of the word.
For high-quality installation, block preparation is important, as a window opening, which is not considered in isolation from the house structure, but as its important component.Any changes in the geometry of the window unit can lead to negative consequences, therefore, the preparation must be approached wisely.
In an apartment brick or frame and in a wooden cottage, the preparation procedure is different.

Preparation of the opening in an apartment building includes:
- definition of window geometry, the presence of distortions, cavities or irregularities that prevent installation;
- definition of new window dimensions;
- selection of materials for changing the geometry of the opening;
- cleansing the aperture of excess layers;
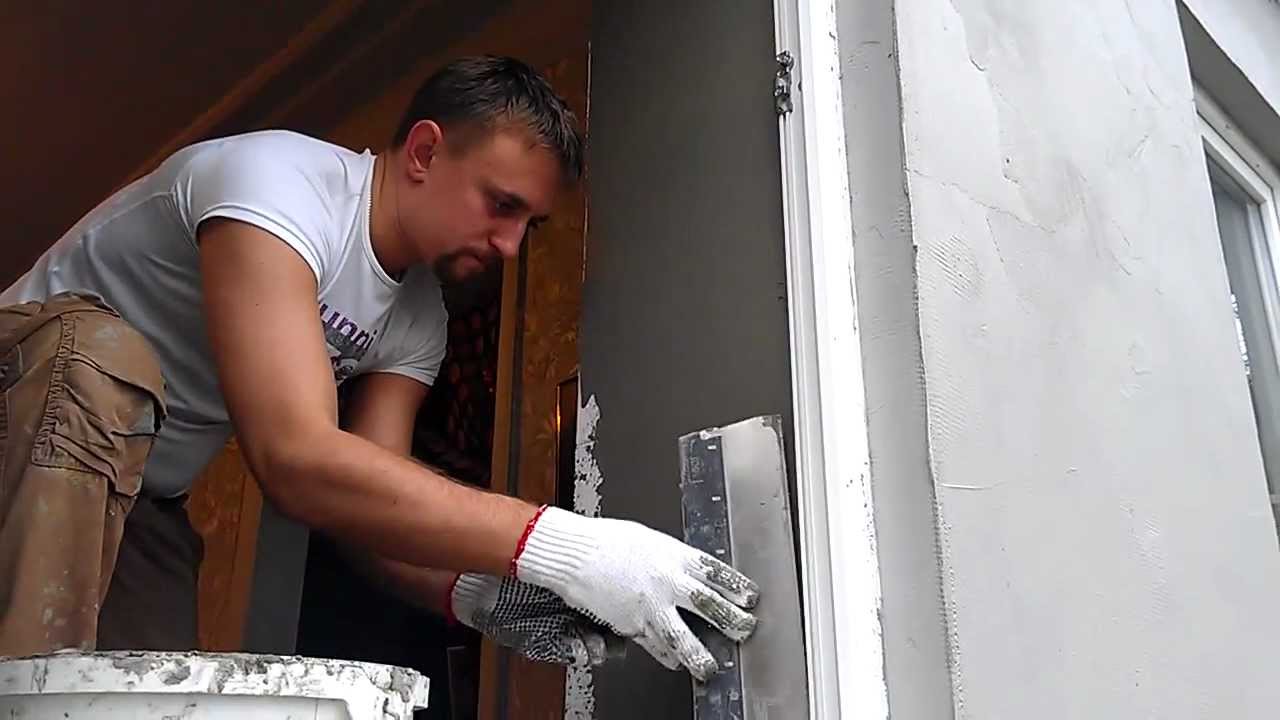
- primer and surface leveling;
- re-priming.
The geometry of the window is determined by plumb and construction level. If the skew does not allow installing a standard-sized window unit, the opening is subject to repair.
New parameters of the opening are determined by considering how much it can be reduced or expanded without damaging the window unit. In most cases, the choice is made in favor of reduction. This process is faster, less dusty, and the frame for a small opening also needs to be ordered small. And the smaller the window size, the cheaper it will cost. The main thing is that it passes as much light as is required by the SNiP in accordance with the area of the room.
You can align the window opening yourself with the help of drywall, putty and plaster. Drywall is needed for large distortions, which is often a problem of old houses, and plaster is needed to fill any irregularities with a depth of more than 10 mm.
In addition to drywall use plastic profiles and insulation (mineral wool, basalt wool).
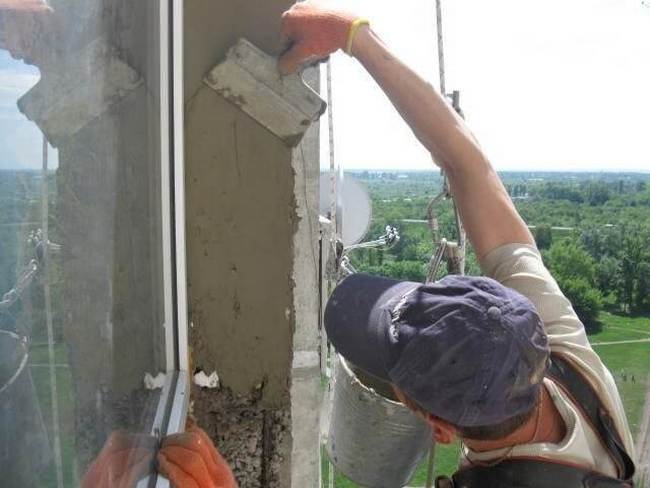
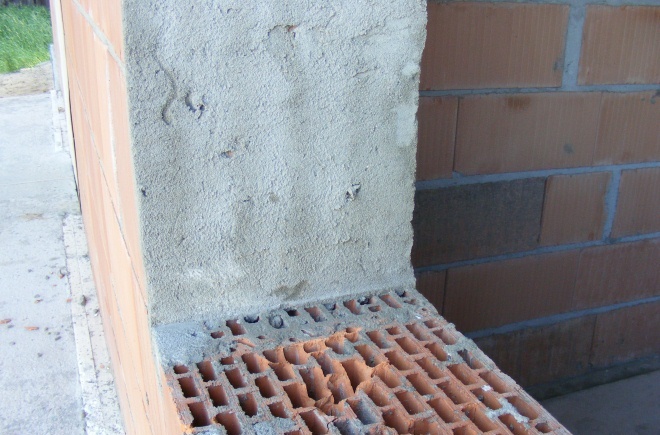
The maximum allowable layer of plaster is 10 cm. Using it, it is possible to even openings that were “killed” during the dismantling of the old window.
Before applying the plaster surface of the opening must be dusty and primed in two layers. For brick surfaces, a silicone-based primer is suitable. The brick is porous, so a strong film needs to be created on its surface. For concrete floors suitable concrete contact. It will improve the adhesion of the plaster to the surface.
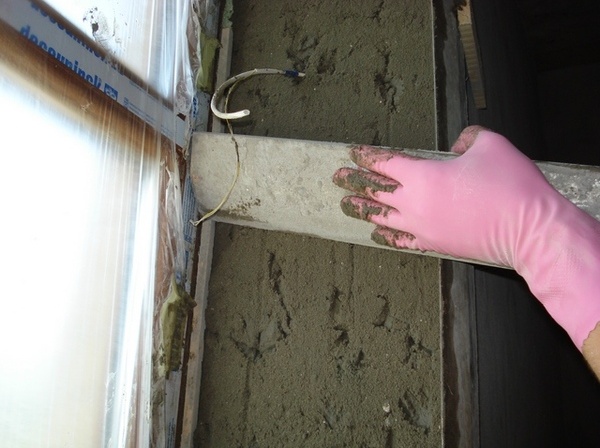
A layer of plaster thicker than 5 cm is recommended to be applied in two layers with an intermediate primer. After that, she needs to dry well. During surface leveling, it is recommended to check the results with plumb lines and level.
According to building codes, surfaces are considered flat when the vertical and horizontal walls of the opening are parallel to each other.
The maximum permissible deviation is 4 mm per meter of profile and not more than 8 mm over the entire length. Finishing coat of plaster must be primed.
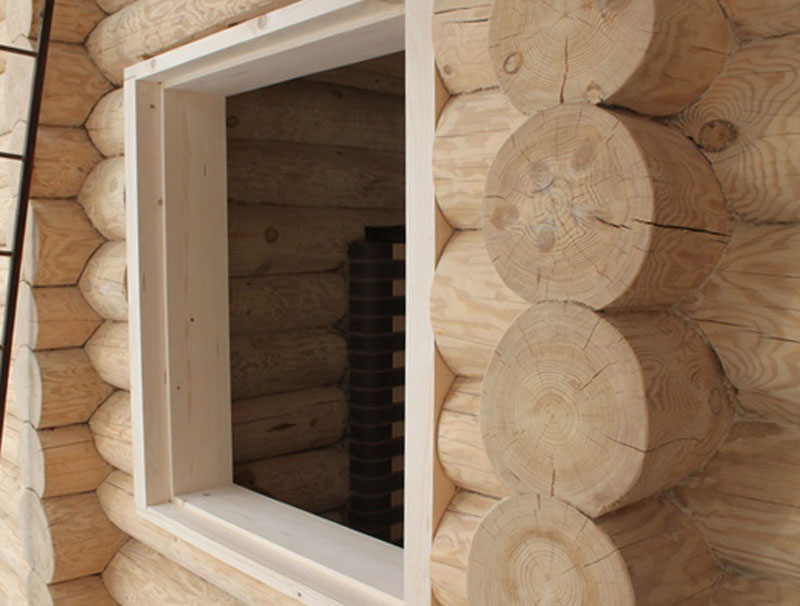
In a wooden house the way to align the opening is completely different. Due to the fact that the tree accumulates and releases moisture during the year, that is, it narrows and expands, the load on the window block (frame) increases. Neither a sandwich panel, nor a siding covering from it do not rescue. That the window was not damaged, it is necessary to establish okosyachku.
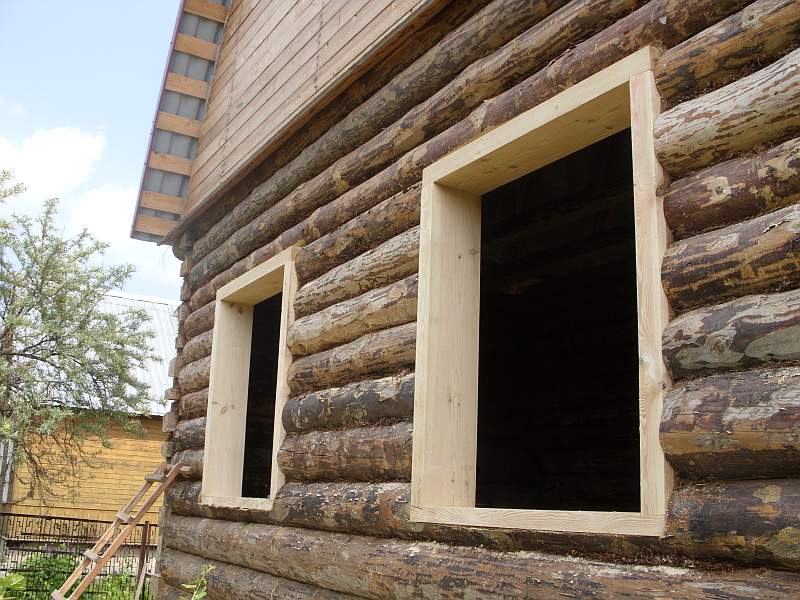
Okosyachka or obsad is an additional frame inside the window opening, which is mounted in such a way that it can be moved a few centimeters. This protects the windows from damage with regular fluctuations of the box.
Installing an okosyachku own hands is already difficult. It requires some skills in carpentry, so it will be more efficient to entrust the work to a specialist.
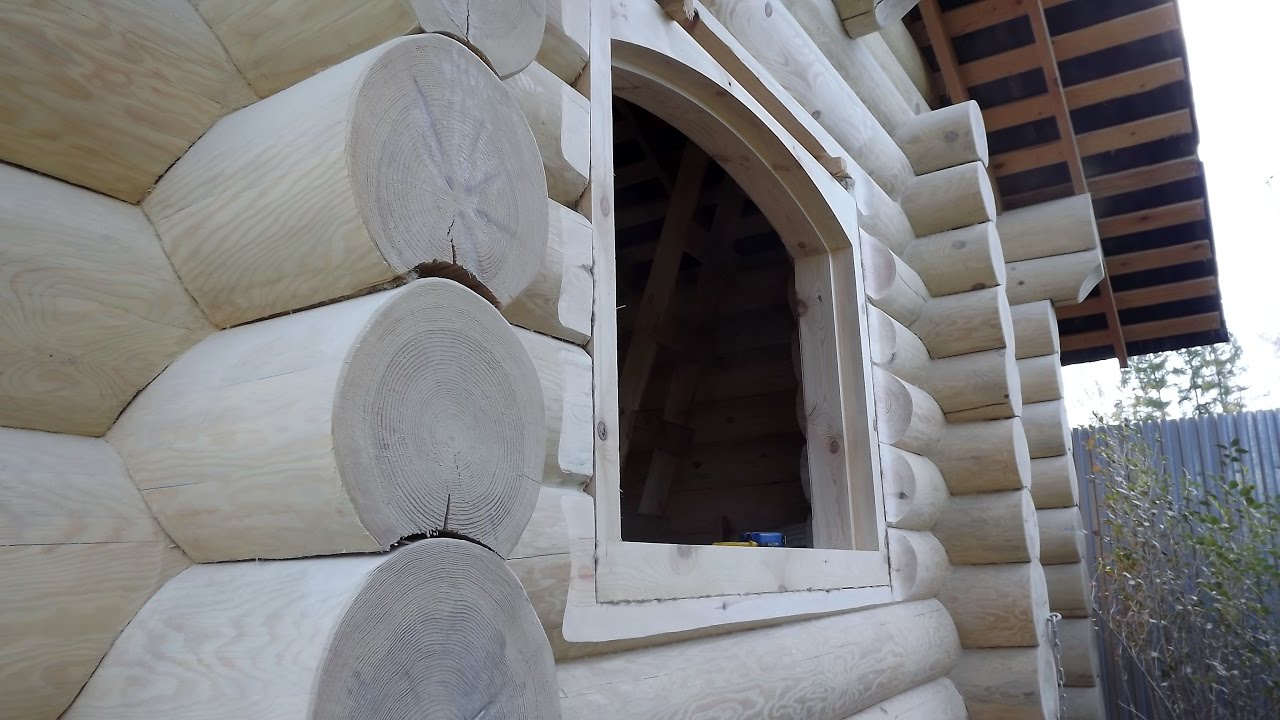
The master will choose the correct shape of the octopus: U-shaped, T-shaped, arched, fair or rough, power, euro, combined. Suitable obsad provides tightness when installing glass and protects them from deformation.

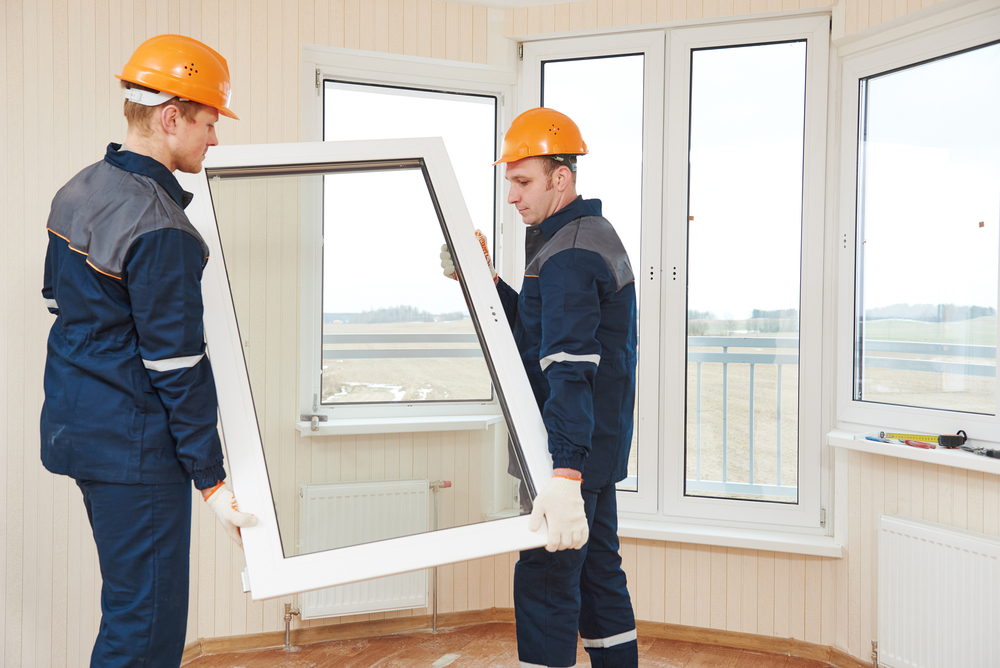
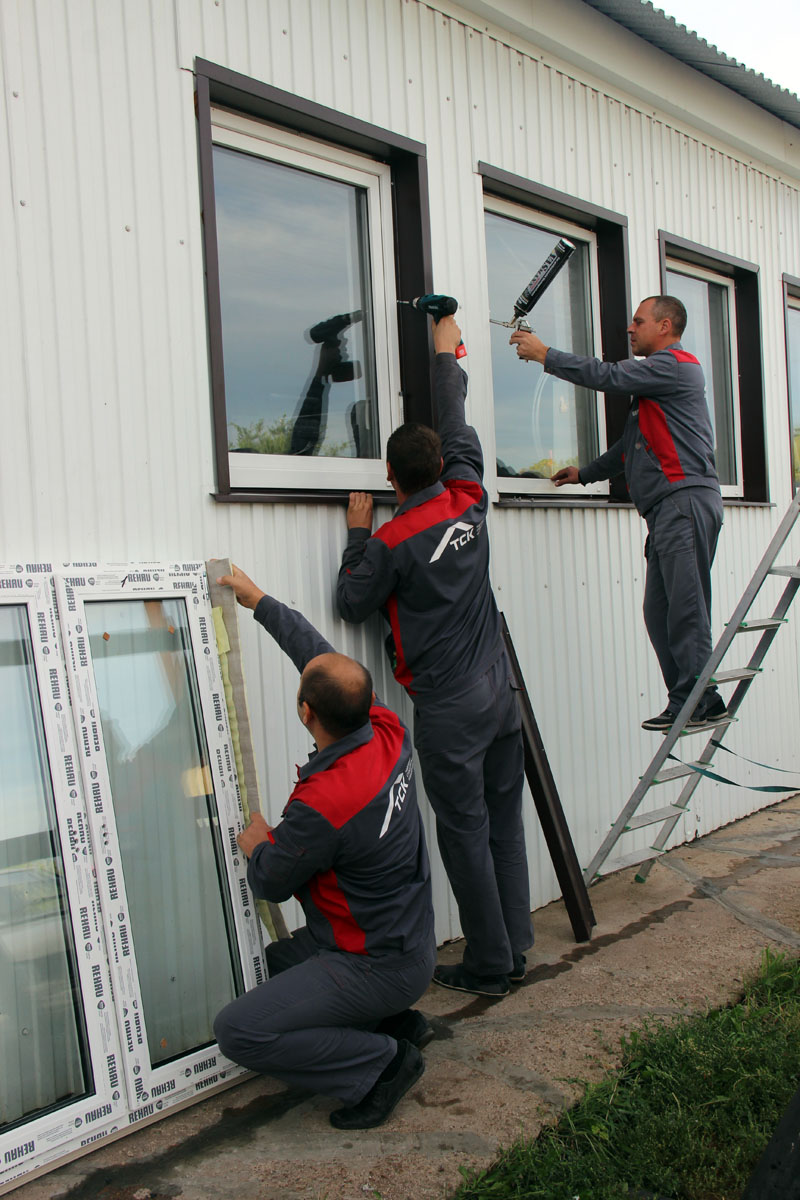
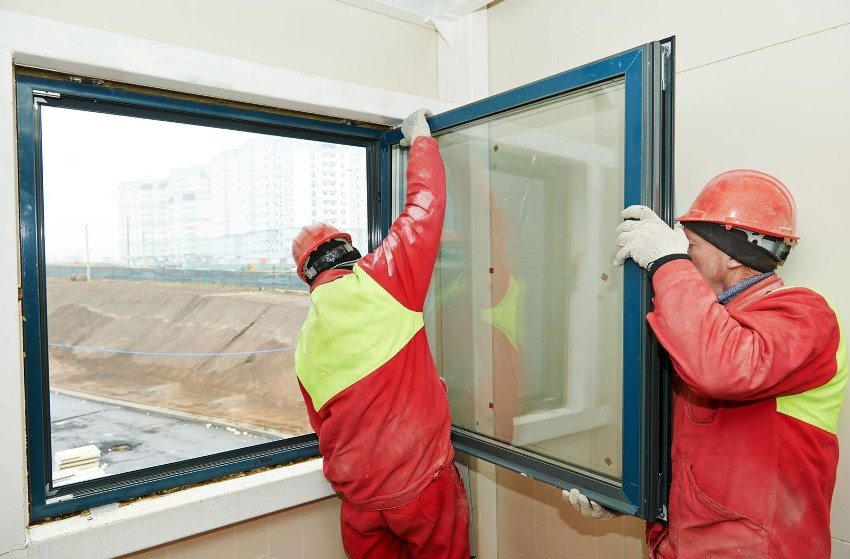
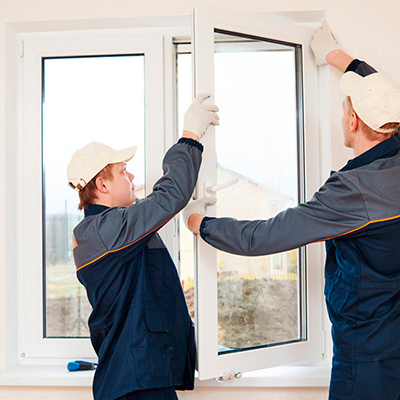
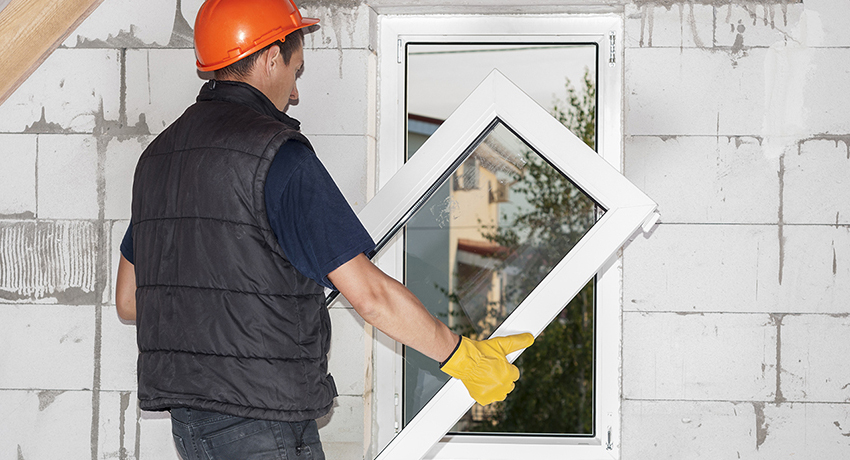
Installation: step by step description
Replacing the old window with modern windows without the help of the installation team is difficult, but possible. This will help step by step instructions and recommendations of the pros.
There are two ways to install windows with your own hands: disassembling the structure and installing a solid block.
The first method is more laborious, but reliable. It is required for installation of large windows and indoors above the 12th floor. The second is suitable for installation of standard structures at a relatively small height.
Let's start with a simpler one.
Installing windows without disassembling the structure
Performed in stages:
- Dismantle the old window.
- Preparing a window opening.
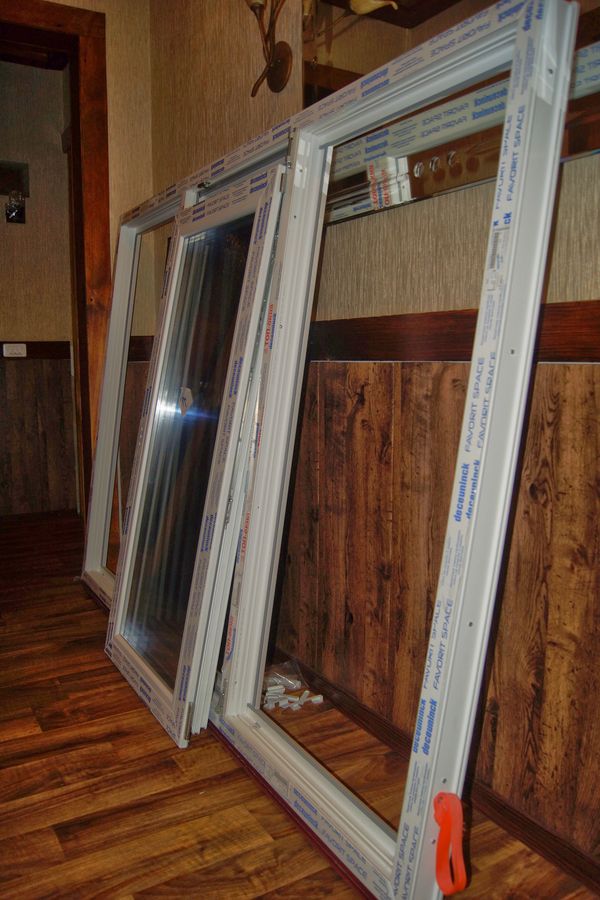
- Preparation of the window unit. In this case, a block is meant as a window system.
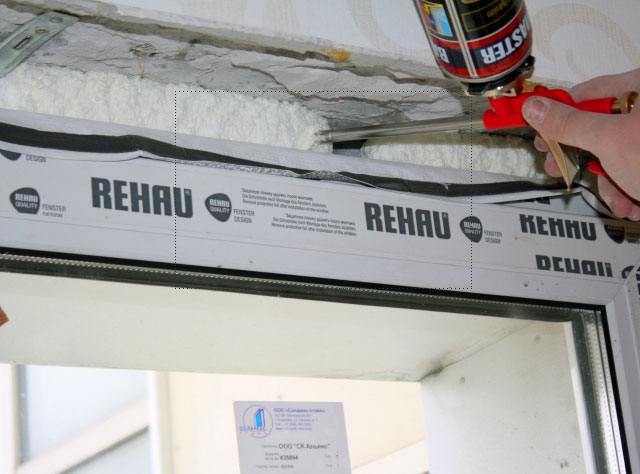
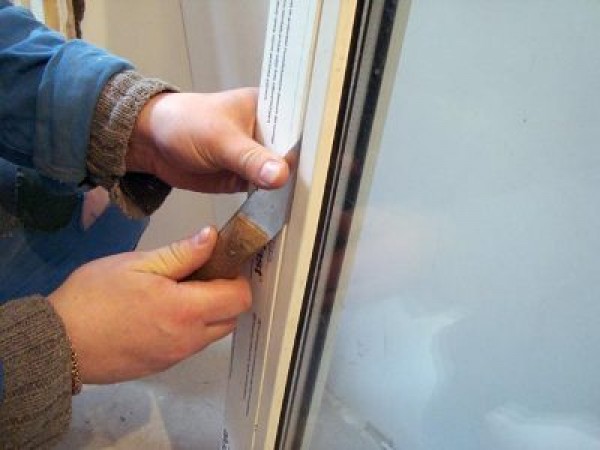
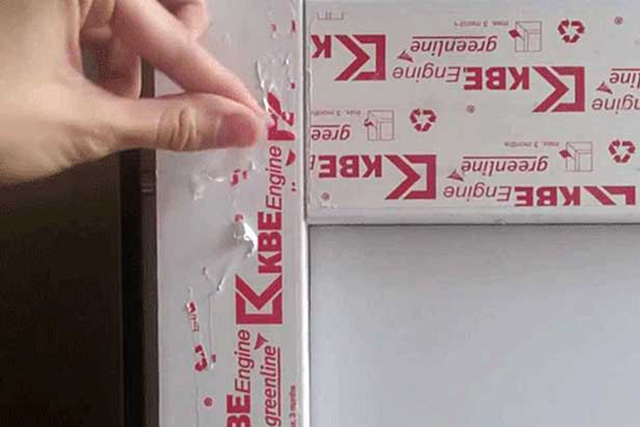
Before starting work, you need to remove all the protective film from the profile, so that it is more convenient to apply the marking and glue the tape.
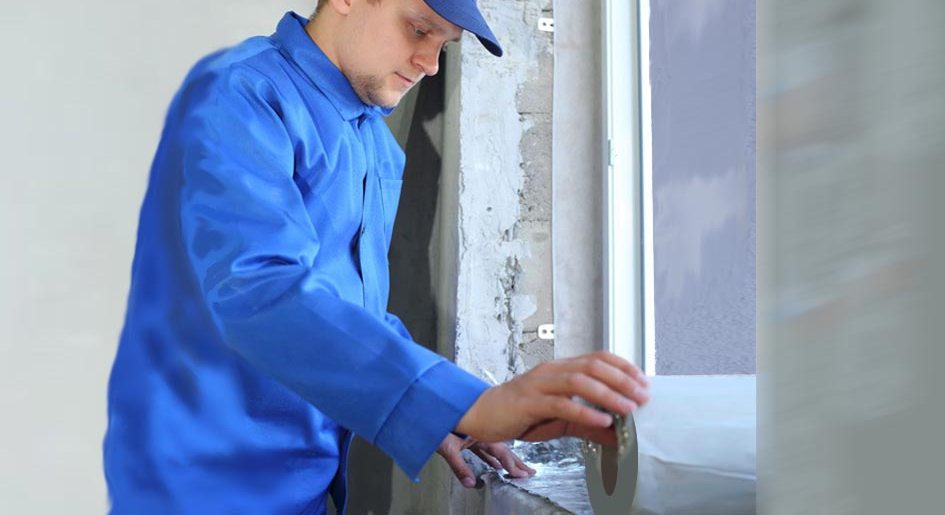
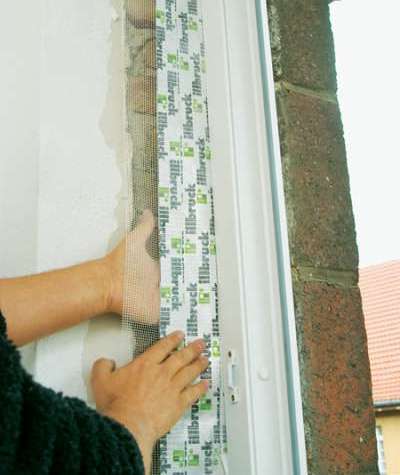
A one-piece block, without removing the glass units from it, is first of all glued with a compressed sealing tape (PSUL). It protects installation seams from moisture and UV rays, prevents water from filling the joint, prevents condensation and improves the sound insulation and vapor barrier properties of the system.
The tape has a self-adhesive layer.It is glued to the window frame along the outer perimeter.
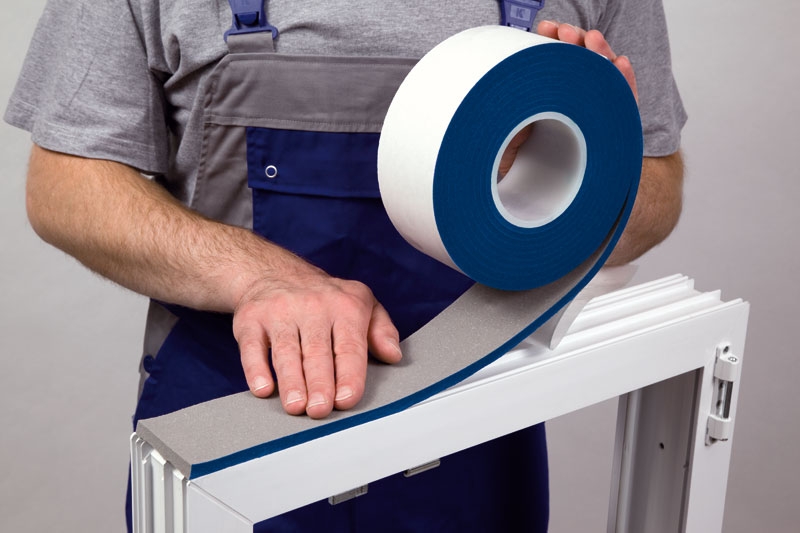
After PSUL use sealing tape. They protect seams and seams from any negative environmental influences. At the same time they allow the window to "breathe."
There is also a self-adhesive layer on the tape. Tape glue the window on the butt on three sides: left, top, right. It should make the letter P.
You must leave the free edge of the tape to stick it on the slopes overlap. This will improve tightness and fixation in the opening.

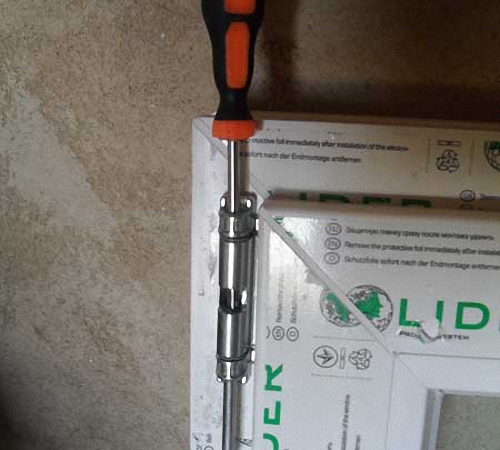
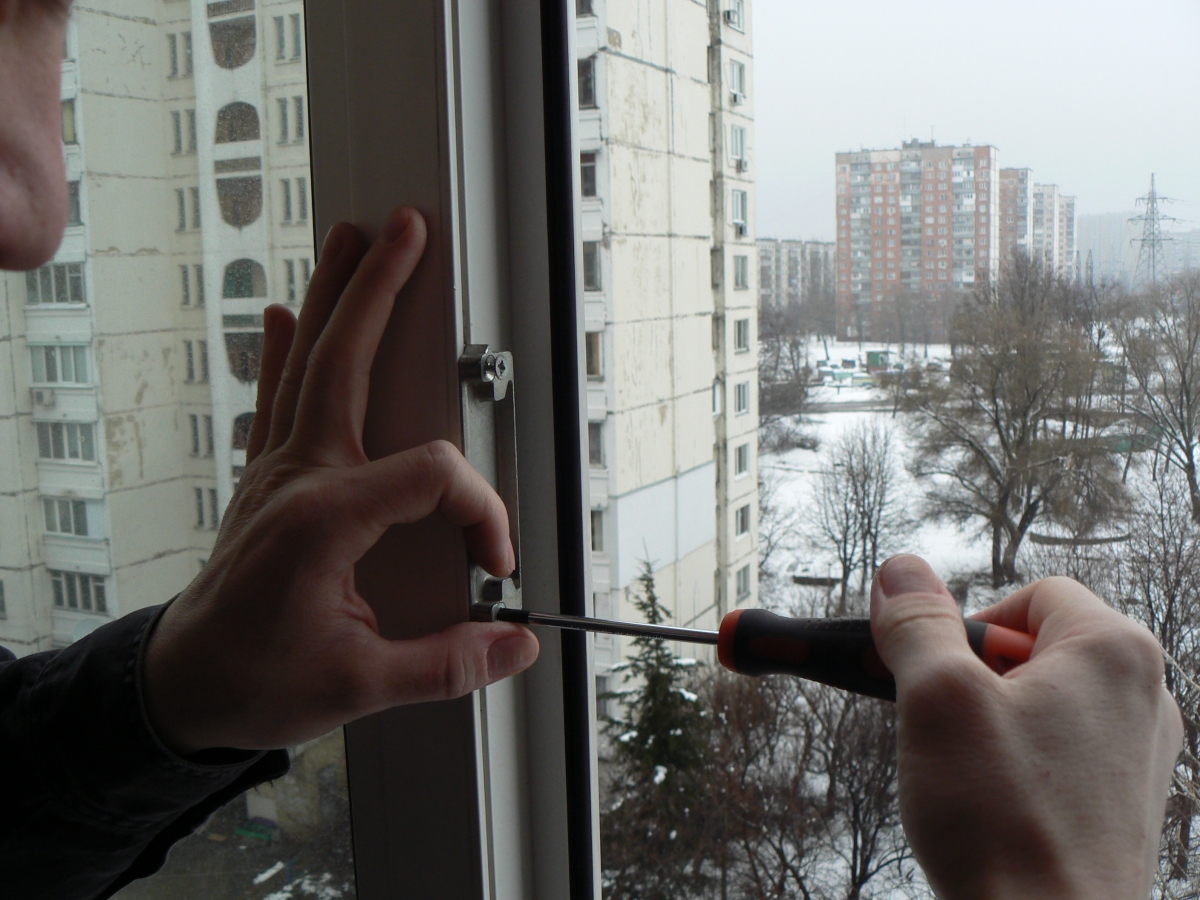
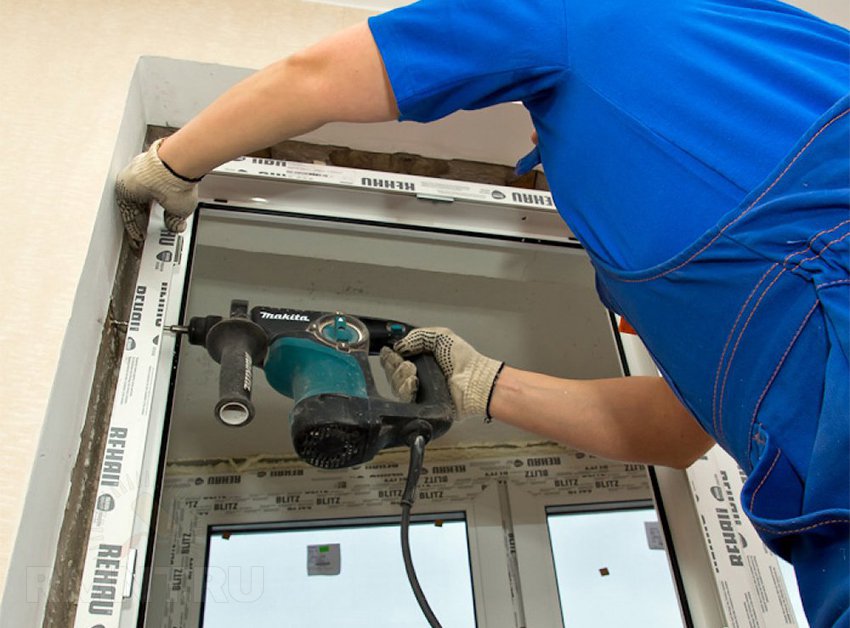
Mounting fasteners
In a non-separable structure, it is carried out before the block is inserted into the opening.
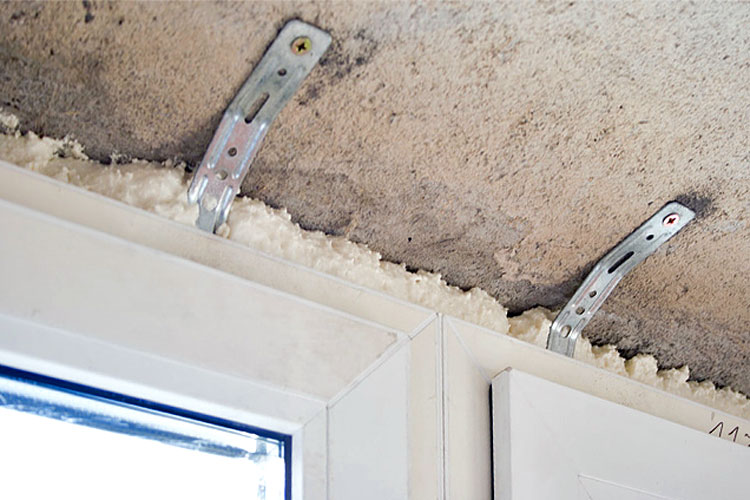
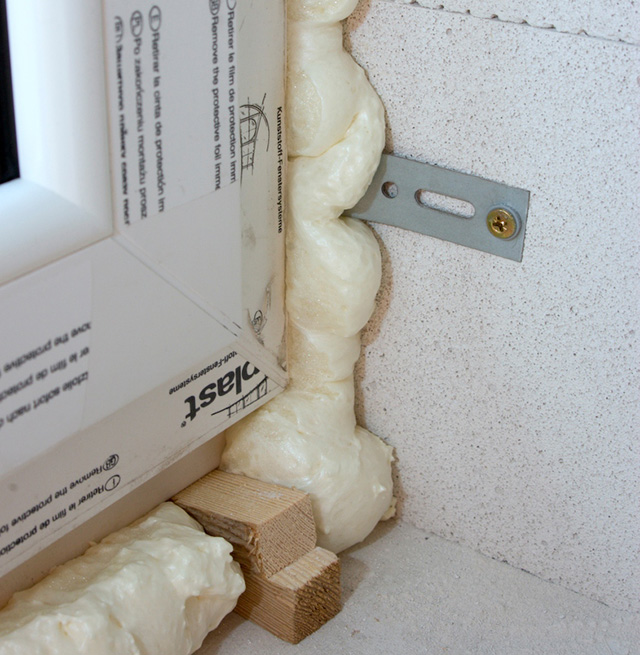
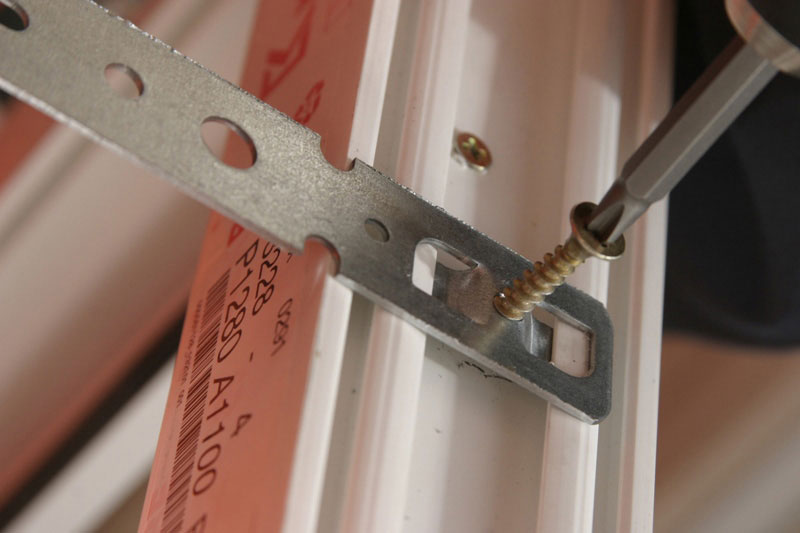
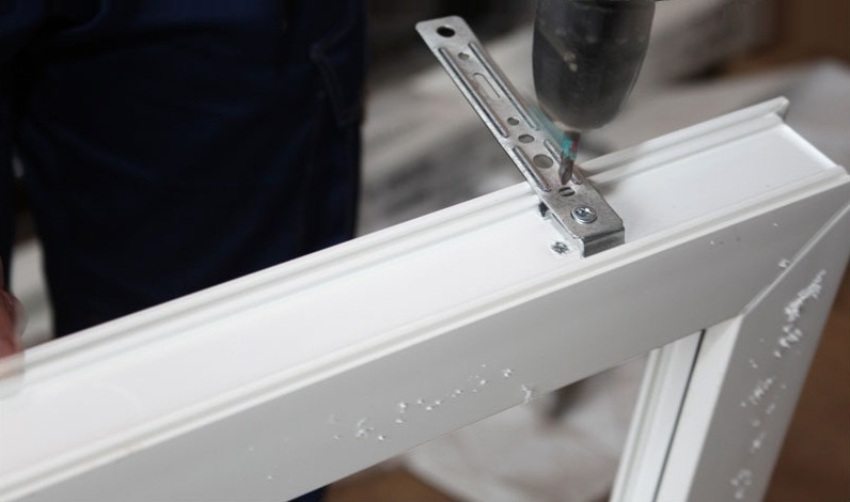
First you need to install anchor plates. The distance between them should not exceed 70 cm.
Anchor plates are inserted into special grooves and fixed with screws.
They do not require additional drilling of the frame.
In addition to the plates, you need to make holes for screws on concrete. To do this, from the impost (shutter separator) measure to the left and right of 20-25 cm and drill holes in the installation profile. You need to do this carefully so as not to damage the glass unit.
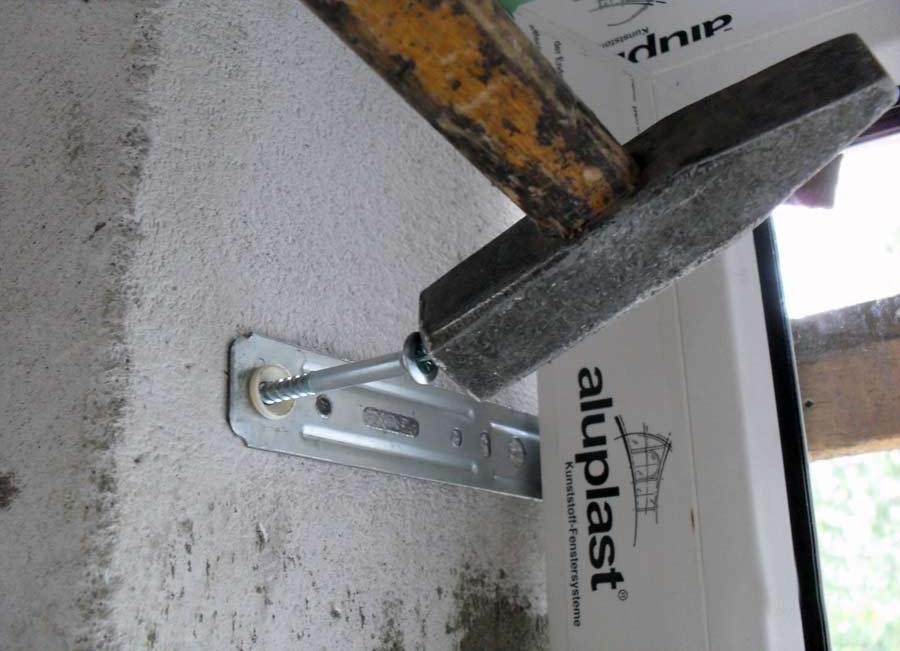
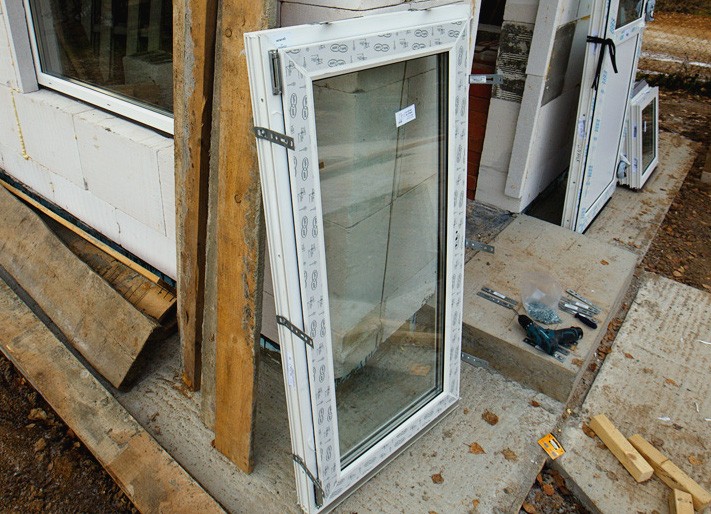
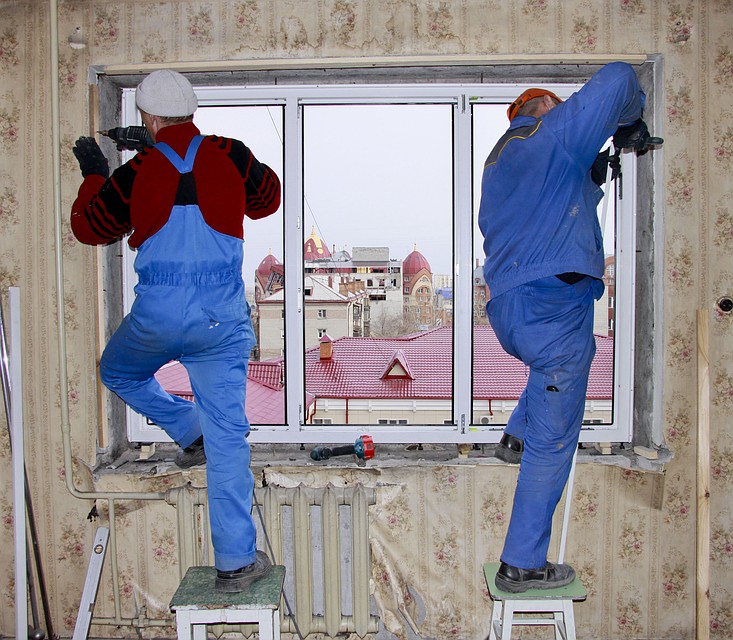
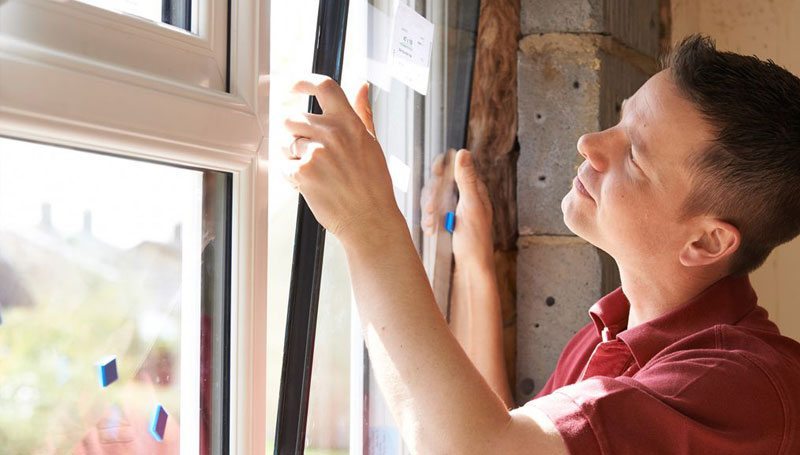
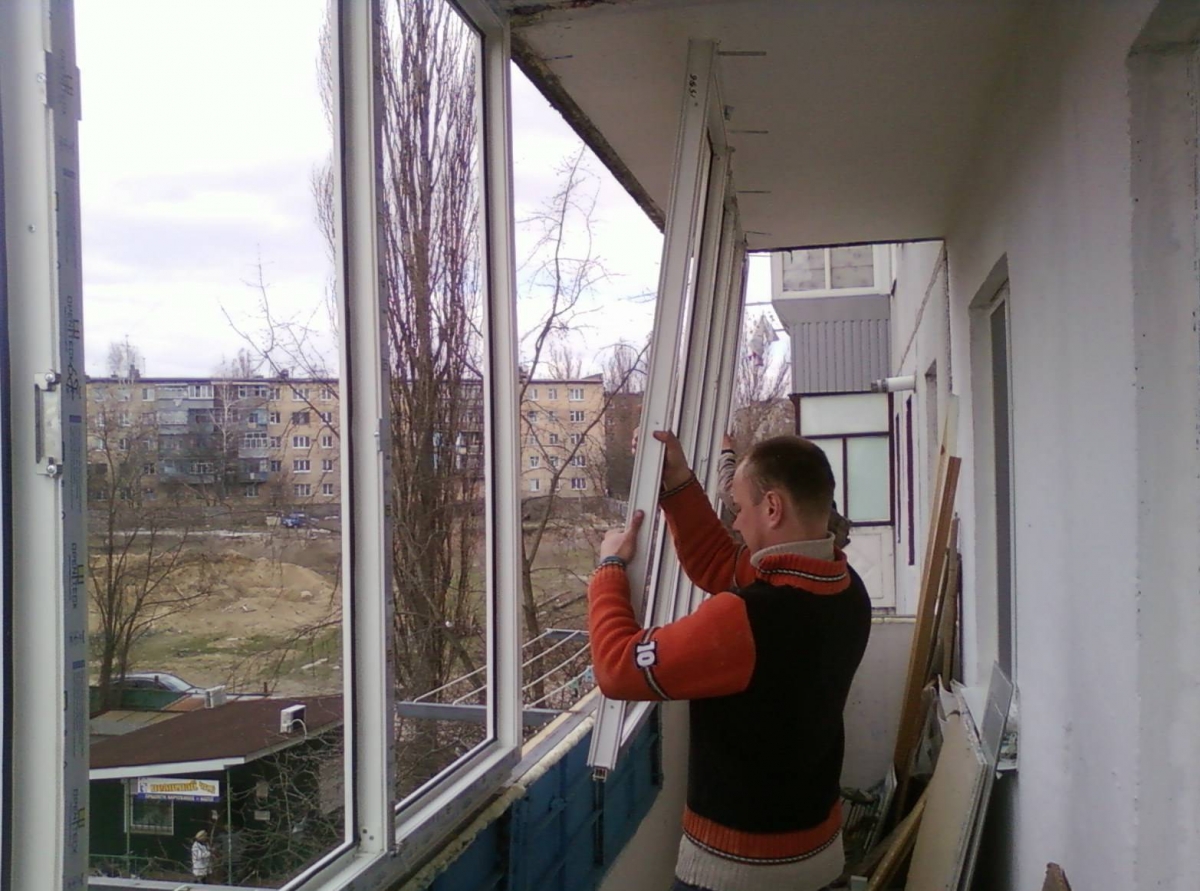
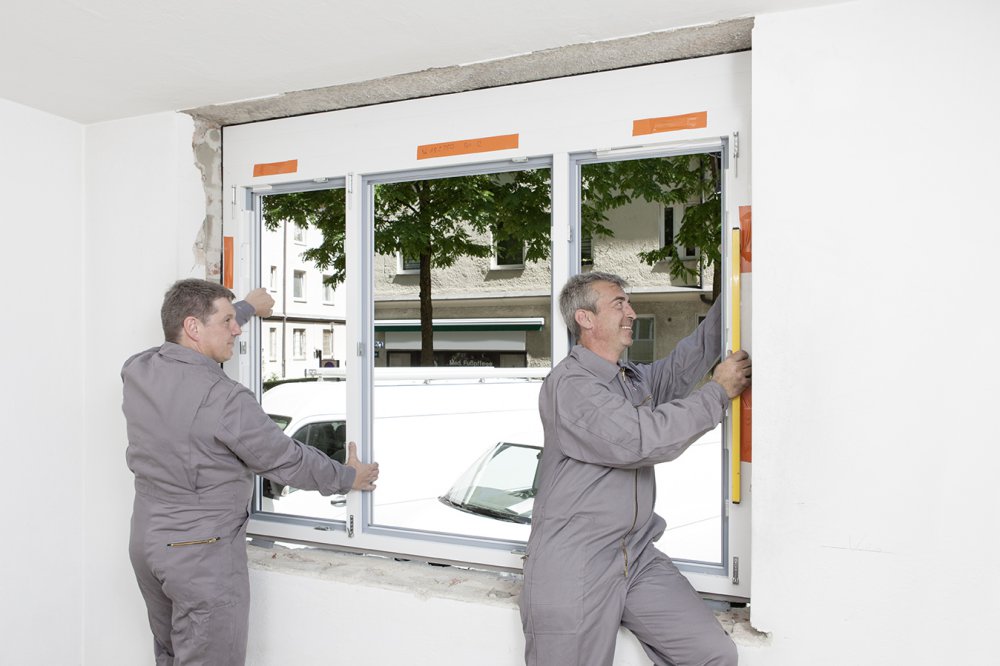
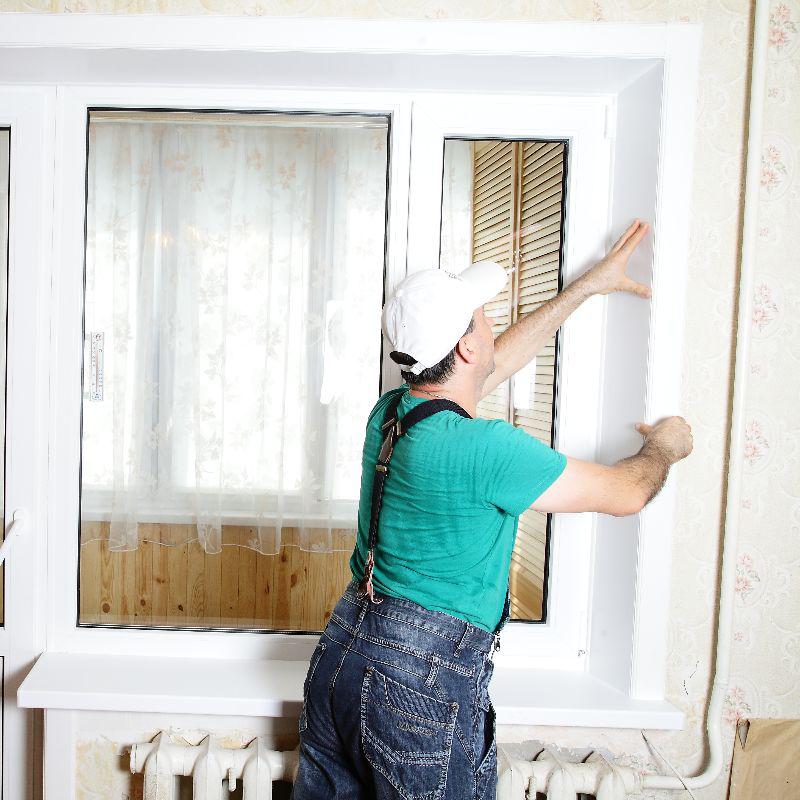
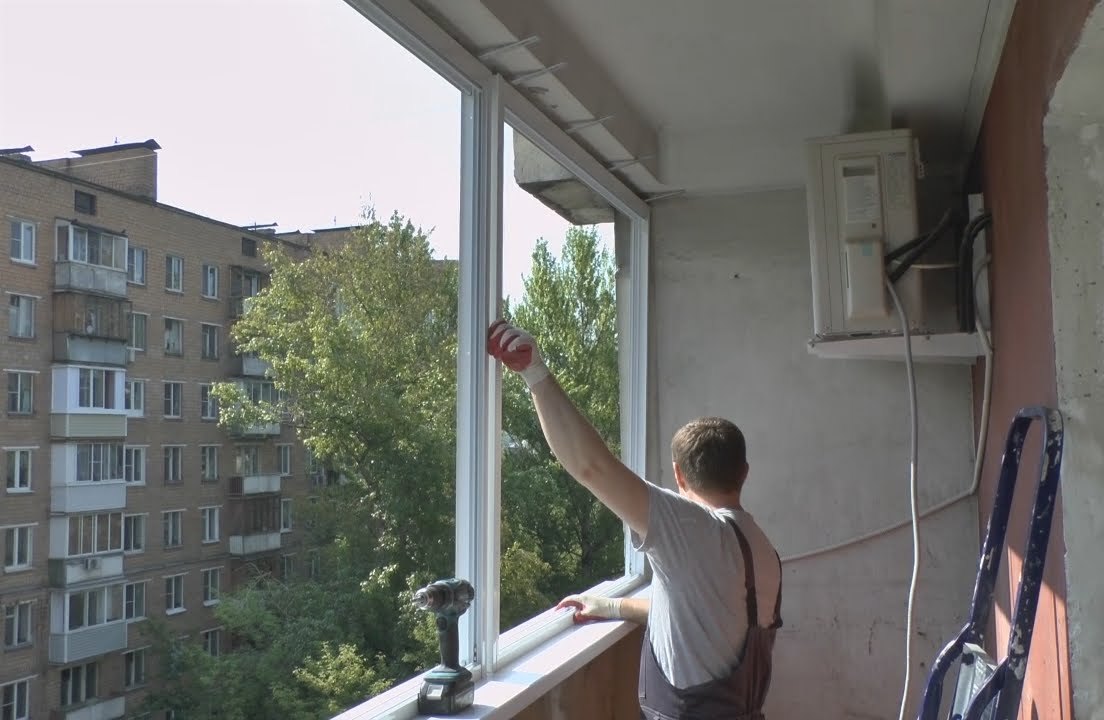
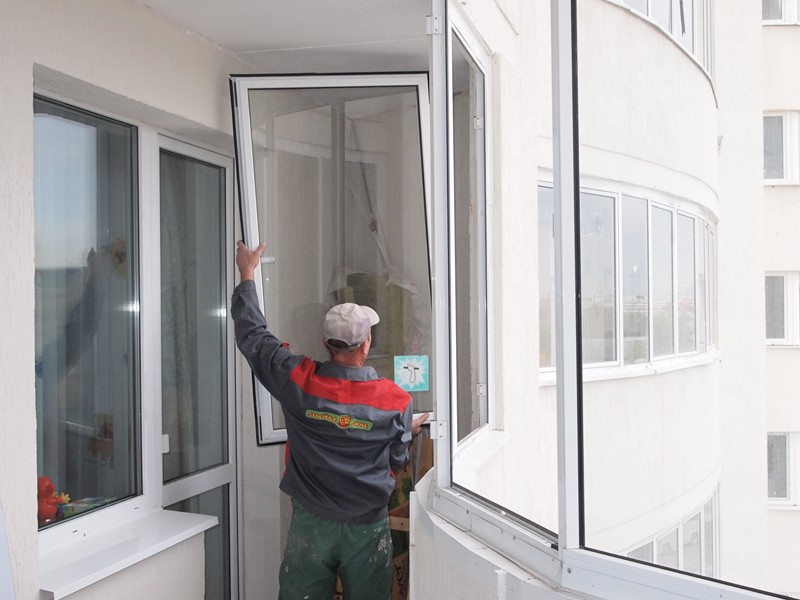
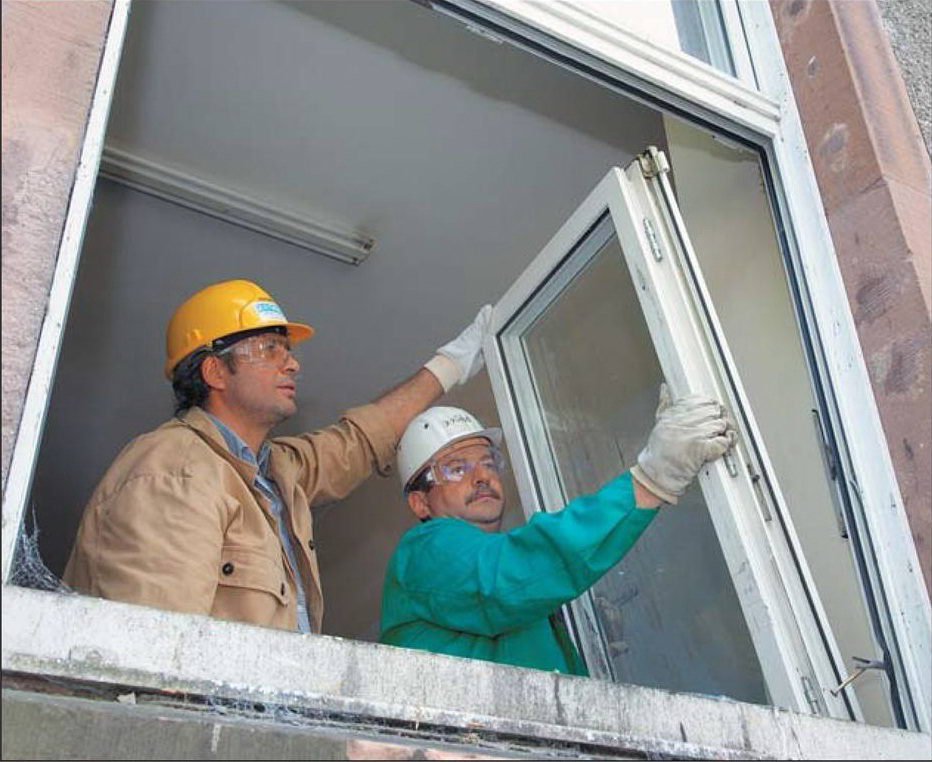
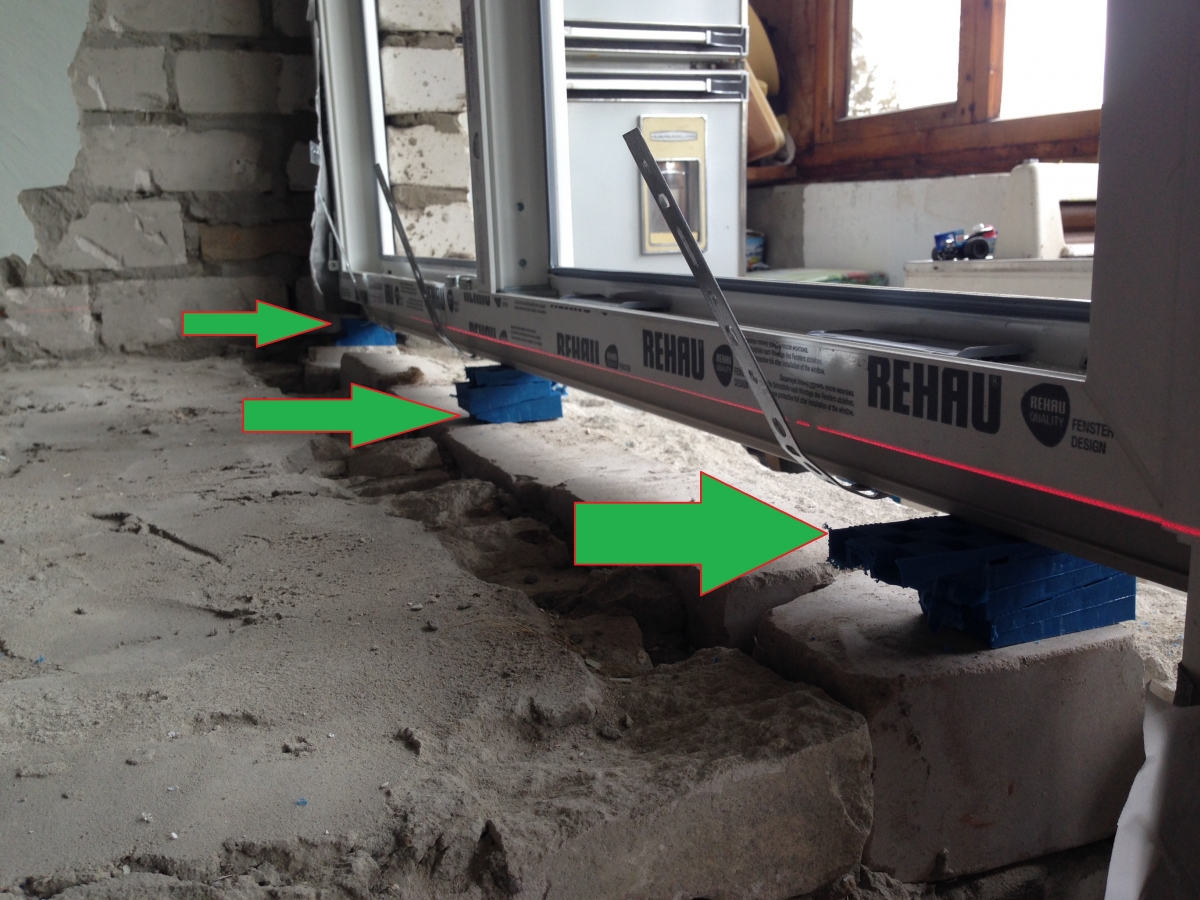
Installing the unit in the opening
To keep it in place, it is temporarily necessary to fix it with two screws in the anchor plates.
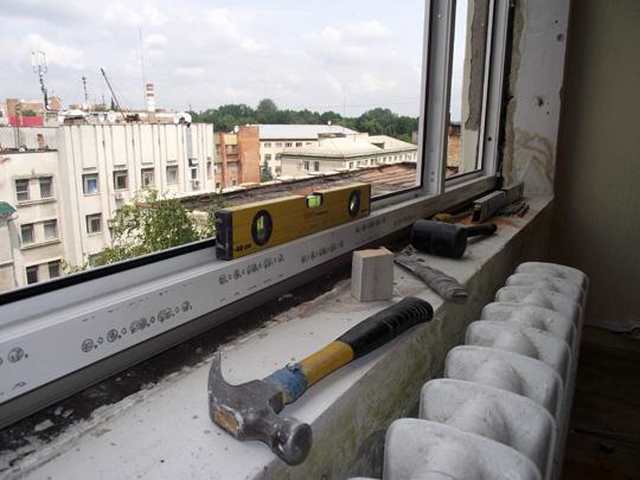
The next step is to align the profile with a horizontal line.For this, wedges of special material are used. It has a low thermal conductivity and does not form sound bridges, so the wedges are not removed when zapenivanii seams.
The horizontal line of the installation profile is checked using a water level. Then it is leveled in a vertical line, using the same level.
When the frame is in place, you need to fully secure the anchor plates with screws. Screw the screws on the concrete into the installation profile.


Tape installation
Installing a vapor-permeable diffusion tape on the outside of the window. It is glued in the place where the ebb will be installed. Its task is to provide waterproofing of the external seam.
The tape is equipped with a self-adhesive layer for attachment to the frame, wall and slope.
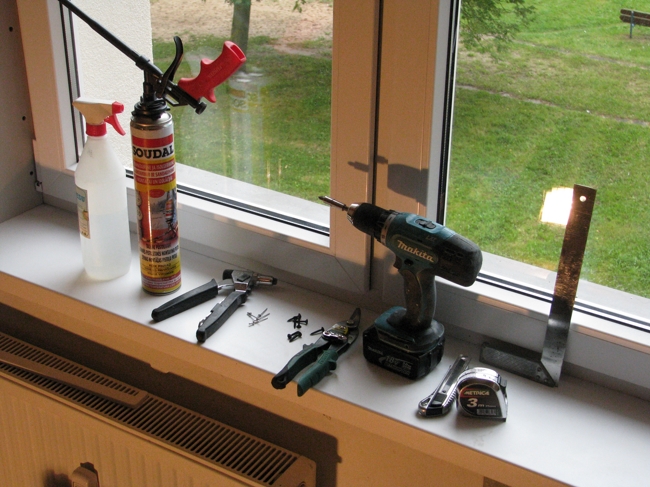
Preparing for foaming
For better foam polymerization, it is recommended to wet the surfaces with a spray gun. Then, remove the cap from the foam bottle and fasten the gun to foaming. The balloon must be turned over and shaken intensively.


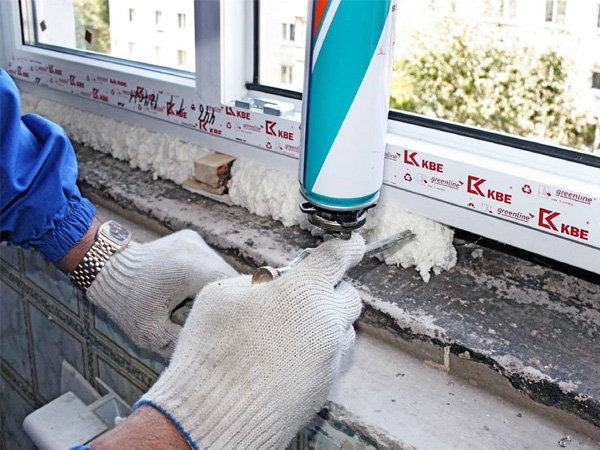
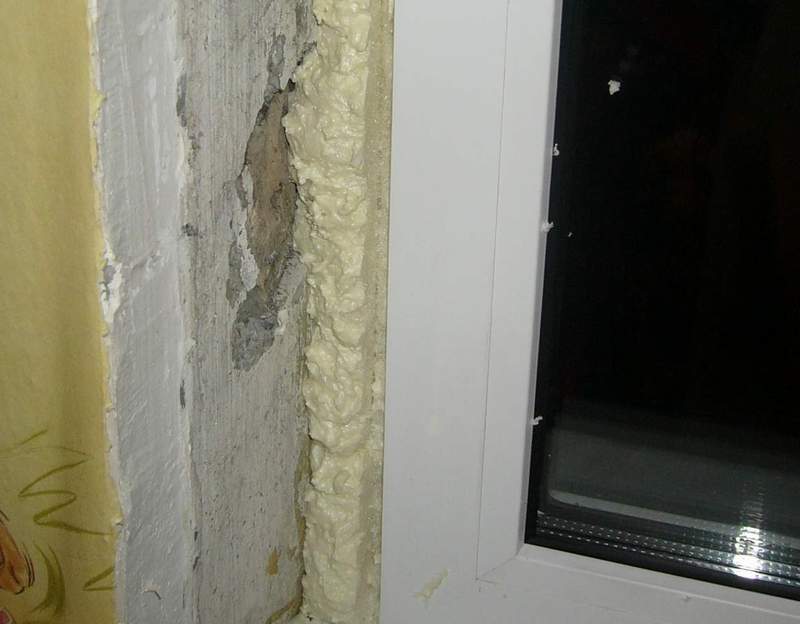
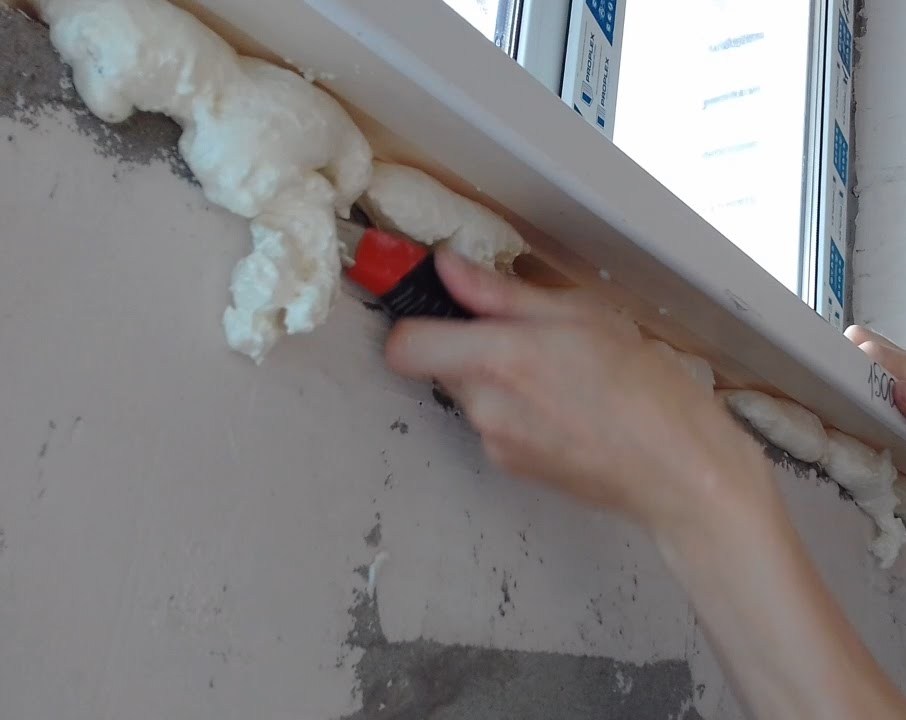
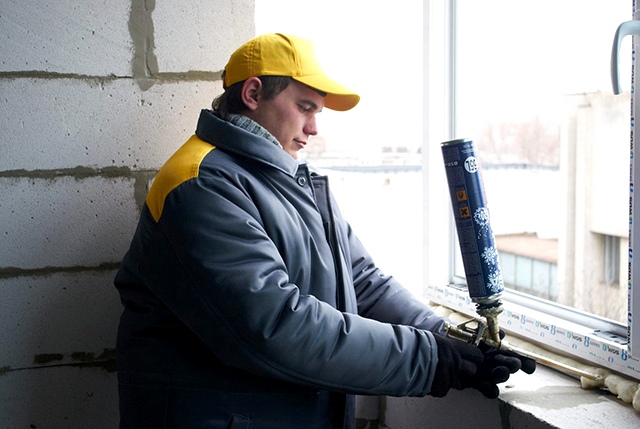
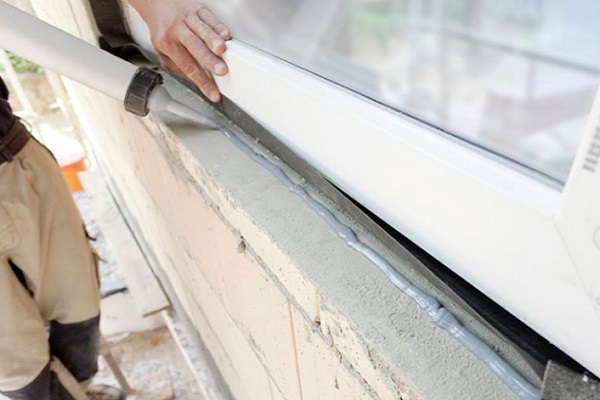
Filling the joints with foam
Balloon with a gun to keep bottom up. The seams are filled from the bottom up with zigzag movements.
Important: the temperature of the cylinder should not be lower than 20 degrees before the start of work and throughout the process of foaming. "Warm" material fills seams better.
The seam must be filled so that it does not have to cut off the excess foam. The fact is that the top layer of foam "glazed" and creates a water-repellent layer. When cutting off excess, this layer is broken. The porous structure of the foam allows it to absorb moisture, and this reduces the service life.

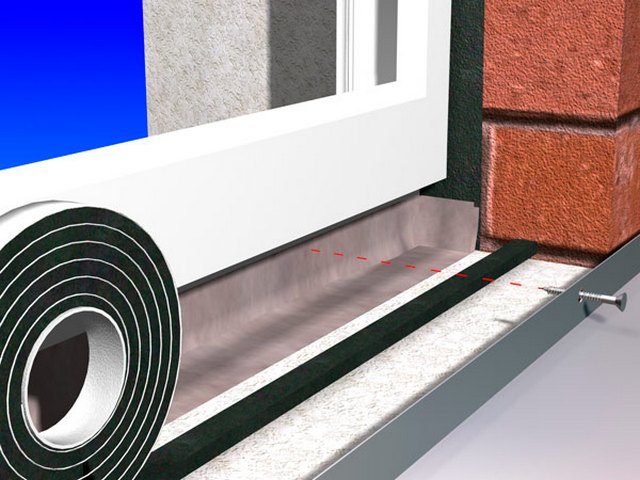
Installation of metallized tape
The tape is placed on the windowsill, close to the edge of the frame, with the institution on a layer of foam. It provides additional hydro and thermal insulation.
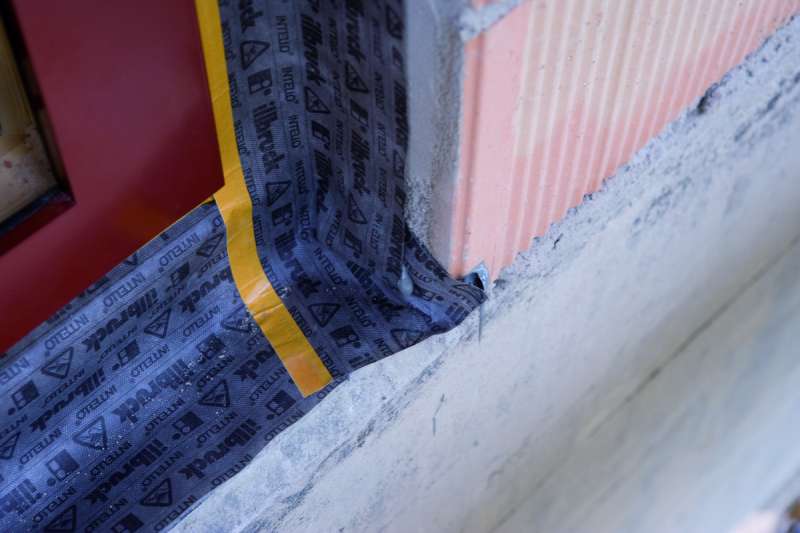
Seam sealing with vapor barrier tape
After polymerization of polyurethane foam, you need to bend the edges of the vapor barrier tape on the slopes and glue it with a self-adhesive layer. Thus, the seams will be maximally protected from the negative effects of moisture and freezing.
In the corners of the tape is mounted overlap.
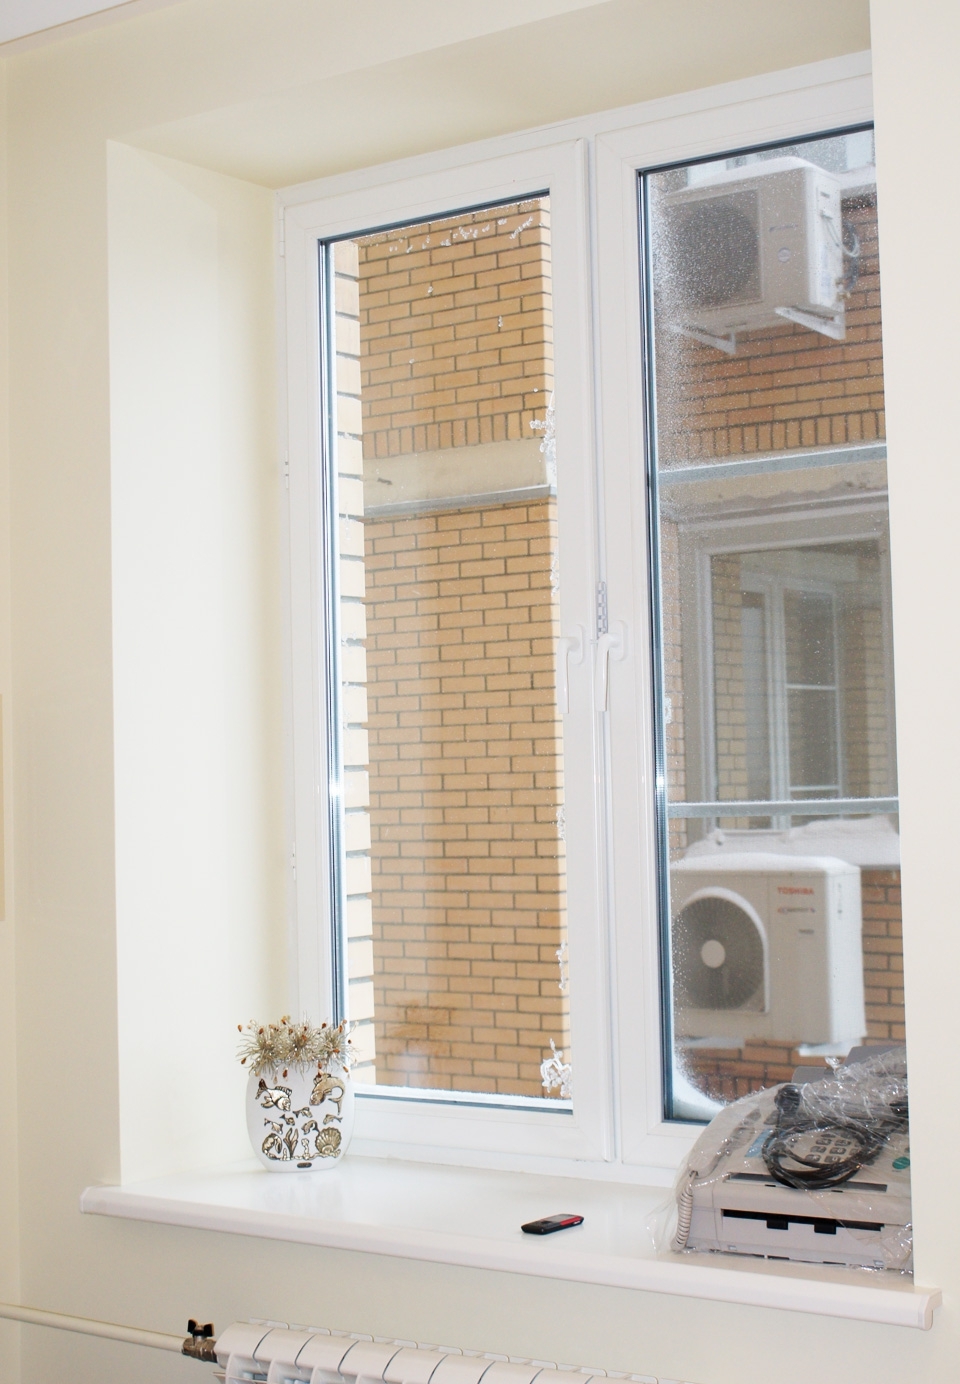
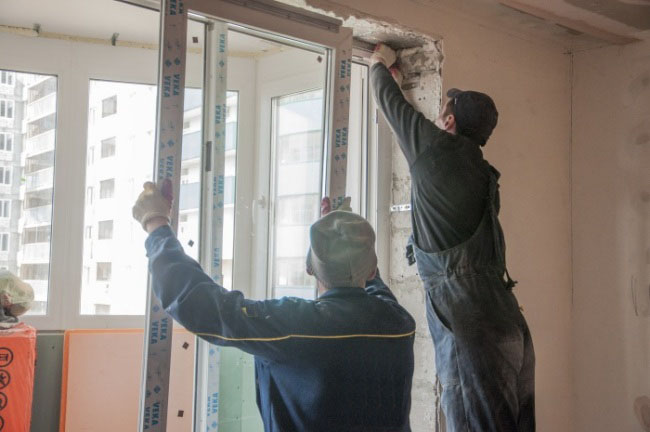
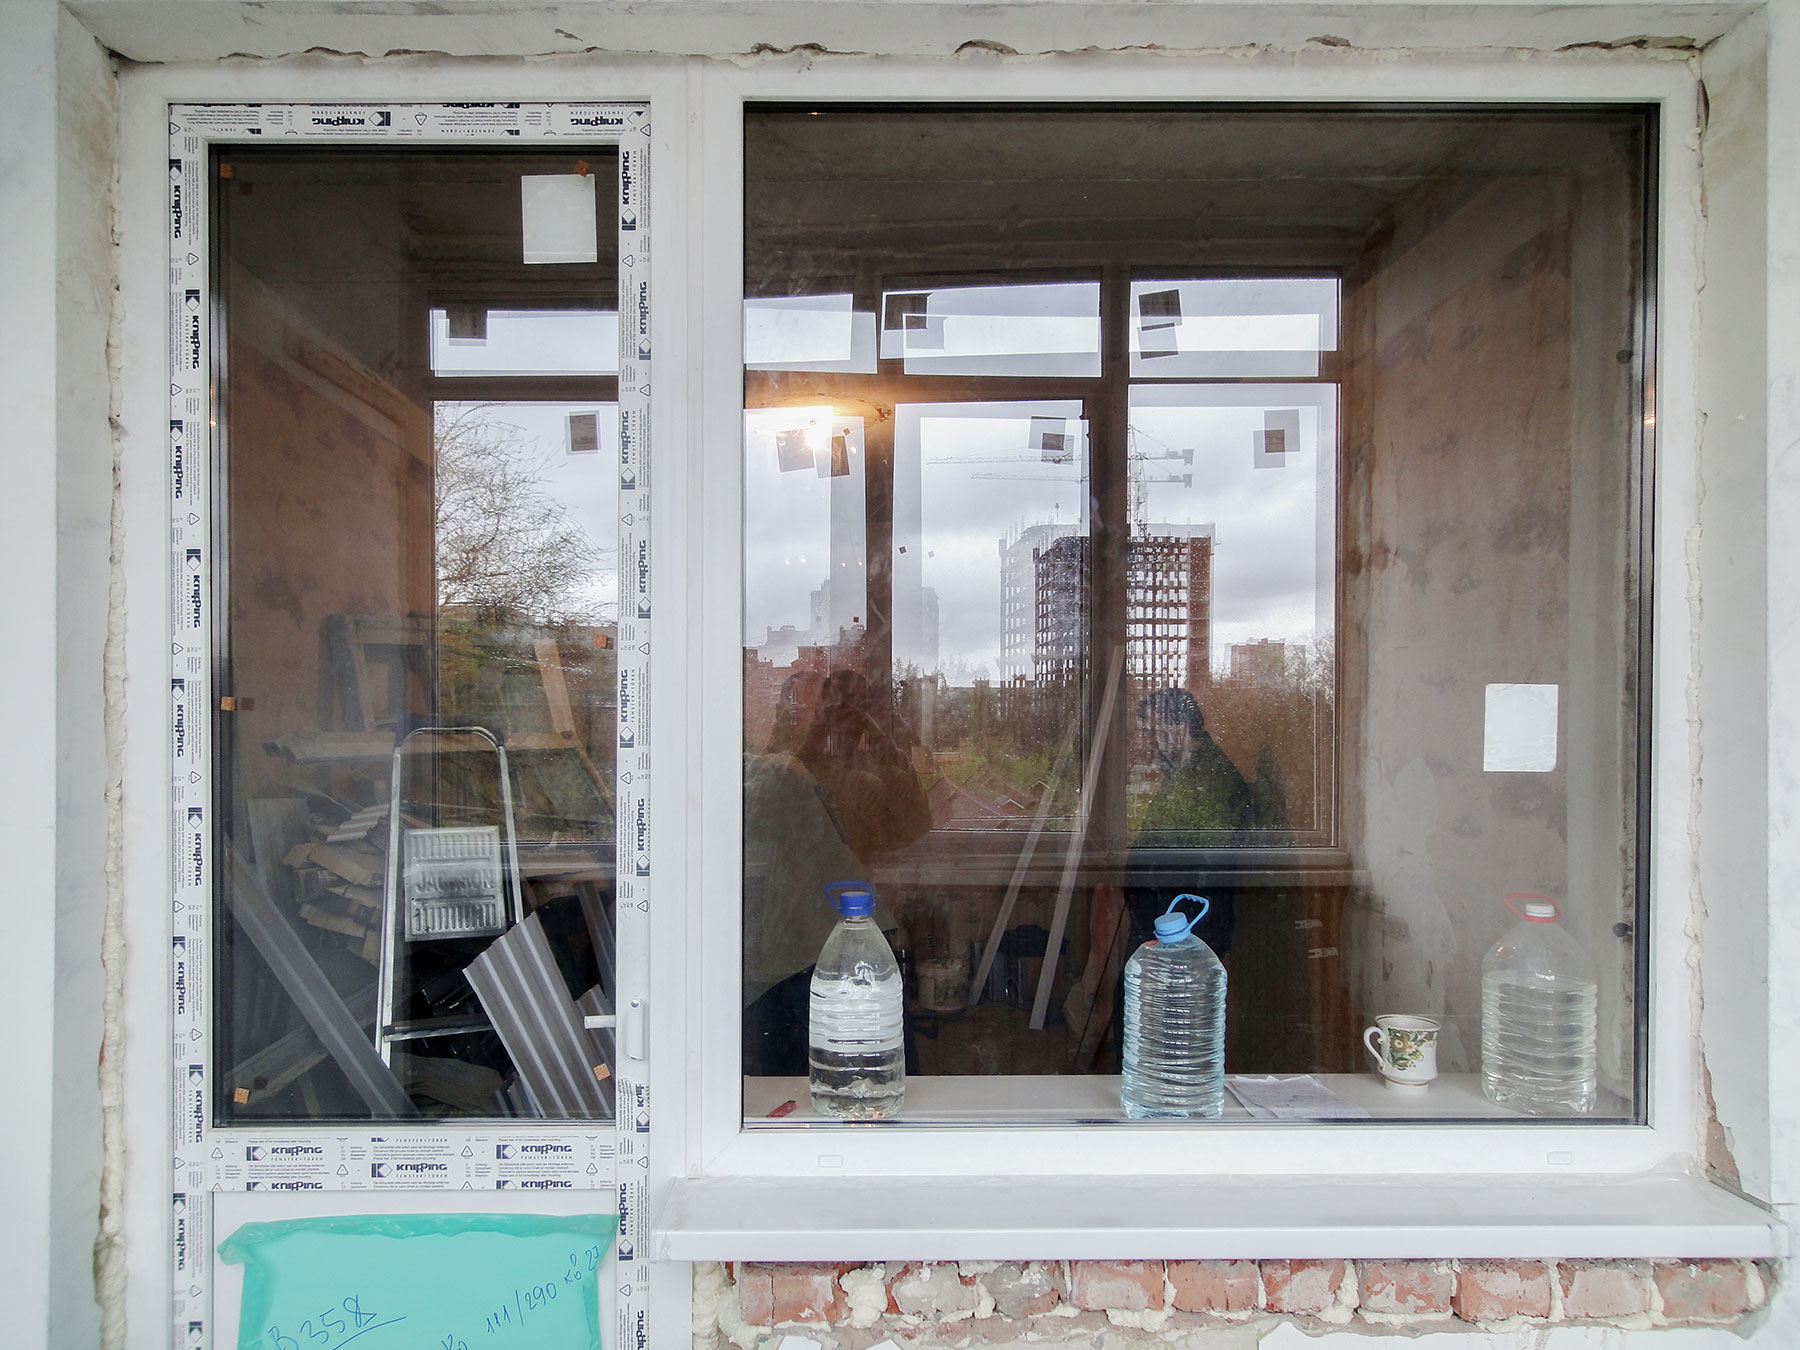
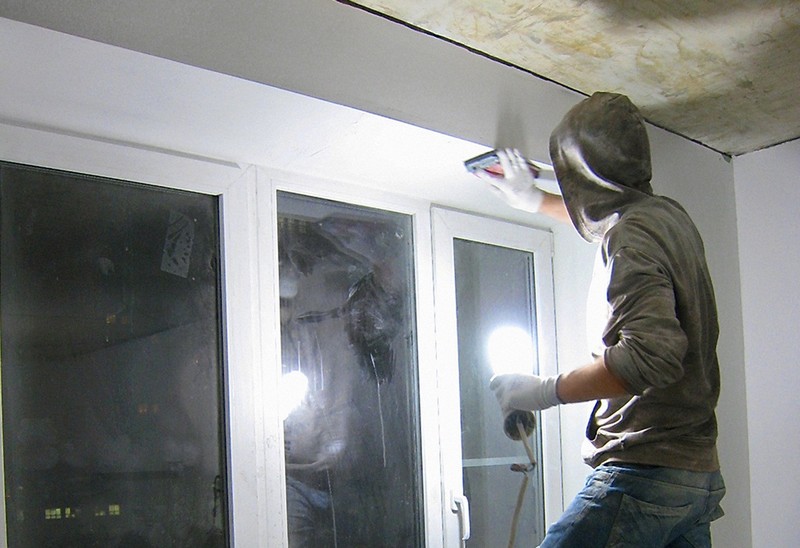
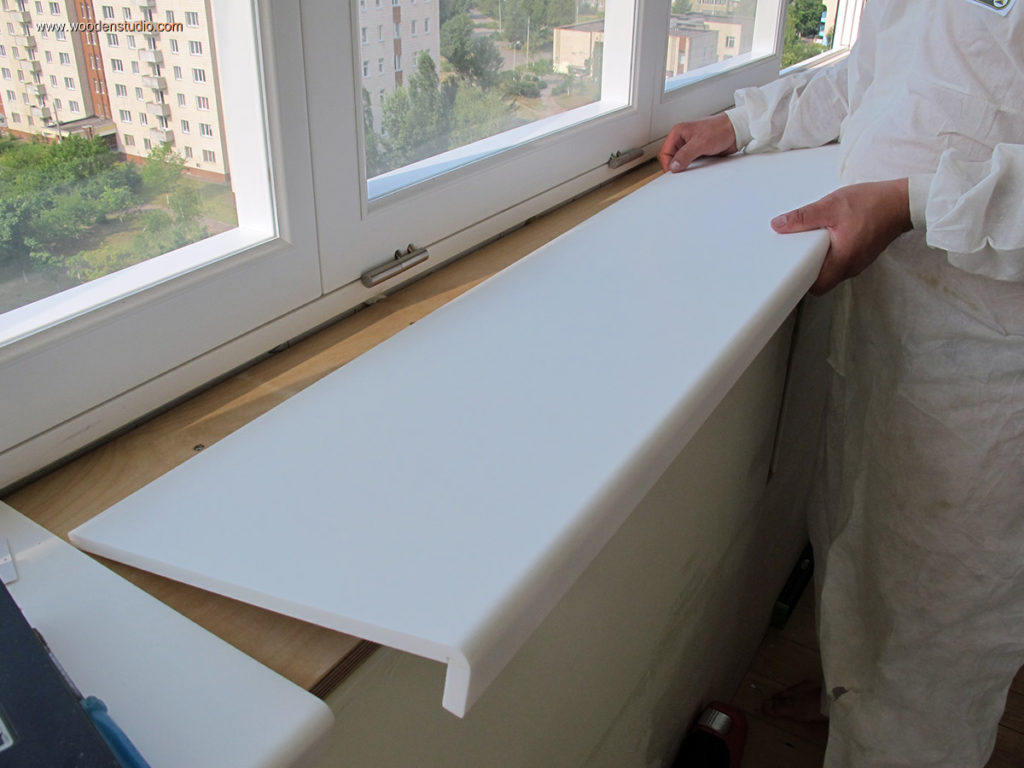
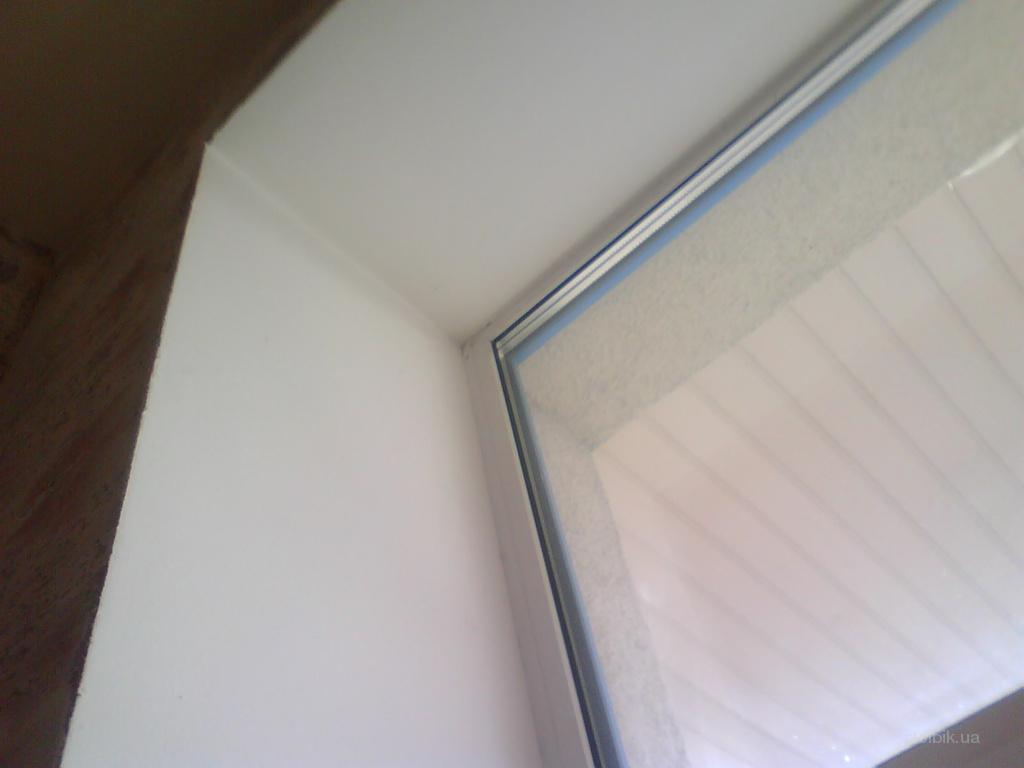
Installation of windowsill and trim slopes
The window sill is often "planted" on the mounting foam. And the slopes are leveled with plaster or covered with finished PVC parts.

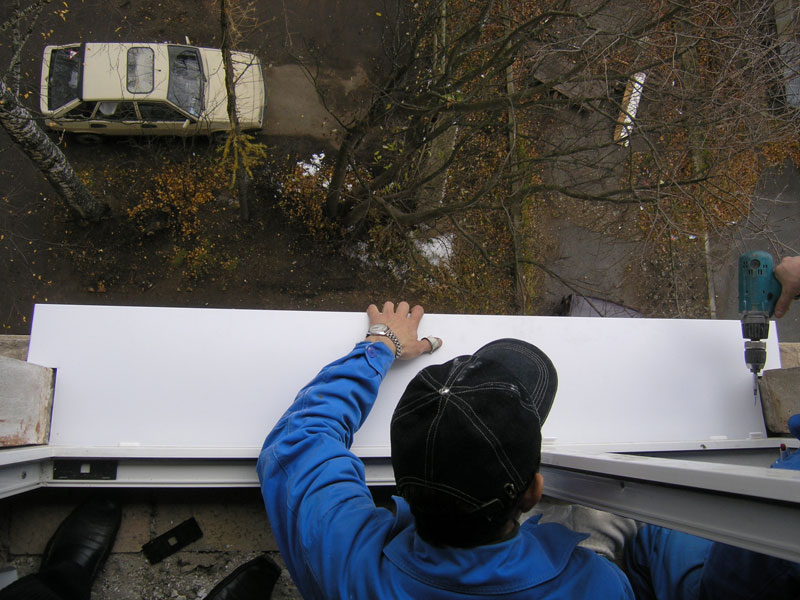
Mounting low tide
Installation of double glazing according to GOST without disassembly is completed.

Installation of windows with disassembly design
It is more difficult to put a collecting window, but this method is more reliable, and sometimes there is simply no alternative. It is also performed in stages, but the stages are slightly more than for the installation of a one-piece construction:
- Dismantling the old system. It is the same for all rooms if it is planned to replace windows with more modern ones.
- Preparation of the opening. There are no principal differences either.
- Unpacking and disassembling the window system. Carefully remove the sash from the hinges. Two ways for different types of loops are already mentioned in the paragraph about the dismantling of the window. In the same place there is an instruction how to remove shtapiki and to take double-glazed windows, if necessary.
- Preparation of the window unit, but already without frames and double-glazed windows. The actions are the same: the use of insulating tapes and seals, installation of anchors and bolts.
- Installing the block in the opening and aligning it horizontally and vertically. The most important thing here is that the block should be aligned not by quarter, as inexperienced installers often do, but by the geometry of the apartment. If you do everything right, the window will stand exactly relative to the geometry of the room, and it will not be difficult to mount additional structural elements.If the frame alignment went wrong, you will have to spend a lot of time on plastering the slopes and fitting the accessories for a crooked window.
- Reliable fixing of anchor plates.
- Preparations for filling the seams with foam and foaming.
- Installation of insulating tapes on the slopes. At the same stage, you can lay a windowsill metallized tape.
- Laying the protective tape from the outside, under the ebb, and mounting the ebb.
- Installation of a windowsill.
- Finishing slopes. If it is done with plaster and paint, you can swap the last two stages. First, install the frames with windows and protect them from contamination, and then proceed to the finish. At room temperature, the plaster and paint better hardened.
- Build the window. For this you need to return to the legitimate places of the sash with double-glazed windows. In order not to damage the double-glazed windows, you can take them out of the frame, fix the doors in the hinges and only then replace the double-glazed windows.
Recommendations
Around the installation of windows on the thematic forums a lot of debate. Some users argue that you can only entrust this responsible business to professionals, others, using real examples, prove that the team of installers did the work very badly.
The truth, as usual, is in the middle.

Installation teams successfully cope with the installation of windows, if they have the experience and motivation. Motivation, of course, in monetary terms. Cheap work is performed only by very conscientious workers.
That is why it is worth examining the issue and installing the windows yourself, if saving is important in repairs. Cheap services will still not give a better result than the average owner of an apartment.
"Layfkhaki" from experienced masters:
- For better adhesion and protection of the surface of the opening from moisture, a primer should be applied in two layers, suitable for a particular type of material, or a liquid waterproofing based on rubber.
- Choose a plastic profile with a large number of cameras (for example, 6) so that the windows can withstand temperatures from -60 to +60 degrees.
- Pay attention to the depth of "landing" glass. The deeper it is, the less risk of condensation inside the chambers.
- Choose a durable profile of hard plastic with at least two, and preferably with three contours of insulation.
- There is a widespread opinion among installers that if there is foam inside the quarter, anchor plates should be used; if there is no foam, they are stuck.However, the use of plates reduces the risk of sound bridges and cold bridges, as well as condensation, so they are preferable.

- Before all the manipulations with the insulation of the window block (frame), you need to insert it into the opening and check the geometry on the basis of the apartment, and not a quarter. To do this, use a laser level.
- The most accurate markup for attachment points for anchors is obtained by using a laser level, rather than roulettes and rulers. It will be with zero error.
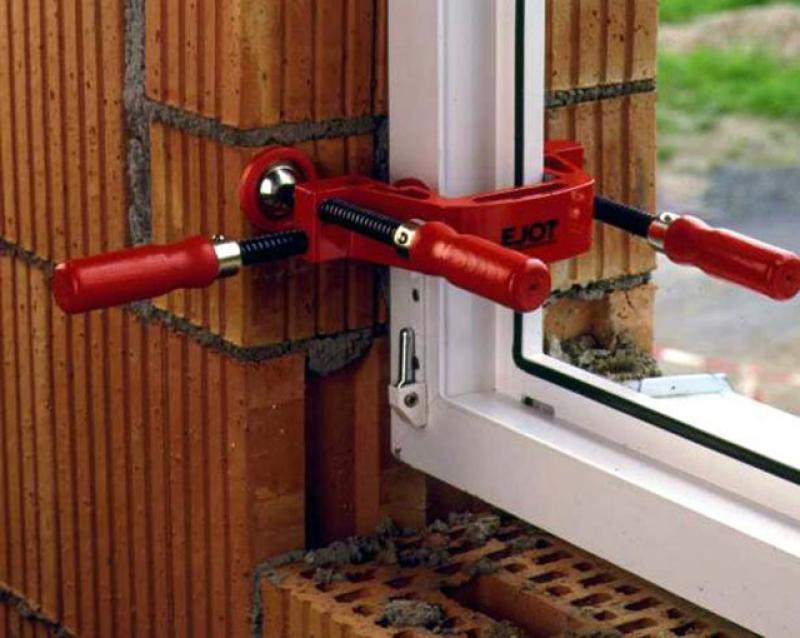
- To prevent the window in the opening from being fixed to the bolts, you can use two clamps on the left and on the right. After the window has been aligned vertically and horizontally with wedges, the profile is clamped with clamps and it is no longer necessary to hold it.

- On the fixed profile immediately make a mark for fixing fasteners. After installing the block in the opening, wedging the window will be much easier.
- The wedges themselves must be removed. They do not form cold bridges, but interfere with further finishing of the slopes and window sill. To remove the wedges, it is necessary to fill up the seams not completely, but only a quarter on each side.After a day, when the foam grabs, the wedges can be removed and fill the remaining gaps.

- Sealing tape must be glued with a margin of overlap at the corners of the opening. But it is not necessary to cut it, otherwise cold bridges are formed. One continuous piece of tape is glued along the entire perimeter.
- The PSUL tape from the outside should be glued in two rows in width.
These simple tricks will simplify the work and help to achieve the most effective result without the help of the installation team.

How to install the window correctly, see the following video.


