The subtleties of the selection and manufacture of the hatch for the cellar
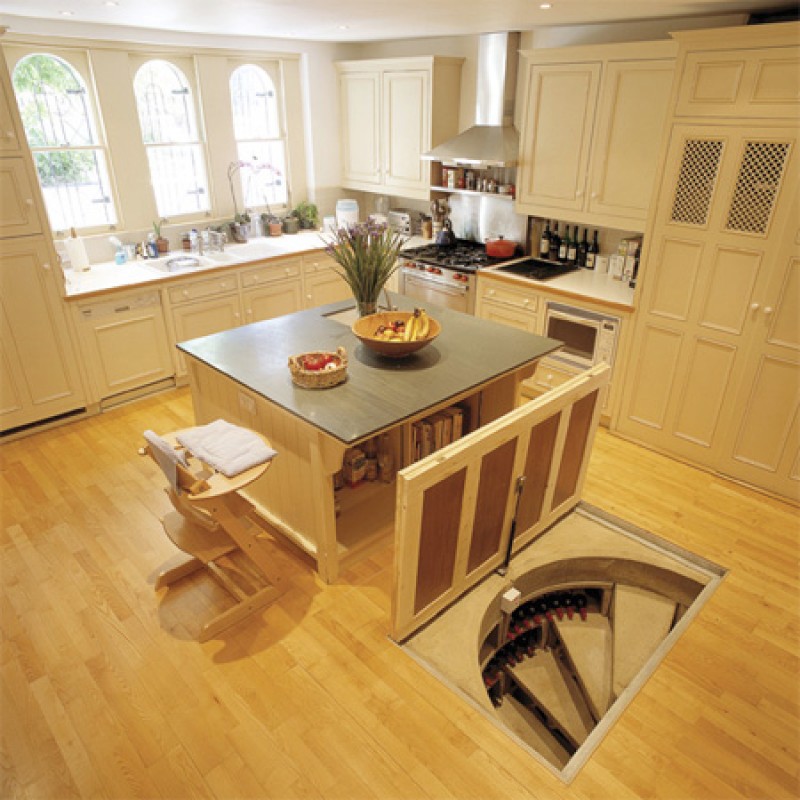
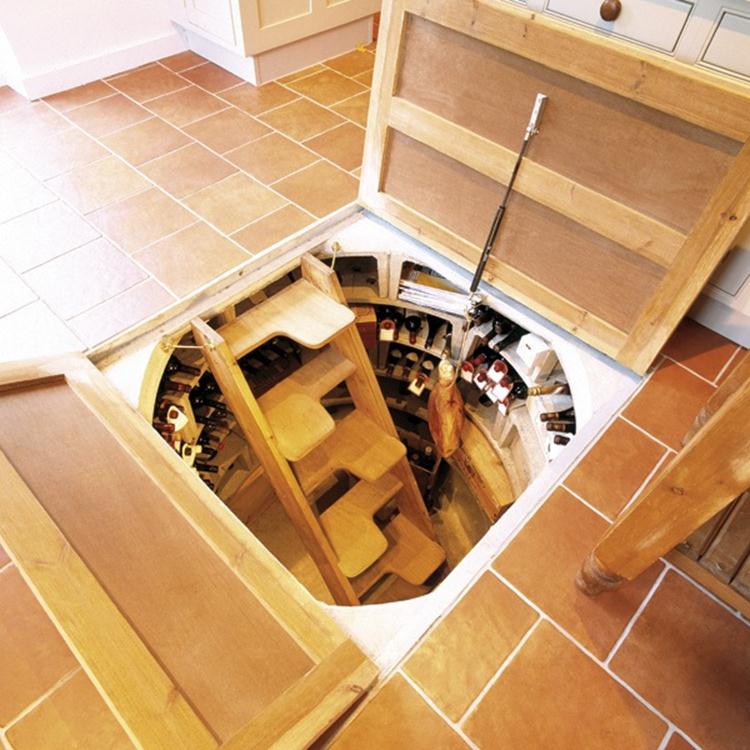
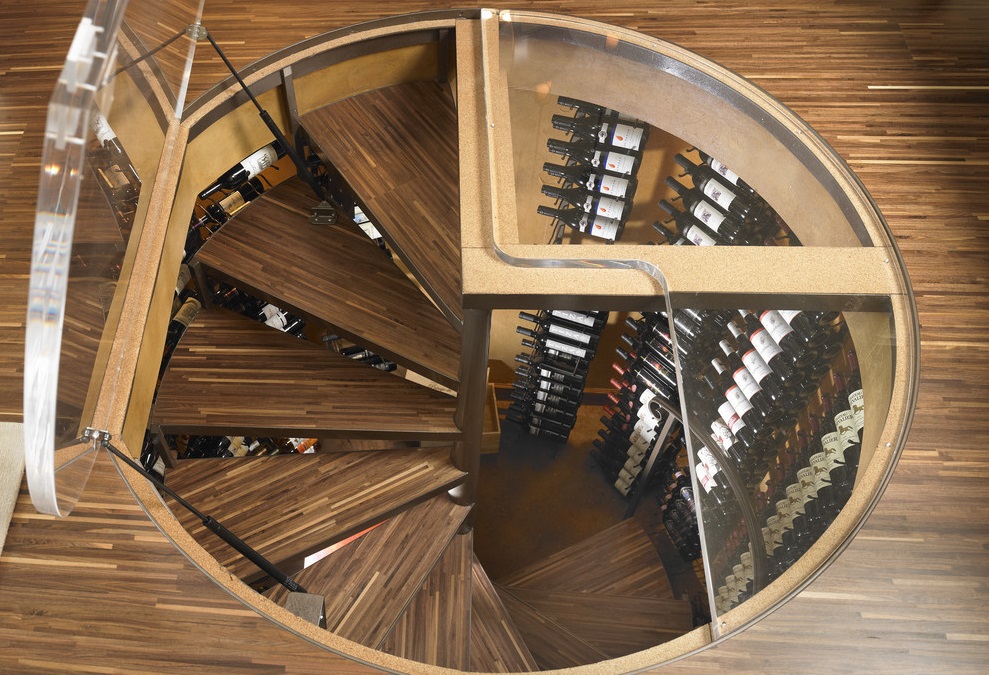
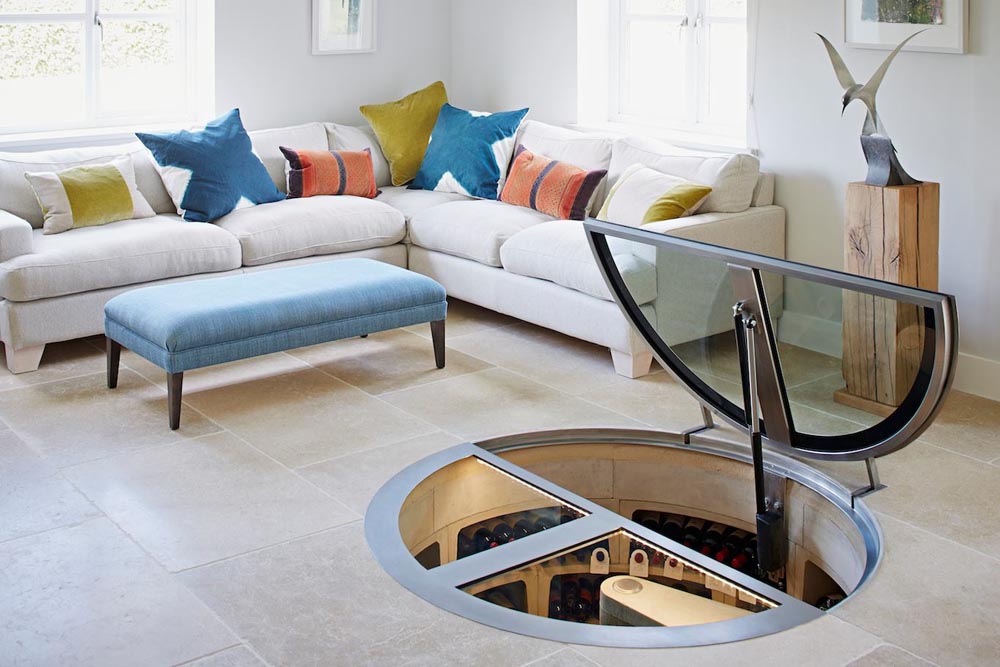
The basement serves not only to store food, but also acts as a utility room in which certain things are stored. The overwhelming majority of modern basements are planned in such a way that the entrance to it is either invisible or decoratively decorated in accordance with the stylistic design of the door.
Special features
To date, there are many options for ready-made designs of hatches for the cellar of various kinds. Installation can be carried out independently, depending on the complexity of the selected design and the skills of the buyer.
The hatch doors are divided into three types and are classified according to the method of opening.
- Swing. The principle of operation is similar to a regular entrance door - the lid is fixed on one side with hinges, and a lock or a simple latch is mounted on the opposite side.
- Removable. These models are the most budget and easy to install. Such a door is simply superimposed on top of the opening of the hatch.
- Sliding. This option is more applicable to the street cellar. The principle of their operation is to move the door along the guides.
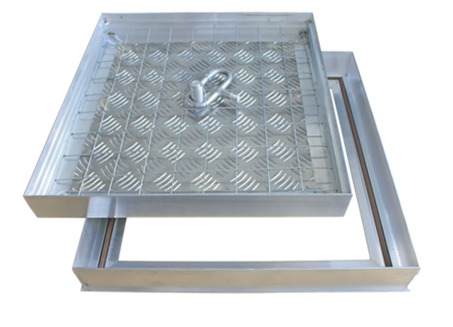
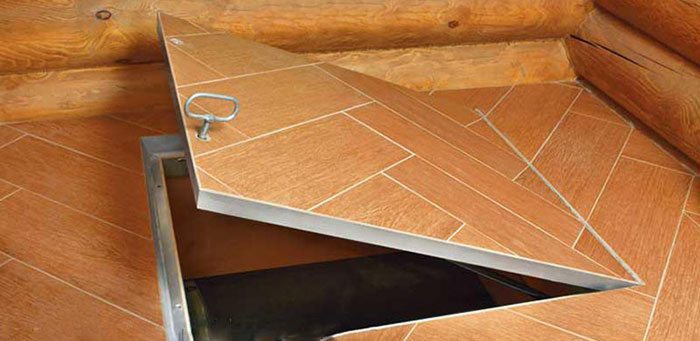
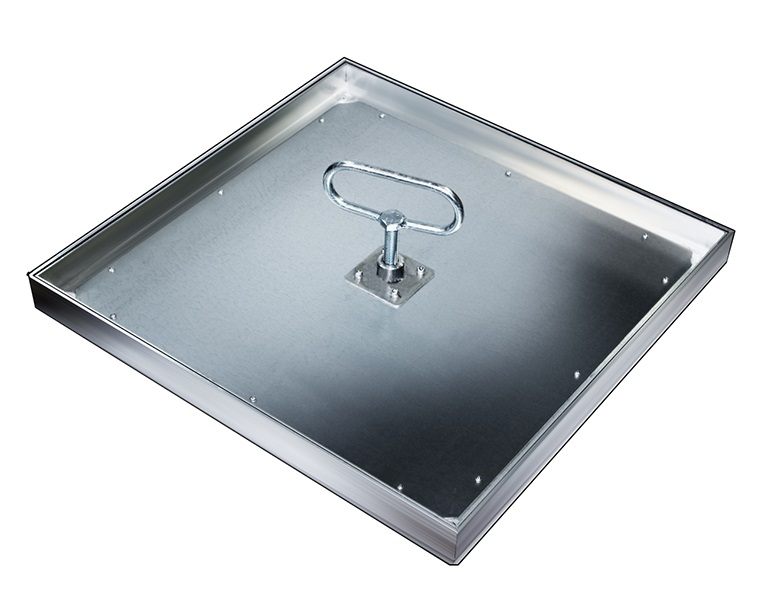
Decorating hatches also has a number of features that are suitable for laminate, floor tile or linoleum. If the floors of the house are made of natural wood materials without additional coatings, then the choice of finishing material for the hatch cover is obvious. In the case of any complex finishing material, it is better to make a choice in favor of aluminum and steel structures. Their appearance is similar to a shallow rectangular container. Upon completion of the installation work, its frame is filled with concrete mortar, and the completely dried surface is veneered for the necessary flooring finish option.
It’s quite easy to make and manufacture cellars with a staircase in a private house with your own hands if you follow the recommendations of specialists. Do not forget to choose the right curtain on the device, the mechanism for lifting, manholes with easy lifting, multi-lever elements.
There must be a hidden handle and a suitable lifting mechanism, as well as trimmed decorative elements.
Drawings and designs
In drawing up the drawing it is necessary to take into account several factors.
- The location of the hatch for the cellar, which is chosen so as not to impede the free movement in the room and do not touch the objects around it.
- The most suitable size of the hatch in accordance with the required parameters. The minimum size for comfortable operation is 75 by 75 cm.
- Material of which the hatch is made. It must comply with high strength, but at the same time have a minimum weight.
- Materials that will ensure tightness and heat insulation of this design.
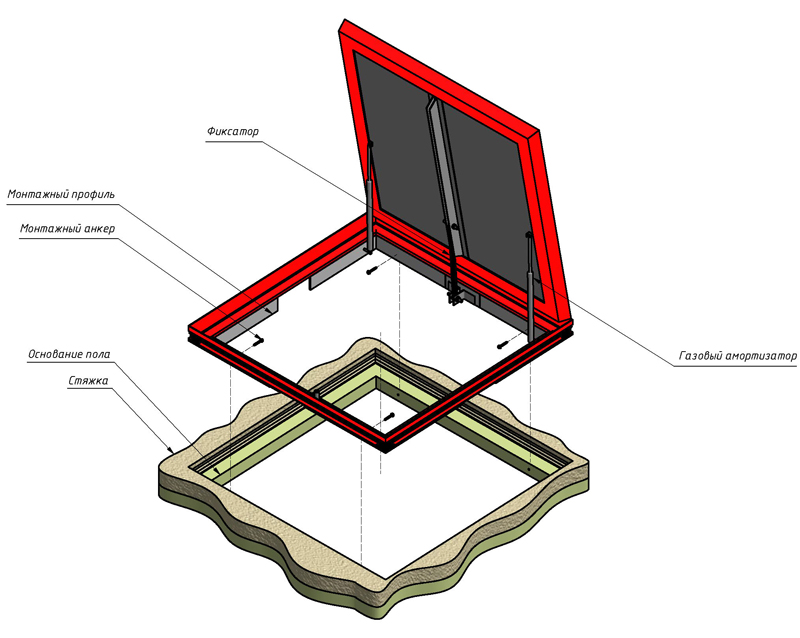
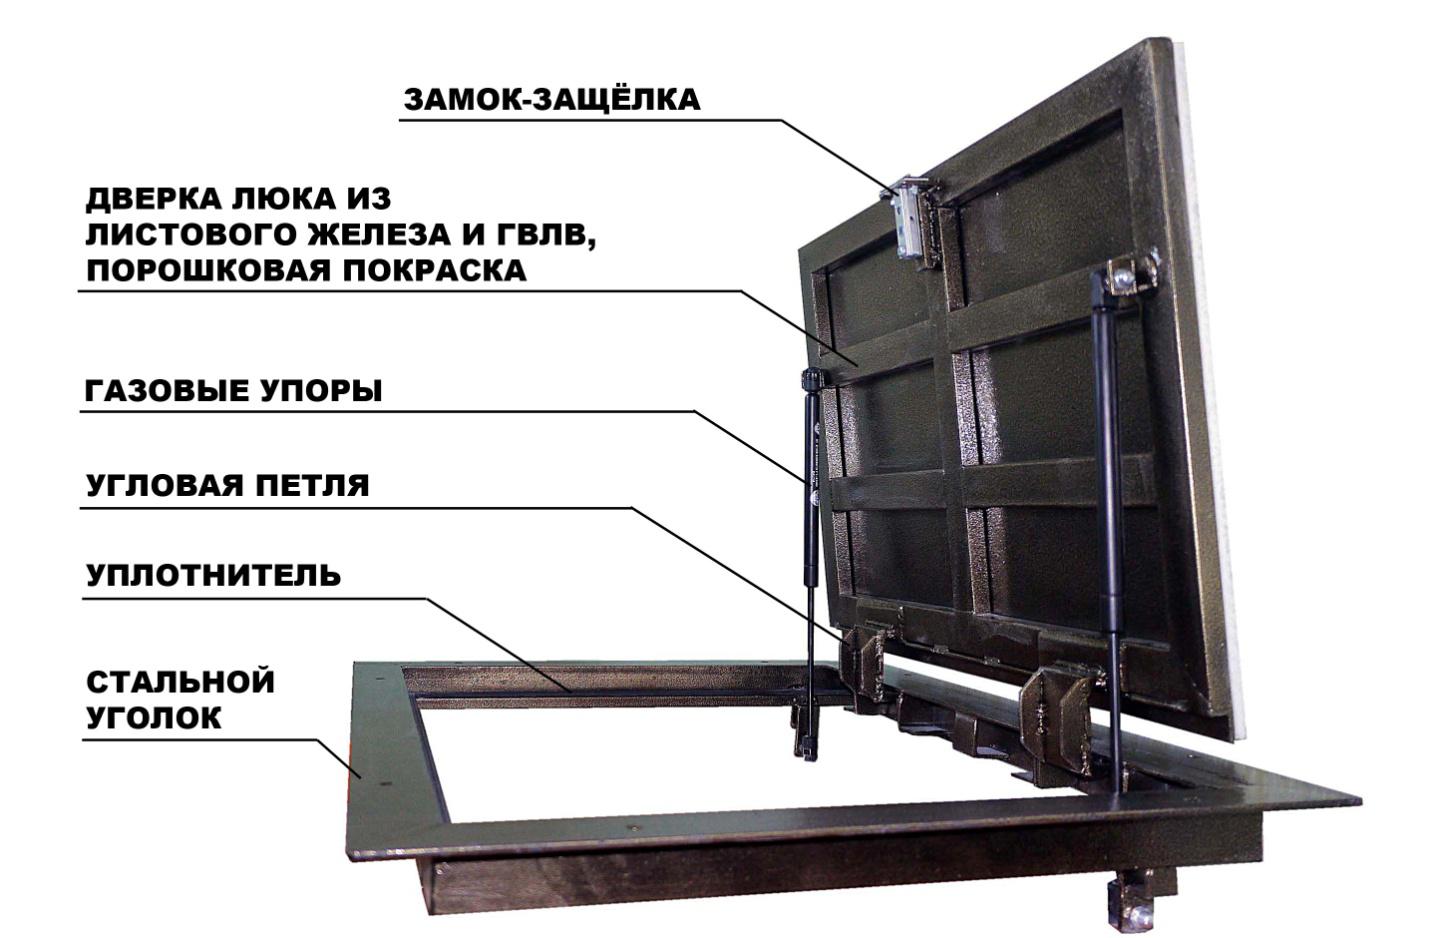
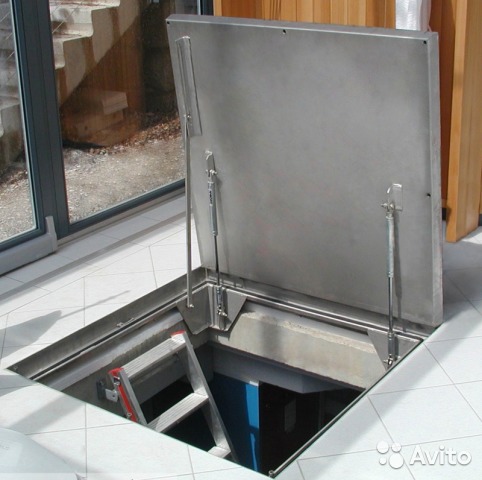
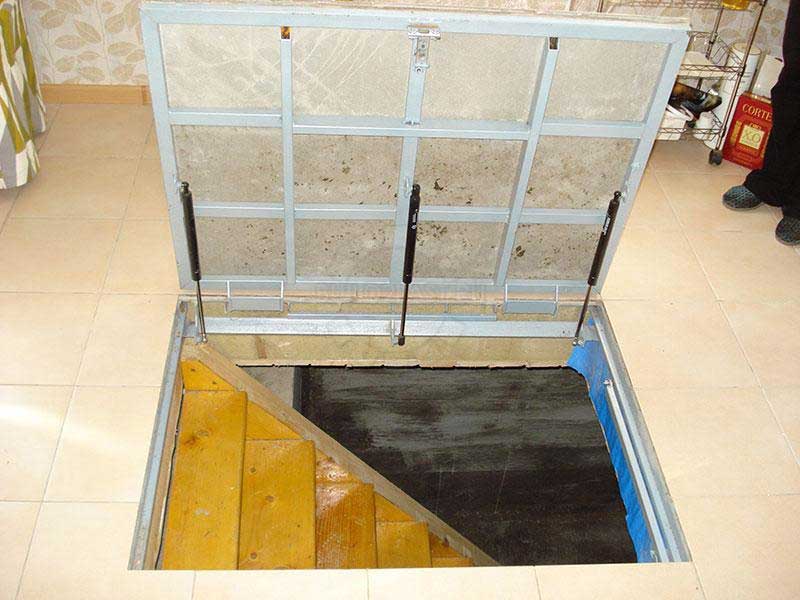
Cellar hatch covers are often equipped with additional smooth-running systems.If there are small children or animals in the house, fixing devices are provided. In order to avoid all-access penetration into the cellar, the hatch is equipped with an electric drive.
Design principles of additional functions
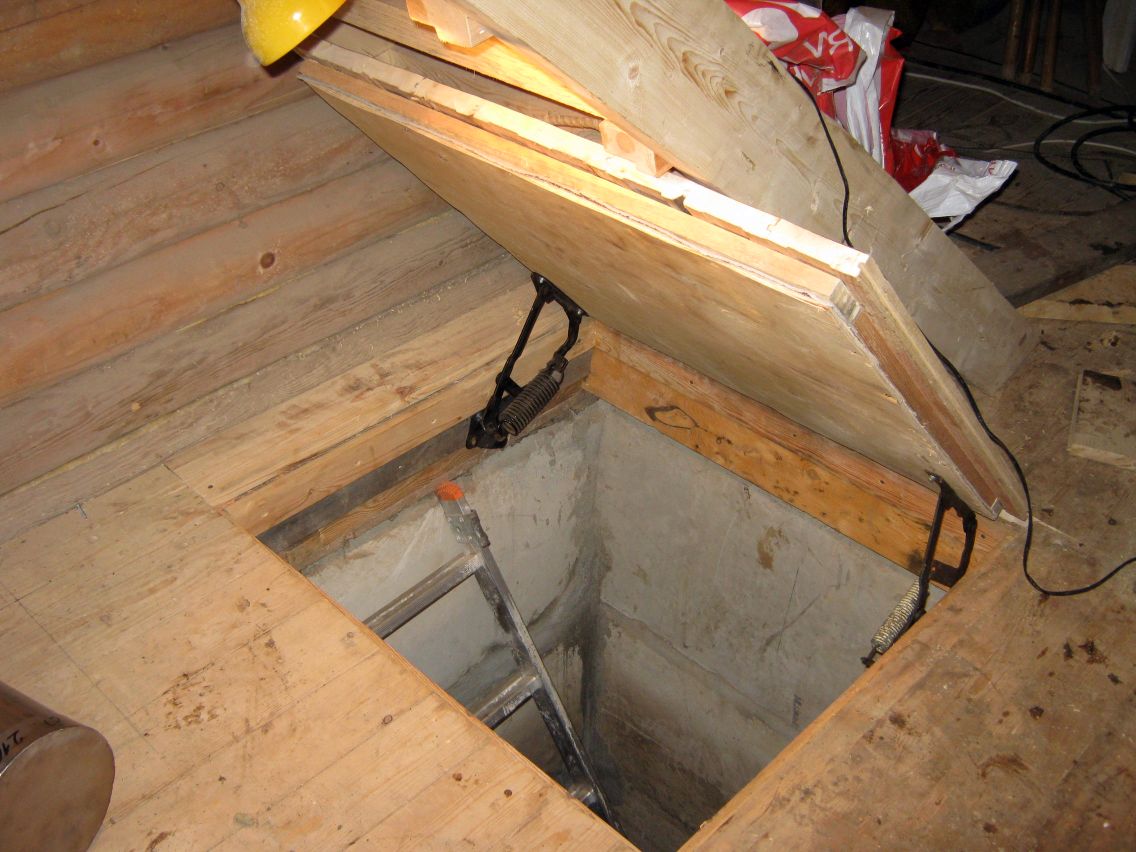
Smooth running is designed to facilitate the operation of the hatch. Its cover is equipped with shock absorbers, which provides a smooth closure to prevent injury. When mounting such a mechanism, the lid should be open. There are several ways to equip the cover with a smooth stroke.
- The most popular is spring, which uses spring hinges, as in the hood of a car. It is suitable for lightweight metal or wood manhole structures. Fixing the door is positioned so that it opens perpendicular to the floor.
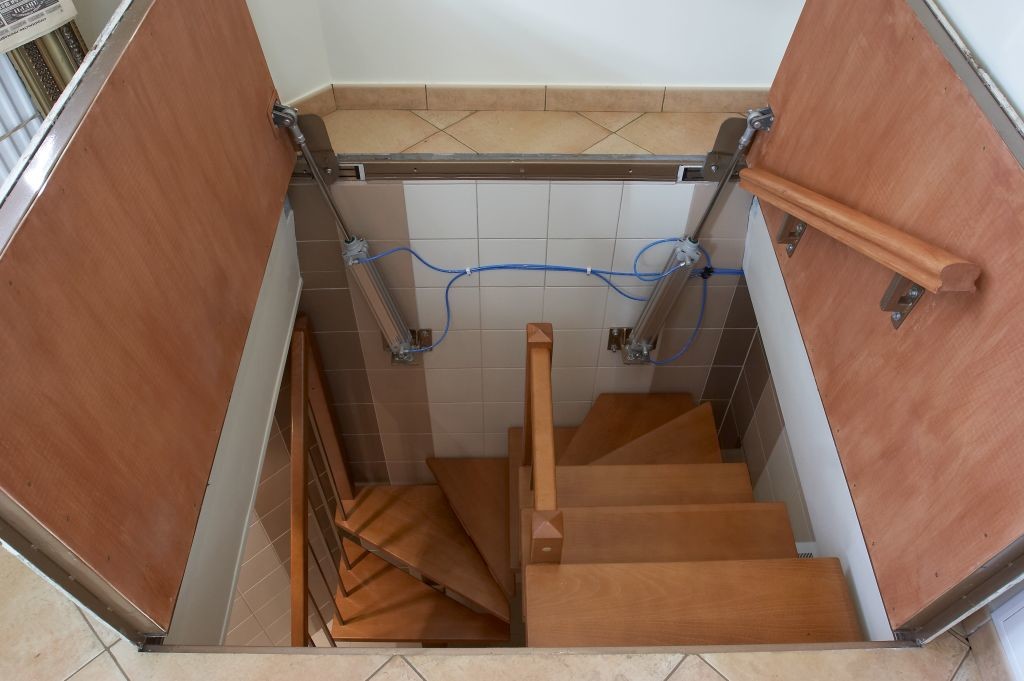
- And also apply gas shock absorbers. Used for hatches with heavy doors.
As a rule, such hatches are equipped with folding, concealed or removable handles. The advantages of such options is to prevent children from entering the basement. In the case of self-production, it is better to use simple, inexpensive options for which no metal products are intended.

Electrically driven structures. The drive is installed in several ways. To install the simplest version you will need:
- electric motor;
- duralumin pipes;
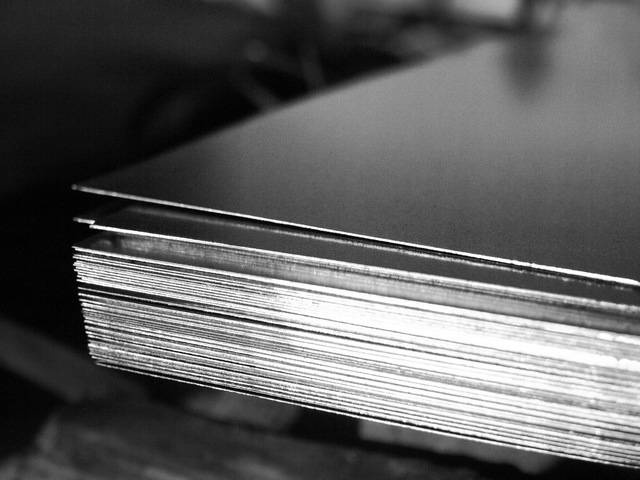
- sheets of steel;
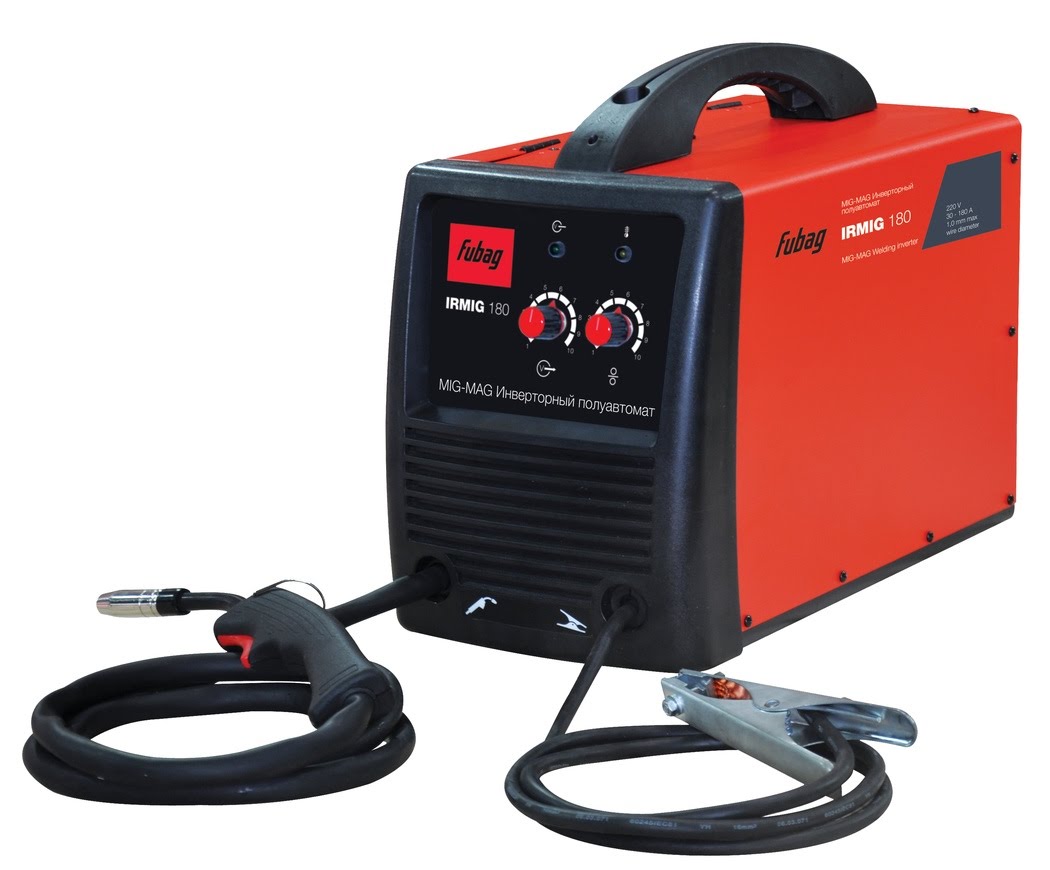
- welding machine;
- Bulgarian with cutting wheels;
- cable;
- current source;
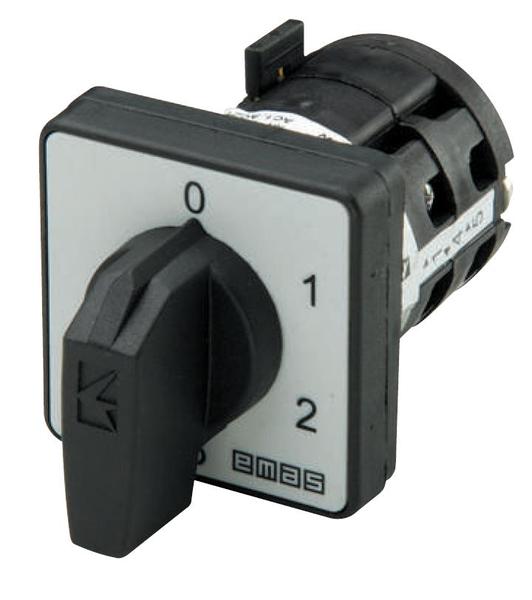
- three-position switch.
For full operation of the mechanism, the manhole cover should open less than 90 degrees. It is driven by a rotation system, opening or closing the lid with a rod. Control is exercised by the remote control.


The retractable system is more complex, but it allows you to make the hatch cover almost invisible. Its installation will require:
- steel sheets 5 mm thick;
- two electric motors;
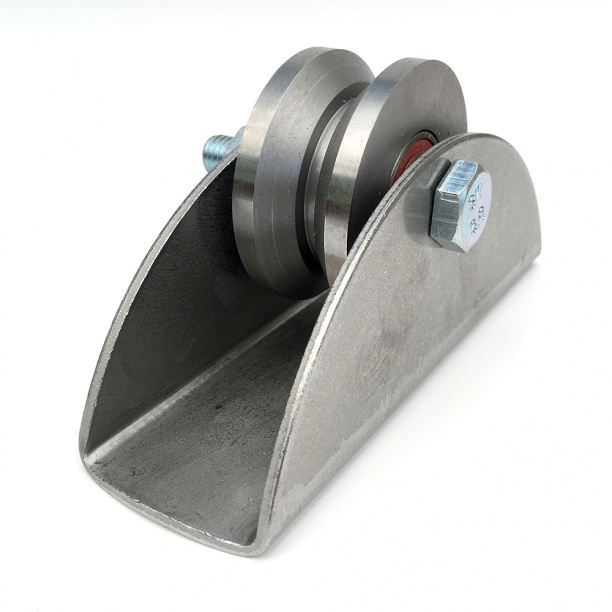
- metal rollers;
- three-position switch;
- current source;
- cable.
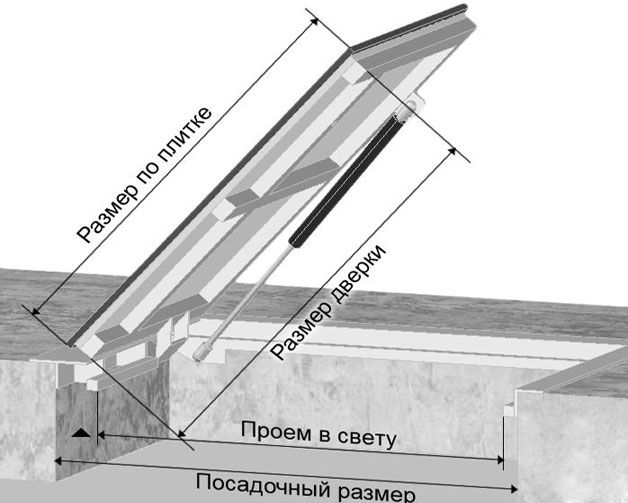
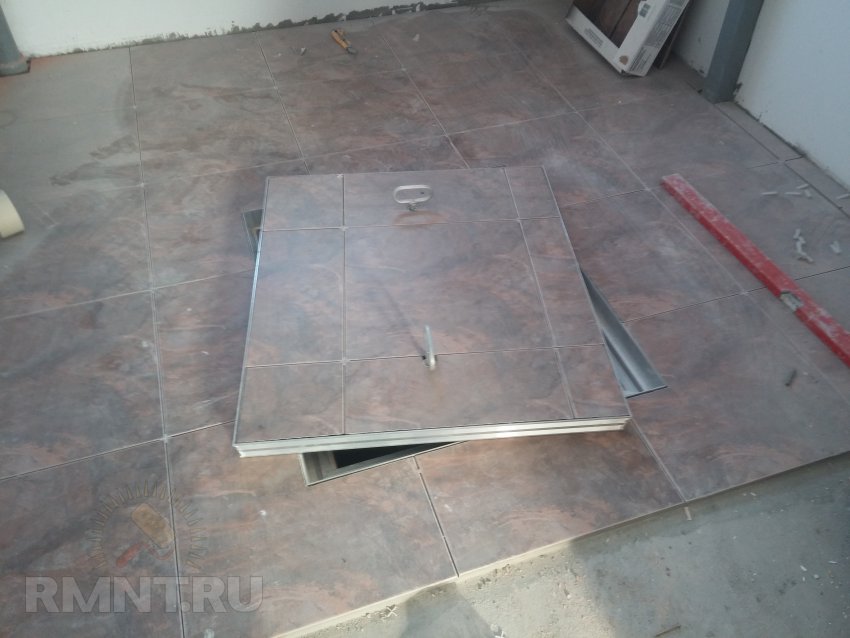
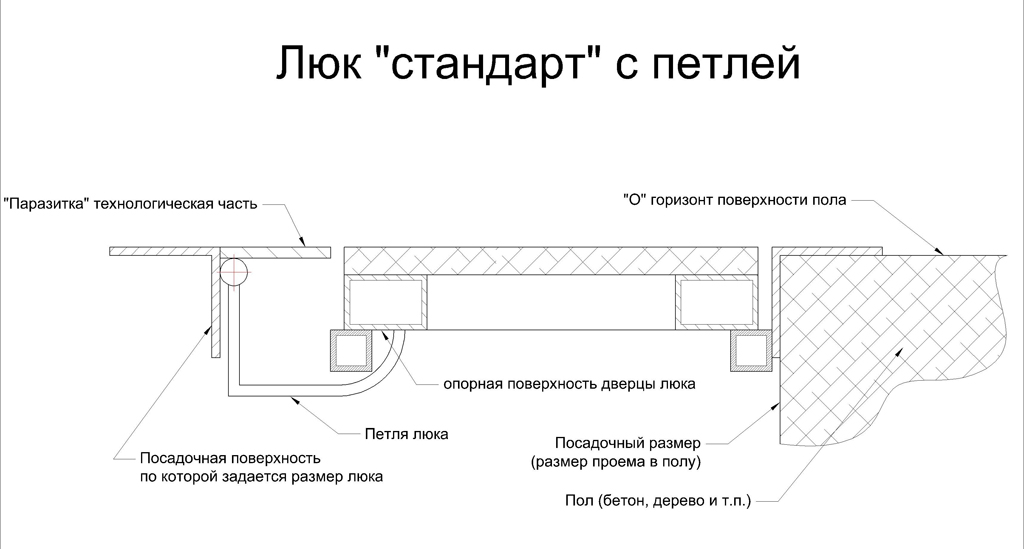
The hatch under the floor tile requires the development of a drawing in which the parameters are displayed:
- the width and length of the hatch box;
- thickness of the frame and opening;
- loop location
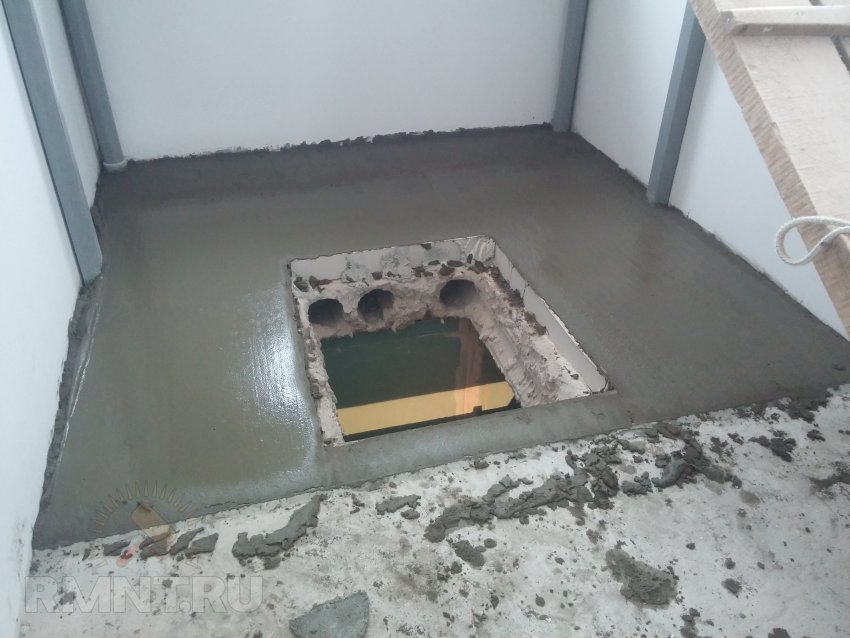
The installation of such a hatch requires a smooth base, therefore, before installing it, an alignment plate is poured. To do this, perform several operations:
- Determine the level of the floor covering taking into account the thickness of the tile and the adhesive layer of approximately 12 mm.
- Prepare the solution and set the beacons.
- Fold the doorway under the future hatch, leaving about 100 mm around its perimeter under the lid support.
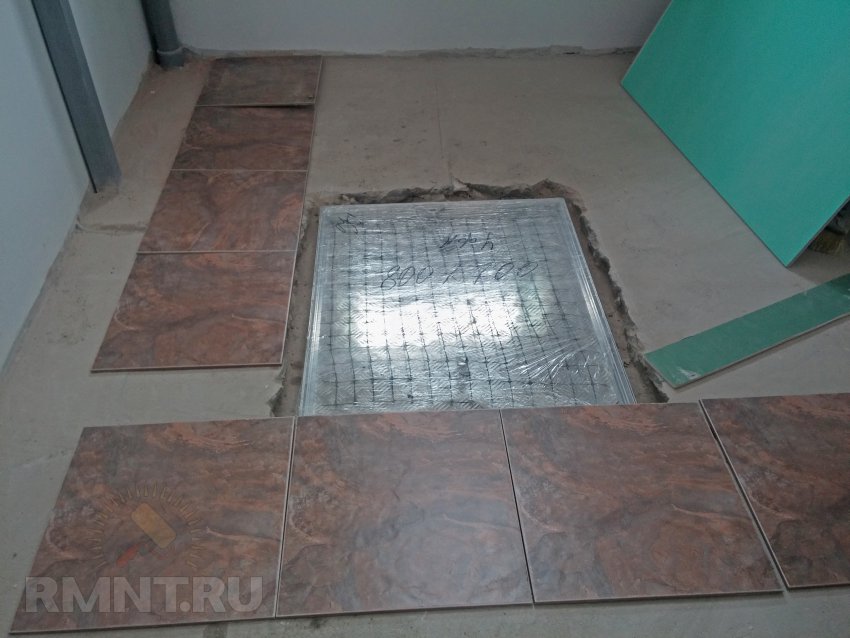
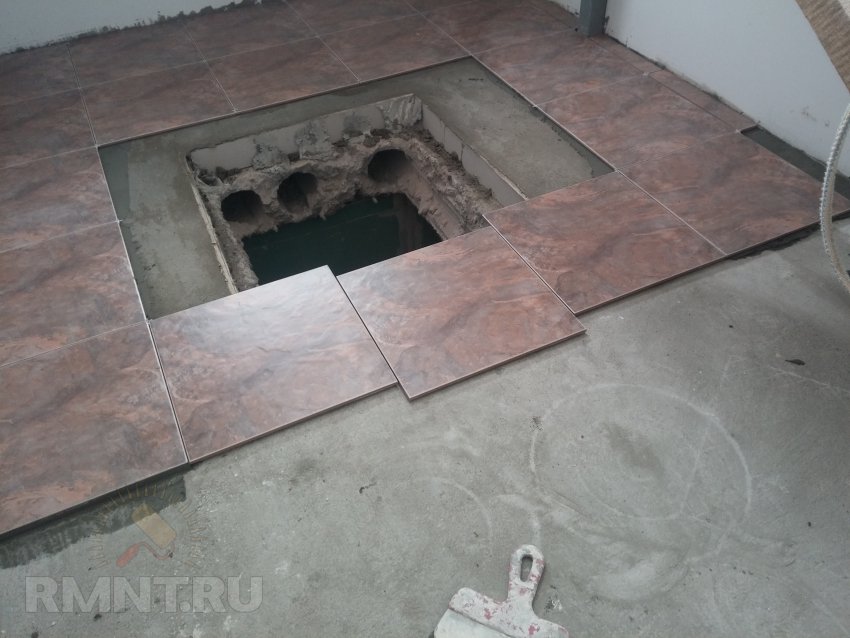
- After the solution hardens, the hatch is pre-fitted.
- Tiling should start with a corner located in a prominent place. Finishing the opening occurs after installing the frame for the manhole cover.
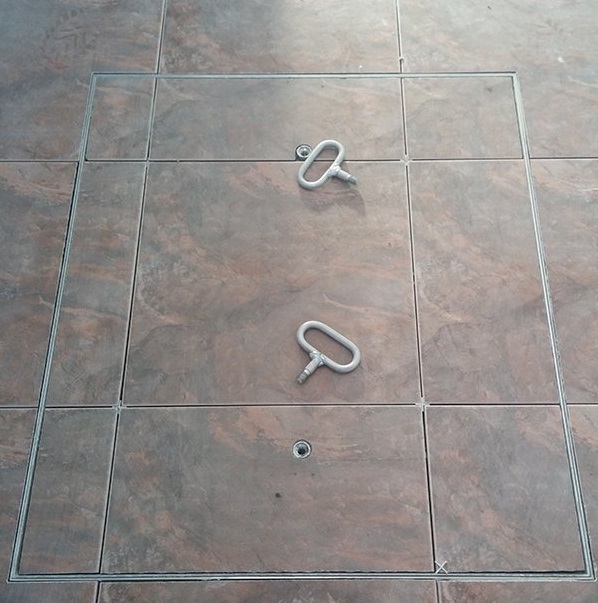
To decorate the ends, you must follow the following procedure:
- install the frame, aligning it, focusing on the construction level;
- to fill with a solution all the existing gaps between the frame and the tie;
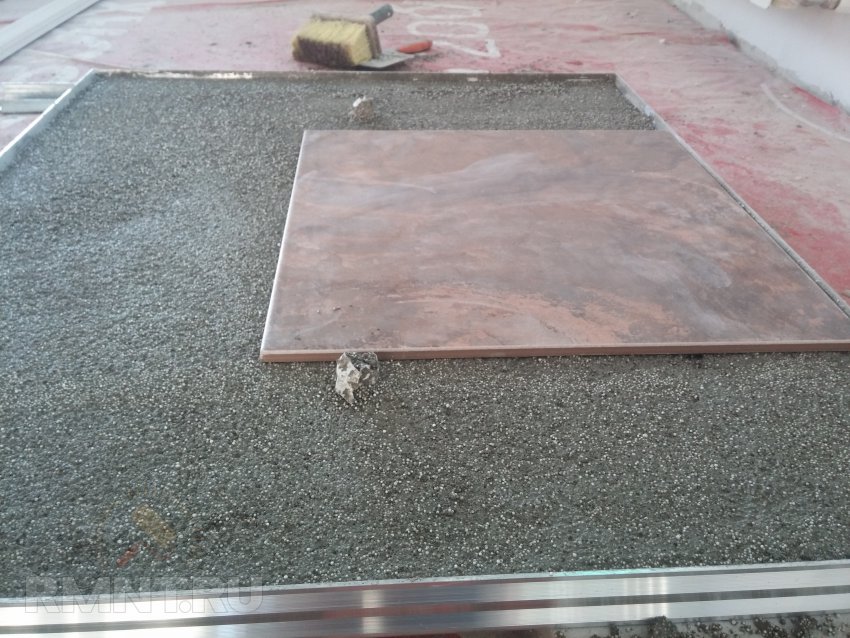
- after complete hardening of the mortar, the tile is laid in the area around the opening, with the necessary fittings and trimming of the tile, to do this the beacons are installed, then the cement mortar is poured and leveled;
- slopes are also revetted with tiles; before the adhesive layer is completely dry, it is recommended to fix the tile with adhesive tape, having preliminarily set the delimiting crosses.
Installation procedure and facing of a cover of the hatch
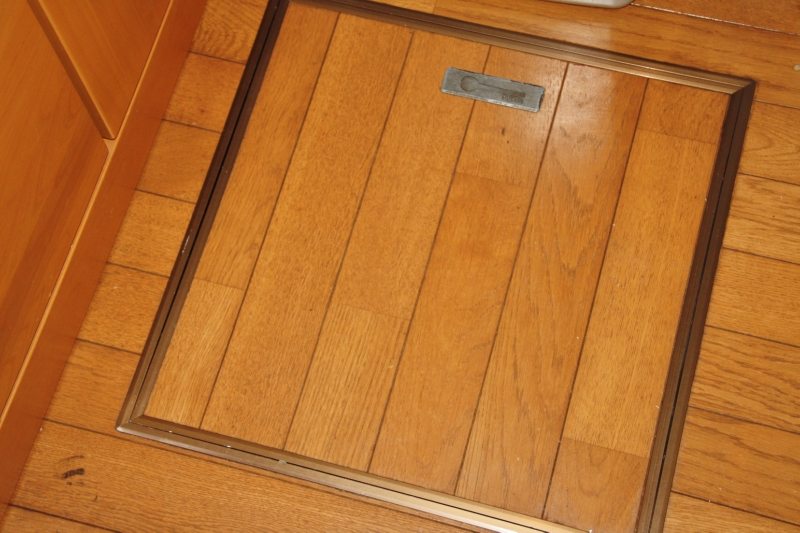
The hatch is hinged using any of the above mechanisms. Then the finish of the fixed cap begins.For this you can use floor tiles or other finishing materials. The main requirement is that its appearance is in harmony with the rest of the room design.
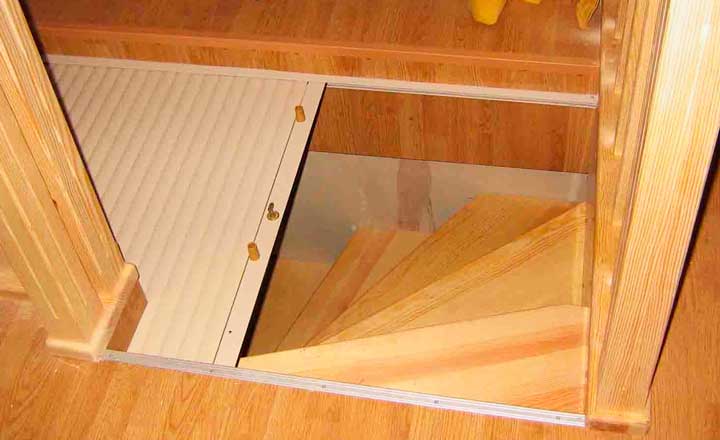
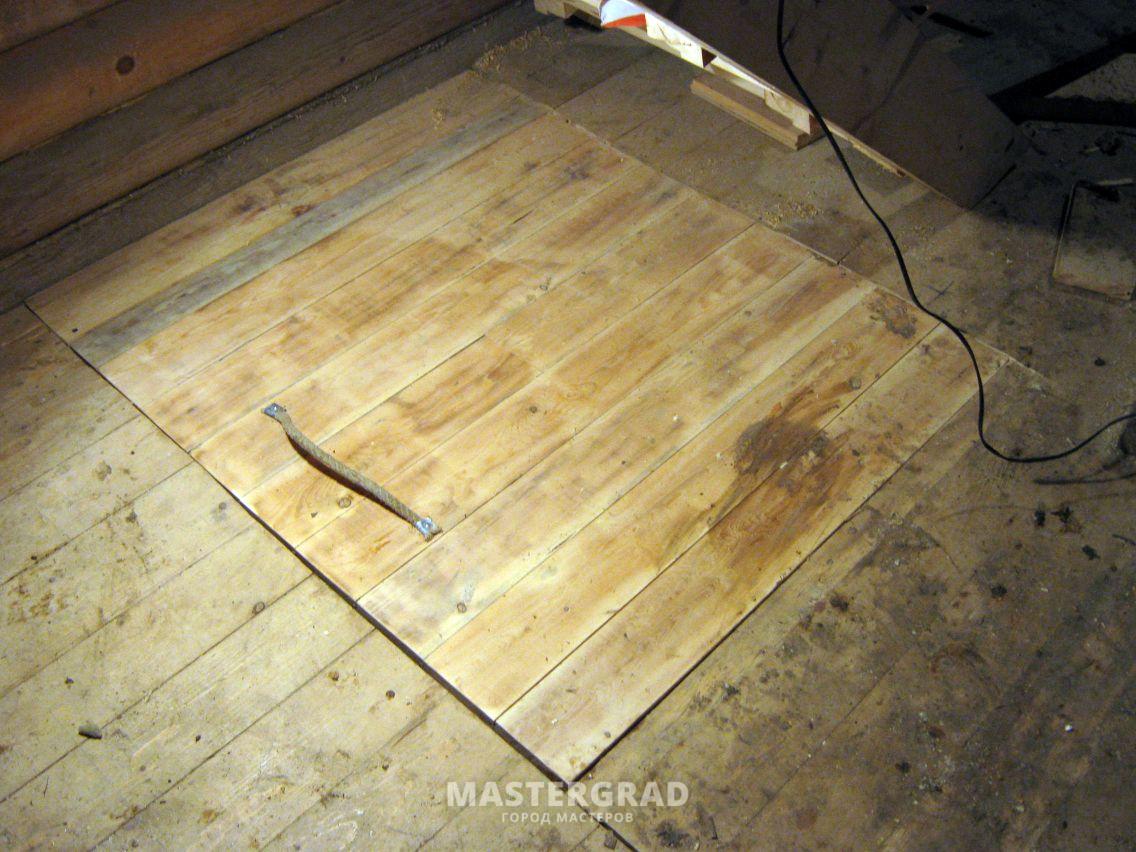
In wooden houses, hatches are usually not trimmed, but simply covered on top with linoleum or other material. For example, you can use laminate.
How to do?
In order to achieve the visual effect of the absence of a cellar hatch, its covering must fully correspond to the covering of the entire floor. That is, if it is a tree, then the hatch cover should be from the same tree. Or if it is parquet, then the hatch, respectively, should look the same.
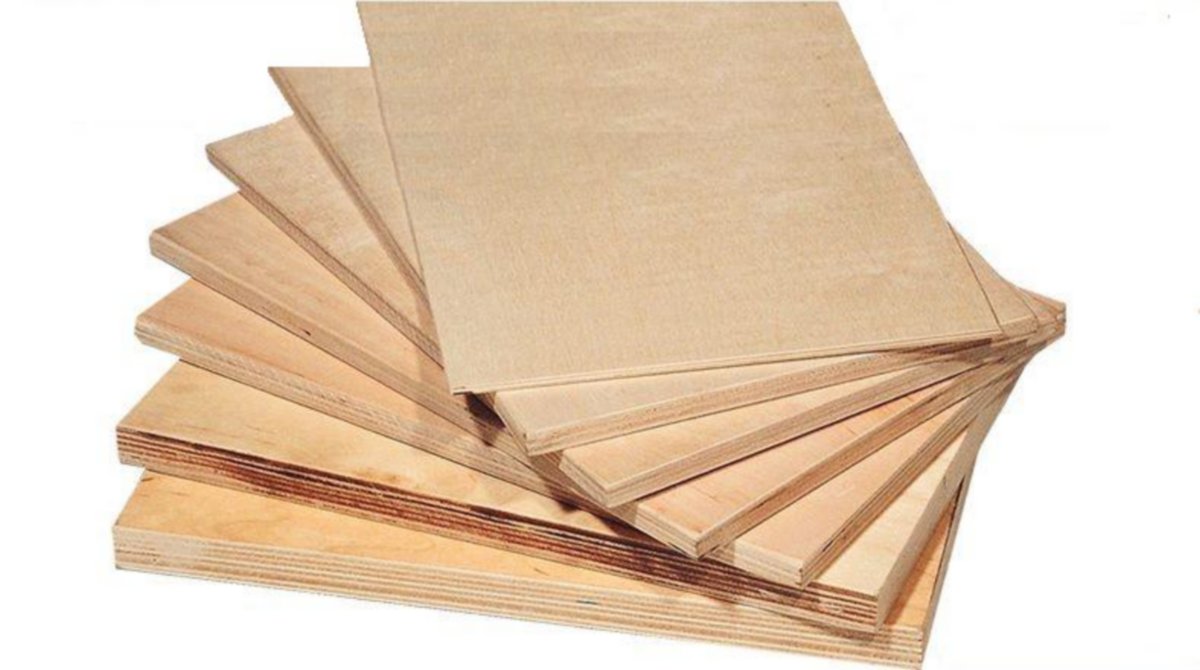
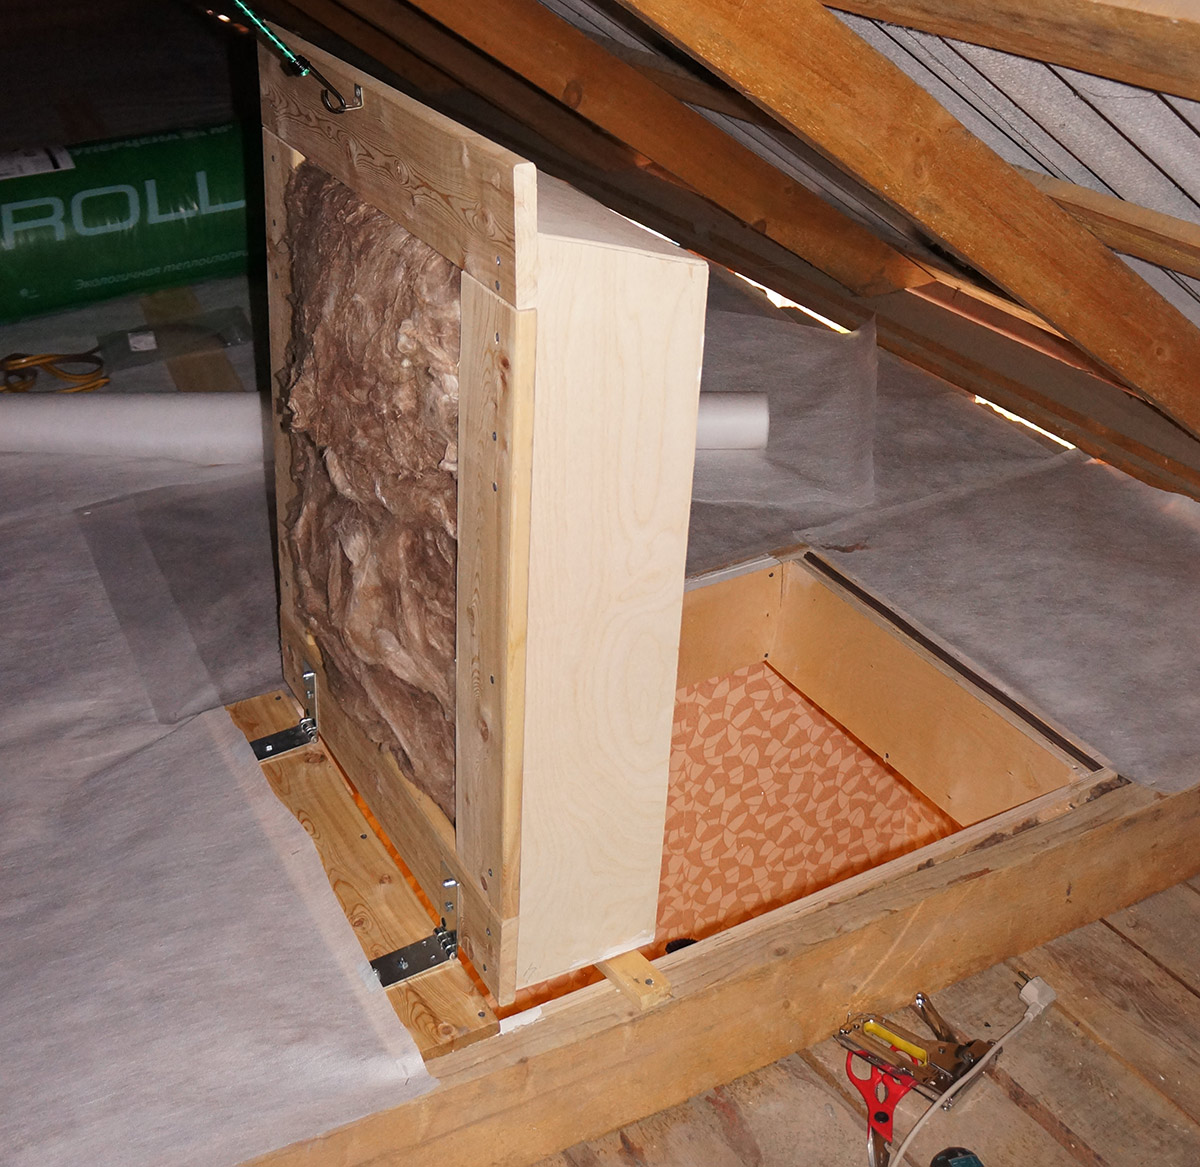
Standard hatch for the cellar. The hatch cover is made with a slight decrease in size, so that it completely falls into the opening of the basement passage. The resulting gaps should not exceed 5 mm. First of all, four supports from a bar are nailed to the wooden flooring, which will serve as a support for the cover. Blanks are made from the floorboard to 80 cm. Then, a 79 cm by 79 cm square is cut out of plywood. A 1 cm gap is laid between the hatch and the floor, this helps prevent deformation from moisture and temperature drops.
The crate of the inside of the hatch is made with short slats or slats of 79 cm length. Parts made of wood must be covered with at least one layer of drying oil. This is done to protect them from moisture and fungus.
The height of the hatch should correspond to the draft and finishing coating and consist of three layers:
- plywood sheet, on which the batten of rails is stuffed;
- insulation is placed in the space between the slats;
- on the slats, fixing the insulation, the finishing layer is packed from the board;
Nailing the top layer is best done parallel to the floorboard. This design has a small weight, so it is suitable for mounting on ordinary hinges from the basement with a gas closer. The plastic box has its advantages, but is higher in price.
The thickness of this entire structure must match the thickness of the floorboard.
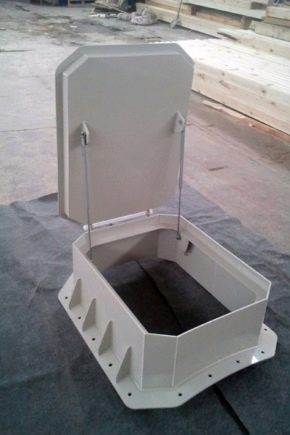
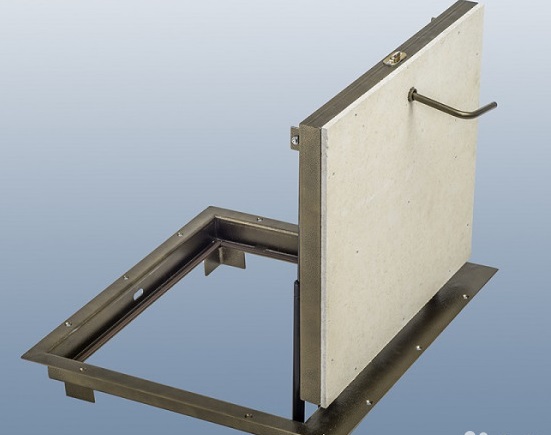
Metal construction must be sturdy compared to wood. The cover for her to do alone is problematic. For its production from the steel sheet with a thickness of at least 3 mm is cut the base. The corners, on which the stiffening ribs are attached, are boiled along the perimeter of the base from the inside using a welding machine. Between them is insulation.
The entire total area of the cover is divided into 4 equal parts. When working with metal it is necessary to clean all seams. The width of the insulation should fully comply with the width of the corner. Above, a layer of insulation is fixed with a sheet of steel or tin with self-tapping screws. For making the entrance frame, the corner is cut into fragments according to the size of the opening of the hatch. Then the corners are welded together and fixed to the concrete with anchors, one of the sides of the frame will play the role of supports for the hatch. A sealant is attached to its protrusion to preserve heat and protect it from excessive friction. The lid itself is attached to the entrance frame by reinforced hinges with a gas closer. Floor tiles are ideal for finishing the kitchen.
Tips for making cover technology
At the initial stage of developing the layout of the hatch, the following factors are taken into account:
- when placing the hatch near the wall, it is necessary to calculate the distance from it to a distance that allows the doors to fully function;
- when planning the arrangement of the kitchen basement should provide the location of his hatch as far as possible from the kitchen and other furniture;
- at the street location of the basement, the lid and the hatch system are selected on the basis that its door can support the weight of a person;
- The optimal size of the entrance to the basement should be calculated according to the dimensions of the users.
When self-fabricating blanks for metal hatch should be considered:
- the size of the steel sheet should slightly exceed the dimensions of the entrance hatch;
- the installation angles are located on average at a distance of 8 mm from the sheet edge;
- stiffeners are mounted directly in the center of the structure;
- welding of parts is carried out without gaps;
- ready cover must be cleaned and primed;
- in the openings from the inside fit insulation and fixed the finishing layer.
On how to make a hatch for the cellar with your own hands, you will learn in the next video.


