Technique of the construction process of the cellar: important nuances
Homemade harvesting, as well as the harvest of vegetables and fruits are stored in the cellar. Whether the private house is in the project or construction work has been completed, it is necessary to equip this functional element of the suburban area.
Special features
Often the cellar is confused with the basement. In fact, the difference is huge: the cellar is a specially equipped room designed for long-term storage of food, and the basement is the building structure, which is the foundation of the house. The height of the walls of the cellar does not exceed two meters, while the basement walls are at least 2.5 meters high. The basement can be heated, and the cellar is kept cold (2–4 degrees above zero). Even arrange glaciers to ensure the safety of products.Yes, and build a basement only under the house, and the cellar can be equipped not only at his feet, but also in any convenient area of the site. It's time to figure out how to do it in the country with their own hands.


Device
First of all, it is necessary to draw up a project and decide on the main parameters of the future vegetable store.
- The standard cellar is a 4x4 m square. The width of the pit is taken into account along with the masonry walls and waterproofing, and the length is chosen depending on their needs.
- The depth of construction should be below the level of soil freezing, which allows you to keep cold at any time of the year.
- When designing the height take into account the growth of the owners. People of medium height feel comfortable at a height of walls 1.8 meters, and high ones will rather put up two-meter walls. It is also important to take into account the number of households, for example, for four family members the best option is at least 5 m².
- If the light soil of the site rests on a rocky foundation, a hole for the cellar is dug only up to it. The cold needed by the products is maintained by the heat insulation of the upper part of the cellar.
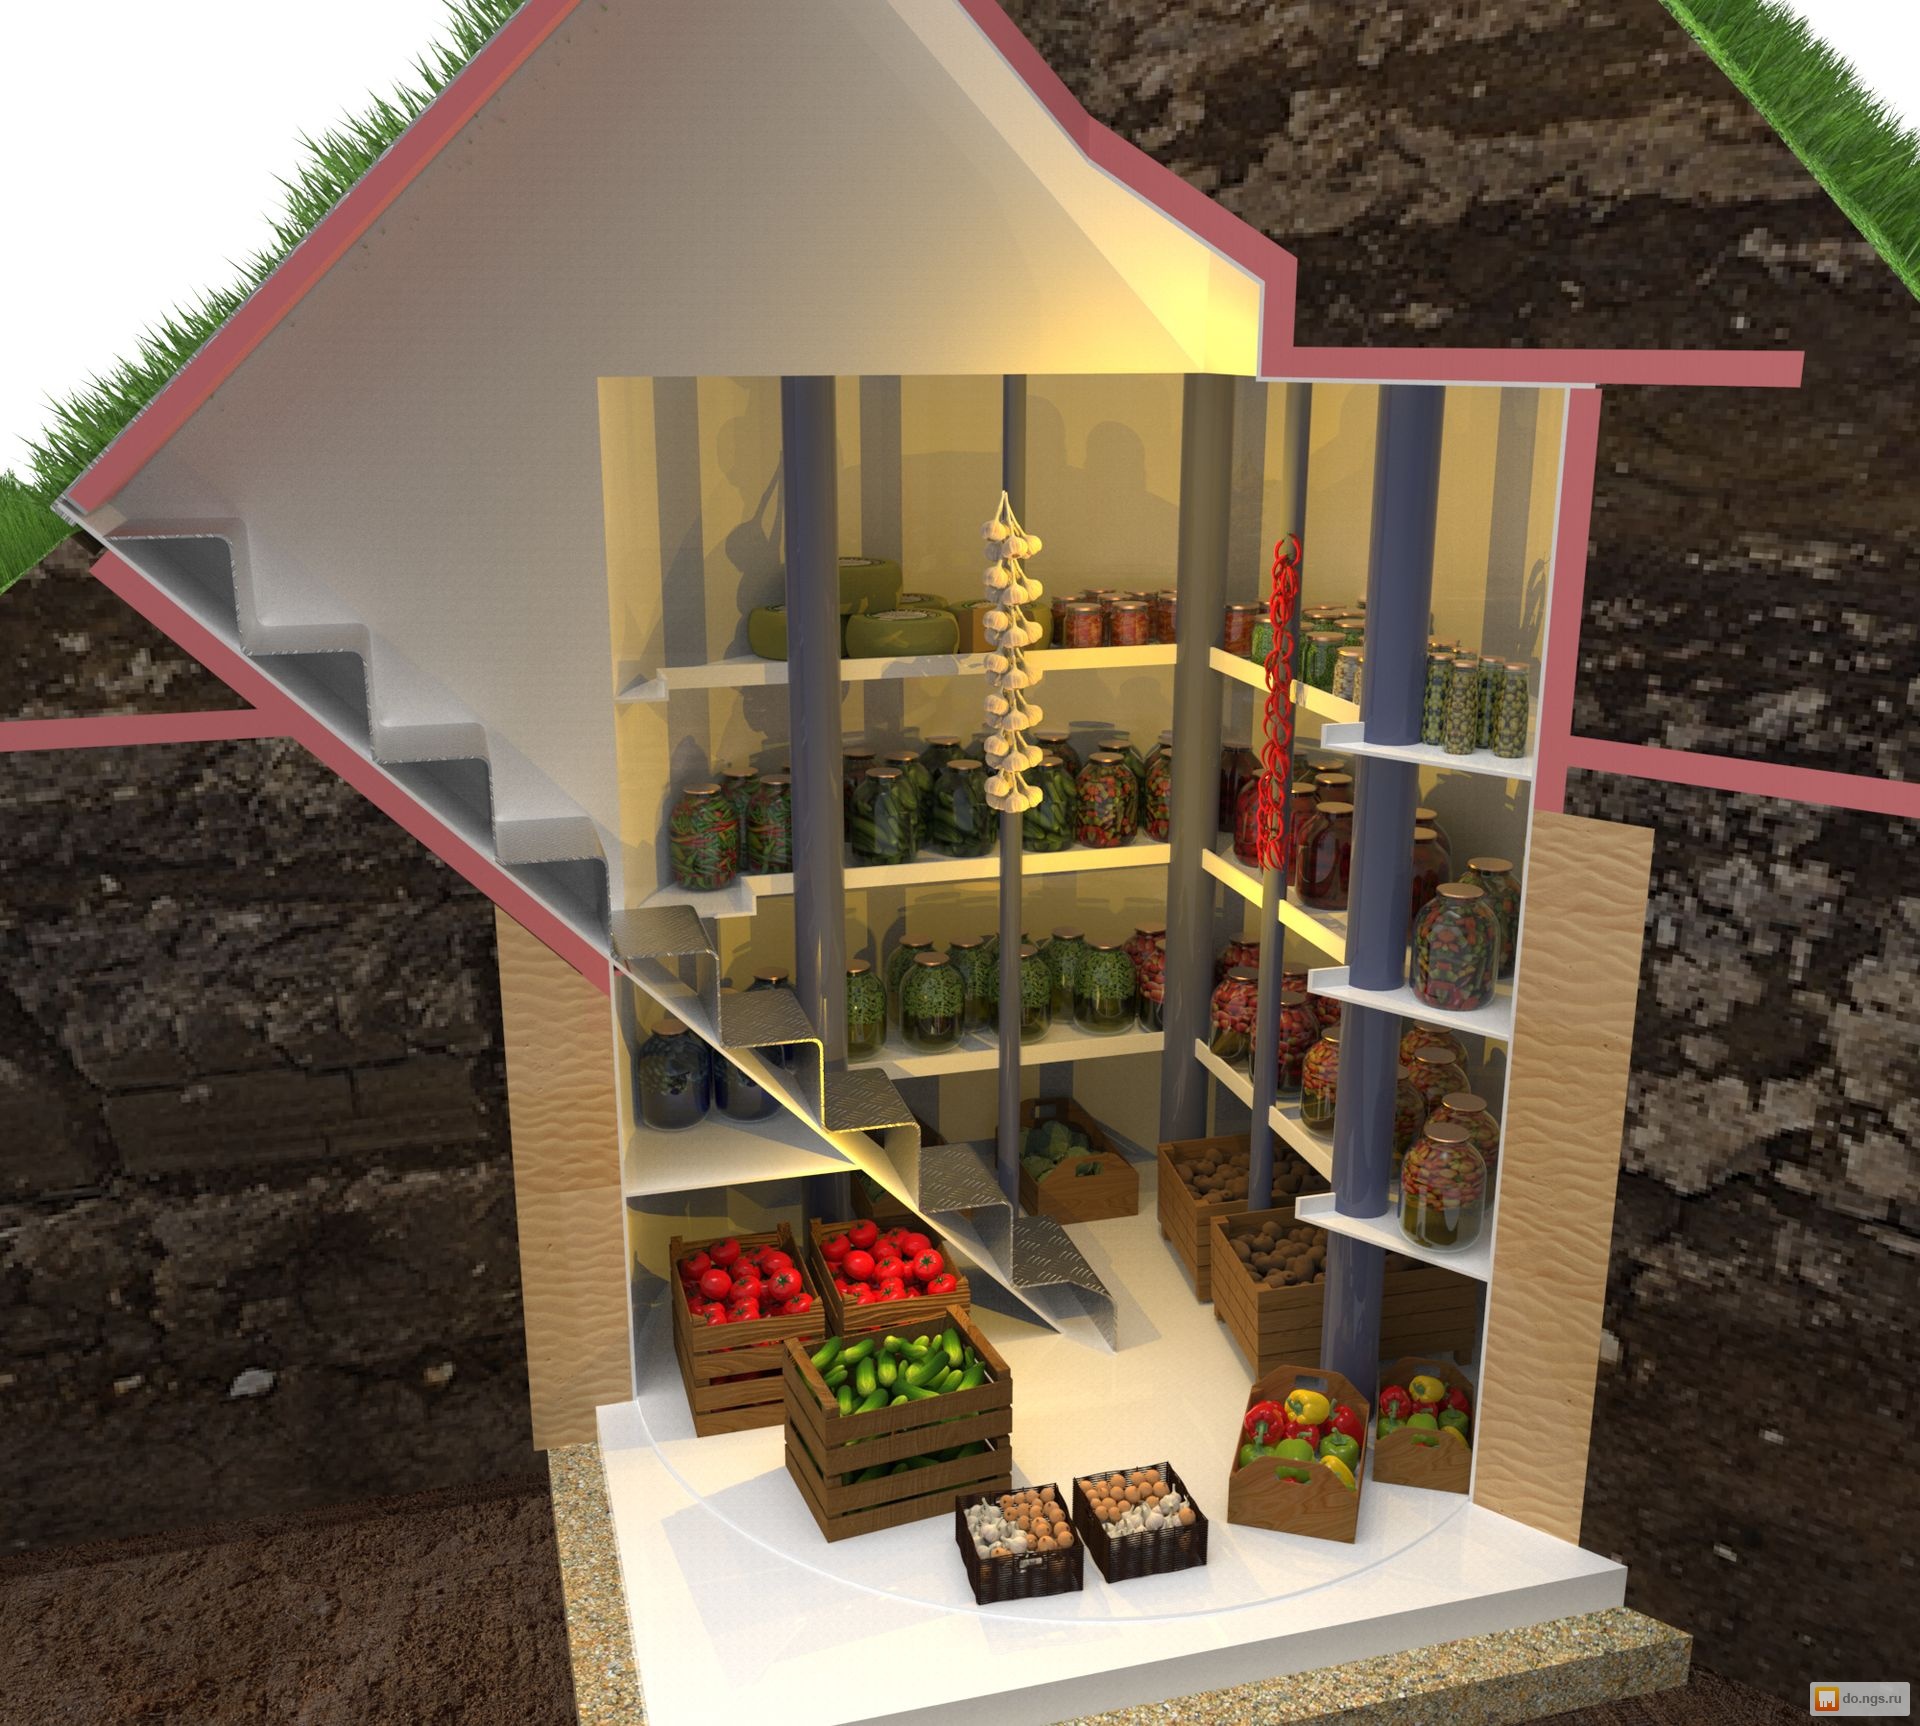
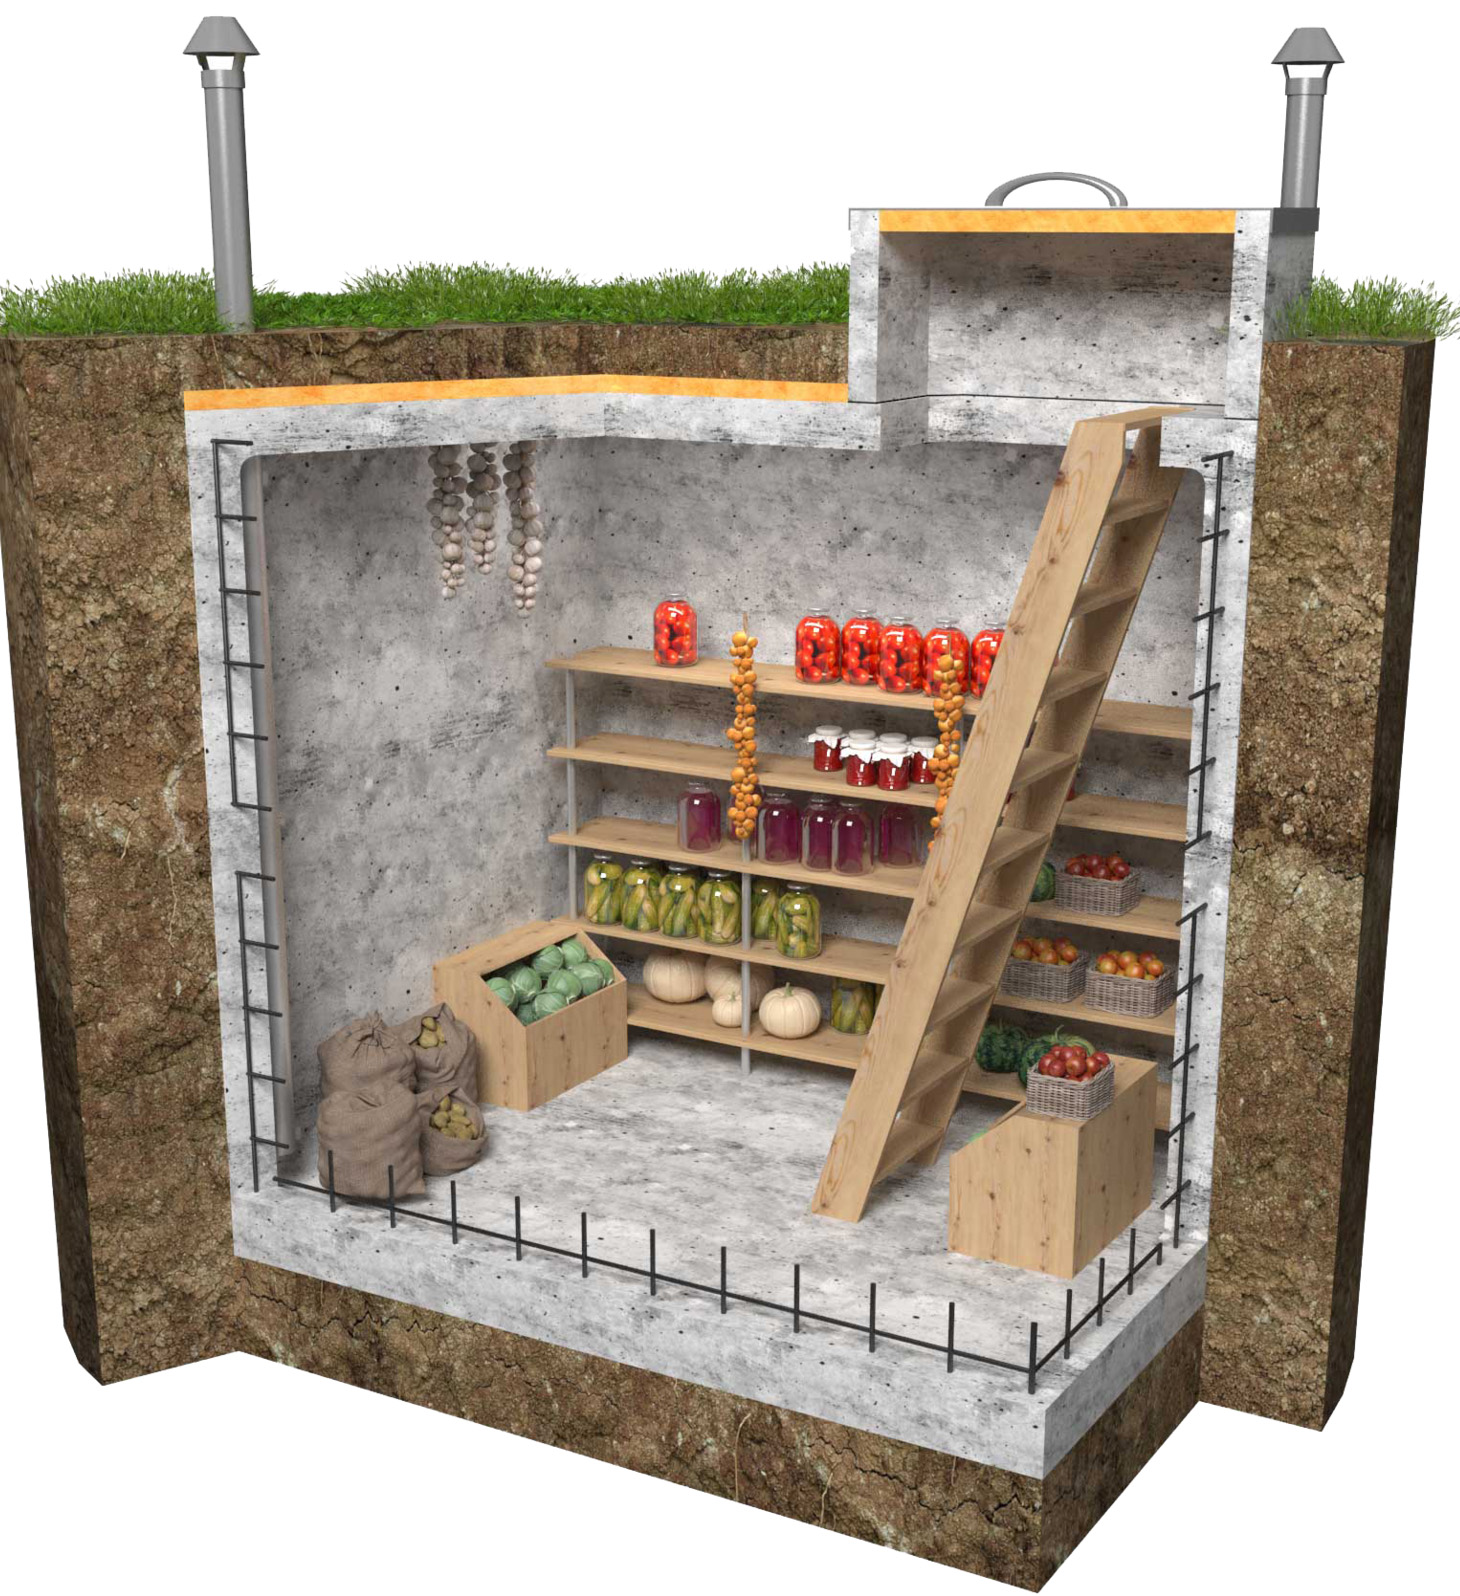
- The entrance to the cellar is arranged on the north side of the building, and the descent into it is carried out through a hatch through mobile wooden or stationary stairs made of brick or concrete.The ventilation system will protect the room from the fungus, and electricity will make it safe to descend and stay in the cellar.
- If the building is located outside the walls of the house, in order to protect it from the wind, it should be planted around saplings of low shrubs.
- The cellar under the house should be designed at the stage of building a house. If the construction of the cellar was not provided in advance, it is dug manually through the floor.
- Construction work is carried out in the summer, since this period is distinguished by a low level of groundwater, and the day X itself is appointed, guided by the weather forecast. After all, rain can flood the unfinished building and negate all efforts.
Of all the modern variety of cellars, four types are especially popular, each of which has its own advantages and disadvantages.
- Bulk cellar is a frame, covered on all sides with earth. It is built at some distance from the country buildings. To build a bulk vegetable store, you need to find out how deep the land freezes through a particular region, and then determine such an important parameter as the thickness of the soil around the cellar, which will allow you to create a functional building.
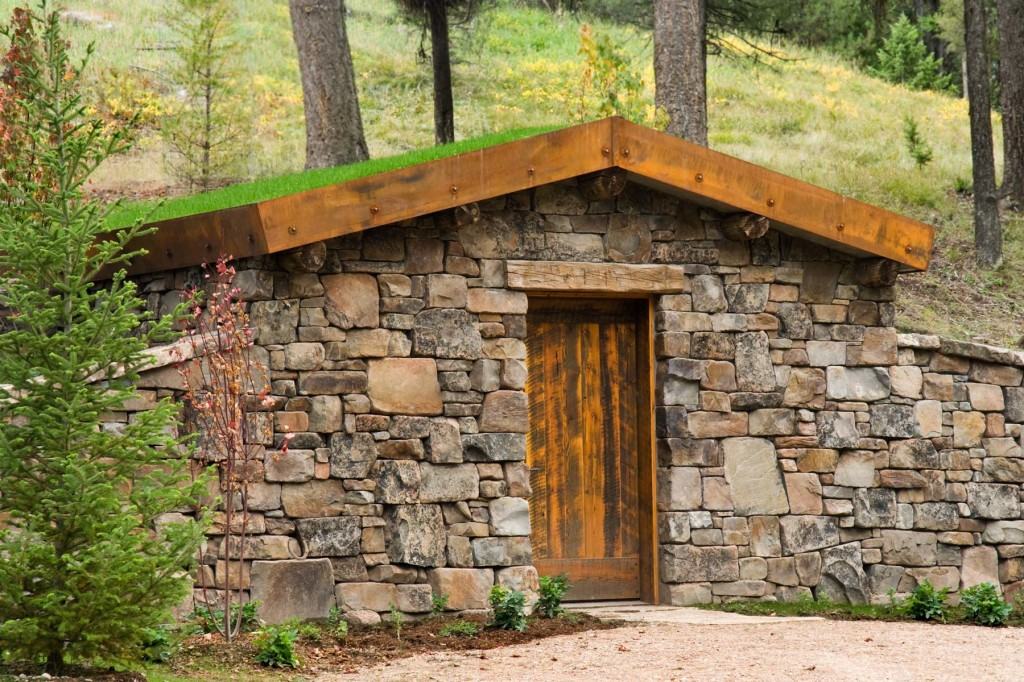
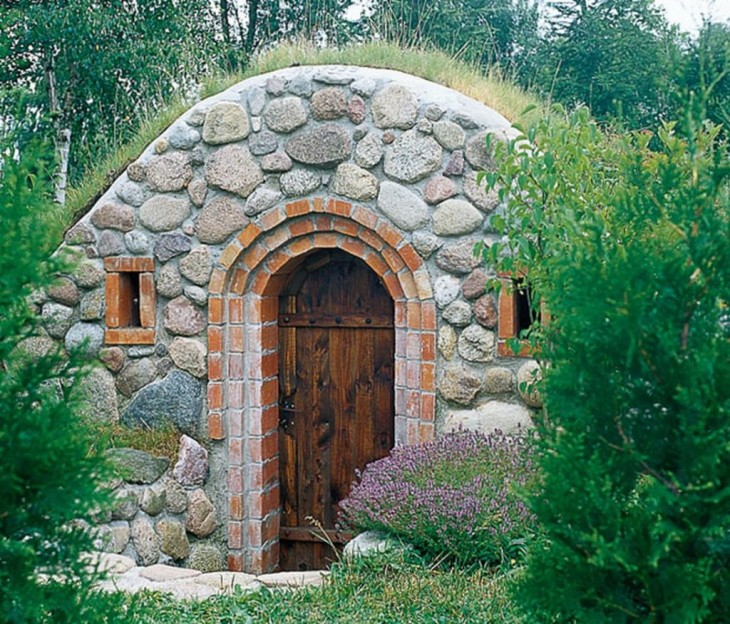
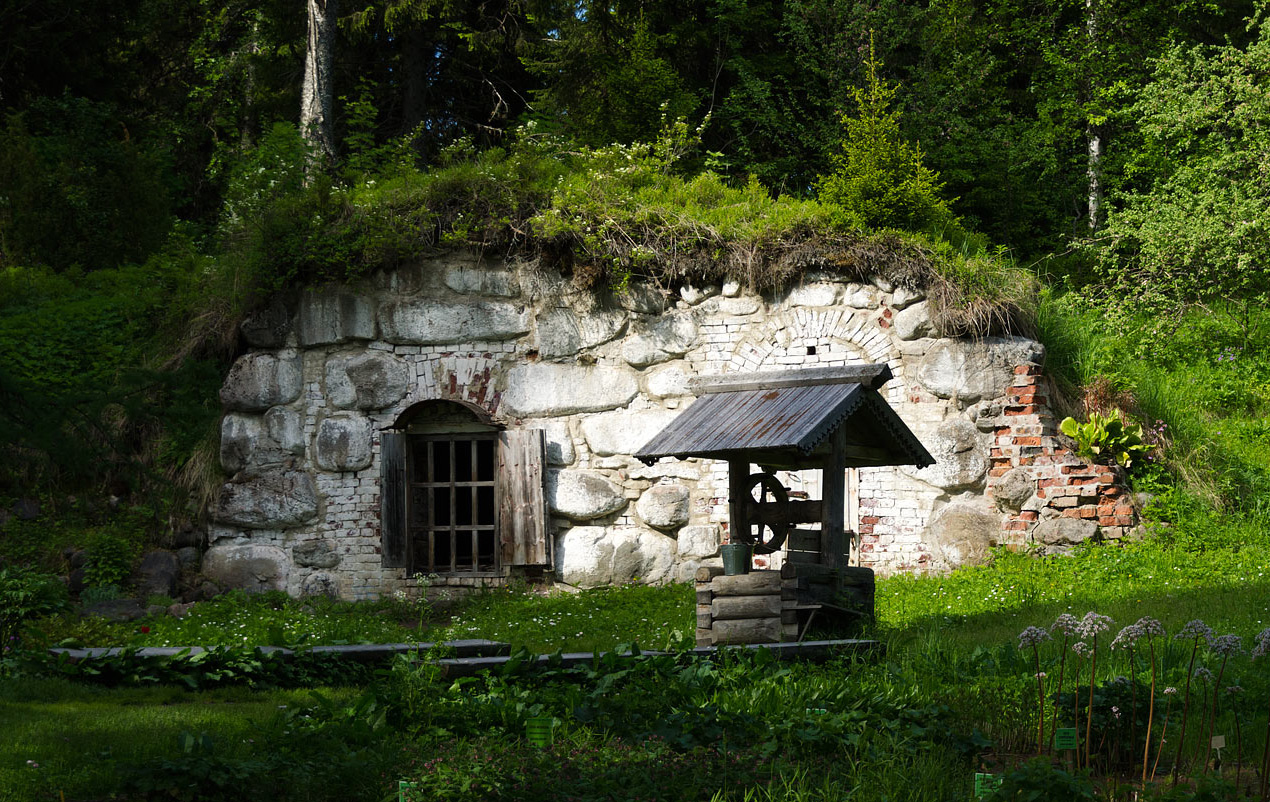
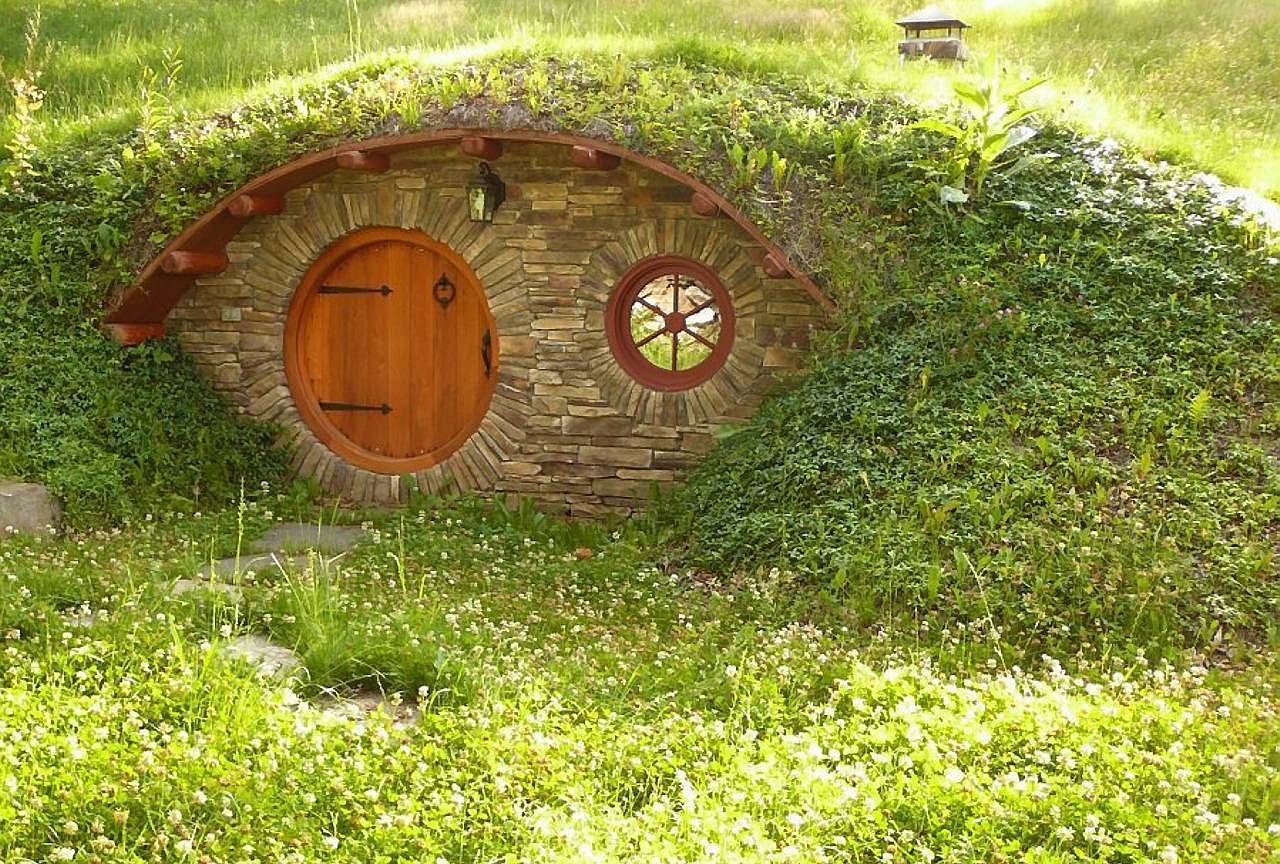
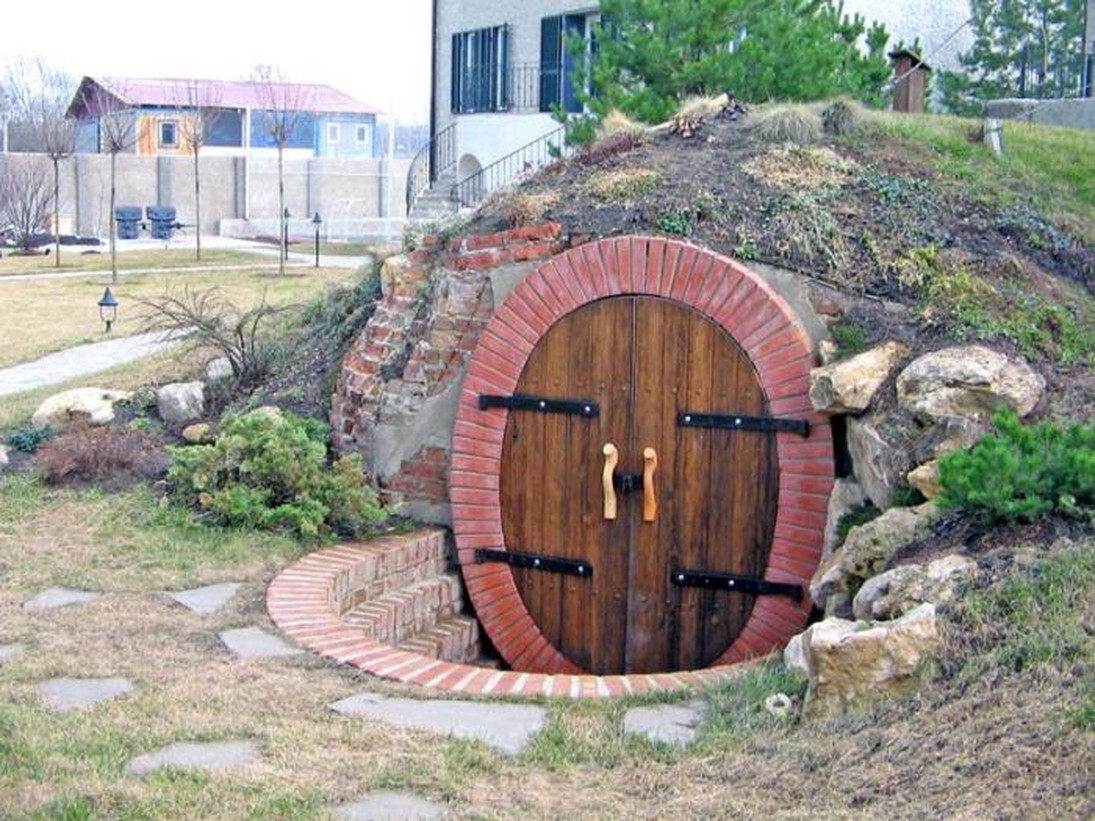
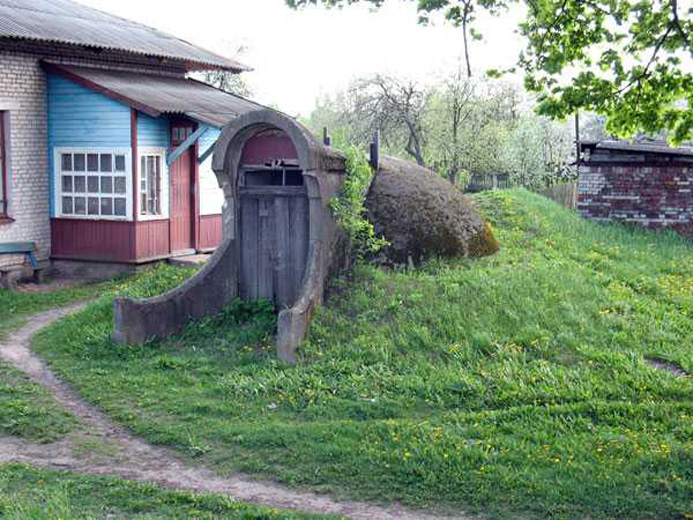
- The ground cellar is built on any plots, regardless of the level of groundwater, because it is located on the surface of the earth, towering a meter above it. It can be made both separately standing, and wall, when one of the walls of the cellar becomes a wall of a house or a shed. Both options are compact, non-volatile, function well in the warm and in the cold season. If you like the idea of a separate cellar, you should think about its design, so that this outbuilding becomes a worthy decoration of the site.
- A submerged or underground cellar is built under a house or shed, protecting it from temperature extremes and weather conditions. The underlying layers of the soil, which do not freeze even in severe winters, establish an even temperature in the storage facility. When arranging such a cellar, they excavate a ditch at least two meters deep, and then arrange waterproofing for reliable protection from the pressure of groundwater. The slightest inaccuracy will lead to flooding and time-consuming repair of the cellar, which is a very costly measure.
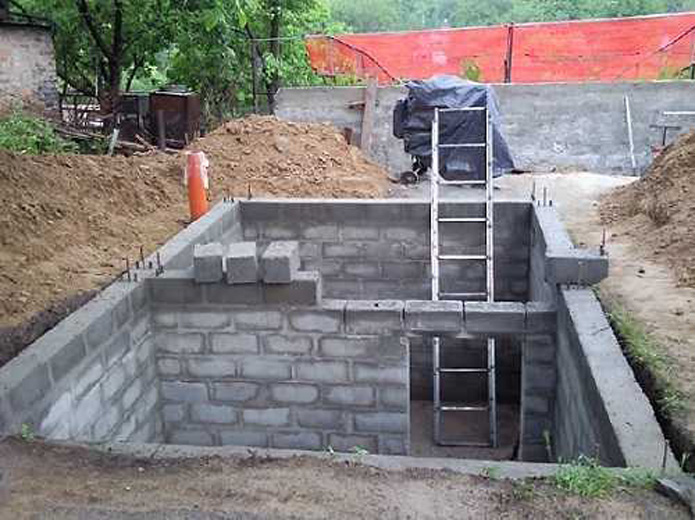
- The optimal design is a semi-buried cellar, which is placed at a depth of 1.5 m.Two-thirds of the structure protrudes above the ground, and the base and one of the walls of the repository hide in the soil. This design is distinguished by a minimal risk of flooding, a large amount of space, and the absence of narrow steep steps or ladders.
How to choose a place?
The durability of buildings of any kind and the safety of the crop in it are directly dependent on its location. According to experts, the best place for a cellar is any hill or hill, because deep underground water allows you to save on waterproofing materials. If we consider a flat plot, then we should build a cellar not far from the house, so as not to run to it in bad weather through the whole vegetable garden.
Anyway, the owners of country houses need to have an idea about the location of groundwater they got the site, because the pologreb should be half a meter higher than the underground water.
To choose the right place for the construction of the cellar, you should pay attention to the following points:
- places where mosquitoes swarm, reeds, sedges, forget-me-nots or sorrel grow, it is better to ignore, since the water is close to the earth's surface.Low rare grass suggests that groundwater is located at great depths;
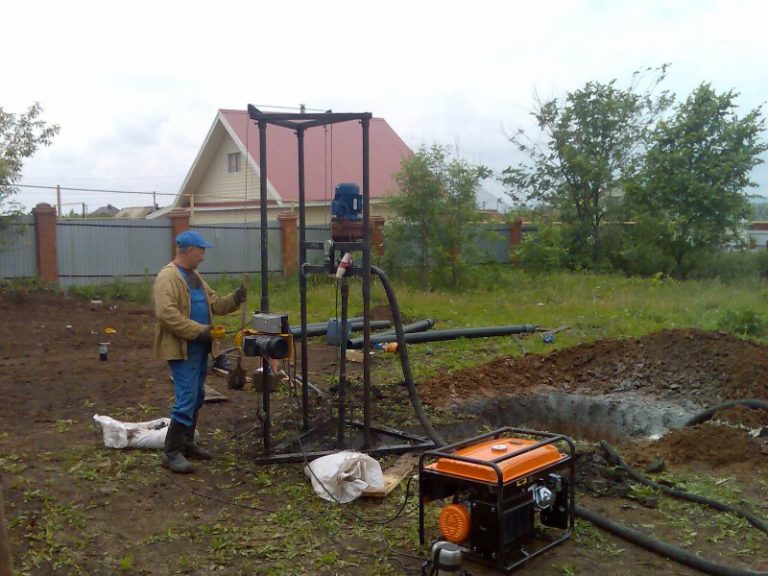
- If the place has already been chosen, but I want to make sure that this option is the best for building the cellar, a well two and a half meters deep should be drilled in the ground. The water level at one and a half meters from the surface allows you to build a buried cellar, and 80 cm - semi-buried;
- you should talk with your neighbors, who have wells in the plots, and find out how much water rises during the autumn rains and spring floods and what is its level in the dry period;
- You can use the old grandfathering technique: take a shred of wool, wash it with soap, dry it, put it on the ground where construction is planned, and place an egg on top. Wool and eggs should be covered with a clay pot, and the turf should be poured onto the pot and left overnight. In the morning look: if the egg and yarn in the dew - the water is close. The egg is dry and the wool is wet - water is far. If the wool and the egg remain dry, the water is at a great depth;
- Another solution is also known: take a mixture of sulfur, quicklime and copper sulfate (the total weight should be 800–900 grams) and put it in a clay vessel.The lid should be tightly closed with a lid or tied with a cloth in two layers, buried in the ground to a depth of at least half a meter and left for 24 hours. After this time, the pot should be dug out and weighed: the weighted capacity “speaks” of the high water level.

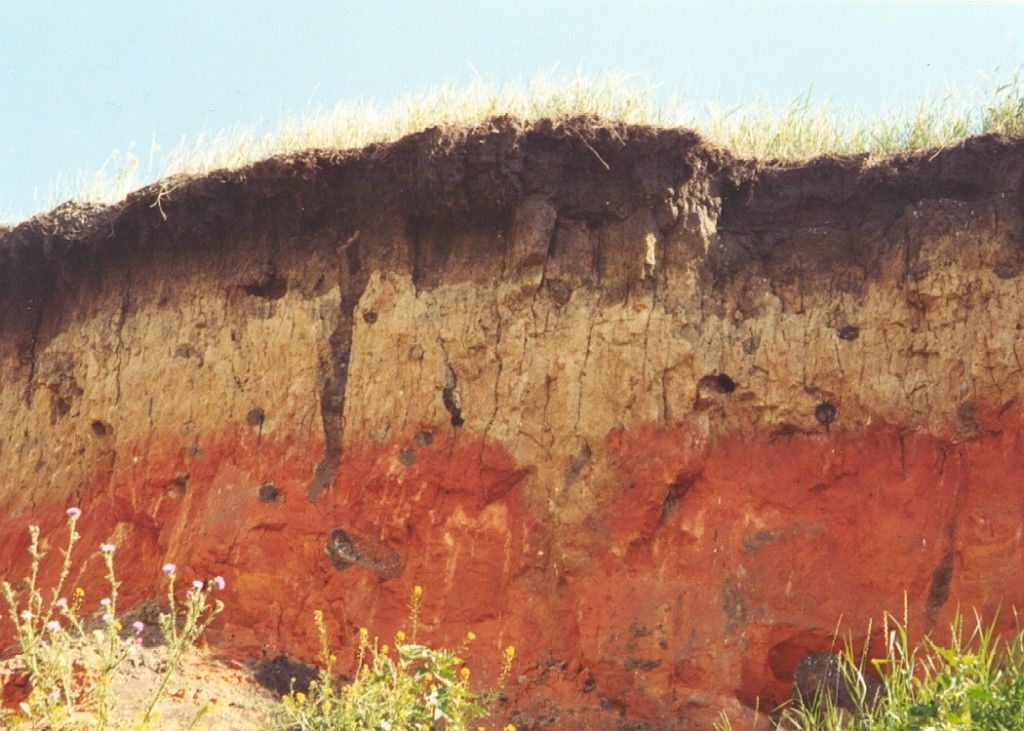
For the construction of the cellar, it is necessary to take into account not only the level of occurrence of groundwater, but also the following features of the soil in a particular area:
- sandy soil is a loose rock consisting of silty and clay particles with air cavities between them. This type of soil is used as a filter, filtering or anti-milling backfill, as well as bedding under the foundation;
- The basis of heavy and light sandy clay is clay particles. The first consists of them by 6–10%, the second - by 3–6%. This is a rather loose soil containing sand particles up to two millimeters in diameter. If you roll the wet sandy loam with your hands, you get a rudimentary cord;
- 10–30% loam consists of clay particles, and a different ratio of clay and sand makes it possible to separate them into light and heavy (the latter contain 20–30% clay particles). The wet light loam will break when you try to roll it into a ring, the heavy one is more plastic;
- Clay soil contains more than 50 percent clay, has a diameter that does not exceed one hundredth of a millimeter. The soil is plastic, when it gets wet it swells up a lot and has a low water-carrying capacity. It is solid when dry, and when it gets wet, it becomes sticky;
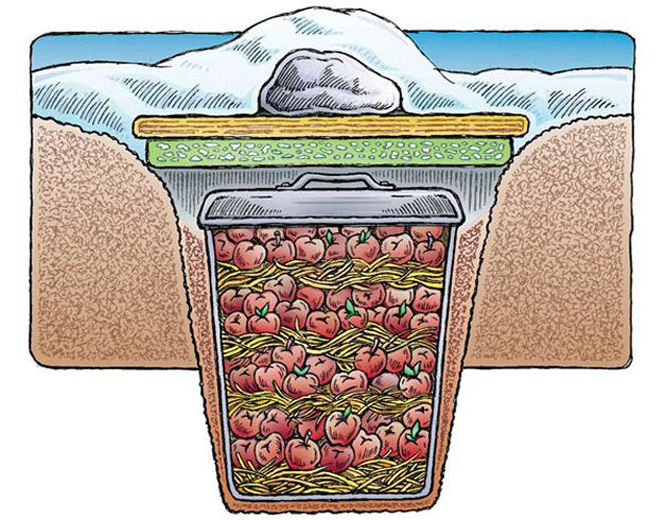
- black-brown peat ground is a mixture of decomposed plants with clay, sand, limestone. High moisture capacity, gas absorption capacity and disinfecting properties of peat make it possible to use it not only for the embankment of the cellar, but also for pouring roots and root crops so that they retain their useful properties longer.


Spice, clay and loam not only freezes through at temperatures below zero, but also increases to ten percent (the so-called soil swelling occurs). At the same time, the normal forces put pressure on the base of the foundation, and the tangents are directed along its vertical walls. As a result, in 5–10 years, the building may be 80–90 centimeters above the original level.
To avoid this, you need to either bring non-crumbling sandy soil to the site, or choose high-quality materials that will not allow the structure to twist.
Materials
The choice of building materials depends on the water level.If a dry place is chosen for the cellar, you can use any materials, including wood, treated with special compounds. If the site has a high level of groundwater, you should choose the most waterproof materials with low hygroscopicity, for example, metal and concrete.
To determine the preferences, it is worth considering the pros and cons of the materials from which the walls of the cellar are erected.
- Concrete is a durable material with low hygroscopicity, thanks to a complex of means it can be made almost waterproof. Additives and special vibrators compact its structure. Double treatment of cement-based polymer compositions of 6–8 times reduces the leakage of water through the capillaries. To reduce the conductive properties of concrete, you can use rubber paint used for swimming pools.
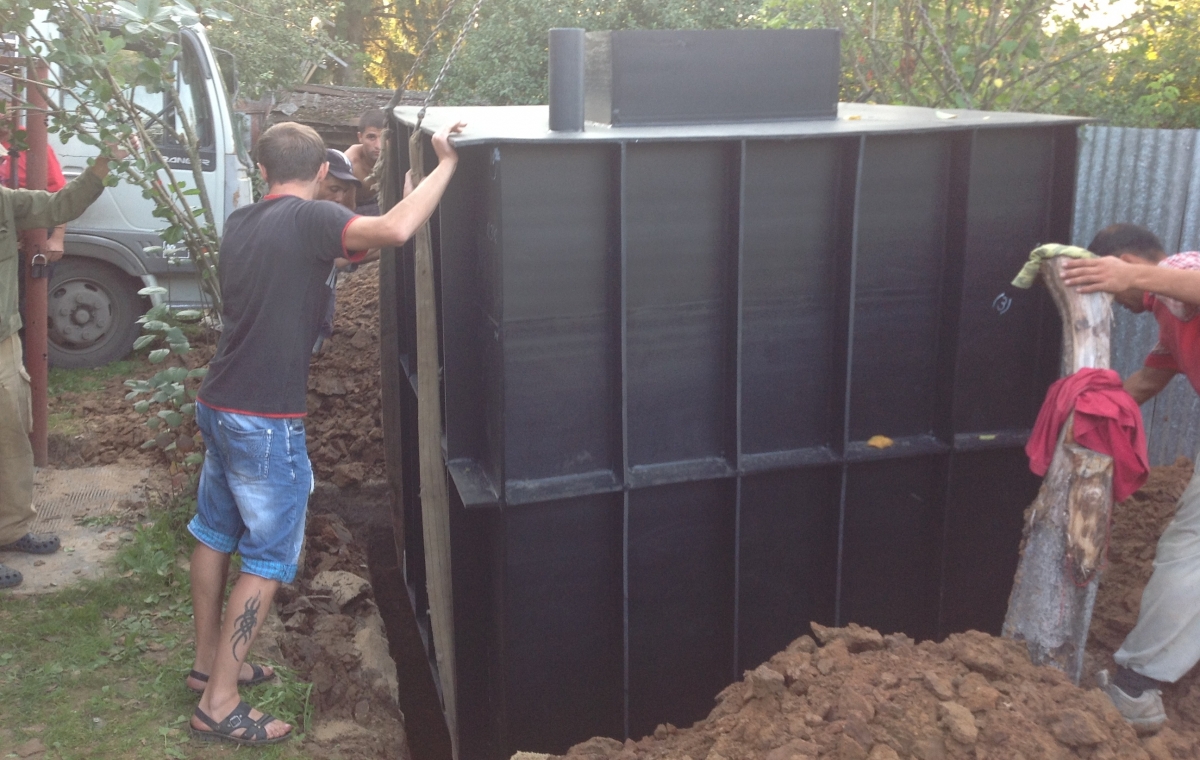
- The metal cellar is a box with hermetically welded seams and struts on the bottom and walls. Outside the box 2-3 times treated with anti-corrosion agent and buried in the ground. Well-made welding protects against water, but there is another attack: with a seasonal rise of water, the cellar may be on the surface.Struts hold the box, helping to cope with the pressure, but often they can not cope with the forces of nature.
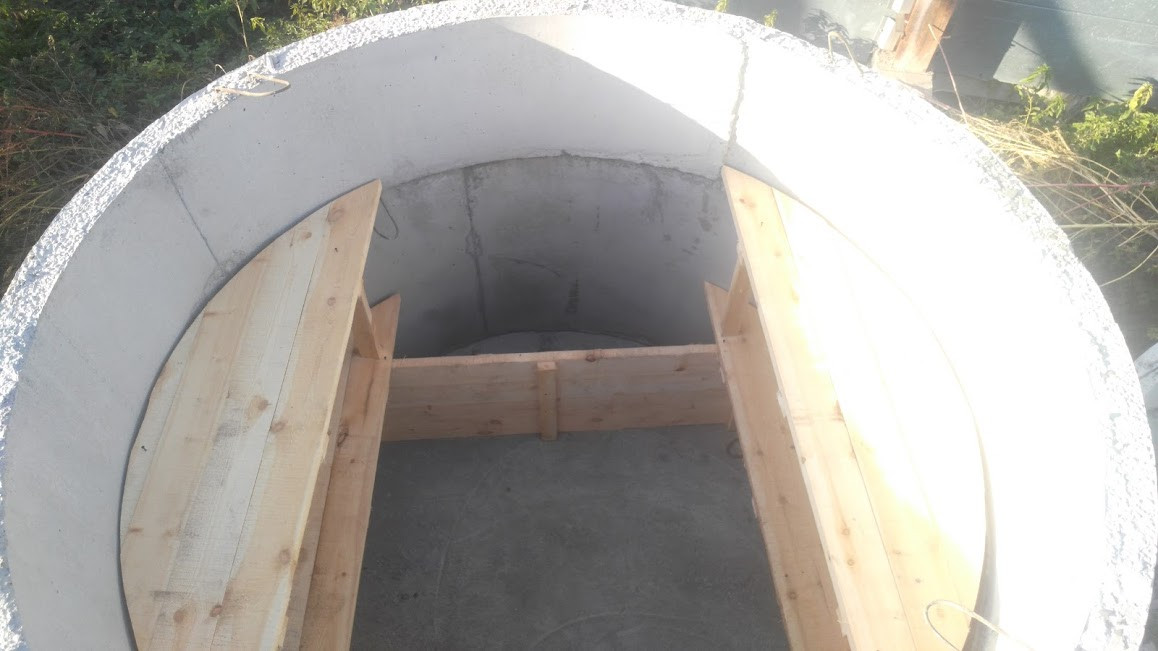
- If you do not want to get involved in the erection of the walls, you can make a vegetable storehouse of concrete rings with a diameter of 2 or 2.5 meters. The latter option is more preferable, since after the installation of shelves in the cellar of smaller diameter it will be cramped. Before installing the ring is treated with such means as a coating waterproofing, bitumen mastic, molten tar or impregnation of deep penetration.
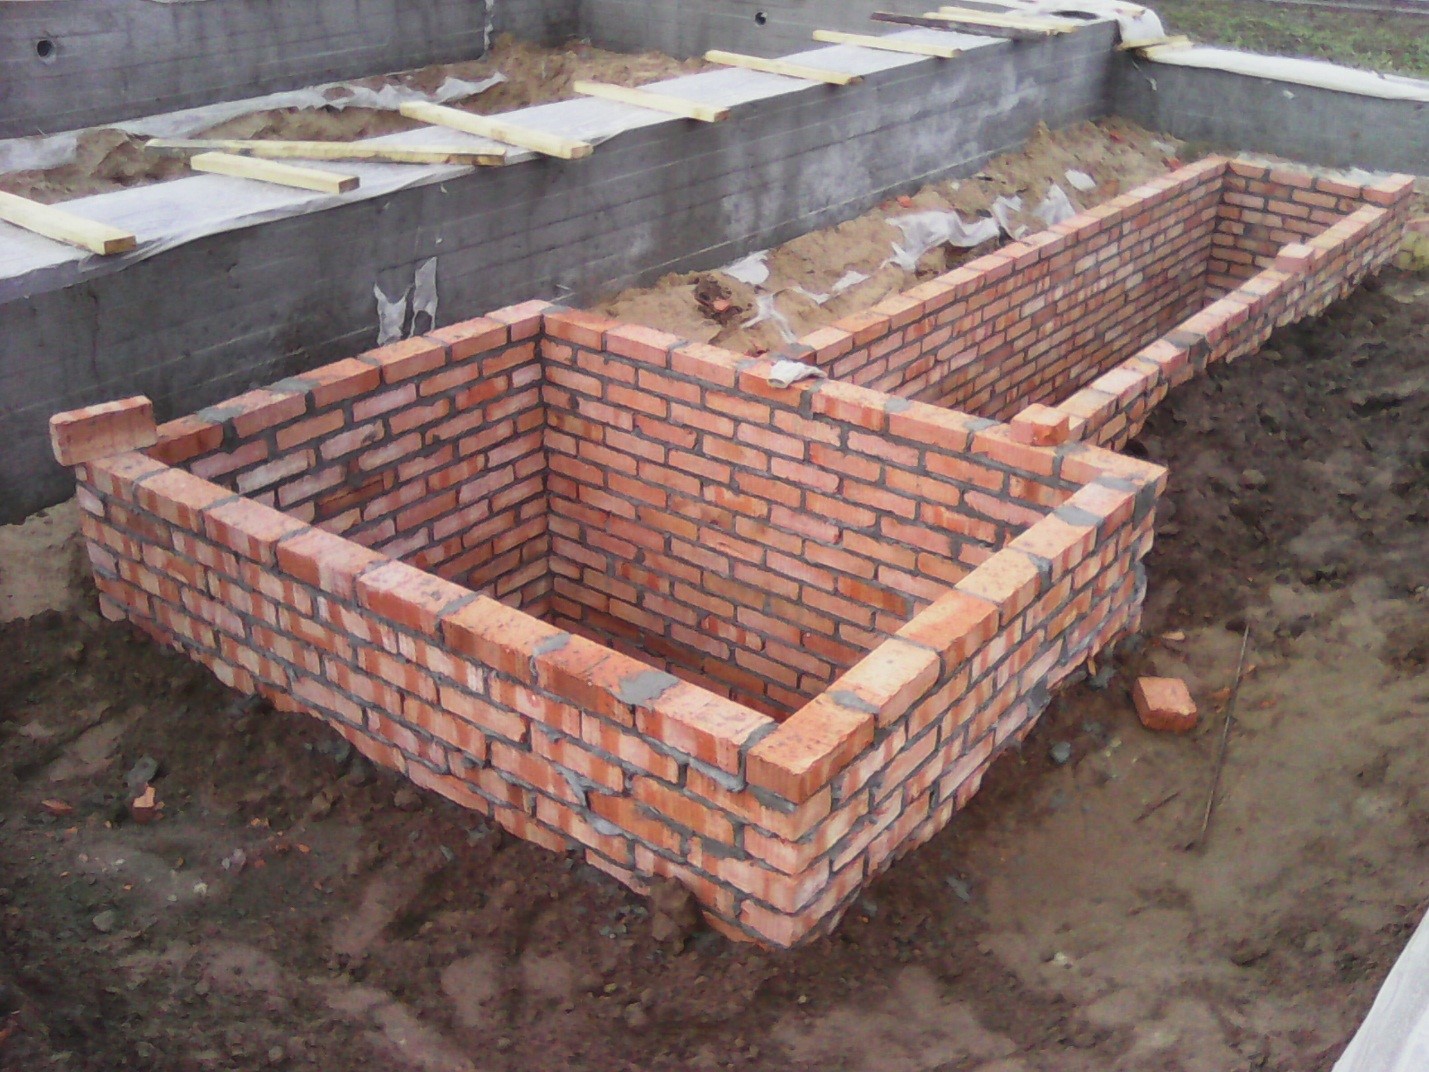
- The red burned brick differs in high moisture resistance and durability. It is suitable for terrain with both low and high groundwater levels. For the construction of the cellar is possible as a solid brick, and its fragments, suitable for use.
- If the house is located on a plot with a low water level, it is possible to build from slag blocks or expanded clay concrete blocks. When buying first, we should ask what kind of raw material was used to make it, because ideally it should be fragments of bricks, and also check the units for radiation with a dosimeter.Expanded clay is a porous and brittle material, collapsing from mechanical damage. The construction of the cellar with the use of these materials requires high-quality waterproofing.
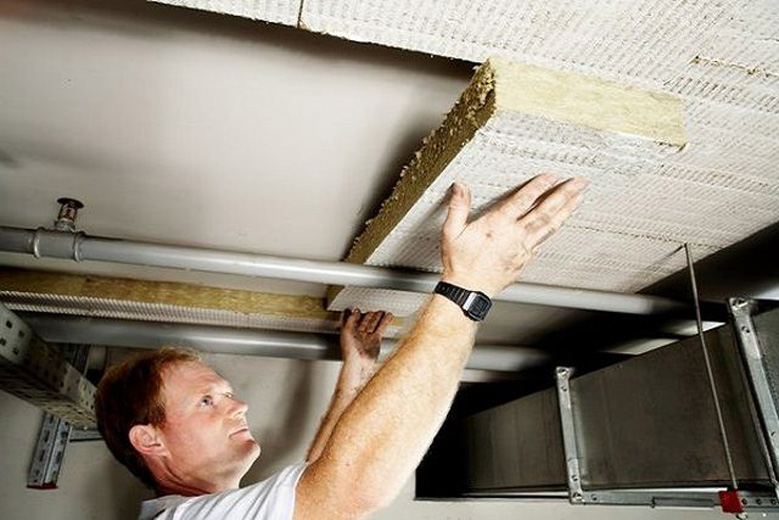
To reduce the effect of tangential forces on the basement of the cellar, hot bitumen, silicone enamels are used, and they also use natural or semi-natural drying oil. The ceilings are equipped with wooden poles, bars or planks, they are treated with antiseptics, laid and wrapped with any thermal insulation with a thickness of 30 centimeters. As a heater used slag, as well as foam or polystyrene.
The ceilings are coated with clay, and soil or slag is usually used as sprinkling, but if you choose such combustible materials as peat or sawdust, they should be covered with a two-centimeter layer of sand.
How to build?
The construction of a cellar of any kind takes place as follows: the walls are covered with a clay castle, and the floor is covered with a sand pillow, protected from the ground. The final stage of work is the compaction of walls with concrete, brick or blocks. In words, everything is simple. But it is worthwhile to step by step consider the process of arranging a cellar of any type.The low level of groundwater allows the use of the bottom and pit construction of the device.
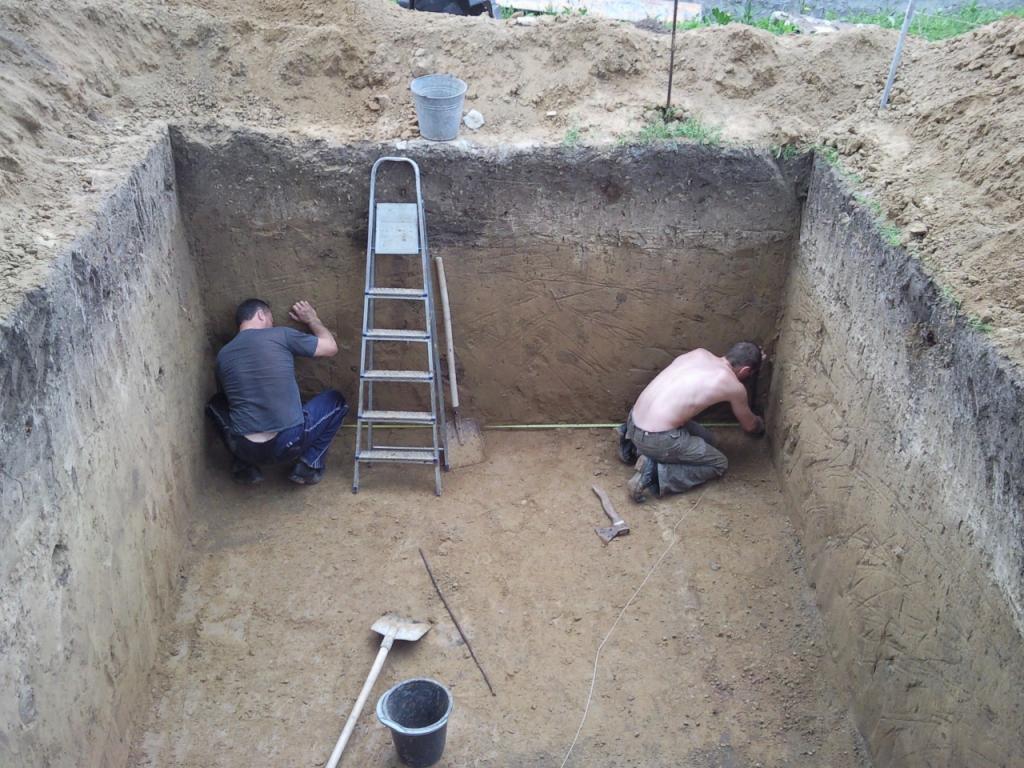
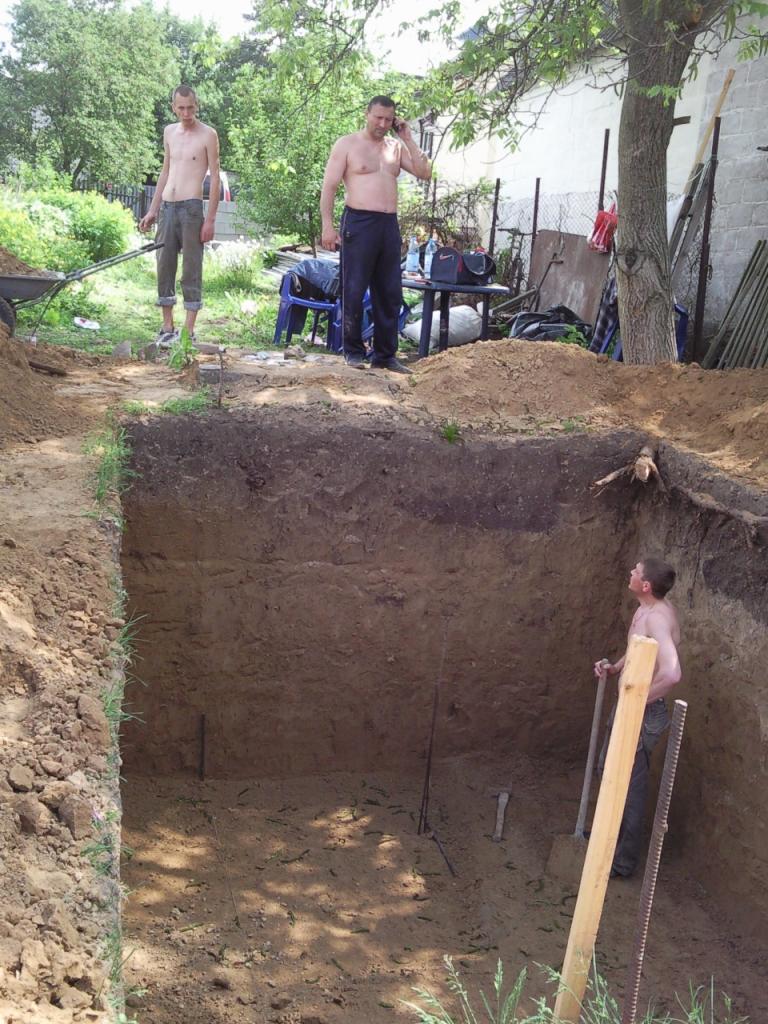
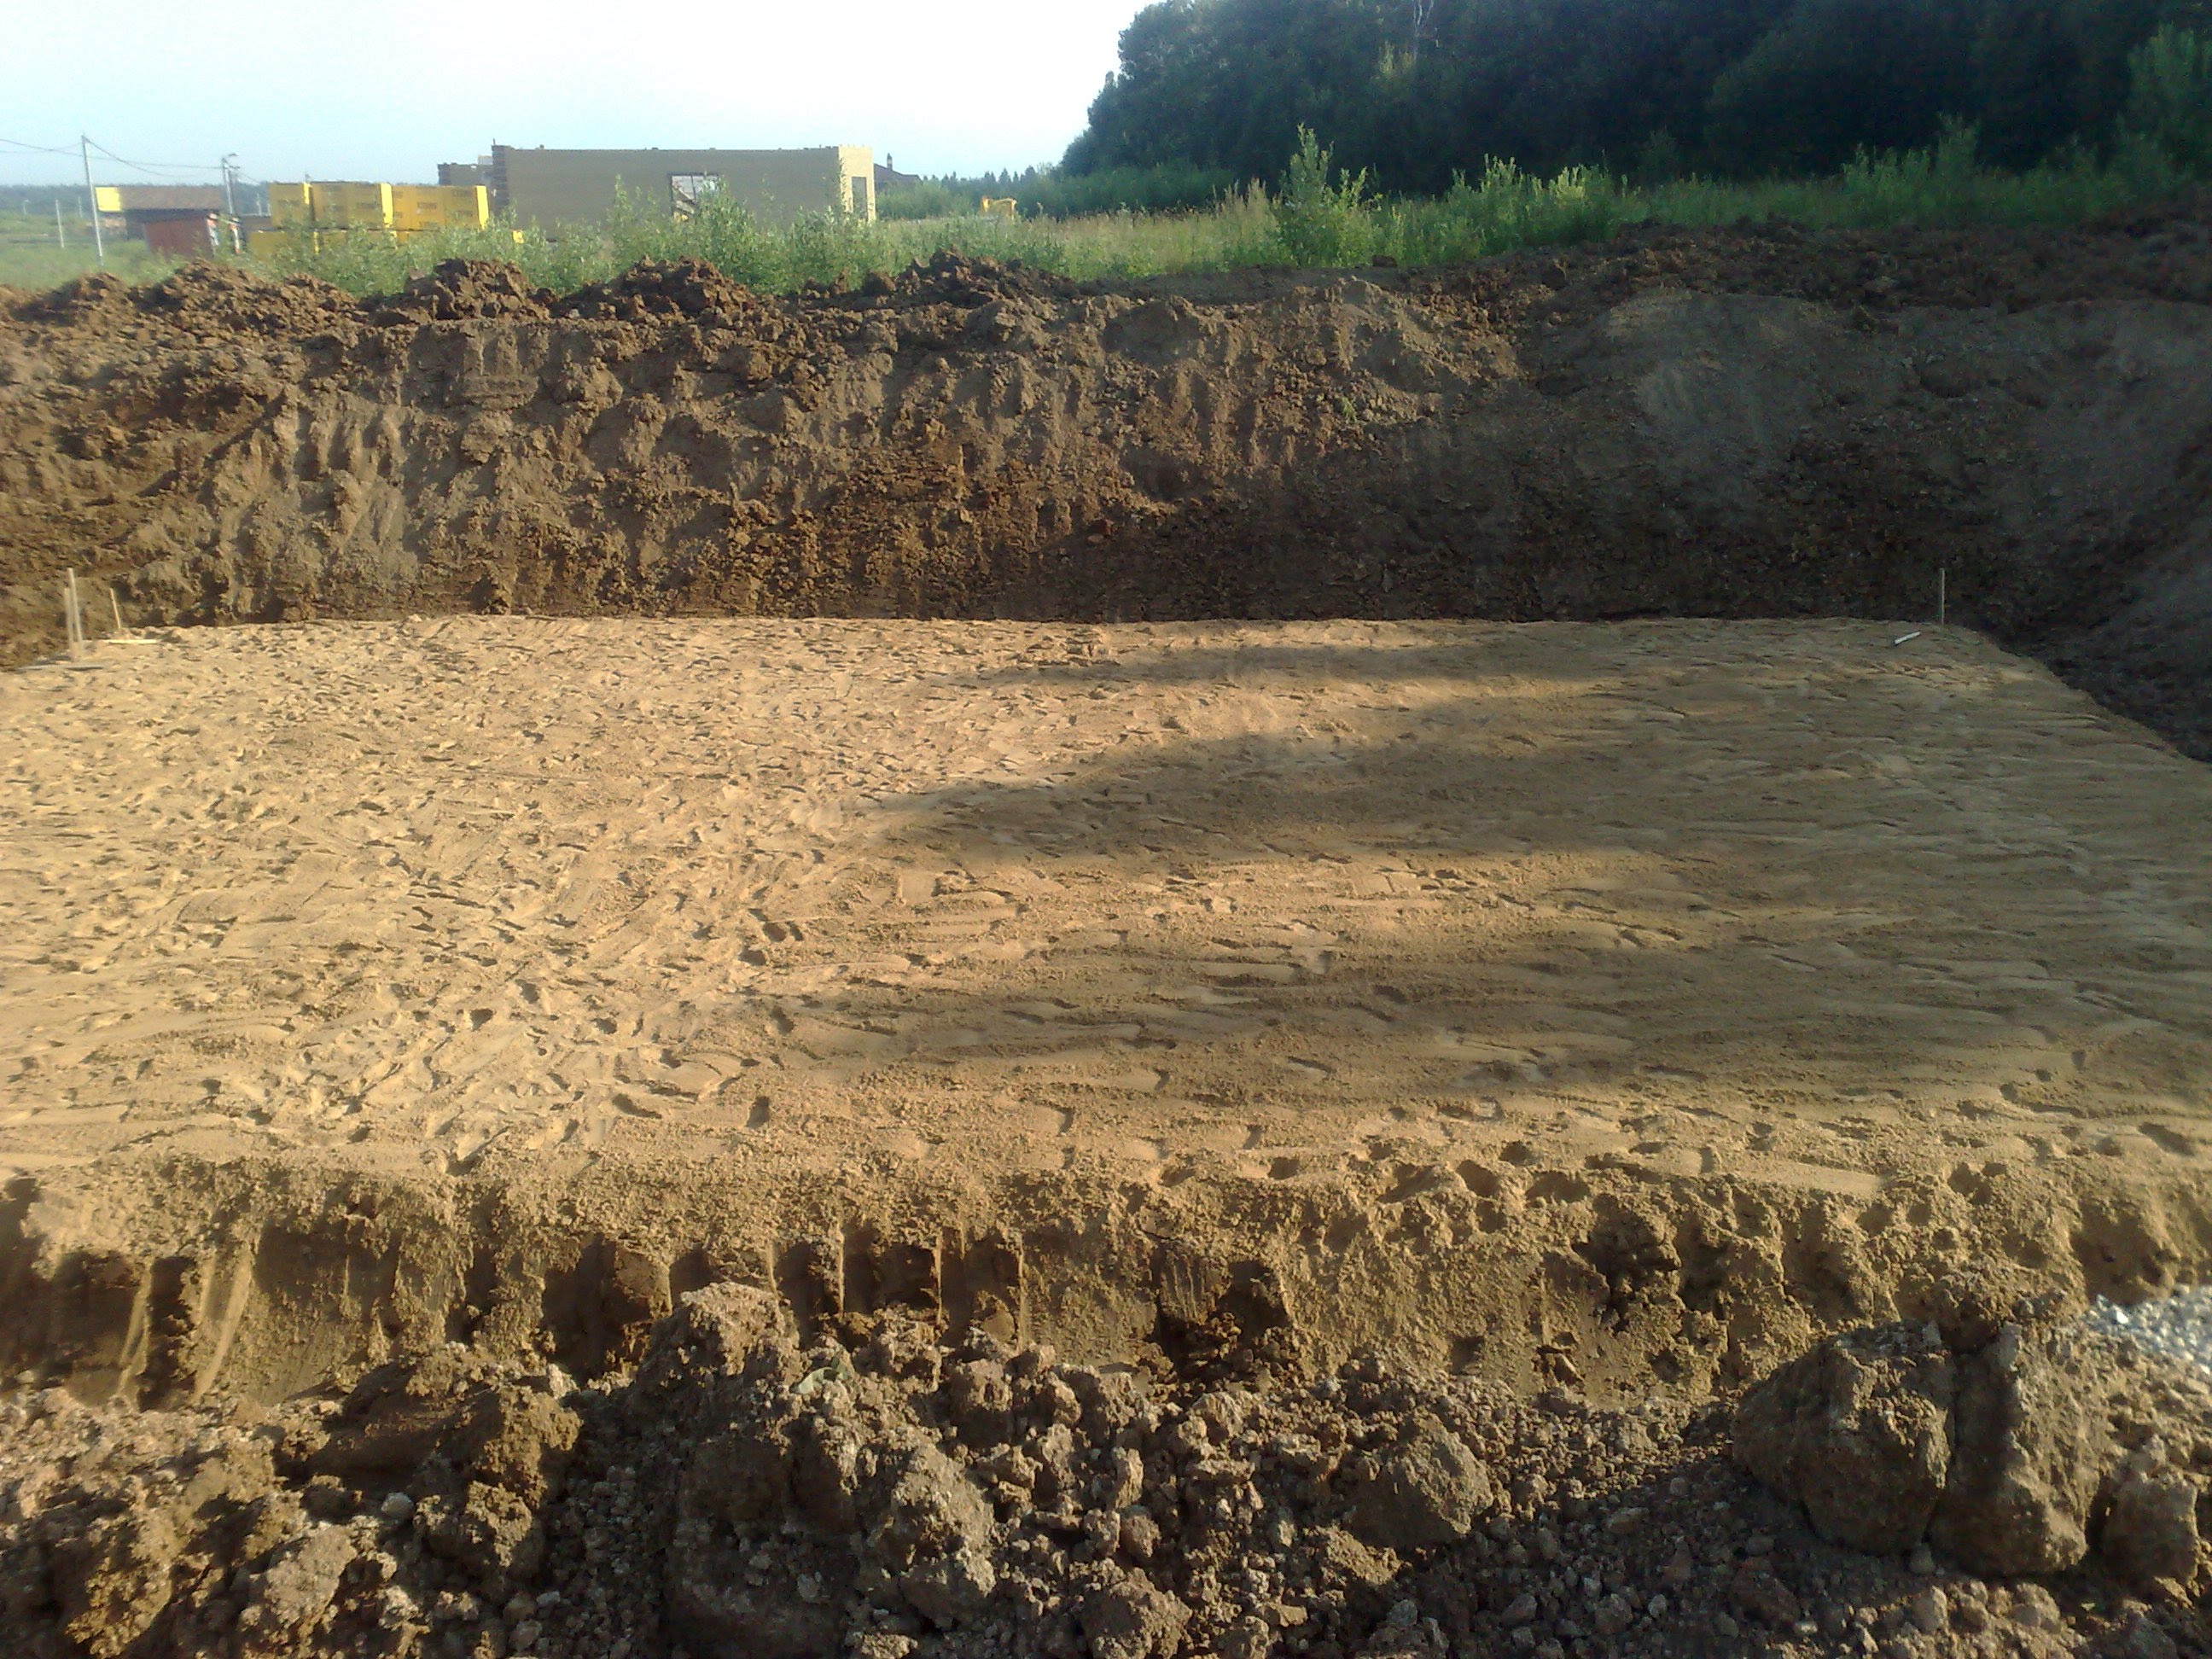
In the first case, the concrete or brick box of the future vegetable storehouse is first erected on the earth's surface, and then gradually buried. The works are going slowly and take a lot of effort, but this does not affect the appearance of the site. Yes, and external waterproofing boxes can be carried out efficiently, nowhere slowly. The second option is to dig a pit to a depth of three meters manually or with an escalator.
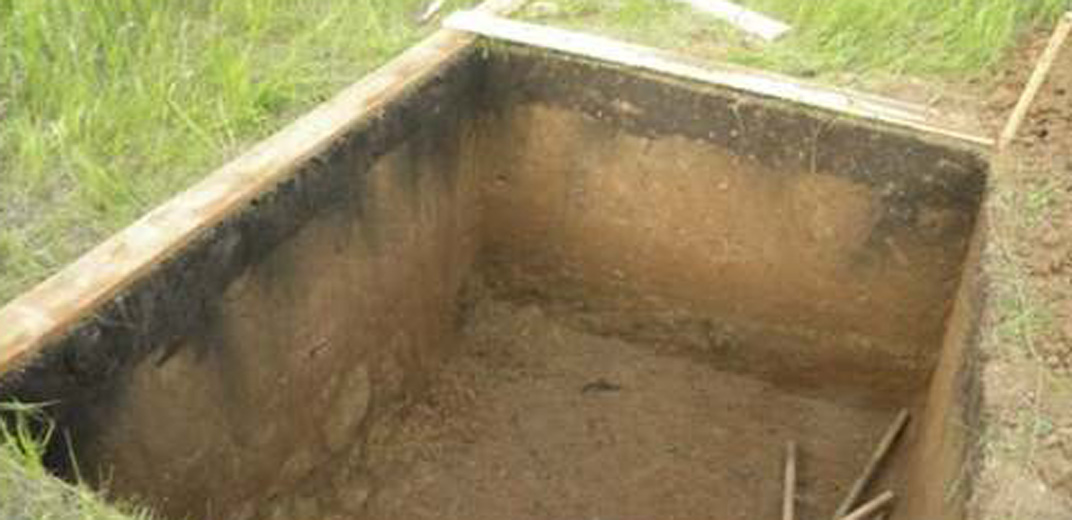
Its dimensions must exceed the dimensions of the basement by at least half a meter. This is the most common way.
Using the pit method of the device, you should perform the following steps:
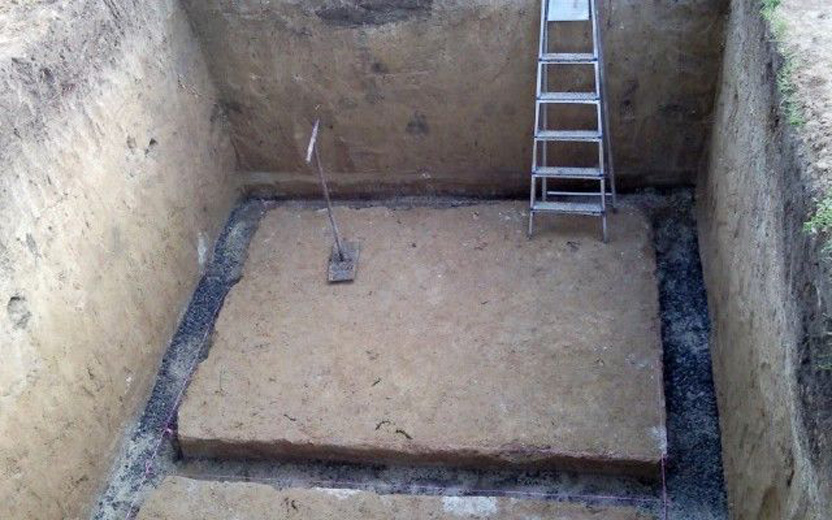
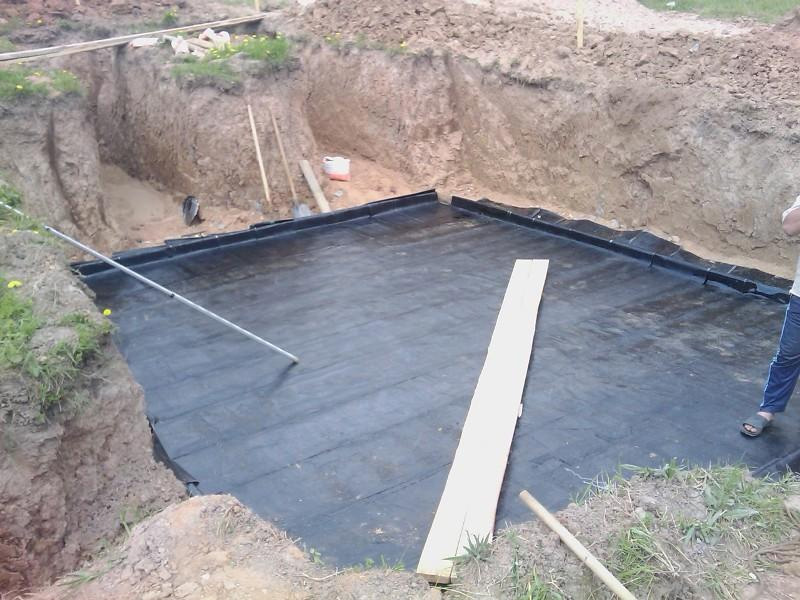
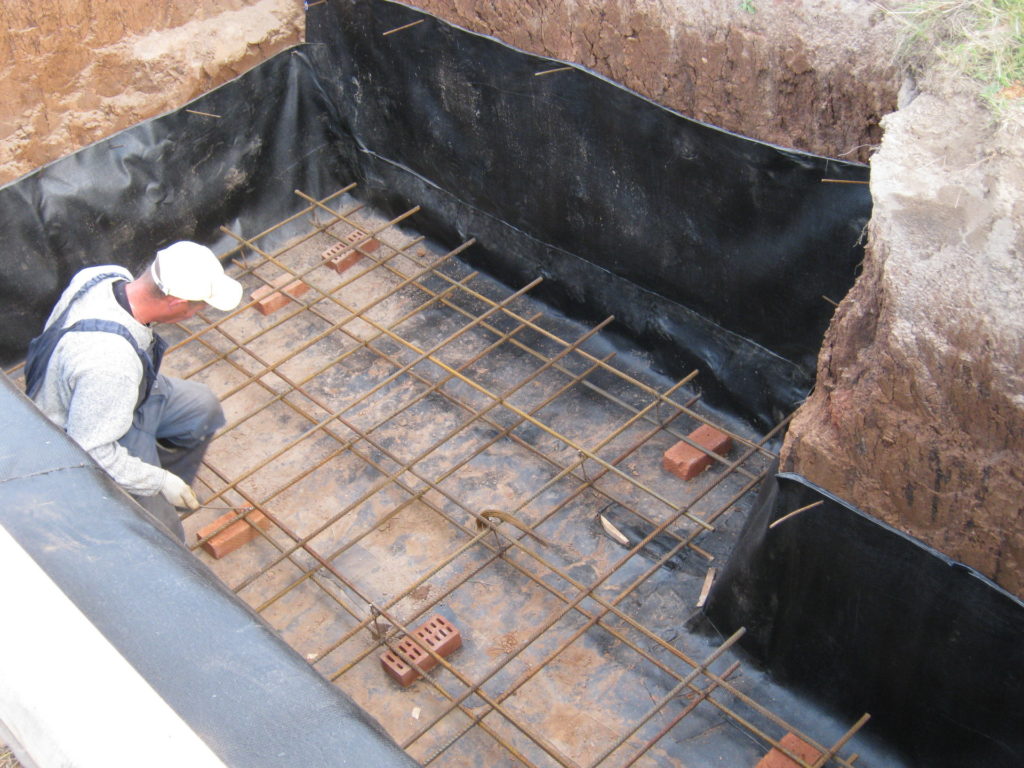
- the bottom and walls are leveled, then the bottom is covered with sand, and a layer of rubble and broken brick is laid over the sand. The total thickness must be at least twenty centimeters;
- heated bitumen is evenly poured onto this multi-layered surface to protect the cellar from water;
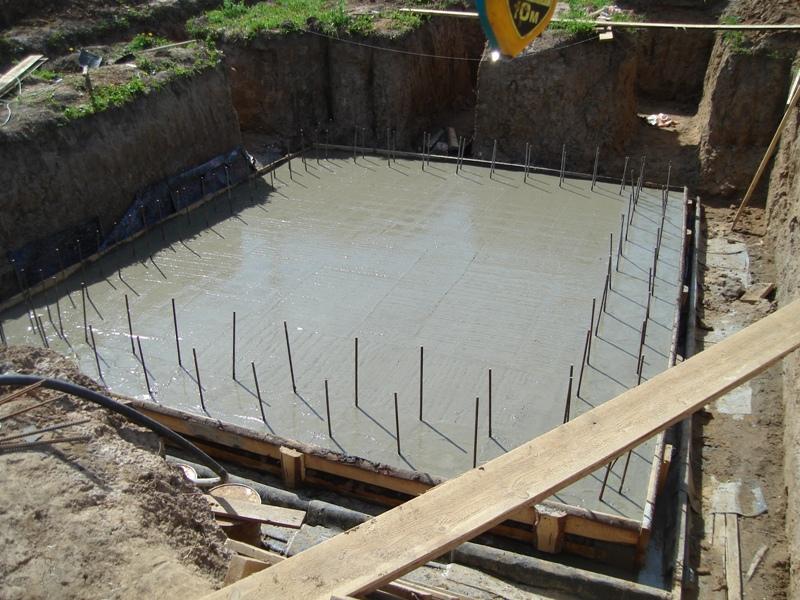
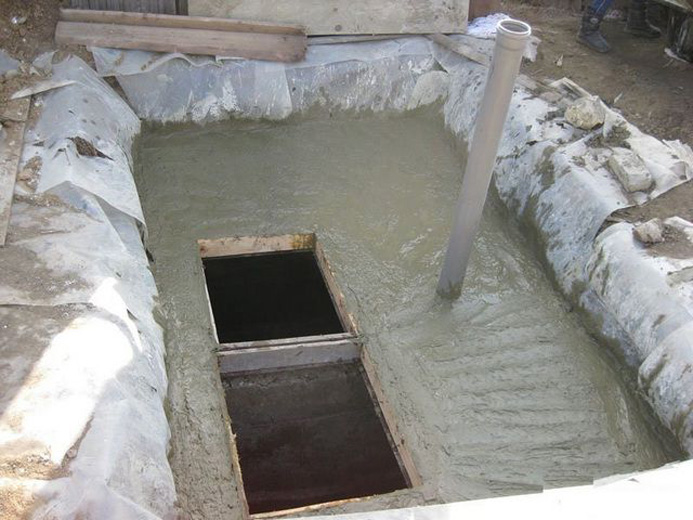
- reinforcement or metal wire is laid on the rubble and poured with a layer of concrete 10–15 cm thick;
- when the concrete hardens, they begin to lay out the duct, and the length and width of the base should exceed the outer dimensions by 30–50 centimeters.

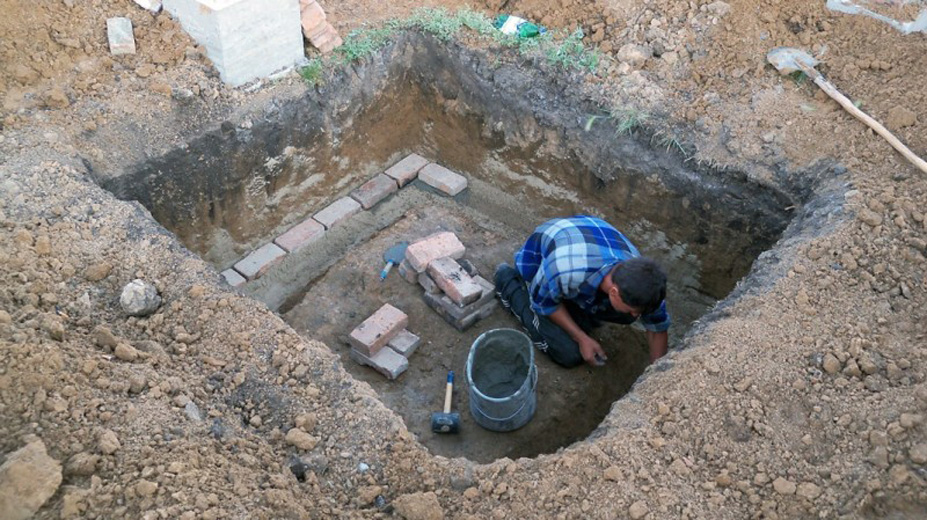
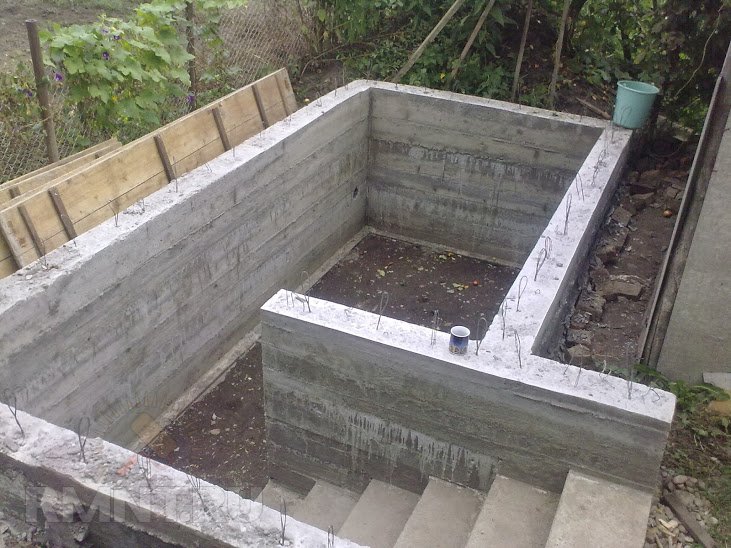
After arrangement of the pit, the following types of work are carried out in stages:
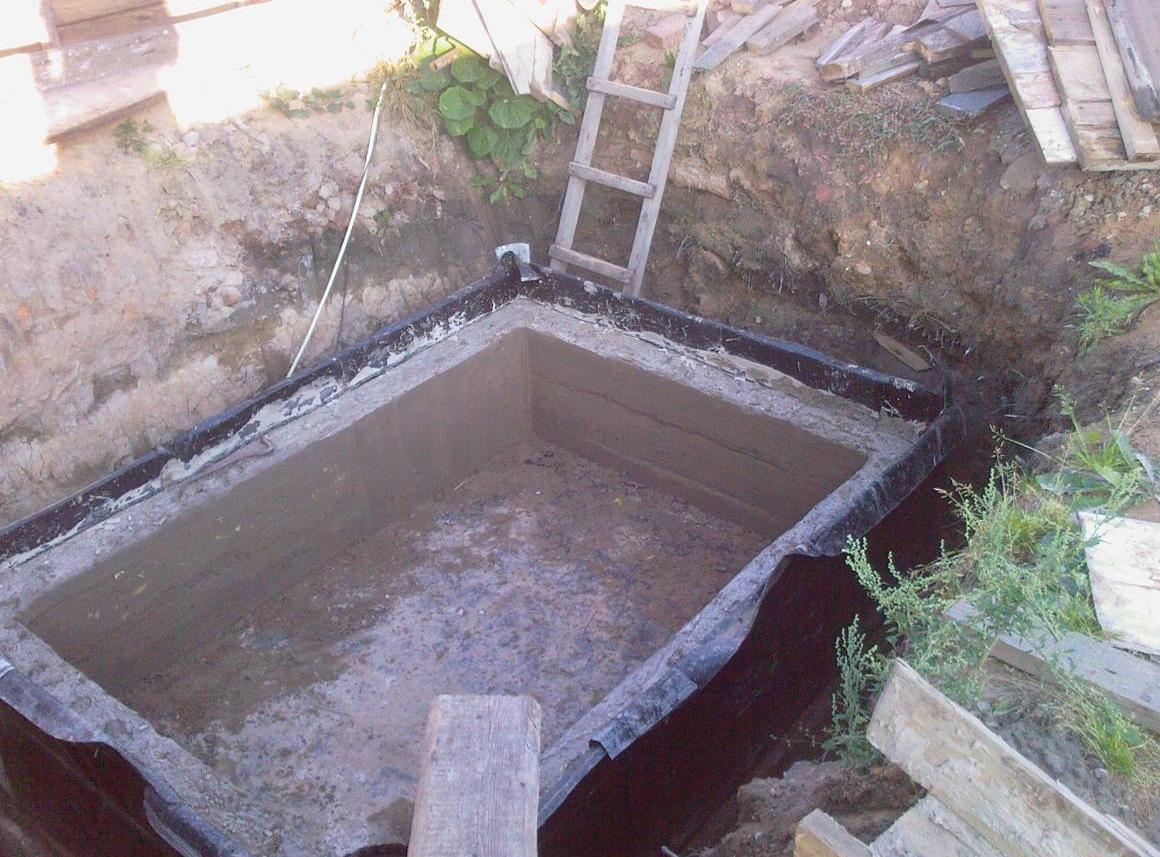
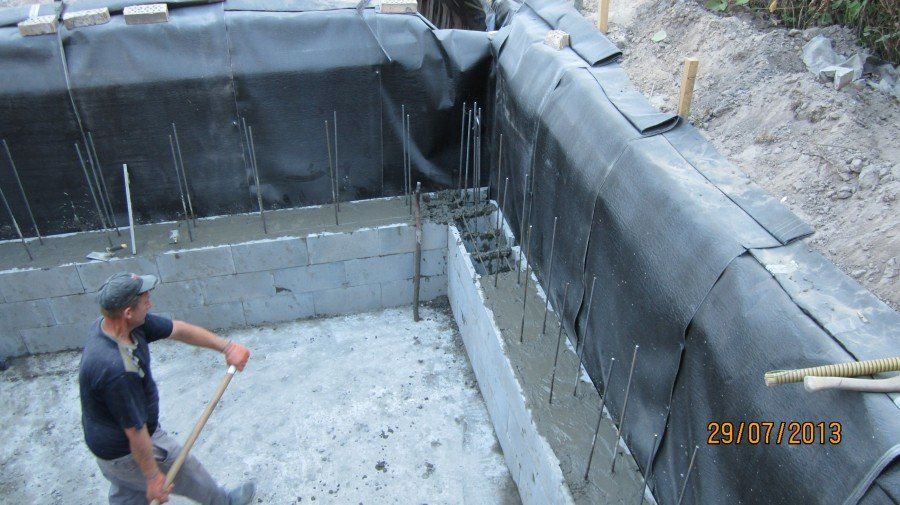
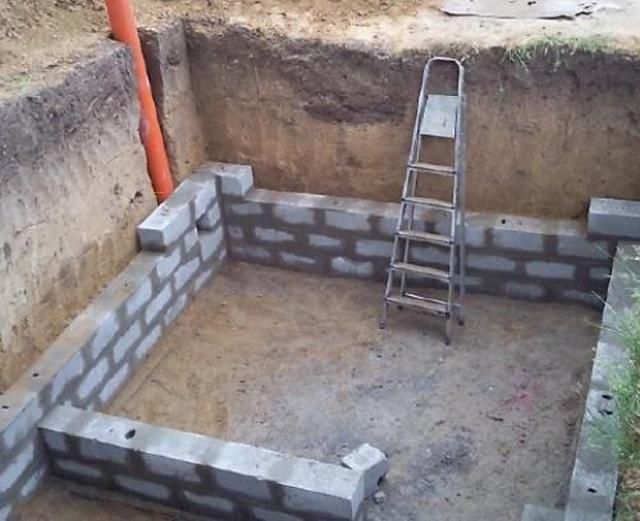
- the thickness of the walls does not exceed one brick, they are laid out by alternating between spoon and butched rows. Immediately before work, the material is moistened, and every fourth row is reinforced with a 4 mm metal wire. Armature put on both sides, retreating to 5 centimeters from the edge. Reinforced corners especially firmly;
- After the wall has been built, it is necessary to carefully plaster the inside and outside. For this purpose, prepare a cement-sand mortar, which dries within a month;
- if the cellar will be used as a vegetable store, it is sufficient to simply tamp the floor or lay it with cobblestones. The slightest irregularities are eliminated with the help of a sand cushion, which is shed and trampled down. To protect against wet soil create a coupler in two layers with roofing material in the middle;
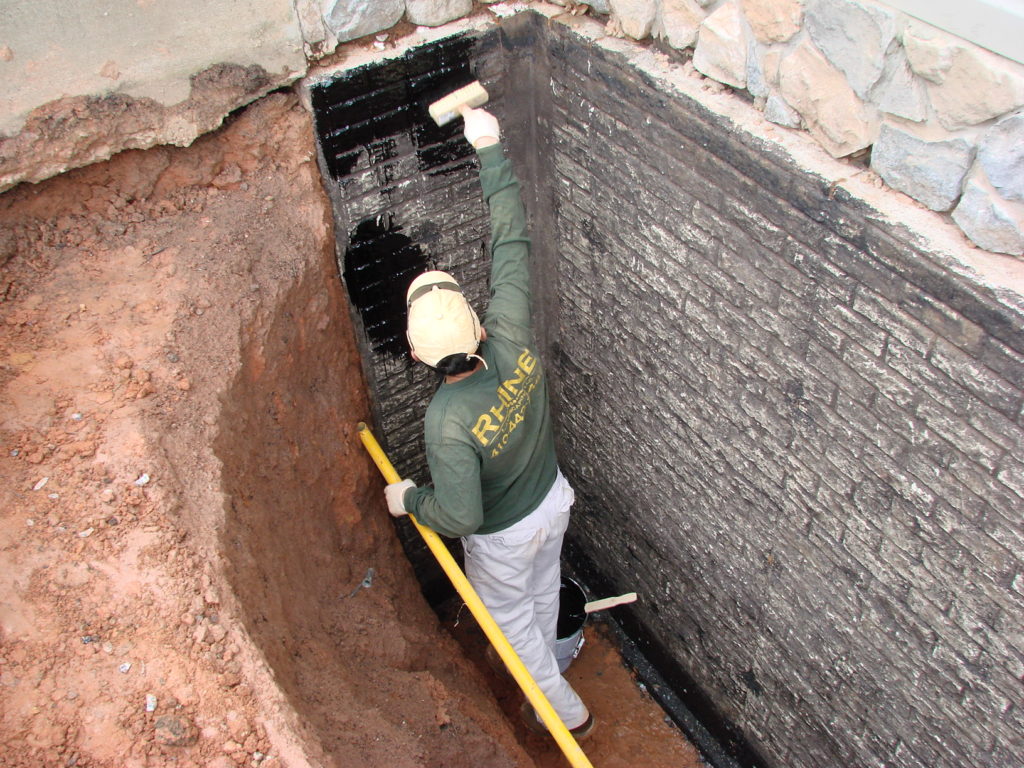
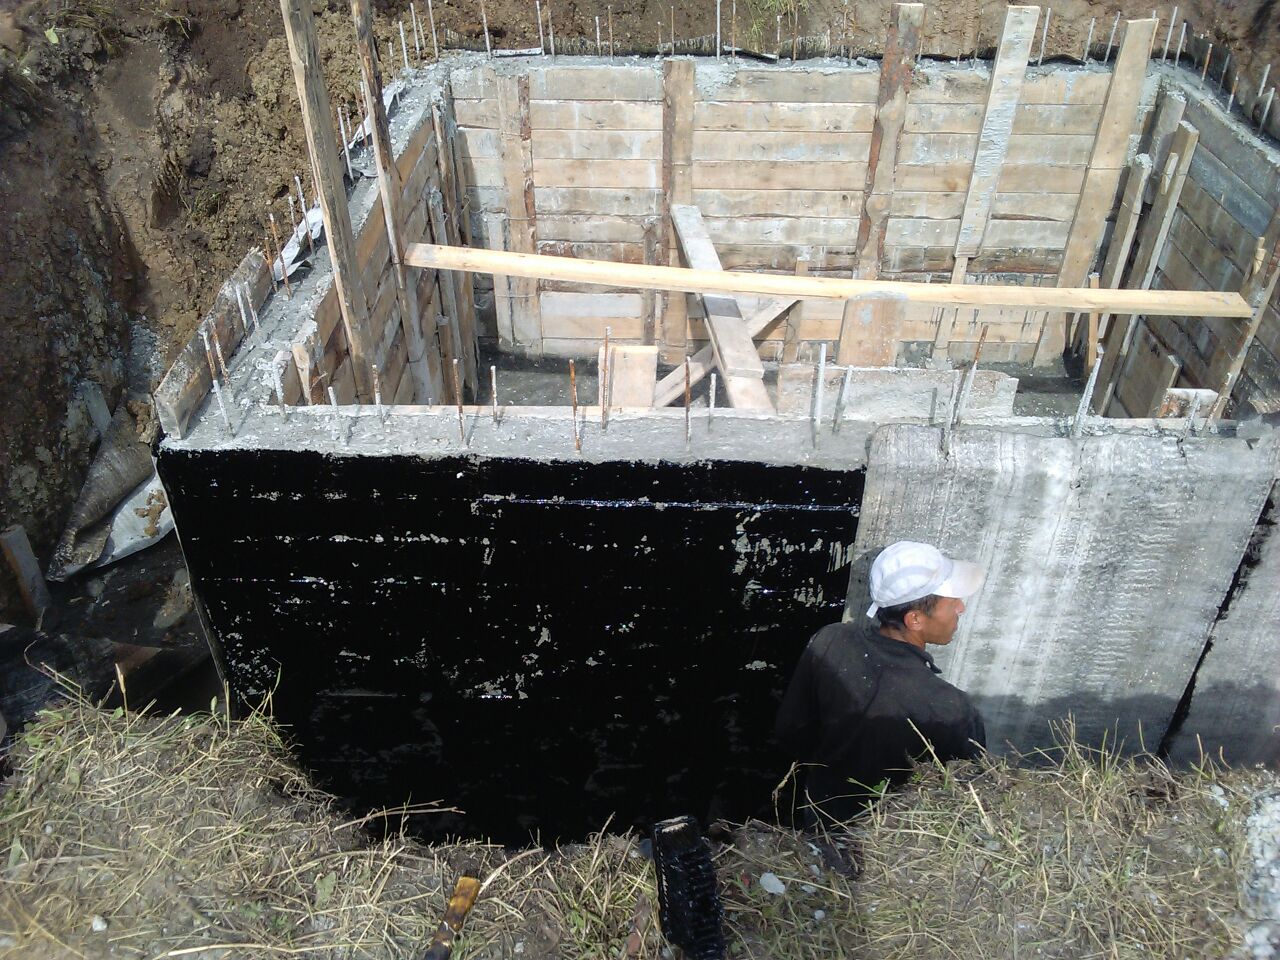
- The waterproofing consists of two layers of bitumen mastic, in 2–3 layers pasted over with tarred roofing material. Horizontal row of ruberoid alternate with vertical, overlaying sheets with the help of molten bitumen. Carefully isolate the joints of the walls and the base, then coat the roofing material with a 10-centimeter layer of greasy clay and cover the foundation pit with earth.
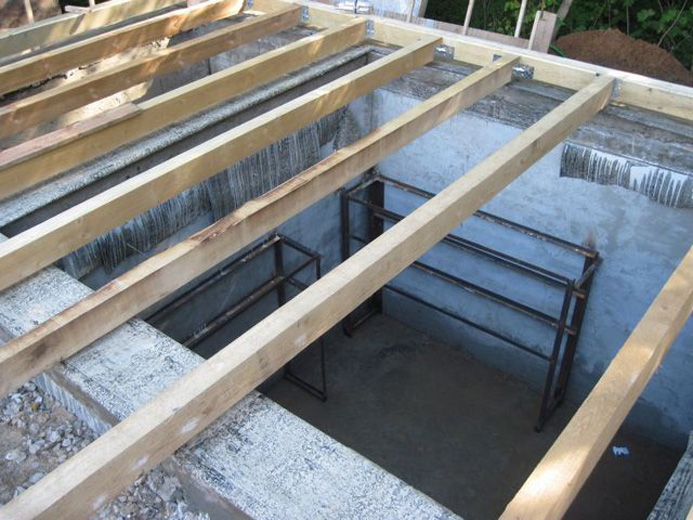
Then they erect walls and build ceilings and a roof from monolithic concrete slabs, timber, logs or thick boards - everything depends on personal abilities. The simplest option is the device shedding a wooden roof.
To create it, you must perform the following steps:
- 2–3 times thick boards are treated with an antiseptic, and parts in contact with the ground are protected with hot bitumen and roofing felt;
- corners are welded along the perimeter of the walls, then the timber or logs are impregnated with antiseptic compounds and laid out close to the walls with a step of 600 centimeters;
- interior finishing is done with asbestos-cement flat slate, plaster and whitewash, and they are pasted over with tiles and other waterproof materials. Two layers of roofing material, bonded with hot bitumen, are laid on the floor, and the length of the approaches to the base is up to 30 centimeters. Then do the roofing felt and lay the tile;
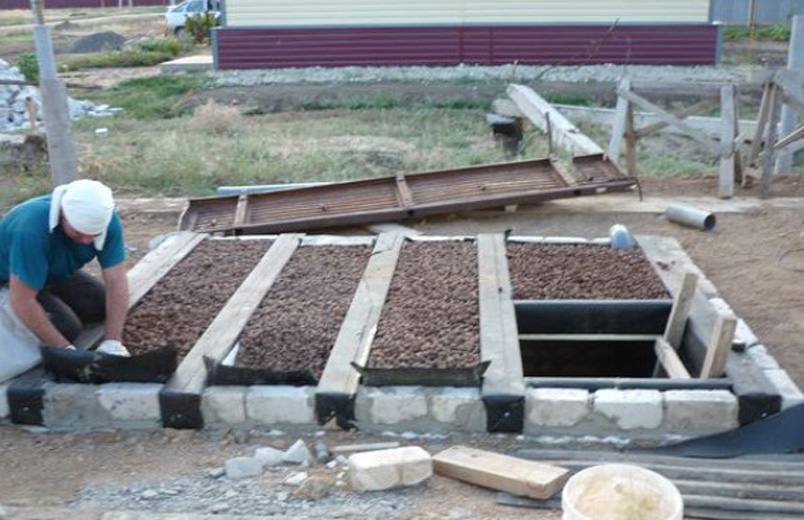
- For the device of overlapping apply the croaker or thick boards, which are laid in two layers. And then make a hole in it the size of a meter per meter;
- the frame of the future entrance is welded from metal corners soto arrange the outer and inner covers for additional thermal insulation. The folding or removable cover must be treated with a heat insulator;
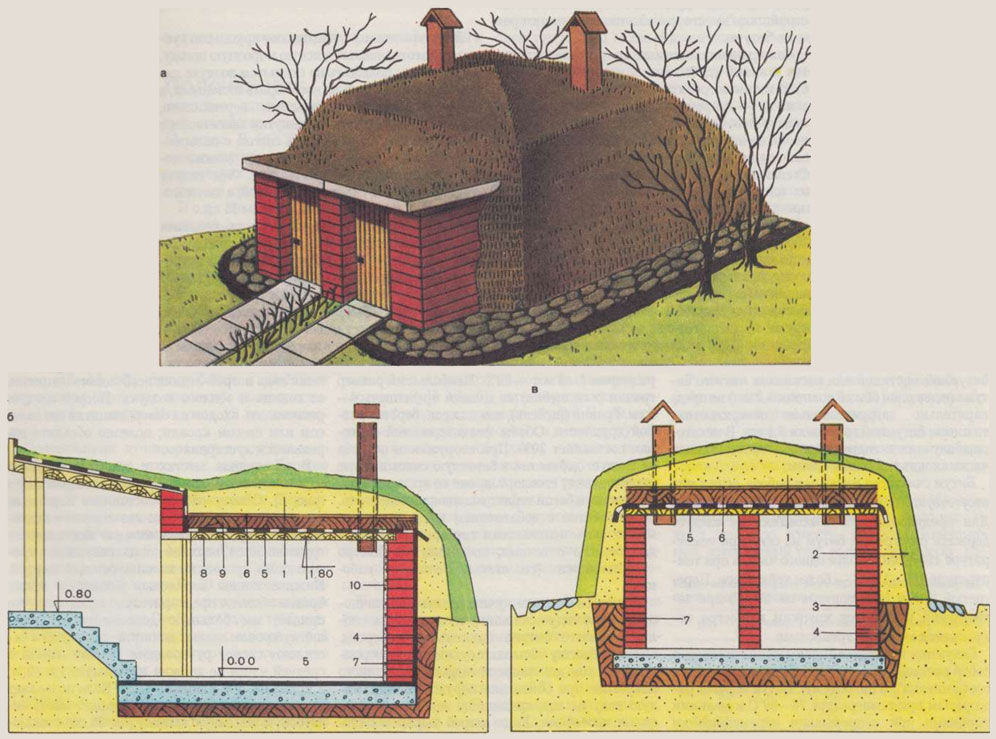
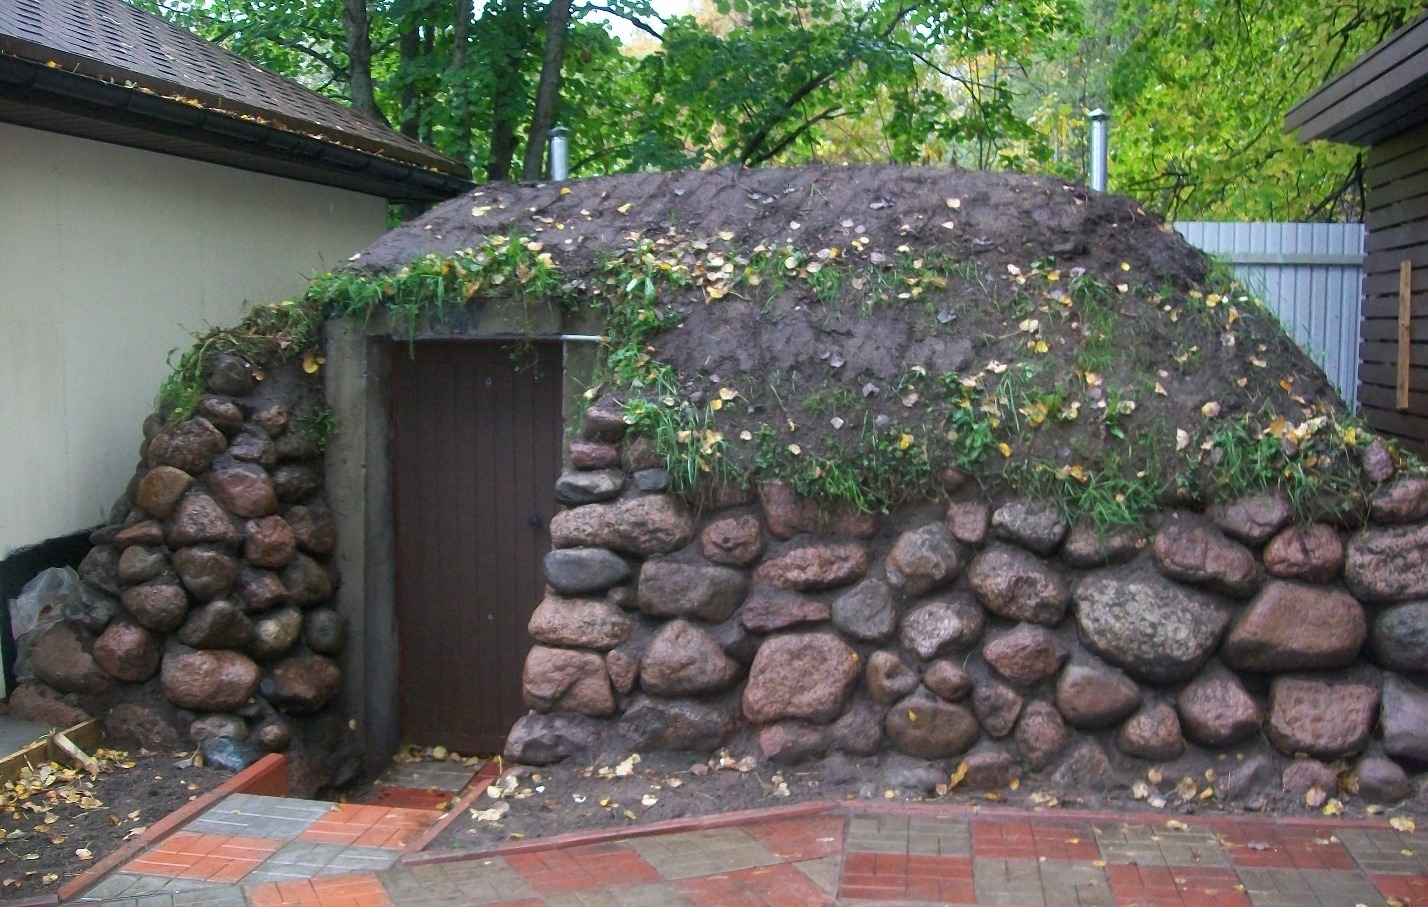
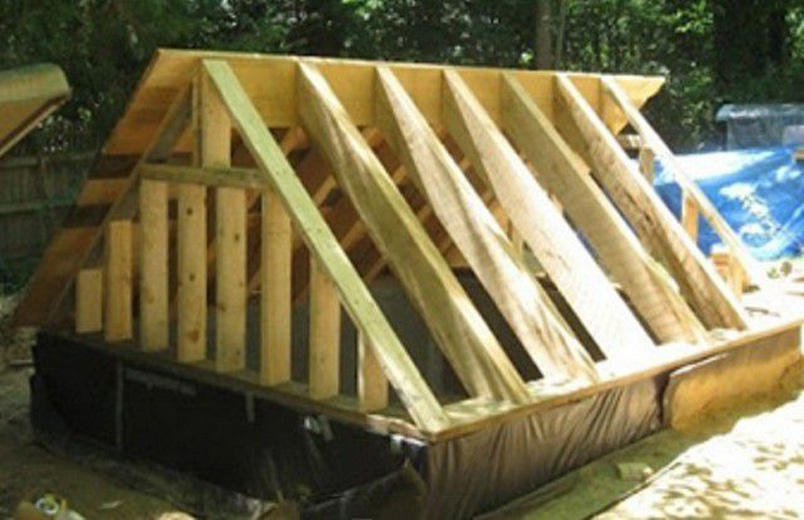
- If you live in the northern regions, where the ground freezes to two meters, you should install a graveyard with a gable or chetyrekhskatny roof that will close the cellar from all sides. The roof is covered with any insulating material like clay, reed or reed or covered with earth. The cellar protects the vegetable storage from precipitation and decorates the site.

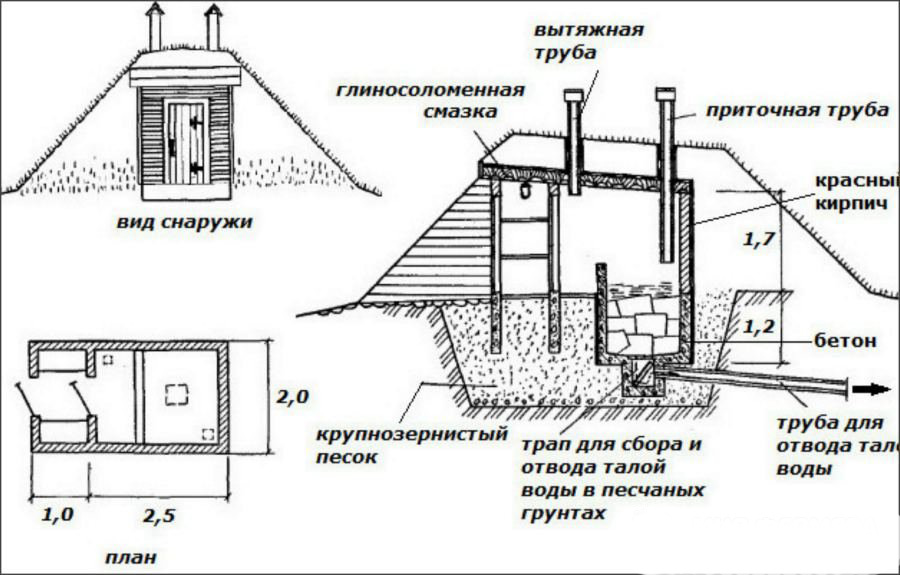
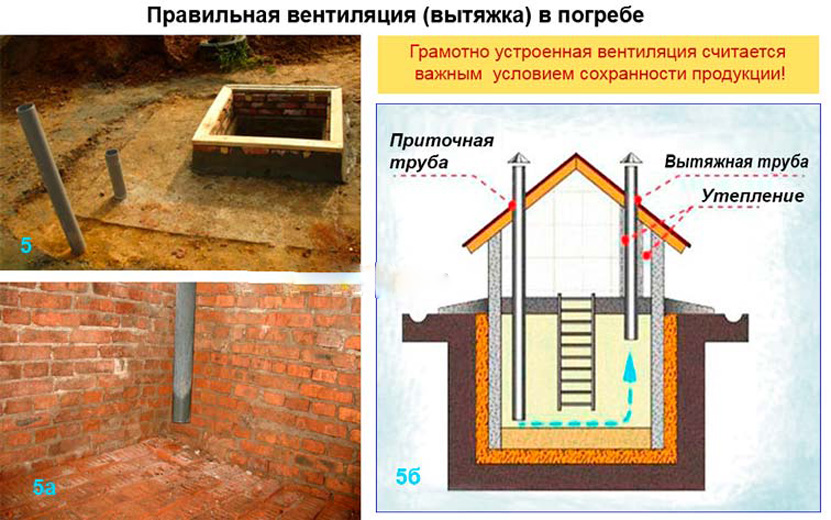
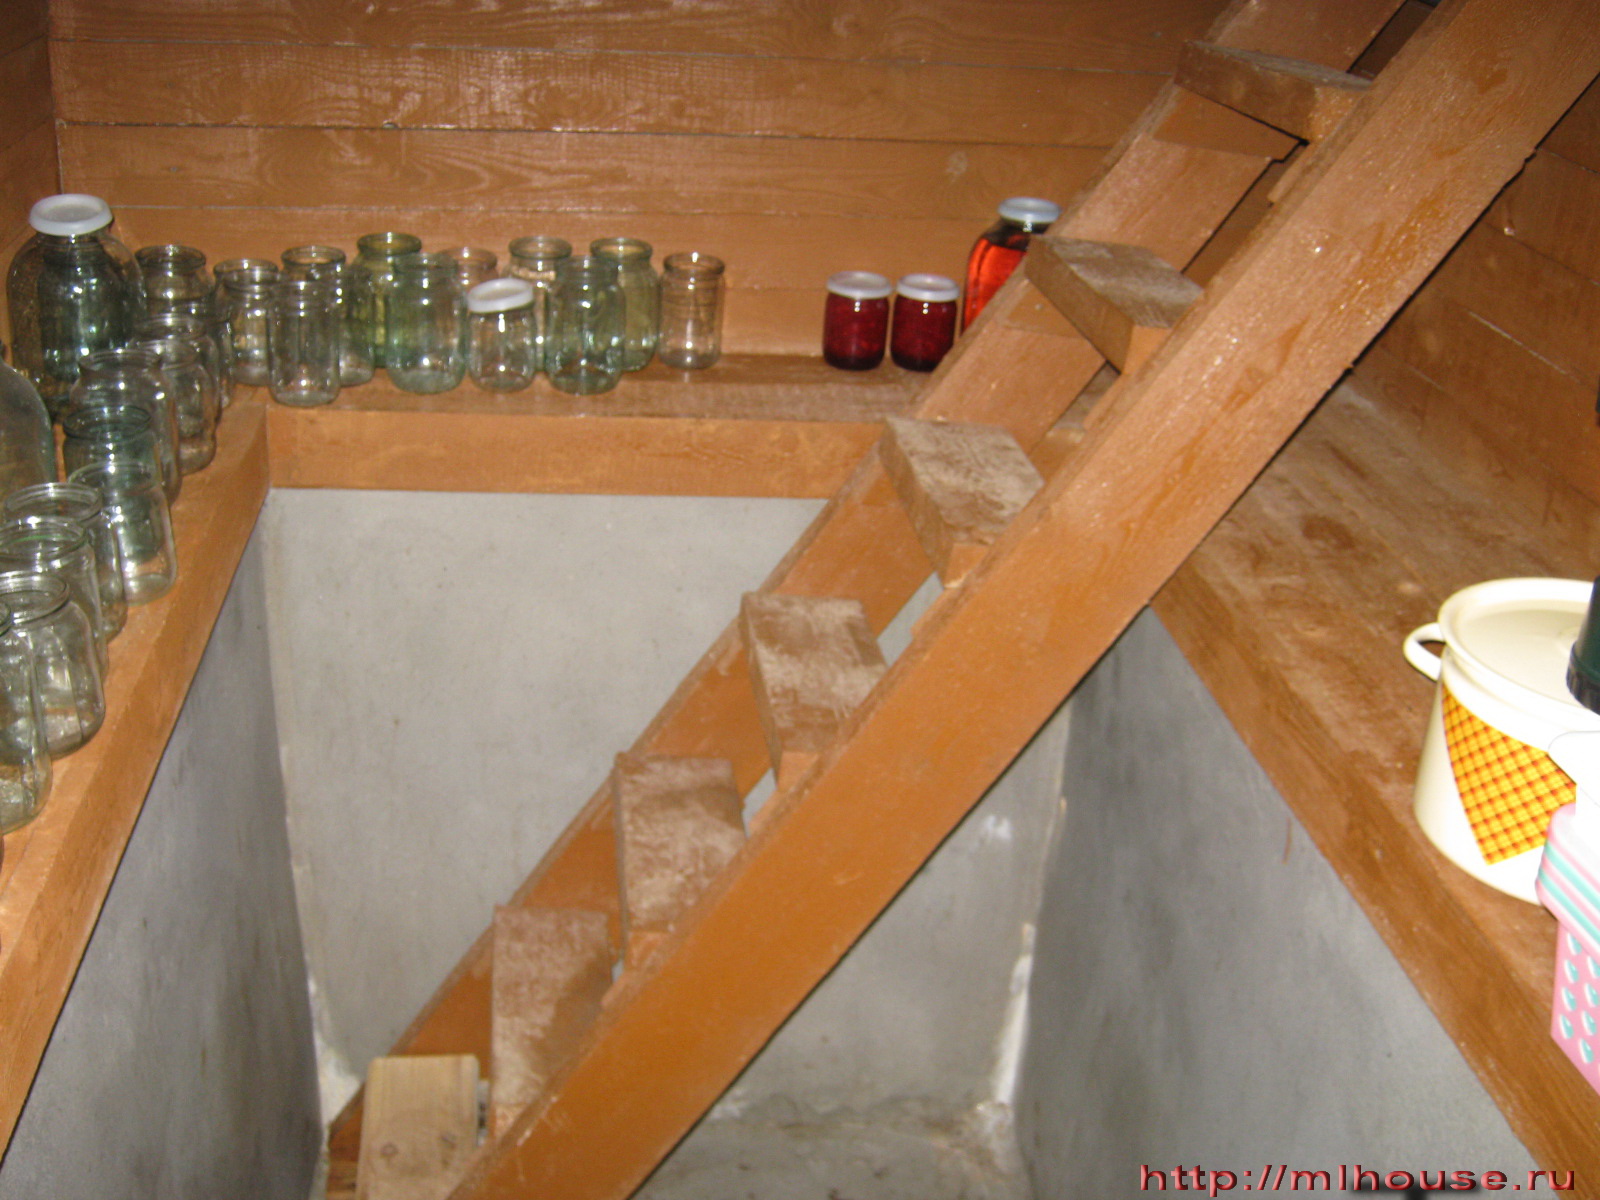
After that, in the cellar you need to put a ladder with gentle steps at an angle of 45 degrees and properly insulate the walls. For insulation used rolled roofing material, stekloizol, polystyrene foam or foam. And also the walls are insulated with a clay-salt layer at least 30 cm thick. The final stage of the work is the ventilation exhaust device, which provides air circulation.
To do this, put two pipes in different corners of the cellar: at the same time, the end of one of them should be 20–50 cm from the floor, and the second one should be placed near the ceiling.

Arrangement of each type of cellar has its own nuances, but mainly they relate to waterproofing works, namely:
- the low level of groundwater allows you to limit the pouring of the concrete floor, plaster and paint the walls. In this case, sheets of roofing material are used for waterproofing;
- if the water level is high, the walls are plastered inside and outside, impose 3-4 layers of roofing material, smeared with bitumen mastic. Then they press it with a brick wall and in addition they coat the brick walls with greasy clay;
- if the site is sandy drained soil, apply two layers of bitumen mastic on the walls, and then a layer of coarse sand;
- additional waterproofing is carried out for buried structures: the underground parts of the walls are treated with a waterproof agent, covered with roofing paper, a layer of rigid insulation is arranged on top of it, followed by another layer of roofing material, and then all are covered with earth;
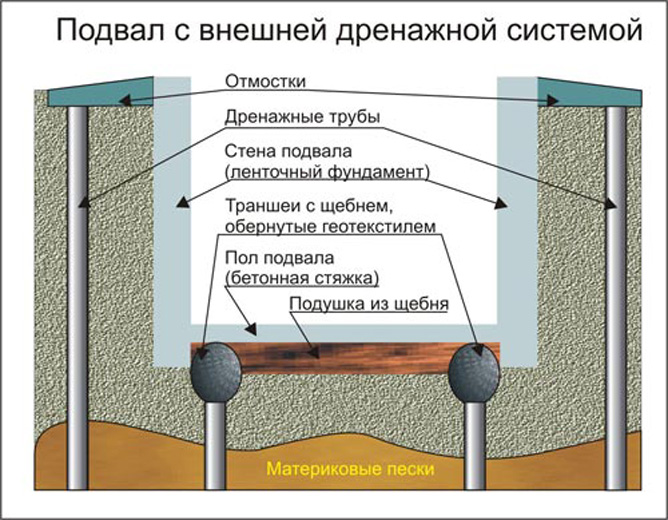
- in order to minimize the risk of flooding, a drainage system is installed in the submerged and semi-submerged cellars. They dig a hole in which water will collect, and carry out pipes around the perimeter of the cellar below the floor level with a slope in its direction. Another option is to dig a drainage ditch, filling it with large gravel.

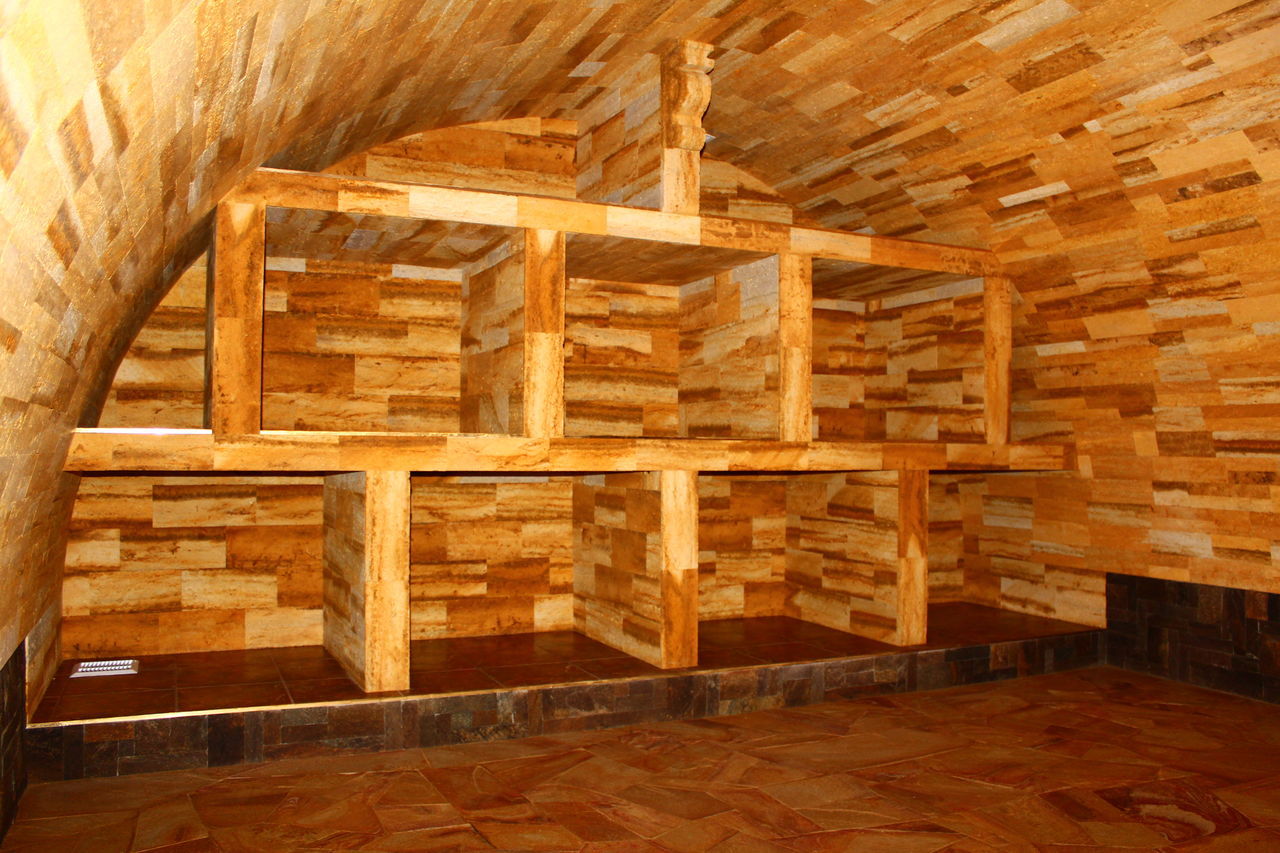
Arrangement
The cellar does not need careful finishing, but in order to be comfortable in the room, it is worth making it with common building materials. This is facing brick, and decorative stone, and tile, and plastic panels. You can even use thin boards or lining, treating them with protective agents.
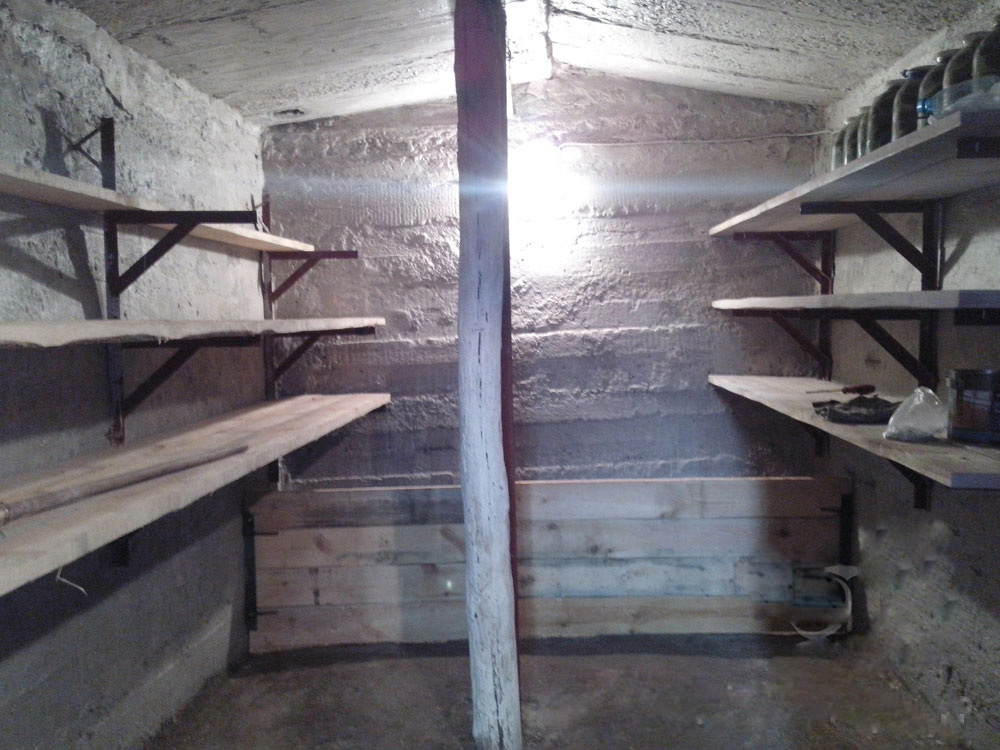
It is necessary to draw up a draft of the internal arrangement of the cellar and designate the location of the shelves. It should indicate on the plan that they will be stored.

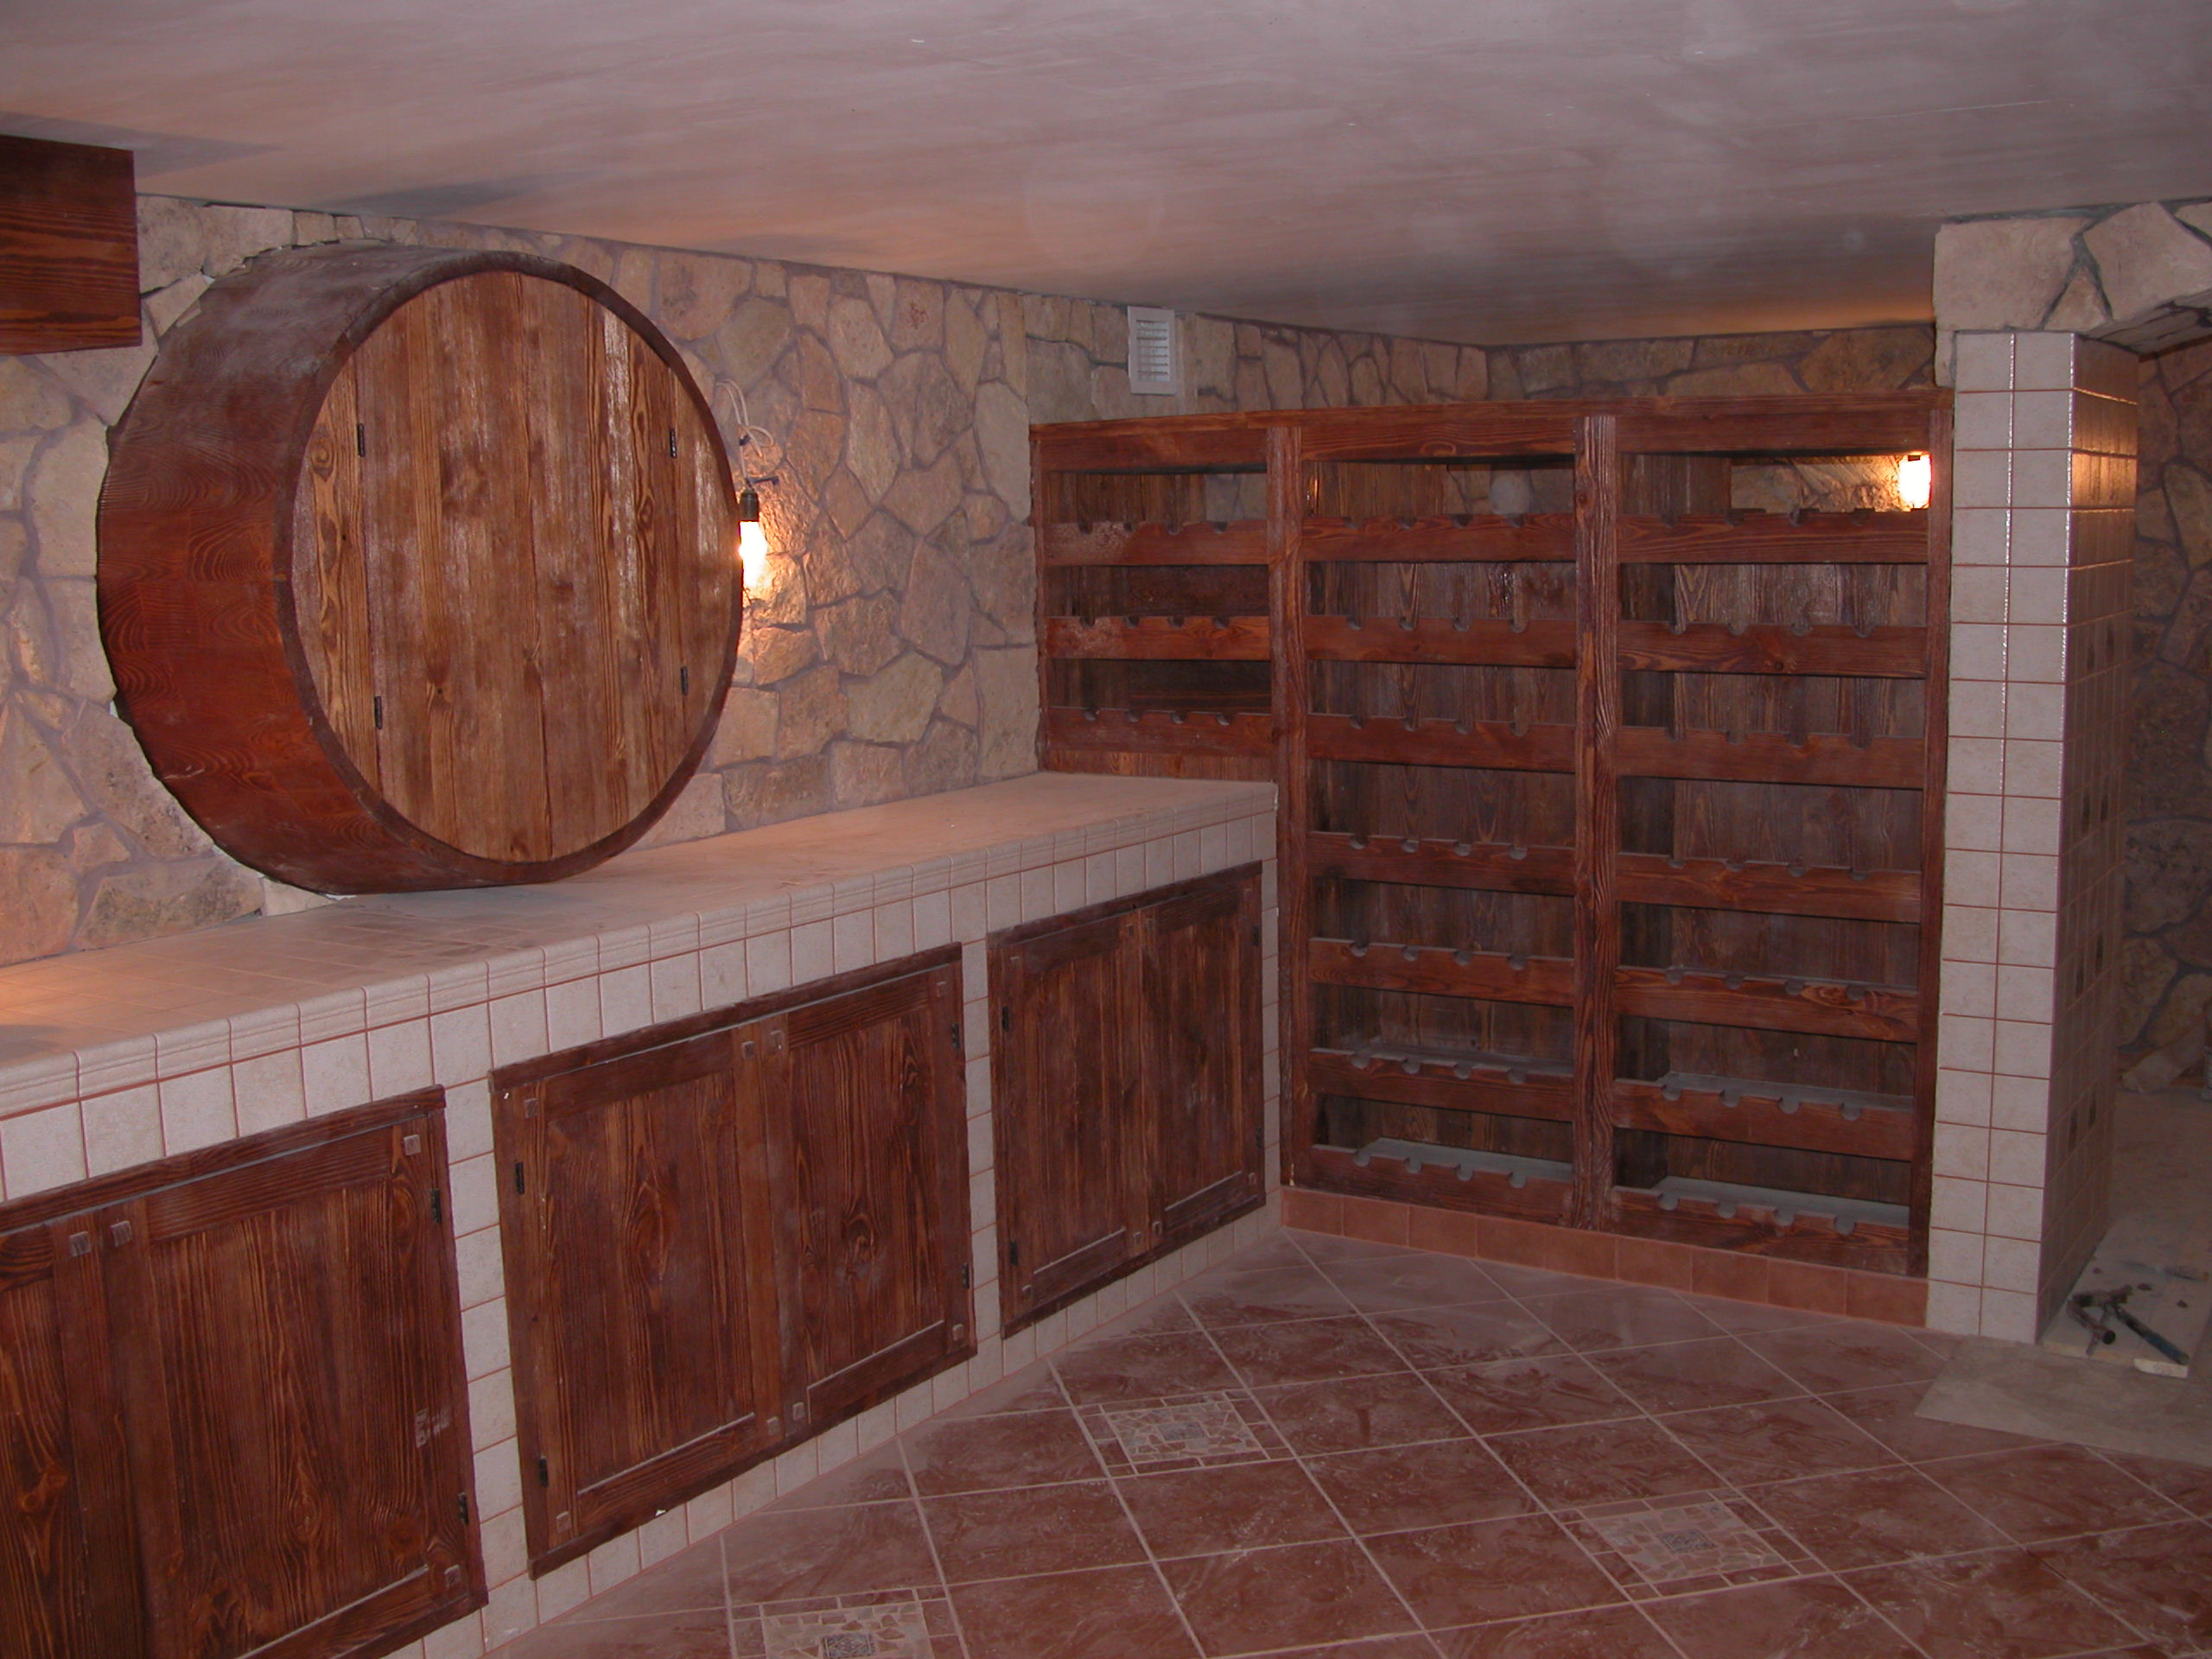
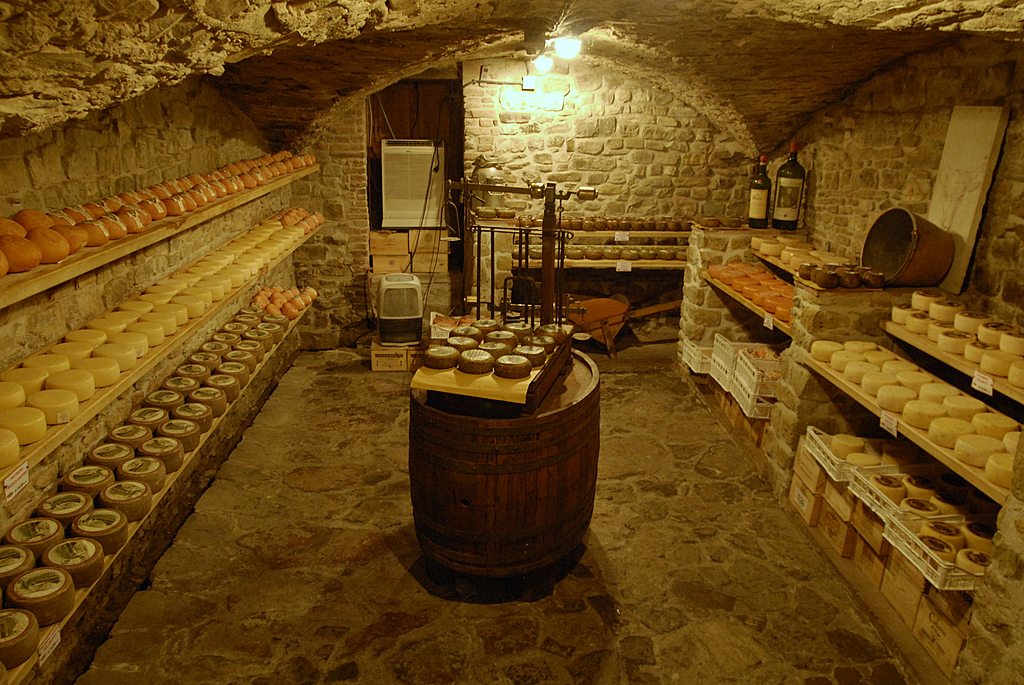
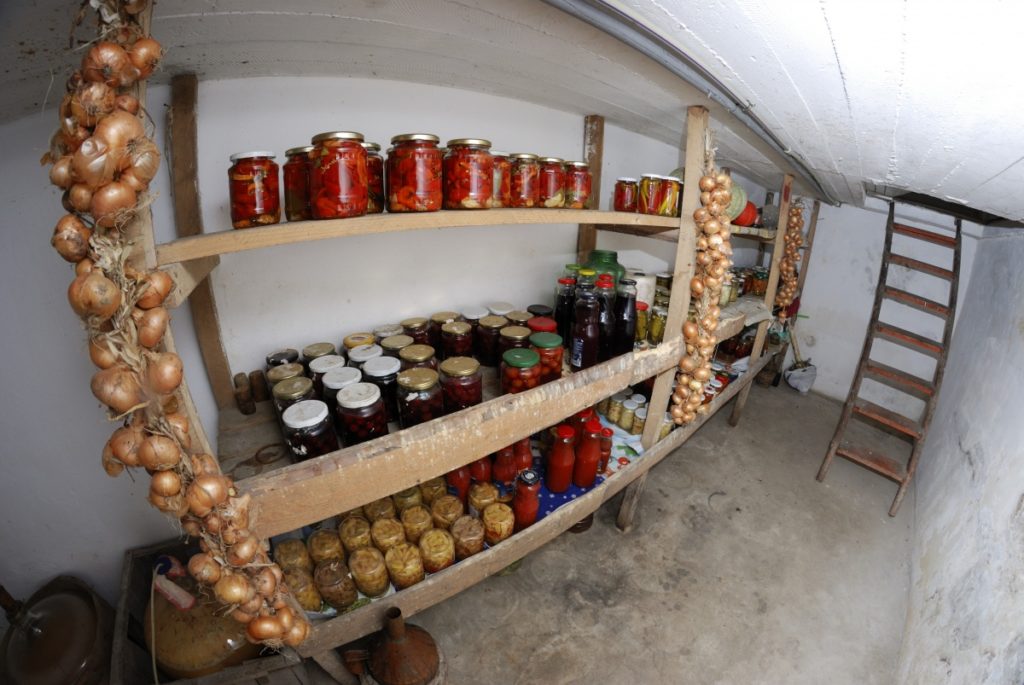
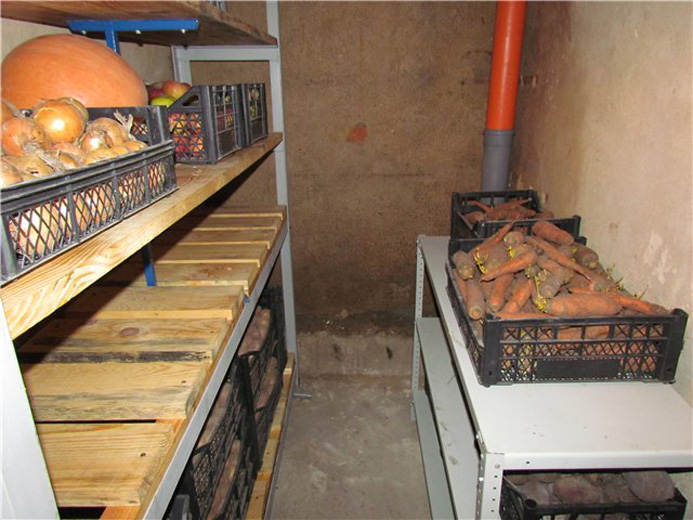
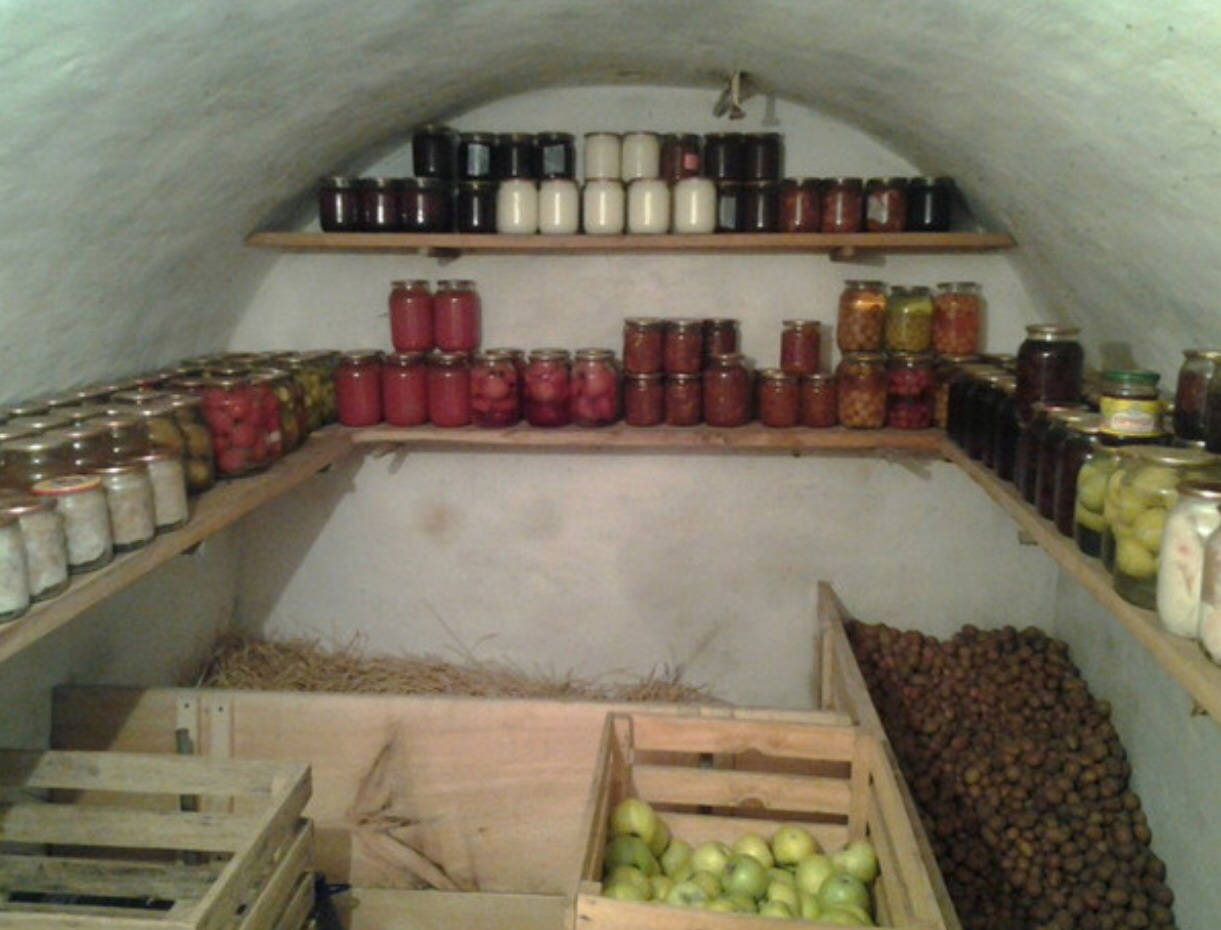
According to experts, the rack with shelves is conveniently located on the right side of the entrance, and on the left - boxes of vegetables. For convenience, the cellar is made multisection, dividing it into an area for potatoes, a compartment for fruits, a department for vegetables. Yes, and pickles, jam, too, are placed so that it is convenient to get to them. To this end, the cellar is equipped with shelves and shelves, which have supplies.
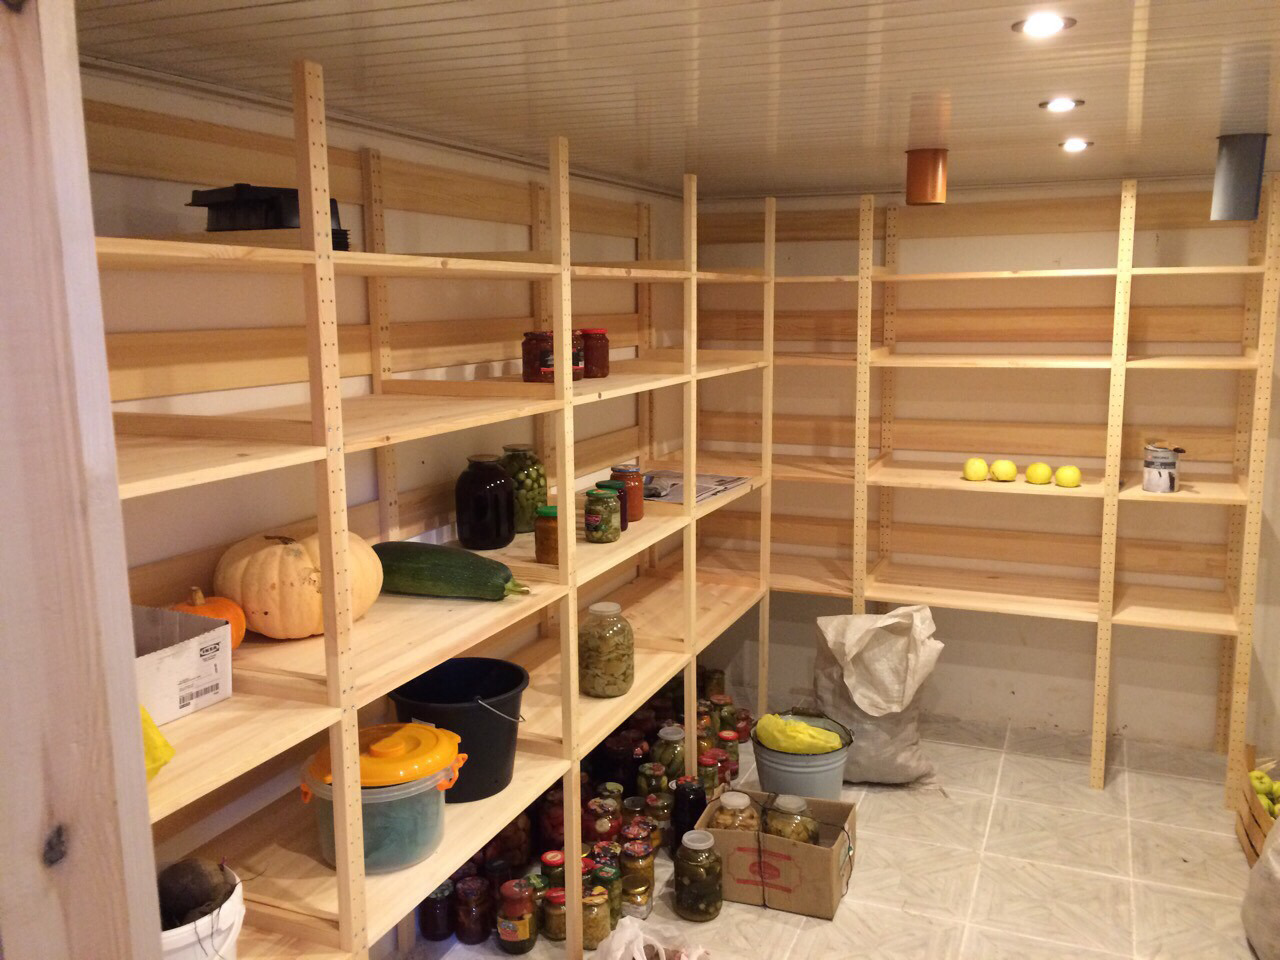
For their arrangement should take into account such nuances as:
- the installation of shelving is performed as separate small sections, and the entire length of the wall of the cellar;
- two-meter width of the cellar allows you to place racks on both sides, leaving a small passage 900 mm wide in the middle;
- it will be easier to get to the shelves located near the wall if their width is 500–600 mm;
- so that the shelves do not bend under the weight of the boxes and cans, their length should not exceed 700 mm;
- the height of the rack corresponds to the height of the cellar, but, as a rule, it does not exceed two meters;
- a single full-wall rack, as a rule, does not disassemble. But the racks, consisting of compact sections, dismantled and dried in the sun.
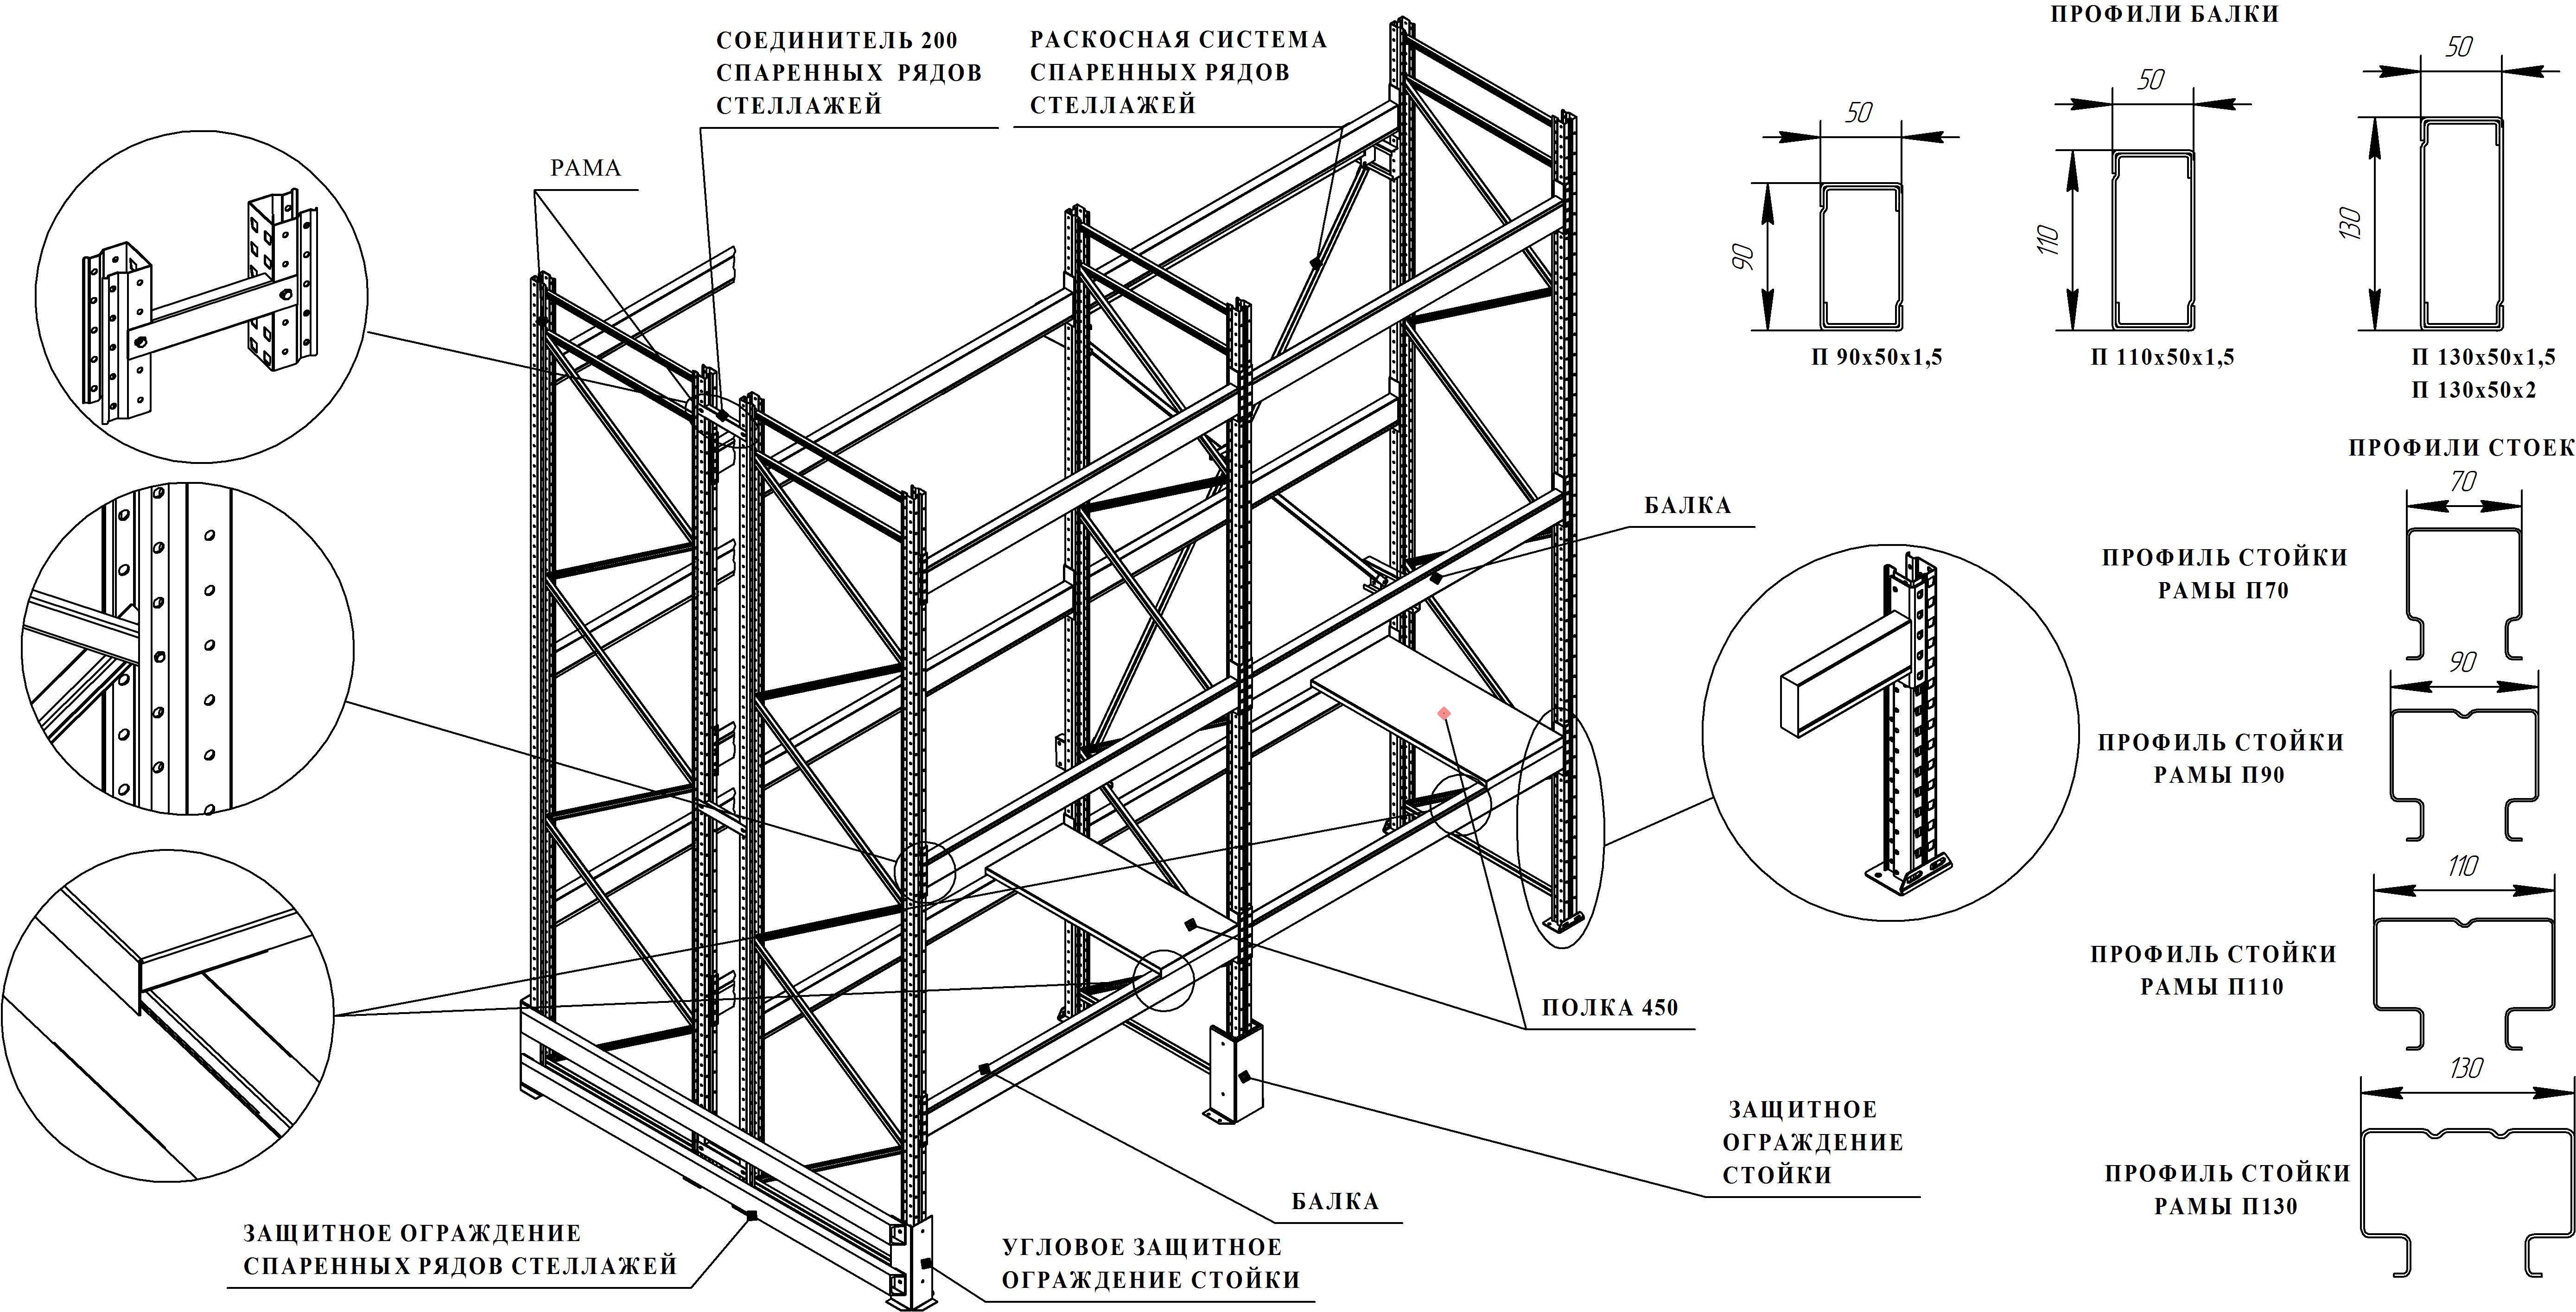
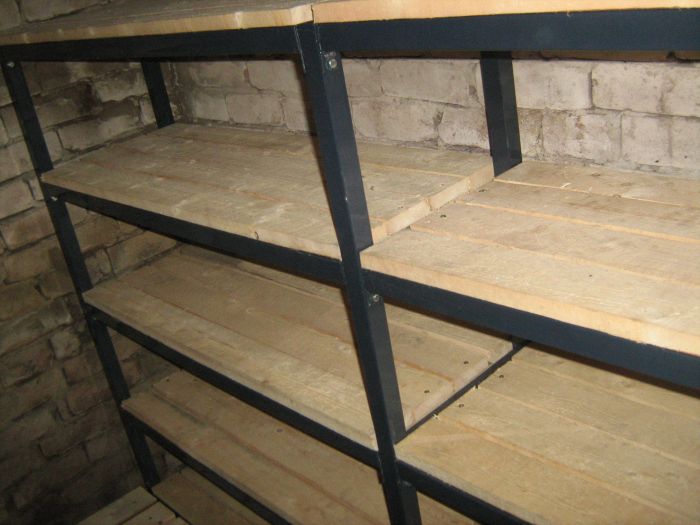
Shelves and shelves are made from planks or wooden beams, concrete and steel corners. Sheet plastic is used very rarely, as this economical material is not durable and durable. It should be more familiar with the features of creating a rack of different materials. It should start with wood, as the most popular building material.
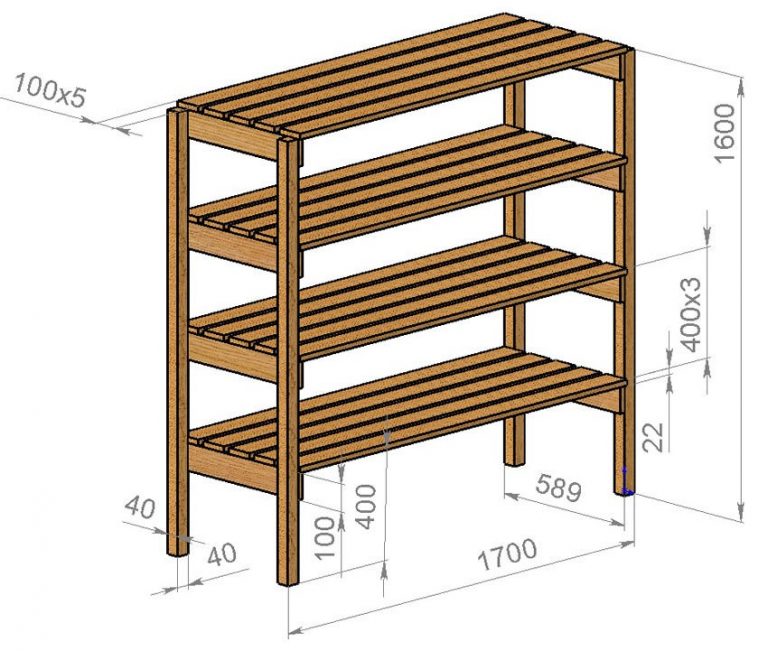
To create a wooden rack, you must perform the following steps:
- the rack is made of timber section 100x100 millimeters;
- the timber is cut to the size of the drawing, and the last one involves the creation of transverse frames. To do this, take a pair of racks and cut them to the desired height, and then mark up space for shelves;
- horizontal longitudinal and transverse connections are made with the help of a board of 3-4 centimeters thick;
- longitudinal links are mounted in bars from the same board.Their width is 8-10 centimeters. The length of the bars corresponds to the length of the entire rack or one section;
- cross-links provide bars equal in thickness and not interrupting the length of the depth of the structure;
- on the racks perform marking, sawing nests, taking into account the thickness of the connecting bars, and then proceed to the assembly of the rack.
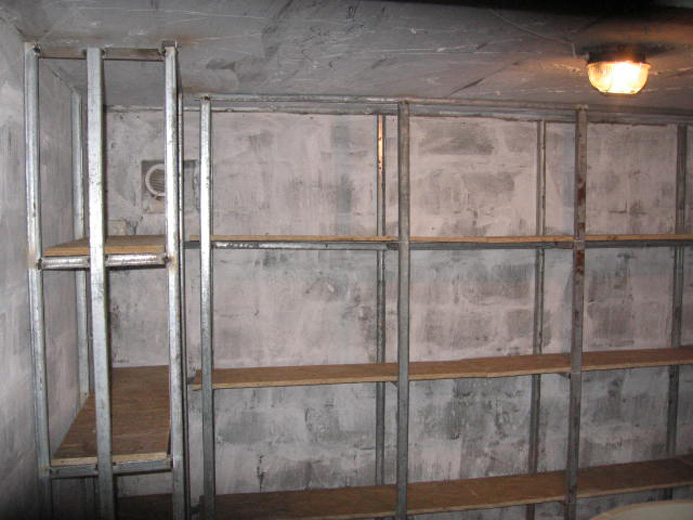
The rack from a metal corner is established by means of welding.
You can mount it with a corner of five-centimeter width as follows:
- procure racks and cross bars. Racks design or to the ceiling, or to the level of the upper shelves;
- make markings for mounting transverse corners and weld them. If there are multiple racks, the level of the corners should be the same on all shelves;
- weld cross bars. The result is a frame on which asbestos cement sheets or boards are laid;
- the frames are installed directly in the cellar either at a distance from the walls, or with a tight fit to them. For this, longitudinal angles or pieces of reinforcement are welded to the posts;
- steel frames can be fixed with wooden bars 8x2 centimeters.For such fasteners, a hole is drilled in the transverse corners, and the welding is replaced with a bolt fastener;
- when all parts of the rack will be ready, it remains only to go down to the cellar to mount them;
- at the end of the assembly, it is necessary to paint or varnish the rack in order to protect the metal from corrosion.
Concrete racks require careful design, since after construction it is not possible to move or disassemble such a structure.
It is important not only to make the dimensions and create a drawing, but also strictly observe the following sequence of works:
- a separate foundation should be equipped for the rack, otherwise over time it can sink into the ground and collapse;
- it is necessary to fix the reinforcement on the wall at a distance of 400–500 mm - this is the future support for the shelves of the structure. To increase its margin of safety, it is worth using paint or anti-corrosion agent;
- should form shelves. To do this, to the sheets of plywood nail boards to get the board. At the bottom of the container lay a reinforcing mesh and pour the cement solution. With good weather, freezing will occur quickly and in 2–3 days the concrete shelves will be ready;
- It is necessary to install the finished shelves on the armature.
To extend the life of the shelving and shelves installed will help the following simple recommendations:
- it is necessary to provide natural ventilation of the cellar that maintains a normal level of air humidity;
- Every year, in spring or summer, it is necessary to put the shelves outside and dry them in the sun to get moisture out of them;
- It is regularly worth checking the condition of the shelves and removing rotten products from them;
- if there is high humidity in the cellar, each year you need to coat the walls with slaked lime;
- sooner or later, the steel shelves in the cellar will be covered with rust, but the oilcloth or adhesive tape on them will protect the appearance of rust spots on the banks, which are so difficult to clean;
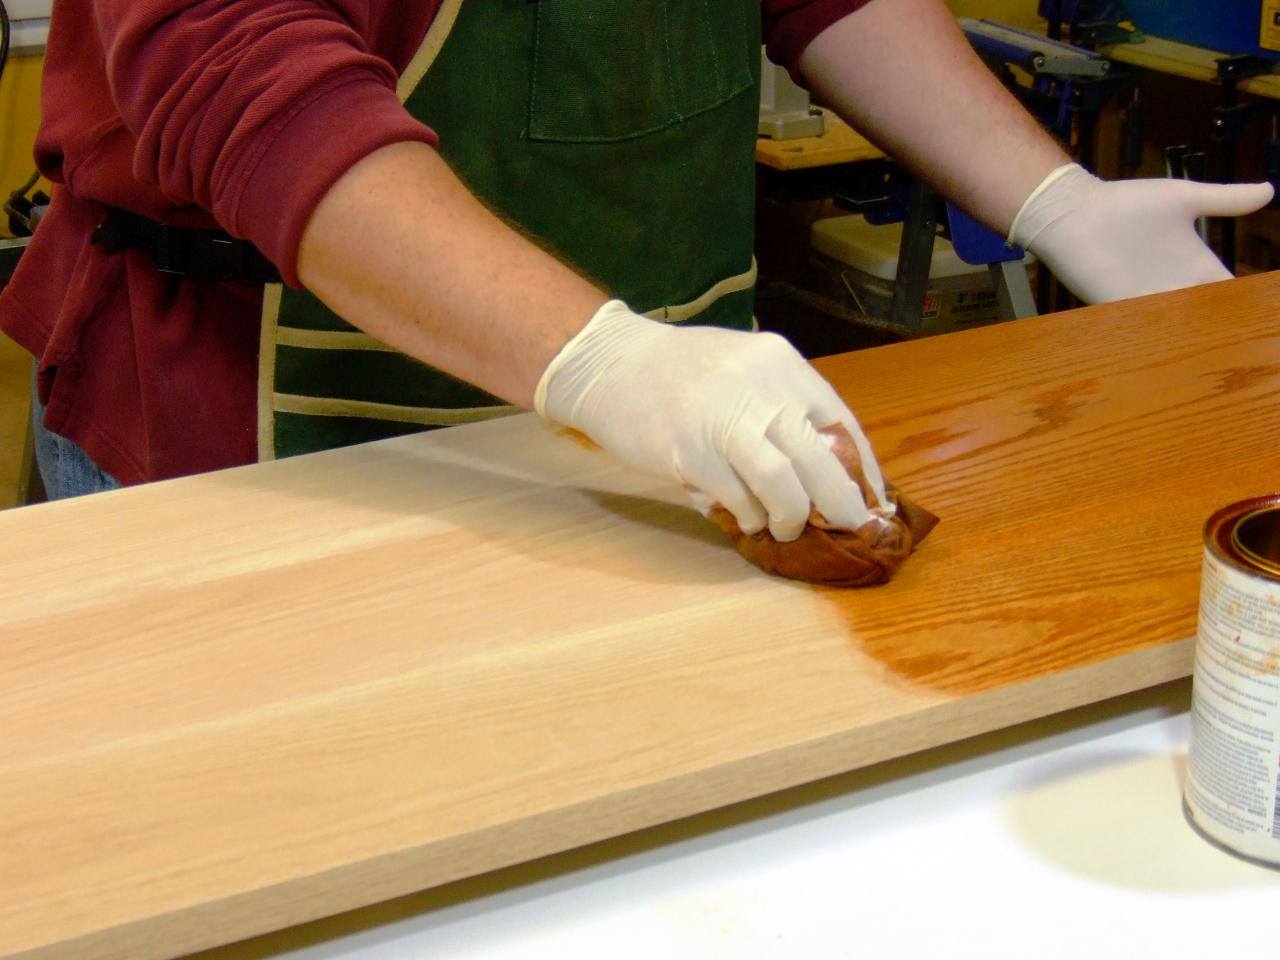
- Before installing wooden shelves and racks, it is recommended to soak them with linseed oil or any other protective agent. When choosing special equipment, it is necessary to check that they are intended for residential premises (information about this is written on the package). It is necessary that the chemistry does not affect the taste and smell of supplies.

Tips
With all the abundance of materials, experts recommend viewing all sorts of ideas about the arrangement of the cellar and choose the appropriate option.
- In order not to get involved in a labor-intensive construction, it is worth buying a cellar-capsule in the form of a ball with an attached ladder. To install it, dig a hole, place a capsule in it and fill it with earth, leaving only the door on the surface.
- The finished vegetable storehouse of seamless plastic is equipped with a steel ladder, built-in lighting, as well as exhaust and forced ventilation. To install the cellar, they dig out a pit, place a plastic case there and cover it with earth, and leave only a hatch on the surface.
- For the installation of an airtight barrel cellar made of high-quality fiberglass, any type of soil will be suitable. This design will last for about 50 years, maintaining a constant indoor temperature. It is an ideal option for storing food.
- If most of the life takes place in the city, it is worthwhile to arrange a cellar on a loggia or balcony. You should take a tight-fitting wooden box and lay it out from the inside with any thermal insulation material. Especially good for this purpose suitable foam or mineral wool. The temperature regime in the cellar is maintained by means of an incandescent bulb, which is switched on through a relay or contact thermometer.

How to build a cellar with your own hands, see the video below.


