Features of a warm floor in the screed

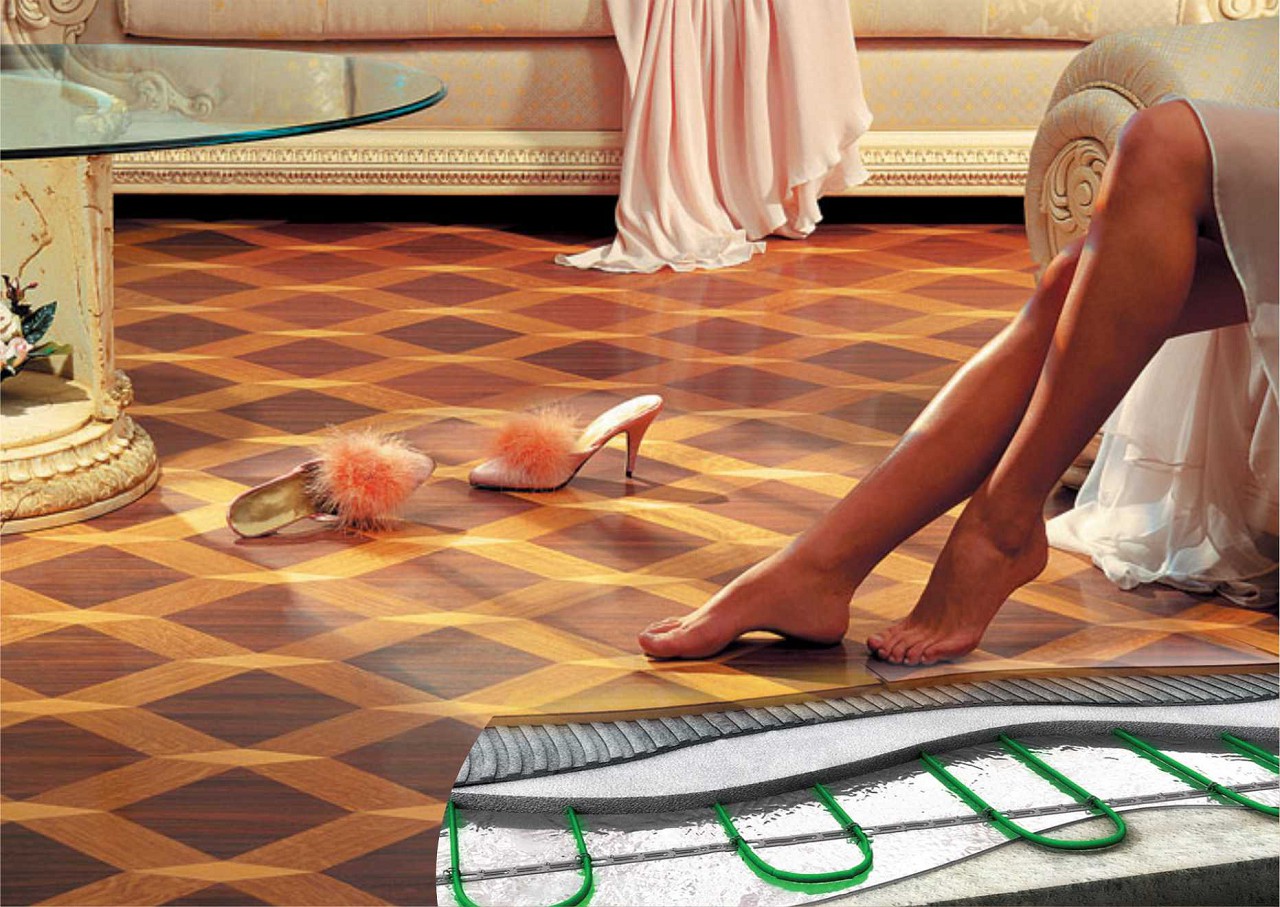
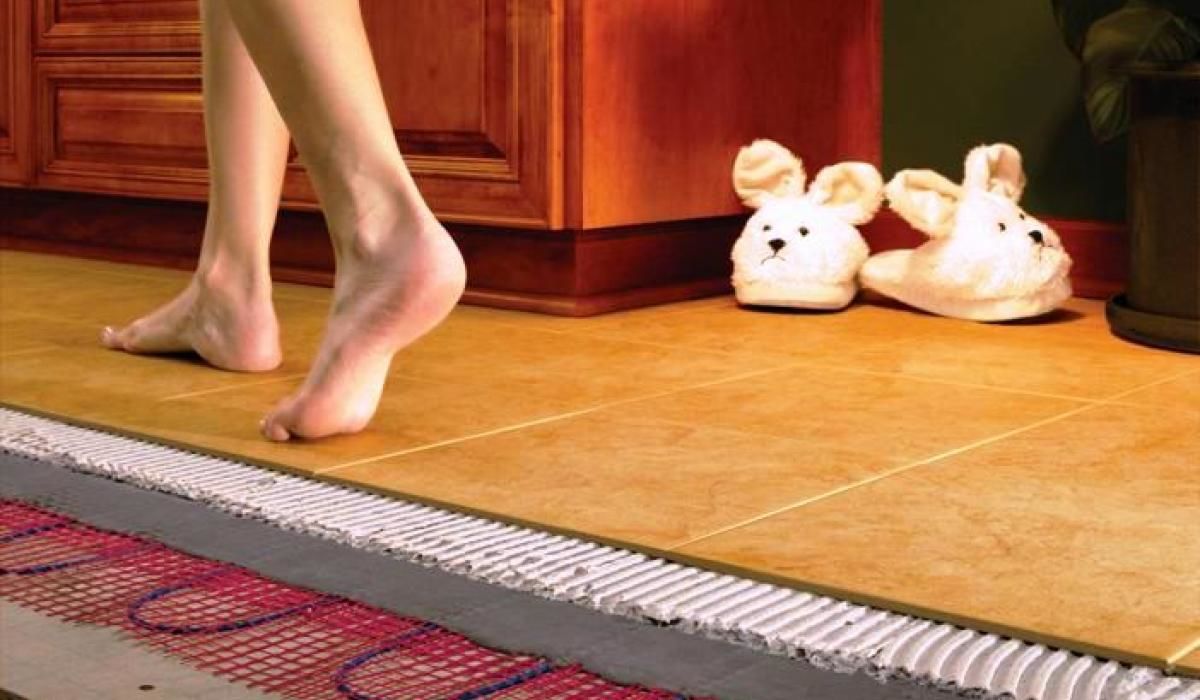
Underfloor heating is a popular system of basic and alternative heating of premises. The design promotes uniform distribution of heat, retains the natural humidity of the air and does not clutter up the space.
Features and device
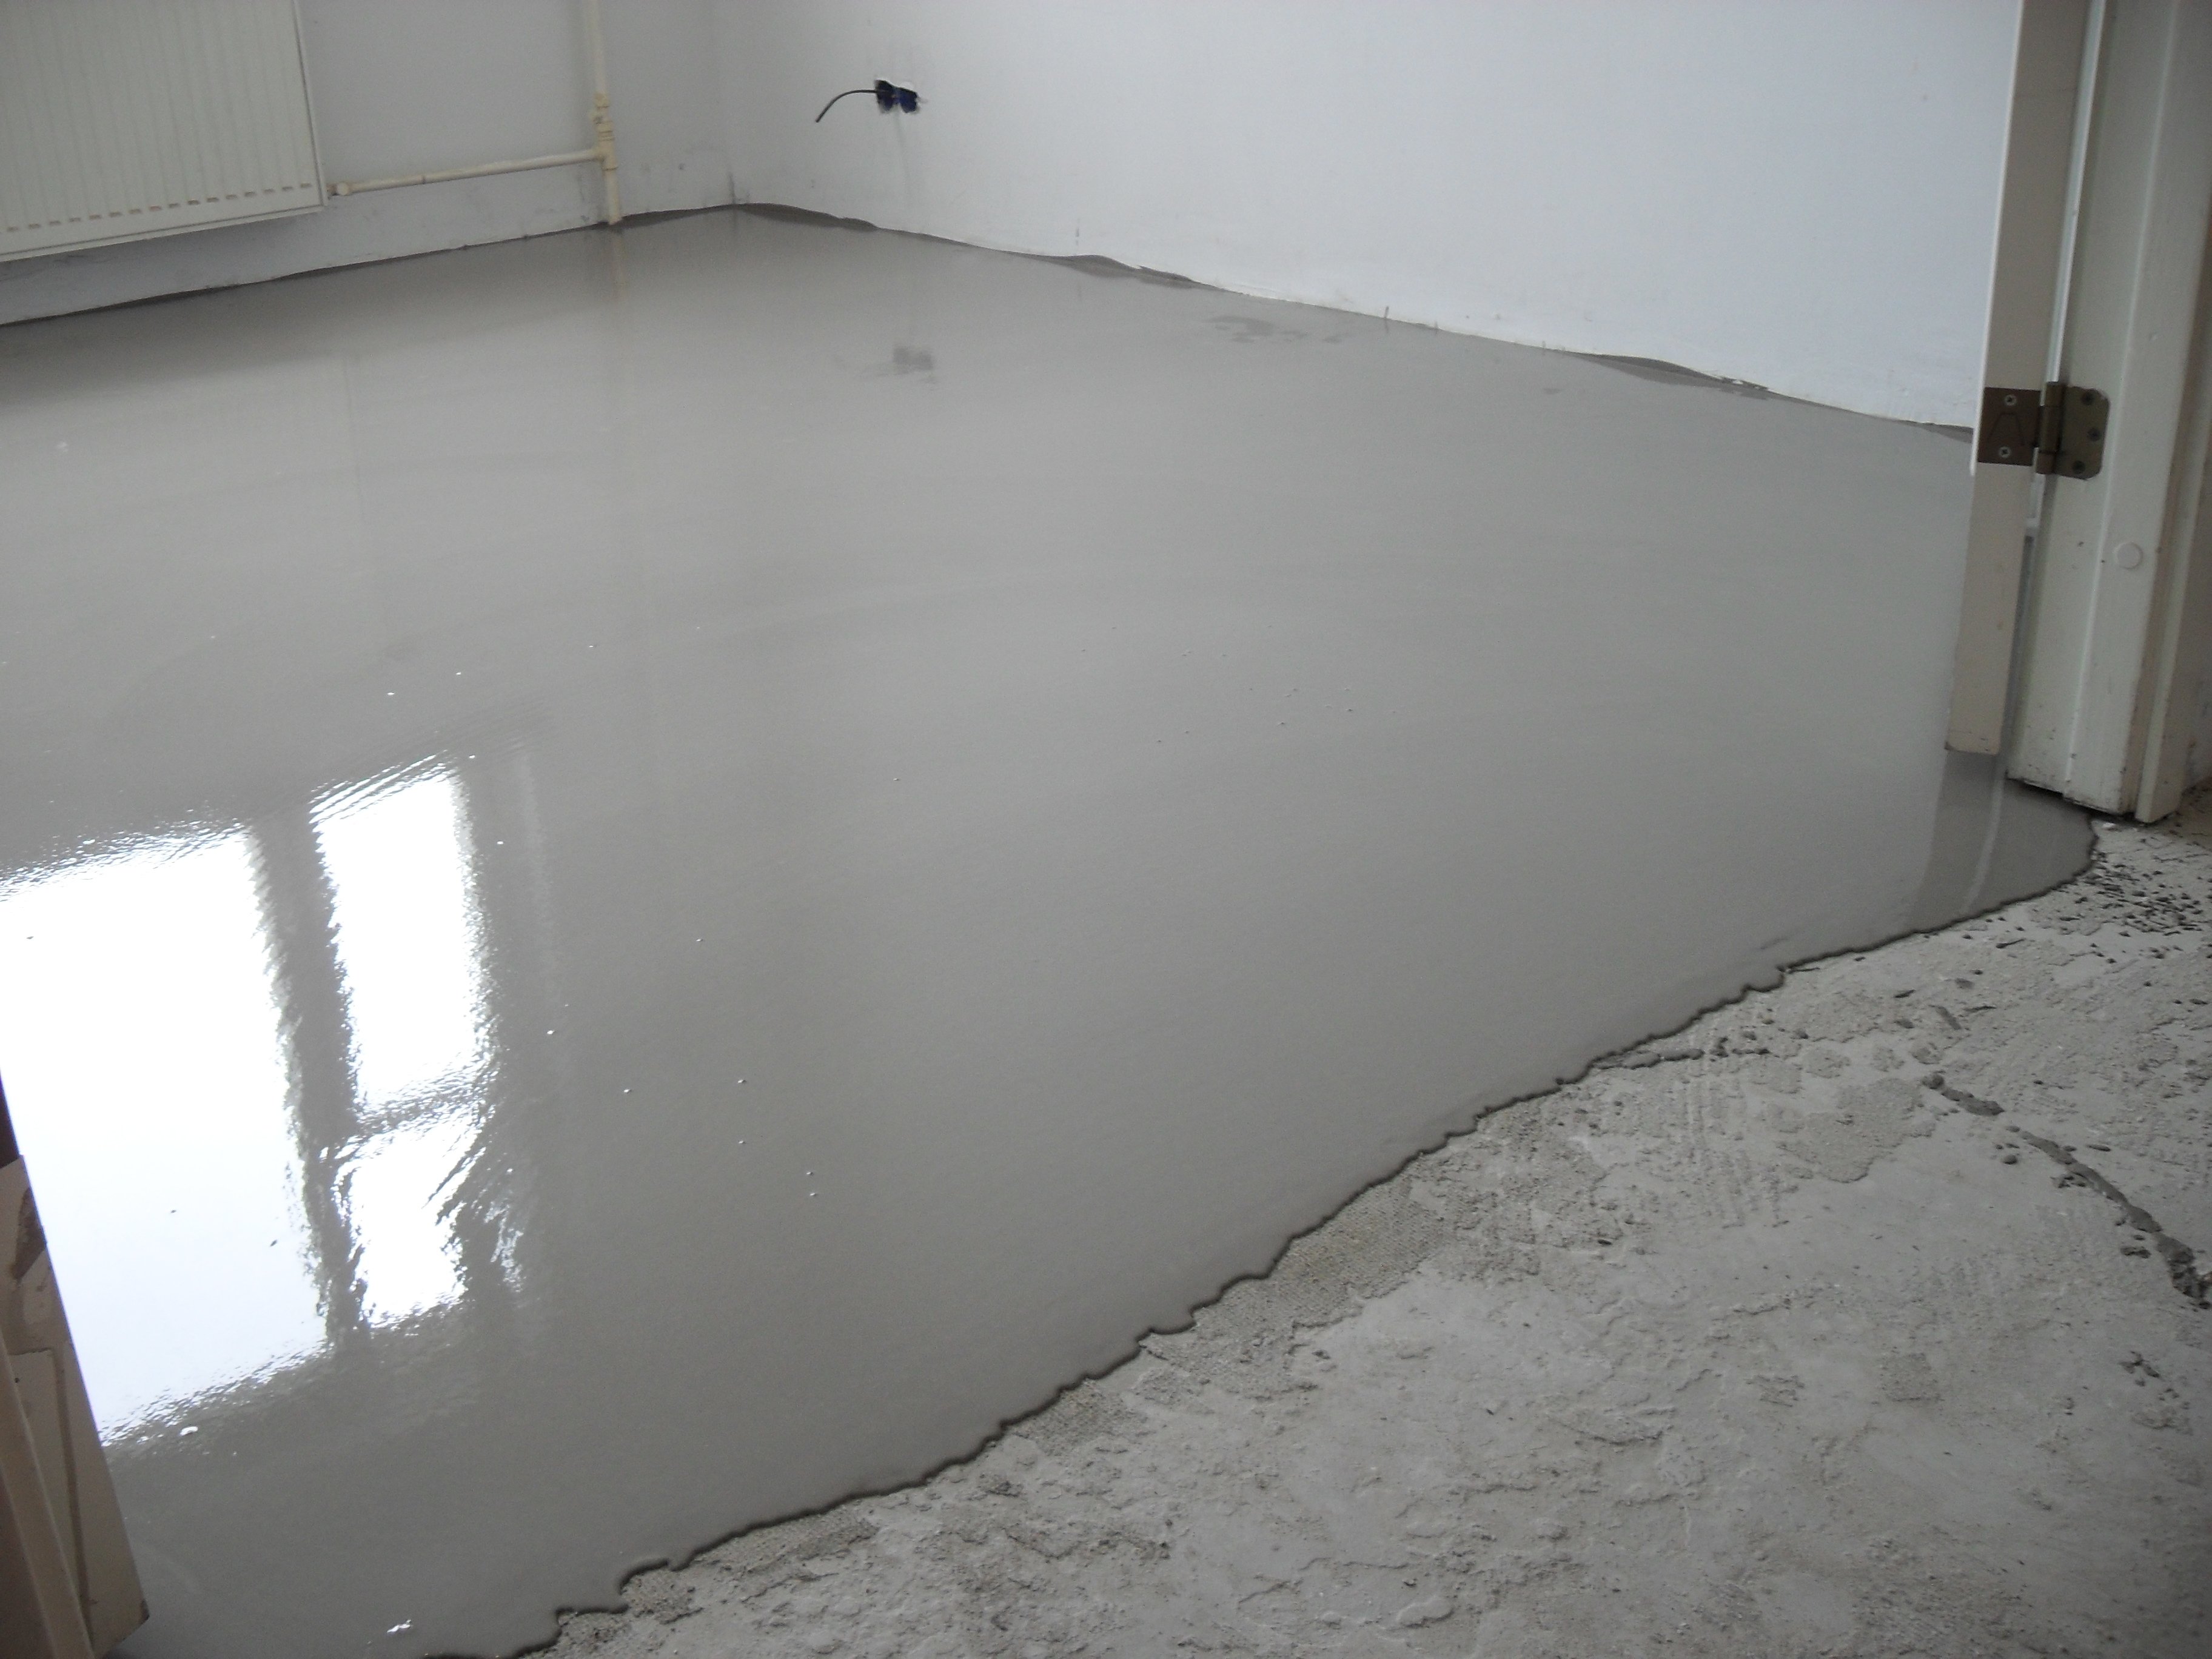
A screed is a layer of special mortar or concrete. It serves as the basis for a decorative coating and is the place where the heating elements of the floor heating are located. The screed also performs leveling and stabilization functions, on which the service life and the presentable appearance of the floor covering depend.
The advantages of this system installation of heating devices can be attributed to the absolute fire and environmental safety design,full autonomy and the possibility of self-regulation of temperature, long service life and efficiency.
The downside is a decrease in the height of the room due to the elevation of the floor.

The “warm floor” design can have different designs:
- cable;
- water;
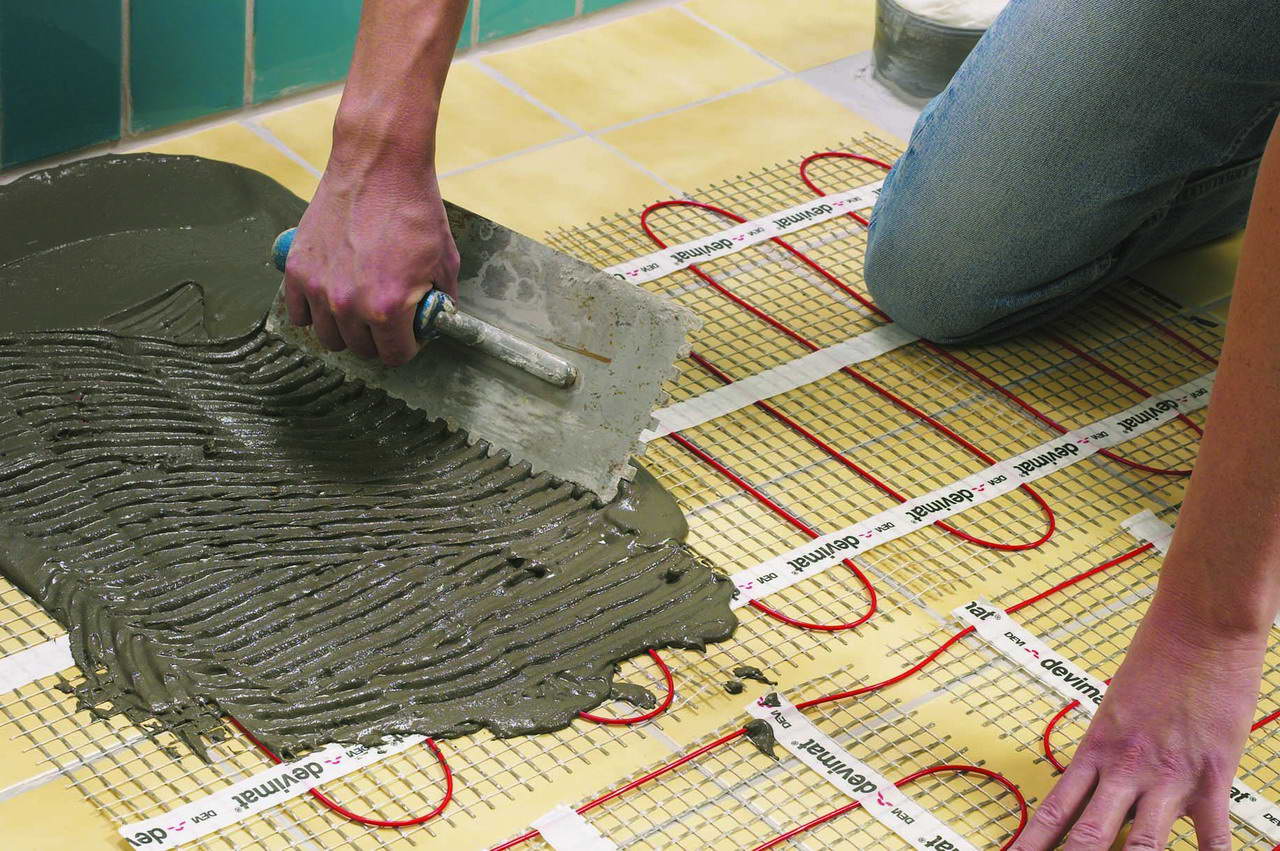
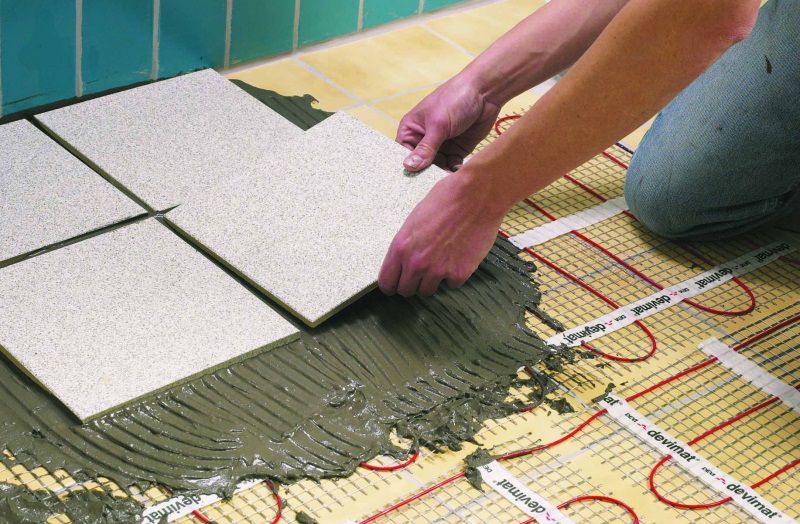
- thermomat;
- infrared
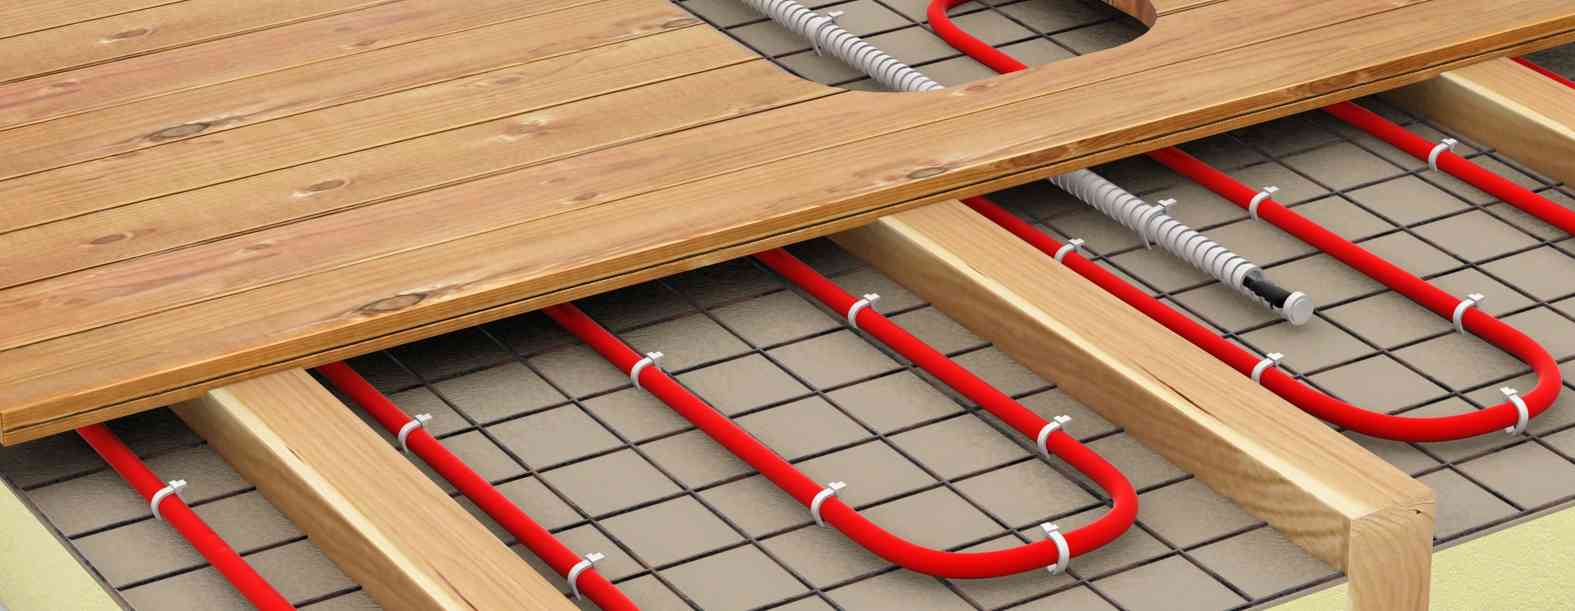
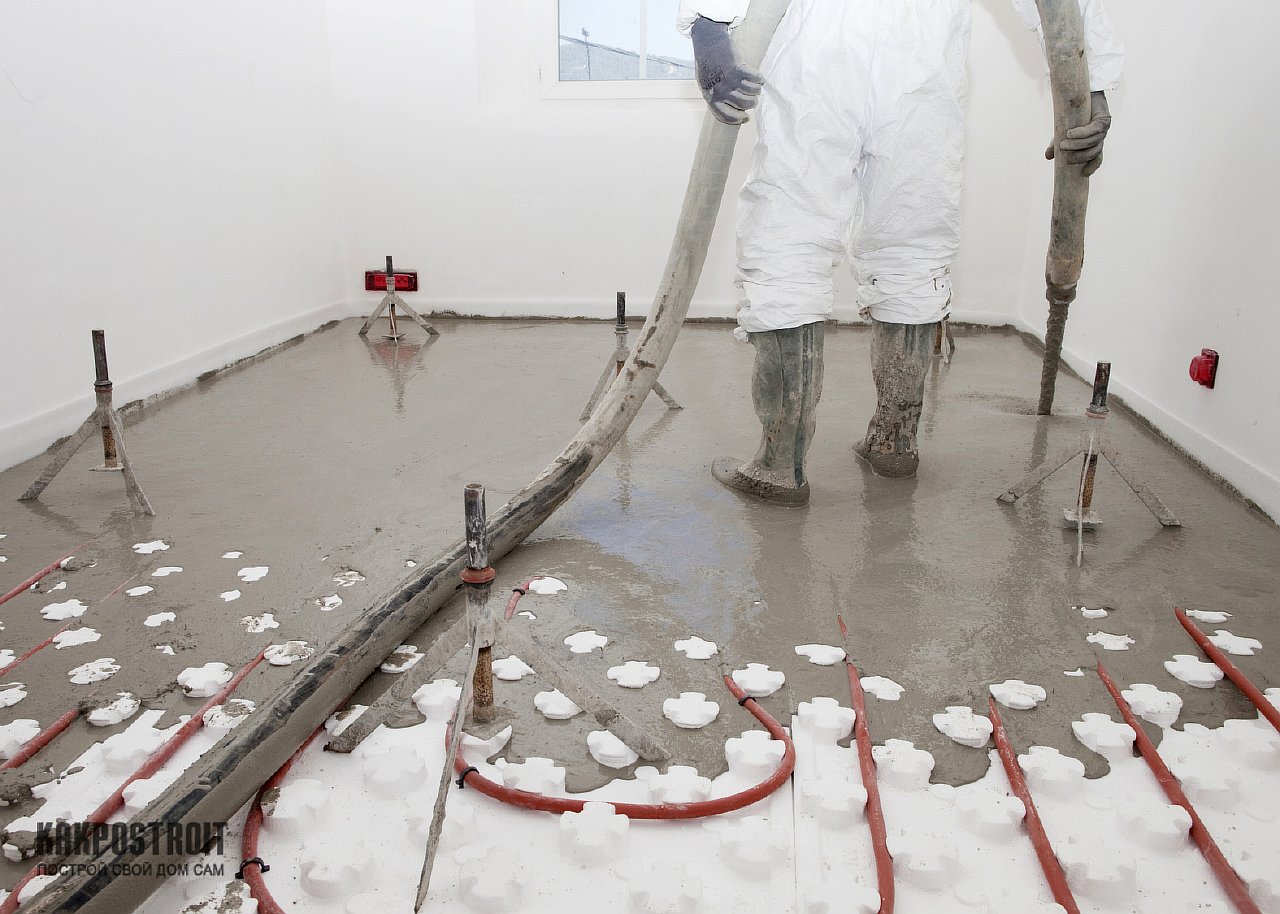
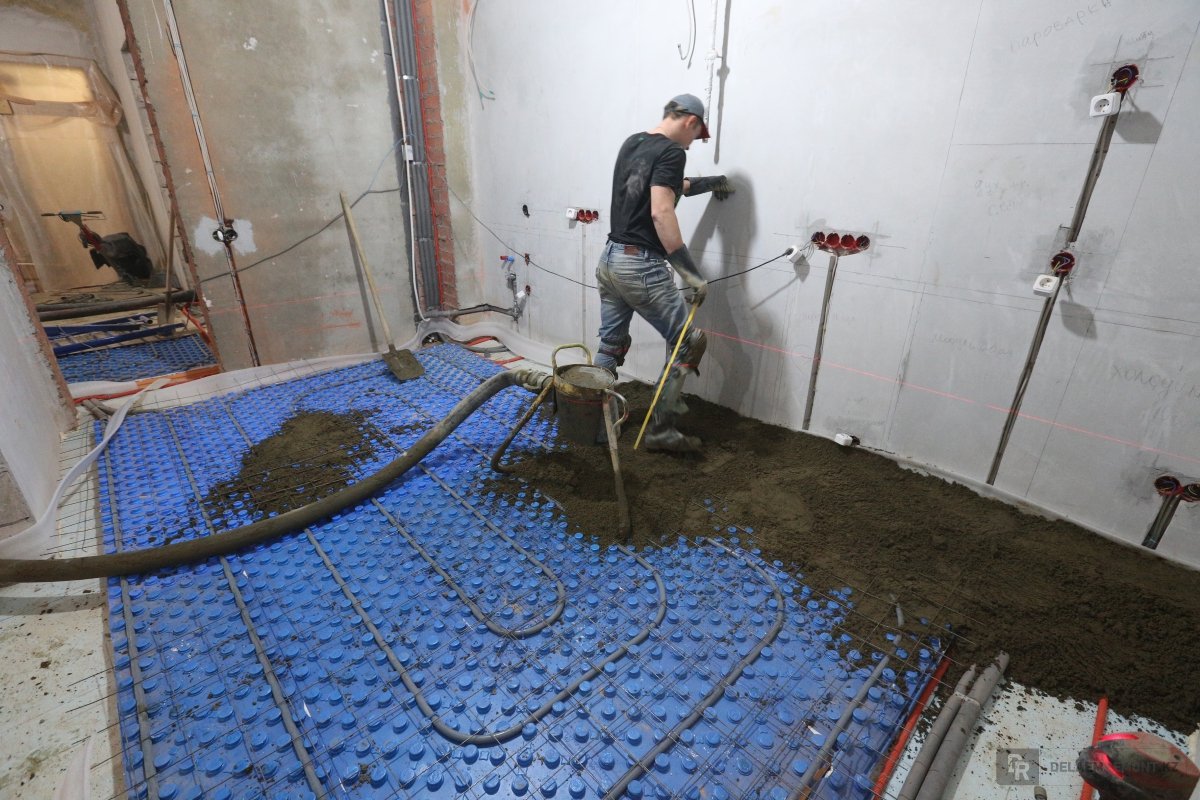
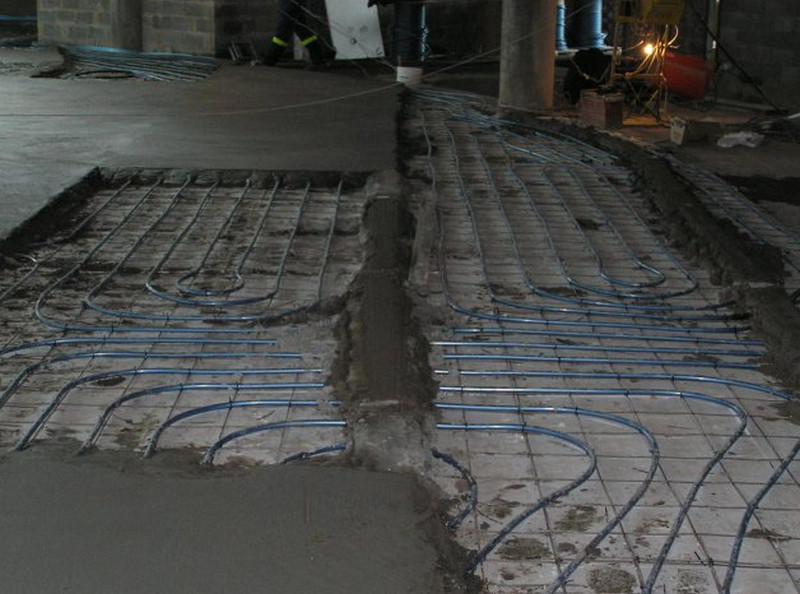
The water system is a network of pipes connected by a manifold, responsible for the movement of hot water through the pipeline, equipped with thermal sensors and relays.
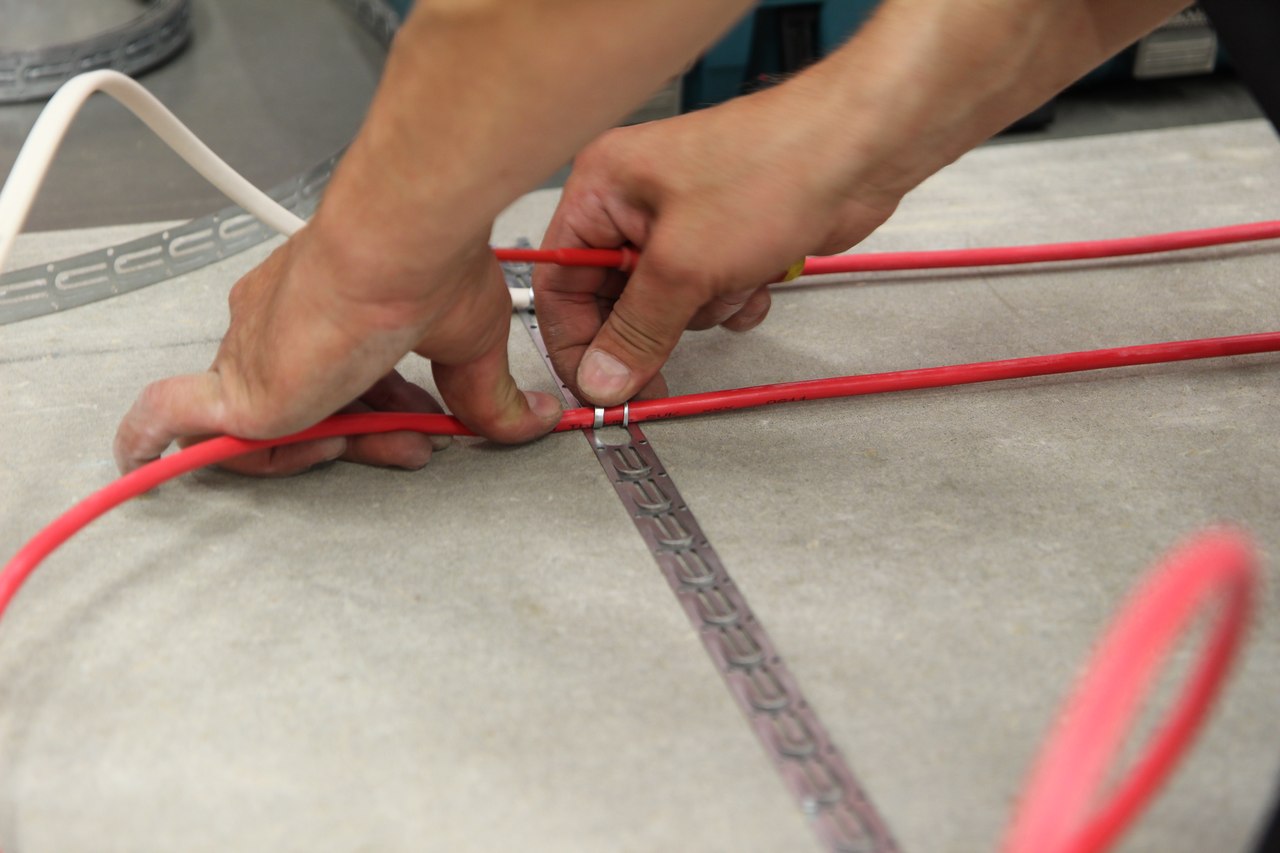
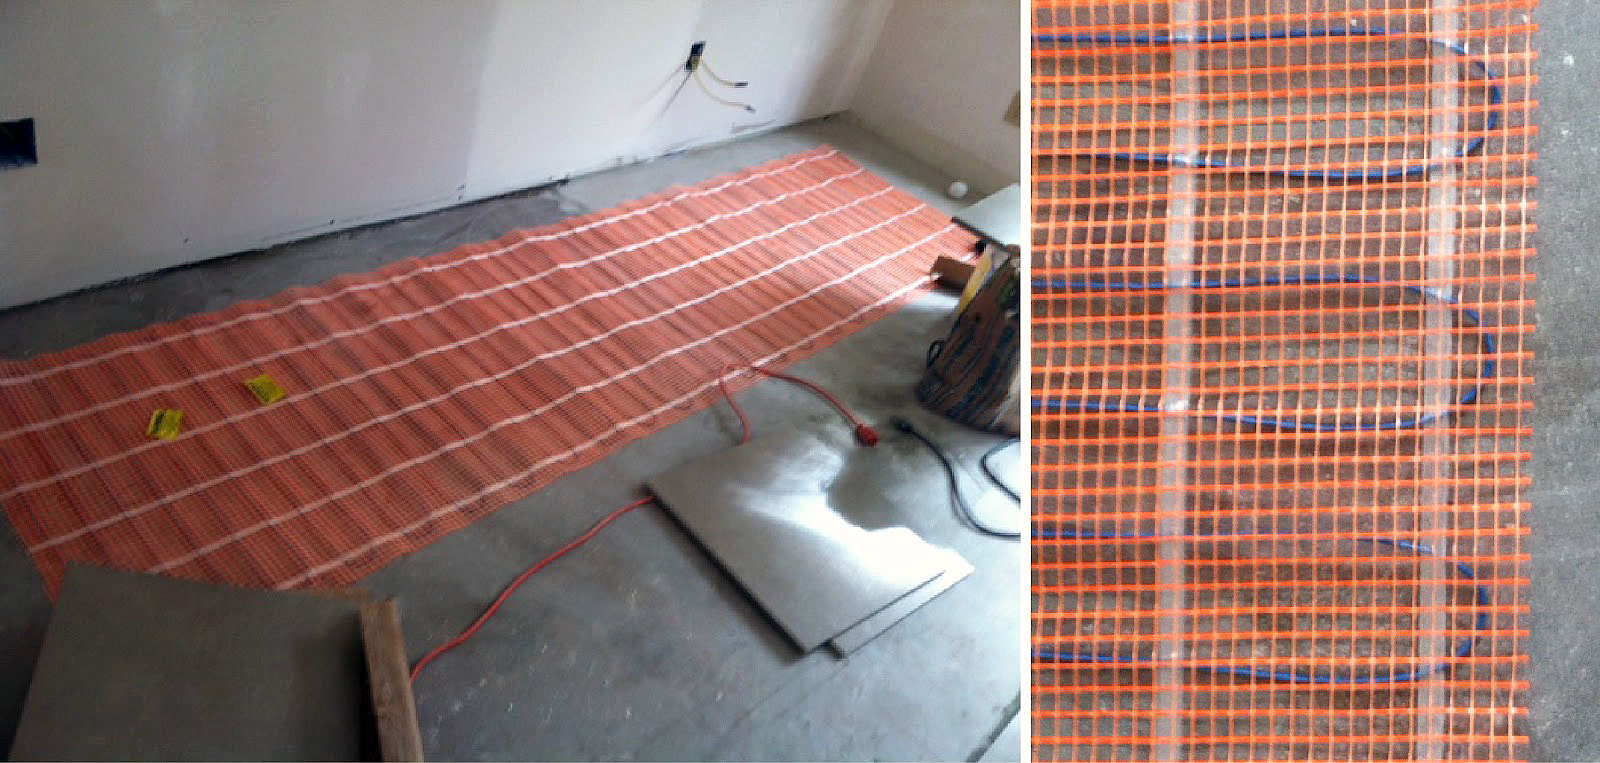
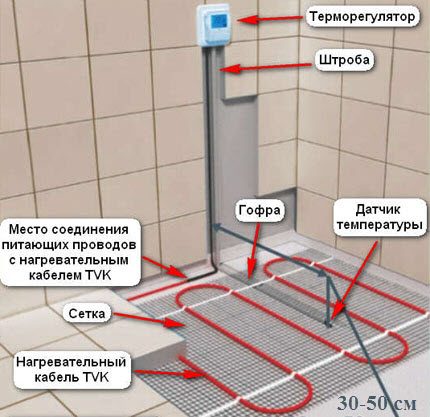
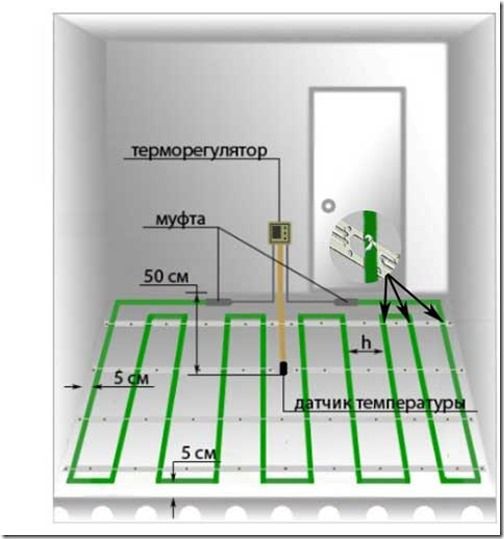
Cable heating is presented in the form of electrical wires laid in rows, working on the principle of converting electrical energy into heat.
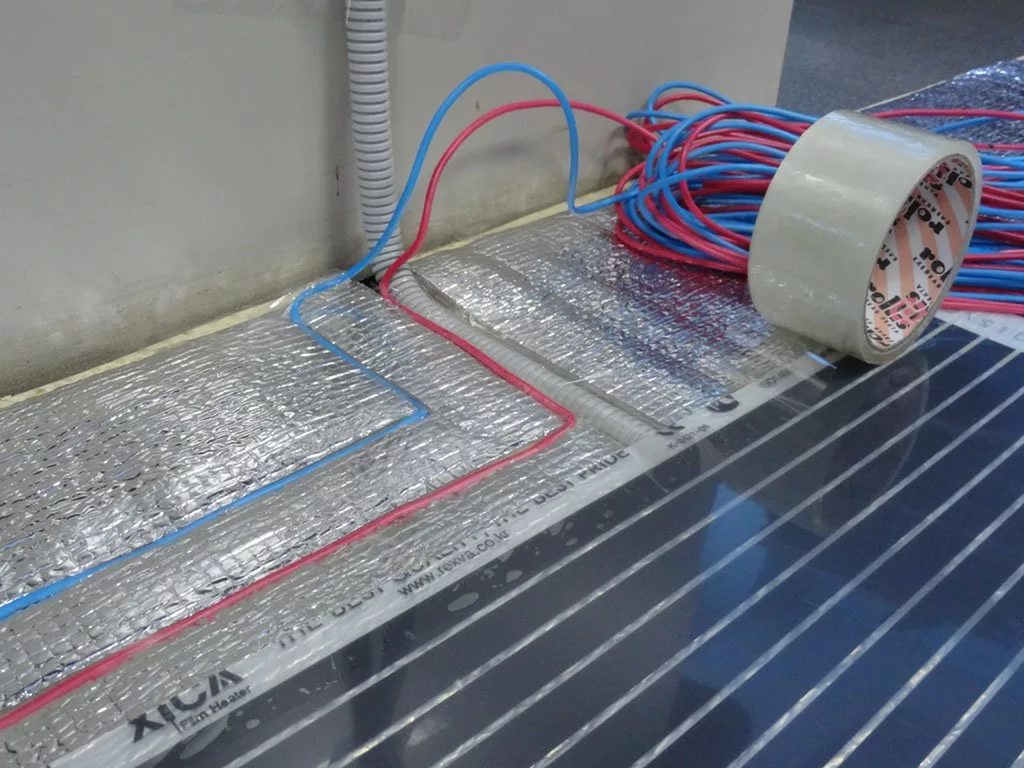
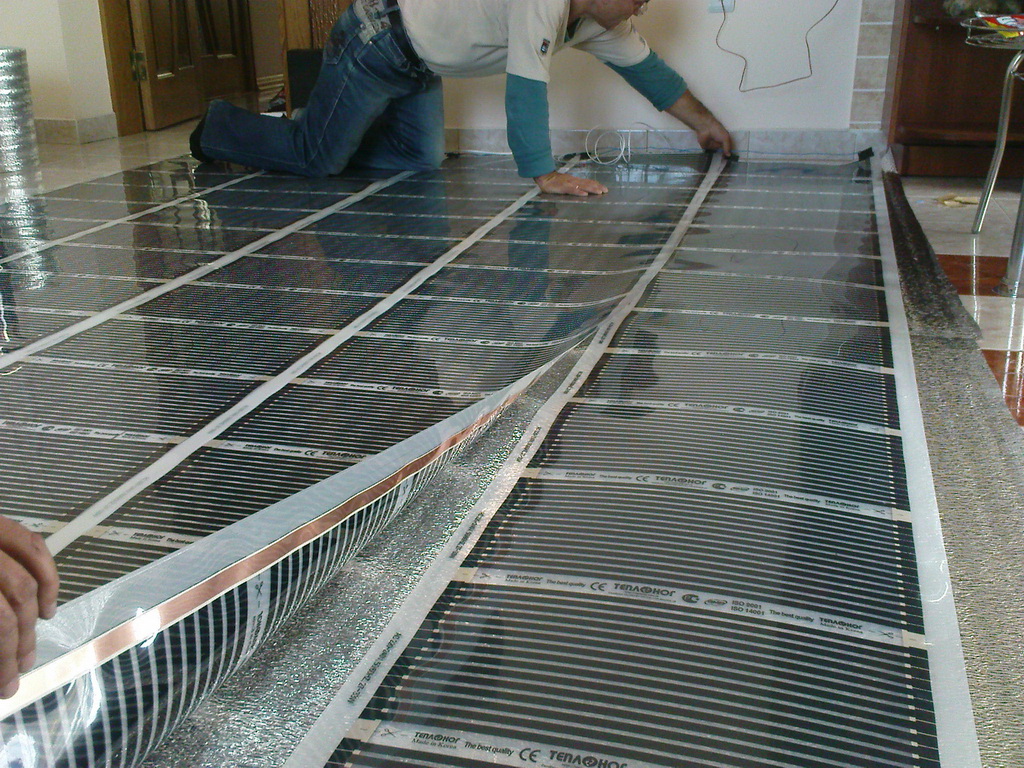
The thermomat system is a thin film with heating elements laid and fixed inside, having a roll design. The infrared heater is also designed as a thin web, being the most effective and durable heating system.
However, it is not poured into the screed, but located on top of it, immediately under the decorative coating.

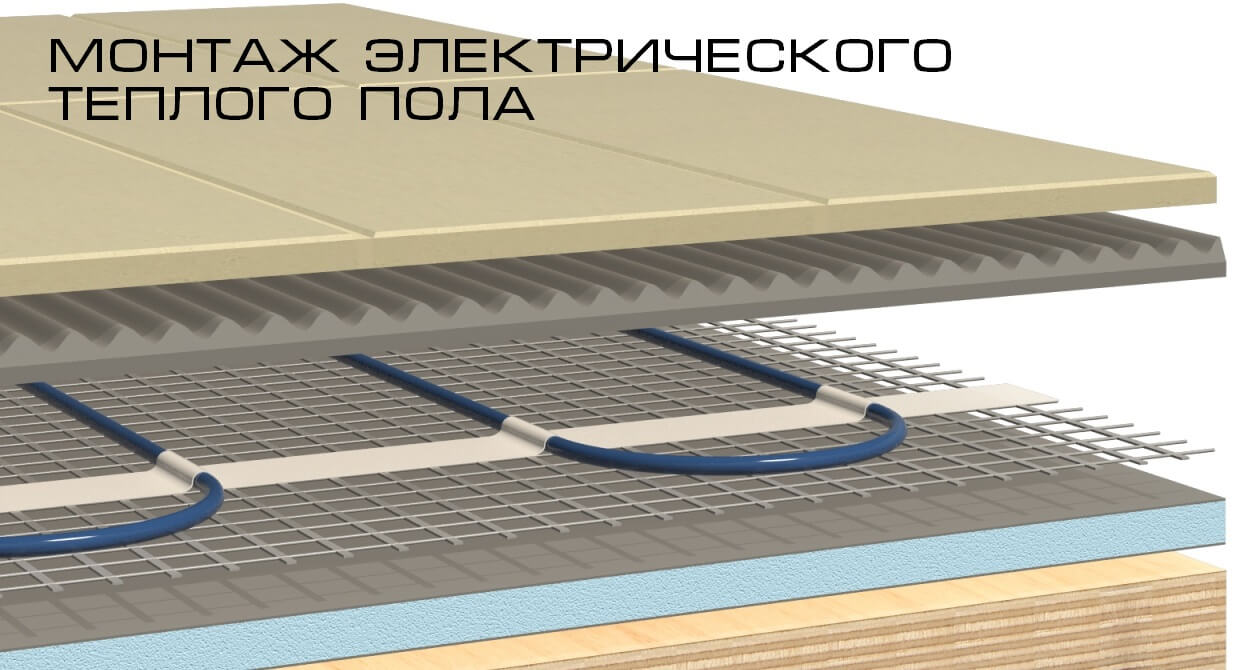
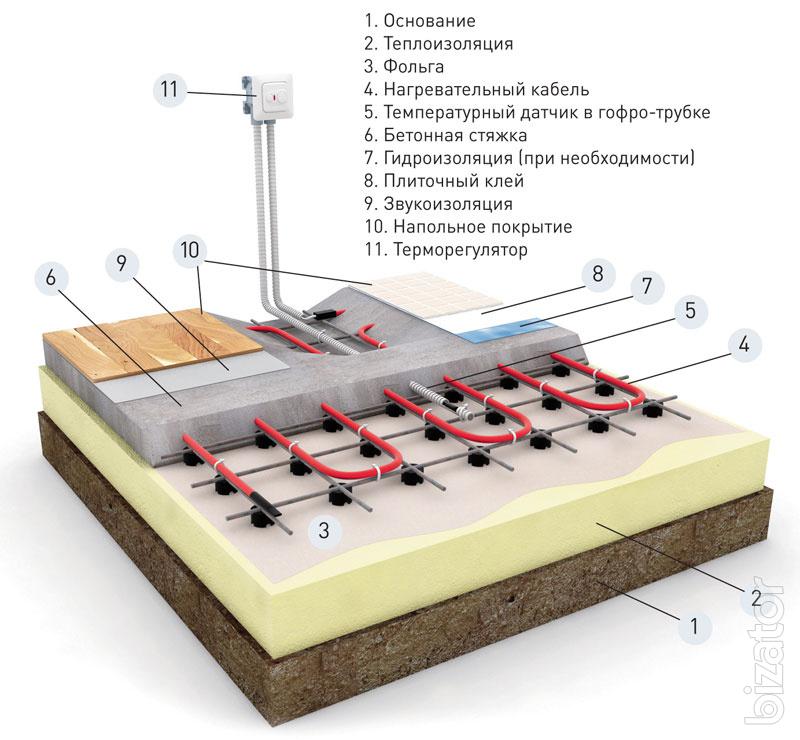
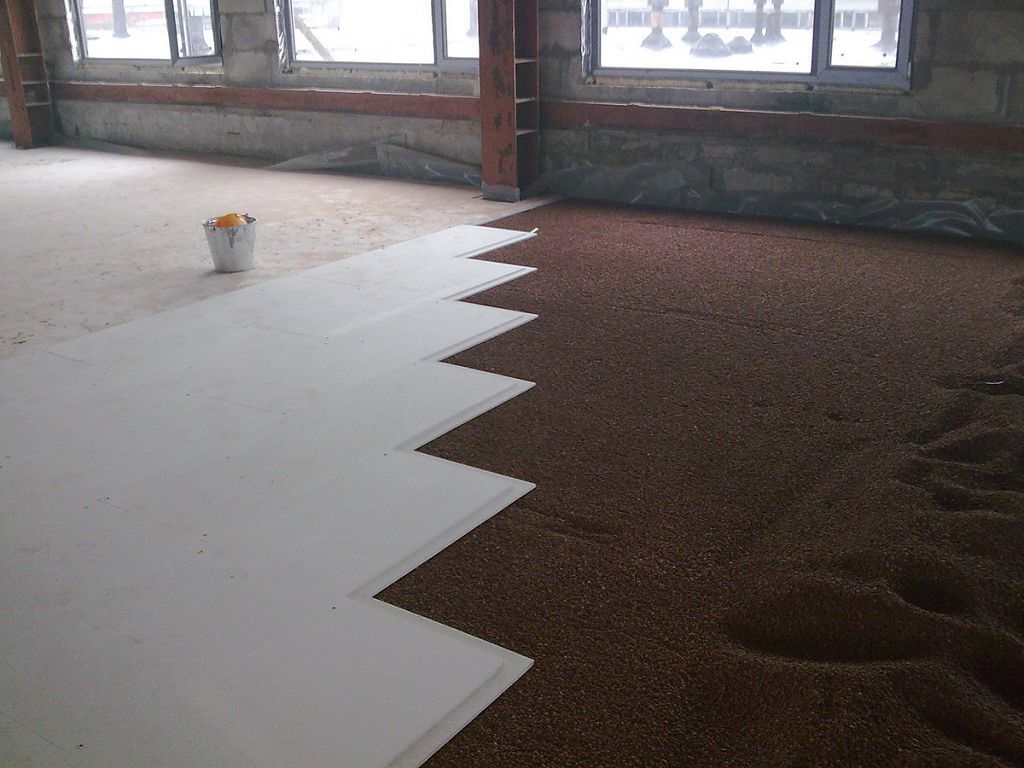
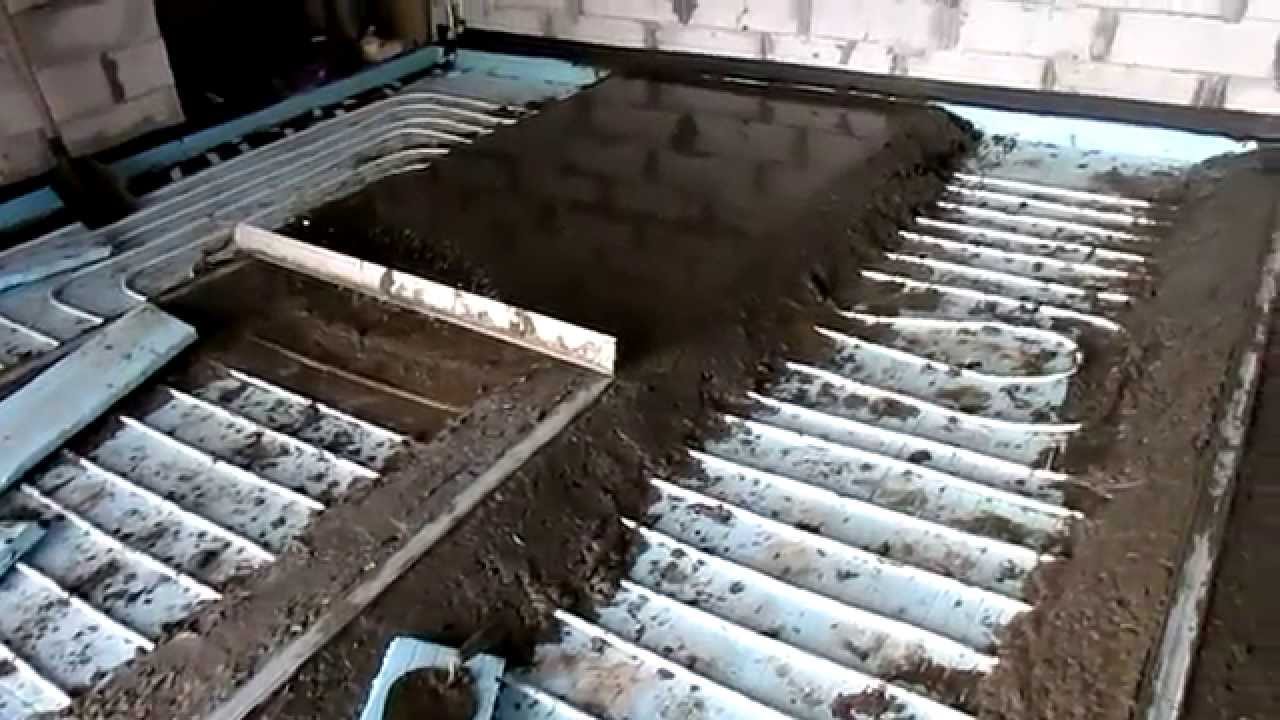
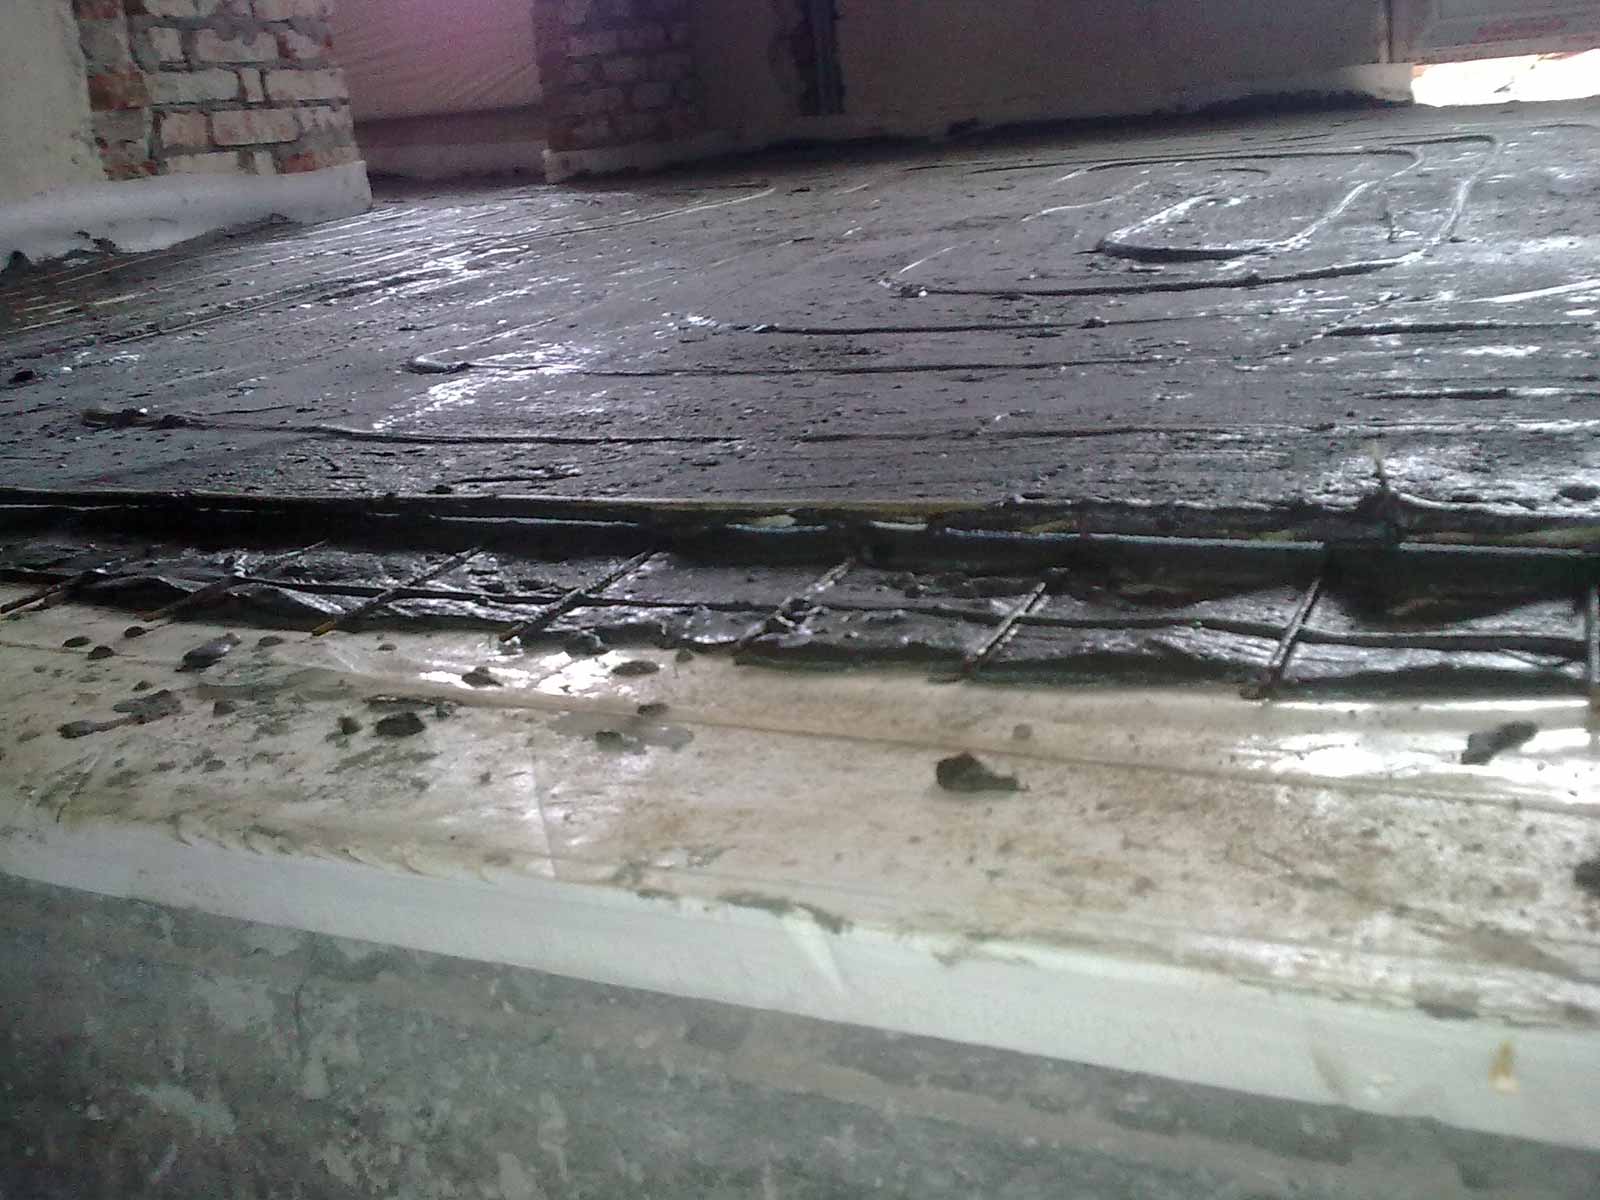
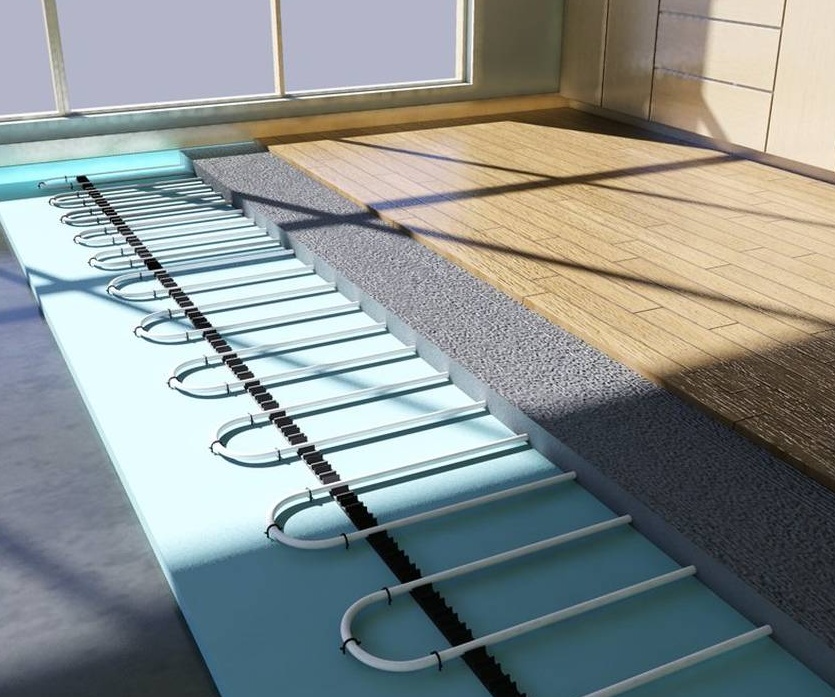
Warm floor in the screed is a layer cake, where the two lower layers are hydro and thermal insulation.Next is the reinforcing mesh and thermal element, and the solution is completed with a solution of concrete or a special leveling compound. Layers can vary depending on the condition of the subfloor and the need to use a waterproofing layer. So, for the electric heating system there is no need for it, and in the presence of a large number of lower floor defects, an additional leveling layer is poured under the heat insulator.
Special attention should be paid to the thickness of the applied solution. It should be the same throughout the area of the room. This will ensure uniform heat distribution and high-quality heat transfer. Too thin a layer will lead to poor heating of the screed, faster heat transfer and cracking of the surface. Thick layer is also unacceptable. It will keep warm and not let it out.
For a warm water floor, the optimum thickness of the screed is 6-7 cm, and 3-5 cm of them should be above the pipeline.
When laying the thermal cable, the thickness should be three centimeters, and for the thermomat system, one and a half centimeters will suffice.
Types and composition
Screeds are dry, semi-dry and wet. Dry screed is a plywood, sheets of drywall and chipboard. To accommodate the system warm floor is used wet and semi-dry type.
Wet screed is made from a mixture of cement with sand and rubblediluted with water to the desired consistency. Sometimes some claydite and gravel are added to the solution. The brand of cement for the preparation of the solution should have a quotation not lower than M300. Instead of sand, it is better to use screening: it will provide higher traction and prevent delamination and cracking. When preparing the composition, it is necessary to use a plasticizer at the rate of one liter per square meter of the filled area, which will allow to reduce the final thickness of the screed to three centimeters. Cement screed is suitable for all types of floor heating.
Semi-dry screed is performed using dry mixes and does not require prior alignment of the subfloor. When dry, there are no cracks and no shrinkage and deformations occur. Such a composition hardens much faster than concrete, and a short setting period and a small amount of necessary liquid will prevent the solution from flowing to the lower floor.

Semi-dry and wet screeds are floating and stationary.The first type is used in cases where it is necessary to install heat and waterproofing. As a result, the layer has no direct adhesion with either the floor or the wall. The thickness of this floor must be at least 3.5 centimeters and have a multilayer structure. Floating screed is used for pouring over soundproof material, which consists of mineral wool and is covered with a waterproofing film from above.
Stationary screeds are formed without the use of insulation.

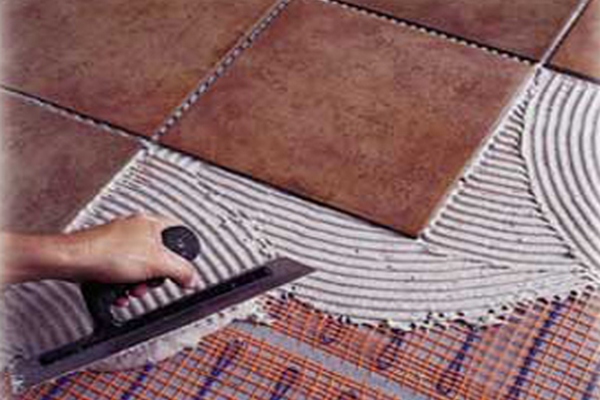
Tile glue is used as a screed when installing an electrical floor under the tile. It levels the surface well and dries quickly. If repair is necessary, such a screed is much simpler than concrete.

Which is better?
When choosing the type of tie, you should be guided by the type of subfloor, the purpose of the room and the type of heating system. Concrete screed is suitable for all designs of warm floors. The advantage of this screed is moisture resistance, durability and the ability to use in rooms of any type. The concrete composition can be applied both on an existing draft floor and on the ground. The disadvantages are the risk of cracking,separation and separation of the concrete floor from the base, as well as the need for regular wetting with water for 3 weeks until it dries. The finishing coating can be laid only after the complete curing of the screed.
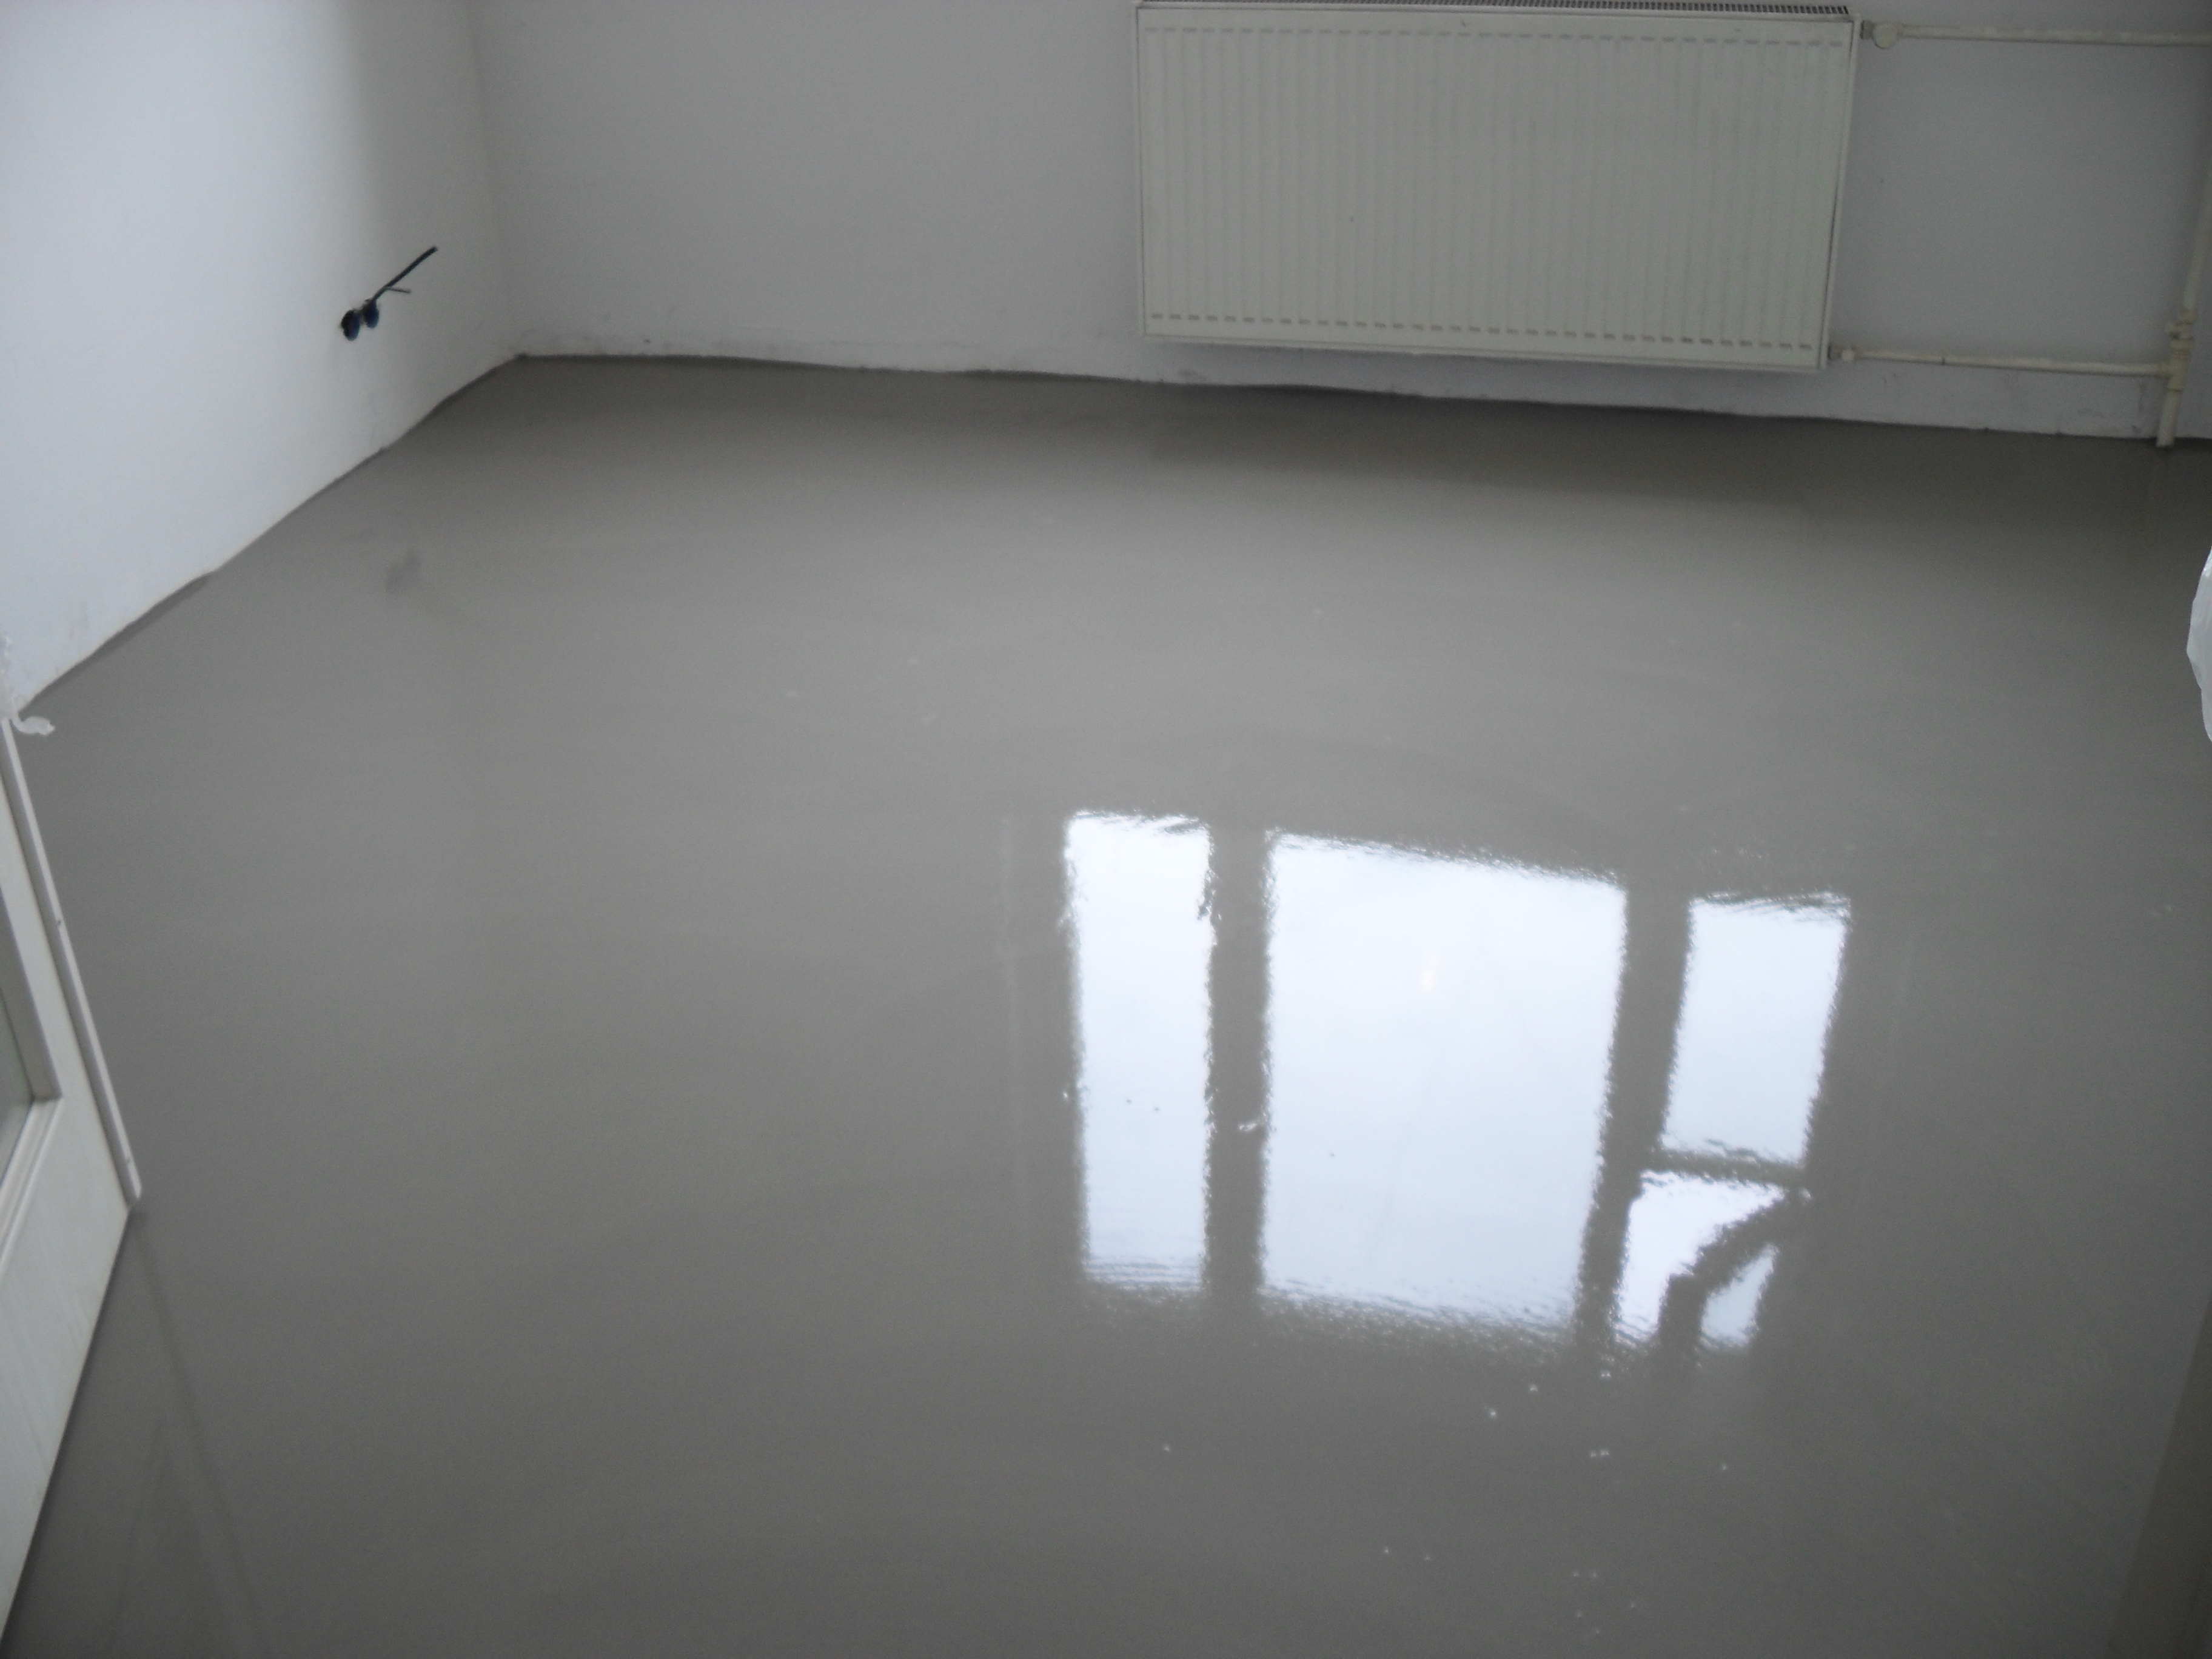
Gypsum screed is a semi-dry type due to the small amount of liquid required for the preparation of the solution. It is a self-leveling mixture that dries and hardens very quickly. The advantages of such a screed is the absence of the need to install reinforced mesh and pre-priming the surface. The coating layer may be less than three centimeters. Due to the porous structure, the semi-dry screed provides high thermal and sound insulation of the room.
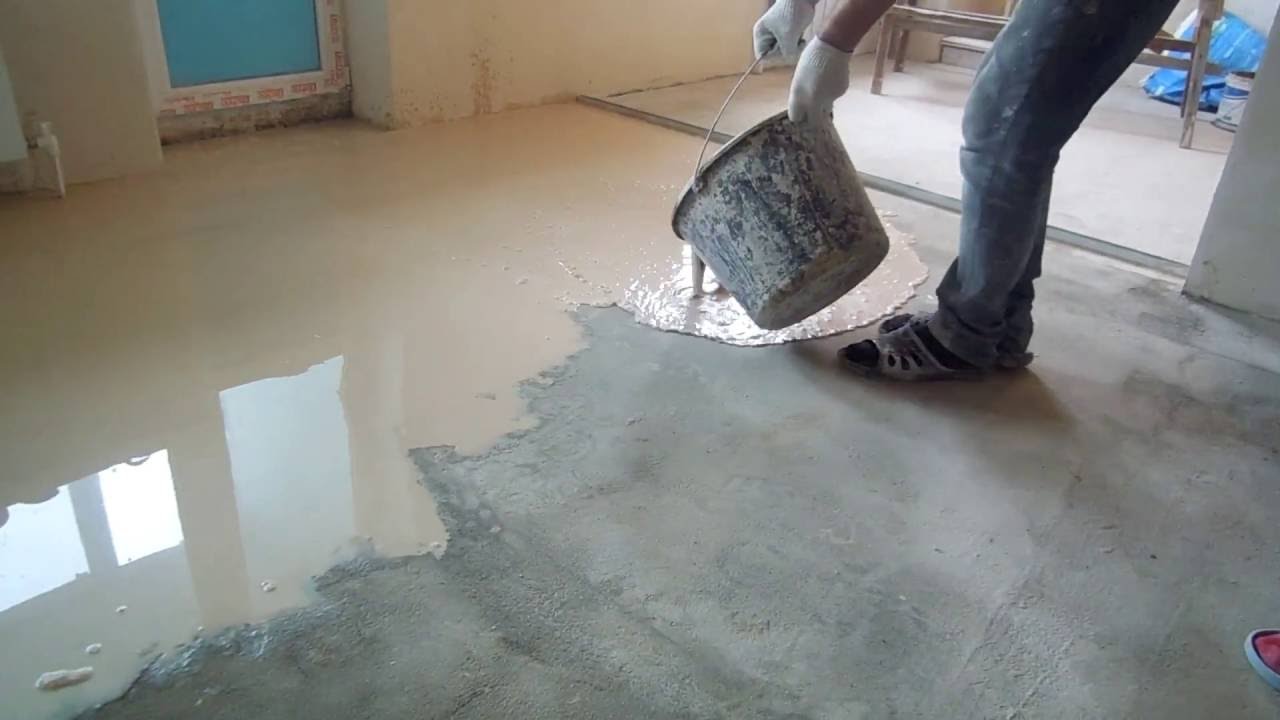
Self-leveling mixtures are easy to prepare., are environmentally safe and have a smooth and glossy surface after complete drying. Suitable for all types of floor heating. To improve ductility and prevent cracking, fiber blend additives and modifiers are included in dry blends. The disadvantages include setting the solution too fast.
As a result, the composition should be prepared in small portions that can be used within an hour.
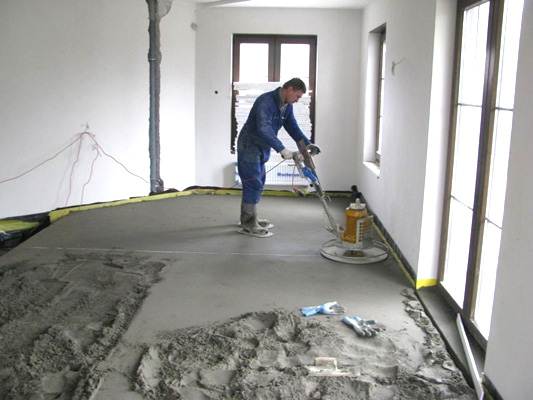
Laying technology
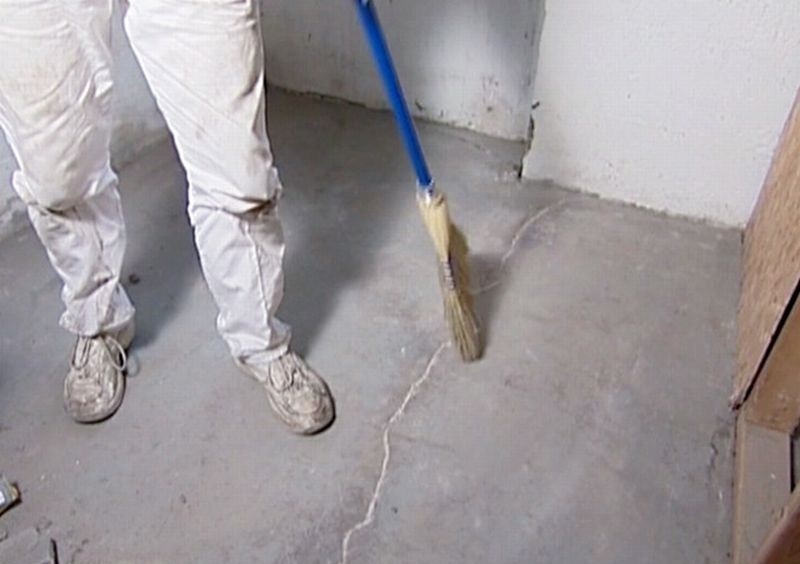
The first stage of the installation of the floor should be the preparation of the working surface. To do this, you need to close up large gaps and chips with the solution, and clean the subfloor from dirt and debris. Next, it is desirable to cover the surface with a layer of primer. This must be done when casting the concrete floor. If indoors it is planned to install heavy furniture, then it will be necessary to use reinforcing mesh and additives from large fractions. This must be done so that in future the surface of the self-leveling floor does not subside and does not crack.
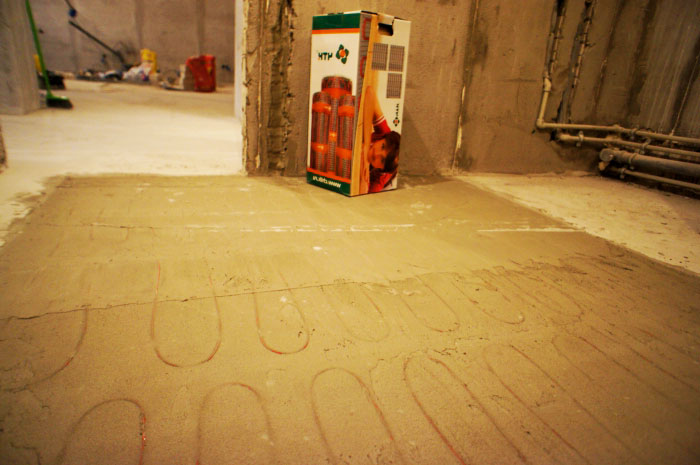
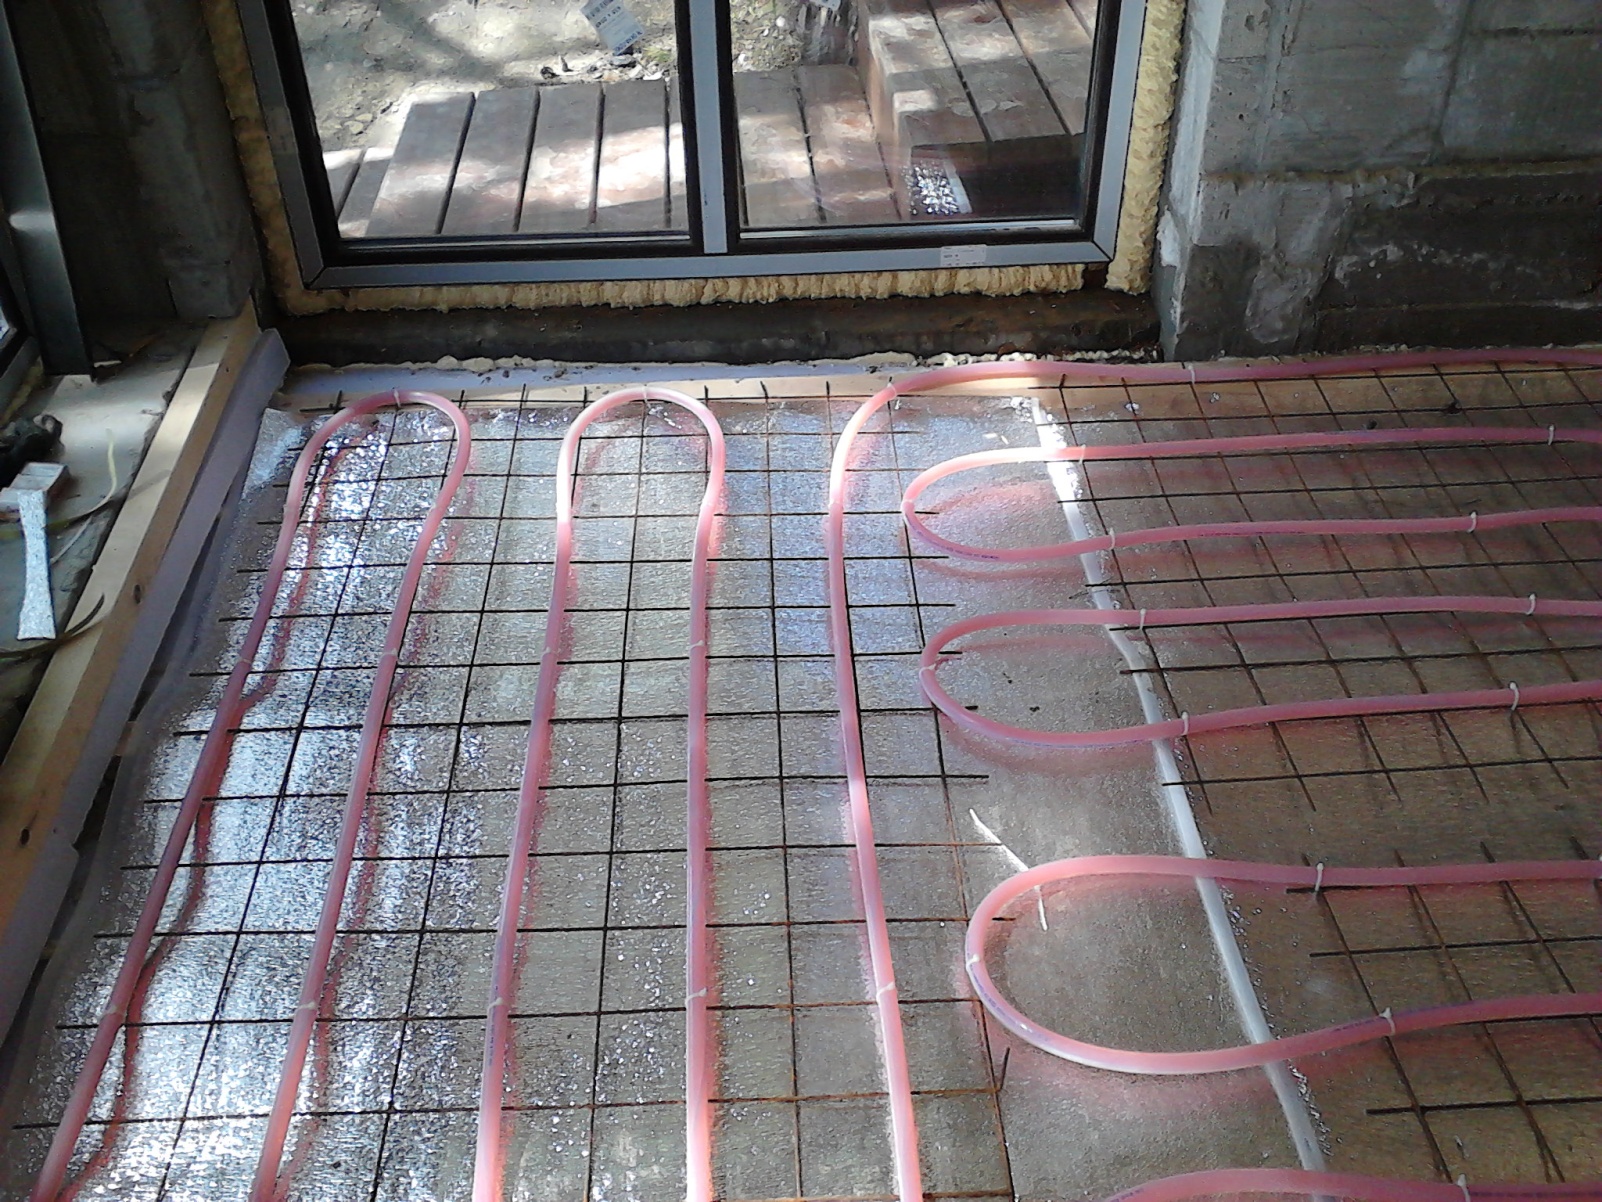
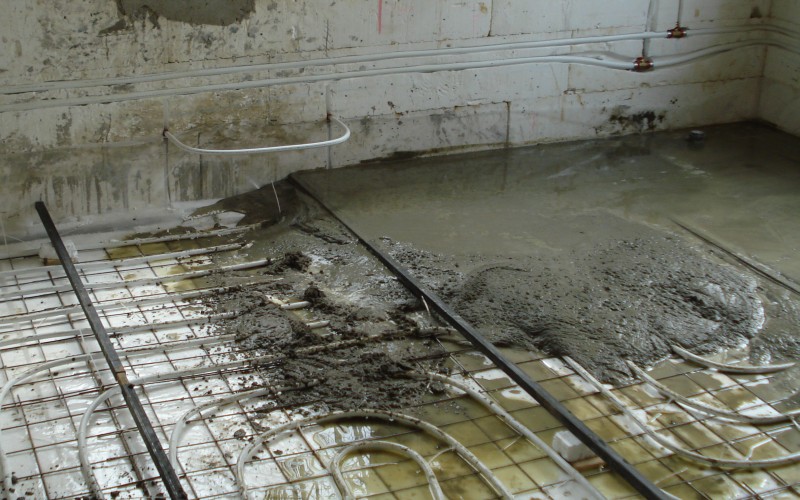
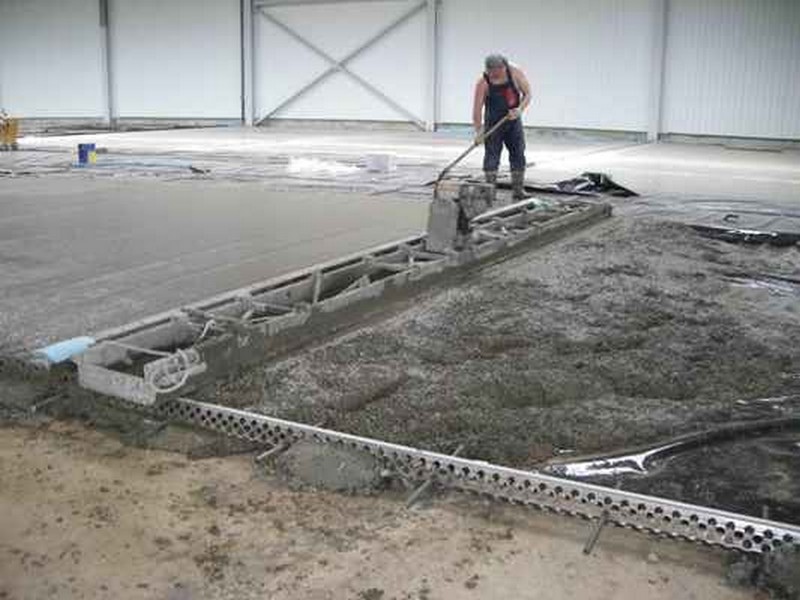
If the floor is filled with a water heating system, then it is necessary to form expansion joints. If the floor area exceeds 10 square meters. m, the seams are made on the structures of the fence. The perimeter of the room should be laid damper tape, which is designed to absorb the expansion of the drying layer. Then you need to conduct a test run of the "warm floor" system, and check the tightness of the pipeline. Next, install a reflective layer that prevents heat loss.
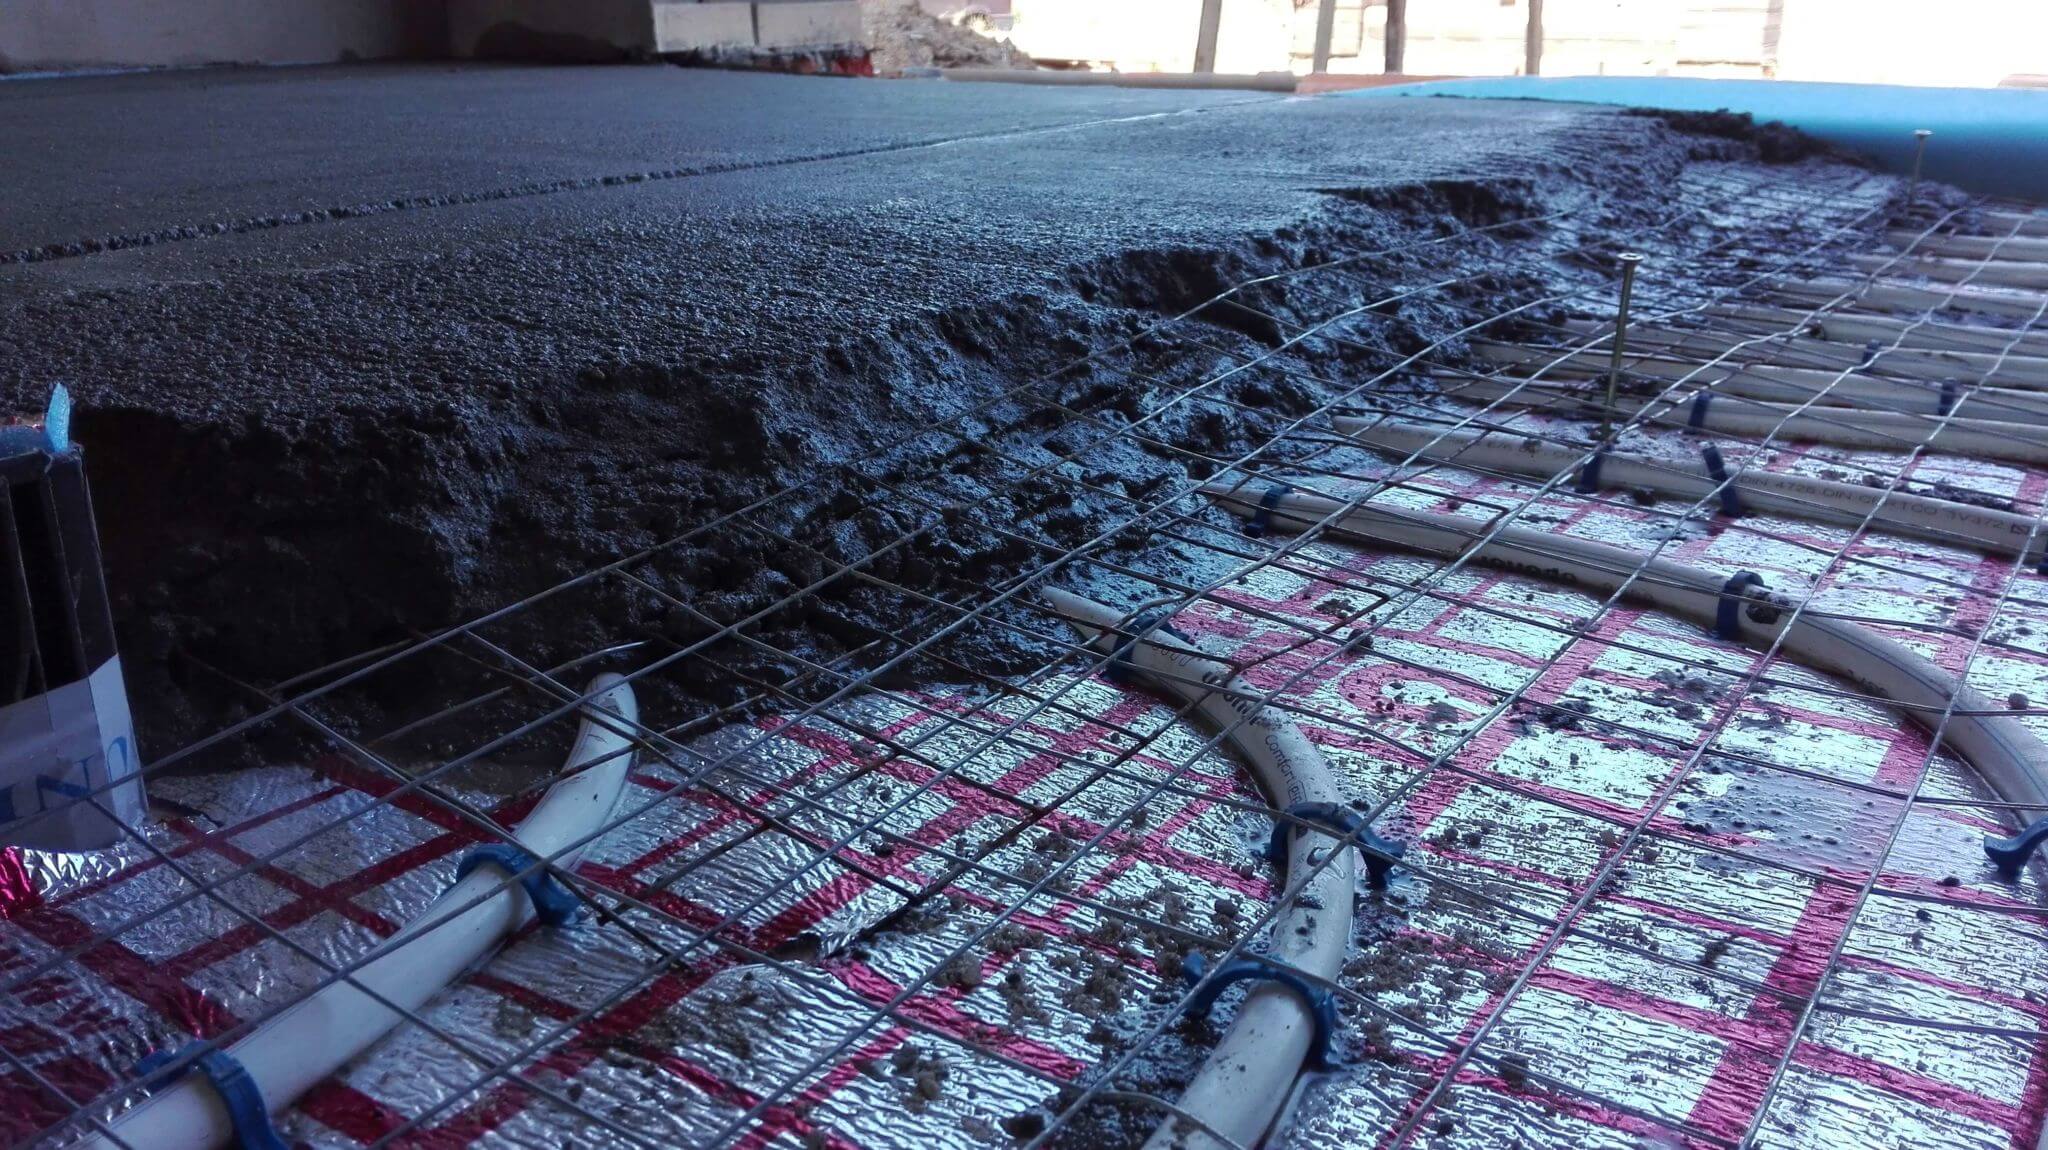
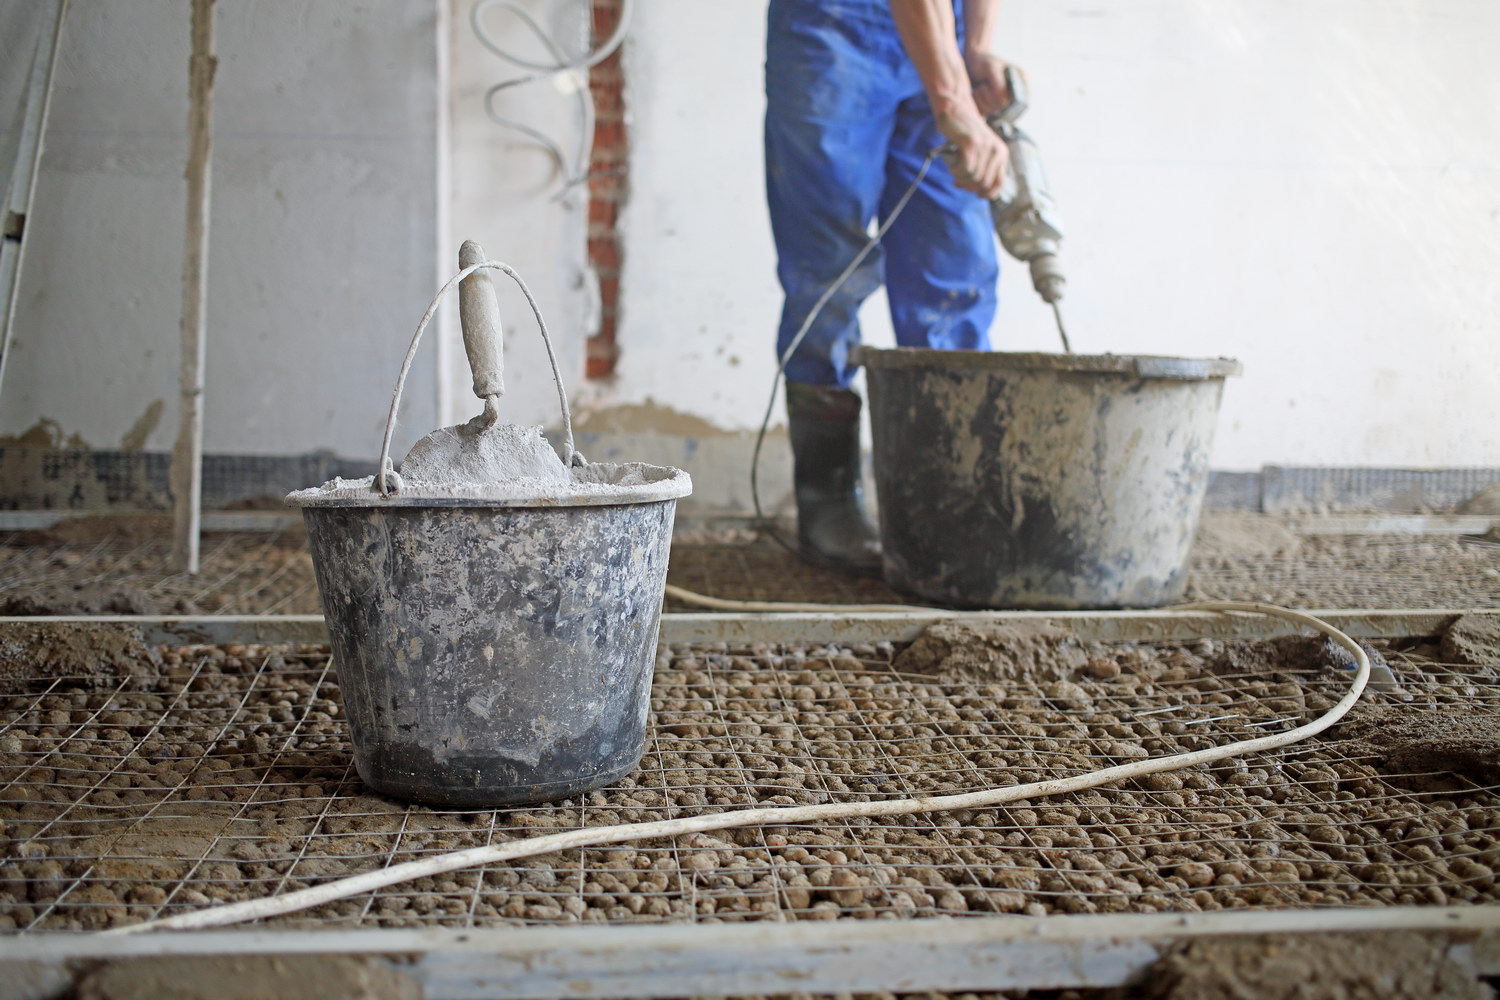
Reinforced mesh can be laid on top of a reflective screen under the pipe, and mounted in the upper layer of the screed in case of a large thickness of concrete. Next, you should proceed to the preparation of the solution. For work in residential premises, it is necessary to use grade 150, and for industrial buildings it will be suitable for 300. The composition for the water floor should be made on the basis of screenings and contain a mixture of fine-grained rubble with sand.
This composition has the best indicators of strength and heat transfer compared with the cement-sand mixture.
When preparing the solution it is necessary to strictly observe the proportions of the components. This will prevent cracking, peeling and coloring the dried floor. The optimum ratio is 1 part of cement and 6 parts of screening. When using sand and crushed stone, 4 parts of crushed stone and 3.5 parts of sand are taken for 1 part of cement. It should be noted that when there is an excess of rubble, the surface of the dried floor will not be sufficiently smooth.
To improve the plasticity of the composition, a plasticizer is added to the solution during mixing, which can be used as liquid soap. The finished solution consistency resembles sour cream.Often used fiberglass or armovat. They are added to the solution and can do without the use of reinforcing mesh.
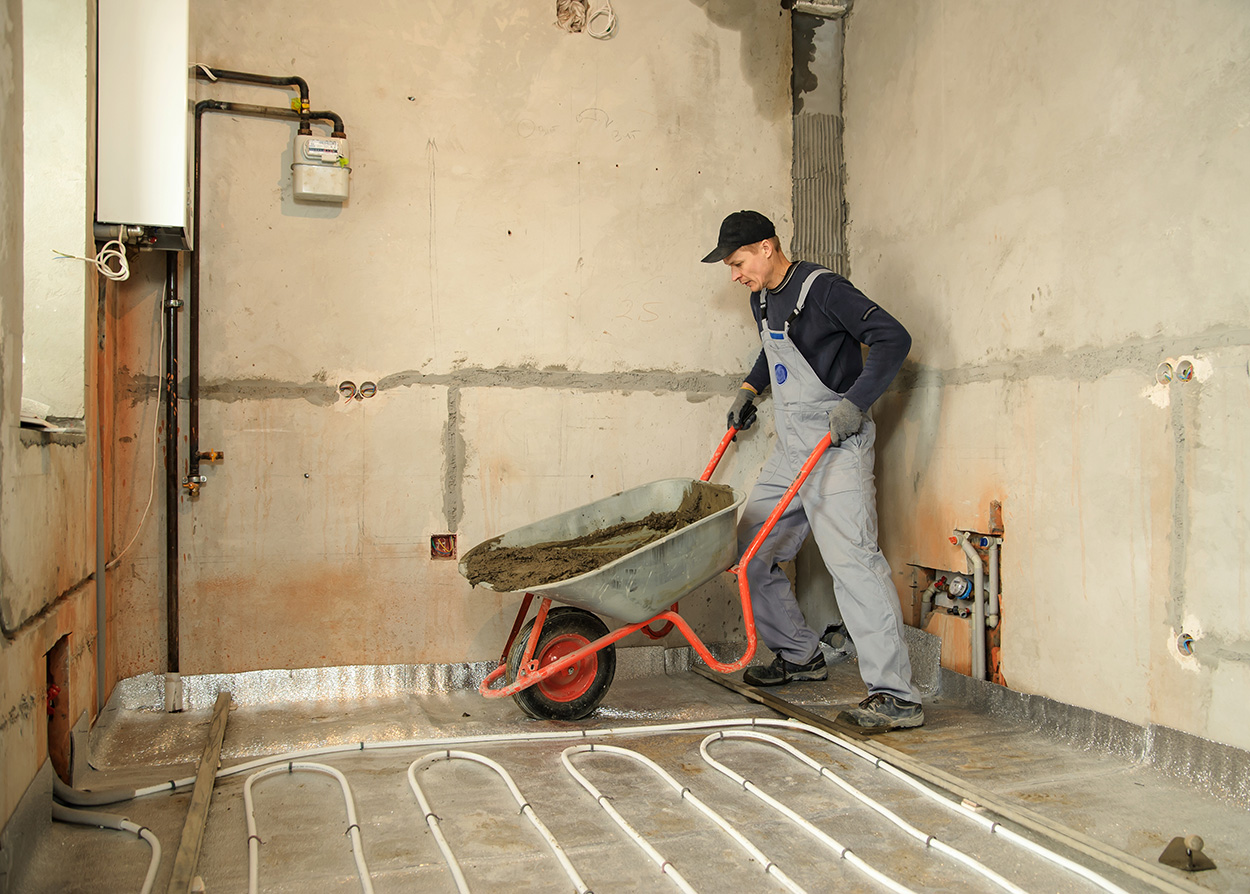
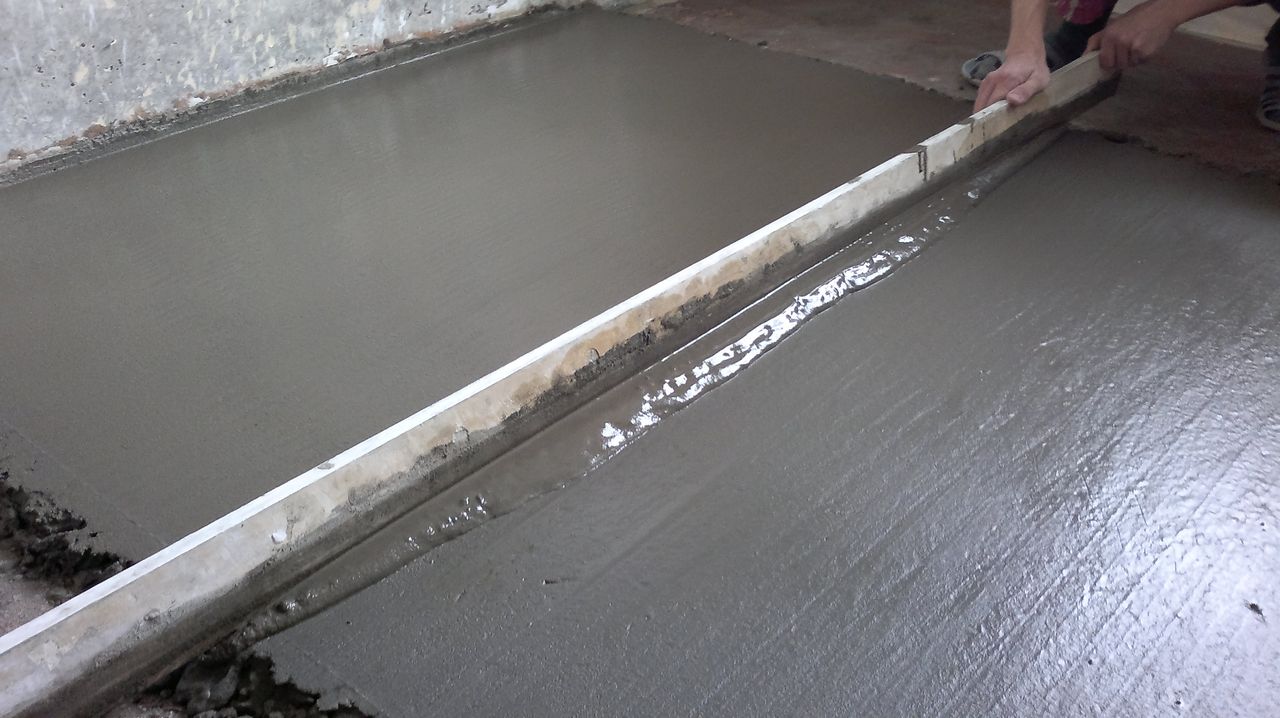
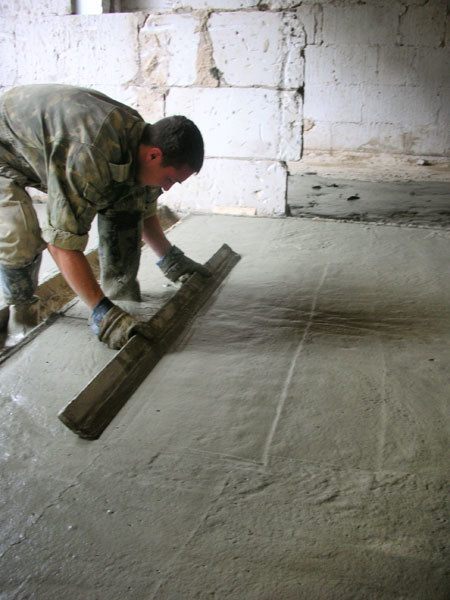
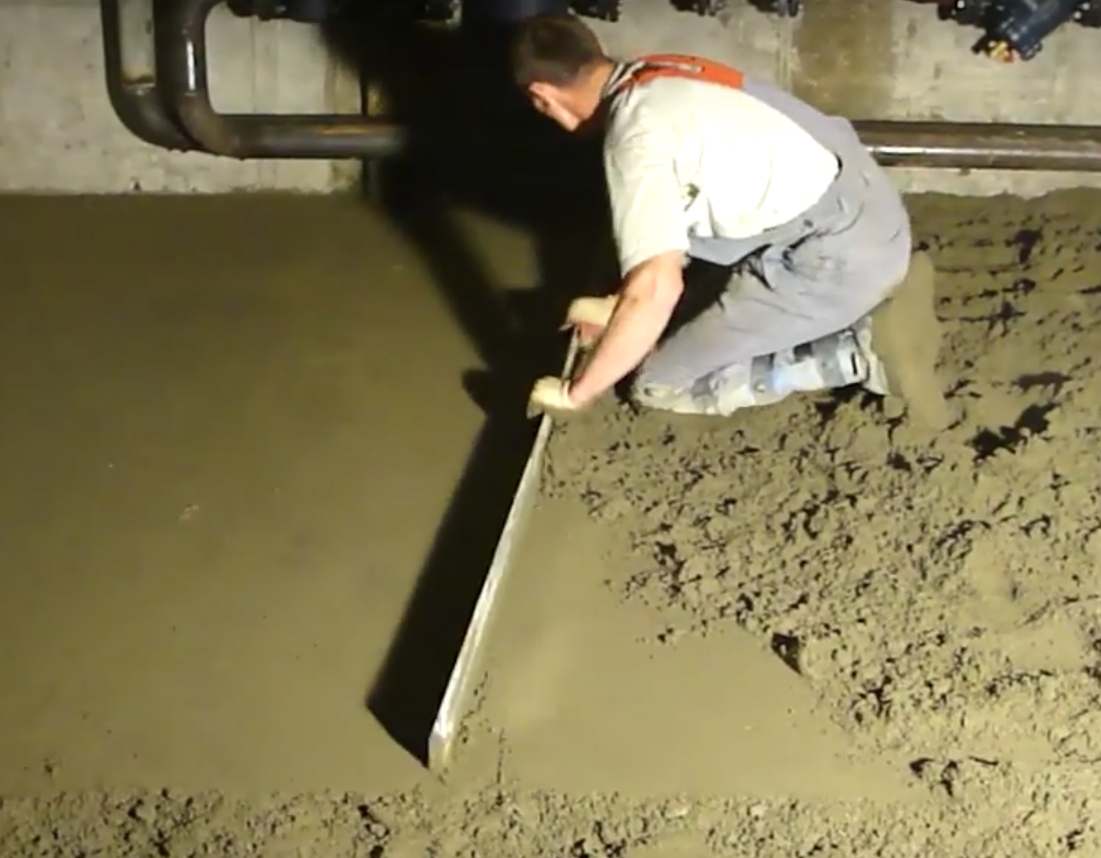
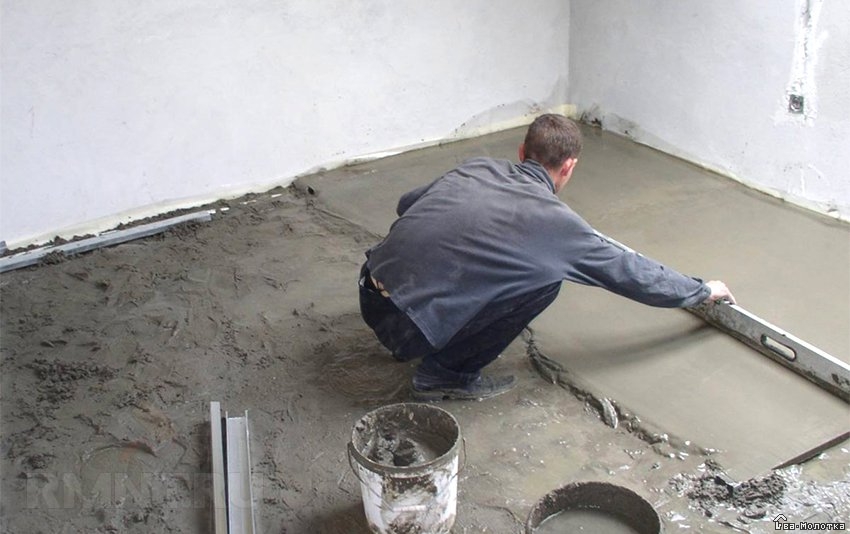
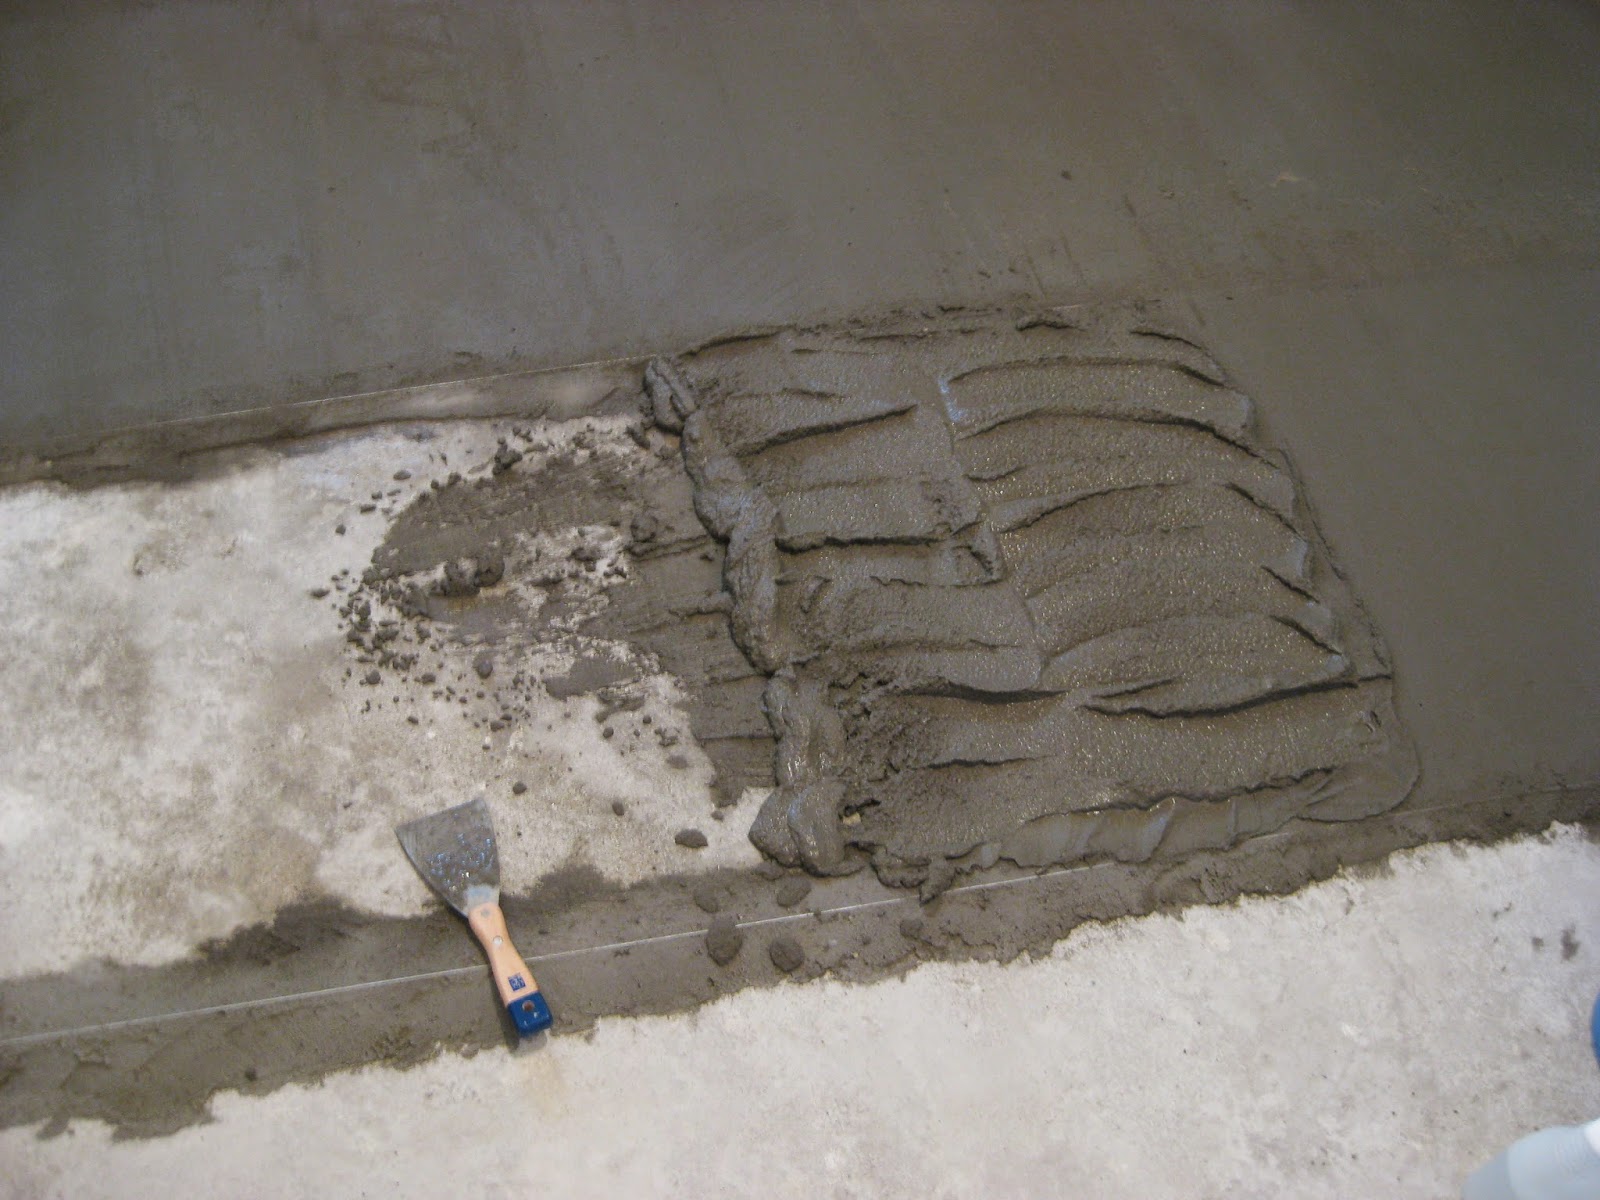
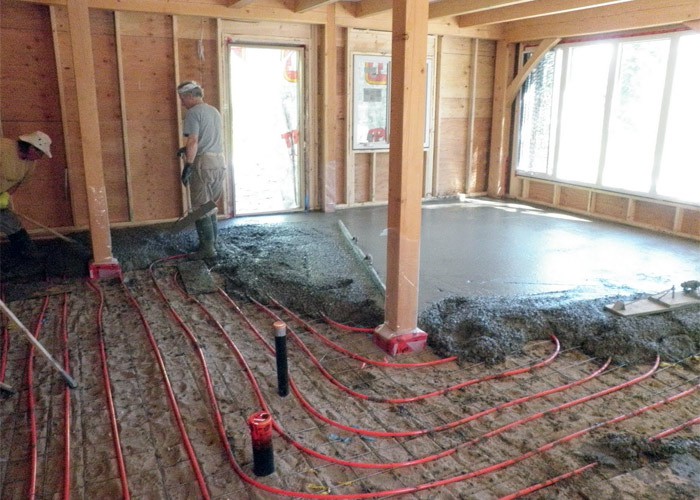
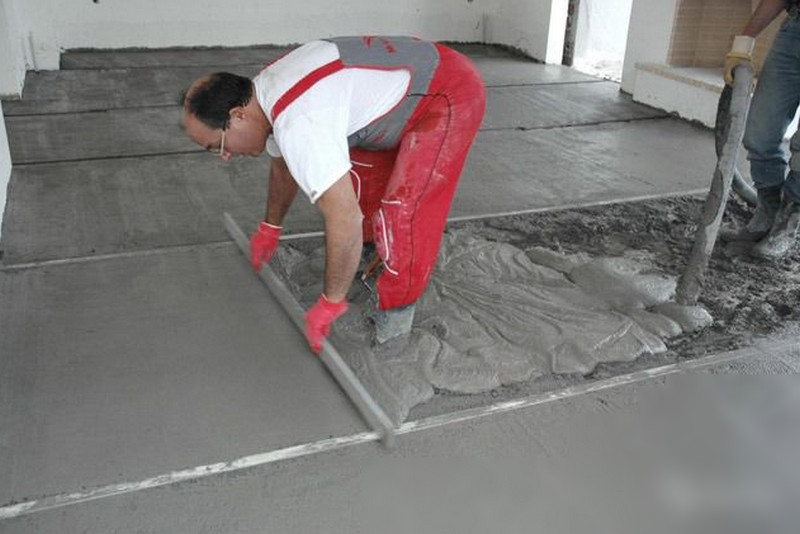
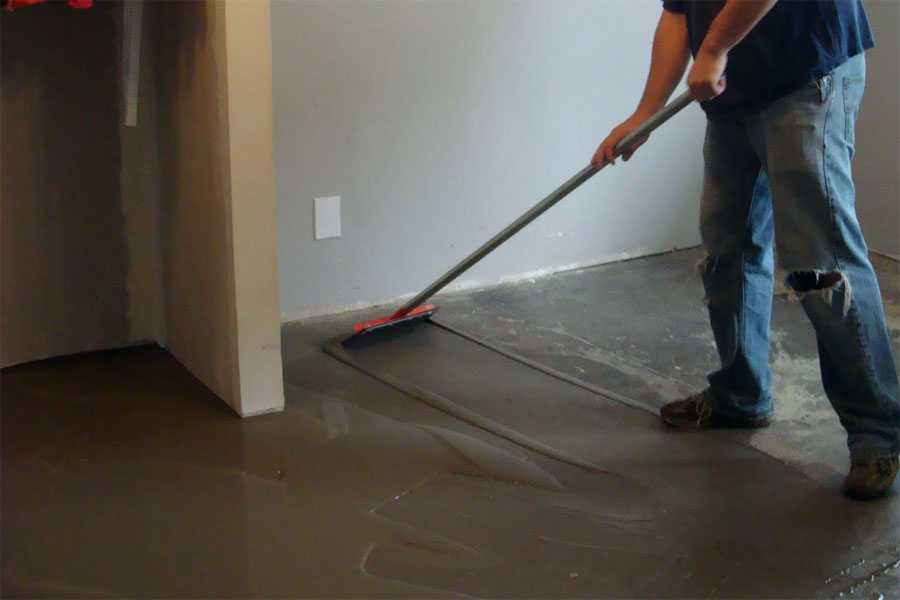
Fill should be done from the far corner of the room. The solution needs to be leveled in time with a spade, and as necessary to remove excess. Before aligning the screed, pull the reinforcing mesh. This will remove air cavities.
The maximum thickness of the screed for a warm water floor should not exceed 11.5 cm, of which 5 cm falls on the heat insulator, 1 cm of the solution - under the pipes and 3 cm above them. When pouring concrete, you need to tamp with a rake or a special vibrator. This will help to release air bubbles, which further prevent the formation of voids. The thickness of the pipe itself is 2 cm. After complete drying, which occurs not less than 30 days, you can turn on the heat.
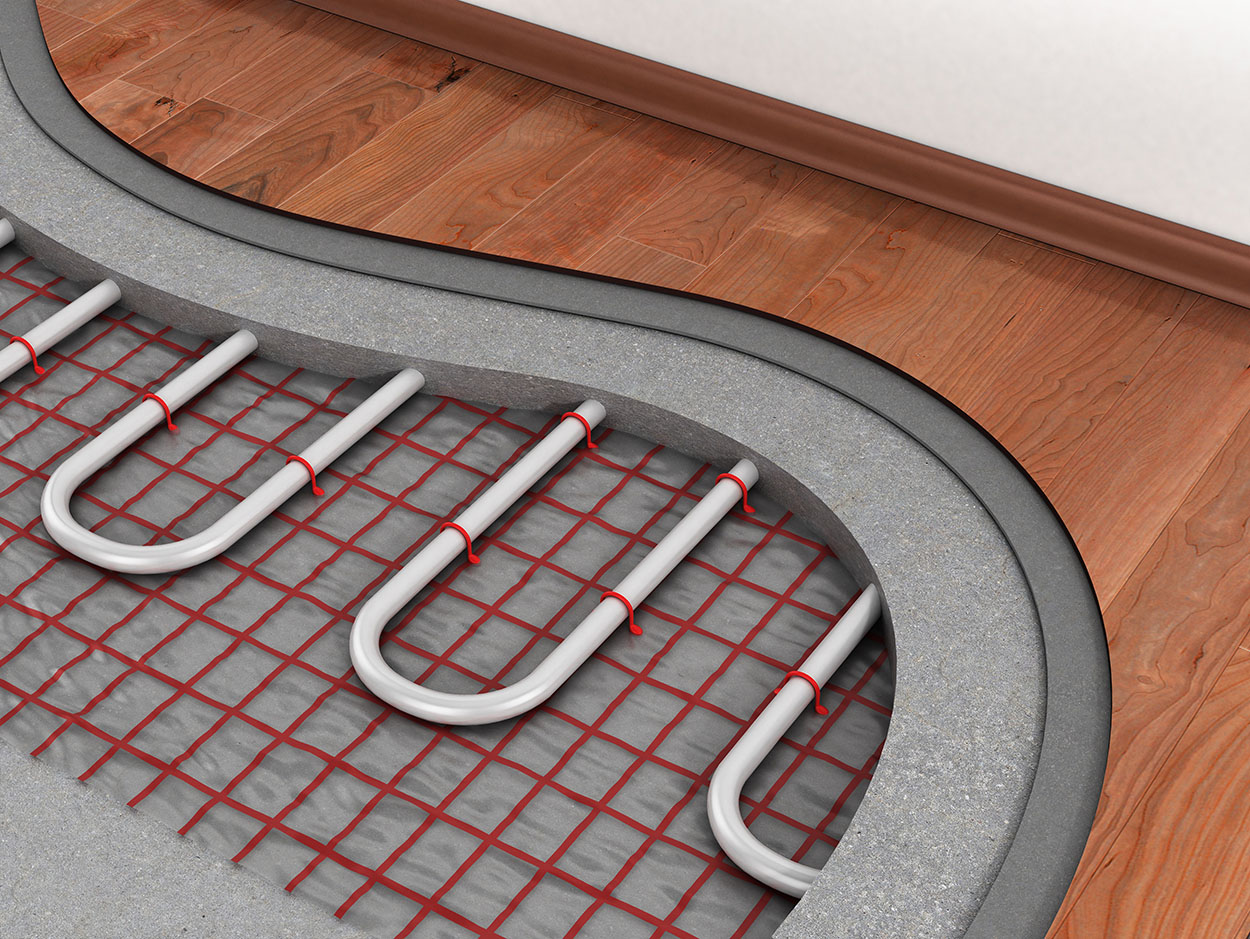
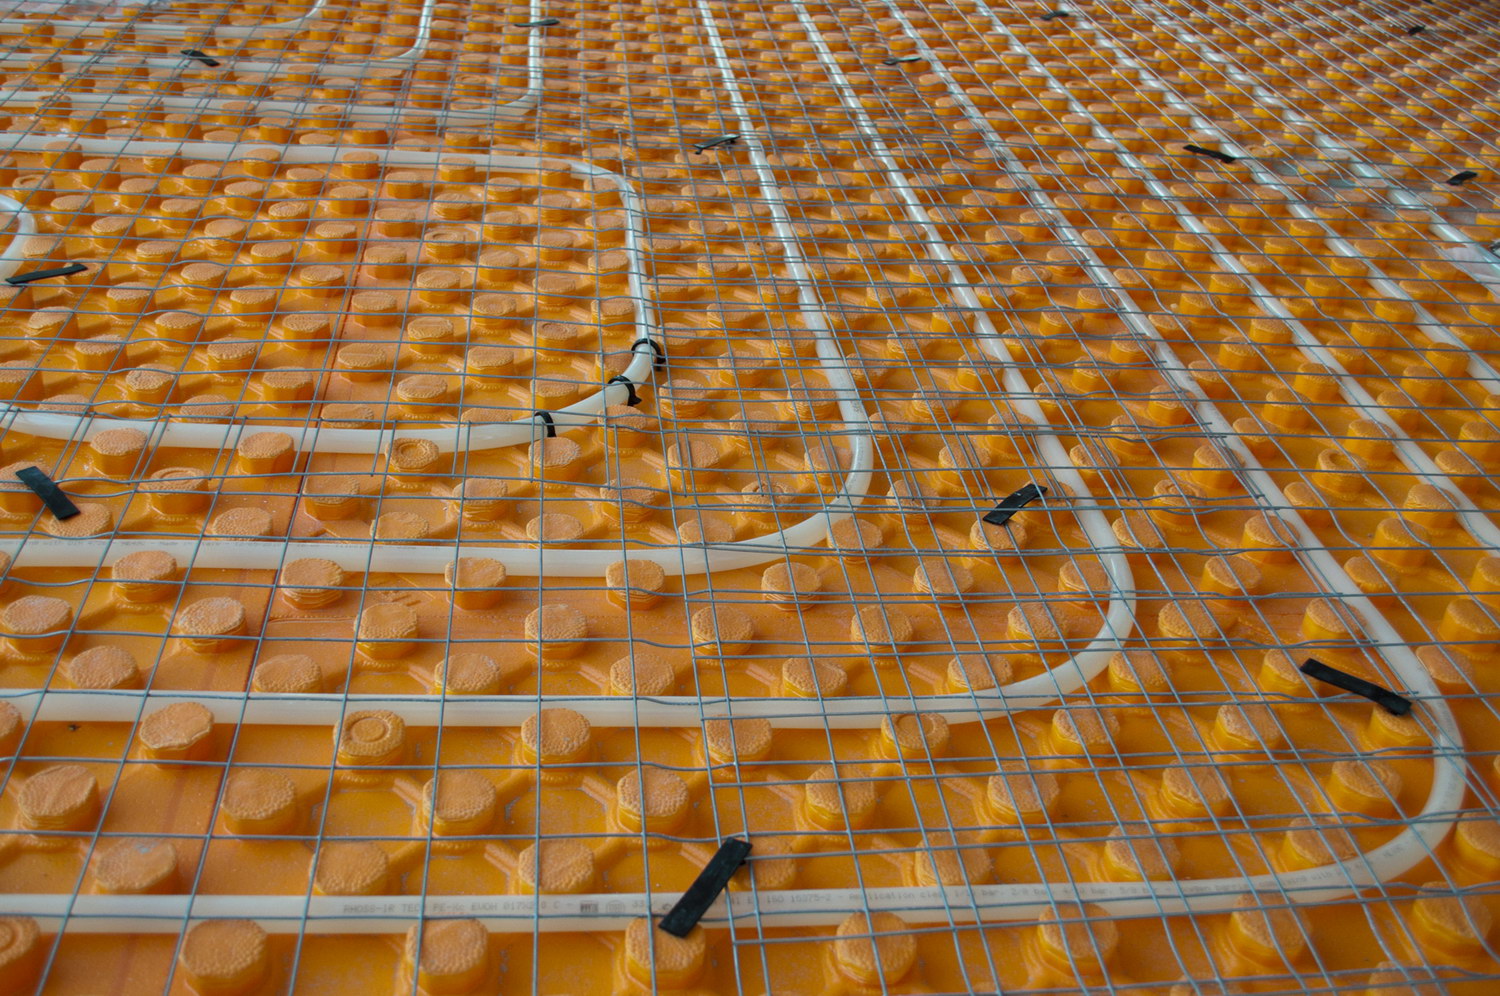
Filling of the floor with cable and thermo mat heating is carried out using reinforced mesh, which is laid down and is needed to fix the cable on it. Otherwise there is a risk of surfacing wires. Layout of the cable should be performed evenly, avoiding sharp bends and creases of wires. Cable and thermomat should not be in contact with the heat insulator.The thickness of the screed is less than that of the water floor, which is explained by the small thickness of the cable or thermomat, it is from 5 to 10 cm.
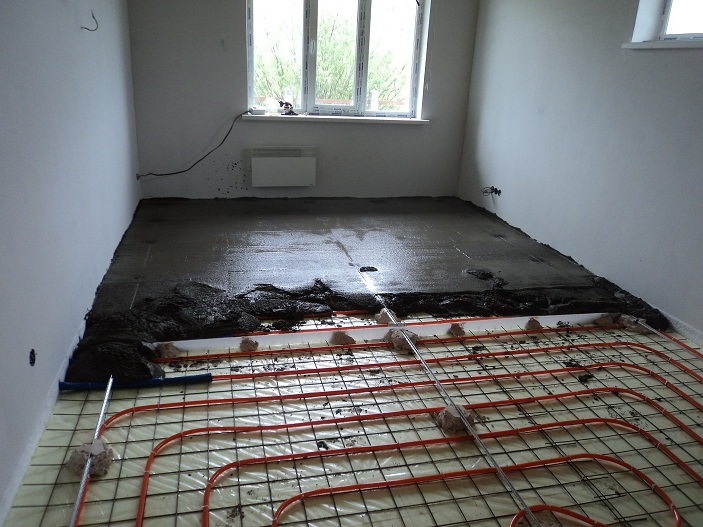
The optimum thickness is 7 cm. This is explained by the fact that too thin a layer retains less accumulated heat, which means that the heater will need to be turned on more often. The thermomat can be laid both on top of the screed and into it, but the layer thickness over the heating element cannot exceed 2 cm.
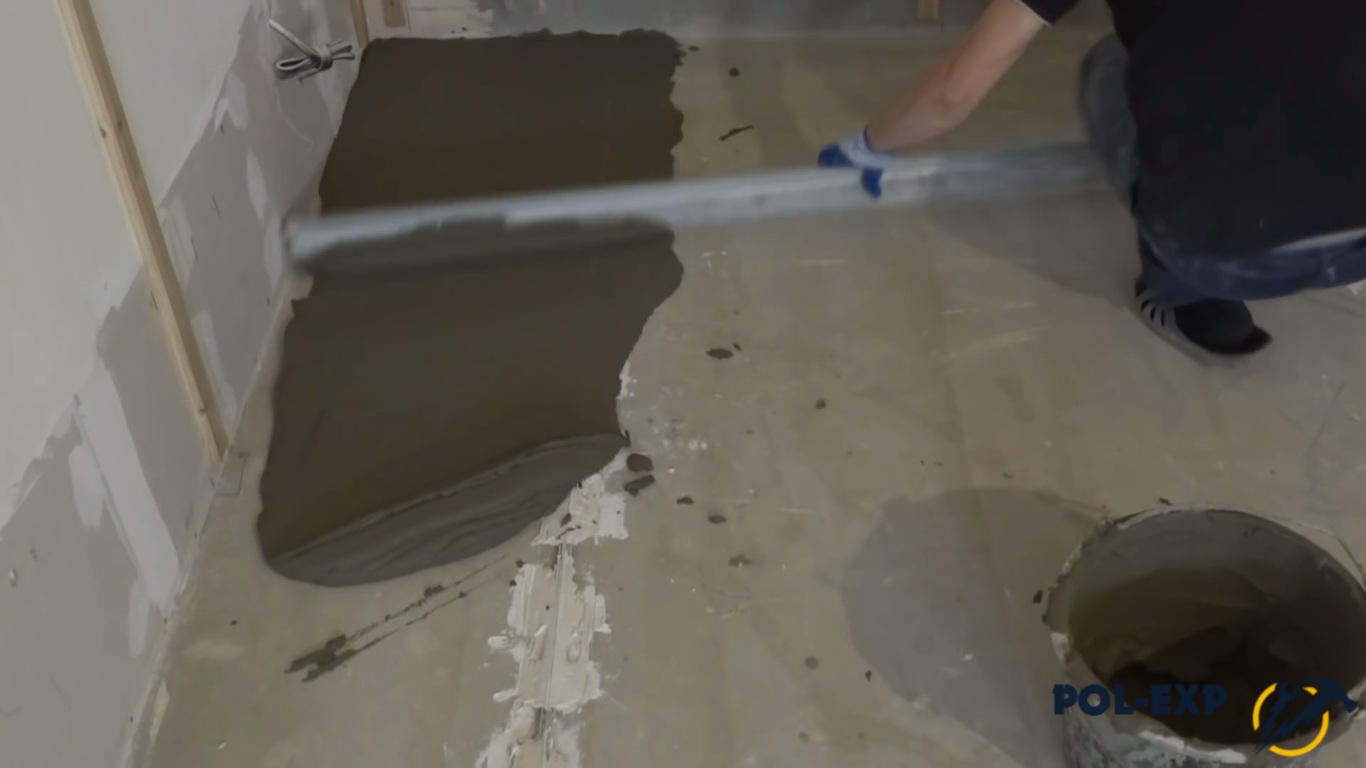
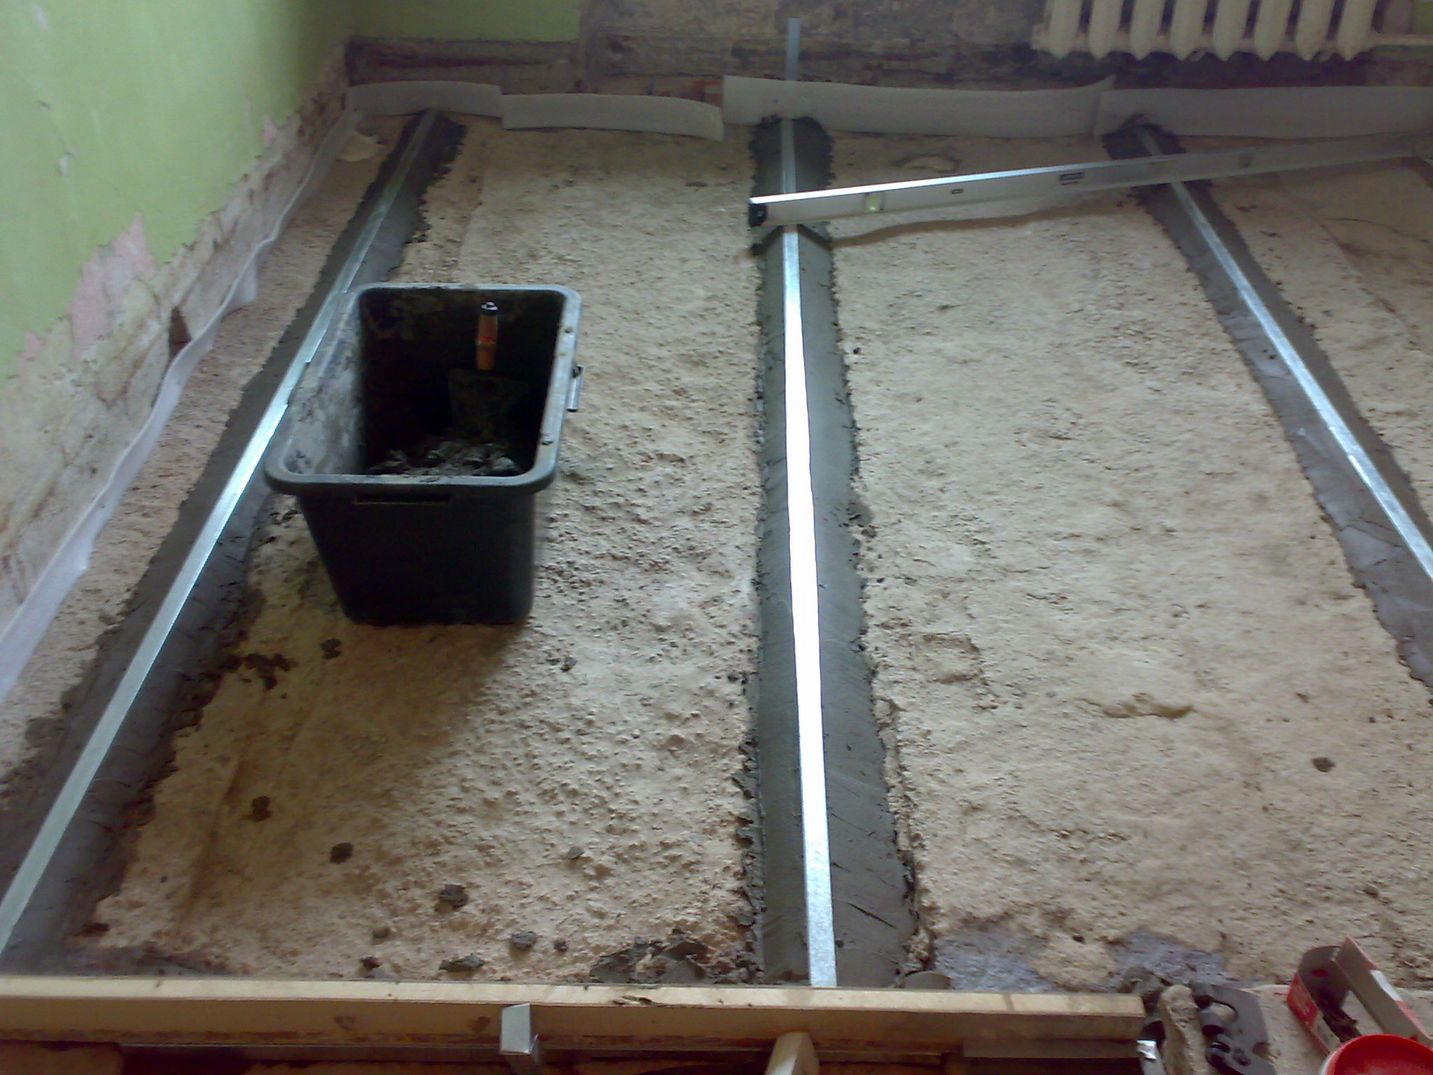
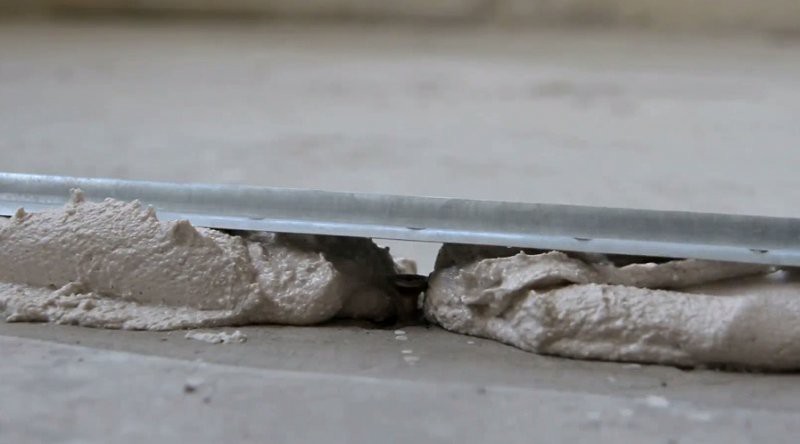
Floor filling should be carried out at the lighthouses. They are necessary to guide the height of the fill and can be both alabaster columns and factory products. After the initial setting, the beacons are carefully removed from the concrete with a spatula, the holes are moistened and filled with mortar. As it dries, the concrete floor undergoes regular wetting and leveling, which is done with a scraper. After removing all excess and uneven terrain, the surface is leveled with a special trowel. The damper tape is removed with a knife.
The rules for pouring self-leveling gypsum mixes are the same as for applying concrete mortar, but the leveling technology is slightly different.Immediately after pouring, the entire surface must be treated with a needle roller. This will release air bubbles and prevent the formation of voids. Beacons should be removed quickly, before the mortar sets. To do this, use a special nozzle on the shoes in the form of long spikes. After drying, the plaster surface does not require wetting and grinding. Gypsum mixes have a very short drying time, so a decorative coating can be laid within two days after completion of the work.
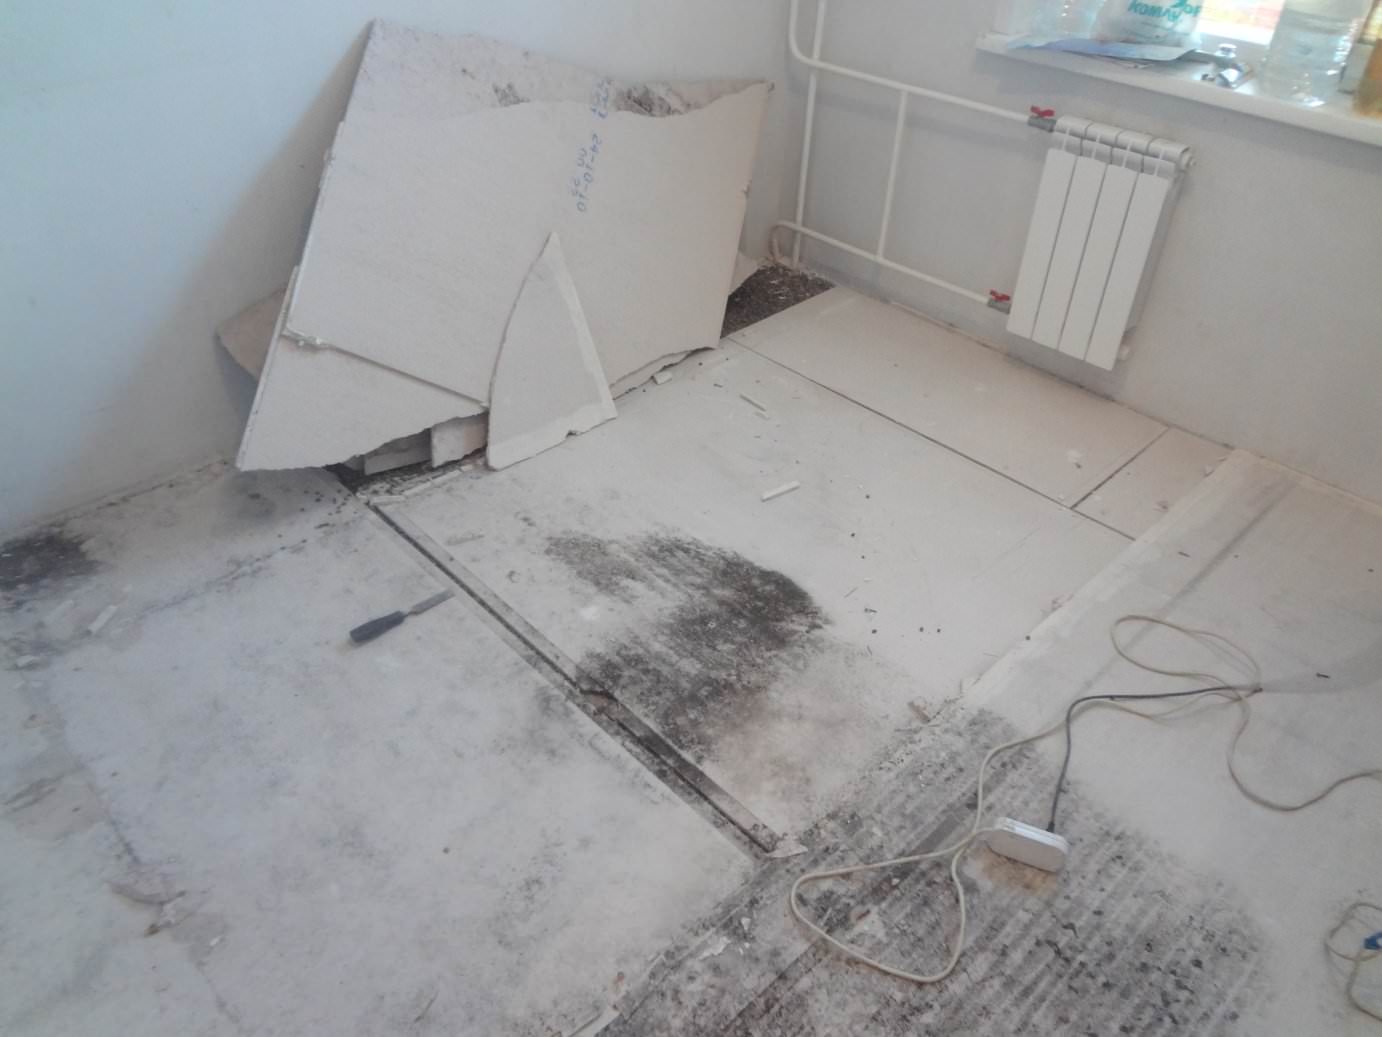
Faults
If, after drying the solution, cracks appear on the screed, it is necessary to urgently start repairing the surface. Cracks can cause uneven heating of the floor, in which certain areas will experience overheating. This will lead to a rapid failure of the electrical system. Violation of the solution preparation technology and the presence of drafts during floor drying can lead to the formation of cracks. For more uniform drying, concrete floors should be covered with plastic wrap.
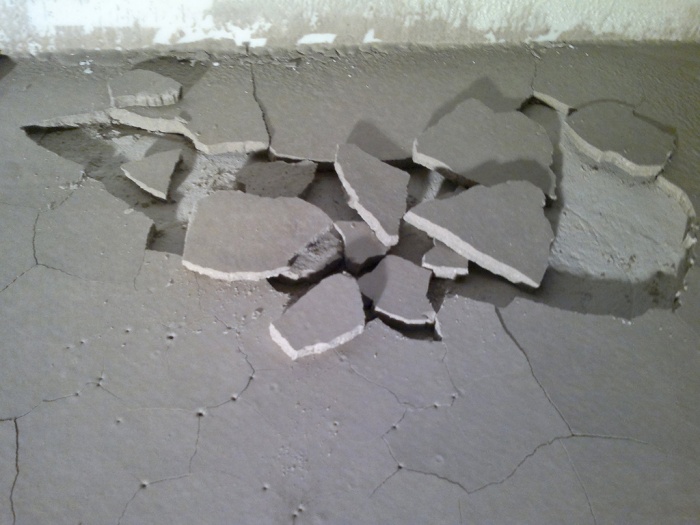
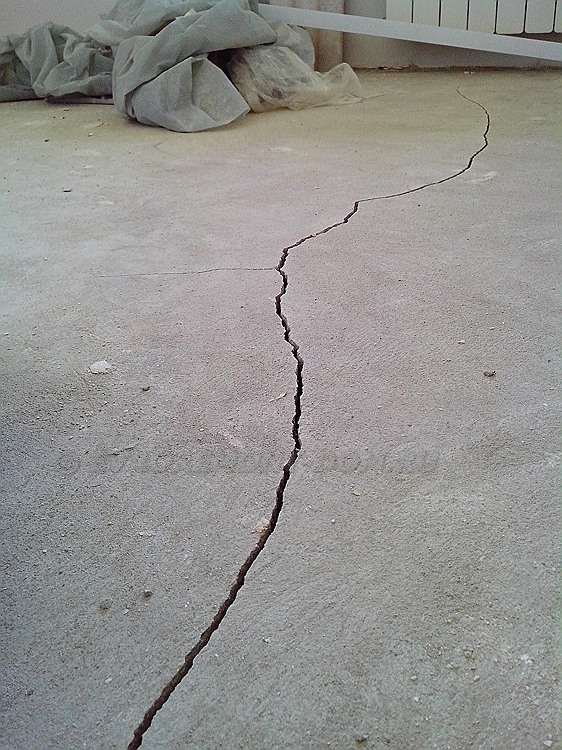
In order to repair the floor, remove the peeled material from the cracks and remove dust with a vacuum cleaner.Then you need to moisten the groove and putty with fresh solution. After drying, it is necessary to grind and grind the damaged area. In the case of severe peeling, swelling and significant cracking, the entire layer should be immediately dismantled and re-filled.
Useful tips and tricks
To ensure that the “warm floor” system lasts a long time, while the coating is not deformed and retains its presentable appearance throughout its entire service life, Some points should be considered:
- when installing an electric floor in the bathroom, it is necessary to ground This will make the use of the structure completely safe;
- Before you start pouring should draw a detailed layout of the pipe or cable. If it is necessary to repair it, it will allow to open the necessary area and limit it to local repair;
- thermomats and infrared film heating systems are placed either on the screed or in tile adhesive. The thickness of the layer should be made minimal, and the front part of the film construction should be left not filled;
- for reinforcement, you must use a metal grid for a thick layer, and fiberglass - for thin.
Laying warm floor and the formation of the screed can be done independently. With the right approach and compliance with the installation technology, it will be possible to get an even and solid base for the decorative coating, at the same time solving the problem of basic or additional heating.
How to properly fill the floor, see the following video.


