Bath enameling: restoration methods and restoration stages
Any object ever wears out, and the bathroom bowl is no exception. After prolonged use, chips, scratches, cracks, and rust spots appear on it. Not everyone has the opportunity to pay for the replacement of a new bath, and sometimes people just do not want to throw out a cast-iron product due to the fact that it keeps the water temperature for a long time. To reduce the cost of enameling, you can carry out this procedure yourself.

Causes of damage to the enamel coating
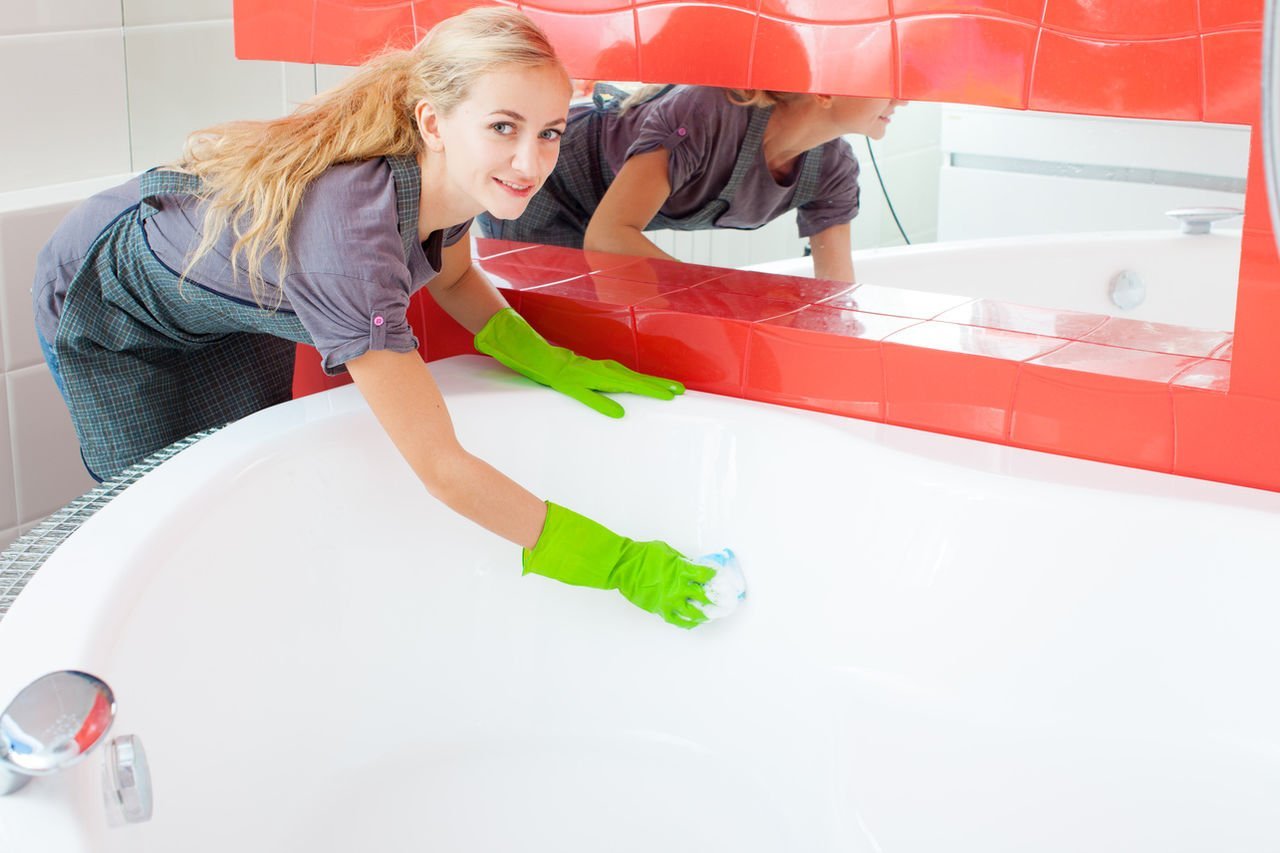
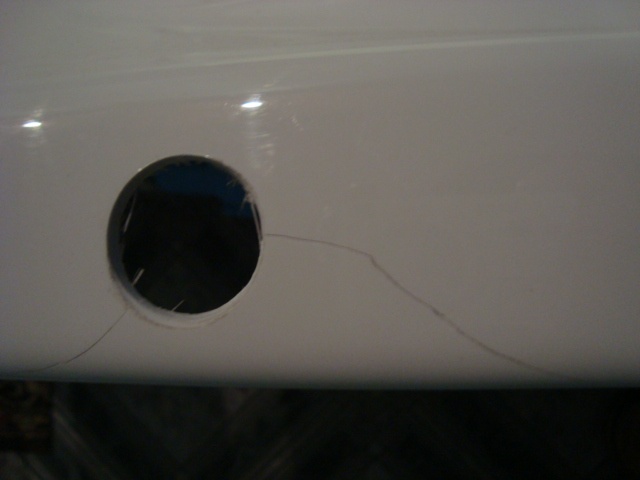
The rate of wear of the bath surface depends on many factors. The first one is improper surface cleaning. This is the most common cause of rapid wear of enamel. The use of steel wool or abrasives when cleaning results in immediate damage to most of the surface.

Enamel is quickly damaged by the use of acids or other chemicals for cleaning waste pipes. Chlorine, bleach, vinegar and lemon juice also act on it. Many use these tools to try to remove stains. In fact, while this enamel only more wear. After rubbing the bath with abrasive substances, scratches formed on it, which then gradually get dirt particles.
Many factors also affect the wear of bathroom enamel.
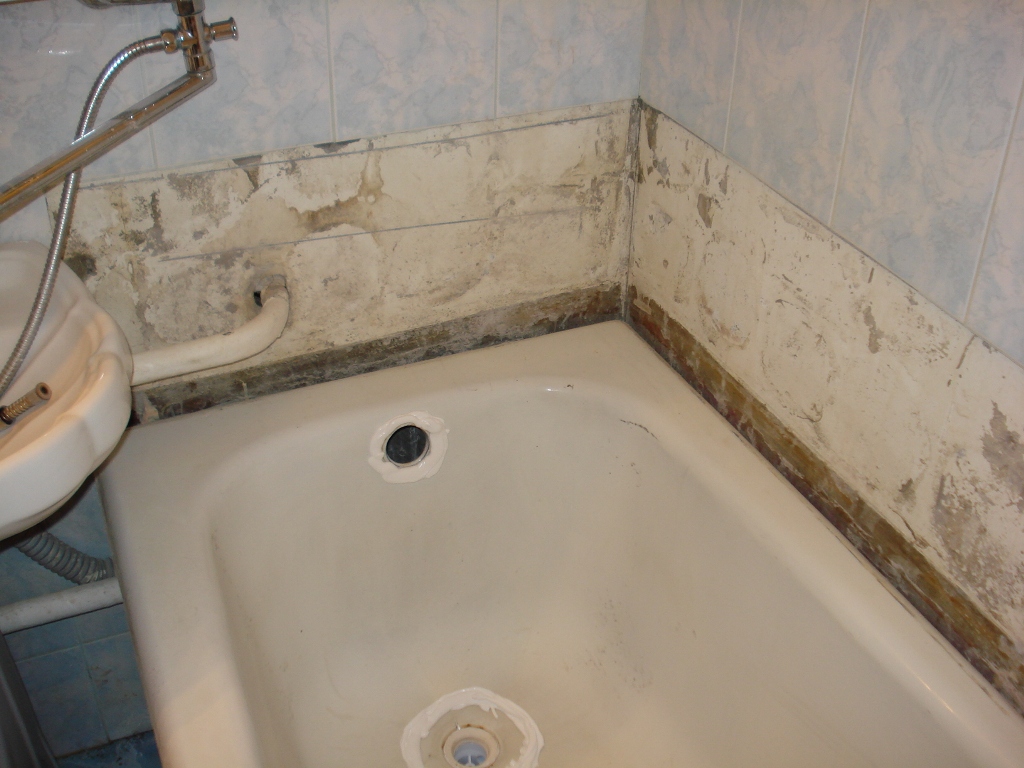
- Water quality Sometimes water contains an unacceptably high proportion of additional particles, which over time either paint the surface or scratch it. Contaminants, such as plant colloids and iron oxide, will stain the surface. Even new bath surfaces are often painted. In areas where water contains a lot of lime, sediment forms around drains and taps. It is important to ensure that dripping taps are closed and that water does not remain in the bathroom.
- Dripping faucets. Regular dripping water causes serious damage to the bath surface. The first sign of damage is the staining of the enamel surface. This spot is usually green or slightly brown.Dripping taps leave rust around the sink. Even if you replace the bath, but leave the dripping valve, rust will reappear.
- Water temperature. Highly hot water causes the metal to expand and contract. Sudden temperature changes can cause cracks and other damage. It is recommended to periodically check the temperature of the hot water. Recommended temperature should not exceed 65 degrees.
- Proper installation. Poor installation of the bath can lead to water collection. If water stays on the surface for a long time, it will damage the enamel. A high level of various particles in the water will only add problems. Another cause of rust around the drain is that water cannot drain because it is above the bath surface. Correct installation of acrylic, fiberglass and marble baths is crucial, as the curvature causes cracking.

- Non-slip mats. Many people leave rubber mats in the bathroom to drain water from them. By regularly cleaning them up, you can avoid the occurrence of mold and soap deposits.
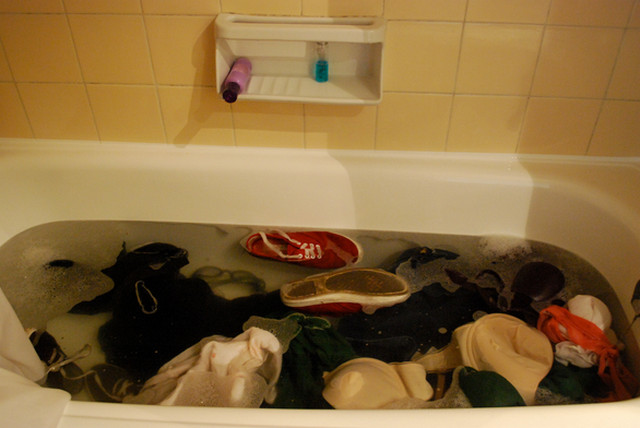
- Soaking clothes. Dyes soaked in bath clothes, can stain the surface of all types of baths.They are difficult to remove from acrylic bath surfaces, as stains are deeply soaked. Strong detergents in laundry detergents can also damage enamel.
- Dyes for hair. Hair dyes contain strong chemicals that easily stain the surface of the bath. It is not recommended to use dyes for hair in any bath.
- Soap. Many soaps contain caustic soda, which over time whitens a lot of enamel pigments. Soap should not remain on the open surface of the enamel for a long time.
- Other reasons. Frequent use of various bombs for baths and oils also spoils the surface. The constant use of colored disinfectants and soap in the bath water leads to the formation of stains, which can then be removed only by polishing. In some cases, the stain penetrates the surface and is not removed.
- Inevitable factors. If the above reasons can be reduced to a minimum, then some of them are unavoidable. For example, the use of water with iron, which leaves yellowish brown spots.
Ways to upgrade
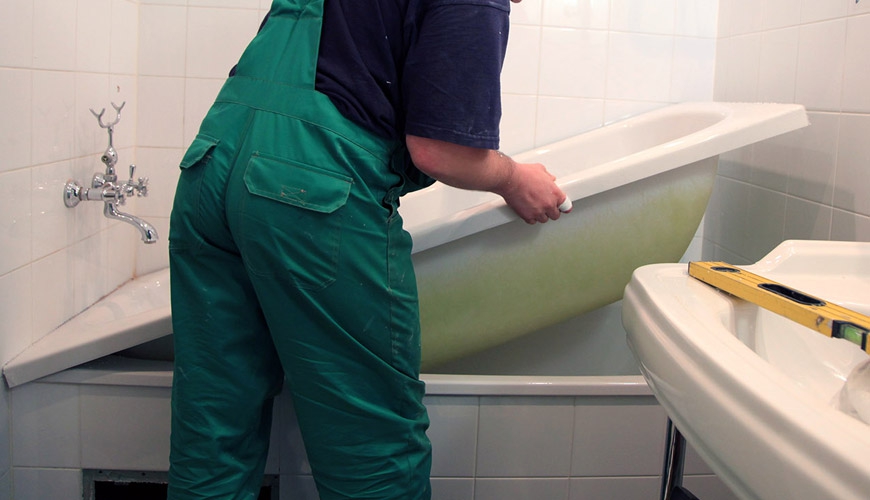
The renovated coating extends the life of the bathroom for 6-10 years.In order to carry out the enameling of the bath, it is necessary to buy special tools, as well as carefully study the information about the stages of work. All of the following methods of enamel coatings have the advantage that they do not require dismantling of the old bath.
Self enamel bath is easy to make.
Before starting, it is enough to study these methods:
- restoration of the enamel coating using liquid acrylic;
- painting with new enamel using special kits;
- restoration by mounting an acrylic liner.
Each of these examples has its own advantages and disadvantages.
The main advantage of using enamel can be called a large range of colors. In addition, this method allows you to reanimate the old bowl at no extra cost.
The cons of the method are much more:
- short enamel coating life;
- the disappearance of gloss and yellowing of paint when using reagents, cleaning agents and detergents (taking care of enamel is possible only with the help of soap and water);
- the coating is hard but very brittle, so cracks may occur when hitting hard objects;
- when the bath is filled with hot water, the metal expands, and the enamel remains in place: this can cause cracks in the layers of enamel paint;
- long time solidification of the new layer.
The surface of liquid acrylic has several clear advantages over enamel:
- there is no sharp unpleasant smell during the bathroom renovation procedure;
- acrylic is flexible, plastic, does not crack when the metal expands during water heating;
- acrylic dries pretty quickly;
- it is easier to apply than enamel;
- durable in use.
The disadvantages of the coating are also present: loss of gloss, sensitivity to the use of cleaning agents and mechanical damage.
A worthy opponent of enamel and acrylic is an insert made of acrylic. Medical materials are used as raw materials for manufacturing. It is distinguished by the following characteristics: resistance to dirt, long-term protection of color and gloss, it is resistant to damage, absorbs noise when bathing. In addition, it is characterized by a certain resistance to various substances, long life.
There are disadvantages that every consumer should be aware of.Acrylic inserts are made to certain standards, so that it may not fit into each bath. In addition, the product is relatively expensive.
Remember! Do not blindly trust manufacturers who guarantee the quality of the coating of any size, since it is likely to be made of technical plastics, and this poses a threat when used.
You can cover the product with a special coating. Such processing generally has only positive feedback.

Enamel selection criteria
The density and durability of the enamelled coating will depend on the quality of the product you purchase. Therefore, it is very important to pay attention to the particular composition.
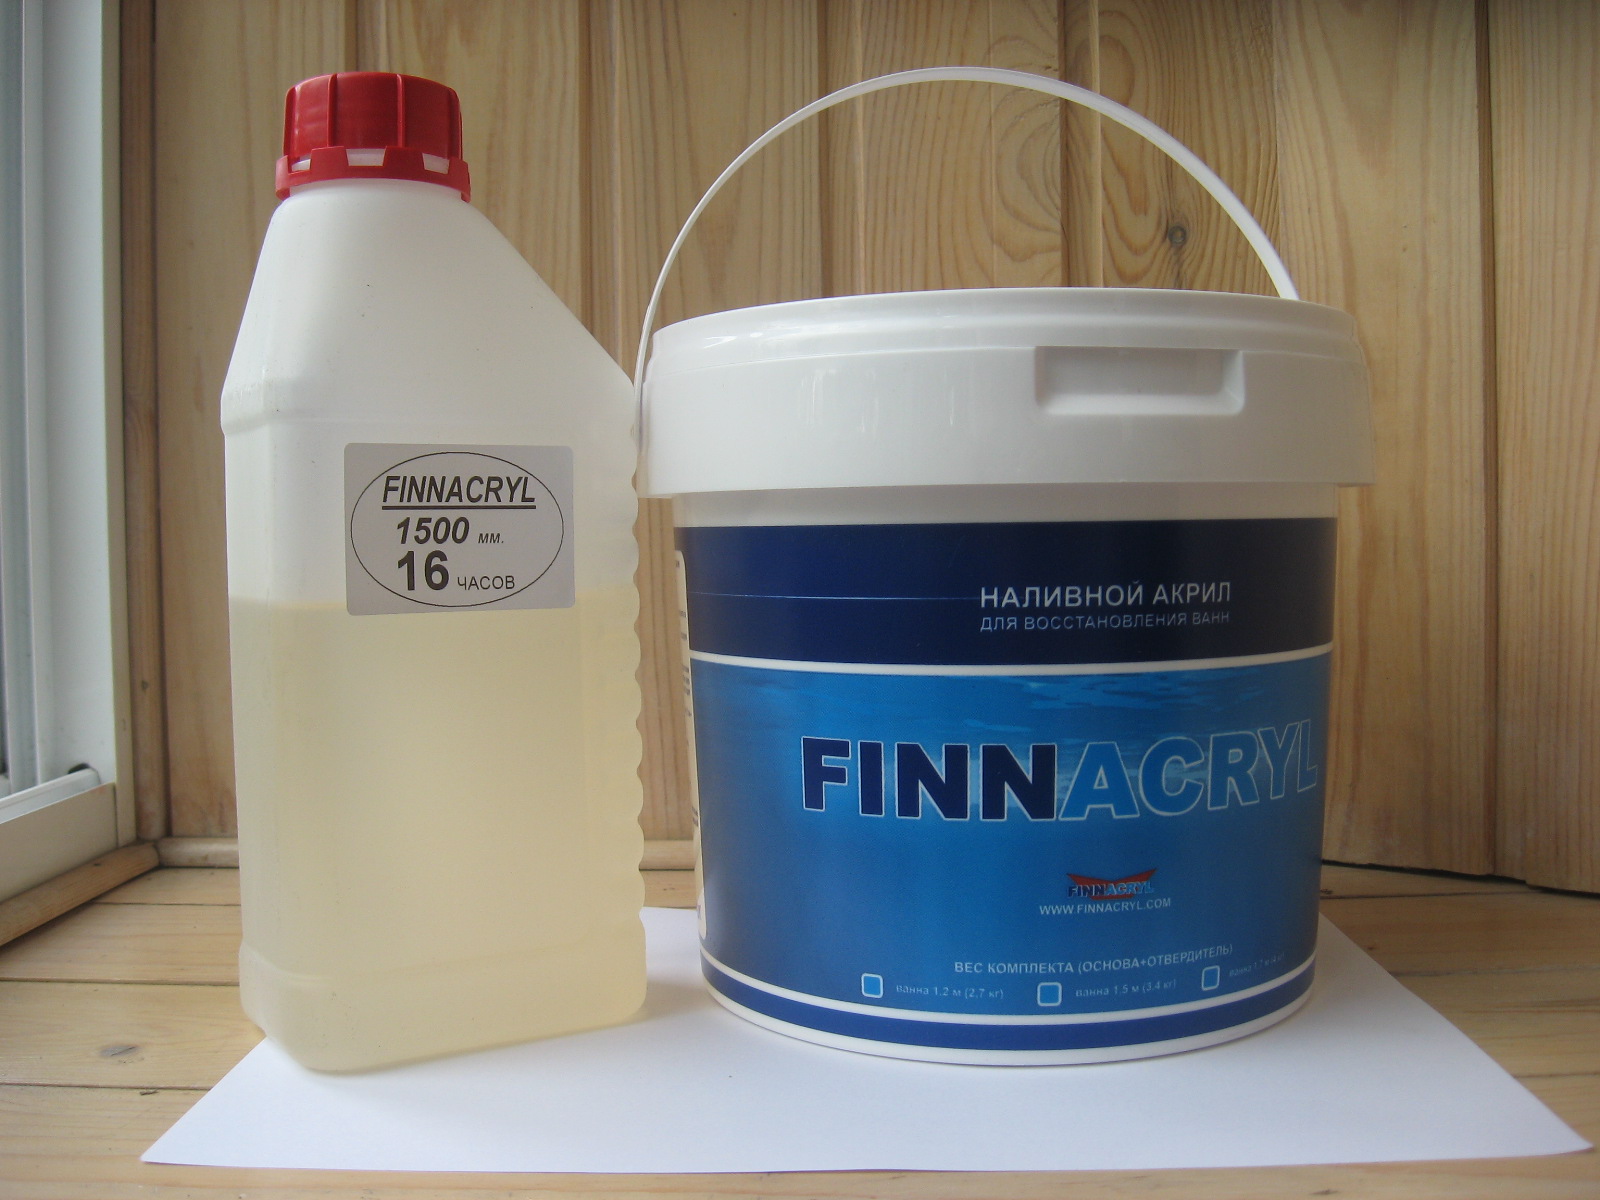
Hardener shade
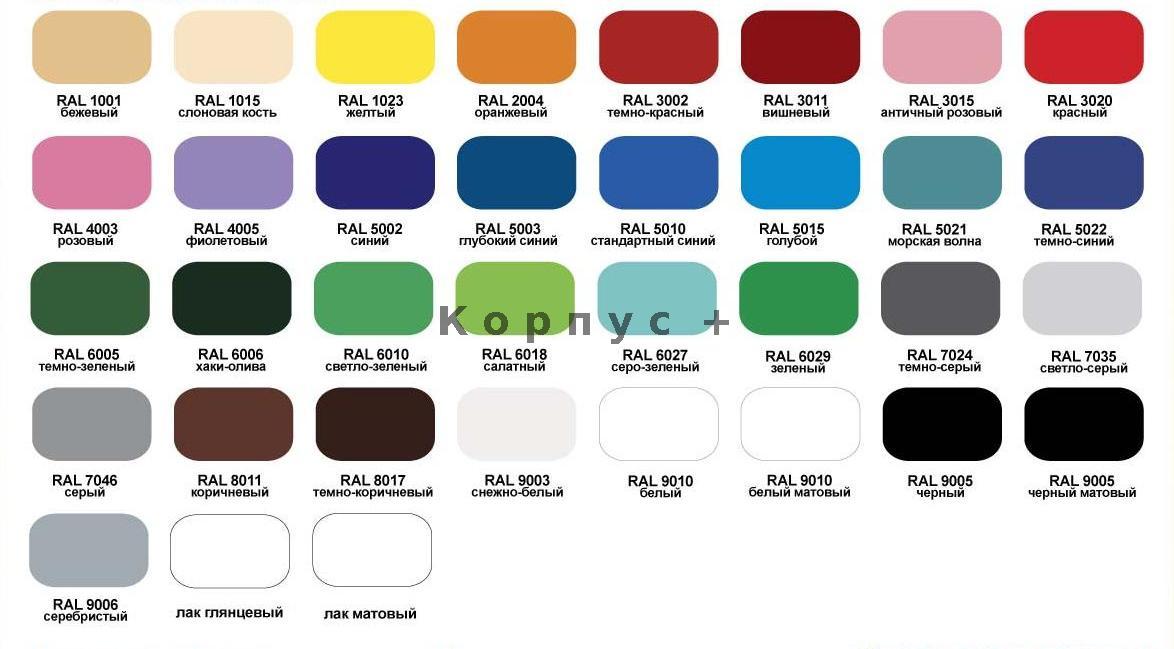
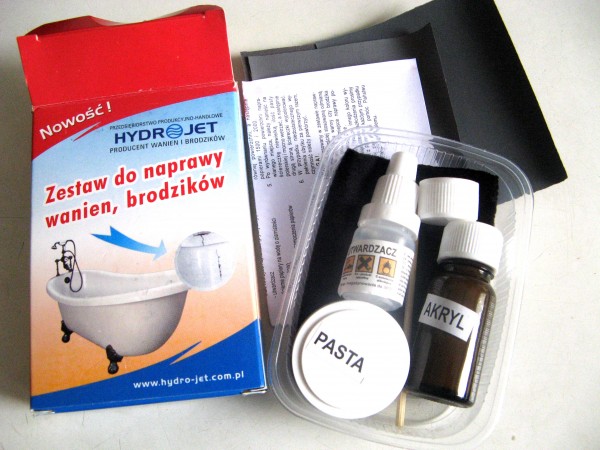
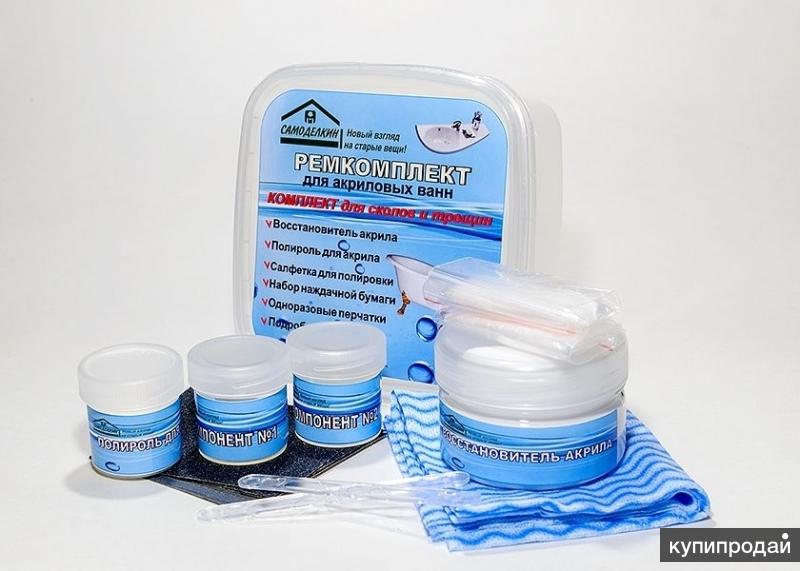
Usually, a bathroom bowl restoration kit consists of two or three components. The hardener is included in the standard kit for enamelling the bath. Pay attention to its shade. If it is yellow-brown, red or rusty, you and the finished floor in the bathroom will not be snow-white.

Application methods
All compositions for the restoration of the bath surface can be applied with a brush, roller or spray.The sprayed composition is sold in aerosol cans. Aerosols are desirable to use only on small areas with damage. If applied to the entire surface of the bowl of the bathroom, you can get a non-uniform layer. In order to independently restore the enamel layer, it is better to work with a brush.
Enamel hue
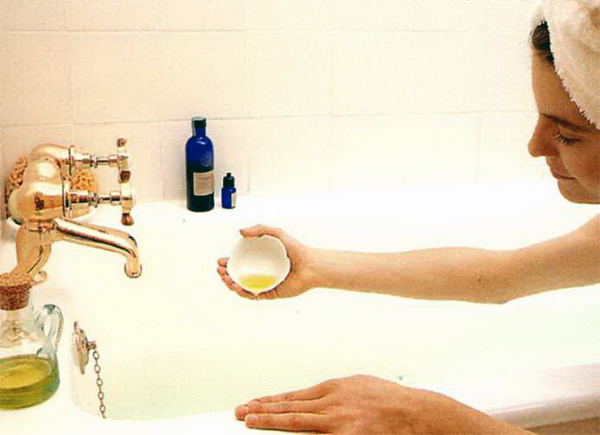
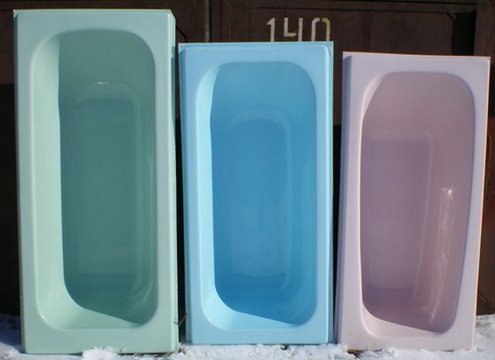
The color of the enamel can be tinted individually. It can be adjusted to the existing bathroom plumbing. To do this, you need a special paste. It can be included for enamelling. If not, can be purchased separately. According to experts, the shade of the finished bathroom cover varies depending on the lighting. Therefore, the shade of the finished mixture is better to choose in the same light as in the bathroom.
Kit components
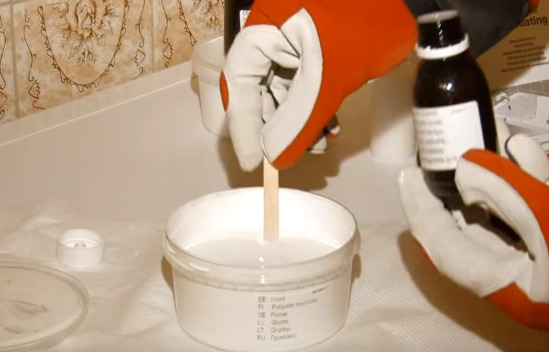
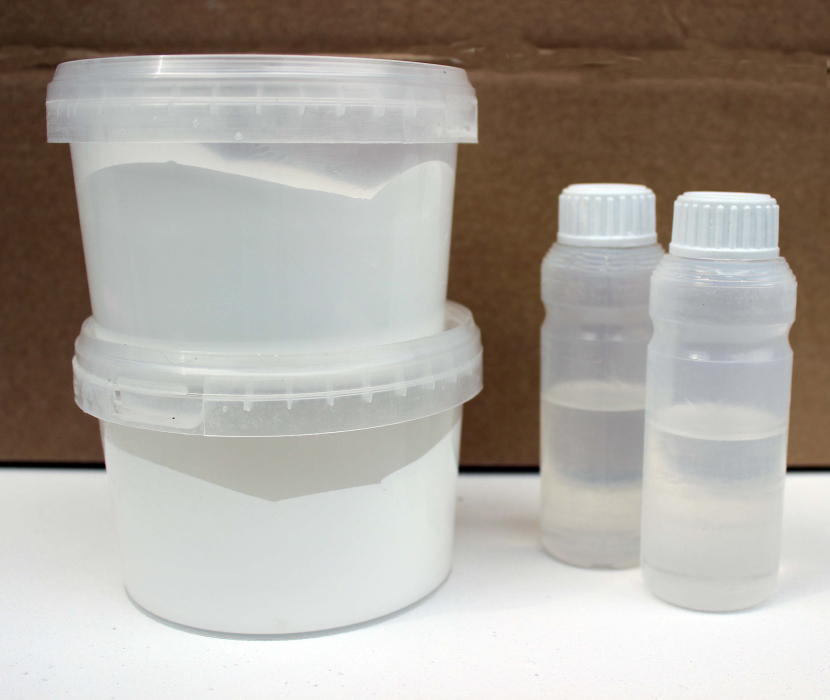
Sets for self-restoration of the bowl in the bathroom can be a different set. Well, if the kit includes not only two-component enamel and tinting paste, but also means for cleaning the old surface.
Enamel Compound Brands
The stores offer a wide range of different brands. However, most often used are described below.
Epoxin 51 or 51C
These compounds are two-component, they are characterized by density. It is recommended to apply only with a brush. Due to the special consistency of the compositions on the new surface, there will be no stains and unpainted areas. Due to the fact that the composition is thick, all the cracks and scratches are completely filled.
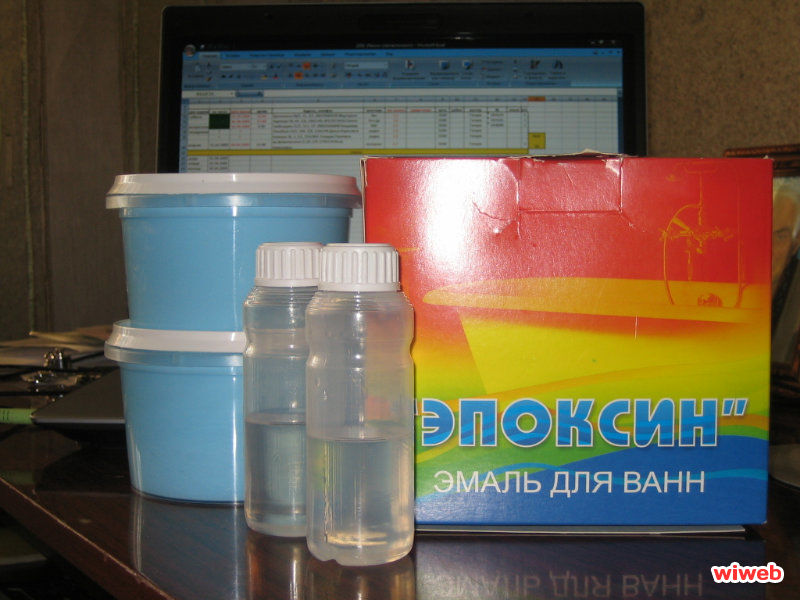
Full drying of the composition occurs within two days. According to the manufacturer, the service life of "Epoxin" is up to 9 years, but only when properly applied.
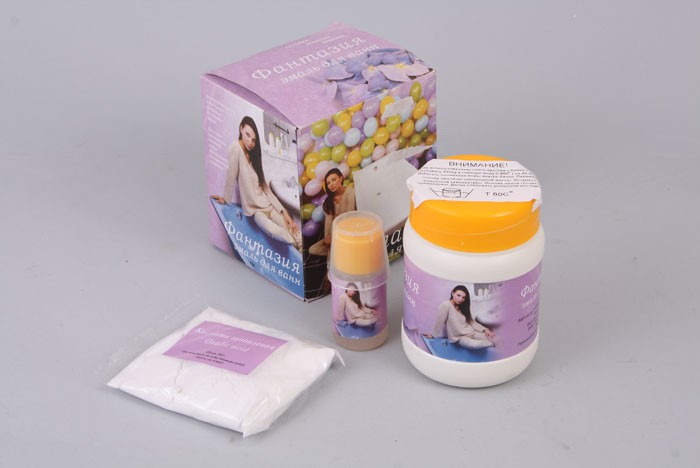
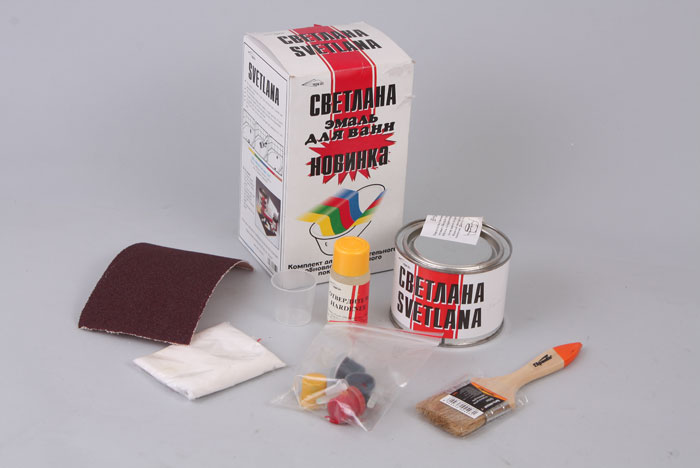
Rend House
These sets, called "Svetlana" and "Fantasy" are also in demand. They are distinguished only by the equipment. The enamel in these sets is two-component, and it can be applied not only with a brush, but also with a roller. Usually, masters with these compositions do not work, but for enameling with their own hands, the mixtures are excellent.
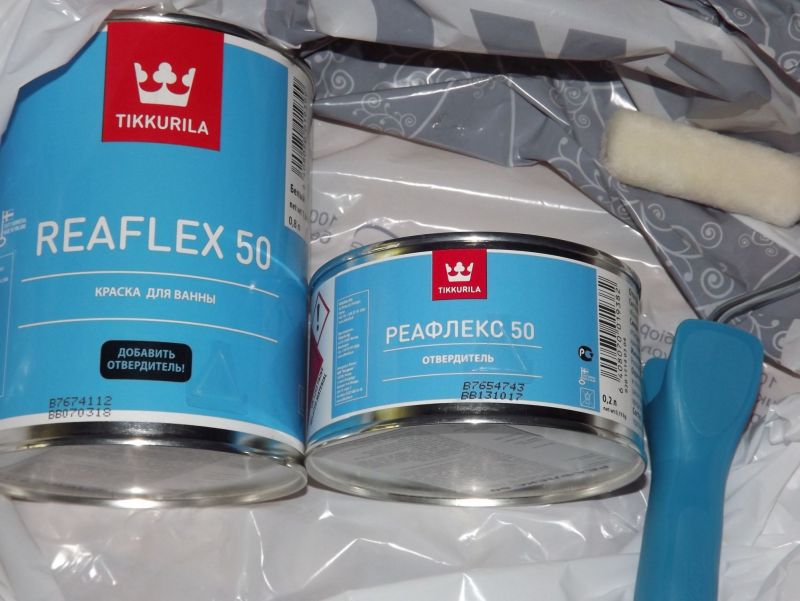
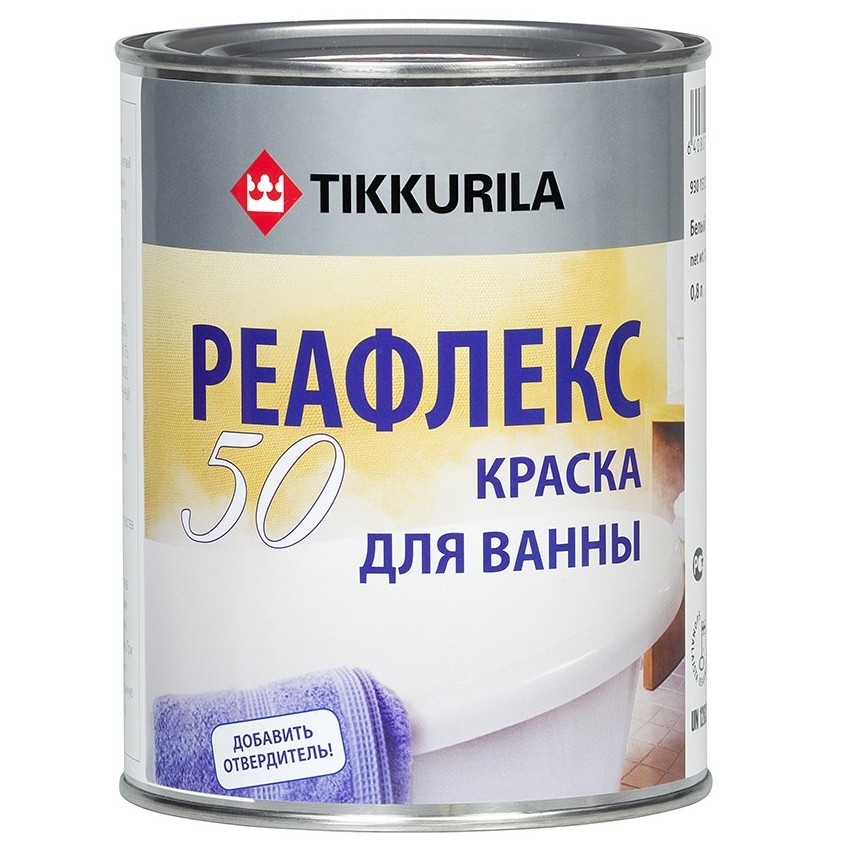
Reaflex 50
This composition is produced by Tikkurila, and is used mainly by professionals. Enamel is produced in the form of a liquid two-component mixture, therefore it is much more difficult to work with it than with previous brands. To obtain a high-quality enamel coating, it is necessary to apply up to four layers of this enamel. After applying each layer, you need to wait a while so that it is completely dry.Therefore, the procedure when using Reaflex takes at least a week, however, the result is excellent.
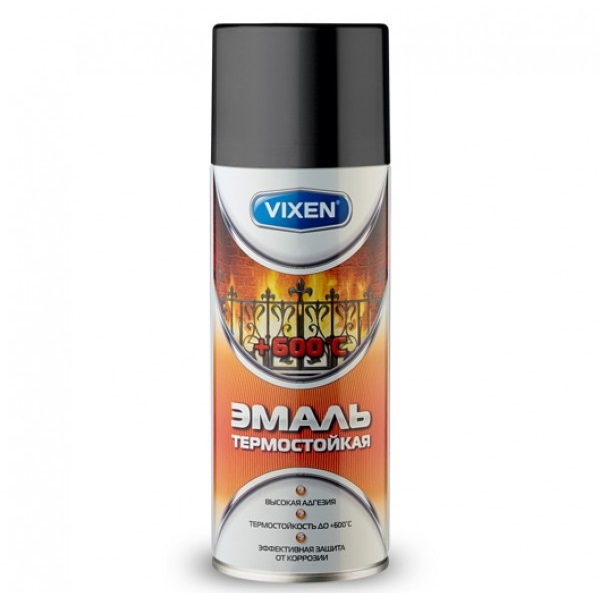
Epoxy quick-drying paint brands Reaflex and Kudo is characterized by its high quality. For ceramics most suitable spray company Vixen. Good feedback from customers also received alkyd and melamino-alkyd paints of the brands under consideration.
In the instructions of different compositions can be found warning. If you have any skills in painting, then surely you are familiar with safety when working with aggressive substances. For some, the recovery technology of the bath is comparable to repairing the outboard motor; in fact, it’s not so difficult. It is necessary to purchase equipment for protection, a list of necessary tools and accessories.
In addition, everyone will help simple skills with plumbing.
Nuances
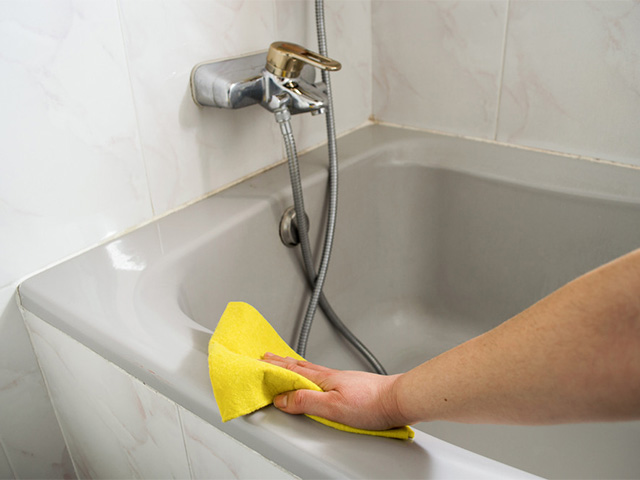
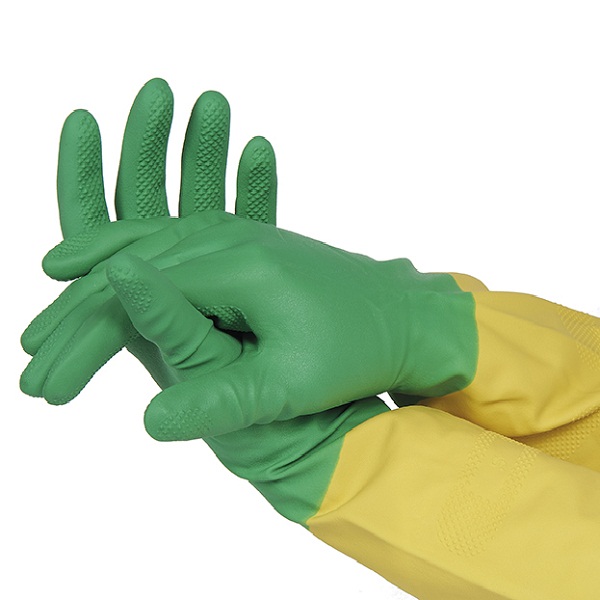
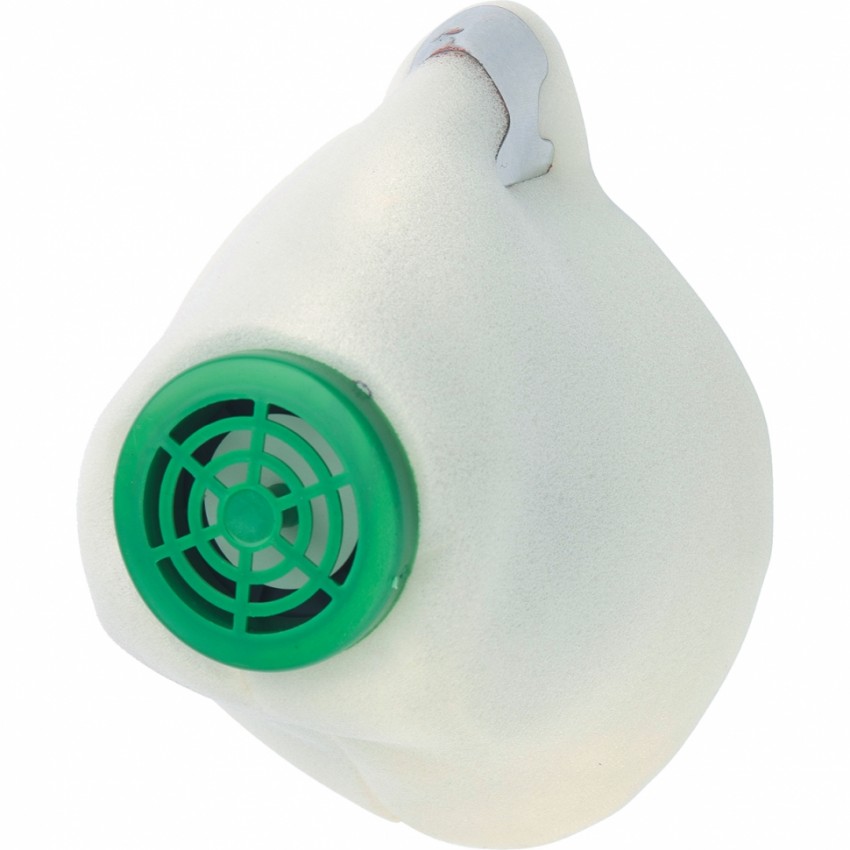
It is better to carry out all painting work in well ventilated spaces where it is possible to open windows. Experts advise to carry out such work in the summer. Ventilation is a must. To paint the bath without harm to health, it is necessary to use a respirator during work.You will need and household gloves, which are made on a latex basis. If they are double-layered, hands will not be damaged by chemicals. Their interior is usually white, and the top layer is yellow. It is better to buy several pairs at once.
Before restoration it is necessary to remove all unnecessary from the bathroom. All mixtures used during enamelling of a bath usually include many aggressive components characterized by evaporation. It would be more correct to take out all the excess from the bathroom, except for the faience elements, before doing the restoration of the enamel coating.
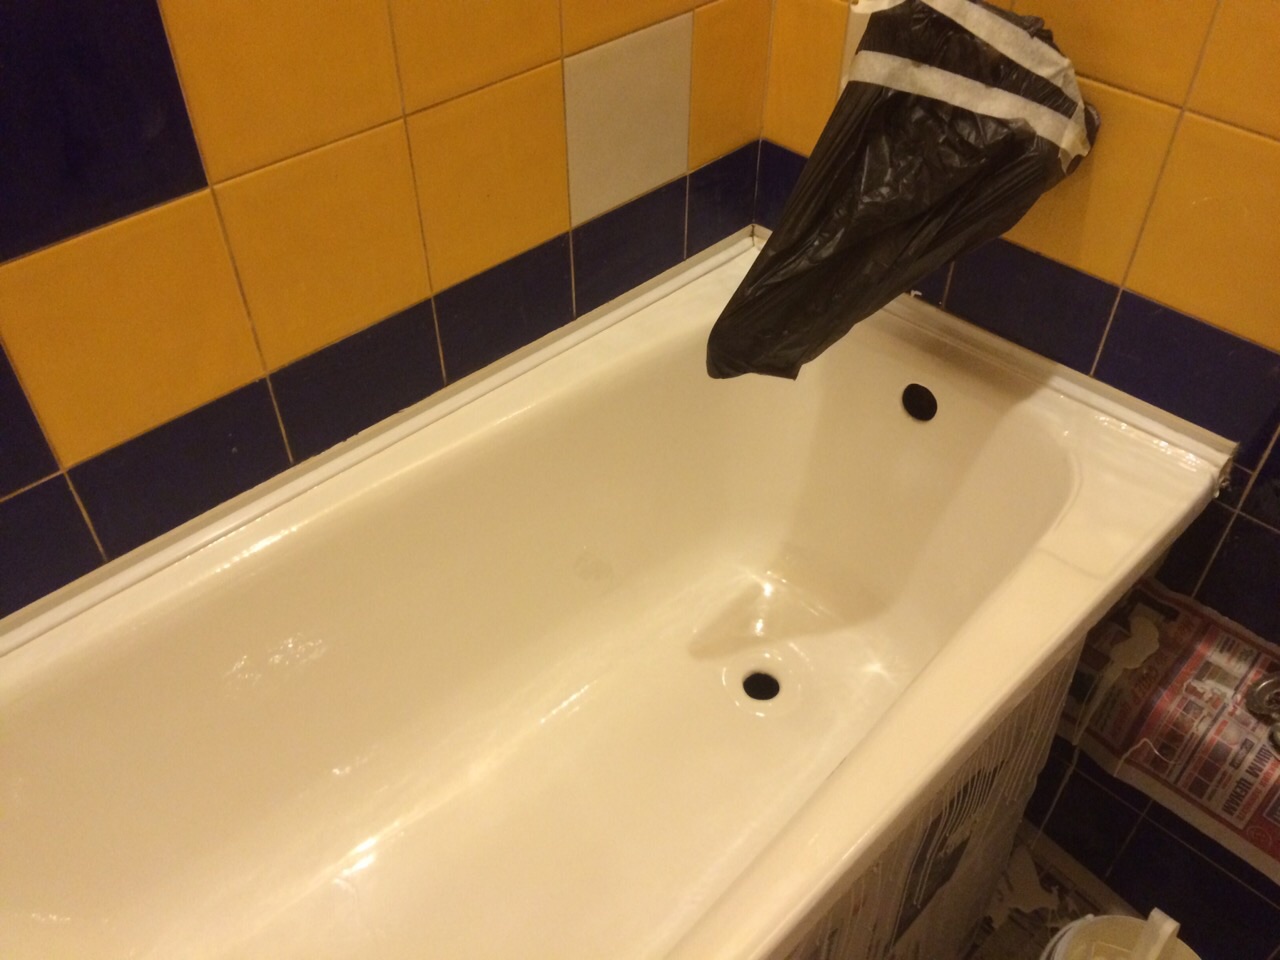
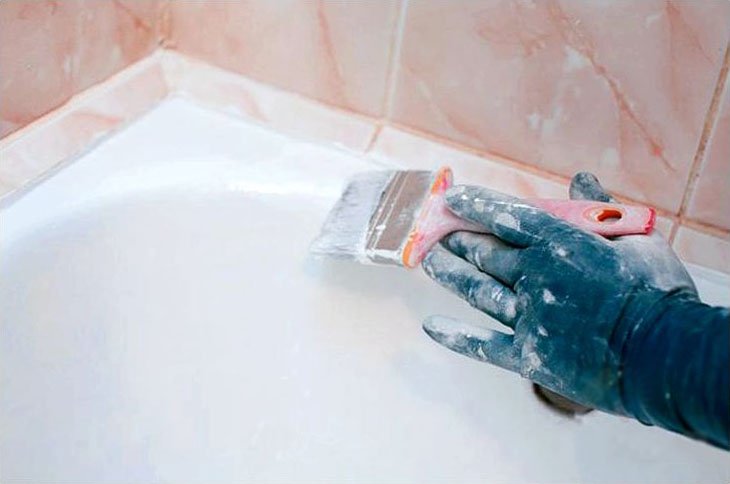
The washing machine should be well packed with foil. You can use food, it is easier to wrap items in it. Before you start painting the sides of the bowl, it is important to glue the tiles over the bathroom with construction tape.
Mixers and hoses preferably removed. The nickel tap must be protected especially carefully.
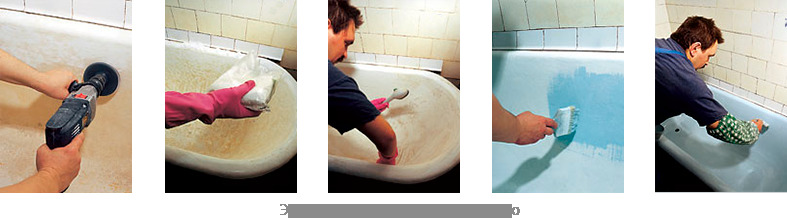
Stages of work
Preparation of a bathroom bowl for all restoration options is the same and proceeds in the following order:
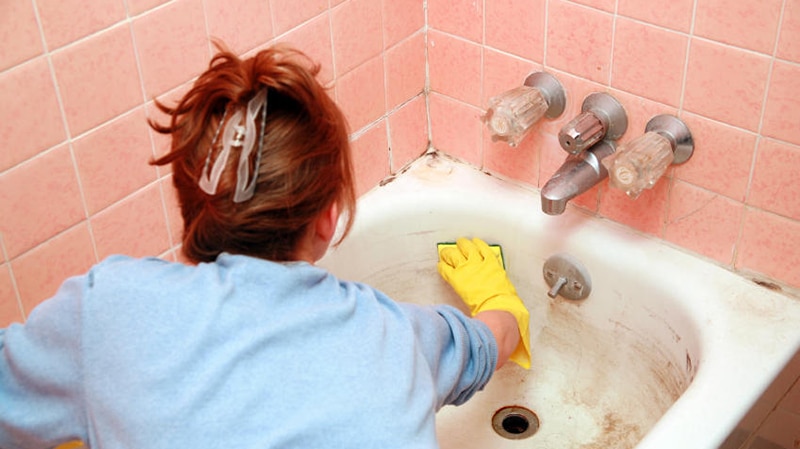
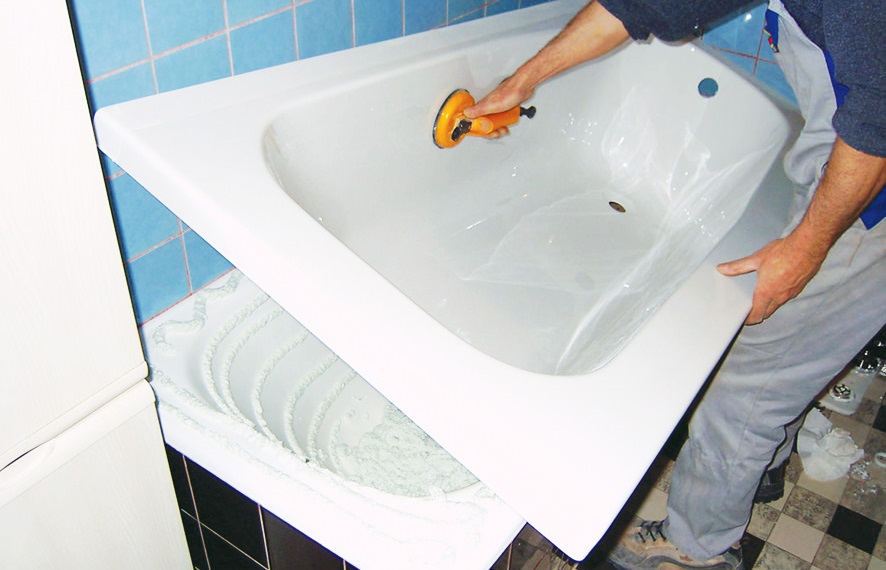
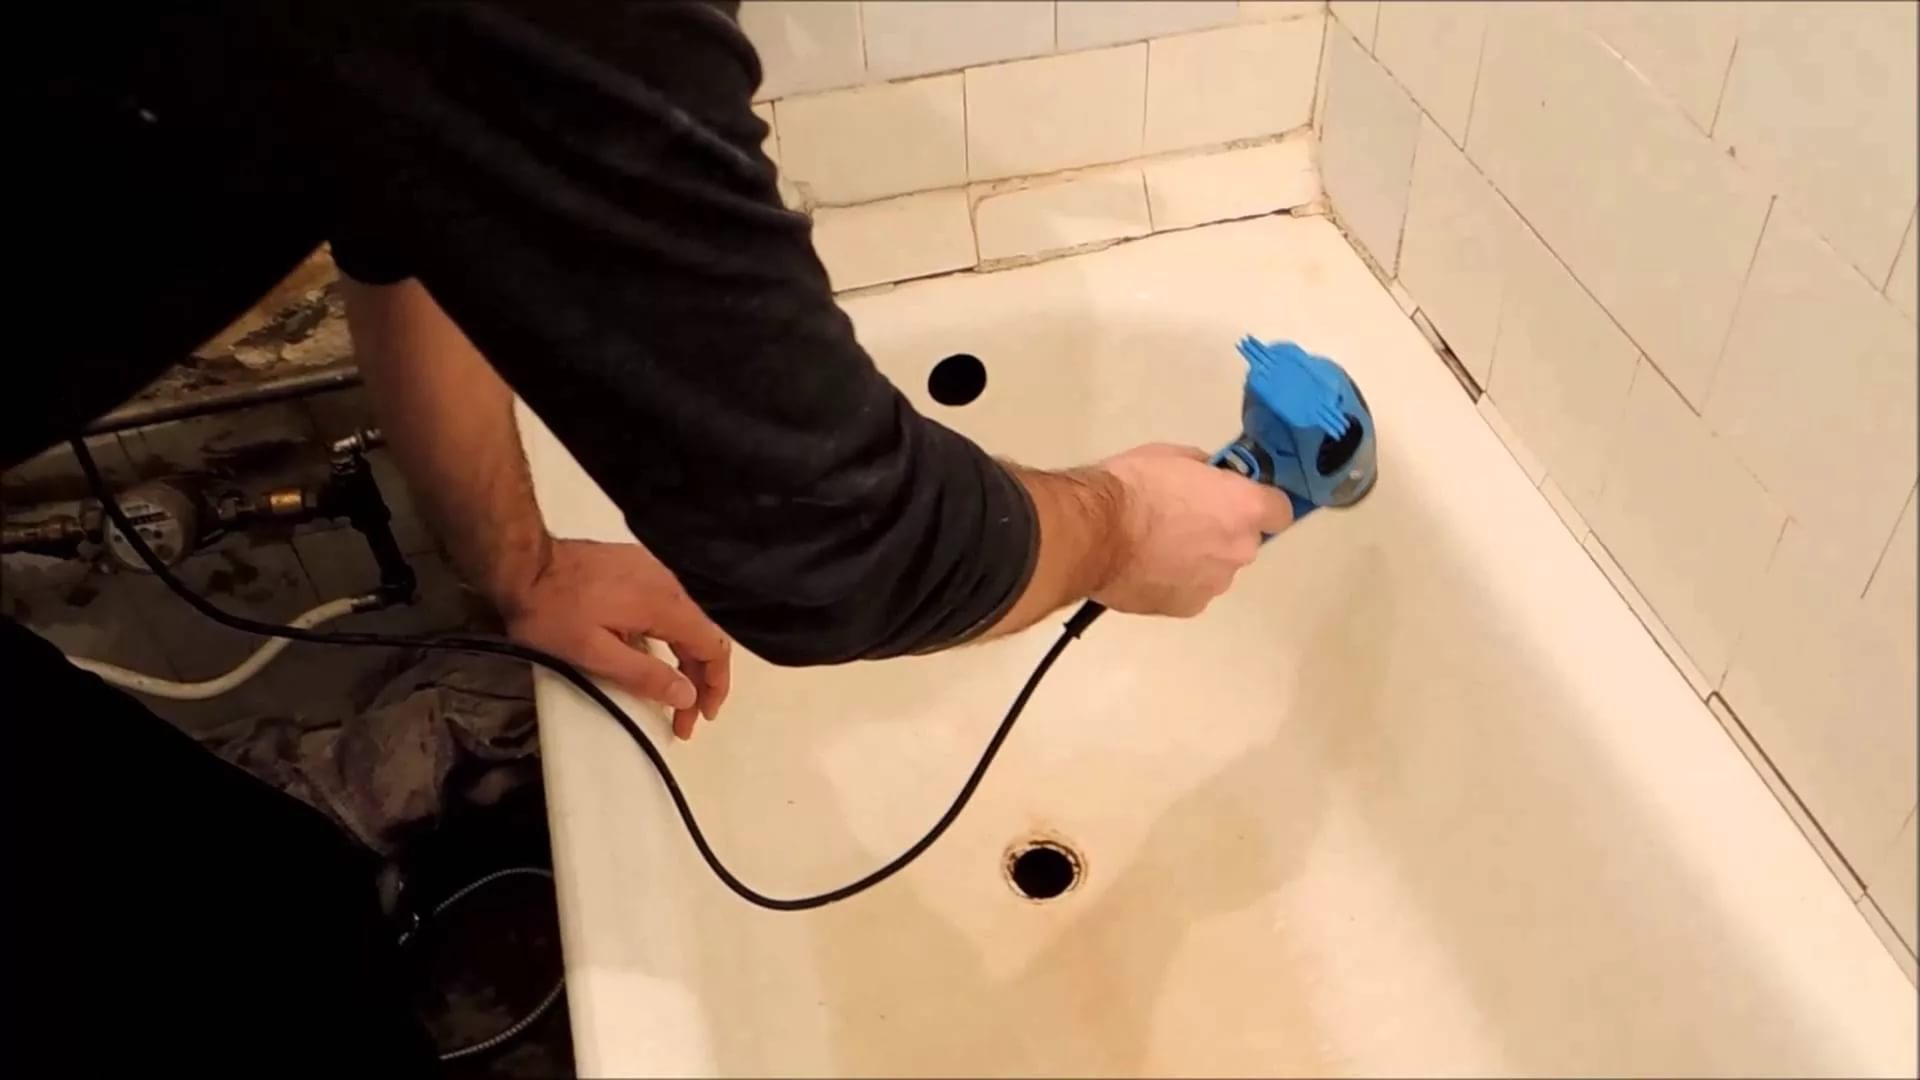
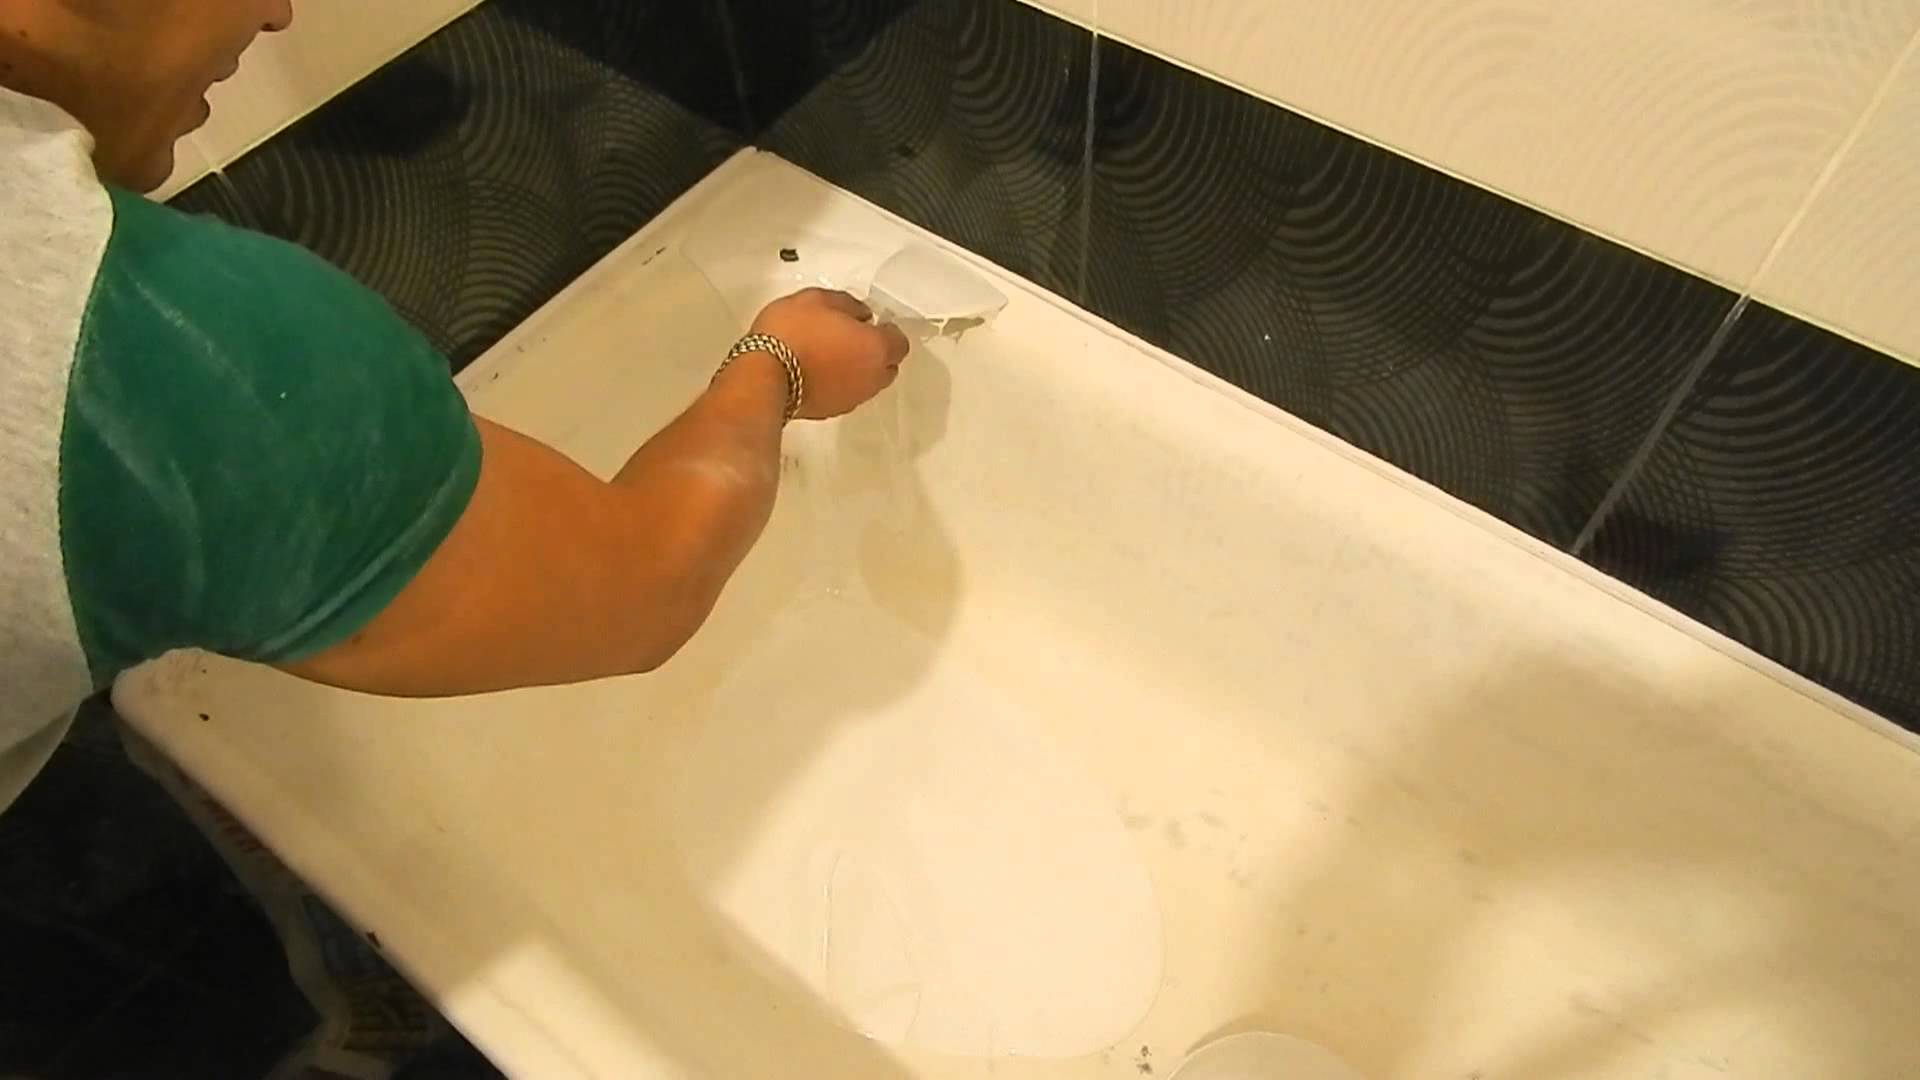
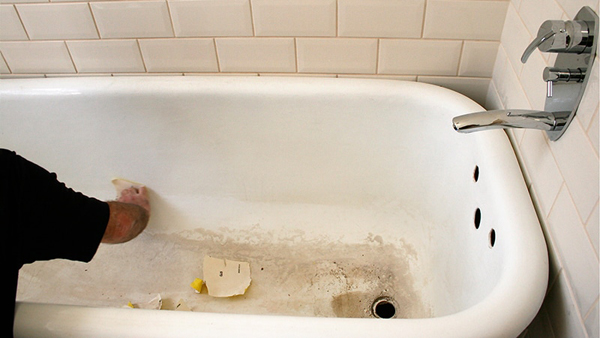
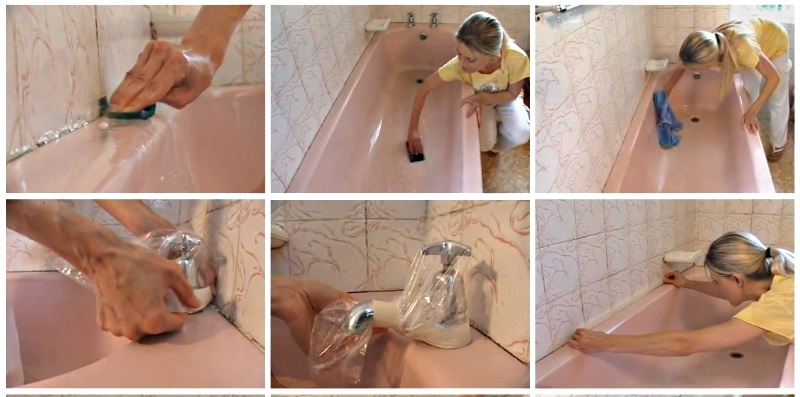
- Cleaning the inner surfaces of the bathroom from the old layer of enamel using abrasive stone. For this fit Bulgarian with a special nozzle. Working with her at times will shorten the time.
- Cleaning the surface with scouring powder.
- Then it is necessary to clean rust and any roughness, with special diligence we degrease the bowl.
- Cleaning up remaining trash. It is easier to clean by filling the bowl with water. After a while, drain the water and wipe it dry with lint-free cloths. You can wait until dry, and then use a vacuum cleaner. This preparation will make the bowl dry and matte.
At home, recovering a metal or acrylic bath is easy. Enough to follow these tips. Acrylic version must first be primed. Enameling is carried out only after the reducing agent is applied.
Before installation, you need to purchase a repair kit.
Paint enamel
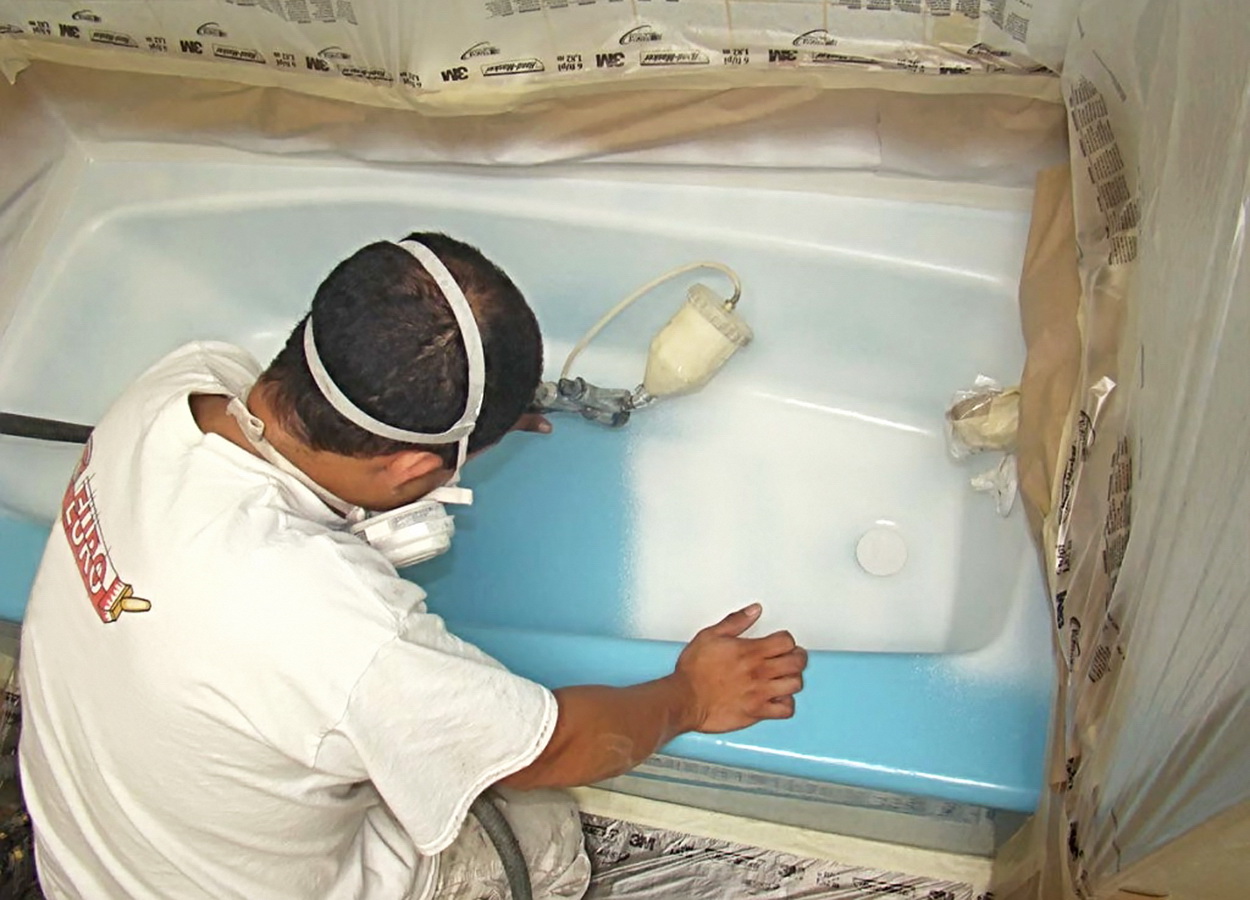
There are several options for applying enamel for the bath; brush and spray. Many will be able to apply enamel with a brush, and for the application of the second method it is necessary to use special devices.
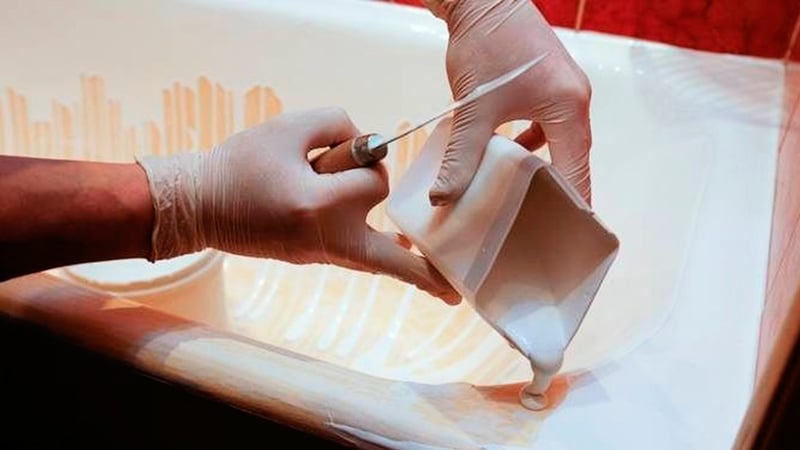
- A base layer of enamel is applied to the cleaned surface of the bowl, otherwise you will need a primer. After applying the working composition of hardener and enamel, it can be dried.
- After the first layer has dried, apply the second layer and wait until it is completely dry.Further, if necessary, two more layers. All work should take about 3-4 hours. To each portion of the mixture is recommended to add 12-15 ml of phthalic acid, gently stirring the solution.
- To properly dilute the paint, you must use the attached instructions. It is better not to dilute the whole mixture at once, but to cook it in portions.
- When painting the bowl with enamel from the brush can be villi. To remove them, use tweezers or a stationery knife.
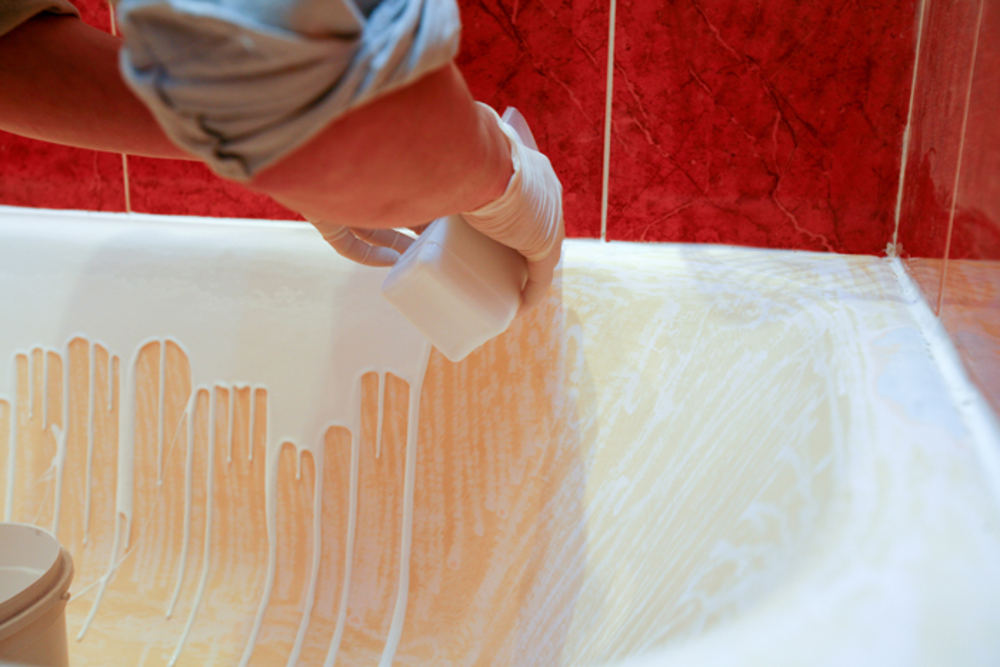
- Painting the surface, moving from bottom to edge. You should have horizontal stripes. Each subsequent strip should be overlapped on the previous one. The second layer of enamel is best applied by the same technology.
- After the second layer has been applied, check for any smudges left. If they appear, they should be rubbed with a sharp movement of the brush upwards. Next to the drain holes, they can then be cut with a knife.

To cover the enamel bath installation work is not required. Enamel is one of the most economical options for bath restoration. You can cover it an unlimited number of times.
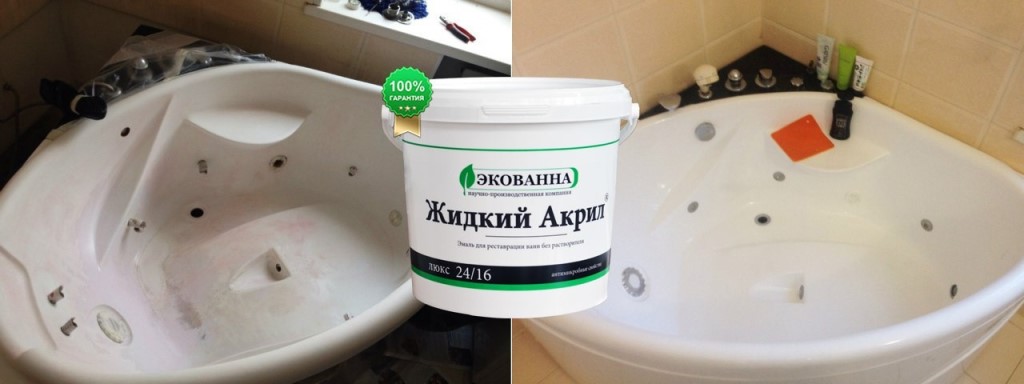
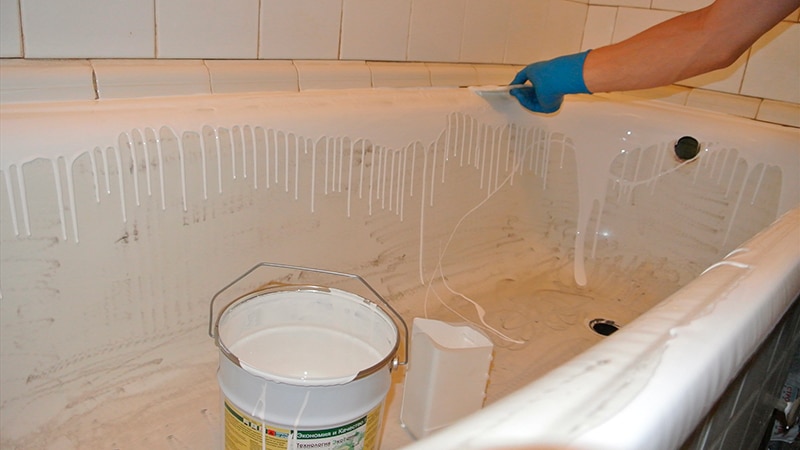
Acrylic coating
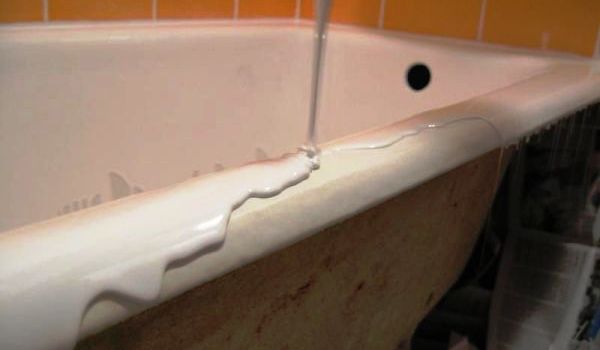
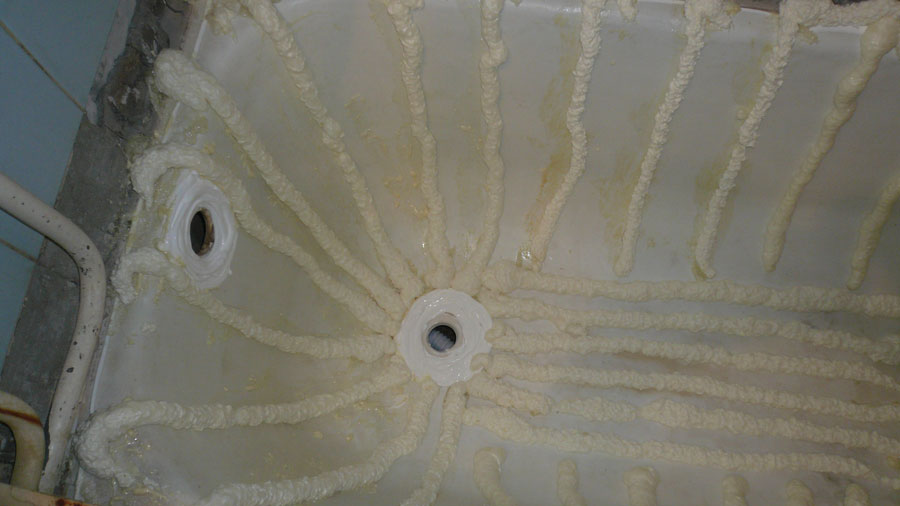
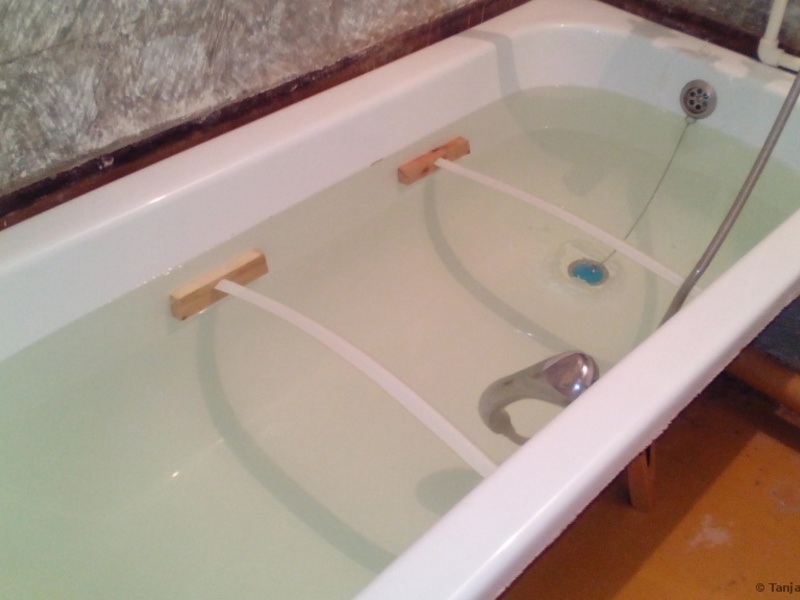
This method is considered the youngest.Relatively recently, the bath began to be treated with liquid acrylic. A distinctive feature of this method - the mixture is poured from the sides of the bowl.
Before pouring acrylic, you must remove the drain in the bathroom. The excess paint will flow down the sides as well as into the drain hole. Therefore, you need to put a container under the drain, and lay out newspapers around the bath so as not to stain the tile.
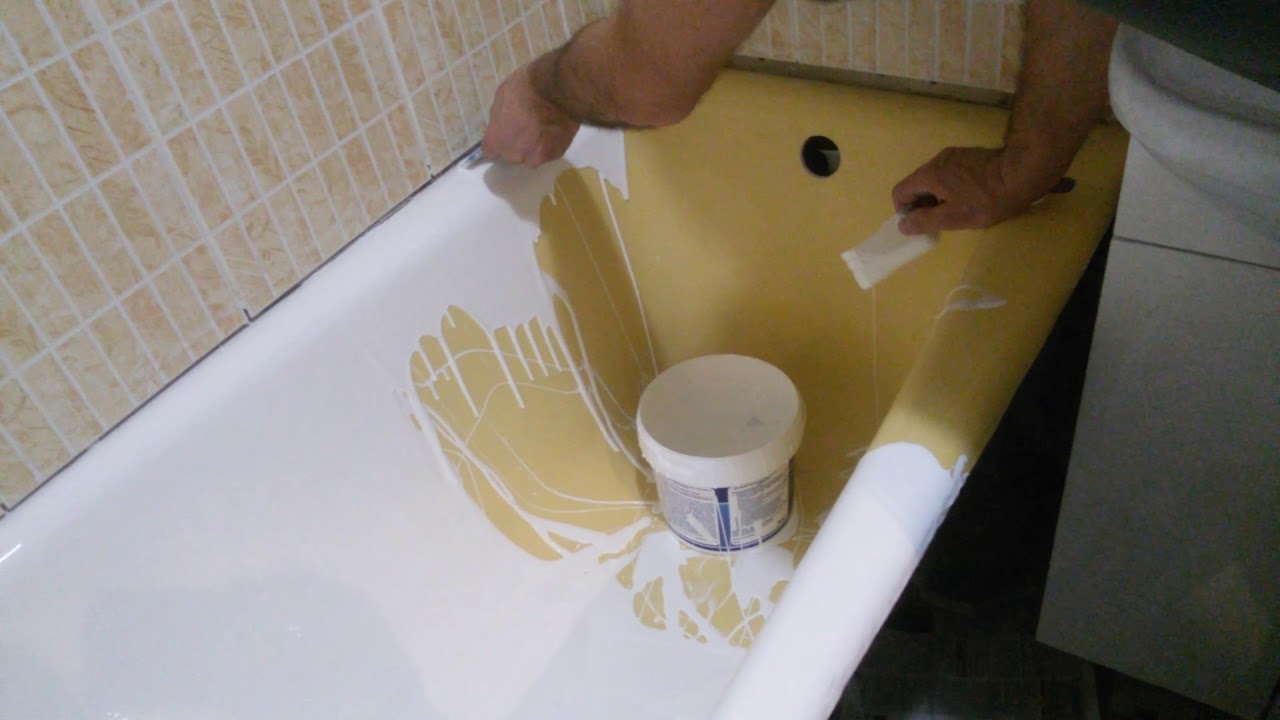
Acrylic, poured along the walls, fills all the cracks. During the application of the solution it is necessary to ensure that no bubbles form. If a bubble appears and does not disappear within 2 minutes, it should be smeared with a brush. The whole procedure should be carried out as quickly as possible, since the mixture can dry out quickly.
To update the enameled surface of the bath, you need to act in the following order:
- On the cleaned surface, fill all defects with putty. Then polish the entire surface of the bath with abrasive paper. If there are still scratches, they should be re-processed.
- Completely dry the surface of the bath. It is best to use extraction gas.
- Prepare the paint by mixing thoroughly with the hardener to avoid the formation of bubbles in the emulsion.Wait ten minutes for the ingredients to merge and start painting.
Acrylic keeps heat, shockproof. By applying a thicker layer than in the case of enameling, the surface becomes smoother. Long service life, about 15 years.
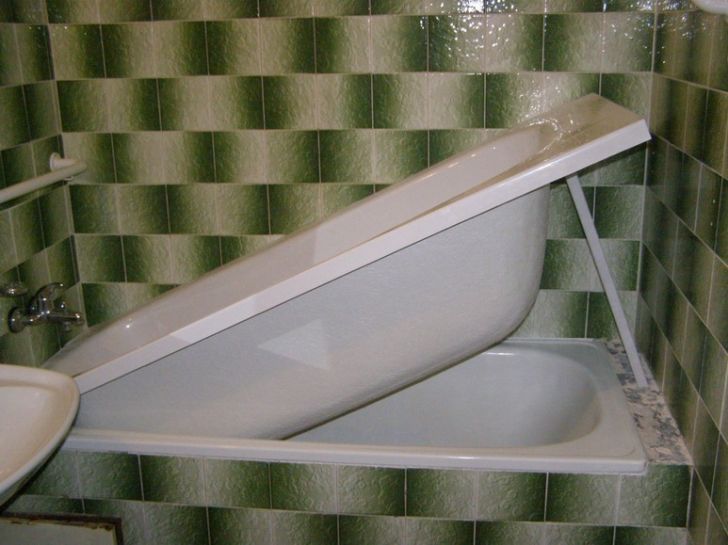
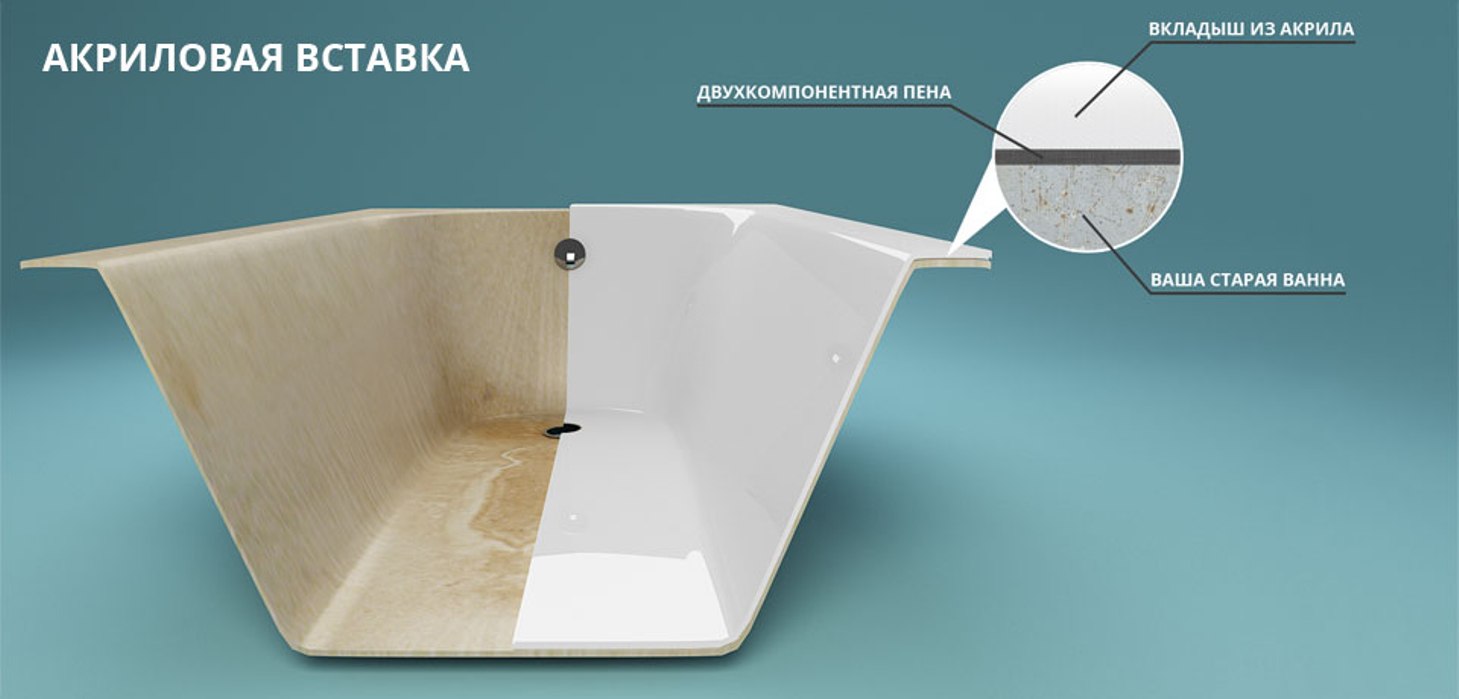
The third option is an acrylic liner.
According to the specifications, acrylic liner is a versatile material. It is easy to clean, durable, rust does not penetrate its surface.
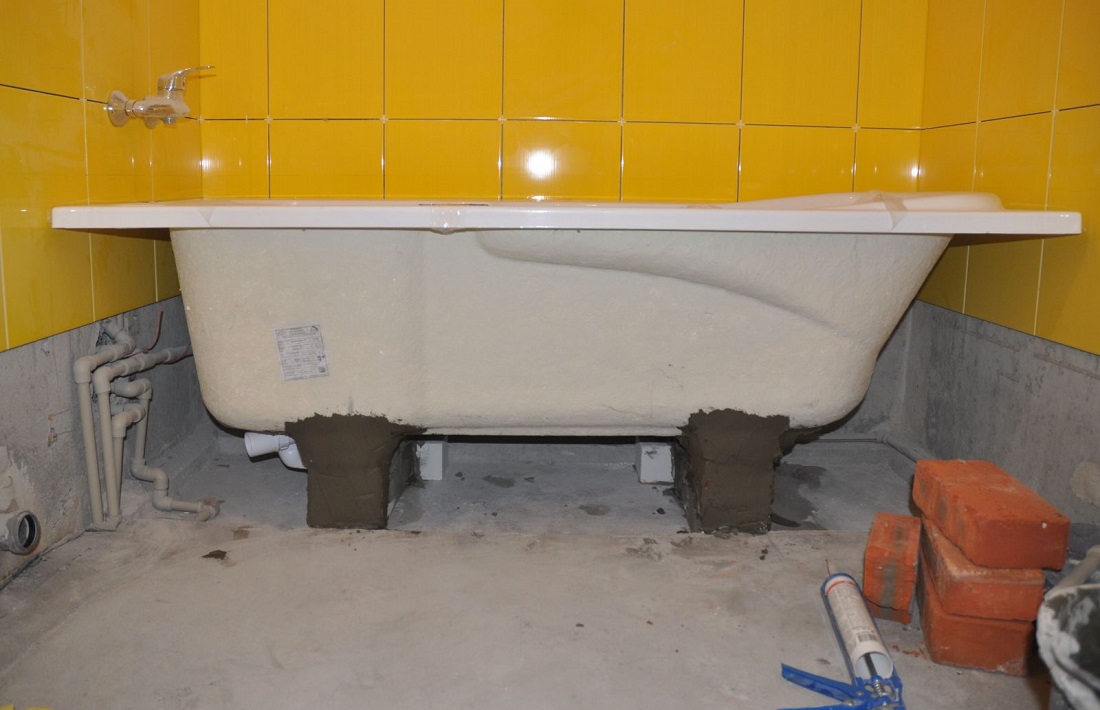
Dry the bath well before installation. Then measure the position of the overflow and drain holes, drill holes for them in the liner.

Using a special glue or foam, the liner is attached to the bath. For a snug fit, fill with water for a while. It is important that the adhesive be applied in a thin layer on both surfaces. On average, it takes about 2 hours to work, and the life of such a bowl is up to 20 years.
Silicone sealants and mounting foams are more suitable for installation. If you use a finished bath, you may experience problems - the liner will begin to peel off. To avoid this, you need to buy a quality sealant. Especially carefully they are treated with places near the sinks and sides.
If you opt for foam, you should know that the usual will not work. We'll have to buy a special one. Ordinary foam absorbs water easily and expands greatly, so it is not used for fixing acrylic liners.
It is better to entrust the installation of the liner to the experts, but you can do it yourself. The cost of this method of bathroom restoration will not be cheap, but a well-laid coating will last for many years.
If you decide to install the liner yourself, start cleaning the room. It is necessary to provide free space around the bathroom, as well as remove faucets, drain and even tile on the wall next to the bathroom.
The procedure itself is divided into several stages:
- First, fit the insert in size. To do this, you must install the liner in the bathroom, make a mark with a marker. Then take it out and trim the excess parts.
- Next, apply a sealant or foam. The mixture should be applied both on the liner and on the bathroom. It is advisable not to leave voids, so that the acrylic bath adheres to the old surface.
- Then the liner is firmly inserted into the bath and pressed. You can use wooden slats on the sides.Then you need to tighten the new siphon.
- The final stage is to pour water into the bathroom, no more than two centimeters from the edges. In this state, it should be left for a day for better adhesion of the liner with the old surface. Now you can use it for swimming.

Various flaws can lead to a shorter service life.
The disadvantages of acrylic liners
The acrylic layer at the liner is much thinner than that of a conventional bath. Despite the assurances of manufacturers, it can not be used forever. In those places where the liner is rubbed, the bottom layer will become noticeable. And even if this layer is white, the appearance of the bath will lose aesthetics. But it is better than rusty cast iron.
Visually, the installation process of the acrylic liner is shown in the video below.
Ordinary people are not able to determine the quality of dry acrylic. This means that the liner will quickly change the white color to yellowed. In order not to run into such a product, it is better to buy more expensive, but from a reputable manufacturer.
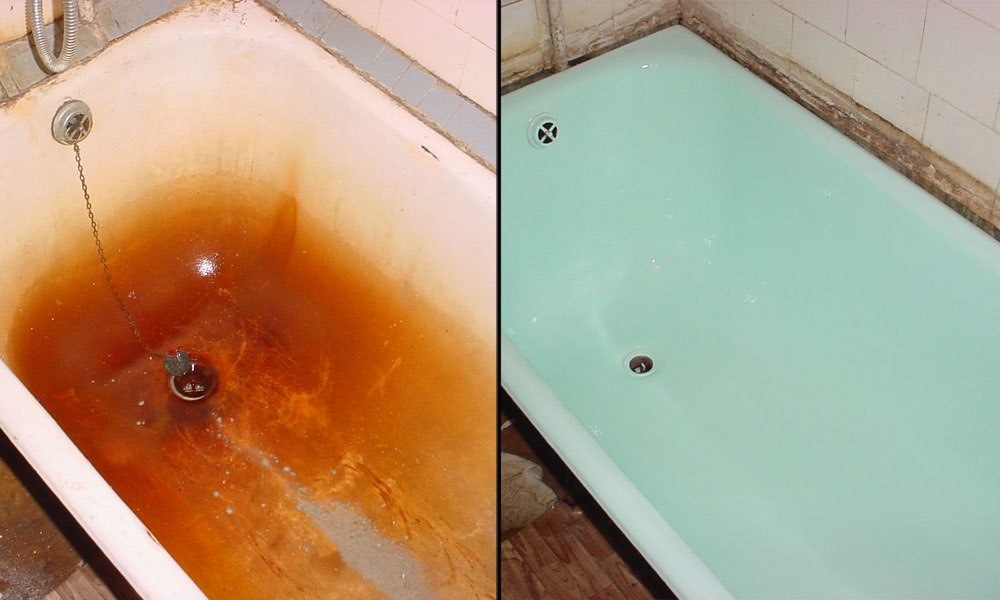
If you accurately examine all methods of bath restoration, then the process will not take more than one day. A new coating will delight with brilliance and purity.


