The subtleties of replacing glass in the glass
Installation of plastic windows (double-glazed windows) is a modern and reliable way to protect a home from noise and cold weather. Despite the long service life, sometimes you have to think about replacing the glass in the glass. This is a rather complicated process, often requiring a wizard call. However, the work can be done independently, especially if you know some subtleties.
Reason for replacing the glass
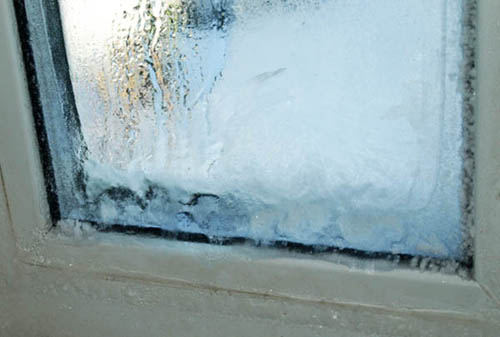
If the double-glazed window loses tightness, then its time to upgrade. Airtightness is a key property of plastic windows, without it the construction does not make sense.
Not always the loss of tightness is visible to the naked eye,but the presence of a defect can be identified by the following features:
- the temperature in the room decreases;
- the glass suddenly begins to fog up;
- in the cold season the windows freeze;
- More noise is entering the room.
With a thorough inspection of the window, it is already possible to see the problem - an error during installation, a crack or an initially poor quality of the material.
In addition to such serious problems, there may be a need for more minor repairs. Unlocked flap or locked handle - any problem can be solved by choosing the right tools.

If it is necessary to replace a broken single window in a wooden house, then it is necessary to follow the advice of professionals.
How to replace the glass?
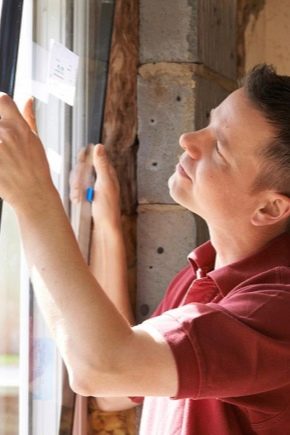
When the package itself is damaged, it must simply be replaced with a new one. Before you begin disassembling a damaged glass unit, you should clearly measure the parameters of the opening. Based on these parameters, you will select a new package.
Now you can proceed to reinstall. Most often the double-glazed window is fixed in the frame with beadings.
Before starting work, you should mark each of them with a number in order to easily determine their position later (incorrect installation of the glazing bead leads to noticeable gaps).
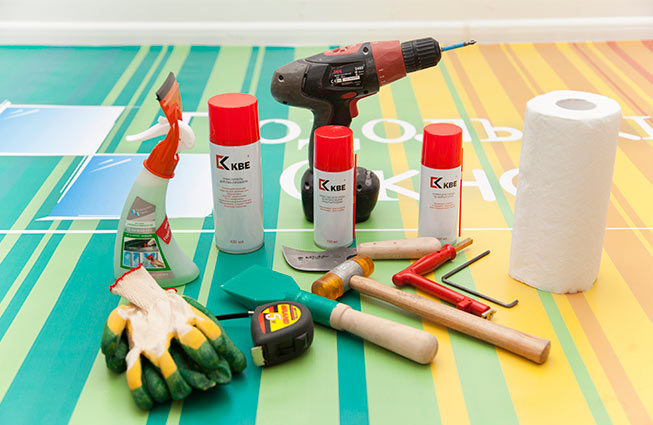
The following tools are recommended for removal:
- rubber mallet;
- stick or rod 5-8 mm thick, which can be used as a lever;
- knife or spatula with a thin blade.
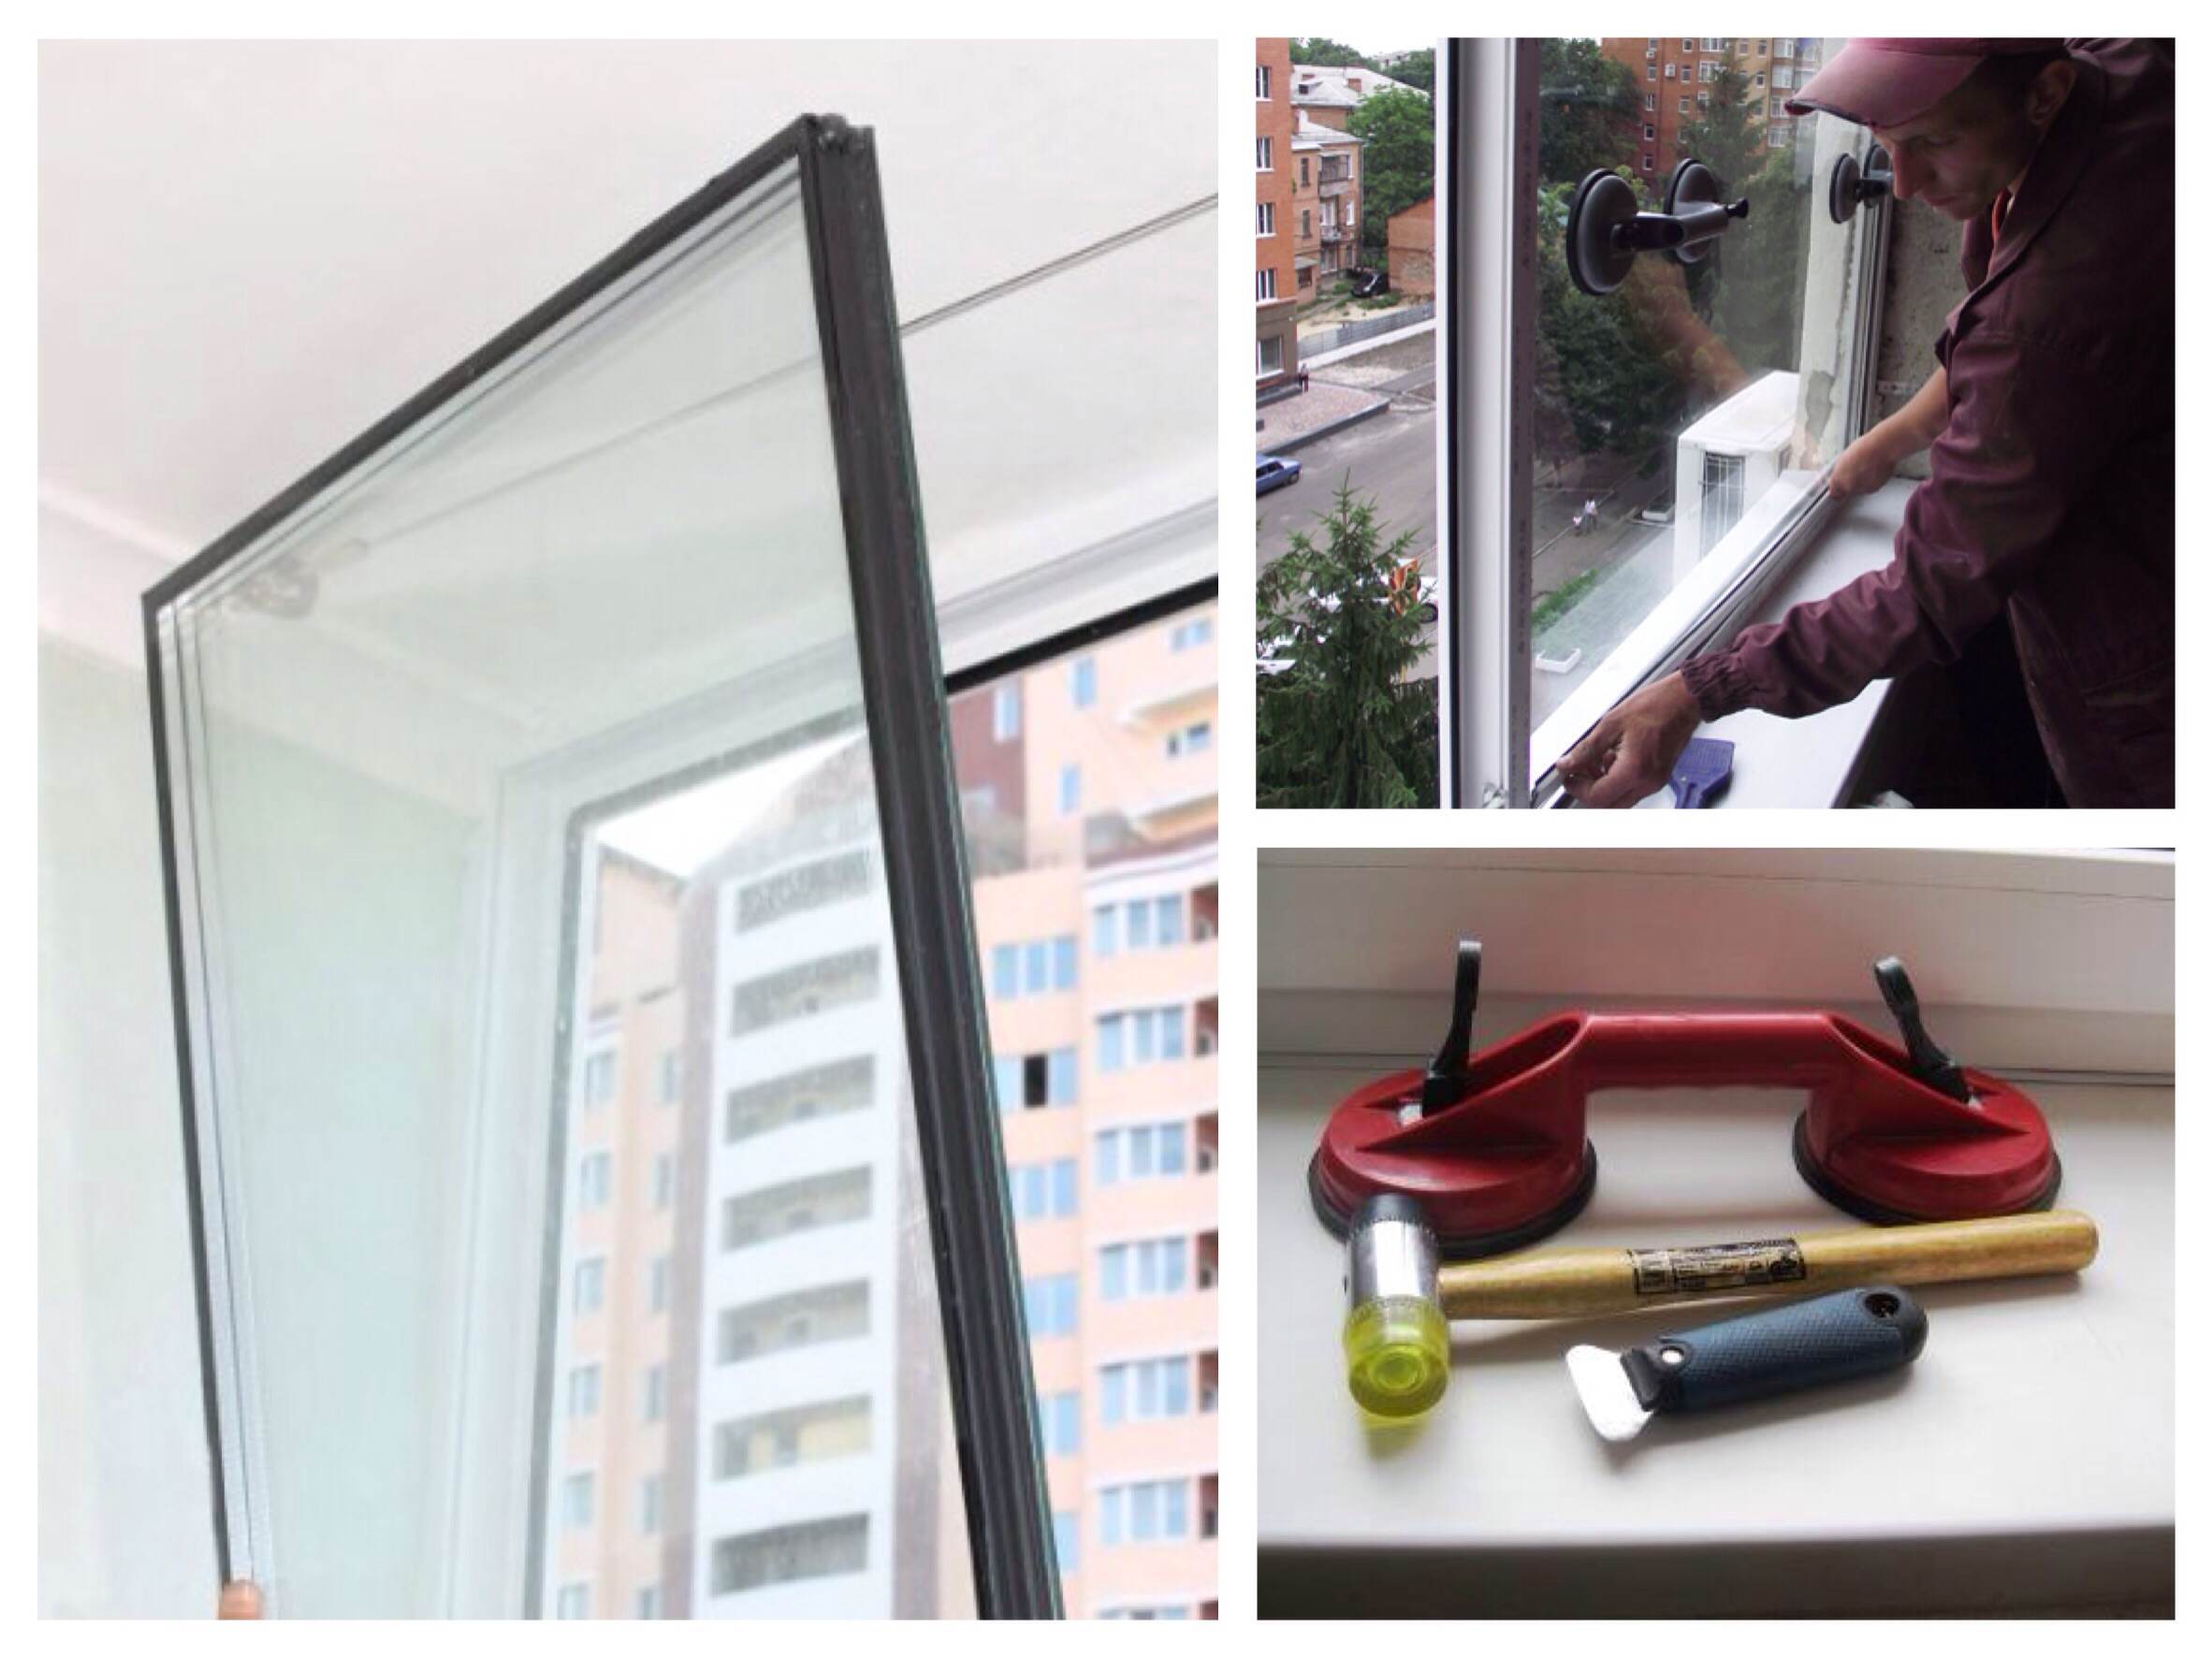
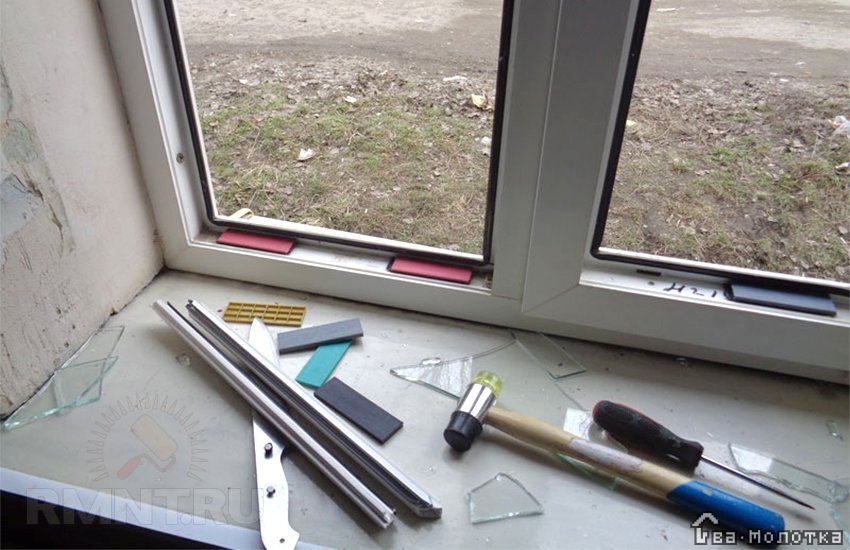
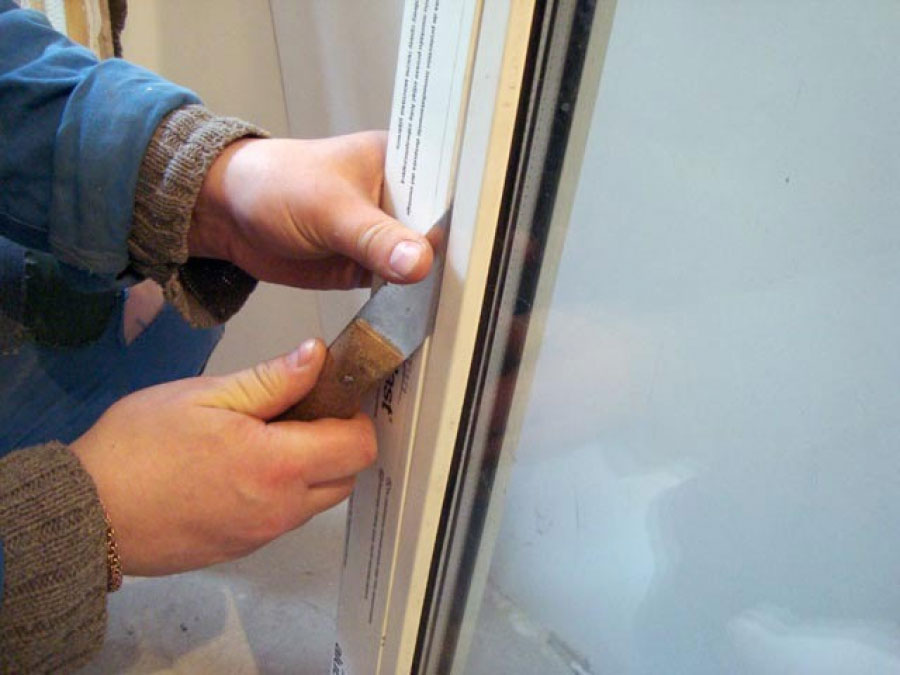
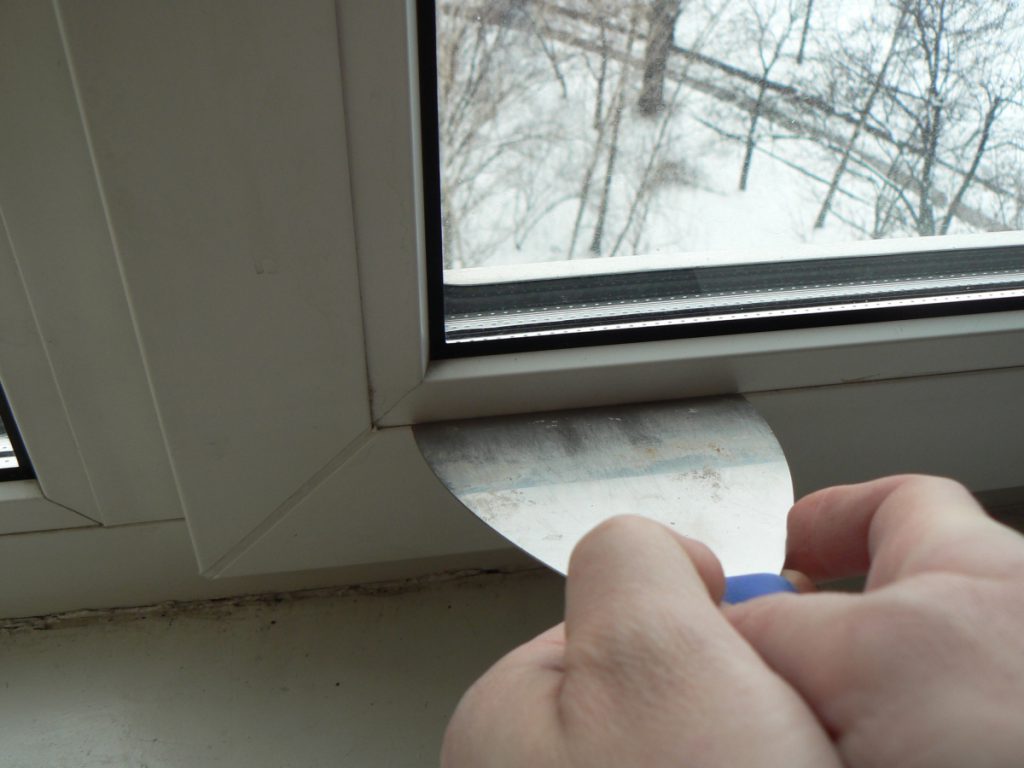
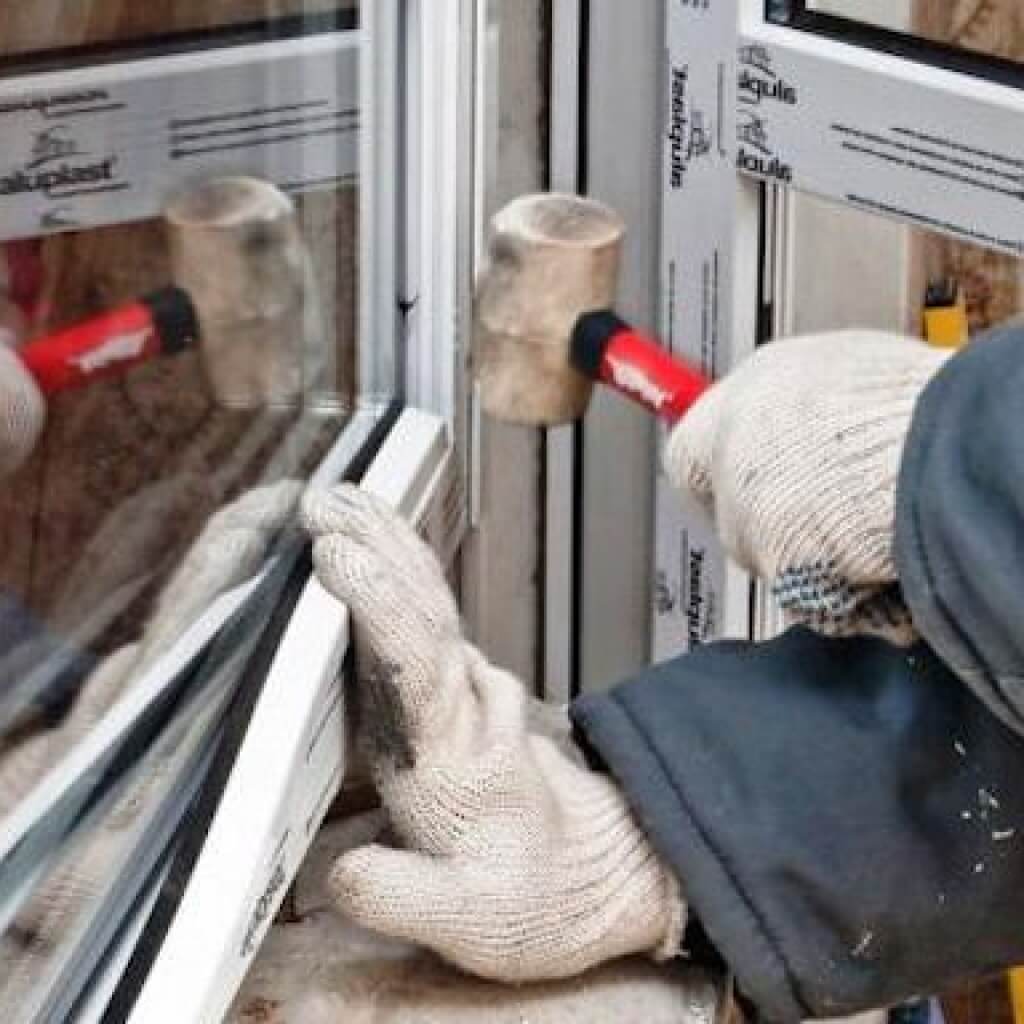
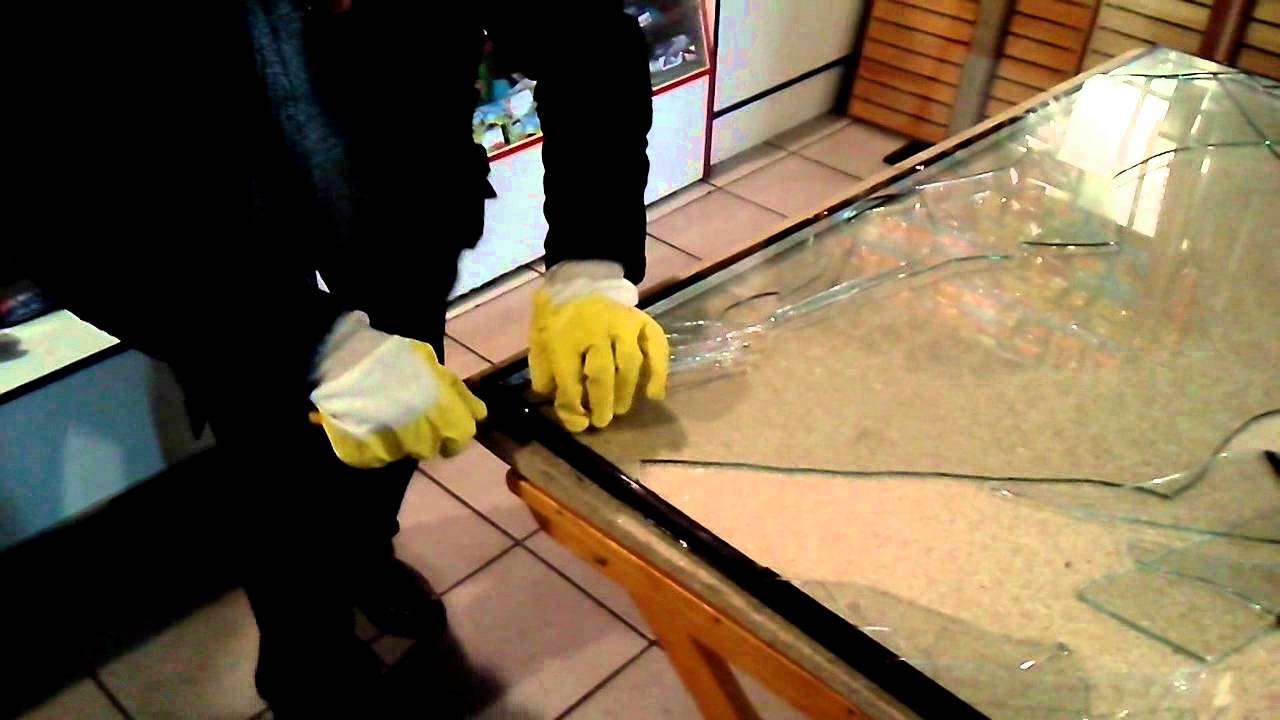
It is recommended to start removing the beadings from the sides. The knife or spatula is gently inserted between the frame and the bead, then it is driven in slightly by means of a hammer. With some effort, we turn down the bead and pull it out of the seat. After side shtapikov repeat the operation with the bottom and, finally, the top. When unplugging it, hold the glass pane with your hand, and then lightly shake it - the bag is still held by the distance plates. This can be done by inserting a lever into the gap.
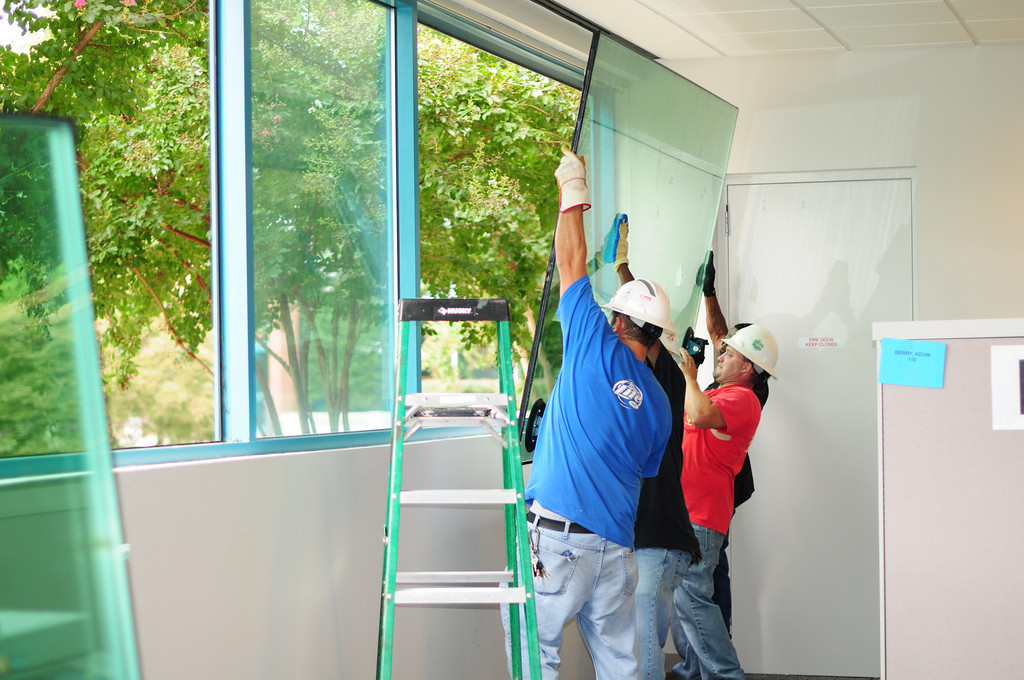
Now the design can be removed, first wearing gloves. For this action does not interfere with the second person, because the glass can be quite heavy.
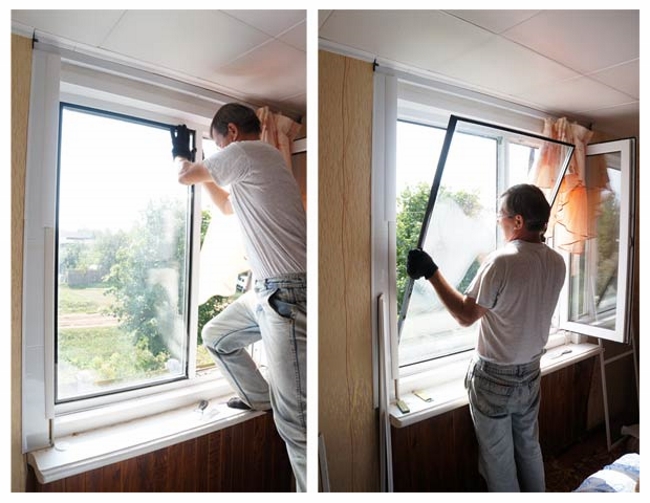
Installing the glass almost repeats the process, only in reverse order. Do not forget to first clean the frame from dirt and dust. Then you need to return the distance plates in place. Very carefully insert the package into the frame and start to hammer the beadings.
At this point, accuracy is especially important, since hitting the hammer too hard will easily lead to damage to the new glass unit.
Blows should be light, precise and even to avoid distortions.
How to change the glass?
There is not always a need for a completely new glass unit. If only the glass is damaged, then excessive spending can be avoided by bothering to replace it. The work will require the tools already mentioned, as well as a number of additional ones:
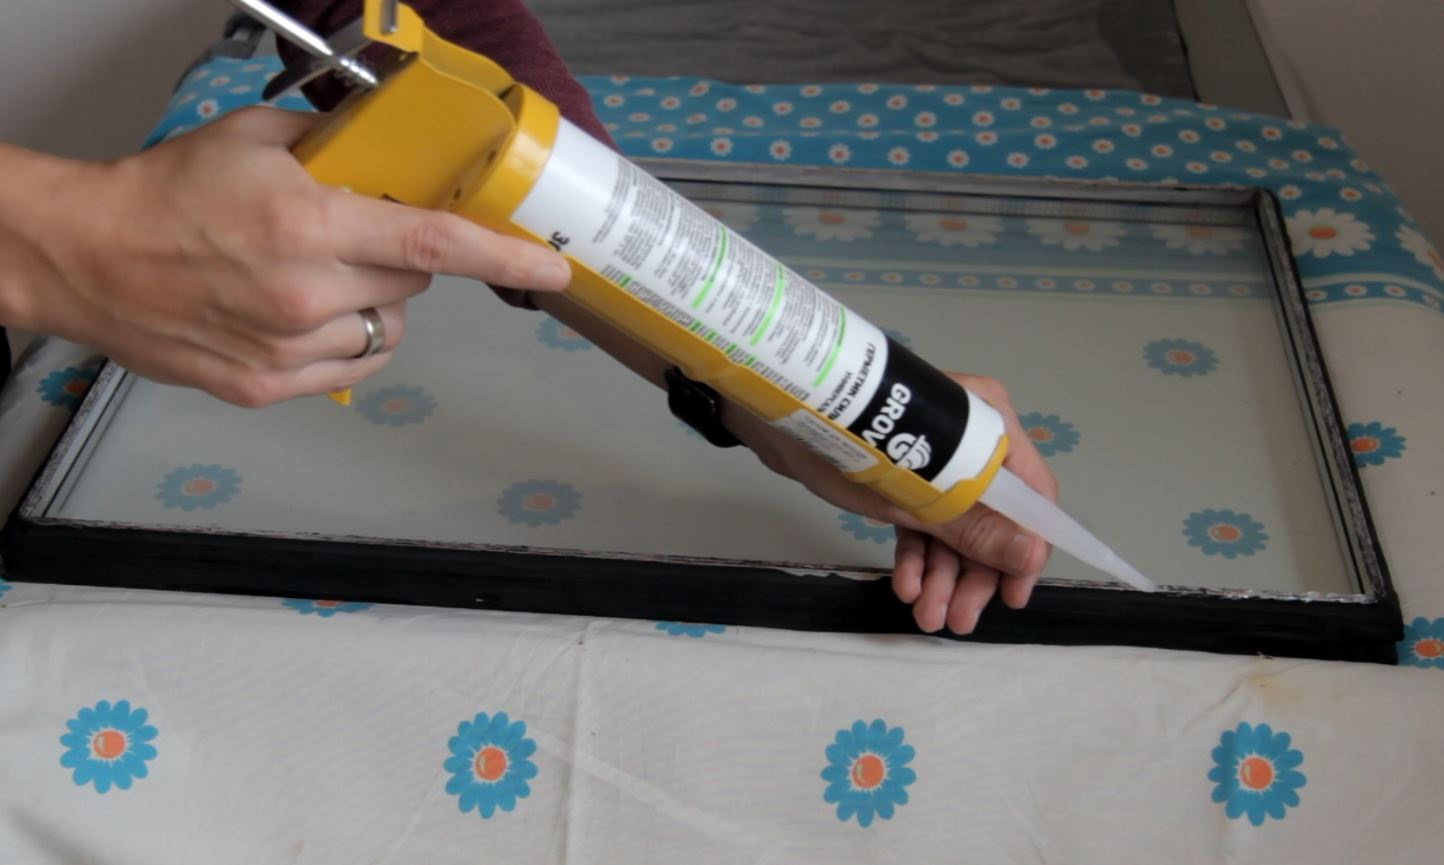
- sealant and butyl tape;
- construction gun;
- solvent (acetone and the like);
- chisel;
- replacement glass;
- glass cutter (if you do not plan to use the help of the carver).
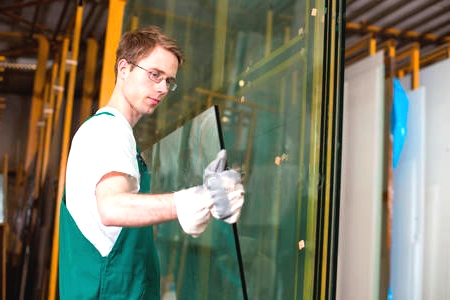
The inner part of the glass unit is an aluminum frame. From inside its cavities are filled with silica gel. Glass is superimposed on the frame and secured with butyl tape.
The first part of the work follows the package replacement procedure — it needs to be removed.
- The first step is to remove the glass in the manner already described.
- Now you need to free the damaged glass. To do this, you can use a knife or a chisel.
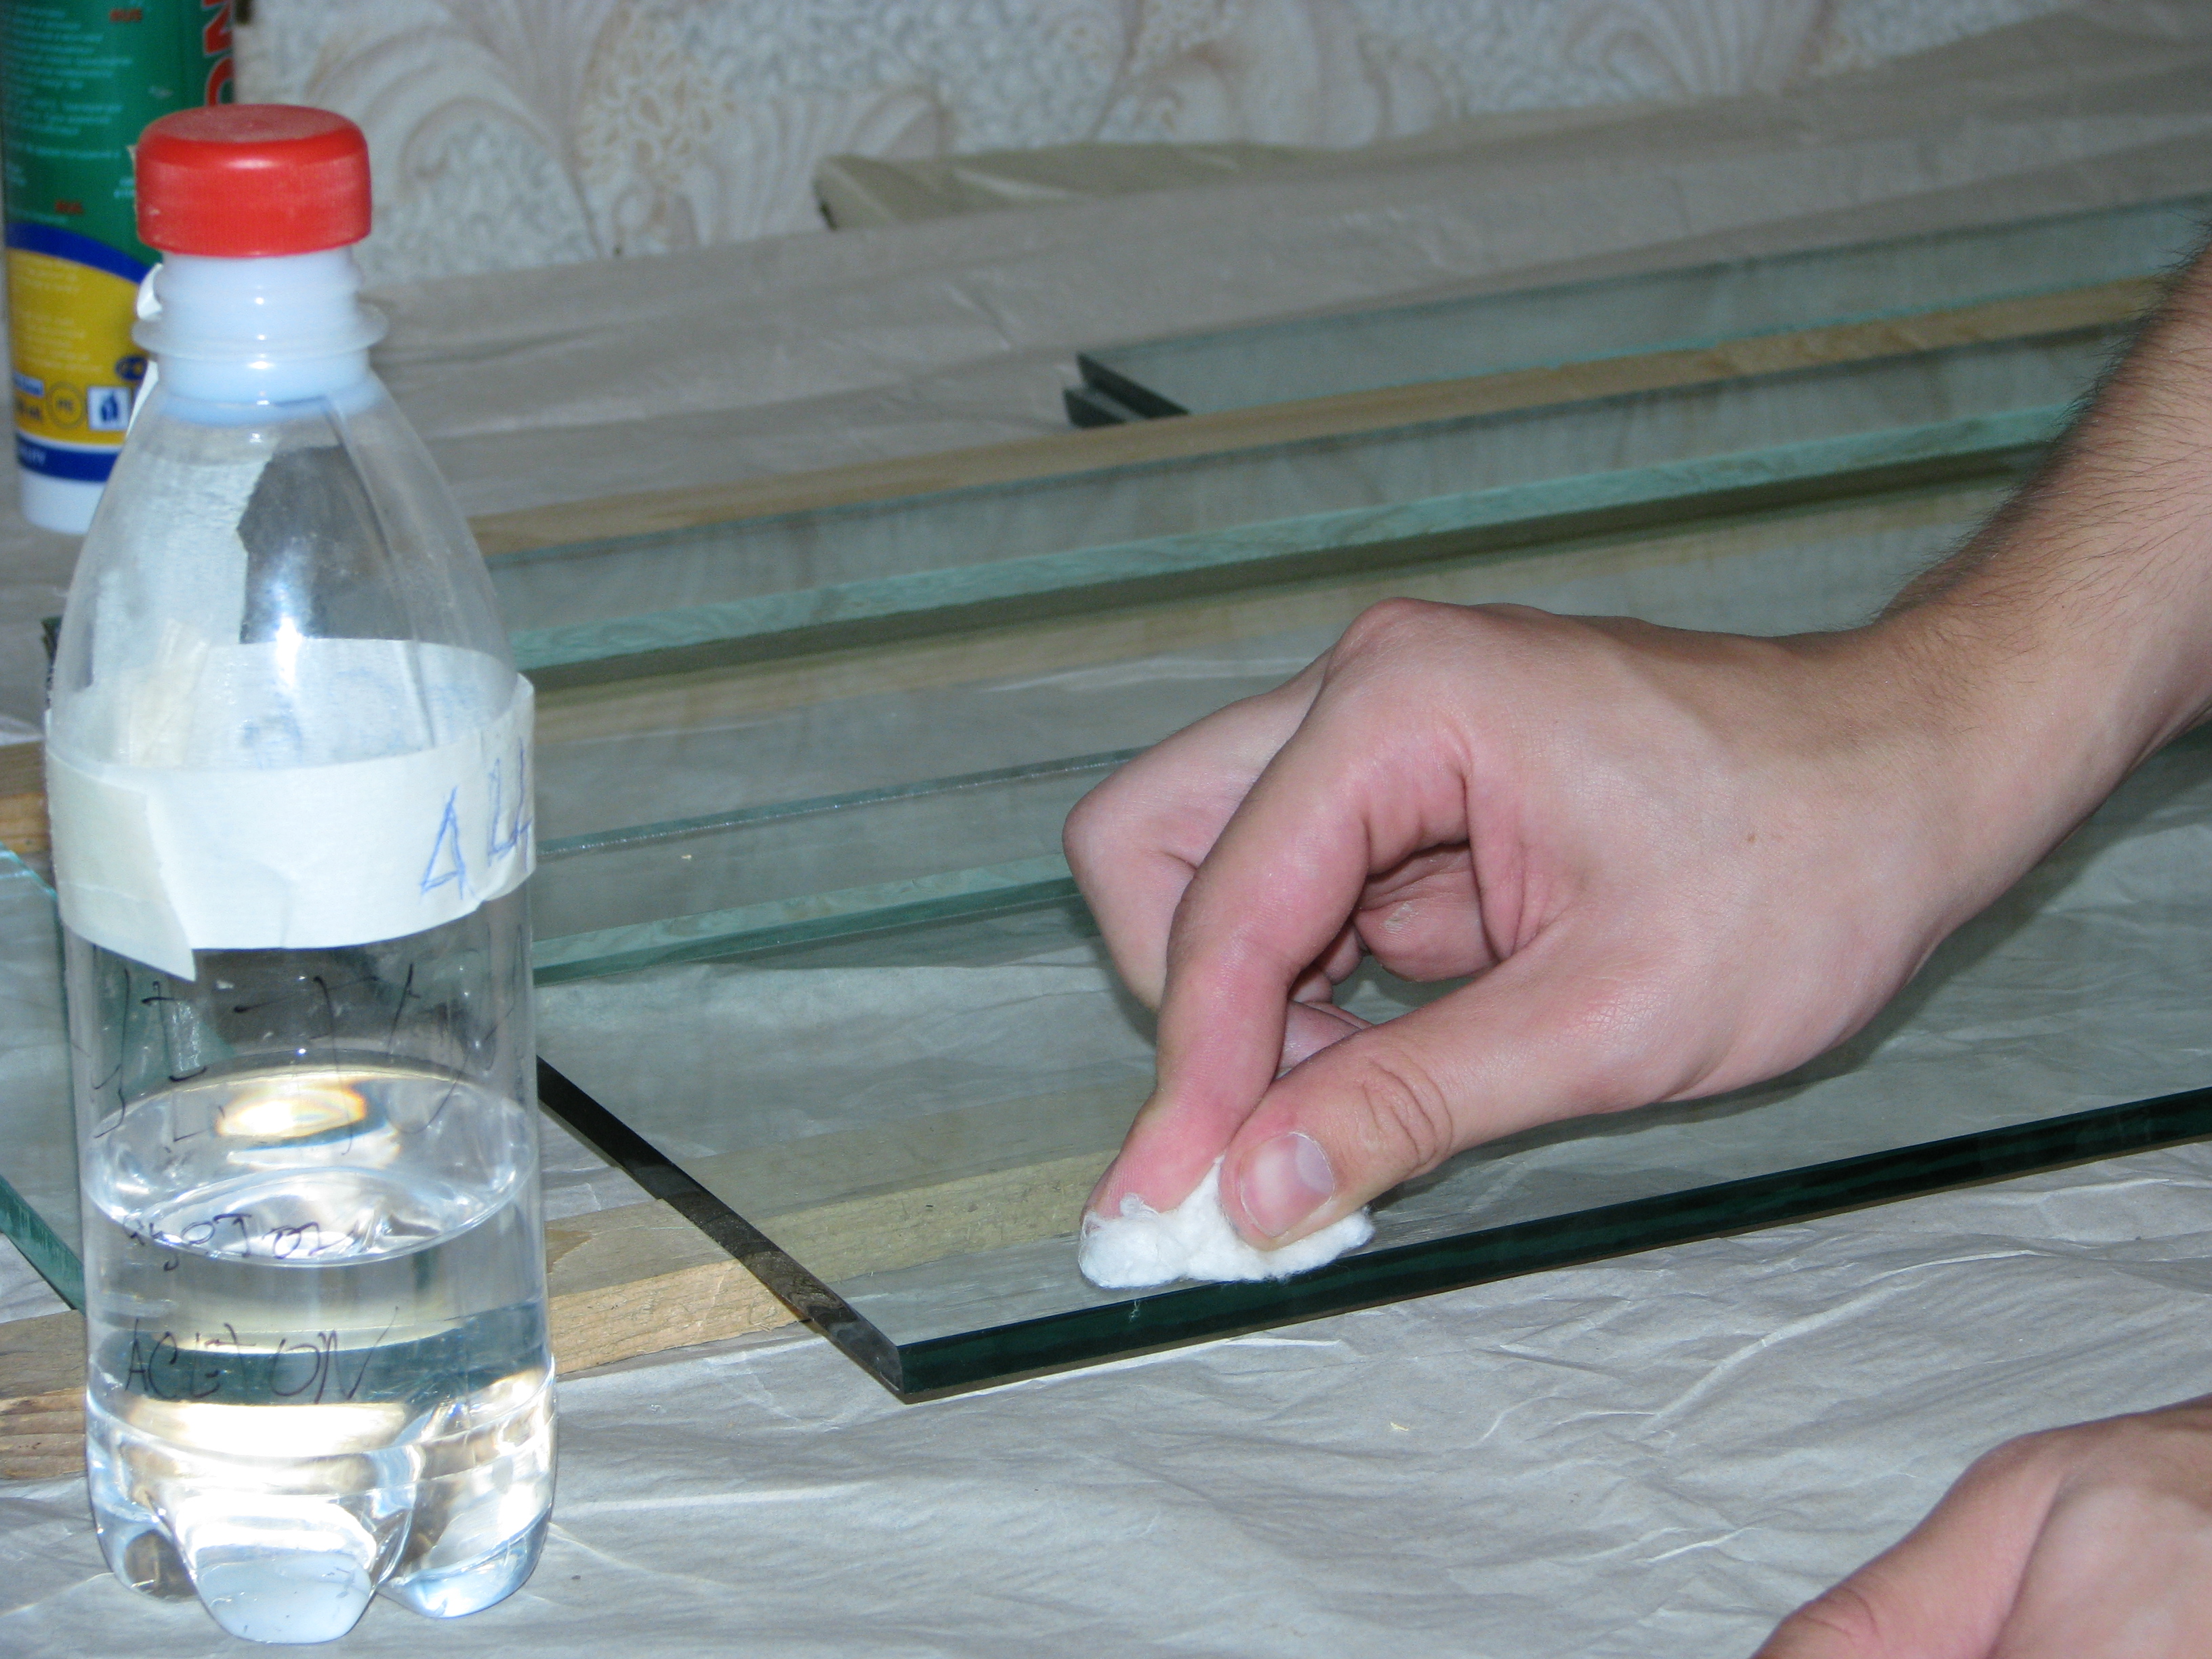
- The glass is separated from the frame on which the sealant remains. It must be cleaned and degreased with a solvent.
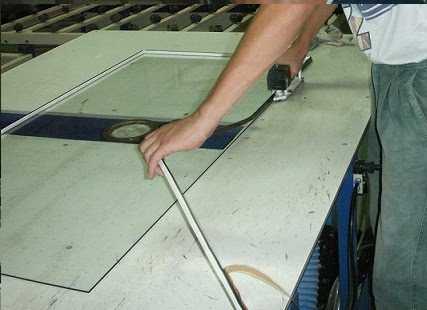
- Glass cutting requires extreme precision.therefore, first measure the old parameters several times. An error in size greater than a millimeter is already considered invalid.
- We cut the cut glass with a rag. A new layer of sealant is applied to the frame of the package with a pistol, after which you can insert glass. It's easier to do with a partner.
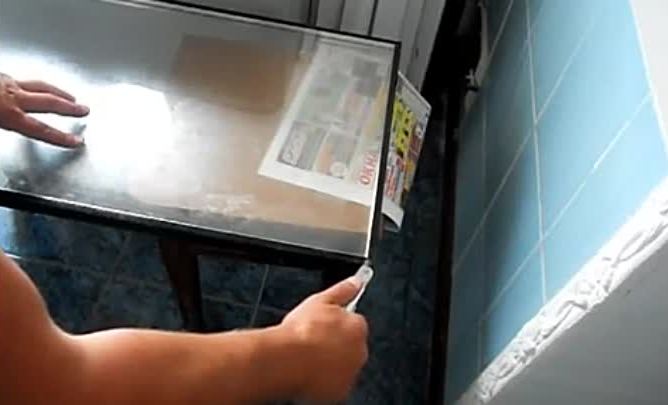
Glass must be applied exactly at once, because it quickly sticks to the frame. There will be no second attempt. As soon as the glass unit is dry, it can be returned to its place.
Temporary glass repair
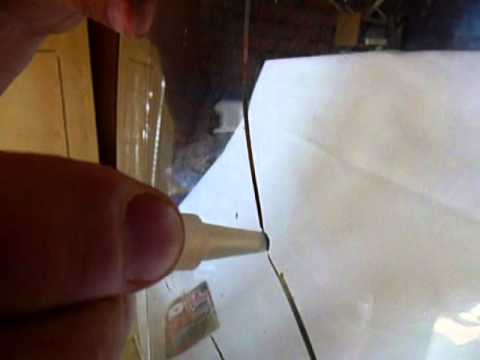
Assume that you still counted your chances and decided to call the wizard to install a new glass. In this case, it would not hurt to preserve the cracked glass with a sealant. This is a temporary measure that will allow you not to freeze in anticipation of repairmen.
For repair, you can use a transparent sealant or optical glue, of course also transparent. With their help, we can cover up the cracks and cover the damaged area, preventing the spread of cracks.
It is required to apply sealant at least twice, between them a break of 2-4 hours is required (more precisely, the drying time of the sealant can be found in the instructions or on the packaging).
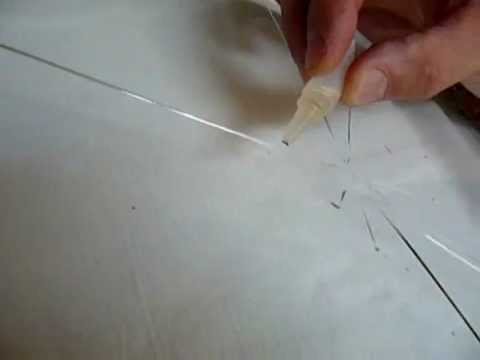
We clarify once again that this is only a temporary tool that will prevent further cracking of the glass, but in no case will prolong its life for a long time.
Window adjustment
Over time, it happens that the windows are not as tightly pressed to the frame as before. One need not even say that it damages thermal insulation and needs repair. Now we will analyze what to do in such situations.
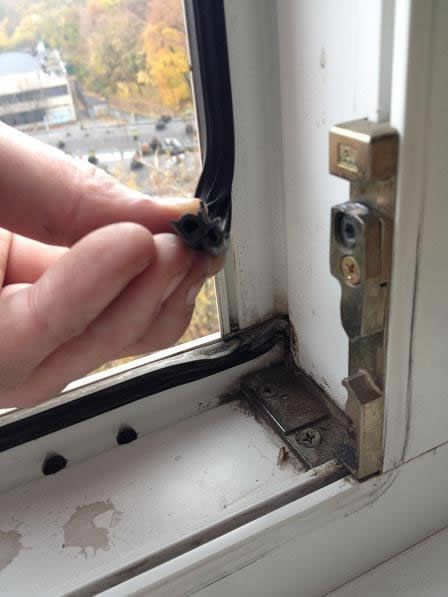
All plastic windows have a pressure device. It is a gum that can fail due to the gradual loss of elasticity or shrinkage.
Fortunately, window manufacturers are aware of this problem. Including for such cases on windows the system of adjustment of clamping voltage is provided.
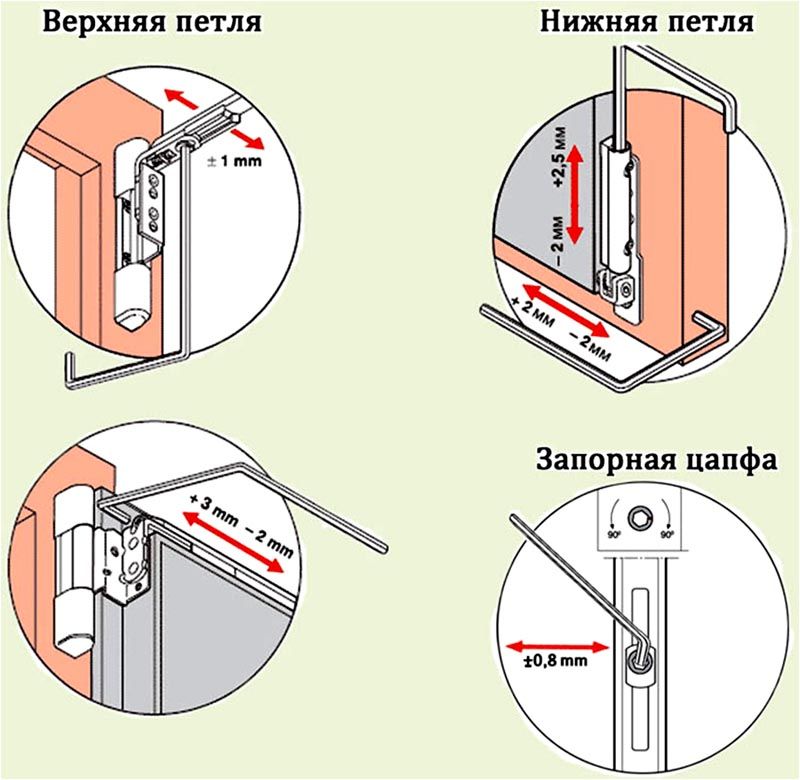
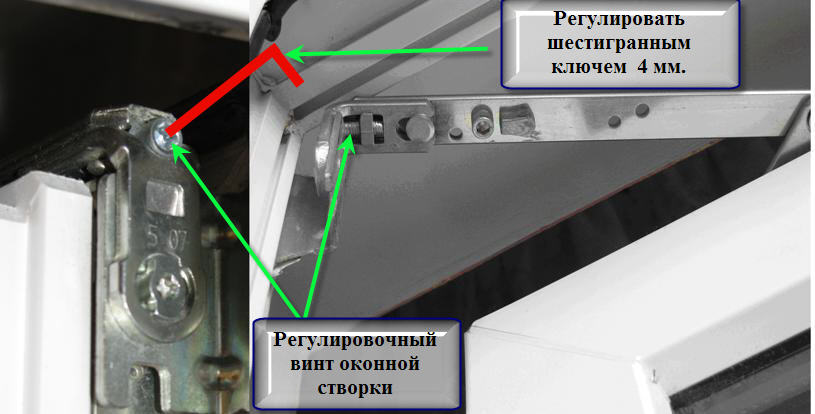
To adjust the mechanism on the windows there are special mechanisms - pins. These are the same metal "barrels" that move along the rails when you turn the handle. Usually they are mounted on three or four per window. You can turn them using a hex or a plain flat screwdriver.
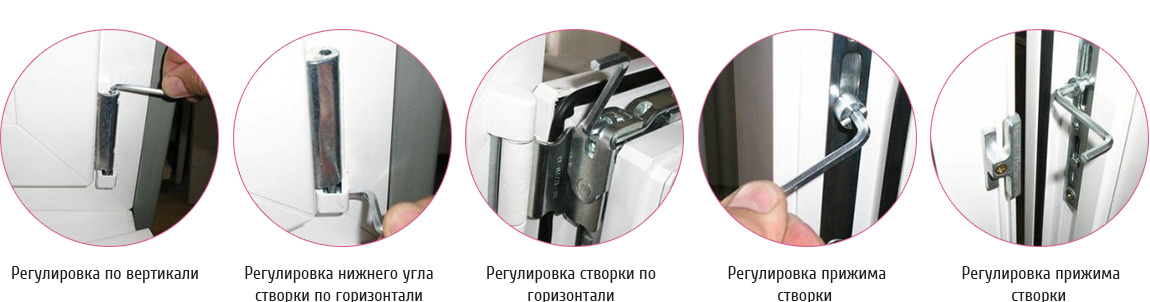
On each axle there are two slots, long and shorter. It is their position that indicates how to turn the mechanism. So, in order to increase the voltage (this is exactly what is needed in case of problems with the elastic band), you should turn the trunnion so that the long slit looks inside the apartment, and the short one looks out.If it turns out that the window has become poorly closed, then the voltage should be slightly weakened by a slight turn in the other direction. You need to turn all the mechanisms, otherwise you will get only a partial effect.
On different windows there may be slightly different mechanisms that are regulated slightly differently. There are three options:
- the pin is turned with a screwdriver, which is inserted into the groove in the center of the eccentric;
- pin slightly pulled over with pliers and only then turn;
- axle just turn pliers, without pulling.

Before starting the adjustment, you should carefully check which of the methods works.
On the windows of some manufacturers such an operation has to be carried out every season. The fact is that due to the nature of the material, the gum compresses slightly in winter and expands in summer. As a result, the clamping voltage changes. Not always this effect is noticeable, but if it happens, then you will know what to do.
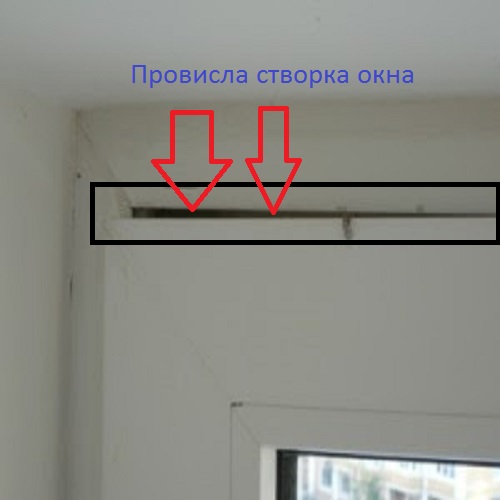
How to eliminate slack sash?
Unfortunately, slack doors are quite a common problem. Each time the window closes everything with great difficulty, until, finally, it begins to touch the frame.There are several reasons for this problem. It is possible that knowing them, you can not bring your windows to such a deplorable state.
- Sash weight The sash can slowly sag under its own weight, and in the case of some additional load. For example, many use the open window as a dryer, hanging clothes on the frame. In such conditions, of course, the slack of the sash will accelerate.
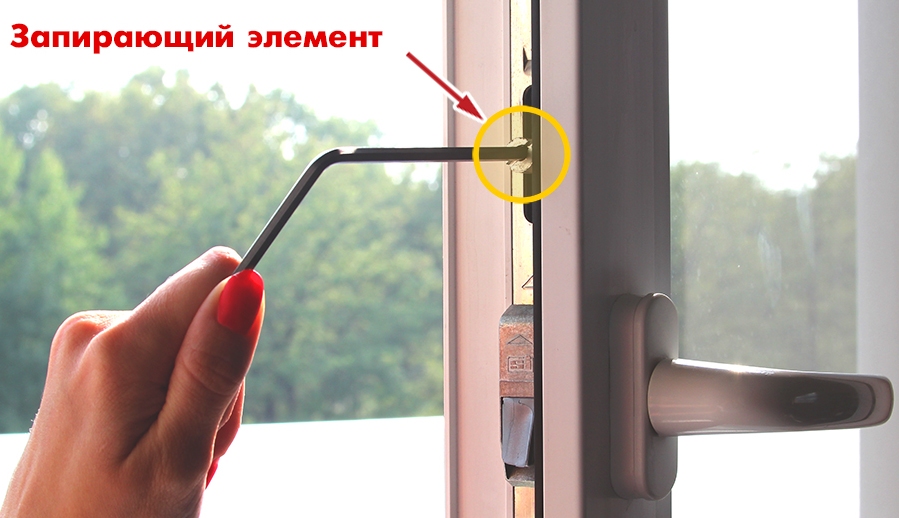
- Installation errorsLow-quality assembly - these are the reasons for which you need to carefully treat the search for the wizard when installing glass. The problem may be the most banal, like a dropout of a retaining element, but the window will stop closing.
With home repairs, the specific cause is not as important as the way to fix the problem. For adjusting you will need a hexagon. The first thing you need to find the adjusting bolts, which are located in the attachment of the sash to the frame. There are three ways of adjusting, depending on the position of the sash now:
- if the sash clings to the lower part of the frame, then the sash should be moved upwards;
- if it touches the middle support, then the shift is carried out to the sheds;
- when you touch the upper edge of the frame, the flap moves down.
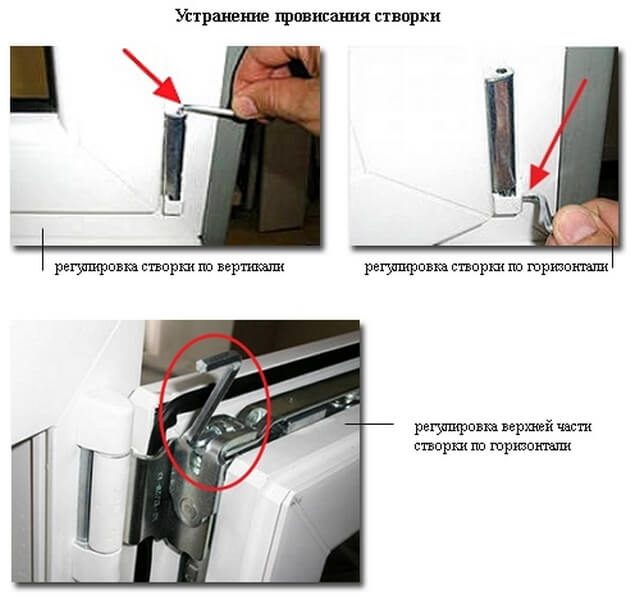
In practice, it looks like this.
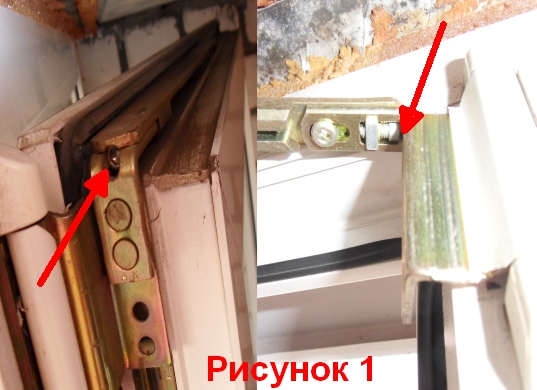
- To transfer the sash to the top or bottom of the need to rotate the bolt in the bottom support. It is covered with a decorative panel, so you first need to remove it.
- Now you need to find the bolt and start rotating it with the key.
- The flap rises when turning to the right, and lowers when the bolt rotates to the left.
- The bolt must be slowly turned until resistance disappears.
- In case it is necessary to bring the sash closer or away from the support (touching the middle part of the frame), it is necessary to turn the bolt located on the same support below. Here it is necessary to turn it half a turn and monitor the presence of a gap between the frame and the sash. If this turn is not enough, then you should continue to turn until the sash completely stops touching the frame.
All problem solved.
For the replacement of glass on a broken glazing with your own hands, see the following video.


