Self-leveling floor: step by step instructions
Every year in the field of construction self-leveling floors are gaining popularity. The great advantage of such floors is the simplicity of their installation: almost any owner who is familiar with the basic technological rules and has step-by-step instructions in front of him can do them himself without the involvement of specialists.

What?
By themselves, self-leveling floors are mixtures whose composition varies depending on the base under which the surface is aligned. A regular self-leveling floor must be manually distributed by a person over the entire surface, but self-leveling coatings also exist.
This mixture is self-leveling on the surface; the floor must dry, the master must provide him with suitable conditions for uniform drying and prevent the formation of bubbles and cracks.

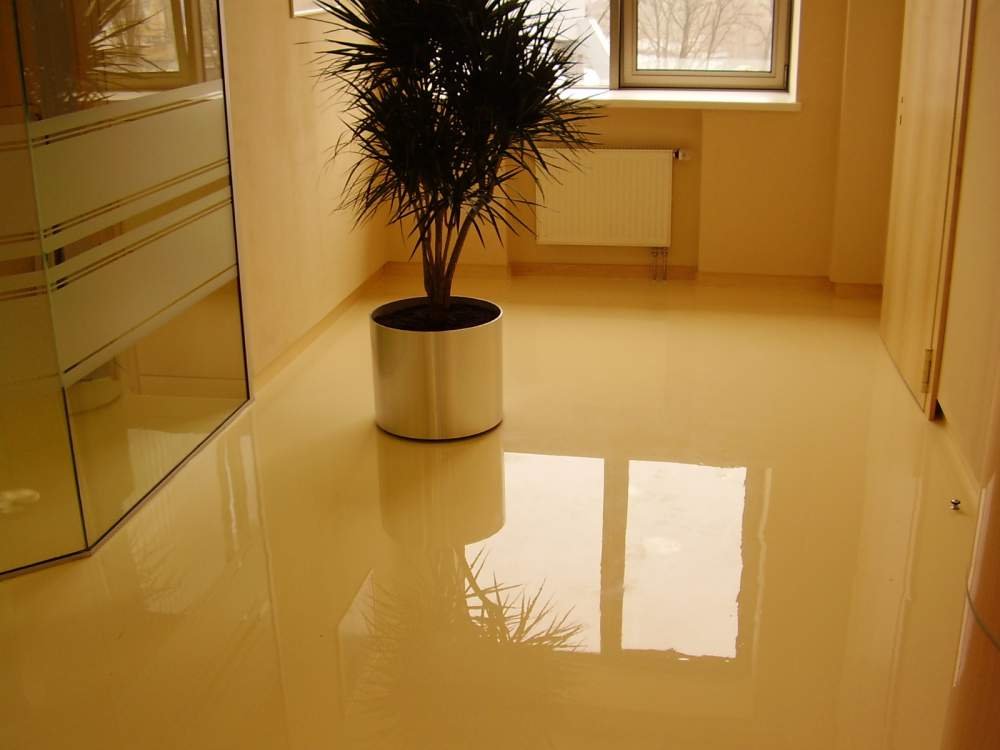
Bulk coatings have a number of advantages.The first thing that catches the eye of even a person who is far from the sphere of construction and repair is that this self-leveling floor has absolutely no seams.
This means that dirt will not accumulate in the joints, which will facilitate the cleaning process to a certain extent. In addition, such coatings are resistant to harsh chemical compositions and have antistatic properties: for washing floors there is no need to look for a special detergent, and dust will not accumulate in the corners.
No less important is the fact that self-leveling floors are durable, due to their elasticity, they withstand a variety of mechanical damage, are resistant to temperature and humidity. Finally, this type of coating is simply environmentally friendly and provides the buyer with a wide choice of colors and shades.


Kinds
Self-leveling floors are truly diverse. They differ in appearance, technology of laying, and also can differ in the invoice.
For example, a self-leveling floor, as a rule, is intended for basic leveling of the surface for further finishing with laminate, linoleum or other coating. Often a mixture of such a floor contains coarse-grained components, and the liquid floor itself is poured in a layer from 2 to 10 cm.

In the case where the self-leveling floor is used for final leveling, the height of the reservoir does not exceed 4 centimeters, and sometimes it is only a few millimeters.
Sometimes the so-called liquid linoleum is used as the final coating, or, in a different way, 3D floors. They are applied in a thin layer over the base coat and have a decorative effect.
There are several main types of self-leveling floors.
The main thing that is worth knowing is that such coatings are mineral (consisting of cement and some modifiers that give the mixture elasticity) and polymeric (consisting of synthetic materials).
It is clear that cement floors are not used in residential premises or are used very rarely. More often owners prefer polymeric products.
Polyurethane
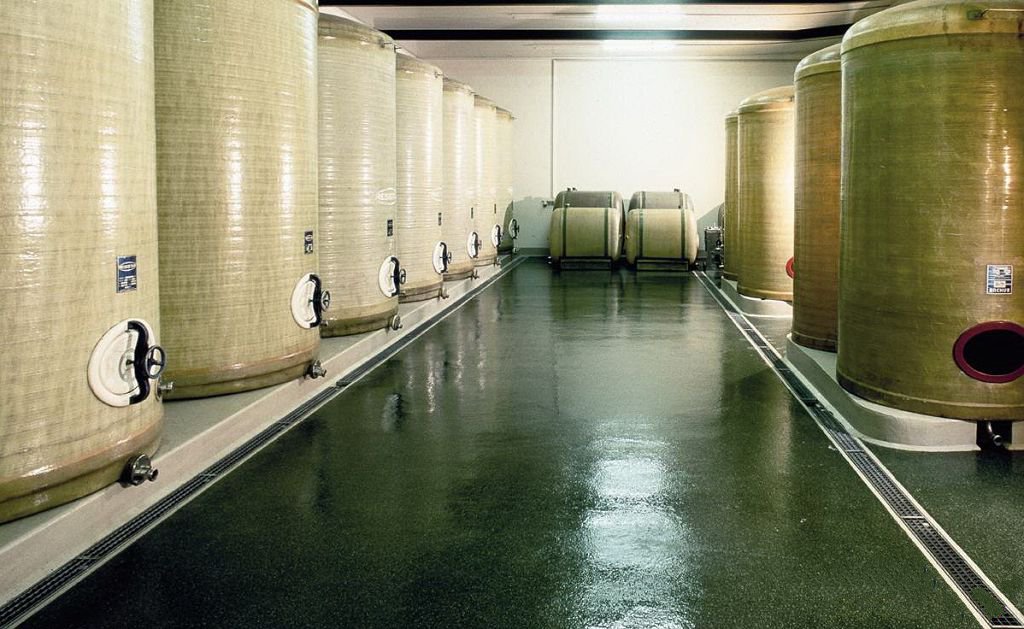
These polymeric coatings are particularly resistant to mechanical stress, chemical agents, temperature extremes and high humidity. They are elastic, which makes them the most durable coating, do not require special conditions of care and do not attract dust, because they do not accumulate static electricity.This allows you to make cleaning the floors as simple and quick as possible.
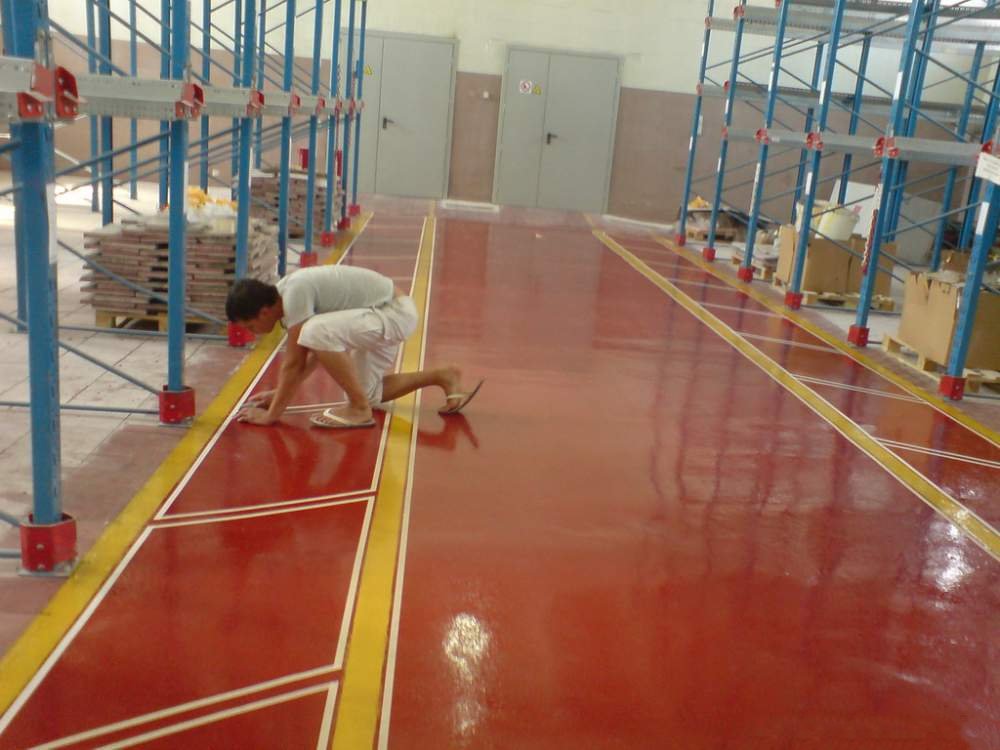
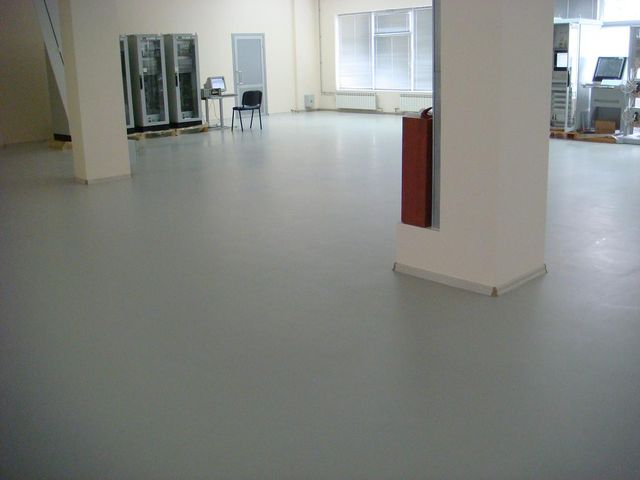
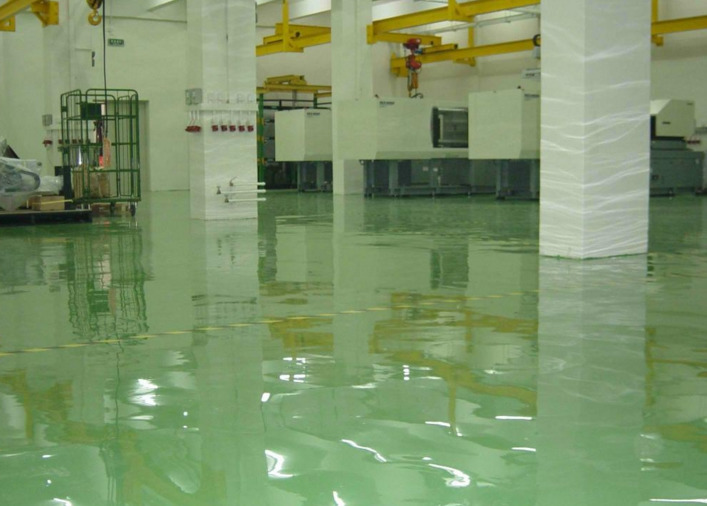
Because of its "indestructibility" polyurethane floors are especially popular in industrial premises and warehouses. However, this flooring is also used in living rooms just as often: it is warm and does not emit toxic compounds into the air (although it should be poured into a respirator).
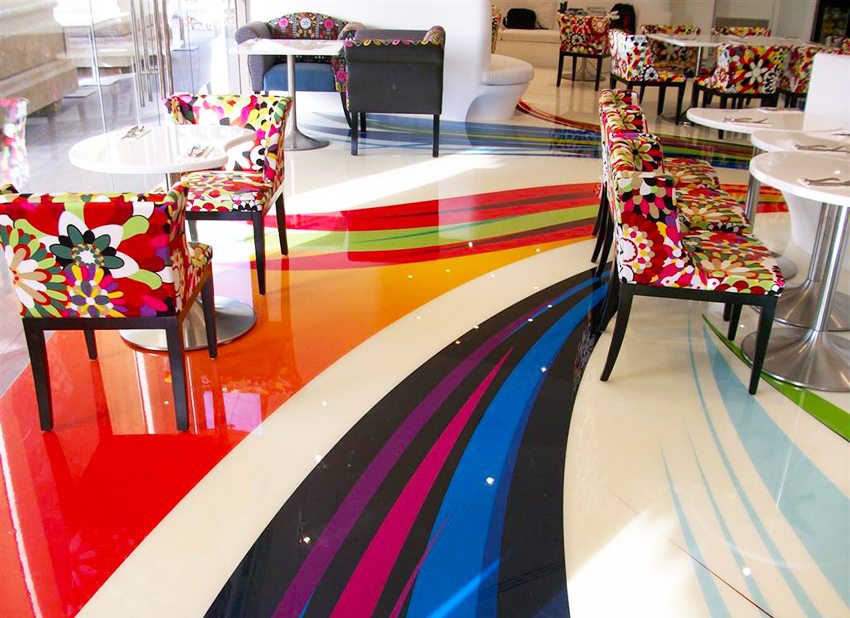
Also, polymer floors can boast a wide selection of colors and patterns: they give designers the opportunity to work with stencils and allow to mix colors.
There are two types of polyurethane coating blends. Single components are the easiest to install and are usually used just in residential premises. Two-component, by contrast, are more widely used in manufacturing and warehouses; in places where the flooring should have increased strength. These mixtures are usually poured by professionals who are familiar with the process.
Epoxy
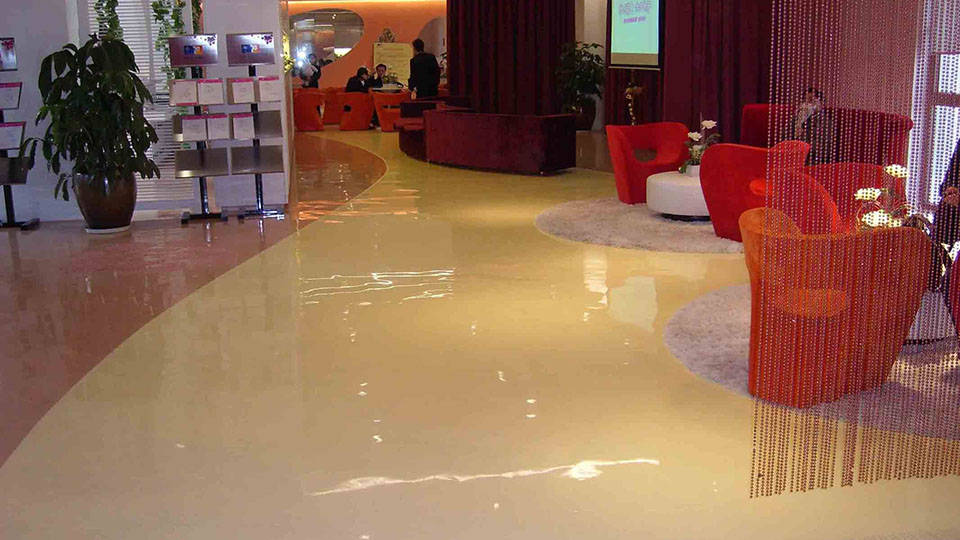
The main distinguishing feature of this type of coating is increased moisture resistance. They have a very smooth glossy surface, absolutely seamless, preventing the ingress and accumulation of dust, dirt and water droplets.In addition, epoxy resin floors are inert to chemical compounds, they do not burn and have no smell (it disappears completely if the room is well ventilated after pouring).
However, epoxy coatings have some disadvantages. Their increased hardness leads to an increase in the brittleness of the surface, the appearance of cracks. In addition, the beauty of the glossy surface over time will inevitably be spoiled by scratches, which will not be possible to get rid of by grinding.
Polyurethane and epoxy glue can be used as a binding element in a rubber floor covering. It is usually used in playgrounds to cushion blows from falls, but it can also be an interesting solution for designing, for example, a balcony and a loggia.

Epoxy-urethane
This coating, as its name implies, successfully combines the characteristics of epoxy and urethane materials. Due to the increased impact and wear resistance, it is most often used in the design of rooms with a high degree of terrain: platforms of the metro and covered stations, parking lots, etc.
Also, epoxy and epoxy-urethane materials are used to create “liquid glass” floors.They are named so because of the ideally smooth glossy shiny surface that looks very much like glass.

Methyl methacrylate
The most rapid hardening of the above type of floors: the material hardens in two hours. Of course, its technical characteristics are much lower than those of other varieties, and such a product can be laid only in a well-ventilated area, but the speed of installation is a significant advantage.
Application
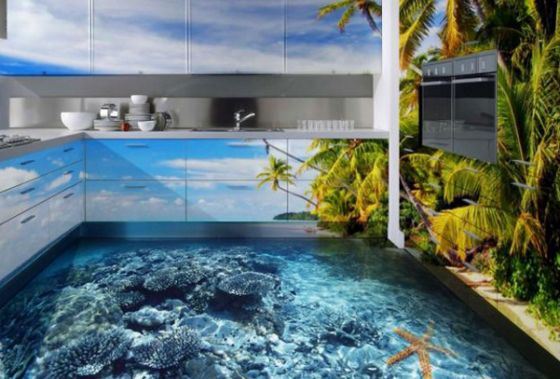
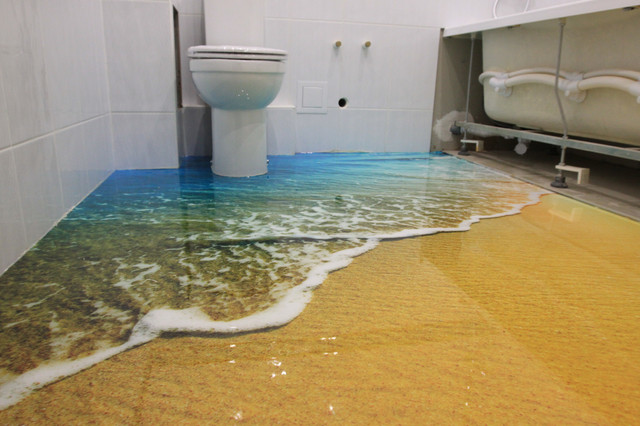
Due to its resistance to mechanical damage, humidity and temperature fluctuations, self-leveling floors are best suited for use in the kitchen, where there is a risk of dropping something. In the bathroom or in the toilet, they provide the owner with the confidence that high humidity will not spoil the flooring.
The same applies to open loggias and balconies: a random drop of drops during rain and temperature fluctuations to the self-leveling floor are not terrible.
In a private house, such coverage can be installed on the veranda and in the hallway: even frequent exits to the garden or the vegetable garden and back, poorly placed garden tools and pets (especially large dogs) will not damage the floor.

Instruments
Before proceeding directly to laying the floor, it is necessary to prepare a special set of tools and equipment.
- Several tanks for kneading the solution. A plastic or galvanized bucket can be used; The total volume of the container must be at least 20 liters. Depending on the area of the room may be more.
- Tool for the preparation of the solution: a drill with a nozzle for mixing or a construction mixer.
- Squeegee for leveling and adjusting the thickness of the composition.
- Reper Beacons.
- Wide spatula for leveling the floor.
- Smoother.
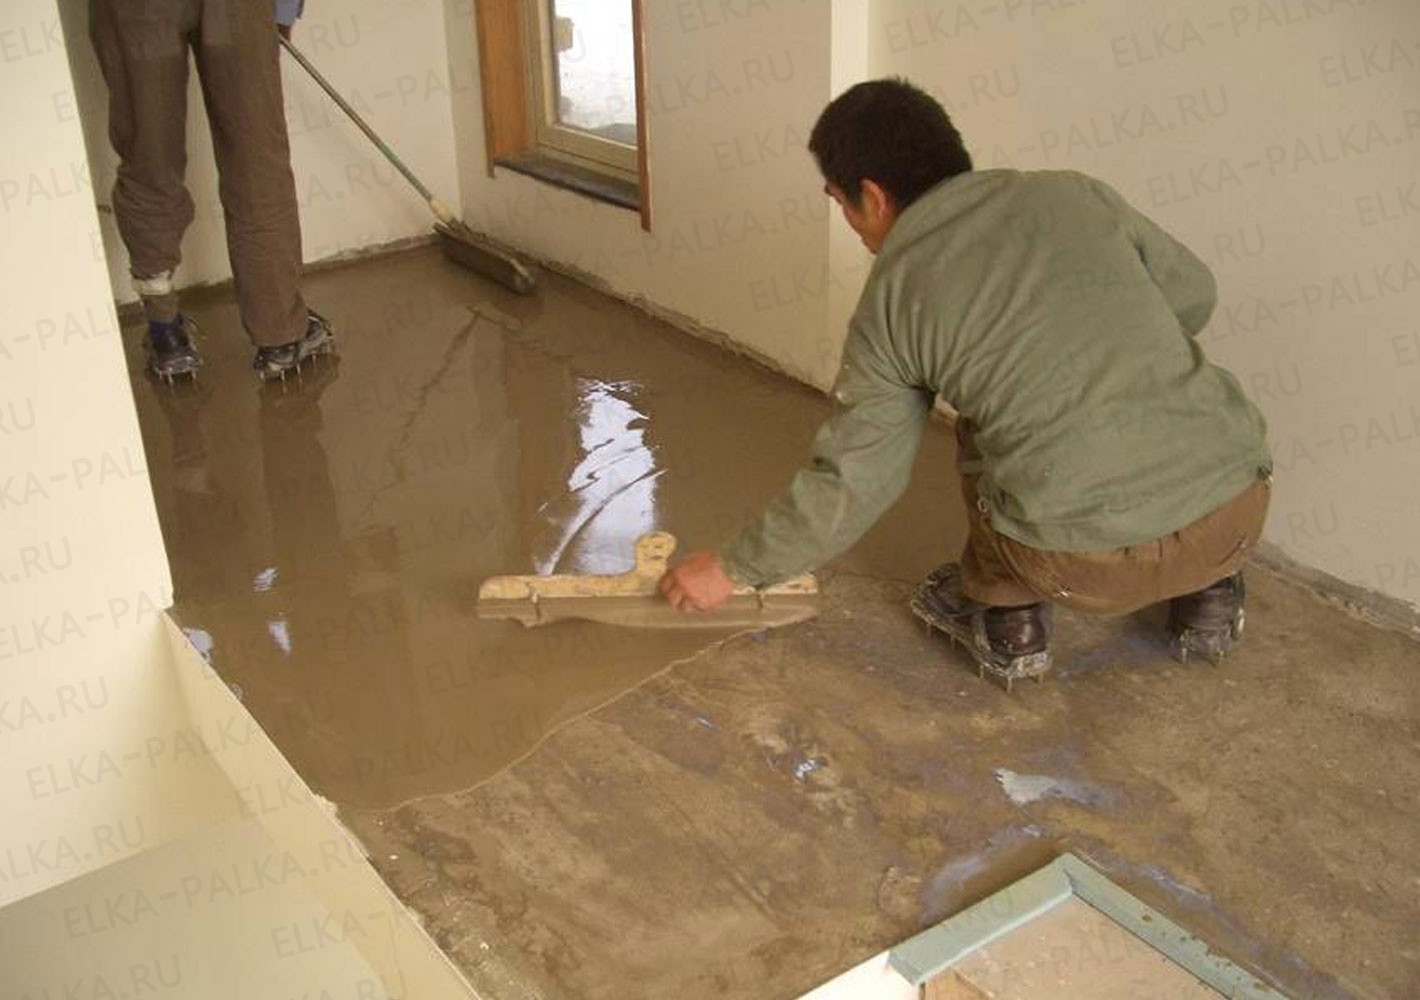
- Stilts or special linings for shoes - krasknosty.
- Decorative flocks and chips, if they are necessary for the design idea.

How to breed?
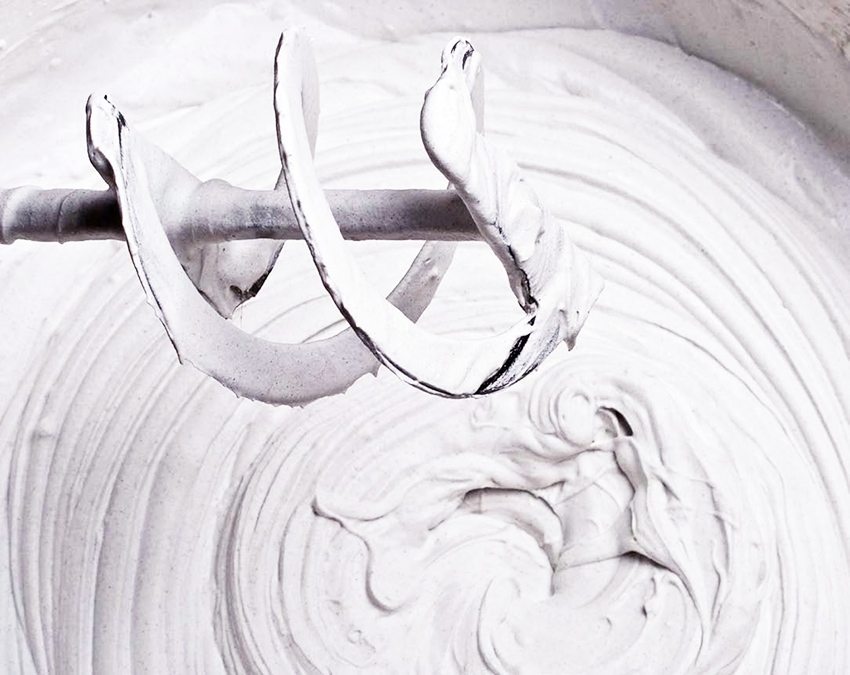
Mixtures for the self-leveling floor on a cement or plaster basis are diluted approximately in the same way: a dry mixture is poured into the water and thoroughly mixed. The main thing in the process of breeding the composition at home - is a strict observance of the proportions indicated on the package. These proportions will make the composition of the correct consistency, which will spread correctly over the entire surface.
It will be important to check the spreadability before pouring.To do this, there is a simple test: a plastic ring (its diameter and height must be within 5 cm; for this, a cover from any can with a cut out bottom fits) is placed on a flat surface, after which the diluted and conditioned mixture is poured into it . The cover should rise, and the solution spread on the plane.
In that case, if the diameter of the spread mixture is within 18 cm, then its consistency is optimal. Otherwise, it is worth adding water to the solution or, conversely, more dry mix.
Base options
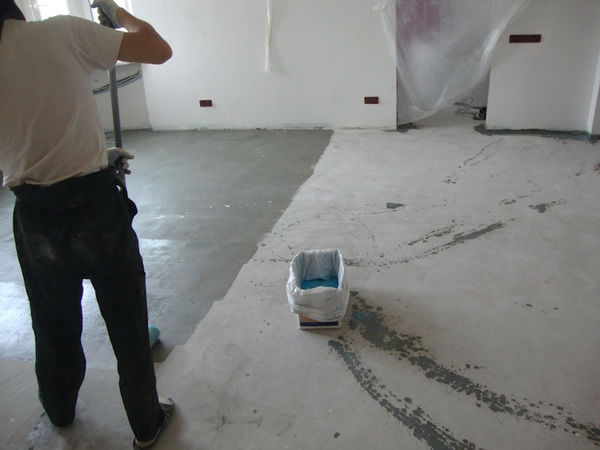
The preparation of any foundation is an important step that should not be neglected in any case, otherwise the floor may lie uneven: the appearance of the surface will deteriorate, and the durability of the floor will be called into question.
Before pouring mortar onto a concrete screed, make sure that it meets three simple characteristics. Firstly, the concrete on which the floor will be poured must be dry, the humidity indicators must not exceed 4%. Secondly, the strength of the concrete screed is very important: compression is not less than 20 MPa, and tear-off strength is 1.5 MPa.It should be given a cement or concrete basis the opportunity to "ripen": the age of the cement base should be 28 days, concrete - at least 3 months.
Somewhat different is the approach to preparing flooring on wood: plywood or remnants of other wooden flooring. The permissible surface moisture in this case can reach 10%.
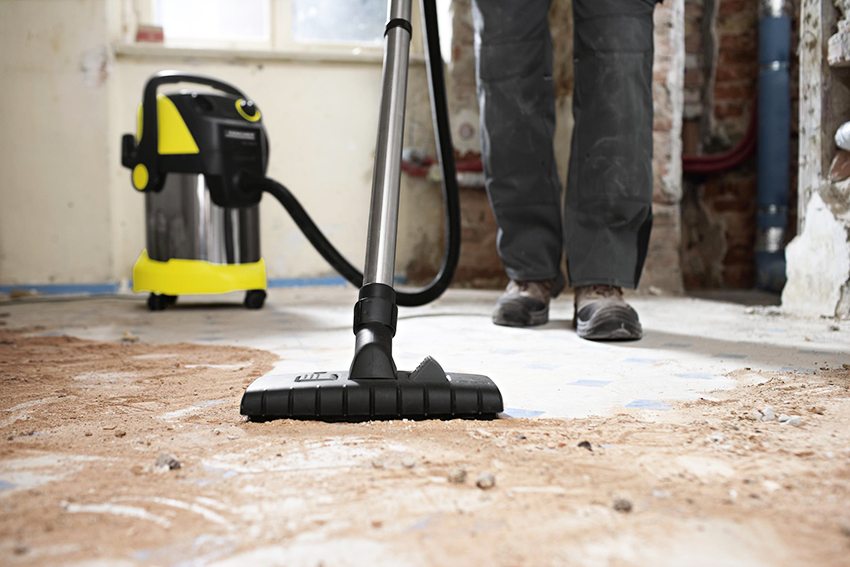
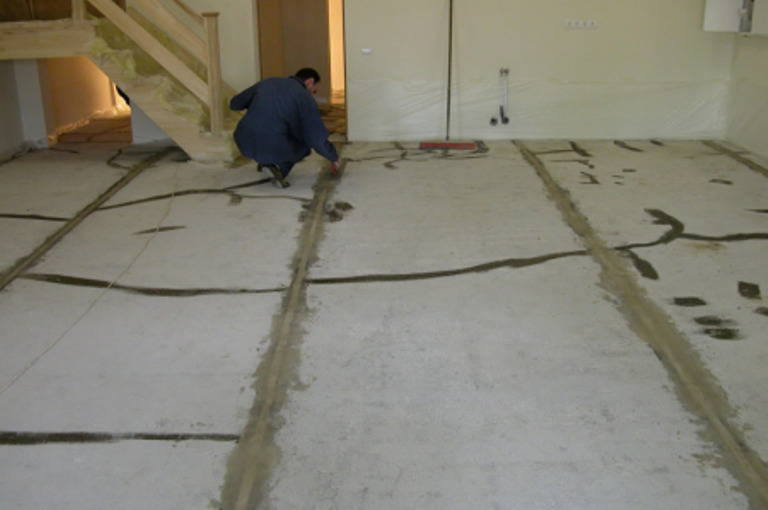
In any case, it is necessary to clean the floor from debris and all sorts of dirt like grease stains, bitumen and bitumen mastic, paint. Cracks and irregularities need to be filled with quick-drying compounds (for example, you can use epoxy putty); small cracks can be sealed with construction glue.
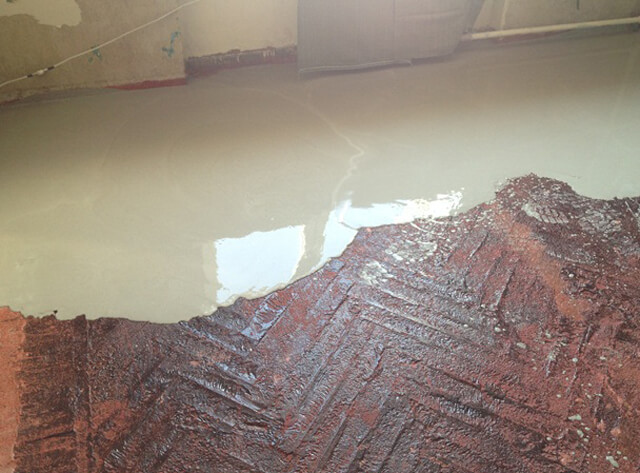
If it was decided to pour the floor over the old tile, it is necessary to check how firmly it is fixed. All elements that are poorly fixed in their places should be removed, and the resulting gaps should be sealed and puttied. Then the surface will need to be degreased. To do this, you can use a solvent.
Less often, masters use penoplex, expanded clay, gypsum fiber board and polystyrene foam as bases for the self-leveling floor. It is not recommended to lay this type of floor on the ceiling, as this will be fraught with increased sound permeability.
Primer and putty
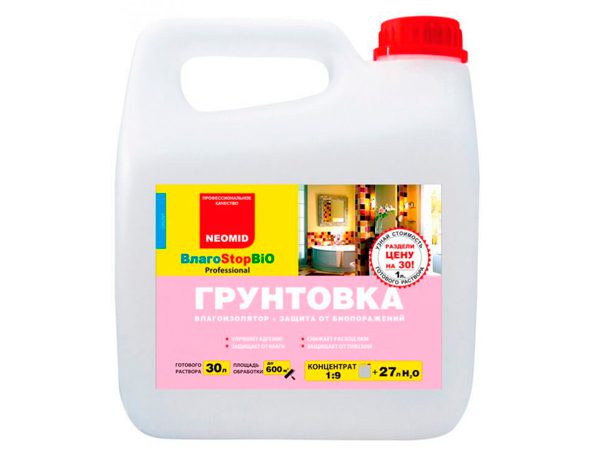
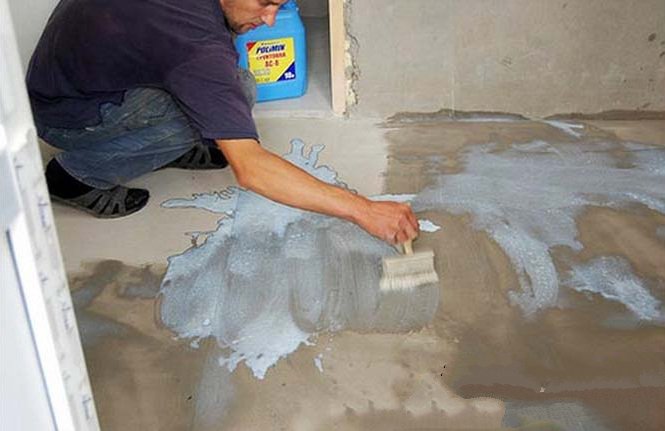
The final steps of the preparatory phase should be the incorporation of cracks and seams. To start all sorts of cracks and chips need to be putty. Best suited for this adhesive composition with special resins. Priming the floor is necessary in order to lay the layer as firmly as possible to the base; in case of increased roughness or porosity of the lower word, it is necessary to prime it several times. To determine the height of the primer will help beacons.
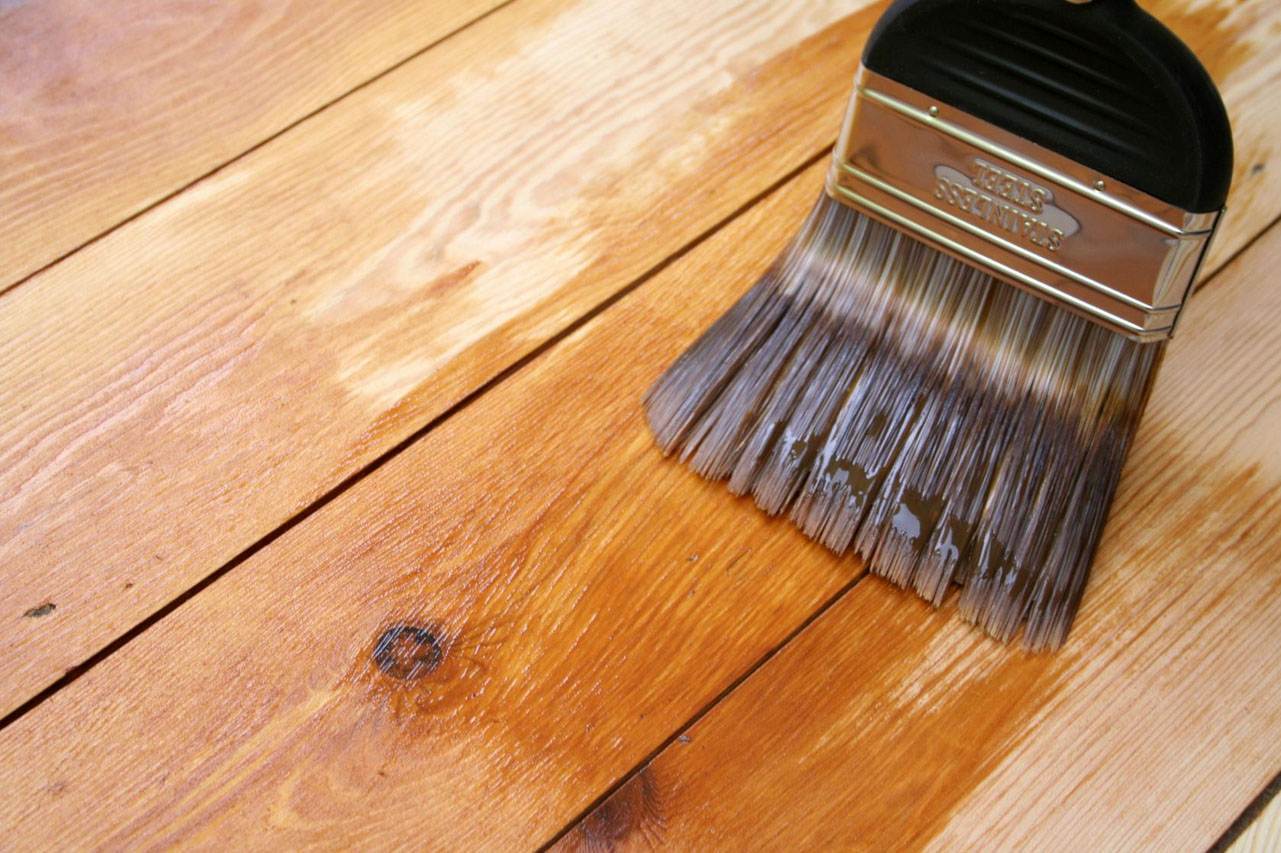
Primers are applied to the surface with a brush or roller in one or more layers. After that, you must leave the floor to dry for at least 12 hours.
It is better to maintain a constant temperature in the room in order to avoid the appearance of bubbles, and to protect the primed surface during drying from dust.
How to reduce consumption?
Typically, the consumption of dry mix for a self-leveling floor is 1.5-1.8 kg per 1 square meter of area with a depth of 1 mm.
So that the consumption of material does not exceed the norm, you need to remember a few simple rules:
- Preliminary puttying and priming will help reduce the consumption of material, so it’s worth assessing the condition of the floor as a whole;
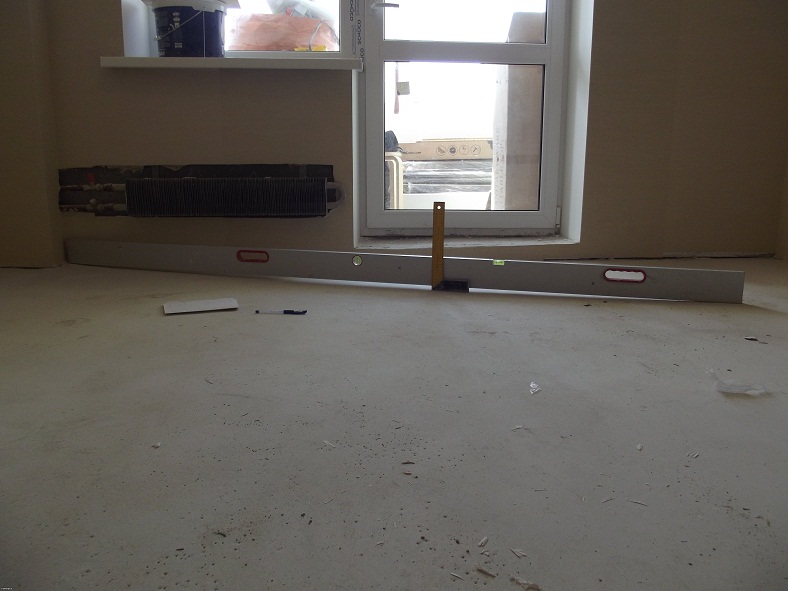
- It is necessary to find the highest point of the surface, after which, with the help of a level and a level, its height should be projected onto the walls and marked with beacons. The largest difference is considered to be screed thickness.
- Finally, the required number of bags of the mixture is calculated. The proportions and consumption of the mixture indicated on the package must be multiplied by the thickness of the intended layer and the area of the room. The result is divided by the mass of the mixture of one bag.
Technology and device
Make floors in the apartment itself is not as difficult as it seems. Especially if the owner has a minimal understanding of the technological side of the process and experience in carrying out repairs.
Laying the self-leveling floor takes place in 2 stages. When all the preparatory steps (surface preparation, mortar preparation and spreading test) are completed, it is time to start pouring the floor itself.
In order to smooth the self-leveling mixture, it will be necessary to act very quickly and accurately.
Ultimately, the self-leveling floor has two layers: a layer of mortar and a surface coating of polymeric varnish. The height of the first averages 3-4 cm, the second - no more than 30 mm.

The temperature in the room during the pouring and drying of the floor should be constant and range from 15 to 25 degrees Celsius. It should carefully monitor the humidity: it should also be constant, from 50% to maximum 70%.
Installation of the floor occurs in stages from the far corner from the door to the exit. If the floor is placed in a large room not by professionals, but by the owner, then it would be better to make several main bands, each of which will be filled with specially prepared for her composition, and the strips themselves should be separated with rails.
Below is a step-by-step instruction on how to properly do the self-leveling floor with your own hands:
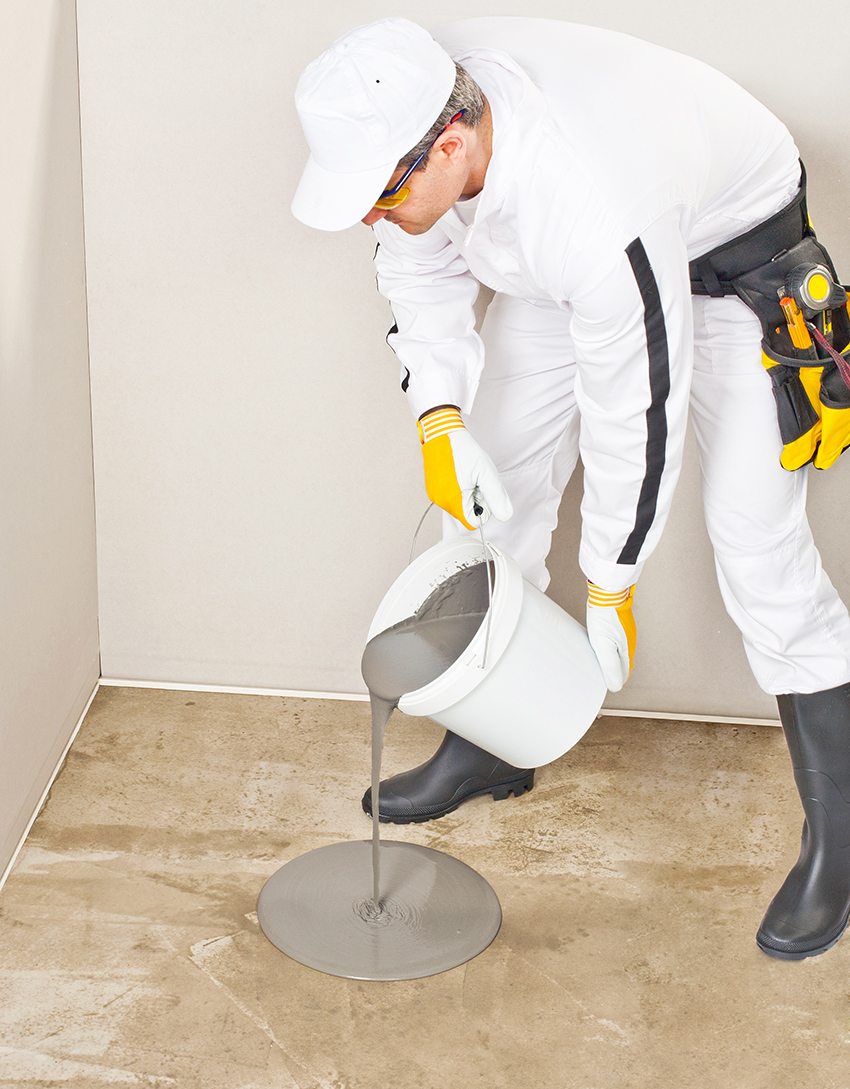
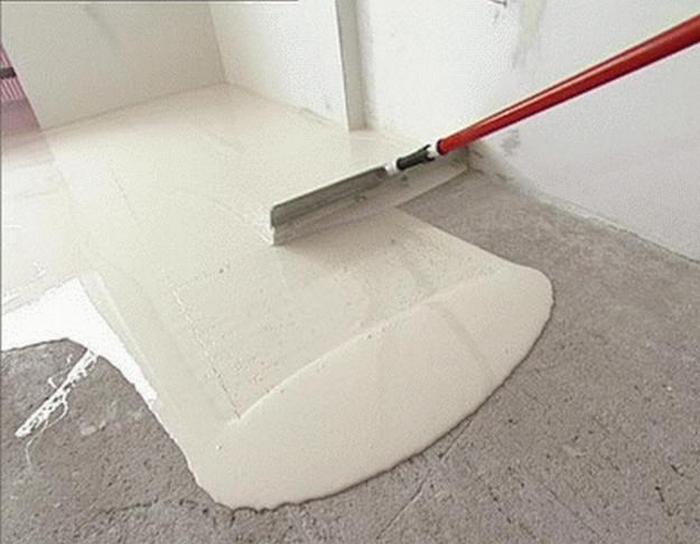
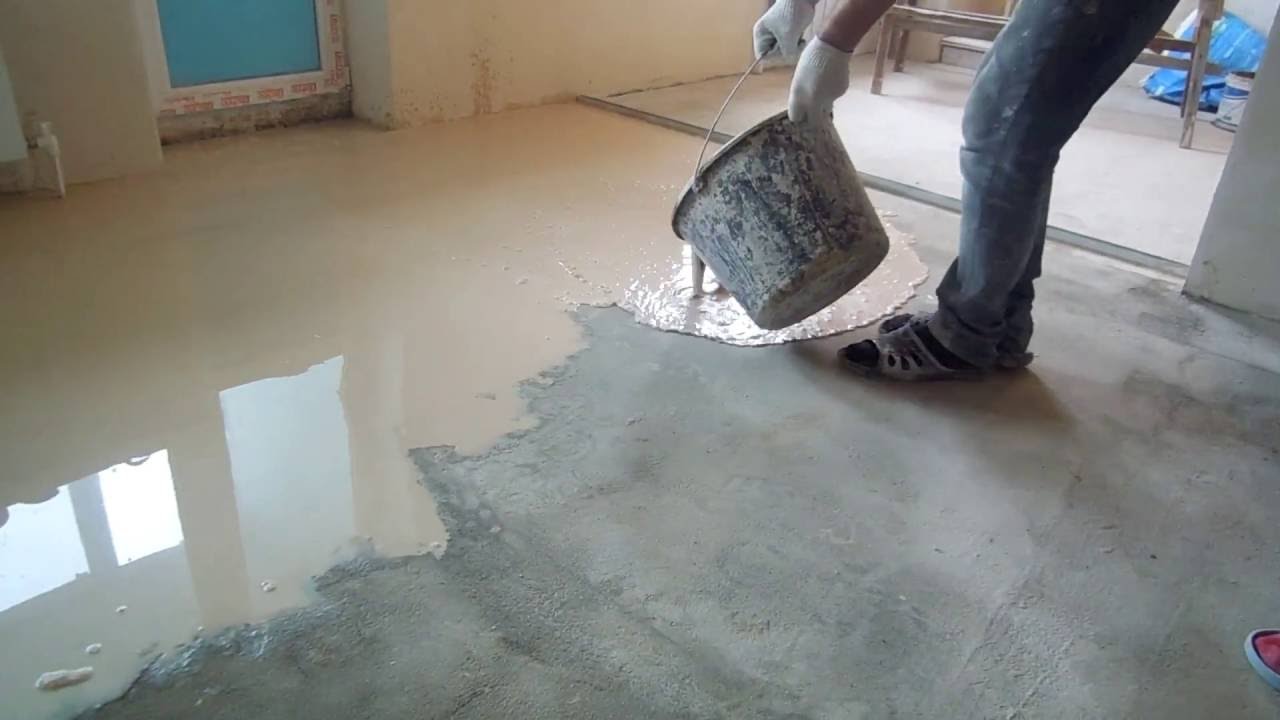
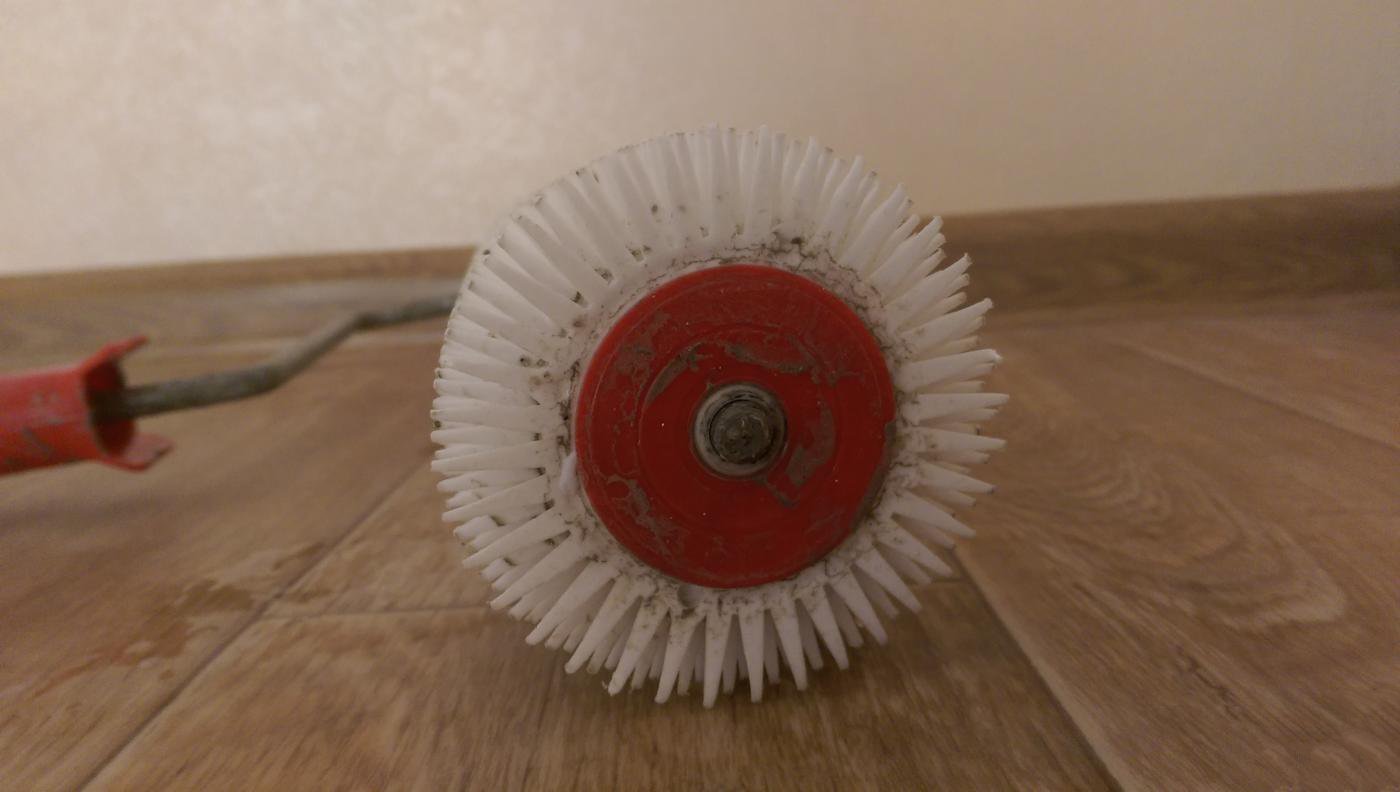
- Immediately after diluting the mixture, the resulting solution is poured onto the prepared floor surface. You can pour parts in portions poured next to each other. Then a spatula is used for leveling. A needle roller is used to remove air bubbles that form.
- The laser level checks the flatness of the floor and, if necessary, re-pour another layer. Alignment should be carried out until the surface becomes as smooth as possible.
- The surface is covered with plastic wrap to prevent dust from entering the solution.
- After drying, a polyurethane varnish is applied over the solution with a thin layer.
The final layer of lacquer can be both transparent and colored, decorative. Its thickness is usually small.
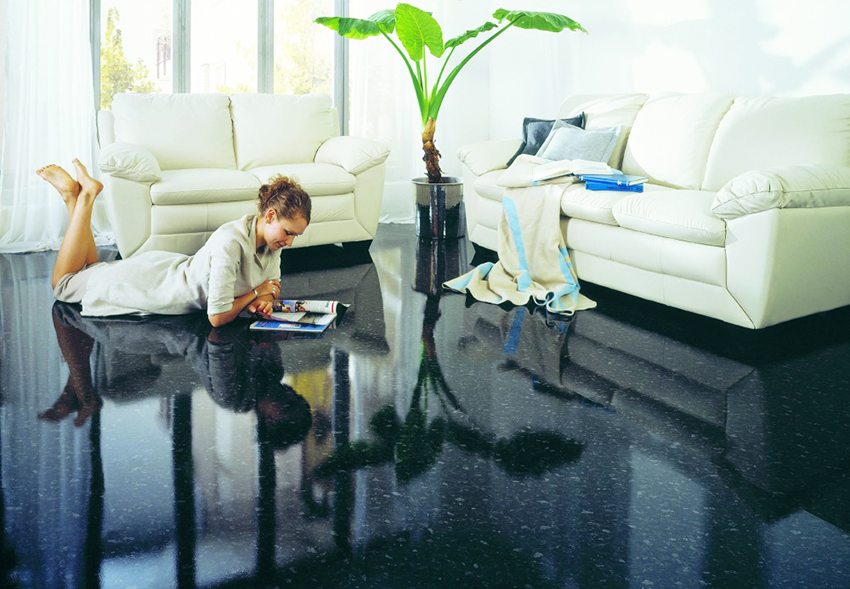
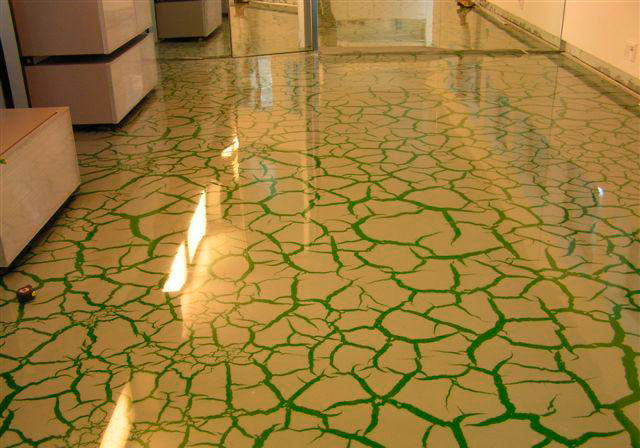
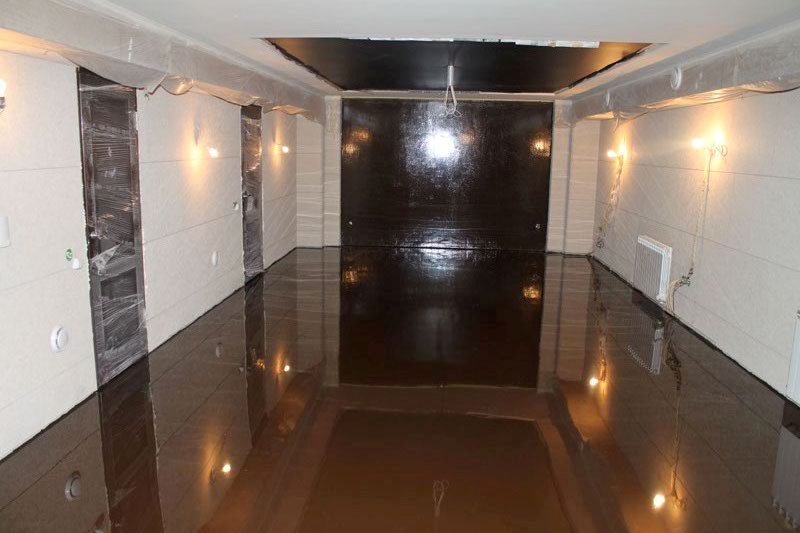
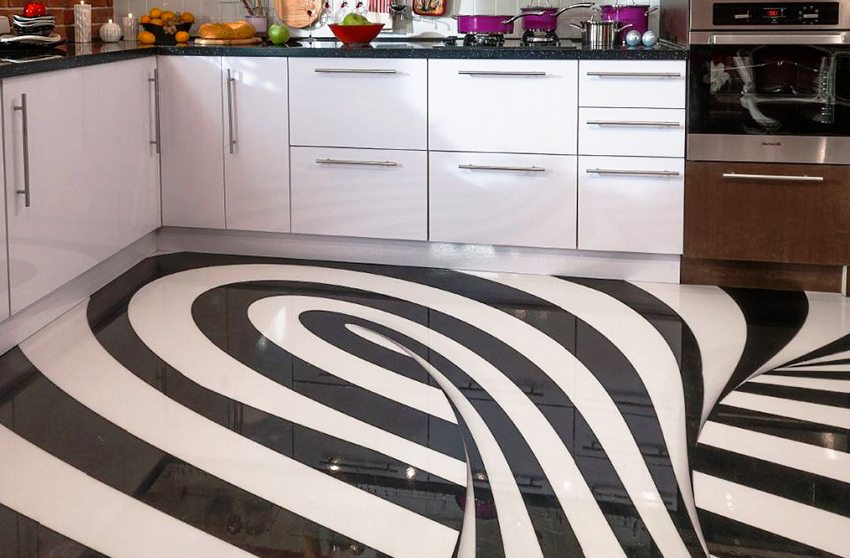
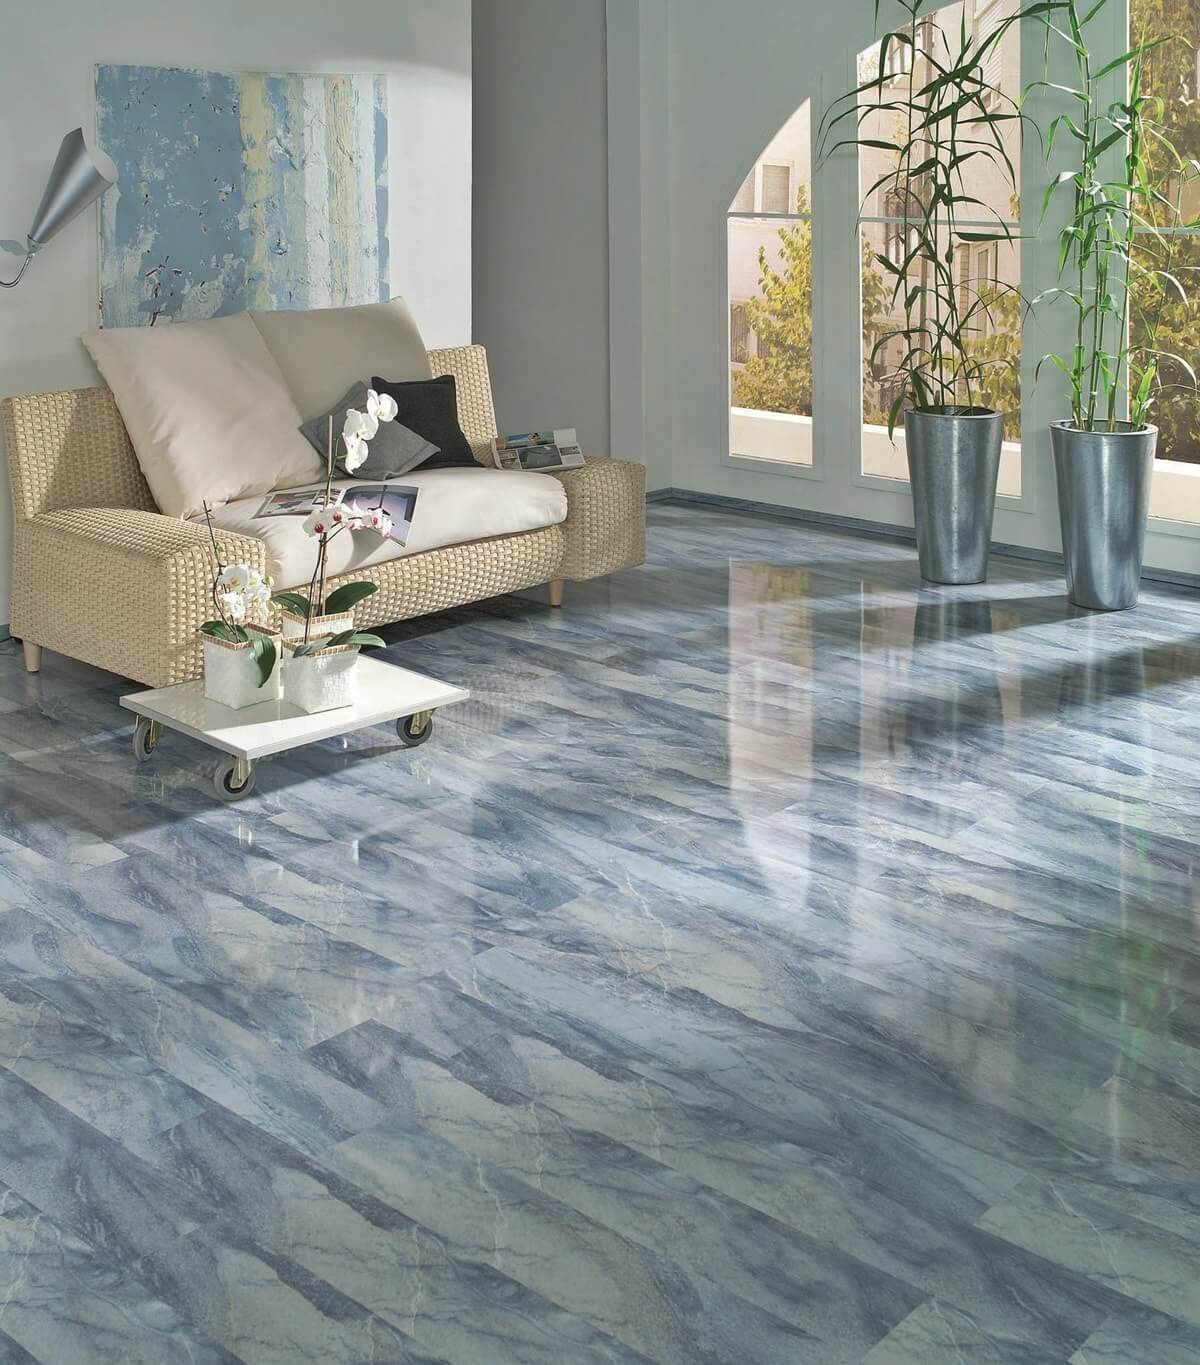
Mixing different colors allows you to create a surface that looks like a marble. A glossy black floor will look no less impressive in some rooms.


Finishing Layer Fill Rules
Despite the great similarity of the rules for pouring base and finish layers, there are some differences between them. So, to begin with, the floor, as it should be, is ground and ground with special polyurethane or acrylic primers.
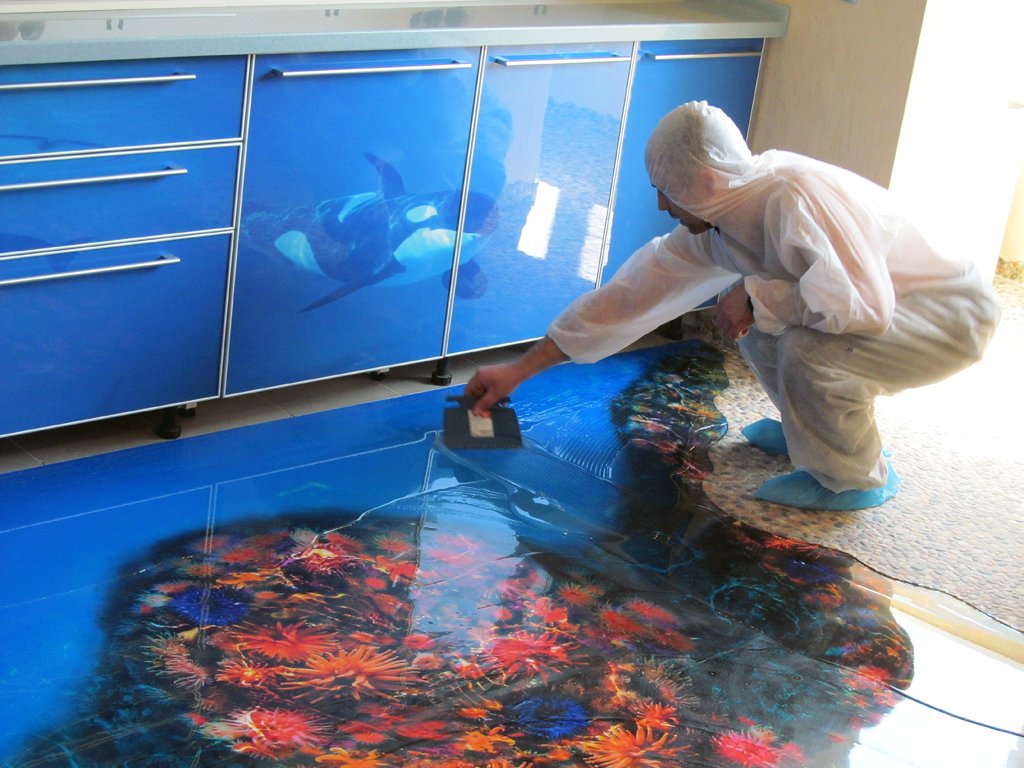
For example, to create a floor with a 3D effect, they apply banner synthetic fabric, which is laid and glued to the primed surface, and after drying (1-2 days) is covered with another layer - a polymer compound.
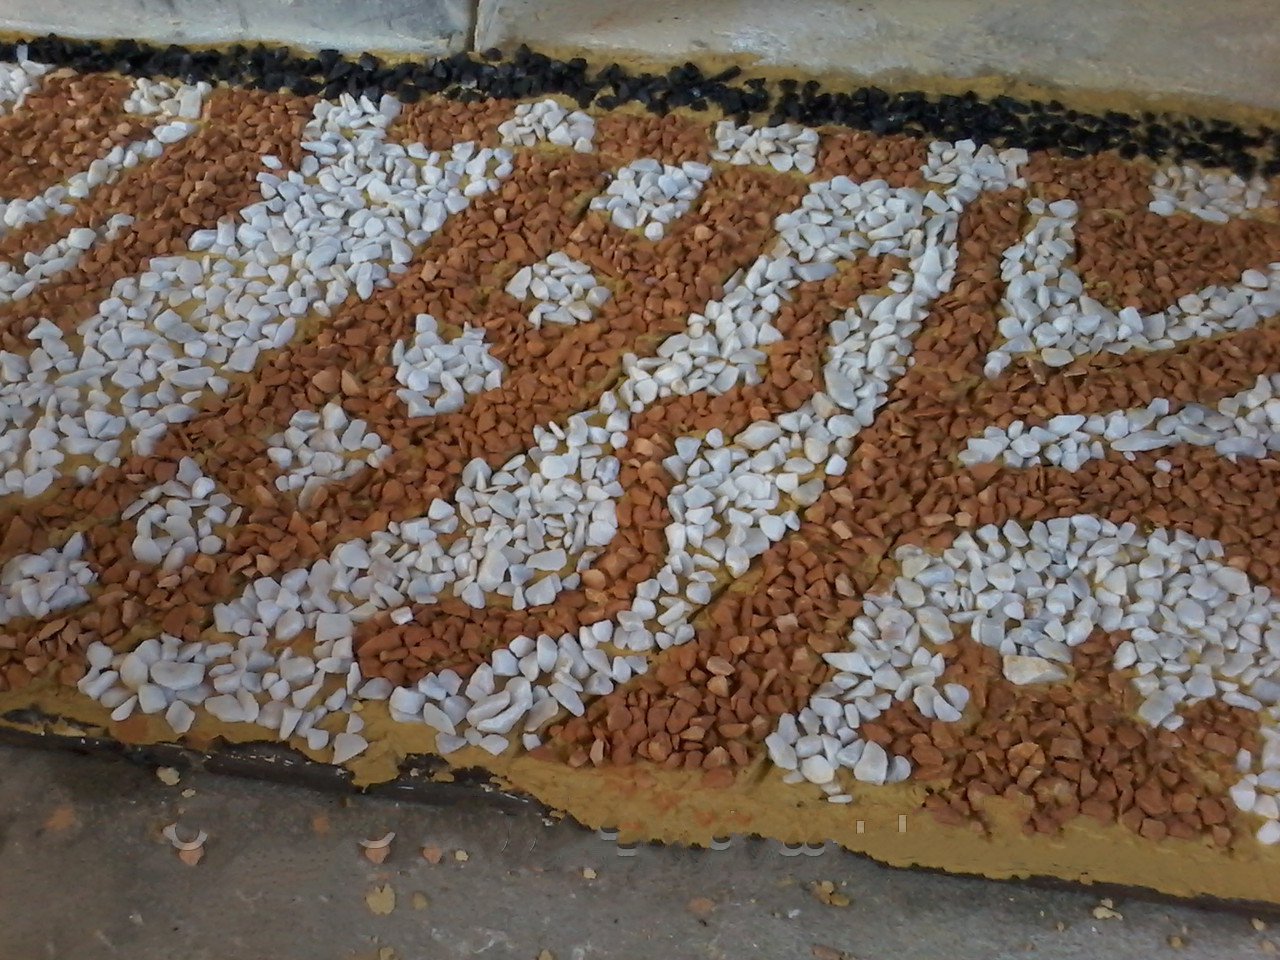
There are options when using different fine fillers for the final coating: marble chips, chips, shells, quartz sand, etc. This floor is considered to be highly filled and requires careful installation: decorative elements should be carefully distributed over the surface and carefully leveled.

How to dry?
Each layer of the floor should be dried separately.
During priming (if the floor was primed in several layers) each individual layer should be dried for at least 12 hours. The exact drying time of the base layer of the floor is usually indicated on the package, but on average is about a day. The decorative glue layer should be dried for at least 1-2 days.
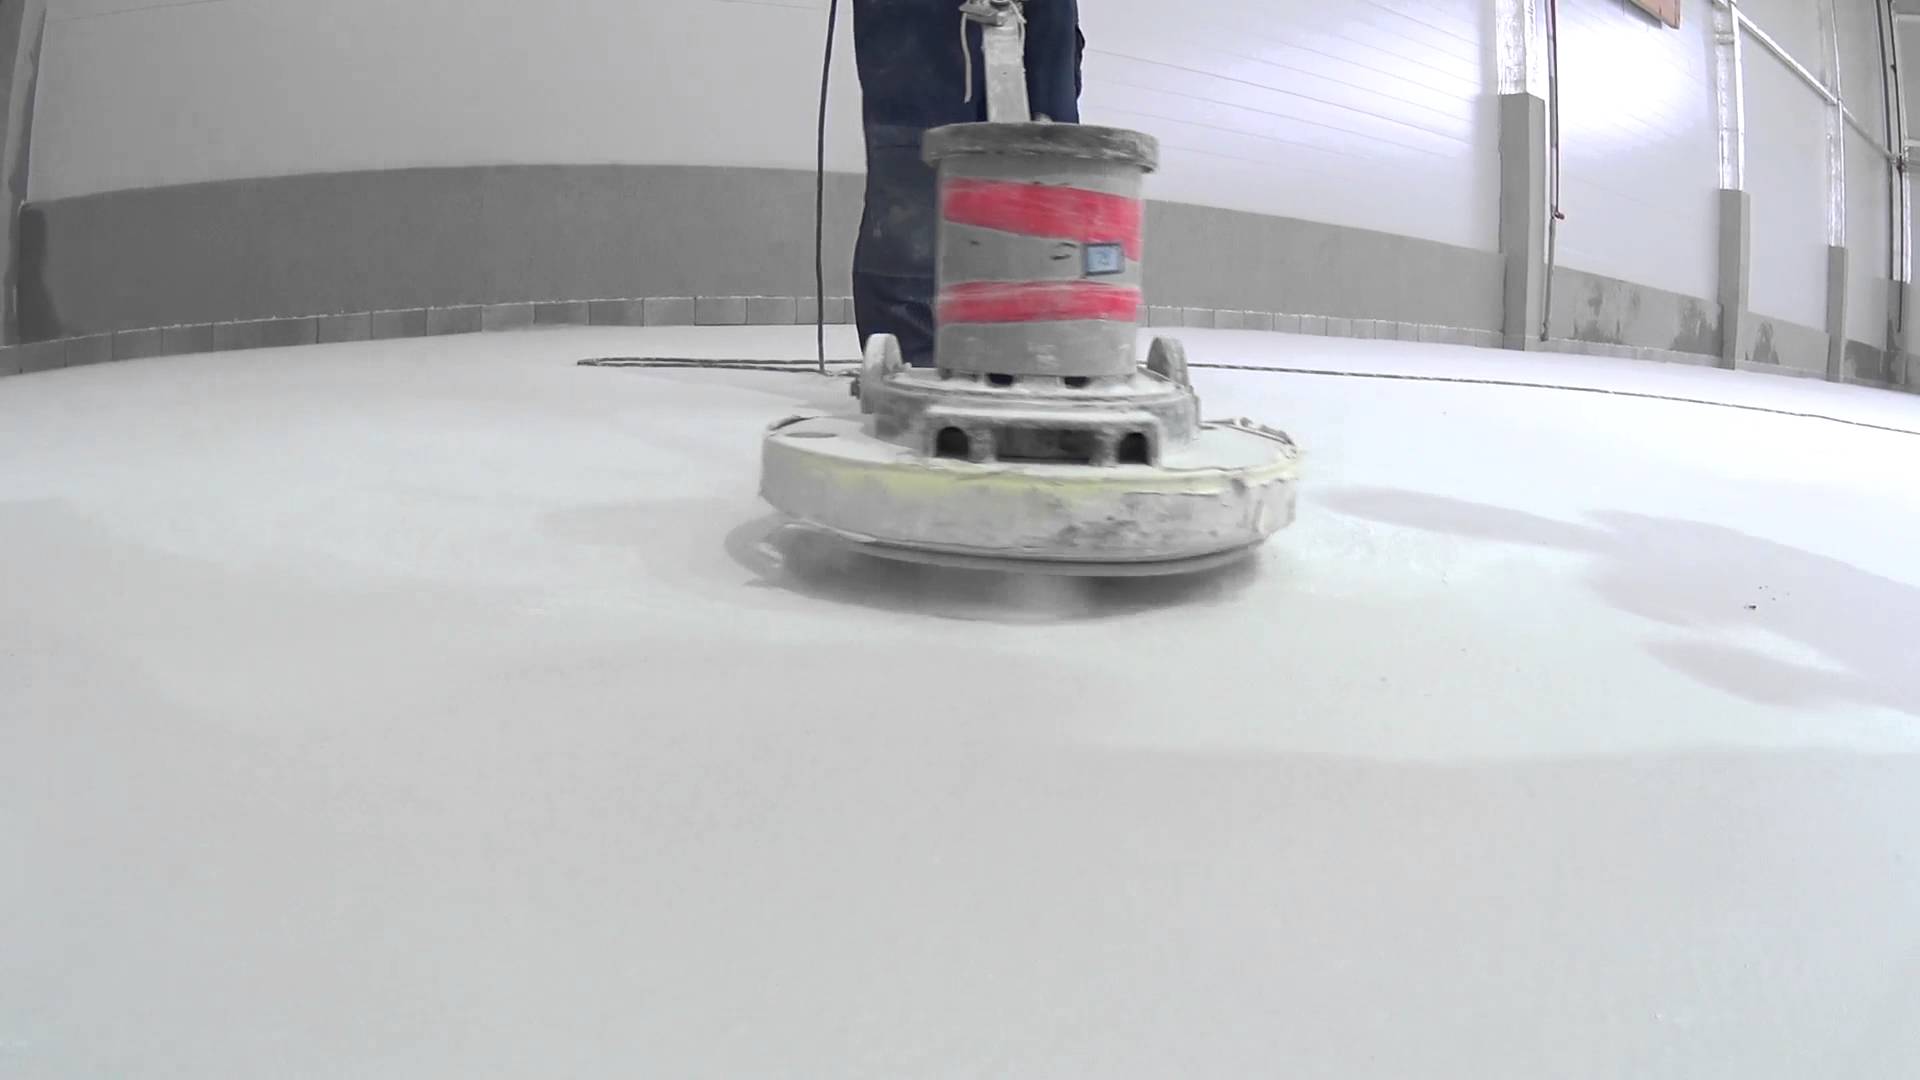
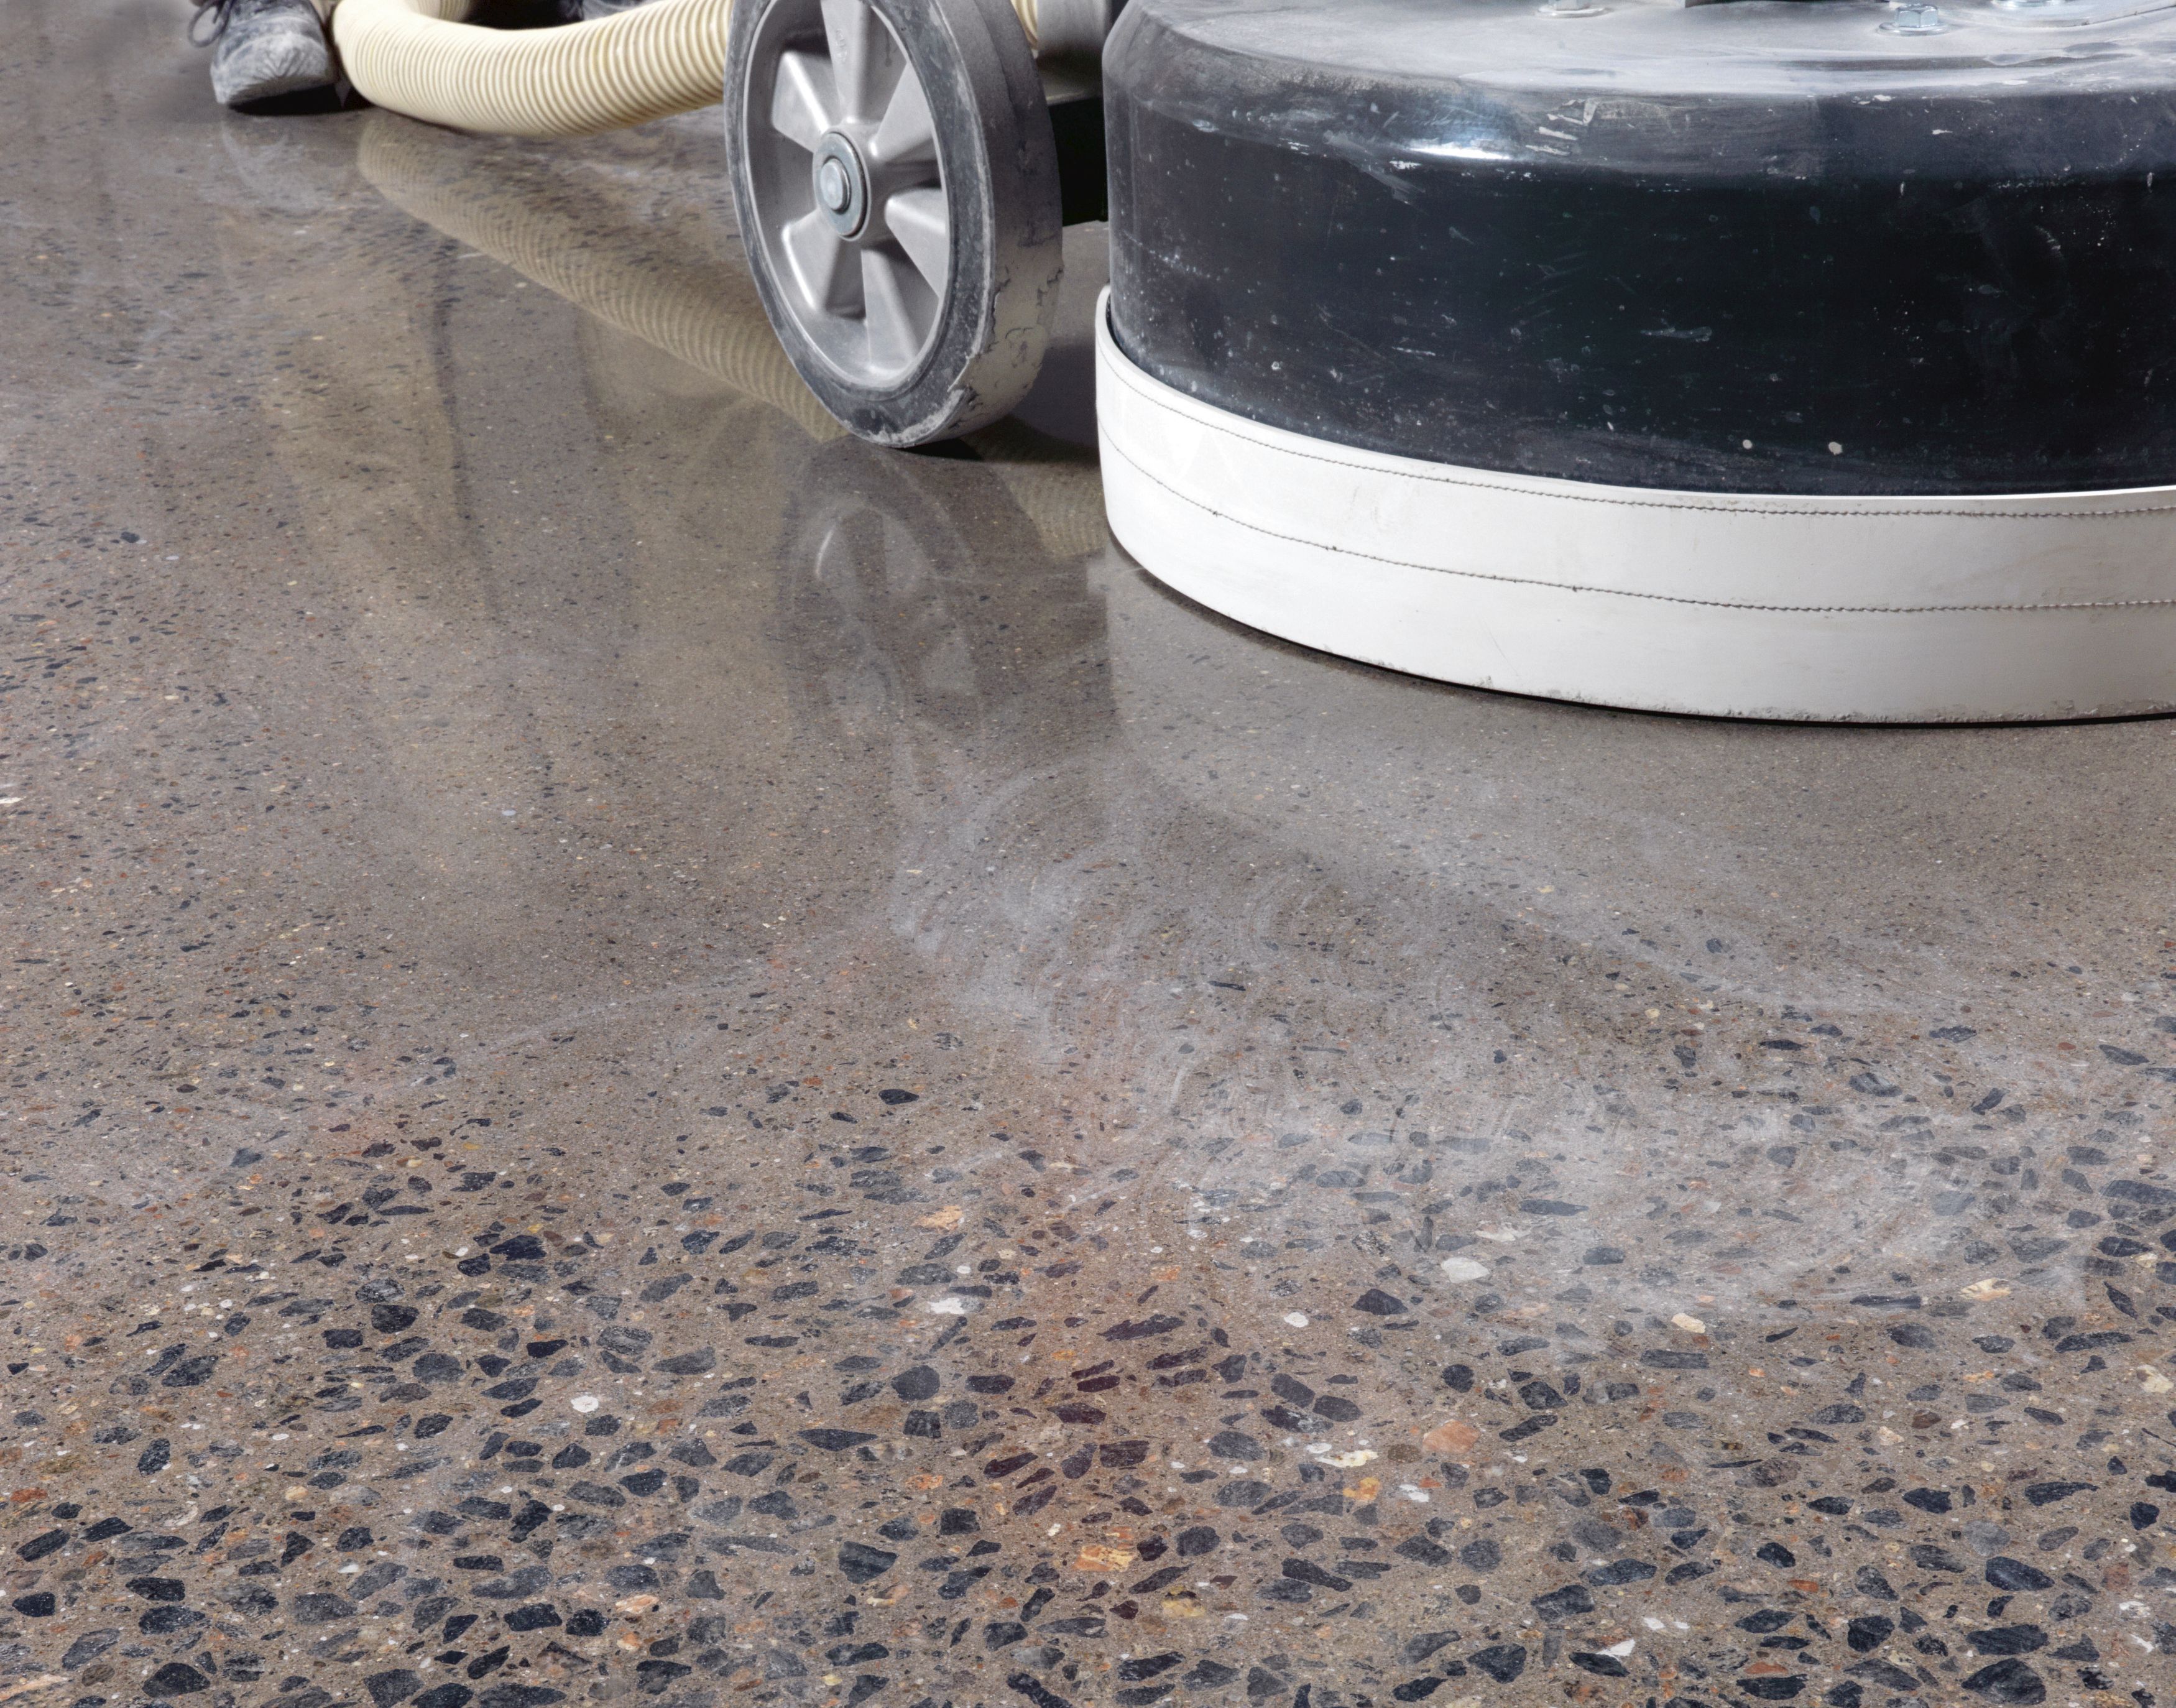
Grinding
To grind the floor in order to get rid of small cracks and irregularities, it is necessary, as in the case of priming the floor on a concrete, or on a wooden base. This can be done with a grinder.
In some cases, if the surface irregularities are not critical, you can also grind manually. To do this, use a spatula, scrapers and brushes with metal bristles; from above it is possible to process a surface with an emery paper.
Painting
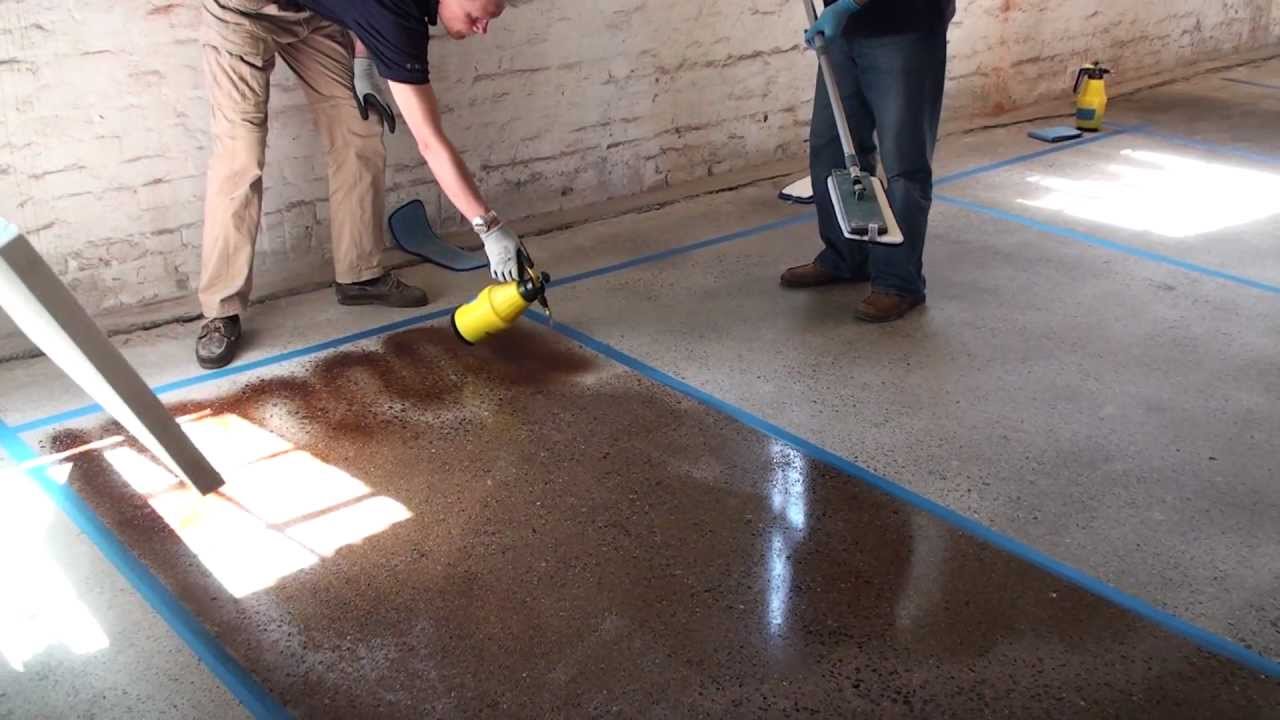
Usually the process of painting a self-leveling floor does not cause much difficulty. The surface must be cleaned of any debris (including construction), dust, as well as traces of old paint, if it takes place, and various cracks and chips should be covered with special construction compounds. In addition, previously (to better fix the paint) you can cover the floor with a layer of primer.
The room, the floor in which it was decided to paint, should not be too wet, and the temperature in it should not rise above 30 and fall below 5 degrees Celsius.
The paint itself is recommended to be applied in two layers. The first is thin, it is dried during the day, after which a dense final layer is applied on top. It can take from one to several days to complete drying (depending on the type of paint).
There is no difference in painting the floor with a sprayer or a regular paint brush: it depends on the skill and capabilities of the person who repairs.
How to make a picture?
There are a great variety of patterns for self-leveling floors. Special space fantasy give 3D-floors, which can be printed anything. However, many owners prefer the more traditional, but no less attractive options.
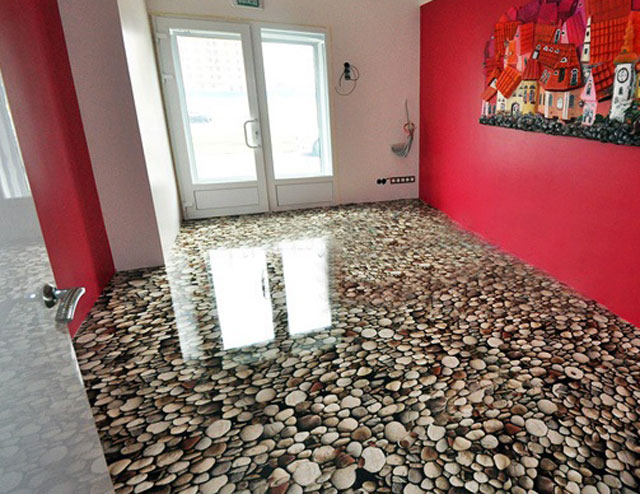
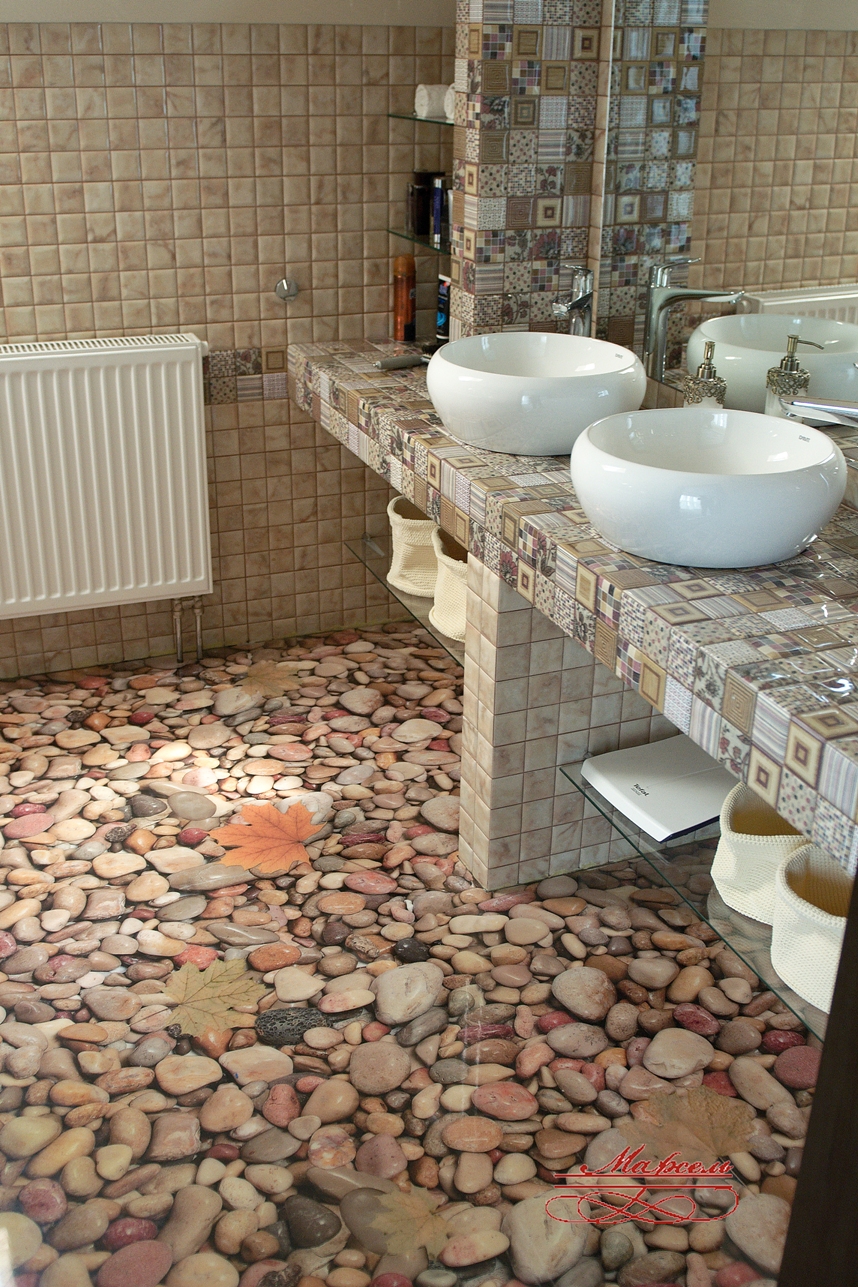
One of the most common is marble flooring. They also (as well as the floors with small elements poured into them: pebbles, shells, decorative chips) belong to the type of 3D flooring. In another they are called concrete-mosaic self-leveling floors, and they consist of two layers: cement-sand and mosaic decorative.Such a floor is waterproof, hygienic (due to the absence of seams and joints, where dirt could accumulate), resistant to wear and has a wide range of colors and shades.
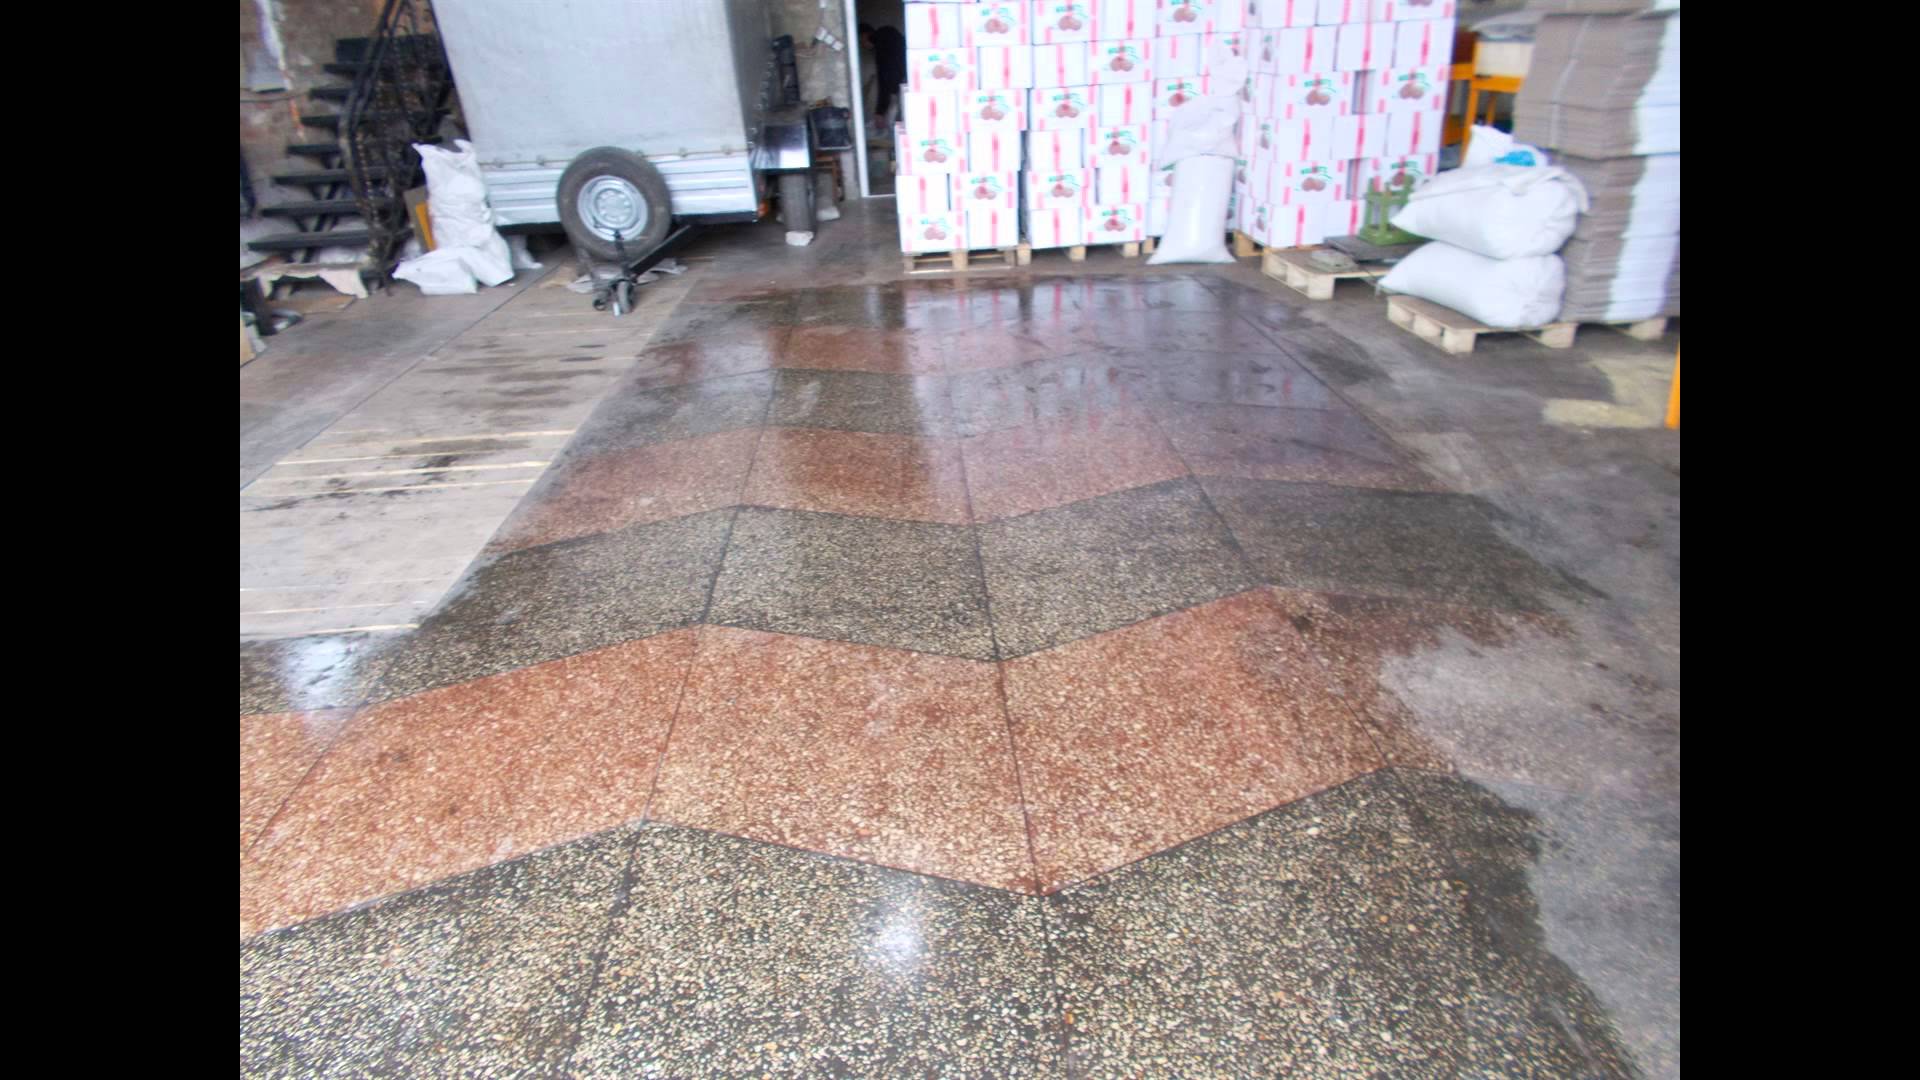

The process of installing the floor with marble is slightly different, although in general it is not difficult to manufacture. So, before you pour the solution, it is recommended to moisten the surface with water. If the floor is not monochromatic, it is necessary to put dividing beacons or slats along the edges of the future pattern or pattern.
After the floor with marble chips is filled, it will need to be tamped with a trowel or vibrating rail, and after the mortar has hardened, the surface is leveled. The floor hardens for about a week, at which time it must be constantly moistened with water, maintaining the necessary level of humidity. The final stage of work - grinding.
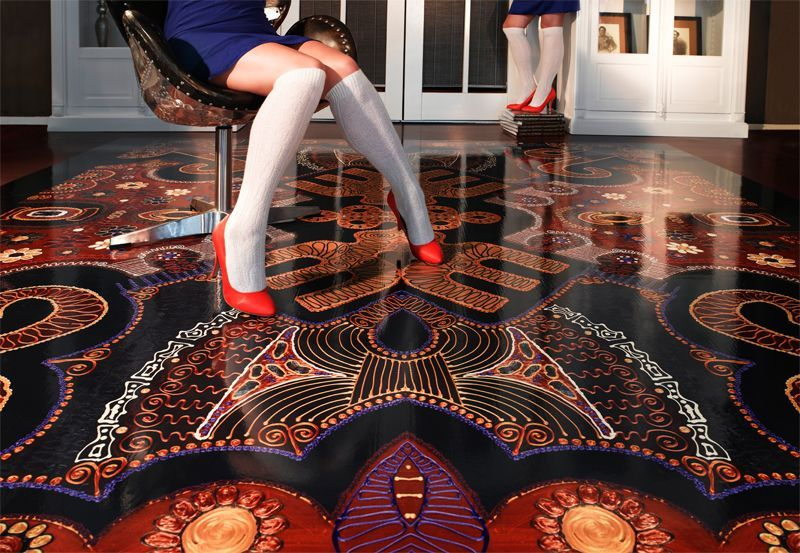
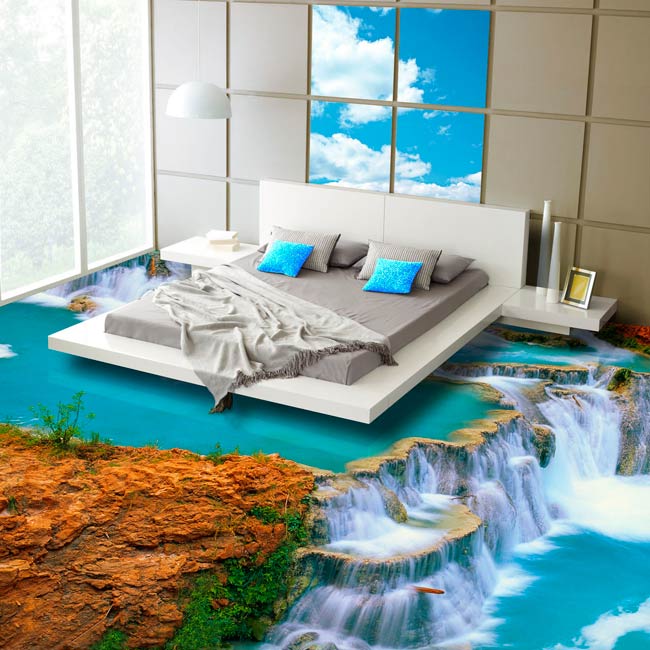
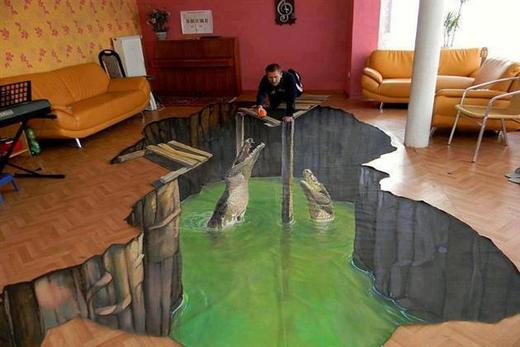
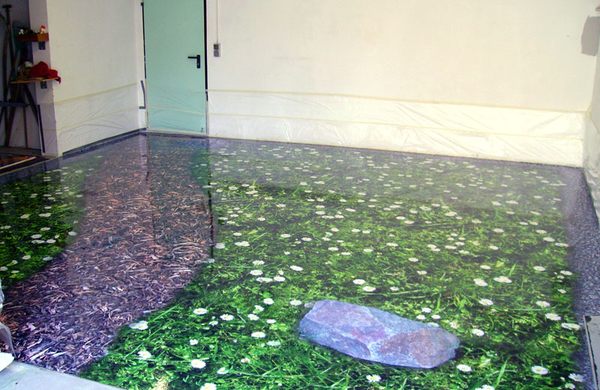
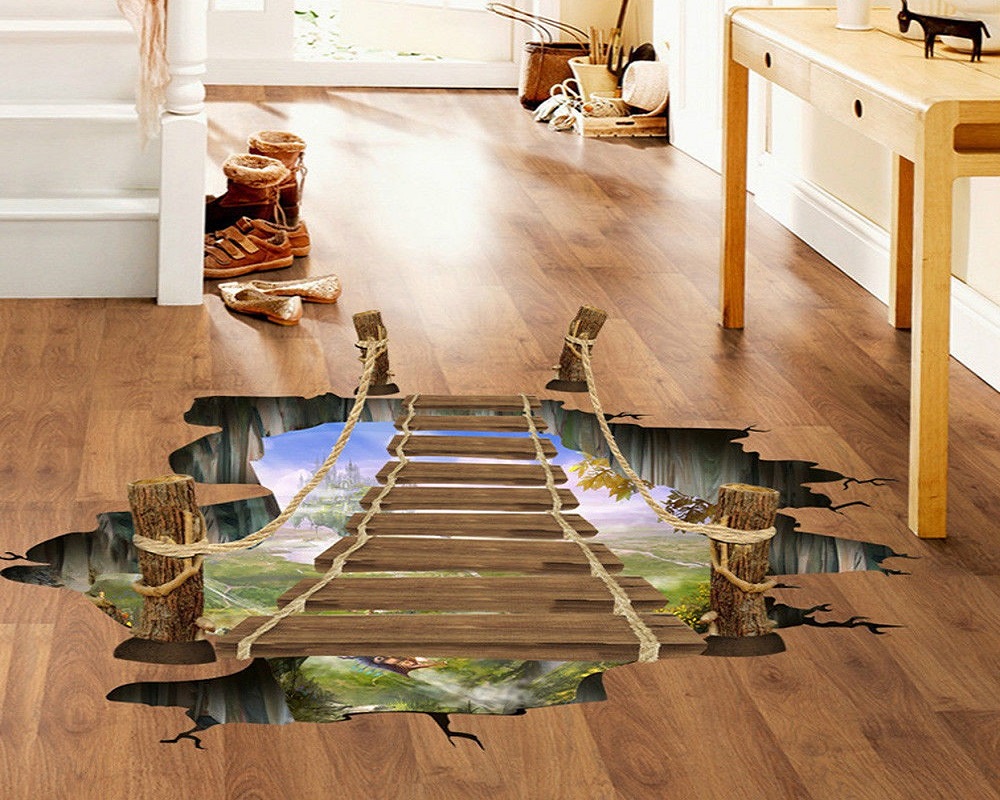
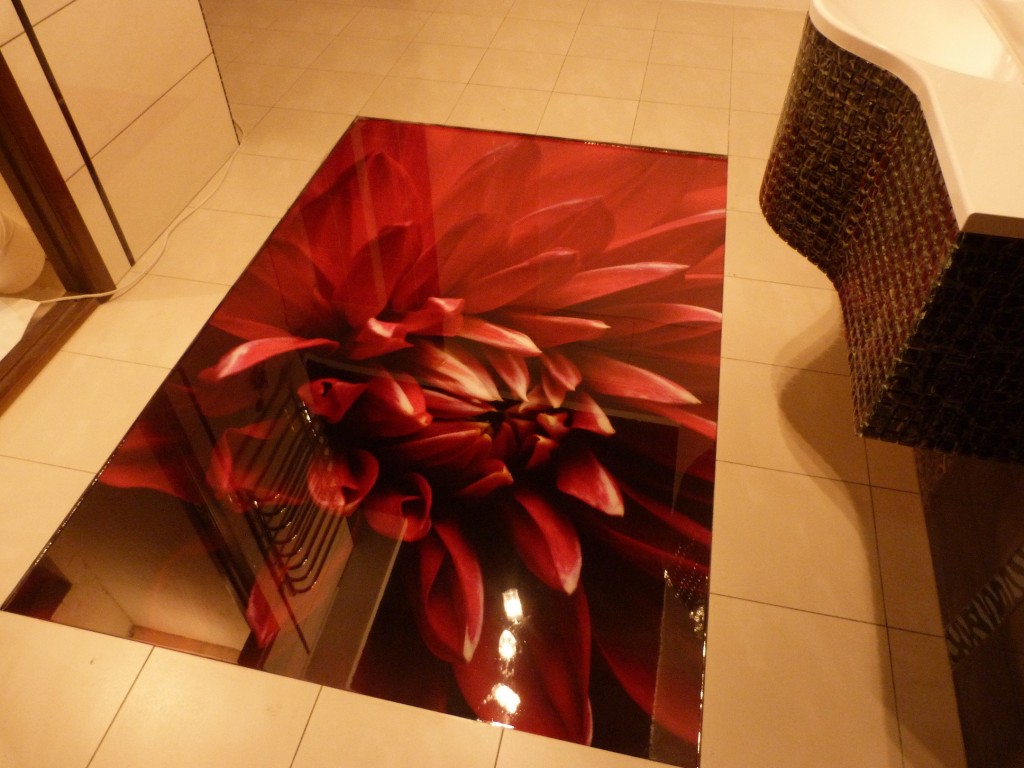
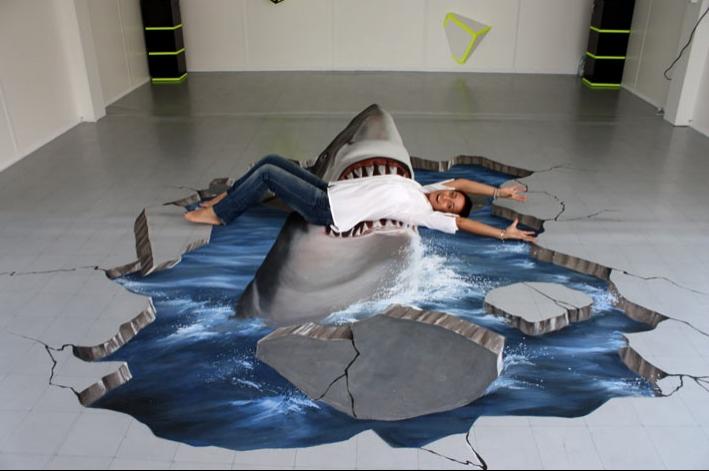
Variants of 3D flooring with drawings give owners the opportunity to create an absolutely unique design in the room. Photos (the main thing is to use a high-resolution picture), optical illusions or unusual complex patterns - there is no limit to fantasy.
For printing images usually use a special banner fabric.Such canvases are made for operation in variable weather conditions: they must withstand both the blinding sun and not be subject to fading, and rain and snow. Therefore, to put such a fabric on the floor is not difficult: it must endure transfer polymer filling. Printing is done by specialized firms.
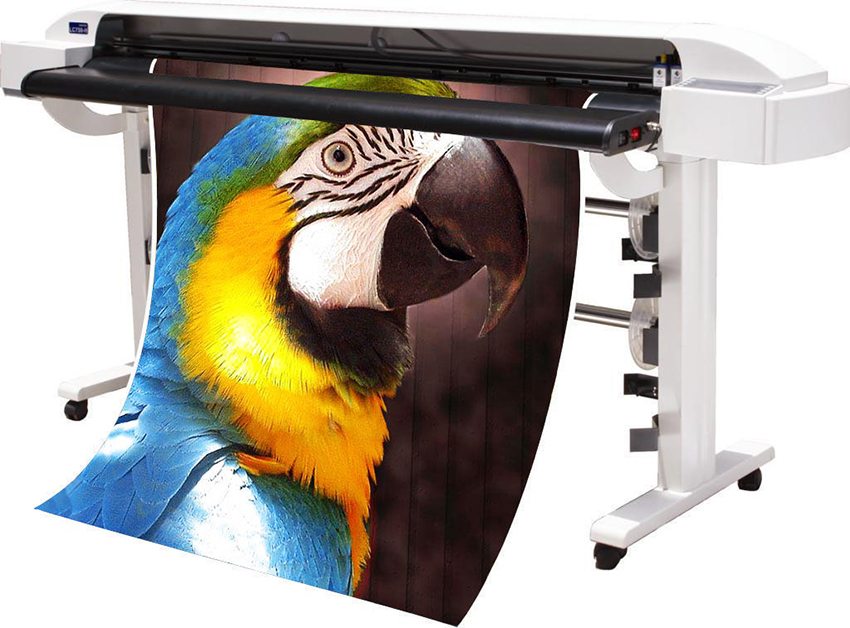
After printing, the finished banner sheet is glued onto the finished self-leveling coating, after which the finishing layer is laid on top of it. This is usually a polyurethane varnish, which does not tarnish over time, has increased strength and is resistant to abrasion.


Errors
Failures occur in professional masters. If bubbles formed on the flooded floor, and then small holes appeared, it means that some mistakes were made in the technological process.
There may be several reasons. Perhaps there was a temperature drop in the room or the humidity was initially increased. Also, air bubbles could remain if the solution was not rolled with a needle roller after pouring.
In general, the needle roller is the main tool that allows to get rid of bubbles at the early stage of pouring.
Reviews
Buyers claim that self-leveling floors with proper installation are very smooth. The absence of seams, in which dirt and small debris do not clog, and also (due to the fact that such a coating does not accumulate static electricity) does not accumulate dust, is especially noted. Moreover, such a floor, despite its smoothness, does not slip and looks very modern.
To the advantages of self-leveling floors add the fact that shortly after pouring, they can begin to exploit. In addition, self-leveling floors are able to independently form a flat tie: many consumers note that after checking the level, the plane formed by the solution came out almost perfectly flat.
Finally, many people note that due to the simplicity of the installation method, it is possible to save a lot on the services of the repair team and, with the name, some experience, pour the floor with your own hands.
Beautiful ideas in the interior
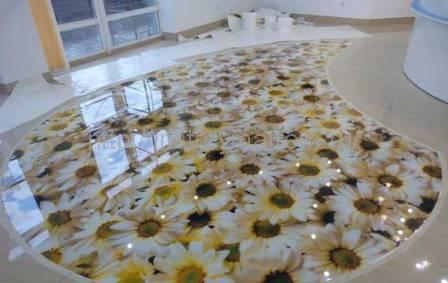
Decorative self-leveling floors will delight the buyer with a large selection of drawings and design options. Especially far in this are the 3D floors, on which virtually any drawing in high resolution can be depicted.
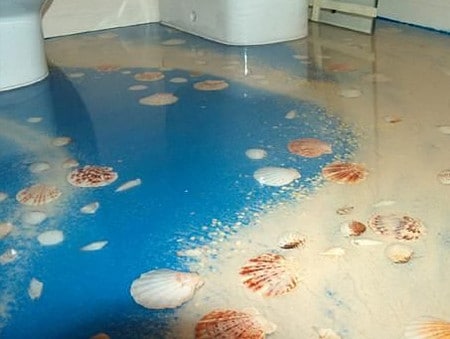
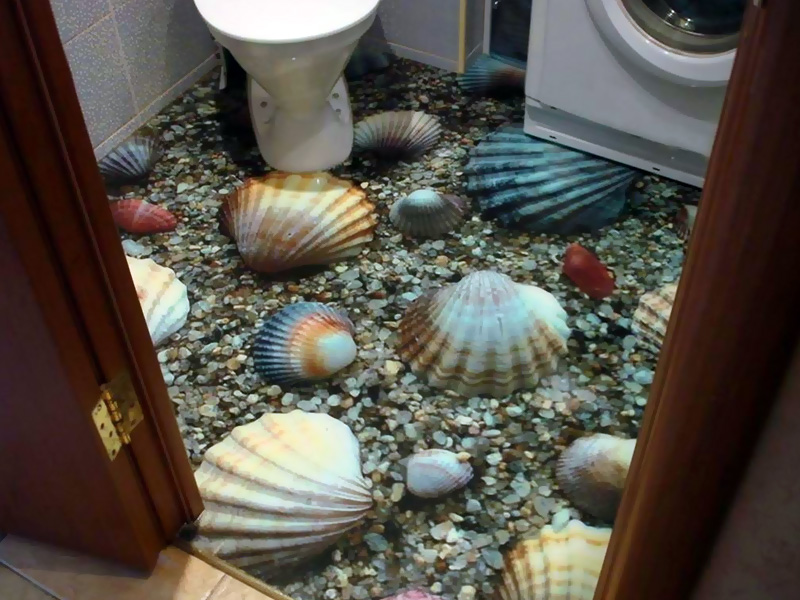
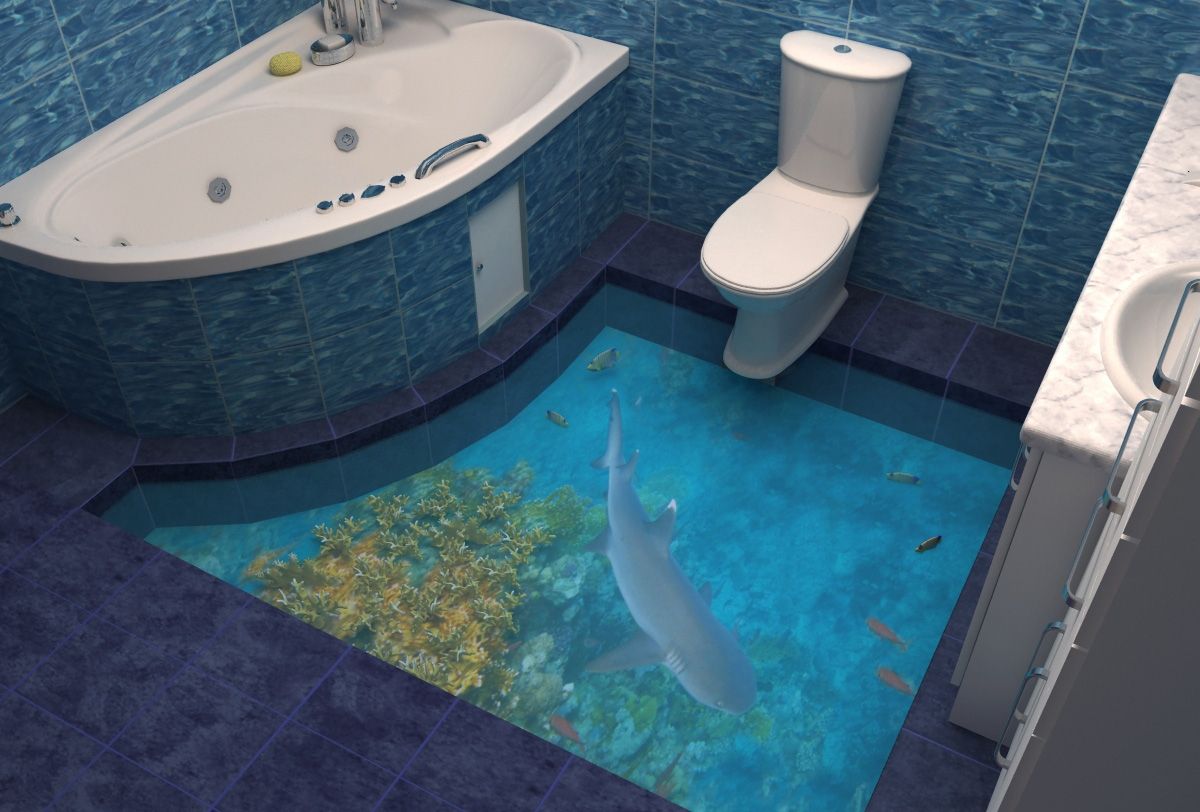
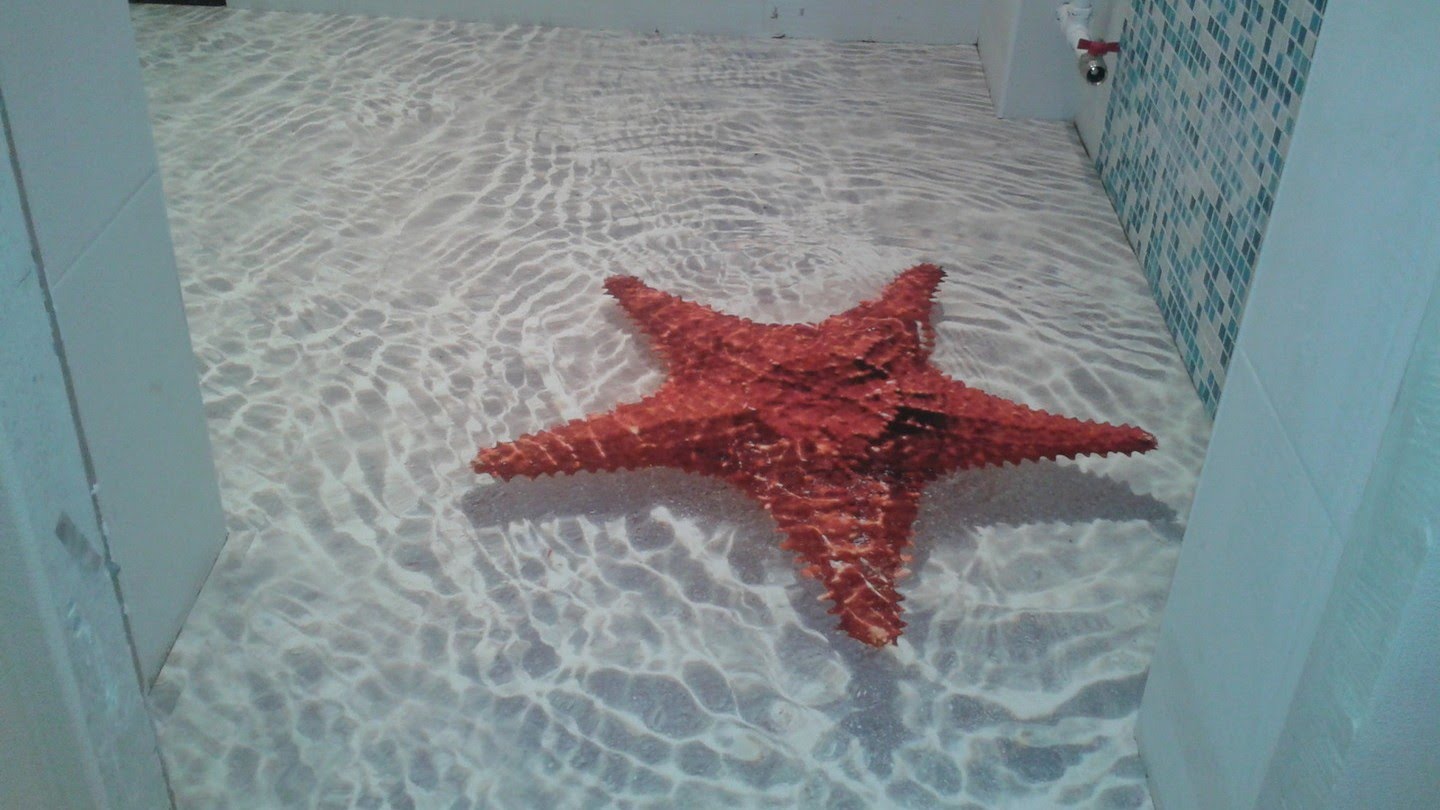
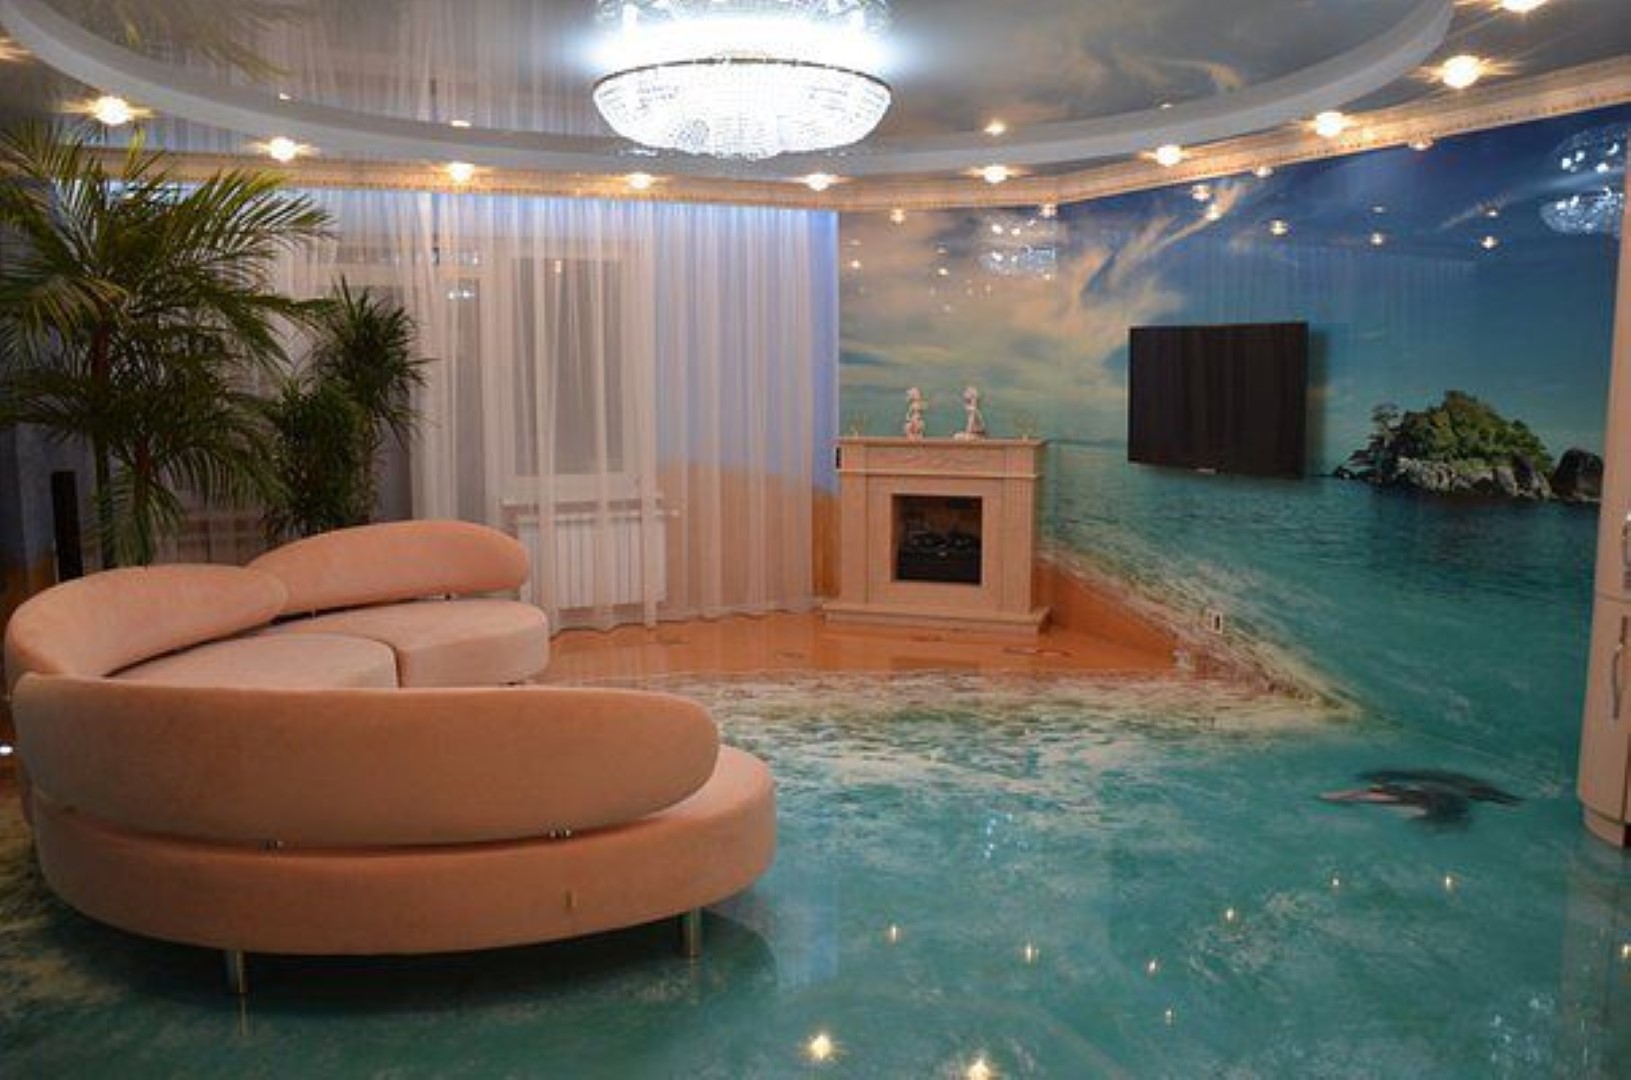
The variety of colors and shades of self-leveling floors makes it possible to create intricate ornaments and patterns. For the bathroom, for example, 3D floors with images of fish, water or the sea bottom will do; another option could be a coating using natural stones and seashells. In combination with wallpaper or tiles depicting sea plants, the bathroom can get an original underwater design.

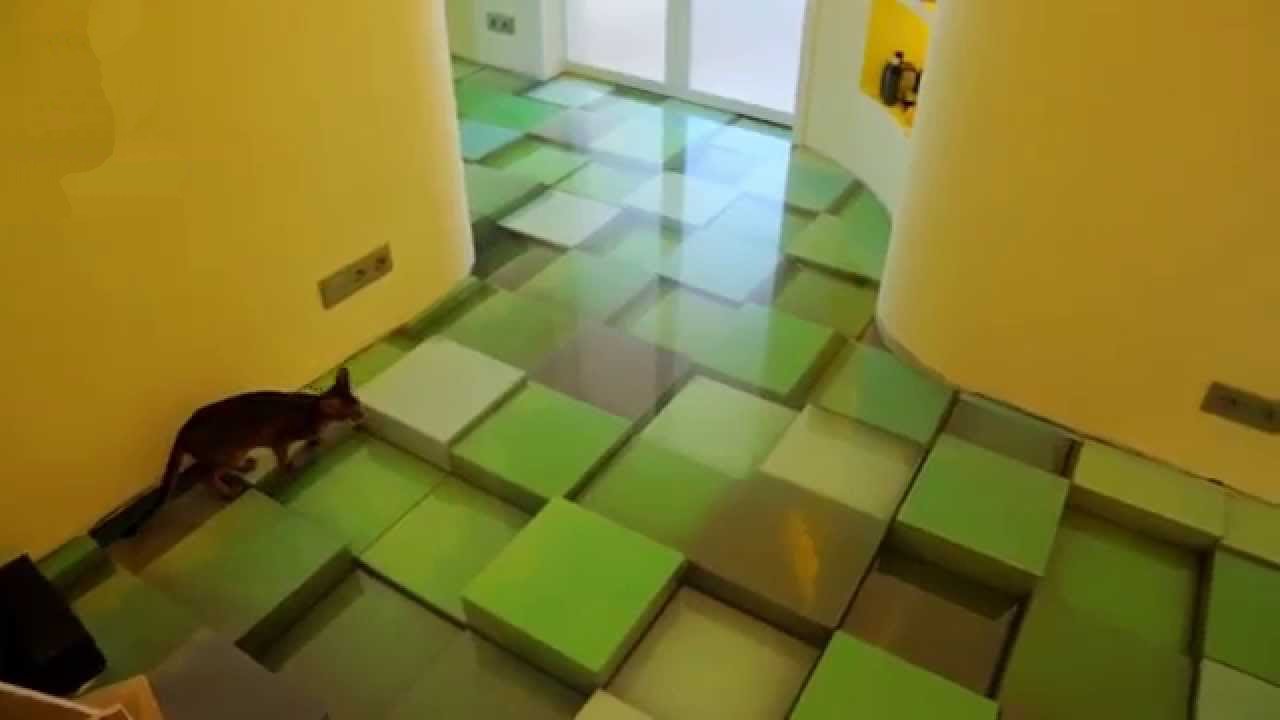
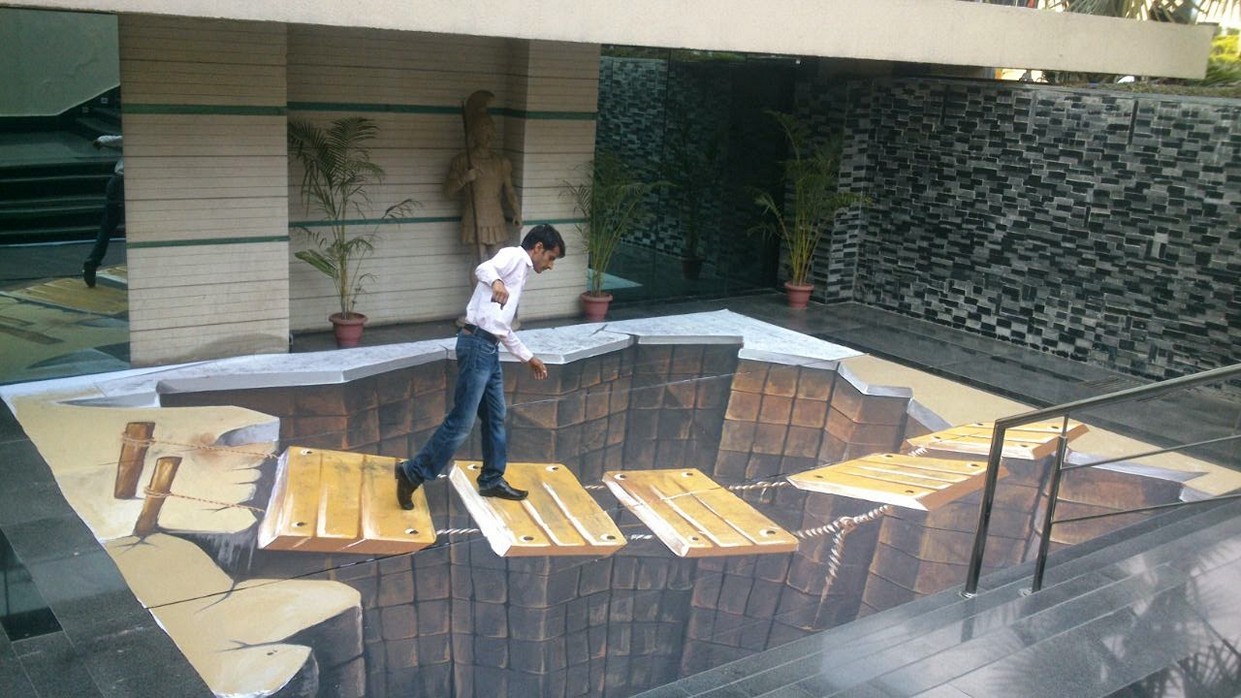
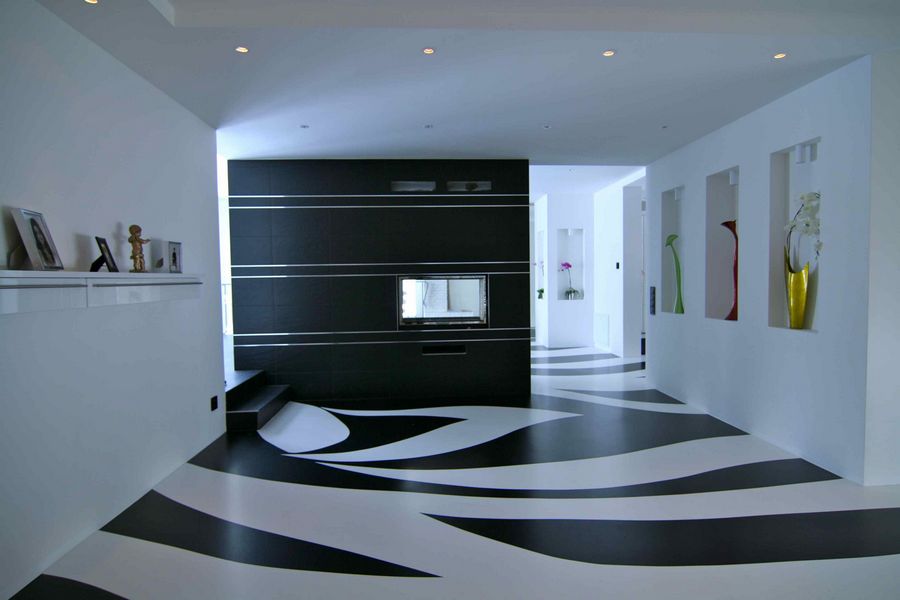
An interesting option would be optical illusions. Due to the fact that in nature and art, in principle, there are a great many optical illusions, the number of design options for such floors is very large.
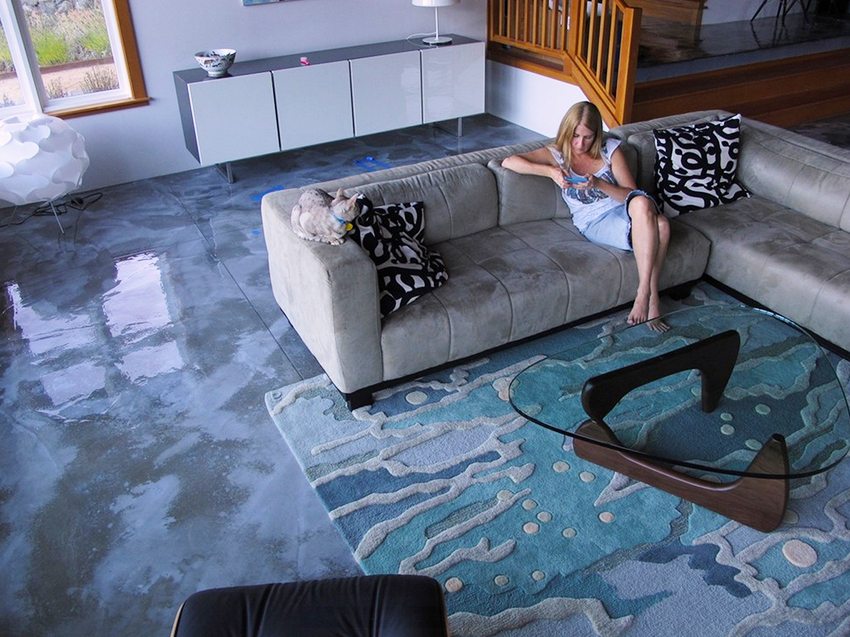
On the one hand, one can always use a dynamic illusion, such as twisting spirals, approaching and receding depending on the position of the subject of the figure, etc. With the right flow, they can increase or decrease the size of the room and even its shape in the horizontal plane.
On the other hand, an interesting choice will be illusions or images that give the room depth: this will help to visually increase the height of the ceilings and in general will look original.

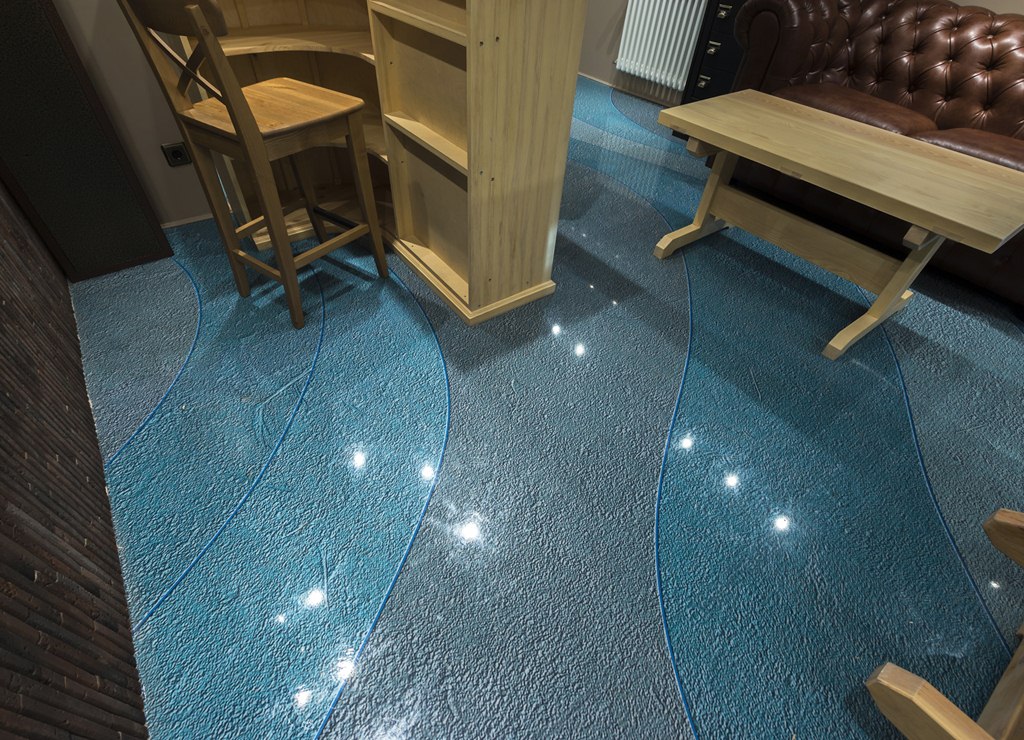
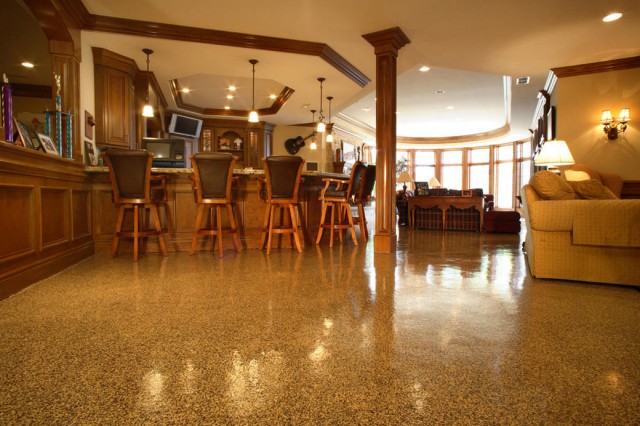
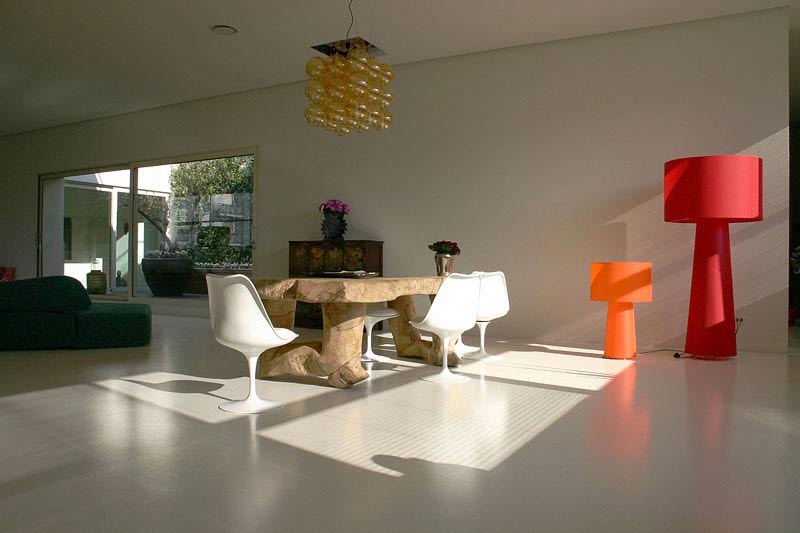
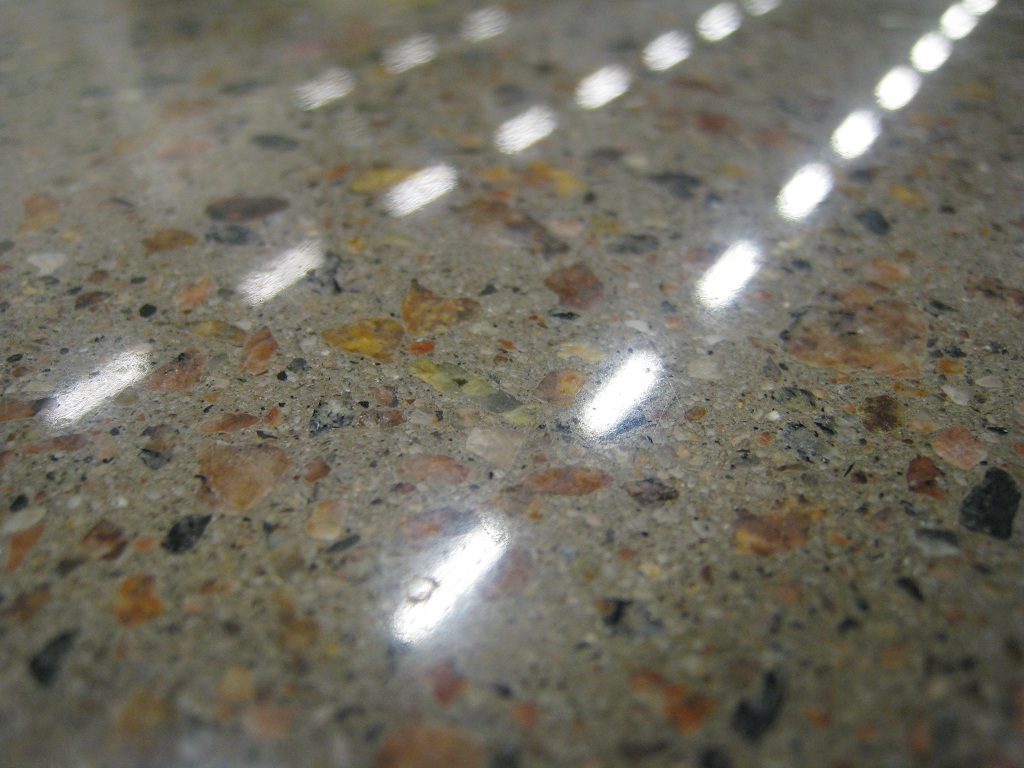
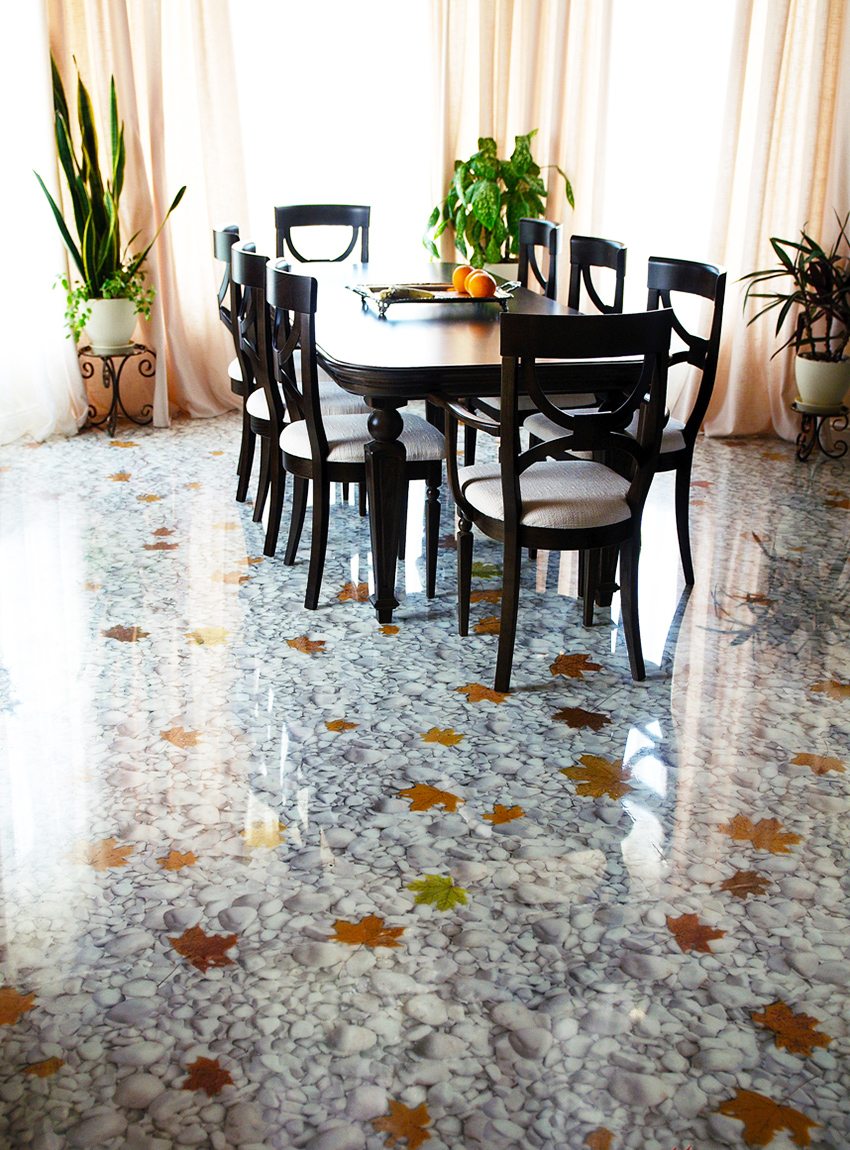
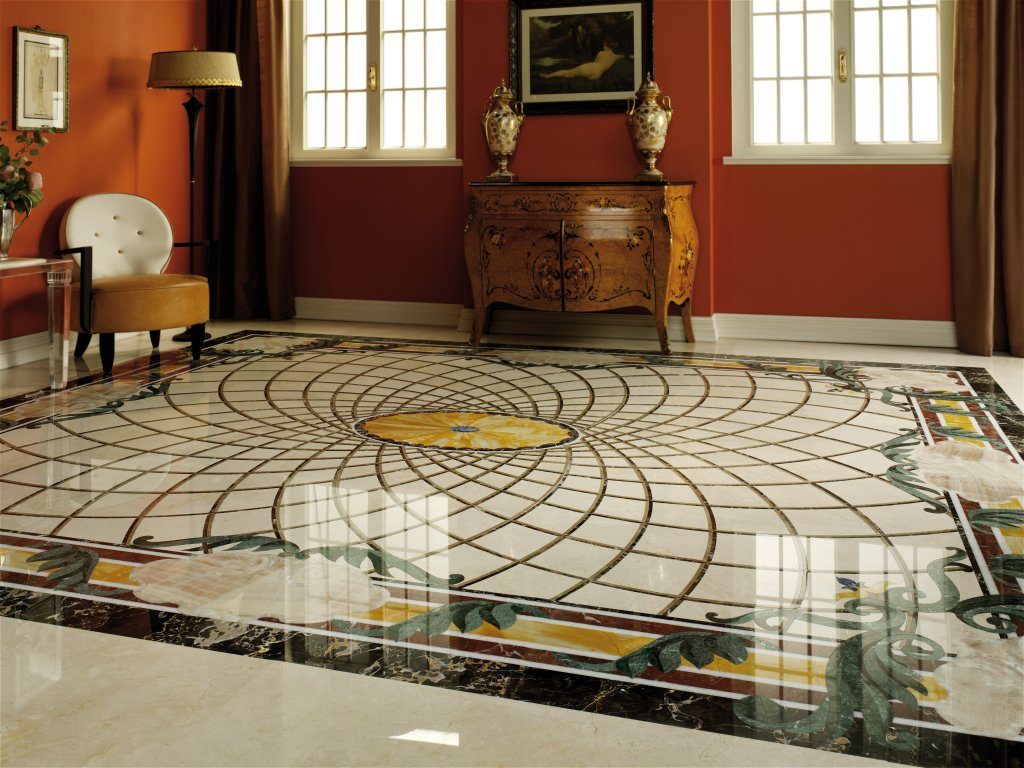
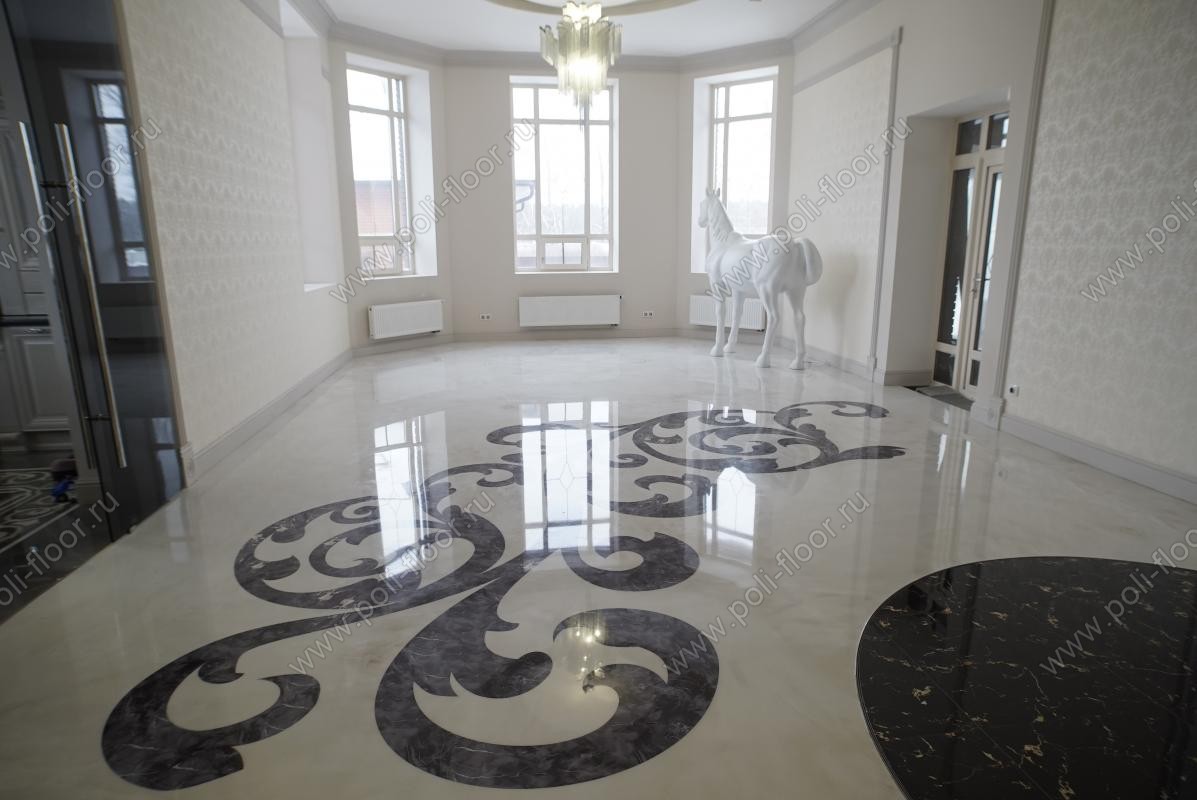
The floor with marble chips looks very majestic and aristocratic in bright rooms with large windows, especially if it is complemented by mosaic elements. They can depict both plain patterns and whole canvases, similar to the mosaic floors of ancient Greek and Roman temples.
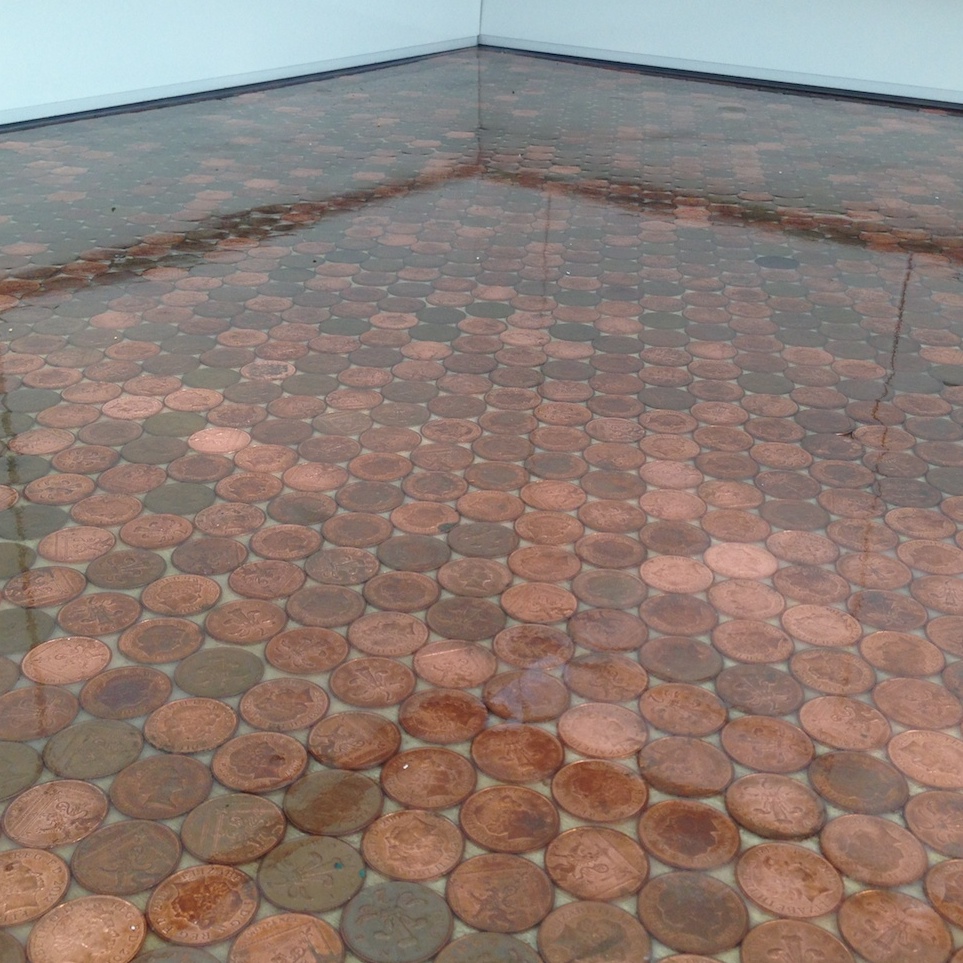
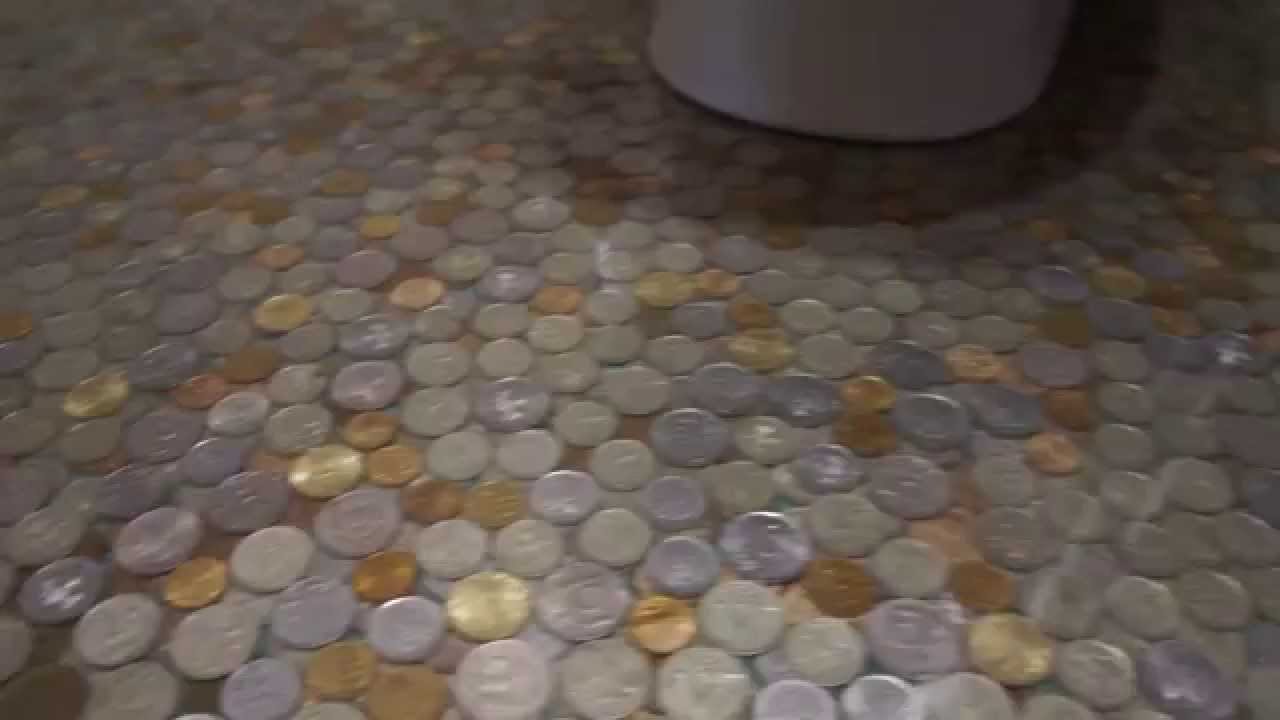
At the same time, in addition to the seashells, pebbles and marble chips already given above as an example, other small objects can be used as decorations for the top layer of the self-leveling floor: quartz sand, coffee beans and even coins.
The main thing is that the floor covering with its color scheme, pattern and patterns (if they are planned on it) is combined with the general design of the room, walls and furniture. Drawing from the floor can partially move to the wallpaper or tile, which will allow to enclose the space of the room in a certain frame and at the same time give it a feeling of completeness and expansion to the sides.
When choosing a 3D floor you should not forget about the perspective. The picture will not seem voluminous from all angles, it must be taken into account when preparing the image.
The human eye sees the floor in the form of a trapezoid, therefore, it is in this position that the final drawing should be.Manipulations with it can be carried out in any graphic editor, for example, in Photoshop. In extreme cases, you can always resort to the help of specialists in the photo studio.
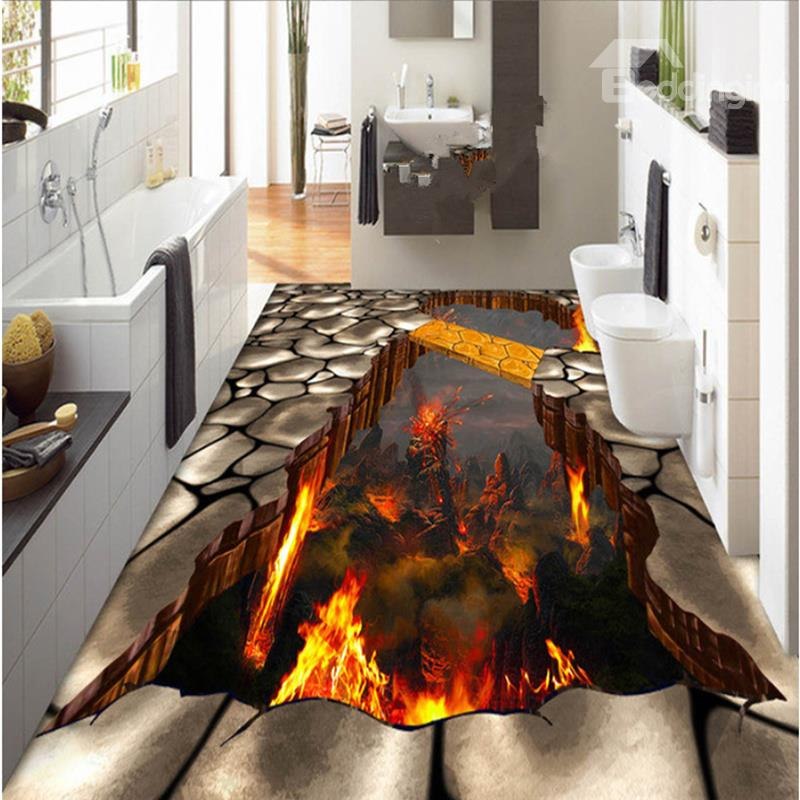
For a 3D floor, it is not recommended to use pictures with aggressive animals, monsters and a self-leveling surface - this can have a bad effect on the psyche and create an unfavorable atmosphere in the room. Also in the apartment where people live with a weak vestibular apparatus, it is not necessary to lay the floor with dynamic images. Other obviously bad design options: too vivid drawings with flashy colors and enlarged small details.
Tips on how to make a self-leveling floor with your own hands, learn from the following video


