Bulk 3D floors do it yourself
Among those who equip their apartment or office, self-leveling 3D floors are becoming increasingly popular. What is important, you can install them yourself. And the strength of the flooring and the original design are additional bonuses.
Special features
For the first time, the space under your feet was created with images with a 3D effect on the streets. Artists painted such realistic paintings on pavements and walls that it was sometimes difficult to distinguish them from real objects. Interior designers were able to find a way to use this effect on the premises.
Despite the complexity of the installation technology and high cost, such decorative flooring had its fans.
Before you start buying materials and installation, you need to consider in detail all the advantages and disadvantages of such a coating.
Of all the advantages are the following:
-
Exclusivity. To achieve uniqueness using self-leveling floors is quite simple. The choice of image is limited only by the imagination of the owner of the room or the designer. You can create a drawing by yourself or with a child or use the services of a professional artist.
-
Long service life. Manufacturers give a guarantee for the mixture for self-leveling floors from 30 to 50 years. The coating is resistant to the fall of heavy objects and the effects of aggressive substances, so it is very difficult to spoil it.
-
Excellent waterproofing. The complete absence of seams will allow not to worry that accidentally spilled liquids will flow to the neighbors.
-
Hygiene. The self-leveling floor has an antistatic effect, or, more simply, “repels dust”, and due to the lack of cracks it does not accumulate dirt, mold, and allergens.
-
Fire resistance Most polymer coatings are not exposed to high temperatures, the class of flammability of the materials used is G1. Materials of this class are usually used on the whole route to the fire exit.
-
Easy care. In a room with such a floor, it is sufficient to simply carry out wet cleaning as it gets dirty.You can use a variety of cleaning products.
-
Possibility of installation in any premises. Provided that the technology is strictly adhered to, it is not difficult to pour polymer floors, even in a room with a non-standard layout. And the ecological safety of mixtures allows them to be operated even in bedrooms and children's rooms.
There are 3D self-leveling coatings with a 3D effect and their drawbacks:
-
High price. The installation price for one square meter, taking into account all the materials and the wizard’s work, fluctuates around 5-6 thousand rubles. Depending on the region, this amount may be higher. You can save money without loss of quality if you do the liquid floors with your own hands. But in this case, you will need to purchase special equipment that you may never need later. Or you can rent it, which will also lead to additional costs.
-
The complexity and duration of the process. The time from the start of preparation of the premises to the complete polymerization of the coating sometimes takes more than a month. The laying process technology is quite laborious, everything needs to be done quickly and very carefully. If something goes wrong, it will be very expensive and physically difficult to remodel or dismantle such a floor.
-
Cold to the touch. Bulk floor temperature close to tile.In addition, under it can not be built underfloor heating. When heated, the composition may release hazardous phenol.
-
The complexity of dismantling and repair. Repairing such coatings is very expensive, but it is quite difficult to damage them in such a way as to require repair. Even more difficult is dismantling. All layers firmly grasp between themselves and the concrete screed. Therefore, it is easier and cheaper to lay a new coating on top of the polymer. Or you can use the services of professionals whose work will result in a decent amount.
So, 3D self-leveling floors have many installation features and complicated dismantling, but they are very simple and safe to use. Therefore, it is necessary to soberly assess whether it is possible to cope with this task independently or it is better to turn to specialists.
If the decision to install the polymer coating on your own is finally made, first of all you need to study in detail all the stages of work.
Choosing pictures
Before you start choosing an image, you need to carefully consider the interior of the room itself. The main rule that needs to be considered is that the furniture should not cover large parts of the design.If it is assumed that permutations are possible later in the room, it is advisable to think over several options in advance.
In the interior of the room, involving a large number of small elements, a concise image should be selected. Conversely, the picture is overloaded with details, you can enter only in the interior, made in the style of minimalism. Otherwise, the choice of drawing depends only on the imagination, artistic abilities and financial capabilities of the owner of the room.
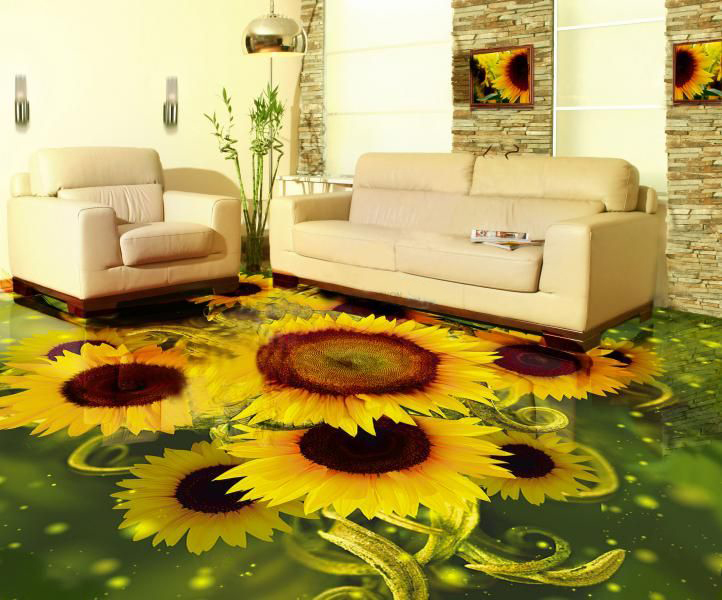
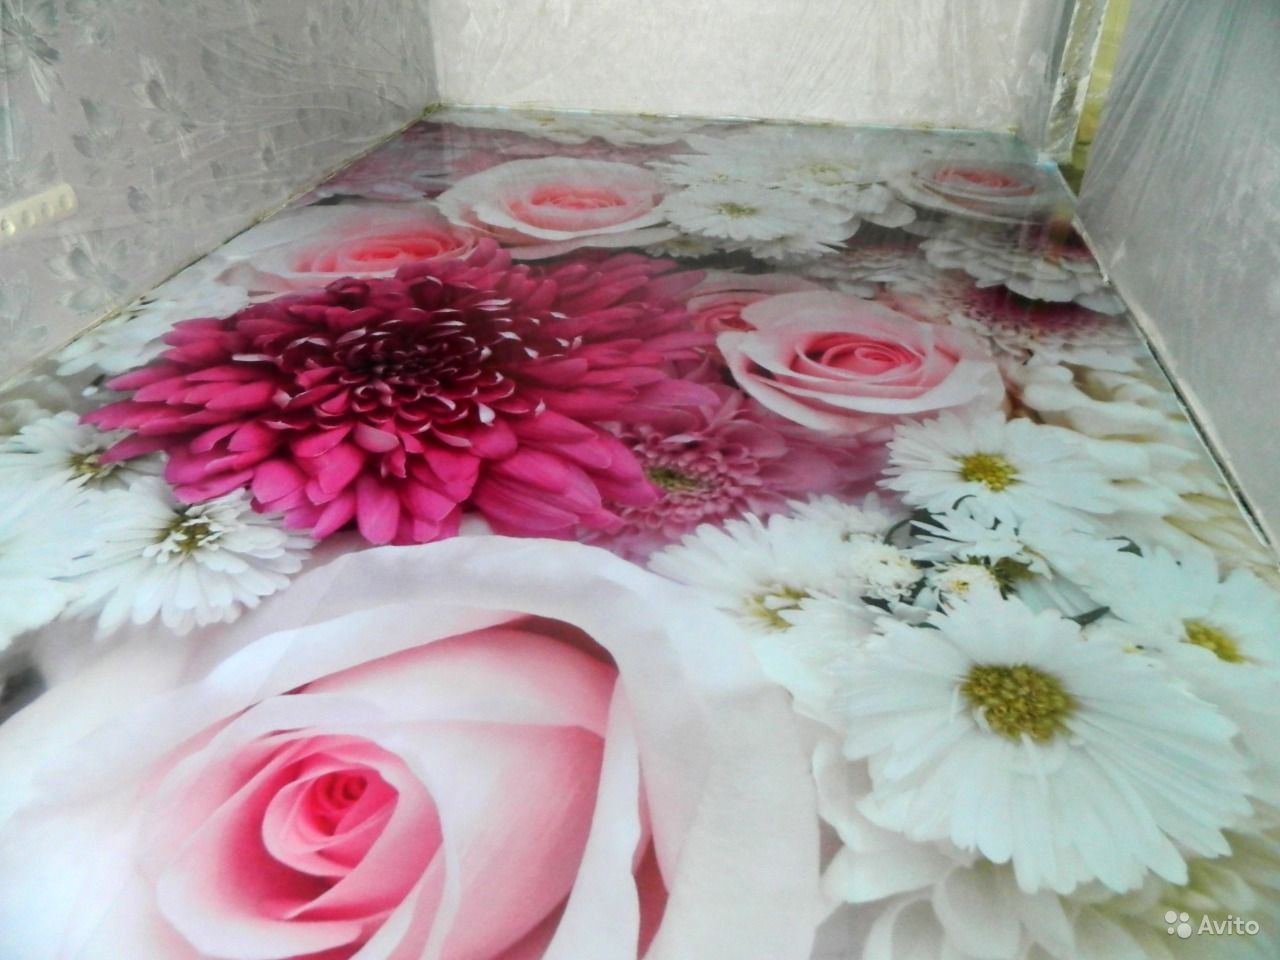
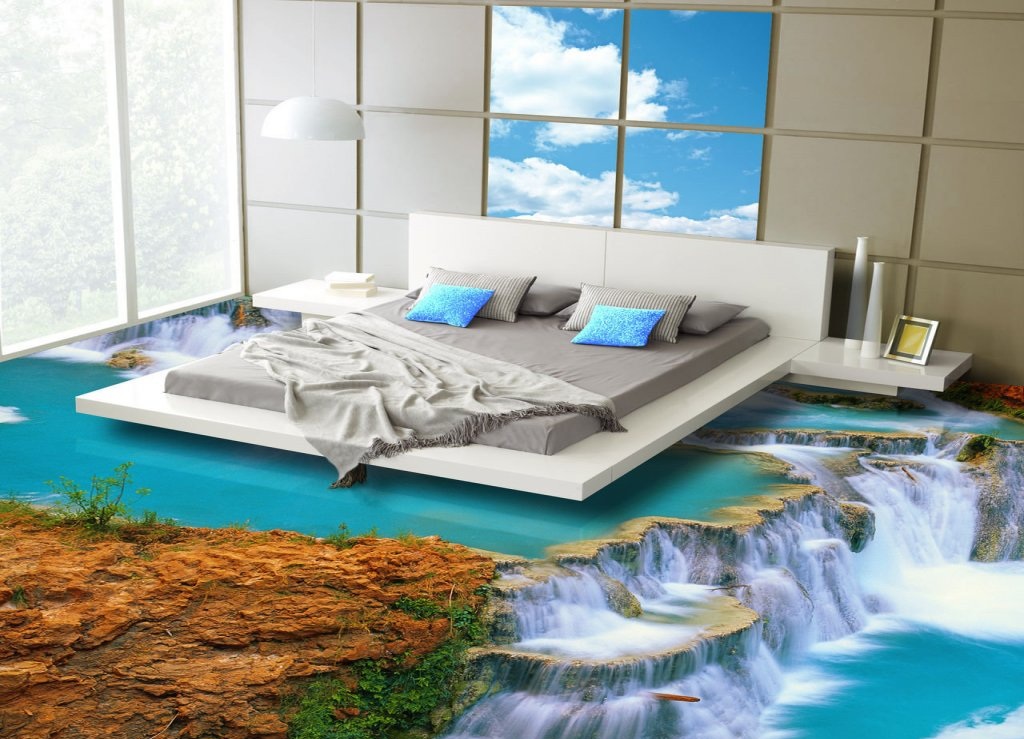
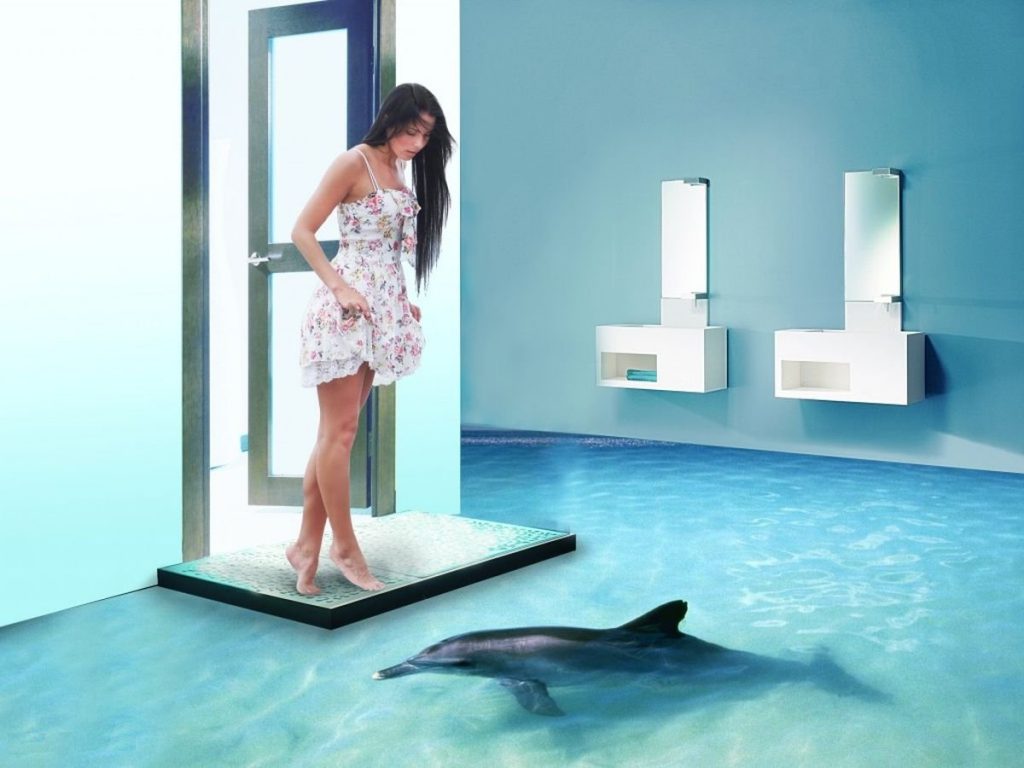
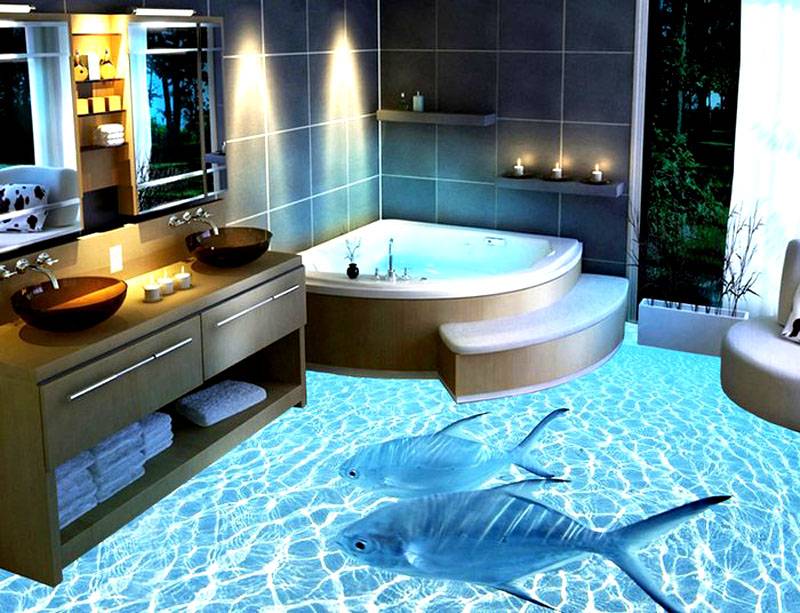
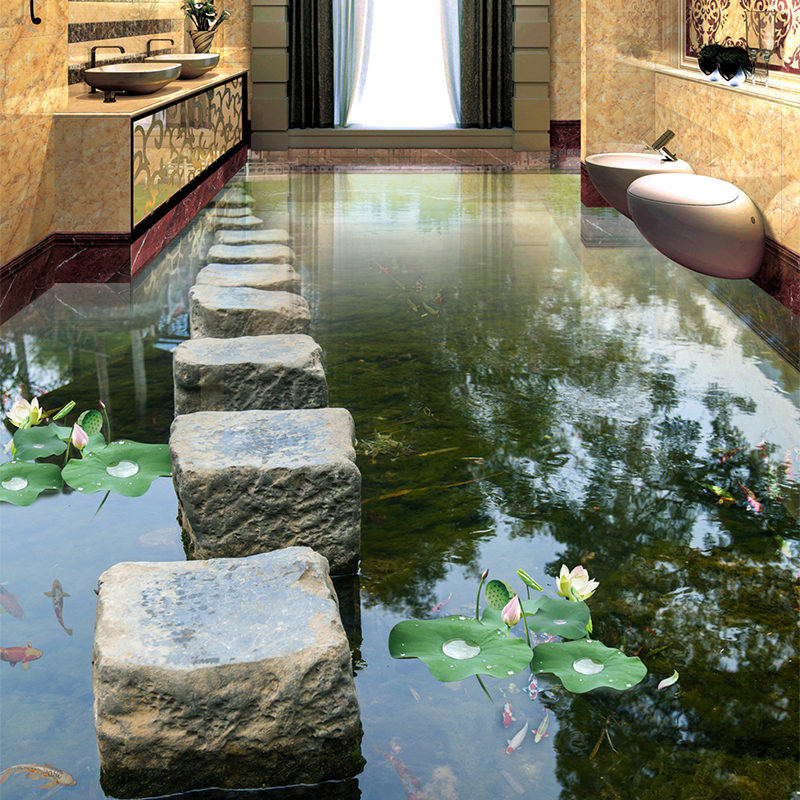
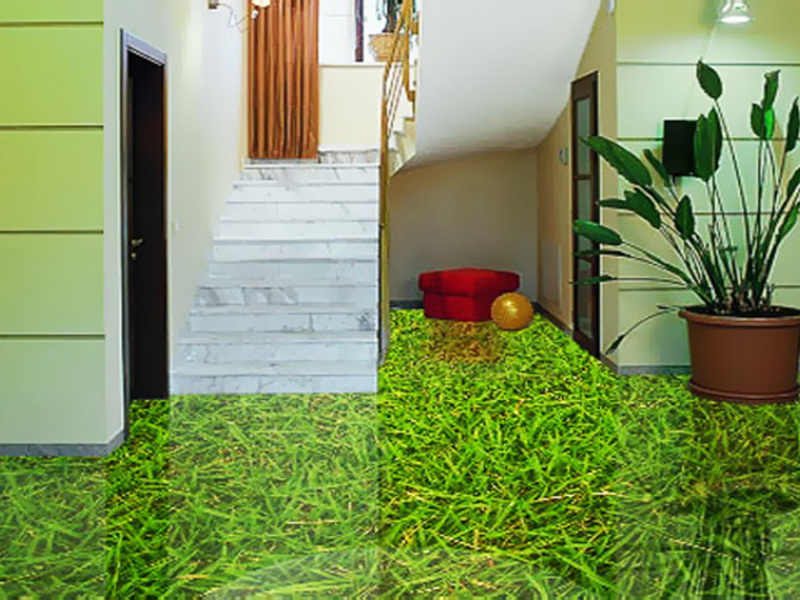
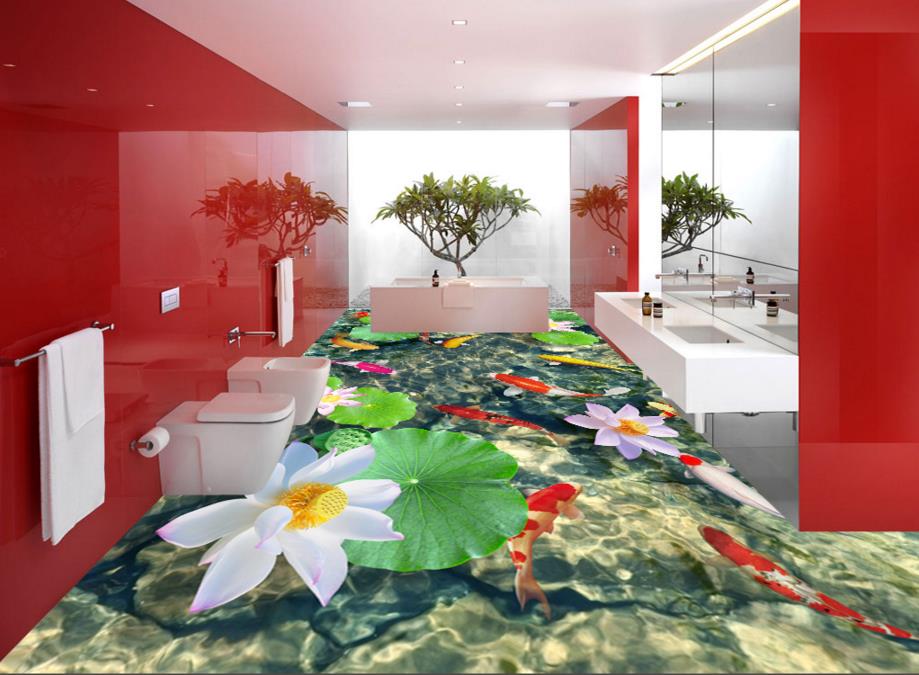
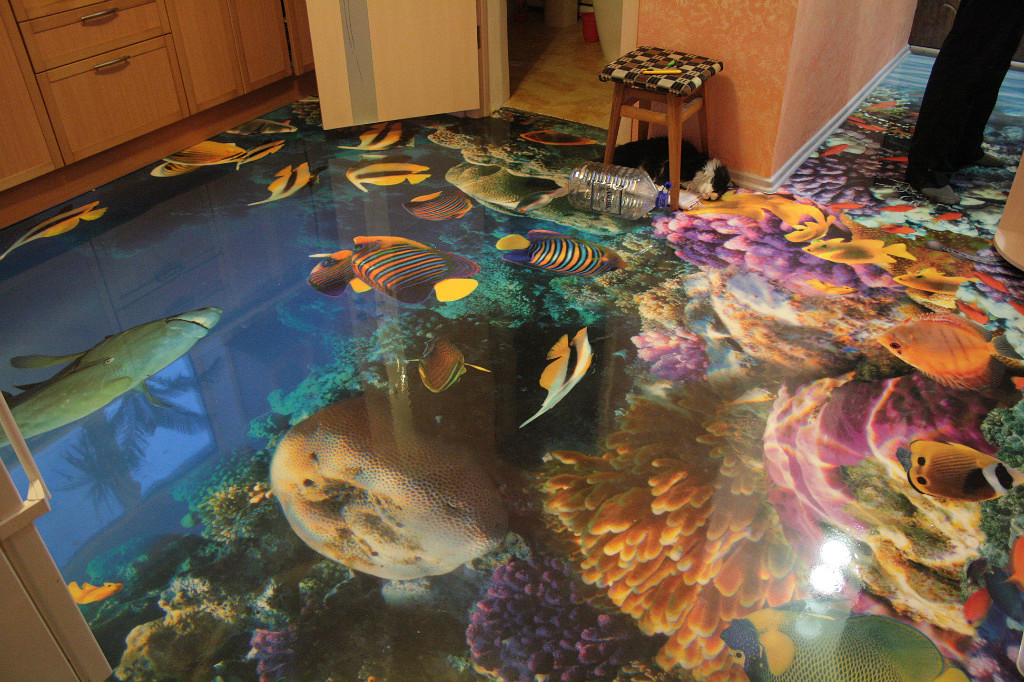
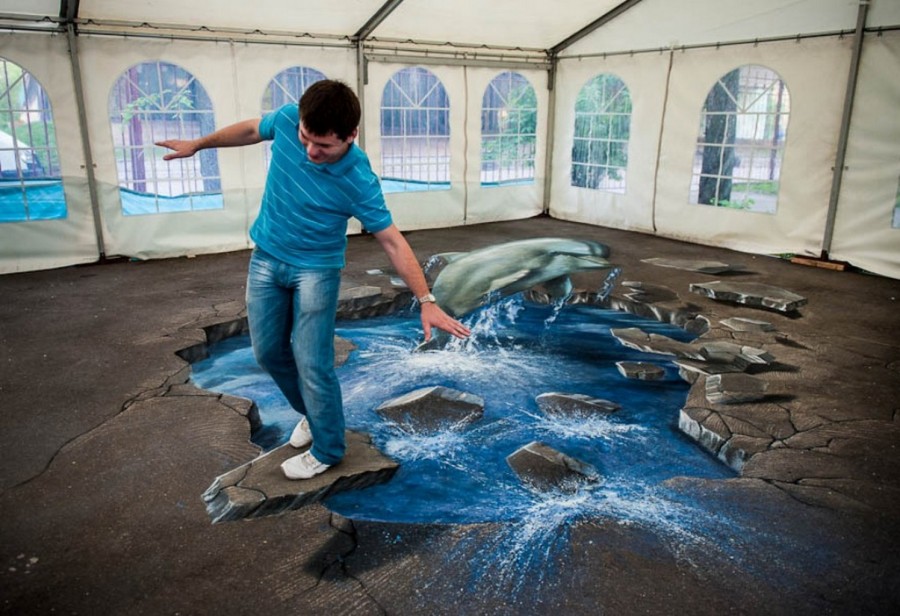
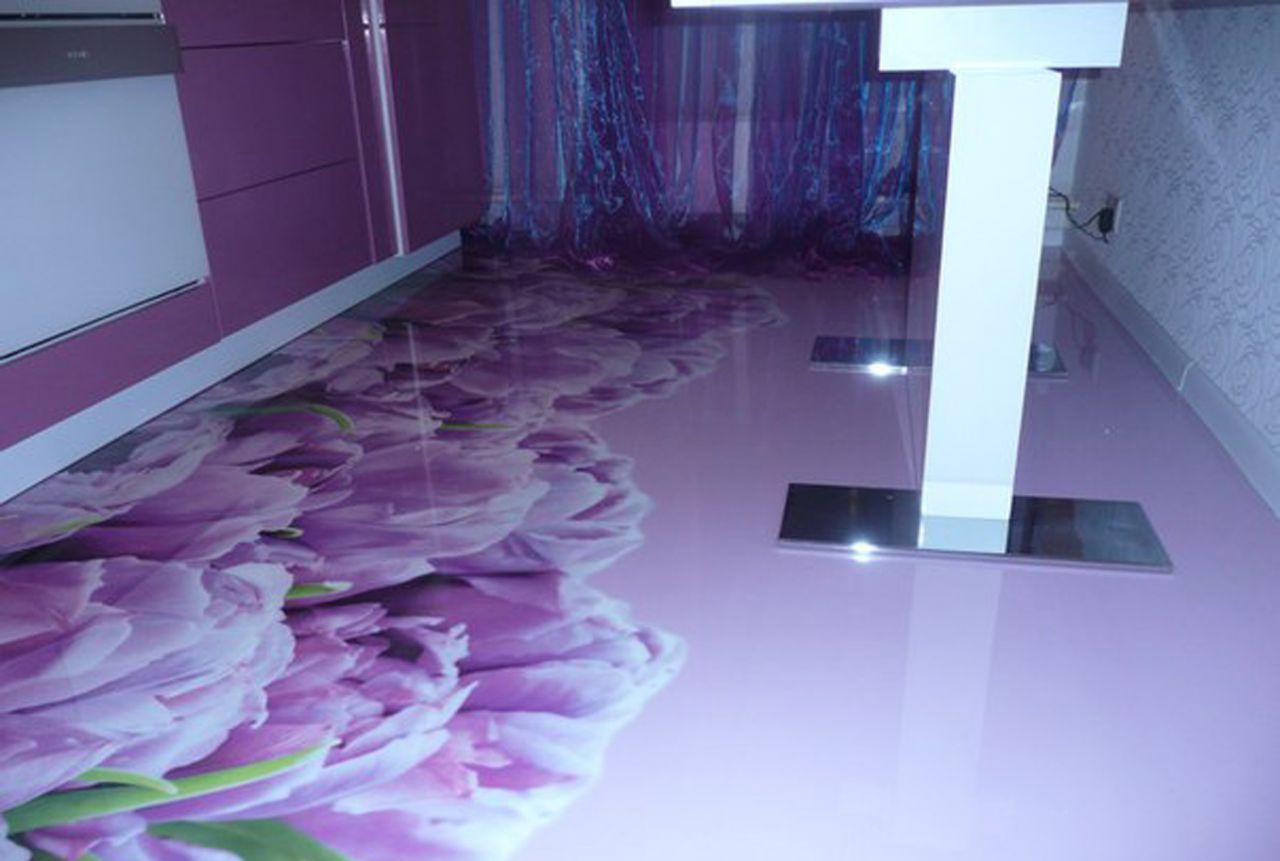
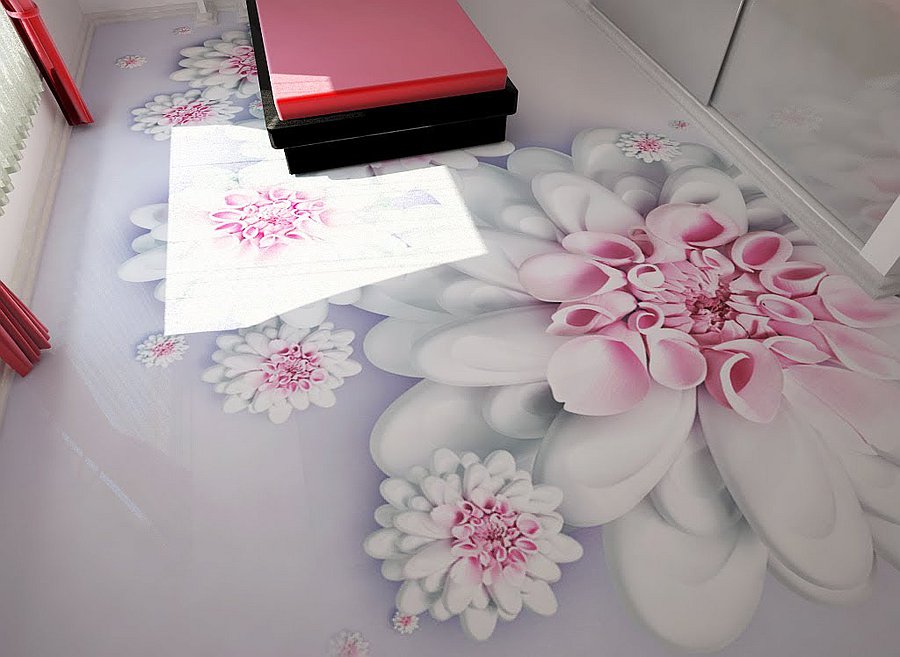
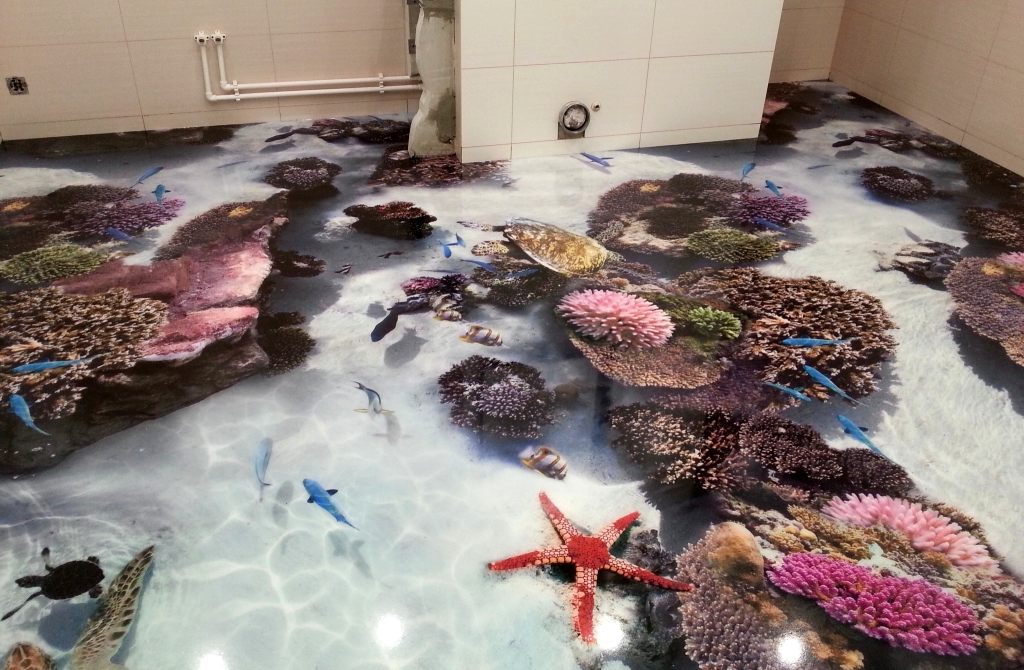
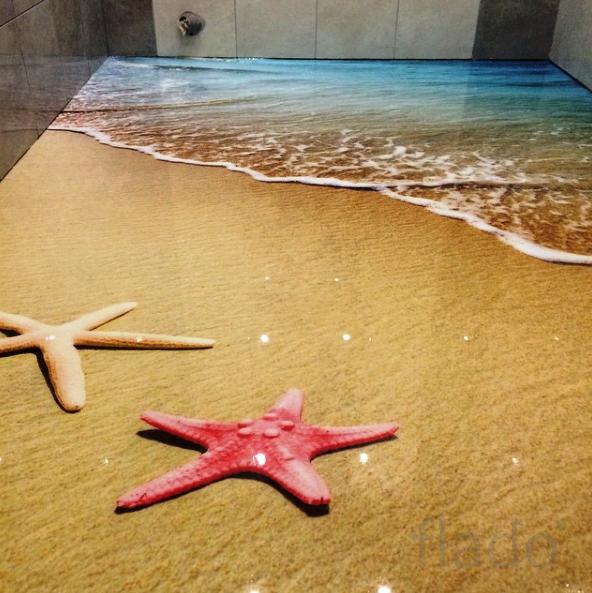
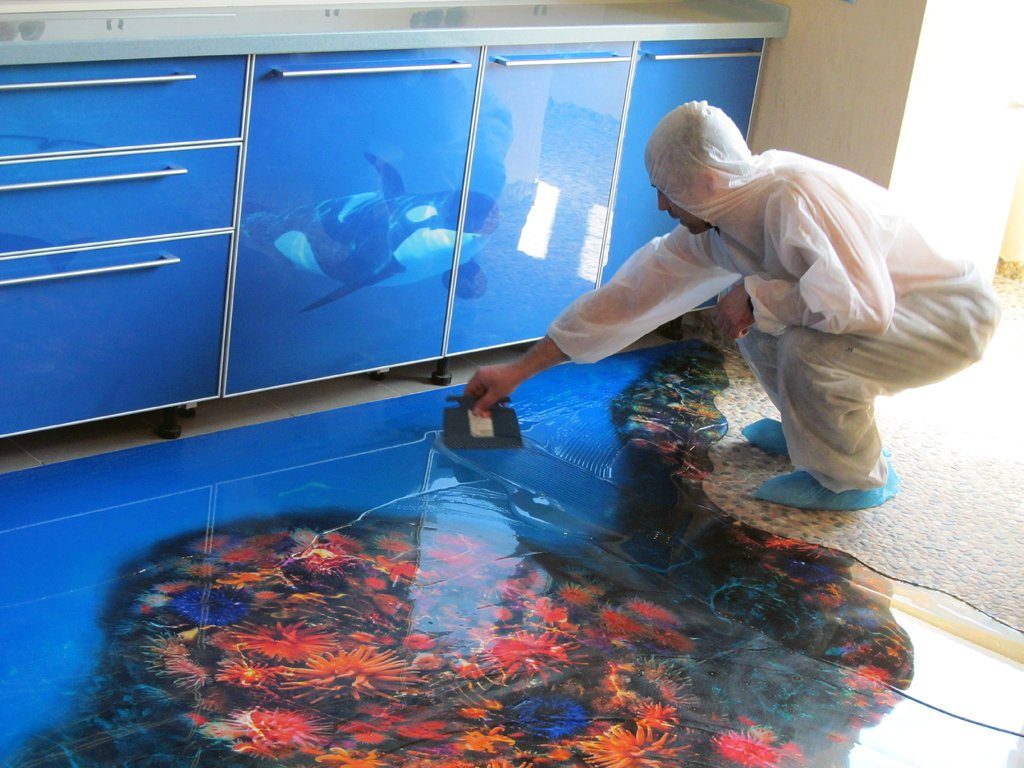
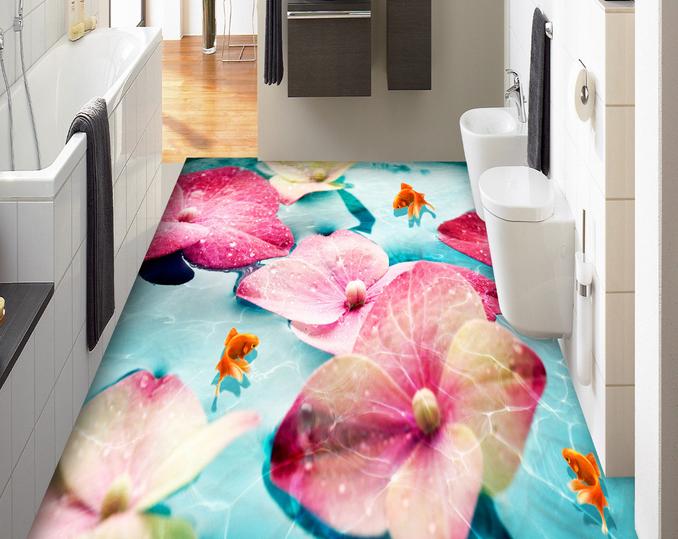
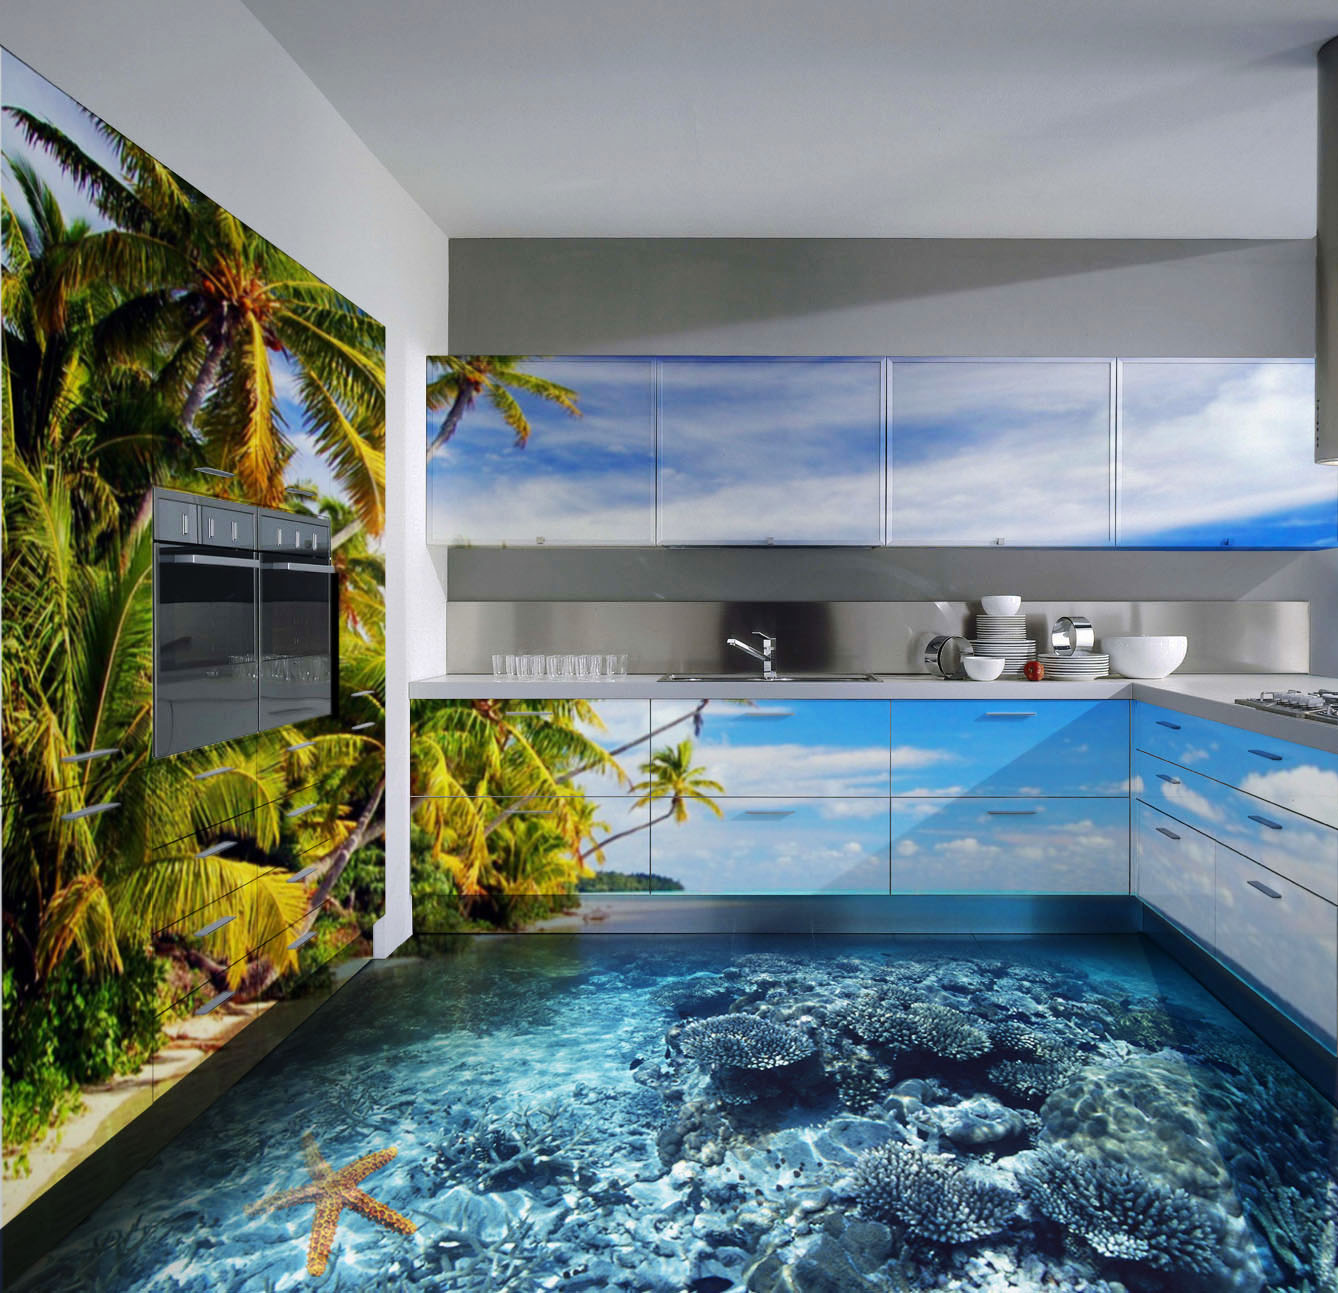
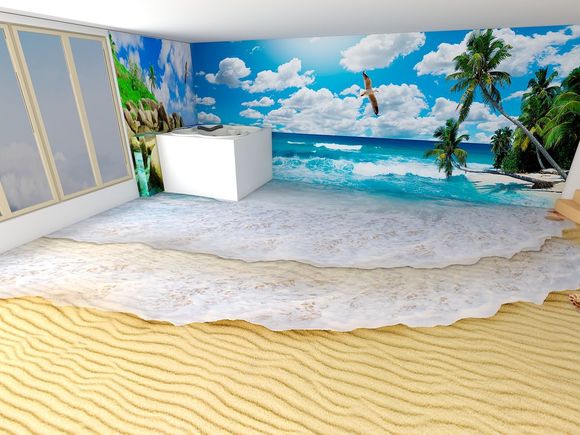
The most common option when choosing an image is a photo with a sense of multidimensionality. Especially popular are pictures of the seabed and marine animals. Such images are recommended to use in the bathroom or in the kitchen. And photos of the forest, flowers, leaves and others are suitable for the living room or hallway.
In any case, the picture needs to be selected so that over time it will not bother you, because changing it after filling with the finishing layer is impossible. It is not recommended to stop your choice on aggressive images and too bright colors, they may soon begin to cause irritation.

The resolution of the selected photo must be at least 300 dpi (dots per inch). Before you print the final version on a large canvas, it needs to be processed. You can do it yourself, if you have skills working in a graphic editor, or with the help of a designer.
First you need to take a picture of the room as it can be seen from the entrance. Then in the editor to trim in this photo all the details, except for the floor. The selected image is converted into a trapezoid shape and a perspective overlay is applied to the cropped image as you would like to see the picture from the threshold of the room. The finished version is converted into a rectangle shape, saved in * png format and printed on an ordinary black and white or color printer in A4 format. Putting the printout in the middle of the room, you need to check the effect of optical illusion from different points.
The finished image can be printed at an advertising agency or printing house that has the necessary equipment. Some of these companies may offer a choice of ready-made options.
Printing can be ordered on banner canvas or self-adhesive vinyl film. It should be noted that some manufacturers of the bulk mixture do not allow the use of canvas banner. In such cases, the only option would be vinyl.
Another option is to create a drawing yourself, if you have an artistic talent, or to turn to a professional artist. The work of a professional will cost more and take a little more time, but will give new variations to show imagination.
All the details of the drawing should be discussed in detail with the artist: the image itself, the style and the color scheme. It is advisable to order a preliminary sketch in A3 or A4 format and check the 3D effect using a photo example.
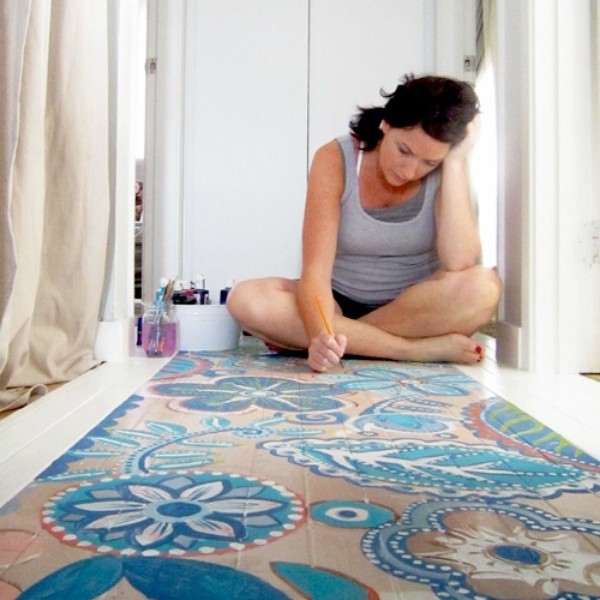
The coordinated image is applied on previously prepared basis with special polymeric or acrylic paints.
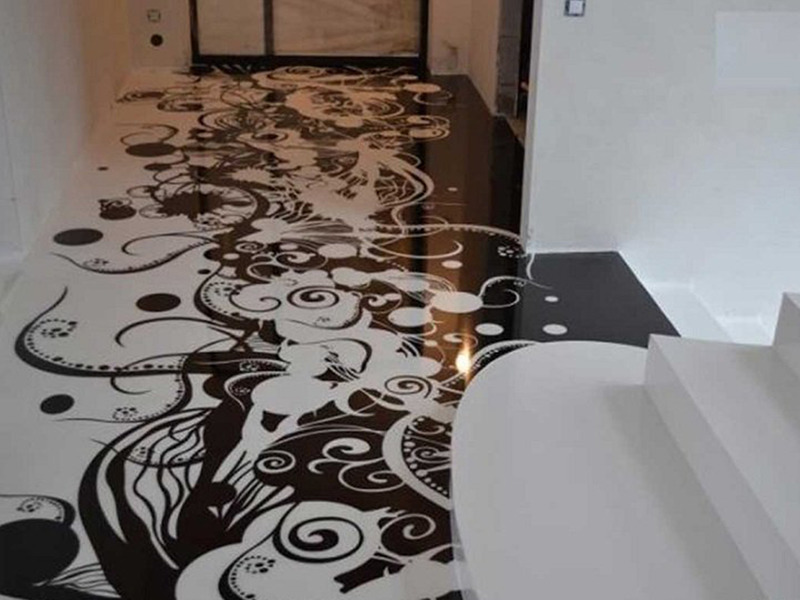
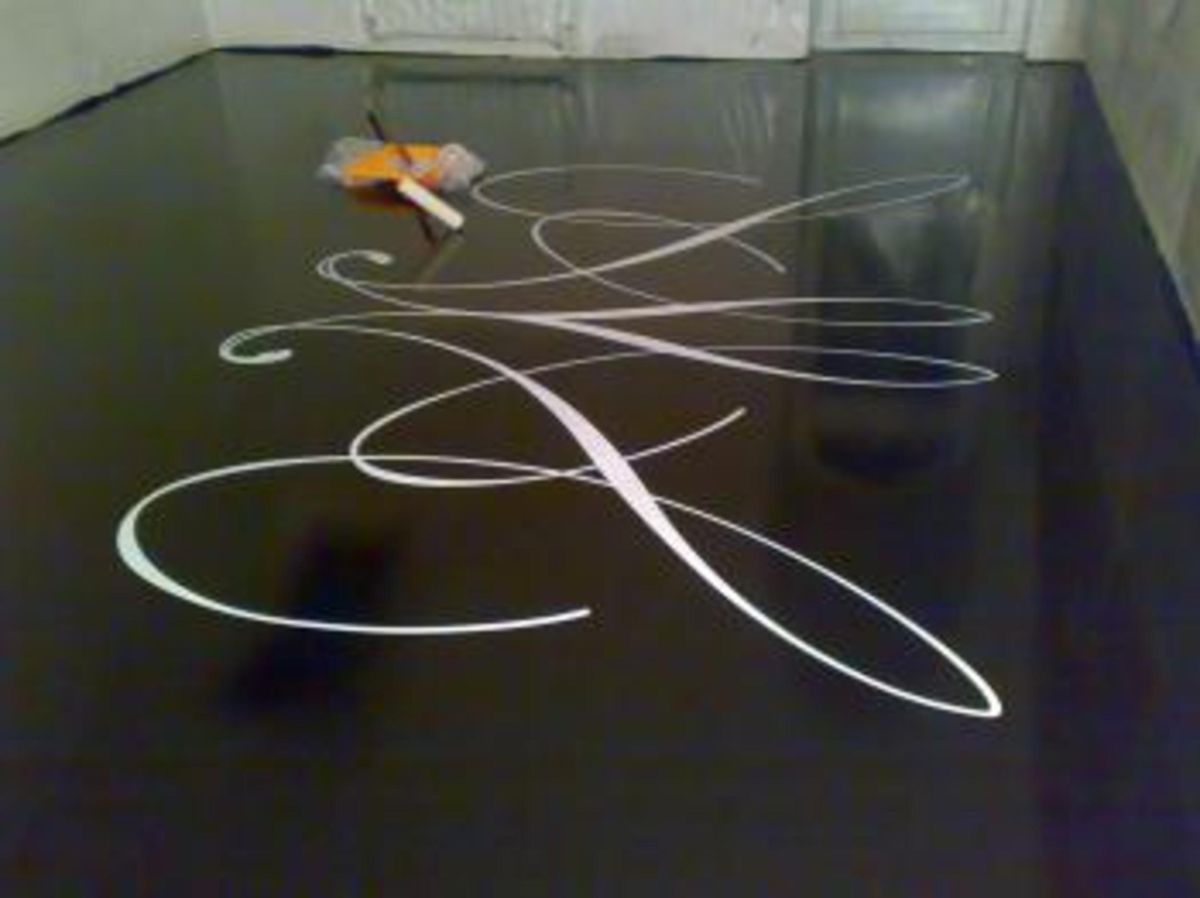
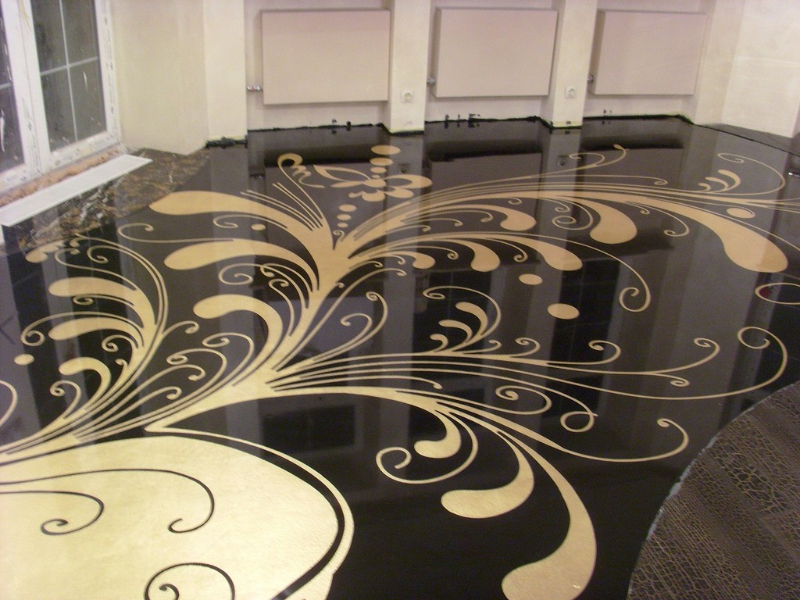
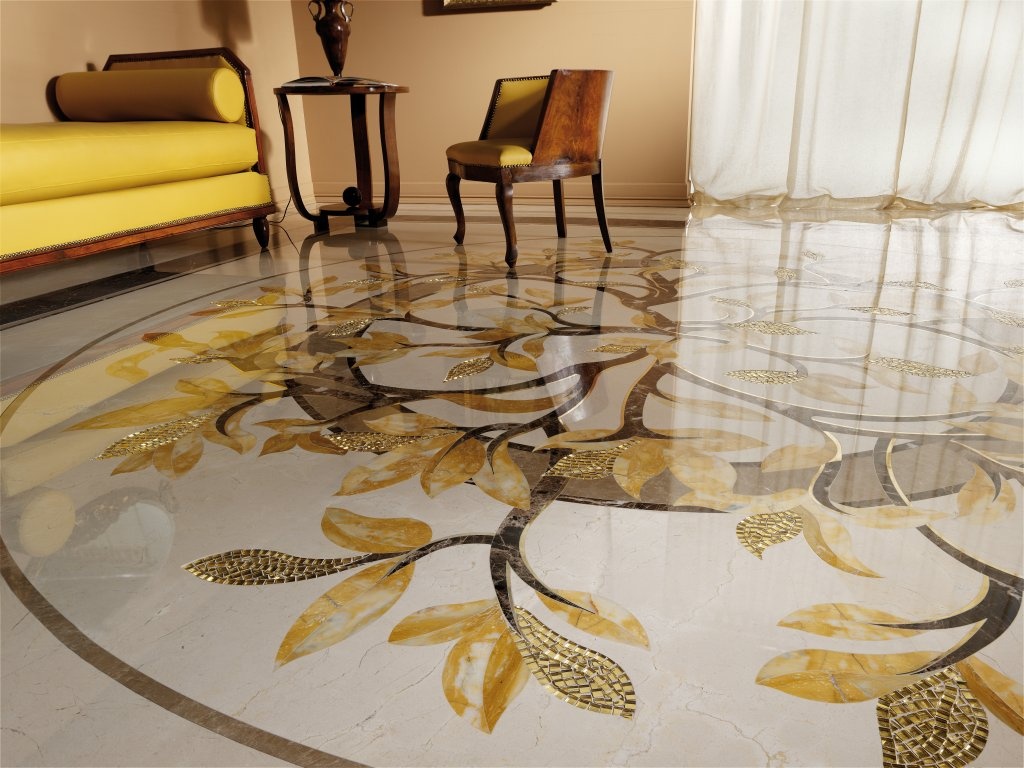
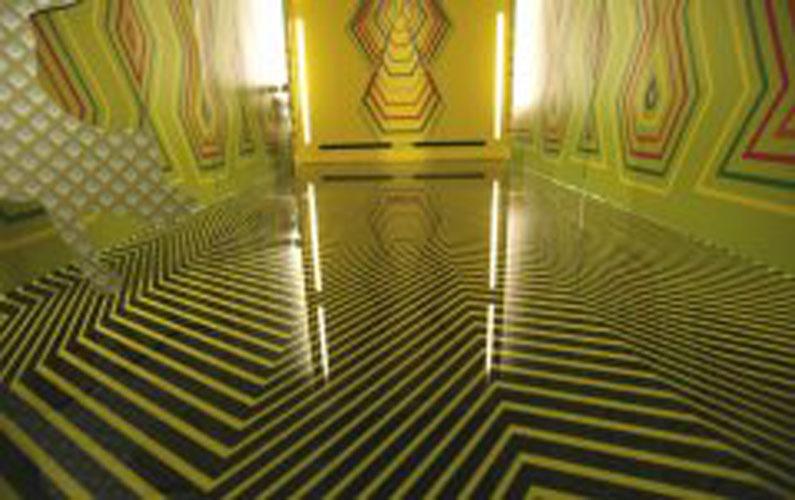
You can also use stencils for drawing. You can buy them in specialized stores or print them in the desired format by cutting on a self-adhesive vinyl plotter. Most often images of floral ornaments or geometric shapes are applied.
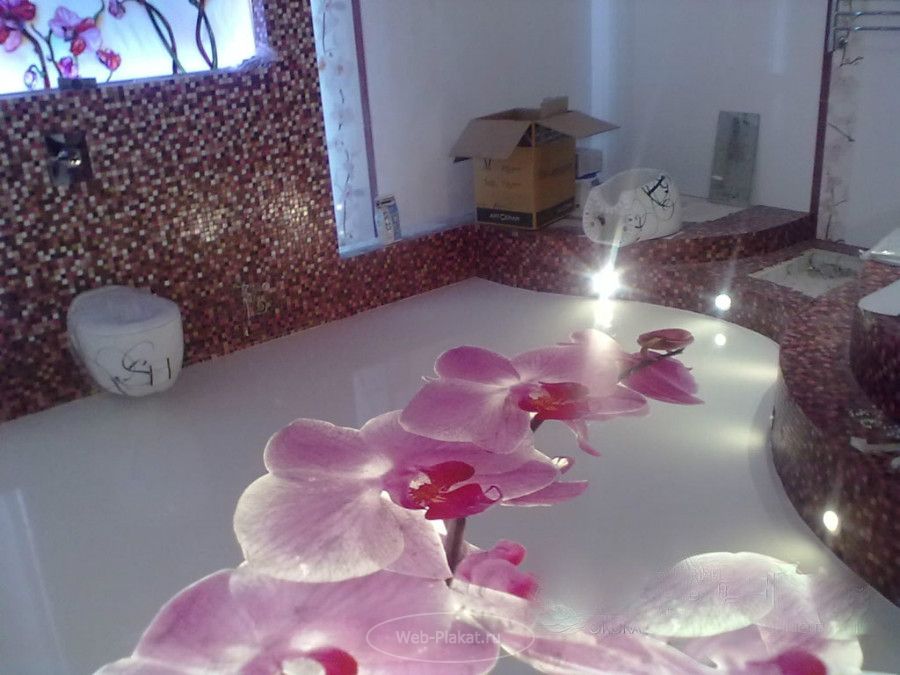
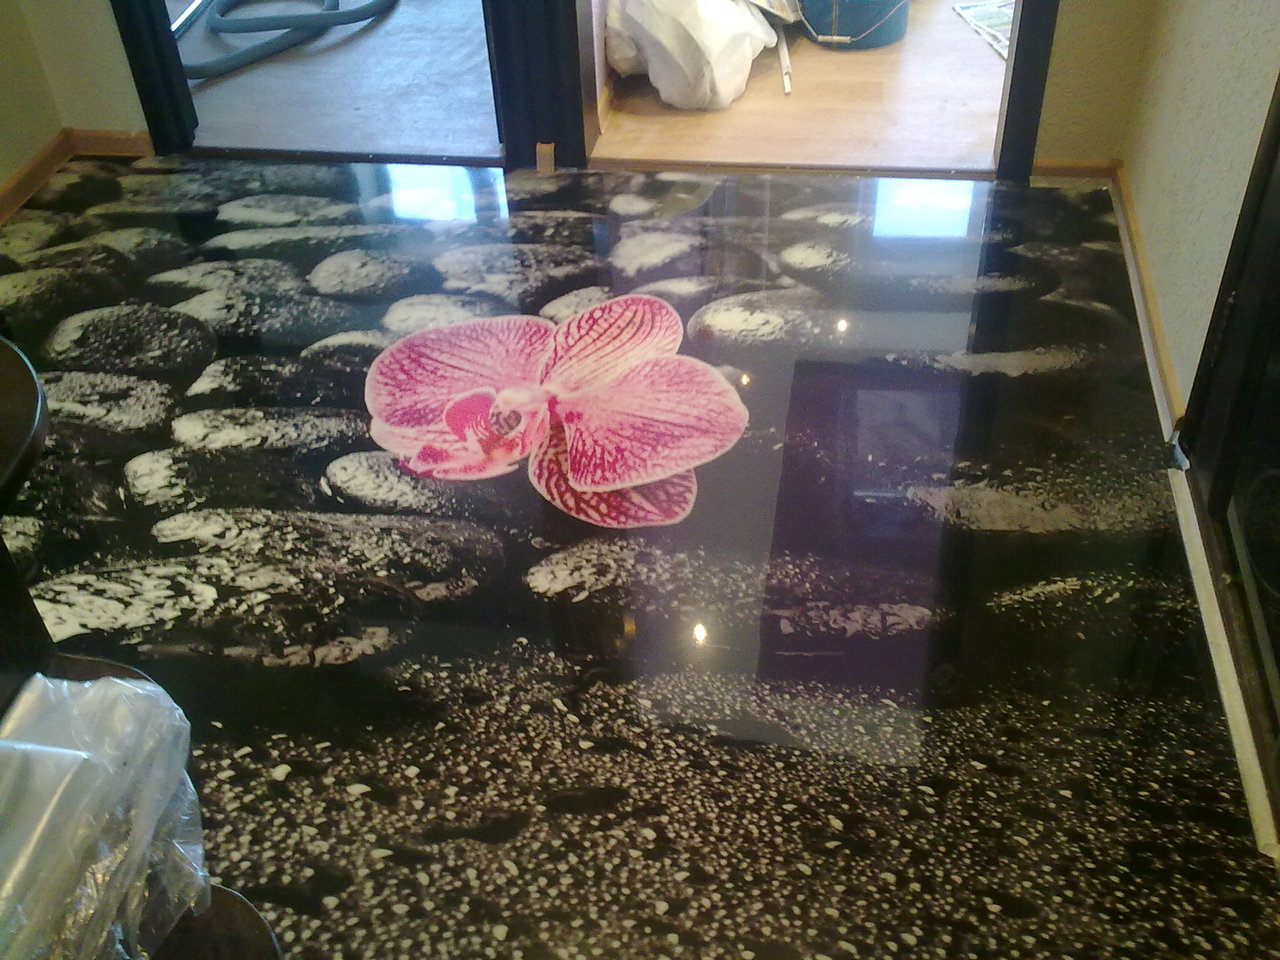
To enhance the 3D effect, you can use small details that are laid out over a drawing or photo. These can be shells, small stones or pebbles, coins or buttons. In some cases, use leaves and flowers.

What is poured?
The next stage is the choice of materials.There are several compositions for filler floors on the market.
For the final layer that creates the 3D effect, you can select the following:
-
Epoxy;
-
Methyl methacrylate;
-
Polyurethane;
-
Cement-acrylic.
For such residential areas as a bedroom or living room, it is better to choose a composition based on epoxy resin. Compared to the others, it is more environmentally friendly, but less wear-resistant. It is not recommended to clean it with powder, which can spoil the top layer. If heavy objects fall, chipping may occur.
Manufacturers warranty on epoxy polymer compounds is 30 years.
Compositions based on polyurethane are perfect for the bathroom and the kitchen. The remaining types of mixtures due to increased strength, but less natural composition, it is better to use on industrial sites and in places with high traffic.

The base polymer layer must be selected depending on the method of applying the image. When using banner cloth or vinyl film, a polymer of standard white color is needed. If the drawing will be applied with acrylic or polymer paints, a color fill is selected for the background.The composition of this layer should coincide with the finish.
To prepare the concrete base may need cement self-leveling floor, concrete screed or putty. It directly depends on the condition of the surface. To treat the base, you must choose a primer.
The lacquer for the fixing coating is selected on the basis of the selected finishing layer. You can select it in a specialized store with the help of a sales assistant or by reading the instructions. For grouting small parts, such as shells, suitable polymer clay or plaster.
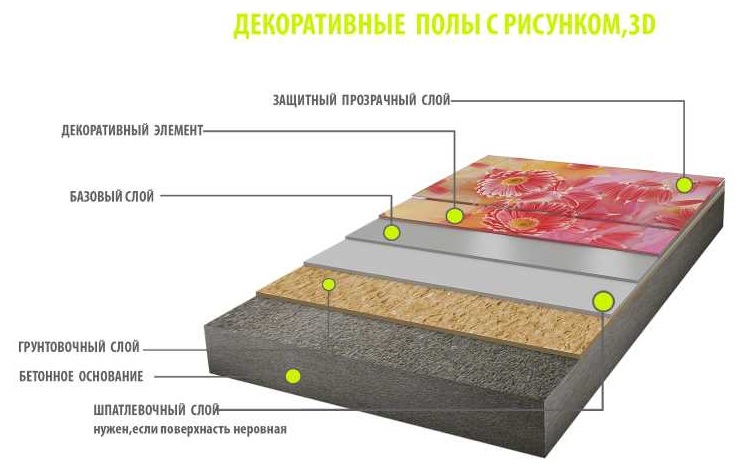
Calculations of the required amount of each ingredient are made taking into account the quadrature of the room and the thickness of the layers.
If the liquid mixture is not enough for the entire area of the room in the process, the coating will be hopelessly damaged. Therefore, buying materials is better with a margin.
How to do?
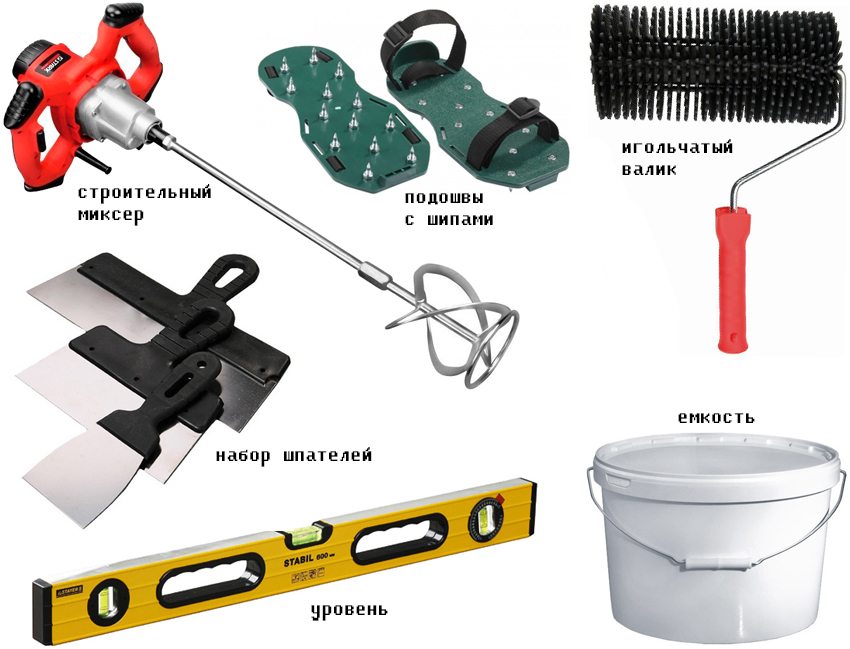
Once all the necessary materials have been purchased, you need to prepare the tools and accessories:
-
Grinding machine for leveling concrete base;
-
Powerful household or industrial vacuum cleaner to remove dust and dirt;
-
Construction mixer for mixing components.Instead of a mixer, you can use a drill with a power of at least 800 watts with the functions of reverse, adjustment of revolutions and a special nozzle-mixer;
-
Rollers: several velor for applying a primer and a lacquer coating, and a needle roller for rolling a polymer base;
-
Squeegee and a set of spatulas of various sizes from 12 to 60 cm;
-
Crack shoes (special soles with spikes);
-
Protective clothing: respirators, suits, gloves. It is necessary both to protect workers from harmful fumes and mixtures on the skin, and to prevent dust, hair and sweat from falling onto the floor.
-
Level;
-
Mixing container;
-
Protective film (suitable material that is used when painting cars);
-
Solvent cleaning tools.
Step-by-step instructions for the manufacture of liquid self-leveling floors involves the following steps:
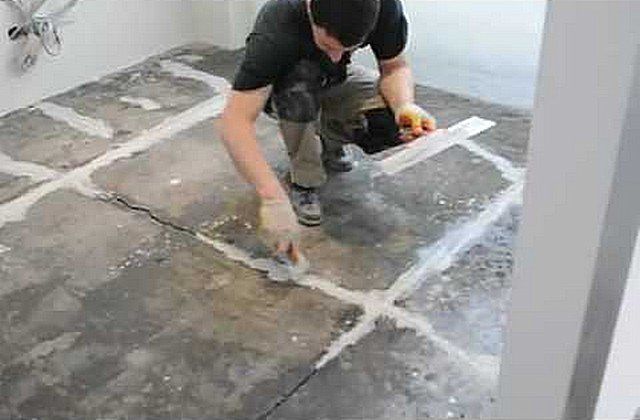
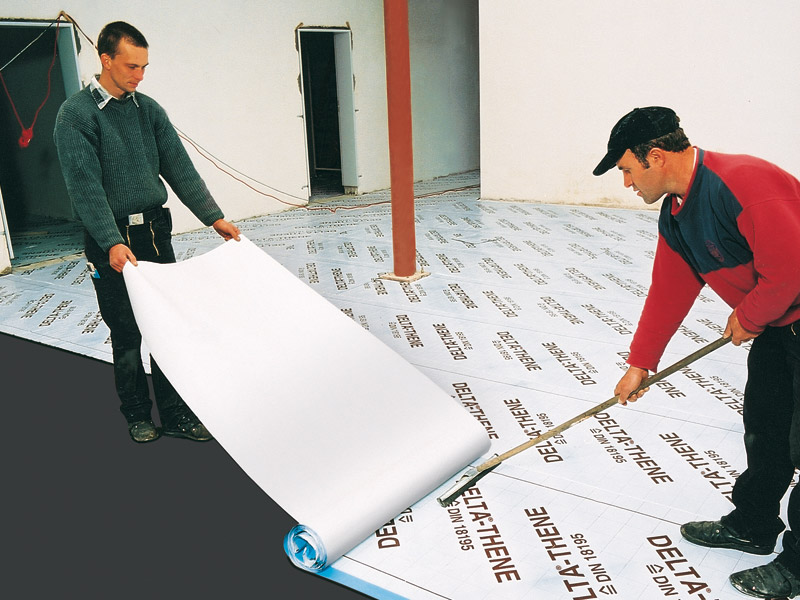
Preparation of the concrete base
After removing the old coating and removing dirt and dust, you must carefully inspect the floor for cracks, stains and other defects. It will not be superfluous to process the base with a grinding machine and be sure to clean the dust off with a vacuum cleaner. Level check whether the surface is sufficiently flat.Flaws must be patched with a concrete screed, putty or self-leveling mix based on gypsum or cement.
Complete drying of the prepared surface can take from 24 hours to several days, depending on the leveling method. The humidity of the coating before the next stage should be no more than 4%.
In the case when there is no special device for measuring, you can use the available tools. Press the polyethylene sheet of size by meter tightly to the surface and leave for a day. If after the elapsed time it does not form condensate or perspiration, you can continue to work.

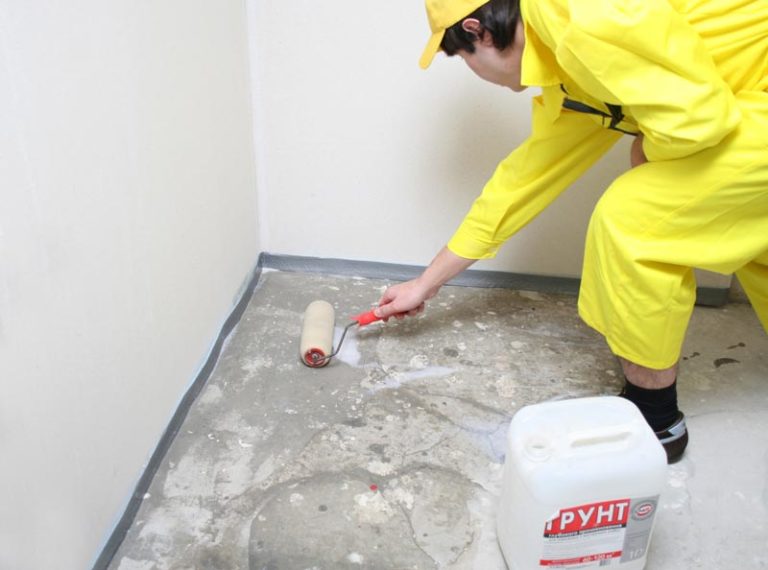
Primer
It is recommended to use a two-component mixture, which must be prepared strictly following the instructions. Usually mixing is performed within 2 minutes with a construction mixer at 500 revolutions per minute using reverse. The primer poured onto the floor and rolled out with a velor roller over the entire surface for no longer than 30 minutes, until the mixture began to dry. After 24 hours, you can proceed to the next item;

Room preparation
It is desirable to sheathe the walls with a protective film to avoid dust and lint on the polymers, to limit the ingress of direct sunlight into the room.The air temperature in the room should be constant, within 10-25 degrees, humidity - no more than 80%. It is necessary to ensure the flow of fresh air, avoiding drafts. Vacuum the surface again;


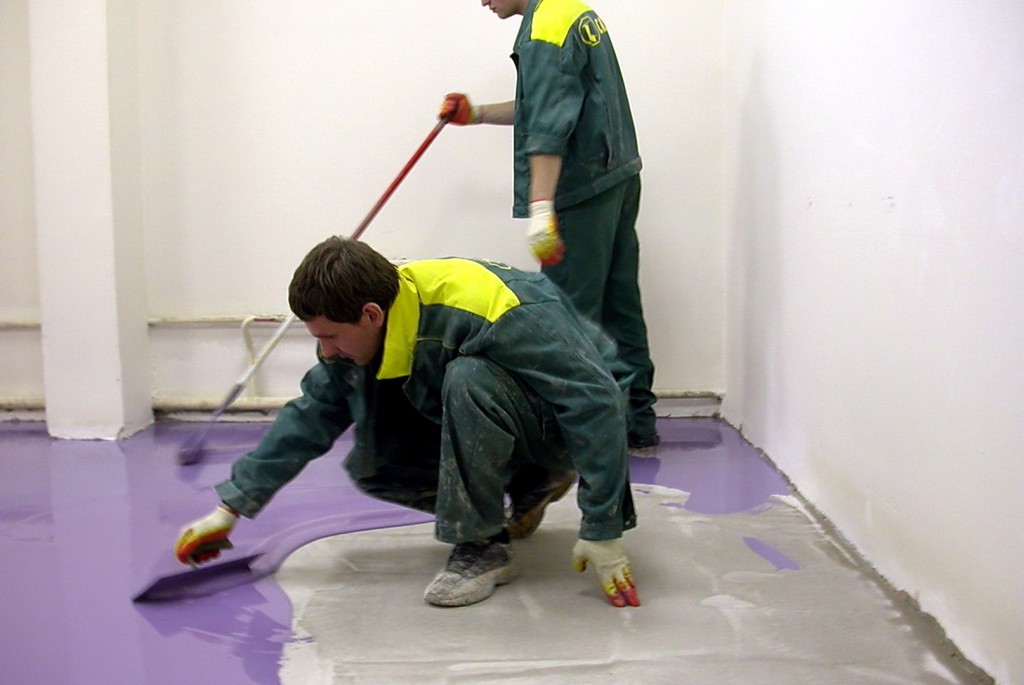
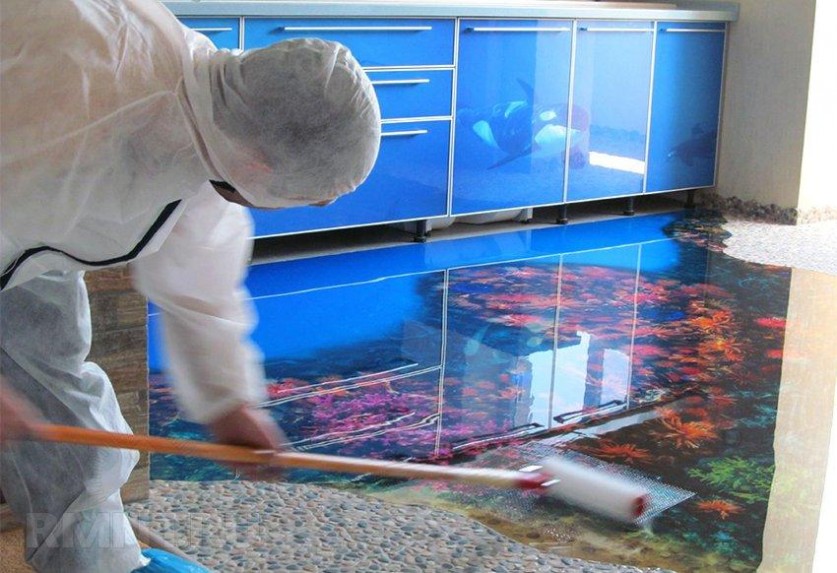
Laying the base polymer layer
To work start only in protective clothing and kraskoostah. Very helpful assistant, who will mix the components in another room. The finished mixture is poured in small stripes, starting from the farthest wall from the entrance. For leveling it is better to use squeegee. H
So that the layer is smooth, you can use a spatula. For this layer, a thickness of 1.5–3 mm will suffice. The mixture must be used within 30 minutes, otherwise it will begin to harden.
The time interval between pouring the strips should be kept for no more than 10 minutes, so the coating will be homogeneous. Within 15-30 minutes after pouring, roll the polymer layer with a needle roller to release all air bubbles. Before drying, leave it for a day;
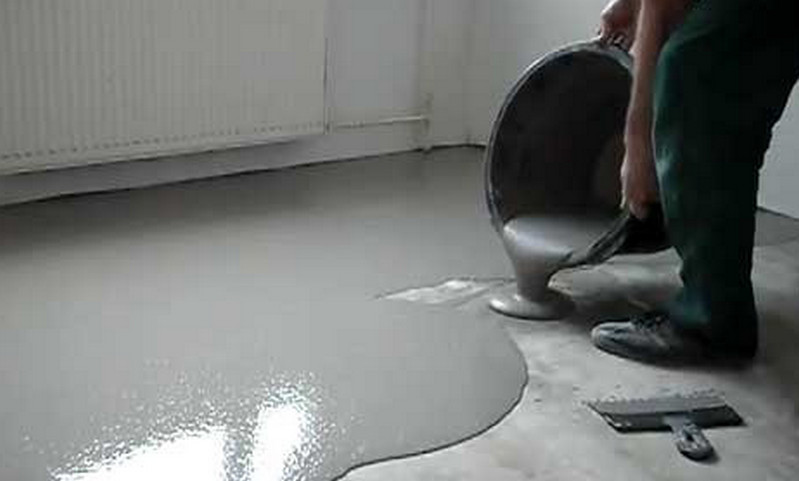
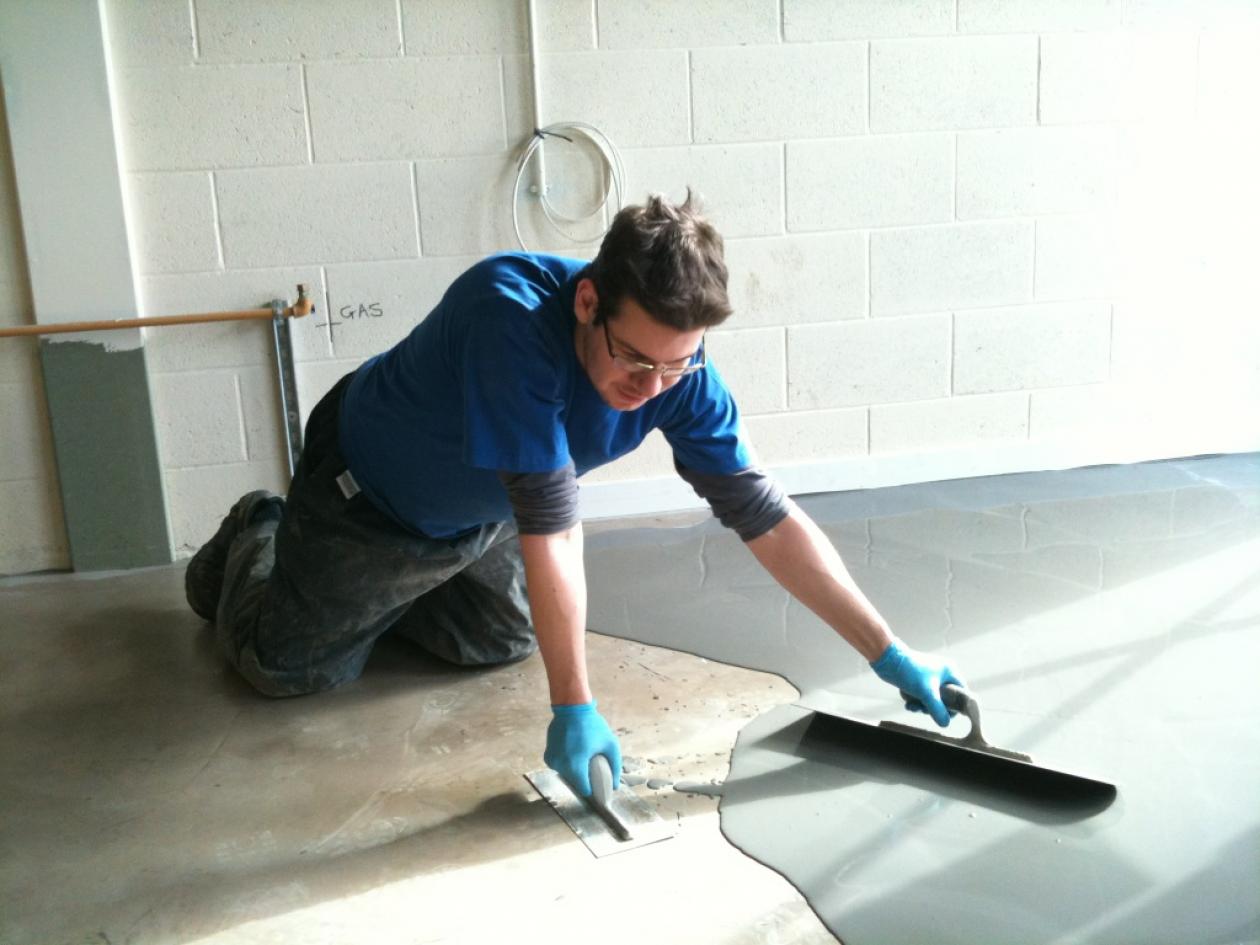
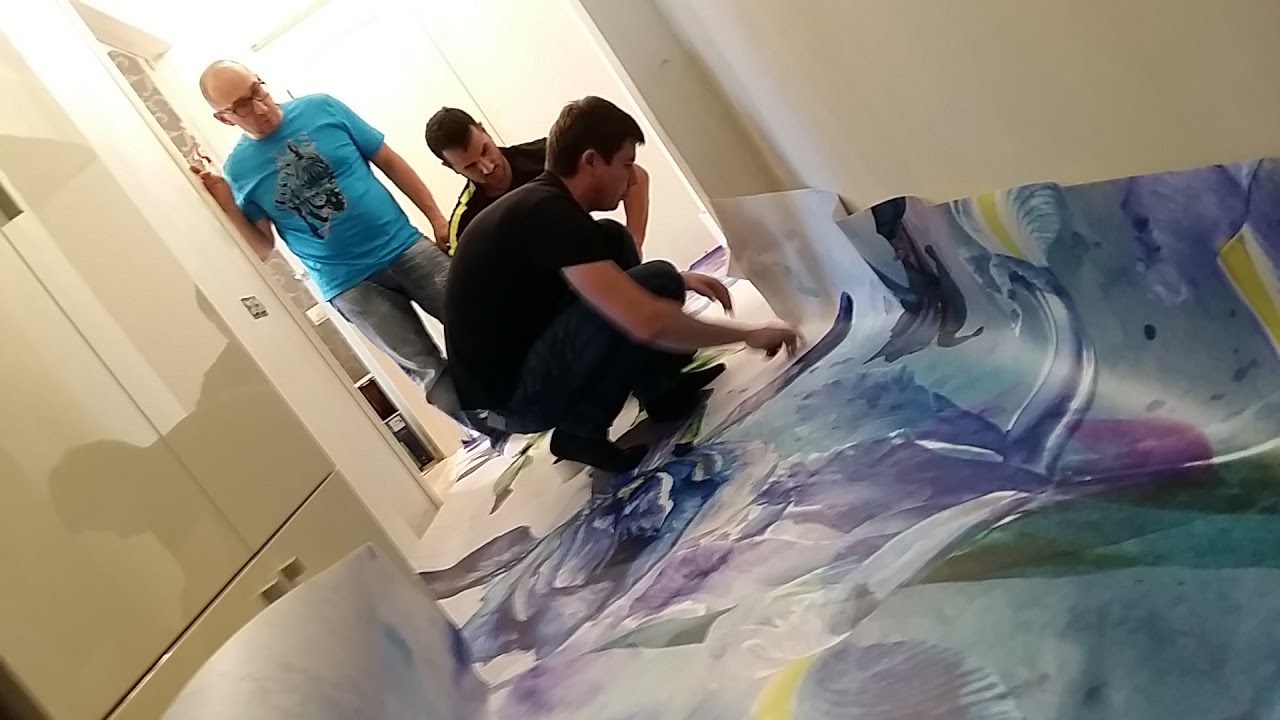
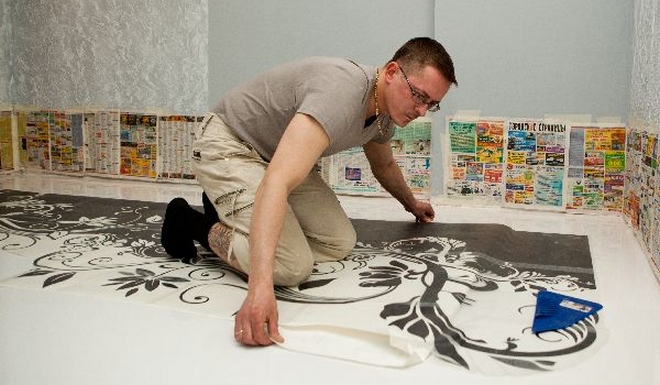
Image overlay
On the previous layer, you can only walk in soft shoes, as ink-shoes or a hard sole leave marks.Depending on the chosen method of applying the image technology will be different. Drawing paints applied directly to the base layer. After drying, it is coated with a varnish or a thin layer of a topcoat to protect it from damage by paint polishing at the next stage.

Two people should work with self-adhesive vinyl foil at once. The paper backing is peeled off in small sections and glued to the floor so that no bubbles form under it. If there are joints, it is necessary to adjust the webs to each other very carefully. The glued image should be immediately treated with a protective layer.
Banner canvas does not have a self-adhesive base, so it must be glued on a layer of varnish or on a thin layer of topcoat. Upon completion of work, the cloth should be degreased with methyl alcohol and covered with a protective layer. If small parts are provided, then they should be laid out exactly on the protective layer immediately after application.

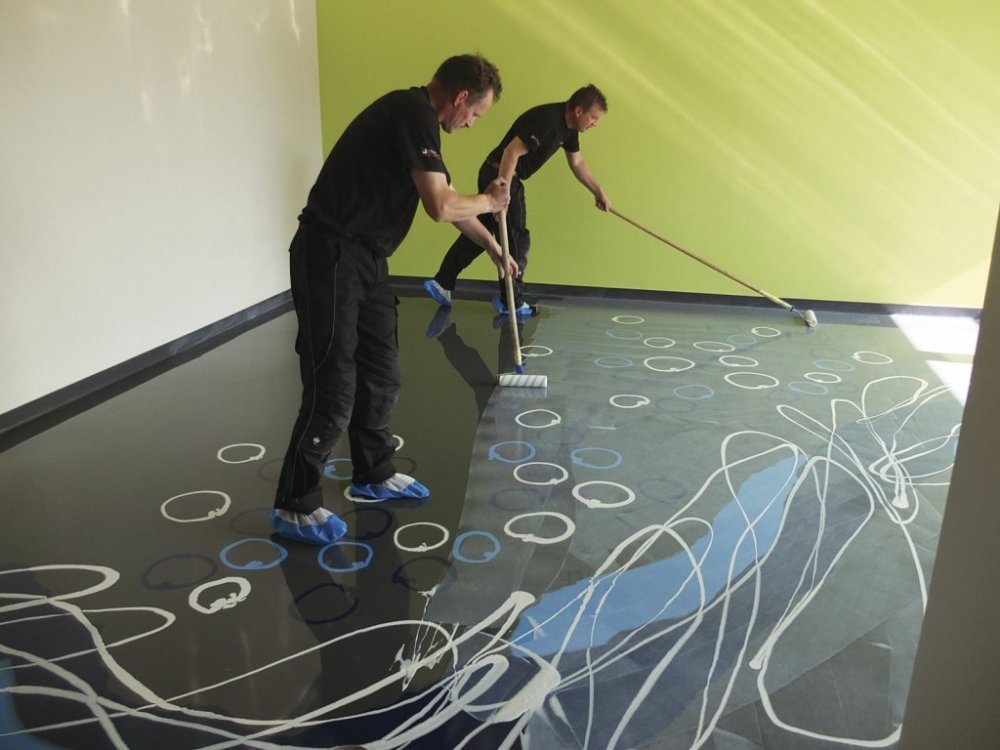
Pouring the finish polymer layer
Manufacturing technology of this layer is exactly the same as the base. Layer thickness to withstand from 3 to 5 mm, depending on the components used.In the process of work, you need to be even more cautious; not a single drop of sweat or dust particles should fall on the coating. You can walk around the finishing layer only in soft shoes and not earlier than in 5 days.
Protective layer
Lacquer is used as a protective coating. It is necessary to select it taking into account the polymers used. Apply in two layers with a brush or velor roller. Well spreads over the surface, forming a smooth glossy layer. The first layer dries within 8-12 hours, it should take no more than a day before the second layer is applied. Giving a full load on the floor can be within 7 days after the application of the last layer.
How to care?
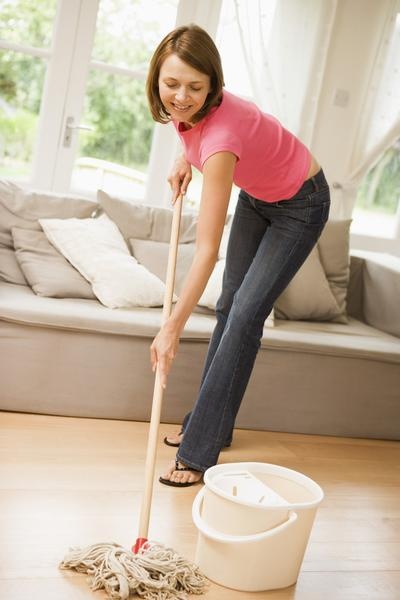
Polymer coatings do not require special care. It is necessary to wash such floors as they are contaminated with ordinary water or with the use of cleaning agents and stain removers. Once a year it is recommended to treat the top layer with a polish or mastic, it can be varnished.
If during operation there are scratches, you need to polish them with special tools and apply a new double lacquer coating.
Owner reviews
The vast majority of owners of such floors leave positive feedback.Many of them have self-leveling 3D floors tested for five years or more. They are satisfied, first of all, ease of maintenance and durability. Beautiful and unusual design pleases the eye for a long time. To many, such a solution was right for the bath, having got rid of mold and fungi.
There are several negative reviews that the color of the coating has changed over time. In this case, experts indicate that a poor-quality composition was used. Therefore, you need to choose only proven manufacturers, and purchase polymers in specialized stores.

Custom solutions in the interior
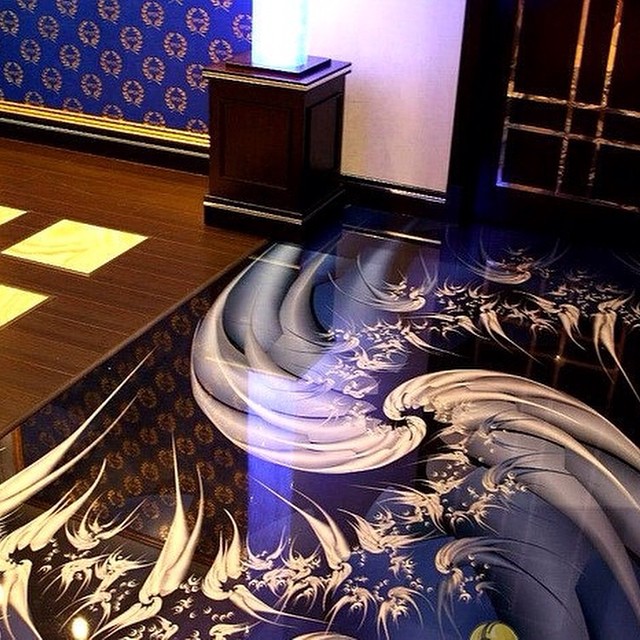
The most common and common solutions are images on the marine theme: the seabed, dolphins, turtles. You can often find different stencils. But every day there are more and more unusual and non-standard solutions in interiors using 3D floors.

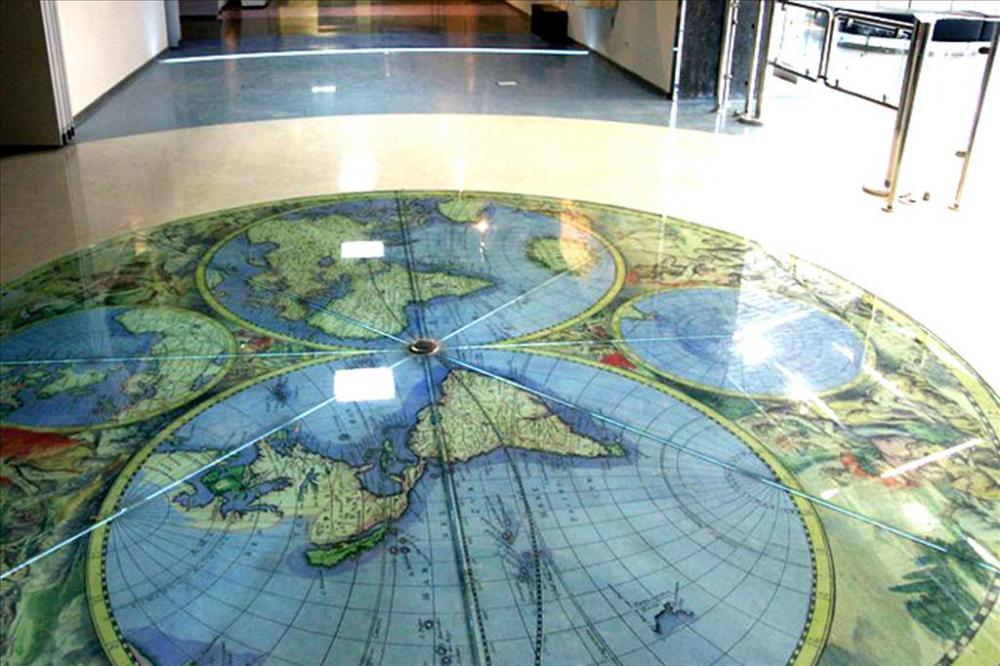
A map of the Earth's hemispheres on the floor in the living room will look very unusual and restrained.
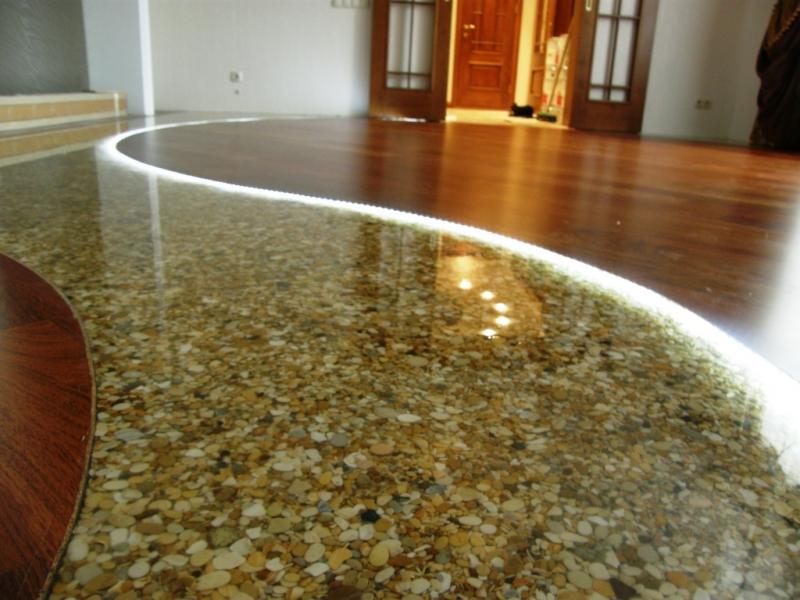
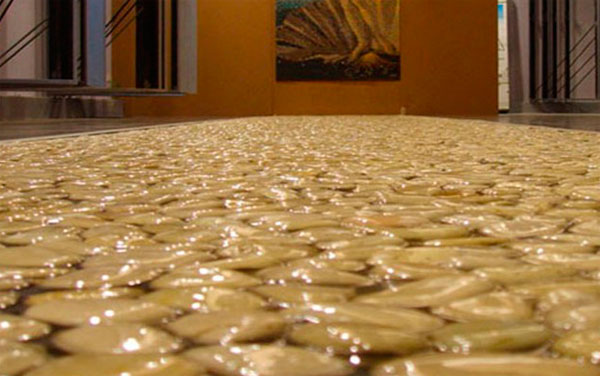
Floors, lined with real pebbles, get a little textured.
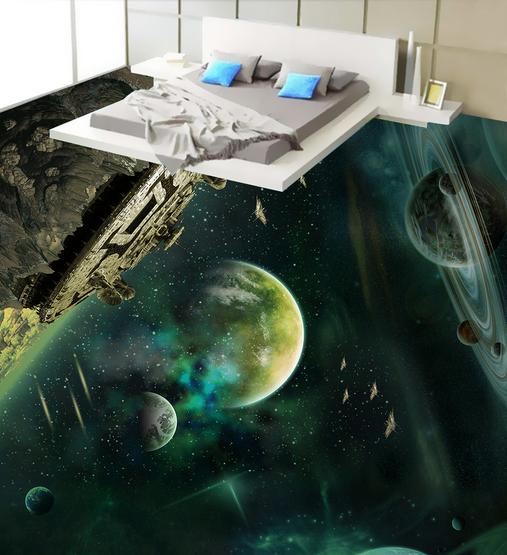
At the sight of space landscapes every time is breathtaking.
Someone will like the view of the city from a bird's eye view.


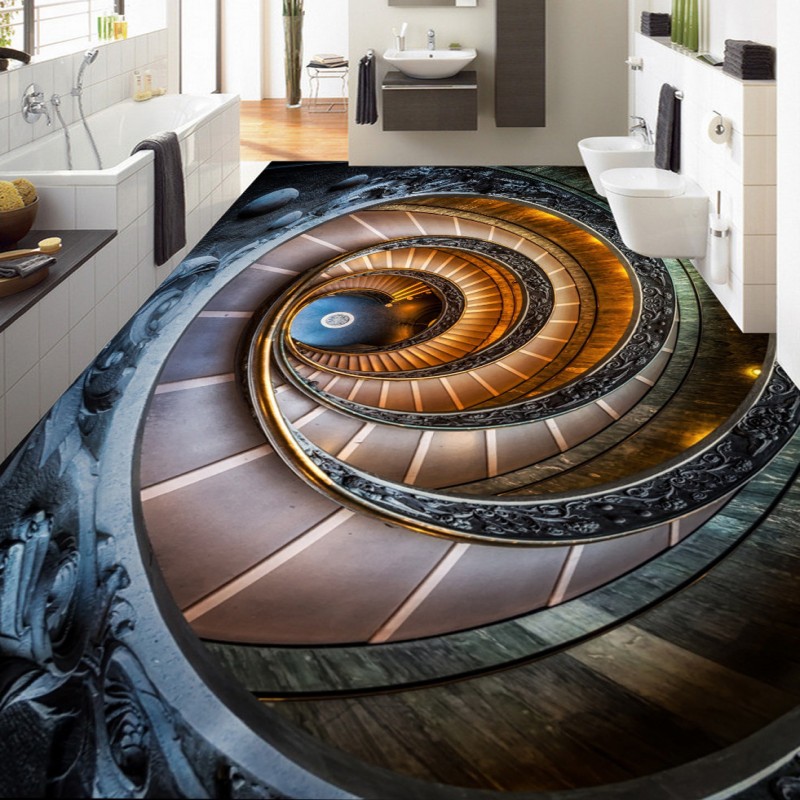
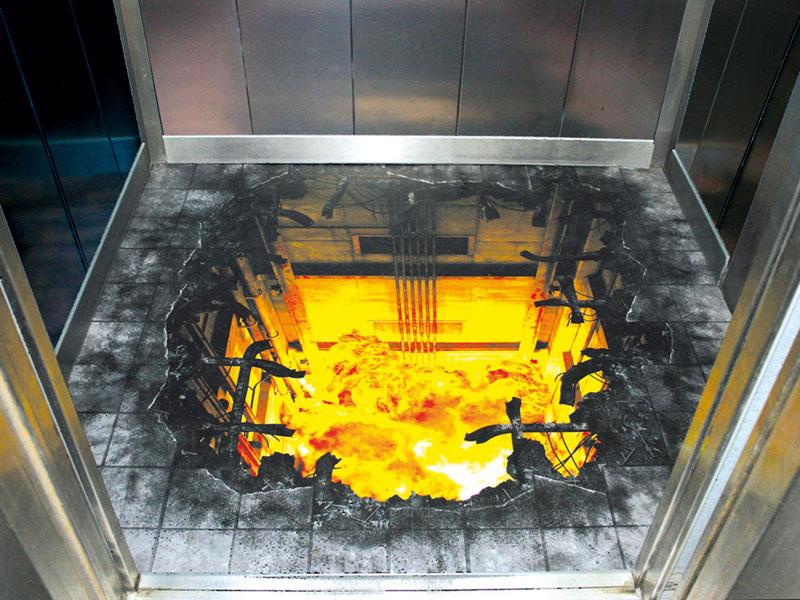
Images in the form of an abyss, dips or stairs down look very impressive, but you need to select them with extreme caution. They should not put pressure on the emotional state.


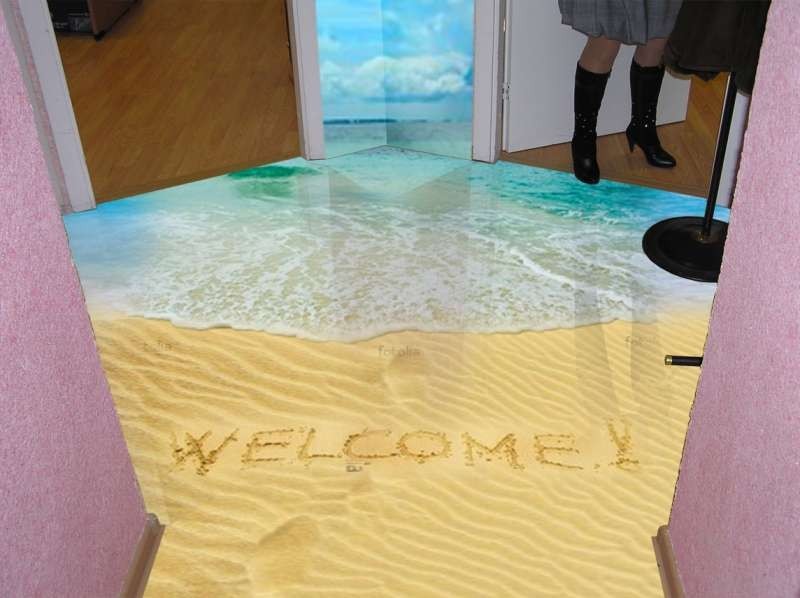
You can use photos with inscriptions. For example, this floor will be interesting to look in the hallway.
Aerobatics will combine in the interior a 3D floor and a 3D wall or furniture.
About how do the self-leveling floors with a picture, see the following video.


