Features of connection of a heat-insulated floor to a temperature regulator
The most crucial moment in the installation of a warm floor is the connection of the underfloor heating to the thermostat. This appliance maintains a constant comfortable temperature in a residential area, spending a minimum amount of electricity.
Special features
The thermostat is designed to stabilize temperature indicators, auto-connect and turn off heating devices. The appliance receives readings from the temperature sensor and automatically switches off the power supply when the required temperature is reached. Even at this time, the appliance is active and continues to automatically adjust the temperature. When the temperature drops, the regulator resumes its activity.
Types and principles of work
Temperature controllers of various heating mechanisms have different auto-control mechanisms.
For water floors:
- Two way valve.
- Three-way valve.
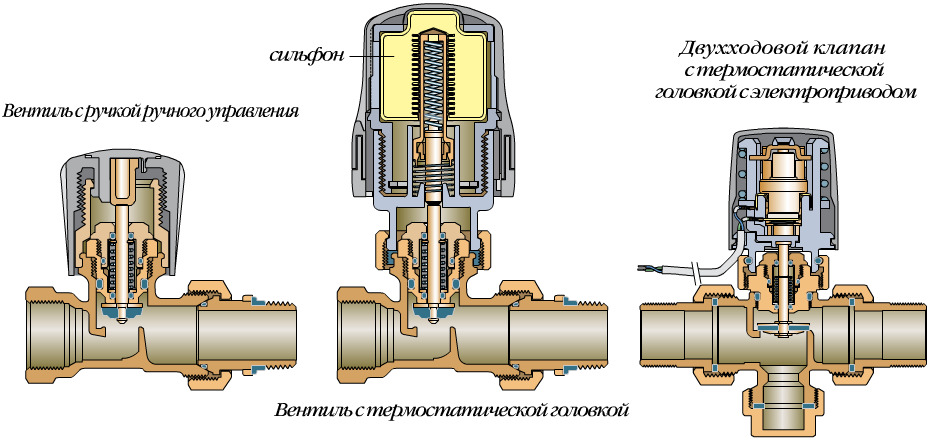

The peculiarity of the functioning lies in the physical limitation of the boiling water inlet to the heating mechanism. At the same time the necessary volume of water of the desired temperature is provided.
Types of thermostats:
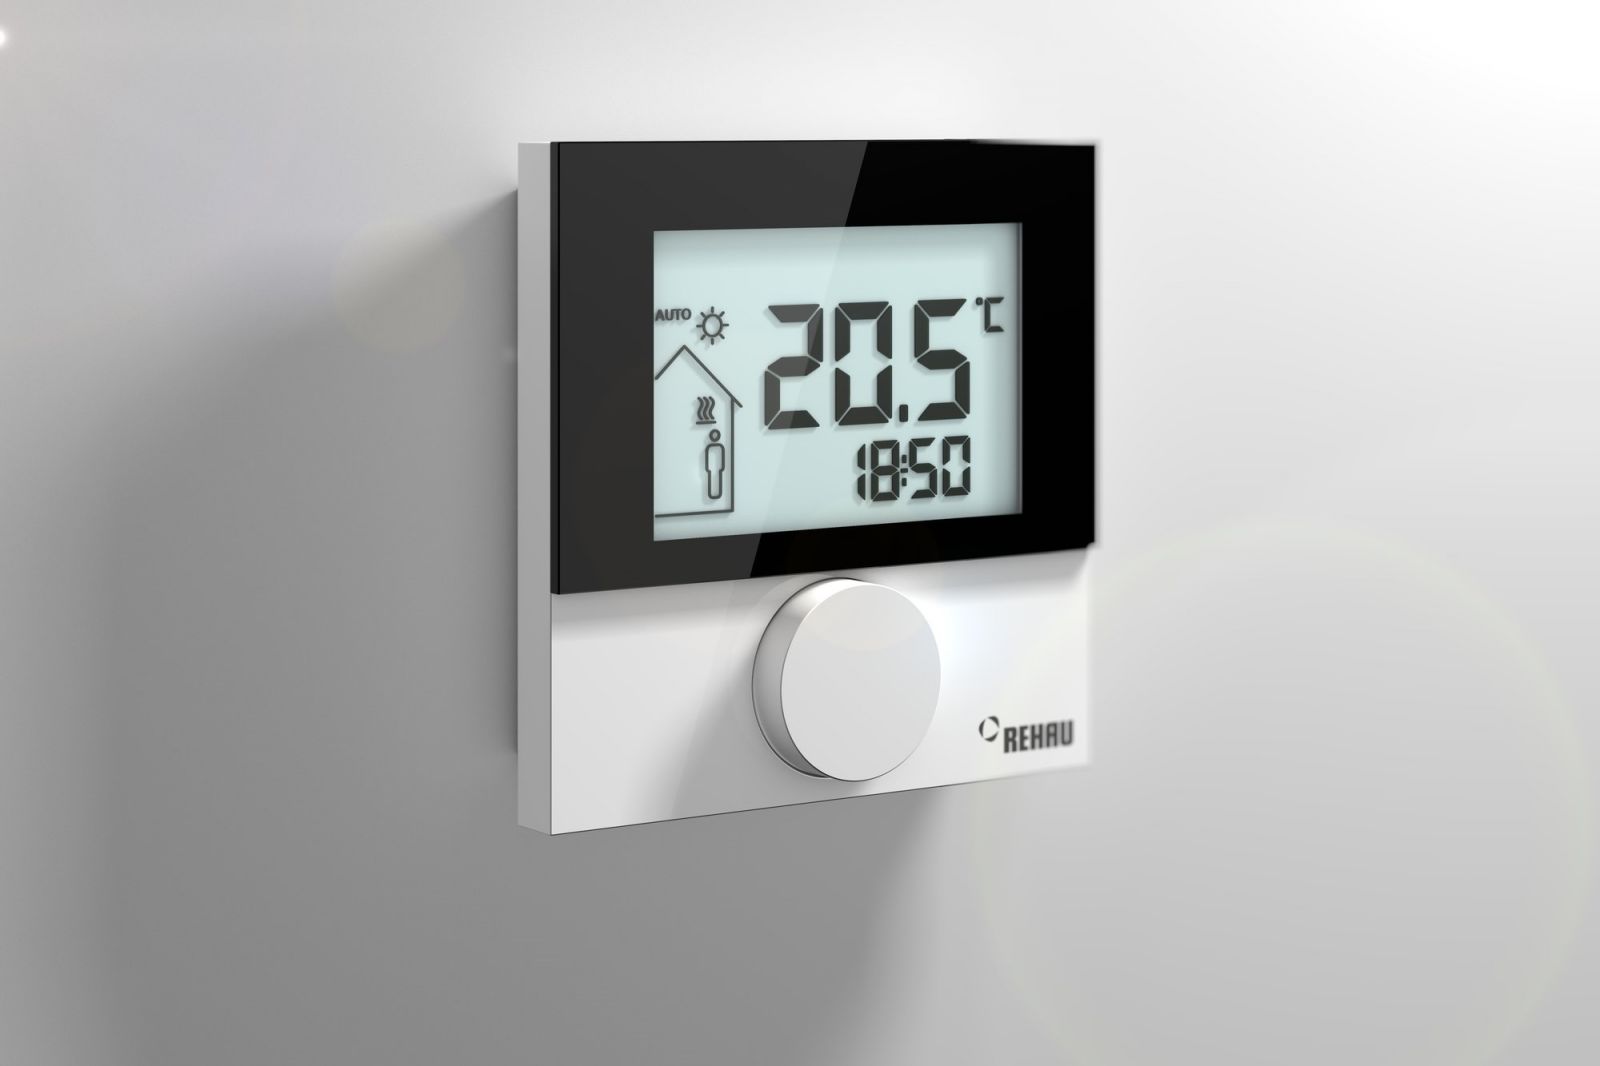
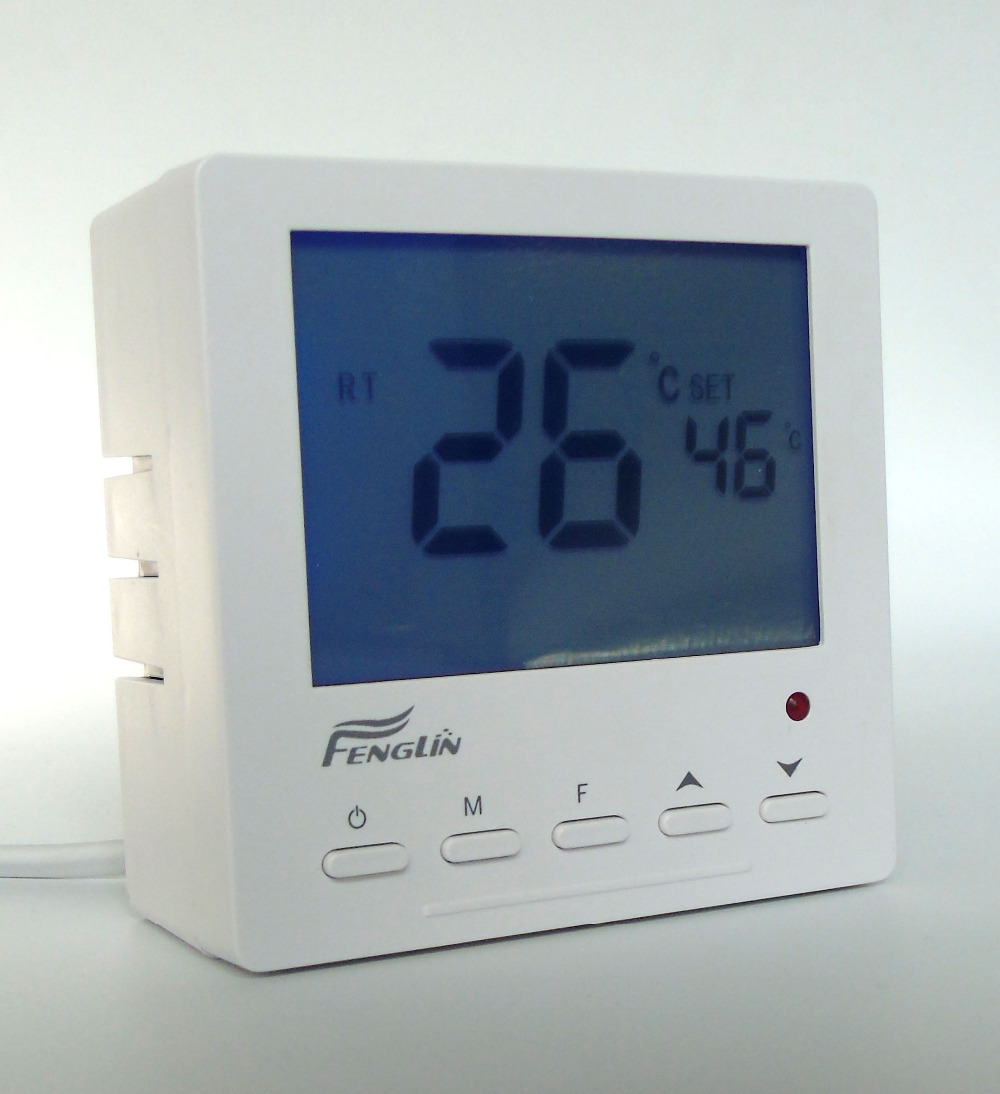
- Digital. The peculiarity of the operation is similar to the electronic-mechanical thermostat. A distinctive feature is the ability to set the temperature in the electrode. The electromechanism is equipped with a touch panel, where information is displayed.
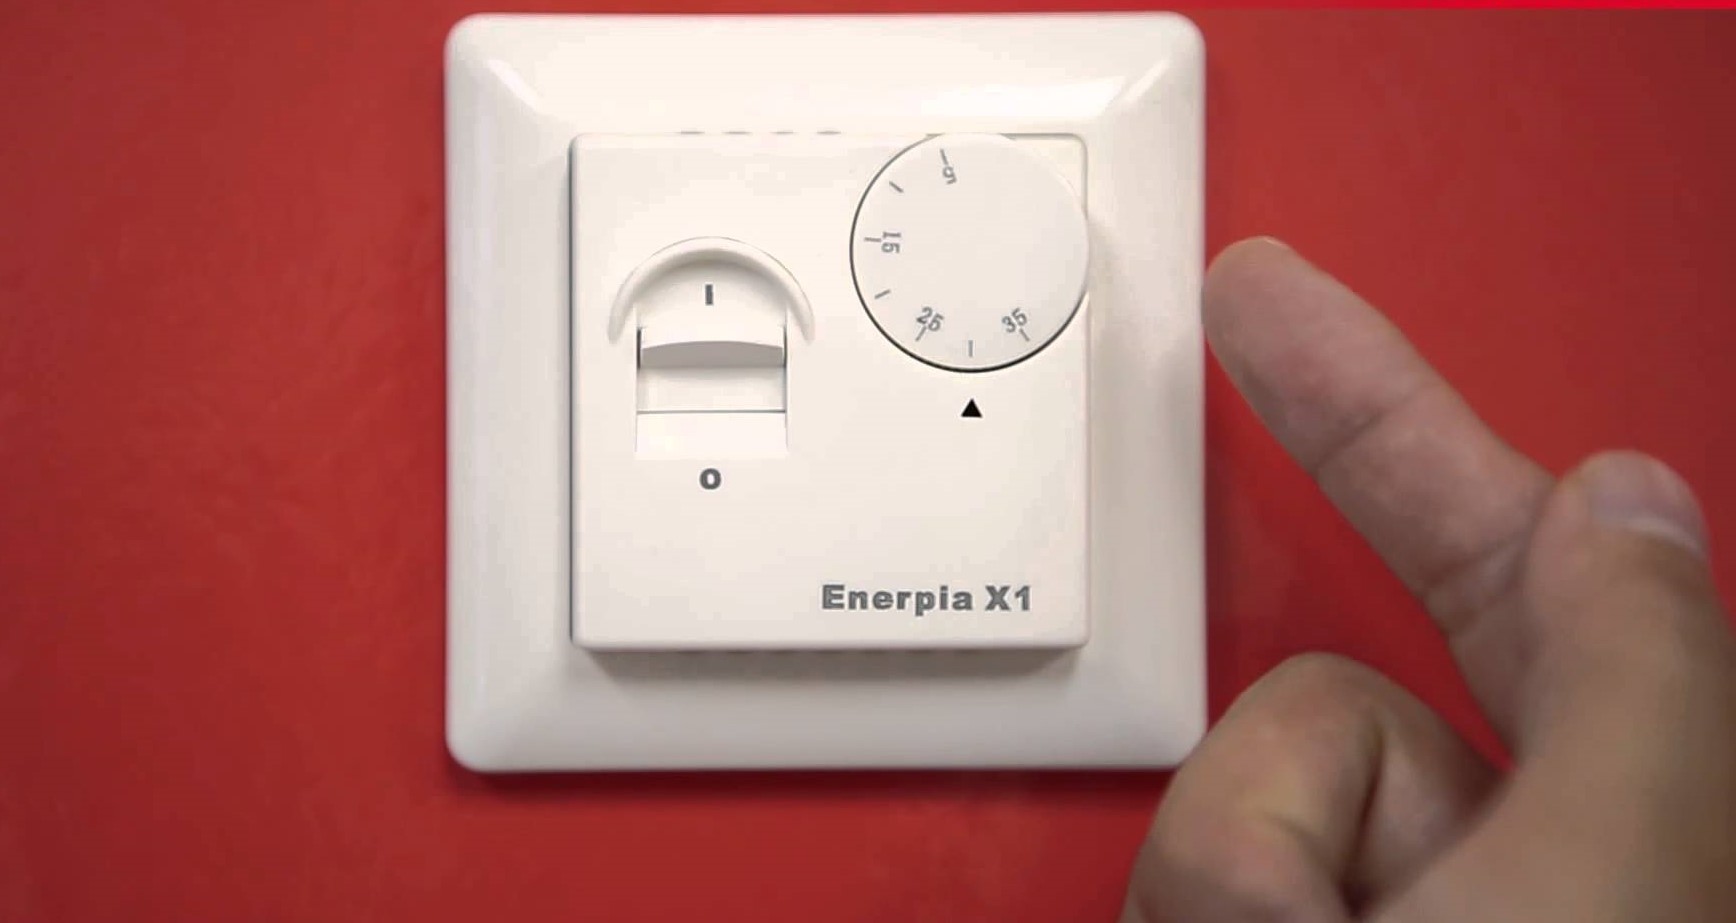
- Electromechanical. It is a device, the principle of operation of which is similar to the work of the iron. Temperature regulation occurs due to the rotation of the wheel. Turning in one direction provides a temperature increase, in the other - a decrease. To determine the temperature mode is possible only by your own intuition. The only advantage of this thermostat is its low price and easy installation.
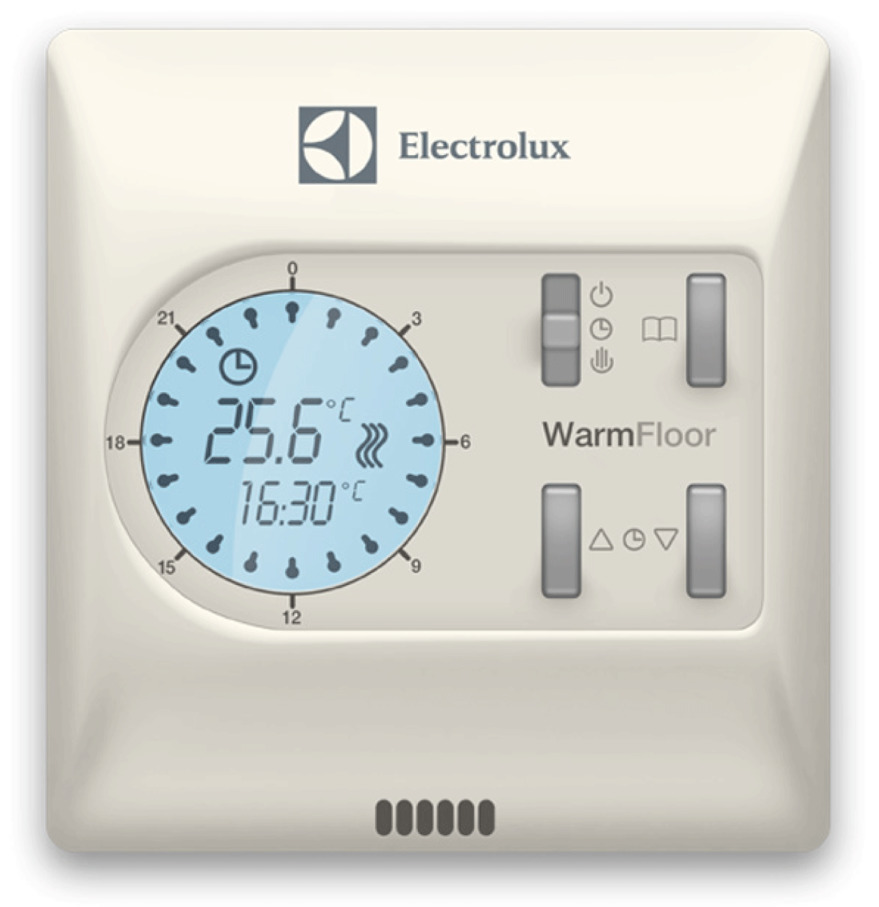
- Programmable. This type of device demonstrates a smart electromechanism.Able to turn off and turn on the heating system at a given temperature. It is also possible to turn on the device at a set time. All temperatures are shown on the control panel.
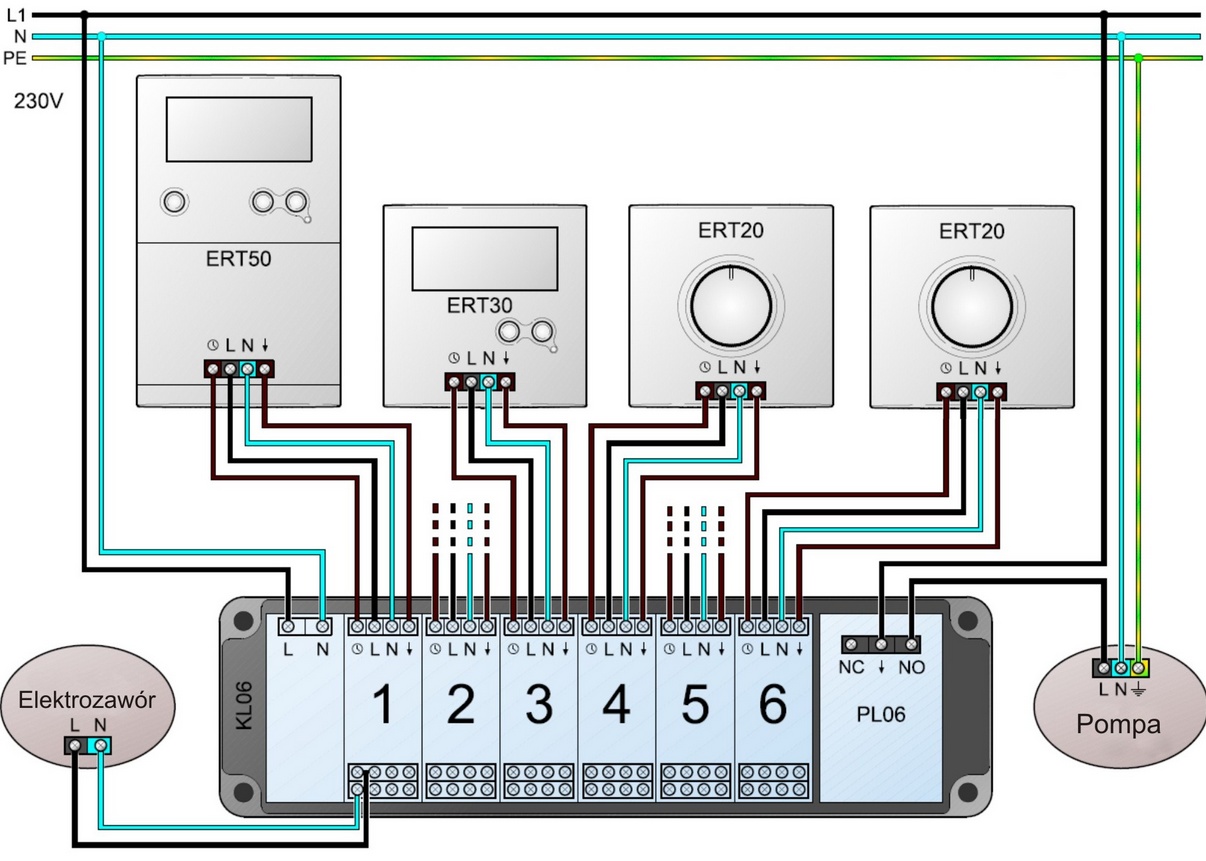
By the number of control channels, the thermostat can be:
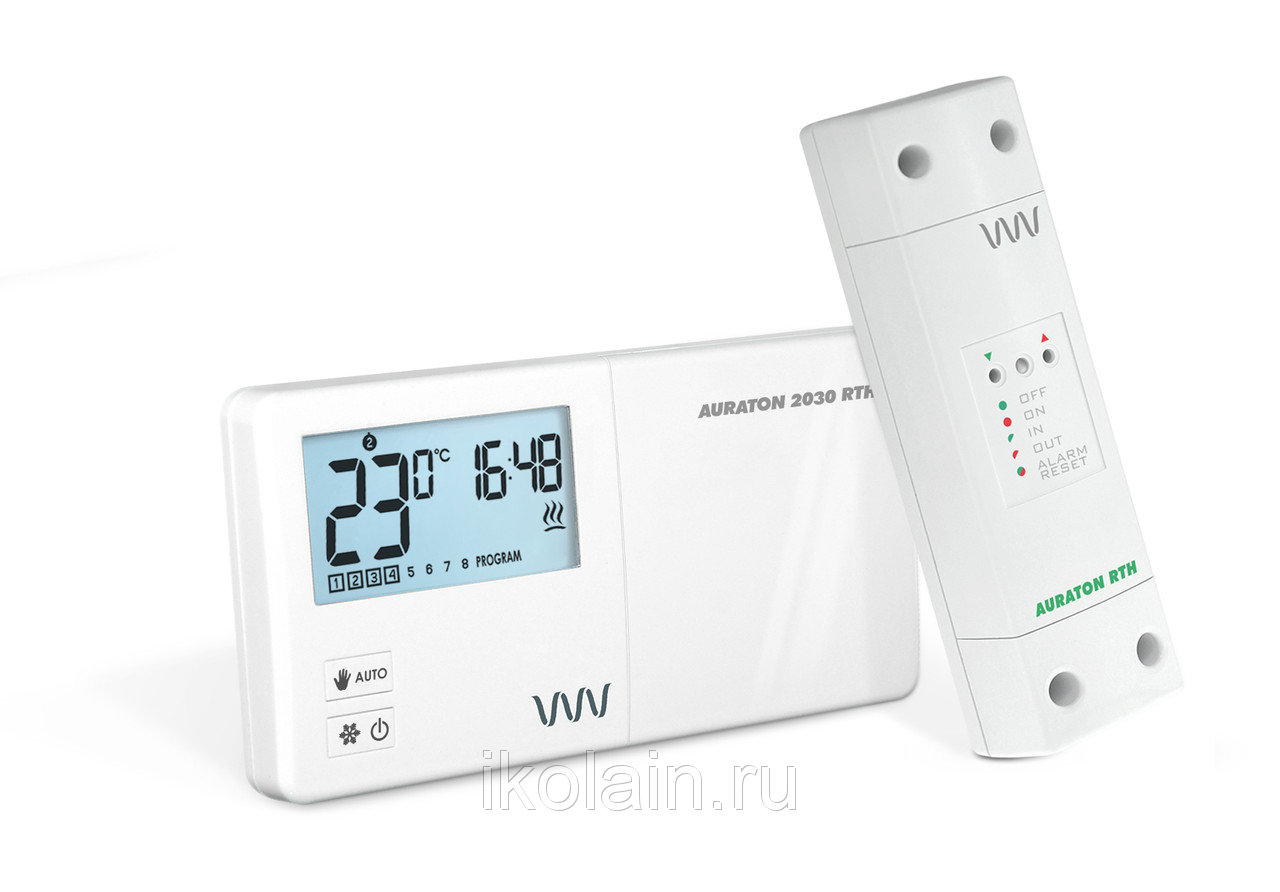
- Dual-zone, which operates simultaneously in two parts of the heating system.
- Single channel - special signal processing from a single sensor.
By way of mounting:
- Internal (built-in).
- External (external, invoice).
At the moment, there are many types of warm floors with heating elements, the most common among them are:
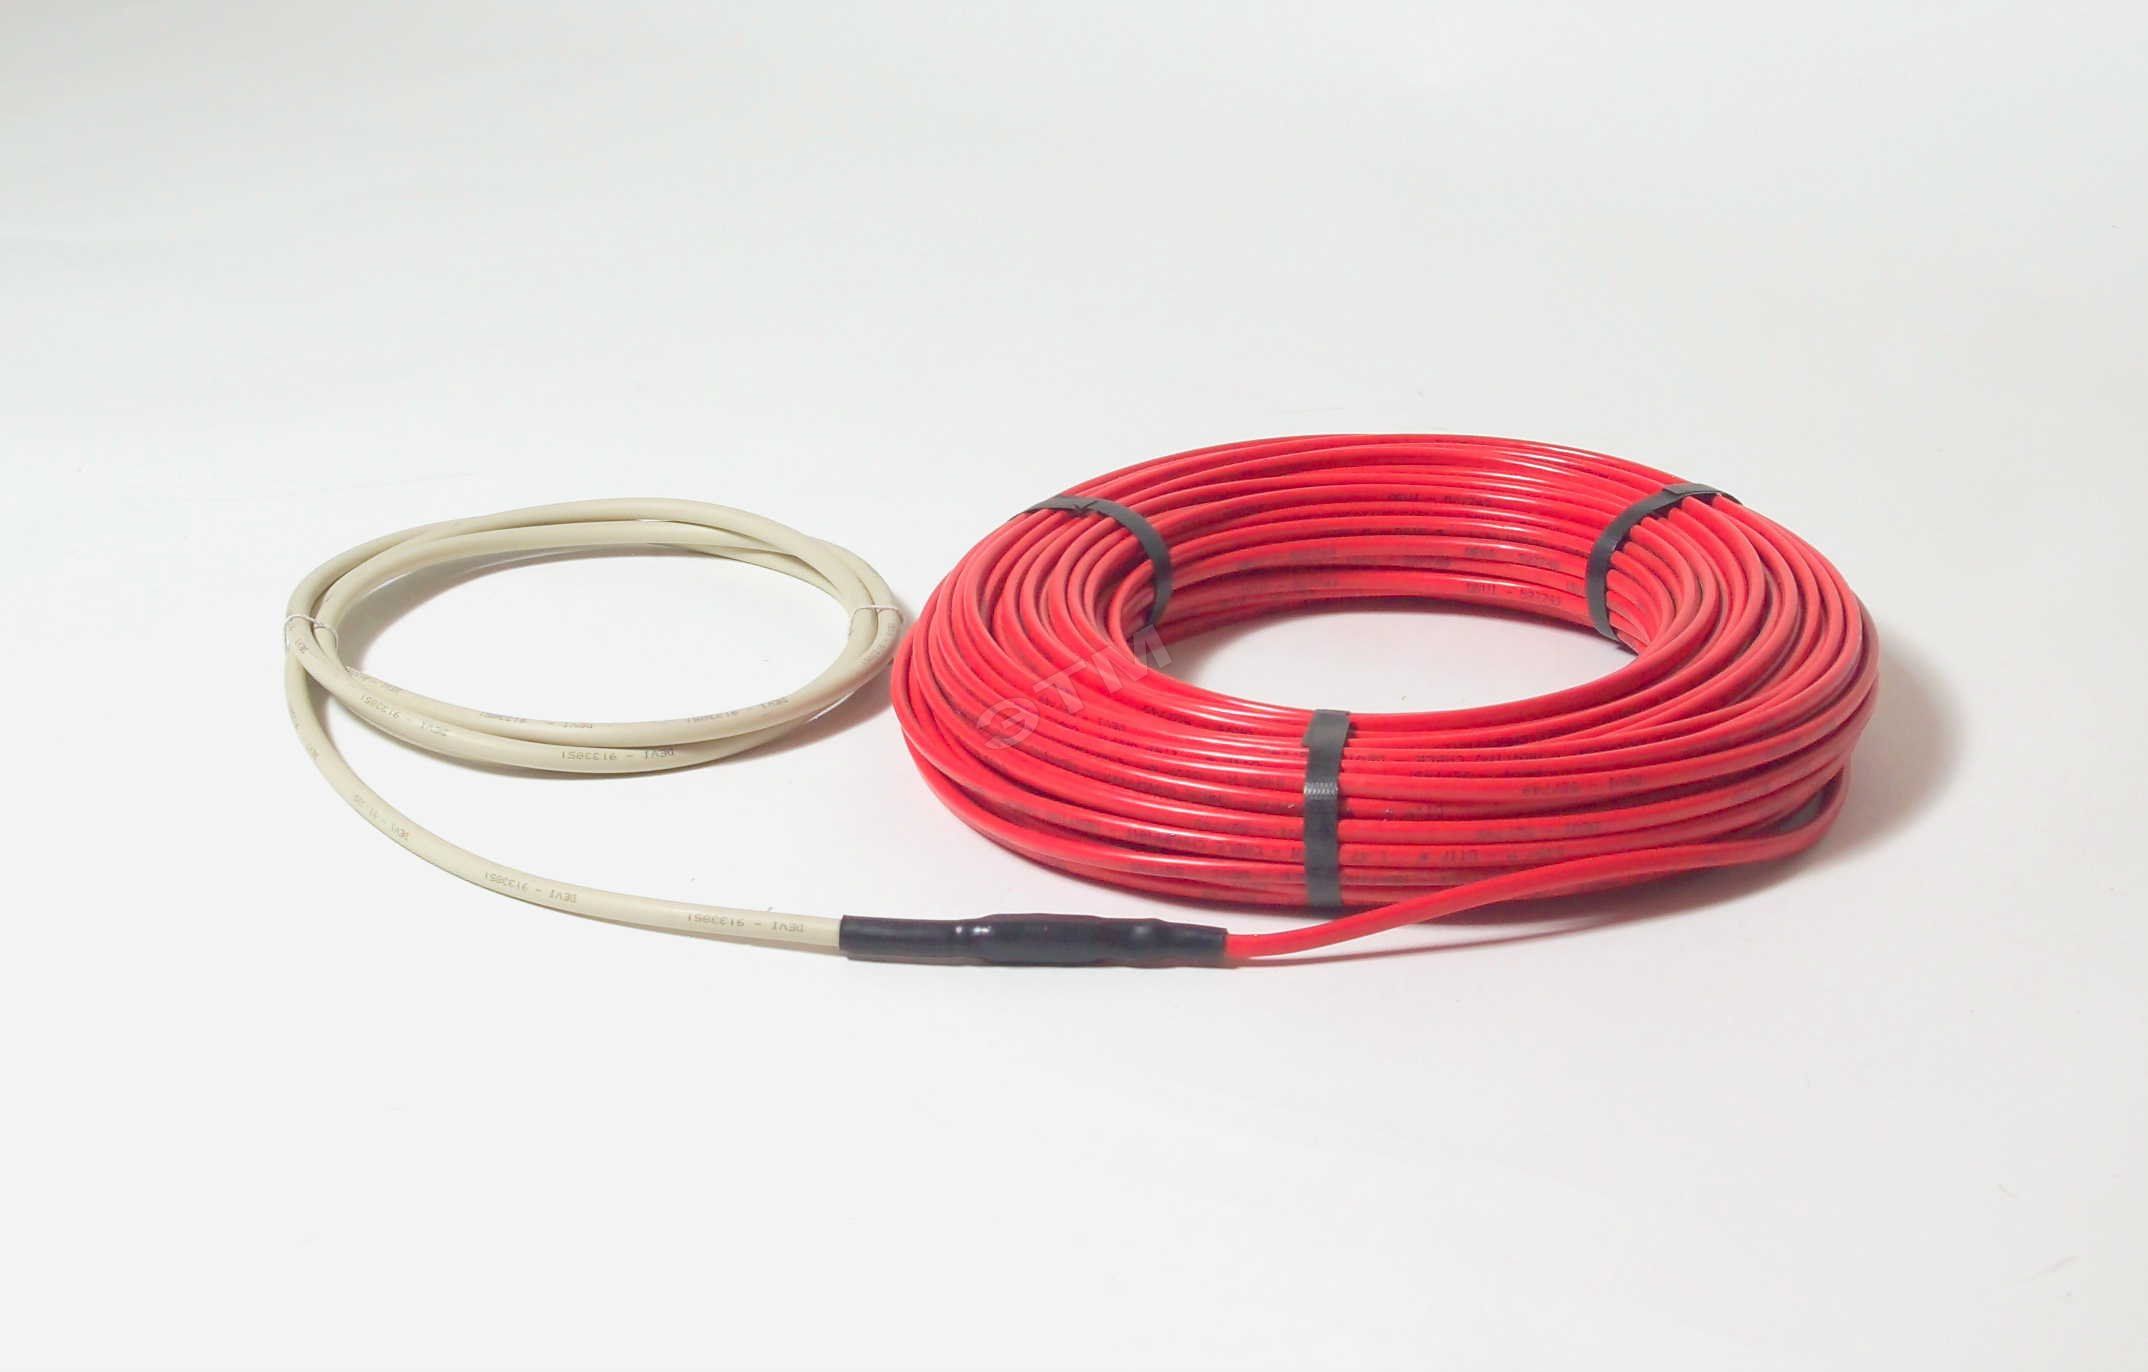
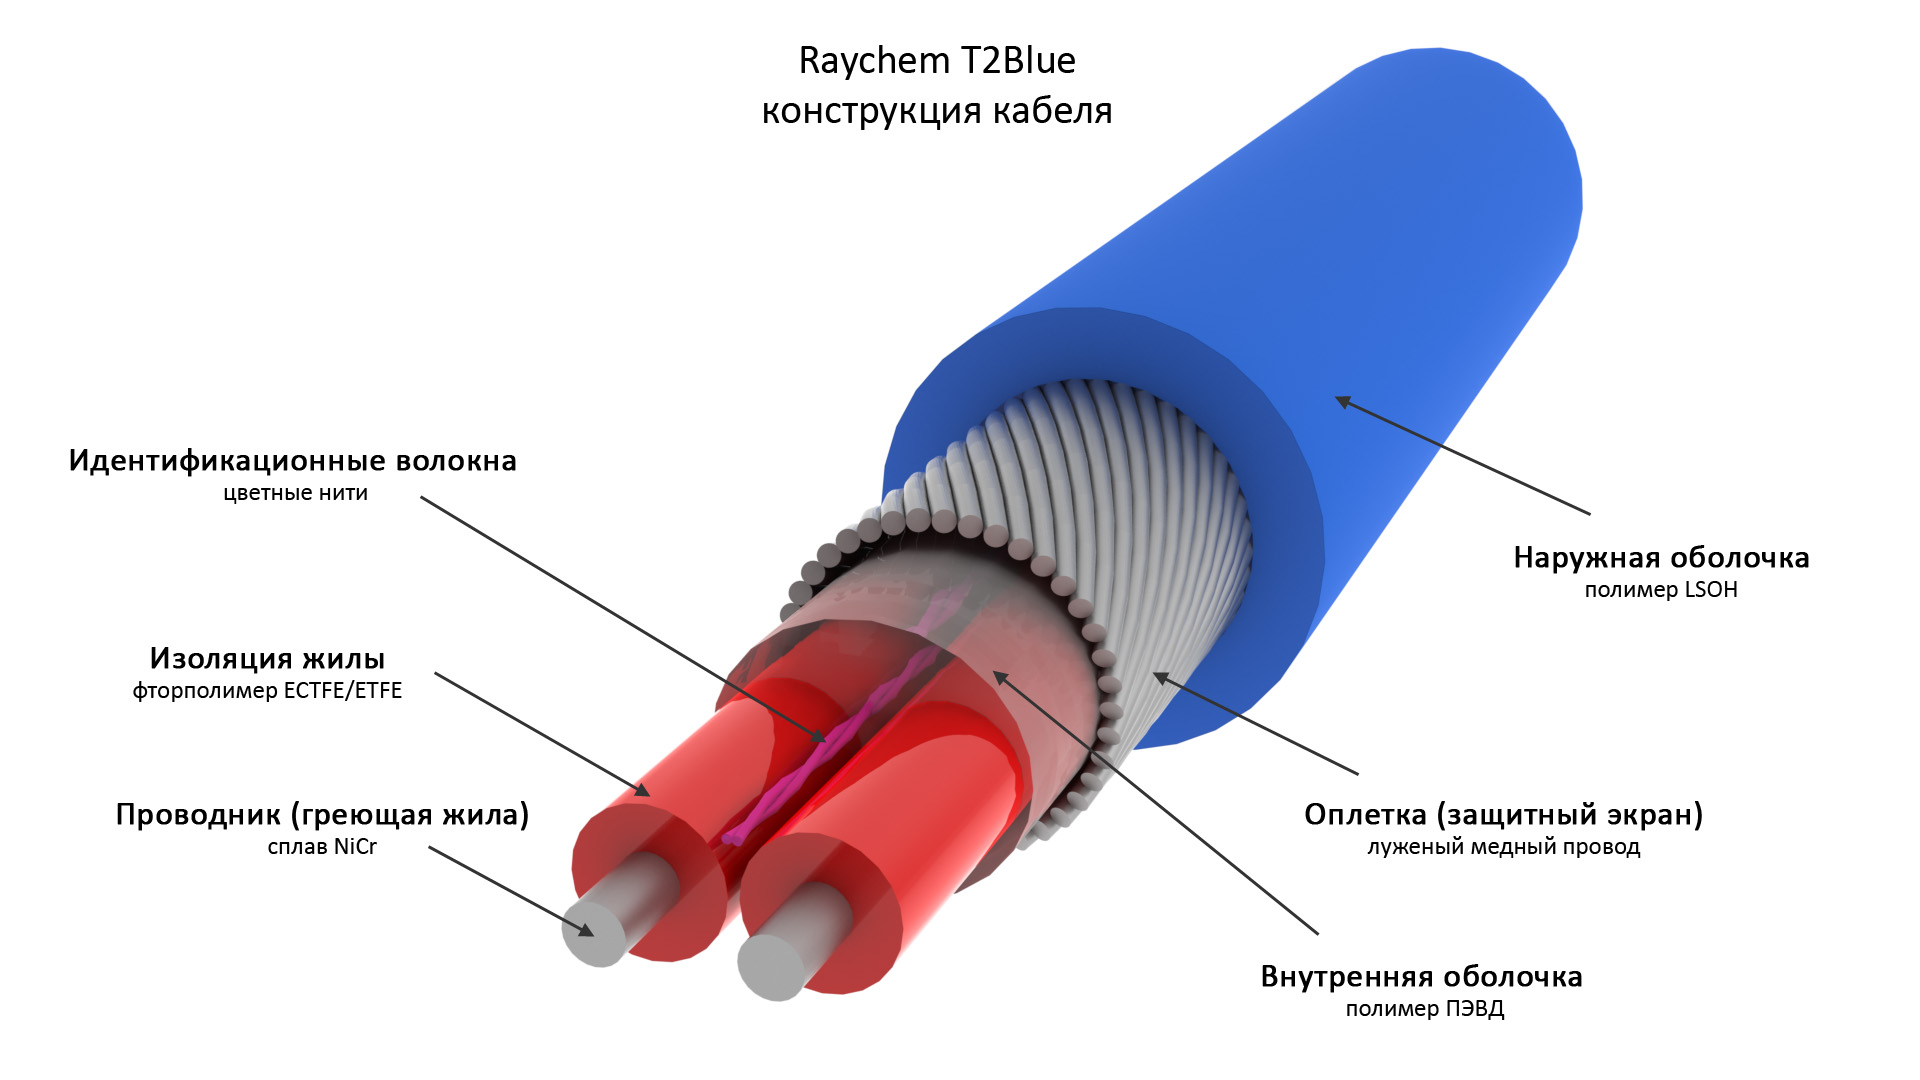
- Resistive cable. It happens two-core and single-core.
- Cable with self-adjusting function.

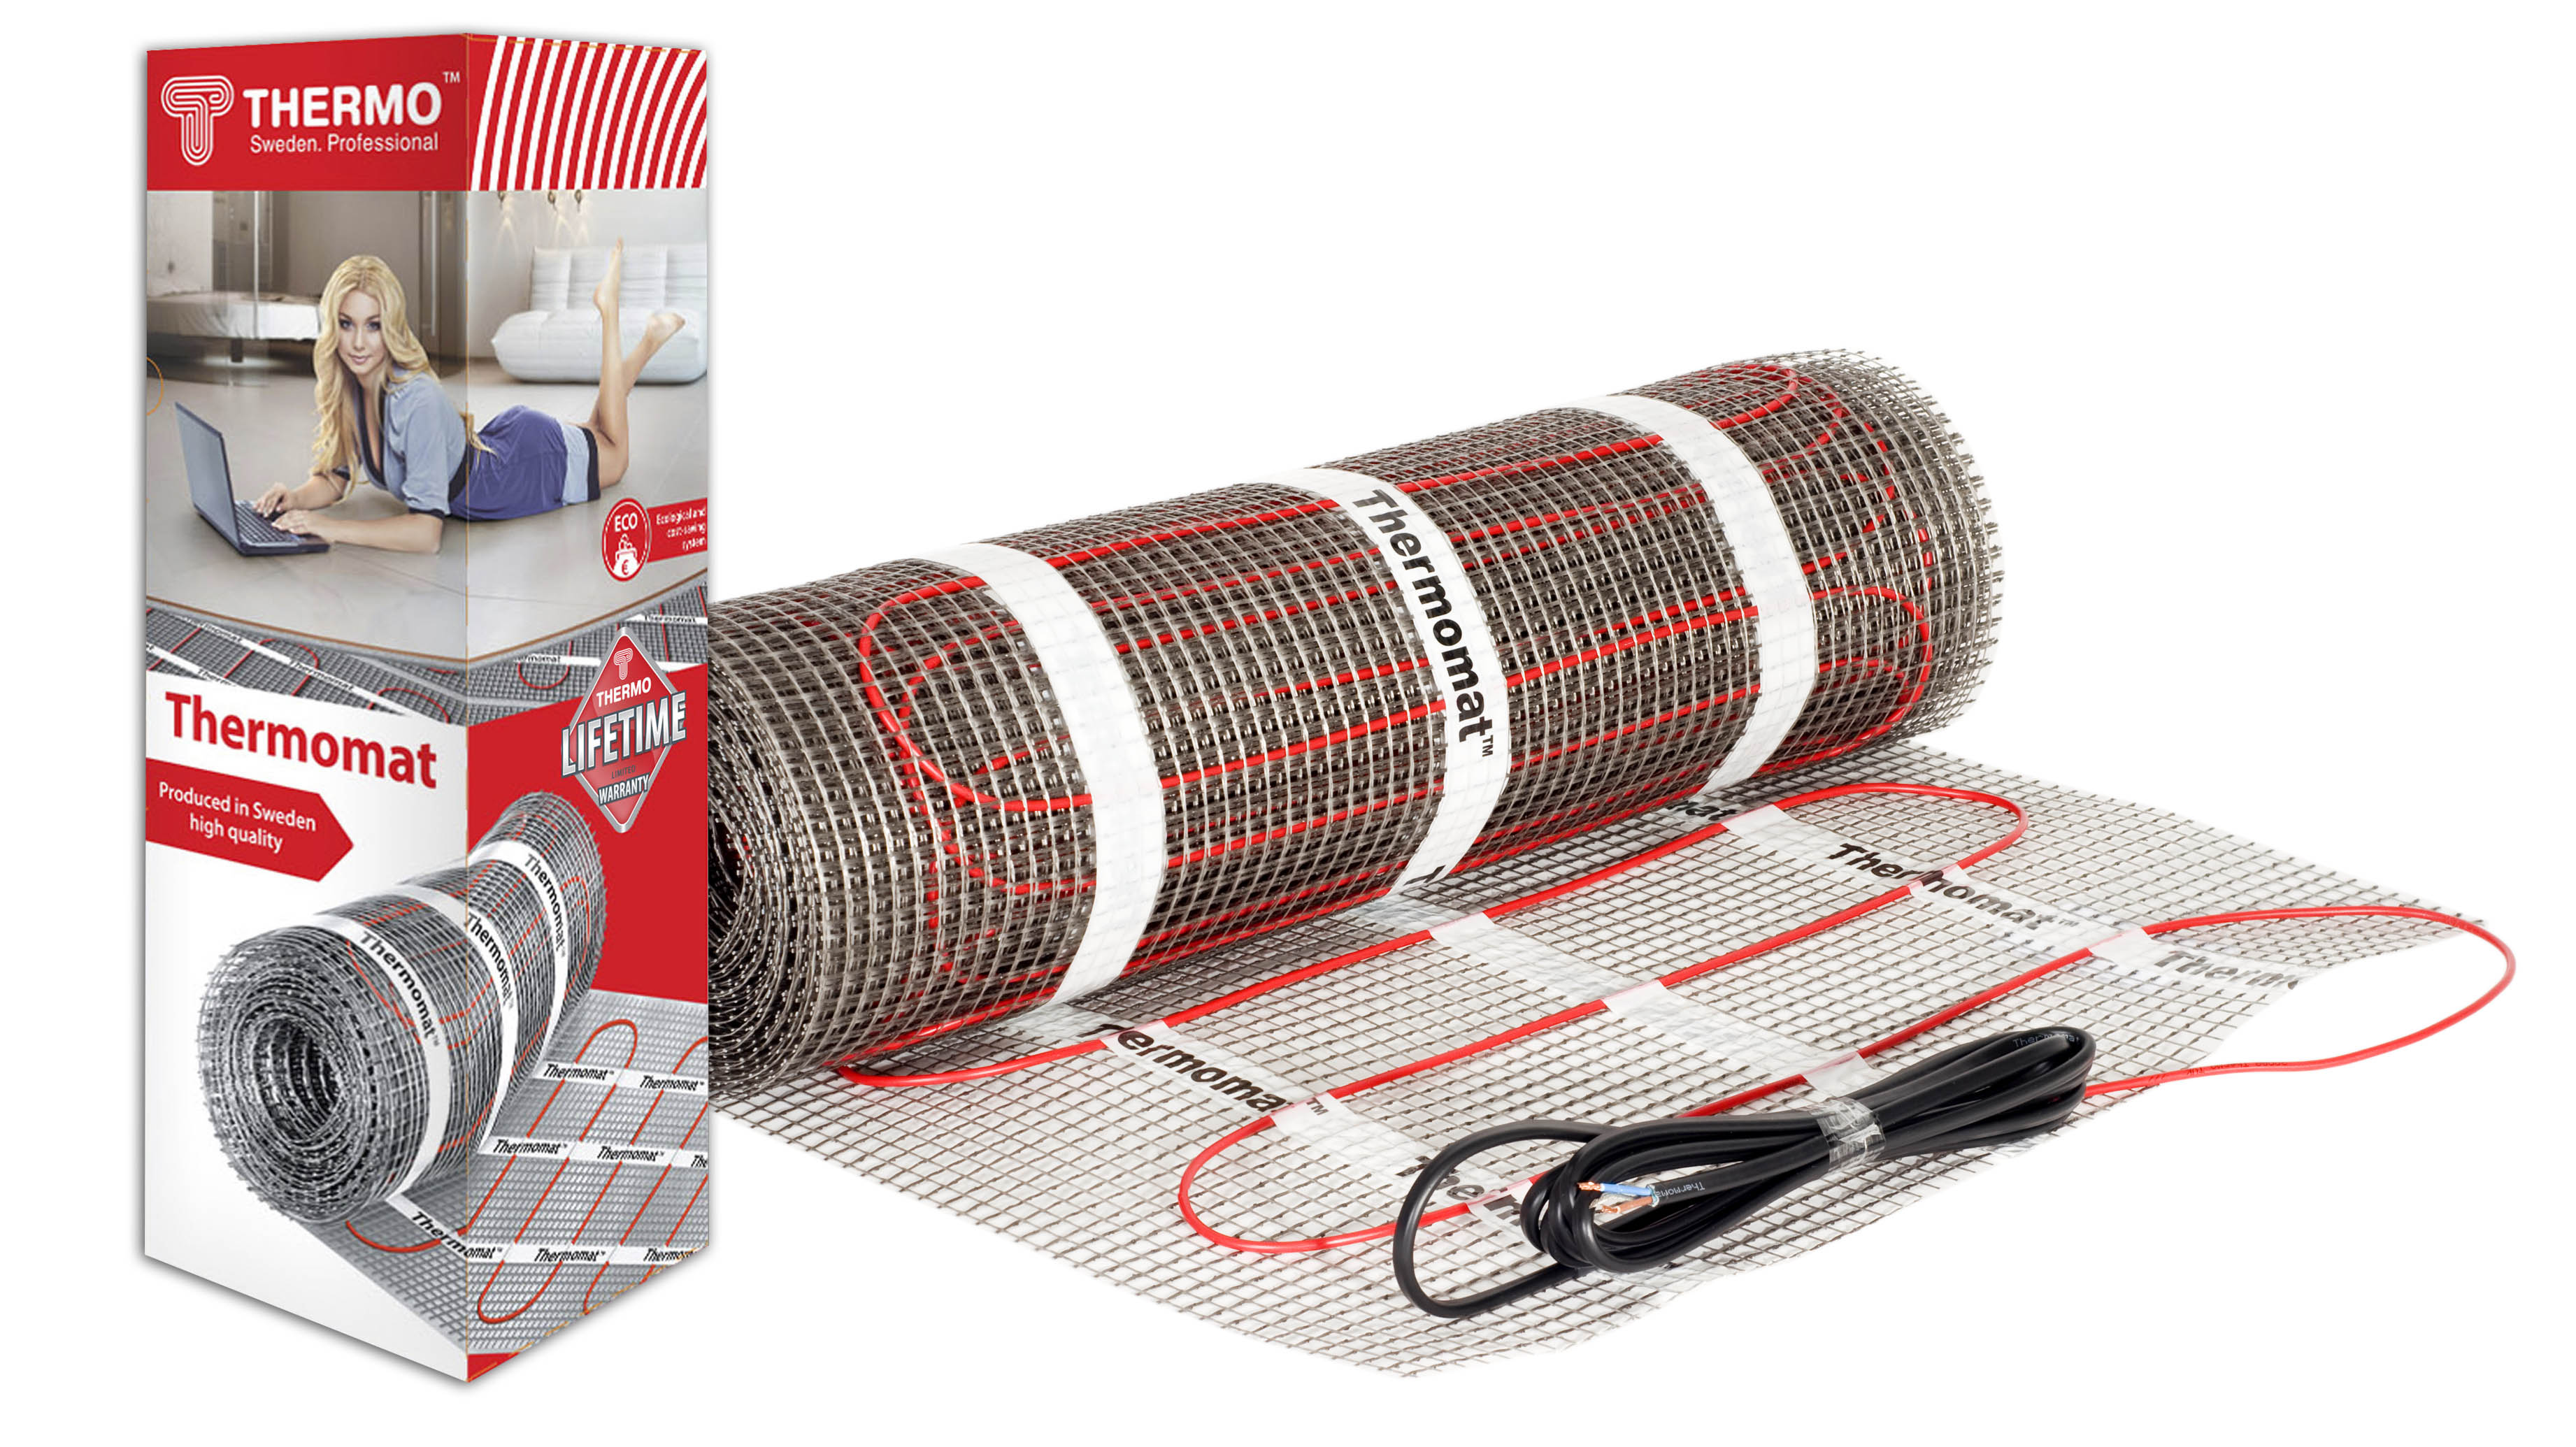
- Thermomat (is a two-layer sheet, inside which soldered heating mechanisms).
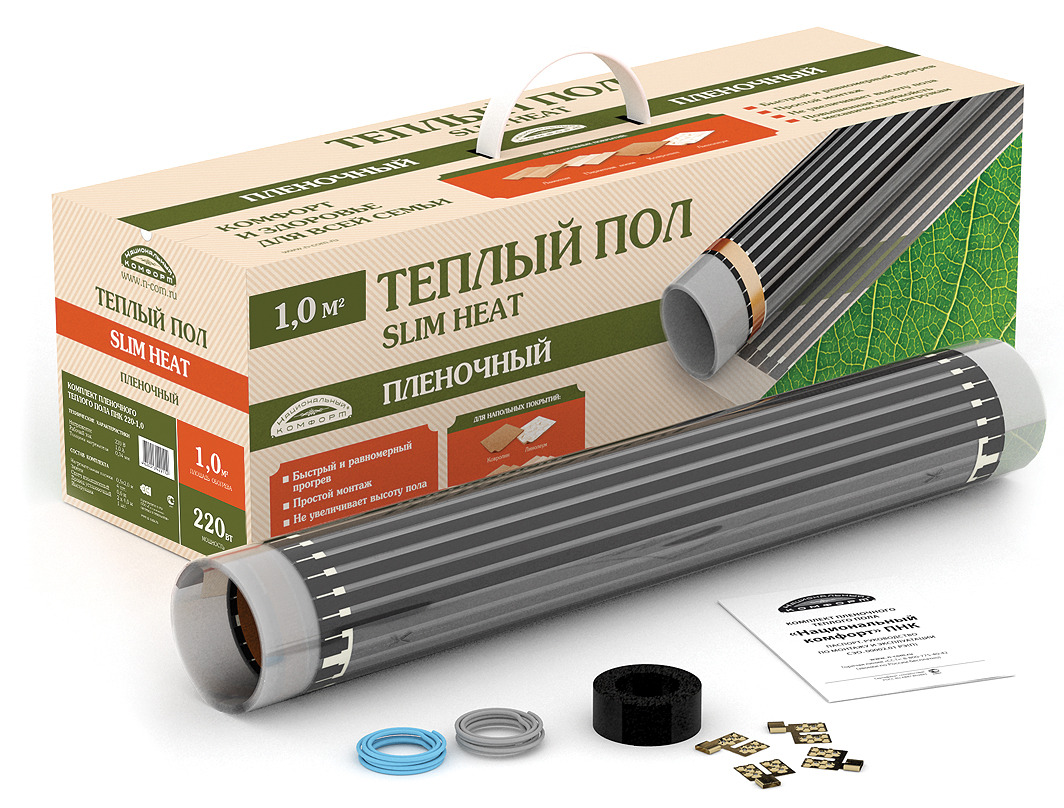
- Film (infrared). The basic basis of such heating are carbon and carbon rods.

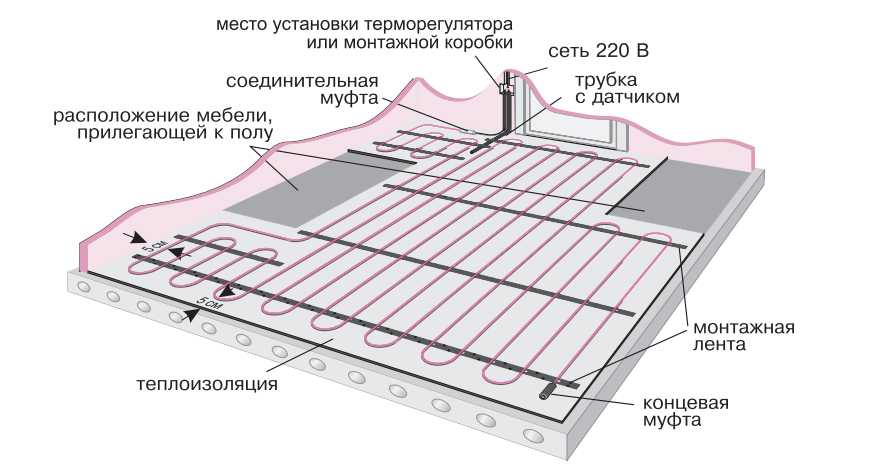
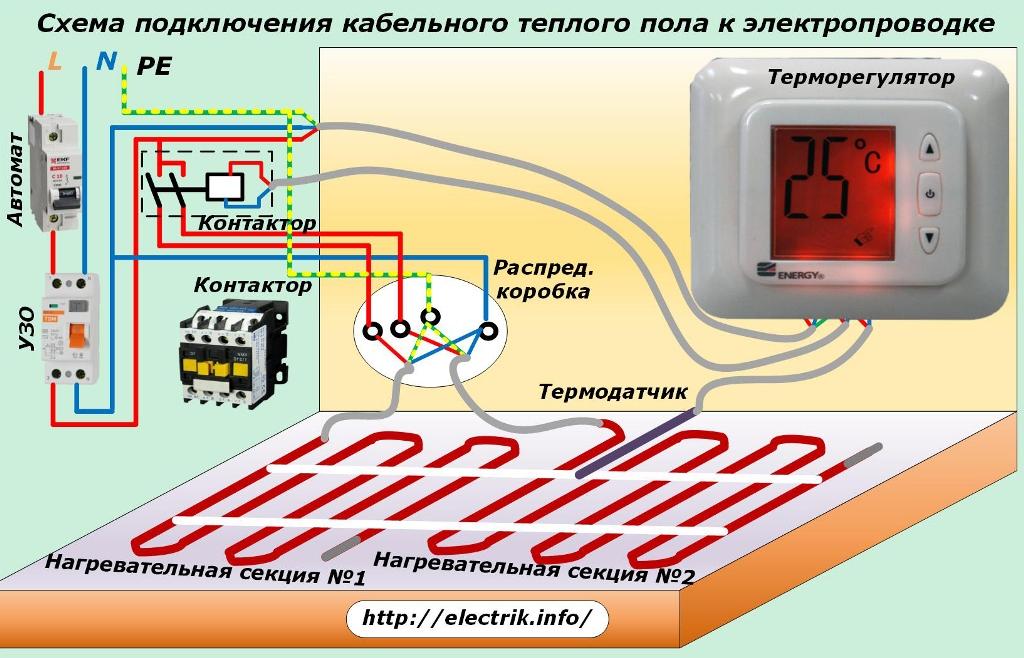
Connection diagram
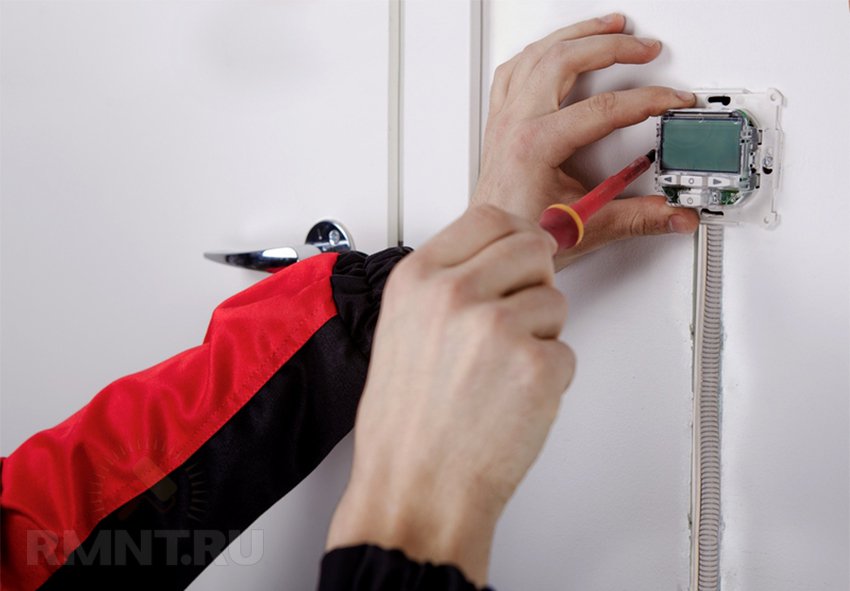
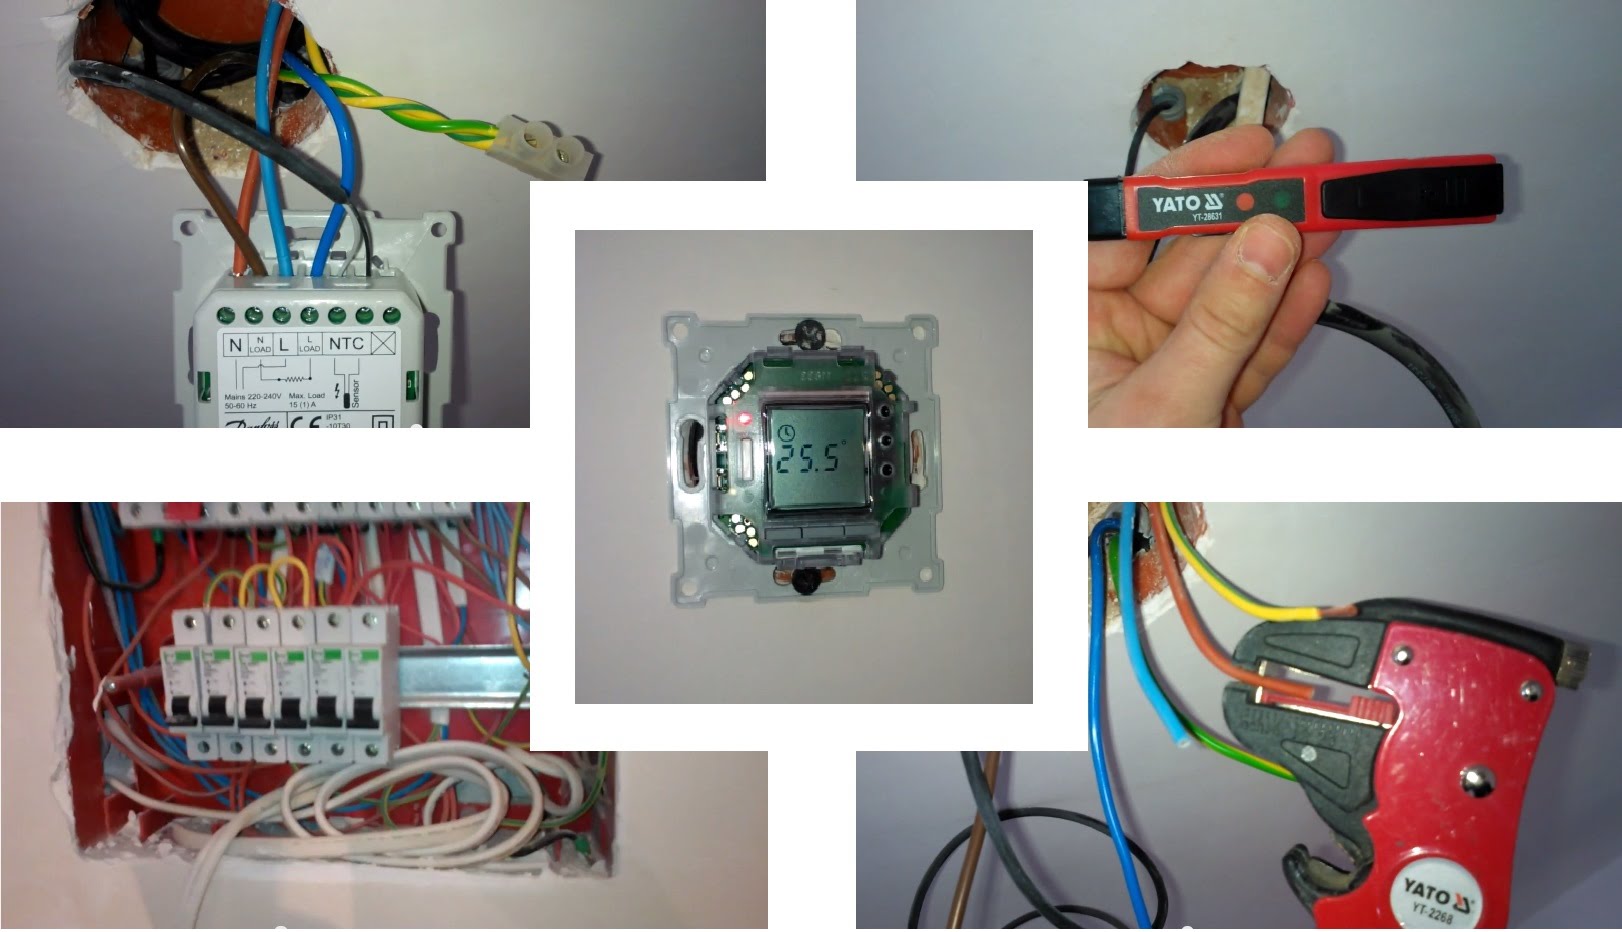
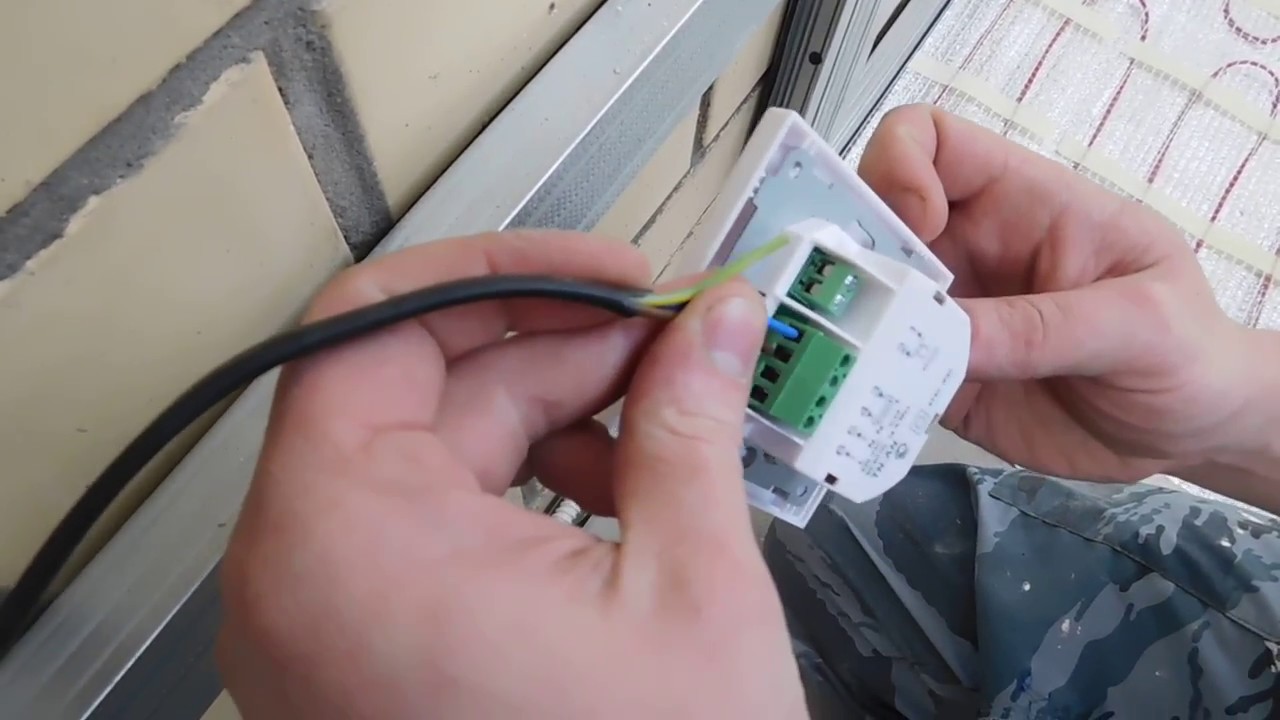
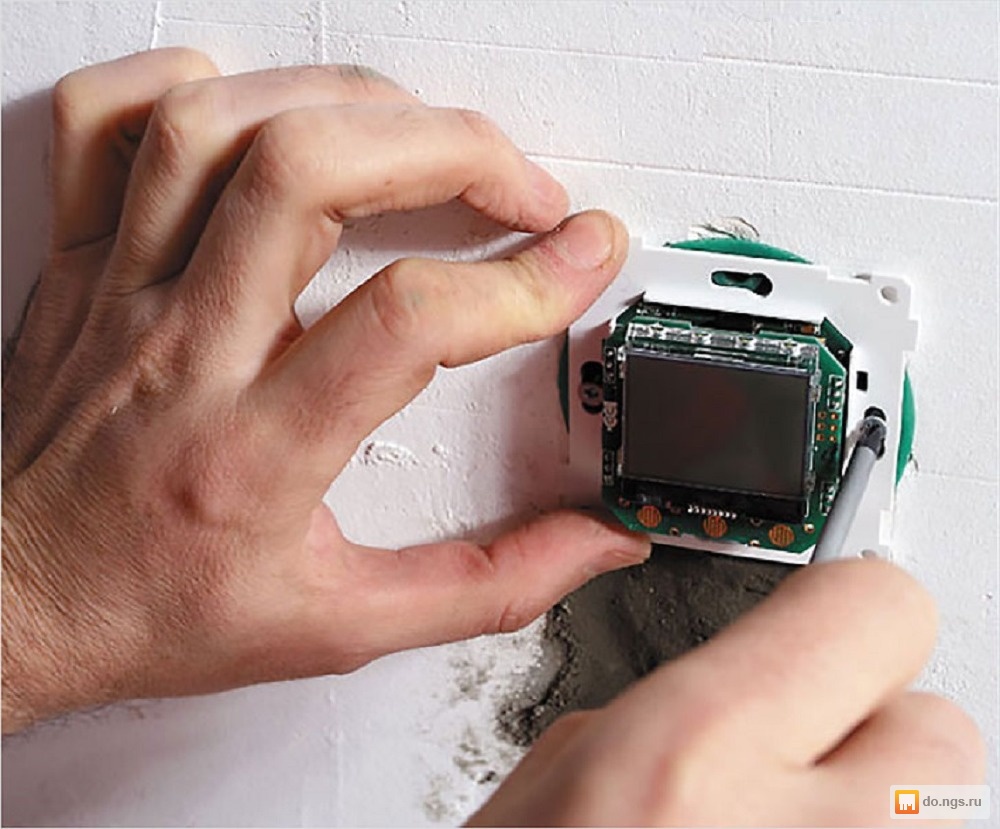
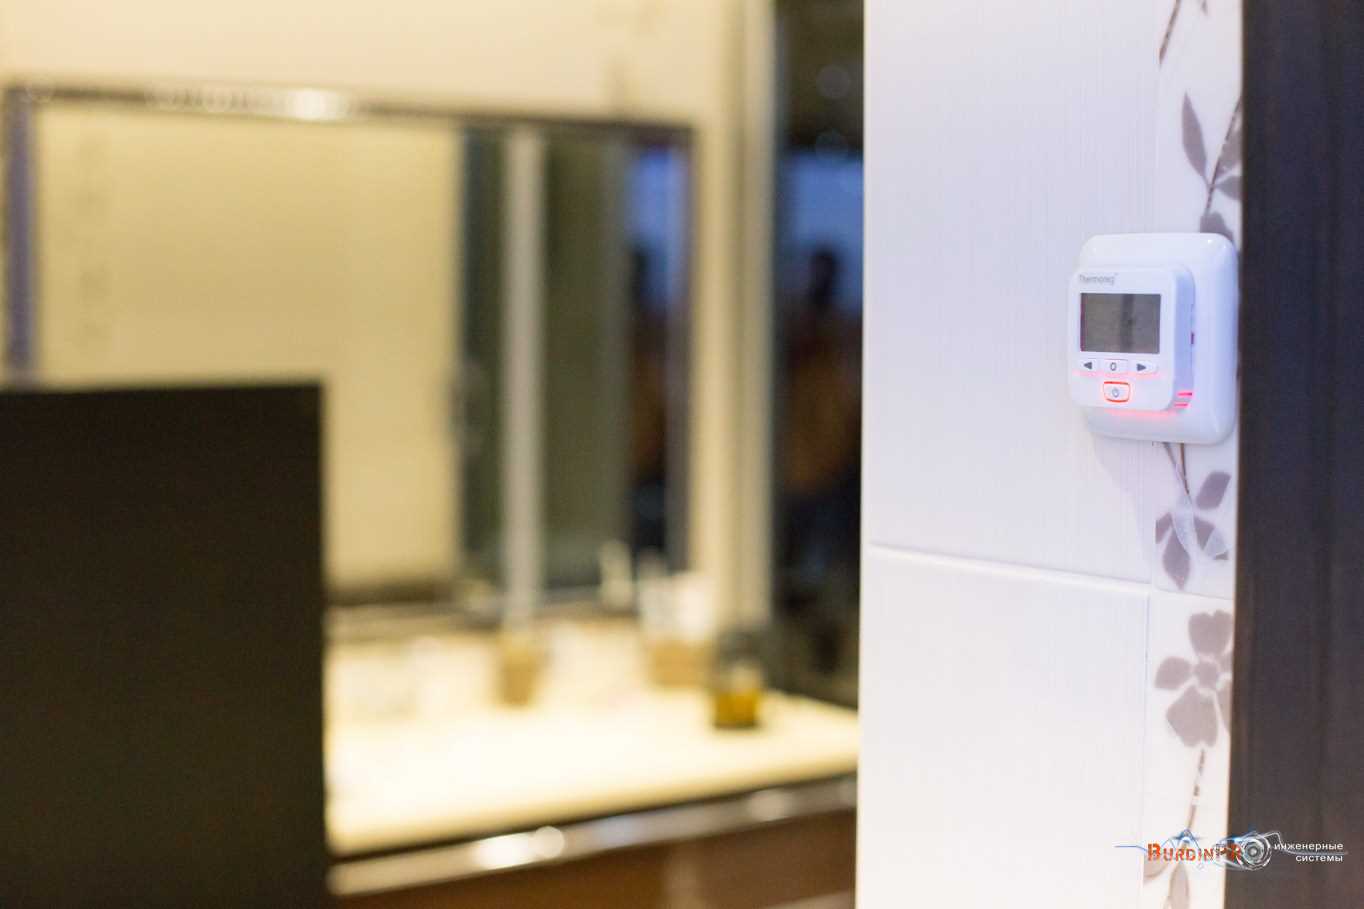
The thermostat is mounted in the wall near the outlet or switch. A mounting box for a thermostat is installed in a prepared funnel in the wall, to which electrical wires (zero and phase) of the power supply network and the temperature sensor are connected. Next, the thermostat is connected.
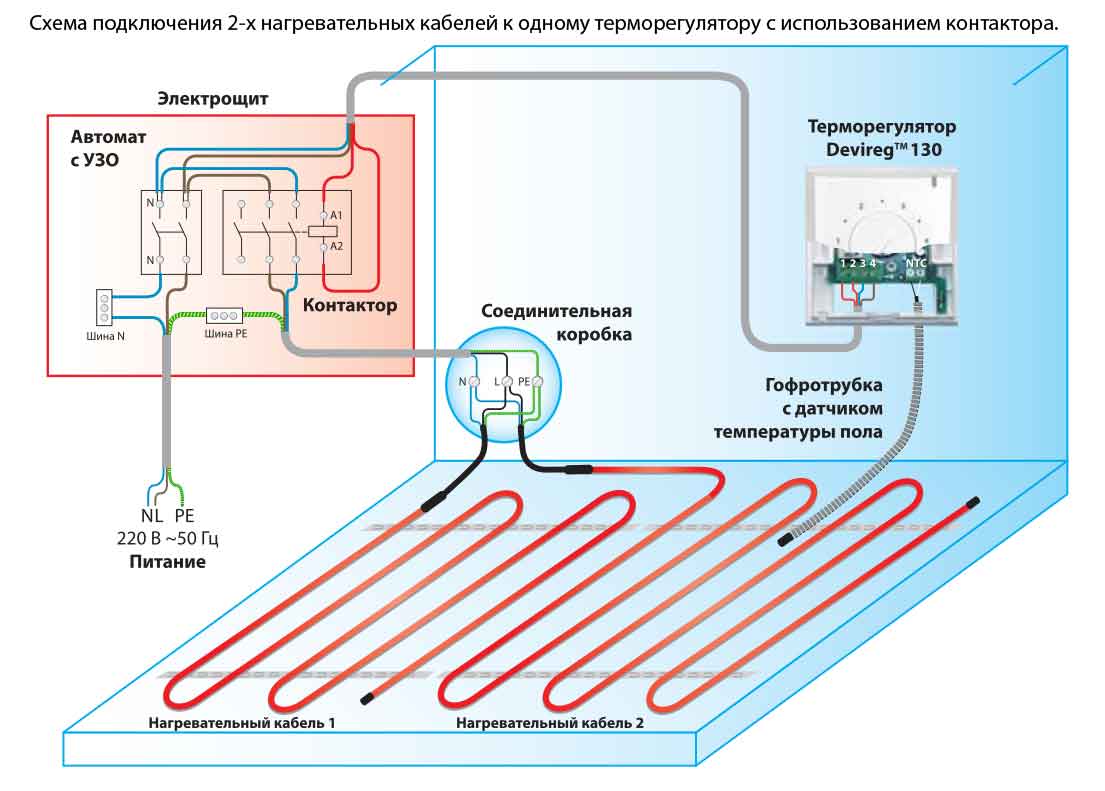
In the mechanism of the thermostat, there are side sockets to which electrical wiring (220 V), a temperature sensor and a heating element are connected.
It is important to know the wires in color:
- White - L-phase.
- Blue - N zero.
- Yellow-green wire - ground.

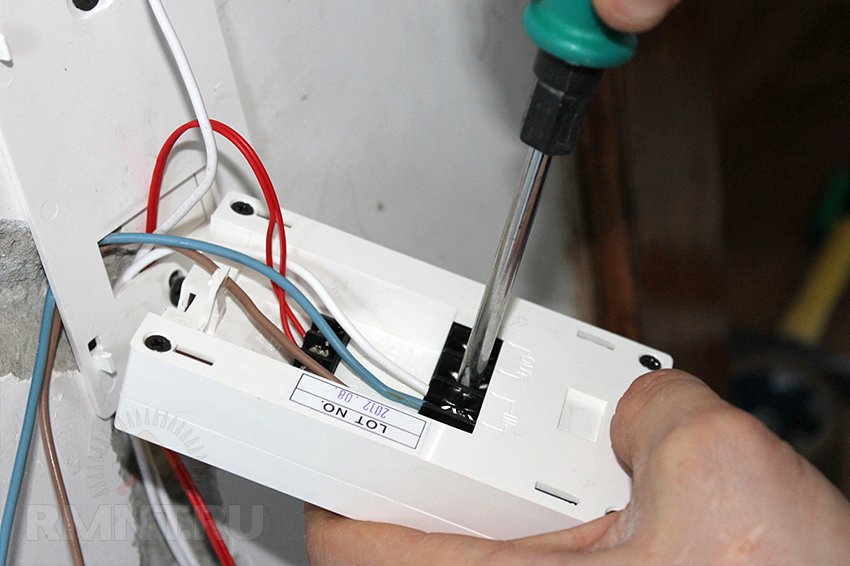
Connection diagram:
- Electrical wires (voltage 220V) are connected to connectors 1 and 2. To 1 the blue wire is held, and to 2 the white one.
- The wires of the heating cable are connected to sockets 3 and 4: No. 3 - wire N, No. 4 - wire L.
- The wires of the temperature sensor are connected to pins 6 and 7, regardless of polarity.
- Check for operation. To do this, turn on the power supply, set the temperature at the device to the minimum and connect the system of heating elements (usually using a special pen or button). Next, set the maximum temperature. The correct operation of the thermostat will show itself with a click, which warns of an electrical short circuit.
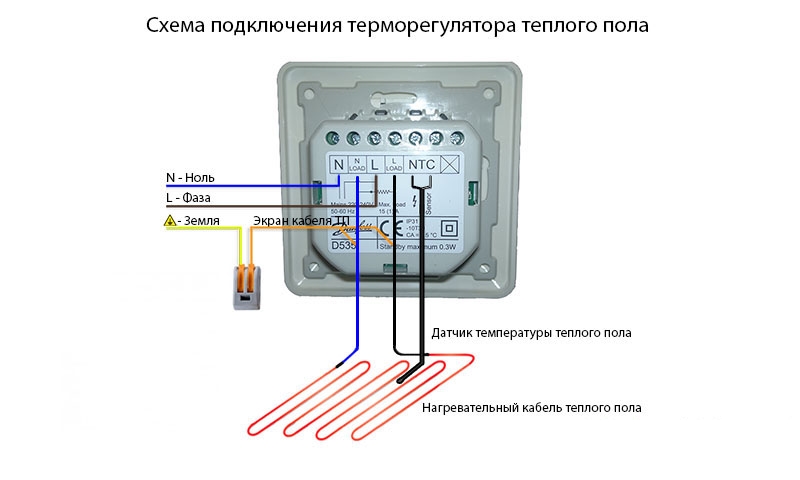
Connection diagrams are different and may vary, so manufacturers for the correct connection of all electrical contacts number.
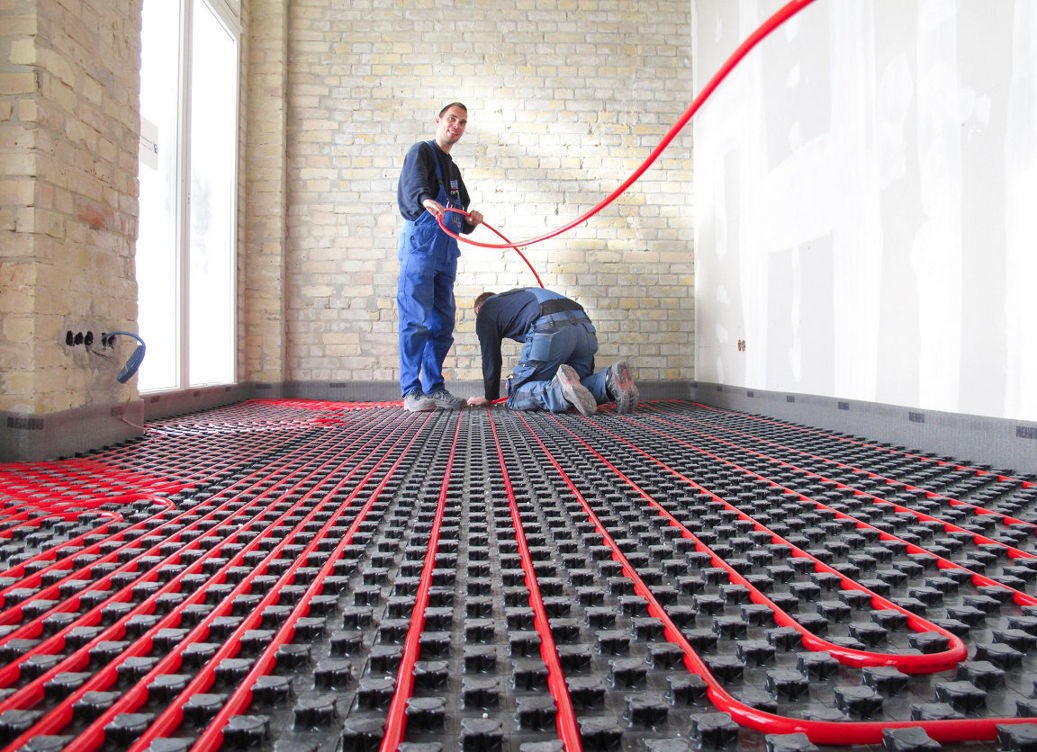
Instructions for connecting a warm water floor:
- To begin with, the temperature sensor is mounted. It is recommended to install the sensor near the thermostat.
- In the design of the heating floor to perform the assembly of the servo. This electromechanism is designed to auto-adjust the water pressure, rolling in the contours.
- Connect the existing cables in a single circuit.
- Adjust the heating elements of the mechanism.
- After installation, you must connect to the network and check the functionality of the entire system. Within 90-120 minutes to make measurements of temperature regimes ordinary thermometer in the area of the sensor. The indicator of correct work is the complete exclusion of deviations in the testimony.
In this case, the thermostat controls the temperature of the air, and not the heating of the coating.
Connecting the thermostat to a two-core cable. The system of two-core cable under a protective layer consists of two current-carrying wiring. It is convenient to install in that the connection is made using a single wire, in contrast to a single-conductor electrical cable.
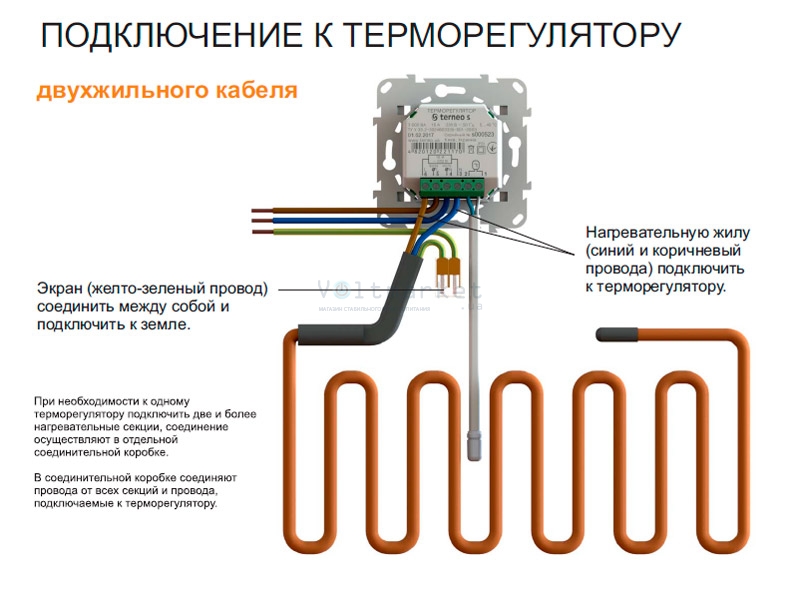
The wiring diagram shows that 3 electric wires are in contact in a two-wire electric cable: brown and blue are conductive, yellow-green is grounding.The phase is connected to the 3rd connector, zero (blue) is supplied to the electrical contact 4, and ground (green) is applied to pin 5.
Single cable connection. The structure of a single-core cable consists of one current-carrying electric wire (white). The second green wiring is for grounding the PE shield. The electrocontacts of thermostat No. 3 and No. 4 are connected to wires of white color, and the green one is connected to No. 5.
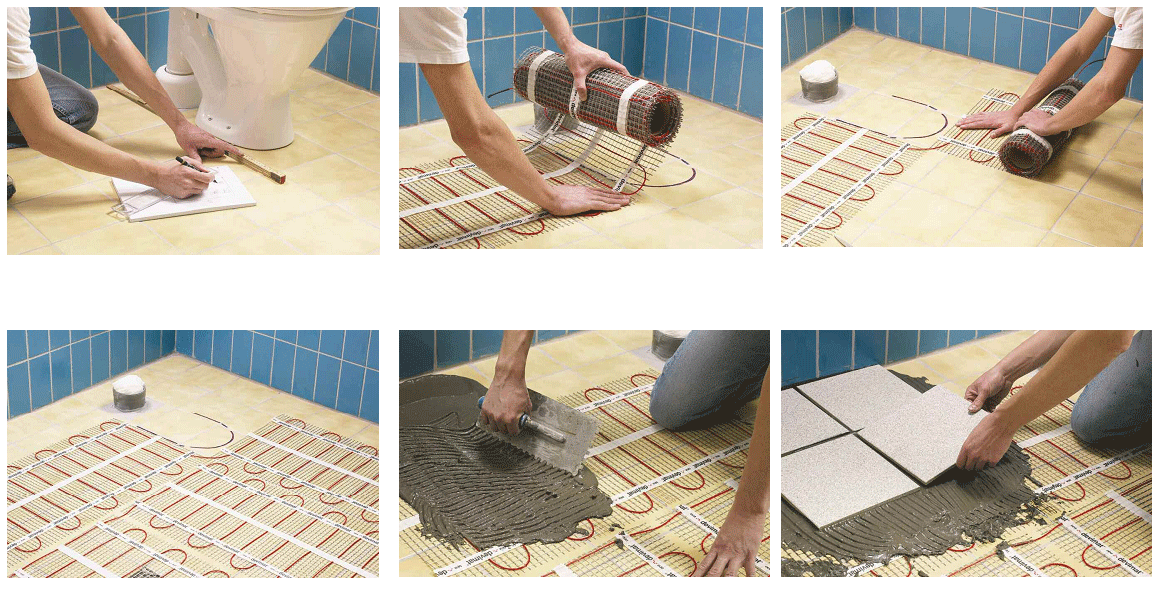
Connecting warm mats is almost no different from the process for cable heating.
Let us only focus on the differences:
- To install the temperature sensor on the surface of the mat is deepening. The design is included in the network using copper conductors located on the edges of the heating mats.
- It is possible to cut the film coating along the contours. From the seamy side of the film, the electric wires are insulated, and from the front side they are left open for connection to the electric wires. Film strips are laid parallel to each other and interconnected.
How to connect with your own hands?
To properly connect the thermostat to the floor with your own hands, you must strictly follow the recommendations of the installation work:
- Place the installation box in the prepared pocket and connect the power cable.
- In the opening of the installation of the glass is necessary to withdraw the temperature sensor.
- Run electrical wiring to turn on a three-way valve or heating cables.
- Using the instruction of the thermal device, to make the connection of the load and the temperature device.
- Next, connect the power cable to the input terminals of the thermostat.
- Power is supplied and heating is turned on. To control the floor heating set temperature 26-28 degrees. If the sensor is located in the wall, a temperature of 20-22 degrees is used.
After all installation work it is necessary to test the system for operation. Areas with uneven heating are disconnected from the network and are tested for resistance. Detected malfunctions eliminate and restore the functioning of the floor heating system. The correctness of the installed system is determined by obtaining the necessary climate at several stages of switching on / off the heating elements.

Installation and Setup
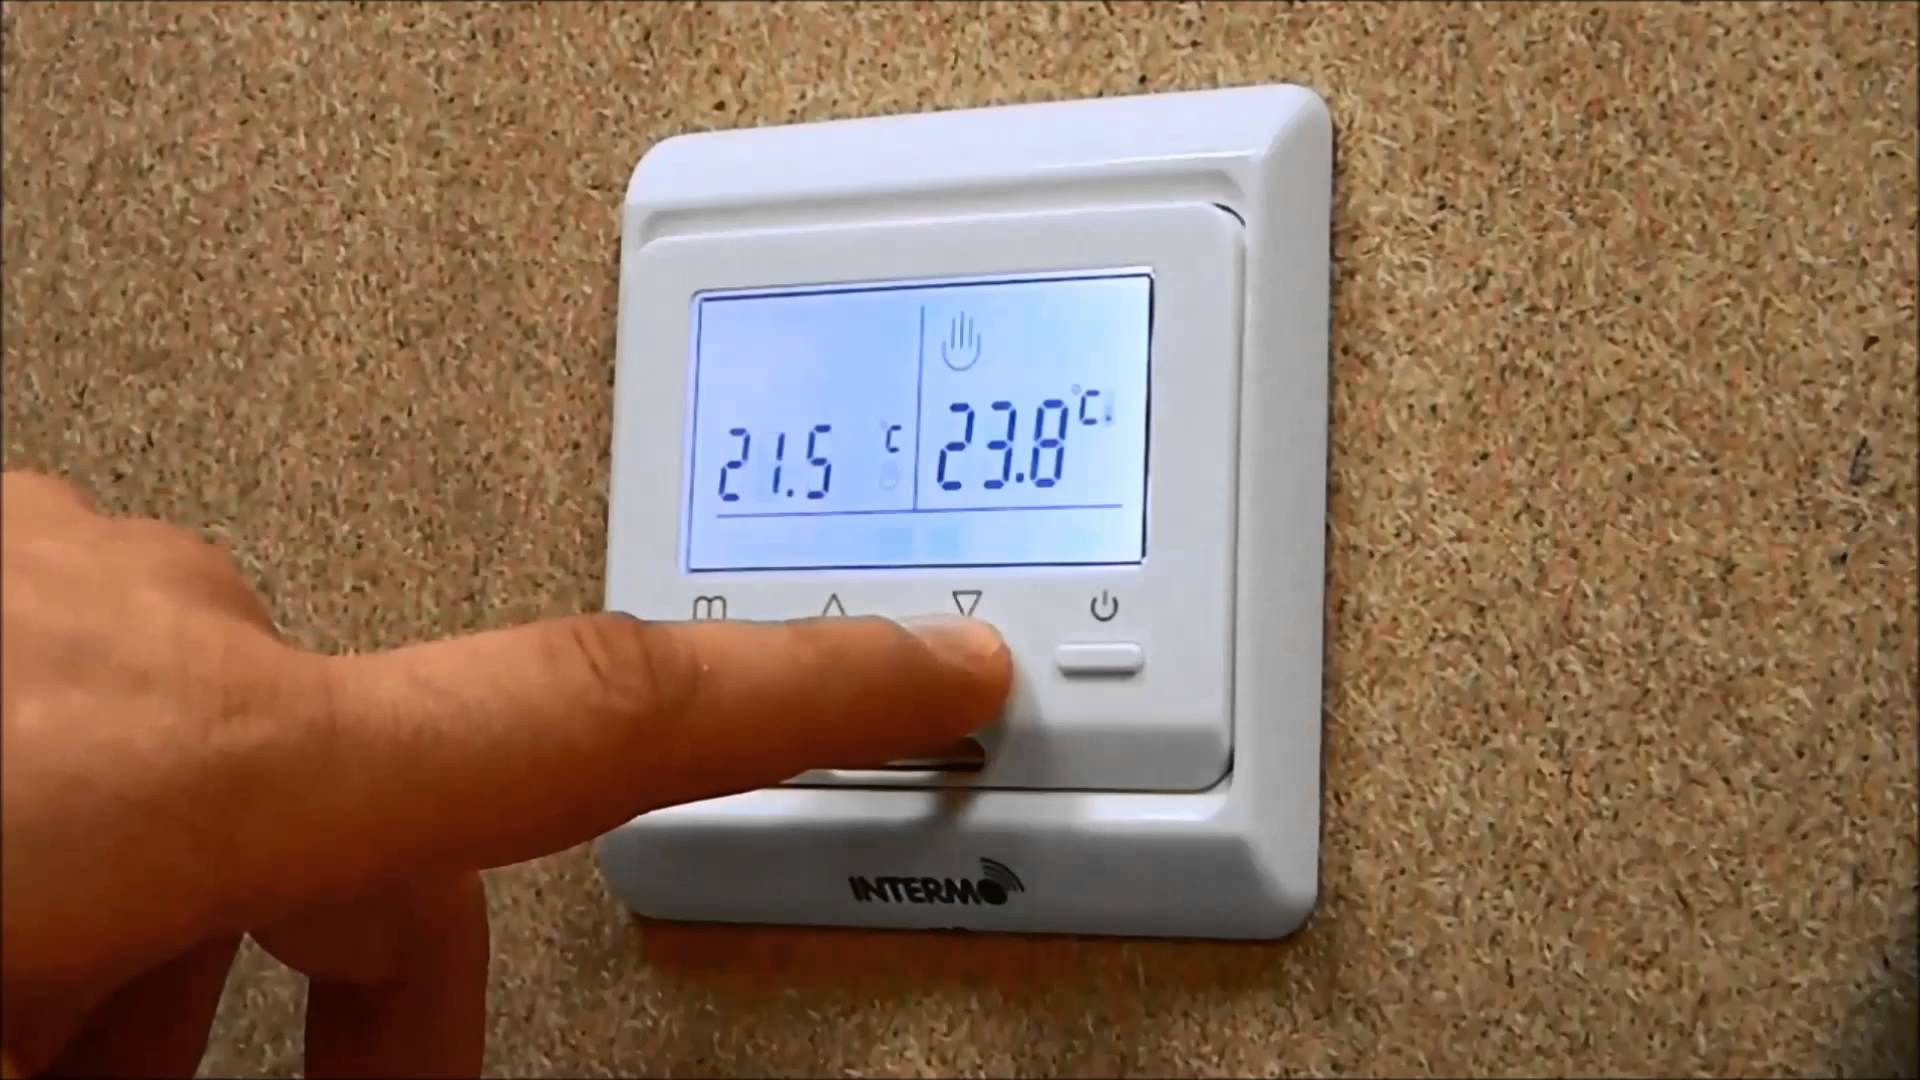
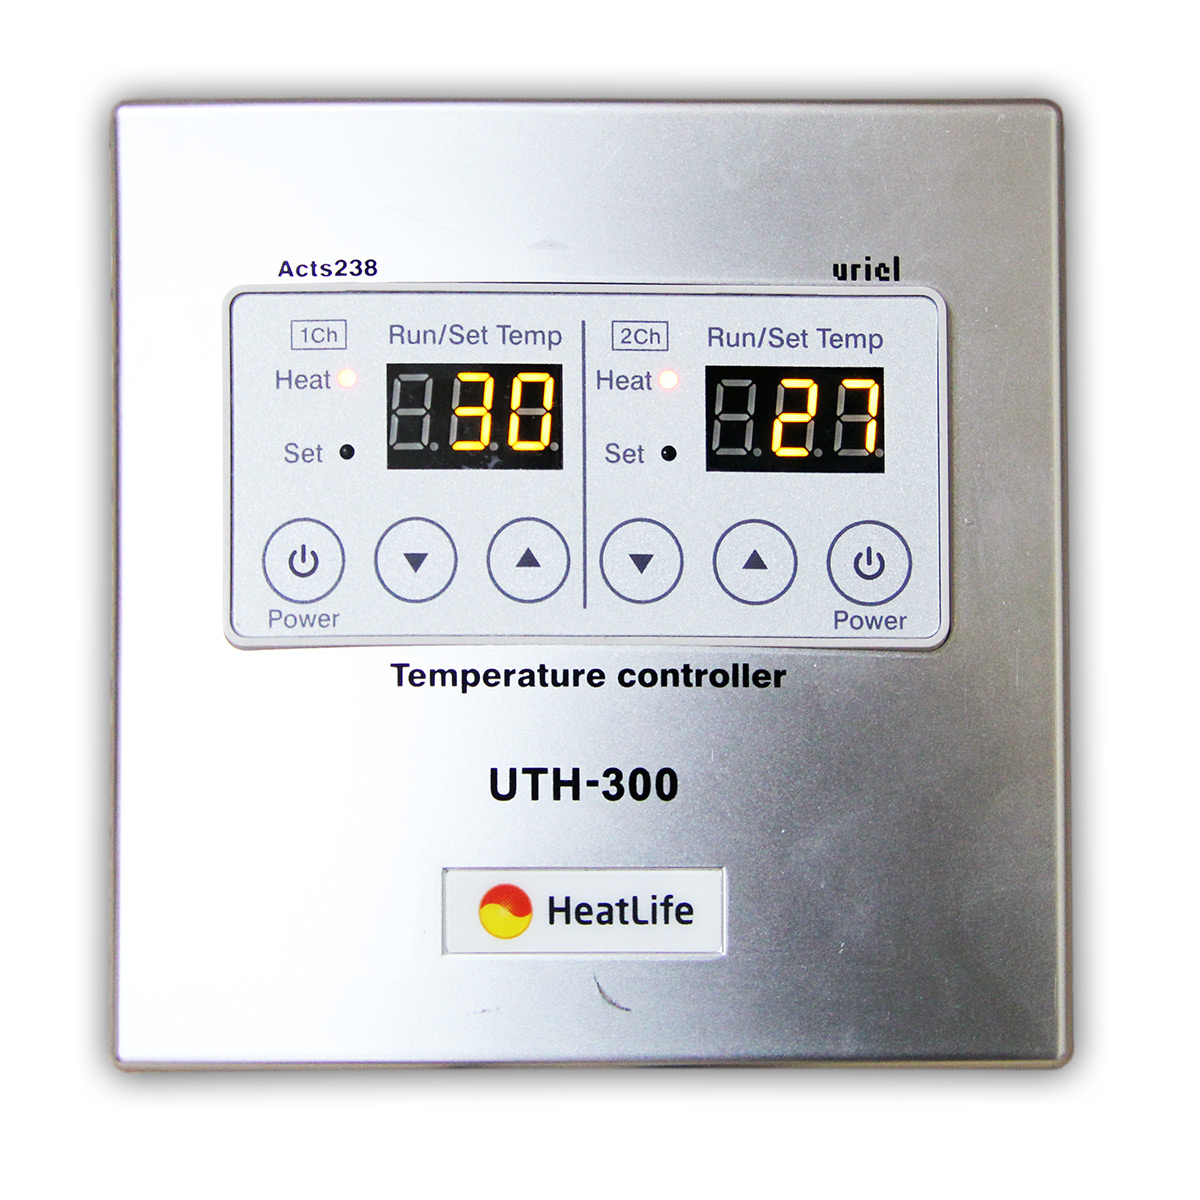
Control and adjustment of the thermostat of an electric floor heating is as follows:
- When the thermostat is connected to the common network and the “0” key is pressed, the device is powered on.
- Temperature control in most models is performed using the "^" and "V" keys.
- When the temperature is set, the Set pointer is lit.
- The desired result of a given temperature state is informed by the Run indicator.
- Disconnection from the power supply is done with the ON / OFF key.
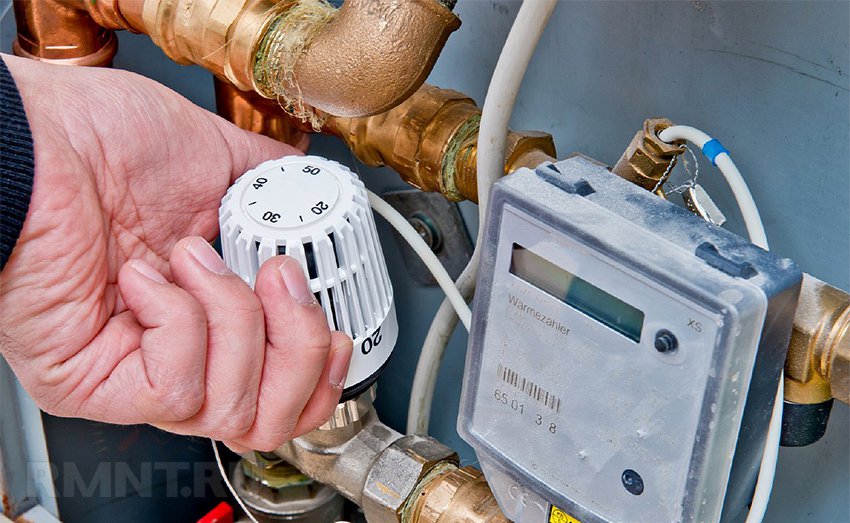
Regulation of temperature of a water heat-insulated floor
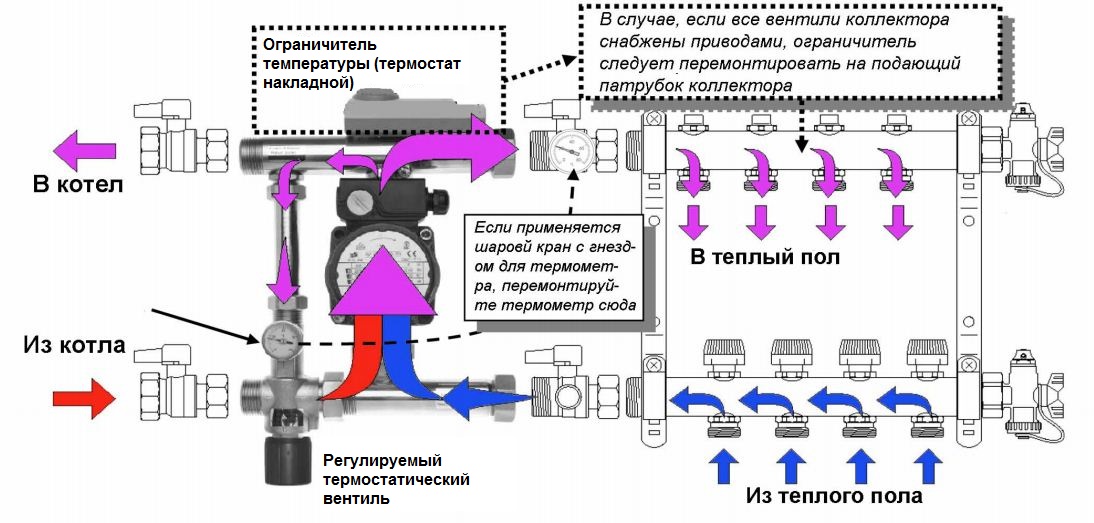
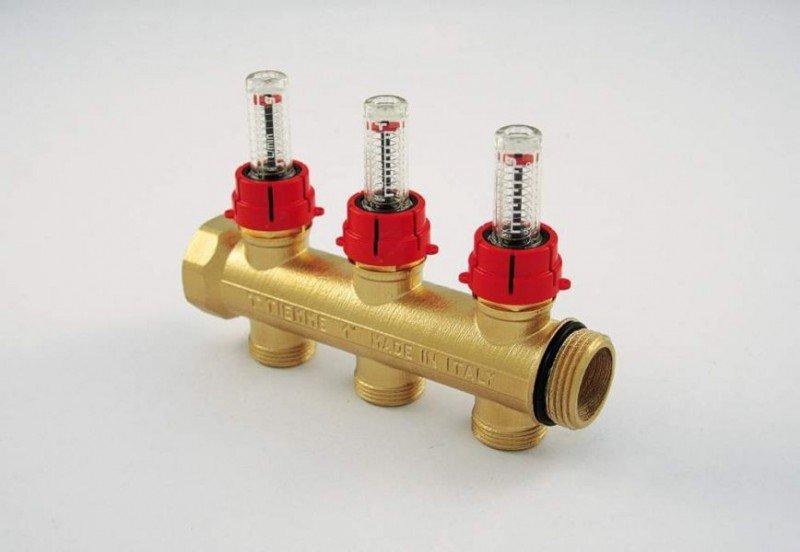
The most common way to connect the mechanism of water heating is made using a manifold. The mechanism is fed to the ends of two pipes: one to the feed comb, the second to the reverse. Each circuit receives a coolant of identical temperature. This method is not very practical, because it is necessary to determine the air temperature by your own feelings.

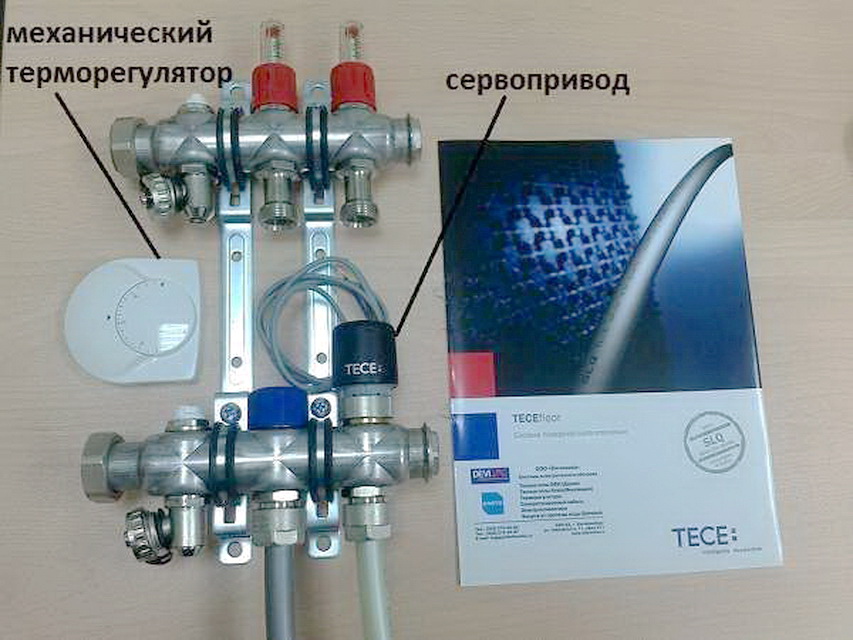
To simplify the work at the inlet, install flowmeters that help rectify the temperature standard. In this case, monitoring is also performed manually. Thermostats are designed for automatic control of the device, and the servos play the role of the performer.
For a large section of heating and a branched heating network, it is better to install thermostats with servo drives. Servos are located in each perimeter on the comb of the automatic coolant supply. The role of the servo drive is to automatically feed an order to reduce and add the volume of coolant. Thermostats are placed in each individual room, where there is such a type of heating. They are interconnected with servos, which are served by special control signals.
The regulators check both the floor temperature and the climate temperature, and are also equipped with a programming function. It is necessary to control and regulate the temperature if such a floor is used as the main source of heating. Make models that track 2 coefficients at a time. In this case, the primary information is the data on the state of the airspace, and the floor temperature is represented by a secondary indicator.
The underfloor heating controller functions as follows: the desired temperature can be programmed on the mechanism panel. With the existing discrepancy, even by 1 degree in any direction, a signal is sent to the servomotors, according to which the coolant flow increases or decreases.Some time later, the temperature position comes to a normalized state.
Automated control of temperature indicators greatly simplifies the control of water structures. To adjust the comb and mechanical valves manually in this case there is no need.
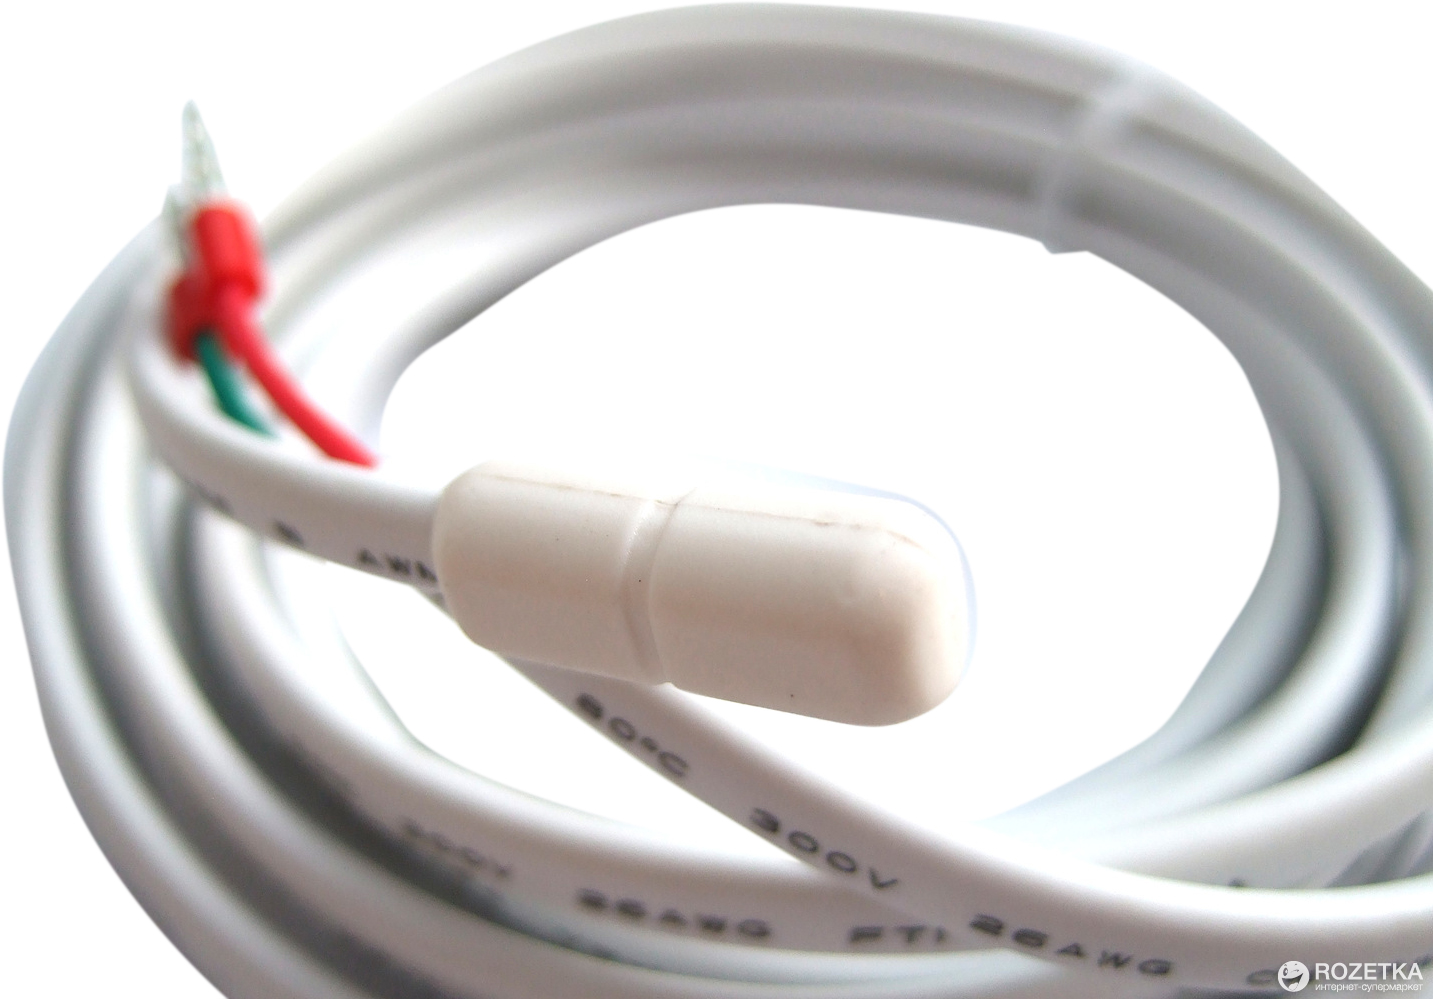
Installation of the temperature sensor of a warm water floor. Electrosensors are mainly located inside the thermostat.
Instructions for mounting the thermostat:
- There should be no other sources of heat near.
- Sunlight on the body is strictly prohibited.
- The thermostat can be installed at a height of 100-150 cm from the floor covering.

Temperature meters are mostly external. This electromechanism is attached to the edge of a long cable. This appliance should be installed in the floor, the required gap between the wall and the appliance is at least 50 cm. It is placed at the same distance from the nearby pipes with heat carrier. The other end is supplied to the regulator and is connected to the appropriate electrical terminals.
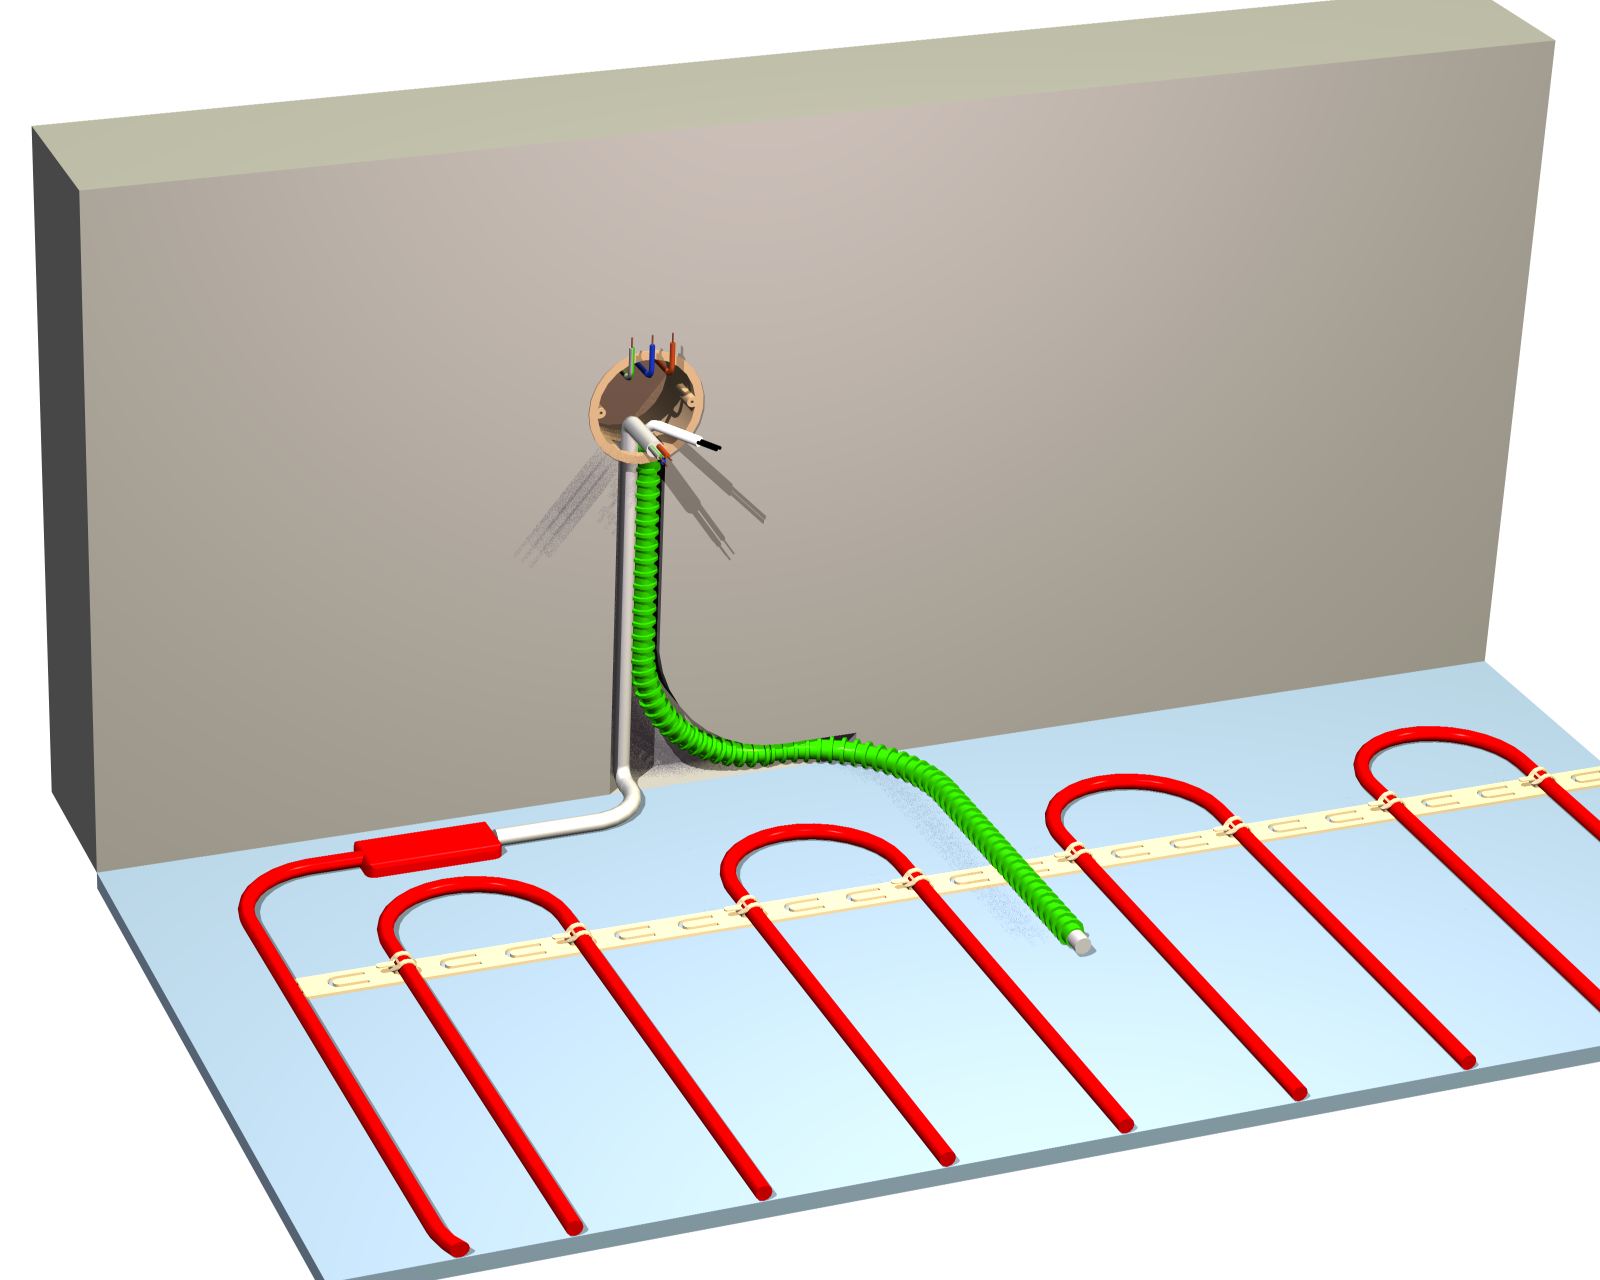
The installation of the thermal device must be carried out before pouring the screed. For further replacement it must be laid in a corrugated sleeve.The edge of the corrugated sleeve, which is located in the screed, must be insulated. The other edge fits into the groove on the wall and fits on the thermostat box. This installation is quite time-consuming, but it allows you to easily replace a faulty sensor.
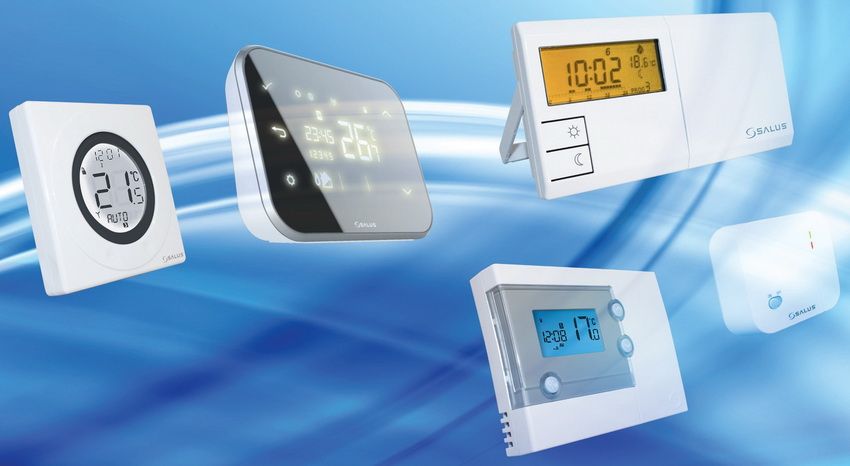
Manufacturers
Among the most popular companies specializing in products of this kind, the following can be highlighted:
- Firm "Heatlux" It is very famous today due to the high quality of its products. There is a possibility of the simplest installation of the system and manual adjustment of the mechanism. The only disadvantage of this brand is the high cost of materials.
- If you focus on the optimal ratio of price and quality, then the world famous brand Grand Meyer will be an excellent example.
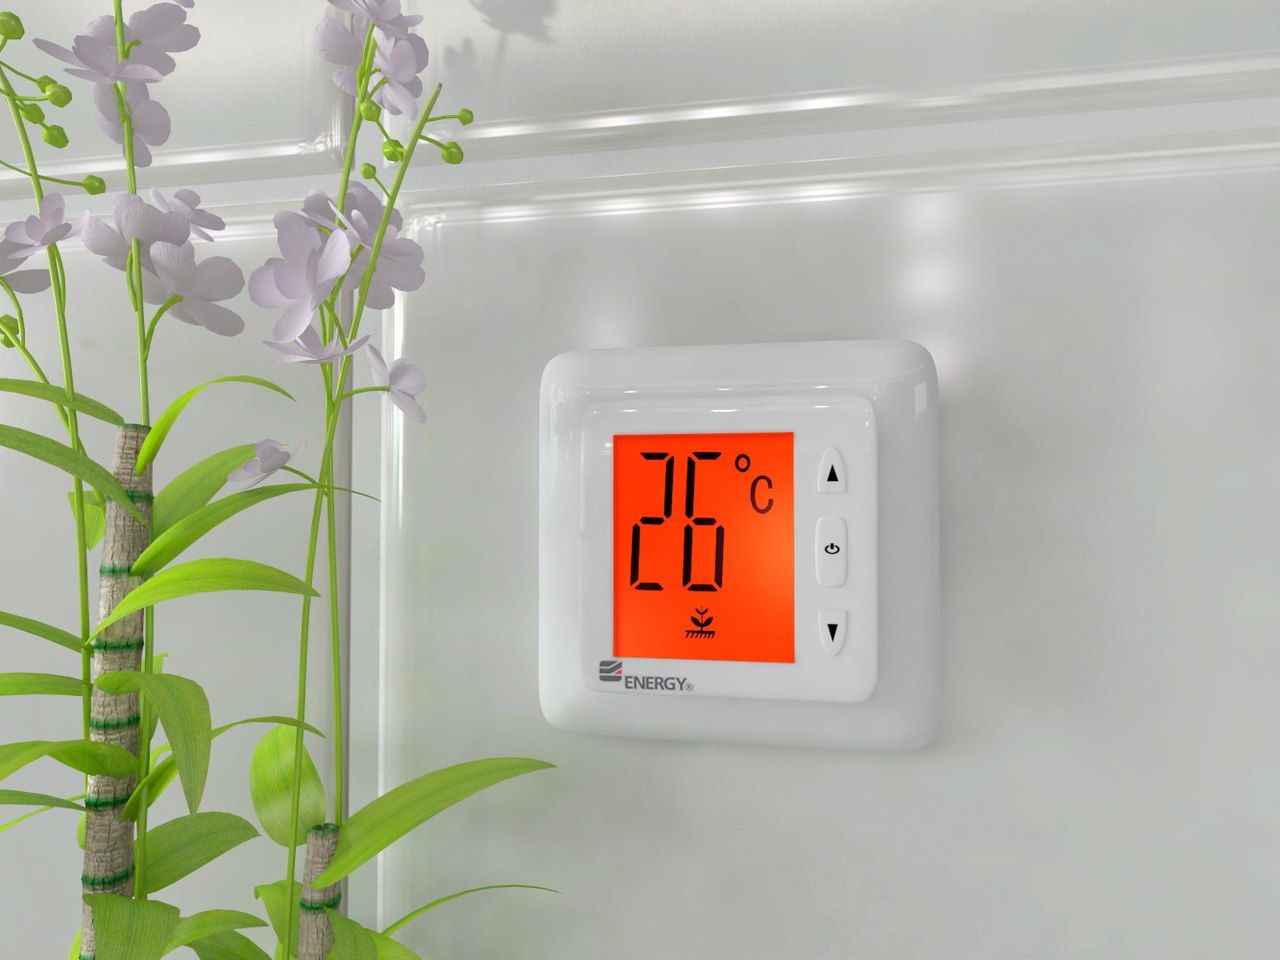
- Energy thermostats have gained great popularity due to its design, which has an LCD display. These appliances work perfectly with different warm floors, thereby saving costs.
Professional Tips
Electrical work must be carried out in accordance with safety techniques. If you ignore these rules, there is a big risk of adverse effects.
Recommendations:
- Electrical work is carried out only in a de-energized room. If it is possible to disconnect the required line, it is better to disconnect it from the power supply.
- Connection of the device is possible only in the assembled structure.
- The thermostat must be kept clean.
- Excess power and current from the parameters specified by the manufacturer is strictly prohibited.
- Without special skills in any case do not repair the regulator.
- If you have old wiring, it will be safer to install a separate line for connecting a heated floor, which is specialized in automation.
- The best option to control the temperature would be to install separate thermostats in each room.
How to connect a warm floor, see the following video.


