How to make a ceiling of drywall with your own hands?
In a short time, gypsum plasterboard has changed from a material that is hardly applicable in repair to one of the most demanded. Columns, arches, multi-level ceilings, false fireplaces - the lightness of the material in the work allows the master to turn the imagination in full force. Even a beginner can make gypsum boards, while observing all the recommendations and rules.
Special features
Suspended ceiling is a single-level or multi-level frame made of metal, reinforced on the ceilings and walls of the room, sheathed with slabs GKL. A prerequisite is also the presence of light sources mounted in it.
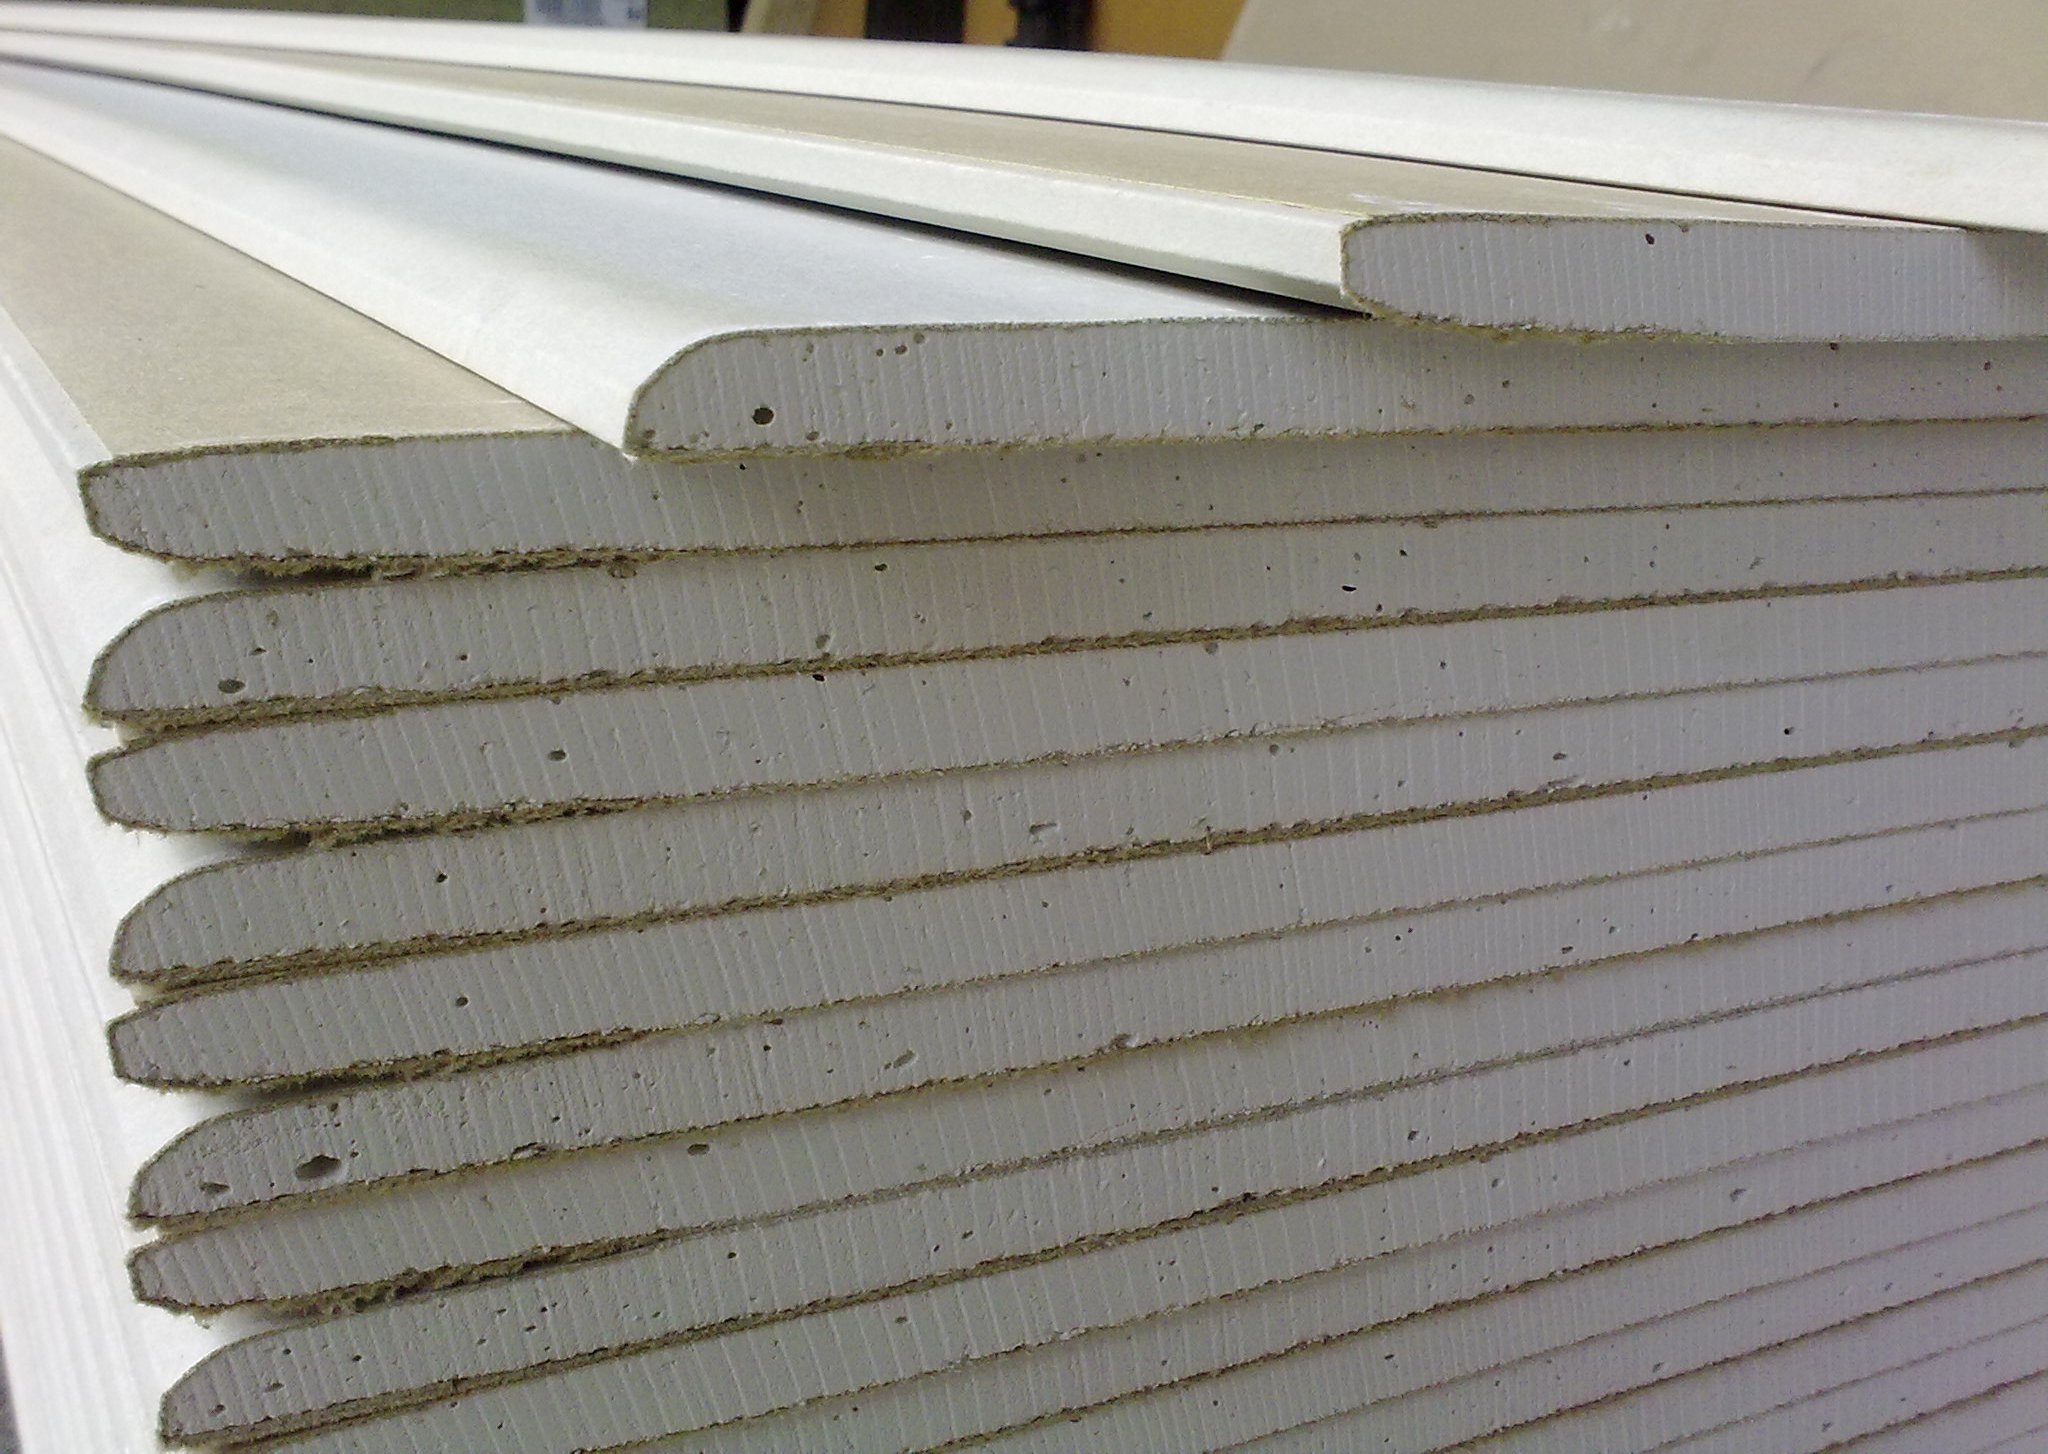
First of all, you need to decide what is a sheet of drywall.If you do not go into details, you can explain this: this is a sheet of dry plaster, covered with cardboard on top.
Despite the seeming simplicity, the material has a lot of impressive advantages:
- With the help of FCL it is possible to align very significant bumps and hollows on the ceiling, without spending much effort. To do this, take a liquid solution - and the advantage becomes even more obvious.
- Inside the frame, on which the sheets of drywall are mounted, you can hide any wires and bring all the desired communications, while leaving them invisible to the eye. And this is a big plus, in terms of aesthetics.
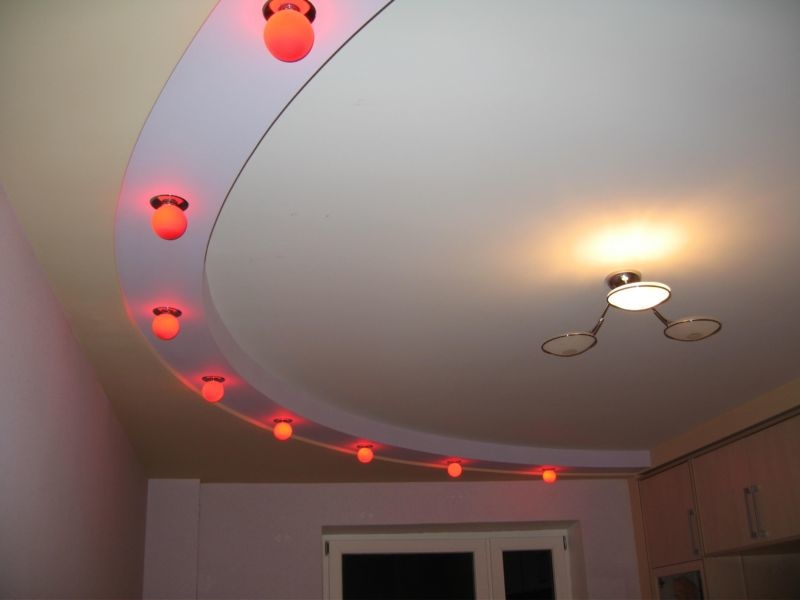
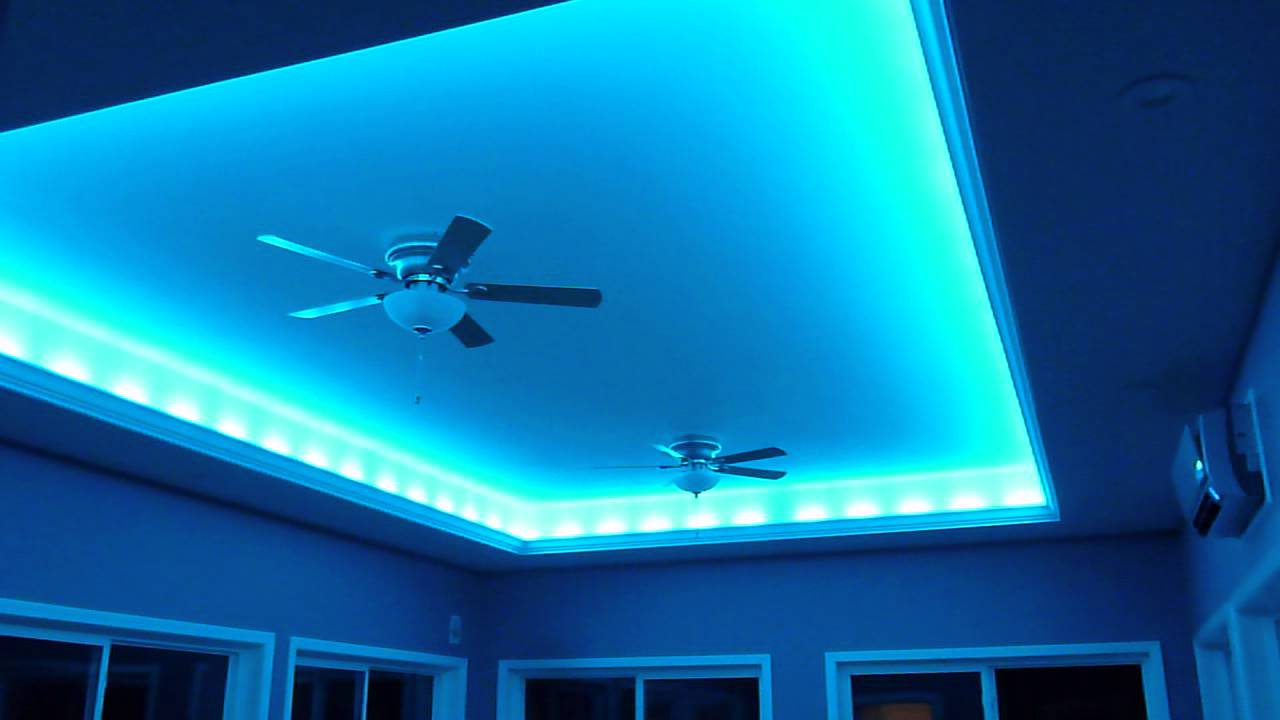
- In the ceiling of this material, you can mount any desired lighting that allows you to achieve completely unique lighting effects.
- Sheets of drywall make it possible to create a multi-level ceiling, realizing the imagination of the owner.
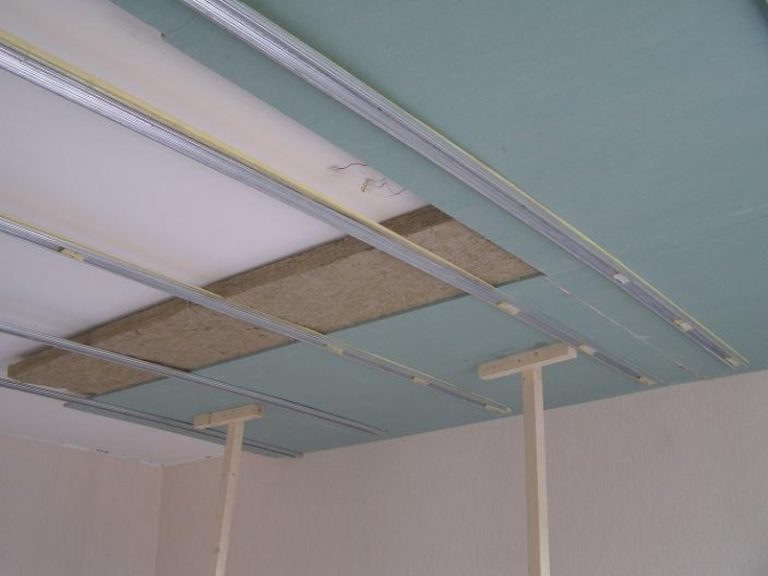
- Due to the free space in the frame, you can arrange additional noise and heat insulation. It is enough to lay an additional layer of mineral wool between the ceiling and the false ceiling.
- GKL is mounted without the use of liquid, dry, which guarantees a minimum amount of dust and dirt.
Everything related to drywall is quite possible to hold events with your own hands. So, it is possible to make an original design with minimal expenses in accordance with your ideas.

Of course, one cannot say that drywall is a material without flaws. Of course, they exist, but they relate more to the installation of the material than to itself.
For example:
- Due to the fact that when installing the ceiling of the plasterboard used frame, the height of the ceiling decreases. And, if the ceilings are so low, it can be a problem.
- If you do not have the skills to work with this material, then you can take a long time with the frame: installation alone will be difficult, it is better to enlist the help of a partner.
- It is impossible to break the technology of the finishing process, otherwise cracks in the seams and between them will most likely appear.

Device
GCR slabs represent the widest range of possibilities to create a ceiling.

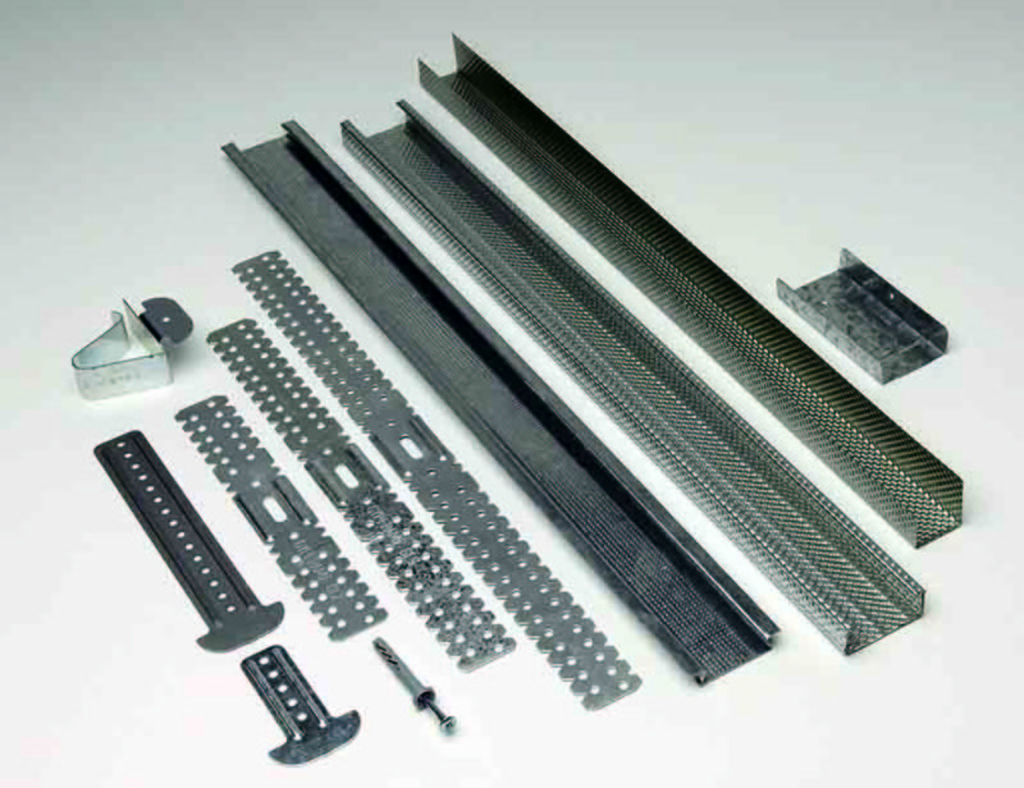
The main components of the gypsum ceiling are the following materials:
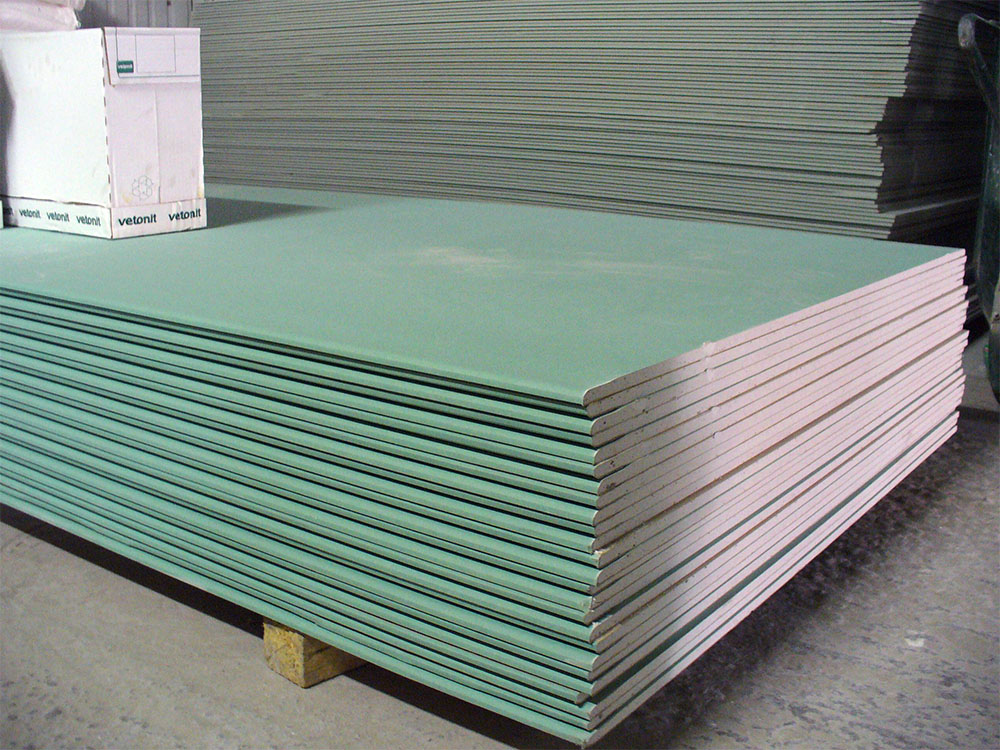
- GCR sheets. They are selected depending on the room in which the ceiling is installed, as well as the functionality of the sheet.Therefore, it is advisable to install moisture-proof HL plates in the bathroom, and fire-resistant ones are perfect for the kitchen.
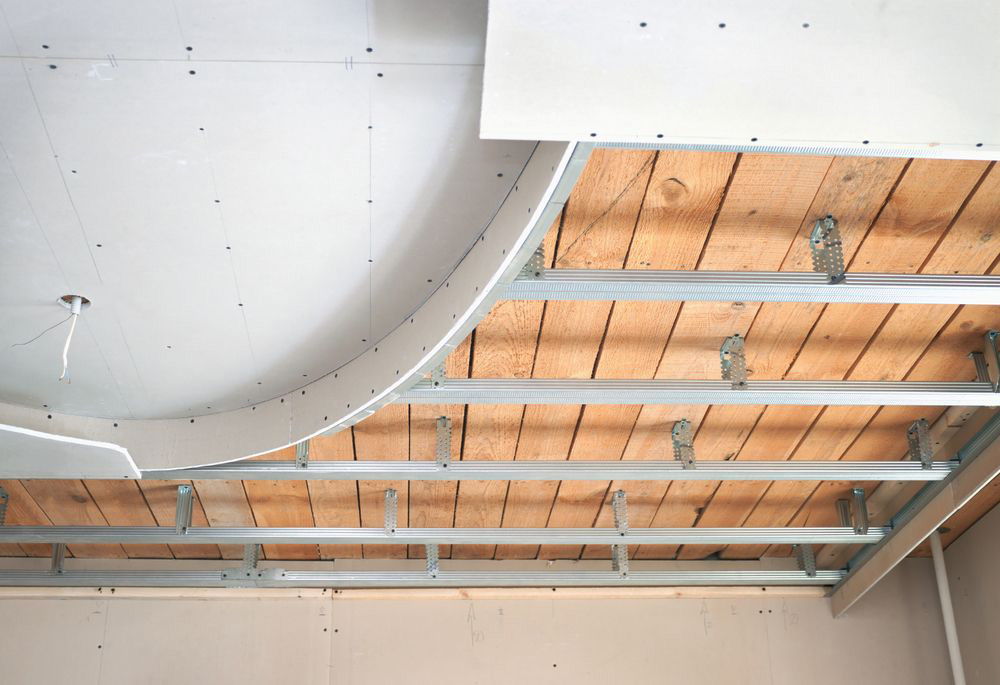
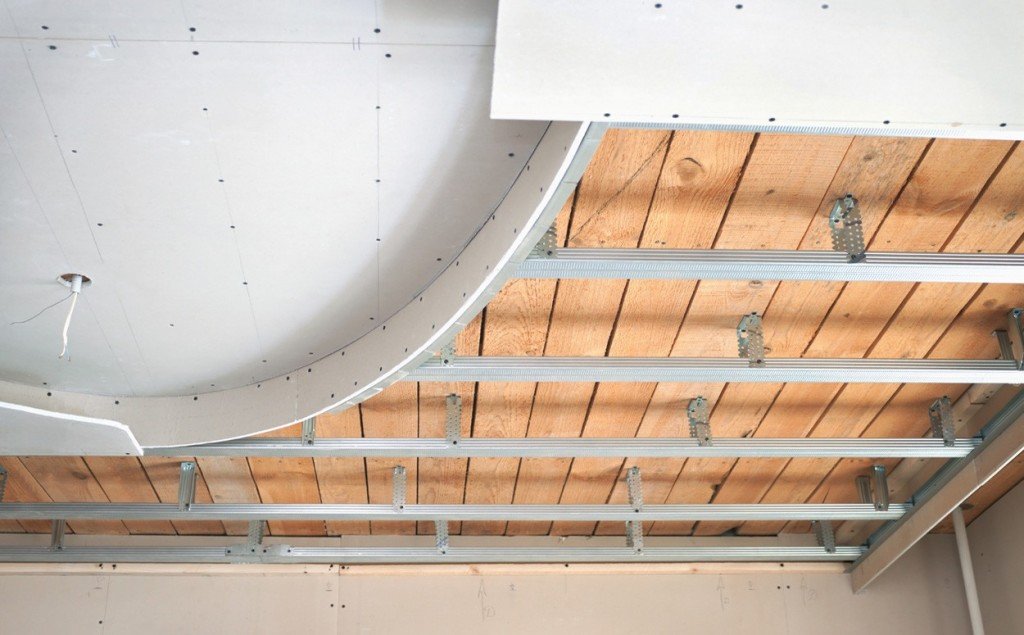
- Profile for the frame, that is, the foundations on which plasterboard sheets are attached. It ensures the stability of the whole structure. Profiles are divided into two types: starting and carrying. The starting profile runs along the perimeter of the ceiling, and the plasterboard plates are attached to the supporting structures.
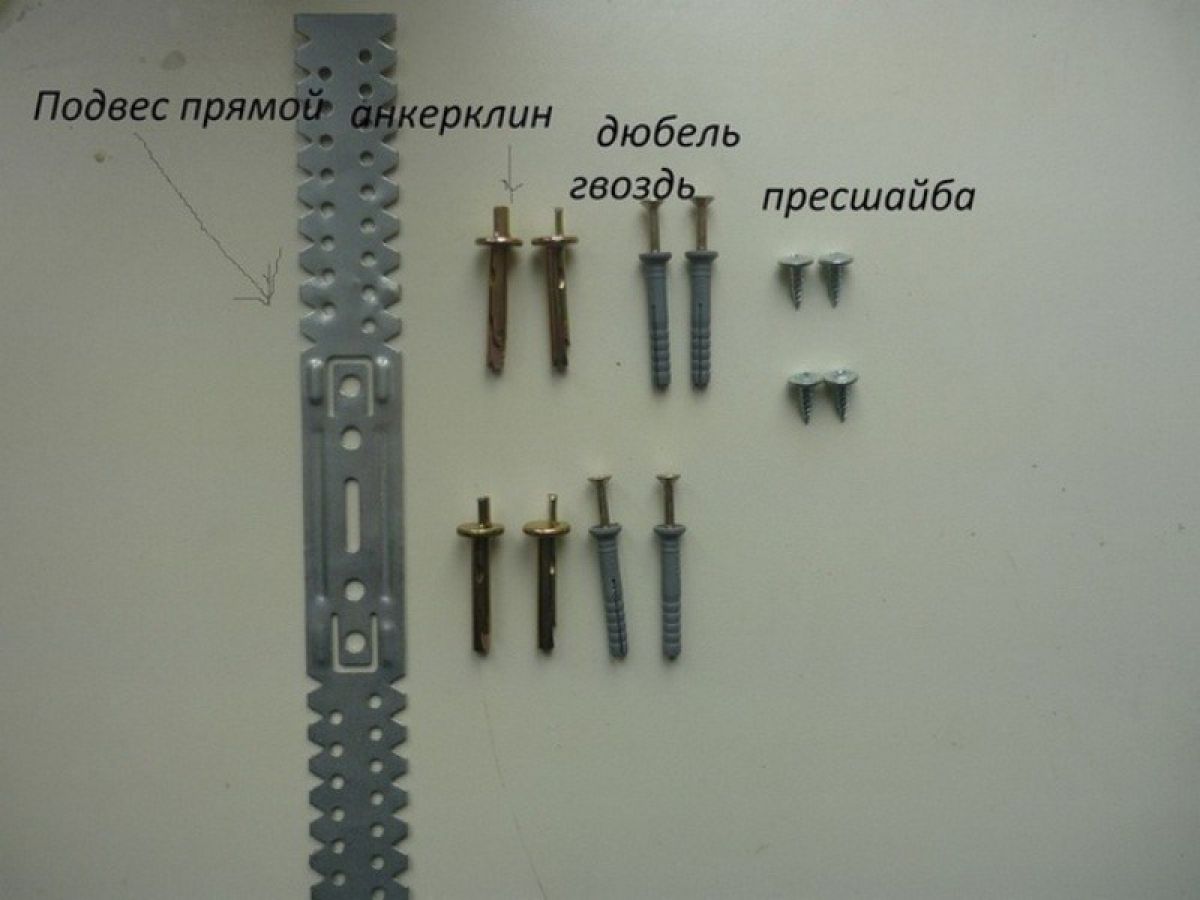
- Metal hangers on which profiles are attached. It is possible to use conventional suspensions or suspensions with a bracket.
- Dowels and screws for drywall.
- Materials for finishing: reinforcing tape, putty, primer, fine-grained sandpaper, which level the ceiling after putty.

Kinds
The suspended ceiling can be mounted in many different configurations. Nevertheless, the main types of three, the rest - the basis for the options more difficult.
Ceilings can be:
- single level;
- simple two or three levels;
- complex.

The most budgetary option is, of course, simple to install and inexpensive single-level ceiling. Anyway, its installation levels the surface of the ceiling, so that it can be easily decorated.

On the basis of the first level, the following line up - thus creating differences in height of the ceiling.
Multi-level surfaces can also be classified into the following categories:
- framework;
- diagonal;
- zonal;
- complex ceilings of other forms.
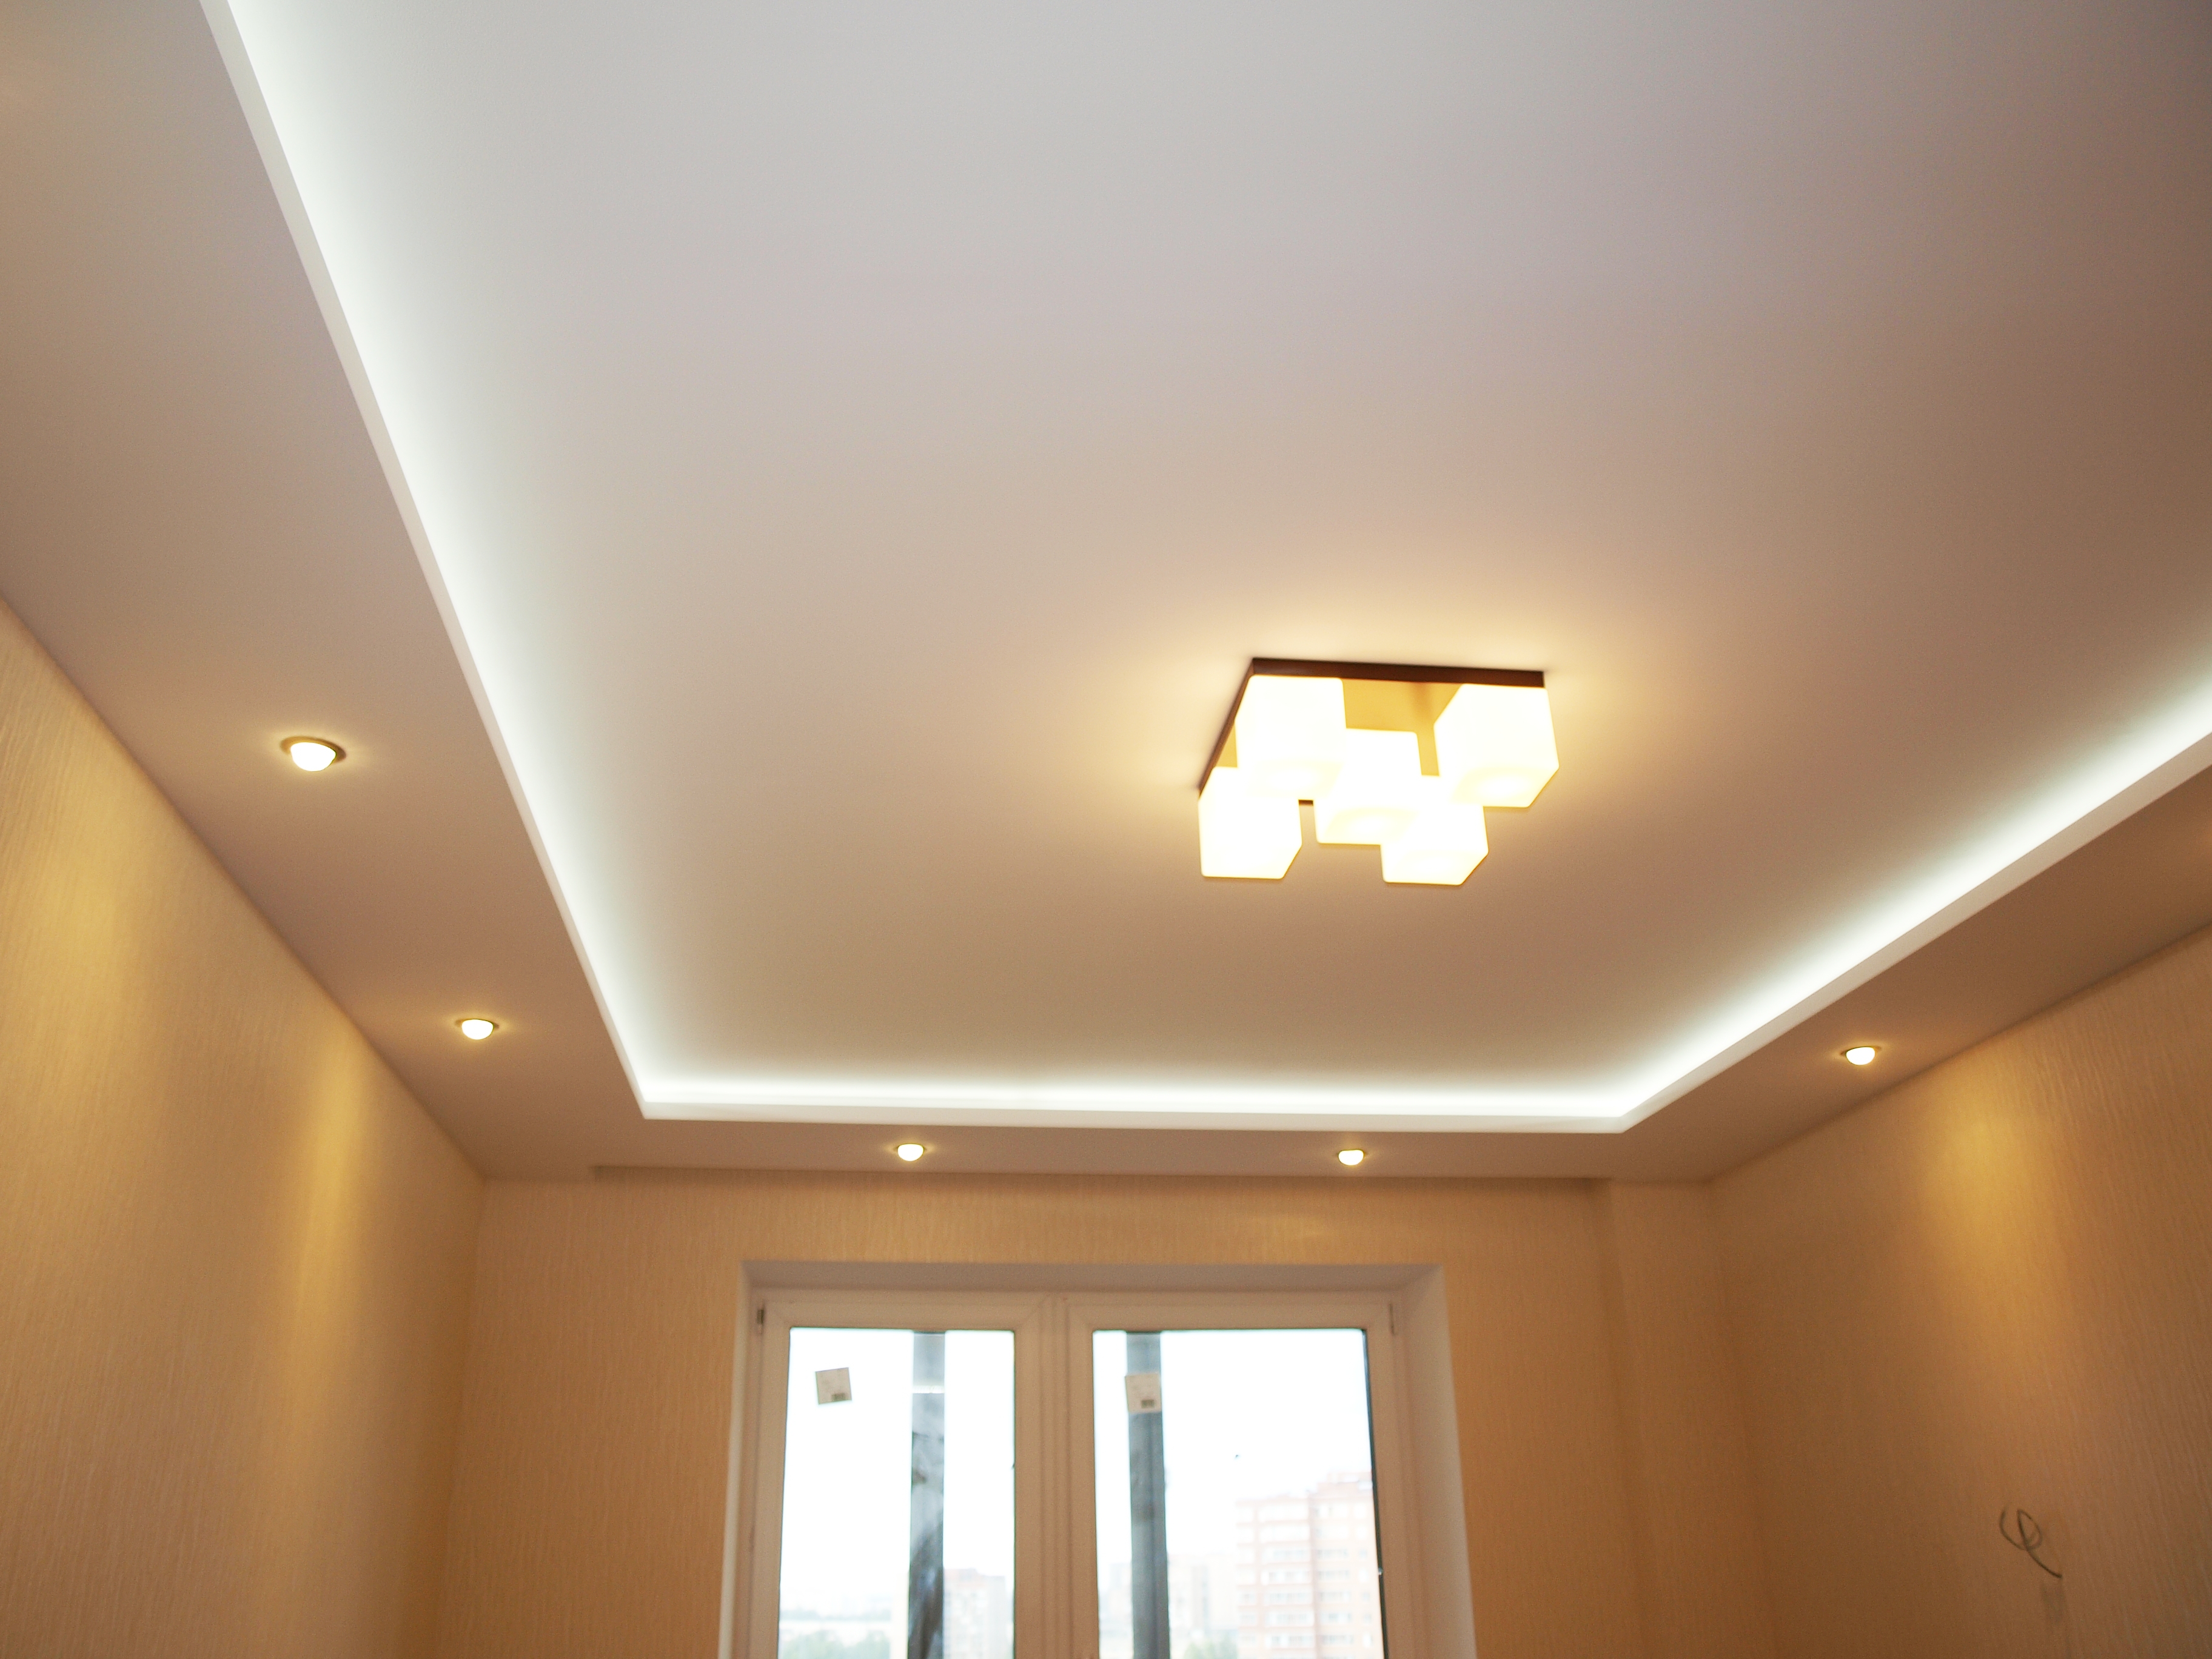
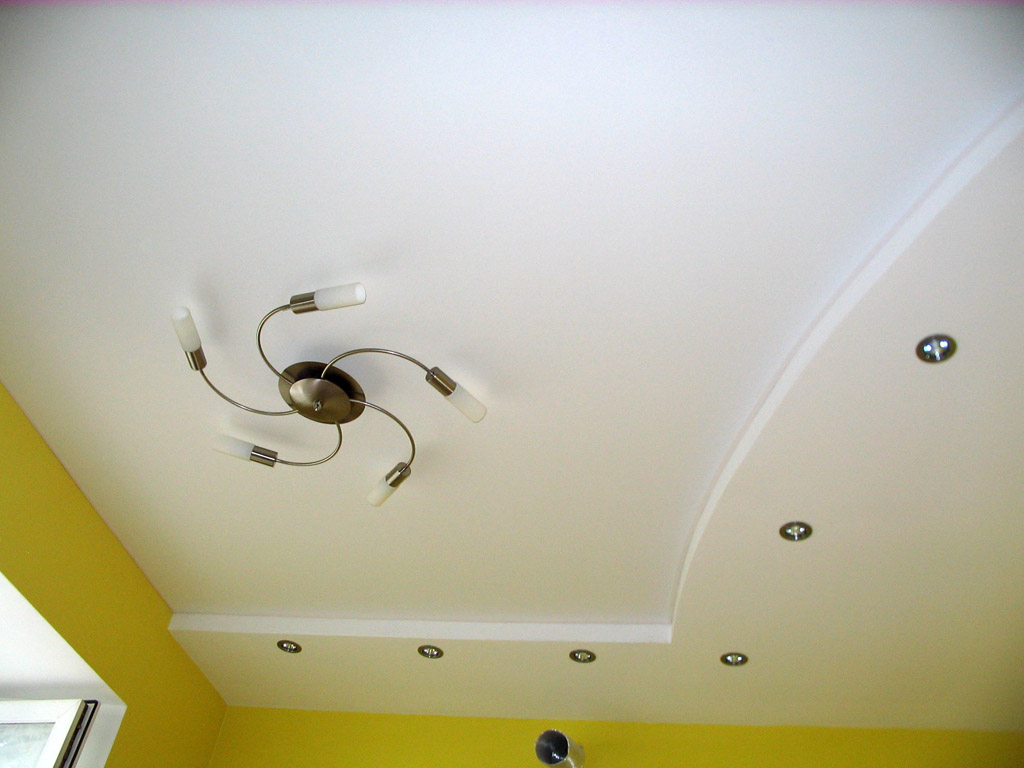
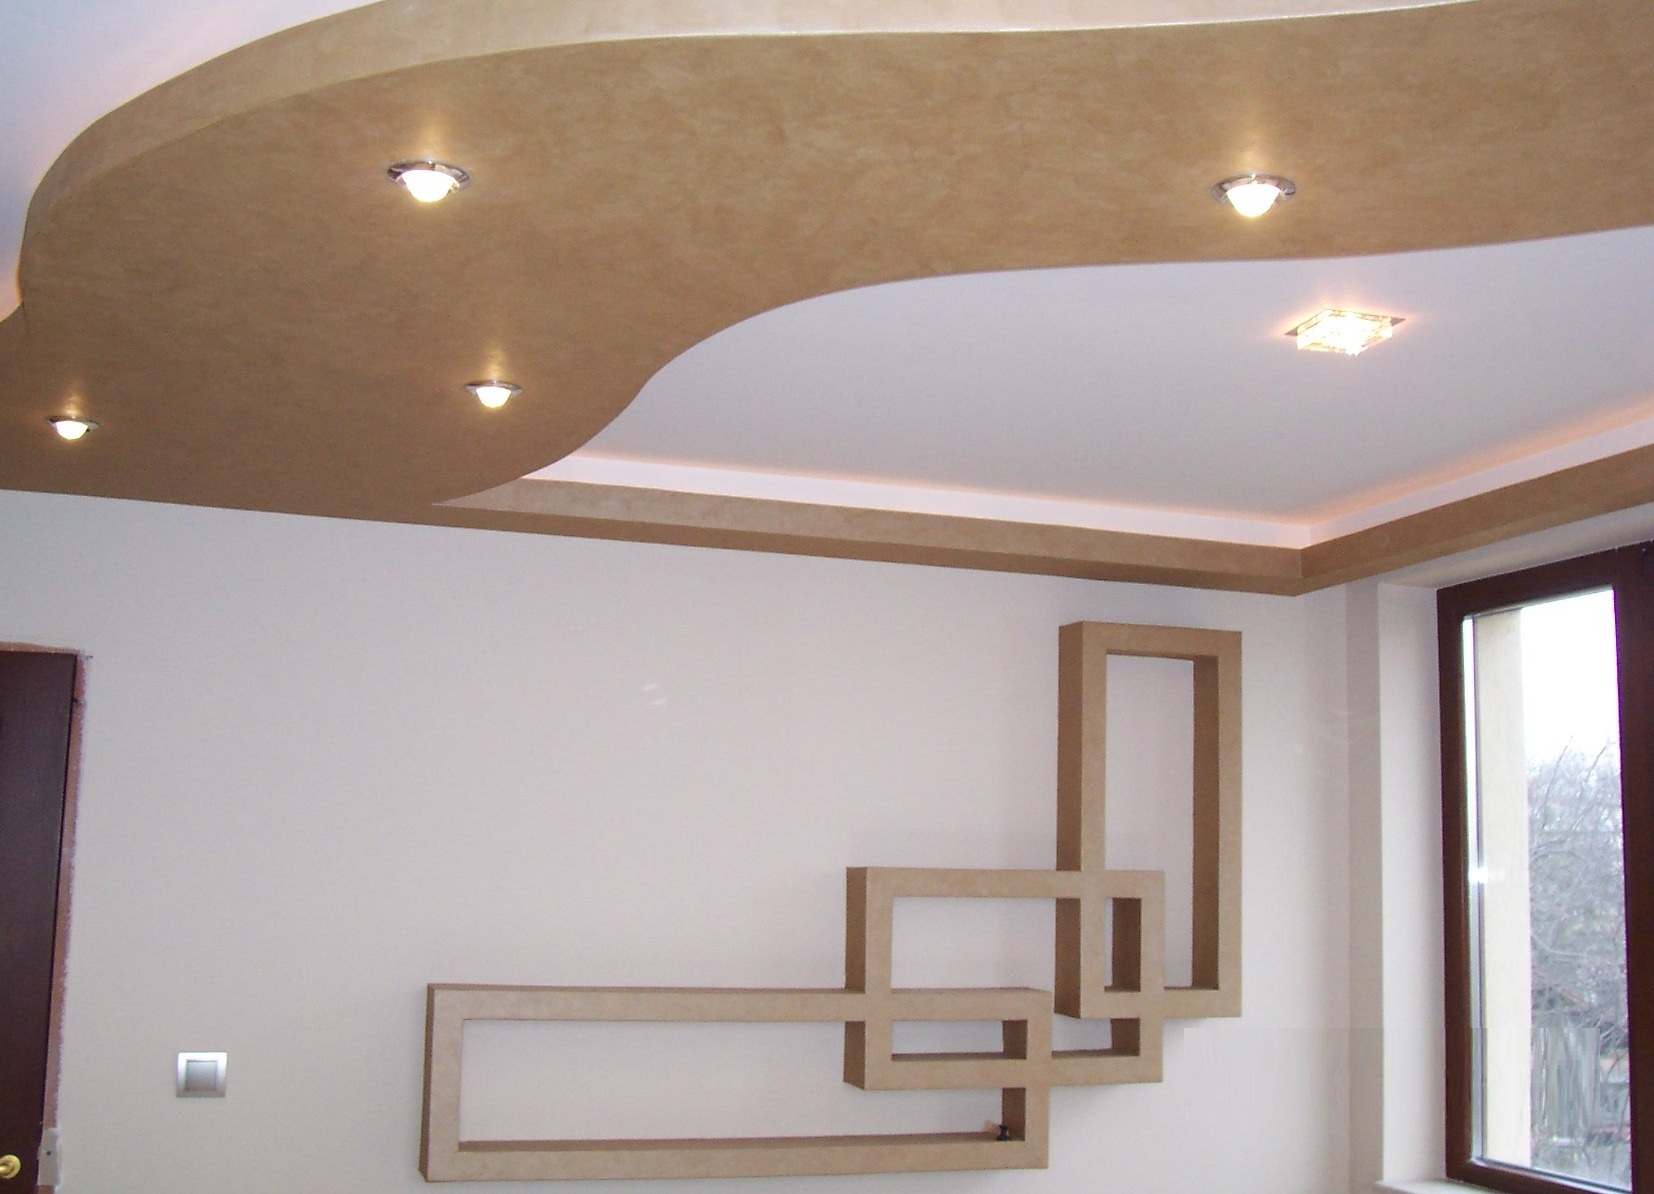
The frame structure is represented by a box made of plasterboard, located in the form of a frame around the perimeter of the ceiling surface. A chandelier hanging in the center of the ceiling will harmoniously fit into the composition.
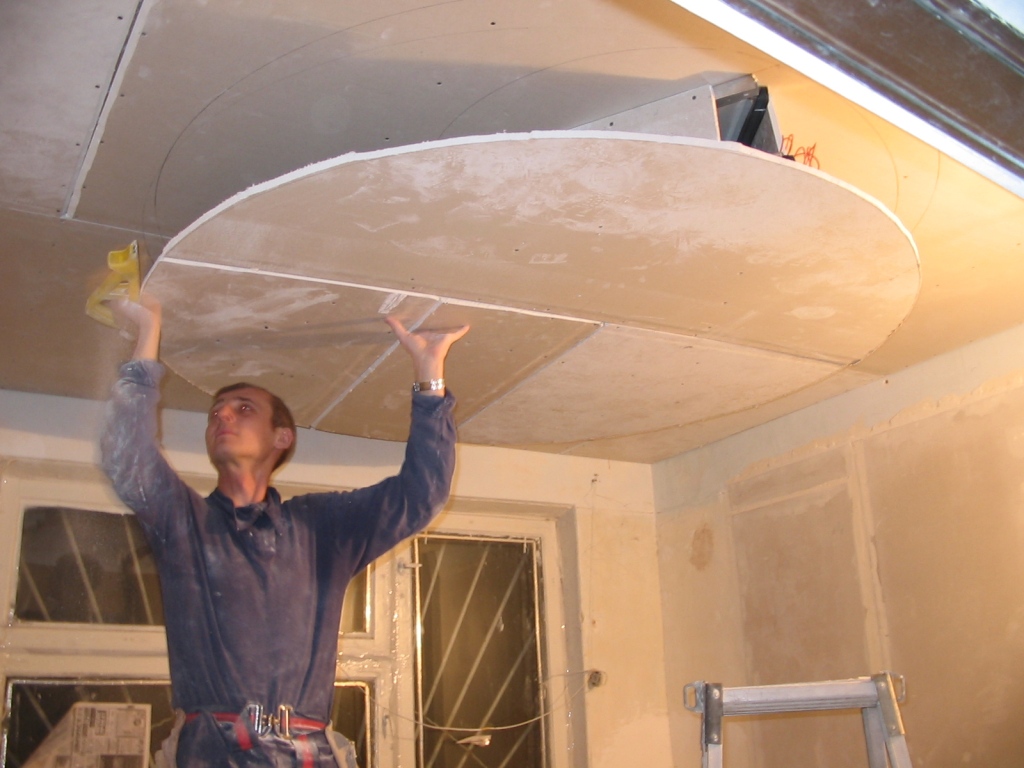
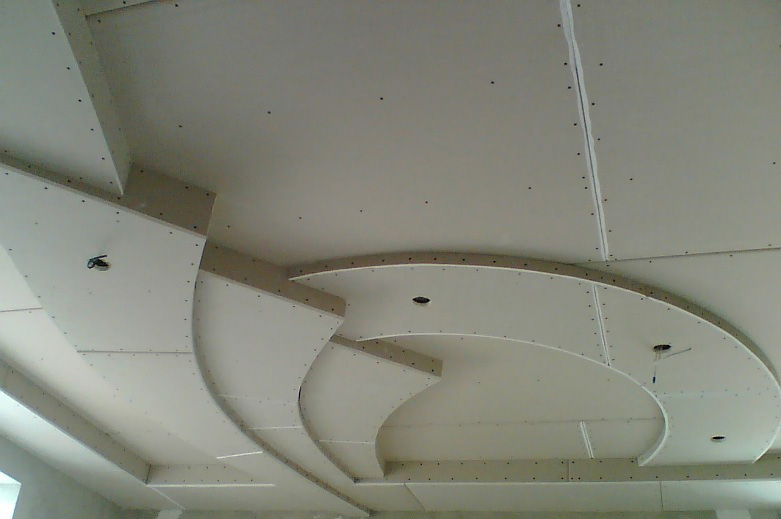
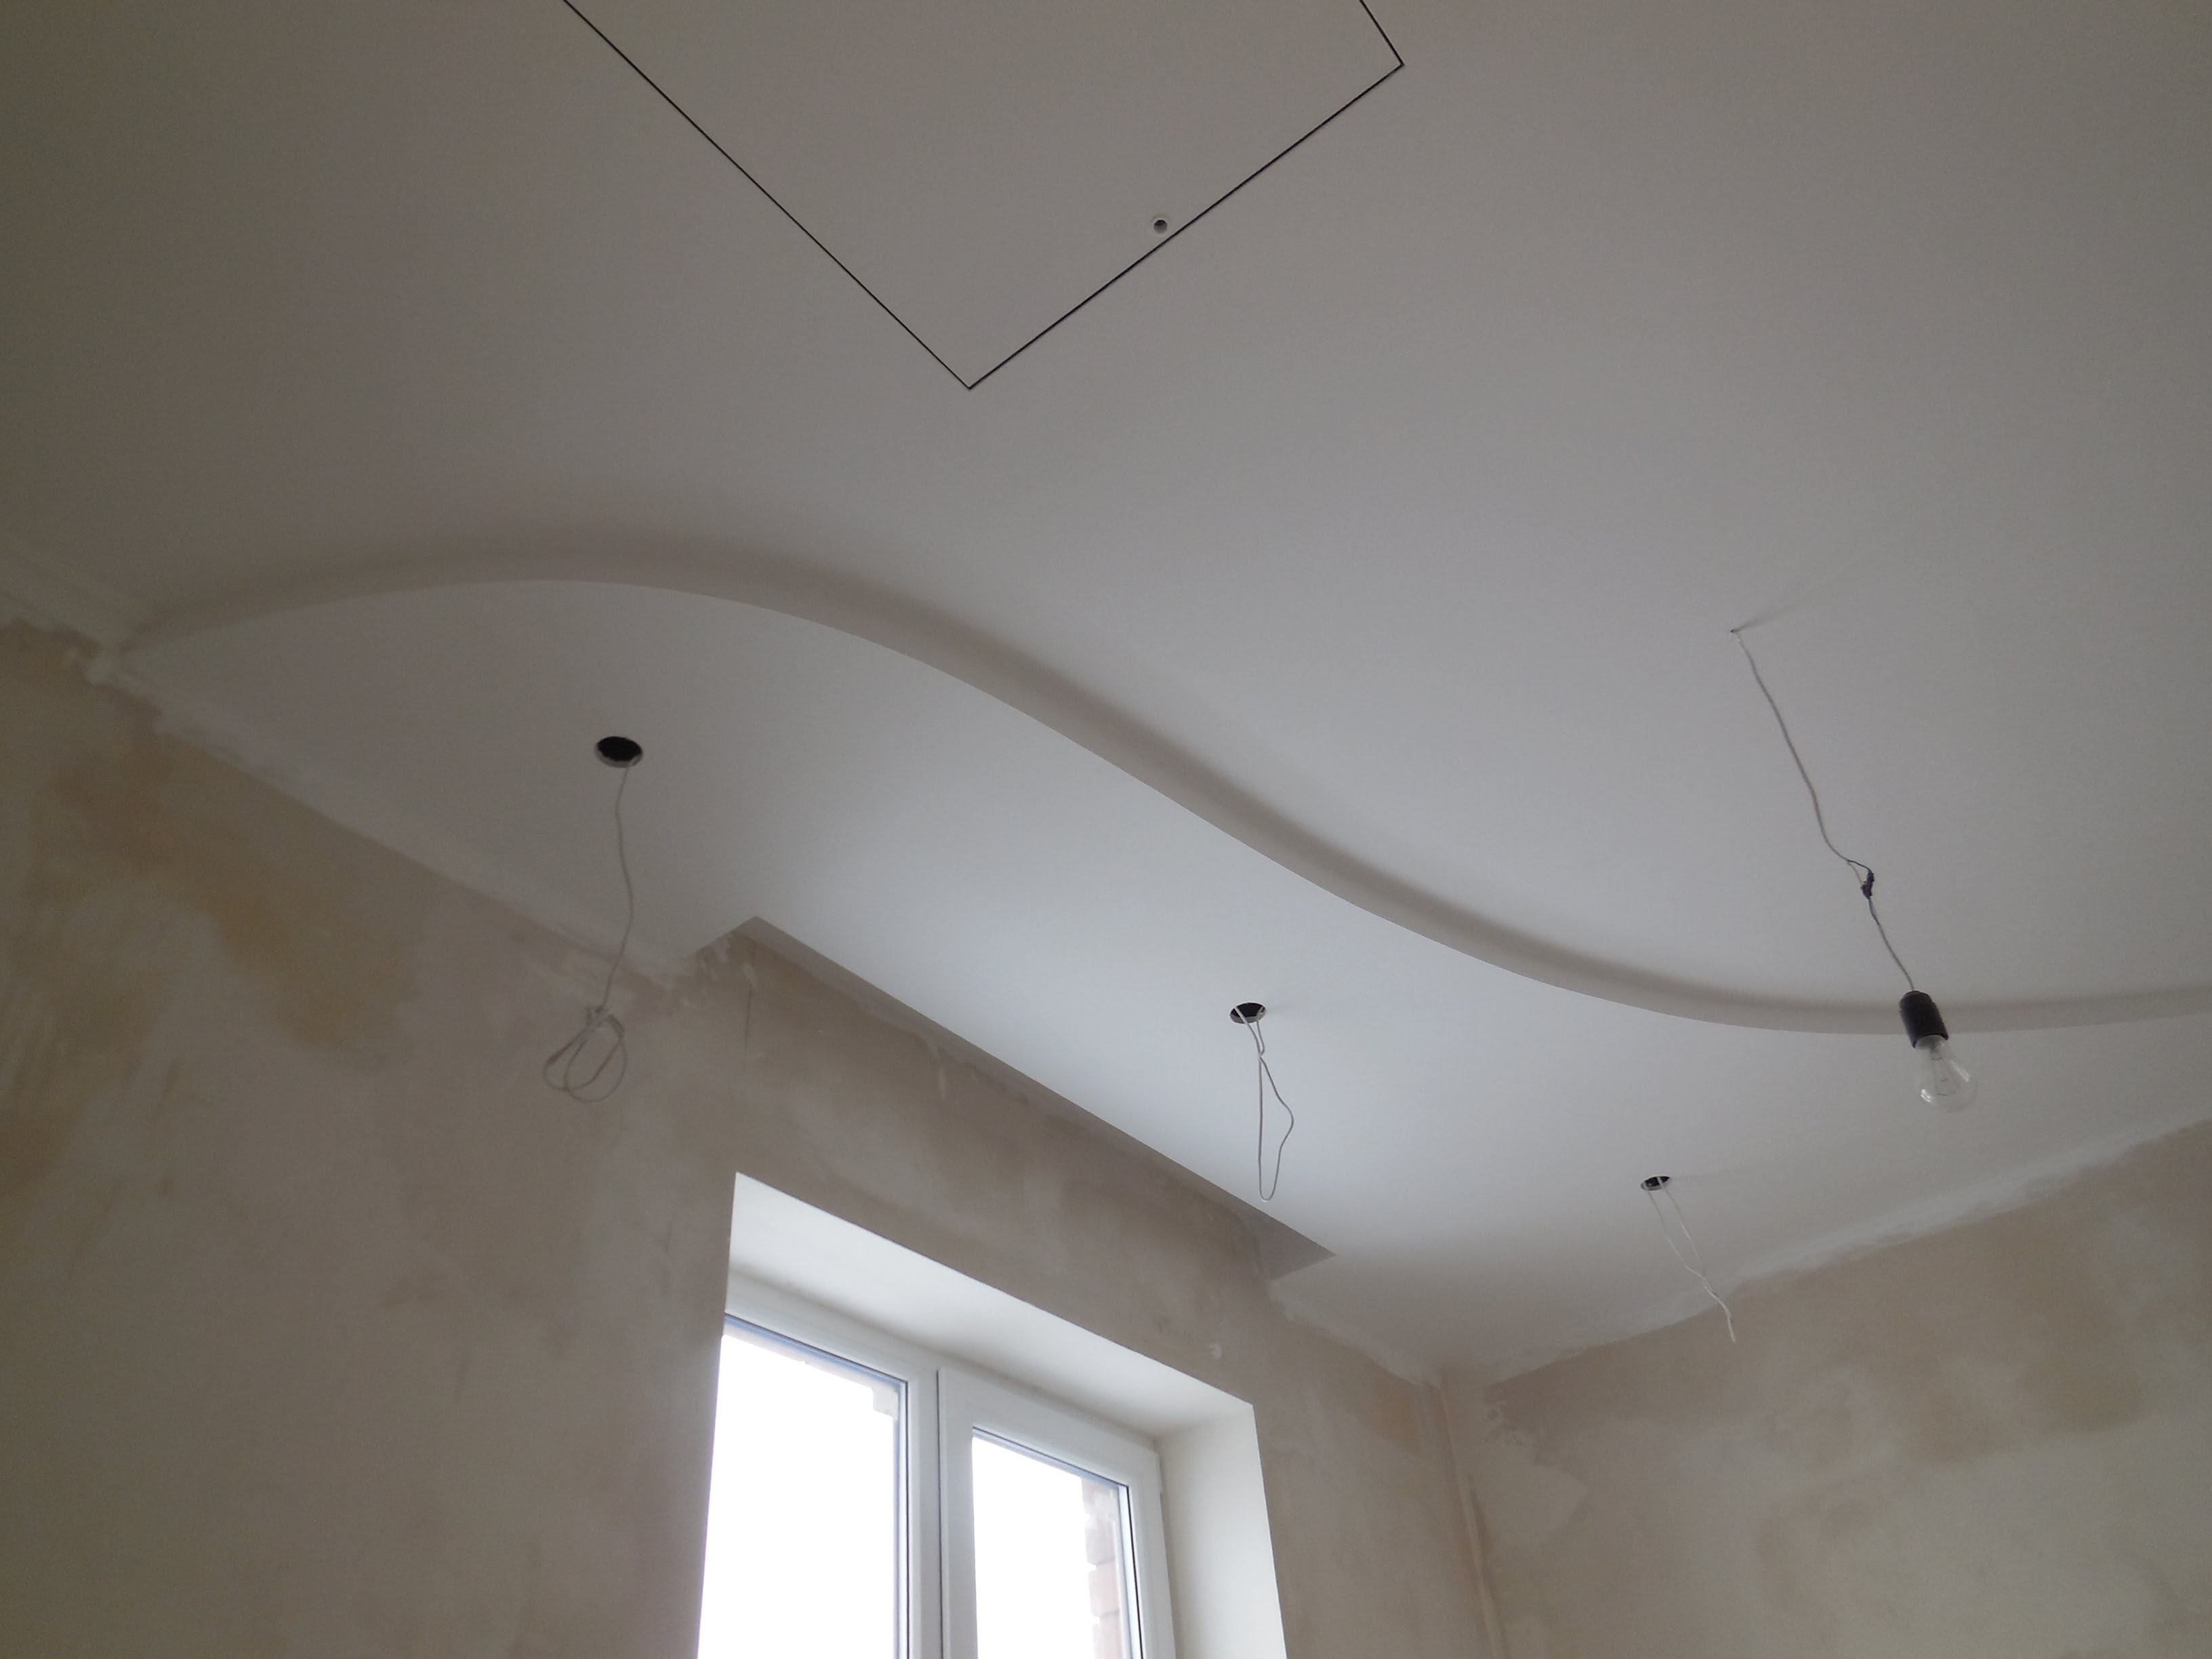
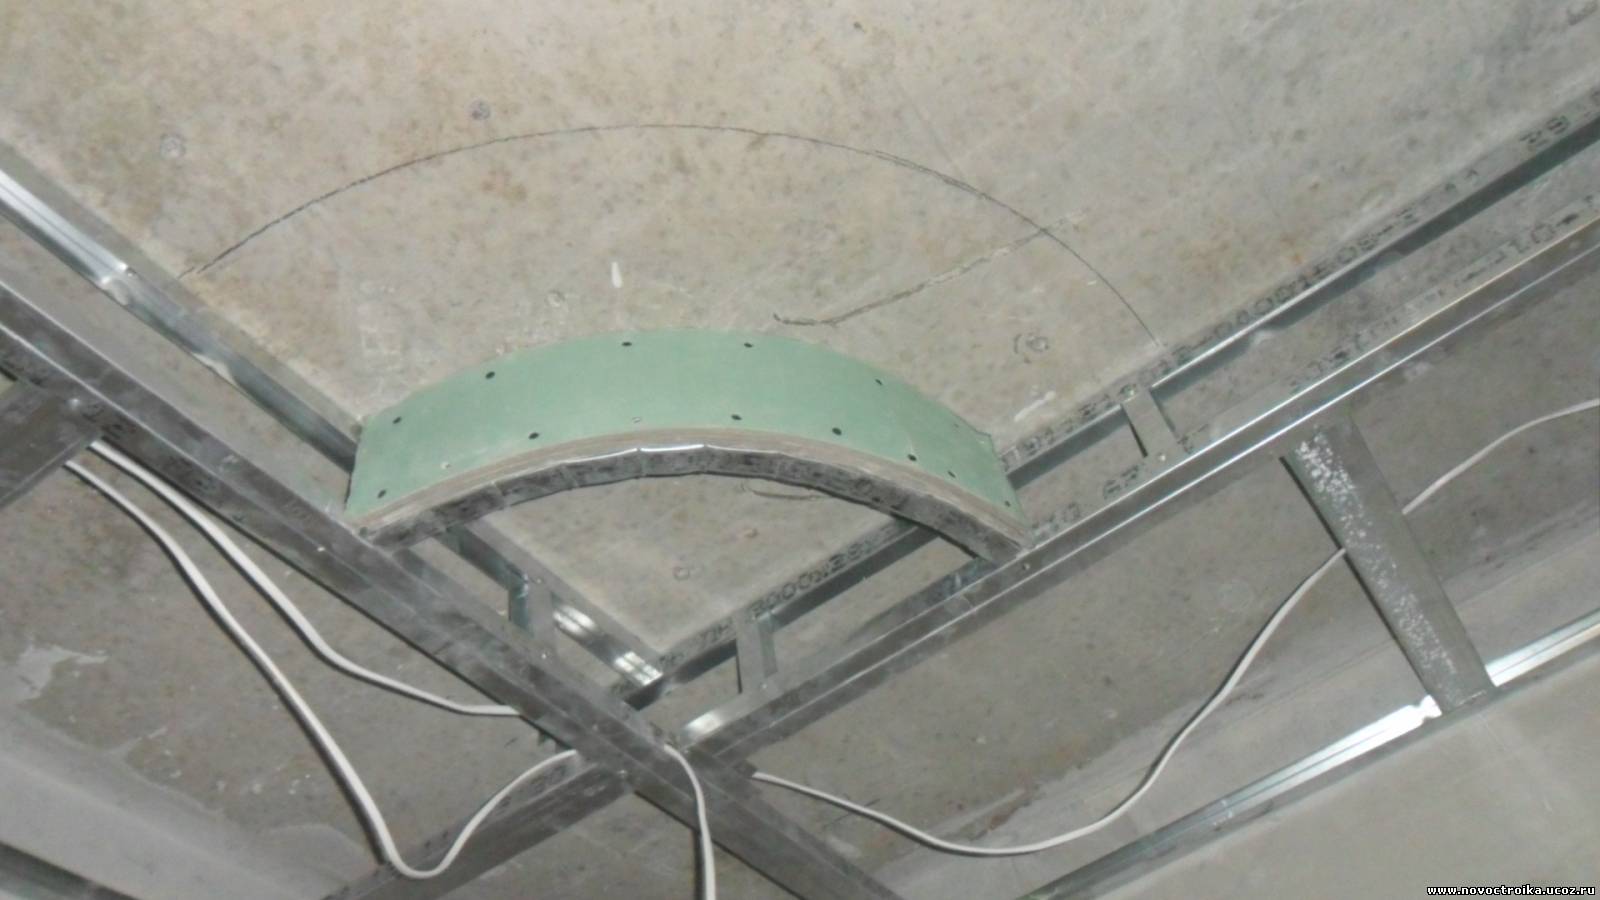
In the diagonal design, each subsequent level divides the ceiling along a conventionally held diagonal, and not necessarily in a straight line: it can be a wave or an arc. Anyway, it marks out half the room. Since GKL is a flexible material, it is not difficult to form a curly line.

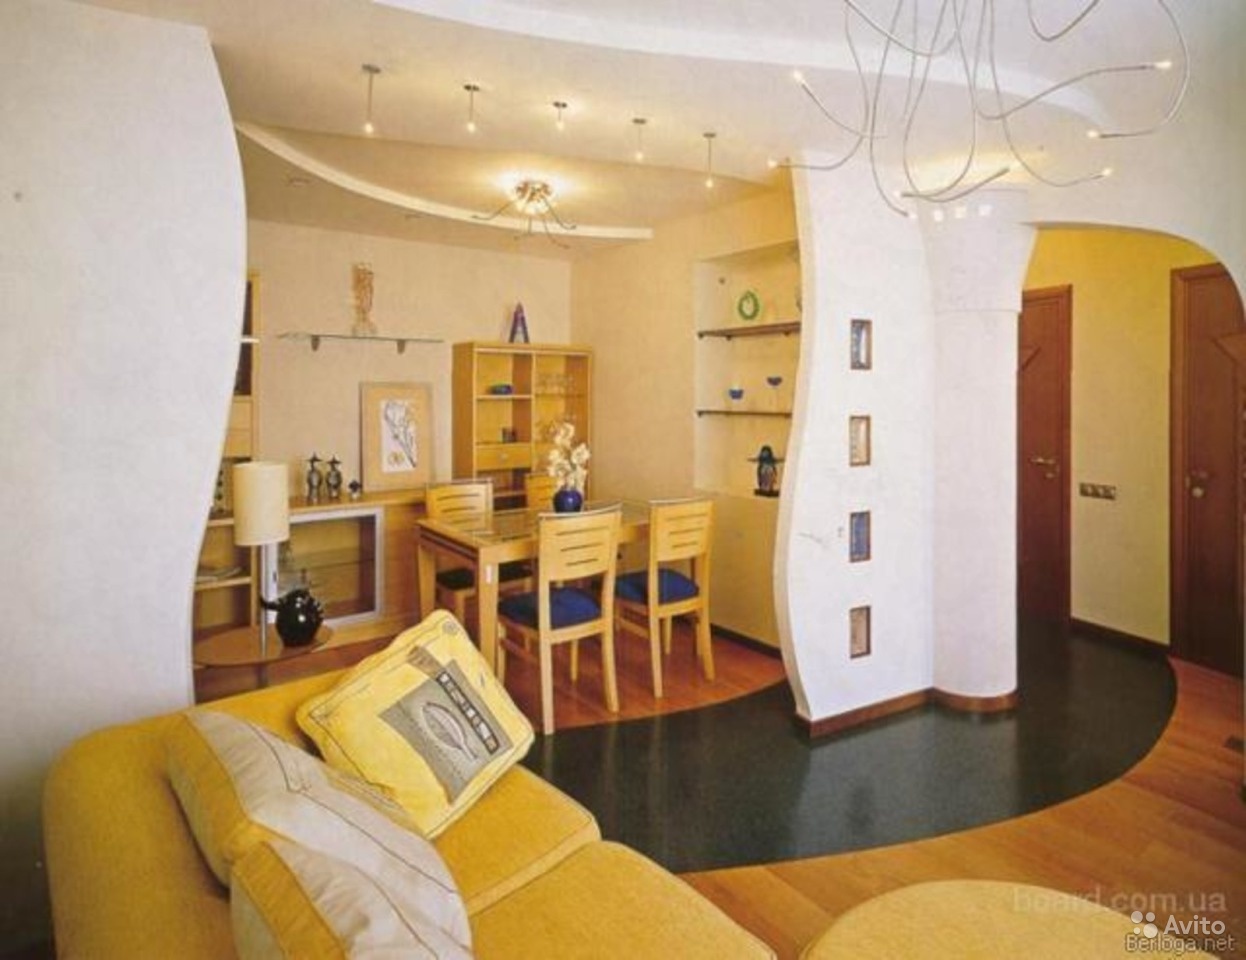
The zone design highlights a specific area, highlighting the work area or recreation area.
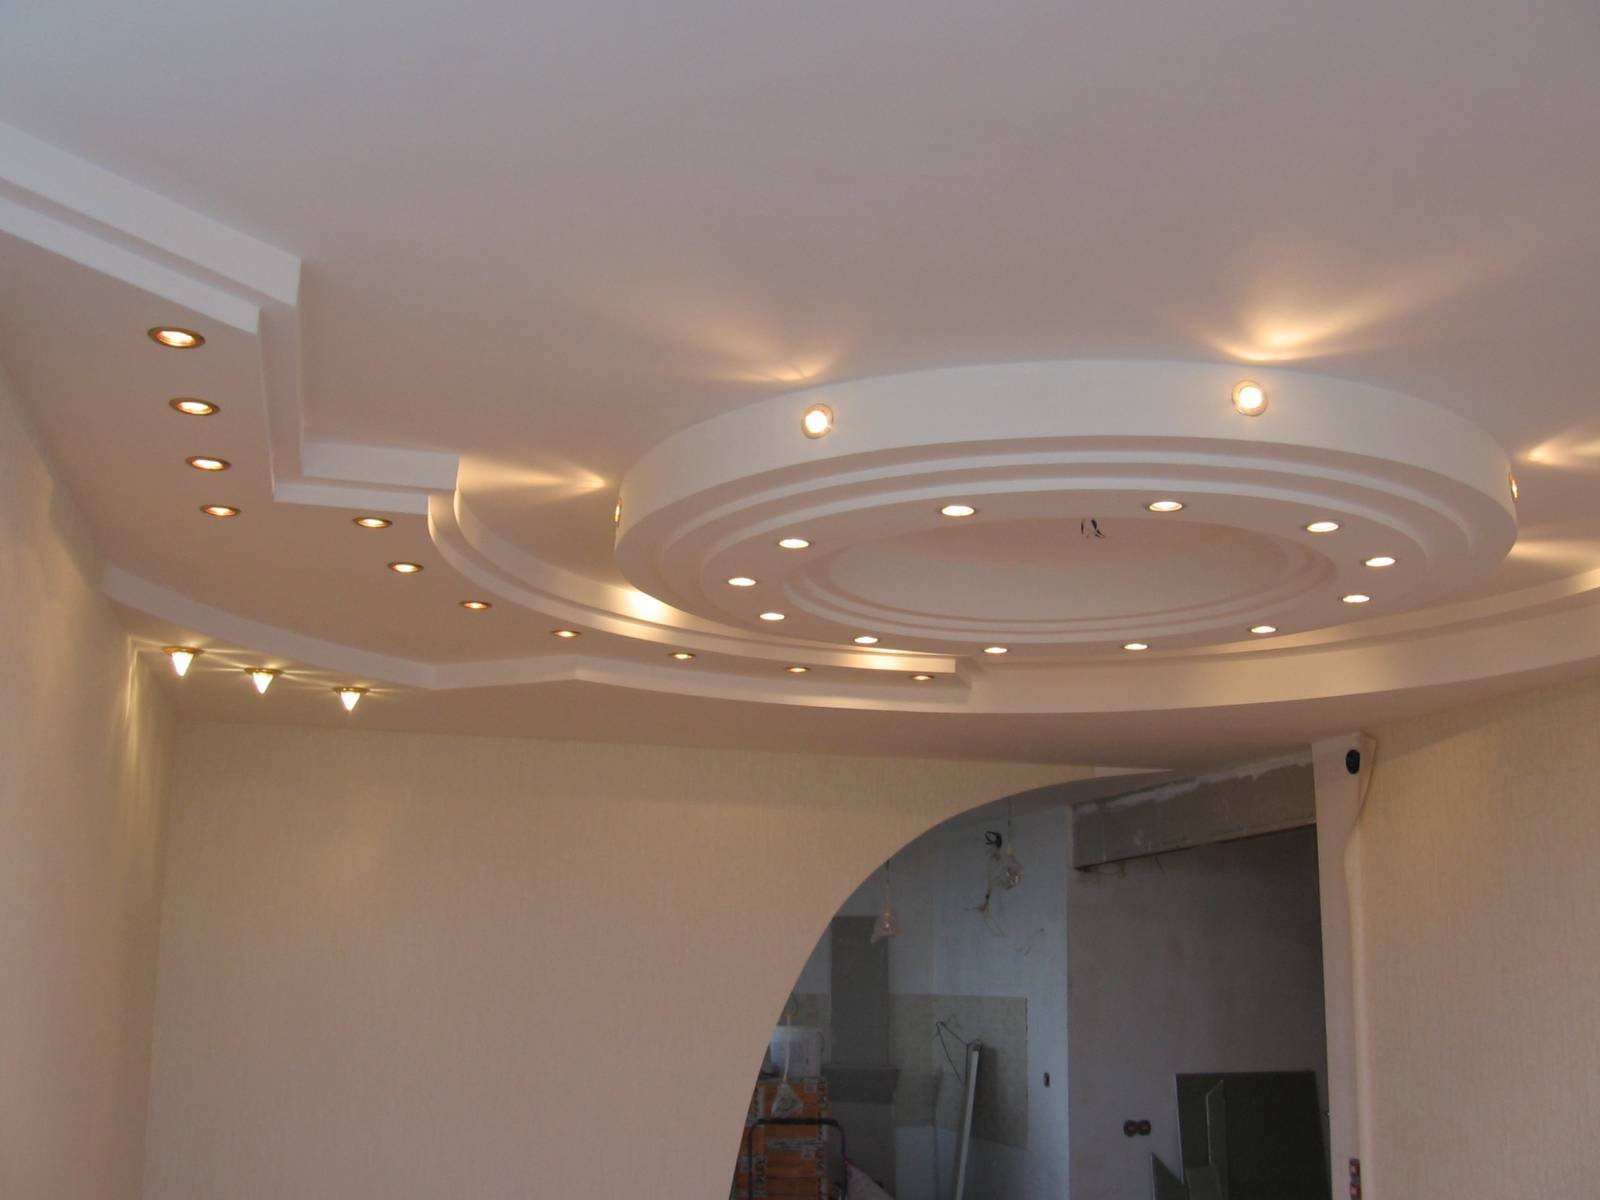
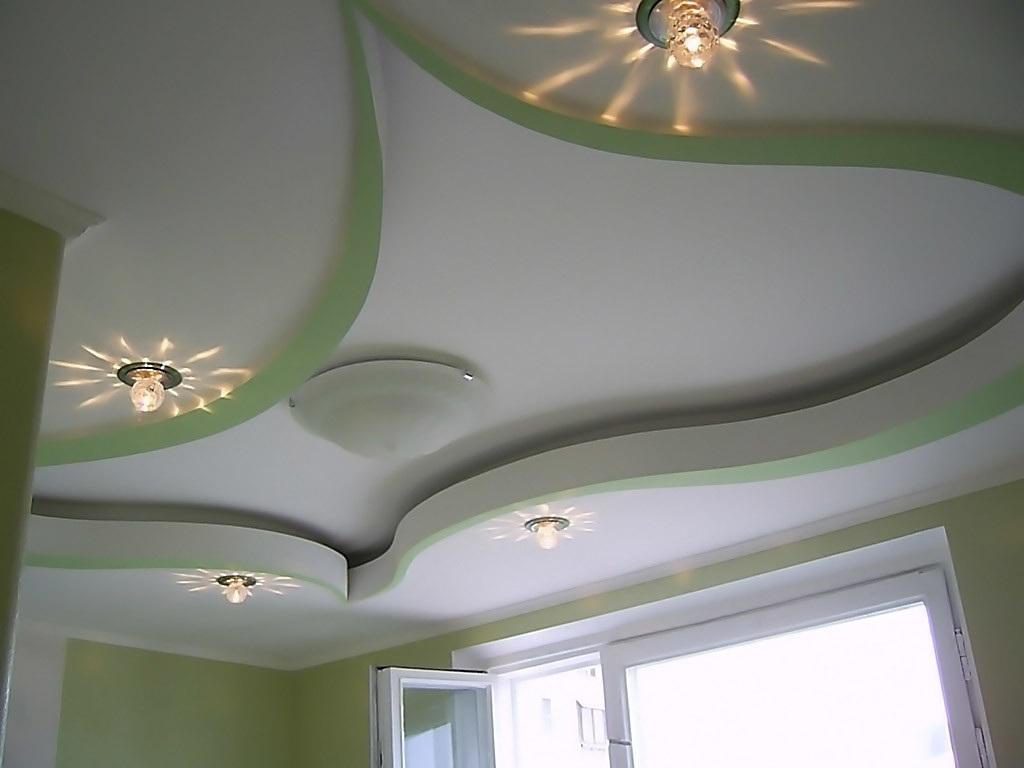
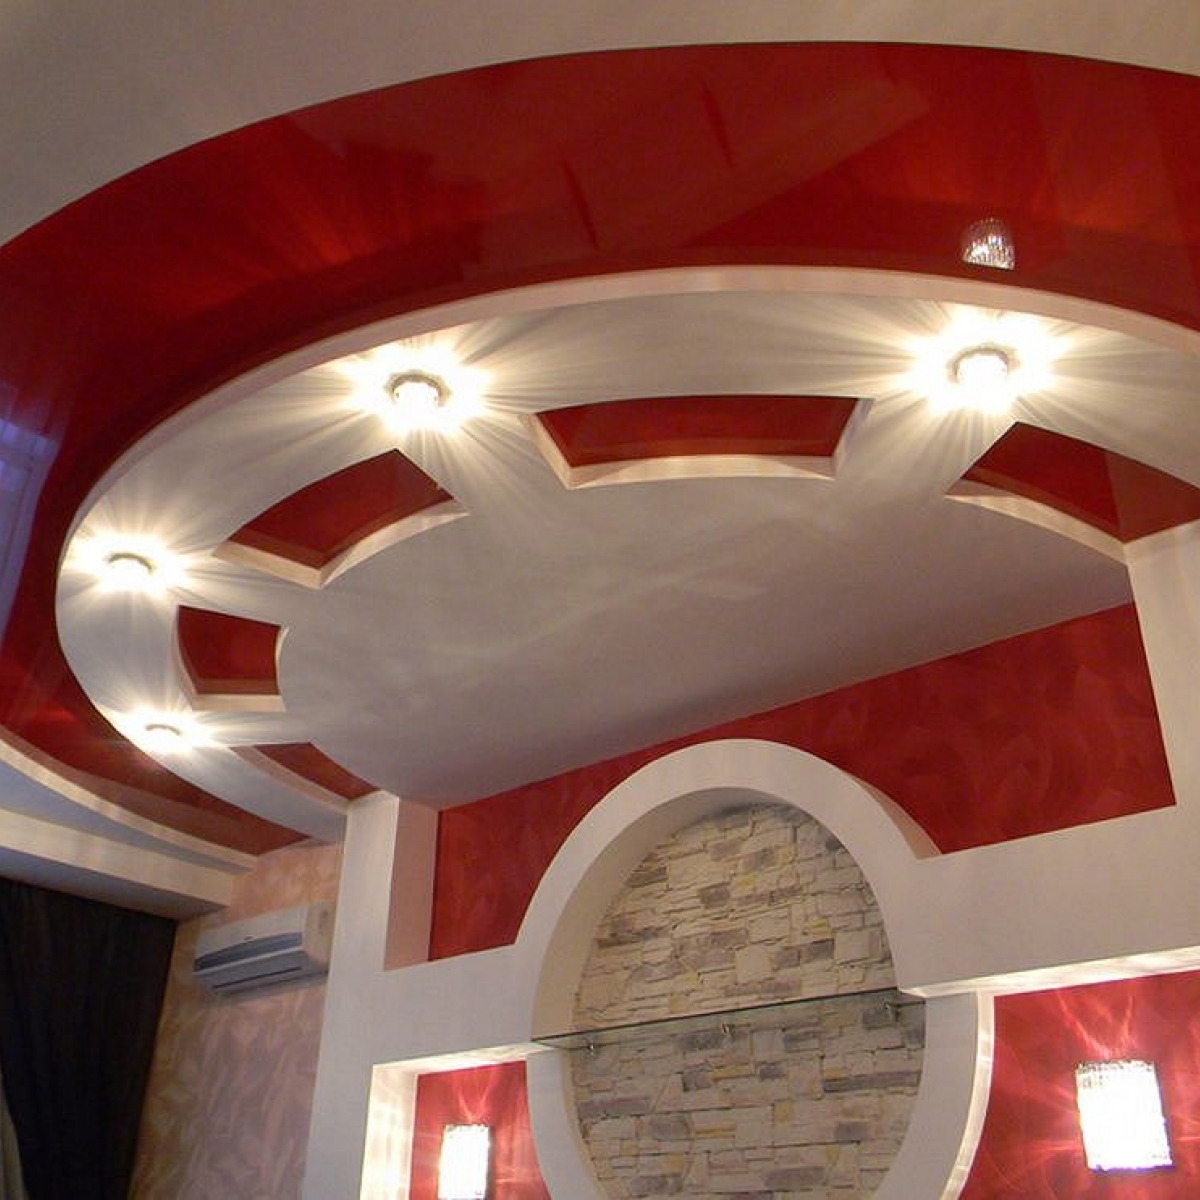
Complicated structures can be given different forms: arched, patterned, figured. The form can also be in the form of a flower, a geometric shape or a spiral. Everything depends on the owner’s imagination and the style in which it was decided to arrange the premises.
Design
The design of the ceiling of the GCR can have an infinite number of options.
There are a number of nuances:
- If the room is spacious and has sufficient height, then it is permissible to arrange a multi-level ceiling and decorate it, for example, by laying out molded baguettes, friezes, medallions, ovals. It is beautiful if the pattern on the floor duplicates the pattern of the ceiling surface.
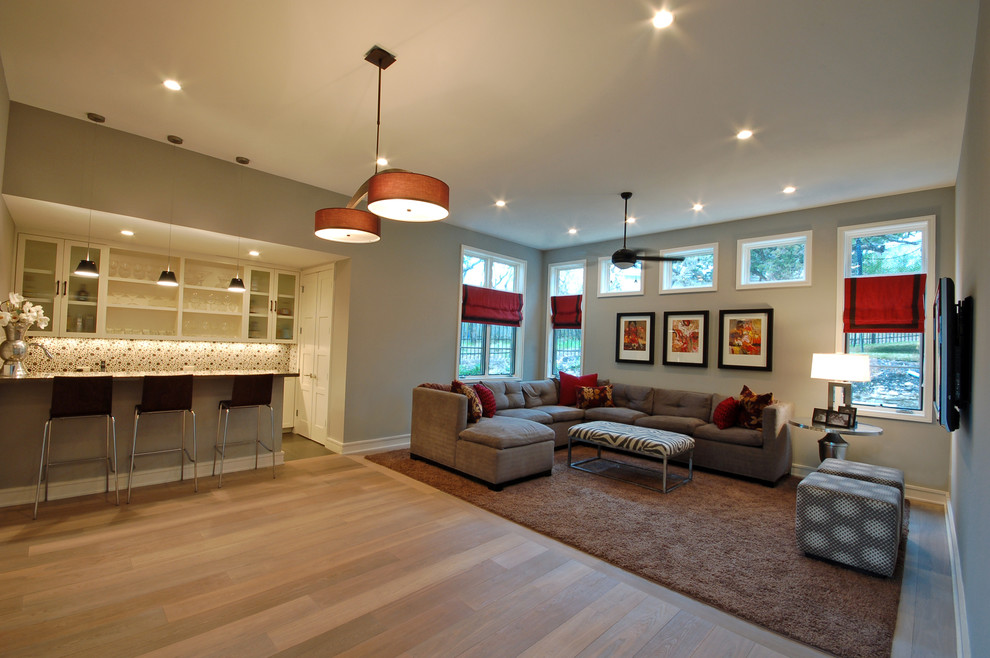
- If the room has a large area, then it can be zoned, highlighting, for example, a recreation area with a home cinema or a dining area. In these cases, it is also good to provide an appropriate lighting for each section with the possibility of a separate on and off - the room will look even more impressive.


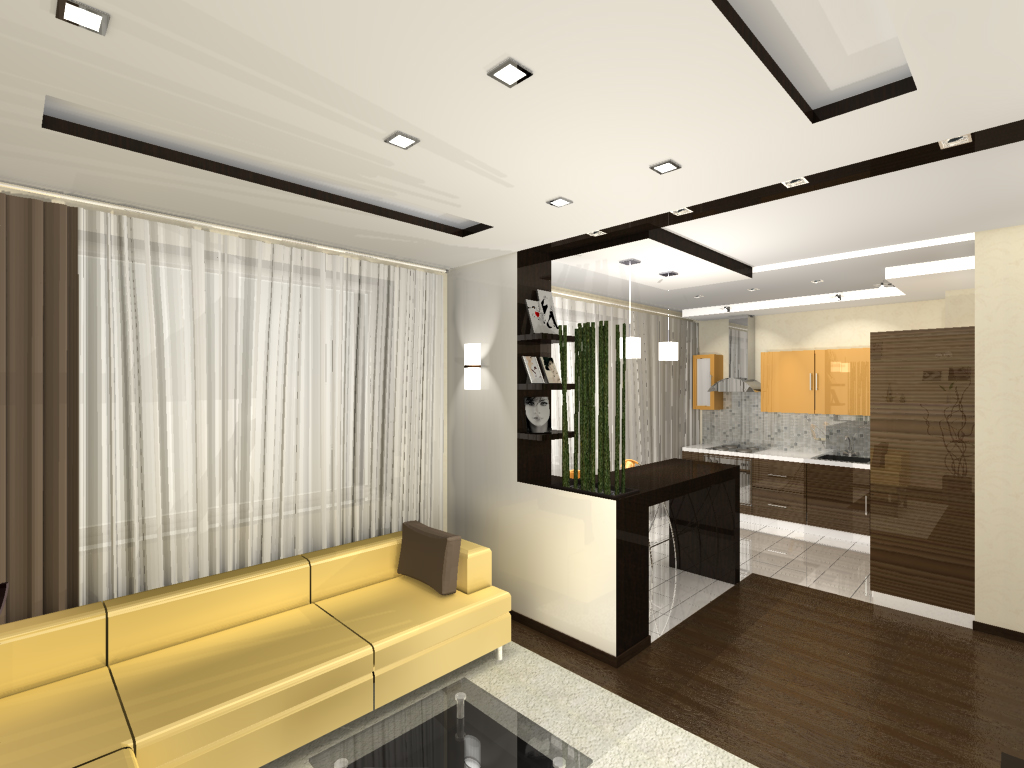
- If the room is small and low, then it is better not to pile up multi-level structures in it - one level is enough. Not to anything, and large ceiling or chandelier with pendants. Harmonious will look most spotlights, mounted in the ceiling surface.
- "Air" space room will add a cornice, if you make it small and let around the perimeter of the ceiling.
- Visually enlarge the room will help this technique: to paint the surface of the ceiling and walls in one color, preferably a light scale.
- After consulting with an interior designer, you can consider installing a mirror on the ceiling.

- Visually, you can “raise” the ceiling in another way: by combining a stretch ceiling with a shiny, glossy surface and a suspension structure made of gypsum board in the interior of one room.
- The ceiling should not differ in style from the rest of the interior space. For example, in a room made in the style of Provence, the ceiling with a mirror surface will look strange.
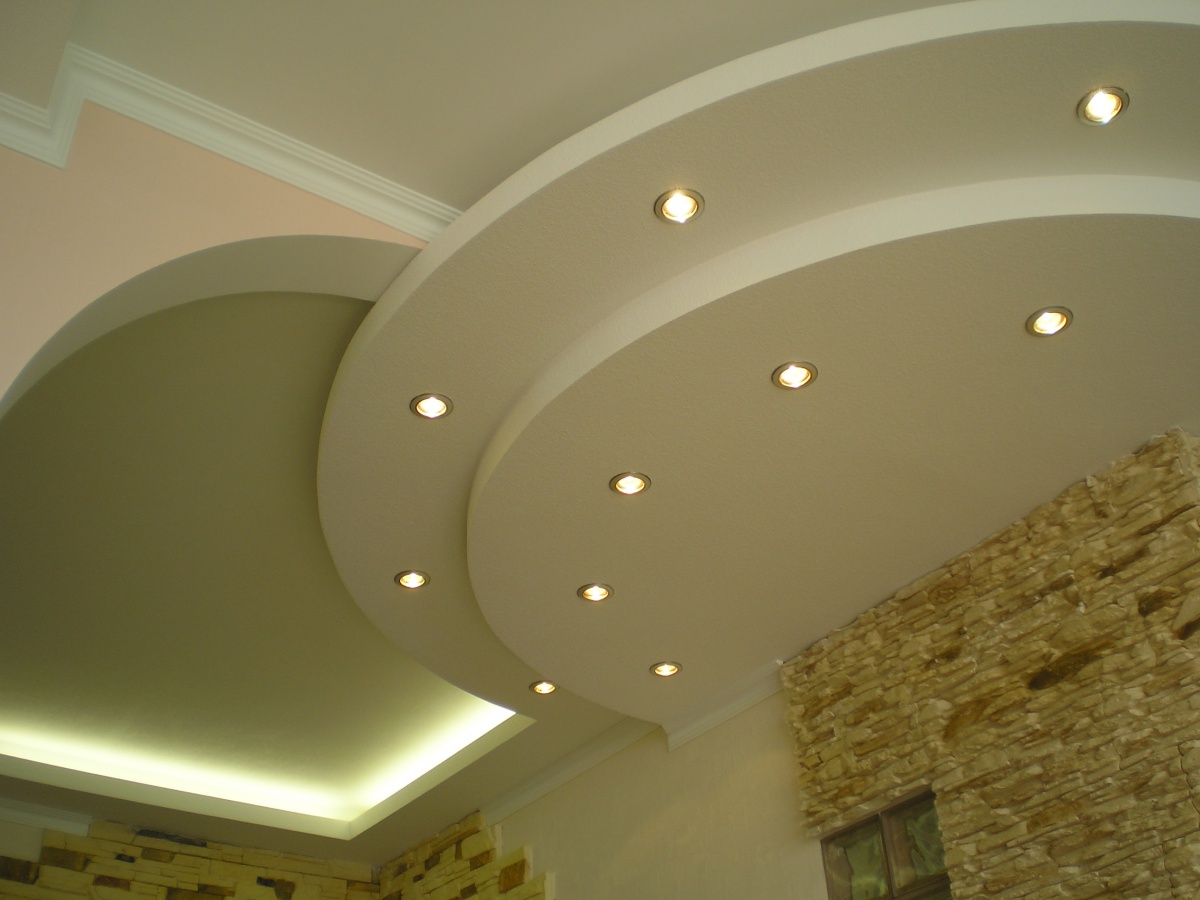
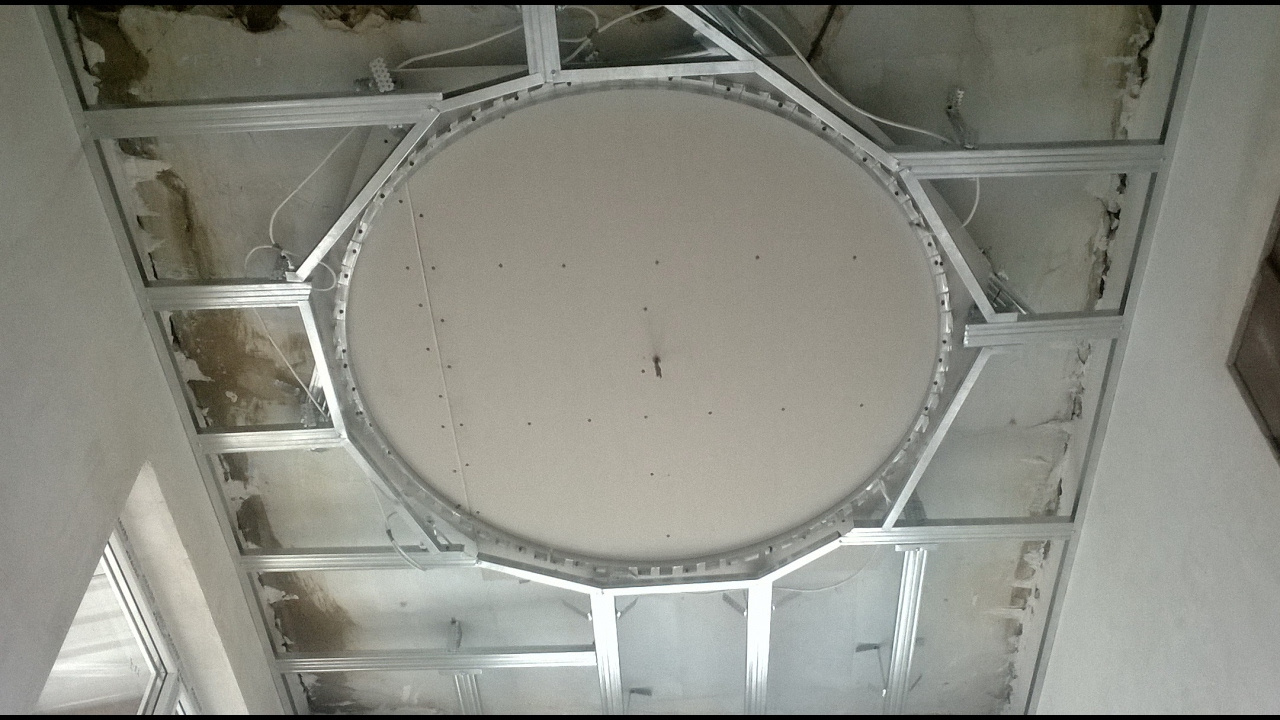
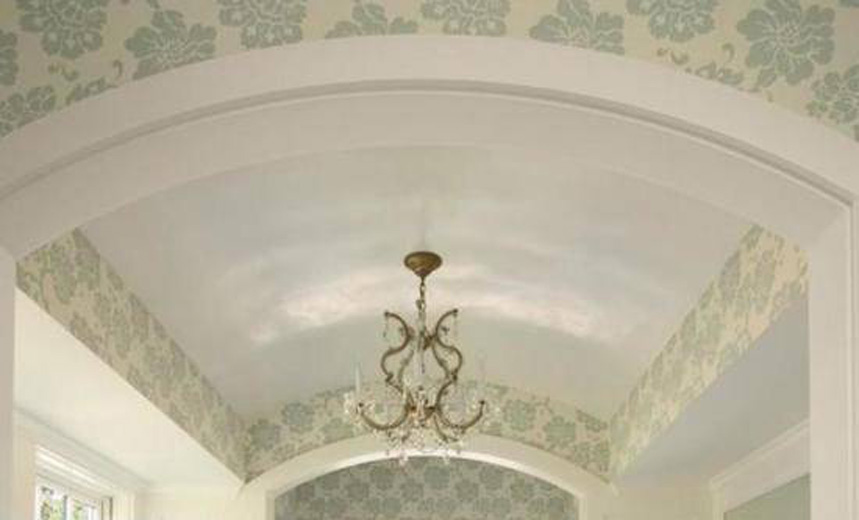
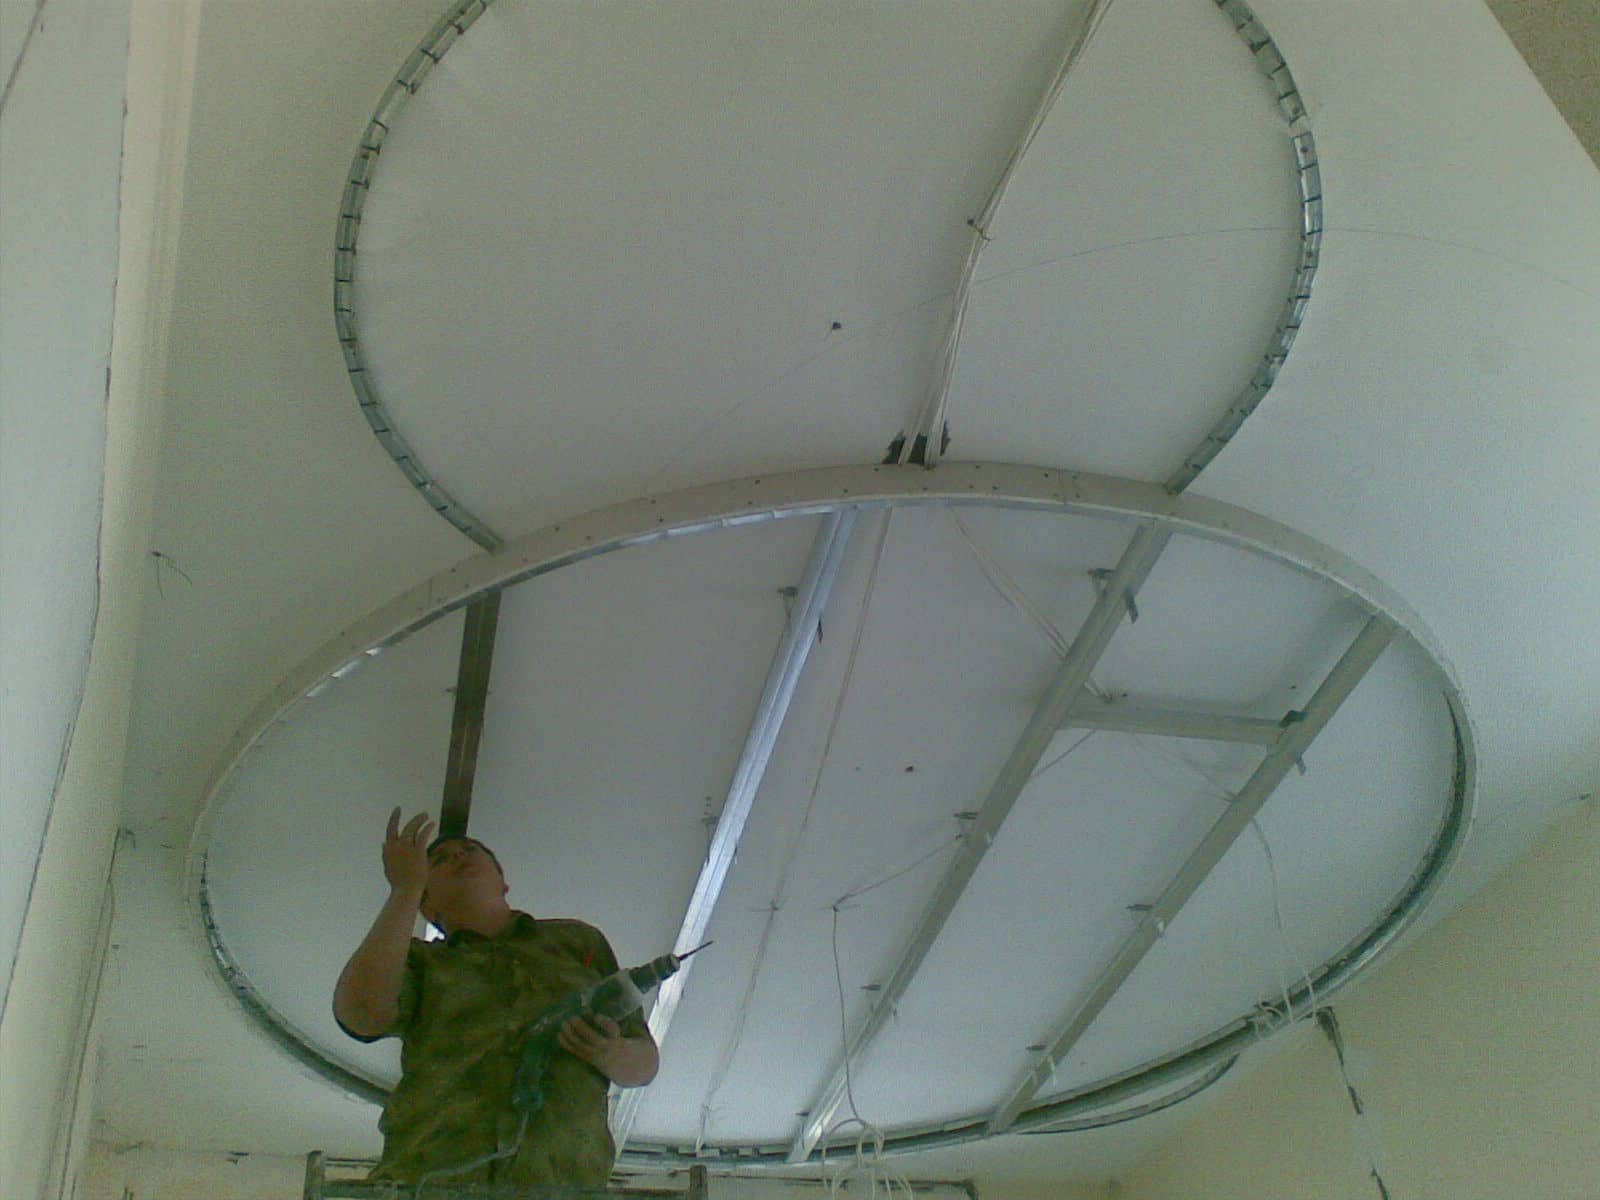
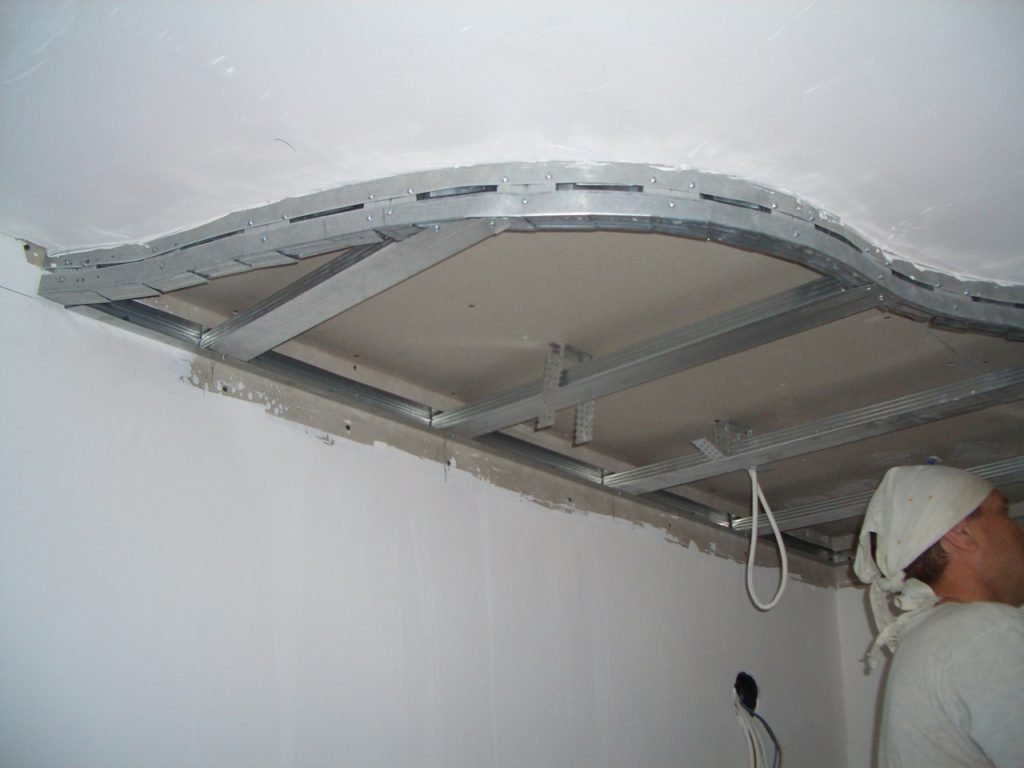
- The most original view of the ceiling of the GCR plates - arched. The lightest arch ceiling is a semi-cylindrical one. The main condition is to correctly mount the base for the ceiling.

There are four main ceiling design options:
- single level;
- two-level;
- three level;
- figured (this includes the arches).
Single-level ceilings are simple and reliable. For smaller rooms this is the best option.
Decorate it in the following ways:
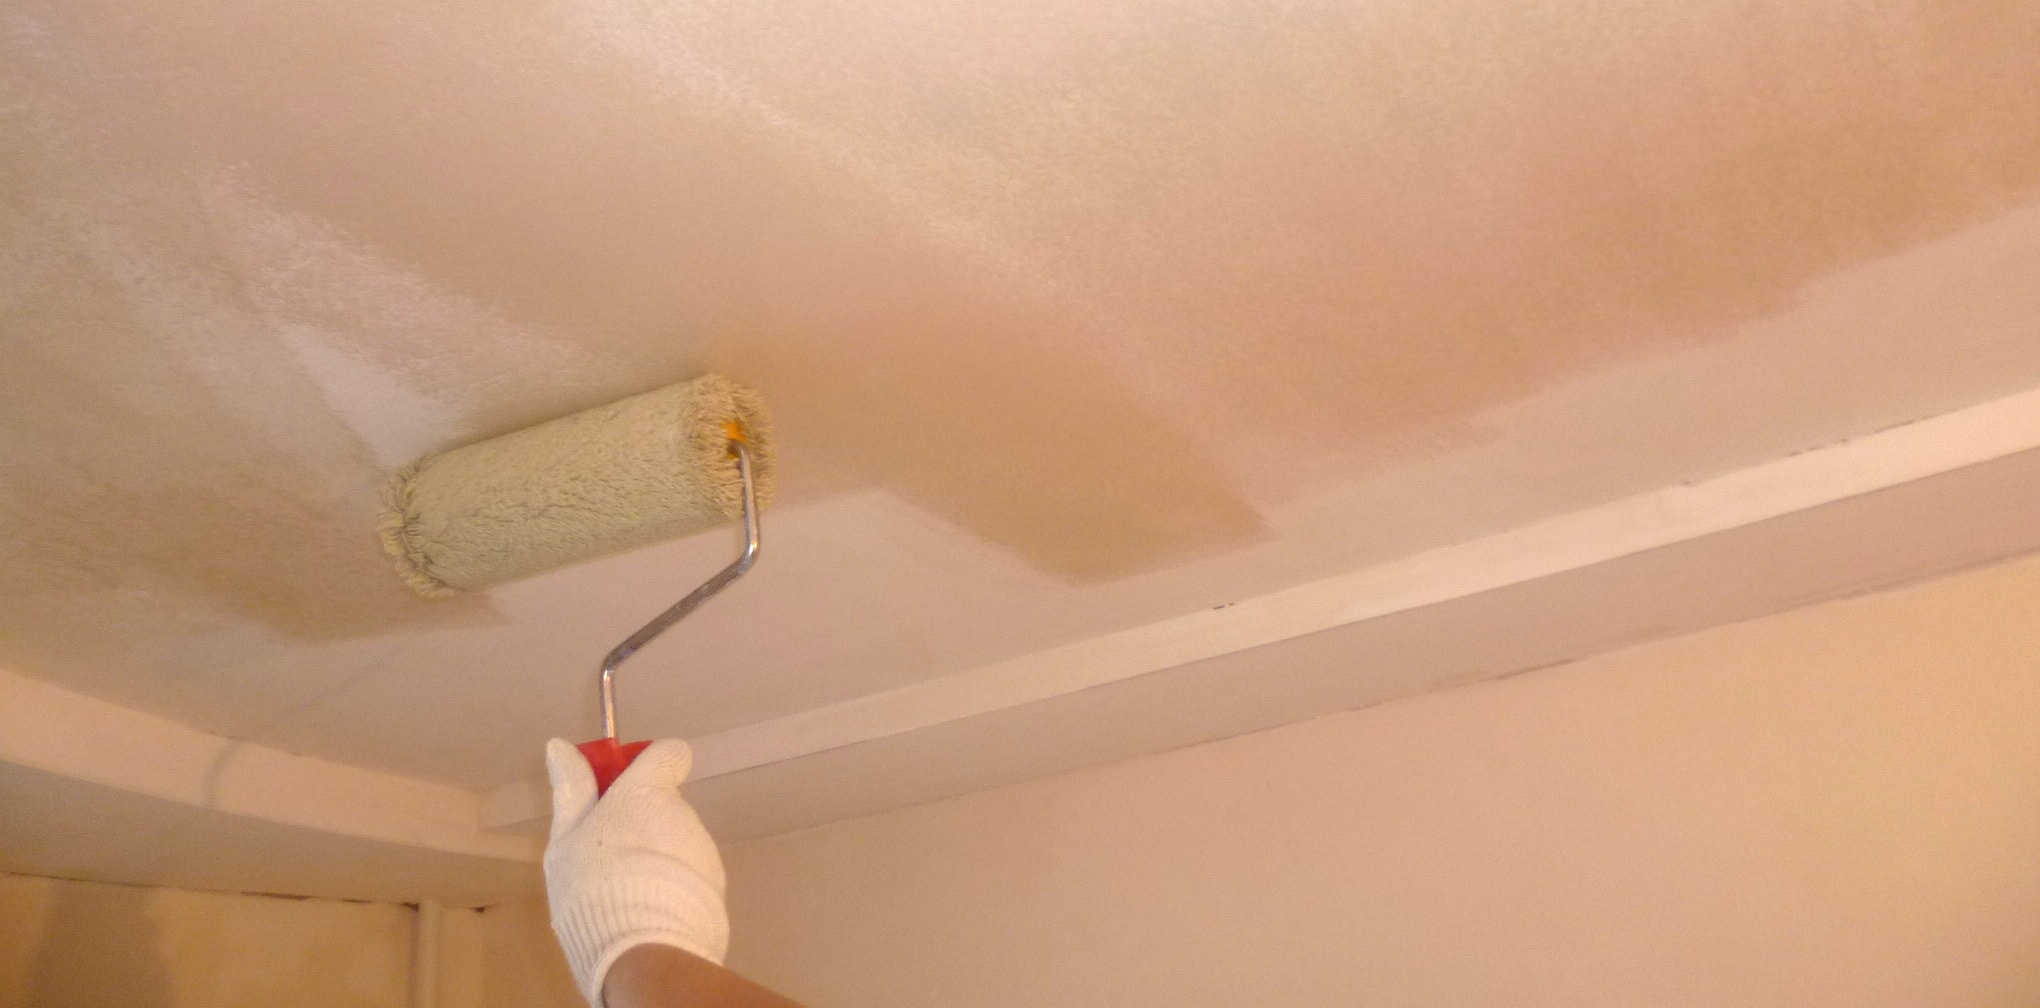
- paint in different colors;
- cover with putty;
- paint by hand;
- paste over the wallpaper.
If the walls in the room below 3 meters, it is better to use light shades. Dark or bright colors can visually reduce the already small space.
Despite the fact that the ceiling is called single-level, it should not have a perfectly flat surface.You can make the level convex or concave, which will give a completely unusual effect. It should be noted that this type of suspended ceiling is the easiest way to do it yourself.
The most popular option is the two-level, as for the three-level - it is quite difficult to perform.
Two-level ceiling provides a lot of variety of options, they can be used to give different forms of the ceiling surface, and the backlight can give even greater originality of the design. To build such a ceiling is easy, but still, some effort is required.
If the ceiling height allows, you can do something like a “reflection”: place the protrusion on the ceiling above the similar podium design on the floor.

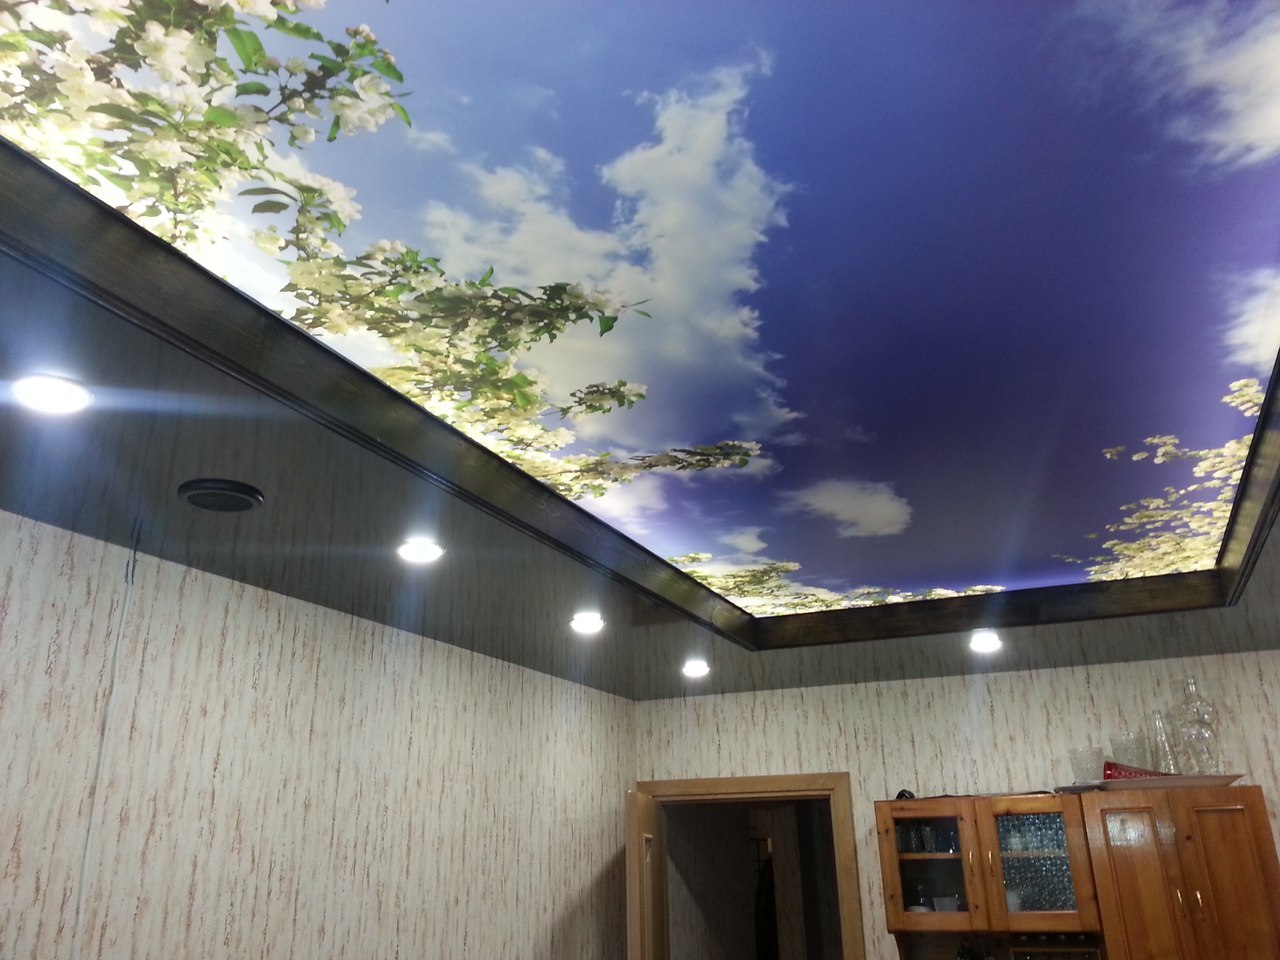
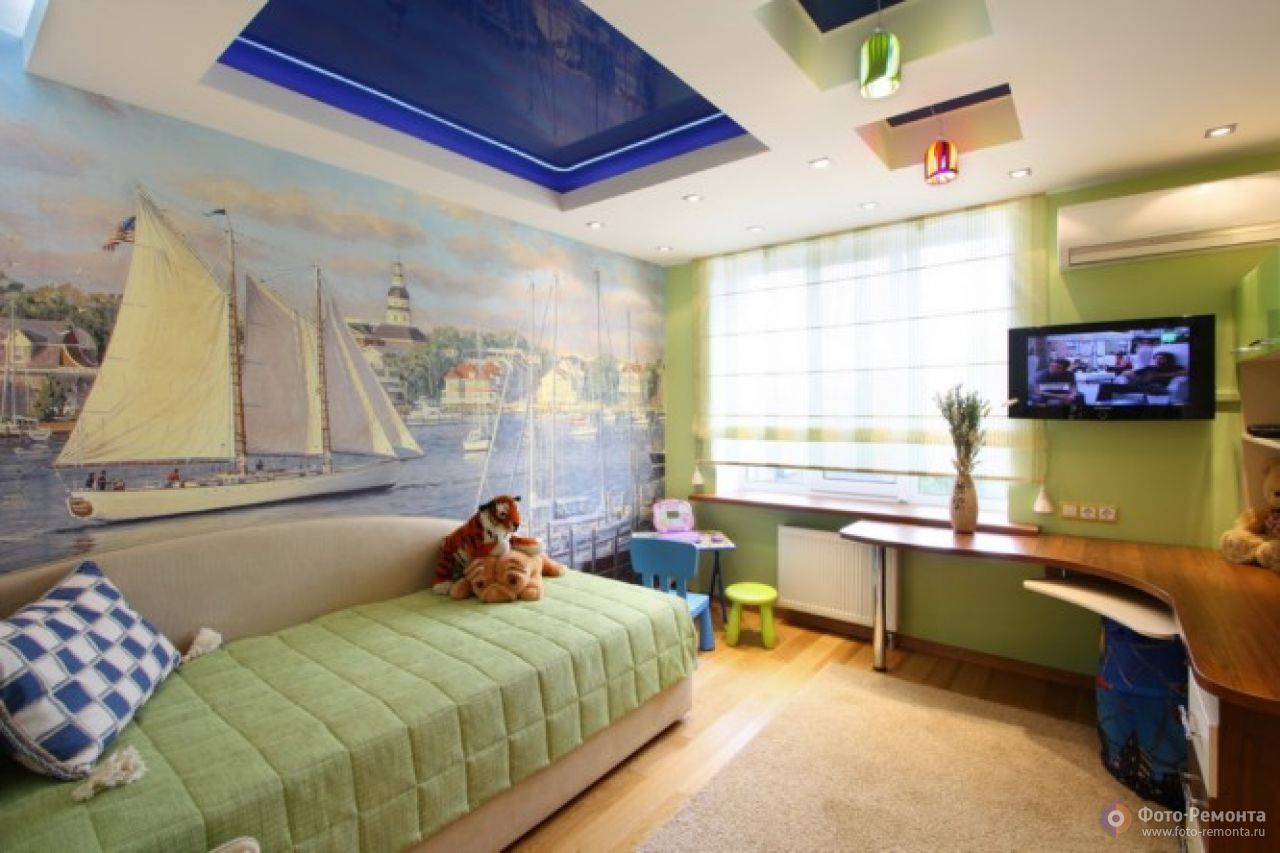
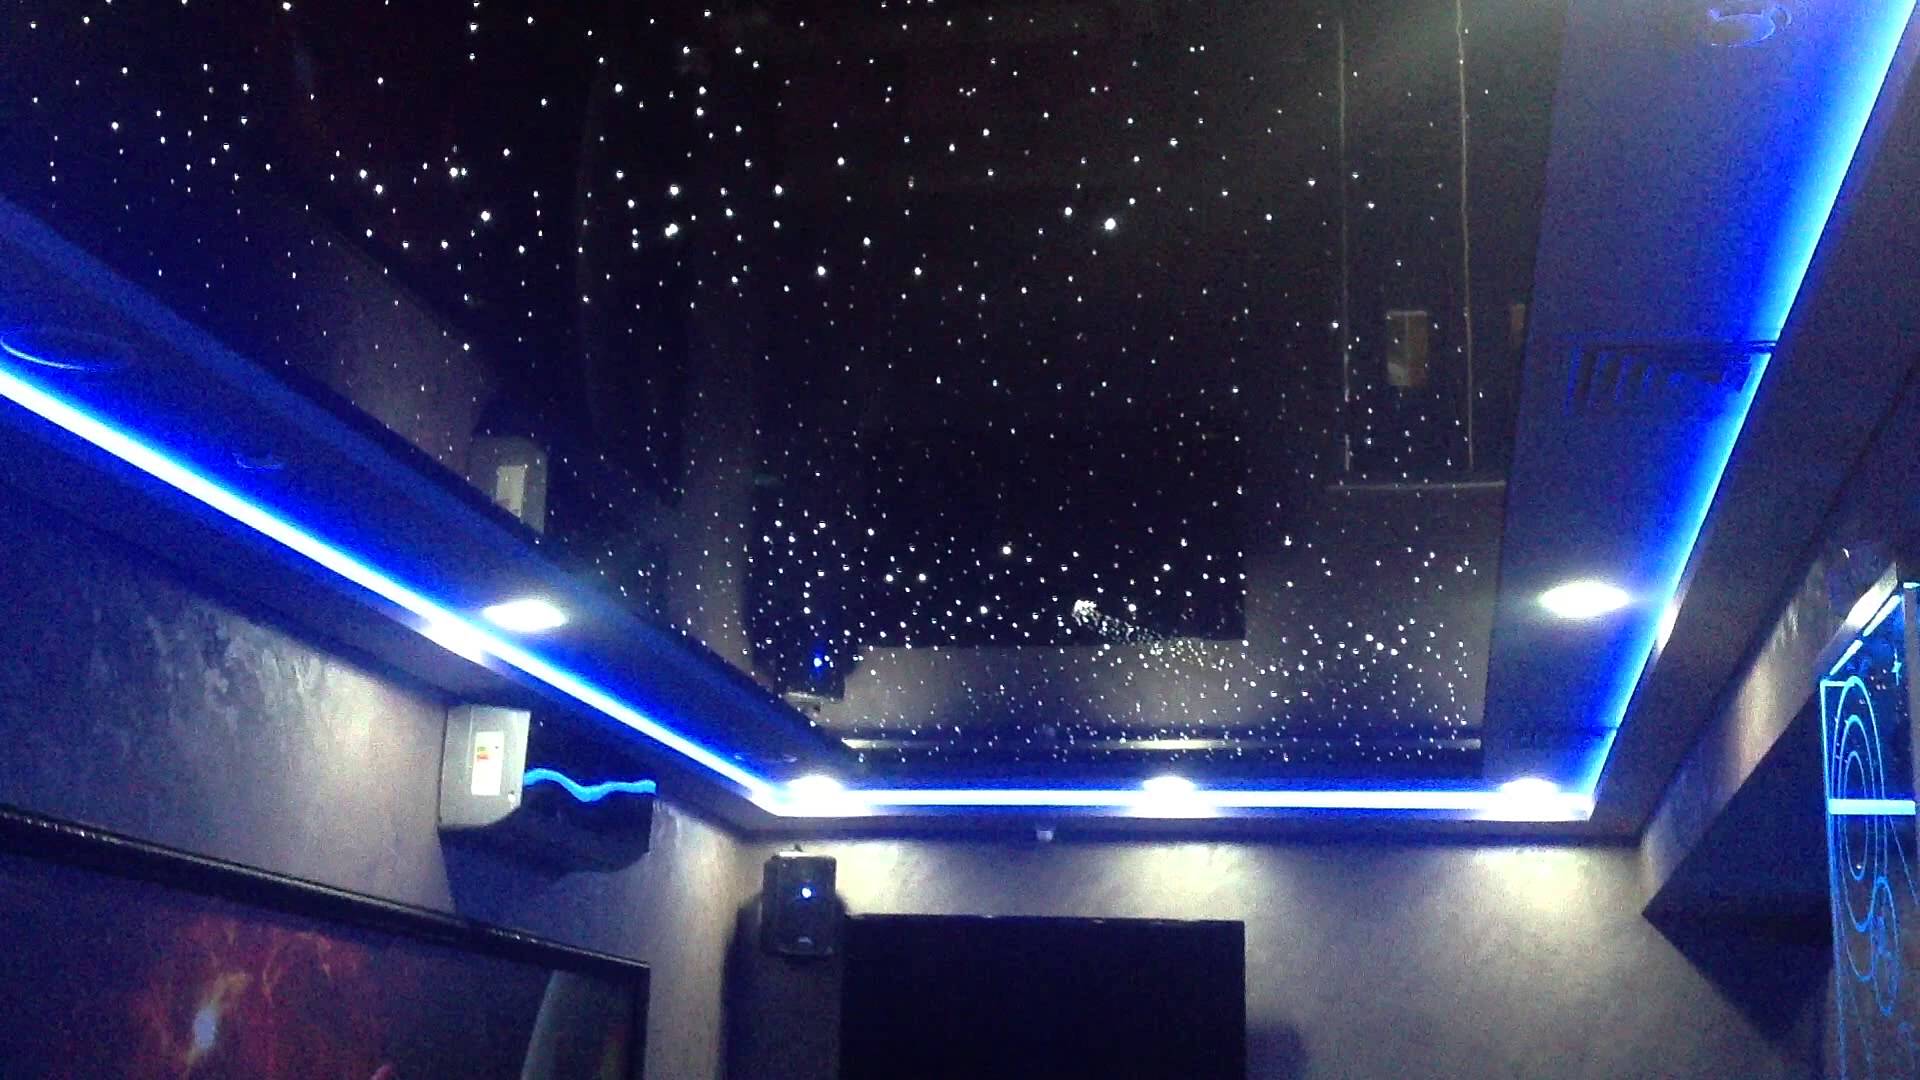
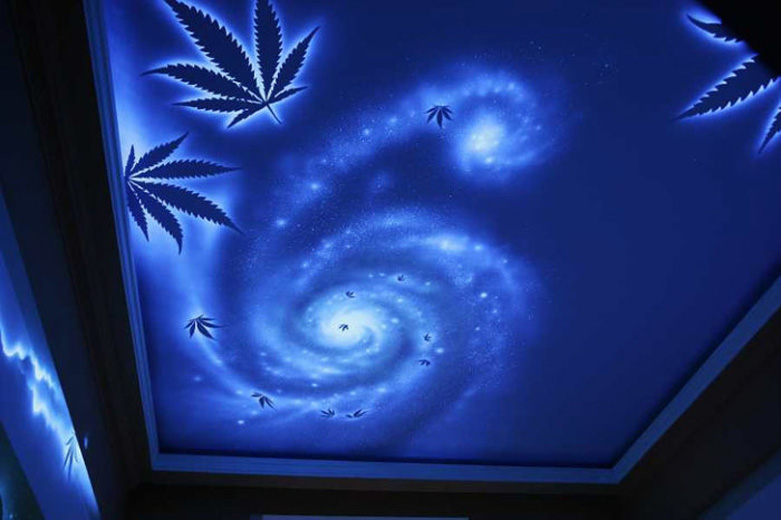
Designs of slabs GKL accompanied by well-designed lighting can look unusually impressive. The flight of design ideas can create original compositions: waves, a combination of matte and glossy surfaces, zigzags and ovals, hand-painted, 3D-wallpaper ("wooden", "sky", "sea and palm trees"). Of course, the design is not limited to one game of levels and colors, without anything you can’t achieve the desired effect.And here the LEDs and halogen, chandeliers and ceiling lamps, mirrors and point lights are used.

Tiered designs have a very attractive appearance. It is best to build them in a room with high and very high ceilings, for example, in a private house, as they "eat up" a significant part of the height of the room. It is more difficult to make them than, for example, a two-tier structure, and, since drywall is an extremely convenient material to work with, it may take a little more time, and the result will be a stunning effect.
Stepped elements of plasterboard can be made to individual order, by hiding in them, for example, ceiling beams or ventilation hood. About built-in light sources should not even be mentioned - they are a prerequisite for a multi-tiered ceiling structure.

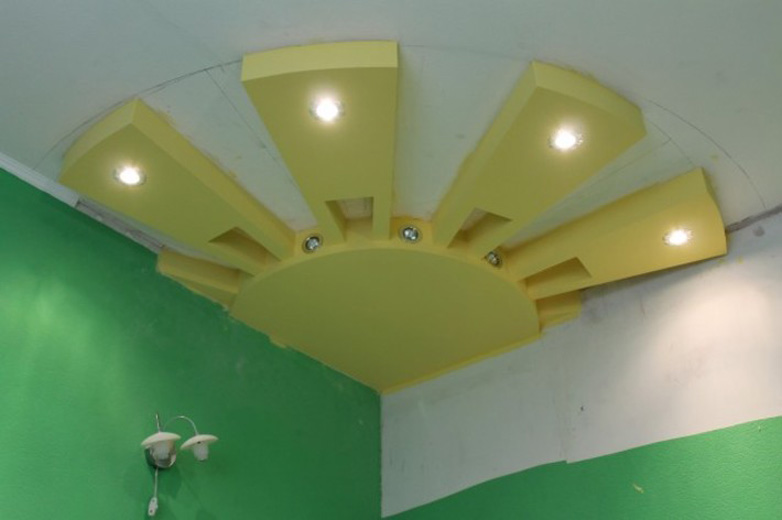
The shaped ceiling requires considerable skills in its design and installation, but non-standard elements (flower, solar system, clouds, starry sky) will appeal to everyone. Drywall has properties that allow you to create from it the desired shape or figures: you can build a structure of intertwined abstract forms, it looks especially good in rooms with a large area.Costly, but effective solution - patterns with small cells. The special chic of this ceiling will give a "roll call" with small patches of similar patterns on the walls.
An interesting option is the so-called soaring ceiling. To create it you need to choose the shape (silhouette), which will be located under the ceiling. It is made separately from plasterboard and attached to the already finished construction. Thus, it creates the appearance that the ceiling element is floating in the air. As a rule, this method is combined with highlighting of the “floating” element along the perimeter, which gives an additional effect to the structure.
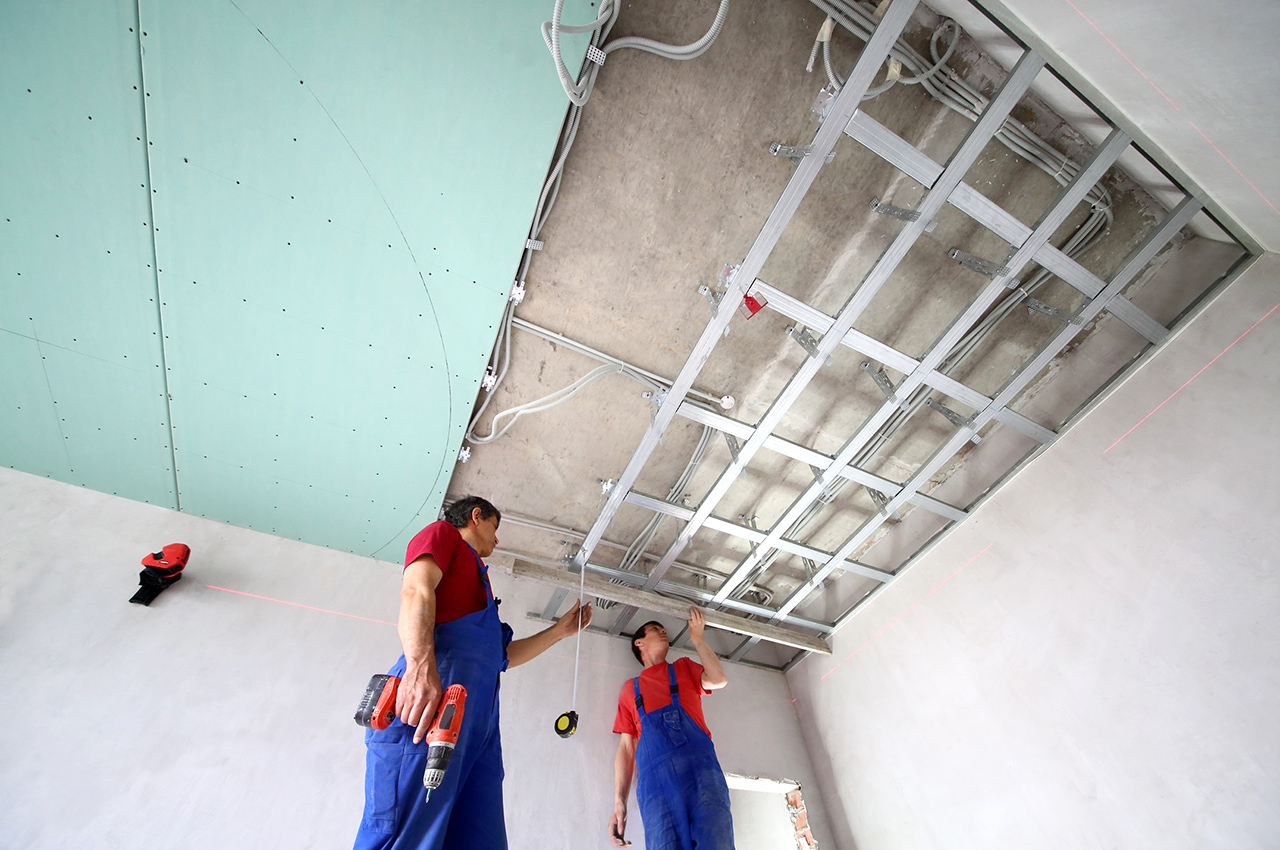
Installation
After the surface preparation of the ceiling is finished, it’s time to start the installation. It is important to strictly observe the sequence of actions and technologies necessary for carrying out each step.
GKL ceiling plates can be:
- hemmed
- suspension.
In a hemmed construction, sheets of plasterboard are attached to the surface of the ceiling with a wooden beam or a curved profile, which is called a sheet set. This is a great option for rooms with a small ceiling height. It is also well suited for installation in a house with hardwood floors.The disadvantage of this type is the inability to hem sheets of drywall so high quality to get a perfectly flat surface.
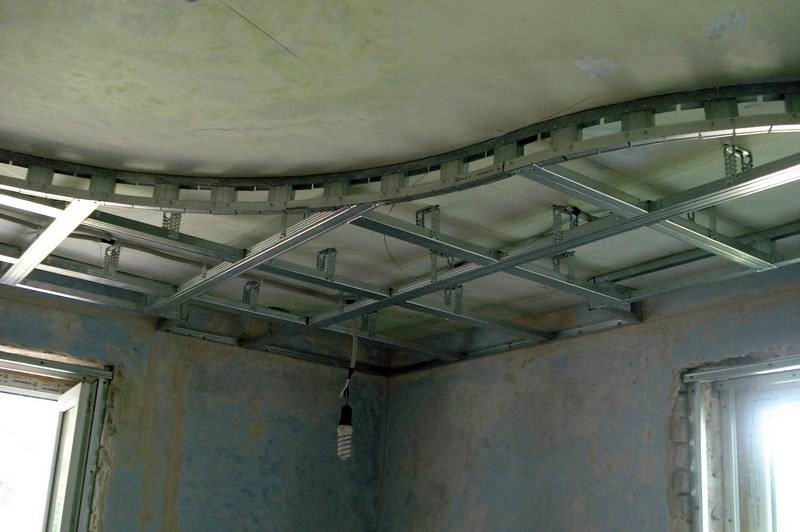
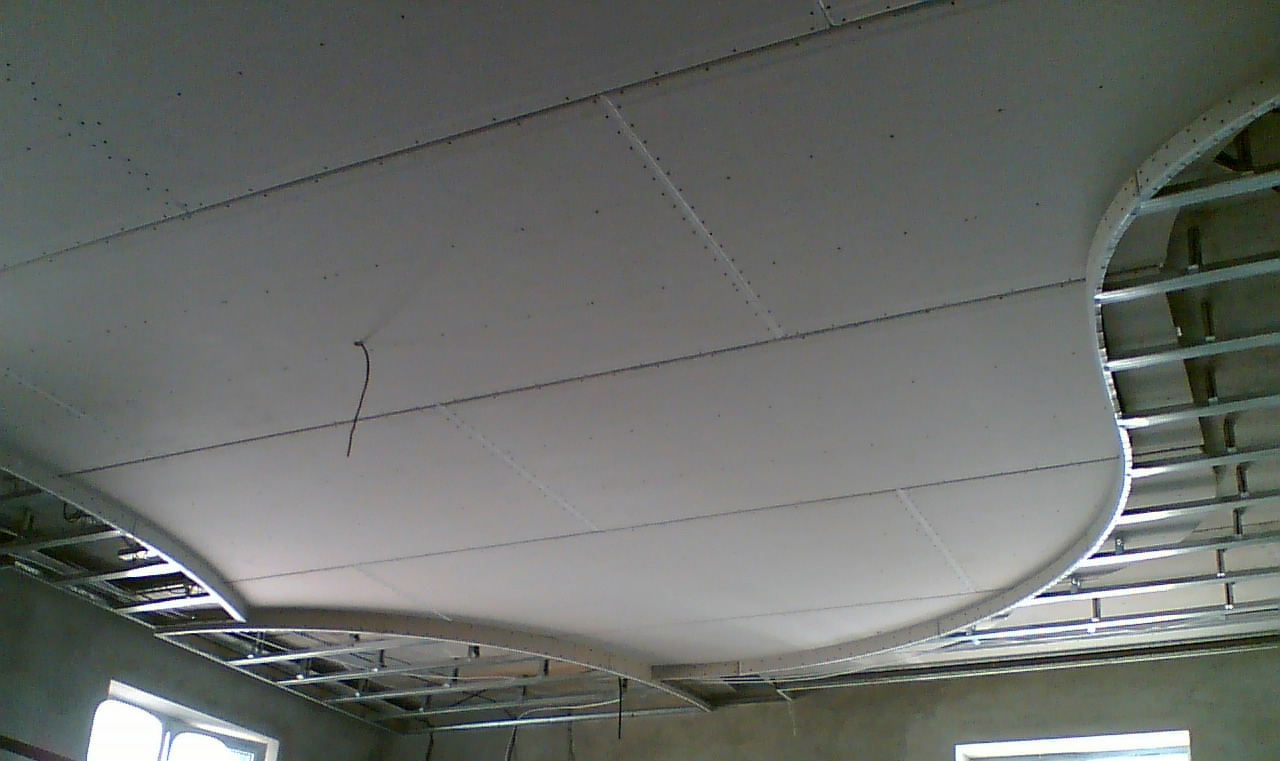
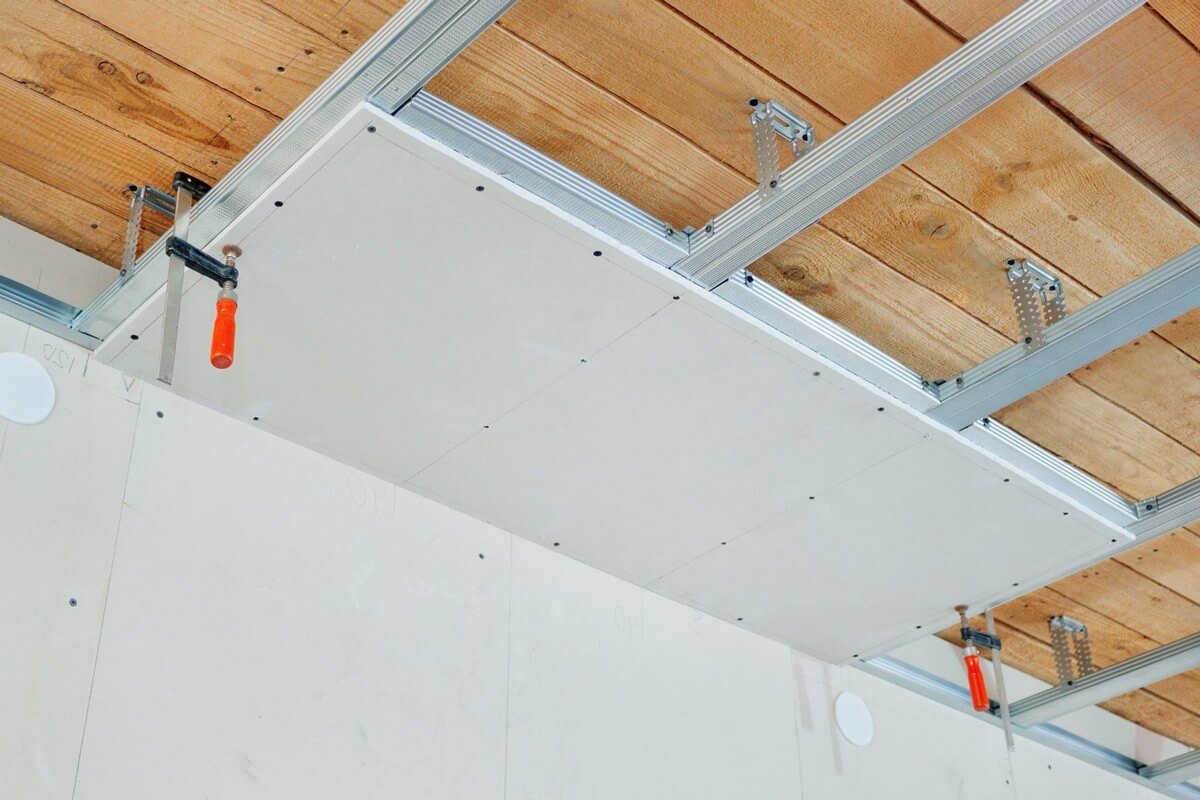
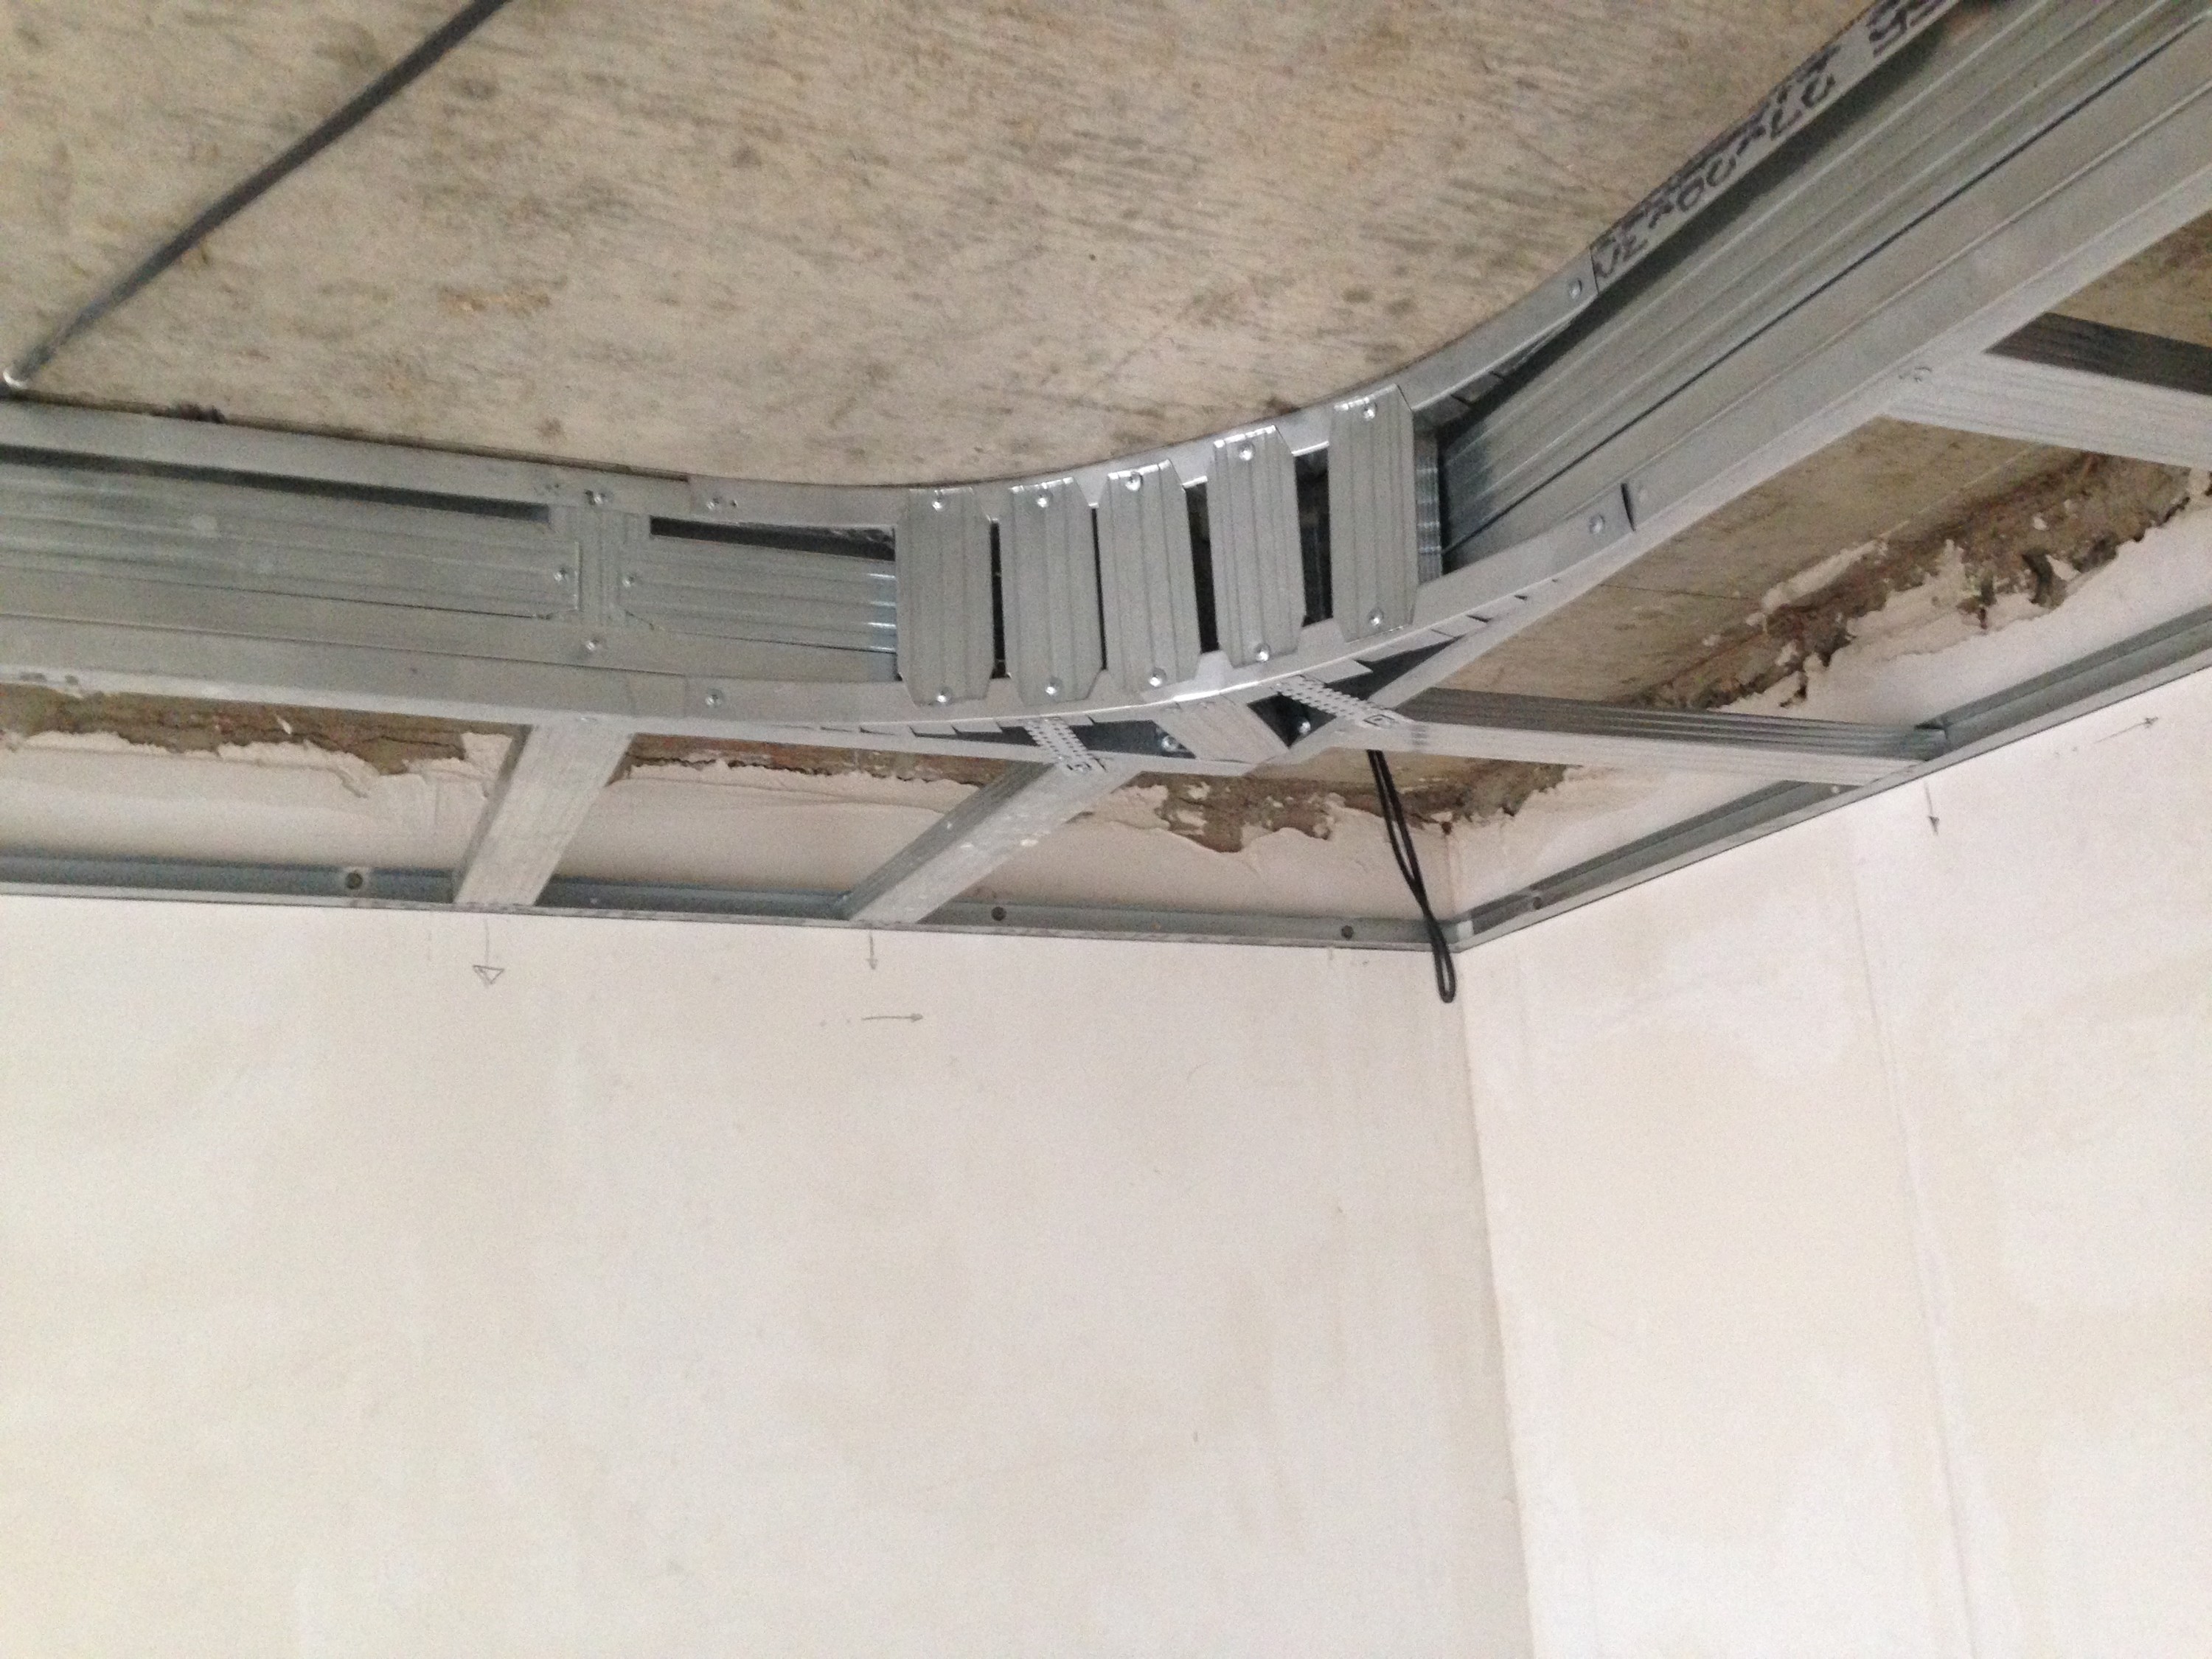
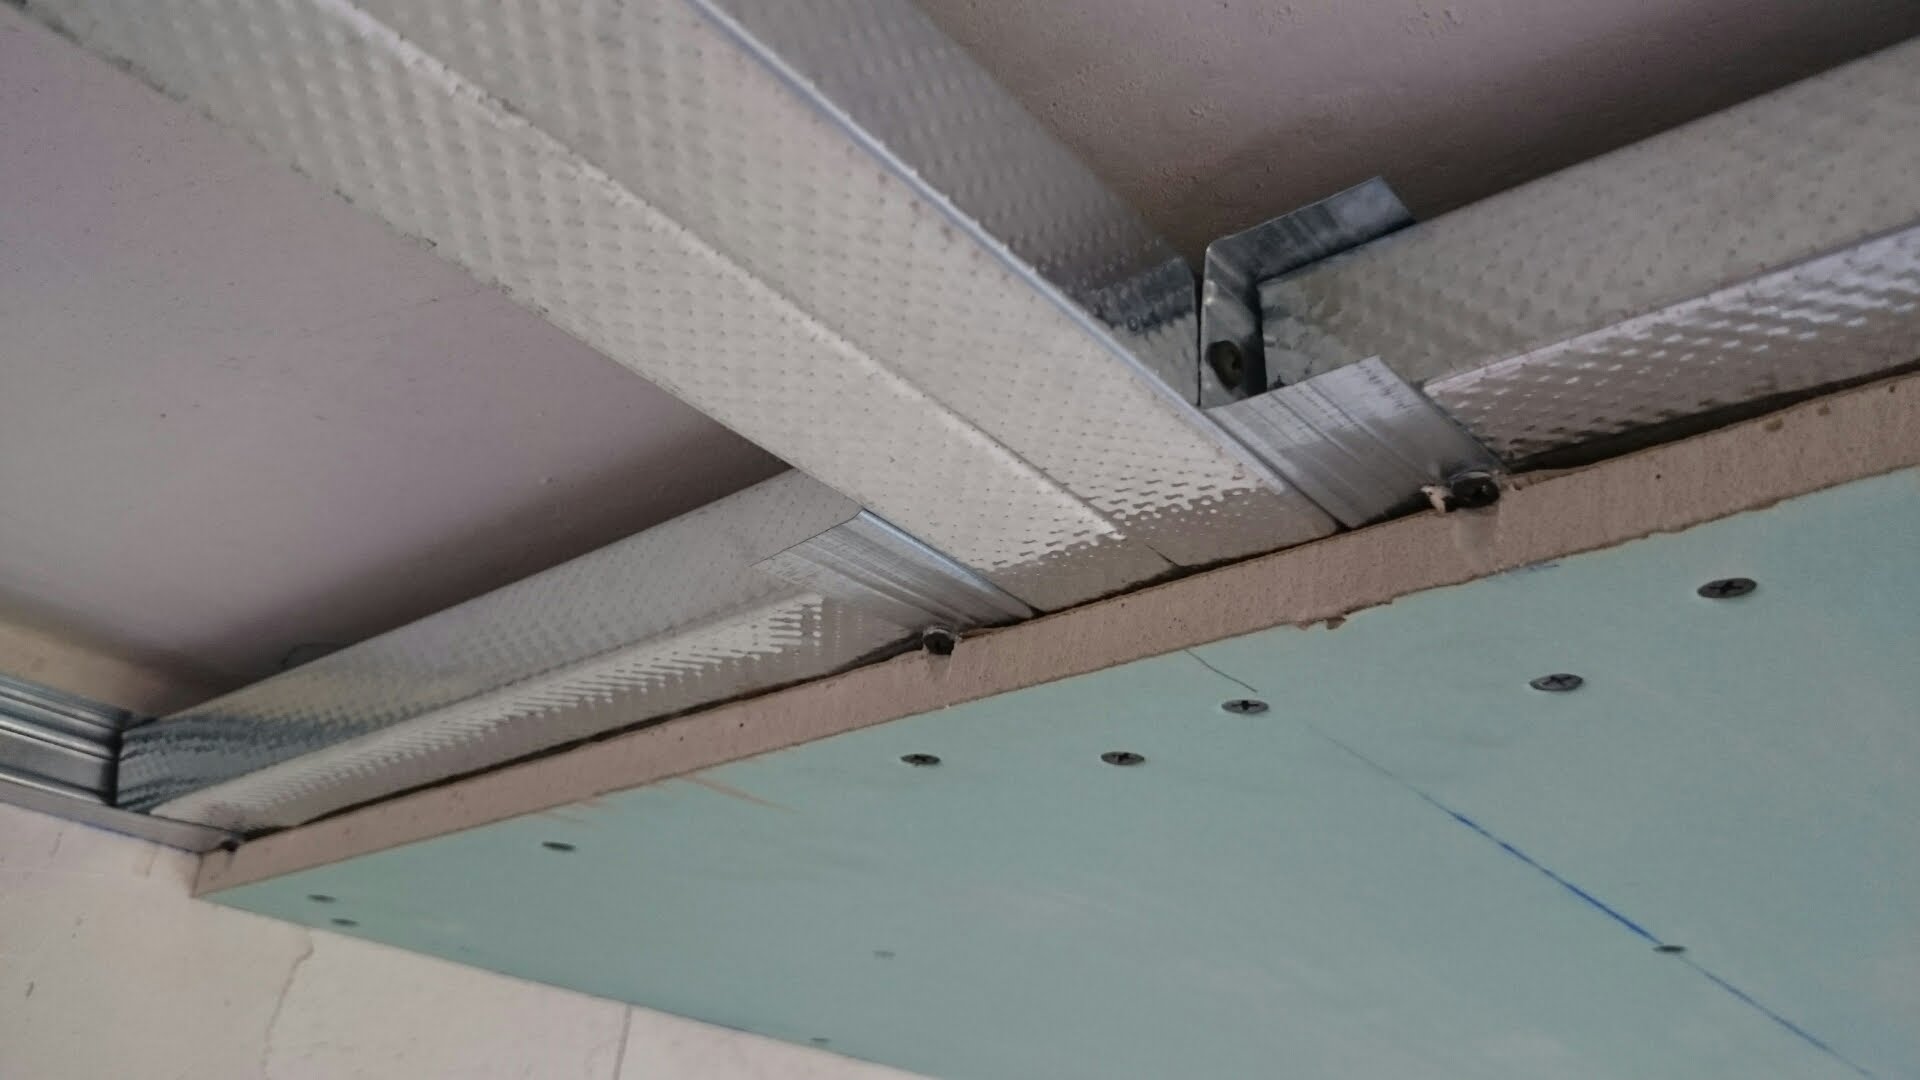
For the suspended ceiling, the plasterboard slabs are mounted on a frame made of profiles fixed on hangers. This design is ideal for hiding ventilation, wiring, lighting.
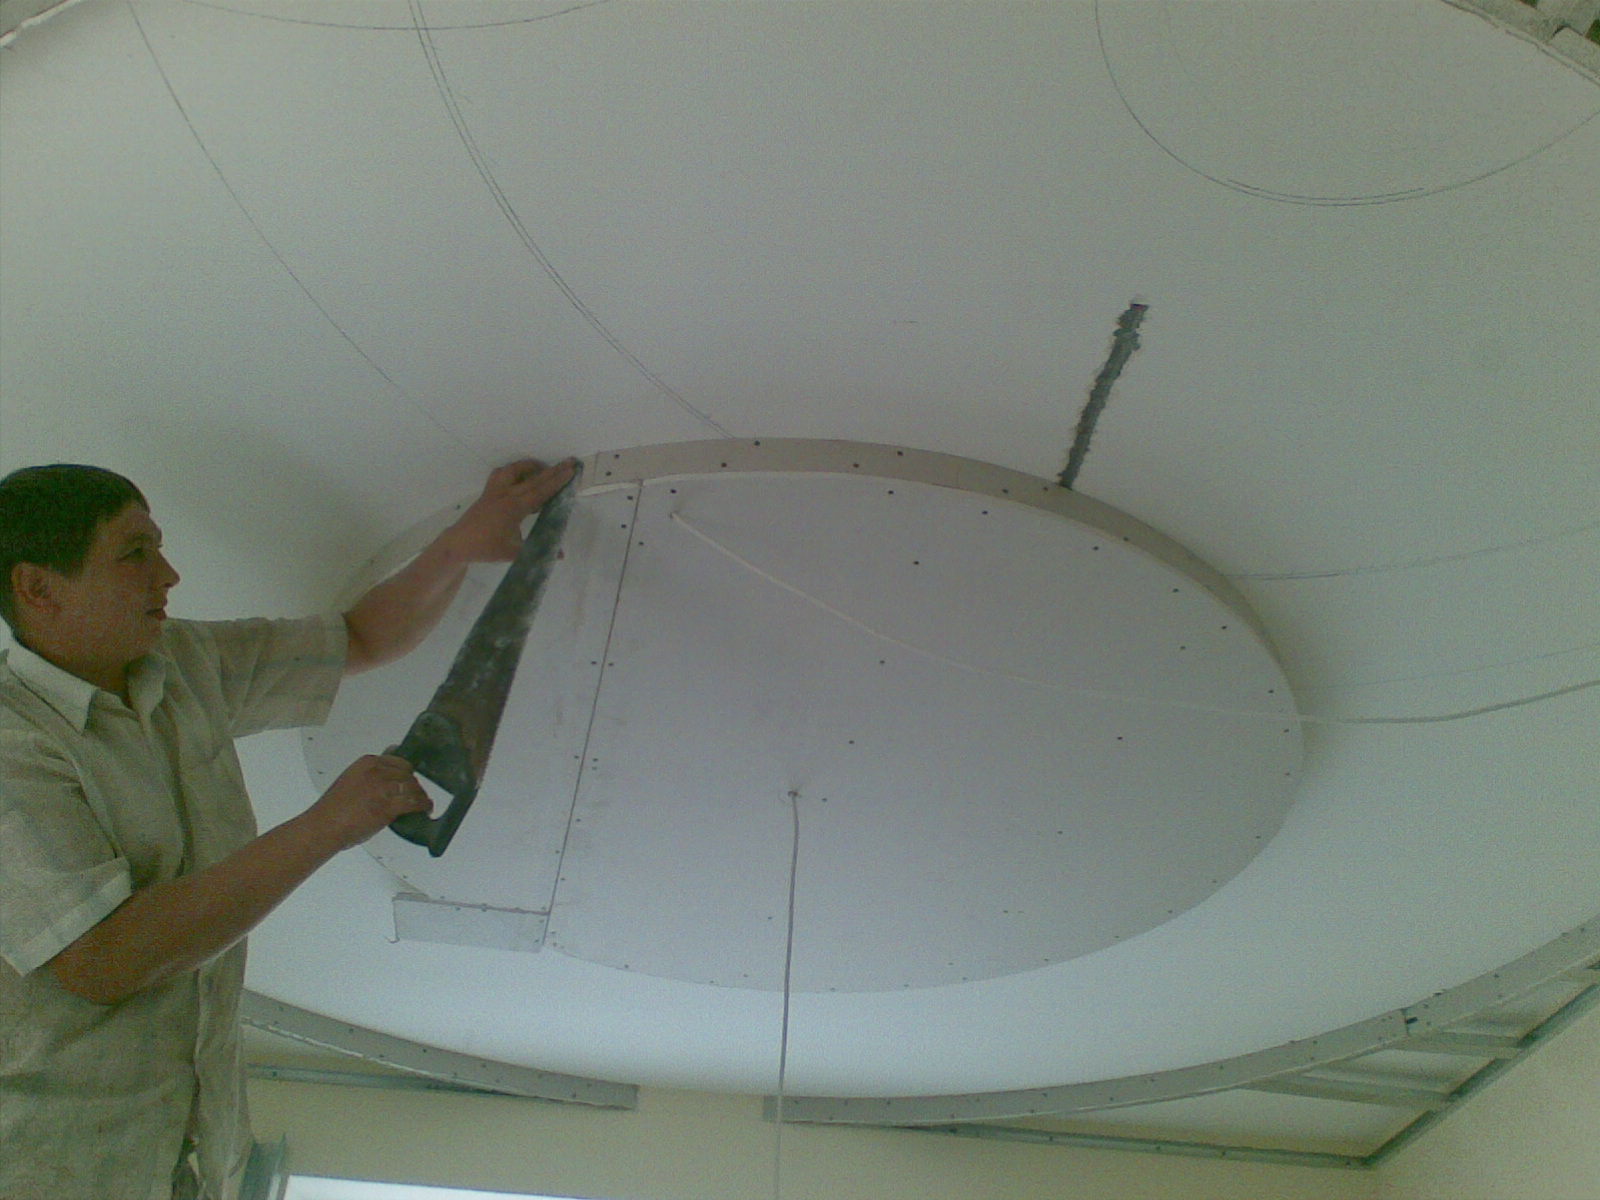
Cut sheets of drywall is most convenient if they are arranged vertically and leaned against the wall.

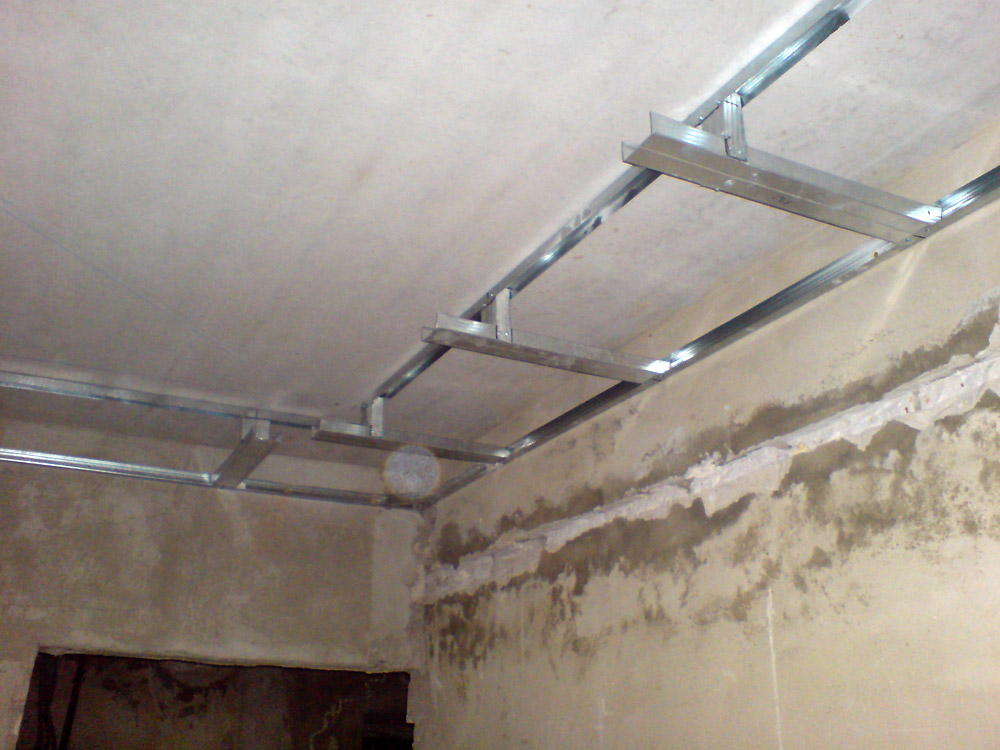
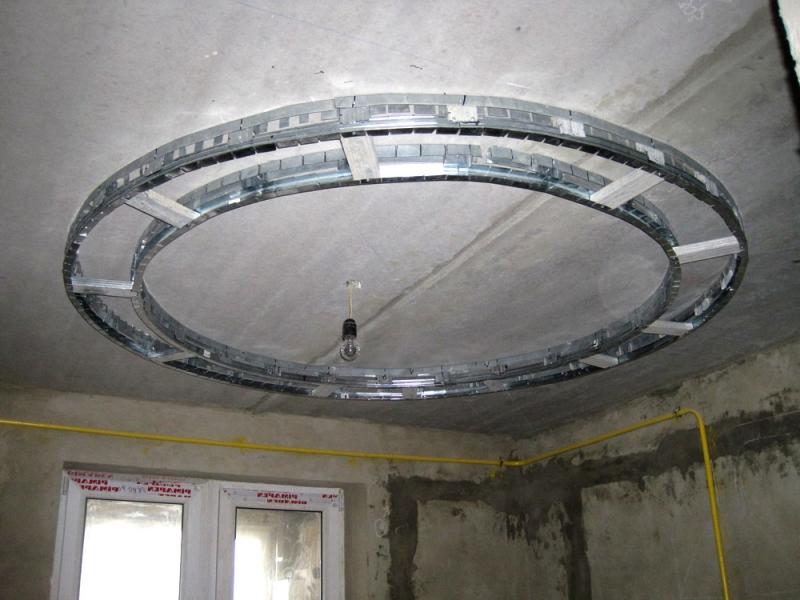
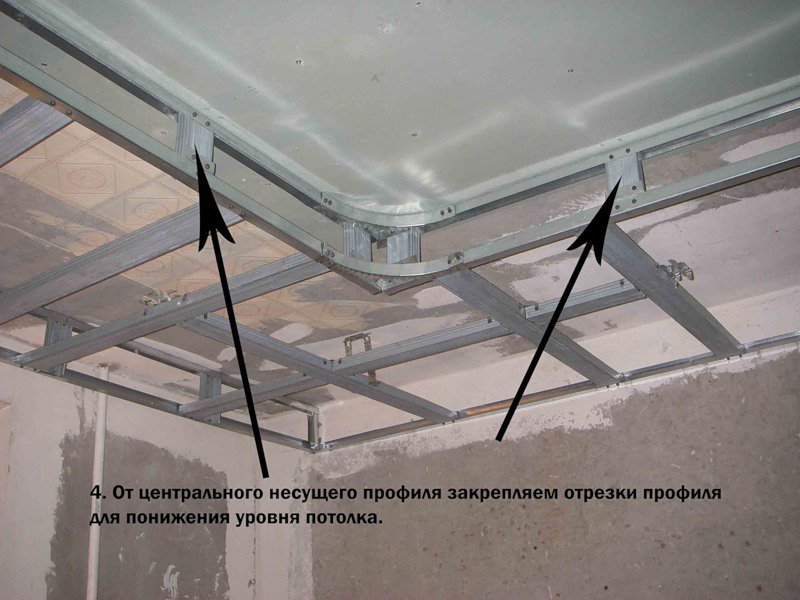
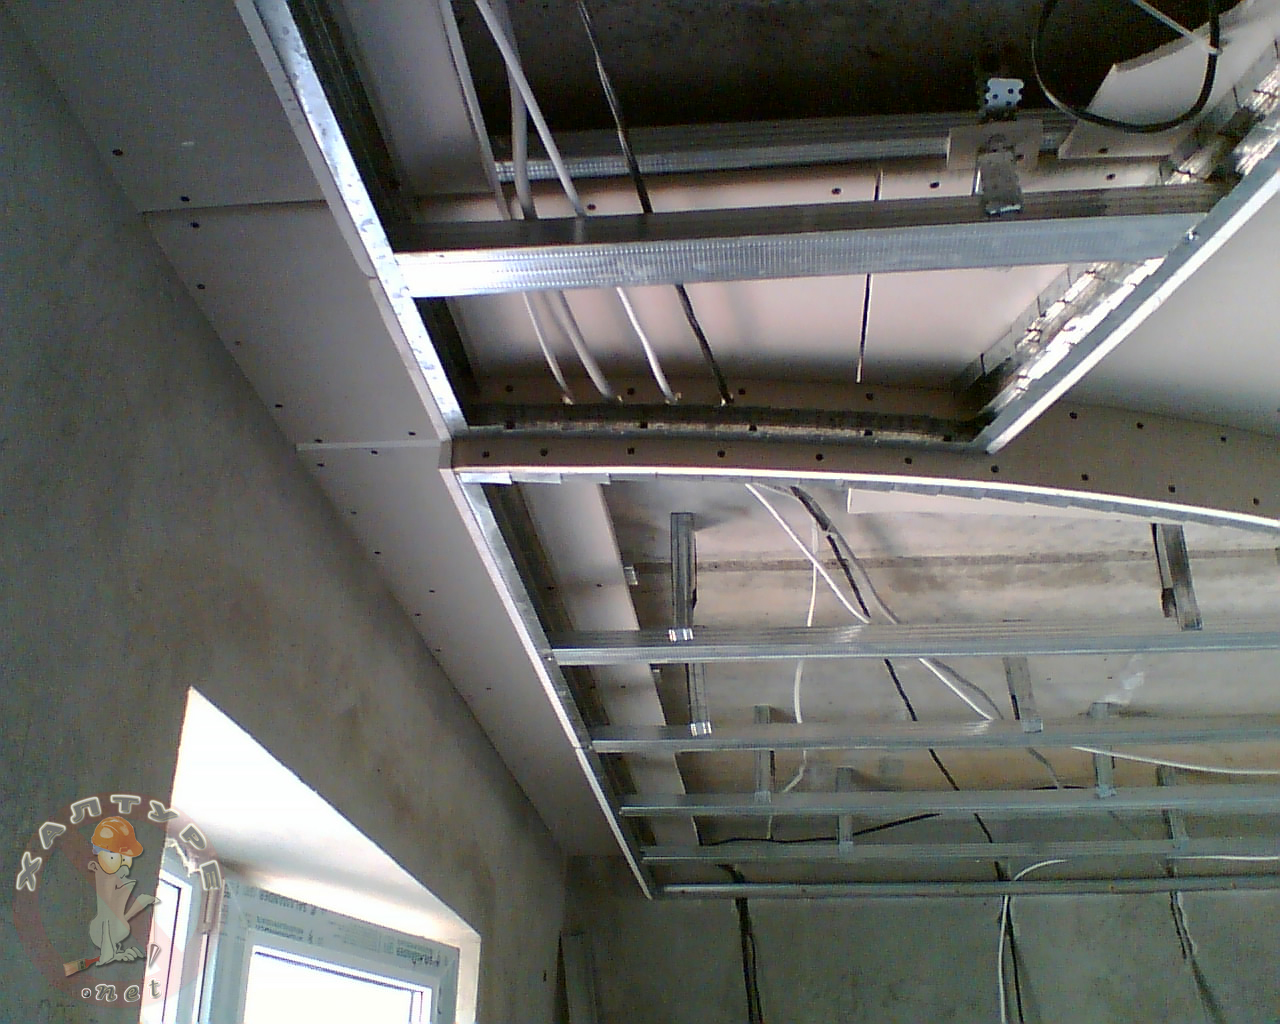
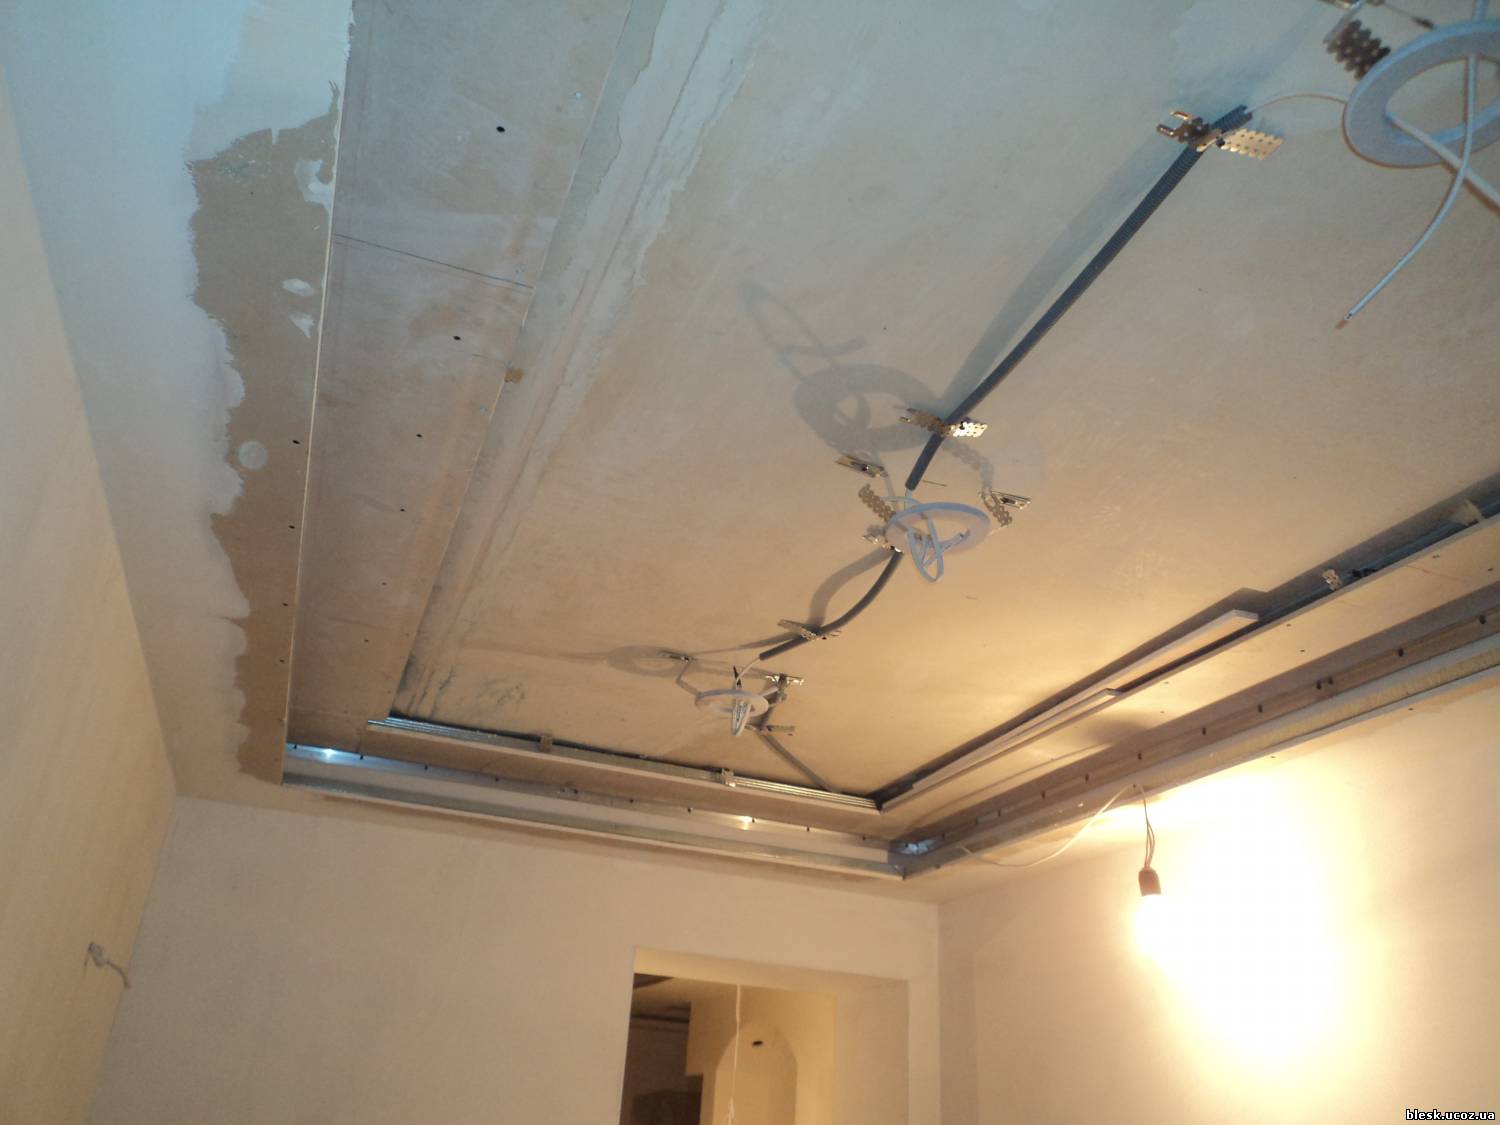
The installation of a suspended ceiling begins with the installation of the frame.
The secrets of this stage are described in the step-by-step instructions:
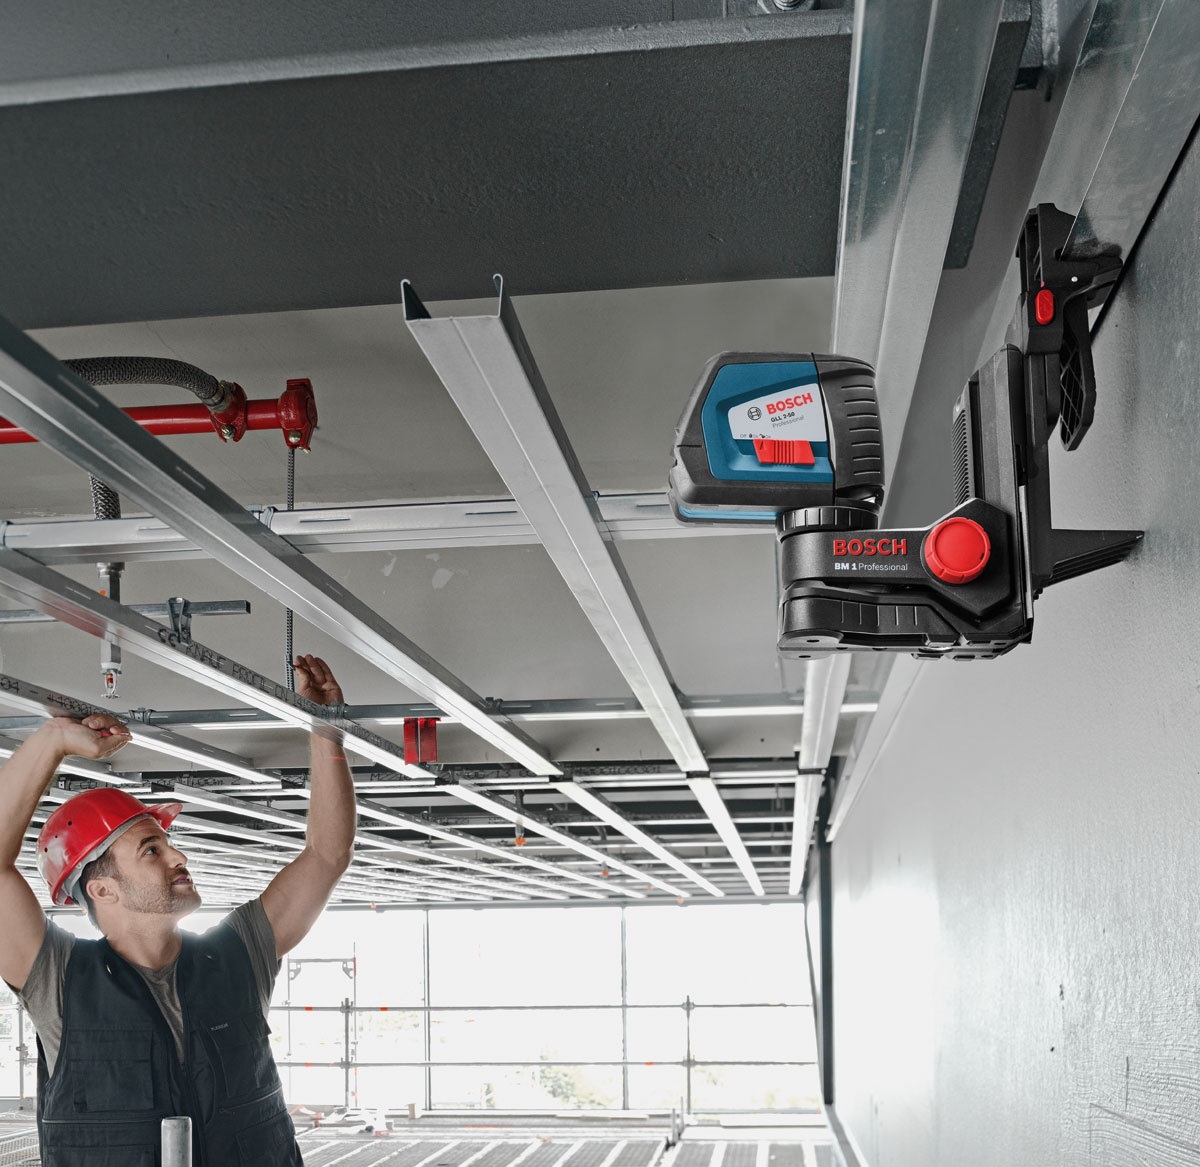
- After the markings on the ceiling have been made, the guide profile (already drilled) is attached to the walls. Its edge is attached to the markup line. Below this mark will be located the elements of the frame. This is an important step if the ceiling is decided to do it yourself.
- Having pasted the guide profiles with the help of a sealing tape, they are fixed on the dowels. Dowels should be screwed in advance.
- Attachment of suspensions every 0.5 m. The initial step from the wall is 0.25 m. Attach suspensions to anchors. It is important to note that drilling produces dust, so all the work of this plan is best done in safety goggles and a respirator.When the hangs are fixed, their edges need to be bent.
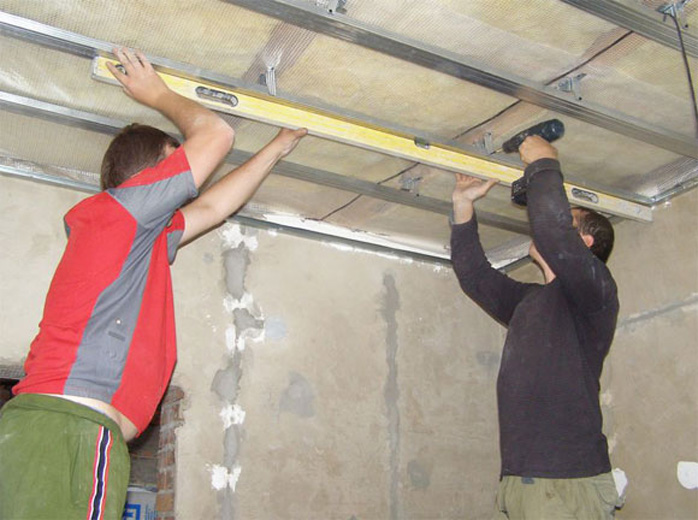
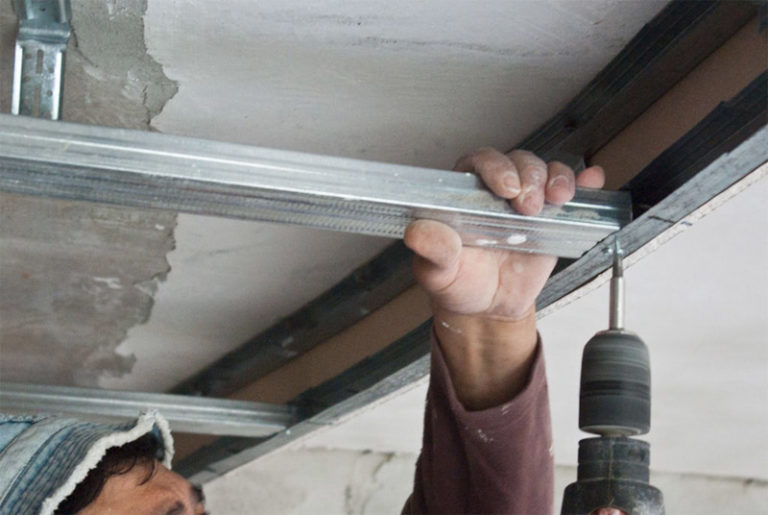
- The next step is to install the ceiling profile. After installation, it should be fixed to the guide. This will help screws without a drill.
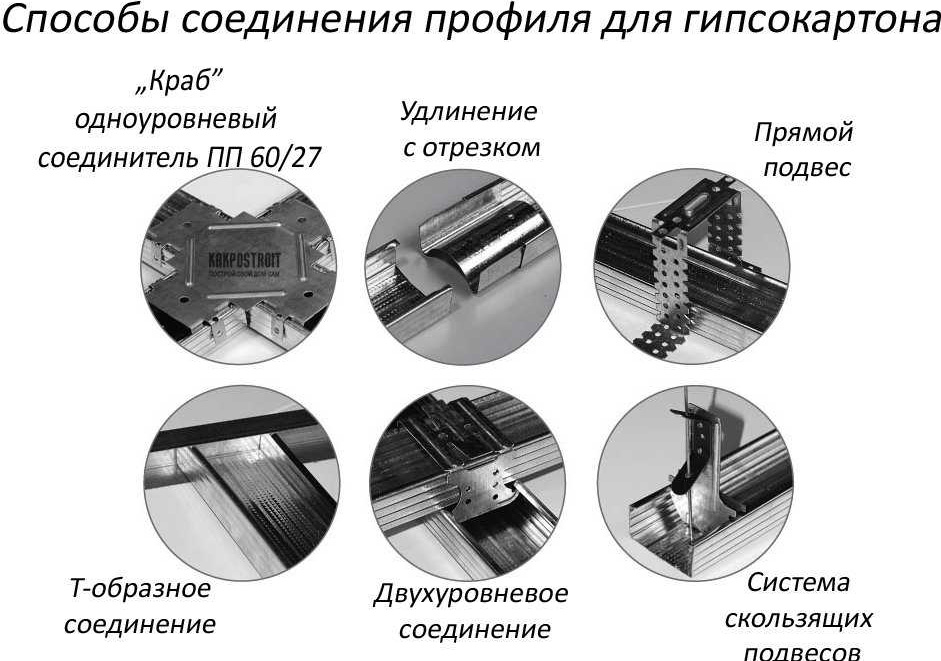
- After that you need to make jumpers - they strengthen the structure. Be sure to check the position of the profiles through the level. Jumpers are fixed with the help of "crabs".
- If insulation is necessary, then the mineral wool is placed in the lintels. It has the property of thermal insulation, and absorbs noise. Work with mineral wool also necessarily requires the use of a respirator, in addition, gloves are needed.
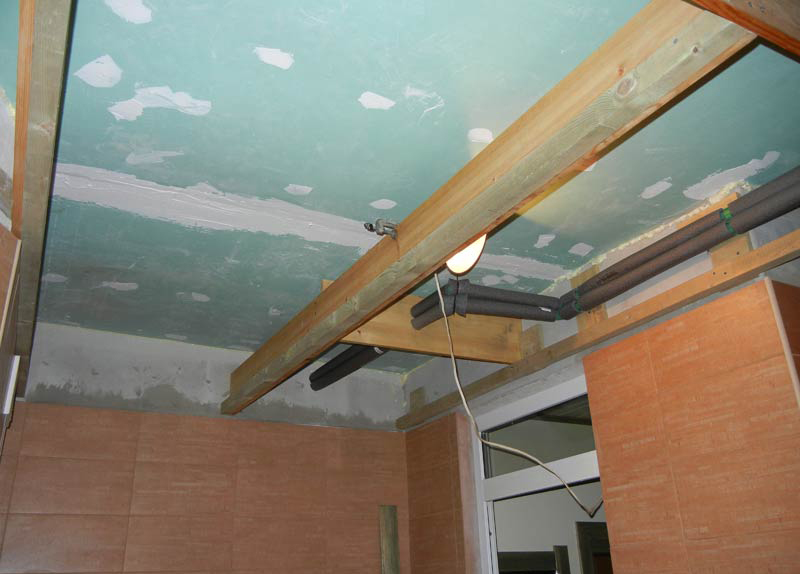
- The installation of the batten is complete, the next thing you need to do is wiring the electrical cable. The wires must be in a corrugated sleeve - in no case should the communication details be crushed or hung on the frame.

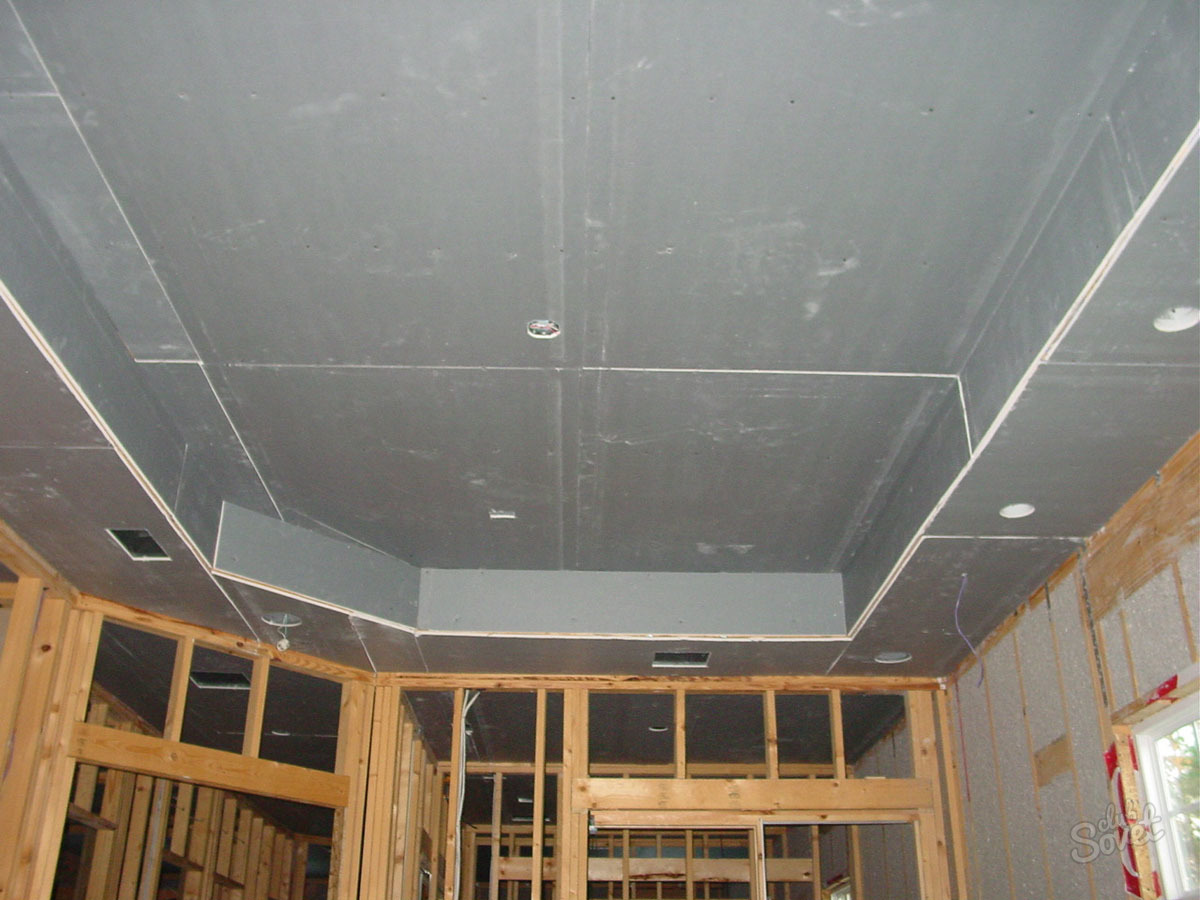
- After that, you can begin to trim the frame plates HL. All sheets must be pre-prepared: in the prone position they should be stored for some time in the room where they will be mounted. In addition, they must be made holes for lamps.
- Sheathe drywall start from the corner, the fastening occurs on the screws every 15 cm.
- Butt sheets are not installed: it is necessary to leave between them 4-5 mm.
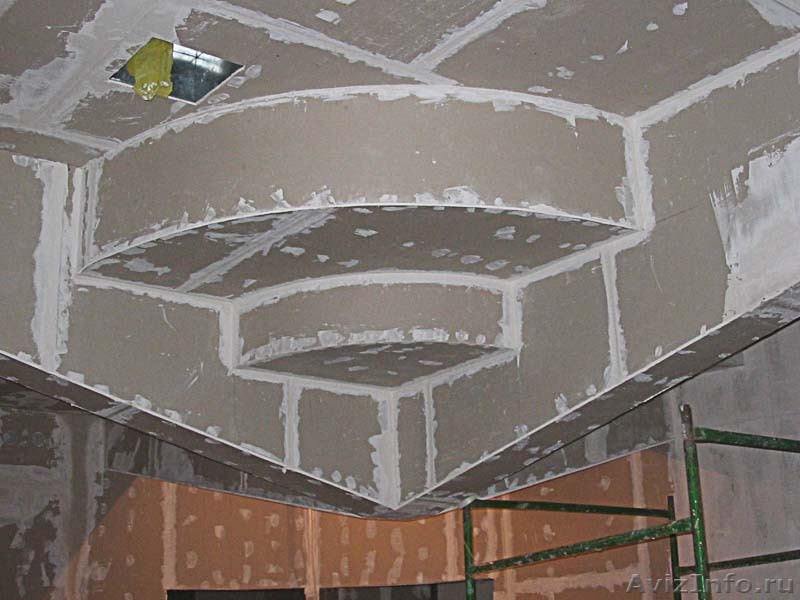
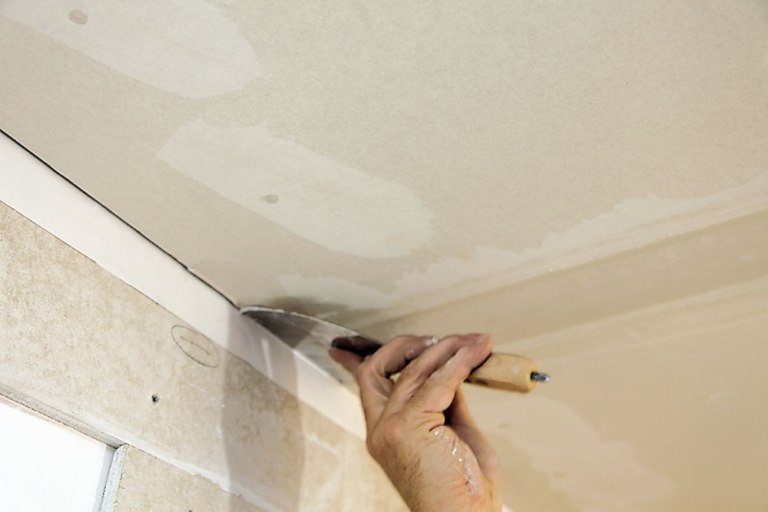
The installation of the ceiling is over; it is possible to proceed to the finishing, but only after the joints are completed. This is very important, because if the seams are poorly repaired, it is fraught with cracks throughout the ceiling. You can do this with the help of a serpyanka grid or putty.

If the puttying method is chosen, the sequence of actions is as follows:
- impregnation of joints with primer with acrylates;
- when dry, dilute the mixture for putty, for example, plaster;
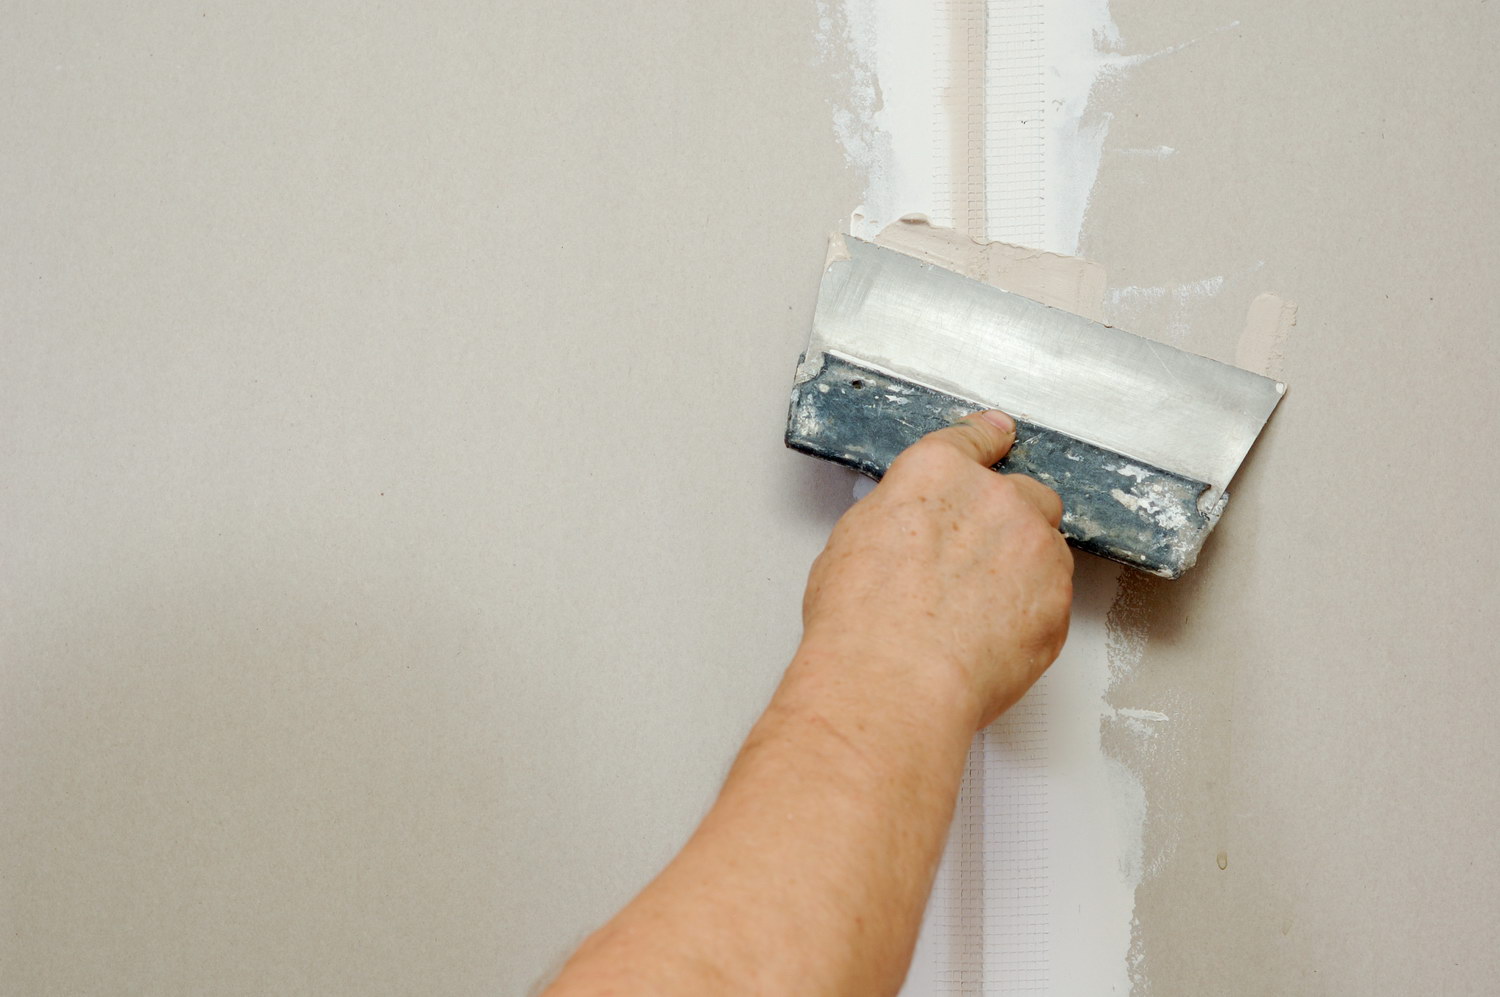
- fill the seams with a mixture and level with a spatula (a wide one will do);
- additionally do the same in the gaps between the sheets and caps screws;

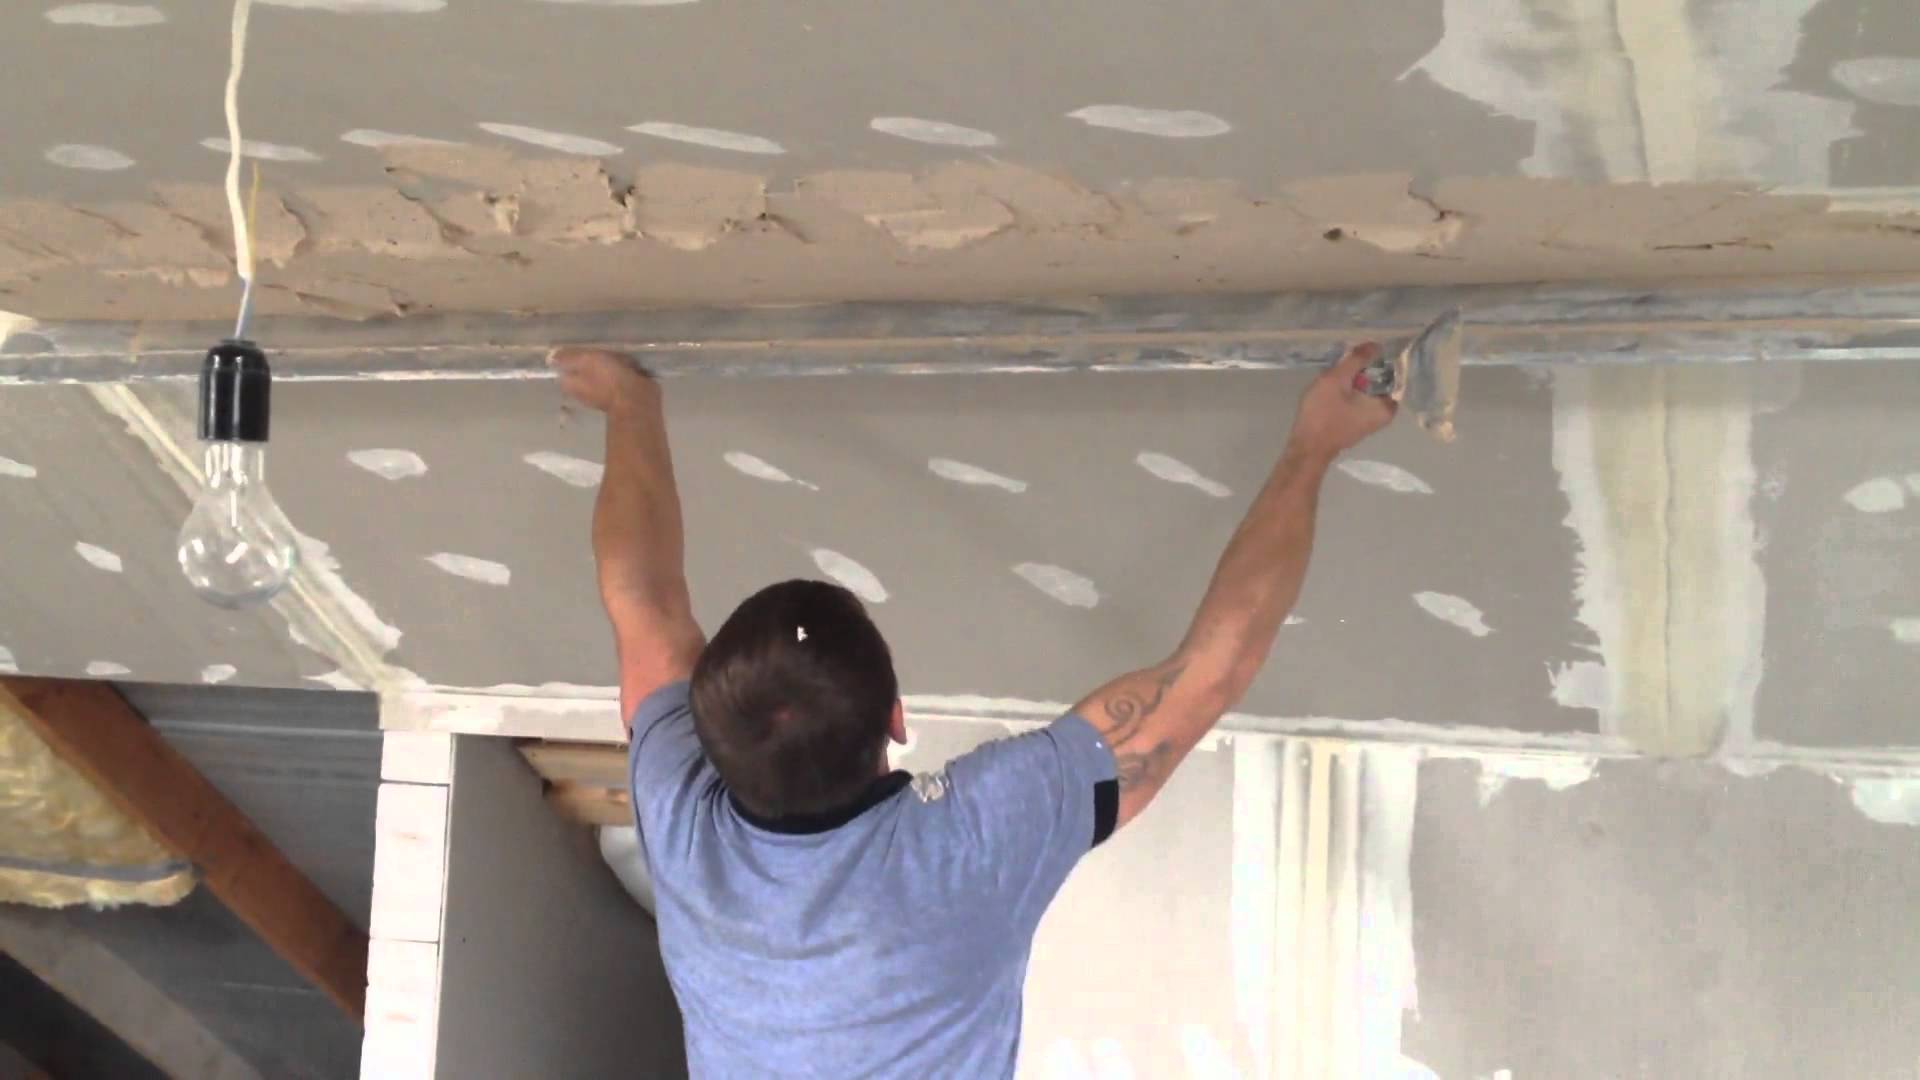
- when dry, glue serpyanka and putty;
- apply a top putty with a maximum thickness of 1.5 cm;
- rub the roughness by grinding with a fine grain;
- remove dust with a dry sponge or vacuum cleaner;
- apply primer with acrylic.
After that, the repair of the surface does not need a very long time, and you can begin finishing work.
Project.The properties of drywall are such that they allow you to create structures of any complexity. But, the more complex the future design, the more accurate the calculation and plan should be. As with any other work, a project is needed to install a suspended ceiling. This includes a graphic image, perhaps an estimate or a list of necessary materials, as well as a sequence of actions. In addition to the list of materials, you also need to calculate their required quantity.
The project of the ceiling of gypsum boards ideally should include:
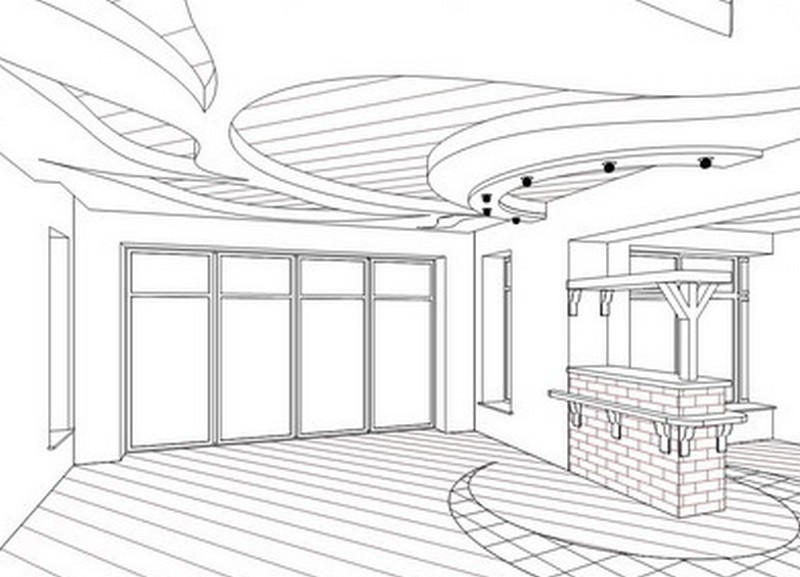
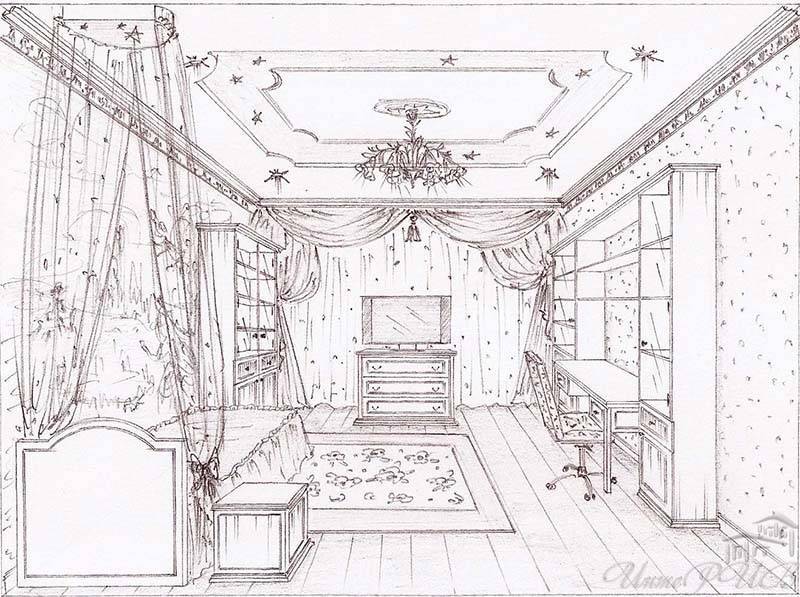
- A sketch (drawing) that contains an image of the future construction. Sketch should be large-scale and color.
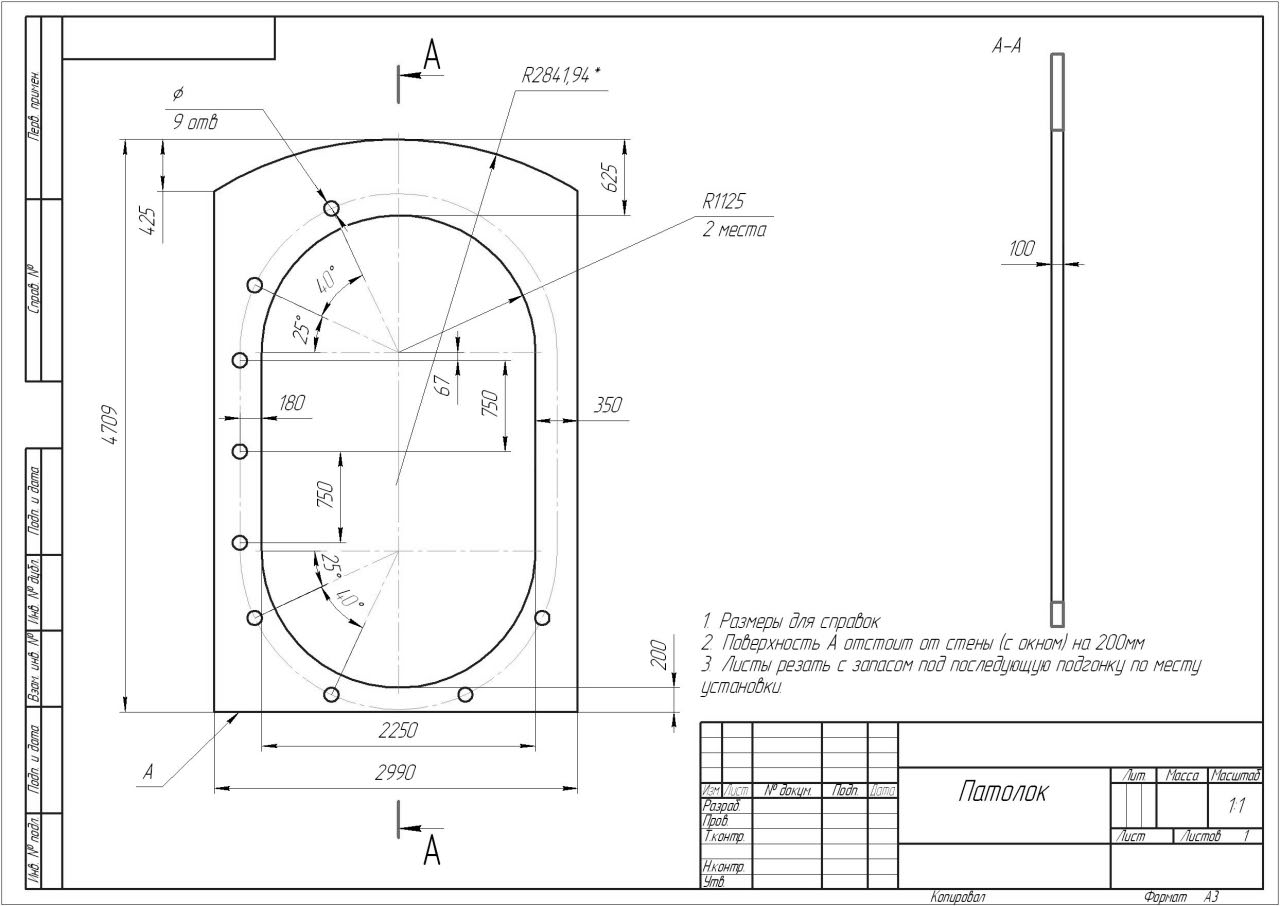
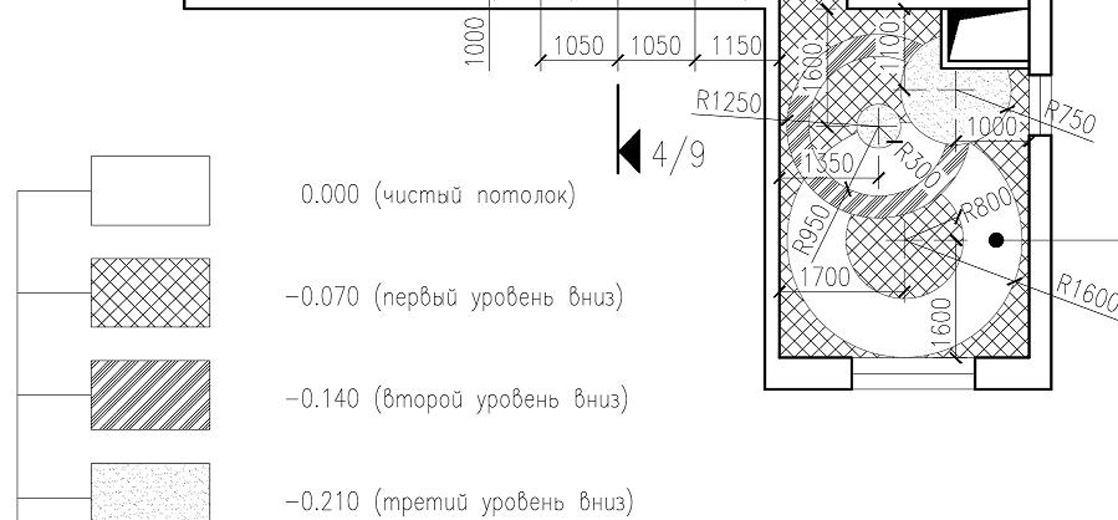
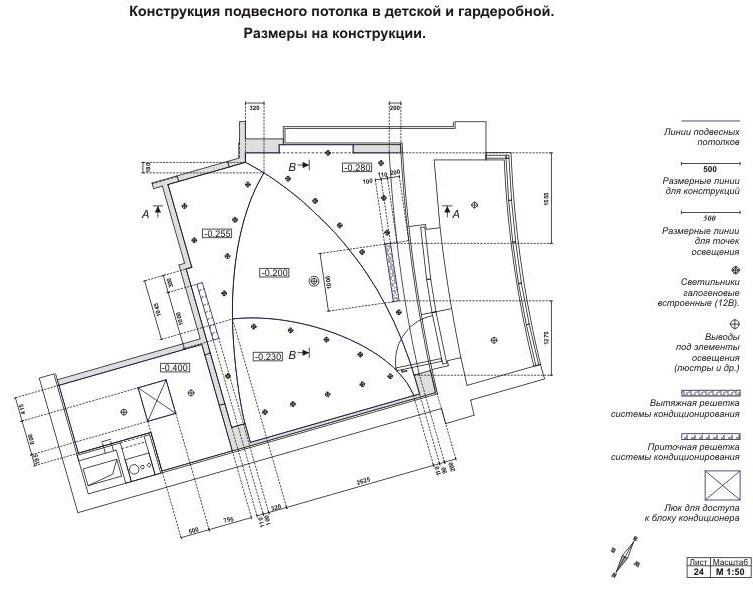
- Drawing - a reflection of all elements of the supporting structure. If there are two or more ceiling levels, the drawing may contain more than one sheet.
- Calculation of materials. The more carefully it is compiled, the less likely it is that compliance with the installation technology will be violated.
If you plan to make the installation yourself, it is better to consult with the professionals, taking with them the project. So it will be easier for them to find the error and point to it, which will help to avoid losses in the quality of the future structure.

When creating a sketch, you need to take into account the following permanent positions:
- floor space;
- height and shape of the ceiling;
- colors of the floor and wallpaper, patterns on them;
- the style in which the room is decorated;
- the design and size of the furniture in the room.
Having drawn a sketch, it is advisable to transfer it to tracing paper. Subsequently, the tracing paper will be superimposed on the drawing of the frame to refine the final design.
Next are the drawings. For the frame of each tier is your own drawing, it is also convenient to make separate sheets for marking lighting fixtures and wiring.
If you put all of the above on one sheet, the drawing will contain too much information and look overloaded.
In the case of planning a ceiling with one level, the cell of the batten is 0.5x0.6 m. If there are several tiers planned or something massive will be placed on the ceiling, for example, a chandelier or a mirror, the cell size decreases to 0.5x0.4 m. Similarly distance between suspensions - from 1 m will decrease to 0.5-0.6 m.
The drawing of the first-tier crates should contain all the information about the attachment points and the passage of the profiles, the bookmark for the lamps, the installation points of the suspensions.The same should be contained in the drawings of all subsequent tiers.
After completion of drawing up the drawings and adjustments to the sketch by superimposing them on each other, it is necessary to proceed to the calculations. Everything should be taken into account in them: from the number of sheets of drywall to cans with a putty. In addition, if the installation is planned to be done by hand, then a separate list should be drawn up, which should reflect the availability of the necessary tools.
Upon completion of the calculations, you need to transfer the graphic part of the project to the ceiling surface. The more precisely this will be done, the more correct, smoother and stronger will be the future suspended ceiling. After marking the ceiling, you can get a rough idea of how the future object will look like. If this is not what you wanted, you need to make adjustments.

Training
Before you begin, you need to make a number of preparatory activities on the ceiling surface, namely:
- Clean the old finish. This can be done with, for example, a spatula.
- Remove molds, grease, rust, fungus with special antiseptics.
- To putty the cracked sites.For this purpose, it is better to take a cement based putty.
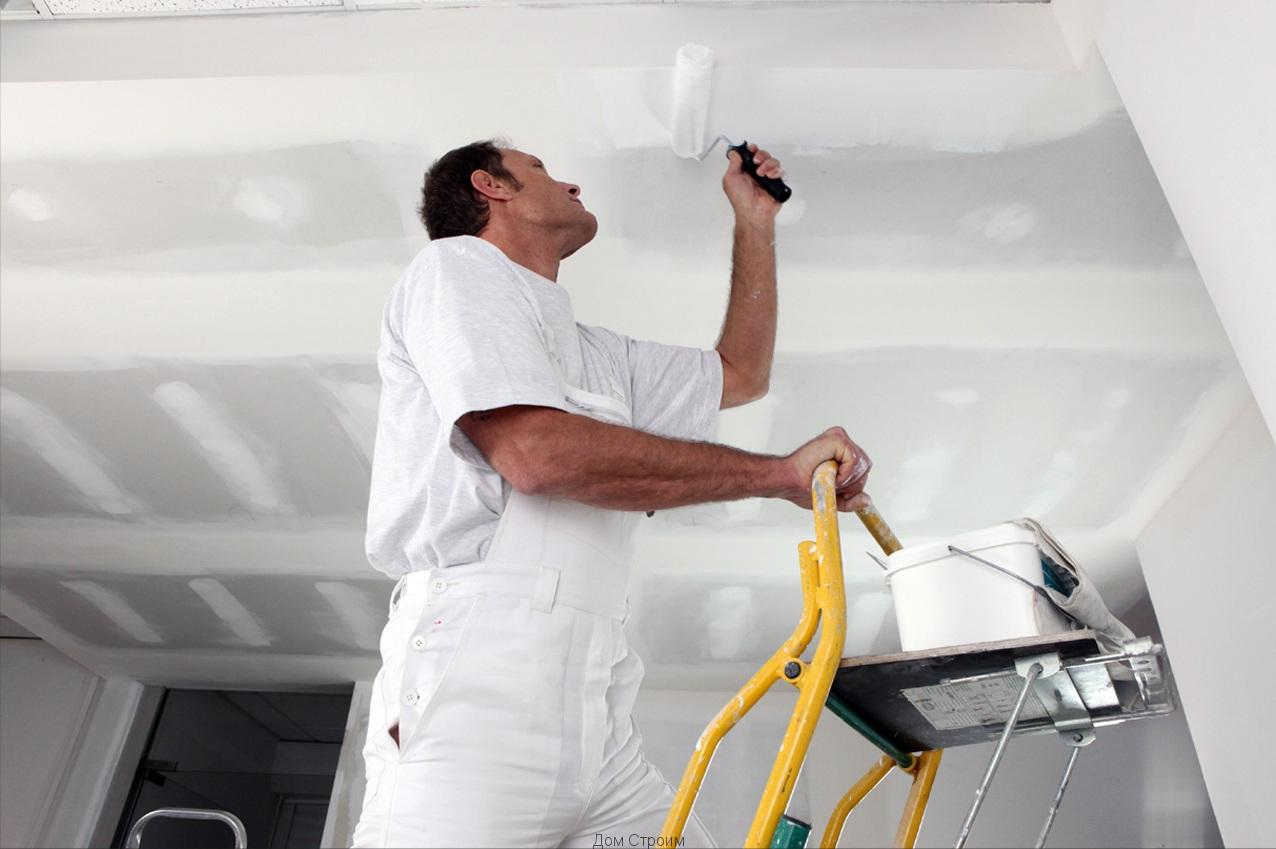
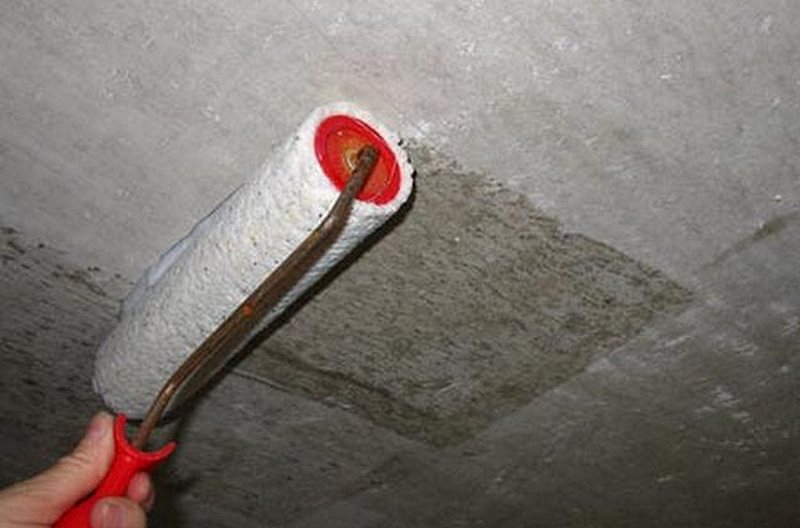
- Prime the coating with a composition that contains an antiseptic (it will be correct to use “Color” or “Lacru”). This condition is mandatory, otherwise the appearance of stains on the ceiling is inevitable. In addition, this is one of the activities that help to level the surface.
After carrying out all these actions the surface is ready. After waiting for the primer to dry, you need to de-energize the room in which you plan to install the ceiling, and you can begin the installation.
Instruments. Preparation of tools and devices is an important preparatory stage of work. Unfortunately, due attention is not always paid to him, as a result of which work has to be constantly interrupted, since there are not enough fittings in sufficient quantities, then roulettes are at hand. Therefore, it is better to prepare in advance everything that may be needed, and not be distracted in the process.
To install a suspended ceiling you need the following:
- guide and ceiling profile;
- U-shaped suspensions;
- profile connectors or crabs;
- dowels and screws, and best of all - anchors;
- sheets of drywall;
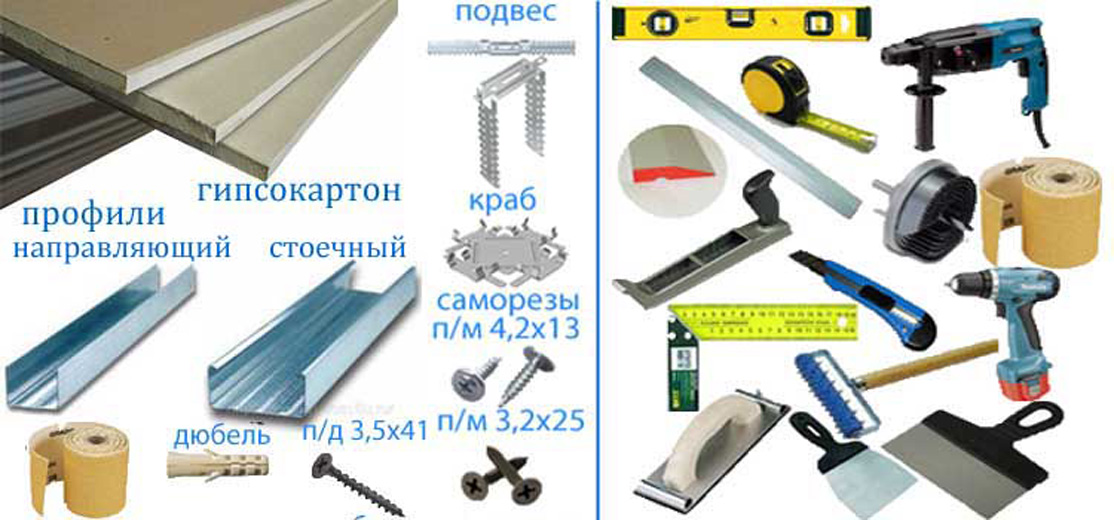
- self-tapping screws (both for metal, and for GKL);
- sealing tape;
- finishing material;
- hydro and thermal insulation material.
There are a few rules that must be followed when carrying out repair or finishing works:
- You should not try to save on materials, for example, on metal profiles. The cheaper it is, the thinner it is, accordingly, it will bend and poorly hold the structure. Properly making a choice, the master ensures the reliability and durability of the structure.
- It is good if the master has levels of two sizes: one is up to 1 m high, the second is 2-2.5 m. If there is a laser level and skills to use it, then two levels will not be needed.
- The thickness of the plasterboard sheets should not exceed 9 mm, otherwise a different framework is needed (tougher) and a different sequence of installation steps.
- It is important to consider the purpose of the room in which the ceiling is mounted, and select the material with its account. For example, for installation in the bathroom sheets of drywall must be moisture-resistant, that is, the usual GCR slabs will not work.
Lighting
The choice of lighting for a suspended ceiling is a very important point, because the lamps can make the composition a "highlight" of the interior or completely kill it with their tasteless combination.
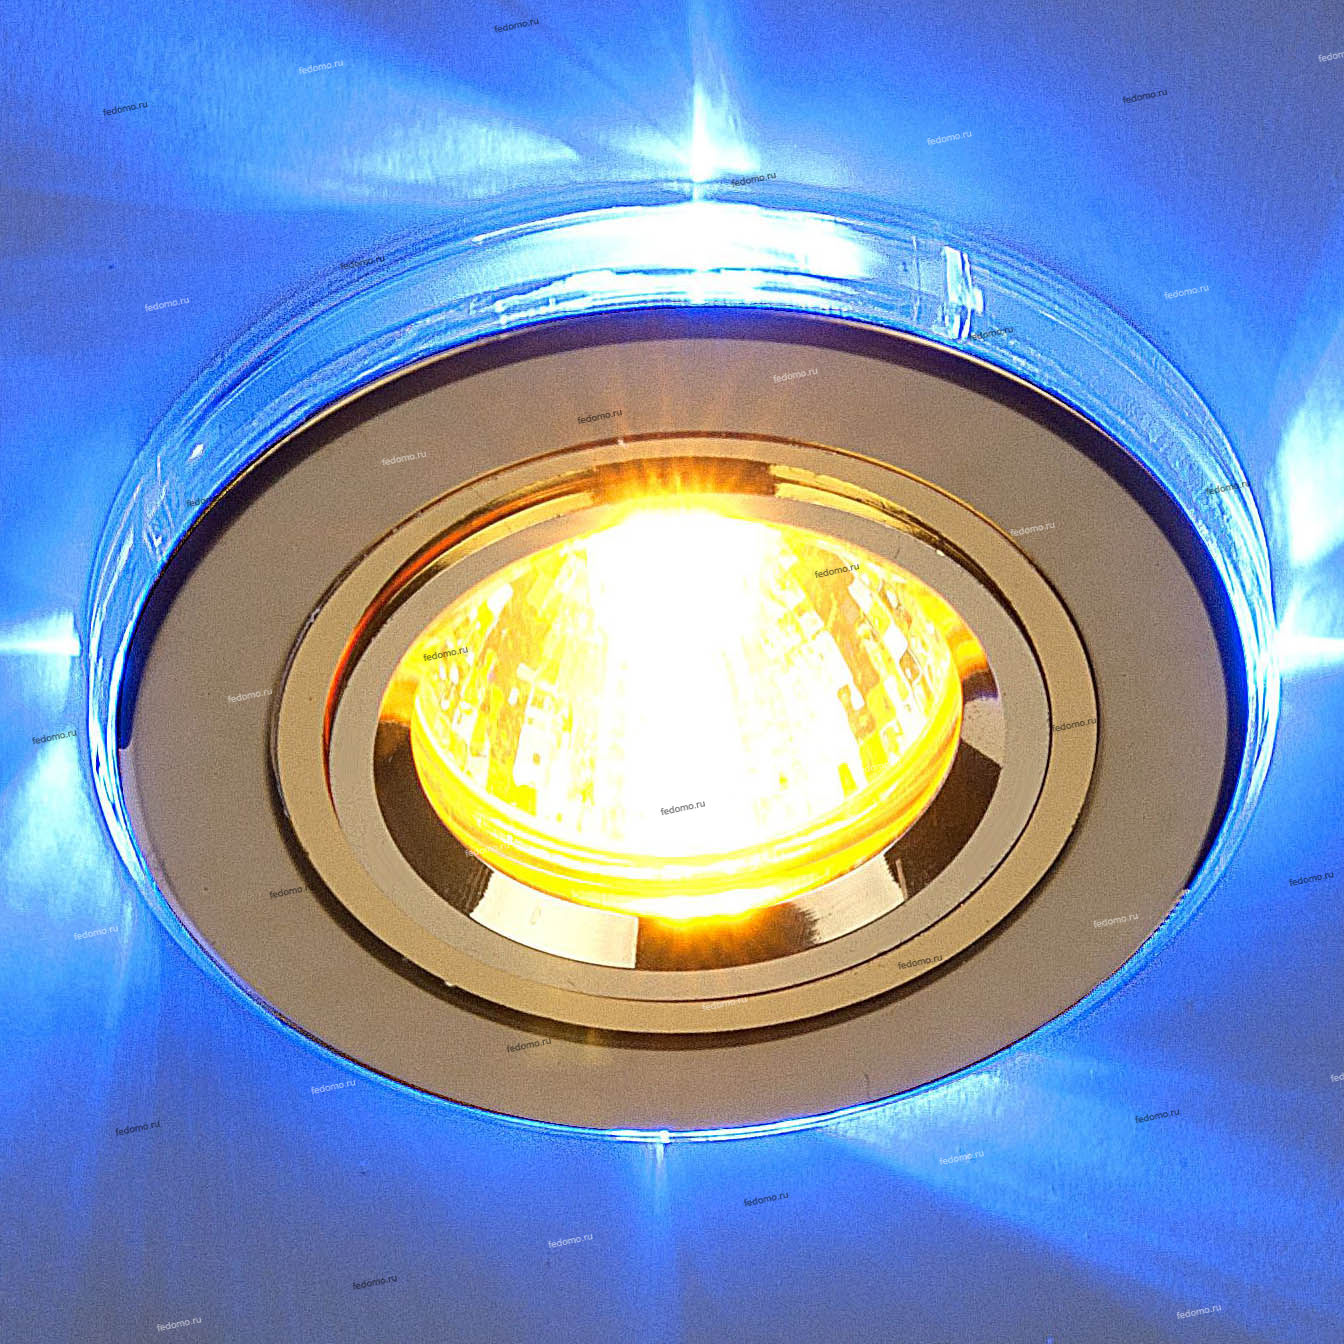
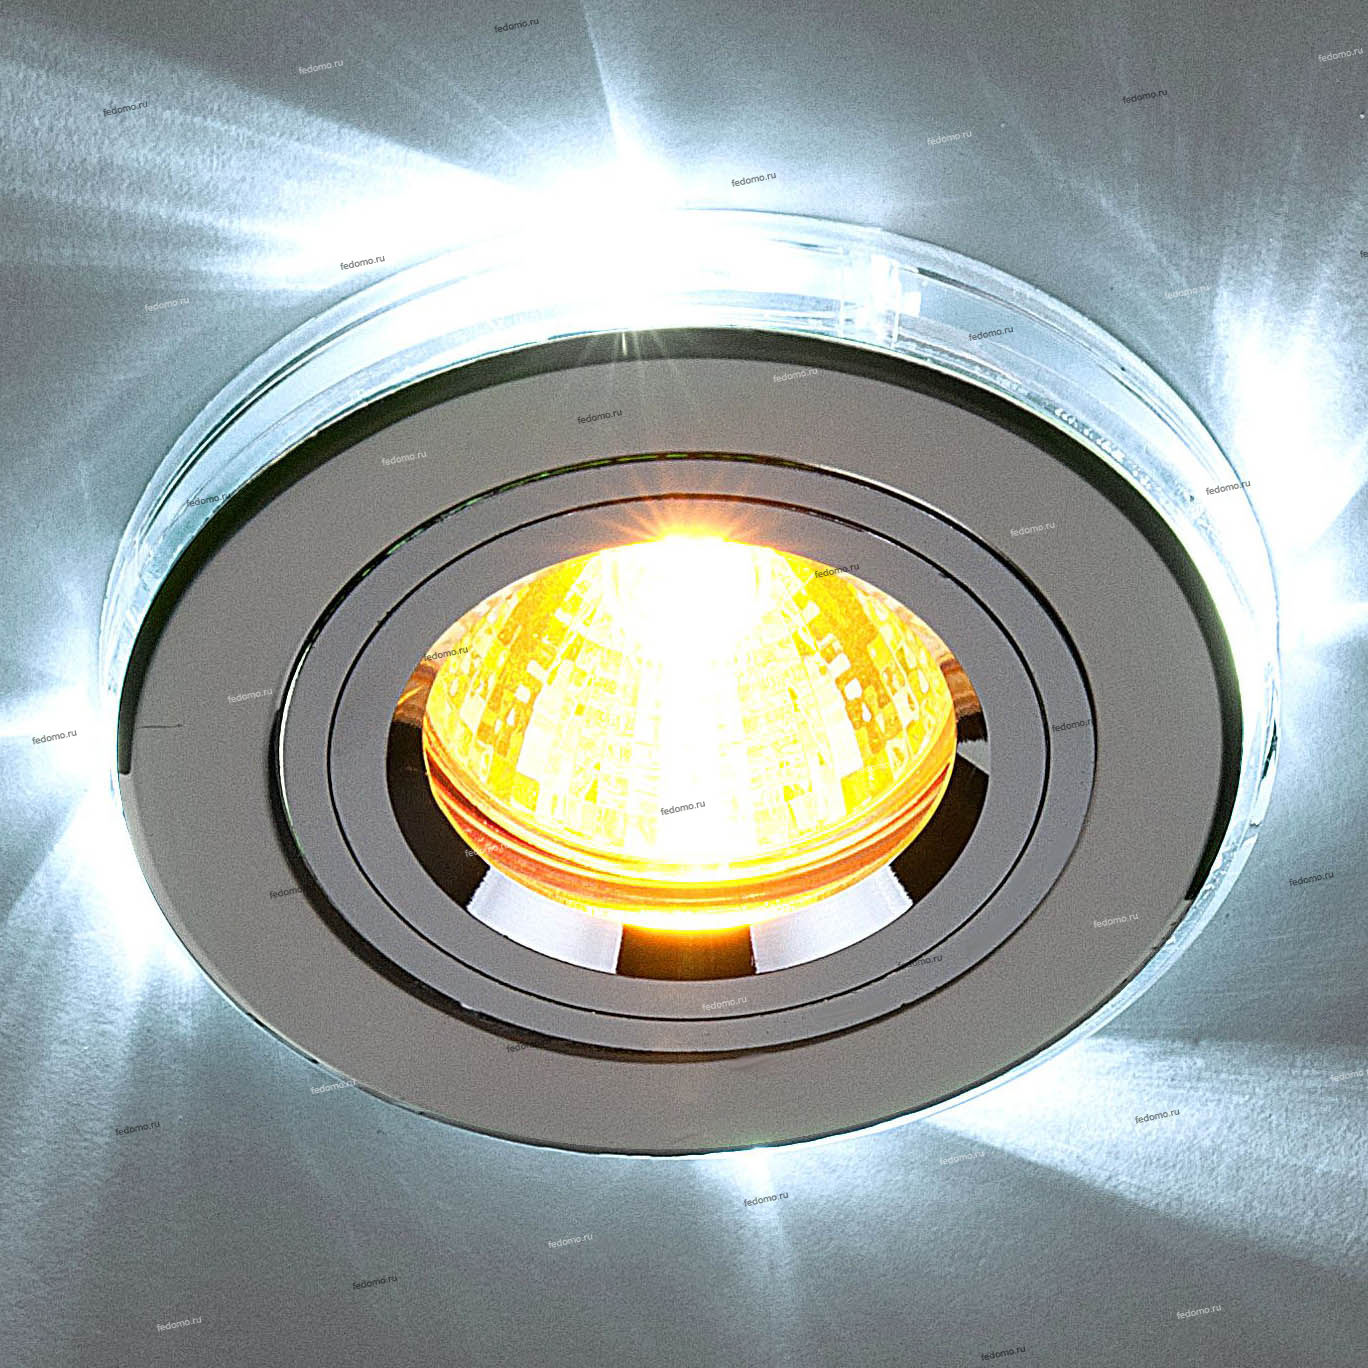
Typically used spotlights recessed, then the lighting can be made multi-position. Most often they use halogen lamps, and the body - metal, glass, brass or thermoplastic. In addition, lamps can be painted in different exquisite shades, for example, polished and brushed brass, bronze, matte or black chrome - this will make them even more attractive.
For backlighting in the background of multi-level ceiling surfaces, fluorescent lamps are used, sometimes neon and duralight.

Light sources with halogen lamps are preferable as point ones because the ceiling height does not decrease as much as they are installed than when installing lamps with standard lamps - this is convenient when the ceilings in the room are already low.
Halogen lamps are classified as sources of warm tonnage near the white spectrum, and therefore do not distort the shades in the room. It’s better not to touch the glass surface with your hands - it is likely that there will be grease stains. This, in turn, will lead to the fact that the glass of the flask at the point of contact melts.It is better to use a clean cloth glove or just a clean cloth for this.
When installing the lamps, one should not forget about the fire regulations and rules, for example, about ensuring a sufficient distance between the ceiling and the ceiling. When using a dimmer as a switch (in order to smoothly adjust the brightness of the illumination), protection to the lamps is not necessary.
The selection of spotlights is carried out in accordance with the purpose of the room and the presence of a number of windows in it. Best suited for this LED or energy-saving lamps. Thanks to spotlights, the room can be divided into zones, for example, in a studio apartment.
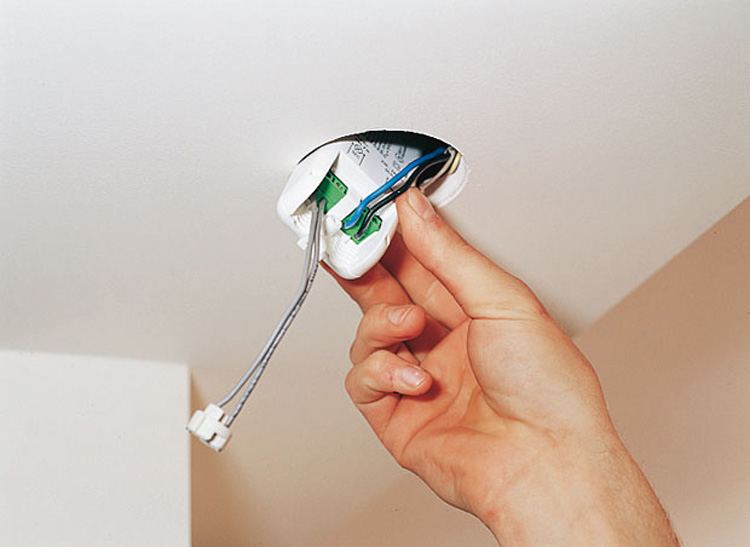
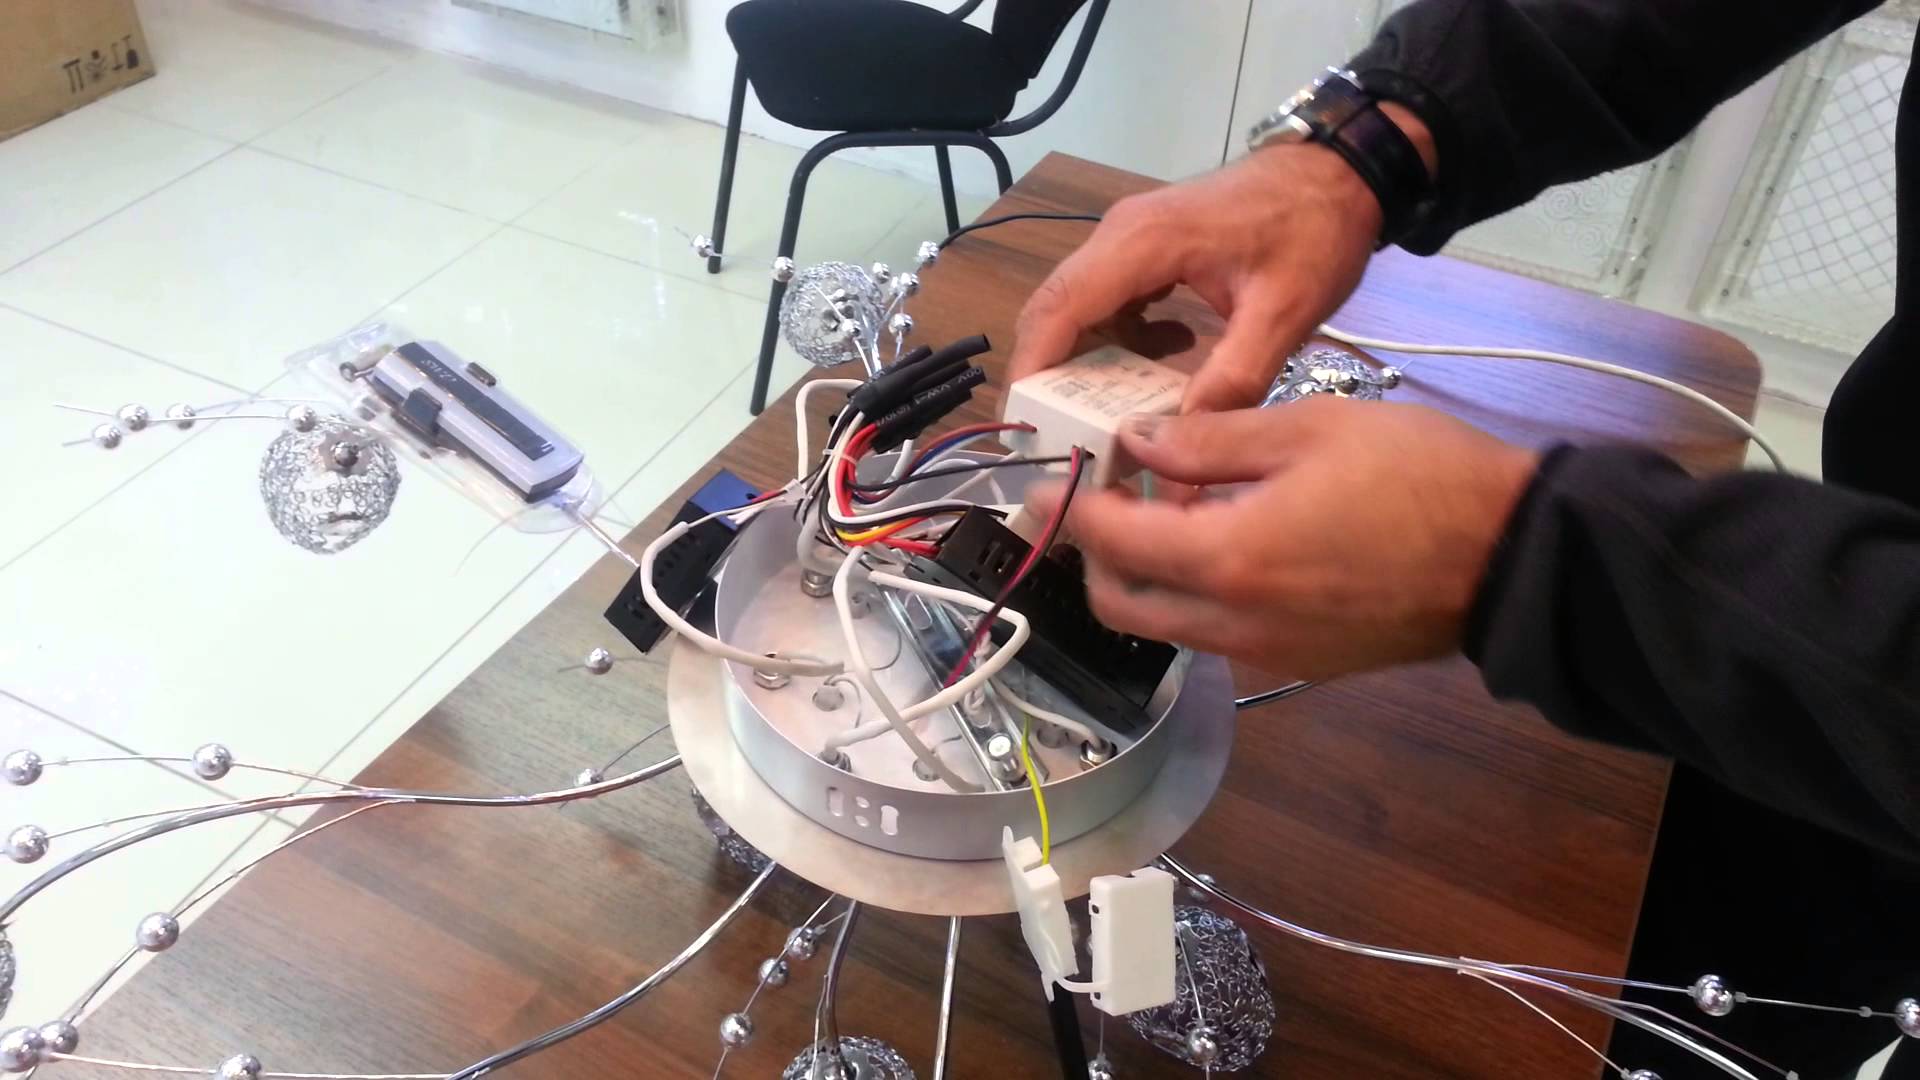
Transformers are usually located behind the plasterboard on a false ceiling, access to them can be obtained through the holes for the lamps. It is better if there are several transformers in the same room - one for each group of fixtures. So, in case of failure of one, the rest will continue to work. The probability that all transformers will burn out at once is extremely small. In addition, one large and heavy transformer may too much point effect on the sheets of drywall.
Transformers are divided into the following types:
- induction;
- electronic.
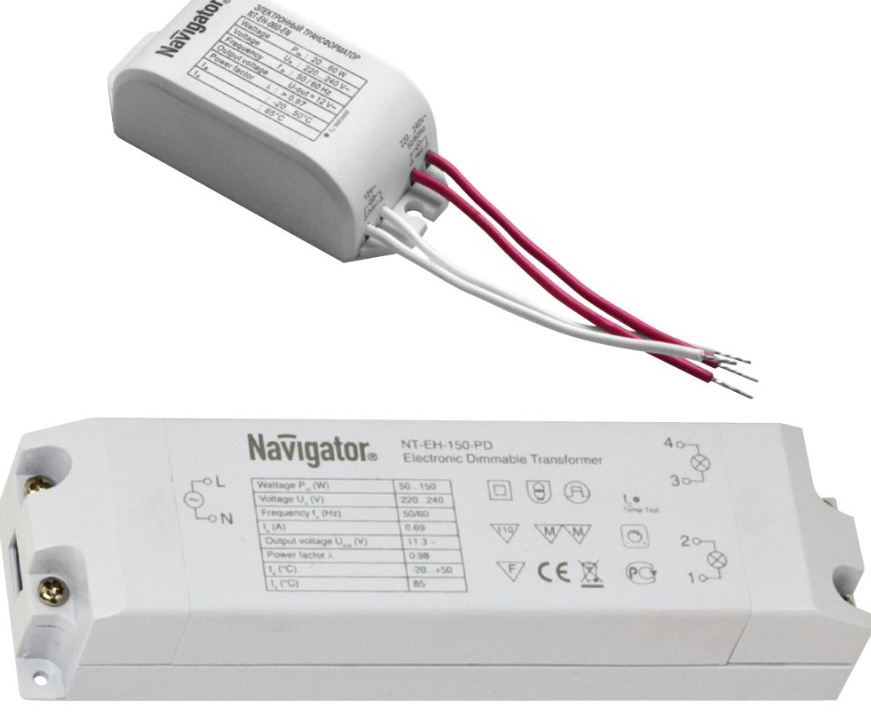
Induction is harder, but safer and cheaper. Electronic is easier, but more expensive and more often break.
The question “how many lamps are required to illuminate one room” is individual for each owner. This problem is easily resolved when sketching a sketch of the future ceiling and marking. On the illumination of a living room in an average city apartment, an average of 12 lamps with a capacity of 50 watts is required. And it is better if the switch is double- or triple-keyboard, thus giving the opportunity to adjust the intensity of the lighting or highlight the area of the room where it is needed.
Also an interesting solution would be to install a dimmer that regulates the overall brightness of the lighting in the room. It is functional as well as beautiful. In addition, the dimmer will reduce energy consumption by more than half and increase the life of the halogen lamps. This is because the work of the lamp occurs more in mild temperature conditions, since it heats up smoothly and gradually reduces brightness.
Of course, installation of spotlights with halogen lamps will be more expensive, but later it will create significant energy savings.
To mount a suspended ceiling with lights,you need to mark the sheets of drywall under the holes for them, and then proceed to drill using an electric drill with a nozzle-crown. Drill holes need only after the purchase of lamps take place, as there is no standard size for holes. Putty is possible only after drilling all the holes.
LED lighting is divided into the following types:
- dome;
- linear;
- LED directional light;
- LED panels.
White fluorescent lamps are used for the most part to illuminate the multi-level ceiling surface in the background. These lamps are placed near each other so as not to interrupt the light surface on the ceiling. Taking this into account, you can calculate how many lamps are required. As a result, the lighting should be soft, diffuse, comfortable for the eyes.
If the perimeter of the ceiling surface is too large and the lamps need a lot, you can use alternatives. For example, duralight, which is a bending plastic light cord-tube. In it are pressed miniature incandescent bulbs, collected in a garland.For the apartment, you can use the modification "fixing" - it glows continuously.
Duralight is cheap, easy to install, durable, there is a large selection of colors, does not require a large "visor" in the ceiling for installation, consumes a small amount of electricity. The disadvantage is weak lighting, but this is easily remedied by wrapping it two or three times instead of one.
Speaking of the electroluminescent wire (cold neon), it should be noted that it is in its essence a flexible cord made of polyvinyl chloride, in which a wire with a current is sealed. This cord is easy to cut and solder - that's the difference with the duralight. It is durable, it can be laid out in configurations of different forms, at night its light is dazzlingly beautiful, in the daytime it is invisible. The area of its application is very wide.
To install electrical wiring should comply with a number of necessary conditions:
- This should be done before the start of finishing works, before installing sheets of drywall on the sheathing.
- Like any other work on electrical installation, you should start by developing a plan, which will provide for what type of wiring will be installed, a circuit with the required number of switches, as well as electrical distribution boxes, cartridges and other devices.Also on the scheme should be determined places for their installation so that they were comfortable to use.
- The connection of wires in places where they are broken, you need to connect only through the adapter - twisting is unacceptable, especially for wires, the material for which was copper or aluminum.
- Wires must be tagged.
- Wires must not come into contact with metal. It is possible to lay them near pipelines, for example, with gas, only in an interval of at least 40 cm.
- Wiring of bundles is not allowed. In addition, it is prohibited to lay wires if the intervals are less than 3 mm between each.
- Connect and branch wires in the rooms can only be using junction and junction boxes.

In modern decor trends do not imply the use of chandeliers with pendants for lighting the room. Nevertheless, there are good examples of classic style solutions, when the chandelier is very appropriate. But, having made the decision to hang it up, you need to take care of strengthening the ceiling structure in the place where this happens, since the gypsum board plates are not designed to withstand such weight.
Subtleties of operation and care
Care for the ceiling of the GKL is easy. So that he does not lose attractiveness for a long time, periodically you need to wipe it with a clean, dry, lint-free cloth. If there is a lot of dust, then the ceiling can be vacuumed, after making sure that the brush is clean. If in doubt, it is advisable to wash the brush with soap and dry thoroughly. If this is neglected, then dark lines may remain on the ceiling of the brush.

Lighting sources (be it chandeliers or lamps) also require care. They need to be wiped with a dry clean cloth, not forgetting that they are under tension. If yellowish plaque has formed around the lamps, then it can be removed with a special felt-tip pen.
Spots of dust and dirt are removed with a slightly damp cloth or viscose napkin. If the contamination is strong, then you can try using the dishwashing detergent, and in the presence of large stains, it is better to refresh the paint layer on the ceiling surface.

Tips
To avoid the mistakes peculiar to beginners, it is important to consider some features of drywall:
- To give gypsum unnecessary moisture, it must lie down.That is why there will be some time between the delivery of the gypsum boards to the room where the installation will be carried out, and the installation itself. Otherwise, the sheets may be deformed.
- Work with drywall should be carried out in a room whose temperature is constant and not lower than +10 C. Moreover, HL slabs must be in these temperature conditions for at least 4 days - two days before installation and two days after, only after 2 days can it be repaired stitches.
- The main rule is that before you cut, drill or fasten something, you need to check and calculate everything. It is not in vain in the installation of a suspended ceiling that there is such an important stage as design. Only after completing all the calculations, combining the sketch and drawings, marking the ceiling itself, you need to proceed to action.
Beautiful examples in the interior
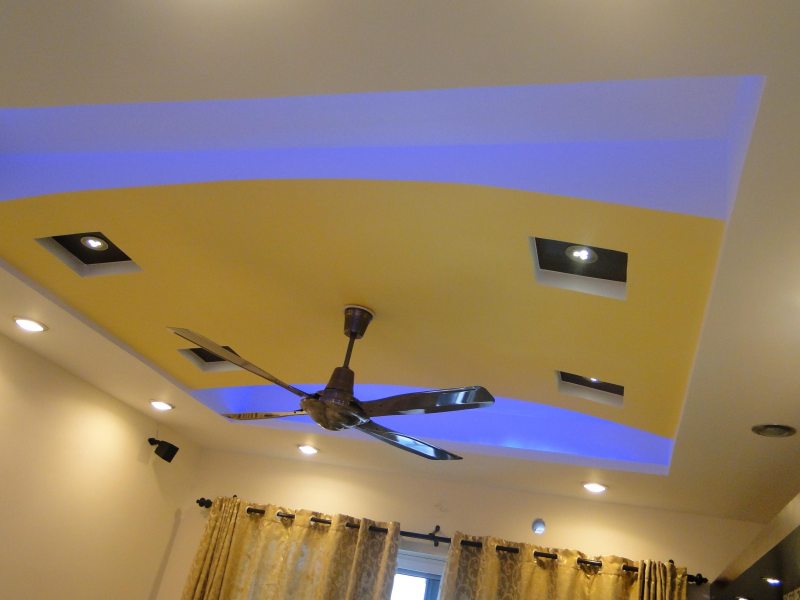
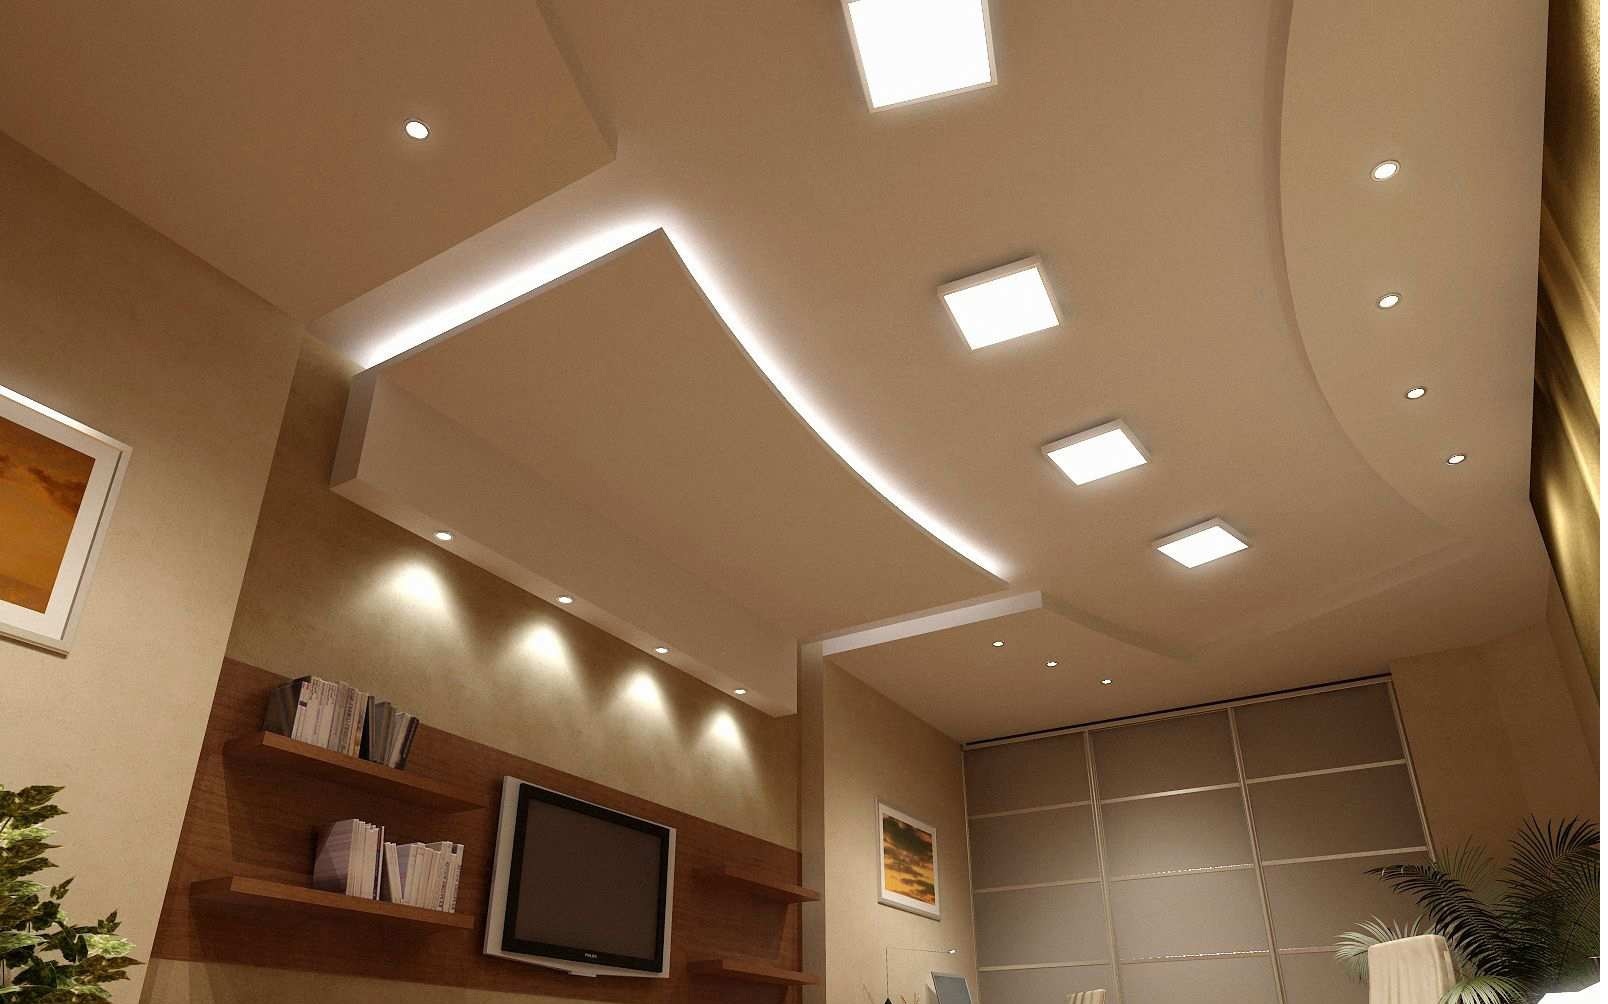
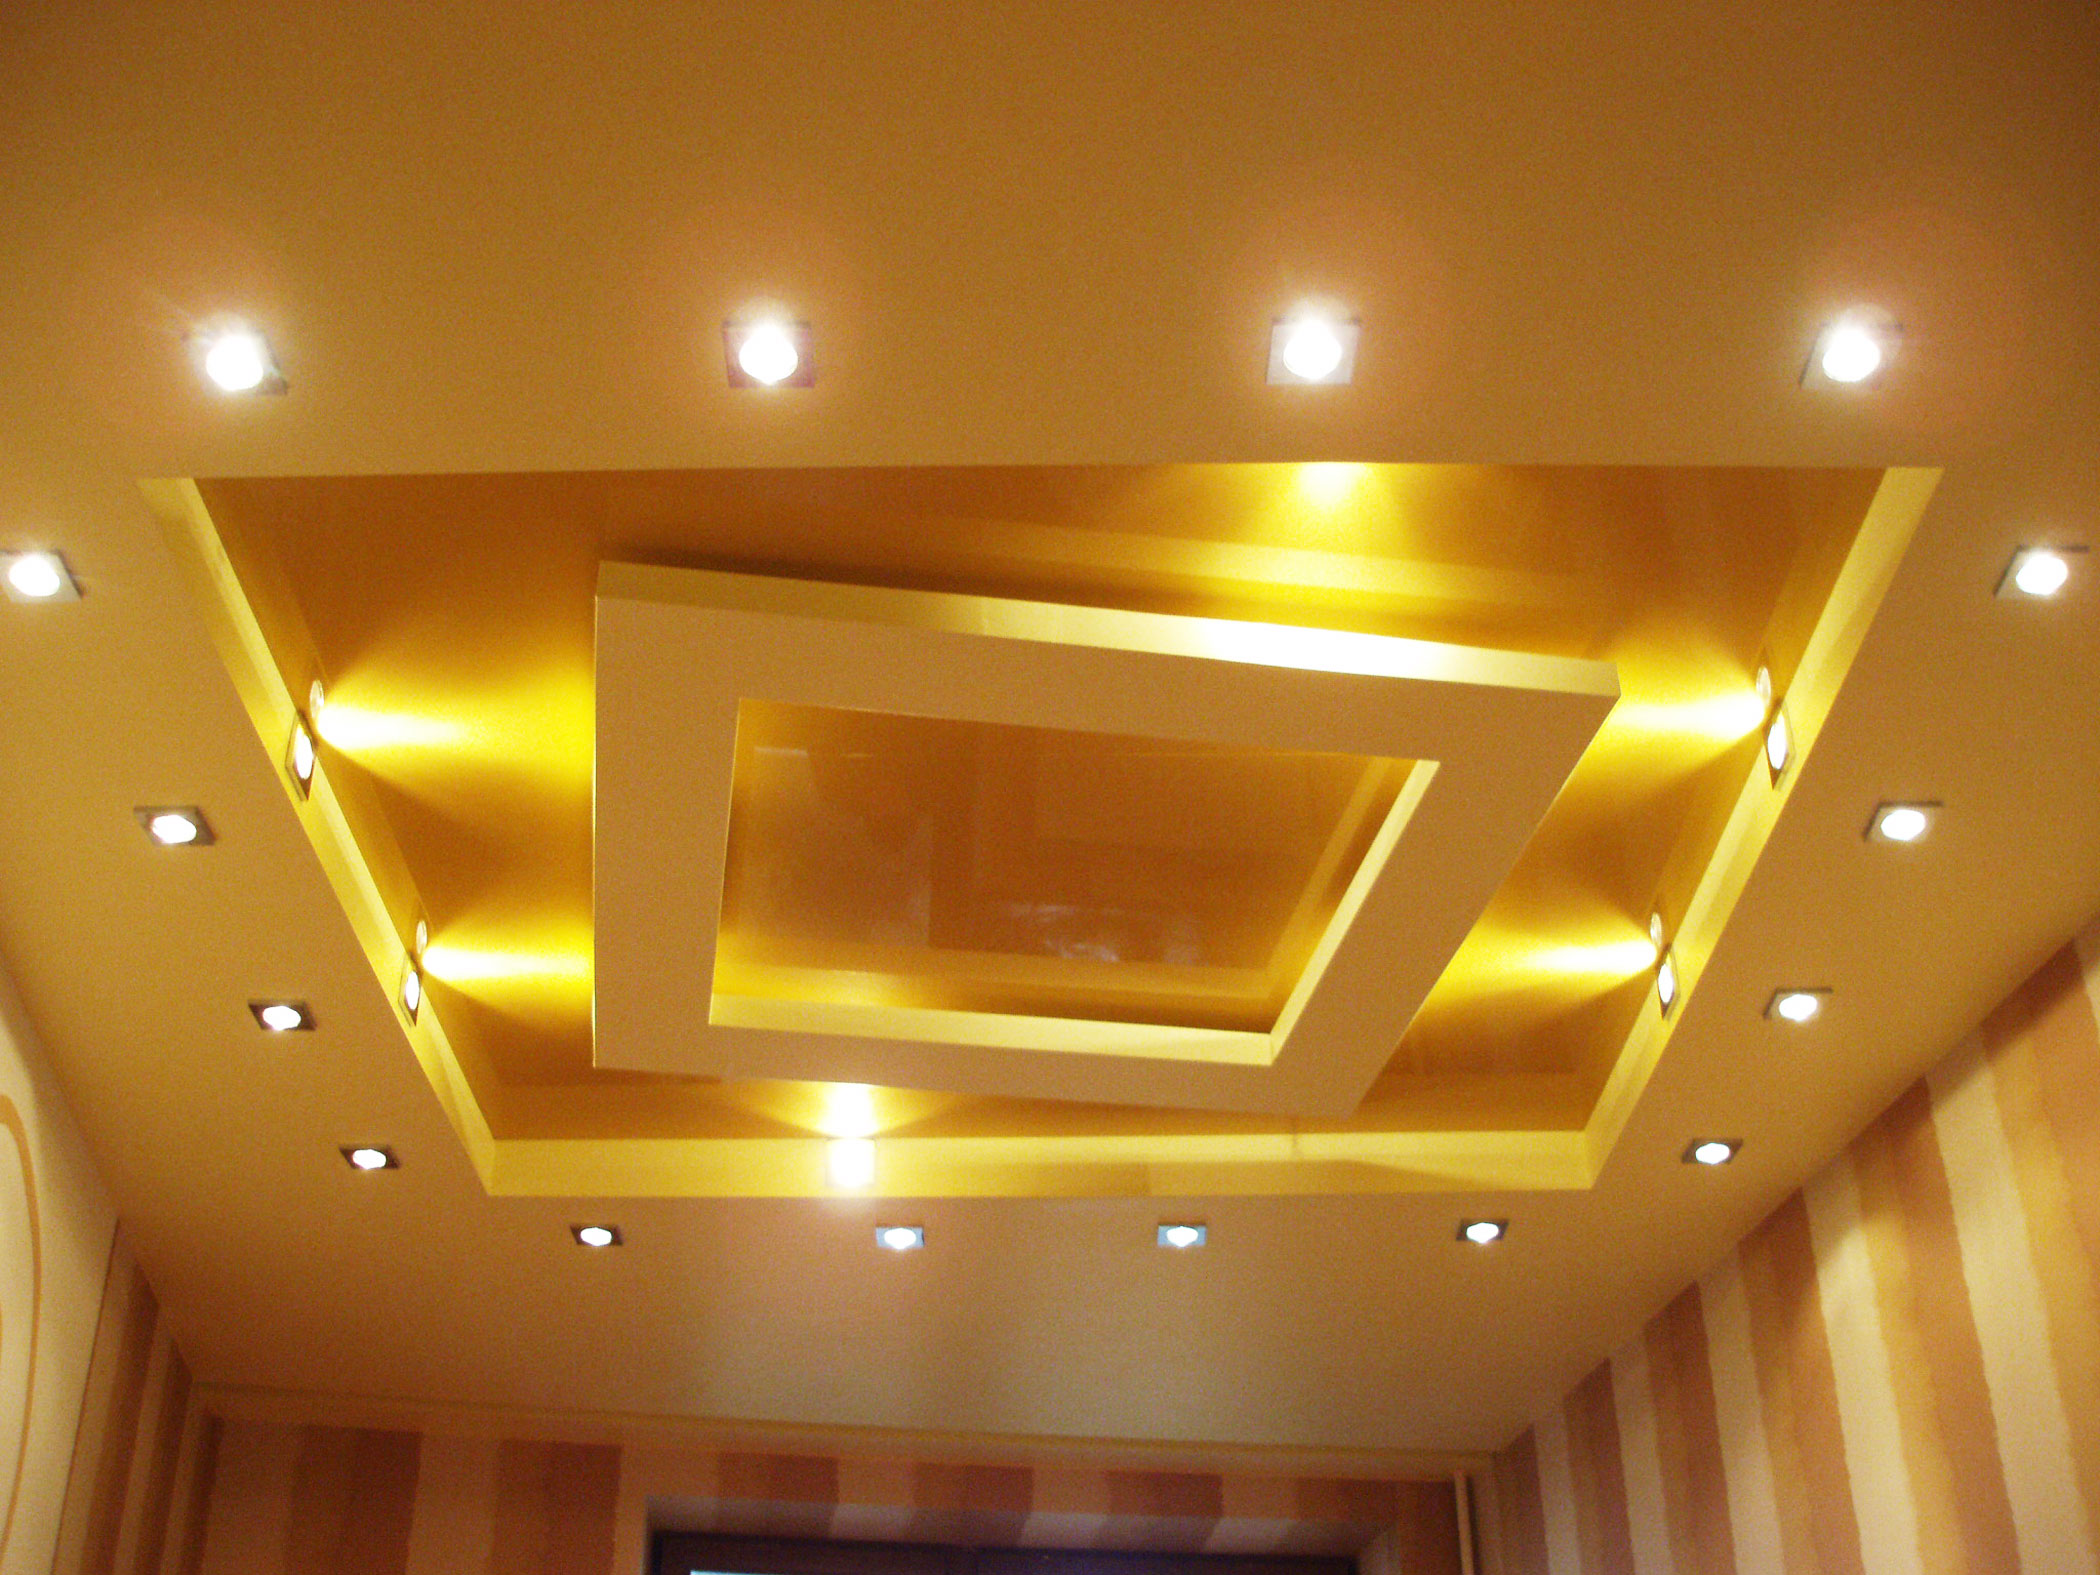
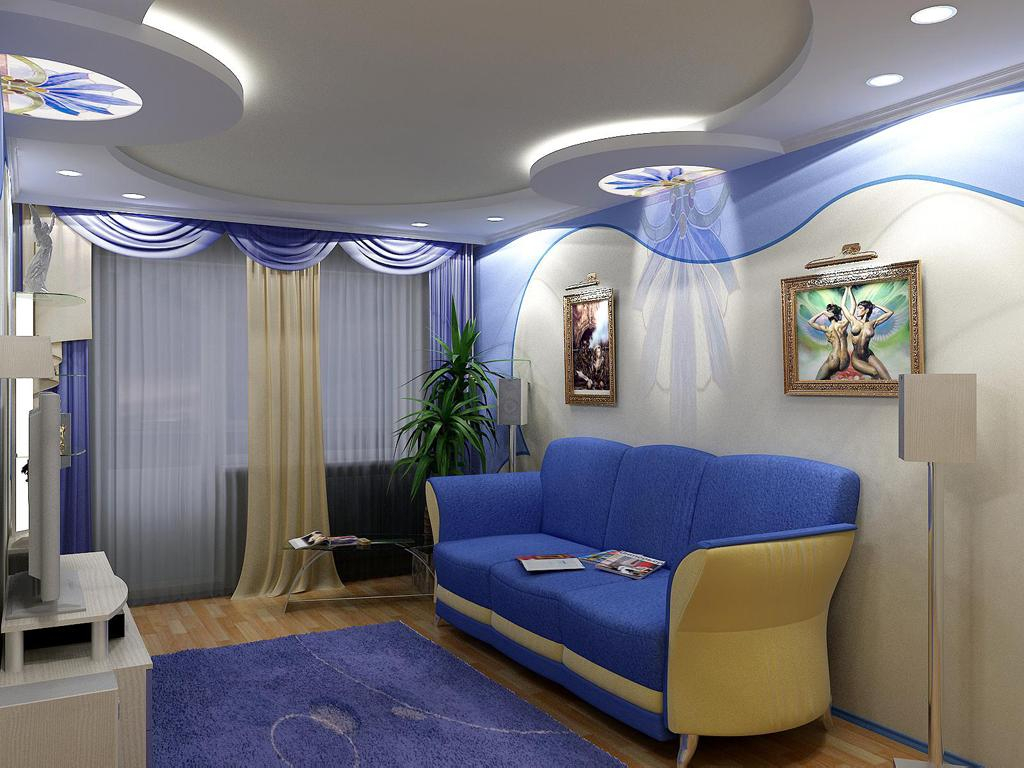
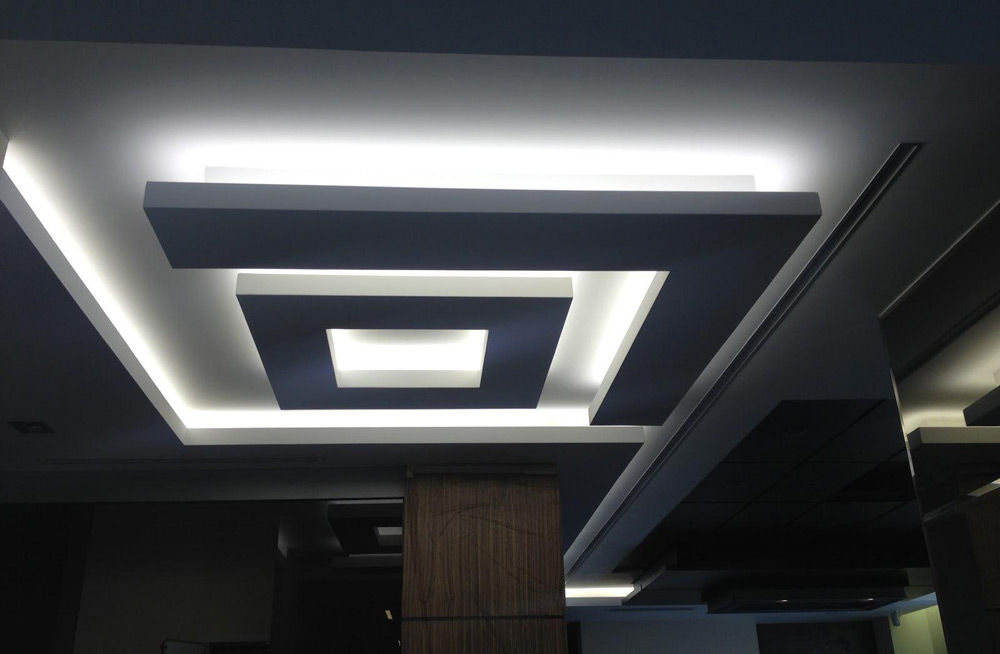
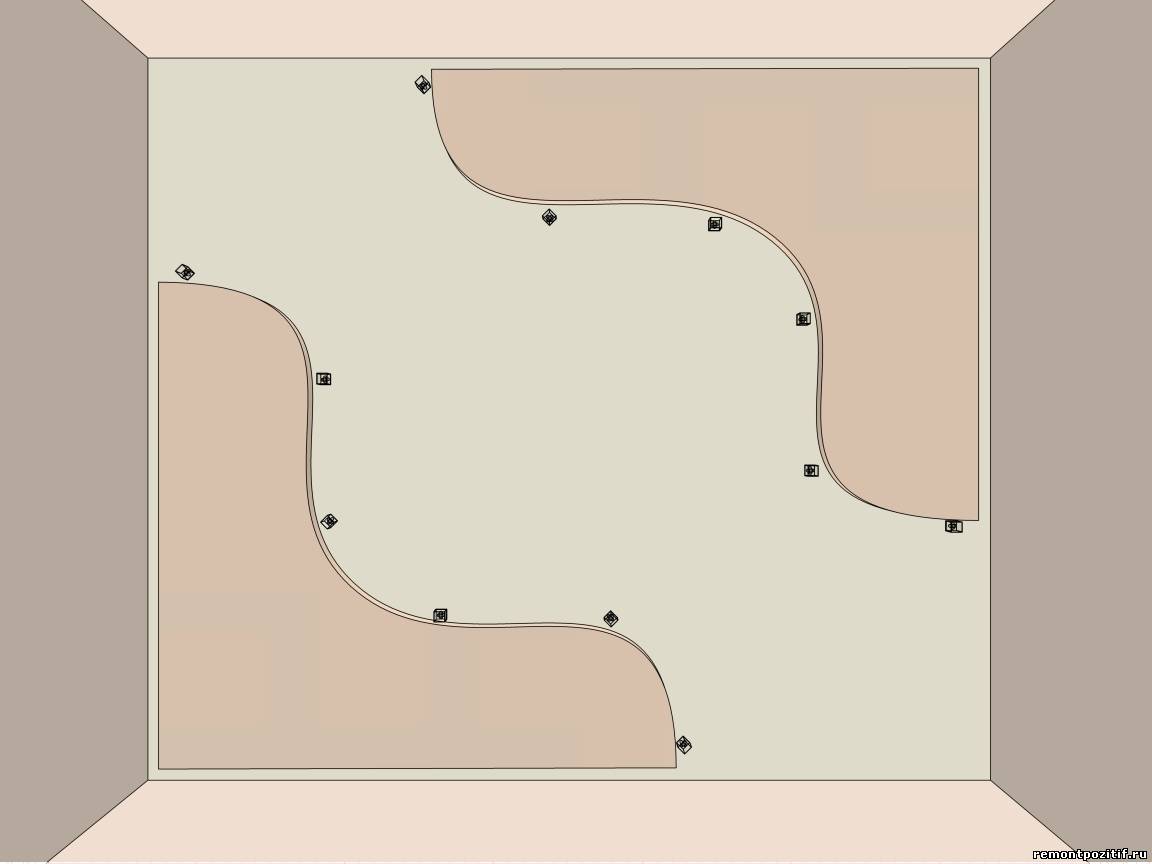
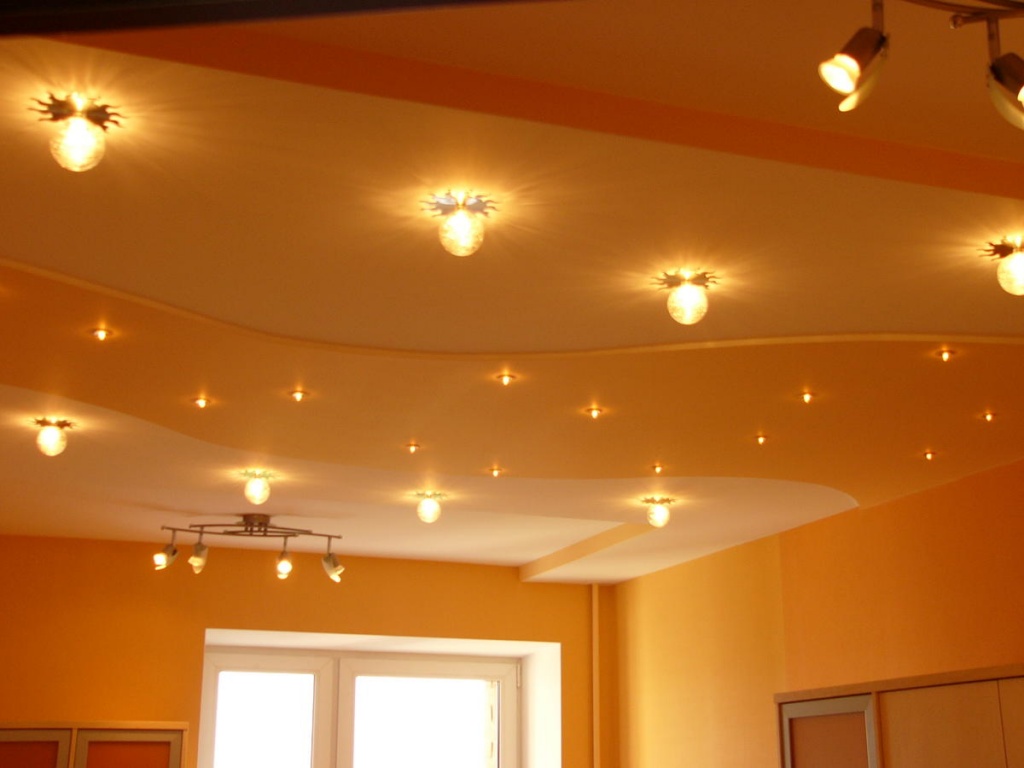
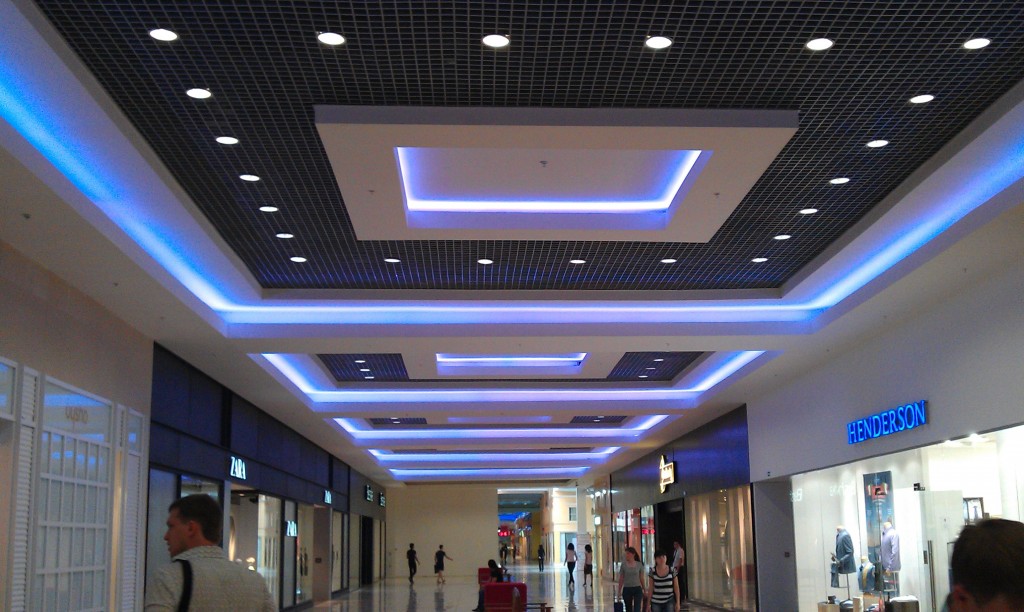
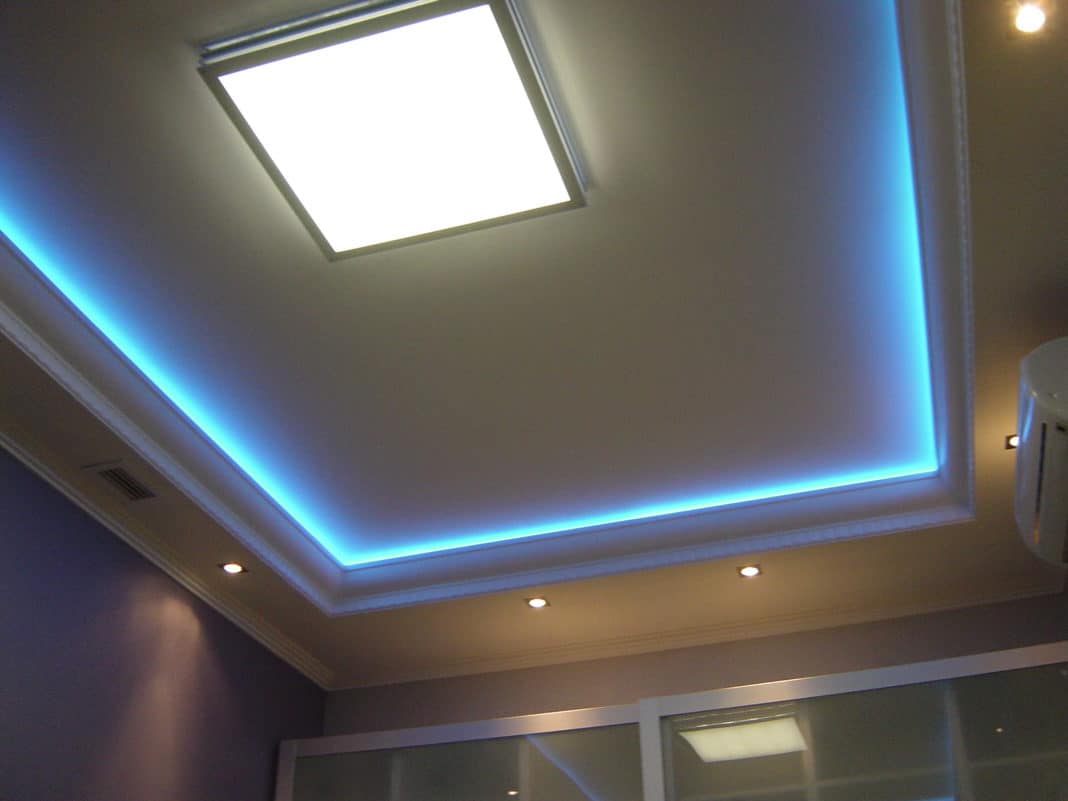
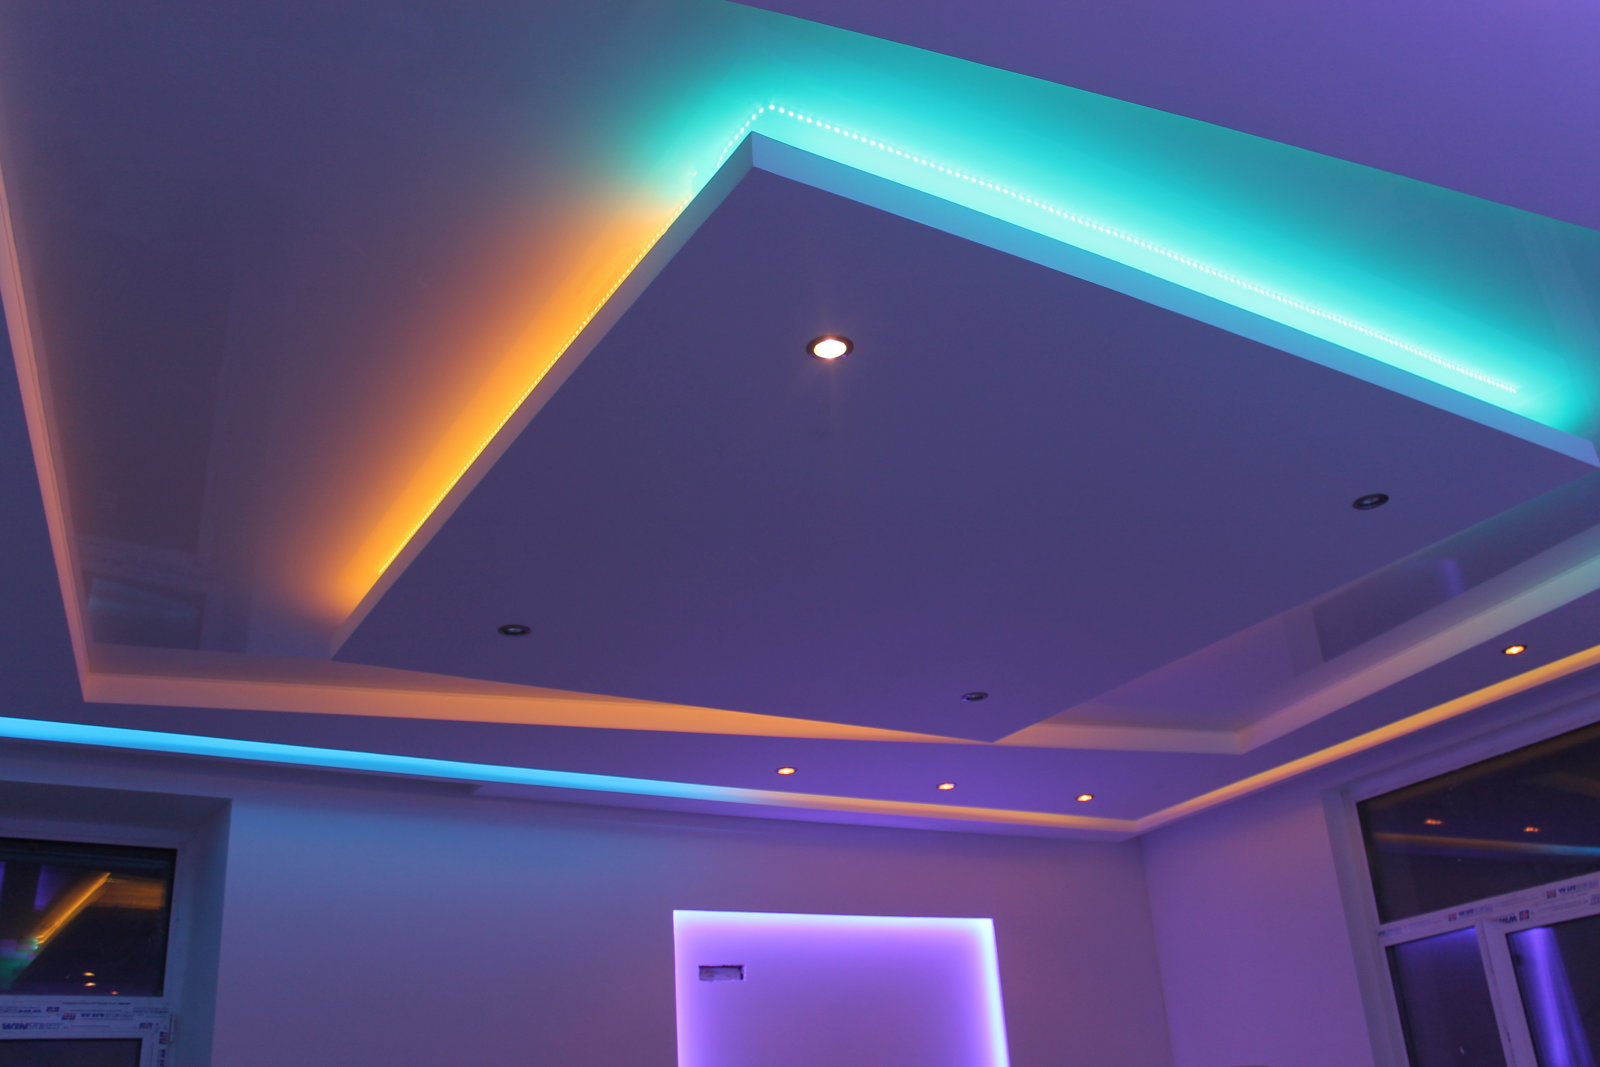
Two-level geometric ceiling of plasterboard with spot lighting and LED panels.
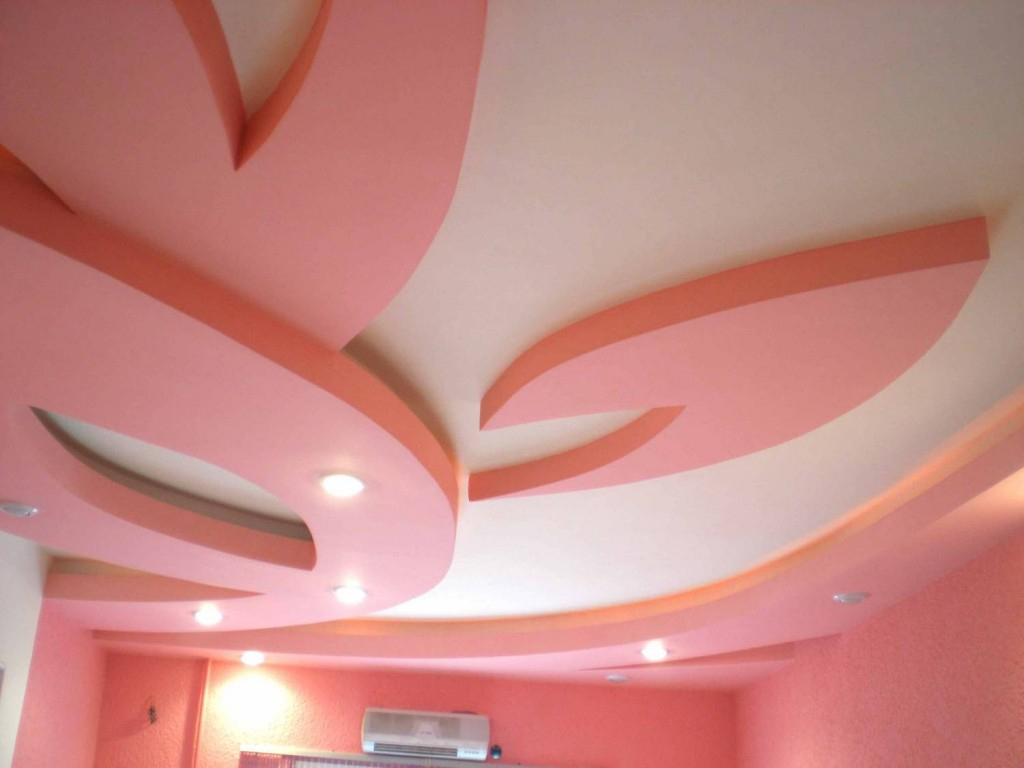
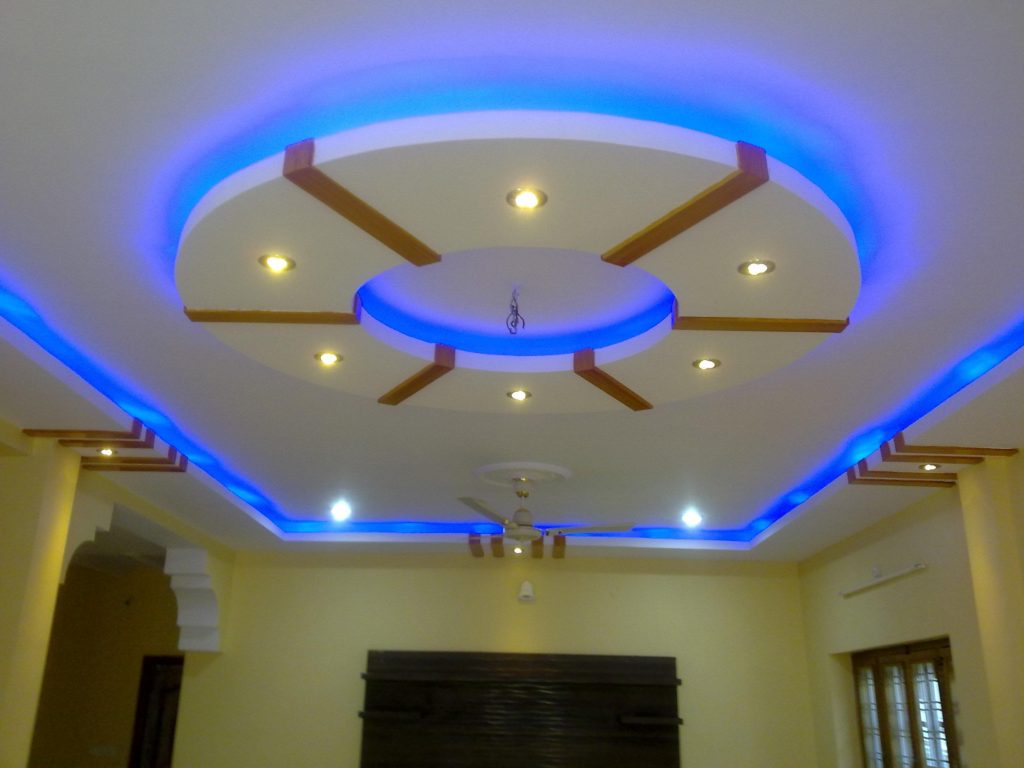
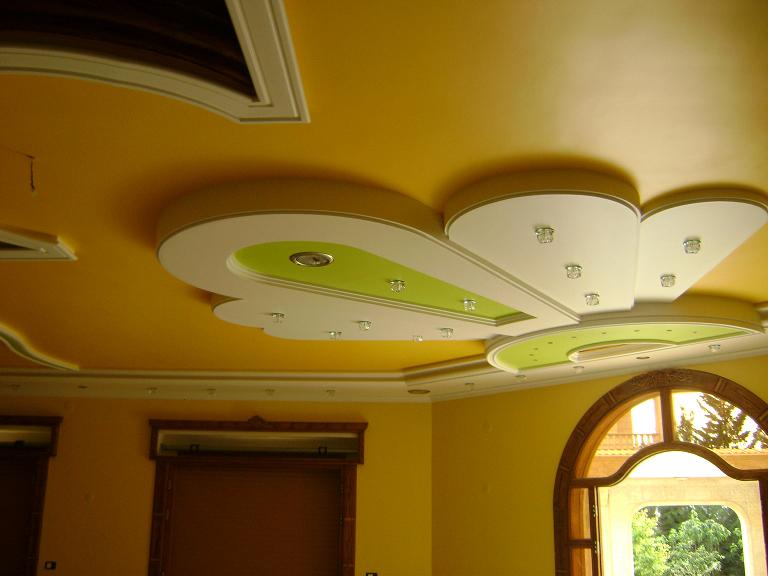
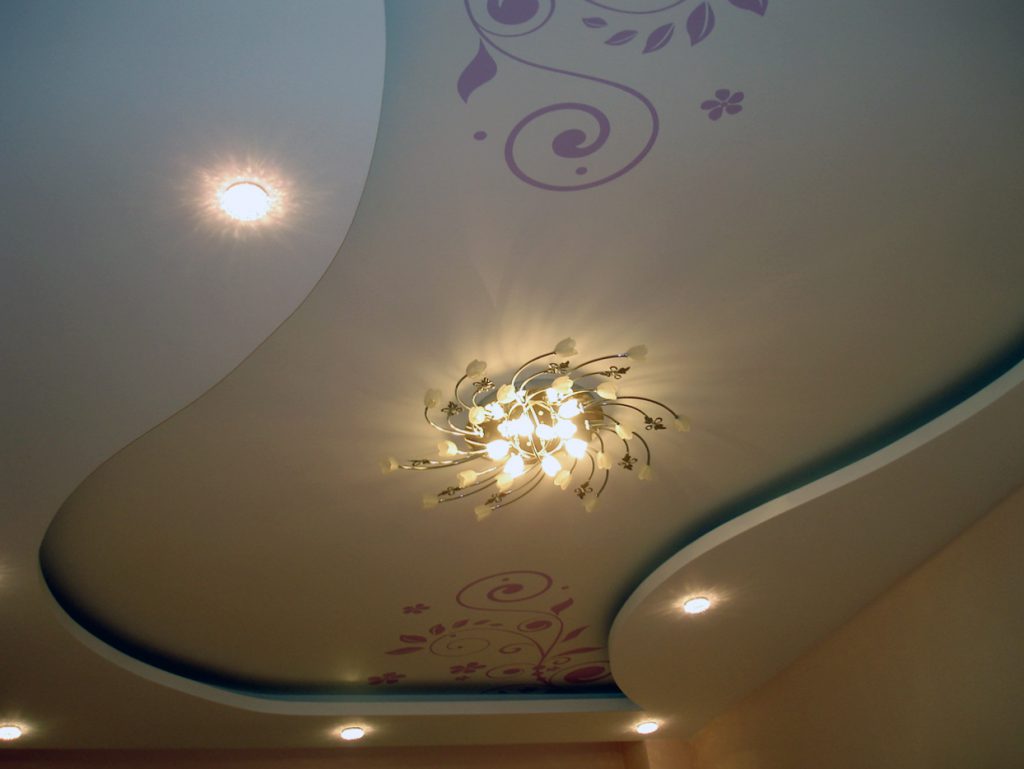
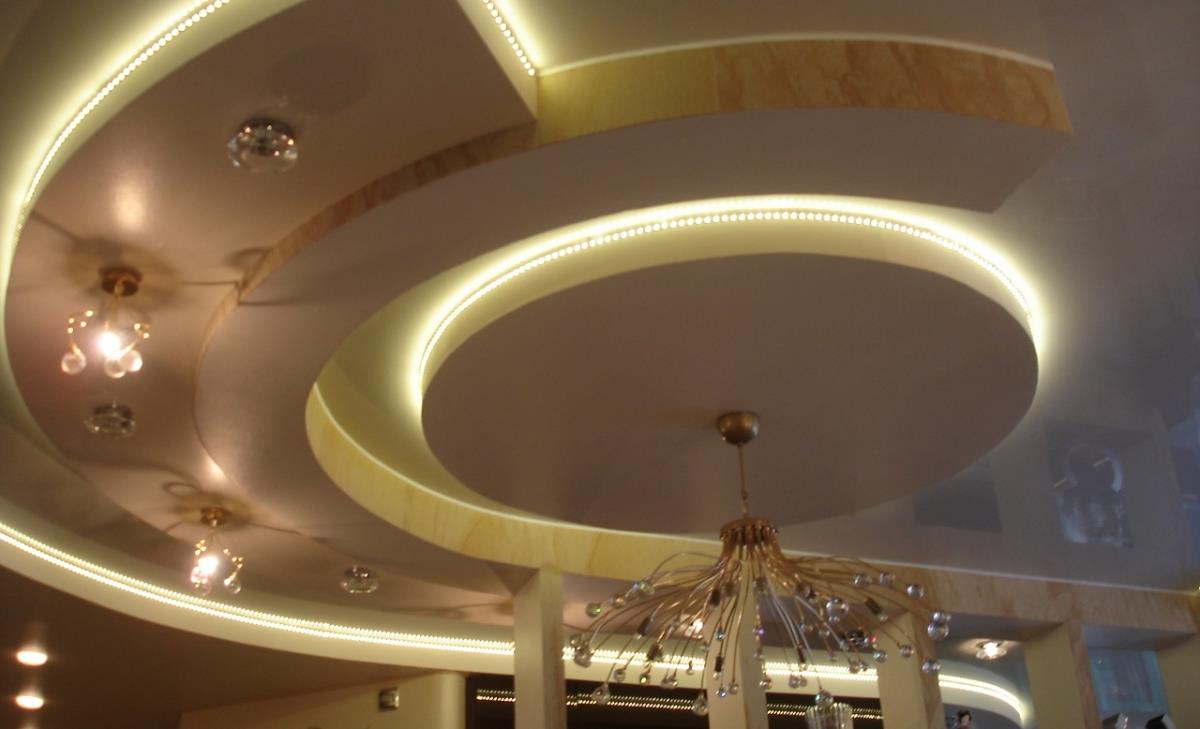
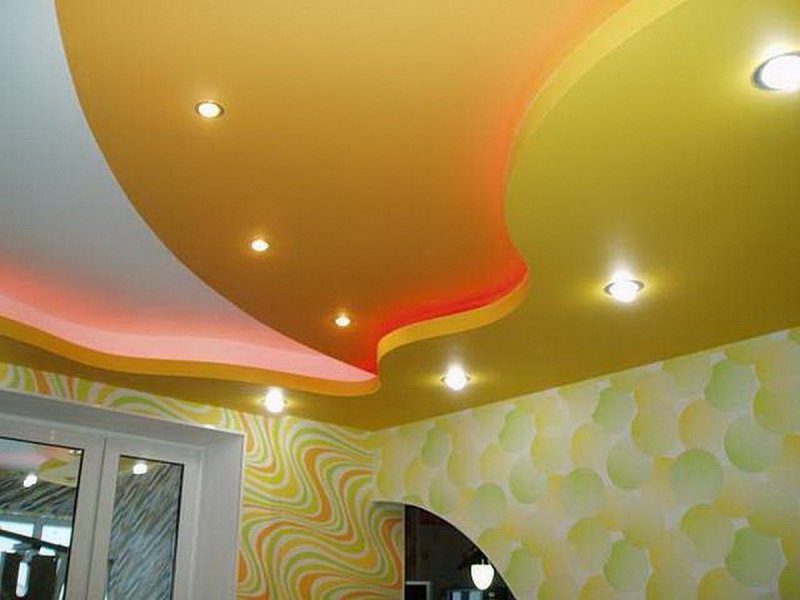
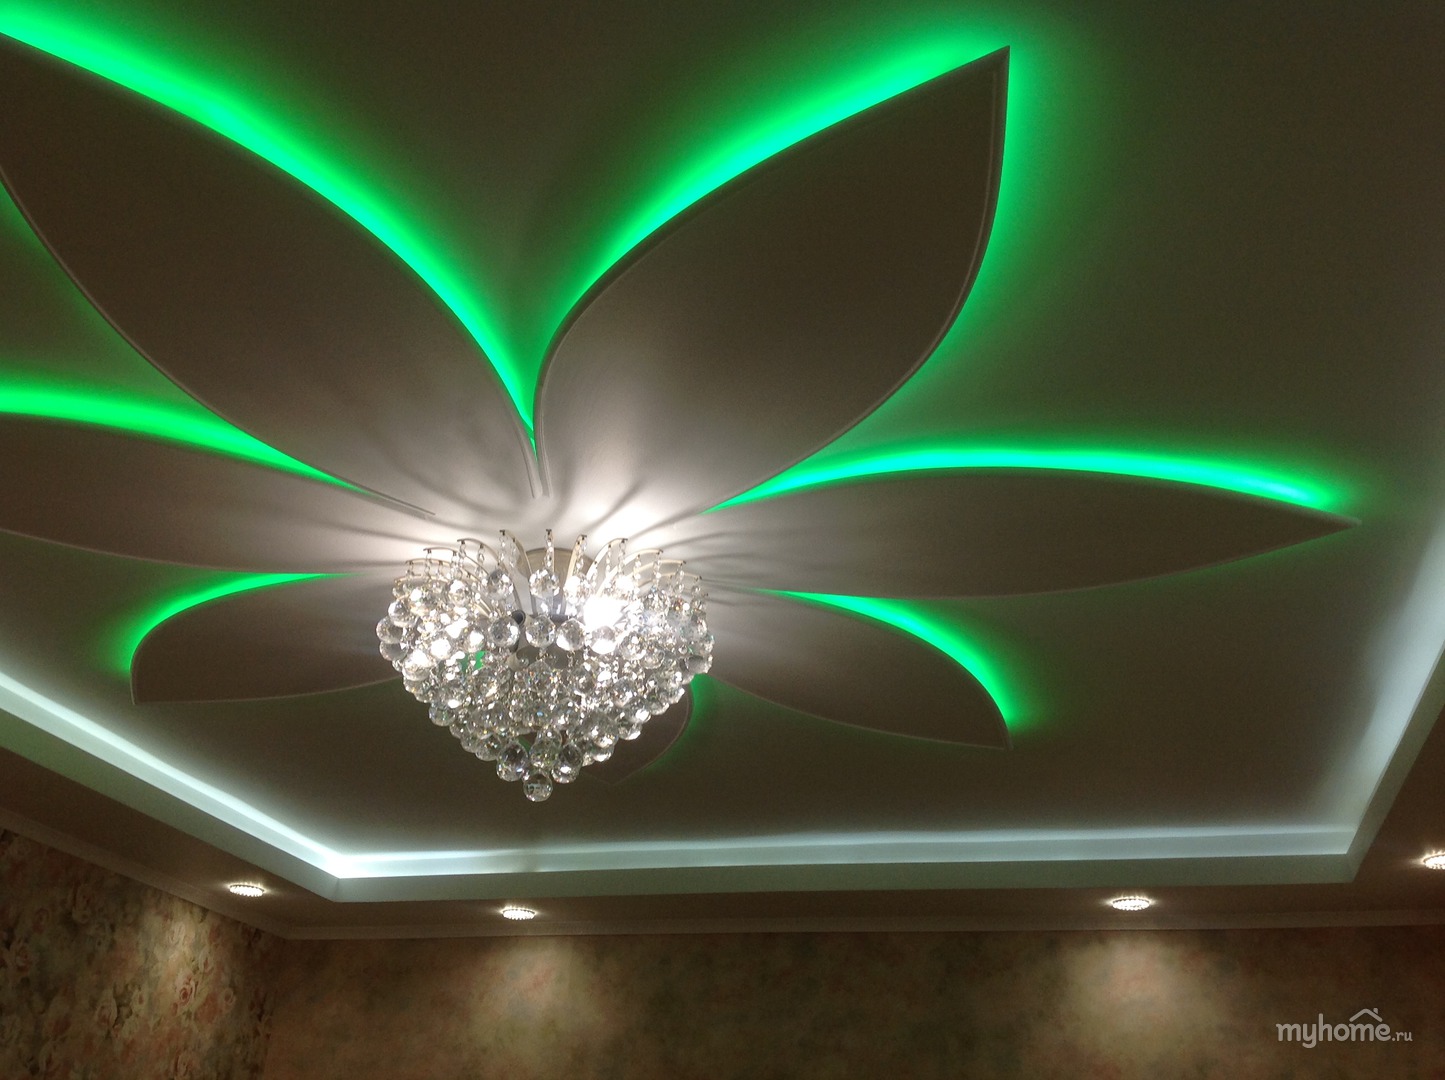
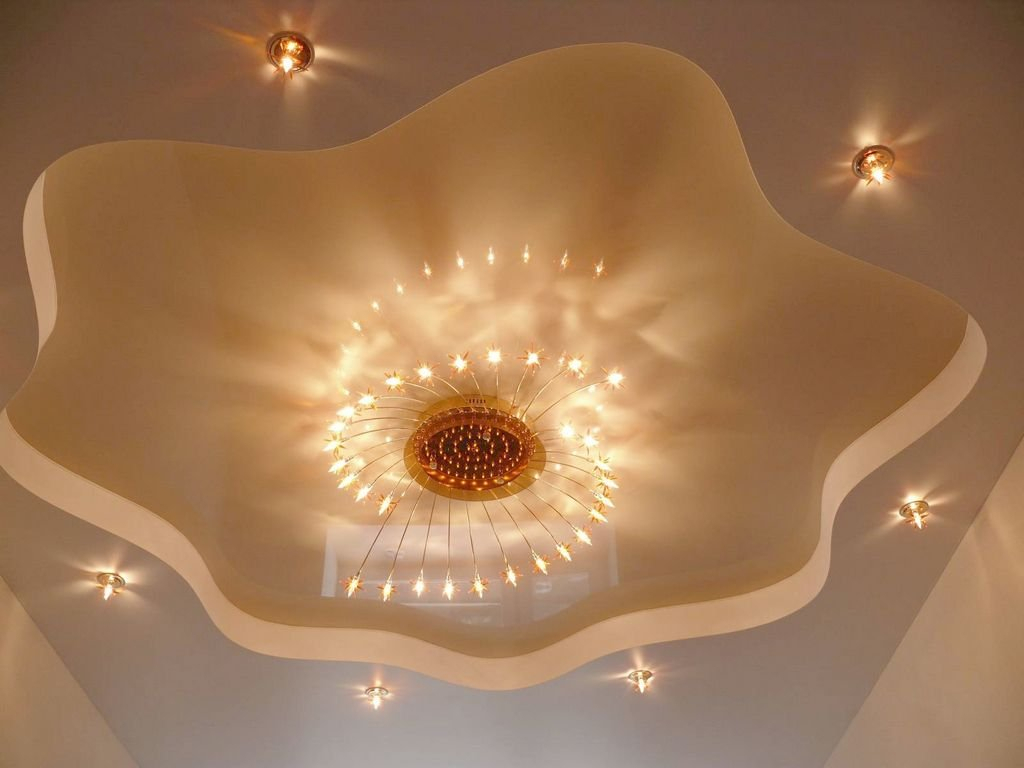
Original flower shaped ceiling. The backlight goes around the perimeter.
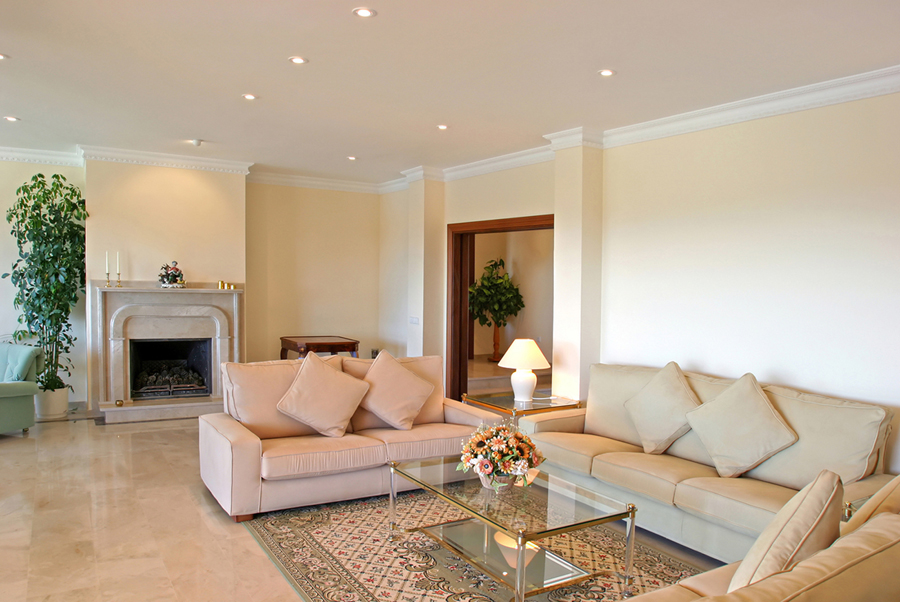
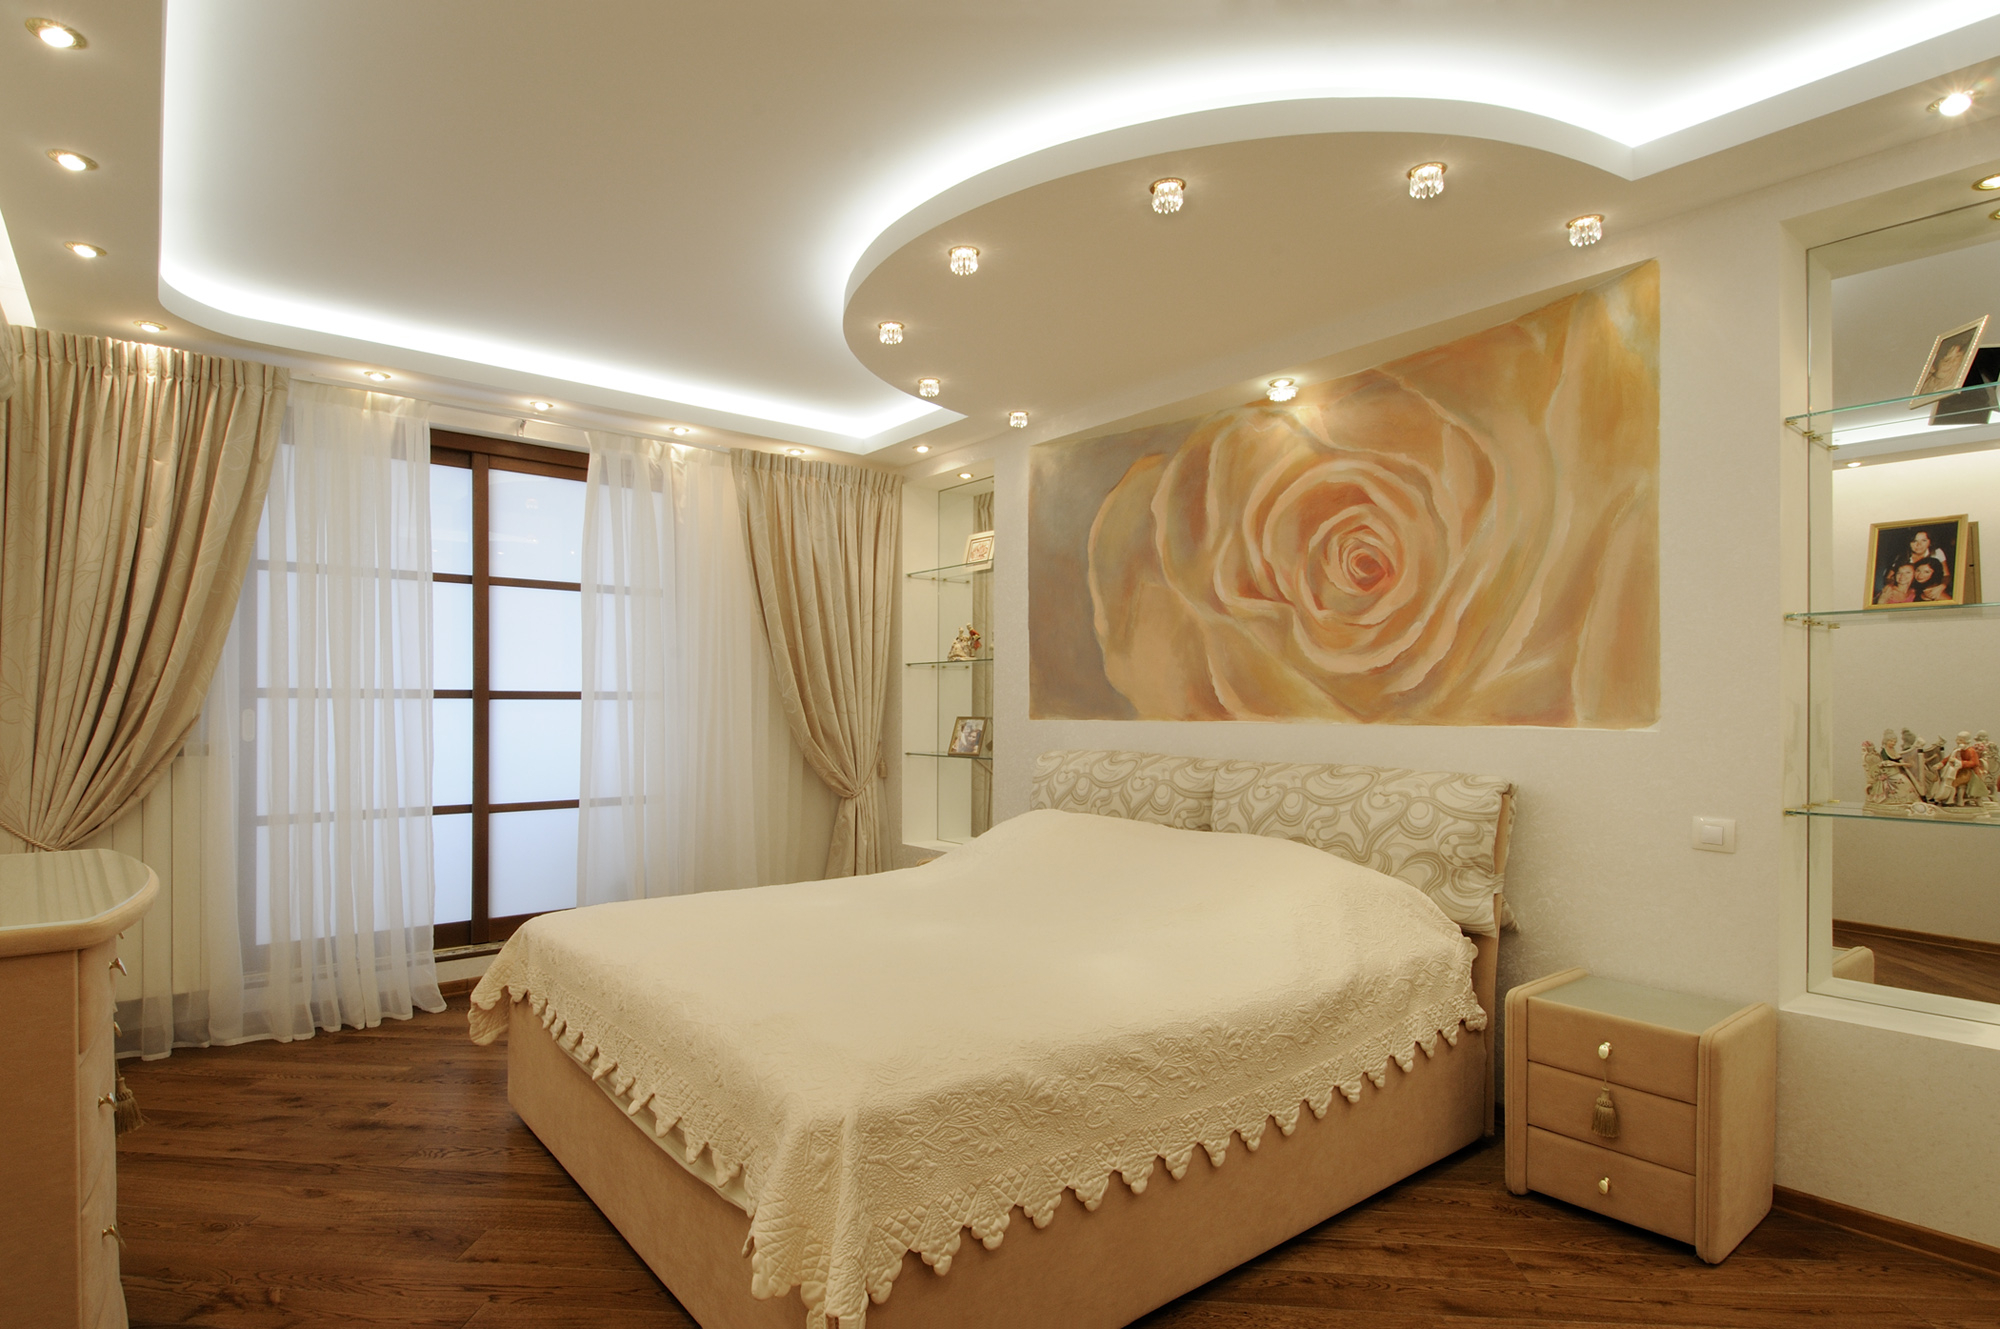
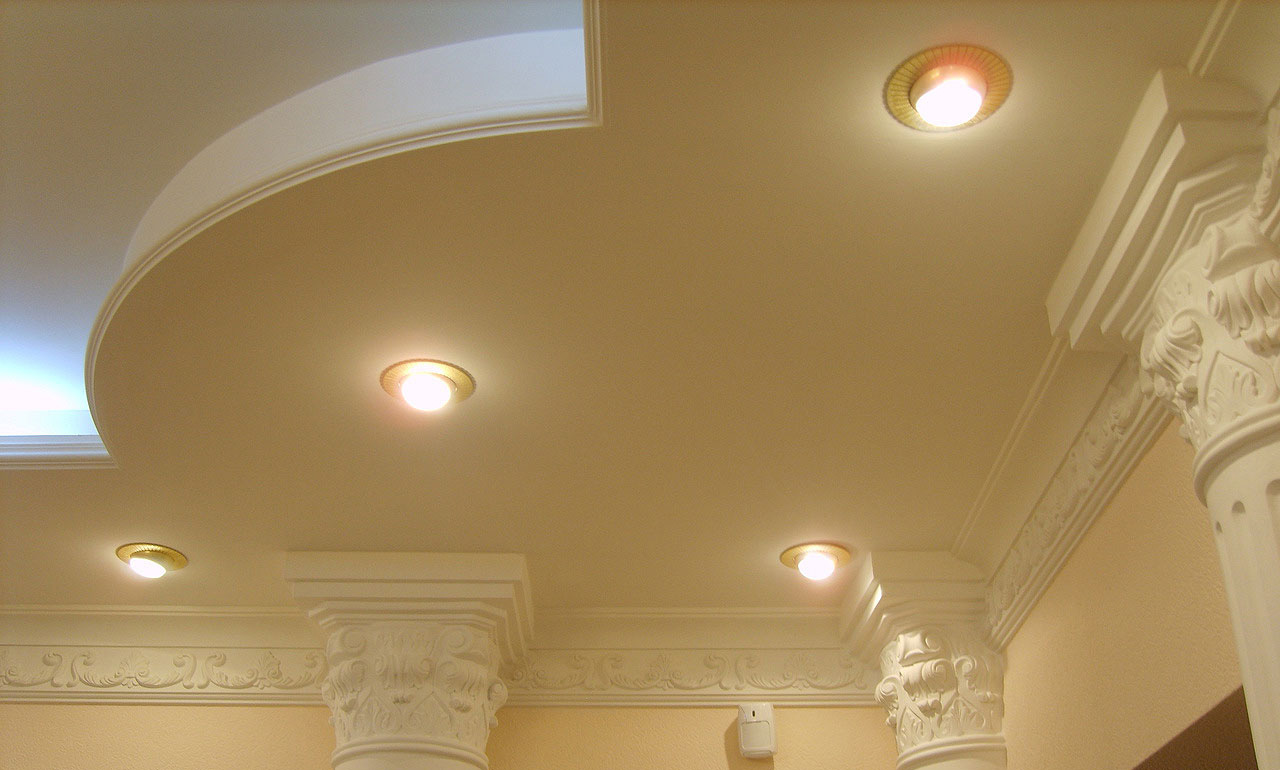
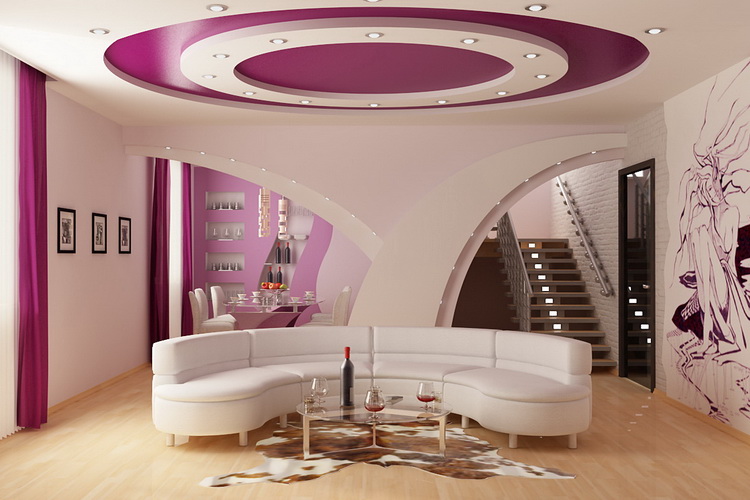
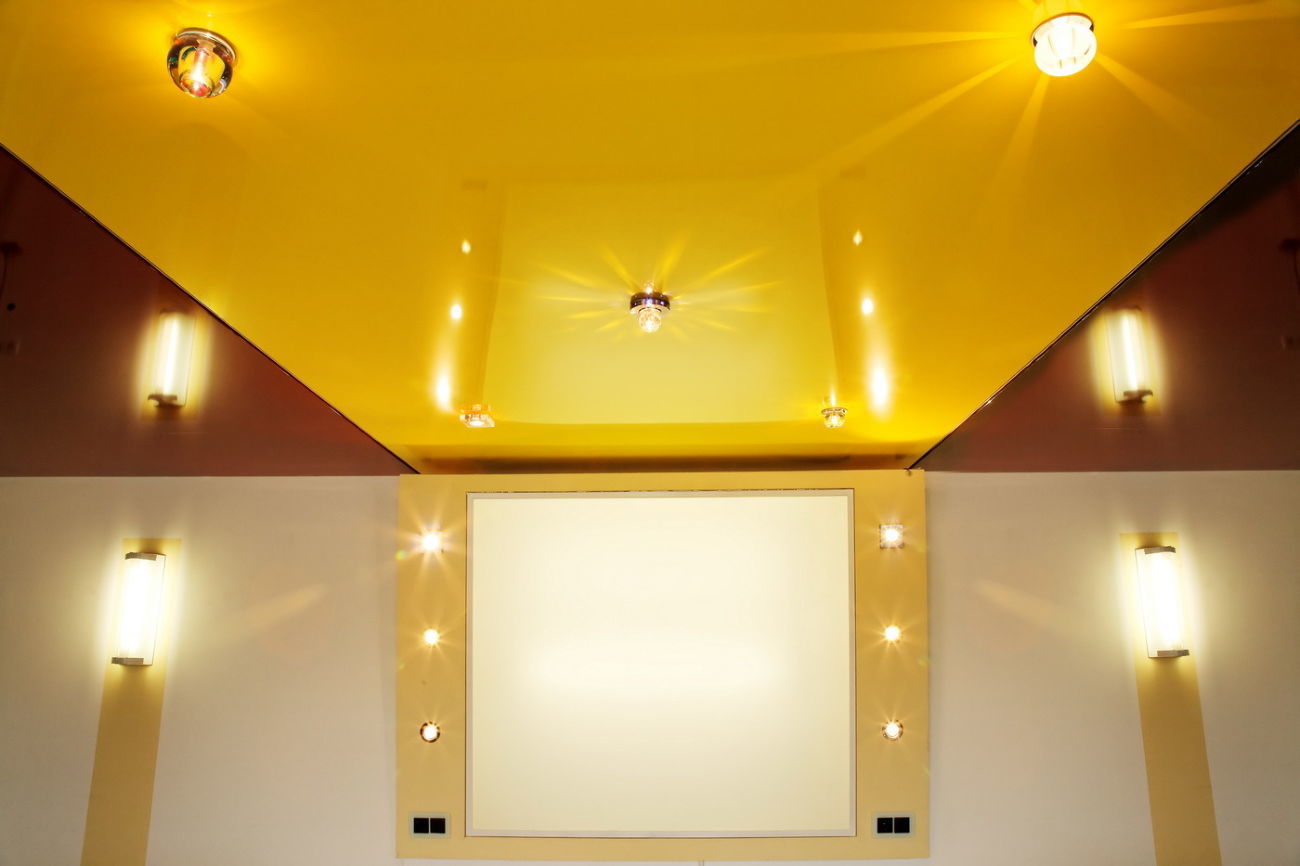
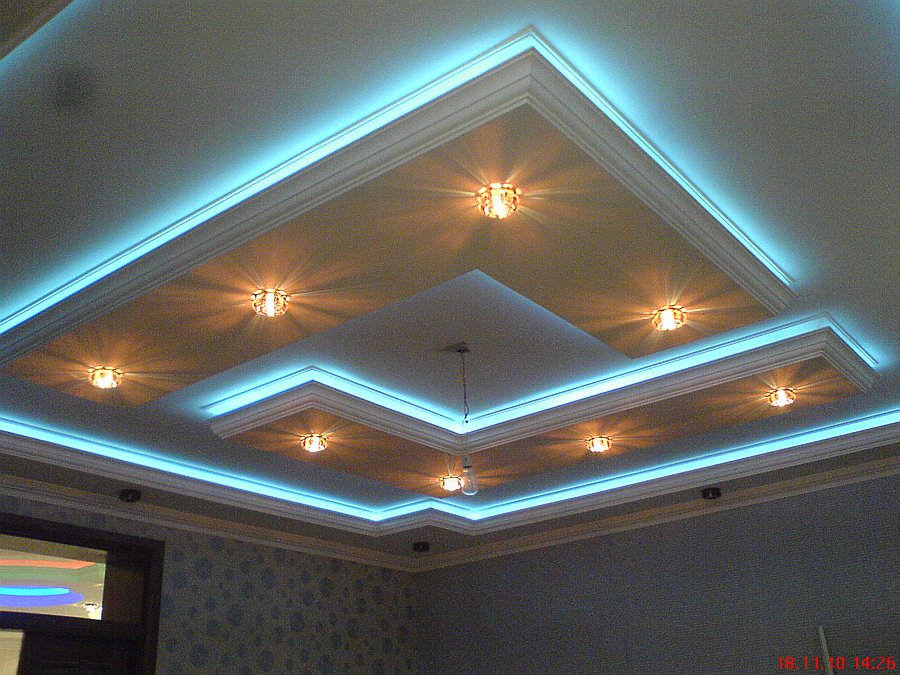
Two-level ceiling, in the lighting of which a chandelier and lamps are combined.
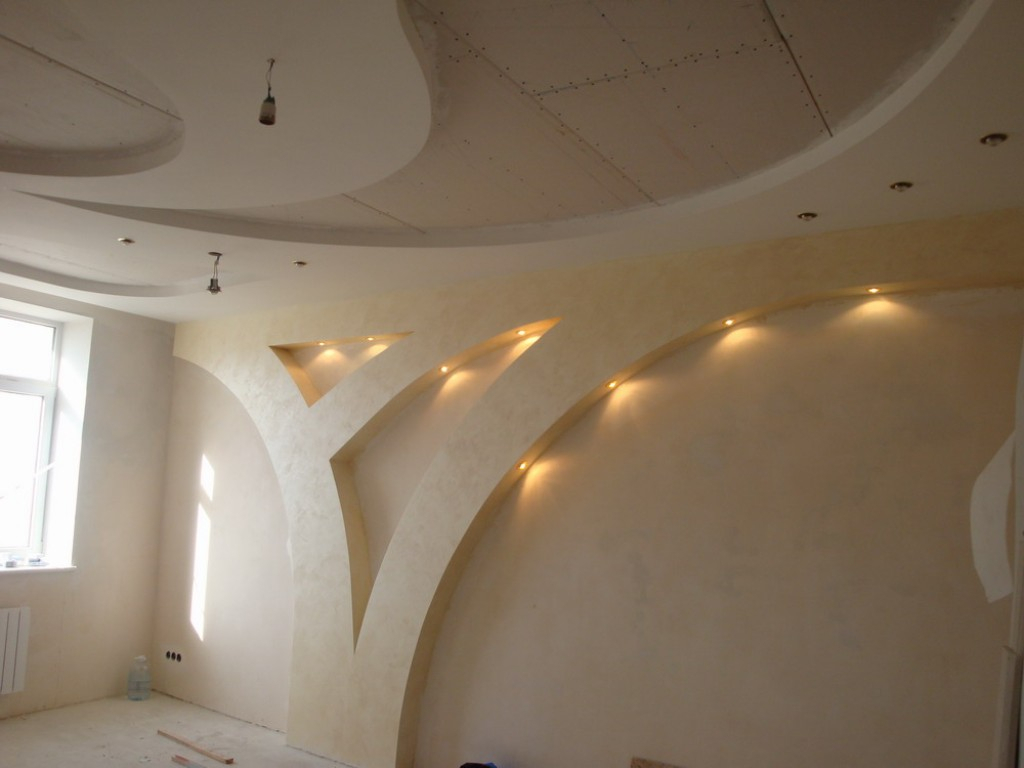
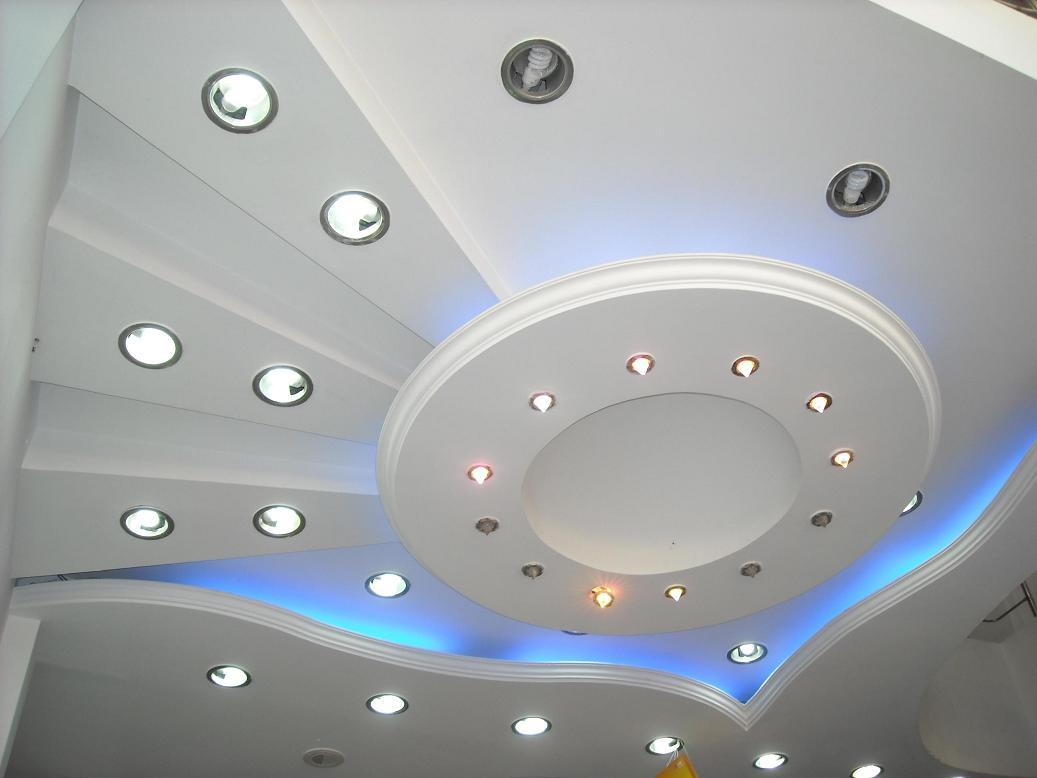
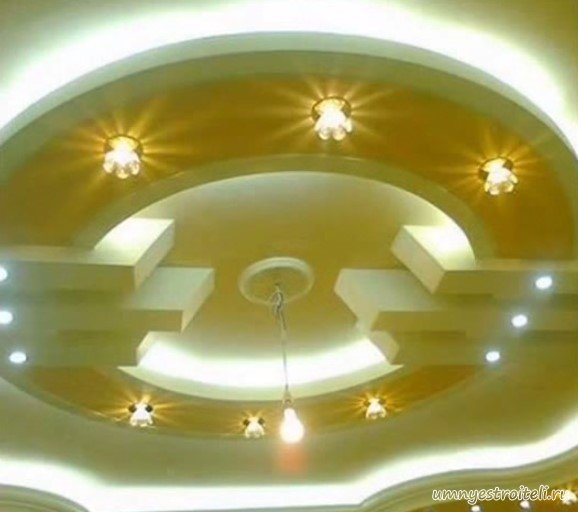
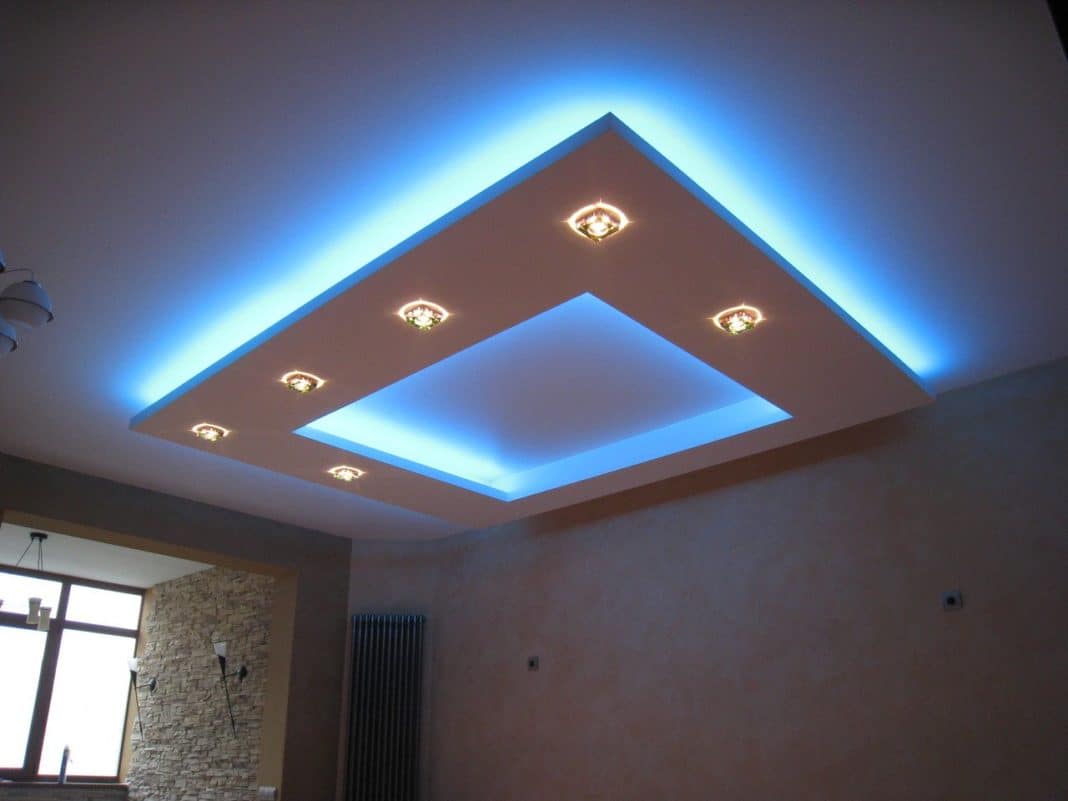
Geometric ceiling with spot lighting.

Video instruction on how to assemble a plasterboard ceiling, see below.


