Toilet Repair: Features and Design Ideas
Toilet room in any house or apartment should be performed flawlessly. But not everyone knows exactly how to achieve this and what points to pay attention to. Moreover, the methods for one type of buildings are not always suitable for others.
Special features
Repair of the toilet with his own hands is available to almost all amateur builders. As always, you will have to take care of a well-thought-out design concept, selection of materials. Difficulties in the performance of work can be associated with an insufficient area of the room, but due to the simplest actions, these limitations are overcome.
It is very important not to forget for a minute about the increased hygienic standards that are peculiar to the bathroom like no other room. Before using any recommendation you like, you need to understand whether it is justified and what effect it will lead to.

Options for different rooms
When it is necessary to repair a toilet of the small sizes, thinking over the concept naturally becomes the first step. And if for a larger bathroom, you can still correct it at a certain stage of work, then you will have to redo everything anew, incurring additional costs. Before designing in “brezhnevka” or in a small apartment of an earlier period, its technical condition should be taken into account. No matter how carefully they were once built, all structures can become unusable.
Any project in such apartments should be drawn up taking into account the most efficient use of available space.
In a modern standard apartment there is much more room for decision making.But one thing remains unchanged: projects that require redevelopment are always worse than those that do not provide for it. It is not only a matter of potential problems, in conflicts with neighbors and with the housing inspectorate. Difficulties are also caused by the increased scope of work (both during dismantling and installation).
Waste disposal is a problem for the country toilet. It is necessary to immediately decide whether it is possible to connect to a central sewer or have to find workarounds.
Capital
Having dealt with the features of a particular dwelling, you need to figure out how much the bathroom will be subjected to global alteration. Only an overhaul will help, if it is decided to merge its parts together or vice versa, to make two separate rooms from one room. The cost of quality overhaul is quite high, as well as its duration, and many of the work is done only by trained installers.
In new homes, or after a recently completed overhaul, it is not necessary to re-conduct it. A more modest option can be considered with limited means.
Economical
Cheap redecoration of the toilet will not touch any pipes, walls or counters.
This category is quite fall:
- installation and replacement of mirrors;
- change of faulty valves;
- installation of suspended or suspended ceilings.
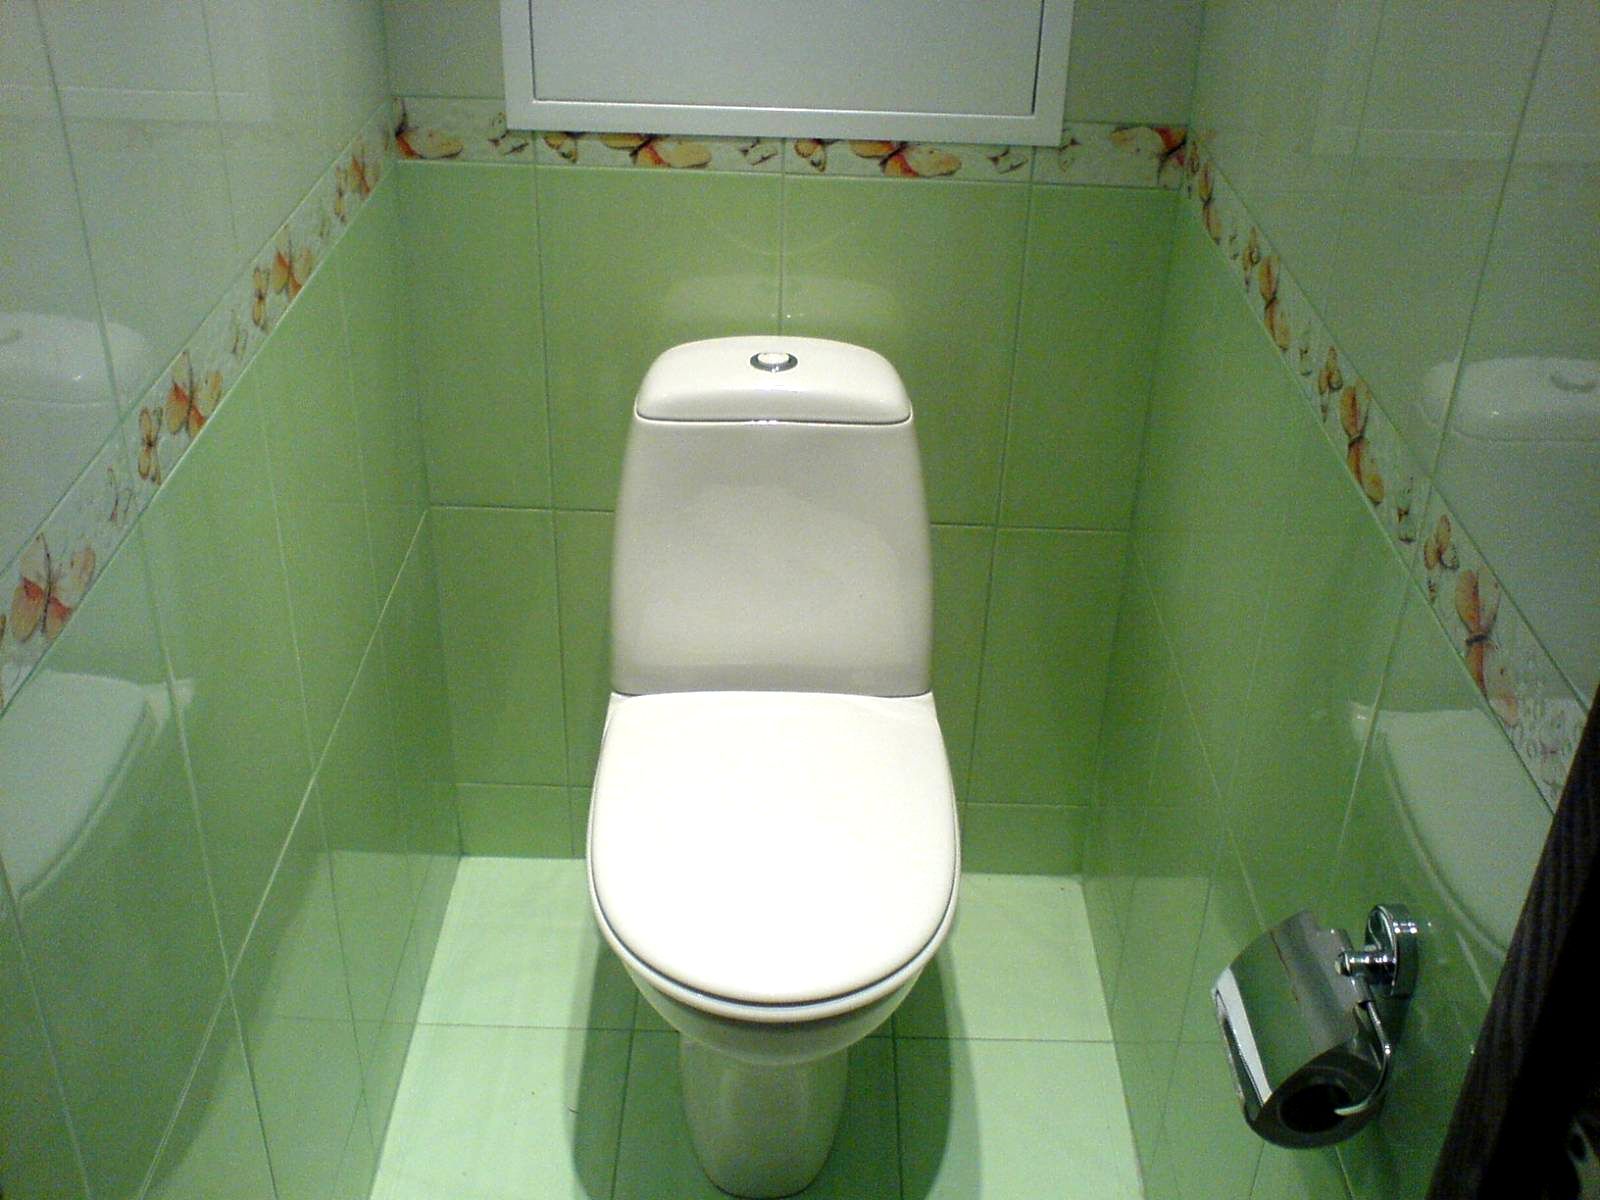
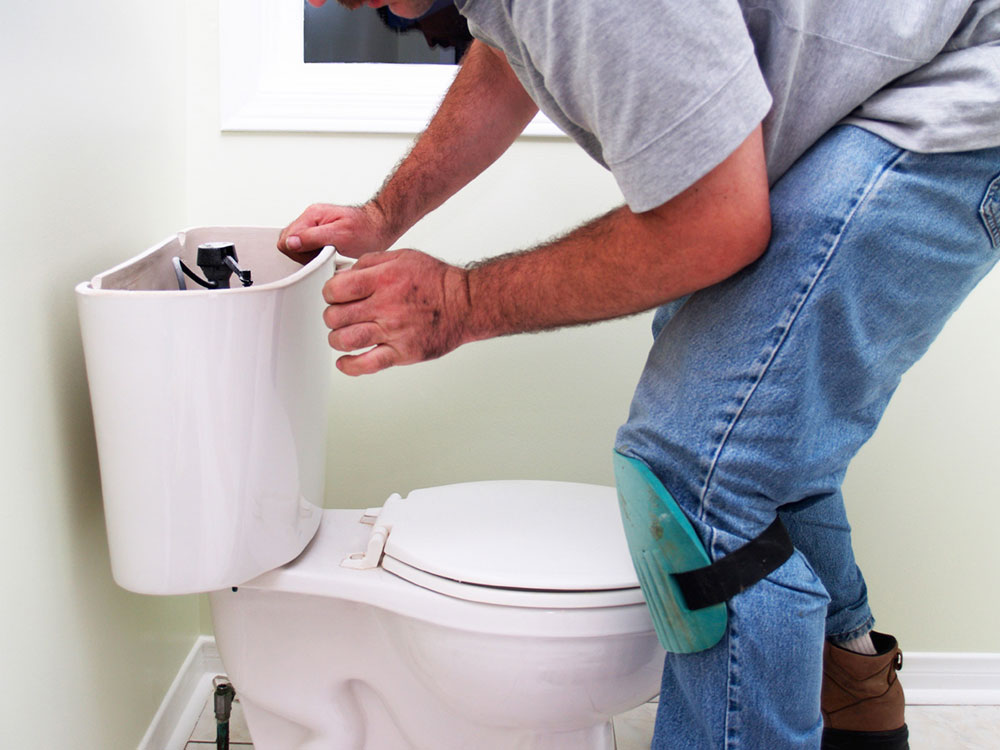
When changing the toilet - this is also a budget type of repair (or part of it). But “easy, fast and cheap” does not mean less responsibly. Every year there are hundreds of cases of poor-quality redecoration in the toilets, the errors in which end with the Gulf of neighbors or serious domestic inconvenience.Therefore, the choice of components, decorative items, tools, and hiring a brigade must be approached carefully.
It is unacceptable to save on any of these components, but a careful study of the market will allow you not to overpay for quality.
Eurorepair
A beautiful and pleasant looking toilet is a cherished dream of many people. To bring it to life and maintain in the future just helps the renovation. From the usual overhaul it is distinguished by the presence of a specially prepared draft room design. Often, even prepare a three-dimensional visualization using special software.
Almost always, when the euro-repair totally change the infrastructure and appearance of the finish, implement creative delights and follow the latest fashion trends. Another feature is that it is advisable to do a renovation in the whole apartment at once, and not in the same toilet in isolation.

Required materials and tools
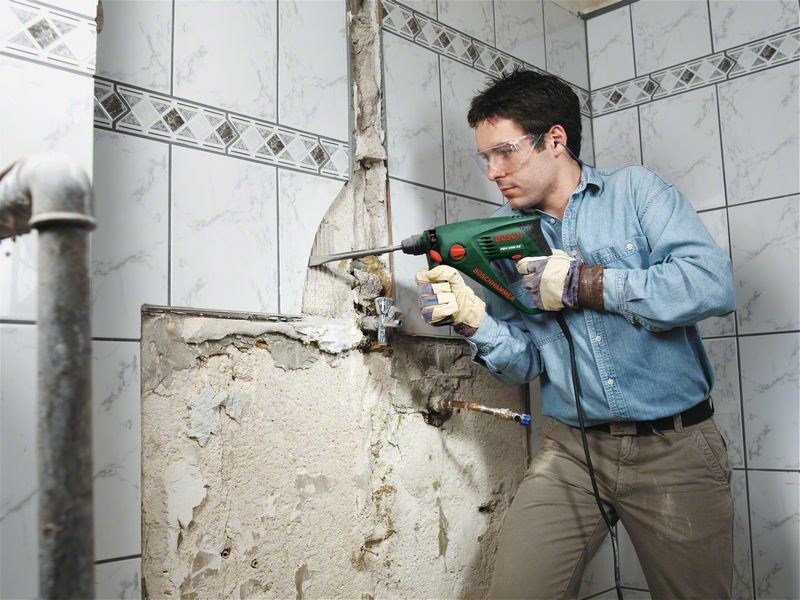
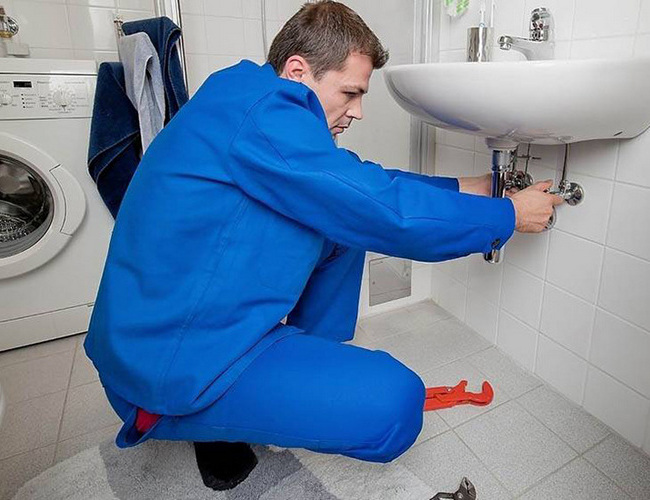
To repair the toilet properly, with no tools, is unlikely to work. You can remove the old accessories with a set of screwdrivers, but it is very time consuming and long.It would be much better to take a screwdriver and a set of bits to it. The plinth from concrete is dismantled by a perforator, it also facilitates the removal of the tile and the preparation of the holes. During the work with a pipe and a toilet bowl the master has to have a gas key ready.

It is impossible to install new pipes, both metal and plastic, without using a welding machine.
Prepare for the application of finishing materials will help:
- roulette;
- folding meter;
- construction level;
- plummet


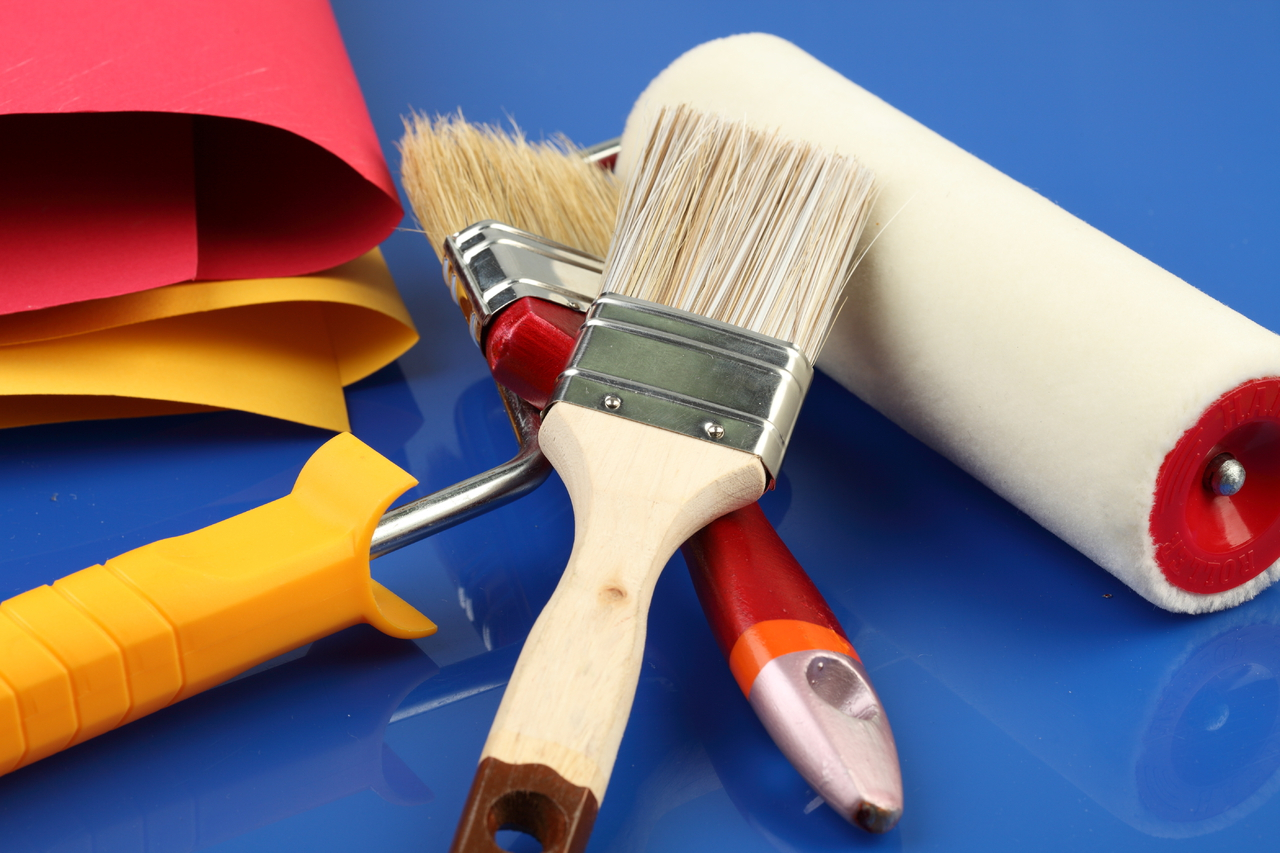
Primer, plastering, putty, paint is applied with brushes and rollers. But to work with tile glue, it is advisable to take a notched trowel. A saw, hammer, chisel, chisel, file and other plumbing tools, carpentry accessories are also needed for standard repairs, including in other rooms. Therefore, spending on their purchase is fully justified.
It is recommended to make a list of necessary tools and consult with him after it is clear what works and with what materials will be produced.


For walls
Tile is deservedly considered a universal solution for the decoration of toilet walls. But you can not take a tile made of ordinary silicates (which has the wrong side white).Despite chemical neutrality, a large number of microscopic pores intensify fluid intake and retention of unpleasant odors. The fight against them with the help of household deodorants is very expensive, besides it has a bad effect on health.
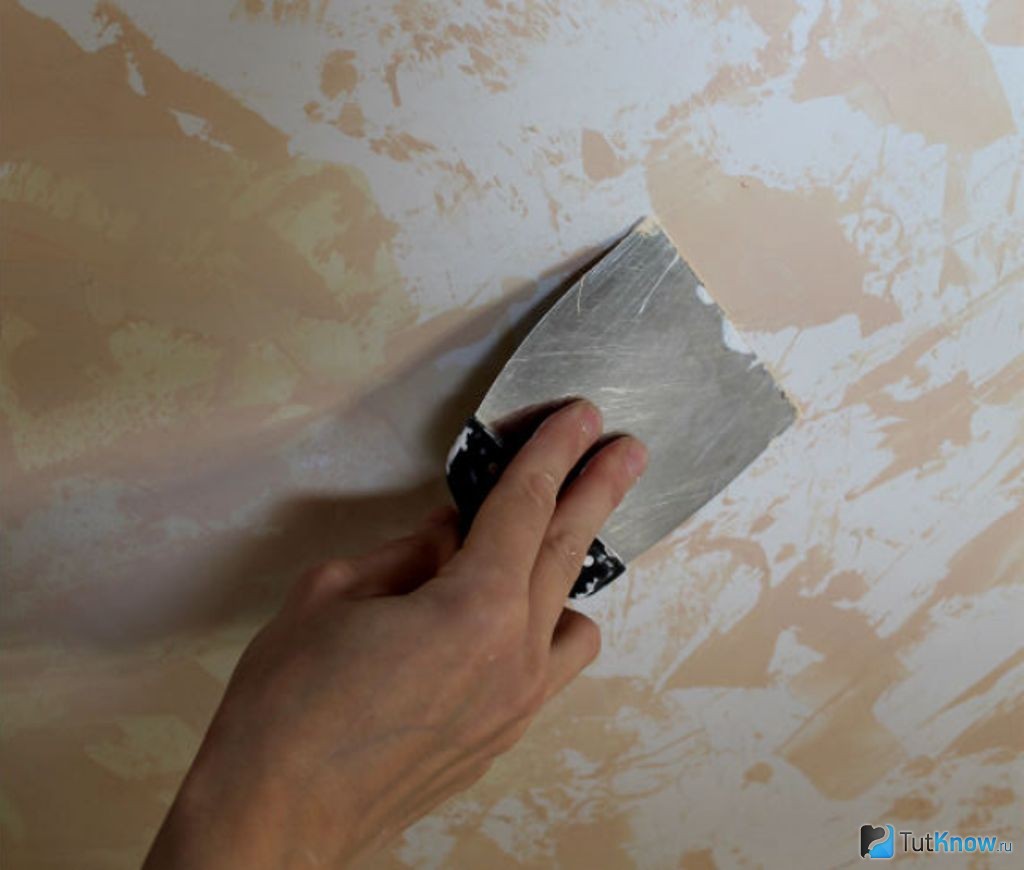
An alternative to tile are wallpapers. In the toilet it is recommended to glue the types of them that can be cleaned and washed. With proper creativity and effort, it will be possible to achieve not a worse appearance than using tiles. The problem is that even the best types of wallpaper are not long enough. But the costs are much less, and therefore frequent replacement will not affect the wallet.
As in the previous case, be sure to prepare the surface to work.

For the ceiling
The standard procedure involves the complete removal of the previous coverage. But what to do next depends on the type of finish chosen. So, suspended and suspended ceilings are mounted on a simple cleaned base. If decorative plaster is used, the coatings are knocked down to the rough overlap and the substrate is prepared as thoroughly as possible. Also take into account the features of lighting.
The specificity of the use of toilets and their "fillings" imposes known requirements on materials that can be used when finishing ceilings.
First of all, these include:
- Condensate resistance.
- Tightness. When a breakthrough occurs from above, it is almost always this material that takes the first blow.
- Mechanical strength. It is not enough for the ceiling to be simply waterproof; it is also obliged to withstand the pressure of the mass of water.
- Easy access to communications hidden behind the ceiling trim.
- Elegant appearance, but without unnecessary pretentiousness and pompousness.

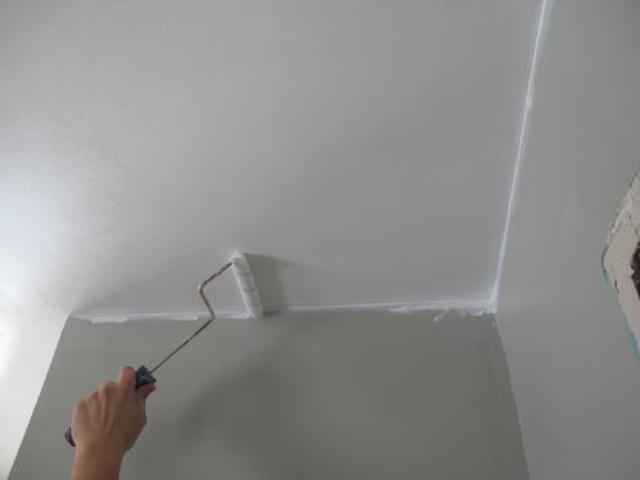
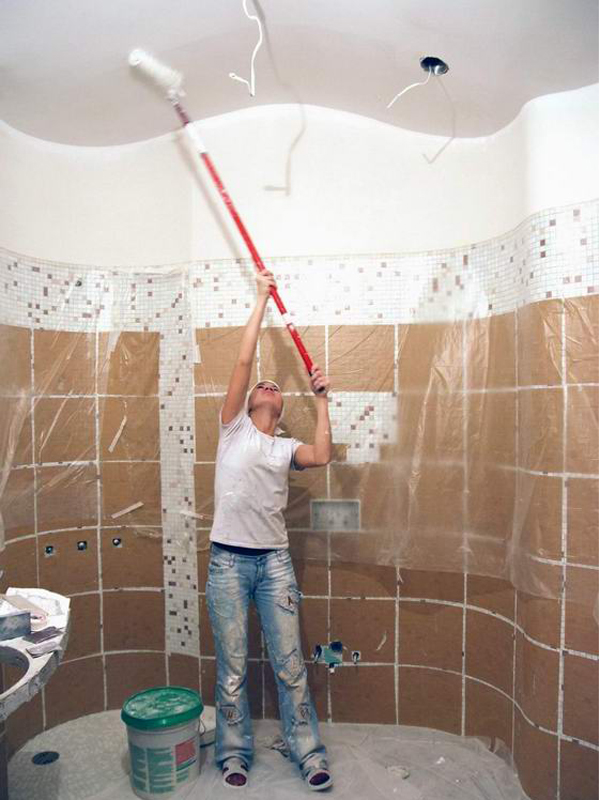
Excessively bright coverage can create inappropriate associations. Absorption of height is inadmissible; on the contrary, the color is selected in such a way as to guarantee visual expansion of the space. The easiest way to satisfy most of the listed requirements is whitewashing. It is applied in about 60 minutes, but usually this time is shorter. But you have to take into account that whitewashed ceilings are unstable to moisture, and the only excuse is the ease of restoring the finish.
Paint is a good alternative., especially since it is much more diverse in appearance and texture.It is recommended to use waterproof solutions - oil, silicone, latex or acrylic. Part of the water-emulsion mixtures can also be used, but here you have to make a careful choice.
Quite a large part of consumers prefer various types of tiles that can not only create a pleasant appearance, but also compensate for slight differences in height. In this case, the toilet does not become lower, but you will need to carefully select the color of the material and the size of the individual blocks.
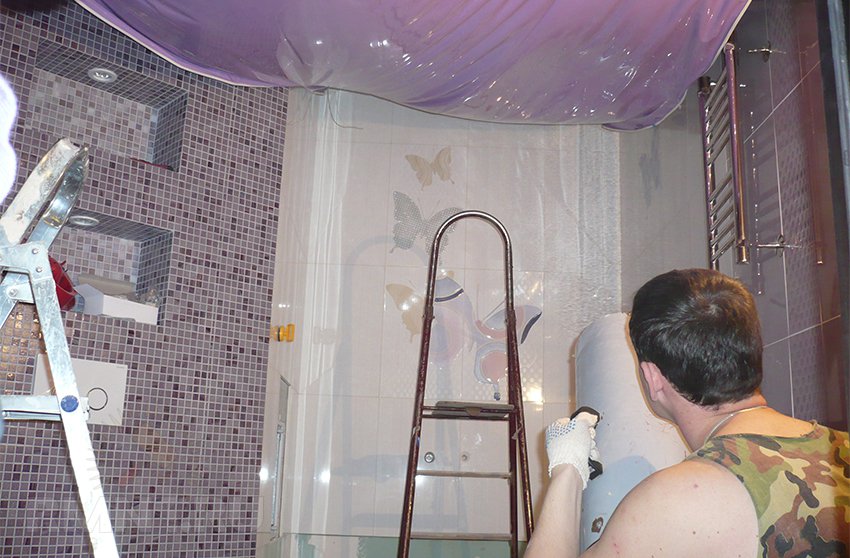
Suspended ceilings will also cover all the problems of the draft foundation, but will absorb at least 3 cm of height, which is why with all the difficulties with sticking tiles it is better suited for smaller toilets.
Cassette structures are not recommended for use in low rooms. But if the toilet is medium or large in size, there will be nothing reprehensible in this method of finishing.
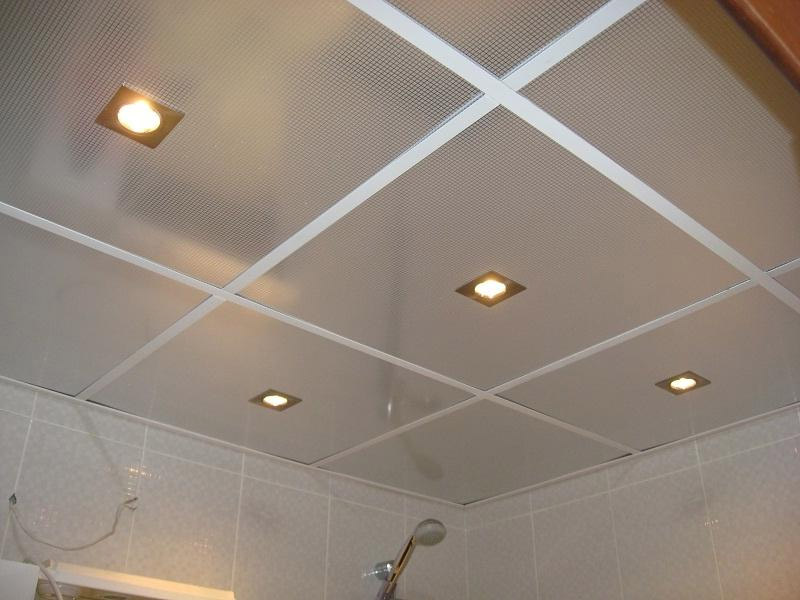

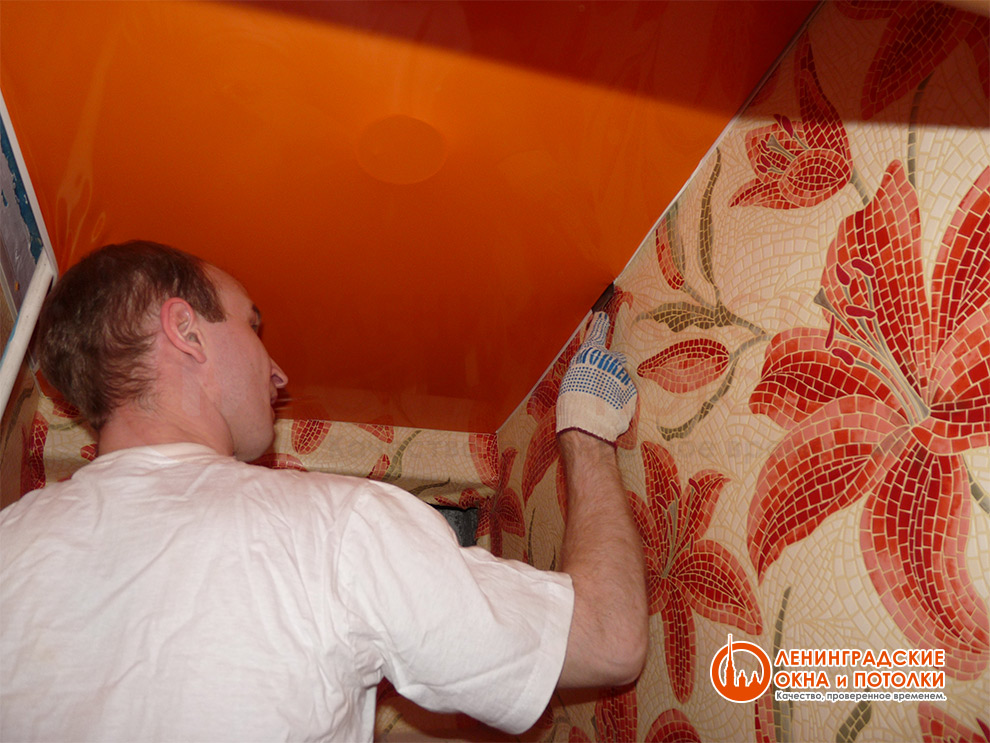
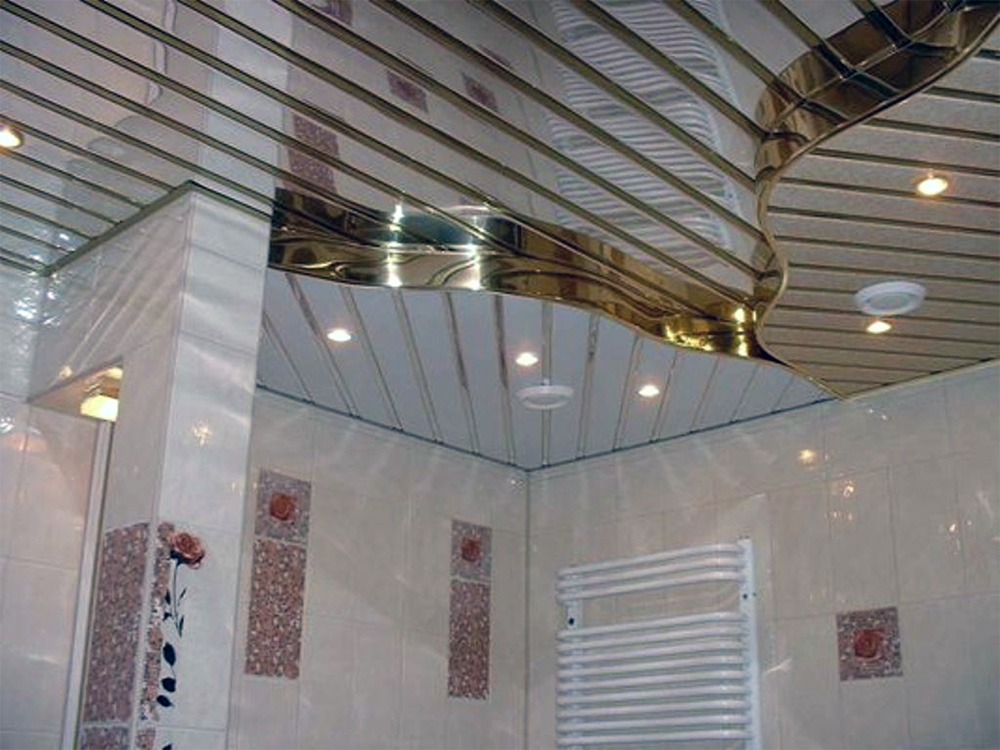
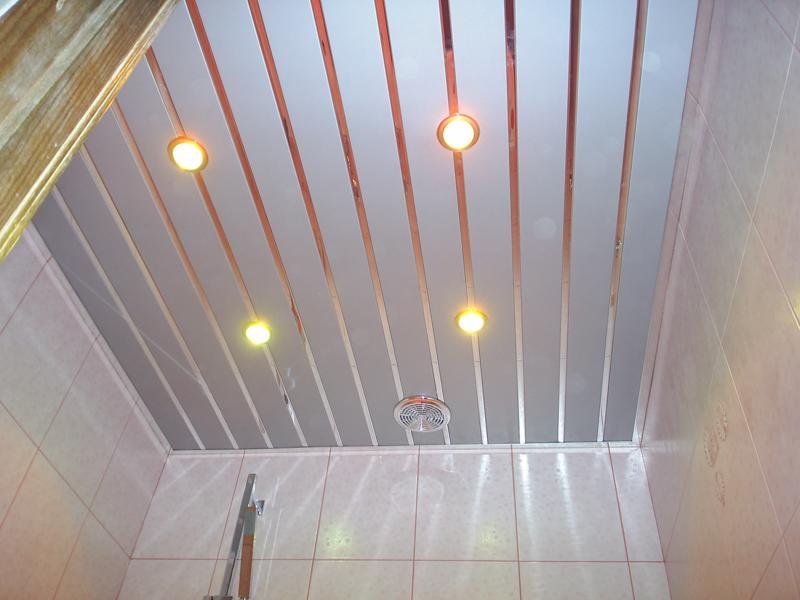
There are more opportunities when using suspended ceilings that are immune to moisture and are fire safe. Means of illumination and wires are easy to clean inside the rails or panels, they will not spoil the appearance.
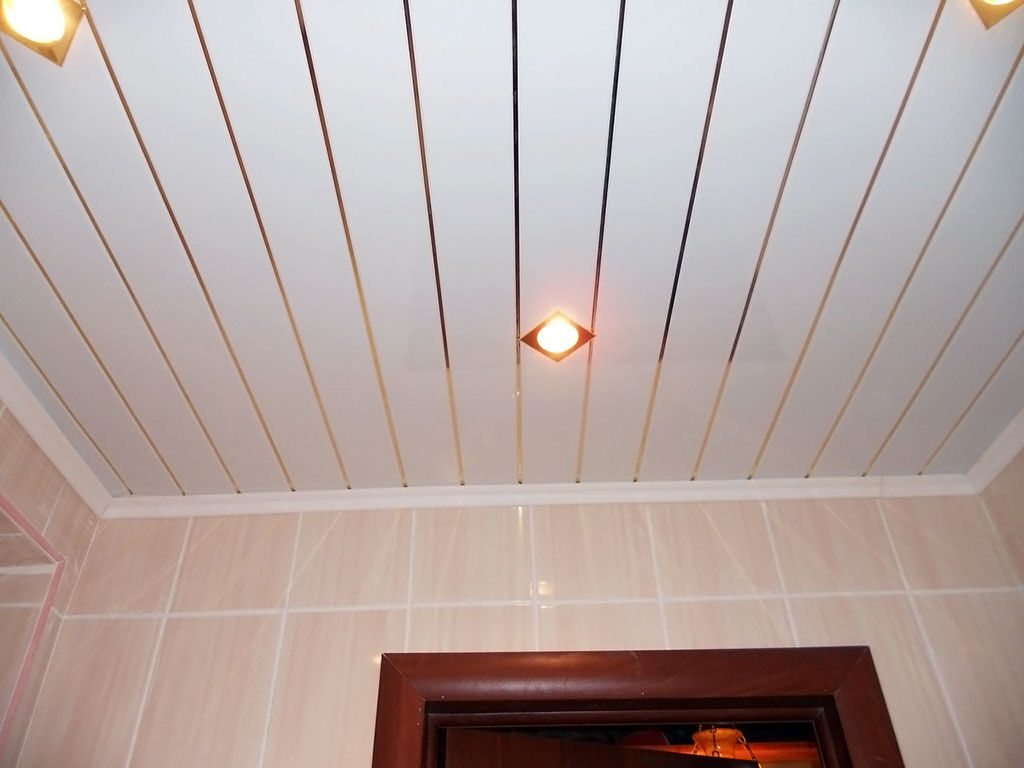
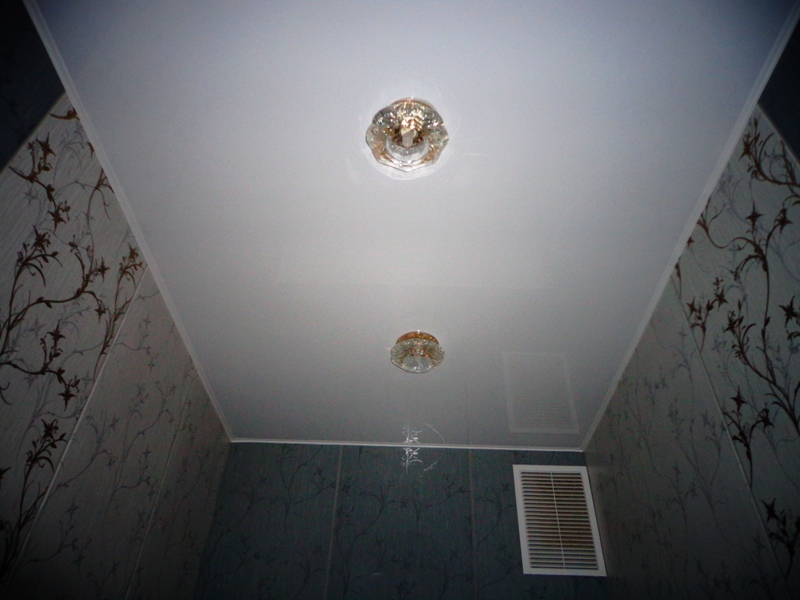
To the ceiling looked advantageous, like the entire room as a whole, you need to carefully select the lamps. Not every light source fits all ceilings. So, for obvious reasons, highly heated constructions are incompatible with suspended and tensioned canvases. The more compact the luminaire, the tighter it is pressed to the plane of the heading, the more advantageous the design will be. An equally important requirement is a body protected from moisture: in this case we are talking about the fire and electrical safety of residents.
Dot elements give great diffused light, but it is better to put them not on the ceiling, but as accents and additional illumination of individual elements. Copper wires are best suited for connecting all lights. Aluminum conducts worse, it oxidizes more actively in case of contact with air, breaks faster and easier, and it is much more difficult to assemble wires from it. Grooves should be smeared with moisture resistant putty.
It is worth to refuse incandescent lamps: they consume a lot of current, and at the same time they heat the air more than they illuminate the space.

Flooring
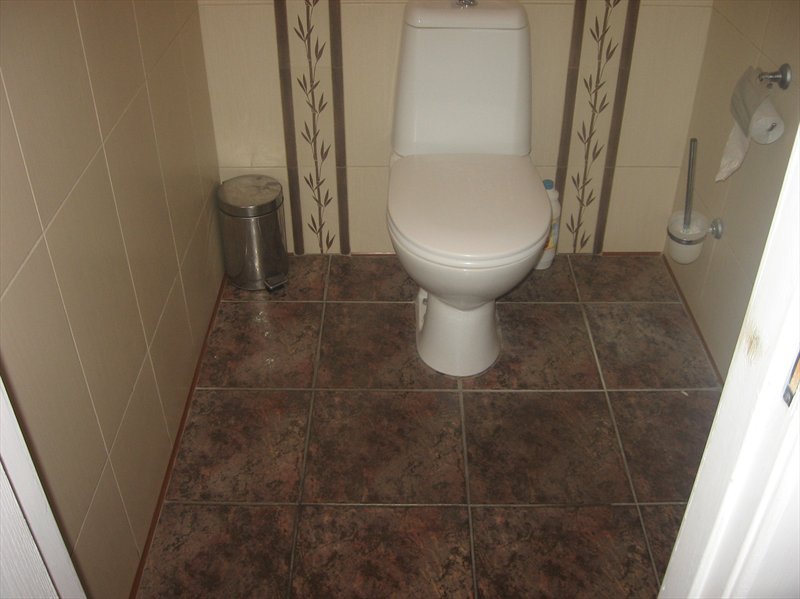
In the toilets of a private house or apartment, the design role of the floor is no less than that of the ceiling or walls. In the same way, when preparing for its finishing, everything must be thoroughly thought out and taken into account subtleties. Widespread in the decoration of toilet floors got tiles made of natural stone and tile.
Their advantages are undoubted:
- strength;
- minimal water absorption;
- resistance to abrasion;
- the ability to choose a floor covering as part of a single collection (of which there will also be material for finishing walls).
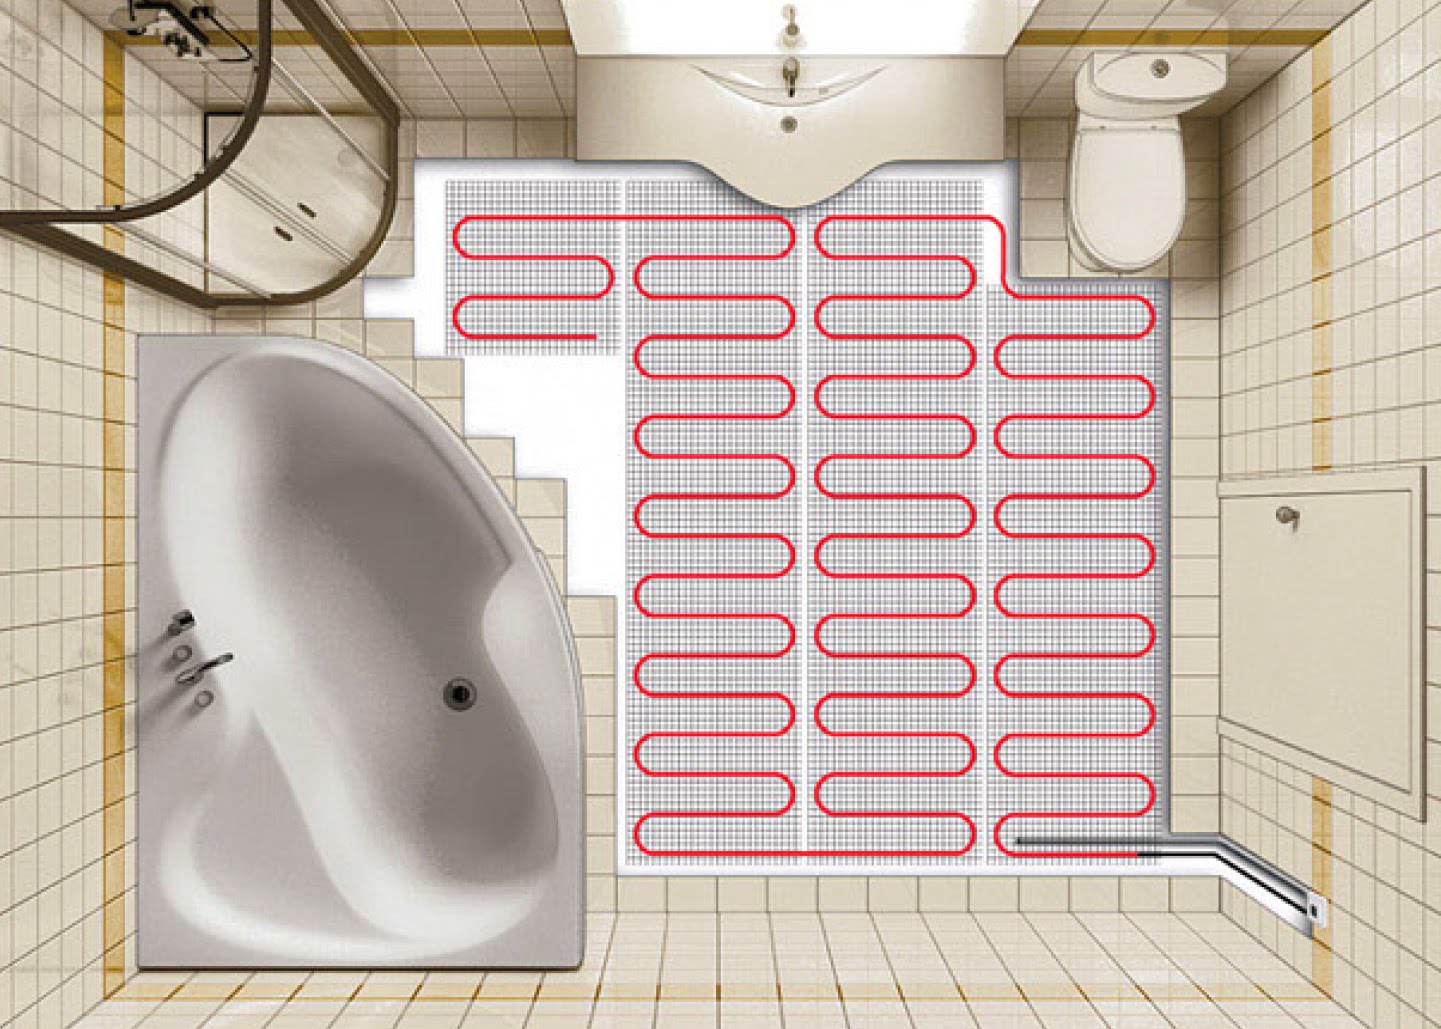
If the foreground is a variety of colors, you should choose a tile, and the undisputed leader in terms of hardness is ceramic. All types of "stone" coatings easily tolerate the action of aggressive reagents, including household appliances. A serious minus of a stone is its coldness; warm floor fixes the problem, but it complicates the design, makes the work more long and expensive. A tile that is placed on the floor must be of 3 strength class and higher.
Among other varieties, materials with corundum coatings and slip-reducing layers deservedly come first.
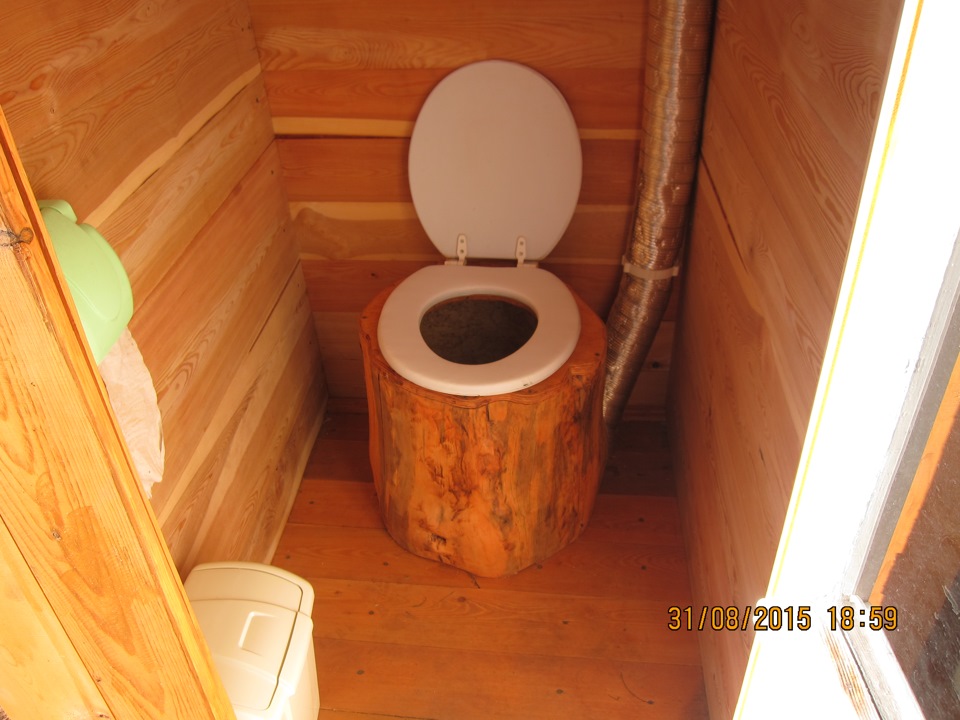
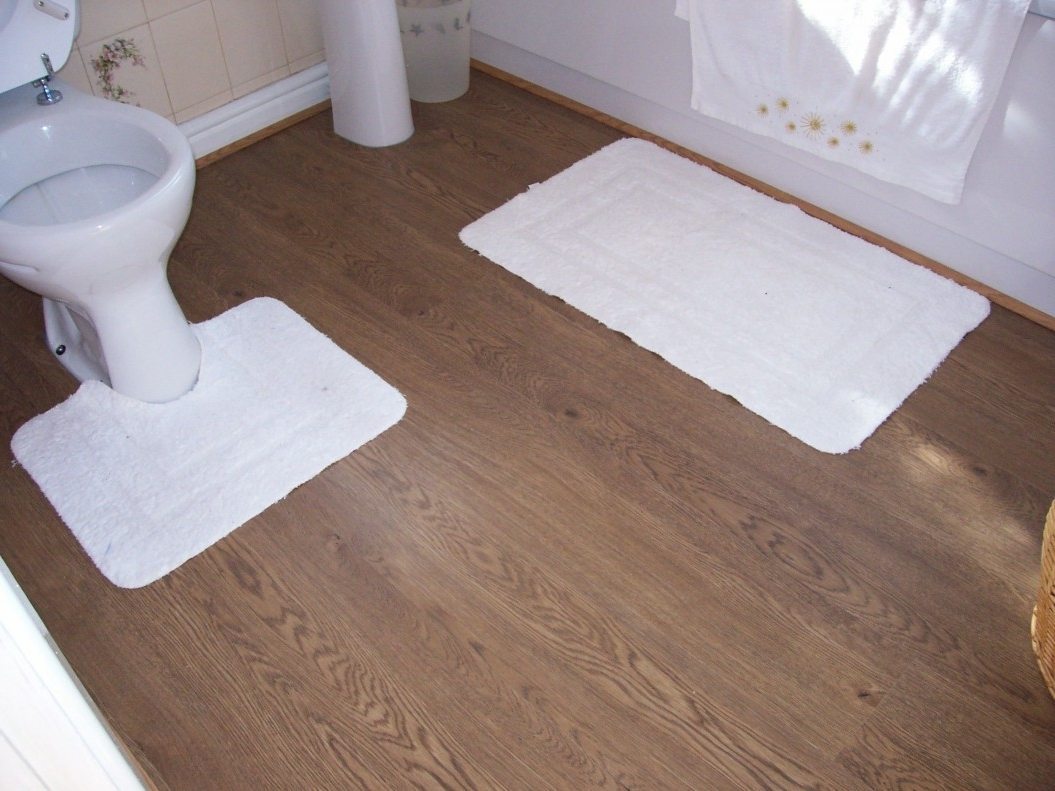
Wooden base impractical for toilet flooring - with external aesthetics on store shelves or photographs, it will quickly swell and swell up, it may rot. Moreover, even thick boards are not devoid of such shortcomings, except that they will appear later. No paint and enamel will not save, because they are applied only on the outside, and the remaining planes remain uncovered protection. Because the use of linoleum is more beneficial than wood. Technologists have learned to give it a huge external diversity, which was difficult to imagine even 10 years ago.
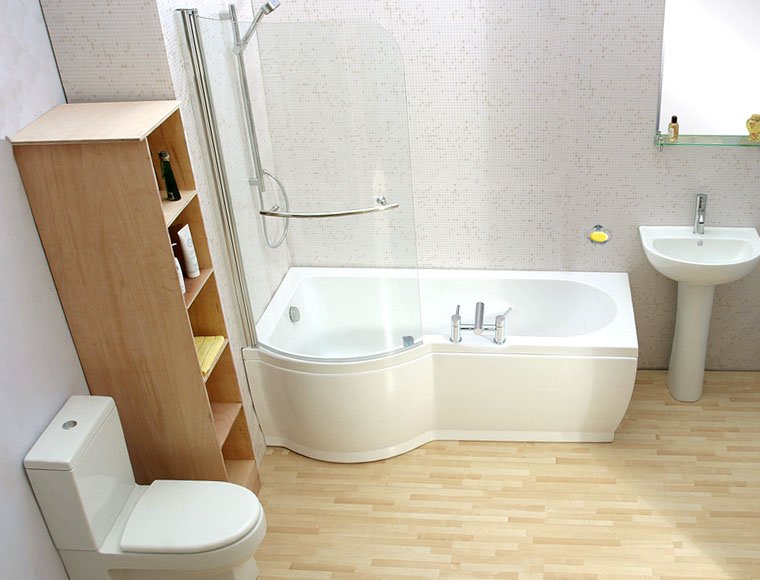
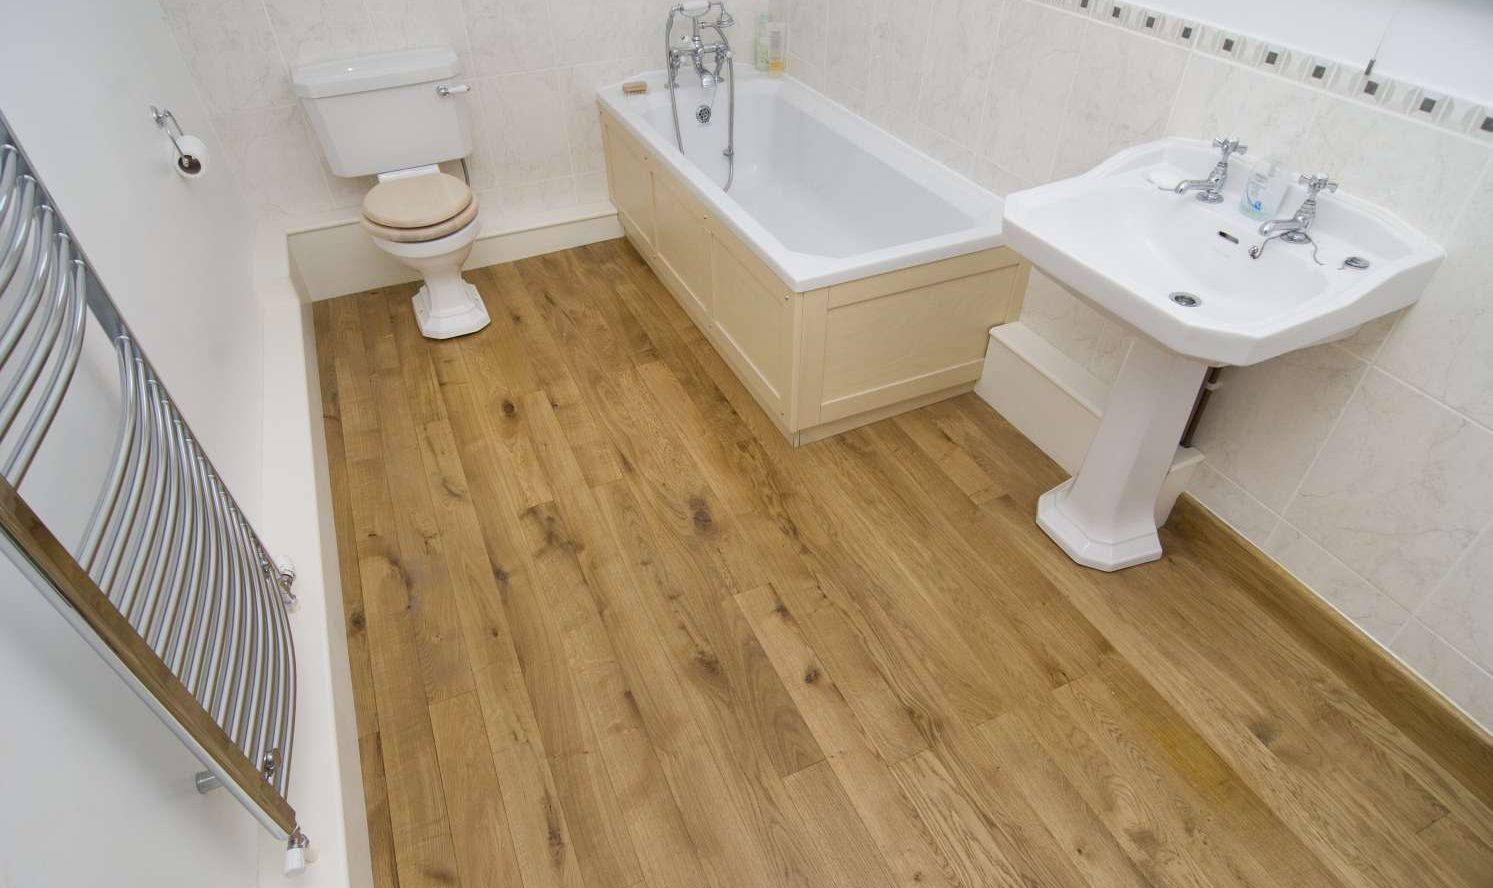
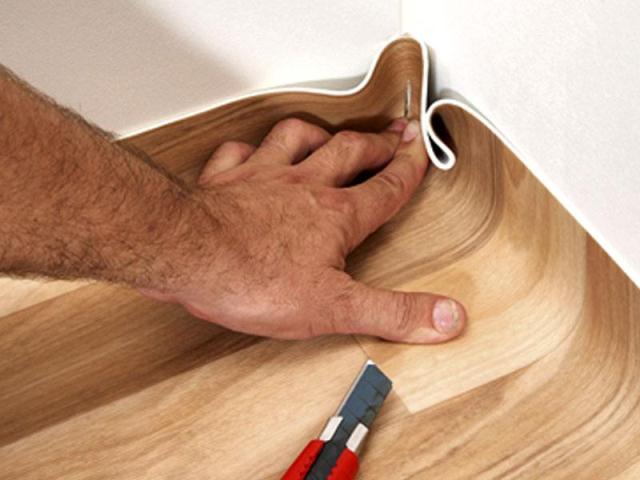
Water-resistant rolls of linoleum are well-fitted in narrow and curly places. Appearance of rot, mold fungi and microorganisms is practically impossible; cleaning the floor from dirt and moisture is very simple. But the complete tightness of the coating can not be achieved, so it will need to be raised from time to time, and the base should be dried and treated with disinfectants.
As for strength, there is no need to lay semi-commercial linoleum in the toilet. Enough of the simplest household, even the most subtle, if only he did not slip.
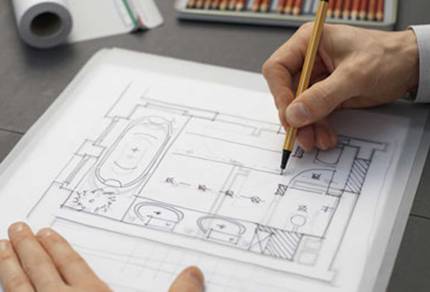
Sequence of work
There is no difference whether it is necessary to carry out a major overhaul of the construction asu or a novice in this field. The first step is always the qualitative design of the future repair. They thoroughly measure the area of the premises, since it depends on it which ideas can be realized and which will remain fruitless fantasies.
Most often, especially in urban apartments of old houses, the place is categorically not enough. In such a situation, you need to abandon the original moves and begin to fight with crampedness.

Where to begin?
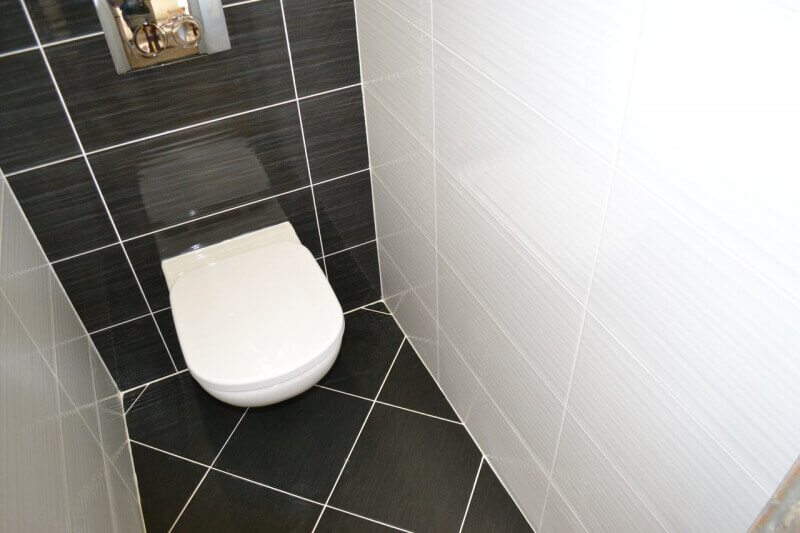
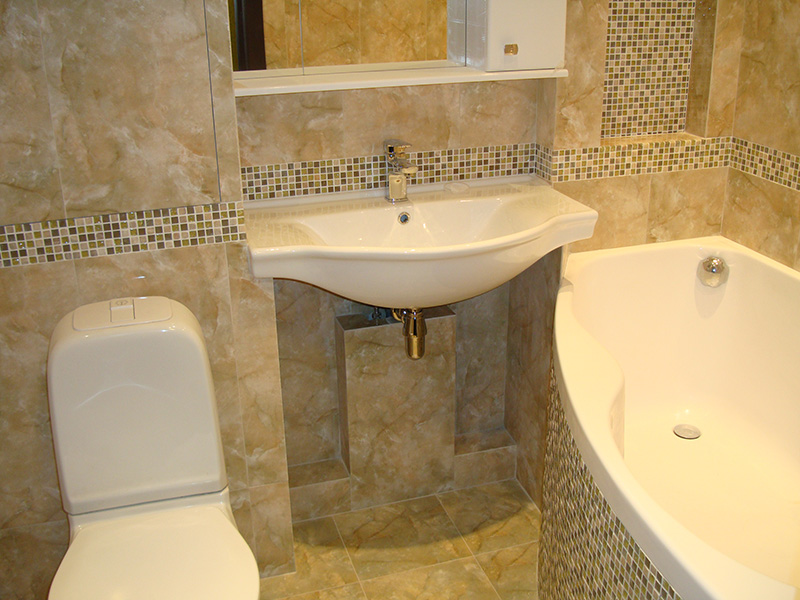
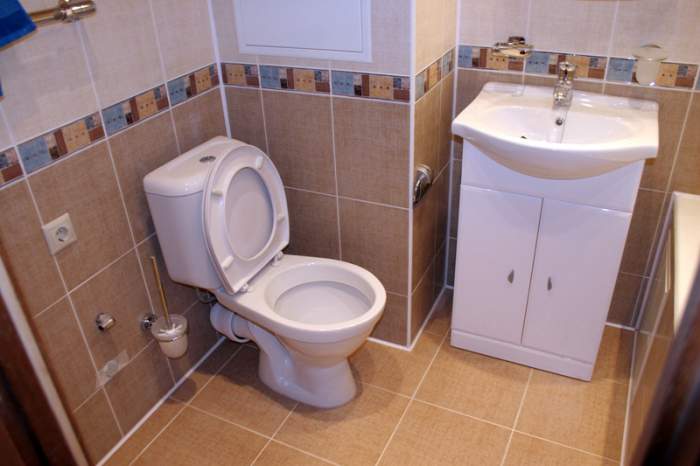
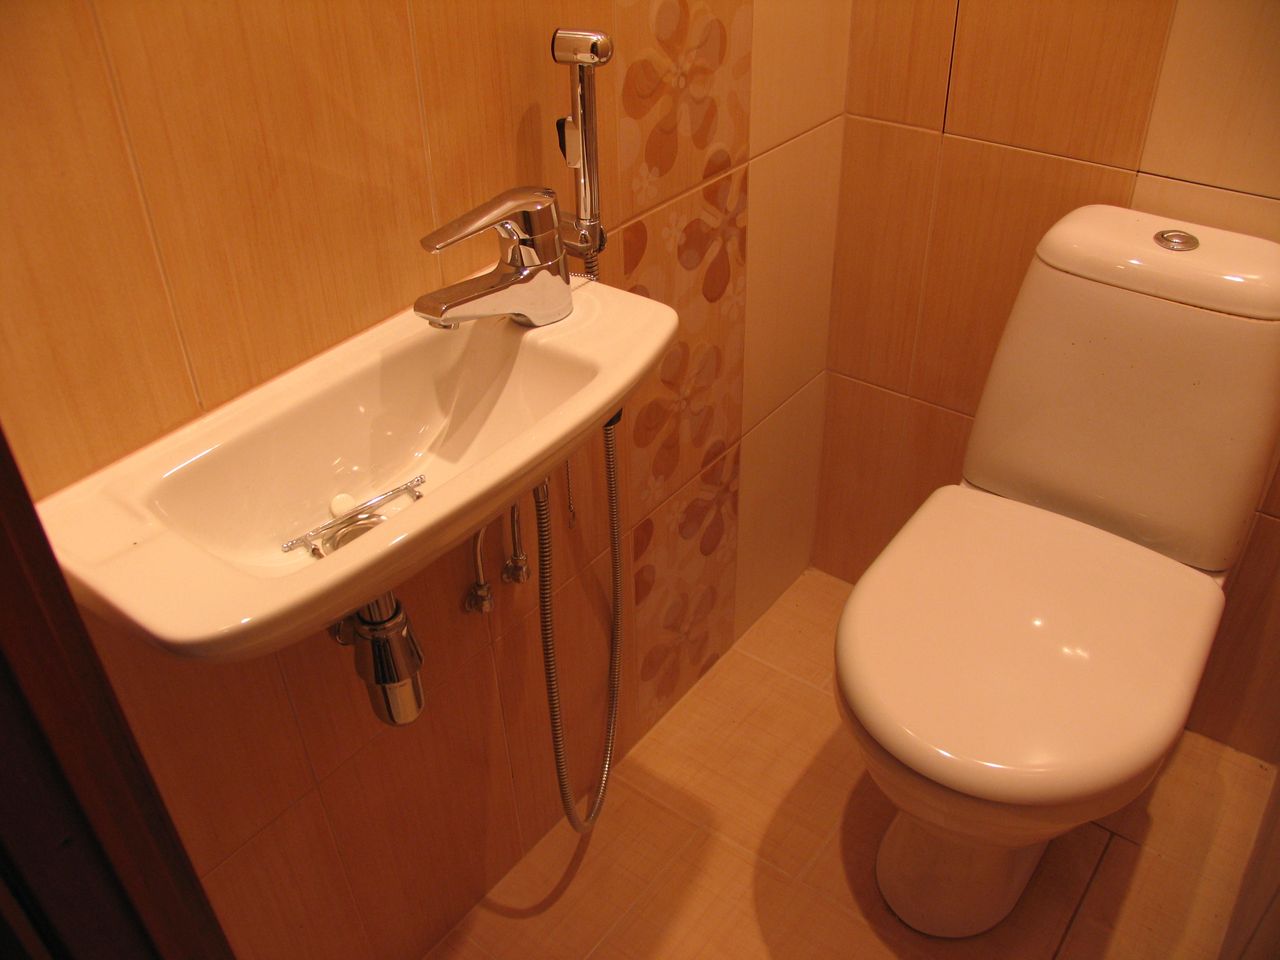
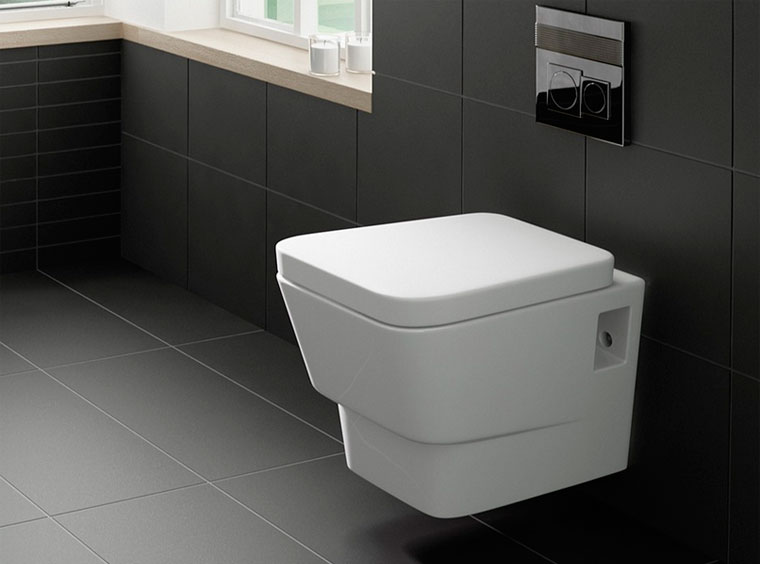
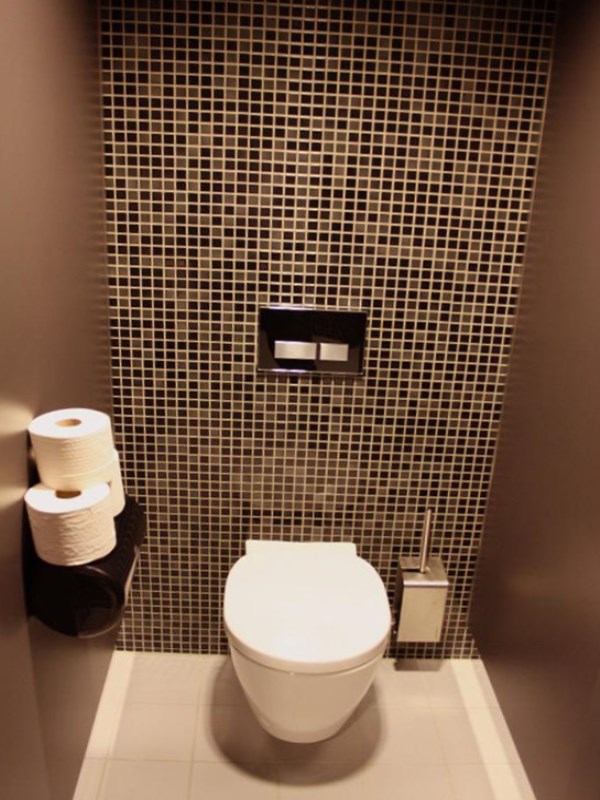
Before starting the design, you should decide on the choice of the installed equipment. With an acute shortage of space limited to the toilet. When the toilet is relatively free, it turns out to put in her washbasin, urinal or bidet. A minimum of 0.4 m is left between the middle of the toilet bowl and the wall, and when a sink is placed, this distance is reduced to 0.3 m. Suspended toilet bowls do not absorb floor space, but due to the mandatory framework, 10 cm or a little more will be taken away from the wall. In addition, the complexity of installation will require the involvement of professionals and pay them.
Having dealt with the "filling" of the toilet, it's time to think about his tone. It is better to make a choice between quiet tones, the slightest diversity is inadmissible. Even with such a restriction, there are quite a few quite attractive options, especially since no one forbids doing color accents. After choosing the colors you can find out the need for tools. The list of them varies depending on the planned materials.
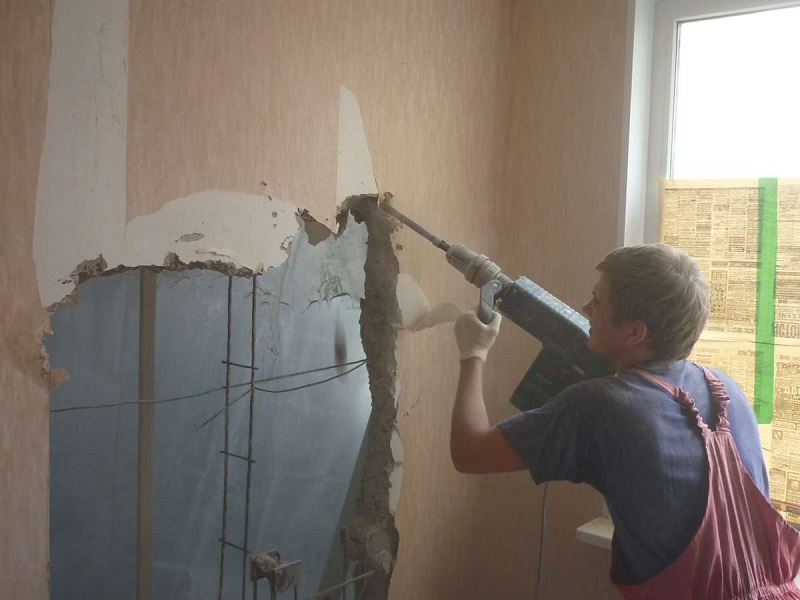
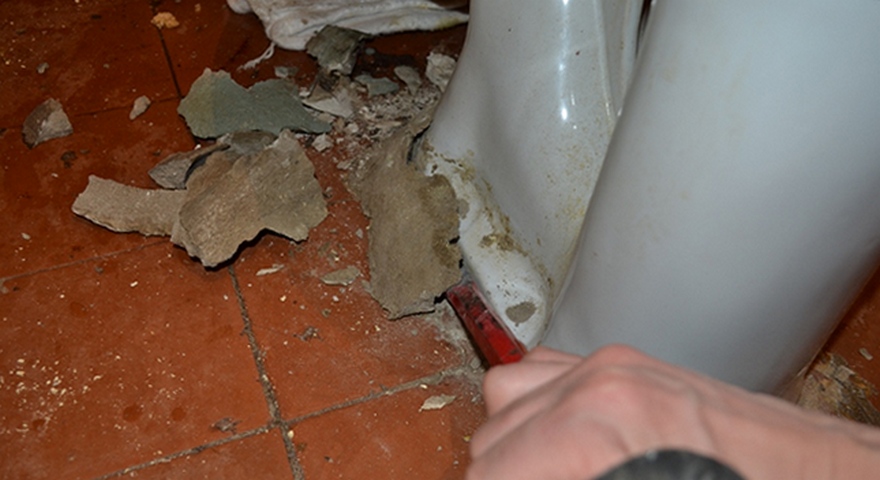
The next step is the removal of the old plumbing and finishing materials., all unnecessary components in general. There is no particular difficulty in this, but it will take a lot of time and effort. Toilets of new versions are removed by removing the corrugations, but the older closets are mounted on the cement base. It will need to break. Removing the tiles is complicated by the fact that even when the outer layer is worn, they are extremely stable.
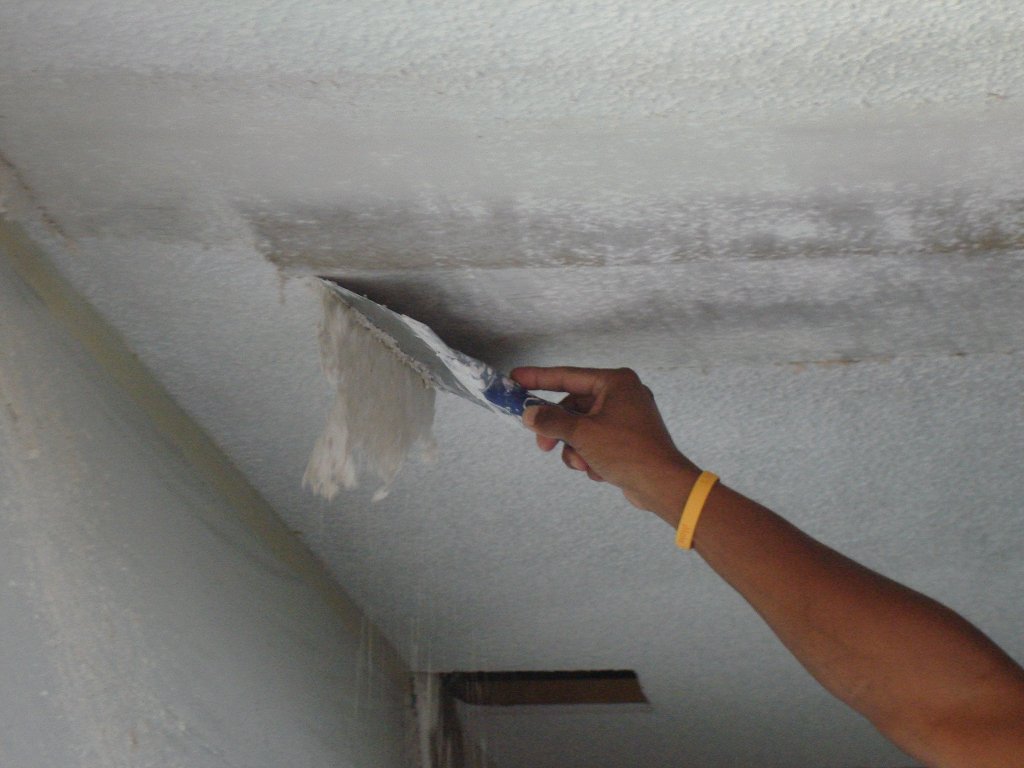
Since the work, regardless of the choice of hand or electric tools, will create a lot of noise and dust, you need to prepare. The optimal period is weekday hours. In this case, all the furniture in the area of access is covered with plastic wrap. Wallpapers are usually soaked and removed mechanically. Strong paint is not removed,with the exception of oil; for any paintwork apply special washes. Whitewashing is removed with a spatula after abundant saturation with water.
Main works
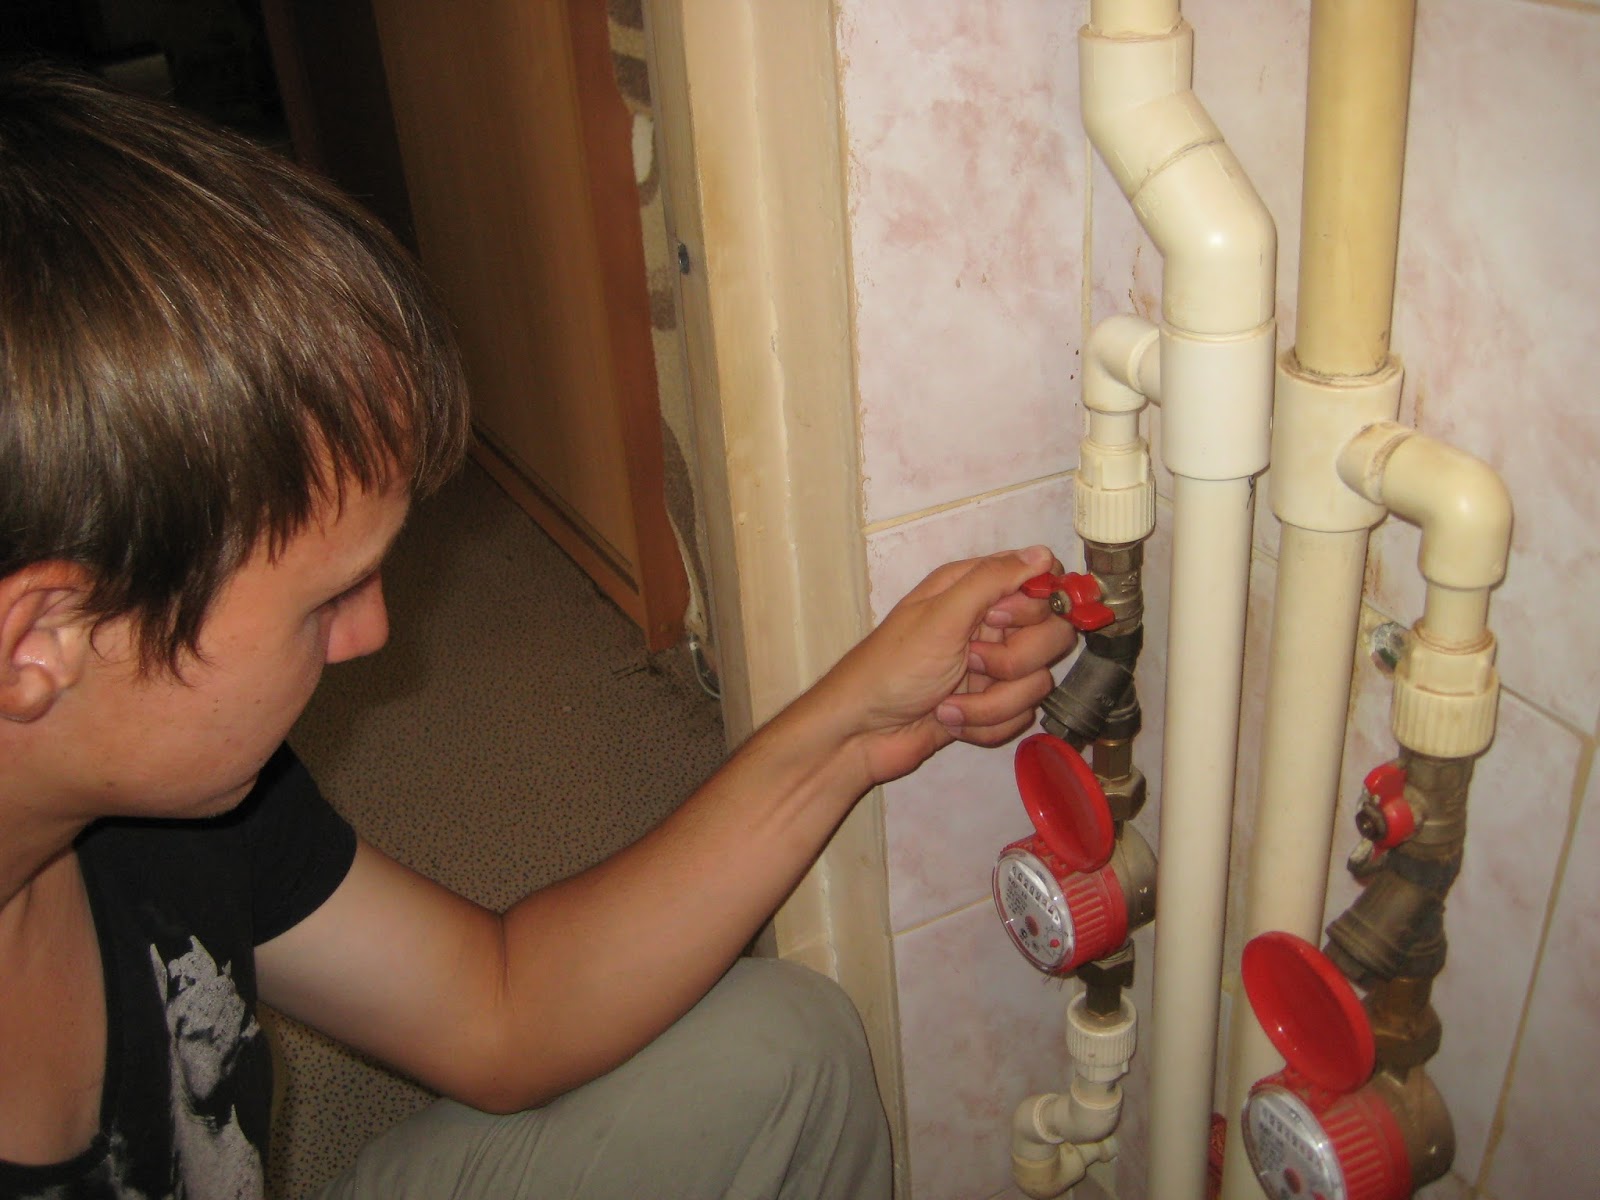
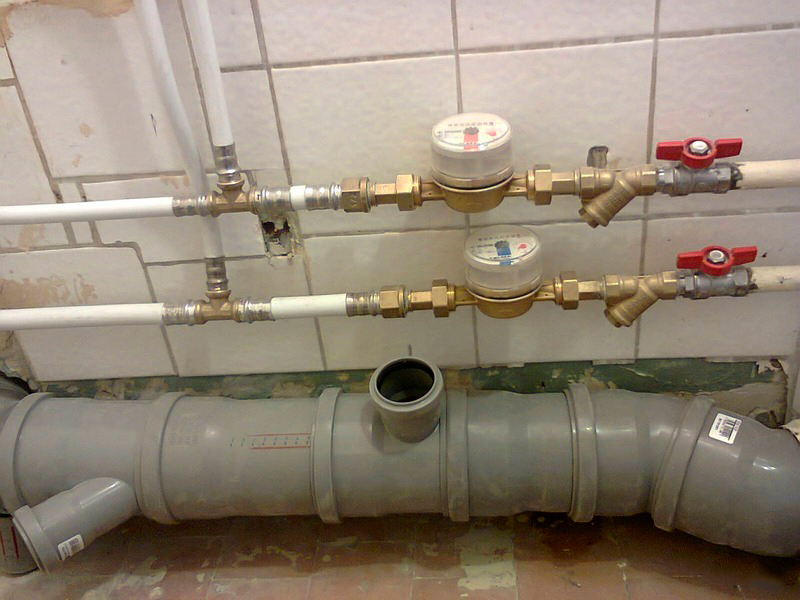
Continuing step by step to perform overhaul of the toilet, they are accepted for the creation of improved communications. In many houses, the old risers are unreliable, then they need to be replaced with new ones made of PVC. In most cases, the entire segment changes from floor to ceiling. Connections are supplied with adapters, and the modular design is easily complemented by parts of the desired format. Pipes inside the toilet room are most often piled up; If the bidet (separate or built-in toilet) is not used, you can usually do without a replacement.
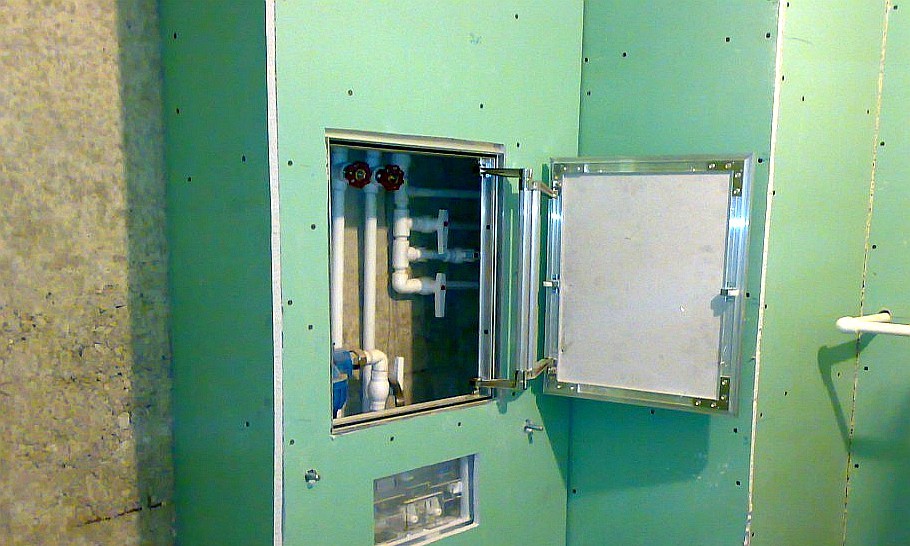
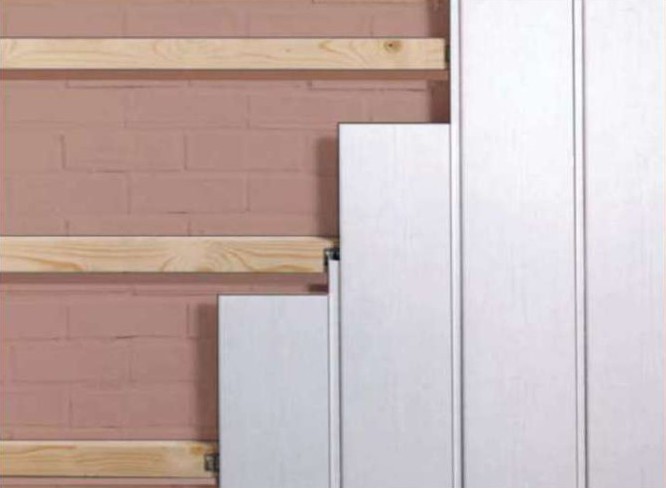
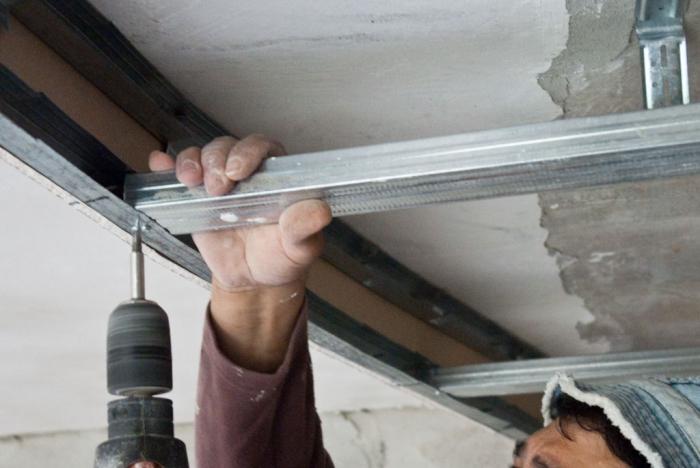
The wiring is hidden in the grottoes, and the sewer pipes are in a specially designated box. If it is decided to repair the walls using plasterboard sheets, the perimeter of the rough walls is covered with a profile that is attached to the dowels with a diameter of 6 mm. When attaching the frame, the main profiles are used, and stiffening ribs are used, spaced in 0.4-0.5 m increments. After this, it is required to fix the moisture-resistant gypsum plaster cut into fragments of the desired diameter. Fixation is made using special screws.
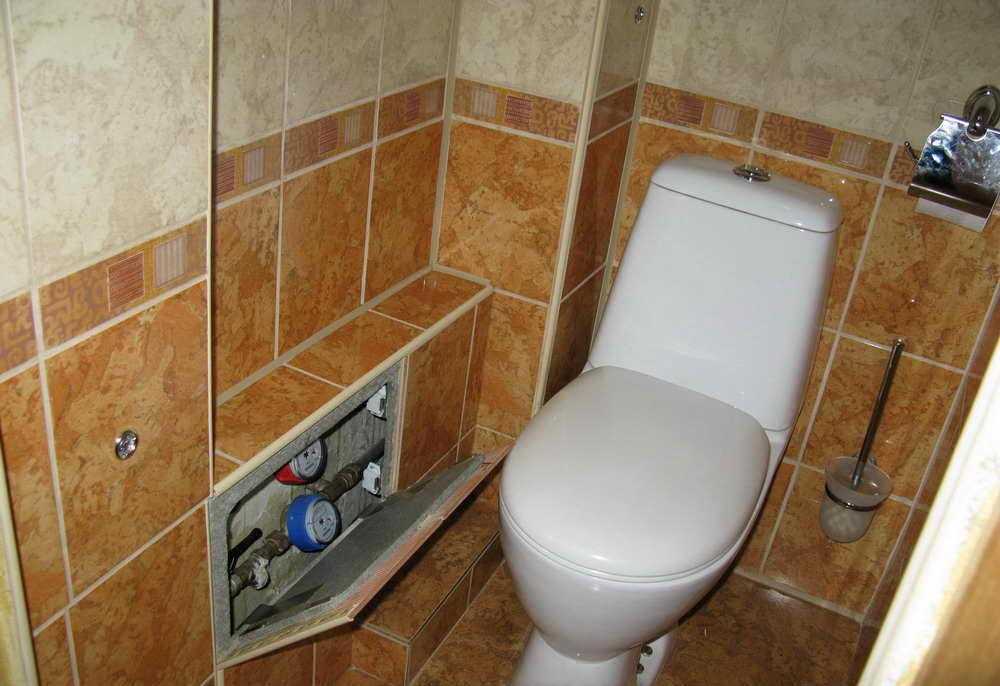
When preparing the sheets, you need to make an opening in them for the subsequent installation of the inspection door, then it will be possible to monitor the state of the equipment and the numbers on the scoreboard. Then you need to make a floor covering. Ceramic tile in narrow places is cut, and therefore its costs are usually higher than show the area. The base is well worked through with deep penetrating primer. The outer surface is leveled on the self leveling.
Then create a self-leveling floor, and the choice of color or transparent composition depends entirely on personal preferences. On a transparent surface, you need to lay an image that becomes three-dimensional after pouring. Accelerated alignment is provided using a needle roller. When the mixture is dry, it will be strong.
Since the vapors released during the freezing of the self-leveling floors are harmful to health, it is advisable to work in a respirator.

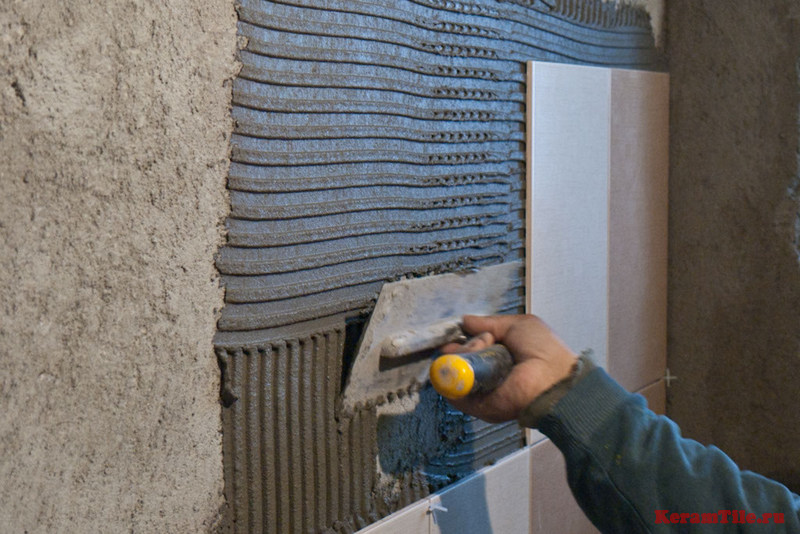
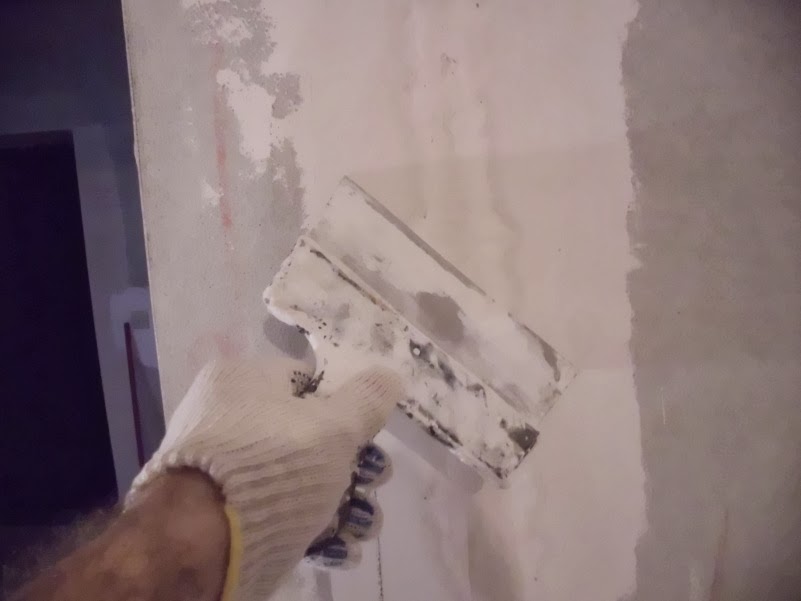
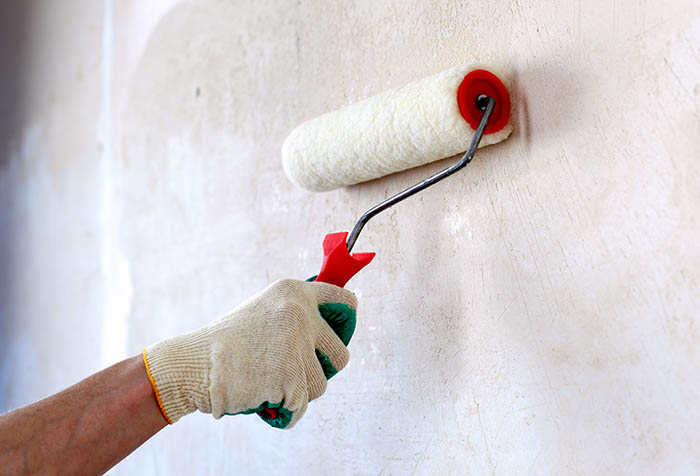
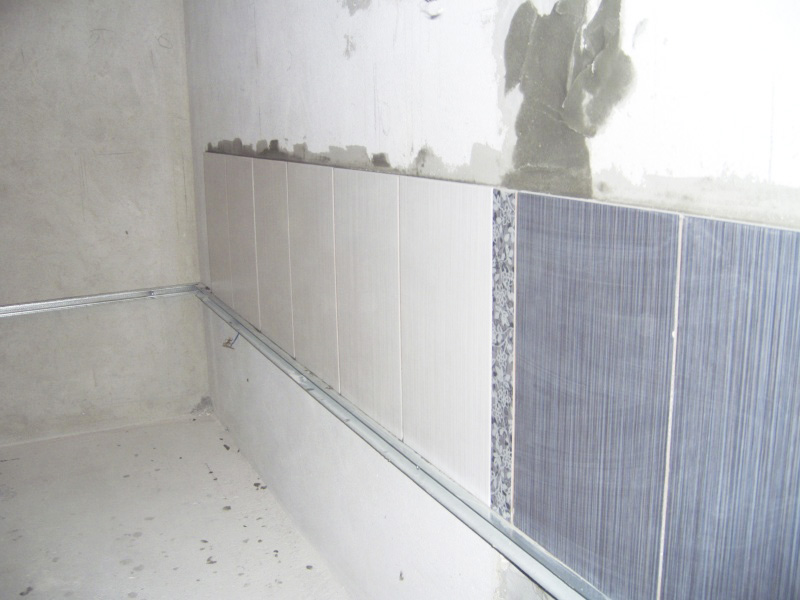
When the floor is ready, it is the turn of work with the walls. Under the tile they are necessarily primed; in case of pronounced irregularities, cement putty is applied. Plasterboard boxes do not get under the tile, with the exception of double priming and embedment of each joint.Along the entire perimeter at the height of the first tile is mounted rake or levels. This will allow to finish the room as accurately and quickly as possible.
The masonry follows the rows until the desired height is reached; it is necessary to put crosses on the joints both vertically and horizontally. When the day passes, the rail is removed and put the bottom tile. If they do not fit, you can trim problem items. So, without unnecessary difficulties, the decoration of the walls is done with their own hands just as good as with the help of a brigade of dressers. Grouting is done in the standard way.
The situation is different when using plastic panels. The walls form a frame of metal or wooden profiles. The gap from one rack to another - a maximum of 50 cm. The frame should go at right angles to the course of the panels. It is easy to install the blocks themselves: you need to start the first part in the starting profiles or corners; attach all the structures with screws through the outer tabs.
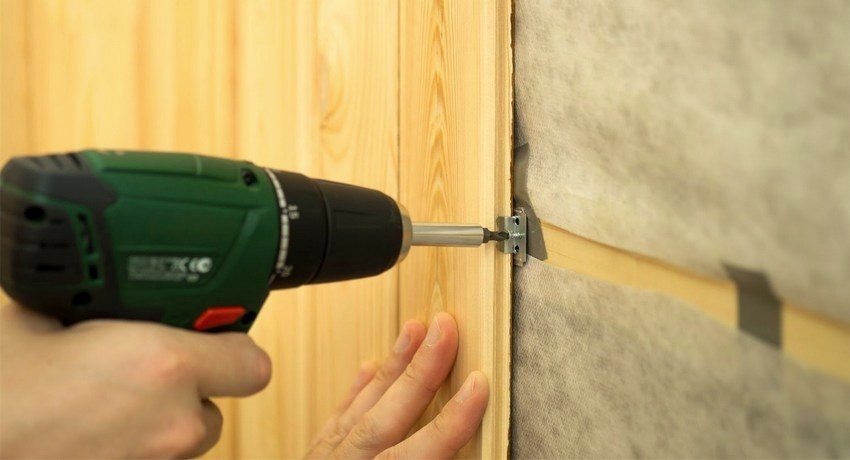
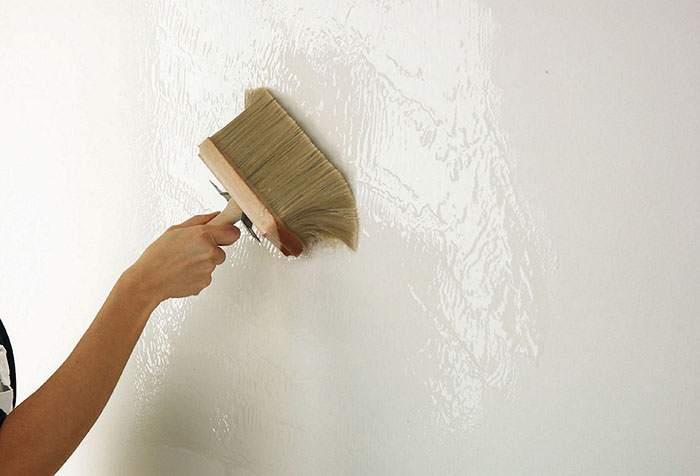
Then you need to close the corners with special elements: they are either fastened before the panels, or glued to the outside on liquid nails.If the wallpaper is chosen, the entire surface is cleaned of dirt and dust, thoroughly primed. Then they putty the walls using Vetonit for wet rooms. Apply it once or twice - depends on how strongly the walls are deformed. In particularly difficult situations, they are impregnated with primer even three times.
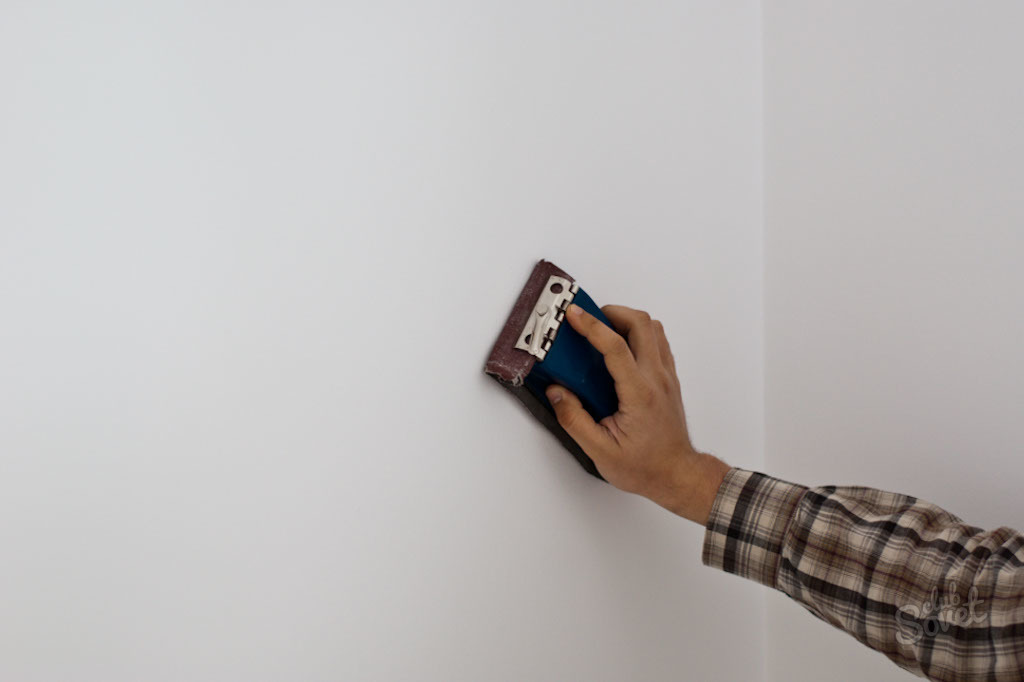
Dried surfaces after priming are leveled with float and sandpaper. You need to move them in a circle. When residual defects are detected, they are additionally puttied and rubbed. After cleaning the walls from dust, they need to be primed again. That's it, the preparation for pasting the wallpaper is complete.
Having overcome all the difficulties in decorating the walls, they are taken to the ceiling. If it is attached, you need to draw a level along the perimeter of the line for exhibiting the structure. The guide profiles are attached to the walls, for this purpose, you will need holes for quick-fit dowels. The step between the main profiles is 0.4 m, the line of their passage serves to attach the hangers. Preparing the frame, you need to attach to it the selected material (always combined with wall decoration for painting).
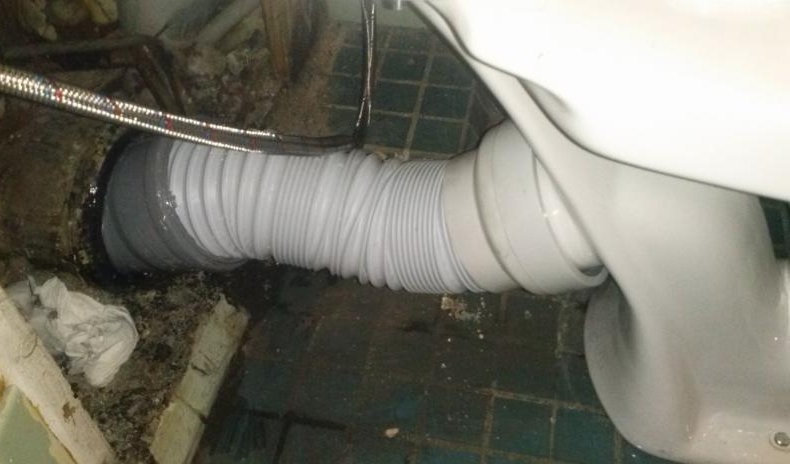
The next step is the placement of plumbing and other equipment. Important: installations for suspended toilet bowls are supposed to be made before wall cladding. In the case of traditional plumbing fixtures mounted on the inlet of the sewer and connected to the toilet. Then it is put in the desired position, since the flexible hose is not difficult to move as you like. The tank should not rest against the wall even at a single point.
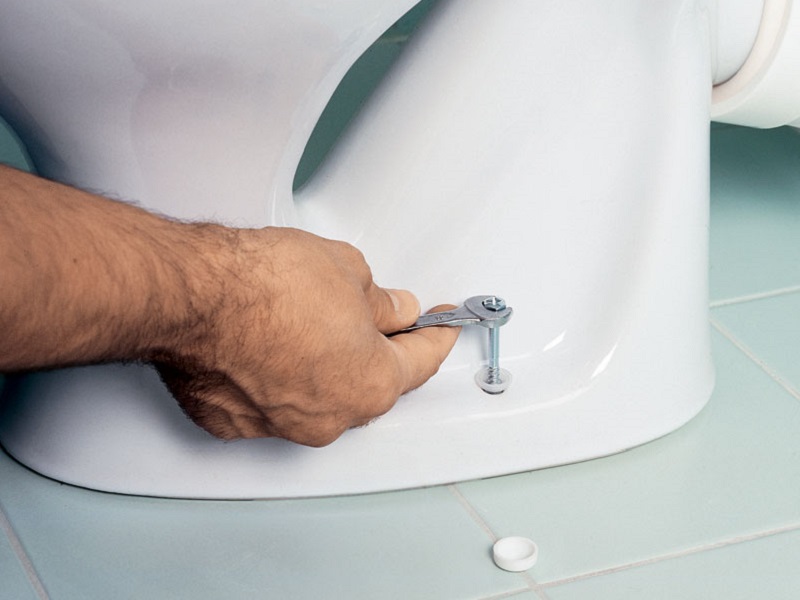
The marking of the sole of the toilet bowl on the floor is made together with the point of drilling. At this point they use borax for concrete, and through the tiles they go with a special drill for ceramics. In the drilled holes put dowels, then put the toilet and pressed to the base of the hexagonal screws. For your information: rubber washers should be placed under the screws, they will allow you not to break the thin plumbing. Hats fasteners covered with decorative caps.
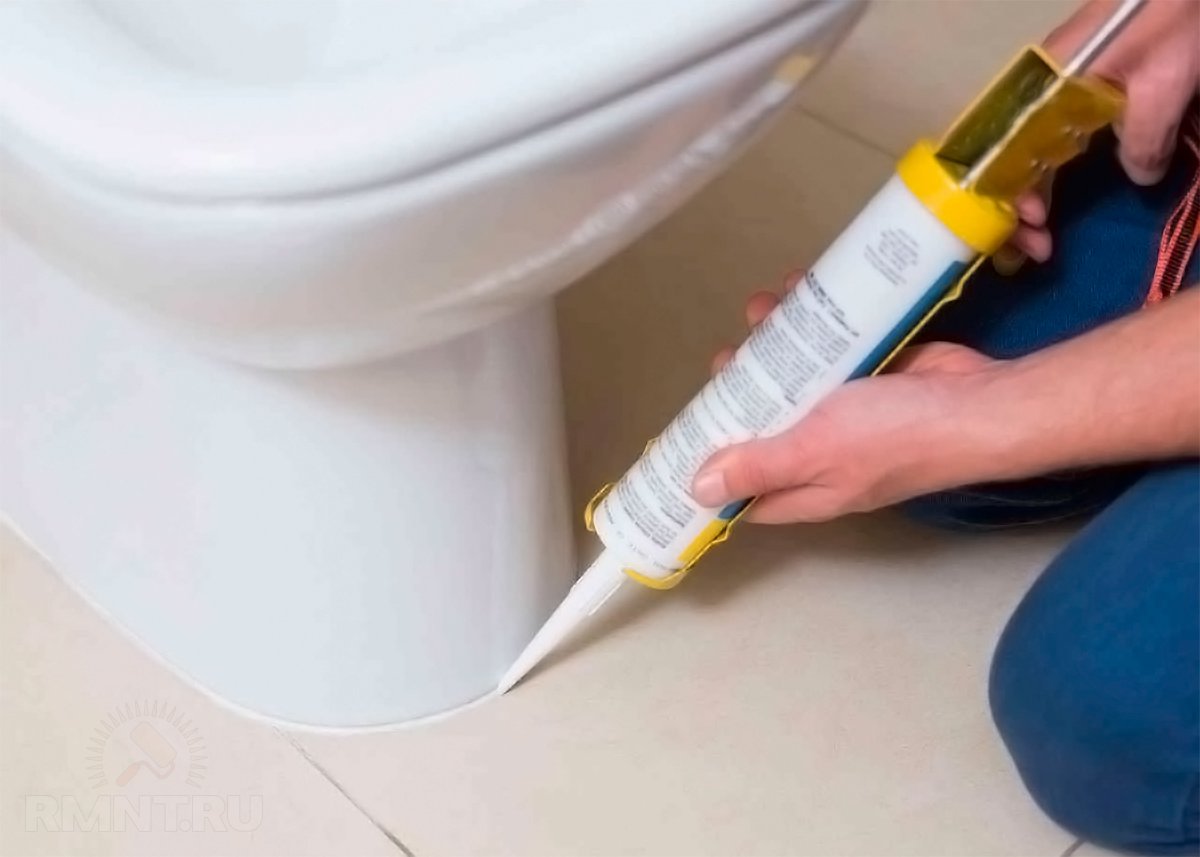
Only after all these works, it becomes possible to connect the water and seal the joint of the bottom of the toilet bowl with a silicone-based compound. If the sink is also placed in the toilet, the choice is reduced to fixing it on the brackets from the kit or on the dowels screwed into the wall.Usually guided by instructions instructions. Only after fastening can you connect the water supply and the drain channel. But this major overhaul of the toilet still does not stop.
How to complete?
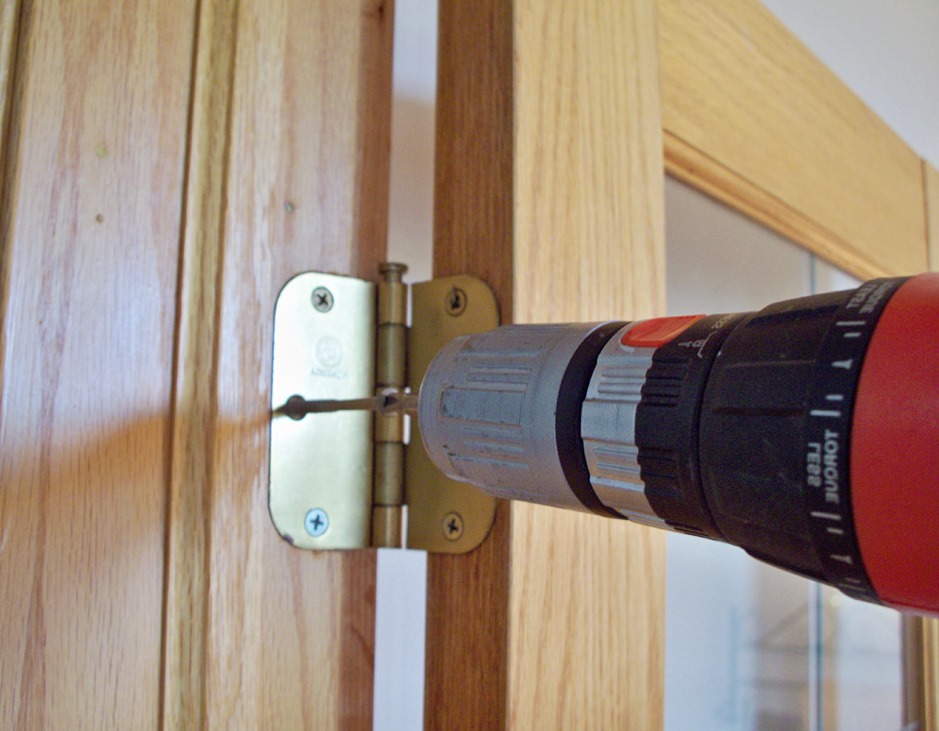
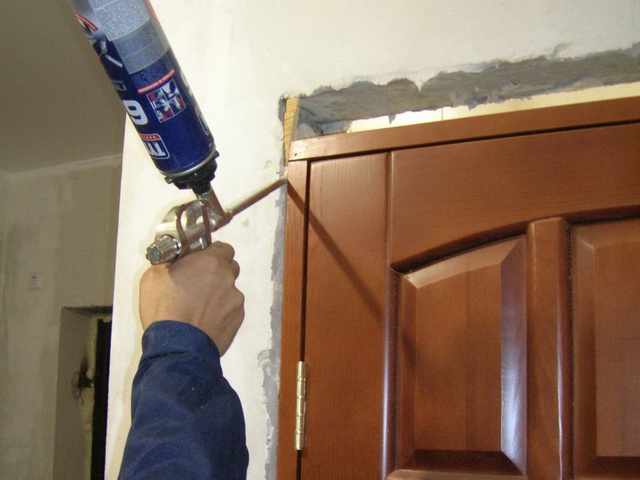
Next, proceed to the installation of doors. The position of the box is calibrated as accurately as possible from all sides. When using heavy cloth, fasten the box with dowels. You should not be afraid of their poor appearance - you only need to arrange the fasteners in the area of the hinges and below the latch slot. For your information: experienced masters check the level after each manipulation in order to avoid the slightest shift. When the installation of the blade is completed, you need to apply mounting foam, filling the entire gap around the perimeter.
When removing foam from a cylinder, it is moved in a zigzag, seeking to hold the box in a certain position. You can not put an excess of foam, because it will inevitably expand and will go beyond the contour. Cut the foam outside after ½ days, while you need to be careful and leave everything inside. Unnecessarily thin boxes are complemented by additional details. In the presence of grooves, you need to cut the strips to the required size and snap into place; simple boards planted on foam or mounted with screws.
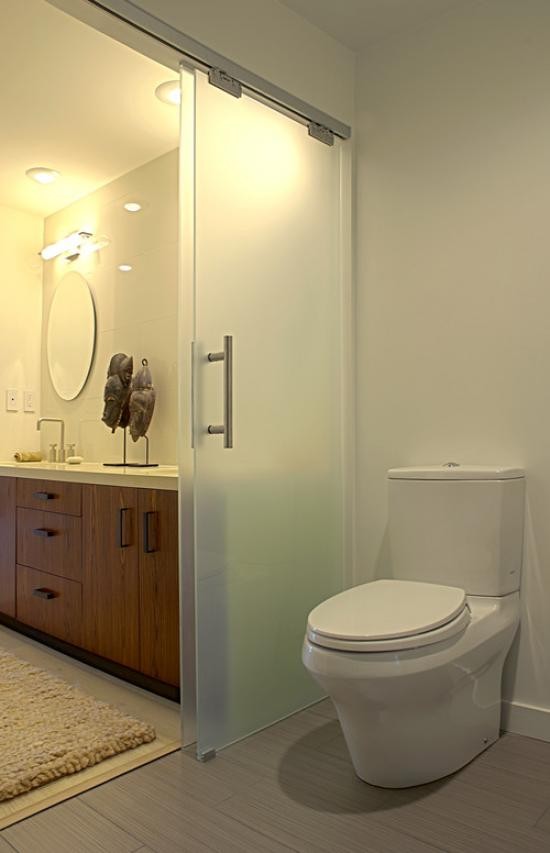
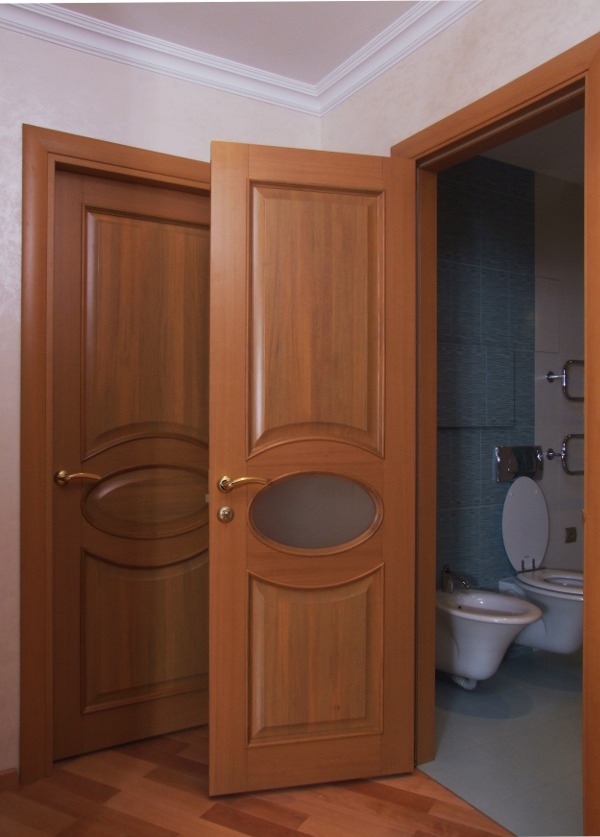
No matter how carefully the doors were mounted, if their choice was unsuccessful, problems will grow like a snowball. Glass designs, in whole or in part, look elegant and become a winning design element. Do not be afraid of peeping from the outside, because you can order a version with tinted or frosted glass. If there are small children in the house, elderly people or seriously ill patients, such doors to the bathroom will allow you to control the silhouette through the glass and come to the rescue in time. At the same time, glass doors are environmentally friendly and comfortable, well absorbing extraneous noises. In the range of any manufacturer there are many interesting models.
In terms of hygiene and convenience, PVC doors are no worse than glass ones.besides, they are usually lighter than wood. This allows you to abandon the powerful loops and heavy boxes, from the hardening of the walls. A special film, even with minimal care, will last for many years.
It is possible to mount wooden doors only in the case when the bathroom is equipped with strong exhaust ventilation. If it is not, then even the most resistant to moisture rocks will dampen and deteriorate in a short time.
Successful examples
It can be a long time to figure out exactly how best to arrange a toilet in an apartment or house, to consult with experts and acquaintances. But most likely to have before your eyes the most interesting samples and ideas that you can navigate.
Then it will turn out to transform an ordinary toilet into a really unusual and original space.
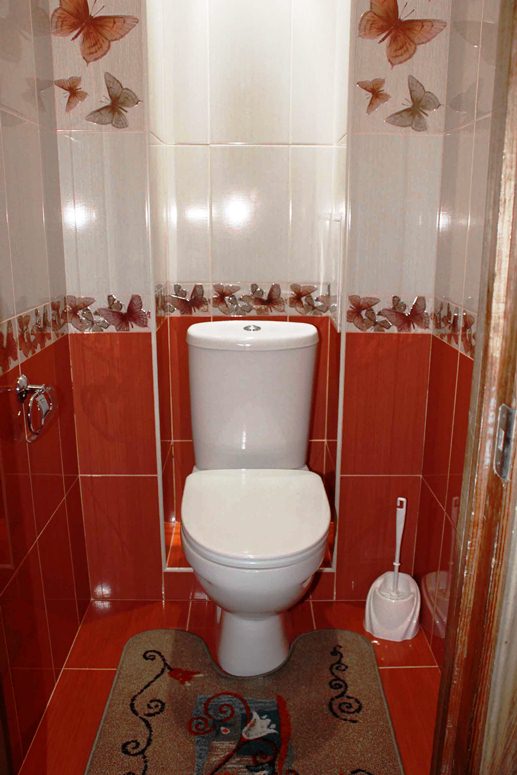
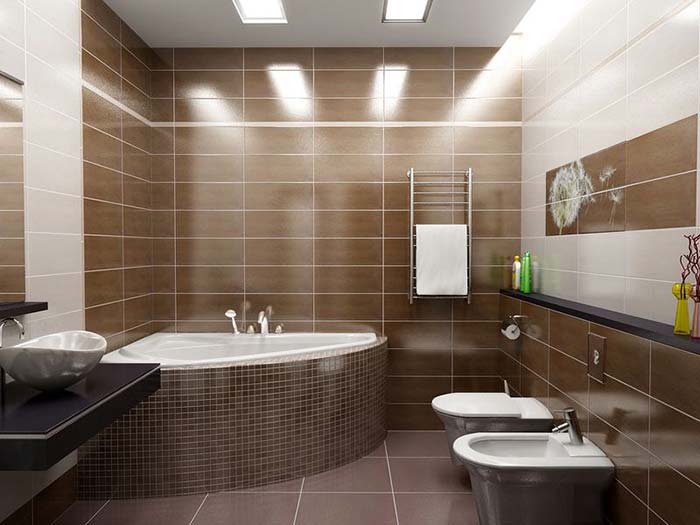
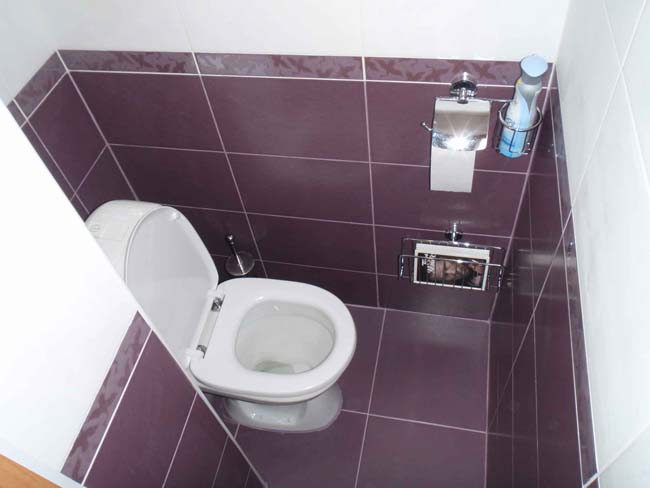
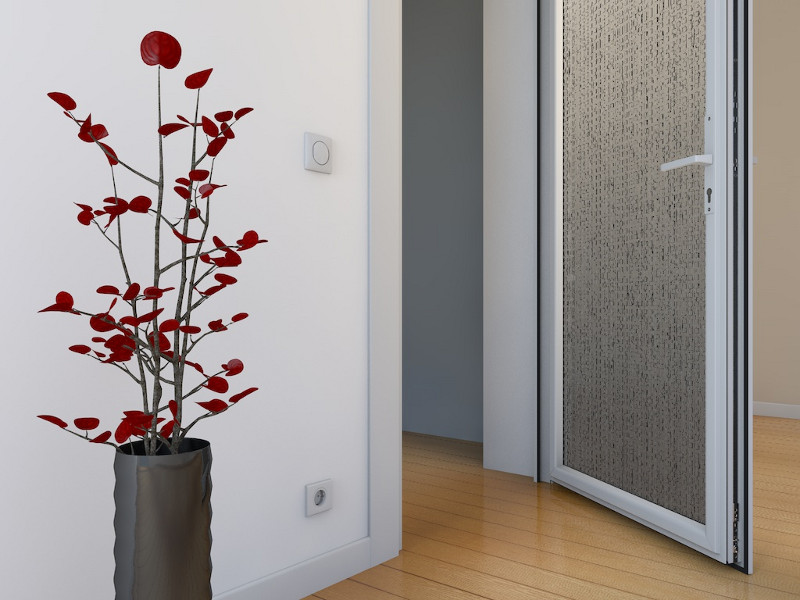
- That's how you can make a fairly large toilet room with an area of 10-12 square meters. There is a sink near the door, and in the center of the wall opposite to the entrance there is a toilet. The squares of rich red tiles seem to form a continuous strip connecting the floor and wall stylistically. Exquisite dark door with a vertical window in the left side complements and completes the composition.
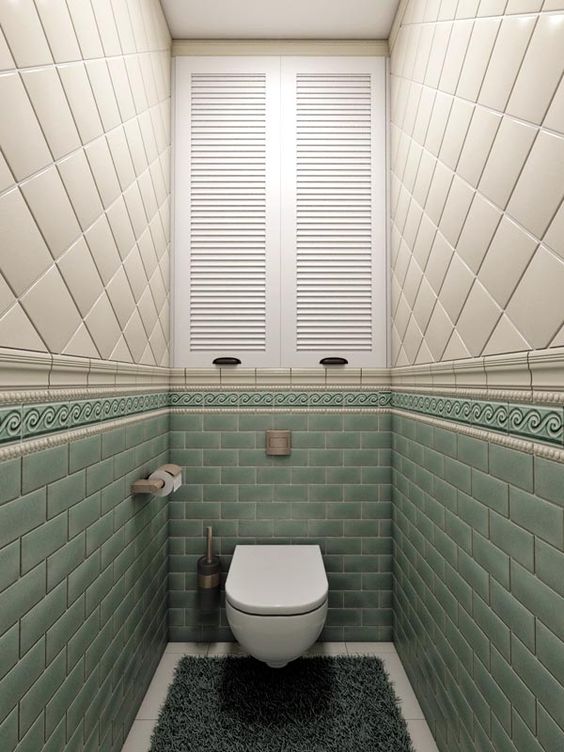
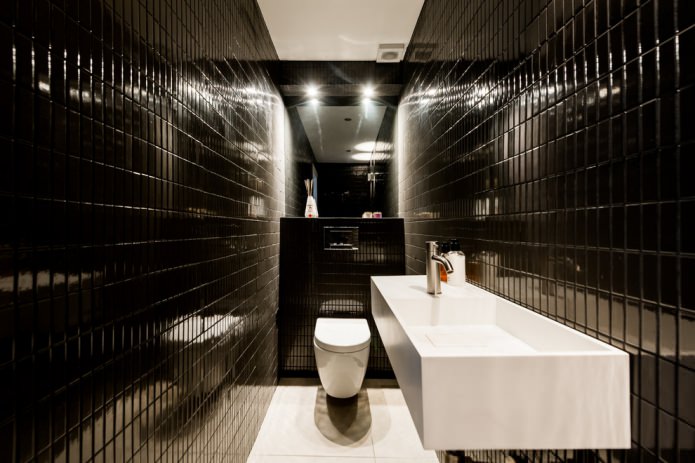
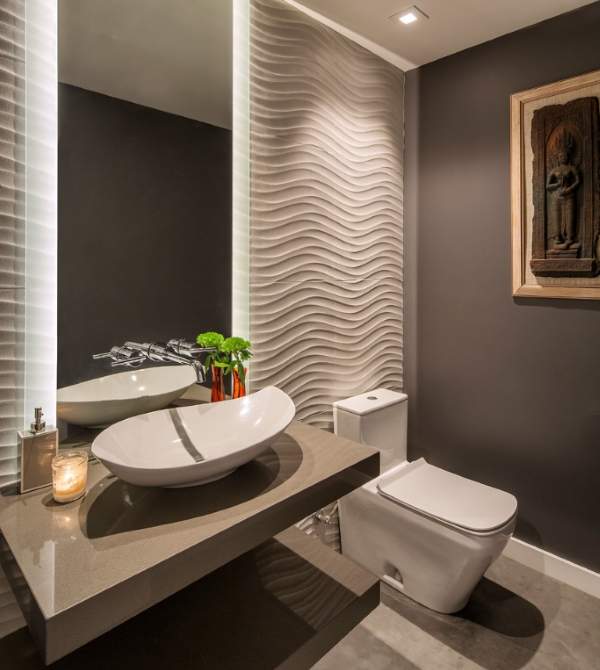
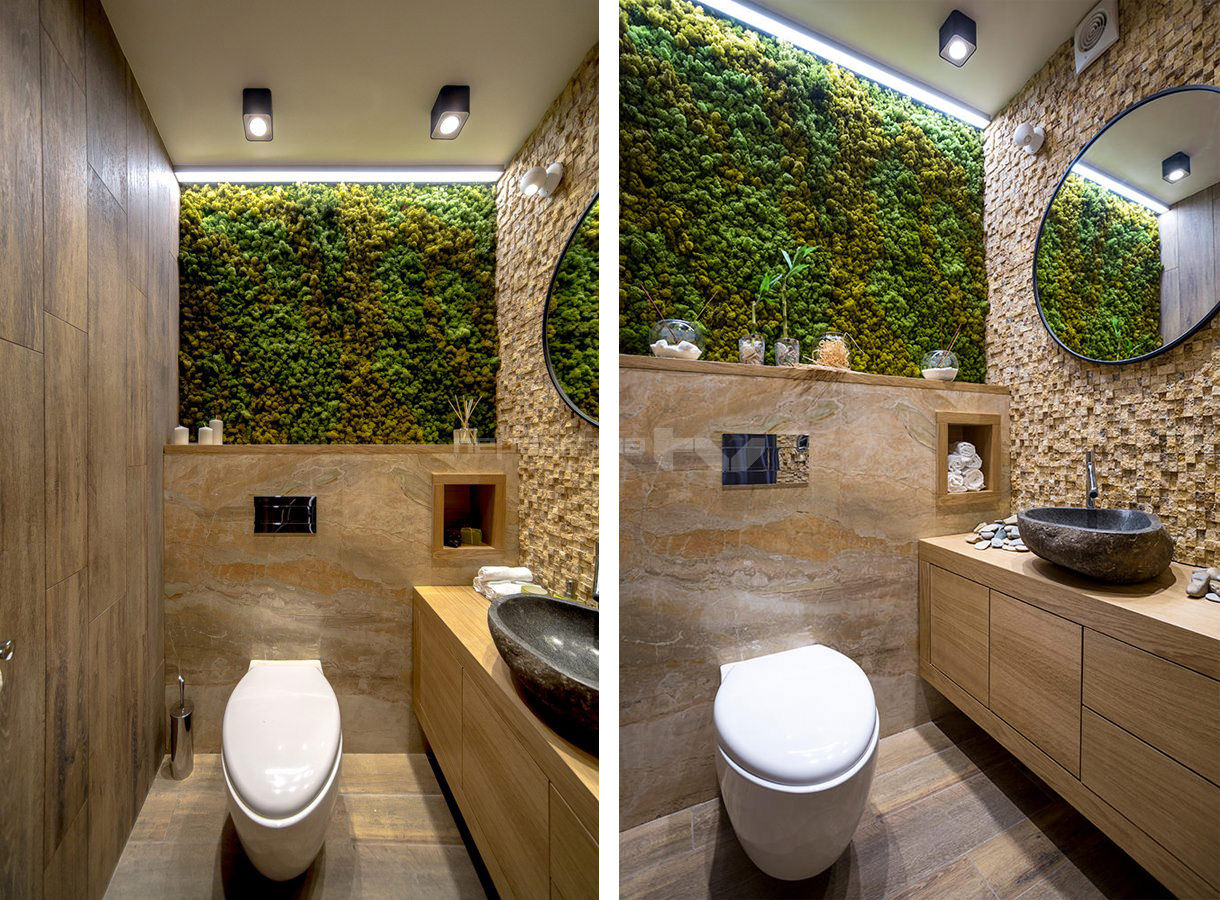
- Modern approach to the design of toilets may be different, but because no less original. The habitual “white throne” is the only item of this color chosen by designers. The walls and floor are decorated with natural stone of different colors. Almost everywhere it is smooth and even, but on the left above the cabinet with the lockers the wall is made with pronounced relief. And in the part farthest from the entrance, the stone background is suddenly replaced by a chic green panel, reflected by an oval mirror suspended on another wall.
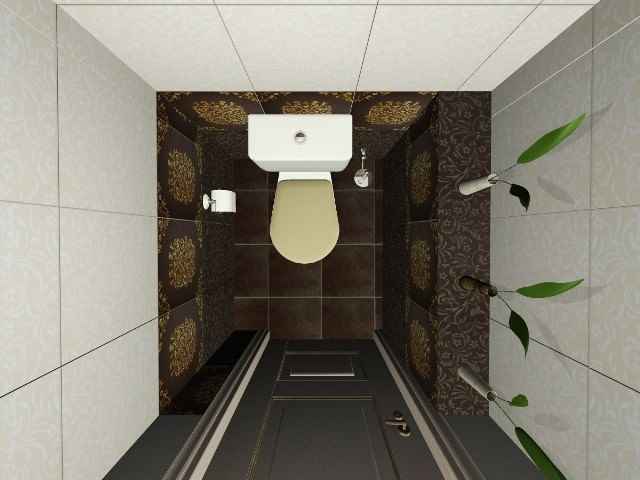
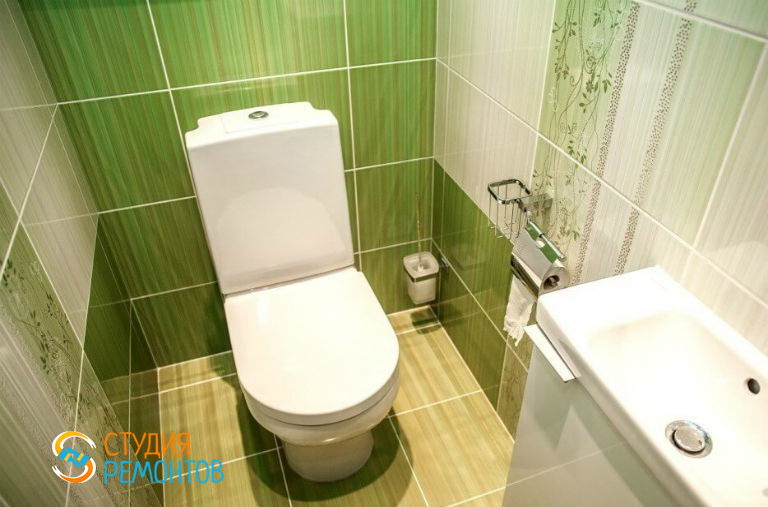
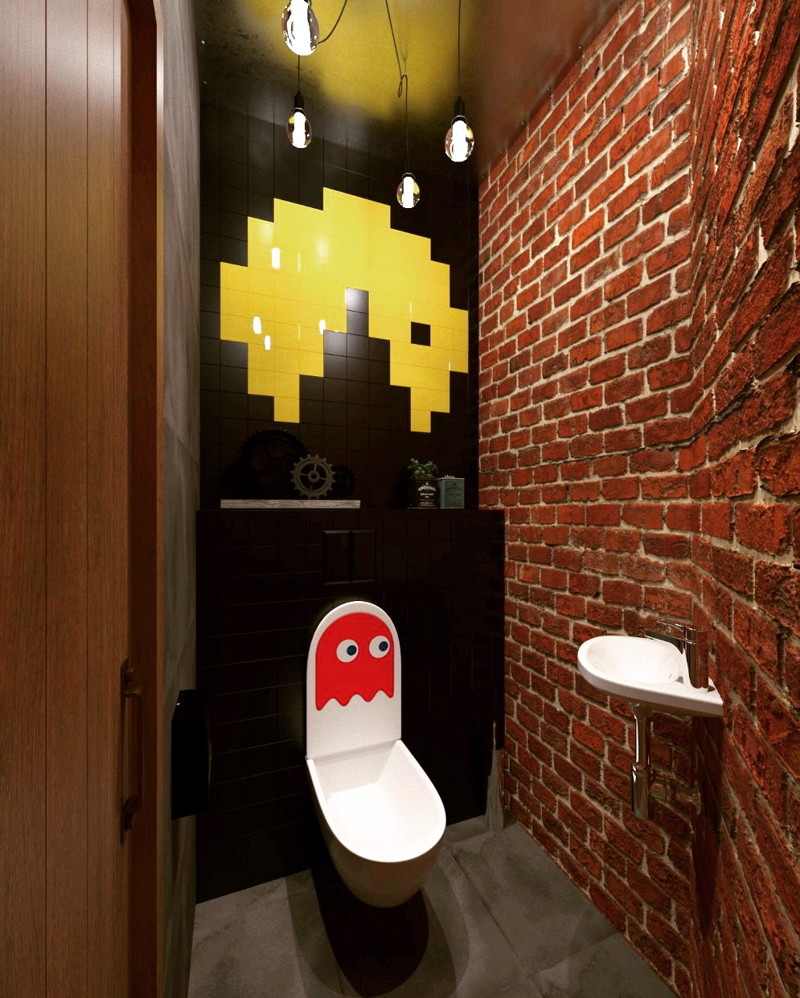
- And this composition clearly contains references to the plots of computer games twenty years ago. An abstract figure in the form of yellow-colored raster cells on a flawlessly black wall hints at this. Looking a little lower, you can see a drawn gray wheel, and to the right of it - a flower and cologne, standing on a stand. The picture on the tank is fun and even some kind of childish in spirit. A wooden door of slightly brown planks, a brick wall going at an angle, plus an underlined antique lighting solution make it possible to consider the design to be quite original.
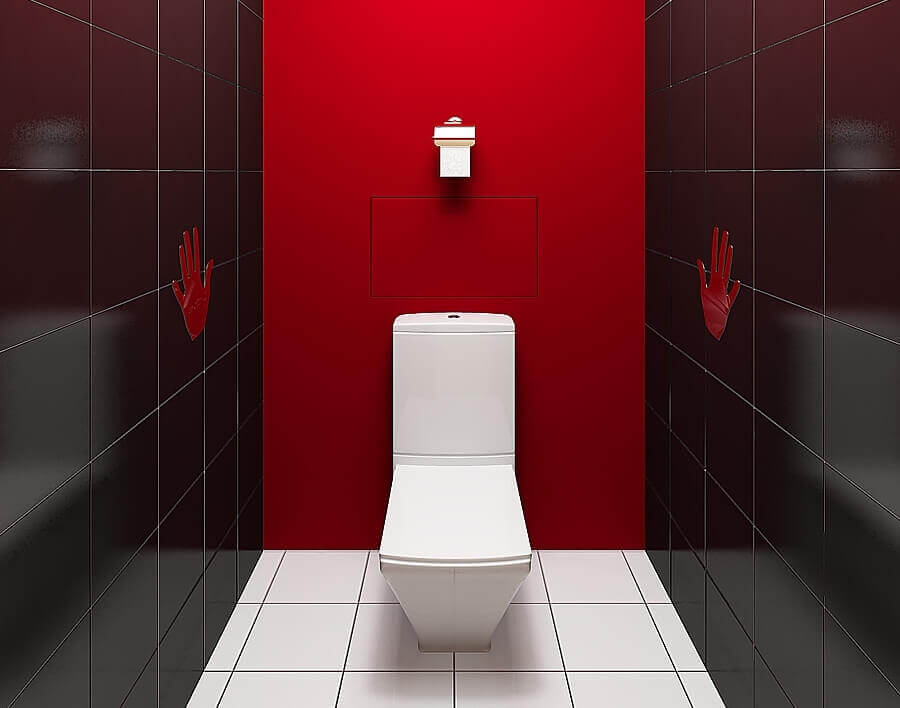
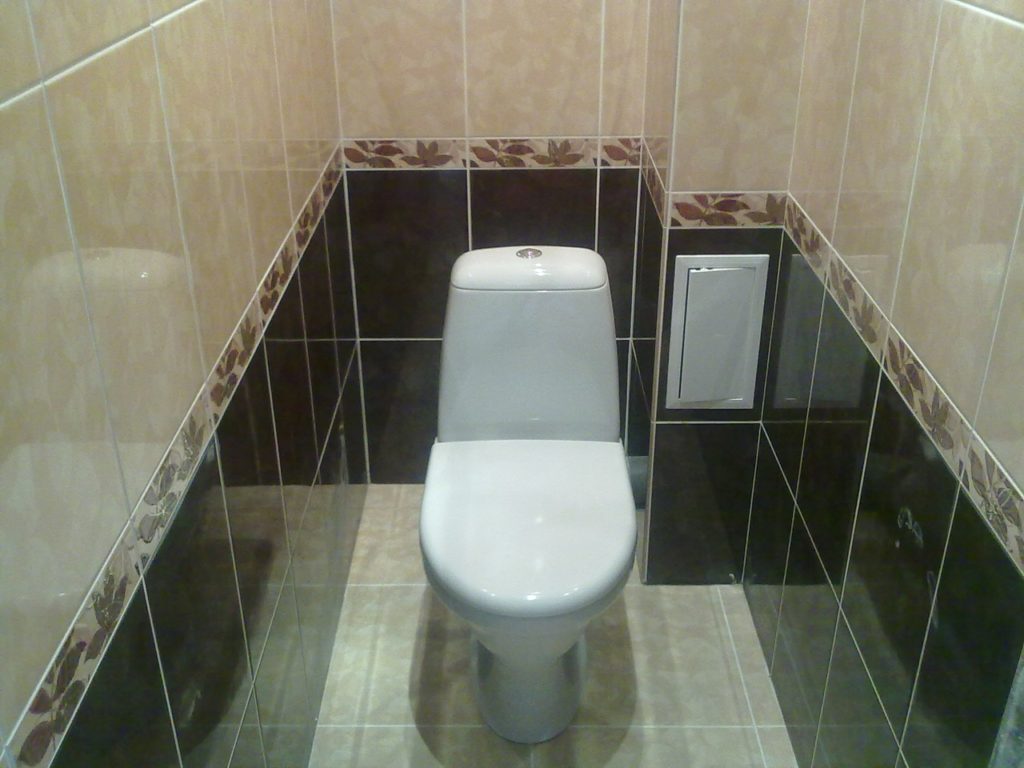
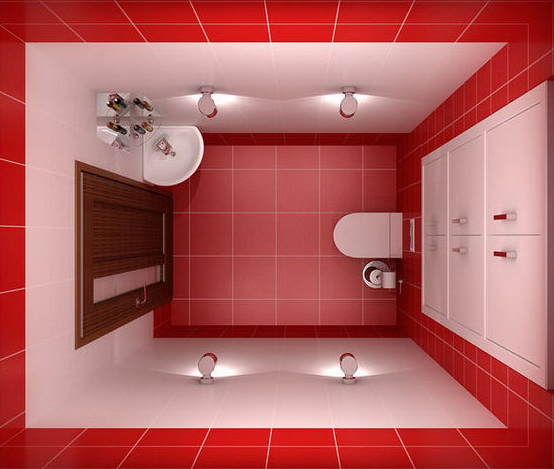
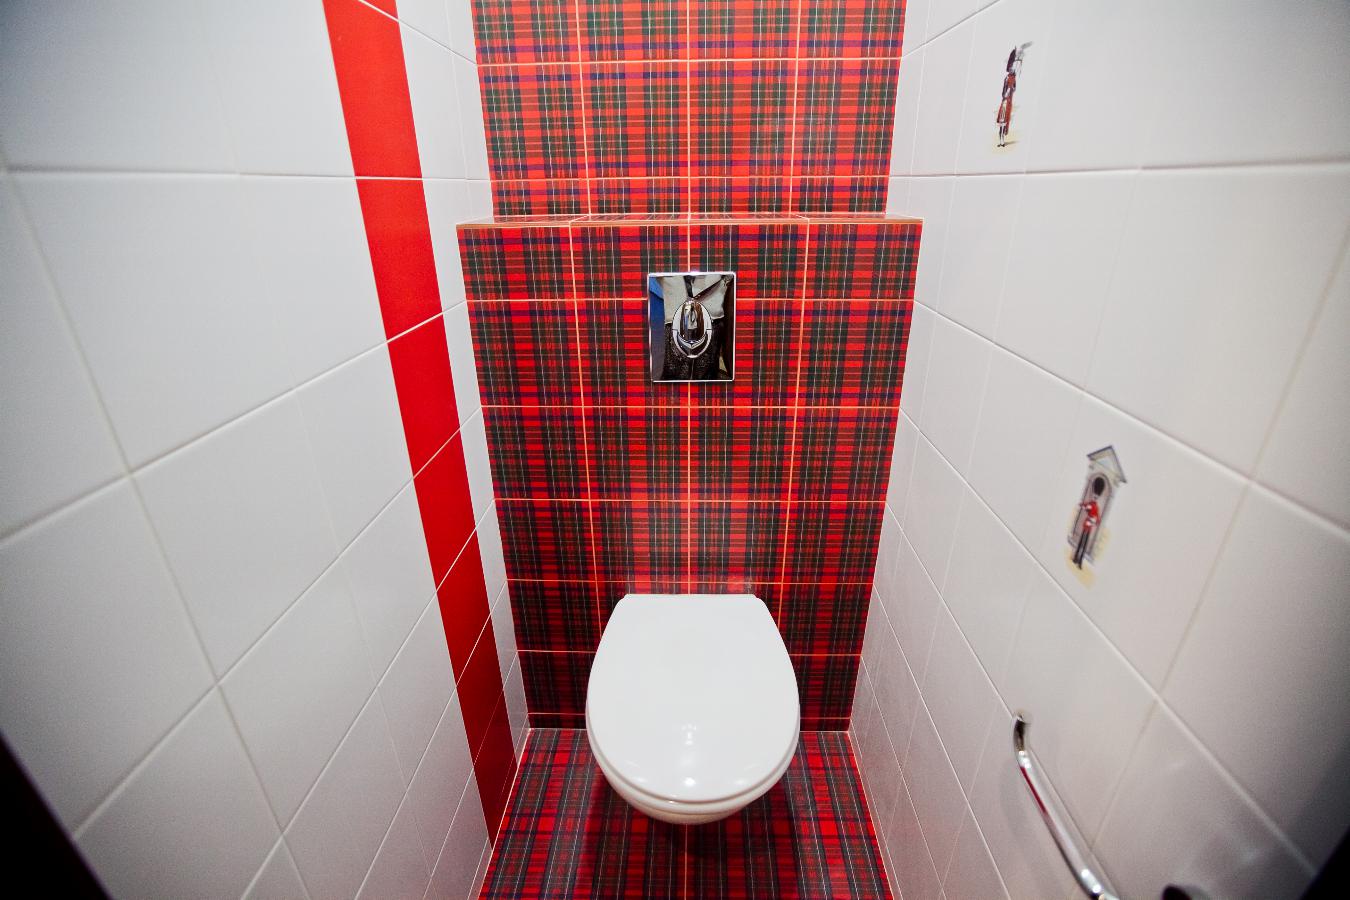
- Here all the design created on the game of white and red. On the side walls they are present in pure form, and the farthest wall from the entrance is made in Scottish motifs. The floor is painted the same way.
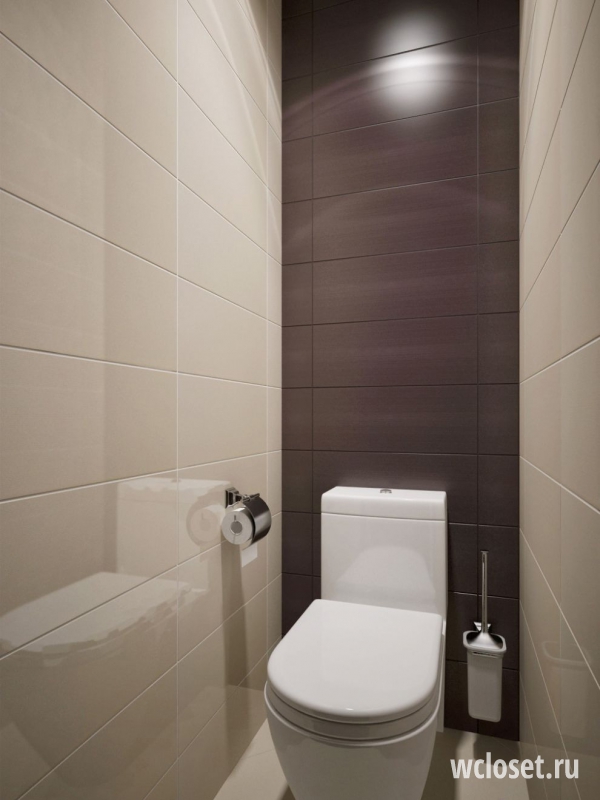
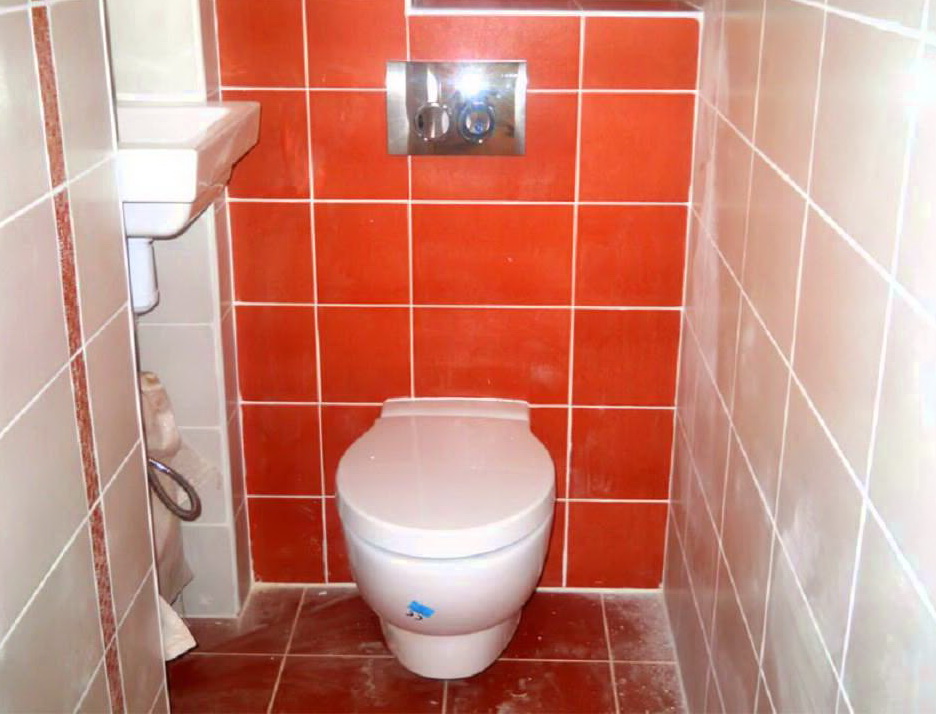
- Similar colors were chosen here, but it is immediately obvious how different designers have worked on the project. It seems to be a small detail - the glittering metal die, allows you to make a very powerful accent. Suspended wall sink looks timidly out of the niche.
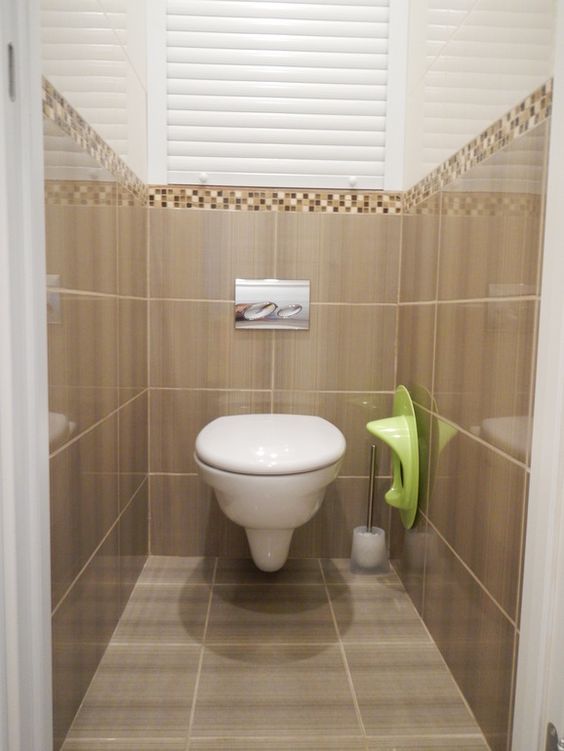
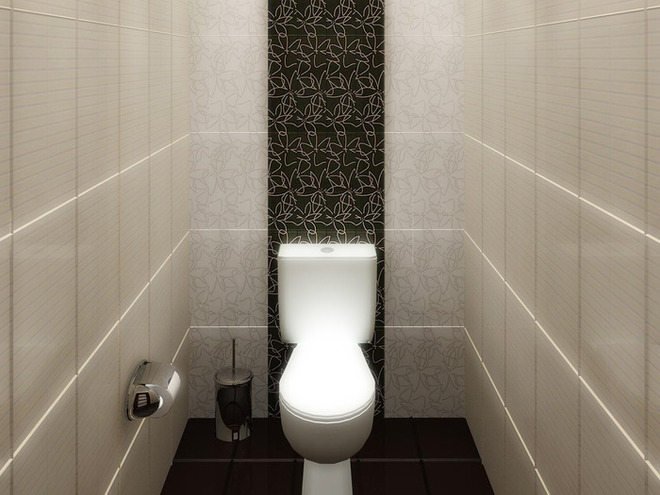
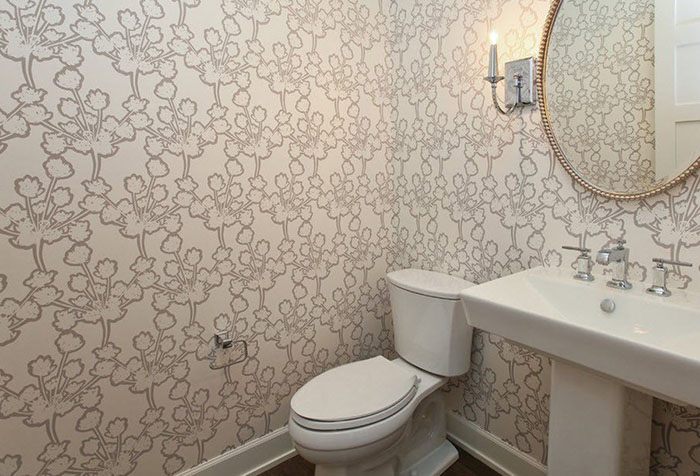
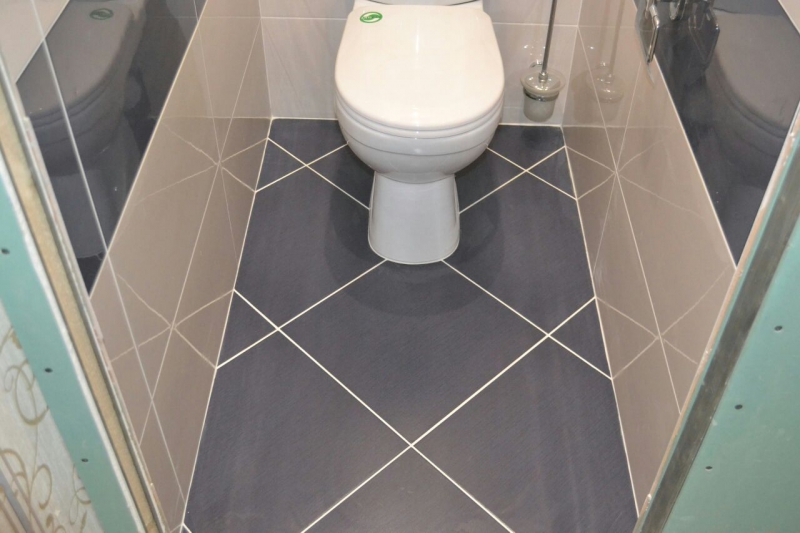
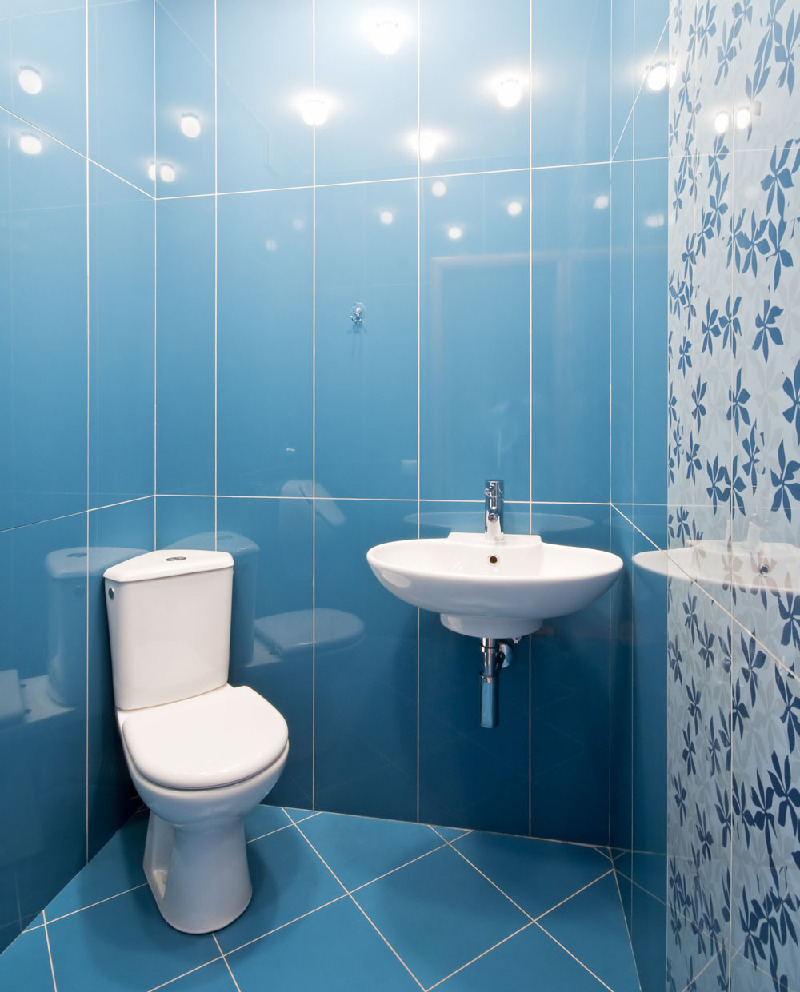
- It is not necessary to combine white and red tones, combinations with blue also look good.Squares on the floor and rectangles on the walls create a very attractive look. The toilet and the sink are set in such a way as to save space. One of the walls is decorated with a blue floral pattern on a calm white background. Numerous spotlights, guessed by reflections, provide comfortable conditions for people.
You will learn more tips on repairing the toilet in the following video.


