How to attach a veranda to the house with your own hands: a step by step description of work
To attach the veranda to the house with your own hands is not an easy task. Despite the fact that this occupation is quite complicated, you can still do all the construction work with your own hands. Just follow the step by step description.
Structural features
Many do not fully understand what the veranda really is, mistakenly taking a terrace for it. Verandas are not divided into open and closed. The SNiP clearly states that this name is attached to the house or built-in glazed constructionand the so-called “open veranda” is a terrace, and nothing else.
So, the veranda has all the same functional parts as the residential house: doors, windows, walls, roof, even its own foundation.The only difference is that it cannot be heated on the veranda, otherwise it will automatically turn it into an additional room. However, many people neglect this requirement, but in vain, because the decision to insulate an extension in this way can have disastrous consequences.
So, it is worth bearing in mind that if you carry out heating on the veranda without first notifying the BTI, then in case it opens up, you will be charged a huge fine.

In general, it is worth bearing in mind that the construction of a veranda needs to be coordinated at the planning stage of an idea, otherwise the authorities may require you to dismantle it.
Speaking about the features of the veranda, it is worth saying that it is not only a great place to relax, but also a wonderful way to expand the space. Often it is used as a hall.that is due to the fact that traditionally the verandas are constructed so as to “seize” the front door. Otherwise impractical constructionbecause to get to the veranda, you have to go out every time, and this is inconvenient.
If you arrange the veranda correctly, insulate it, glaze properly, then it will not be cold in winter or hot in summer. Keep in mind that you are very lucky if the front door of your house was located on the west or east side: the veranda built here, most of the time of the day will be protected from the sun better.
So it turns out to create a corner of relaxation, suitable for both winter and summer holidays.

The verandas are arranged in various stylistic directions, making them completely in harmony with the house. So, if the exterior of the house is made in high-tech style, then the veranda must be made equally high-tech: with large frameless windows, for example.
In a simple folk or rustic style, you need to focus on coarse materials, using stone and wood for building. Gentle model Provence will look great on a garden plot, especially if you have a flower garden in front of it.
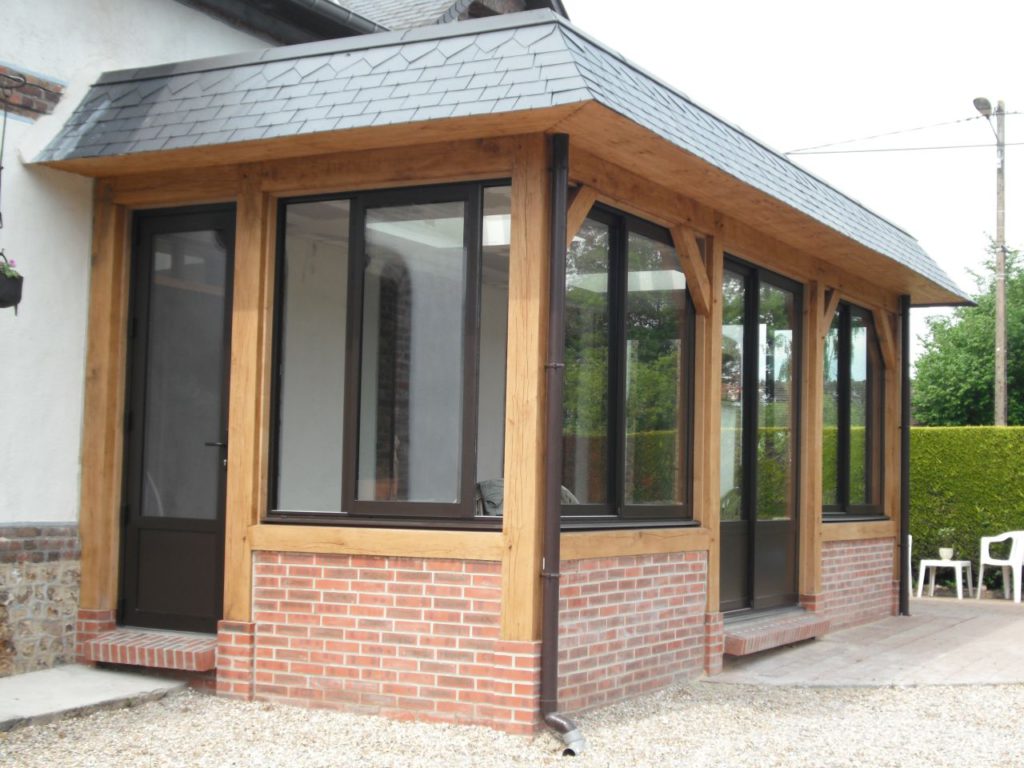
Glazed extensions are made of various materials: wood, brick, even plastic. Wooden verandas most popularSince it is easy to work with wood, and also they have a long service life.
The extensions also differ in size: there are small, “exciting” only a small part of the house and doors, or large ones that stretch across the entire wall (this technique is often used in the construction of porches near small houses). The size also depends on how many people live in the house.. It is necessary to think that they could all be located here at the same time.
During construction it is necessary to take into account the size of the house itself, and to make a start when choosing the dimensions of the veranda from this.

The greatest difficulties are not the construction itself, but the bureaucratic red tape with the legalization and coordination of the construction. It is necessary to start going to instances three or four months before the start of construction work.Since this process is long and exhausting, but necessary.
You should not arbitrarily make redevelopment, as this is fraught with unpleasant consequences.
Purpose
So, glazed verandas fulfill several functional roles. First, they help to maximize the warmth of the house. This is due to the fact that the entrance door is protected from drafts, and the wall with a veranda will require less energy for heating than others, because it will not be exposed to winds or strongly contrasted with the environment 11 degrees higher than in the yard).
Also, the greenhouse effect, which could be a minus building, in this case plays into the hands. The sun's rays that fall into the extension, heat up the surface, but the heat does not go anywhere, but accumulates and holds for a certain period. Warming is one of the cases when such a clear functional difference can be traced between the veranda and the terrace.


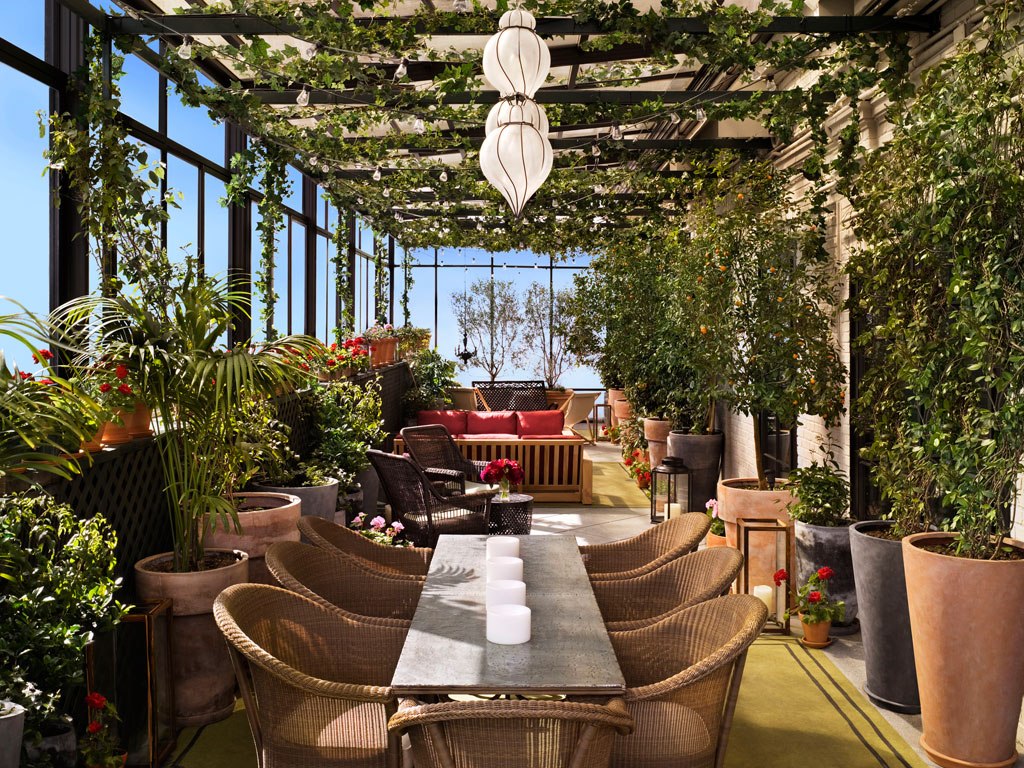
In summertime, you can use the extension as a full-fledged living room., equipping it, for example, under the gym or an extra bedroom. In winter, however, you can store large-sized seasonal items for which there was no place in the house itself, but they cannot be stored outside.
If your house is built on windy territory, then the terrace equipment will not work for you - a veranda is definitely needed. Nobody wants his tea to be blown by strong wind and dust.
It so happened that the terraces are built so as to open the view of the beautiful garden, mountains or something else. But it happens that the site is extremely small, and the whole view that can be provided is a fence between yours and the neighboring site.
In this case, the veranda is an excellent way out, because due to the glazing, it will distract a little from the impartial spectacle.
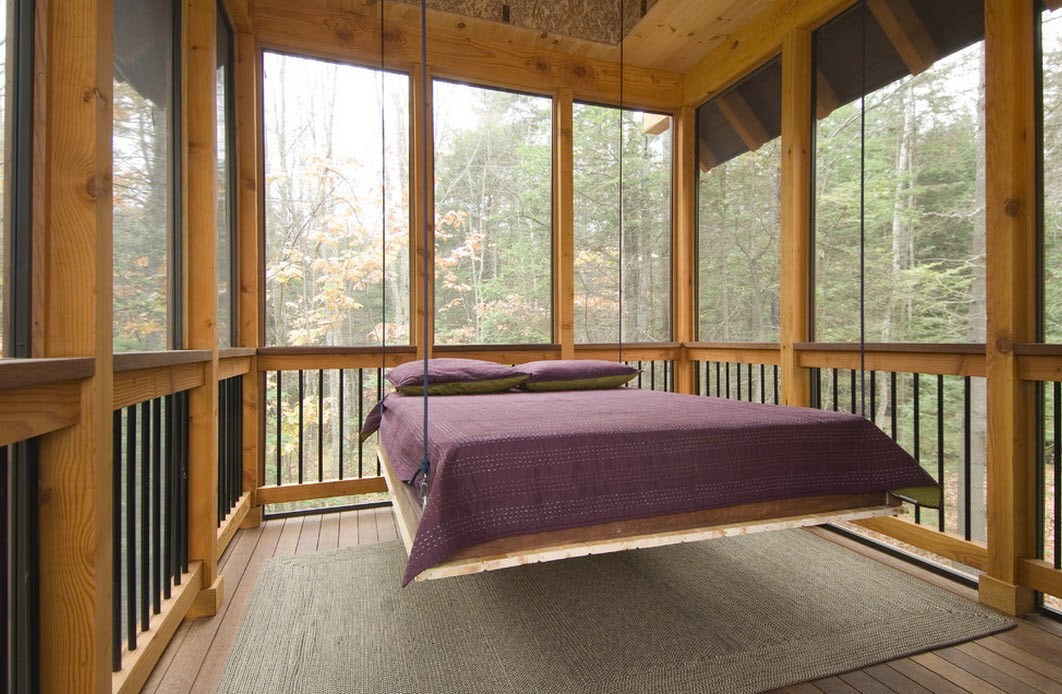
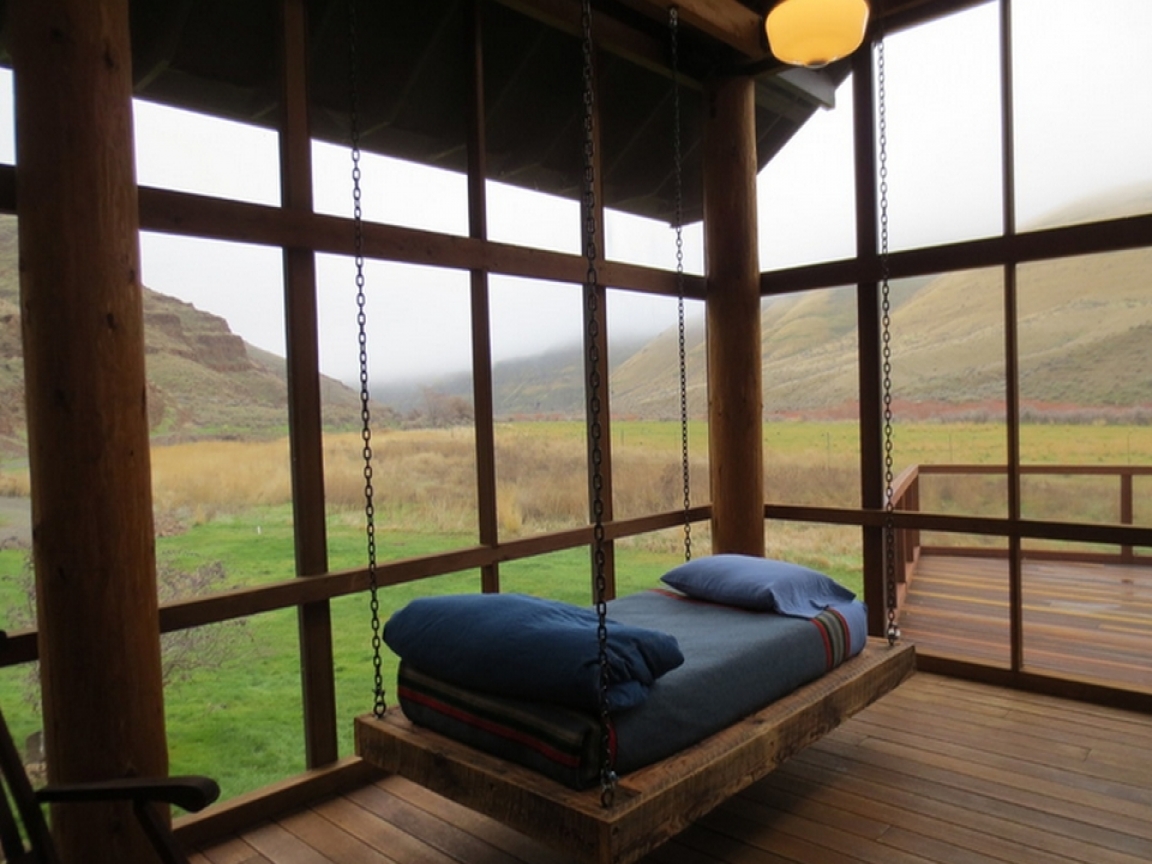
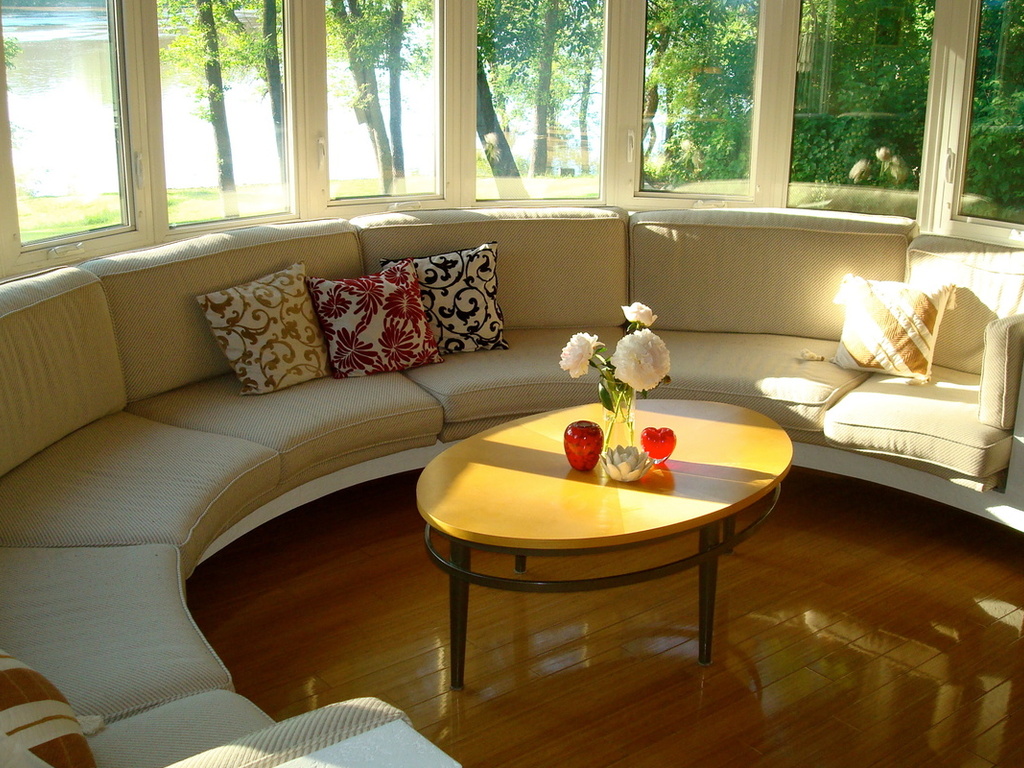
In summer, the veranda has a more comfortable climate than the rest of the house.Here the optimum temperature is maintained, therefore many will equip summer bedrooms in the annexes. It is pleasant to spend the night here: a comfortable temperature is provided, and the glazing protects against mosquitoes and other insects.
It is important to correctly determine the dimensions of the veranda, not only with respect to the house, but also thinking about how you will use it in the future. So, for one-time accommodation of 10-12 people will need a veranda of at least 15 square meters. m


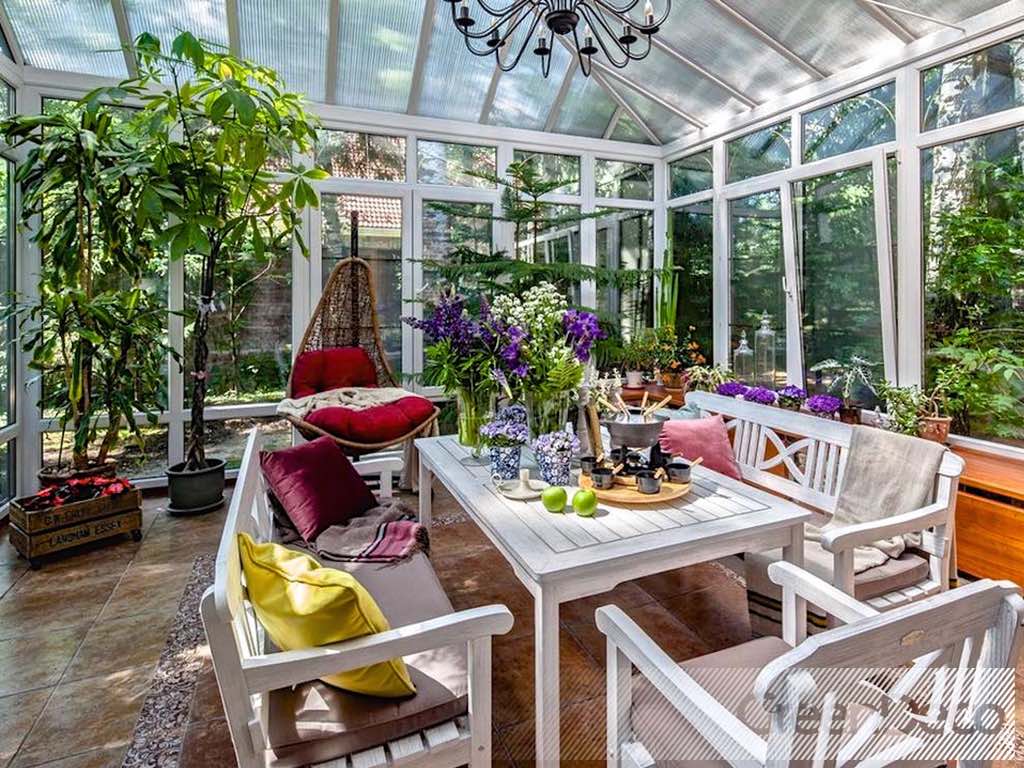
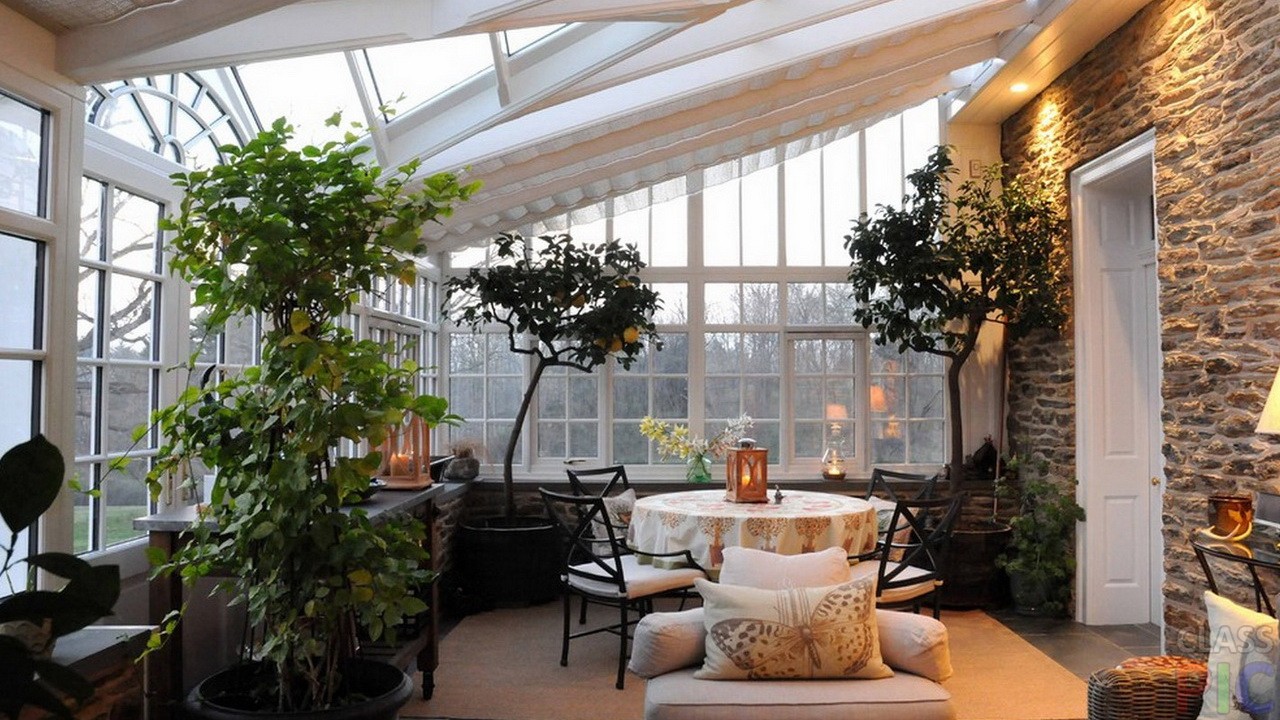
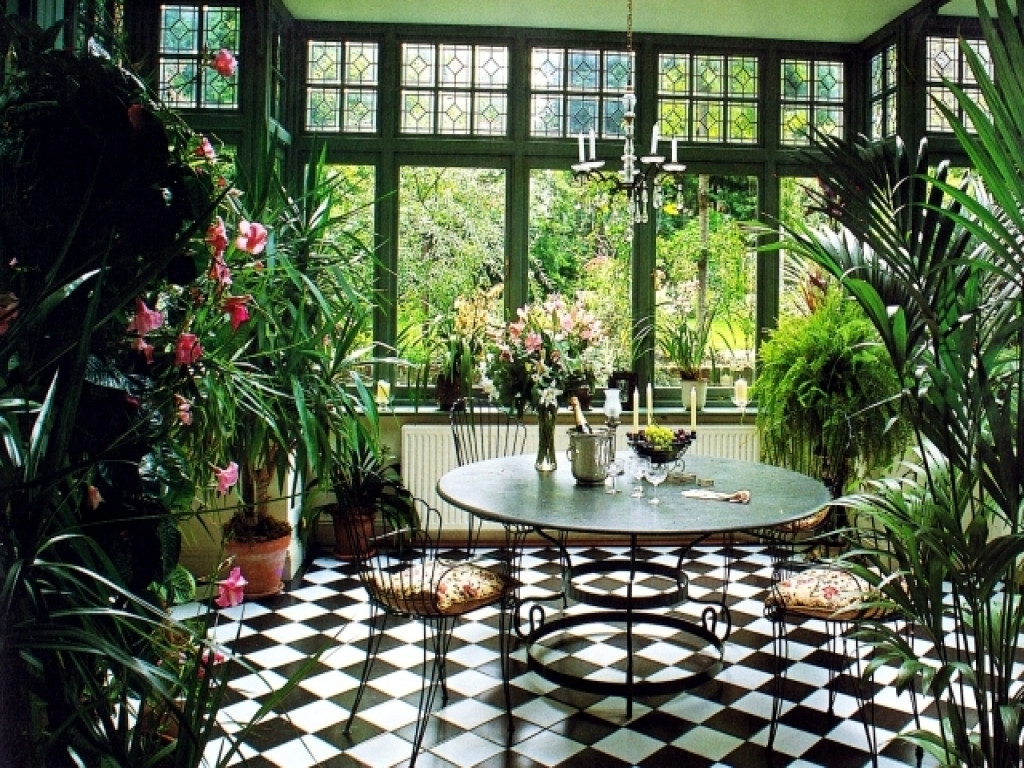
If you are a gardening fan, then can adapt an extension for a winter garden. It provides excellent climatic conditions, as in the subtropics, as well as an excellent degree of illumination.
Some types of indoor plants, placed across the veranda, will look attractive, reviving the space.
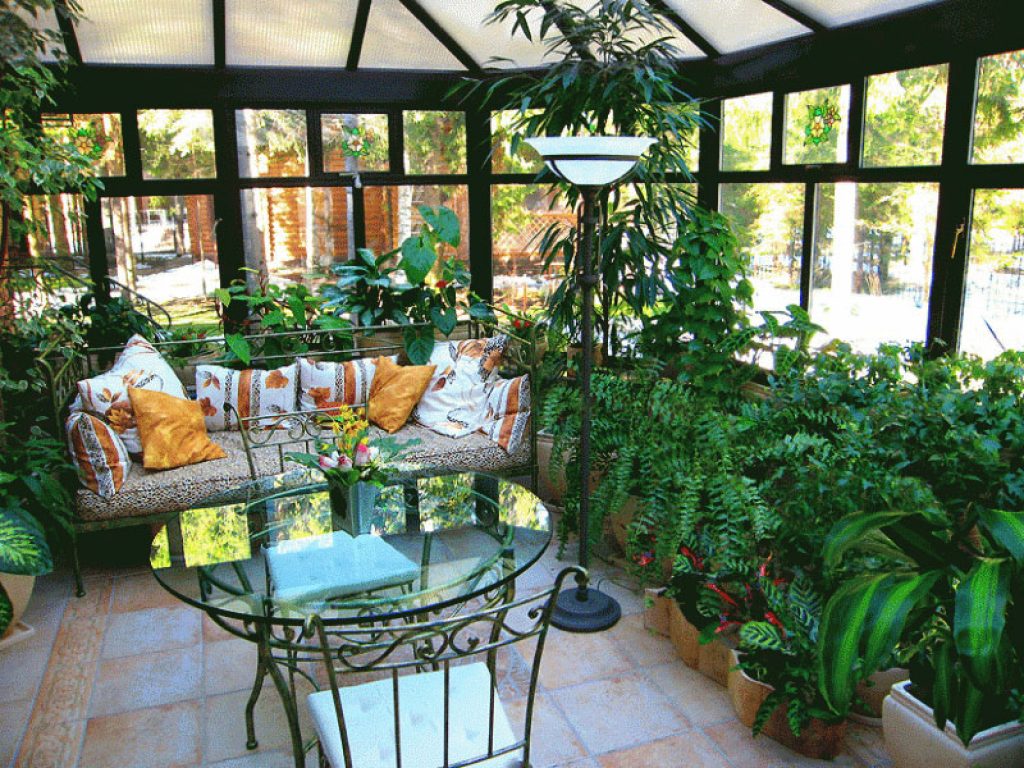


If desired, on the veranda, you can combine several functional areas, for example, by combining a winter garden and a place to relax. To do this, simply increase the area of the extension.
Decide how much space you need for the greenhouse (depending on the number of plants), and how much - for gathering with friends (depending on how large the company will usually meet), and then you will determine the required area.

As an ordinary pantry porch is used throughout the winter. On it you can drag the pieces of furniture for the garden or other equipment.
In winter, you can make an extension with a vestibule, taking off your shoes, leaving sleds, skis and other sports equipment. Some leave outerwear here, but this is not very convenient, as wearing cold clothes during the winter is a dubious pleasure.
Advantages and disadvantages
Since the veranda is almost a room, except for the presence of heating, it has similar advantages. However, in rare cases, the heating on the veranda is still carried out: for example, when a winter garden is equipped.

So, speaking of the pros, we can distinguish the following:
- Sun and rain protection. In this case, the function of the walls is carried by large windows, which protect the space inside from wind, rain, snow, as well as exposure to the sun. It is possible to be on such a veranda even when it is raining outside, not being afraid to forgive or accidentally get wet. Moreover, such protection favorably affects the family budget: no additional protective materials are needed to protect the walls inside the veranda.
- Can be used as a place to store things.. It is not necessary to turn a veranda into a garbage warehouse. This may include the necessary, but rarely used things, such as books, to which all the hands do not reach, or conservation, using the veranda instead of the cellar. It will look great furniture that is no longer needed, but it is a pity to throw it away, because it is still in good condition.
- Possibility to carry out heating, to equip the ventilation system. In order to carry out such work, you need to get a special permit, coordinate everything with the authorities. However, it is possible to make heating on the veranda or install a split system. Well, if the heating is not common, but separate, with the function of switching on and off. This will make the operation of the heating system more convenient.
- Use as a bed. Sleep in nature for many - part of the summer holidays. You can get rid of all the negative factors of this activity (likelihood of rain, annoying insects) if you sleep on a glazed veranda. Due to the large panoramic windows, communication with nature will not be lost, and at the same time, the comfort of an ordinary residential building will not be lost.
Disadvantages of glazed verandas are available, despite all their advantages.
Here are some of them:
- Heating is ineffective. In order to properly warm the veranda, you need a huge amount of thermal energy. This is due to the fact that the extension is not warmed as thoroughly as a house, so part of the heat will be lost and go outside. So, even when heating is carried out or when a split-system is equipped, it will be difficult to maintain a constant temperature in the extension: in summer it will still look more like a greenhouse, and in winter it will be only 10-12 degrees higher than outside.
Big problems are waiting for someone who decides to carry out the sewage system on the veranda, for example, equipping a summer kitchen with a sink here. Work will be energy-intensive and very expensive.
- Visibility restriction. Even in spite of the fact that the windows on the veranda can be made panoramic, taking care that the frames were almost invisible, you still will not get the full sense of nature as on the terrace. Isolation from smells, sounds, drafts is good when viewed from one side. However, on the other hand, dacha or country holiday is valued just for the feeling of unity with nature.In addition, if you make the windows not panoramic, then on a fully glazed veranda you will not feel like outside the house, but as in it.

- The need for stylistic selection. You can not make a veranda of any kind, such as a gazebo. Be sure to ensure that the exterior of the house and the veranda are stylistically equivalent. For example, if a house is decorated in the Mediterranean style, then the extension will have to be decorated with arched openings, revetted with stone, and make many other decorative elements.
It is considered that it is best to plan the construction of the veranda at the initial stage of planning the house in order to harmonize the extension into the overall architectural composition as harmoniously as possible.

Thus, we can conclude that the glazed annex has advantages that fully balance all its drawbacks.
Material selection
Verandas are built from a variety of materials. This is due not only to its functional purpose, but also to what landscape surrounds it, what is the exterior of the house. However, most of the extensions are made of wood or brick.
These materials have all the necessary qualities:
- they are durable;
- look attractive;
- easy to work;
- Excellent "friends" with thermal insulation materials and others.
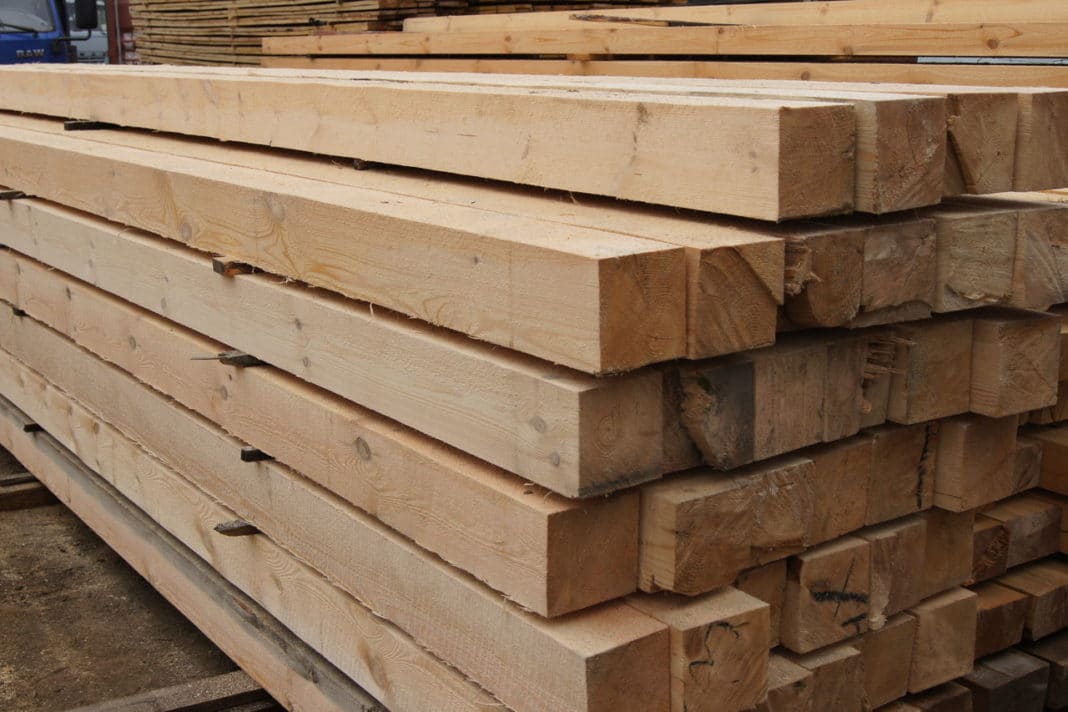
The tree is one of the most popular options.which is not inferior to its position in new materials: aerated concrete, sandwich panels, polycarbonate. The verandas of log or log look cozy and homely. Often, such options are chosen for summer cottages.because in the country I want to relax and rest. However, wood is not only used as a base material. In particular, often frame structures are made of wood, the floor is laid out with boards.
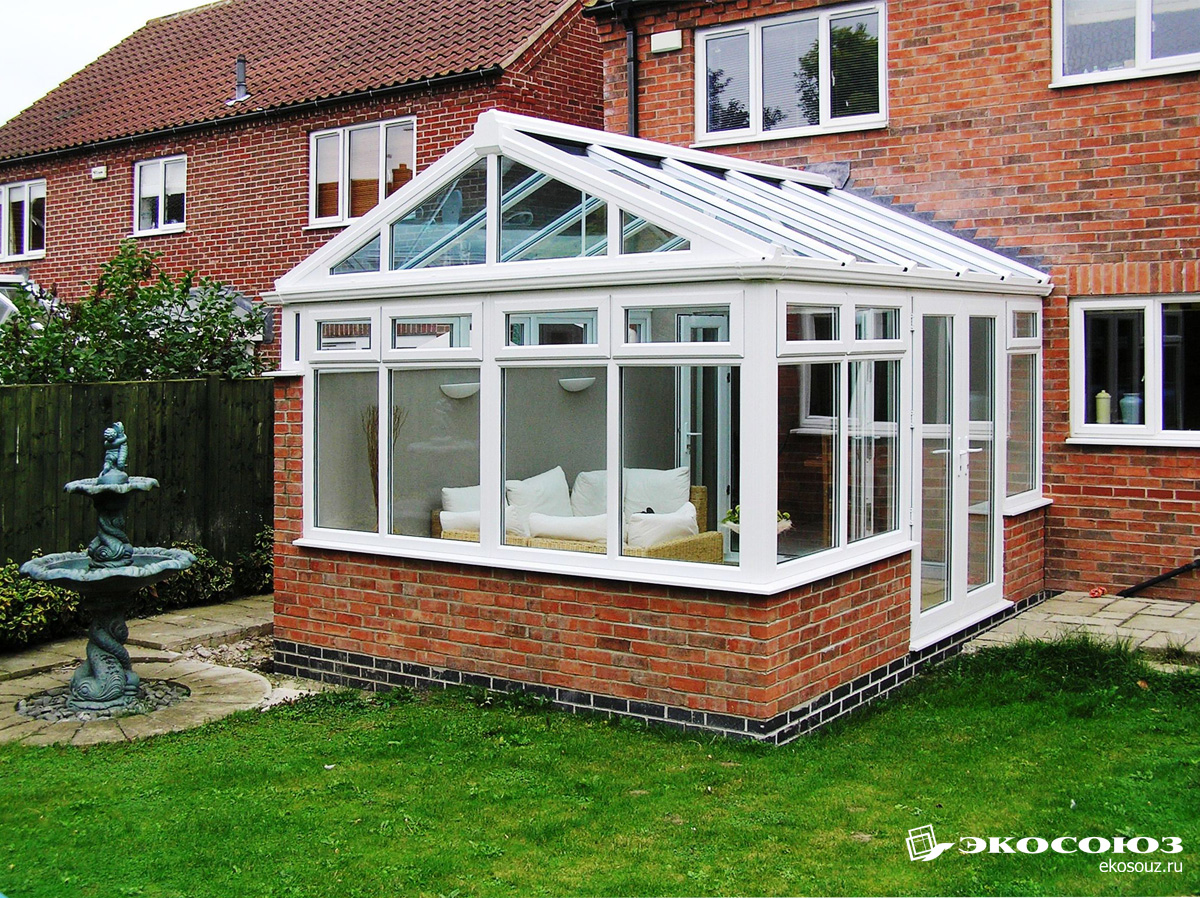
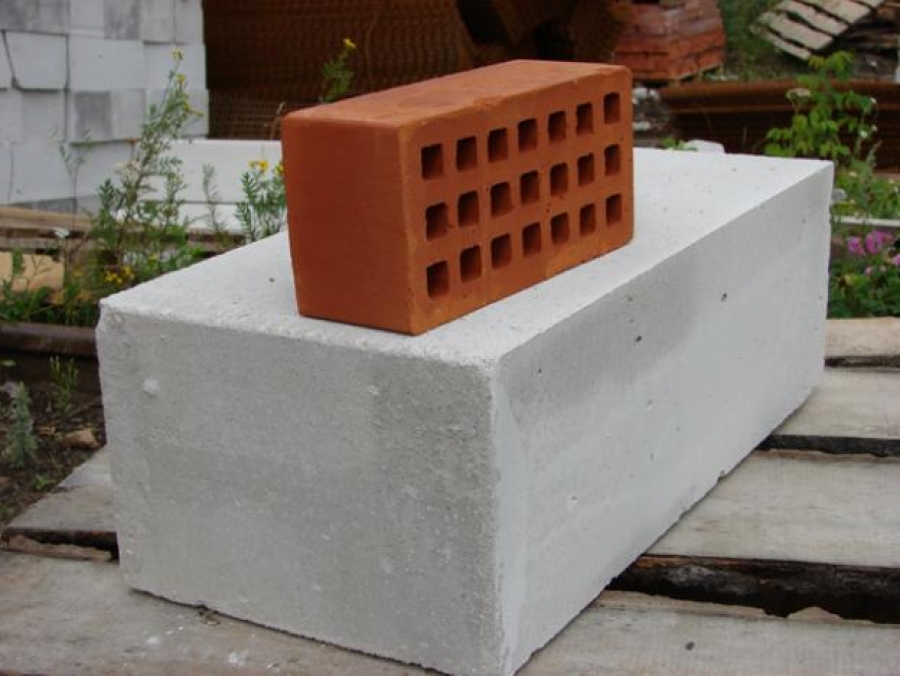
The second most popular is brick. Brick verandas are mostly winter, with high-quality insulation. They are organized in year-round homes.. Working with brick requires a certain skill, but the result exceeds all expectations. Besides piles can be made of bricks for the foundation.
Compared to wood, a brick wins only because it does not need to wait for shrinkage of the material to glaze the veranda. So, it can be erected within one season.
It is worth noting the metal, which is also used in the construction process.. Screw piles are made of it, which are chosen on a par with brick ones, since they are convenient to install. For the frame choose a profile tube. The metal profile is reliable, strong, it is often impregnated and treated with various compounds against corrosive processes, so that such a frame will also be durable.
You can make a veranda from metal profiled sheeting, if you are limited in funds, however this option is not very attractive aesthetically, is traumatic, does not keep warm.
Polycarbonate shield design looks interesting and unusual. Glass extensions of this type are partially transparent, but at the same time may be colored. They pass a lot of light inside, but protect from prying eyes (except for the glazed parts), because the polycarbonate is cloudy.
Due to the special structure of polycarbonate panels the material keeps heat well provided that the joints between the shields are well sealed. Such verandas often do not warm additionally.

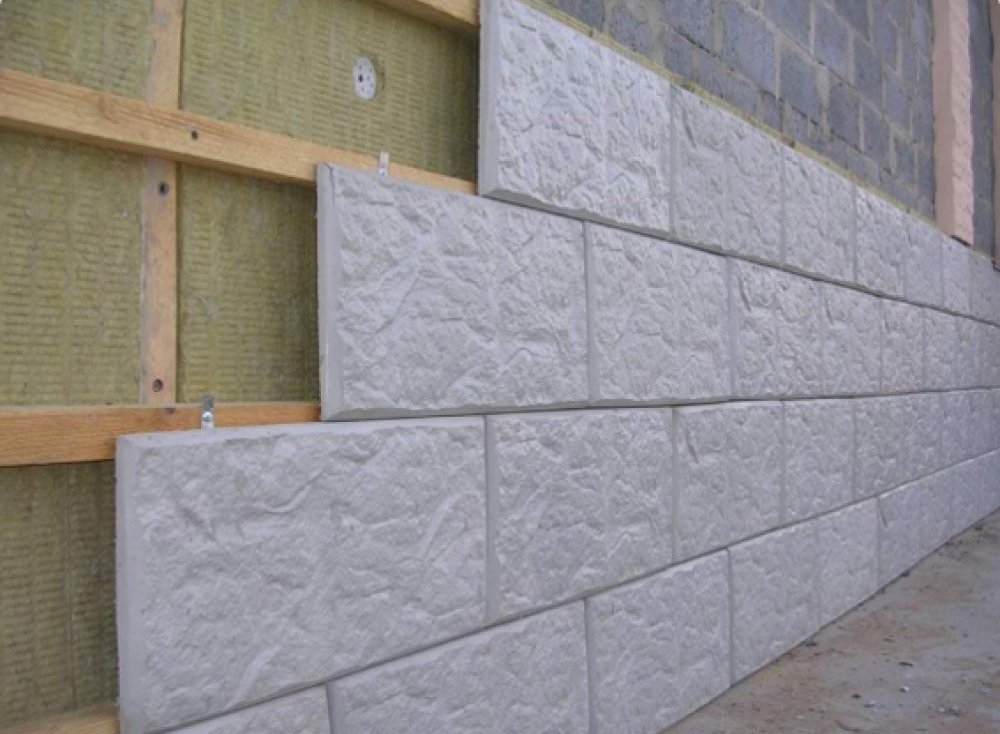
The development of recent years are materials that allow to build a porch quickly. Foam blocks and aerated concrete blocks are used for operational construction.. The essential difference of materials from each other consists only in moisture and frost resistance: aerated concrete loses much in this respect, because it absorbs water like a sponge. However, it is worth remembering that simple walls of these cellular materials do not leave. They are necessarily coated with siding, tile or other material.. Therefore, the frost resistance parameter can be ignored.
Aerated concrete or foam block walls can be easily insulated, while the insulation will be at a high enough level.

Whatever material you choose, remember that the main requirement is the correctness of all the construction, insulation and finishing of the extension. If you do it right, the veranda will stay as long as the house itself.
Project
Drawing up a project plan is an important step. The decision to rebuild the house, to finish the veranda here is a redevelopment. So, drafted project must be legalized before proceeding to construction workotherwise, when selling, donating, or transferring a house, there may be problems with the fact that the property according to the documents does not match the actual one.Owners can be severely fined.


Since it is necessary to create drawings and diagrams correctly, to carry out all the calculations correctly and without errors, and the best solution would be to contact professional architects for help. This is especially true if you plan to make a large and fully equipped extension, for example, if you plan to equip a bathroom or full heating here. Professionals will quickly and efficiently draw up a project plan that will be approved by the authorities without any complaints..
For some, the decision to turn to professionals seems to be expensive, so they decide on drawing up a plan on their own.

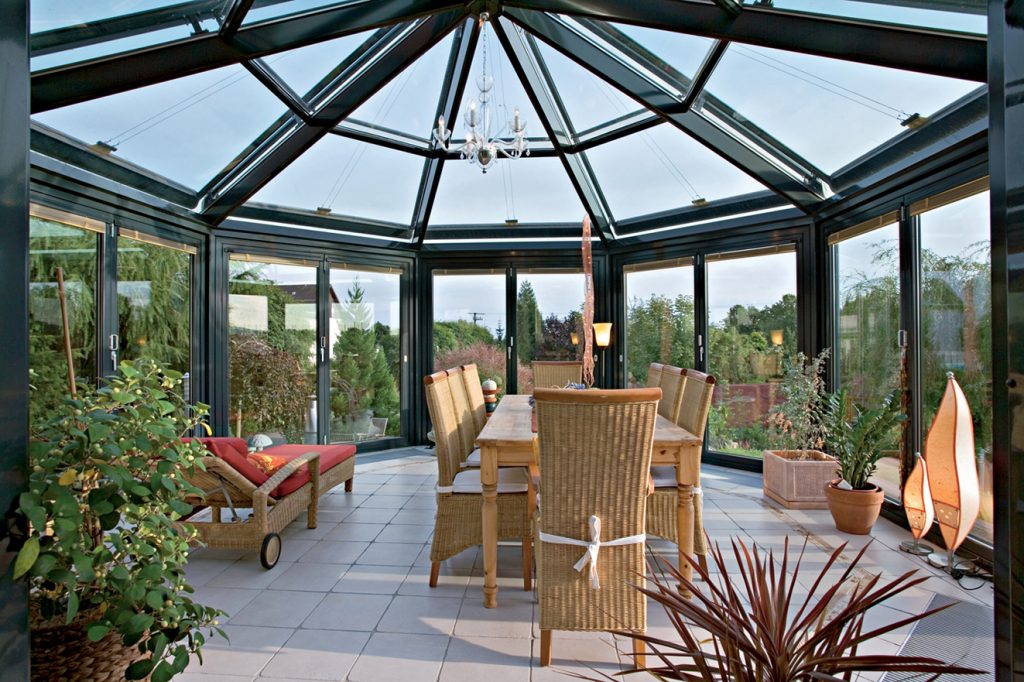
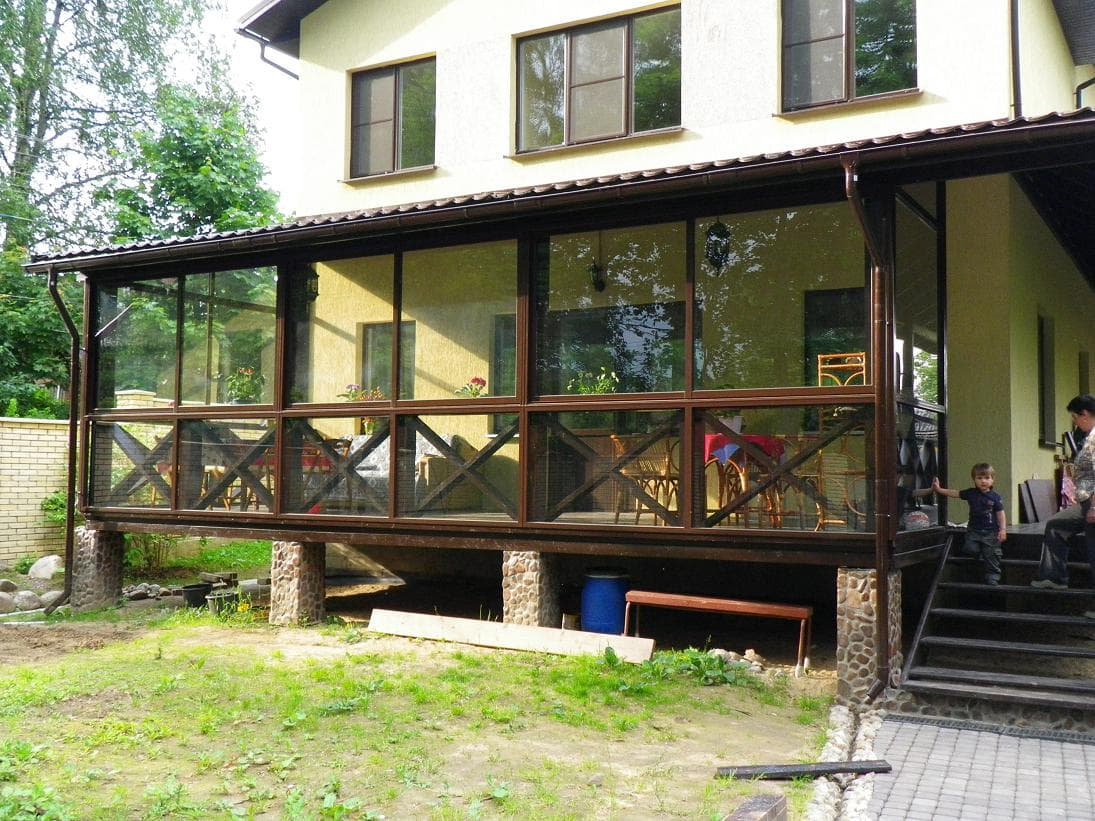
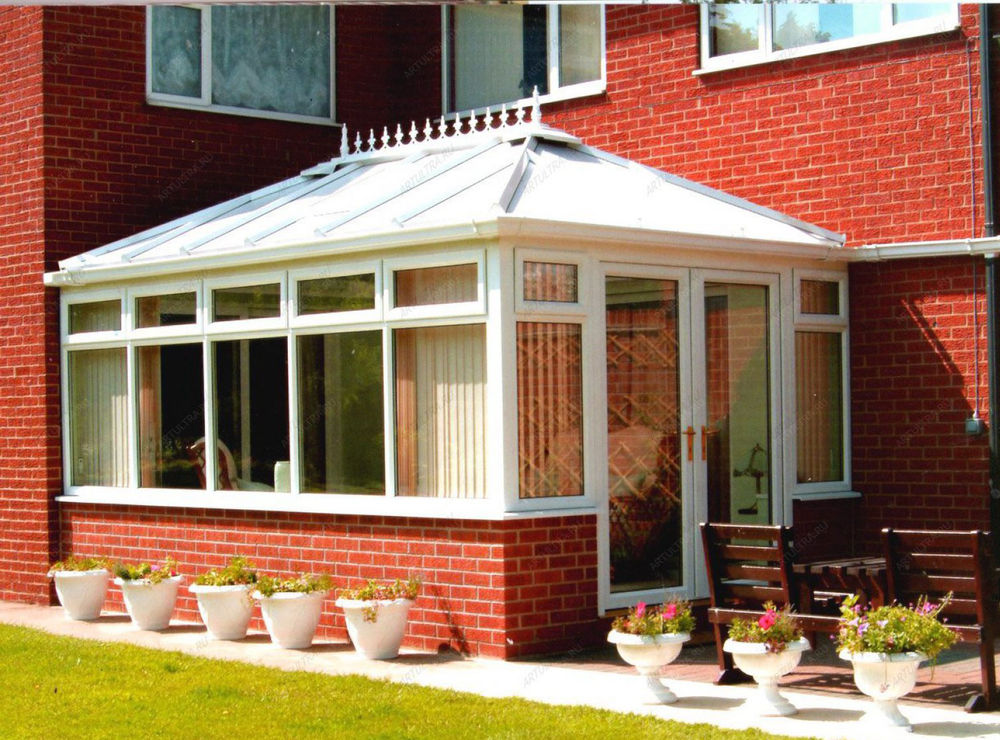
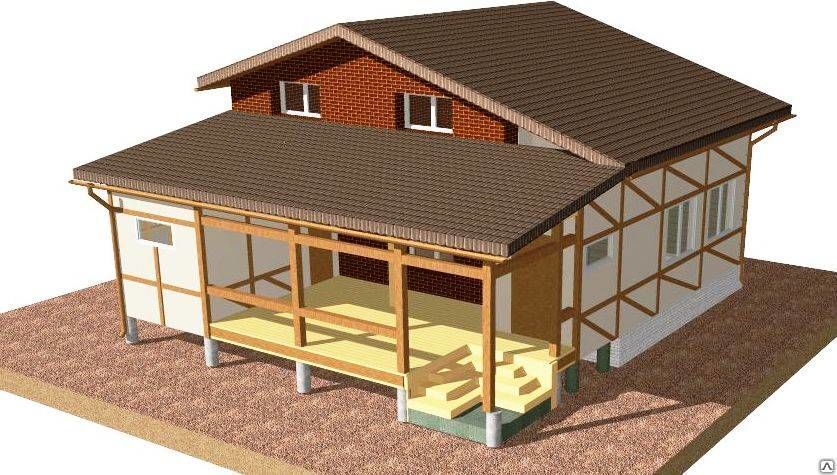
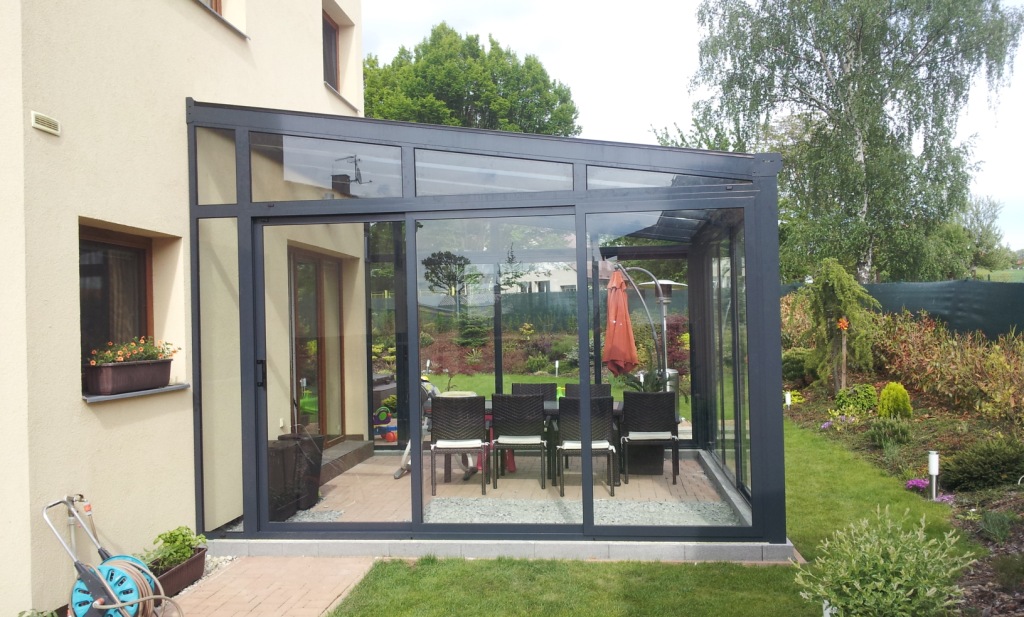
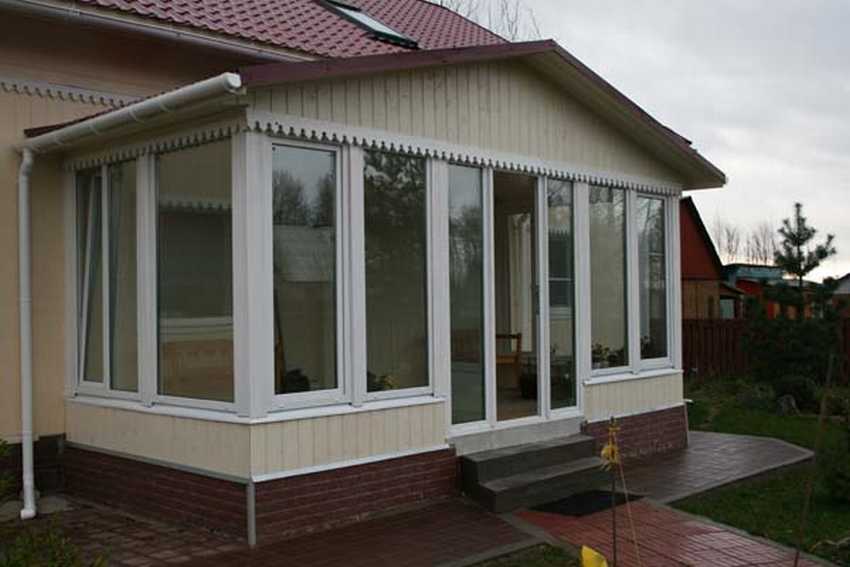
Before developing a project, it will be necessary to determine several provisions, the first of which is the location of the veranda relative to a private house. So, veranda can be corner, front or front. Corner covers two adjacent walls. Typically, such extensions make large, roomy, combining several functional areas at once (for example, a kitchen and a living room).
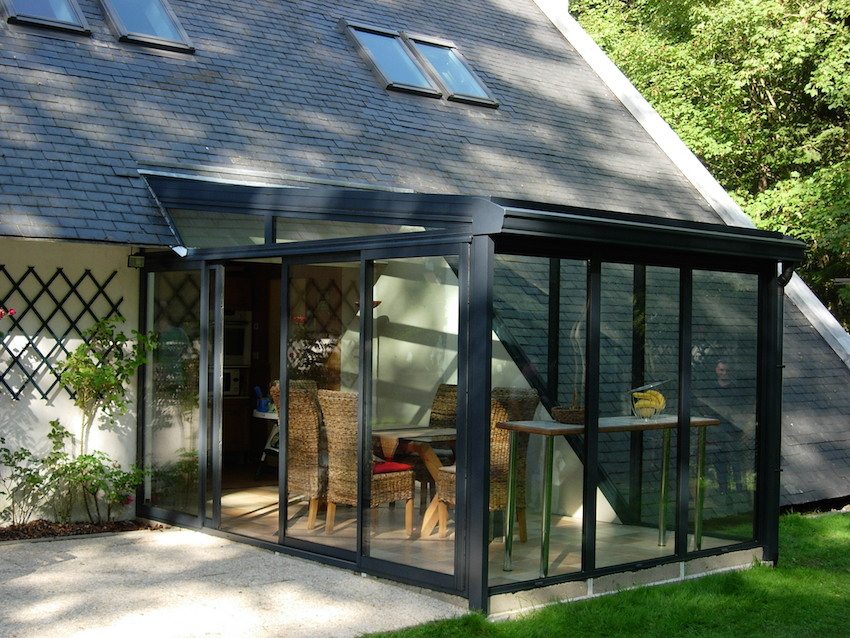
The facade is attached, respectively, from the front side of the house, having the wide porch facing the wall of the building. Such extensions are the most popular.

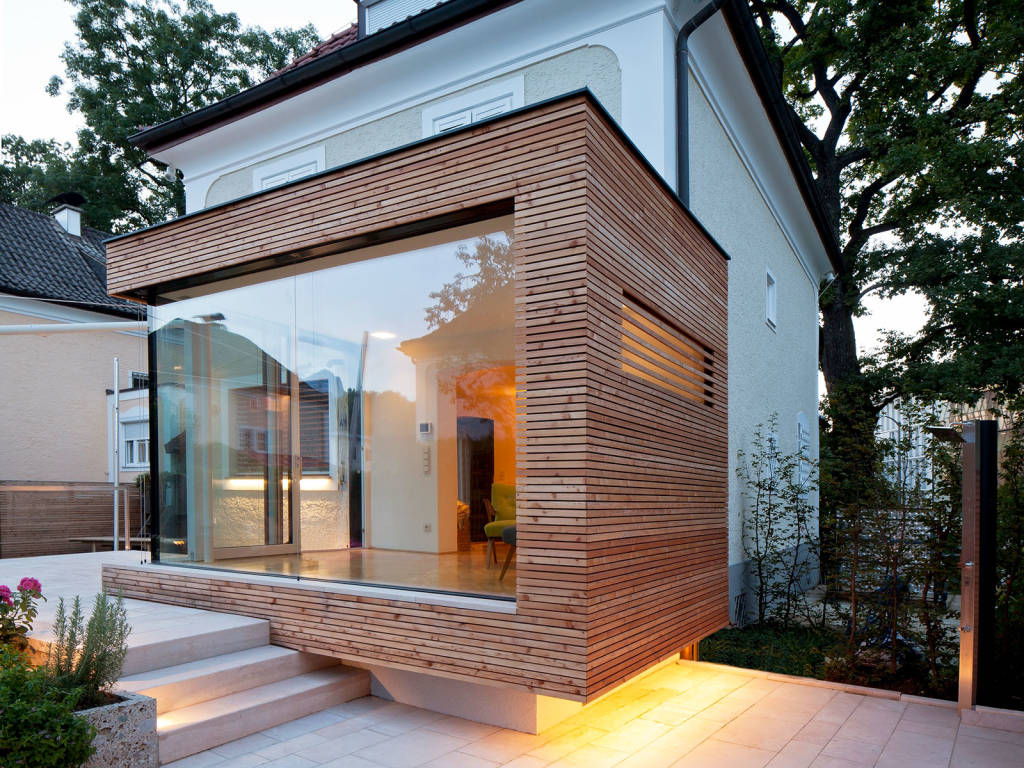
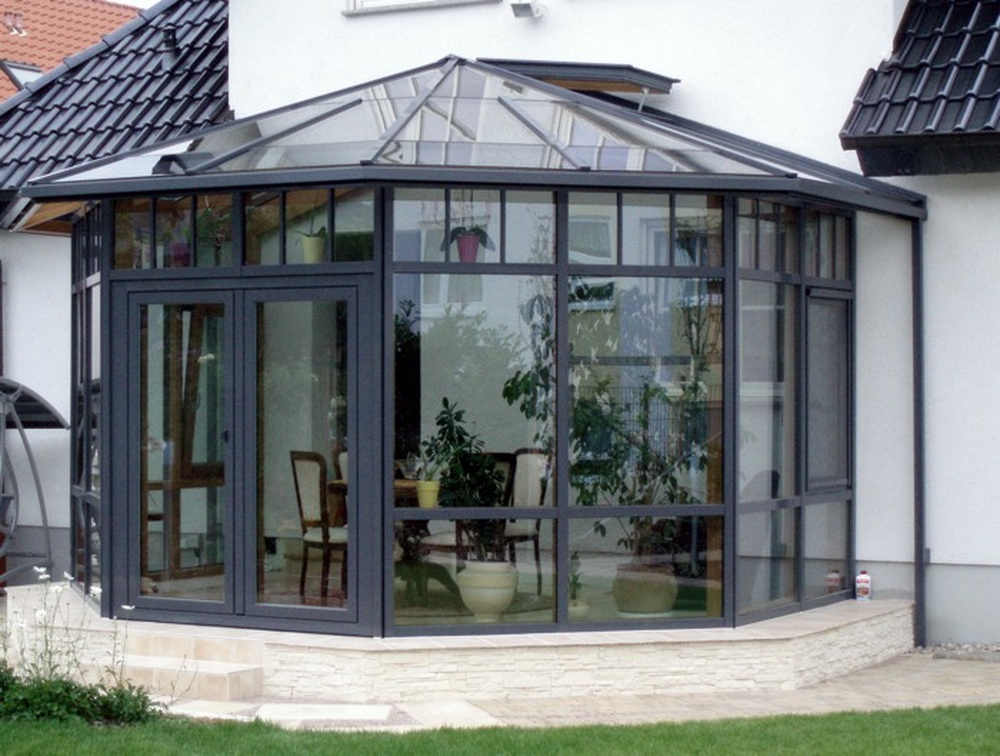
The end option is of the most interest because it is least common.. Here the veranda is adjacent to the wall of the house with a narrow side - butt, and it turns out that it seems to be given out, giving the house an intricate architectural look. The extension does not capture the entire wall, as often happens with the facade.
End options are often built under the winter gardens and greenhouses to ensure maximum light access to the plants.

Having decided on how the extension will be located relative to the house, they proceed to the definition of the form. The most common are rectangular, round or semicircular and polygonal variants. The easiest to erect is a rectangle.. There is no need to have any specific knowledge to properly make the foundation or build walls.
Polygonal variation (often a six or octagon) also does not require muchbecause it consists of straight edges, but the semicircular and round verandas are the hardest to do. It is necessary to carry out specific calculations, correctly select the load on the foundation, not to mention the fact that the construction work itself will take more time and require additional efforts.

The choice of structural features is not available here, since the verandas are of only two types: built-in and attached. Since the built-in version is planned at the stage of drawing up a drawing at home, it automatically disappears.
It is more difficult to cope with the attached veranda, however, it also has its advantages. For example, during the construction of a house, its construction can be abandoned by completing the construction later, when finances allow. It is necessary to approach the drafting of the project with full responsibility, since in the future not only the beauty and convenience of the attached structure, but also the legality of its equipment on the site will depend on it.
Training
The first stage of preparation is the execution of a building permit. It must be obtained before all work is carried out.
For this you will need the following documents:
- existing design drawing of a house;
- designed veranda project;
- a certificate that you are the owner of a residential building and a plot;
- statement that you want to rebuild the house.


After the project is approved, the layout of the veranda, its dimensions can not be changed.Any changes must be recorded, and this requires re-submission of documents for further approval. Such negligence can be fraught with several years of litigation during which you will not be able to complete construction.
After all the documents have been prepared and permission has been received, it will be necessary to proceed to the preparation of the site. First of all, it is necessary to completely clean it from debris. Also get ready for the fact that you have to get rid of all the green spaces: grass, trees, flowers, and also remove some of the sod. Prepare the facade, getting rid of the visor and porch.
If a balcony on the second floor is organized right above the entrance, you will have to think about how to competently use it as part of the roof structure of the future extension.
Next, go to the pouring of the foundation. It belongs to the preparatory work, because in the future you will have the right to choose what to build here - a terrace or a veranda.
The foundation device can be any, but most often choose the tape or pile options, each of which has its own advantages. In contrast to the pile, the tape option will allow you to further warm the floor.
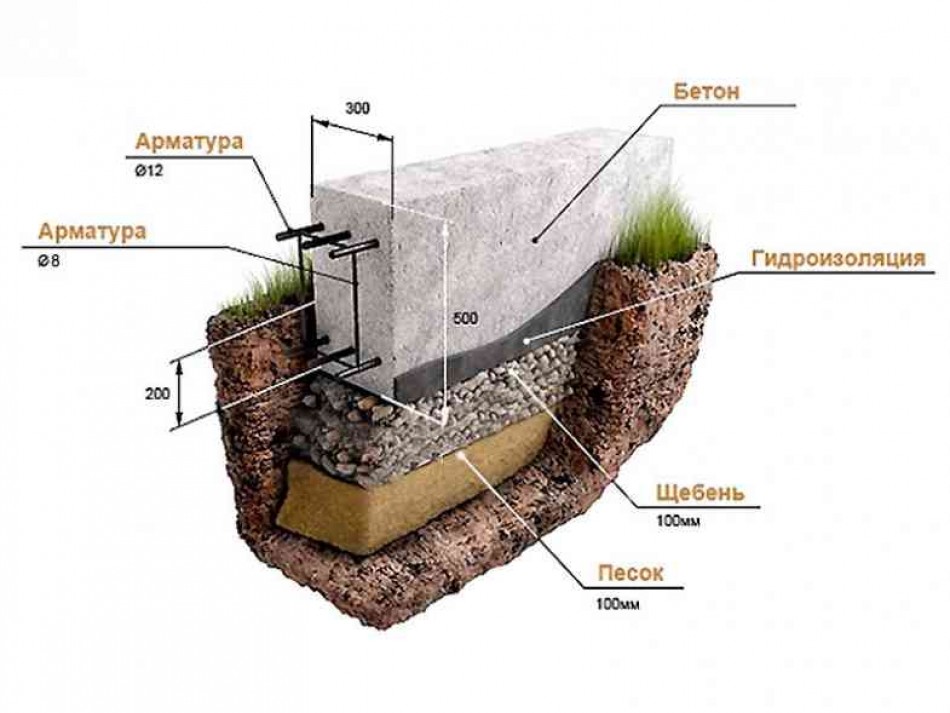
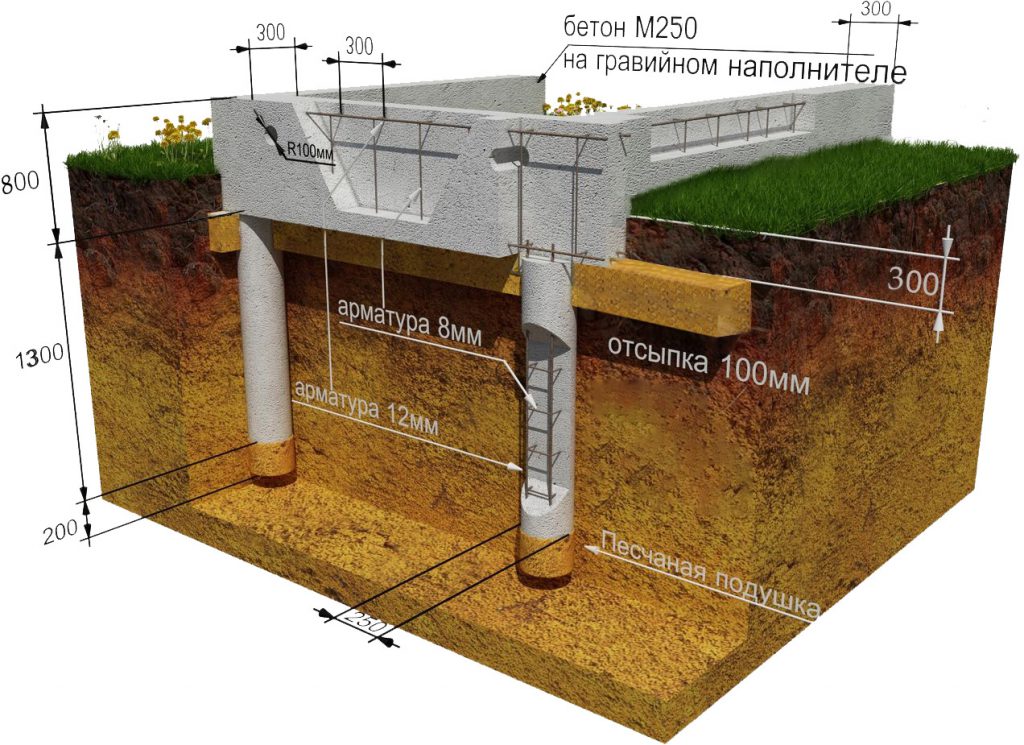
So, a tape base is made as follows:
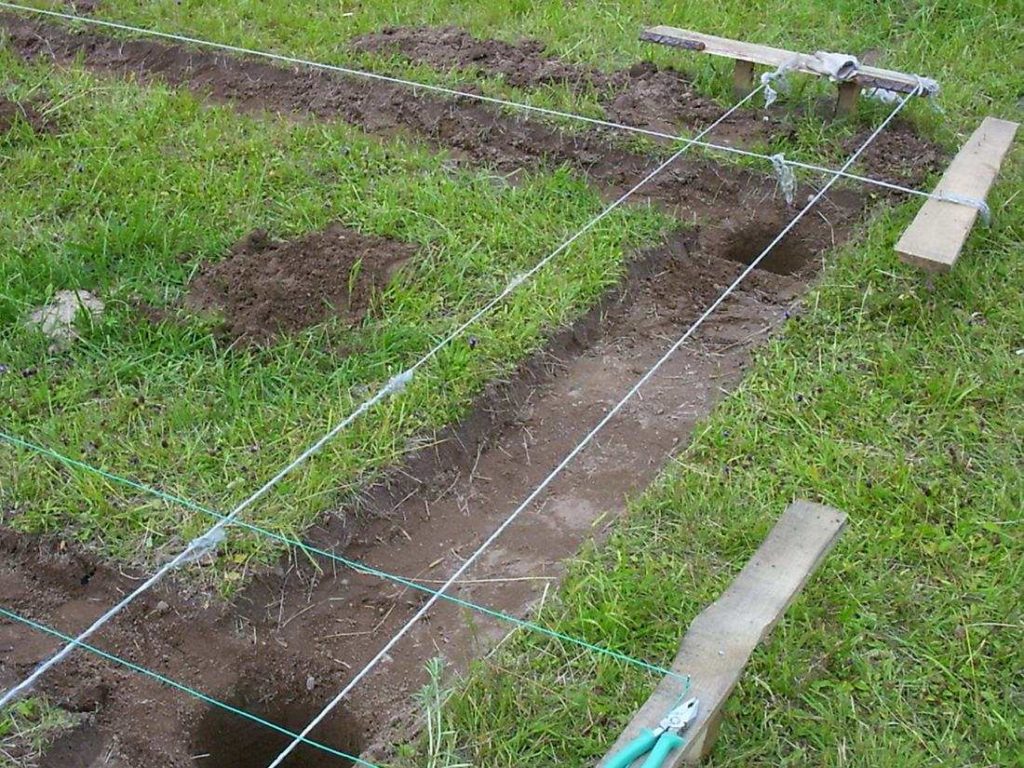
- Knowing the design size of the veranda, it is necessary to mark the site in accordance with the plan. This can be done with stakes at the corners of the future extension and the rope stretched between them.
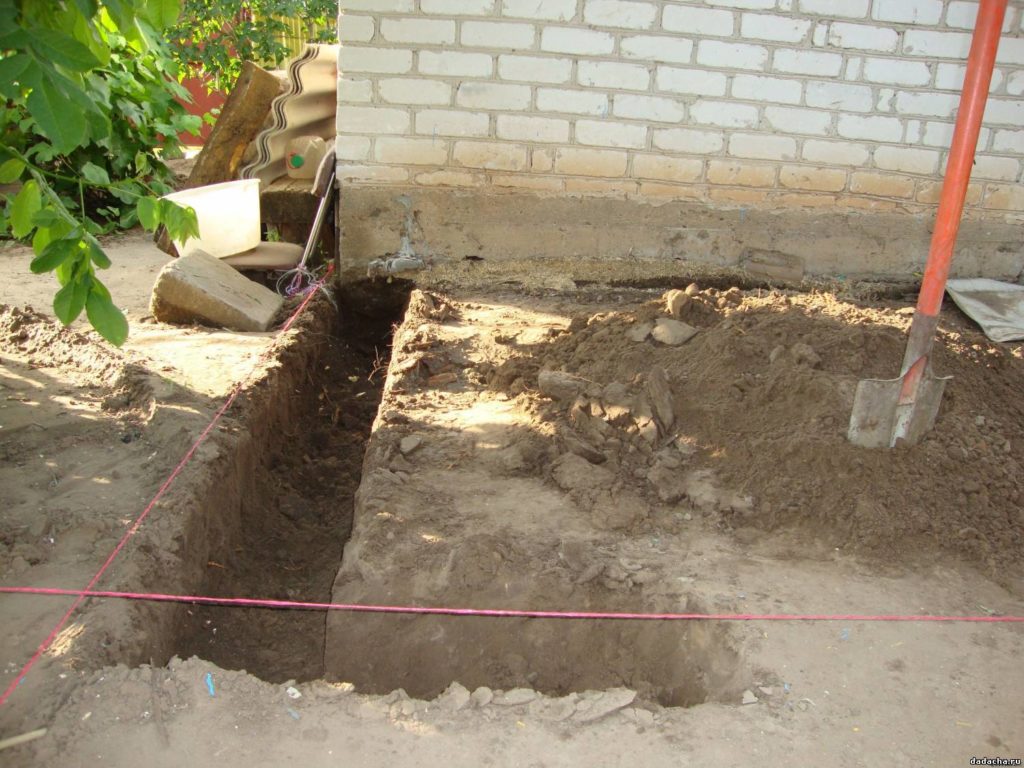
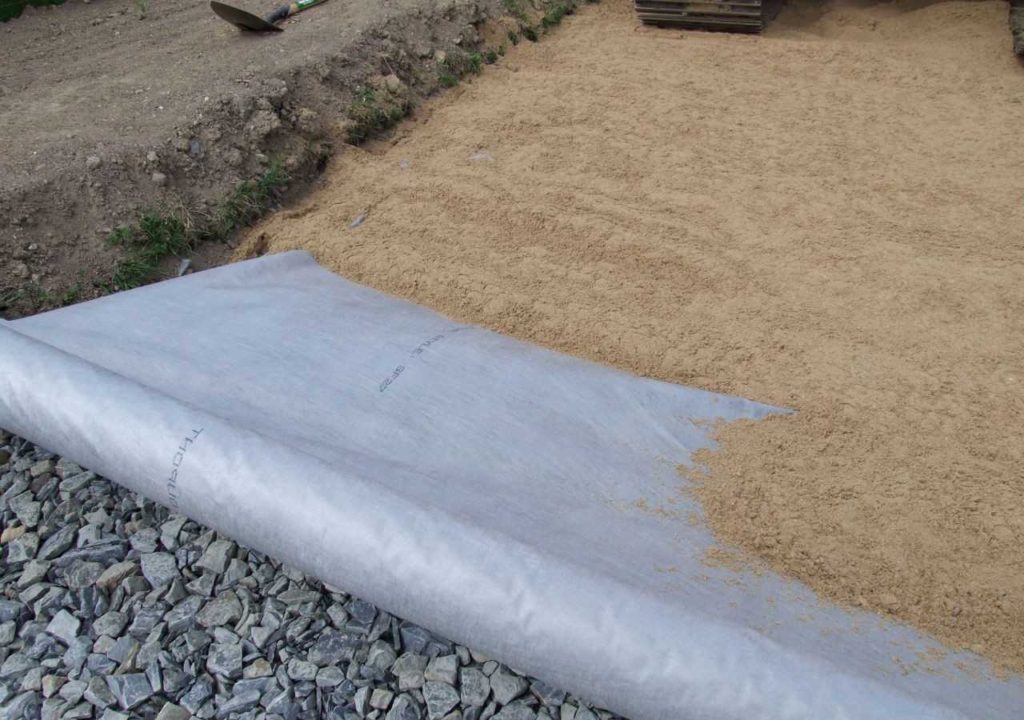
- Next you need to dig a trench around the perimeter of the markup. Its width should be about 50 cm, and the depth - the same as the height of the foundation of the house. If you can not find out the height of the base of the house, then pay attention to the type of soil. Depending on how he is heaving, the trench may be 1-2 m deep.
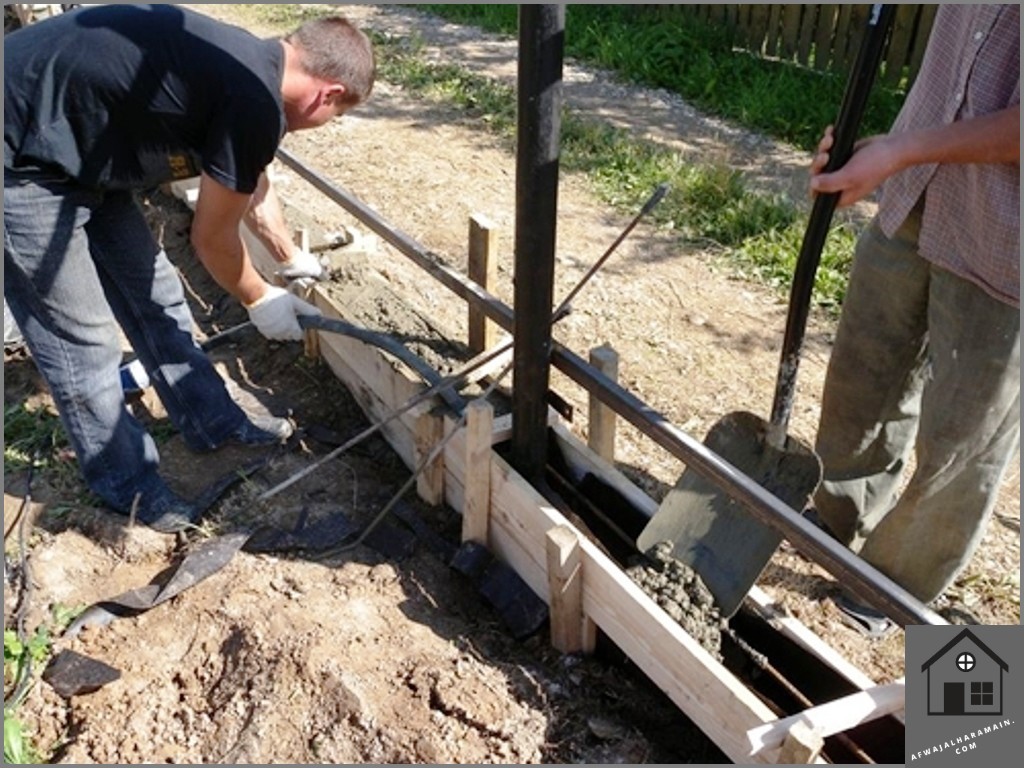
- Take wide boards for formwork, knock a box out of them a little wider than a trench. The height of the formwork should be equal to the height of the finished foundation, like at home. Install the formwork.
- Strengthen the bottom of the ground with a pillow of sand and gravel, carefully pouring it with water. Make a few layers, alternately pouring the river sand, then gravel, each time pouring water.
- Install the reinforcement so that it is 10 cm from the trench walls and 1.5 cm above the ground.

- To prevent the cement mortar from flowing out of the box, cover the formwork walls with roofing felt.
- Next, pour the concrete solution.Carefully level him with a shovel until he grabs so that the foundation is as smooth as possible. Leave to dry for 30 days, previously covered with plastic wrap to protect against precipitation.

Instructions for the manufacture of pile foundation (it is also called columnar) is as follows:
- The markup is produced in the same way as for strip foundations.
- Next, dig pits with a depth of 1.5-2 m, depending on how heaving soil. The width should be 10-15 cm in diameter greater than the diameter of the pillars.
- The bottom of the pit is strengthened with a gravel-sand pillow.
- Piles are installed and poured concrete. If they are hollow inside, then you need to fill them. To do this, crushed stone, gravel, slag.
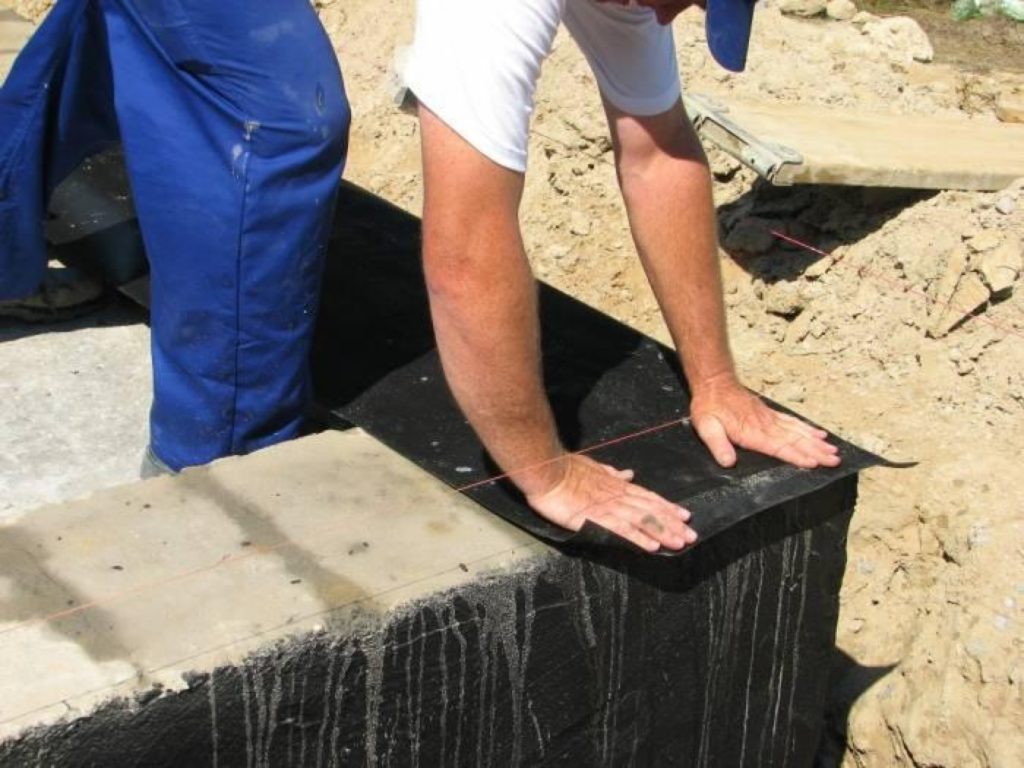
- After the construction dries, make waterproofing hot bitumen. She just poured them.

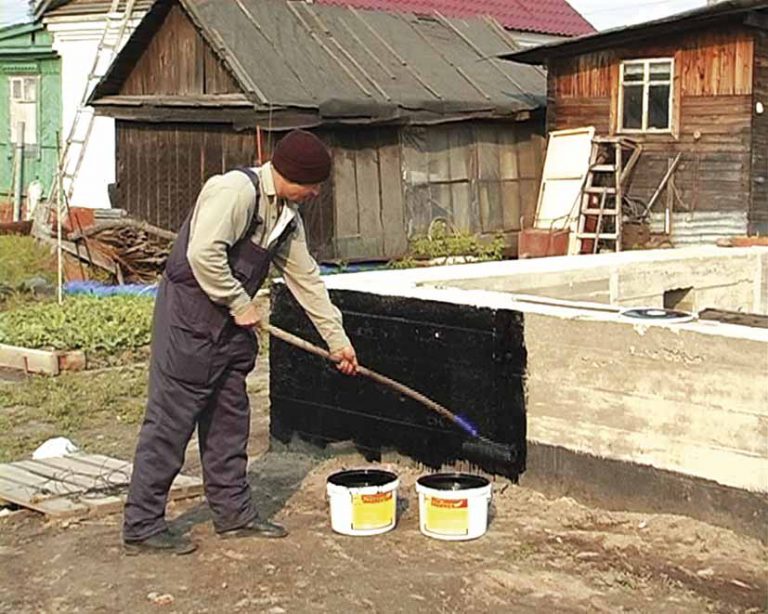
After the foundation is made, you can proceed directly to the construction of the veranda.
How to build your own hands: a step by step description
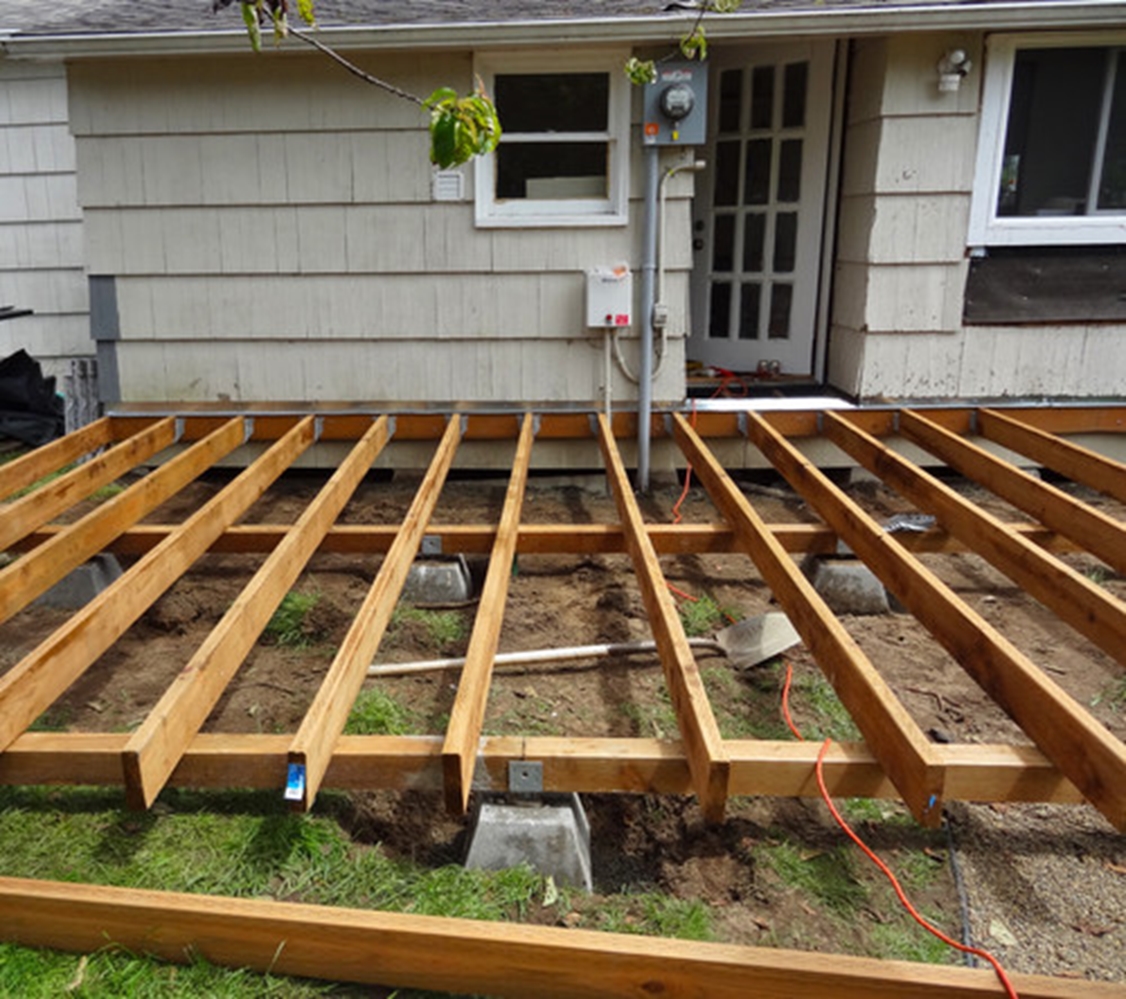
The construction of the veranda begins with the creation of a subfloor, which must be equipped immediately after the foundation has been completed. To begin, treat the base with roofing paper, laying it in two layers.Keep in mind that you will need to choose which floor to install: from wood or from concrete.
For light wooden construction or on a timber frame, wooden floors are suitable, while for a more solid brick extension it is better to choose concrete.
Draft wood floor can be done by yourself, if you follow the step-by-step instructions:
- To begin with, attach the bottom rail as a beam to the foundation with anchors or bolts. To fasten the bars together, use galvanized nails.
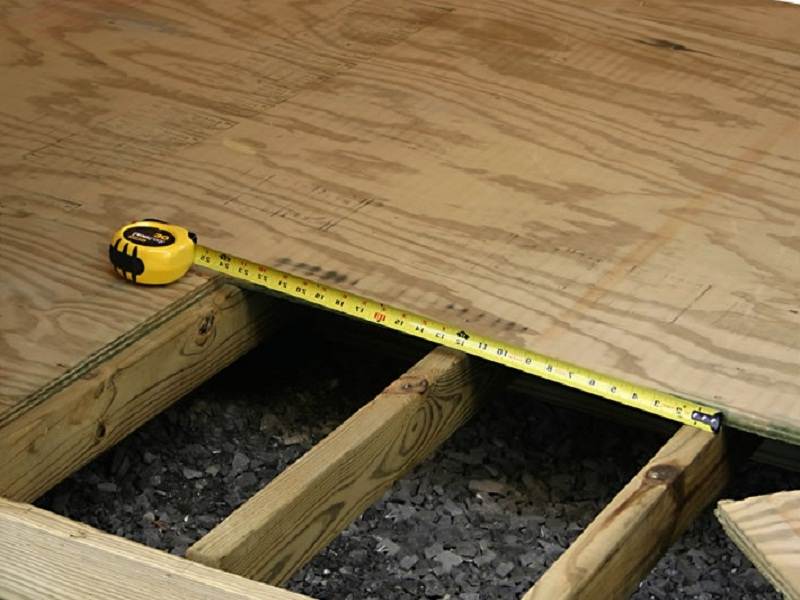
- Next, you need to mount wooden lags to the bottom trim. The distance between them should be 50 cm. Such a step will ensure sufficient reliability of the floor construction. For fastening use anchors and galvanized nails, as well as when attaching the bottom trim.
- Warm up the floor, having filled clay in the cavity between the lags.
- Do the flooring. To do this, use a thick plywood from 5 mm, attaching the plates with self-tapping screws or galvanized nails to the floor.

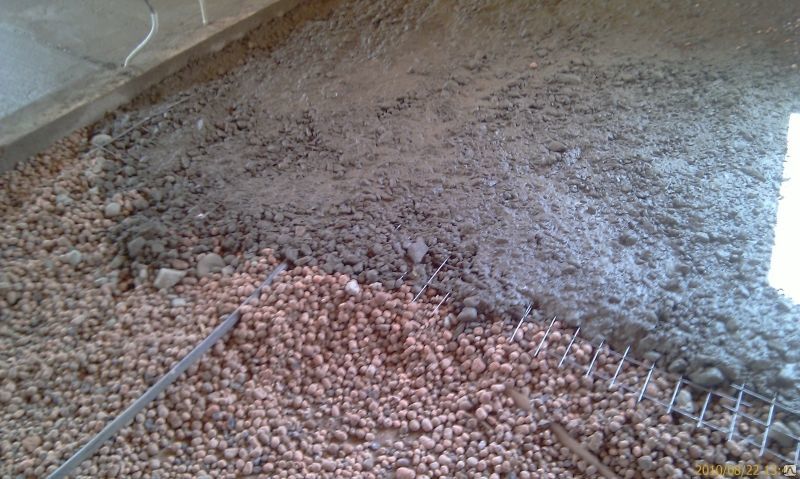
To make a concrete option, use the following method:
- Spread sand on the roofing material with a layer of 10 cm.
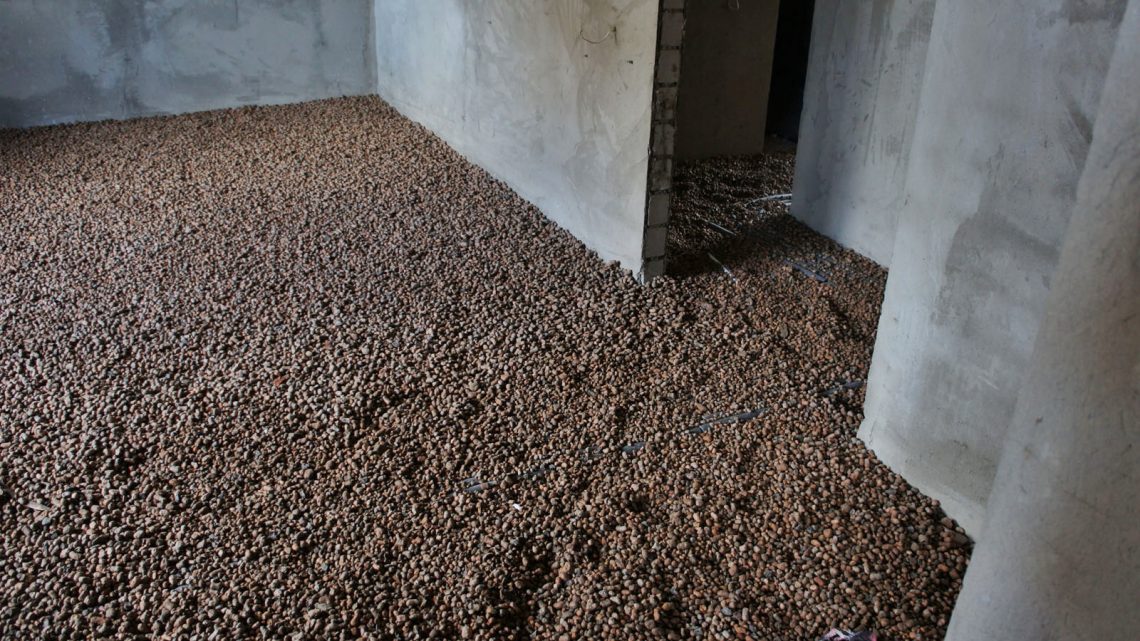
- Cover the sand on top with a layer of expanded clay.
- Lay the metal mesh (reinforcing). The diameter of the cross-section of the rods should be from 6 to 8 mm, and the cell area - 25x25 cm.
- Fill with concrete, the thickness of which should be 30-50 mm. To make the layer as even as possible, use the beacons, setting them at a distance of 2-4 m from each other. Be sure to use a level to check the evenness.
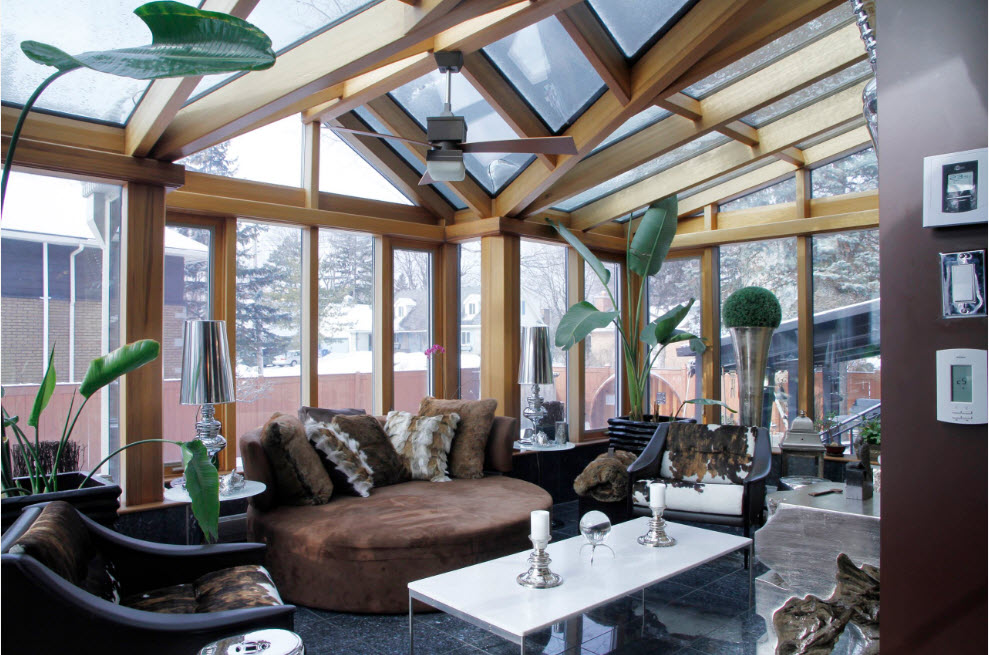
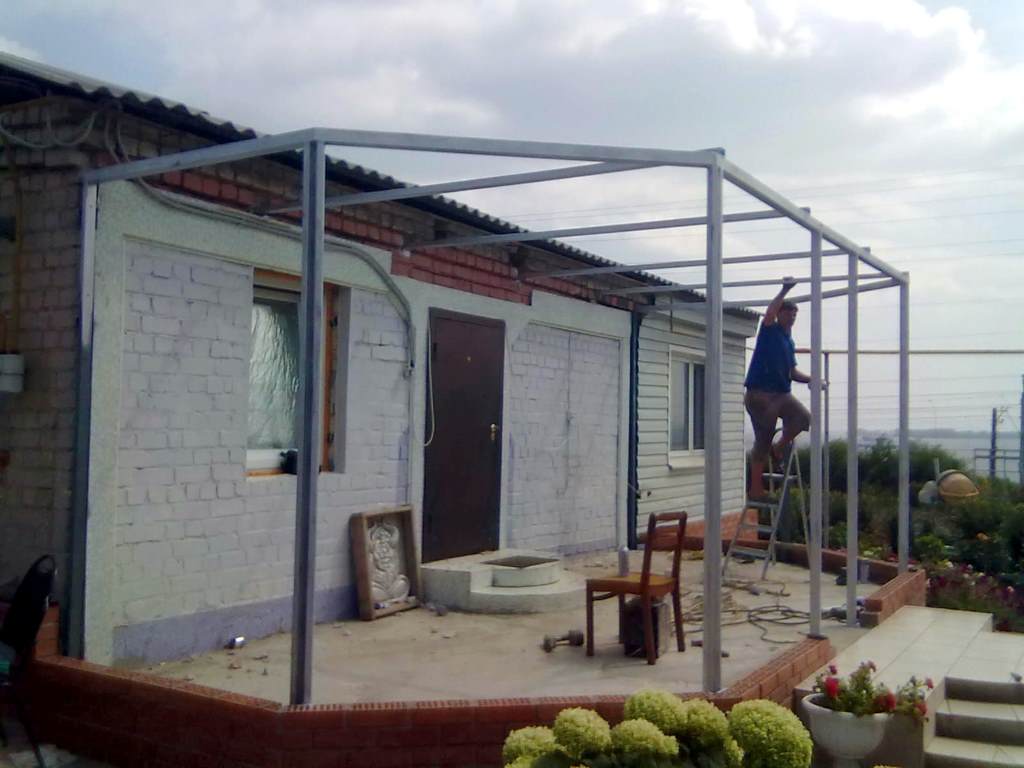
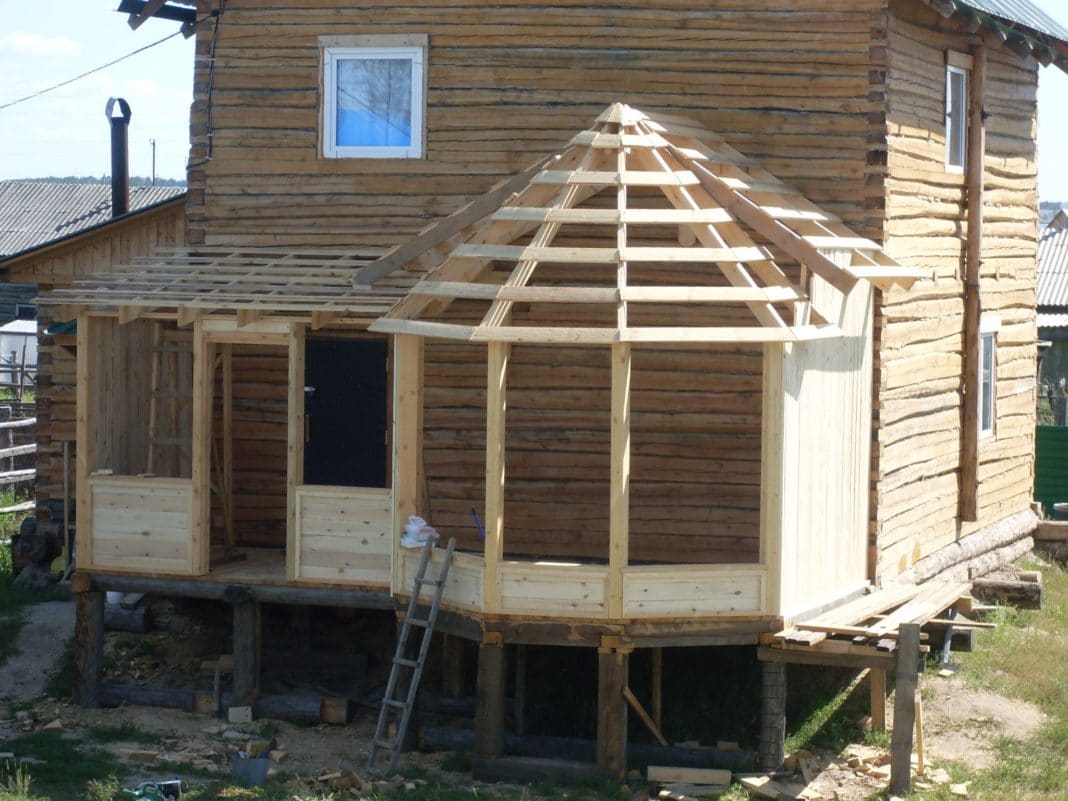
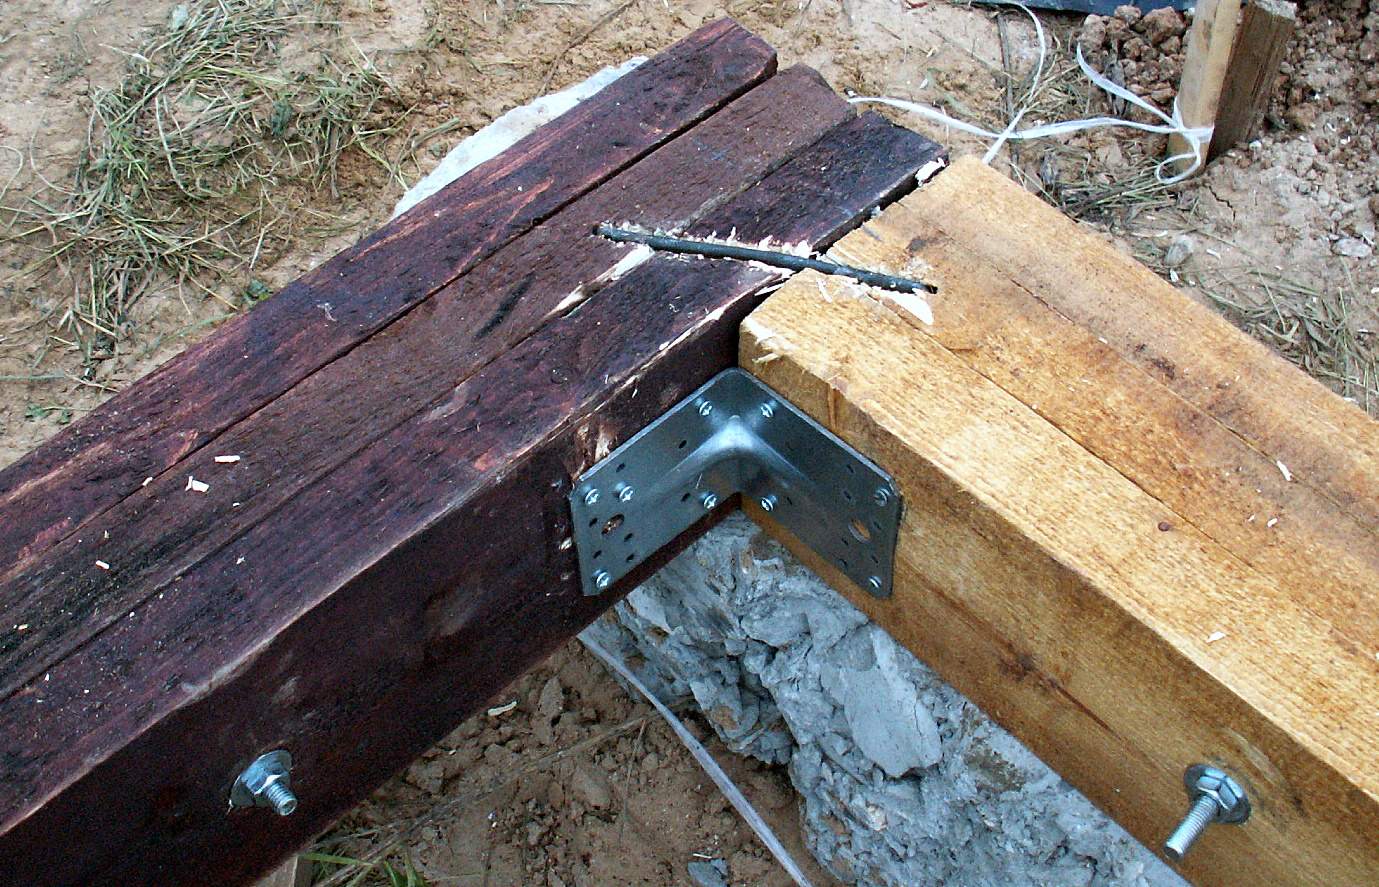
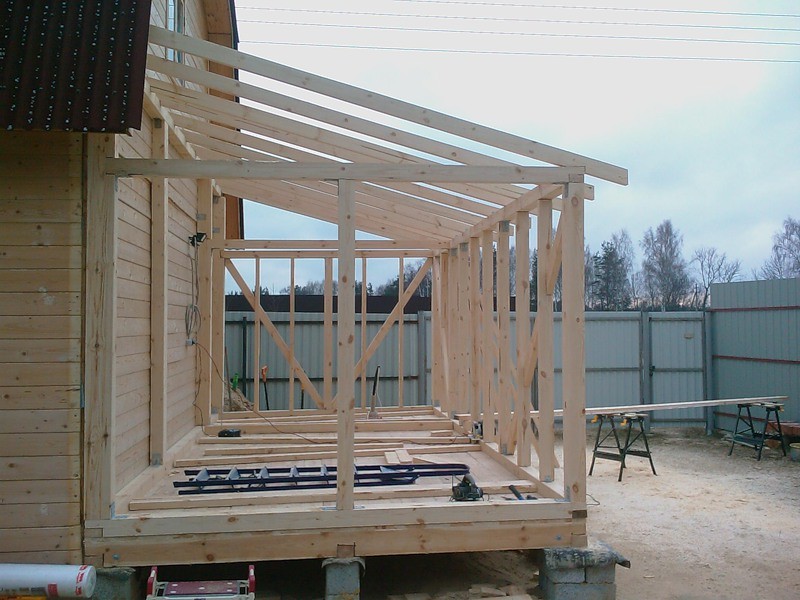
Next, go to the construction of the frame. It will be the same for both warmed and unheated verandas.. The same goes for the roof, except for the fact that for the winter terrace it will need to be further warmed.
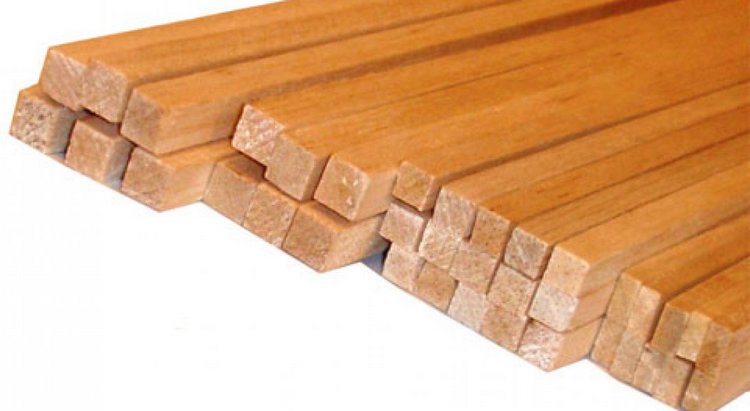
The frame can be from almost any material, however most commonly used wood. To create a batten, a timber with a section of 10x10 cm is suitable.
Cut in grooves at the base of the special grooves, which will be installed in the future vertical columns. Install the verticals using brackets (the decision to combine the installation into grooves and brackets ensures maximum reliability of the frame structure).

Install the top trim bar in the same way in the grooves, thereby creating a low trim. It should be borne in mind that on attached verandas they usually make one slope below the other.therefore, the vertical supports on the opposite side of the adjacent wall should be 50 cm lower.
To make the upper trim, you must first fasten the highest and lowest racks, and only then do the fixing intermediate.

When the top trim is ready, it is time to lay the rafters for the roof. The rafters are attached to the strapping by means of anchors, and the cross beams with longitudinal fastened with screws. The distance between the rafters should be 50 cm. This will allow the roof to further sustain the weight of the roofing material. A bar with a section of 10x20 cm is taken for rafters. Next, the frame is sheathed with a selected material (for example, plywood).
With brick options everything is much simpler. Here they immediately proceed to laying out the walls, getting a warm and durable building.
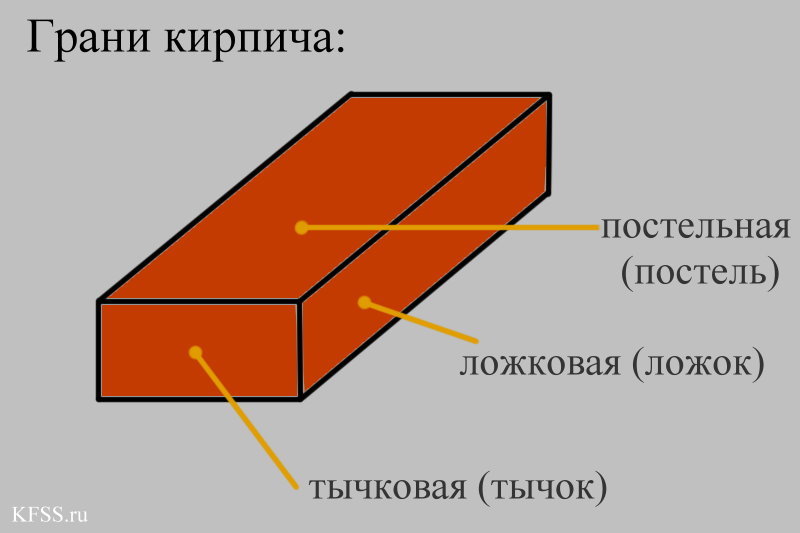
So, the following types of masonry are most suitable for independent work:
- spoon;
- tychkovaya;
- chain.
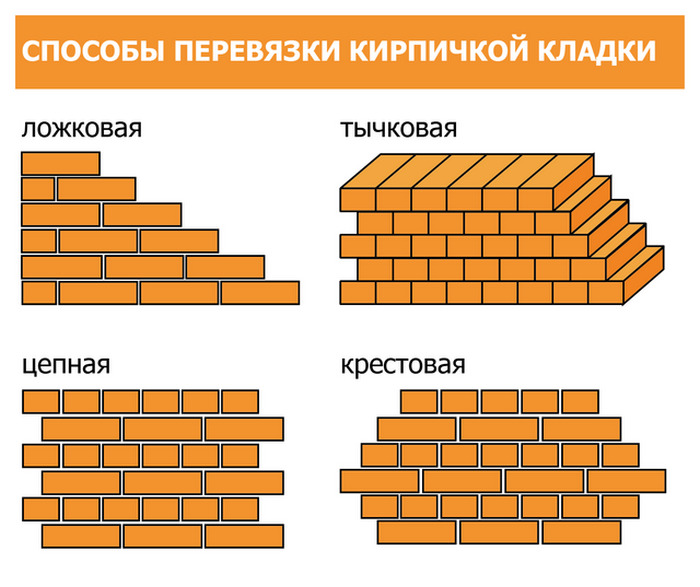
Bricks are bonded with cement mortar. While laying out, it is important to check the level of evenness of each row.: It is likely that an inexperienced master will “lead” the laying. After the solution hardens, the arrangement of the reinforced belt is carried out, the upper trim is made of wooden bars, the frame is made of wood for the roof.In this case, the trim is not necessary to perform.

Roof and ceiling are made depending on which version of the veranda is chosen: summer or winter. In the first case, the roofing flooring is placed on the rafters without heat-insulating materials, and in the second case, the insulation is first laid, and then - the roof material.

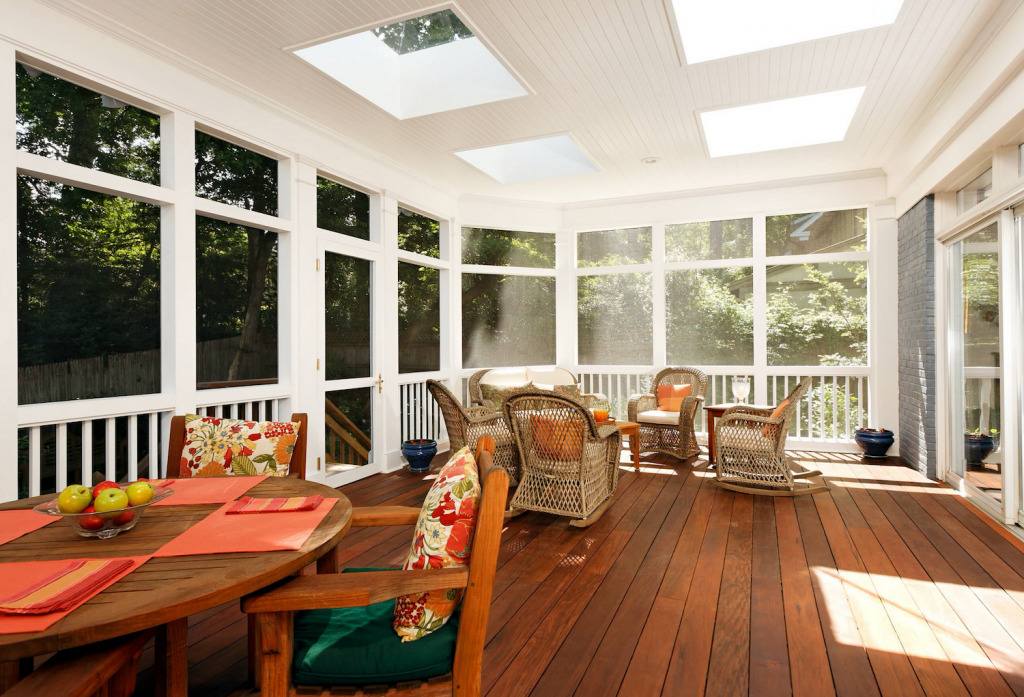
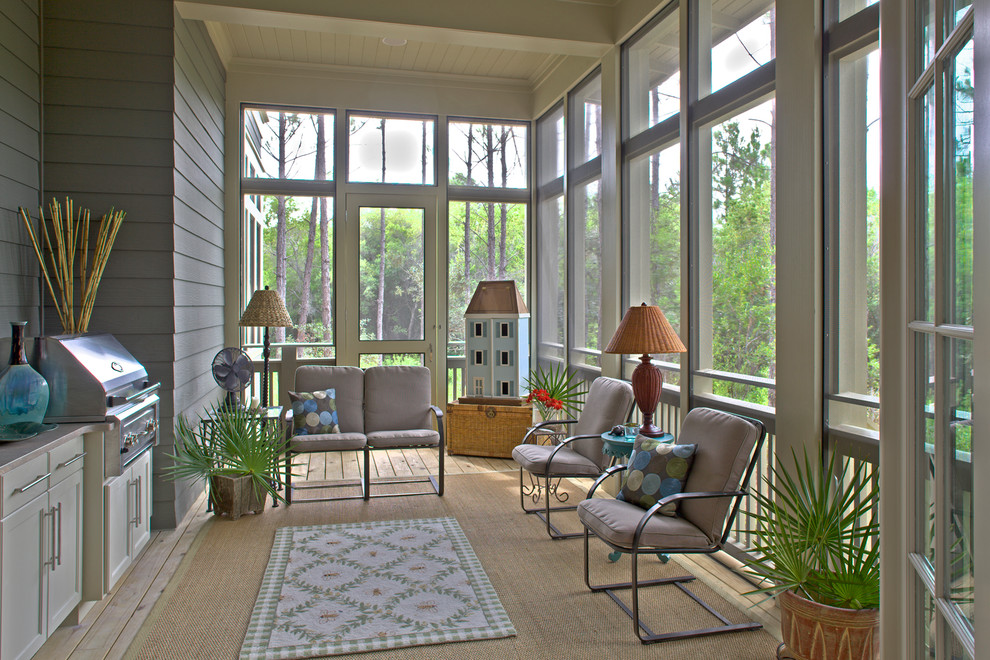
Summer
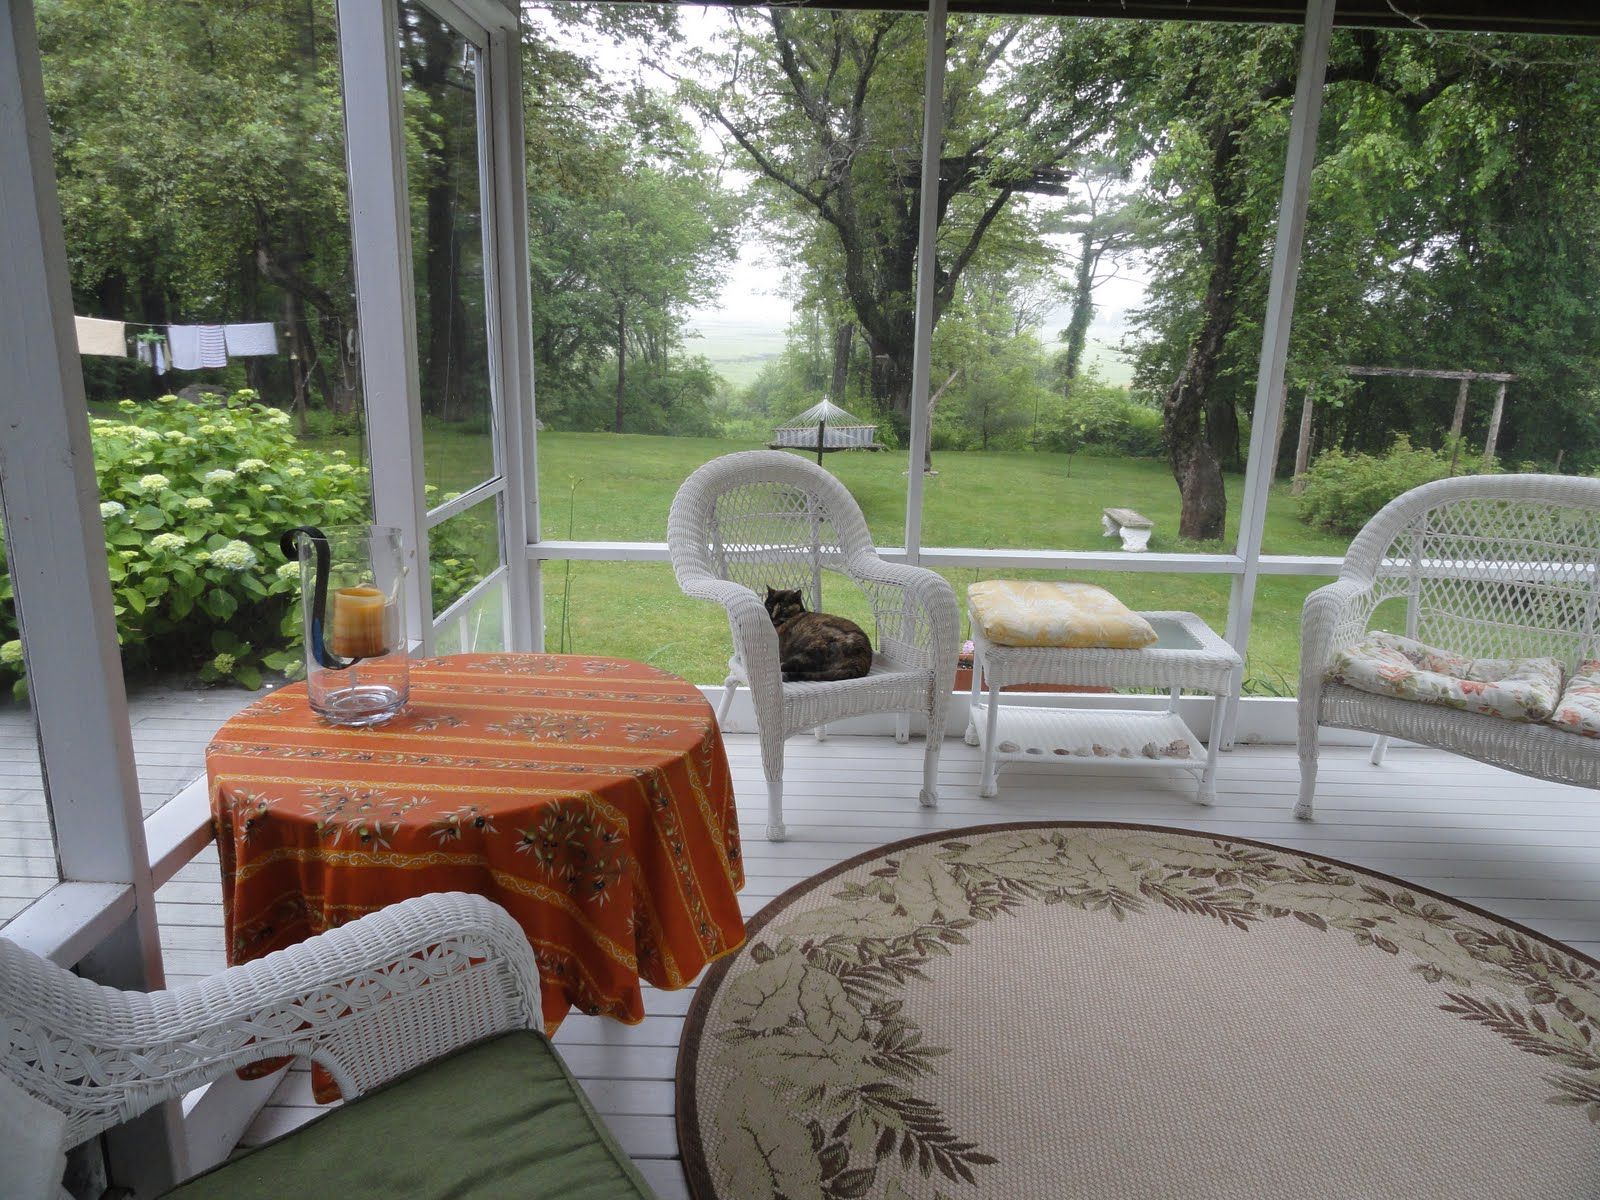
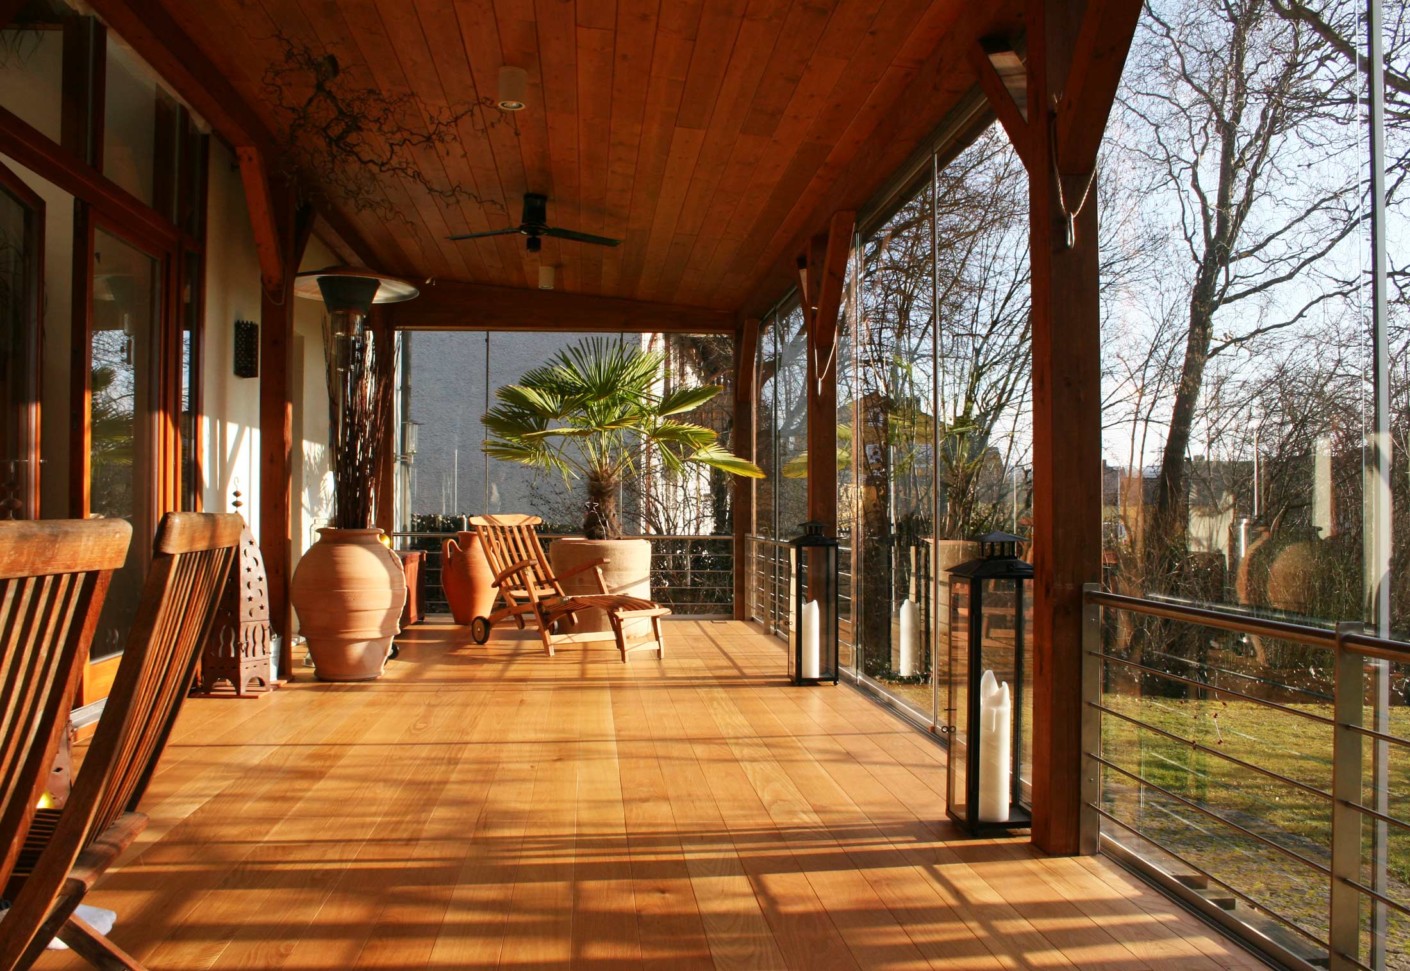
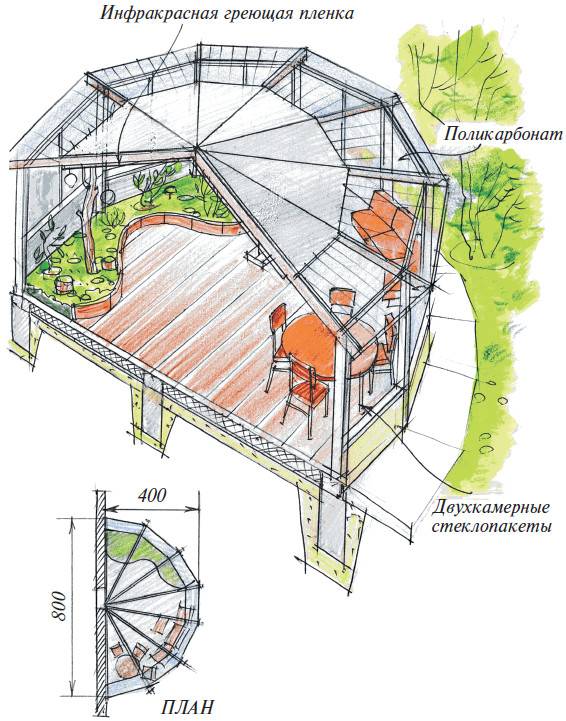
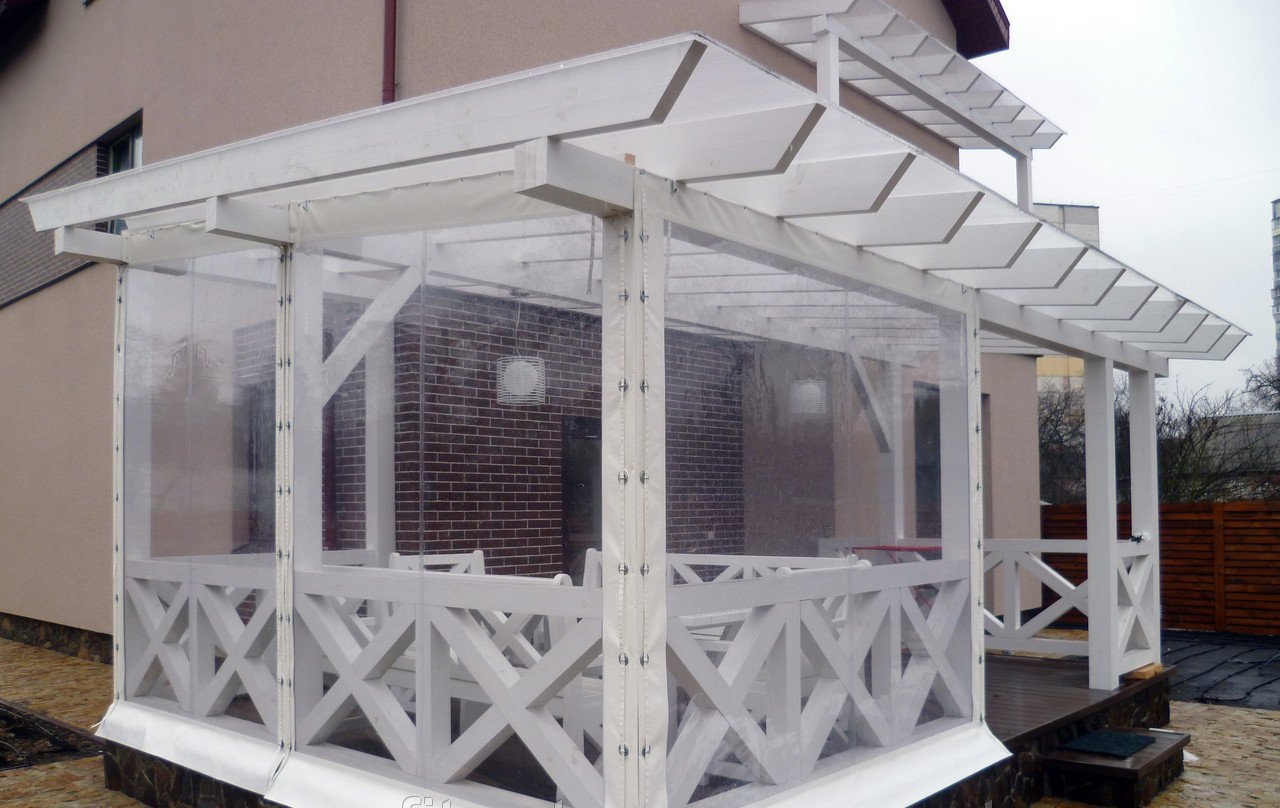
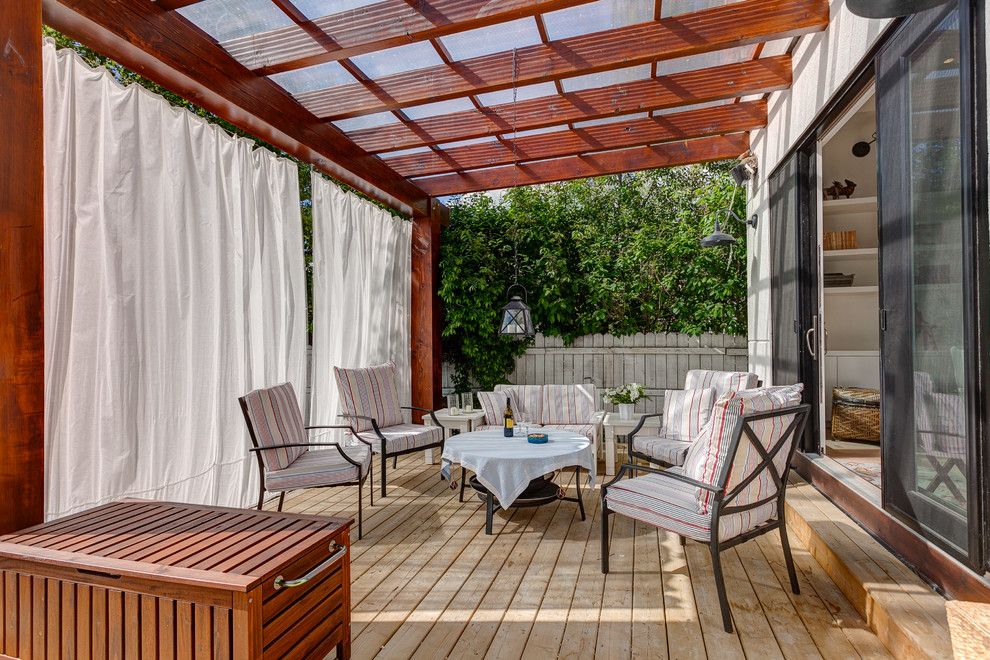
Summer terrace is different from the winter lack of insulation. If in the open terrace there is only a fence without any hint of the walls, then in the veranda, even in the summer, the walls or their likeness should certainly be. One of the options as easy as possible to organize the walls on the frame, while making them transparent - PVC film. Such original PVC windows will open the maximum visibility of the site, but at the same time they will protect well from rain and sunlight.
Additionally, flexible curtains can be provided with panels that will unfold from the inside, blocking access to light (they can be called curtains from the sun).
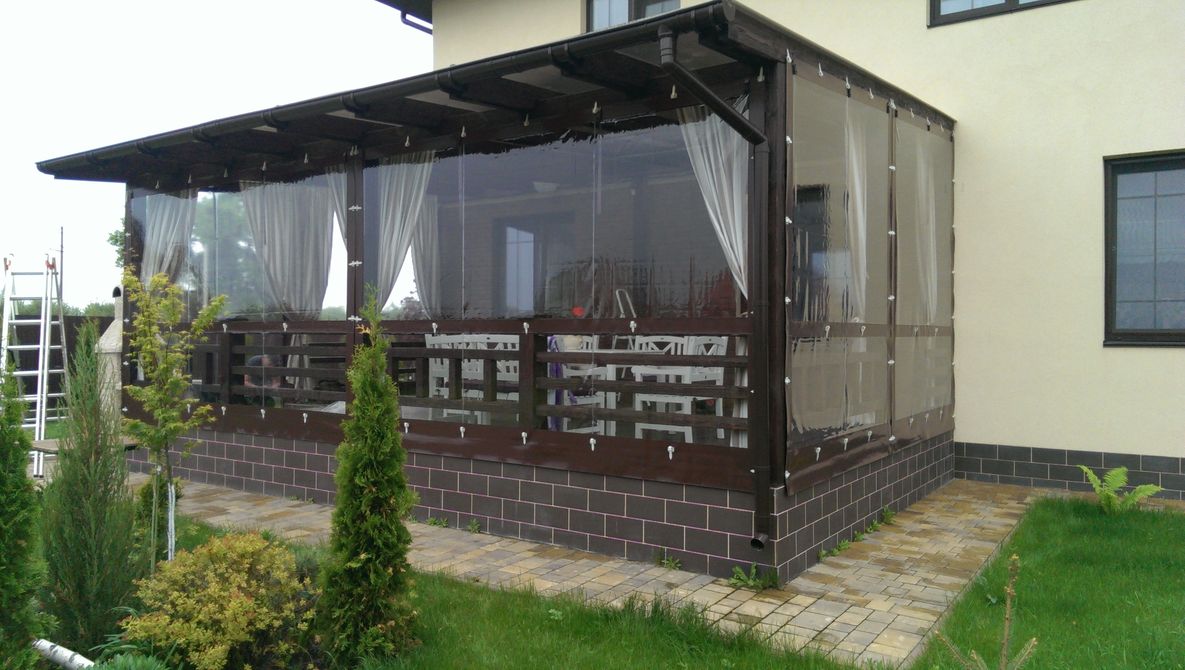
Tie the PVC film easy: it is fastened with special straps or wire, which, if desired, can be quickly dismantled. Although the variant is called summer,it provides excellent thermal insulation characteristics, which may not be very good in the summer period: the air inside is very hot, and its movement does not occur and the greenhouse effect is created.
To equip the veranda under the kitchen with a stove, when there is no adequate ventilation, such flexible curtains can not be.
Another option is plywood.. In this case, the seams are not laid with special insulating materials, but remain as is. Make only work on painting.
Even despite the full glazing of the extension, the air exchange will not be disturbed, and an optimal and comfortable microclimate will always be maintained on the veranda.

The decision to make a polycarbonate veranda (either completely or only the roof) is bold and risky. The material perfectly passes the sun's rays, but does not allow heat to go out. therefore will need to take care of the construction of high-quality ventilation systemif you want the microclimate to be optimal.
It should be borne in mind that the positive feature that the restructuring or dismantling of such a structure can be performed as soon as possible: the polycarbonate panels are fastened with ordinary screws, and to disassemble the porch, the screws will only need to be unscrewed.
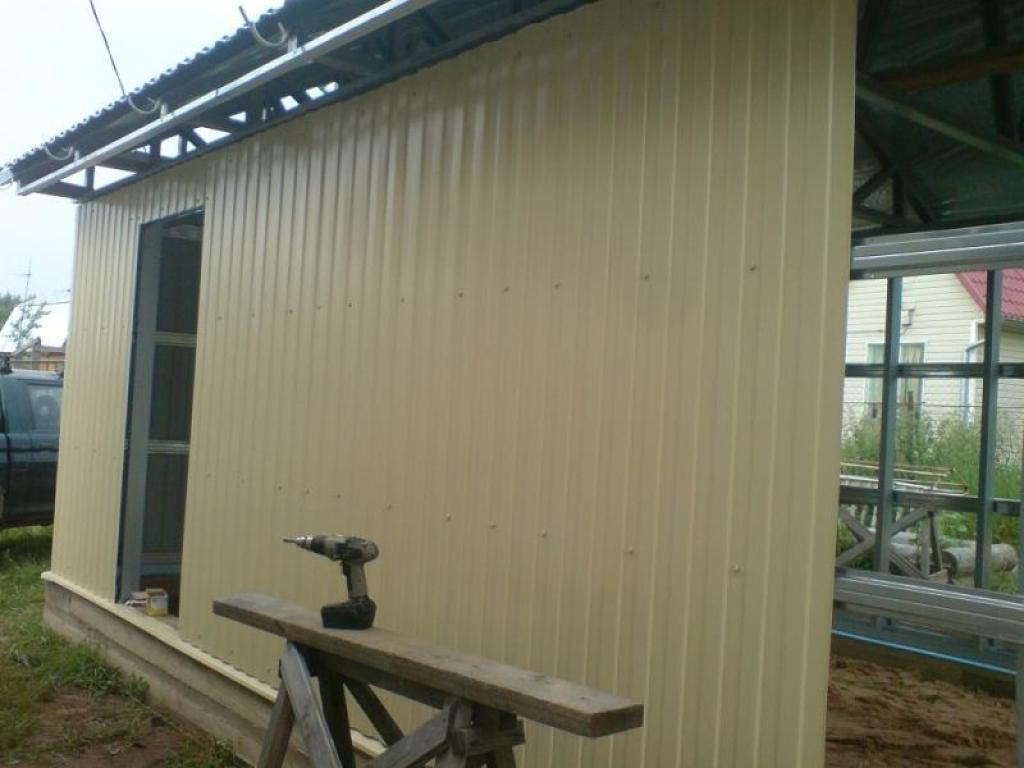
An interesting option is to make a porch from various metal structures.. For this you can use, for example, profiled. Metal verandahs look less attractive than other analogues, and besides, they are not very convenient to use: the metal heats up under the influence of sunlight, which is why the temperature in the extension significantly increases. But the metal is well protected from rain and wind.
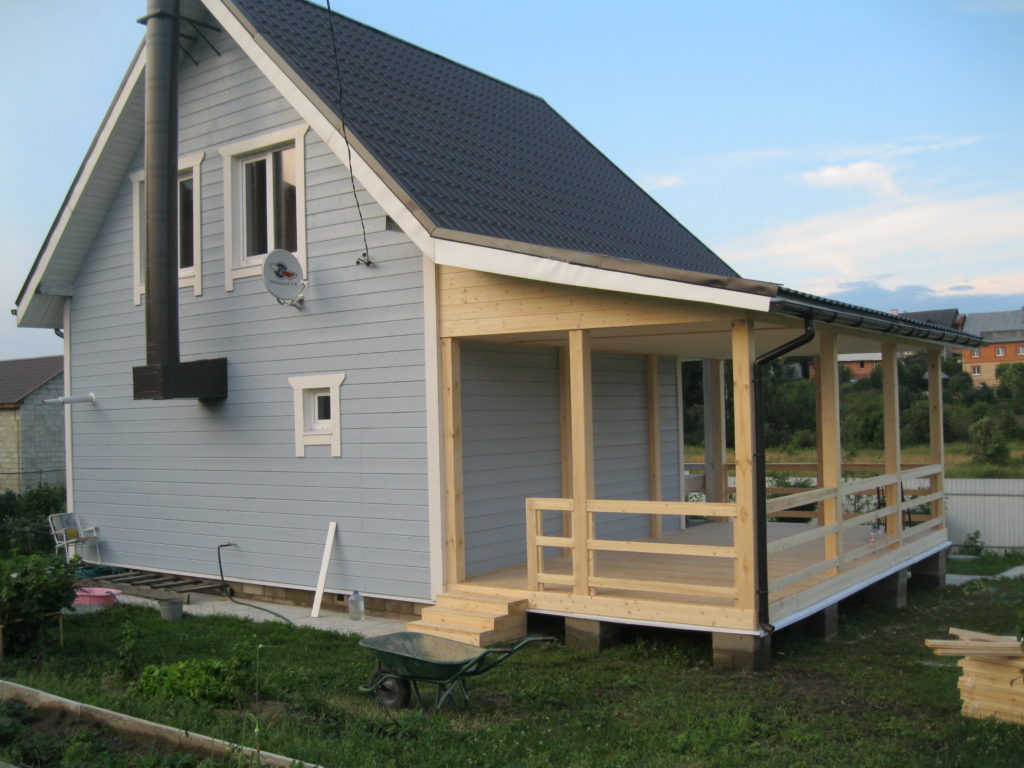
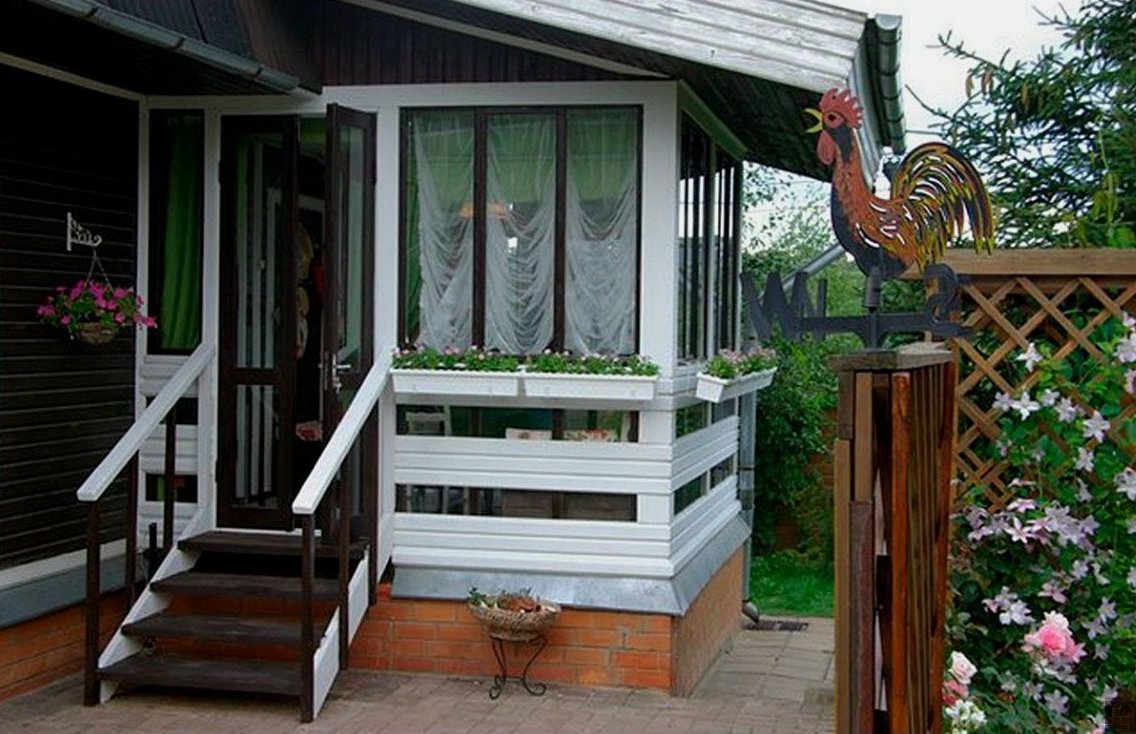
Do not forget that you will need to build a staircase and porch. Some make handrails, especially if older people live in the house. In some cases, the need for railings due to the fact that with them the porch looks stylistically more correct, harmoniously combined with the house.
On the summer verandas you can do without the door between the porch and the extension itself, hanging here only curtains of some material (for example, PVC or tulle). When making a porch from synthetic materials, such a solution will provide adequate access to air, thereby making the air exchange more intense and leveling all negative factors like the greenhouse effect or too high temperatures.
Winter
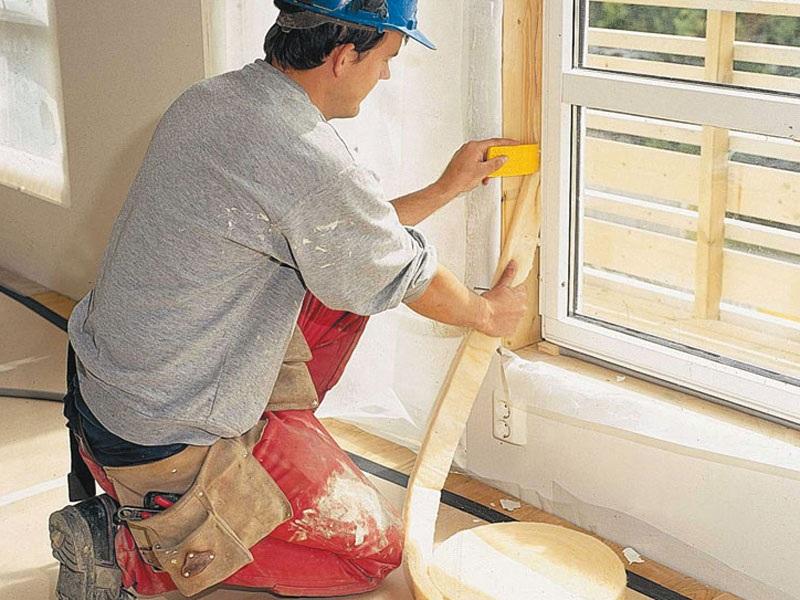
Warm extension is made a little differently than the summer covered. The first difference is the materials. So, when building a winter version, be sure to use sturdy and reliable materials: wood, brick, gas or foam blocks.
Wooden verandas are built from log or timber. The positive thing is that it is possible to insulate the wooden walls at the stage of laying the crowns. This saves time.
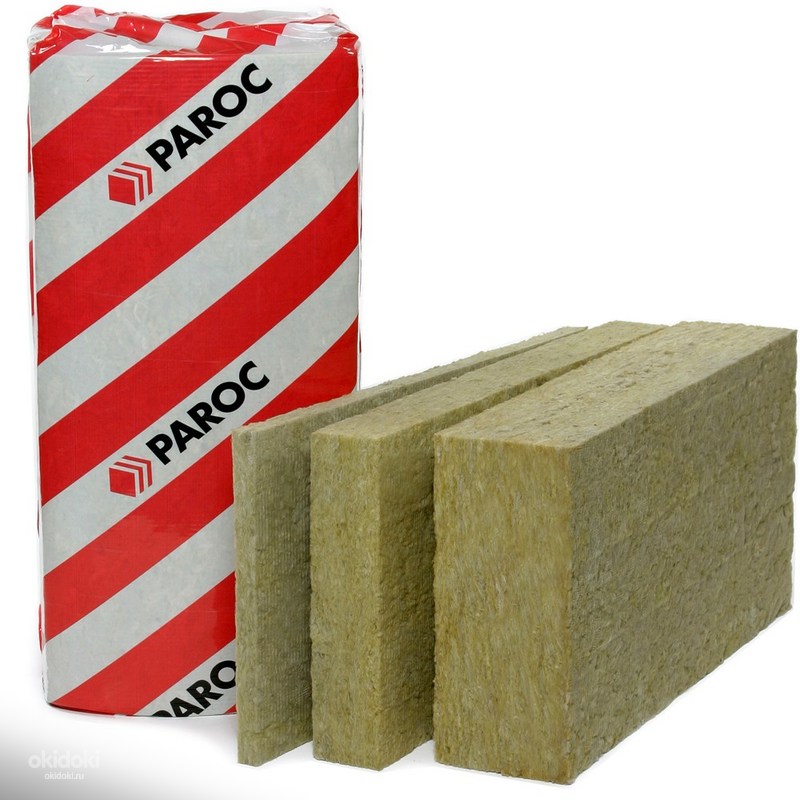
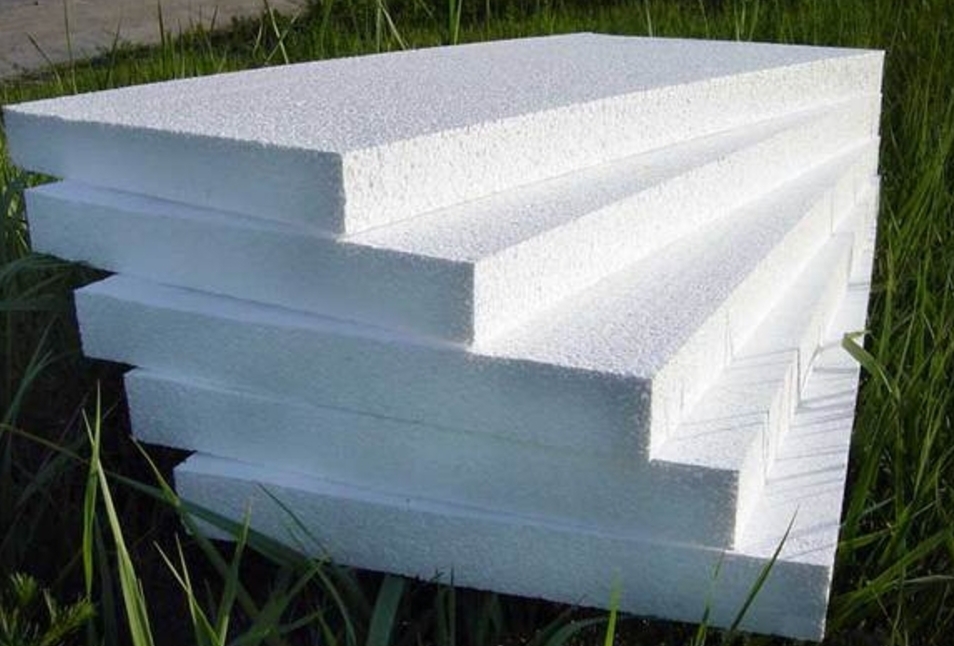
You can use both synthetic materials (mineral wool, foam) and natural materials (tow, felt, moss) as insulation materials.
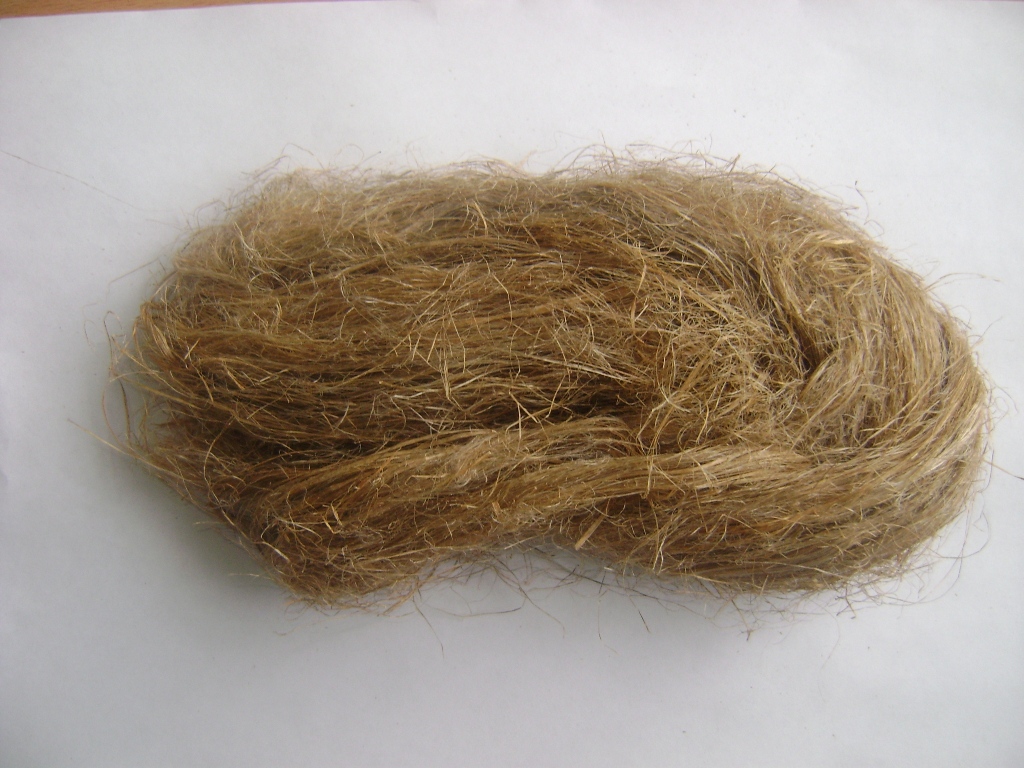
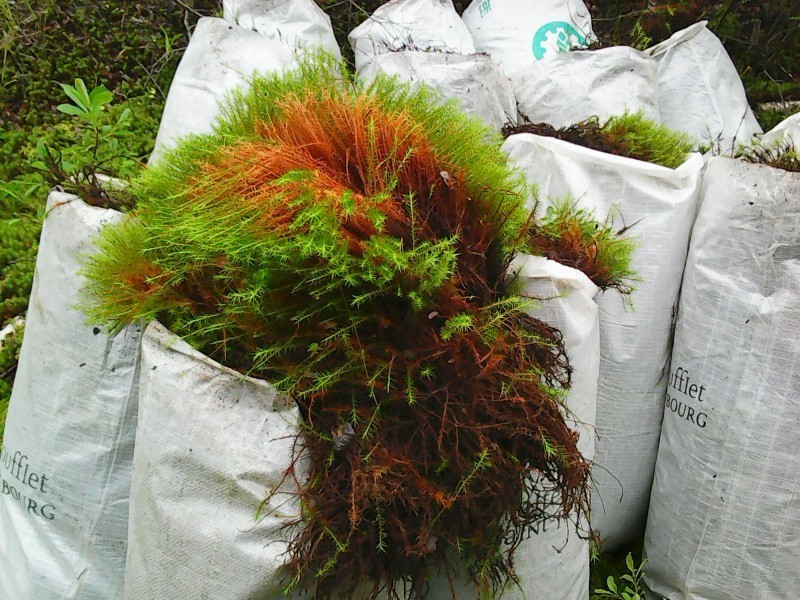
Of course, preference is better to give natural materials, as they have several advantages:
- environmentally friendly;
- have good thermal insulation characteristics;
- do not collapse during operation;
- do not emit harmful substances.

If you wish, you can arrange the veranda outside with siding or tiles. Wood is a great option if you are ready to invest enough money in an extension building.
Brick verandas are most often found in homes.. The construction of brick is a priori turned out to be closed, therefore there is no special sense to equip it for the summer version.
Warm such verandahs from the inside, using mineral wool and foam.However, be careful: You should not choose foam plastic if you plan to equip a kitchen with a stove on the veranda, build a stove or a fireplace. When heated strongly, the foam will release extremely dangerous carcinogens that can cause significant harm to human health.
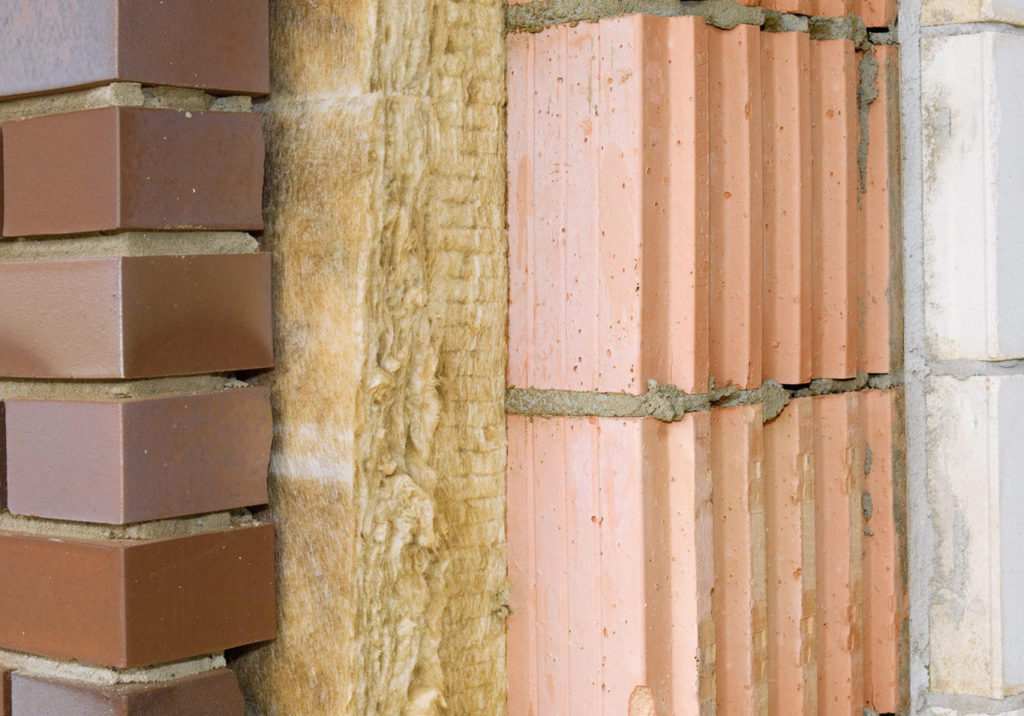
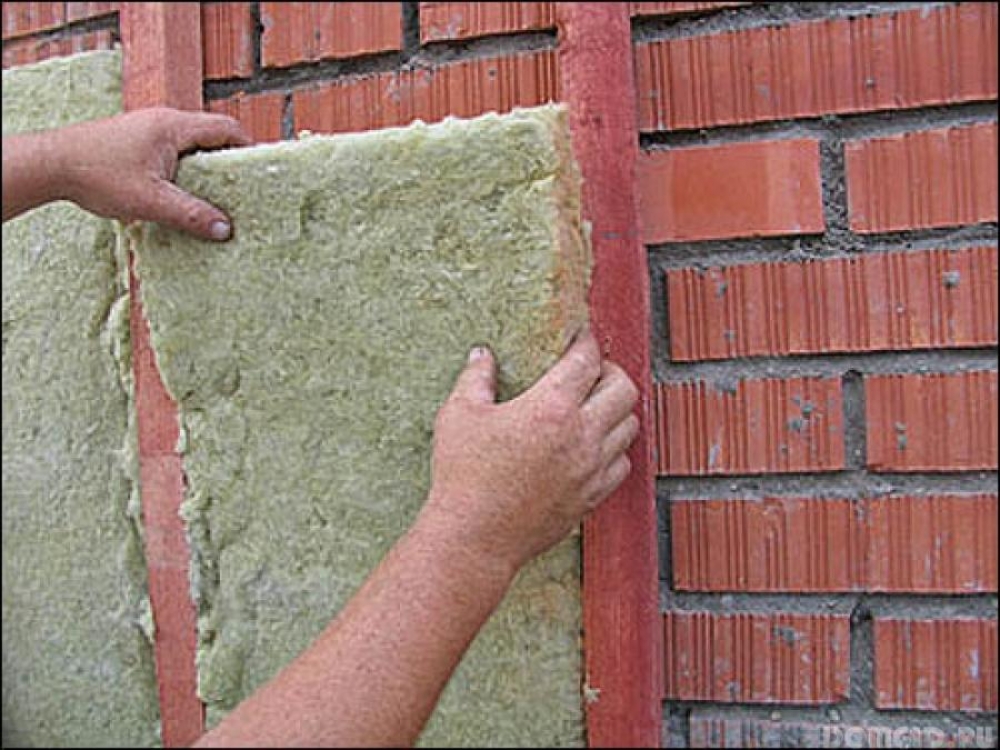
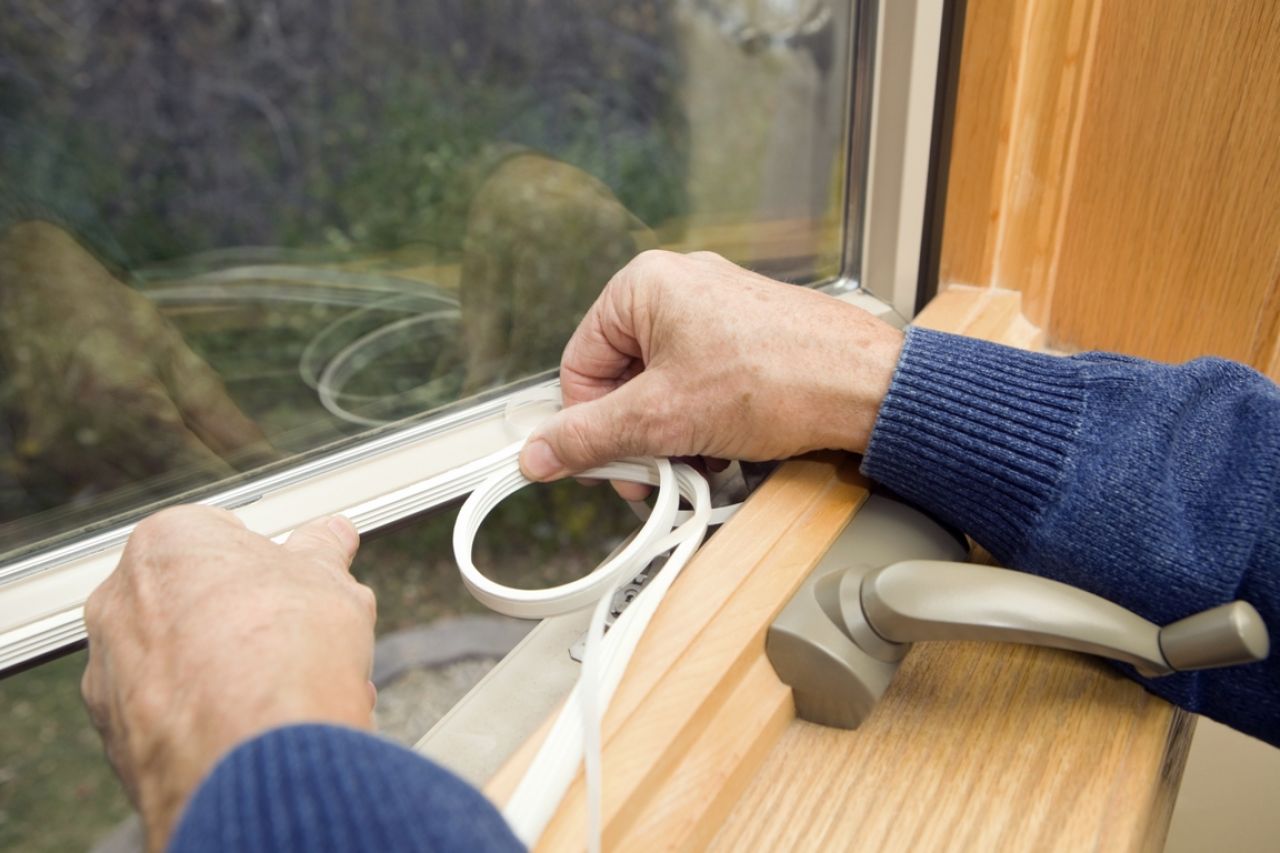
It is important to pay special attention to the insulation of windows. If the choice fell on plastic windows, there is nothing to worry about: they are already being produced so that they protect from the wind and cold to the maximum. Wooden or aluminum frames are required to be additionally treated with foam or choose another way to seal all the cracks. In winter, such windows caulk.
Attachments made of aerated concrete or foam blocks are necessarily insulated outsideHowever, the main focus here is on the ceiling insulation. It should be borne in mind that such a warming will not give the desired effect. Veranda insulated only partially. However, warming walls, prefer mineral wool, because it is she who works best in tandem with these modern building materials.
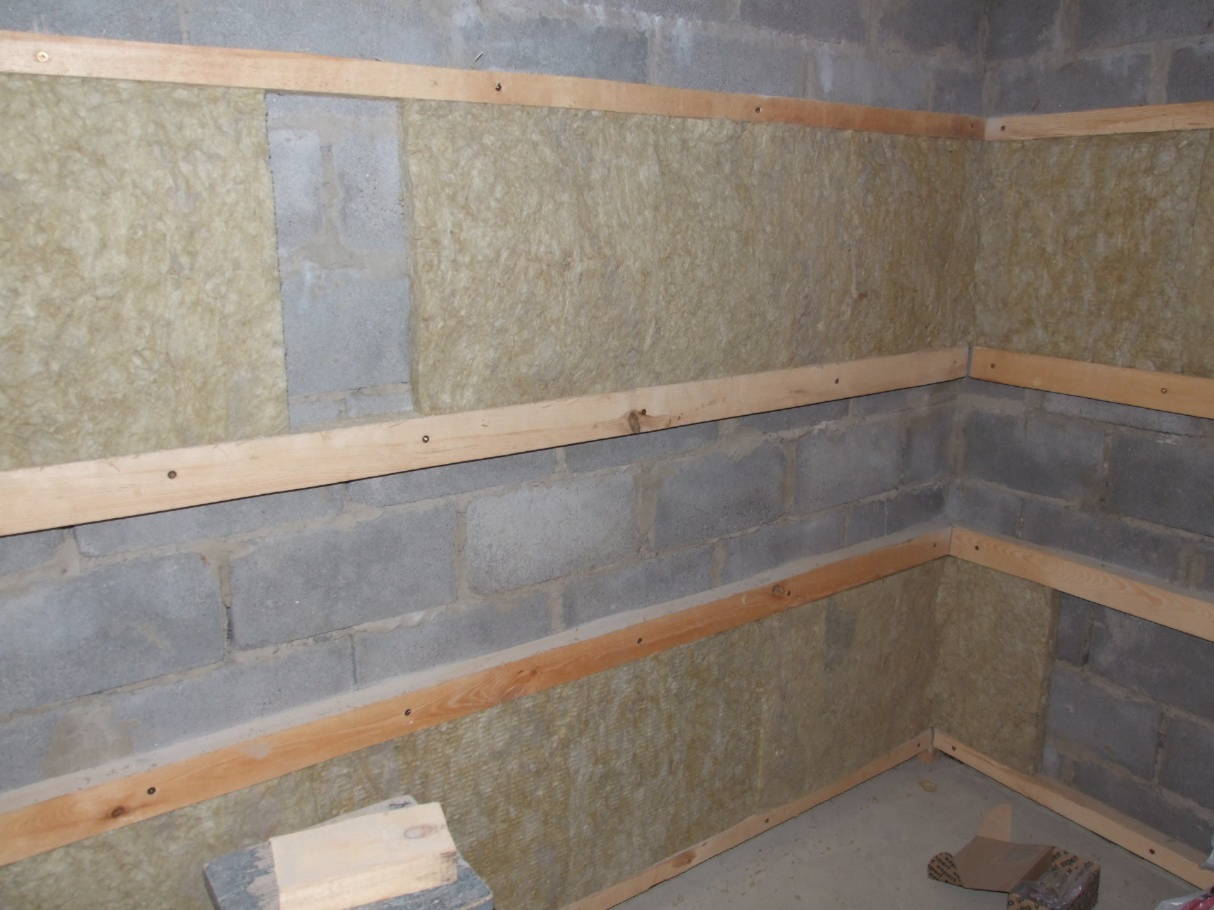


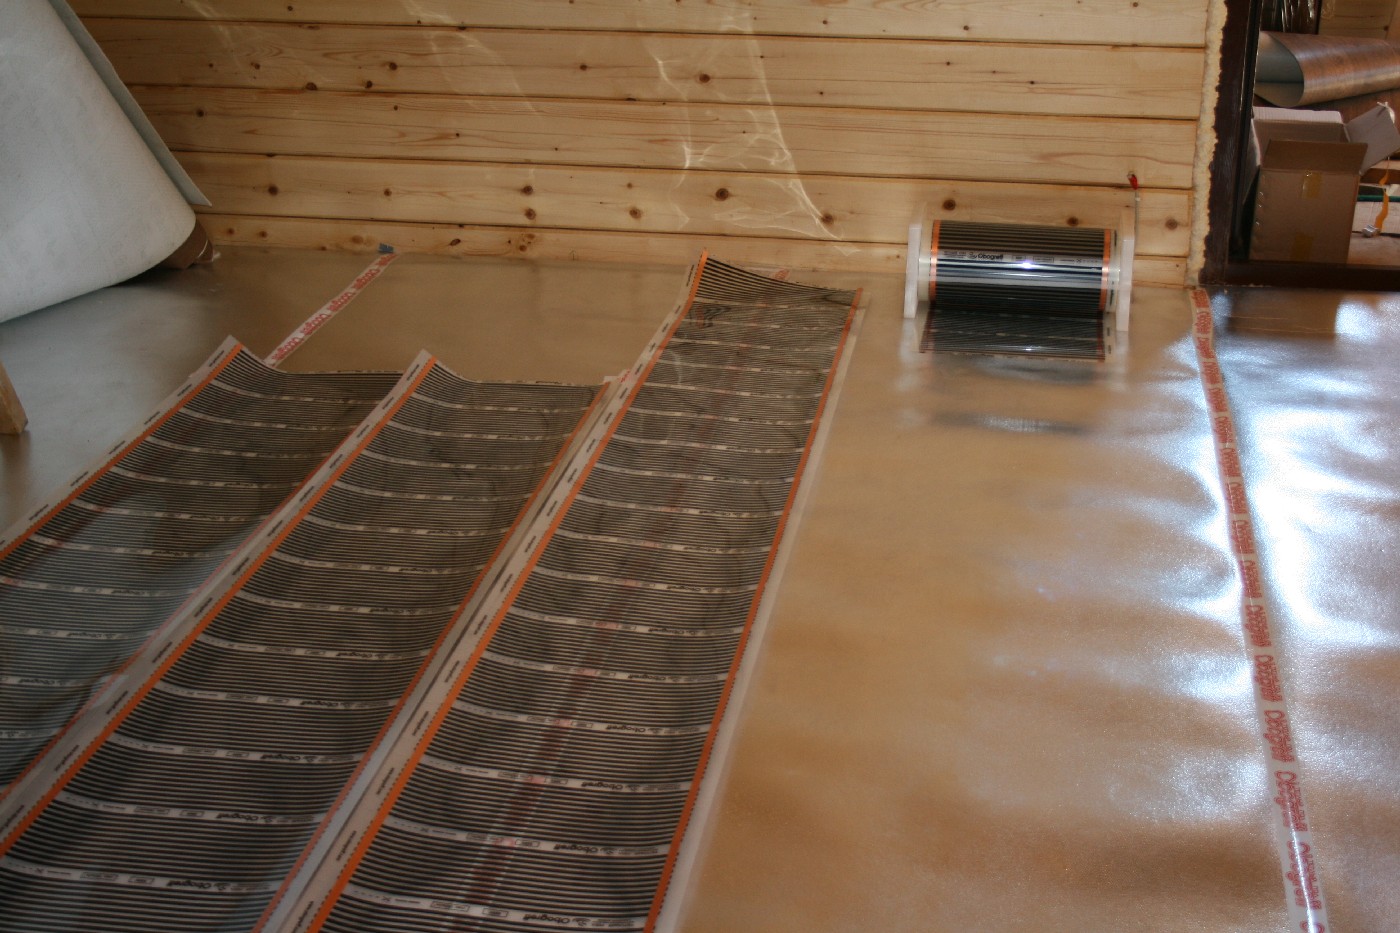
Separately it is necessary to disassemble the floor warming. To do this, use expanded clay or equip the system "warm floor".If the second option is chosen, it is worth preparing for the fact that the cost of electricity will be phenomenal, while there is no guarantee that the veranda will be as warm as the rooms.
In order for the "warm floor" system to work as efficiently as possible, there is one rule: all the gaps in the base of the floor must be repaired.
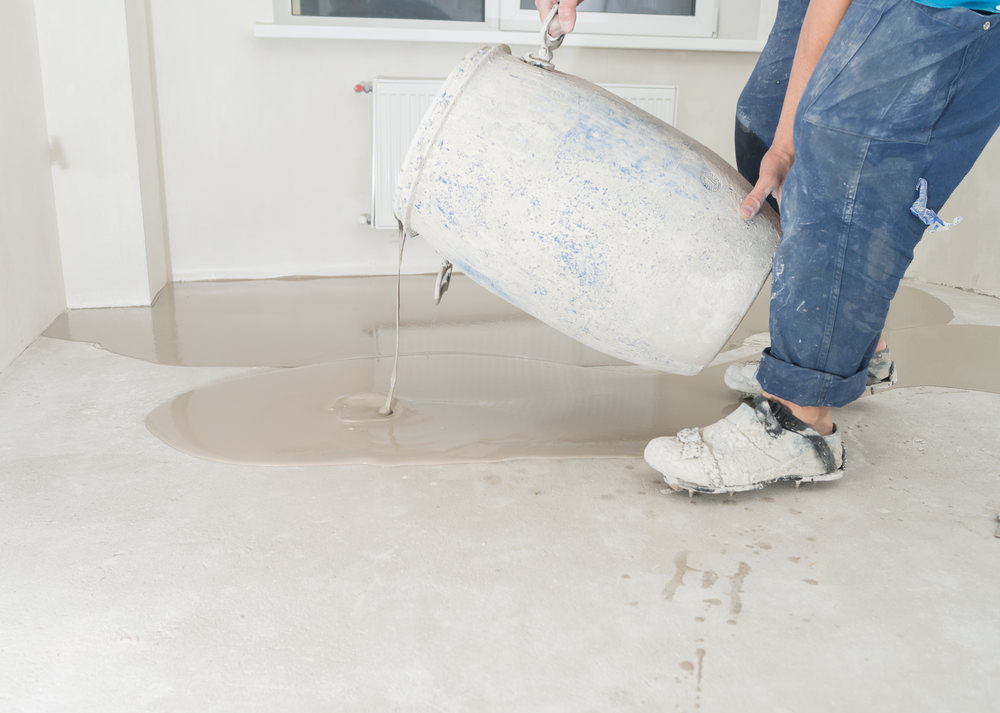
It is best to make a concrete screed: it will help to isolate the floor as much as possible.
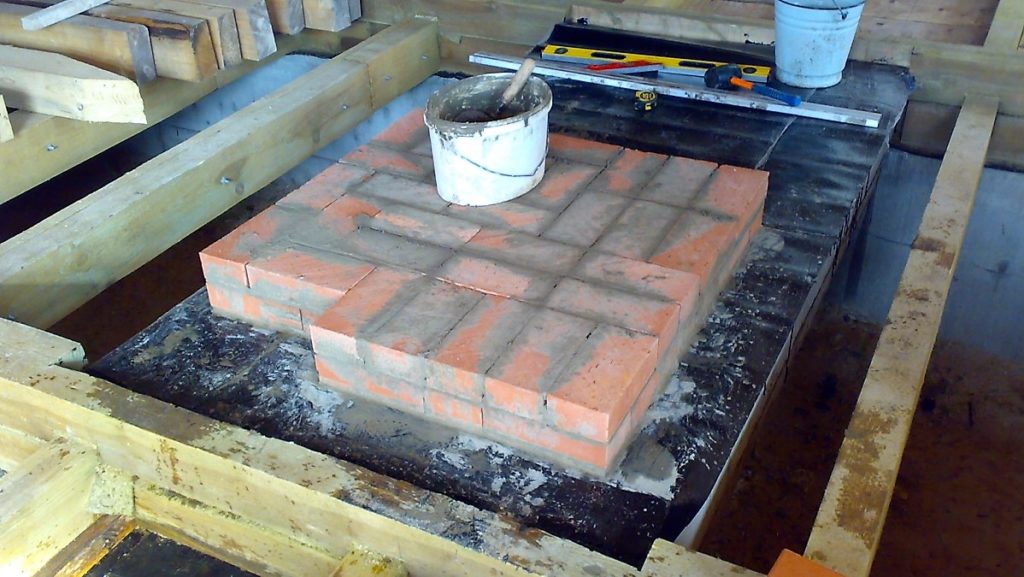
If a stove is planned to be installed on the veranda, then the foundation should be further strengthened in that place. For this you can use reinforcement.
Also it will be necessary to lay a thick iron sheet in the place where the fireplace or stove will be placed. It is advisable to protect the space in front of the fireplace so that accidentally fallen coal does not burn the floors.
Interior arrangement
Starting to repair and finish the veranda, it is worth remembering that it can be considered as a full-fledged room, but at the same time one should not forget that it is not a room yet. It is necessary to take into account the special climate created here.
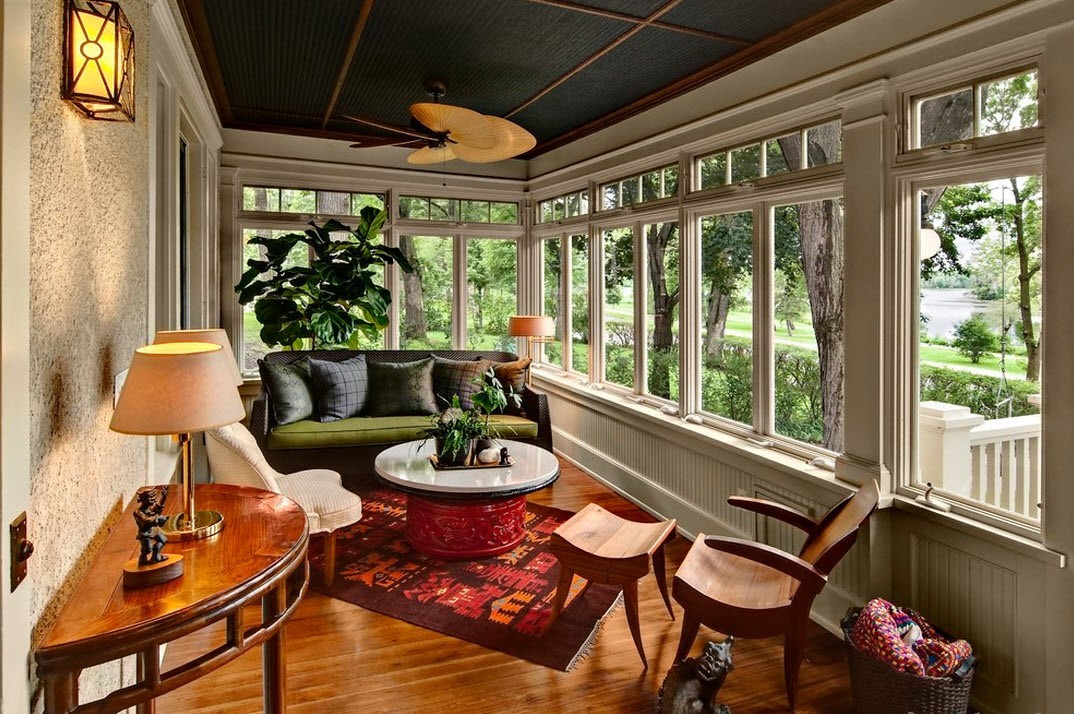
Finishing traditionally starts from the ceiling. There are a couple of requirements for the material that is selected for the ceiling: its lightness and resistance to moisture. That is why materials such as PVC panels, polycarbonate, lining and unusual wicker. When mounting each of the options, it will be necessary to arrange the joints with the wall plinths to ensure maximum flatness of the coating.
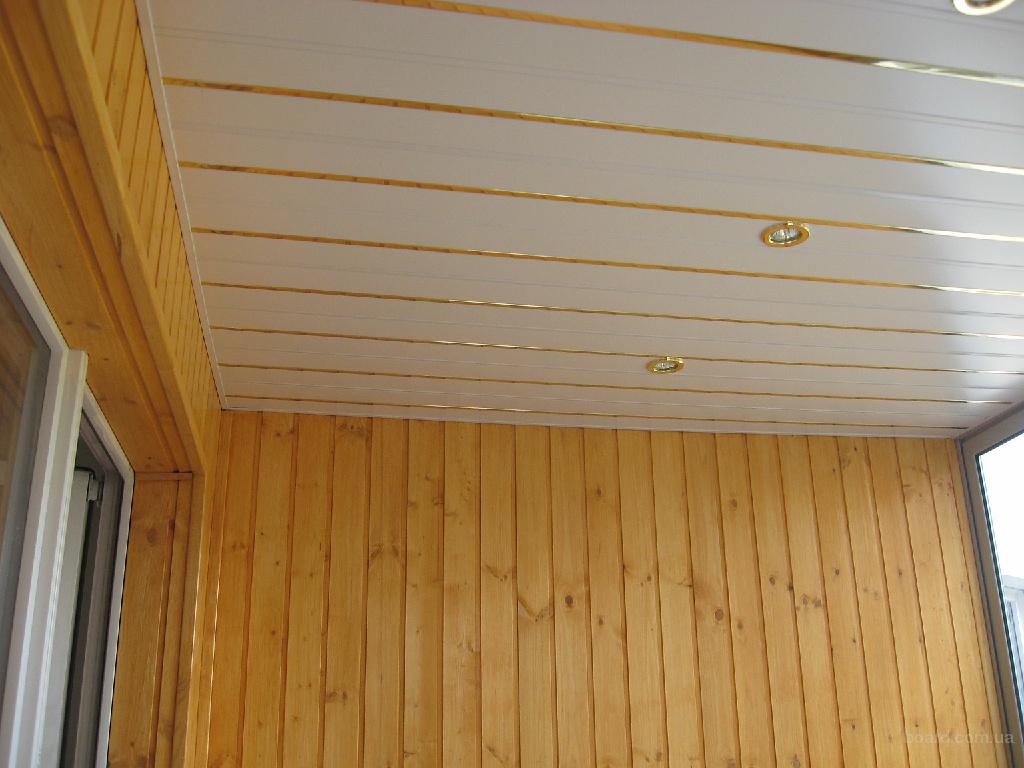

Sheathing clapboard is suitable not only for ceilings, but also for walls. The design of the room, sheathed with this material, it turns out at home comfortable and at the same time stylish. When installing this material it is worth remembering that over time it expands, therefore it is best to leave gaps between the slats 7 mm wide.
The advantage of PVC panels lies in their lightness. In addition, they are perfect for decorating the ceiling on the veranda, and in the house. The ceiling is perfectly flat, the joints are not visible.
Due to the fact that the material is sold in a huge number of colors, it helps to bring to life virtually any creative idea.
Polycarbonate is used not only for the decoration of ceilings, but also as a roofing material. It is durable and at the same time light, sold in a large assortment of colors. Polycarbonate panels are of two types: monolithic and honeycomb.The difference lies in the price and the fact that the latter have improved thermal insulation qualities.
Polycarbonate is a modern alternative to glass in the absence of its inherent flaws, such as heavy weight and brittleness.
The wicker ceiling is a mounted shield of bamboo shoots connected. This option gives the situation a special charm, rustic or tropical flavor. Shields must be additionally fixed transverse slatsotherwise the structure will not be strong enough.
The walls of the veranda are lined with clapboard, PVC or MDF-panels or decorated with decorative plaster. Each of the options has its pros and cons. Since the wall paneling and PVC panels were discussed above, it is worthwhile to dwell in more detail only on the two remaining materials.
Decorative plaster can be used both to imitate another material (for example, stone), and to be an ordinary relief coating for painting.
To get a certain appearance, you need to pay attention not only to the choice of the type of material (“liquid wallpaper”, color, stone), but also to the application technique.
MDF is an environmentally friendly material, but this is not their only advantage. Covering with MDF panels will ensure good noise and heat insulation, high resistance to temperature extremes. In addition, it is easy to work with this material.
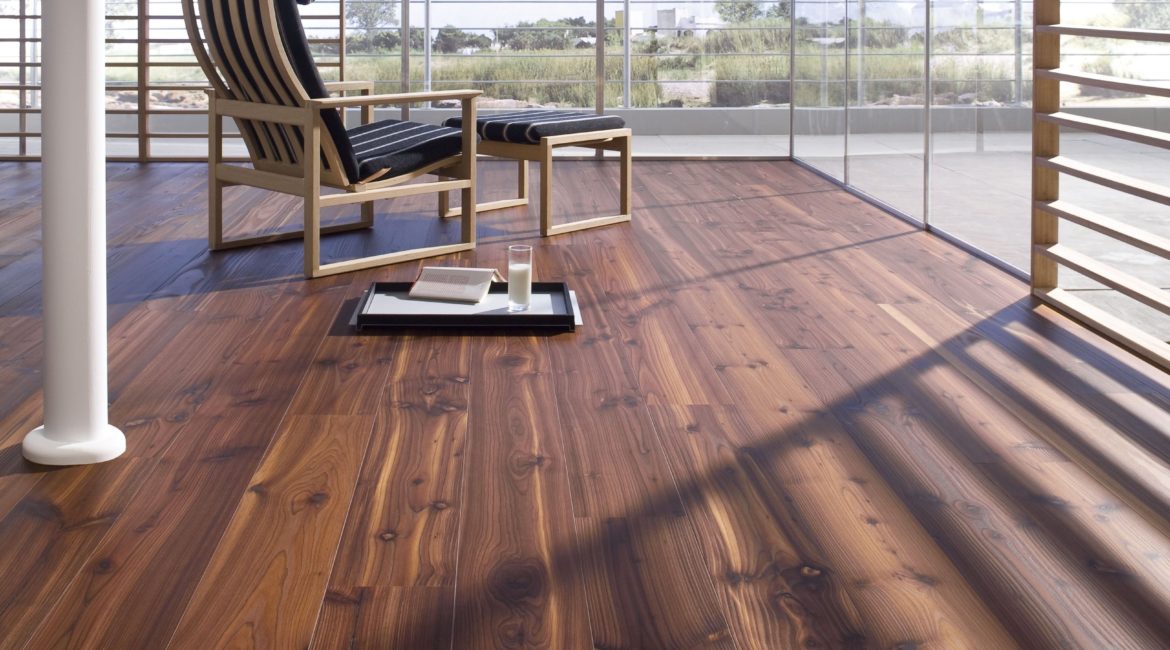
There are also several floor options for the veranda. Most commonly used:
- decking;
- rubber;
- concrete;
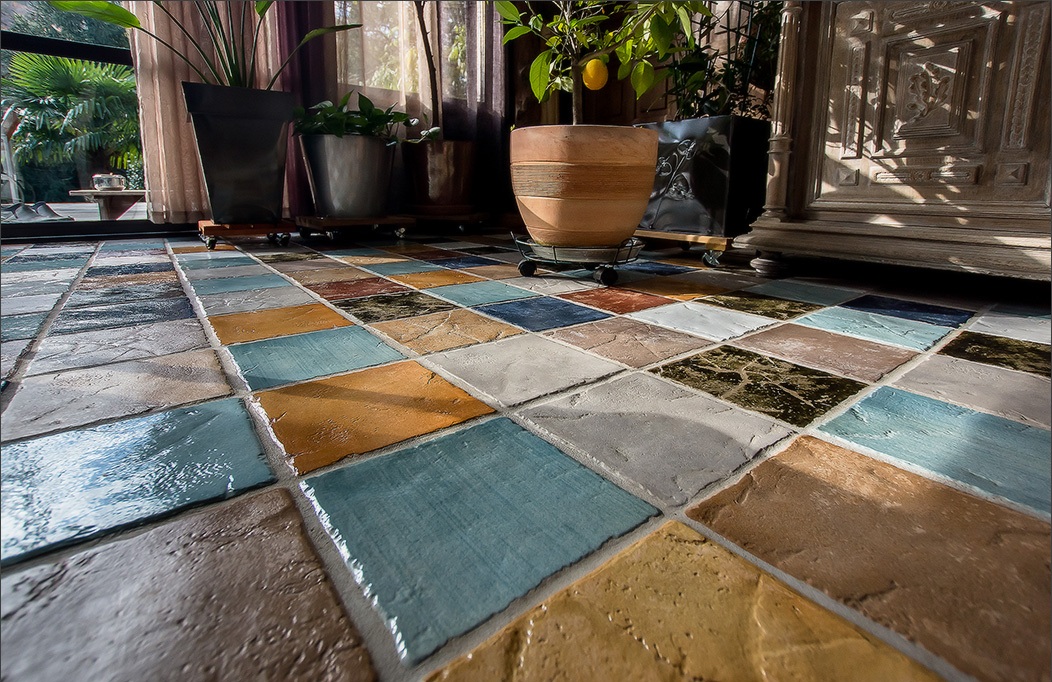
- tile;
- linoleum.
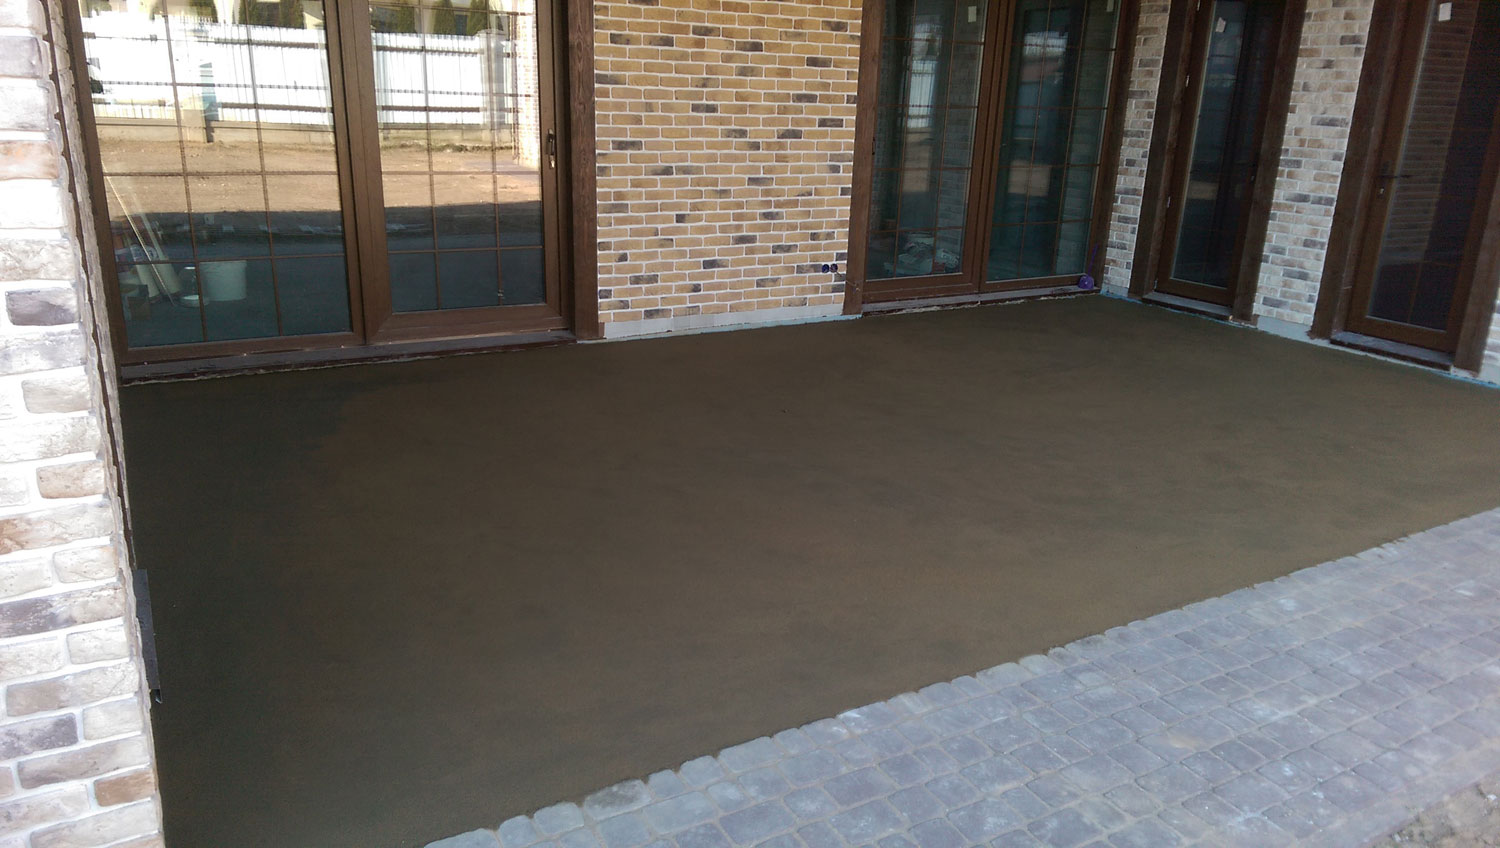
The simplest is concrete floorWhich is often left in summer verandas. This coating will further cool the room, which will ensure coolness in the summer. In winter, the annex will be cold.
Linoleum can be laid directly on a concrete base. Depending on what kind of linoleum will be selected, additional advantages will appear, for example, thermal insulation, impact resistance and others. Of course, each of their characteristics increases the price.
Rubber coating, decking and tile laid out on the principle of mosaic. Each of these materials is highly resistant to moisture, temperature fluctuations and mechanical stress, and they are easy to maintain.

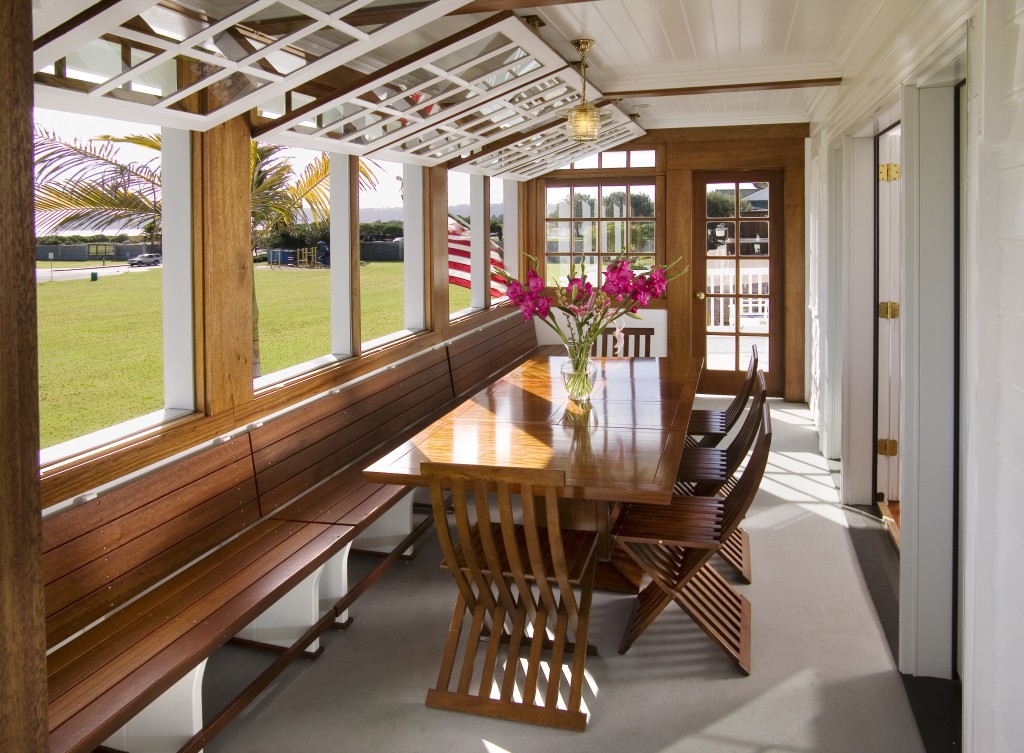
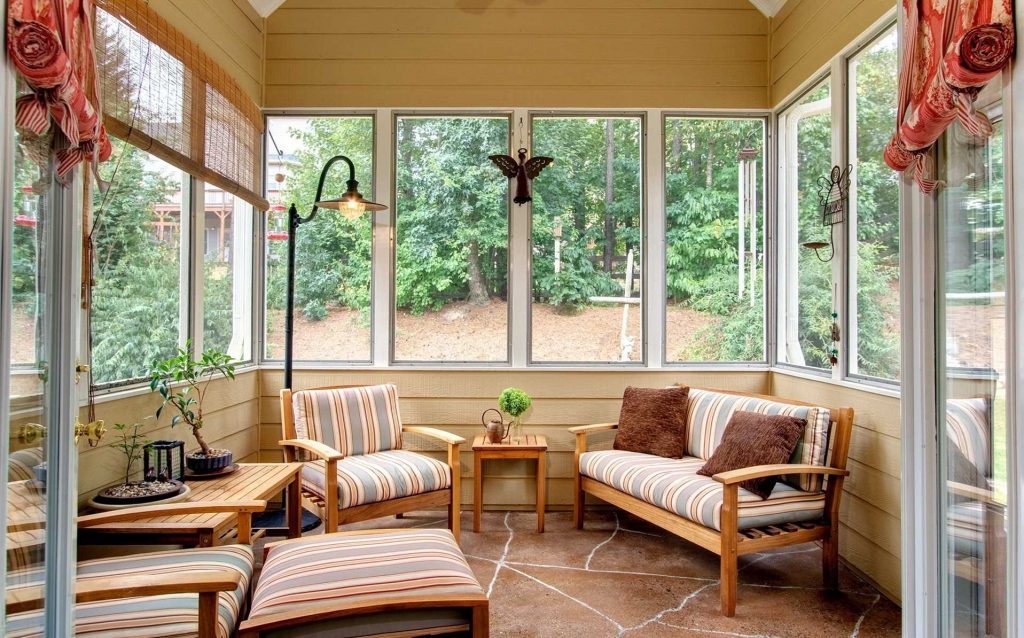
From the furniture to the porch usually make the most necessary: tables, chairs, sofas. If the extension is used as a summer kitchen, here you can "settle" a small sideboard for dishes, add a few wall cabinets.
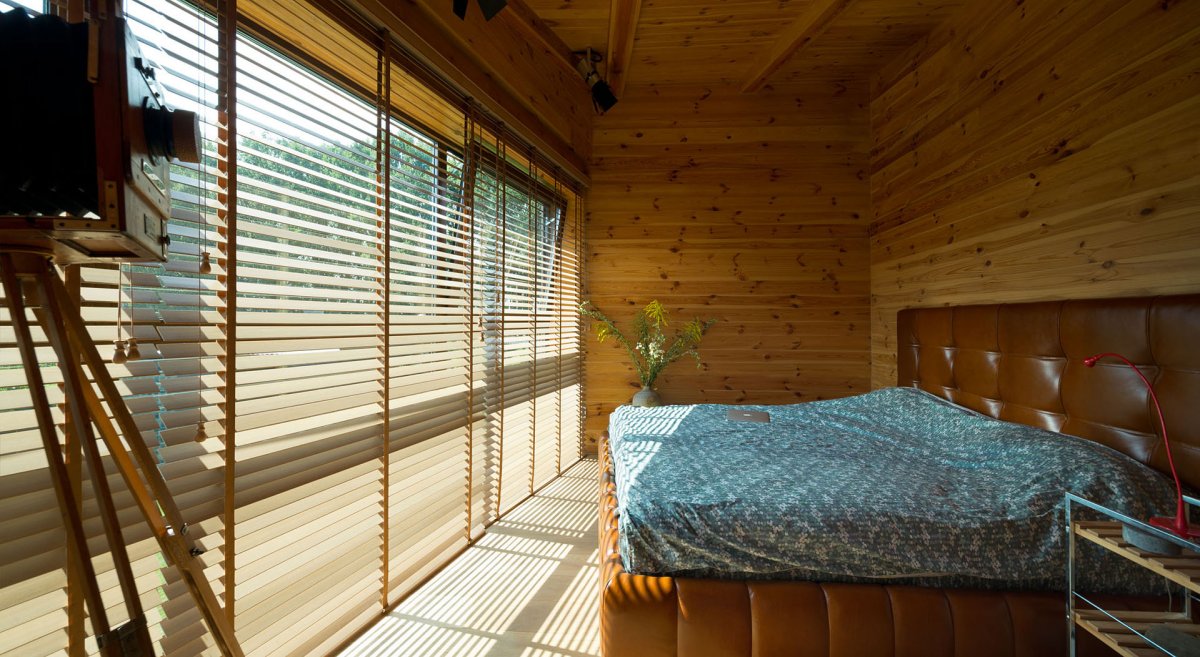
The bed on the veranda is usually not placed, preferring to use a folding sofa for sleeping.


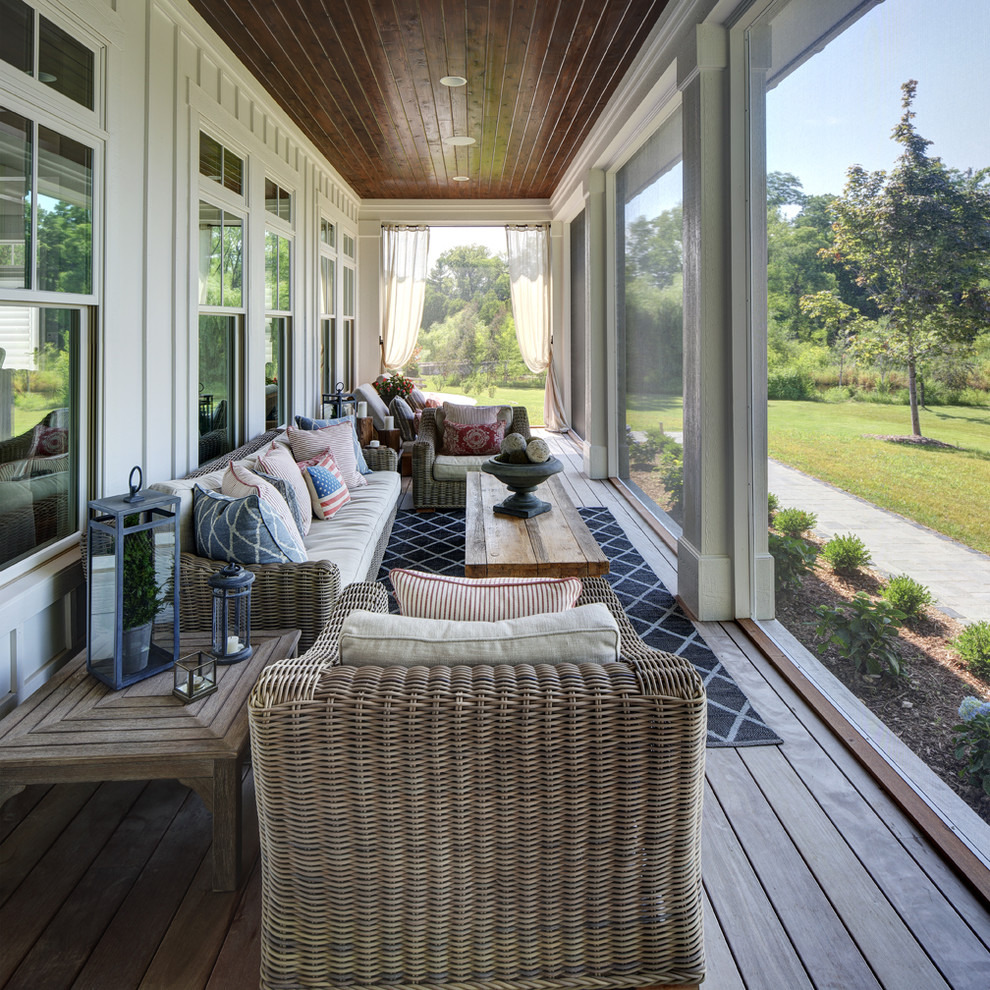
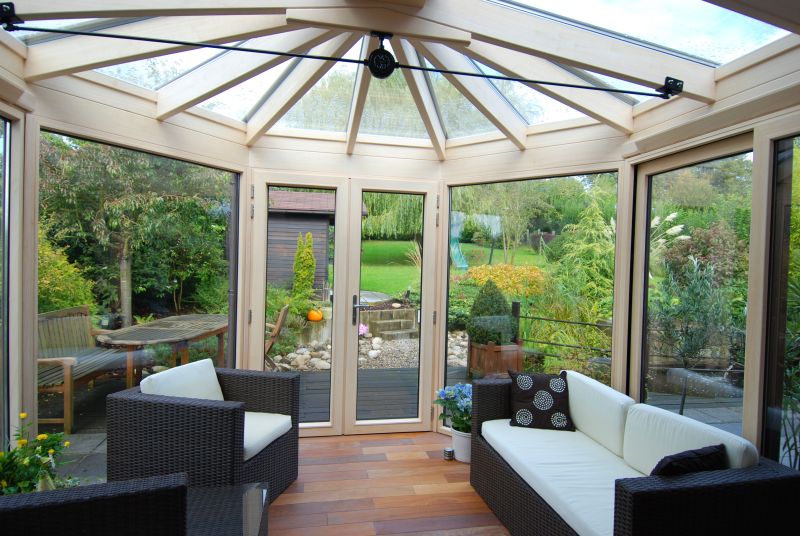
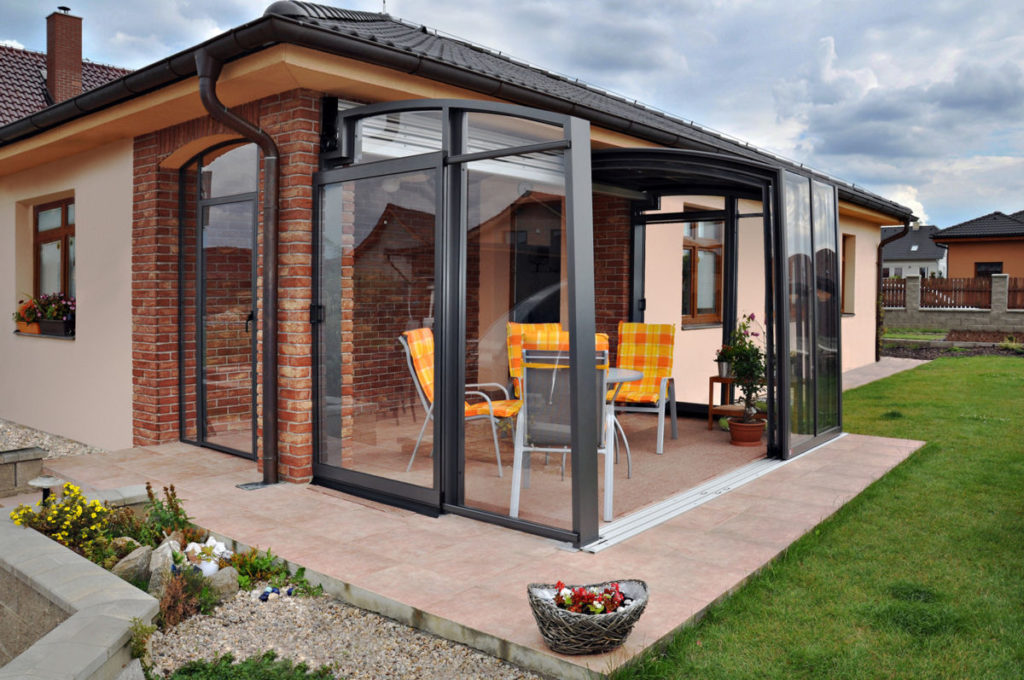
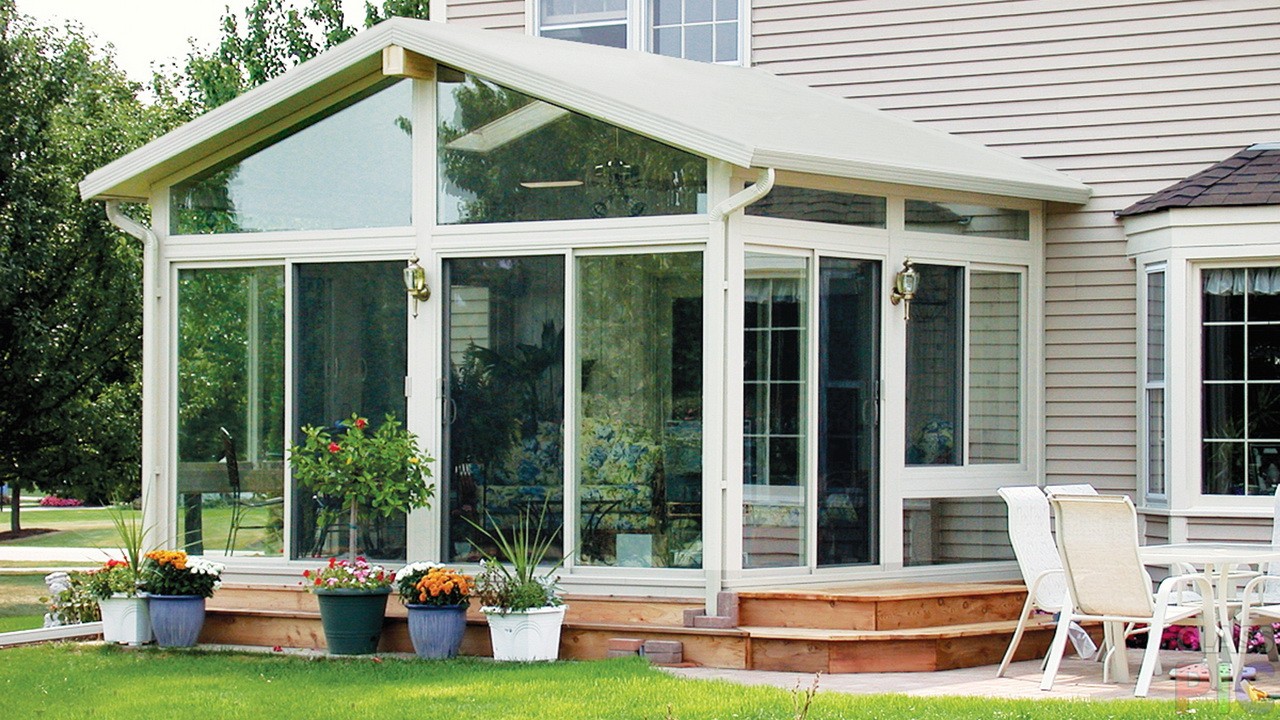
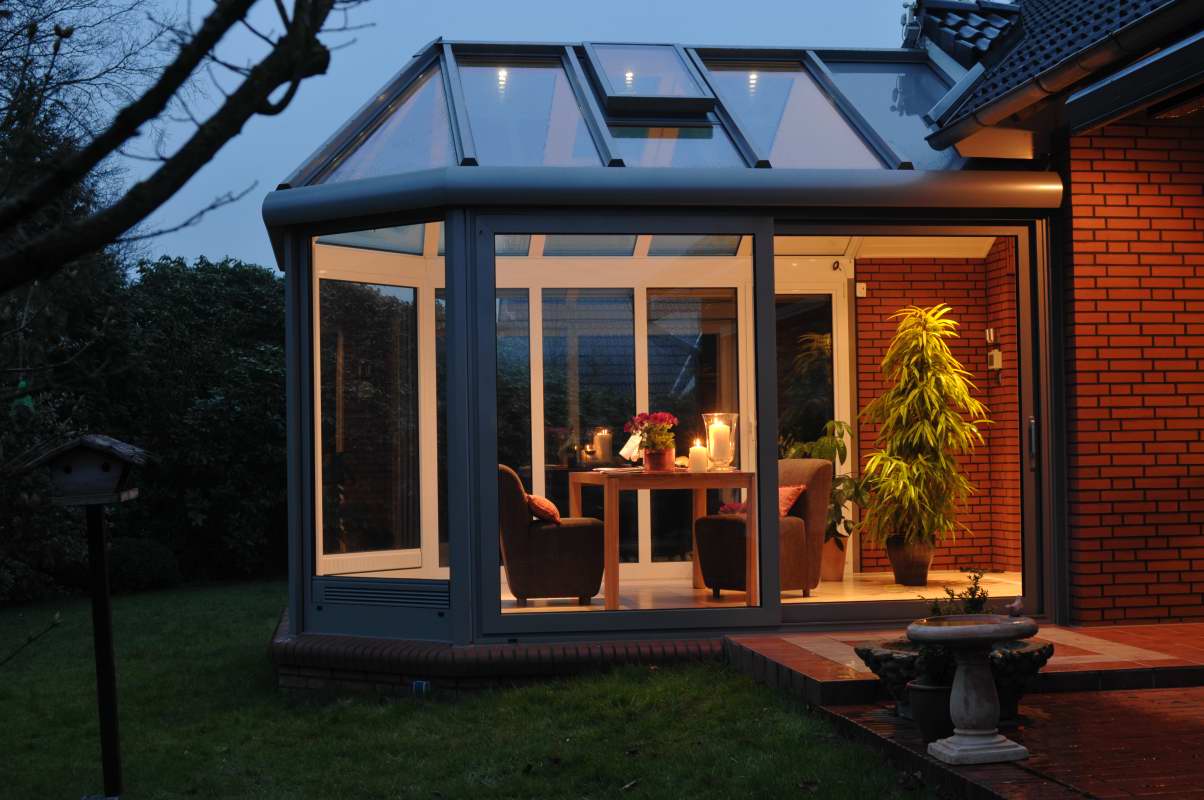
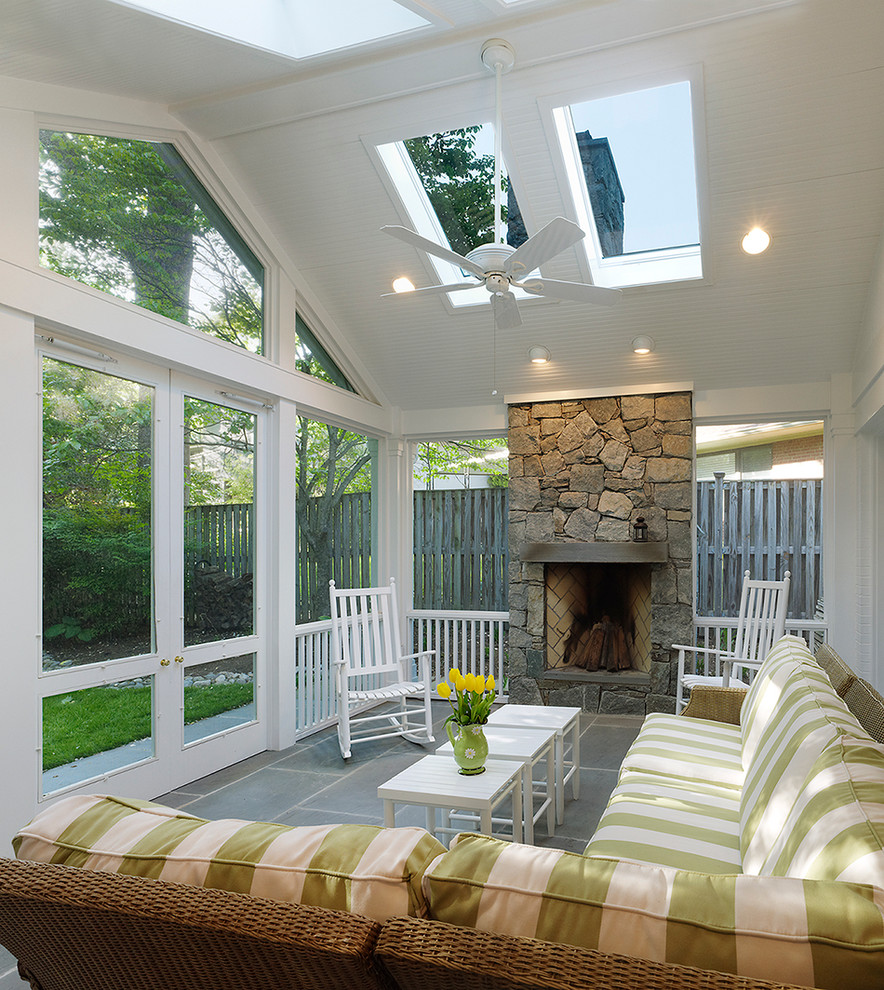
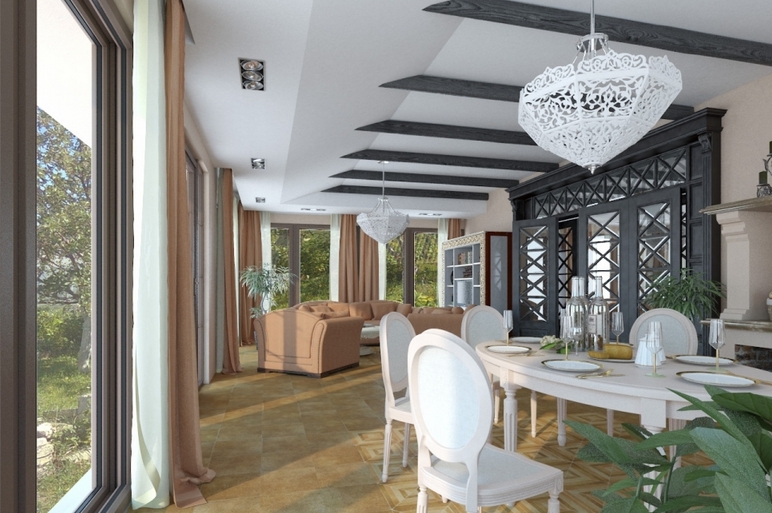
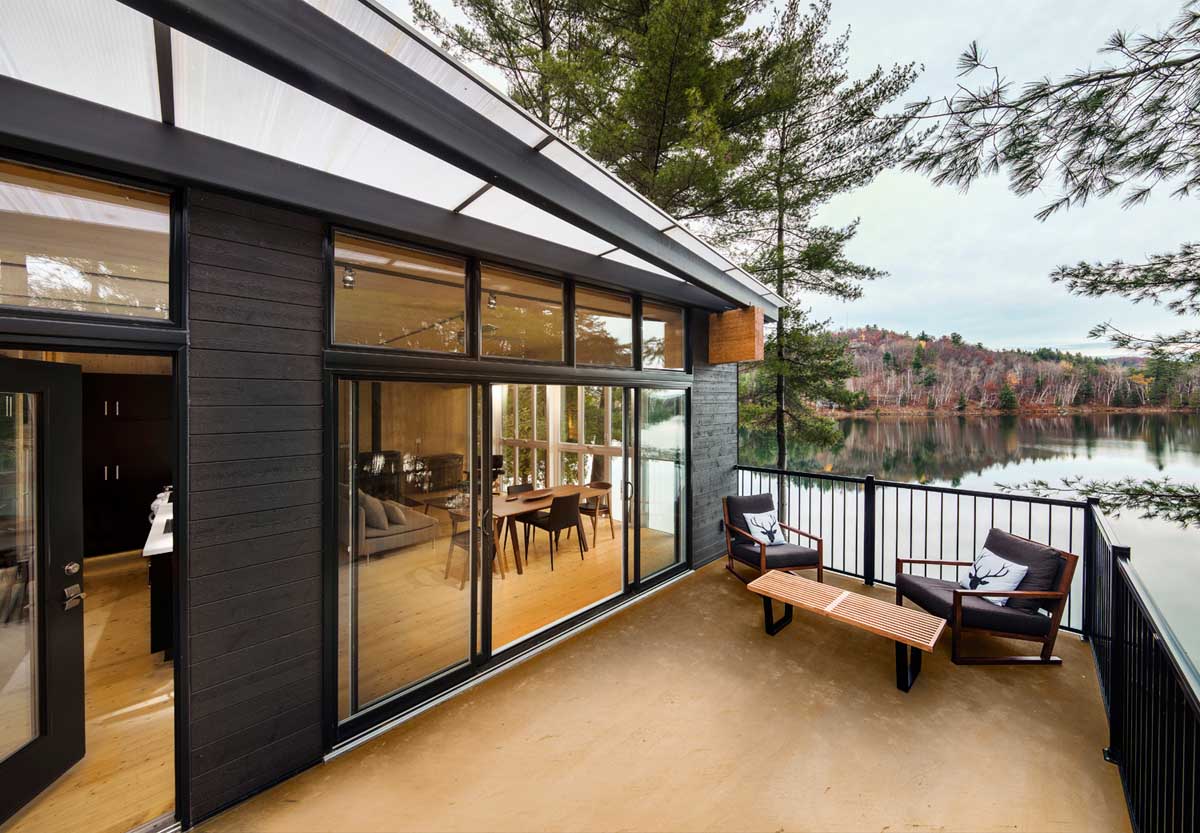
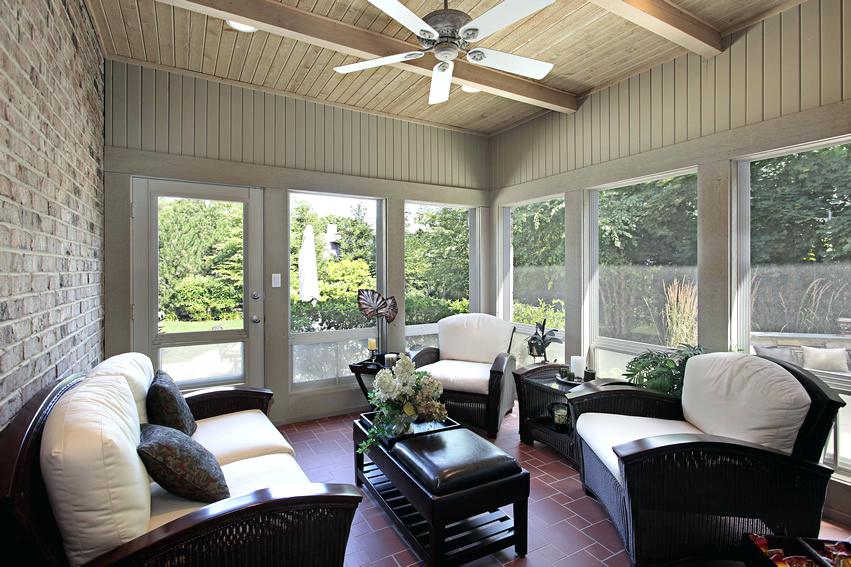
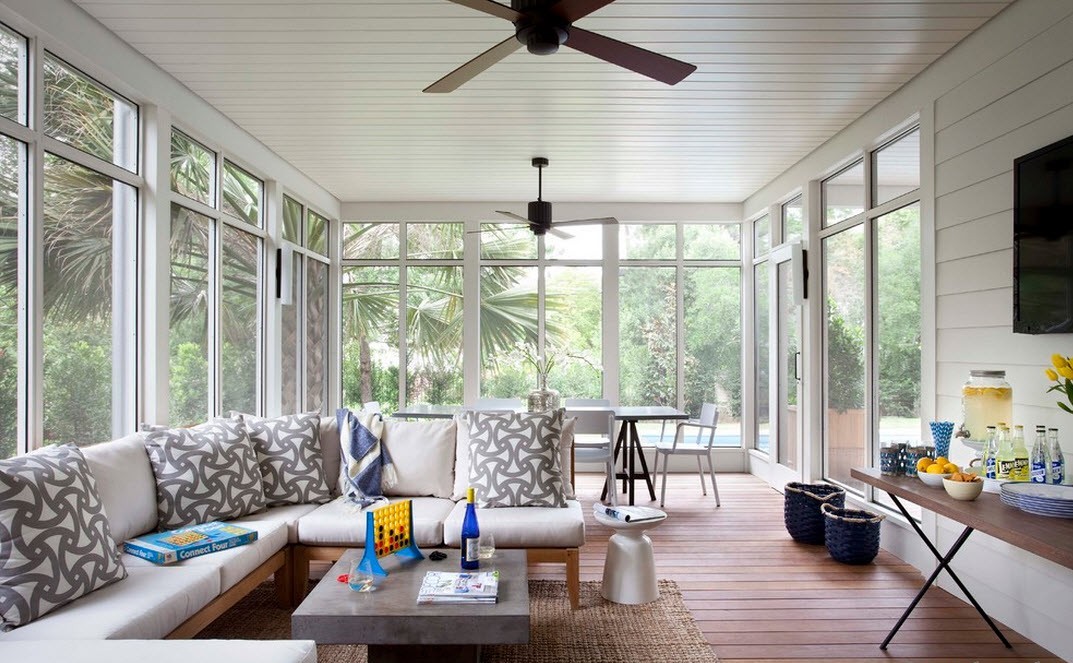
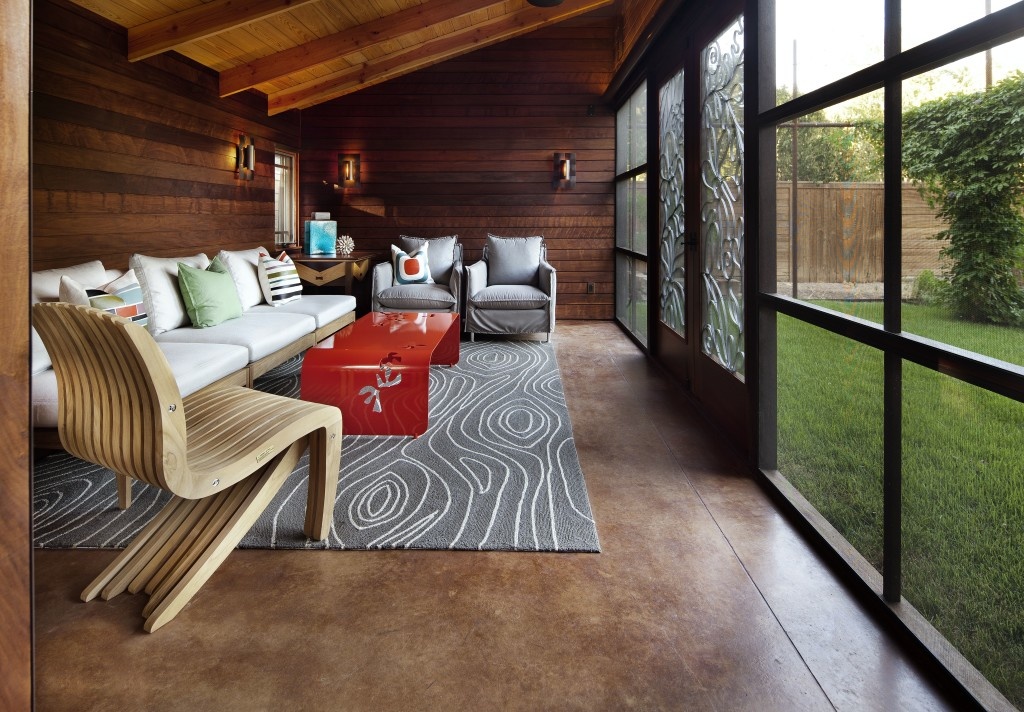
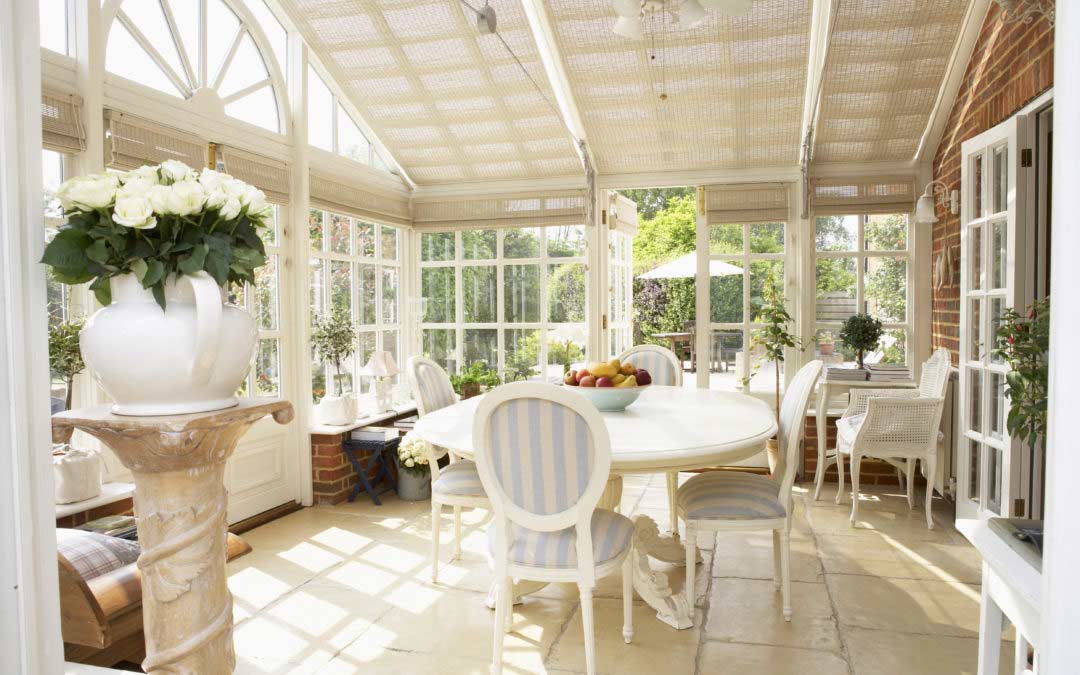
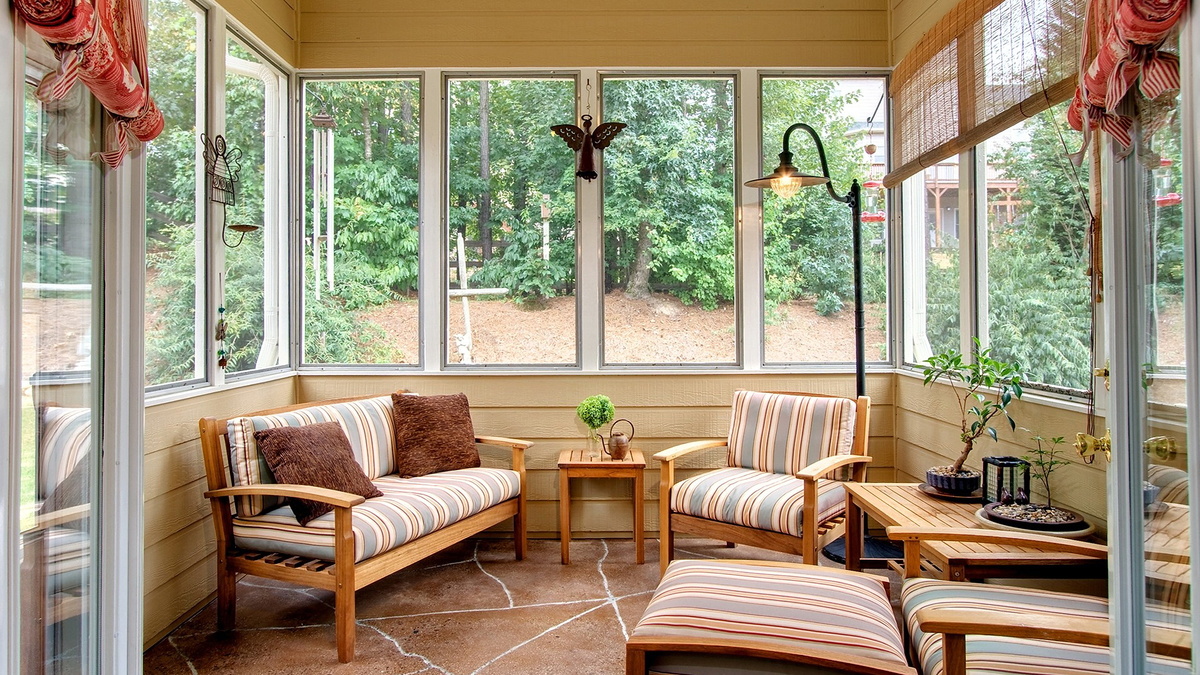
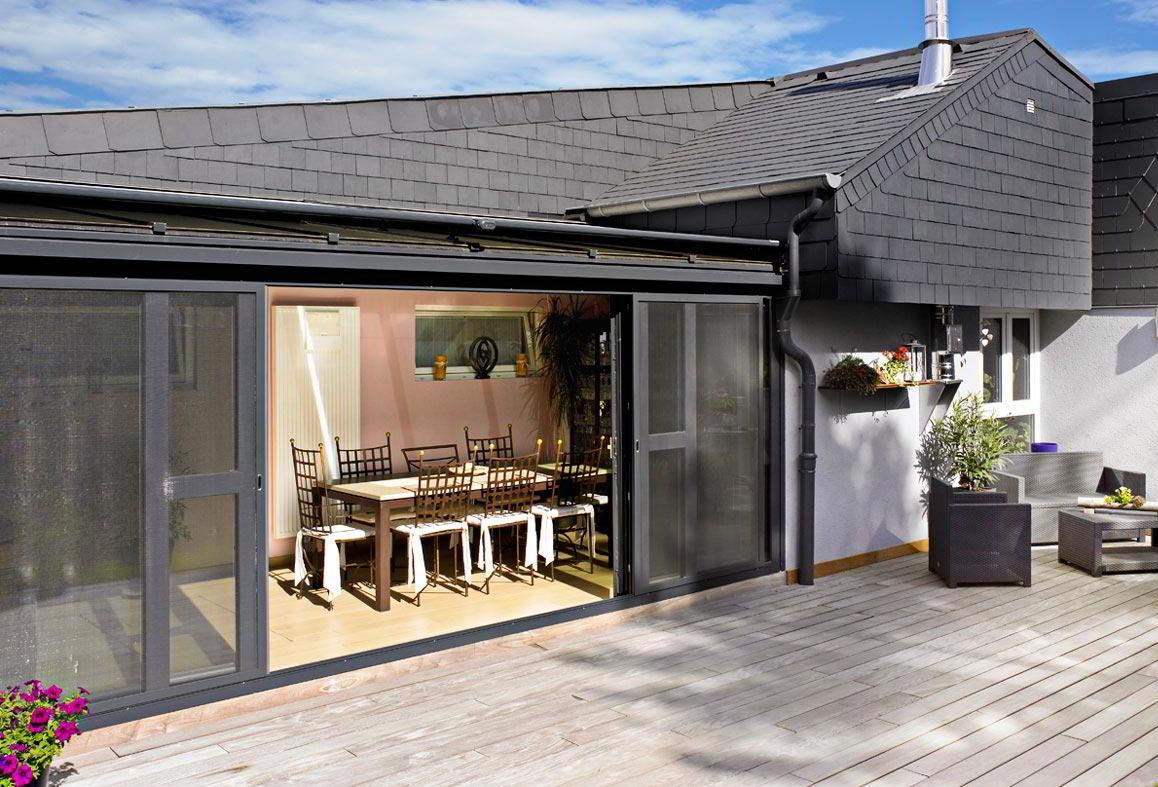
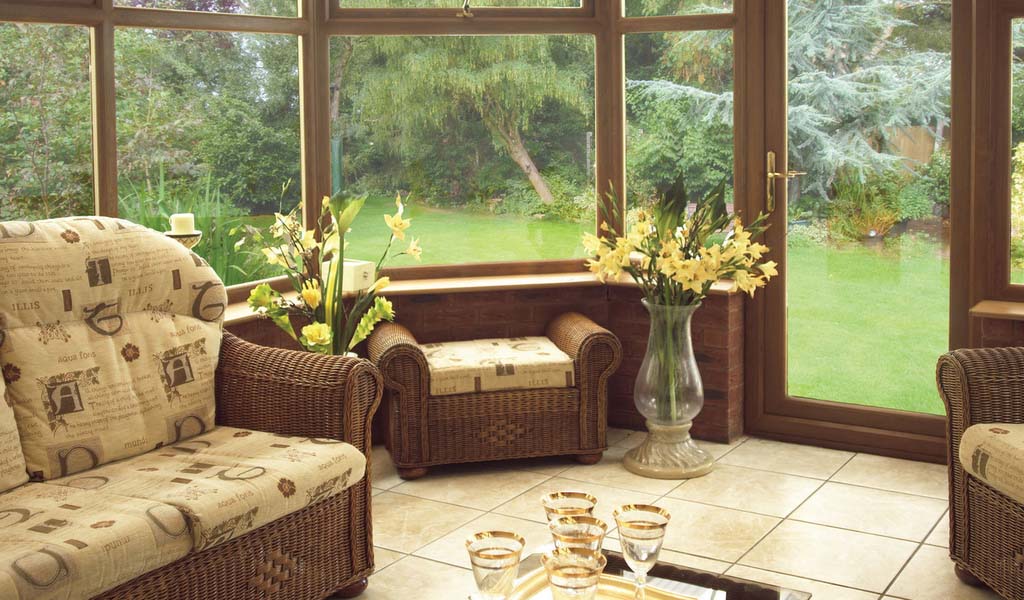
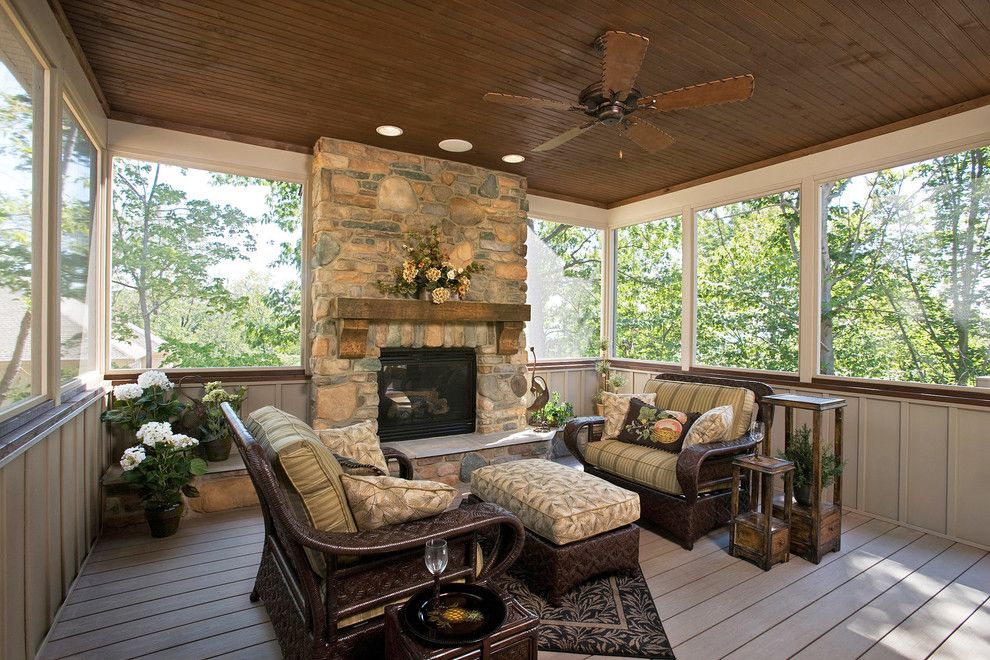
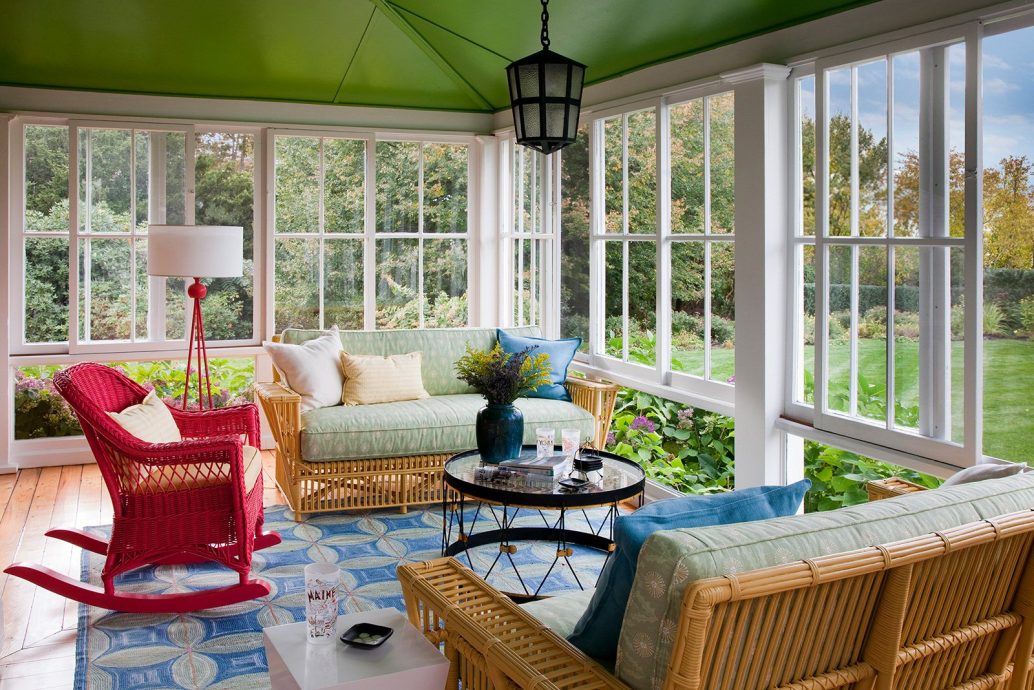
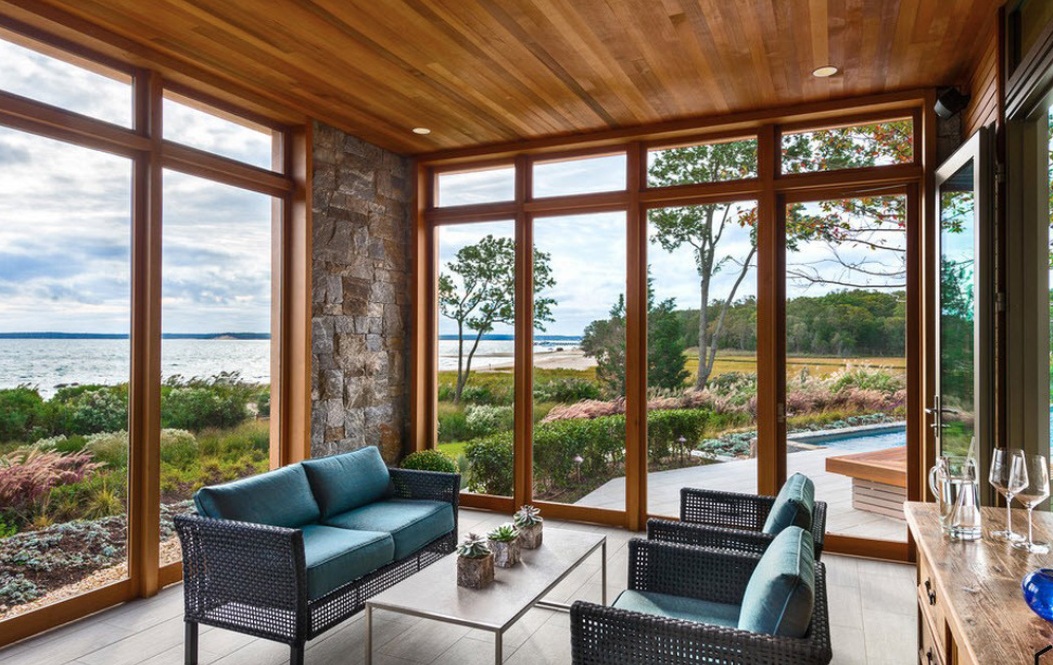
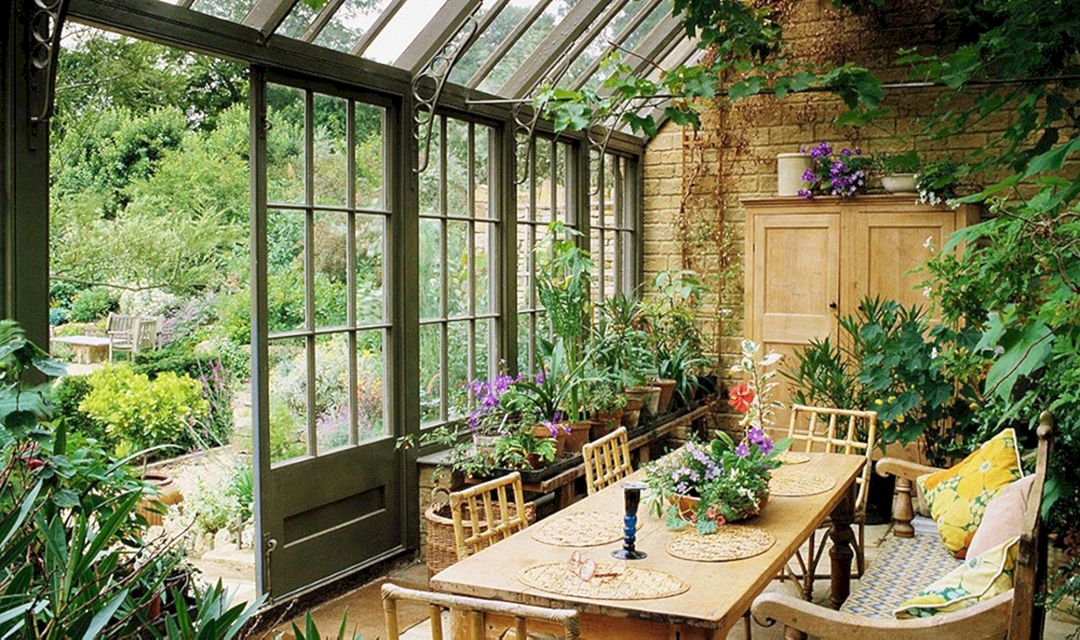
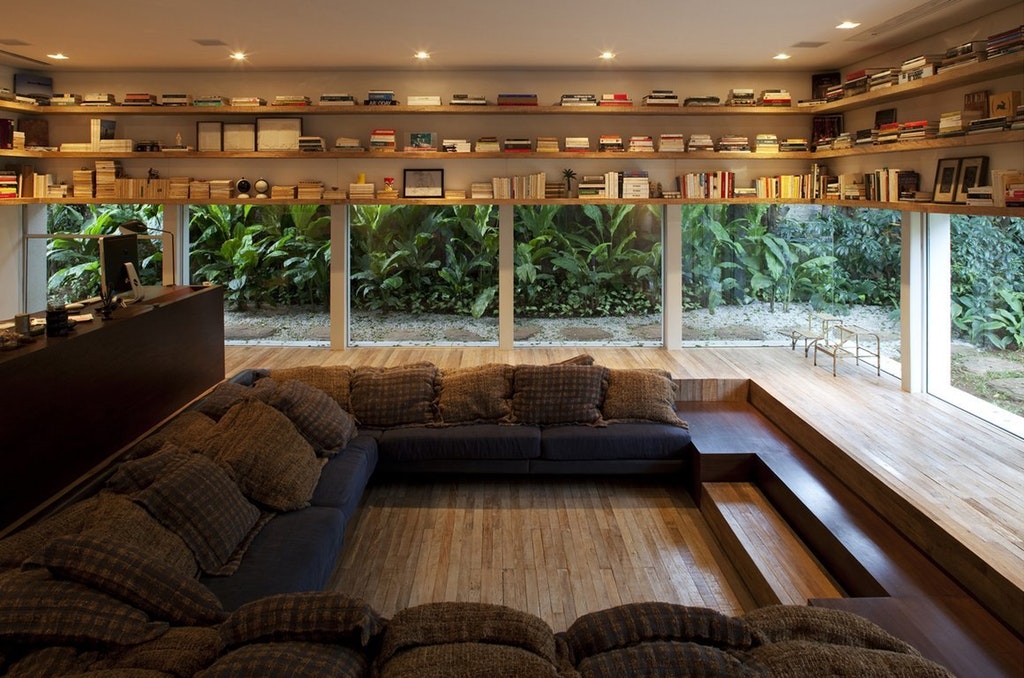
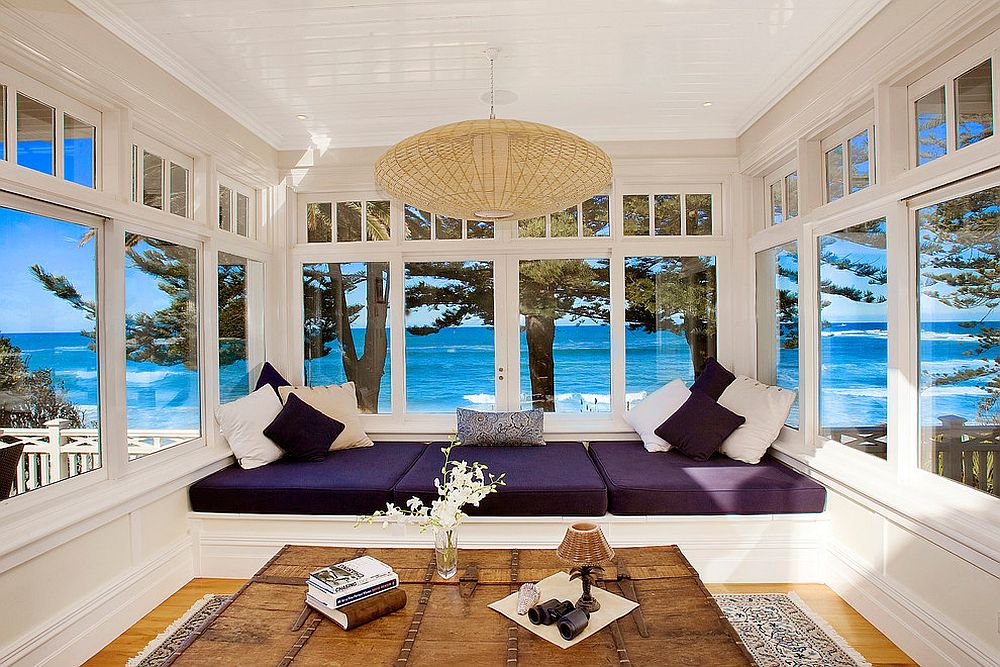
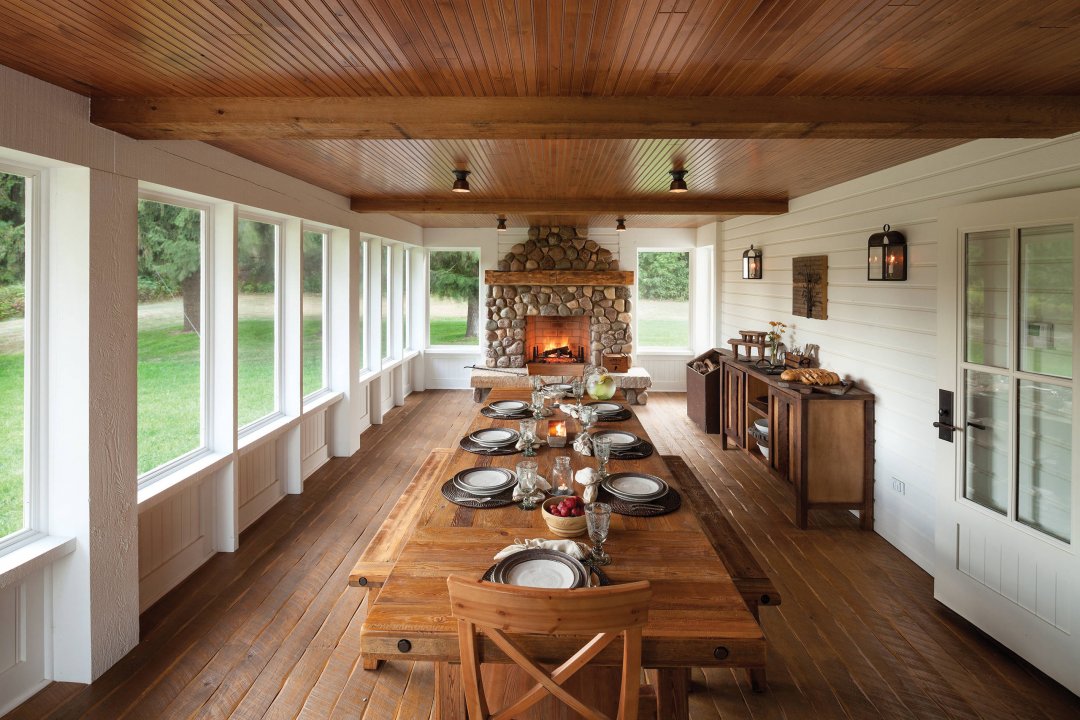
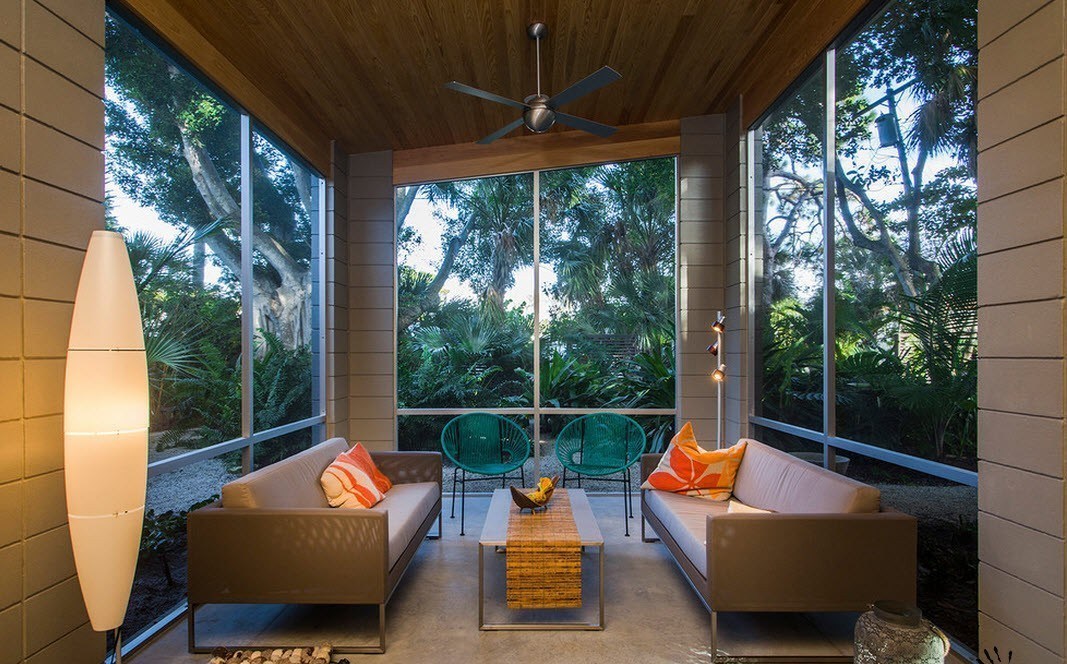
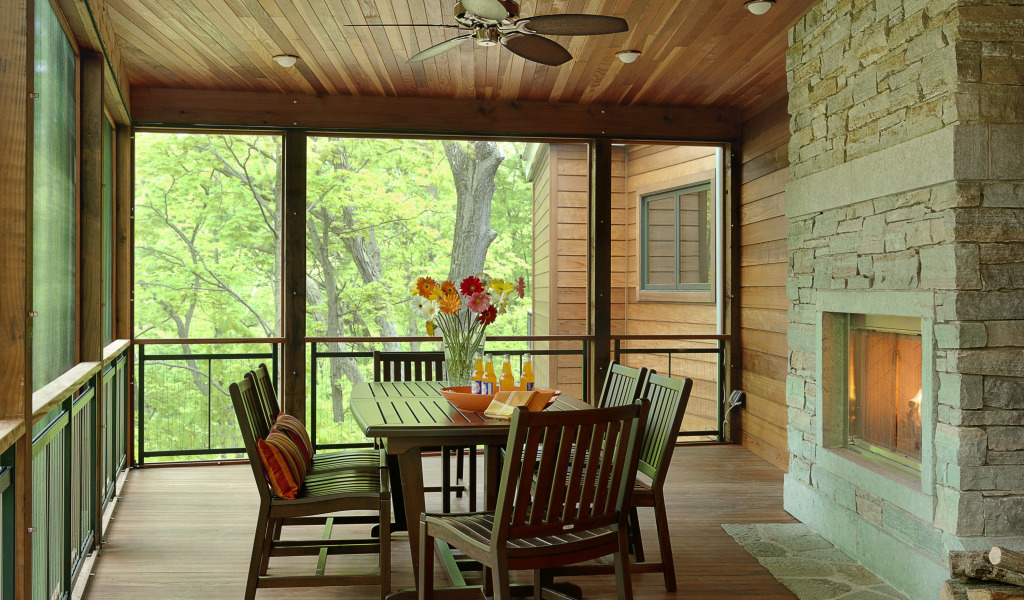
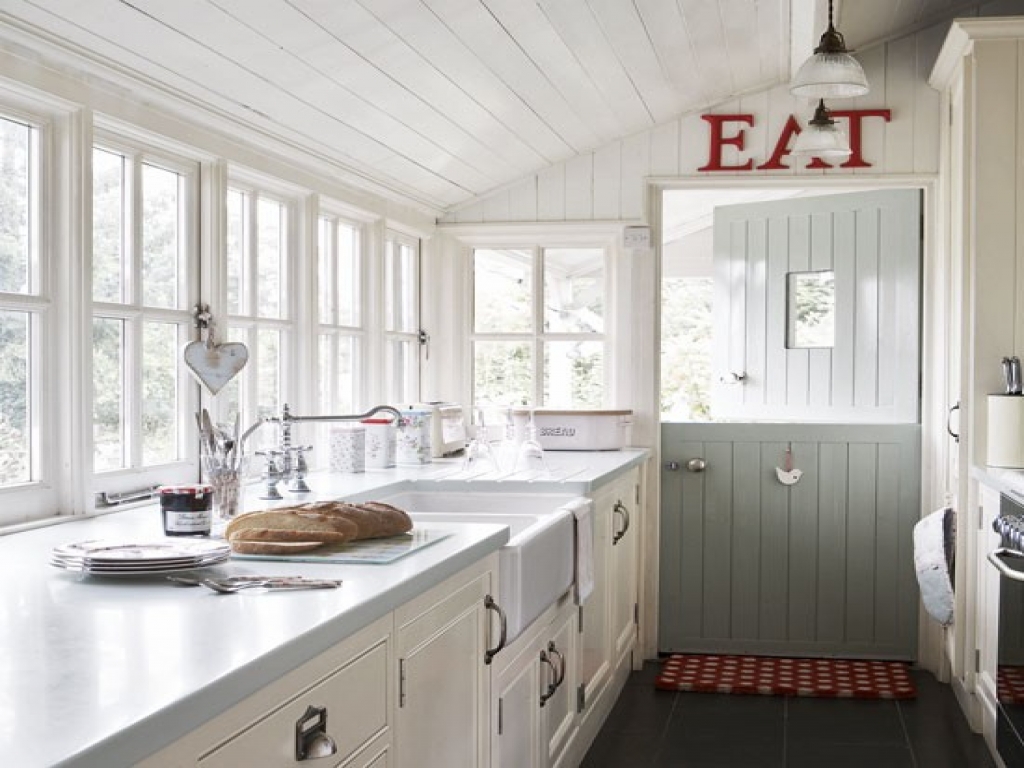
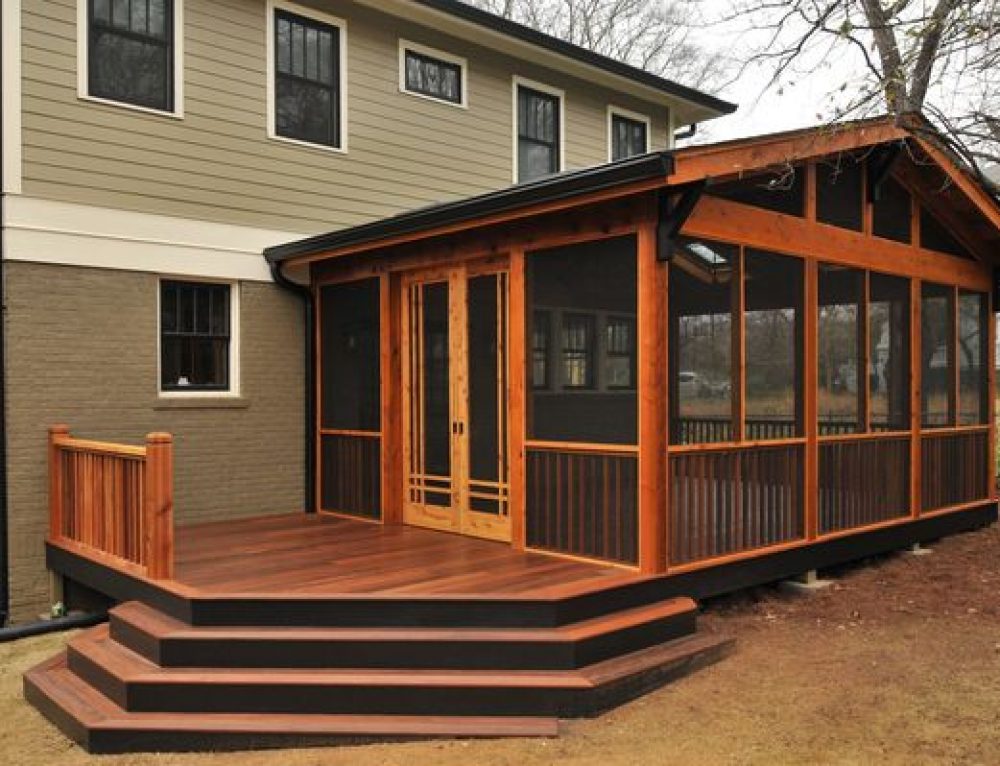
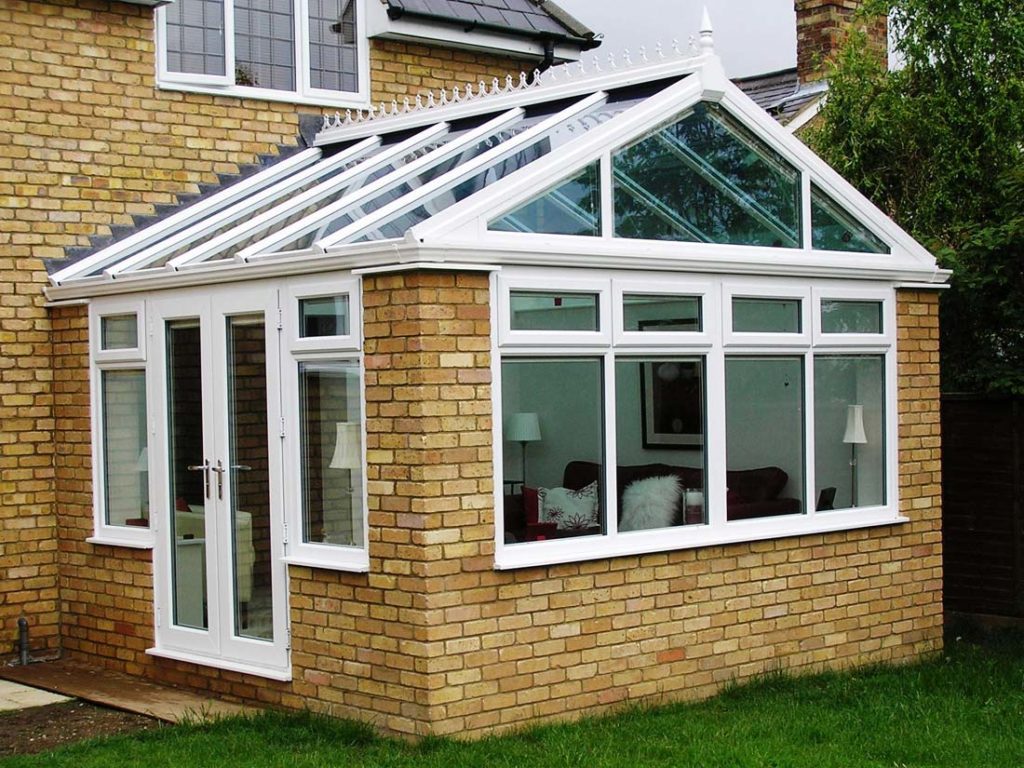
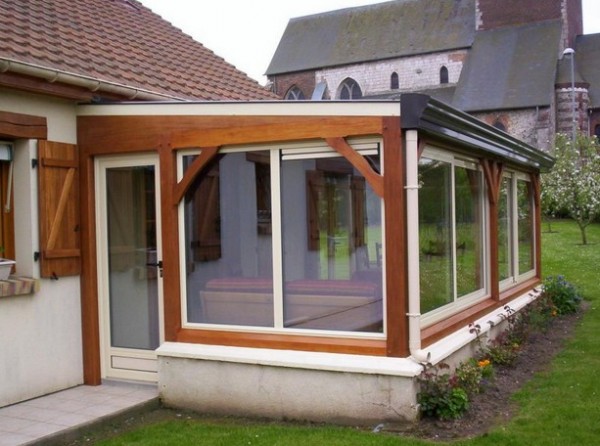
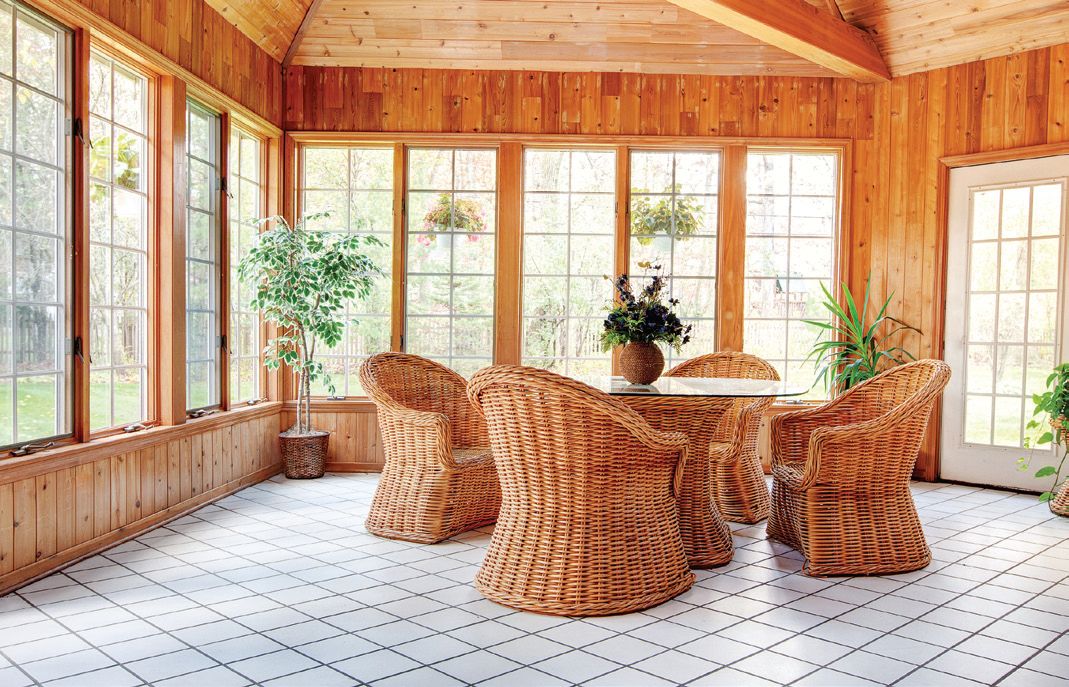
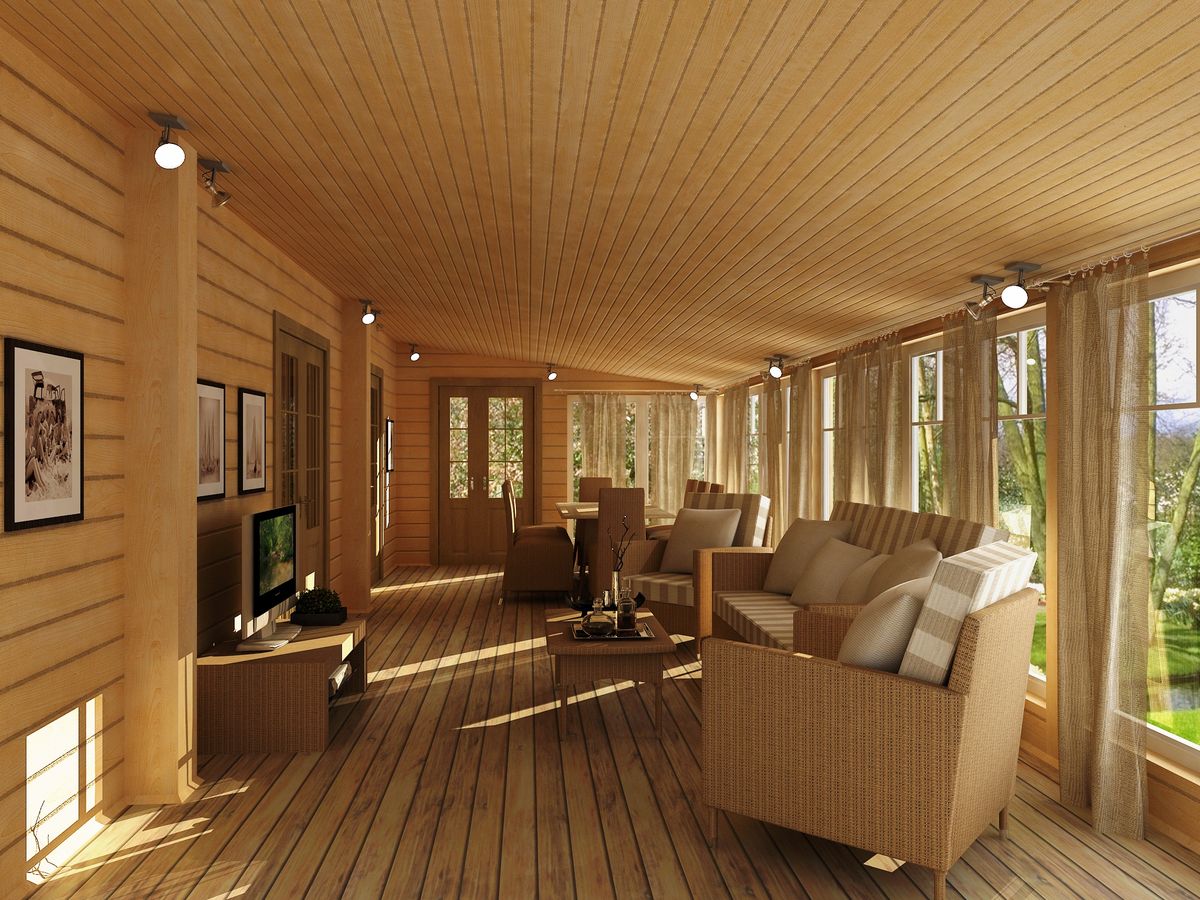
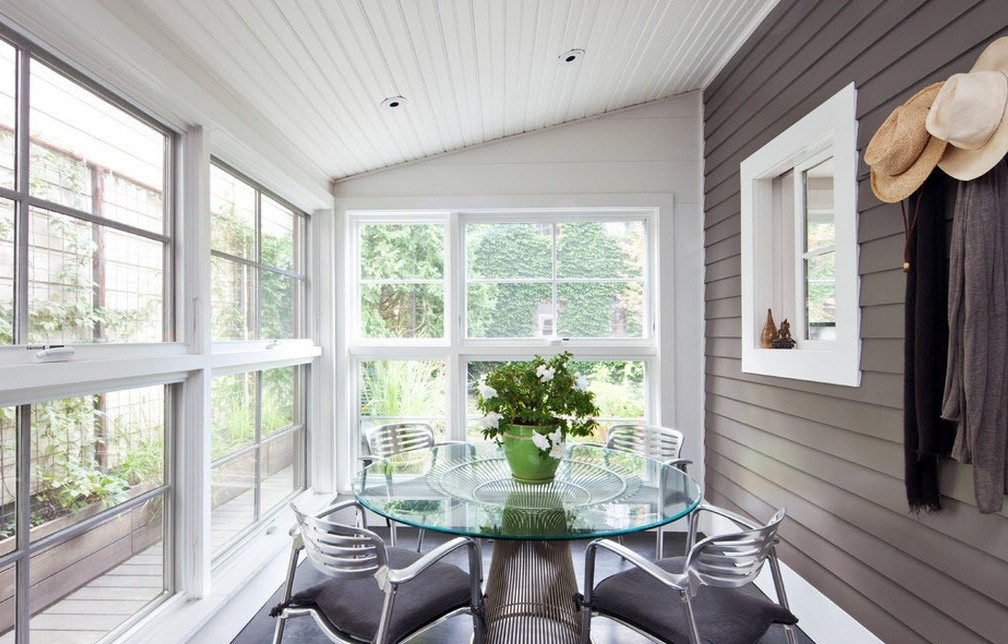
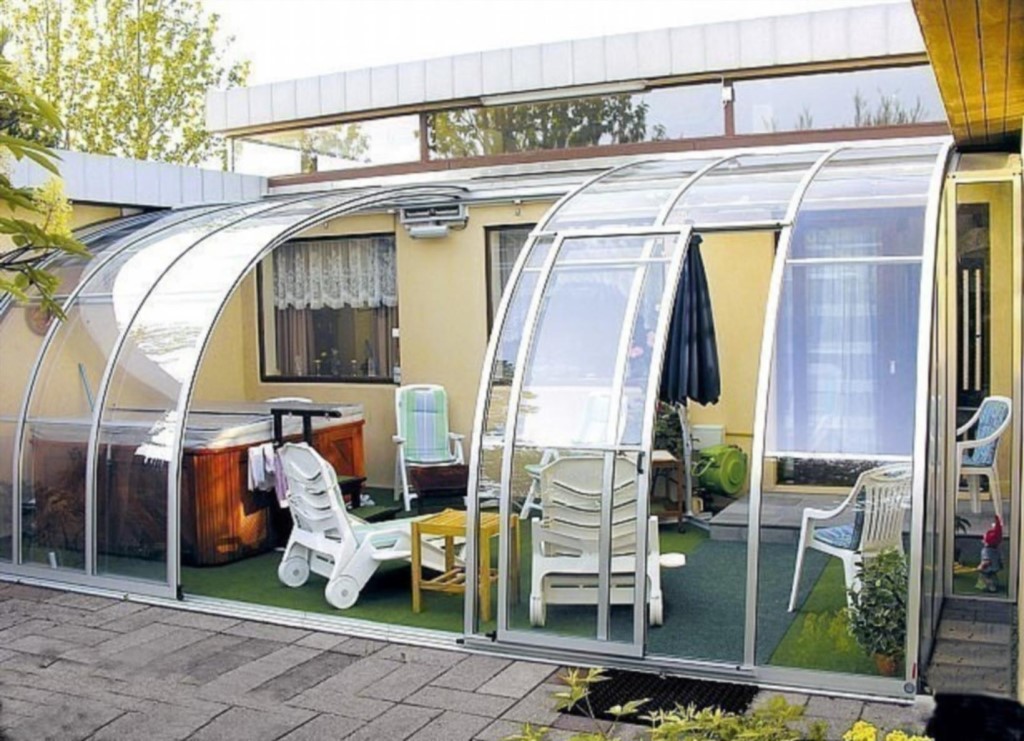
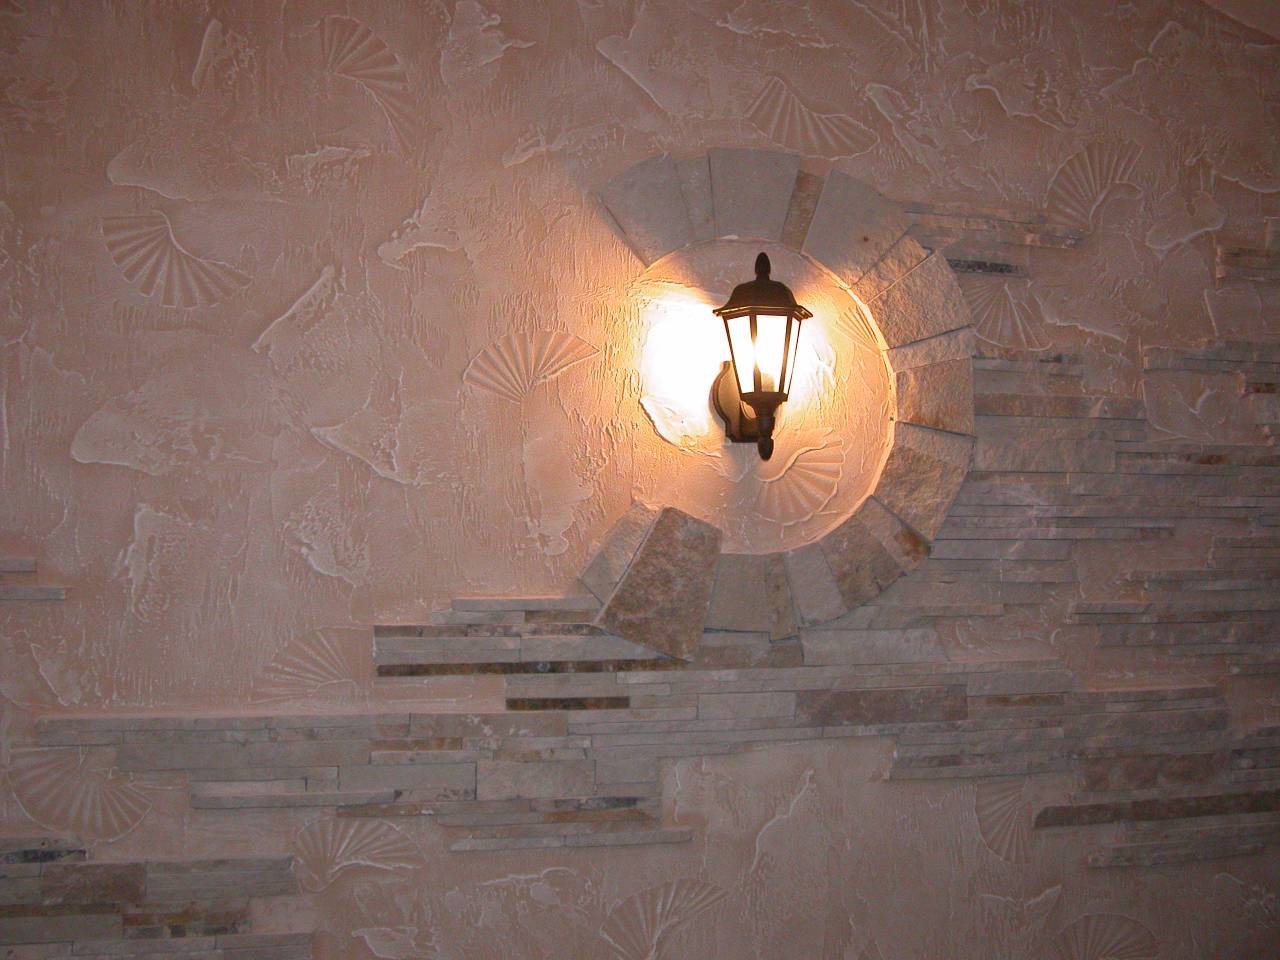
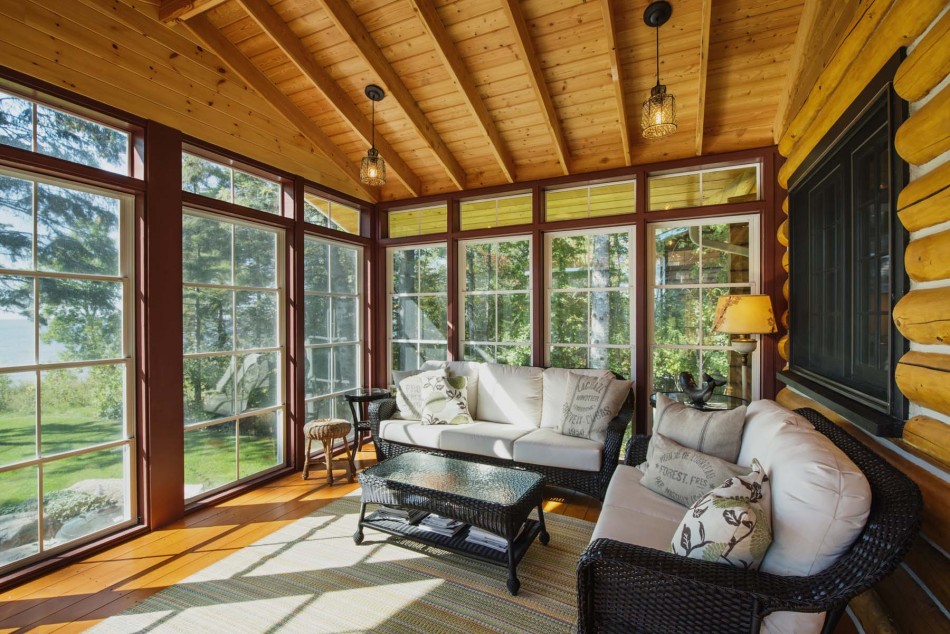
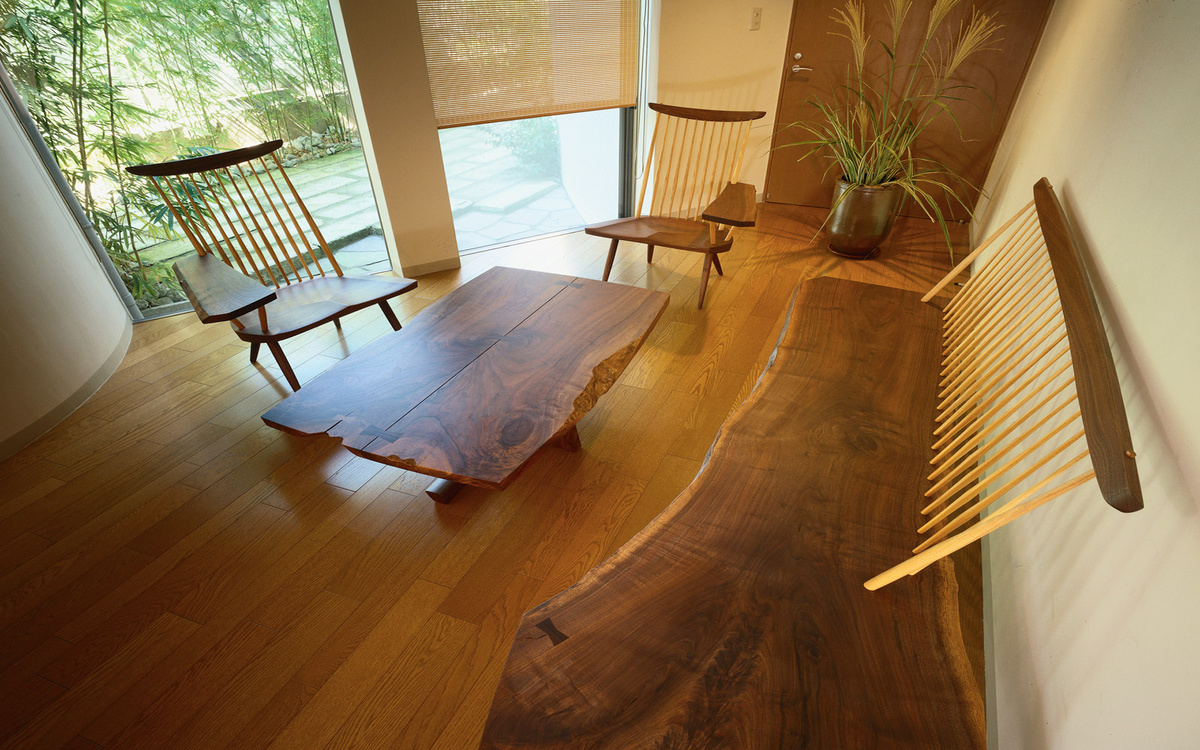
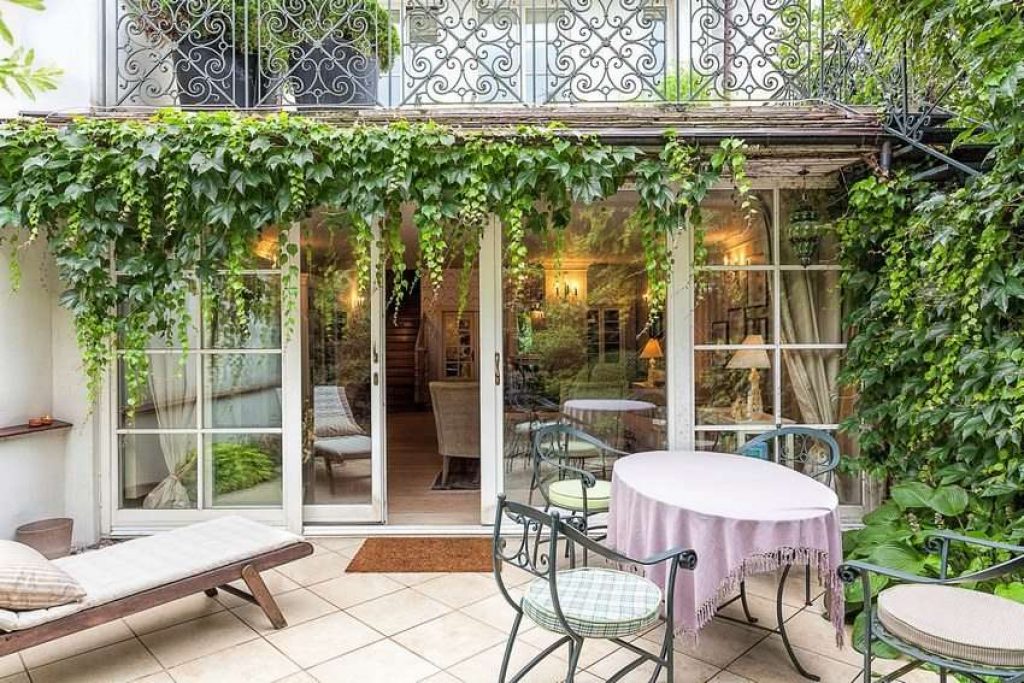
Ready examples
The veranda should be made in the same style with the house. It looks most advantageous when both the walls, and the roof, and the foundation are made of exactly the same material.
Wooden building in Provence style looks great. Here the presence of the roof was not provided. The role of the roof performs a balcony on the second floor.
Fully transparent verandas - a tribute to modern traditions. For glazing such options are used the latest materials: polycarbonate, polyvinyl chloride and others.

In some cases, in the extension, you can draw the curtains, allowing light to penetrate only through the ceiling. This creates a special atmosphere of intimacy. At the same time, this approach provides the optimum temperature in this kind of room.
Terraces in high-tech style can be performed in the classical form, and as bay windows, the parts emanating from the walls, the so-called end extensions.However, it is important to remember that the form must be strict: polygonal, rectangular, square.

An interesting version of the veranda of wood and glass is presented in the next video.


