Plastering work: the subtleties of construction

At capital repairs of the room, as a rule, there is a need for plastering. The matter is laborious and raises many questions for those who decided to do it on their own and for the first time.
Best of all, planning plastering work, turn to professional craftsmen. If you decide to plaster the walls yourself, you need to carefully examine all the subtleties and nuances in order to achieve ideal results.
Special features
Mixtures are of different types, have different characteristics and nuances of application. Different plaster compositions are used inside and outside the room.
To correctly determine what kind of plaster you need, you need to understand the features of the walls.The deciding factor will be the material from which the walls are made. Most often the walls are wooden, brick and concrete.
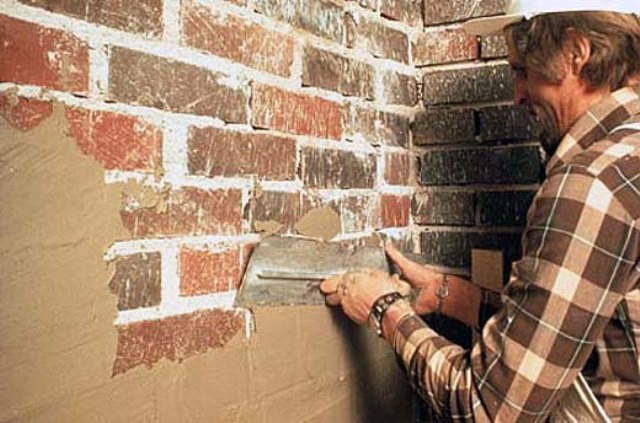
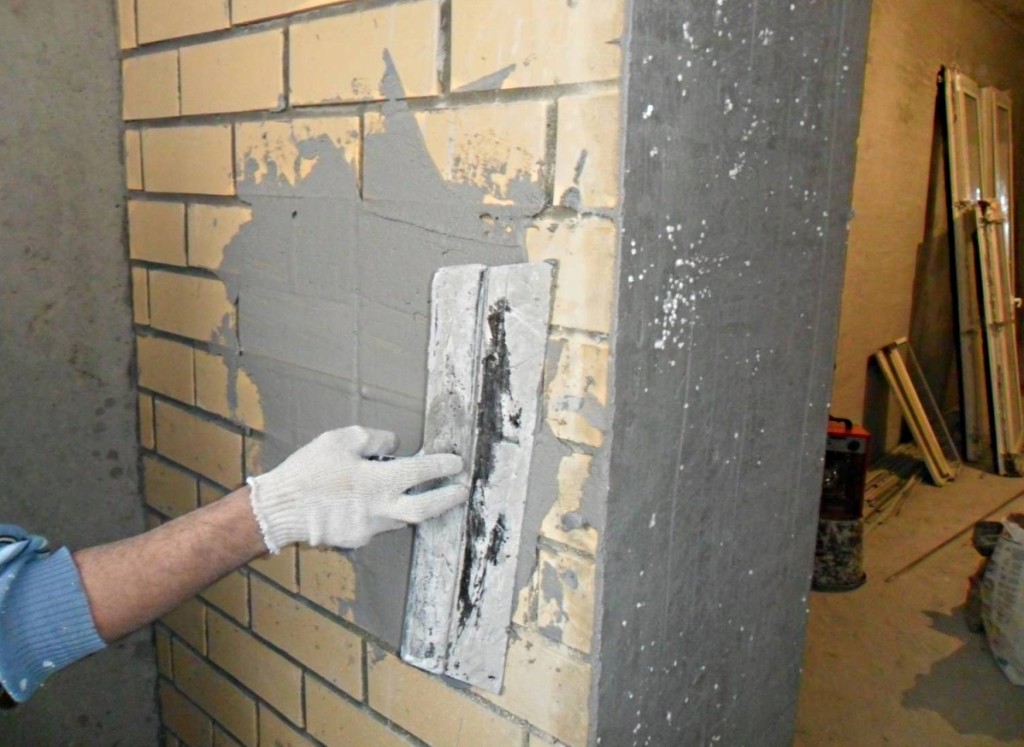
For plastering a wall made of brick, you will need a solution prepared on the basis of cement. There may be two options: cement mixed with sand or cement mixed with gypsum. The key difference of solutions in the hardening time. Gypsum will grab faster, so the solution with gypsum must be prepared immediately before application and in small portions, while the mixture with sand can be mixed in a larger volume.
If the material of the wall is concrete, before plastering it is necessary to give the wall a slight roughness for better adhesion of the mixture to the surface.
In this case, the wall is treated with a primer with quartz chips. And just as in the case of a brick wall, plaster is added to the solution in order to further strengthen the coupling. For a concrete wall, it is imperative to use a primer.
Foam block walls do not need additional warming, so plaster them with a decorative purpose. Primer is required here.because the foam block has poor binding ability.When choosing a solution, the index of agdezii is crucial.
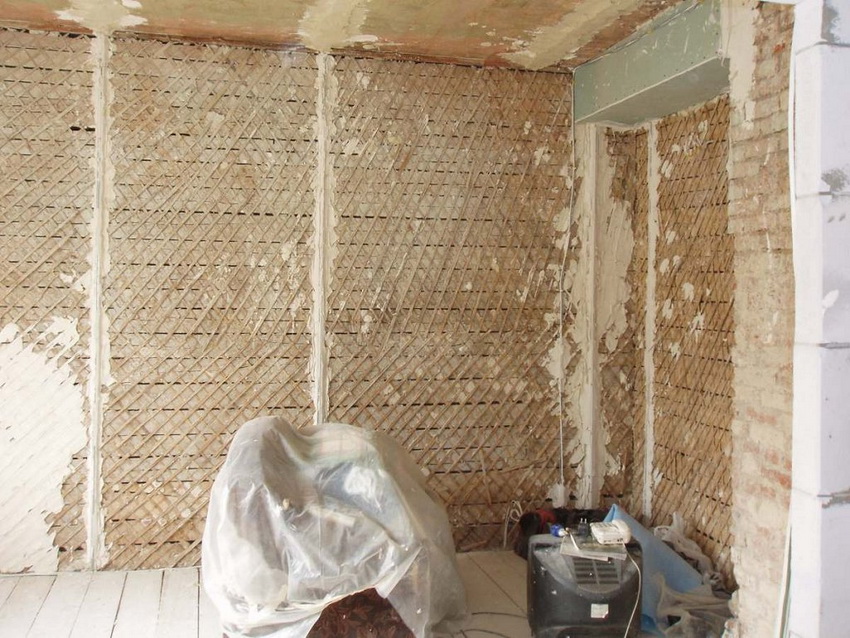
Wooden walls due to the smoothness, less than the others are suitable for plastering. But you can still do this by preparing the surface thoroughly. It must be carefully cleaned and supplemented with missing roughness, serifs, stripes, kerfs. You can also use additional wooden grilles, which will serve as the basis for the first layer of plaster mixture and allow it to firmly grasp this intermediate layer.
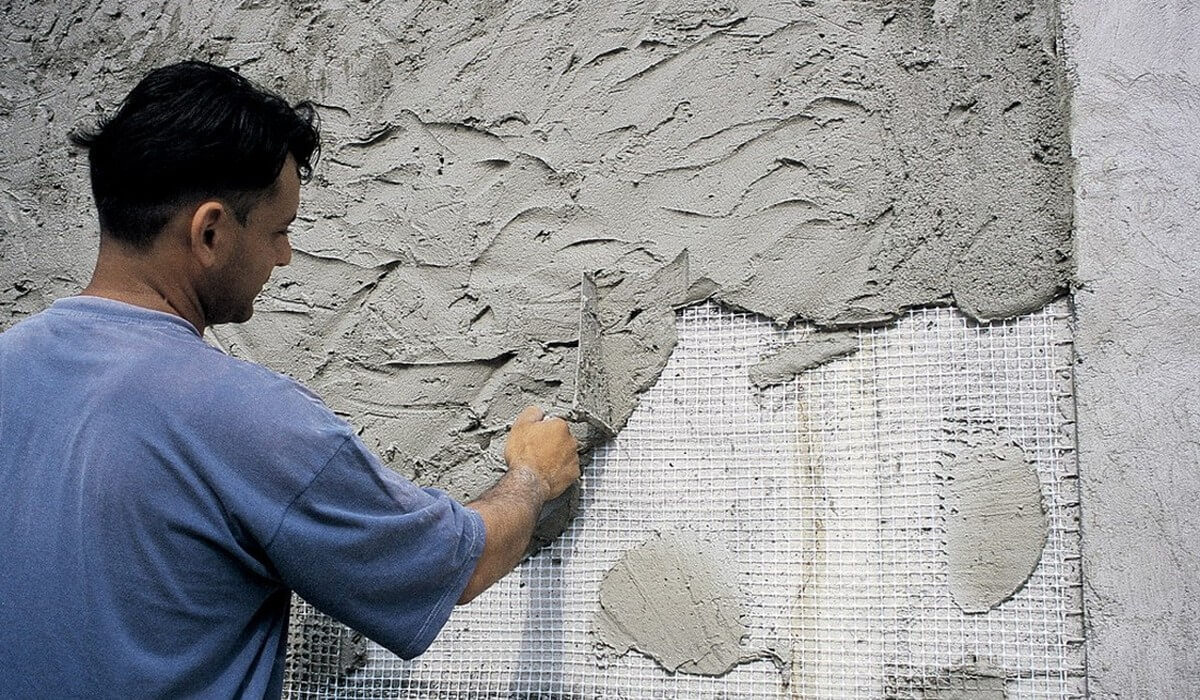
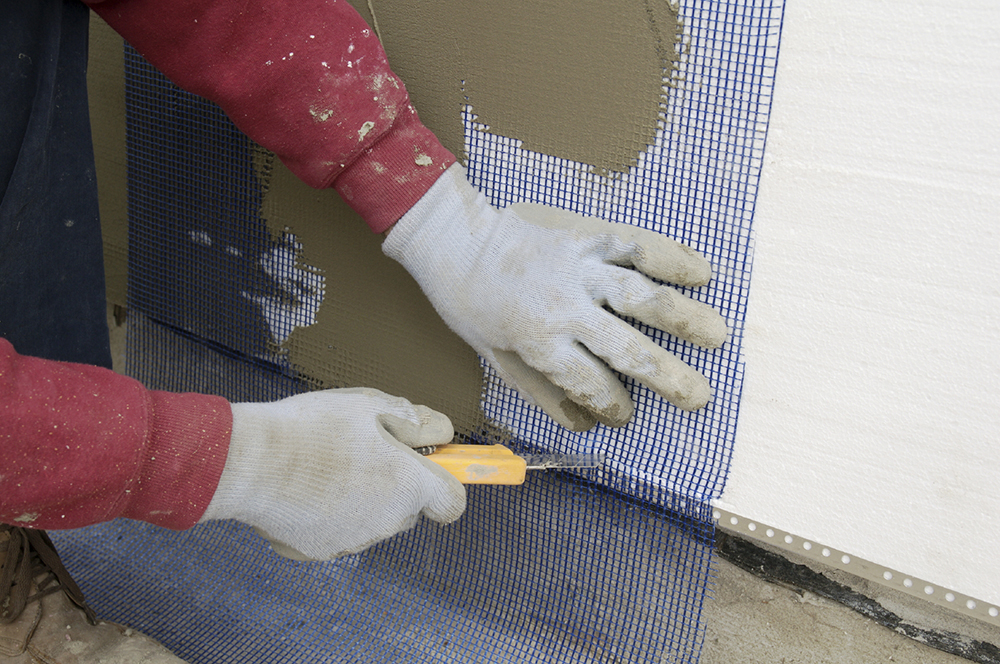
When plastering walls with irregularities, you will need to install a reinforcing mesh that will become the frame for the future new layer of the wall.
And in order to properly handle the mixture of corners, you will need an additional tool - a trowel. Also, such walls are better to plaster using lighthouses. This is a special system of profiles that are attached to the wall and then serve as a guide for leveling the surface.
Advantages and disadvantages
The advantages of plaster are obvious: this coating is a universal material for finishing both internal walls and external facades. Regular plaster protects the walls from the influence of destructive factors, levels the surface, can strengthen the sound and heat insulation of the room.Decorative plaster is a finish, the beauty and durability of which is undeniable.
An alternative may be walls covered with plasterboard, but you need to understand that drywall has a number of drawbacks, the most important of which is its fragility. And using plaster for interior decoration, you can plan further work with the wall, for example, installing fasteners for a plasma TV or shelves. Such a wall can withstand a large load.
Its properties depend on the basis of the plastering mixture.
Acrylic
The mixture based on acrylic is not subject to the influence of microorganisms, has vapor permeability, but this plaster is subject to contamination more than other types. At the same time as the main component is acrylic resin, which gives greater strength to the finished coating. It can be cleaned with conventional means, water and cleaning compositions. And the facade finish applied outside can even be watered.
If you use such plaster on top of a reinforcing mesh, this will greatly increase the resistance of the wall.
Acrylic compositions are divided into two categories: for interior and exterior work.. Ready-made acrylic blends can be supplemented with antifungal components and tinted in any color. It dries in relation to other plasters quickly, so it will have to be applied at a good speed. This must be considered when planning the scope of work.
You also need to remember that when such a mixture dries, its color will fade and become less saturated, therefore, in order to get brighter and more vibrant colors, the tinting liquid will need more.
Primer and plaster is desirable to purchase from one manufacturer, because their properties will complement and strengthen each other. Thin-layer plasters are produced in finished form.
If you want to get a thicker layer, then the best will be to get a dry mixwhich is divorced according to the proportions indicated on the packaging, and it is more convenient to apply it with the help of special machines. However, this does not allow to avoid leveling the finished layer using hand tools.

Silicate
The mixture on the basis of liquid glass has a large vapor permeability, does not absorb pollution, is used when it is impossible to apply a standard (acrylic). Silicate plaster cover the facades of buildings.Due to its structure, this mixture fits well on complex surfaces and has high adhesion. It has the properties of insulation.
One of the nuances of such a mixture is a change in color when wet. When wet, the wall will darken, then return to its original color when dry.
The solution will dry out pretty quickly, which needs to be remembered. Such plaster is available immediately in finished form, so it has a rather limited palette, which also needs to be borne in mind.
Before applying this plaster wall must necessarily be treated with a special silicate primer, which would entail additional time costs.
An important and special property of glass-based plaster is resistance to fire, which provides additional fire safety.
In general, this type of plaster is more picky in applying, but at the same time perfectly performs its functions, it is comfortable to use.
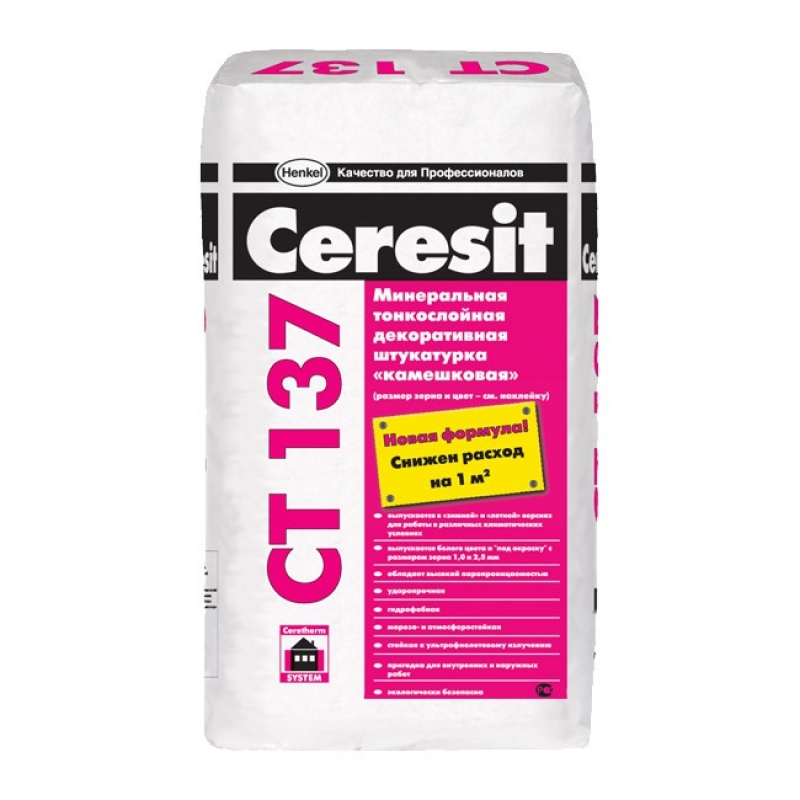
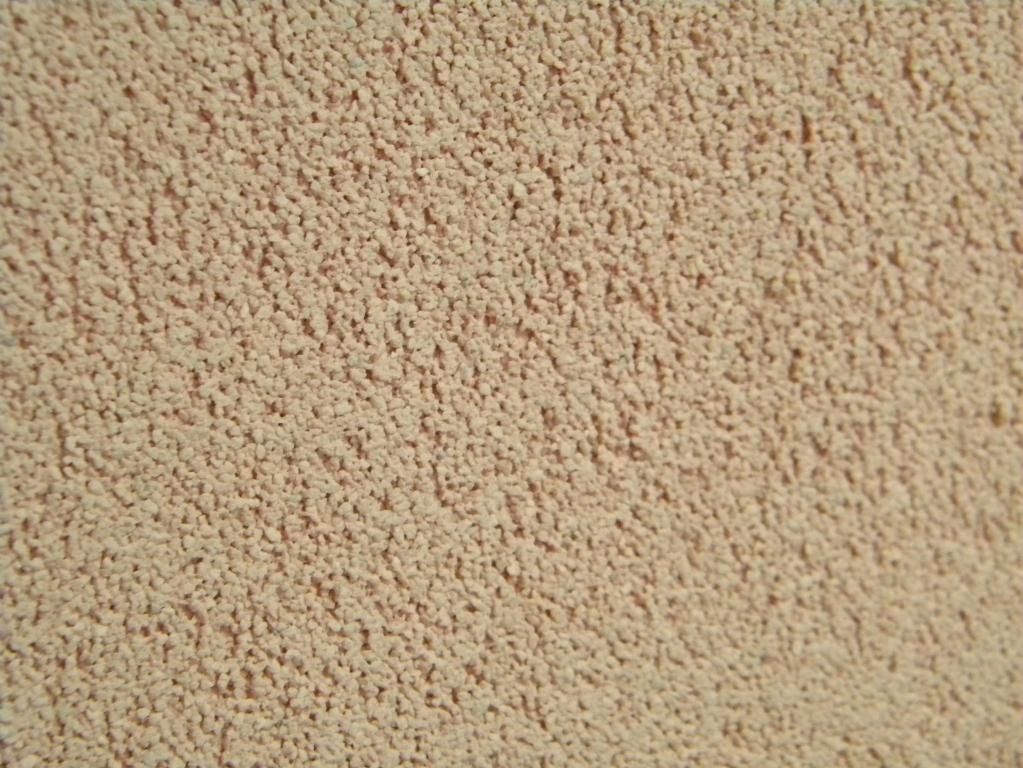
Mineral
Mineral plaster as the main component contains marble or granite chips. It has cement in its composition, protects the wall from mold and mildew.The most common option, besides having a low cost. It is possible to use it as a base for painting..
The level of strength of this material is much higher than that of acrylic mixture, therefore, subject to all rules of operation, this coating will be the most durable. Due to the porous structure, the mineral plaster exhibits an interesting property: at high air humidity, it does not weaken, but, on the contrary, strengthens its protective properties. Quietly passes air, but at the same time is an excellent heat insulator.

Very well manifests itself such a mixture when working with drywall in the interior decoration.
Since the mineral mixture can be presented in a transparent form, it is easily tinted in different colors and is very convenient for decorating the internal surfaces of the room. Different textures of this mixture give a different effect to the finished wall.So, the “fur coat” variation is optimally created with this kind of plaster mix.
It is also necessary to remember that to calculate the consumption of the mineral composition is quite problematic, because the thickness of the layer will depend on the size of the crumb fraction. The wet silk texture is in great demand from mineral plaster.
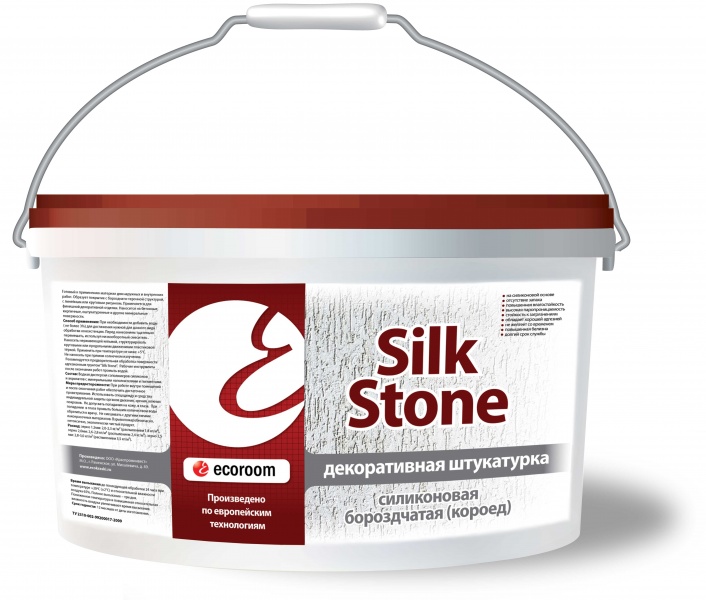
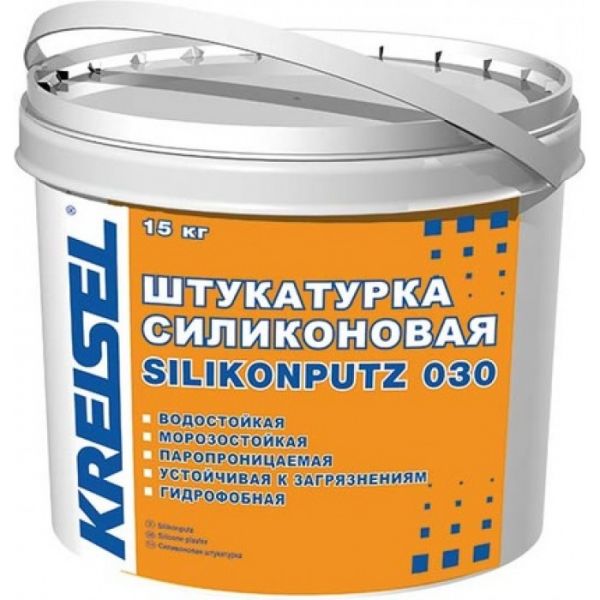
Silicone
This type of plaster has a high elasticity, almost unlimited choice of colors, does not require special care. But there is a drawback, it is the high cost of the material. This mixture appeared relatively recently, and its basis is polymeric resins. The obvious advantages are high agdeziya, high elasticity. Such material does not attract dirt at all, resists fungi and mold.
The coating is so durable that it can be successfully used in industrial zones, since it is absolutely resistant to acid and alkaline effects. For facades you need to choose frost-resistant mixture. Mix consumes approximately 3-4 kg per 1 sq. Km. m surface.
Types of mixtures
Mixtures for interior decoration, finishing differ in their structure and properties:
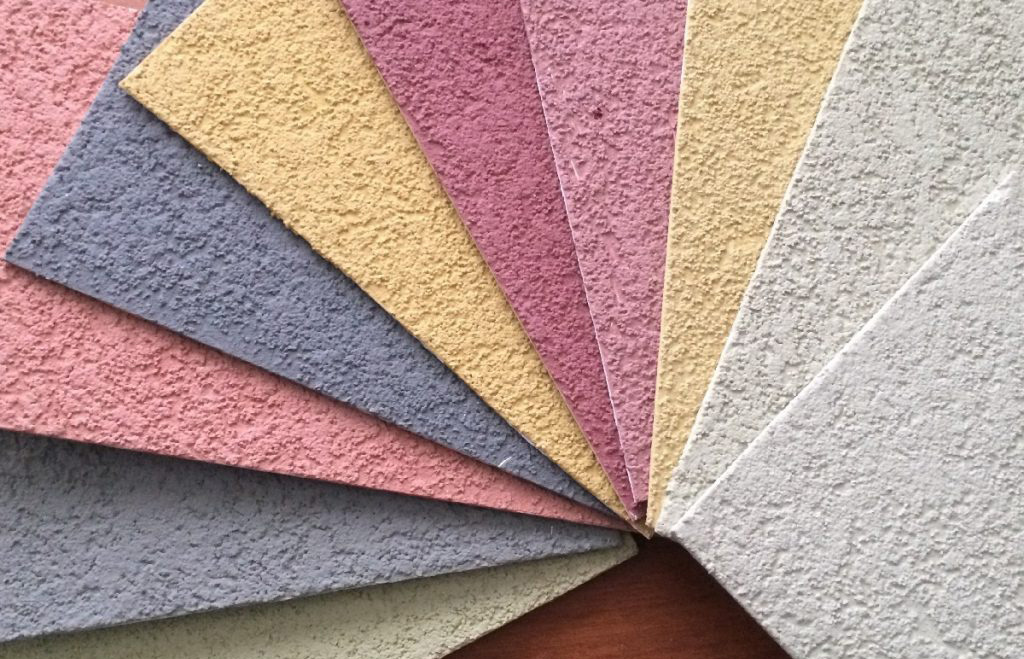
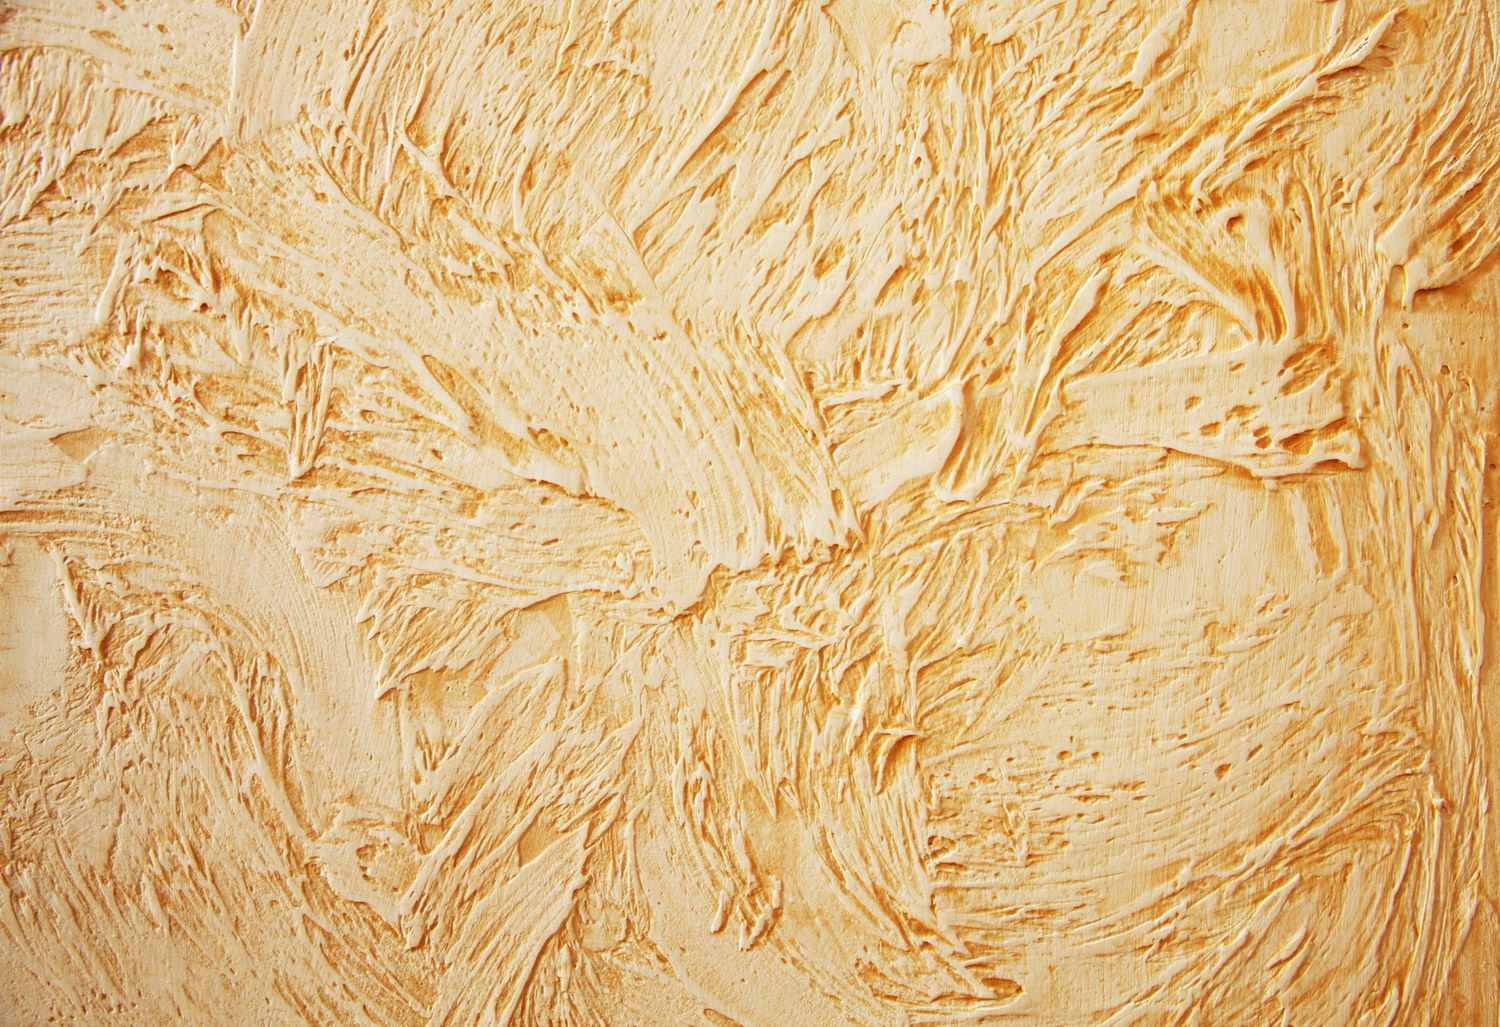
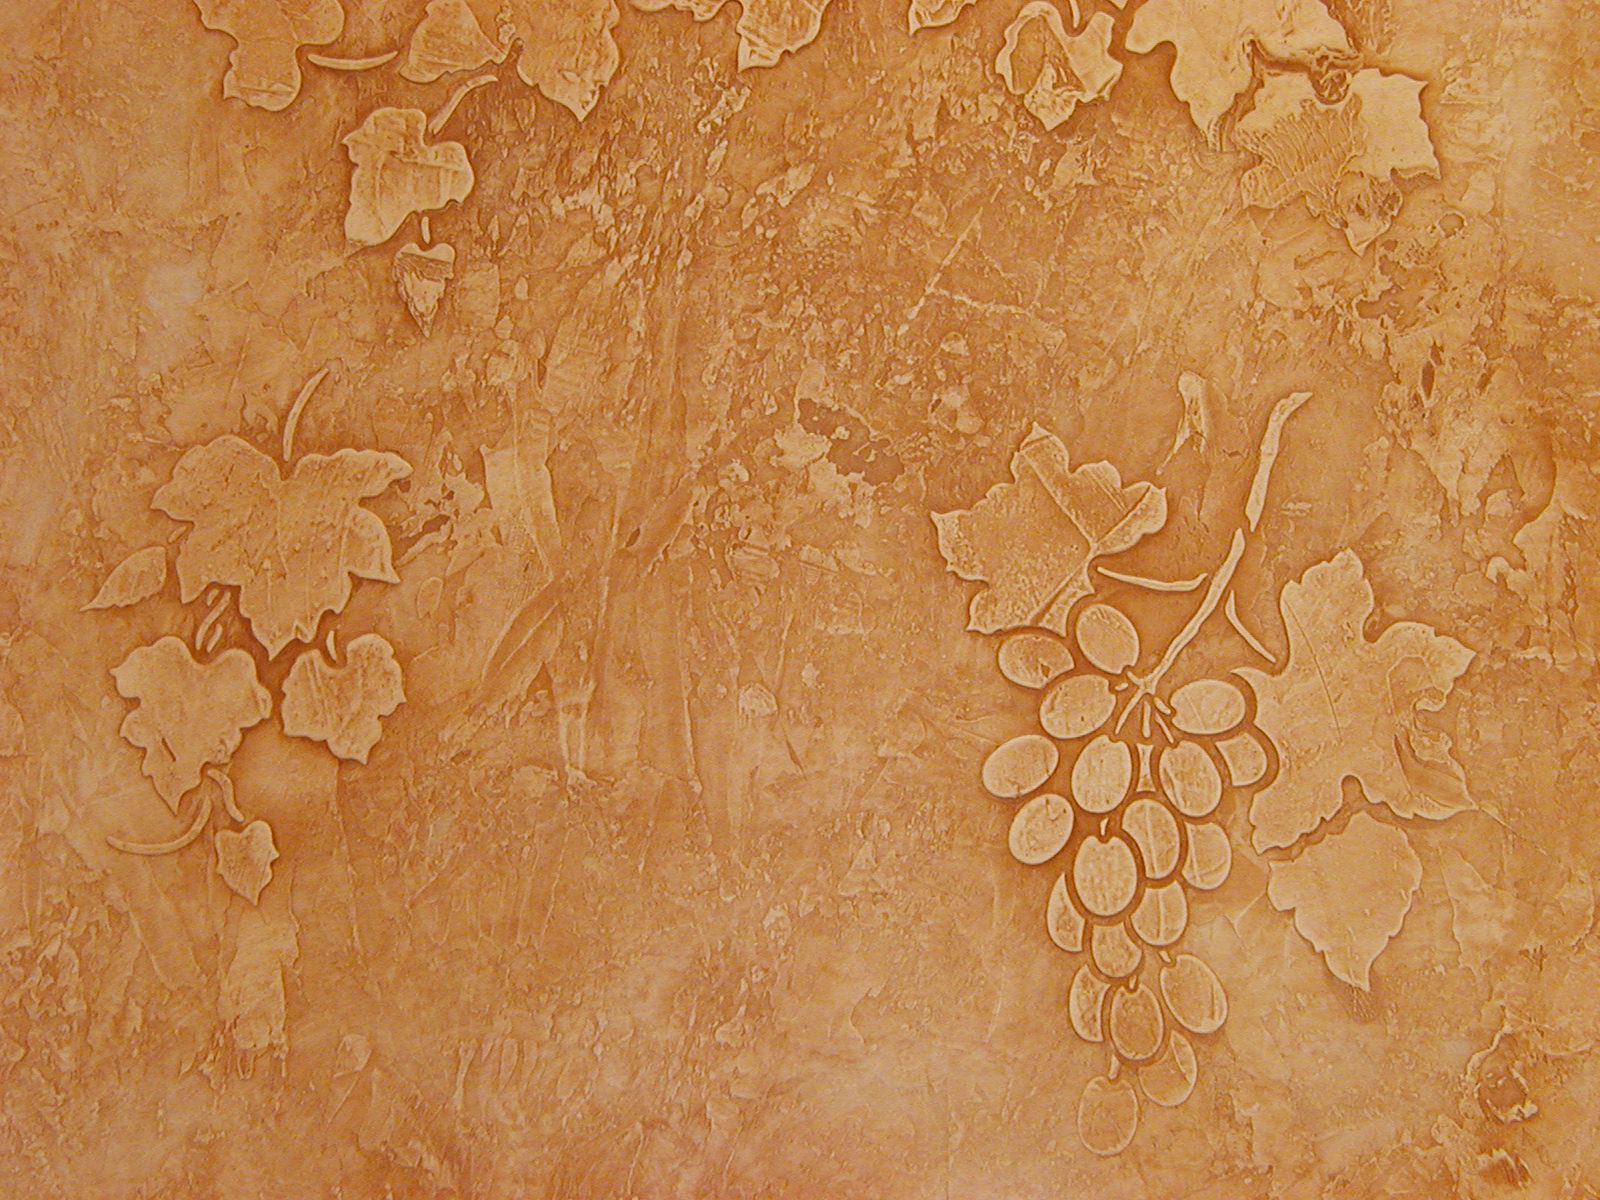
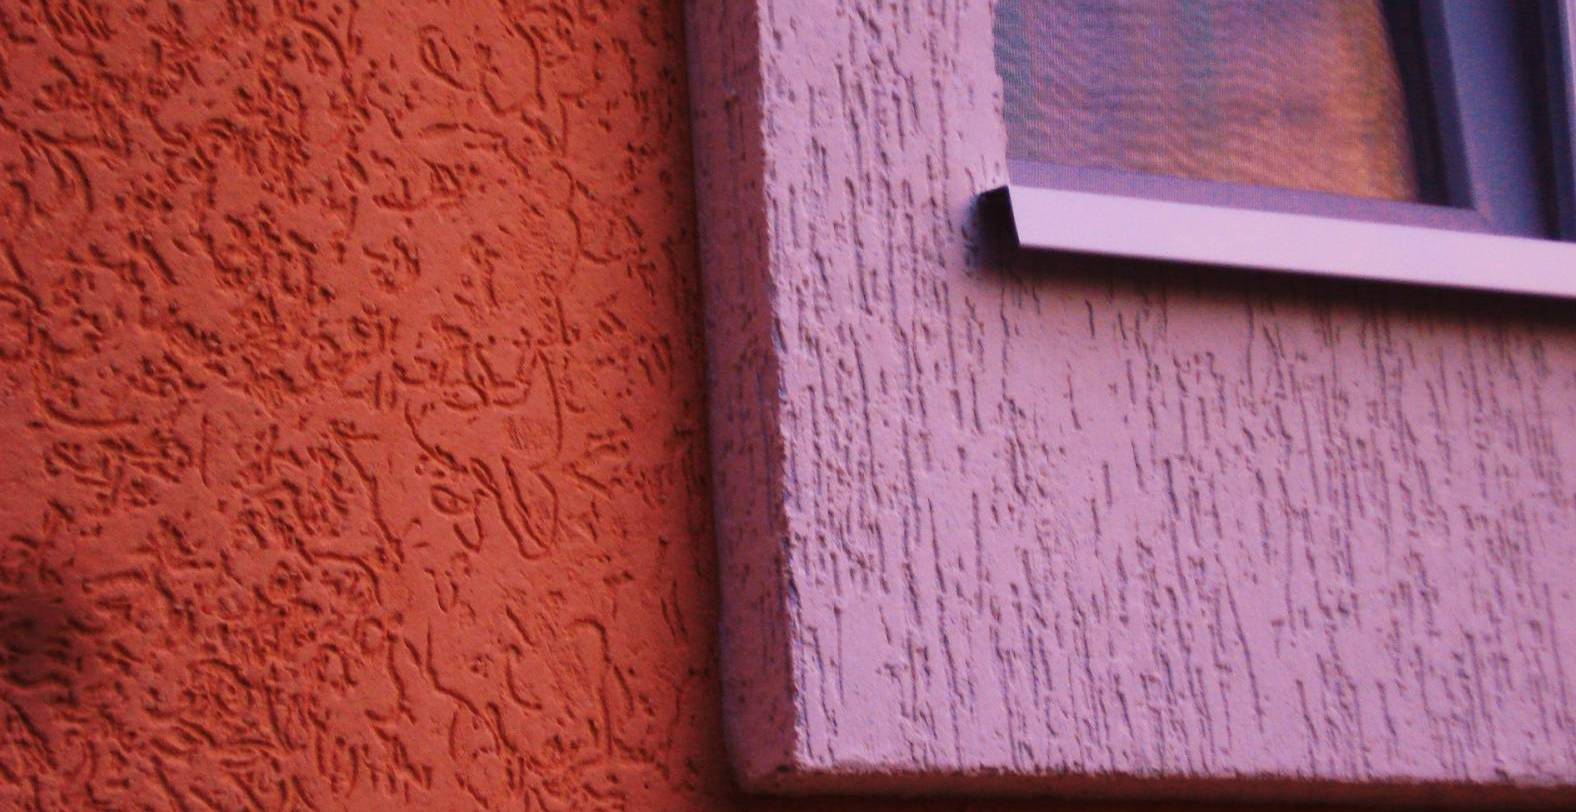
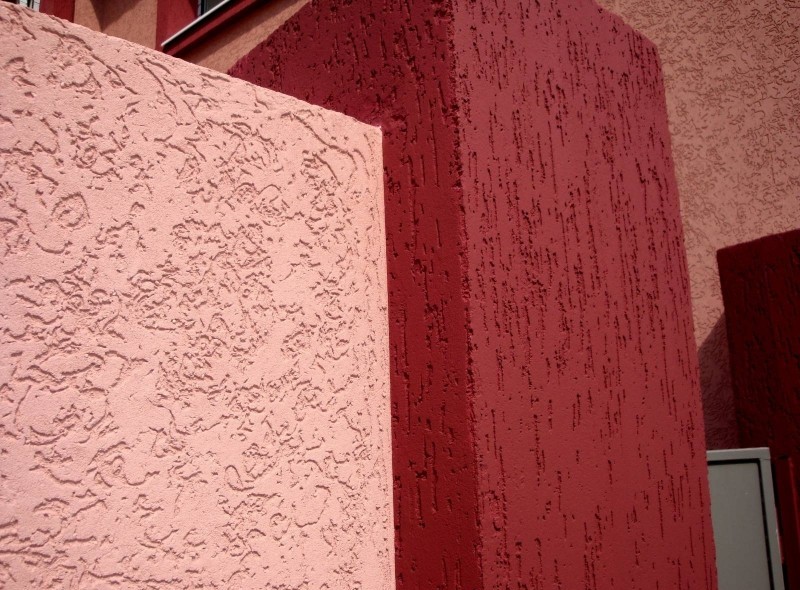
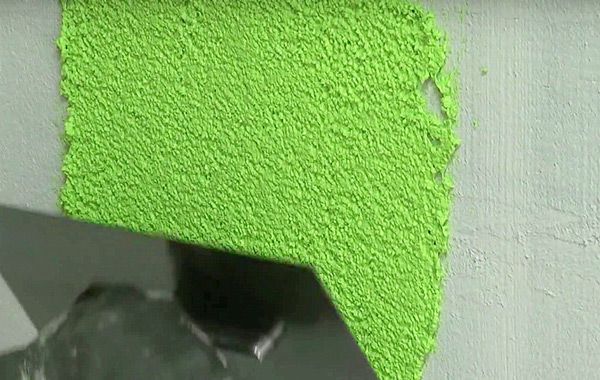
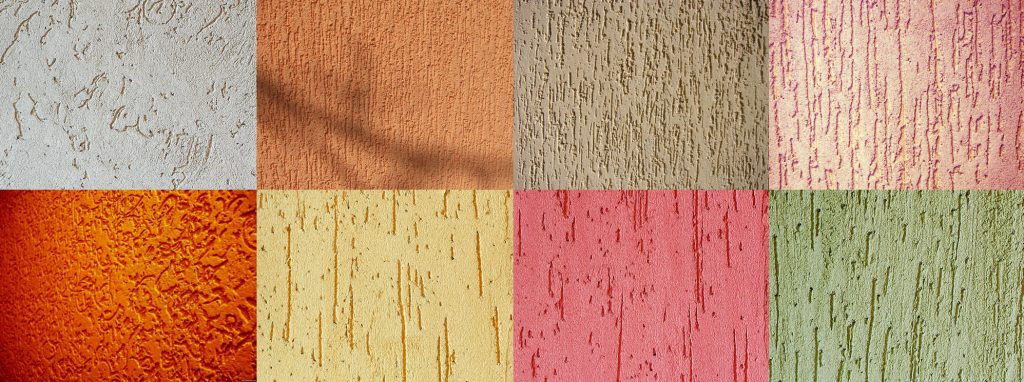
- Textured or textured plaster becomes such because of the presence in the composition of solid particles of medium and coarse fractions, for example, stone sand, chips. An interesting nuance: textured plaster can be made independently by adding various additives to the usual mixture to change the structure, for example, marble chips.
- Smooth plaster creates an imitation of glossy walls with different patterns and stains inside. This effect is achieved by special application technology.
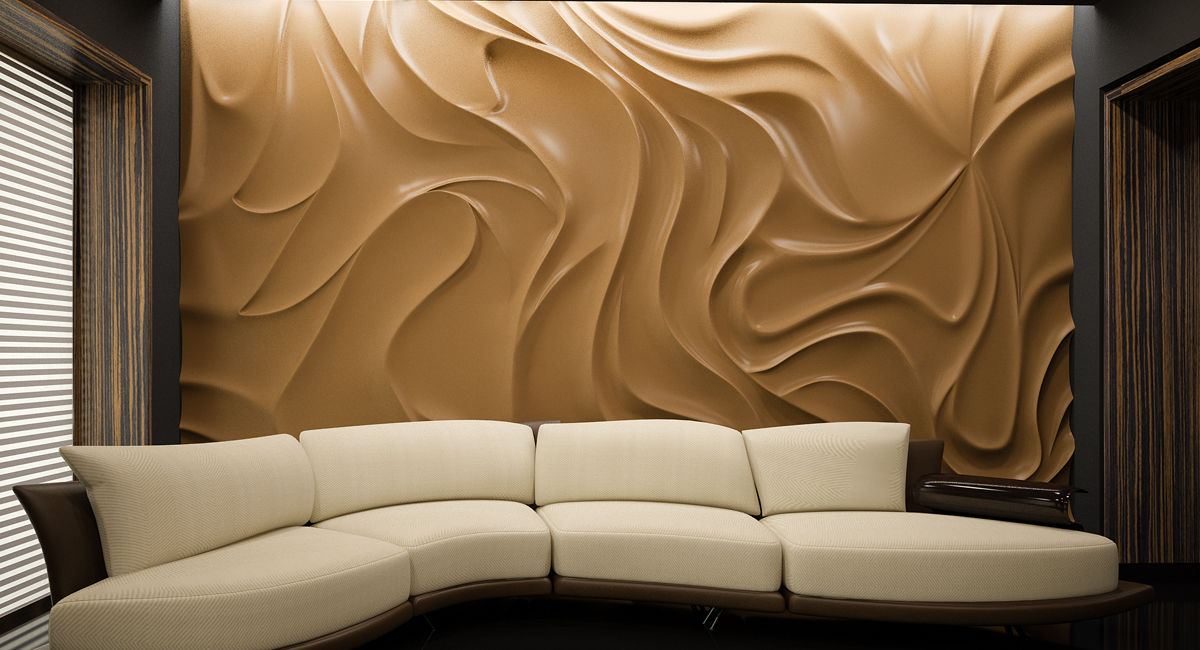
- Relief or structural the mixture, as well as a smooth one, is applied in a special way, which allows you to create deep reliefs and embody various design solutions.

The decor of the room can be made of various textured plaster. For example, the apartment in which the hallway is finished with one type and color of plaster, and the corridor or bathroom - with another will look very impressive.
Consider the most popular types of decorative plasters.
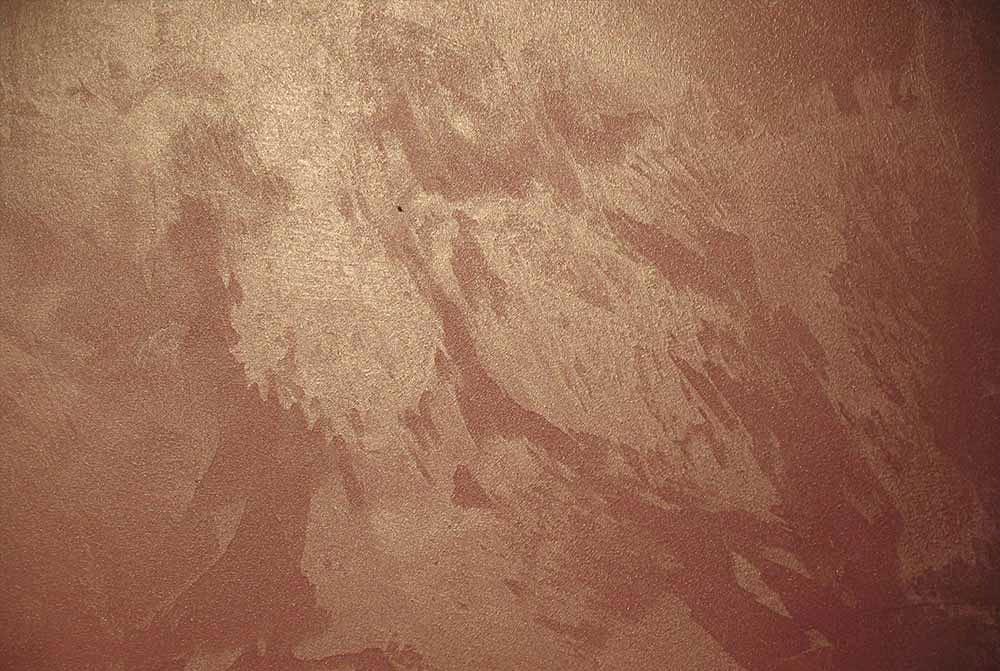
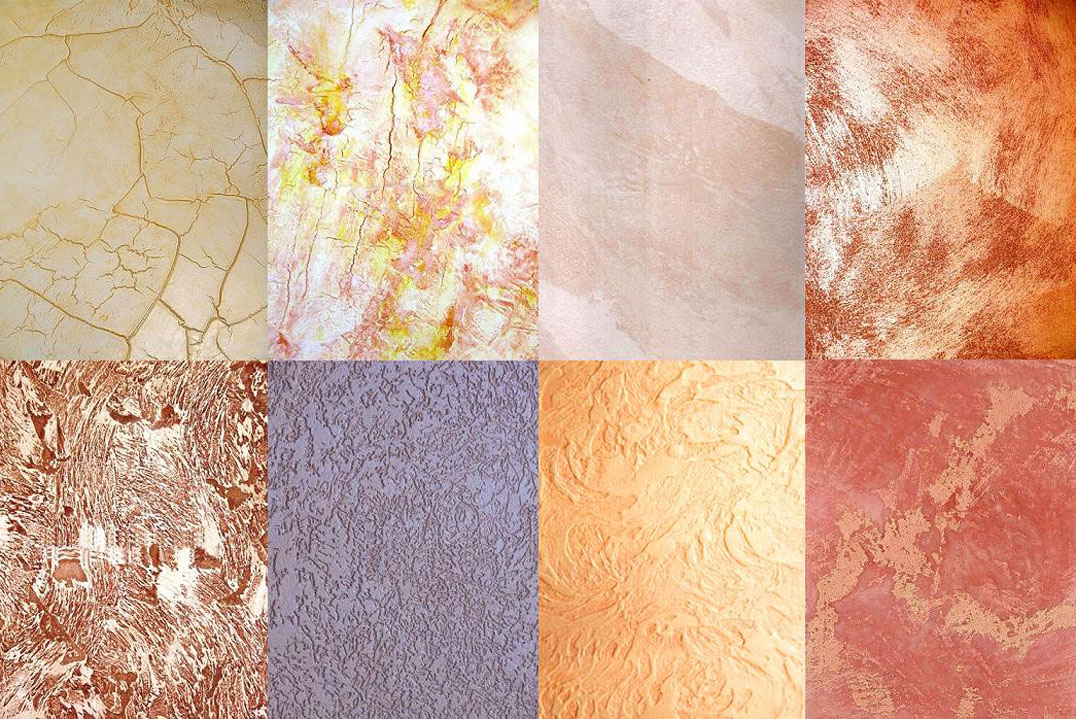
Venetian
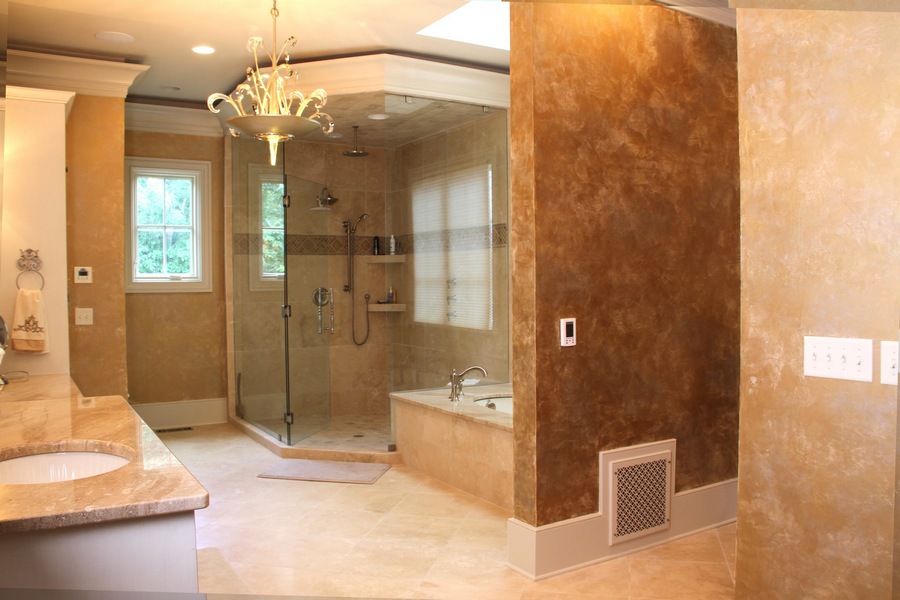
Venetian plaster is ideal for bathrooms. It looks like a marble coating. Stone dust is used for the base of such plaster.
Applying it is not a simple matter; sometimes you have to apply up to 6 layers.to get the desired result. But when it is reached, there can be no regrets about the effort spent, so beautiful and spectacular view takes the room.
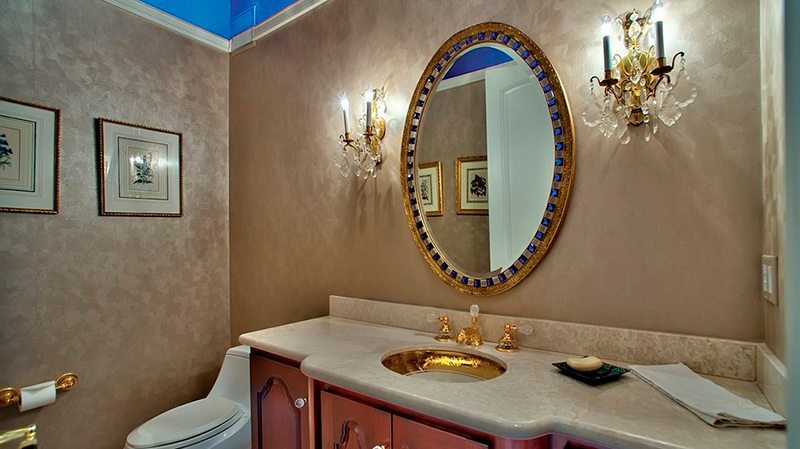
Using Venetian plaster, you can create a smooth and relief effect, it all depends on the technology of application.The great advantage of this plaster is that it successfully fits on any surface. Since this mixture is initially transparent, it is possible to give it virtually any color.
With proper application and conditions of use such a plaster will last up to 15 years.
In order for the Venetian mixture to become textured, large marble chips are added to it.
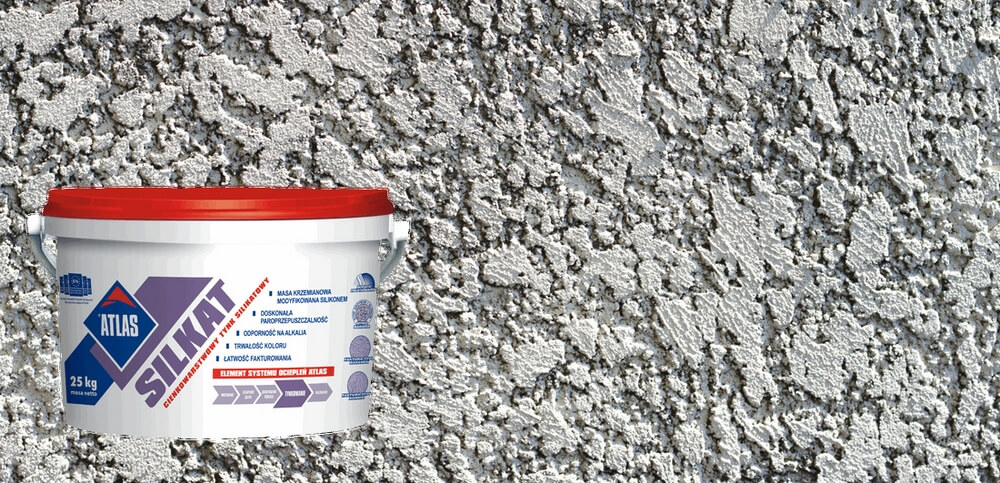
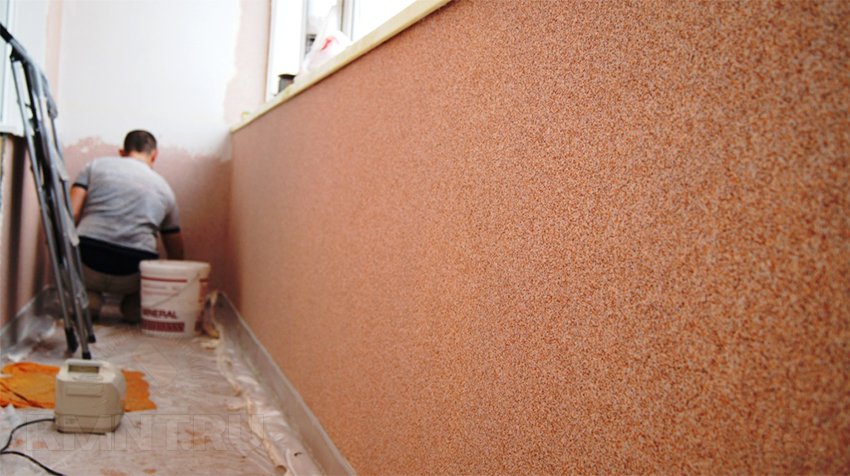
Bark beetle
Bark beetle plaster is an excellent option for facade decoration. Due to its structure, it has increased strength, and the damage on it is hardly noticeable, therefore, it is also used for office or public premises. There are two types that differ in the composition of the base substance. The first is created on the basis of acrylic, and the second on the basis of gypsum.
Material with an acrylic base can be bought completely ready for use, while plaster with a plaster base can only be found in the form of a dry powder.


The granularity of this mixture is due to the presence of granules of marble or granite. The effect depends on the size of these granules, so larger ones will leave wide grooves, while smaller ones will leave almost invisible paths. Marble granules can be replaced by polymers, then the weight of the mixture will be significantly reduced.
It withstands weather changes, is well resistant to high humidity and exposure to sunlight.Easy to clean with a sponge and water.
Lamb
The mix "lamb", similar with bark beetle plaster, front plaster. It creates a relief wall covering, reliable and spectacular. Indoors, it can also be used, especially when there is a need for applying a particularly resistant and durable material.
Applied to any wall. Lies on the foam, due to its vapor permeability prevents the accumulation of condensate between the layers, which provides a favorable microclimate in the room.
Scope of application
Apply plaster for finishing of premises. In this way, the walls are prepared for painting or wallpapering. There is also a plaster designed to finish the facades of buildings. Plastering work is carried out to align and strengthen the walls, as well as to warm the room.
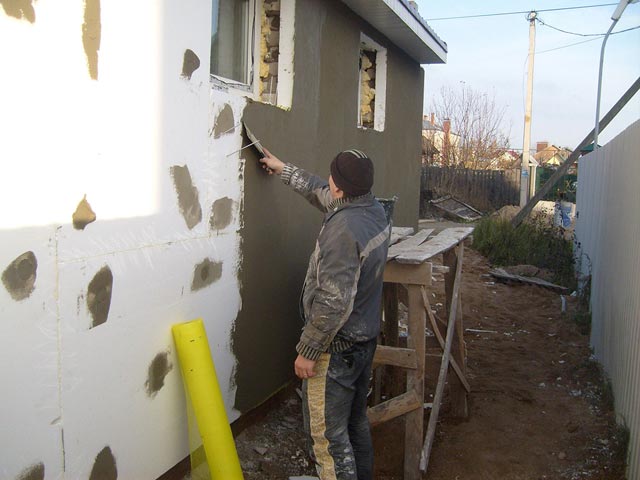
The most common option for plastering for the purpose of warming is to apply the mixture on the penoplex. Penoplex is the ideal insulating material. They are surrounded by the facade of the house, then the layer of foam plaster is coated with plaster. Indoors, a similar variant of insulation is also possible.

Plaster is almost universal option for finishing of any surfaces. Laying the mortar is possible on brick, on concrete and even wooden surfaces can be covered with plaster mix.

Contrary to popular belief, the solution can and should be applied to the foam.
Being an excellent heat-insulating material, the foam at the same time is quite fragile and needs long-term protection from external damaging factors. And the plaster for this fits perfectly.
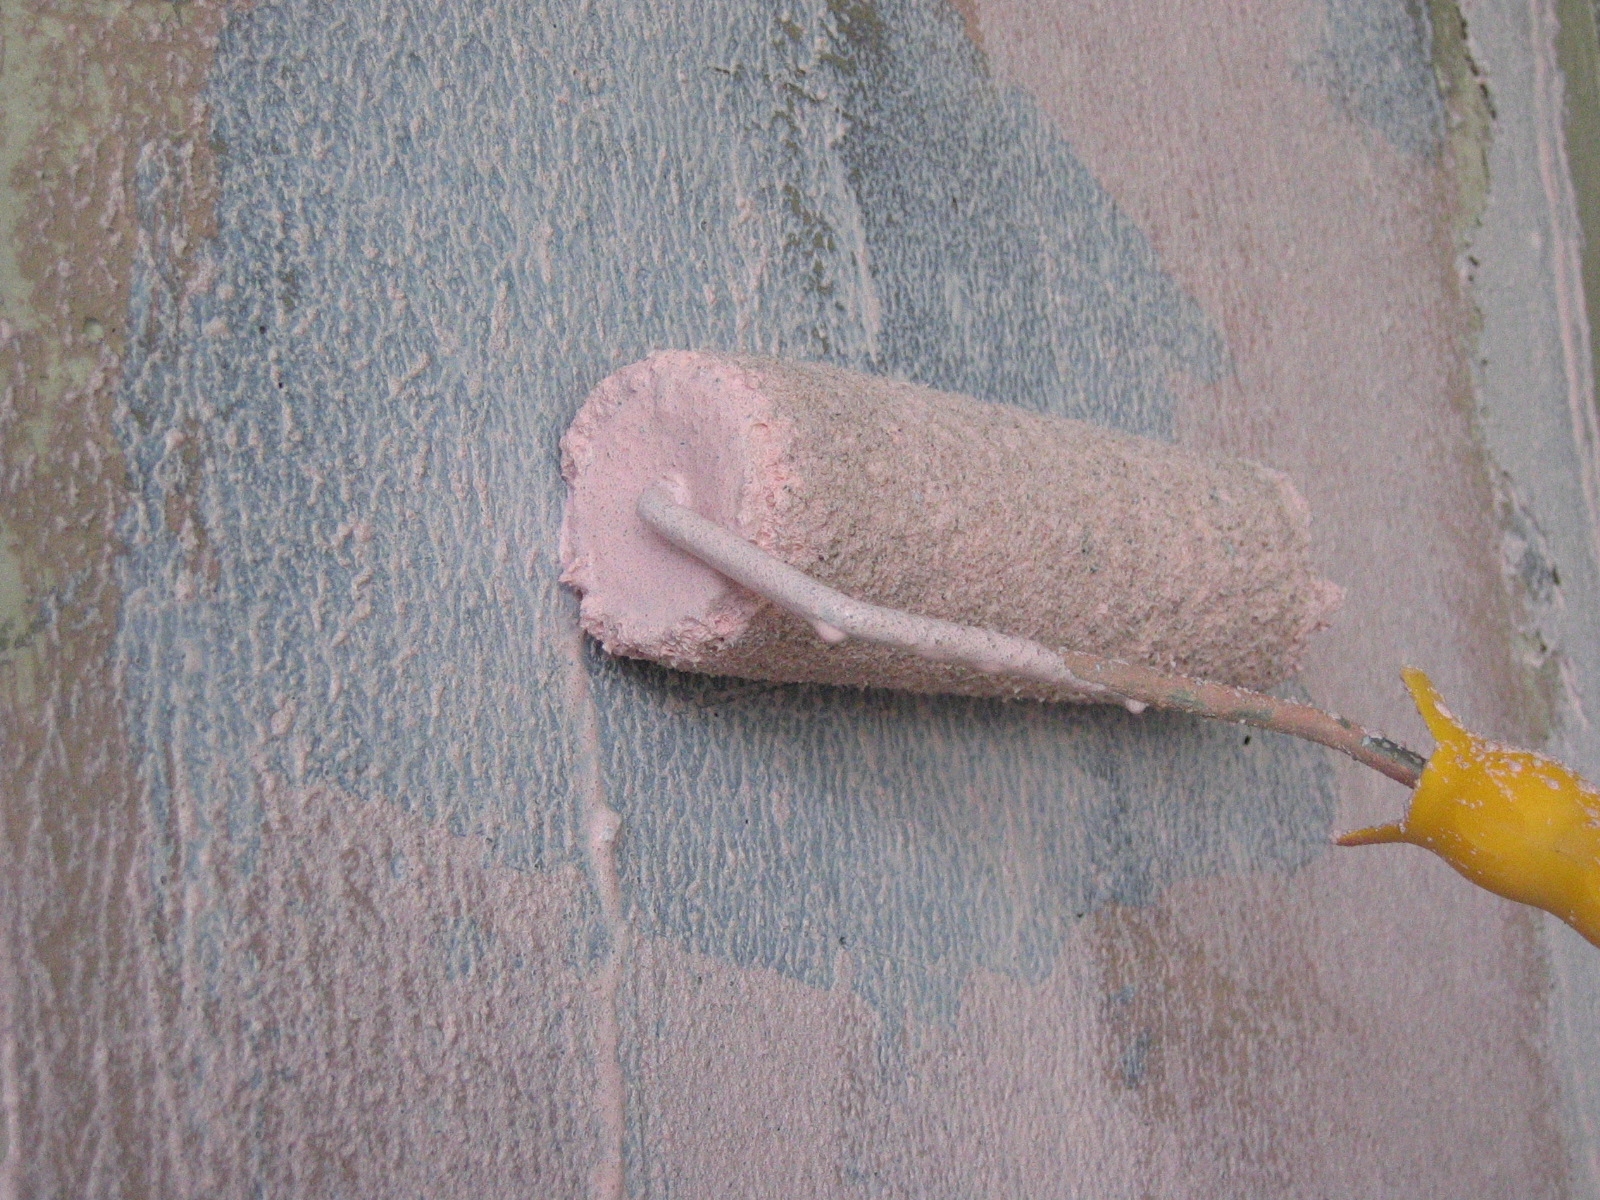
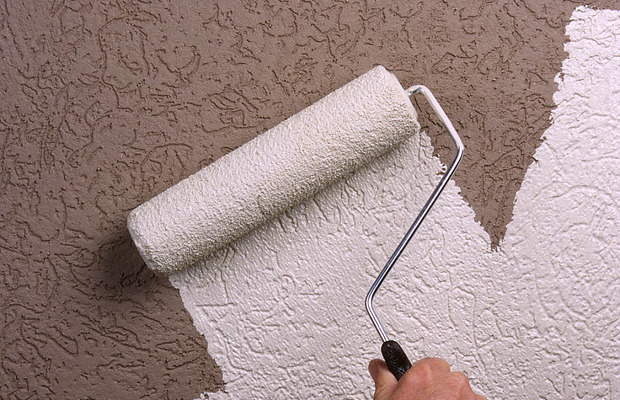
Various types of decorative plasters help to make the decoration of the room original and even unusual. For decorative plaster there is a special tool - shaped roller, with which you can create real masterpieces in the decoration of walls. The principle of its operation is as follows: on the damp surface of the plaster mix there remains an imprint of a roller, which is a pattern.
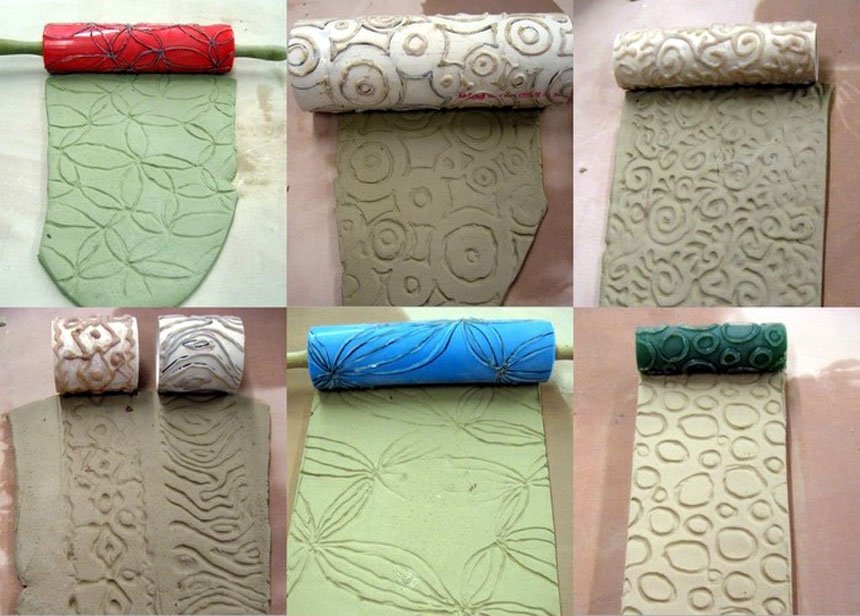
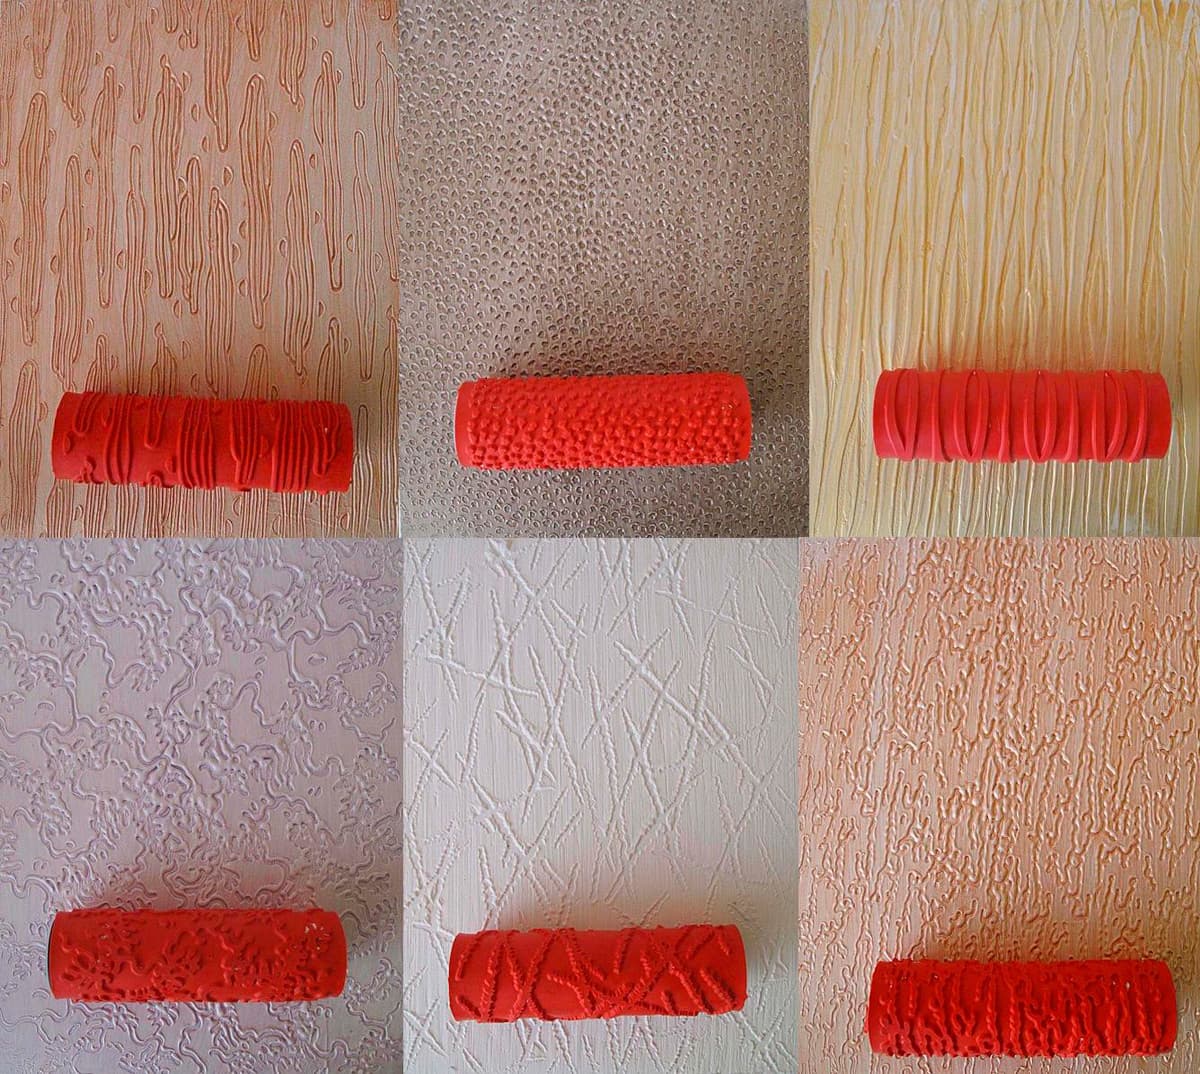
Roller coating can be made of various materials: it can be leather, plastic, foam rubber, rubber. The appearance of a certain "fur coat" will create rollers made of fur. The foam rubber sponge from which the roller cylinder is made can be personally wrapped with threads in various ways, creating your own unique ornament.
For in order to carry out distinct patterns on the surface of the plaster mix, you will need rollers with a hard coating. Such rollers will be reusable, with a convex or, conversely, concave surface, to create three-dimensional or depressed patterns.
To create a drawing, the plaster is applied to the wall, waiting for it to dry for a while, and then start moving with a roller over the layer, giving it the desired look. Movement should be smooth. It is important to put a joint pattern into the joint, avoiding overlaps and overlaps.
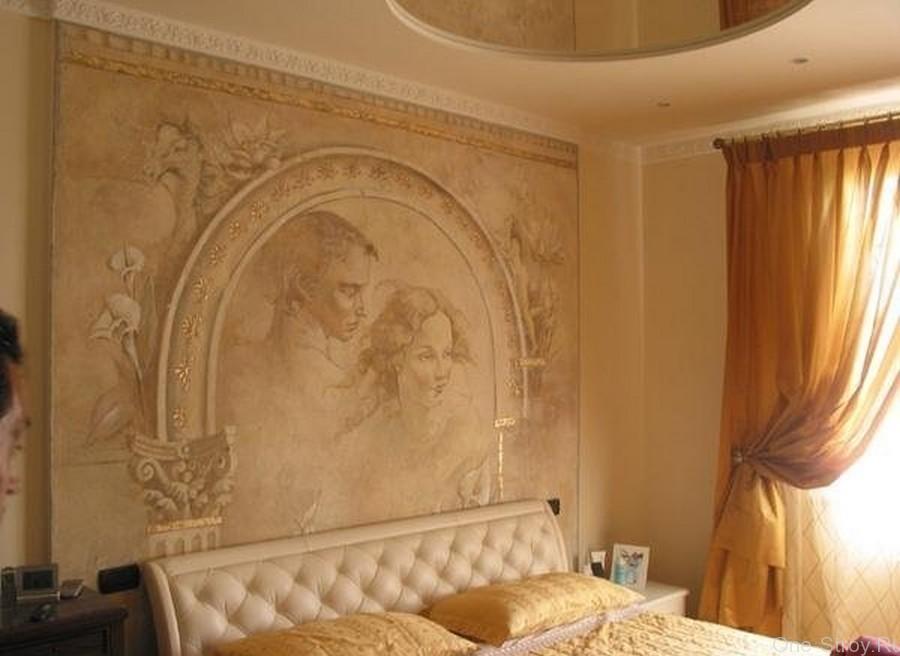
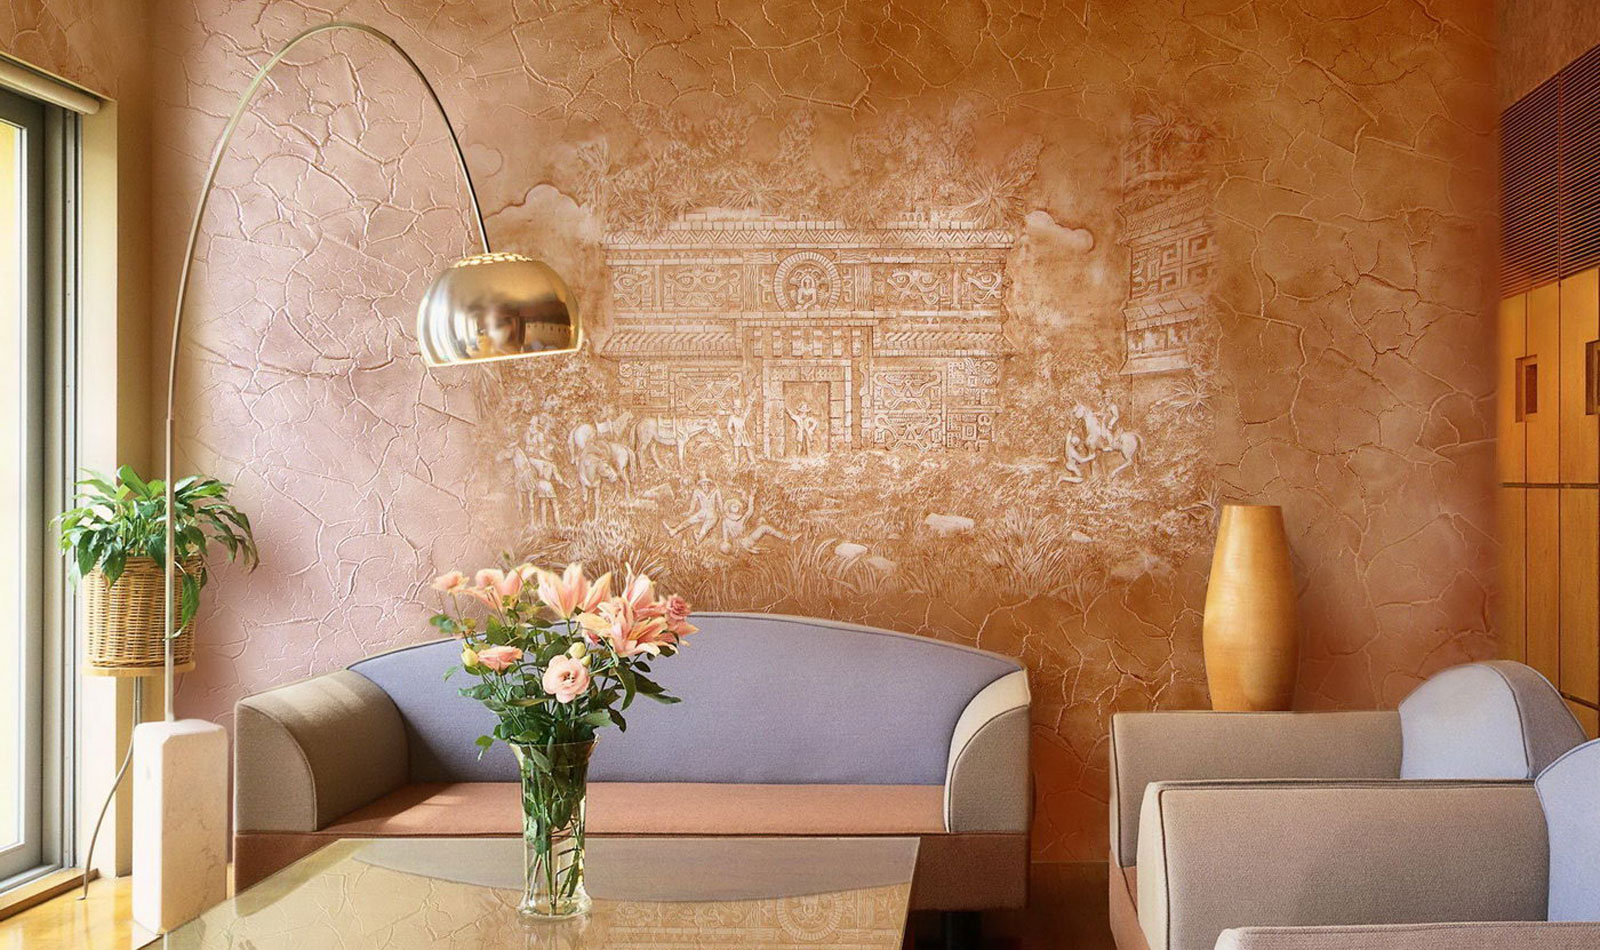
- Sgraffito - one more, very interesting type of decorative plaster. The technology of its application is very peculiar. Layer on layer, using a stencil, superimposed multicolored mixture, which is then partially removed. The result is a complex ornament. Such a surface can be dry cleaned. If the integrity of part of the element is violated, it is necessary to replace the entire element, that is, to completely remove the damaged area, and to cover part of the wall again.
- Terrazitovaya plaster mix is used for facades. It looks like an imitation of rocks. The rather heavy and dense structure of this plaster does not leave much space.for creativity.

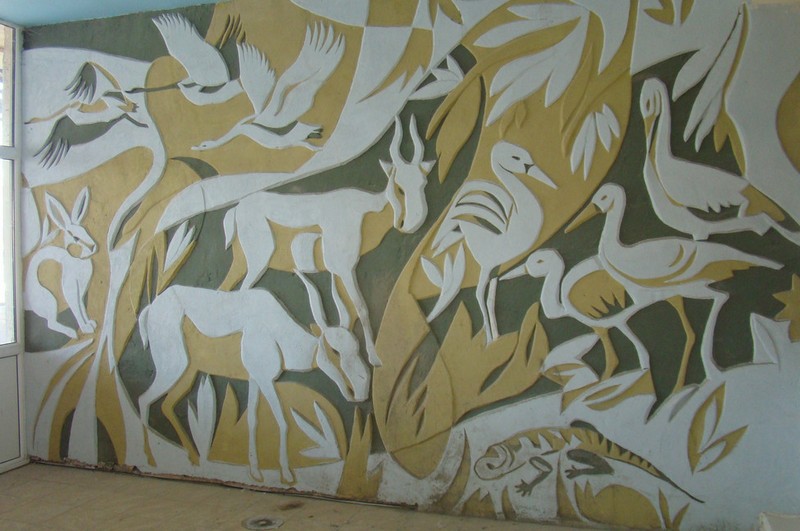
The usefulness of decorative plasters lies in the fact that they smooth out the irregularities of the wall. If there are errors on the surface, they are easily hidden under the relief patterns.
Since modern technologies allow creating various imitations on the basis of decorative mixtures, such as rocks, silk and velvet, marble and granite, the scope of application of plasters is extensive.
Required tools
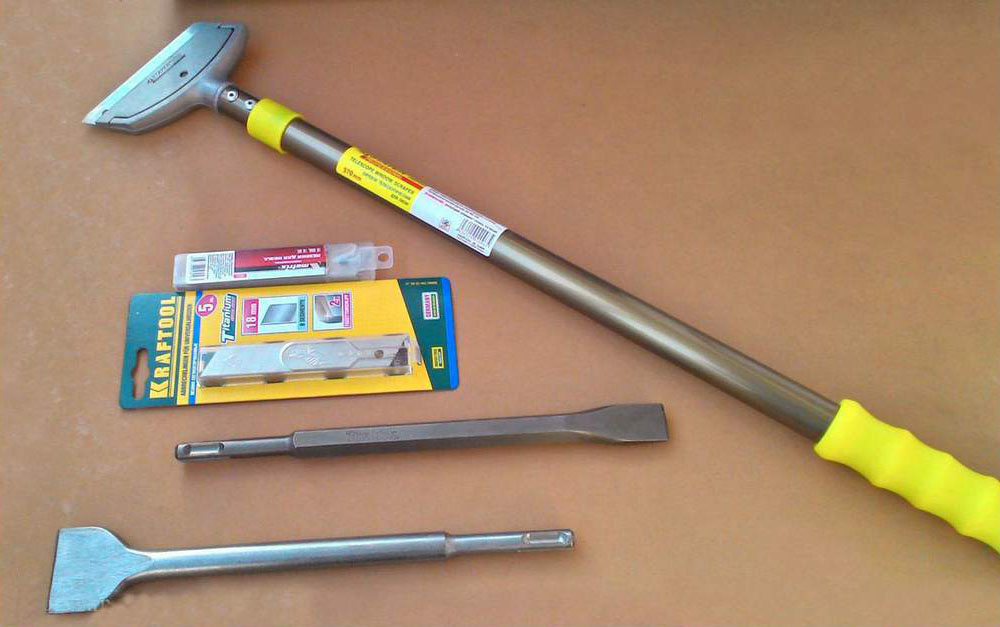
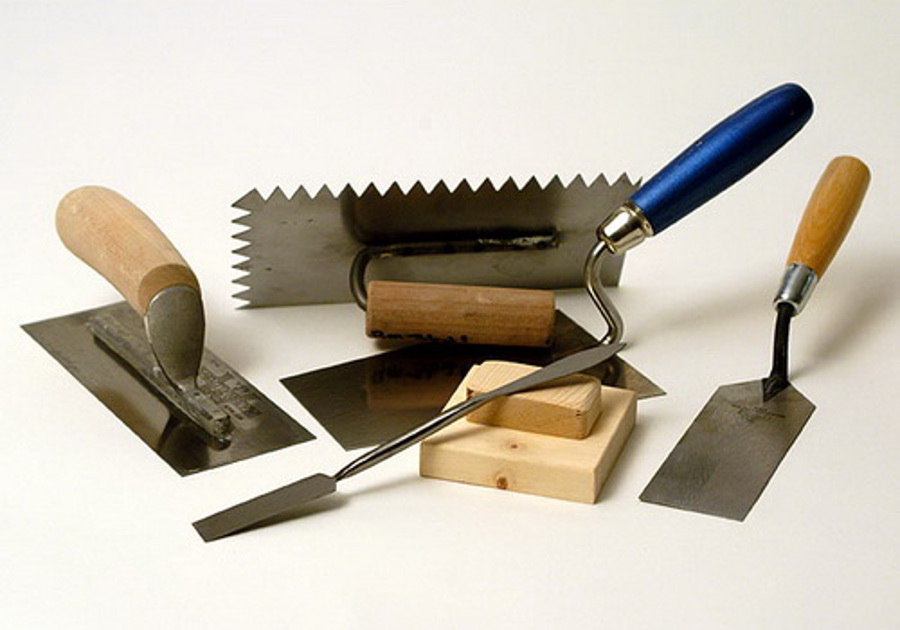
To perform plastering work will need special tools. Knowing the list and appointment, you can buy them yourself. And some even make their own hands.
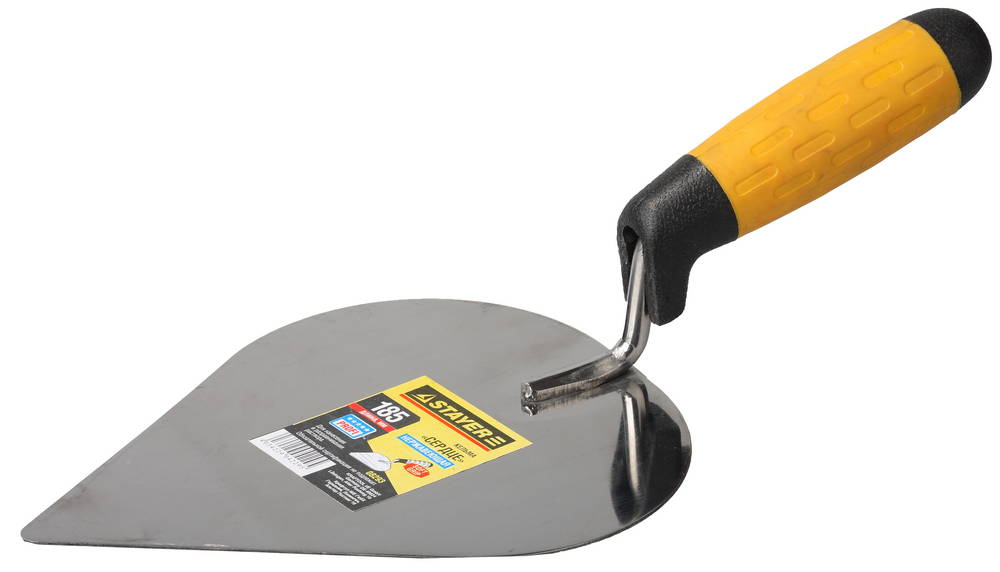
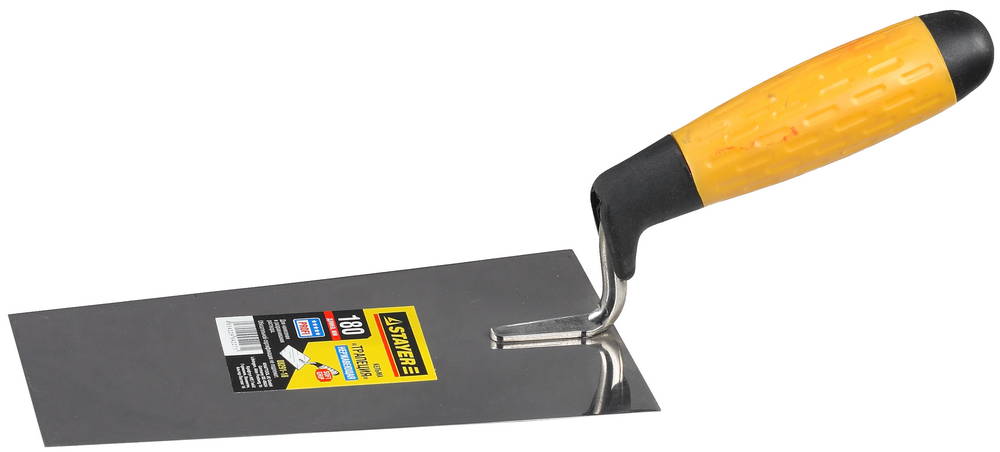
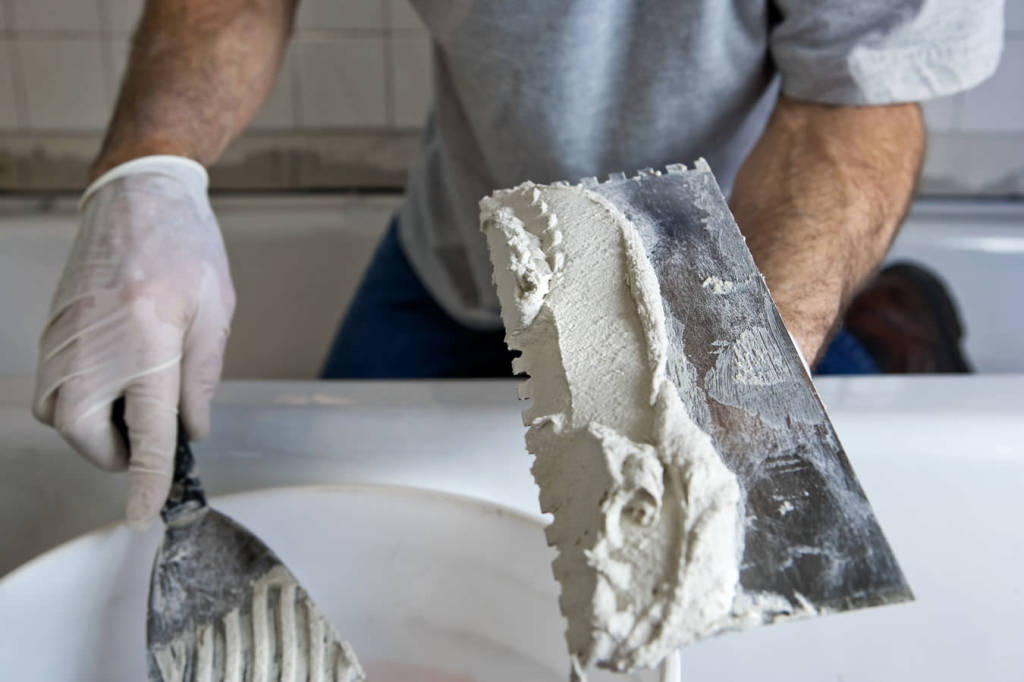
- Trowel - a kind of trowel. Designed for measuring material. Trowel the same throw the mixture on the wall and pre-smoothed on the surface. It looks like an iron shovel with a small wooden handle. The ideal size is 12-18 cm. It is usually made of stainless steel. Choosing a tool for working in the winter or autumn, it is preferable to stop at the trowel with a wooden handle. Also note that different tools are suitable for different types of mix.For cement mortar cement trowel, and for plaster "bark beetle" special plastic.
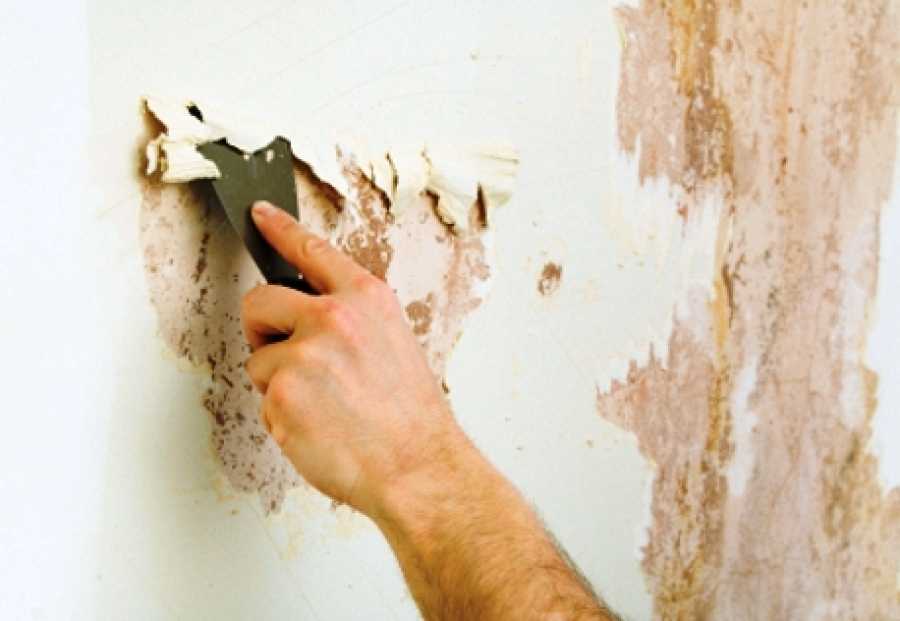
- Scraper - used for stripping irregularities. This tool is designed for various cleaning works. It is convenient for them to scrape off bumps, paint or wallpaper residues. A spatula can be used as a scraper, then its blade should be shortened, so it will be easier and more convenient for them to work. Paired with a scraper can be a rag or sponge in order to soak the sticking wallpaper. Sometimes the scraper may not cope with the old-laid plaster. In this case, it is reasonable to attract heavy artillery, such as a puncher.
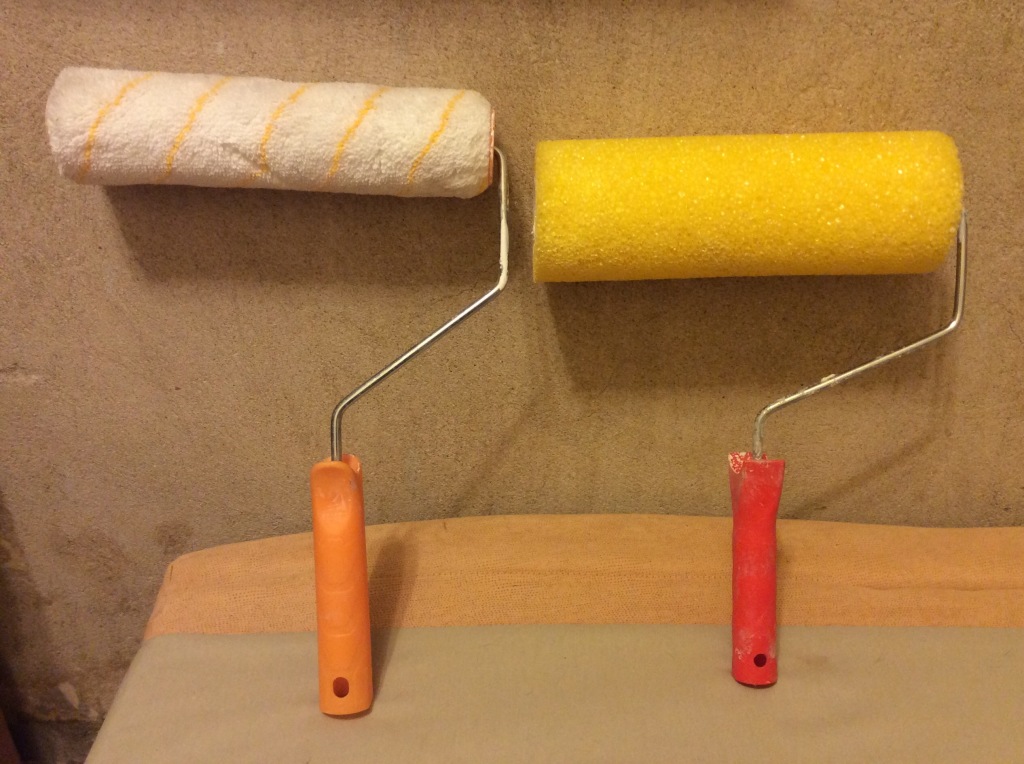
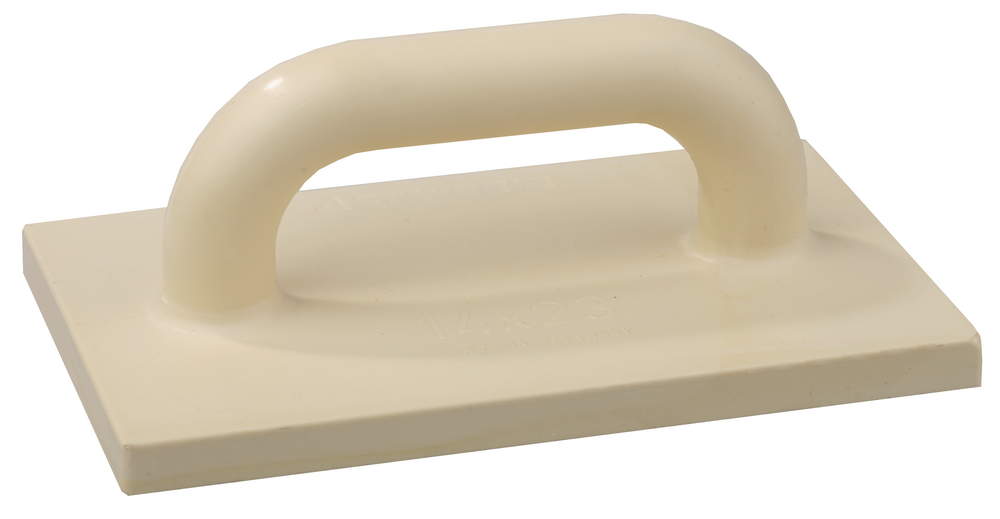
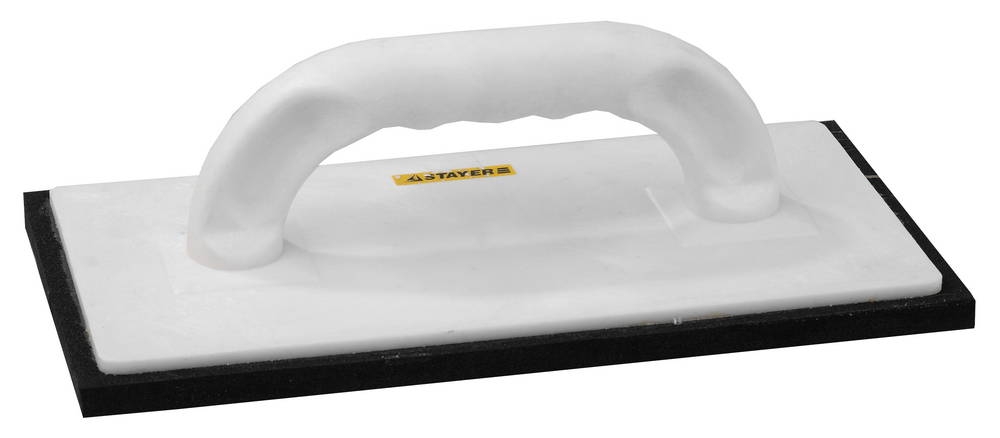
- Grater - This is a wooden plate on which a wooden handle is attached. Grater smooth the layer of the mixture on the wall, after using the trowel. Material for manufacture may be different. Most often, graters are wooden, plastic, rubber and metal. Plus a wooden grater is a small weight, which can be significant during prolonged work. Cons - in the fragility and instability to moisture. A plastic grater is usuallyAcquired for one-time work and used by professional craftsmen. For a beginner, such a grater will be difficult to use and will instantly become unusable. The advantage of the metal grater is that it is durable and smooth, perfectly aligns the wall and protects the plaster mixture from moisture.

- Tuxedo - just like a grater, it can be used to smooth the solution, but it is convenient for them to work in the inner corners. They remove excess mixture and application defects.
- Rule - A tool to check the irregularities of the walls and fix them. It is a long, perfectly flat strip of metal or wood. Wooden rules are short-lived, because they deform under the influence of moisture. To increase their service life can be impregnated with protective agents. The rule of aluminum weighs little and lasts a long time. The alignment of the walls occurs due to the rule along the lighthouses.

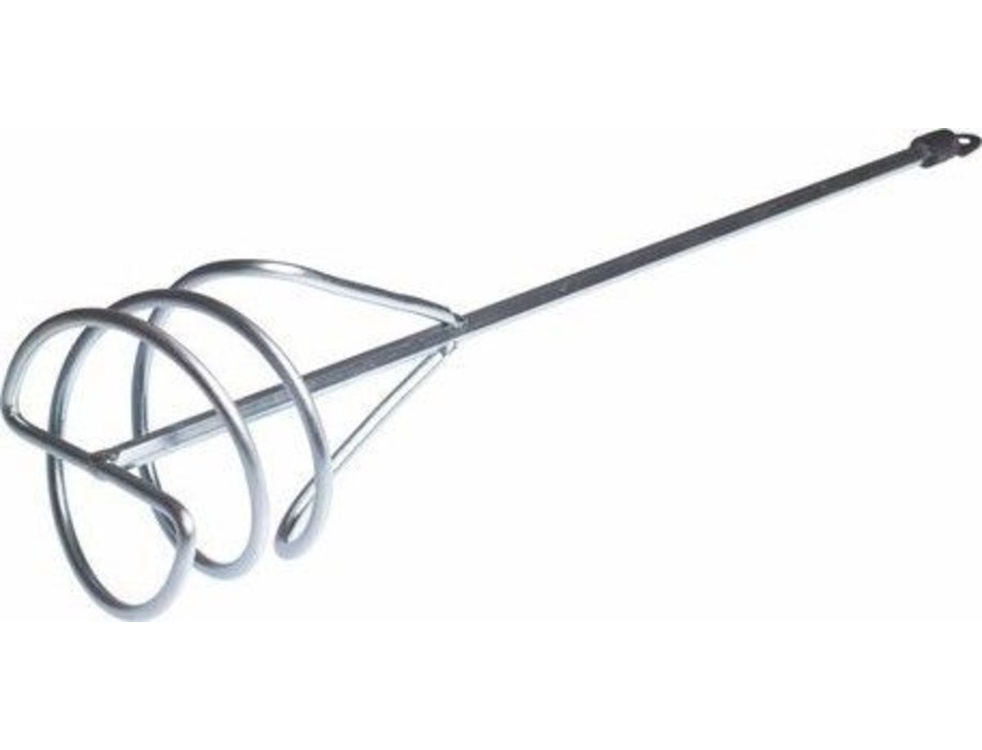
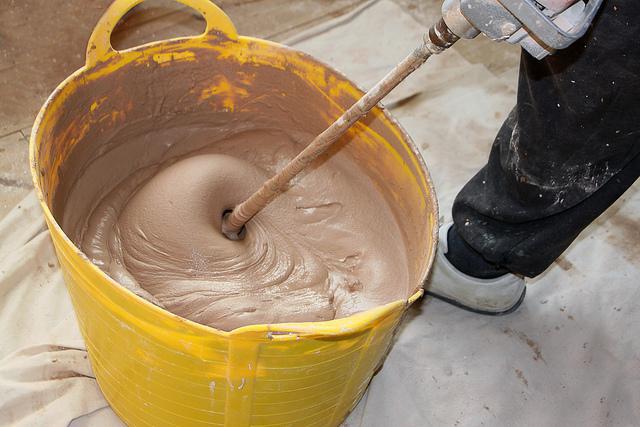
- Mixer used for thorough mixing. Its use allows you to save time and get a quality solution. Mixers are single-spindle and duplex, by the number of nozzles.Replaceable nozzles are different for different types of material. The nozzle with straight blades is used for mixtures where tightness is required. It works in a horizontal direction. Spiral blades are suitable for cement and putty. A nozzle with opposite screws, is used for mixing paint mixtures. Universal beaters are not the best choice because they will cope equally well with all kinds of material.

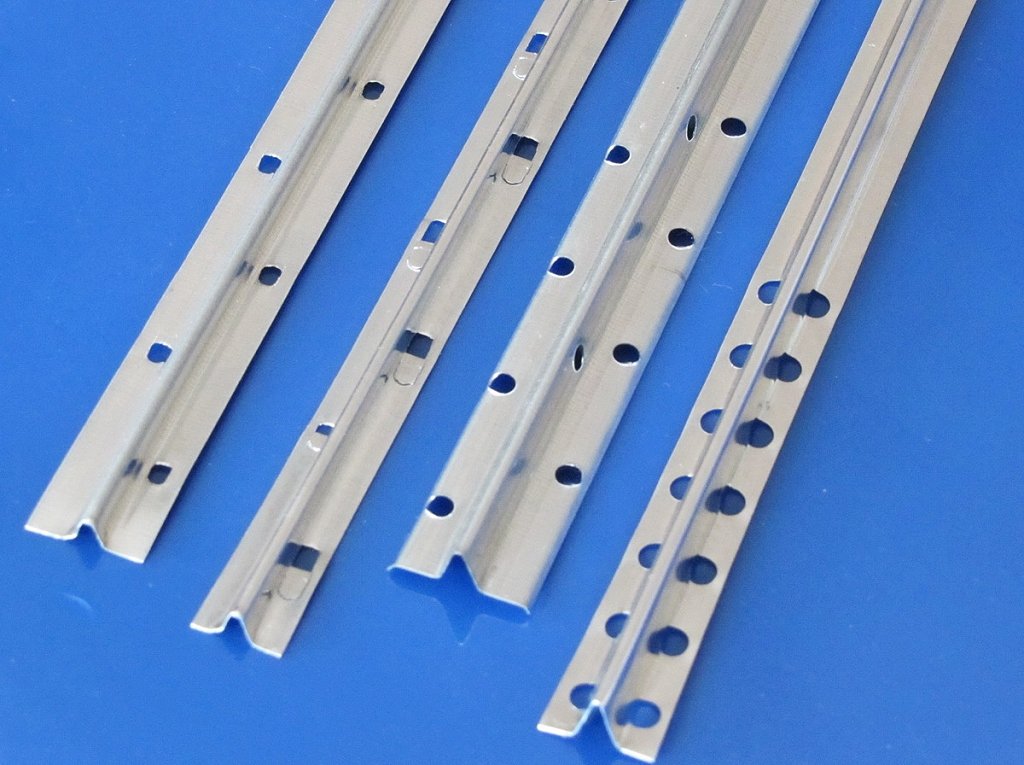
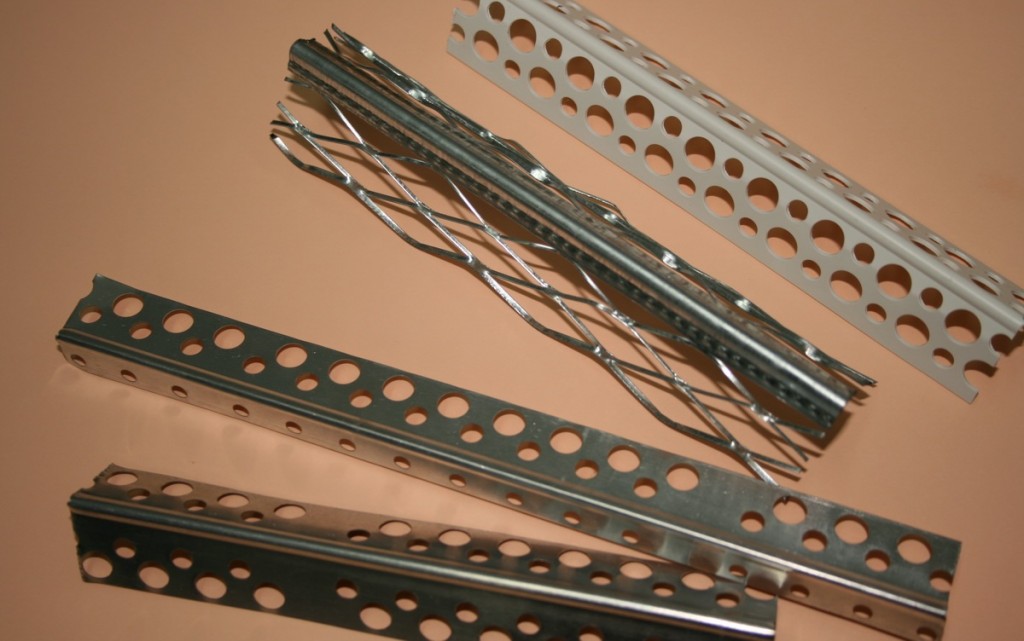
- Profile for plastering will be needed when plastering at the beacons. Actually beacons and will be metal or wooden beacon profiles. Wooden beacons do not require special mortar or glue, and metal ones are necessary when using gypsum mortar. The most used beacons are made of steel and are suitable for a plaster coat of 6-10 mm. Such beacons can be left in the wall after finishing plastering, and it is not even recommended to remove them in order to avoid cracks. Plaster beacons help the coating to withstand temperature fluctuations in the room, as they divide the walls into fragments. Installing them is easy, it’s not necessary to have experience, but when planning to do it for the first time, it’s better to ask for help,it will be difficult for one to do this work. Suitable not only for walls, but also for the surface of the ceiling.
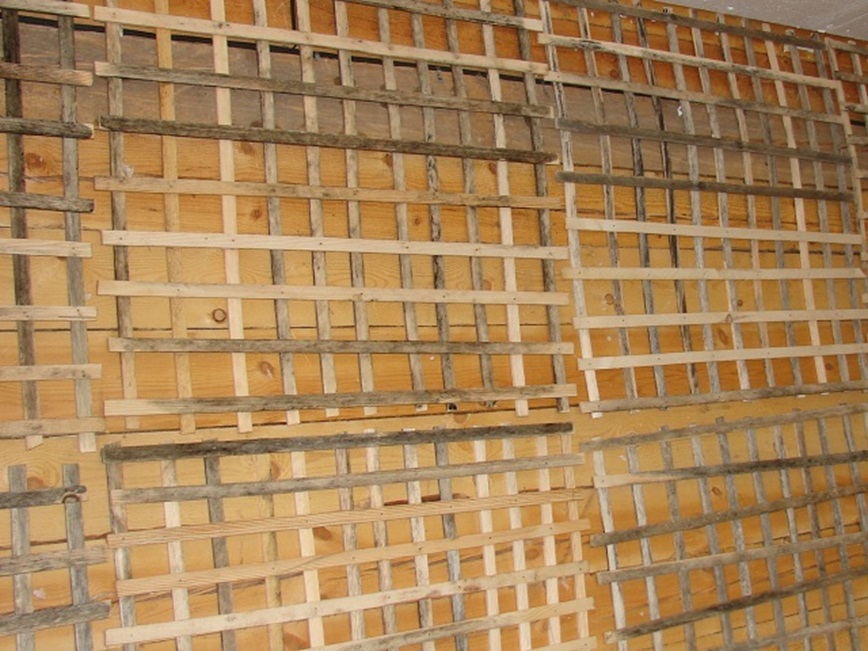
- Shingles - additional material and auxiliary tools for the preparation of wooden surfaces for plastering. With shingles, wooden vertical surfaces are upholstered to strengthen the plaster. In fact, these are wooden strips with a thickness of up to 5 mm, which are packed perpendicularly to each other, to form a grid. Subsequently, a mixture will be applied to this grate.

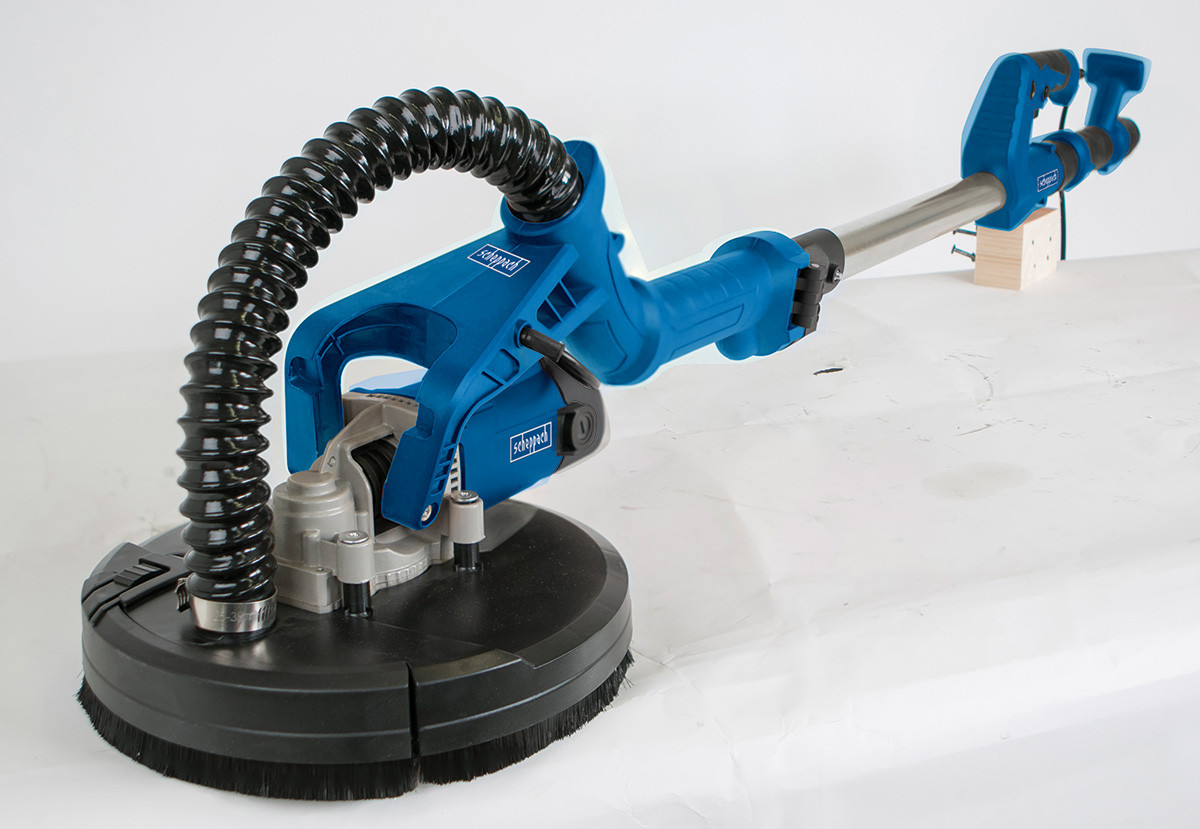
- Plane - necessary for cutting off excess plaster in the corners of the room. A type of plane is a grinder, powered by electricity. This machine is convenient to grind the corners, having some practical skills. Grinding takes place with sandpaper, tucked into the machine. When purchasing an ordinary plane you must make sure that its knives are aligned along the sidewall plane. The bulging knives will leave grooves on the surface of the plaster mix.

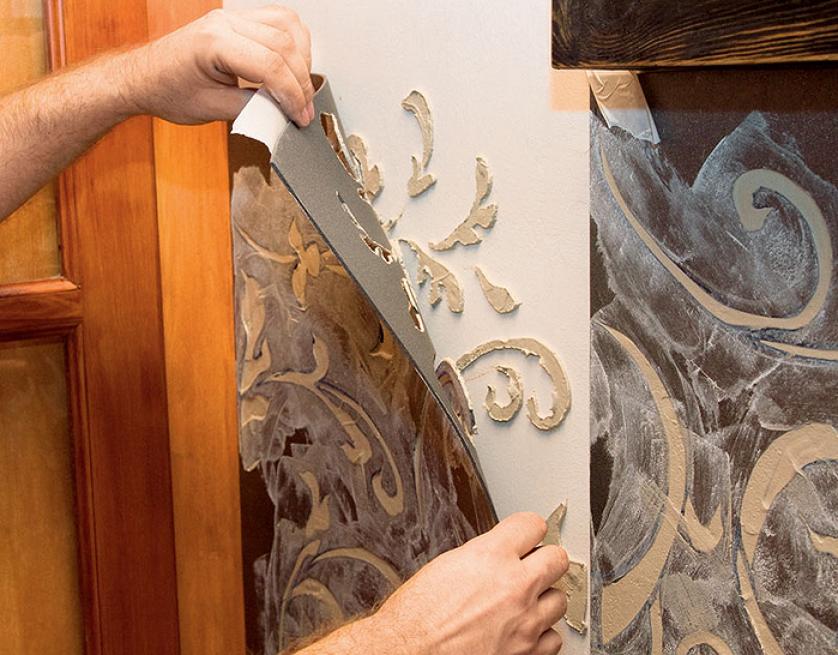
- Stencil - will help when using decorative plaster. Using a stencil, you can create three-dimensional, various forms of reliefs, repeating patterns or single accents.You can make a completely unique design. The stencil looks like a plate of transparent plastic in which the pattern is cut. You can purchase ready-made stencils or order your own pattern from a printing company. A drawing applied through a stencil will not give a large amount of surface, rather, it will rather protrude slightly above the main part of the wall. It is necessary to plan a place for the future pattern and fix the stencil with masking tape. Between the layers of the applied mixture, it is desirable to use a primer. After the material dries, the stencil is removed with a fast, confident movement.

How to calculate the flow?
It is quite simple to calculate the mixture consumption: the manufacturer indicates the parameters for the calculations on the material packaging. It must be borne in mind that when applying plaster on uneven walls, consumption increases. And also the expense will depend on the type of mixture. Approximately determine the rate per square meter. m when applying a layer of 10 mm.
Thus, the expense will be:
- for gypsum composition - 10 kg;
- cement mix - 16-18 kg;
- decorative is consumed in the amount of 8 kg per square. m
If you need more accurate calculations, you can use a calculator online or a scheme recommended by the manufacturer.

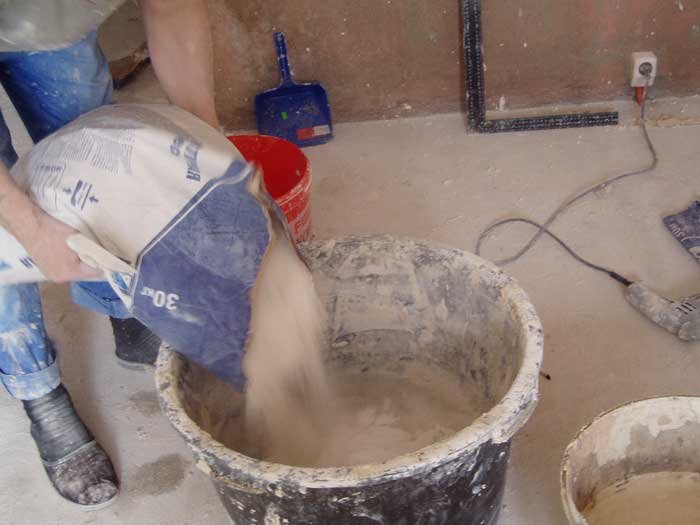
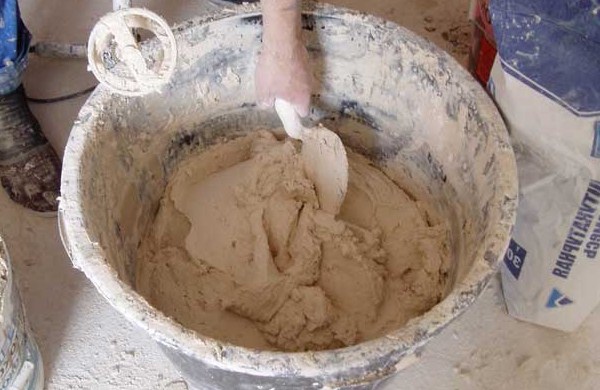
How to prepare a solution?
As a rule, plastering of walls is done in three layers:
- first layer fit in a spray, so for him the mixture should be quite liquid consistency;
- second layer more astringent;
- third - even more dense.

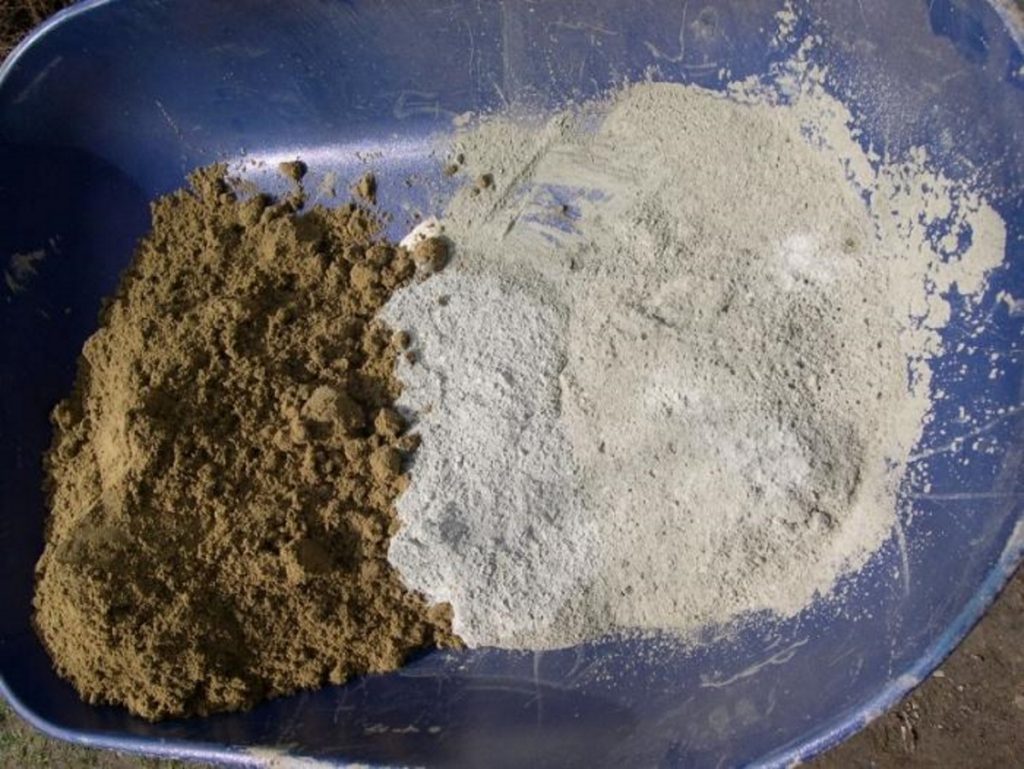
If the plaster will be laid in one layer, it is necessary to dilute the solution of medium thickness. If the solution is too liquid, there will be no hitching with the surface, and if there is a lot of binder in the mixture, the layer will crumble. The three components of the mixture: liquid (water), a binder and the desired aggregate must be mixed in the correct proportions in order to obtain the desired result.

Consider the rules of quantity for different compositions:
- For cement plaster the proportion is as follows: the first layer for splashing is 1 portion of the binder per 4 portions of aggregate. Soil - 1 part binder for 2-3 parts of aggregate. The third, finishing solution is diluted in a proportion of 1.5 parts of aggregate to 1 part of binder.
- With the addition of clay paste. For successive three applications, the proportions are the same: 3-5 parts of aggregate are recommended for 1 part of clay.
- Lime composition suggests the following recipe: spray - up to 4 parts of aggregate for 1 part of binder. The second application of 2 to 4 parts of aggregate to 1 part of the binder. For the final, finishing layer, 2-3 parts of aggregate are used for 1 part of the binder.
- Lime-cement mixture counted for one serving of cement. The first layer, spray, 0.5 parts of lime powder and aggregate in an amount of from 3 to 5 parts. The second, ground coat for optimum consistency will require from 0.7 to 1 part lime and 2.5 to 4 parts of aggregate. Finishing should be carried out using a solution of 1-1.5 parts of lime per 1 part of cement and the amount of sand should not exceed 2.5-4 parts.
- In a clay-lime mixture from 3 to 5 parts of sand should fall on 1 part of clay and 0.2 parts of lime.
- Cement-clay the mixture does not require different proportions for all three layers. You can use one mixture at the rate of 1 part of cement, 4 parts of clay and from 6 to 12 parts of sand.
- Lime-gypsum composition It is made of 1 part of lime, 1 part of clay and 2-3 parts of sand for the first layer, 1.5 parts of gypsum and 2 parts of sand for the second layer and 1.5 parts of gypsum for the third layer. It is important to note that for the finishing layer sand is not added at all.
What should be the layer?
Starting plastering, it is important to understand that the layers of the mixture for plastering should be made as thin as possible. This will ensure the strength and durability of the applied coating, while thick layers will shorten the life of the material of the renovated walls. There are certain standards for the thickness of the layers, which are caused by the surface material.
On a brick wall You can apply a layer of at least 5 mm, the maximum thickness without a reinforcing mesh is 2.5 cm, and using a mesh 5 cm.
Concrete walls will require the application of a 2 mm layer, the maximum thickness without a grid is 2 cm, and with a grid of 5 cm.
Wood coating due to its smoothness, it is not good at holding the mixture for plastering. Since such work on such a surface will require additional devices, such as a reinforcing mesh or shingles, the parameters of the layer will depend on the thickness of the products used. You can focus on the thickness of 2 cm.
Three recommended layers of plaster will also have a different thickness:
- First layerwhen the composition just pounces on the surface of the wall is called splash,it is not leveled and is a preparatory stage for the main application, contributes to better adhesion and ease of laying the following layers. For a splash of normal thickness on the surface of a brick there will be a figure of 5 mm, and for a wall of wood - 8 mm.
- Next layercalled a primer, basic. Its thickness will depend on the type of mixture and the material of the surface. It can be from 0.7 to 5 cm.
- Third, finishing layer, finishing. Being the final, it performs a decorative function, its thickness should not exceed 5 mm, optimally 2 mm.
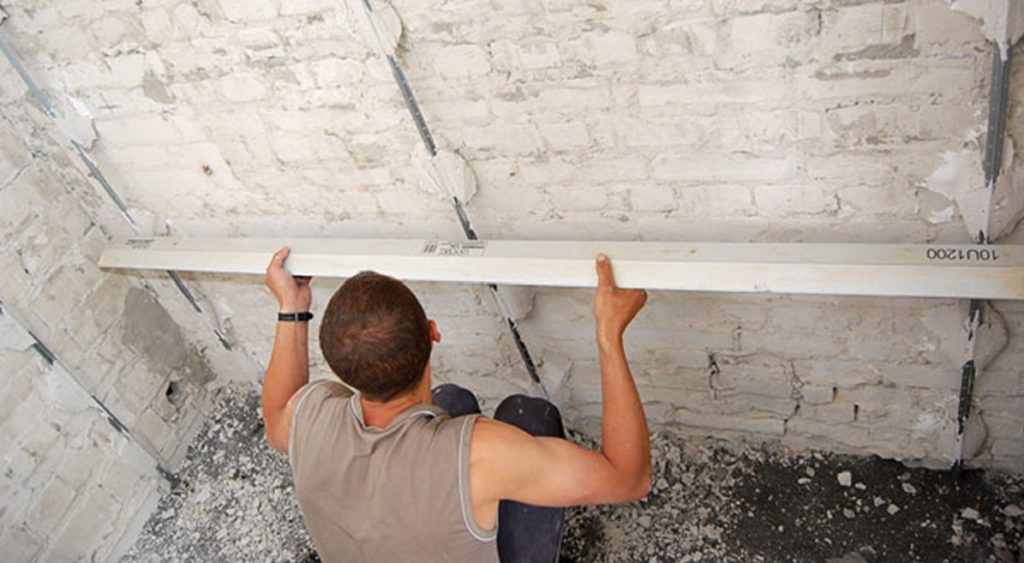
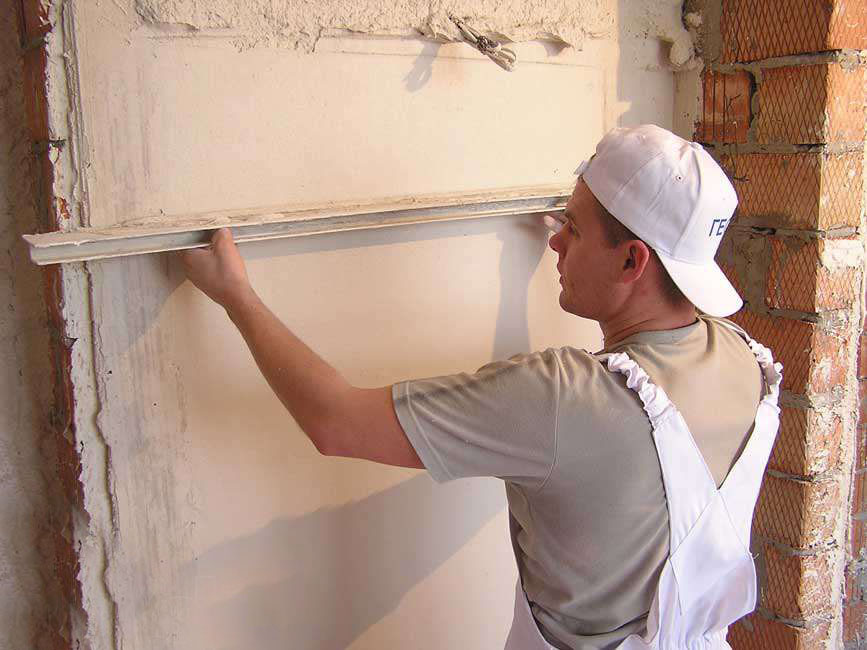
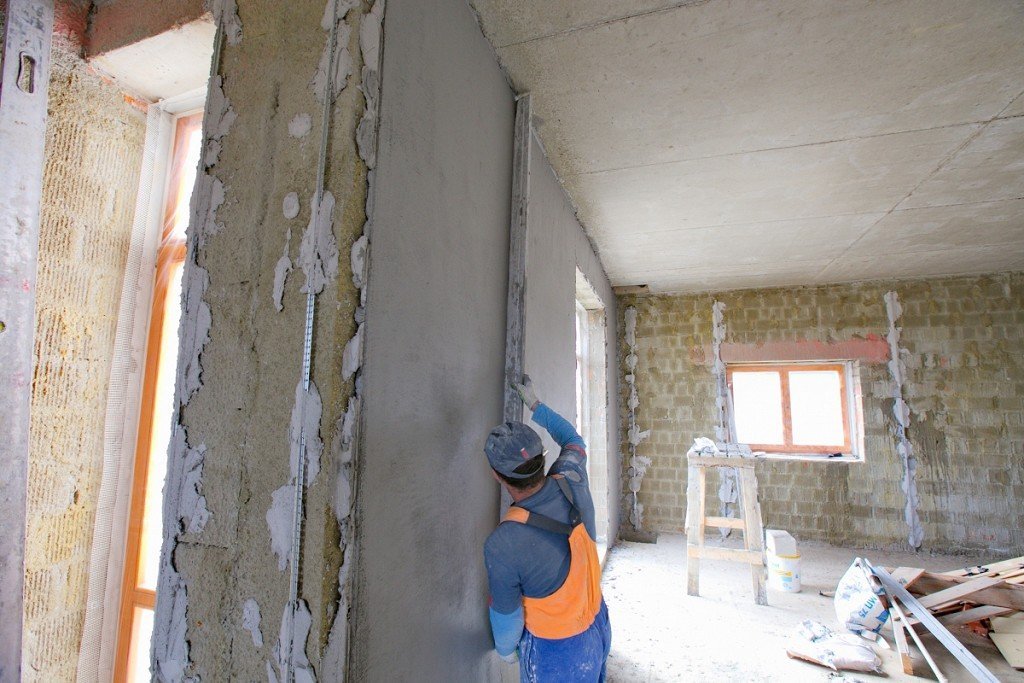
How to pick up beacons?
Lighthouses for plastering walls are used when there are significant irregularities. These are assistive devices that work in conjunction with the rule rule. The lighthouse is a guide for the rule on which the tool rests. It looks like a metal or plastic profile of different sizes and sections. There are straight and angular.
Guides can be made independently of wooden bars. When plastering walls made of wood and foam concrete, it can even be more convenient, since such lighthouses can be fixed on the wall with screws.You can also make beacons of plaster or alabaster yourself. This version also has its advantages.
If industrial technology beacons are recommended to be dismantled at the end of wall plastering, self-made beacons should not be removed.
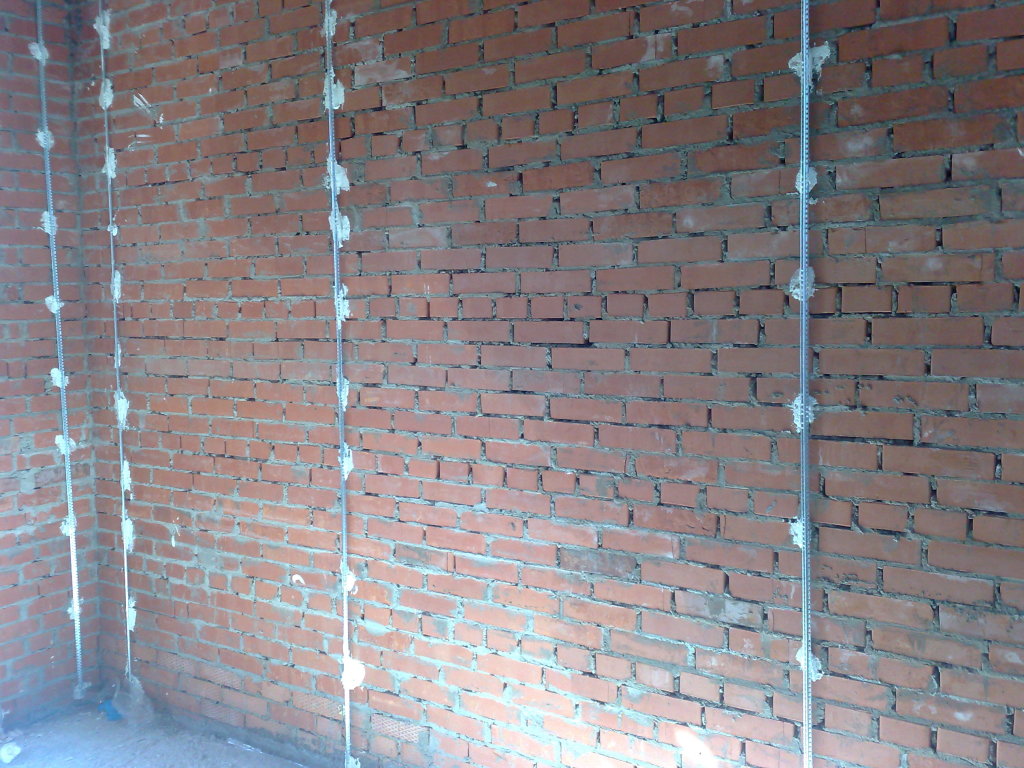
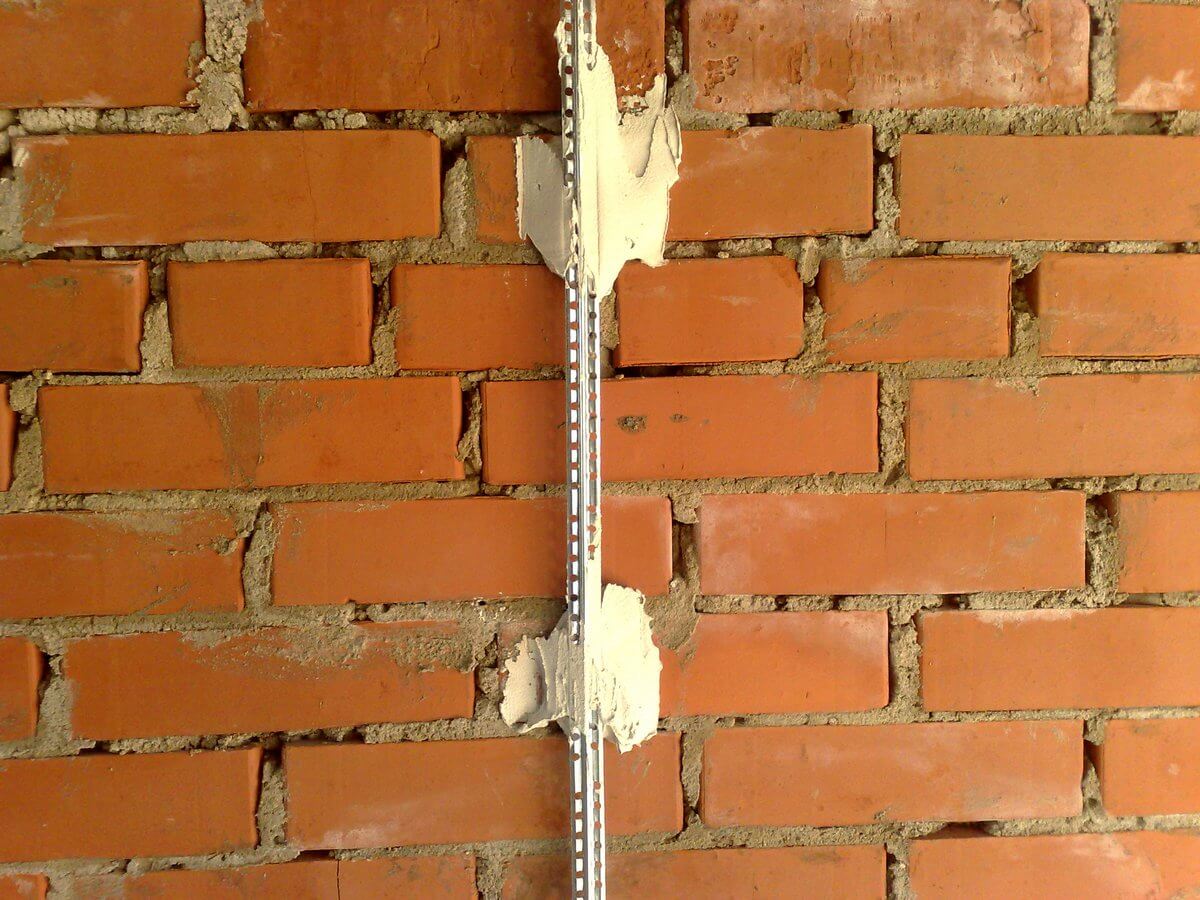
Before installing beacons, the rule is applied to the surface to determine the most prominent part. From this point will be put beacons. They must be firmly fixed to the surface., so as not to change its position with pressure. First, the lighthouses are set in the corners, providing a small indent. Perfect accuracy is needed here. Beacons should be strictly vertical.
After the installation of the main lighthouses, they are stretched with threads or fishing lines, and already focusing on these lines, put intermediate points. It is necessary to pay attention to the length of your rule, it also matters in the installation of poppies. They must be arranged so that the distance between them was 15-20 cm less than the length of the rule. It is also desirable that the distance is not more than half a meter, so that you do not have to level large volumes of space in one approach.
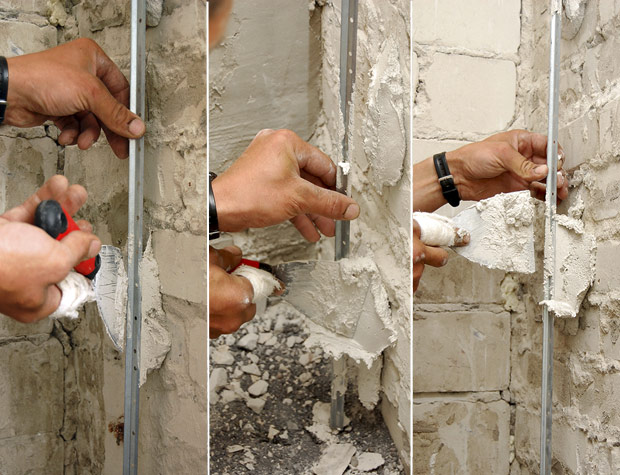
You need to constantly monitor the level during the installation of beacons. The installation process of the beacon system takes some time and is quite laborious, but at the same time, this approach will allow to apply the plaster more evenly and expertly, the walls will look qualitatively and professionally made.
Surface preparation
Different surfaces require different preparation. However, there are general rules that are mandatory for implementation before applying the mixture. If you do not pay proper attention to the preparation, problems will inevitably arise when laying the mixture or when operating the room. Possible detachment, cracks and chips.
The most important action is the thorough cleaning of surfaces from debris, dust, stains and other contaminants.
It is best to use metal brushes for cleaning. For best results, such a brush can be mounted on a drill, in order to enhance the effect using fast turns.. If soot has settled on the walls, it can be washed with a solution of hydrochloric acid. Oil and tar stains are mechanically removed.

To prepare a brick wall, you need to carry out the following stages of work:
- first clean the surface with a metal brush;
- if there are irregularities that are visible to the naked eye, you need to put an additional layer of the mixture, not rubbing it;
- mounds higher than 10 mm are cut or cleaved with any convenient tool;
- hollows are covered with a mixture;
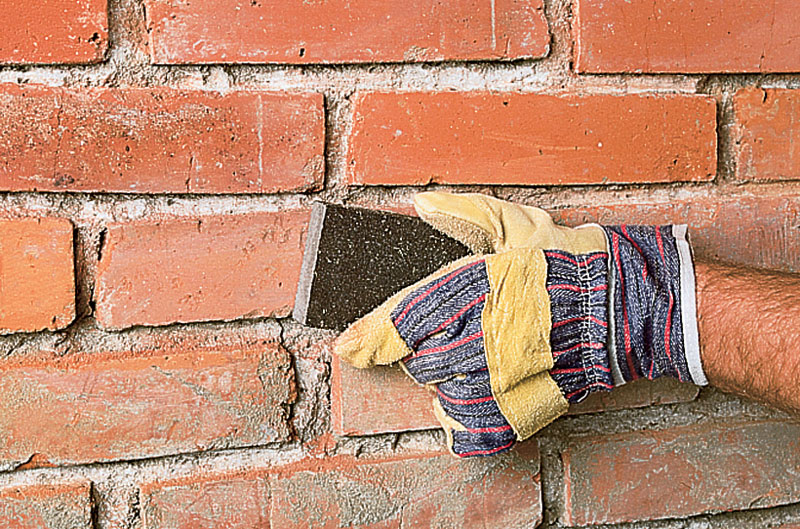
- the seams between the bricks must be carefully cleaned not only superficially. Hammer or chisel knock them to a depth of at least 10 mm, and then pass over the surface with a metal brush;
- remove residual dust and dirt;
- To complete the preparation, you need to moisten the wall.


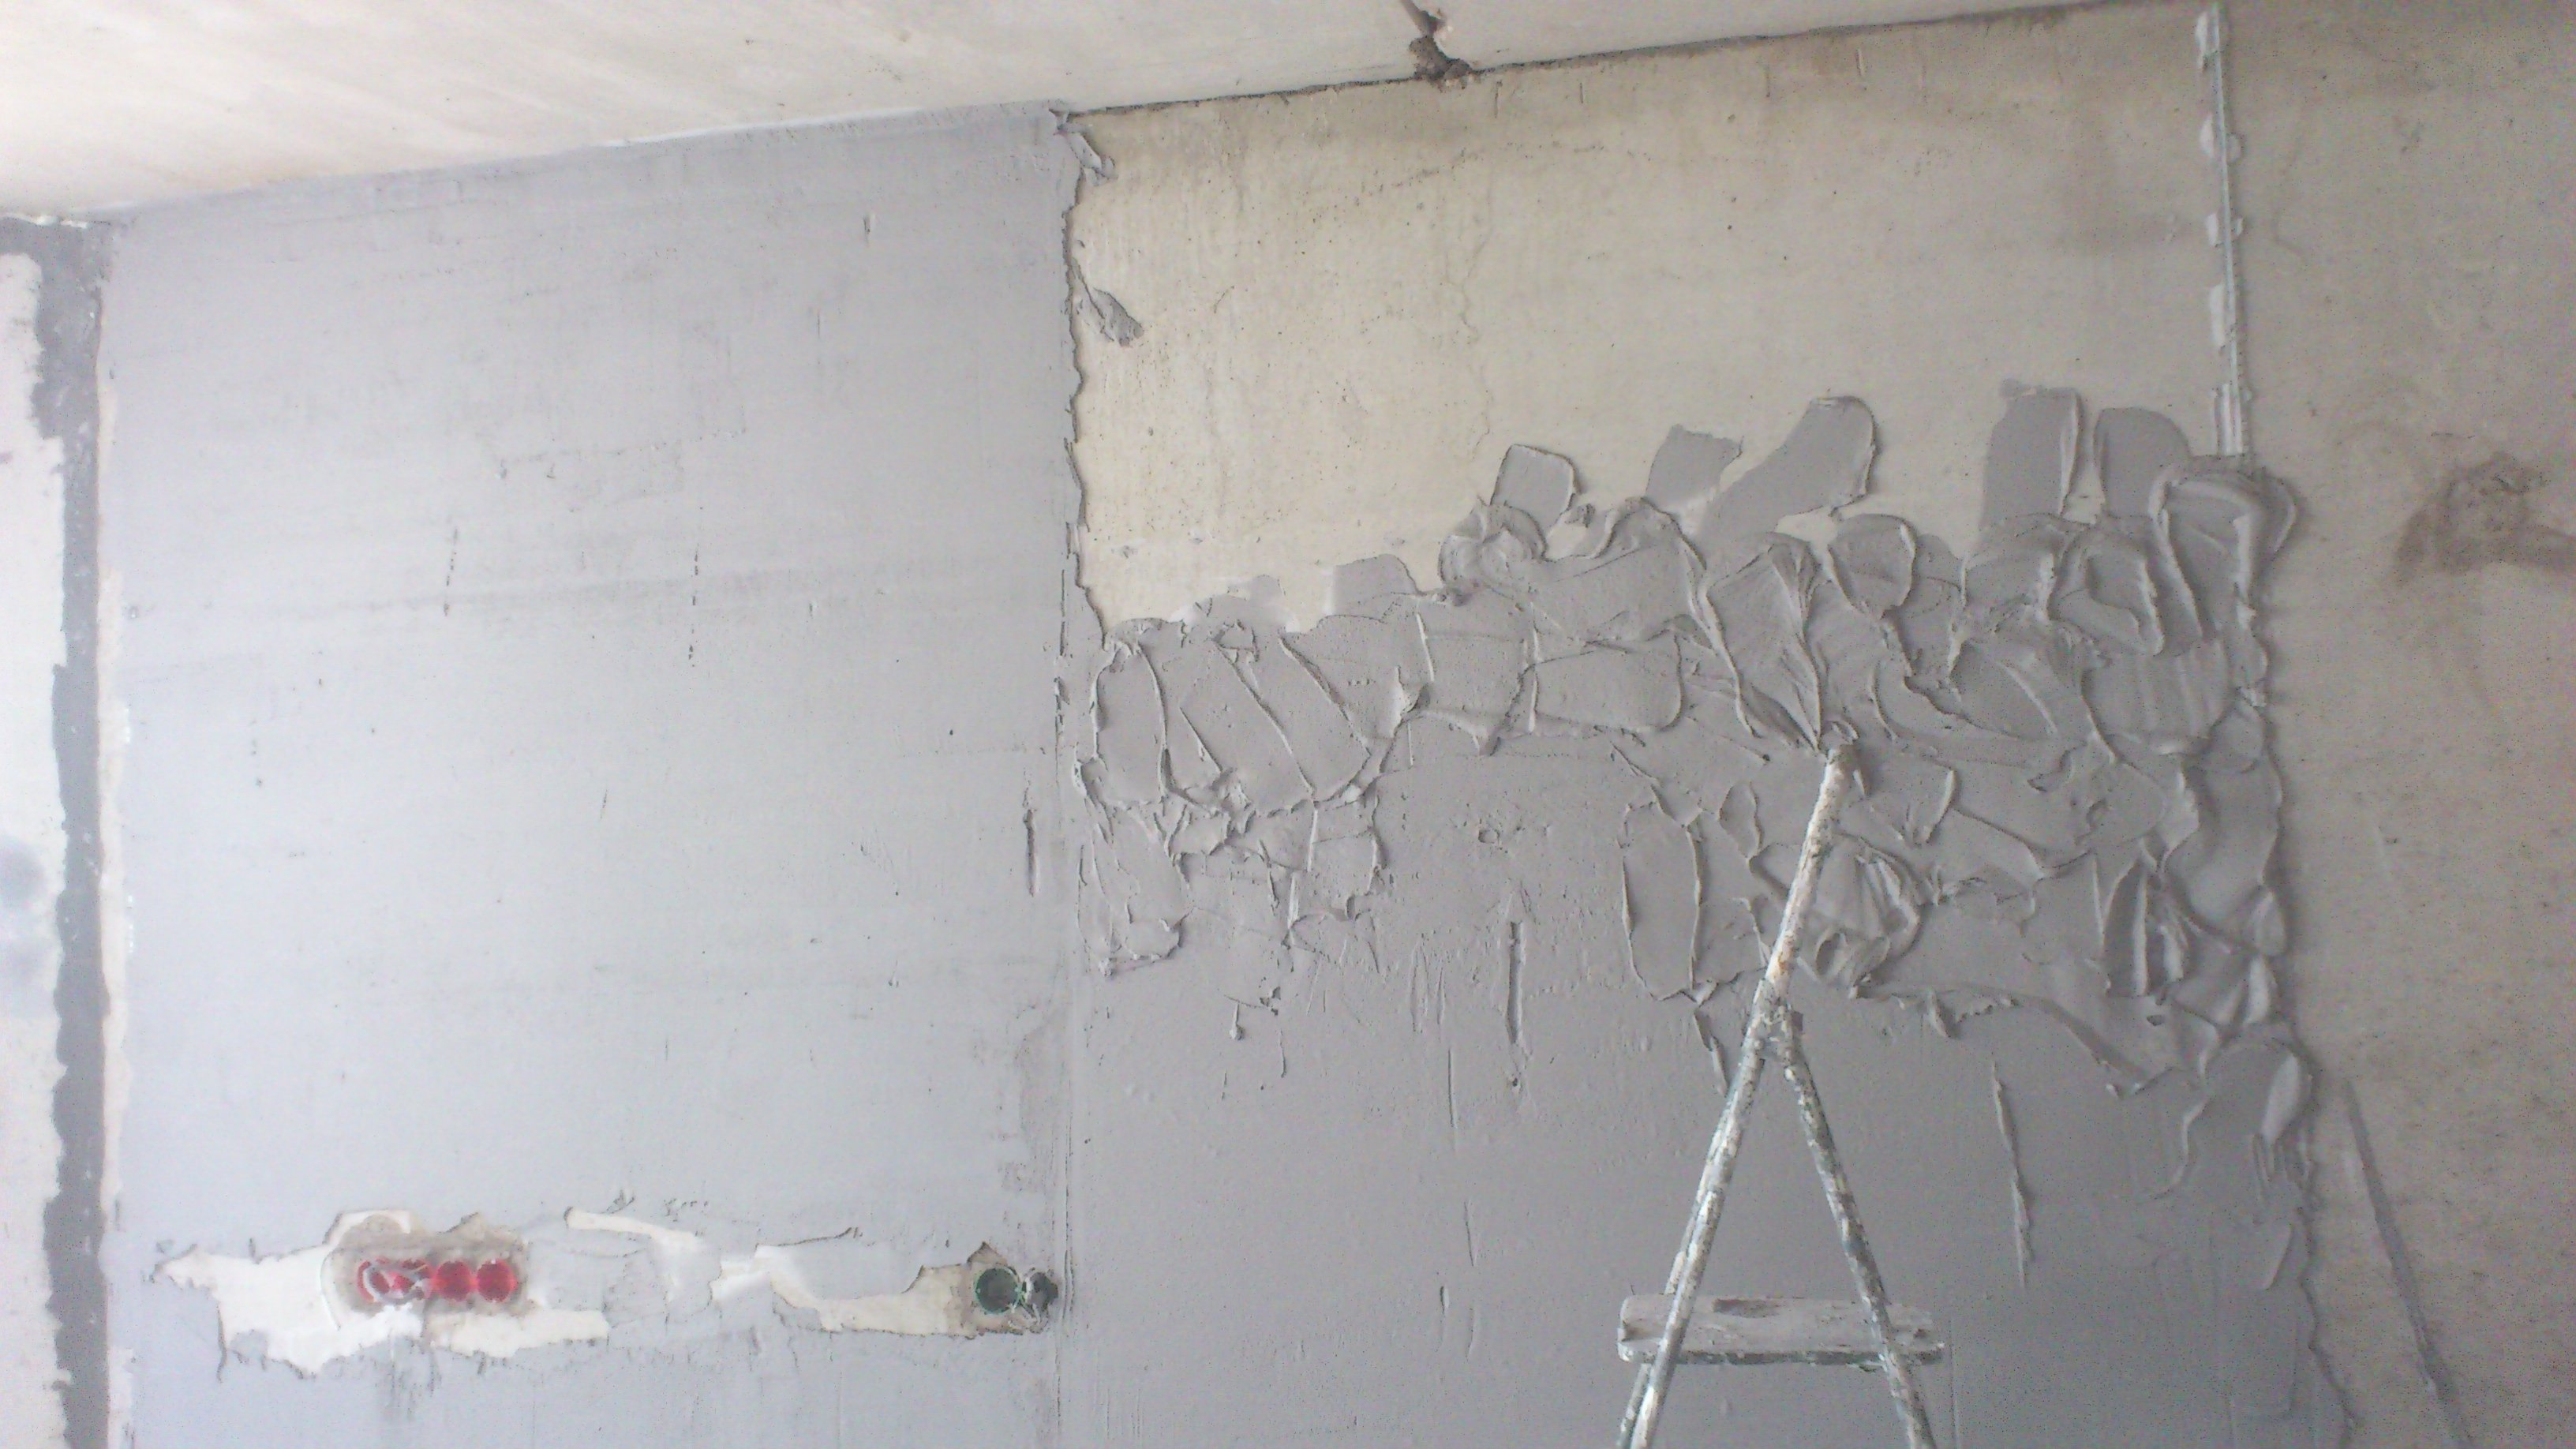
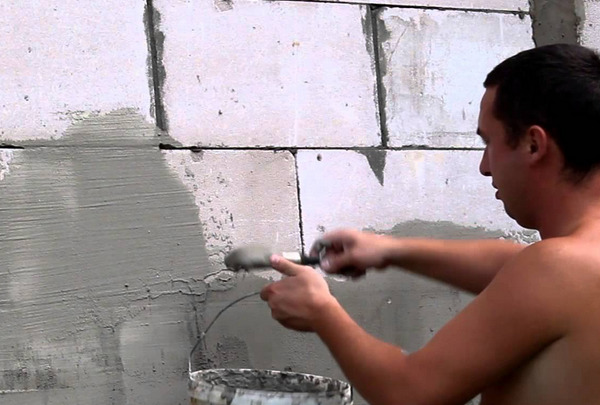
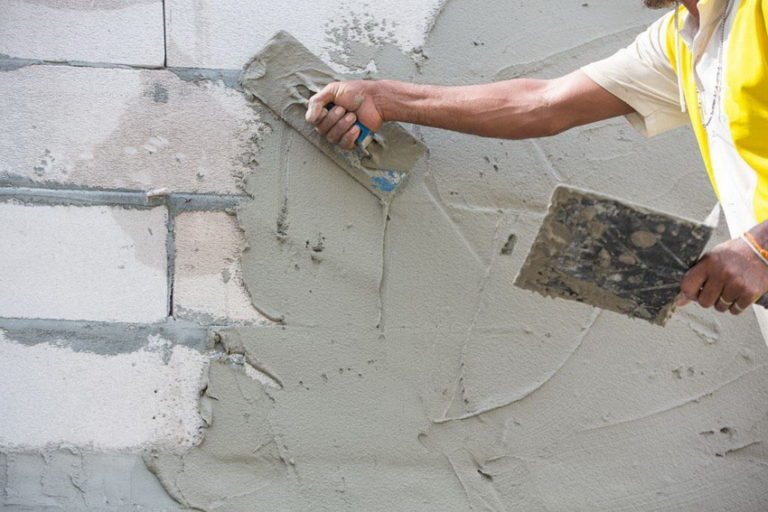
Concrete wall is prepared according to the following scheme:
- the wall must be pre-cleaned with brushes from dirt, dust, remove stains if present;
- further it is necessary to deal with deviations and irregularities according to the principle described in the preparation of brick walls;
- the concrete wall must be roughened, get rid of its smoothness. If the surface is small in area, then it is quite possible to make notches, with a chisel and a hammer, at a distance of 3 mm. If it is necessary to treat a large piece of surface, the notches are applied with a jackhammer.It is best to place them in a checkerboard pattern;
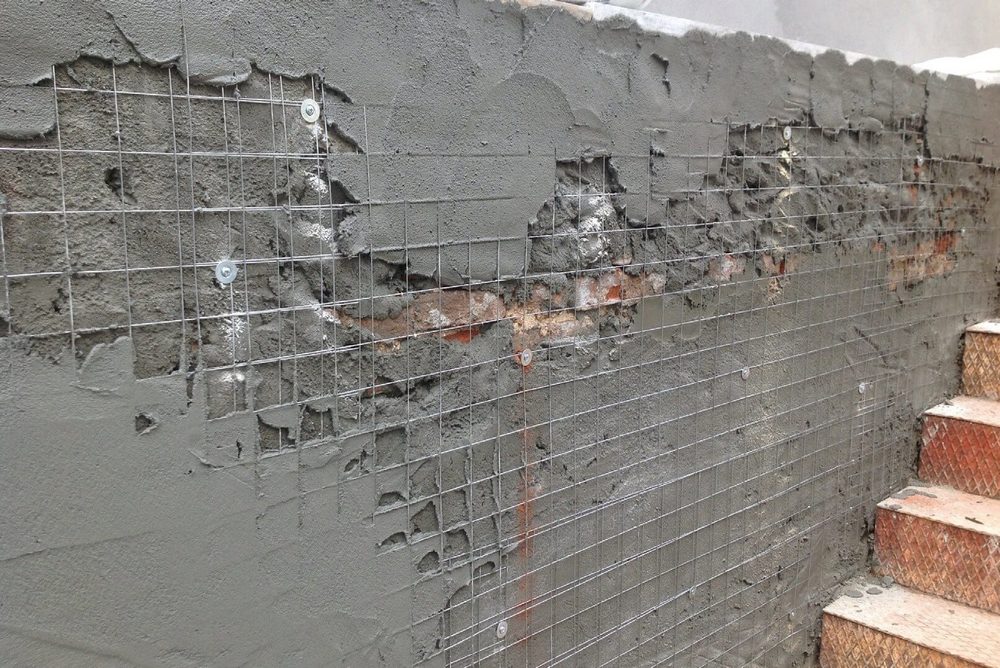
- metal grid can also be installed on the concrete surface. It will promote a good adhesion of the plaster and the wall. The grid is stretched and secured with dowels in a checkerboard pattern. After tensioning it is coated with a solution without rubbing;
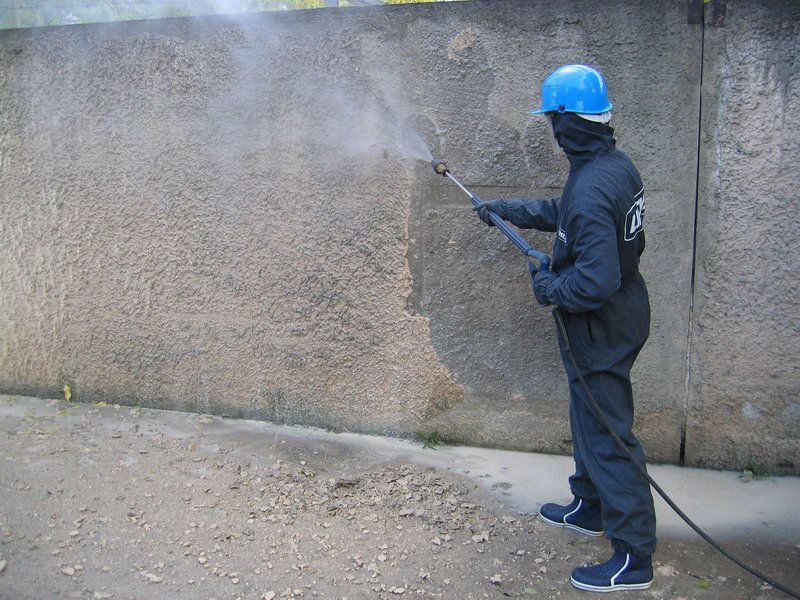
- the necessary roughness can also be obtained with a sandblaster. As a rule, this device is used for large volumes of work, since its use implies a significant increase in costs. The principle of sandblasting is that under pressure, sand is sprayed, and its small particles with a force hit the concrete, causing it micro-damage, which in the end will give the desired adhesion.

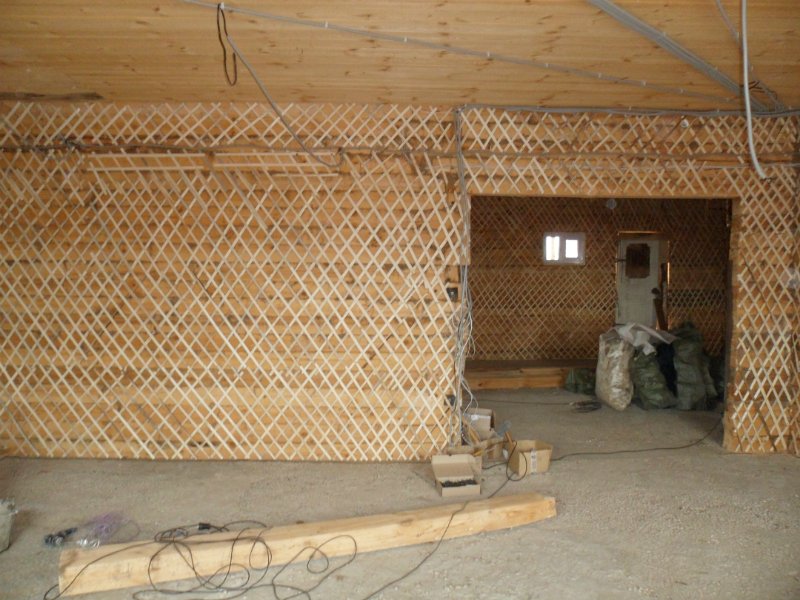
A better choice for finishing wooden walls is drywall.. But sometimes there is a need to apply plaster mixture. In such cases, classically shing is used. The process consists of stuffing small wooden dranok plates to the surface.
There are also ready-made dying sheets of a larger volume, which are much more convenient to use, saving time and effort.The second option is to mount on the surface of the metal mesh. The easiest and easiest way is to hammer metal nails into the wall in a checkerboard pattern and braid them with a steel cord..
Not obligatory, but recommended procedure is surface treatment with a primer.
There are a large number of them, each has certain properties. One important quality unites them: primers, penetrating deep into the surface, make it homogeneous, which maximizes adhesion enhancement. When choosing a primer is recommended to carefully study the information from the manufacturer. Make it simple, detailed and complete instructions for use are necessarily attached to the primer.

Application process
So, the surfaces are prepared, the solution is diluted in the right proportions, the beacons are exposed, the reinforcing meshes are stretched. It's time to begin the main and final stage - the application of plaster. Before you begin, it will not be superfluous to pay attention to important points.
Temperature and humidity in the room. As a rule, desirable or even necessary temperature and humidity parameters are indicated in the mixture information. On average, the temperature should be from +5 to +35 degrees Celsius, and the humidity should not exceed 60%.
- In the process of applying it is important to monitor the cleanliness of the tools. They must be rinsed thoroughly after each step.
- You need to start from the top, gradually moving below.
- Each layer of plaster must be completely dried before applying the next. At the same time it is important to prevent drying out.
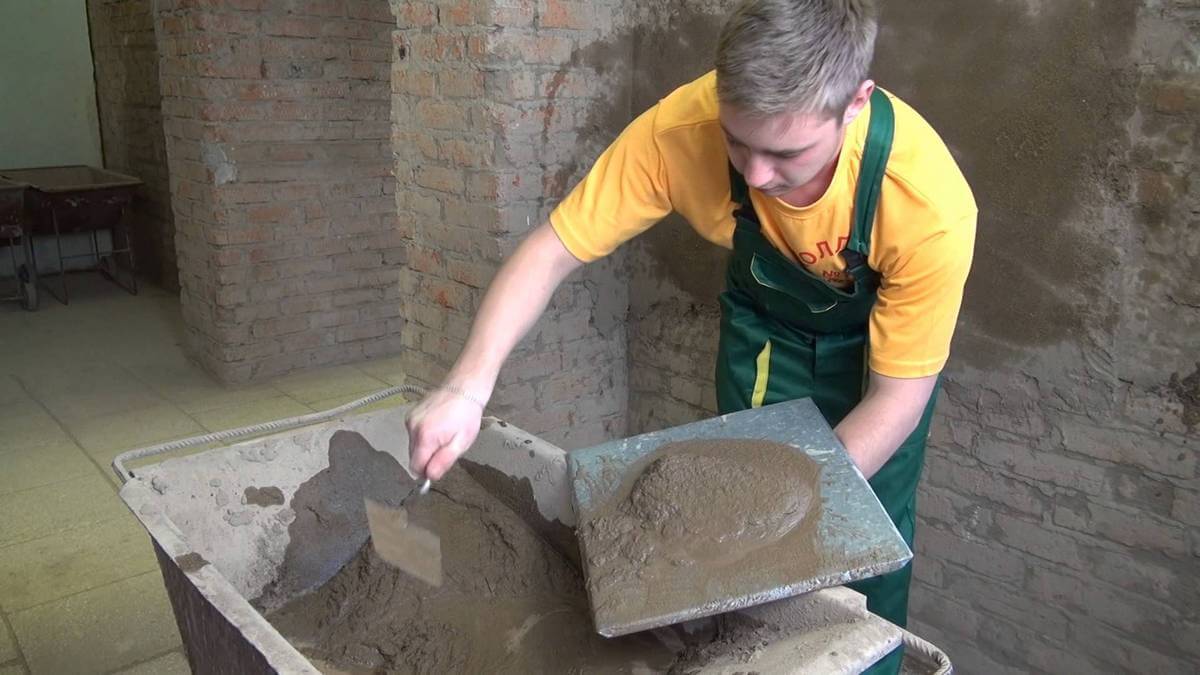
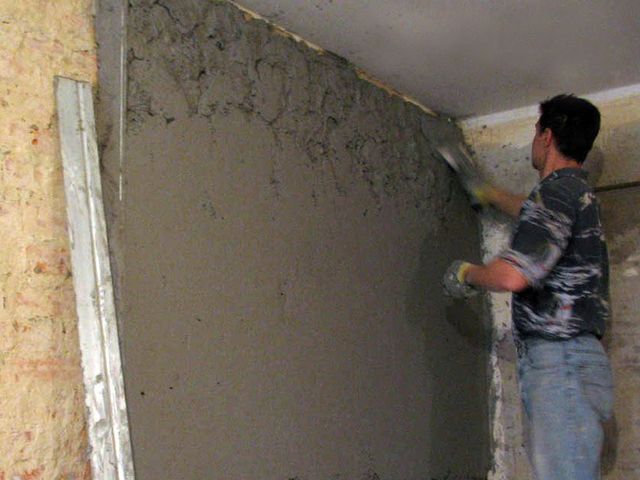
The application of plaster is carried out in several successive stages. The first layer, called a spray or spray, is applied by spraying the composition onto the surface of the wall with a trowel. As far as possible, it is necessary to keep the distance from which the mixture is thrown the same..
It is not necessary to level the applied plaster, unless there are particularly prominent places on it. Large bumps need to be removed. It depends on how correctly the first layer is applied, how firmly all the plaster on the wall will hold.
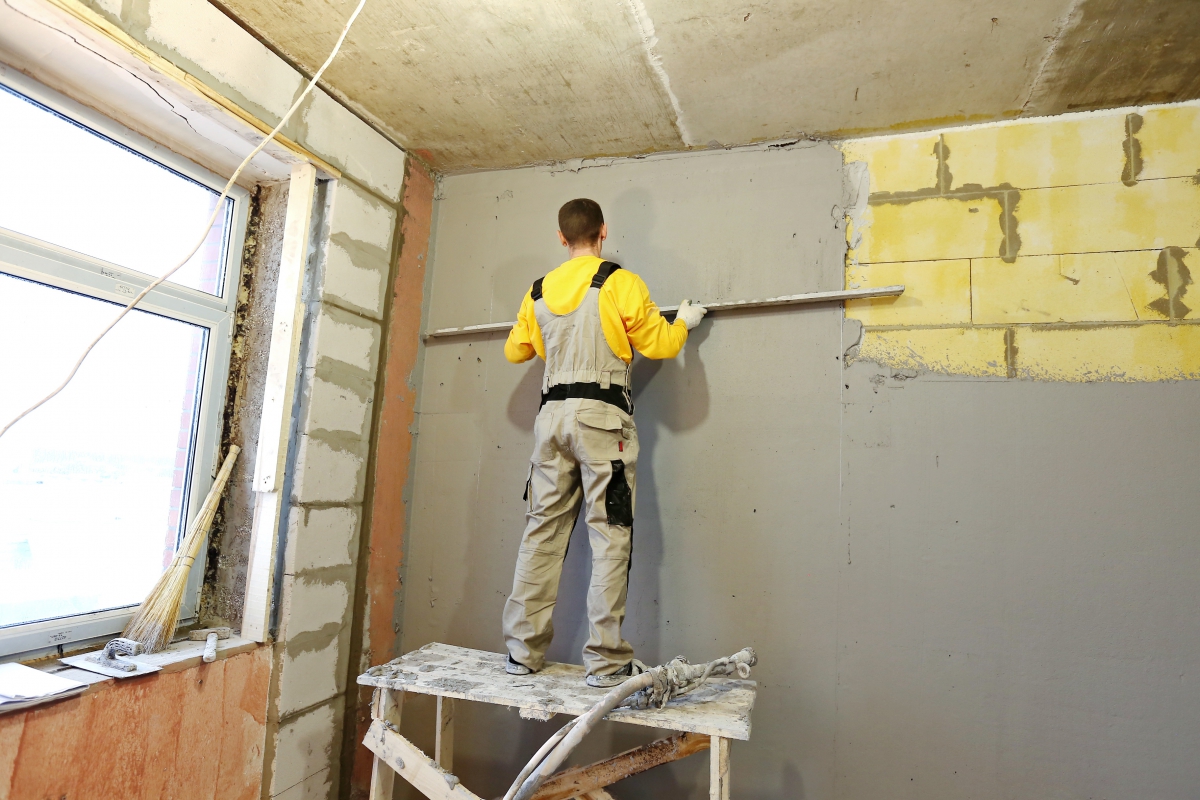
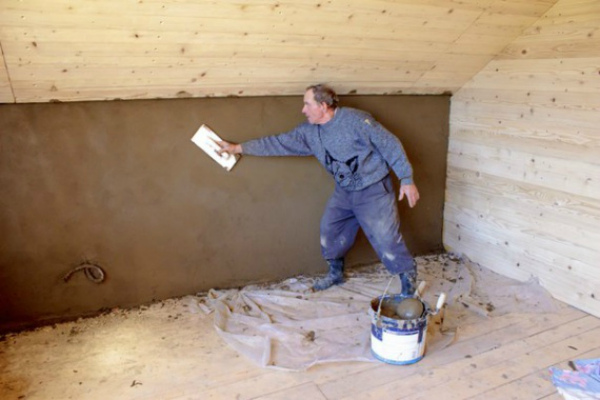
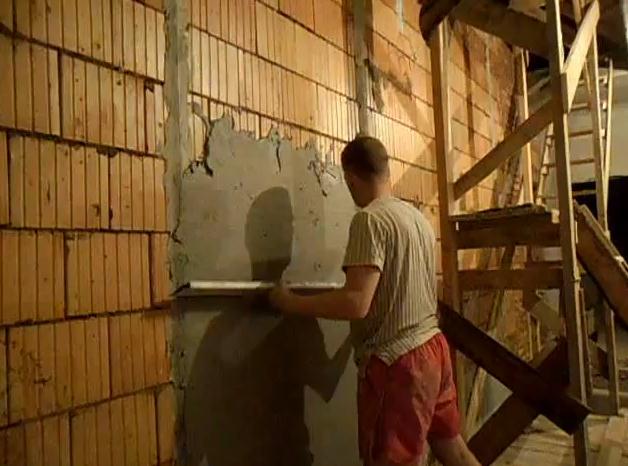
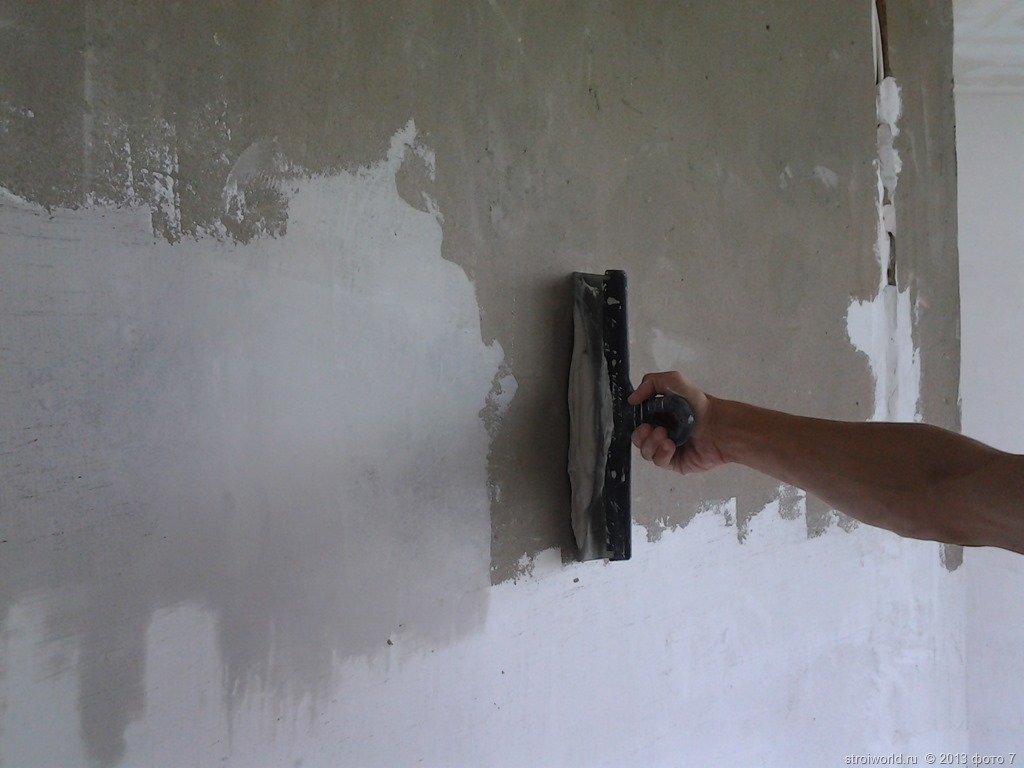
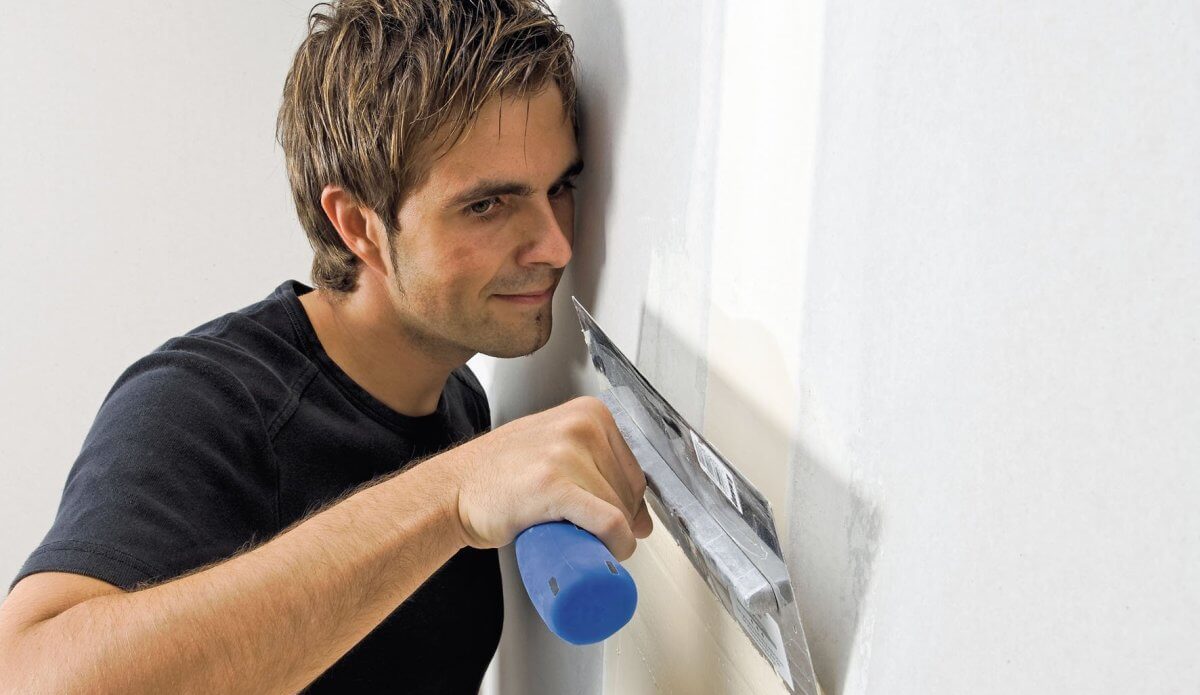
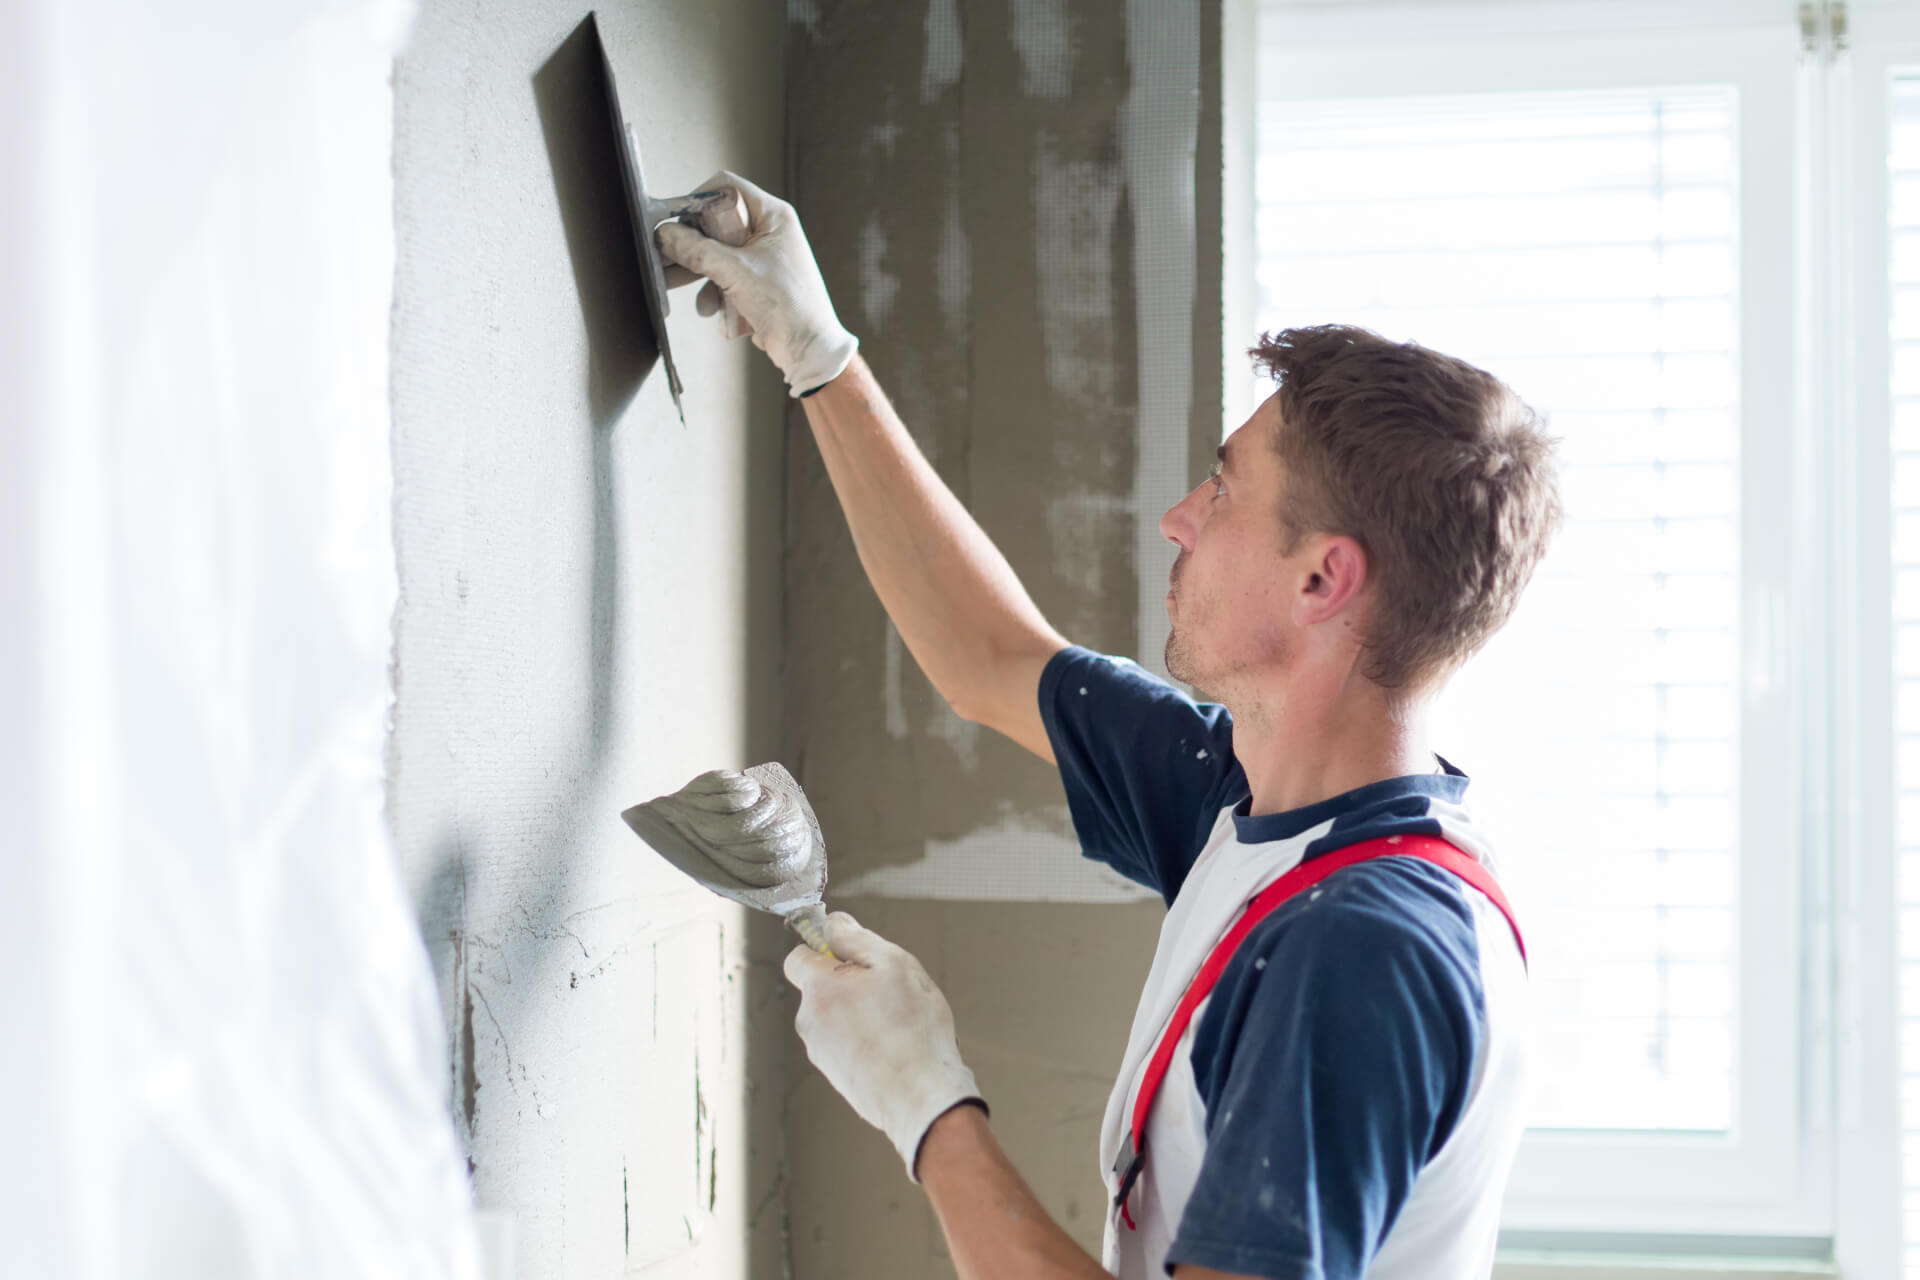
After the layer of spray dries, you can apply the next layer - a primer. Check how dry the first layer, it is easy: you need to press a finger on the surface, the finger should not be wetted and fall into the plaster.The primer mixture is thicker, therefore it is applied with a wide trowel and leveled. In this way, they plaster a small surface area, for example, a square meter, and proceed to the next section, carefully rubbing the joints with a spatula.
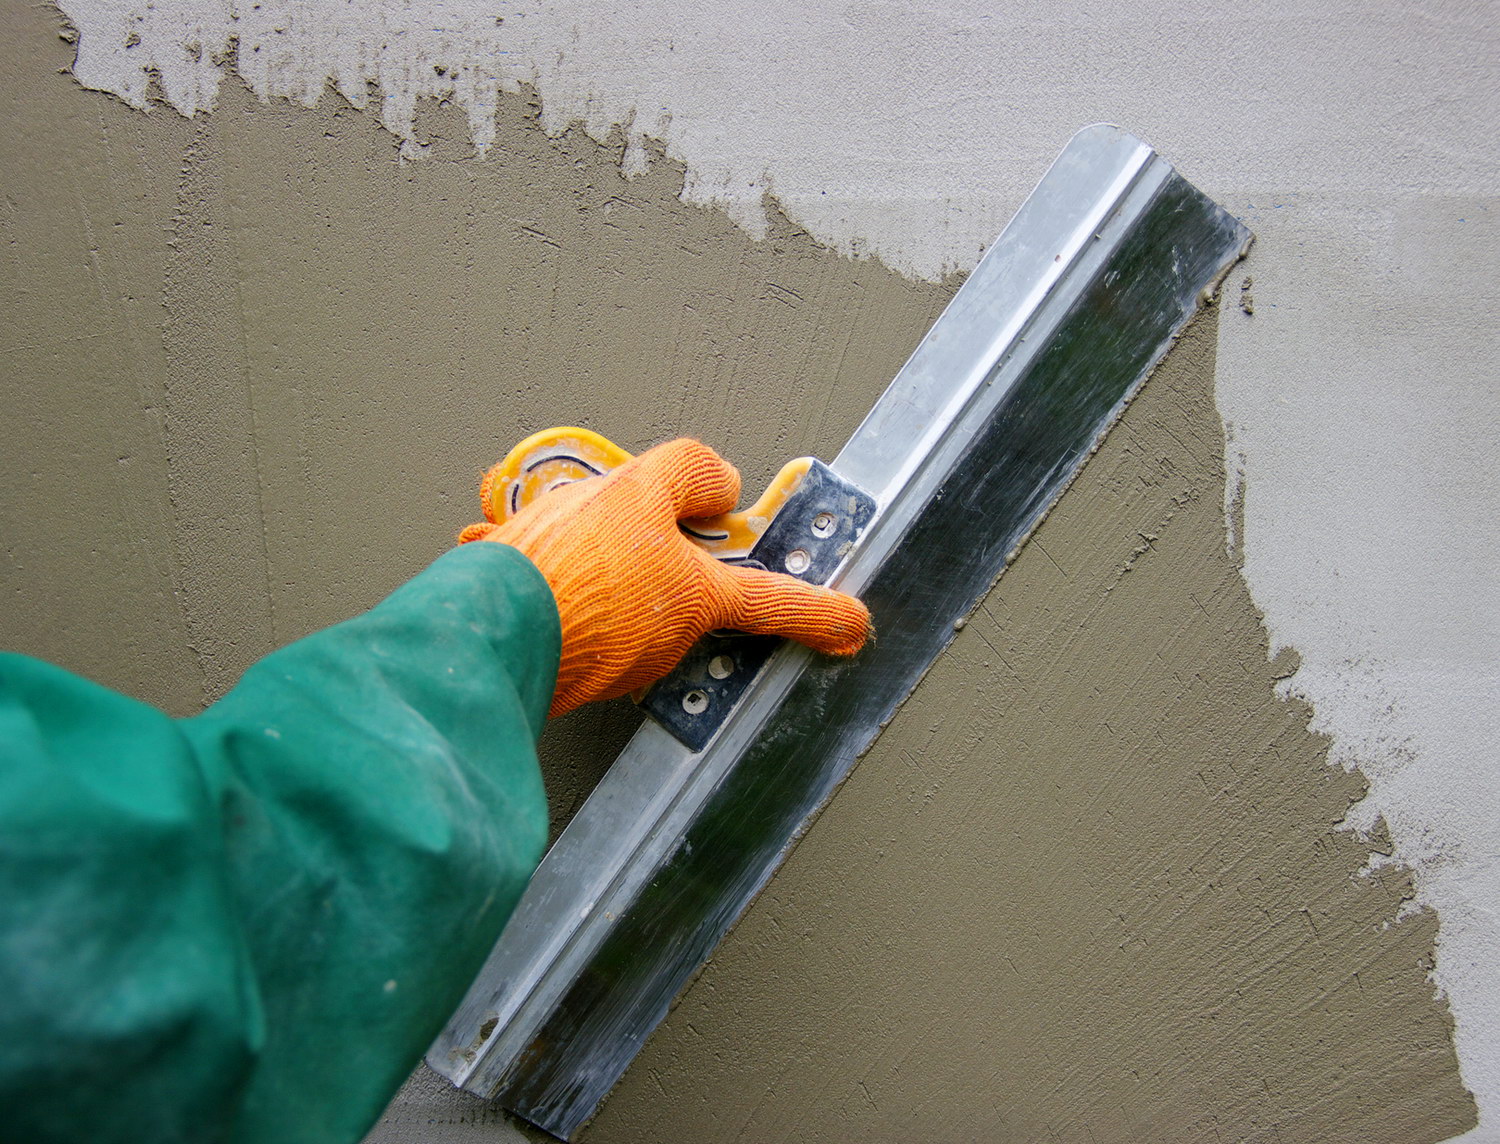
After that as a part of a wall measuring 8–9 meters will be applied a mixture, we need the following tool, which is called the rule. The rule is convenient to align and smooth large areas., smooth movements with uniform pressure. The technique of movement must be self or circular. Do not act jerkily or sharply.
Gradually, the entire surface will be covered with plaster. In the process, you should carefully monitor possible irregularities and protrusions. Track areas with fallen particles. They need to be leveled immediately, in small areas, because if defects show up after the mixture has been applied over a considerable area, errors can be corrected only in a way that will require applying another layer. And this, in turn, will affect the quality, because the thicker the layer, the less strong and stable it is.
The final layer is applied very thinly, but in such a way as to cover all possible defects.
The solution for the finishing layer should be homogeneous; particles in the mixture should not be larger than 2 mm in size.. If it was allowed to dry the previous layer, you need to walk along the wall with a brush dipped in water. The mixture is applied with a spatula, pressing its edge against the wall, sweeping movements in an arc.
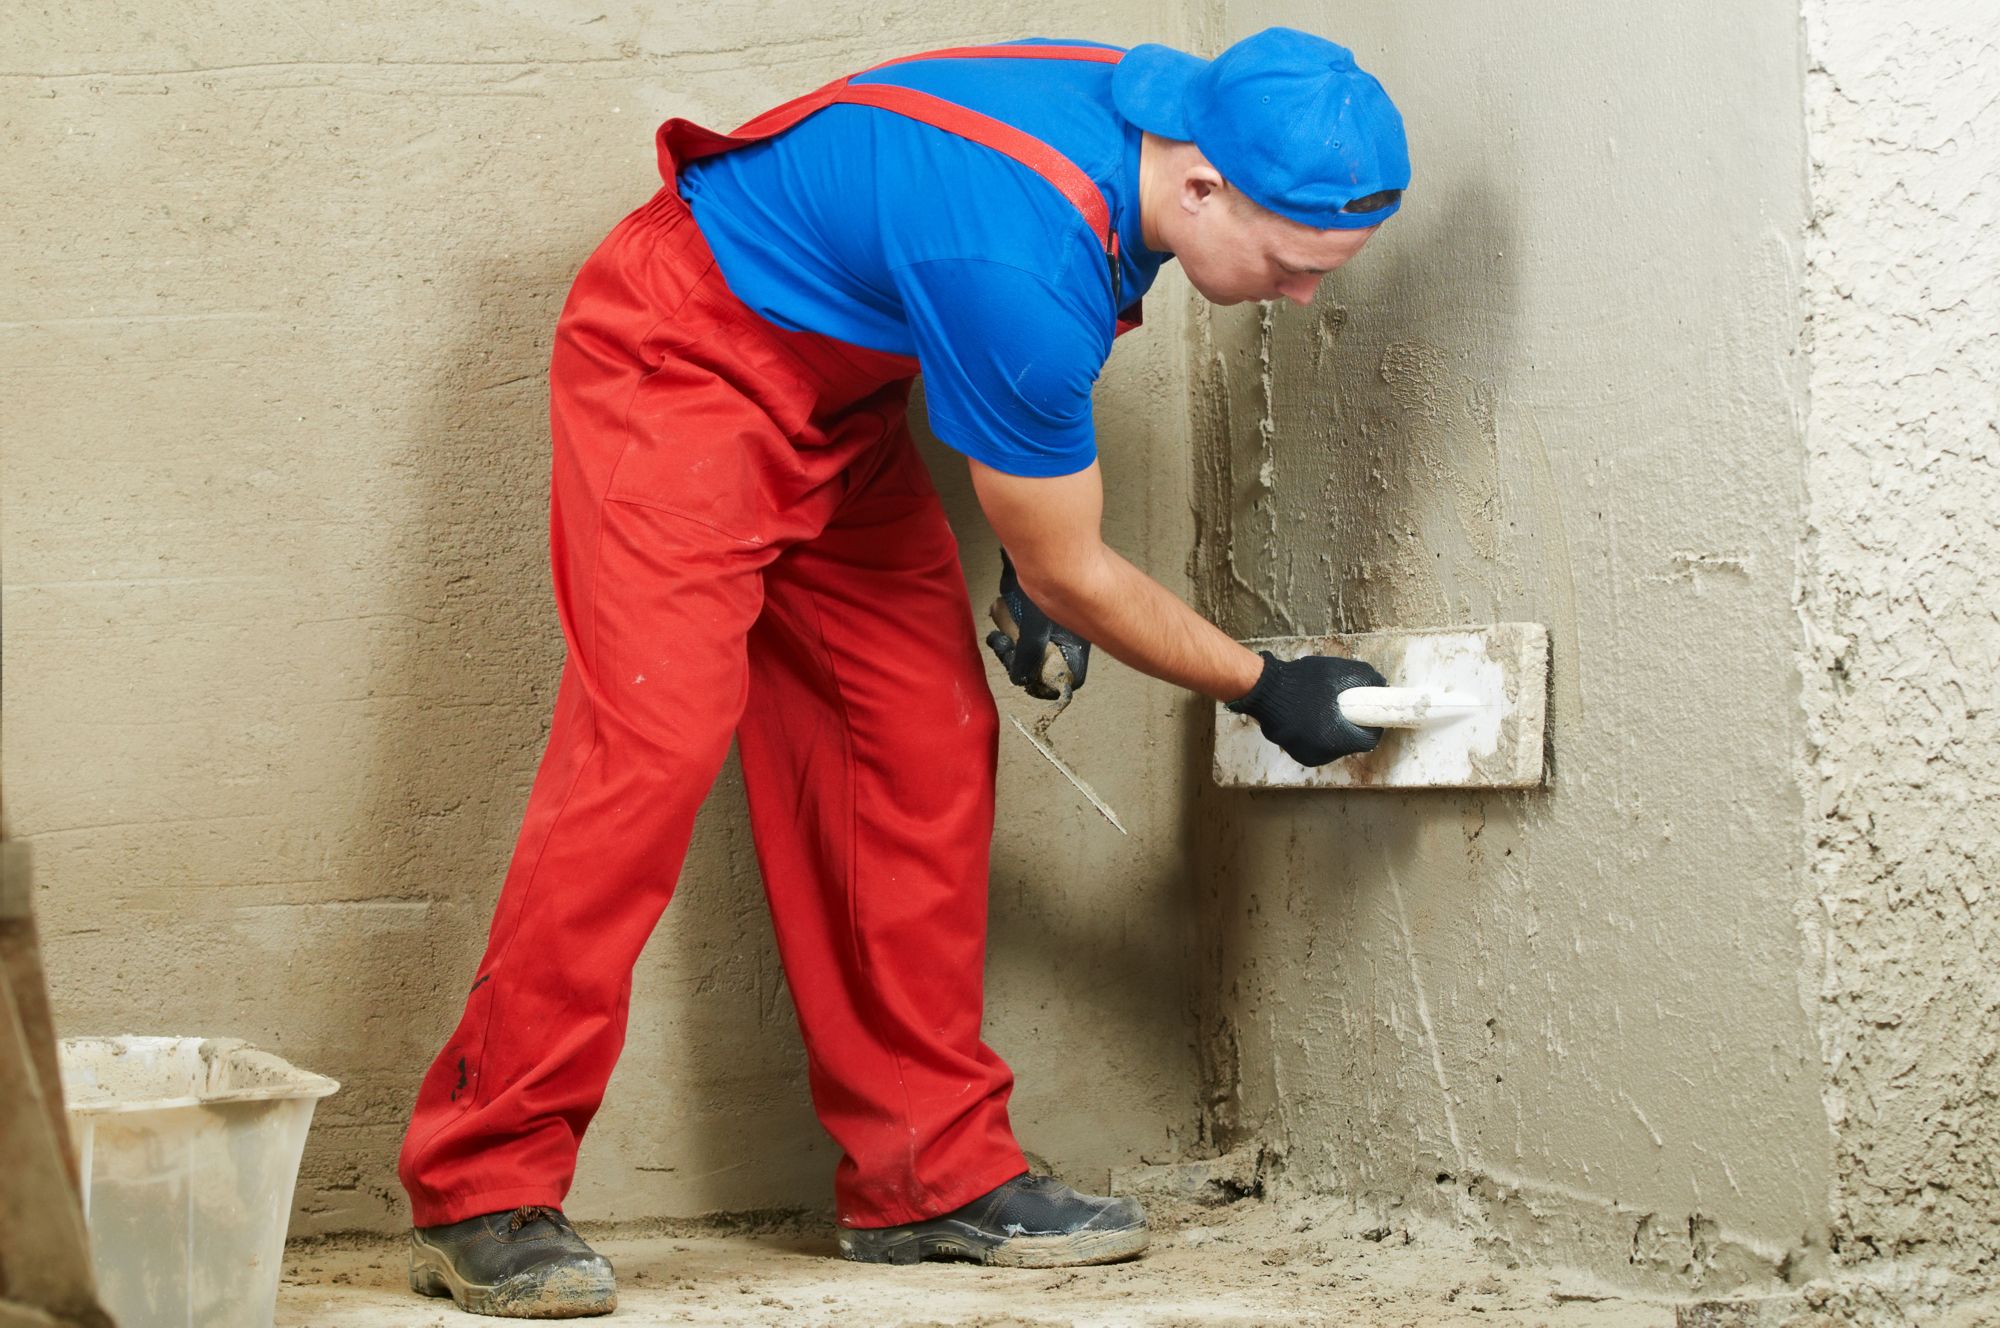
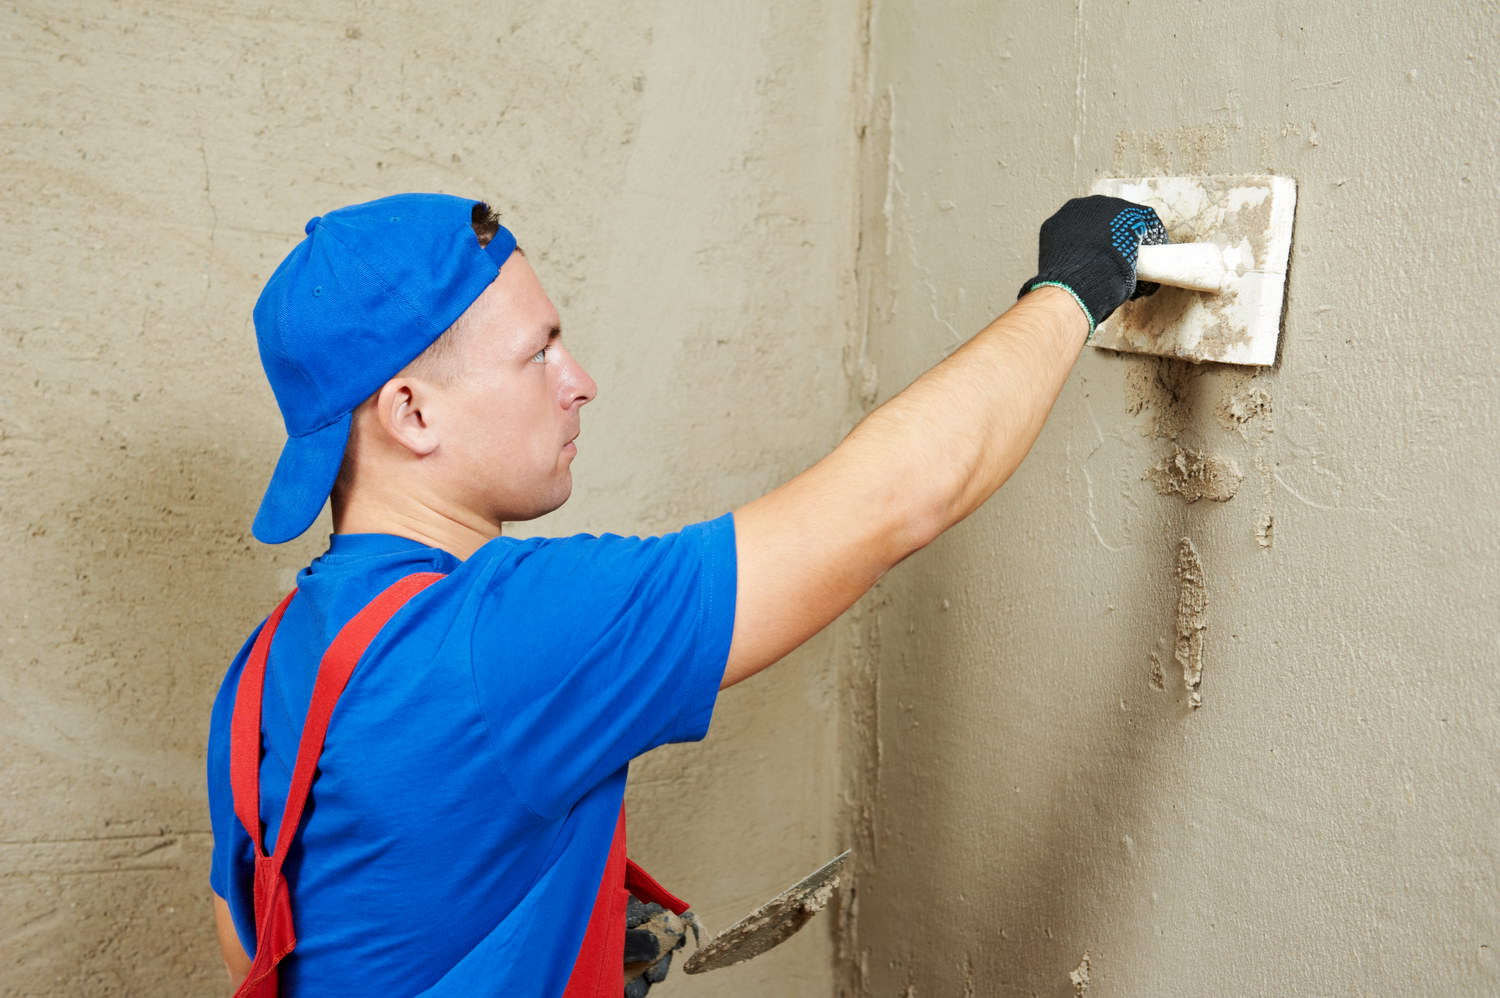
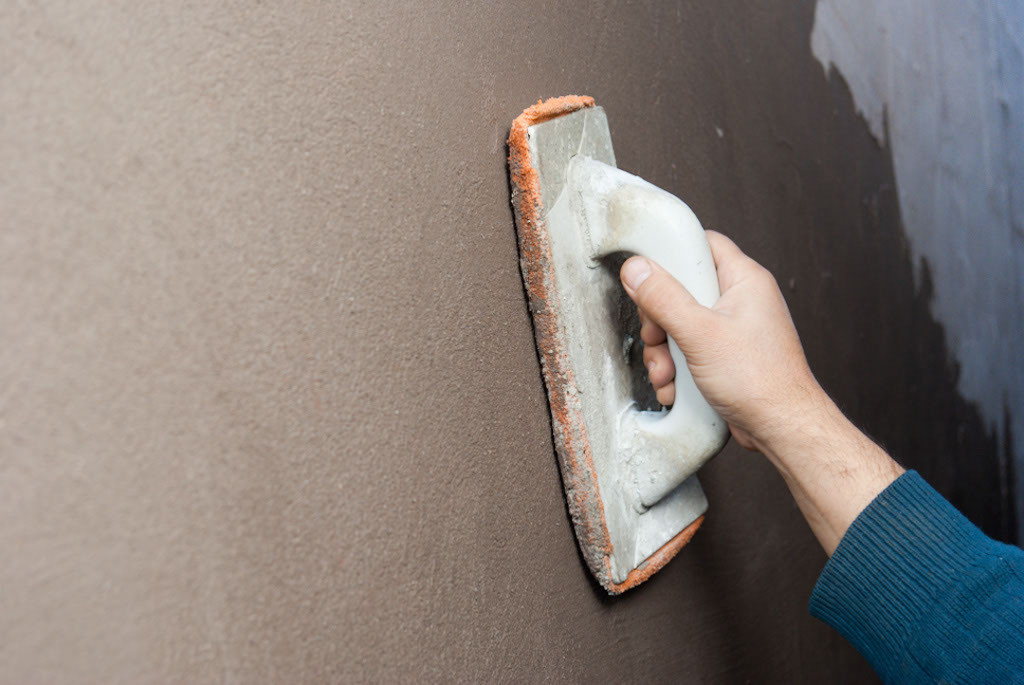
Even if the whole process is produced by technology, small irregularities will be present. therefore upon completion of wall plastering, another type of leveling is needed, called a grout. It is carried out sequentially with the tools of a grater and tighter. The first stage is grouting, the second is smoothing.
Before roughing the surface slightly moistened. After that, float movements in a circle, with a uniform pressure on the instrument begin to rub the wall. You need to act very carefully, so as not to thin the layer of plaster, but only to perfectly level it. For surfaces inside the corners used poluterok. Tool, similar in appearance and functions with a float, only smaller. The “crackdown” wall is rubbed with a float with a felt layer with smooth, sweeping movements. Then go to the next stage.

Smoothing is performed by float with a layer of metal or rubber strip. First, the movement should be on the vertical lines, and then on the horizontal. You can not make circular movements or alternate vertical lines with horizontal.
If all the rules of applying the plaster mixture are followed correctly, the walls will be smooth and pleasant to look at.
Tips and tricks
Plastering walls is quite a difficult and time-consuming process, which is still under the force of a beginner. It is important not to forget the key points. By all the rules prepare the walls. When applying plaster for painting, carefully smooth the surface. Throw the solution on the wall should be carefully, not too moving away from it. Display smooth lines along the lighthouses.

Dries plaster on walls from 1 day to two weeks. So, for example, the rule for gypsum plaster is: 1 day for 1 mm of solution. To more accurately calculate the drying time, you can pay attention to the information from the manufacturer of the plaster mix.
Lime-cement coating can dry out within a week. It is not recommended to try artificially to speed up the drying process.The warm indoor temperature will allow the mixture to dry on its own. This is fraught with a negative impact on strength.

The ideal temperature for plastering is +20 degrees Celsius.. If possible, avoid drafts, direct exposure to the sun.
Few non-professionals know that dry plaster also exists, and it is nothing but drywall. Of course, such material is unlikely to be a good choice for building facadesbecause it is completely unstable to the effects of climatic phenomena. But for interior finishes it may be ideal, especially in the hands of a newbie of repair work.
On how to properly align the walls with plaster beacons, see the following video.


