The subtleties of the installation of drainage system
Rains, especially oblique showers, can ruin the walls and foundation of almost any structure. High-quality and reliable drainage system - a guarantee of durability of the building. The process of installing the drainage system does not necessarily shift on the shoulders of professionals. Having studied the subtleties of work, you can install the drain on your own.

Special features
Systems designed to collect precipitation is a desirable element in the arrangement of any dwelling. Modern housing projects often already imply its existence. The option of creating gutters at the stage of installation of the batten for the future roof is used most often.However, no one cancels the possibility of installing gutters and pipes on an existing roof.
Drainage systems are distinguished by a variety of designs and materials available. For example, not so long ago, the system was made only from galvanized steel. This material was the only available option. Modern products are also metal, but they are covered with polymeric compounds. Also, drains are made of plastic.
Each material has its own quality characteristics, which should be considered in more detail. So, today on sale you can find drains:
- galvanized;
- metal;
- polymer coated;
- plastic.
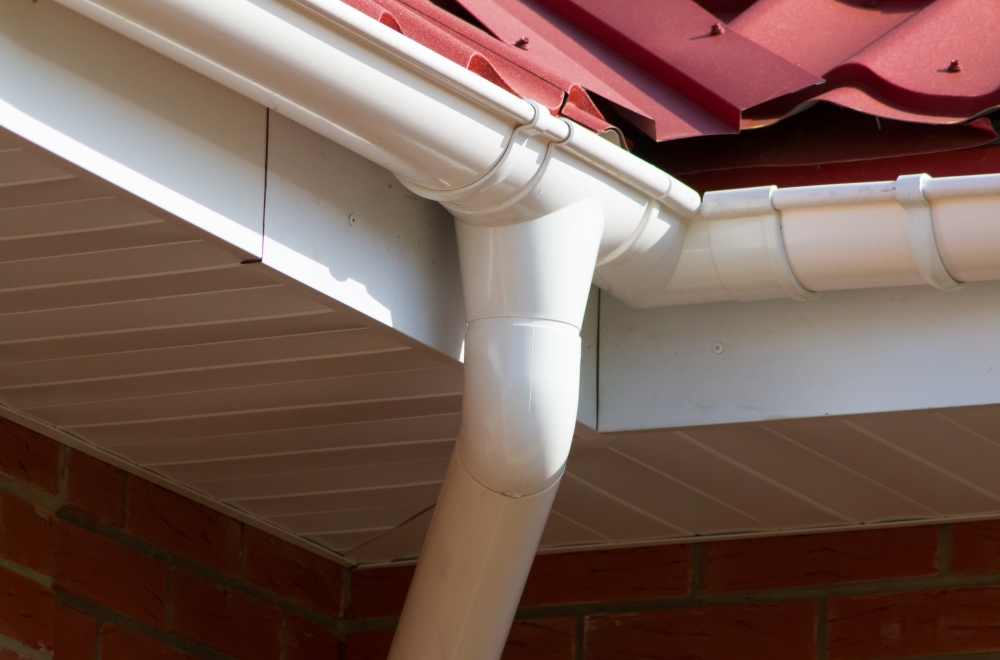
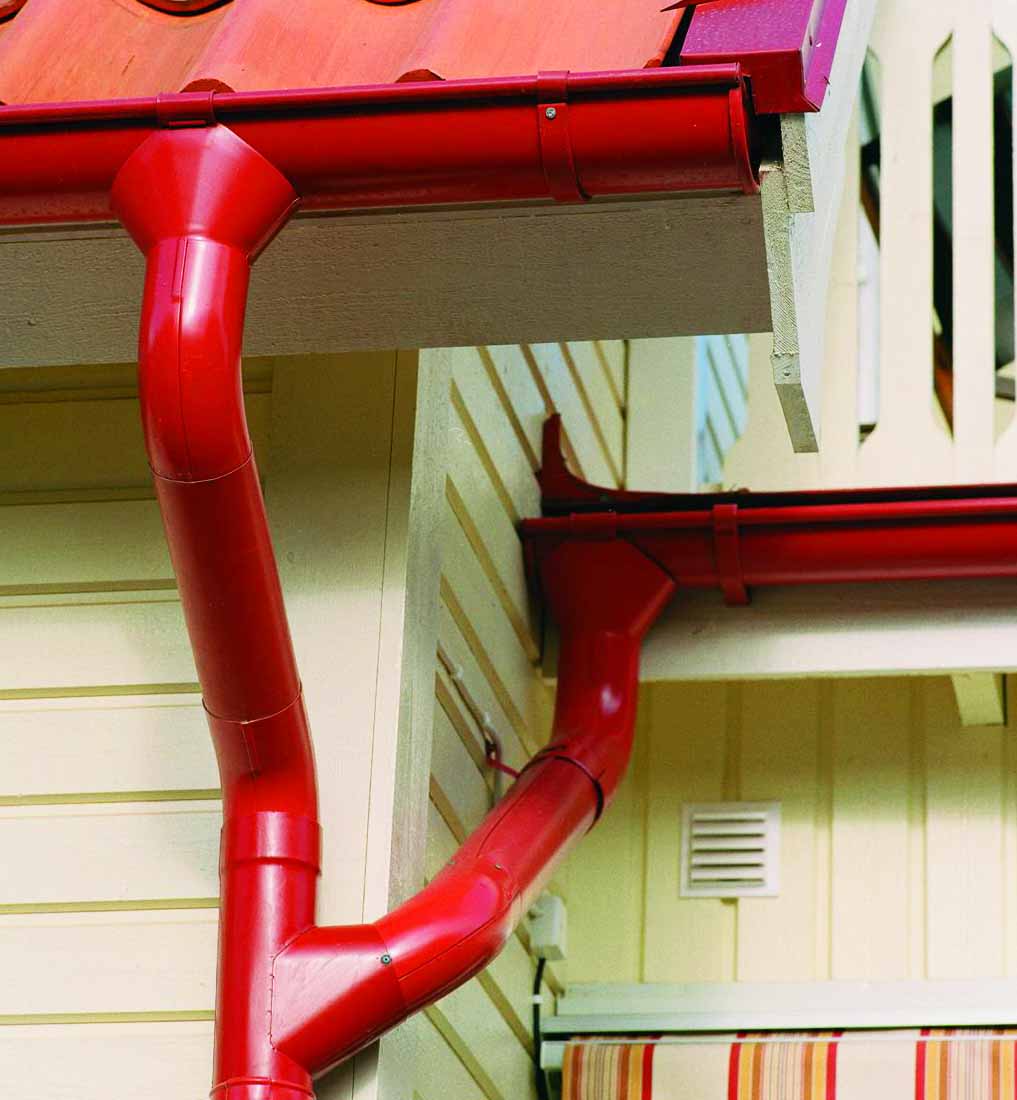
Drainage systems made of plastic in recent years are becoming increasingly popular. This is the best option, since the plastic that is used for drains is not afraid of temperature extremes, and is resistant to frost and heat. Plastic pipes are not afraid of corrosive processes. The negative impact of ultraviolet pipes from plastic is also not threatened.
Plastic brackets are usually wide, so they provide a tight and reliable fit.Minus plastic gutters - the inability to bend the structure, as it turns out with metal parts. Designs are usually customized to specific design dimensions. Another major drawback of plastic systems is the high cost.

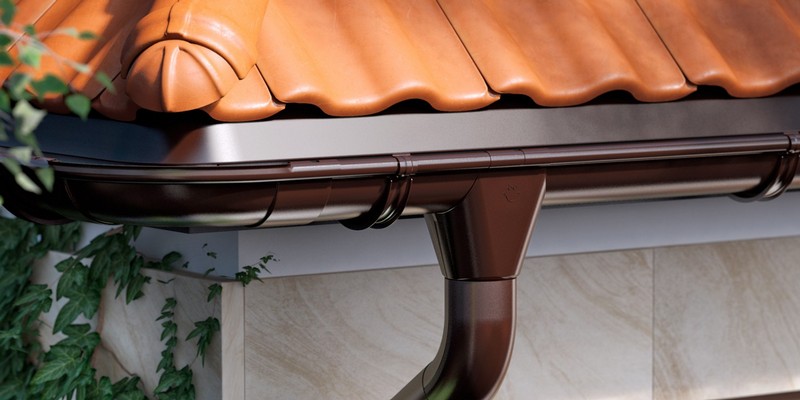
Metal drains, supplied with a polymer coating, have a lower price. The operational life of such systems is quite long. External natural effects of such drains are also not terrible. They look quite presentable. However, when the polymer coating is damaged on such structures, corrosion often occurs. It is easy to damage the coating, sometimes it happens even during installation work due to the usual fastening elements.
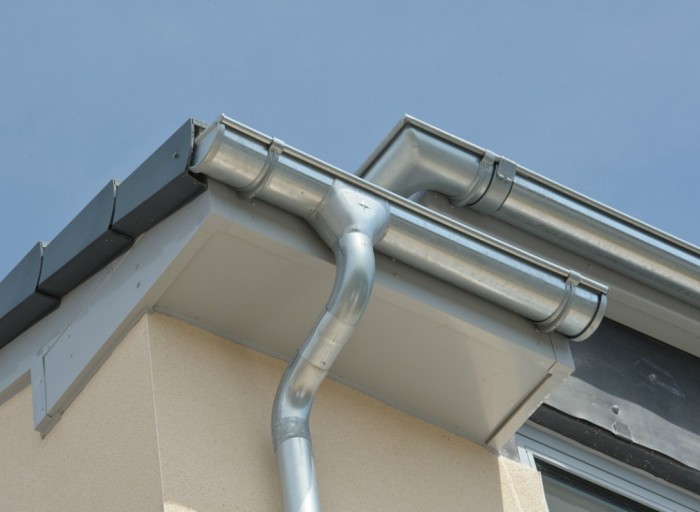
The most inexpensive type of systems are galvanized steel options. Despite the cheapness, such drains are not too popular, because they are usually not aesthetically pleasing. Systems have a long service life, corrosion can appear only with deep scratches. The main positive quality of metal systems is the easiest fitting of parts to the desired configuration.

As for the supporting fasteners, they can be sold as a complete with the main system, or separately. Holders must fit the gutter.In this regard, you can also rely on the technical requirements of SNiPs and GOST.
Technical requirements
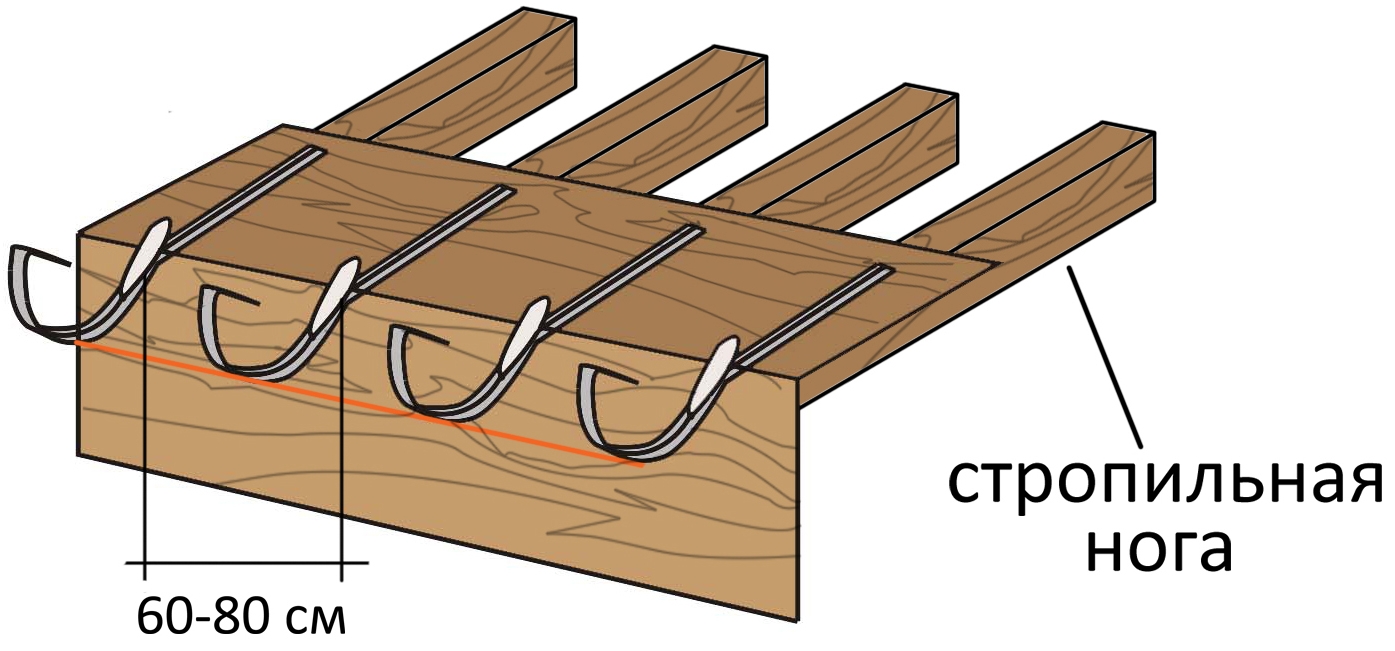
The number of brackets according to SNiP is considered according to the standard distance between fasteners, which should be 50-60 cm. To calculate the required number of fasteners, the total length of the system must be divided by this distance. If the building has a non-linear shape, then you can calculate the total number relative to each wall. Corner elements need to be counted pieces, since the drains located at the corners must adhere on both sides.
The brackets can be attached in several ways.
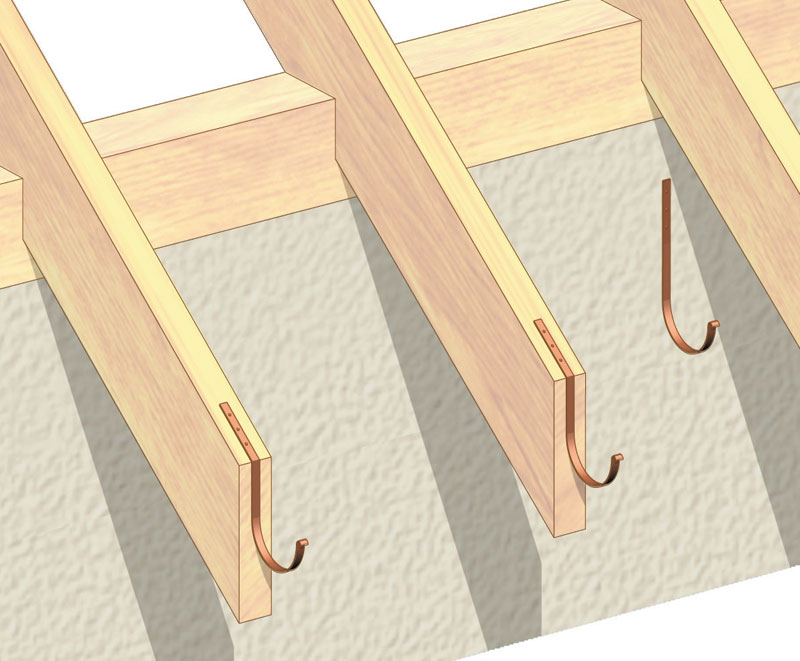
- To the roof truss system. This option is suitable for roofing material that has not yet been laid.
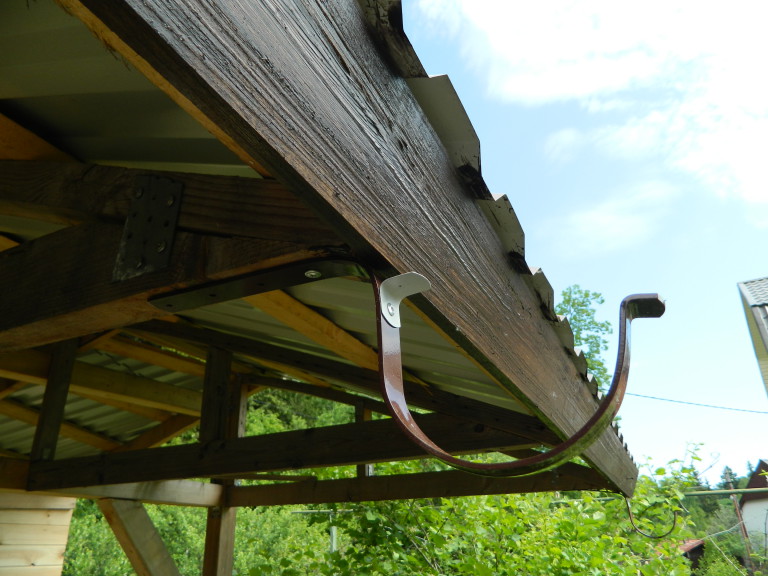
- To wind board. This option is the only one in the case that the drains are made of plastic. With other materials it is one of the possible options.
- To the last board crates under the roofing material, if it is solid.
Also this method is suitable if the roofing material has not yet been laid. GOST assumes that the brackets should be mounted with regard to the created system slope. The easiest way to do this is with metal options, since they can be bent with improvised means.
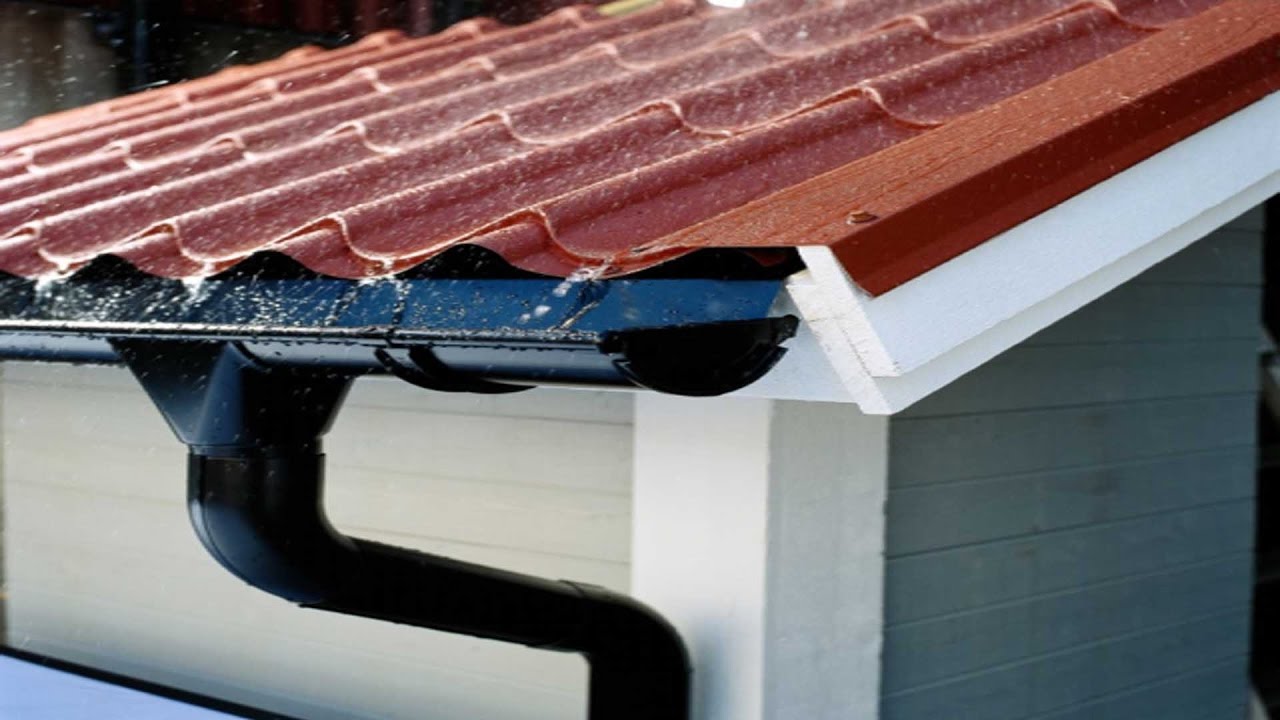
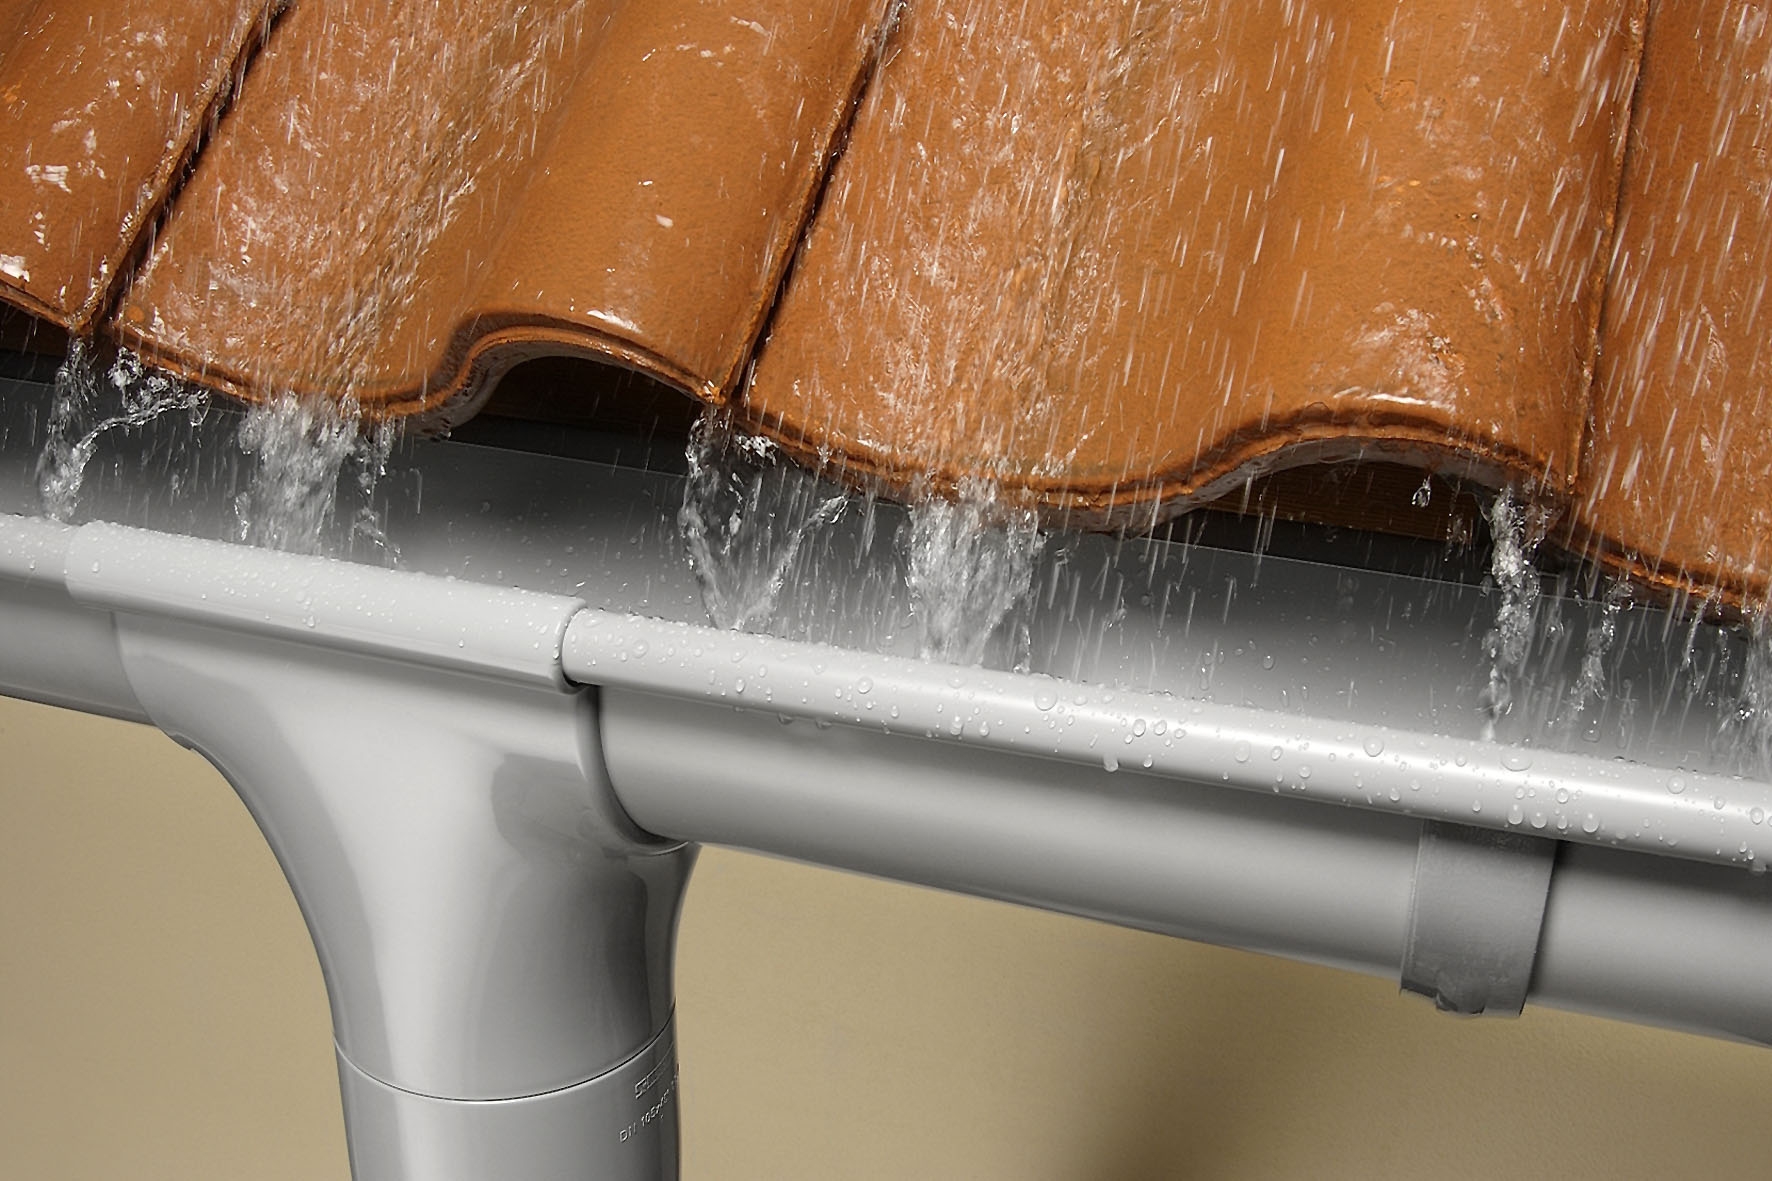
According to the same regulatory parameters, the gutter should be placed so that the roof covering ends without reaching half of the gutter. The location of the gutter in 1 / 2-1 / 3 will be correct, this will allow the system to catch water even during heavy rain showers.
Regulatory rules suggest the optimal choice of placement of the structure. For example, it is not recommended to install a high chute in snowy regions, as well as on roofs with a low angle of inclination.
If the region of your residence is not snowy, and the roof has a sufficient slope, you can not worry about the location of the structure. If the low gutter does not work, then you can install additional snow guards. The snow will come off the roof a little bit and will not harm the storm system.
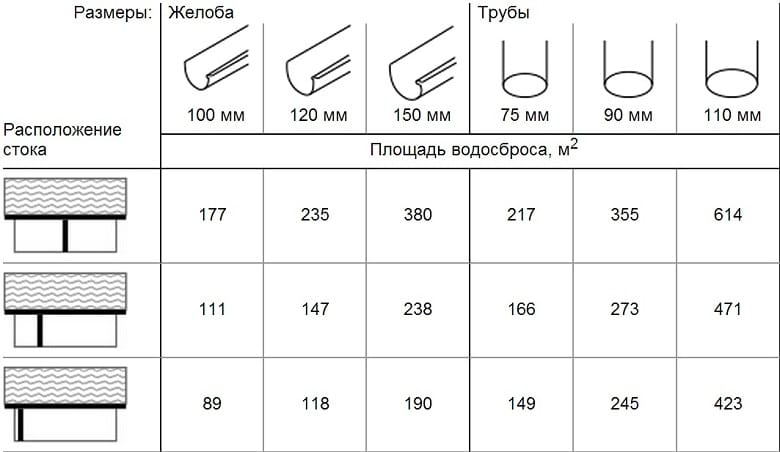
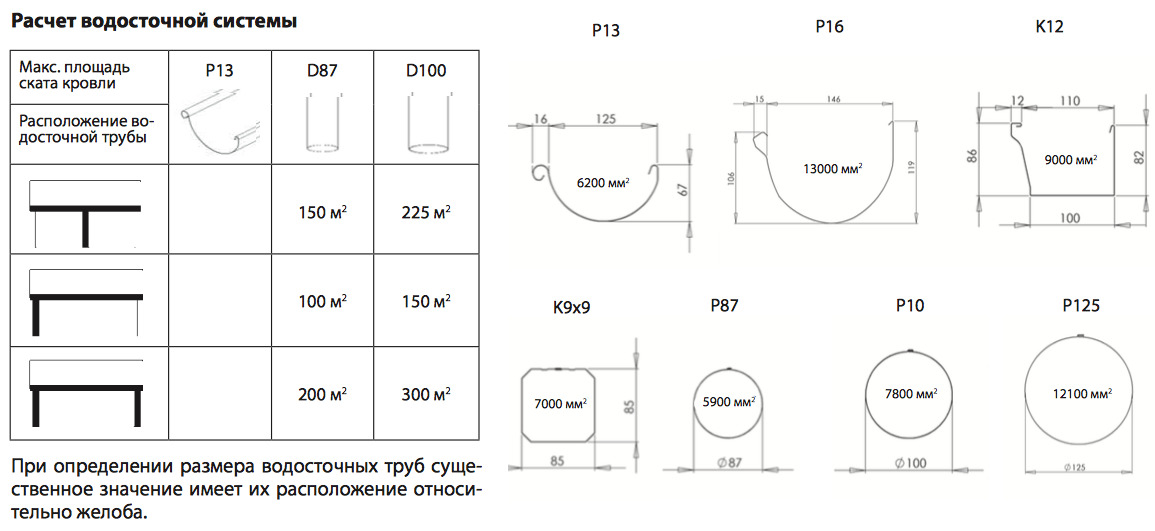
In addition to fasteners, it is important to correctly calculate the number of pipes and gutters. It is also worth considering that if the diameter of the system is displayed incorrectly, then it will not be able to divert the required volume of water from the roof, or it will cope, but it will be unreasonably expensive.
There are certain principles for the calculation.
- For surfaces with a total area of slopes up to 50 square meters, pipes of 75 mm and gutters of 100 mm are used.
- For surfaces ranging from 50 to 10 sq m, pipes with a diameter of 87 mm and gutters of 125 mm are used.
- For roofs with a square more than 100 square meters, pipes with a diameter of 100 mm and gutters of 150 mm are relevant.
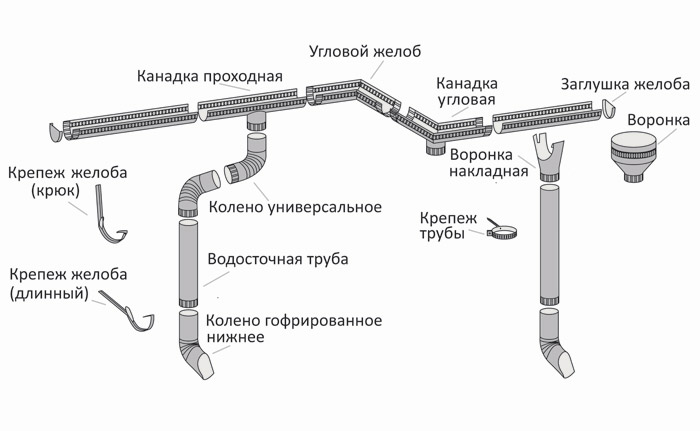
The draft of the drainage system on paper will simplify the task of choosing all the constituent elements. All data on your intended design should be reflected schematically. For this work useful knowledge of the types of systems.
Kinds
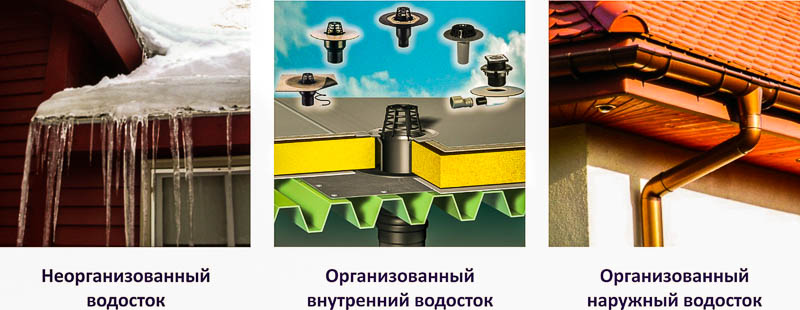
At arrangement of a residential building it is possible to apply various water waste systems. The most popular option is mounted outside the structure and is a combination of various elements in which water can accumulate. For further removal of moisture sometimes equip storm sewers or wells. Summer residents install conventional barrels to collect water, which can later be watered garden.
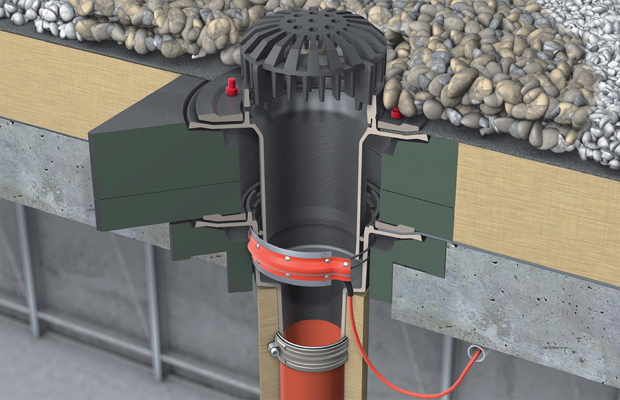
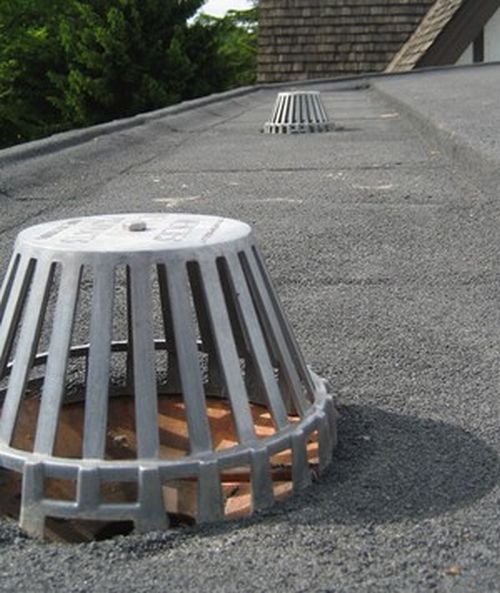
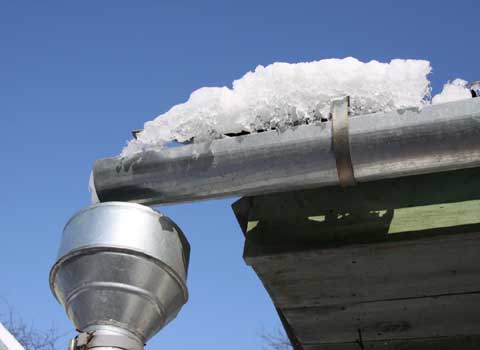
This version of the system of plums is called organized, external. However, it is of little acceptable for flat roofs. Here, the best choice would be a storm funnel, which is usually round. Water enters the sink inside the funnel, then goes into the pipes and goes to the sewer. The required number of such craters in the roof is determined by regional natural factors, as well as the area of the roof.
Internal drain can work on the system of free flow. Also sometimes equip version of the system with a siphon. Such systems require a small number of funnels. In drains, where water must flow by gravity, the flow velocity is determined by the angle of inclination of the gutters.
Experts distinguish another type of drainage, which is classified as unorganized. Such a drain is a roof with a properly equipped slope. On it, the moisture flows down freely, while the facade of the building does not "suffer" at all. However, due to the fact that the water falls close to the foundation, the risk of its destruction increases. This option is acceptable for shed roofs. At the same time it is desirable to do a bias towards a courtyard
Such roofs are rarely used for residential buildings. According to SNiP, unorganized drains are allowed only on high-rise buildings. In addition, for the possibility of arranging an unorganized drainage experts calculate the annual rainfall in the region. It should not exceed 300 mm / year.
On the part of the building where the ramp is facing, you cannot place balconies. Also, there should not be carriageways, pedestrian areas.
The roof covering is equipped with a visor with a length of at least 60 cm. Unorganized drain will not provide good protection to residential buildings.
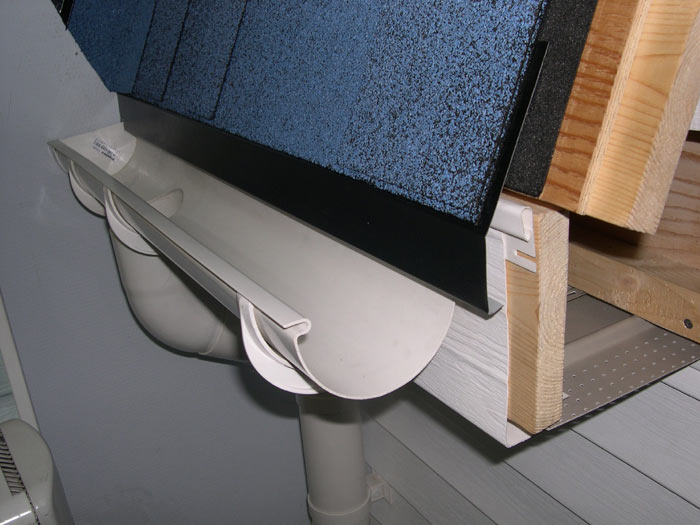
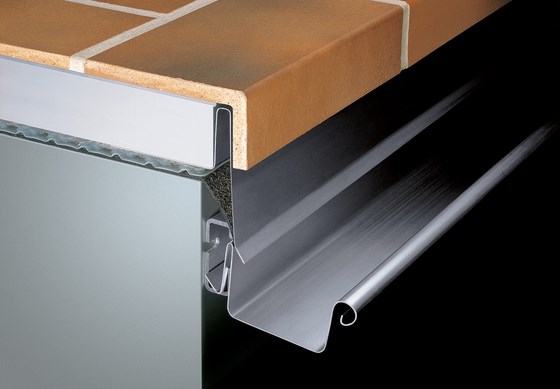
There is another version of the drain, called drip. It looks like a plank attached to the gable or eaves of the structure. Kapelnik is a good protection of the facade of the house from moisture. It acts as follows:
- water enters the plate;
- then it is poured into the gutter;
- Further sediments fall into the drainage system.
The device of different types of drainage systems is different. Let us consider in more detail the traditional systems of external and internal type.
Device
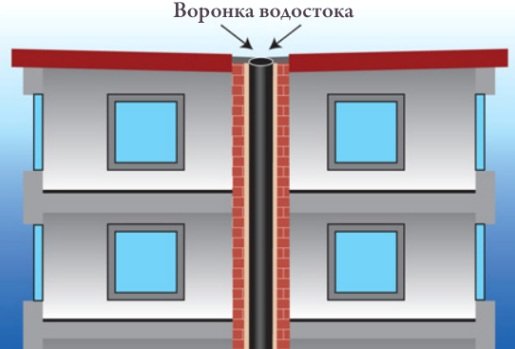
The device of internal drain involves the placement of pipes inside buildings. Such a system does not allow the pipes to freeze through and is well suited for regions with very variable weather. The advantage of the system is that the pipes are not visible from the facade, which improves the exterior. A feature of the device is the mandatory presence of drainage or a special place where rainwater flows.
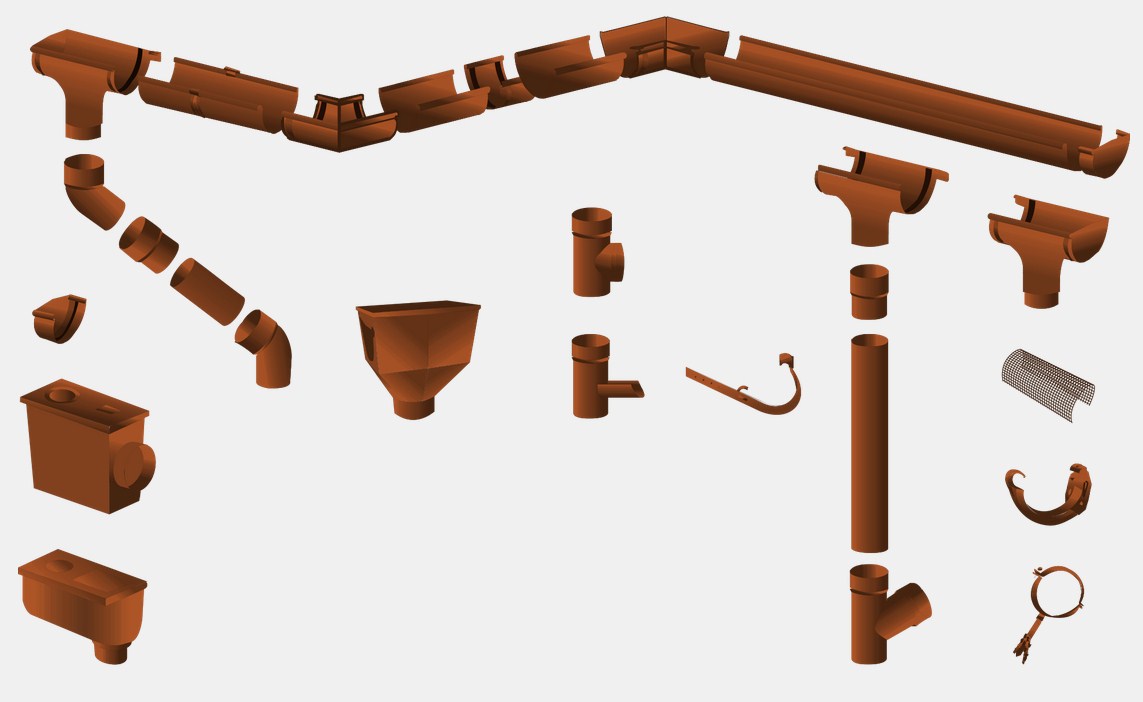
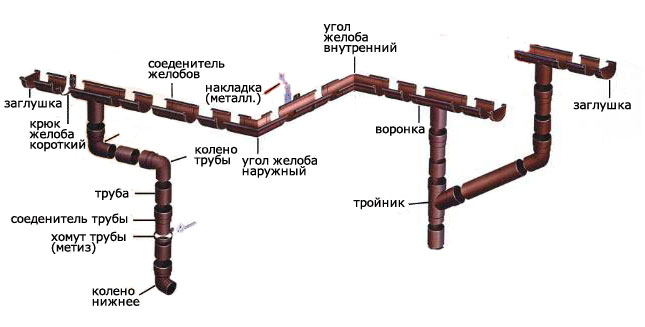
The system design assumes the obligatory presence of:
- pipeline;
- receiving funnels with a collector;
- special cleaning systems.

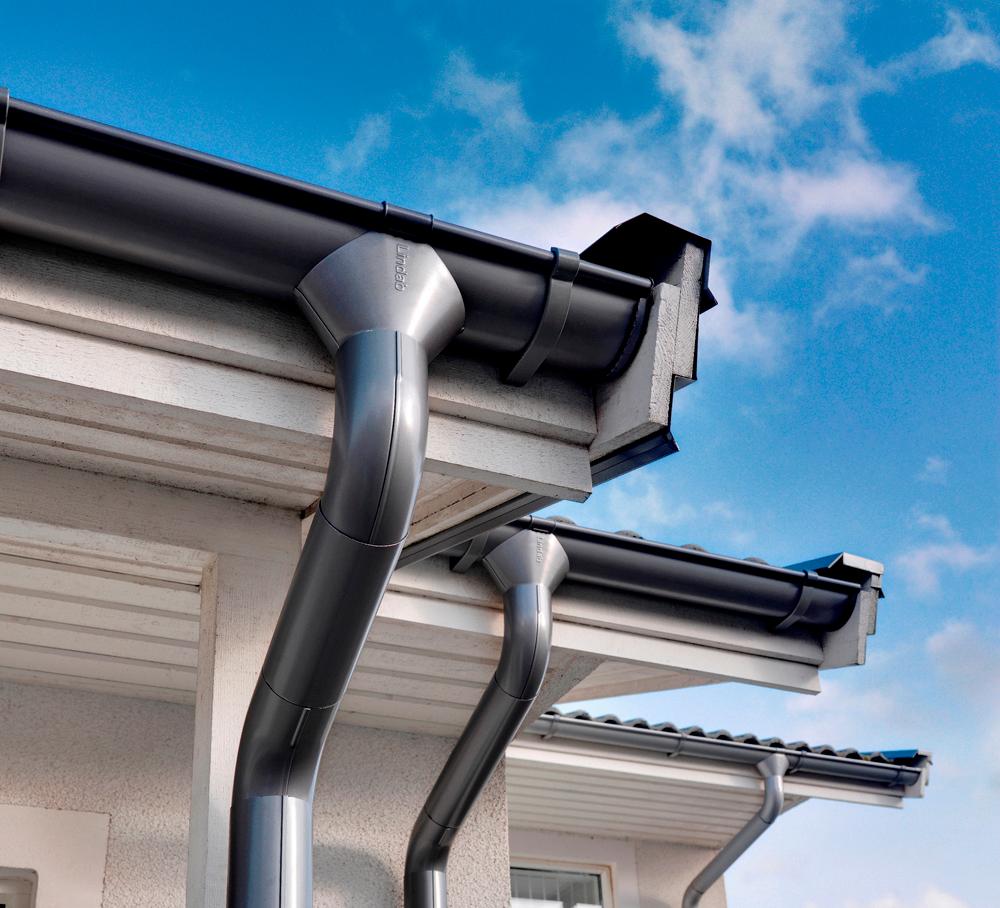
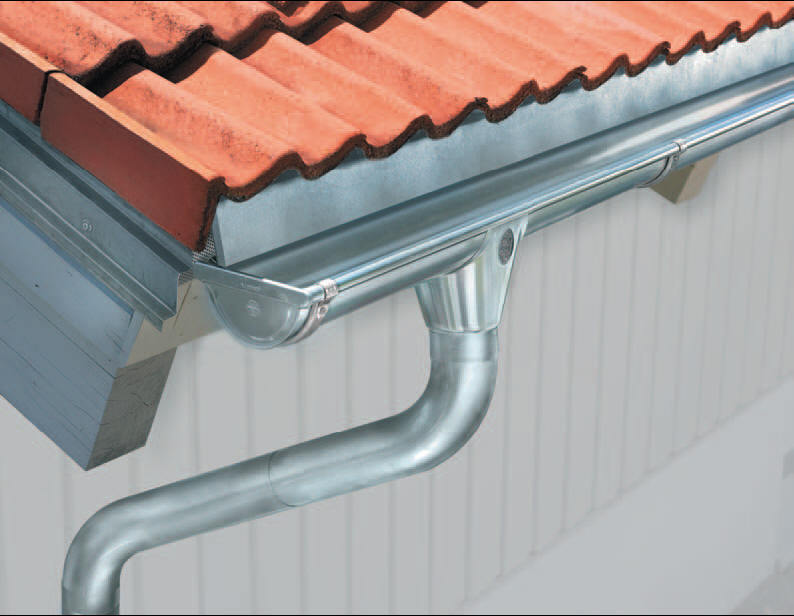
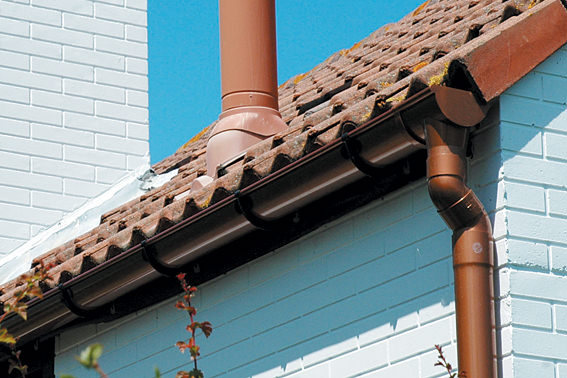
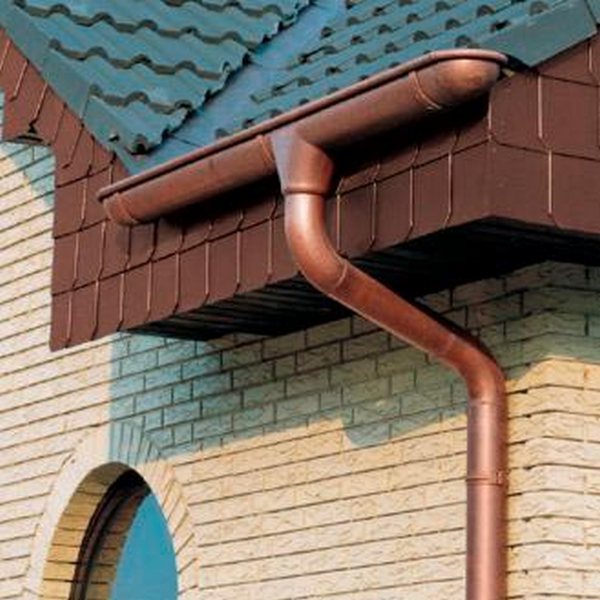
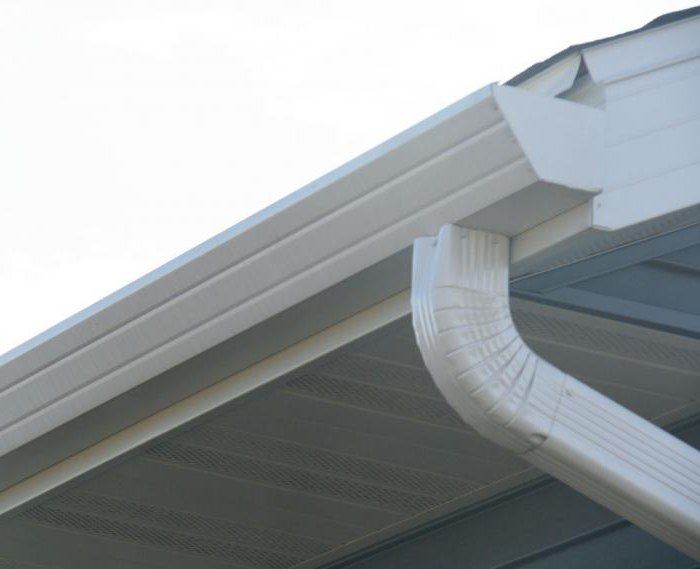
Unlike the first option, the external drain is placed on the facade of the building. Most suburban private buildings are equipped with just such a system. Its main convenience is that the drainage device is allowed after construction. With an internal drain this option will not work.
The advantages of the external device are as follows:
- simple installation;
- easy care;
- no need for professional knowledge and skills.
In addition, for the device external systems, you can use a variety of materials.
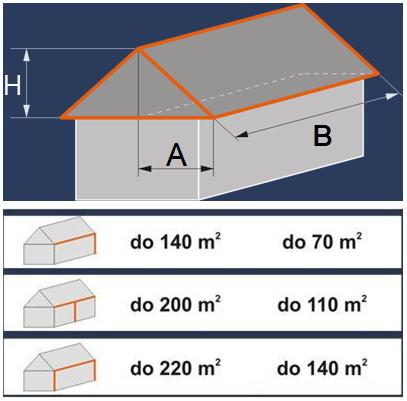
Material calculation
To calculate the materials for SNiP, the following data is necessary:
- roof area;
- amount of average annual precipitation;
- minimum temperature in the winter in the region;
- availability of rain sewage.
This calculation helps to determine the number of gutters, or rather, the total length of the overhangs, which is divided by the length of one gutter. For example, the total length of the overhang is 40 meters. Subtract the length of the corner elements (15 cm on one side) It turns out: 12 * 15 = 1.80. Then: 40 - 1.8 = 38.2 m.
Standard length of one galvanized gutter - 3 meters. This means that 13 gutters are required (38.2 / 3 = 12.7). The number of connecting elements is selected according to the number of joints in the structure.This will help you drawing in which you want to draw a rectangle with schematically located elements of the drain. For our example, we need 18 couplings.
The number of brackets for fixings is calculated based on the total length divided by the regulatory step. For example, for plastic it is 60 cm, and for metal it is 70 cm.
If the system is not closed, and the gutters will be mounted with open ends, then you need to determine the number of plugs. For example, for a gable gable roof, on which the system is mounted in two threads, you need to install four plugs. If the roof is hipped, hip-type, plugs are not required at all.
The number of corner elements will be equal to the number of external and internal corners of the house. The number of pipes is chosen so that it coincides with the number of drains, and their length must correspond to the height of the structure. In some cases, need curved knees. Their need is determined by the width of the overhang.
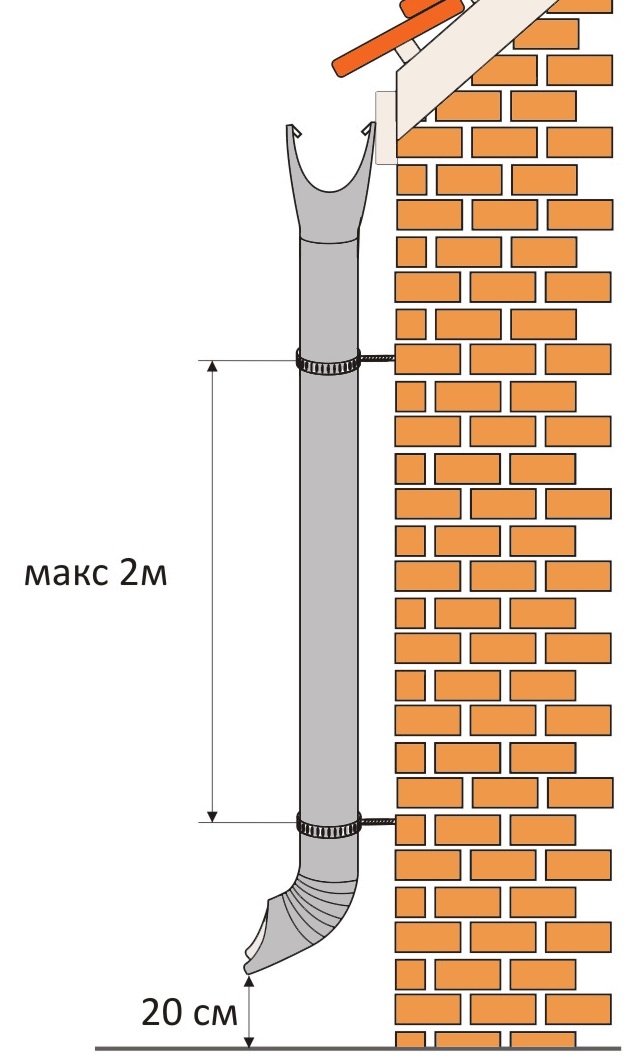
For each section connection, you must wear a hose clamp. If the pipe is three meters long, there should be two clamps: one on top, the other on the bottom.
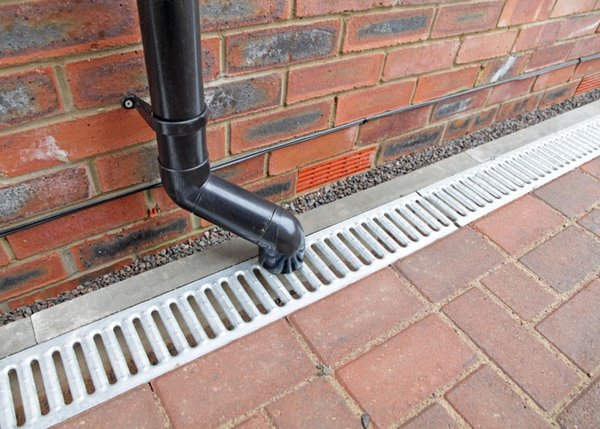
The tap must be located 30 centimeters from the ground (can be lowered to 15 cm, but only if there is a collector).
Calculation of internal drainage is carried out according to the rule - one funnel per 0.75 meters square. The spacing between the craters is determined by dividing the length of the roof, measured along the longitudinal axis, by the number of craters. In addition to water intakes, the system will require:
- risers;
- discharge pipes
- release.

For internal drainage, you can choose pipes with a diameter of 100, 140, 180 mm. The length can be 70 or 150 m. The incoming moisture is transferred to the storm sewer. If drainage is supposed to be used year-round, then the system is better placed in a heated zone.
The internal system often suffers from debris that can get into it from the roof. The design of protection is extremely simple - a cap and a glass. This is an auxiliary element, but it copes well with the retention of various garbage.
Such an auxiliary device is not required if the internal drain is installed with a siphon. This is a special valve for storm sewer connected to the drain. It keeps the pressure of the water in the pipes. When filling the drainage system, the valve opens, a very rapid precipitation occurs. The formation of blockages in the siphon system is rare, it is almost not necessary to clean it.
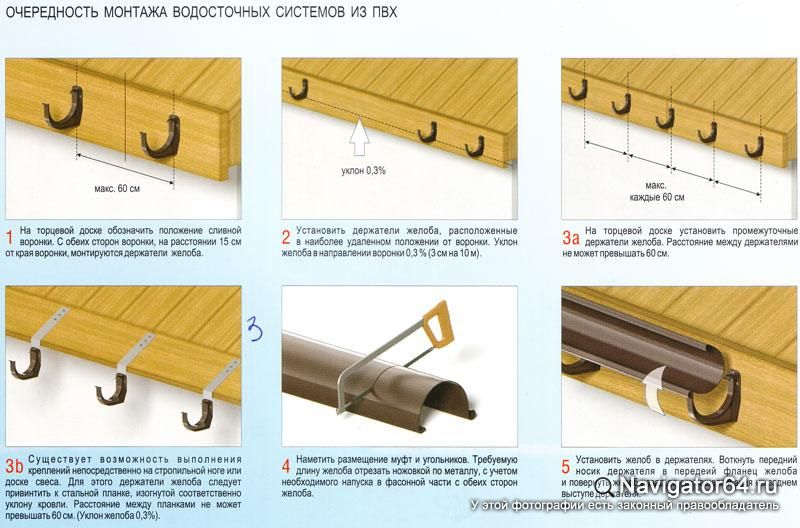
Installation
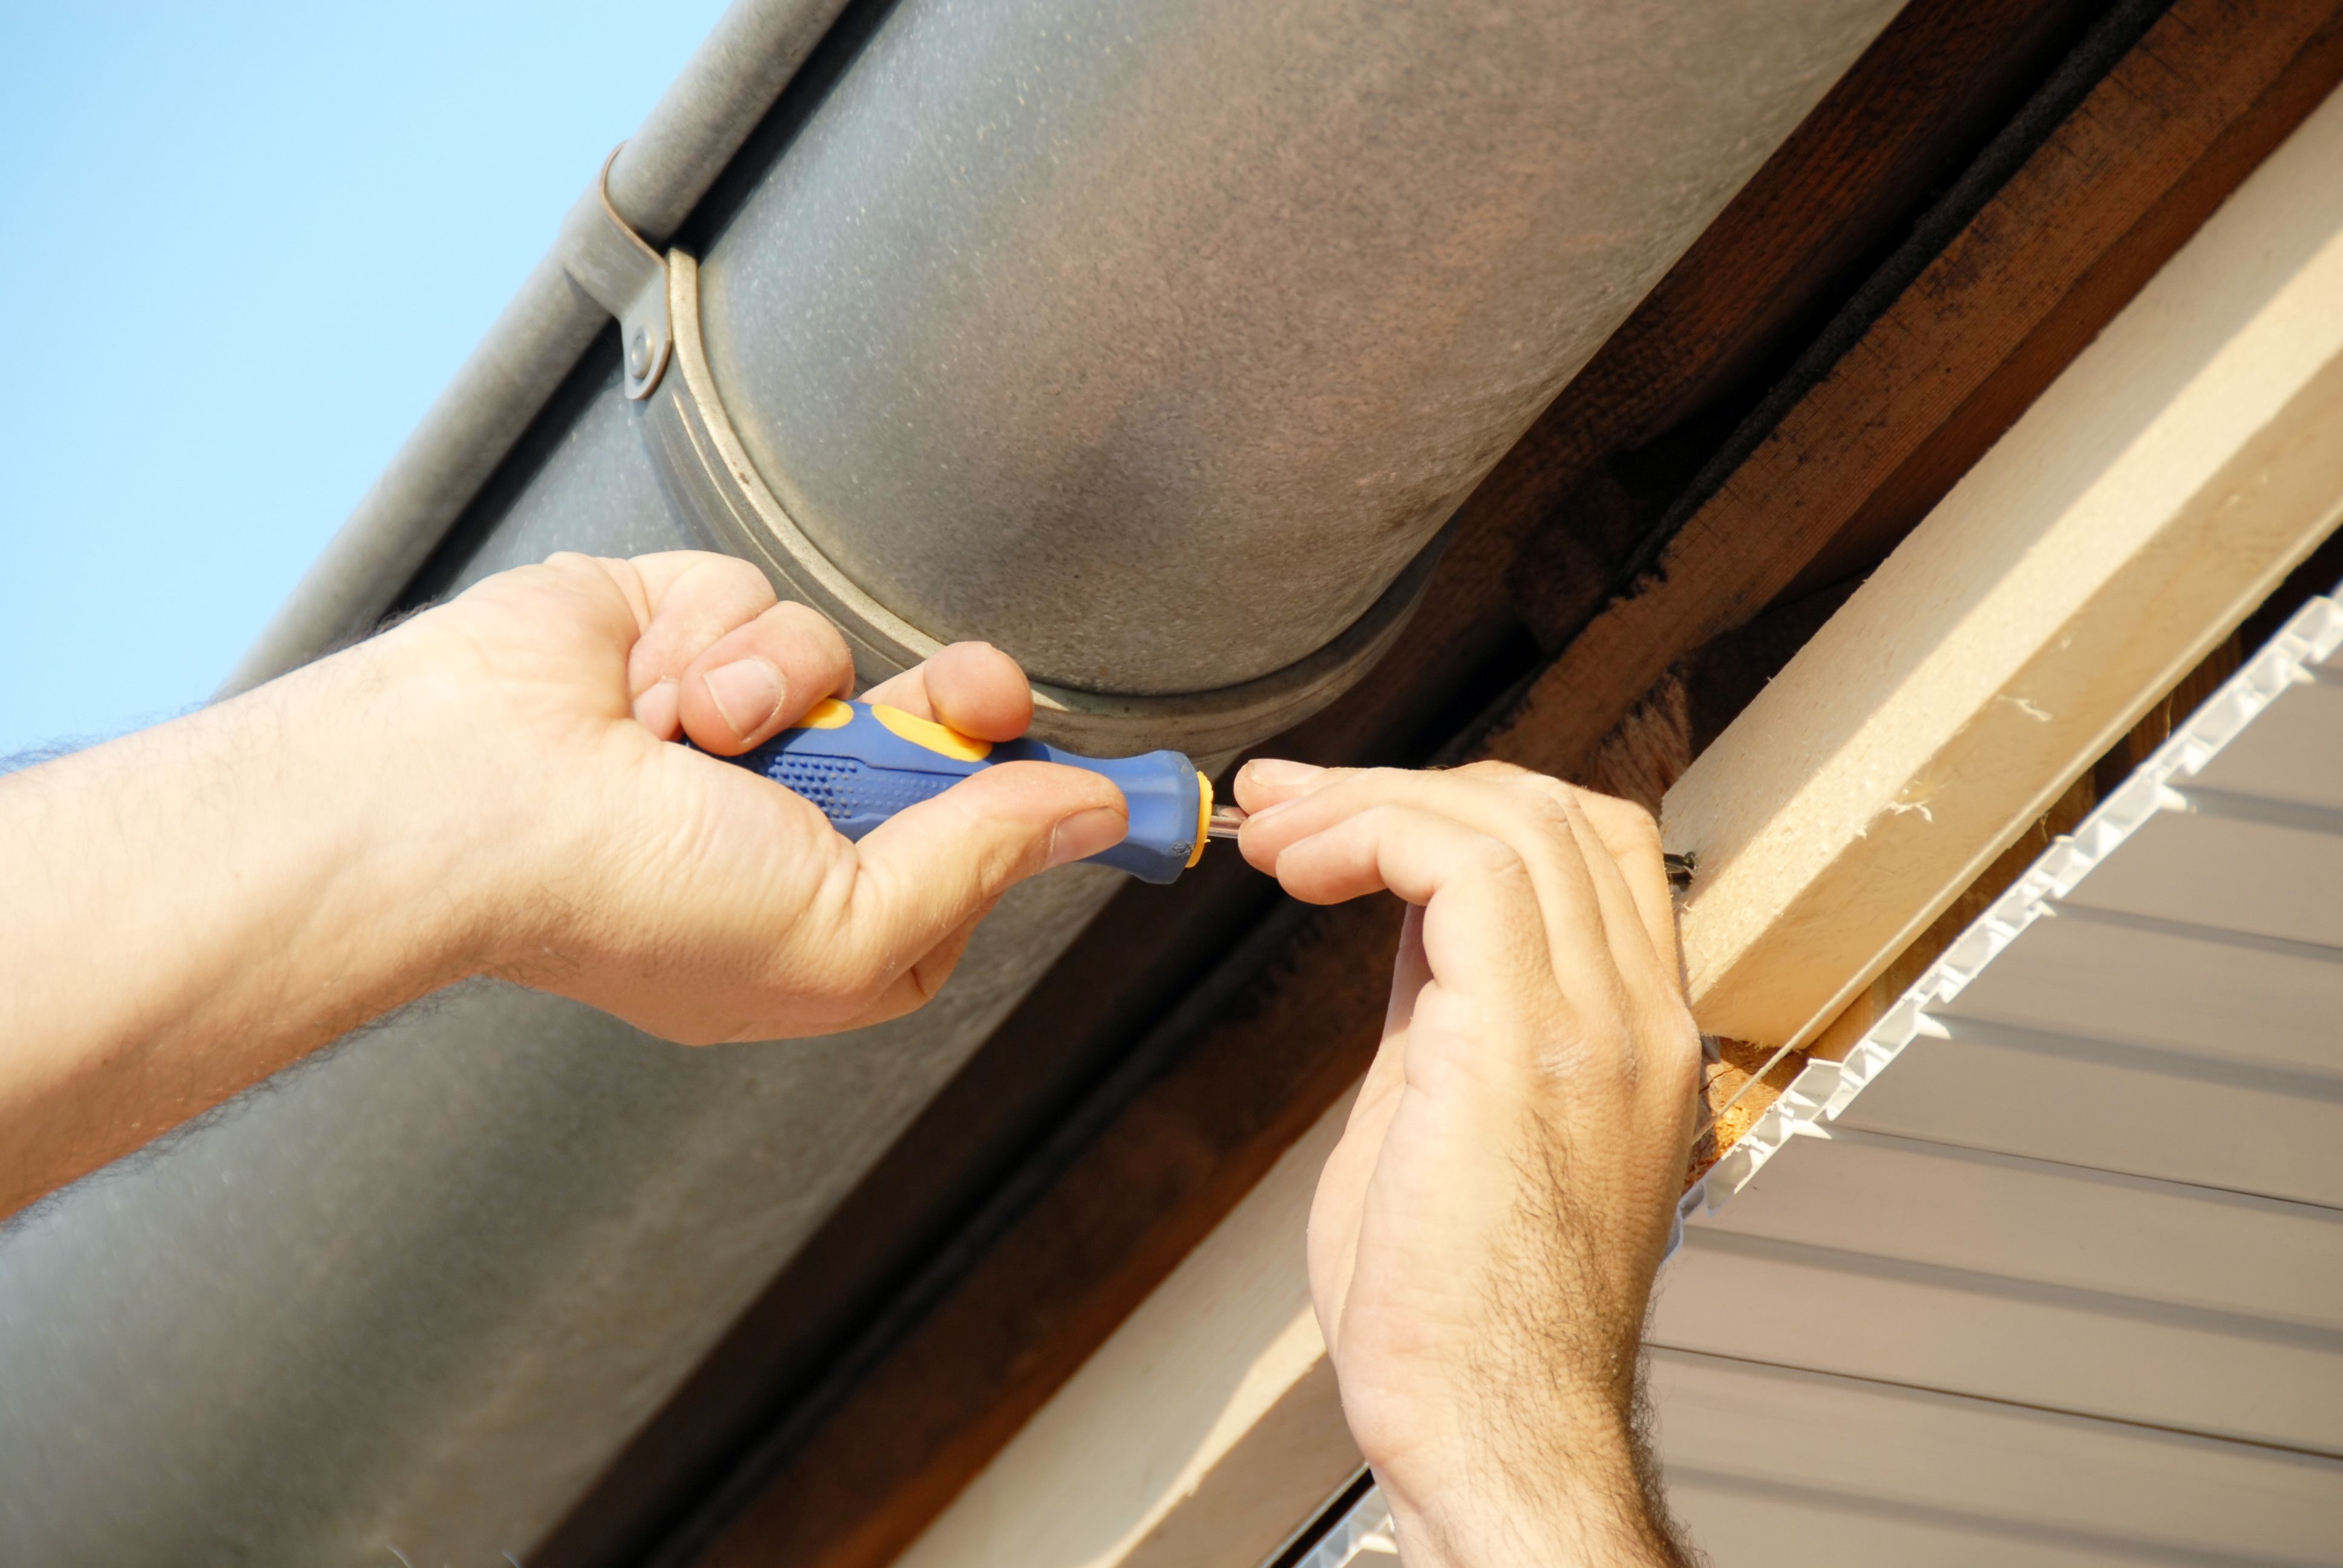
Do-it-yourself installation of gutters will be correct if you strictly follow the instructions. It will be more convenient to mount, having considered in detail a specific example. According to the example, you can make a drain after laying the roof covering.
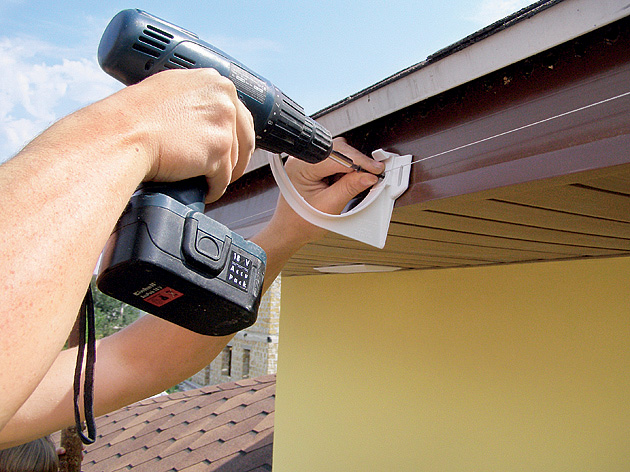
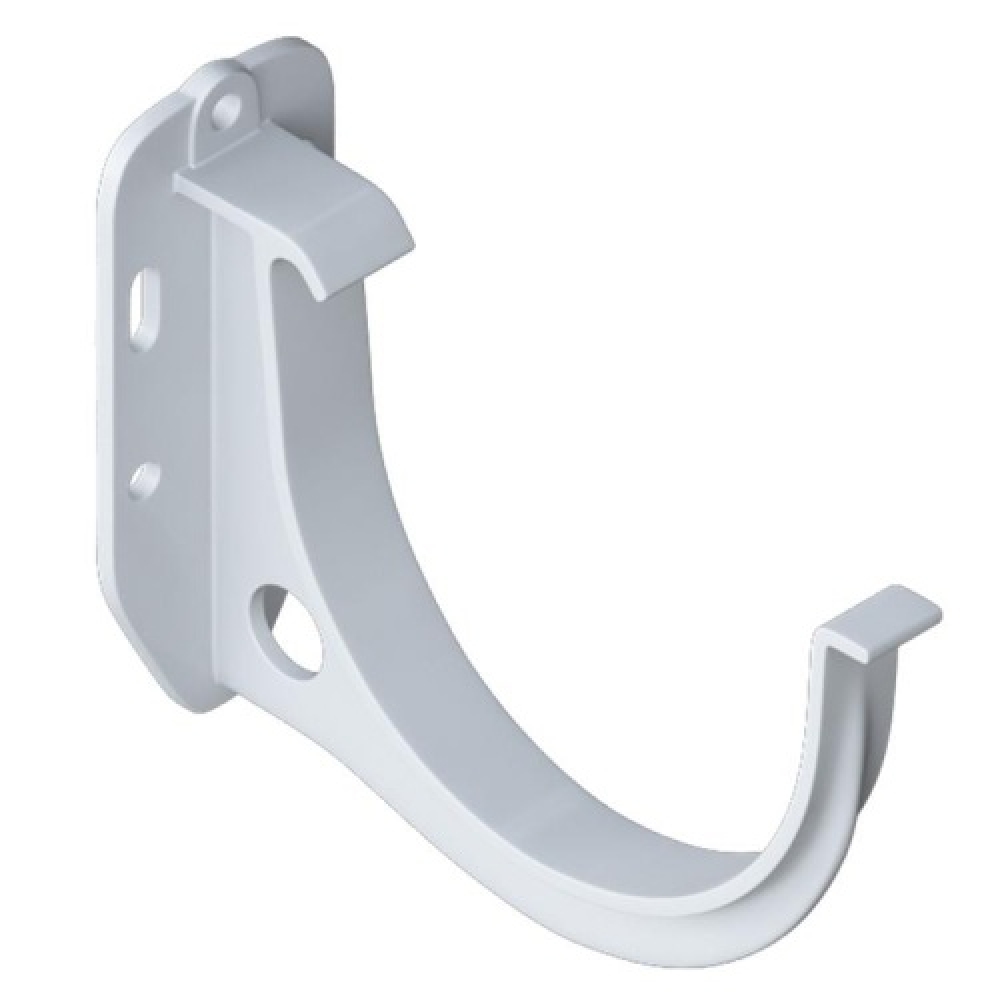
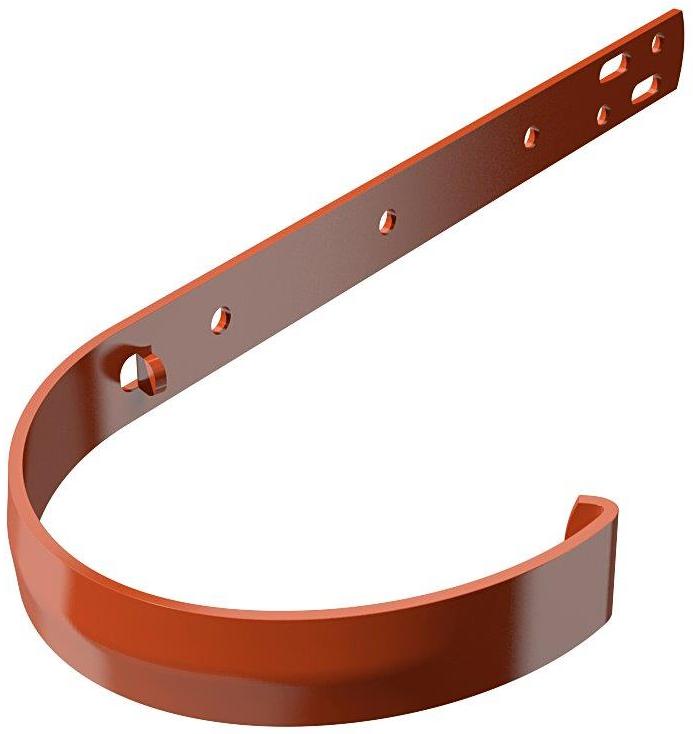
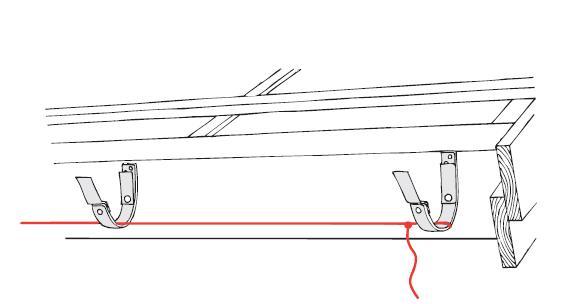
To assemble an outdoor system according to this scheme, long gutter brackets are required. Mount brackets will need to bottom board. In our example, the roof covering material is tile. Therefore, it is enough to raise the elements of the roof covering laid in this row.
For the efficiency of the drainage system brackets, it is important to properly prepare. Fasteners must first try. Note that the edge of the gutter should not protrude beyond the line of the roof slope. Ideally, there should be about 2 cm between the edge of the hook and the line of the slope. After fitting, a marking should be applied. The first hook in any case should be located above the last.
For fitting the first hook you need to put to the place of the upcoming installation. Directly on the slope set rule or ordinary rail. Measure from the bent part of the hook to the rule of about two centimeters. Mark the bend point.SNiPa condition - the chute should overlap the edge by a third. Find a point that meets this condition. Put a label on the leg of the bracket.
Find the slope to the water intake. The running meter of the eaves is about 3 mm slope. In the example, 12 meters of drain, then 3 * 12 = 36. That should be the difference between the first and last hooks. Draw a fold line. To do this, place the brackets in the right quantity in a row and draw an inclined line on their legs. Marked hooks number.
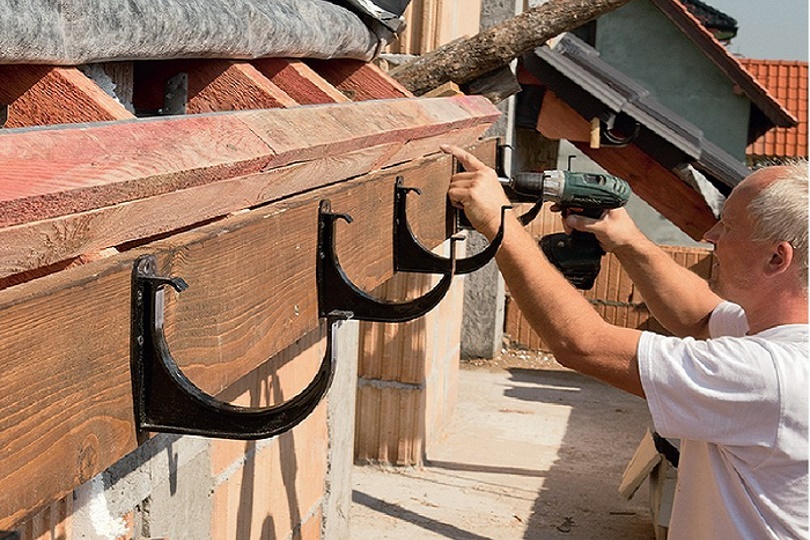
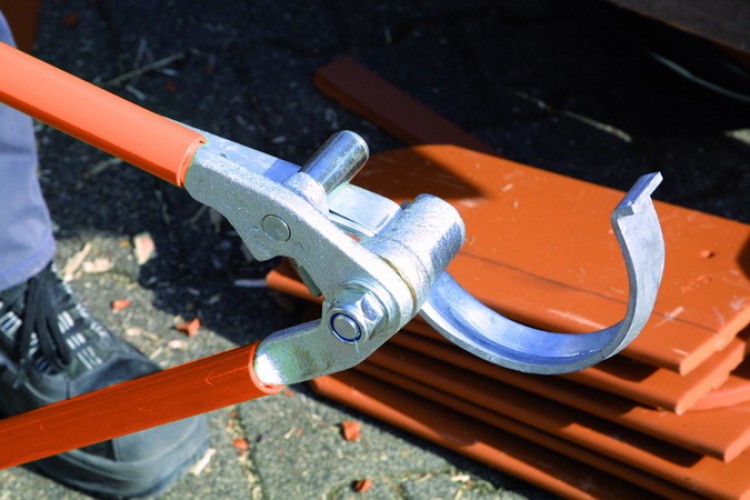
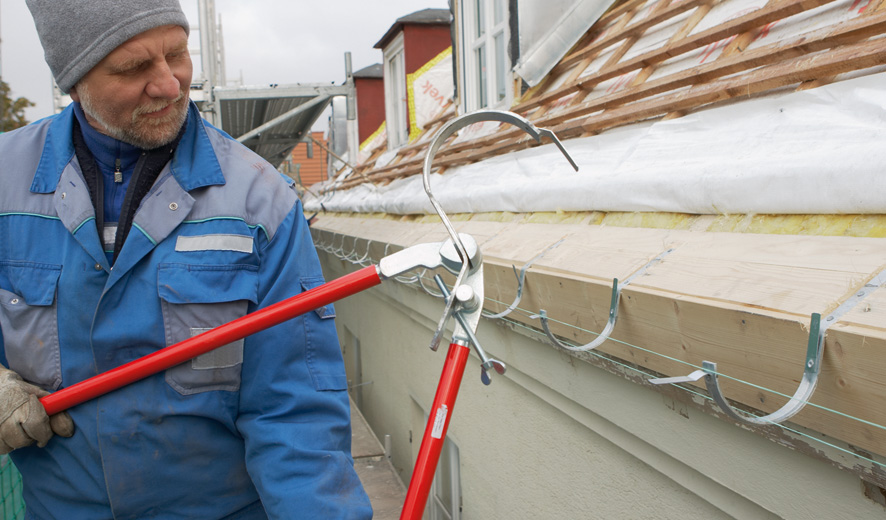
Holders bend with a special device that optimizes accuracy. A vice can be used for work, but only if the hooks are uncoated.
To keep the slope, attach the two extreme brackets first. Stretch the control line between them. Fastening ordinary hooks made according to the marked distance. The main work has been done. It remains to install the gutter and funnel. Spend another stage of fitting, but to the chute, or rather to that part of it, to which the drainpipe will be attached.
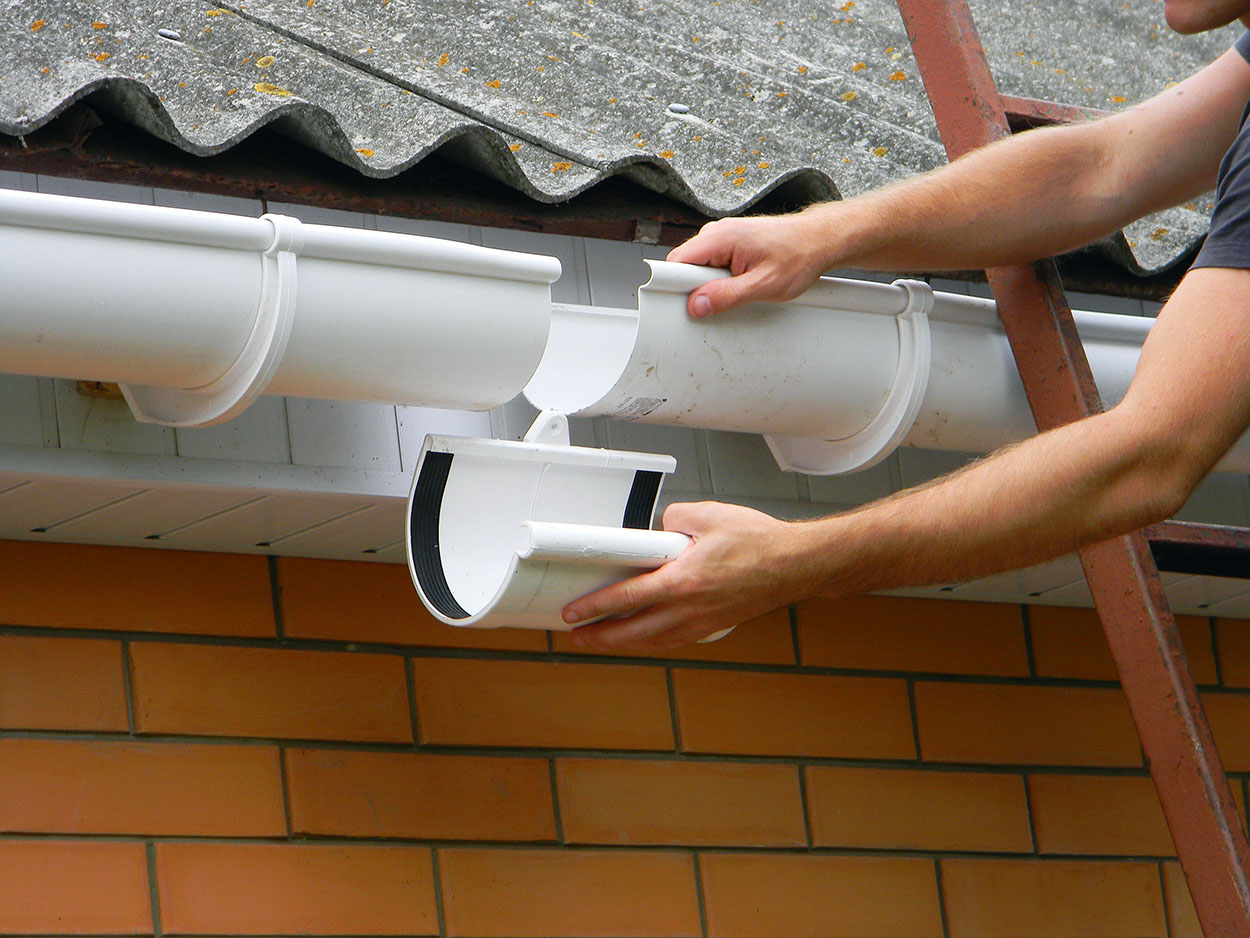
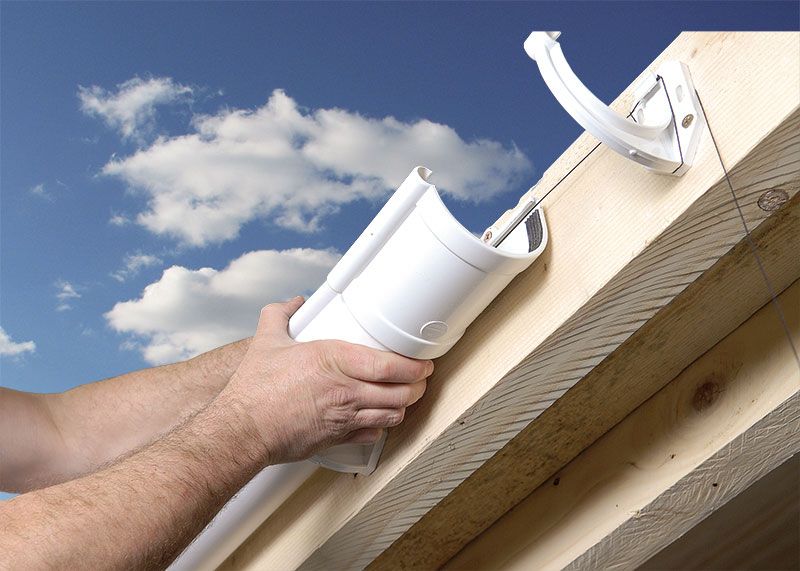
To find the exact place for drilling, it is better to put a plastic funnel on the chute.
Mark the hole with a marker, and then cut it out in the gutter.For the formation of the hole fit a hacksaw. The tool makes two counter gash. The edges of the gash and the drilled hole are cleaned with sandpaper. Next, you need to mount the funnel on the gutter and secure it with special latches. It is easy to mount the system to a flat wall; it is enough to fix it on the hooks and fix the pipes of the funnels with glue.
On the roof, installation of the system begins with gutters with a funnel. Strengthen the gutter details using connectors. It is desirable that the inside of the connectors is also covered with glue. If necessary, the last step will be the fastening of the plugs. They are needed to collect water from the pitched roofs with two drains.
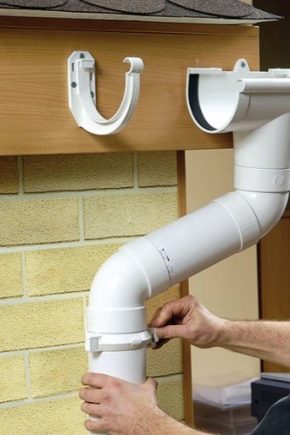
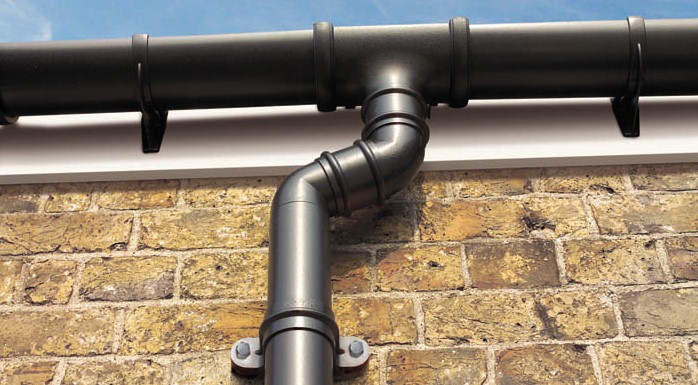
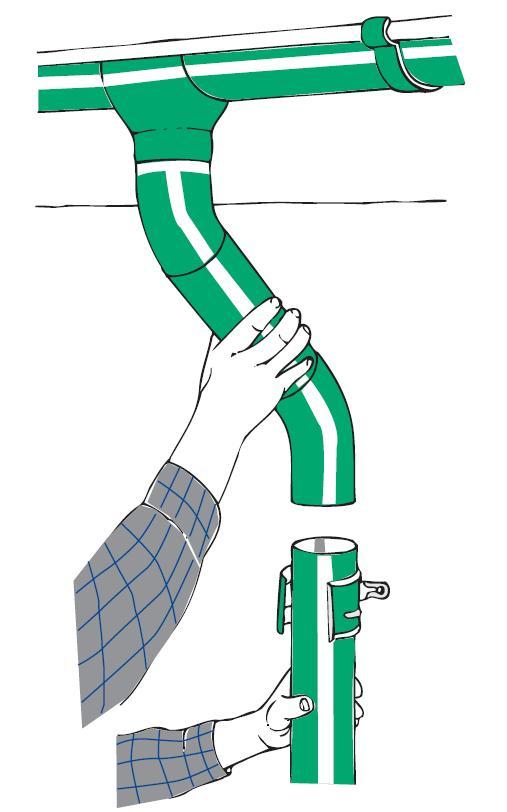
The assembly of vertical risers begins with the assembly of the knees. If the structure has a wide eaves, then the stages will be more. Here you will need to try again. It is carried out after joining the funnel of the first knee to the nozzle. Attach the lower knee to the installation site on the wall. Measure the distance between the parts with a ruler.
Then proceed to cutting the connecting piece. The transition from the catchment to the drainage system may be located at an angle.Connect the parts with couplings installed. Tighten not too tight. The drain to the bottom pipe must be fixed with glue.
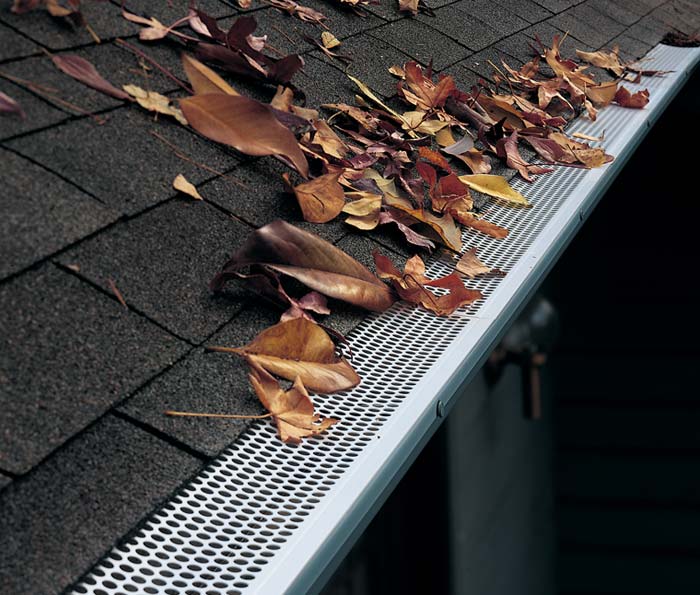
Drainage is not necessary if rainwater will be collected in the stormwater system. The end of the pipe may be located above the catchment tray, at a distance of several centimeters from the surface. To prevent gutters from clogging up with debris, it is recommended to overlap them with bars.
Tips
- The heavier the pipe material, the smaller the distance between the hooks should be. All auxiliary parts (hooks, funnels and plugs) must be mounted before installing the main gutter line.
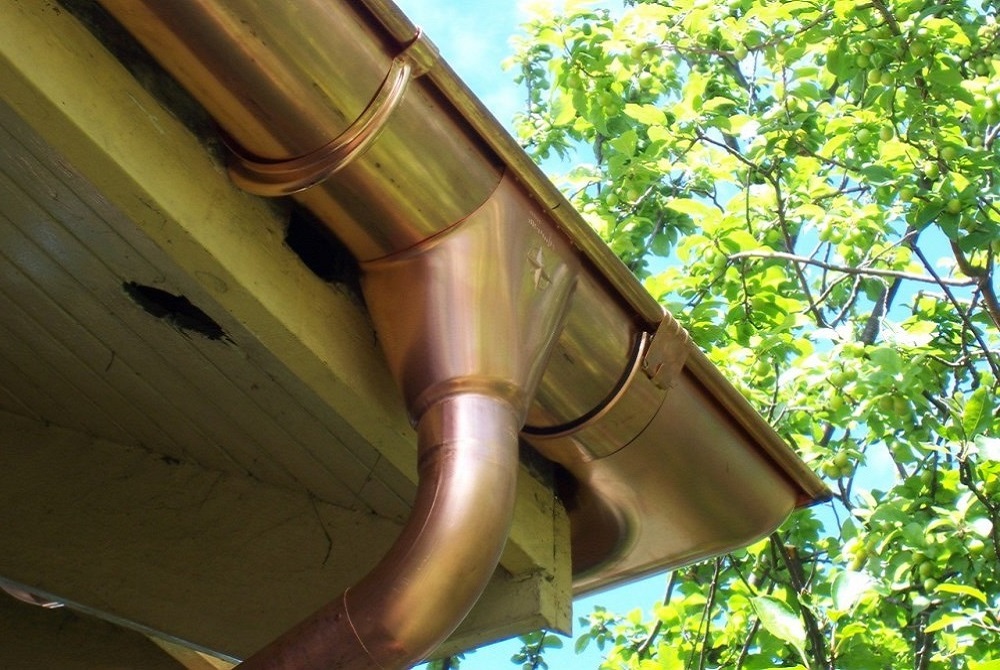
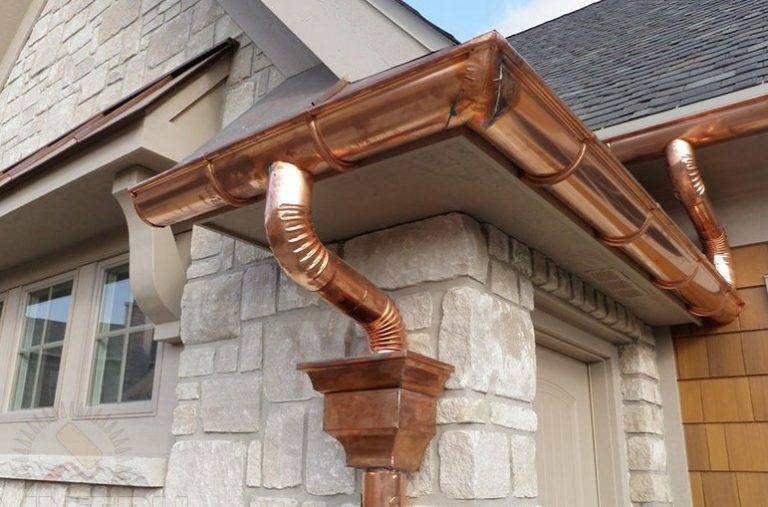
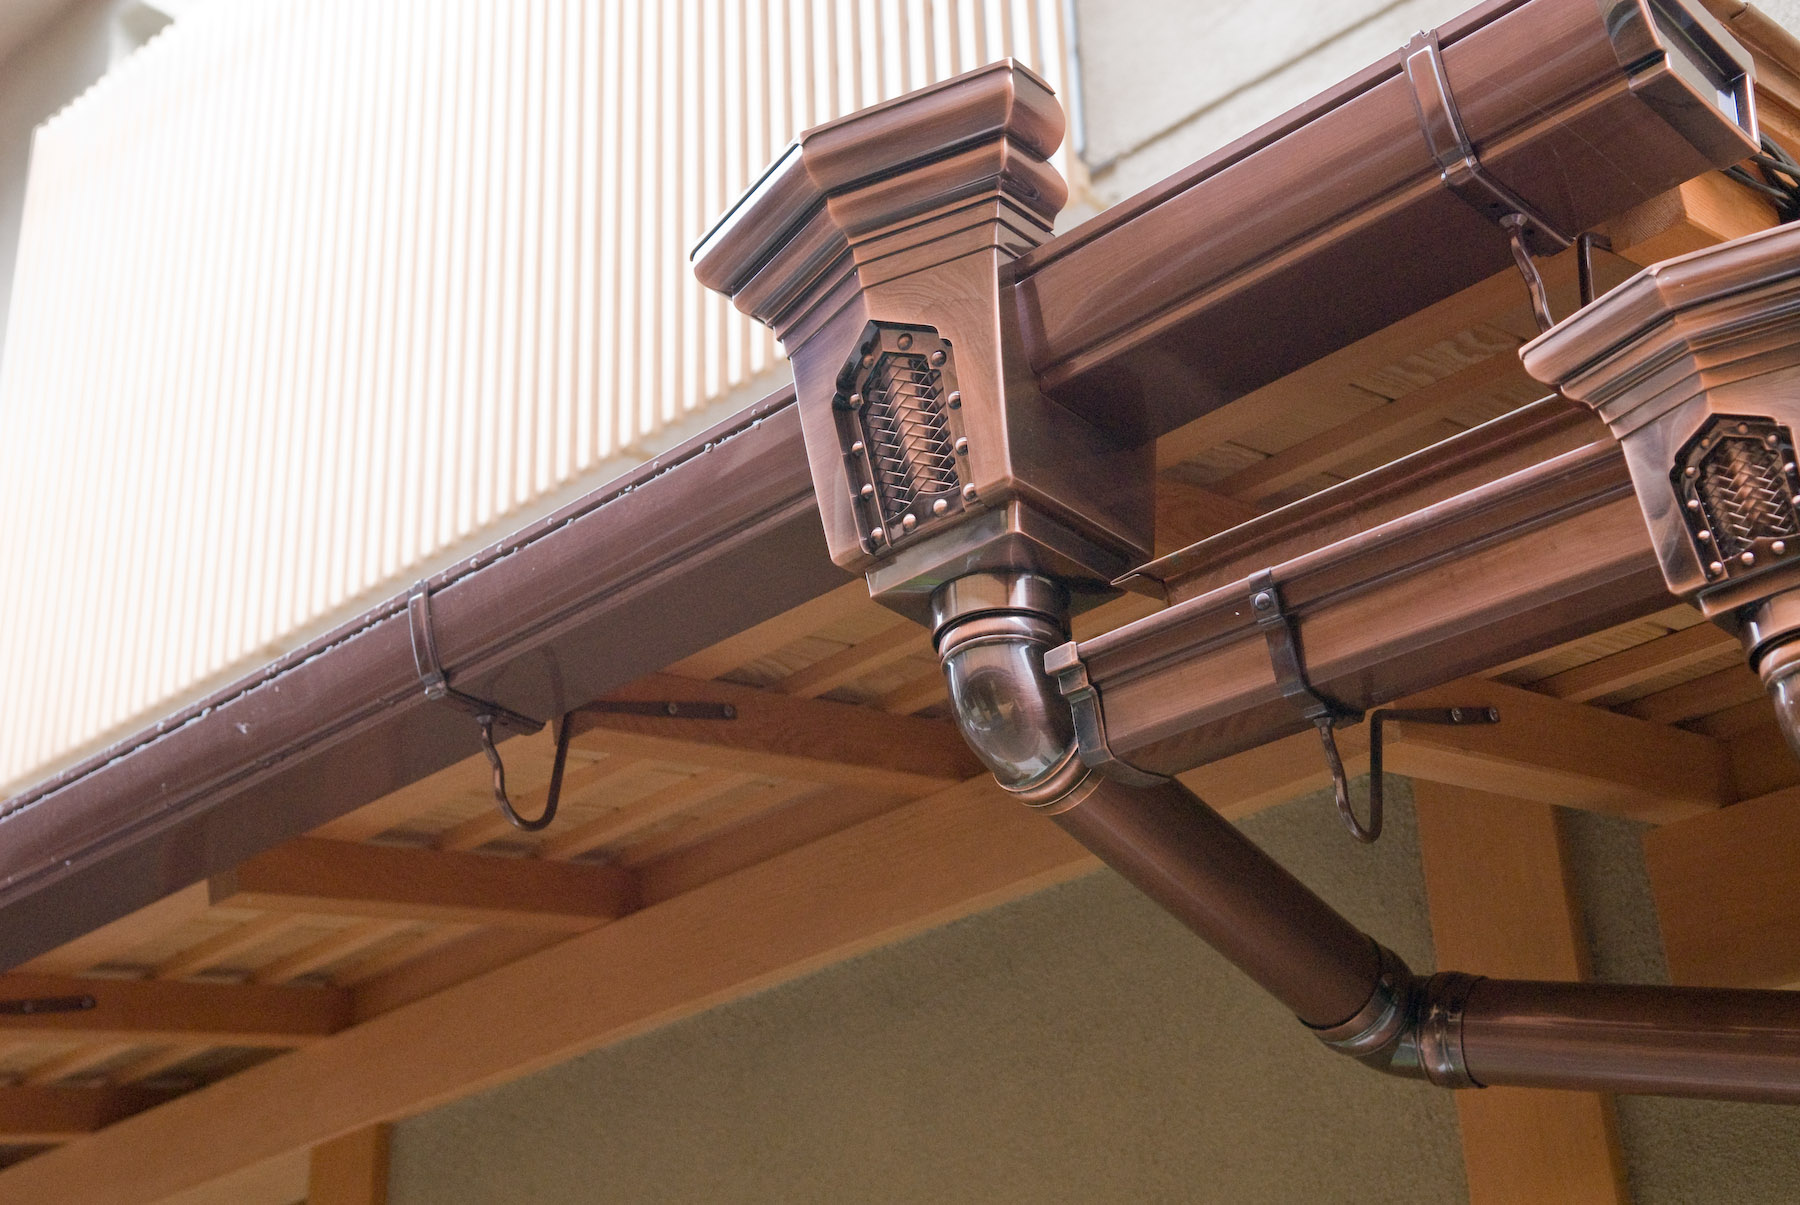
- The most durable material drainage systems is copper. Copper pipes do not react to atmospheric phenomena. Service life of copper parts can be more than one century. However, such a system is expensive. It will not pay for itself if it is installed on a modest house or a simple industrial building.
- Methods of connecting elements are chosen depending on the material used in the construction. For example, for plastics, the method of cold welding, using clamps,using rubber seals.
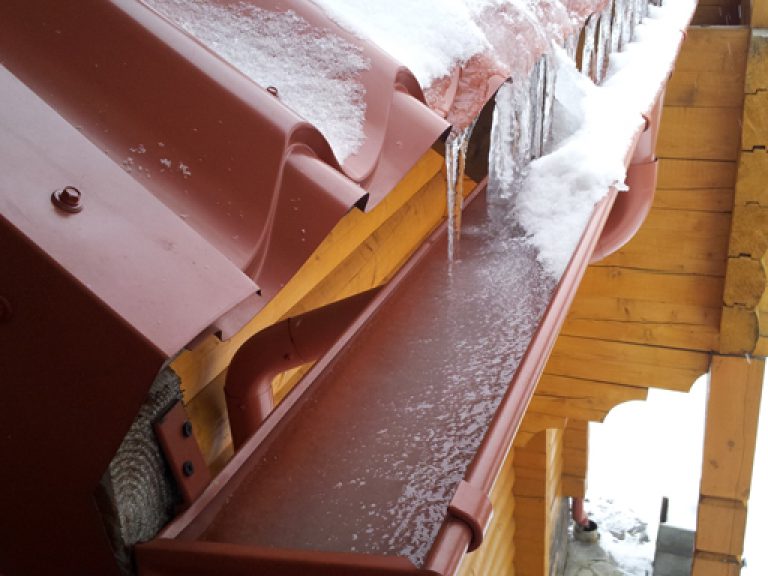
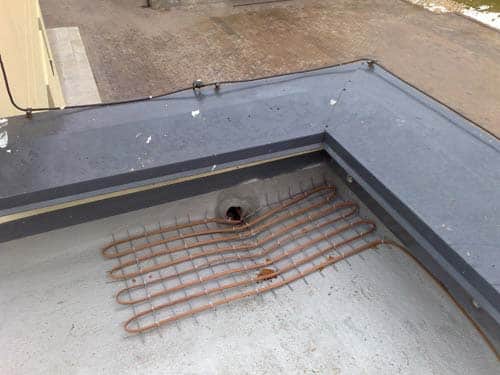
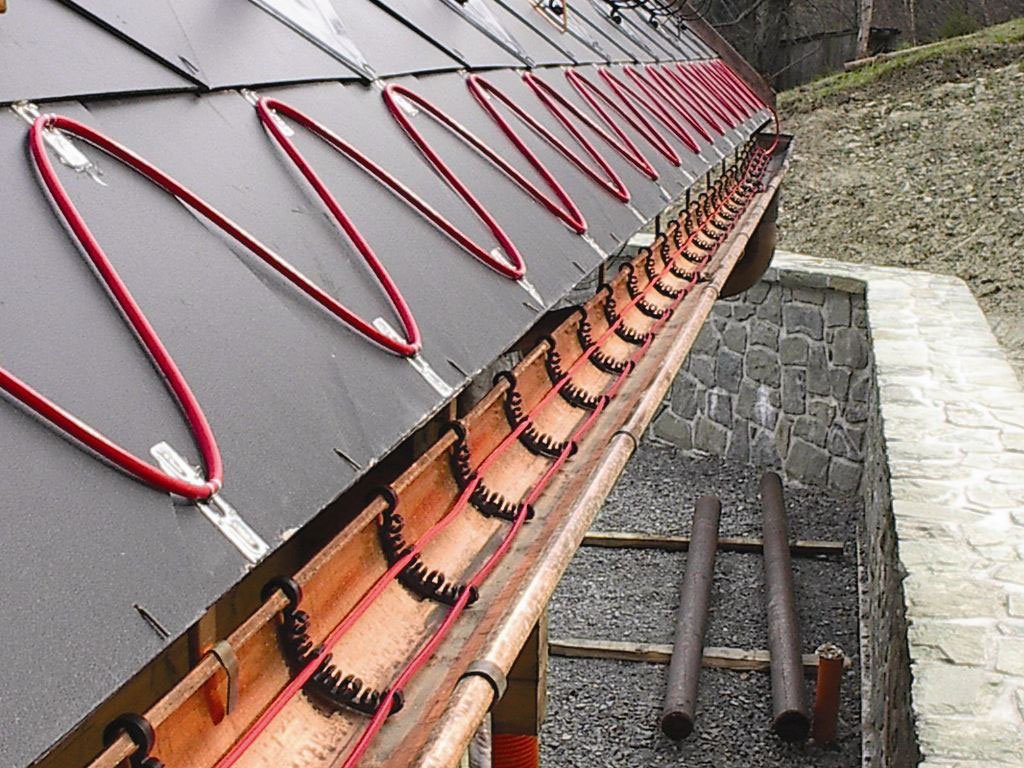
- In areas with cold weather conditions, you can install a heating drainage system. This pleasure is not cheap, but it effectively prevents icing and, therefore, the collapse of the entire system.
- There is no need to cut metal gutters with an angle grinder, especially if these are elements with a polymer coating. The best tool for cutting gutters is a hacksaw.
- Do not forget about the need for periodic cleaning of the system. Open-type gutters are easily clogged with fallen leaves, and small debris and dirt gets into the pipes. Gotted garbage will have to clean up manually. In the cleaning will help a good pressure of water, for example from a hose. There are experts who will perform this work for a monetary reward.
- Mount the chute with all connections and plugs better on the ground. To raise the system under the roof, you will need an assistant. If a person works alone, then it is better to assemble the system at the top, under the roof, but this is not very convenient.
- The optimal adhesive for joining PVC pipes is a two-component, based on a polymer compound (the second component is tetrahydrofuran).This is a heat-resistant composition, resistant to chemical aggressive substances. Hardening of substances is observed for 4 minutes. Glue is sold in containers weighing from 0.125 to 1 kg. The mechanical strength and safety margin of such an adhesive composition is very high.
- For metal, you can use clips and seals. If the installation of the system you can not afford, then for installation it is better to call professional installers. The work will be done efficiently and quickly.
How to make installation of drains and their subtleties, see the video below.


