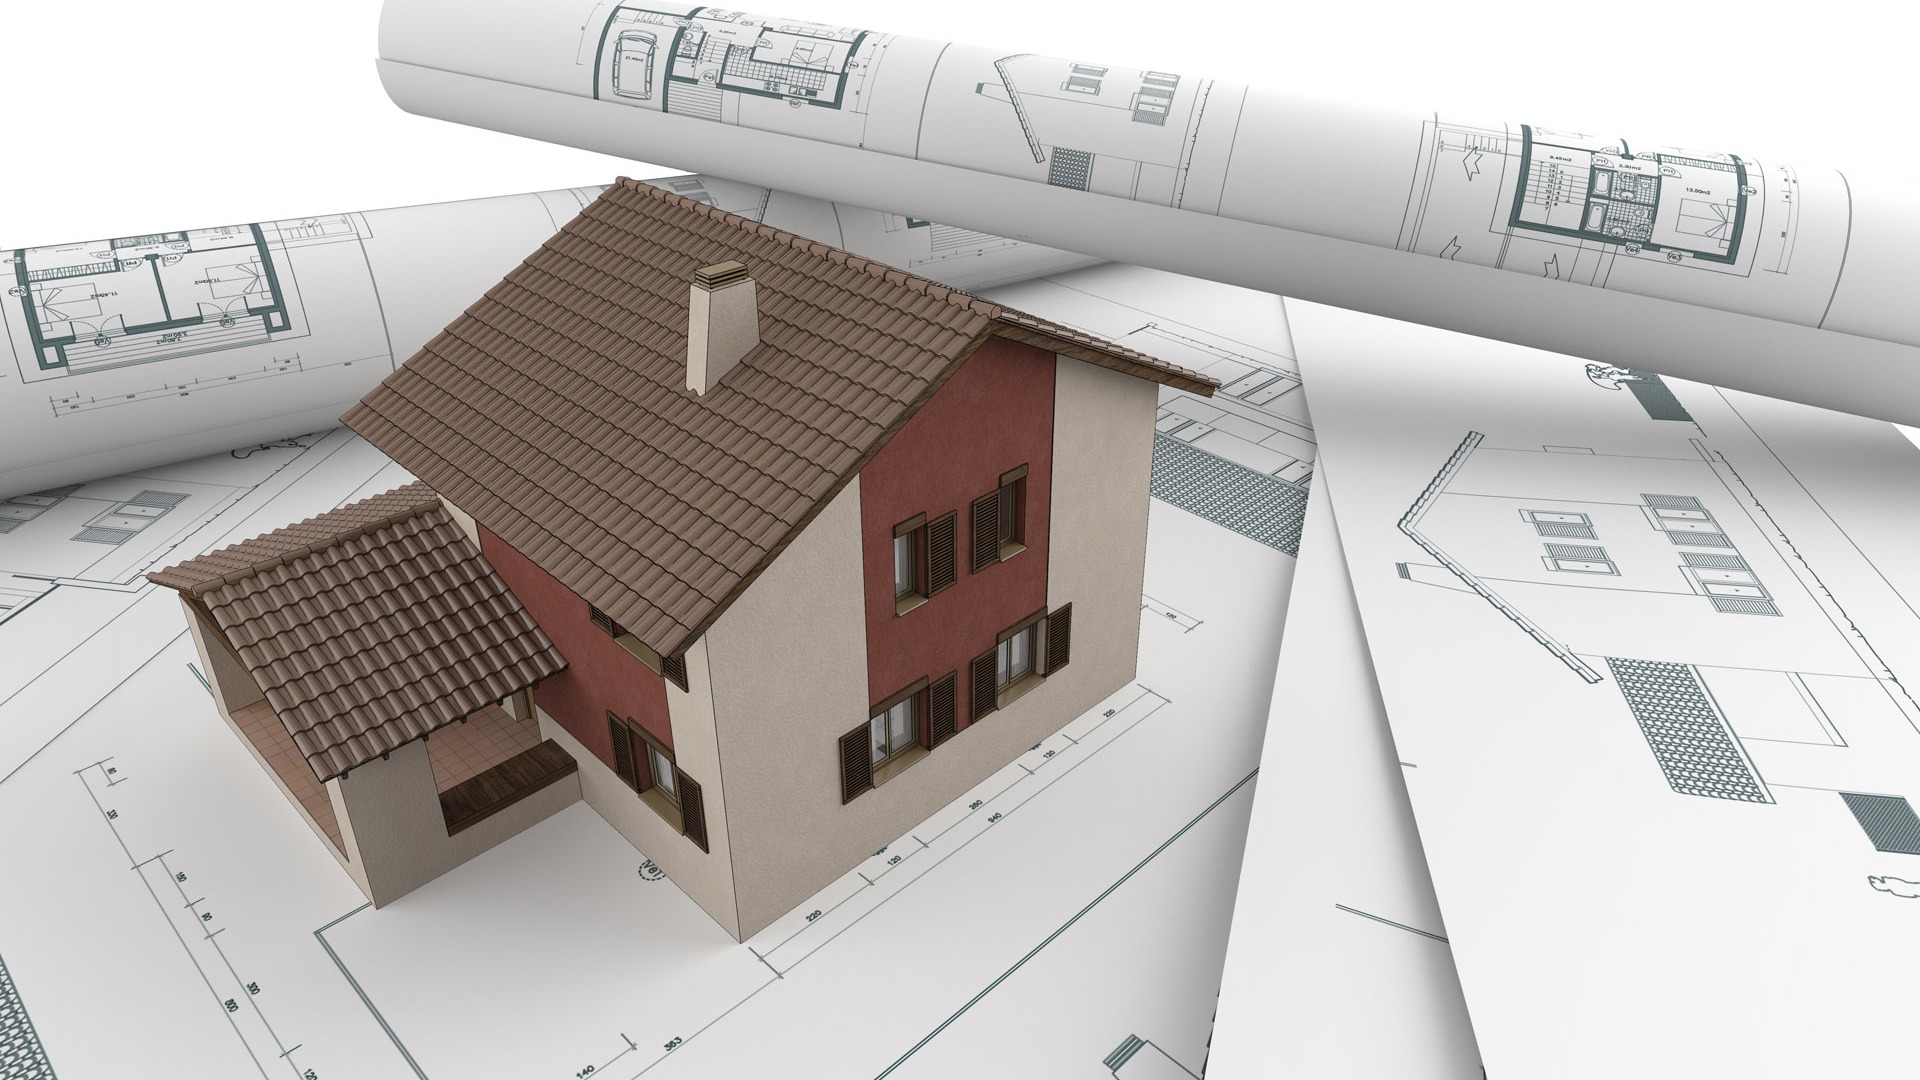
Construction of houses from aerated concrete
Nowadays, the range of building materials is greater than ever. You can build a house not only from wood or brick, but also from all sorts of blocks. One of the most popular today are aerated concrete blocks with many positive qualities. Today we will analyze in detail how to build a house from this sought-after material.
Advantages and disadvantages
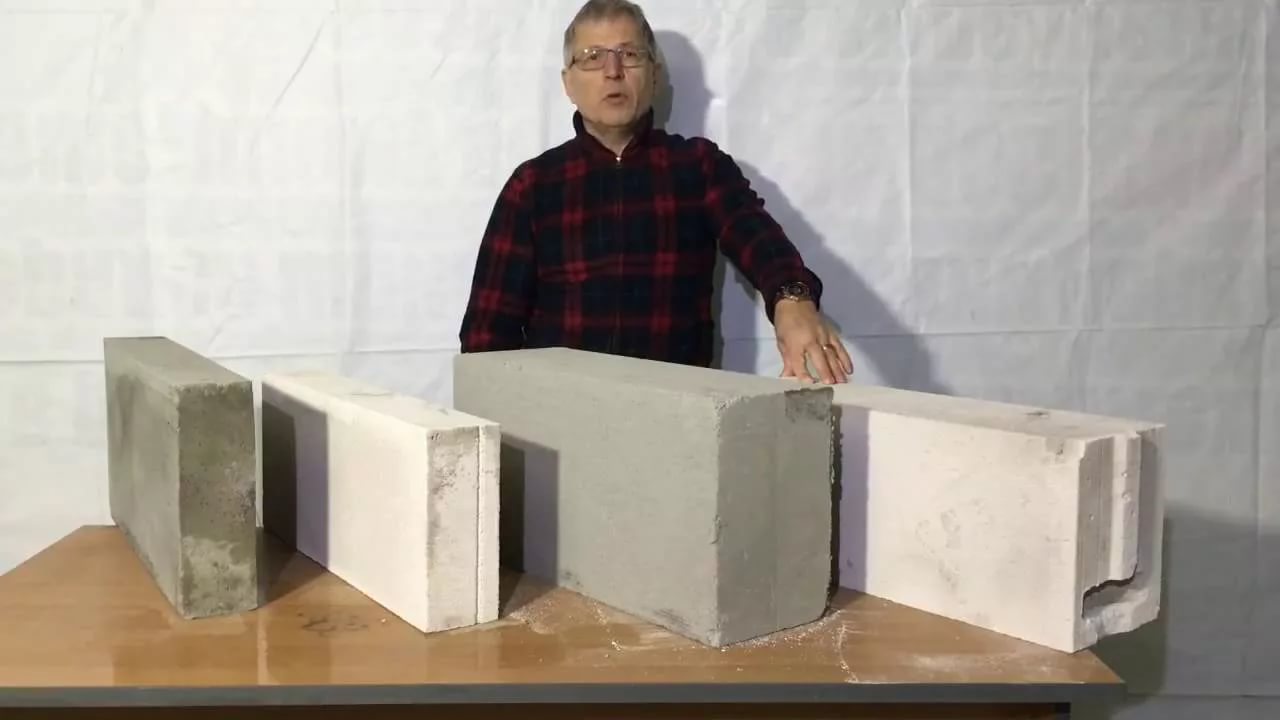
Currently, on the streets you can find a huge number of block houses of various modifications. It can be both small and modest buildings, as well as luxurious buildings of several floors. For the construction of such facilities used a variety of materials. Most often, of course, there are houses of aerated or foam concrete blocks.These materials are difficult to confuse with something, because they have a distinctive appearance, recognizable by most people.
These building materials are not for nothing are so enviable popularity. Their demand is due to a large list of positive qualities that are inherent in them.

Let's get acquainted with all the advantages of aerated concrete blocks:
- This material has good thermal insulation characteristics. Most managers focus on this quality, realizing aerated concrete.
- Another important advantage that attracts most modern consumers is an affordable price.
- A distinctive feature of aerated concrete blocks is their density. This parameter can be 400-1200 kg / m 3.
- These building materials can boast resistance to moisture and moisture. Even under the condition of a high level of air humidity, the indicators of the blocks themselves will be low.
- Not to mention that the aerated concrete is fireproof raw materials. It is not only not subject to ignition, but does not support the flame that has already flared up. This characteristic is especially relevant when building a reliable and durable house / cottage.
- Aerated concrete is not afraid of not only fire, but also low temperatures.Due to this characteristic, a gas-block house can be built even in a harsh climate. Under the influence of subzero temperature values, this material does not lose its positive properties, does not collapse and does not undergo deformation.
- Aerated concrete is resistant to biological effects. This parameter can not boast of the structure, for example, of wood. Due to this quality, gas-block houses do not need to be treated with special protective compounds and powerful antiseptics. In aerated concrete do not get insects or rodents.
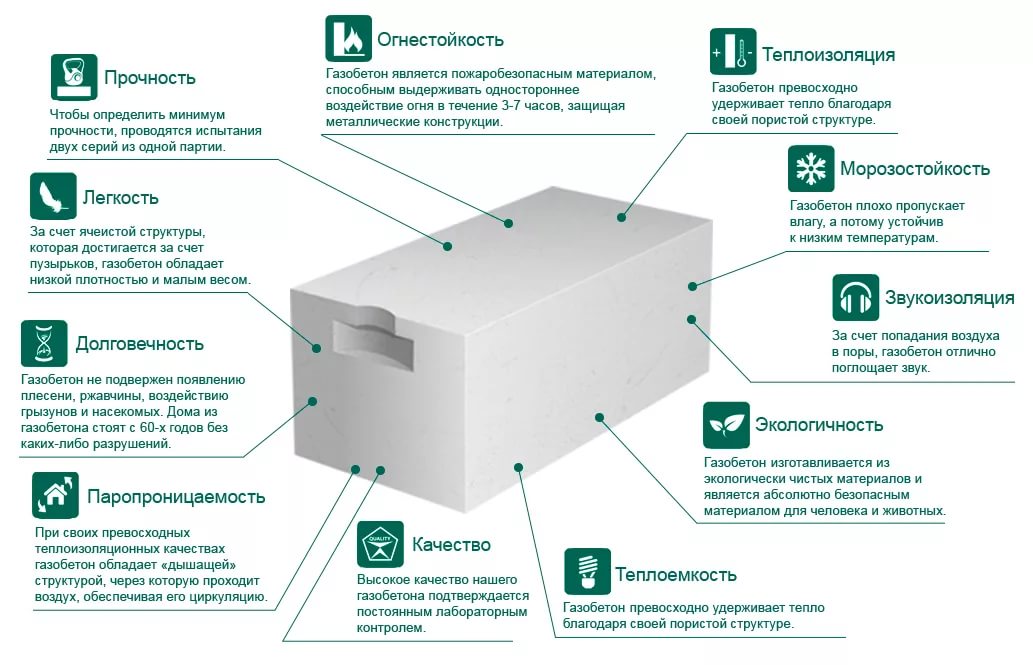
- Aerated concrete is a durable material. Houses from it can stand for more than a century.
- The material is environmentally friendly. In its composition there are no hazardous and harmful chemicals that can damage the health of households. According to experts, only natural wood can compete in environmental performance with aerated concrete.
- Aerated concrete blocks can boast good sound insulation characteristics. In houses of similar material there is no excess noise reaching from the street.
- Aerated concrete is a fairly durable and reliable material.If we supplement it with high-quality reinforcement, we can build a large house with several floors.


- Many masters claim that aerated concrete is a very pliable material that is easily processed. Thanks to this feature, aerated concrete blocks can be seamlessly trimmed if necessary. Here it is necessary to take into account only one nuance: the dowels do not hold very firmly in wall ceilings made of aerated concrete, therefore instead of them it is better to use special screws.
- In the course of the manufacture of aerated concrete leaves a small amount of cement.
- Aerated concrete blocks have a small weight, explaining the ease of working with these materials, as evidenced by reviews of owners of block houses.
- Blocks of aerated concrete are characterized by a special structure with cells. Thanks to this distinctive feature, materials can be easily moved from one place to another without asking for help from a crane.

- Gas-block houses are built with the use of a special adhesive substance that perfectly replaces cement mortar. It is easier to work with him, and bridges of cold are not created.
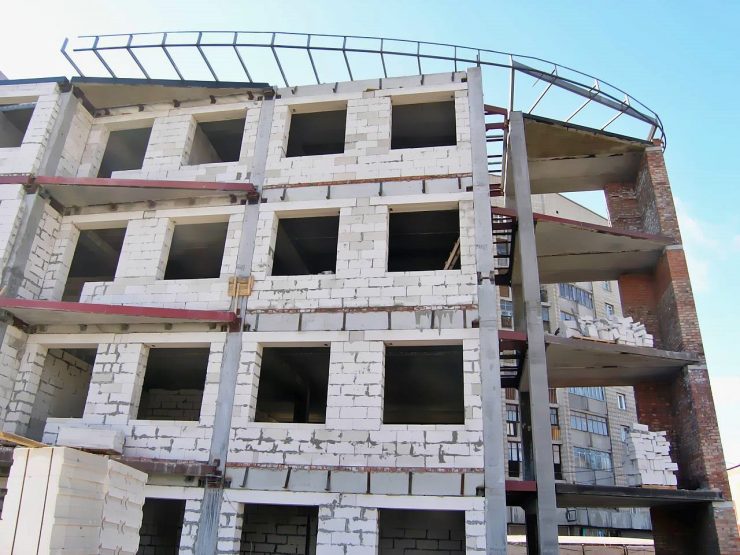
- Few people know that not only cottages can be built from aerated concrete, but also reliable, sturdy high-rise buildings. This inexpensive and popular material is versatile. From it you can make all sorts of outbuildings, closed fences, steps and even elements such as flower beds, gazebos or fireplaces.
- This material boasts excellent vapor and breathability. Experts say that in aerated concrete houses air circulation and the percentage of humidity are regulated naturally, ensuring the maintenance of a comfortable microclimate inside the dwelling.
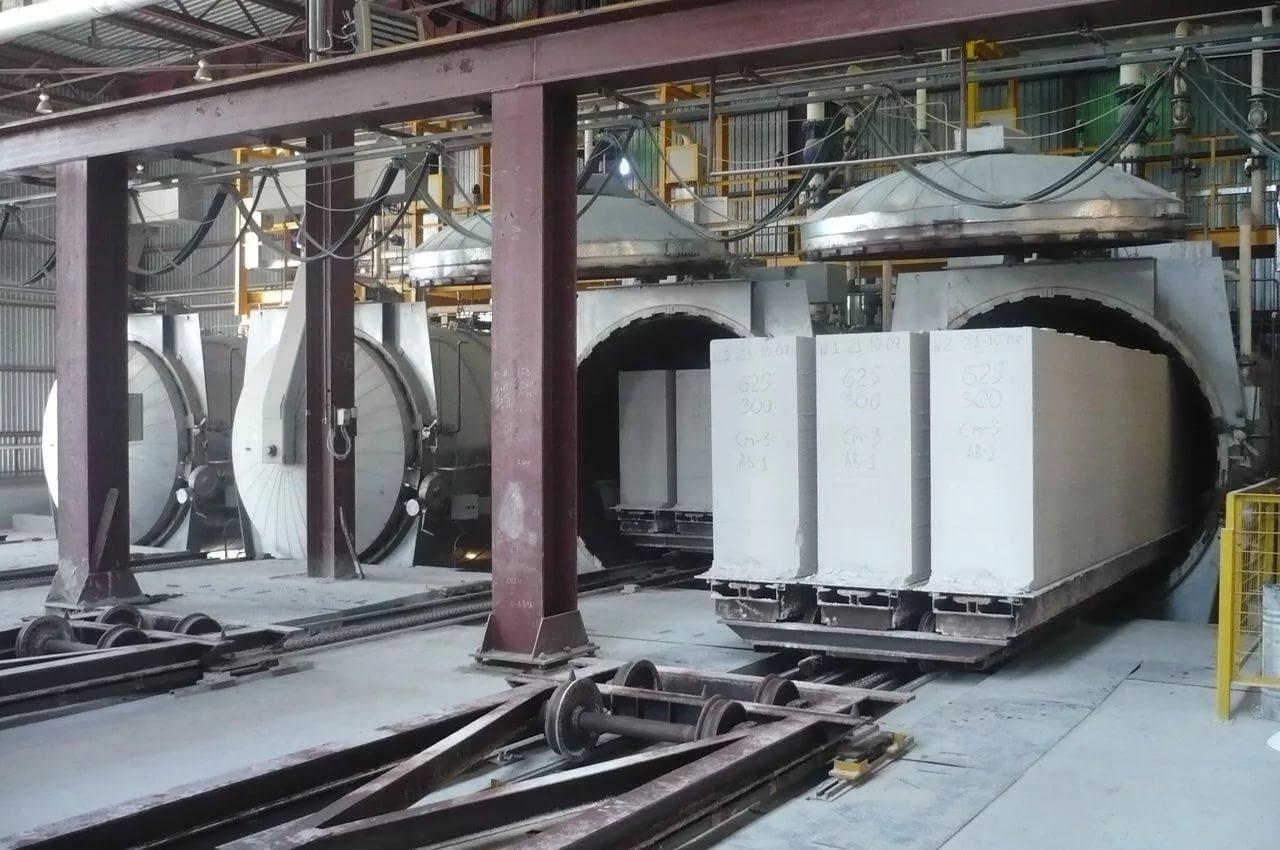
- Today, these materials are made by many manufacturers in the factory with the use of high-tech equipment. Such aerocrete subjected to strict quality control at all stages.
Aerated concrete, like any other material for construction, has its drawbacks.
Let's get acquainted with them:
- The main negative quality of gas blocks is their high hygroscopicity.
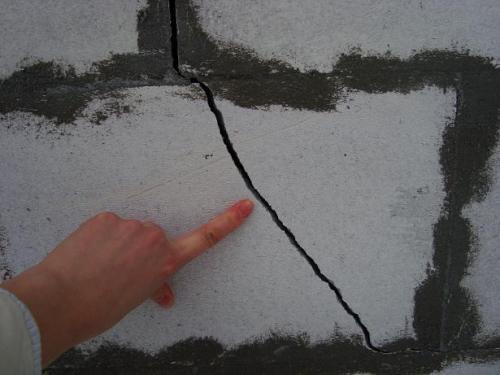
- If the foundation structure for a gas-block house was made with any violations, then large and noticeable cracks could form on the buildings.Moreover, this damage usually occurs not only on the masonry lines, but also on the blocks themselves. As for the microcracks, they appear on these details after 2-4 years.
- Of course, gas-blocks form the optimum moisture level in the room, however, after a while, moisture begins to accumulate in such materials. This fact may eventually lead to damping of the blocks, and then their separation.
- Insulating characteristics of foam blocks, of course, are not bad, but the same cheap foam blocks in this matter are ahead of them.
- If you built a house of gazoblokov, then in the end you will definitely need to finish it. Most modern manufacturers claim that buildings made of such material will last for several years without lining, but we must not forget that aerated concrete is a material that absorbs moisture into its structure, after which it gives up and absorbs again and again. Over time, the building will acquire an ugly look, and inside the blocks will be damp.
- When finishing the gas blocks inside the dwelling there may be certain problems. For these reasons it is recommended to purchase a special plaster on a plaster basis.Yes, it has excellent adhesion properties, but in conditions of sharp temperature surges, cracks may follow these walls that follow the masonry contours.
Design
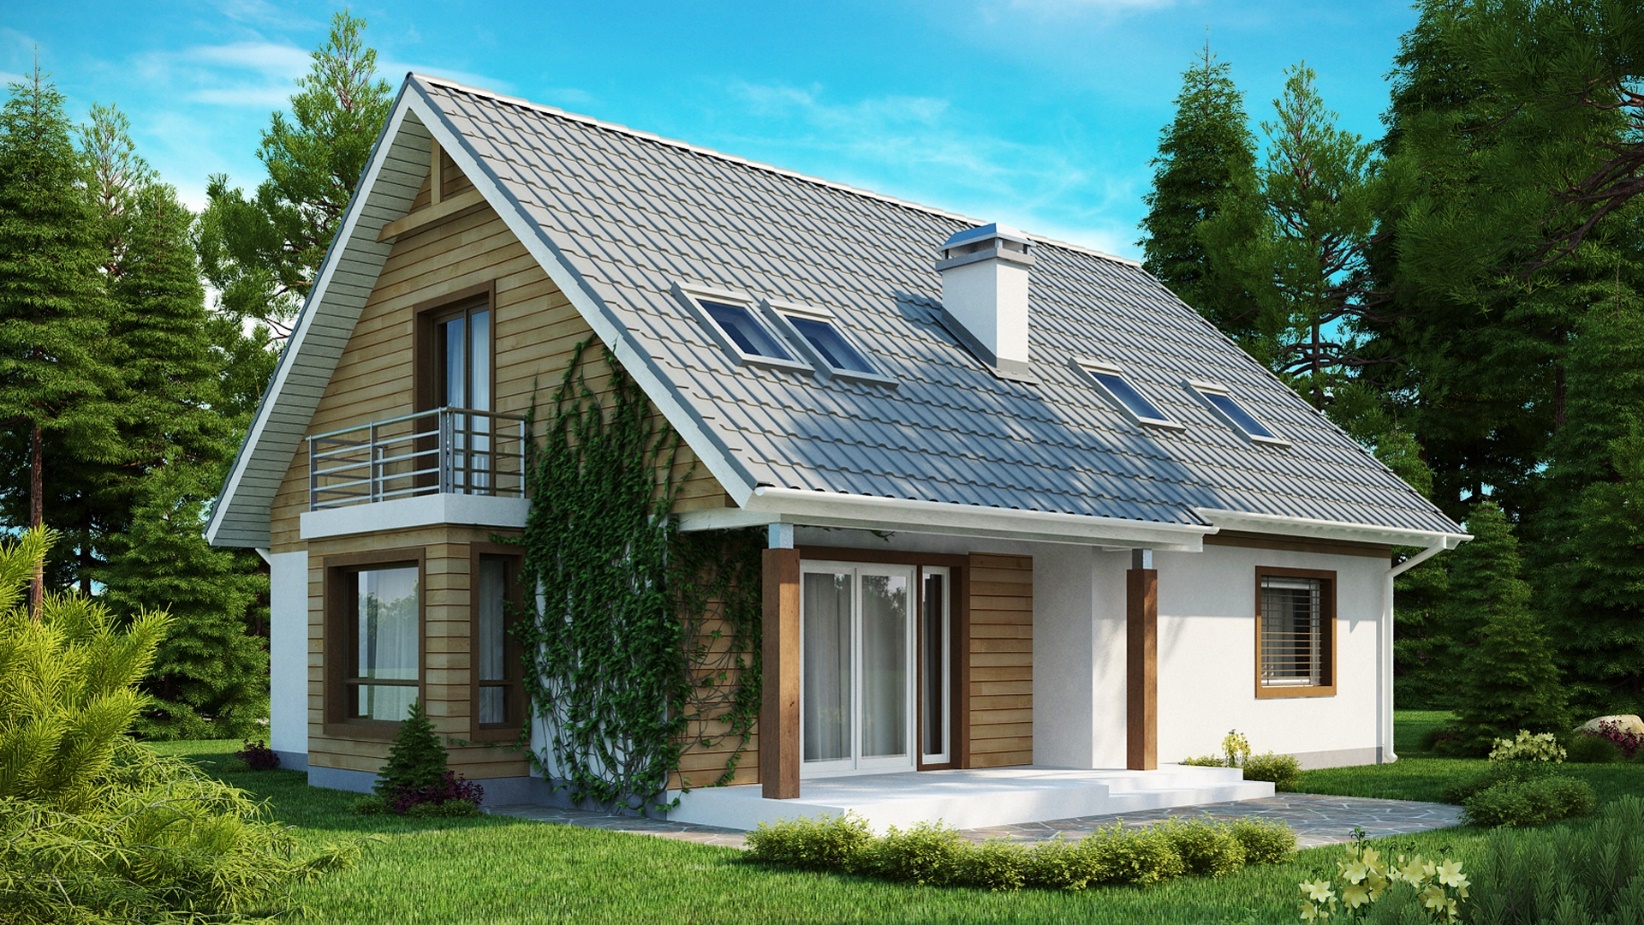
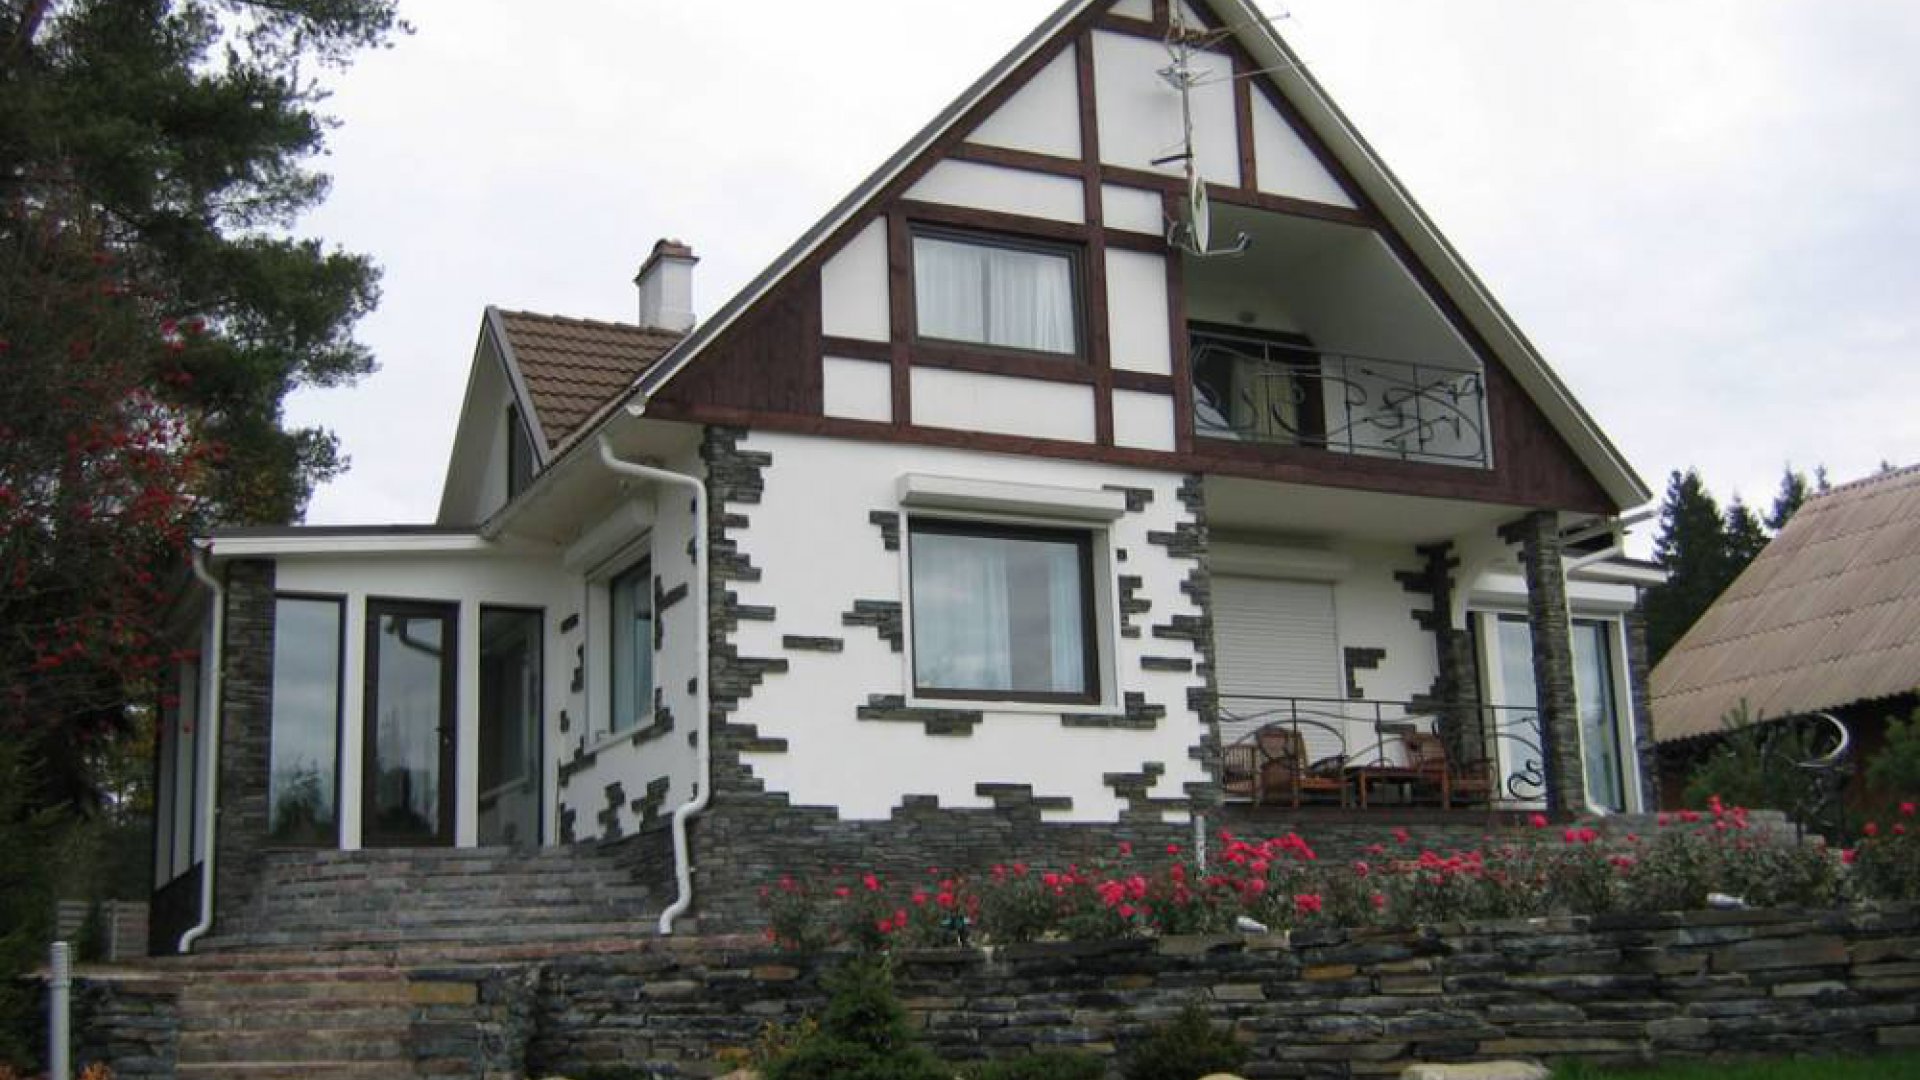
Many consumers believe that only a simple and unremarkable house can be built from aerated concrete blocks. In fact, from this material it is quite possible to build a very original and spectacular building, which will attract the attention of neighbors and passers-by. The main thing is to competently draw up a plan and scheme for the future structure. Let's get acquainted with some interesting projects of private houses from aerated concrete.
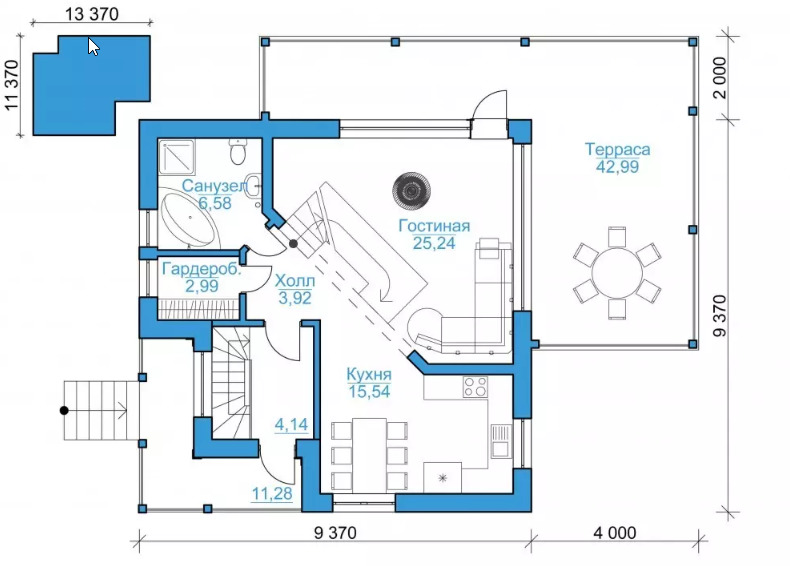
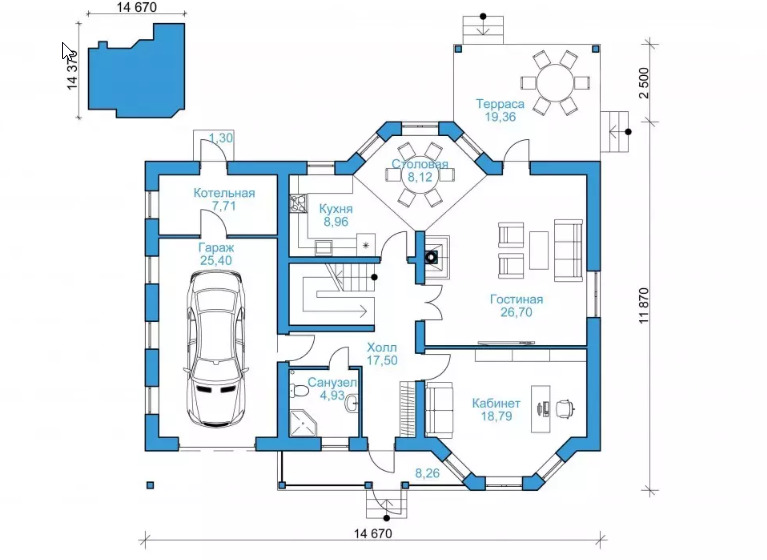
From this popular material you get a very stylish and modern house with attic and basement floors. On the ground floor should be located a separate entrance from the street. In such conditions it will be possible to provide a place for two cars, as well as a home laundry. On the ground floor there is a place for a small boiler room. To access the basement you need to install an internal additional staircase.
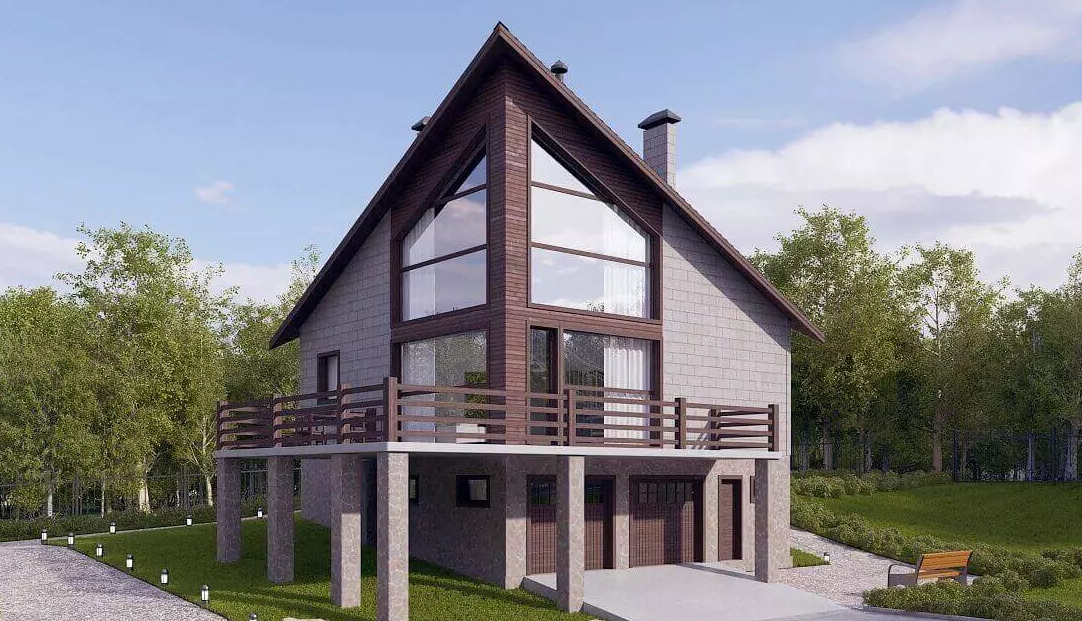
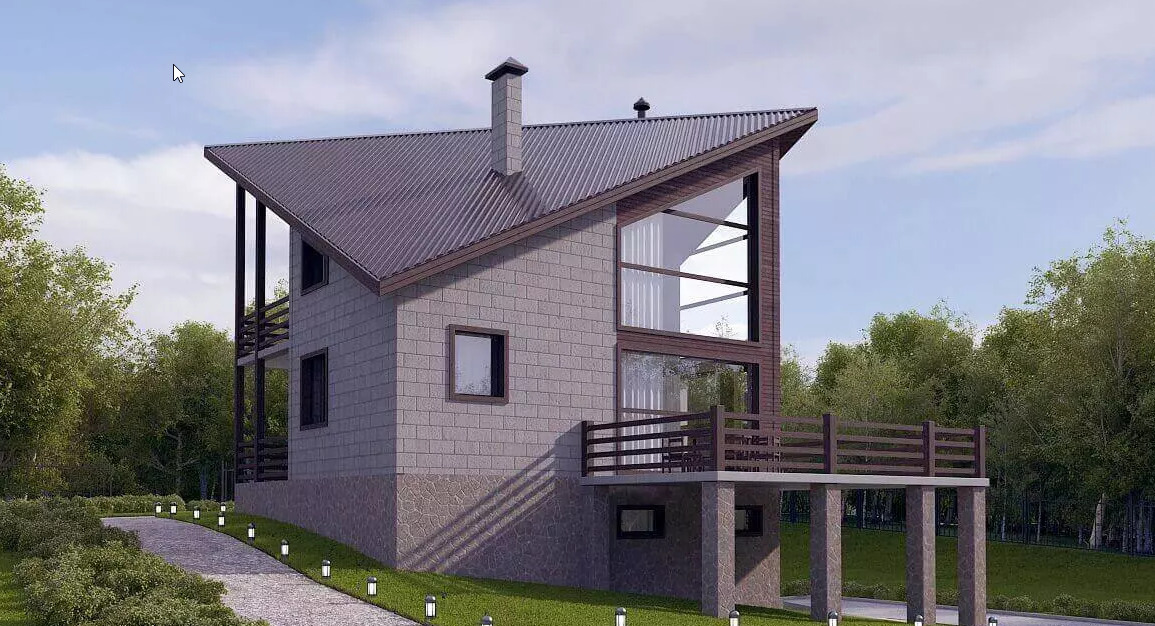
The first floor will look especially rich and stylish if you arrange it with chic panoramic windows.In this area should be placed a spacious living room, kitchen, combined bathroom and dressing room, complete with a small window. At the entrance will find its place a terrace with supporting columns.
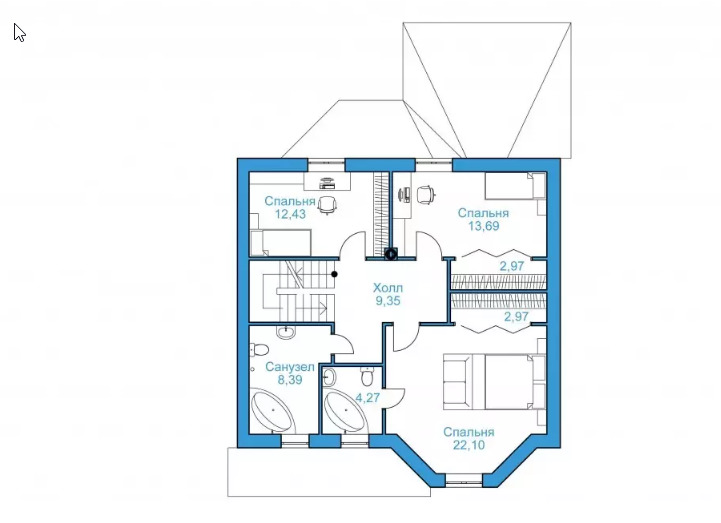
As for the second floor, here you can equip two small, but comfortable bedrooms, as well as a shared bathroom. From one of the bedrooms should make the exit to a small balcony. Such a two-story house with a basement will look very interesting if you give it an angular shape and repeat it on a non-standard dual-slope roof.

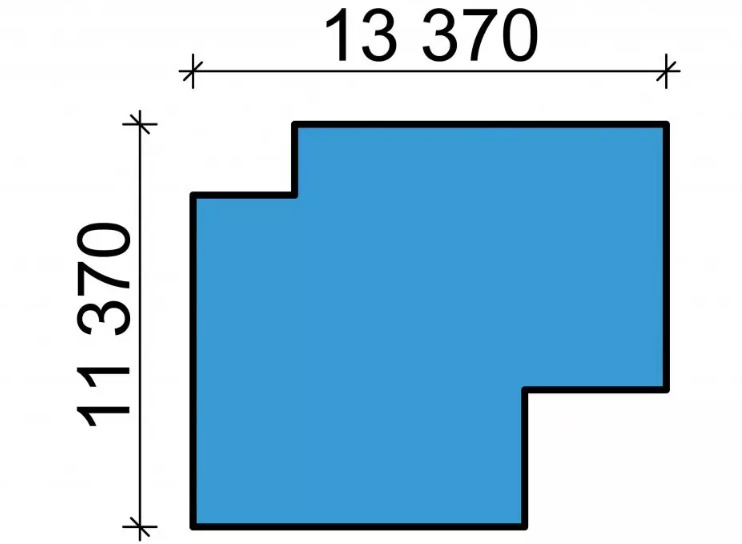
If you are planning to build a neat and bright country house, then you are likely to be interested in the next project.
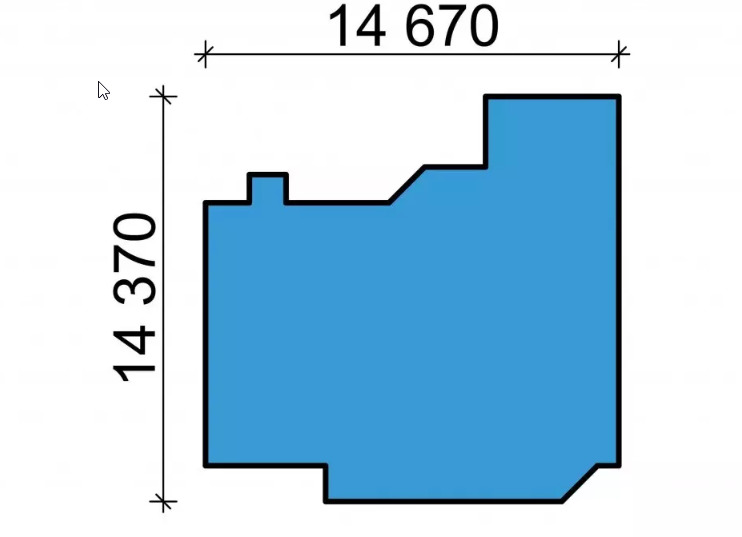
The building area of 274 square meters. m can be equipped with the following premises:
- garage;
- closed terrace;
- 2 bathrooms;
- wardrobe;
- living room;
- kitchen.
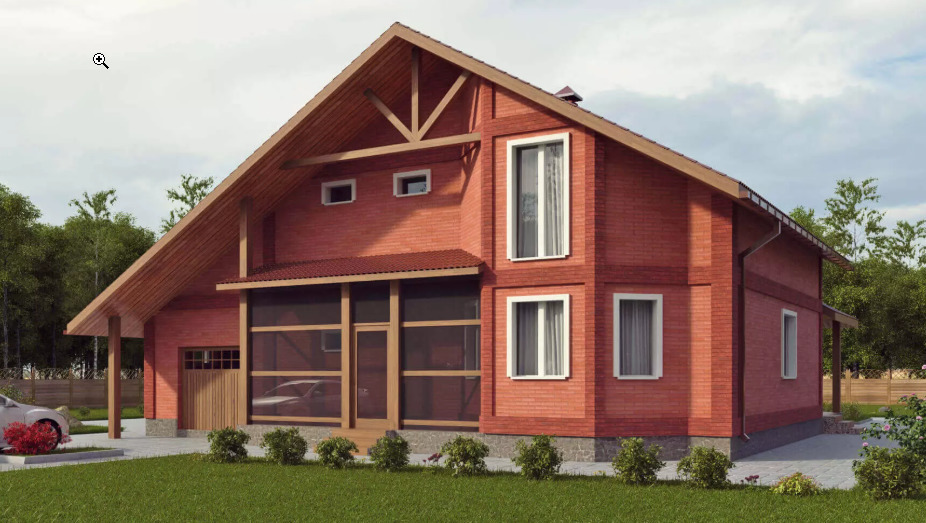
In the spacious cozy living room you can install a large fireplace. Between the living room and the kitchen there is a beautiful bay window, where a round dining table can be placed. From here you can enjoy views of the site.
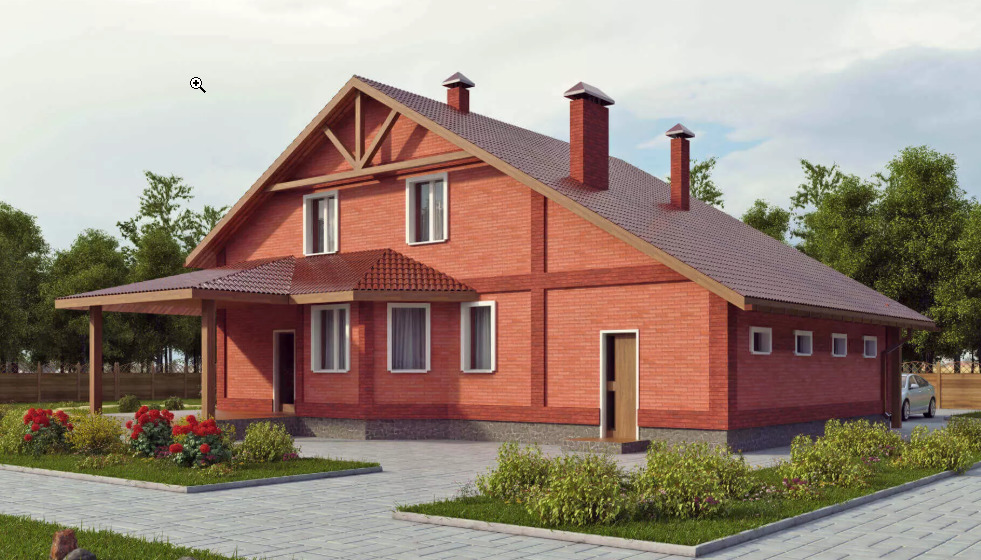
As for the second floor, three bedrooms are planned here. Two of them should be equipped with dressing rooms,thanks to which it will be possible to save a lot of usable space, because the need for bulky and roomy cabinets with similar facilities will simply disappear. Quite a lot of guests will be able to accommodate in such a house, so it is better to equip 2 bathrooms on the second floor. If you want, one of them can be converted into a sauna or utility room. This cozy and welcoming cottage with an attic, a terrace, a garage and a bay window can be decorated with red brickwork combined with wooden beams. The roof is better to make a simple dual slope. This structure in the English style will radiate cordiality and comfort, if it is surrounded by small floral plantings.
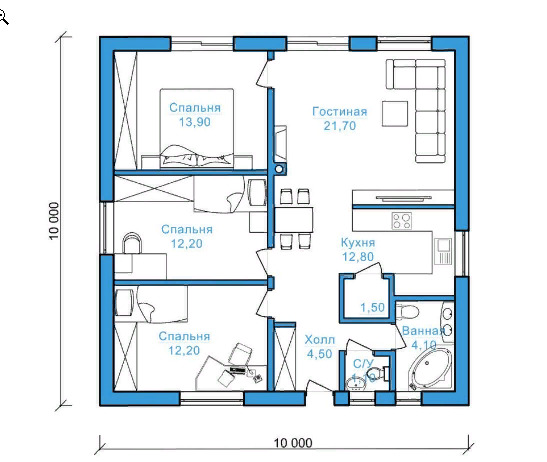
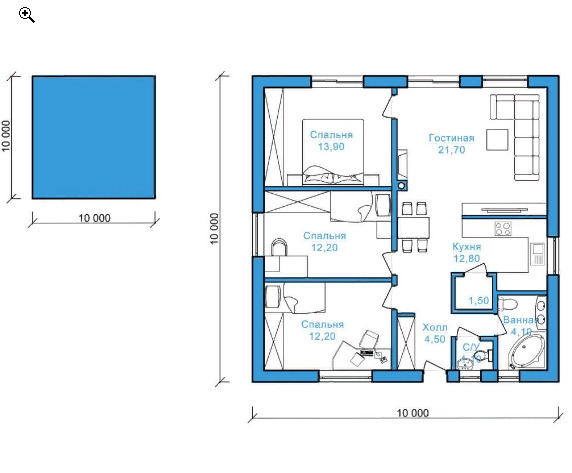
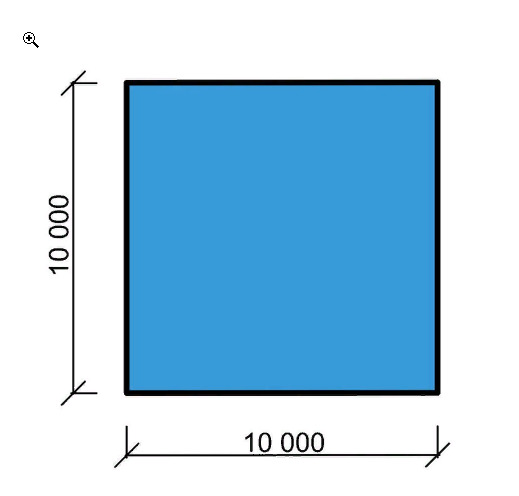
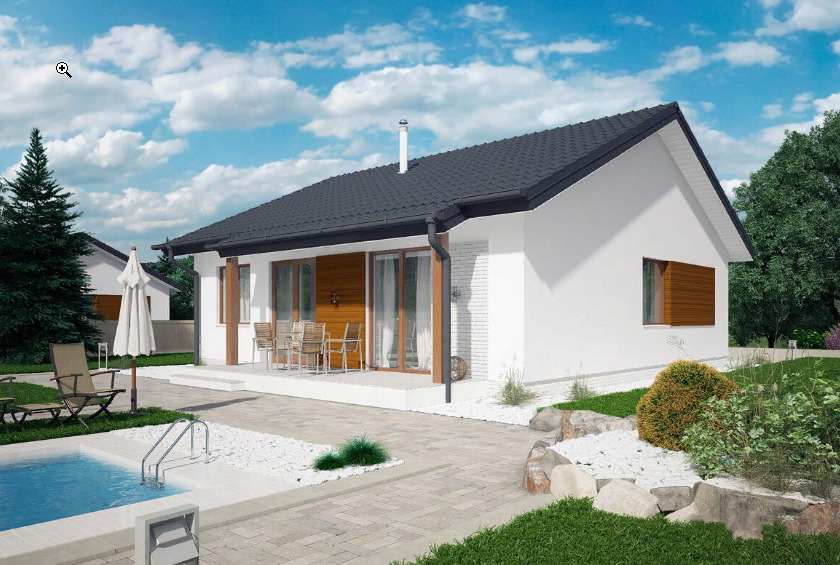
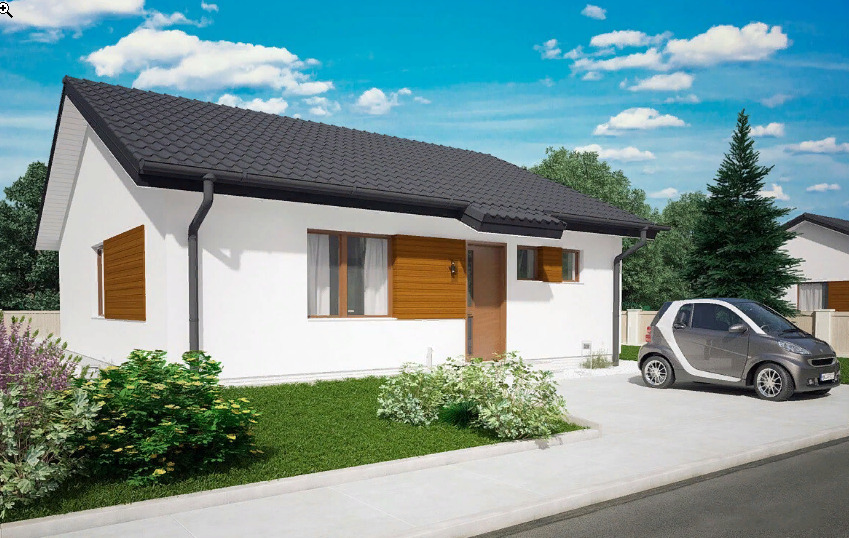
If you want to build a small but beautiful and cozy house with dimensions of 10x10 and an area of no more than 100 square meters. m, you should consider the design of a single-storey structure of the correct square shape.
In a similar building will find its place:
- spacious living room, separated from the kitchen by a small partition;
- three bedrooms located directly opposite the kitchen and living room;
- the bathroom and the bathroom should be located behind the partition separating them from the kitchen;
- The hall can be positioned between the bathroom and the very first bedroom, located on the left side immediately from the entrance door.
Before such a compact house should be equipped with an open parking space. For exterior decoration it is better to use light materials that will not visually make the structure even smaller. Play on the contrasts - consider a double-slope roof with hard tiles of dark gray or black. Equip a small shed in the backyard behind the house, place tables and chairs under it, and set aside a small square pool.
Choosing a foundation
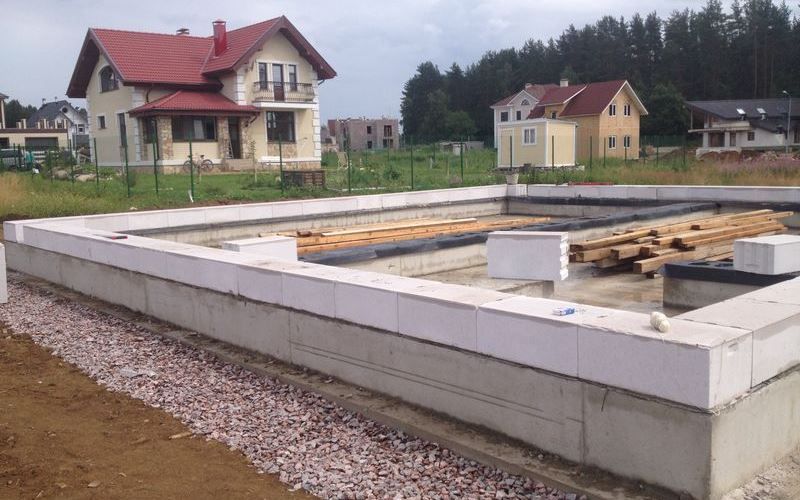
For the house of aerated concrete need to build very reliable foundations. If we are talking about the soil, which is not prone to heaving, you can turn to a simple ribbon variant. This foundation is chosen most often, since it is built quite simply, but it is also quite strong. As for the depth, it must necessarily be lower than the level of soil freezing. Because of its design, the reinforcement of the tape will compensate for any loads that appear due to heaving.
If the depth of soil freezing is 2 m or more, the foundation of the belt type may be too expensive.In such a situation, when the ground is laid at this level, a pile foundation with a grillage is usually constructed. There can not do without him. Rostverk will be responsible for the compensation of uneven movements, which often appear on the foundation structure of the pile type.
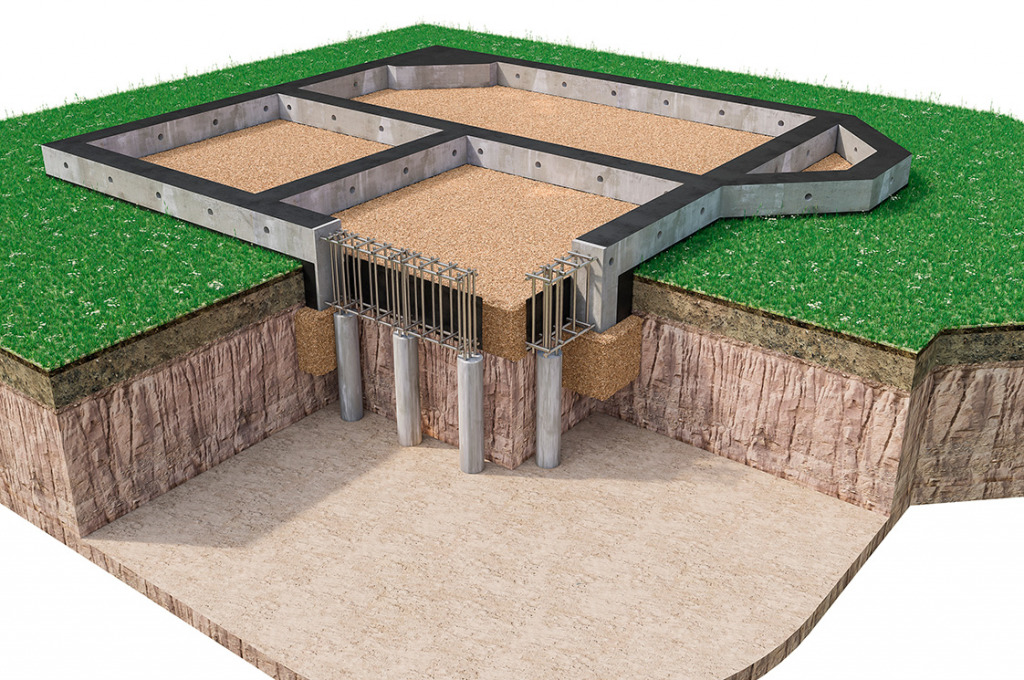
One pile often lifts a little more, and the second - a little less. If you do not build the grillage, it will lead to the formation of cracks. For this reason, the organization of the grillage is mandatory if the walls of the house will be made of a gas block.
The most qualitative option of the base which will be steady against emergence of damages is the option in the form of a monolithic plate. Of course, it will cost more than the above options, but with it the gas-block house will not be subject to the appearance of defects. Typically, such a base settles on soils, characterized by a small carrying capacity, for example, peat bogs or fine-grained sand.
As a result, it may happen that a monolithic version will cost less in such conditions than a strip foundation with a depth of more than 2 m.In this situation, the monolith is more expedient if, due to the peculiarities of geology, it is not possible to build a pile structure.
It is not recommended to make a prefabricated foundation for a gas-block house. Most often, problems arise in cases where the foundations are made of brick or building blocks. Since these materials themselves are prone to cracking, together with cellular aerated concrete, this can turn into a rather serious problem: cracking will be almost impossible to avoid, and this will negatively affect not only the exterior of the house, but also its reliability. That is why prefabricated foundations in the manufacture of gas-block houses should be abandoned.

Do not forget that with the question of what kind of foundation is 100% suitable for a gas concrete house, it is better to turn to experienced designers who have the results of geological studies of your site.
How to build?
Gas-block houses are good not only for their durability and reliability, but also for the relative ease of construction. If you want to build a similar house with your own hands,then you should follow the detailed step-by-step instructions so as not to encounter many problems encountered by inexperienced builders.
We will consider in stages how to install a gas-block house without resorting to the help of professional craftsmen.
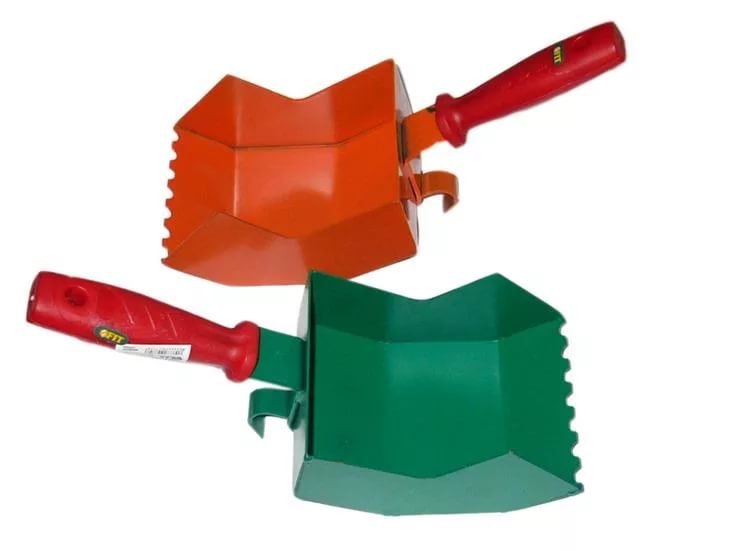
For the construction work you need these tools:
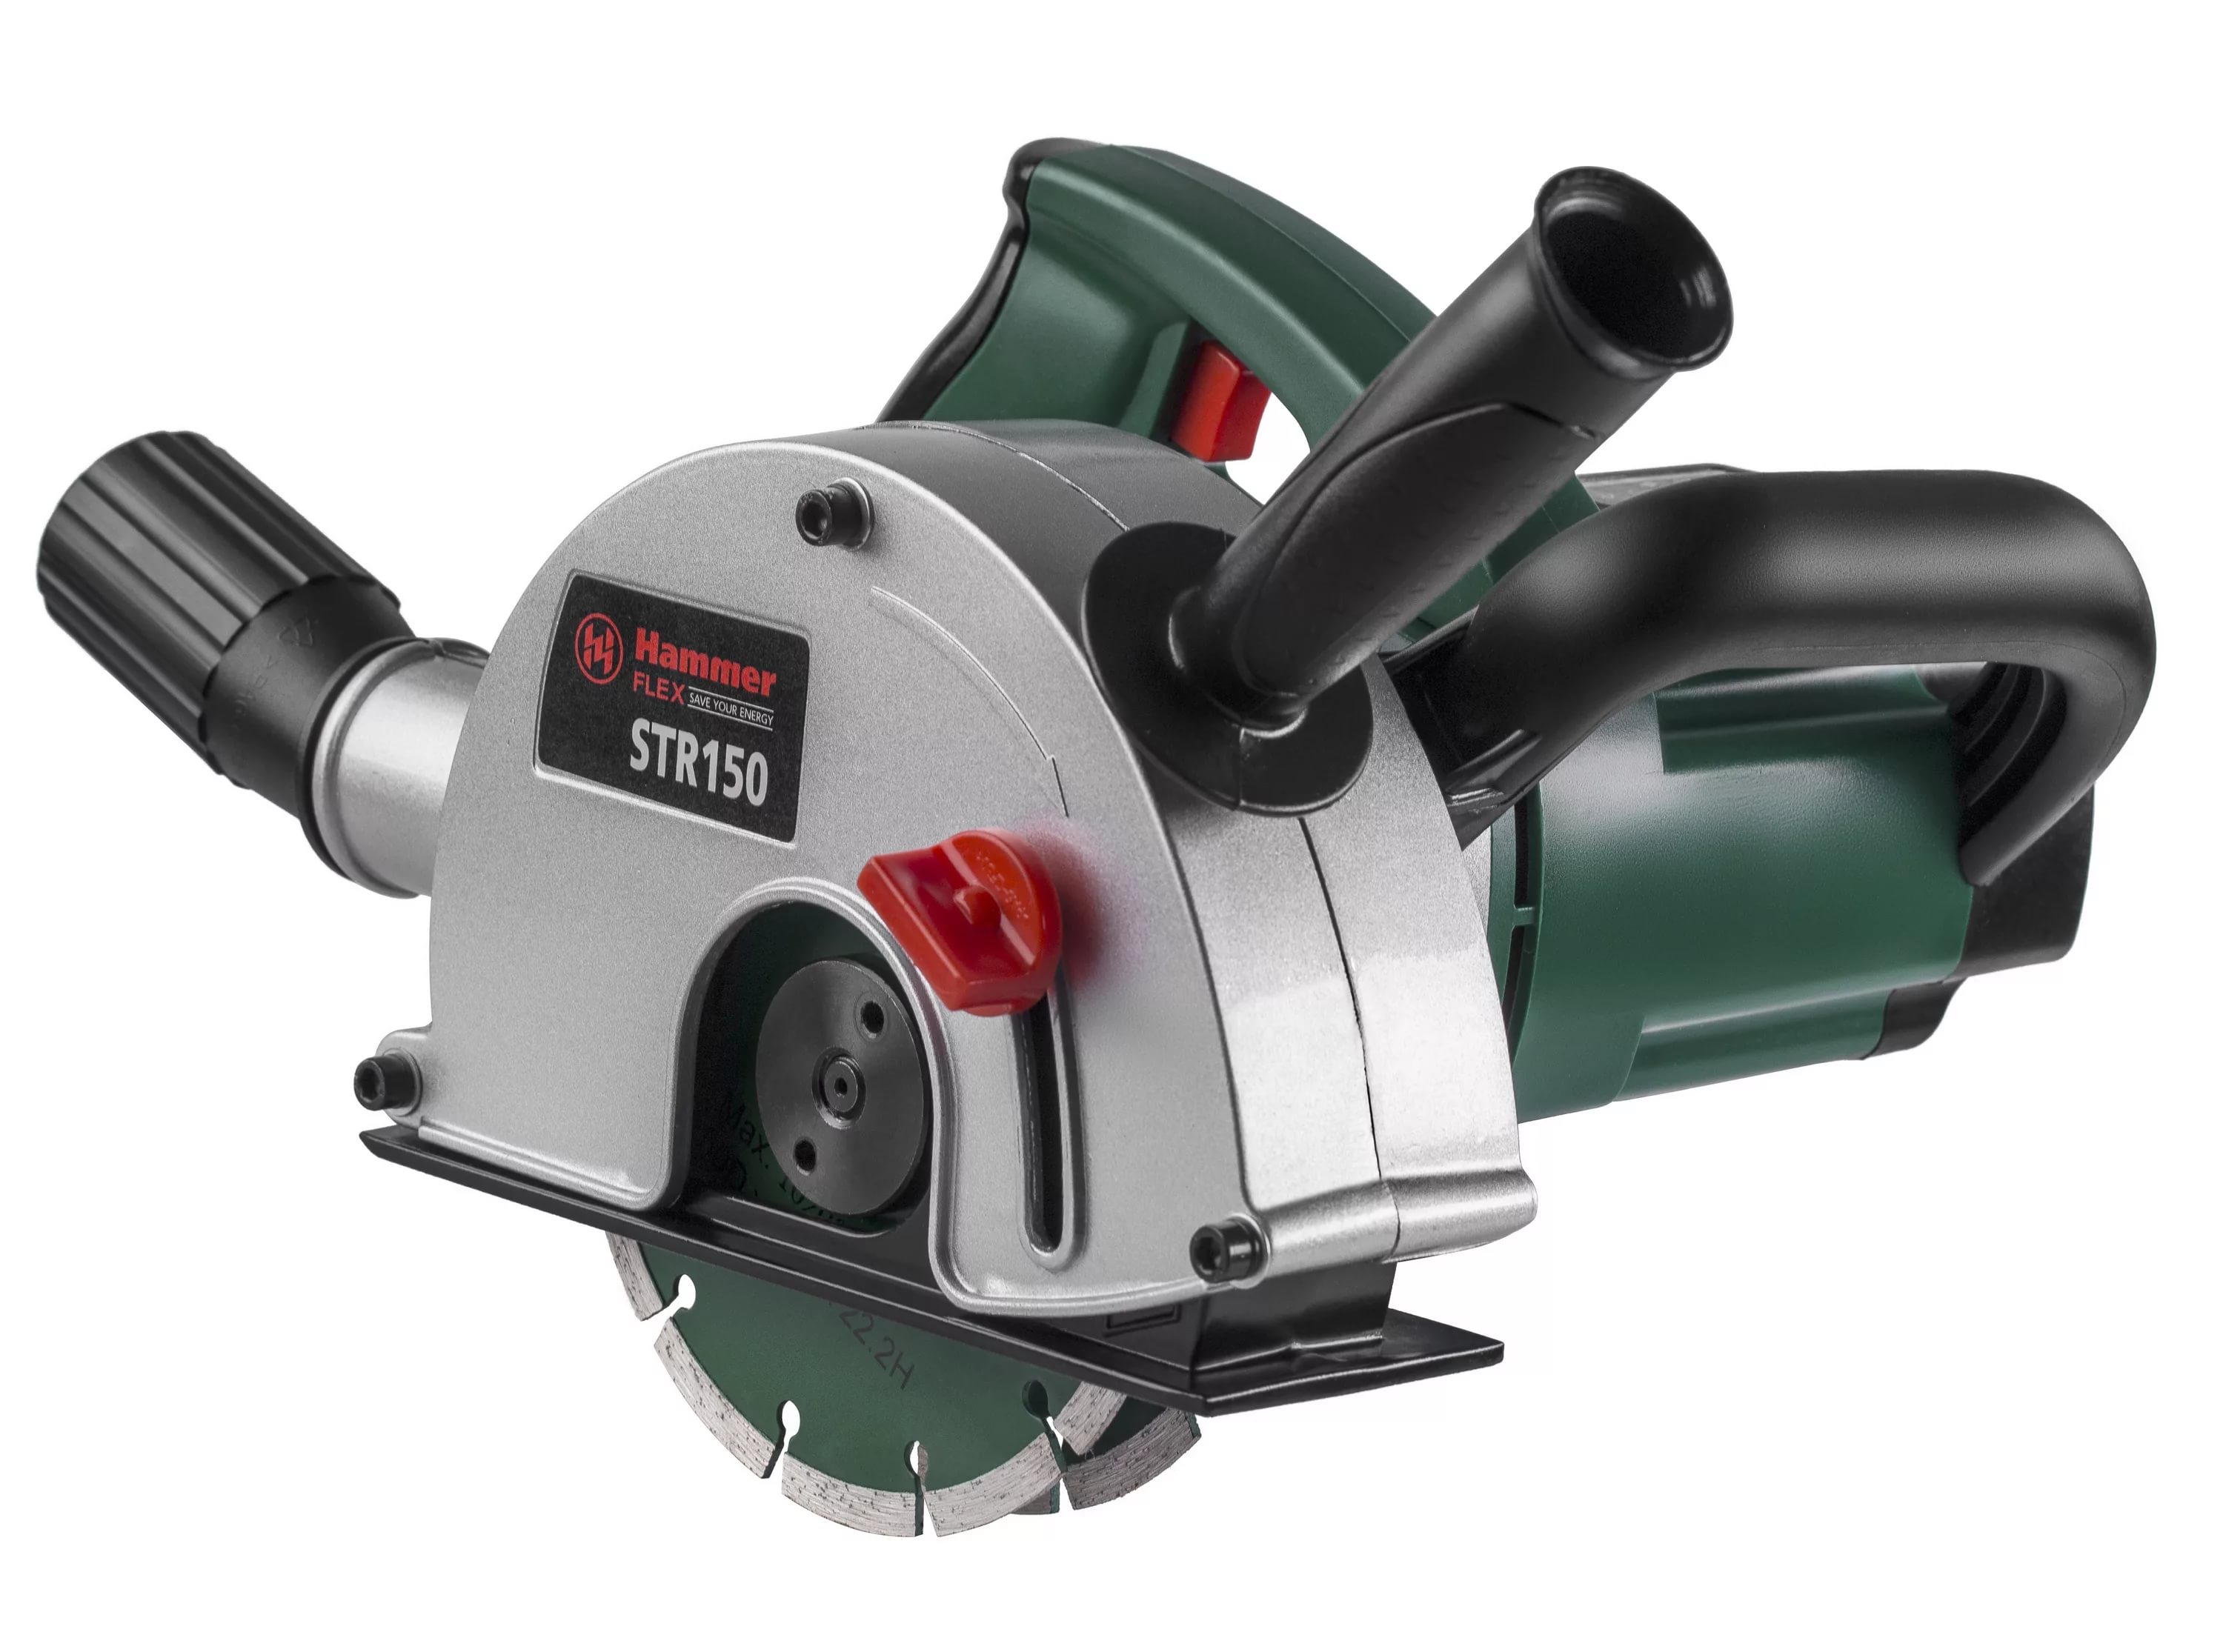
- band-type saw;
- drill;
- hand saw;


- wall chaser;
- mixer;
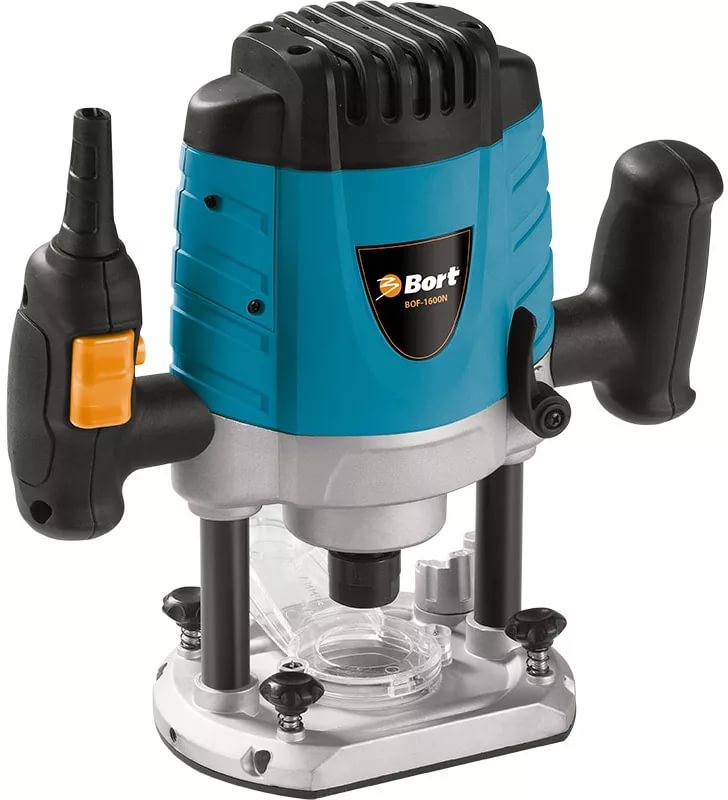
- electric cutter;

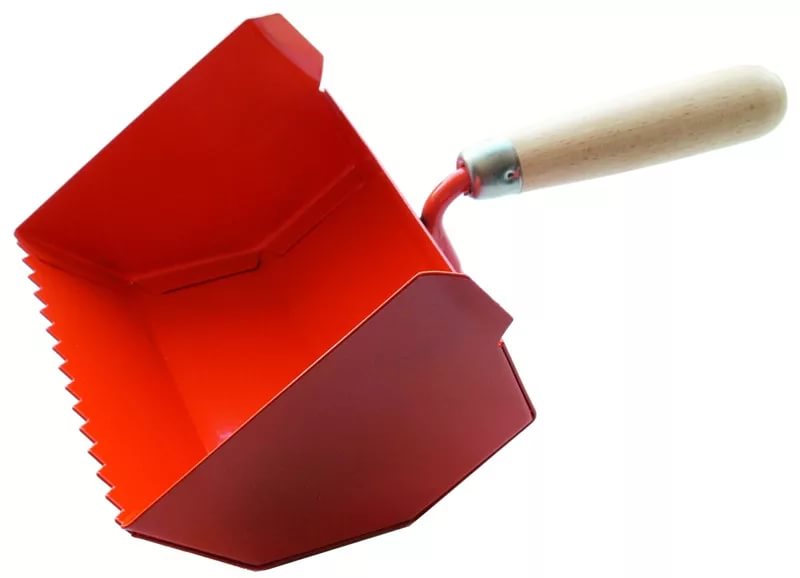
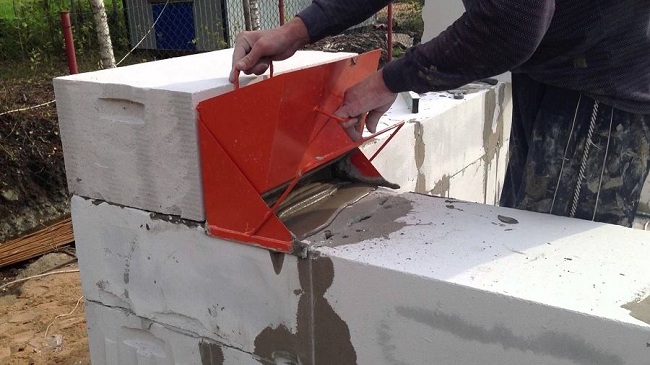
- scraper bucket;
- hacksaw;
- grater;


- necessary fasteners;
- adhesive carriages;
- trowel trowel;
- rubber mallet;
- sanding board.

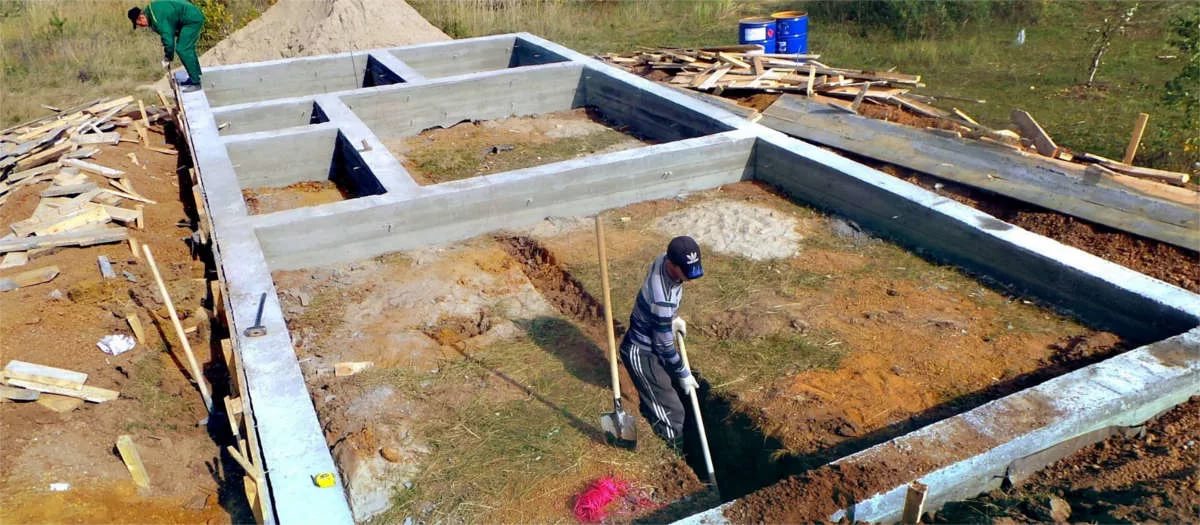
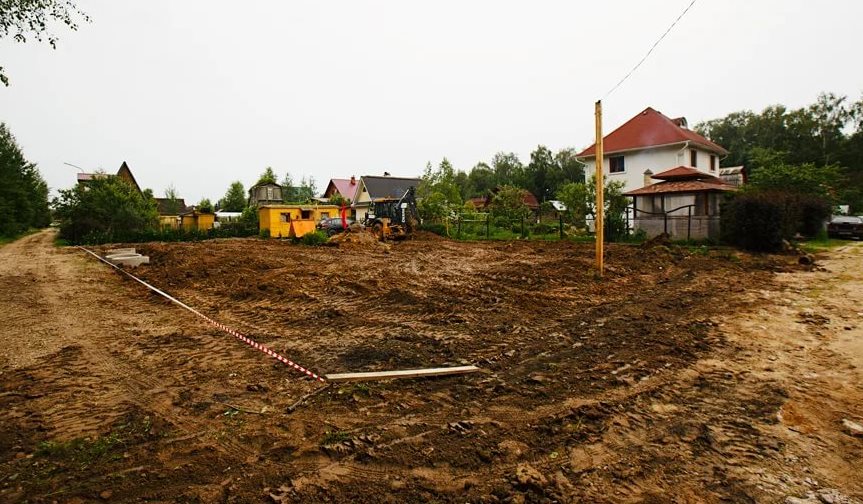
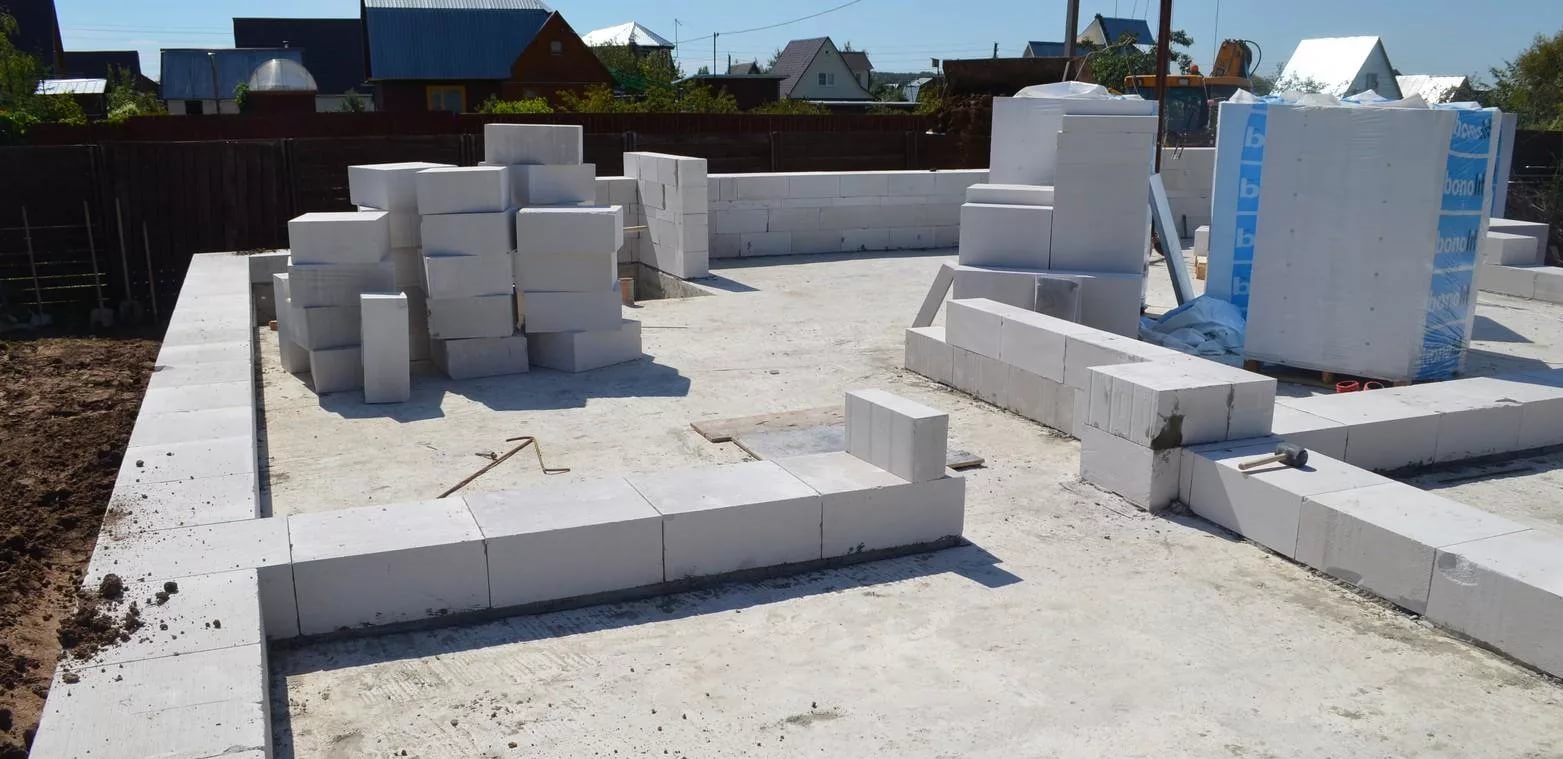
The first step is to build a high-quality and reliable foundation. Before starting work with this base, it is necessary to thoroughly clear the area. Remove all unnecessary and go to the markup.
To do this, use bars reinforcement and a special cord or rope. First, determine the axis of the planned structure. Take a plumb line and mark the first corner of the foundation structure. Stretch the rope to the 2 and 3 corners perpendicular to the first mark.

Next you need a square. Mark with it 4 angle. Make measurements, moving diagonally.If the length parameter is the same, then this means that everything goes according to plan and you can proceed to the installation of rods and the subsequent stretch of the rope.
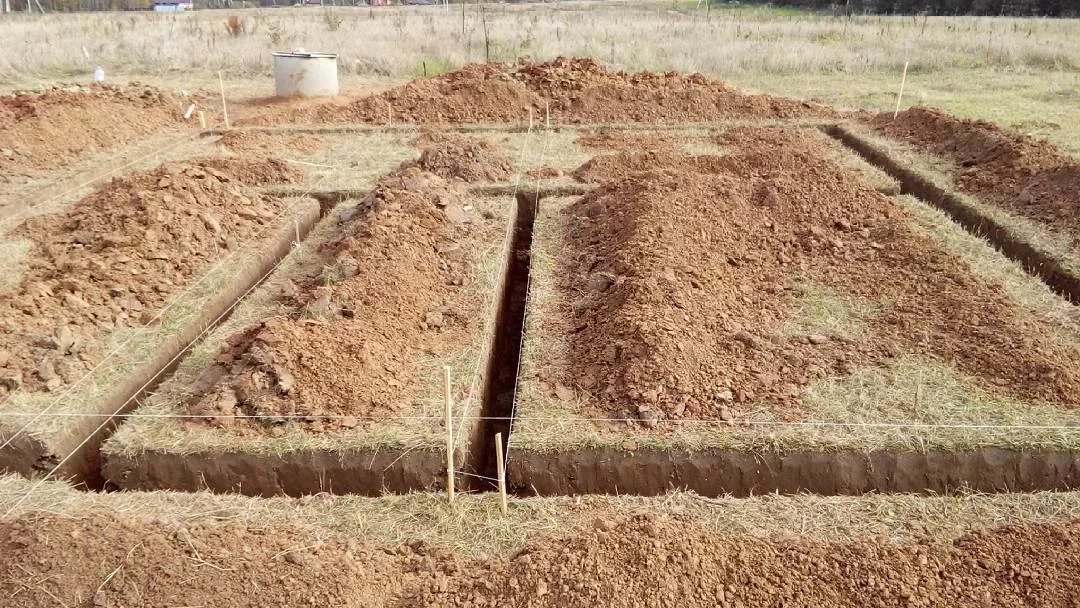
The same method is necessary to conduct the internal layout of the base. It is important to make indents from the external base (about 400 mm). As for the trench, it must be dug along the perimeter of the planned dwelling, and under the future internal wall ceilings.
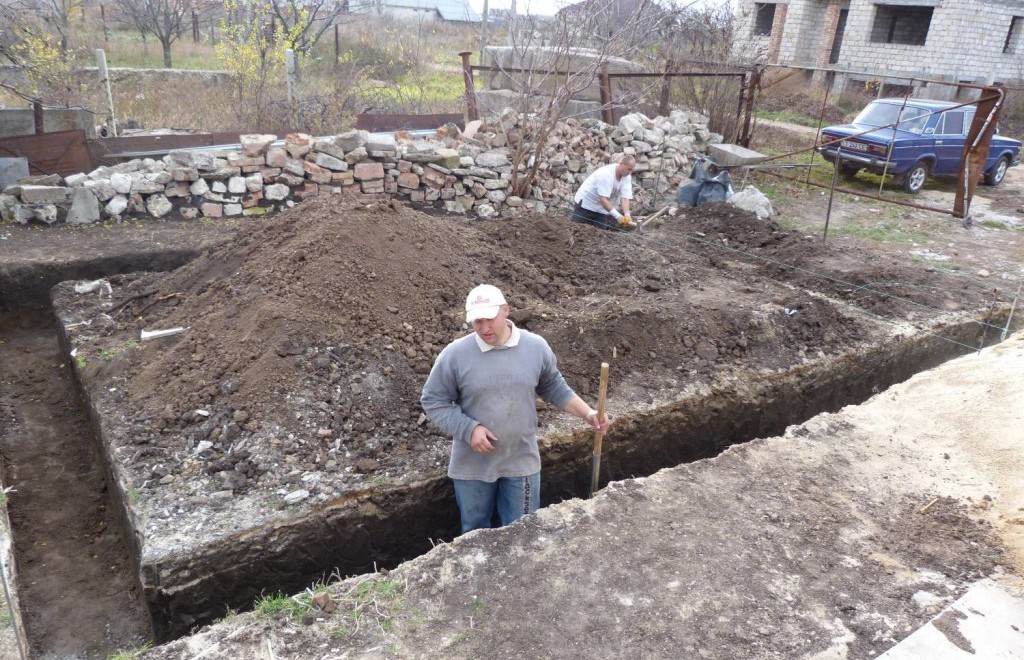
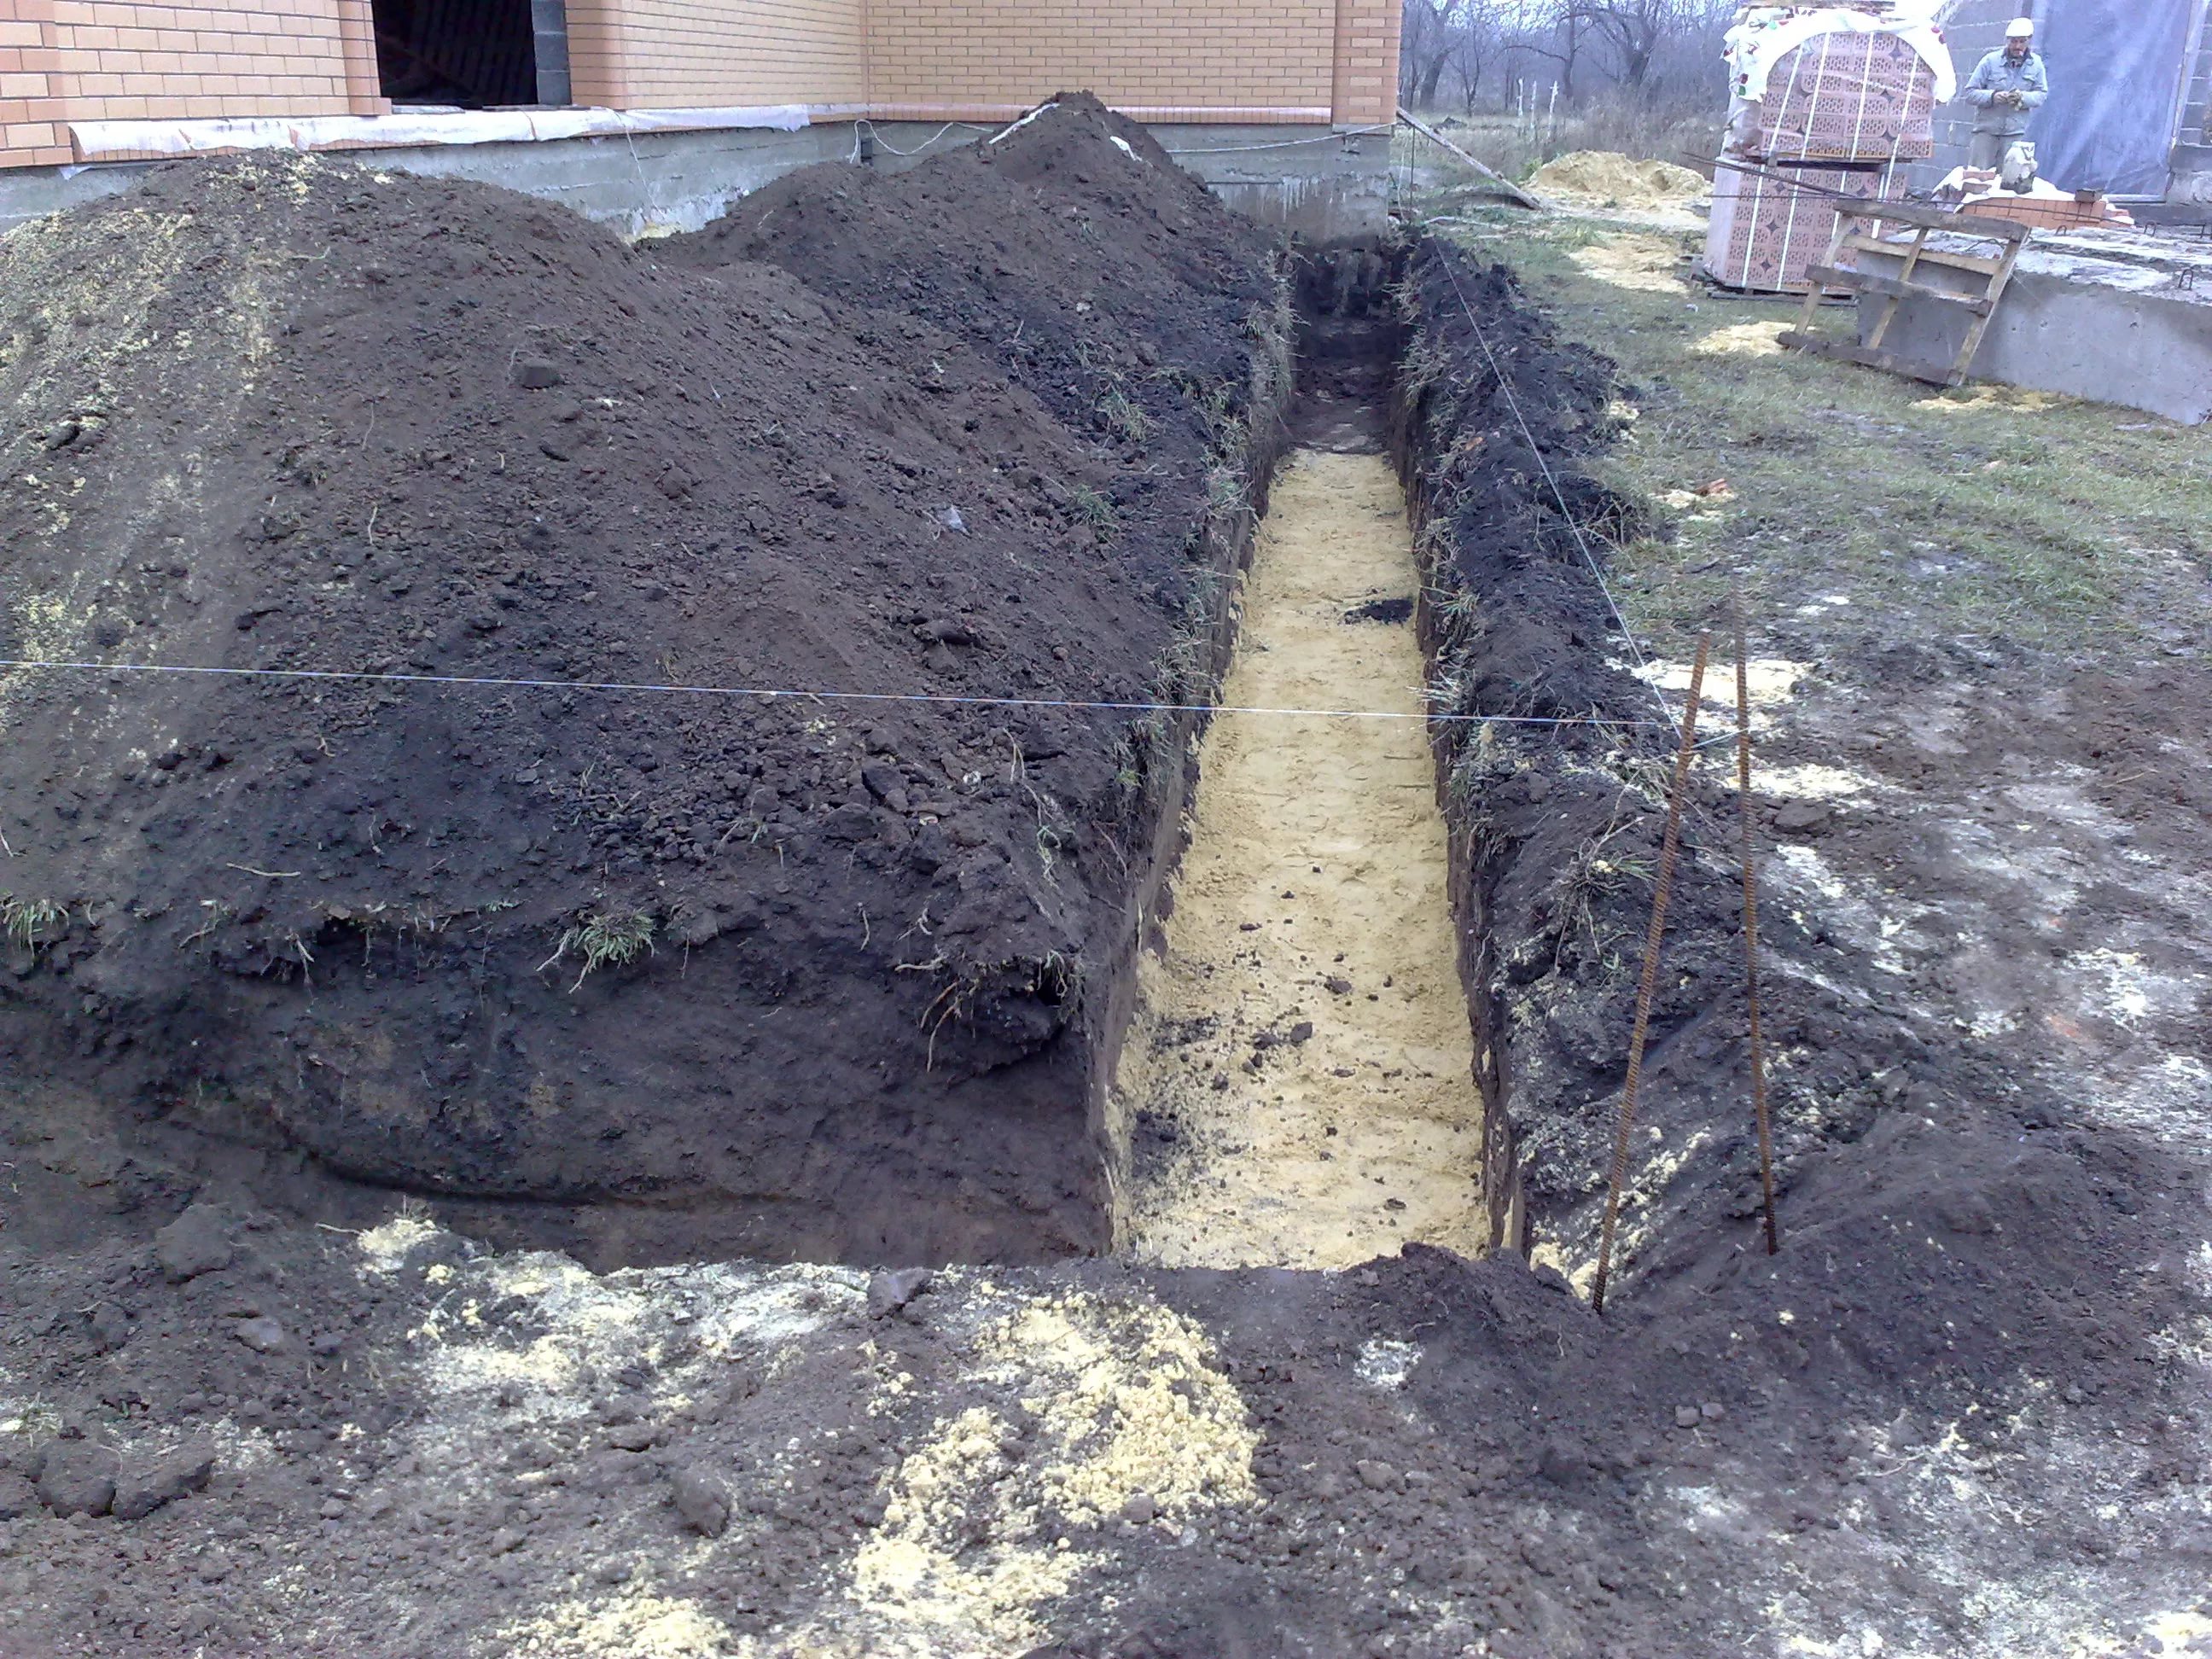
Next you need to properly prepare the trench. Find the lowest point on your site. Calculate from it the depth of the pit. It is permissible to build a house of small dimensions on a 40 cm ribbon.
In other matters it is necessary to rely on the structural features of the structure and the site. Take into account the degree and point of soil freezing and groundwaters. After that, you can proceed to digging a trench. Keep in mind that the walls of the pit should be exclusively vertical, and the bottom - smooth. To check these parameters, you must use a level and plumb.
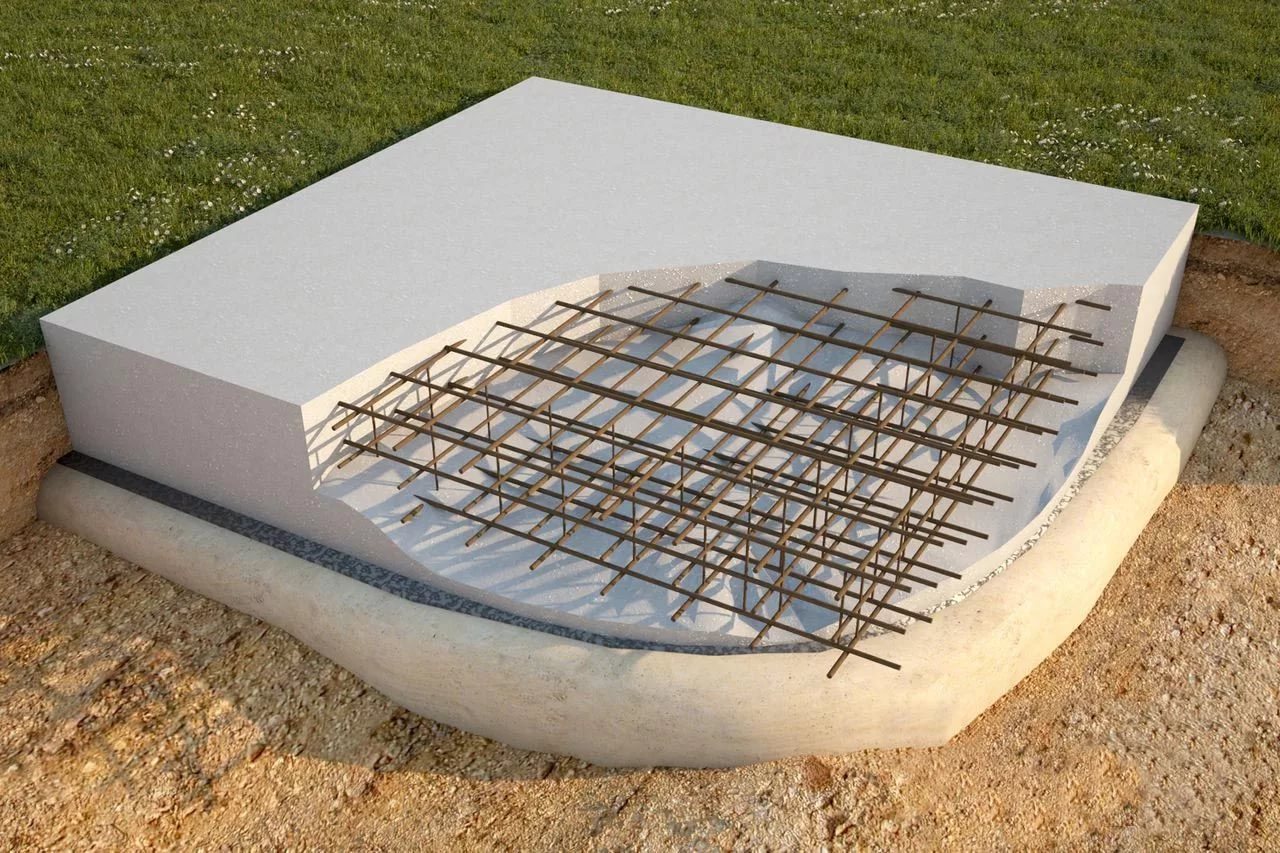
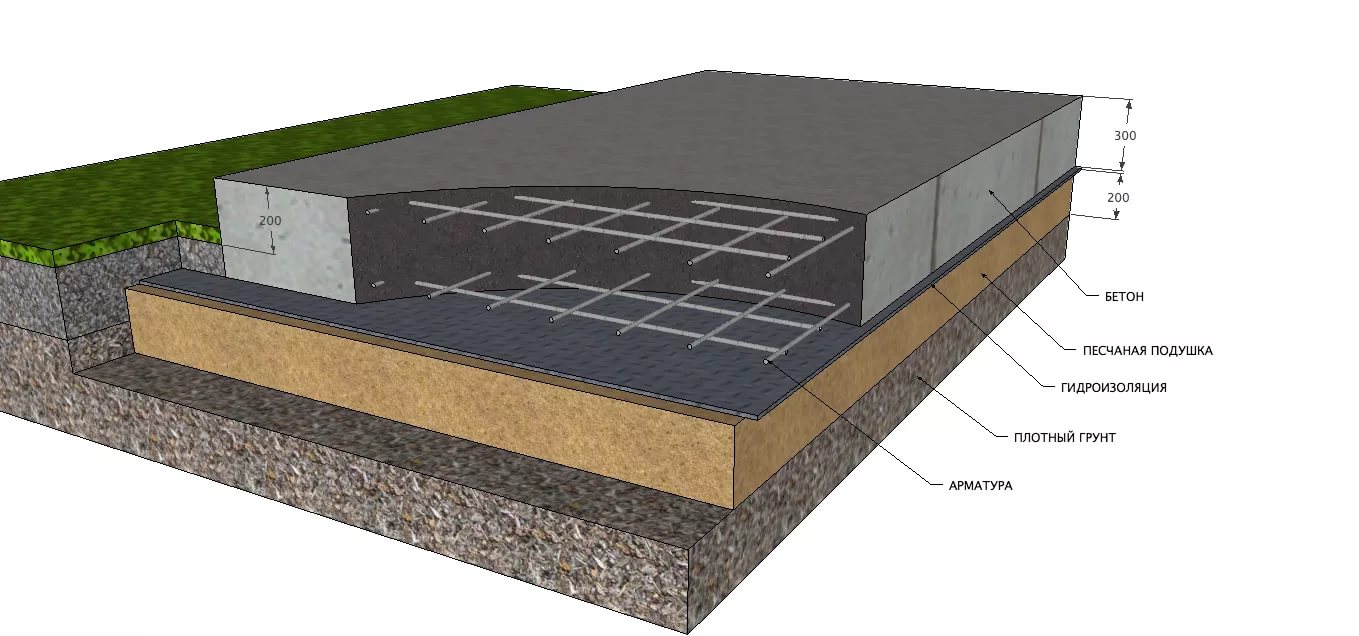
On the bottom of the dug trench should put a pillow of sand. Tamp it well. This component will be responsible for the optimal distribution of the load on the base during the change of seasons. It is advisable to make a pillow 15 cm thick. On the sand you need to sprinkle rubble and lay sheets of roofing material.
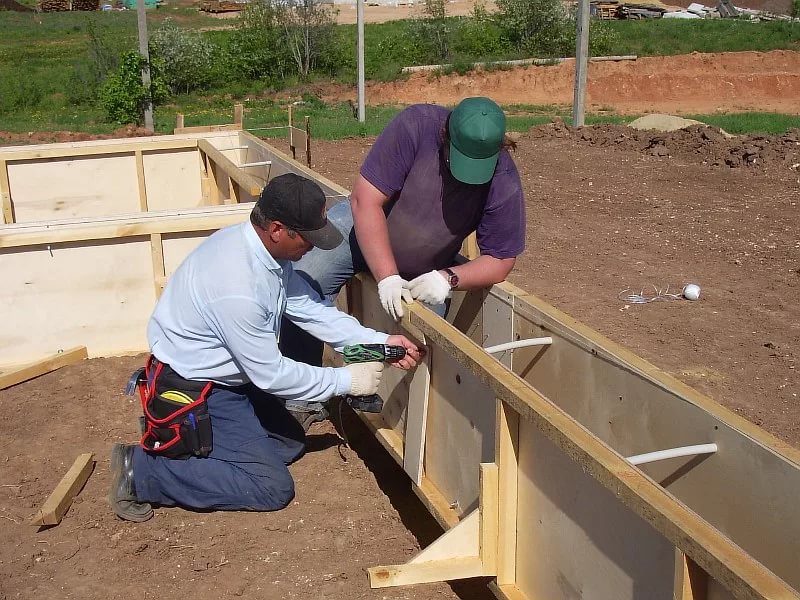
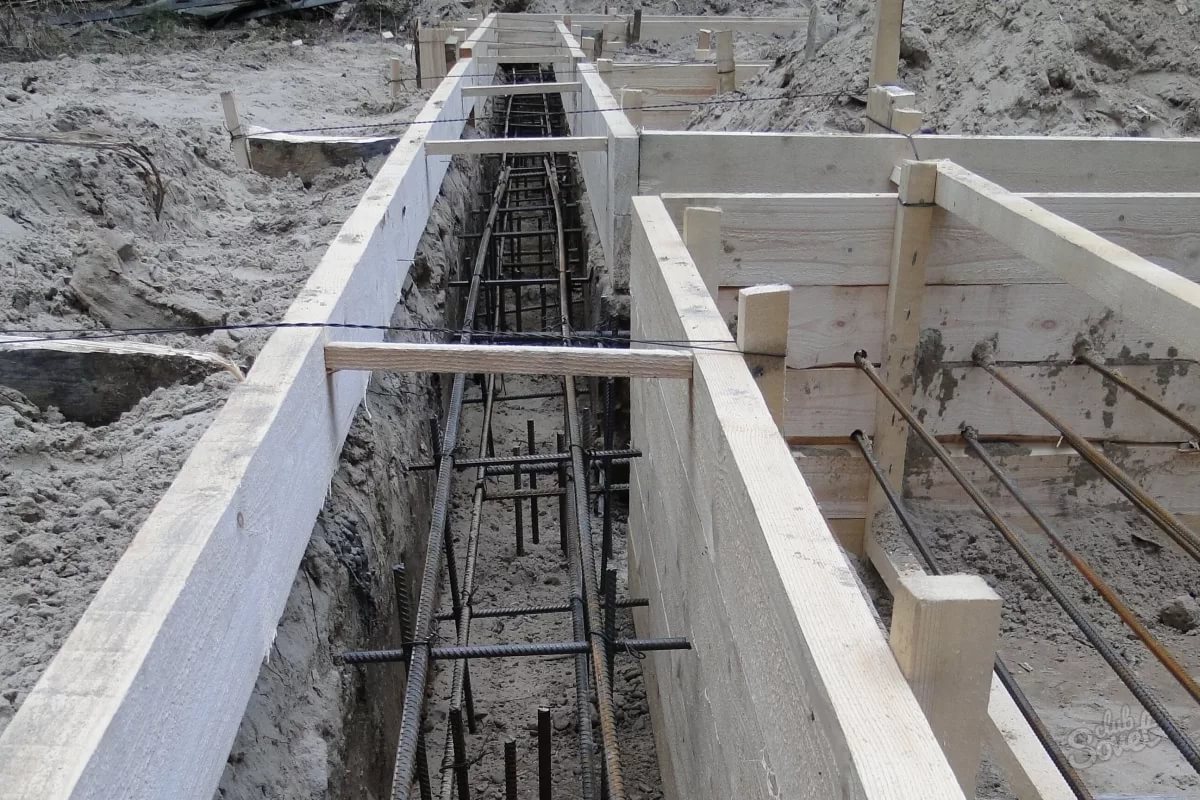
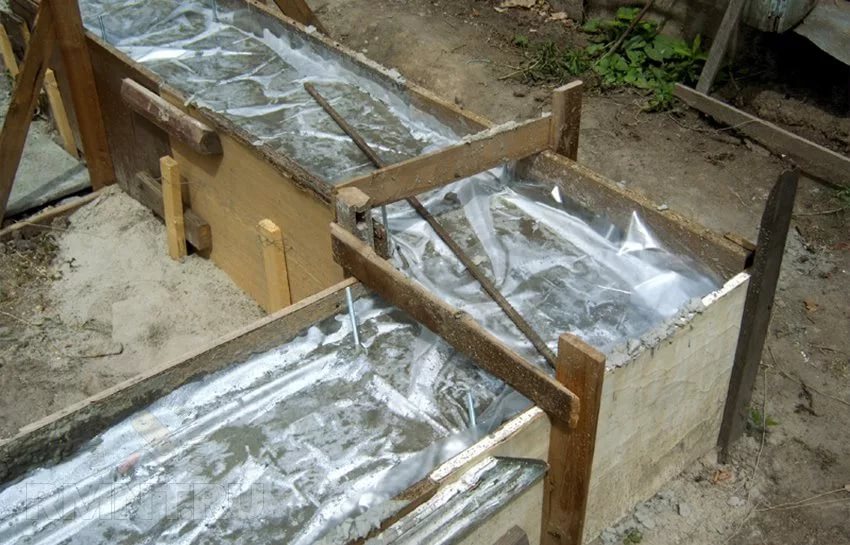
The next step will be the formwork assembly. It can be built from boards, plywood sheets and other similar materials. The formwork parts must be fastened together with nails or screws. Along the perimeter inside this structure it is necessary to stretch the line at the level of the surface of the future casting.
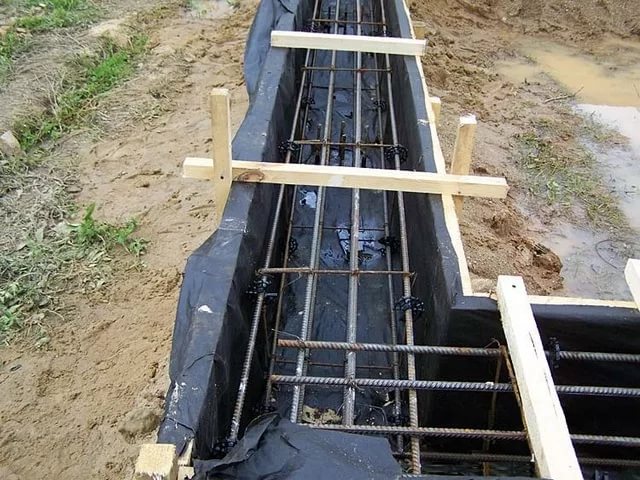
At this stage it is required to consider the location of the holes for the water supply system and sewer system. For this purpose, empty pipes are usually put in the right places, and then filled with sand mixture.
Now we proceed to the installation of reinforcement parts. Take rods with a diameter of 12-14 mm. Tie them into a mesh using steel wire. Mesh cells can be of various sizes. The heavier the structure, the more compact the side of the square should be.
As a rule, there are enough cells having a size of 20x20 cm. The grid should be made in accordance with the dimensions of the excavated trench. Note that between the lined layer of reinforcement and the top of the trench, you need to leave 5-centimeter indents. They will come in handy so that later the reinforcement was precisely poured with concrete.
The next step will be pouring concrete.Multiply the width of the foundation structure by its length and height. Thus, the required volume of concrete solution is determined. Prepare or order a quality mix.
If you decide to prepare this solution yourself, then you should stick to the old and proven recipe:
- take 1 piece of cement;
- 5 pieces of rubble;
- 3 pieces of sand;
- water in the quantity required to provide the desired consistency.
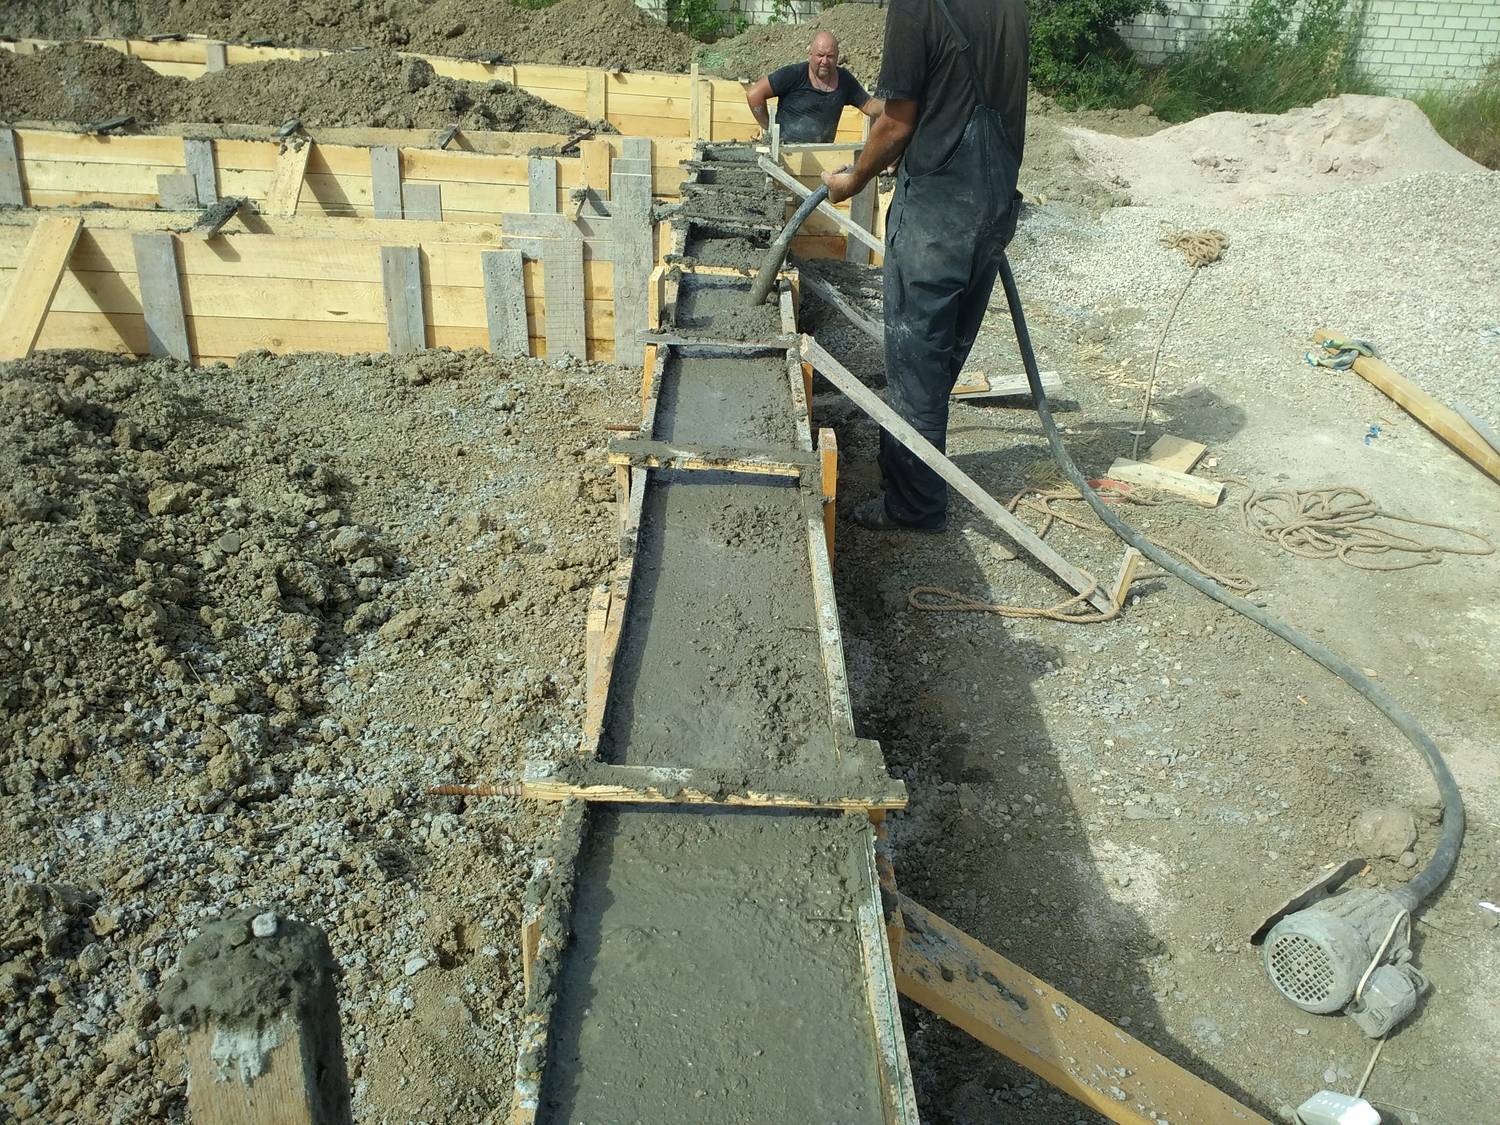
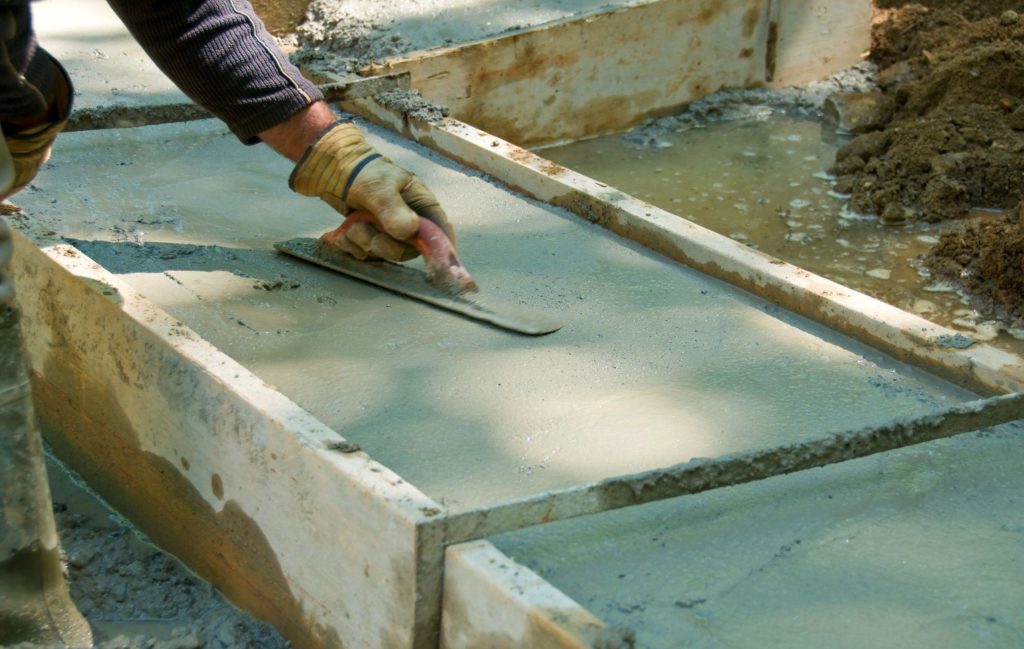
Pour the composition evenly, 200 mm thick. You should not hurry, thoroughly tamp every layer. Pour the concrete solution to the level of the pre-set rope in the formwork.
Be sure to level the surface of the fill using a trowel. Pierce the concrete layer with reinforcement at several points. Gently tap the formwork on the outside with a hammer.
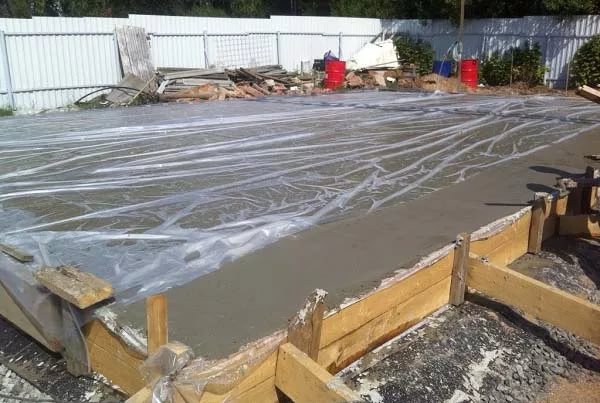
In order for the foundation to gain strength, it will take him at least a month. For this period of time it is necessary to close the design with plastic wrap to provide protection from precipitation. In hot weather it is necessary to water the structure with water so that it does not crack. As for the formwork, it should be removed no earlier than 10 days after casting. Many experts recommend leaving it for a month.
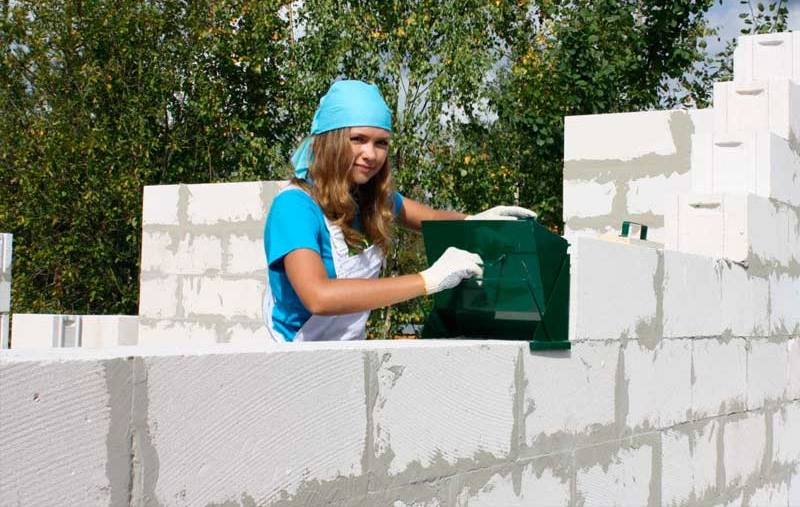
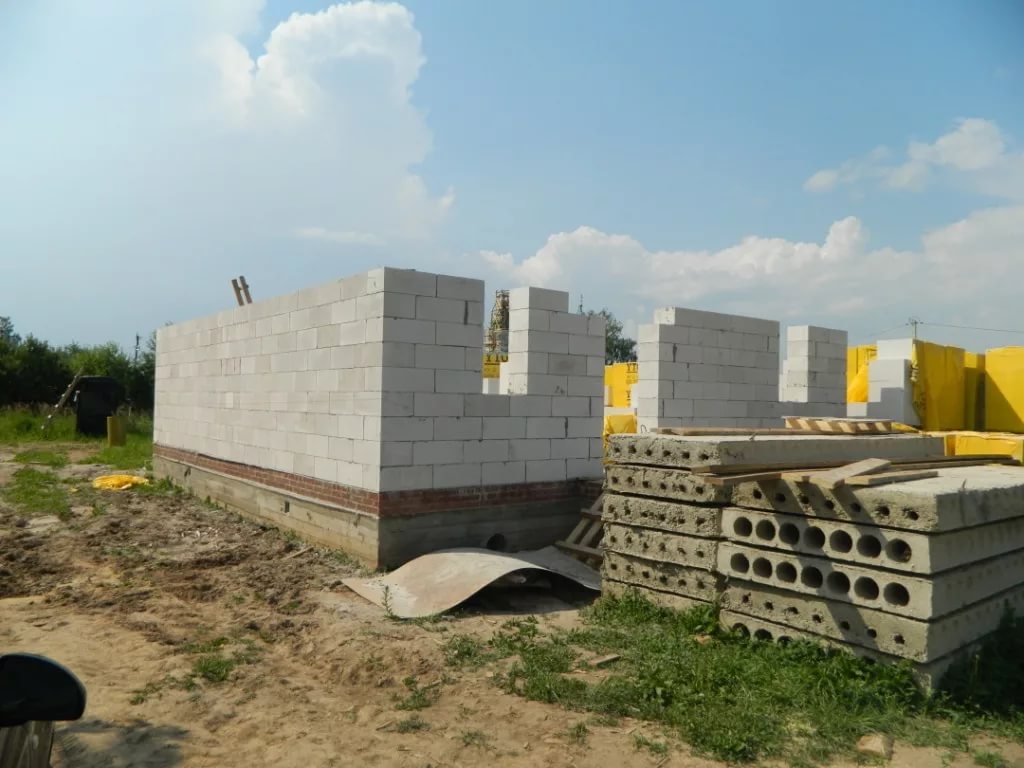
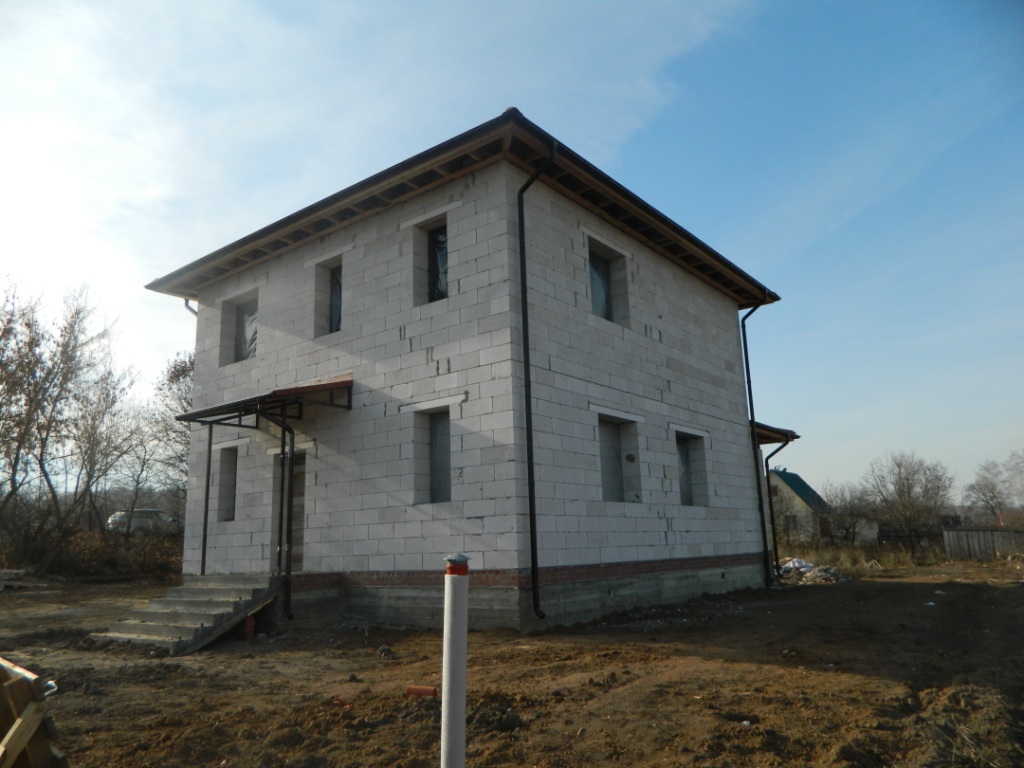
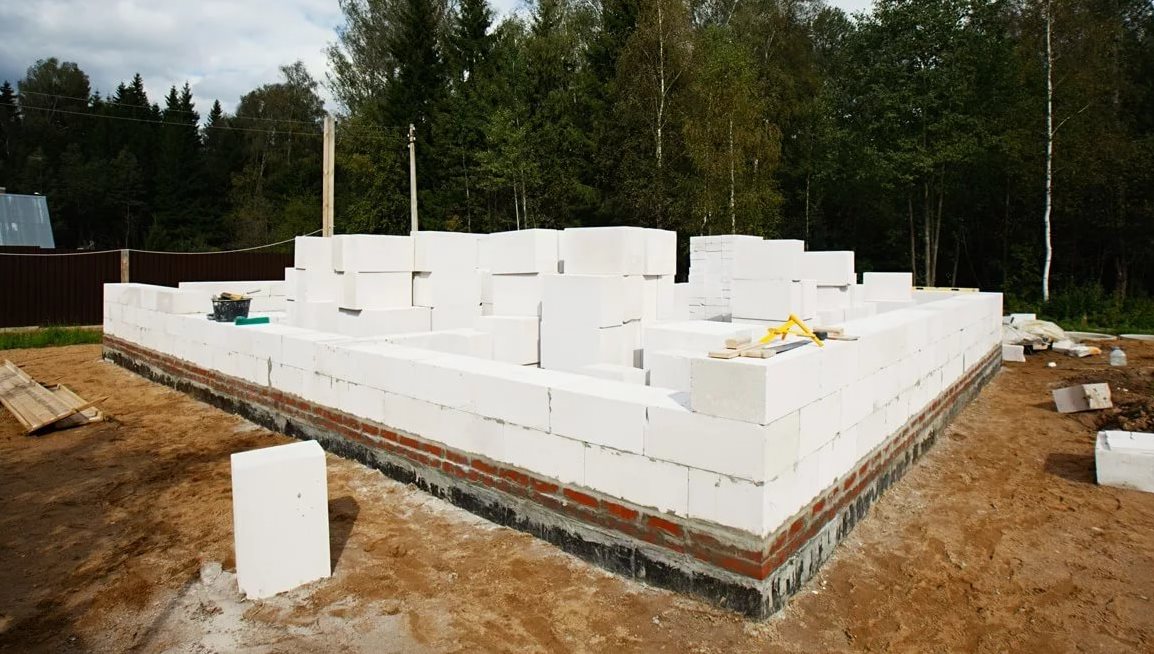
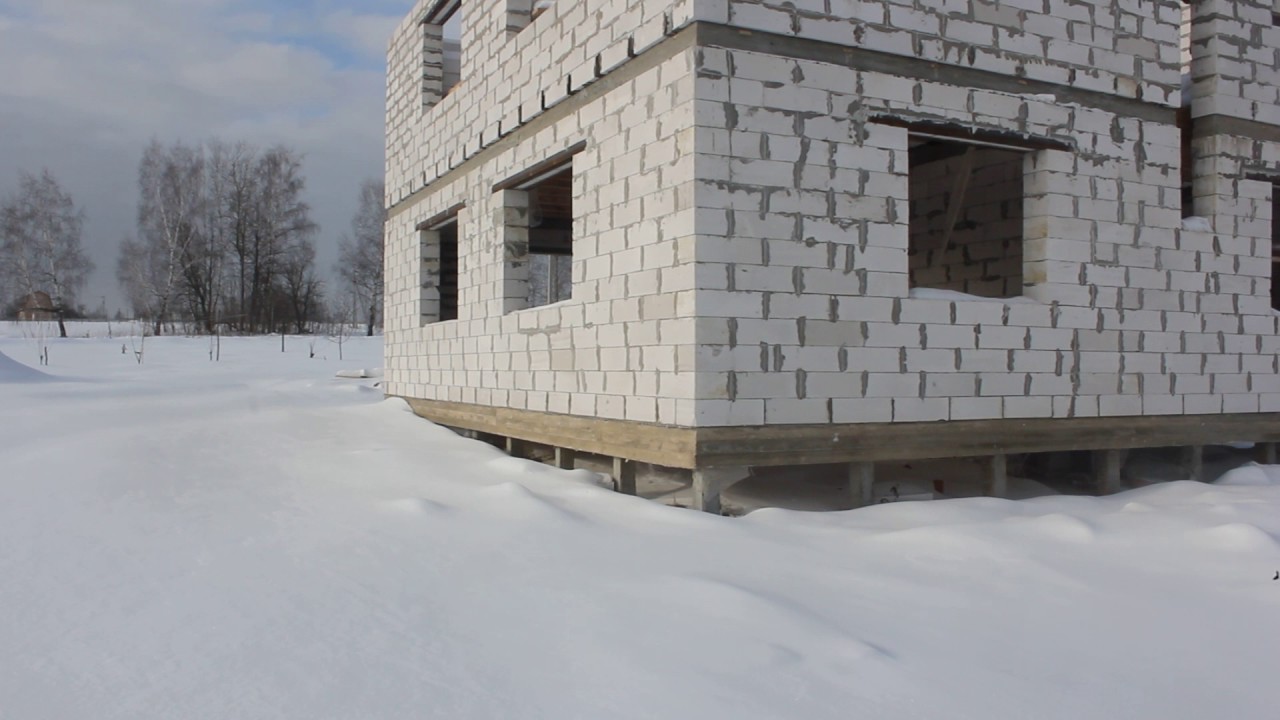
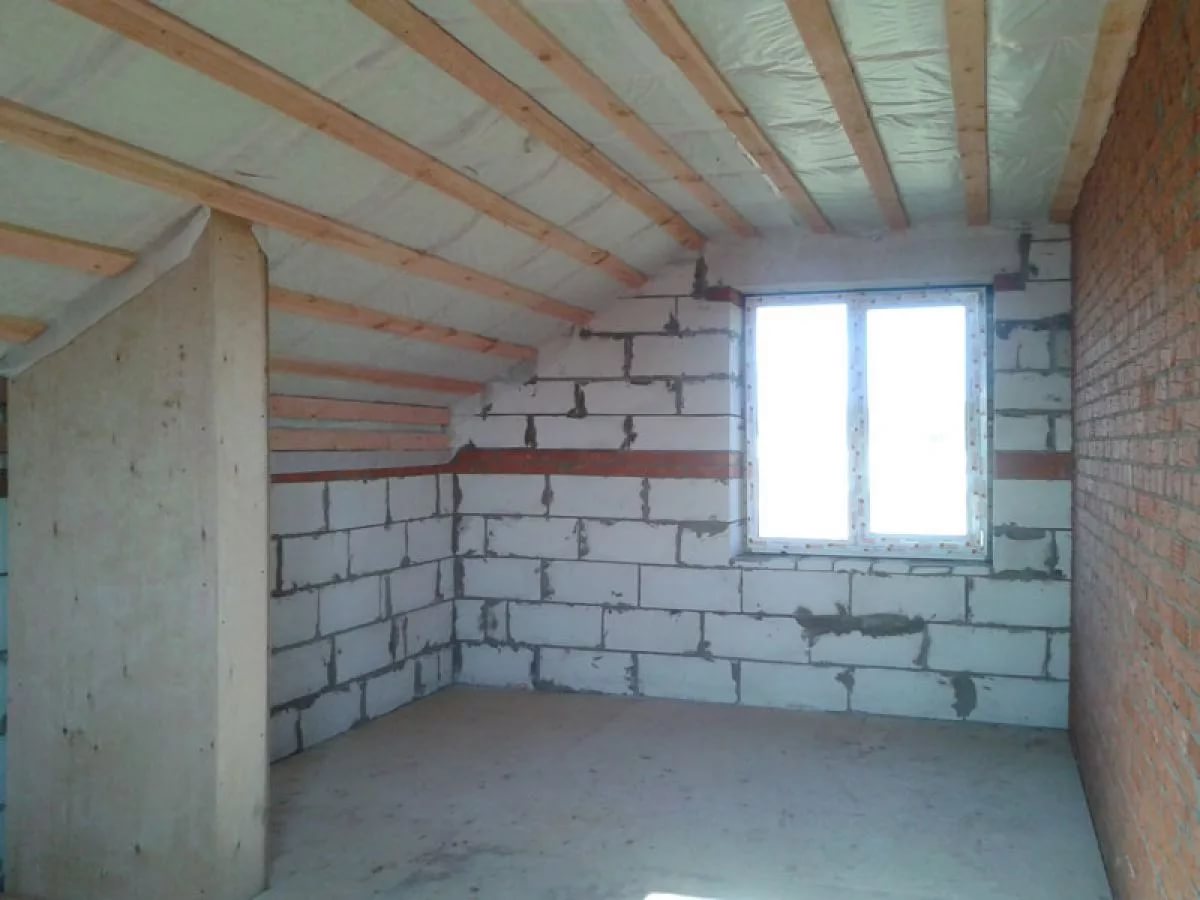
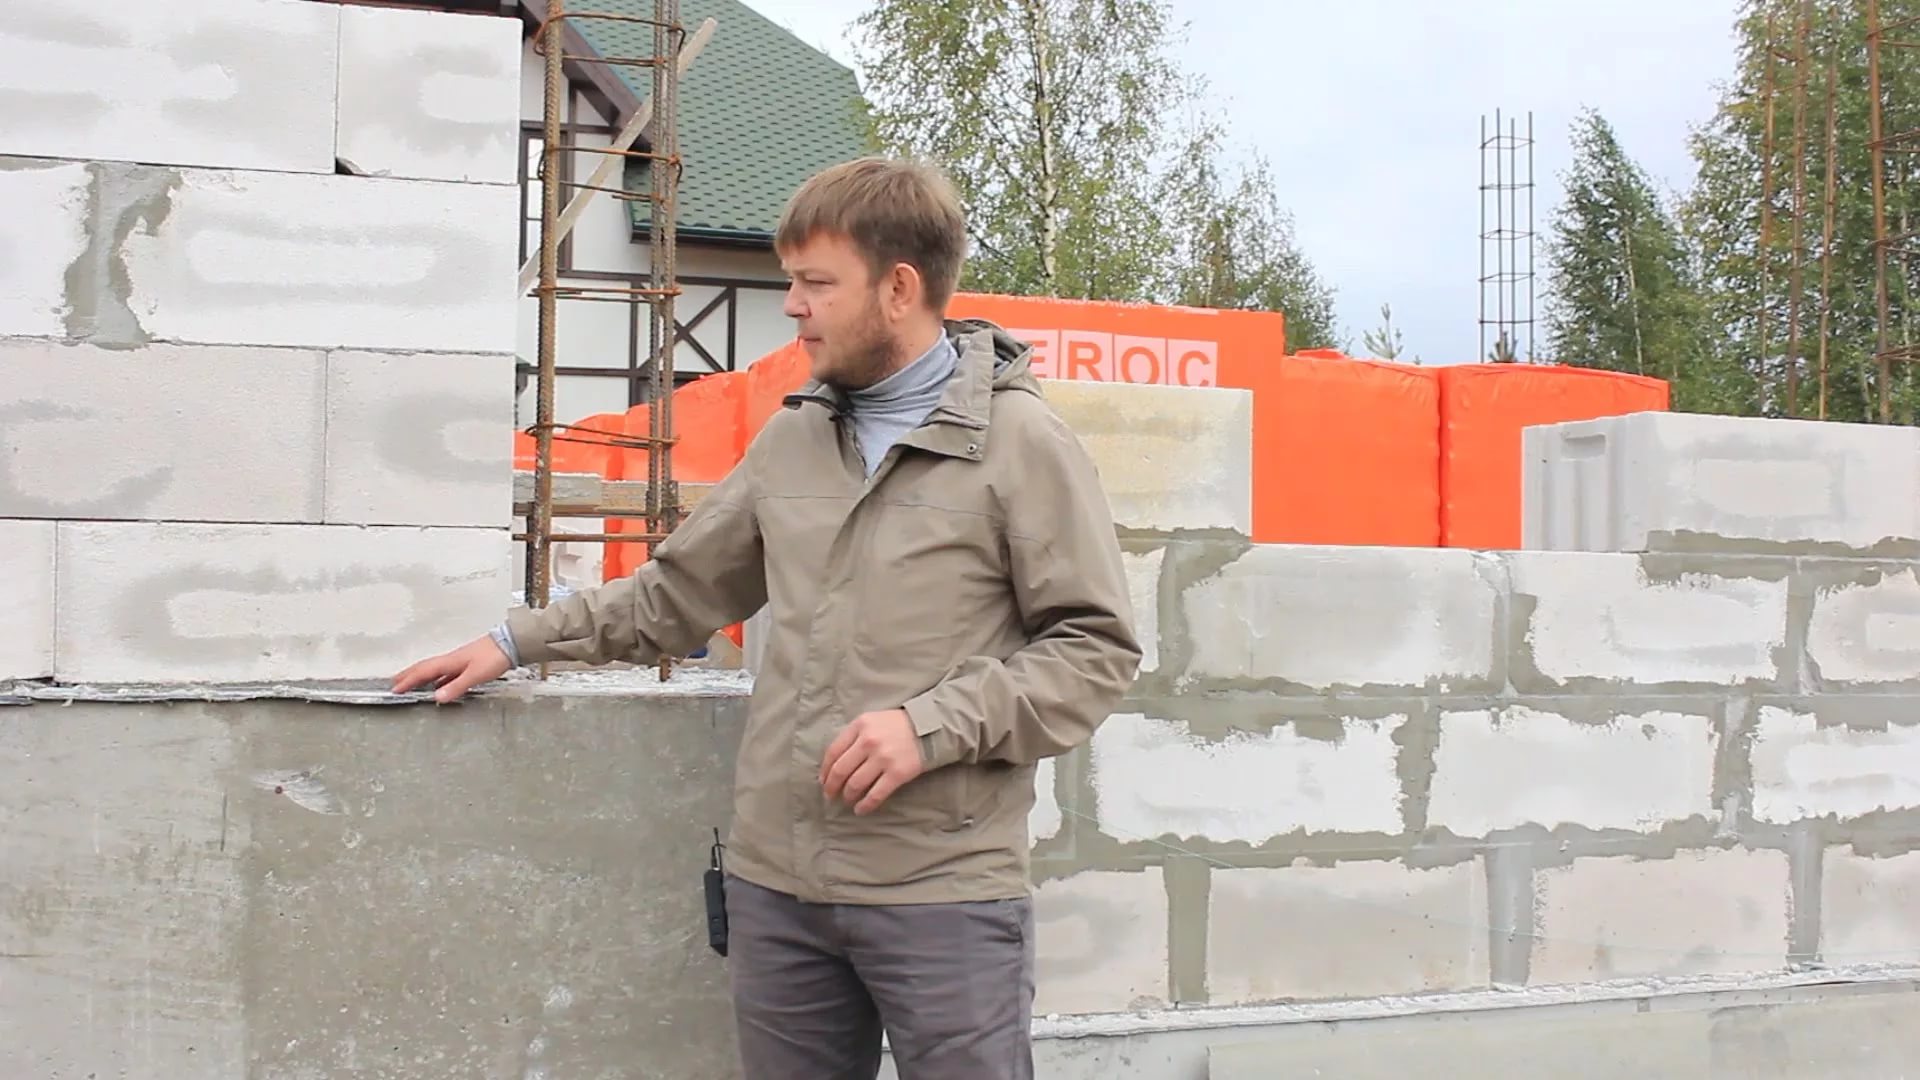
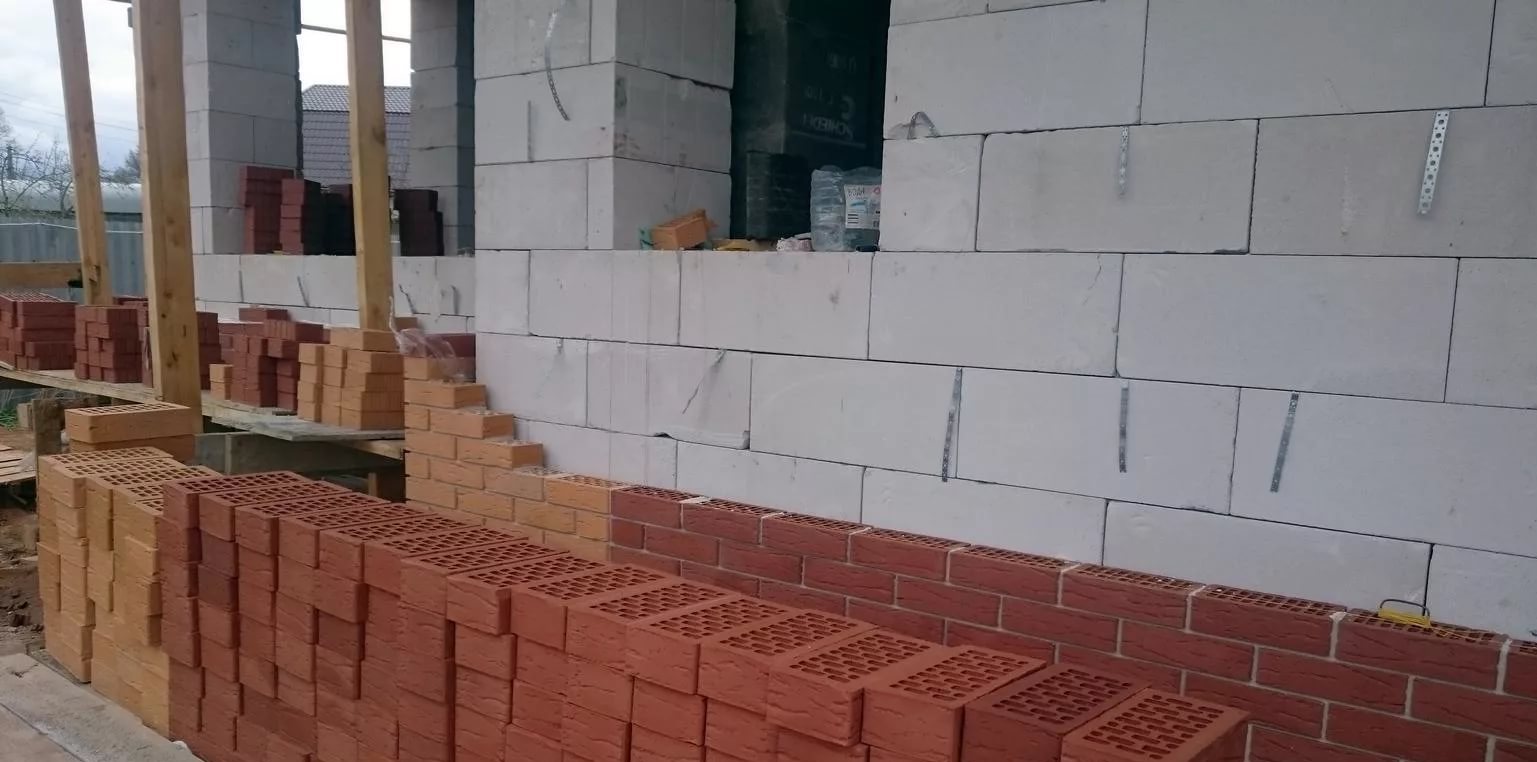
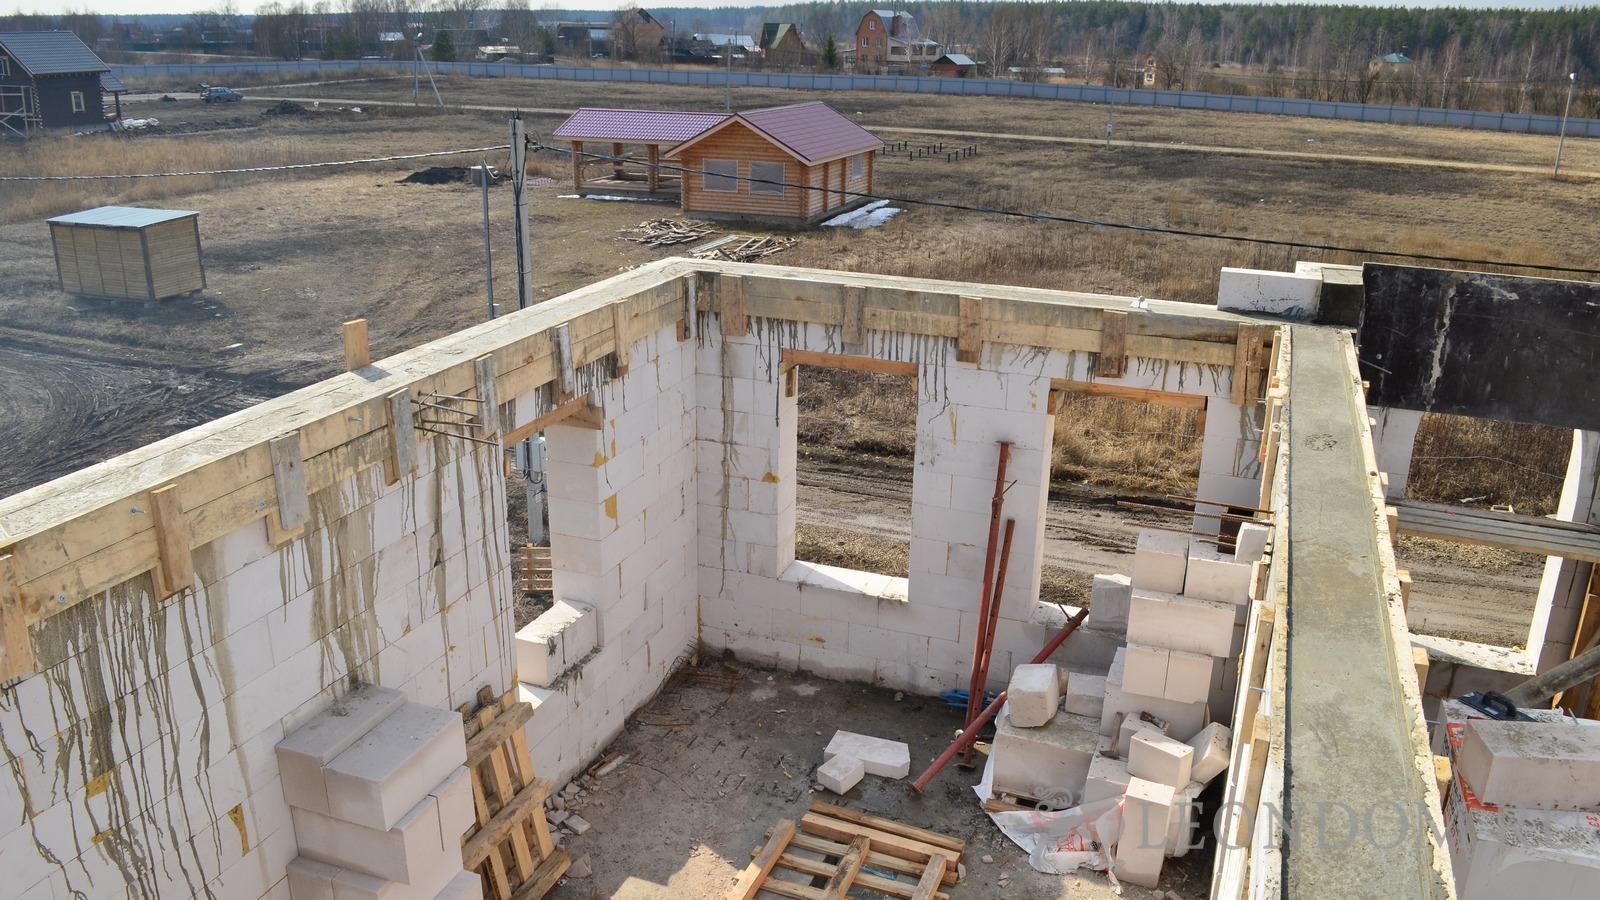
Then you can proceed to the design of wall surfaces. For their erection it is recommended to use gas-blocks, the construction of which is made according to the type of thorn-groove system. Working with such elements is easy and simple. Of course, you can use any other materials. From this technology erection of the house does not change.
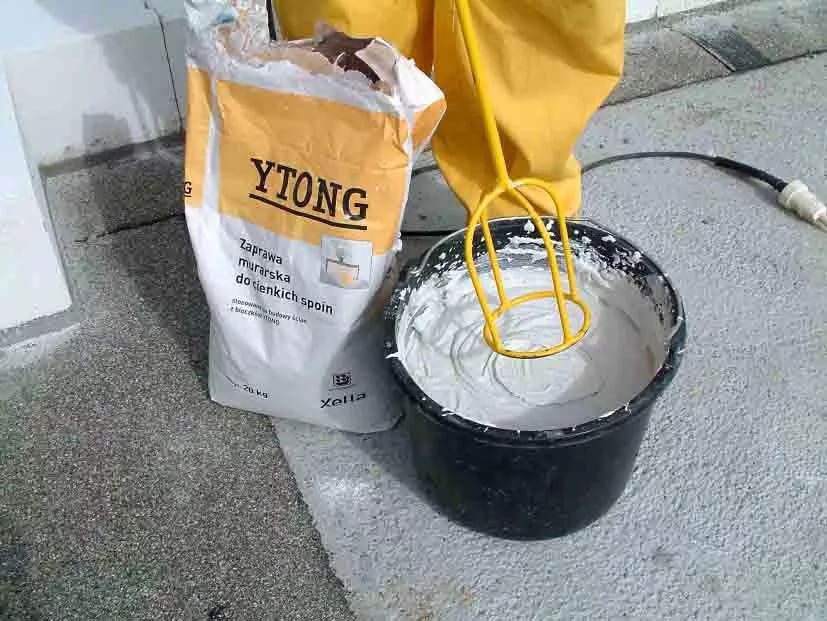
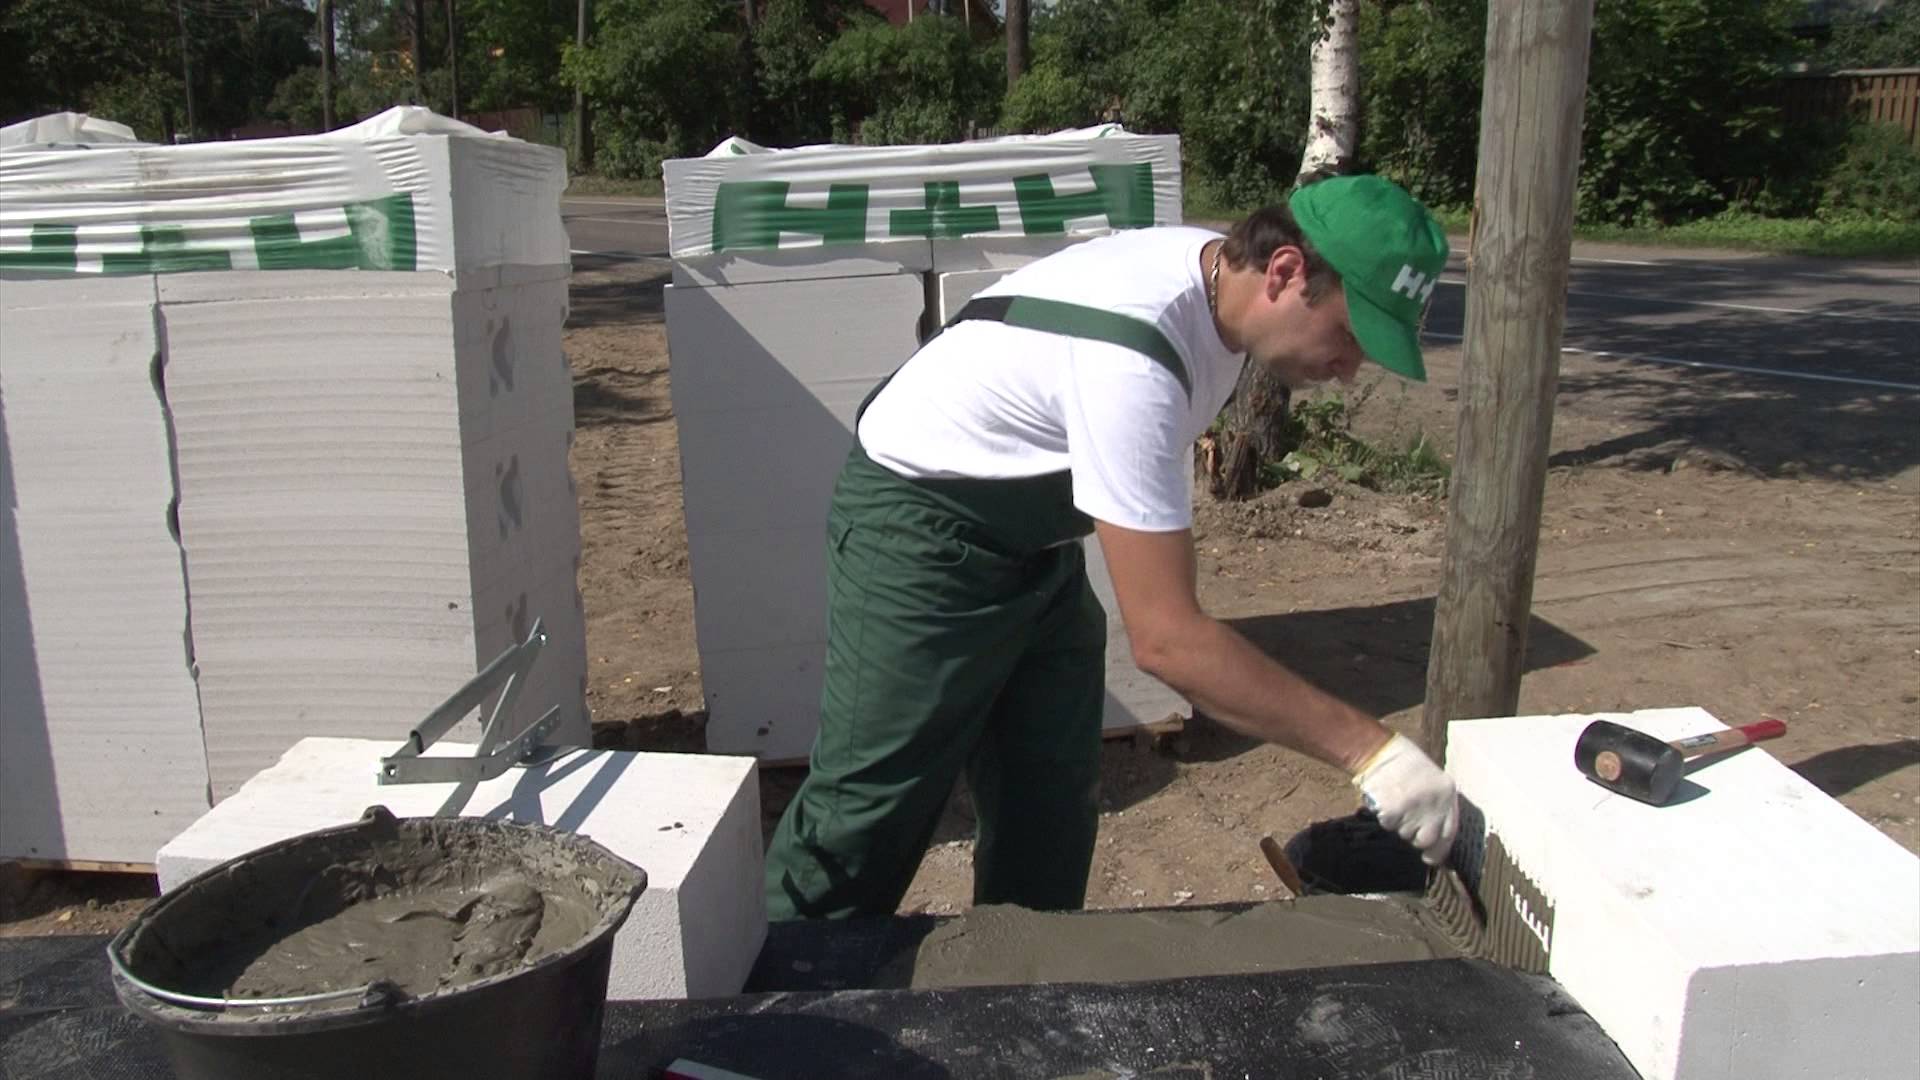
You can start laying the first row of aerated concrete blocks. For its installation it is recommended to use sand-cement mortar, and not special glue. Of course, it will dry longer, but you can adjust the flatness of the starting blocking.
The minimum layer thickness is 10 mm. There are practically no upper limits. Due to this fact, you can smooth out all the differences.
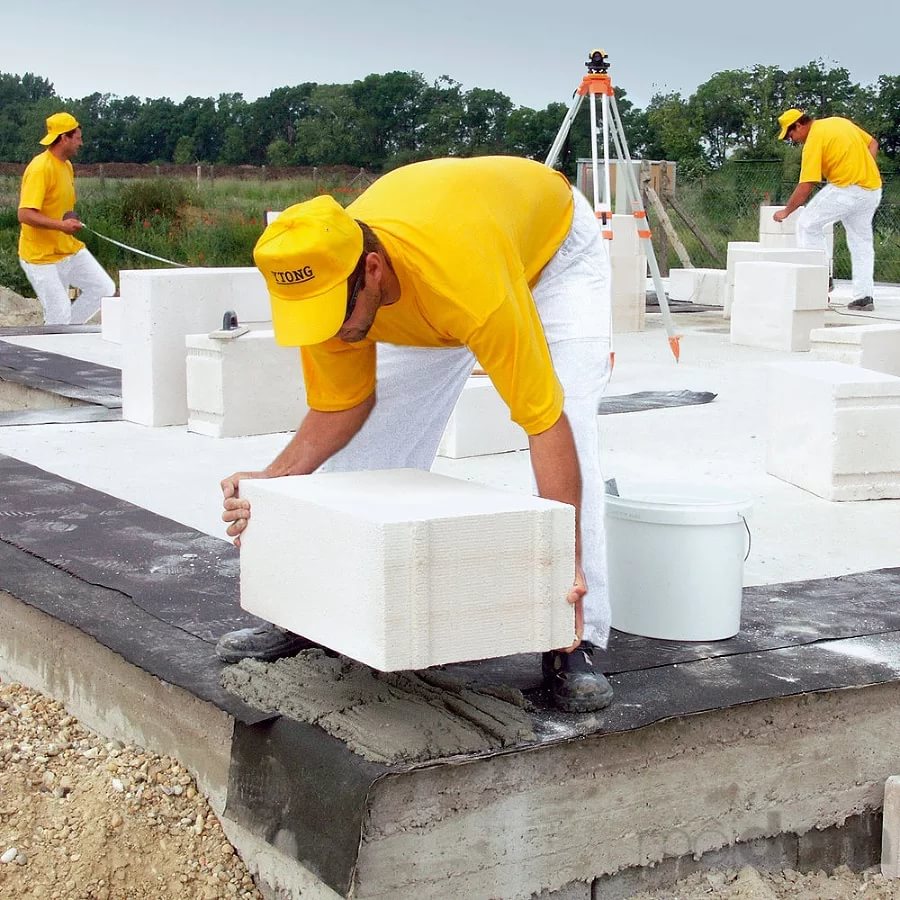
Find the highest angle possible. You need to start the construction of it. Take a fishing line and mark the wall surfaces of the dwelling. After that, you can put the starting aerated concrete block.
Next, you should put a block on each of the remaining corners and stretch the rope between the individual elements. In the process, do not forget to check the flatness of laying each gas block.Lay out the first row around the perimeter of the future structure, as well as in the areas for the manufacture of internal walls.
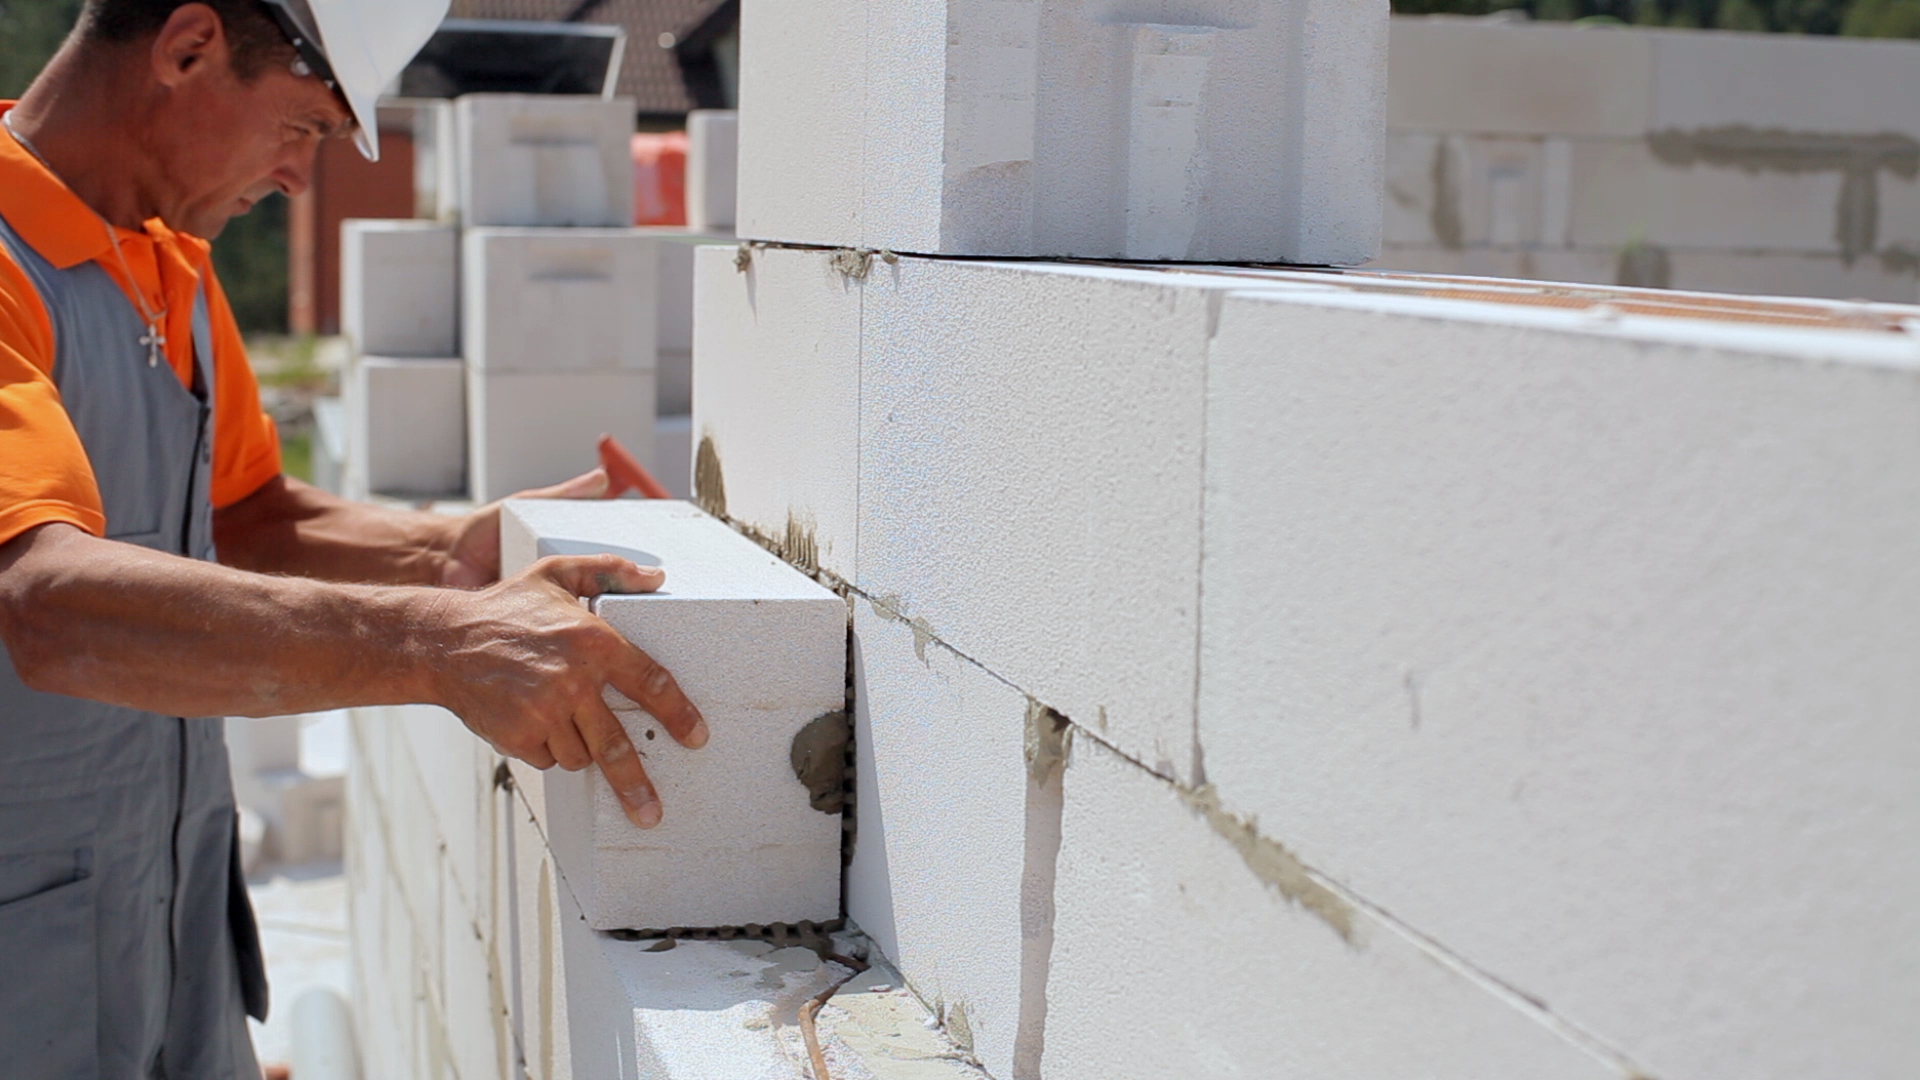
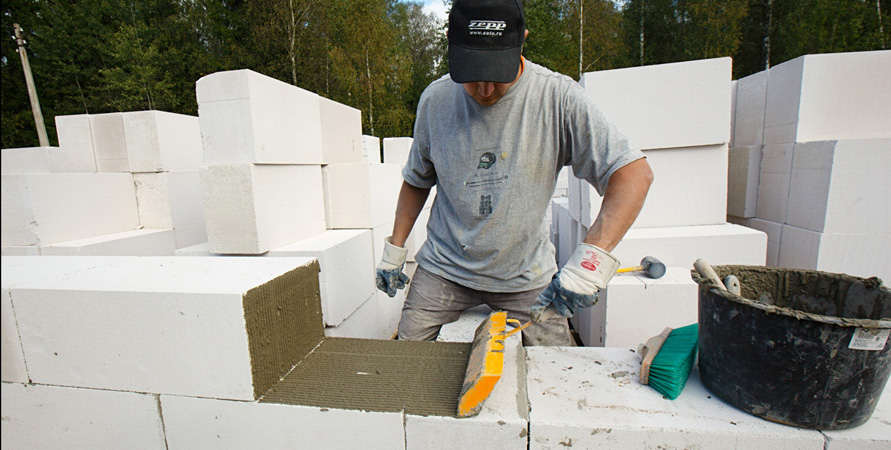
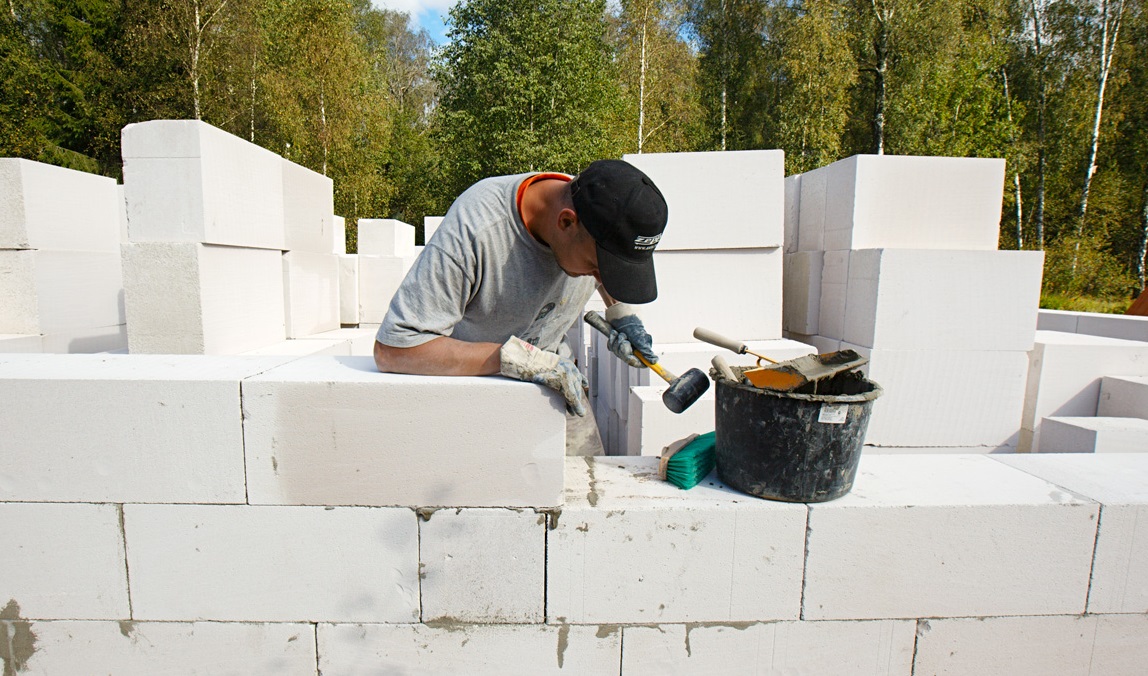
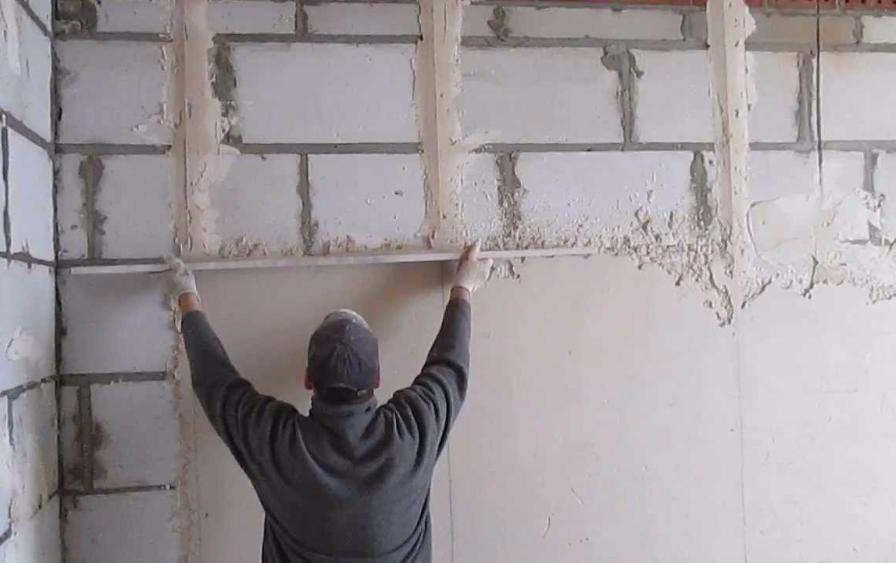
Further it is possible to stack 2 and 3 rows. First you need to take a polish and polish the top of the first row. In the future, in the same way will need to act with all the rows laid. Due to this treatment, you will be able to apply the adhesive layer more evenly.
Then you can put the next rows. It should use a special adhesive composition, designed specifically for aerated concrete masonry. You need to act on the same principle as when installing the starting row - start from the corners. The rows will need to be tied up, shifting to half a block, as is the case with brickwork. The smallest parameter of such a shift is the mark of 80 mm.
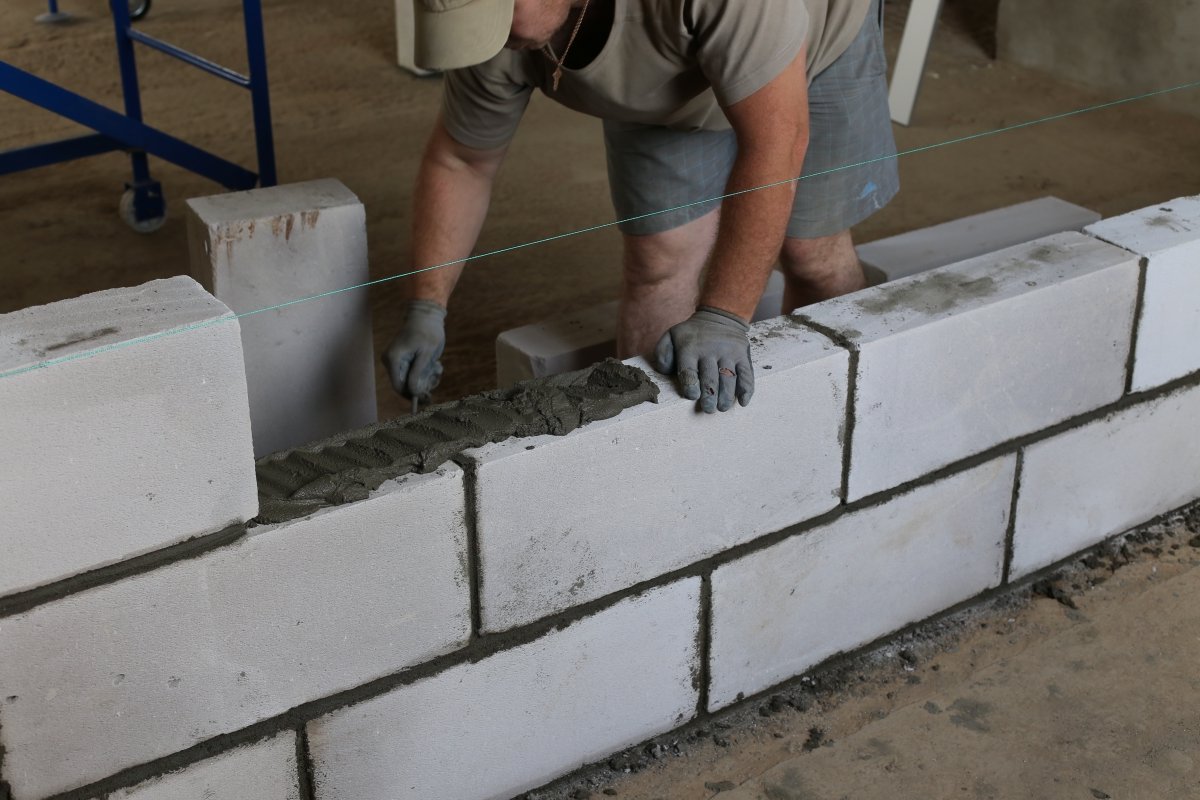
To apply glue, it is recommended to use special buckets equipped with cloves. Consider that aerocrete should be placed as close as possible to each other. Shift them close to each other.
Do not forget to check the flatness of the masonry using the level. If this is required, you need to align the blocks with a rubber mallet. Work at a fast pace, because after the glue dries, it will be too difficult to move the block. After that, you need to build a reinforced belt between floors.
Equip windows and window sills.For example, the last specified parts in height can be 4 masonry rows. Window openings need to be reinforced by completing the installation of 3 rows. Here you need a wall chaser. In the area where there will be a window opening, you need to run 2 parallel lines. Their length should be such that they extend beyond the window by 300 mm from each side. Reinforcement rods should be installed in the grooves and secured with cement-sand composition. Thus, the wall for mounting the window structure will be ready.
You will also need to make jumpers. These components are necessary to strengthen the wall section located above the door and window openings. Note that without jumpers similar structures may collapse.

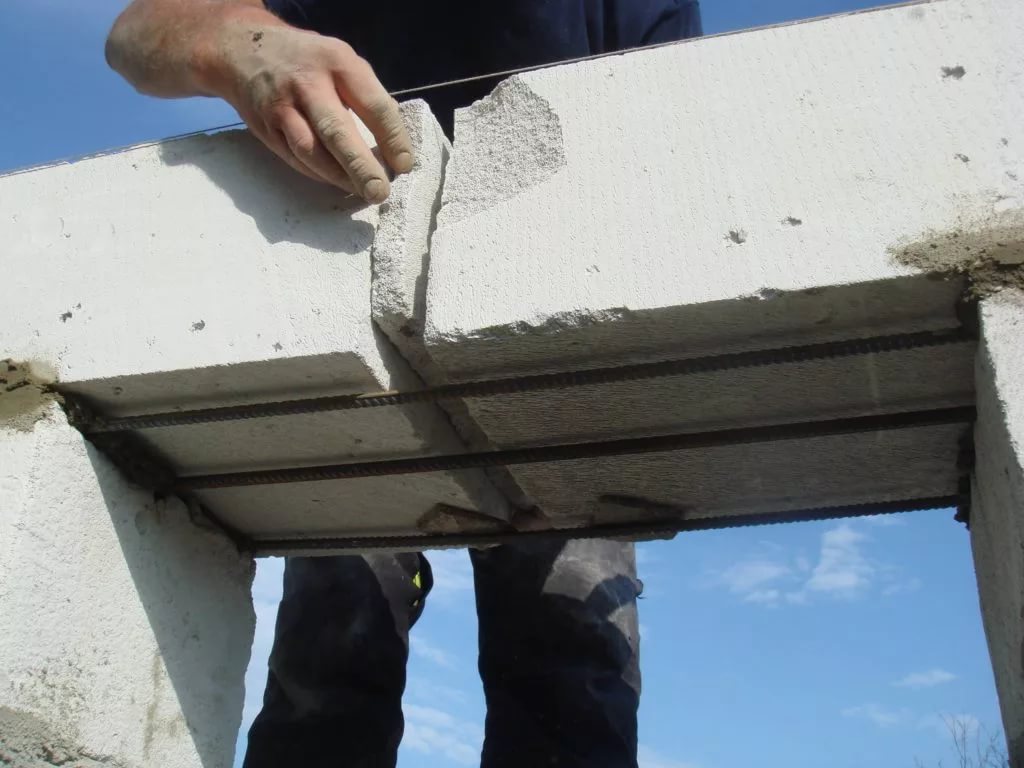
To carry out these works, you can use ready-made U-shaped blocks. They are glued to each other in accordance with the desired length, then set, put the valve and pour the cement mixture. You can also build a formwork.
To make the formwork, it is best to use aerated concrete blocks, the width parameter of which is 10 cm. To obtain such details, it is permissible to cut a conventional block into 3 identical pieces.Then the blocks must be glued to the desired length. Using the wall chaser, make 3 longitudinal grooves, put reinforcement in them, pour cement solution and let the construction dry for a day.
Jumpers should be installed with the side with reinforcing bars down. Fill in the remaining spaces with blocks if required. For this, it is permissible to use pre-cut elements of suitable dimensions.
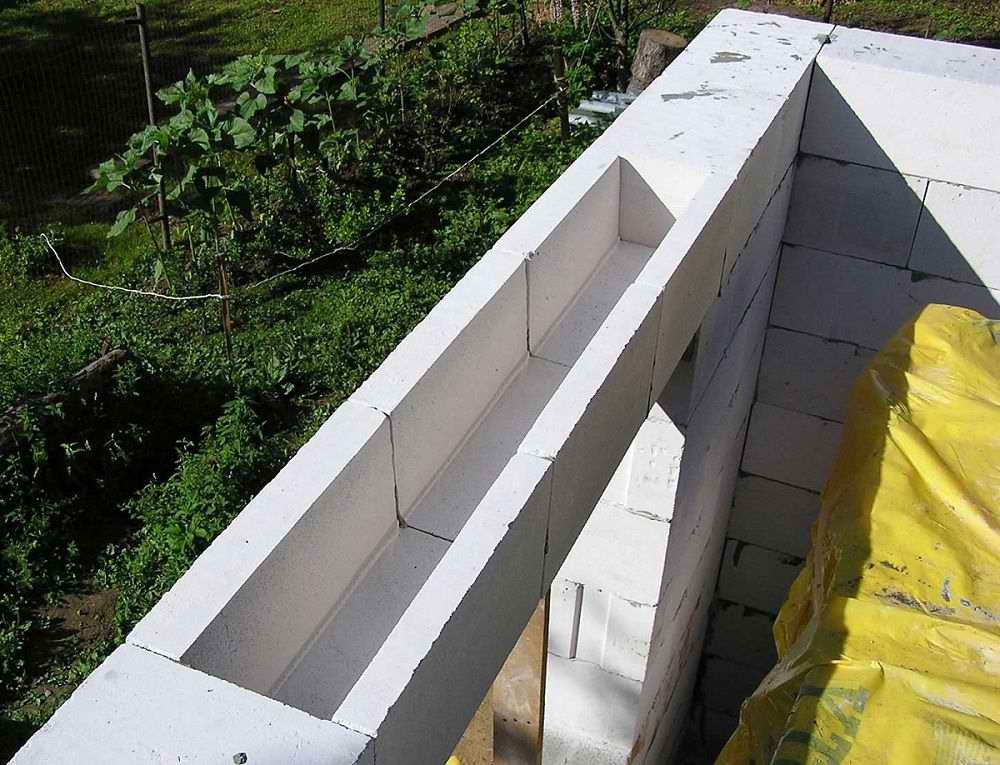
After completing the laying of a row with jumpers, you need to go to fill the reinforced belt. This construction must be made of reinforced concrete. She will be responsible for the integrity of the concrete structure.
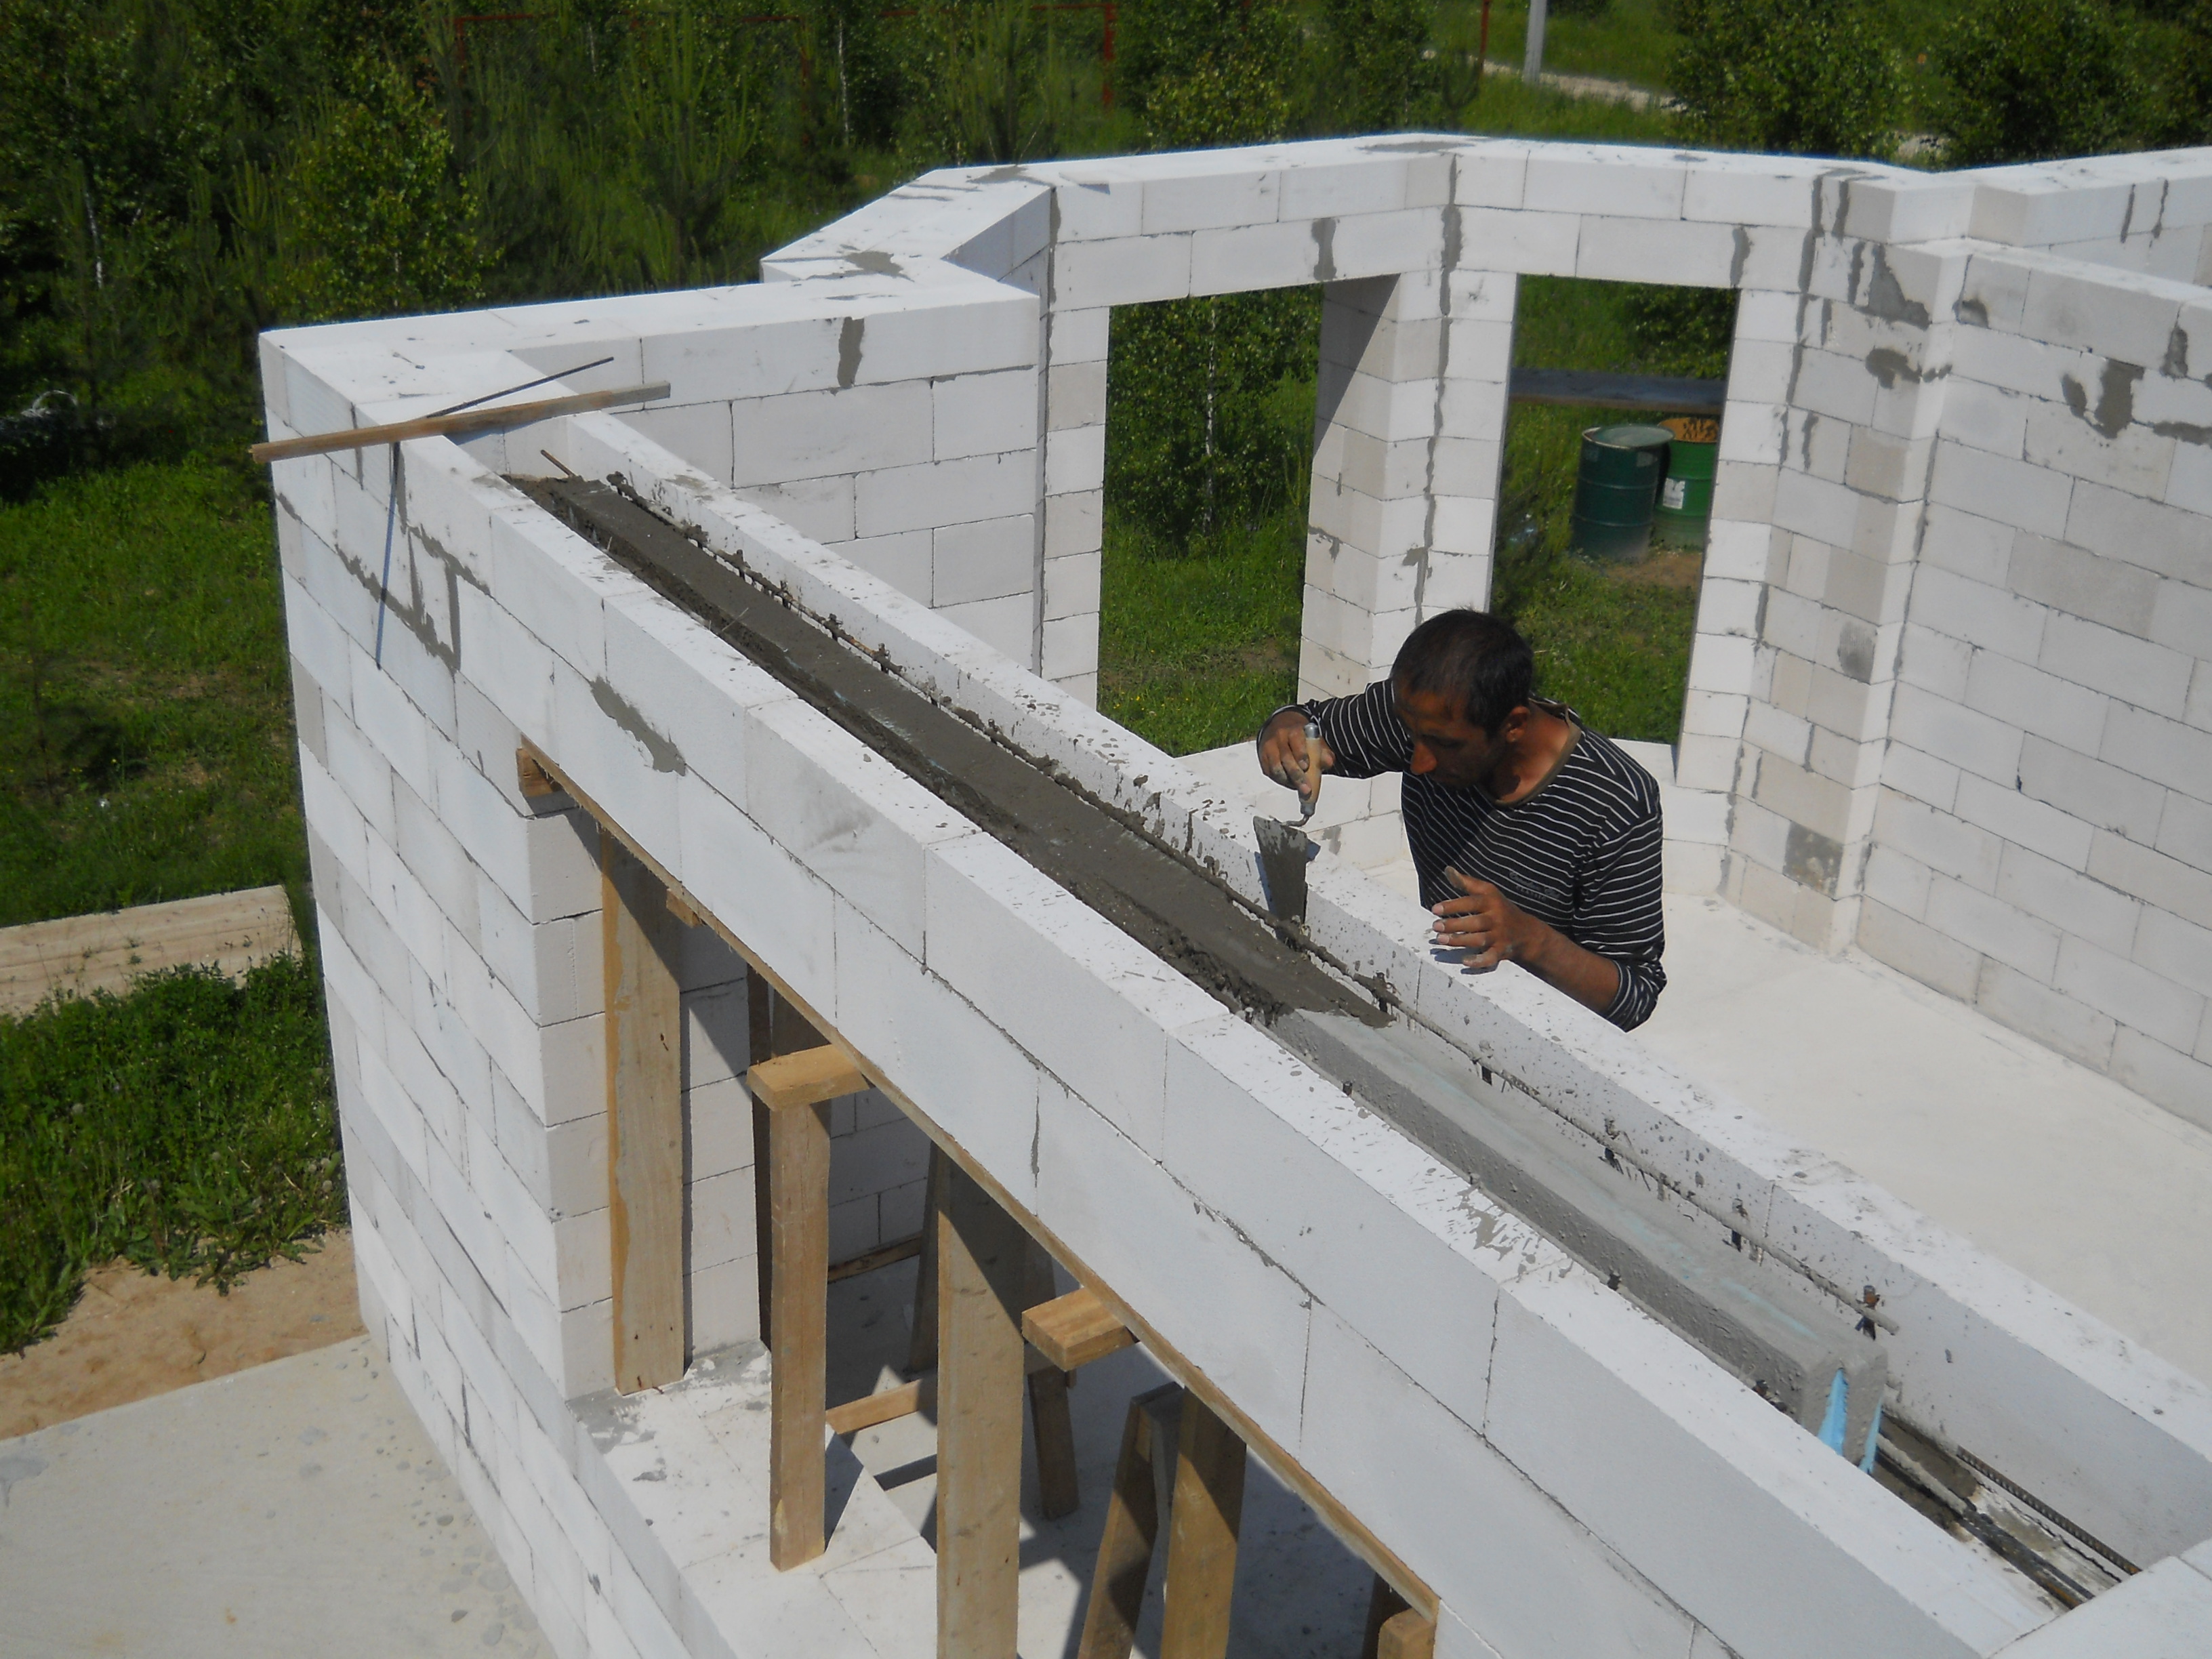

Take concrete blocks measuring 10 cm, form a formwork from them around the perimeter of the walls. Put the reinforcement parts in the ditches, and then pour the cement composition. In the reinforcement should be installed metal studs that will be needed to attach the power plate. They can be made from reinforcement.
There is another good option - to put the threaded rods. At this stage, the box at home can be considered complete.

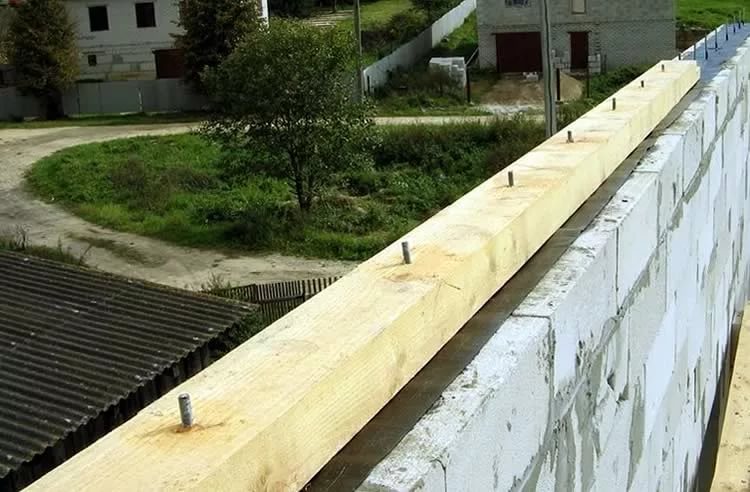
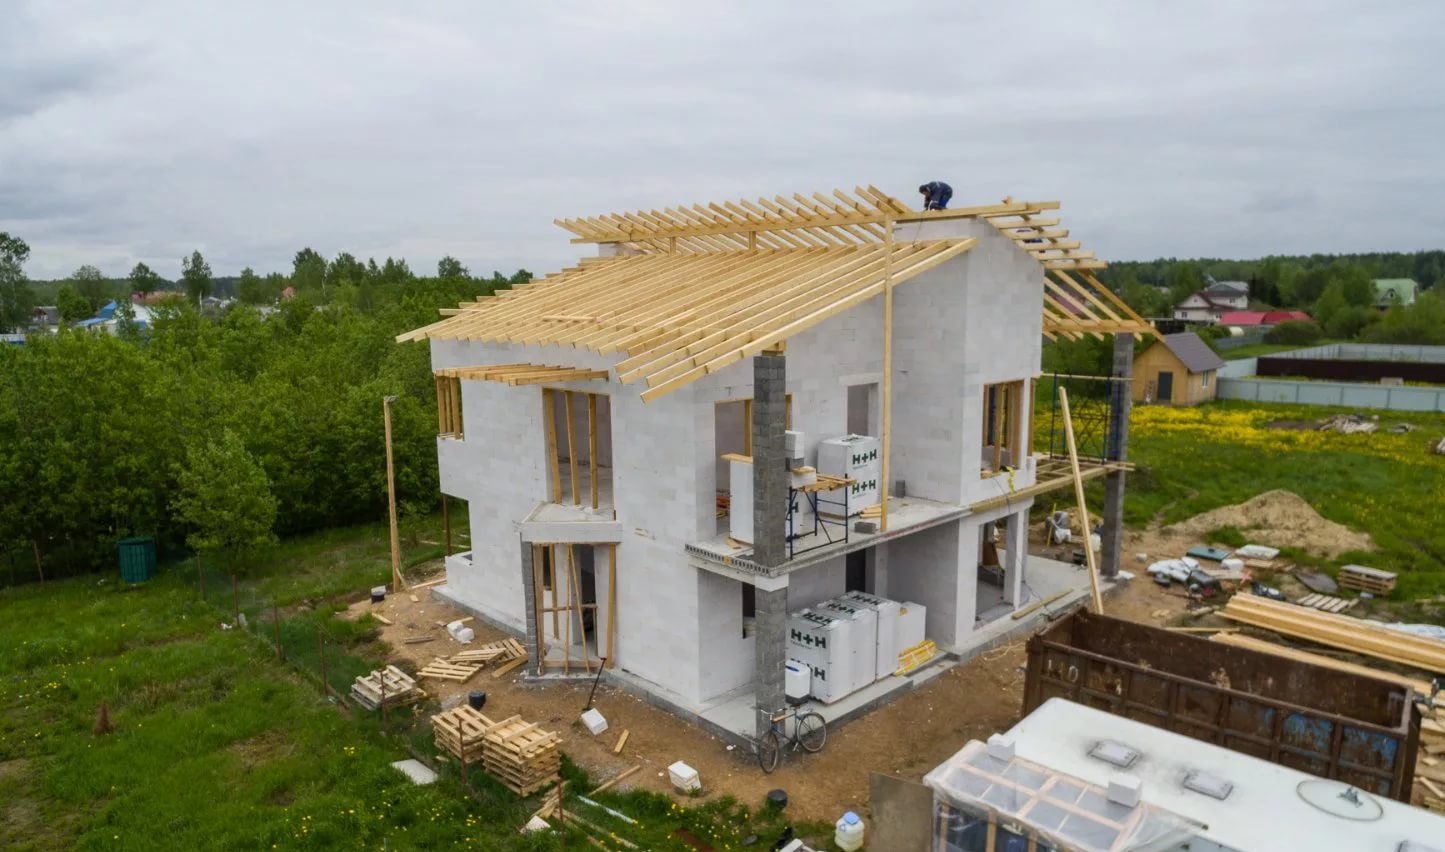
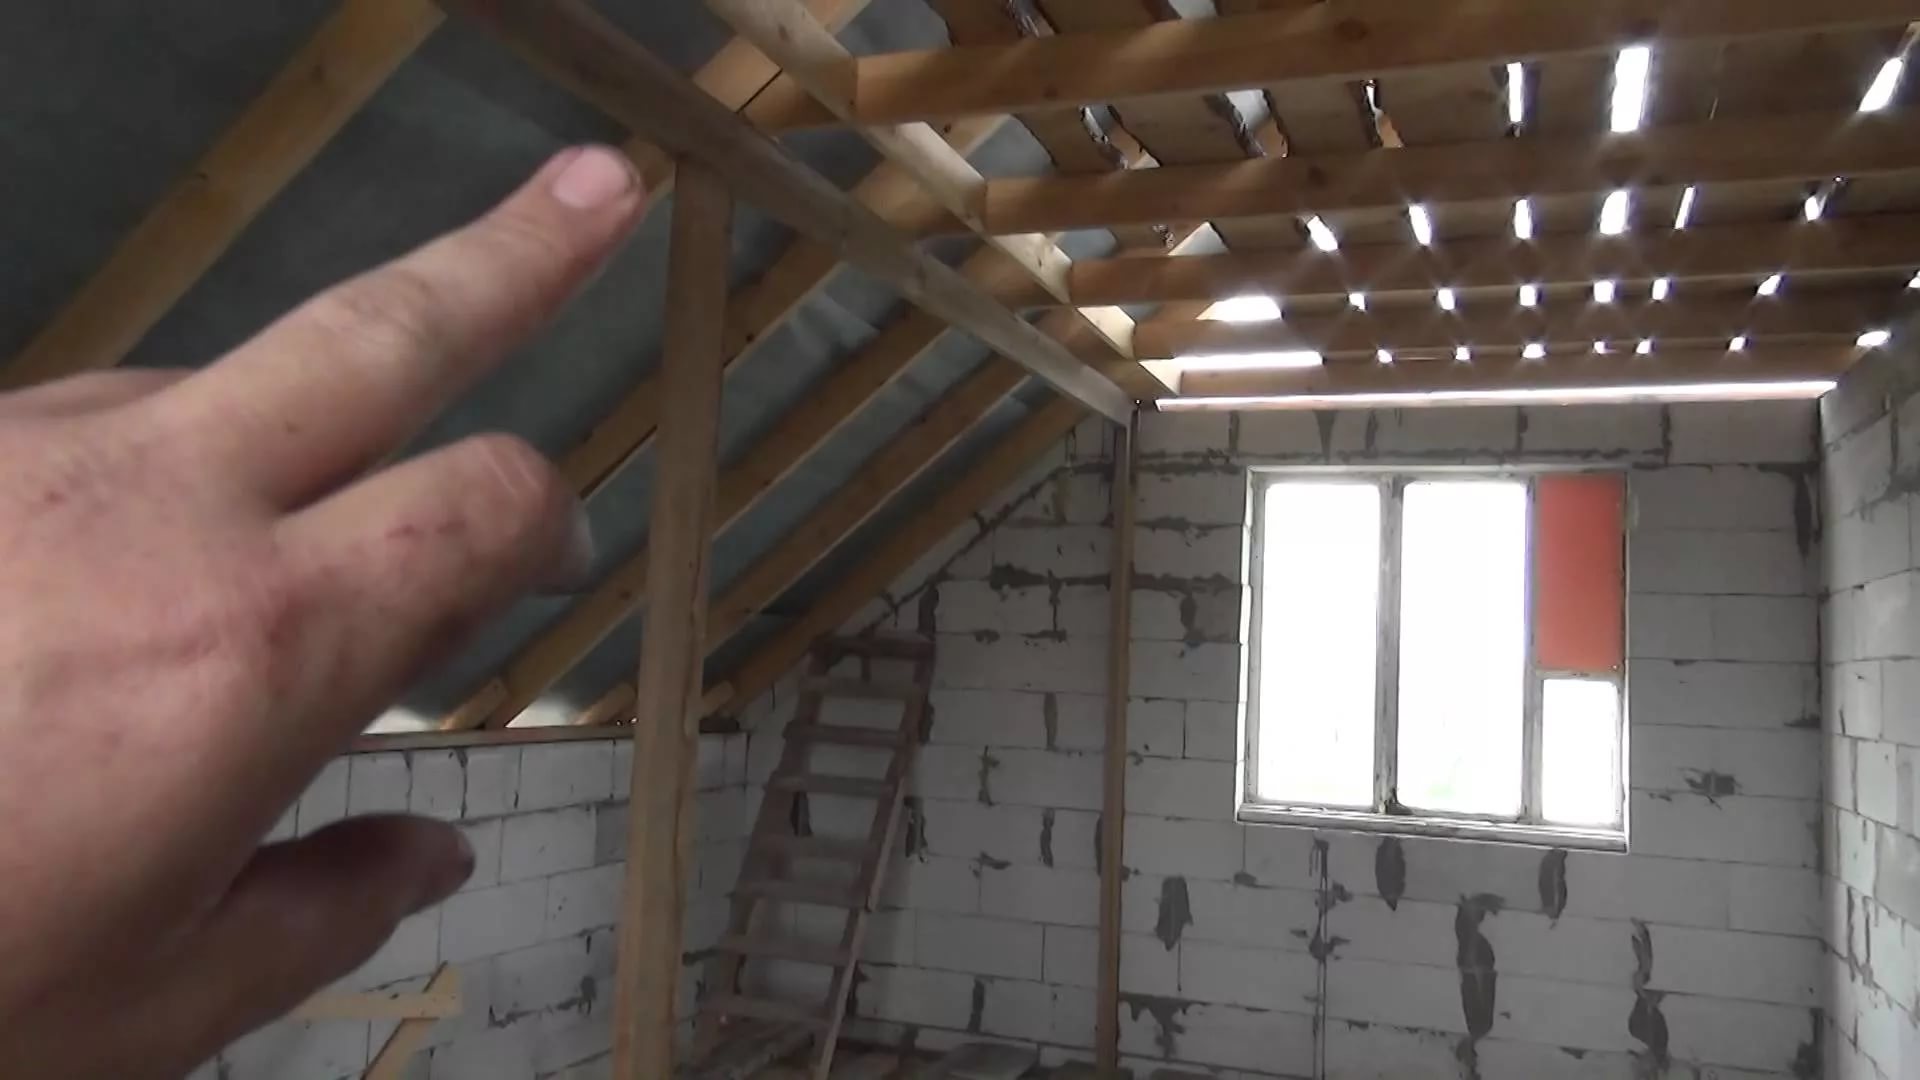
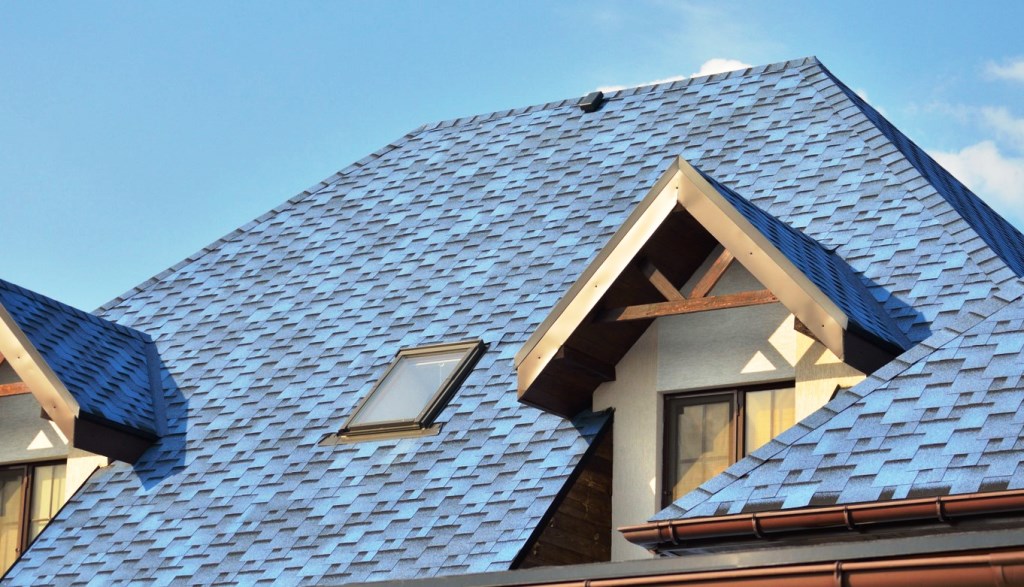
Now you can move on to the construction of another important component of any home - the roof.Mauerlat is already ready with us, now we need to install rafters. In this situation, the actions may be different - it is necessary to rely on the distinctive characteristics of your chosen roof structure.
The choice of homeowners there are several options.
- Roof with one slope. In residential construction, such structures are used less often. Most often, shed roofs are installed over barns and other outbuildings.
- With two ramps. The gable roof is quite acceptable to use in a small country house.
- Mansard, hip and other complicated structures. Such types of roofs are the best options for arranging a full-fledged residential building of aerated concrete.
It does not matter what kind of roof structure you have chosen for your home.
In any case, it will need to be supplemented with insulating materials:
- waterproofing;
- thermal insulation;
- vapor barrier.
In some situations (for example, if we are talking about the attic arrangement), insulation is additionally installed.

A waterproofing layer should be put on the rafters. It is best to use for this wooden slats.These parts will perform the function of a contra-grille, on which the battens of the sheathing intended for the roof will subsequently be fixed.
A warming material should be installed under the waterproofing layer in the gap between the parts of the batten. Most homeowners opt for this mineral wool. Of course, you can give preference to any other material, for example, polystyrene foam or foam. Heat insulation material should be covered with vapor barrier film. It should be attached to the truss parts using wooden slats.

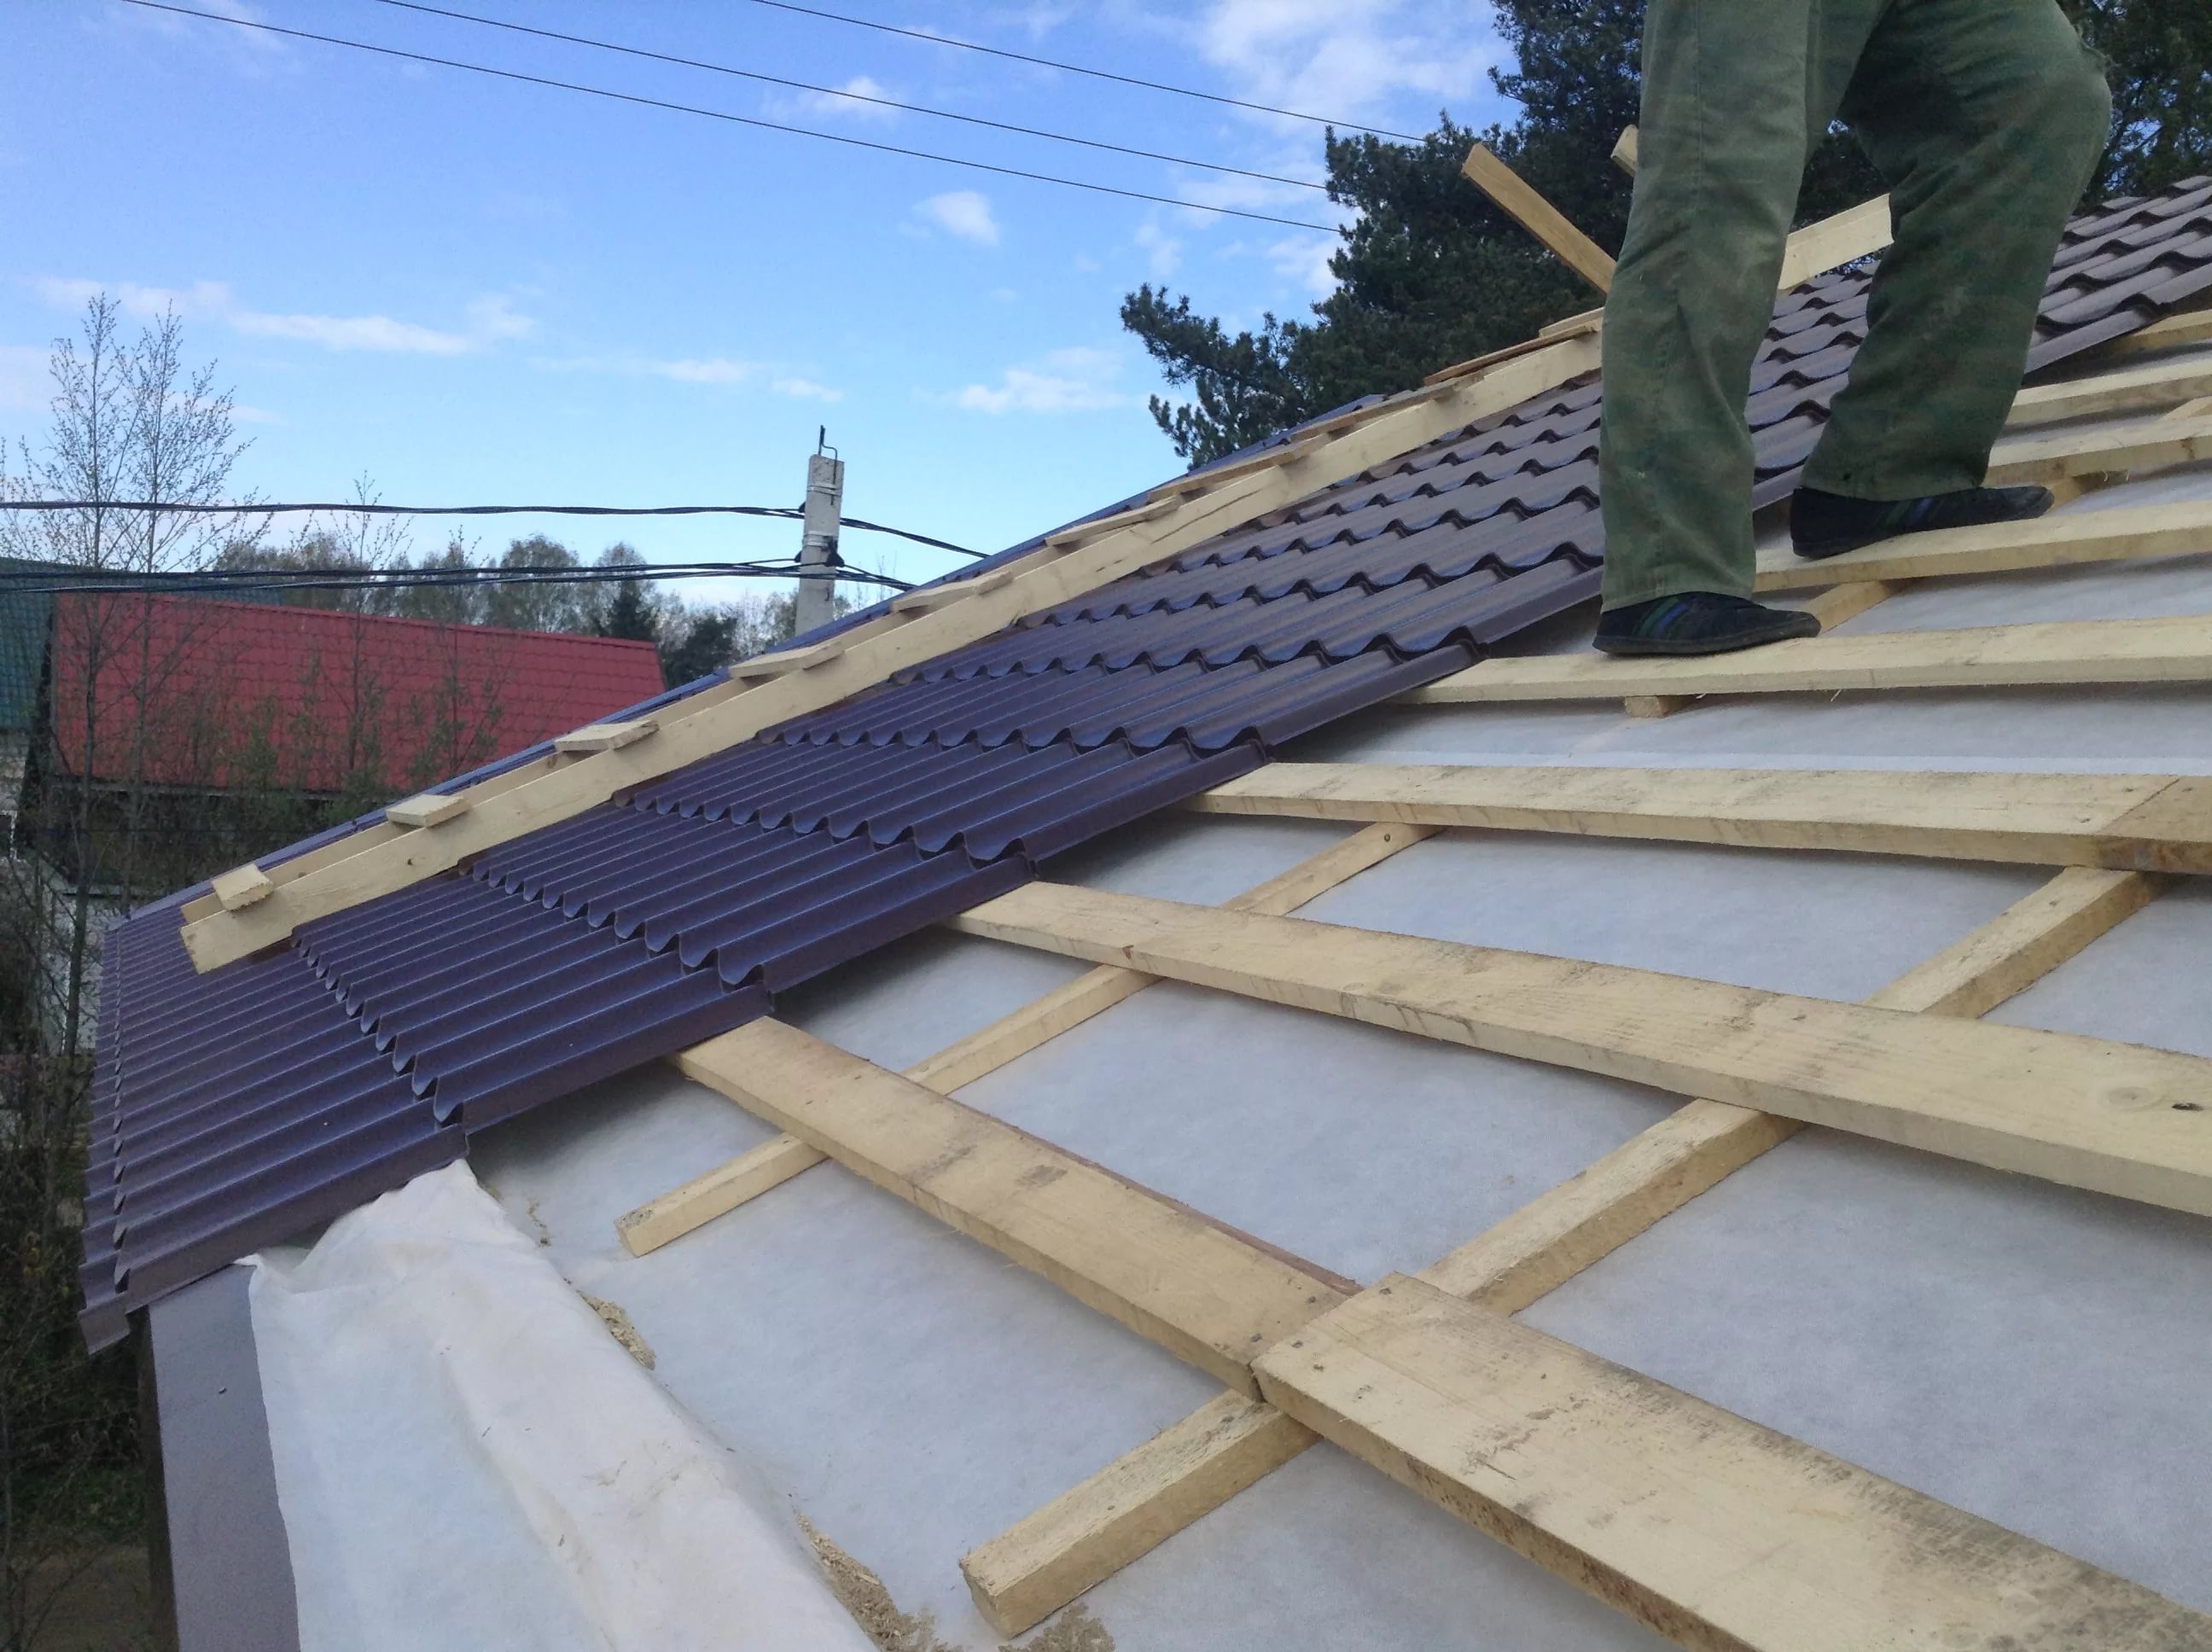
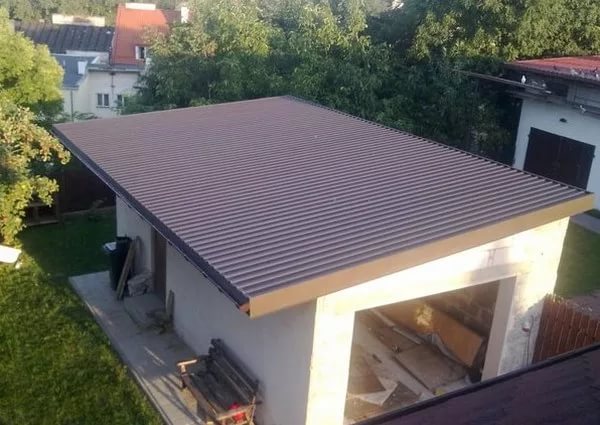
Completing all the above stages of work, you need to lay the finishing roofing. In this case, you need to focus on the budget and personal wishes.
The most popular materials that are used for roofing are:
- bitumen tiles;
- slate;
- professional flooring;
- metal tile;
- ceramic tile.
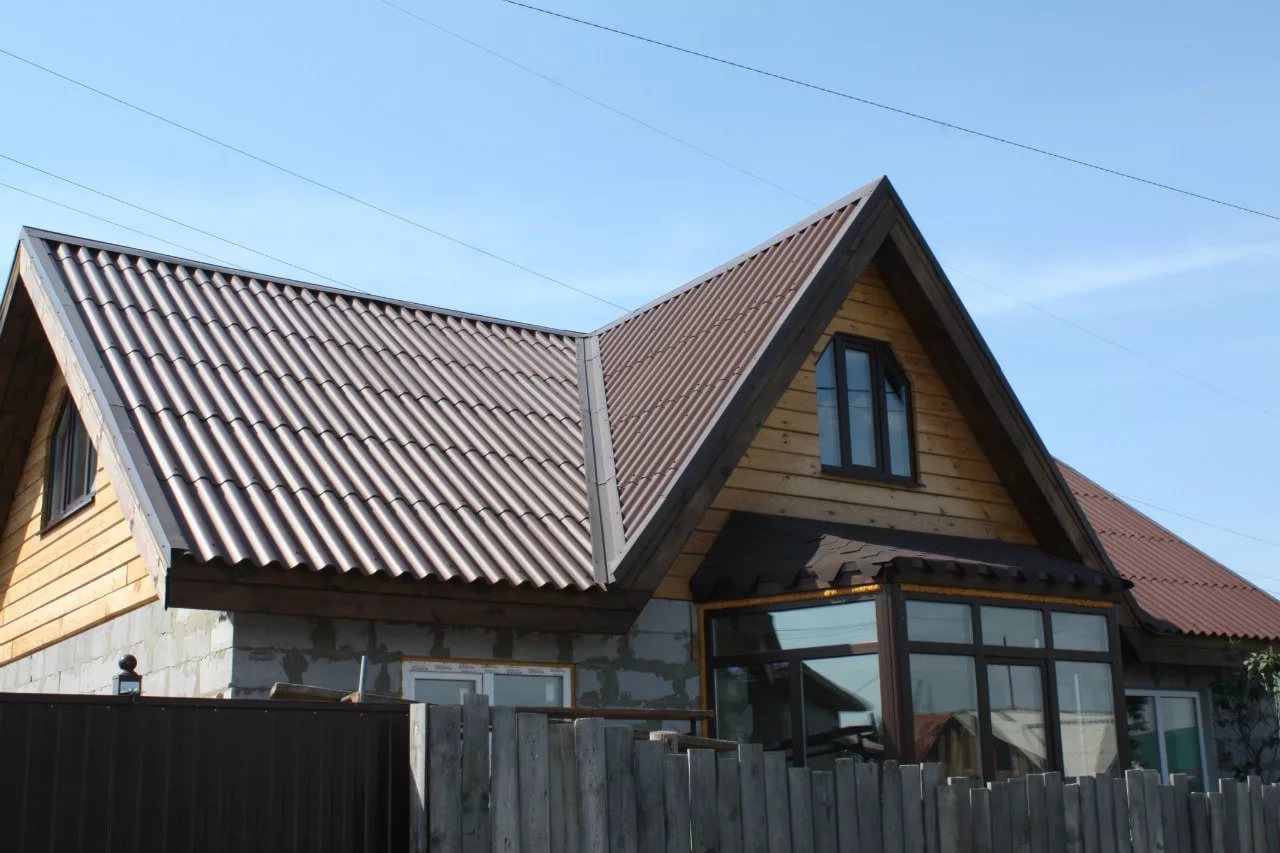
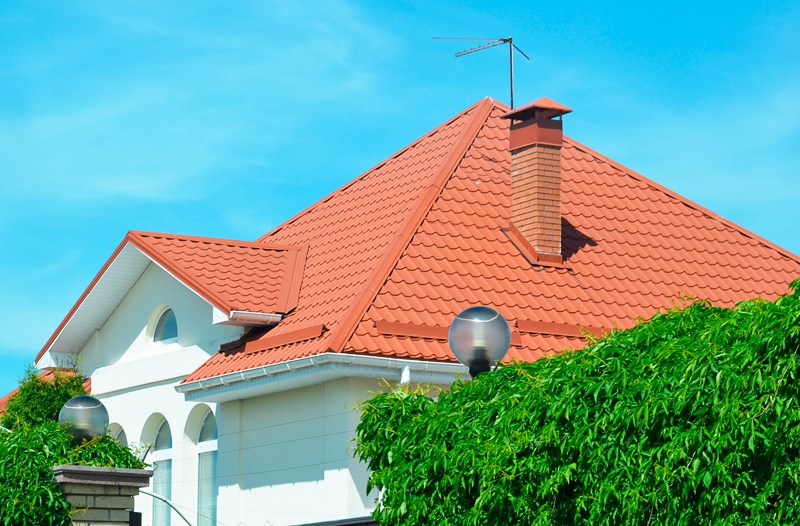
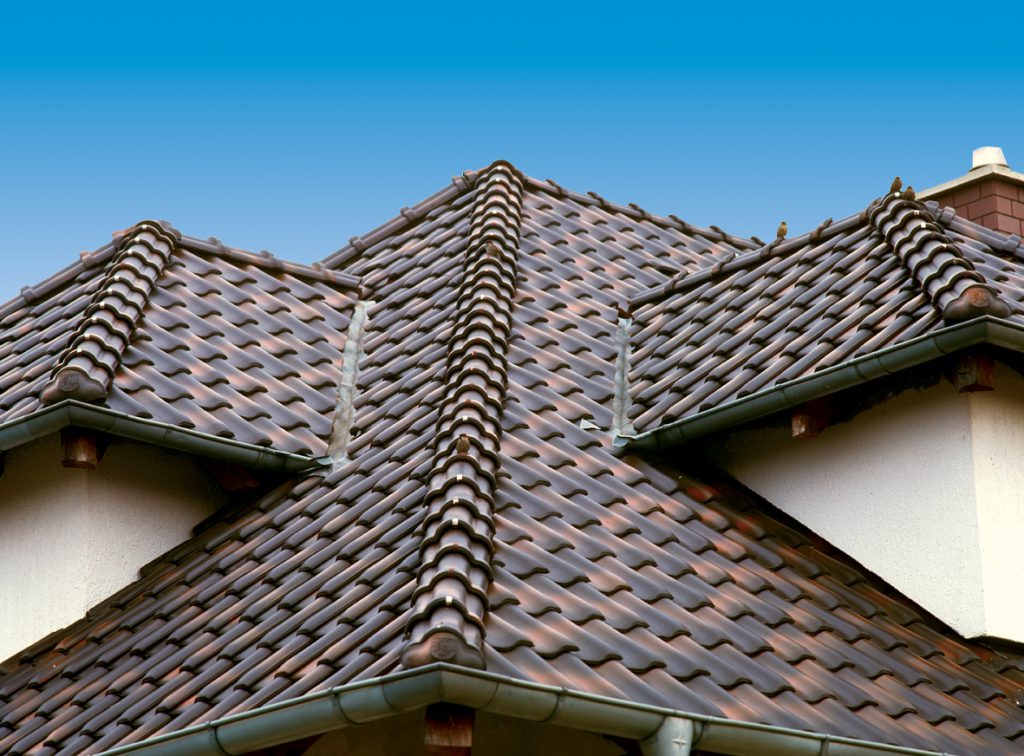
Every type of roofing should be laid starting from the bottom. As a result, the sheets will become fixed in such a way that the sedimentary moisture will flow through them without falling under the surface of the flooring.If you have completed all the specified stages of construction work, then we can assume that the box and the roof of the block house are ready. In the future, you will need to do the installation of engineering communications and decoration of the building.
Interior finish
The gasblock house requires high-quality interior decoration. Fortunately, today in the shops of building and finishing materials a lot of reliable and durable decorative coatings are sold, which can be applied to the gas block without causing any harm to it. Finishing materials must meet the requirements specified in GOST and SNiP.
To decorate the ceiling in such a block house, you can use the following methods:
- cover the base with plaster, and then paint or install sheets GKL;
- with the help of drywall to build various multi-level structures with built-in lights.
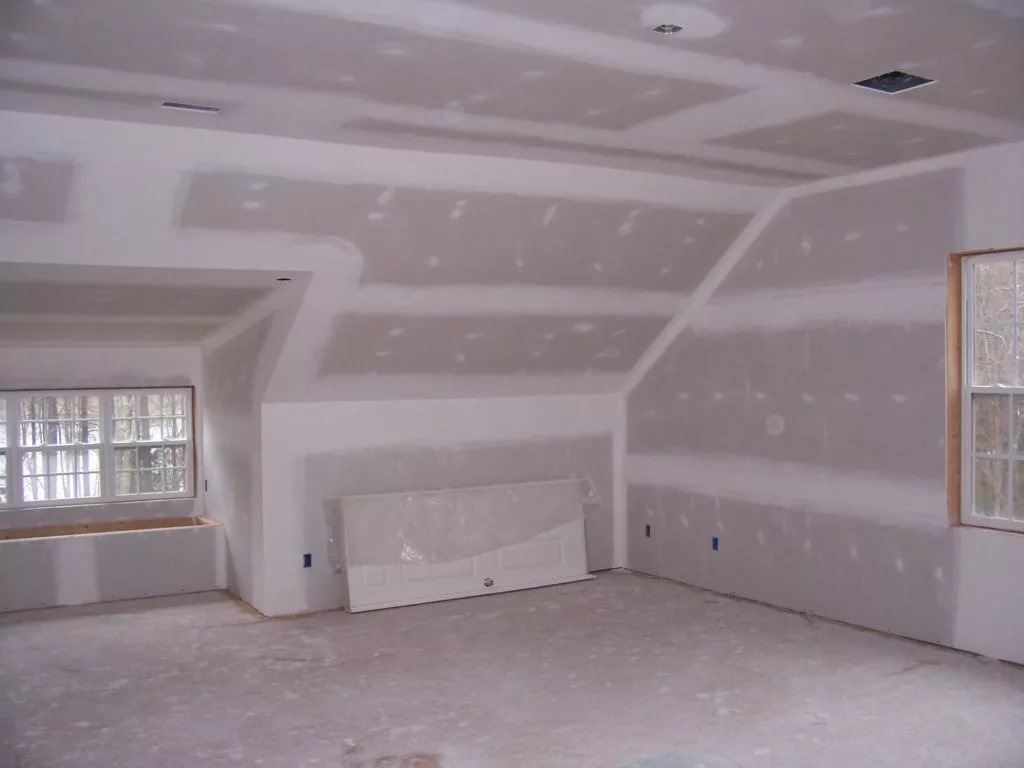
Drywall is attached to the ceiling base on a pre-prepared frame. Plaster coating in this case is not required, but insulation can be provided.
As for the walls, here before applying the finishing coating, you first need to make a high-quality alignment. It is mandatory to cover wall ceilings with a primer and lay a reinforcing mesh. This is due to the fact that the characteristics of the adhesion of aerated concrete will not allow the finishing materials to be firmly joined together without undue influence.

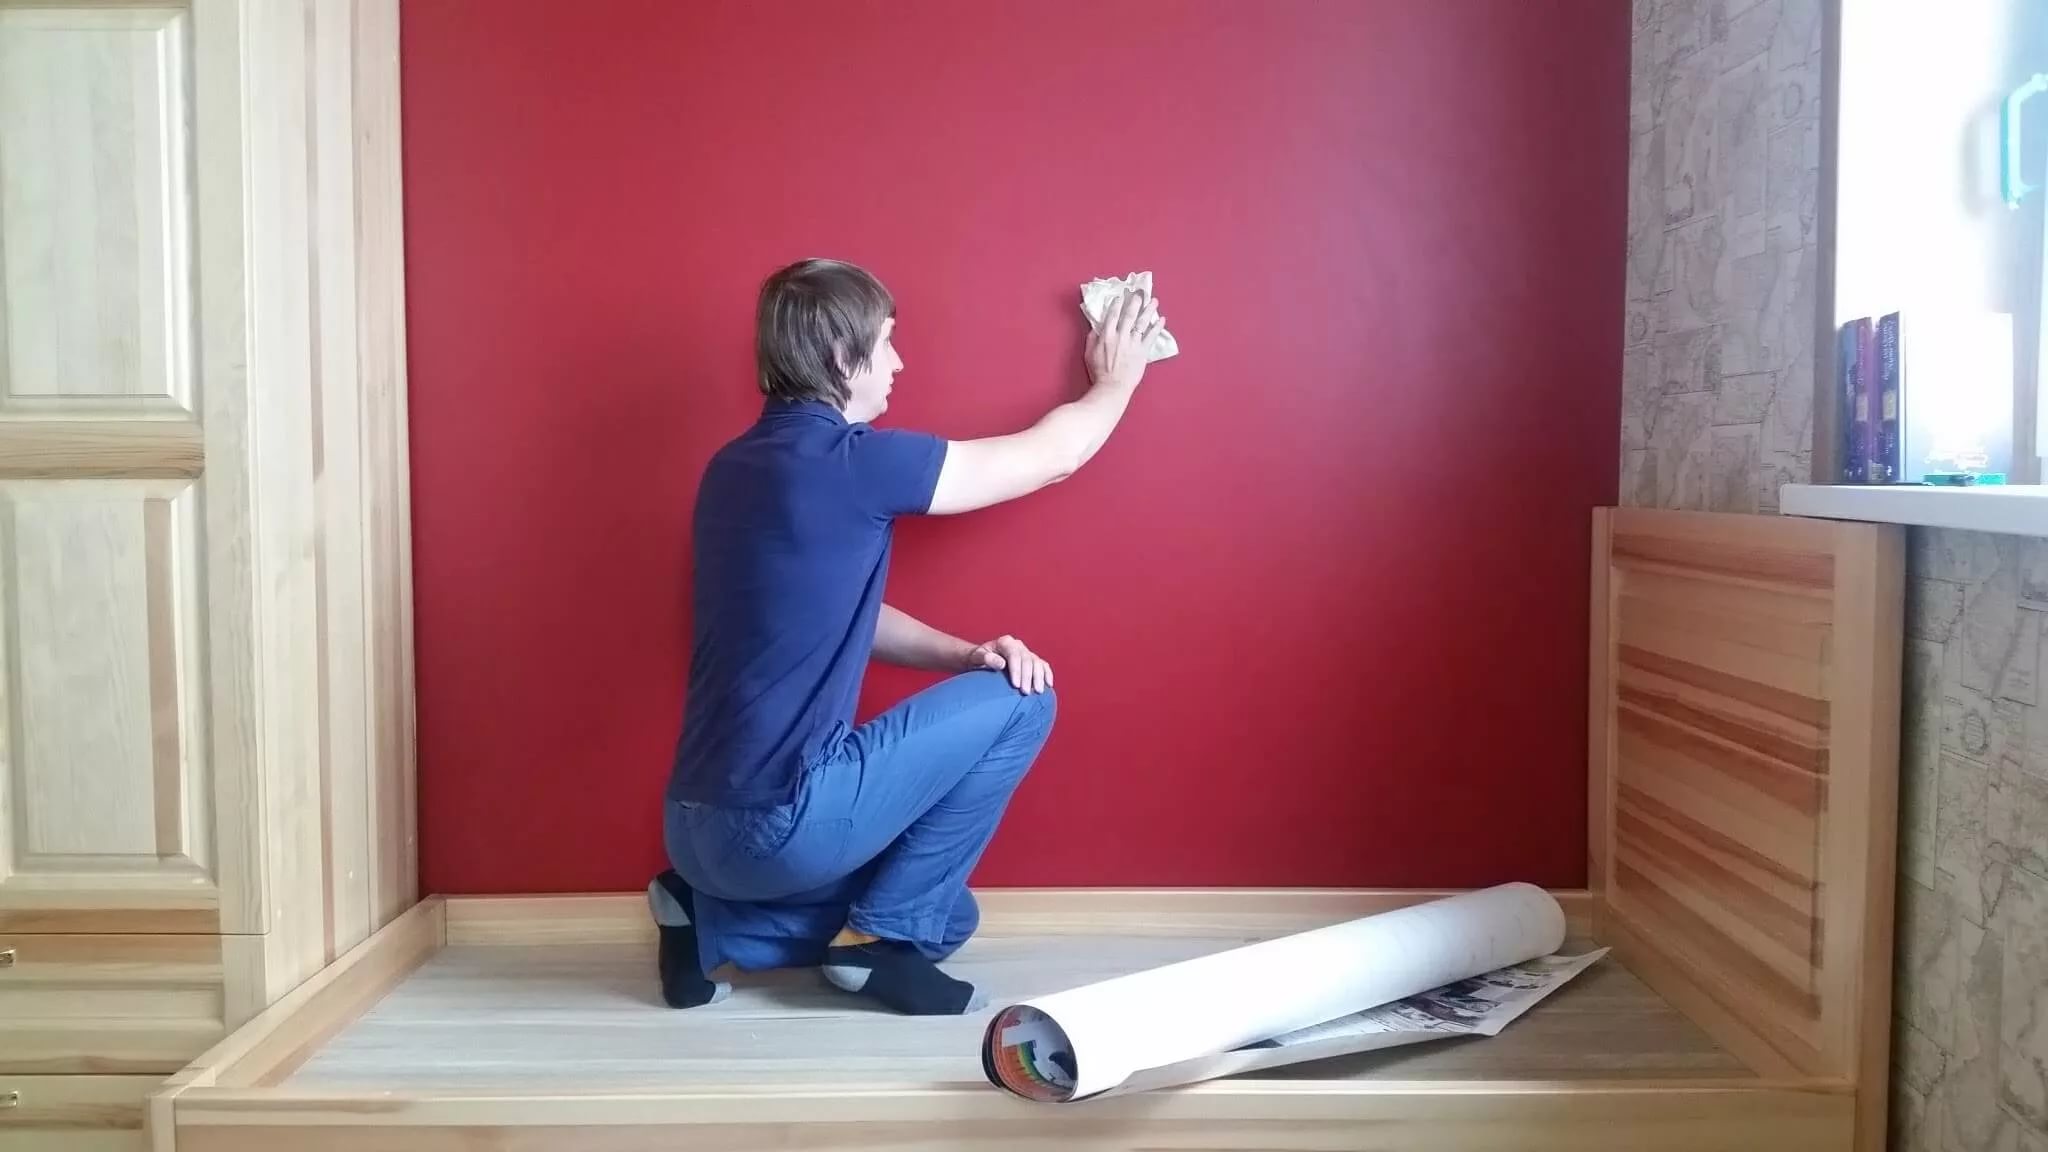
Prepared wall surfaces can be painted, wallpaper or decorated with decorative plaster mixture. Some areas can be covered with spectacular decorative stone or other similar material. You can focus on the corners, window openings, or select certain functional areas.
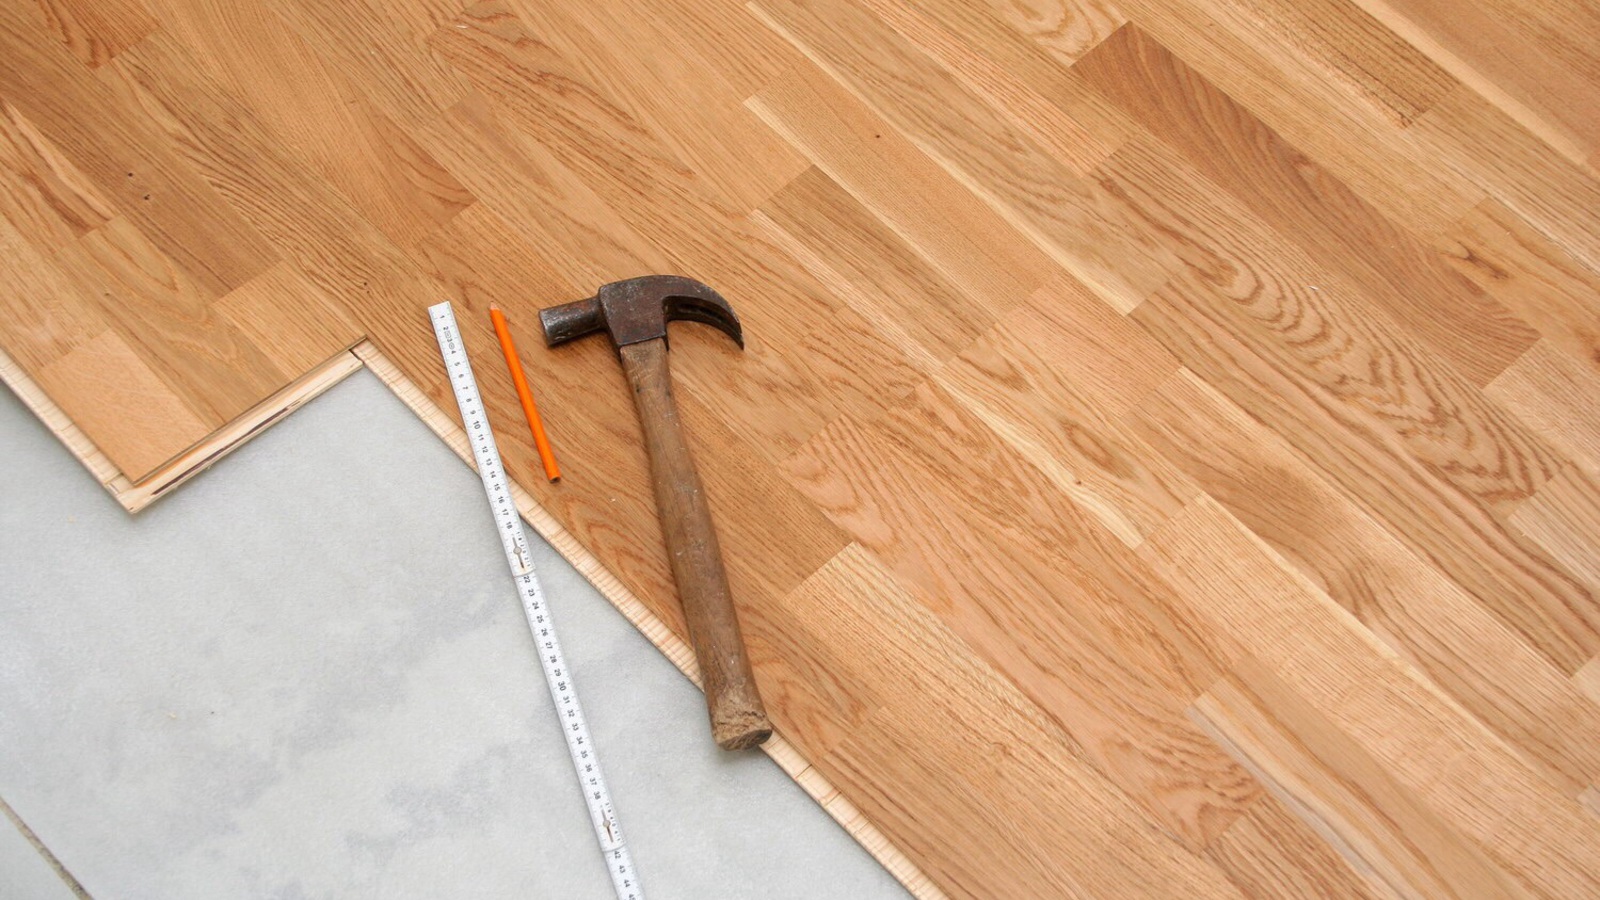
Such materials as laminate, parquet or linoleum are most often laid on the floor. In the kitchen, in the bathroom and in the hallway, porcelain stoneware or ceramic tiles are mainly installed. Before laying decorative flooring materials, first install wooden logs. After that, the floor is warmed and covered with a board.
If you want to diversify the interior a bit, you can turn to beautiful arched structures. Most often they are made from gypsum sheets. This material is easily processed, so it is used inside a wide variety of rooms.With the help of drywall, you can arrange in your home construction of almost any shape and configuration.
Recommendations
- The main advice that experts give is not to save on building a foundation. Do not forget that such a material as aerated concrete does not tolerate any ground movement, therefore, it is necessary to choose a suitable structure based on the characteristics of the soil and the characteristics of gas blocks.
- The project of the future block house is recommended to be ordered in the respective organizations, since any problems and mistakes made in the documentation can lead to dire consequences. The drawings of the structures of aerated concrete will determine the whole process of the future construction work.
- If a crack appeared on the aerated concrete block, it most likely indicates a shrinkage of the foundation, which was installed without adhering to the appropriate technology. Do not worry, such material can be restored, having missed the defective areas with a plaster mix.
- Do not neglect the installation of a reinforcing belt. It is necessary for any home, built of block materials. Thanks to this component, the building acquires strength, reliability and stability.
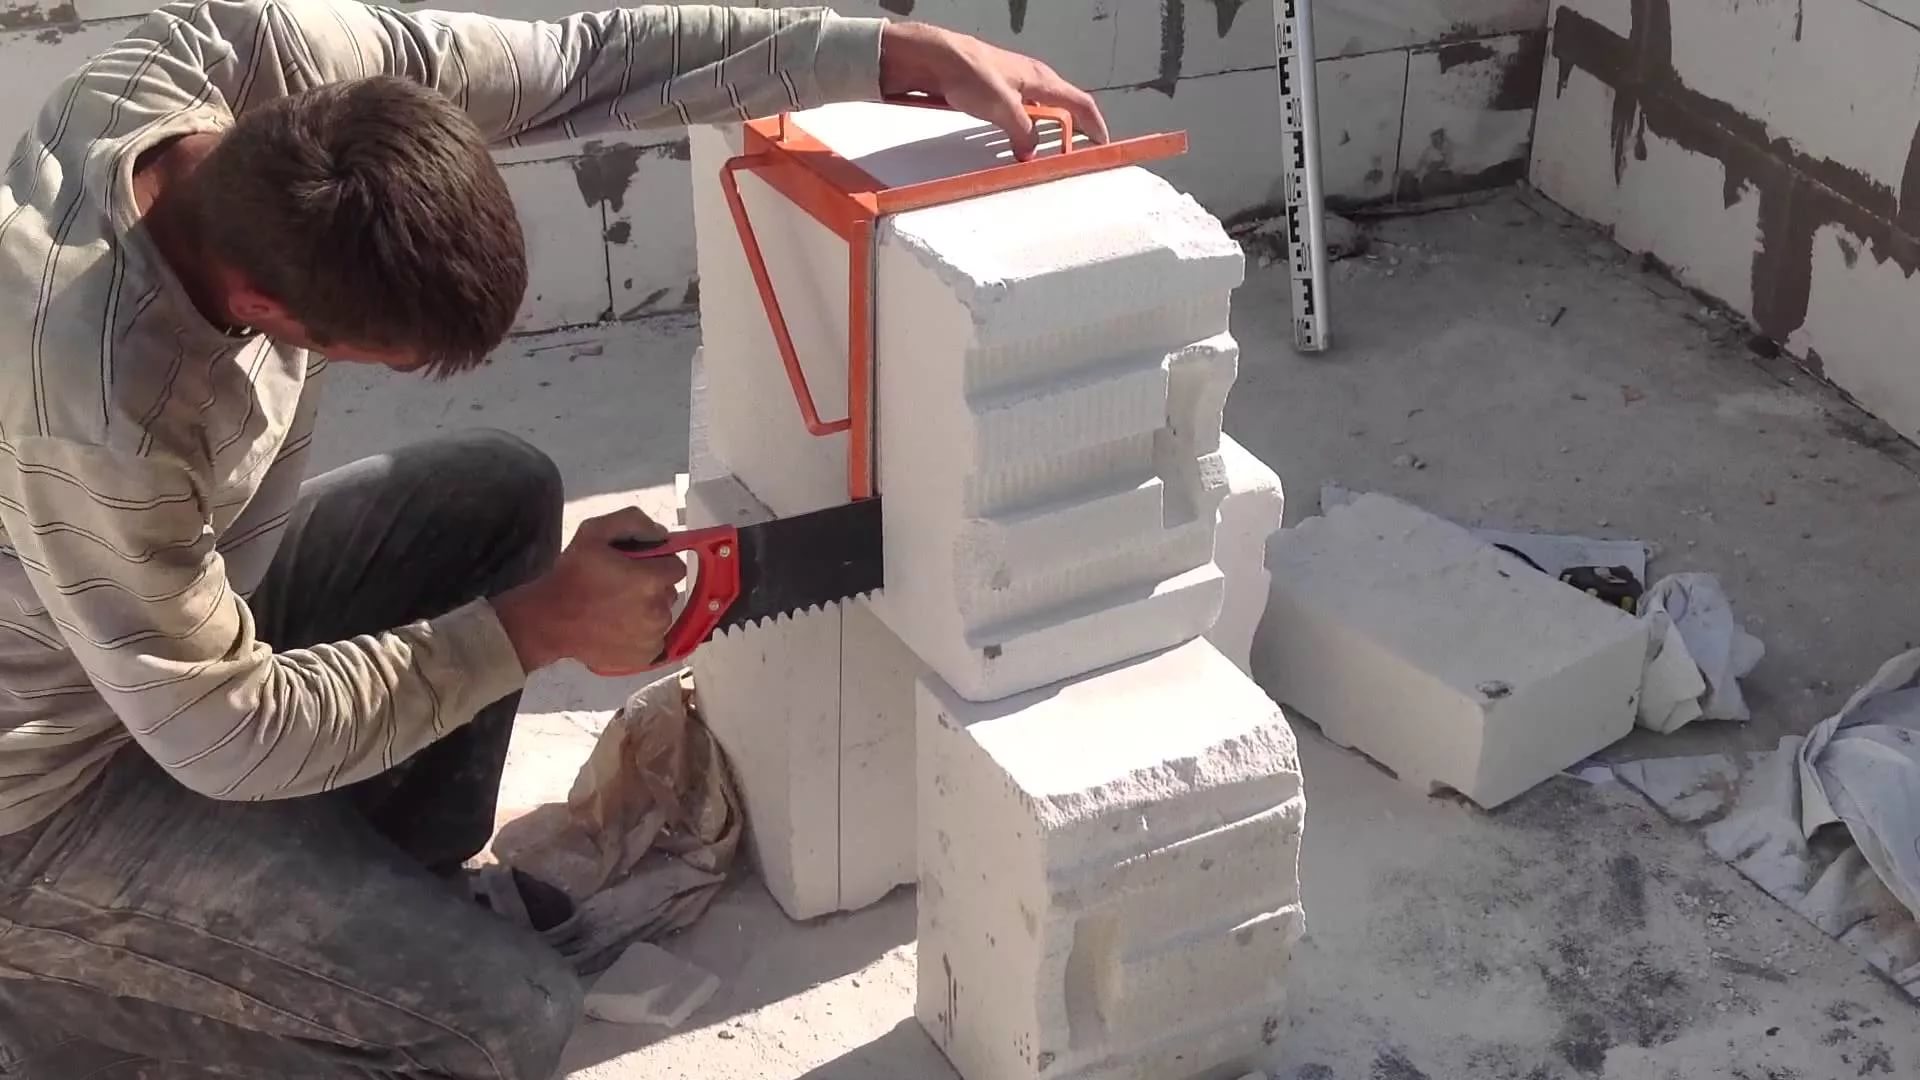
- If in the process of arranging the openings you did not manage to get into the length of the whole block, you can remove the extra piece with a saw or a hacksaw.
- Do not block windows openings. Of course, later they can be cut out, but it will take extra time and effort, so it’s better to leave these planes open.
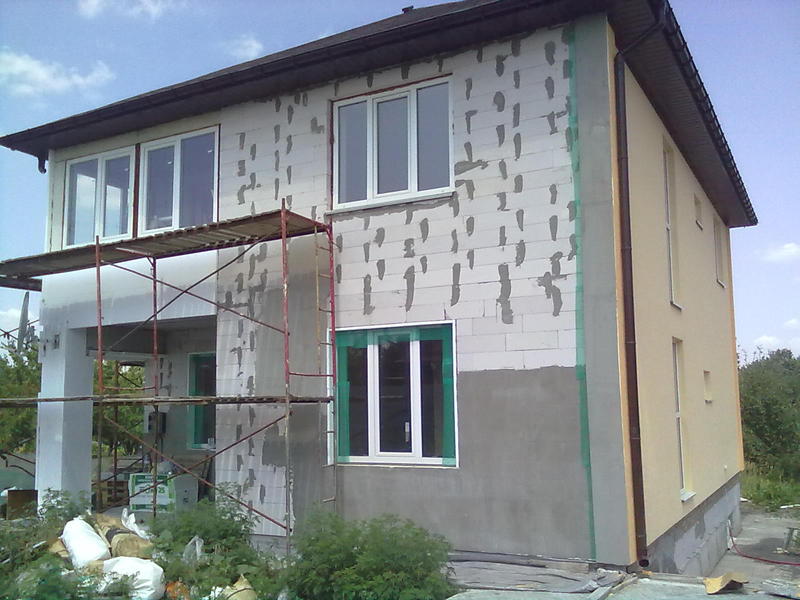
- Any facade work can be carried out only a year after the construction of a block house. In addition, by the time the interior should be completed.
- If you work with materials such as aerated concrete, then you need to use only special fasteners. Other options will not reliably hold in block walls.
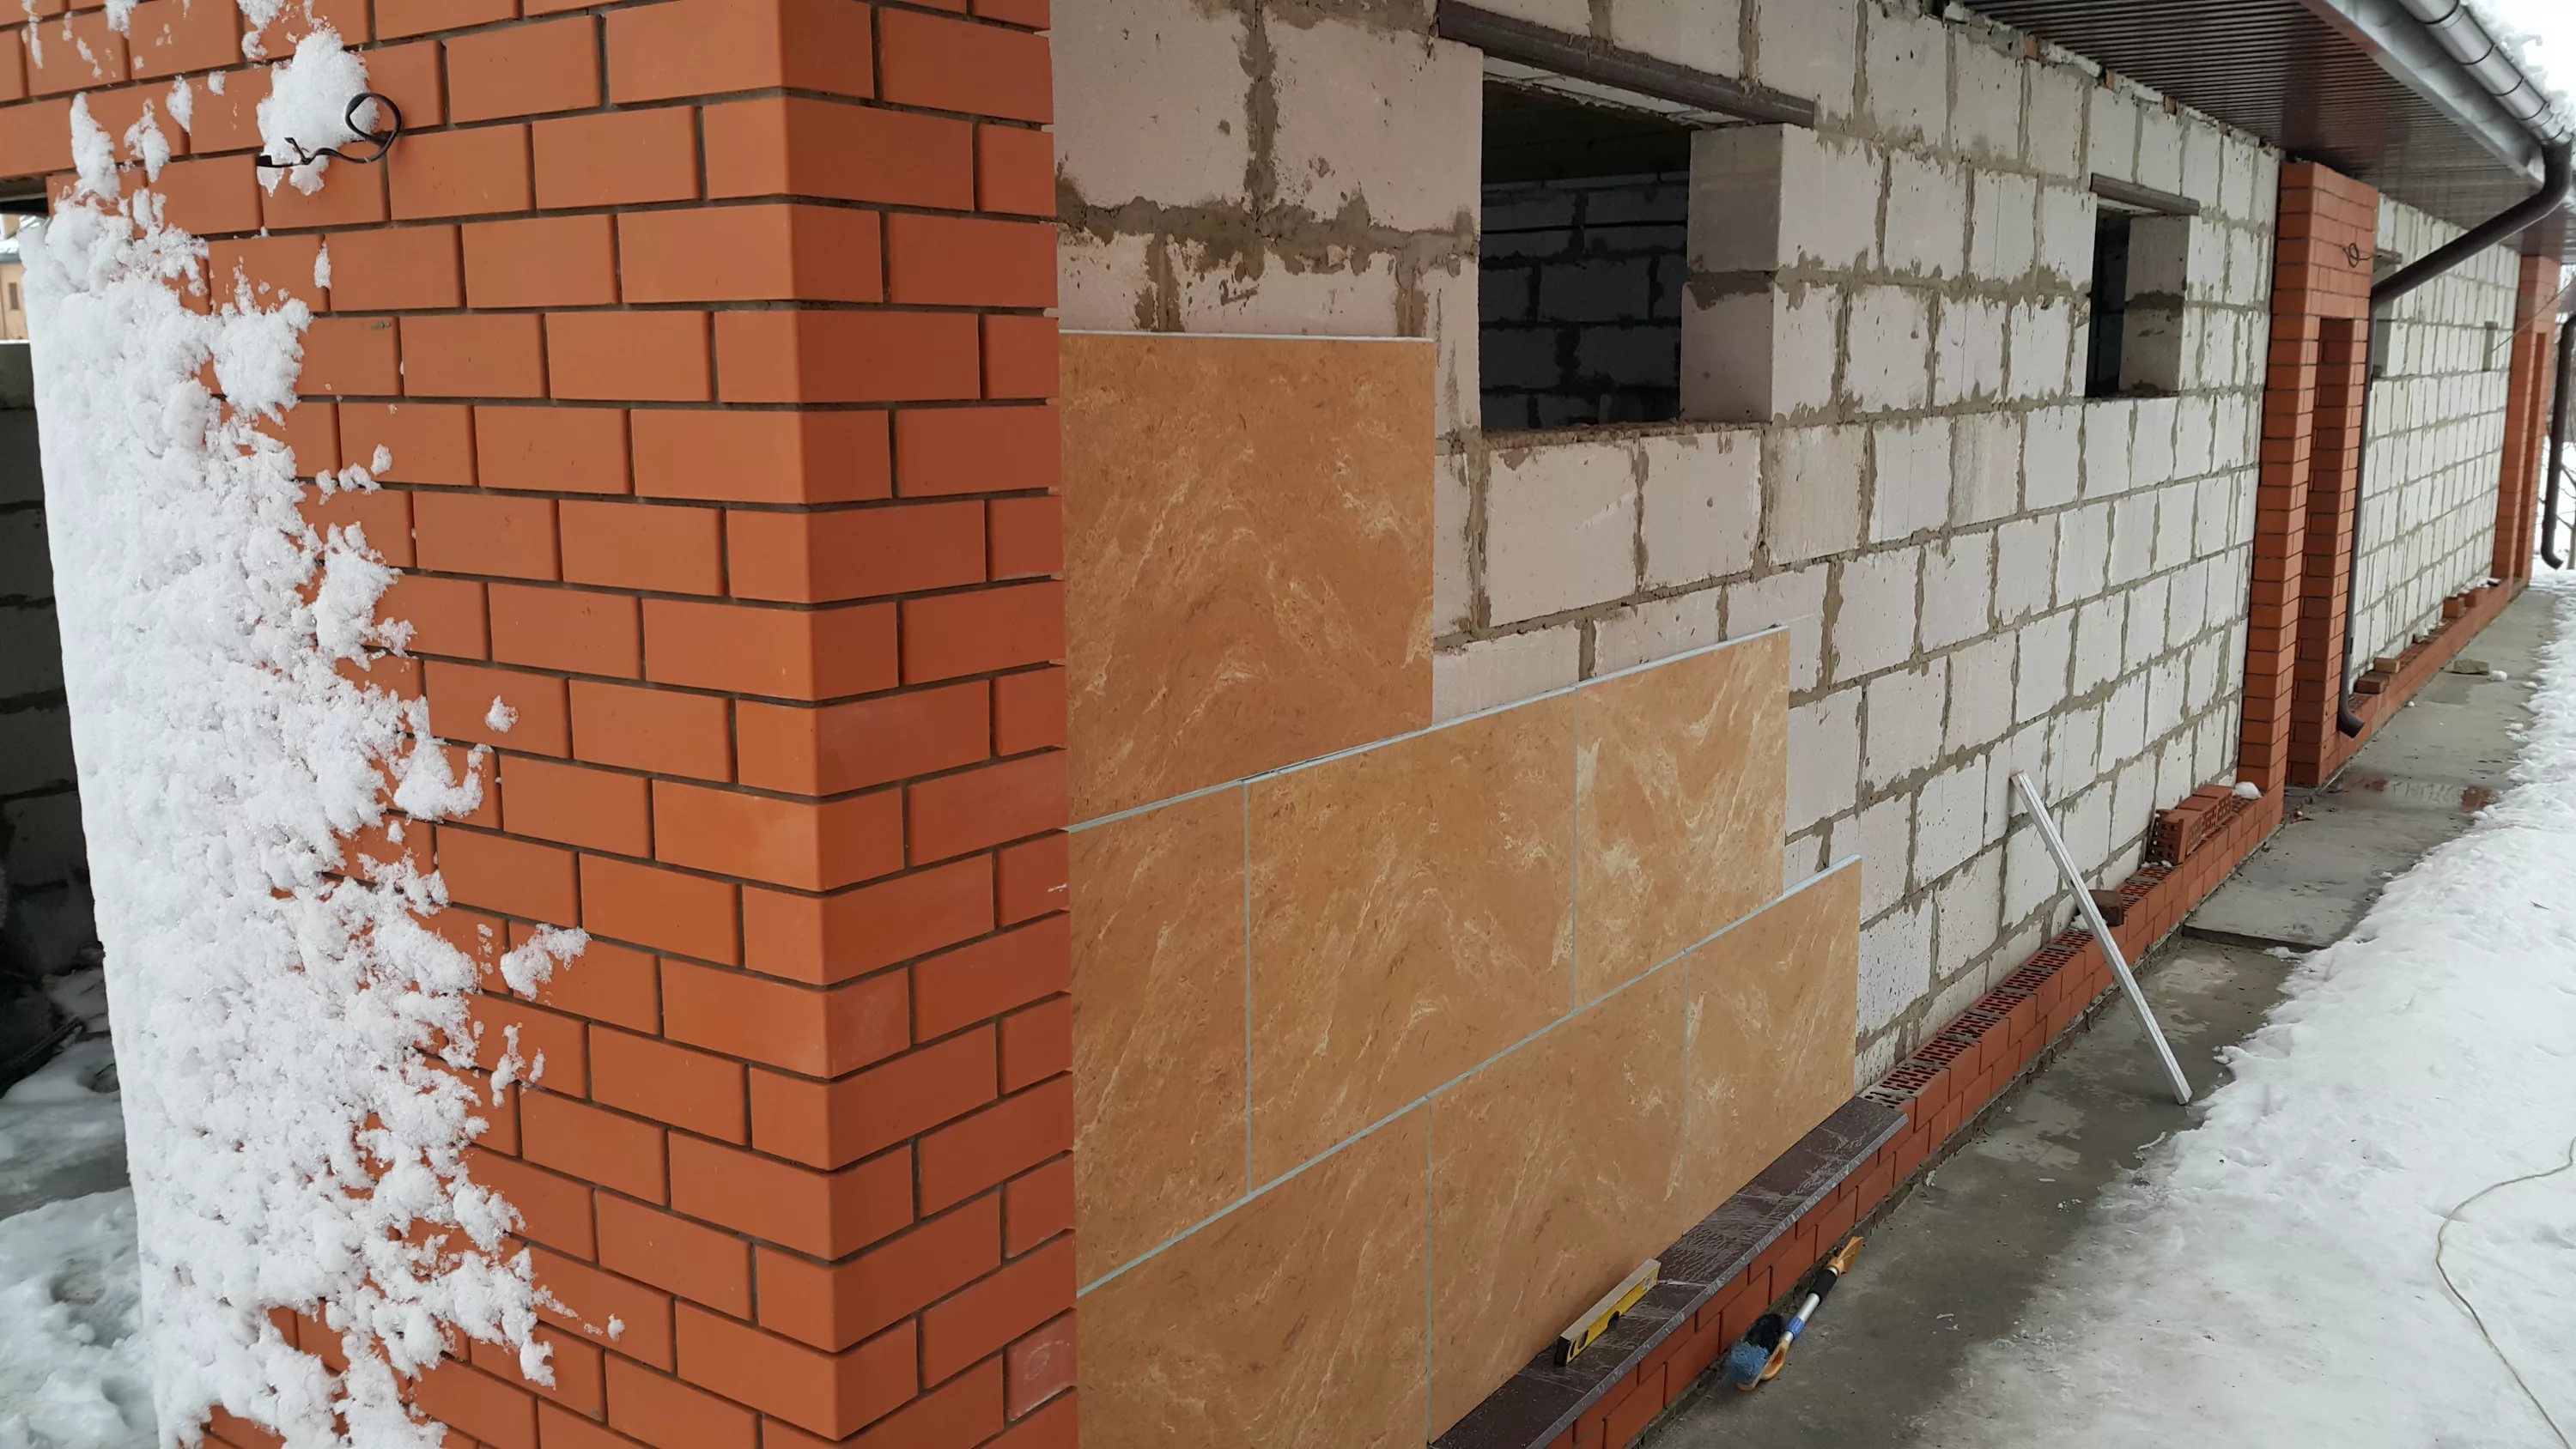
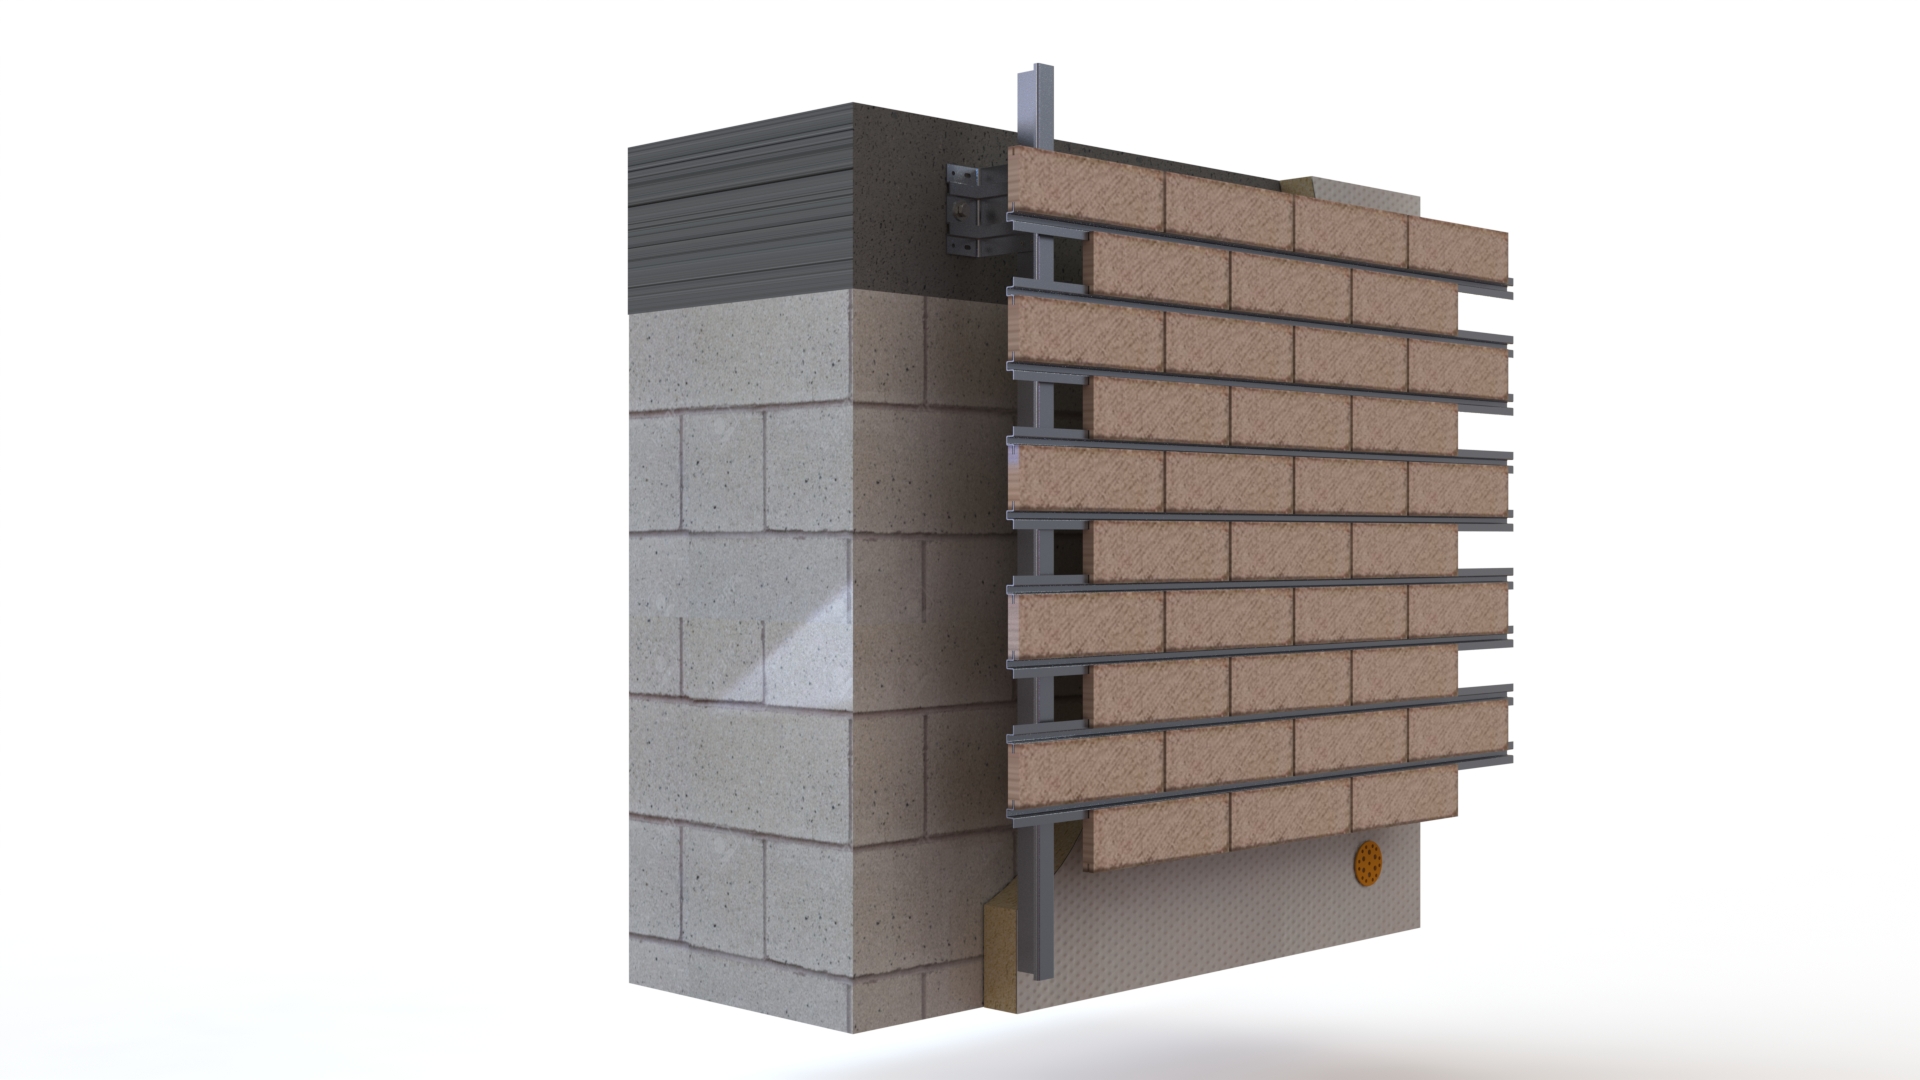
- To connect facing materials (for example, brick) with bearing structures, special flexible connections are used. These parts are made of composite materials. They significantly reduce the heat loss of block houses. In addition, they are not subject to corrosion.
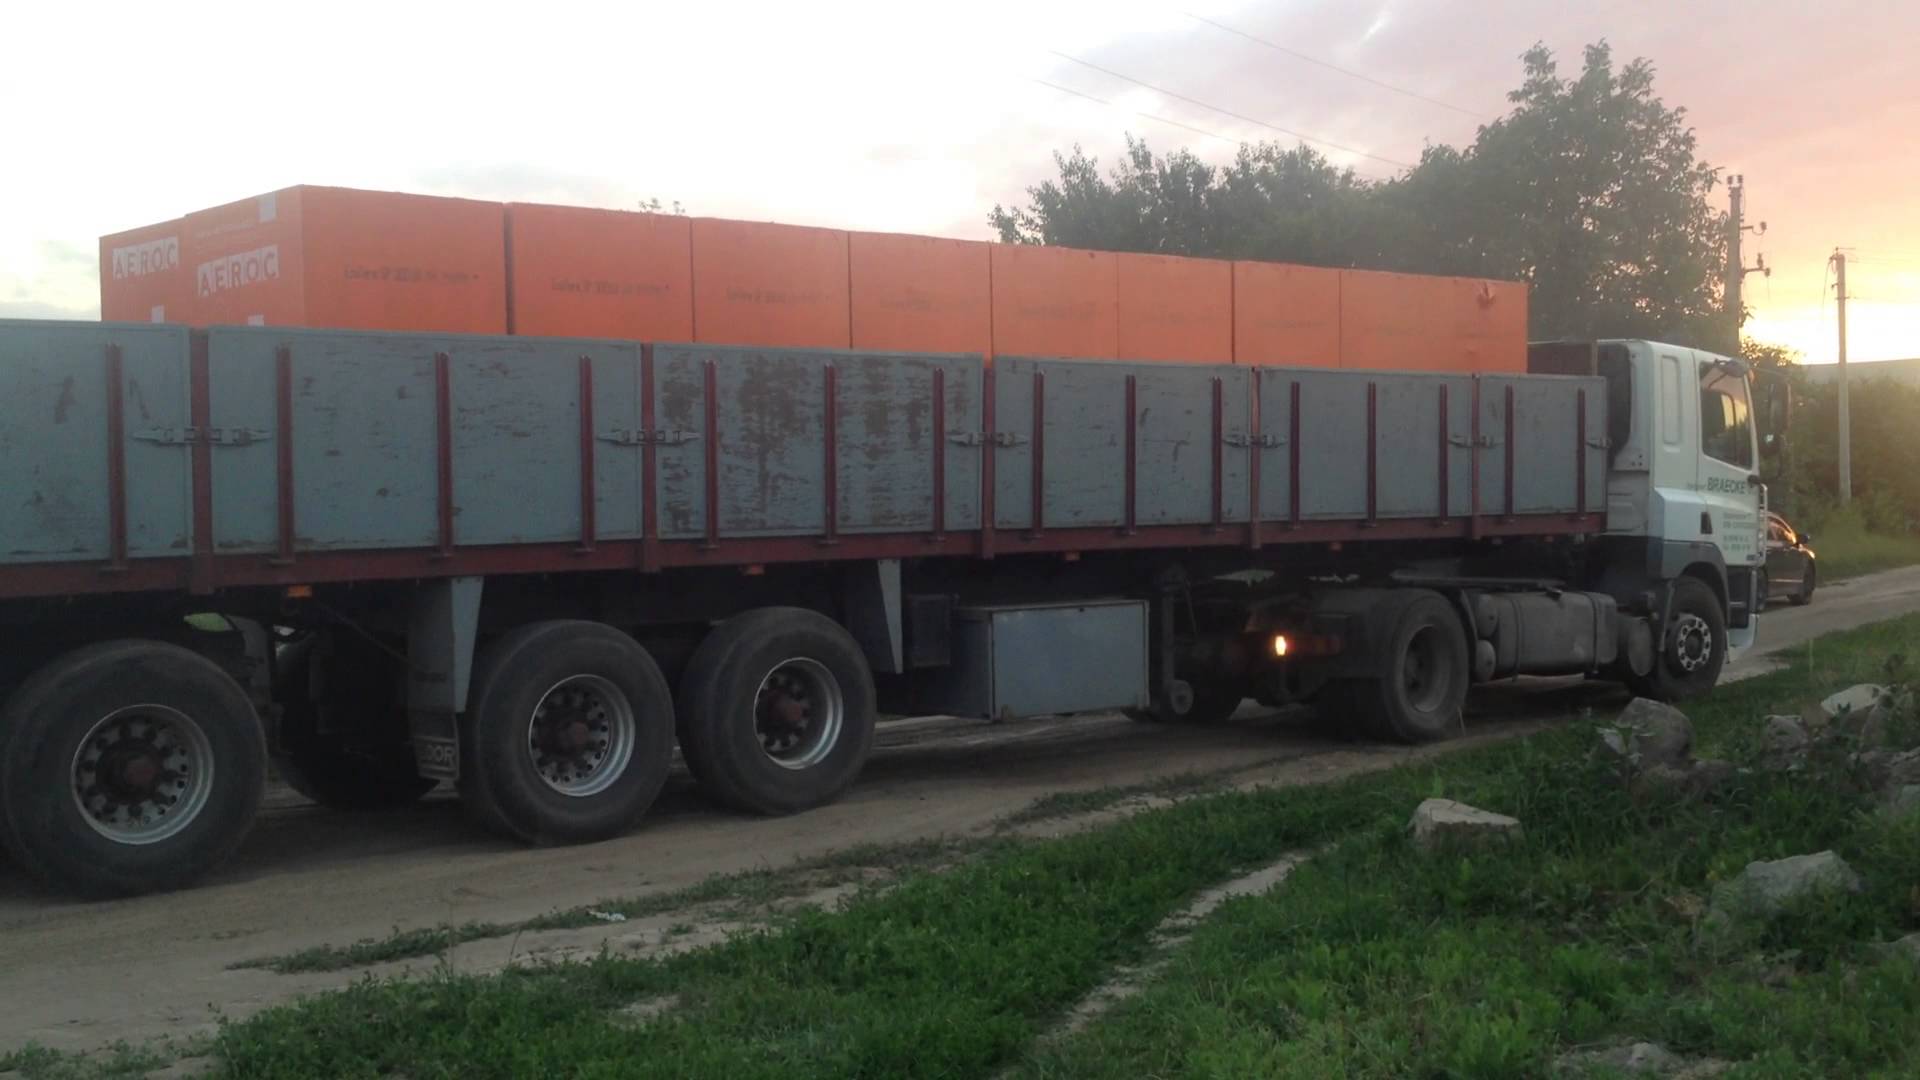
- Transport aerated concrete blocks should be careful not to damage them. It is advisable to close them with a special film to protect from the effects of precipitation.
- If the aerated concrete blocks are properly reinforced, then they can be used in the construction of external walls and internal partitions of various modifications.
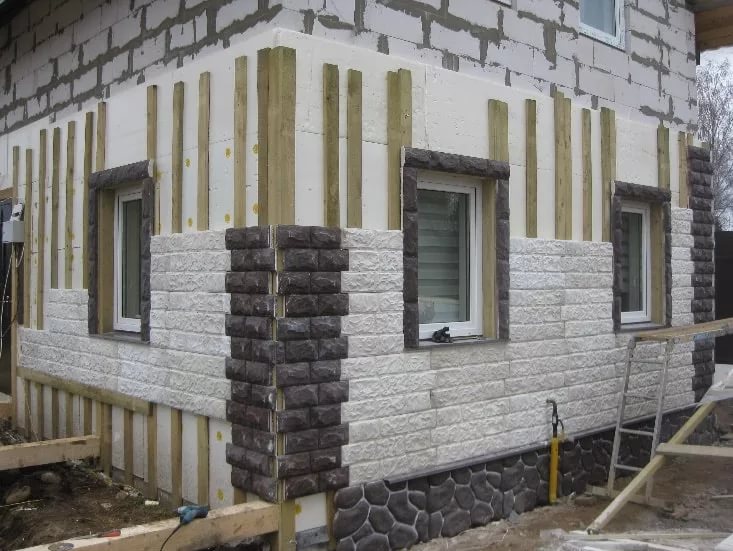
- Do not neglect the exterior finish of the aerated concrete house. High-quality lining will not only remove the obvious and hidden imperfections of this material, but also extend its service life. Finished blocks will be more protected from the effects of negative environmental factors, which will positively affect their performance.
Many homeowners are wondering which materials are best to use for the exterior cladding of a gas-block house.
Nowadays, people most often turn to the following options:
- brickwork;
- decorative masonry;
- ventilated facade;
- special plaster mixes.

- When working with a concrete solution on hot days, it should be remembered that during drying this material should be sprayed from time to time with water. Thus, you protect the concrete base from cracking.
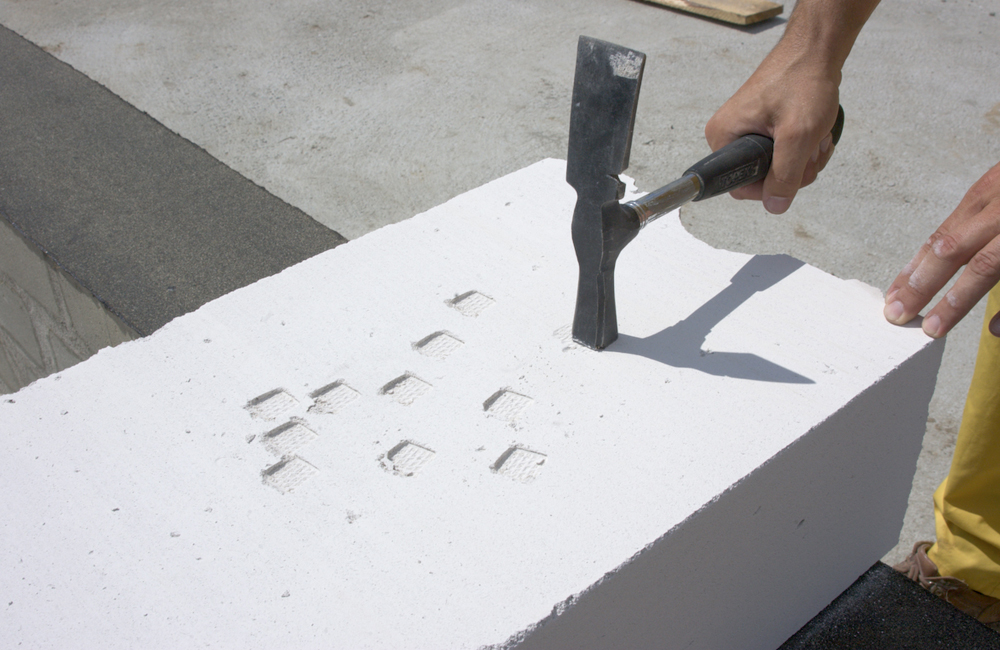
- To make the grooves in the aerated concrete, you can use the grinder, equipped with a diamond disc for dry cutting.Thanks to this practical tool, the strokes will be taken out without problems by a wall chaser.
- To reduce the time required to erect a block house, it is permissible to use special U-shaped blocks as jumpers above the door and window openings. If you want to save money, then it is quite possible to make such parts with your own hands from a single gas block.
- Remember that the speed of construction work directly depends on how high-quality and accurate the first row of aerated concrete masonry is. If it is laid out in accordance with the level indicators, then mounting the remaining rows will not be difficult and will not bring problems.
- It is not recommended to keep laying concrete blocks from two angles towards each other. Thus, it will be quite difficult for you to bandage the rows, as well as to fit the final part to the required size.
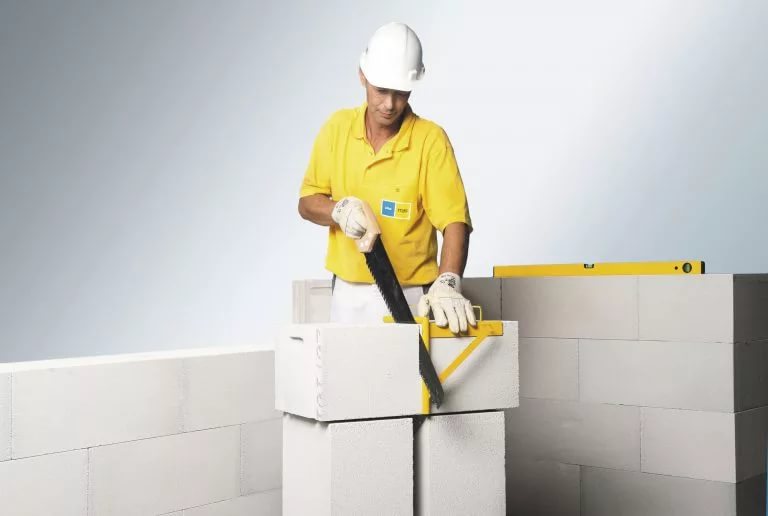
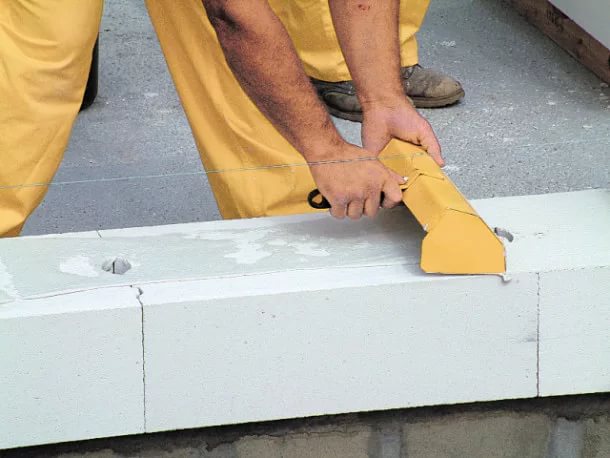
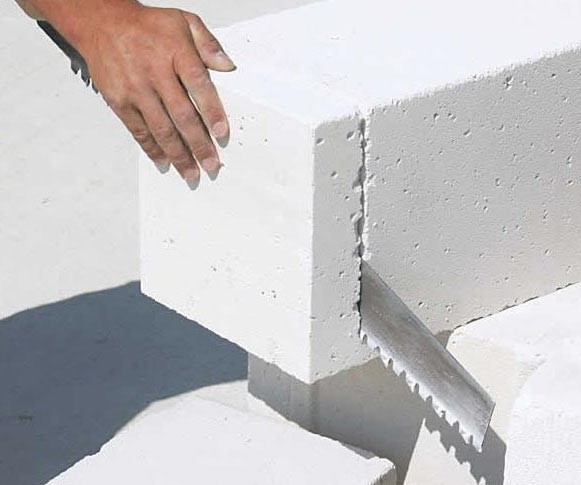
- If you need to trim the aerated concrete block, then for this it is quite possible to use a simple manual hacksaw, however, experts advise to give preference to a more practical tool - a saw-alligator, in which there is a canvas with pointed taps.With this device you will save not only time, but also your own strength.
- To lift the blocks, it is recommended to use a homemade tool - rhombus grip. With such a device, it will be easier to lift and move building materials.
- Experts advise to install aerated concrete blocks using homemade scaffolding.
- Throughout the construction work is very important to constantly use the level. Most often, masters choose the bubble or laser option. Do not forget about this tool - without it, building a strong, attractive and stable home will be almost impossible.
To learn how to quickly and cheaply build a house of aerated concrete, see below.


