Installation of metal: instructions for laying
The metal tile became one of the most demanded roofing materials long ago. But there is a popular myth that only trained professionals will be able to lay it. In fact, the situation is different - with due diligence, any tidy person will cope with this work.
Where to begin?
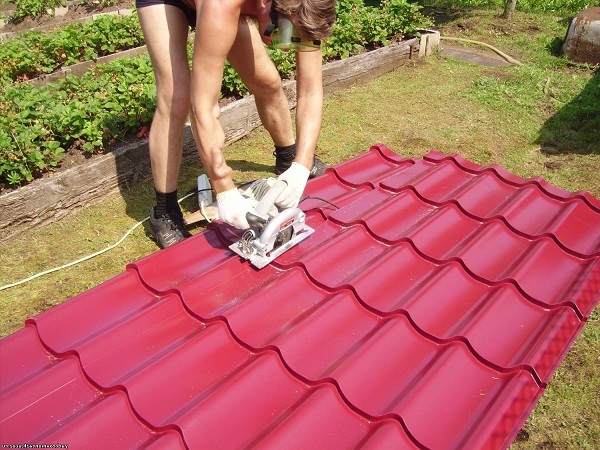
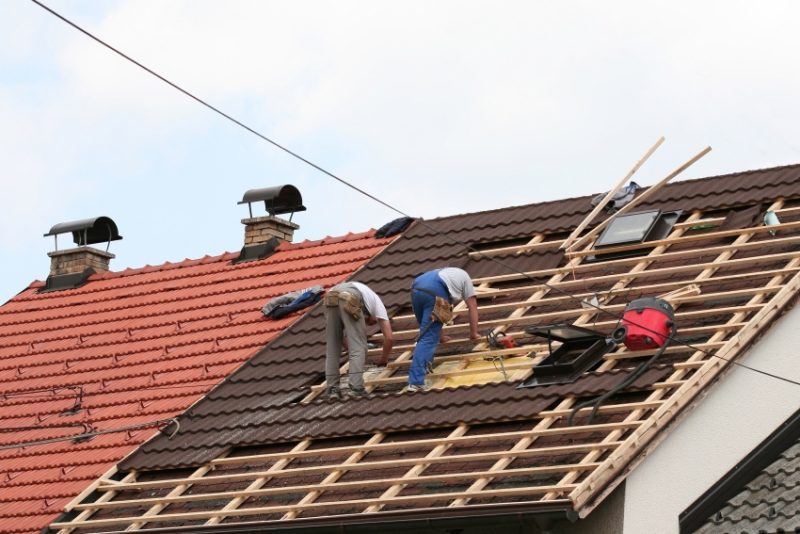
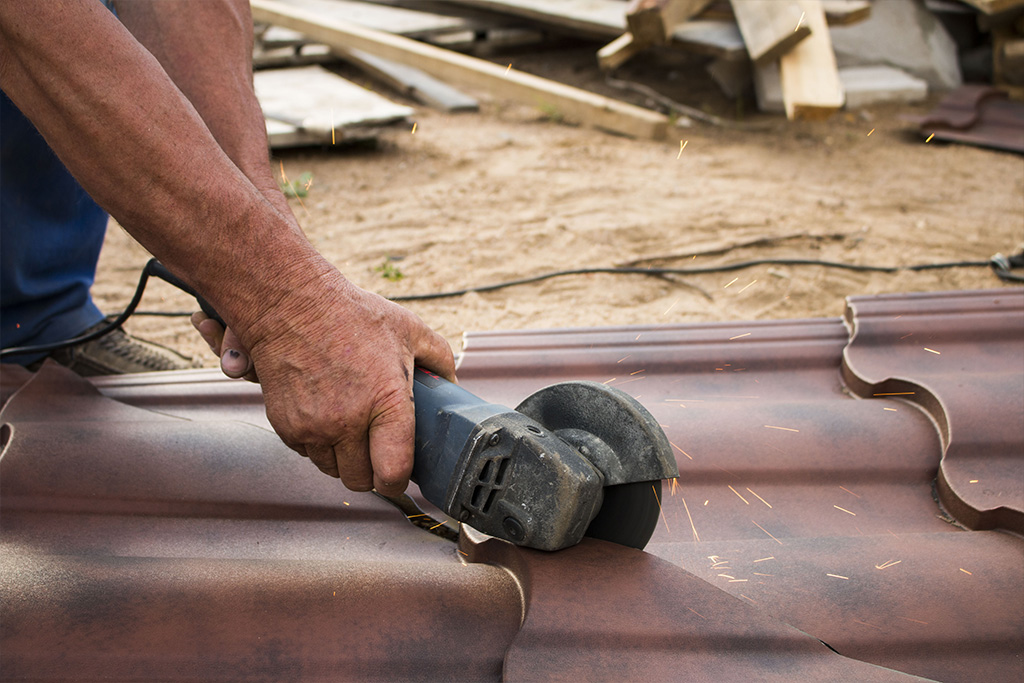
Installation of metal tiles begins with a thorough preparation for work. First of all, calculate the exact need for the material and repel, of course, from the size of the roof. They need to be measured as carefully as possible. Cutting the material into the necessary fragments is done with an angle grinder, but without an abrasive wheel - it damages the tiles too easily. The former roofing cake is supposed to be removed without residue,because the rafters are not designed for two covers at once; In this preparation for laying in general ends, except for tools and materials.
Tools and everything you need
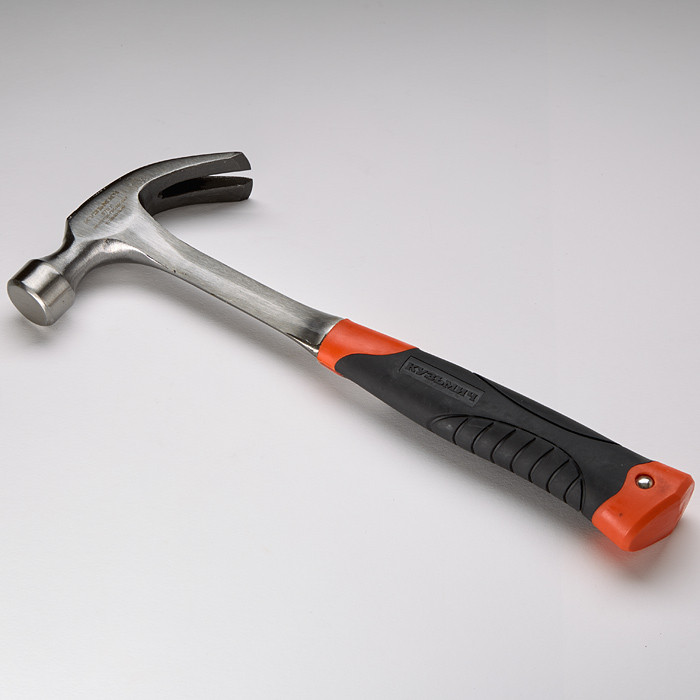
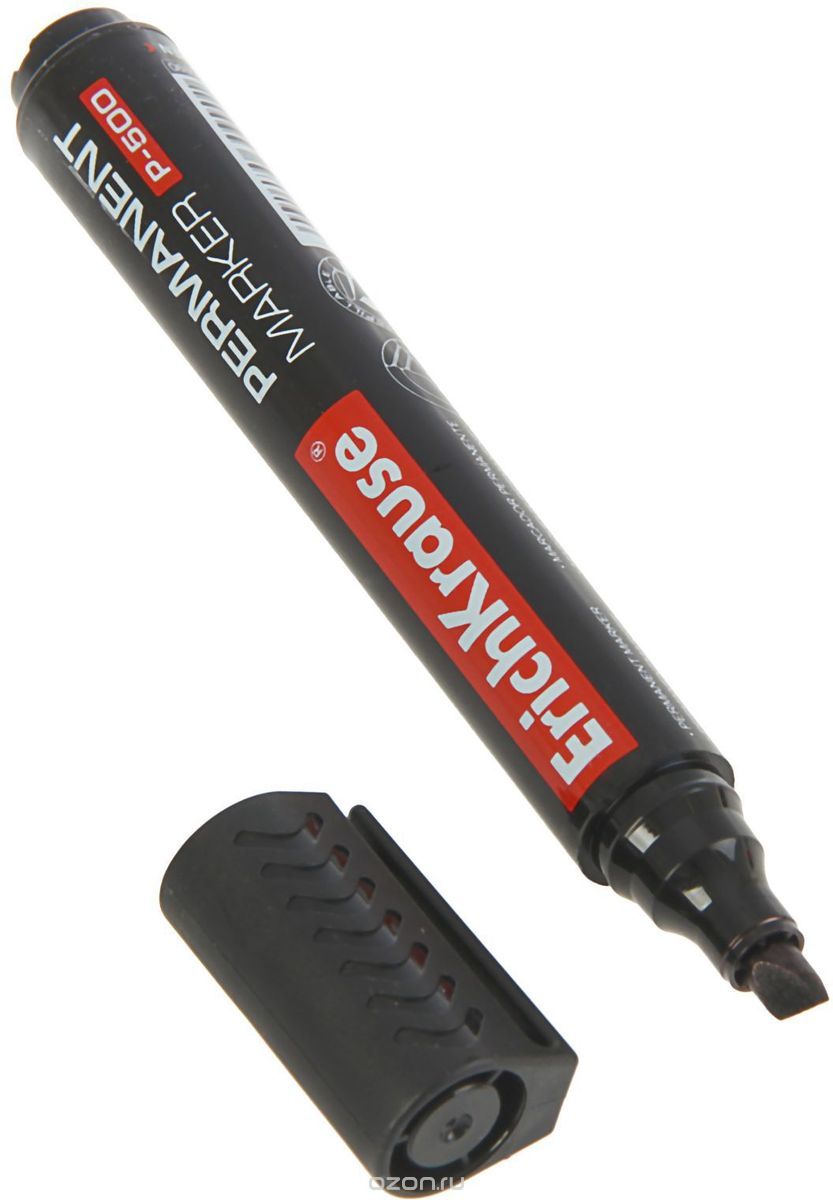
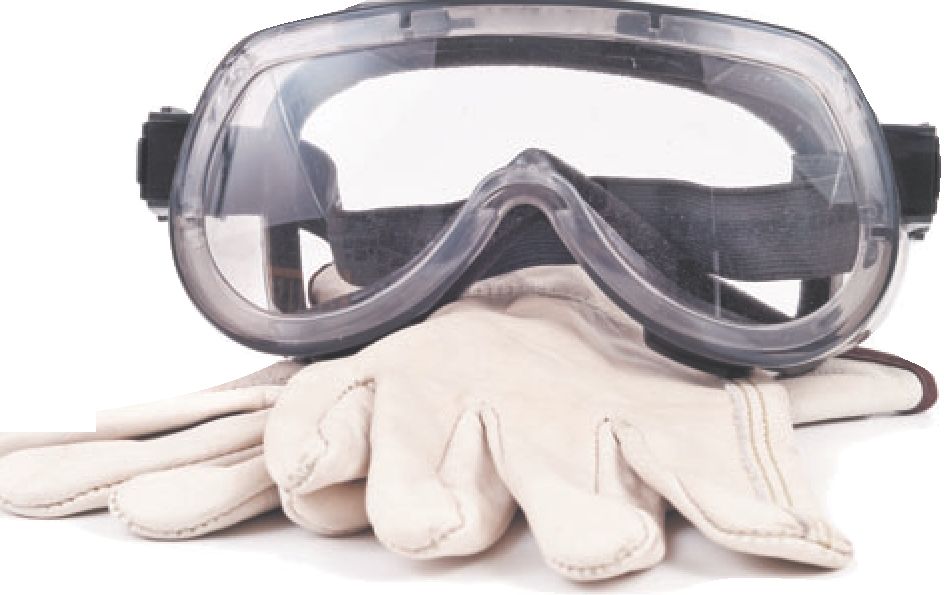
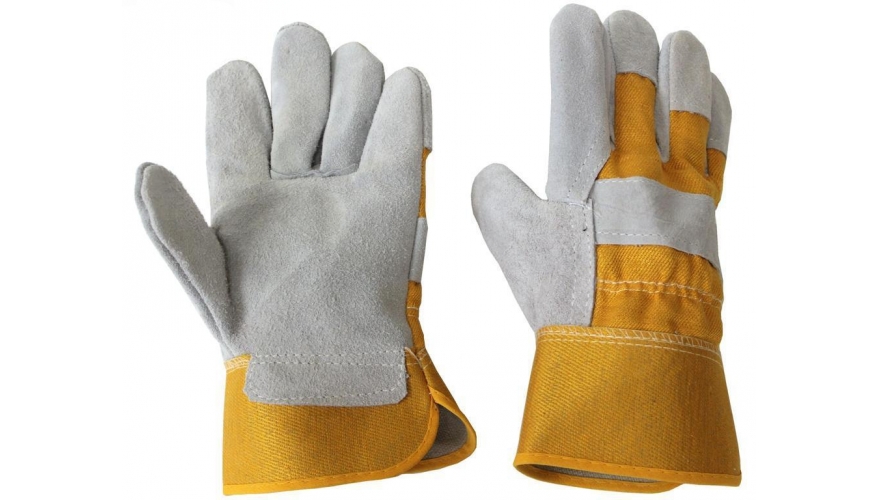
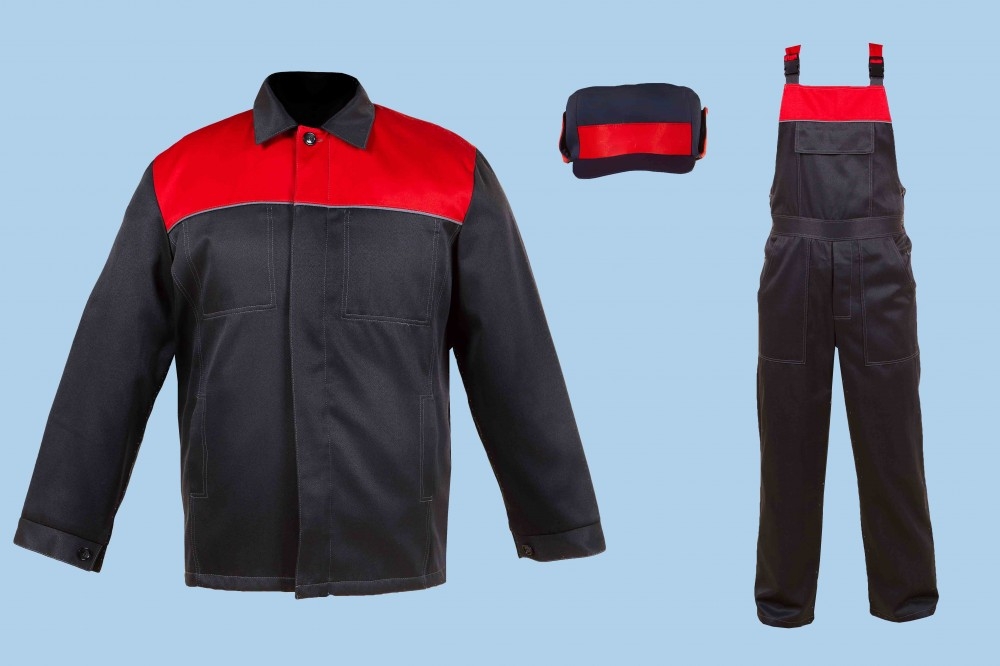
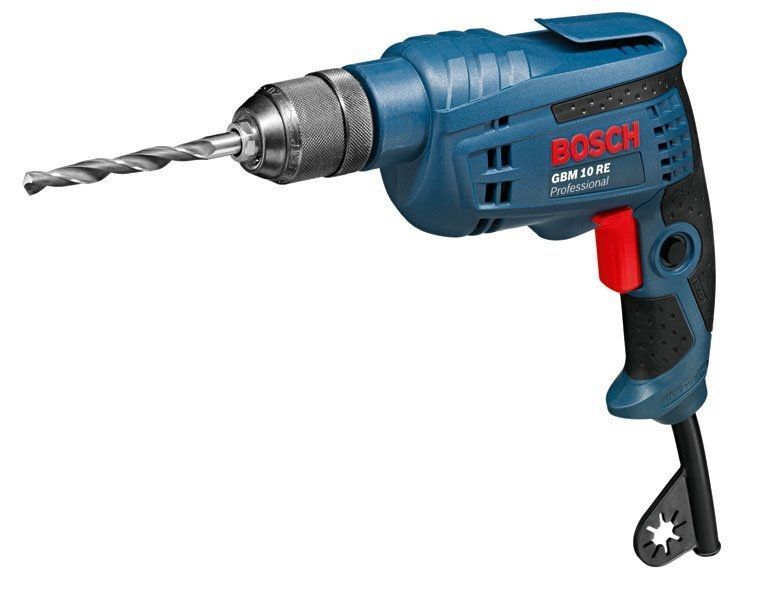
To lay the metal tiles with your own hands, you need to cut them to exact dimensions with the help of scissors for metal. Removing the size and comparison with them requires the use of roulette. To climb to the roof, it is extremely important to use a solid ladder or stepladder. Fastening is done with an electric drill and screwdriver. From hand tools you need a hammer, a black stationery marker, a wooden batten of great length. When working necessarily use gloves and glasses made of durable plastic.
You also need to stock up on components such as:
- guide boards;
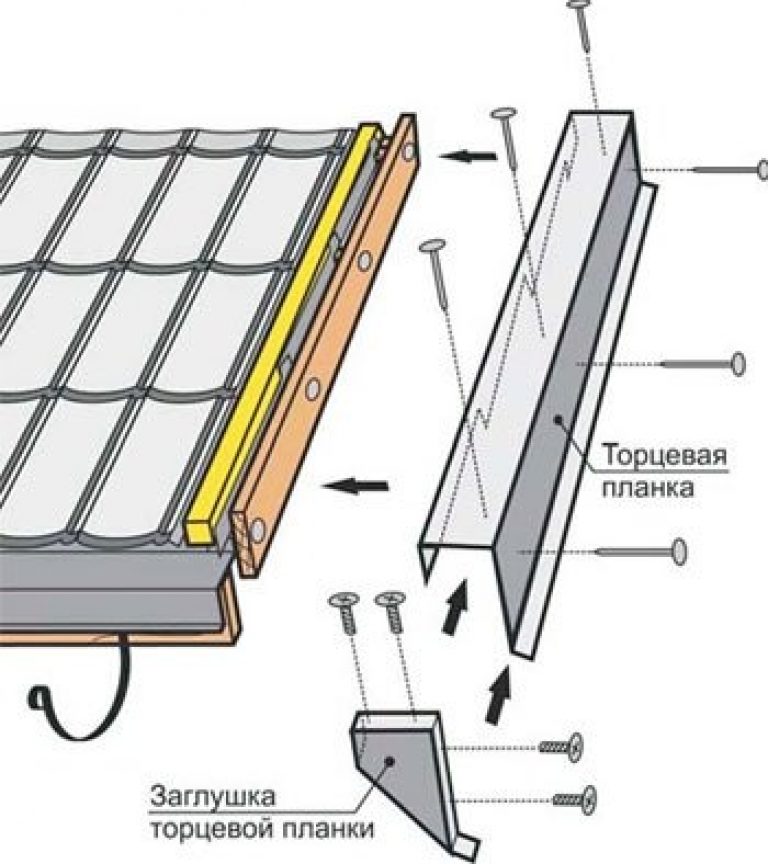
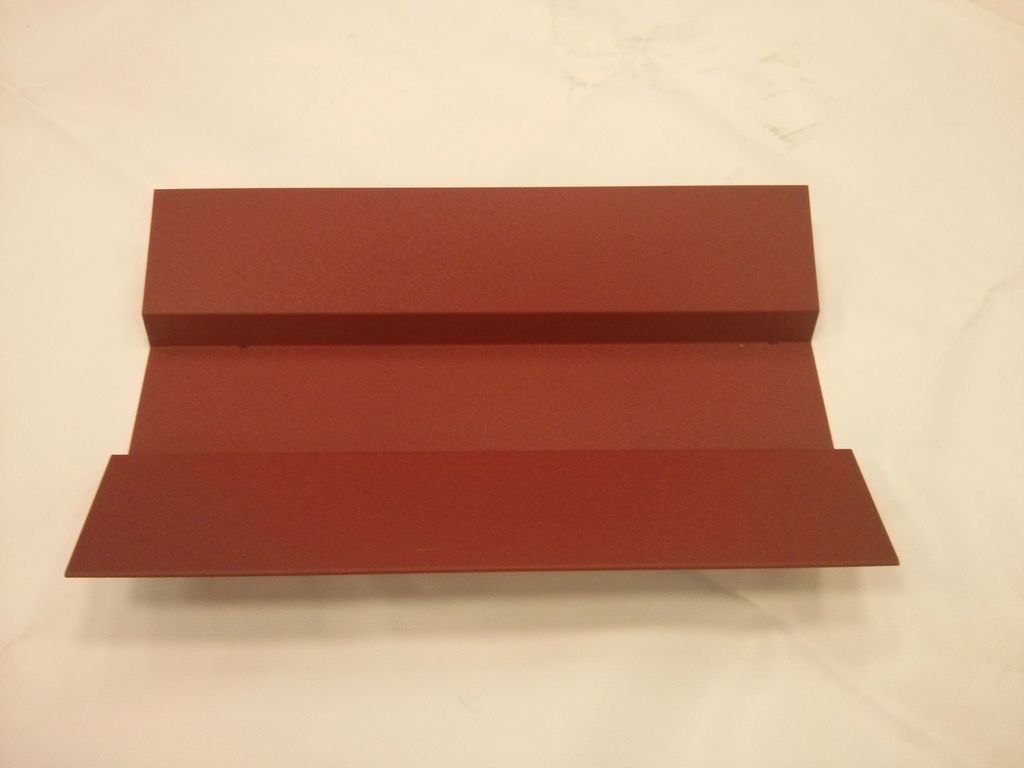
- roof strips;
- waterproofing material;
- tile itself;
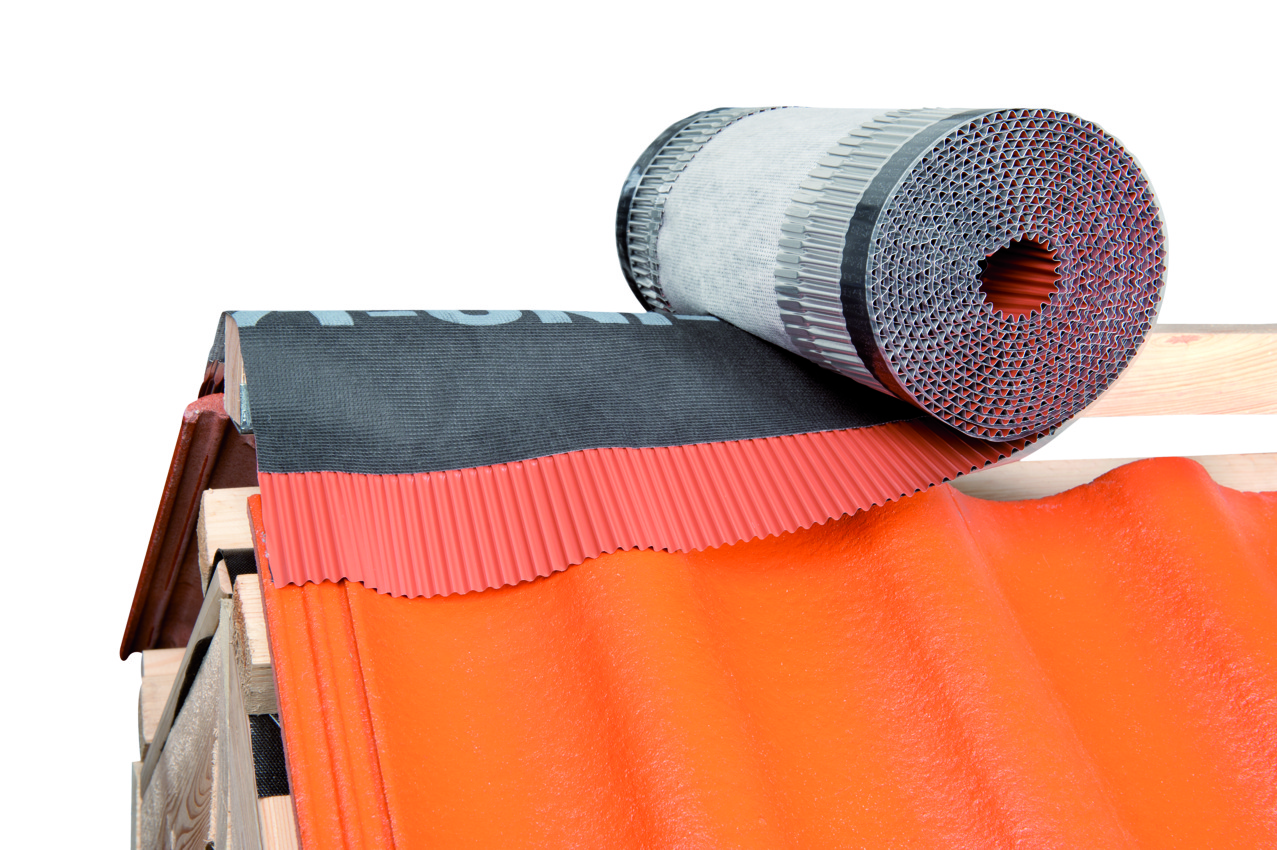
- aero rolls;
- end and ridges;
- decorative lining;
- screws with washers;
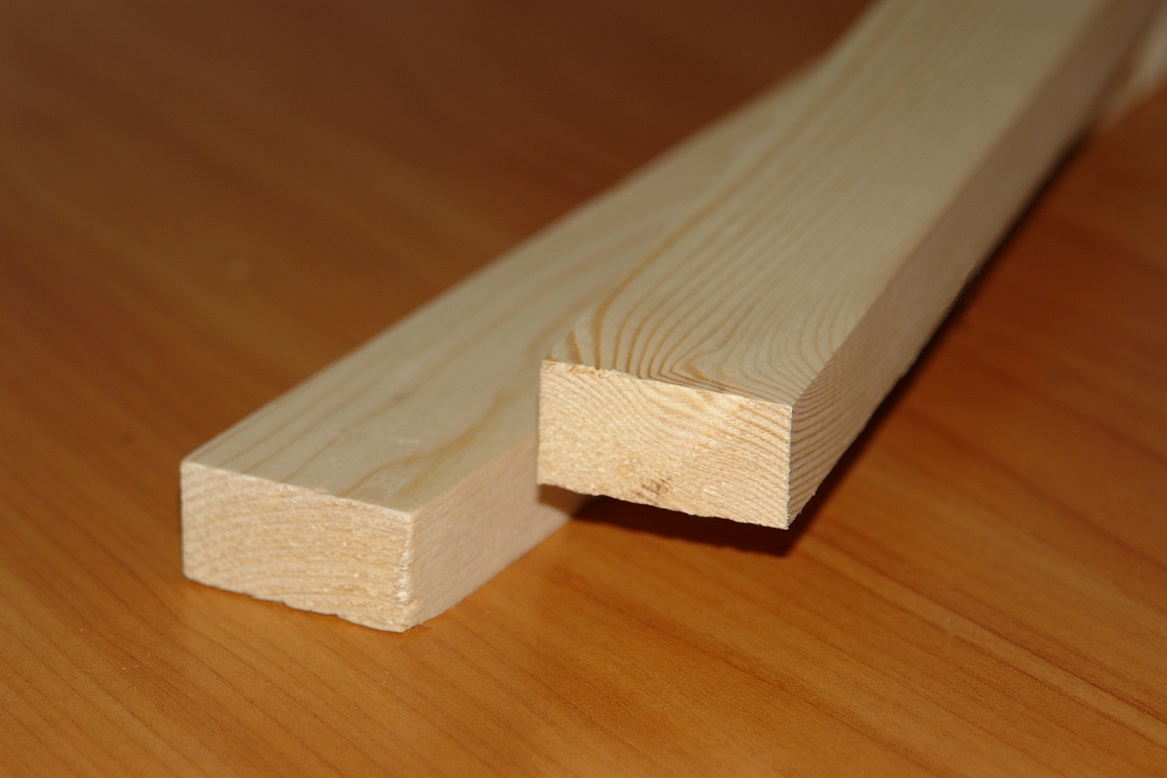
- board 25x100 mm in the required quantity.

Types of roofing and elements
Its features have the calculation of the necessary elements for a gable roof. Let's say its dimensions are 8x5 m (on the slopes).Counting the required number of sheets is determined by dividing the length of a single slope by the width of the sheet. Here we have in mind the working width together with the overlaps, and not that which is obtained by measuring with a tape measure. It is recommended to round off the obtained non-integer value always in a big direction and take into account that one of the sheets can be divided equally and be applied on two slopes at once.
The simpler the type of roofing (especially the configuration of the slopes), the less the tiles will go to waste. By increasing the length of the sheets, it is possible to reduce the amount of overlaps. But this turns into complication of work and heavier transportation, for which you have to pay a lot. Judging by the experience of most people, if the length exceeds 6 p. M, it is desirable to divide the sheet into parts. Overlap of at least 0.15 m, if the slope is steeper than 25 degrees, and not less than 0.2 m, it will be, if the roof is flatter.
Laying tiles on the insulated roof implies installation:
- waterproofing film;
- one or more ventilation gaps;
- vapor barrier.
For mounting films used special brackets; the moisture barrier itself may be vapor permeable or impermeable.Water vapor pass is required if there is a cold attic below, but for a heated residential attic it is not so significant anymore. But ventilation under the roofing layer must be ensured. If it is not mounted, condensate inevitably appears below, and the safety of the house structures cannot be guaranteed. It is advisable to use, as under any layer of metal on the roof, cn
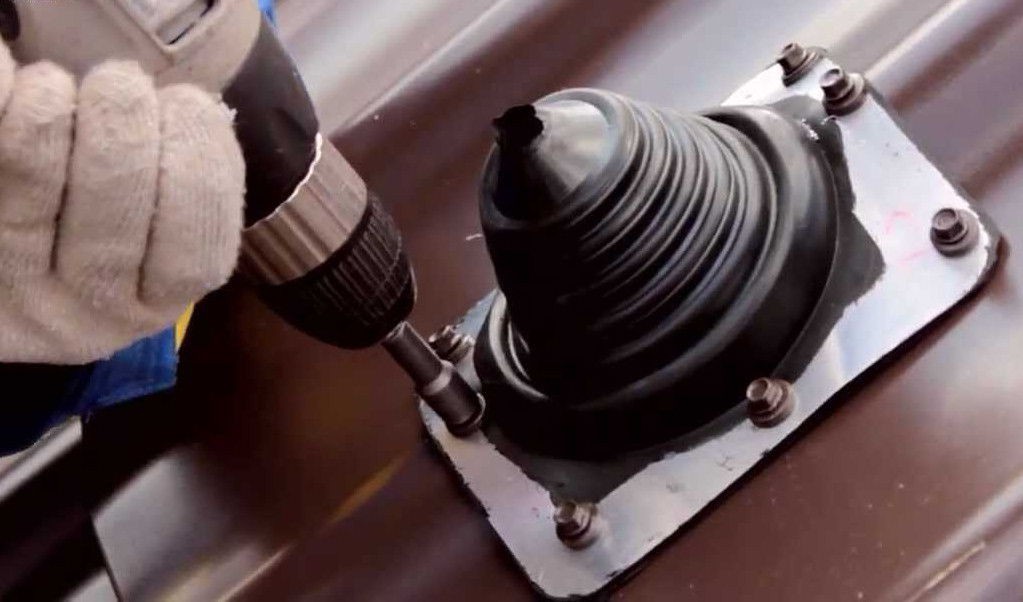
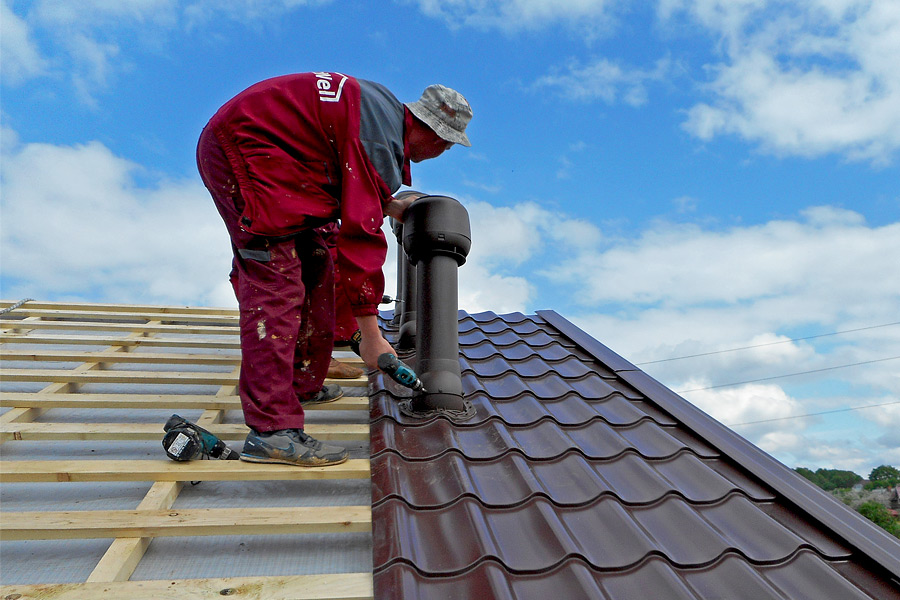
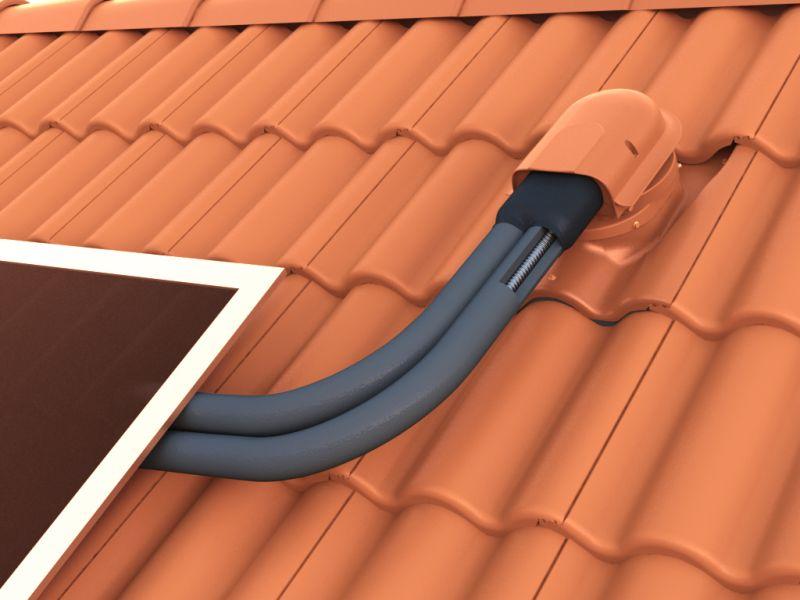
Such membranes are one-sided, and the side that is smooth to the touch should not be applied to the insulation. It is advisable to carry out work on the arrangement of ventilation and antenna output in close connection with each other. Usually the upper part of the antenna outputs are cut off, leaving approximately 80% of the size of the racks. The exit of the ventilation pipe, which should be held by self-tapping screws, is displayed in the passage elements. To connect the outer part of the hood with a duct in the house, a corrugated pipe is useful; Adhesive tape is used to fix this pipe in position and seal the joint.
All these measures will improve the quality of the insulation, but it is necessary to deal with its appropriate type.
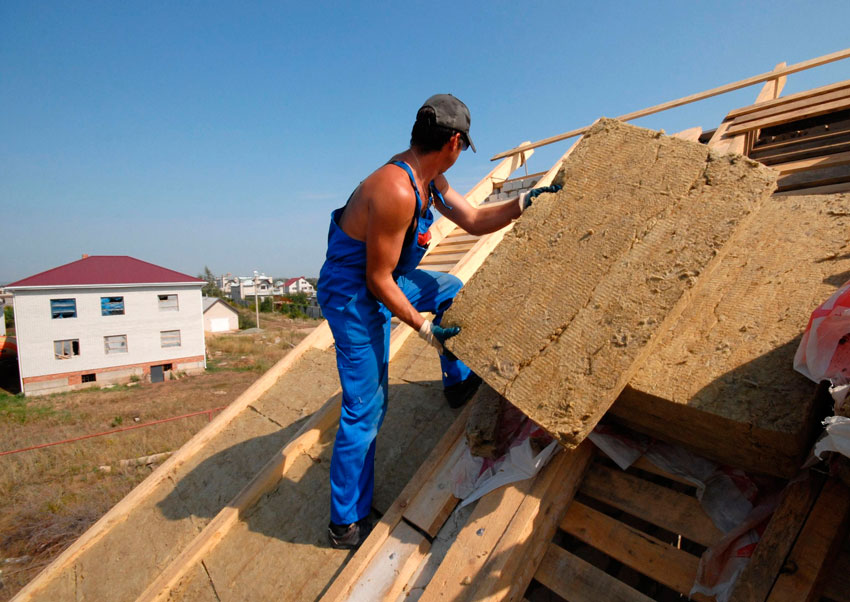
One of the best options is mineral wool, since it:
- does not burn;
- well extinguishes steps and blows of raindrops on the roof;
- mechanically strong;
- stably retains valuable qualities for decades;
- Mounted with his own hands without any problems.
From warm rooms, wadded insulation should be thoroughly protected by a vapor barrier, because their water vapor permeability is high.
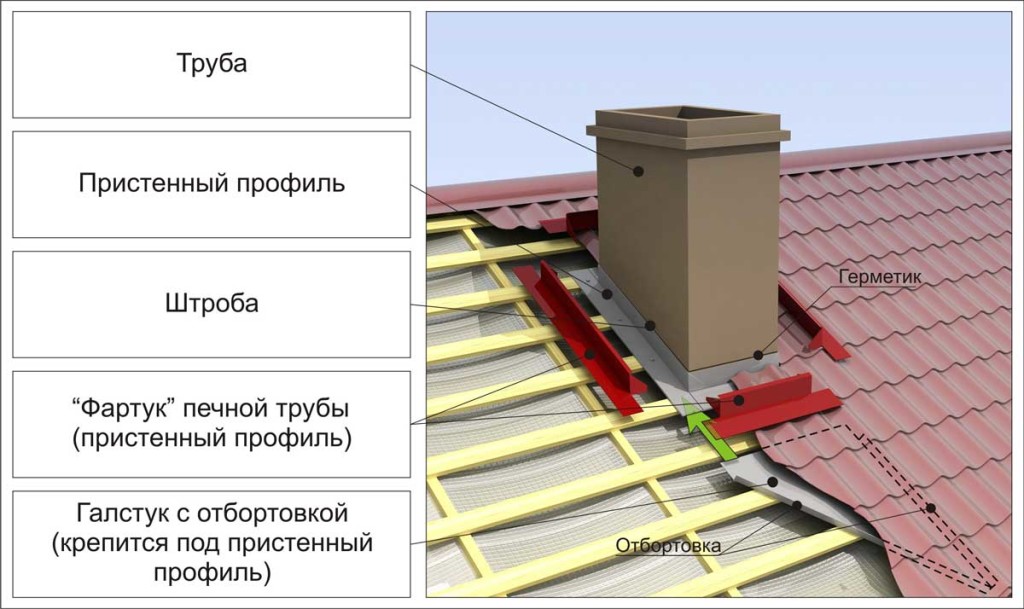
Having dealt with the insulation, you need to find out the details of the device endovy. All flanging laid the bottom layer of insulation, and to keep the cut sheets, you will need screws. No less significant than endova, the passage through the roof of the metal of steel pipes and chimneys. If the chimney goes through a heat-insulated roof, it will be necessary to lay a strictly defined number of layers of insulation, as well as roofing insulation, to create a ceiling crate.

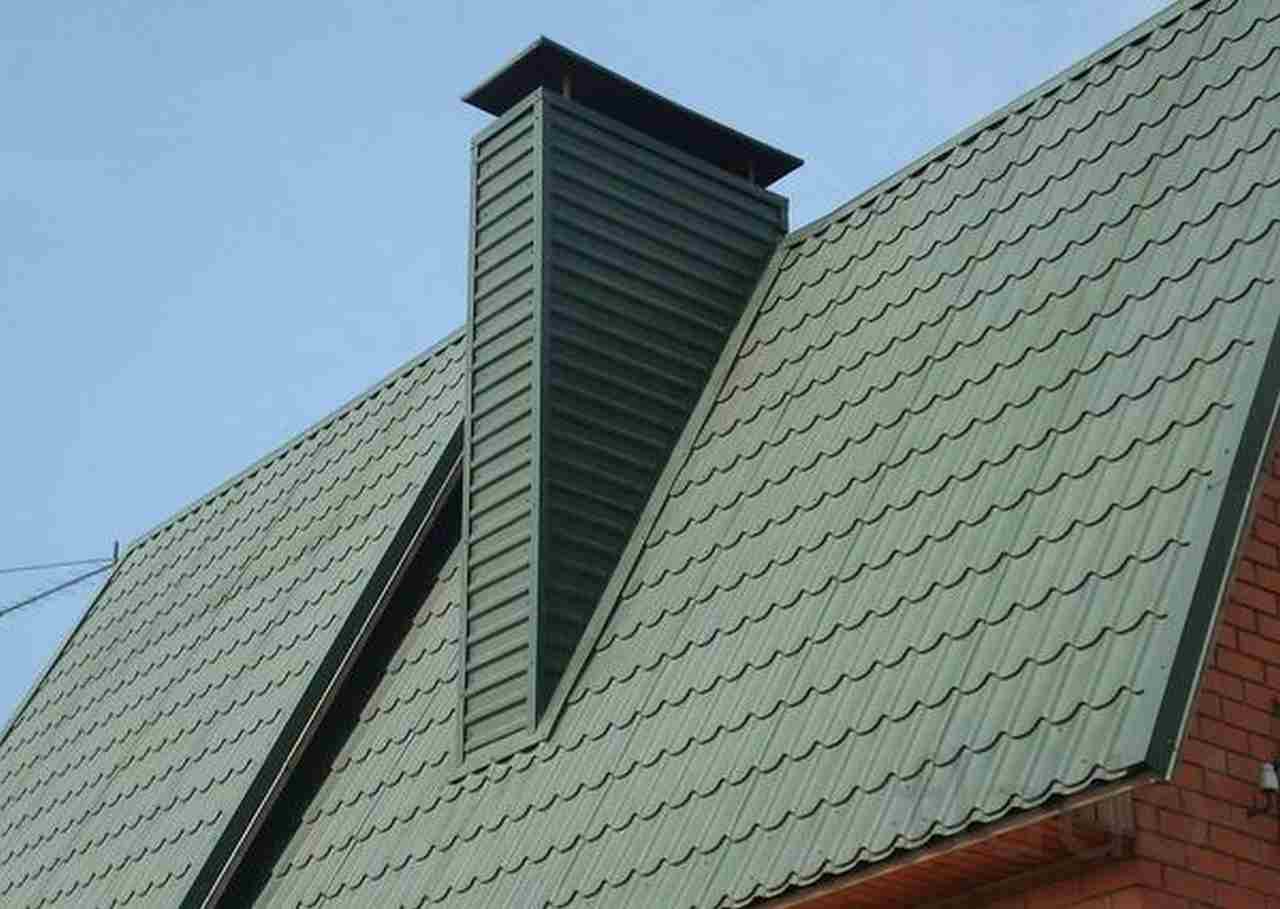
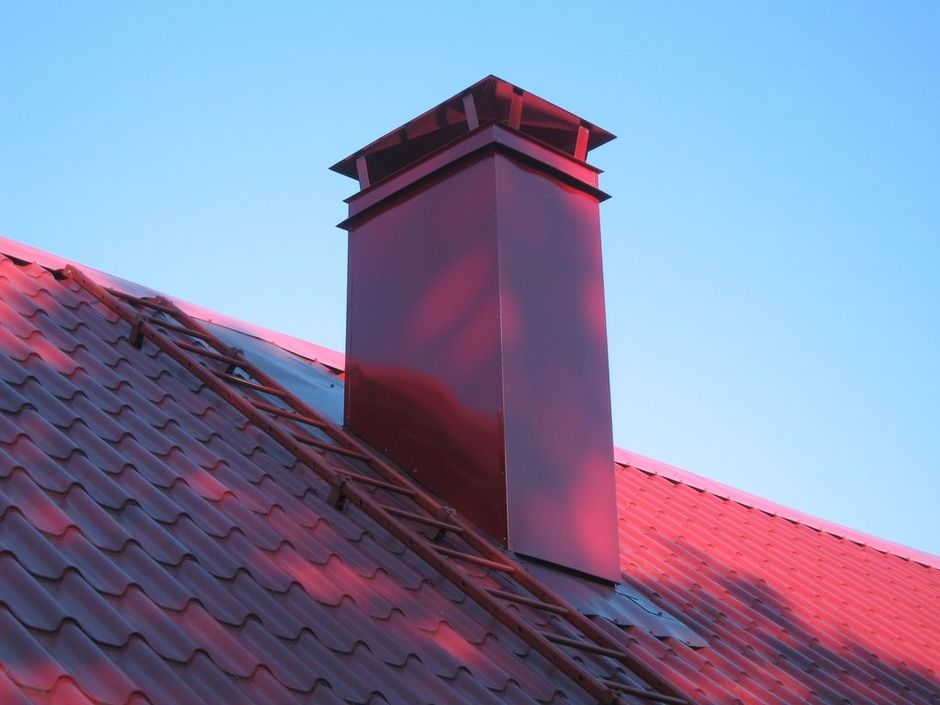
Qualified professionals solve this problem by constructing a special box that surrounds the top of the pipe. The box itself necessarily covers from direct contact with the chimney. For isolation from each other, mineral wool based on basalt or fiberglass is used.What kind of geometric shape this node will be is determined by the type of materials used. Most pipes are rectangular, round or square. Metal and cement are mainly made in the form of a circle.
It is forbidden to take the pipe out through the valley, because then it will not be possible to reliably ensure the tightness of their connection.
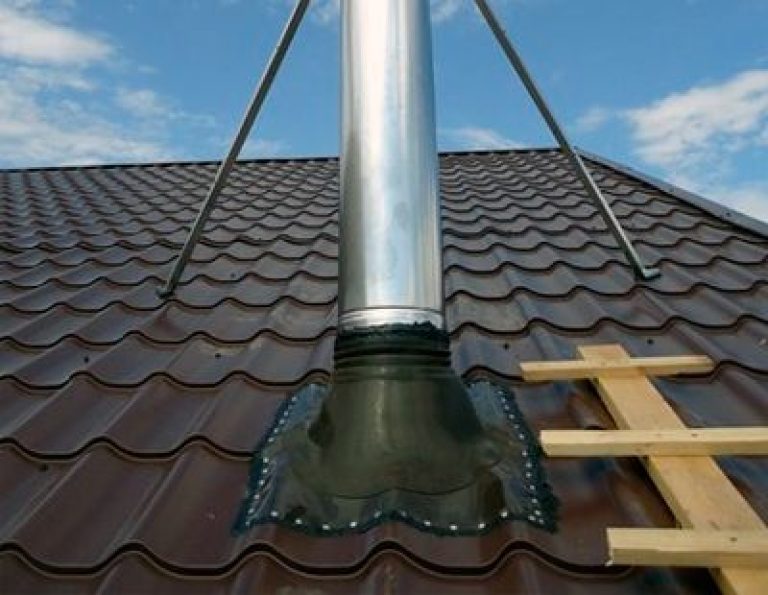
Any chimney pipes must be supplied with protective umbrellas.
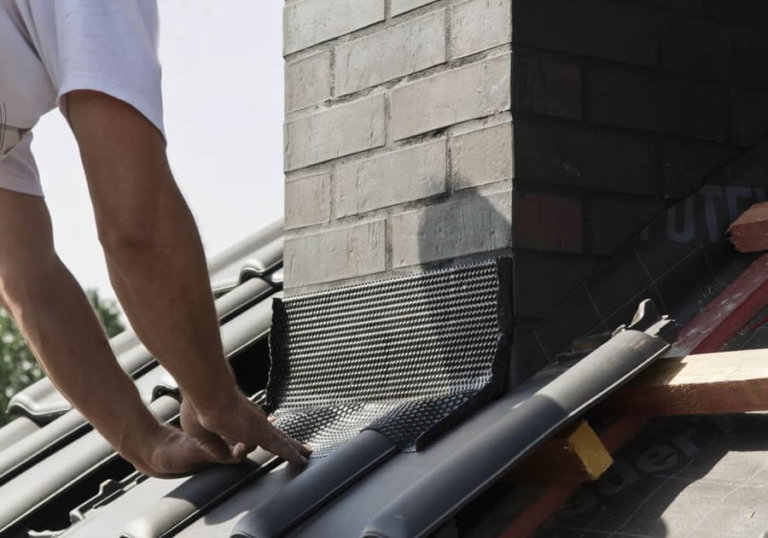
When forming the outer apron, waterproofing materials are used that are resistant to high temperatures. The ceiling openings around the steel chimney will need to be closed with a thermal barrier or duct; this requirement is relevant not only for wooden roofs. Instead of fluffing, vermiculite or expanded clay is sometimes used to protect the bulk of the material from overheating. But the traditional way using basalt wool is more practical and safe.
When removing any chimney through the insulated roofs put auxiliary transverse beams. Removing the pipe in the already created roof, the joints are treated with a sealant or covered with adhesive tape. To collect and drain condensate, a drainage channel is useful.It is not necessary to buy it, such a thing can be done with your own hands. Round chimneys are fastened with steel brackets, and gaps are always provided for the thermal expansion of the structure.
Regardless of whether the roof is equipped with a pipe or not, it is important to correctly calculate its slope. Not only the consumption of metal tile depends on this, but also the practicality of using the roof, its properties. The slope changes - and immediately another becomes susceptibility of the house to precipitation and wind, and the life of the structure changes. Calculate the required slope in size can, if you use a formula of the form X = H / (1 / 2L). The height here is the interval between the overlap and the ridge, that is, the growth of the rafters, and by the length is meant the width of the house.

To recalculate the slope of the roof in percentages, the result will remain only multiplied by 100. Elementary trigonometry (arctangent) will help to convert the calculated figure to degrees. According to this scheme, you can find out the necessary parameters for roofs with one slope, but then you need to take into account the full span. When the slopes are unequal among themselves, the distance is counted from the projection of the ridge on the overlap, and the angles are determined for each plane separately.
If the device is very complex, there are many differences and relief parts in it, they introduce an amendment to the horizontal projections.
The smallest (11 degrees) slope can be used only in an ideal situation when the effects of snow and rain are deliberately excluded. The level of load from the wind transmitted to the lower parts of the house will be small, but the snow and ice will not go down on their own. Judging by the recommendations of most manufacturers of metal tiles, the normal operation of the roof in winter conditions is guaranteed only with a slope of not less than 14 degrees.
It is not recommended to overestimate the parameters calculated or specified in the accompanying materials, because this will lead to an increase in material costs, an increase in the sail area of the roof being created and difficulties with wastewater.

But the maximum flat roof has its drawbacks.
After all, a small inclination does not allow to avoid water seepage through the joints between the sheets and the attachment point, so additional measures will need to be taken.
In winter, there will be more problems with cleaning the roof from snow - if this is not done or is not enough, it can fail.At small angles of inclination the crate becomes heavier, it will be more difficult to attach parts to it. And one more drawback - you will not be able to make an attic or an attic of a large area.
If to consider peaked roofs, other difficulties come to light here. Thus, at a 45-degree angle, the snow mass will itself slide down. But a heavy metal tile can repeat the same maneuver and will have to strengthen the mount, attach each element to the crate as carefully as possible. Extremes converge - both with insufficient and with excessive steepness, it will be necessary to put more sheets. Therefore, angles of 11 and 70 degrees are theoretically possible rather than realizable.
For a shed roof, the most practical value is a corridor from 20 to 30 degrees, and for a gable the second figure can reach 45 degrees.
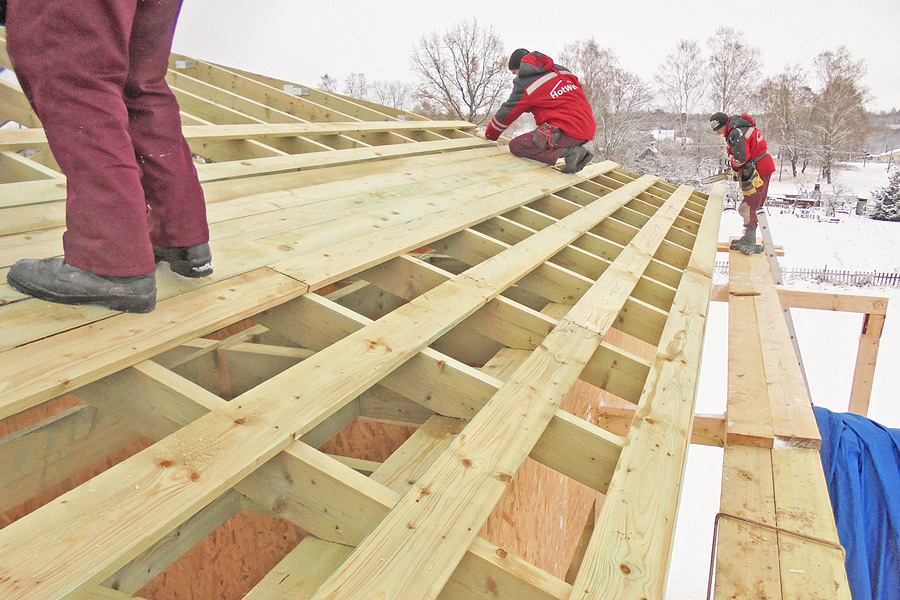
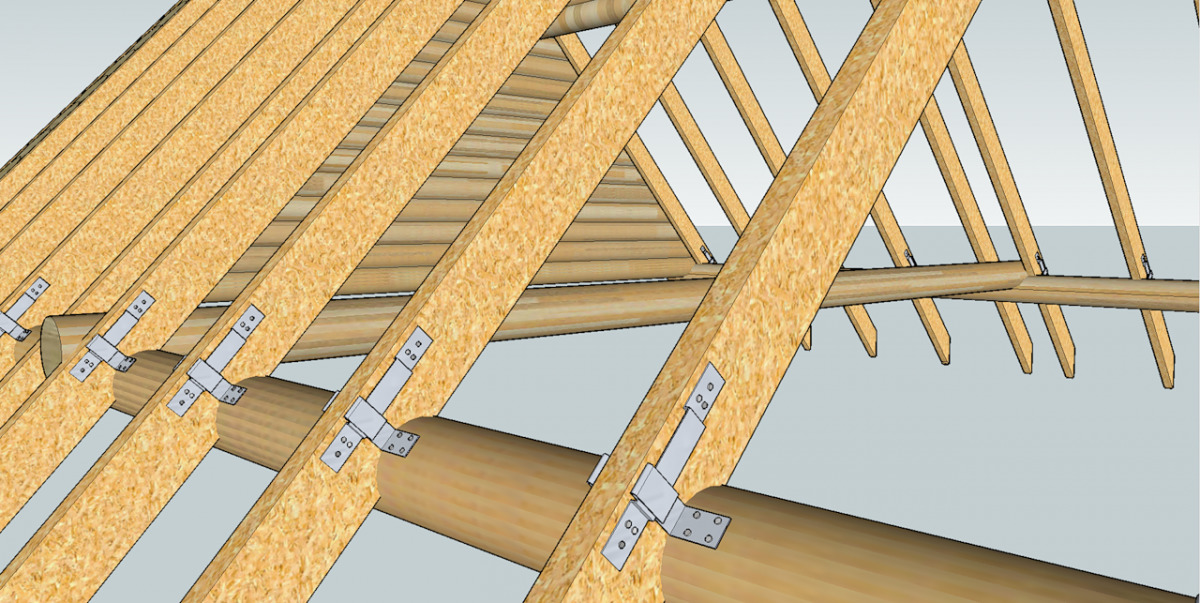
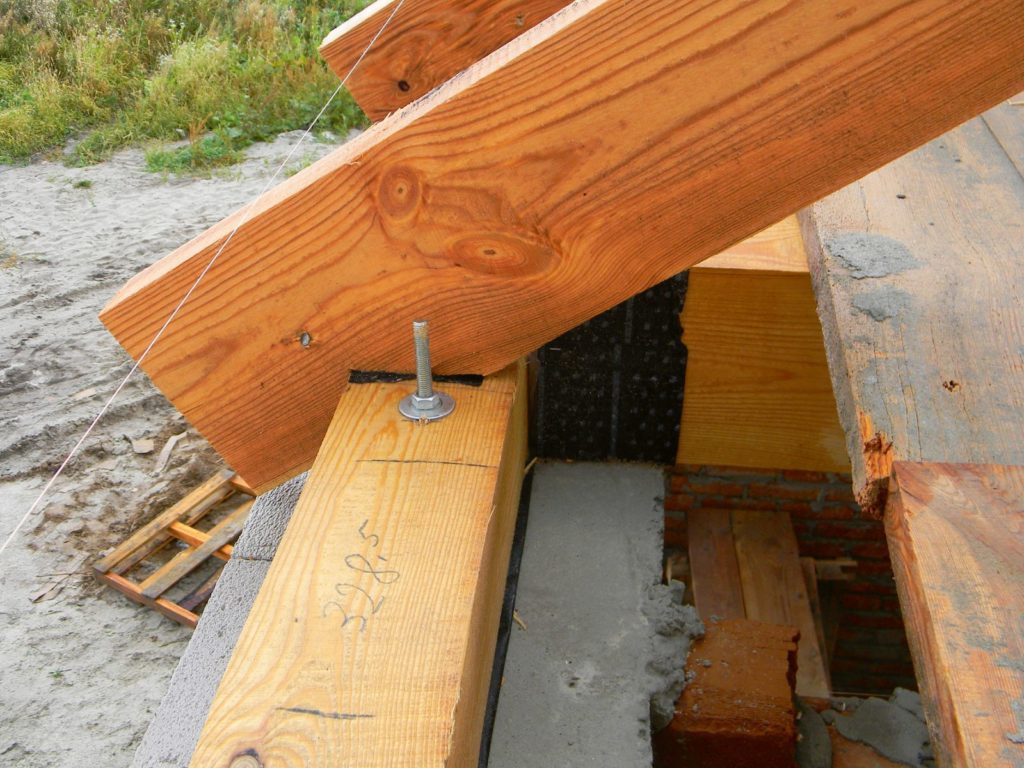
When the outer contour and shape are selected, it is time to deal with the trusses. As a mauerlat, usually, coniferous timber in the form of a square is taken, its side is 10 or 15 cm. The cross-section of the cross-section should be exactly the same, this part is placed at a right angle to the bearing walls. A triangular roofing structure is assembled from the rafter legs, which takes the brunt of the weather element, therefore special attention should be paid to its creation.Additionally, stands are prepared, directed along the vertical of the structure, due to which the compression from the ridge evenly spreads along the bearing walls.
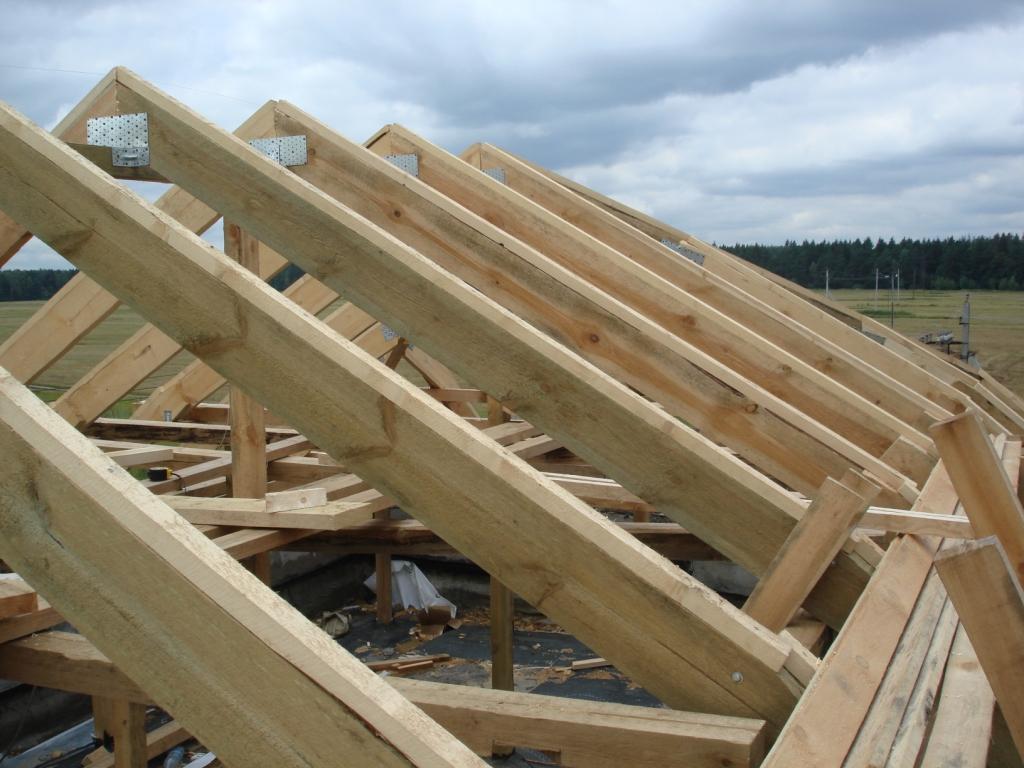
The length of the ribs at the racks is determined not by standard standards, but by performing special calculations.
In addition to them, equip the tightening - it is the horizontal part of the truss triangles, which prevent the legs from moving arbitrarily under different loads. But they only use puffs when creating hanging trusses, and if they have a solid support, there is no need for this element at all. The redistribution of bending loads from the ridge nodes carry out the struts. As for the sheathing, it is made of wooden boards, timber, placed at an angle of 90 degrees relative to the legs of the rafters, and enhances the overall rigidity of the roof.
In addition to these elements, you will need to do:
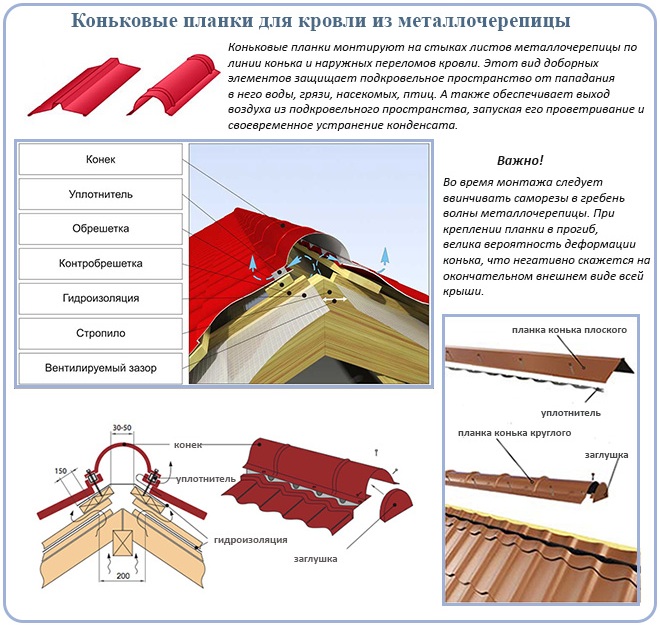
- ridge (right joint between slopes);
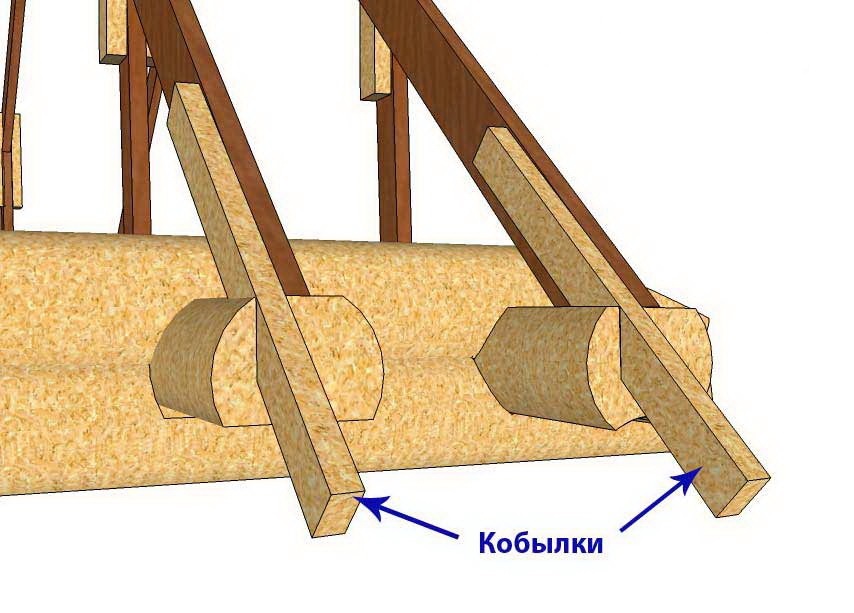
- overhang - a detail extending beyond the contour of the bearing walls by 40 cm and preventing moisture from penetrating to their surface;
- fillies - replace the overhang, if the ends of the rafters do not allow it.
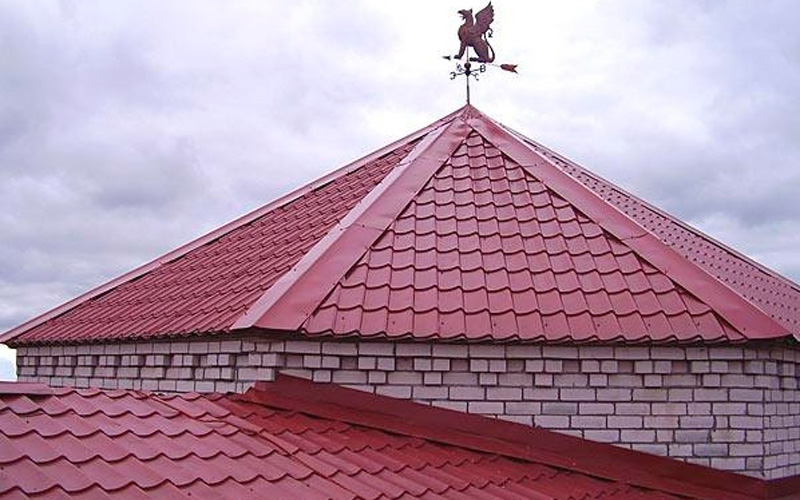
As for the choice of the number of skates, it should be made not only for aesthetic reasons.
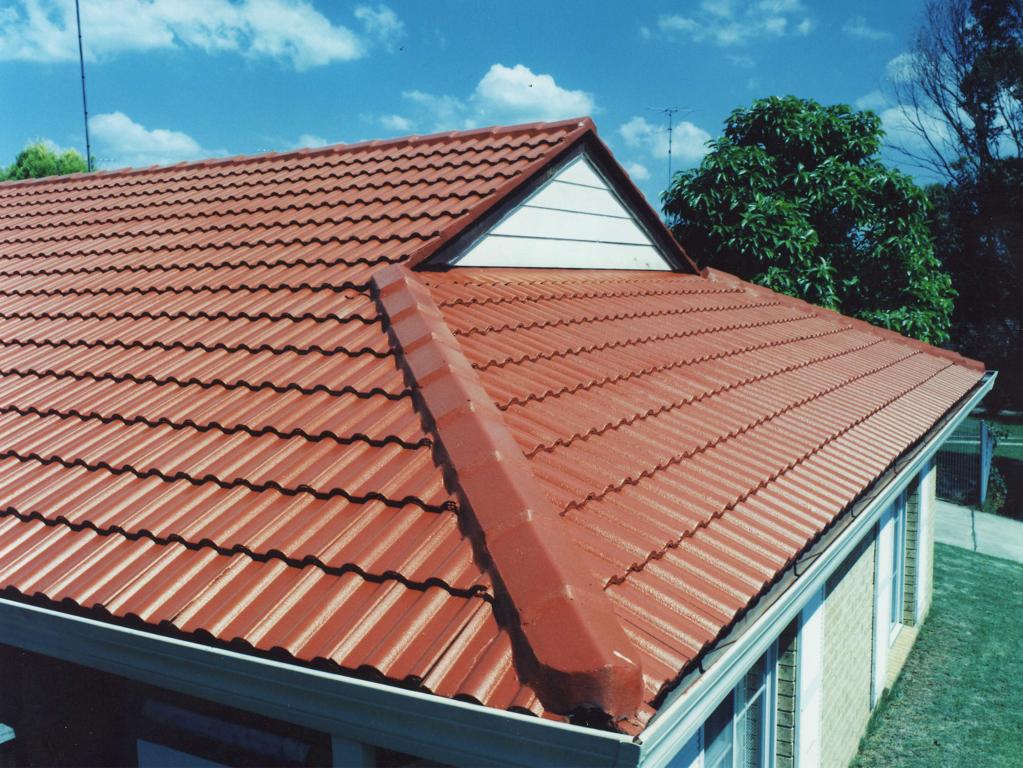
Thus, single-pitch roofs are used only where there are no attics — on small houses, above porches and extensions, above economic structures.
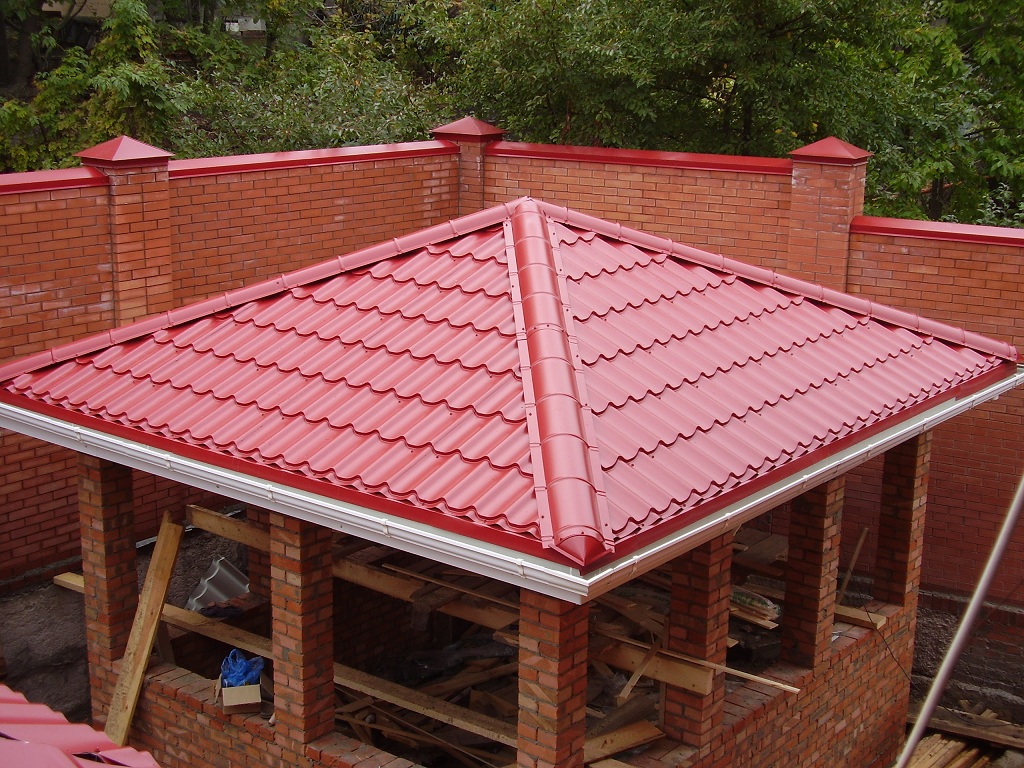
Tents are different from ordinary gables in that the gables seem to be cut at an inclination to the full height. The half-hinged roof is similar to a hip roof, equipped with the same four slopes in the form of a triangle, but the gables are only partially cut. If the main part of the building is round, the roof is made in the form of a dome, but all of these options, as well as conical, two-gables, and so on, are much less common for gable and single-sided roofs.
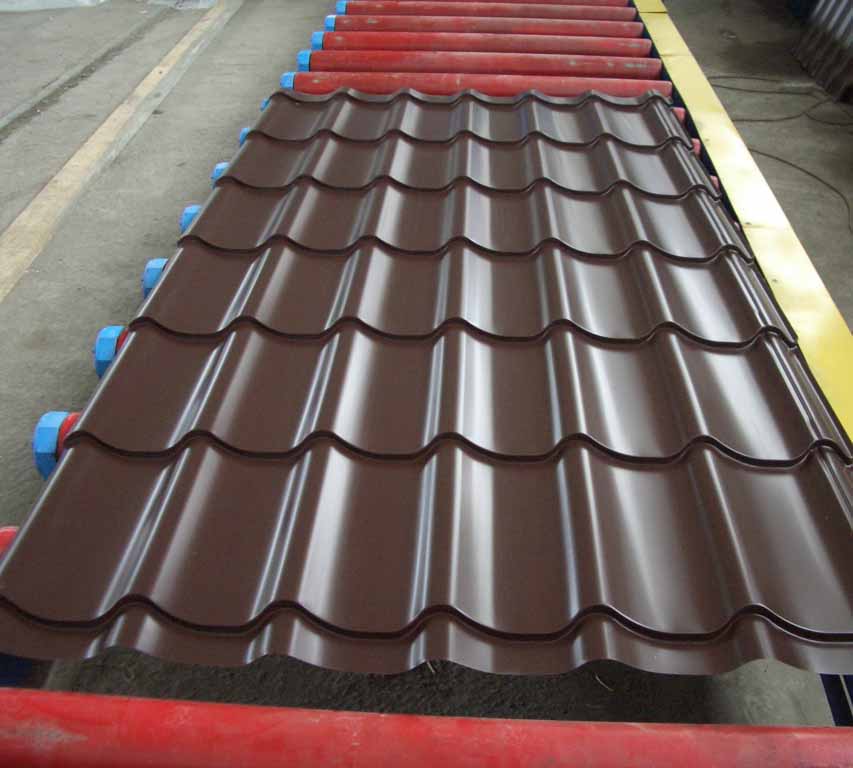
Calculations
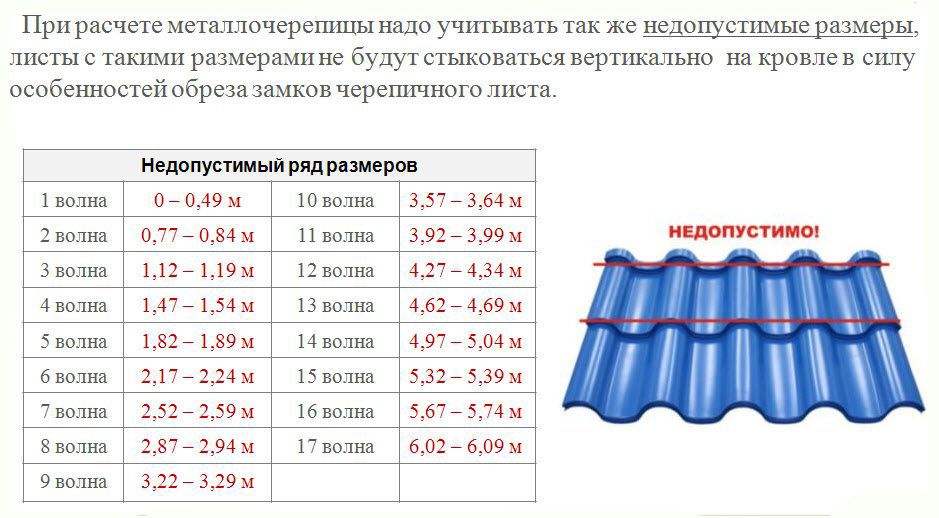
When looking at the roof of a metal tile it is found that it is formed by rows and waves (that is, lines perpendicular to the plane of the slope). The gap from one row to another among roofers was called the step of the wave. When on a tile sheet the step is 350 mm and six waves, it is called a module. Typical offers of the Russian market include from 1 to 10 modules. You can choose individual sizes, but then the total cost will be much higher.
It is important to remember that for technical reasons the sheet cannot be shorter than 45 and longer than 700 cm, and all waves and joints necessarily form a monolithic ensemble along the slope.
Considering the required number of modules, it is easy to determine how much material will be spent on the roof of one roof. In addition to the base material, you will also need steel strips (each 200 cm in length) and sheets of steel 200x125 cm, painted the same way as tiles. The minimum angle of inclination is 11 degrees, and the maximum - 70 degrees. Most often delivered levels are calculated on a roof with a bias in 30 degrees. If this value is different, they are customized according to individual requirements defined in the scheme.
Installation Methods
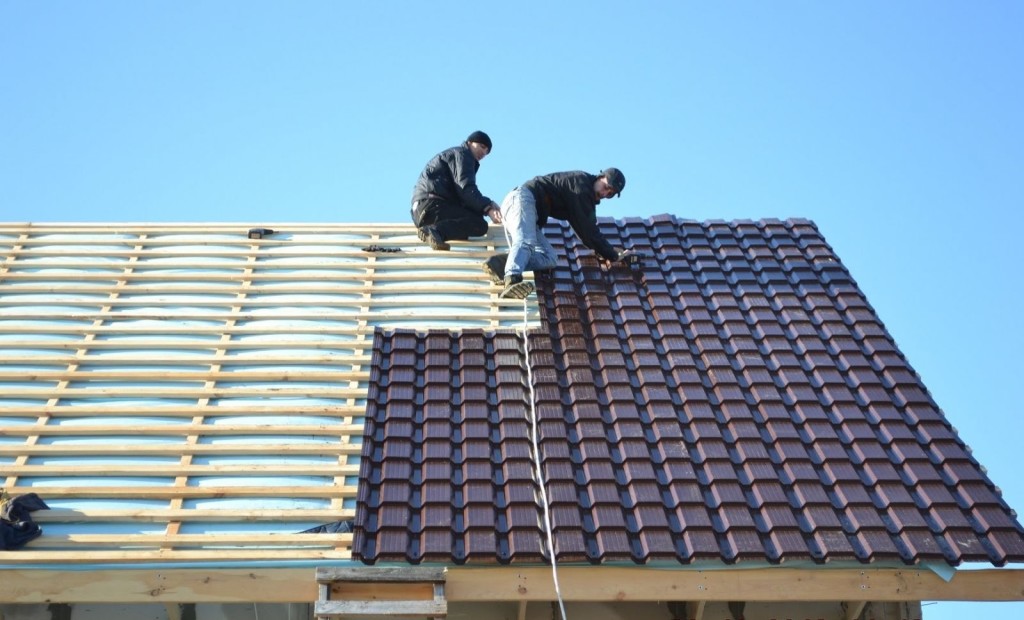
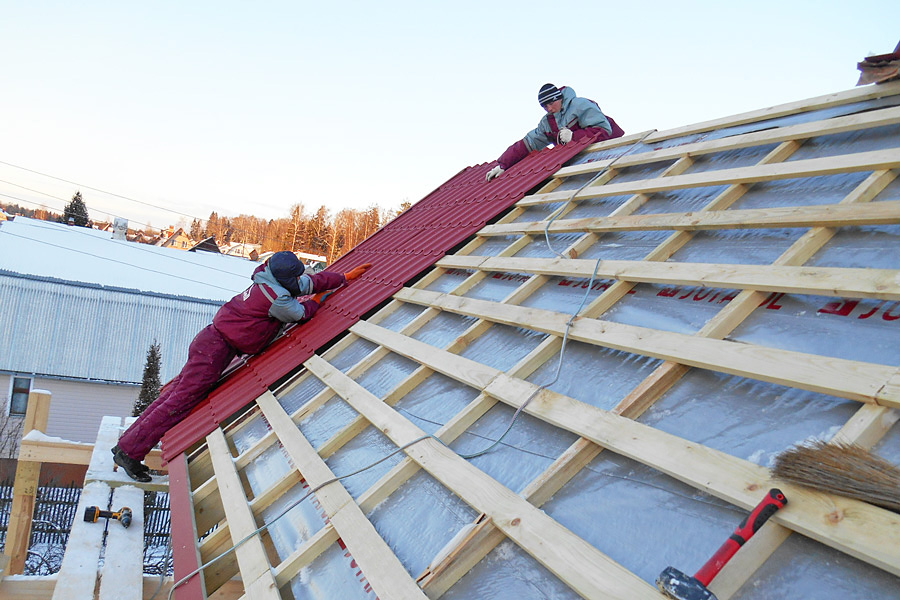
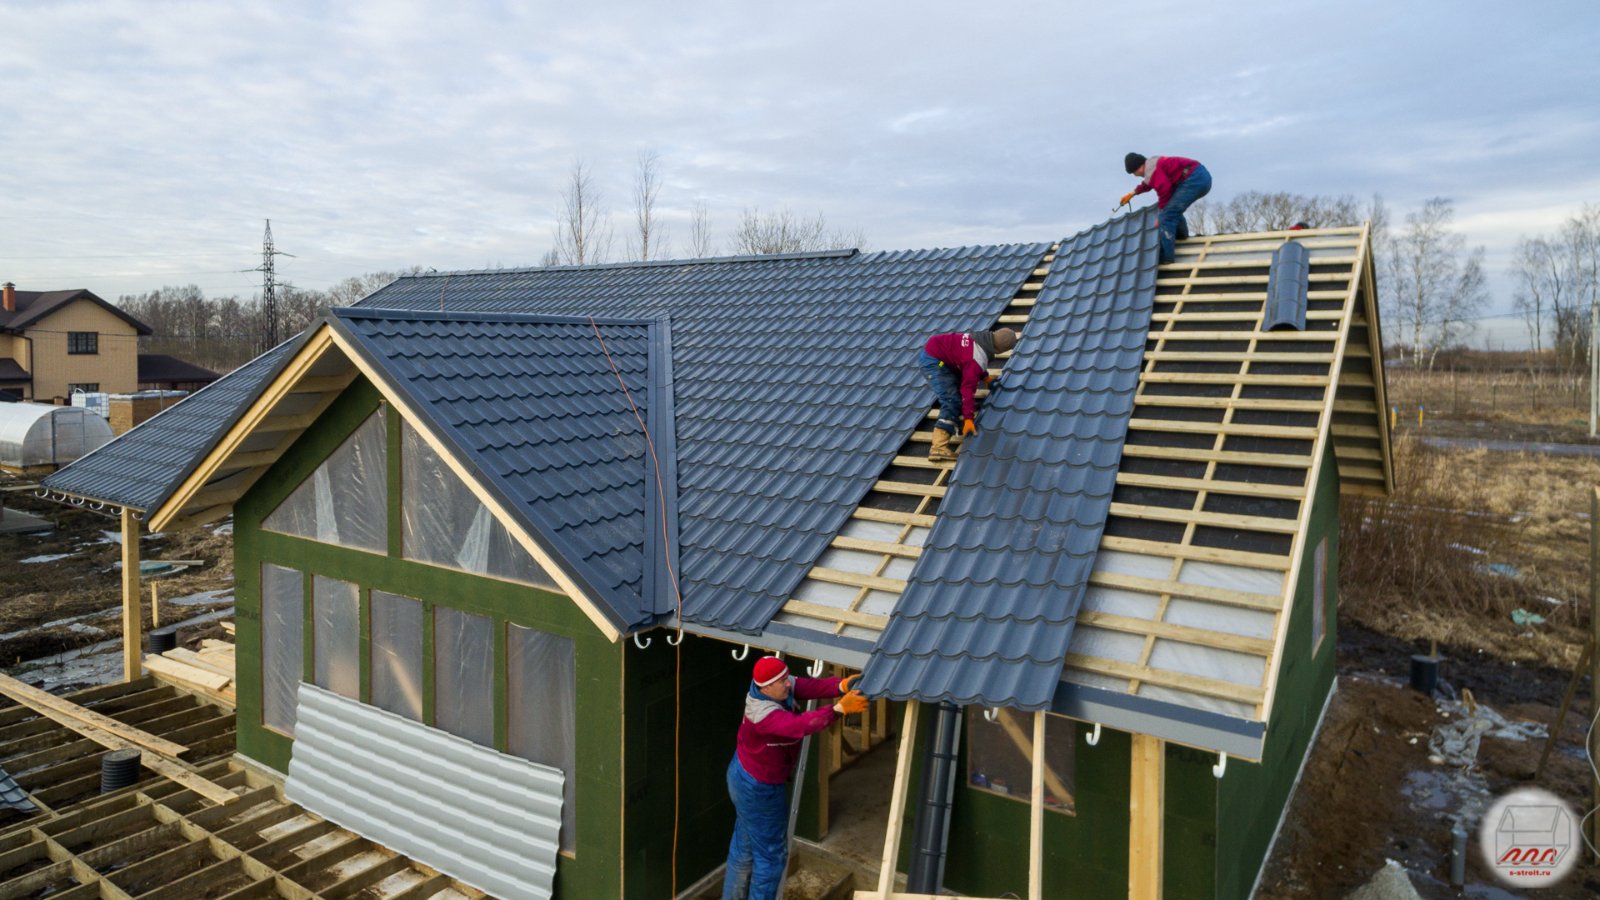
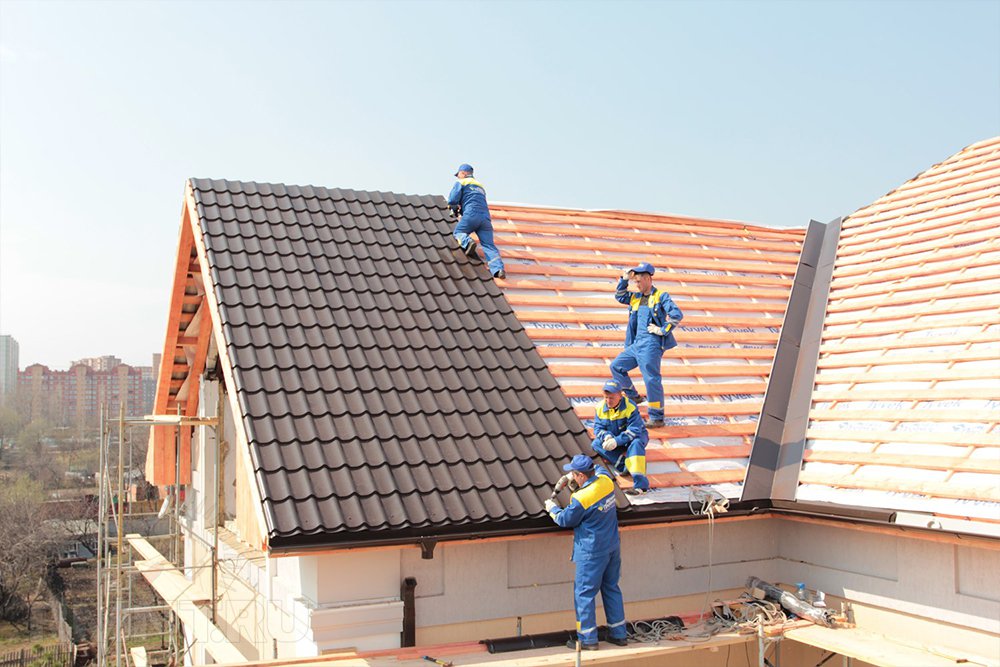
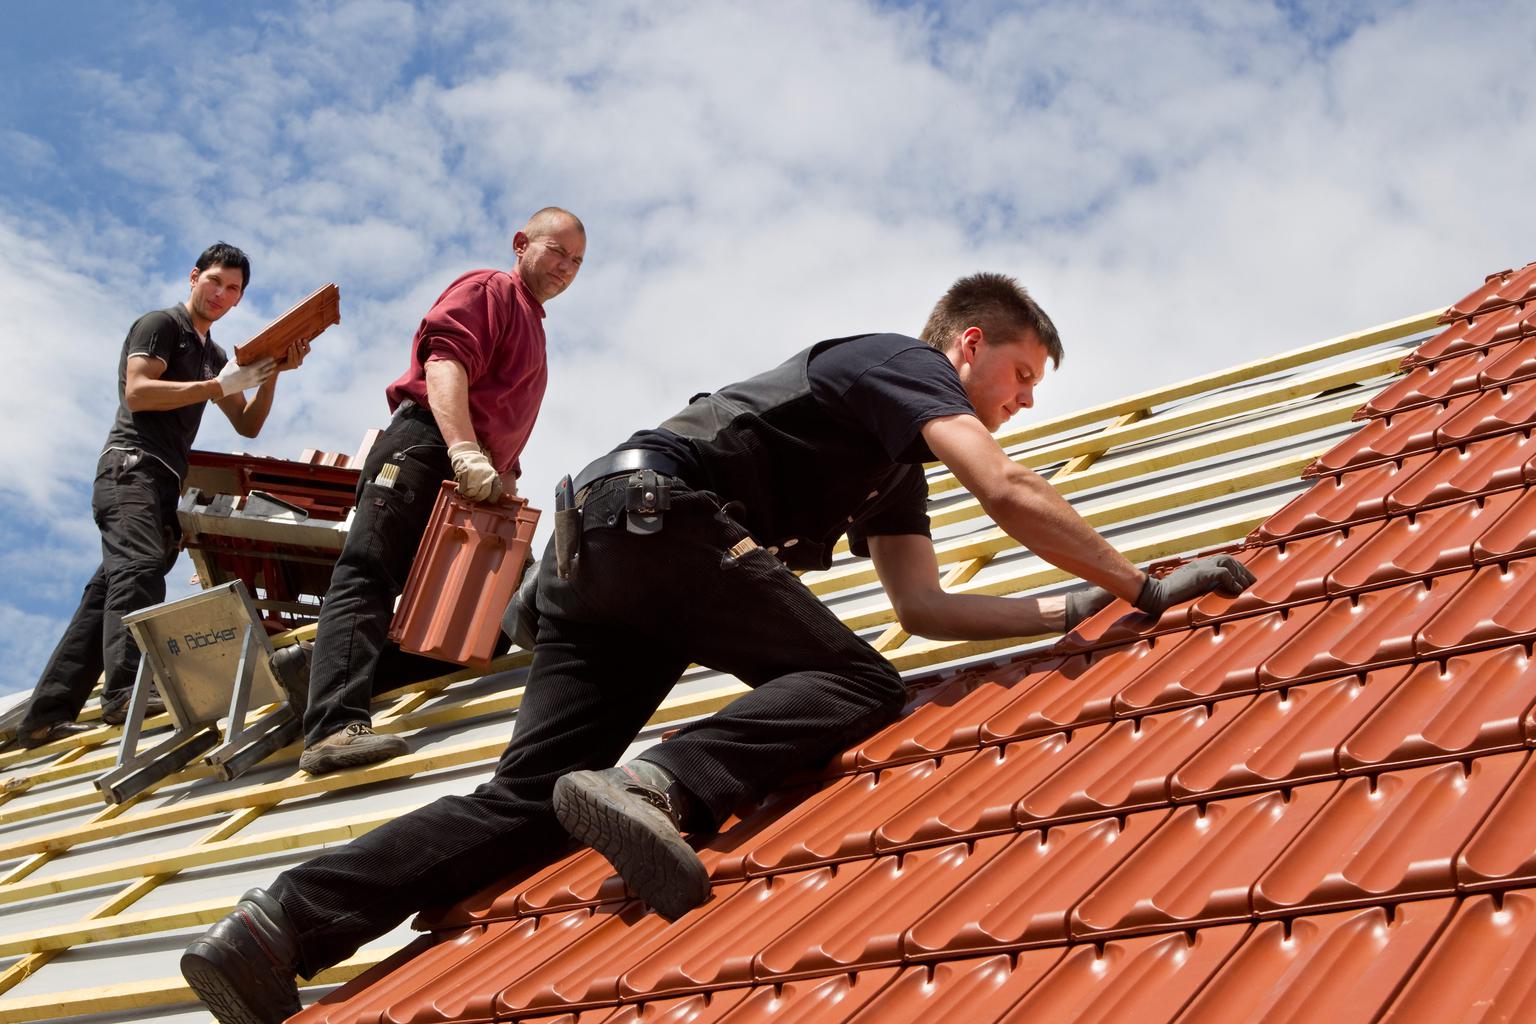
Select the appropriate type of roof and carefully calculate its parameters - only half the solution. It is important to find out how best to lay the metal tile. This is a reliable material, but if an error is made while laying, after a few months all the work will need to be redone. There are two time-tested installation options: one row and several rows at a time. Regardless of the chosen path, 2,3 or 4 sheets are assembled into a block, attaching to each other for short screws.
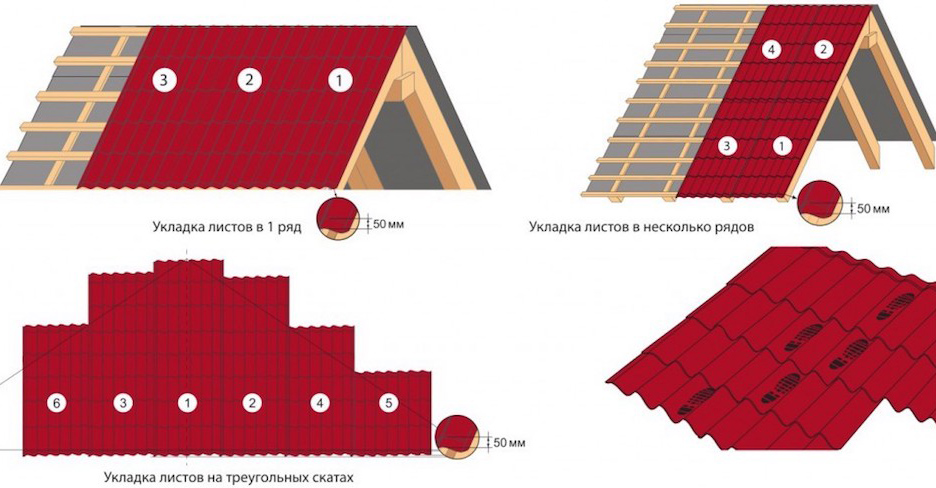
Then they are attached to the crate, trying to get as high as possible. Then there will be an opportunity to twist the block around the central self-tapping screws, aligning laying of sheets for their optimum exhibiting.If single row mounting is selected, the very first sheet becomes guides for the entire strip. It is aligned on the eaves and the ends of the slopes, and for greater convenience, attached to the screw at the ridge. The second sheet is required to put on the left in an overlap on the first.
Then these did connect with each other with a screw: it is inserted over the wave under all transverse folds. This method allows you to lay out the blocks of a pair or two pairs of sheets. For your information: the sheet finishing each strip is not attached to the base until the next package of metal tile is leveled. Installation in several rows is significantly different - working from right to left, but still the first sheet is leveled, focusing on the eaves and ends. The second piece of metal should overlap the first, and they are attached to a common screw at the ridge in the middle of the sheet.
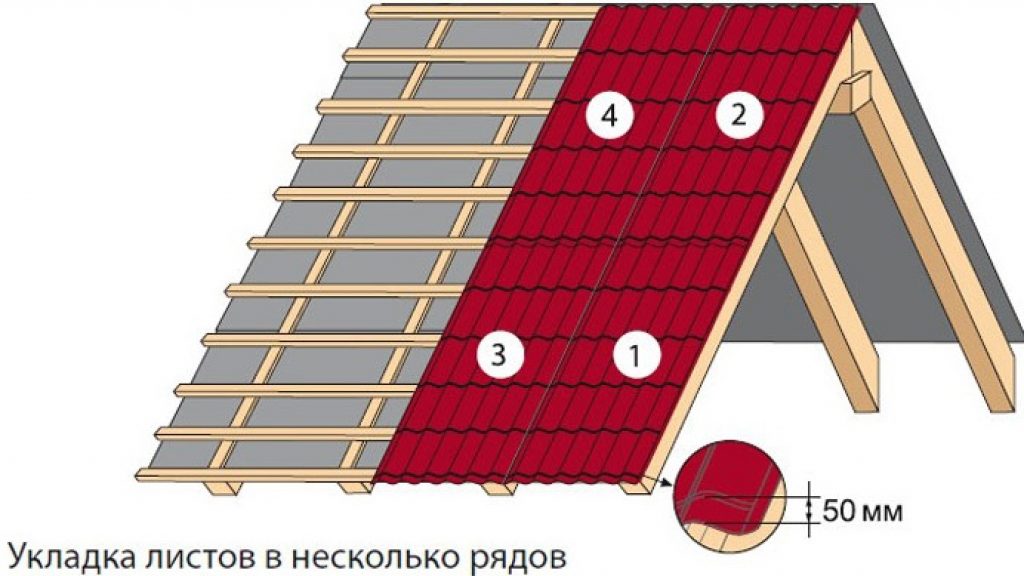
The junction between the parts of the cover is clamped with screws, which are inserted into the top of the wave. The third sheet of the row is placed to the left of the first. To cover the roof was more convenient and easier, you should start from the side where there are no bevels and cuts, other parts of the roof, which would require cutting the sheet. Lay the material, moving to the slanting skates or to the sloping ridge.The fourth sheet is superimposed on the third and they are tied with short screws, but they are not screwed to the crate (after all, you will need to adjust the geometry of the lined block).
Detailed guide to work
Briefly acquainted with the device of the roofs of metal and its installation, it's time to find out how to do all the work in stages. The design of the roofing pie differs depending on whether the warmed or cold roof gets off.
Rough finish
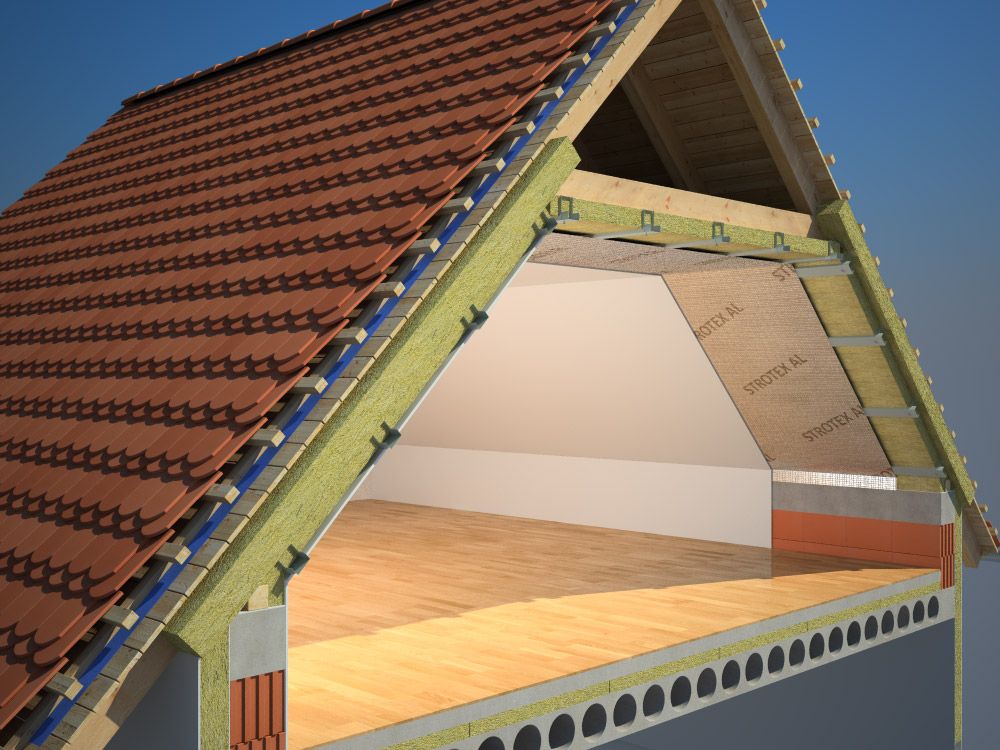
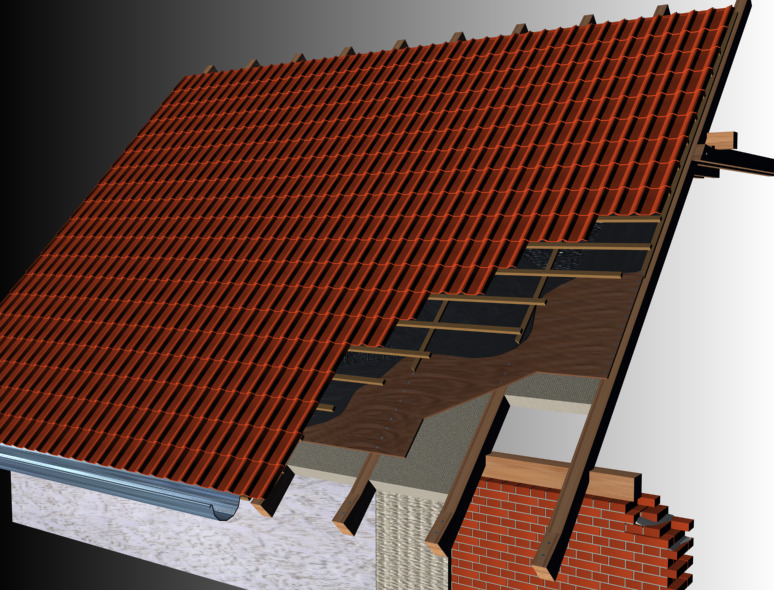
Apart from the facing layer itself, above the warm attic are placed (from top to bottom):
- crate;
- counter lattice;
- water retaining membrane;
- a layer of fire resistant insulation;
- steam barrier;
- substrate.
For cold attics, the device is simpler - there is no need for warming and limiting the movement of steam.
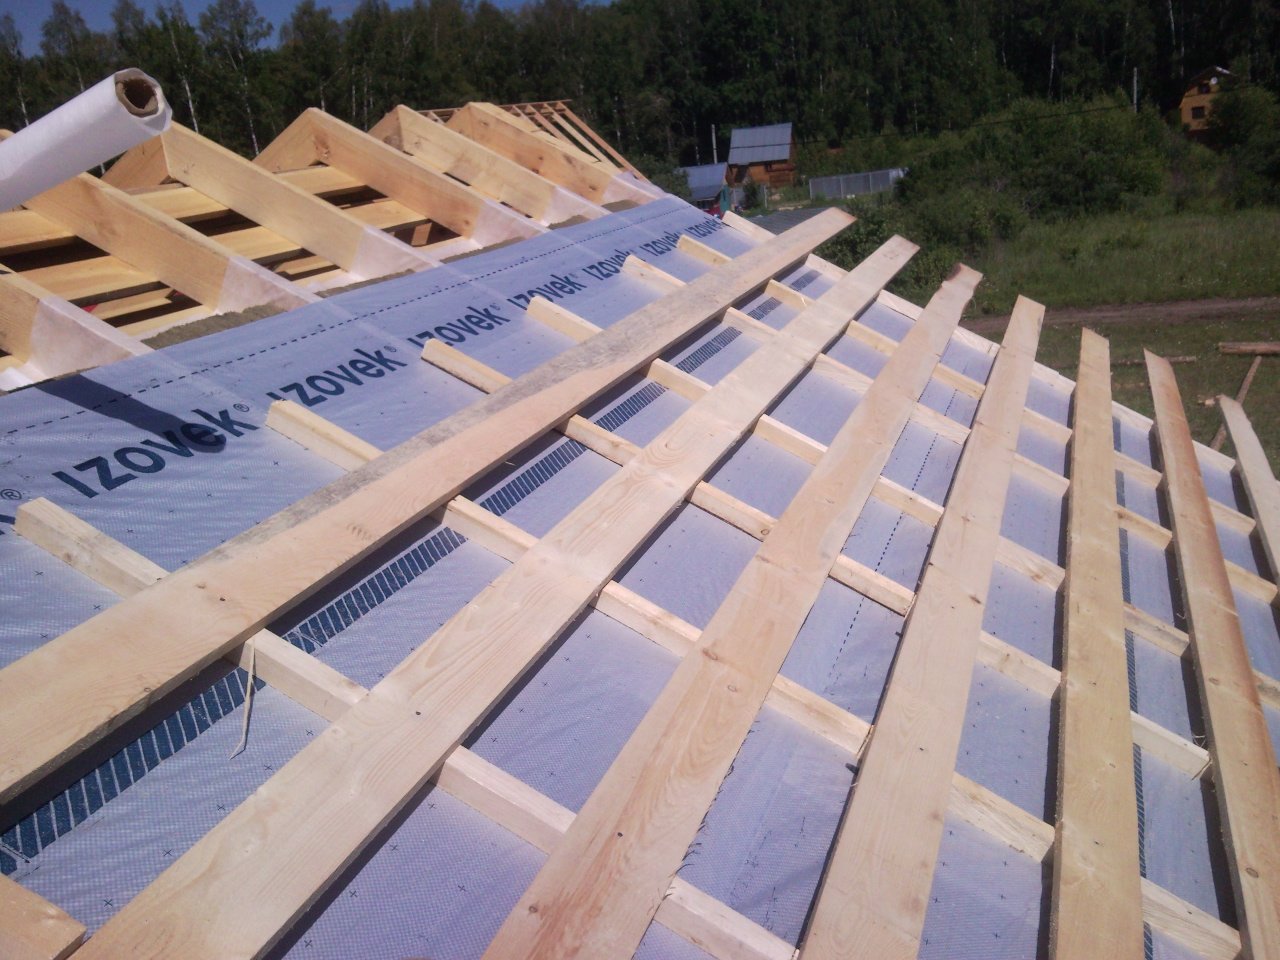
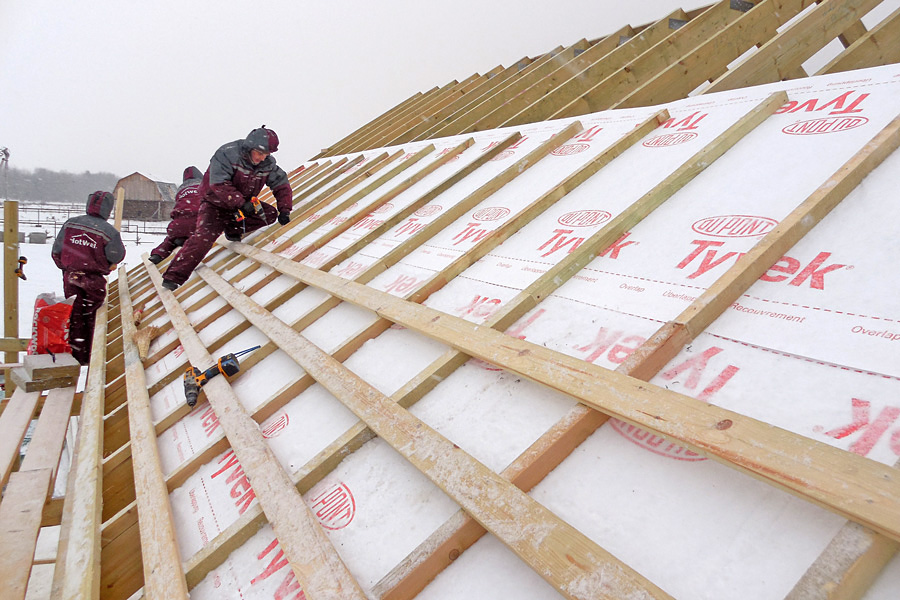
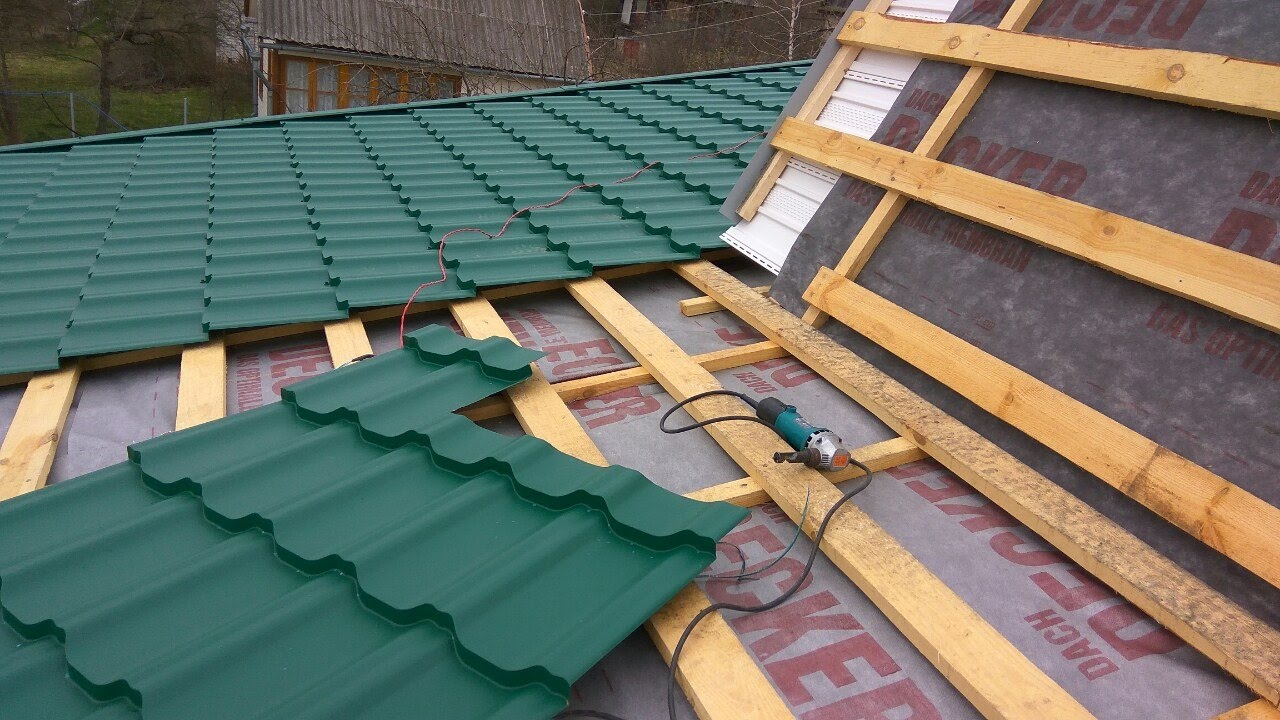
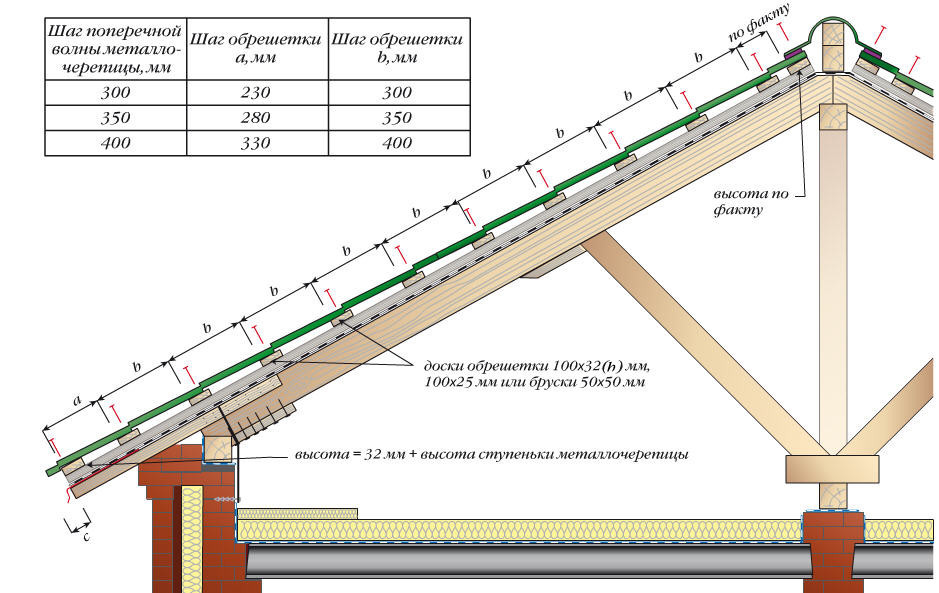
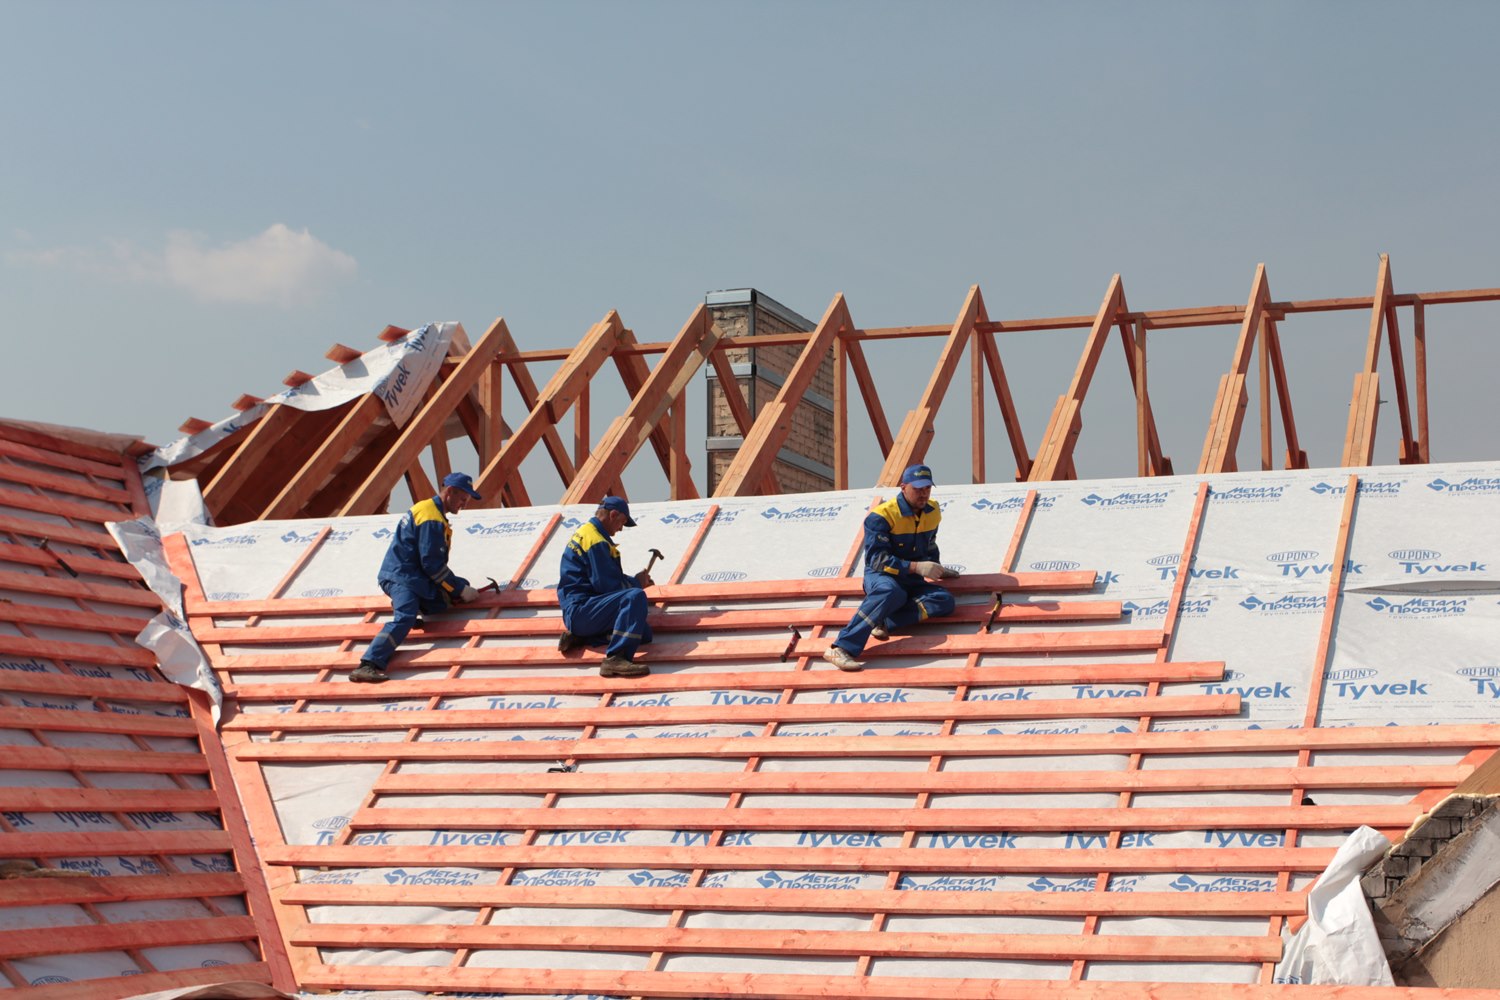
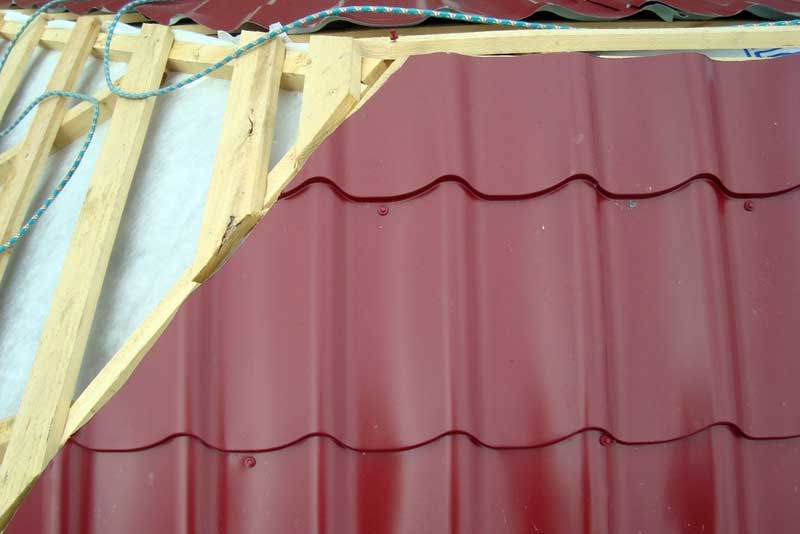
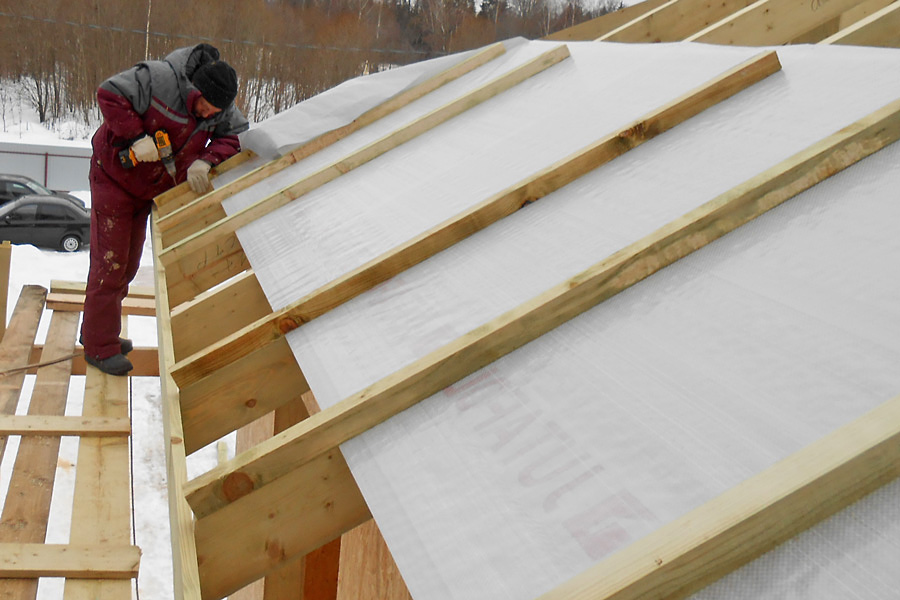
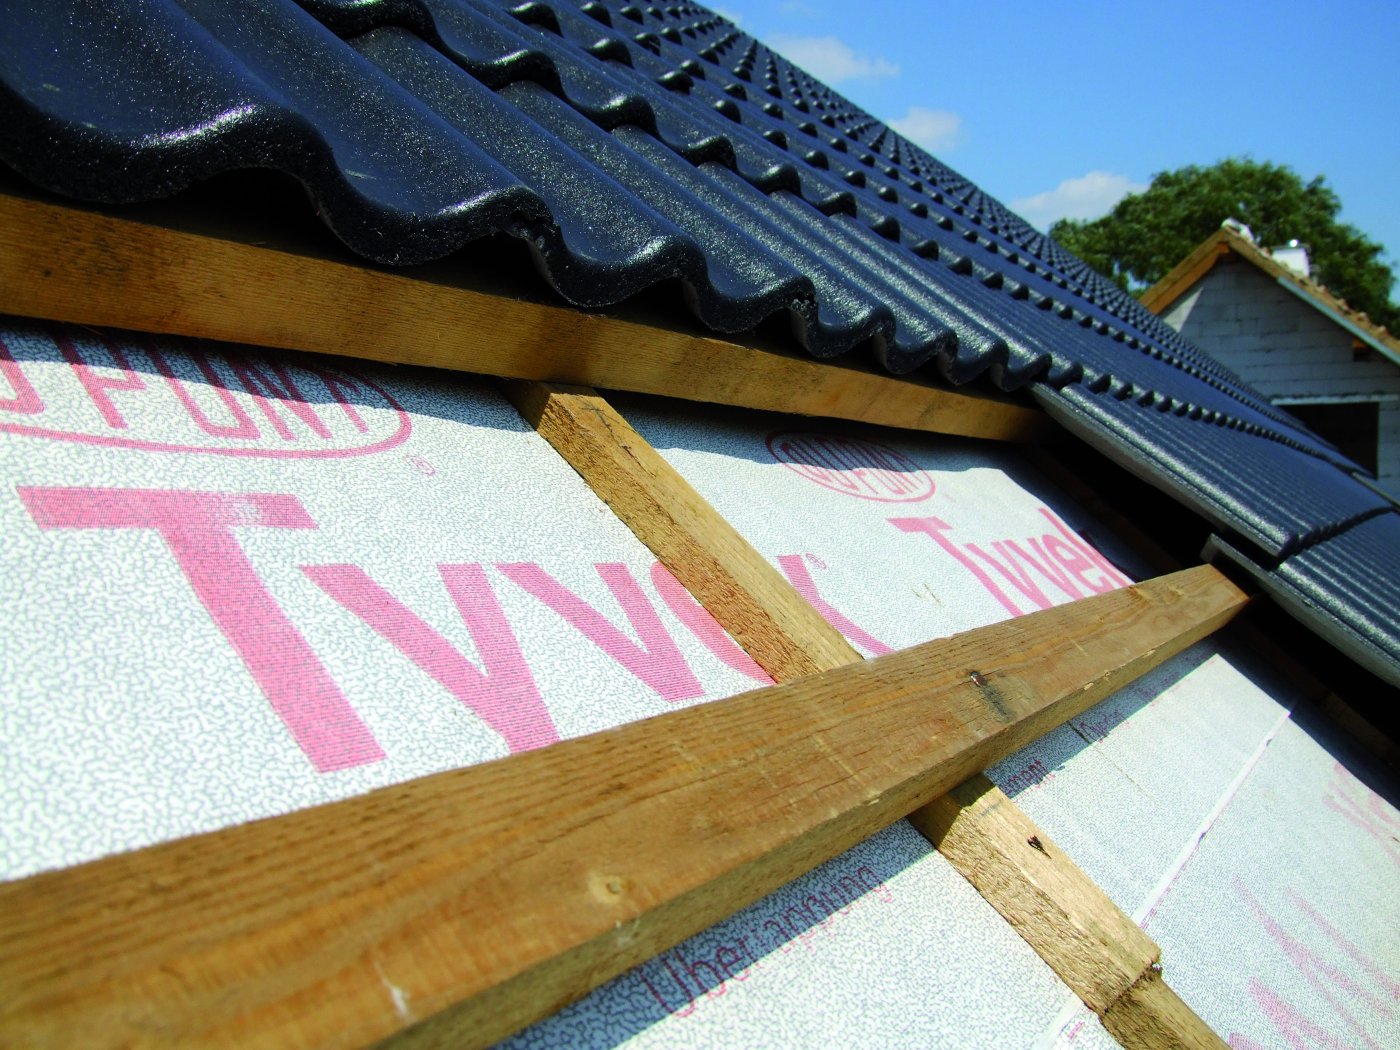
The crate is made of 5x5 cm timber, the alternative is the boards of 3.2x10 cm. In both cases, the constructions are attached to the counter-lattice beam held by the rafters. Thanks to the counter lattice, not only the mechanical coherence of the pie pieces is ensured, but also a ventilated space is formed inside it.And because it reduces the risk of colliding with the accumulation of condensate.
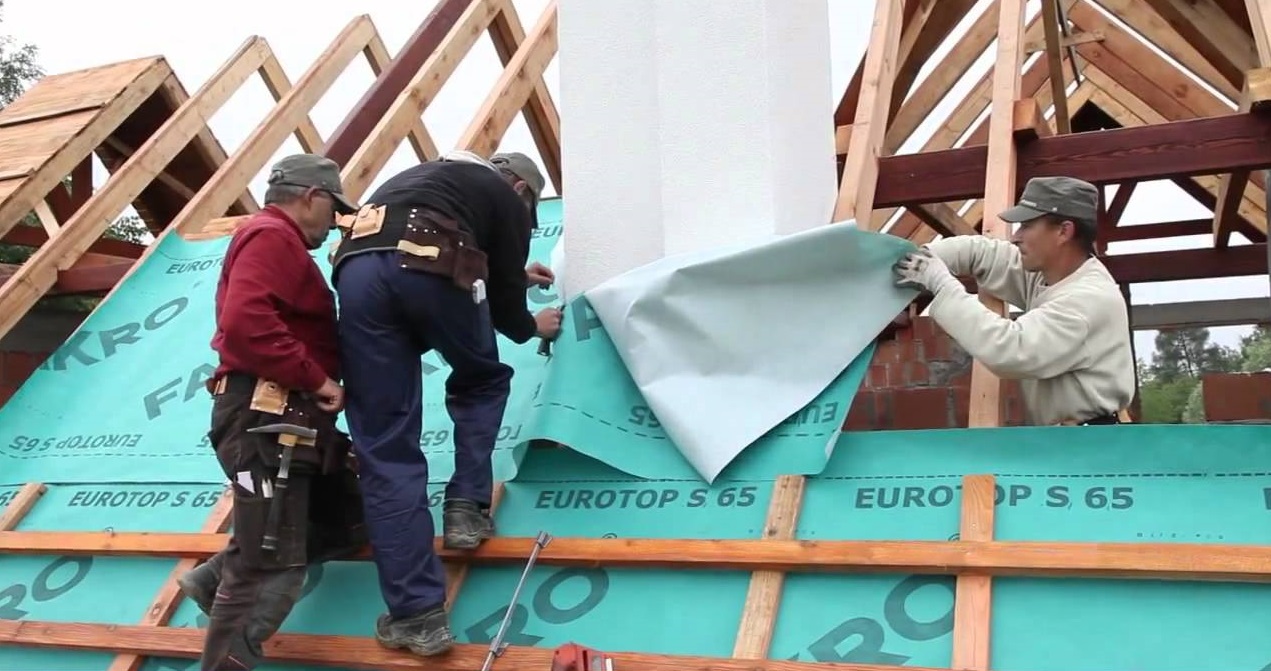
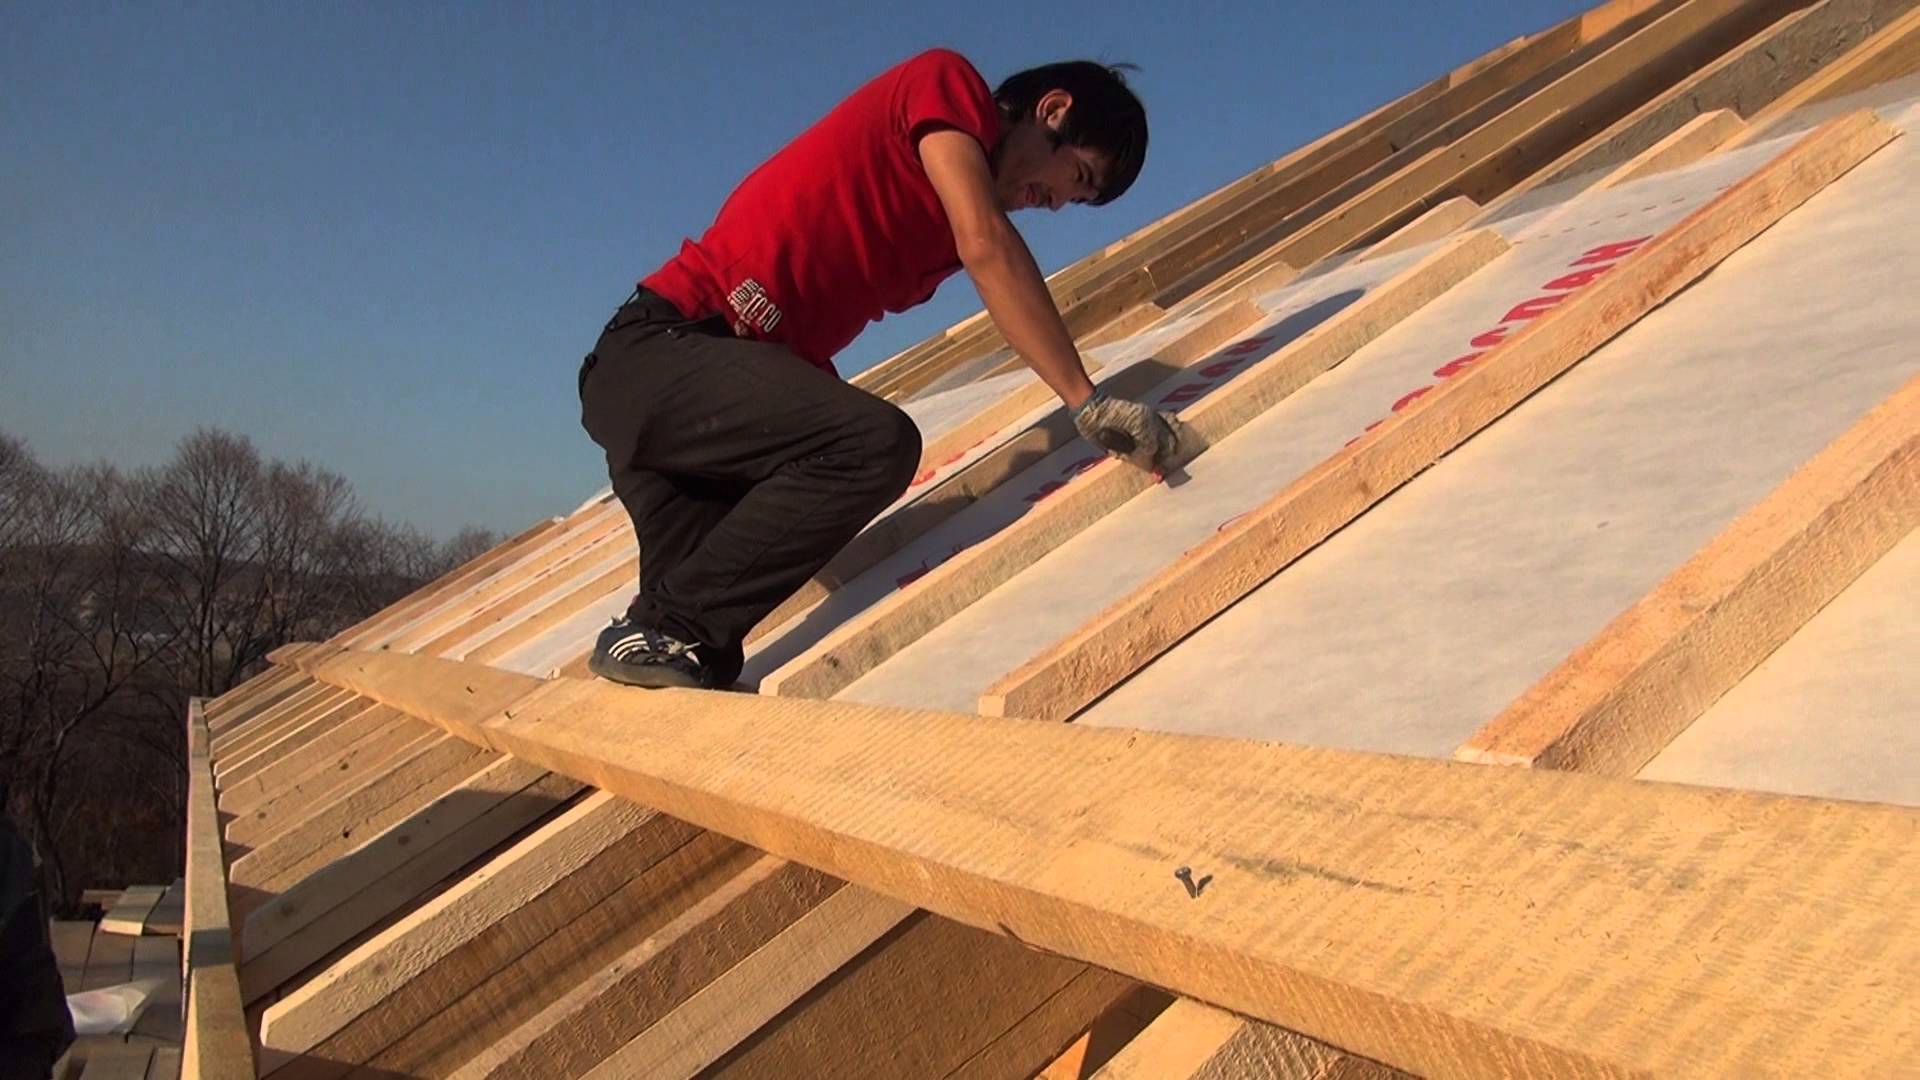
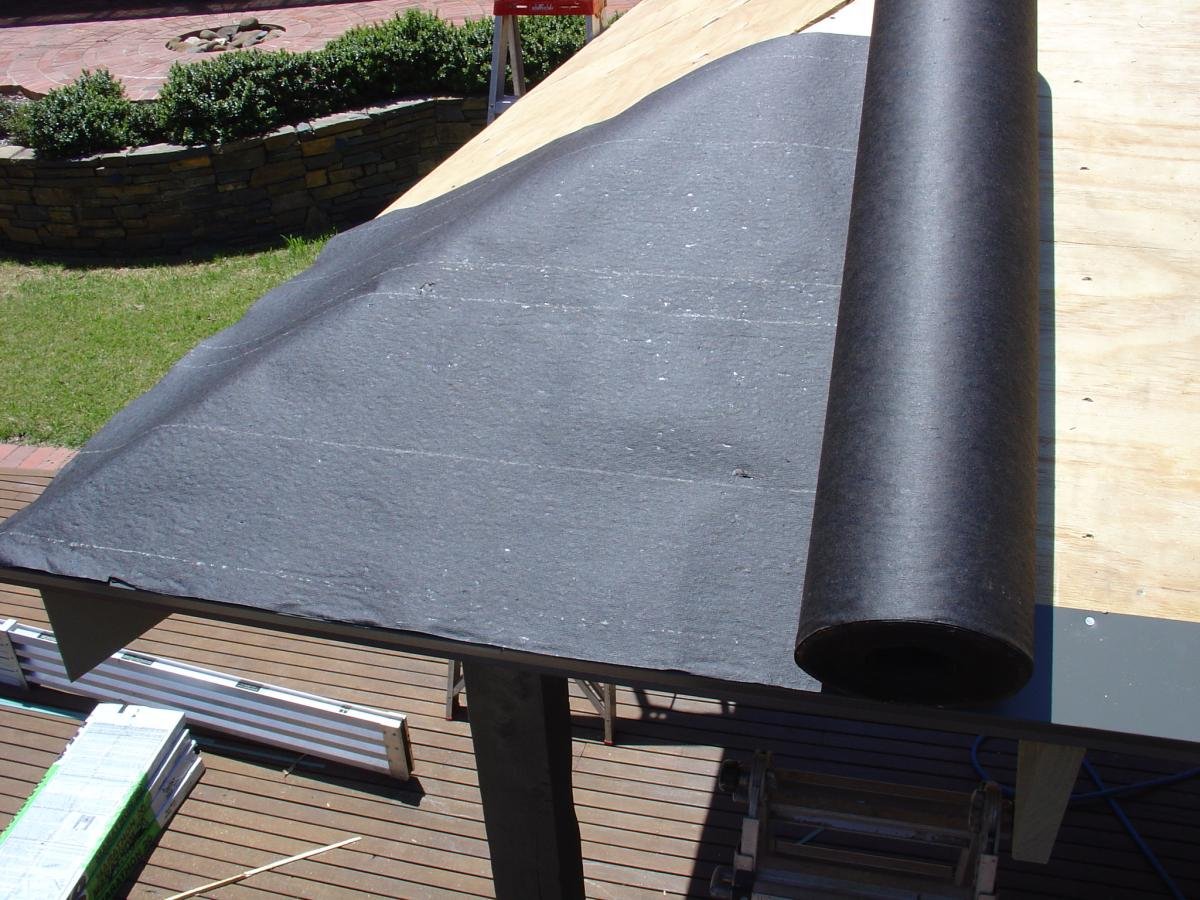
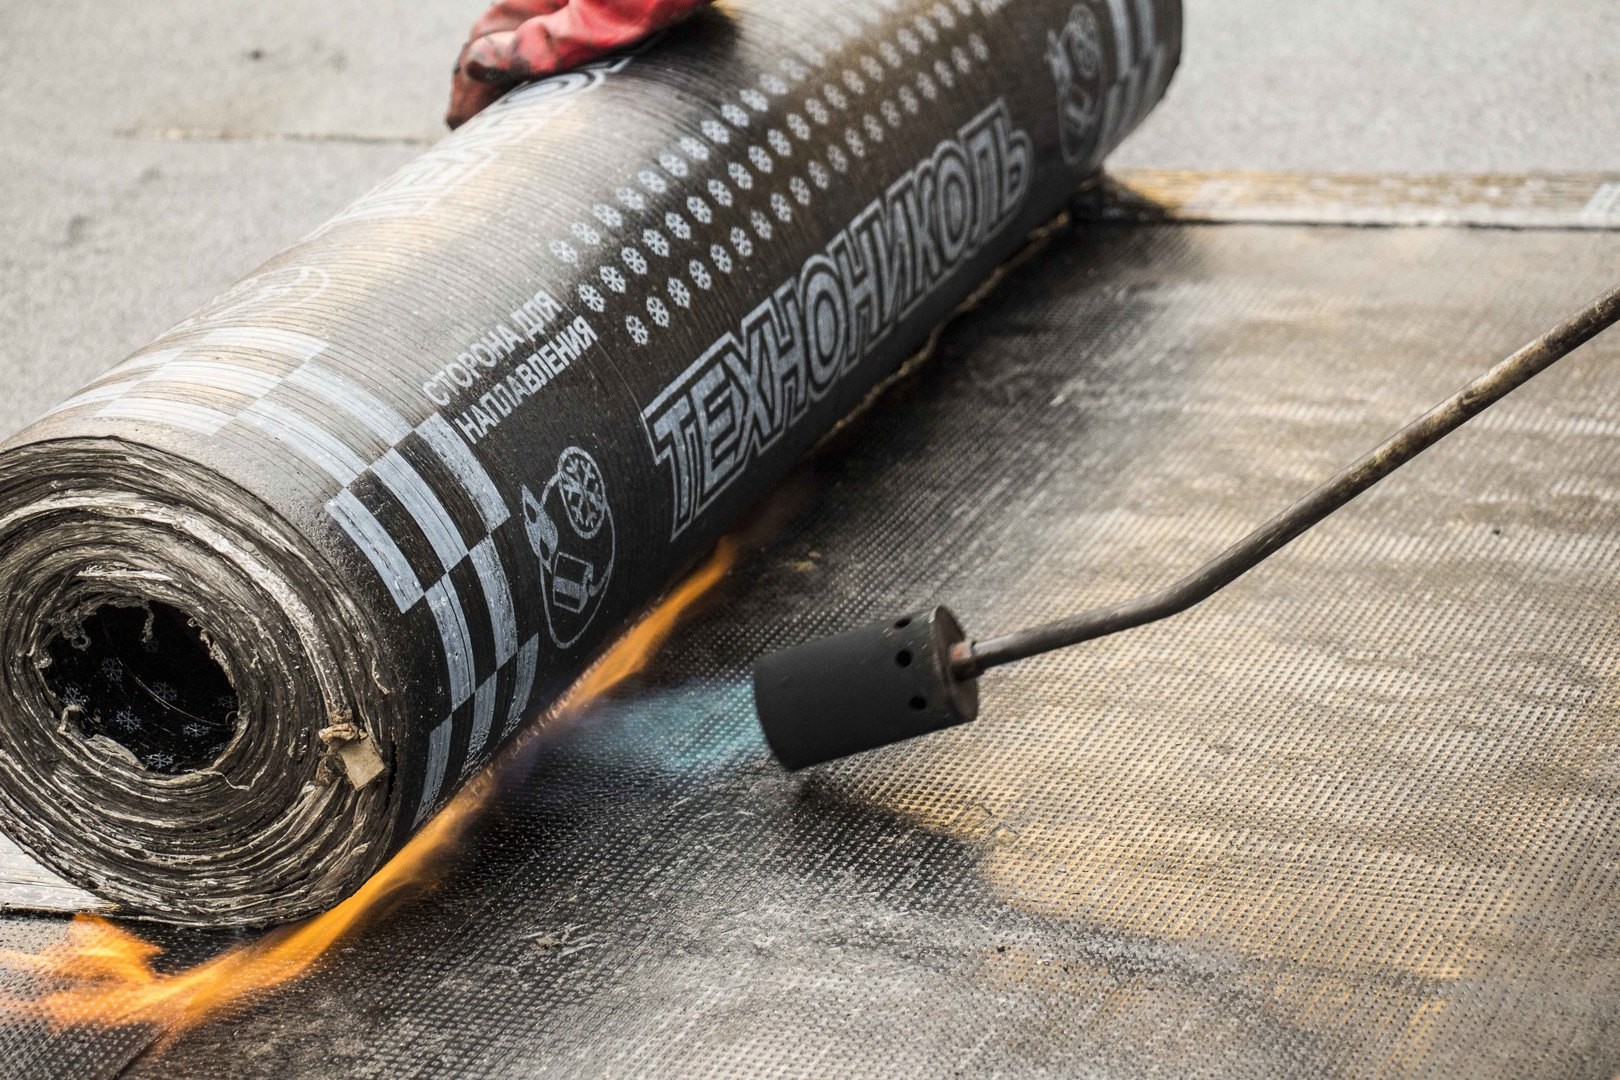
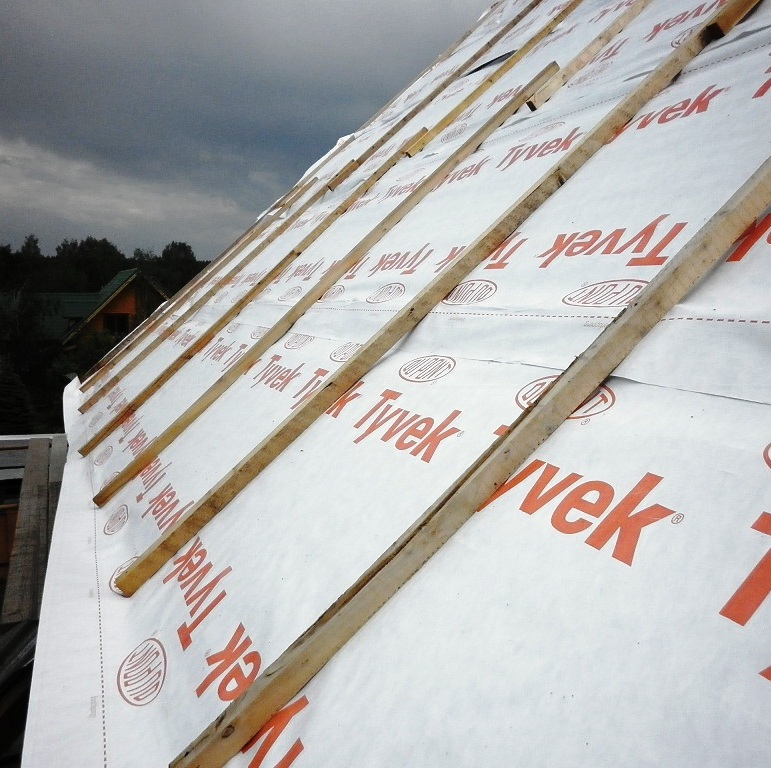
It is impractical to make a monolithic flooring of wood under the metal tile, because parts of the batten are mounted at intervals of 35-40 cm. The exact value is determined by the wave step. Where the gutters and cornices are located, the board flooring is 14-15 cm wide. Beforehand any piece of wood is supposed to be impregnated with antiseptics and means of protection against fire. Then comes the turn of the waterproofing membrane or film, which must pass the vapor, not to be destroyed by ultraviolet radiation and last for a long time.
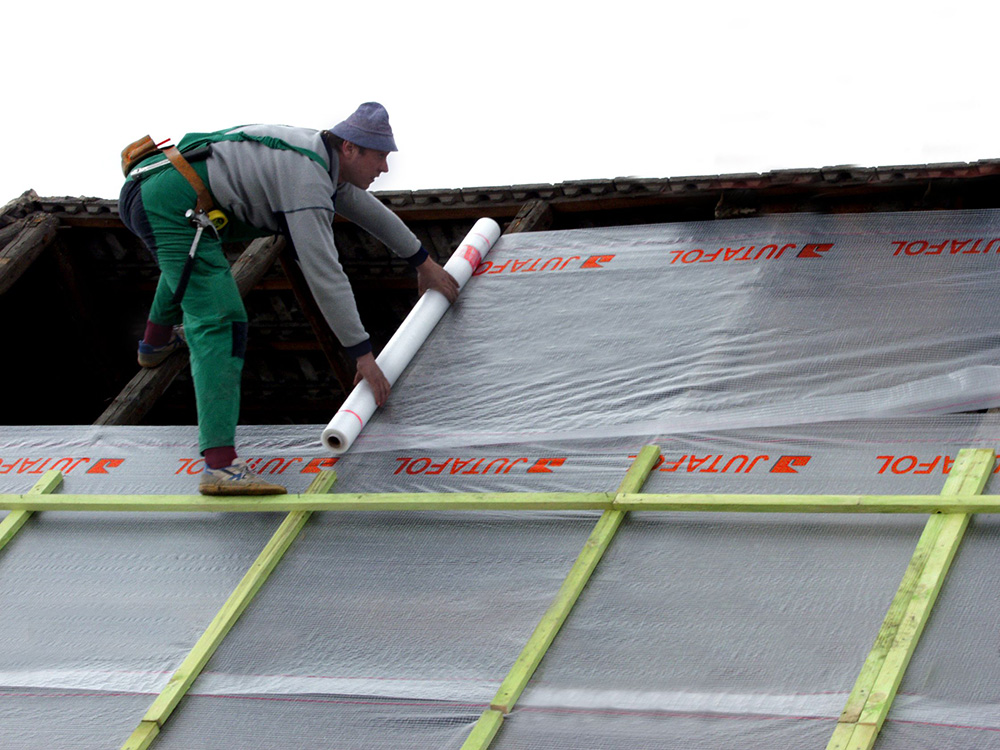
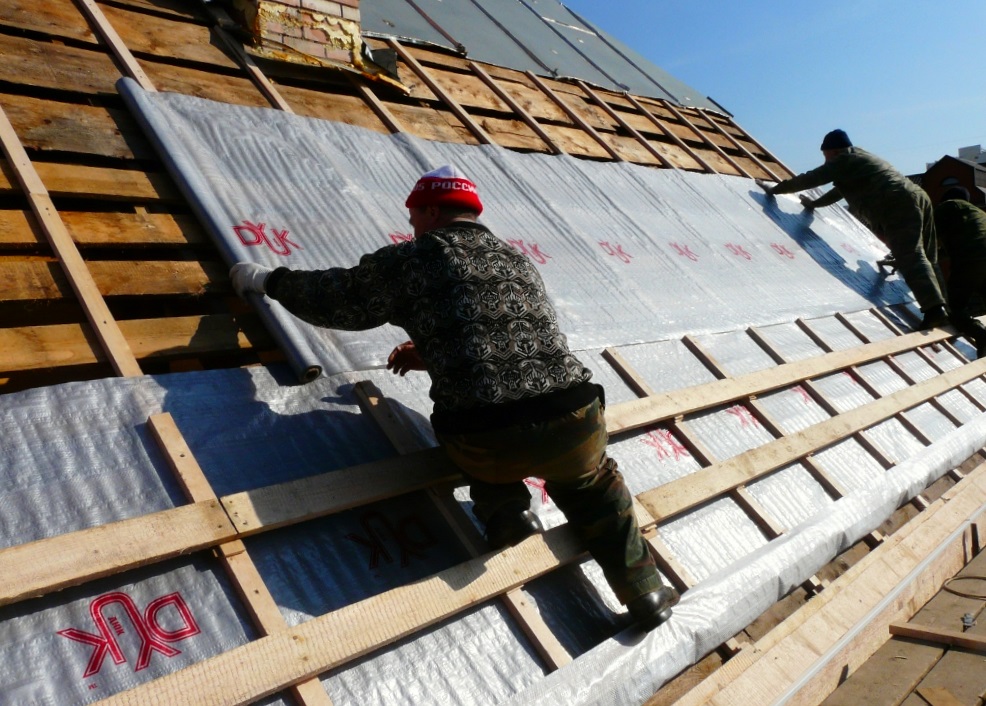
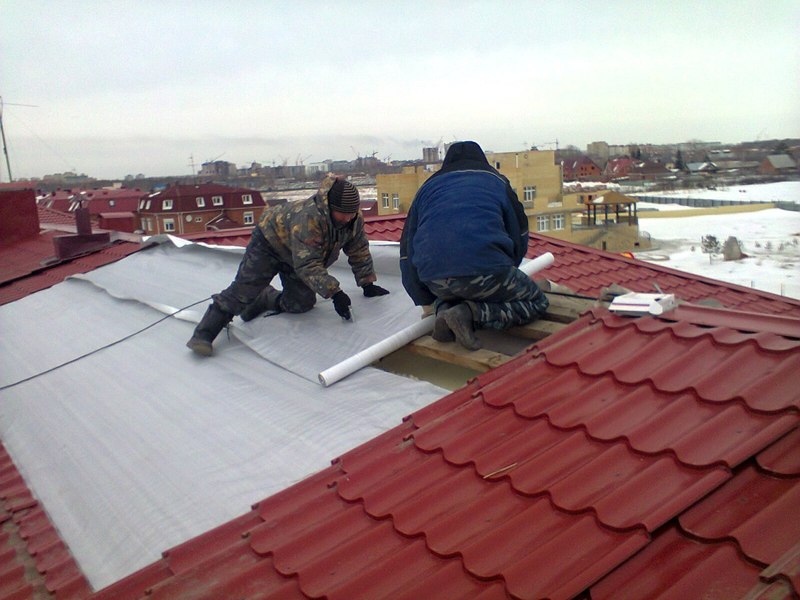
Waterproofing is mounted exclusively in dry weather. If it rains, it is better to postpone this matter until a more convenient moment.
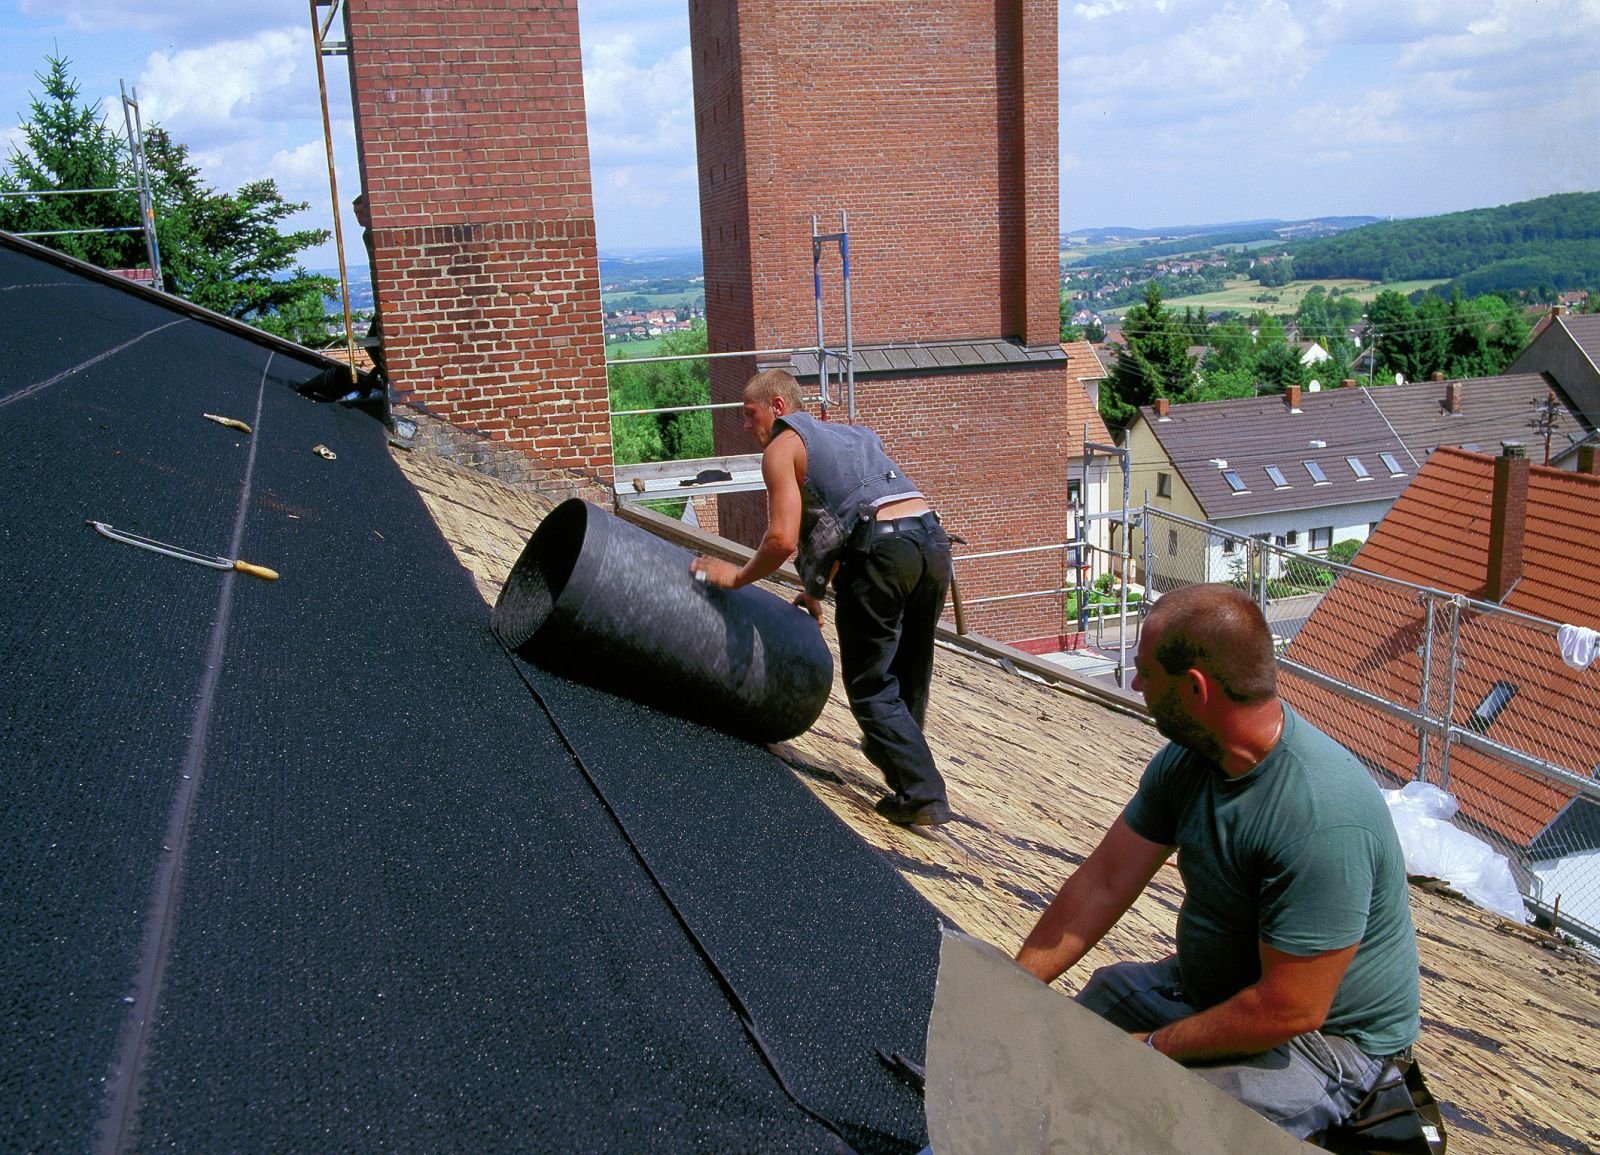
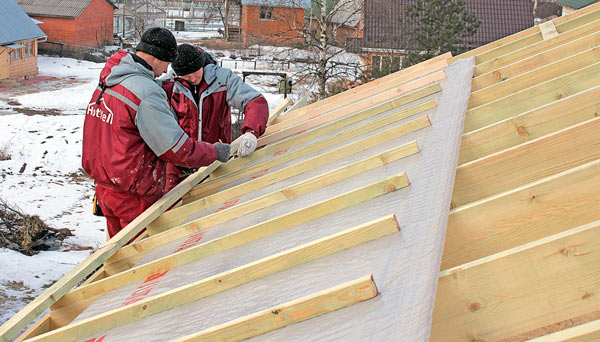
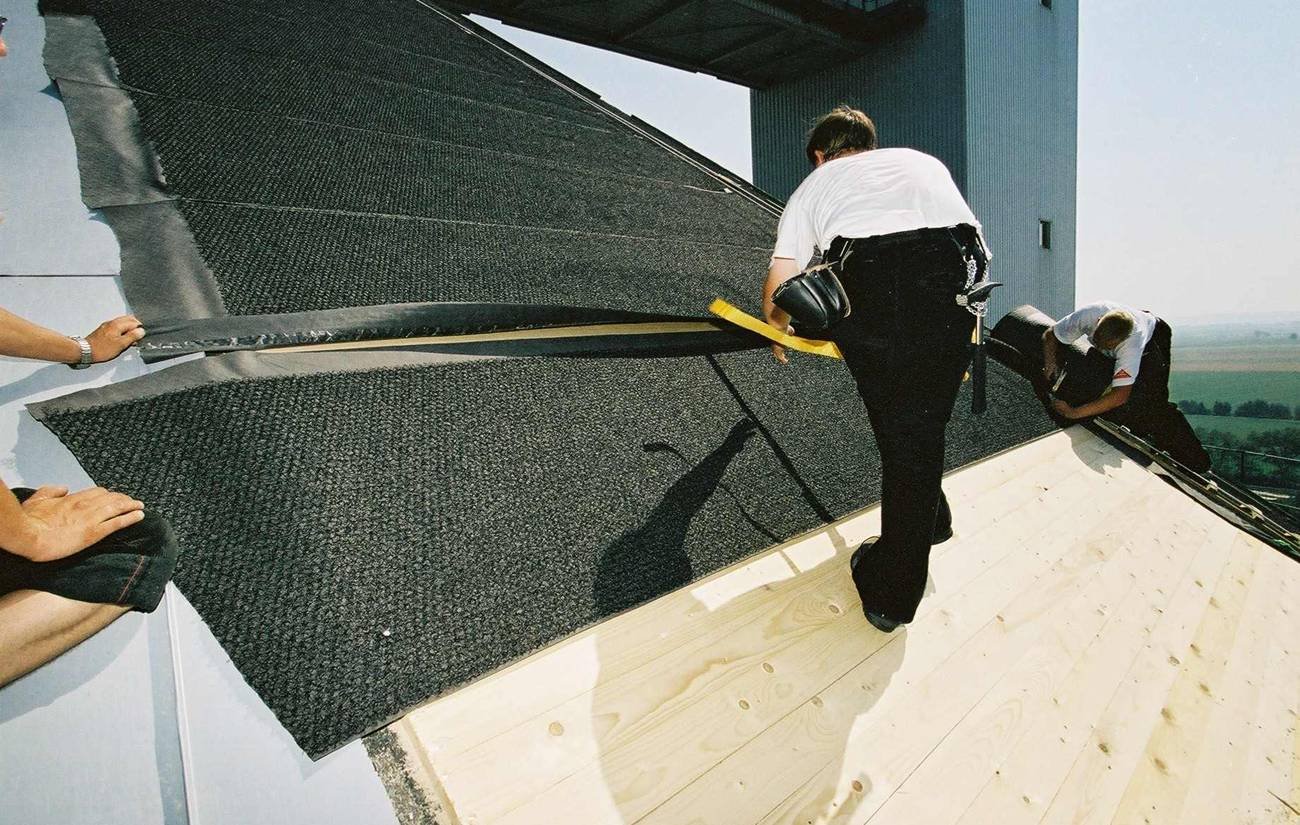
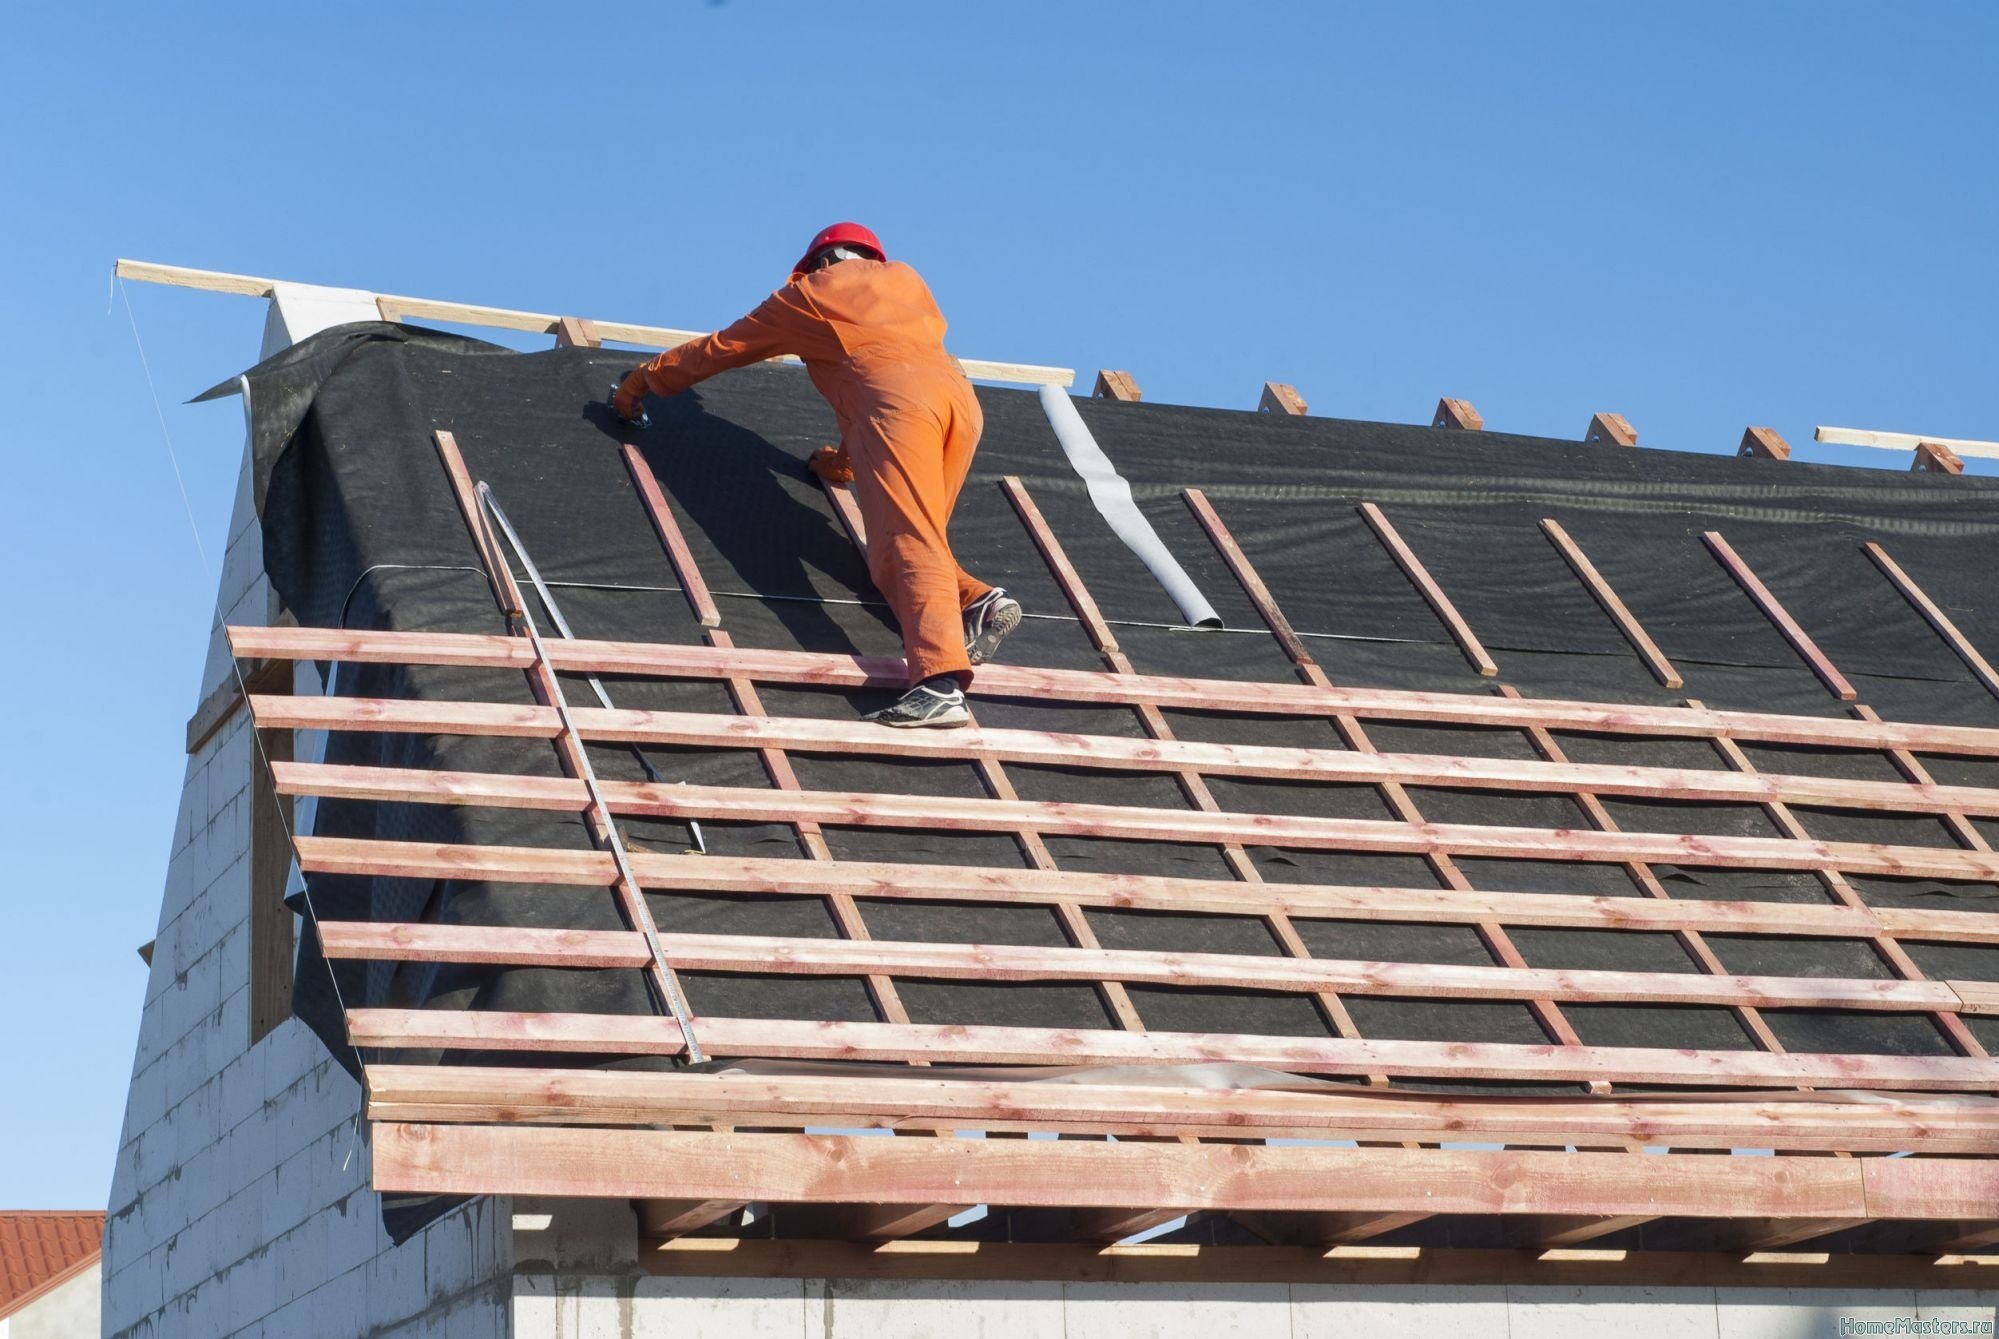
The rolls roll over each part of the roof, put it overlapping, moving across the rafters. Begin laying at the eaves, and ends at the ridge. Basement sheets of waterproofing are supplied to the front boards of the eaves. The exact overlap of the film is determined by the angle of the slope, but its minimum value is at least 70 mm. To make the joints more tightly, adhesive tape and dispersion materials are used.
A common mistake is to use combustible insulation, hoping for special flame retardant impregnation.
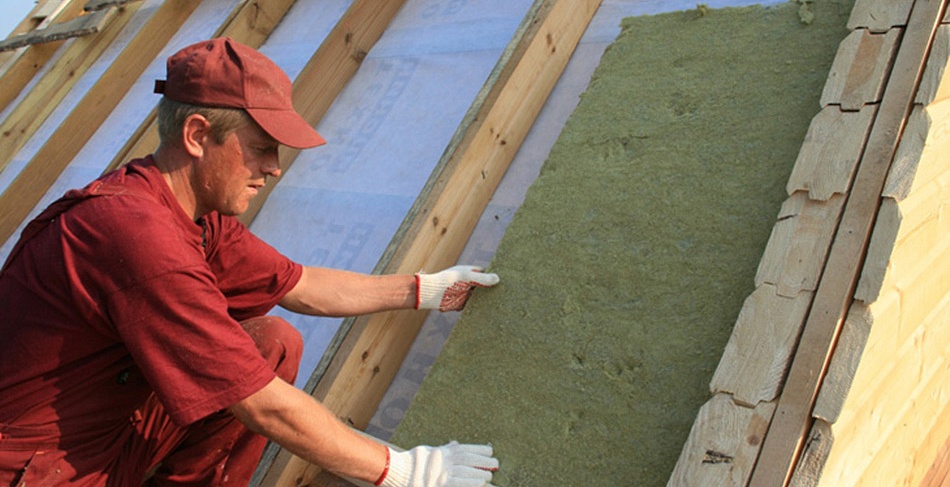
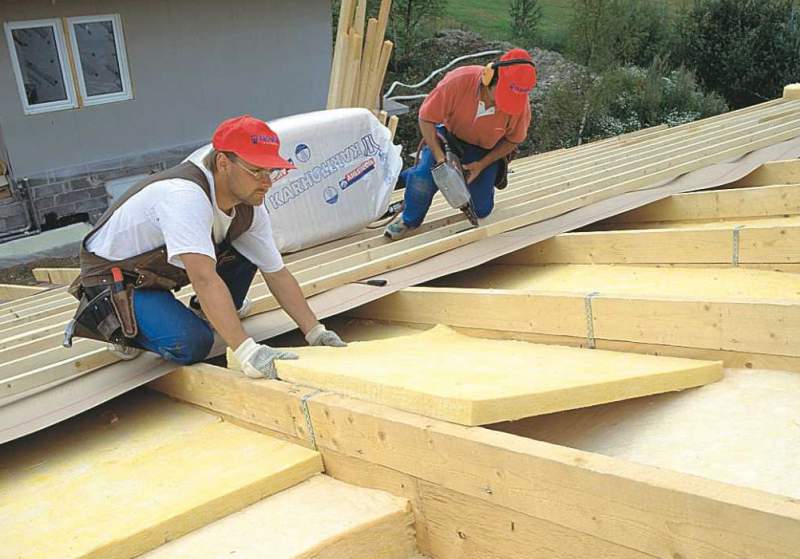
It is assumed to use only those materials that do not themselves ignite without additional processing. The thickness of the insulation is chosen by conducting a special heat engineering calculation under the terms of certain places, but even in the warmest regions of the Russian Federation it is from 15 cm. It is recommended to give preference to plate insulation from leading manufacturers, they are the most reliable and safe.
The laying of the plates is done inside the rafters in the thrust, their fixation is made without additional fasteners, because such structures are elastic. The choice of vapor barrier is also responsible, and the focus is on density and water vapor permeability. The inner lining is made of boards or gypsum boards, this work is started after the installation of other layers.
The load from the roof itself, accumulating snow and moving people is at least 200 kg per square meter. This circumstance must be taken into account when designing and constructing rafters.
Both cold and warm metal roofs are equipped with sound-proofing material - they are placed on the crate either in a continuous layer or in places where the front cover will be fixed.
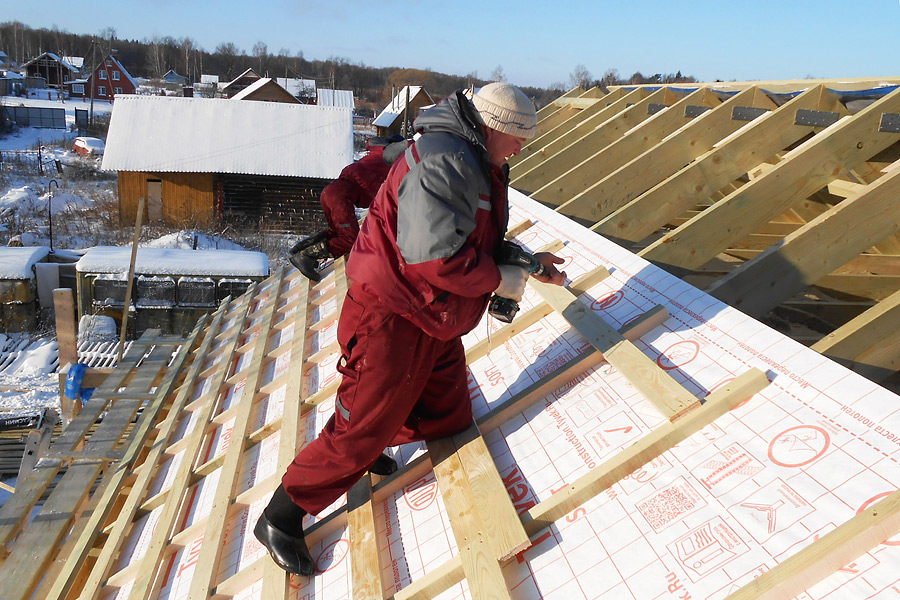
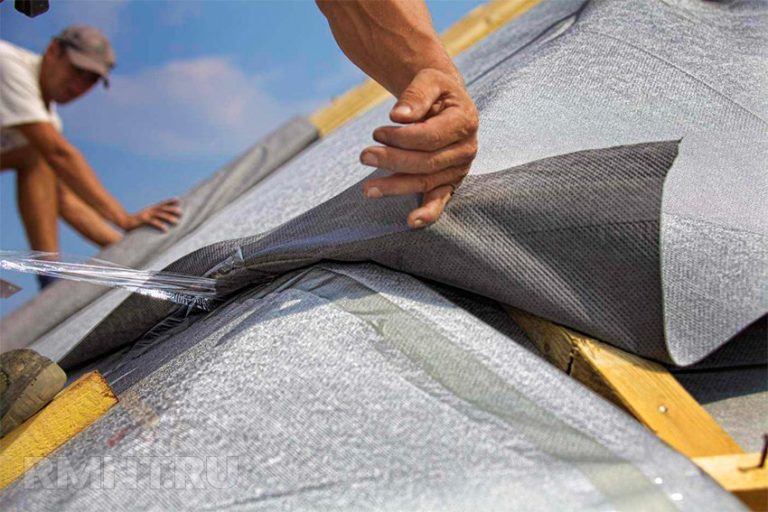
If the slope of the roof is from 14 to 20 degrees, the slats can be set relatively rarely. And when a thin steel steel sheet is placed on top, an inseparable crate of edged boards is prepared. Their minimum thickness is 3.2 cm, and the installation step is reduced to 1 cm. It is required to nail the slats for the contra grilles to the rafter legs with the help of galvanized nails. They are driven in every 30 cm. When preparing waterproofing, you need to use membranes that effectively suppress the formation of condensate, fire-safe and resistant to ultraviolet rays.
Construction staplers are used to attach the membranes that protect against water to the feet of the rafters. Above the waterproofing placed layers of crates and contrabreshetki. From fibrous insulation materials to a waterproofing layer, leave a gap filled only with air. To form it, nails are driven into the edge of the rafters 1 cm away from the waterproofing and stretch the mesh, which is best done from the cord. To help the walls withstand the weight of the roof and the additional load (wind, snow, ice) can concrete screed.When the upper floor is large, it is made on all bearing walls, not limited to external planes only.
Additional reinforcement of structures is achieved by means of concrete columns that are withdrawn from the foundation, as well as by means of supports for the beams holding the rafters.
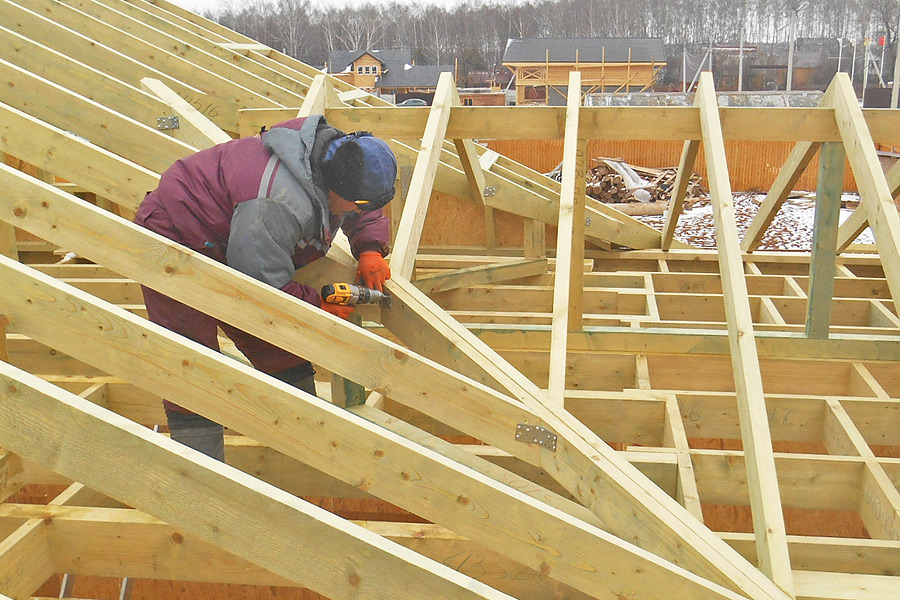
The planes of the slopes are ideally smooth, and if defects are found in them, they should be cut with a plane. Heavily damaged items should be replaced. Working with rafters, it is required after each manipulation (especially when the diagonal of the slope is displayed) to check their geometry with a building level. Noticing the bias, it is removed with the help of additional elements.
It happens that the slope (between the ridge beam and the eaves) is more than 6 m. In such cases, the sheets are divided into fragments and docked them overlap. The old roofing from the rafters is removed completely, and after dismantling, the rafters themselves and the crate are checked very carefully so that everything is intact.
When preparing for any roofing work and in the process of the layout of the metal tile itself, it is impossible to revet the facade, close the pediment and perform other work.
Such a “time saving” is irrational and turns into only additional losses.

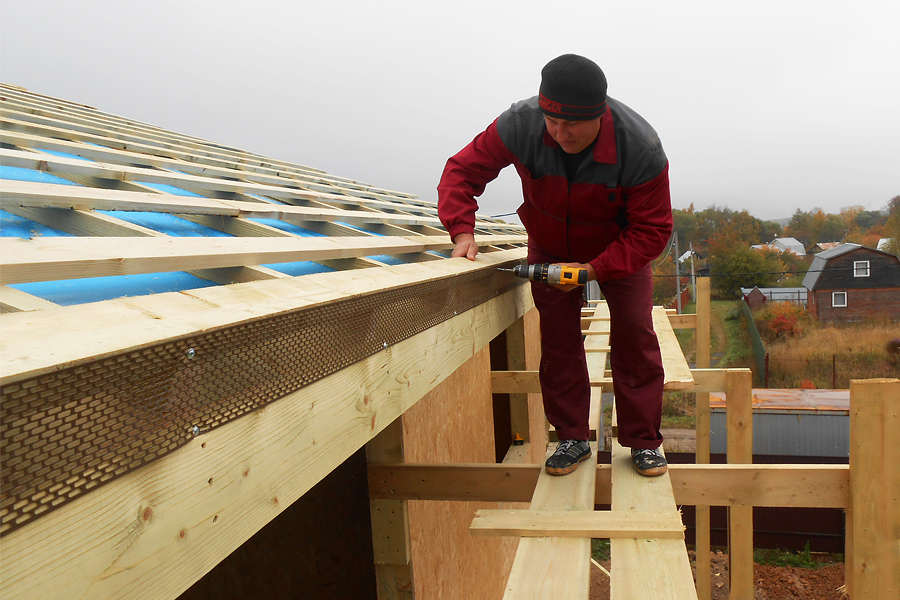
The gap between the obreshetka bars should be made in accordance with the manufacturers' instructions, but not less than 0.6 and not more than 0.9 m. Before work, carefully evaluate the coincidence between the boards or the bar, because blocks differing in size and configuration can damage the roof covering . When stuffing the cornice, you should put an extreme strip of boards so that it does not stand for it. Parts with a thickness of less than 150 mm must not be used to guarantee the strength of rafters and to compensate uneven planes. The membrane film placed on top of the lathing is unacceptable to attach with nails or screws, only adhesive tape is used.
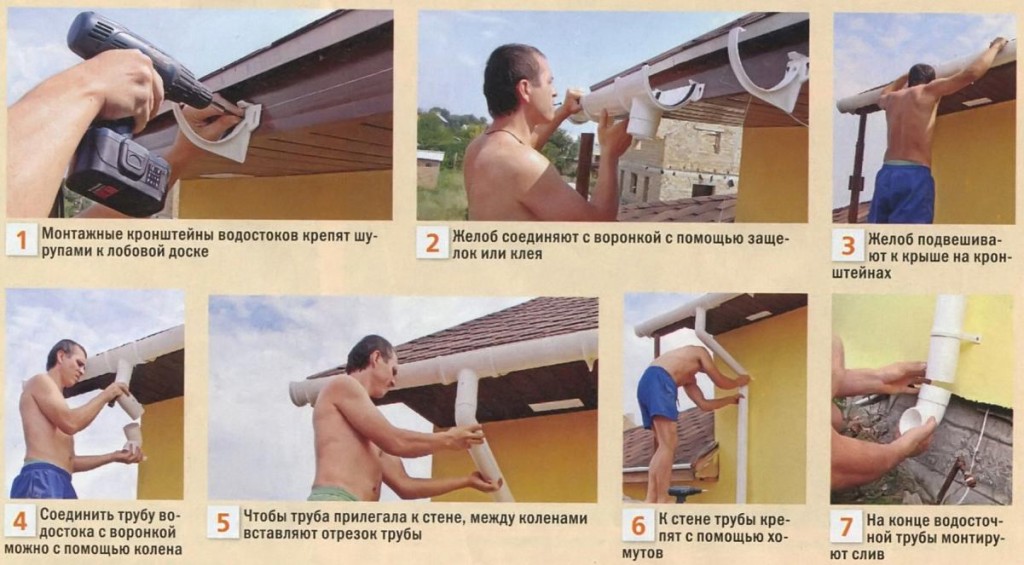
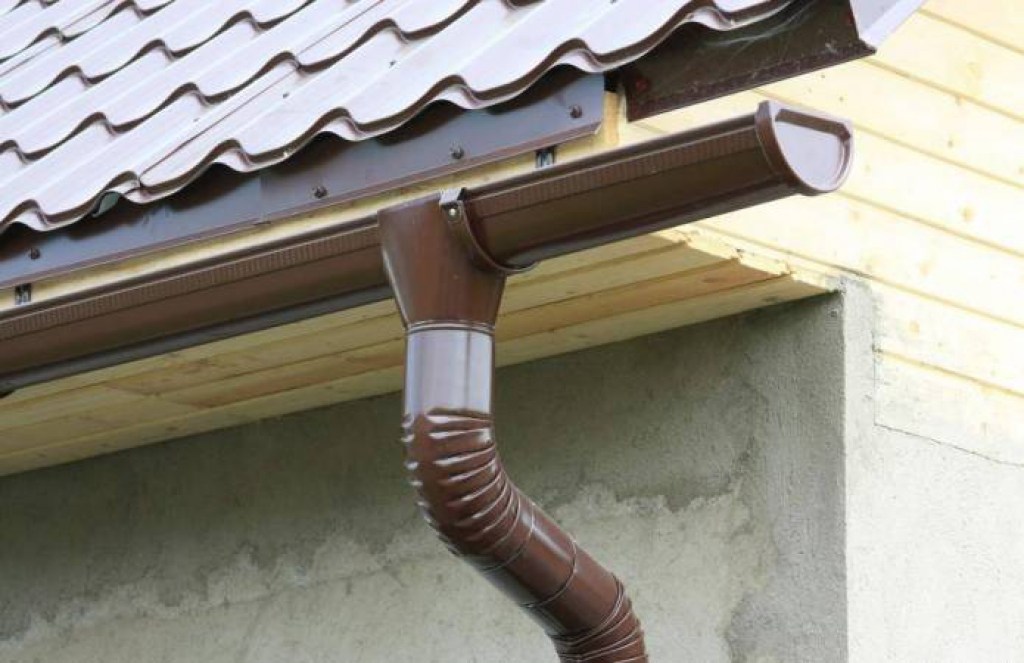
Having finished with eaves levels, are engaged in a drain. It is best to buy a special system from a supplier of metal tiles to avoid compatibility problems. The first step in the installation will be fixing the brackets that hold the gutters. Immediately engaged in the installation of ventilation grilles on the eaves. Once this is done, the preparatory stage of work can be safely considered as completed.
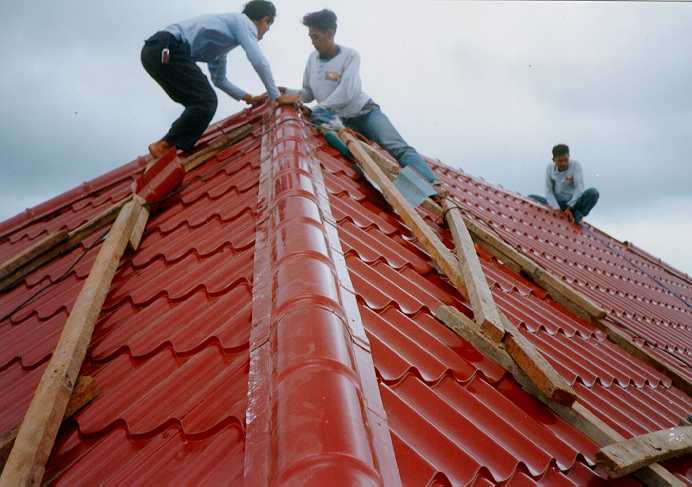
Laying the final material
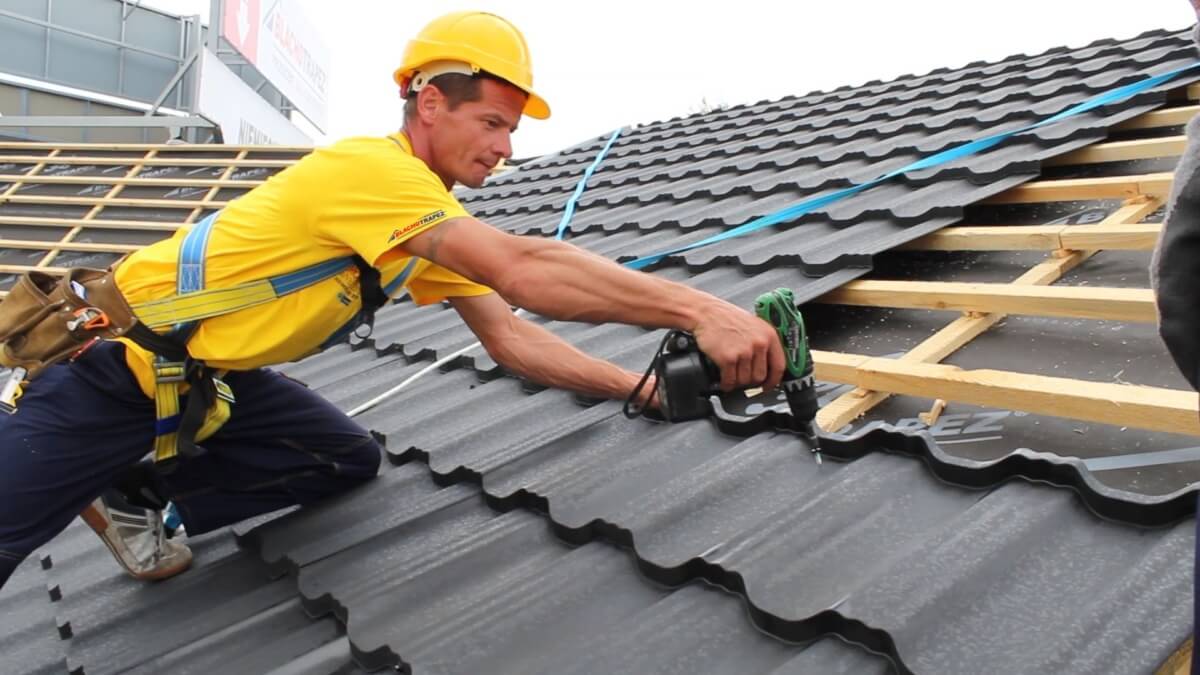
The technology of fastening metal is much easier than any preparatory work.But it also has its own important subtleties, nuances. Work from the lower corners of each ramp. If in the process of laying it becomes necessary to adjust the sheets, they are simply cut to the desired size.
The junction between the sheets should be opposite to the line along which water will flow. If done otherwise, rain flows will flow inward.
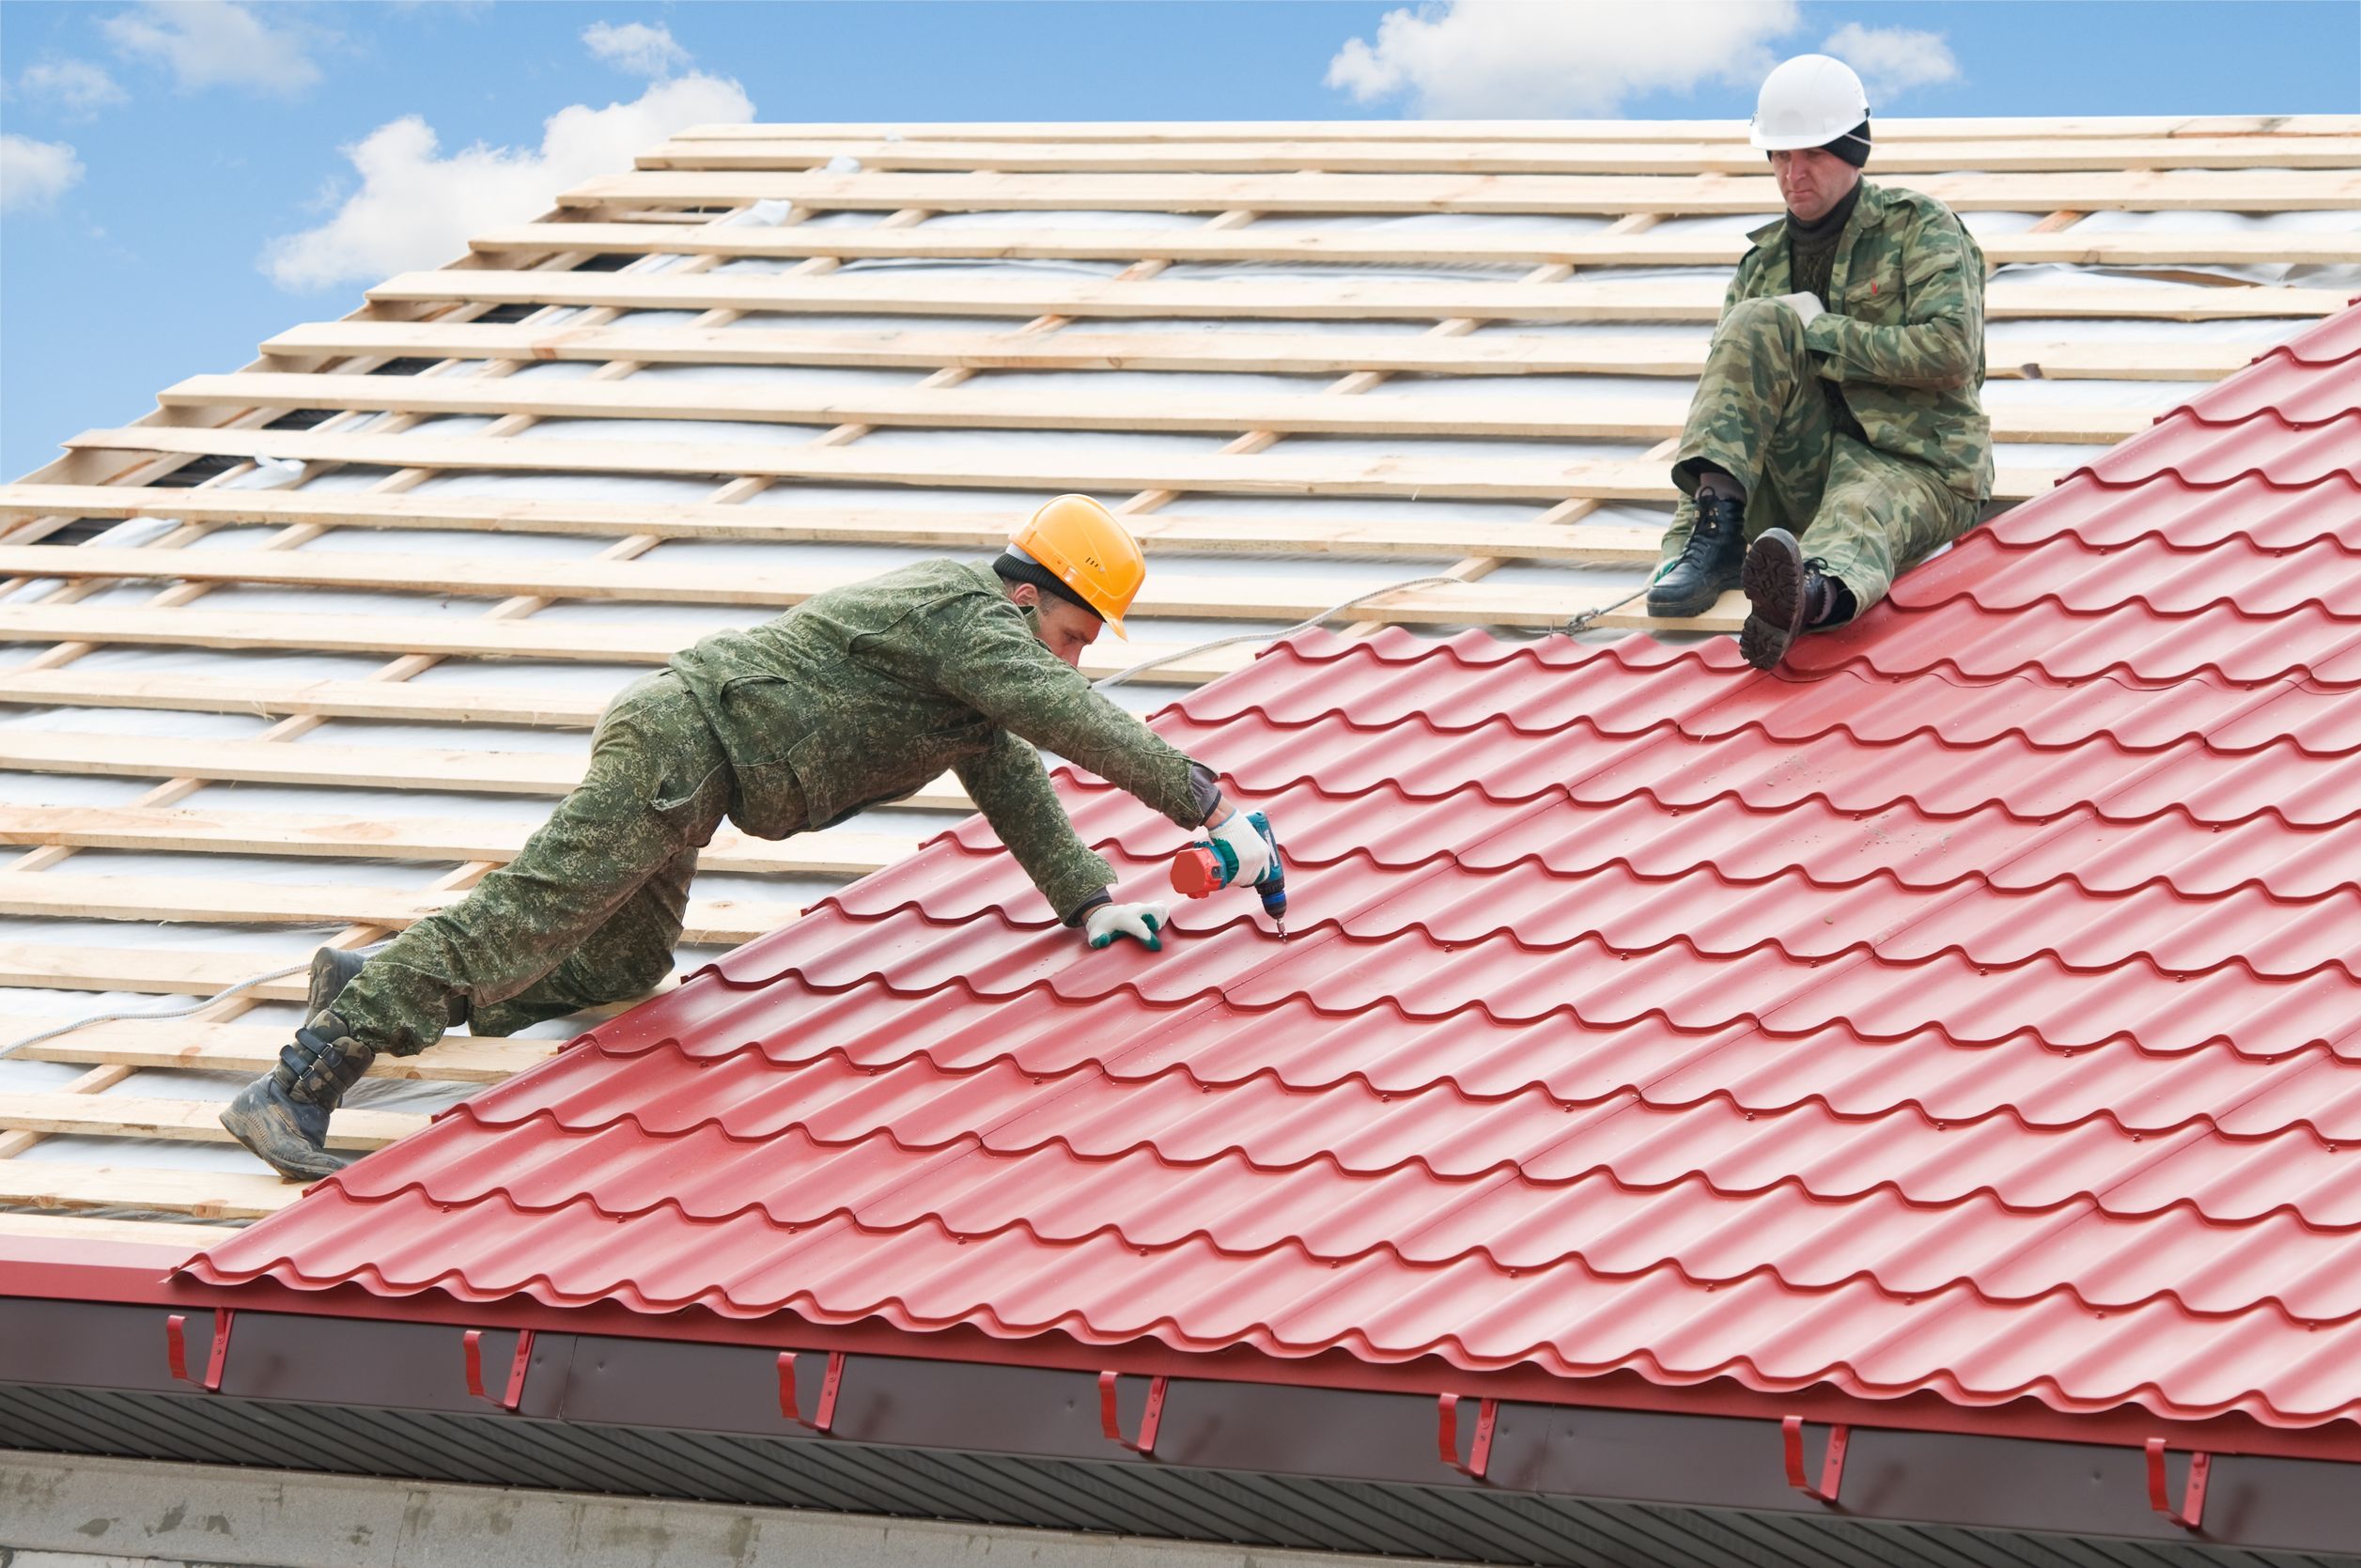
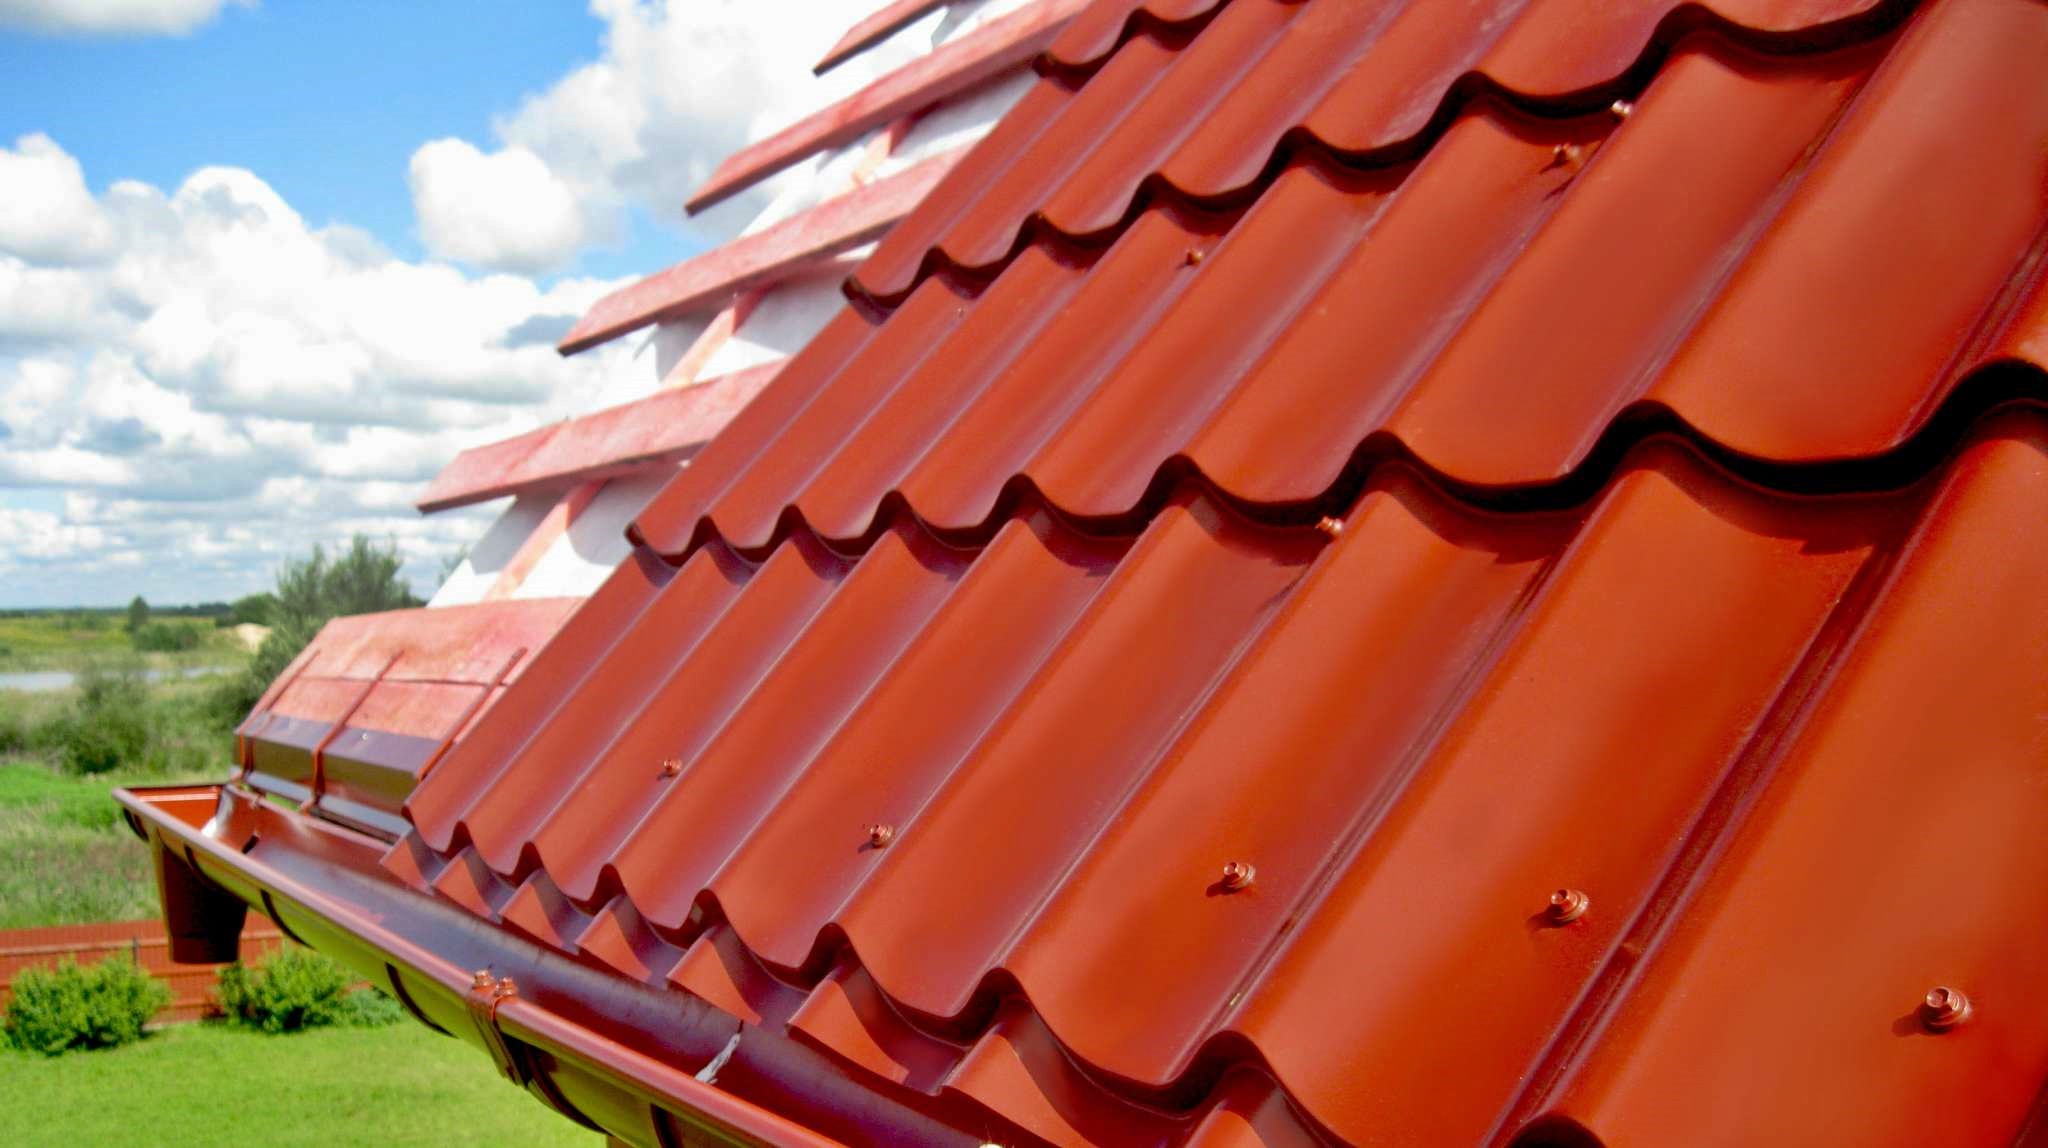
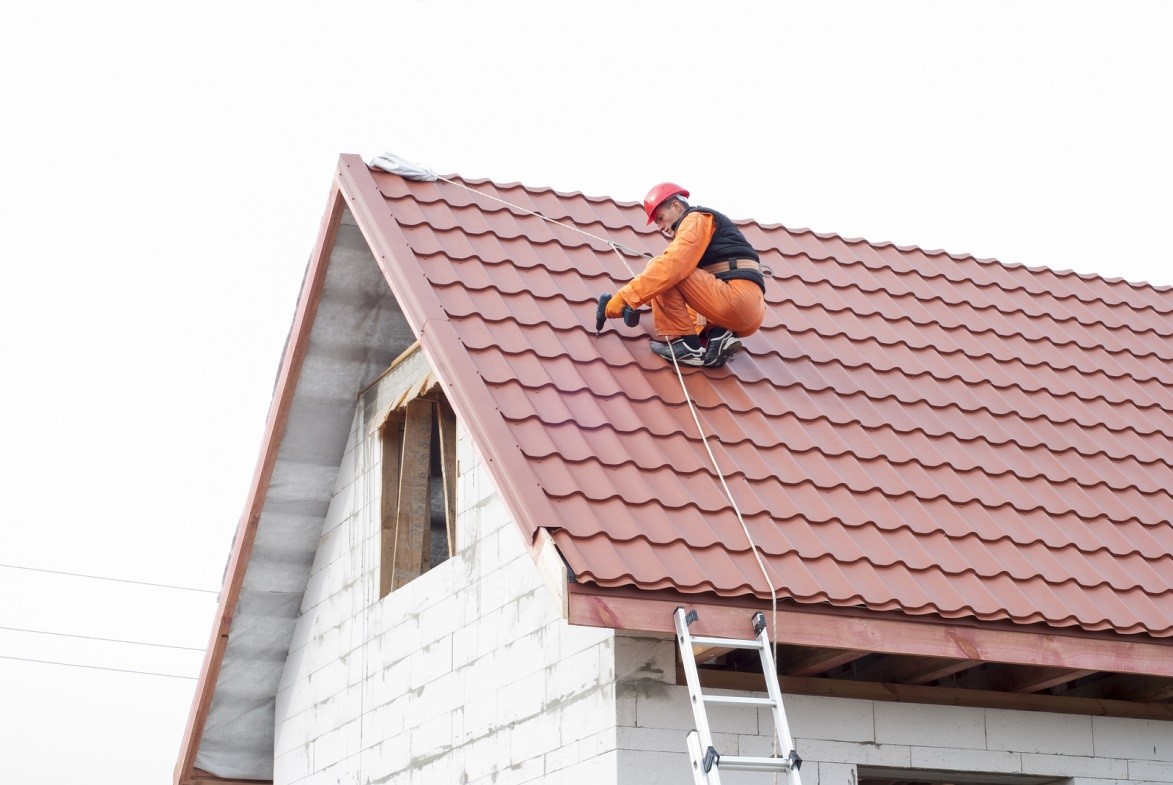
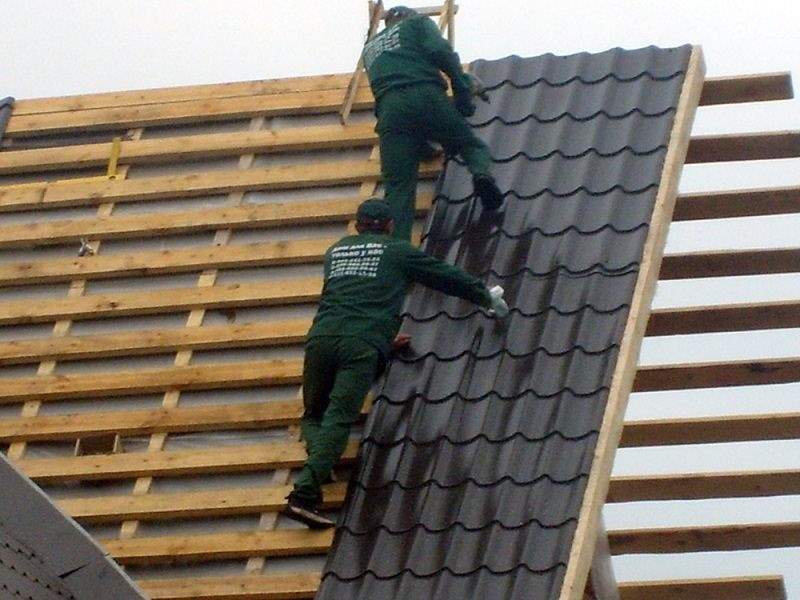
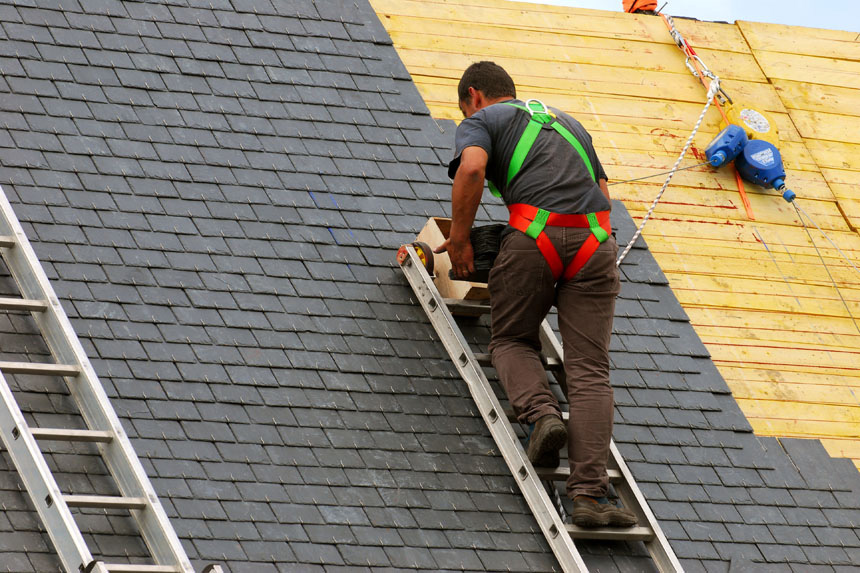
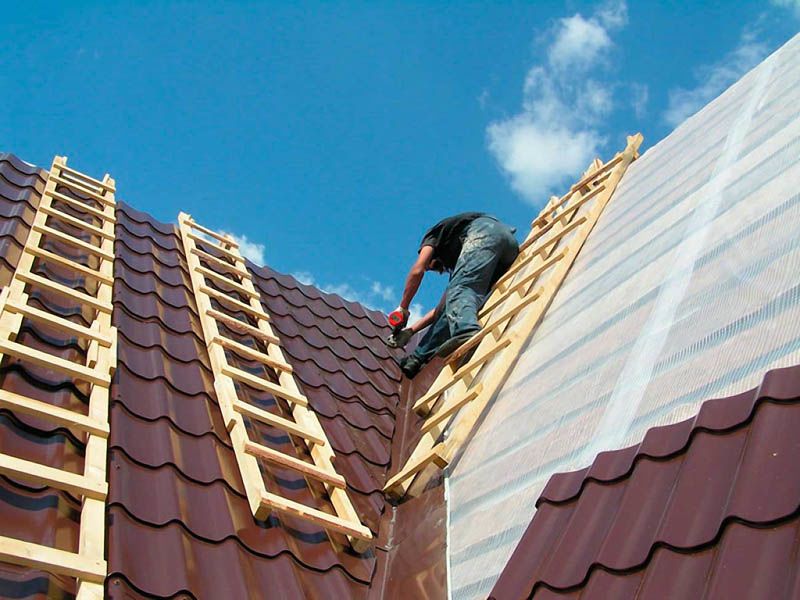
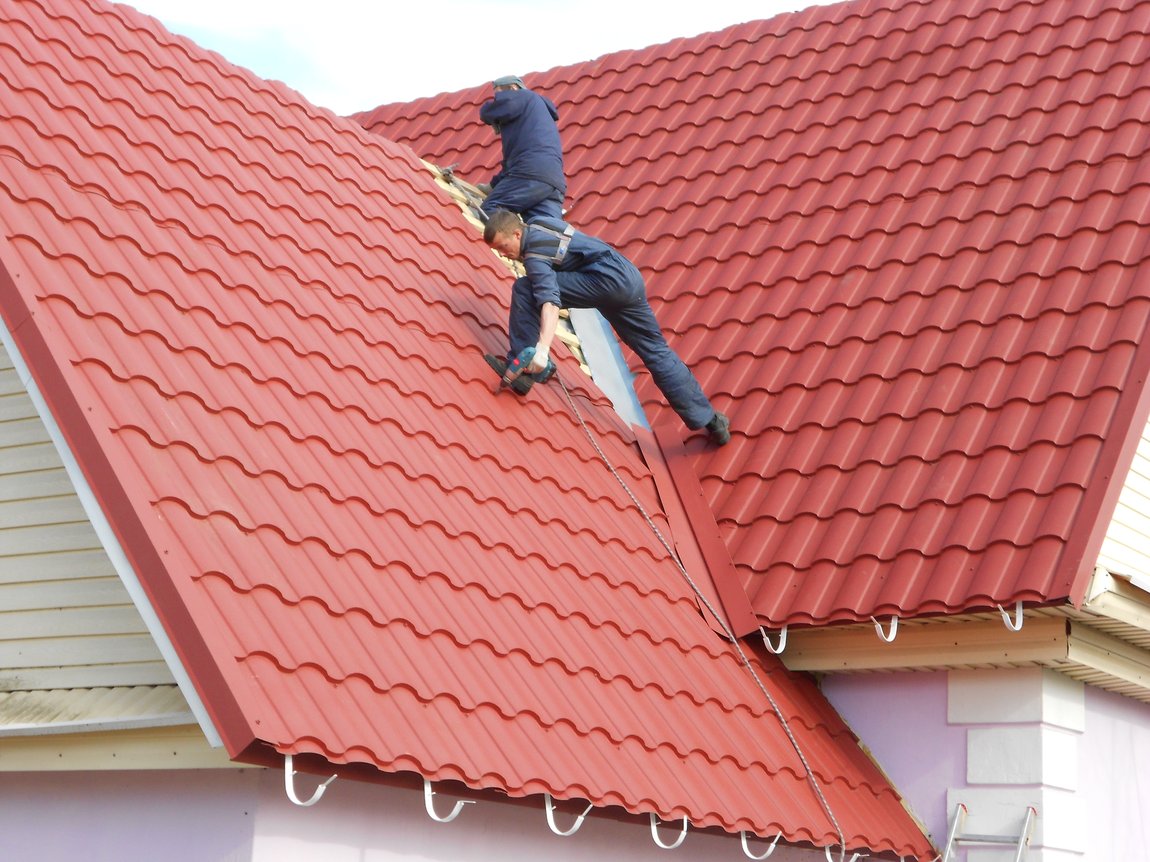
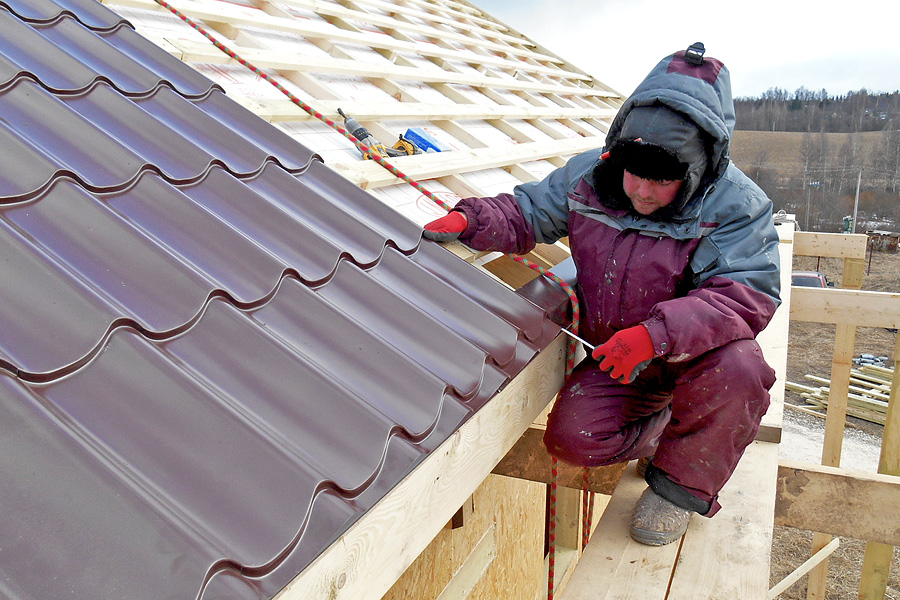
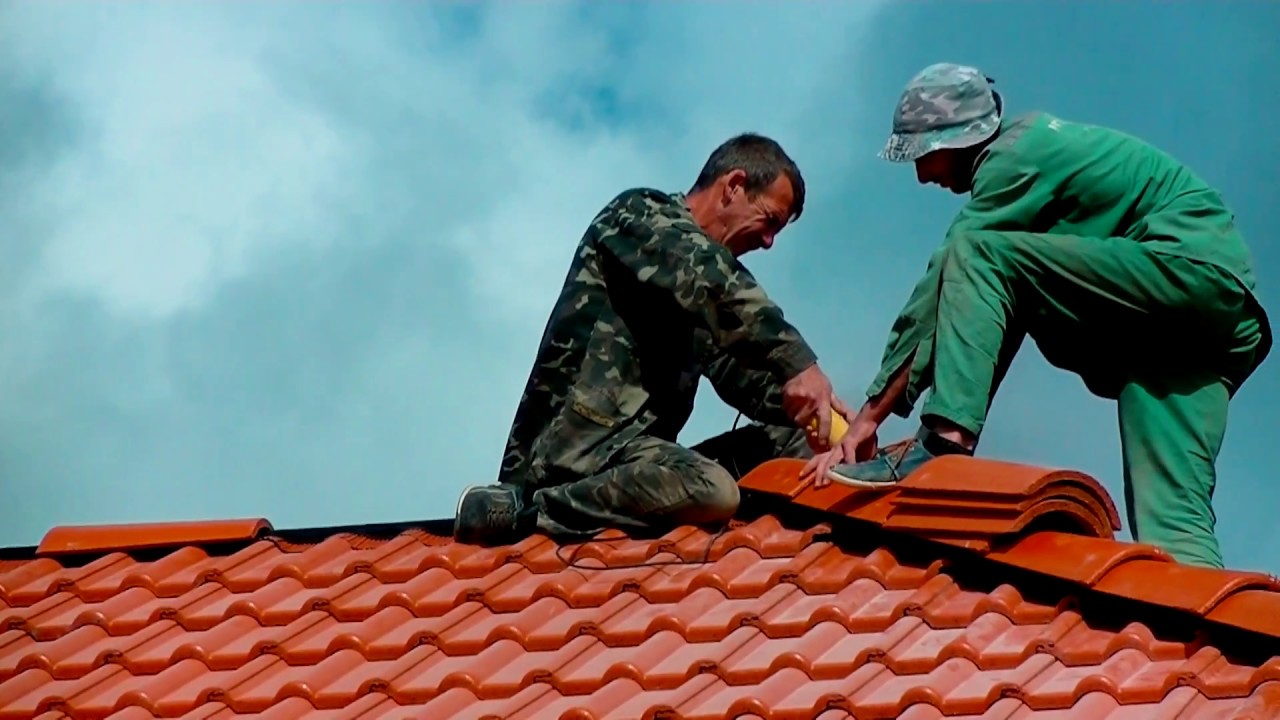
The first row of cover is placed, carefully watching the projections - it should be displayed 4 cm beyond the eaves. It is not necessary to accurately measure this distance, an error of a few millimeters will not worsen anything. Subsequent sheets are laid easier and faster, but will have to concentrate again when it comes to the fragments placed on the ridge. It must be remembered that the installation of metal, and the preparatory work is carried out at a height, and this makes special demands on the organization of work.
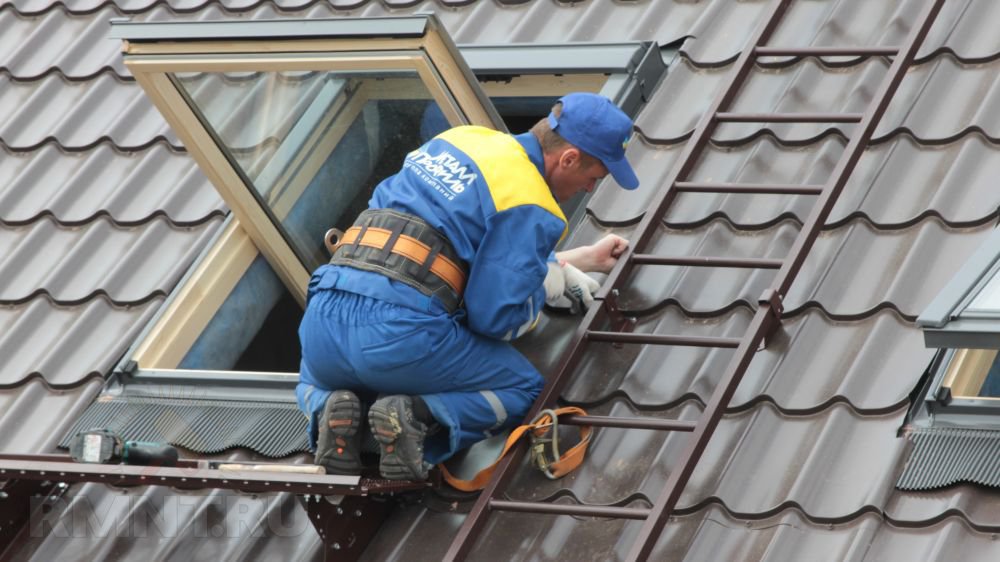
Be sure to use special belts and safety cables. Before climbing, they put on shoes with a raised rubber sole on the roof.
It is strictly forbidden to install metal tile:
- at dusk and at night (even with good electric lighting);
- during rain and until the surface is dry;
- in the fog;
- when the wind is stronger than 15 m / s (even if they are separate gusts).
It is necessary to lift upstairs exactly as much material and tools as is needed for work in the next 1-2 hours.
It is better to spend more time on the ups and downs than to face problems due to cluttering up space. Of course, you can never work on an icy roof. Garbage, defective and damaged parts of the material, dismantled structures, packaging and everything else descend from the roof only along the stairs. It is not allowed to drop them down.
The work tool should be placed where it will not fall. It is very important to ensure that the instruments themselves and the stretched wires (cables) do not interfere with anyone and do not end up under their feet. Any mechanisms, especially electrical ones, are checked in advance on the ground, not only before the commencement of work as a whole, but also at the beginning of each working day. Carefully check the integrity and operability of the insulation. Before you lift up large sheets, you need to make sure that there is no strong wind, otherwise they may be damaged.
All work with metal tiles, even unpacking, must be carried out in mittens and working clothes, because the edges of any sheet of metal tiles are extremely sharp, and sometimes jagged.
Any instruction for professional builders invariably reminds that this material is slippery., and walk on it should be extremely cautious, only with a safety belt. If the metal tile is lifted using special mechanisms, it is recommended to check their serviceability before each launch. It is impossible to walk and stand under the lifting point and in a certain radius from it (the stronger the wind is within the limits of the allowable, the greater this radius). When unloading the bags, they are always lifted, but not pulled out of the package.
A typical technological card requires not to lift a long shaped sheet by the edges, they should be held only from the sides. If dirt is found on the metal tile, it is required to remove them with household detergents, and, moreover, as sparingly as possible. Potent blends can damage the coating. It is not always possible to apply all delivered sheets in one day, so you need to know how their storage is organized.You can not leave the metal roofing in the factory tight packaging, it is folded on the sloping bars, because it allows you to leave and evaporate the drops of rain.

Metal-coated plastic should be stored (both in the package and without it) for a maximum of 14 days. If it is required to leave it for a longer time, store the material in the same way as the galvanized type.
Step-by-step instructions for laying sheets of material involves preliminary preparation:
- additional support boards;
- bars for through output (fire or inspection hatch);
- stairs on the roof;
- wall stairs, partly on the roof;
- snow catchers;
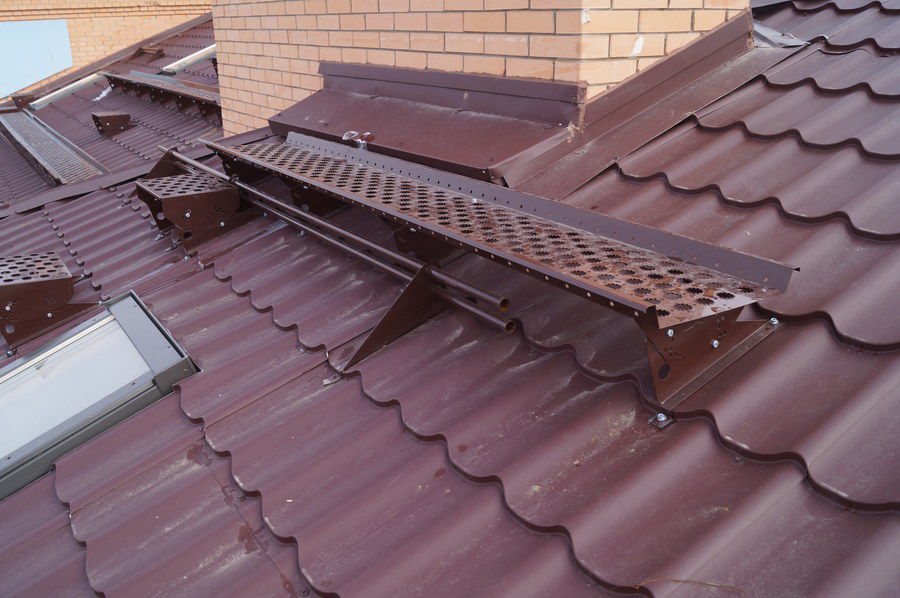
- roofing bridges.
Cut metal to the desired size is recommended saws and scissors for metal, hand-held electric saws with teeth of hard metals. The grinder with abrasive discs is not just harmful when cutting the material, it cannot work closer than 10 meters from the sheet, since sparks flying around can damage the tile. If you are going to mount the coating, its surface must be freed from chips, fasteners and rivets. Mounted metal tiles are painted with metal paints suitable for the curtain rods themselves.The same paint is applied to the edges of the edges and to all randomly scratches.
A feature of 1/1025 format sheets is that some of them are equipped with an auxiliary transverse bend, simplifying installation and blocking the spread of material. Such covering can be laid on the roofs of a complex configuration only after careful measurements, and the required length of sheets should be calculated by professionals.
Working on a hip roof, the cut blocks will not be able to be put on opposite ramps, as they have a transverse pattern.
If you have to step on the laid sheets of metal, it is advisable to walk in places where the crate is set.
It is impossible to properly cover the roof with this material, if you do not check whether the transverse folds are well joined after the installation of each block.
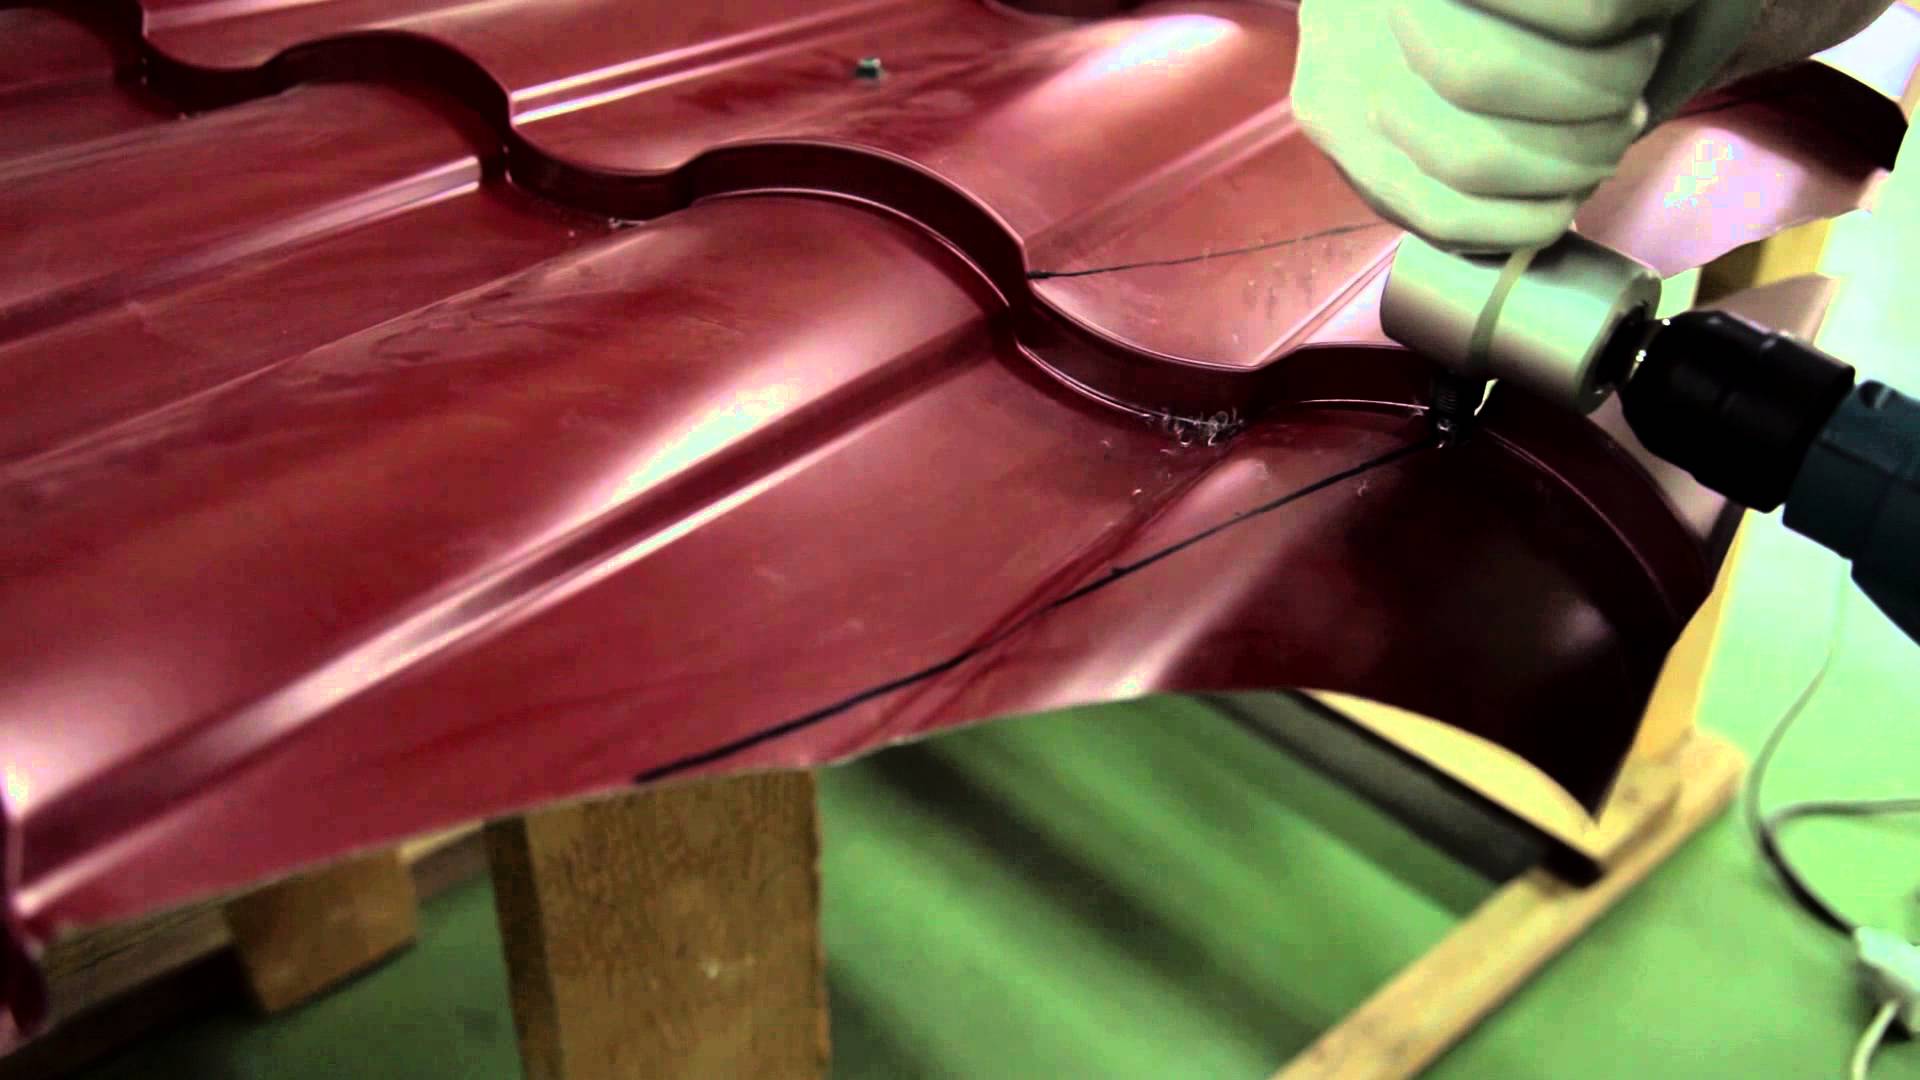
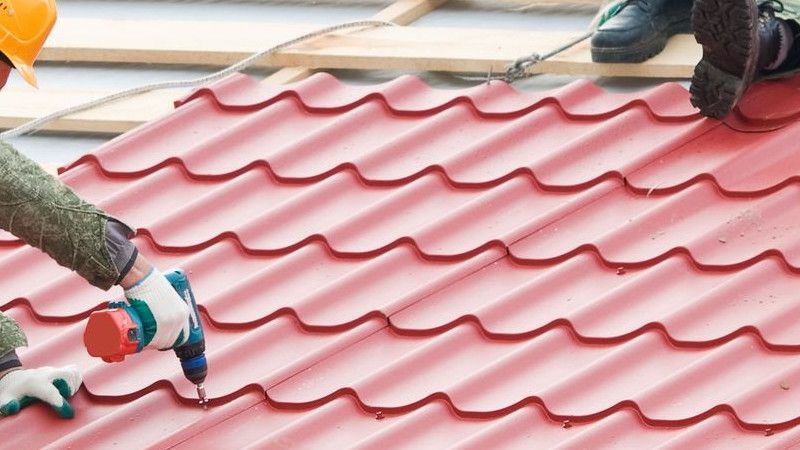
It is recommended to fasten metal tile with screws of the following sizes:
- 0.48x5;
- 0.48x6.5;
- 0.48x8 cm

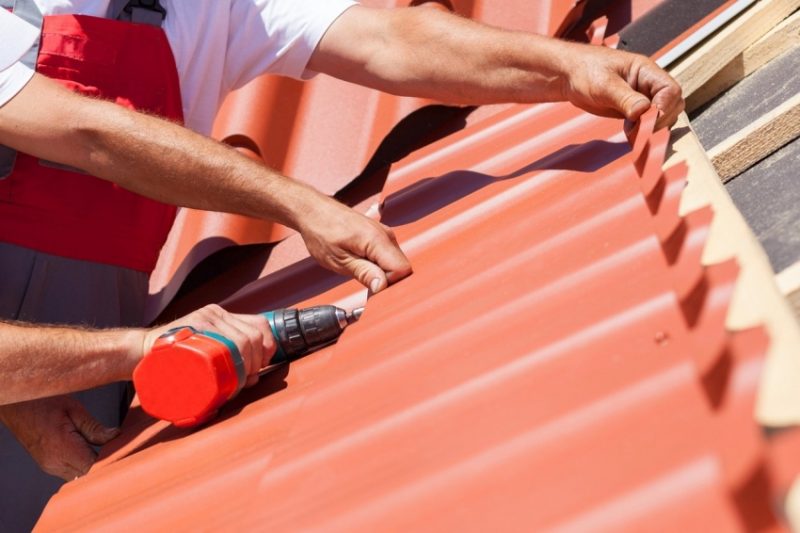
The special role belongs to screws with dimensions of 4.8 x 28 mm. They are necessary to attach the coating in the lower parts of the waves, at the eaves, in the overlap. They are also recommended to fasten the strap. Not all fasteners of a certain size are suitable for work, in this case it is recommended to use screws with a sealing layer made of EPDM rubber.For your information: nails are absolutely wrong, as they are less reliable than screws.
A big mistake is to tighten the fasteners all the way - in this case, the surface may become covered with dents.
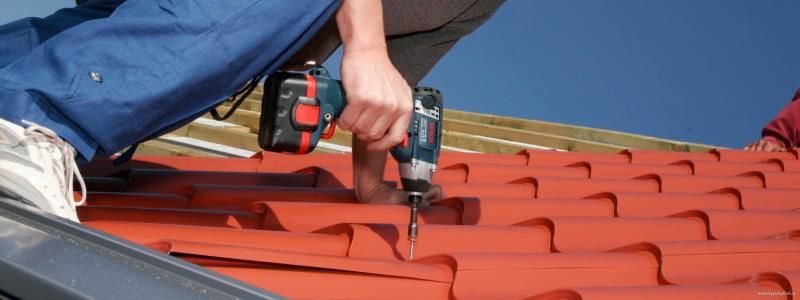
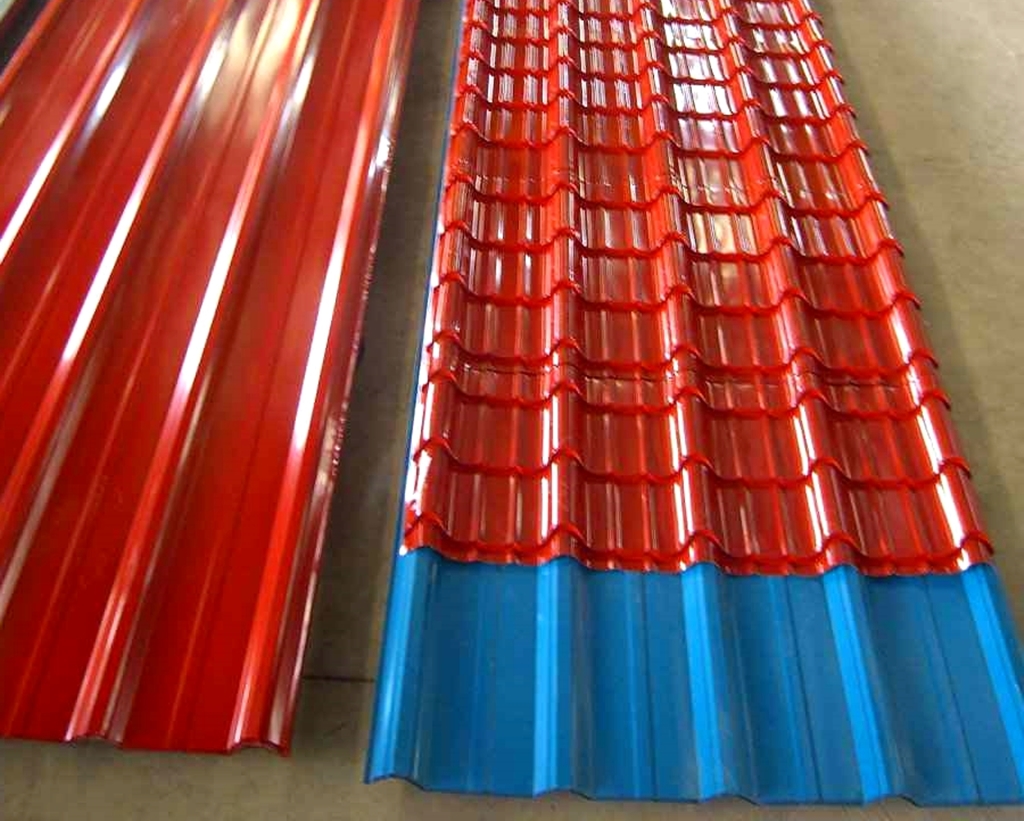
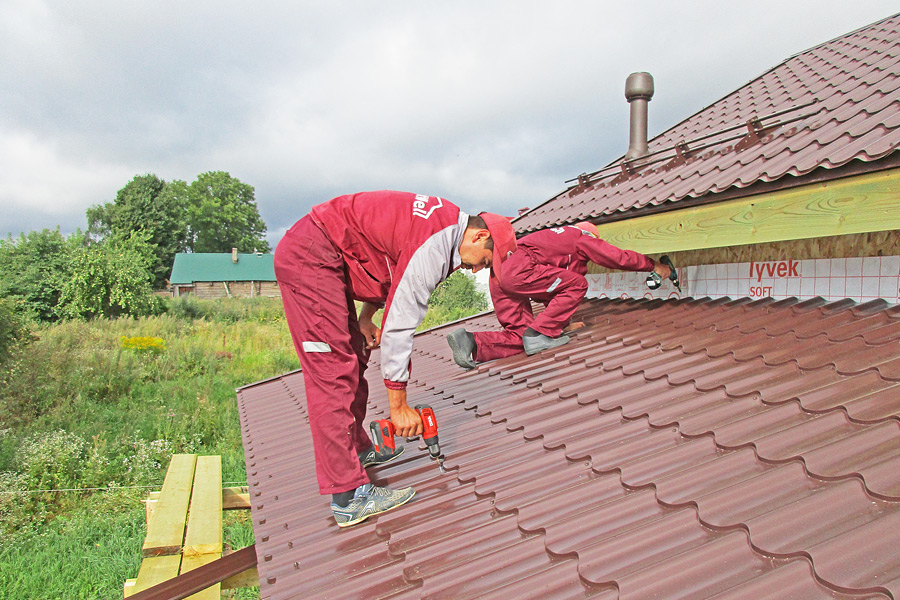
Manual screwdriving is impractical and tedious. The electric drill helps to simplify work, which has the functions of smooth adjustment of revolutions and can operate in the reverse mode. Shaped sheets are tilted at 1: 4, and trapezoidal should be installed at an angle of 1: 7. Some manufacturers refuse to be liable if the profile is placed on the roof with a smaller incline. For a folded roof of the classical type, a slope of at least 1: 12 must be made.
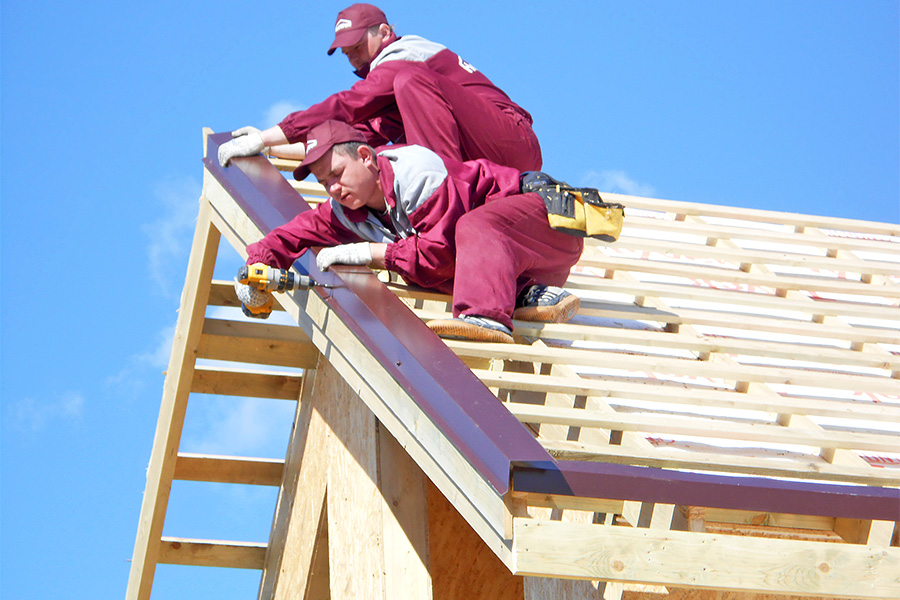
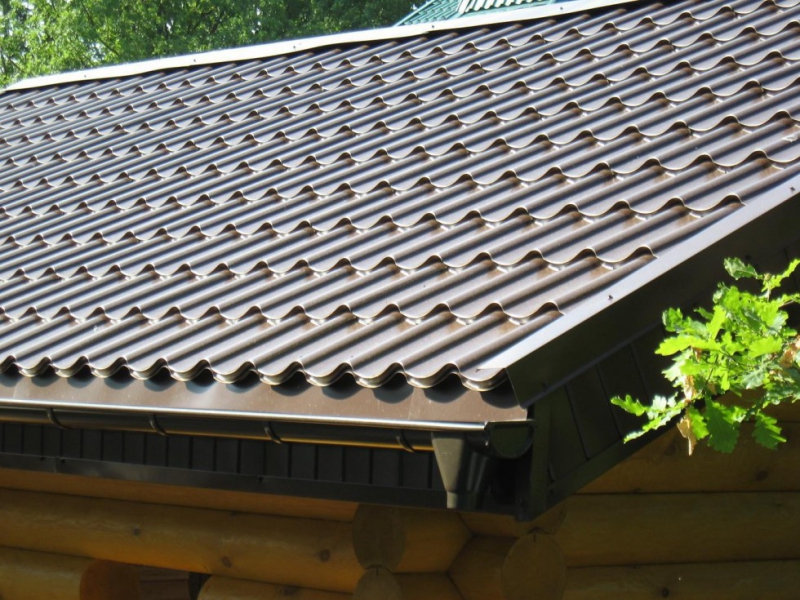
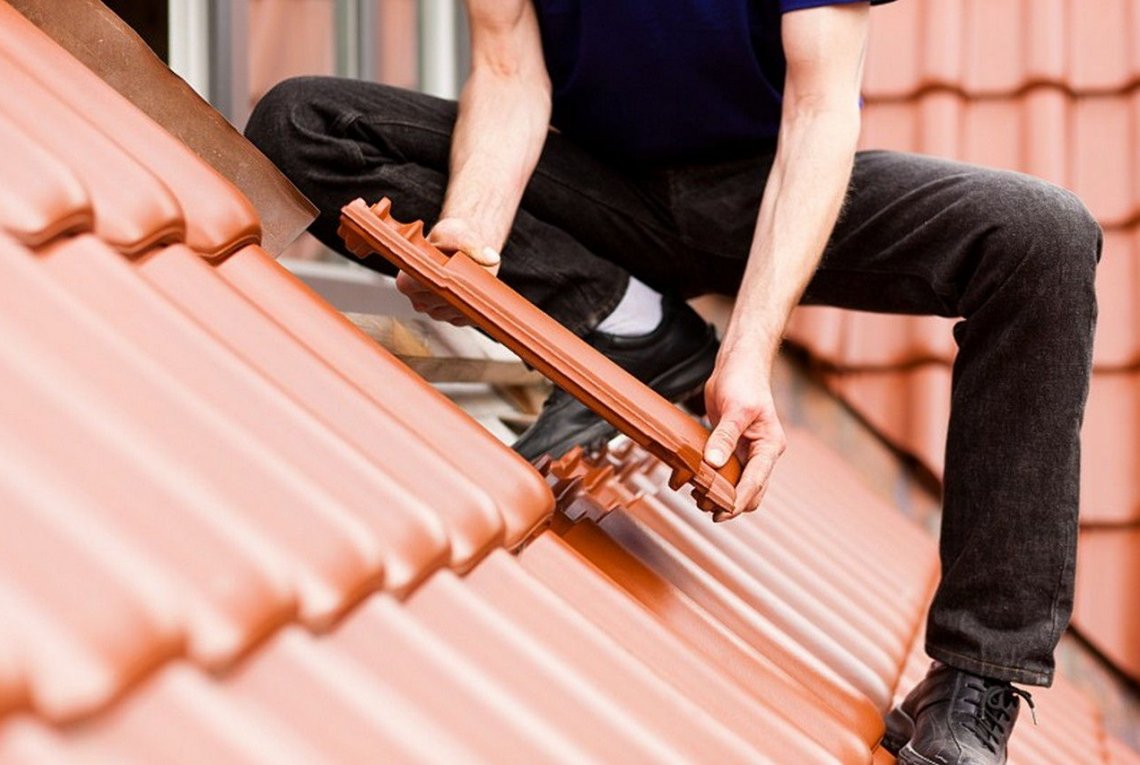
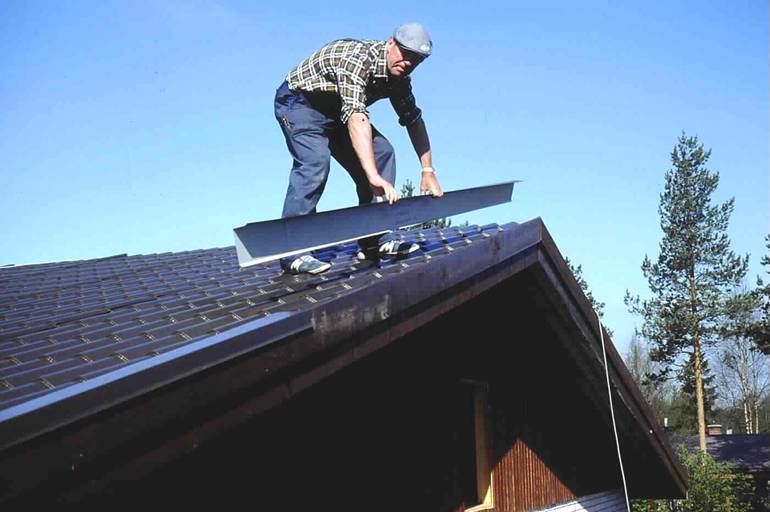
Gable strap attached from the sides to the gable boards, and at the top they are attached to the metal tile. The fasteners are placed at a distance of 80 cm from each other, the mutual overlap of the gable slats is 10 cm. Before mounting the ridge shaped strip it is supposed to fasten the end caps with rivets. Overlap make 13 cm, for smooth designs - 3 cm less. From two to five ridge planks are tied into a single unit with screws and set along the ridge.
Next, seal the joints between the strap and the sheet profile. The ridge elements themselves are punched with screws through the seals to the sheets along the top of the waves (they go through one wave). The ridge adjacent to the slope is better to do this: the end is cut off under the slope and mounted tightly under the sheet.
To seal the shaped ridge elements, it is recommended to take a self-adhesive compound of the “Top Roll” type.
There is nothing difficult in all these works. You just need to be careful and careful.
Pro tips
Even with a complete understanding of the standard technology of work, you can make serious mistakes or skip the opportunity to reduce costs and simplify work.
According to experts, high-quality ventilation of the space under the roof of metal meets three requirements:
- a gap from the waterproofing to the metal itself is ensured;
- air goes freely through the eaves;
- Nothing prevents him from passing through the section under the ridge.
Only by completing these conditions, you can guarantee a stable attic or attic insulation.
Before work, check the timber and planks. There should be no signs of mechanical damage or insect exposure.
Do not take material with deep cracks or poorly dried wood. All nails must be made of stainless steel. The required length of their recognize, doubling the thickness of the crates.
If you have to dock the boards with each other, you need to bring the border to the rafters at every opportunity.
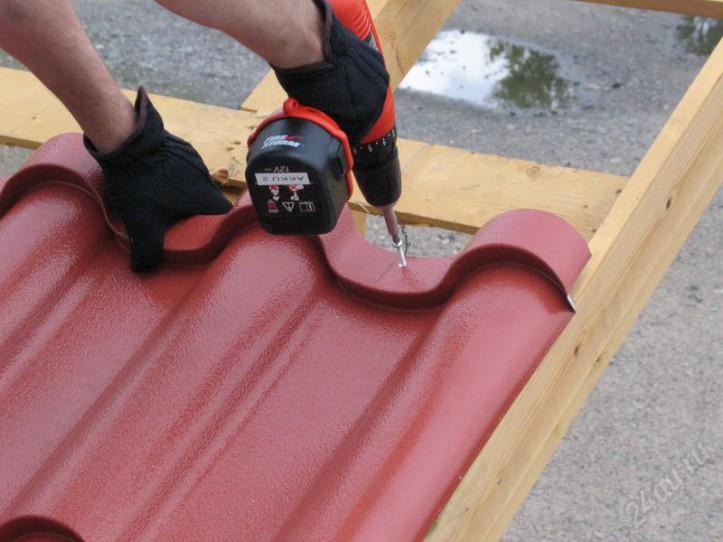
Neighboring horizontal rows are set so that the joints are mutually displaced. Screws, which are screwed sheets of metal, put at least 6-8 pieces per 1 square. m, because the coating is heavy and it must be thoroughly pressed to the support. When making a tiled roof for a warm attic, it is advisable to install the windows of the living room on the crate held by the rafter beams. If the windows are very large, it is better to attach them directly to the rafters.
Waterproofing membranes with increased diffusion are placed on the insulation without gaps, and the anti-condensation film should be placed after a certain period. Between two adjacent rafters film can sag a maximum of 20 mm (with the greatest distance of 120 cm). If the crate is made of wood, you need to put the anti-condensate film under the counter lattice.This will optimize ventilation from the cover sheet to the film. When a drain is created, the installation of the eaves is preceded by the placement of holders of the gutter. And the eaves must end at the level of a third of the gutter leading from the wall.
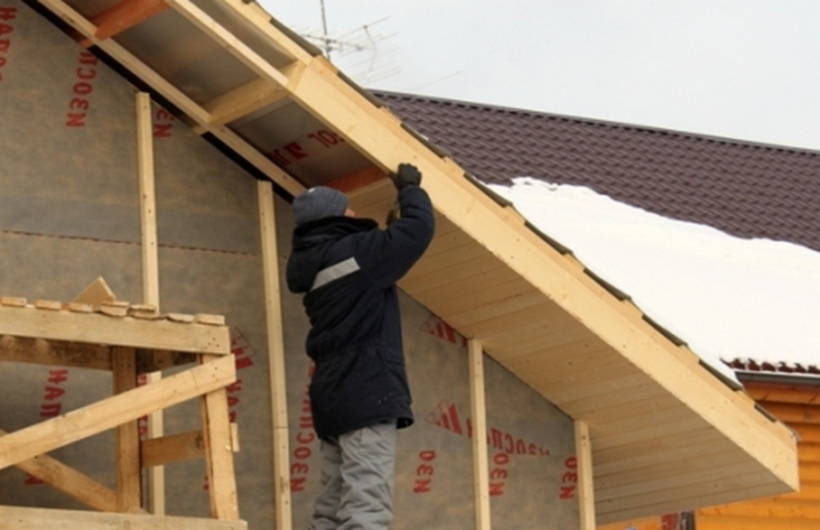
Connecting the eaves with crate relies self-drilling screws with a flat top. It is necessary to join two eaves with a raid of 5-10 cm. To hem the eaves overhangs of the roofing itself can be professional sheet metal siding or front panels.
It is strictly forbidden to fasten metal roofing in the upper deflections of the waves, as well as to use a hammer to secure the screws.
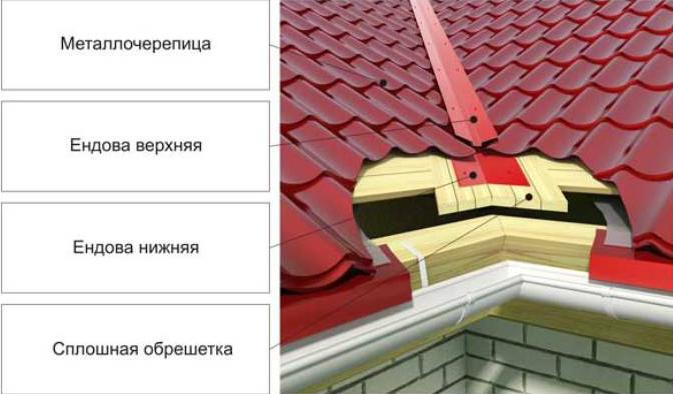
Fastening of the lower end valley is made on the clamps, and from the end of the sheet to the lowest point of the end valley there should remain at least 10 cm.
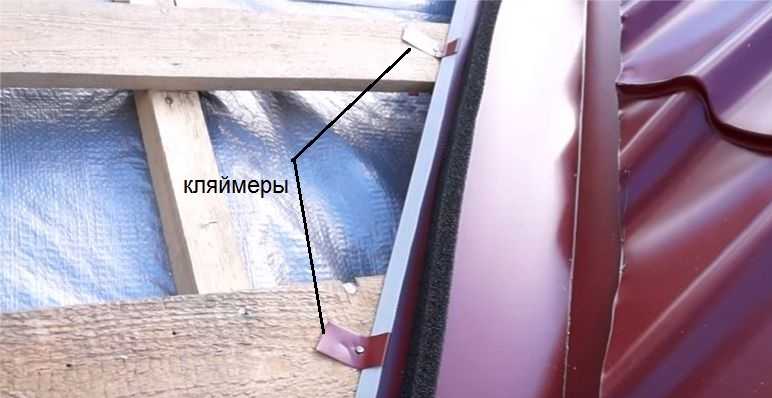
Upper endova is mounted after the metal tile layout is completed. To do this, use roofing screws, piercing the tops of the waves in increments of 20 ... 30 cm. It is unacceptable to violate the lower endova. When attaching gables try to cover the upper deflections of the waves. The ridge and metal tile are separated with polyurethane foam, and the ends of the ridge element must be blocked with a decorative cap.Joints are necessarily treated with sealants.
Wall profiles must be used where the roof fits not only to the walls, but also to various pipes and dormer windows.
They are placed on the metal tile and attached to the problem elements. At the level of the cornice after the second strip of the batten, various fences are mounted. Their appearance and specific performance are determined by the slope of the roof and the type of tile. It is recommended to use self-drilling bolts with an external zinc layer (5.5 x 25 mm for metal and 5.5 x 60 for wood) for the connection.
It is unacceptable to mount the fence to only one metal tile.
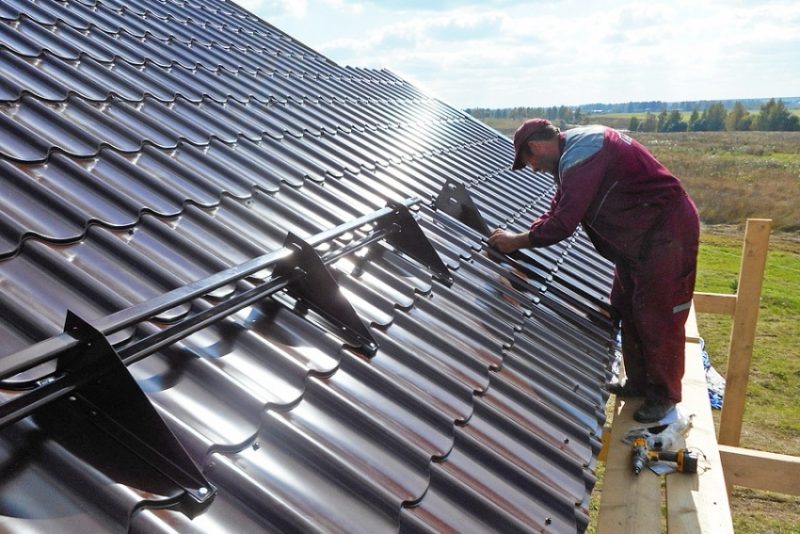
To connect the protecting designs among themselves, apply bolts. In the deflection of the waves, snow-delaying elements are placed, they are fastened through the tiles and the sealing gasket to the crate itself. In the places provided for this, crate profiles are made in advance with a step of 12 cm (it is counted along the axes of the profiles).
Snow traps should be mounted above the fence, and if the slope is longer than 10 m, it is advisable to use a pair of them.

You can see the installation process of the metal tile in the video below.


