Half-hilt roof do it yourself: drawings, roof system and step-by-step instructions
Covering the top of the house can not be assessed purely utilitarian. In fact, this element has an important decorative meaning, because the impression it receives from people, including the owners themselves, depends on it. The original solution often becomes a half-hinged roof.
Special features
The half-hipped roof is sometimes also called the Dutch one, which directly indicates its origin. That is why the main feature of the protective structure is the combination of an elegant appearance with the ability to withstand a significant wind load. It should be remembered that polupalmovaya roof is quite complicated in structure. It will not be easy to design it and then mount it.
To a large extent, it “pays off” by combining the positive characteristics of gable, tent and hip constructions.
The configuration of the gables is close to the trapezium formed by the hip elements, which allows to achieve several positive points at once:
- good aerodynamics (streamlined);
- excellent resistance to strong winds - this is important not only in open areas, but also near rivers, in the foothills and mountains;
- increase the efficiency of the use of attics;
- the ability to change the angle at which the slopes are inclined;
- nice appearance.
But we must not forget that the half-hipped roof is not so easy to make - you can make it yourself with the help of professional craftsmen and under their direct guidance. The amount of material spent increases significantly compared with other options. The reason is the complexity of the geometry and the weighting of the structures - it is necessary to carefully calculate all the loads and ensure for each part the ability to resist them.
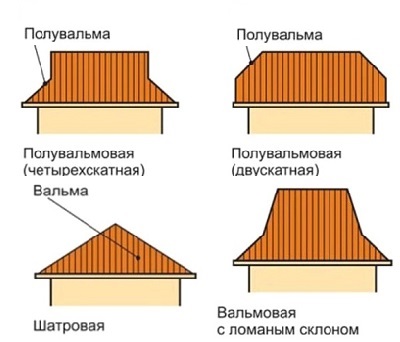
Types of construction
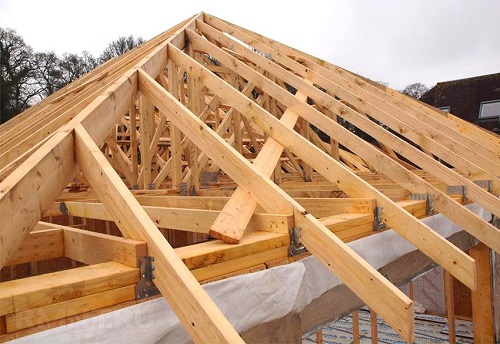
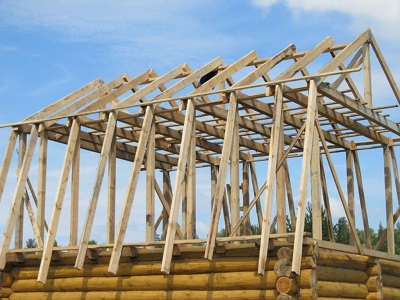
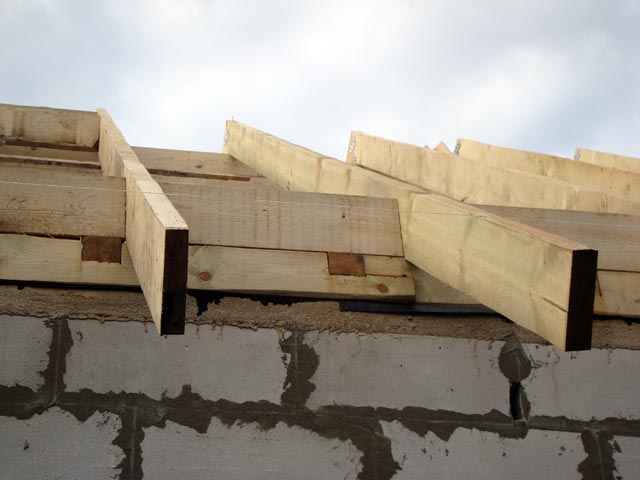
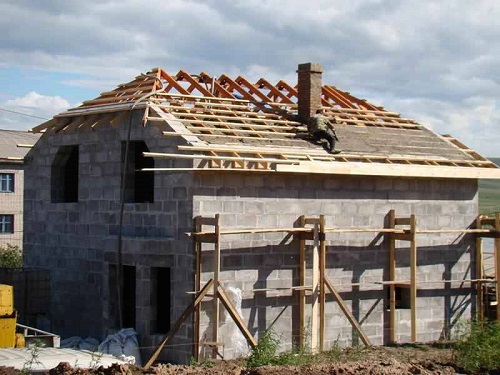
The gable truss system includes, first of all, a mauerlat-bar in the form of a square, which helps to distribute the weight load on the wall and translate it into the foundation.Legs, ridge runs, diagonal legs, ordinary rafters, fillies and a number of other elements are also used. When choosing a hanging contour frame of the house does not have any bearing partitions. The rafters are supported only on top of the skate girder and on the top of the mauerlat. For the rest, there is no support.
Extensive heavy legs push in the direction of the wall of the house, so they must be compensated by bolts, drawbars, attendants and struts. There is another device, a nasal one, which is used when at least one load-bearing wall is located within the perimeter of the building. Then it will be a good base to hold the rafters. Since the energy directed to the sides is reduced, additional burdening is not required, therefore, reducing the number of supporting parts will not affect the stability of the system.
Specialists working with the roof indicate that, whenever possible, the lay view of the structure is preferable and more reliable.
There is a so-called Danish variety, which is equipped with a triangular block in the upper lobe of the butt. The bottom line of the triangle is in contact with the vertical gables, built in the form of a trapezoid. The line of tangency forms a convex angle.
The difference from the simple hip construction is that the ends of the slopes are shorter.
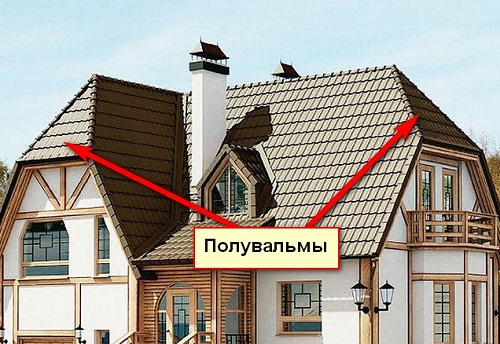
It is important to know that any half-hinged roof, no matter how formal it is called, will in fact be a four-slope roof, since the separation is only conditional. If it is called this, then unlike the gable option, the end slopes are not drawn from the skates, but from the central points of the side slopes. They necessarily reach the eaves overhangs.
Half-gated gable roofs in a one-story house are distinguished by the fact that they make it easy to create an attic. If you use the four-sided construction of a full-fledged sample, then the attic should be equipped with a very high window. In addition, it will not work to put a balcony on the end.
Dimensions
Mating the boards is an excellent practice, which allows even from small elements to get a large block and to perform, for example, a part with a width of 9 meters or more. When calculating the allowable and justified length, width or thickness of the board, a balance should be maintained between strength and load, because a strong structure inevitably turns out to be heavier. The smallest section, which is considered permissible according to technical requirements, is 5x15 cm. That is what it should be used to save when constructing buildings of a secondary row.
When constructing long spans, it is worth choosing for rafters boards of 15x15 or even 25x10 cm. An even larger section is justified except for very large roofs (for example, on an apartment building, above a solid trade pavilion and similar buildings). Regulatory parameters may be useful, but they do not reflect the climatic specifics of certain localities.
Therefore, professional builders clearly agree that calculations should be carried out every time a new structure is created.
The optimum thickness of the boards for the formation of rafters ranges from 40 to 60 mm. When constructing a roof over household structures of secondary importance, it is allowed to save using a tree 35 mm thick. But above the houses it is recommended to put solid rafters from boards with a minimum thickness of 50 mm. As the board lengthens, its required width increases.
The most accurate calculations are made using special software.
Sometimes the recommended cross section of rafters may be reduced if special slopes are used.
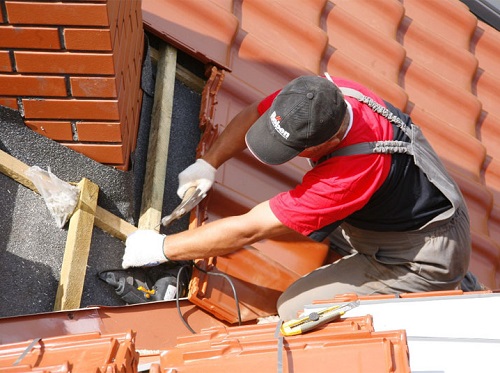
Materials and tools
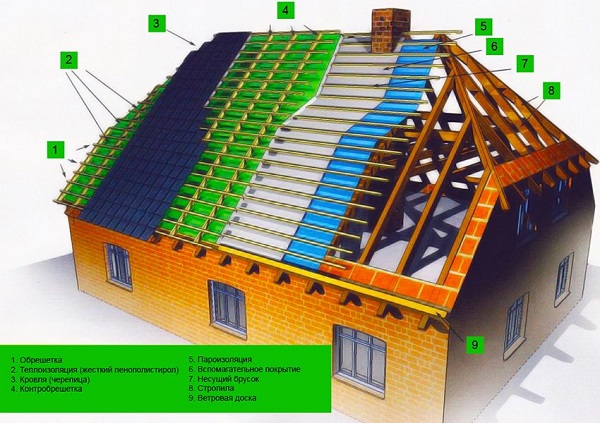
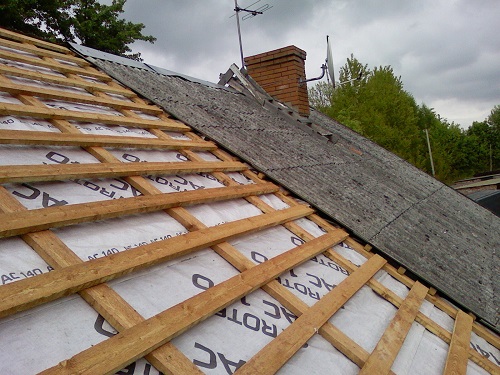
It is not enough to pick up boards for the rafters - to build a half-halogen roof on a timbered or other house competently and in a short time will not work if you do not use suitable materials. The choice of thermal insulation, vapor barrier and means of protection against precipitation and wind is in many respects individual - it must be consistent with both the warm or cold arrangement scheme and the type of facial material, with the order of its use. Therefore, it is on him and is worth concentrating.
Metal tiles should have a lower slope of 150 mm, and if it does not exceed 200 mm, you will have to carefully seal the joints.
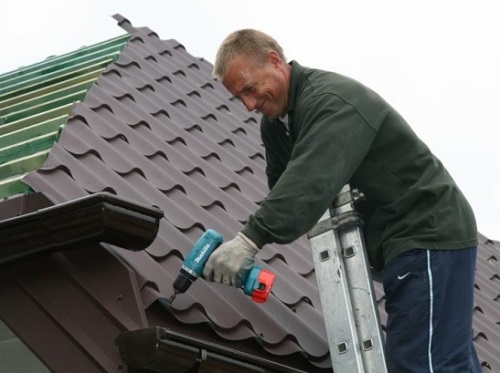
The roof of this type is mounted using screws, equipped with rubber pads. Attaching a metal tile to the base is quite simple, and its mass is relatively small. The requirements for transportation, loading and unloading are quite sparing, the cost of the material is small. However, one has to reckon with a significant amount of waste during work and with the need to mount enhanced noise protection from below.
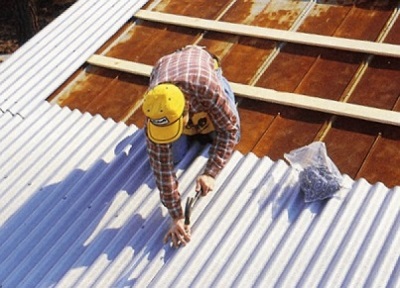
When choosing a profile flooring, a roof slope of at least 100 mm is required.
It is necessary to fix this material with the help of 6-8 screws per 1 square. The installation of the profile flooring on the former rolled material is allowed. The advantages of the coating are in the long period of operation, the strength of the bend and a small price. But you have to reckon with the fact that the roof can become very noisy if you do not take care of sound insulation.
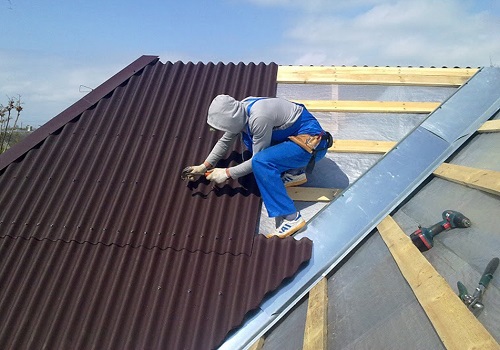
Ondulin is good where required:
- excellent hygienic and ecological quality of the coating;
- ease of cutting;
- strength;
- convenience during transportation;
- lack of noise during operation;
- comfortable cost.
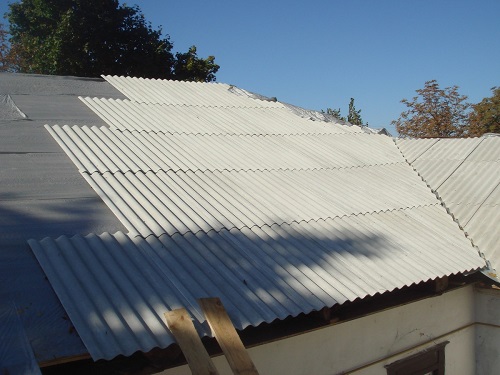
But it is important to remember about its disadvantages: ignition when heated above 110 degrees, the likelihood of paint fading, the danger of moss overgrowth of insufficiently illuminated areas. Cheap and long-serving slate is suitable when the roof is inclined from 12 to 600 mm, a prerequisite is an overlap of 1 or 2 waves.
The crate is mounted below, for which square bars are used. When taking slate reinforced profile, support structures should also become thicker.
Be sure to need a lining layer (ruberoid, pergamine) and additional soft material for all nails.
It should be remembered that the presence of asbestos in the composition of slate can adversely affect people's health. In addition, even the best varieties of slate are very fragile, they can absorb moisture and become covered with moss and lichen. Steel faltsevy roofs are strong, externally beautiful and can work for a long time. But they easily let the cold through, which raises the bar for quality requirements for thermal insulation. The fastening of the “pictures” on the crate is made using thin steel clamps.
Regardless of which of these materials and types of construction is chosen, it is advisable to work in the same way as professional builders. And this means, among other things, the mandatory purchase of only those materials, components and fasteners that meet the requirements of the state standard.

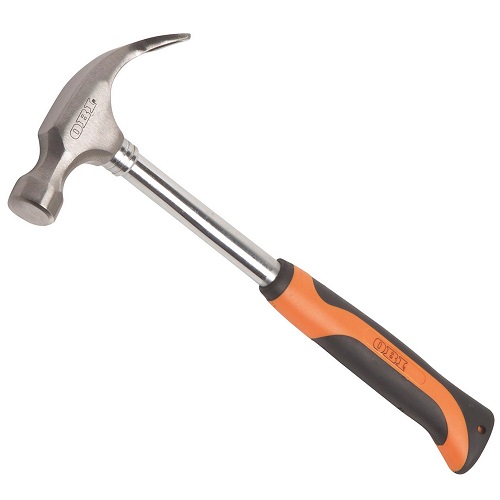
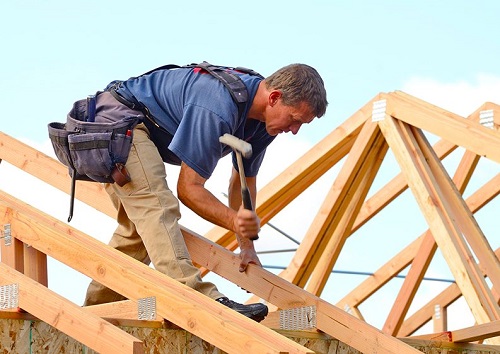
When working on the installation of roofing materials do it yourself will need:
- construction knife;
- sturdy hammer;
- cord (on it align the line);
- building level;
- saw on a tree of average size;
- stapler for attaching insulating sheets;
- screwdriver;
- pliers.
How to make yourself?
Variants of projects.The differences between specific versions of the hip roof are determined by the angle of the short hip relative to the walls of the gables. It can be both convex and concave, there is an upper or lower placement of a half hip. In the drawings of the Dutch half-collapsed roofs, it is clearly visible that a half hip is placed at the bottom. The upper side of the trapezoid stretches parallel to the vertical triangle, which can be either monolithic or with a dormer window.
The Danish type of roof implies that the half hip is a triangle. It is supported by a vertical gable in the form of a trapeze. The whole structure together forms a convex angle.
The difference from a simple hip roof is that the end slopes are shortened.
It is not necessary to be limited to the classical variants - there are chetyrehskatny designs, each side of which belongs to the Danish or Dutch group. There are buildings in which the hip of smaller length is placed from one end or from one side.
Regardless of the chosen approach, there will be a certain part of the legs of the rafters, which are installed according to a hanging or inclined scheme. It is necessary to carry out the suspended structure where the box has no bearing walls inside.
It is also appropriate in a situation where it is not possible to put support for ridge runs.
In both cases, the heels rest against:
- in the mauerlat;
- in the upper crown of the framework used instead;
- in the floor beams.

The development of the Dutch format in one way or another is quite common. An example is a design that resembles a postal envelope, but differs from it in the projection of hip contours. The Danish "broken" system is more complicated and more expensive than the classic half-hinged roof. During the preparation of projects, it is not necessary to scrupulously calculate each element - experienced builders and architects recommend limiting themselves to calculating the longest part, while all others do the same or slightly smaller size.
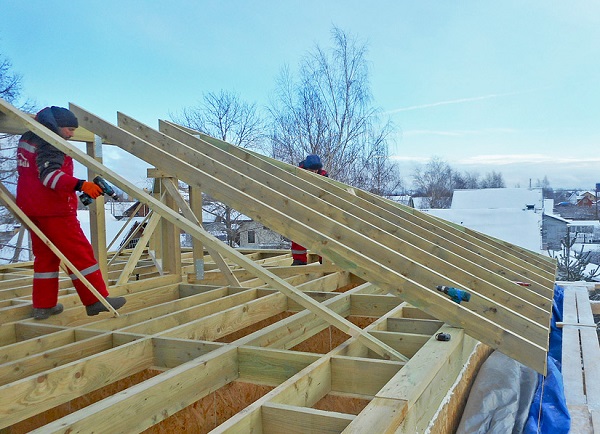
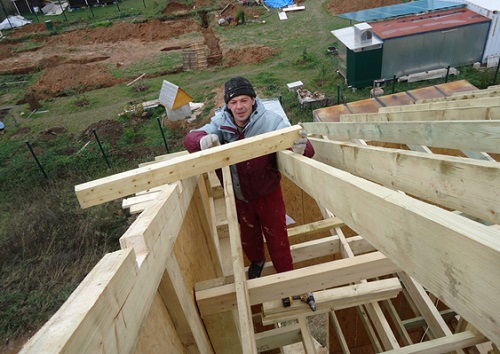
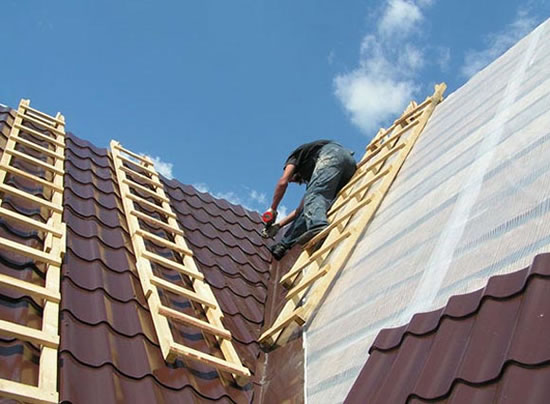
Guide to construction. Any step-by-step instructions on the construction of a half-folded roof do it yourself, which means that by the beginning of the work all the necessary calculations and drawings have been made, because both are necessary for the selection of materials and the estimation of their quantity. Mauerlat is made unlike the classic wood frame.
The timber is laid in the form of separate strips:
- the first one is flush with the inside of the front walls;
- the second is in the middle of the inner support wall;
- the third is flush with the internal planes of the gables.
Then comes the turn of the floor beams, laid out at a right angle to the beam of the Mauerlat key walls. If it is required to join two bars together, then the weakest position in their connection is brought upwards from the inner supporting wall. When mounting props that keep the run of the skate on the same inner wall, it is very important to estimate the distance from one peripheral rack to another, since the length of the key roof fragment depends on it. Ordinary racks are placed at equal distances from each other - the uniform distribution of the load that is created depends on it.
It is important to know that before fixing it is necessary to control the support lines with a plumb or laser meter.
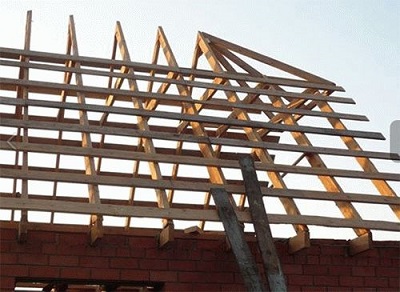
Auxiliary stitches help to eliminate distortion of stand positions after measurement. They are removed as soon as the final fixation is made. After it comes the turn of installation of the rafters of the main ramps (their ordinary legs), for which purpose they choose a suspension or a slant technique.It is worth remembering that in many drawings that can be found on the Internet or in special manuals, floor beams are not displayed in order to simplify the presentation of information. In fact, of course, without overlap do not work.
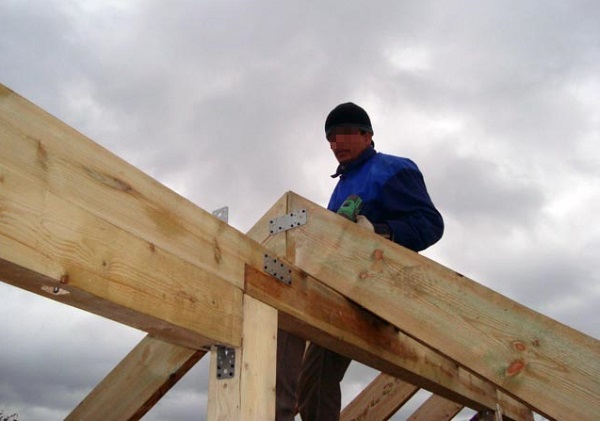
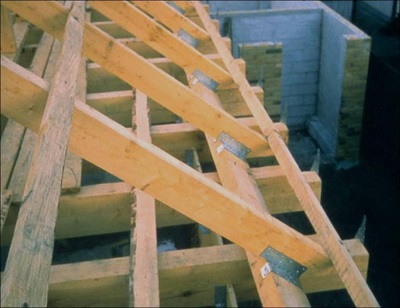
Diagonally running rafters are designed to connect the edges of the skates with the corner points of the gables. First, a fragment of the board is placed flush to the outer side of the mauerlat, the dimensions of which are 5x15 cm. This part is slightly pressed to the base with nails so that it does not change its position and does not fall during further manipulations. This approach allows you to quickly determine where exactly the points should be located. Then they take a board (size is not important), which is placed on top of 3 or 4 ordinary rafters, so long as the parallel with respect to the run is observed.
Landmark must check: whether it is horizontal to the desired extent. Then the board is pulled up to the nailed area. At the intersection, they find the point from which they lead the line for gash. The diagonal block itself is tried on, applied to the top of the peripheral truss and to the corners of the trimmings.
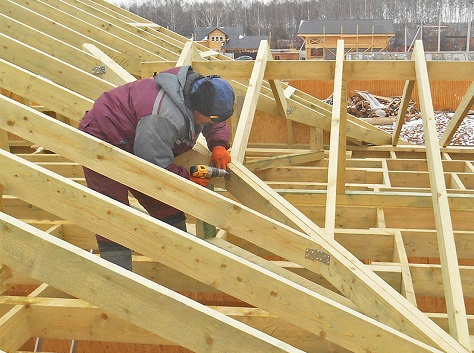
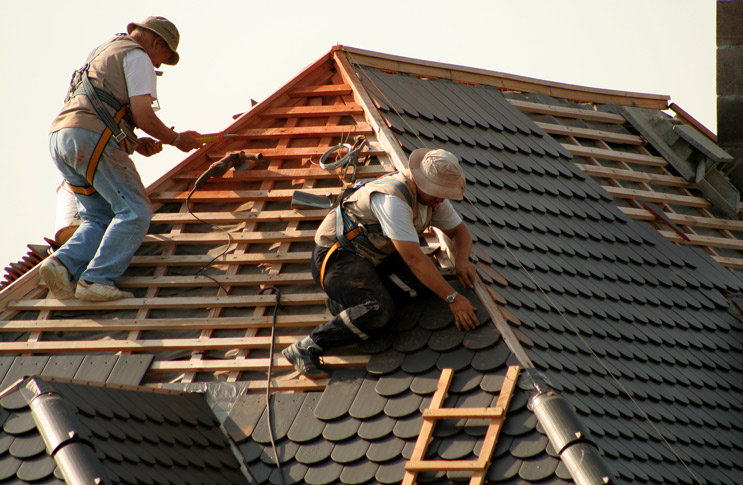
It is recommended to work together to share responsibilities and not to miss anything. Accounting planar gash is optional - you can later adjust the horizontal blanks (they are mutually mirrored).
Then the upper one drank out, and the necessary distance is laid up, counting from the gablet of the pediment in 4 places. At the same time duplicate the imaginary contours of the board. Fill marks are performed only on a solid basis. If there are no serious problems, then you can immediately proceed to the next stage of work. The heel of the rafters, which runs diagonally, rises above the mauerlat by a carefully measured distance (it is counted from the top point of the skates).

The reference point is the construction cord. The middle leg of the half hip is placed only after the goniometer measures the angle that separates the cord from the support stand, as well as the angle of intersection of the diagonal parts. The blank is tried on again, the result is transferred down to determine how deeply to make the lower cut and how to make a drink in the same place. Narodniki, filling hip slopes, prepared in the usual manner, but adjusted for size and installation conditions.
When all the truss legs are ready (long and short), you will need:
- mount gable fillies to make the ends overhangs;
- put wind boards on the perimeter of the roof;
- increase diagonal details with the same size board.
Another option is as follows:
- laying of the power plate on the walls of the outer perimeter and gables;
- laying out the top of the carrier partition in the house;
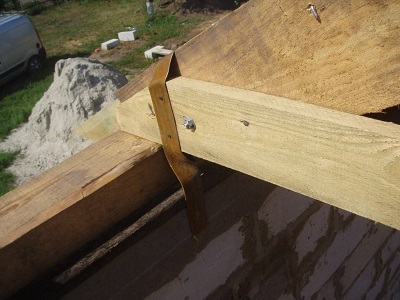
- fastening of the base with brackets (bolts) in wooden constructions with the help of a tie-rod-reinforced tie in concrete and brick structures;
- for protection against moisture, the gap between the main wall and the support bar is filled with roofing felt;
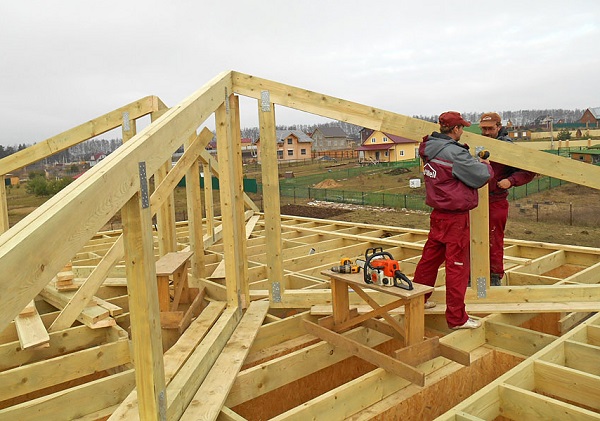
- internal logs are equipped with vertical posts connected through the skate girder, all angles are measured repeatedly to eliminate the slightest mistake;
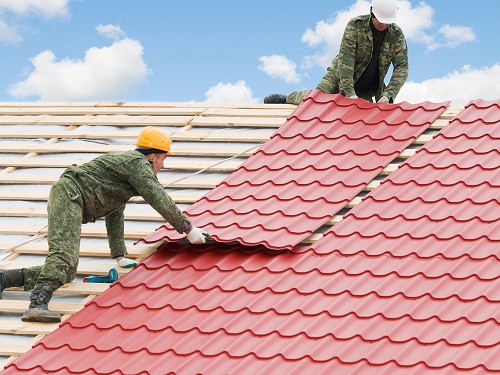
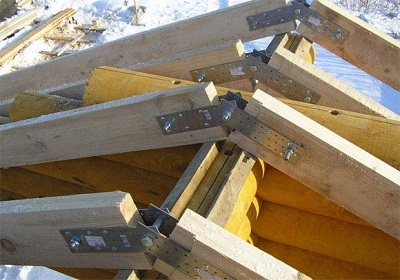
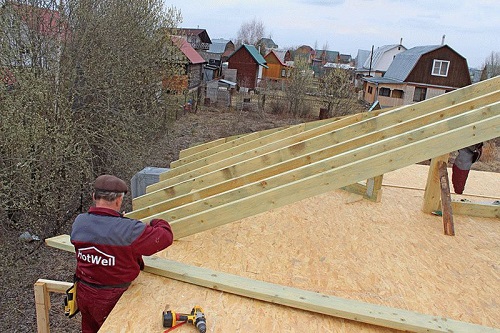
- put the rafters of the ordinary level with a distance of 0.6 or 1.2 m;
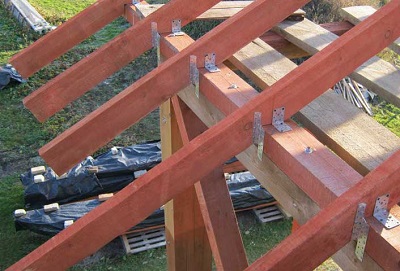
- fixing the diagonally running structures from above with nails, from below with steel angles;
- flooring holders with drank bottom for Mauerlat, length is calculated with a reserve for the overhang;
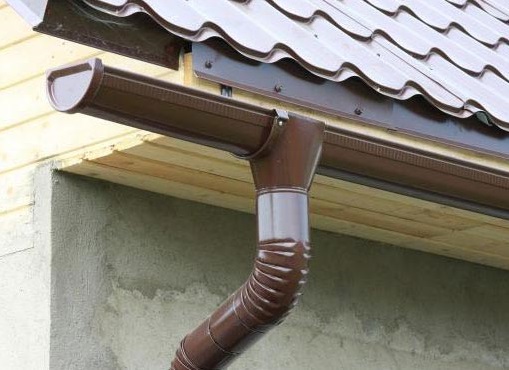
- placement of cornice fillings, wind boards and drain holders;
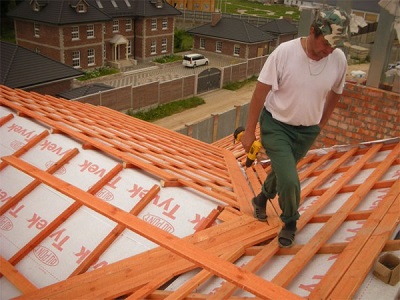
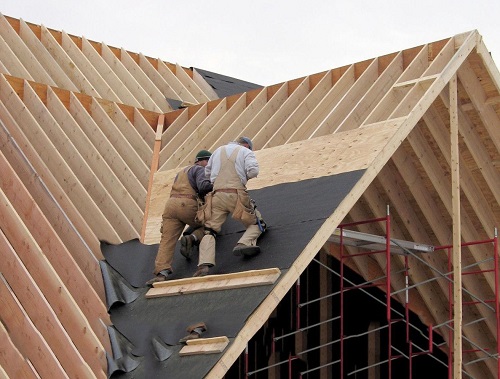
- preparation of crates and waterproofing;
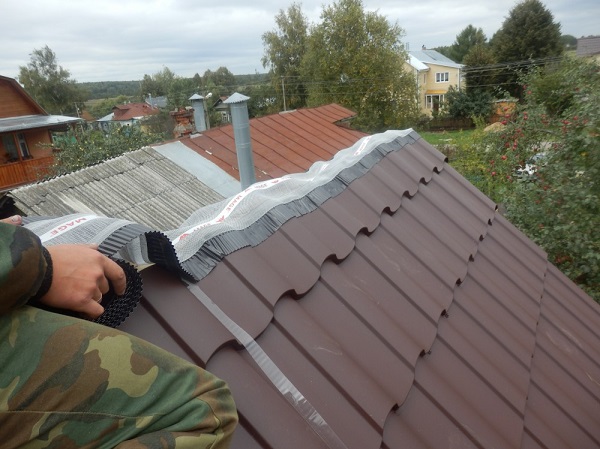
- cutting and flooring of roofing material with a run of strips or sheets from 100 to 150 mm;
- completion of work on the drain.
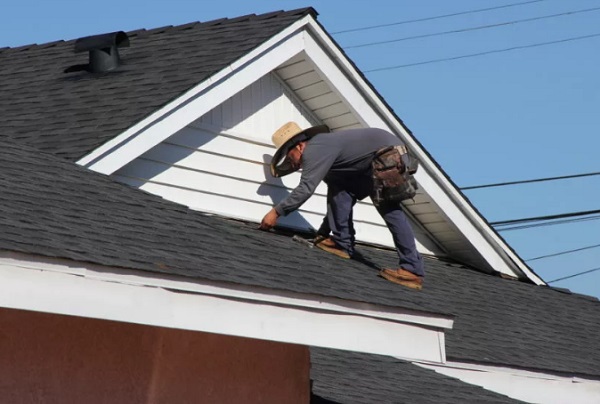
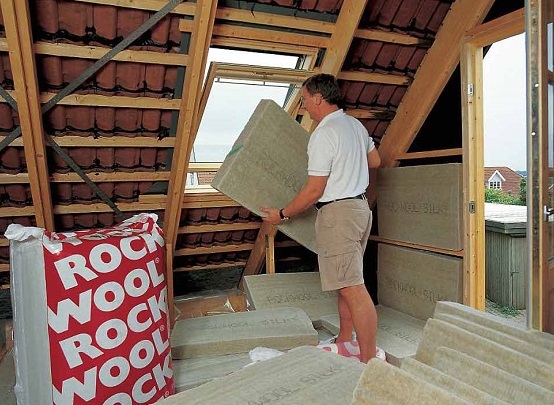
When the external work is finished, they start working inside. The half-hinged roof is necessarily insulated and sheathed with decorative materials. After finishing, it is only necessary to control the actual condition and repair problem areas in a timely manner. Any, even the weakest points of leakage and passage of cold air should be immediately eliminated. Compliance with these principles allows for a long time to exploit the roof, but only if it was done correctly.
It should be said separately about the security measures in the construction of the half-hinged roof. It will be necessary to strictly follow the instructions of manufacturers of materials and tools when storing, moving and lifting to the top. All work is carried out exclusively in calm or in light wind, in clear dry weather. Before starting work, inspect all the tools every time.
It is forbidden to work with poor visibility, as well as without protective gloves.
Calculations. In addition to the choice of the half-hinged roof scheme, it must be carefully calculated. This stage does not pass any developer.
To simplify the calculations, the treated surface is conventionally divided into figures. For the Dutch formation is characterized by the division into rectangles and trapezoids. First, calculate the area of the slopes, and then the area of the triangular parts.
If the Danish roof is executed, then division into a rectangle and a number of triangles is performed. Then calculate the hip ramps and double the rate. The results are summarized. It is important to note that the slightest mistake can have very unpleasant consequences.
Therefore, to save on the services of professionals, even at the design stage, is stupid and irrational.

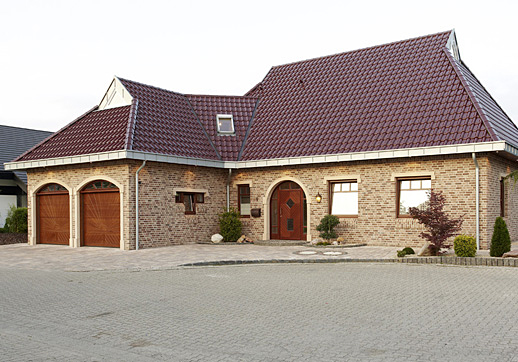
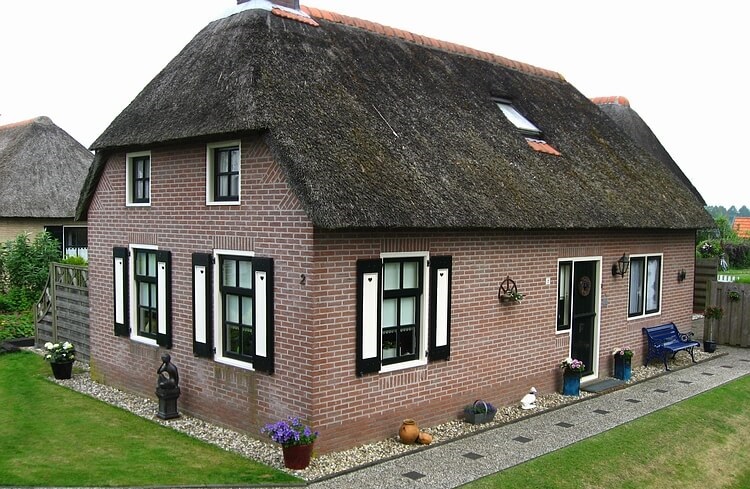
Beautiful examples of private houses
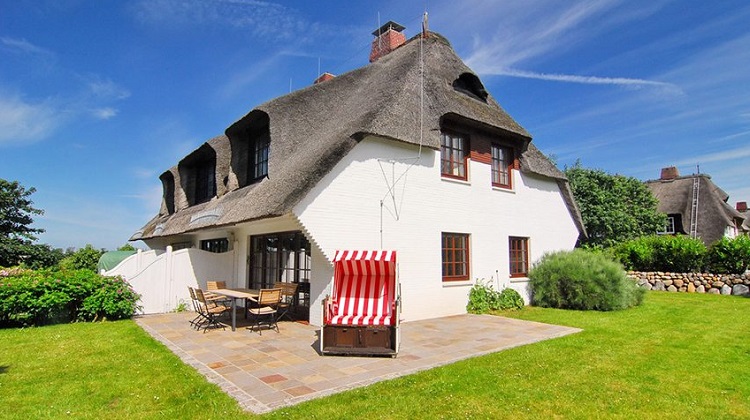
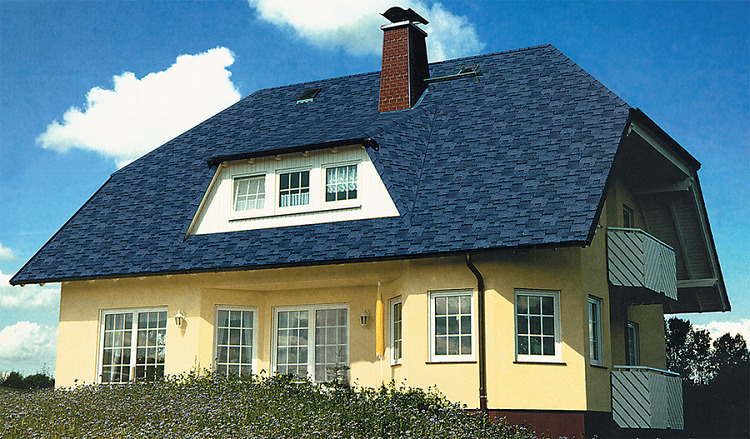
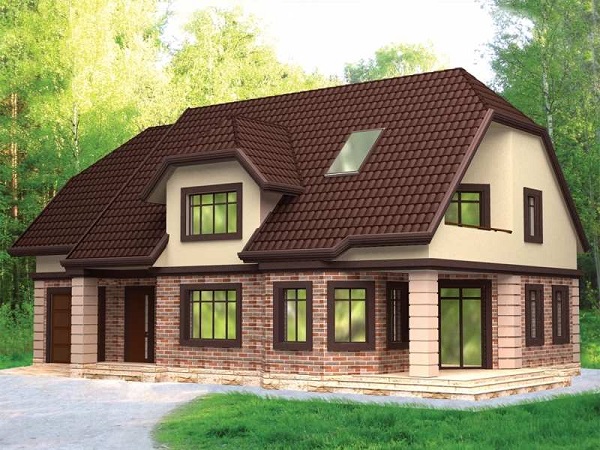
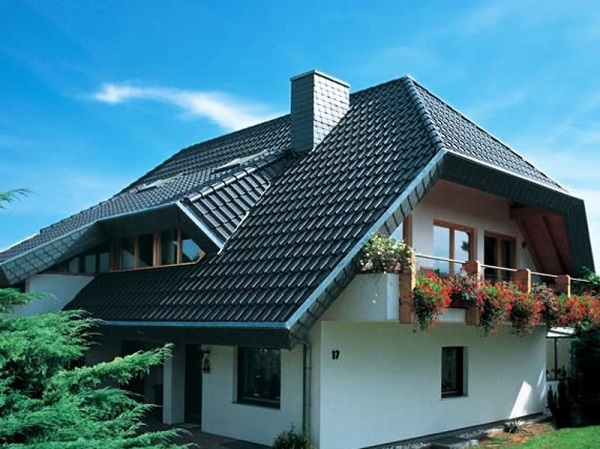
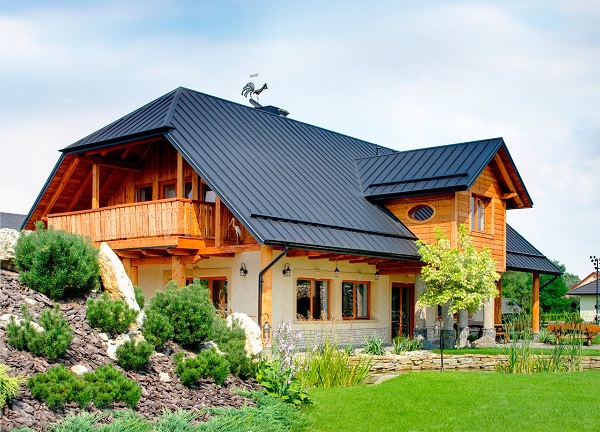
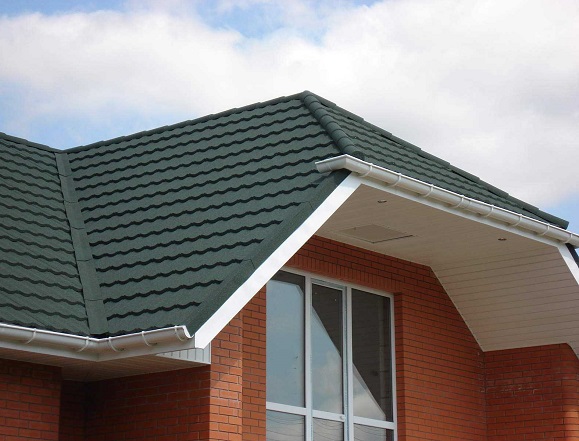
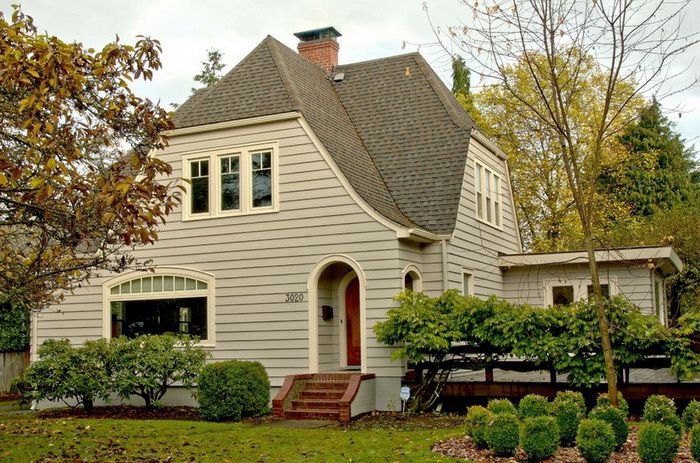
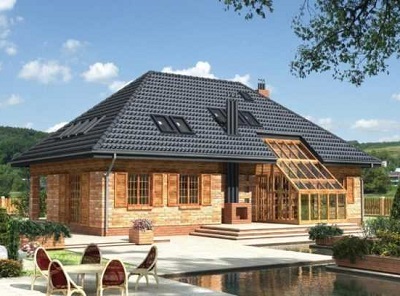
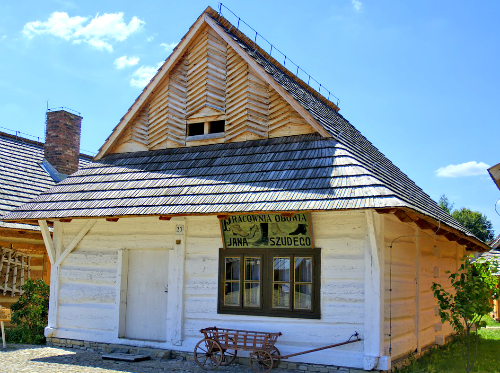
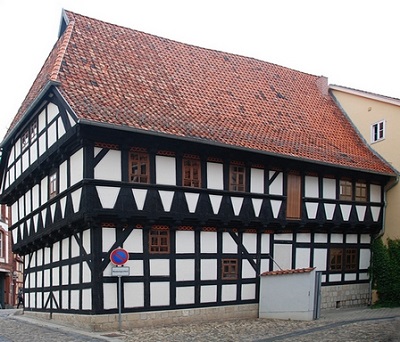
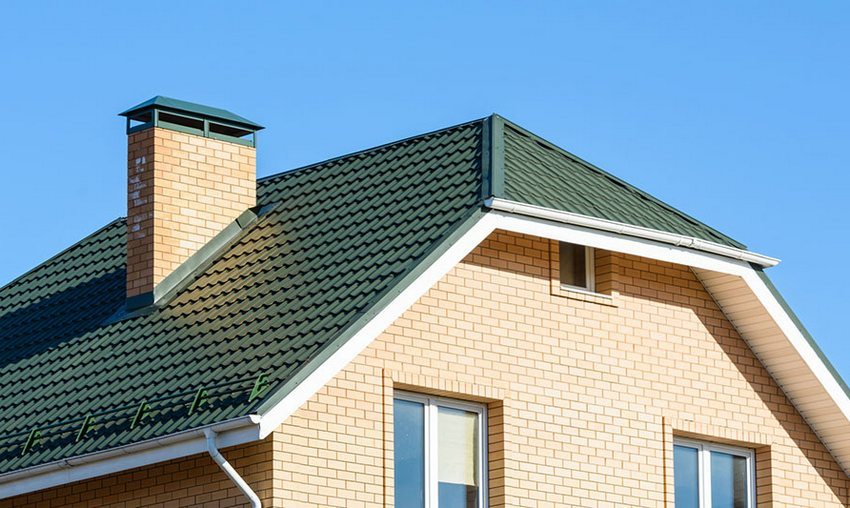
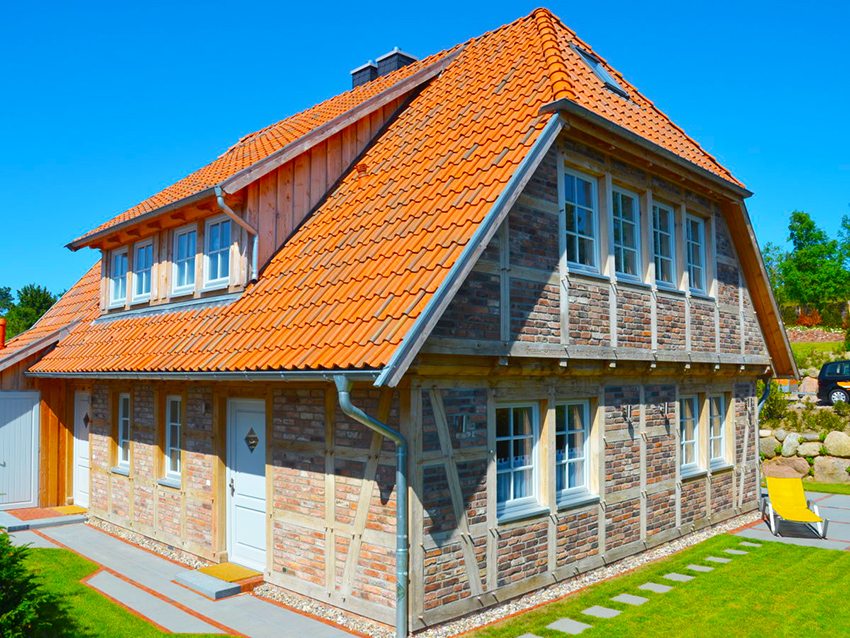
The type of hinged roof looks really beautiful and unusual and can be very diverse in appearance. The photo below shows just such an example. A shiny metal tile, even glittering in the sun, lined up in a bizarre geometric pattern, is in perfect harmony with the light brick of the walls, which does not create such a dazzling look. There is another option, with an attic - there are already going to interesting color experiments: this roof is purposefully decorated with rusty metal.
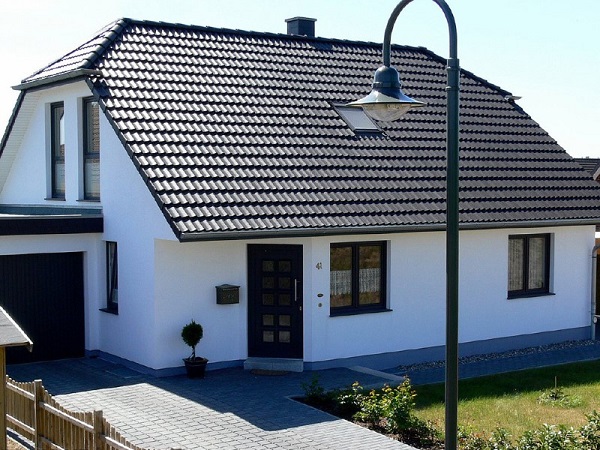
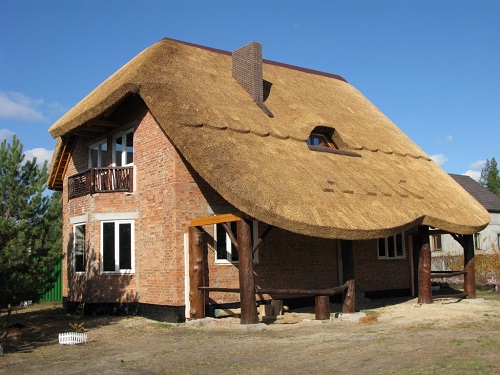
Sometimes architects go even further.Here is a sample of a radical approach: black, as if worn and worn, the half-hinged roof with white inclusions in different places. From the side it looks like it was not firmly installed on the rafters, but simply put on top, like a hat. The pinkish brick walls completes the ensemble and creates an interesting contrast. In the roof itself there are two relatively small windows used to illuminate the attic space.
For information on how to quickly and efficiently wash down rafters on the hip roof, see the video below.


