Wooden floor on logs: features and laying
The modern market of building materials, including flooring, provides a huge selection of materials for flooring both in a private house and in an apartment. Recently, most of the tenants prefer materials of natural, natural origin. Not the last place in this list is taken by the traditional wooden floor, which for many centuries has proved its environmental safety.
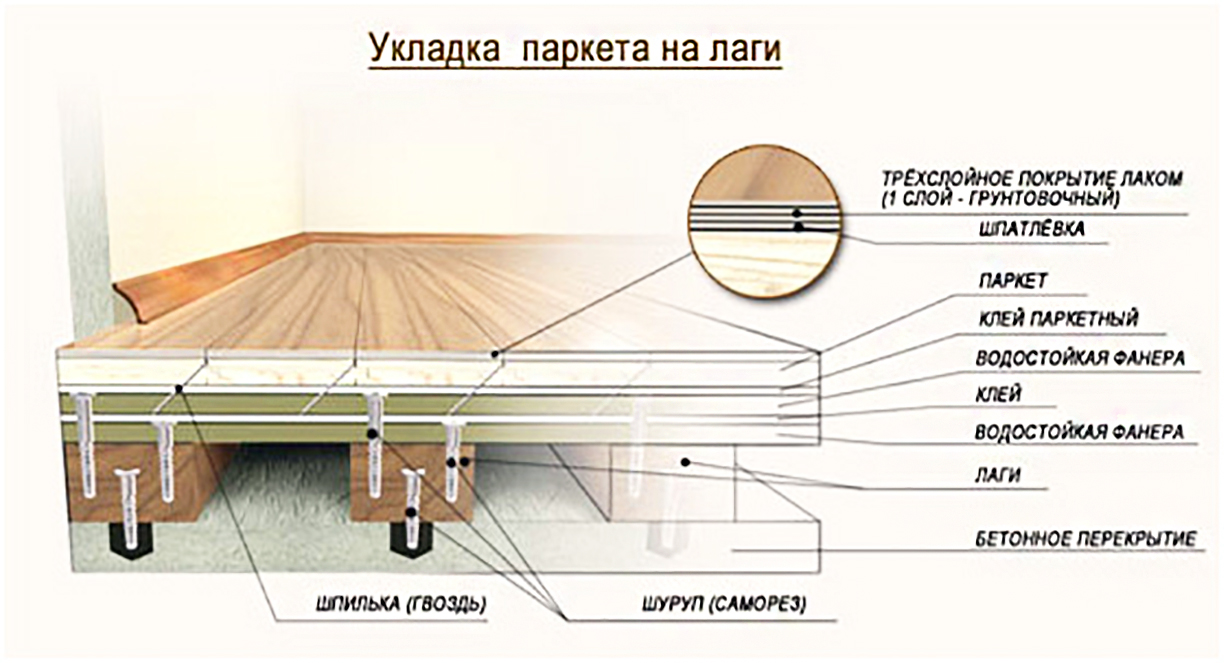
According to experienced builders, the most practical solution is to build a wooden floor on the logs, that is, above the base of bars or boards of sufficient thickness. There is no need to hire a team of builders, all this is quite capable of doing with their own hands.
Constructions
Due to some elasticity of the board as a floor covering, the design of the flooring requires the construction of a peculiar supporting skeleton, resembling a cake.In addition, and the place of his device - whether it is the floor of the first or second floor, attic or terrace in private urban housing or a balcony (loggia), bathroom in the apartment - dictates a number of requirements for the structure of the supporting structure before the floor covering.

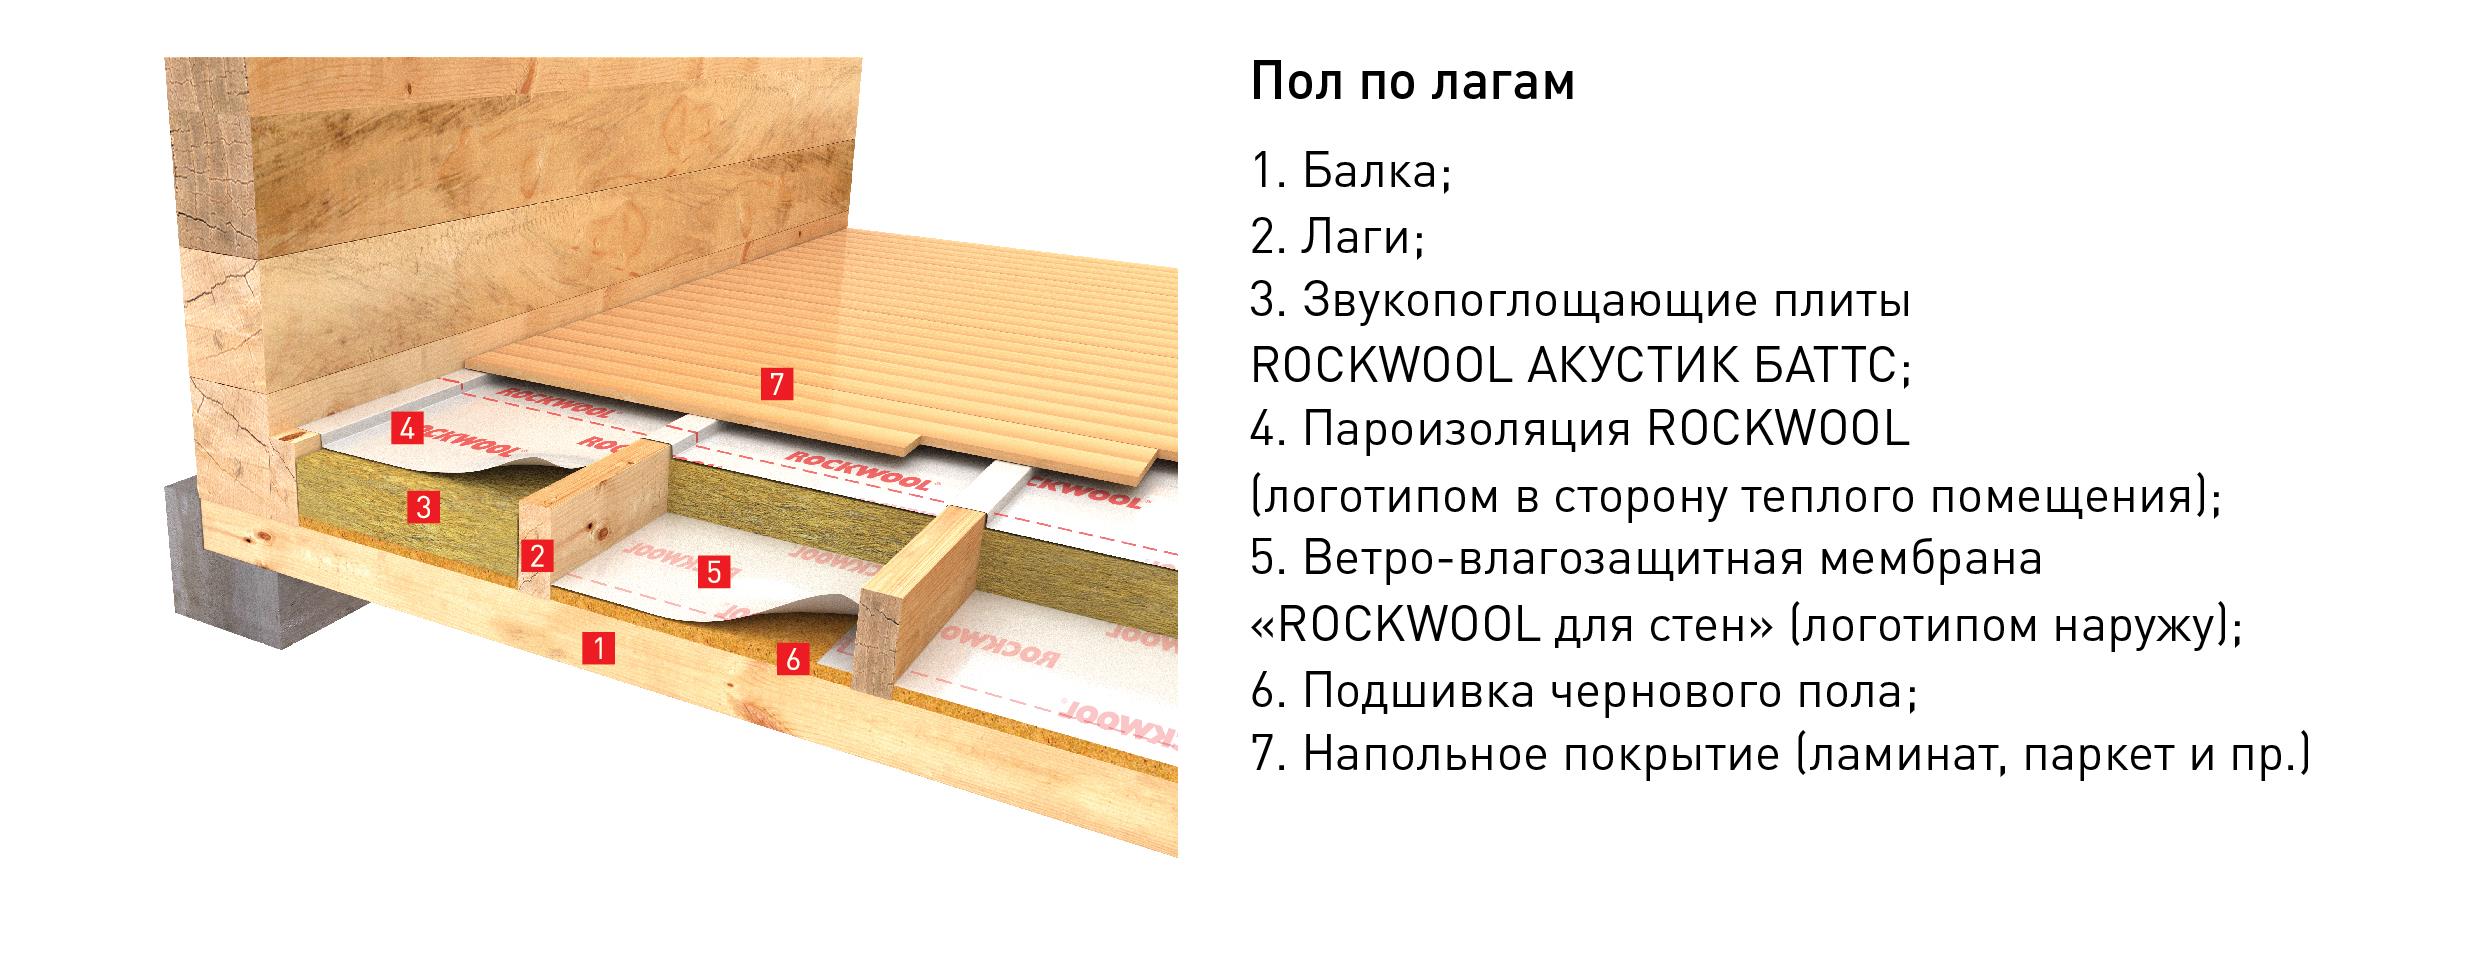
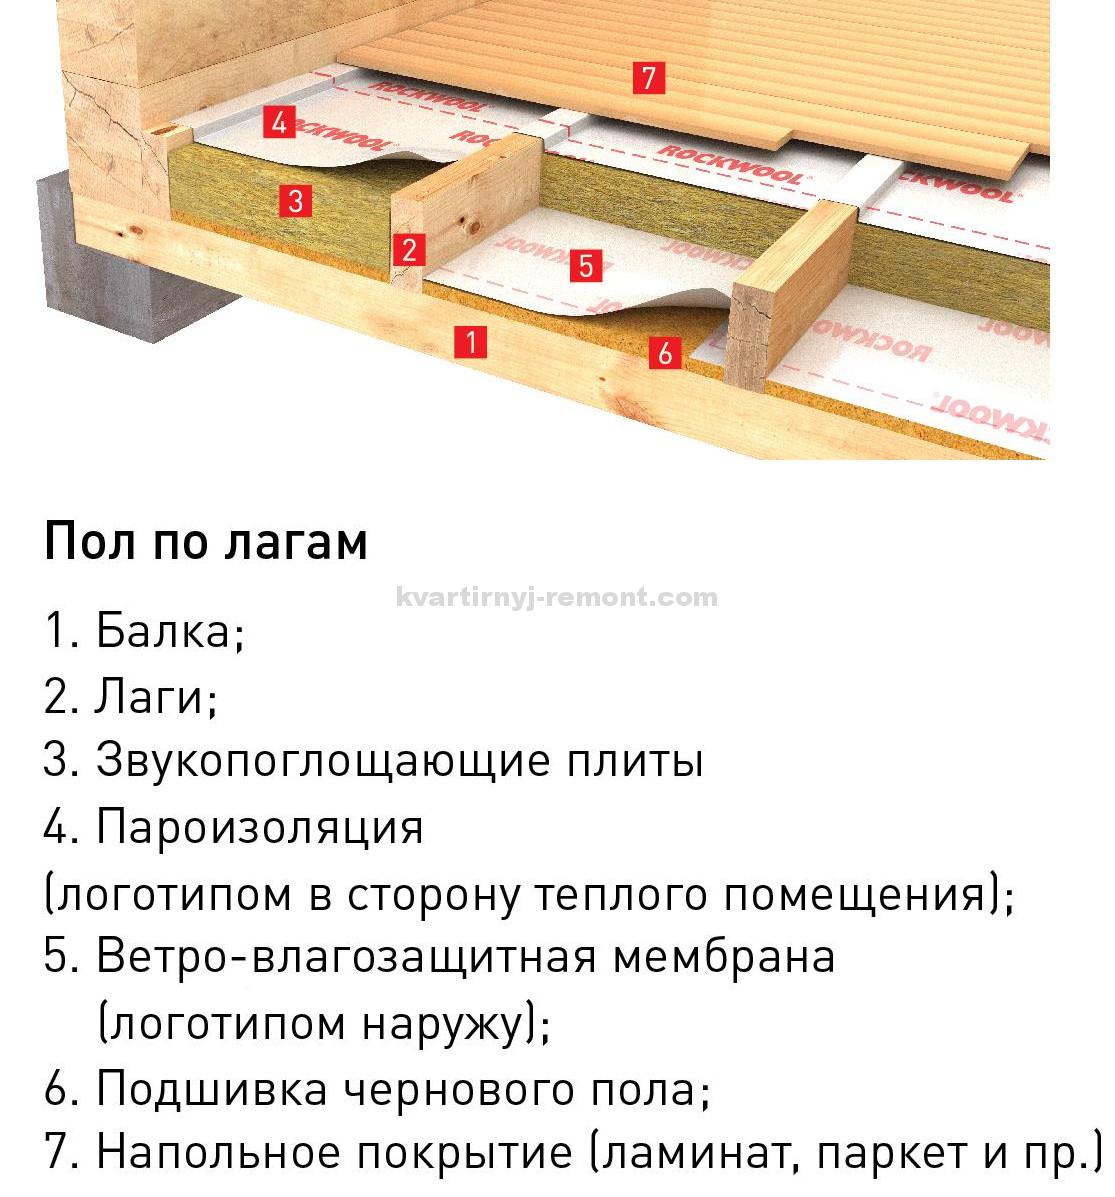
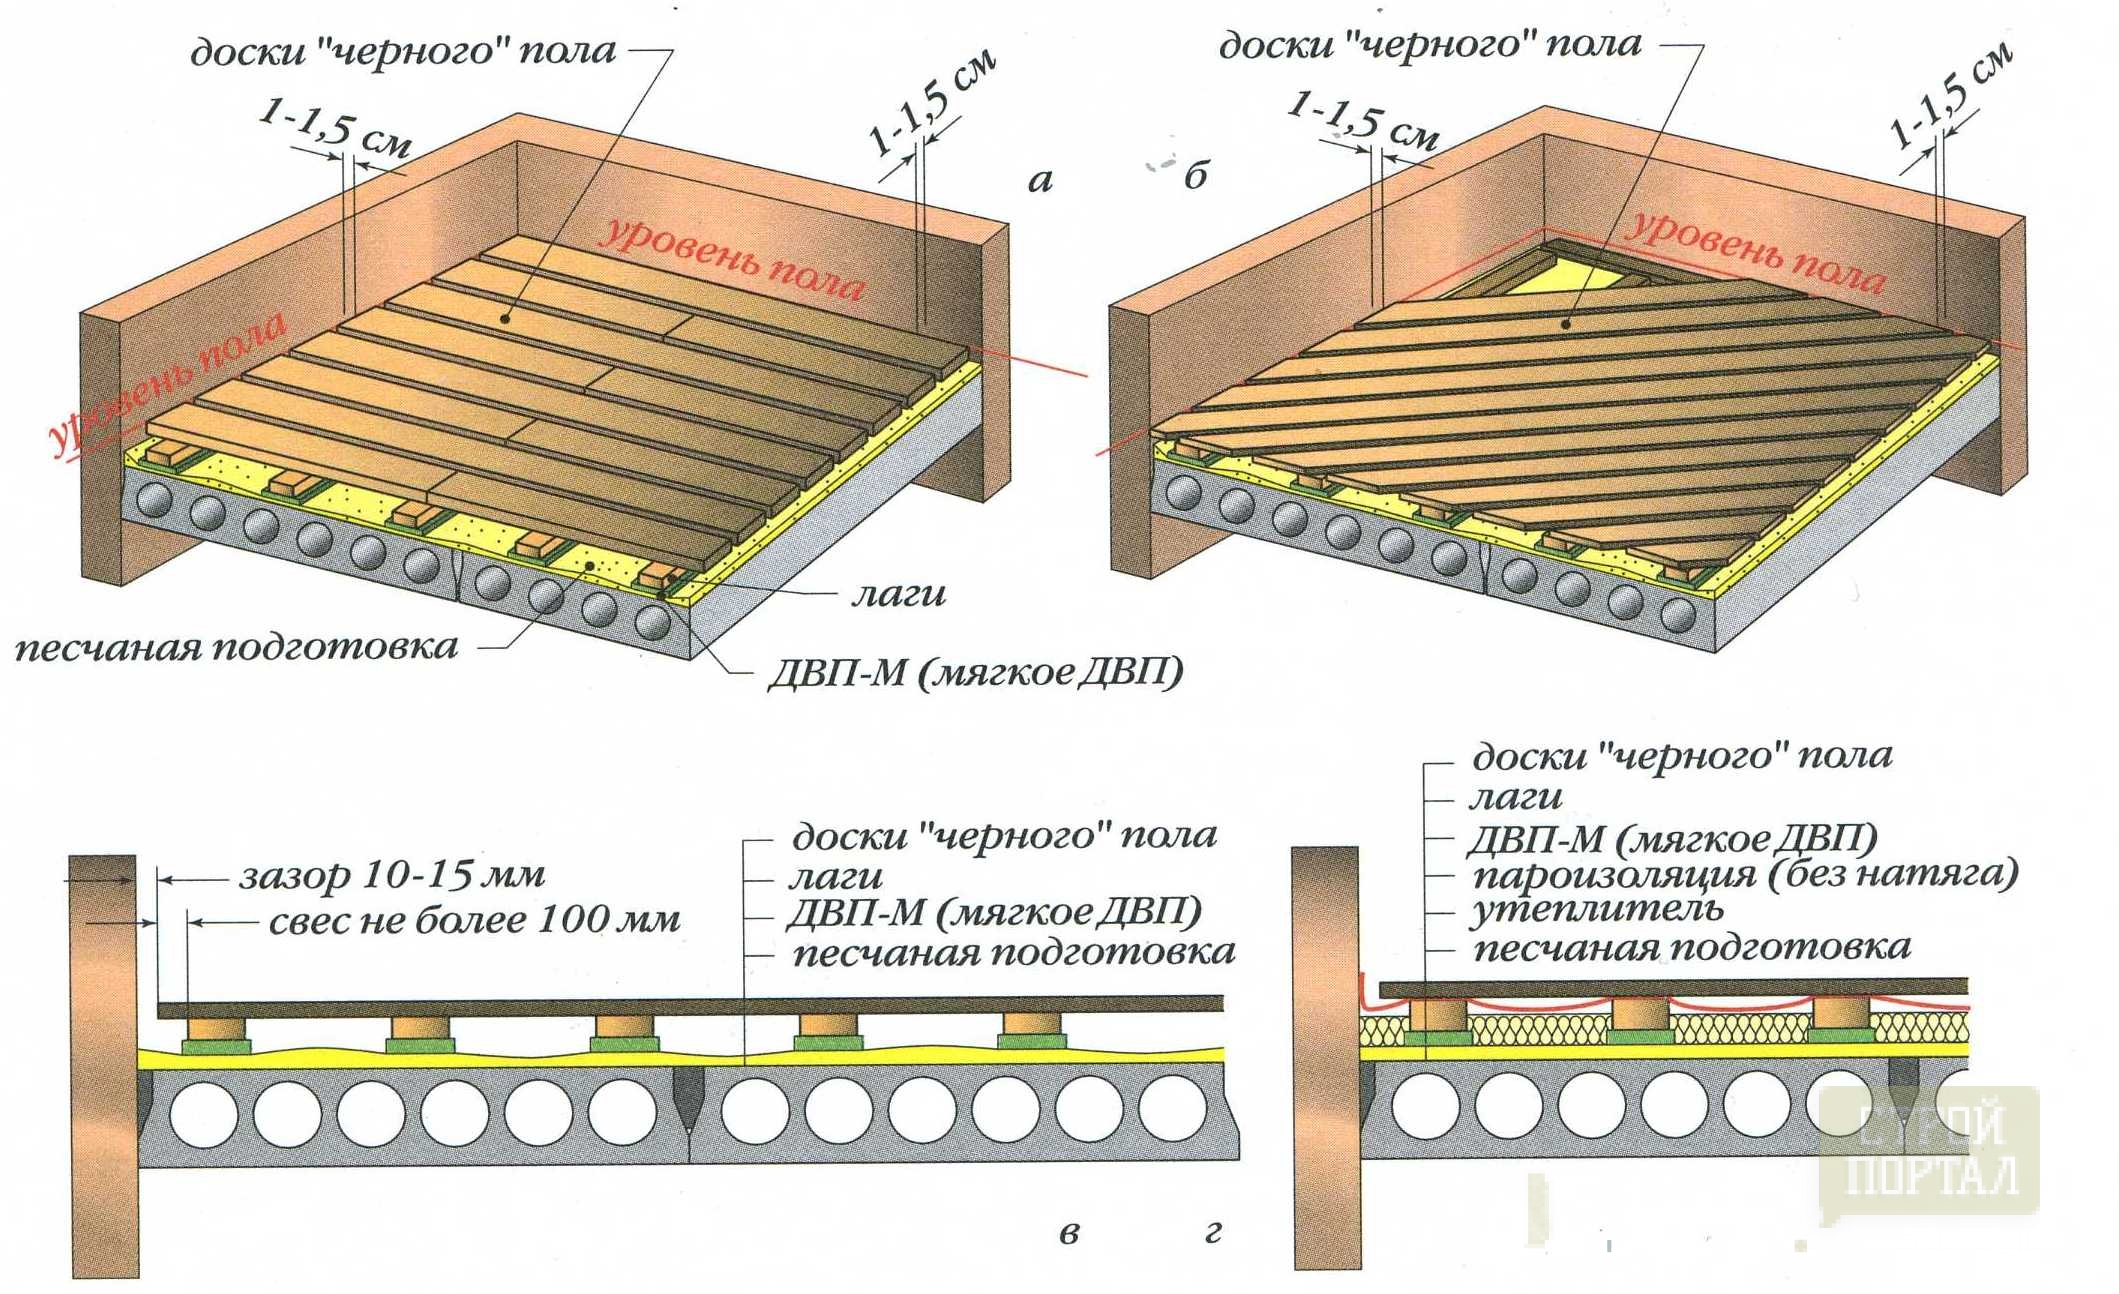
Regardless of the type of premises in which the repair is carried out, the design includes some mandatory elements:
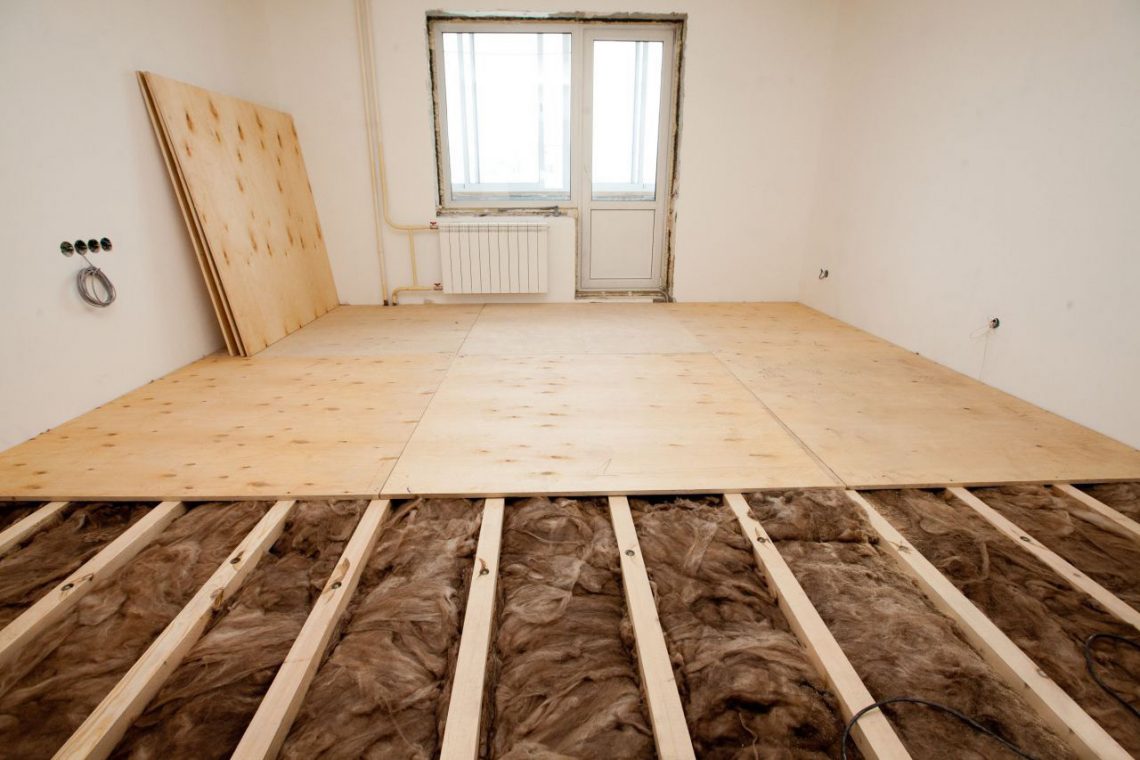
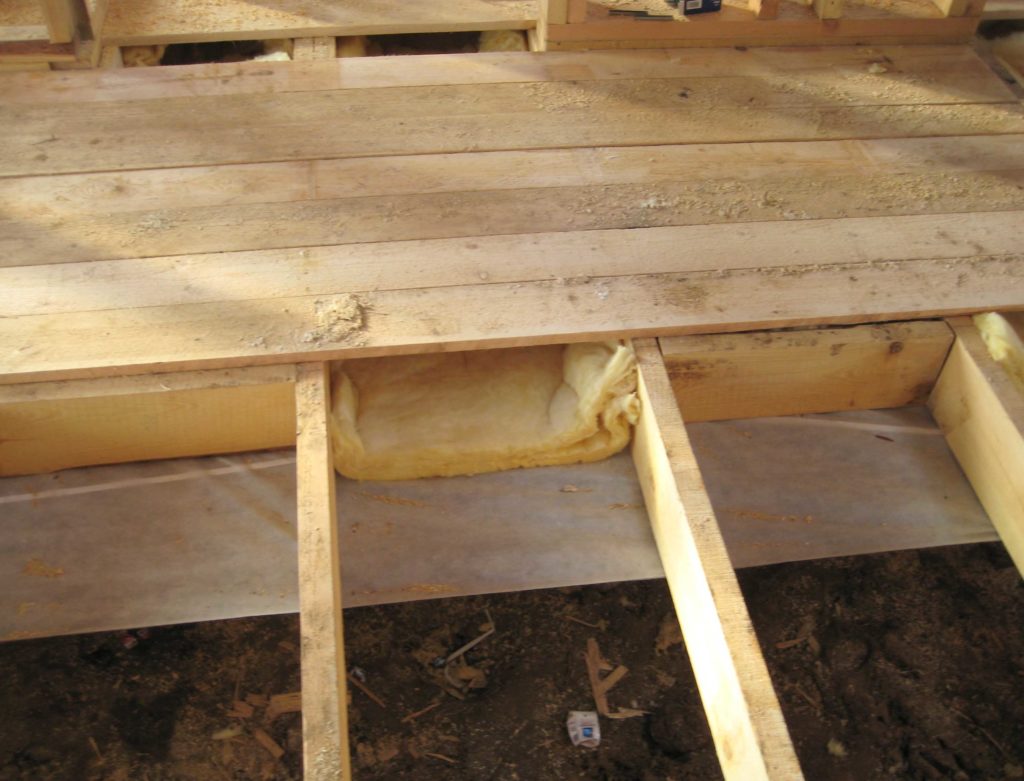
- Vapor barrier. Concrete or wood floors, and in a country house, it is possible that the open ground should be isolated from the supporting skeleton of the log. Wood of any species is a rather hygroscopic material, and even careful antiseptic and antifungal treatment does not always exclude the possibility of rotting or mold damage. Eliminating the source of dampness means extending the life of the floor many times. For these purposes, suitable polyethylene film with a thickness of at least 150 microns (micrometers, "micron"). The strips are laid with a small overlap of 5–10 cm, the joints are fastened with a wide adhesive tape along the entire length of the joint. The tolerance on the perimeter of the wall is about 20 cm.
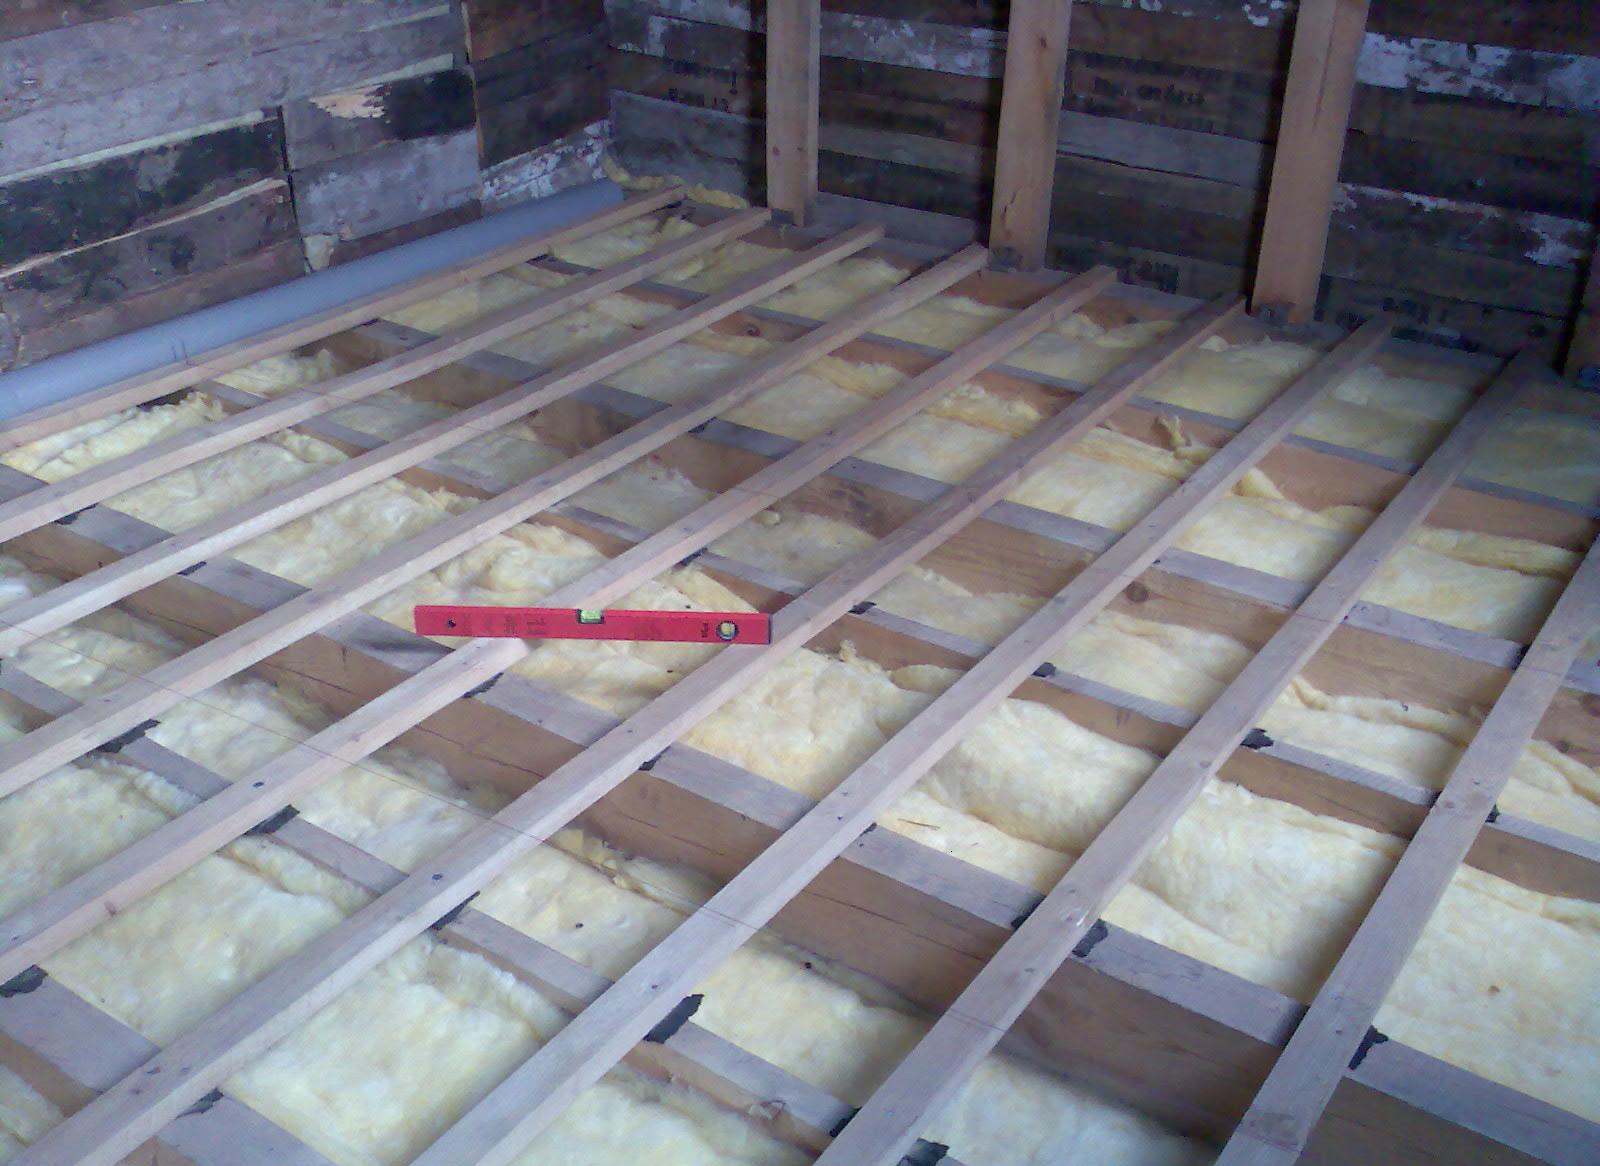
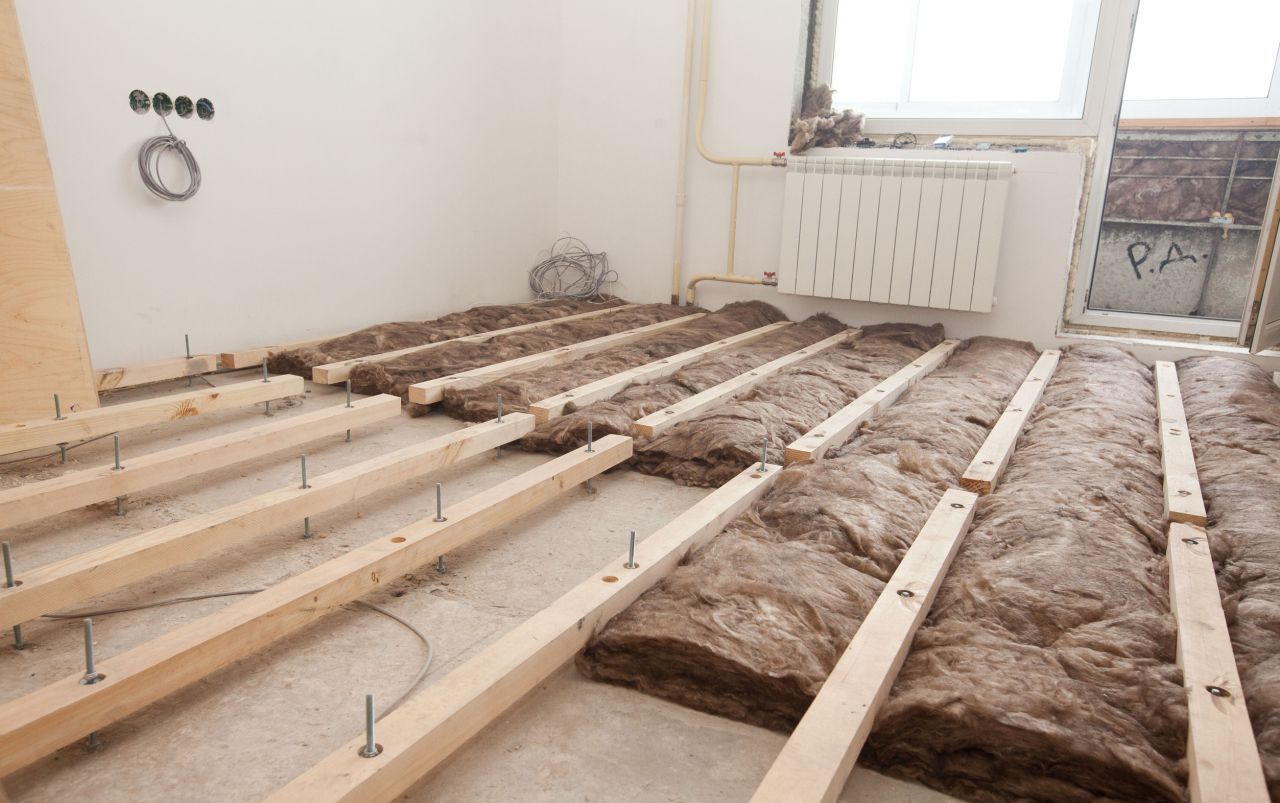
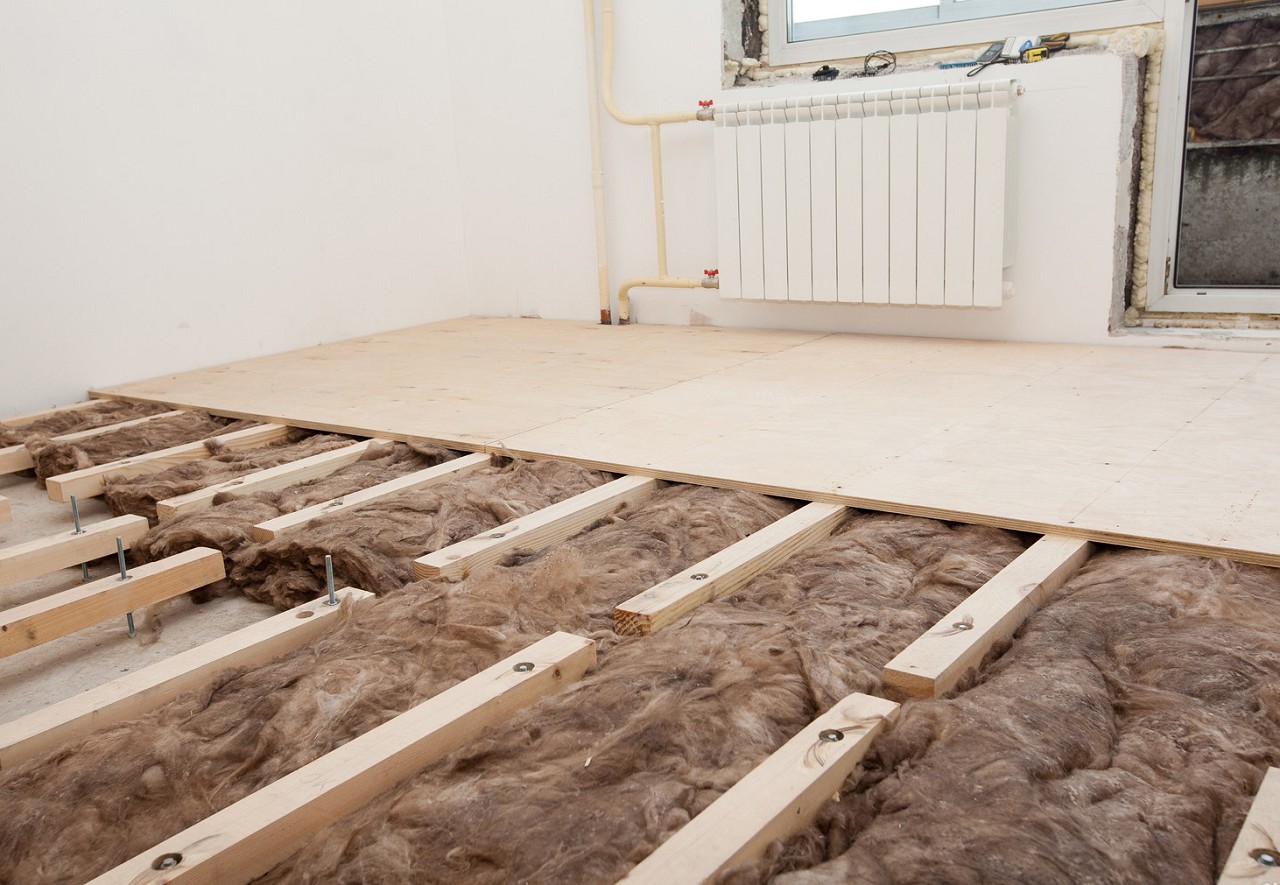
- Heat and noise insulation. So that the floor always remains warm, and the sounds do not penetrate either to the neighbors or from them, the space between the lags should be filled with foam plastic (penoplex).As a safer non-combustible material, it is better to use mineral wool (Isover, Ursa or the like). It is very important to lay the insulator not on the entire height of the lag, but leaving 1–2 cm to the top edge, thus ensuring the natural microcirculation of air in the space under the floor board.
- In order to keep the noise insulation insulator always dry and not losing its insulating properties, another layer of plastic film should be laid over it. As in the case of the bottom layer, the edges overlap and are fastened with adhesive tape.

Depending on the purpose of the room, one of two versions of the wooden floor is used - cold or warmed.
Cold
This design is suitable for balconies, terraces, mansards, hallways and other rooms where tenants are seldom and short time. In this case, a sufficiently passive heat insulating layer - foam or mineral wool, discussed above. If the room is dry and the floor is not moistened from the bottom of the base, you can do without heat insulation.
Insulated
If a heated floor is planned (whether it is water or electric), then the heating elements are laid over the film covering the heat-insulating layer.This method is completely safe, since the melting point of polyethylene is much higher than the maximum temperature of the source of heating.
In addition, the heat from the heating elements due to the heat insulator is not consumed on a concrete or wooden draft basis, but goes to the heating of the upper finishing coating and is transferred to the room.
Do I need a underground?
The answer to this question depends on where the floor is being repaired. So, if this is the first floor of a private house, then the underground is needed in order to increase the distance of the supporting structure from the open ground as much as possible. This is especially important when the groundwater level is too close to the ground, and the soil near the house is constantly moistened. In these cases, waterproofing of the foundation is necessary, but this issue is subject to closer scrutiny in a separate article.

In other cases, there is no need for a subfield, and in some cases a balcony, upper floors - its execution is simply impossible.
Foundation preparation
One of the most important stages of preliminary work, which determines the durability of the structure. Proper preparation of the foundation for flooring will ensure its reliability for several decades, and, possibly, for several generations of tenants.
This stage should be approached with great care and attention.

If the work is done on the first floor of a private house and the foundation (plinth) is not sufficiently waterproofed, it is necessary to cover a sand cushion with a minimum thickness of 25 cm on the ground.
Of course, it is also necessary to ensure the natural passive ventilation of the underfloor space by organizing air exchange with the external environment through small openings in the basement. Thus, it will allow to avoid damage to the lower support nodes by a mold fungus and a musty smell of dampness.

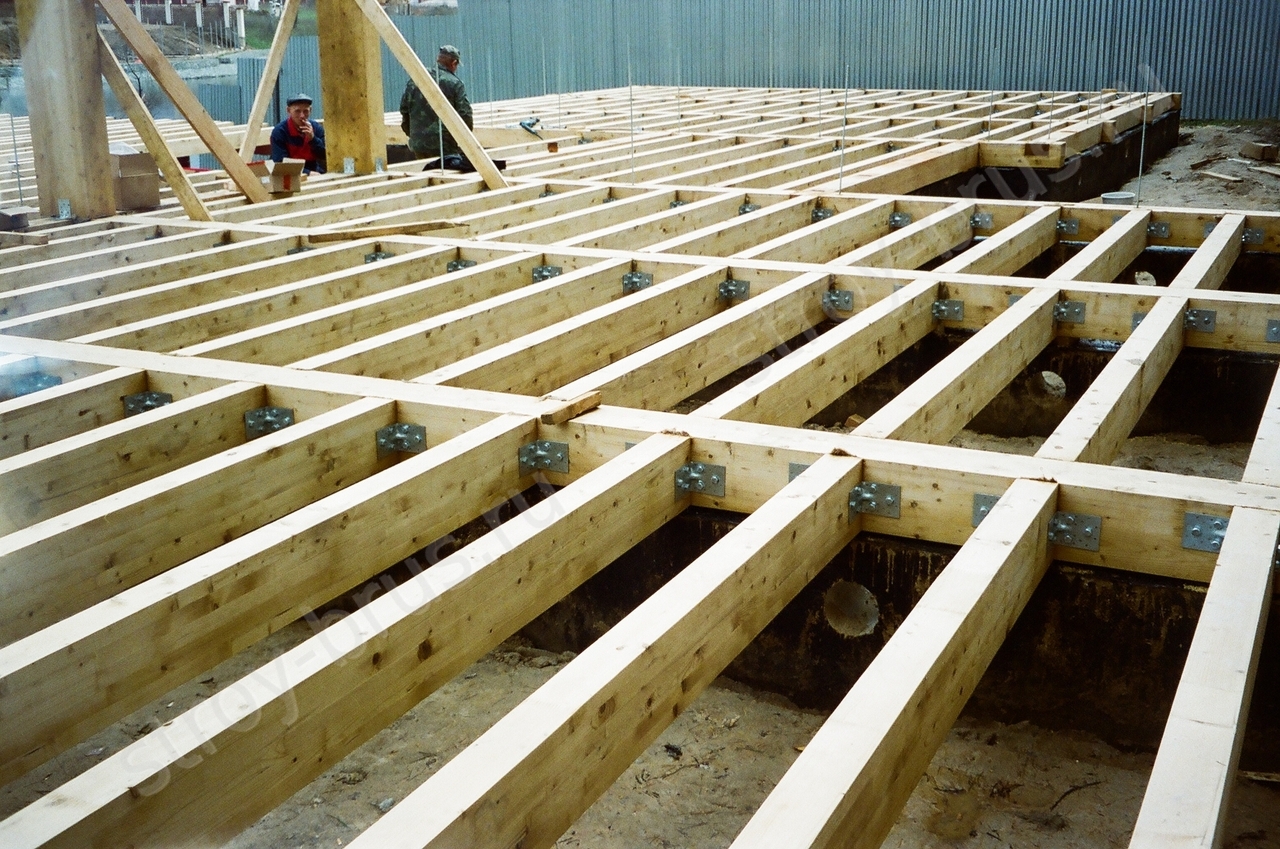
If the height of the basement is sufficient for organizing a subfloor, and in one of the measurements the distance between the bearing walls exceeds 4 meters, in this case it is necessary to reinforce the floor overlap with additional supporting posts.
The best solution is 2x2 brick supports: two bricks are laid parallel to each other on the cement-sand mortar, the next row is also parallel to each other, but perpendicular to the previous row. Before this, a pit is dug not less than 50 cm under a column with a side not less than 40 cm and is poured with concrete to the edges. Reinforcement for these amounts of work is not mandatory, but remains desirable.
If the supports are prepared in compliance with all building codes, then a hole is dug for the column to a depth, greater than the depth of soil freezing, a pad of sand or gravel 20–25 cm high is poured into its bottom and then poured with concrete. In this case, reinforcement is required.
There is a solution with concrete posts. For this, formwork is being prepared from old, but flat boards - a kind of box in the shape of a future column, in which reinforcement is necessarily embedded, and is poured with concrete. This process is a little more time consuming and time consuming, especially when using one set of formwork, while the concrete columns are much stronger and more economical than brick.
The position of the support posts must be calculated so that the distance between them does not exceed one and a half meters. Of course, it is necessary to observe strict vertical columns.

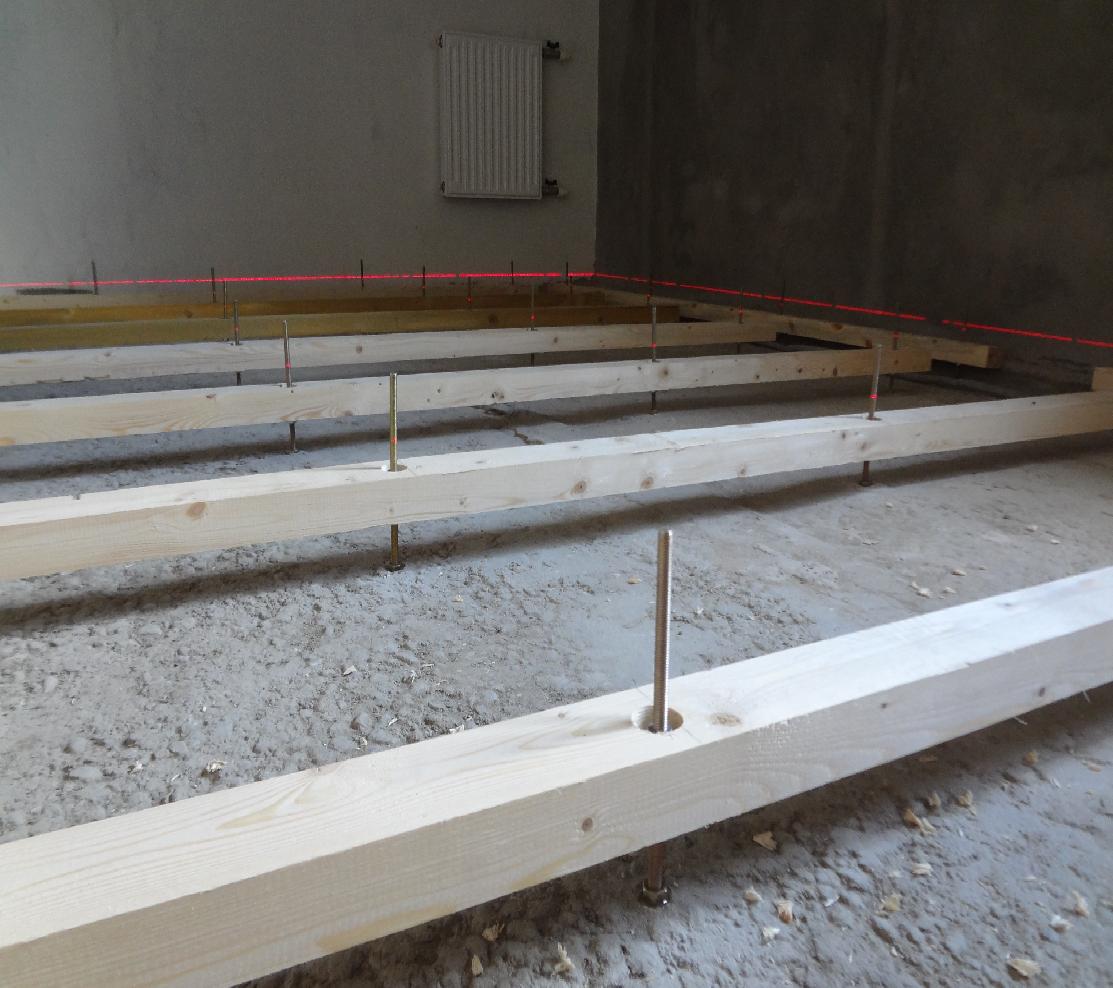
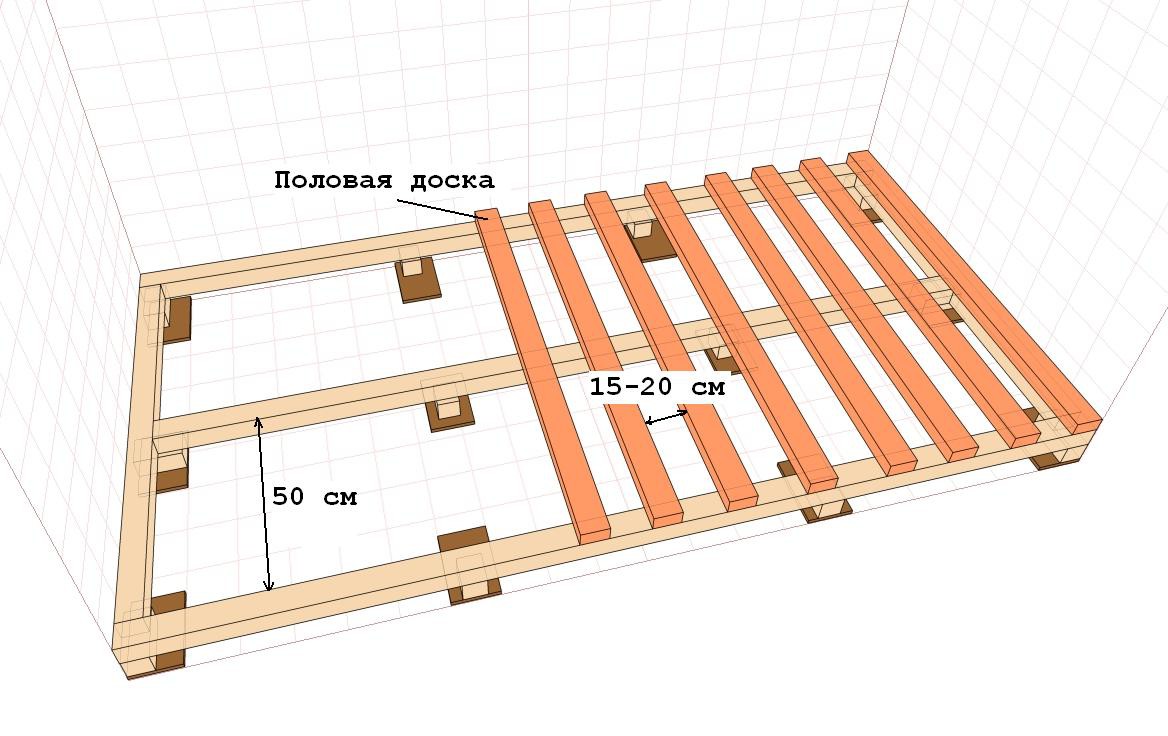
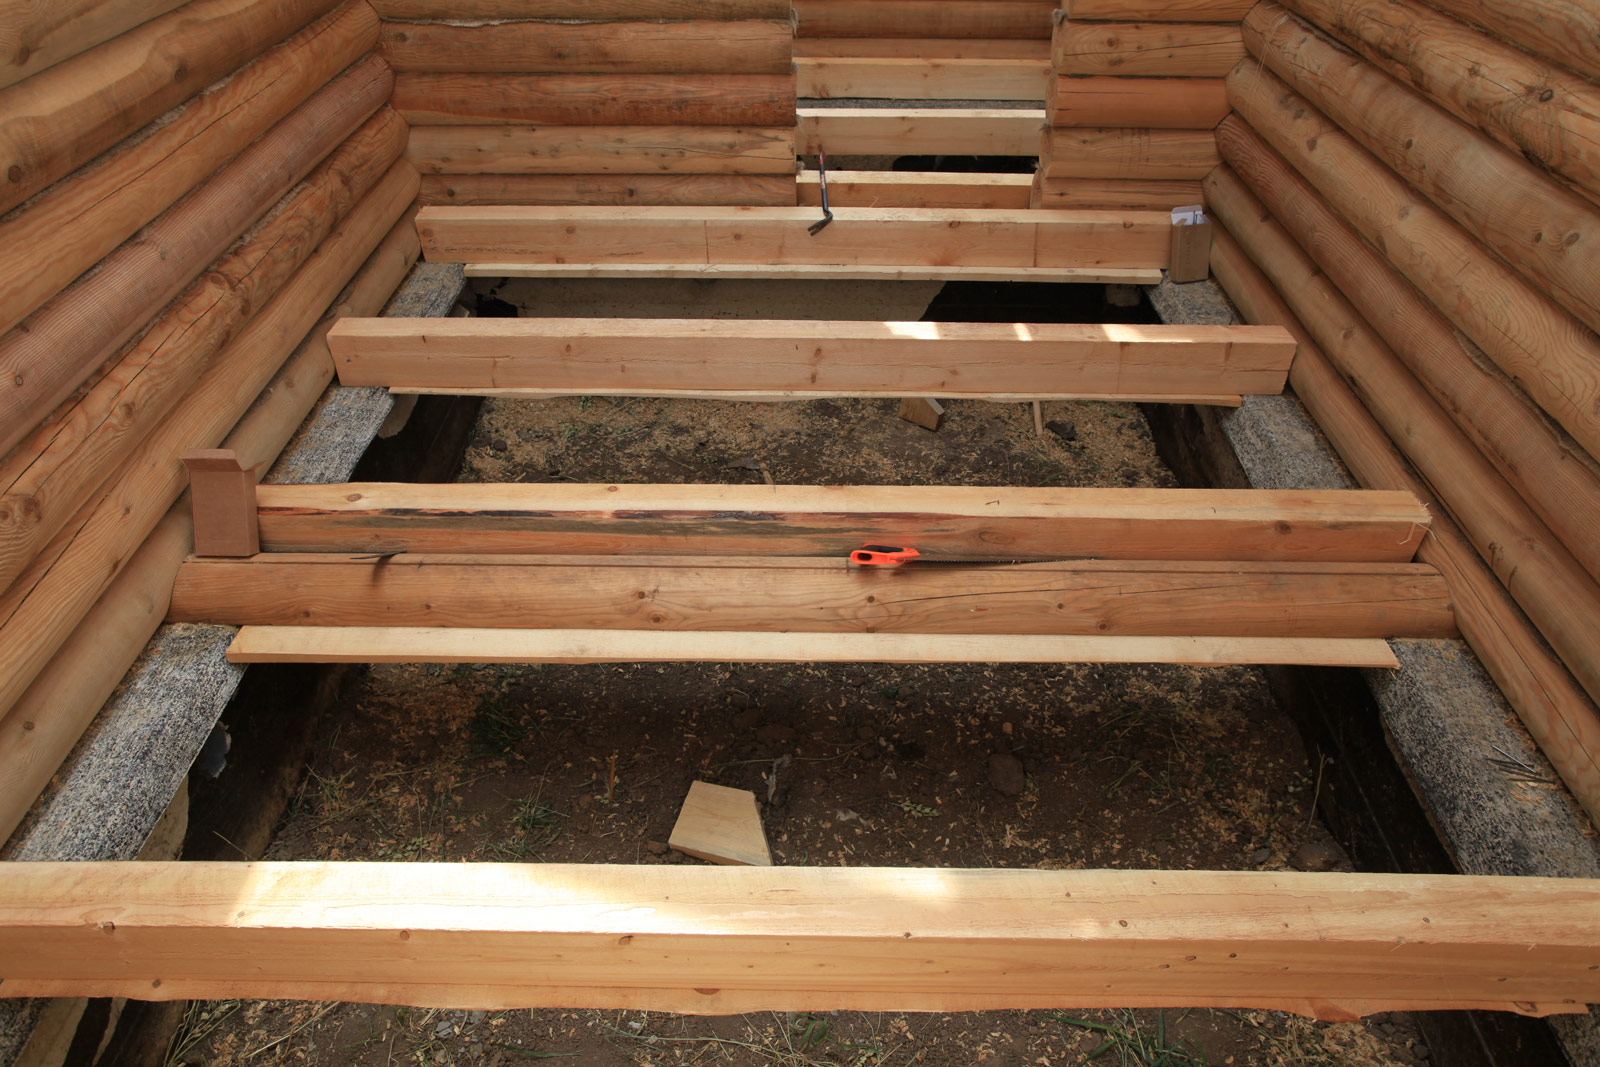
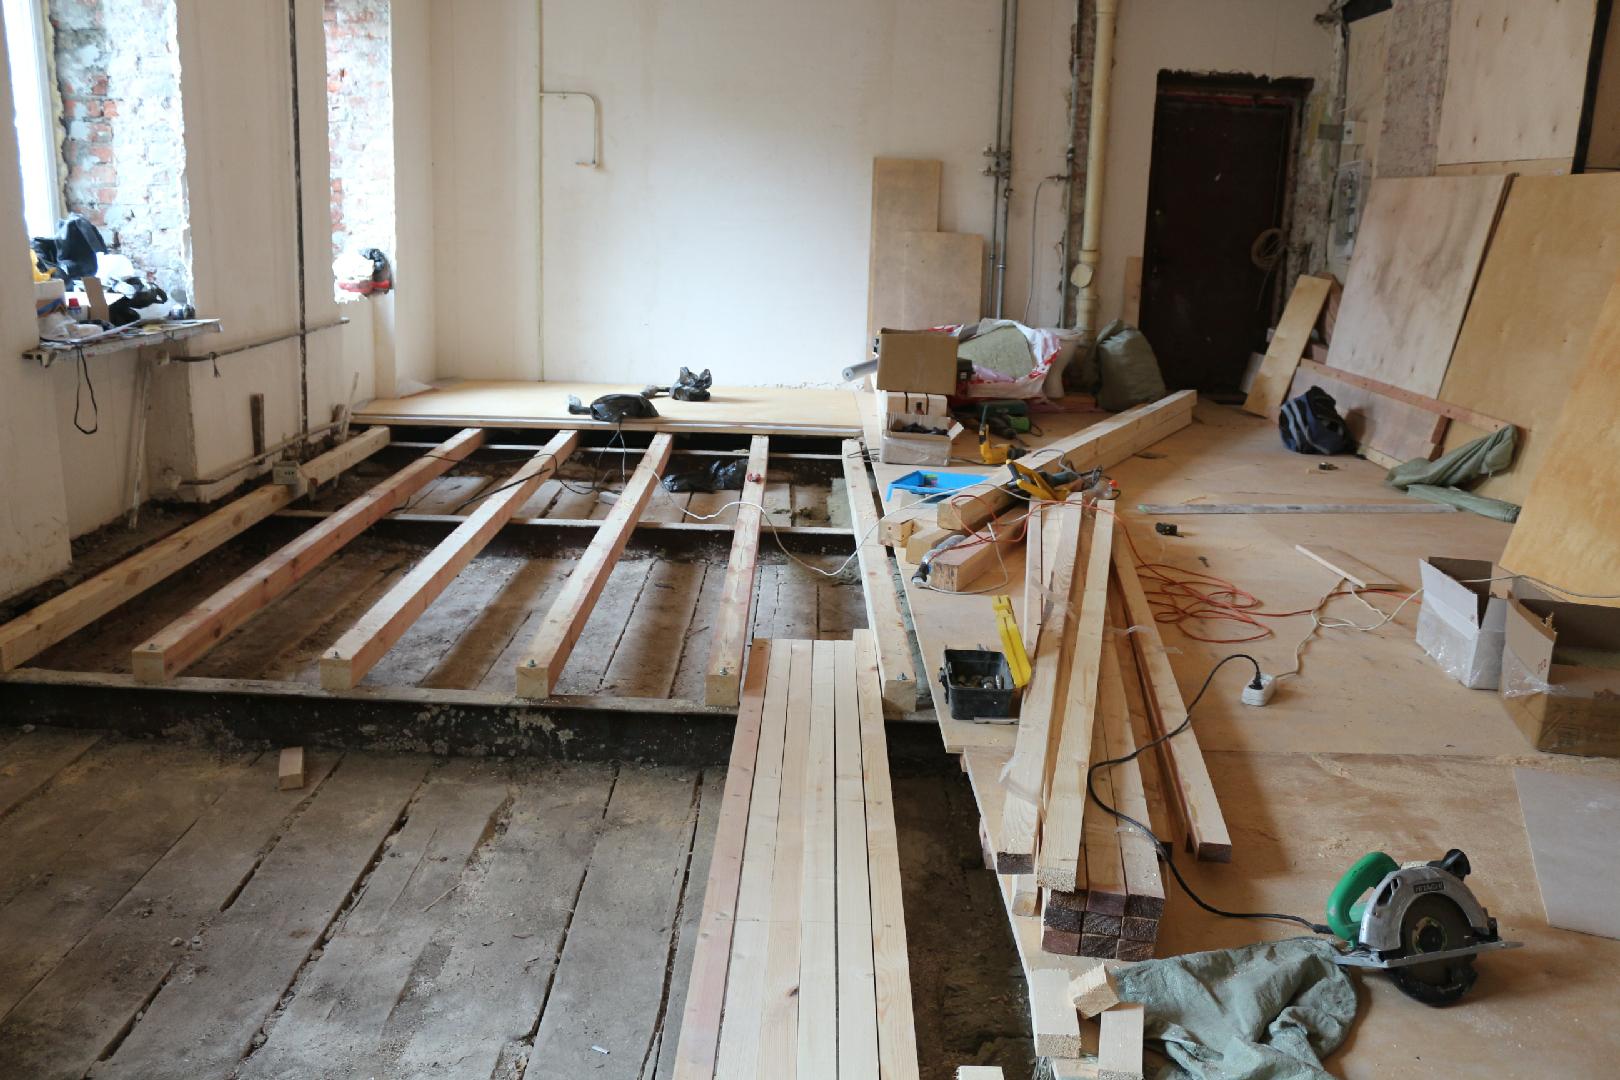
Further along the supporting walls and pillars, a timber can be laid out with a section of at least 150x150 mm, at best - 150x200 mm per edge (the wider side should be located vertically). It is permissible to use a twin board 50x200 mm with short, 30-40 cm inserts from the same board every meter.In general, the step between the beams should not exceed 1 meter, the parallelism of laying the bars is mandatory. Fastening to the posts - on anchors or dowels.
After that, concrete and brick areas should be coated with bitumen mastic, wooden elements should be impregnated with fire and bioprotective solutions, and after drying, they should be coated with wood primer. So is the bearing frame.
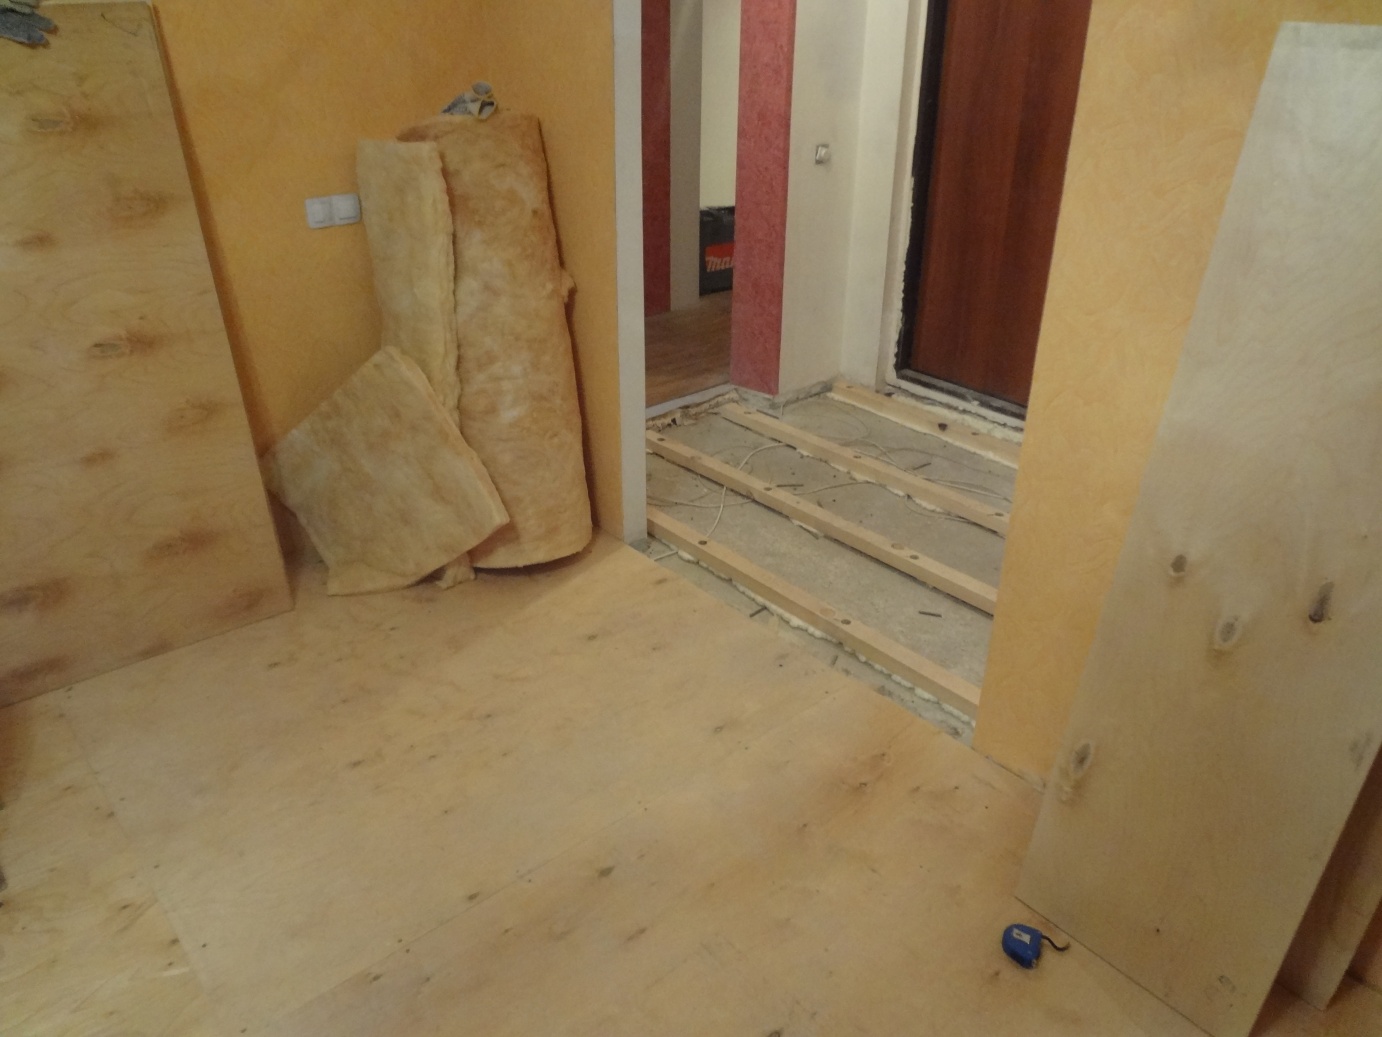
If the builder is faced with the task of laying a wooden floor on a concrete base, it should be prepared under an engineering board. Fragments of reinforcement protruding from concrete need to be cut off by angle grinders (angle grinder, popularly “Bulgarian”), knocked down concrete flows with a pickaxe or perforator in a jackhammer mode, the cavities should be leveled with a cement-sand mortar. If time and budget allows - to perform a screed over the entire floor area, this can achieve the necessary degree of horizontal position and flatness of the surface.

If the distance does not allow and you have to lay the floor directly on the ground, then in this case it is better to remove a layer of soil of 20-25 cm, instead of it, pour a cushion of gravel, rubble or sand of appropriate thickness, compact it thoroughly and saturate it with antiseptic.
At best, instead of a gravel-sand cushion, lay a building grid over the entire area and pour concrete with a thickness of 10 cm. Then cover the waterproofing layer of plastic film (at least 350 microns thick), at best, roofing material, and carefully glue the joints.


If an old wooden floor is used as an engineering board, you need to inspect its condition. If some areas are rotten or crumbled, they must be replaced, the boards with a creak or wobbling must be fixed. The base of the tree must be primed, also apply an antiseptic, then dried and then covered with a film.
But even in this case, it is best to use logs before laying the finish board, as the old coating can shrivel, lose strength and in these places the finished floor can sag.
Whatever the option of preparing the subfloor is chosen, it is very important to keep it horizontal. This affects both the quality and ease of installation of a wooden floor, and its functionality in the future.
How to choose lags?
For these purposes, it is preferable to use softwood.Due to its natural origin, this variety is already “saturated” with resins, which prevents its drying and protects against a number of fungal lesions, and with proper preparation will ensure long-term preservation of strength.
As a log, it is convenient to use dried timber with a section of at least 50x50 mm.

Often used and a simple board with a thickness of 50 mm. There is no need to choose a grooved board for logs, but at the same time it is necessary to abandon the usual unedged board with remnants of bark (wane) on it. Even with careful impregnation with antiseptics, the woodblock insect larvae can remain in the tree cut, the bright representative of which is the bark beetle. A regular edged board or timber is a solution that is sufficient for this issue.
It is very important to choose the material for the lag correctly, as they are the first to take the load from the finished floor. When buying, you need to look closely at the general condition of the material; there should be no mold or traces of it, “wormholes” from logging larvae, as well as cracks, chips and other mechanical damage. The presence of knots or “sleeping buds” is not critical, but if there is a choice, it is better to prefer a board with a smaller number of them.
In general, the board should be straight, without bends, whole, massive, without odors, natural even color, with an even cut.
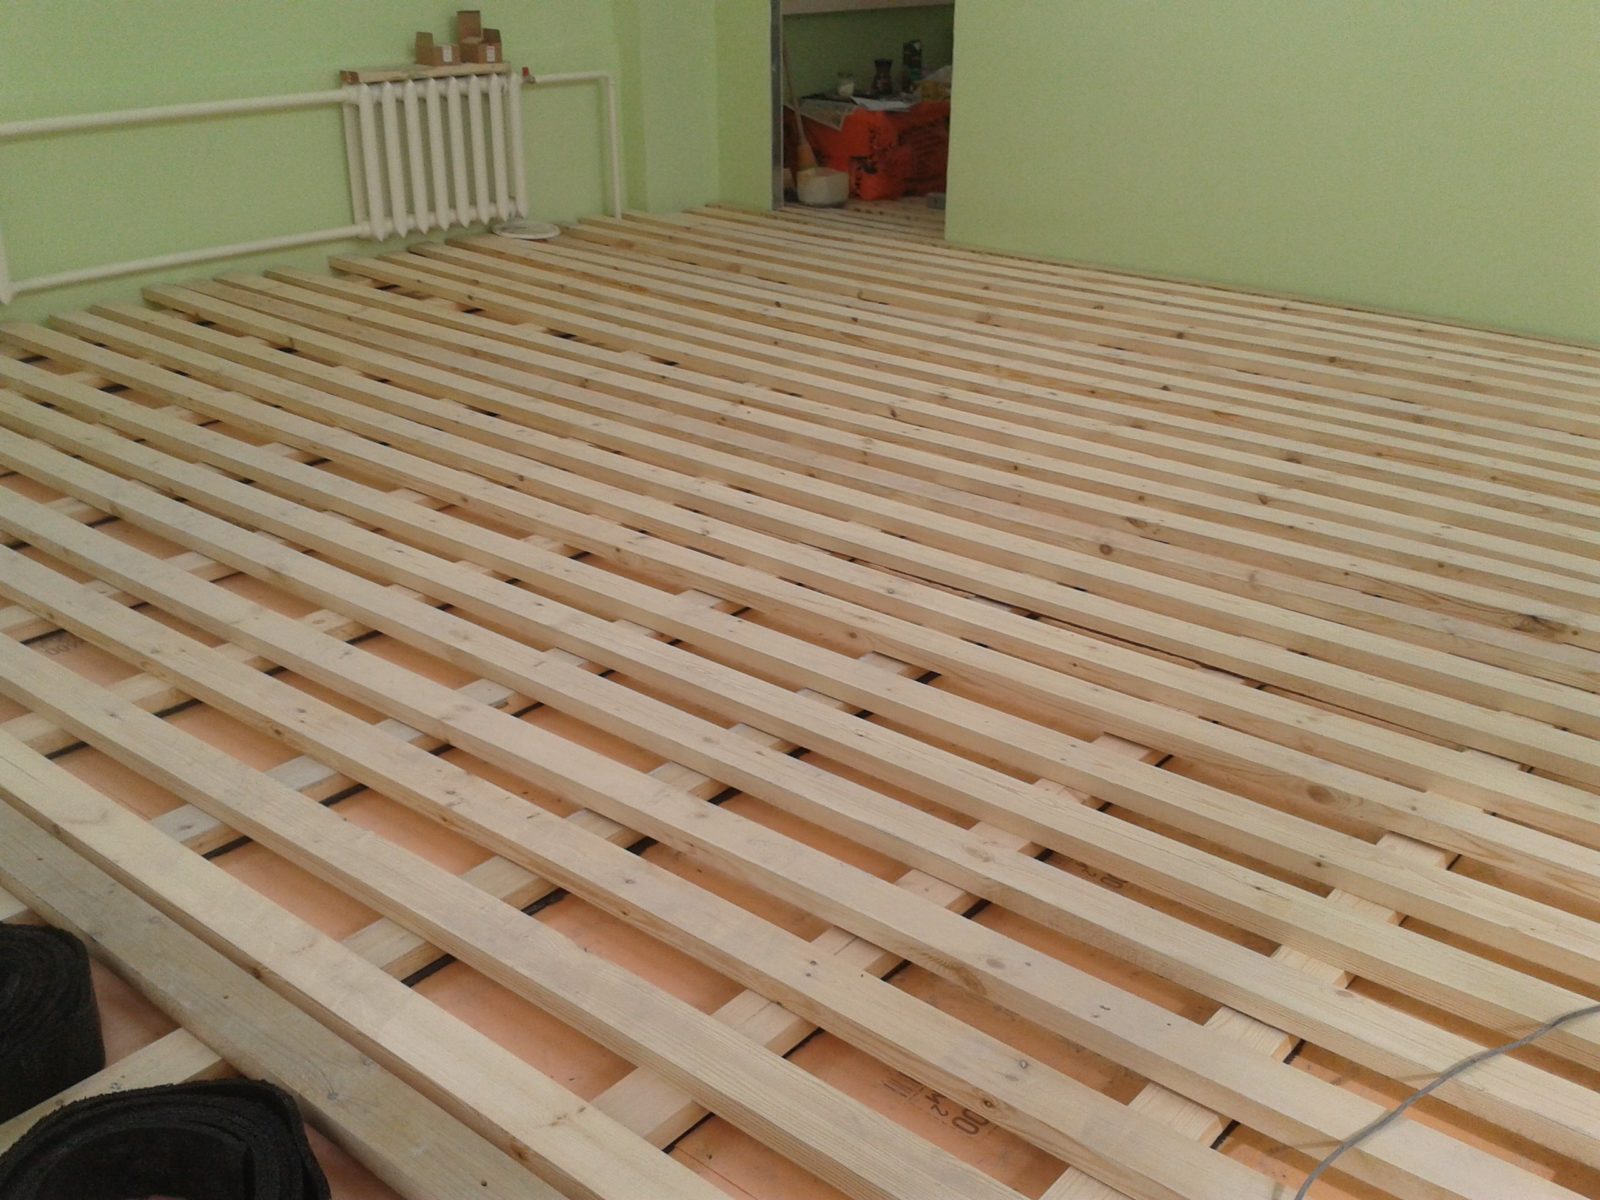
Location methods
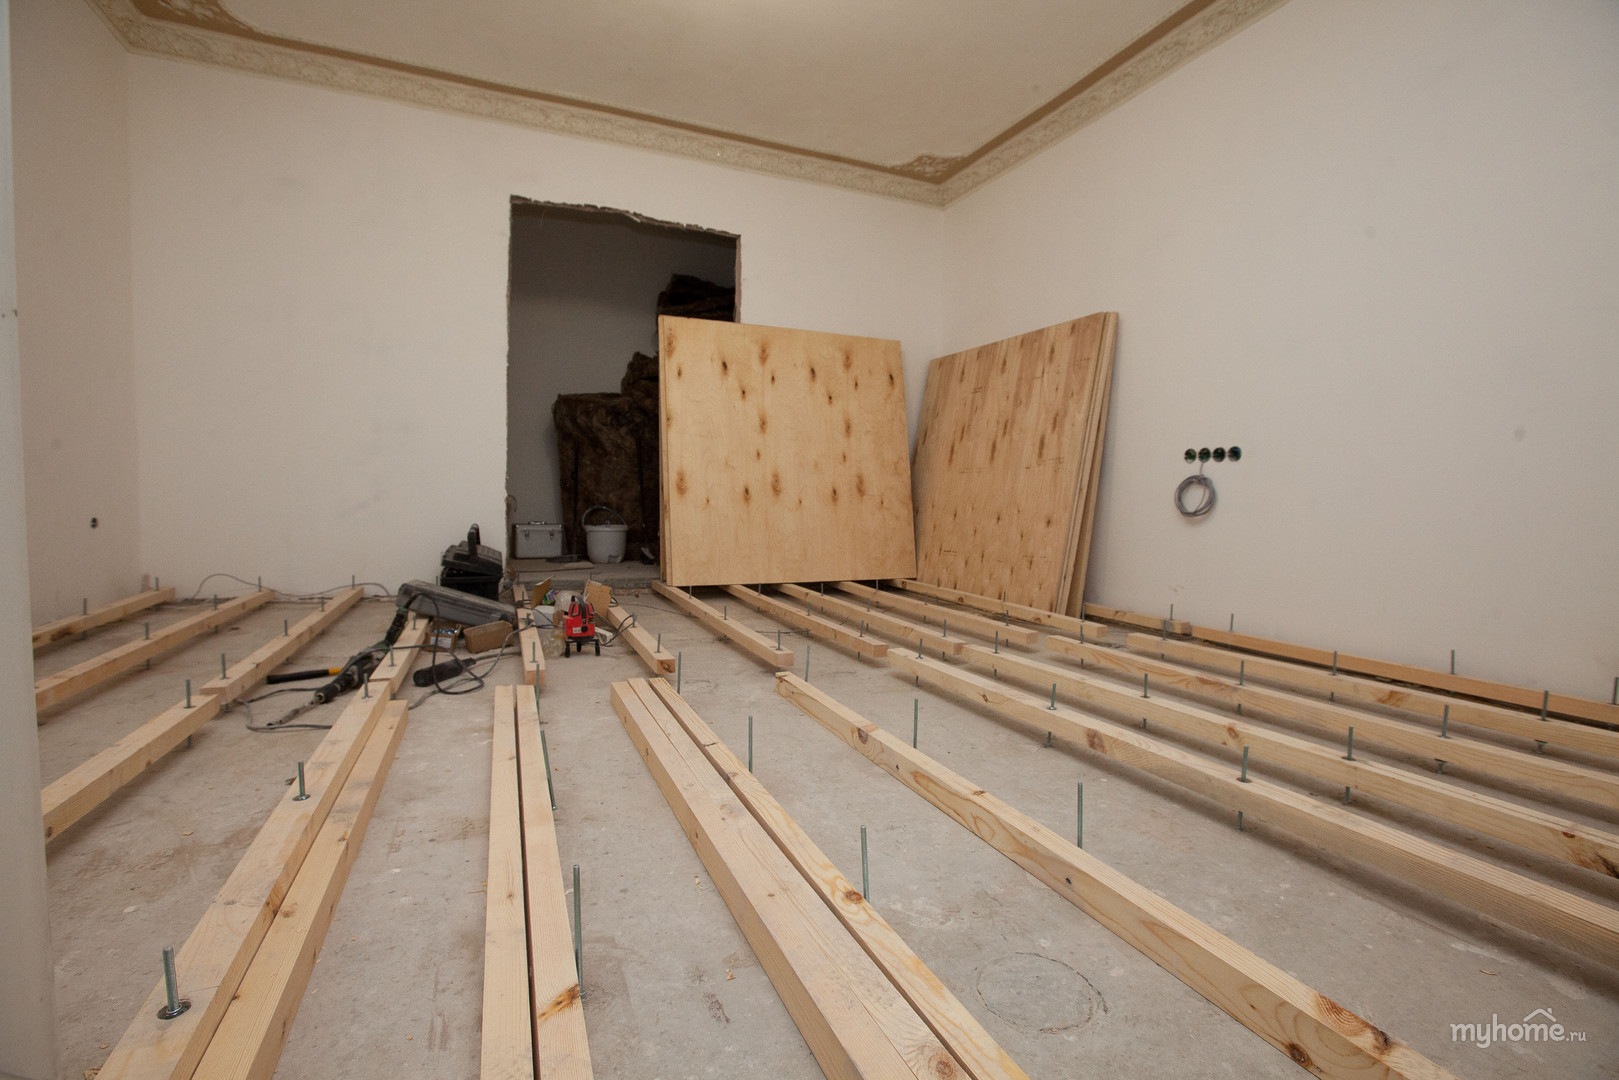
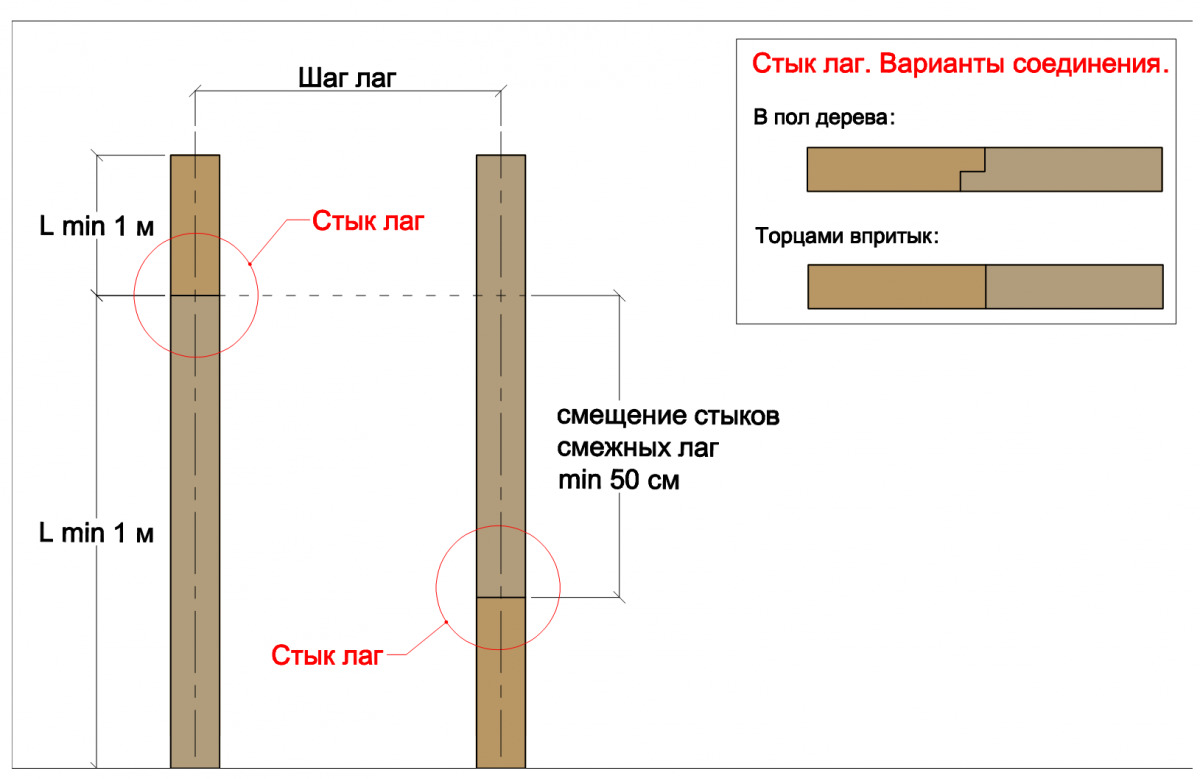
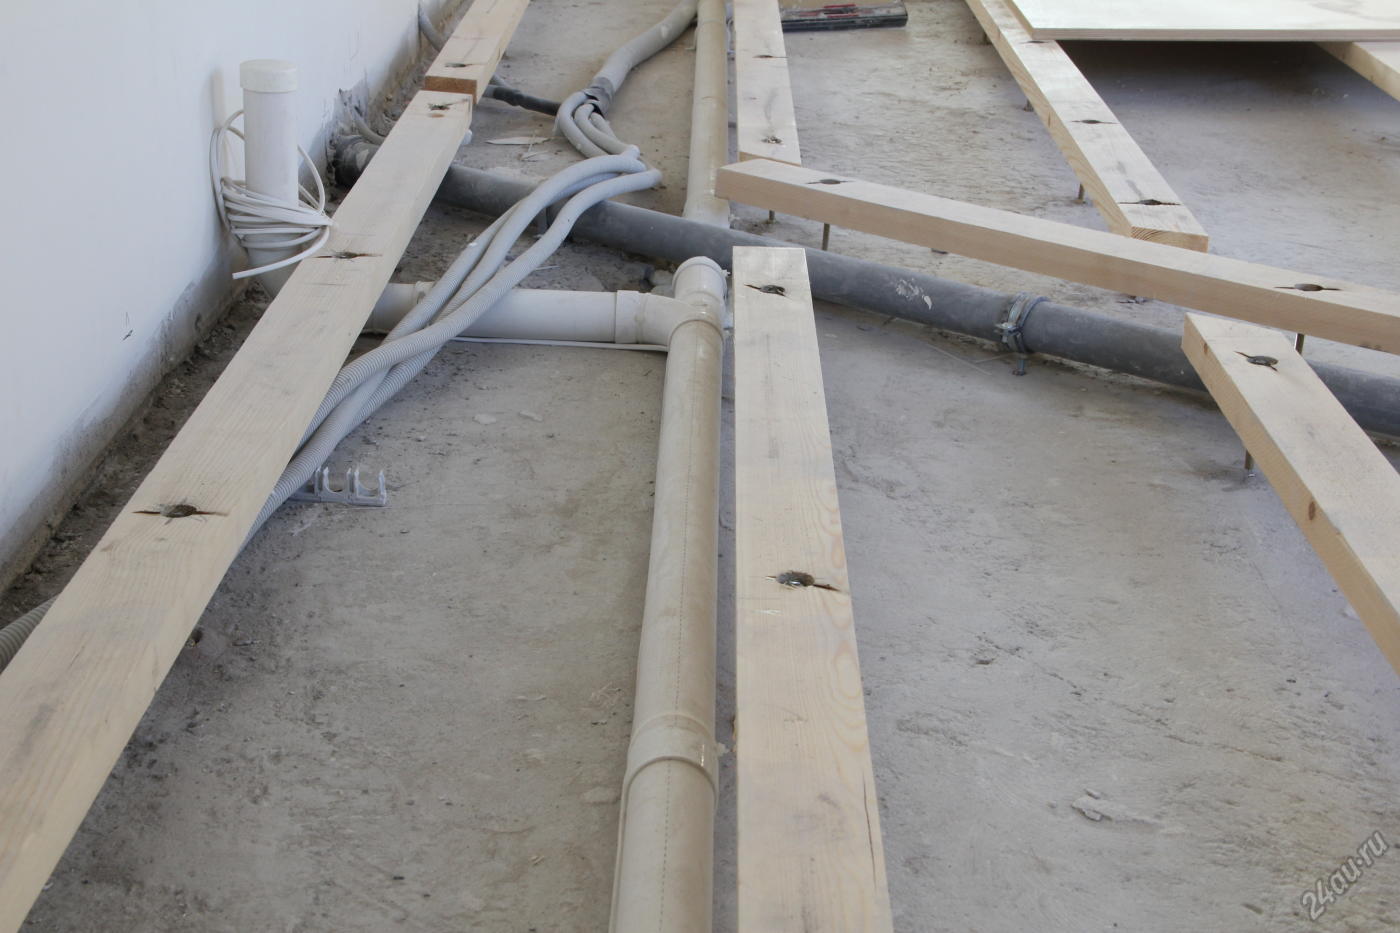
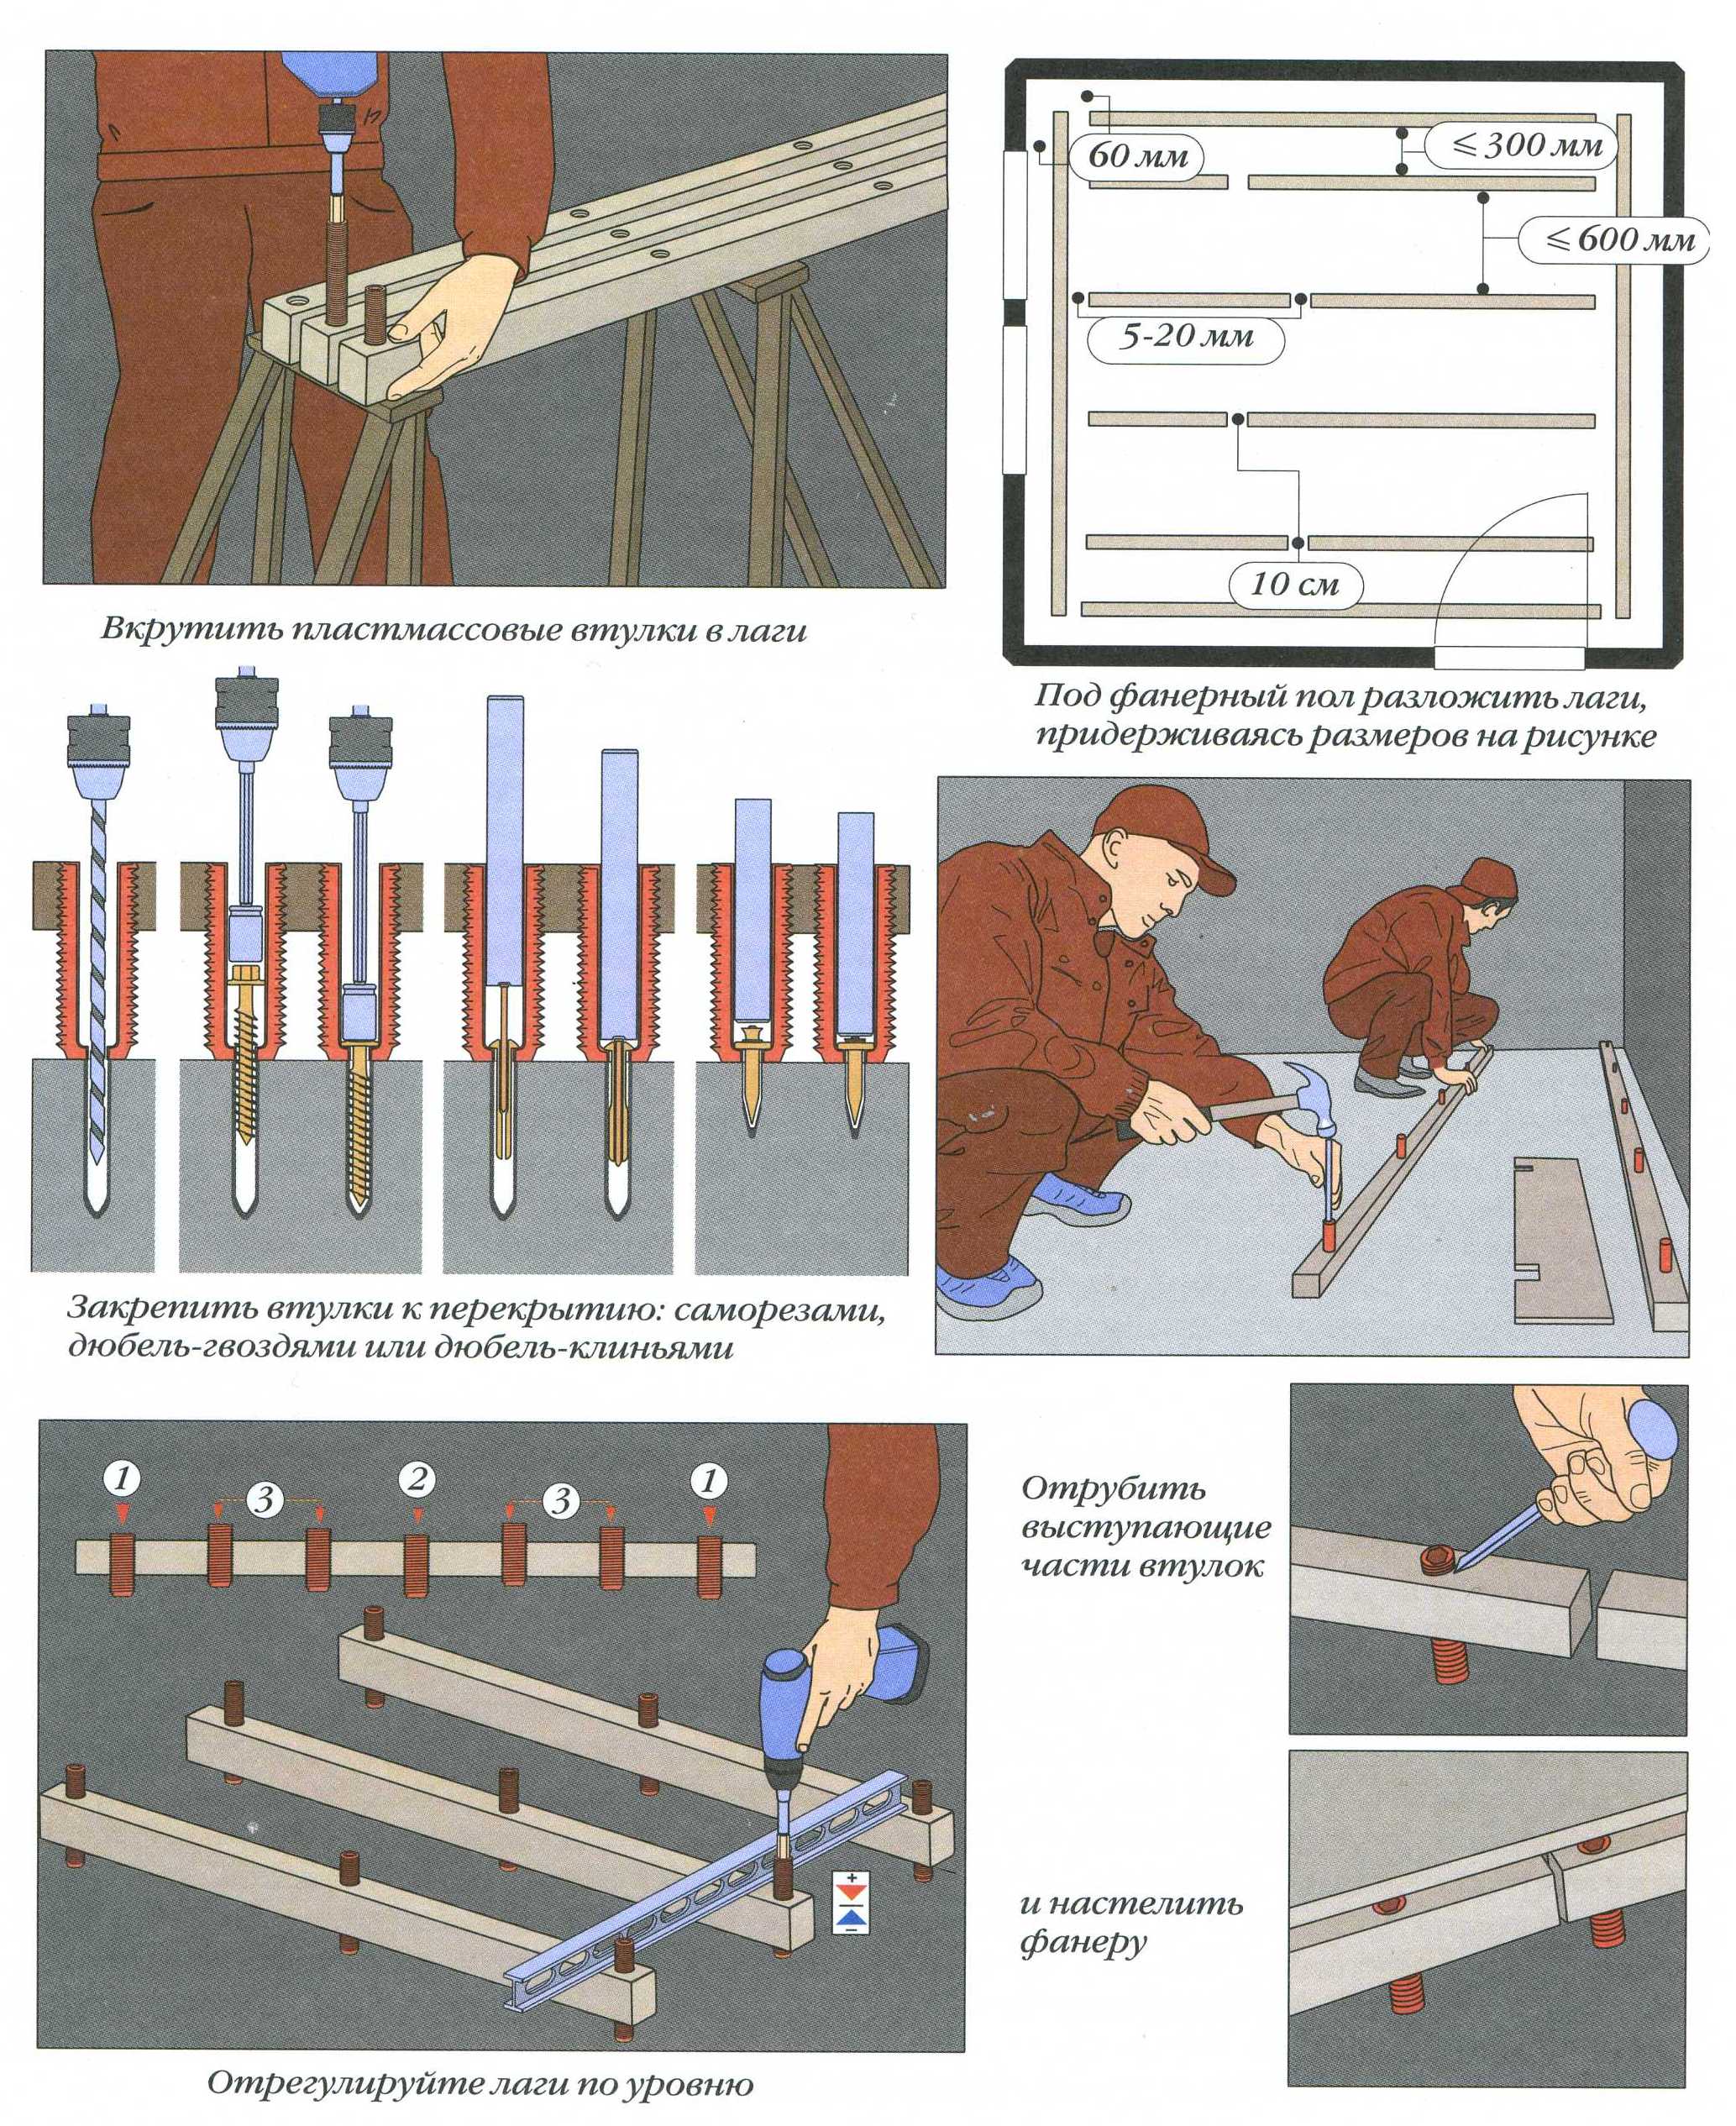
Regardless of which frame is being installed, it’s enough to place the lags 50–60 cm apart in steps. With a longer distance, the upper finishing board can sag (“spring back”) and lose strength.
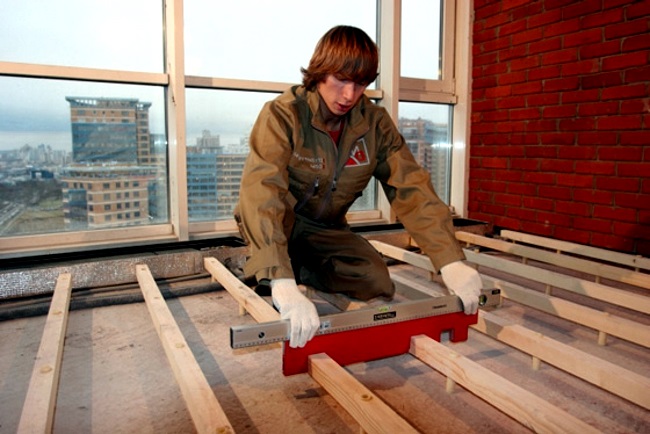
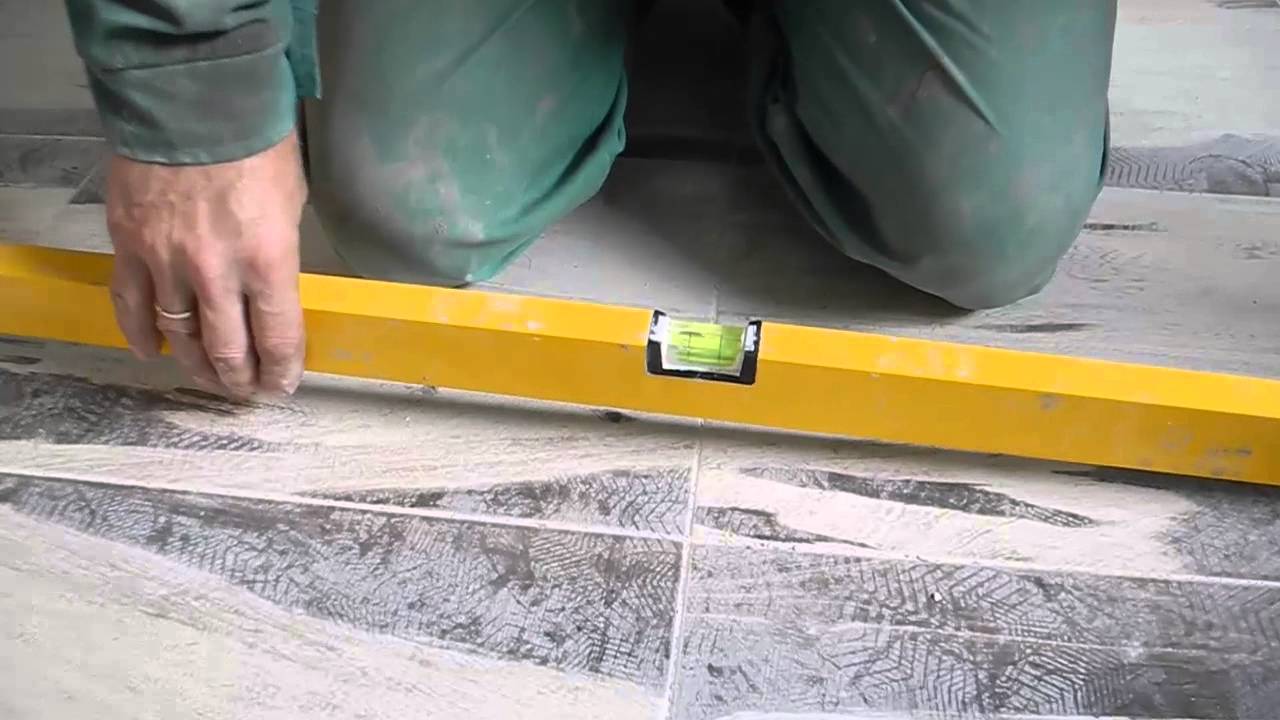
It should start from a higher section, if the draft floor has drops, align horizontally with the help of a building level, and also install logs with the greatest possible respect for parallelism. To do this, on the opposite walls it is enough to draw a horizontal line or to stretch the construction cord over the mark of the upper surface of the lag.
However, if laying on the ground is performed, a single layer may not be enough. In this case, the lower layer is decomposed in increments of up to 100 cm, the upper one is also 50–60 cm.
Installation
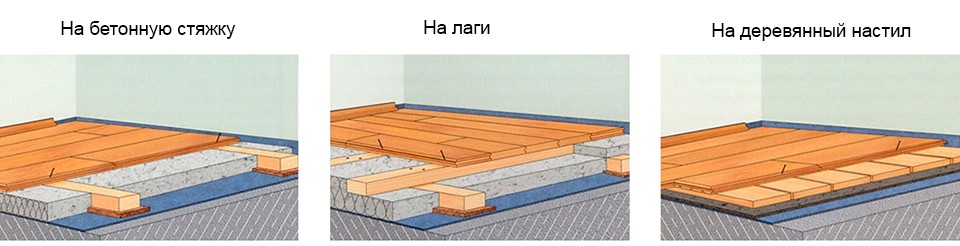
The lag mounting technology is dictated by the subfloor - the base to which they are attached.
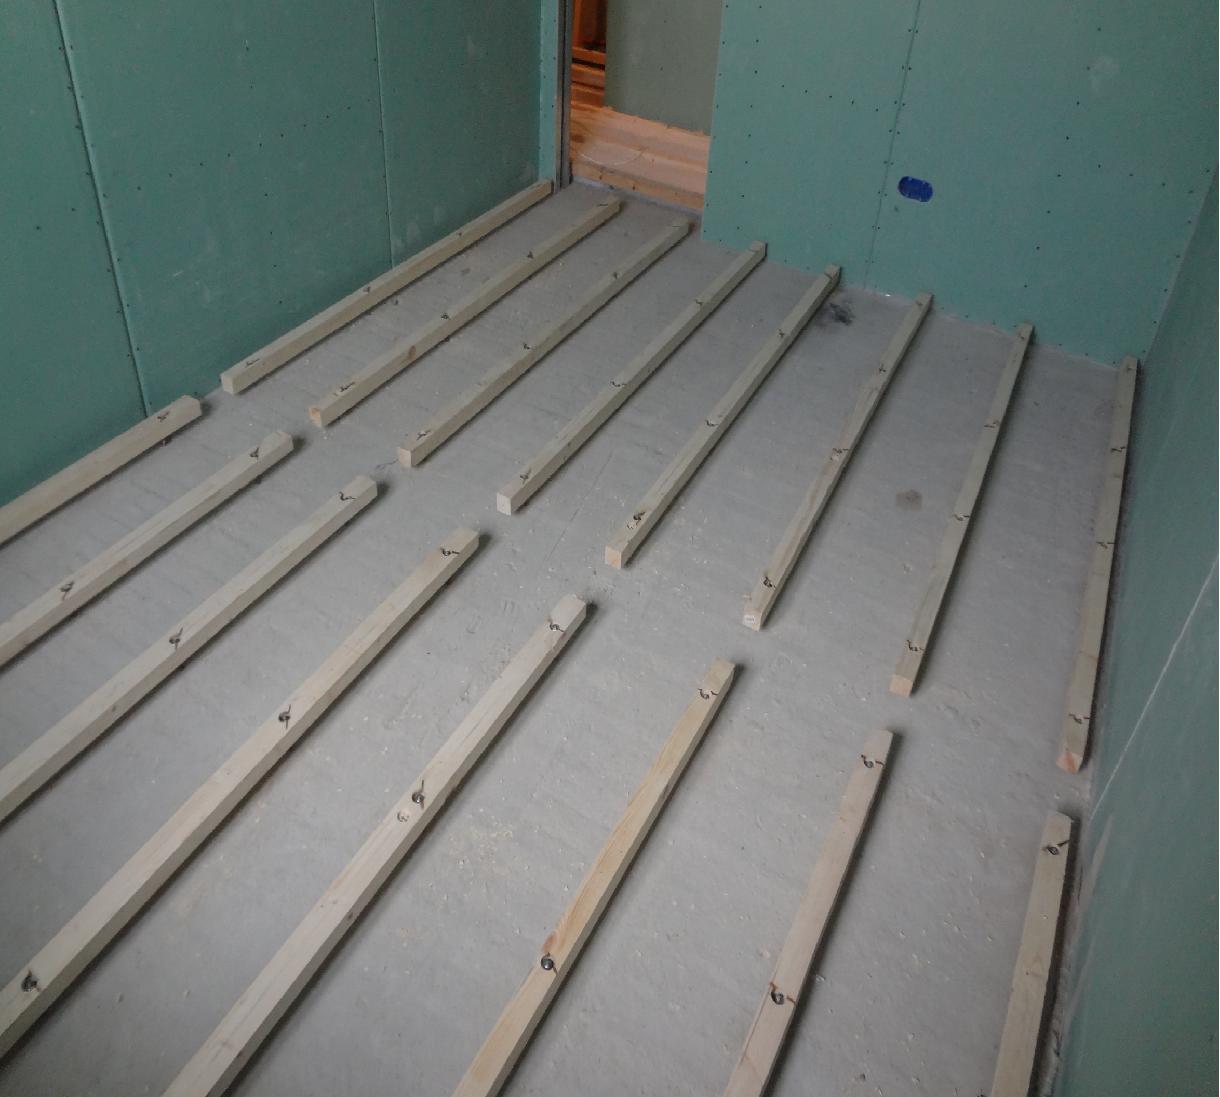
In the case of a concrete floor, it is permissible to use construction glue (PVA, Bustilat and the like), since rigid fixing is not required - in domestic premises the floor covering is almost not experiencing lateral loads.

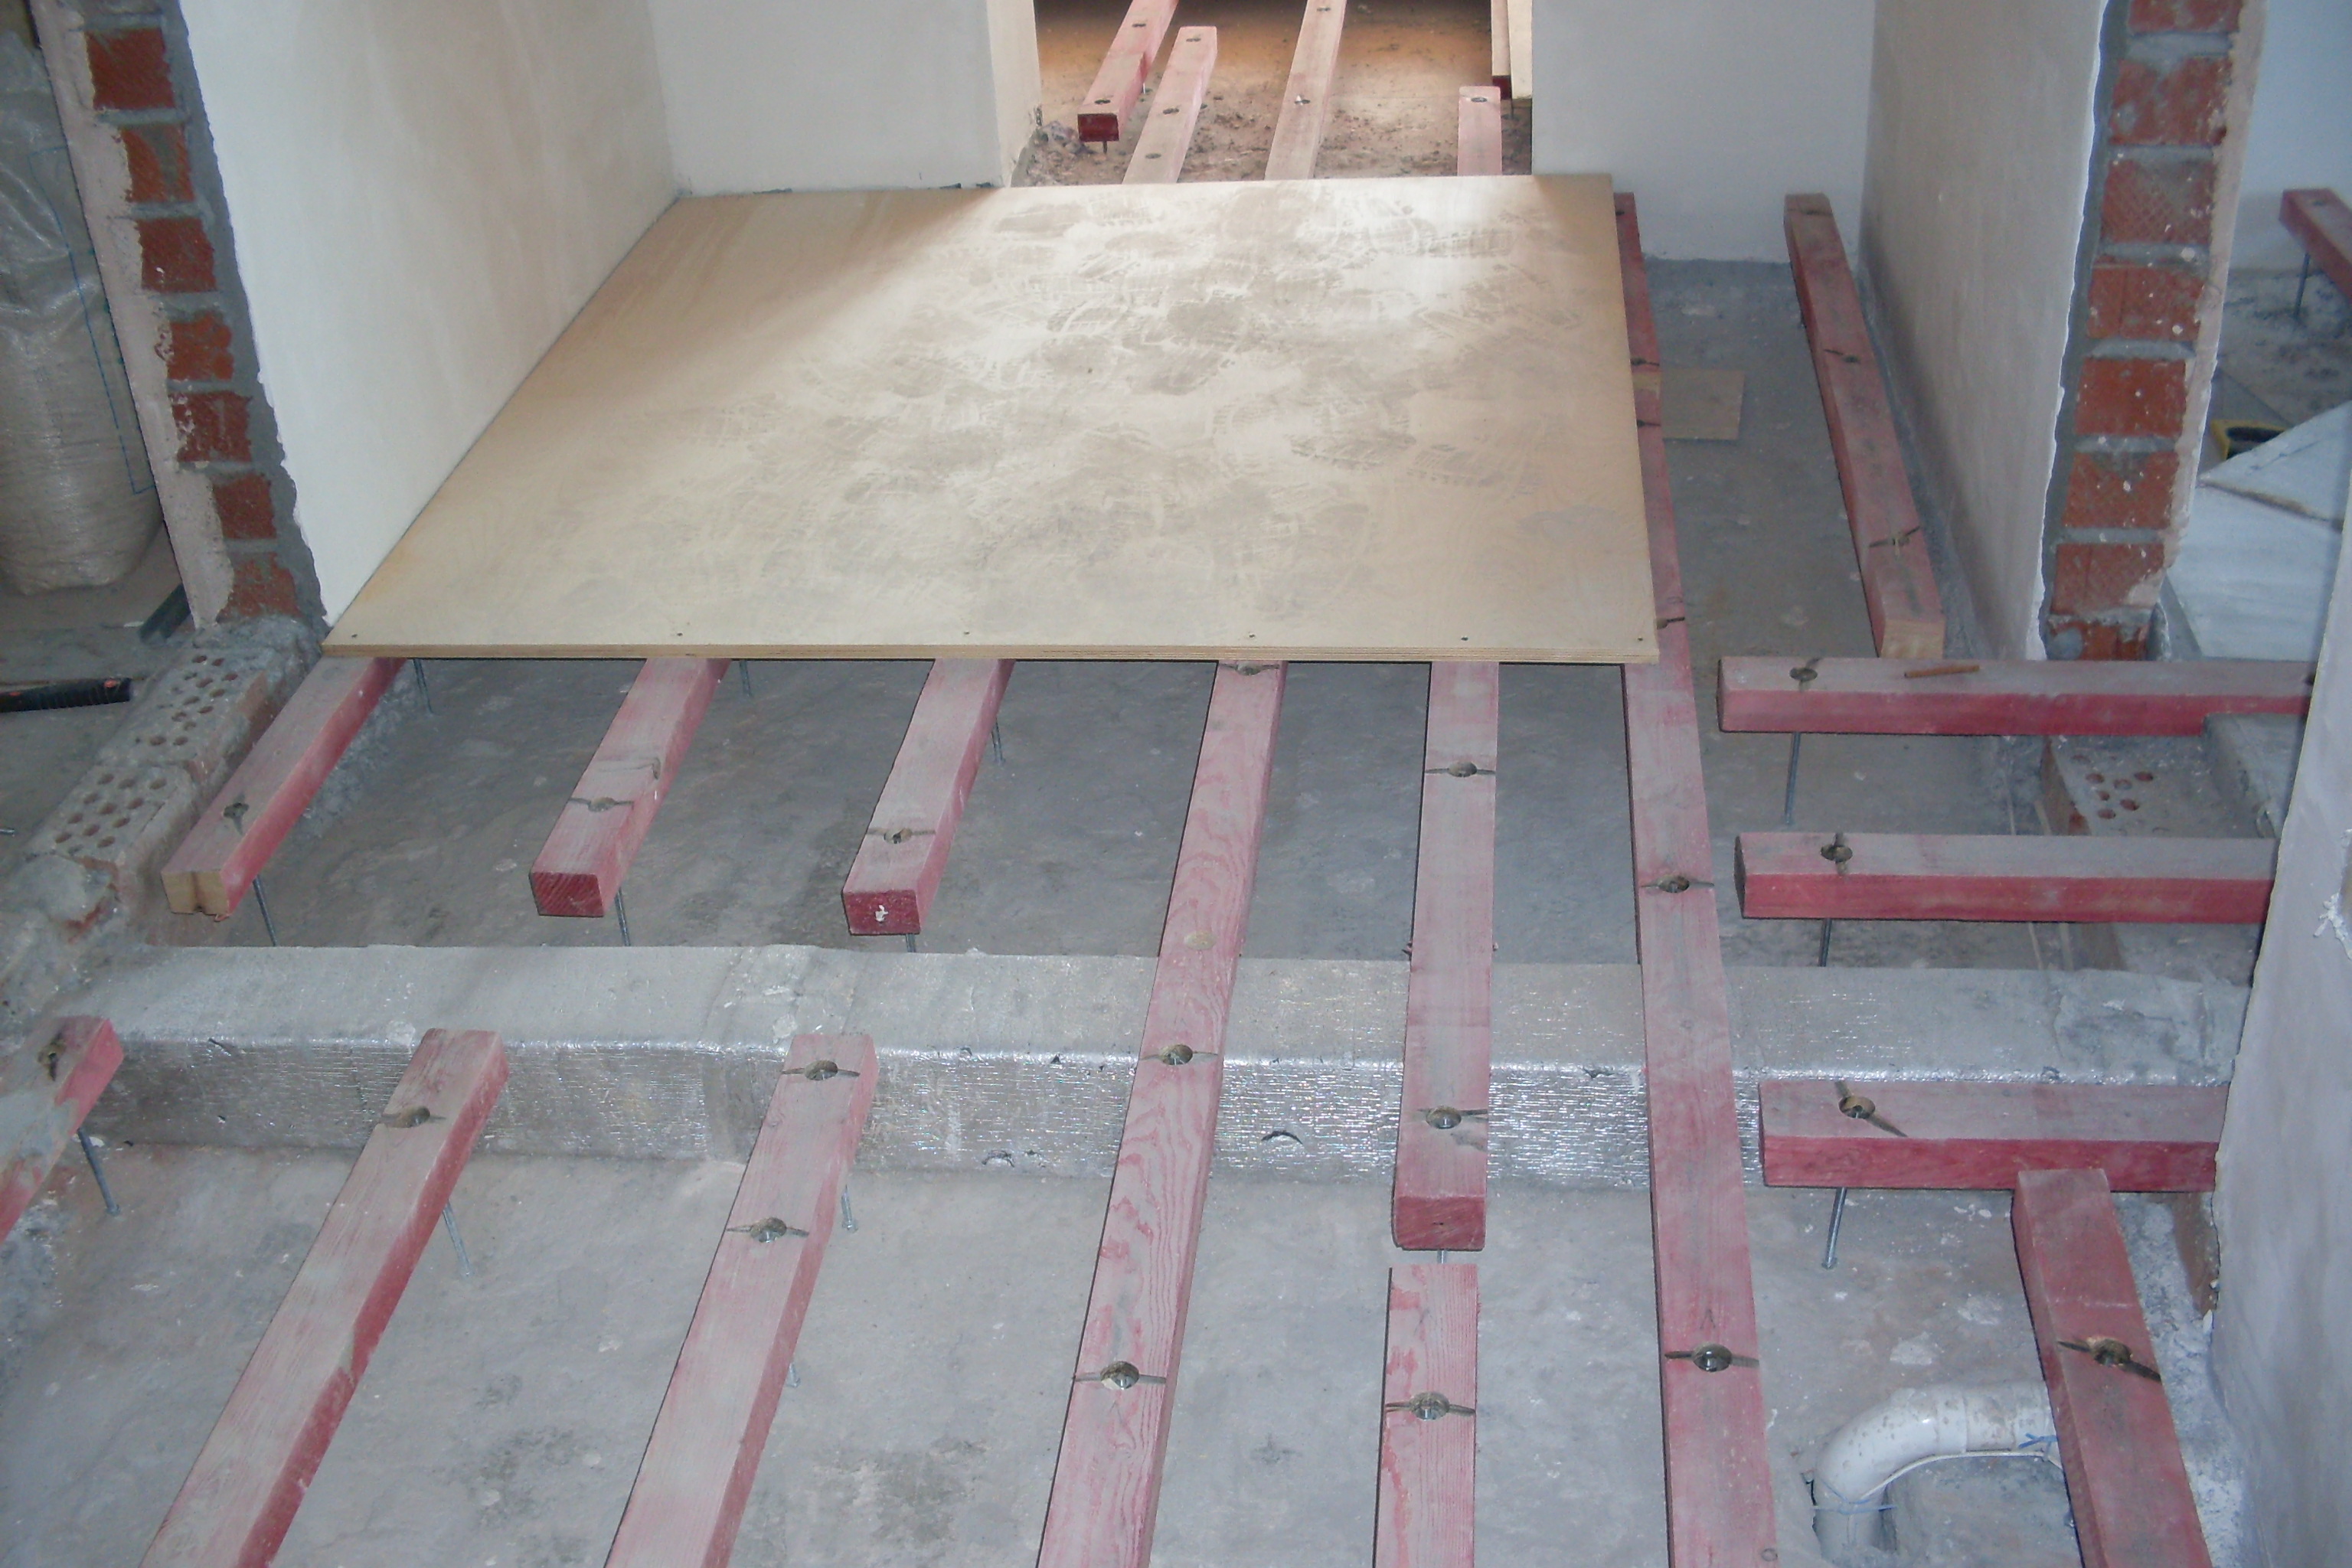
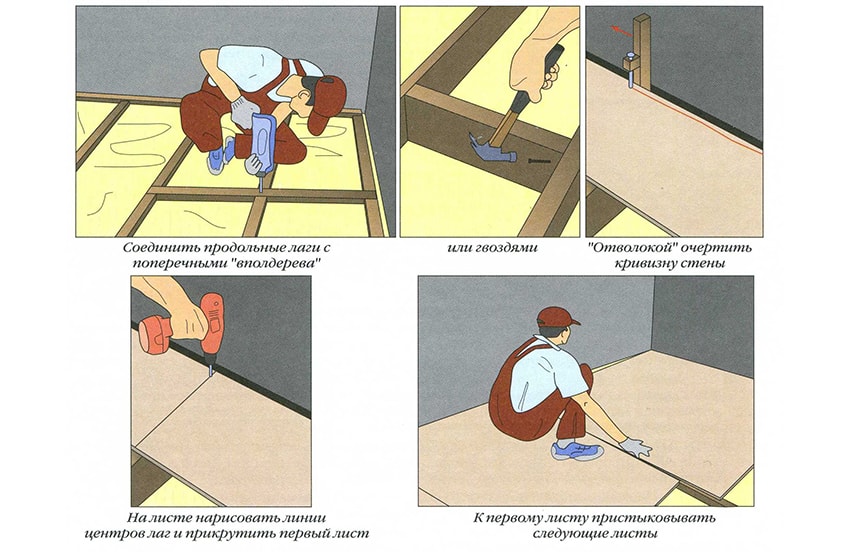
In the case of installation on wooden beams, logs are laid across them and fixed with self-tapping screws at each intersection with a support.
If the installation is done over the old wooden floor, it is enough to fix the logs to the base with self-tapping screws every 70–100 cm.
In the general case, just like when laying on the ground, it will be enough to lay out the lags, then fasten one board at opposite edges, observing the step between the lags.
With further installation of boards, the total weight of the structure will be enough to avoid lateral shifts.
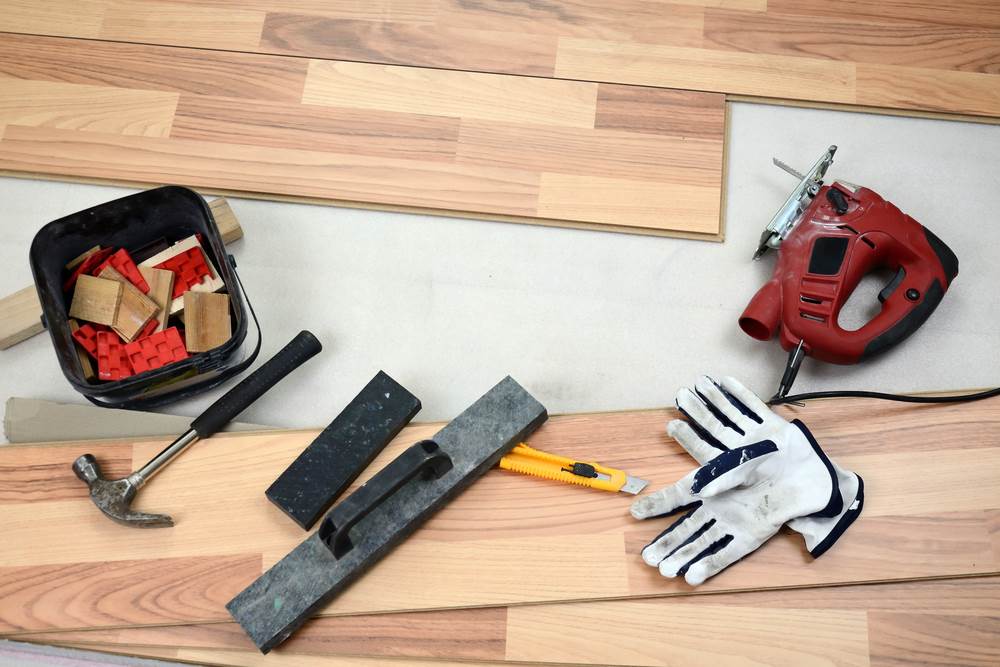
Required tools
To perform the described work, the master will need the following tool:
- building level (metal bubble, as a rule, two-meter, and with a large area of the room or long corridors, you may need water or even laser);

- screwdriver with a corresponding self-tapping screw bat;
- for the construction of columns and work on the concrete base - pick and trowel;
- circular saw (as a last resort - a hacksaw on a tree);

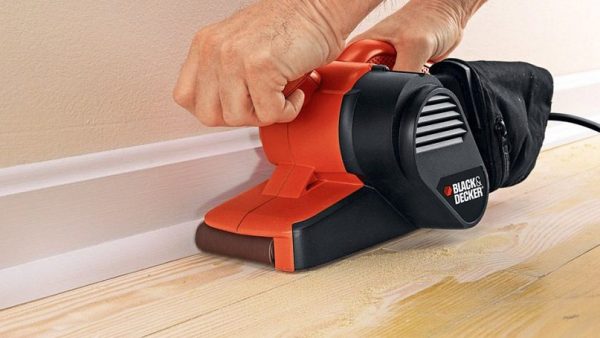
- grinding machine (belt or disk);
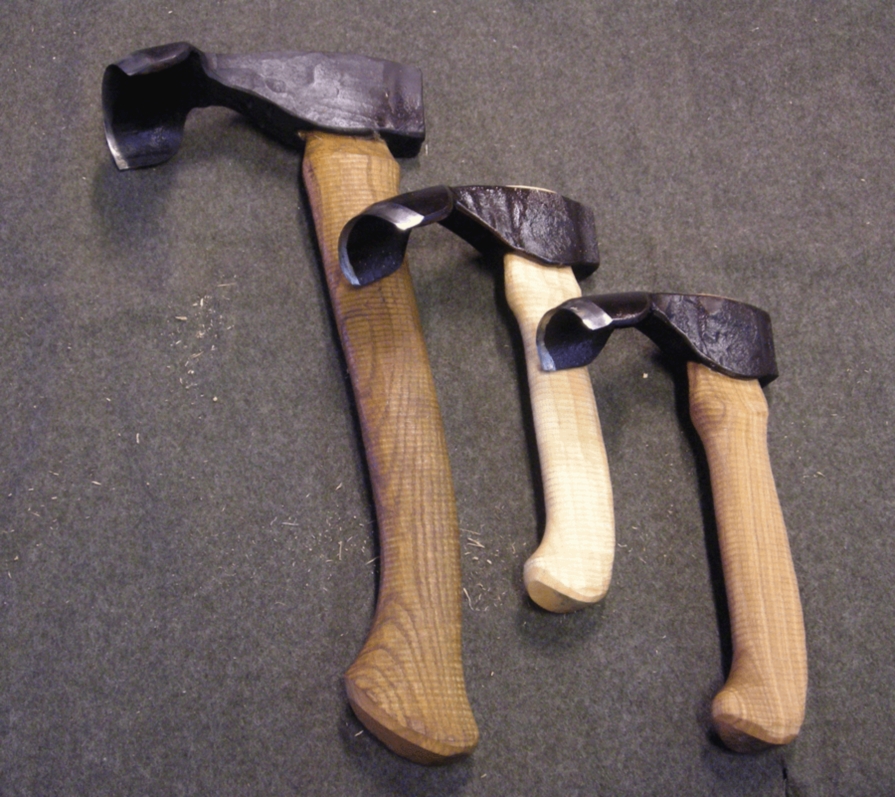
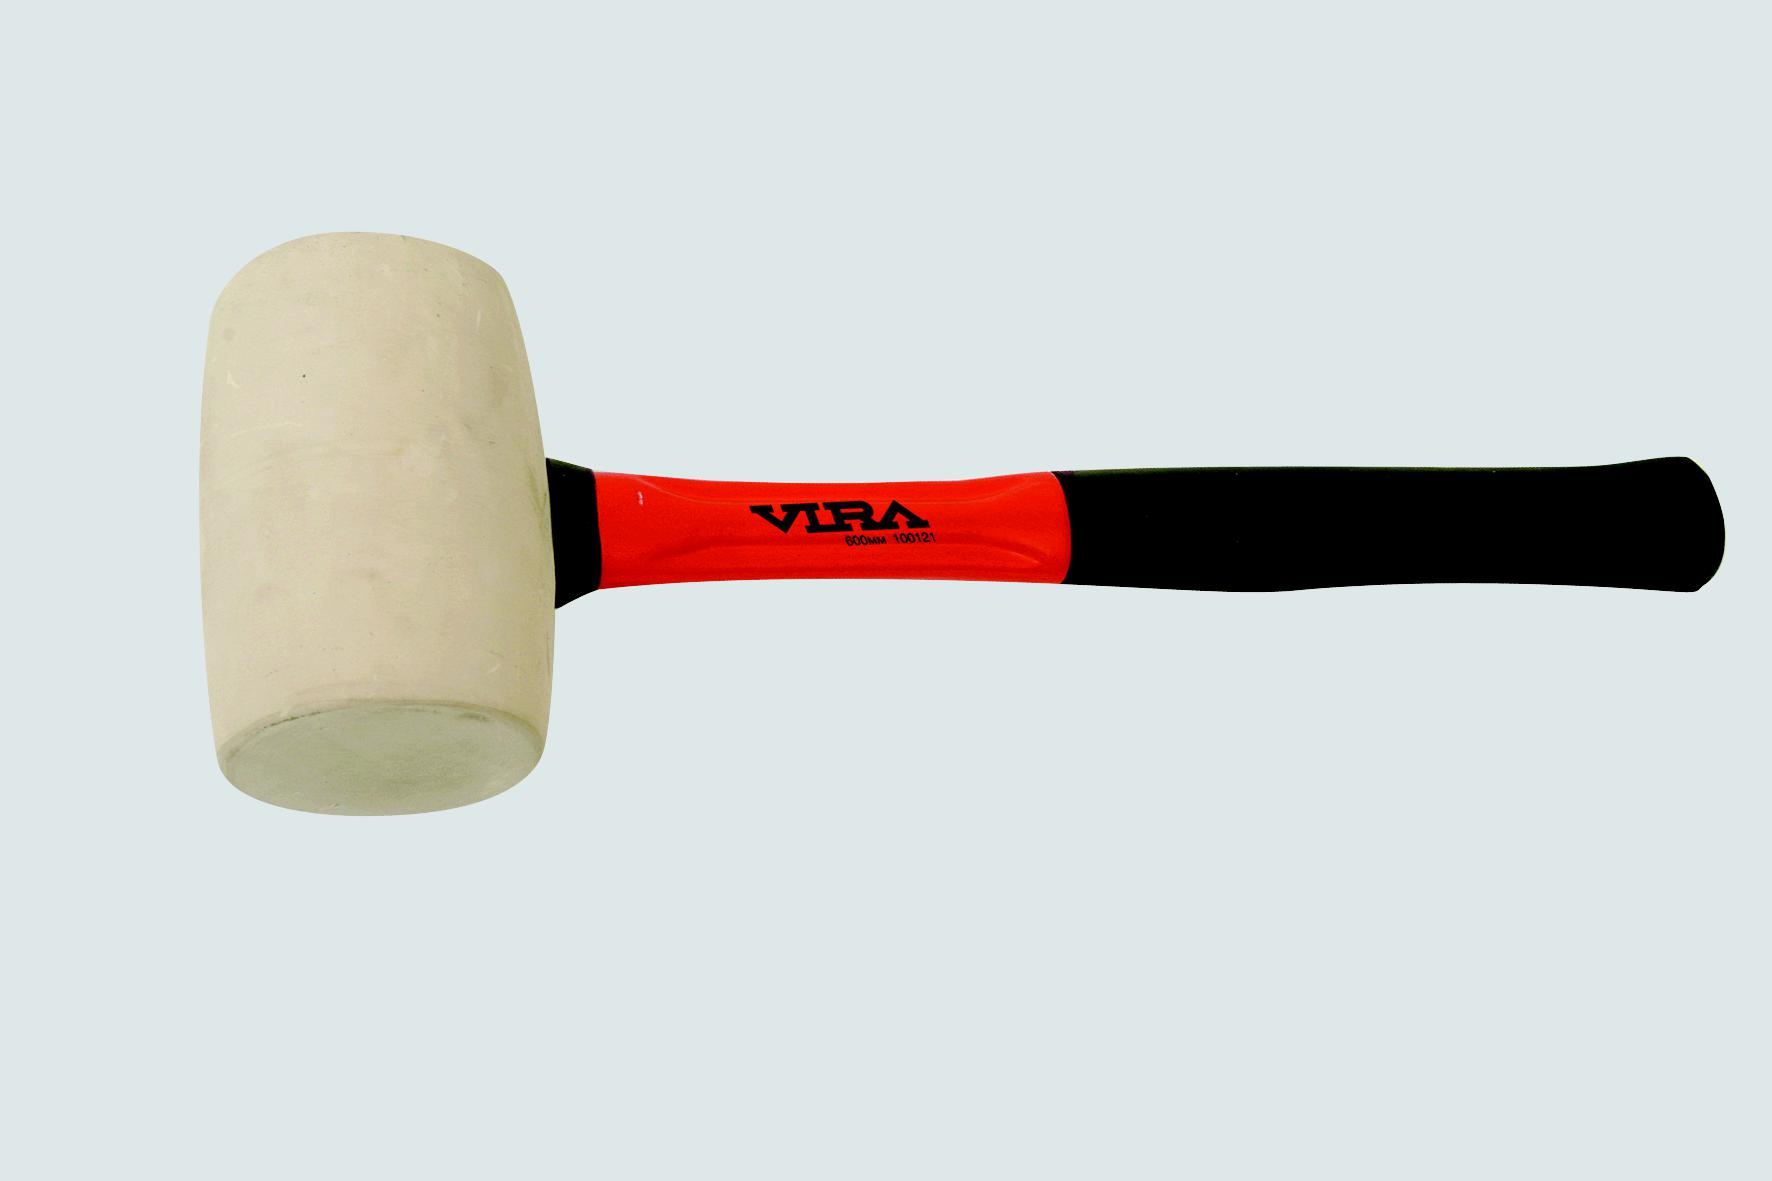
- wooden hammer (mallet);
- tape measure, pencil.

Tools alone are usually not enough.
From the materials will additionally be needed:
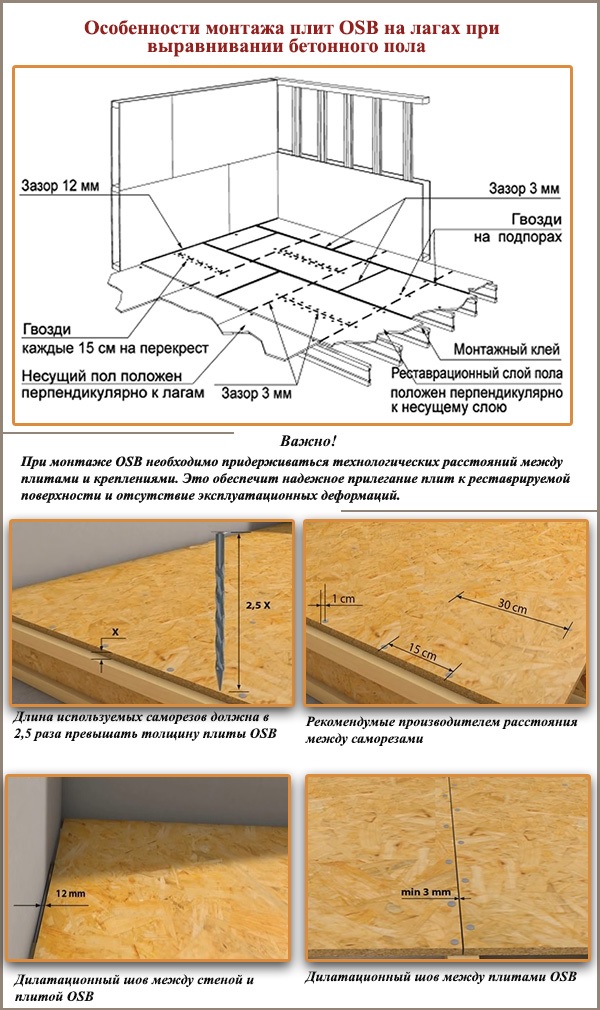
- self-tapping screws of sufficient length, but not more than the total thickness of the bonded element and base;
- polyethylene film, roofing felt;
- construction glue or "liquid nails";


- Scotch;
- acrylic paint, varnish;
- putty;
- Glasses, gloves, other personal protective equipment.
Determine the step size
Based on the total area and type of base of the subfloor, it is easy to calculate the required amount of material. For example, with a room geometry of 5x4 meters and laying the lag parallel to the short side, the required number of 4-meter bars with a cross-section of 50x50 mm with a step between them of 50 cm is 11 pieces. It remains to calculate their total length (44 m) and multiply by the length of the sides 0.05 x 0.05 - in this case the required amount is 0.11 cubic meters.
Important note: since the board and the timber is measured by the volume - “cubes”, that is, cubic meters, in the calculations all measurements must be reduced to meters, in other words 50 mm is 0.05 m, and 20 cm is 0.2 m.
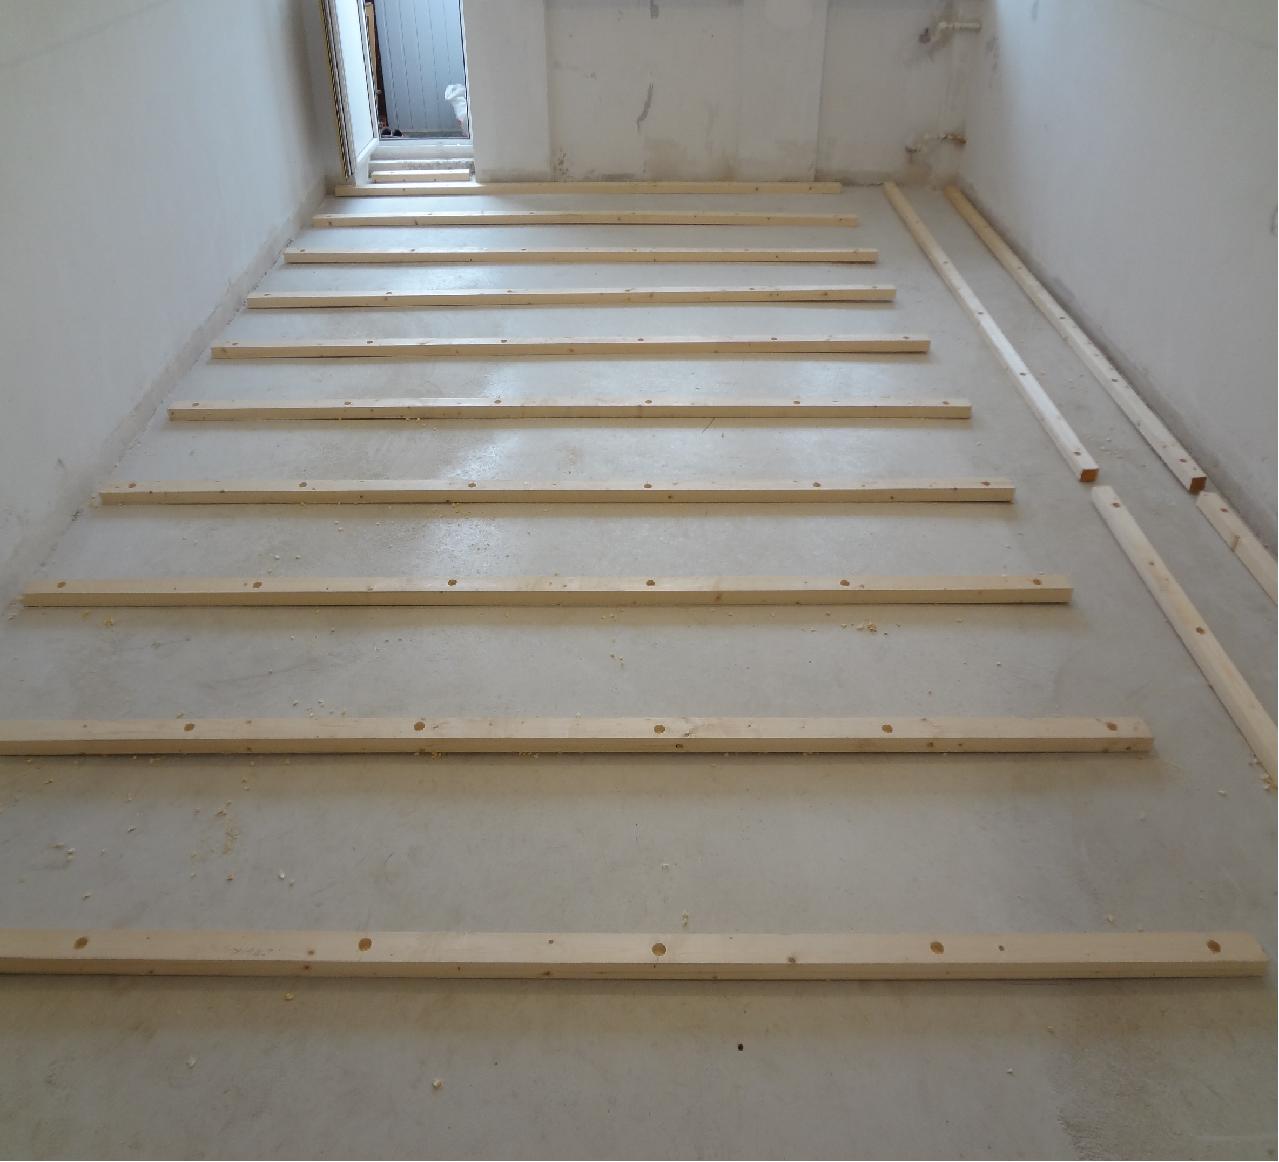
Laying lag
For one or two days before mounting the logs to the base, and after all the preparatory work is done, they should be brought to the room where the floor will be repaired. Thus, the material "gets used" to the microclimate of the room.
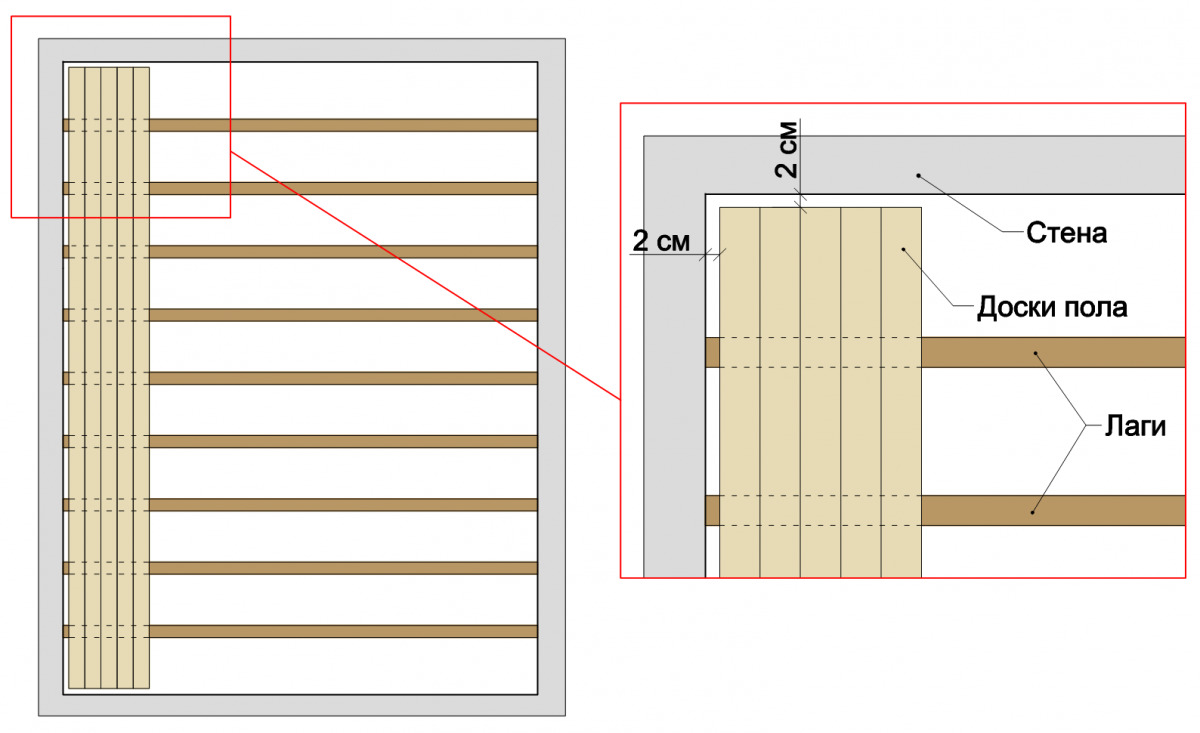
The peculiarity of wood is that when the humidity or temperature drops, the material does not change its size along the fibers, in other words, the board or the bar does not require compensation gaps in length. And since lumber of relatively small cross section is used as lag, it is sufficient to comply with the distance from the wall within 5-10 mm.
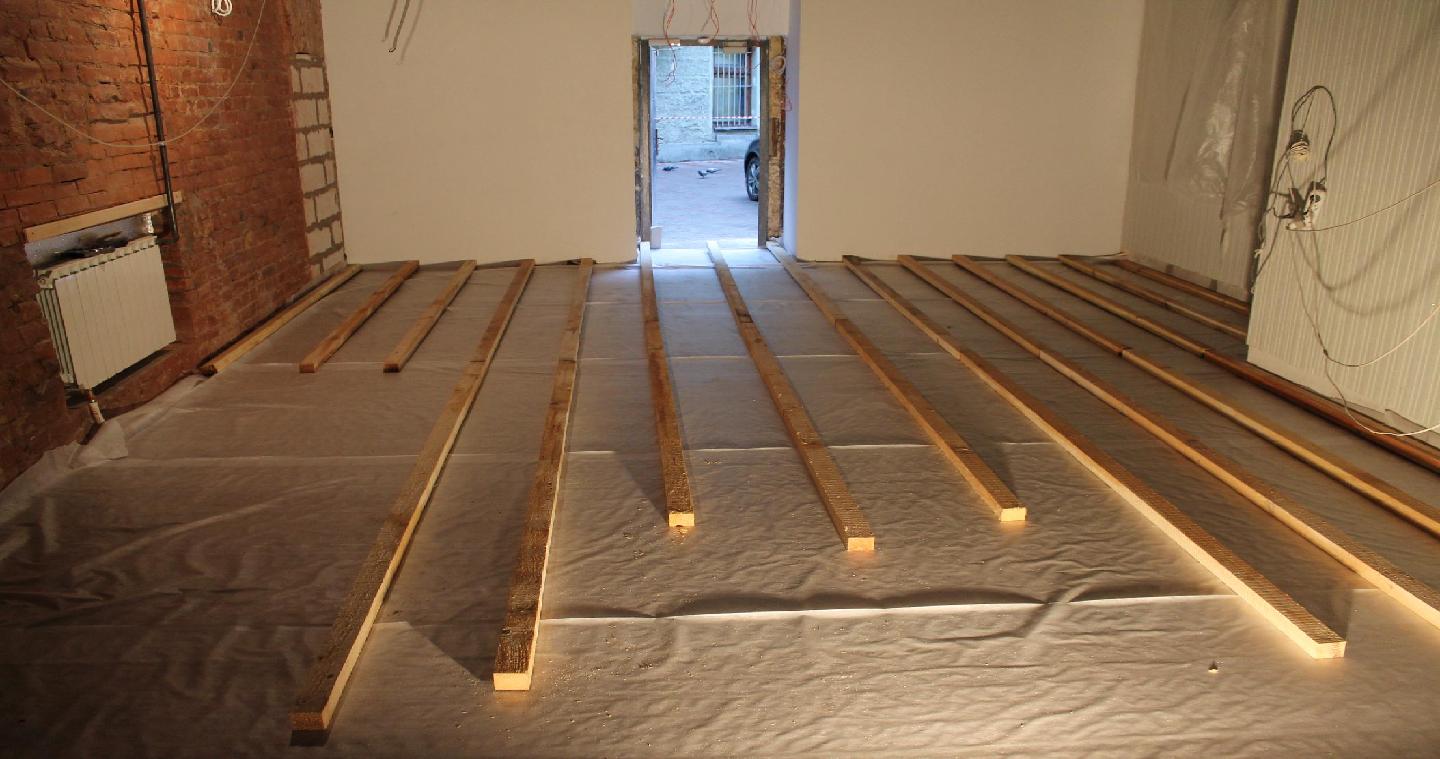
Starting from the highest point, if there is a height difference, the lags are stacked one by one with preliminary fixation at two points along the edges. Having finished this stage and making sure that all elements are parallel and at equal distance from one another, you can attach them to the base permanently - with self-tapping screws with a step of no more than one meter.
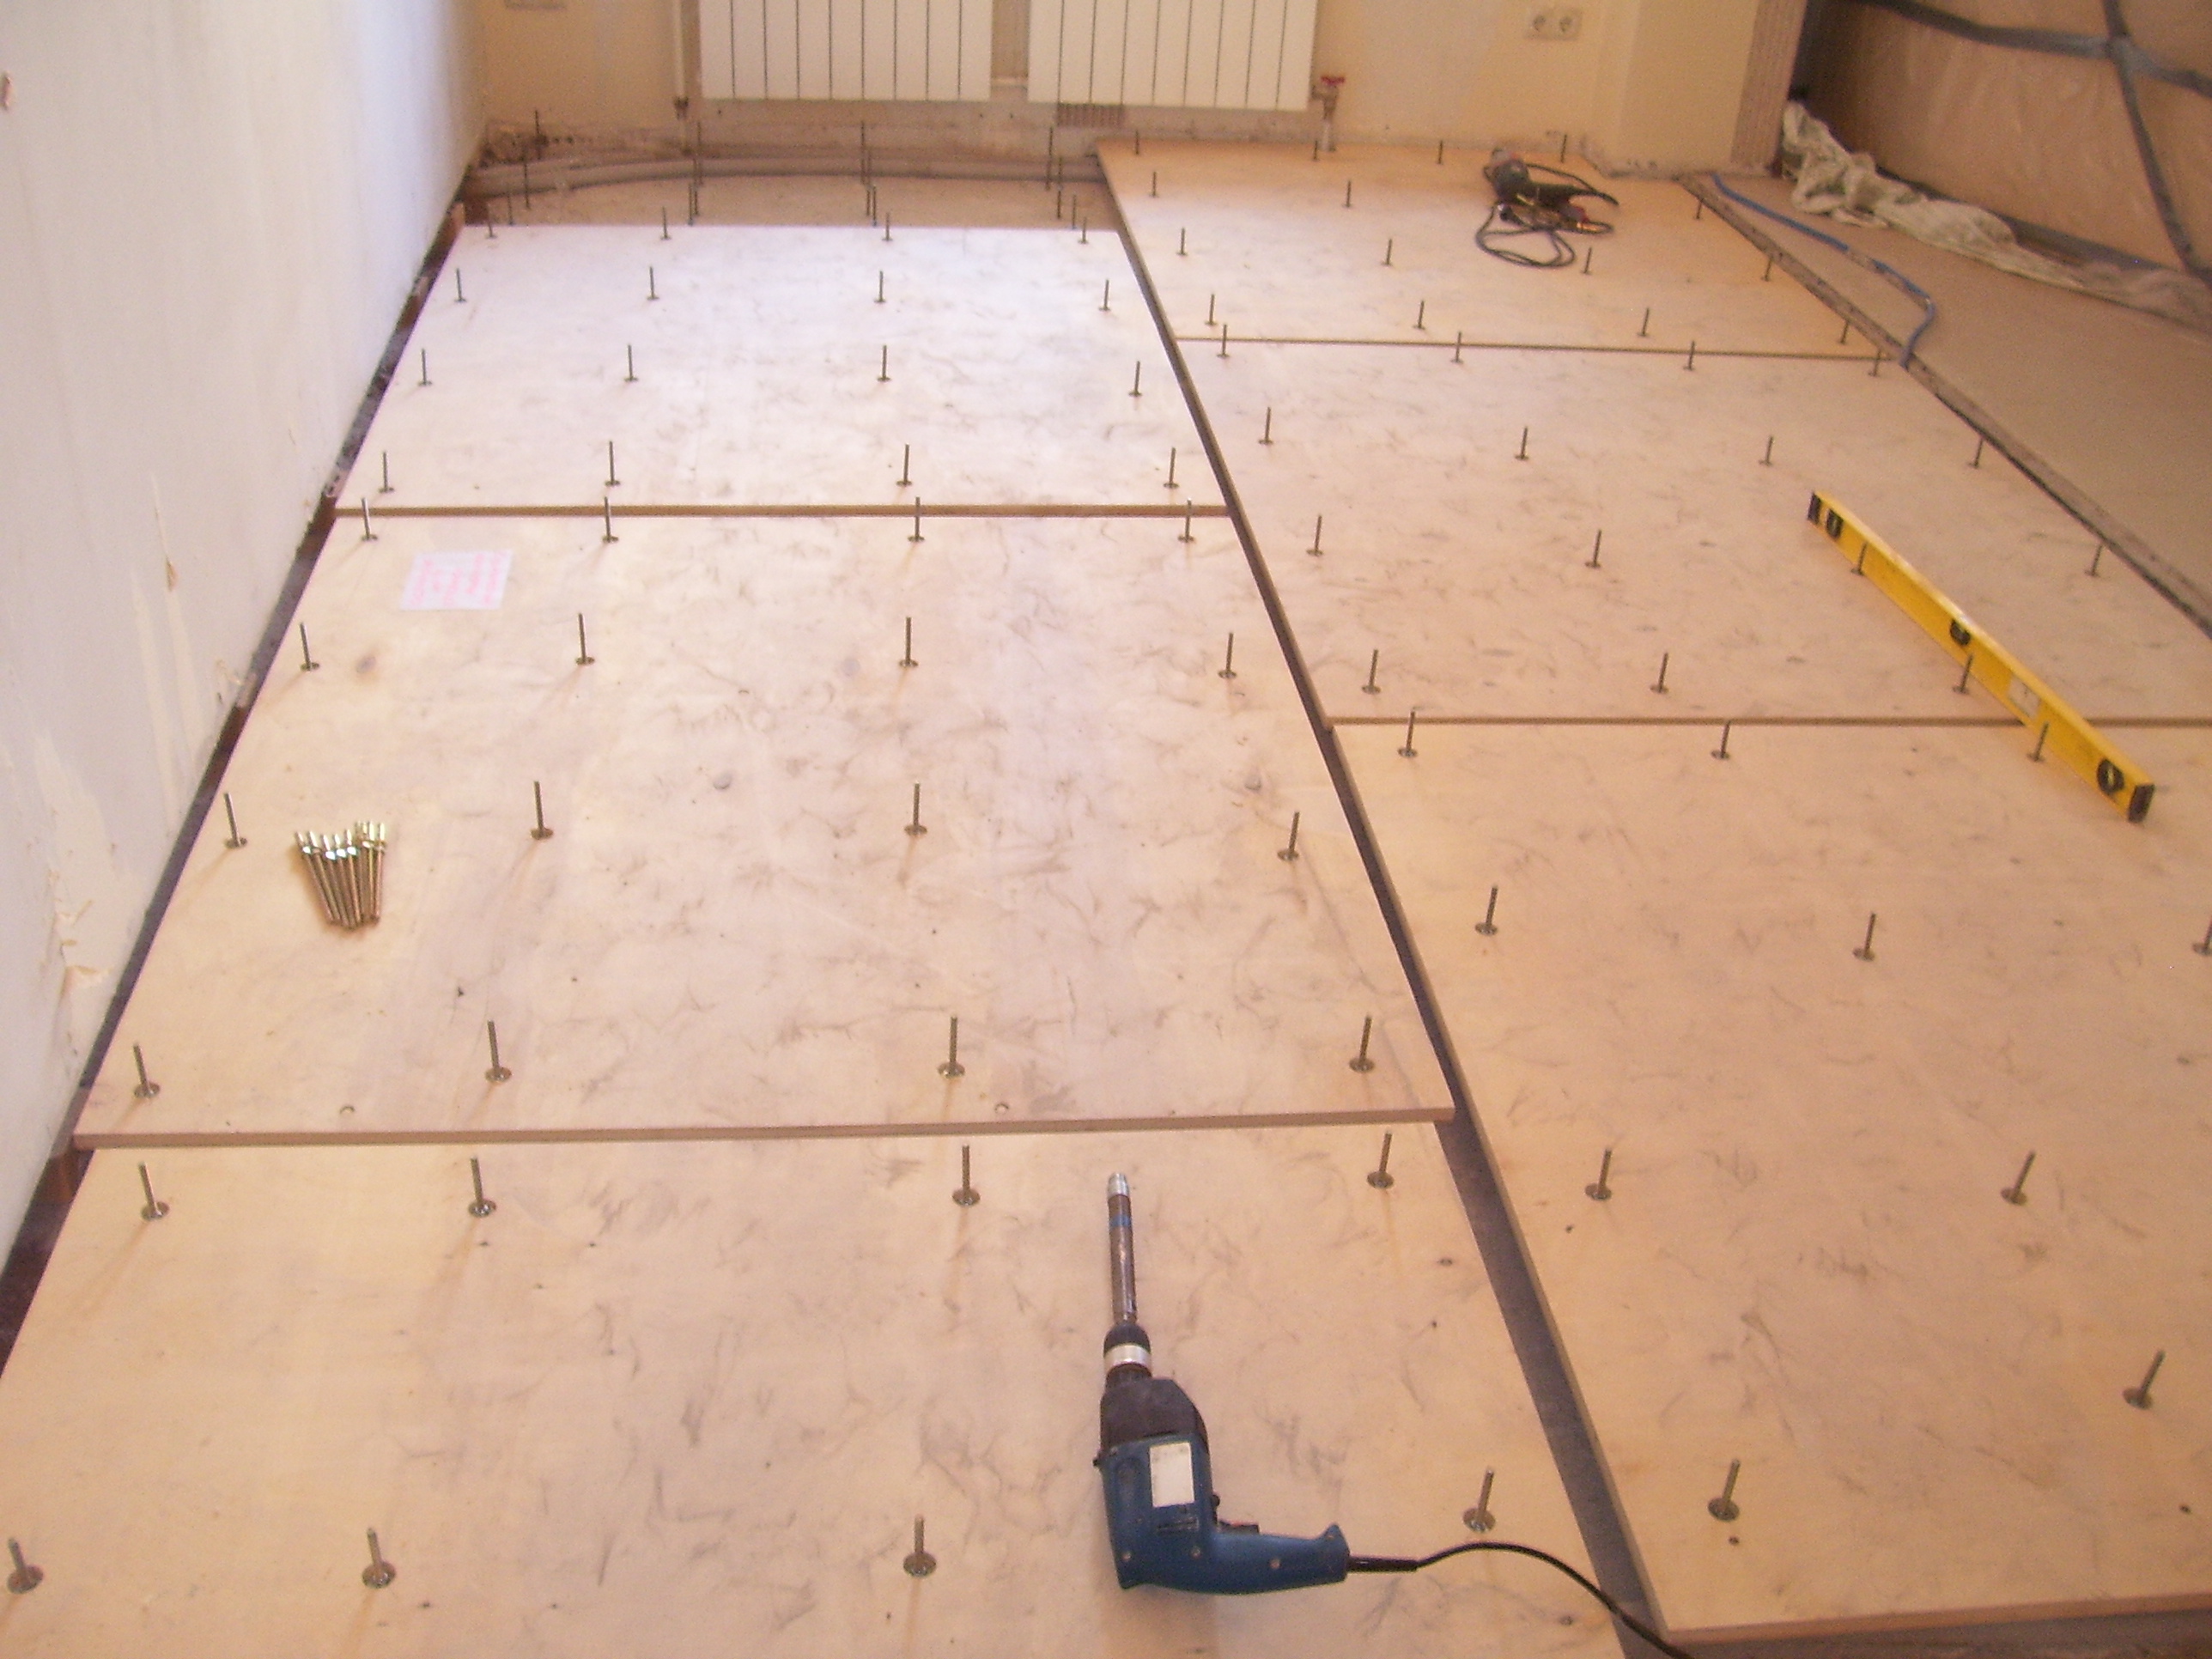
In the space between the lags, as mentioned above, it is possible to lay the insulating material, lay a moisture-proof film over the top, holding the edges together with adhesive tape.
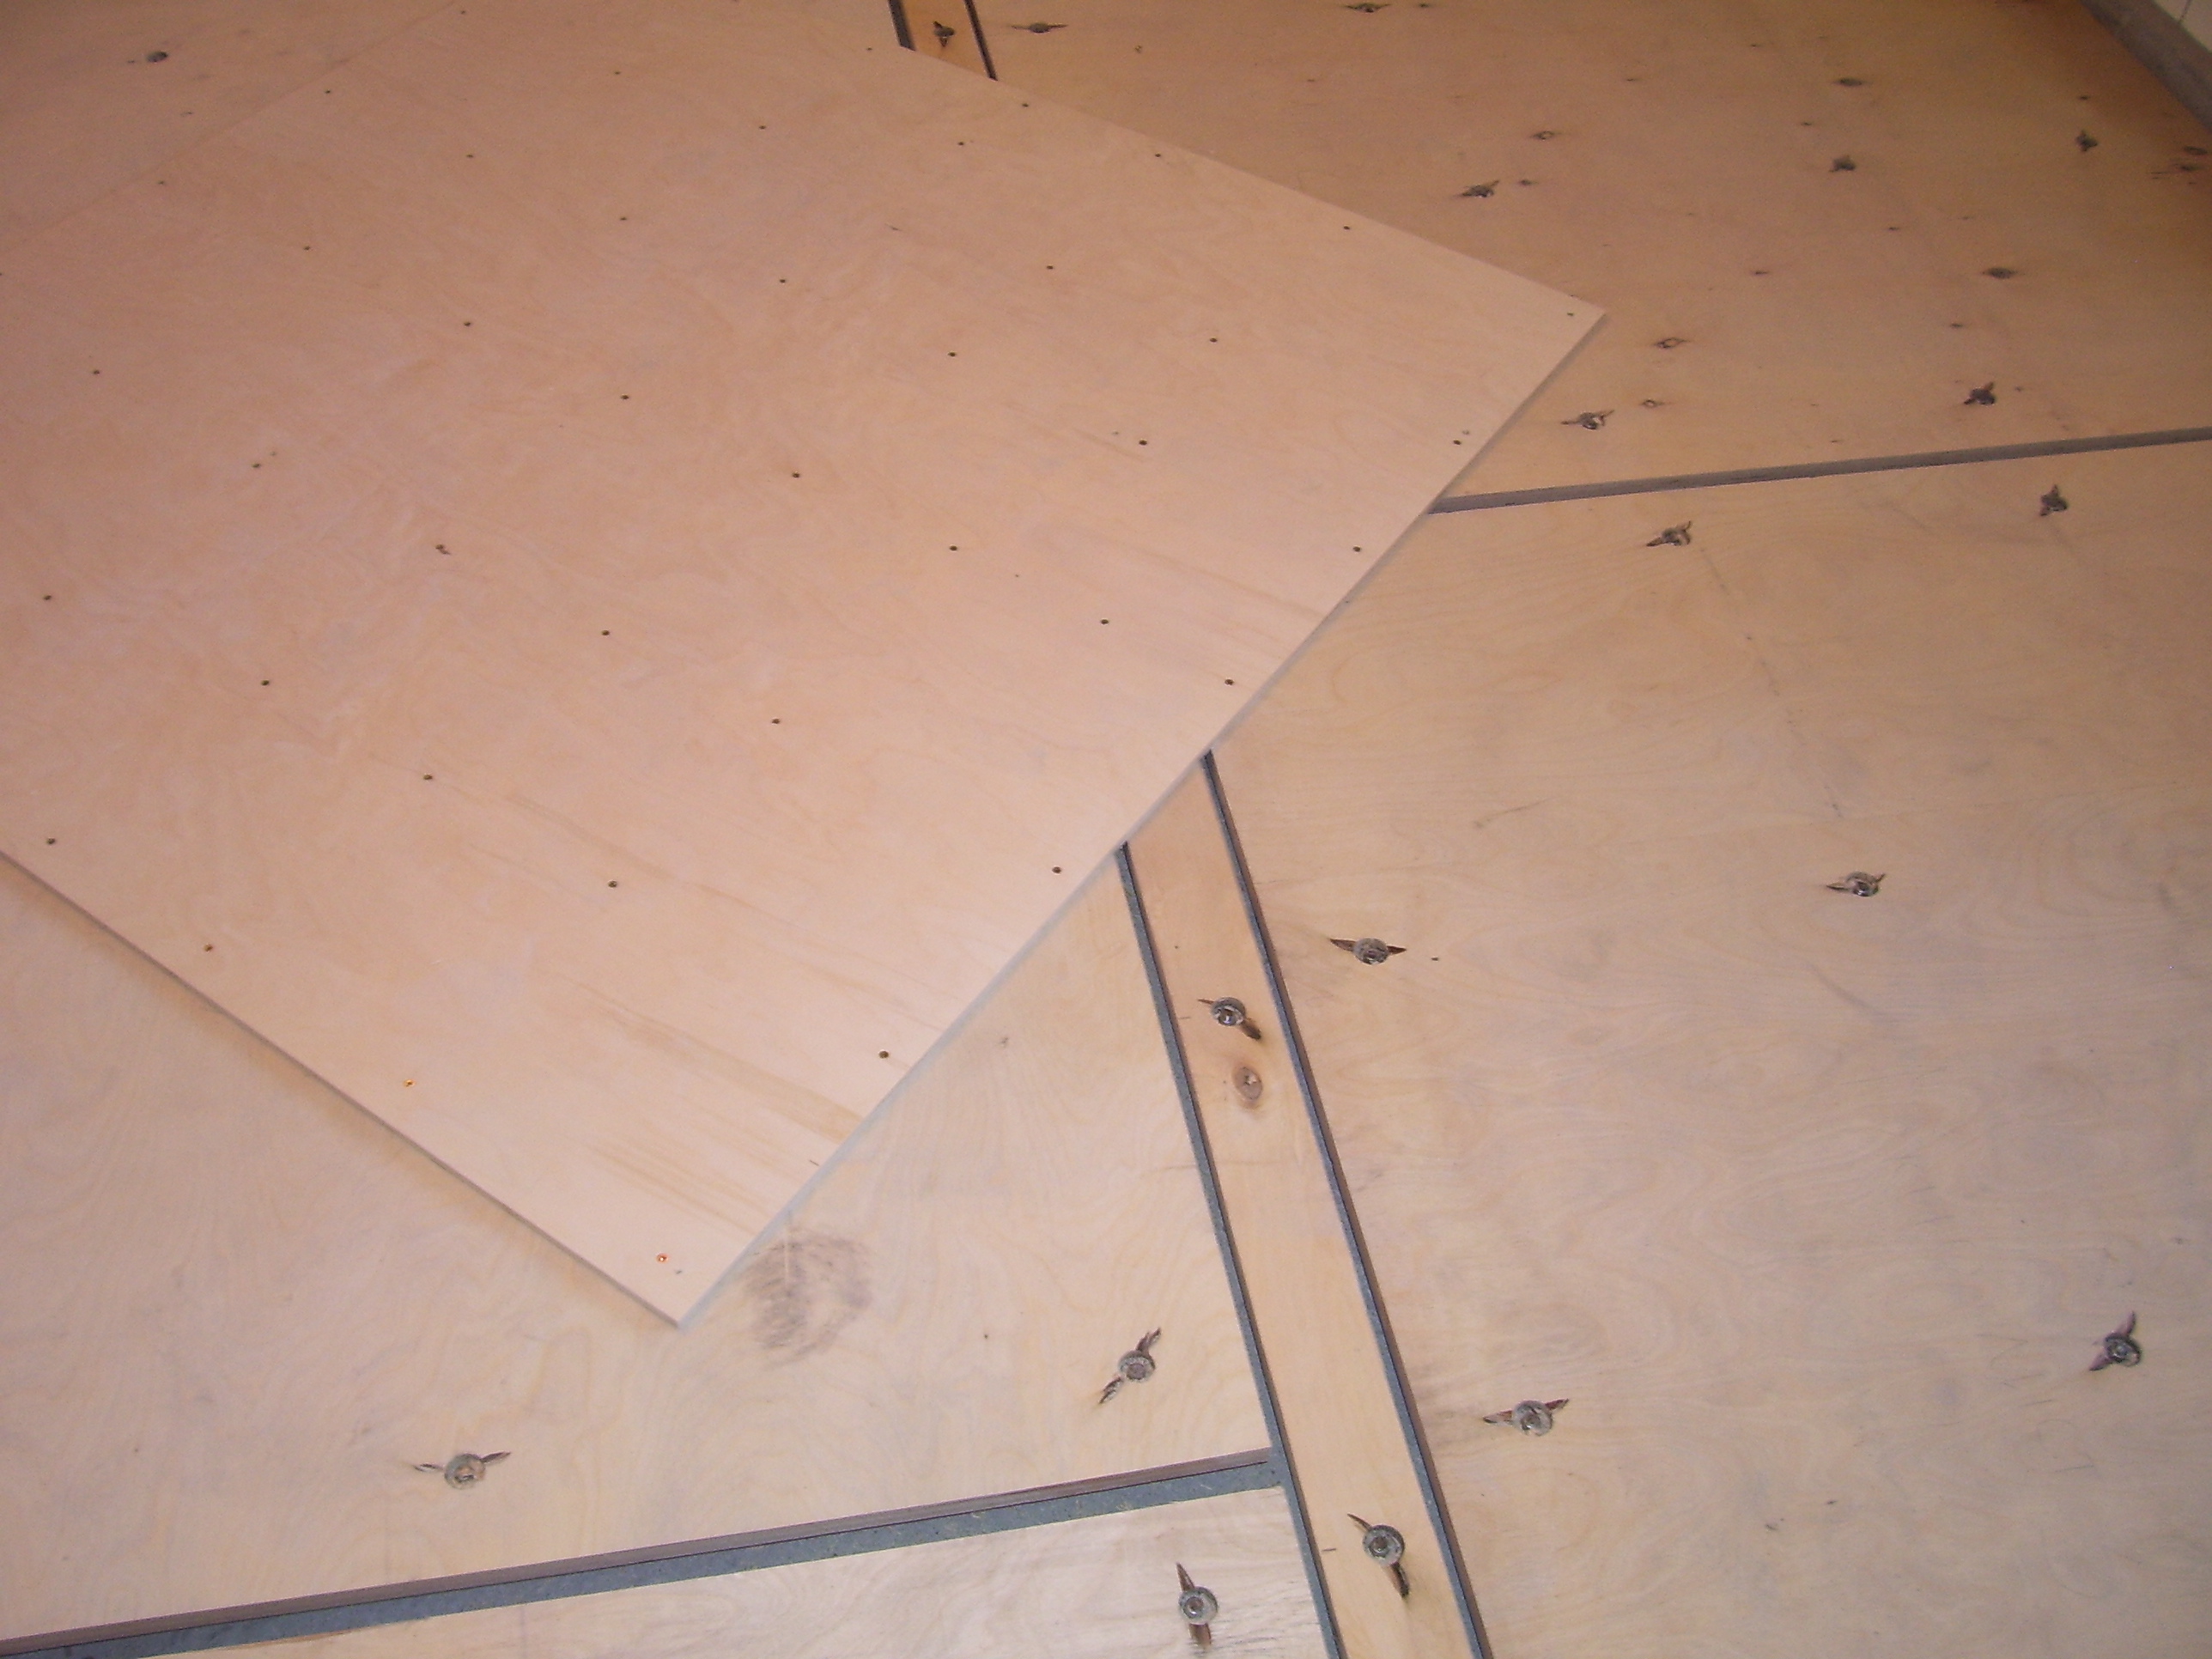
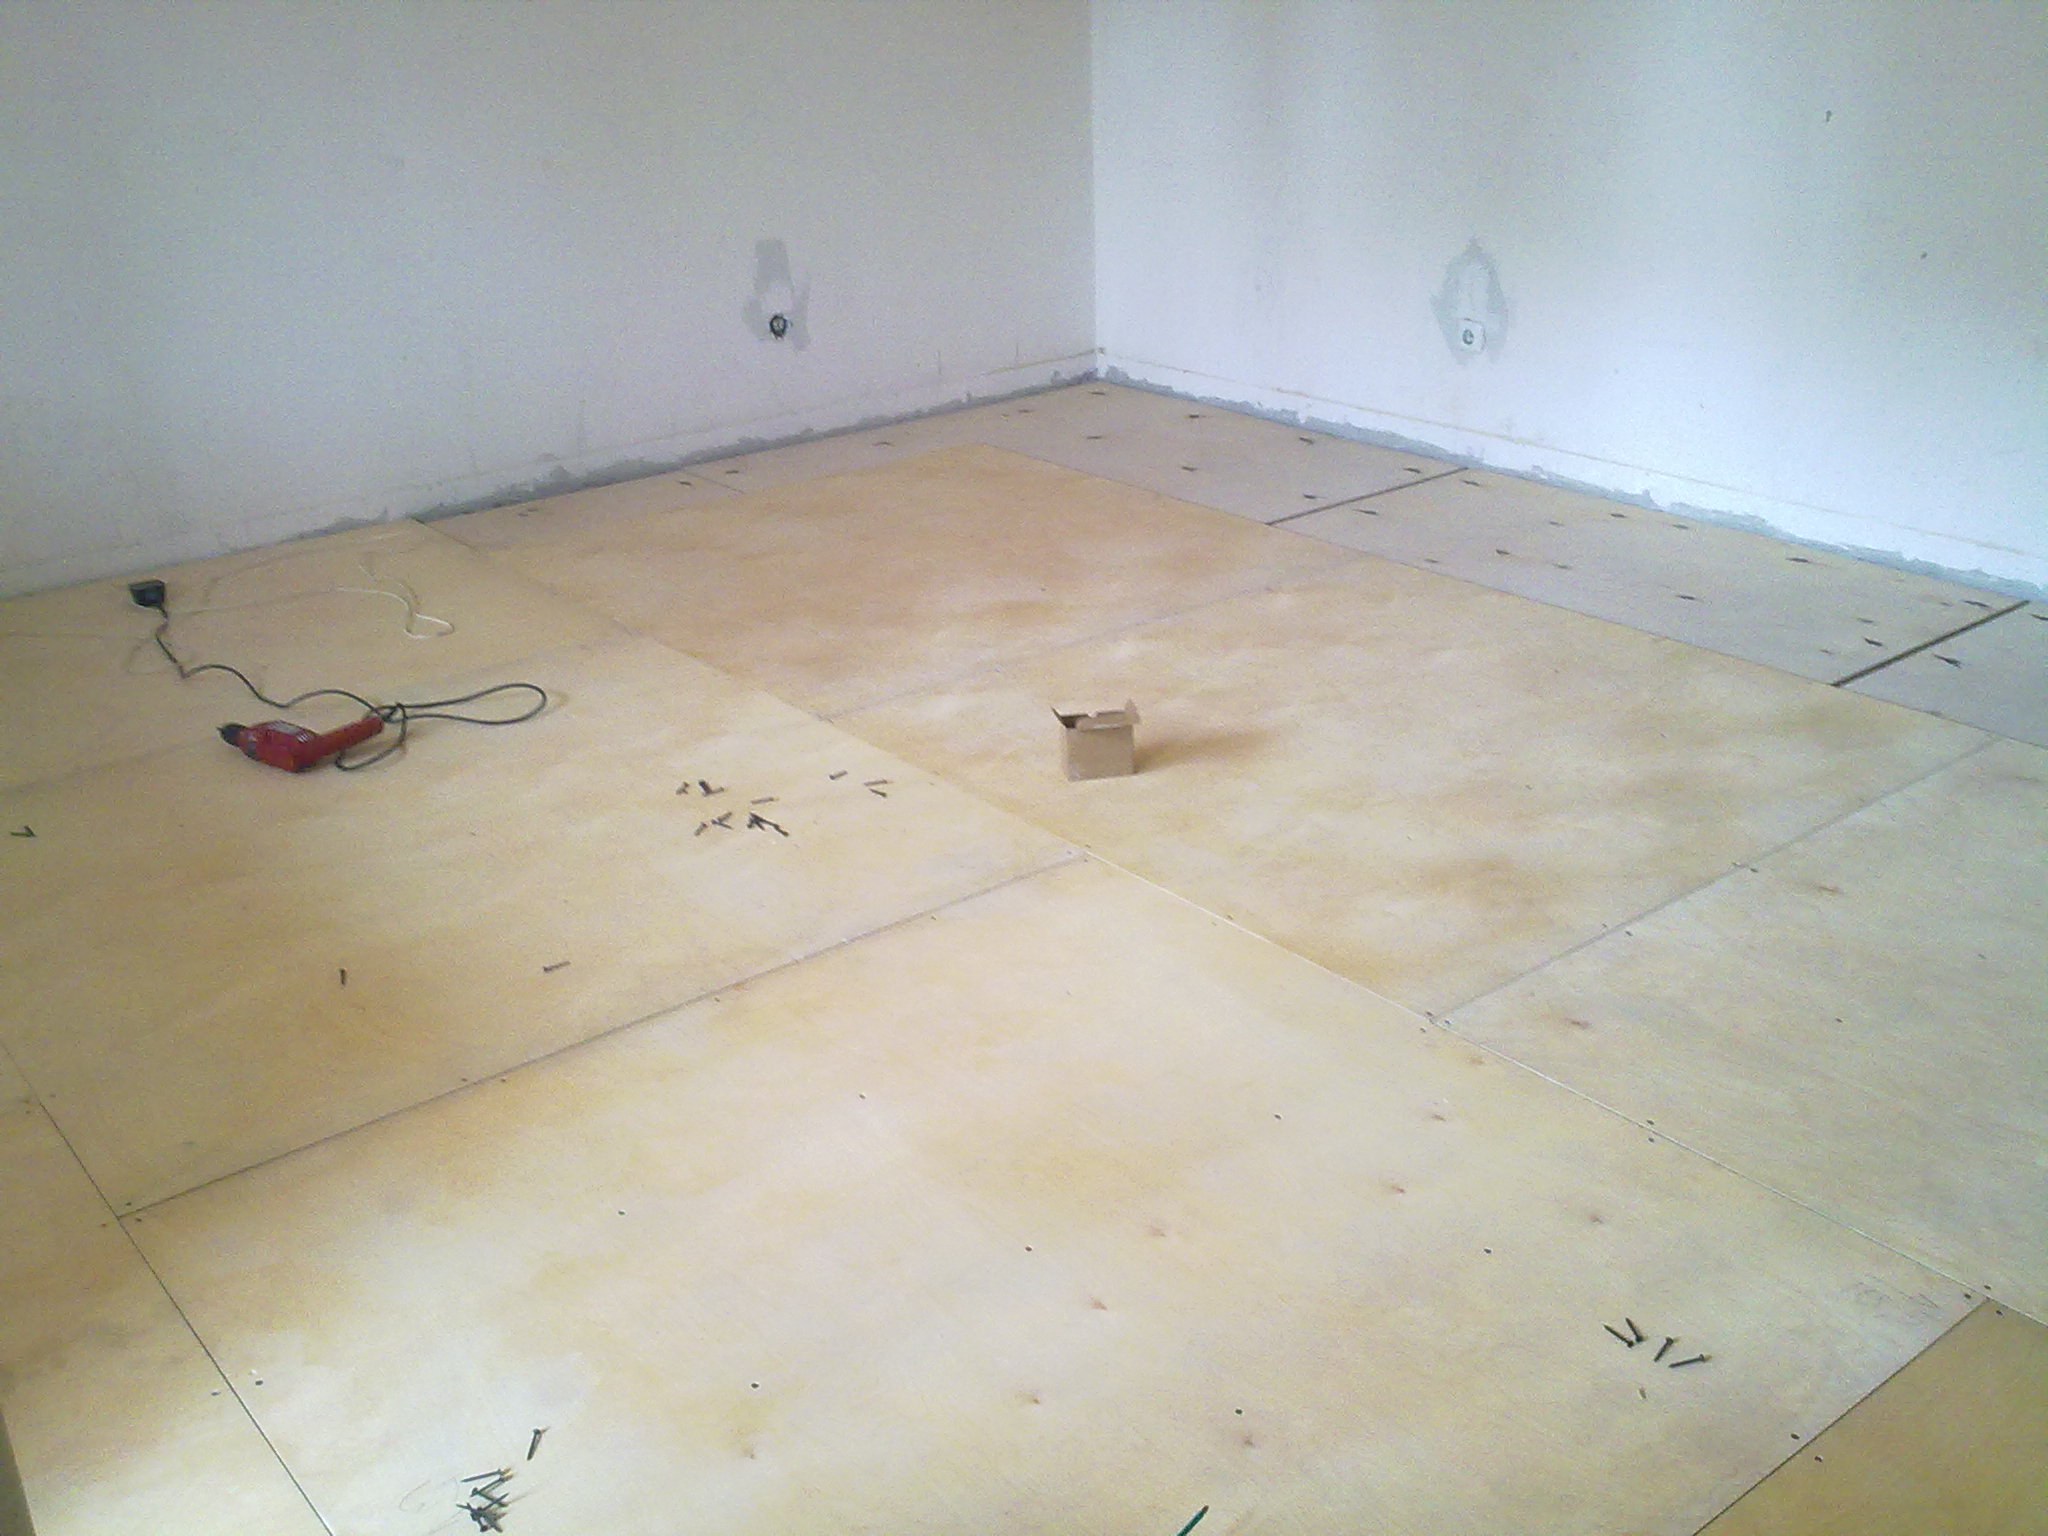
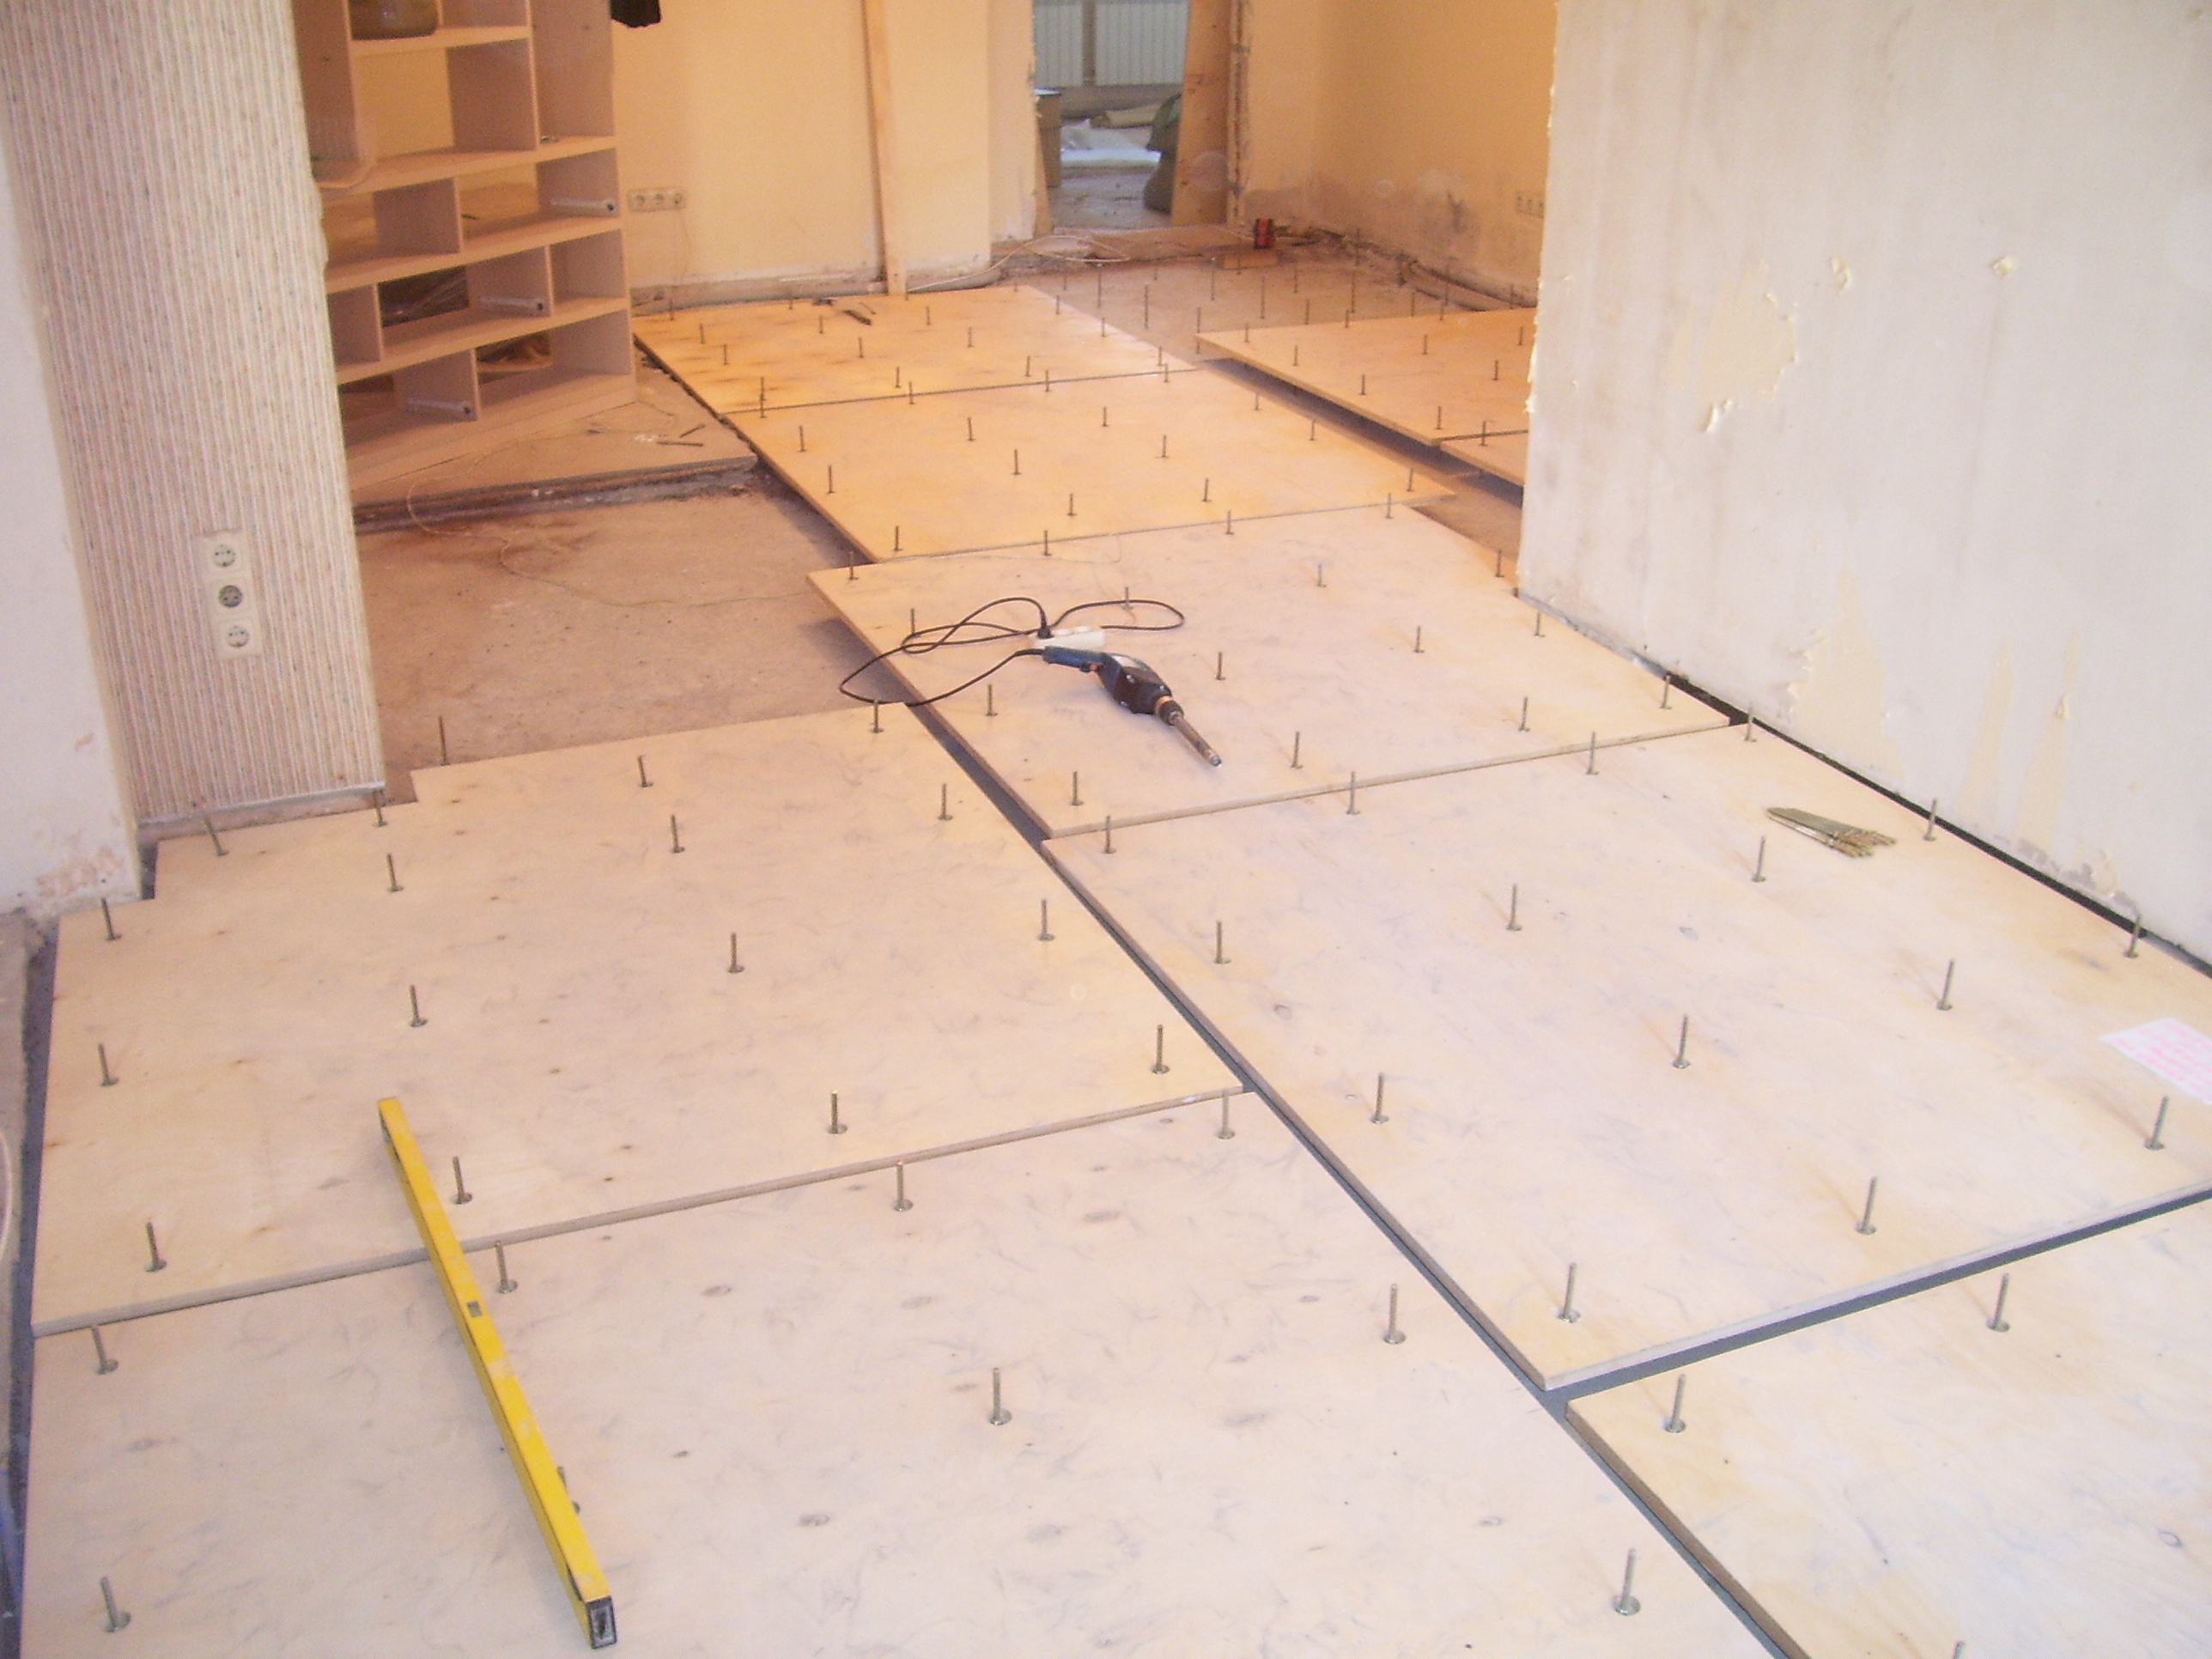
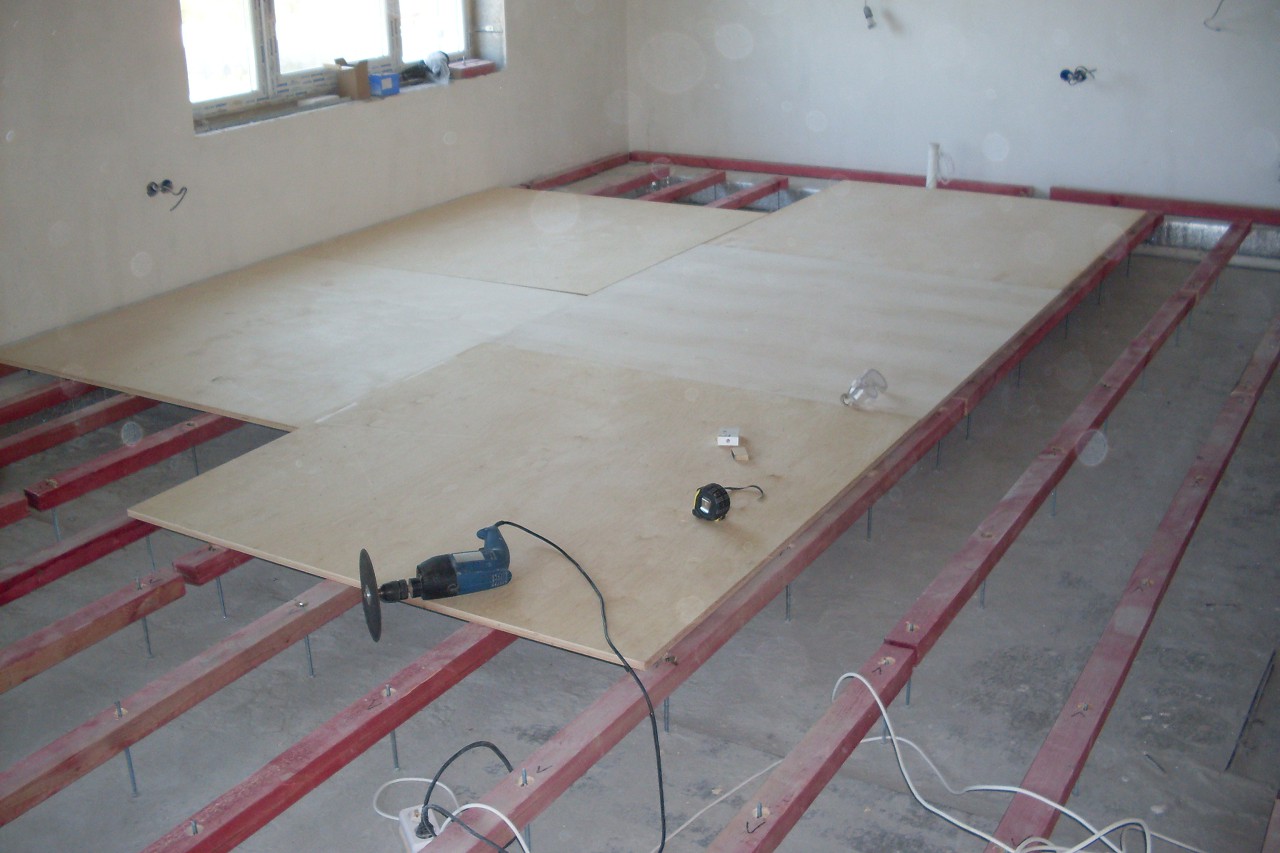
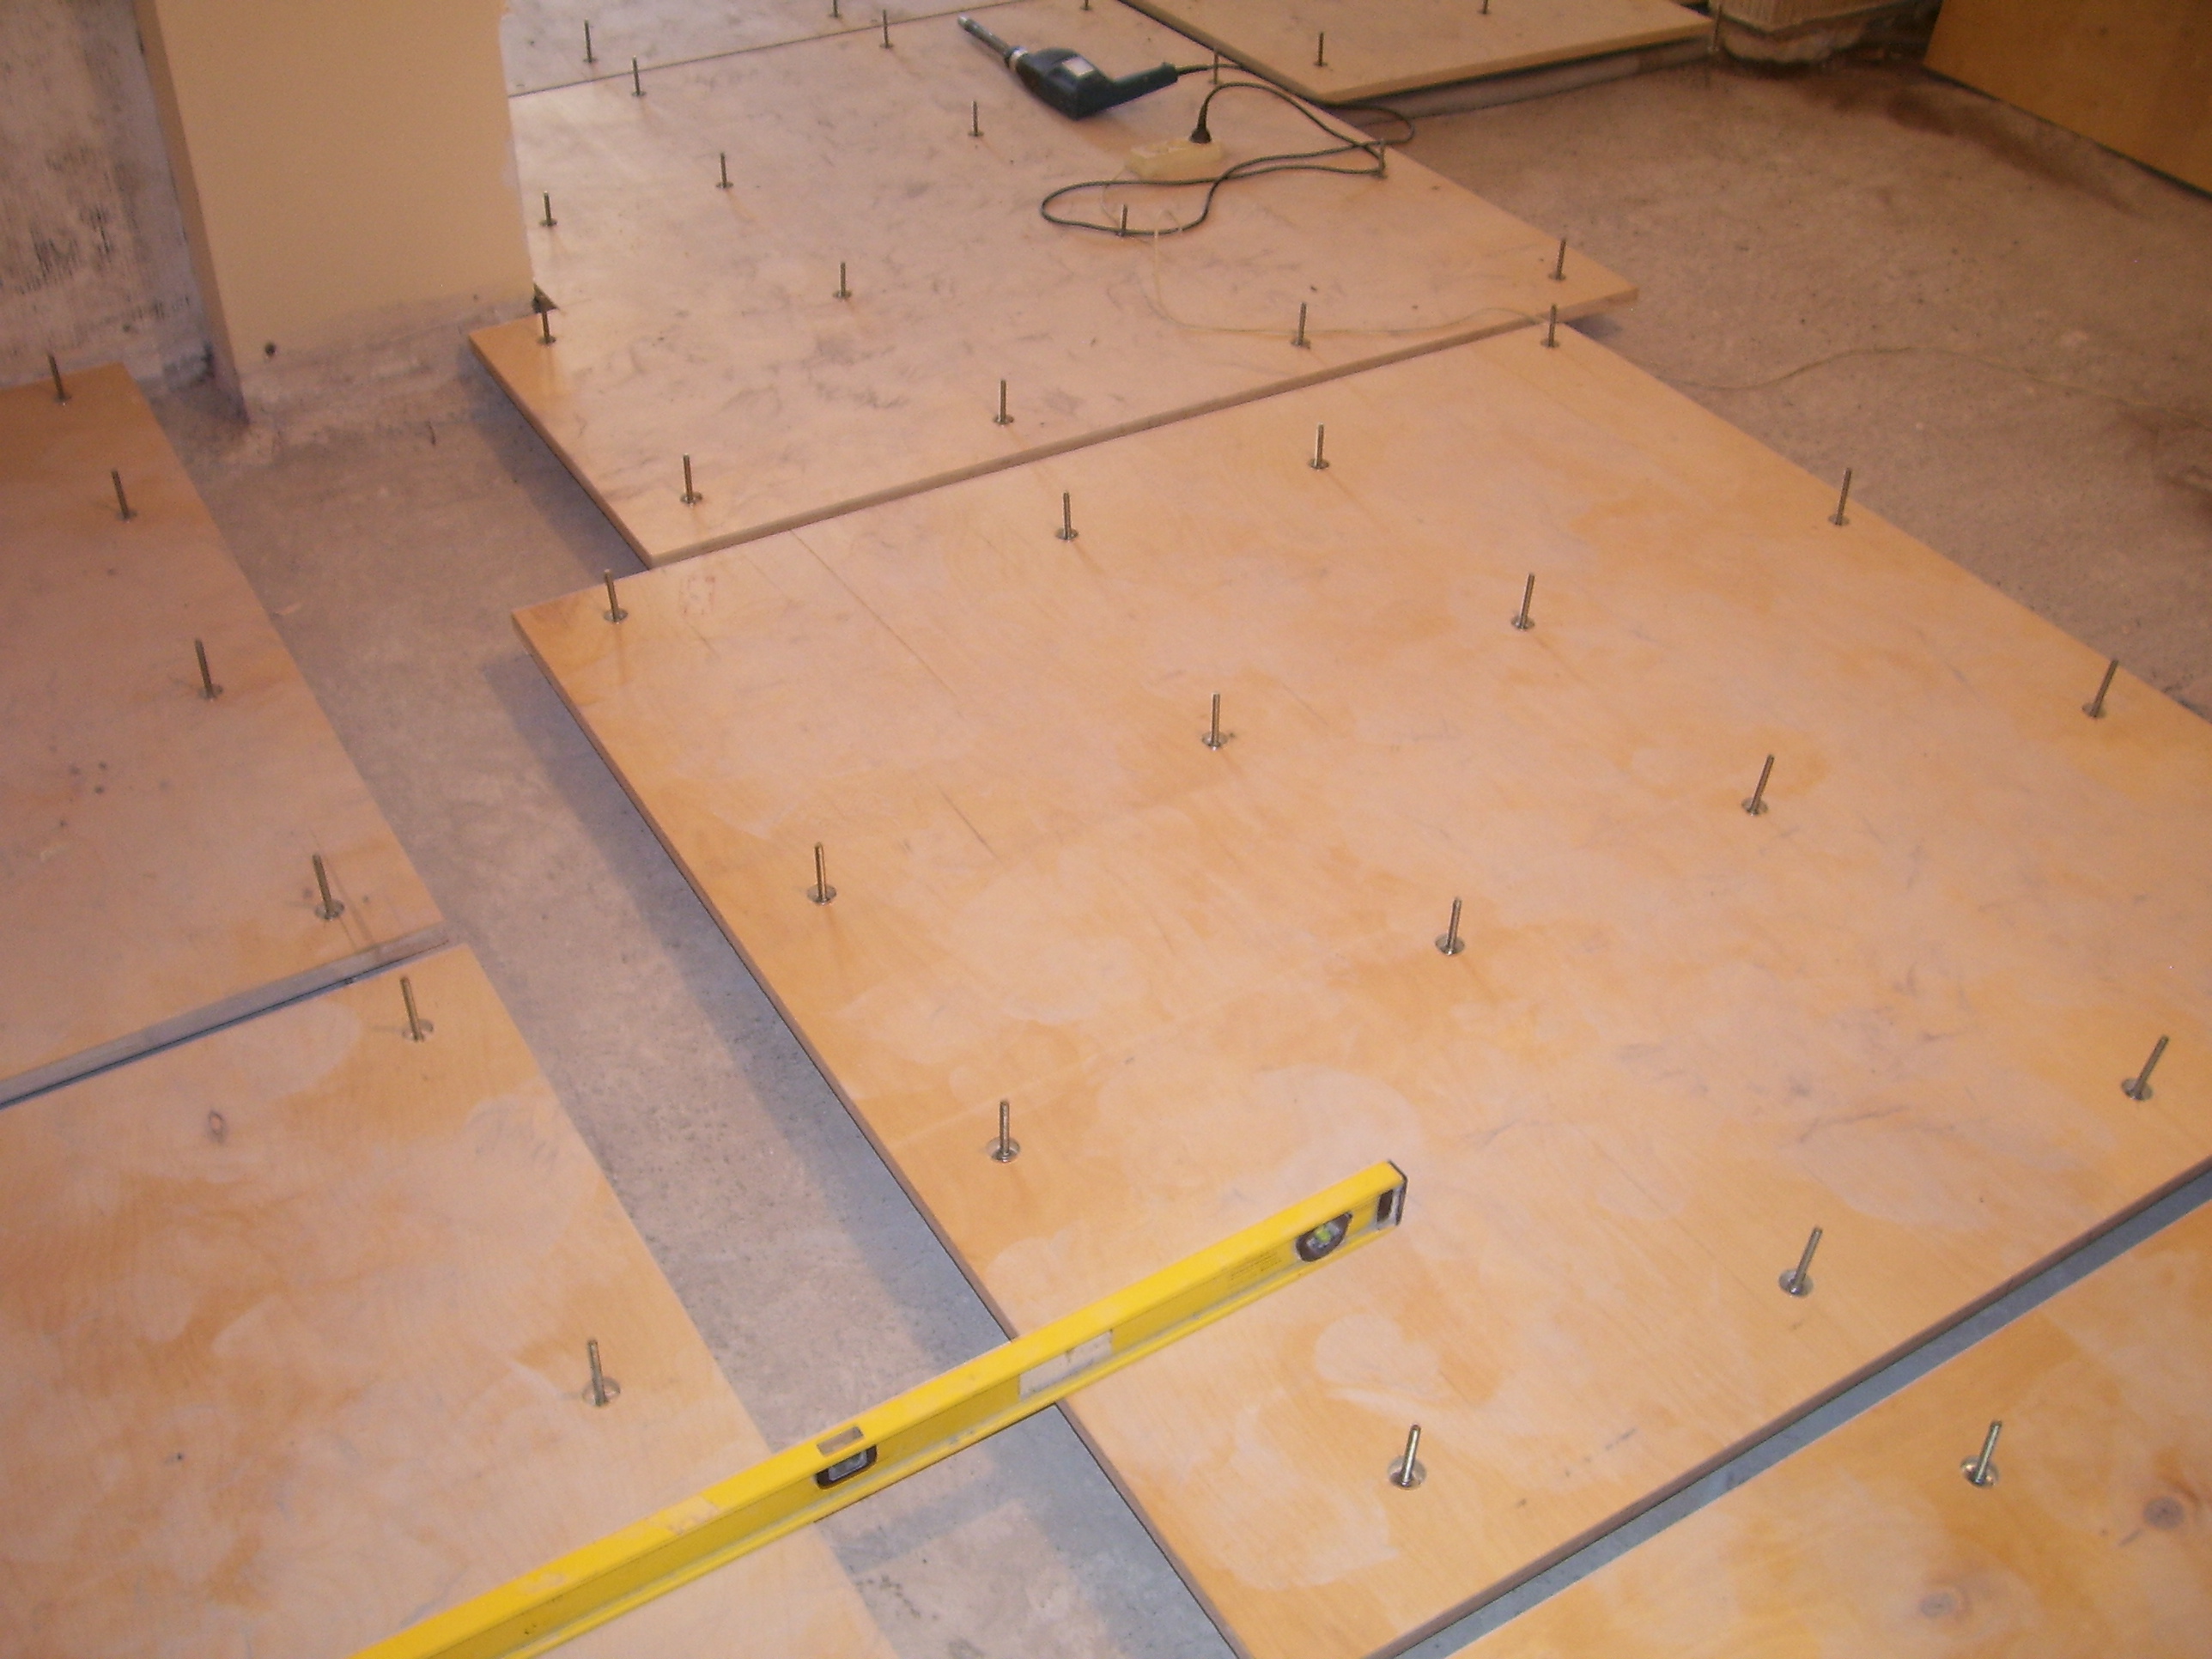
A height difference of a few millimeters is not critical; to compensate for it, it is enough to butt the sheets of hardboard - for these purposes it is a fairly soft material. Laying hardboard need for the entire area of the room, if necessary, can be cut with a construction knife. Fix the chipboard with short nails (10–15 mm) to the logs, 4–5 per square meter.

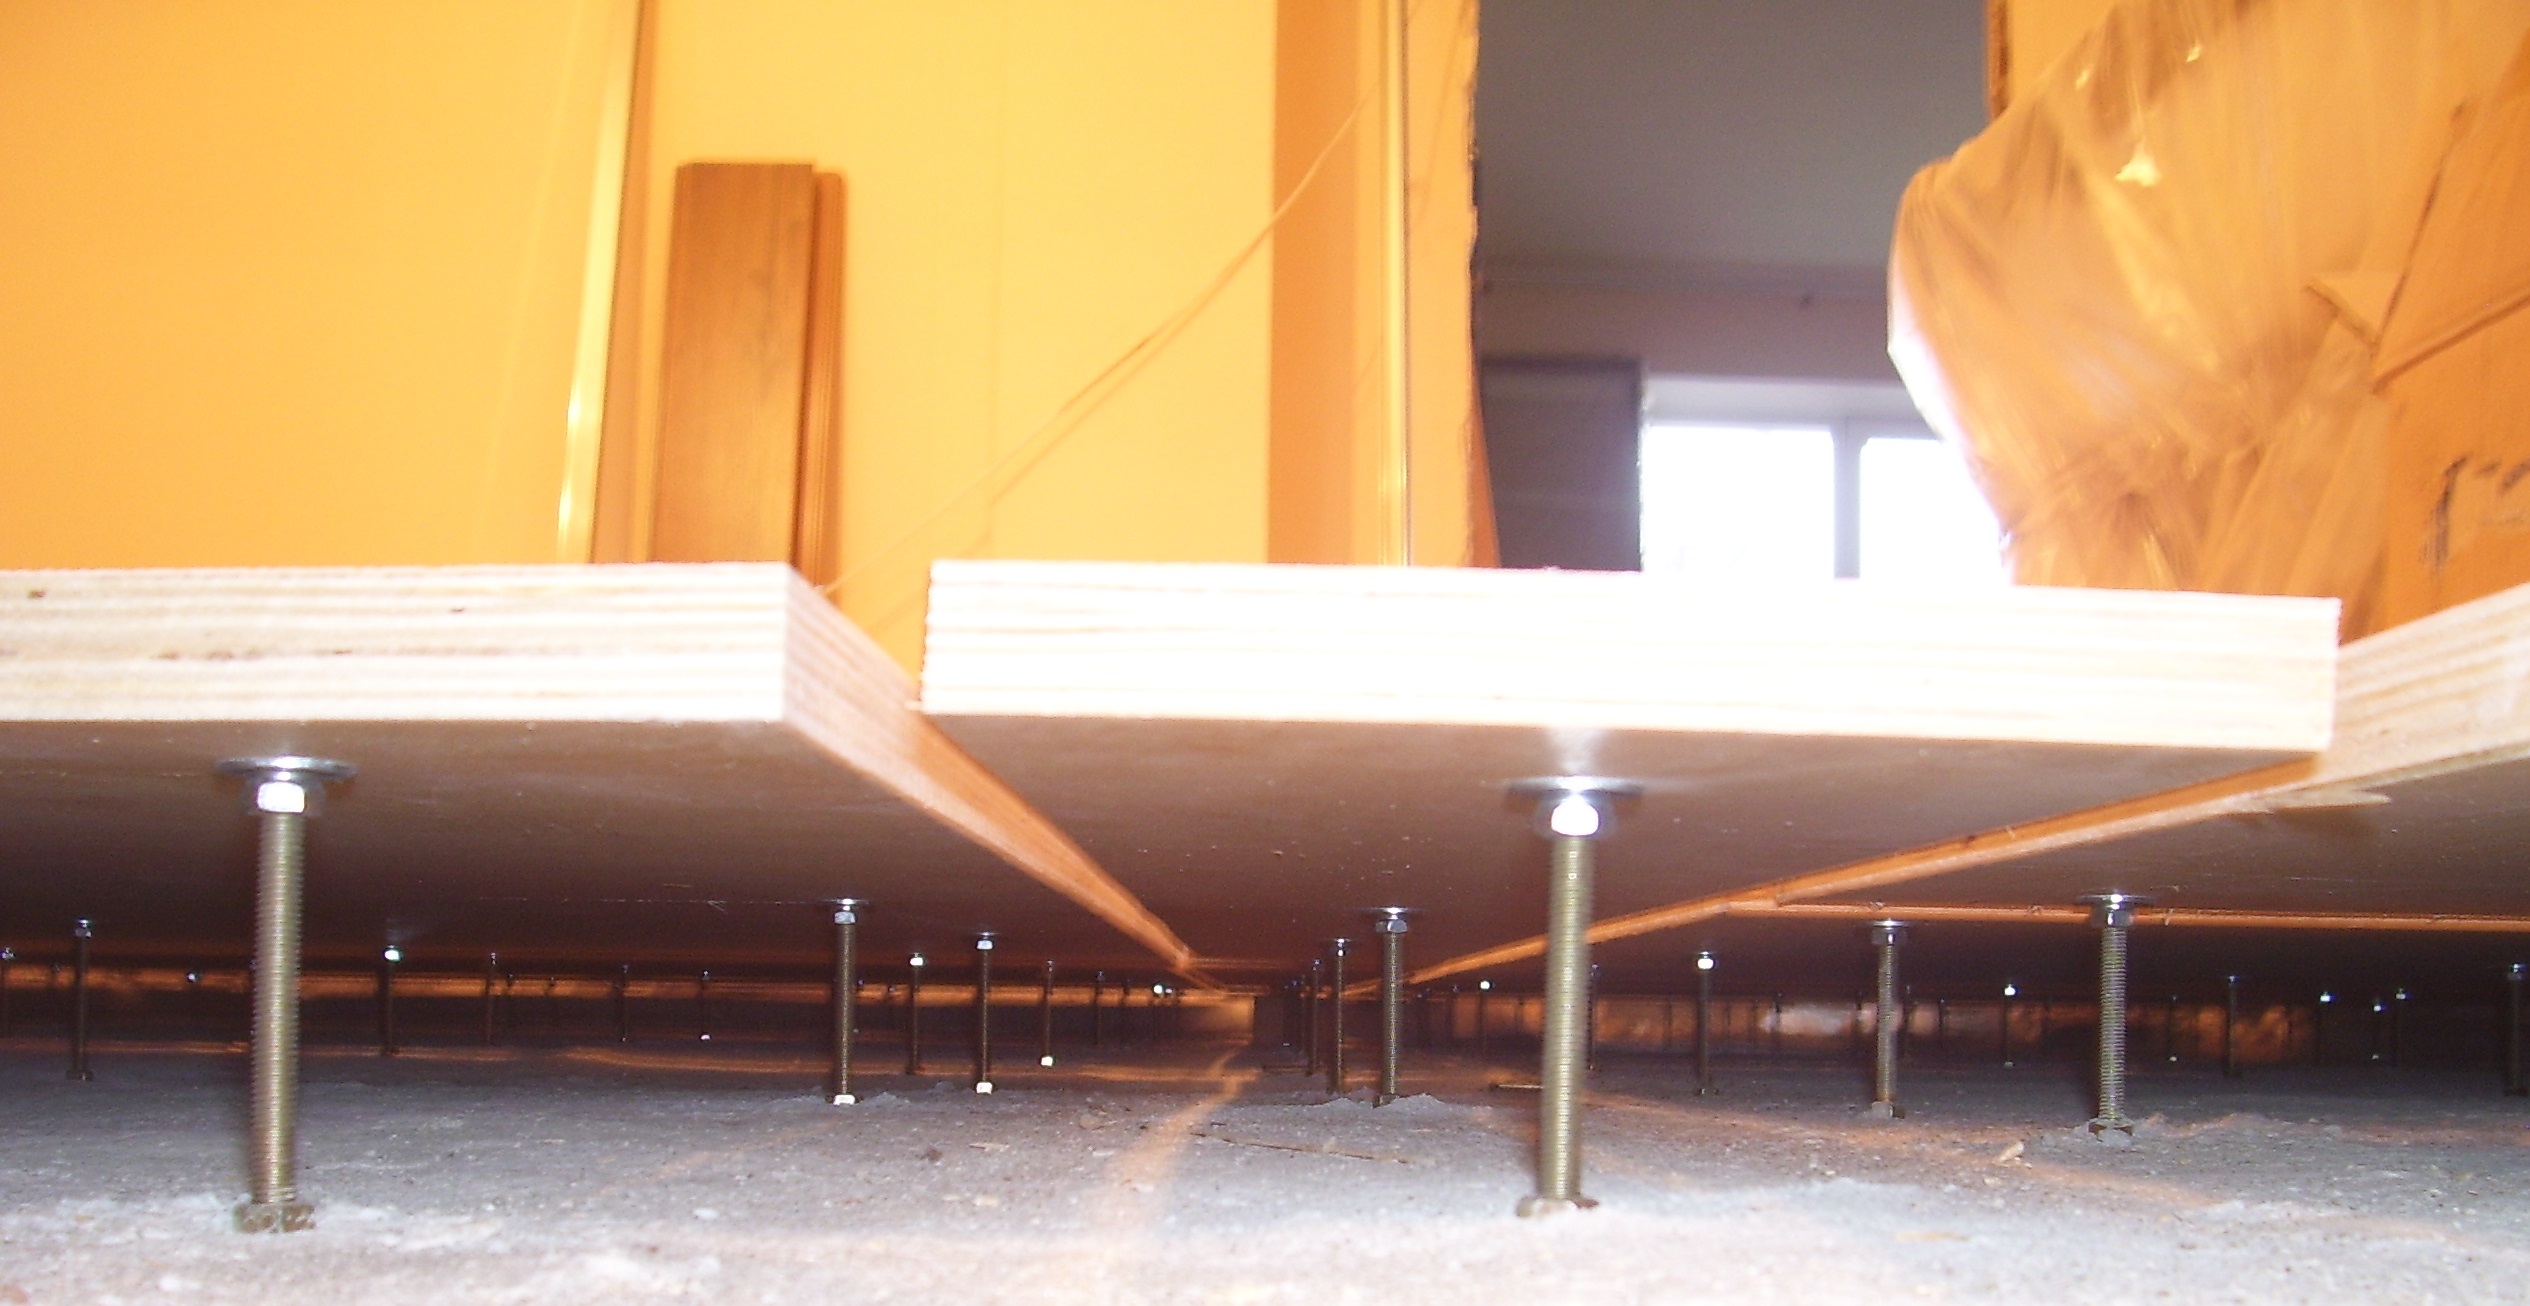
If during work on concrete, the elevation difference is greater, then under the logs you can put trimming of the same bars or boards, pieces of plywood, metal plates. It is important to ensure that the linings do not slide off - fasten them with glue.
In a room with a window it will be correctly placed in the direction perpendicular to the window, in this case, when laying the finishing board, the smallest irregularities will be immediately noticed and quickly eliminated.
Flooring
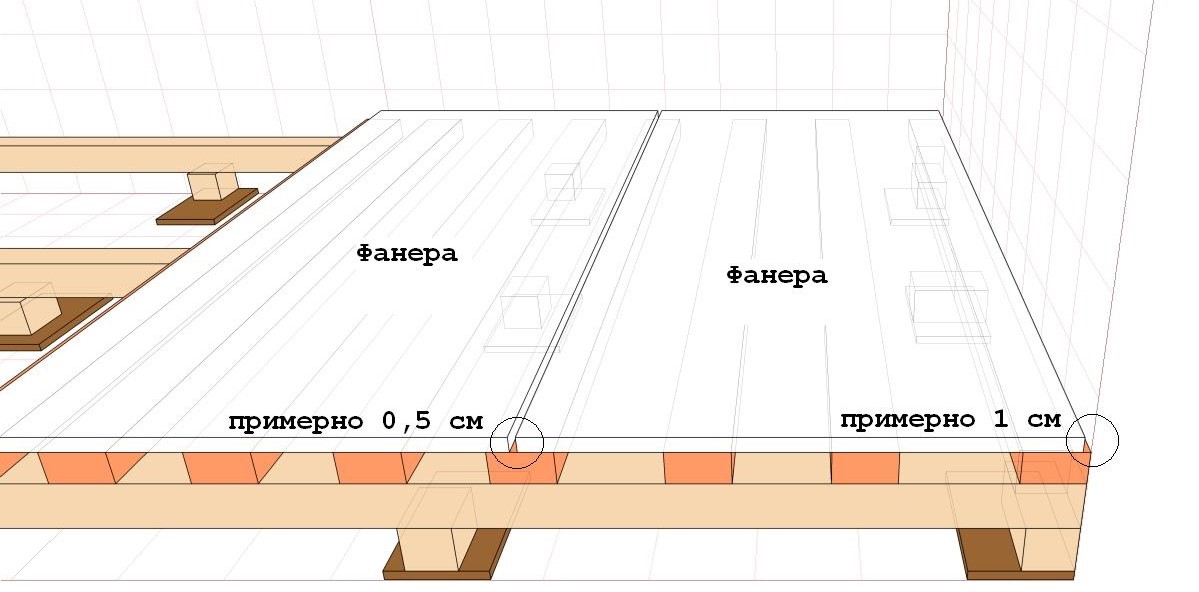
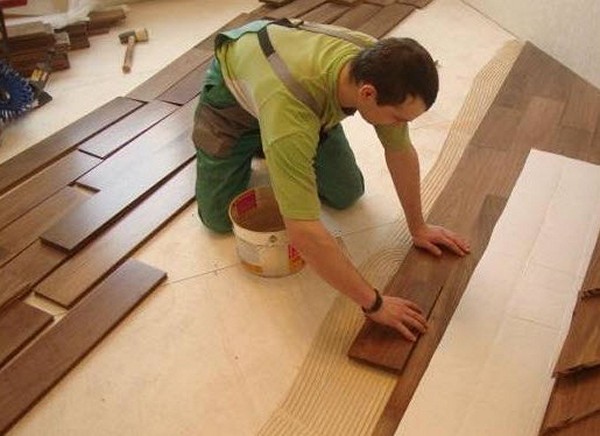
This final stage is the most crucial, as now the facial, finishing layer of the floor covering is being laid. The board must be laid across the lag without gaps, leaving a distance from the wall within 2-3 cm.
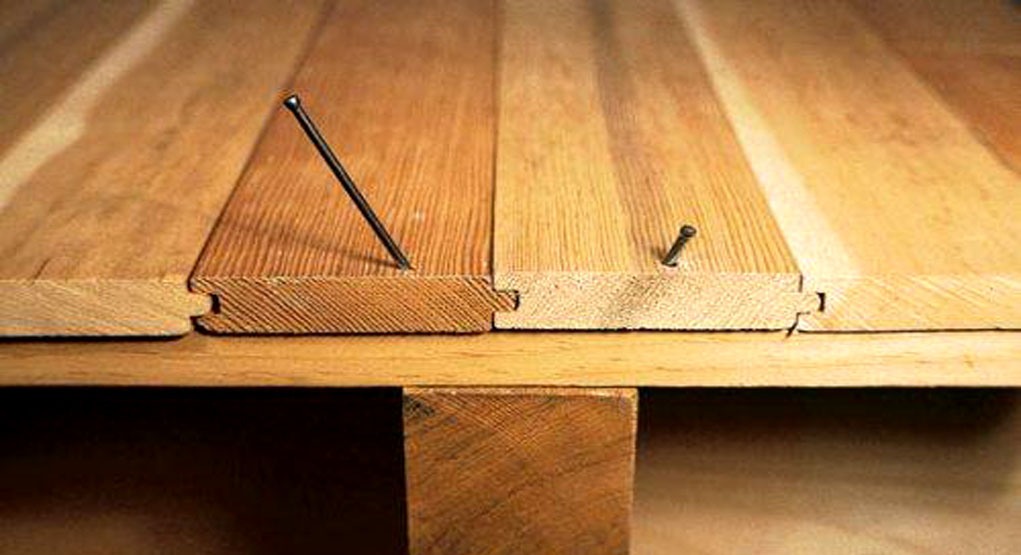
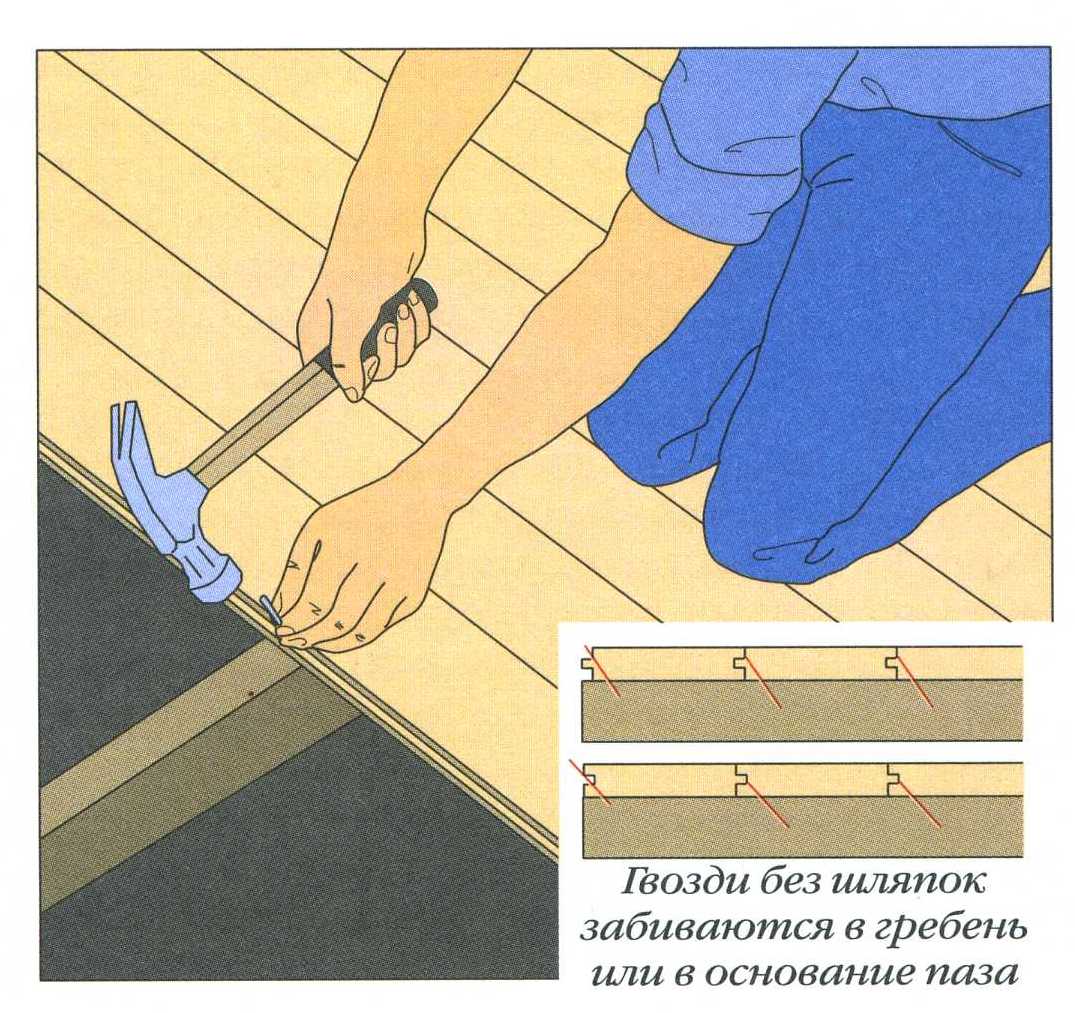
If a grooved board is used (thorn-groove connection), it is advisable to lubricate the sides with PVA glue and pull the adjacent boards well together. As a device for tightening, you can use any metal object like a chisel, but it will be enough to press the boards with your hand, tamping with a wooden hammer, while trying not to deform the board's canvas, and if there is a dowel - do not damage it.
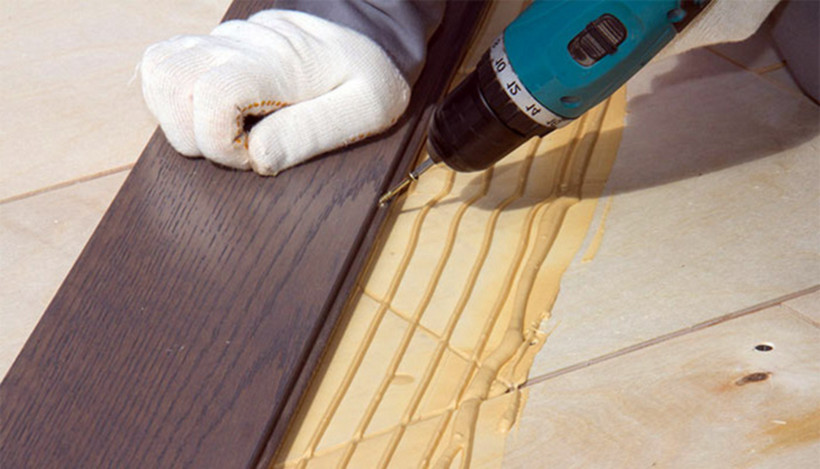
Finally, fix the boards to the logs with self-tapping screws, and the caps of the self-tapping screws must be recessed by 3 - 5 mm.
After completing the flooring board, you need to process it with a grinder over the entire surface of the floor, thereby eliminating the burrs and smoothing out minor irregularities.

How to putty and paint?
After the floor is mounted on logs, it needs final processing. Having finished fastening, it is required to saturate the boards with fire and bioprotective compounds and dry them well.
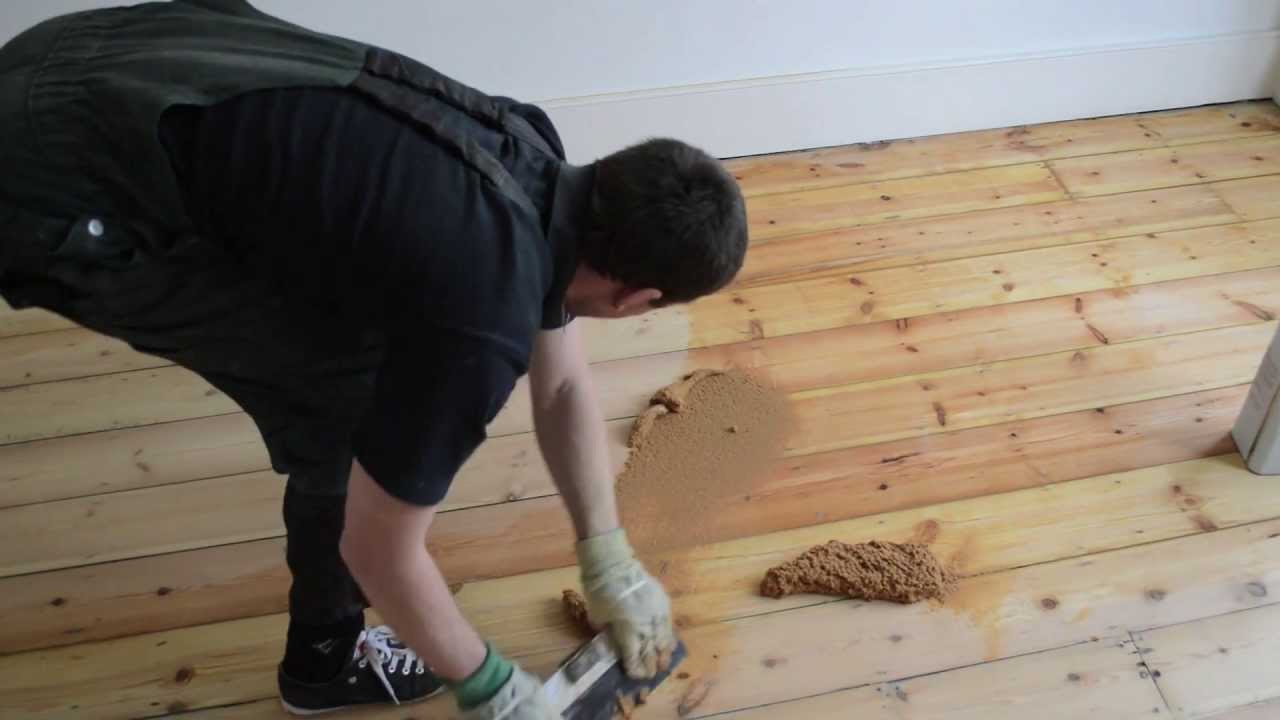
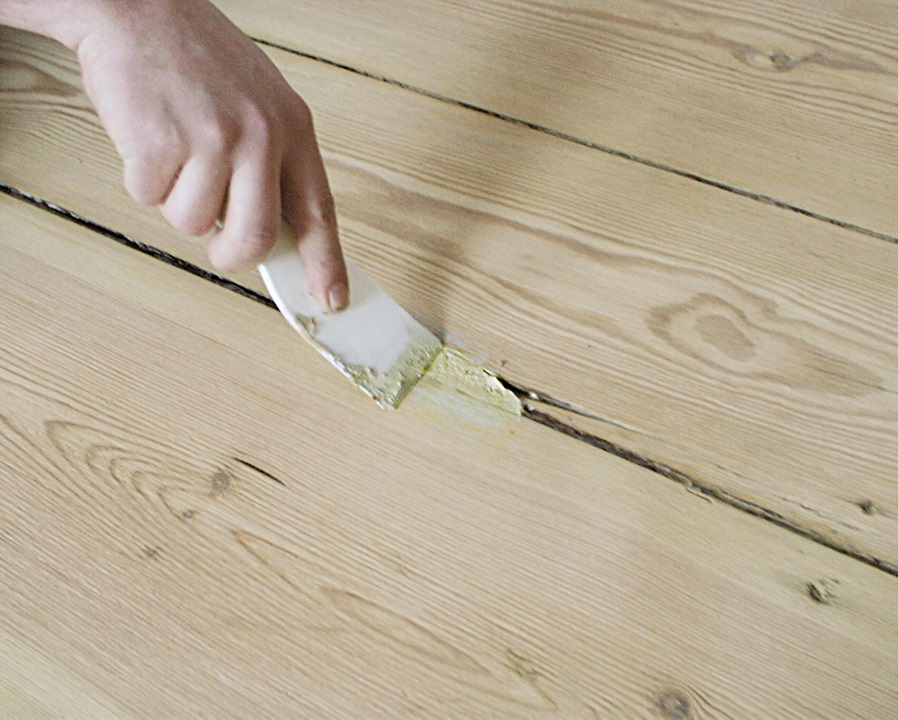
If cracks form when laying, they need to be puttied, as well as to hide the caps of the screws. Acrylic plaster is preferred for this, since it is more fluid and fills all minor irregularities. You can also apply oil-glue or oil filler, while you need to consider that it dries a little longer and after drying it becomes a bit more fragile than acrylic.
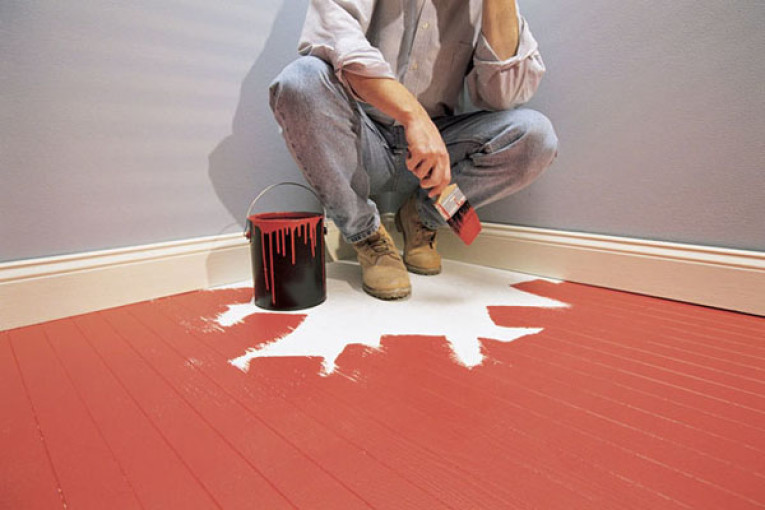
After puttying a new floor needs painting. The final coating performs, in addition to the aesthetic, and two practical functions - it increases the resistance to abrasion and increases the moisture resistance of wood.

Today, the choice of compositions for the floor is quite wide, each has its own characteristics of application, advantages and disadvantages.
It is conditionally possible to divide them into three categories - paints, enamels and varnishes.
- Paint for application to the floor - oil. Significantly increases the moisture resistance of wood. Proven for decades, proven as a reliable and economical material. It has the highest resistance to abrasion - it is optimal for hallways, verandas and corridors. When applying paint it is worth considering that it dries up to two days. Ideal for rooms with high humidity - bathrooms, bathrooms, kitchens.

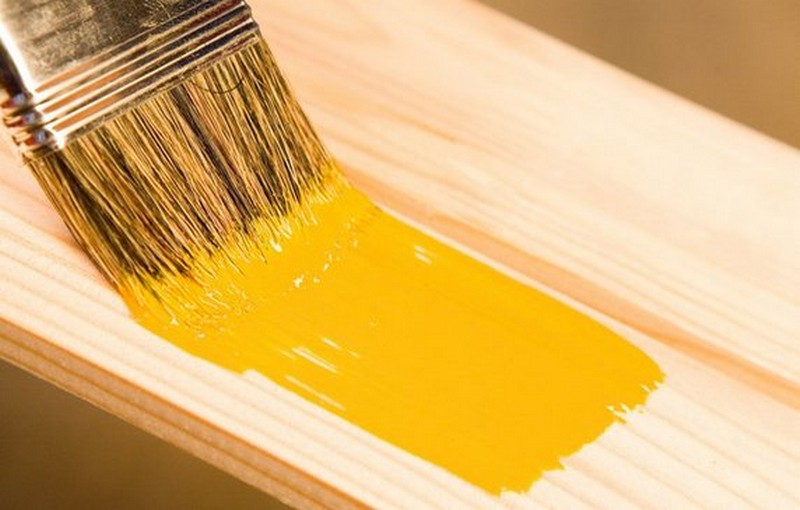
- Enamel is represented on the market in the greatest variety of colors and shades.. Lies on the wood evenly thin layer, dries quickly enough. Because of its rather liquid consistency, it is very fluid and in some cases requires application in three layers.
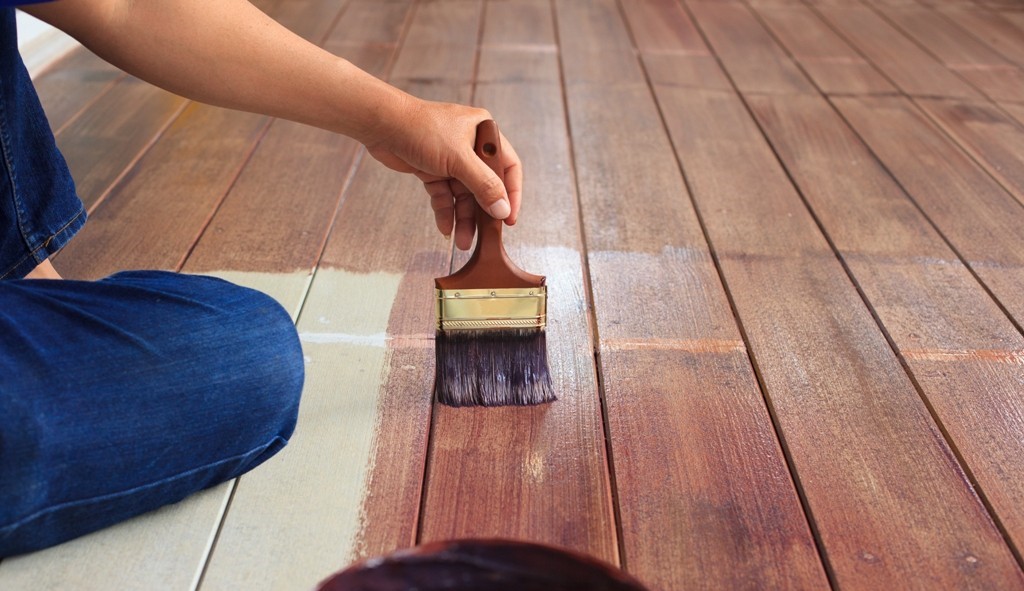
- Varnish - alkyd or water soluble. It has the lowest wear resistance, low hiding power. At the same time, it can advantageously emphasize the natural beauty of the natural wood massif.

In each case, it should be borne in mind that even the colors of one manufacturer from different lots may differ in shades, so it is best to mix the coating from different cans in the same container. Depending on the coloring composition it is allowed to apply color additives on a mineral basis.
On this device wooden floor on the logs is finished.
About what features laying wooden floor on the logs, see the following video.


