Subtleties connect the heated floor

Underfloor heating today are becoming very popular. With their help, you can create a comfortable environment inside any room. Structures are complex systems that are not so easy to install. Before embarking on their arrangement, you should learn the subtleties of connecting a heated floor.

Special features
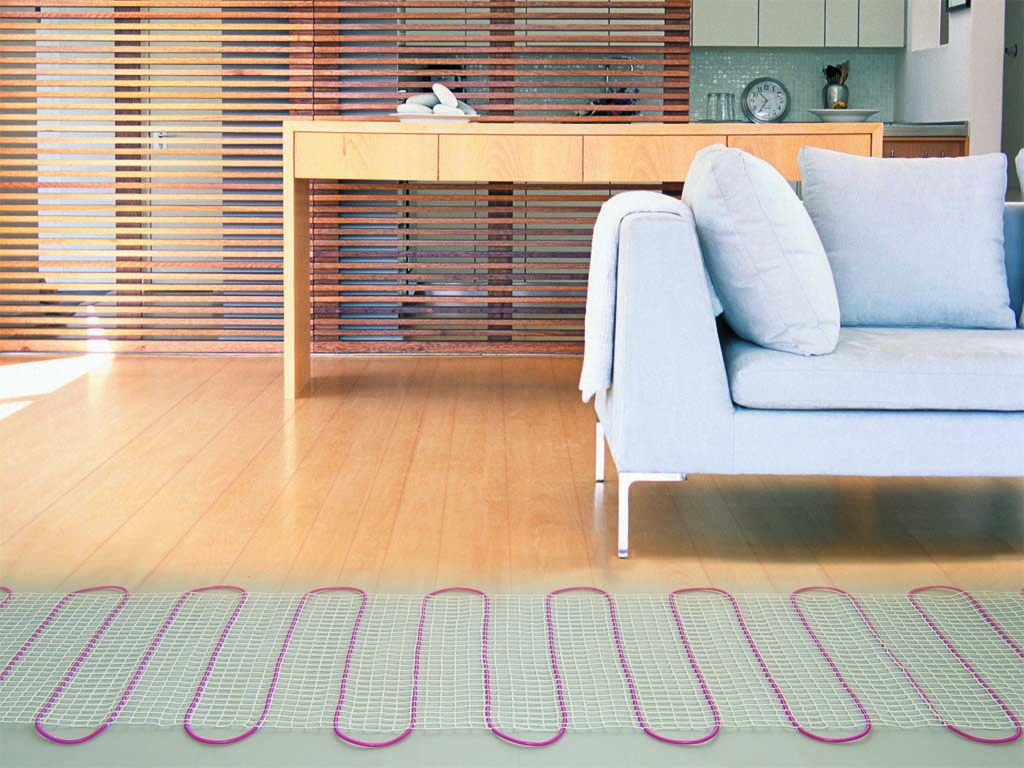
Underfloor heating is a heating system located under the flooring. It can be used as an auxiliary or main type of heating.
Such a construction consists of several basic elements:
- Heat pipes. Depending on the method of heating, they are divided into water and electric.The latter have begun to be used much more often, as it is easier to work with them. Water floors are not able to work on electricity directly. The water in them is heated by various types of boilers, which should be properly connected to the pipes.
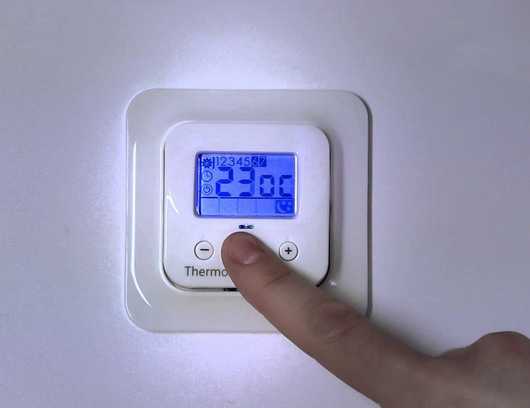
- Control systems. This includes all types of thermostats that allow you to maintain the floor temperature at the same level. If they are not included in the scheme, then the heat pipes can overheat or simply heat the room quite strongly.
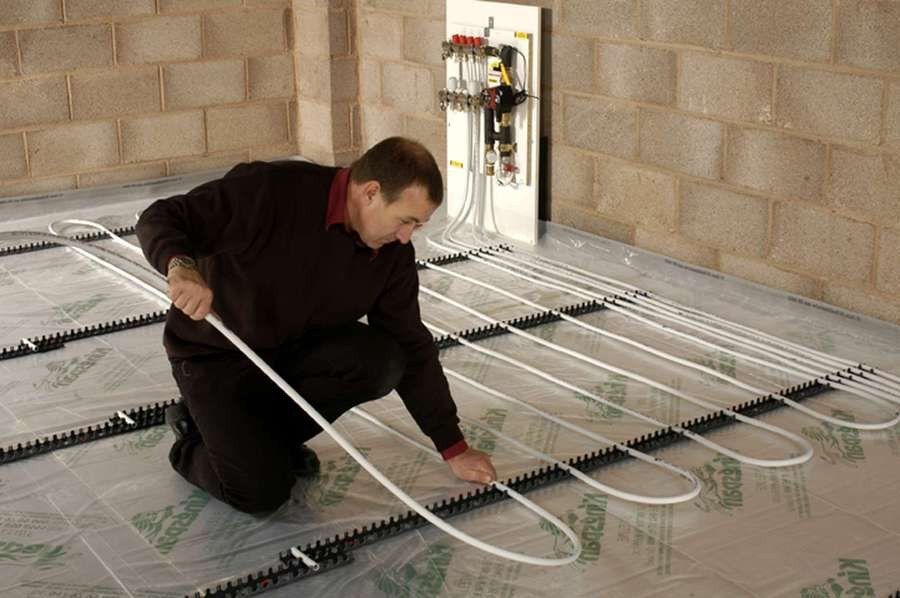
Installation of a water floor is a difficult procedure which not each expert will be able to execute. But, having mounted this system, you receive a durable and economic design.
Wiring the floor heating
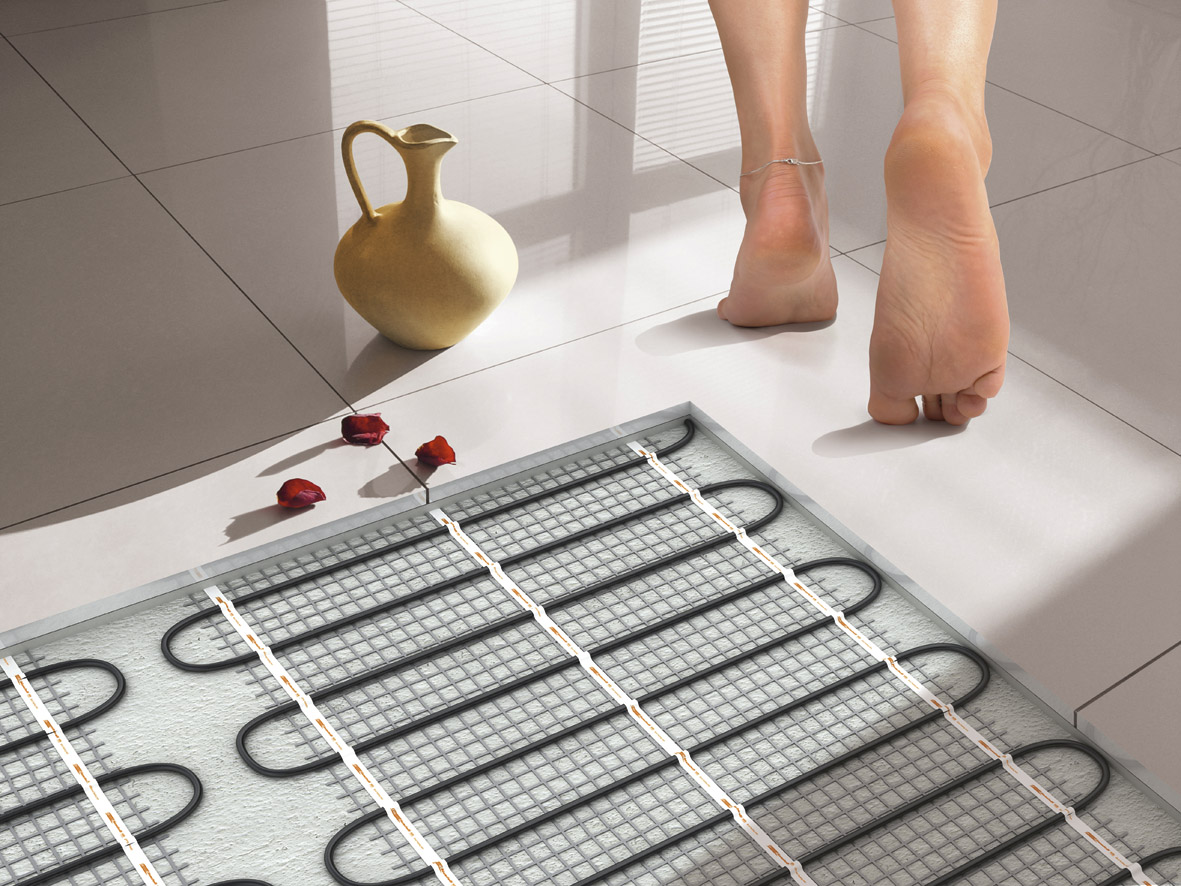
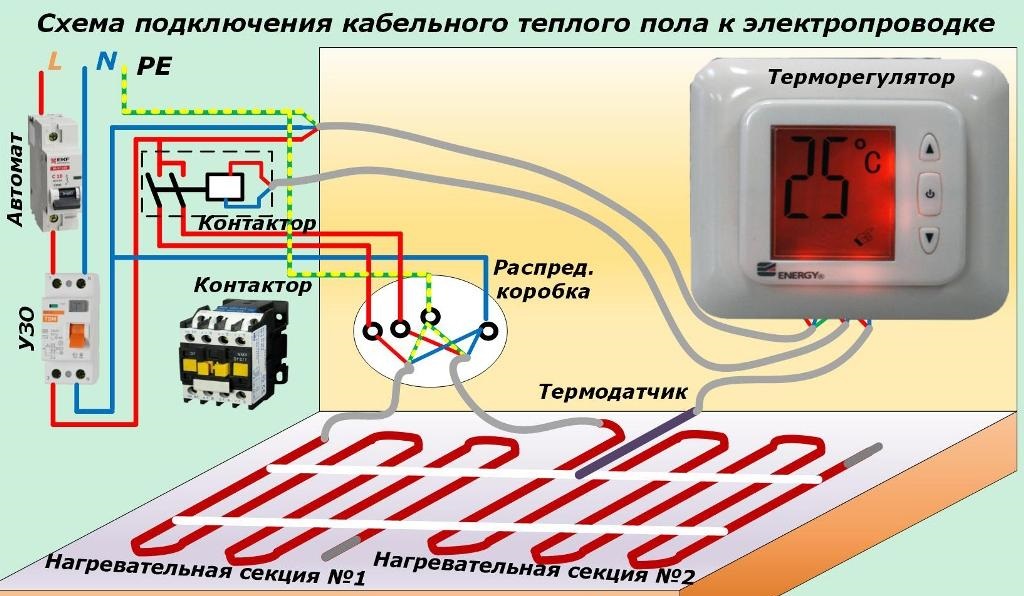
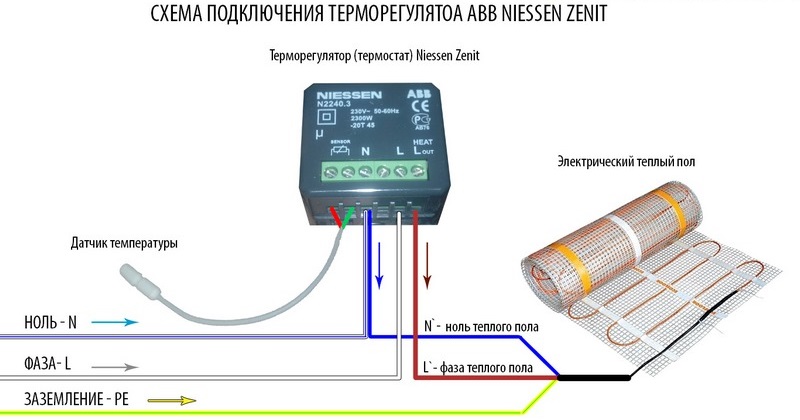
Heated floor is a construction of pipes or electric mats that need to be connected to an energy source. There are several ways to install this system, which is desirable to use correctly. The wiring diagram for electric underfloor heating is often performed using a temperature regulator.
It works together with a thermal sensor, which allows to start heating, depending on temperature changes of the surface.

Here there are two ways to organize the work of the electric floor:
- The use of mechanical thermostat. It controls only the temperature using a rheostat. The disadvantage is the inability to fine-tune the system.
- Electronic devices. Regulators of this type are already equipped with several relays. More versatile mechanisms, as supplemented by special microprocessors that allow you to program the switching on and off of electrics, depending on temperature or time interval.
Please note that connecting electrical floors is almost identical, regardless of the location of the cable on the surface. Here it is only necessary to connect the outputs from the heating elements to the electrical network using an intermediary thermostat.
As for water floors, there are 2 main ways to connect:
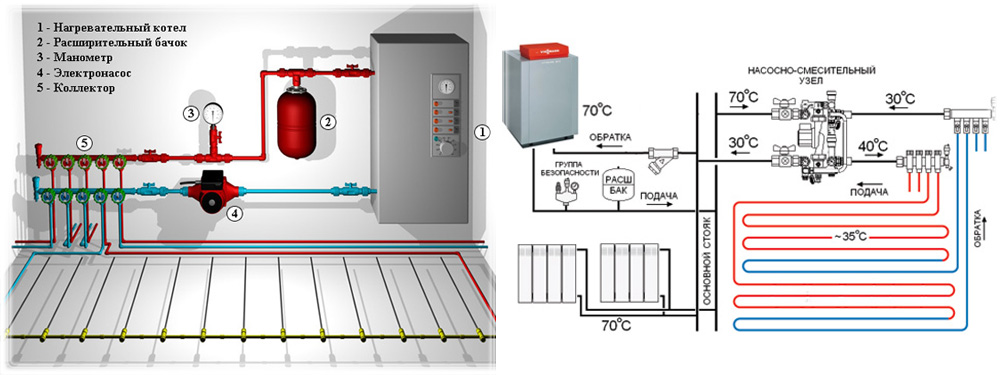
- Connection of a heat-insulated floor with pipes of the centralized heating. Suitable for apartment buildings where designs simply crash into pipes with hot water (from a heated towel rail, etc.). To minimize heat loss for the rest of the residents, experts recommend connecting to the central heating on the return pipe. True, the water here is not so hot.
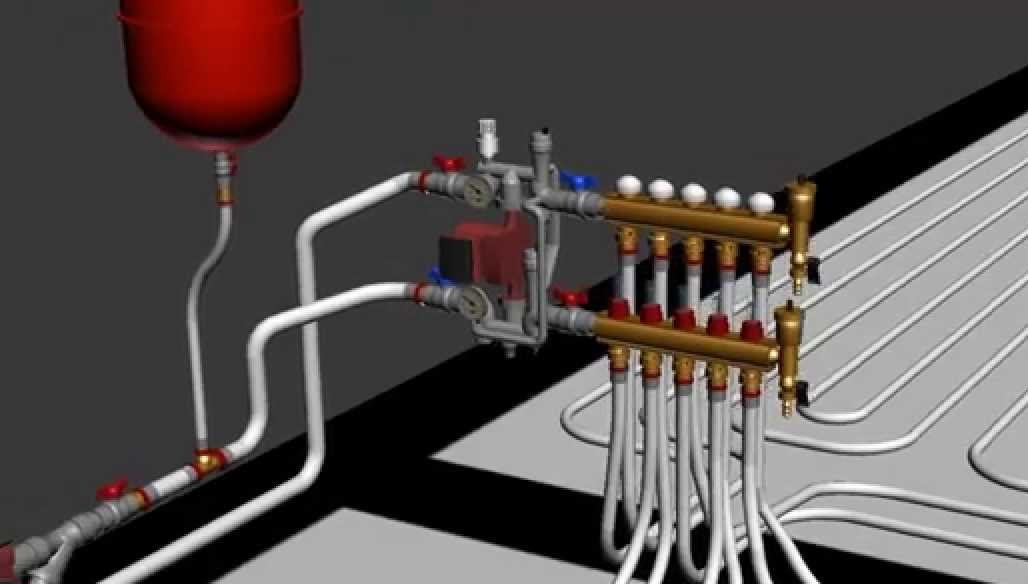
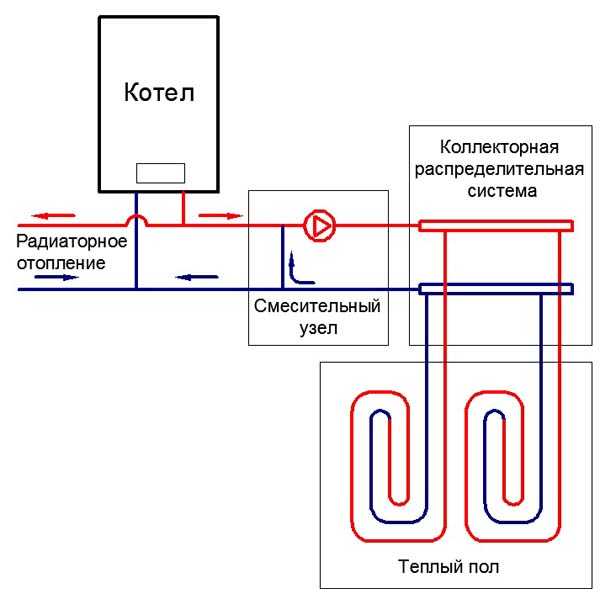
- Connection to an individual heating system. This option is more practical and is used in private homes. If desired, you can use it in the apartment, but it will be quite expensive and labor-intensive. The main element here is the heating boiler, to which the distribution system is connected. With this approach, you can use it for the organization of floor heating, as well as central heating in the form of batteries.
How to connect?
Installation of water and electric underfloor heating differs only in the method of connecting to the power supply. In the first case, you need to embed the pipes into the heating system or to the boiler, while in the second variant, you simply need to connect the electrical cables to the central electricity system.

The process of connecting the water floor involves the implementation of a few simple recommendations:
- The pipes from the system are connected to the heating boiler only by means of special shut-off valves. If the heating source is used only for floor heating, then it is directly connected to the output and input ends directly without a collector.
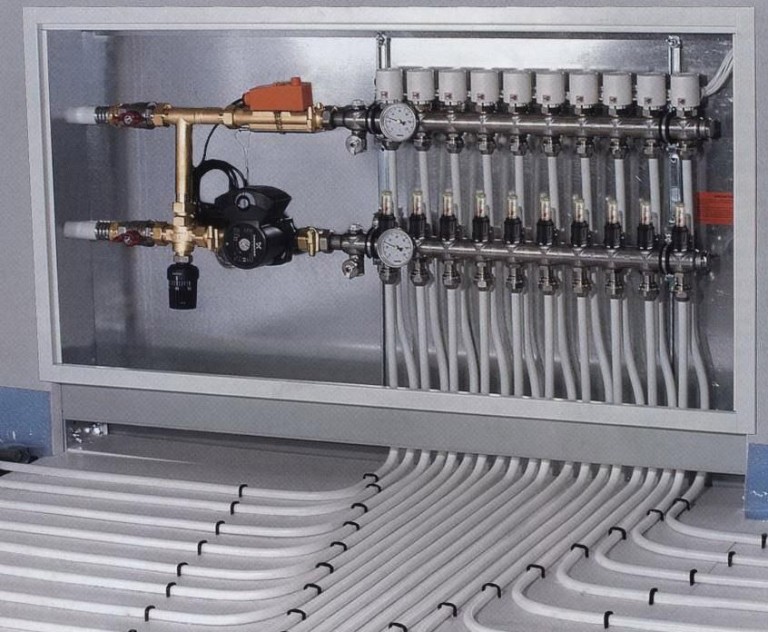
- The formation of several heating circuits involves the installation of servos. With their help, you can control the temperature in each of the individual zones. Servo drives are installed between the floor pipes and the heating boiler.
- When boilers are used to heat batteries and built-in structures, then it is advisable to supplement them with combs and three-way valves. The latter design is needed for proper distribution of water. She often works with a mechanical thermostat that controls the temperature of the coolant. It is important to use boilers that will provide the desired degree of heating.
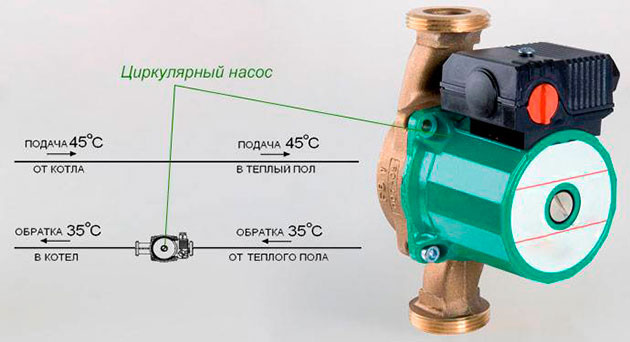
- For more efficient circulation in each independent area, it is desirable to use circulation pumps. They can be installed both at the outlet and at the inlet of the coolant into the system. But the first option is preferable, as it allows to achieve a more uniform mixing.

Technically, the connection of a water floor involves the following operations:
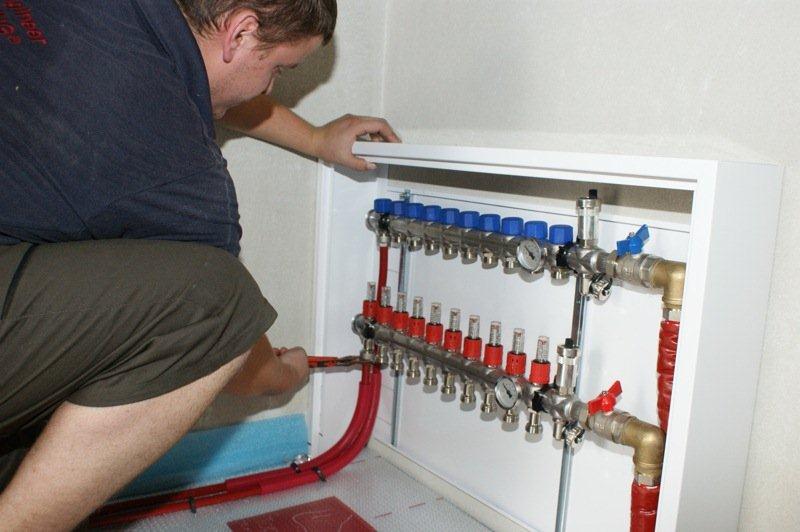
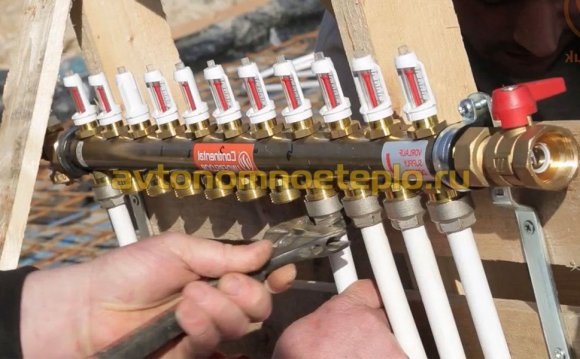
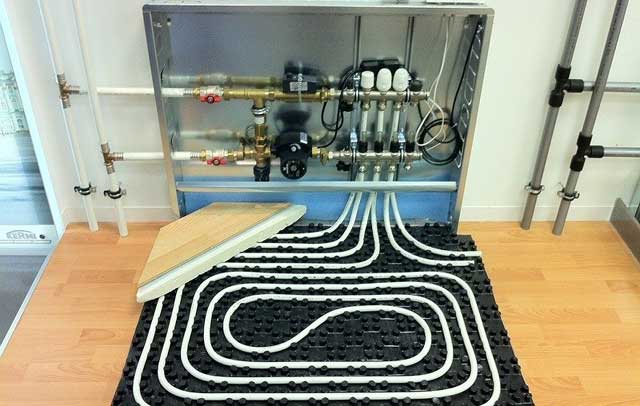
- Laying of the pipeline and connection of its ends to the boiler or connecting manifold.
- Connection Pipelines are connected using special adapters.In most cases, between these systems, thermostats, a pump, a bypass, as well as special devices that control the pressure inside the pipeline are built in.
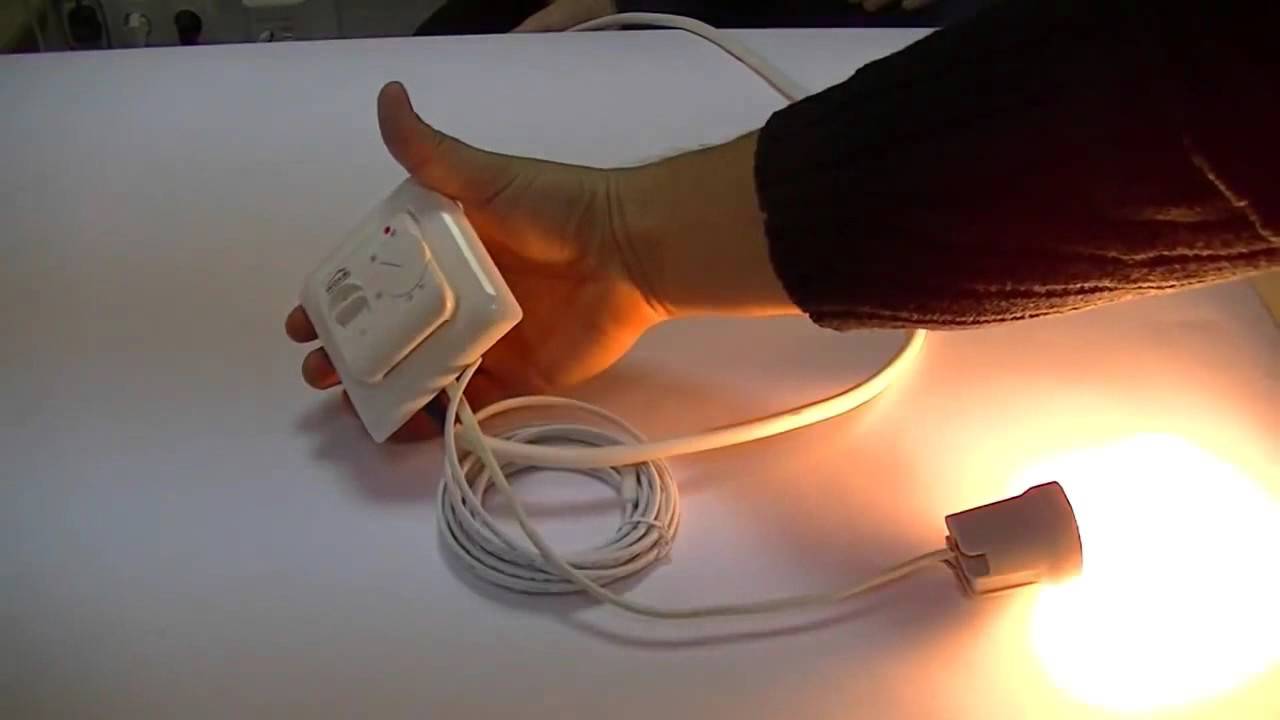
Connecting electric floors often begins with the installation of a thermostat.
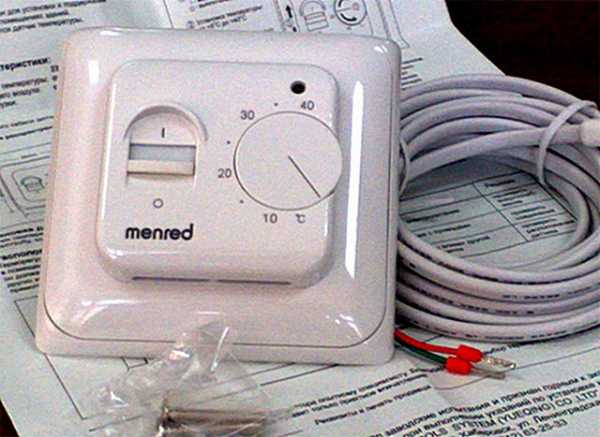
You can apply current to it in several ways:
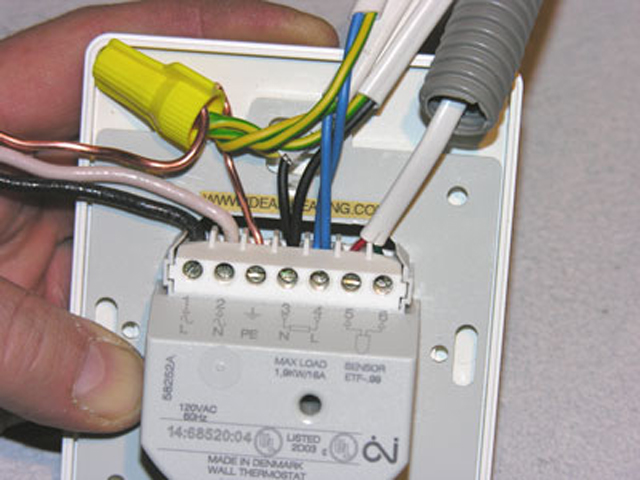
- Through the outlet. For this purpose, cables of zero and phase are taken from this system. They are laid to the location of the regulator. If the latter is located inside the wall, then it is desirable to place all the wires inside the grooves.
To connect the cables, they should be fixed in special slots of the regulator. They are marked with special labels. Please note that this way you can connect the device to an outlet without grounding. If it is still needed, then simply remove the cable from the thermostat to a special outlet in the panel or another place.
- Use the shield. Here you need to connect all 3 cables (phase, zero and ground) to the box already. For this, it is desirable to apply the RCD, to which the wires are brought. After that, the protective device according to a special scheme is already connected to the electrical network at home.
Let us consider in more detail the technology of connecting various types of cable floors:
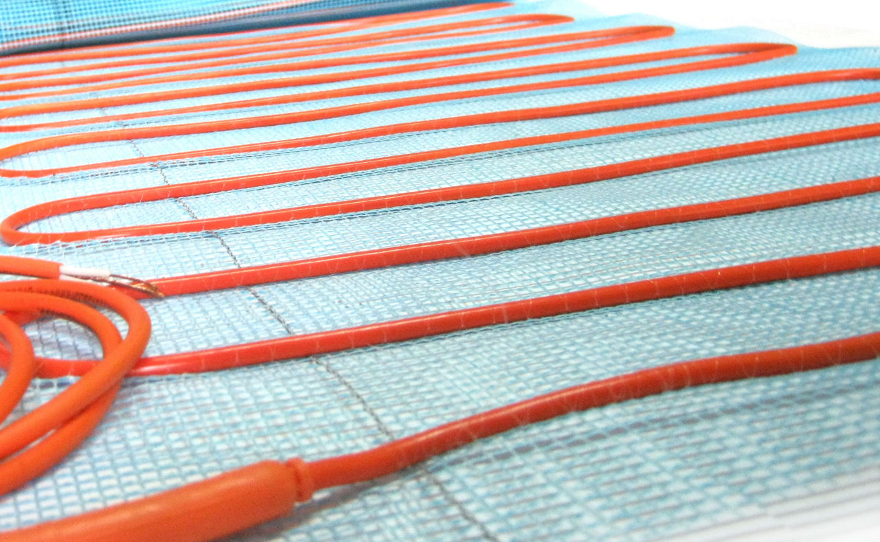
- Film floor. This material consists of thin mats, which are placed over the entire surface of the floor covering, choosing one of the layout schemes. Between the tape elements, it is desirable to glue tape together. Each sheet is connected to the electrical network in series. It turns out that we need two main wires that will move away from the thermostat or junction box.
After that, each individual mat connects with the central residential small cables. For their connection using special terminals. It is important not to confuse the plus and minus, as this will not allow the floor to warm.
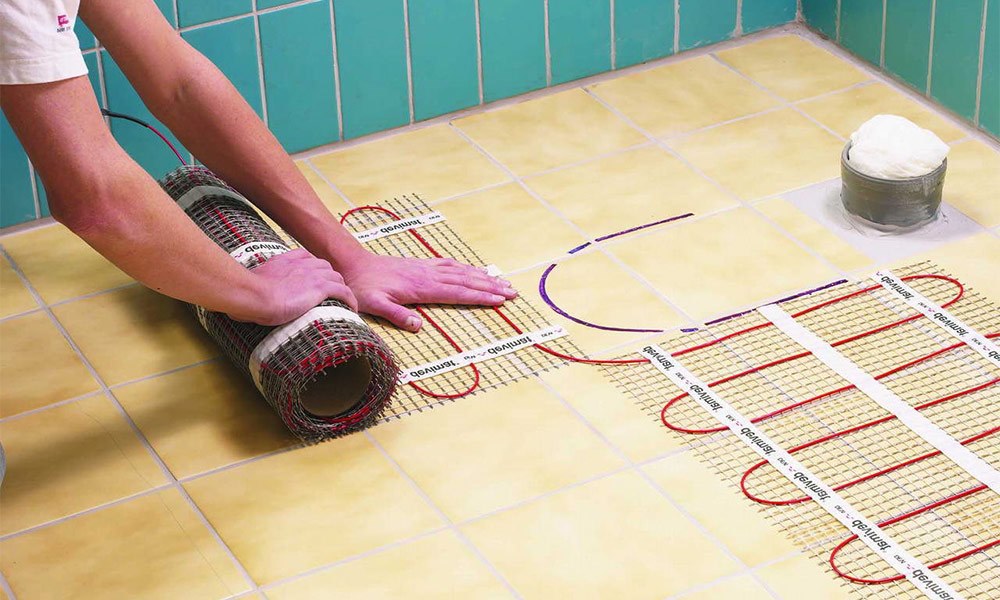
- Core floors. This type of floor also consists of separate mats, but all conductors here are arranged in parallel. First of all you need all the sheets among themselves should be connected in series. Cables are also used for this, but they are already attached to the corresponding outlets on the mats themselves.
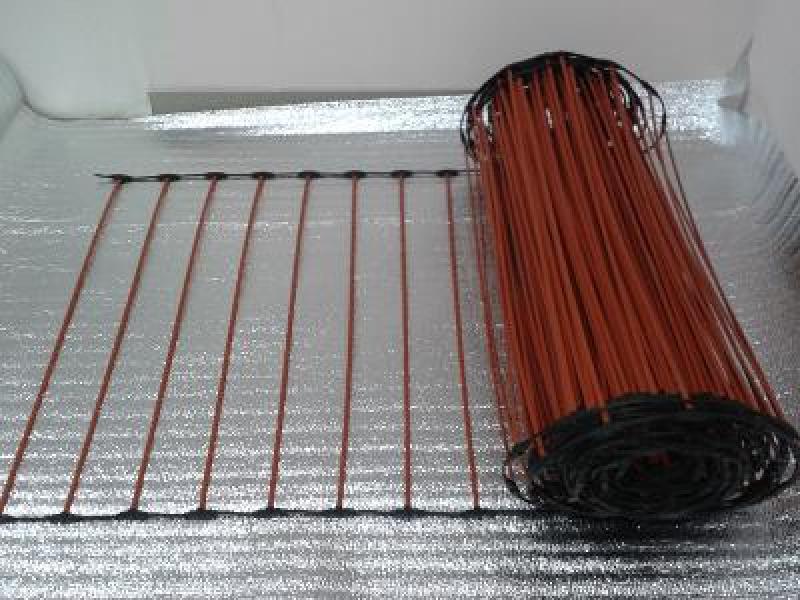
It is important that a solid chain is formed after installation.
When everything is ready, a phase and zero should be connected to the first mat.This is also done with the help of special thermowells. Please note that if you connect the mats incorrectly, it can lead to a short circuit or the system will simply work inefficiently and quickly fail.
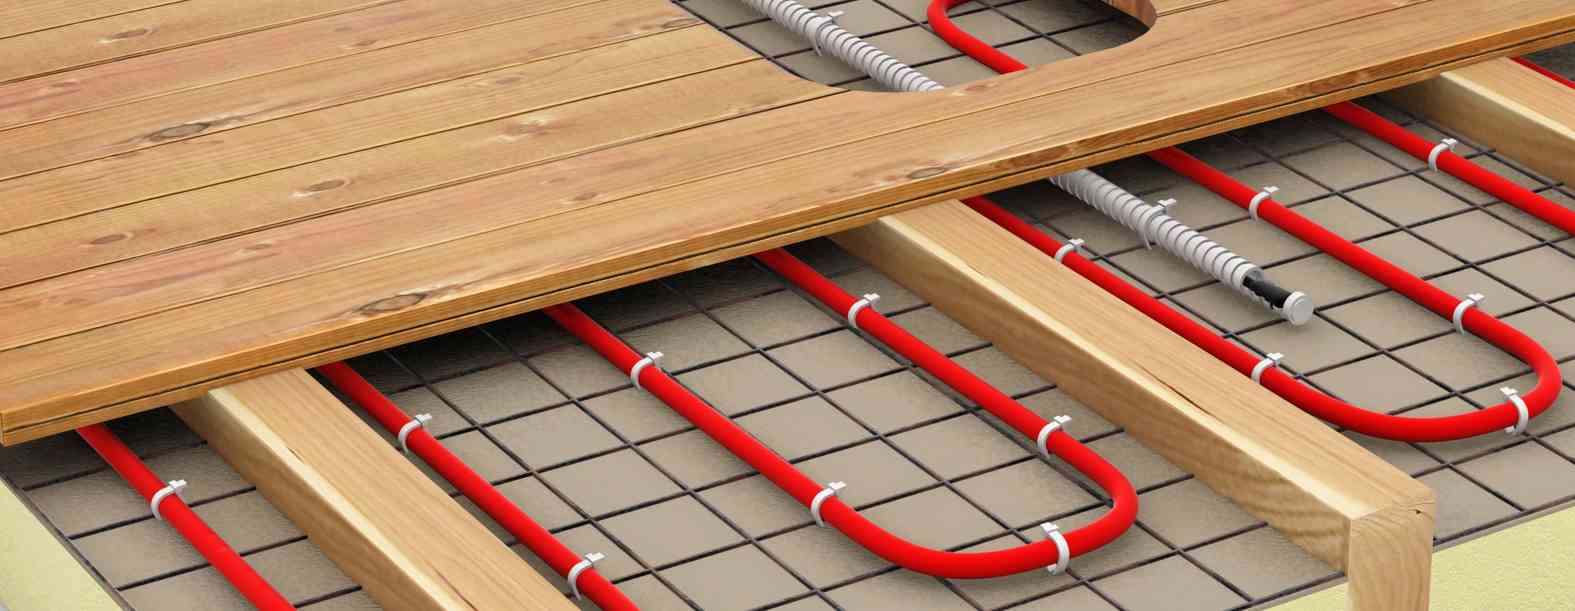
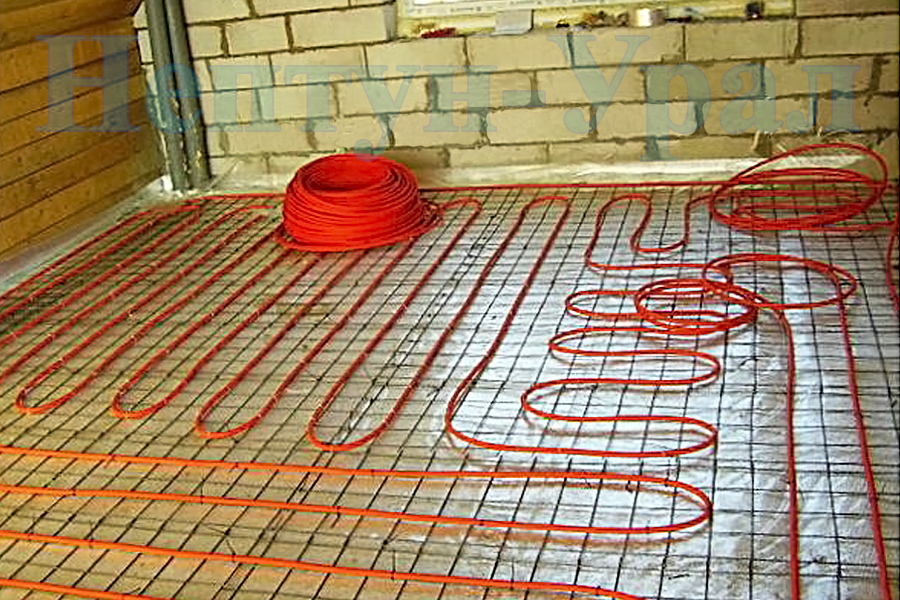
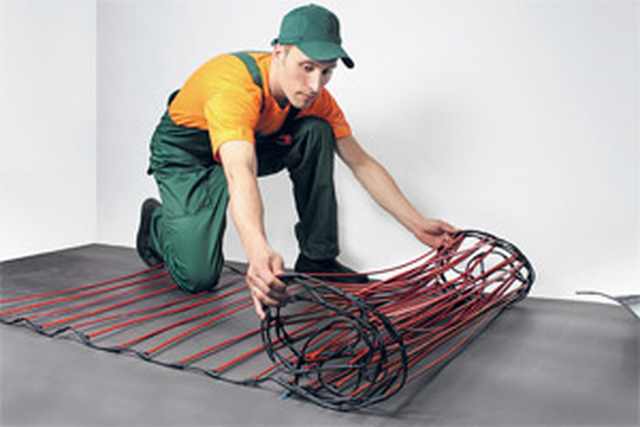
- Cable floors. The peculiarity of these structures is that they consist of a separate wire, which is placed around the perimeter of the room. The complexity of their installation is the choice of the correct layout and respect for the distance between the coils.
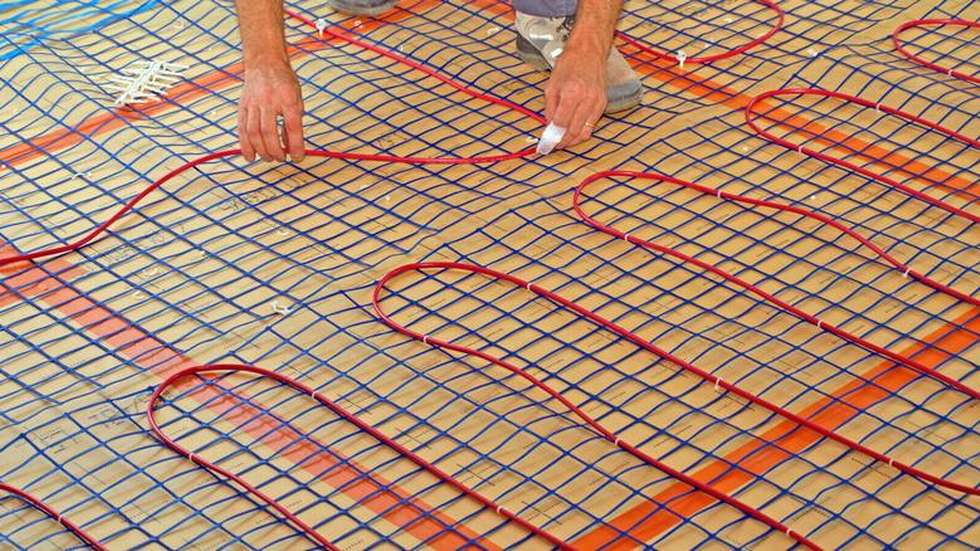
It can be used single and two-wire. If you use a cable with only two conductors, then it should end and begin to connect it to the phase and zero of the electrical network. And the other wire is used as grounding.
Two-core cables consist of 3 wires already, which are much easier to connect. To do this, use only one end of the wire. Each of the cores is connected to the corresponding terminals on the thermostat or circuit breaker.
Please note that the installation of such floors can be carried out directly to the electrical network without the use of thermostats.
But this approach will not allow to control the floor temperature qualitatively, and will also lead to large energy costs.It is important to be sure to familiarize yourself with the recommendations of the manufacturer before connecting, which will allow you to choose the best option of operation.
Customization
Particular attention here should be paid to water floors that need to be tested. They can be turned on only a week or two after pouring the screed. Heating at the first power up should be minimal, as this can damage the concrete layer.
To set up the system, you should perform some simple operations:
- Initially, it is advisable to make sure that all the taps are open and that water will be able to get to the desired point of the floor.
- Having established the minimum temperature, it is necessary to turn on the circulation pulser. After that, with the help of flow meters, you should check whether the flow passes through all circuits. If this is not the case, you need to look for a place where air has accumulated or the faucet is closed.
Setting electric floors is done with the help of thermostats. Here you just need to transfer the device to a certain temperature regime, and then analyze the operation of the system over a certain time.
If the system is turned off at the right time, then you can fully exploit the warm floor.
Faults
Underfloor heating very often fails, which leads to difficult and long repair.
Water structures can become unsuitable for the following reasons:
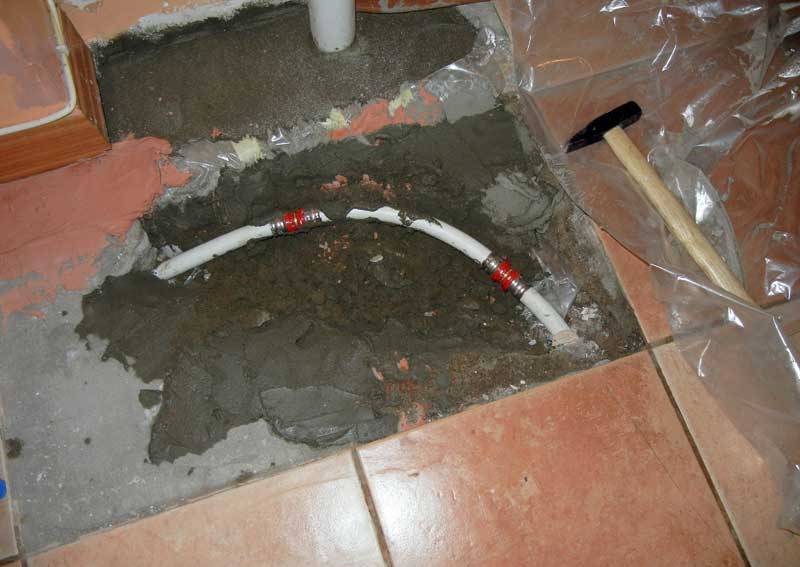
- Damage to the pipe. Water leakage is a rather dangerous phenomenon that is difficult to identify. If such a problem is identified, you must immediately turn off the pump and heating. After that, the place of breakdown is searched and the breakdown is eliminated.
- Uneven heating. This problem is associated with different lengths of circuits, as well as improper configuration of the collector. Water simply circulates in one place faster than in another.
- Breakdown of the circulation pump. If this mechanism fails, the water will warm up slowly. In this case, the floor will be warm only at the beginning of the contour.
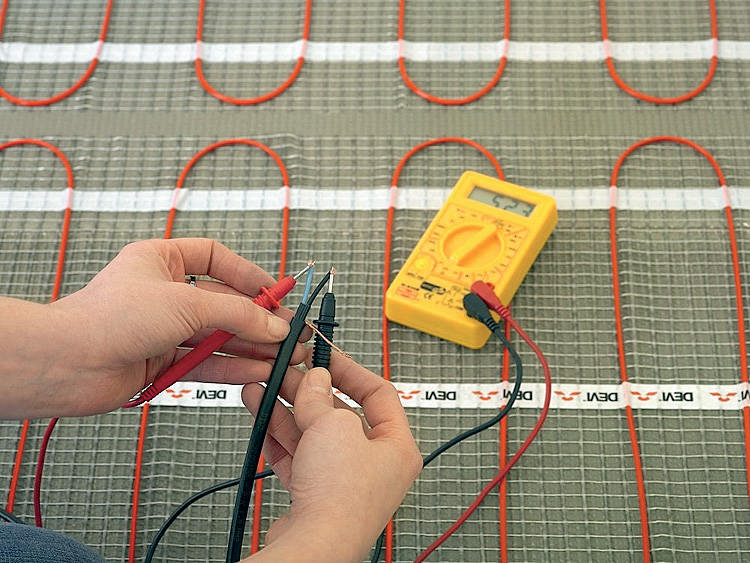
As for electric floors, all the damage can be reduced only to two phenomena:
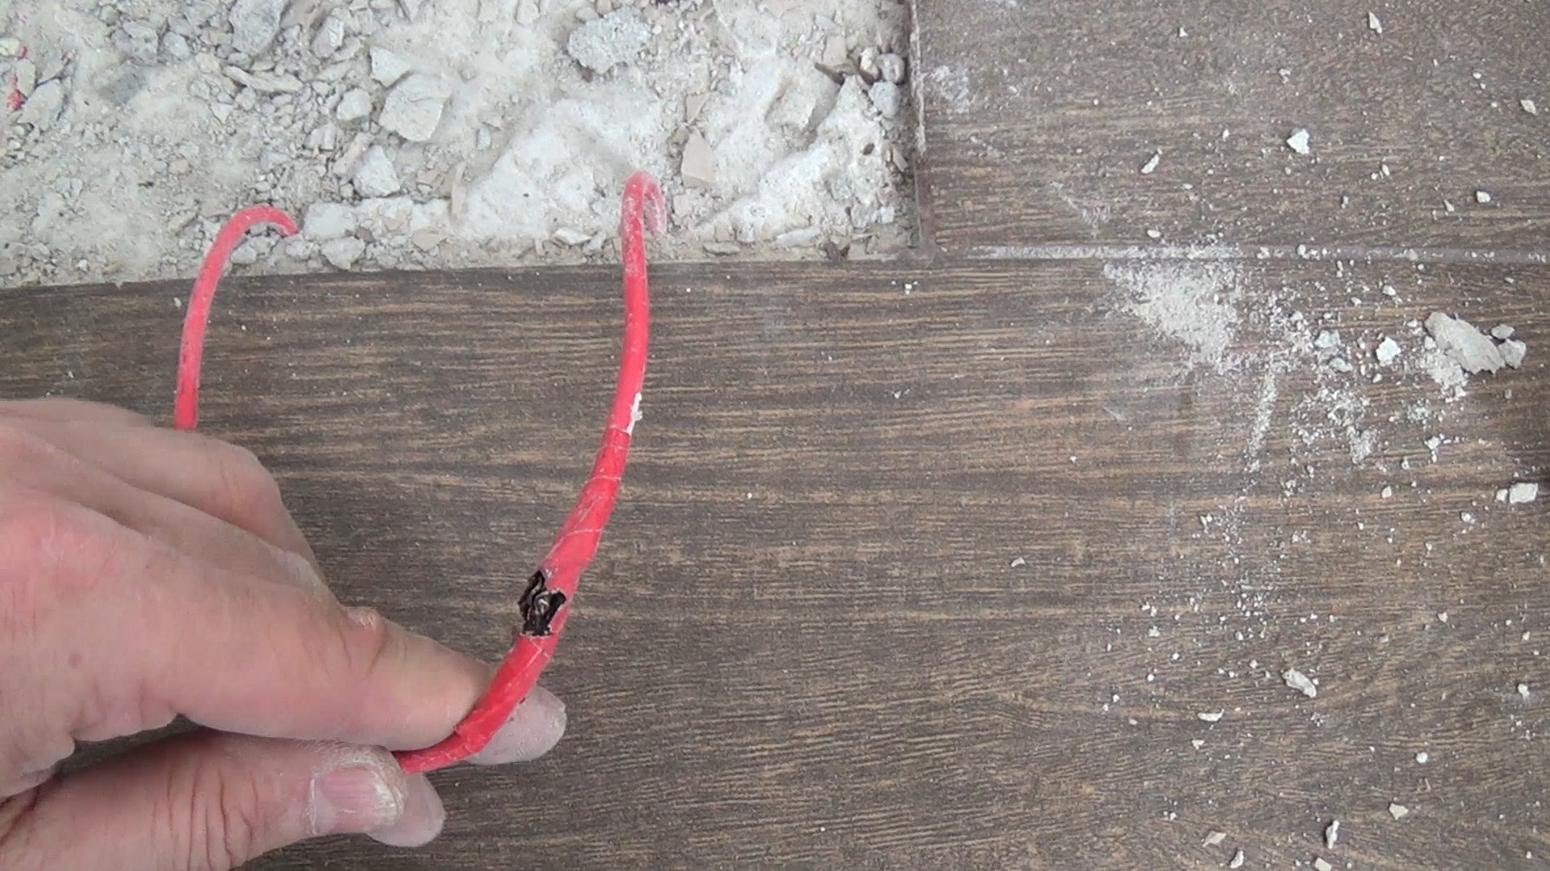
- Damage to the cable. You can identify the gap using special devices. But it is not always possible to restore work, since it will be necessary to install a completely new floor or a separate mat.
- Thermostat malfunctions. There are also several damage options.One of the main reasons is the failure of the temperature sensor. This leads to uneven heating, as well as premature shutdown of the system.
Expert advice
Installing underfloor heating is a complex procedure that depends on several factors.
To get a reliable and durable system, experts recommend sticking to the following tips:
- Regardless of what type of floor you are mounting, you should avoid placing coolant under furniture and other structures that are vulnerable to heat. Select the correct layout of the pipeline or electrical cable.
- Be sure to calculate the power of the boiler or electrical network. It is necessary to select the technical characteristics of a warm floor.
- Use only high quality materials. In most cases, the pipes and cable are hidden under the screed layer, so they cannot be repaired quickly. This is especially true of the pipeline, which can give leaks.
Connecting underfloor heating is a difficult task, requiring preliminary calculations and the use of special equipment. Therefore, it is better to trust its team of installers, guaranteeing a long and reliable operation of the entire system.
Detailed instructions for installing underfloor heating in the next video.


