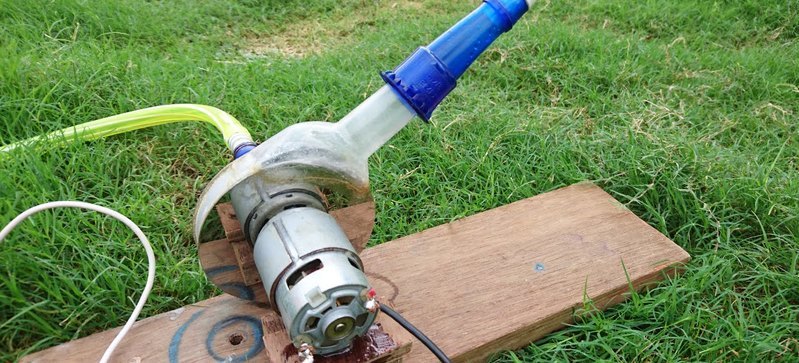
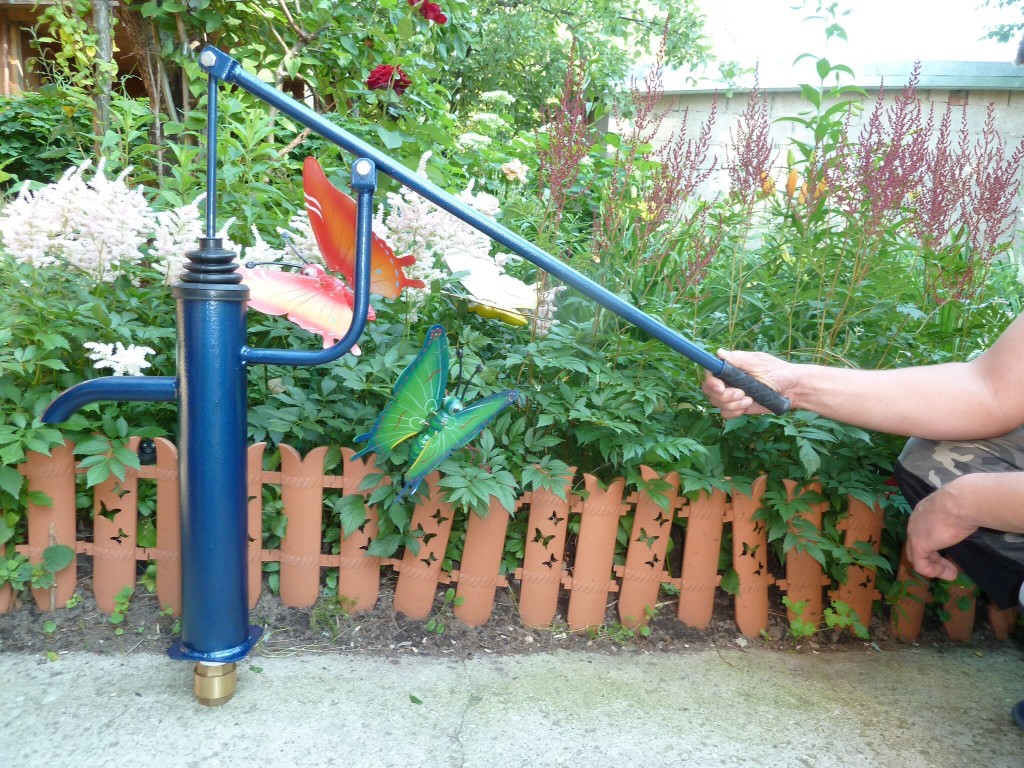
The details of the process of manufacturing a water pump
Arrangement of personal backyard or suburban area is in the first place for each owner. Of course, the primary task is to solve the problem of water supply. If there is any reservoir in the nearby area, you can purchase a pump. The modern specialized market offers a wide range of different models of water pumps that can satisfy the wishes of any, even the most picky and scrupulous, buyers.
However, such devices can be made by hand, while avoiding significant costs.
Use of wave energy
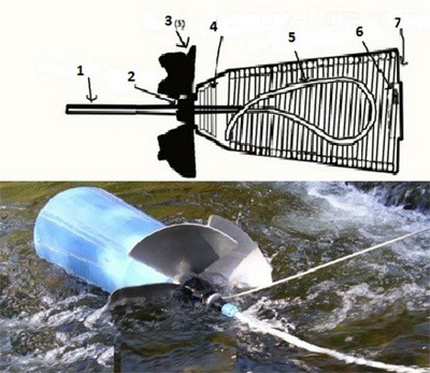
This option is best for sites that go to the shore of a reservoir.To construct the pump, you need a log about 3 meters long and two stakes, a small piece of plastic corrugated pipe and two valves.
On the log you need to attach several loops of wire, the diameter of which should be 6 mm along the ends. Bottom on it you need to fix the prepared cut of corrugated tube. Valves are pre-fixed on the pipe to the end openings.
The principle of operation of this pump is based on the action of the waves. A wave of water raises the log, while the length of the pipe increases, and the liquid is sucked through the lower inlet. Accordingly, when a wave lowers a log, the size of the corrugated tube decreases, and water is squeezed out through a special upper valve. This process is periodically repeated depending on the fluctuations of the waves.
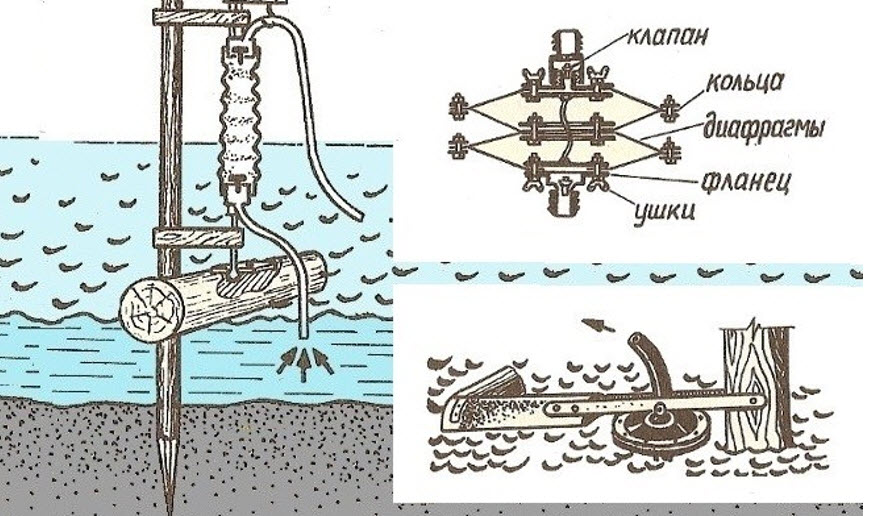
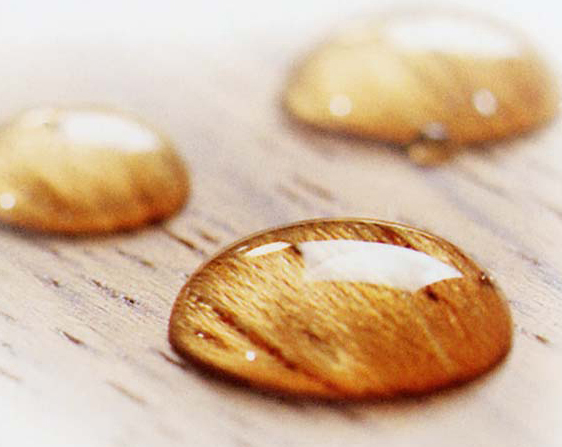
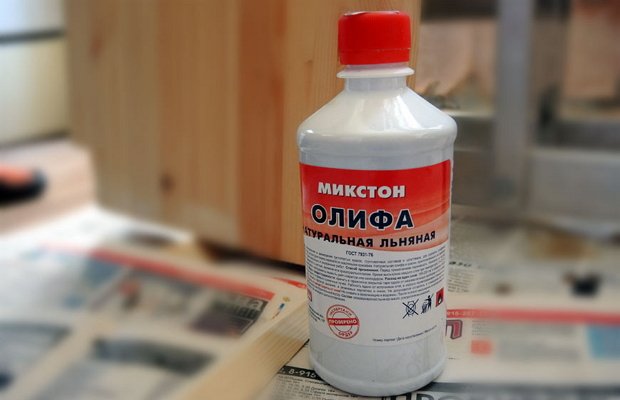
This design allows you to lift water from a depth of about 25 meters. In the production of this design it is important to properly handle the float with the help of special means to protect the wood from the constant exposure to moisture. The best option would be to use for this purpose the usual linseed oil.
To achieve a greater effect, it should be applied in a heated form. The treatment of the surface of the log must be carried out several times.
Wave water pump (option)
Such a design will greatly simplify and facilitate the process of pumping water from any reservoir. Managing her is not very difficult.
The manufacture of this device can be divided into several stages.
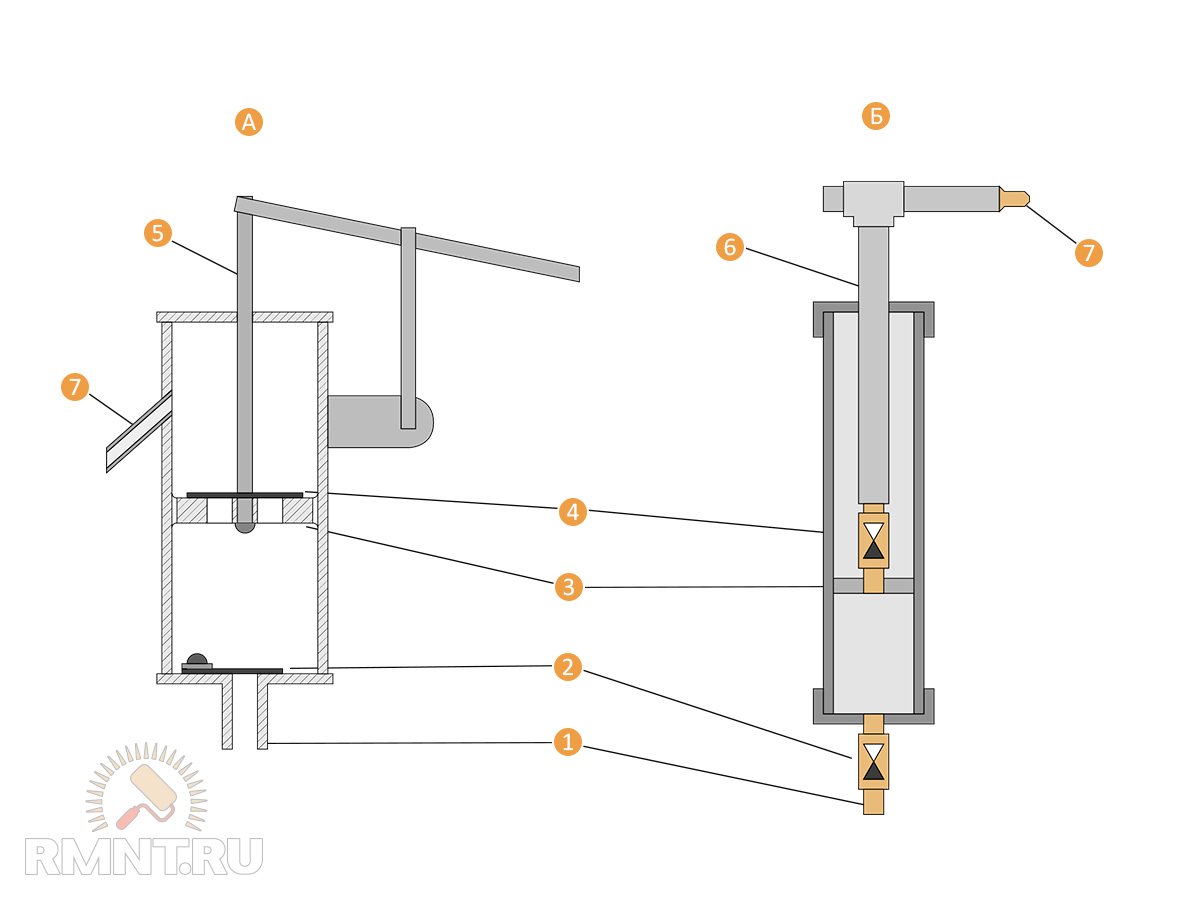
- At the first stage, it is necessary to engage in the preparation of the main delivery element of the structure. This element is a hollow cylinder in the form of an accordion. In the process of compression and stretching, the volume of this part will vary significantly, while creating the pressure necessary for pumping out water. As a material for the manufacture of this element, you can use a conventional car tire of the required diameter.
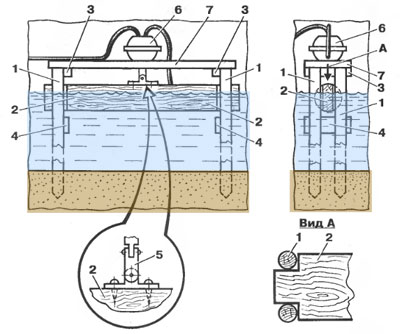
- The second step in the manufacture of the pump will be the creation of a special "floating" site. To do this, you can use a wooden material, the dimensions of which must match the dimensions of the chamber, or ordinary plastic bottles, closed lids. The selected material should be carefully fixed using tape or buildingscotch tape on the bottom of the camera.
- Next on the top of the camera should fix a small wooden board. It will help the camera to always stay afloat.
- After that it is necessary to fix the wave pump. Two pillars must be driven into the bottom of the reservoir, the upper platform of the structure is rigidly attached to them. For the lower platform of the device, it is necessary to provide special loops of wire. It is necessary for the free movement of water.
For the manufacture of such a design, you can use different materials, as long as they perform all the necessary functions. Repair of such a water pump can be done at home, given our advice.
Use of solar energy
This homemade water pump is very easy to make. For the manufacture of such a design will need a conventional hose made of plastic. The best option is to use a plastic hose section of 2 inches.
Installation of the hose can be done in two ways:
- spread out in the form of rings on the surface;
- suspend the hose with a wire, using several vertical posts.

The principle of operation of this design is based on the heating of water in the device by the sun. As the hose is filled, the water in it will gradually begin to warm up by the sun’s rays and will rise.
The junction of the hose and the tank or any other container should be covered with a special material to provide reliable protection from various negative influences. Any material with a reflective surface will do for this.
This design is able to lift water from various reservoirs from a depth of about 8 meters.
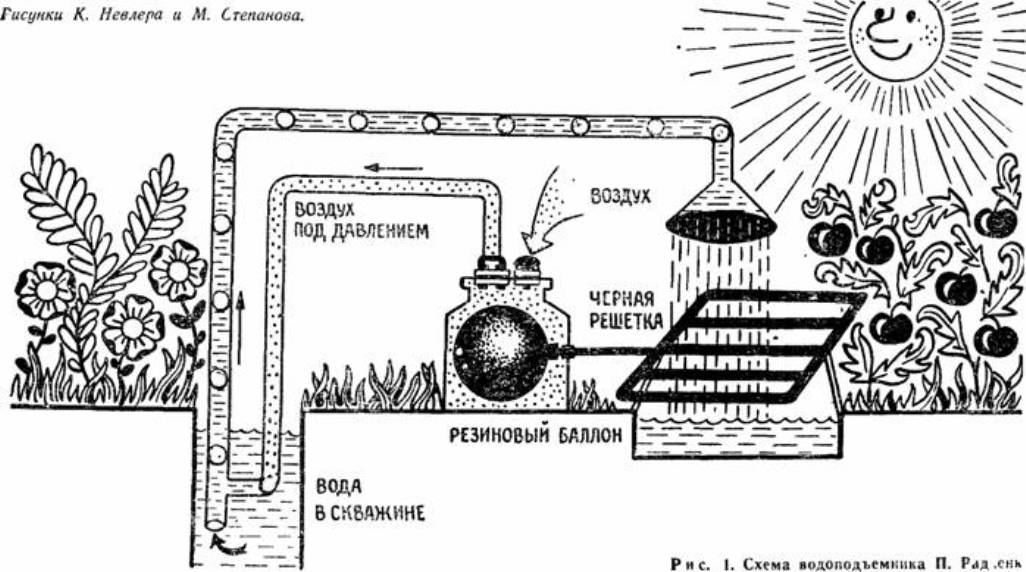
Solar-powered pump: always on (option)
The design of this pump consists of a special grille, in the tubes of which propane-butane is located. The grille is connected to a rubber bulb dipped into a container. In the tank lid there are two special valves: the first one is designed to pass air into the structure, the second one releases it under a certain pressure into the air pipe.
In order to set the pump in motion, in the warm season it is enough just to pour the grid with cool water. When this occurs, the cooling of liquefied propane-butane, the pressure of its vapor decreases.This contributes to the compression of the rubber bulb, and the container is filled with air. After a certain period of time, the sun's rays will dry the grid, and it will heat up again.
The resulting vapors of liquid will inflate a rubber bulb, as a result, the pressure in the tank rises and air will escape through a special valve into the pipe. The resulting cork from the air will play the role of a piston, and drive the water in front of you to the shower head. The liquid then again falls on the grid and cools it.
Such a system works not only in the summer, but also in the cold season. In this case, the cyclicality varies slightly. The cold, frosty air cools the lattice of the structure, and its heating occurs due to the impact of groundwater. Therefore, if the garden or the dacha is located on the shore of a reservoir, it is not necessary to carry water to watering the garden using buckets. It is necessary to make a pump for pumping water with your own hands from scrap materials. In this case, the sun's rays and the course of the river will do the main work themselves.
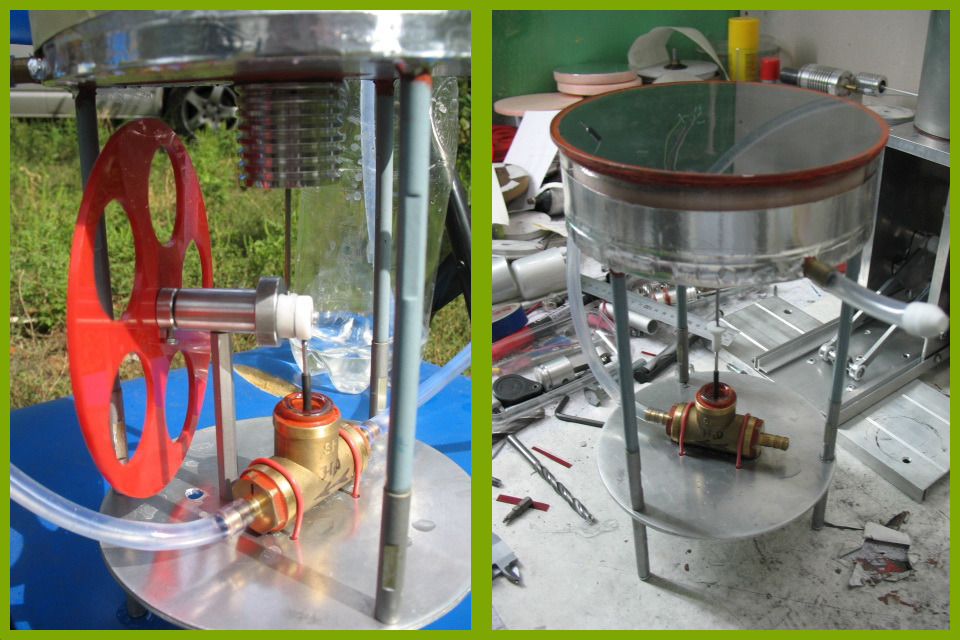
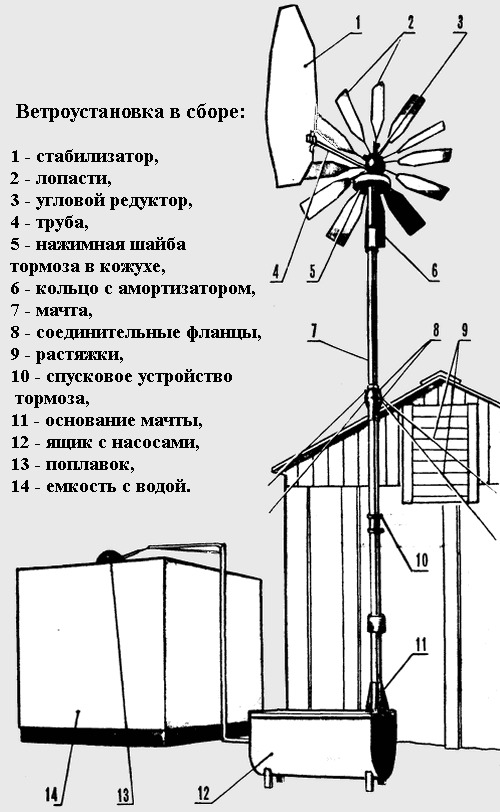
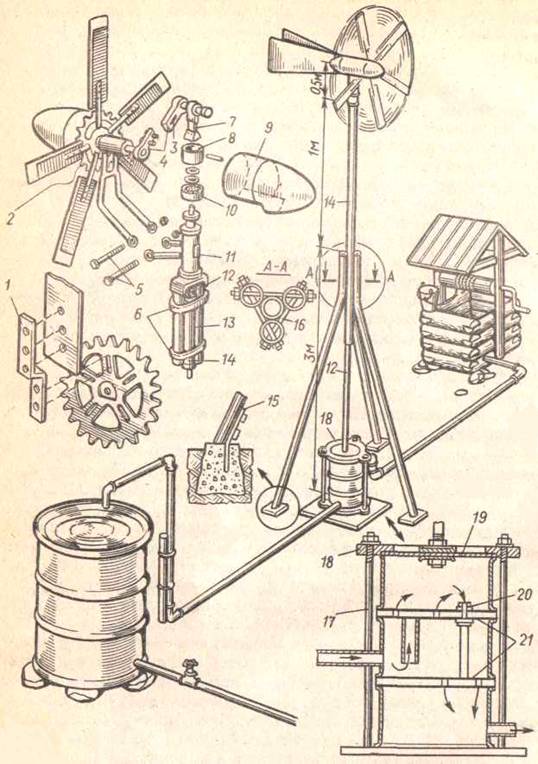
A more complicated and time-consuming process is the manufacture of wind structures for pumps for pumping out water.Here it is necessary to show a maximum of sharpness and imagination. Such devices often contain complex elements, such as flexible drives, various forms of scoops, and so on.
In addition, the design may include a piston pump or diaphragm pump, which are needed for pumping water.
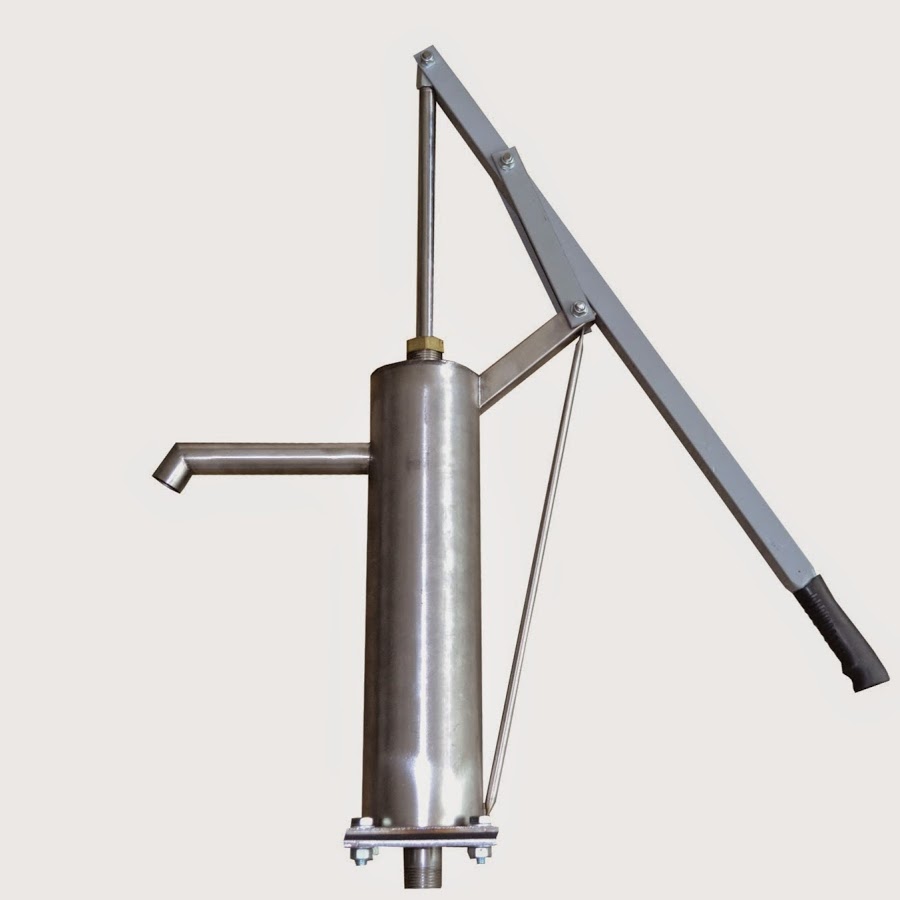
Manual transfer devices
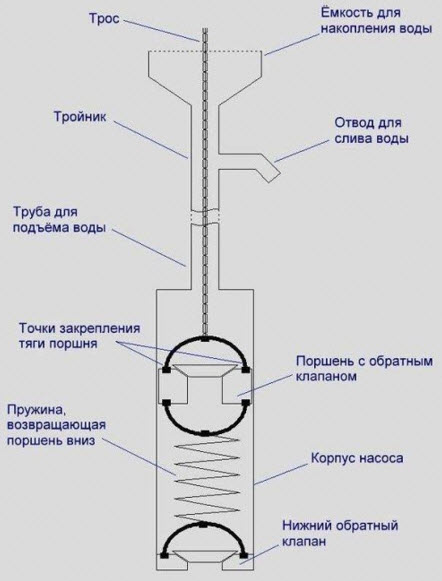
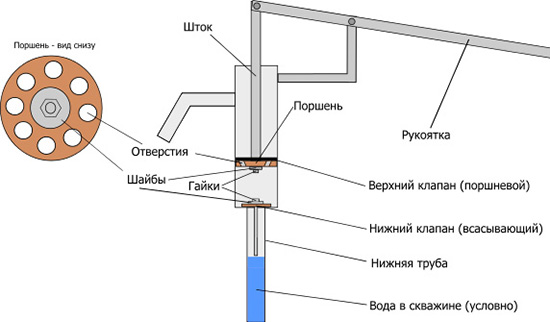
A distinctive feature of these devices is the ability to use this unit without electricity. Option can be vacuum or plunger. You can do this mini-pump yourself, for this you need a few details.
- Base. The main component that serves as the basis for fixing the entire device. For this you can use a PCB or glass fiber. The thickness of this material should be 20 millimeters.
- Flange. For the casing bundle with the base of the structure, a special threaded part is required. This is important, as it is necessary to eliminate the leakage of water.

- Bottom valve To ensure reliable overlapping of the main pipe hole, it is necessary to install a valve.
- Limiter This detail will help to avoid displacement of the valve during operation from the main axis of the structure.
- Housing Inside the housing are all the main components of the pump design, which provide pumping and draining of water.
- Piston with valve. This element plays an important role in the design of the pump; it is necessary when pumping fluid from the main pipe into the housing to the opening intended for draining using a special lobe valve.
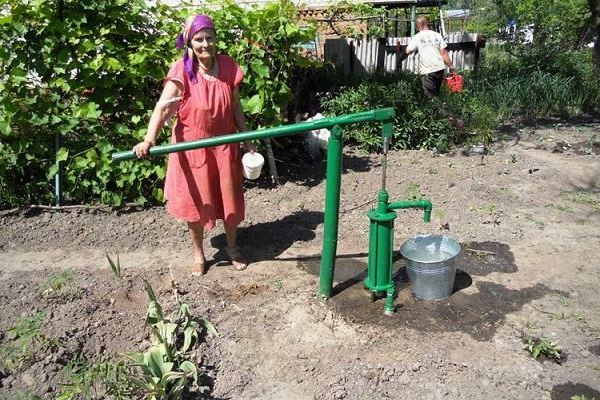
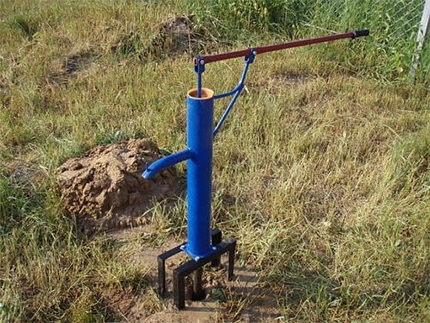
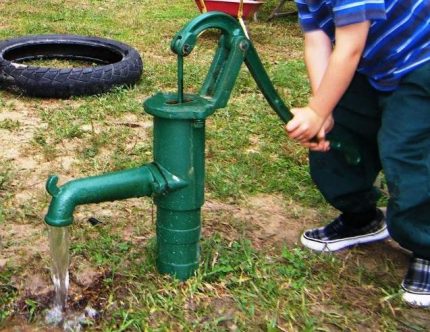
Such structures are used for pumping water from wells or wells.
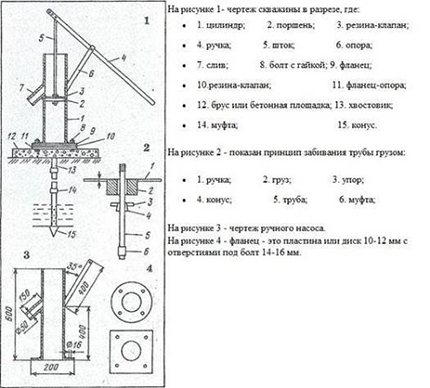
The principle of operation of the manual pump
Applying a slight effort to the special lever in the upper direction, it is necessary to begin its movement. At the same time, a certain pressure is created inside the pipe, which acts on the non-return valve, and the process of drawing water from the casing into the body of the structure begins.
When the pressure inside the pipe is equalized, the check valve gradually lowers and closes the opening to the casing. This creates the necessary pressure to open the flap valve, the water enters the upper cavity to the opening to be drained, and is poured into a previously prepared special container.
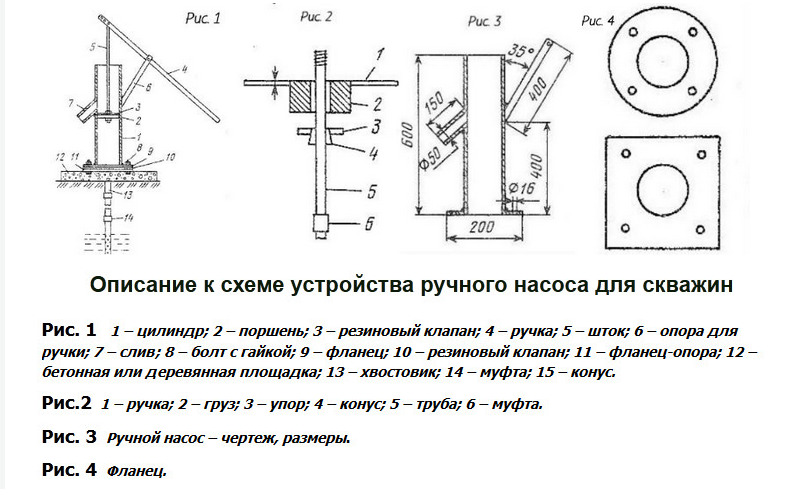
Manual water pump do it yourself
Such a design is the best option for pumping water from various wells, in contrast to the wind model.
For the manufacture of this device will require a small amount of quite affordable materials:
- insignificant amount of wire;
- car camera, such products can be found in almost every person;
- brake chamber;
- small steel balls;
- several copper tubes;
- special epoxy glue.
After all the necessary materials are prepared, you can proceed to the assembly of the pump. First you need a brake chamber, you need to carefully plug all the holes in it, except for one. The hole should be located on top of the chamber, the stem will be placed here. In addition, special outlets should be provided under the valves at the bottom of the chamber.
Next, you need to drill a small hole in the prepared copper tube on the inside, the diameter of which should correspond to the size of the steel ball. To prevent the ball from falling out of the tube during pump operation, a special wire must be welded on top of the copper pipe.
The next step in the production of a pump is to manufacture a check valve. This process is completely identical to the previous step, but there is a slight difference. A small special spring should be installed between the steel ball located in the copper tube and the wire welded to the end of the pipe.
Then the finished inlet and check valves must be firmly fixed in the brake chamber.
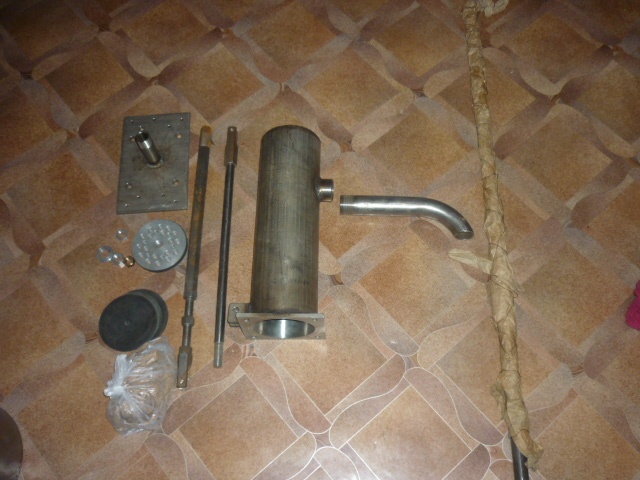
From the car camera you need to cut a small circle and make a hole inside it. Next to the hole you need to glue with epoxy glue two washers from different sides. Through this hole a special threaded pin is fastened, fastened with nuts. This design will be used as a sealant in the manufacture of a water pump. The finished seal should be fixed to the brake chamber and glued with a special epoxy adhesive.
The final step in the manufacture of a water pump is to install the rod. It must be threaded through a specially prepared hole located on top of the brake chamber. With the help of the rod connect all the details of the water pump.
The design is ready, you can install it in the pond, and proceed to the pumping of water.
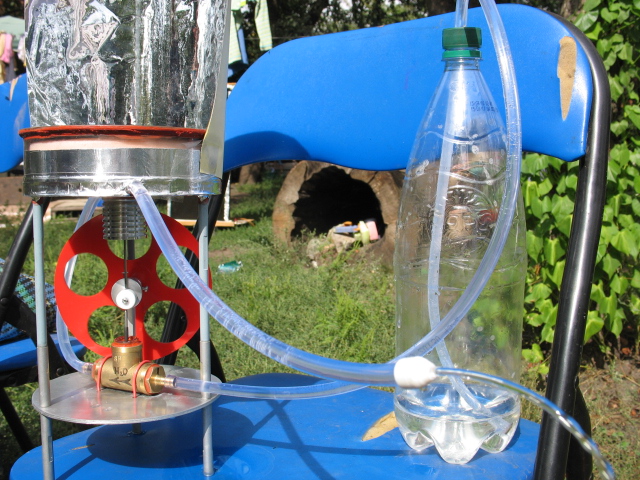
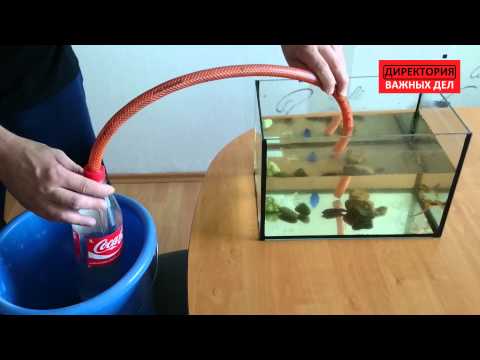
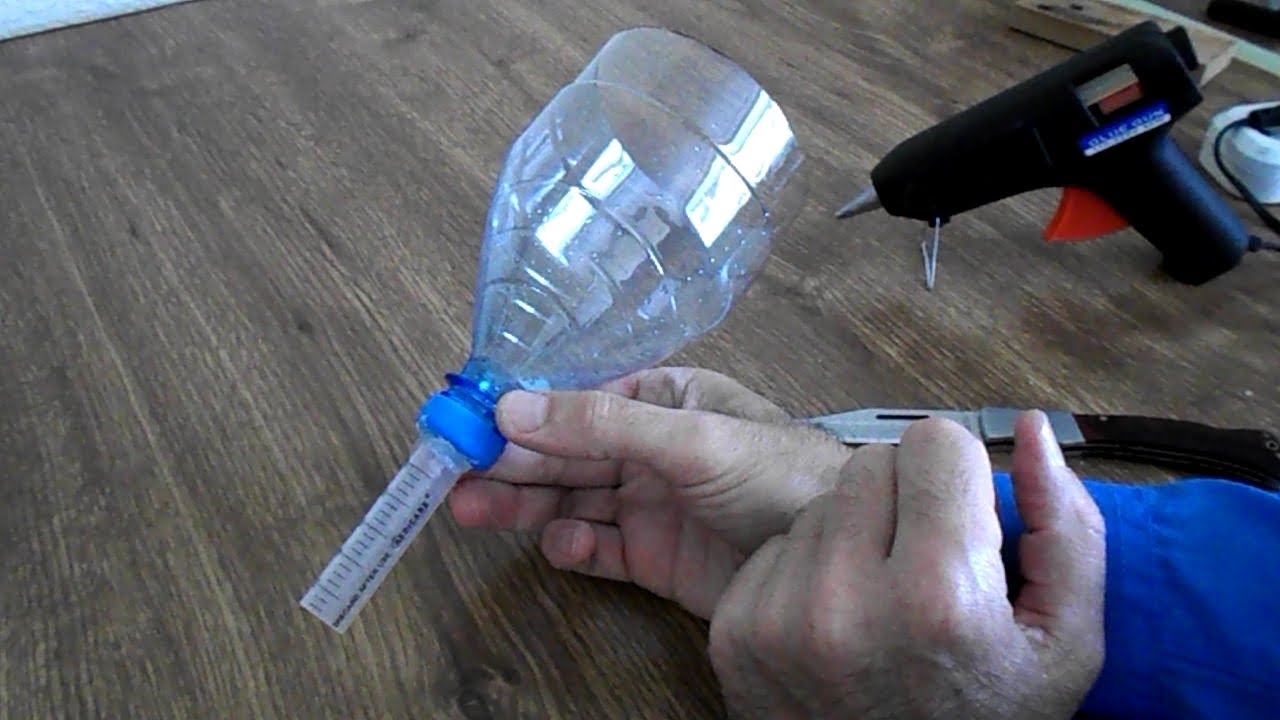
Pump from a regular plastic bottle
This is a very popular design among summer residents, because its manufacture does not require a motor or a pressure level meter. The popularity of the device due to the low cost and simplicity of design. This device is the best option when pumping water from both the reservoir and special tanks and barrels. The principle of operation of the structure is based on the principle of communicating vessels and does not require connection to the power grid. This is also a weighty argument in favor of the use of this design by many summer residents and owners of personal plots.
It’s very easy to make such a device with your own hands; this will require ordinary materials that can be found in every home.
First you need to take a plastic bottle and make a small hole in the cap with a diameter of about 8 millimeters, while removing the gasket located in the cork.
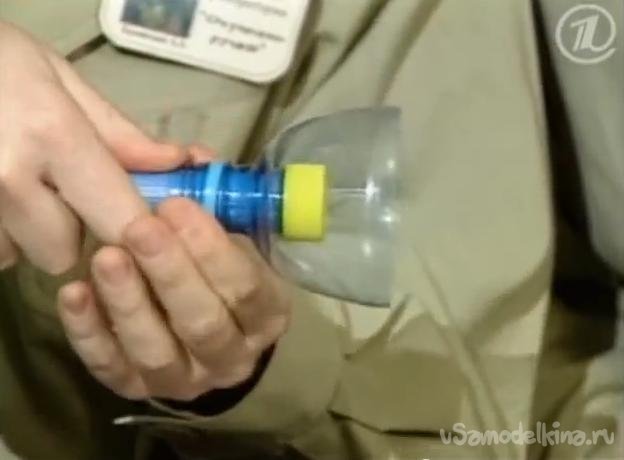
Next, you need to reduce the size of the extracted gasket. To do this, on the edge of its diameter should be removed approximately 1 millimeter,a kind of petal about 3 millimeters wide will be obtained, and return the gasket back to the cork.
After that, it is necessary to trim the neck of the bottle. A petal located inside the plug will play the role of a valve. At the same time, water will be able to freely penetrate inside, but the valve will not let it flow back to it.
Next, you need to install the finished valve in a plastic tube of suitable diameter. From the bottle you need to additionally cut another part - from the neck to the shoulders, you get a kind of funnel. This element should be mounted on a plastic tube so that the valve is located in the funnel. On the other side of the plastic tube you need to attach a flexible hose.
After that it is necessary to place the structure in a pond or in a special container with water.
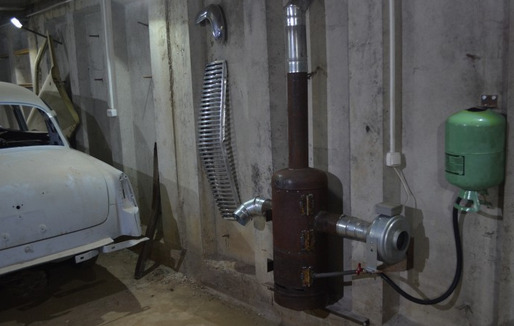
Oven pump
The principle of operation of this design is based on creating a pressure difference.
For the manufacture of the device will need:
- a large barrel, made of steel, with a capacity of 200 liters;
- ordinary blowtorch;
- branch pipe, equipped with a crane;
- rubber hose of the required length;
- special nozzle on the hose in the form of a grid;
- electric drill.
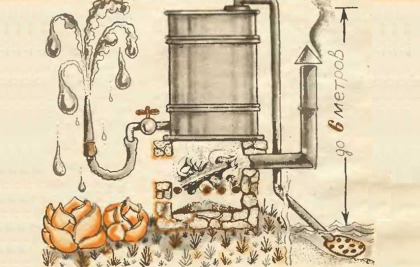
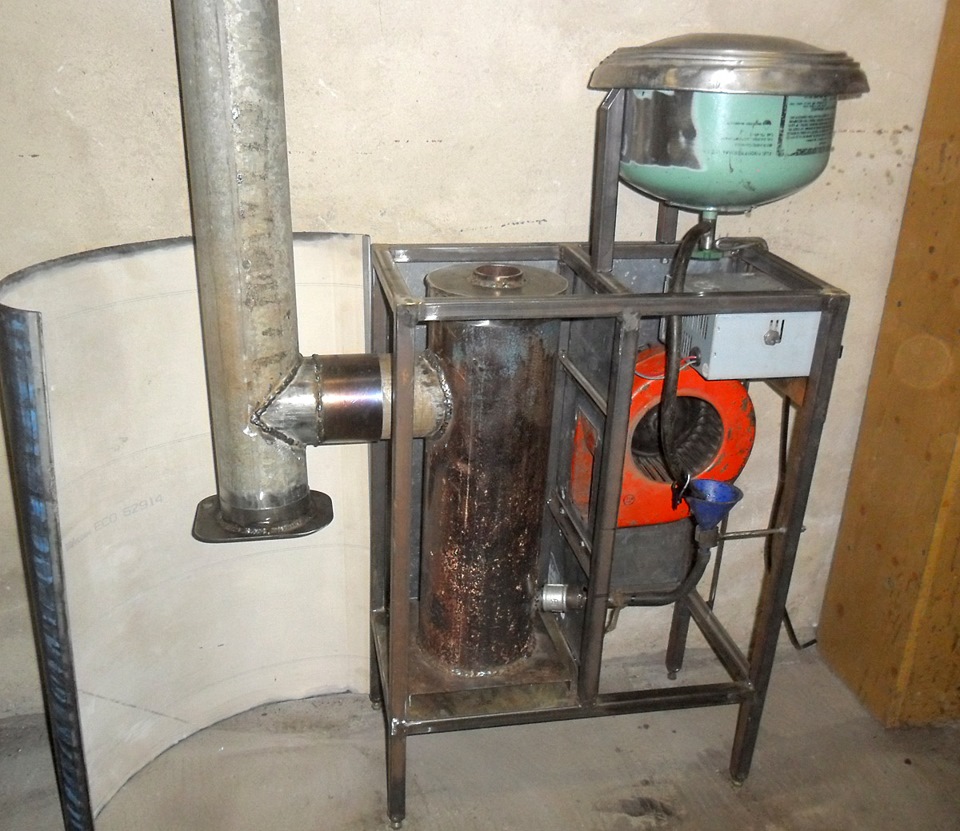
In the lower part of the prepared steel barrel, you must embed a special pipe, equipped with a convenient crane. In the cork with a thread that covers the barrel, you need to drill a small hole, the diameter of which must match the size of the prepared rubber hose. Next, insert the rubber hose into this hole. The second end of the hose must be closed with a mesh nozzle, and then lowered into the reservoir.
Under the bottom of the steel barrel you need to install a blowtorch or primus stove. At the bottom of the barrel you need to pour some water, literally 1-2 liters, and make a fire under it. This produces steam, which displaces the air that enters through the hose into the reservoir. After that, the fire should be put out, the barrel will begin to cool. As a result of these actions, the pressure inside falls, and water begins to flow from the reservoir.
This design of the furnace-pump does not heat the water, contrary to the opinion of some, which is based on the name, on the contrary, it starts pumping water exceptionally well.
Thus, to make a hand pump for pumping out water with your own hands is easy and quite simple, using improvised means, ingenuity and a little imagination.This can be done both from a washing machine and from a vacuum cleaner (the main thing is your imagination).
How to make a water pump with your own hands, see the following video.


