Features and sequence of installation galvanized gutters
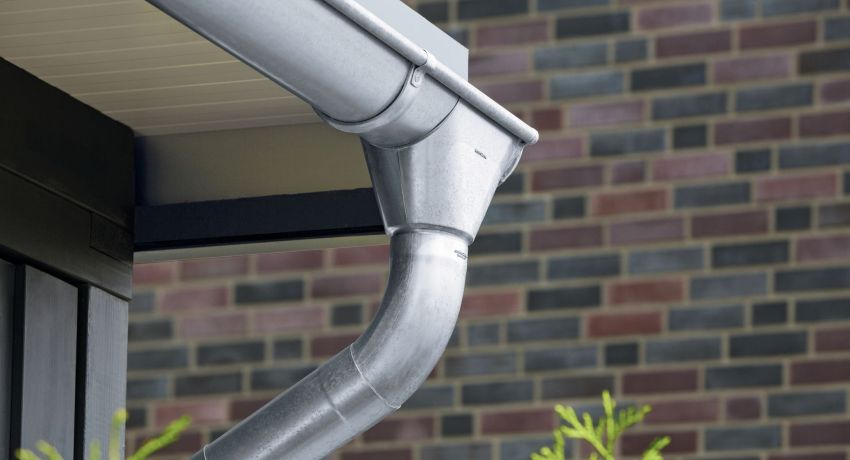
It is quite difficult to maintain a private house without a drain system in good condition for a long time. Because rain and melt water cause significant damage to the roof, facade and foundation, if they are not promptly removed from the surface of the roof. Just a similar function is performed by the drain - it is a design for collecting water from the roof covering and diverting it to the storm (rain) sewer system. It is recommended to install the system for the discharge of excess water both on small buildings and on large mansions. In this case, its installation can always be done by hand.
Device and elements
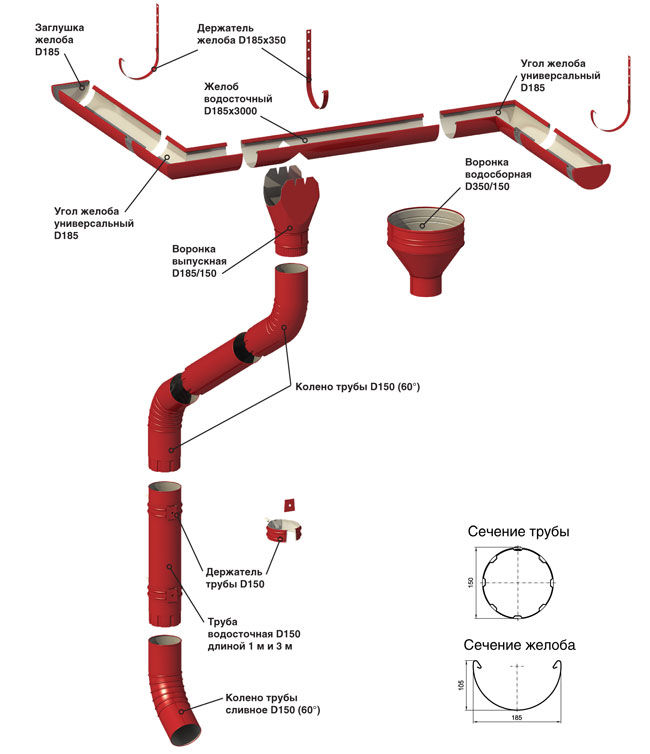
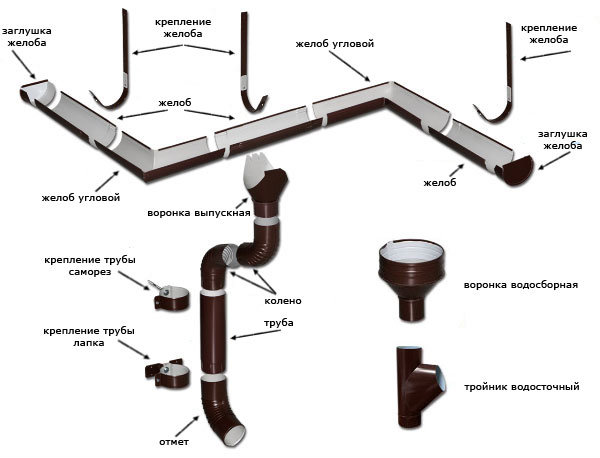
Despite the variety of variations of drainage systems, they all have approximately the same structure and consist of similar structural elements, such as:
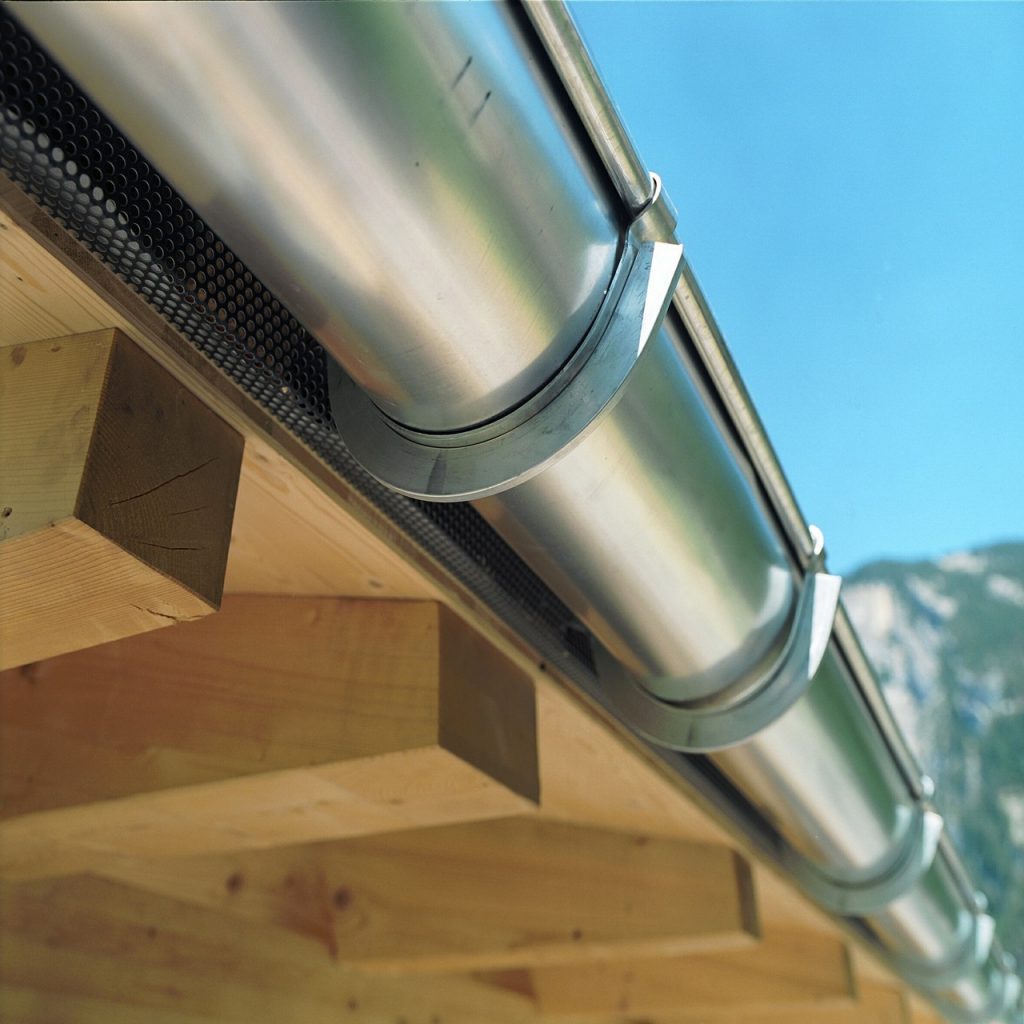
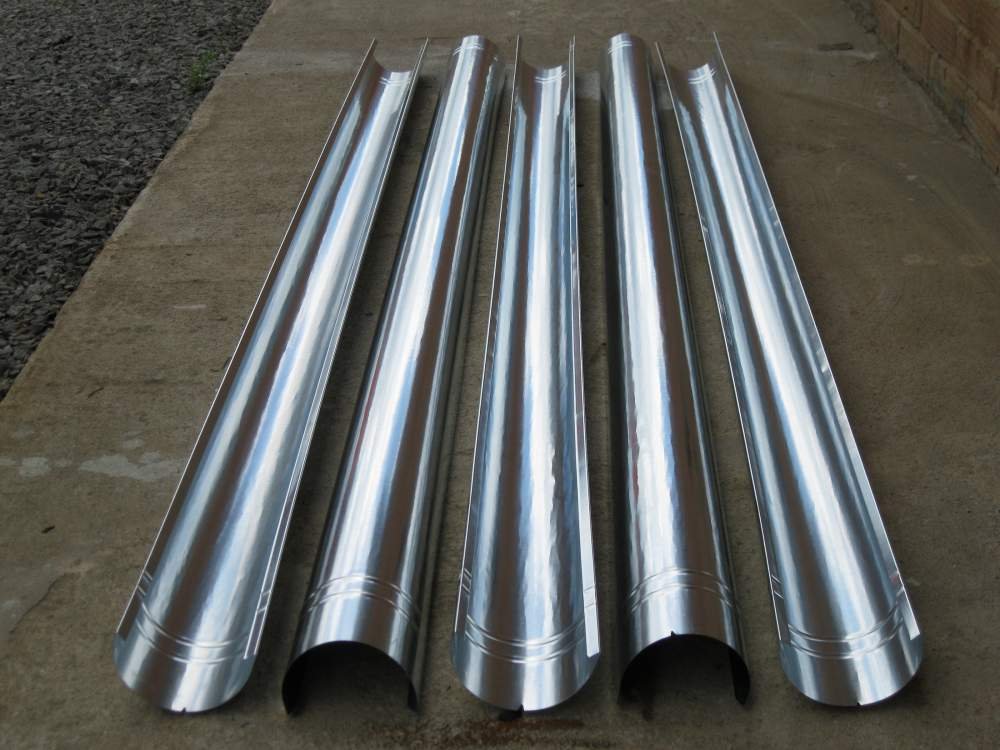
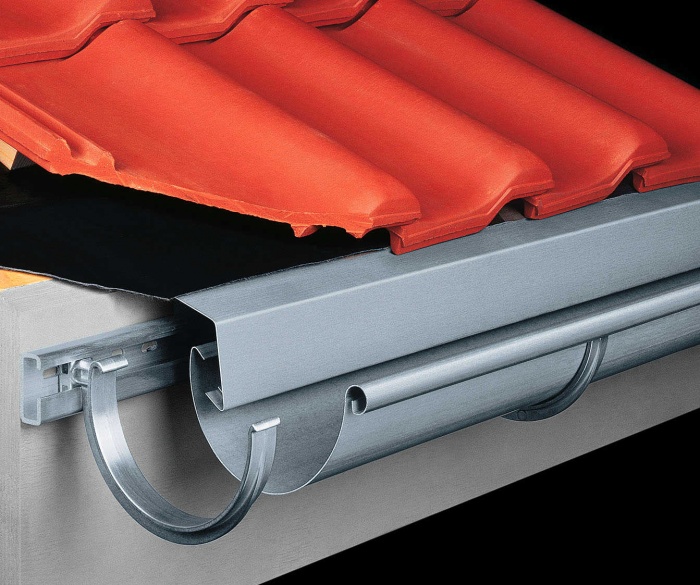
- the chute (gutter) is the main piece of galvanized steel drain that collects water flowing from the roof slopes. As a rule, trays are produced with a length of up to 4 meters;
- hooks brackets. On them the tray is settled. Brackets made of plastic are commonly used for systems made of polymeric materials;
- cap for the left and right ends of the tray;
- funnels that are mounted on the edges of the trays;
- central trough funnel, which is fixed by means of glue or with the use of sealing material and grooves;
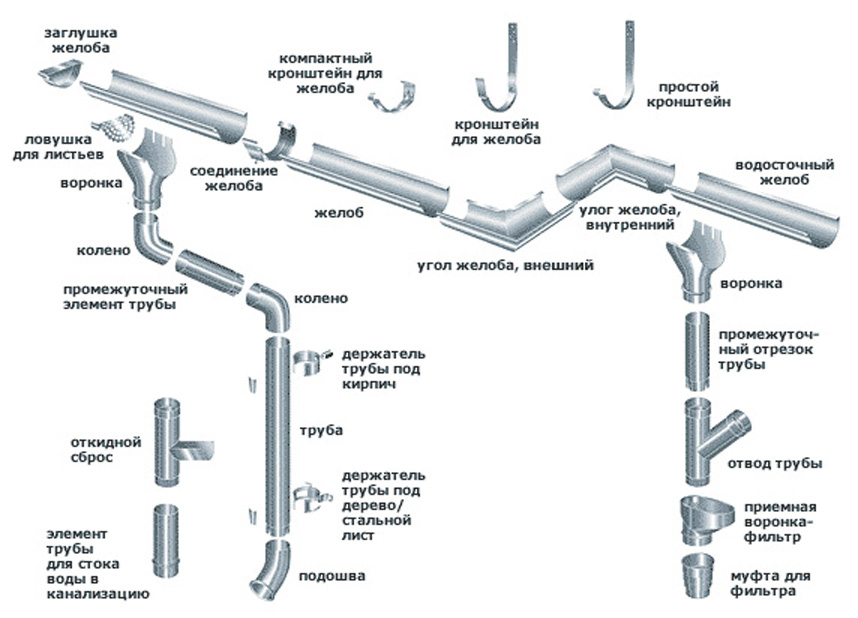
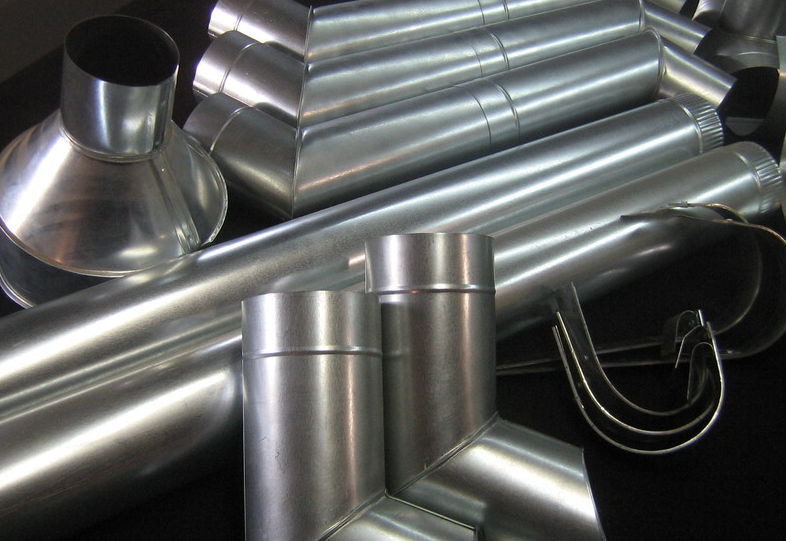
- coupling element for the tray. It can be installed on the glue or with a special mortise joint using gaskets for sealing;
- internal and external connecting angles of 90º;
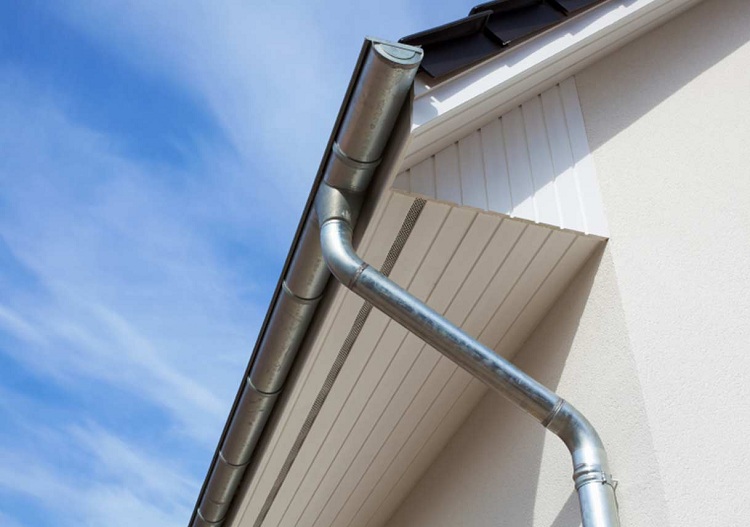
- drainpipe with coupling;
- screw clamp, which tightens the coupling connection of pipes and other elements;
- the tee provides a joint of two drainpipes;
- transition coupling is used when the need to connect pipes of different diameters;
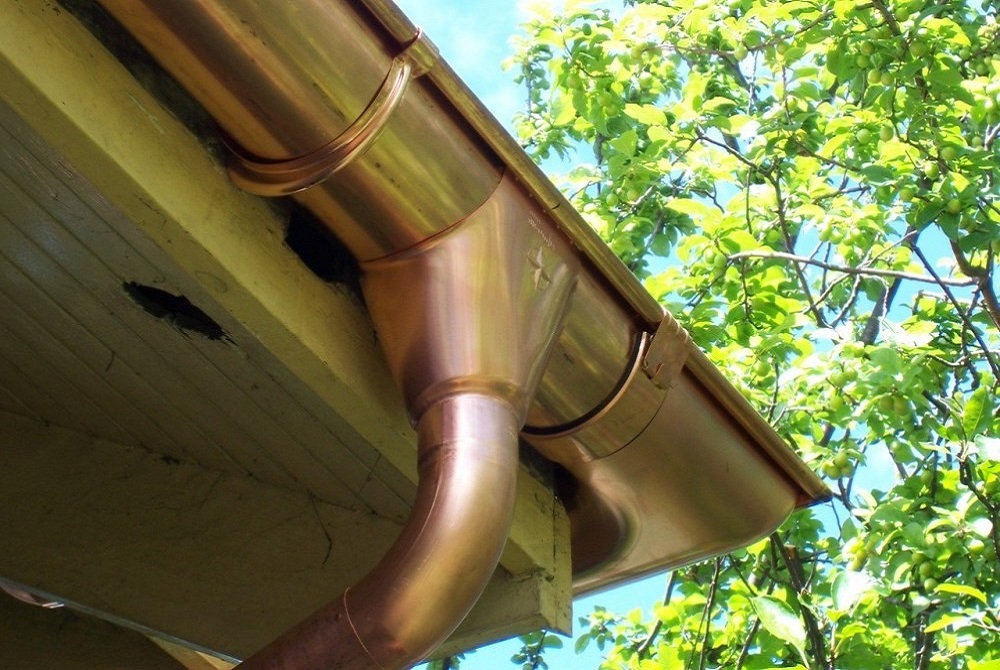
- elbows (elbows) for mating drain pipes. As a rule, they have an angle of 60–70º. Different manufacturers can set their own standards. Of course, in one system, the elements must be with identical angle values;
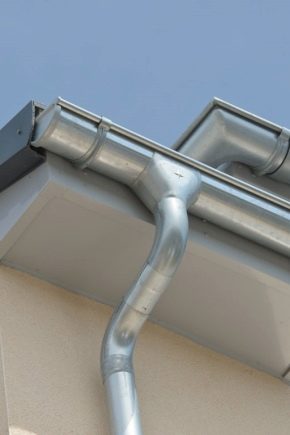
- A running end outlet (drain elbow) with an angle of 45 º serves to direct sewage into the storm sewer system. This element is also known as mark.
In addition to the elements described, for individual drainage systems, instead of brackets, an eaves strip is included in the kit, which is an auxiliary holder of brackets, or even carries out their functional purpose.
Advantages and disadvantages
The following positive qualities contribute to the demand for galvanized drainage systems:
- resistance to fading under the influence of sunlight;
- absolute fire resistance;
- in the process of temperature and humidity fluctuations, the geometric shape of the elements and the structure as a whole remain unchanged;
- long service life, during which the strength characteristics of the system remain almost unchanged;
- stability under loads of static and dynamic nature;
- small weight in combination with decent strength properties;
- easy installation;
- the ability to easily cut with scissors for metal or hacksaw, make a hole;
- You can paint the color of the roof or other parts of the house.
Today, manufacturers offer a drainage system of galvanized steel, with a polymer coating. These samples have more advantages, for example, in addition the following should be noted:
- good sound insulation;
- good anti-corrosion properties due to zinc layer and polymer coating;
- large variety of color design.
If we talk about the shortcomings, then you can stop at just one. If the galvanized drain is painted, you will have to maintain its presentable appearance all the time. It will be necessary to tint from time to time, which is not always convenient and profitable. Elements coated with polymer, this fate has passed, which is already a significant plus. But their cost is higher, in addition over time, even the polymer under the influence of the sun's rays loses its appearance.
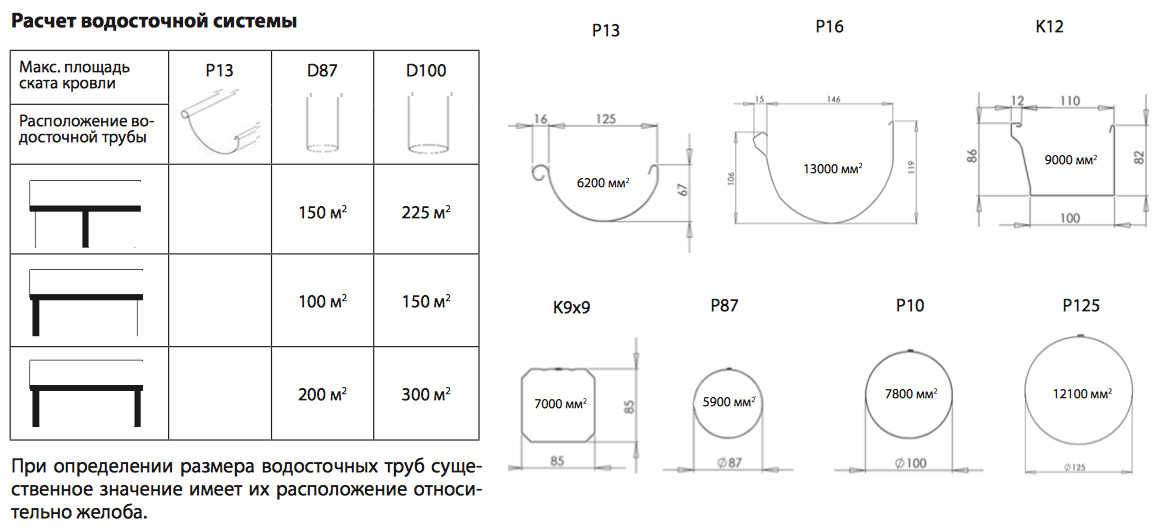
Dimensions and manufacturing
The choice of a specific diameter of drains depends directly on the configuration of the roof and the total area from which water is drained. Companies produce components with diameters of 100, 140, 150, 180 and 216 mm. The diameter of the drain directly affects the throughput of the volume of water. As a result, it is desirable to use a larger diameter in the lower part of the roof, for example, where water from different areas accumulates, increasing the capacity of the system as a whole. It is necessary to disassemble in more detail how you can make the elements of the drainage system for the roof yourself.
This will require galvanized sheets or galvanized sheet steel coated with polymer.
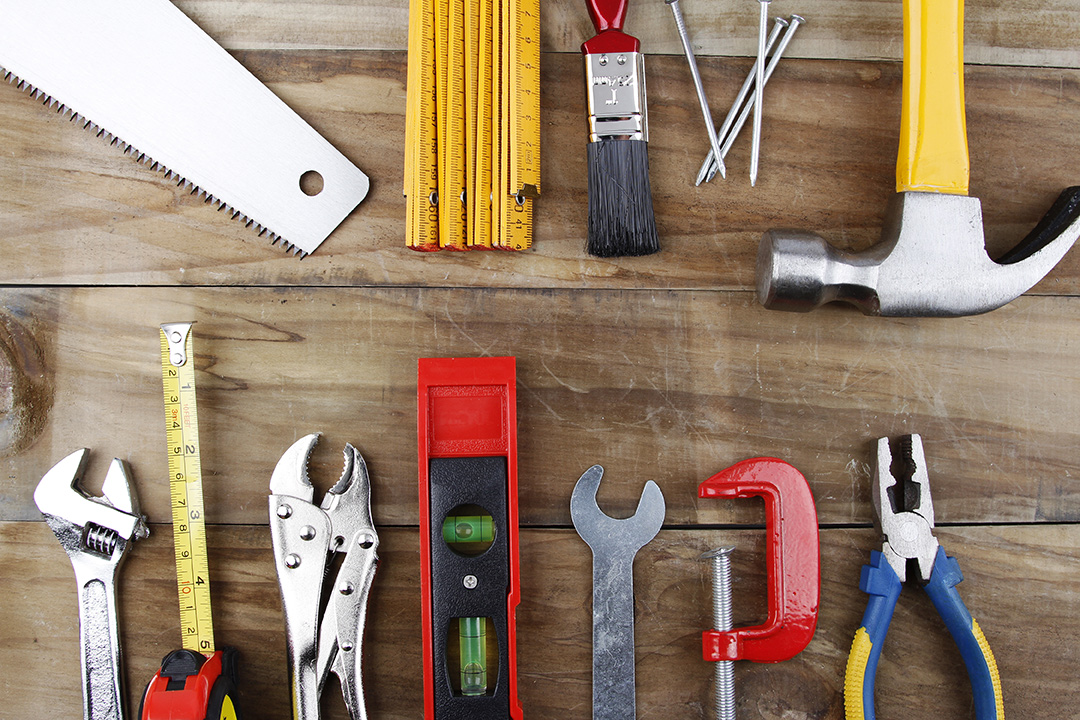
List of required tools
To install galvanized gutters, the following materials and tools are required:
- Kiyanki - wooden and rubber;
- metal corner with a minimum length of 1 meter;
- steel pipe of the desired diameter;
- galvanized steel 0.5–0.7 mm thick;
- ruler;
- scissors for metal.
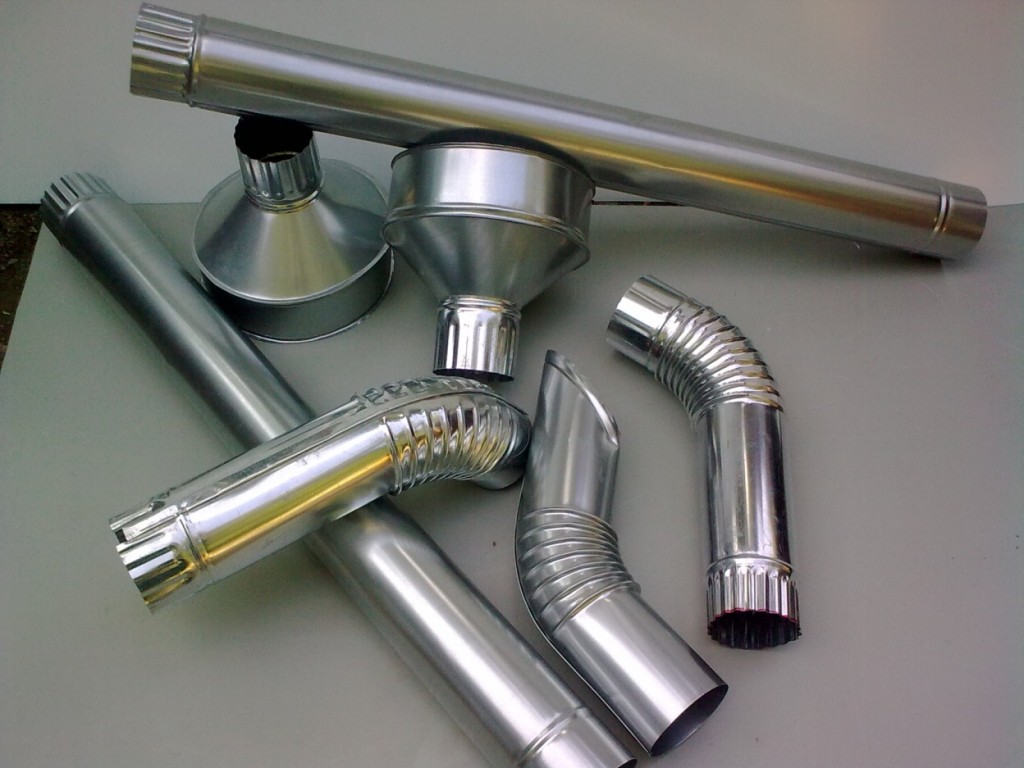
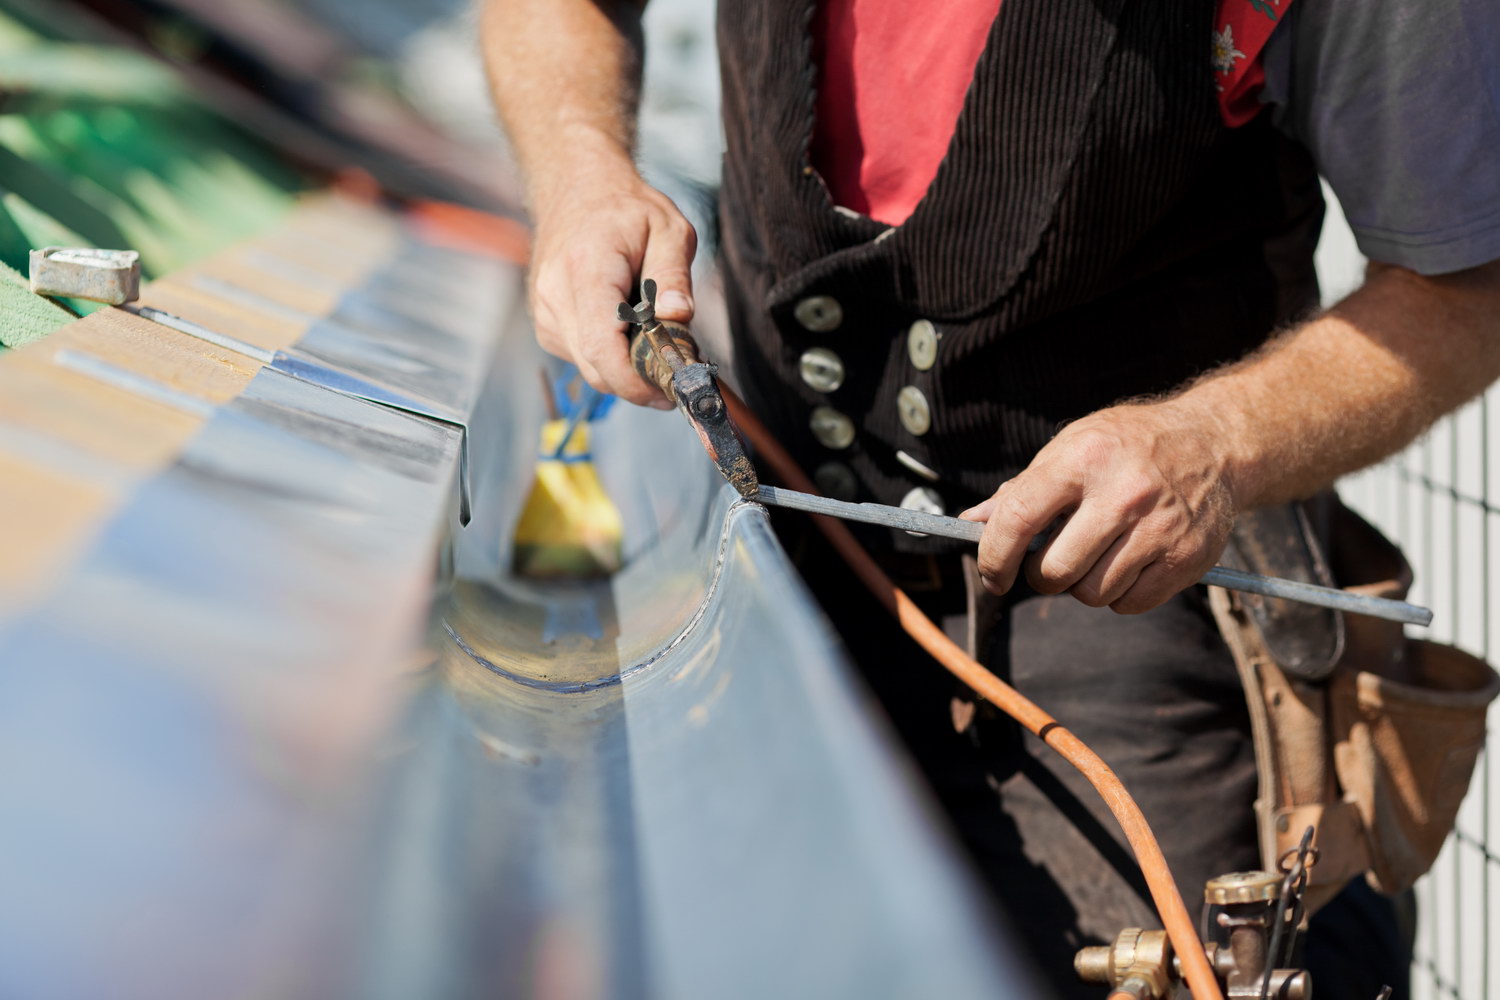
It is extremely important that the mallets are quite weighty, as well as dense and solid, which will give an opportunity to exercise control over the force of the blow. In order to make a drainpipe, gutter, funnel, drain yourself, you need to do the following steps:
- from the sheet with the help of scissors for metal should cut the workpiece to a given size;
- to form a locking joint, bend the longitudinal edge on the workpiece;
- by means of a special milling device by rolling out the workpiece, the product acquires the configuration of a cylinder (for pipes) or a half-cylinder (for the manufacture of trays);
- rollout can also be done manually. To do this, you need to take a suitable diameter pipe, a piece of rail or a metal bar. The workpiece is placed under the pipe and is gradually bent and knocked with a mallet until it reaches the required configuration;
- To make a funnel of a suitable configuration from a galvanized sheet, it is necessary to cut three components: a cone, a bezel and a glass. It is necessary to adhere to the following principles: the rim should be the diameter of the side of the cone to be connected, and the diameter of the lower portion of the glass should correspond to the diameter of the drainpipe. Such subtleties will prevent spontaneous leakage.All elements of the funnel, as well as the funnel itself with the pipe is connected by means of a folded seam;
- in the manufacture of plum special rules do not exist. Commonly practiced in this role is a pipe, cut obliquely, attached to the drain pipe at an angle.
System design
Payment
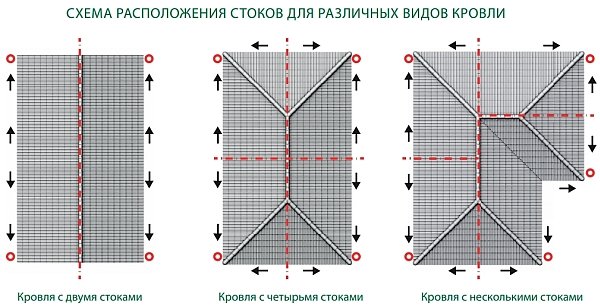
The larger the tray (chute), the more water it is able to collect. If its size is insufficient, it will quickly overflow, and all the water will be on the ground. The size of the tray is set depending on the size of the roof. If it is not more than 100 m², use a chute with a diameter of 100 mm, from 100 to 175 m² - 120 mm, more than 175 m² - 150 mm.
It should be noted that not all roofs are taken into account, but only the size of the ramp where the drain will be placed.
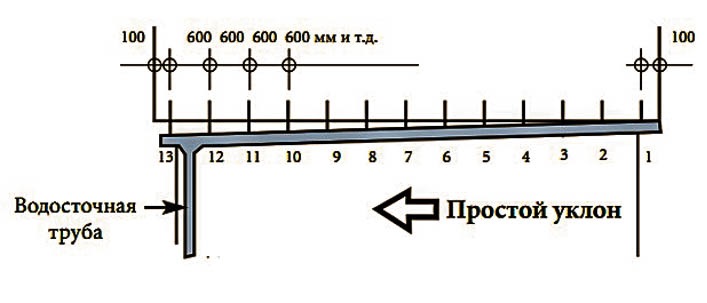
The tray bracket is installed with a certain pitch for metal gutters, it is 60–80 cm, and plastic is no more than 50 cm.
Slope of drain pan
The slope of the gutters is required to direct water into the funnel, otherwise it will begin to accumulate and overflow the tray and not to leave. The slope should be 2–4 mm per meter length. You should not make a strong bias, because on the extensive slopes it will be perfectly visible and spoil the appearance of the house.
Determining the number of funnels
From the number of funnels depends on the rate of drainage of water from the trays, the greater their number, the more productive drainage. Optimally, this is one funnel per 5–7 meters of gutter.
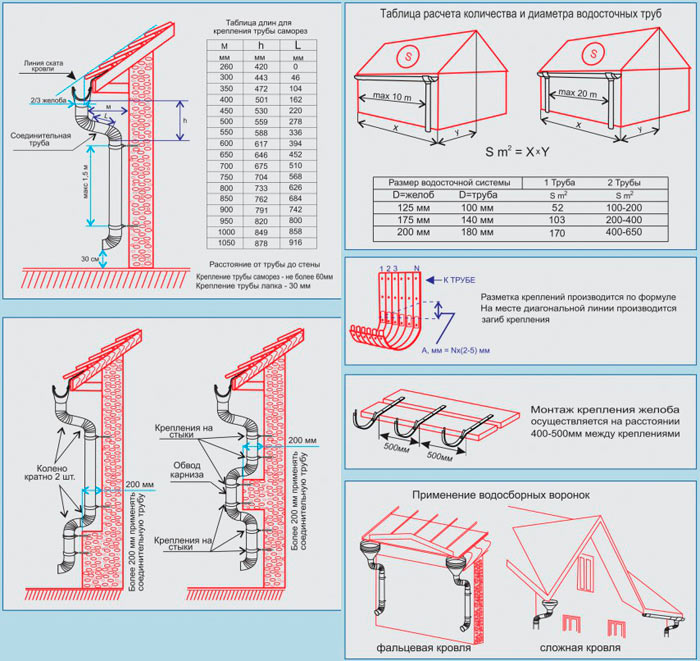
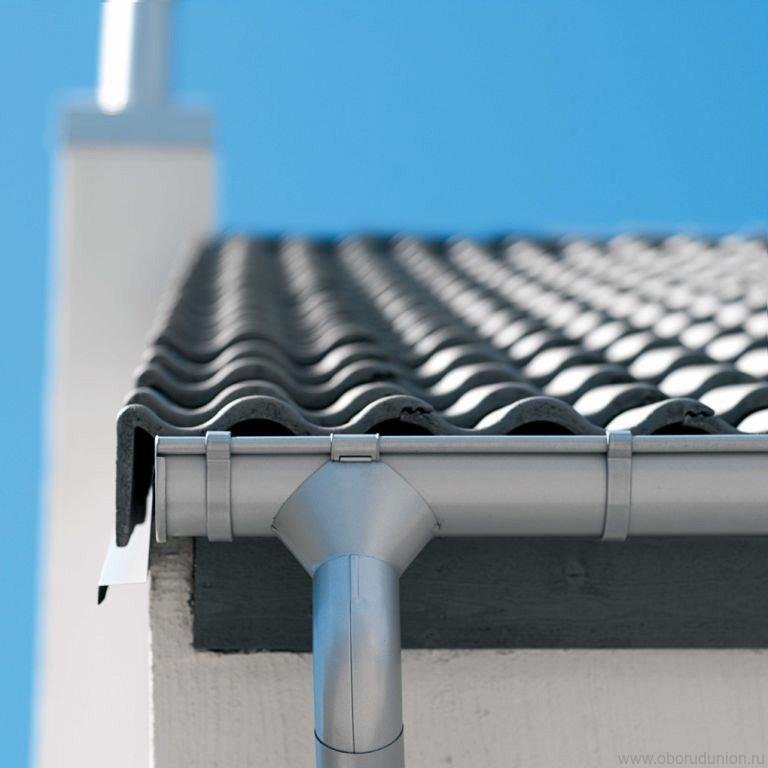
The location of the elements in relation to the roof
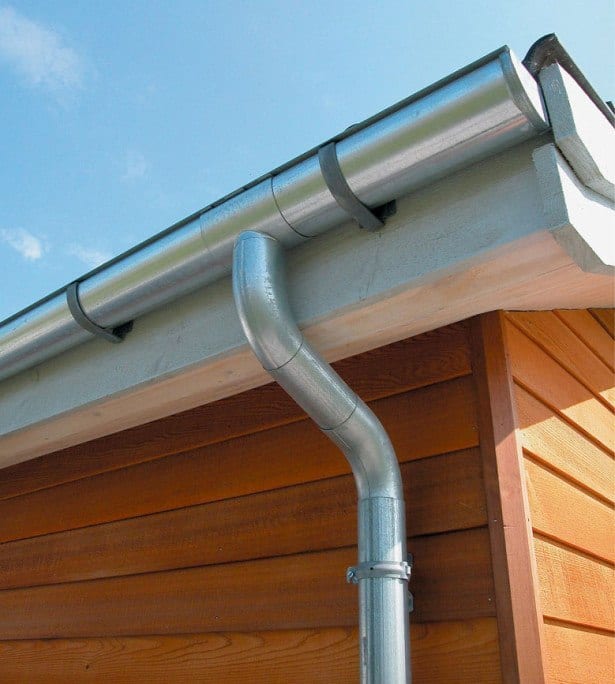
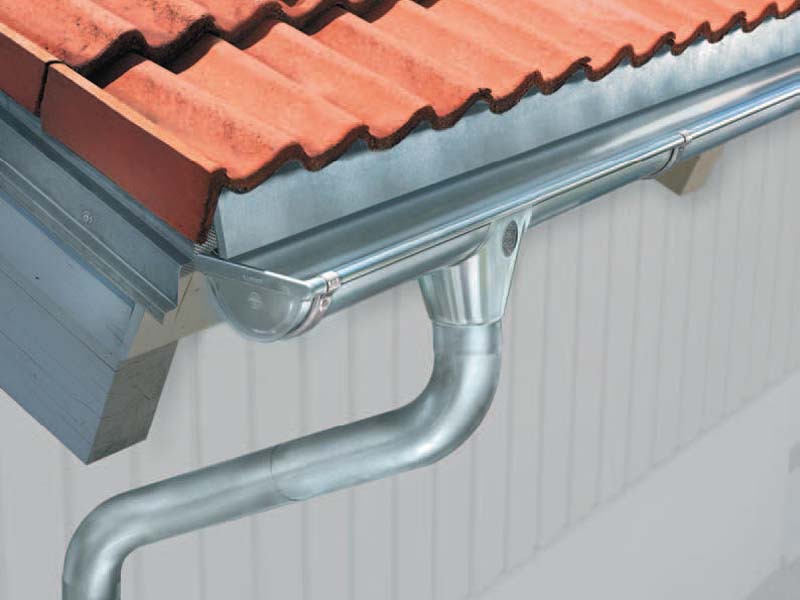
The chute should be mounted as close as possible to the edge of the overhang of the slope. At the same time, the tray should extend over the edge of the roof by half a diameter. This will ensure optimal performance of water collection from the roof.
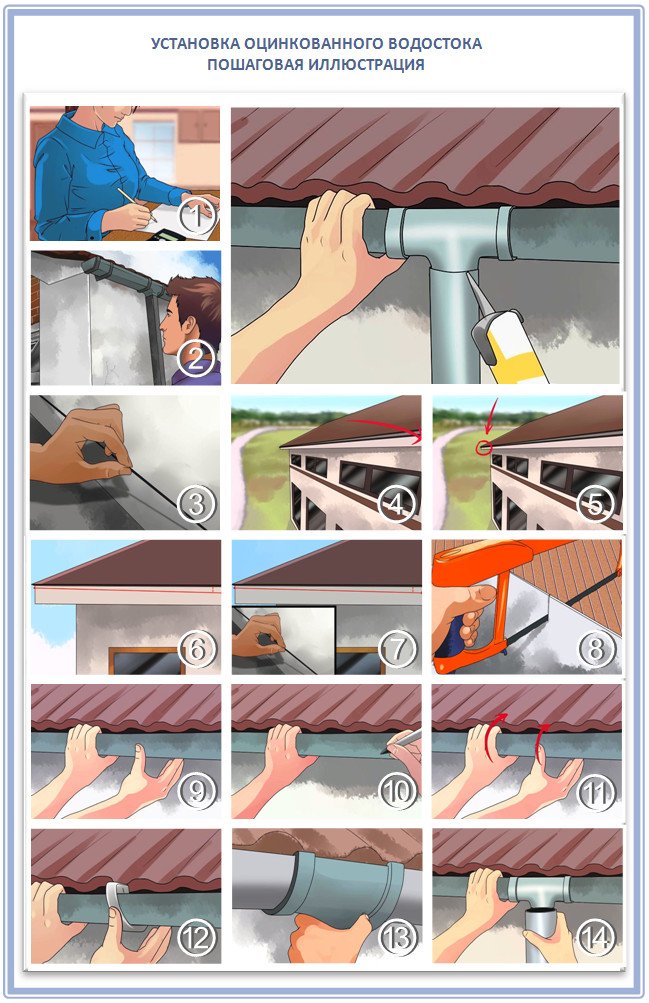
Mounting in stages
To perform this work you will need the following materials and tools:
- hacksaw or grinder for cutting pipes and trays;
- screwdriver and screws for fixing the brackets;
- construction level, tape measure, thread;
- ticks;
- hammer;
- special bending tool.

It is necessary to consider in more detail how the installation of galvanized gutters.
- At the corners and other areas where rain and thawing will be collected, funnels are mounted. They are fixed to the rafters with brackets and screws.
- Once the funnels are installed, you can proceed to the installation of gutters. There are two ways to assemble them: directly on the roof or on the ground.
- Suspensions are mounted on the rafters, which will fix the gutters in the desired position.Suspensions should be installed with a slope - 1 centimeter per 1 meter.
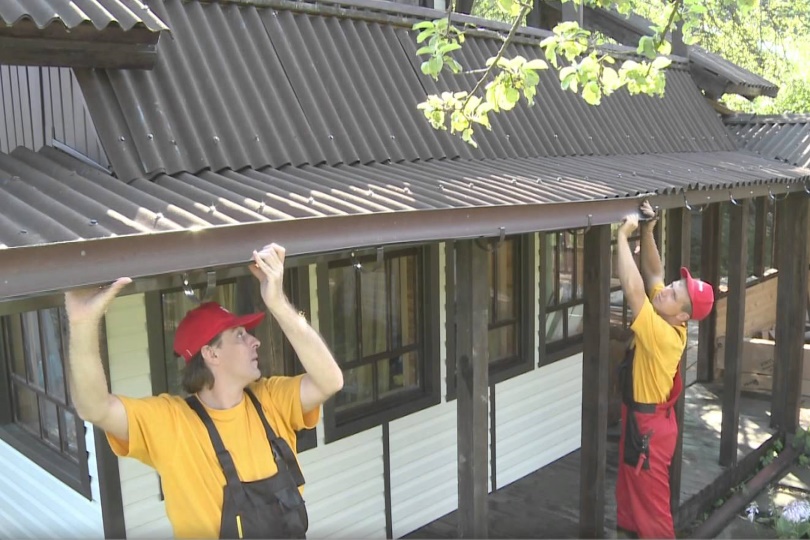
- On them waste trays are fixed. To give them stability, manufacturers advise some sheets to be additionally fixed to the rafters with the help of brackets, although experts mount the brackets over a specified distance. This indicator varies depending on the perimeter of the house.
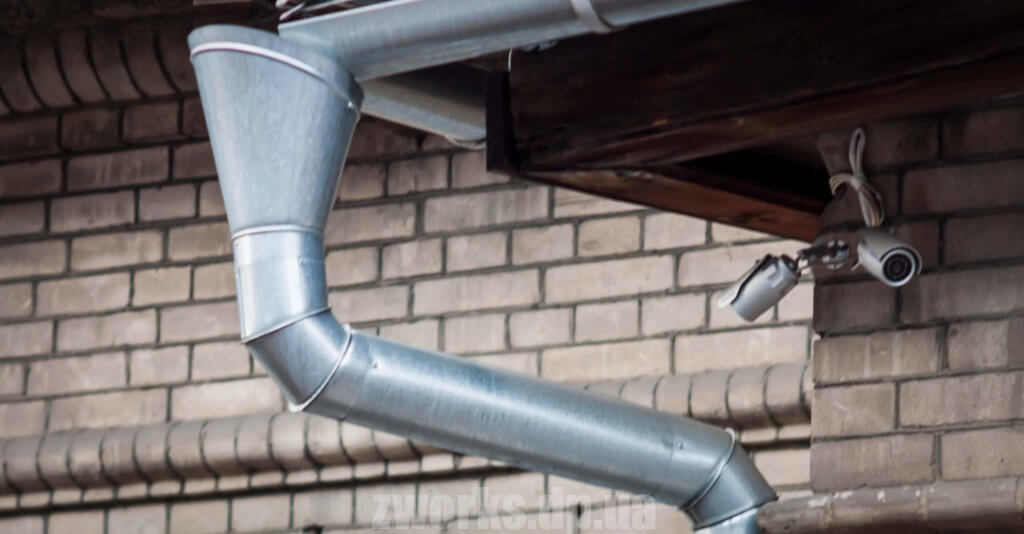
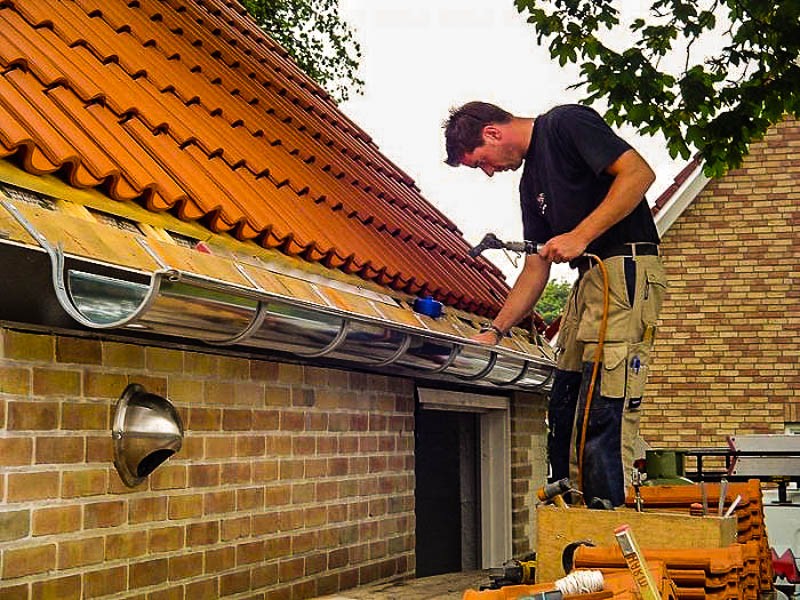
- Then all the individual elements of the structure communicate with each other, and the installation of a vertical drain begins.
- Each section of the junction is completed with a loop, which will ensure the sealing of the connection. You can additionally use ordinary sealants.
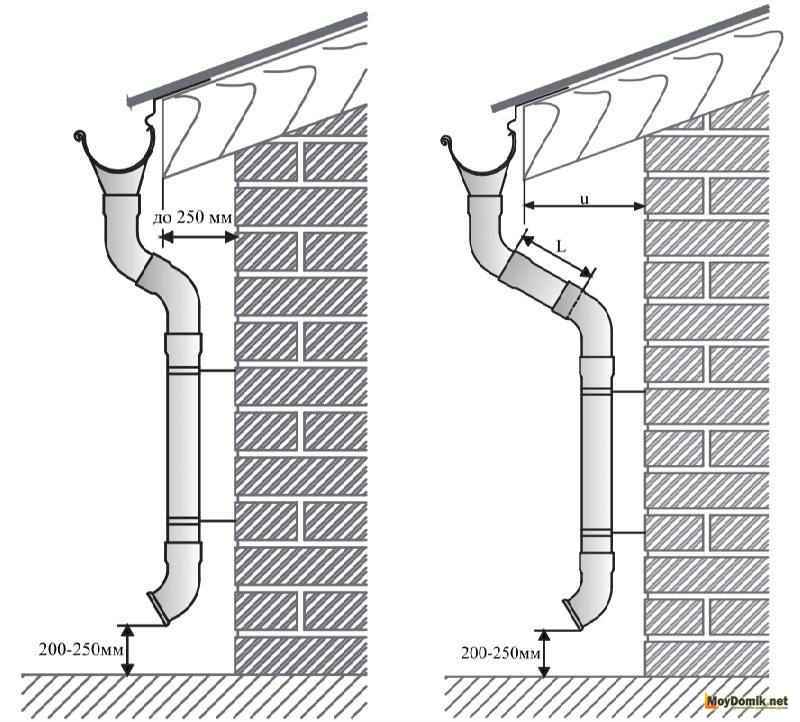
- The vertical drain should hang no more than 40 cm to the ground. If it is supposed to connect the drain with the drainage system, then the tray is put in the wall channel. When needed, the drain is insulated.
All joints are carefully checked, trays and funnels are covered with a grille, which will help protect the structure from littering. Maintenance and repair is carried out once a year. At this time, it is necessary to check the integrity of the entire structure, the strength of the fixtures and the sealing of the effluent.
You will learn more about the installation of galvanized gutters in the following video.


