Design features and technology of construction of hipped roofs
The roof has a great influence on the functionality and appearance of the building. There are several types of roofing that can be used when designing a house. For its high-quality construction and beautiful design, it is important to think of the roof as a key design function. One of the most popular roofs is considered to be hitherto, it provides a presentable appearance, reliability and durability. When building it is important to know the features of the design and technology of construction of such roofs.
Special features
The peculiarity of hipped roofs is that they make it possible to easily build attic floors. Rooms with such roofs are considered the most comfortable, spacious and ideal for living.Such a roof can be created in a private house, use it for a bath or garage. The four-pitched roofs can be covered with virtually any type of material, including asphalt tiles, metal, clay or concrete tiles.
However, if such a roof is part of the attic, it should be lined or covered with metal tiles, standing seam to prevent any leakage of the roof.
Advantages and disadvantages
The four-pitched roof is resistant to moisture and snow weight. It provides more space for an attic or vaulted ceiling, allowing you to create more ventilation in a private house. Its simple design allows you to build such a roof yourself. Such designs are much cheaper than complex types of roofs.
But such a roof has its drawbacks. The four-pitched roofs are problematic in areas with strong wind and hurricane. If the frames do not have a proper construction with appropriate supports, the roof may collapse due to strong wind gusts. Winds can cause damage to the materials of such roofs.
Species
There are several types of hipped roofs for private and two-story houses.You must consider the characteristics of each type to make the right choice.
Hip
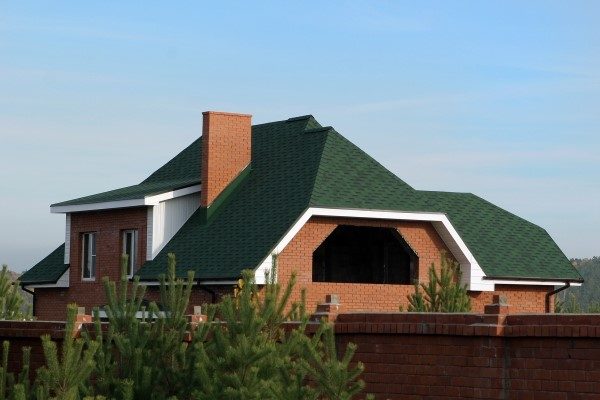
Such roofs have two sloping sides, which create end walls with a triangular extension, called a pediment. They are easy to design, they are not afraid of water and snow. They are economical and good for ventilation. This type of roofing is suitable for all weather conditions.
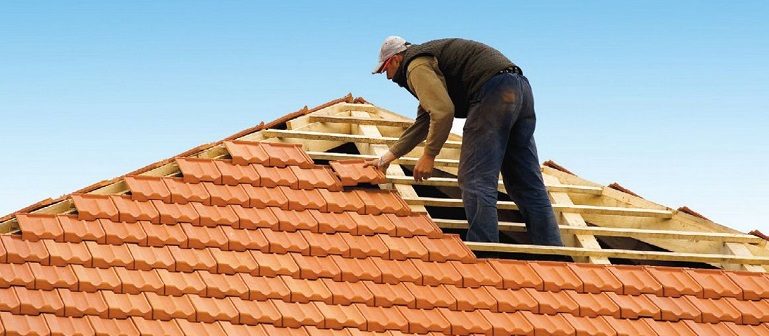
Hip
This is a type of roof where all sides lean down to the walls, usually with a rather soft slope. It is called so, because it consists of hip ramps. It turns out the house without gables or vertical sides of the roof. The roof has a pyramid shape. It is more difficult to build, but it is convenient in everyday life (on such a roof you can build a great attic).
Half-hardened
Each area of such a roof has its own tradition or preference for the materials used to create it. In a climate where the amount of precipitation is less, freezing is unlikely to occur, half-hipped roofs are more often built of brick or concrete. This is a good invention for preserving the heat of the sun. The hinged roof type is cheap and easy to build.
This roof is called a broken line: its end slopes are short and do not reach the middle of the side slope.
Installation methods
There are many types of roofing and technologies for their installation.
Asphalt
Make sure that you have all the necessary tools to install the roof, as well as safety equipment. You will need:
- hammer;
- roofing nails;
- a piece of chalk;
- tin scissors;
- work gloves;
- correct shoes;
- seat belts.

Decide what type of tile you want to choose. Make sure that you have purchased enough material for it to be enough for installation. It is important to follow the step by step technology.
- Prepare the roof for installing roofing tiles. Remove the old roofing material as well as all the nails. Do not install new materials on top of the existing roof.
- Install a litter, waterproof layer between the roof tile installation and the roof.
- Install a “drop edge” on the outer edges of your roof.
- Then you need to install the starter tape or the first layer of tile. Use the chalk to mark the exact center of the roof when walking vertically.
- Center the starting gallery in the middle of the chalk line and attach it in place. Continue to install the tile along the entire length of the roof.
- Continue to install shingles throughout the length of the roof in accordance with the manufacturer's instructions.
- Cut the tile to the required size when you reach the edge of the row.
- When you reach the ridge of the roof, install spinal tiles.
- Perform holes for chimney, ventilation.
- Clear all debris and veneer the roof tiles.
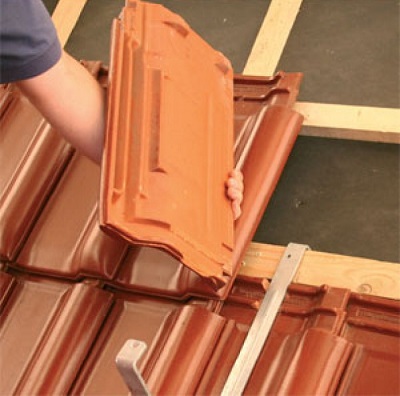
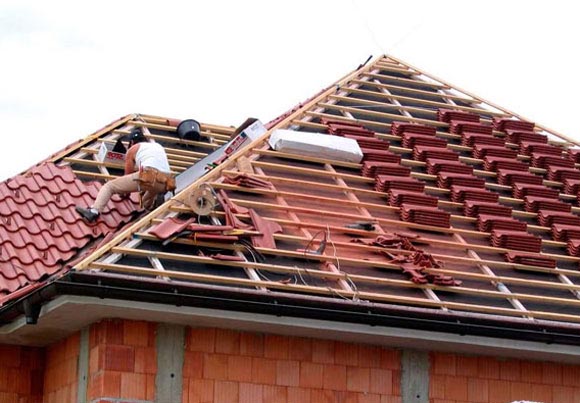
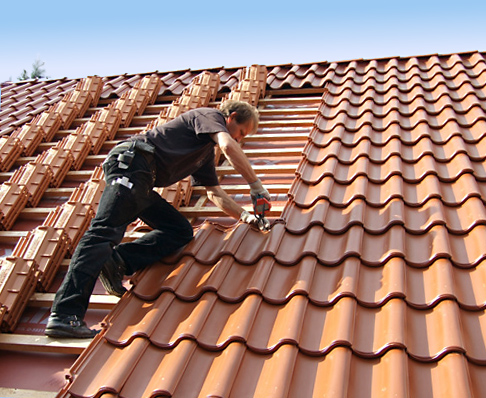
Tile installation
The installation of clay tiles has not changed over the centuries. This ancient form of roofing looks simple enough, but must be carried out by a qualified roofer. It is known that properly installed clay roofs withstand 100 years, poor installation will quickly require repair. There are 2 forms of mounting roofing tiles.
The clay roof is nailed. Usually used in the work of copper nails. The second (most common) method is the use of tips that protrude from the roof. Today, these styles often also provide nails for an extra guarantee.
Other (less common) forms include a suspended clay roof with wires, clamps, or laying them in adhesive foam. These methods are usually performed in areas with special weather conditions.

The main stages of the installation of roofing tiles are as follows.
- Evaluate the roof before moving on it. Record any areas that show signs of rotting or wear.
- Install waterproofing. This is important for clay tiles, as it significantly increases the water resistance of roofs.
- Use chalk to mark horizontal and vertical lines on the roof. So there will be guarantees that the drawing of the composite roofing material will not be deformed.
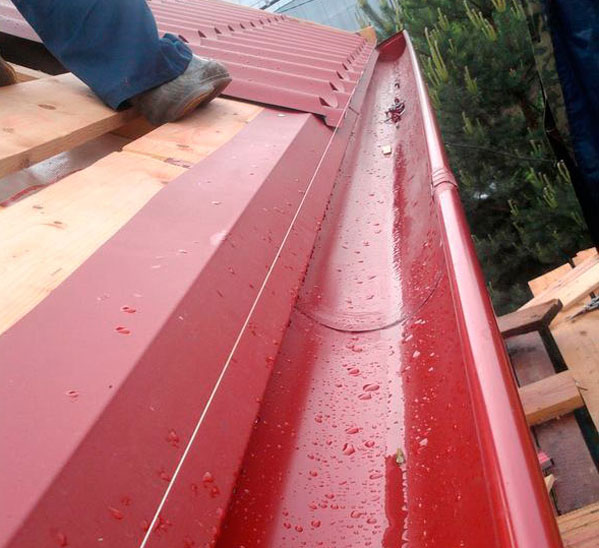
- Install the beacon and gutters.
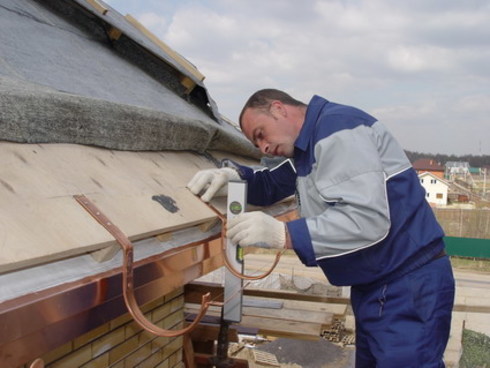
- Use quality metal for gutters.
- Start laying the first row of your tile. Follow the manufacturer's instructions, each type and style of clay roofing may require a different method.
- Use high-quality metal nails that are resistant to corrosion so that the roof of clay tiles held for a long time.
Clay roofing may vary slightly in color, so regroup tiles if you are unhappy with the color scheme. If you are satisfied with the result, continue to work consistently until the roof is finished.

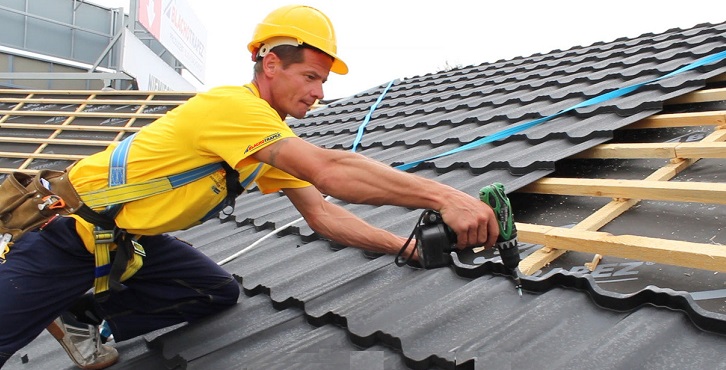
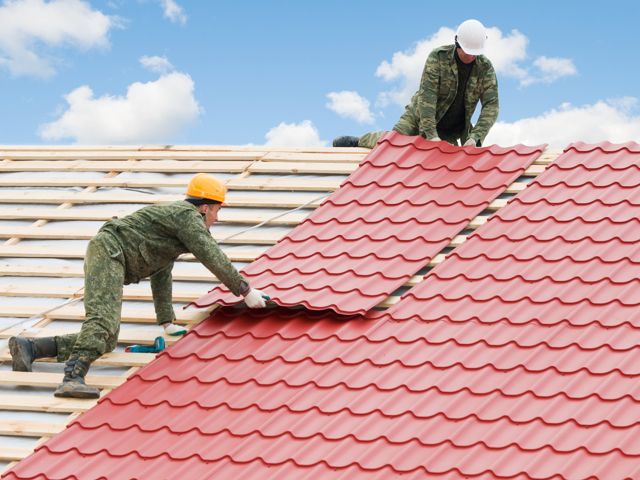
Metallic
Metal roofing is becoming increasingly popular due to ease of installation, durability, safety and environmental friendliness. There are many styles of metal roofing. Before you begin the installation, you need to answer a few questions:
- whether vertical panels, standing seam or tile, what are their differences;
- what type of metal sensor is needed taking into account the budget and climate of a particular region;
- which metal is best for the roof;
- what color of roofing material will look advantageous.
Often, the metal in work needs to be cut or bent to fit straight. Installing air vents may seem like a daunting task. These are the basic steps that are included in the installation of a metal roof.
- Determine the pitch of the roof, which will help determine the type of metal roof used.
- If necessary, remove the old roof, taking into account the type of metal roof, local building codes and the weight limits of the house.
- Install waterproofing. It will protect the roof from precipitation.
- Install the edging of the eaves. Then install metal roofing in accordance with the manufacturer's instructions.
- Clean up any debris generated during construction.
Materials
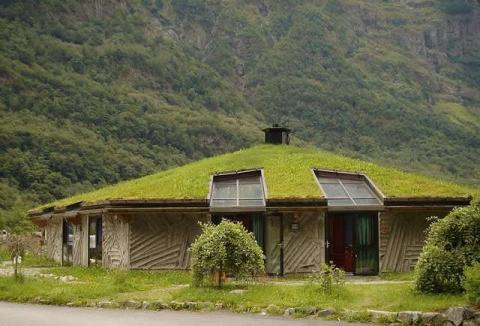
You can build a roof of various materials.Recently, square hipped green roofs have become popular. When building a roof you need to take into account the characteristics of each material. Roof tiles are an important aspect of building aesthetics in patterns, textures and colors.
Roof tiles are usually locally available. The type of pebbles taken into account before construction, the material affects the construction method.
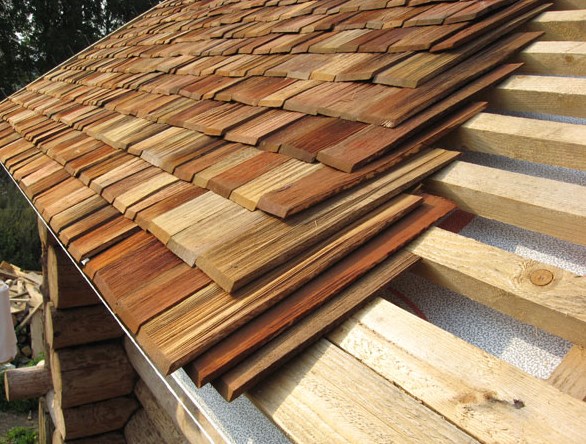
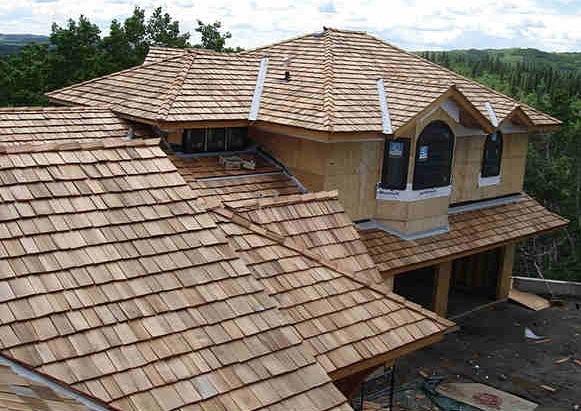
Wooden roof tiles
The most commonly used material, resistant to decay. Make it out of red and white cedar, mahogany. The length of such tiles usually does not exceed 40, 45, 60 cm. The thickness is 1-2 cm in the section. To improve durability, wooden tiles should be installed with air circulation. Experts recommend sheathe such tiles.
You can do this with ordinary plywood (recommended for areas prone to wind). A breathing bucket is also needed - approximately 7/20 cm (to ensure the air flow under the tiles). Wood shingles are prone to decay, but have a unique natural look. The minimum slopes are 4: 12/3: 12. The expected longevity varies between 15-25 years.
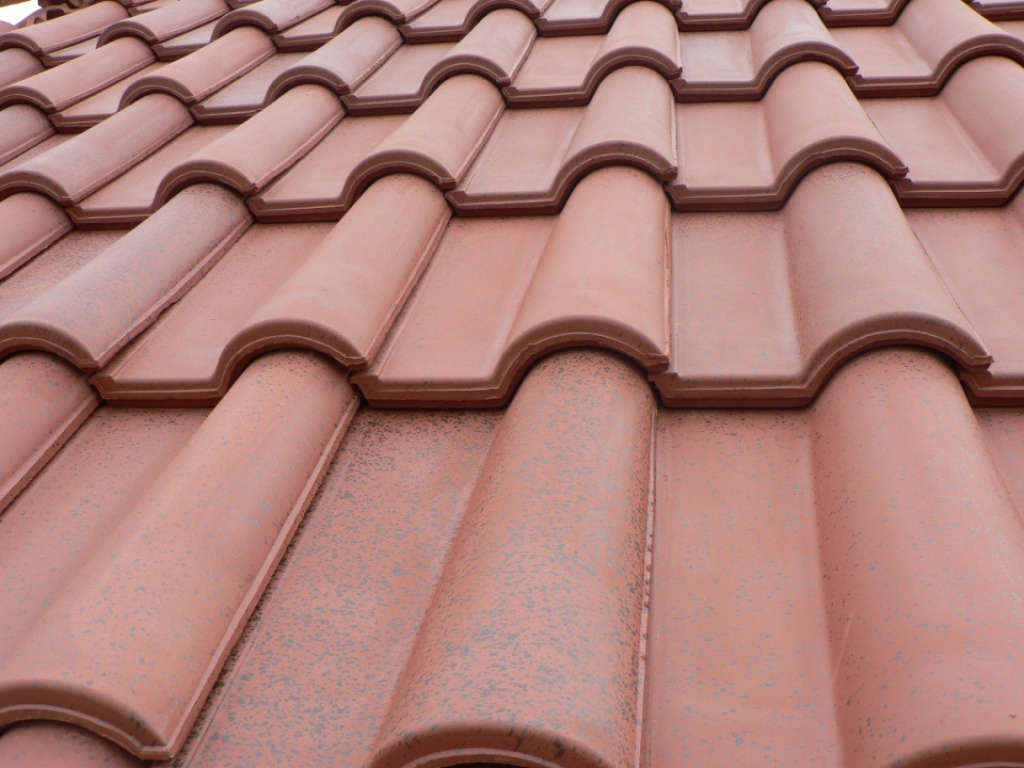
Clay and concrete tiles
The service life of such material is 30-75 years. Is it dried in a drying cabinet or is it cast concrete. Concrete is a fairly heavy material, but plus it is that it is non-flammable, it is safe. The minimum slope is 4:12.
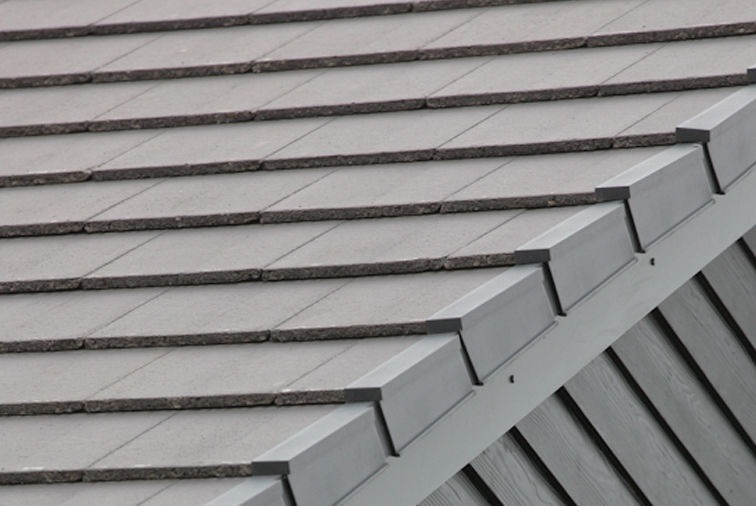
Metal tile
More expensive metals for the roof have self-protective oxide coatings of copper, zinc and stainless steel. The typical size is 45 x 60 cm. The nozzles are attached to the flooring and rolled into a seam. Flat seam systems are commonly used on roofs that have a low pitch. They are also used on curved surfaces (for the dome and fornix). This method cannot be used in warm countries.

Green
Green (ecological) roofs - roof covered with vegetation. These roofs are mandatory in some parts of London. They are more expensive in construction, they are expensive to maintain, unlike the usual type of roof. However, green roofing works well with water irrigation and is an incredible insulator, reducing heating costs, making the house more sustainable. It is also a good sound insulator, expands the size of the garden, creates the effect of value at home.
There are 2 types of green roofs.
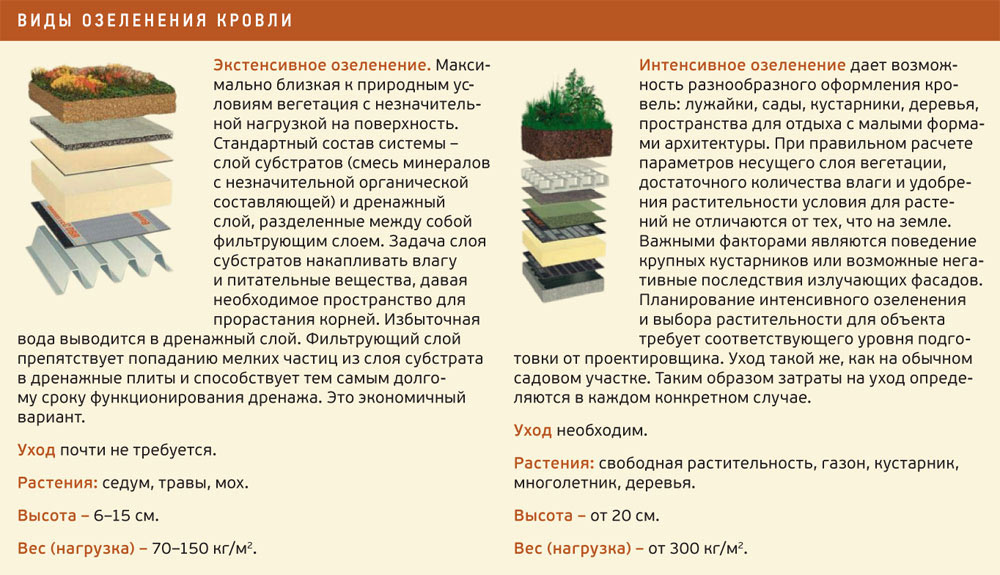
Extensive
Extensive green roof - option less than 6 inches thick. Due to the thickness of the growing environment, the vast green roof can support only drought-resistant small plants. The reasons for this are limited root space and the small amount of water the soil can store. Because of this, the roofs do not require maintenance and can withstand moderate loads.

Intense
An intense green roof has up to 90 cm of land, and therefore can grow a greater variety of plants (shrubs, grasses and even trees). Often it looks like a real garden. However, these varieties need more attention in terms of content.

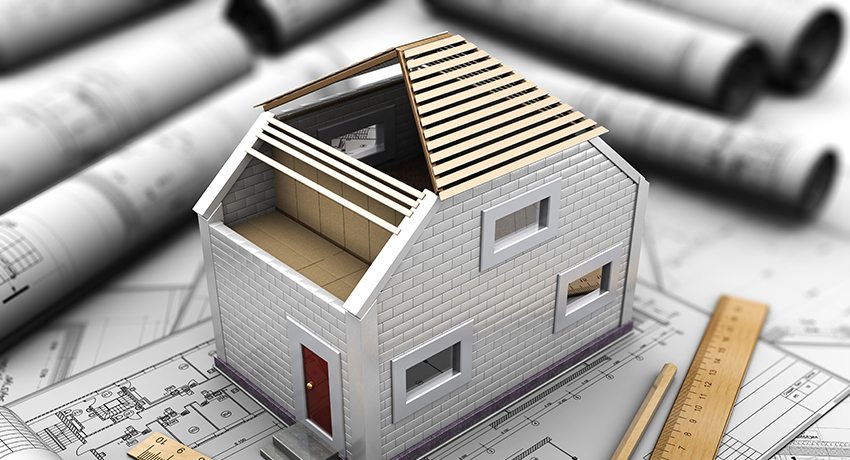
Design
The roof with a chetyrehskatny design is simple in design. Its symmetrical form is attractive, allows maximum use of attic or mansard space. If you have carpentry skills, you can easily create such a roof. The roof structure with four slopes requires that the slope of the sides can be in the range of 5 to 60 degrees.
It depends on atmospheric loads, the purpose of the attic and the type of roofing materials used.In areas with frequent and heavy precipitation, the slope should be significant (from 45 to 60 degrees). In regions with strong winds and occasional rains, the slope is usually much less.
If the angle of inclination is approximately 5-18 degrees, it is recommended to use a roll covering, 14-60 - roofing metal, 30-60 - tile.

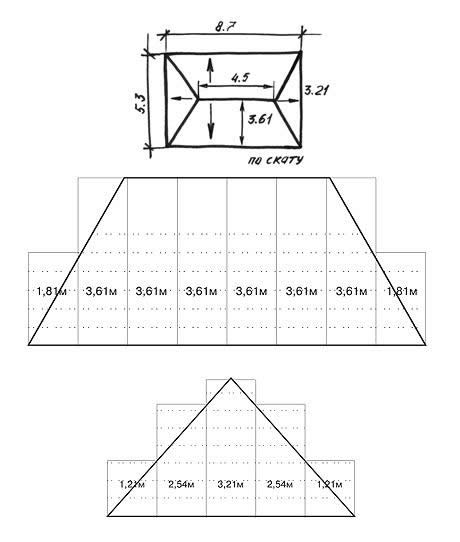
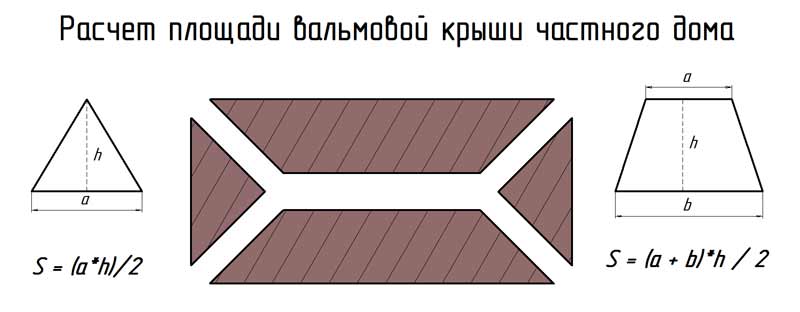
The height of the roof ridge is calculated using a trigonometric expression for right-angled triangles. Calculation of rafters - the beginning of the drafting of the whole house. The cross section is determined depending on the expected load (weight of the roof, roofing pie, external influences) and the degree of inclination of the roof. With the help of calculations determine the step between the rafters and check their bearing capacity.
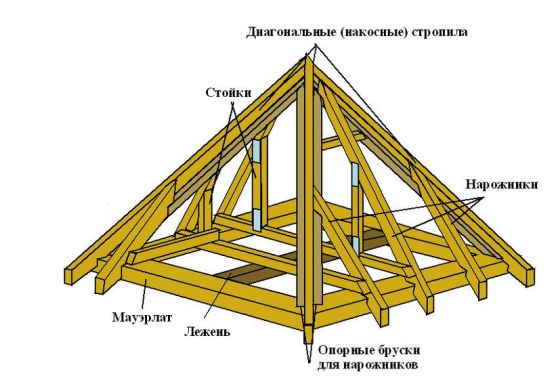
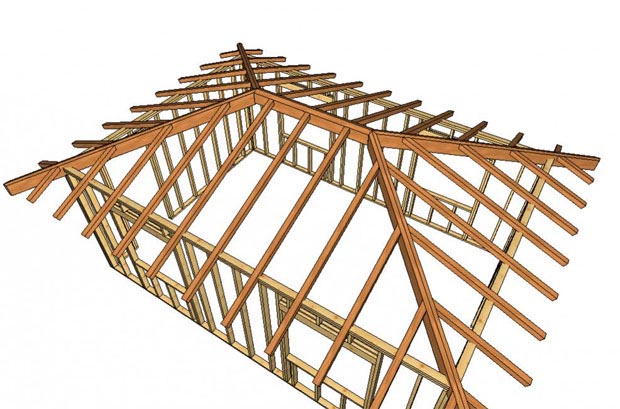
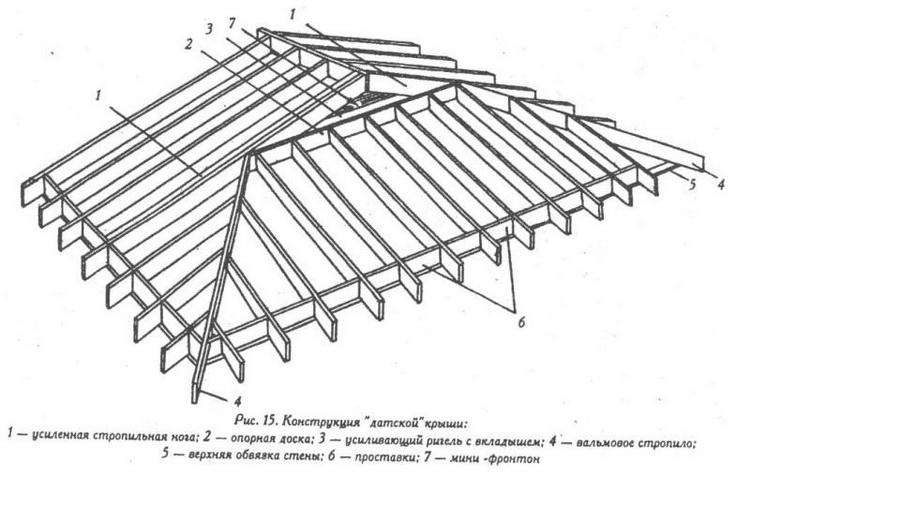
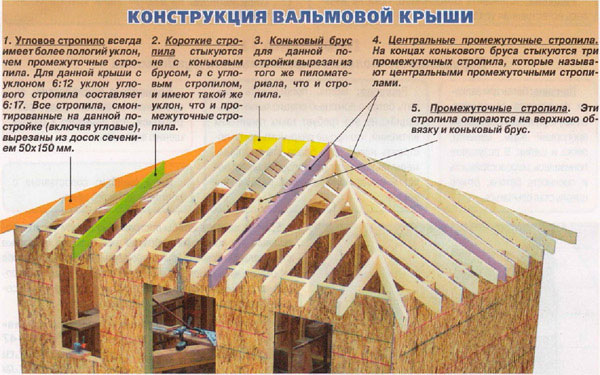
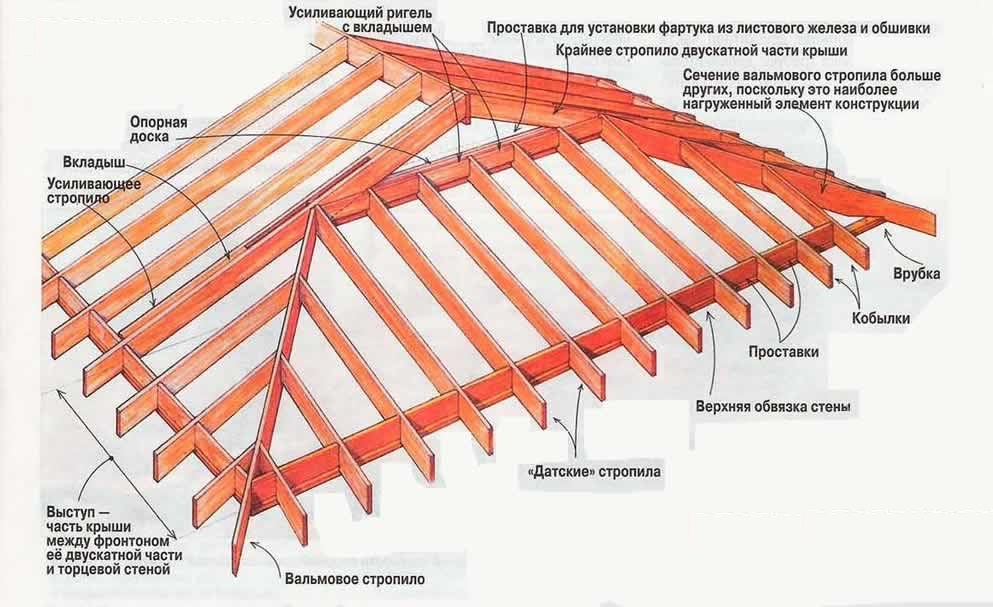
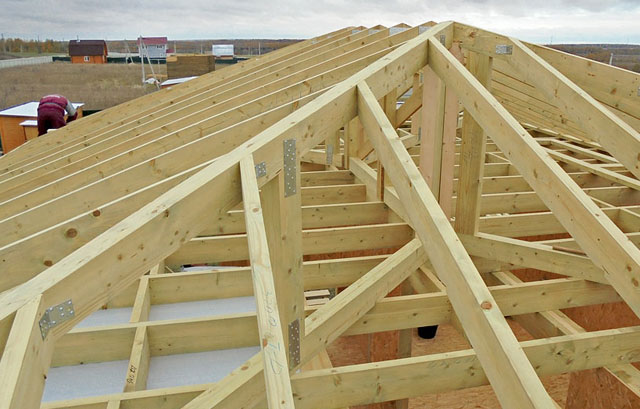
Main elements
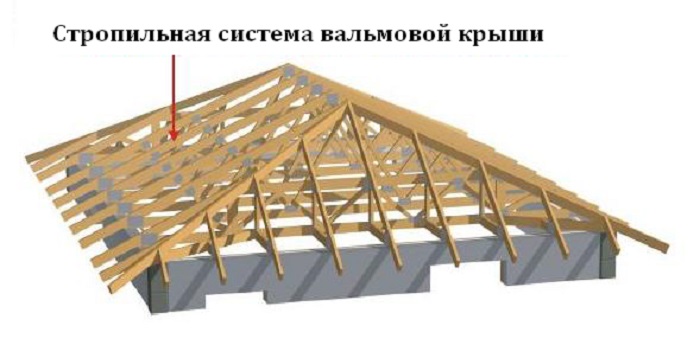
It is important to know the basic elements of the four-sided roof. The frame or frame design is designed to support roofing materials, therefore, maintains the water resistance of the building. Rafters are structural elements of the roof that support the cladding. Ordinary they are perpendicular to the wall, they never touch it.
Roof pitch refers to the amount of roof elevation compared to the horizontal dimension of a roof, called a run. As a rule, it consists of 12 units.If the roof rises 4 units in a length of twelve, the height is 4: 12. In degrees, this figure is 18.43. The girdles are small overlapping roofing blocks with stepped vertical joints. They are made of wood, asphalt, slate, clay, concrete, metal, or other materials.
Load calculation
The slings are subject to constant and temporary loads, so it is important to correctly calculate the desired level of maximum permissible value. The main calculated parameter of the snow load, adopted in Russia for the middle belt, is 180 kg / m3.
- If the slope of the roof is more than 60 degrees, the snow load is not taken into account.
- The standard calculated wind load for the central zone of Russia is 35 kg / m3.
- If the roof slope is less than 30 degrees, the wind correction is not taken into account in the drawing.
The load parameters are adjusted for local climatic conditions due to certain factors. The total weight of the roof is calculated based on the amount of materials used and the total area of the structure. When calculating, payload indicators are introduced into the system (for example, if water heating tanks, ventilation tanks are installed).
It is necessary to calculate the strength of the rafter and the degree of possible deformation under different conditions. Rafters in the form of a rectangular strip with a section corresponding to design loads, slabs with parameters 5x15, 5x20 cm are used more often. The choice is limited to sawn softwood (for example, spruce, pine) with a moisture content of 18-22%, treated with antiseptic and fire retardants.
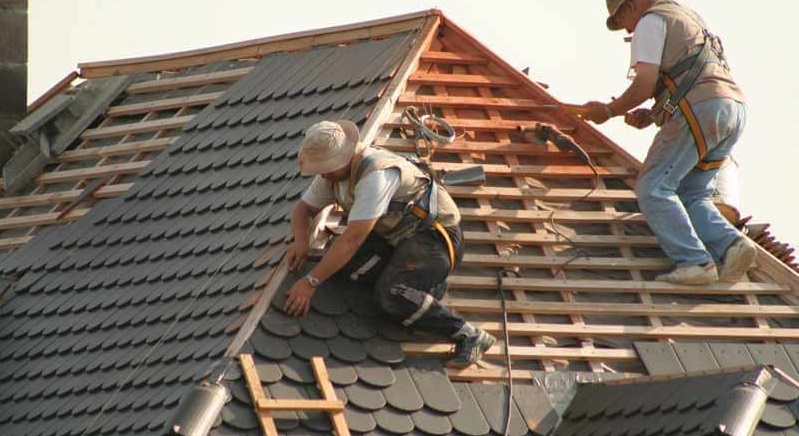
Installation of hip roof
A hip roof is a roof that slopes down at all points and has a uniform pitch angle. This roofing option is good for draining water and preventing leaf growth. Although most people build such roofs from trusses (prefabricated frames), you can build your own hip roof from scratch.
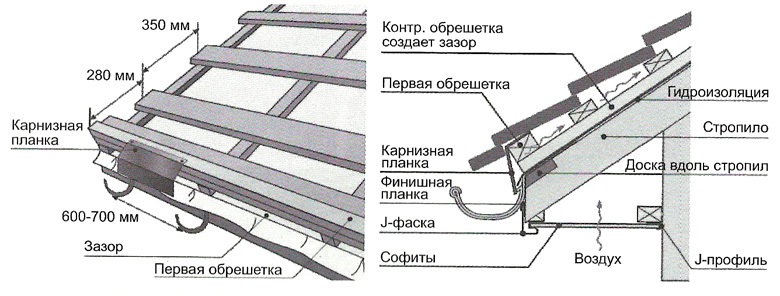
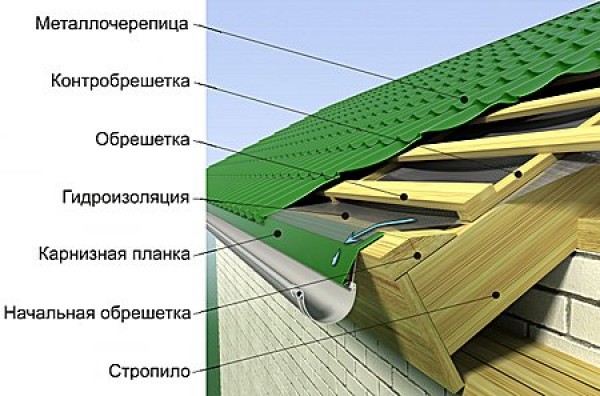
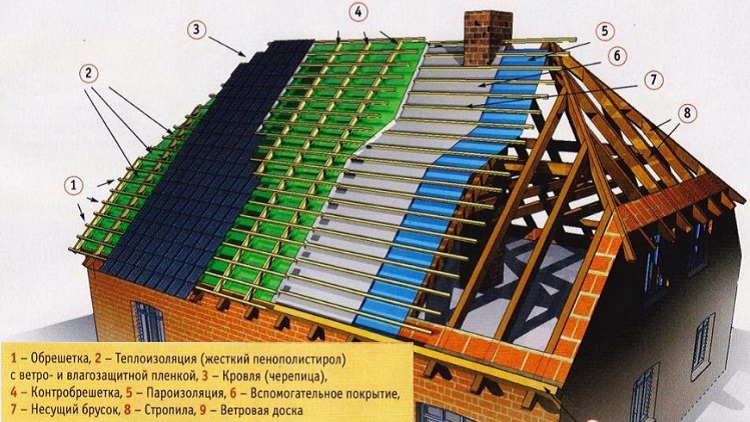
Roofing Cake
The roof structure consists of a whole complex of related materials and elements. These include acoustic waterproofing, vapor barrier, ventilation elements. Because of its multi-layer nature, this four-layer construction is called a roofing cake.
Markup
To create markup, it is important to perform a series of specific actions.
- Measure the length of the common, cross-country rafters and ridge beams using the ridge at the end of the rafters themselves. Common rafters are those that run from the top of the wall to the top of the roof.
- Jogging run through the joints, where there are two faces of the roof. Measure them according to the step. The ridge board runs along the top of the roof and where common and cross rafters meet. Measure it according to the length of the building other rafters that will fit this.
- Measure the common rafters according to the desired pitch or angle of the roof.
- Cut the rafters to the appropriate size. You should have enough common rafters so that they are located at a distance of 20 inches (50 cm) along the walls. On a simple roof over a rectangular building there will be four cross-country rafters and one board with a crest.
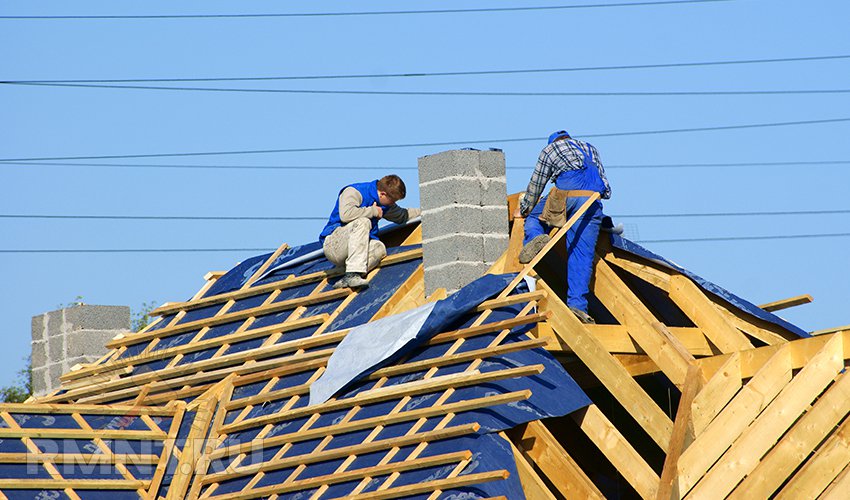
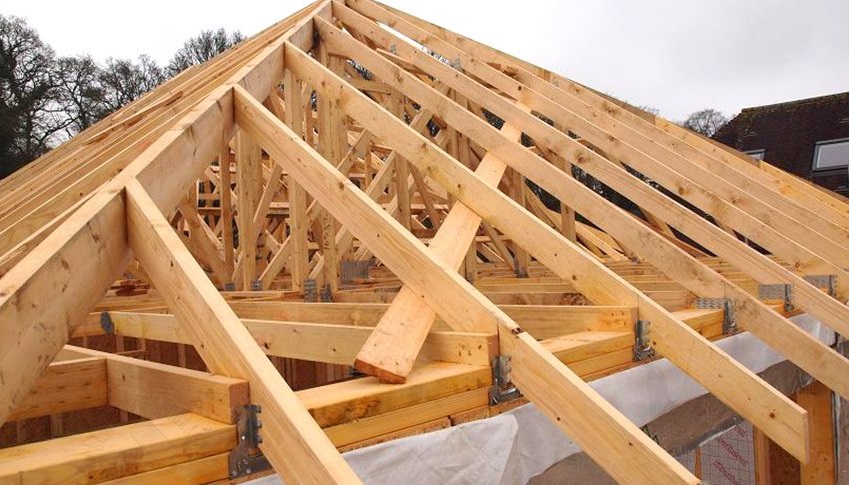
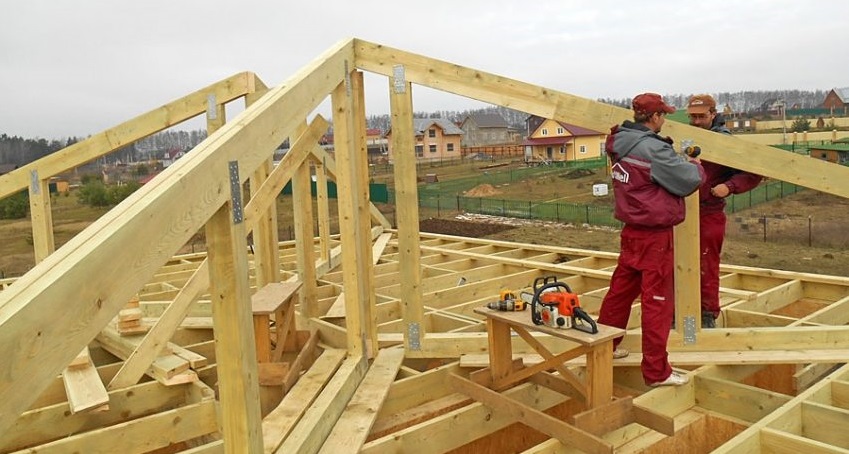
Sequence of work
The plan to install the hip roof for a one-story structure does it yourself with building a roof truss system. But in this case there are significant differences. Before the start of all work, auxiliary materials should be provided, representing a small elevation for the wizard.
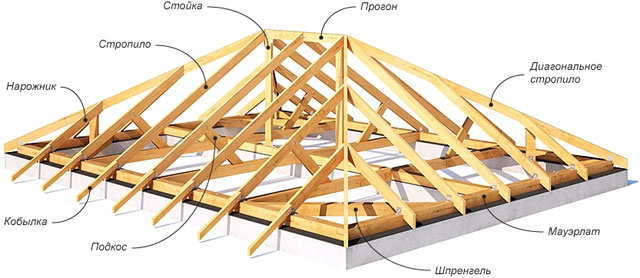
- After that, you can proceed to the installation of the first element - the spinal beam, which is attached to the previously erected vertical supports, located with a step of 3-5 m.
- Then install the power plate, which is necessary for even distribution of the roof load on the structural components of the house. It is located in the center of the outer wall or is offset to the inner edge.
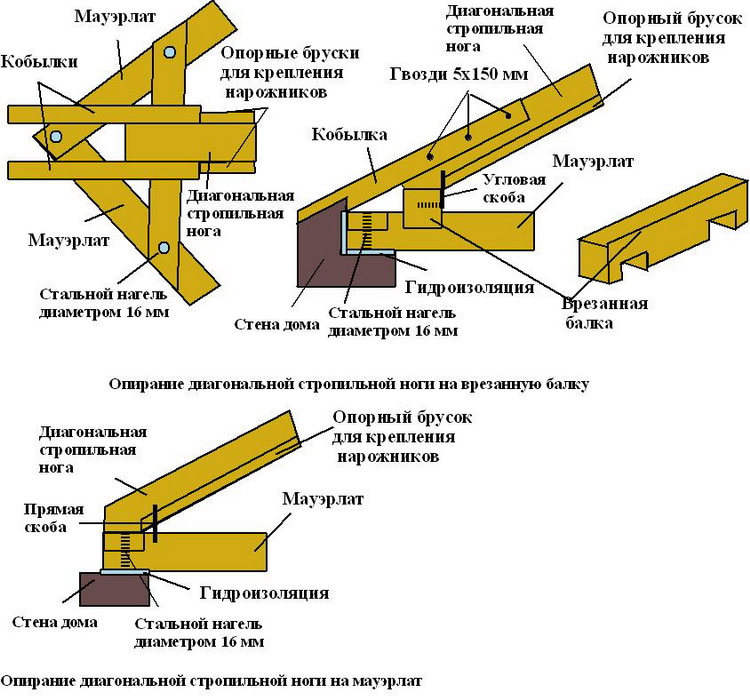
- Once the power plate is installed and secured, you can begin to install the diagonal truss legs, which are connected to external corners and fixed inside.
- Subsequently, the inclined lines need to be attached to the slopes. Outside or semi-footboards are distinguished by the fact that they are installed in pairs. They are fixed with support for the power plate and diagonal line, the mount is performed at different heights.
The next step is the construction of spacers, which are attached under the diagonal supports. The tilt angle is 45 degrees. Then you can continue to install intermediate lines that have two points of support: at the top of the ridge, the bottom edge - to the mauerlat. They are installed with a certain uniform ridge, which averages from 1 to 1.2 m.
To improve the design of intermediate rafters through 1 element is additionally fixed to the supporting wall of the house with the help of metal strands or brackets.
Tips and tricks
It is worth paying attention to several important recommendations and tricks that will help to build a hip roof.
- The quality and durability of the material. Make sure the materials you choose are durable. A quality manufacturer will study each stove. If your party has a large number of broken plates, you can put the blame on the manufacturer.
- Select an installation contractor. Choosing a contractor to install the roof is important to know his track record. If possible, go to past contractor assignments and talk to homeowners. It is important that the contractor was a professional in his field. To put the roof should be an experienced master.
In addition, we must not forget about the quadrature of the structure. Without this, build a quality design will not work. Knowing all aspects of roofing as well as the most common mistakes will also help you when choosing a roofing contractor.
A well-built roof can last 100 years.Do not rush, carefully prepare for the design of the roof.
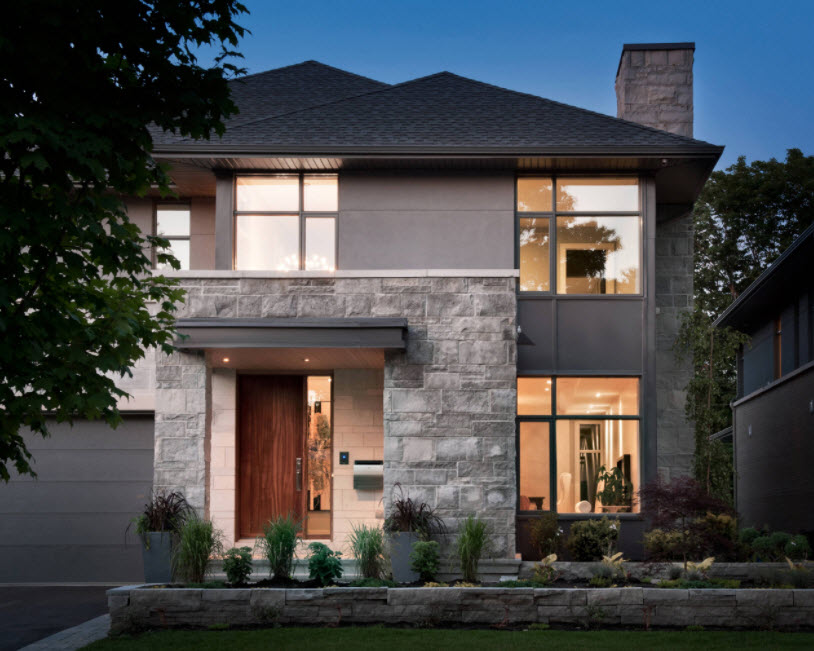
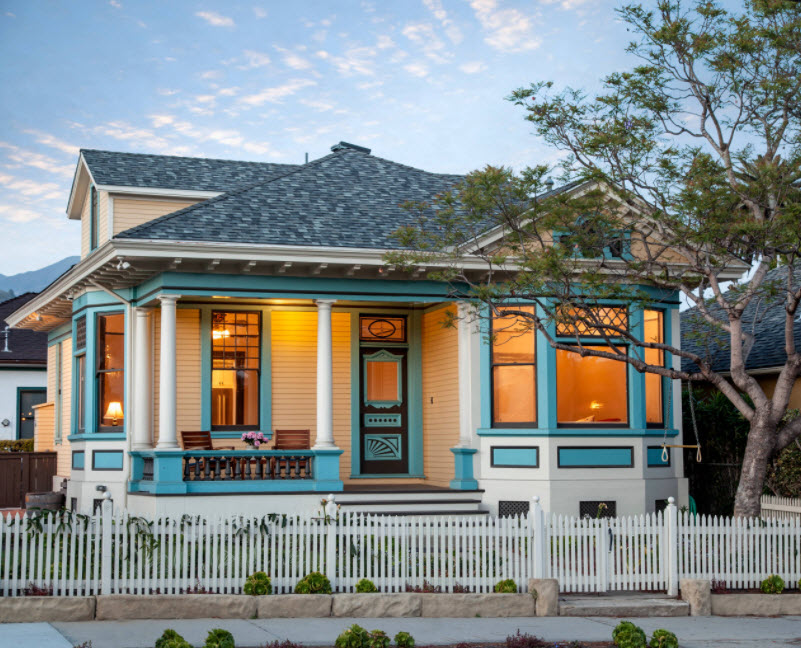
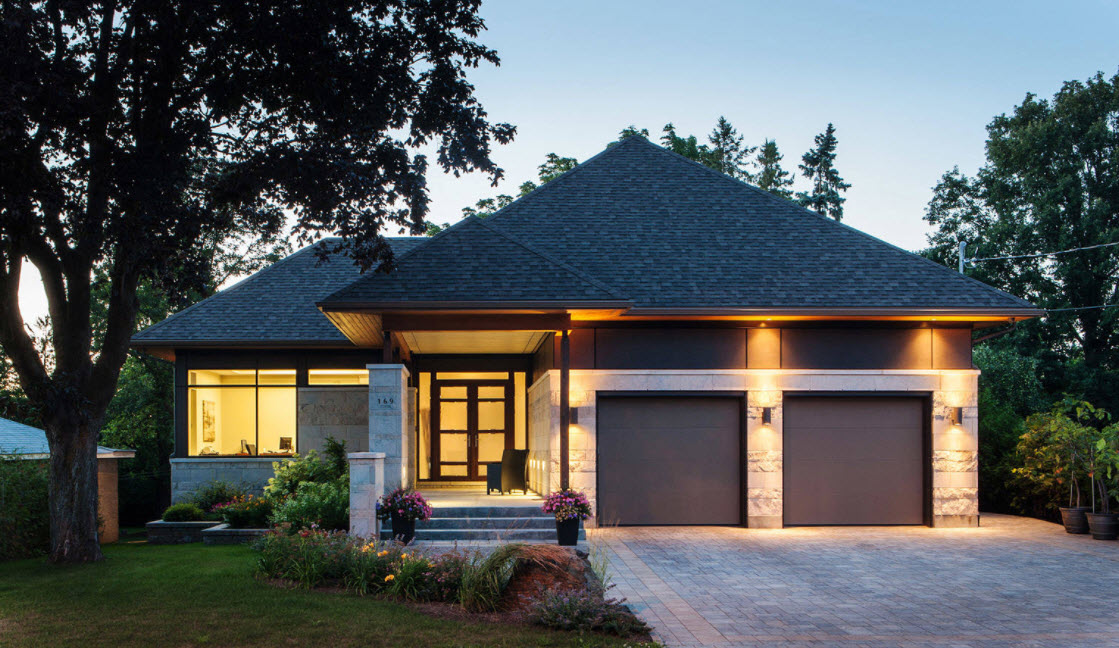
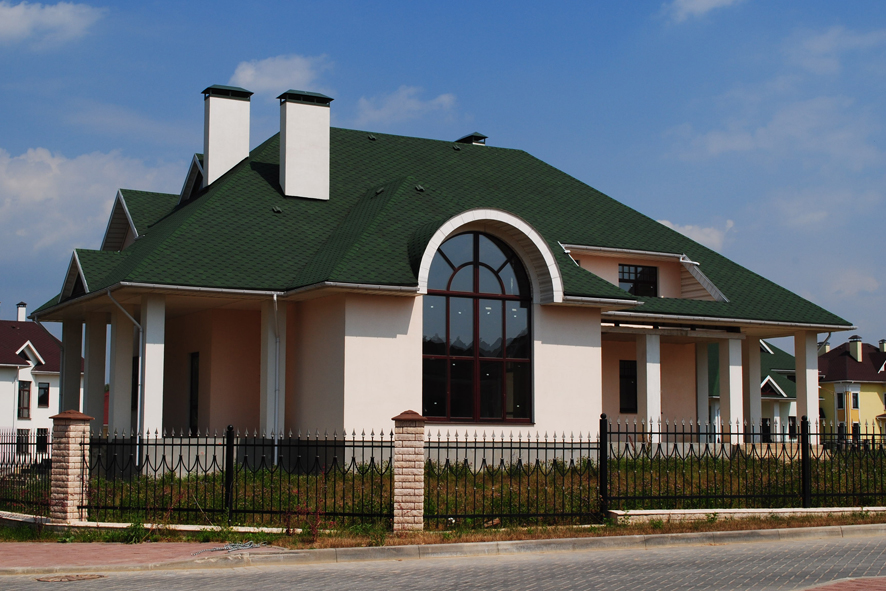
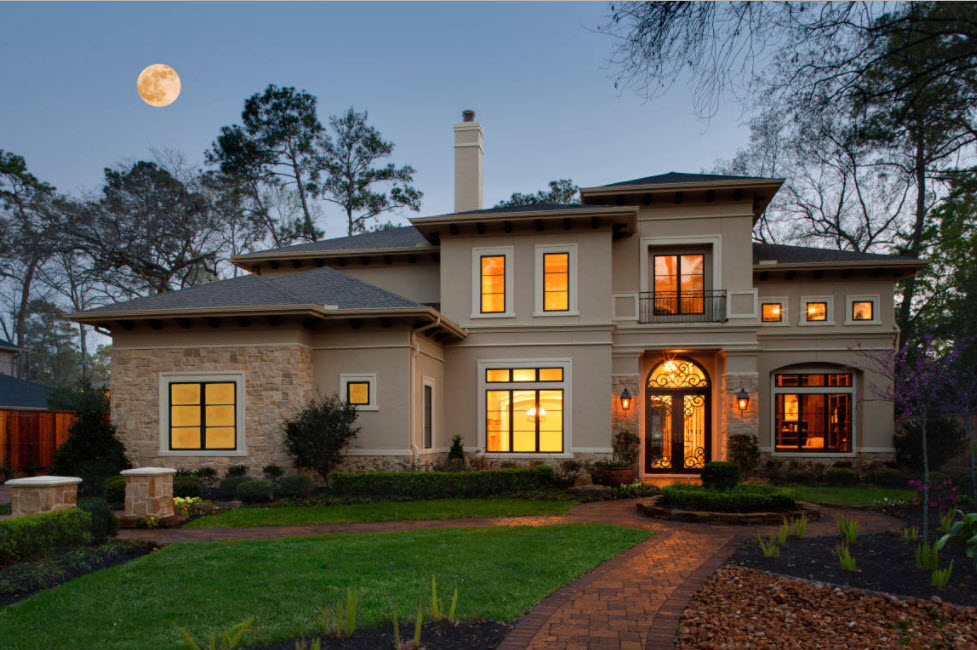
Successful examples and options
Assess the possibilities of the design of hipped roof and its advantages will help ready-made examples.
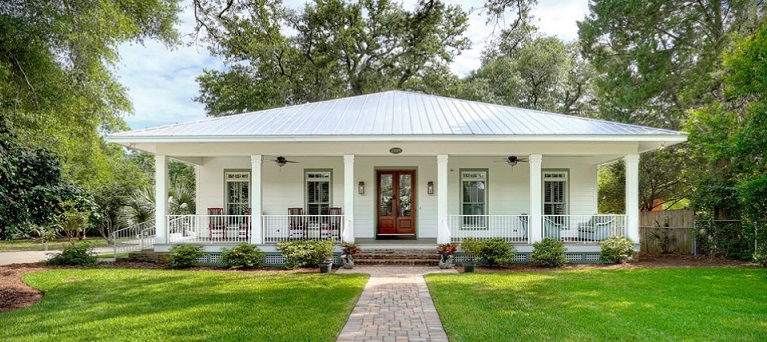
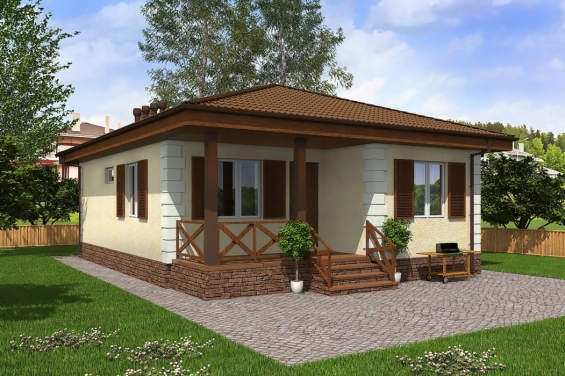
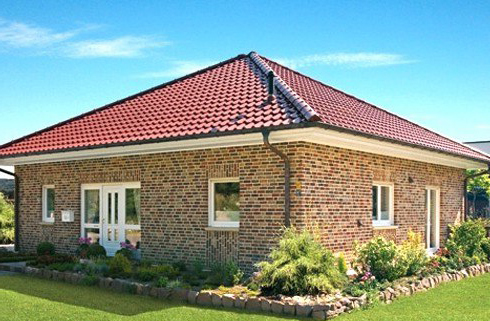
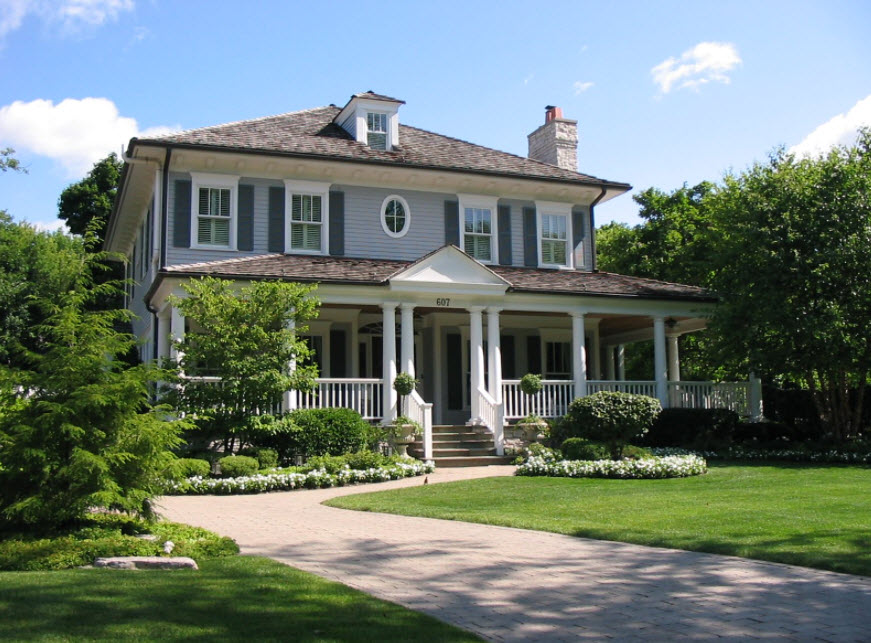
- The easiest option with a four-sided roof.
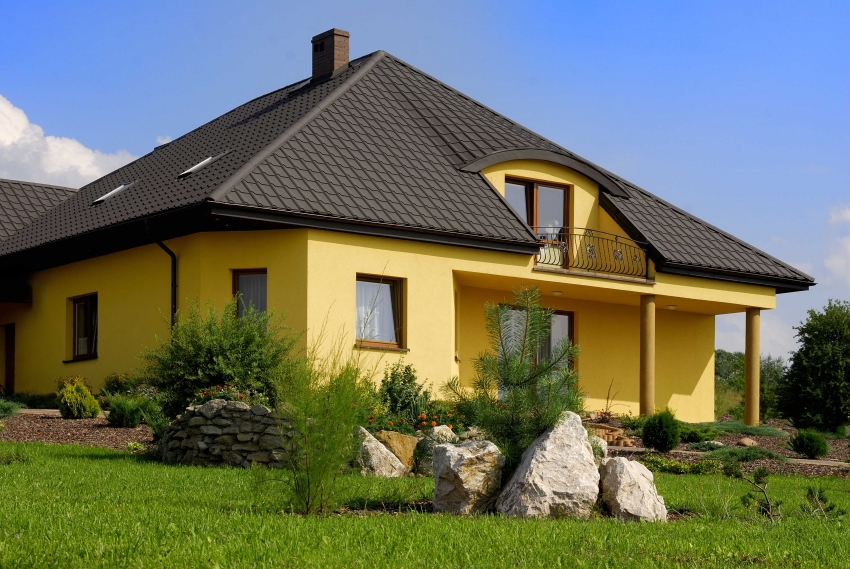
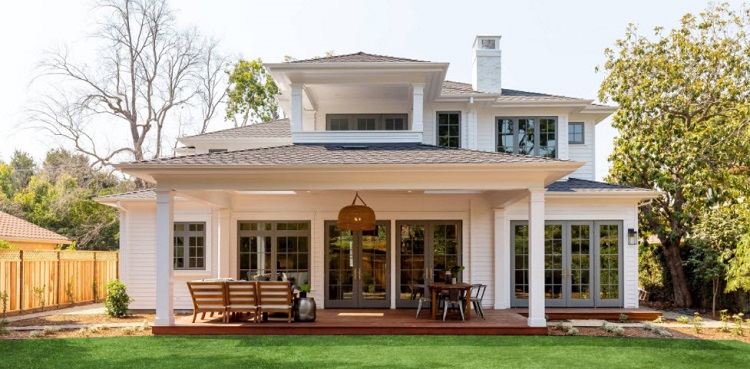
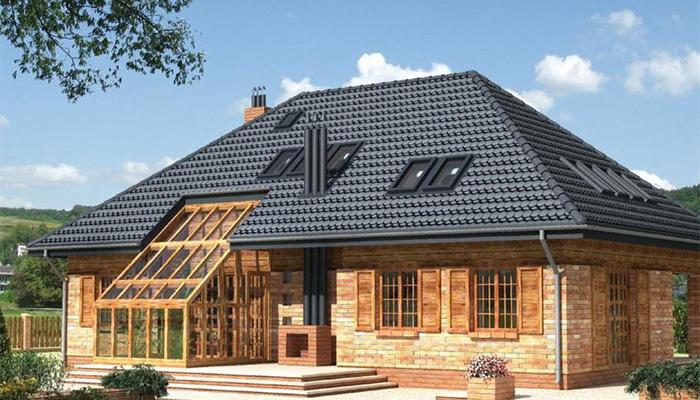
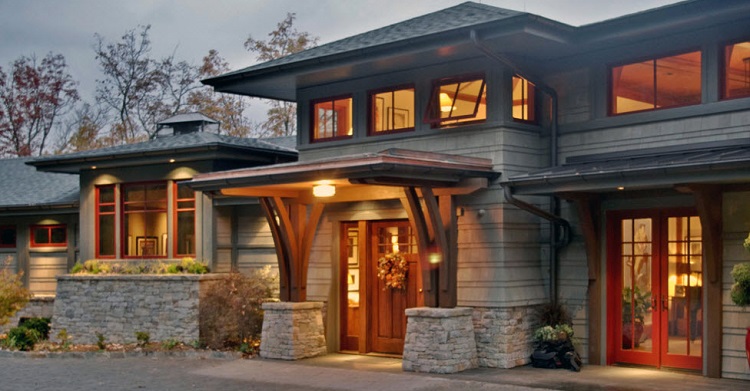
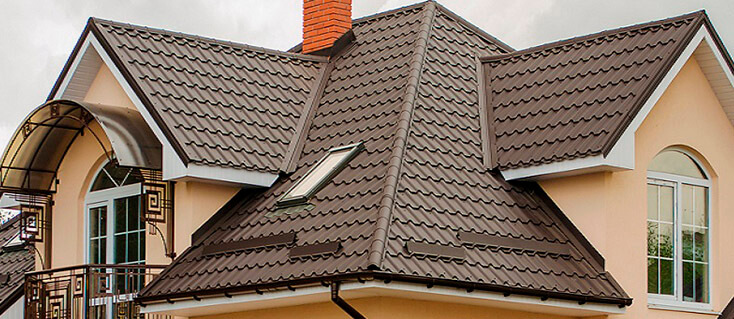
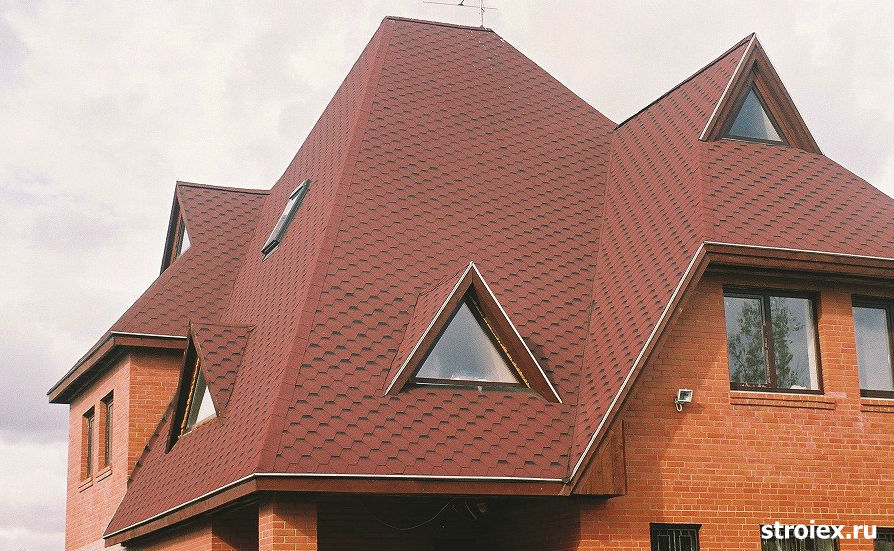
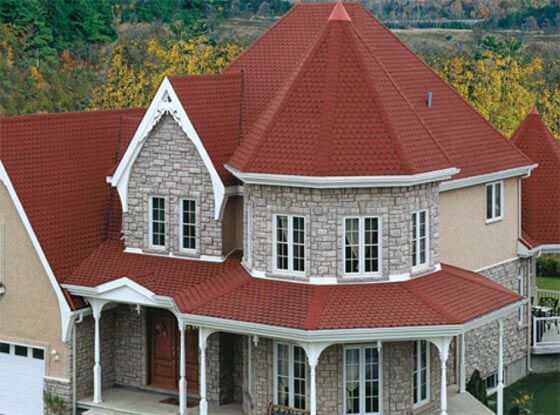
- Roof type mixed. On the image you can see how wonderful the four-sided type is combined with other types of roofing.
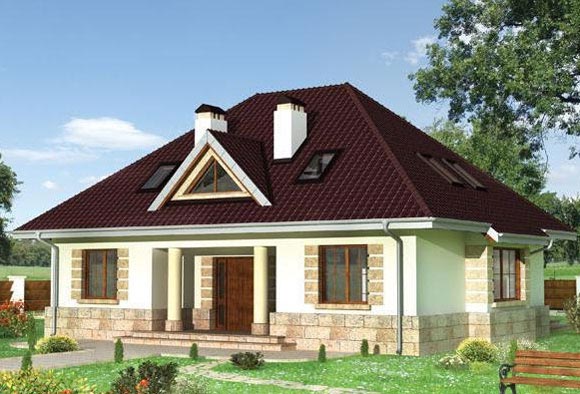
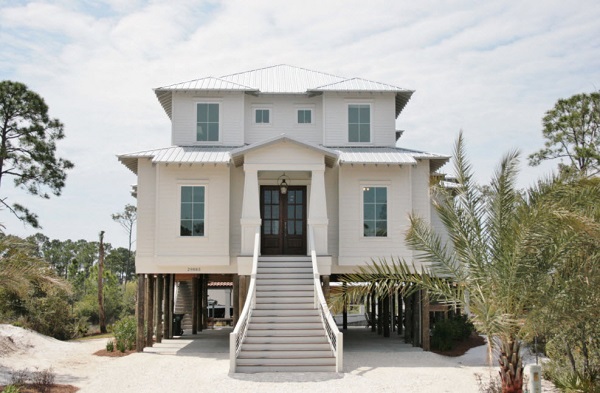
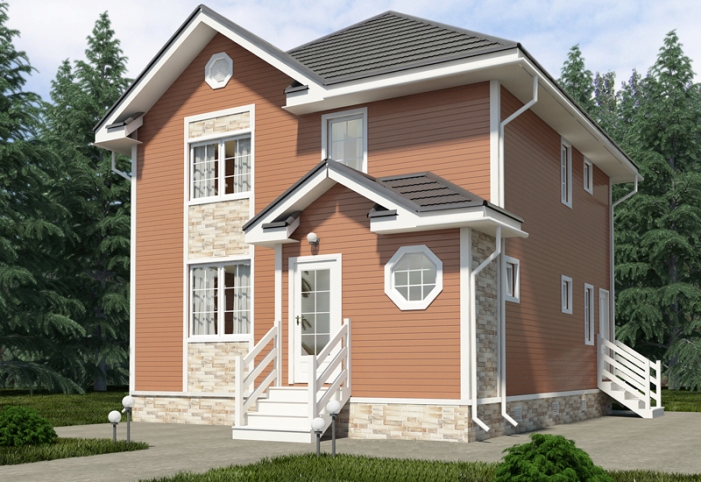
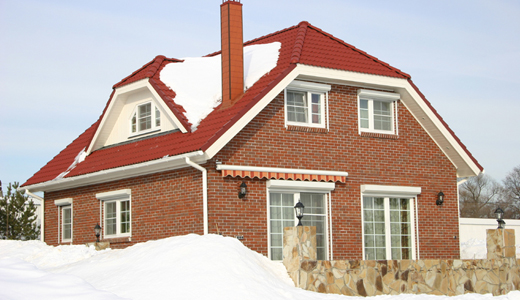
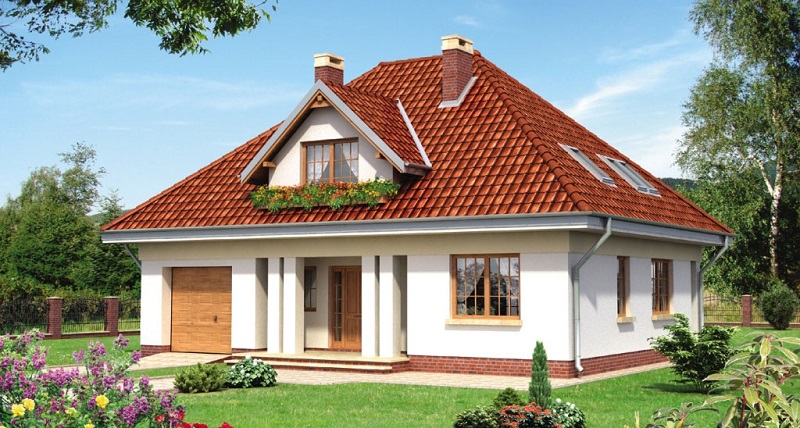
- A beautiful version of the roof with attic and attic.
In the next video you will find a step-by-step instruction on the construction of a hip-hip roof.


