Roofing: what it is and how to make it right?
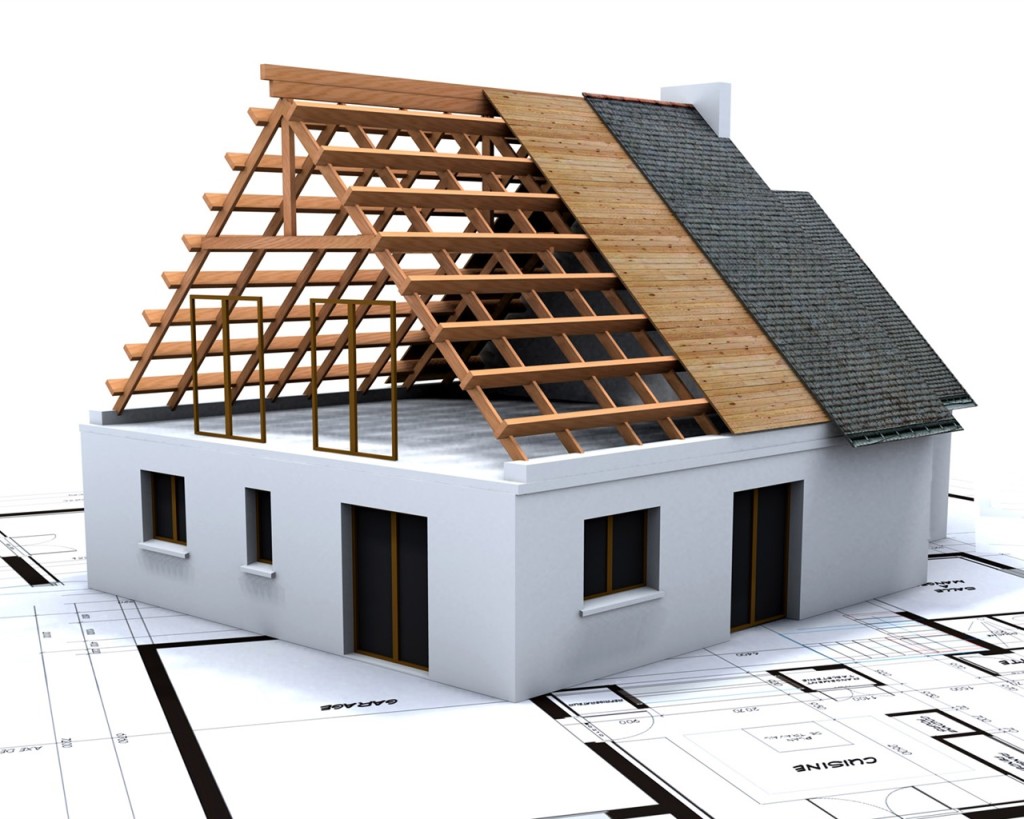
The roof is a mandatory design that is present in any home. It not only protects the living space from winds and precipitation, but also makes the structure more attractive and complete. In this design, one of the most important roles is played by a properly built crate.
Description
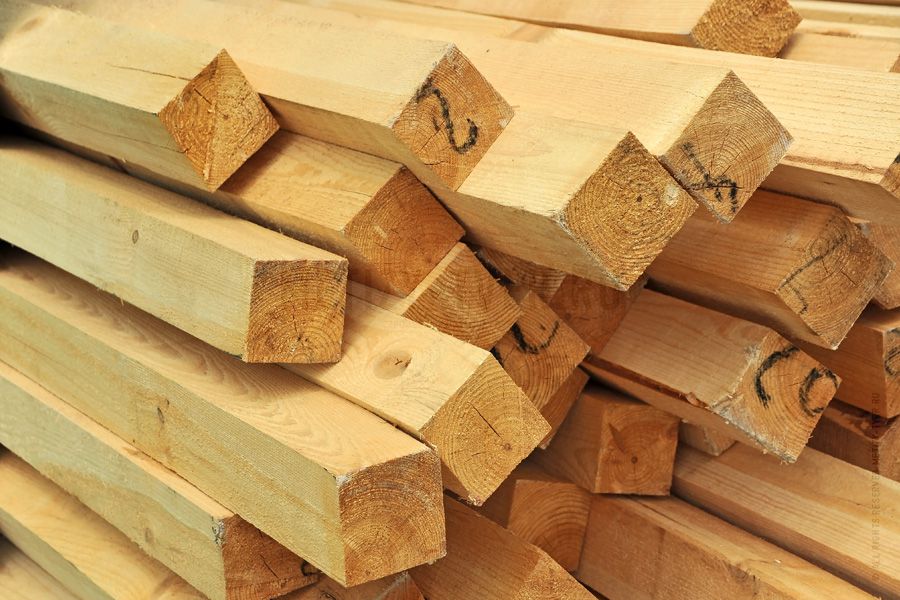
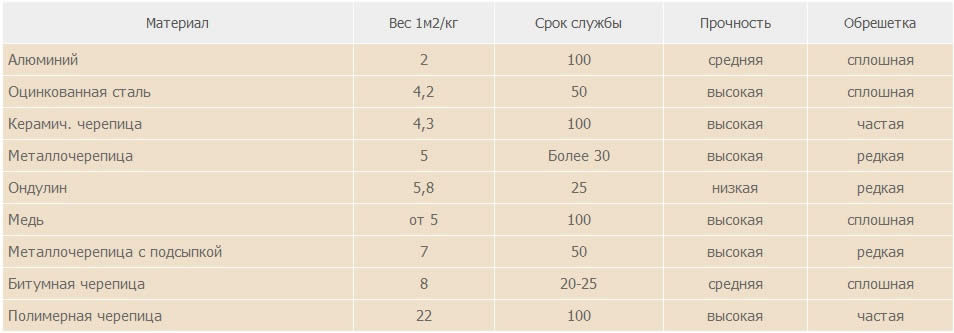
Currently, the choice of roofing materials is very rich, so choose the best option for every taste and budget. To cover correctly and reliably lay on the base, it is necessary to mount a strong and durable lathing. This design will extend the life of the roof and make it more wear-resistant.
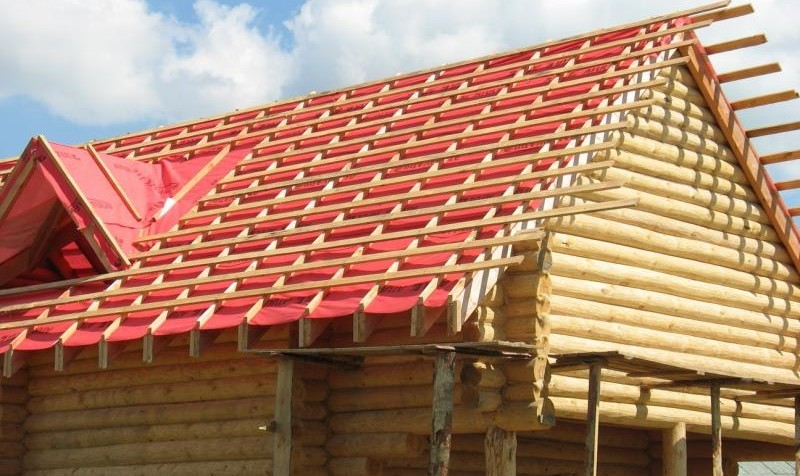
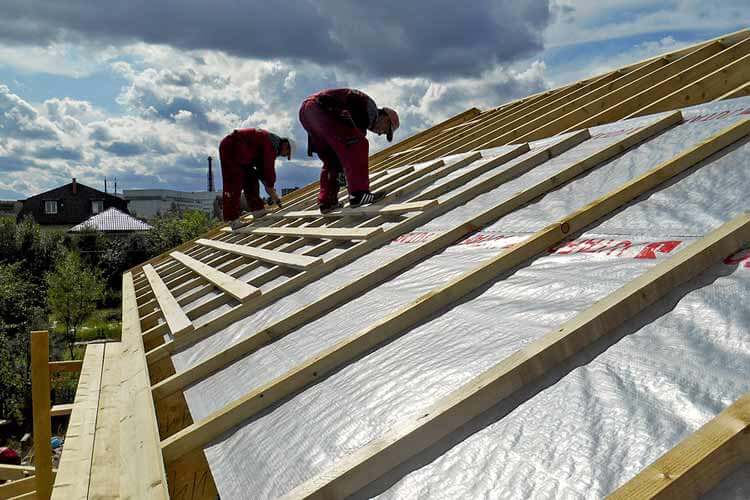
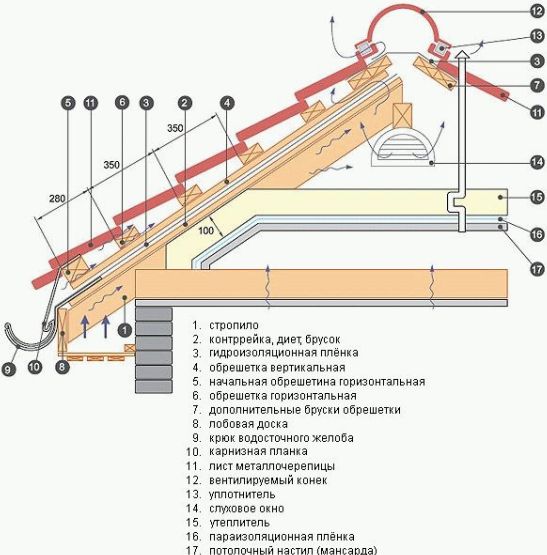
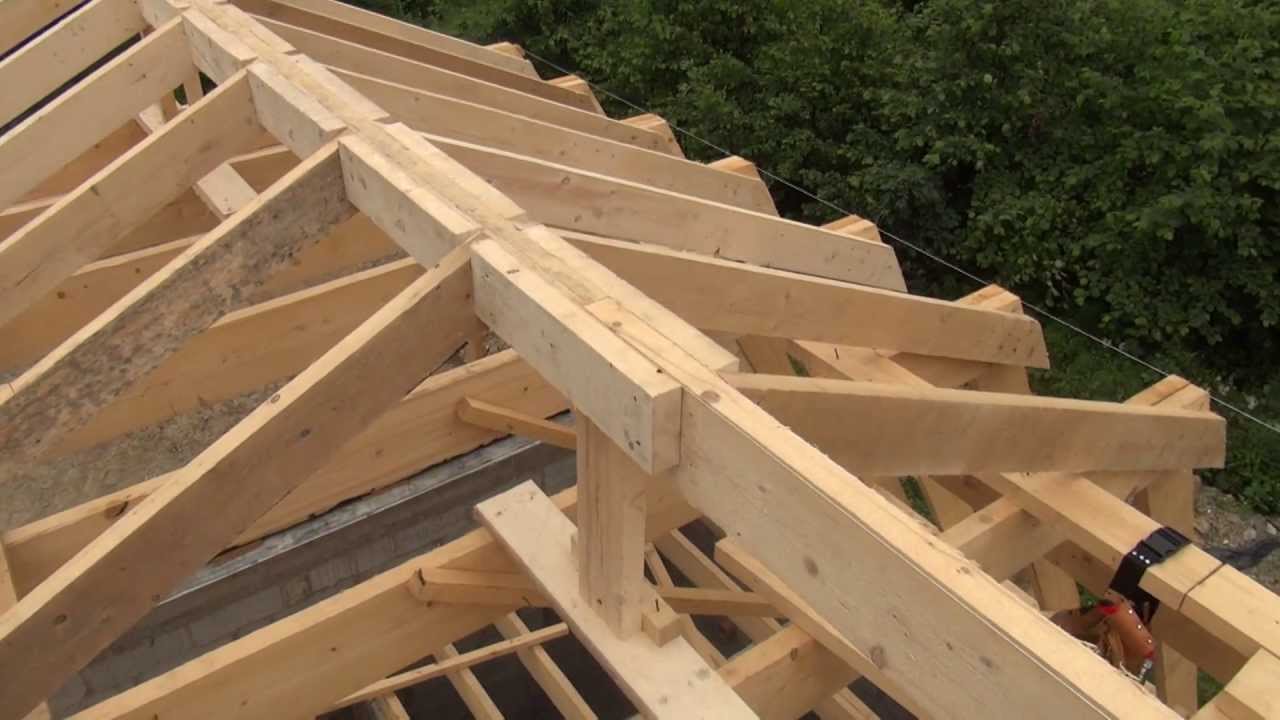
The sheath itself is a perpendicularly laid bars. These parts are mounted on truss feet.This design assumes the main load of the roof material. At the same time rafters transfer the weight of the roof to the ceiling. In the correct performance, it turns out a reliable system that serves for many years.
Another important component of the roofing "pie" is the counter-grill. This design differs in its functions and structure from crates, but not everyone knows what it is.
Kontrobreshetka also consists of wooden bars. They are stuffed directly on waterproofing material, on rafters. This construction is assembled to form a high-quality waterproofing layer. As a rule, the counter-lattice is installed under the metal tile.
The crate and counter lattice under the roof are made of various kinds of materials.
For such works are best suited:
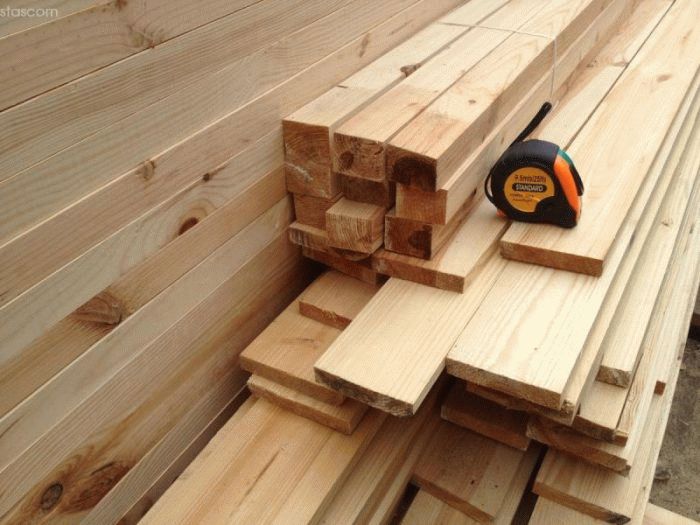
- grooved board;
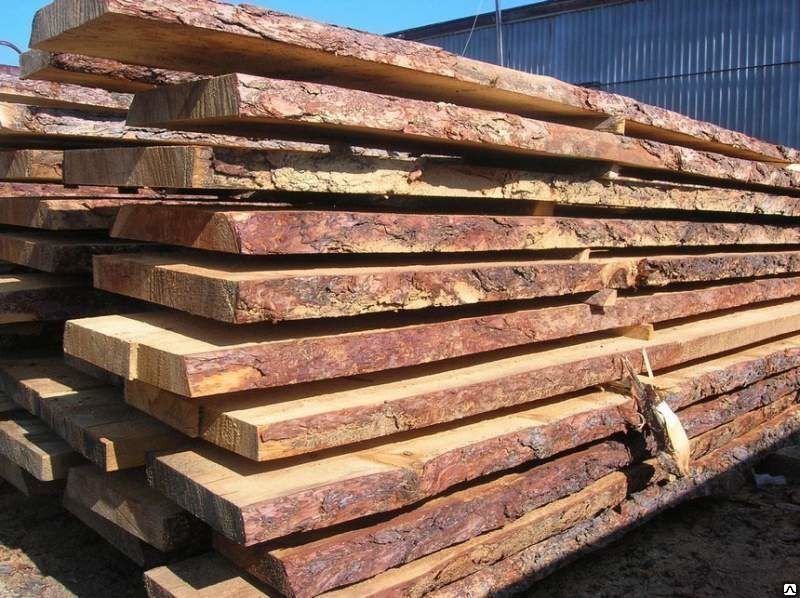
- unedged board;
- edged board;
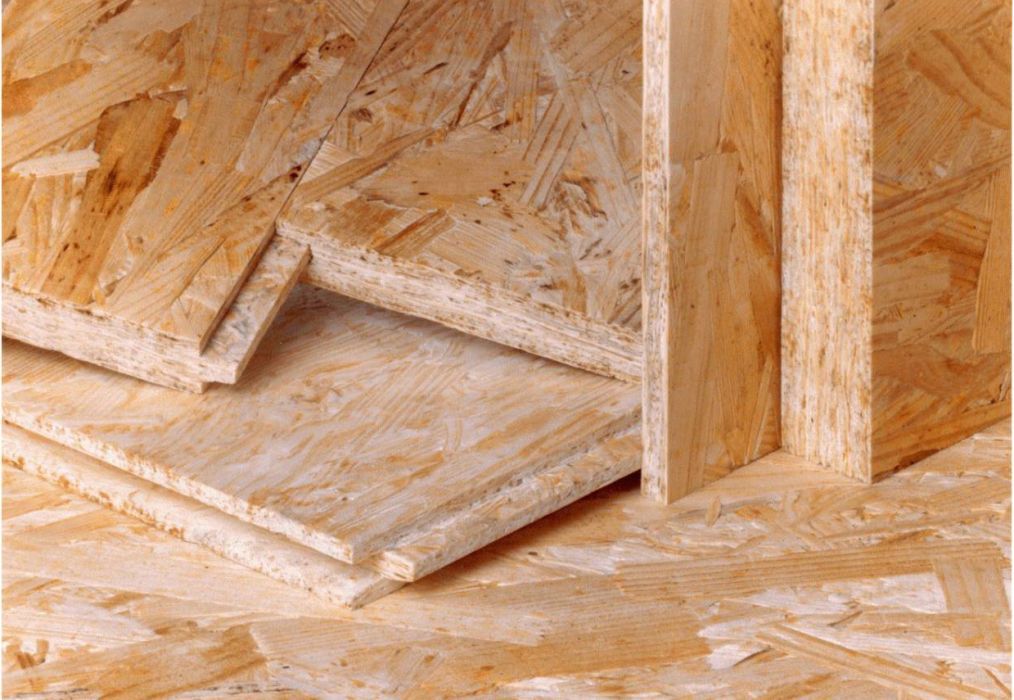
- high-quality plywood, resistant to moisture;
- chip board.
Experts do not recommend making such constructions from planks whose width is more than 15 cm. This is explained by the fact that over time such building material beginswarp. Such defects are especially prone areas located across the fibers.
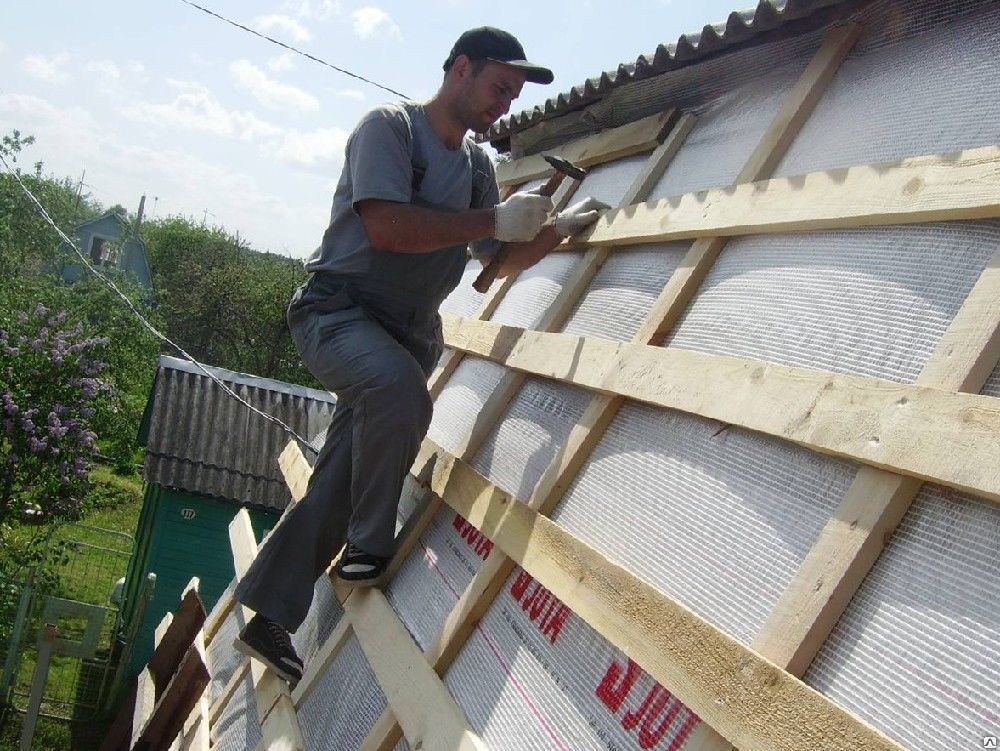
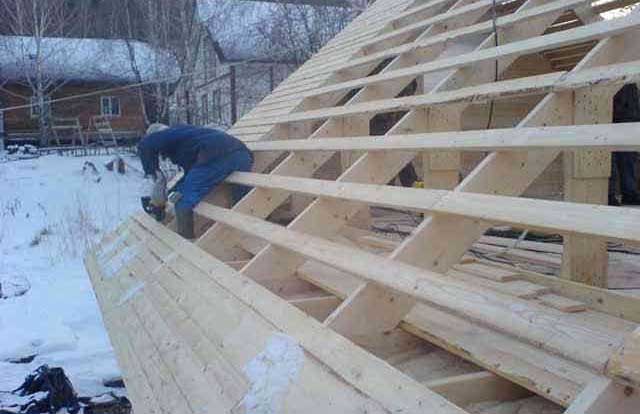
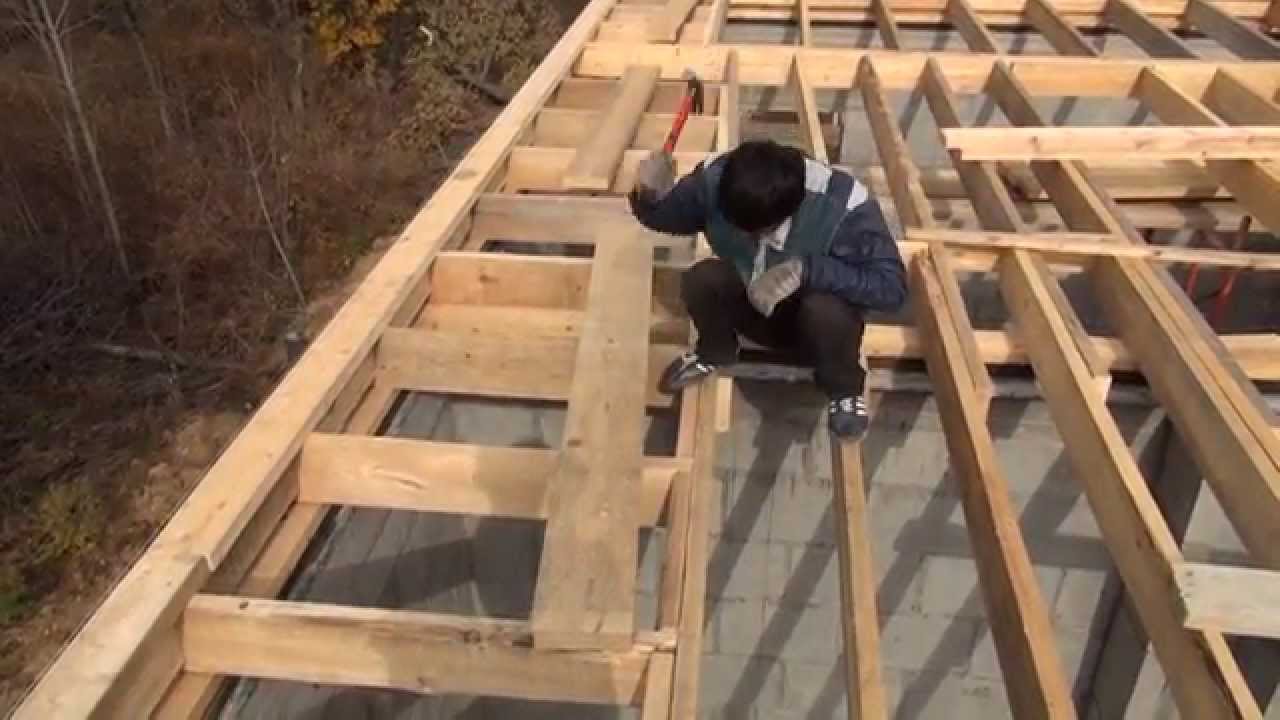
Installation of such structures is quite possible to do it yourself. Of course, this work can not be called very simple and fast. Reliability and durability of the roofing material will directly depend on the quality of the lathing you built. That is why the installation of such systems should be treated as responsibly and seriously. If you doubt your abilities, then it is better not to risk, but to entrust the work to professionals.
Kinds
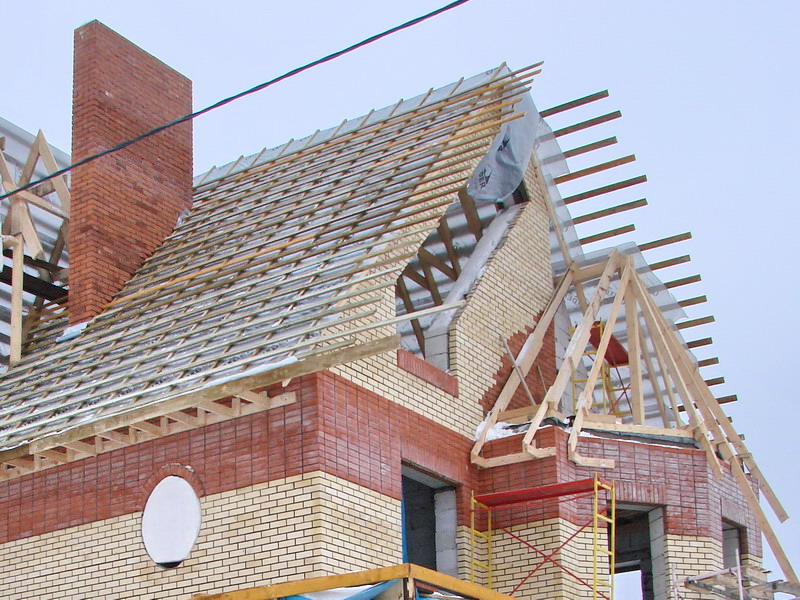
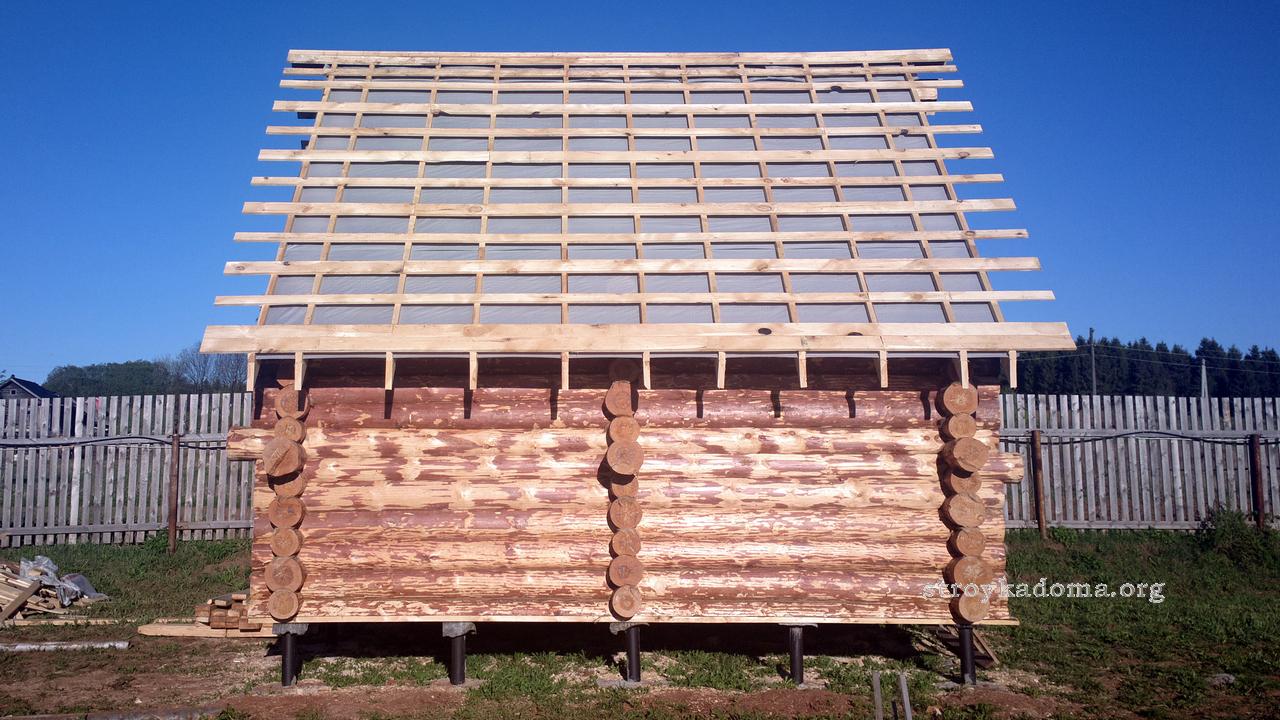
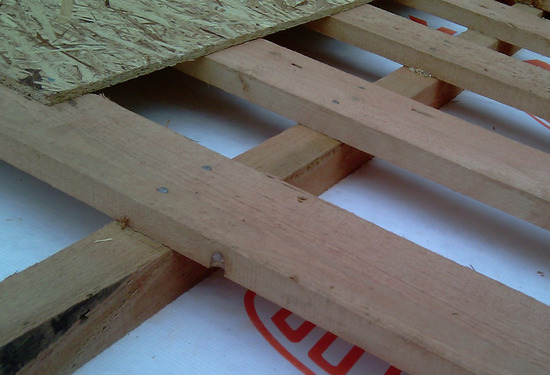
There are two main types of crates for roofing material. They are solid and discharged. Let's get acquainted with these designs in detail.
Solid
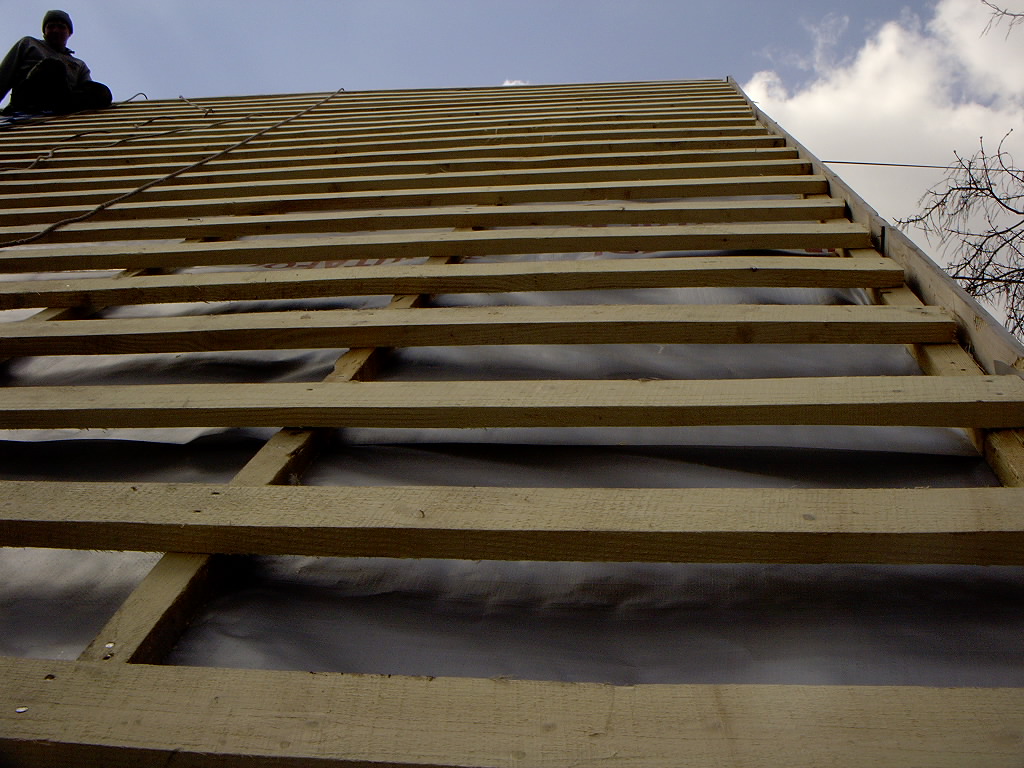
A continuous version of the batten is installed using moisture-resistant plywood sheets or OSB (their thickness must be at least 10 mm). Sometimes boards are used to collect this design. If you use the latest material, then you should note that it fits with small intervals (approximately 10 mm).
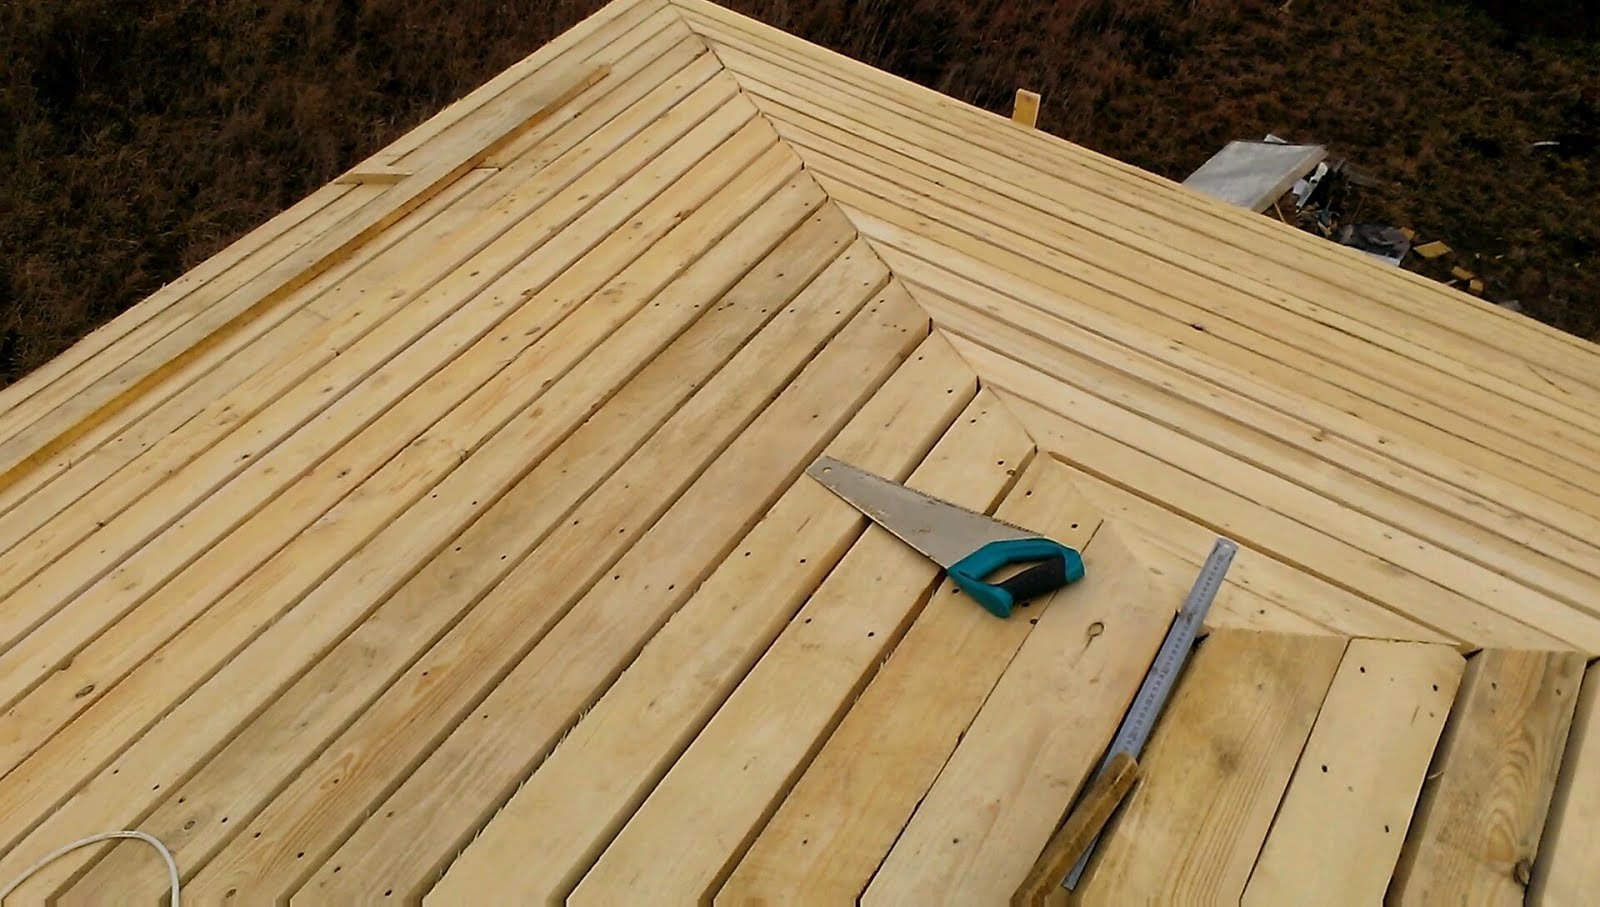
The main advantage of the continuous crates made of sheet material, of course, is a perfectly flat surface, the resulting.On this design does not remain differences in contrast to the options collected from the boards.
However, this system has several drawbacks.
- Laying sheet obreshetki can seriously hit the wallet, since the OSB or plywood boards, as a rule, are more expensive than conventional boards.
- Tight laying tiles on the crate is not always something positive. Increased thermal conductivity of the roof will necessarily provoke the appearance of condensate, even if during the day temperature values fluctuate. With tight installation, there is no ventilation gap to evaporate excess moisture, so it will constantly accumulate under the roofing material, which is very harmful for him.
- If you think about how a metal tile fits on such a foundation, then it becomes clear that in principle there is no special sense in it. For flexible shingles, solid obreshetka is an excellent option, but for metal tiles it is quite acceptable to use more affordable designs.
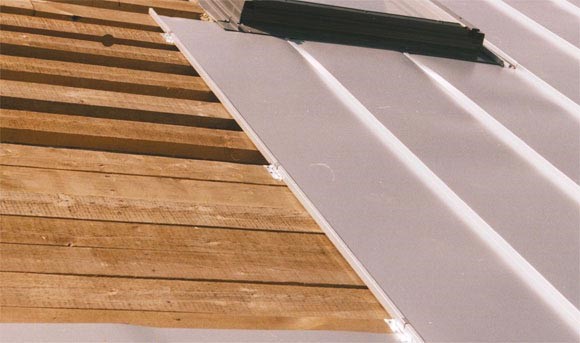
Solid crate, made of boards installed with a small clearance, is best suited for installation at small corners of the steepness of the roof when laying corrugated board, slate or a roof of such material as Ondulin.As for the metal, then sheathing of the boards is not recommended.

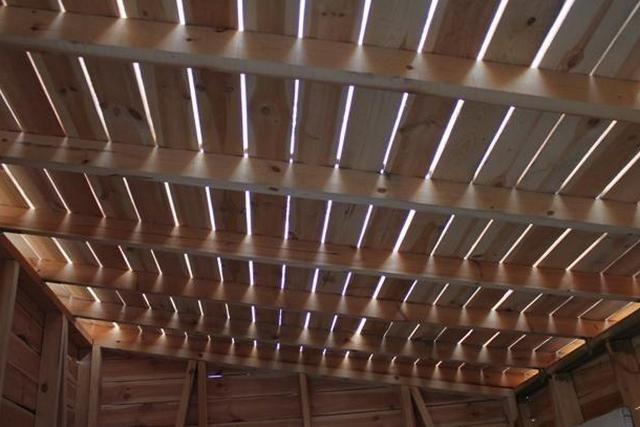
Sparse
Sparse lathing under the roof is recognized as the optimal design. When mounting it, the guides should be installed so that the sole of each horizontal row of metal tile modules acquires a reliable lower support and sufficient material width for installing self-tapping screws.
In this case, the gap between the axes of the horizontal guides, must necessarily correspond to the longitudinal length of the modules of the roofing material. Most often, the step between the bars is a few centimeters. Such a design is well suited for metal roofing, corrugated slate and tiles of natural origin.
To construct a sparse roof, it is permissible to use boards with a thickness of 20-40 mm. The dimensions of the bars can be 50x50 mm or 60x60 mm, and the diameter of the pole - 70 mm.

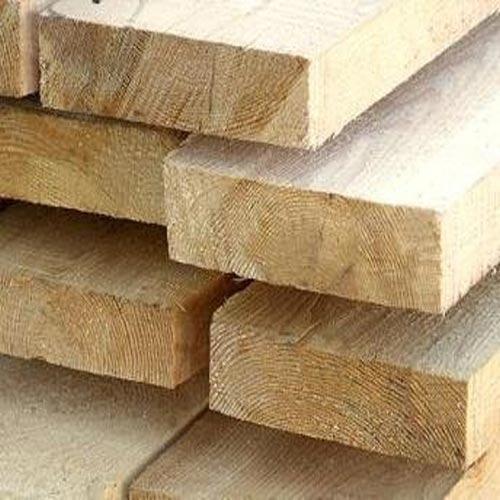
In this case, the choice of a suitable material for the manufacture of crates depends largely on the roof and its features. For example, a tree used in construction should be no lower than grade 2 — no knots and other defects should be present on the material. It is advisable to choose a edged board.
If, in the manufacture of sparse crates, unedged board is used, then its edges must be hewn. Materials whose width is more than 140 mm are not recommended for purchase - such boards can deform over time.
When creating a sparse construction of the batten, it is necessary to choose the material
- on which there are no knots - such defects often lead to breakage of boards under the weight of snow precipitation;
- dry wood - in no case should wood be damp, because over time it will crack anyway, and fasteners (nails or screws) will not hold so firmly in the material.
Very often, a flat solid crate is placed on top of a sparse one. Of course, such a device is optional. It is completely permissible to assemble a solid structure without first erecting a sparse base.
Material selection
As mentioned above, various materials can be used to construct the crates for the roof. The main condition for the selection is their perfect quality. Only with the use of reliable and durable bars over time the structure will not appear sagging or bumps.In addition, the flooring itself must be strong enough not to bend under the weight of an adult.
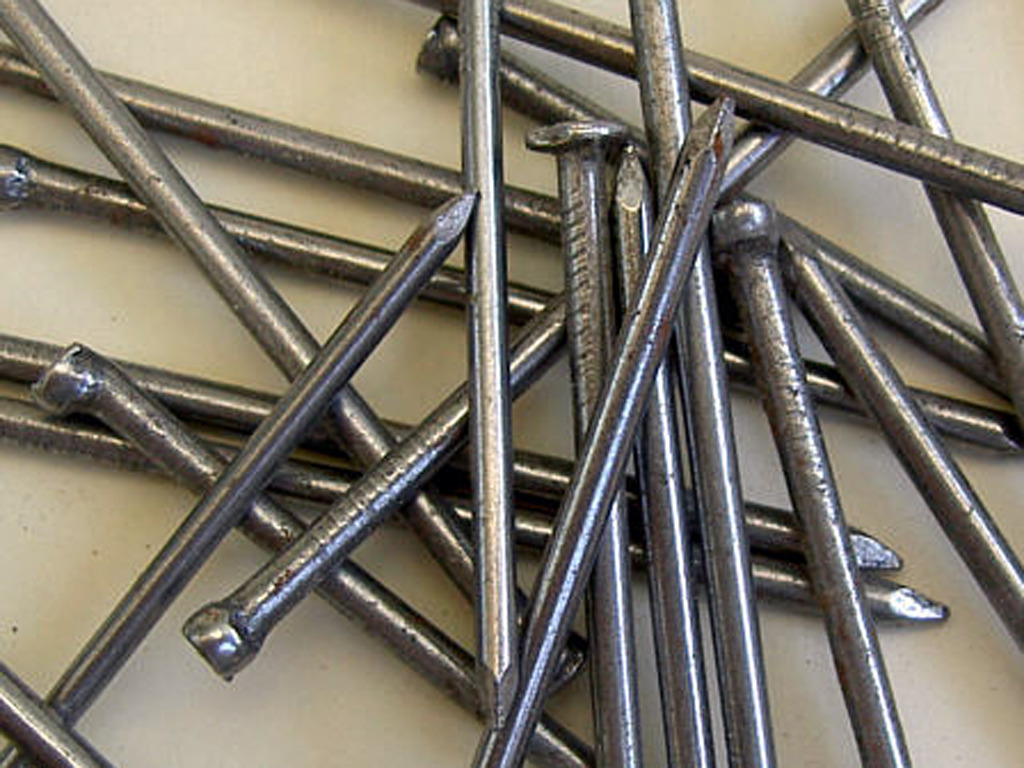
Attention should be paid to the size of the nails that you are going to use when installing the battens. To calculate this indicator, it is necessary to ensure that the length of one nail is not less than double the thickness of the nail board.
It has already been mentioned above that the type of counterbar and main lathing, first of all, depend on the material of which the roof is made. For example, under sufficiently hard coatings, such as metal profiles, tiles or slate, you can use a sparse structure of boards.
The most popular roofing materials are:
- ceramic, cement-sand or polymer tile;
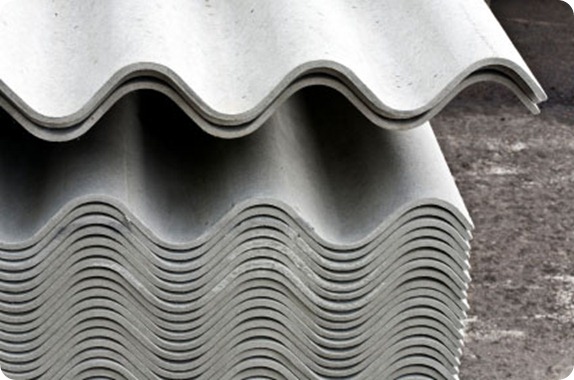
- slate or special euro slate;
- folded materials;
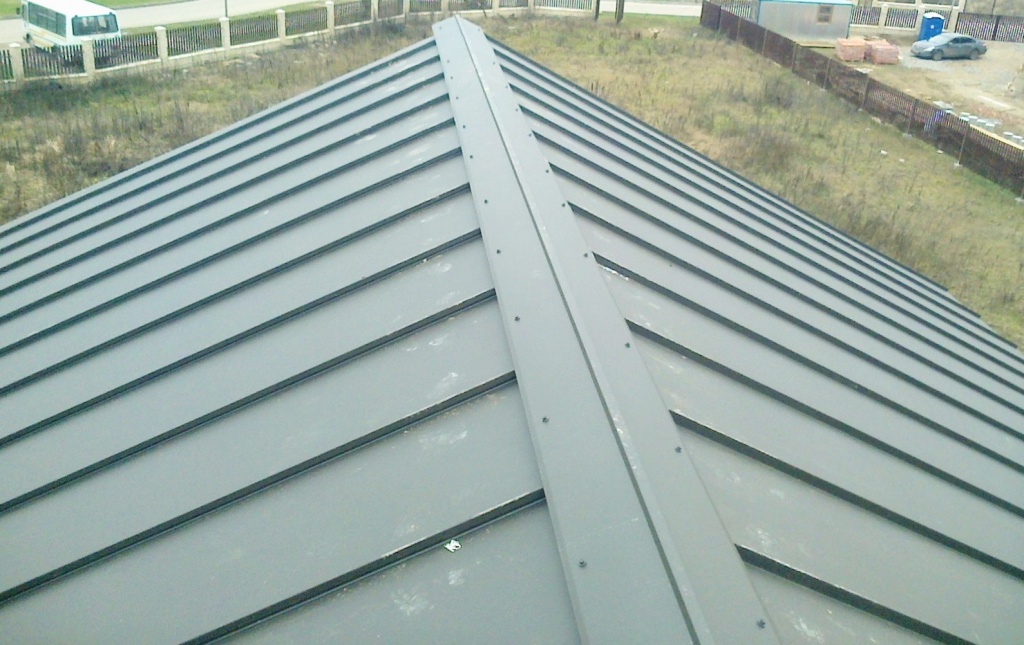
- metal tile;
- soft or flexible roof.
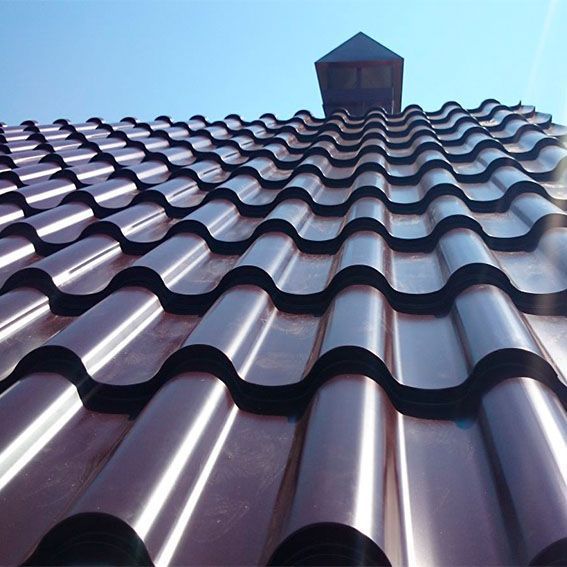
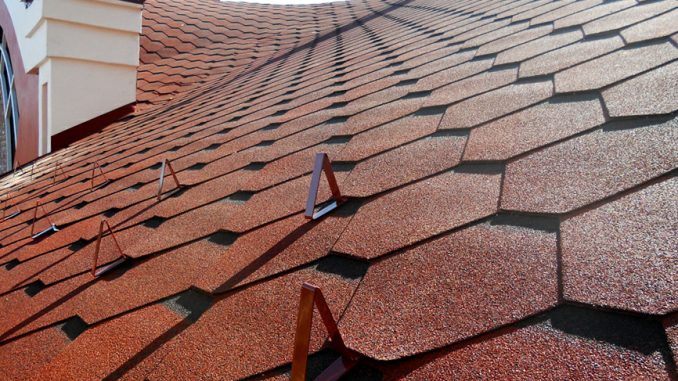
Most varieties of tiles (with the exception of metal) are small piece elements. Such materials are the highest quality and convenient in installation due to the many positive properties and long service life.
The most difficult to recognize materials from the tiles. For this reason, they must be laid on the strongest and strongest crates and bases. For this, it is recommended to use solid bars with a cross section of 50-60 mm.
One of the most common roofing materials is slate. The main advantage, due to which many consumers choose such coatings, is that they have compact dimensions, so they can be easily laid on bars, the dimensions of which are not more than 50 mm. In the process of mounting larger sheets of slate, it is permissible to use elements of the batten, whose thickness is about 80 mm. The step in this case directly depends on the dimensional values.
Large sheets of slate should be installed so that there are at least three pillars under them. This condition must be observed so that a similar roof with time begins to sag under the influence of its weight and precipitation.
The folded roof is not so popular at present, but sometimes it is still used in the design of the roof. Its slope is usually within 14 degrees. As for the configuration of the roof,then it is quite complicated and intricate, so experts strongly recommend installing it on solid types of crates.
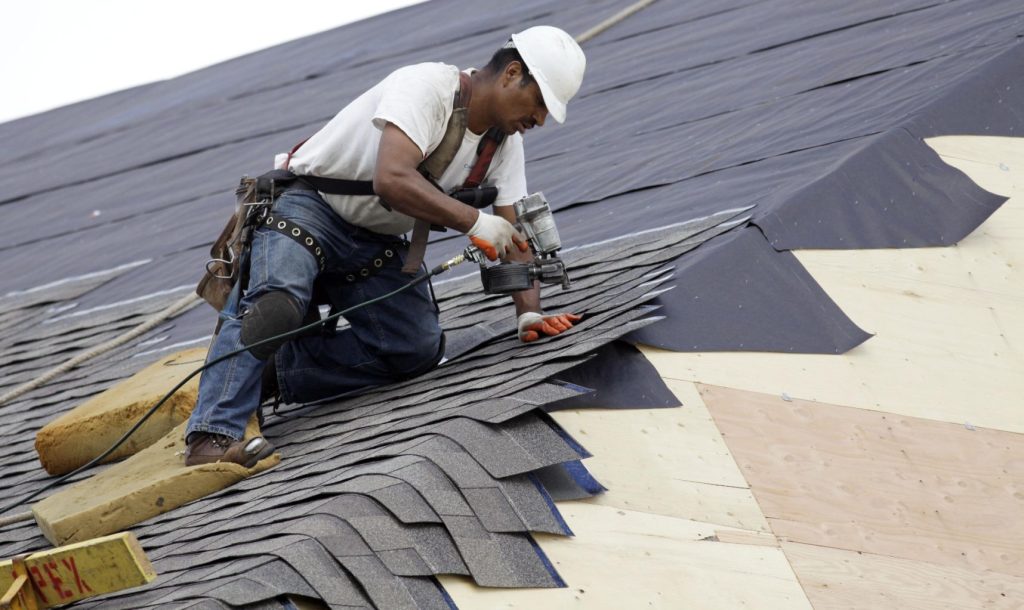
More simple and undemanding in terms of installation is a flexible roof. However, its installation requires a single or double layer of continuous crate. The weight of these building materials is small, so installing them is not so difficult and energy consuming.
Now let's take a closer look at which step of the batten is suitable for various types of roofing materials:
- Flexible roll coverings should be mounted on a solid foundation. The step between its individual components should not exceed 10 mm.
- For a roofing material such as slate, the step should be selected in accordance with its dimensions. The main indicator depends on the thickness of the sheets, which can be 50-75 cm.
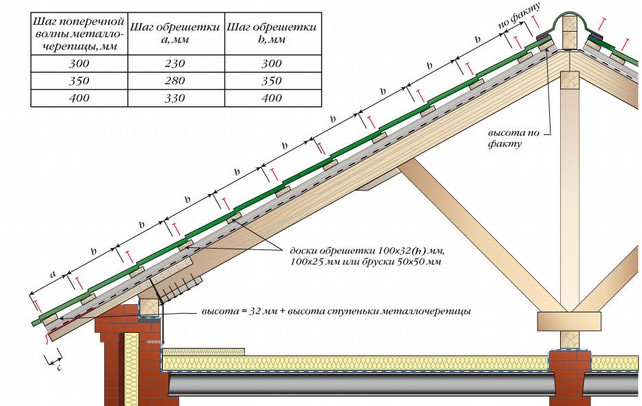
- As for the metal tile, the pitch of the batten for it, as a rule, varies in values from 300 to 400 mm. The gap between the last two bars should be 2 times smaller.
- When laying any type of tile it is necessary to rely on the manufacturer’s instructions, remembering the degree of inclination of the roof.Often, in this case, the boards are installed at intervals of 320-380 mm.
- For a faltsevy roof the most widespread step of a framework makes 200 mm.
Calculations
Before proceeding directly to the installation of high-quality and reliable crates, it is necessary to make all the calculations, because in construction you cannot do without them.
To calculate the required volume of building materials, you need to know the following parameters:
- roof size;
- the type and thickness of the laid material;
- the design of the roofing.
If it seems to you that it is a very difficult task to independently create a project for a future construction, then you can use a special online calculator that will quickly determine all the necessary parameters automatically.
How to prepare?
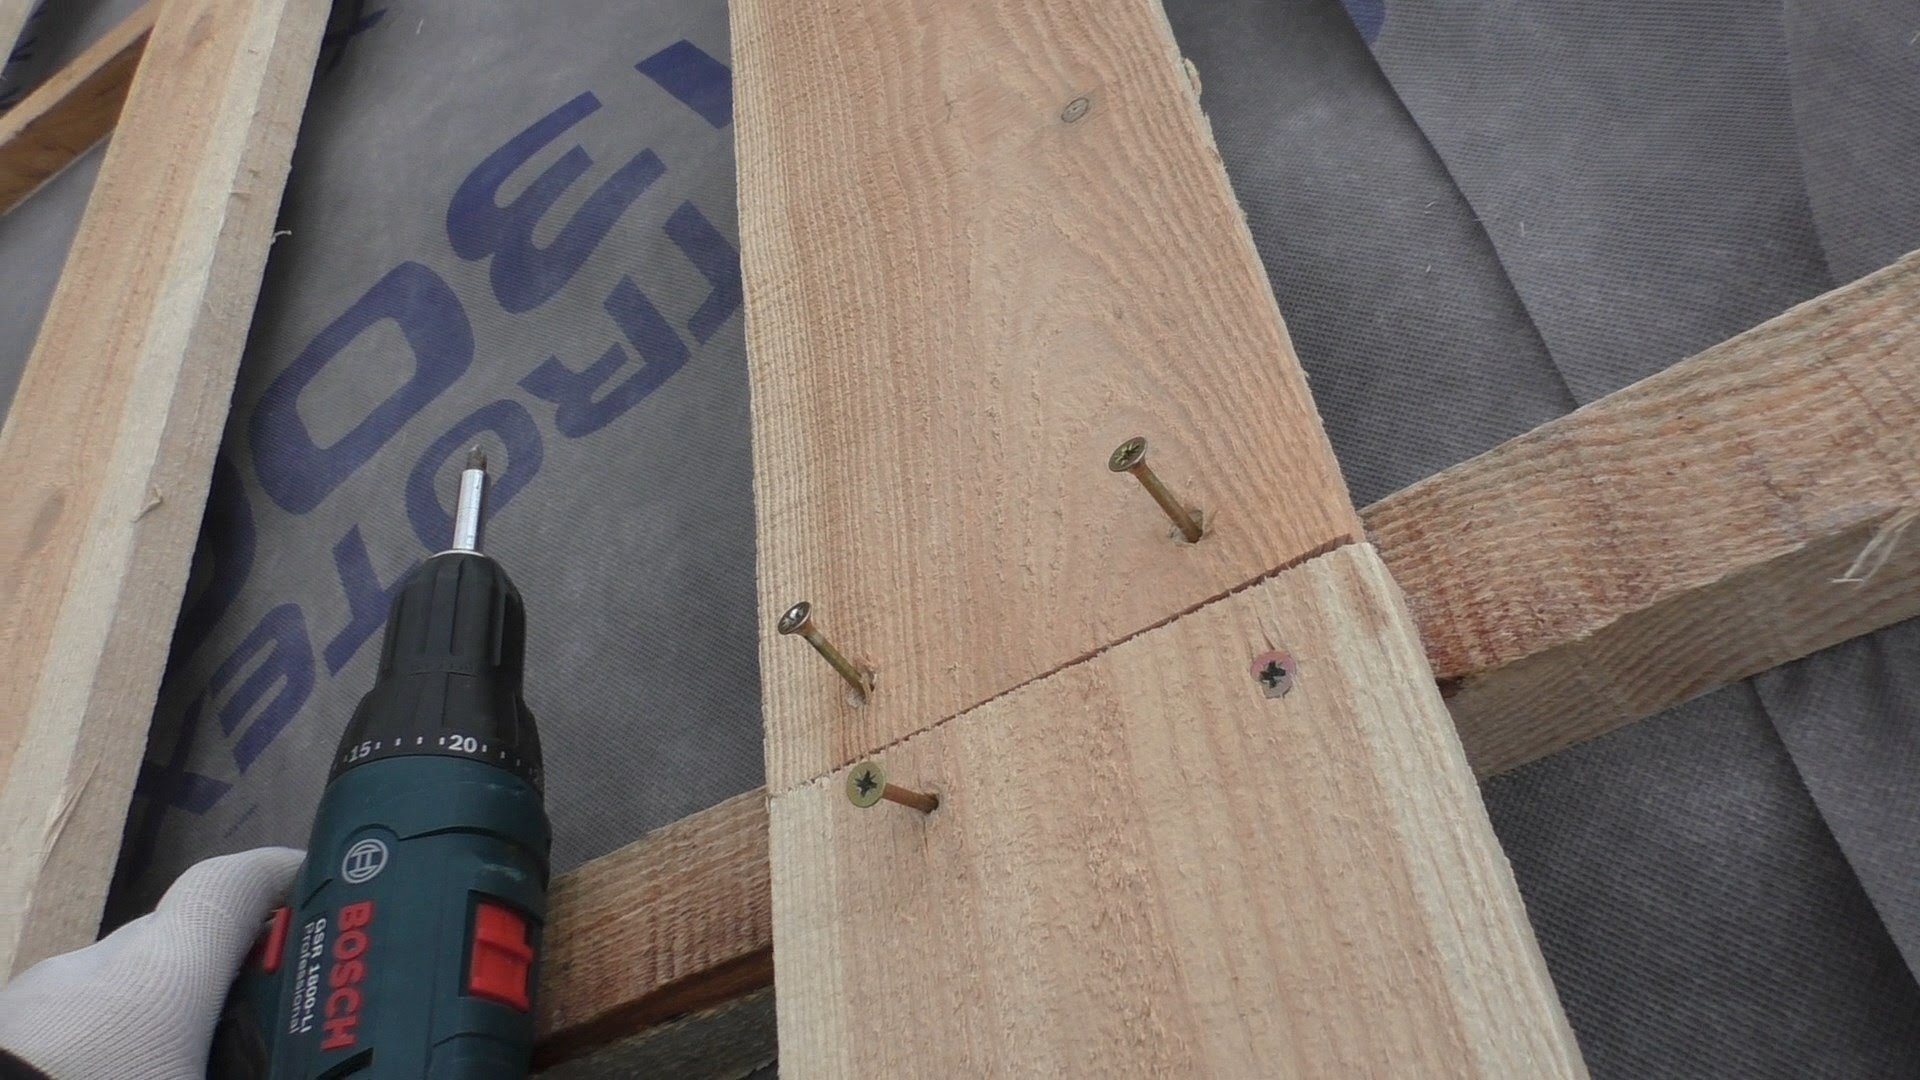
Installation of the crates for roofing material is quite possible to do it yourself. First you need to stock up on all the necessary tools and fasteners, which include:
- nails and hammer;
- screws and screwdriver;
- hacksaw (you can buy a grinder instead of it - it will be more convenient to work with it);
- pliers;
- special pencil or chalk for marking;
- roulette;
- bubble or laser building level.

When you get all the tools and materials, you can proceed to the preparatory work. They should not be neglected, otherwise the construction may turn out to be unsteady and short-lived, and it will be very difficult to install it.
Stages of work.
- First, carefully measure the roof. Then you should proceed to the preparation of boards for the manufacture of frame construction.
- If the roofing material has an impressive weight, it is better to use wide edged boards. Such parts will seamlessly withstand the large weight of the roof.
- Experts also recommend sorting building material. This is due to the fact that in many batches there is a non-standard that is thinner or thicker. The use of different-sized elements often leads to the fact that the roof is stacked with irregularities and mounds.
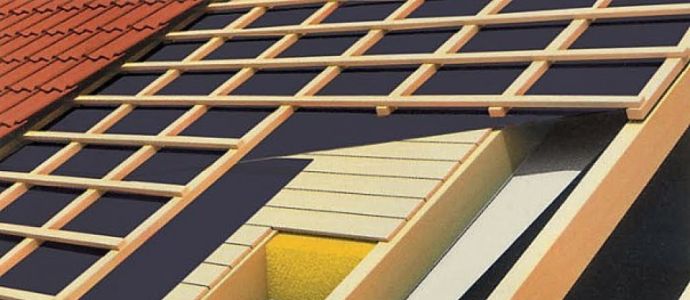
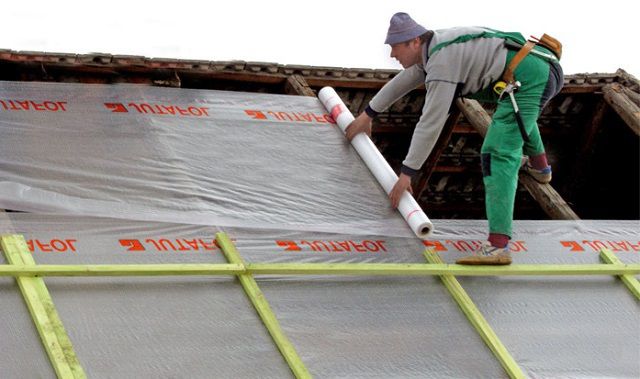
- If you want to further insulate the attic space, then before installing the battens and the roof you need to lay a special anti-condensate film on the base.The fastening of this material should be made directly to the rafters. The film must be mounted in horizontal stripes. At the same time, an overlap of at least 10-15 cm should be done. No need to stretch the film - it should sag slightly between the rafters. It is recommended to fix this material using bars with a thickness of not more than 3 cm.
- In addition, it is necessary to calculate the crate step before proceeding to its installation. It is determined depending on the dimensions of the roof. For example, to install a popular metal tile the most successful place is the bottom of the wave. In the area where one wave ends and the next begins, you need to screw in the screw. In the same place and need to further install the board or timber.
Please note that each manufacturer produces metal tile with its own depth parameter. This indicator, first of all, depends on the height of the profile. For this reason, before starting to install the batten, you should clarify the wavelength of the material.
Installation Guide
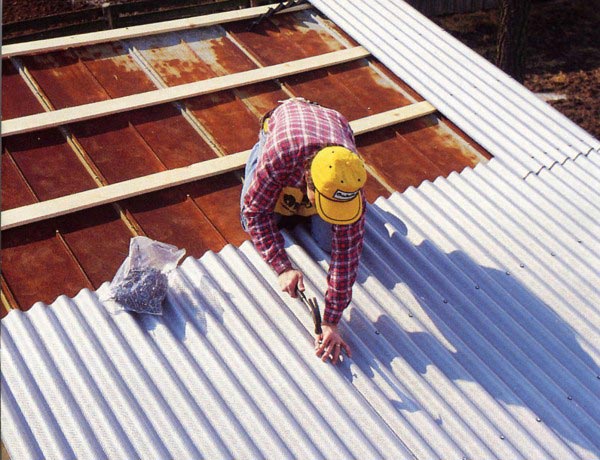
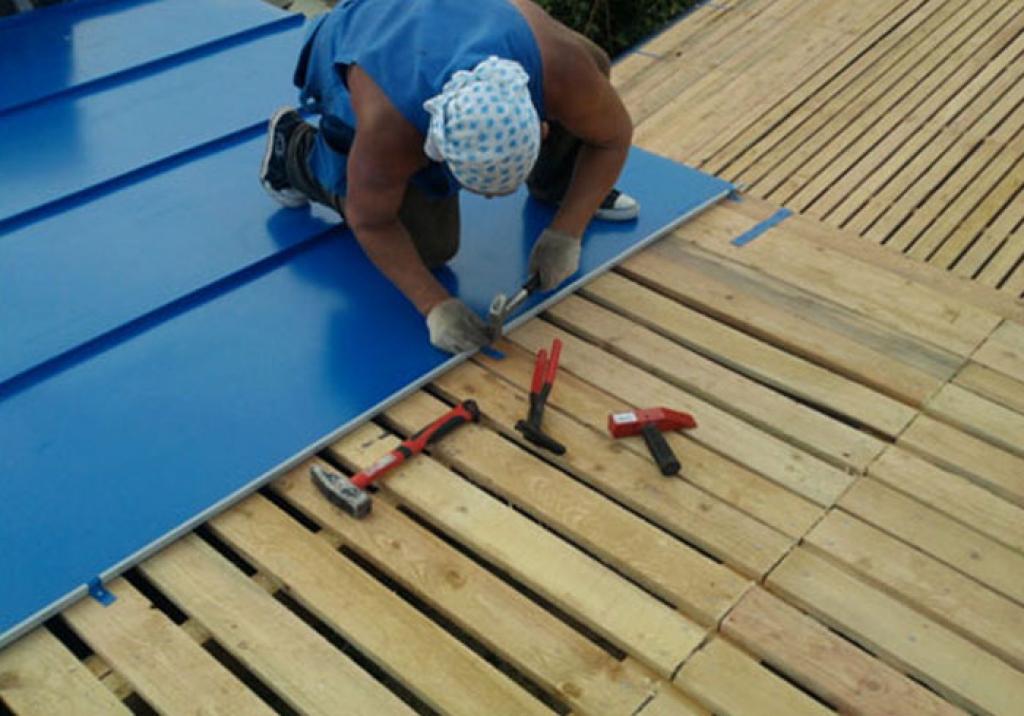
Upon completion of all the preparatory work, you can proceed directly to the installation of the sheathing under the roofing material.Consider a step-by-step installation guide on the example of crates under the metal tile.
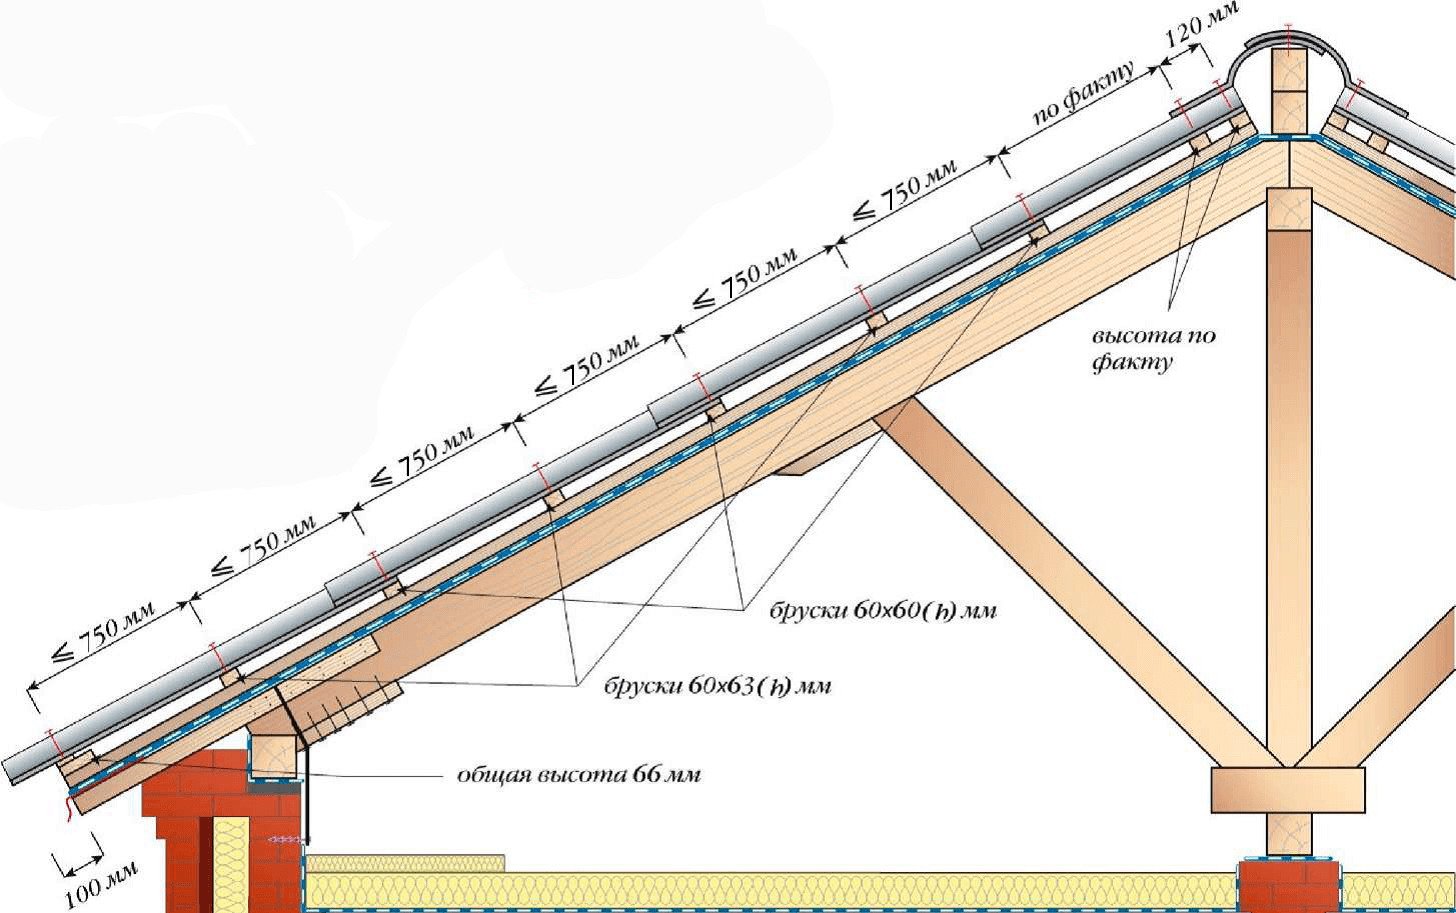
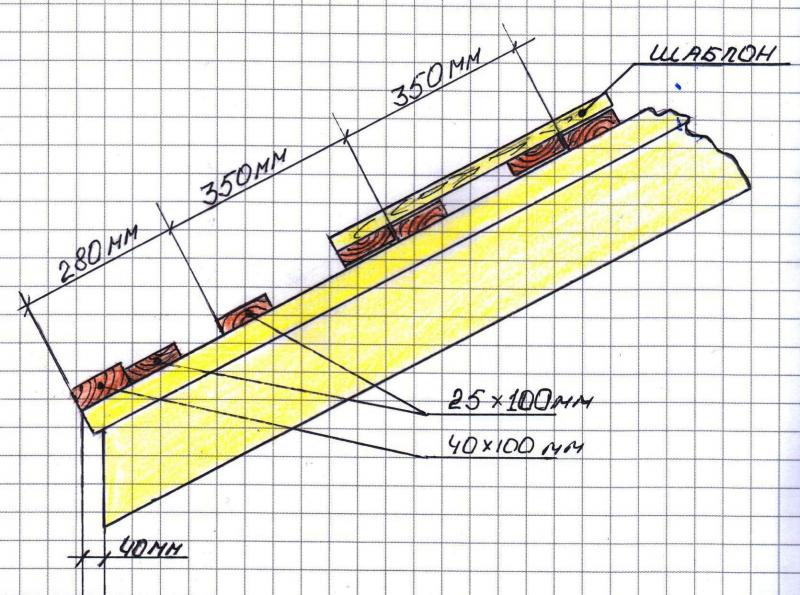
First, for the rafters you need to choose the appropriate bars. Their size must be at least 50x100 mm to create a batten with a cross section of at least 25x100 mm. As for the counterbribe, it can be made of 25x50 mm board. As a rule, in this case the step rafter is 600-900 mm.
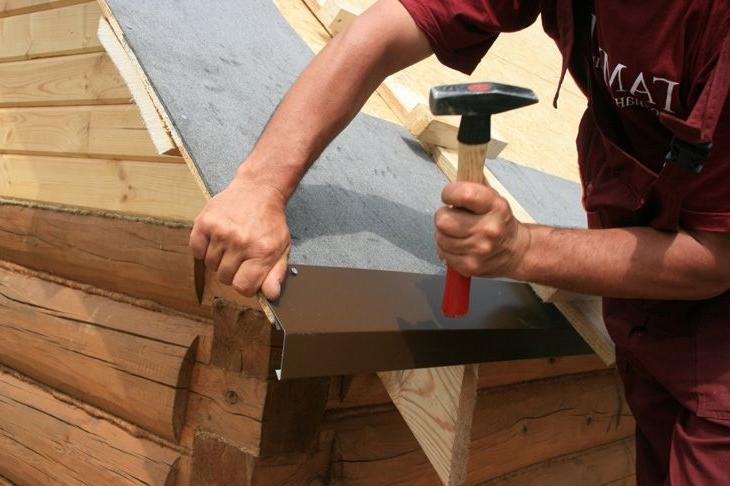
Along the overhang of the eaves should be nailed starting board. But it should be noted that it should not go beyond the overhang itself. To equalize the level difference, this board should be a little thicker than the others (no more than 1.5 cm). The gap between the plank, going beyond the eaves, should be less than 50 cm, than the step between the other elements.
To make sure that this distance is maintained correctly, two pieces of the board should be laid on the ground, and then a part of the tile should be put on it. In this way, you can determine if there is enough protrusion available to allow sufficient flow of water. If the protrusion is larger than necessary, the water will begin to overflow through the chute.
If the protrusion is too small, then the excess water will simply fall into the space between the chute and the frontal plate.In addition, if there is an excessively long protrusion, the sheets may become deformed over time due to the heavy snow load.
After applying the markup, you need to mount the ridge and end strips. In this case, the wind board must be attached higher than the crate itself (approximately the width of one sheet of metal - 35-55 cm).
In order to fix the horse sufficiently firmly and reliably, additional boards with a size of 25x100 mm should be nailed on the joints. With such details further installation will be a little easier.
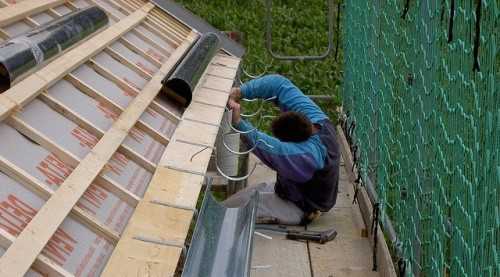
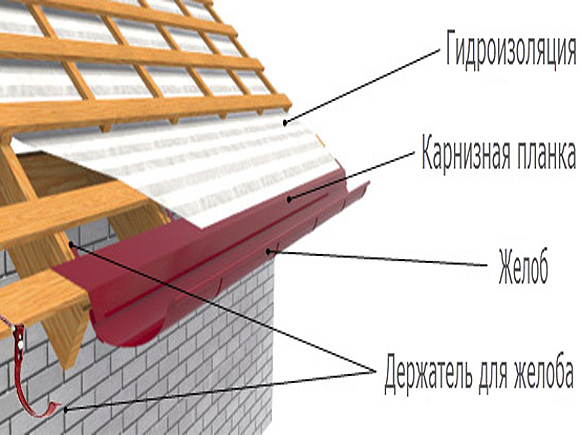
If you want to put a drain before laying the roof, then you need to mount brackets to which the gutters will join. These elements should be installed on the bottom board, maintaining a pitch of 500-600 mm.
First, install the extreme brackets so as to calculate the slope of the gutter for 1 m length. After that, you need to stretch the cord, which will be installed the remaining brackets.
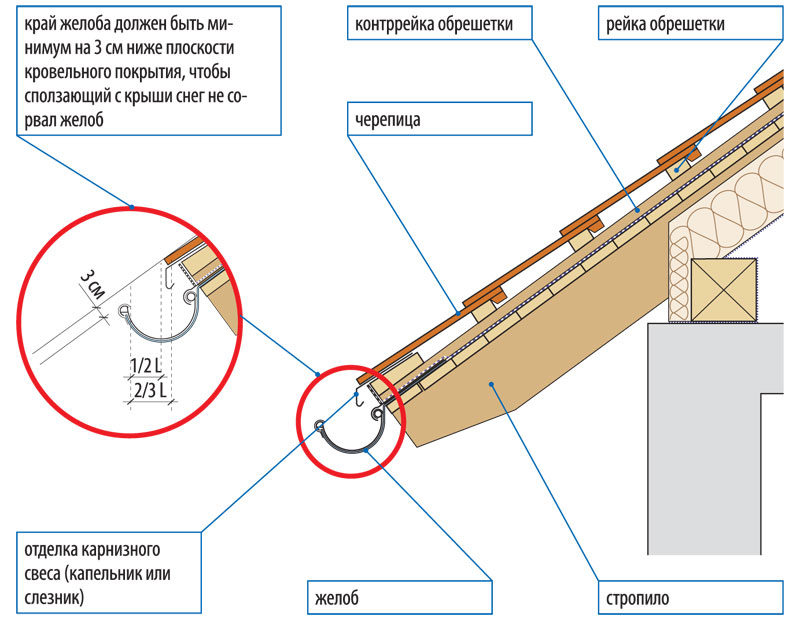
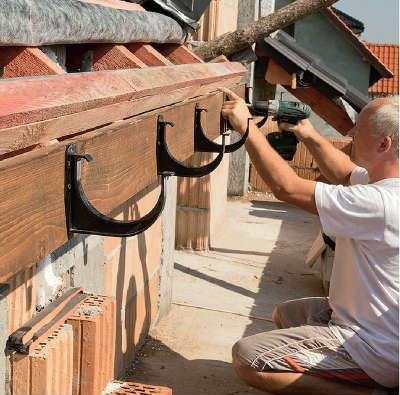
Also, before the start of the direct flooring should establish a cornice bar. The chute should also be mounted on the brackets. As for the curtain rail, it should be set so that its edge, located in the lower part, overlaps the edge of the gutter.
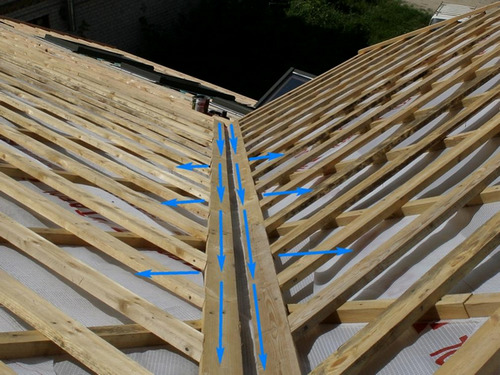
In places where there are various closures, for example, pipes or windows of the attic, it should be installed crate solid type. In this case, preference should be given to smooth and high-quality slabs of wood or chipboard raw materials.
Only by completing all of the above work, observing all the rules, you can lay metal roofing.
Pro tips
You should know the following nuances:
- The correct calculation of the required volume of materials, as well as the choice of the pitch of the batten, directly determines how securely and firmly the roof will hold. In order not to be mistaken anywhere, experts recommend using special online calculators.
- In places of joints and slopes, it is recommended to install a continuous crate. Otherwise, when installing the additional elements, the screws may be in a vacuum.
- To attach material faster, you can prepare a wooden step template in advance.
- If you use sheets having a height of less than 35 mm in the manufacture of crates, you should make the step minimal. In this way you will make the roofing material stronger and tougher.
In the joints located horizontally, it is recommended to make small displacements. They are needed so that over time the structure does not weaken, and also does not require the replacement of certain components of the structure.
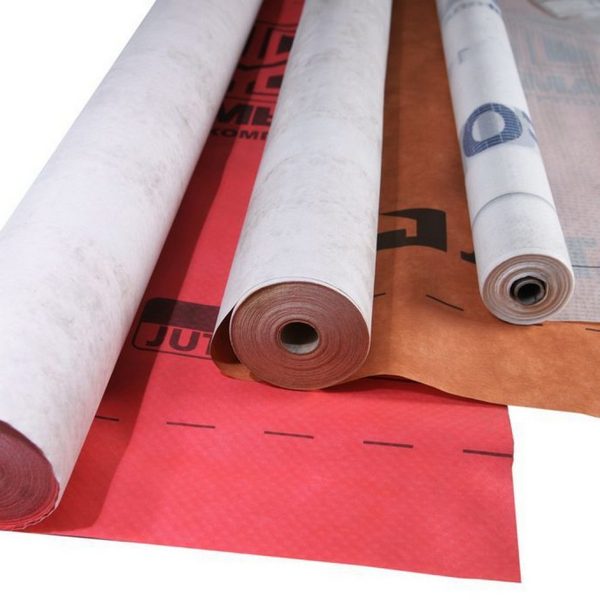
- As a waterproofing membrane, it is permissible to lay almost any dense film that does not let water through. If you are going to make the roof warmed, then you should turn to a special diffuse membrane. It does not hold water vapor from the thermal insulation layer.
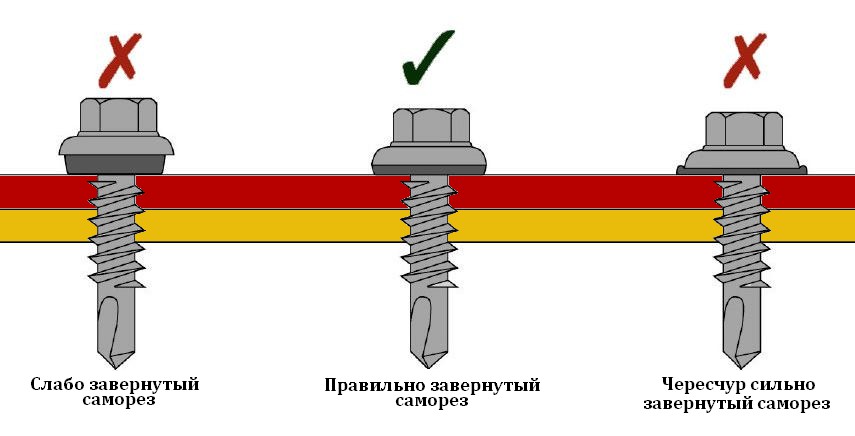
- During installation work, nails and screws are most often used. Fasteners should be as reliable and quality as the rest of the components in the whole structure.
- Ensure that there are no nail heads on the base under the roof. Note that damaged parts can not bend - they must be removed from the material and drive in new ones. This nuance is especially important if you are going to lay a soft roof or a roll covering on the frame.
- The gap between the boards with a solid design should not exceed 1 cm - be sure to follow this.
- For the manufacture of such a system as a counter beam, it is recommended to use thinner bars that need to be stuffed onto the rafters above the waterproofing layer. In this case, care should be taken to ensure that there is a sufficient ventilation gap in the structure.
- According to many experts, the structures consisting of slabs of concrete, crate is not required.
A master class on roof lathing for decking is waiting for you in the next video.


