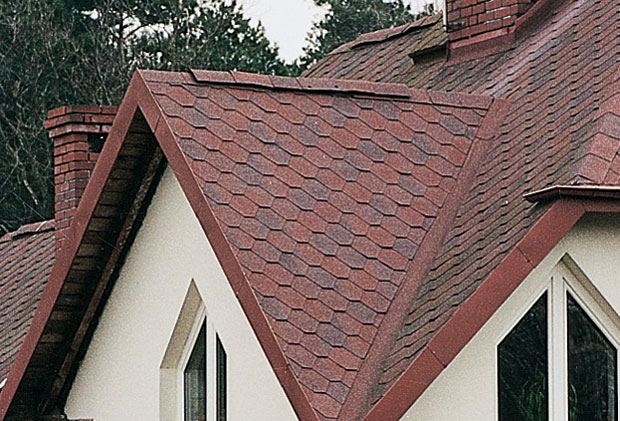
Soft roof ventilation device
Constant and high-quality air exchange under the roof is a guarantee of a long service life of both the roof itself and the entire building. The comfort of people living in the house also depends on ventilation, since it plays a key role in the formation of the microclimate.
Special features
Soft roof ventilation is not an independent process. On the contrary, the presence or absence of ventilation in the premises directly affects the exchange of air in the roof. For effective removal of destructive moisture from the living quarters through the roof, it is necessary to analyze the ventilation of all elements of the house as a complete process.
If the roof configuration is complex, it has a lot of transitions, valleys, the process of removing the exhaust air must be divided into sections and the air flow in the roof should be organized separately.
As a result of good ventilation, the air in the space under the roof should be replaced approximately 2 times per hour.
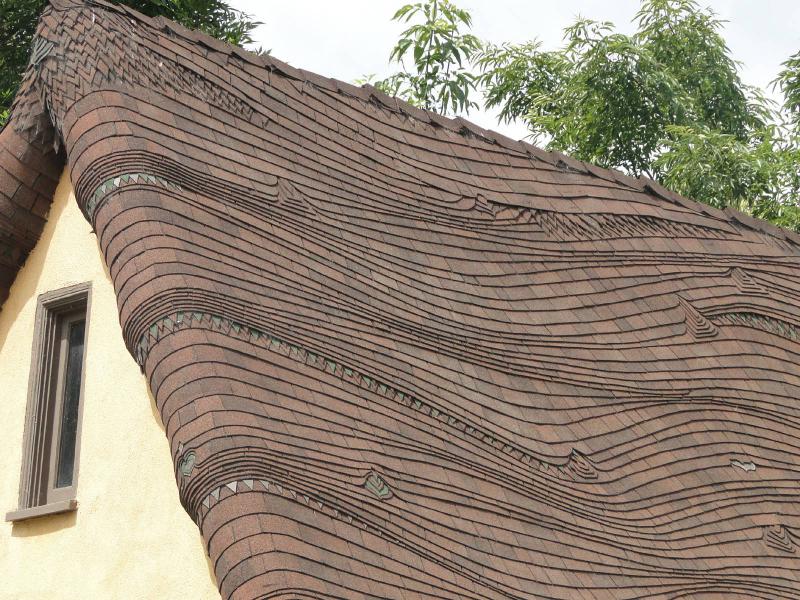
The performance of a ventilated roof depends on the slope of the slopes. The steeper they are, the more intensive the process of airing takes place.
And, on the contrary, in roofs with a slope of less than 20%, the ventilation of the under-roof space is unstable and effective only under the pressure of the wind.
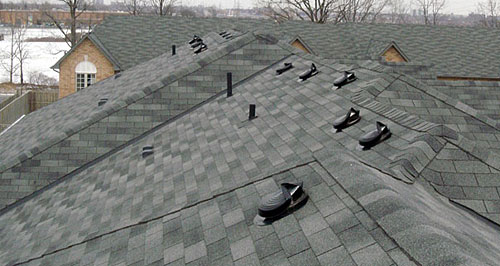
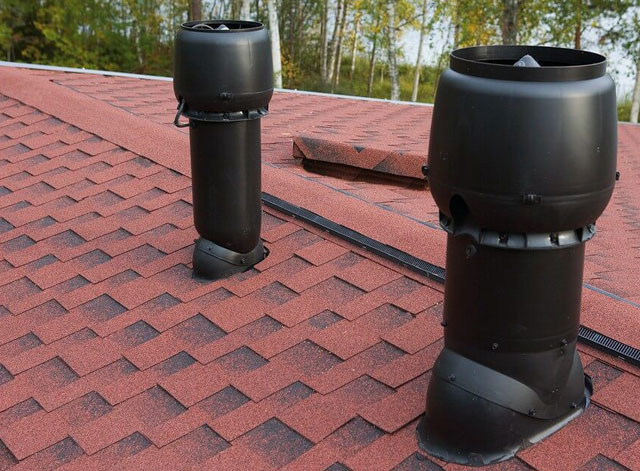
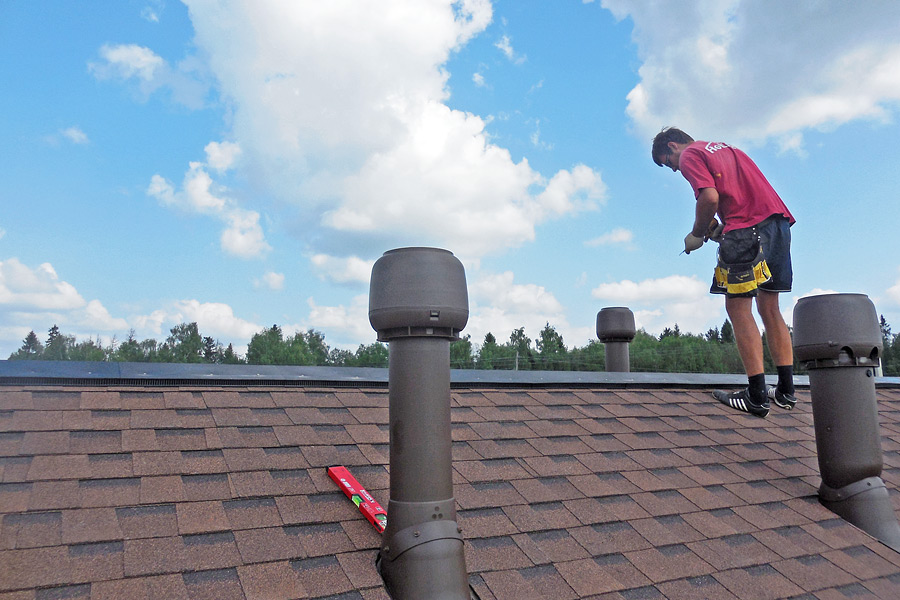
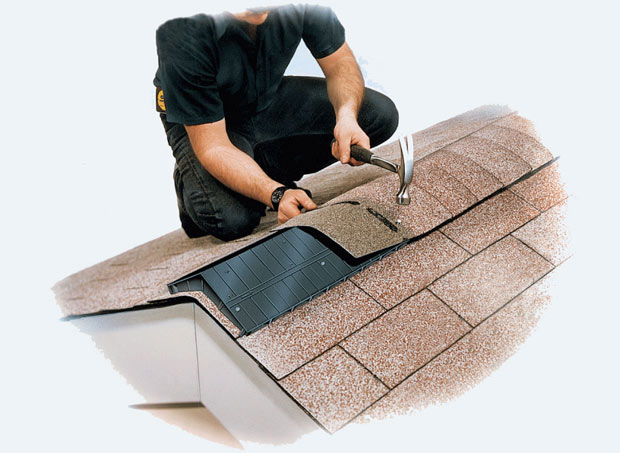
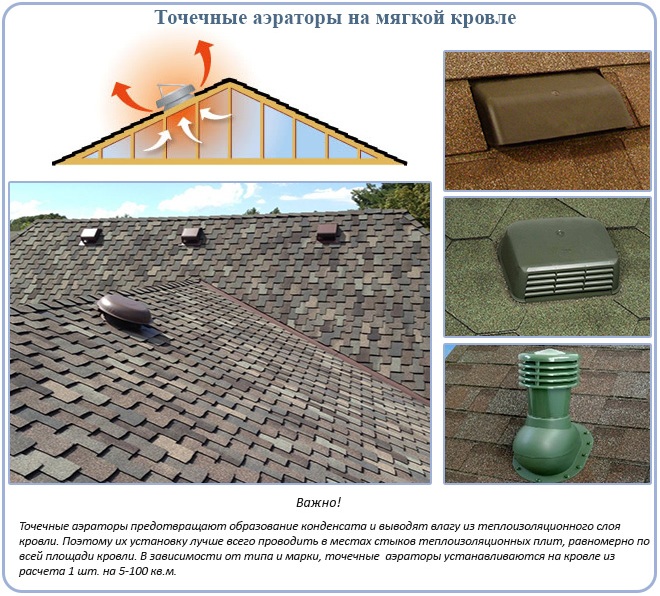
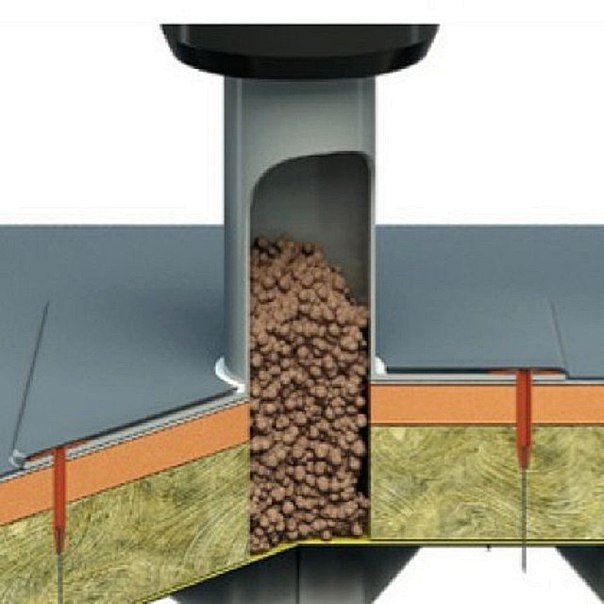
A useful addition is the construction of auxiliary exhaust components (aerators) on the roof, which contribute to enhancing the natural ventilation of the roof. They should be arranged on the roofs of a complex configuration, when ordinary means are no longer enough.
Mounted aerators near the ridge. In the roofing of the deposited materials, consisting of two layers, the installation of aerators is made on the lower layer of material.
Thermal characteristics of insulation and the resource strength of roof structures directly depend on the presence of moisture in them. As a result, a ventilated roof and a room ventilation device are economically viable, even when forced air exchange is required.

Advantages and disadvantages
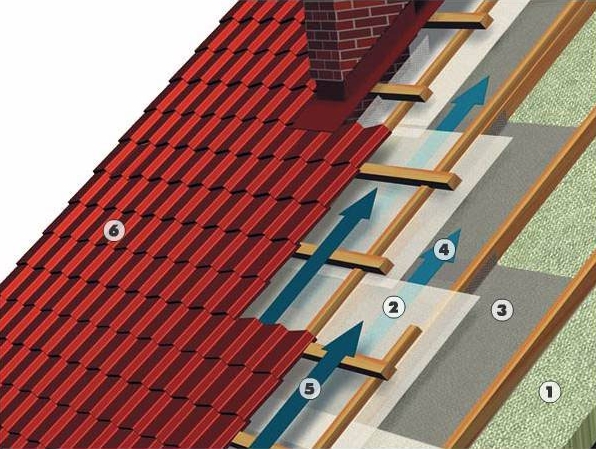
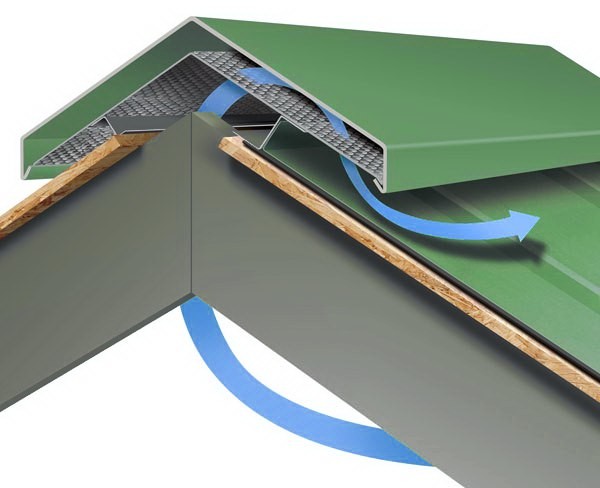
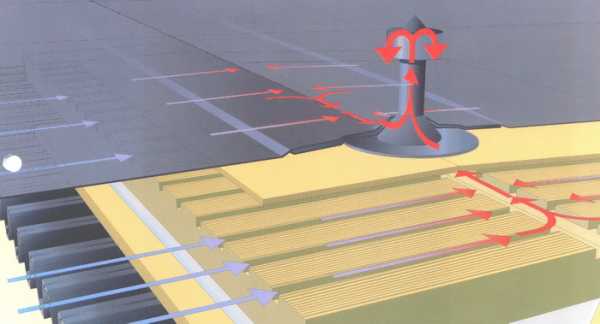
The main purpose of the ventilation system is to ensure the passage of atmospheric air, which facilitates the extraction of the heated from under the roof covering to the outside. Exhaust air provides ventilation of the attic.
If the under-roof ventilation is done correctly, then such a stream of air passes naturally and there is no need to use additional mechanical equipment.
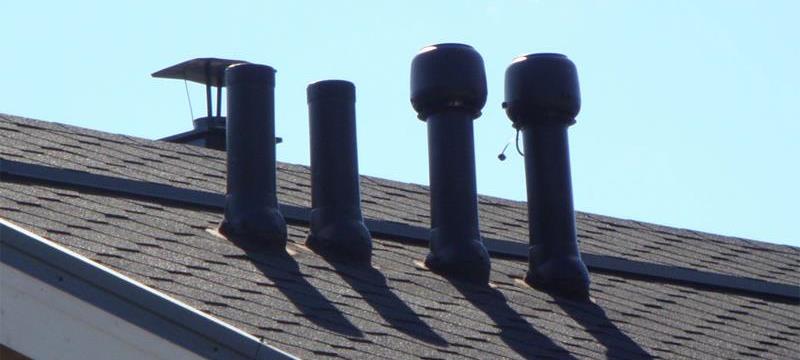
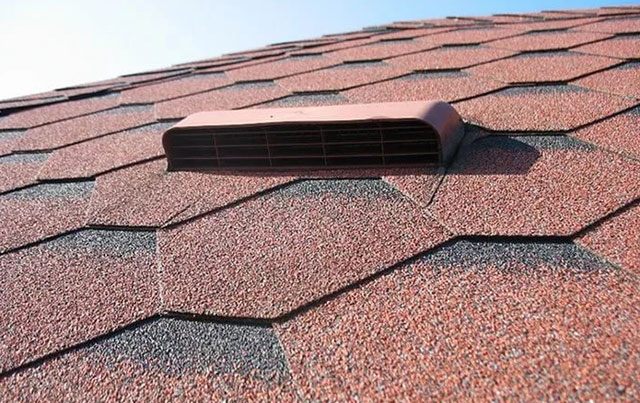
Aerators are available in various diameters and heights. Their size and quantity is selected depending on the roof area of the shingles.
The presence of a ventilated space under the roof has the following advantages:
- stable cool and dry attic;
- external air from the attic is able to go naturally;
- the supporting components of the roof, coatings and the heat insulation layer are not exposed to high humidity;
- lack of conditions for the formation of mold and rot, prevention of damage to the finishing materials of the roof;
- reducing the cost of electrical energy.
Experts have found that when using soft coatings, the main drawback is the accumulation of excess moisture in the screed and heat insulation.
The increased humidity of these layers of the roof provokes a number of negative effects, such as:
- Bloating roofing, resulting from its heating in summer due to the separation of bitumen-polymer materials under the influence of high temperature.
- Thermal conductivity increase causes moisture that has accumulated under the waterproofing material, impairing thermal properties. It is theoretically proved that with an increase in the amount of moisture by 1-2%, an increase in the heat-conducting properties of the material occurs by 30-40%. This leads to higher costs for heating the facility. Along with heat loss, oversaturation of roofing layers with moisture can lead to the formation of mold.
- Destruction of the waterproofing layer and screed provoked by the penetration of moisture into the material. After the temperature of the surrounding atmosphere decreases, the moisture absorbed into the material and its volume increase crystallize. This process entails the appearance of microcracks and destruction of the screed.Similar negative processes occur in the waterproofing layer, destroying its integrity.
Species
Roof aerators come in a variety of sizes and sizes. They are used to ventilate the space under the roof, eliminate condensation and remove moist air to the outside. Before purchasing an aerator, you need to understand the features of their design and types.
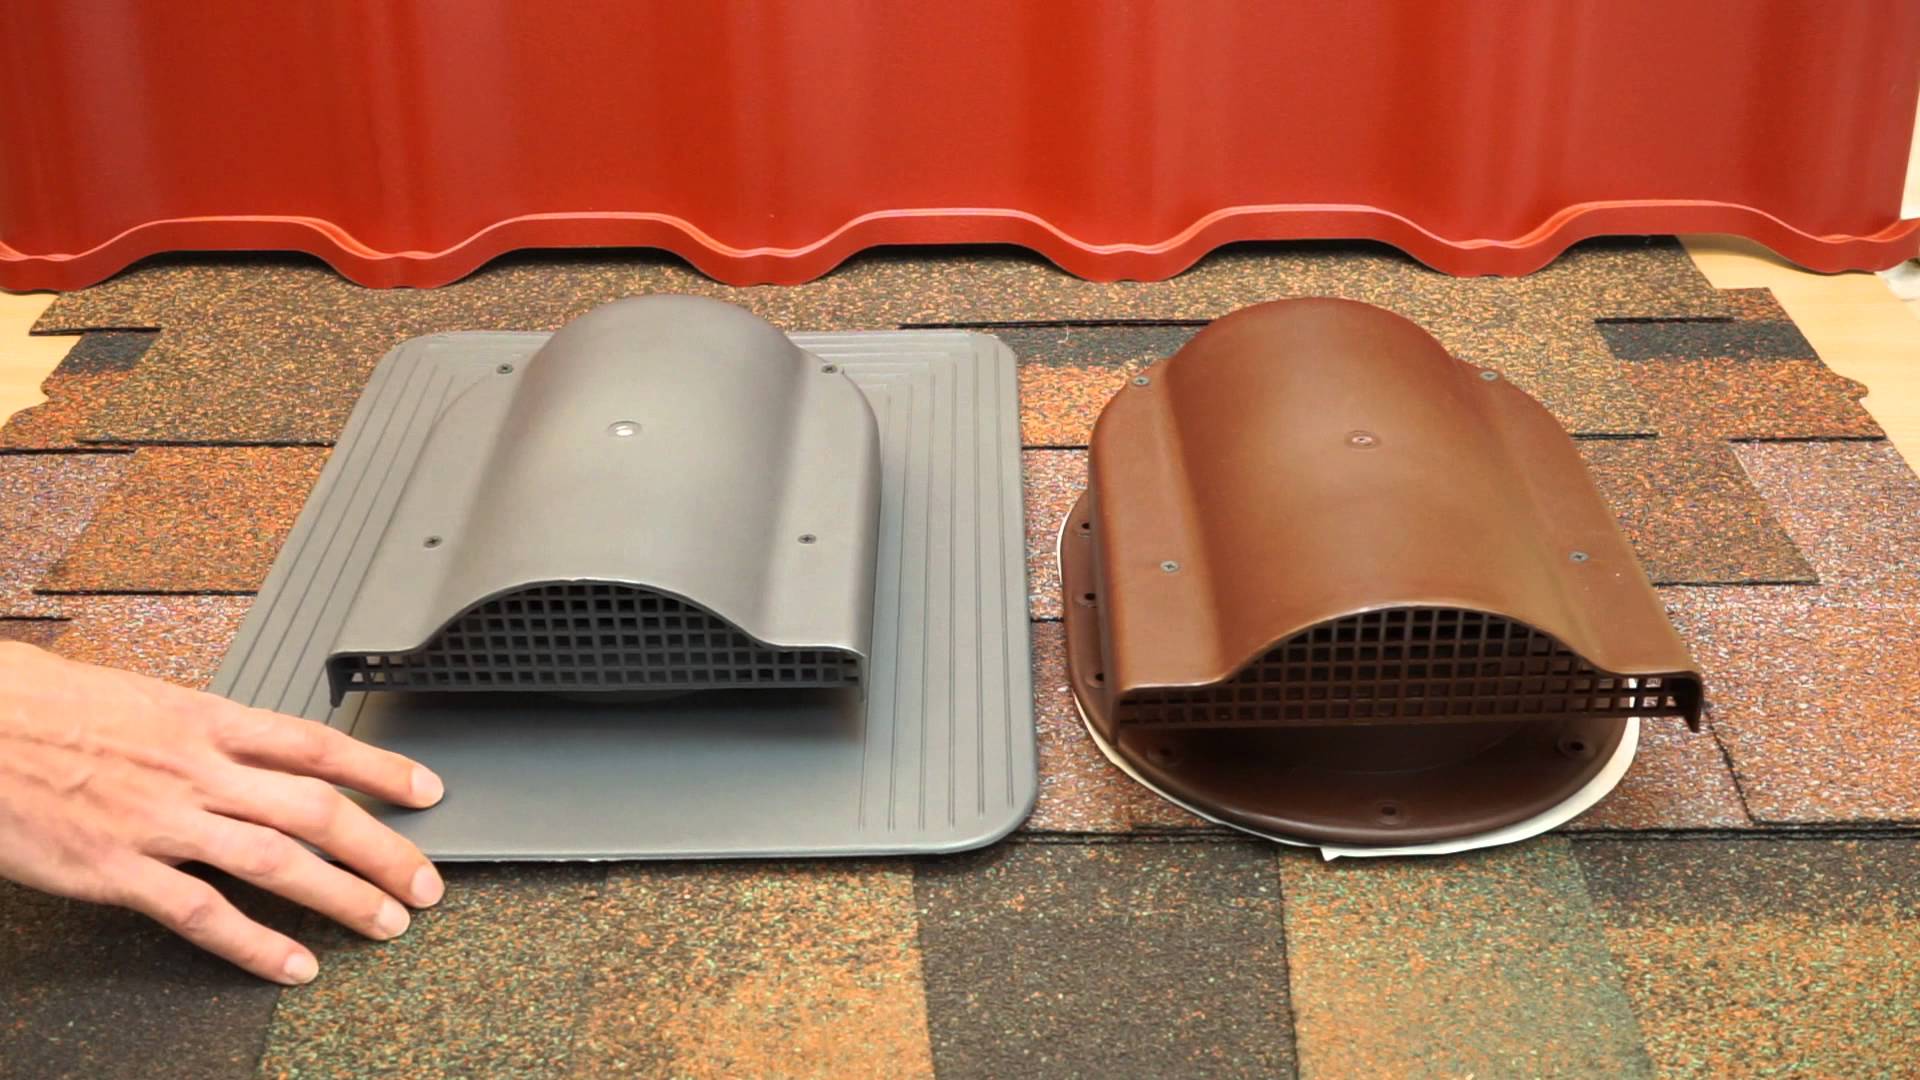
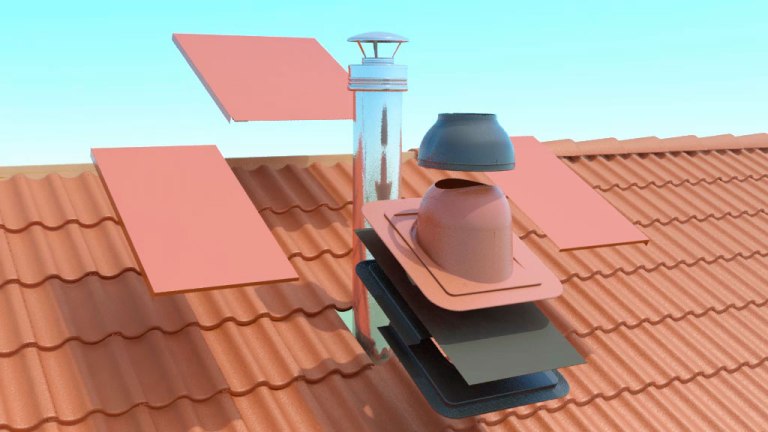
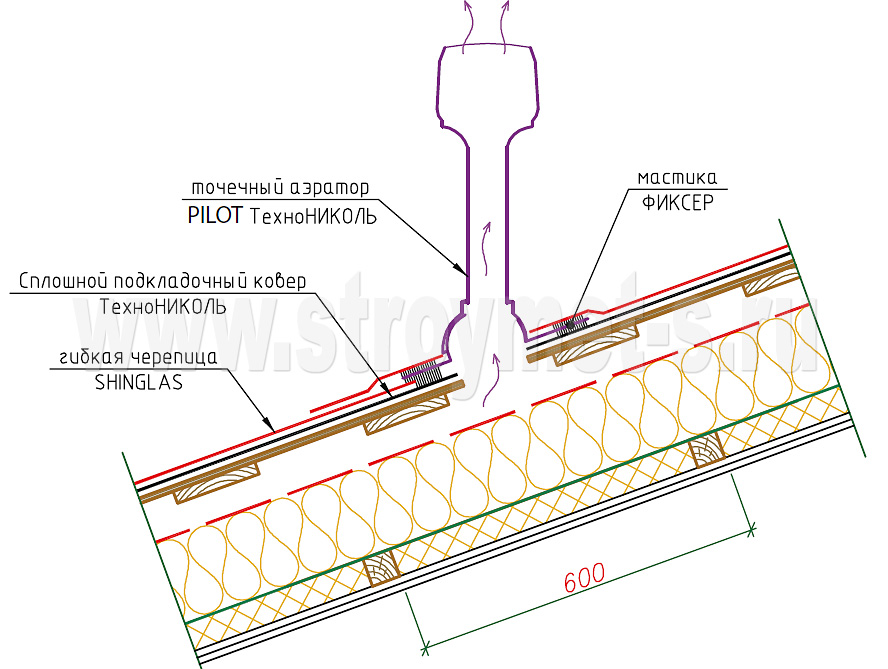
Dotted
Differently, these aerators are called roof-pin valves. They are mounted on the roofs in which there is no ridge - tent and flat. The roofing aerator itself is made of high-strength plastic that is resistant to mechanical stress and exposure to sunlight (fading).
It has 4 parts in its structure: a flask, a protective umbrella for it, a tube and a filtering mesh.
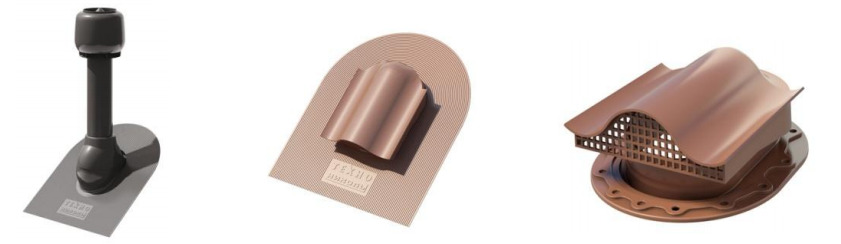
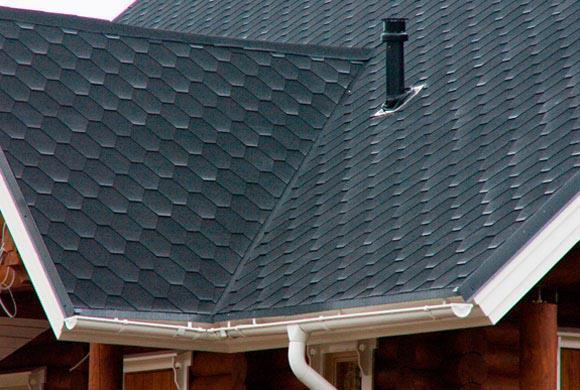
In accordance with the configuration of the flasks, they are divided into flat and bottle. On the sloping and hip type roofs are installed bottle, and on the flat mounted flat. Such aerators function productively if they are placed evenly throughout the roof. As a rule, one deflector is necessary for a 20 m2 roof, but, if possible, it is better to mount two.
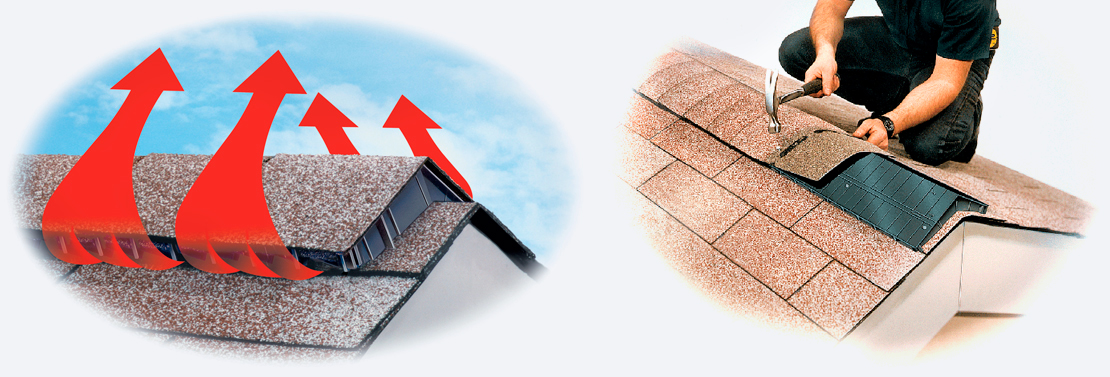
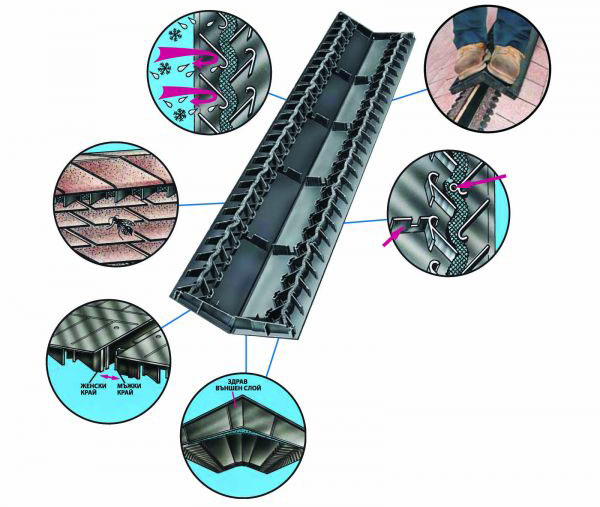
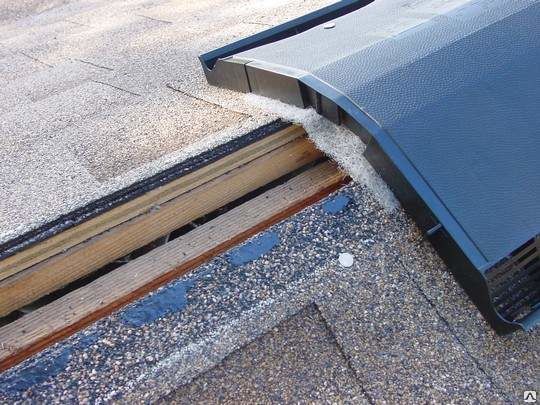
Ridge Continuous
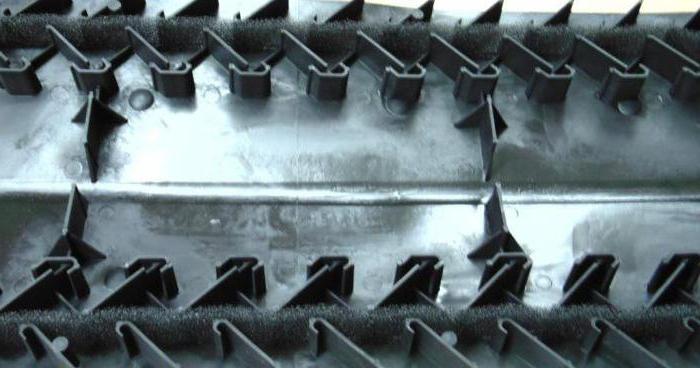
According to the name, installed on pitched roofs, equipped with a ridge. Represent a permanent exit, located at the very top of the slope. The ridge aerator is implemented in the form of a square, equipped with through holes, which are called airways.
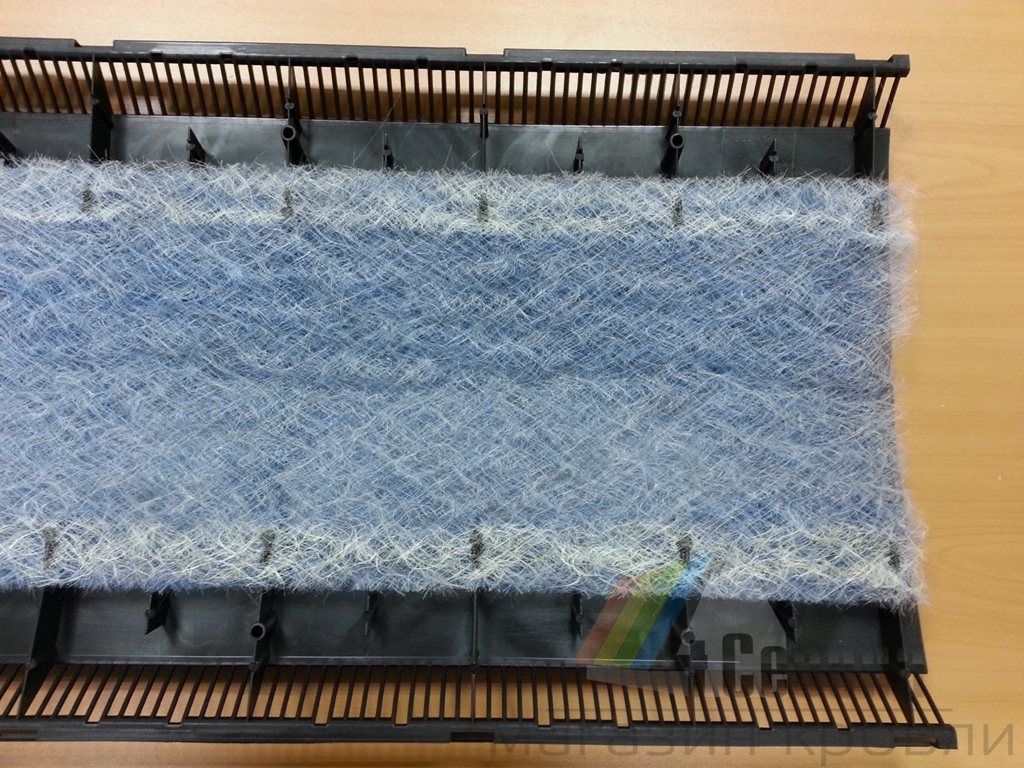
Products are point (made at a distance of 6-8 m between them) and slotted (5 cm gap). There is a protective mesh against penetration of insects inside the roof. Such a device is mounted on the whole ridge and is attached to the roofing material. Its individual components form a complete system. The aerator perfectly retains moisture and allows air to flow outside, preventing it from stagnating in the attic.
How to choose?
Various deflectors are used on soft roofs, the choice of which depends on the type of roof.
When choosing an aerator, preference should be given to products that have certificates from a trusted manufacturer.
When buying, special attention should be paid to the completeness of the kit and the absence of mechanical damage (scratches, chips, cracks and deformation).
Choosing aerators for a soft roof, it is necessary to build on the complexity of its structure, climate and moisture saturation level of the attic.As a rule, one point aerator should be installed on 100-150 m2.
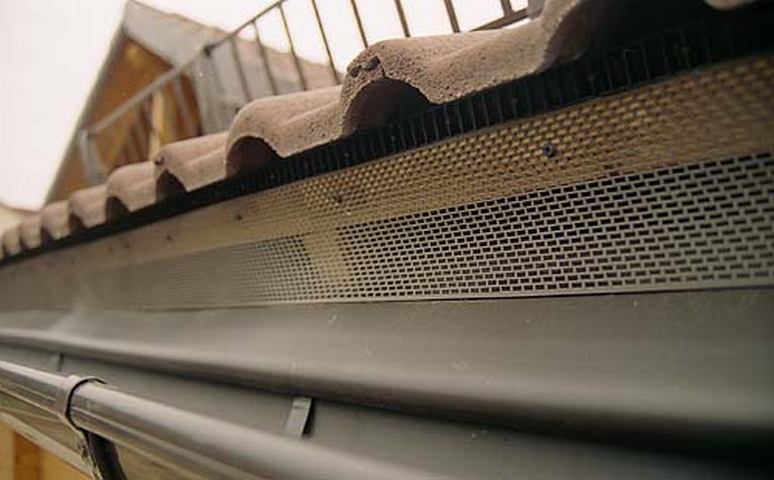
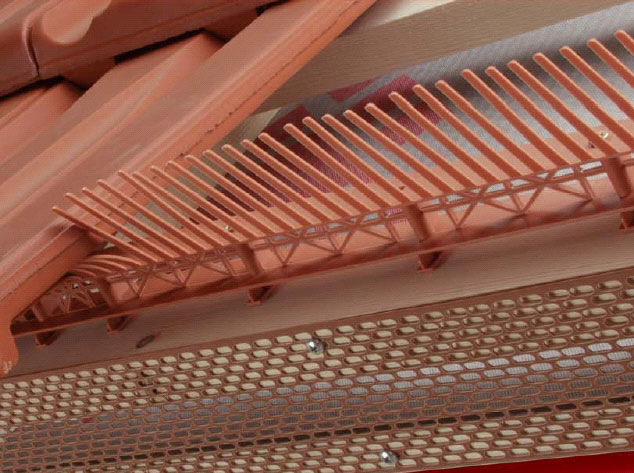
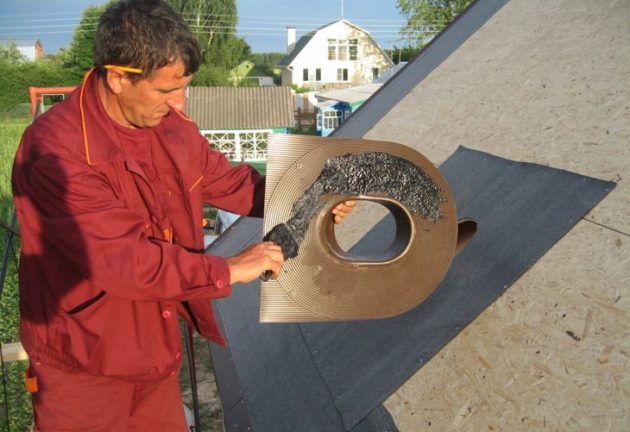
When mounting a ridge aerator, a different approach is taken. A ventilating slit is constructed along the entire length of the joint, and the inflow of air is carried out from under the overhangs, where a specialized aero element (perforated tape) is arranged on the slit.
For all types of aerators, a number of technical conditions are put forward to which they must comply:
- can withstand temperatures from -50? C to +100? C;
- resistance to chemicals that may be contained in precipitation;
- corrosion resistance.

How to install?
Each type of aerator has a specific installation order.
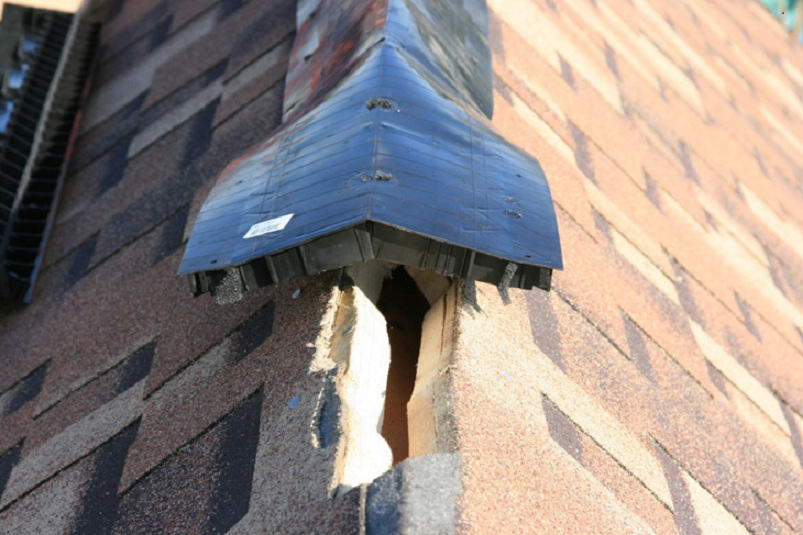
Point devices are mounted on flat roofs and roofs that have an inclination angle of less than 12 degrees. They can also be used as a supplement to the ridge aerators.
Let us consider in more detail the technology of mounting point aerators:
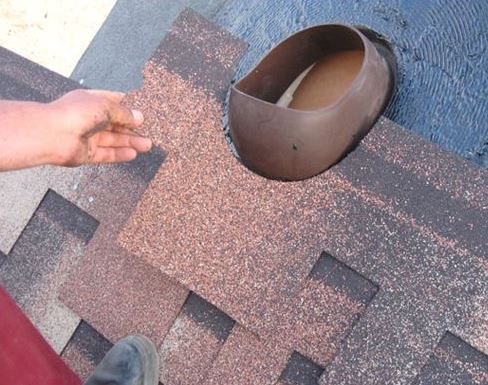
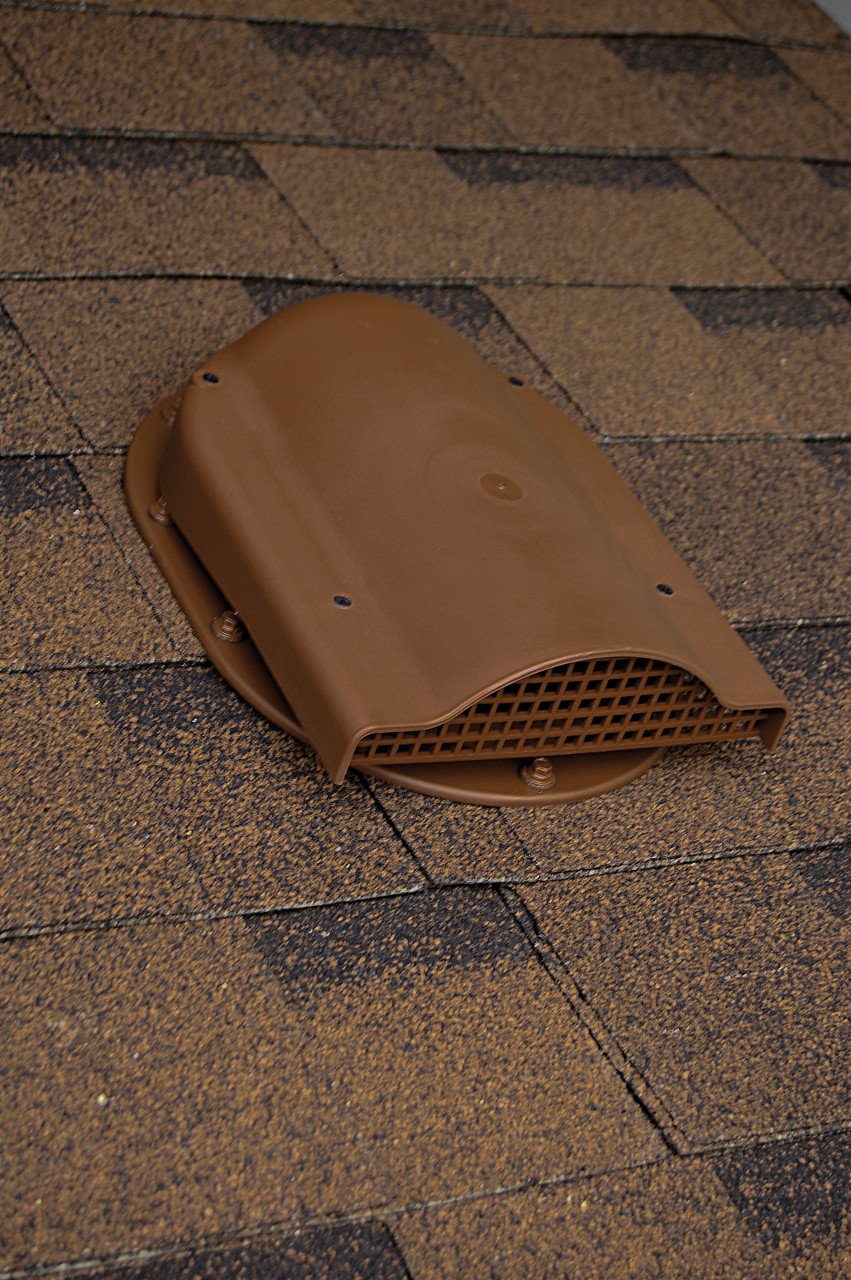
- We determine the location of aerators. Attach the aerator base to the place of installation and draw a pencil around the contour. On the marked mark with an electric jigsaw we make holes.
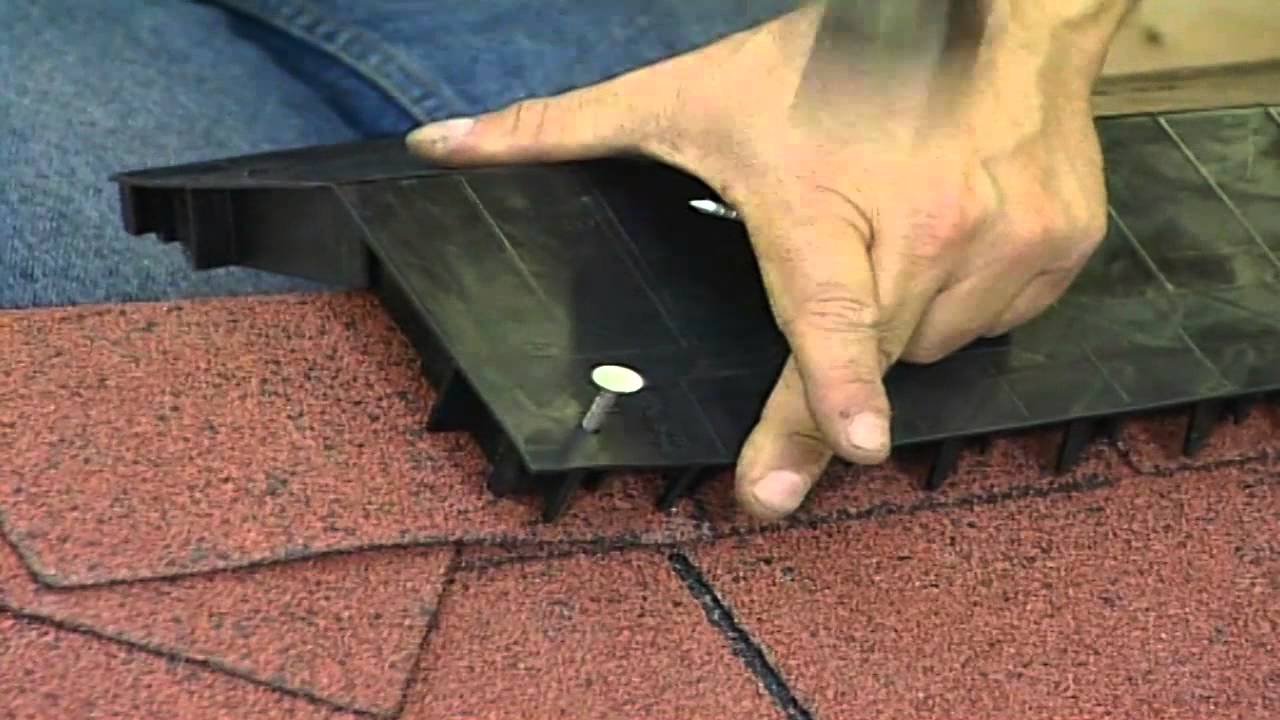
- Install the skirt (base) of the aerator over the finished hole and fix it with screws or nails. For stronger fixing, you can additionally use glue.In this case we apply bitumen mastic on the inner segment of the skirt, glue it to the base and fix it with nails.
- We coat the top of the skirt with bituminous glue.
- Overlap the skirt with soft tiles, undercutting shingles at the points of contact.
- From above on a skirt we put on a grid of the aerator, we fasten it by means of self-tapping screws. Then we install the cap (lid), latch it and also fasten with screws.
Installation of the remaining point aerators is carried out in the same manner.
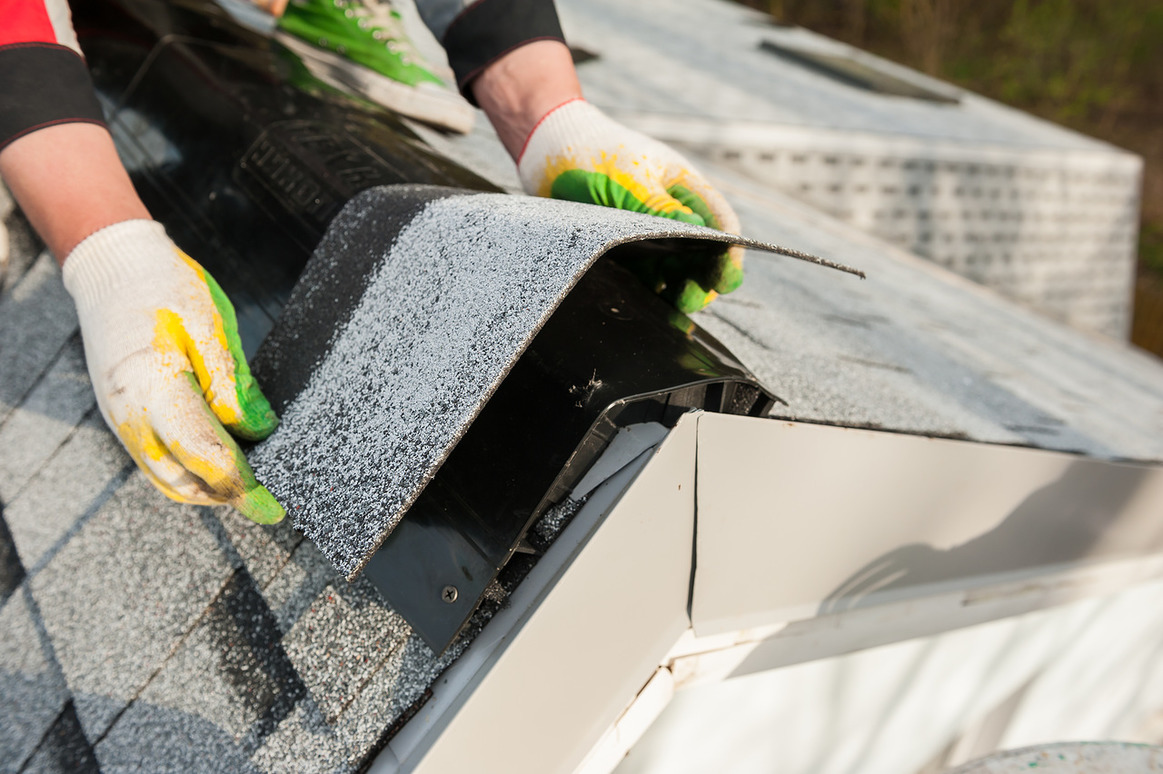
The installation of a ridge aerator is quite simple, it is installed along the entire length of the ridge ridge and its variety - a hip roof, the slope of which is from 12 to 45 degrees. Install a ventilated ridge soft roof can be two methods.
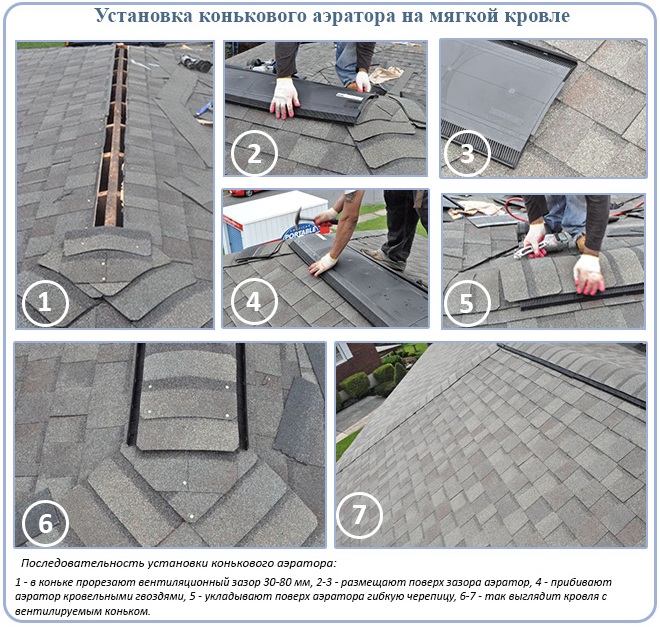
Installation technology:
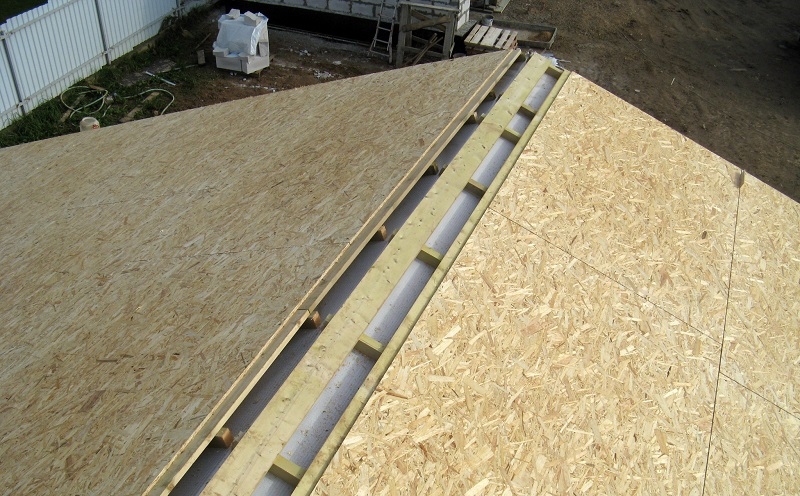
- In one piece, using a circular saw cut through the ventilation slot. It may be the only one (at the highest point of the skate) or consist of two parts (on the sides of the skate). The total thickness of the ventilation gap should be 3-8 cm (depending on the instructions of the manufacturer of the aerator used). The vent groove should end 30 cm to the edge of the ridge on both sides, i.e. the coating remains solid.
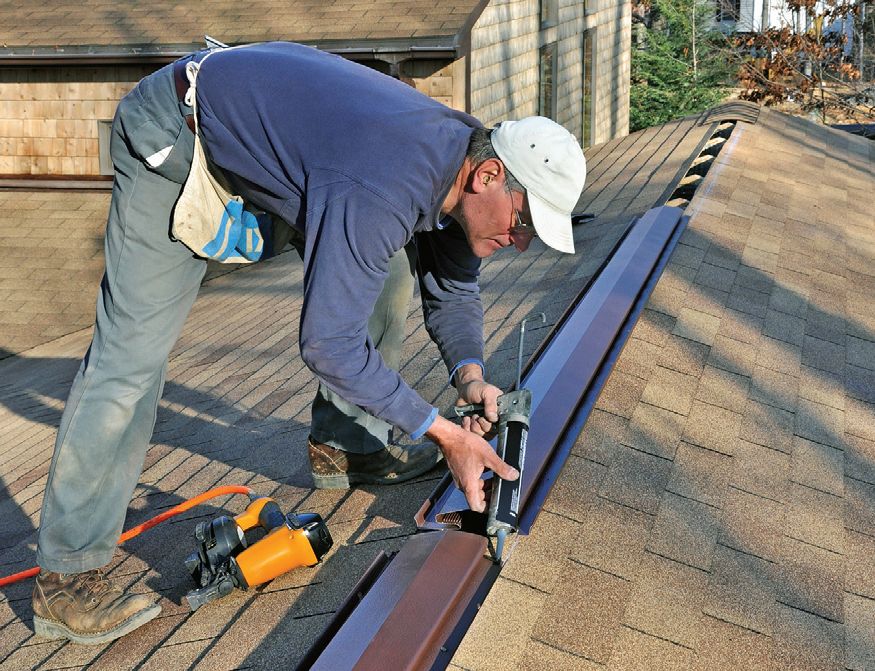
- Areas where the ventilation gap was not cut, cover ridge tiles.
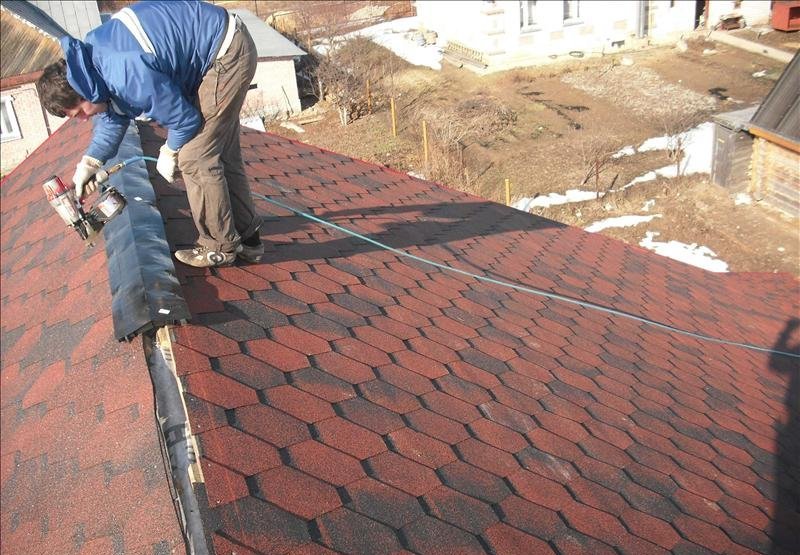
- We make installation of the aerator. Each of its sections is fixed by means of special roofing nails or screws, screwed through the existing factory holes.
- Skate tiles should be laid on top of the aerator profile. Its petals are laid overlapped, according to the standard technology of mounting along the edges. The only difference is the fastening elements. In this case, the tiles are nailed to the aerator with special roofing nails.
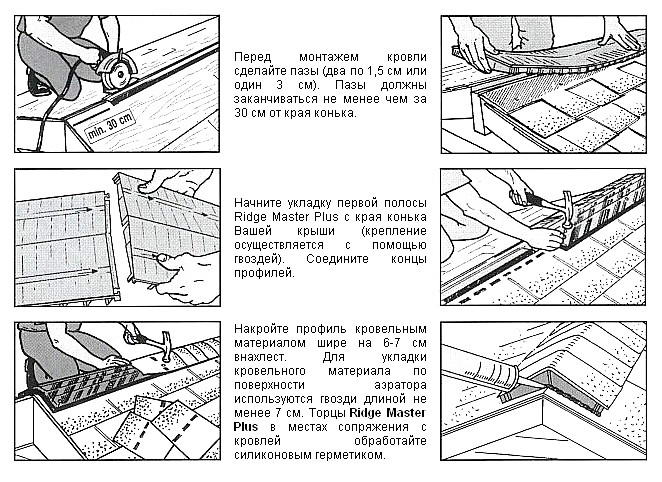
- The places of interface of the aerator with the roof are sealed with silicone-based sealant. Attention should be paid so that there is no depression around the device for ventilation of the roofing space. Water and snow will linger in these grooves, which over time will certainly find a place to seep under the roof.
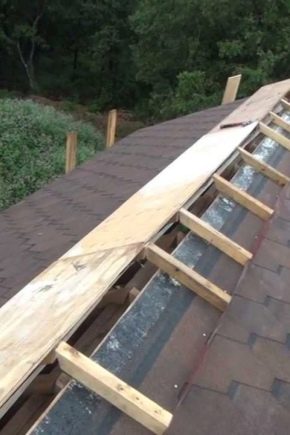
The second method involves fixing the roof bars of wood at the highest point of the roof slopes. It turns out a kind of crate for skate plank. From above to the bars we plywood strip, forming a triangle. Ventzazory form between the bars, and the entire structure, as in the previous case, we cover with shingles.
If the height difference on the roof is quite large and the total height of the structure is not less than 7 meters, then instead of aerators it is possible to install small box-shaped valves together with ridge ventilation.
Houses with a hip or hip roofing architecture are missing pediments. But this is not a problem for the ventilation device. It is based on the same principles as in gable roofs, but at the same time we must not forget that it is necessary to construct entrance gaps to ensure the passage of air around the perimeter of the roof. How many slopes the hip roof would not have, each of them must be ventilated.
A big desire to forget about the device of ventilation of the space under the roof gives a half-hinged roof, since its inclined face elements have relatively small dimensions. The ventilation system here can be built on the principle of ventilation on the main slopes of the roof.
It is slightly more difficult to calculate the ventilation of the end slopes of the Dutch (hip) roof, since there is a window directly above them. This is a hindrance to the use of pipes, but, nevertheless, an aerator or grating can be installed there.
In all the cases described, if the filing of the roof is made of wood, then it should not be monolithic, since air must pass through its gaps into the space under the roof. But in parallel with the above installation rules, it is also necessary to make the correct calculation so that normal draft would form under the roof. Otherwise, all this will not function.
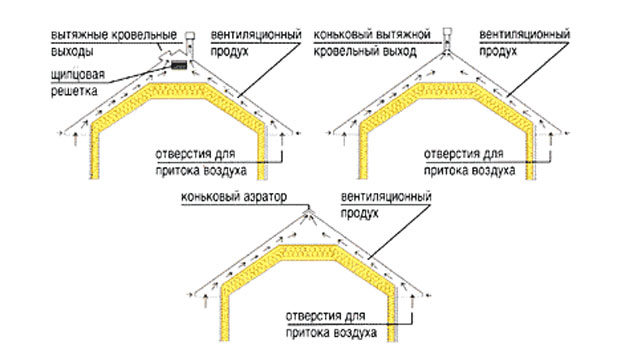
Regardless of the method of device ventilation must ensure:
- the passage of air vapor;
- protection of the space under the roof from precipitation and melting snow;
- moisture should not pass through the construction of the ridge;
- ensuring the evaporation of excess fluid from the room.
Useful recommendations
When arranging the ventilation of the under-roof space, you should take into account a number of important points with your own hands.
- If you intend to get a stronger effect from the movement of air, then it is necessary to apply steam and hydro-barrierslocated under the crate. They are specialized nets that easily let in air, but prevent the passage of moisture and steam.
- To ensure ventilation under the roof of an ordinary single-pitch roof, a small number of outlets, located in the lower and upper parts in equal amounts, will suffice. If necessary, you can supplement the ventilation system with a fan for forced exhaust.

- If you put a fan in a facility that is located in an area with humidity above normalthen the fan should be endowed with a higher power of the electric motor. Fans must be installed in parallel with the roof structure. Inset device in the finished roof is more complicated and will cost significantly more.
- The combination works perfectly on the roof - full skate ventilation and auxiliary elements to enhance the air flow. If, for example, in winter one of them is damaged, the rest will remain in working condition. Roof space will be one hundred percent protected from the accumulation of condensate.
- Also It is necessary to pay attention to the total component of all precipitation falling in a year. In areas with heavy snowfall it is necessary to raise the air ducts to a higher level, otherwise the snow drifts will block the low installed aerators.
- And the last - the desire to save when installing roof ventilation can end badly, being a source of problems both with the roof covering, and with structural elements. Proper organization of effective air exchange is a guarantee that the roof will last more than a dozen years without the need for repairs, providing thorough protection of the entire structure and comfortable living conditions.
It is not that difficult to arrange ventilation under the roof with your own hands for a roof of any kind, and the positive effects of such a construction are considerable.
Roof ventilation in shingles is shown in the following video.


