Hip roofs: a truss system
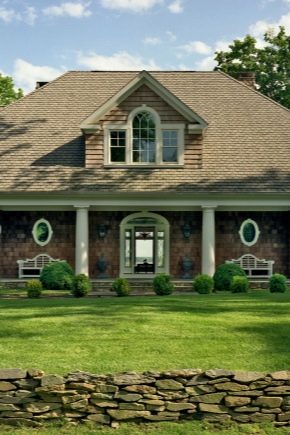
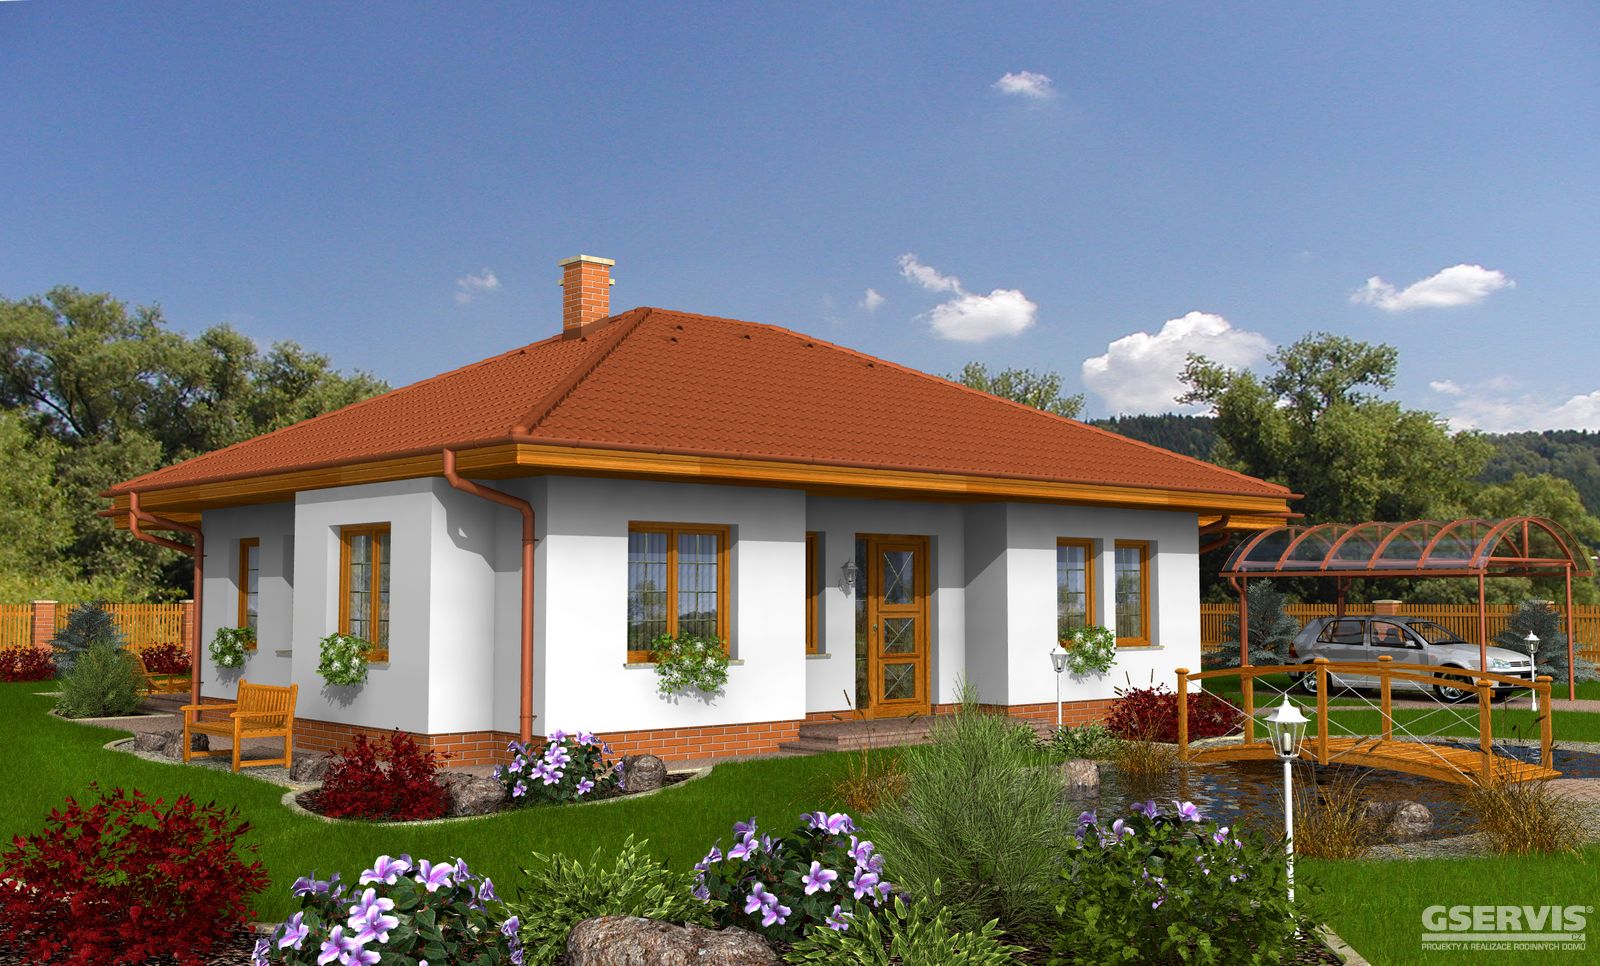
It is difficult to name a more important part of the building than the roof. It is chosen taking into account the weather conditions and materials that should ensure its durability and reliability. It goes without saying that the attractiveness of the appearance of the roof also plays an important role. With all the variety of today's choice, the unusualness of hip-type roofs deservedly puts them in one of the first places to make any private house attractive.
What it is?
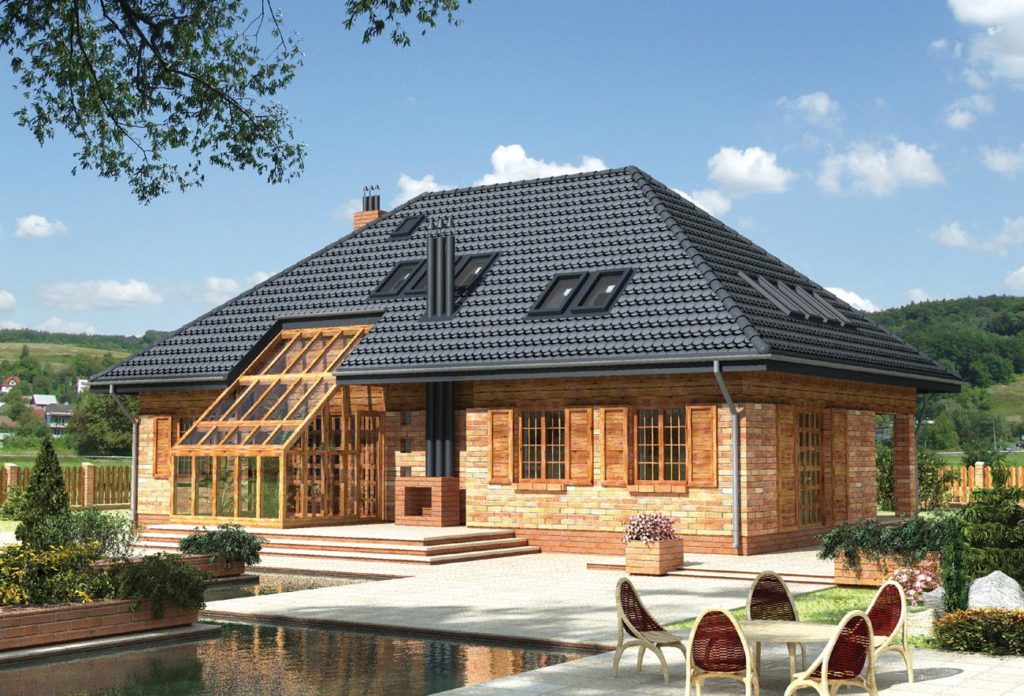
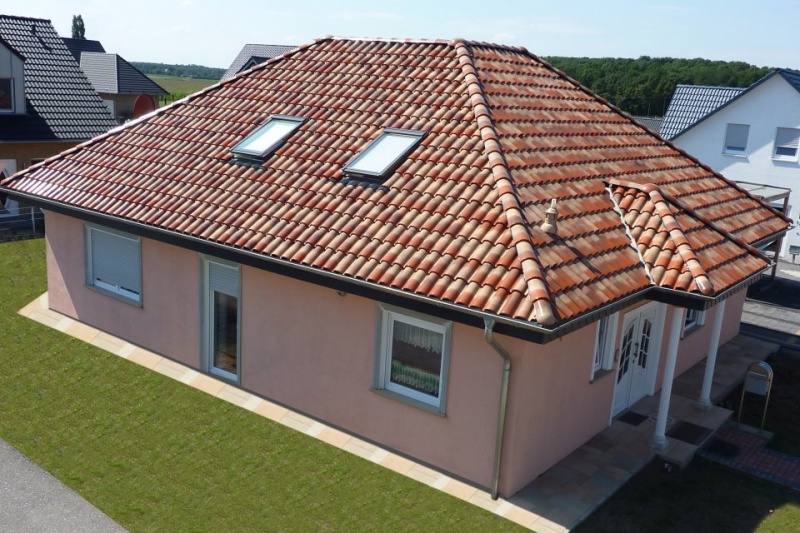
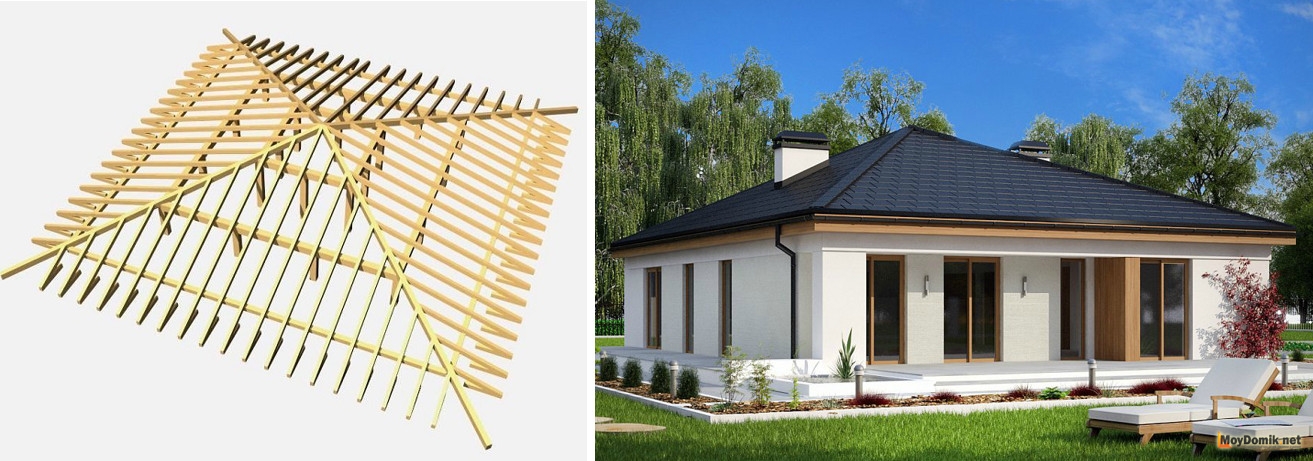
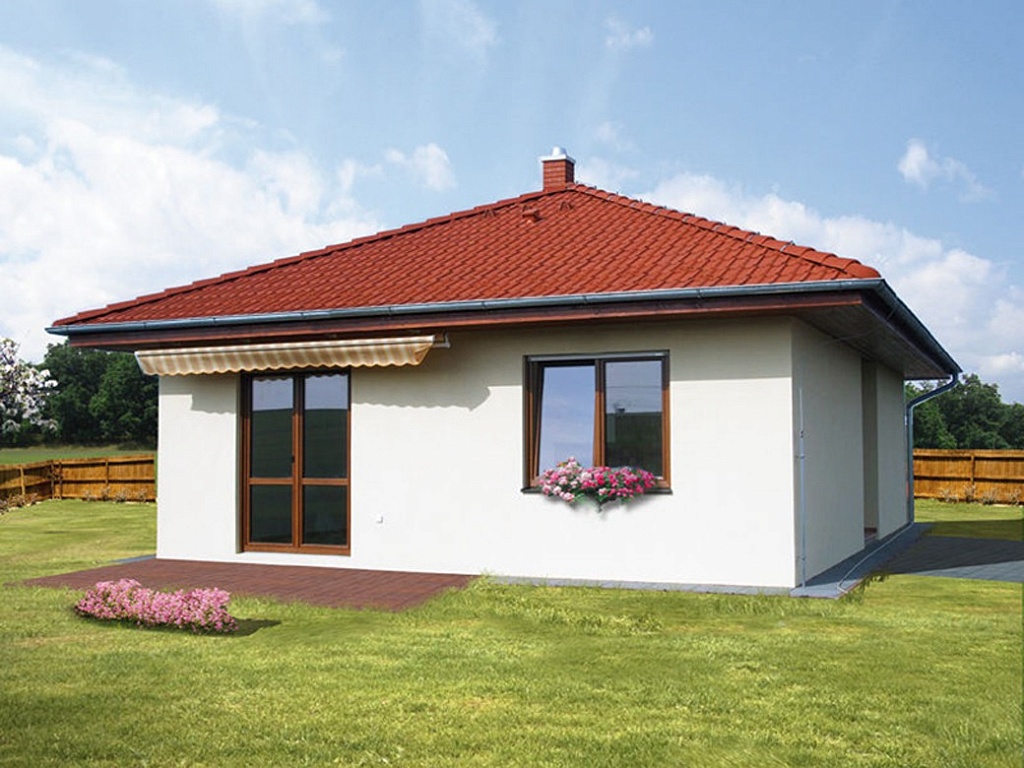
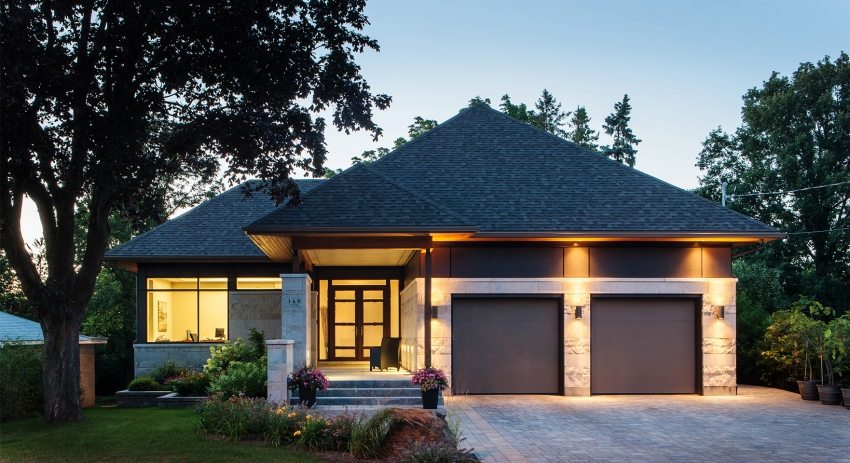
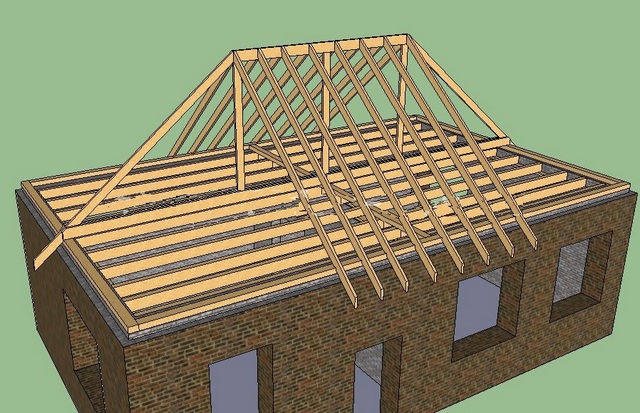
The hip roof consists of two inclined surfaces, which have the shape of a trapezoid, plus a pair of shorter slopes, which are made in the form of an inclined triangle.
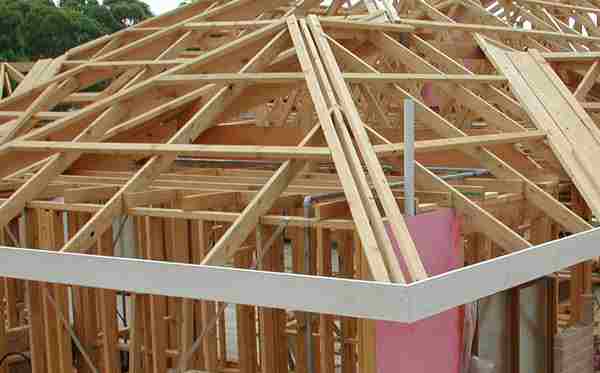
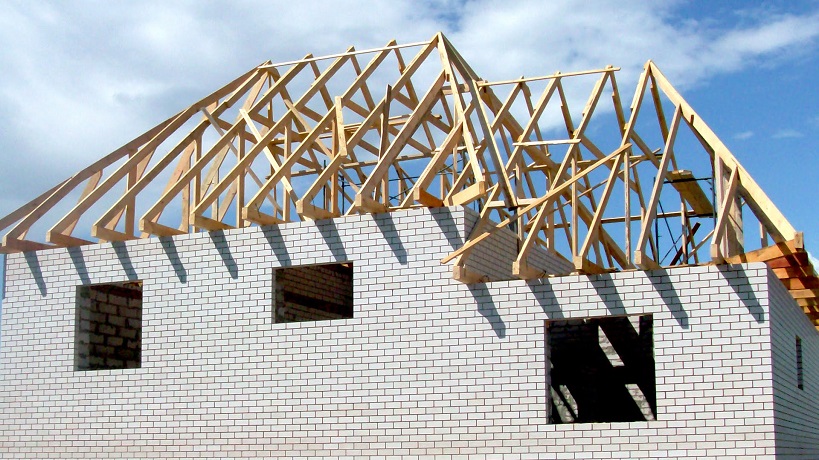
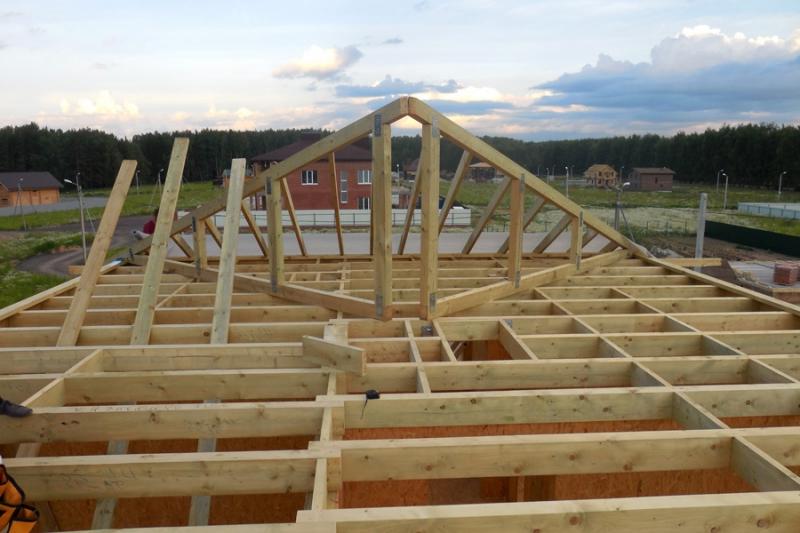
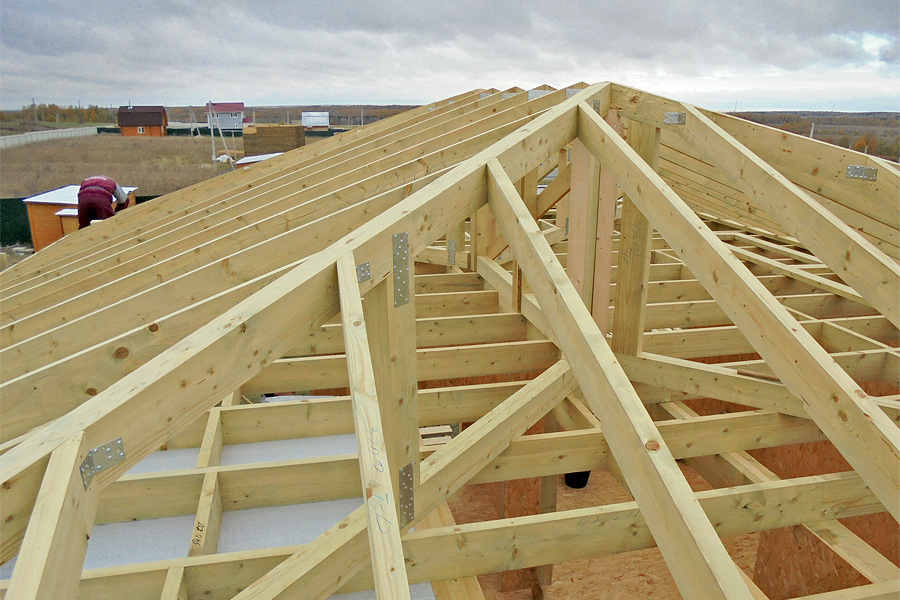
The main difficulties in arranging traditional hip roofs fall on the stage of erection of truss structures, which consist of slanting, private and external rafters.
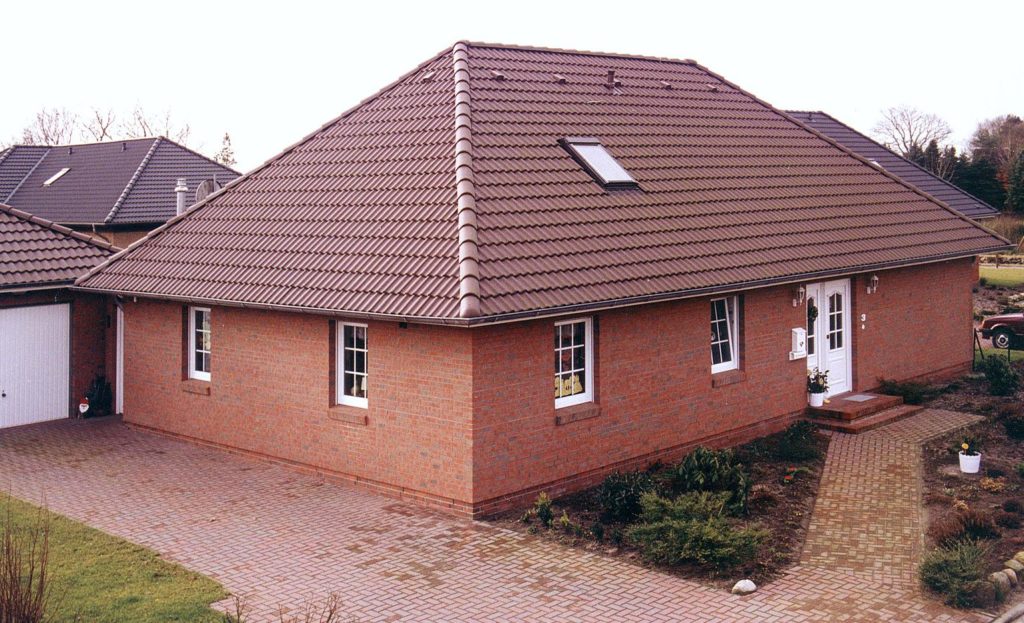
Hip roofs perfectly resist wind loads and generally have high performance characteristics.
At the design stage you need compliance:
- selection of the optimal material for the arrangement of the roof structure;
- determine the intensity of precipitation characteristic of the place of construction;
- installation of average and maximum wind resistance.

Given the above indicators, you can calculate the optimal value of the angle of inclination of the slopes and the heights of the roof structure.
To perform the calculations and make a project, you can use the services of a specialist or pick up projects in the open source. With proper skills, these activities are carried out independently.
Special features
The roof, about which there is a speech, is designed in a peculiar way. A larger ramp is used on any roof, but a short one makes such a design worthy of attention.
The design of the roofing system is such that the ramps do not compensate for the vertical projection of the building in length, and the remaining free area is filled with two short hips.
If you try to make a diagram of the hip roofing structure yourself, you need to use a rake and Pythagorean tables.
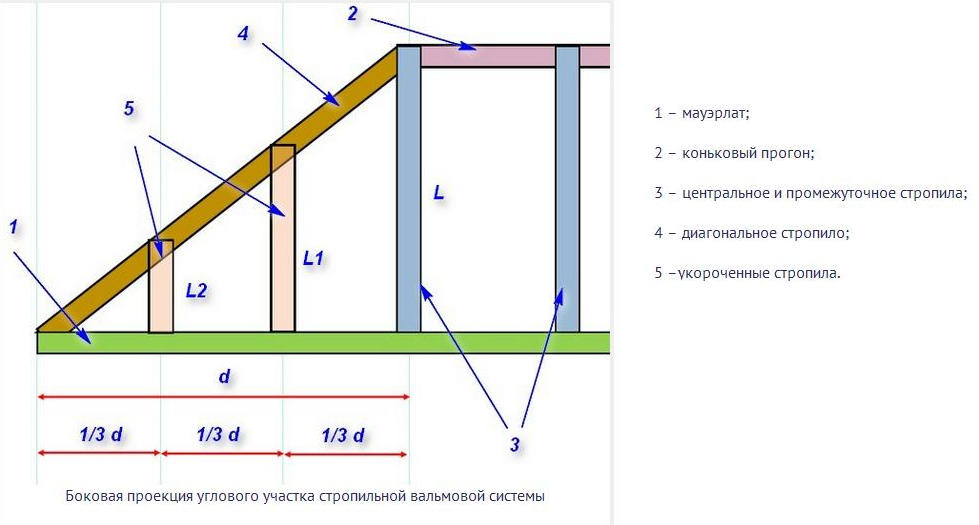
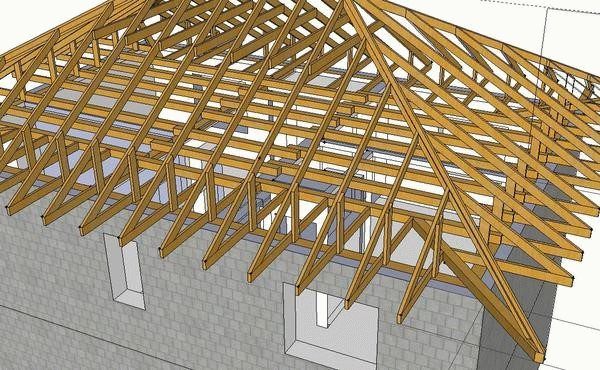
Support for rafters of the hip-type roof is the so-called "Mauerlat" and ridge beams.
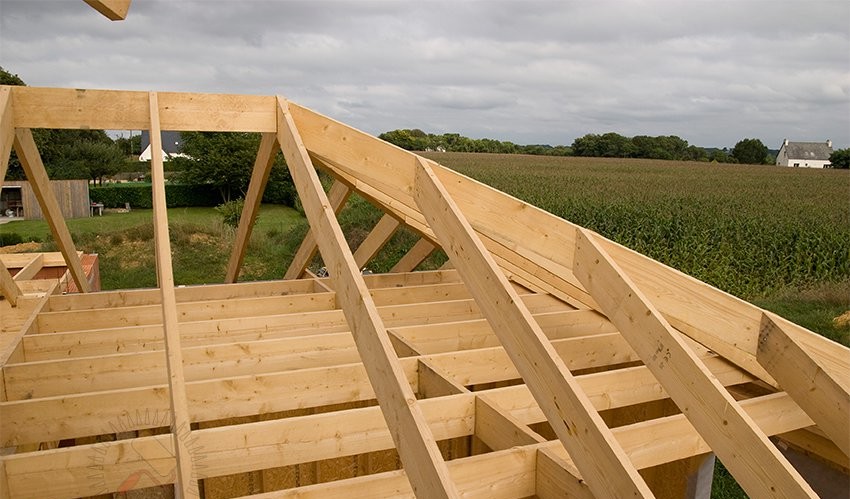
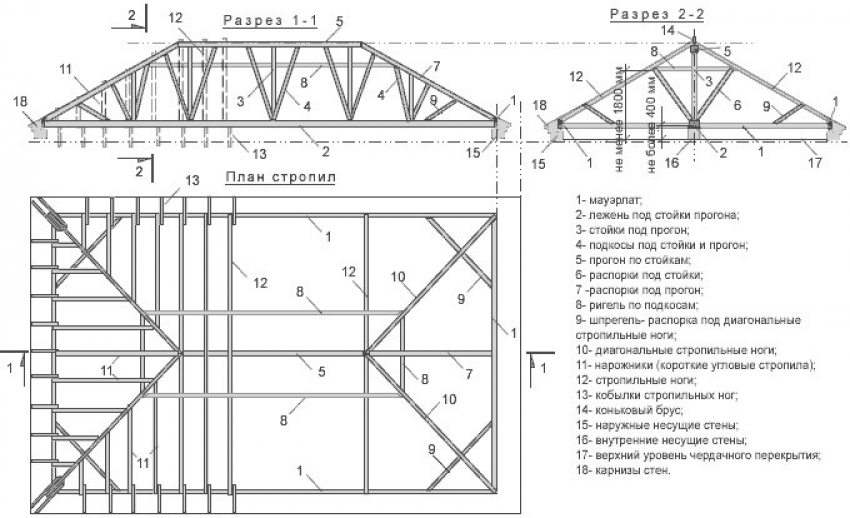
The composition of the roof "skeleton" is as follows:
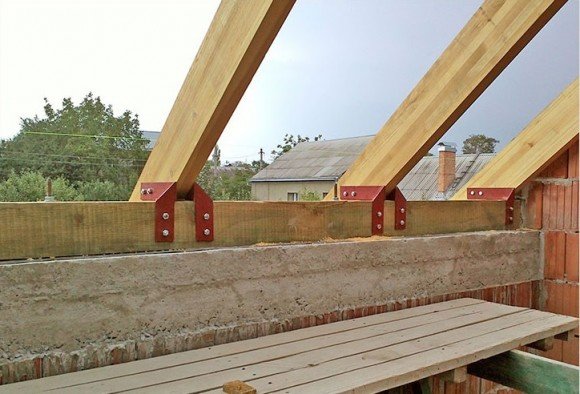
- Support base (mauerlat). It is made of timber 100x150 mm or 150x150 mm. It depends on the design features of the house. The fastener of the power plate in the horizontal line is provided with four stitches, which give rigidity to the whole structure. Mauerlat is made of thick timber and attached to the upper end of the wall with a pin or dowel.
- Racks set along the central axis of the slabs along their long sides and reinforced with temporary supports. Subsequently, ridge bars are attached to them. Their height is chosen depending on the angle of inclination of the slope. Accordingly, the racks are the higher, the smaller the angles between the rafter legs.
- Ridge cant - these are the upper horizontal bars that lie on the rack and serve as rafters. Ridge beams are attached to the rack, they serve as supports for the main rafter.
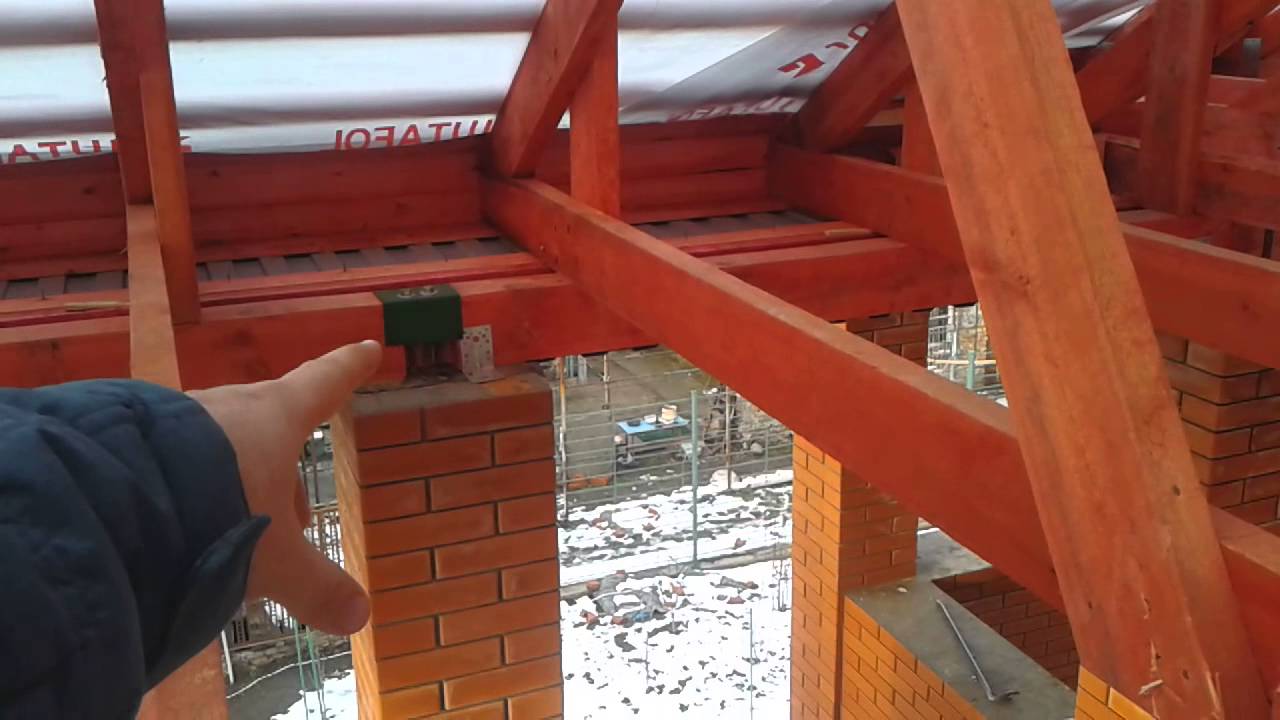
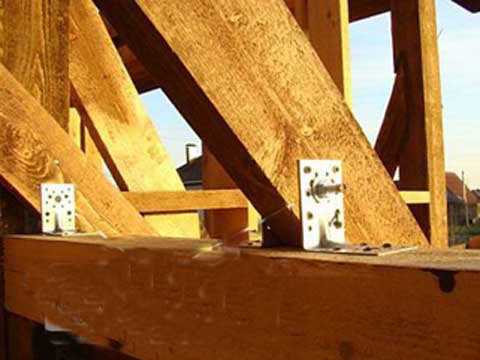
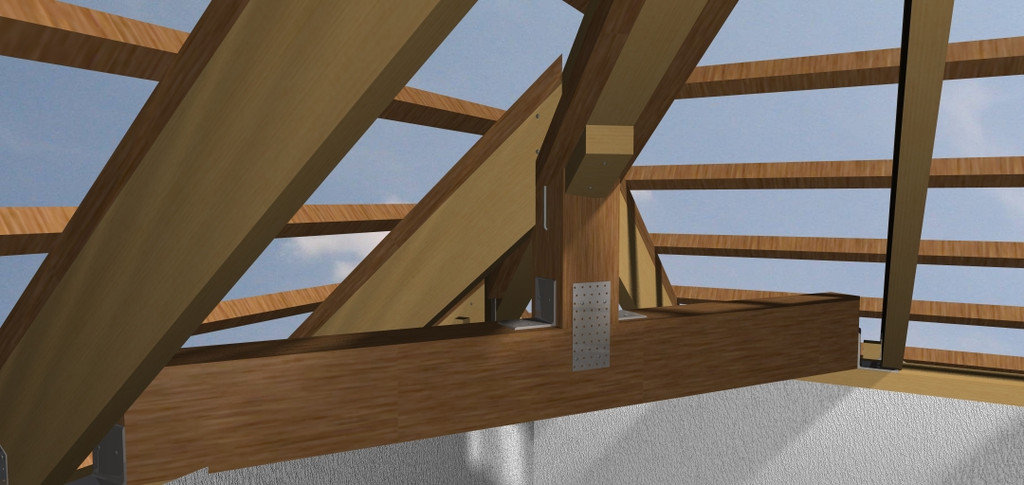
- Main rafter has a support on the mauerlate and ridge bar and is fixed on them with special galvanized steel plates.
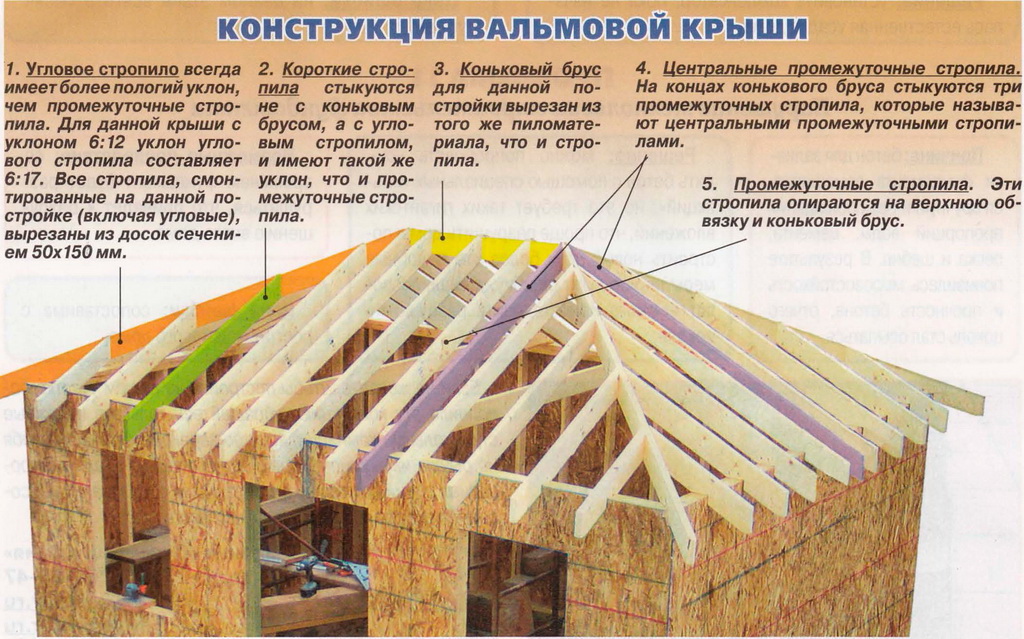
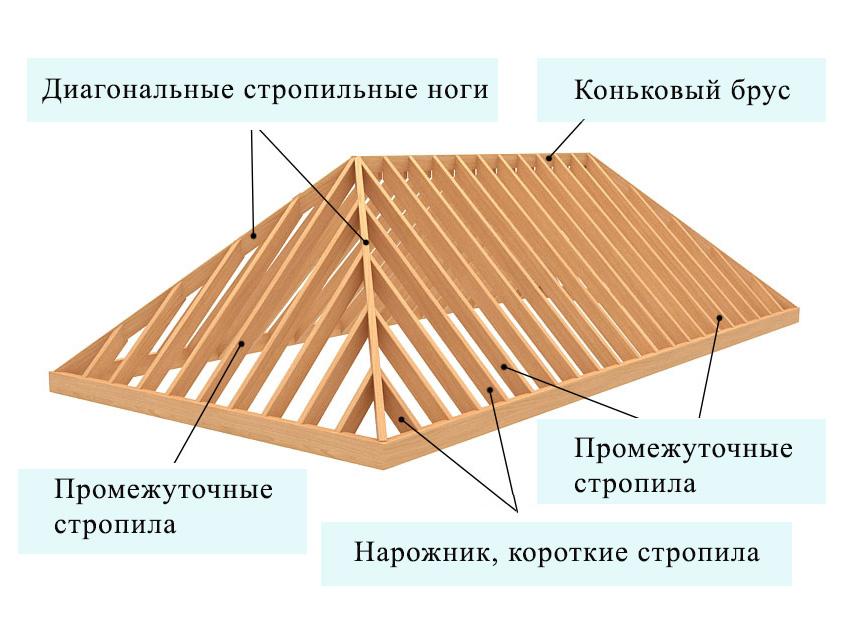
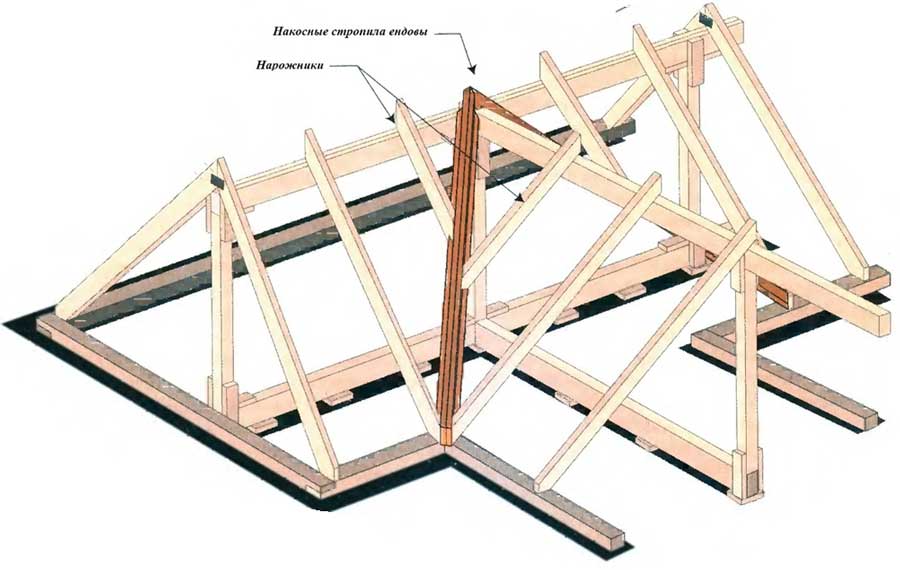
- Diagonal, or slant rafter goes from the end of the ridge beams to the corner of the building. A temporary rack mount is removed when all diagonal rafters are installed.
- Narodnik attached to the bottom of the power plate, and on top - to the rafter rafters. Used as a continuation of the plane of the main slope. They have intermediate distances, as well as between the rafter.
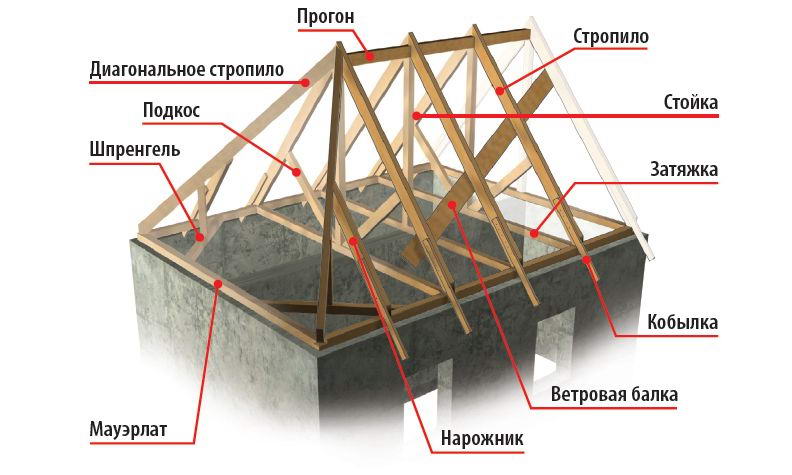
- Sprengel It comes from the lath of the mauerlat to the diagonal rafter and provides reinforcement of the roof.
- Strut Needed to increase the resistance of the roof to the wind. Theoretically installed on the windward side (from the "rose of the winds"). Practically, the strut is used from any side.
- Crates. Performed inside the roof leg and determine the base of the roofing "pie". The designs of roof systems include some important elements with well-defined functions for each.
Advantages and disadvantages
Benefits:
- If you compare with a gable roof, hip gum resists the wind is minimal. Because of all the slopes, the wind does not put pressure on the gable.
- The design has a greater rigidity due to the presence of an angular edge, which connects to the support beams of the skates.
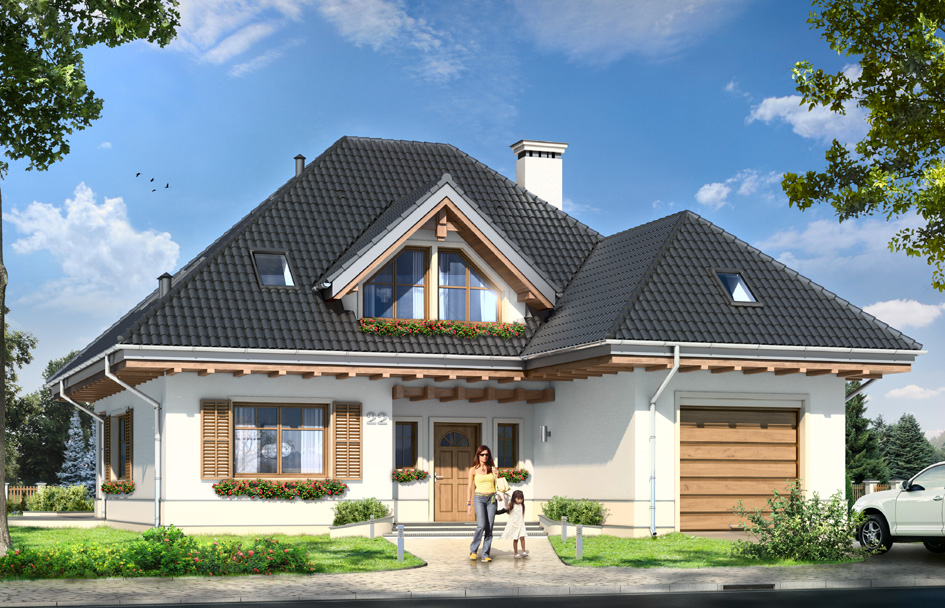
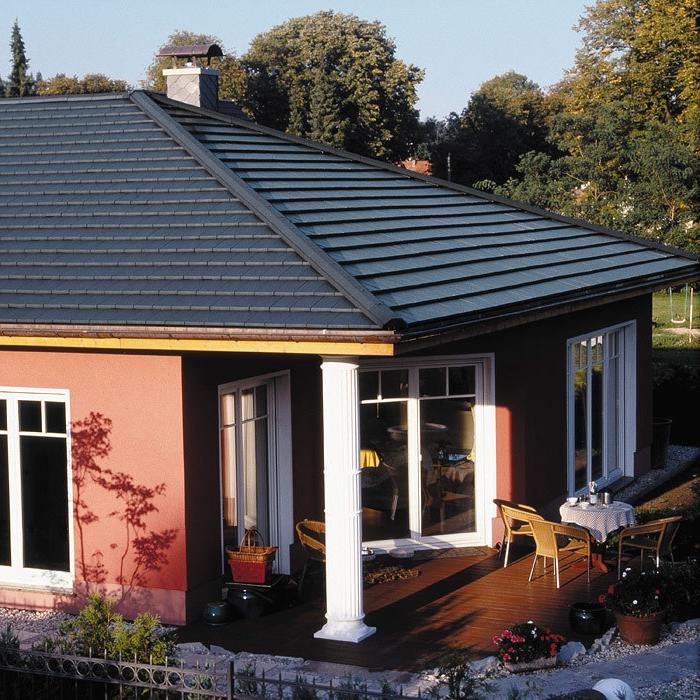
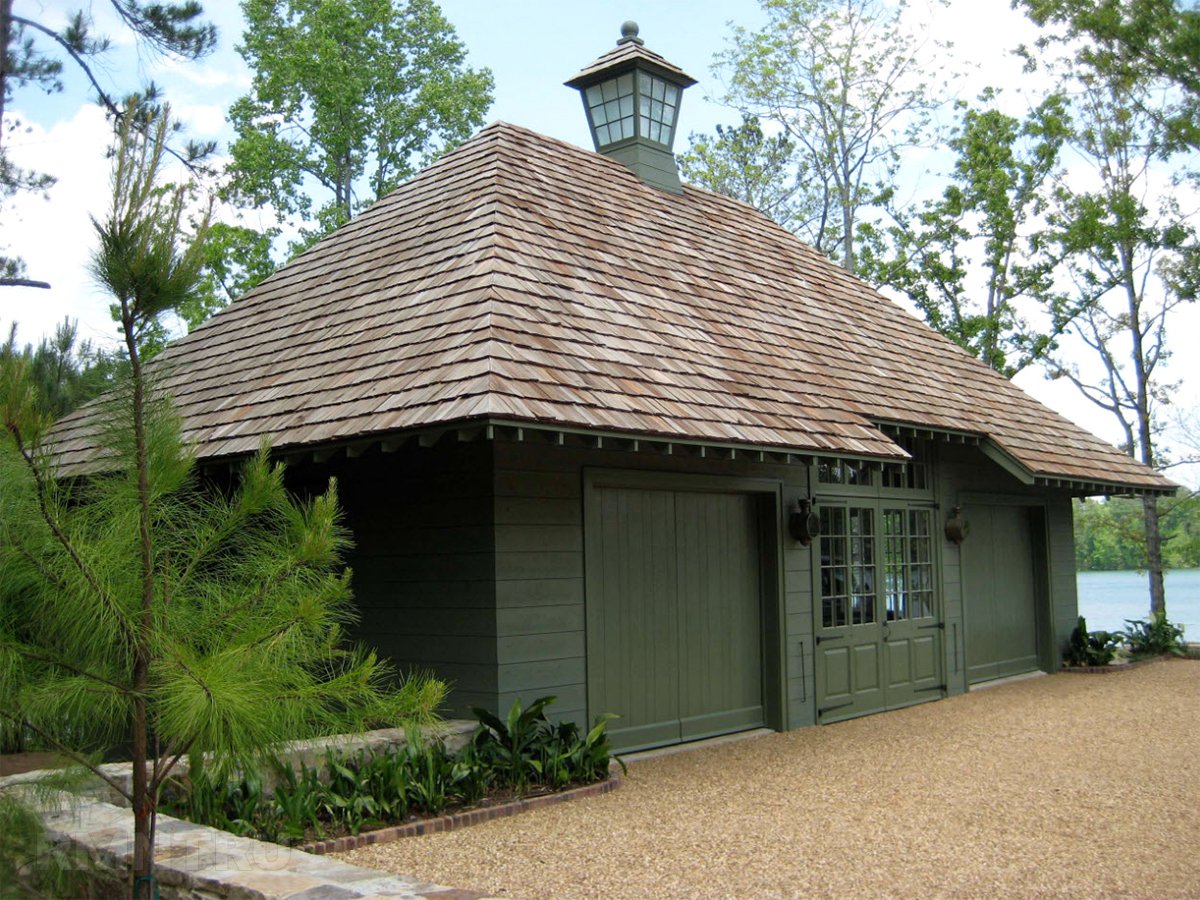
- There are protruding overhangs that additionally protect the walls.
- Great aesthetic appeal.

Disadvantages:
- complex calculations and installation;
- high cost;
- small attic room;
- no attic;
- sunlight penetrates only through special windows.
Kinds
Considering the types of hip roofs, it is necessary to take into account their varieties, the choice of which affects the structure of roof systems.
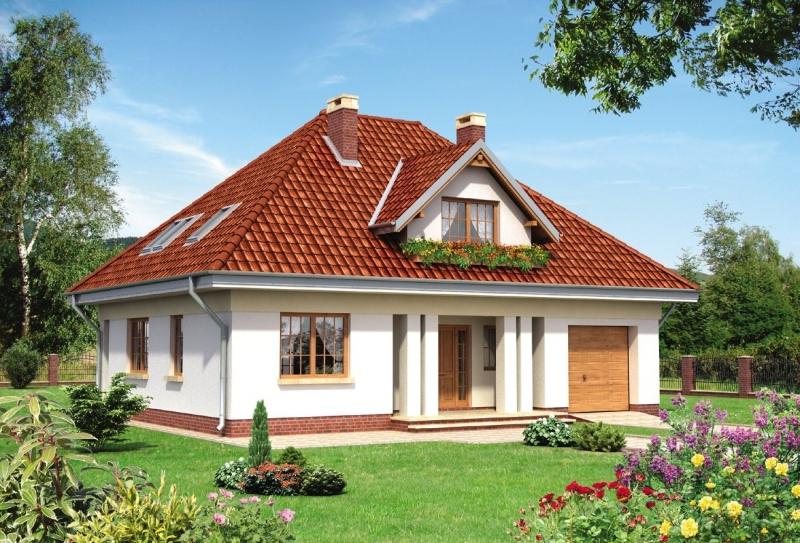
- Classic type. The diagonal ribs rest on the support beams of the skates, the overhangs are located at the same height. The pediment is triangular, the slope is of a trapezoidal shape.
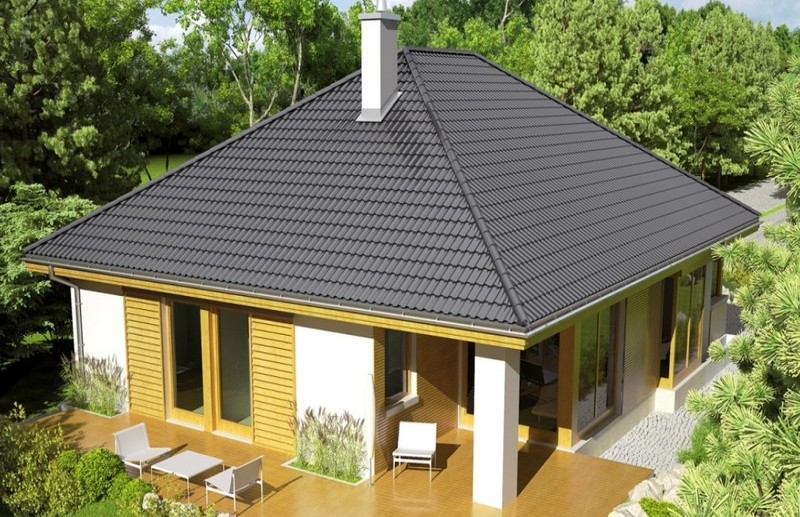
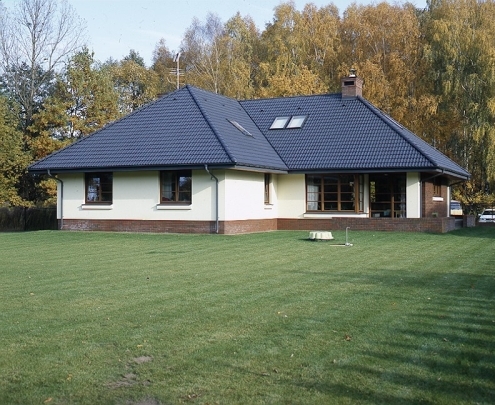
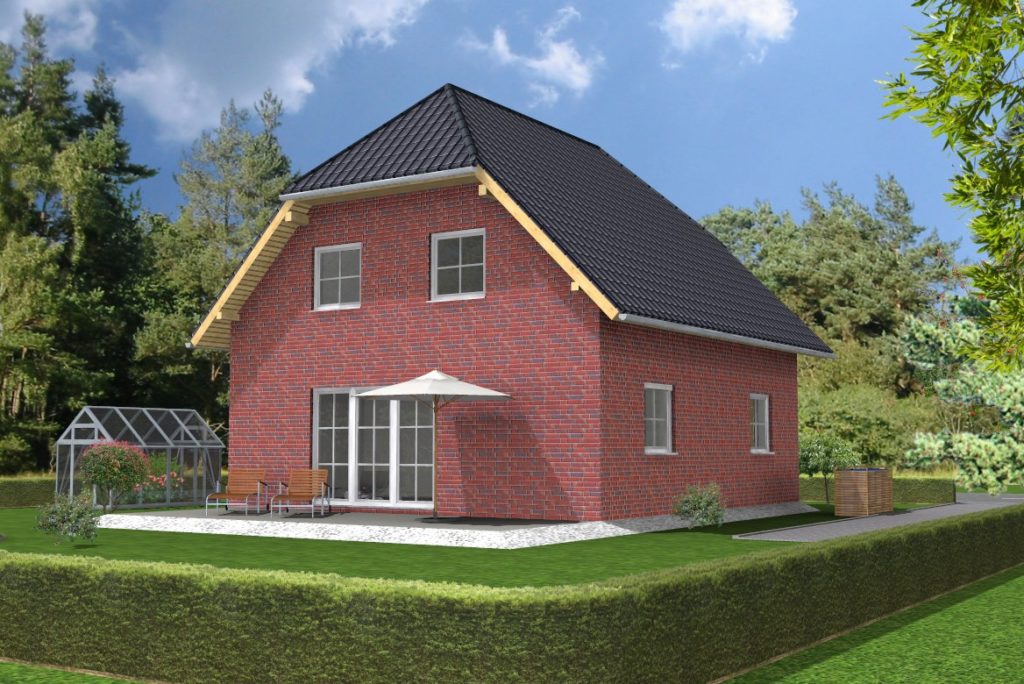
- Tent type. Skate support beam is missing. The diagonal edge is closed with the ends at one point, an ordinary short rafter adjoins the edges. So build a roof, if the building in a vertical projection is a square.
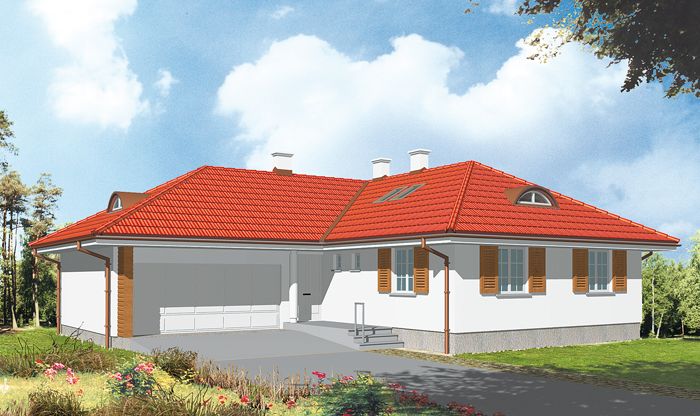
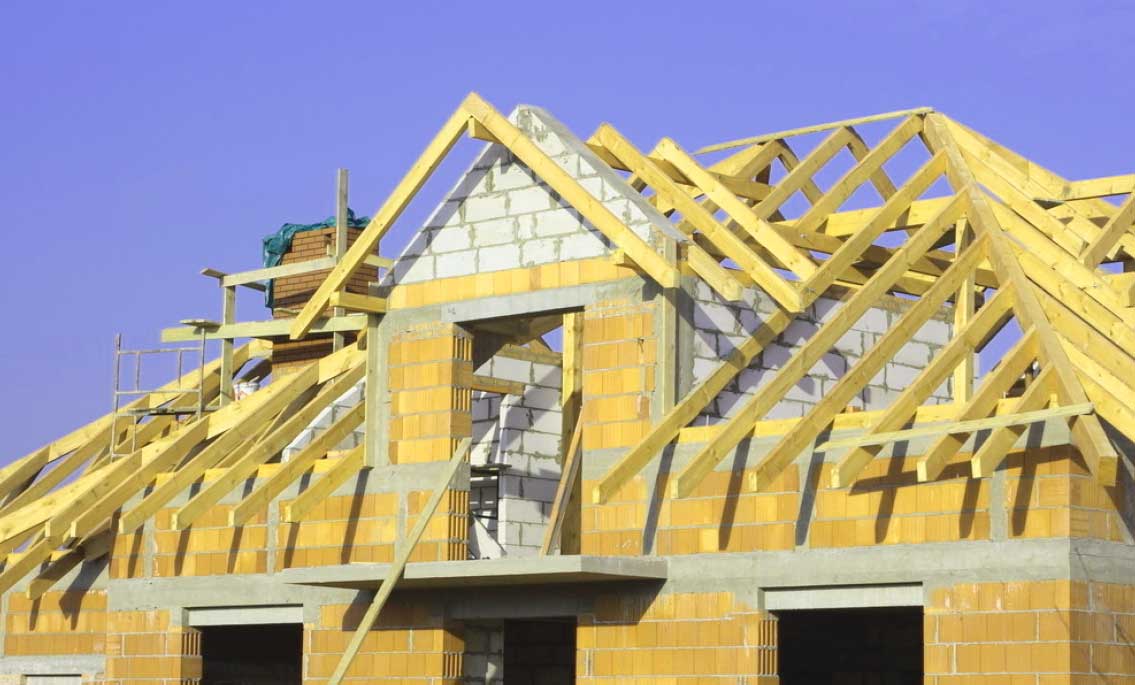
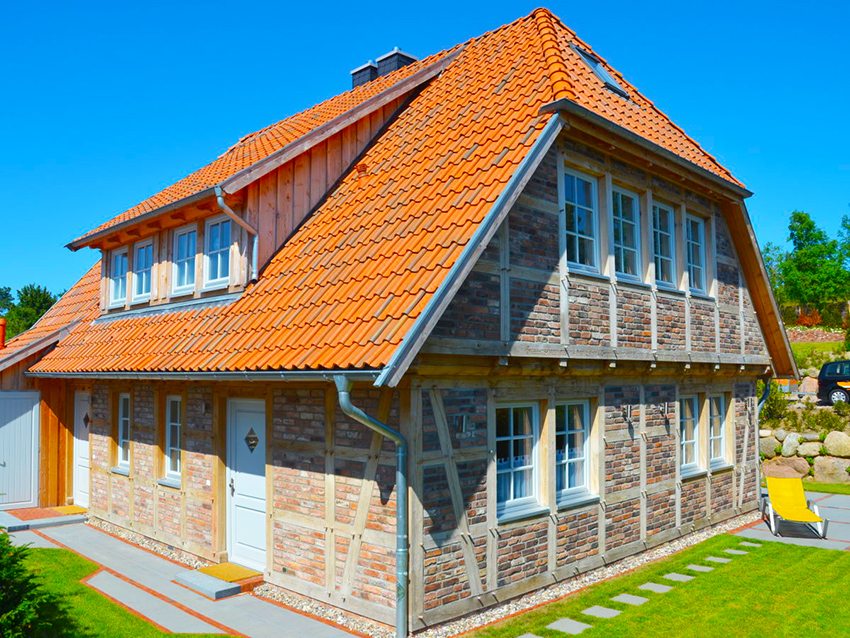
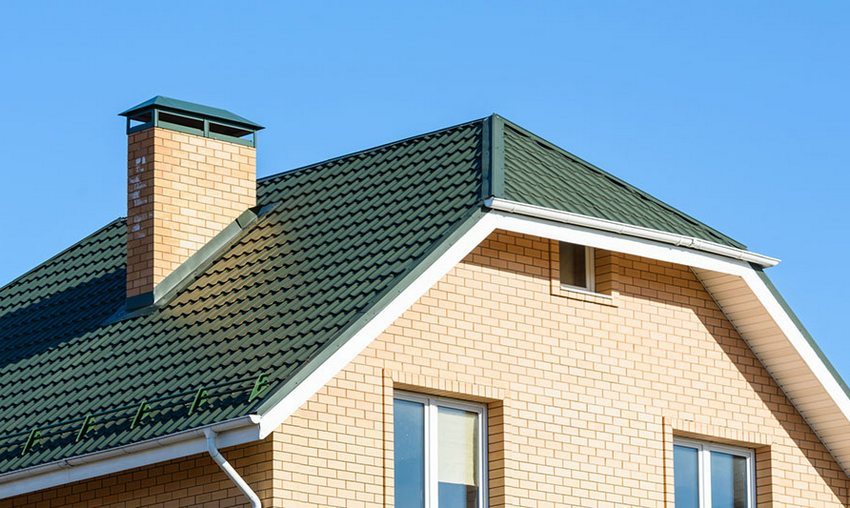
- Half-hip type. The gables are vertical, they install window openings. There are two types of half-hip type - Dutch and Danish.
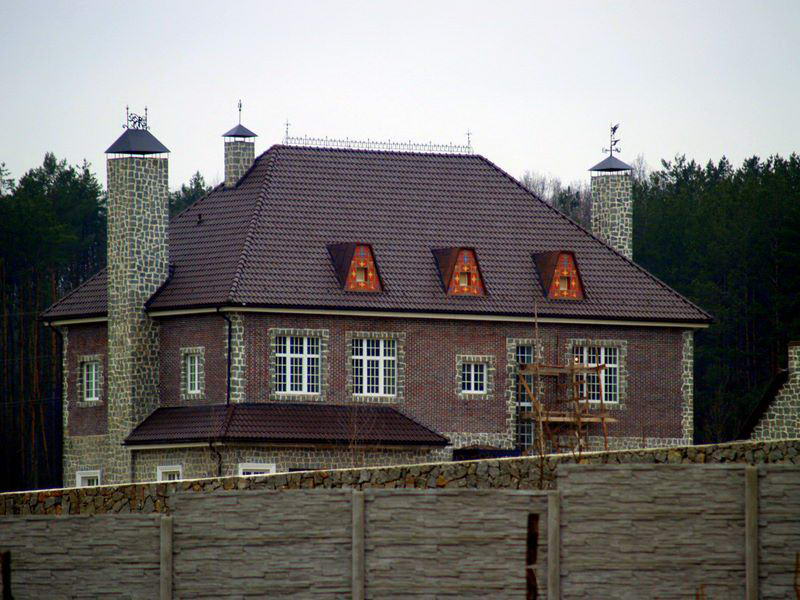
- Broken hip type (mansard chetyrehskatny). Represents the greatest complexity in the construction, since the slopes of different areas and have different angles of inclination. This type gives the possibility of rational organization of internal space under the roof and allows you to give the roof an unusual appearance.
There are also several other types of roofs: single-storey, two-storey, cuckoo, bay window, L-shaped.
How to choose?
The question of choosing the type of hip roof depends only on the preferences of the owner, or rather, on the thickness of his wallet. Say, gable windows will cost no less than usual, and metal roofing on the roof of the veranda will be more expensive than other material.
Payment
Calculate the truss system, given the following prerequisites:
- Wind loads. The stronger the wind, the more sloping it is, which in turn strengthens the whole structure.
- Precipitation. The more they fall out, the more sloping the slopes make, avoiding the excessive weight of snow / rain that collects on the roof and creates pressure on the rafters.
- Type of materials of which the roof is made. This should be considered at the project stage.
- Warming of the roof. Here the distance between the rafters will depend on the width of the strip of materials with which the insulation will be made.
The slopes of the angles of the slopes determine the laying of the rafter. Accordingly, the laying of intermediate rafters is calculated as follows:
- the top piping of the end wall is marked with an axial line;
- then the half-thickness of the ridge beam is calculated and the line of definition of the first central intermediate rafter is plotted;
- then combine the end of the rail and the line of the marked center of the intermediate rafter;
- mark the other end of the rail with the internal line of the side wall;
- get a point that will be laying the intermediate rafter.
The proportion of the length of the rafter and its inception is calculated using a coefficient that depends on the angles of the slopes. The lengths of truss legs are determined by multiplying the tabs by a factor.
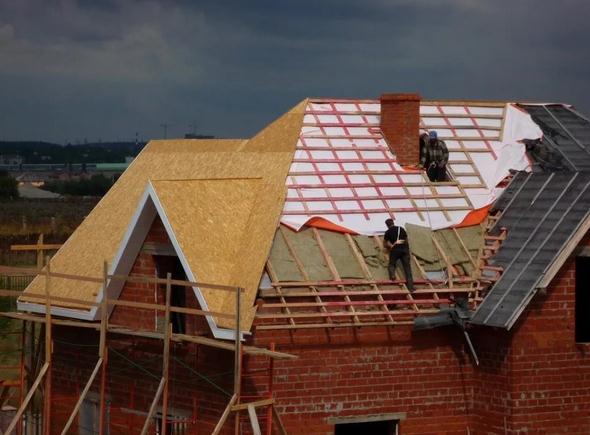
Stages and subtleties of installation
When buying material for the roof you need to know its total footage. Usually, for this, its total area is conventionally divided into parts in the form of simple geometric figures and calculations are made for each.
Thus, the financial costs of the roofing material and construction are determined in advance, and the need for the arrangement and the exact configuration of the battens are determined.
As a result - a schematic drawing of rafters will appear.
It is possible to develop a preliminary scheme with your own hands, but it is preferable to trust the drawings to the specialist. It must be borne in mind that the complex configuration of the roof requires accurate calculations of rafters and material. All these details will greatly affect the price and time of installation.
Drawings should include indication of material assignments, locations of their installations and methods of fasteners. The most important fragments of rafters should be carried out in separate drawings and describe them in detail.
The manufacture of a drawing scheme can become a support for the manufacture of blanks and subsequent installation.
Training
Harvesting rafters - this is the most difficult and time-consuming stage, because it exists:
- the need to ensure the specified angle of the truss foot;
- different length of the maid (short rafter);
- the presence of diagonal rafters (nakosny), which is given a special relationship.
The slant rafter carries more significant loads than the mainfor this reason, requires the manufacture of a material of higher quality. Also, the length of the diagonal rafters exceed the standard.
In order to avoid buying different sawn timber, splicing (pairing) of edged boards is used to obtain a given length.
The splicing technology has the following advantages:
- receive continuous beams of a given length;
- increase the strength of diagonal rafters due to the large (doubled) sections;
- calculation and purchase of materials is simplified (the dimensions of length and section are unified);
- there are opportunities to use boards that are intended to form ordinary rafters
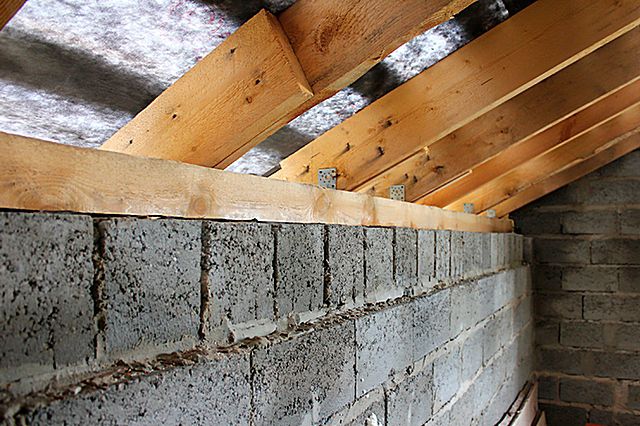
Mauerlat is called wooden bars with a large cross-section (100x100 and 100x150 mm), which are mounted along the perimeter of the house. For him use the highest quality wood.
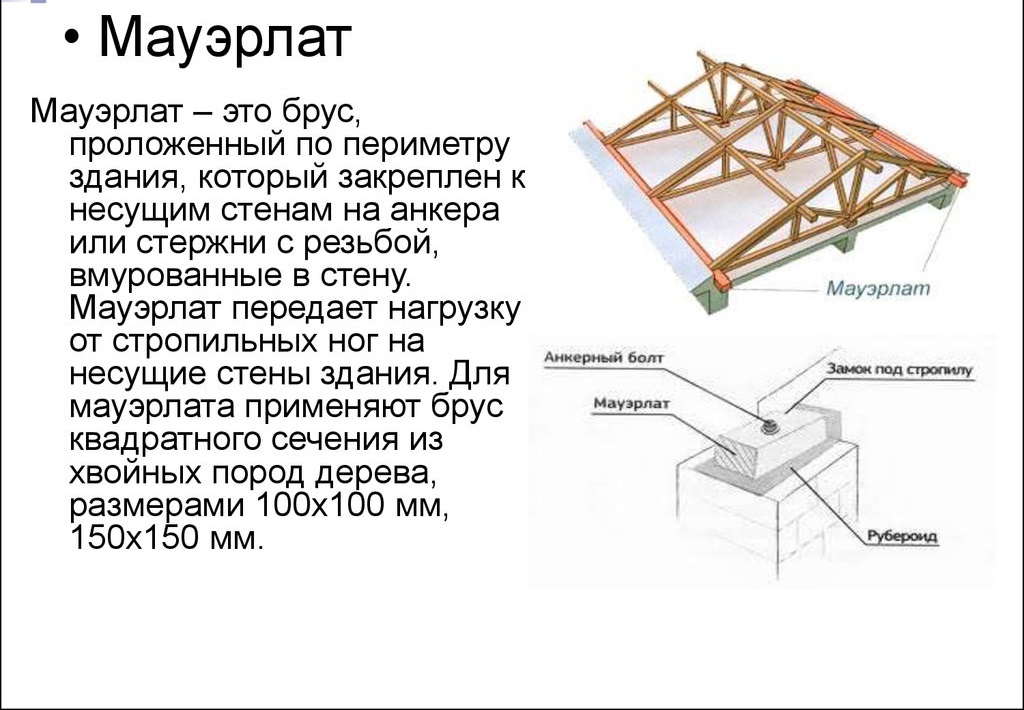
The mounting features of the mauerlat are that the beam is joined along the length of the overlap, and not end-to-end, and it is attached to the wall using a variety of connecting areas with the base of the walls. The joints are reinforced with metal clips.
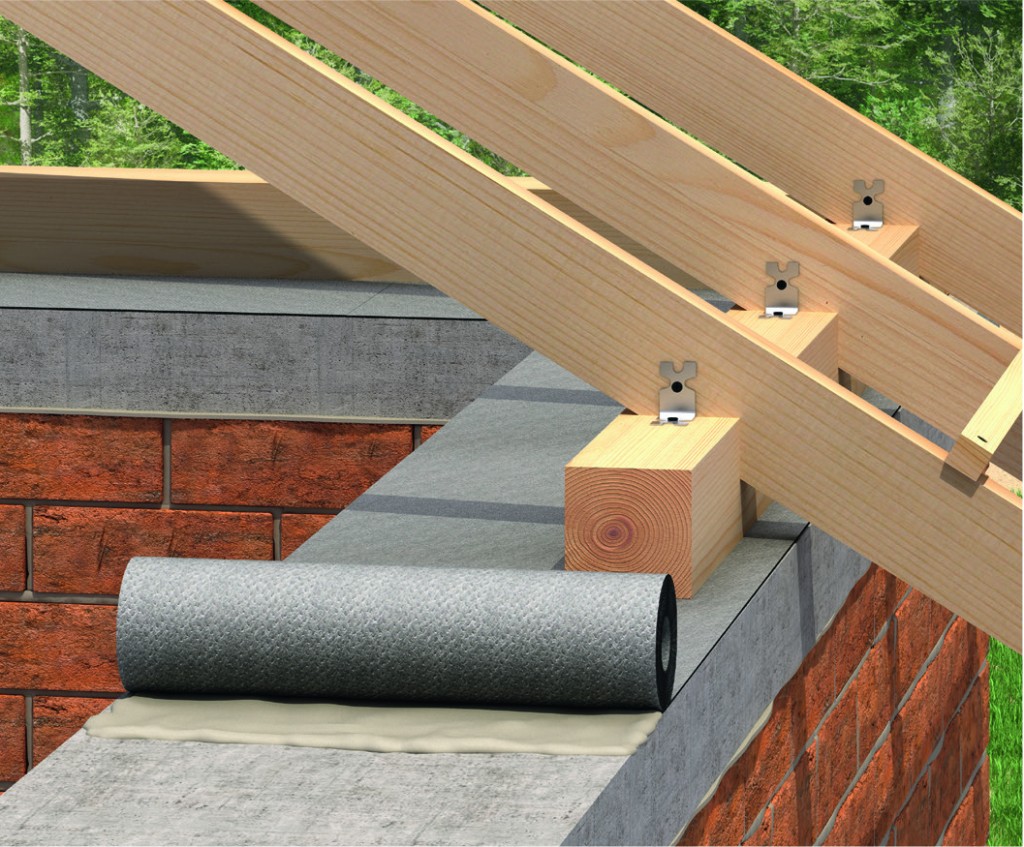
Mauerlat serves as the base of a truss foot and needs protection from getting wet. Therefore, the wall from the beam is separated by a hydrobarrier (roofing material / roofing felt, etc.) can be used.
If the house is brick, (aerated concrete, foam concrete, arbolitovy) Mauerlat laid on a pre-filled reinforced concrete layer, which is pre-installed mounting studs. They have a diameter of 10 mm and above and should go beyond the level of the power plate by 25-35 mm with a step of 1100-1300 mm.
The run is called the beam, which is installed parallel to the power plate. It works as a base when mounting an extra support under the rafter foot. Arrangement of the runs is an optional stage of work, and it is carried out during the construction of the hip roof of a large square footage or with a complex configuration.
It is necessary to mount the skate, only accompanying it with accurate measurement. The roof rests on the ridge beam, therefore it is necessary to install it correctly and check it by the height level.
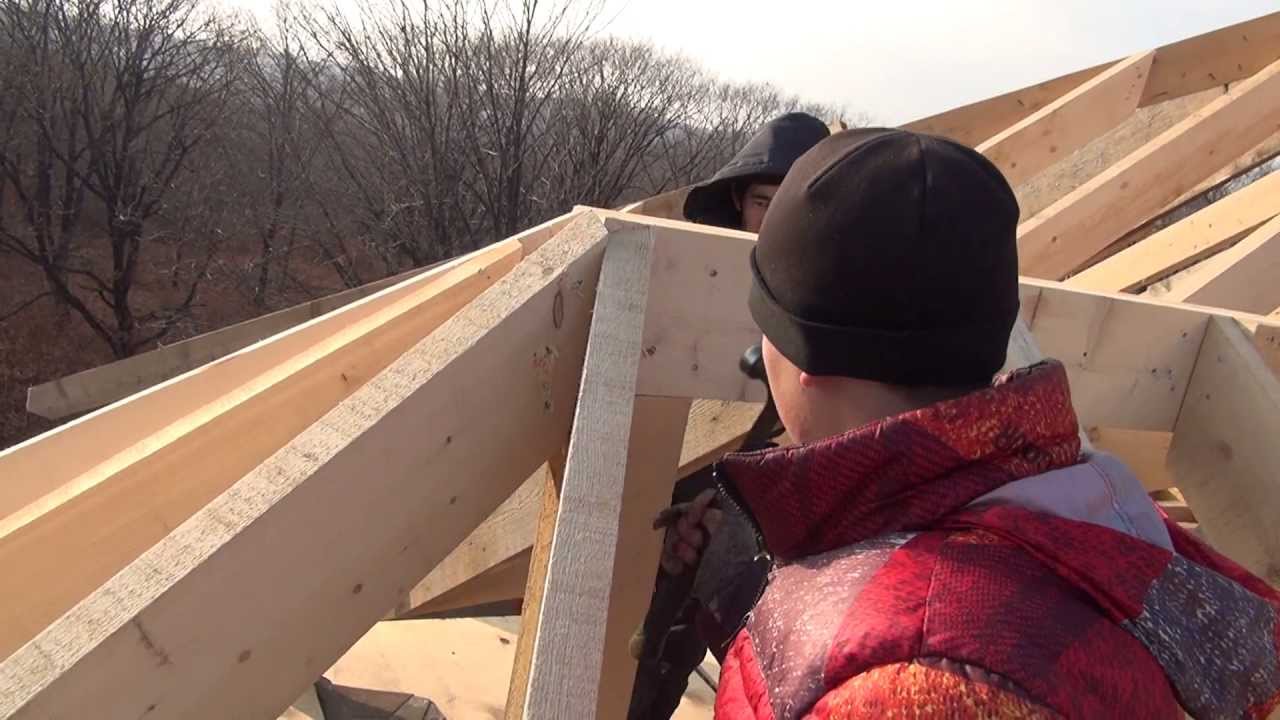
During the installation of the truss foot, there is a divergence of views regarding the sequence of operations. Therefore, it is possible to distinguish two directions:
- Mount the central rafter, and then diagonal. This is a simpler sequence.
- Mounted diagonal rafter, then the rest.
Bottom rafter legs is on the Mauerlate.To make the connection rigid, there is a sense of strengthening the connecting nodes with the help of metal elements (bracket, plate, corner).
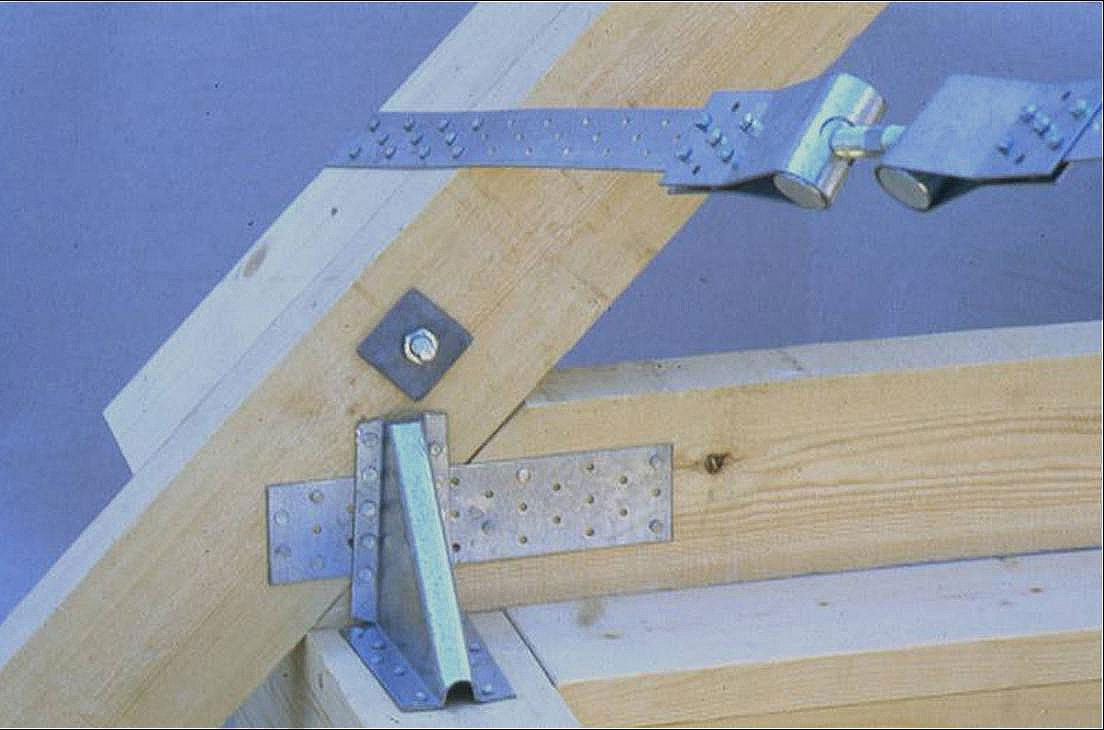
The diagonal rafter is under considerable load, therefore it is strengthened using such means as:
- Installation racks. Mounted on the floor perpendicular.
- Installation of struts. Mounted at angles. Angles are not critical. It is important that the strut reinforces the diagonal rafters.
- Sprengel called T-shaped short beams, deployed 180 degrees. They are used with a considerable length of span and are installed so that the bases of the sprengel are oriented across the diagonal rafters.
Ordinary rafter set the same as the center, which forms the edge of the trapezoid. The lower parts are supported and fastened on the mauerlate, while the upper parts rest on ridge beams.
The Narodnik is made strictly from a whole piece of material. Where it adjoins to long rafters, note a cutting or establish a basic beam. The abutment area is enhanced with metallic elements.
Narodnik is installed only later formed roofing frame.This is the last element of mounting rafters.
Instruments
The design of the roof and the arrangement of the connections determine the set of tools that must be prepared before starting work.
- When working with wood will need levels, hacksaws, hammers, tape measures, marking laces, staplers.
- When working with metal, you will need electric drills, riveters, metal shears.

Tools and consumables must be prepared before starting work, because complex installations of roof systems involve a lot of work on cutting various materials.
To simplify the measurements and the ability to unify the size of the parts, it is recommended to replace the roulette with a gauge rail. Such a plywood construction is most often proposed to be made to a width of 50 mm.
Work
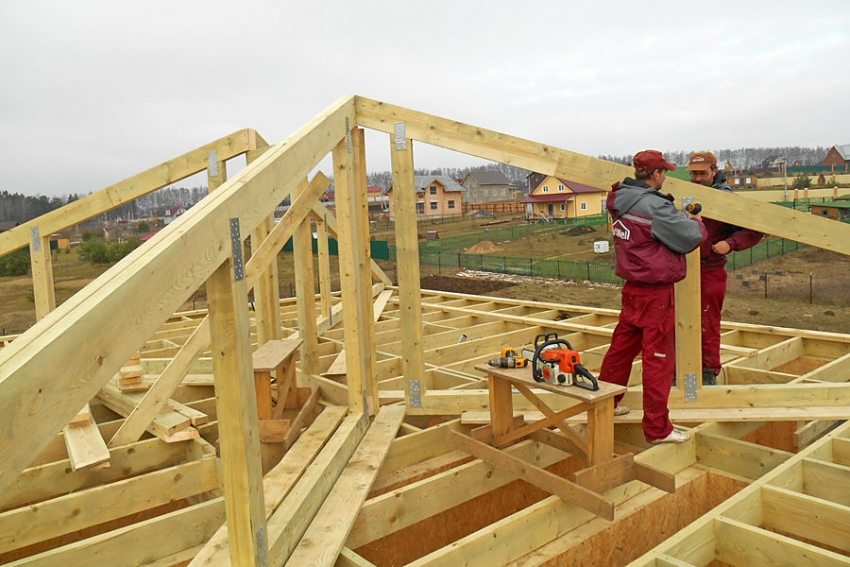
Works produce stage by stage and rush is not the place. It is necessary to carefully think through each step, because the design of hip roofs are complex. In this section, step-by-step instructions are also hardly possible to be given, since the masters' views on these or other points of installation are too different. Only general guidelines are available.
First you need to prepare the wood, process it with antiseptic solutions and dry thoroughly. When ready to begin construction.
To install the rafters system you need to start with laying the power plates on the bearing walls. They should be placed on the layers of waterproofing. Laying mauerlat produced with anchoring. Then they are laid out in accordance with the calculations. To ensure accuracy and conspicuity markup using a bright marker. The symmetry of the marking is very important for the symmetry of the installation of floor beams and other elements. Then stack the overlap of the beams. They can be mounted on the wall near the mauerlat or on fixed bars.
Then mauerlat fasten with puffs. They are designed to facilitate the redistribution of loads.
Upon completion of the installation of floor beams, it is recommended to cover them with board flooring. Flooring is not attached to the beam. It is necessary for the comfort and safety of work.
The next step is to install the rack. It is fastened with the help of slings or on the ceiling beam. The rack is fastened in the upper part with the help of the ridge beam, while the central leg of the rafters from the ends is attached to the beam.Then mark and fasten intermediate rafter from a frontal slope.
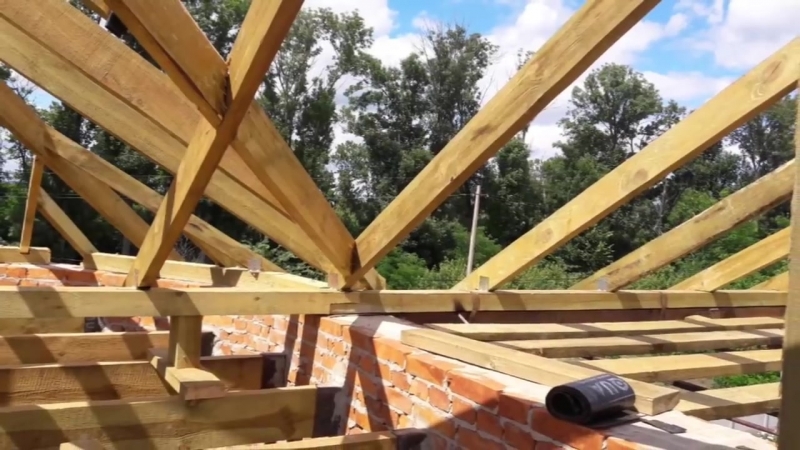
After that there is a diagonal rafter that connects the skates and the corner. Sometimes an extra rack is installed here. On the diagonal rafter fix the crook (short rafter). They are set at the same distance as the intermediate ones. A supporting or reinforcing element (strut, sprengel, wind beam) can be built into the structure.
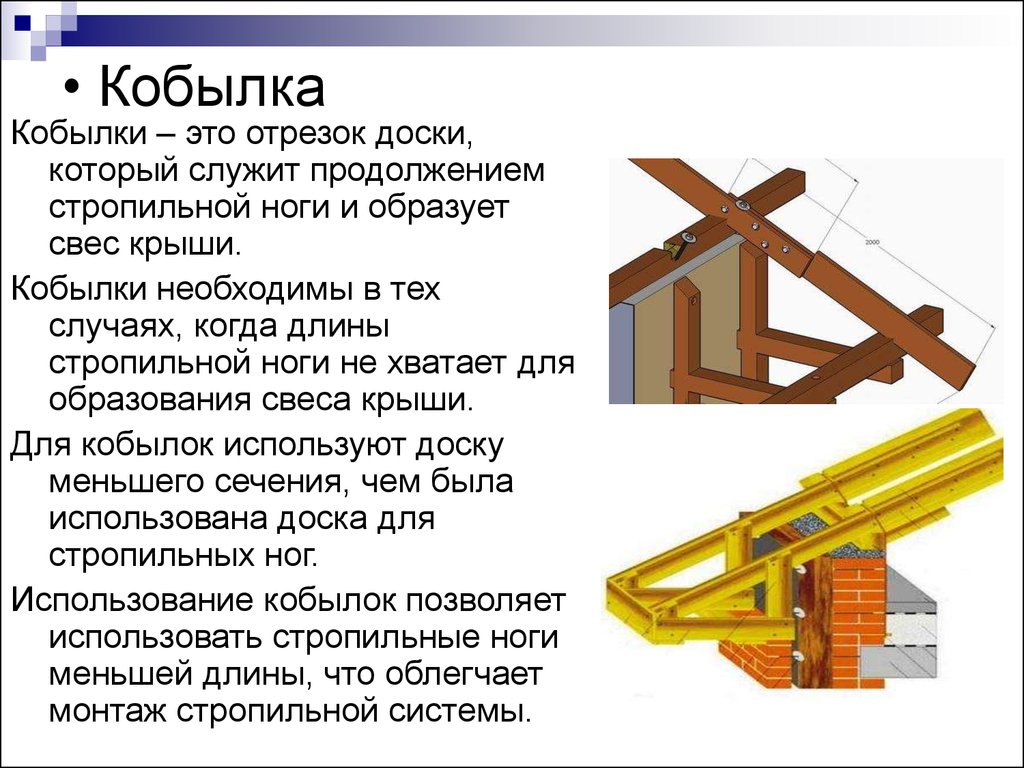
Provided that the rafter is installed and ends on the power plates, it can be extended with the help of additional elements - “fillies”, which are designed to create canopies over the walls.
Useful recommendations
Half-walled roofs (they usually refer to the Dutch and frame type of buildings) look different and allow for the installation of the eaves of the end of the ramp window layout is slightly higher than the front. Construction of this type of roof is usually performed when it is planned to arrange a residential zone inside its attic space.
Ventilation of the cold attic is an interesting option, since in the absence of heating moisture condensation will be insignificant,but removing it is necessary anyway.
See the next video for the steps to build a hip roof.


