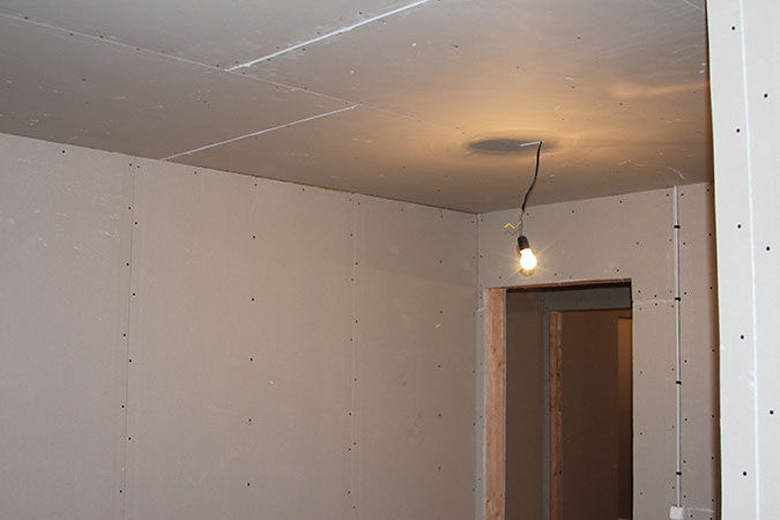
Subtleties of mounting drywall
Having decided to engage in the repair of residential or office space, it is necessary to think out in advance what kind of finishing materials you may need. Drywall - the first option for any finish that comes to mind. Easy, inexpensive, simple both in installation and in further operation are just some of the advantages of this material. Drywall is suitable for almost any interior, whether it is the easiest cottage, cabins or fashionable mansion. The fact is that it is the inner layer between the wall itself and the wallpaper, plaster, stucco and other finishes.
Special features
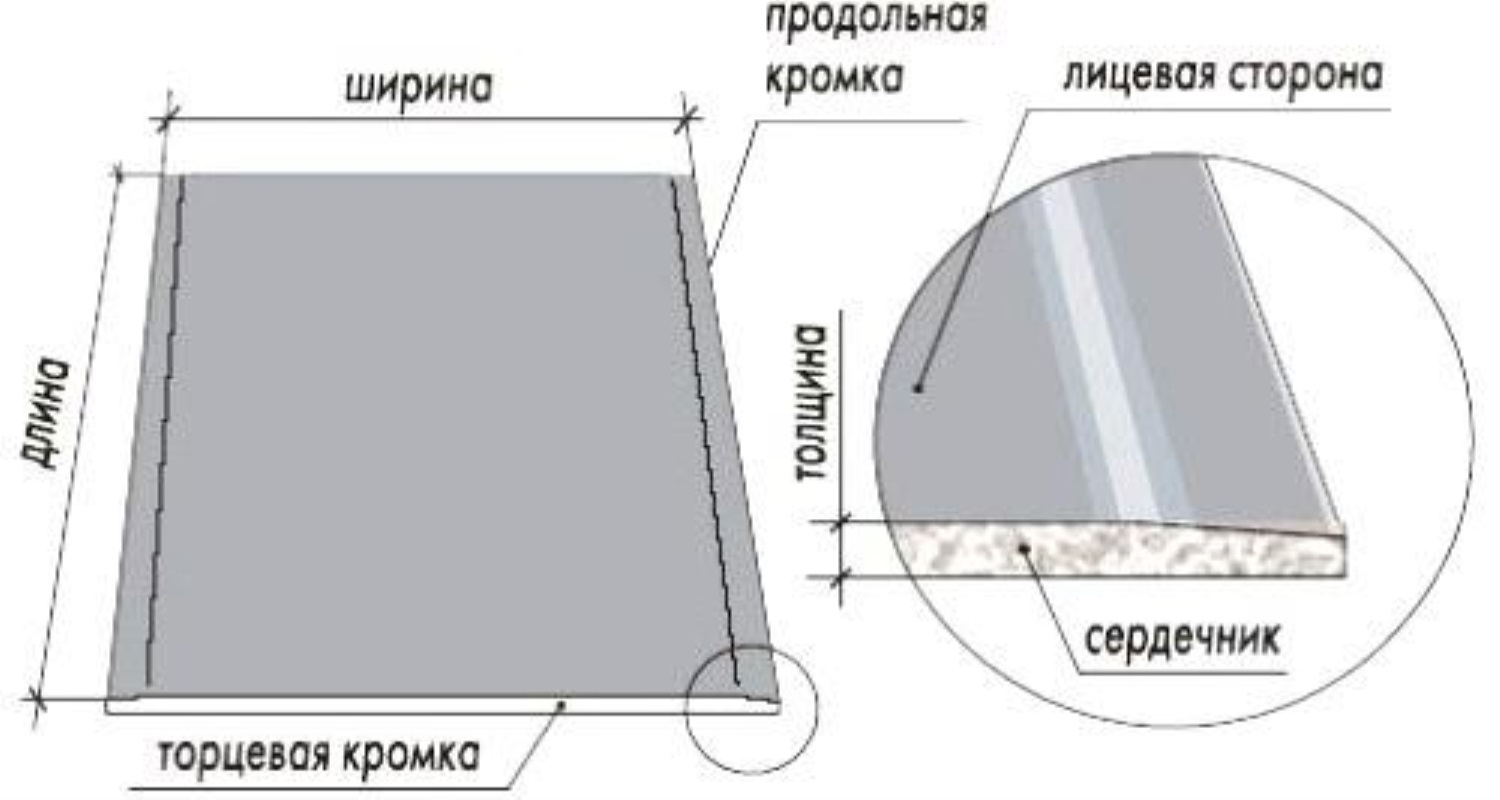
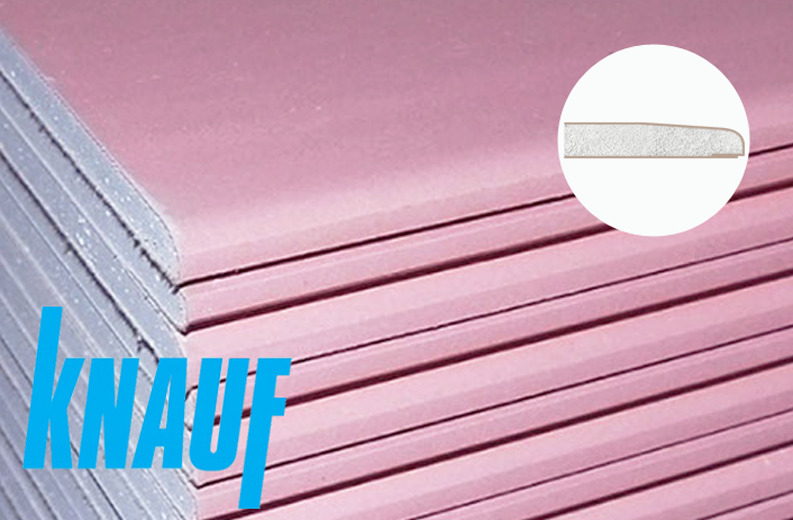
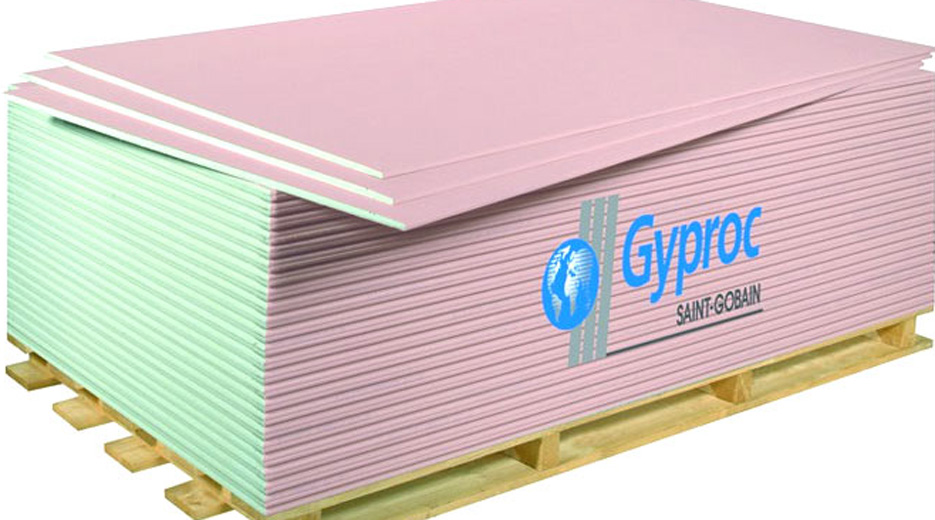
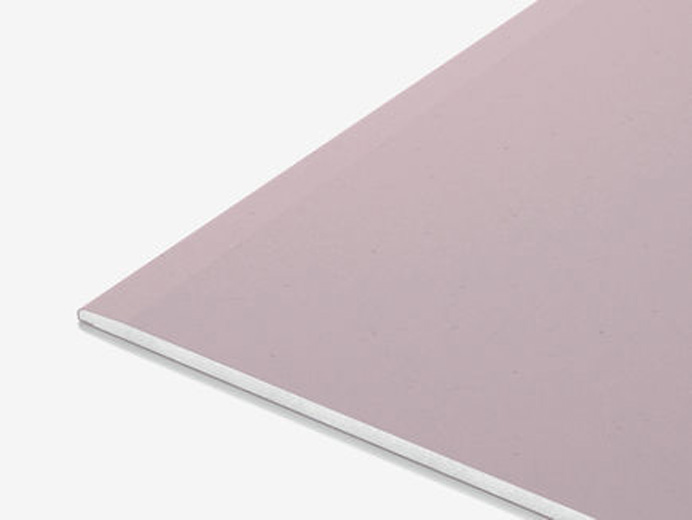
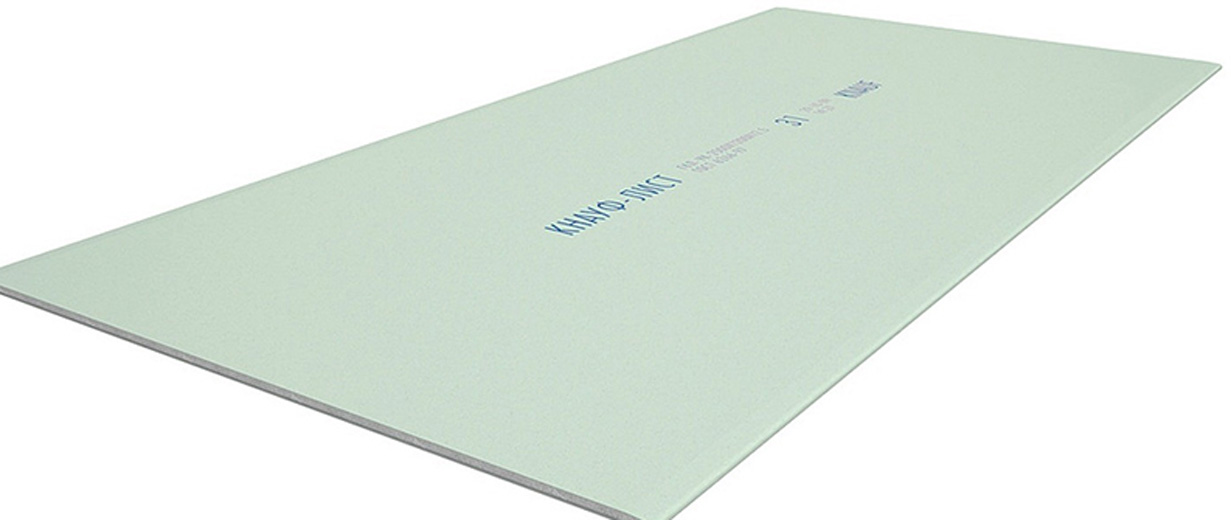
In principle, any sheet of this finishing material consists of two layers of very dense cardboard, which has little in common with the stationery we are used to in multi-colored cardboard for school applications and drawing.The name “gypsum board” itself suggests its component parts - a bonding mix based on gypsum and industrial, especially durable cardboard. Between the above two sheets lay a layer of mineral or synthetic aggregate also with the addition of gypsum.

The secret to the success of drywall - in its composite composition, that is, the complexity of the material. Here and fine particles, sometimes reinforced fiber, polymer or carbon base (it is also called the matrix). Any natural material has exactly the structure, density, strength and other characteristics that nature has endowed it. Composite material is created artificially by man, so that it is possible to lay in the basis of the matrix or the composition of the components in such proportions as is necessary to give it the necessary shape, texture, and so on.
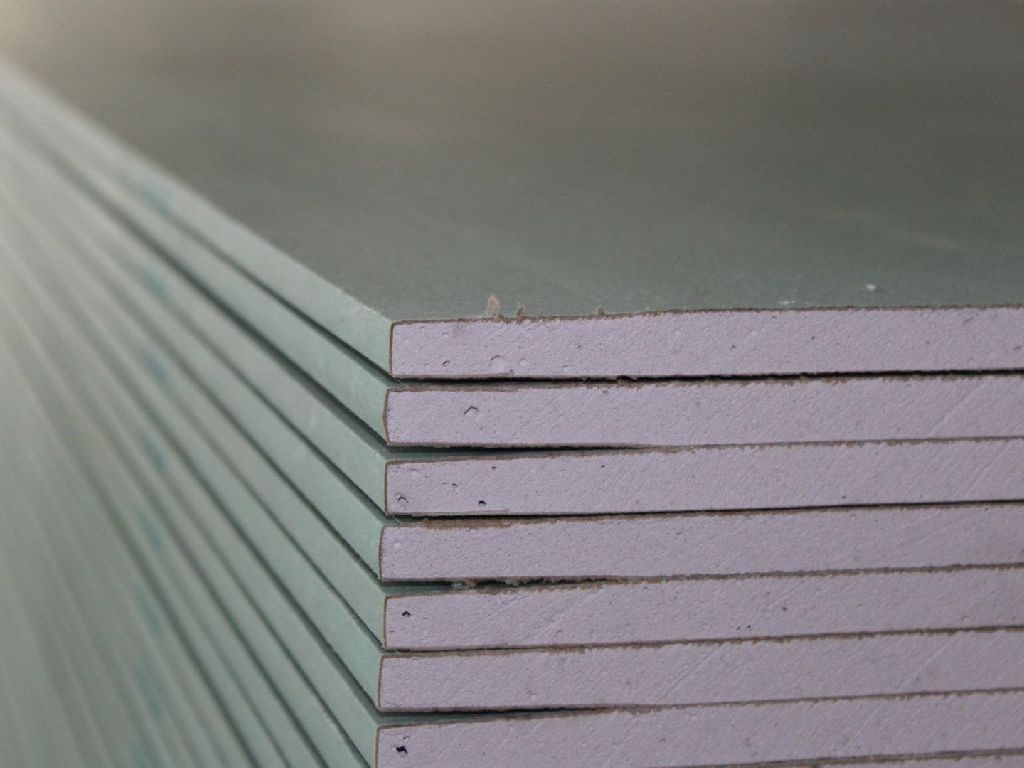

Due to the possibility of self-modeling of material properties, it combines an internal porous medium to retain heat and not transmit moisture, and an absolutely smooth external surface. This matte layer of cardboard is convenient for plating like walls,and the ceiling in almost any room, because from above you can apply a variety of plaster, wallpaper, stucco and paint.
Kinds
First of all, it is worth finding out what types of drywall can be and how not to get confused when choosing the right name. On the price tags in hardware stores you can often see the abbreviation - GCR sheet. Do not worry - this is a professional designation of the same drywall, but depending on its functionality, one or another letter can be assigned here.
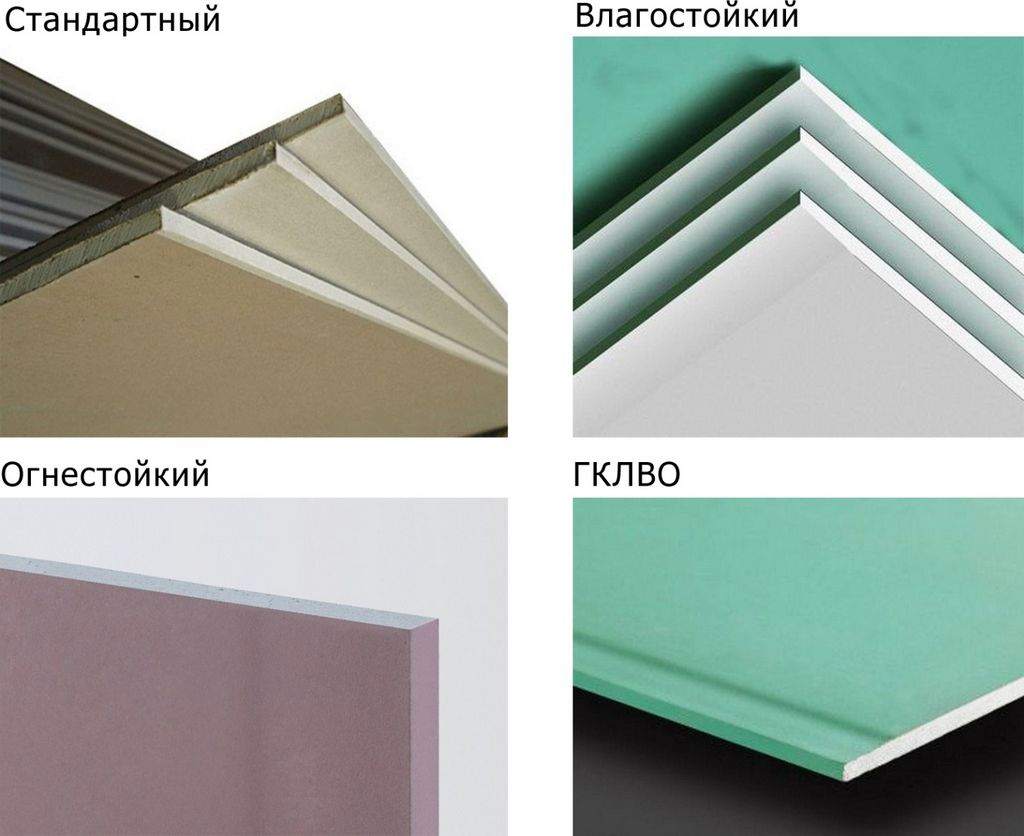
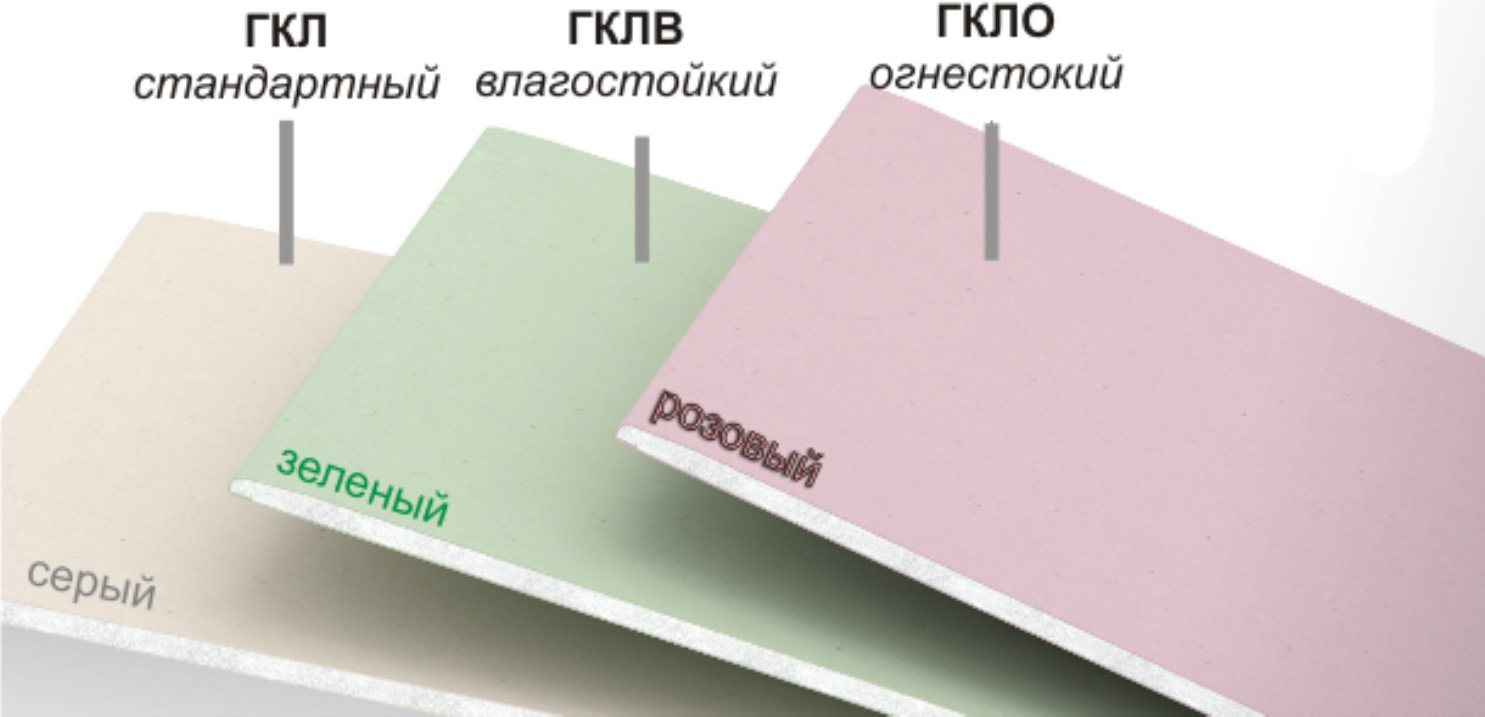
Actually, the gypsum plasterboard itself or standard general-purpose gypsum board can be used exclusively for interior decoration of both residential and commercial premises. Such material is often taken for the manufacture of internal partitions in modern offices - the effect of individual rooms is visually created, although the sound insulation in this case is minimal. Installation of partitions is also practiced when the sheet does not reach the ceiling, since there is simply nothing to fasten it on top of.
This GKL sheet is not suitable for any climate., since it can withstand only “normal” by the standards of mid-latitude Russia, the temperature is approximately -20 ° C to + 35 ° C, then it will no longer be able to adequately perform its functions and will either begin to swell from the heat or contract from frost.For a house in the tropical jungle, it is also not recommended to install an ordinary GCR sheet, because it can withstand humidity not more than 70%. Since we are talking here mostly about the central part of Russia, there is nothing to worry about when buying decorative materials. In conditions of the Far North, for example, you should consult with a professional before purchasing wall or ceiling plasterboard.
Outside, gypsum board for standard use looks like a pale gray sheet, which is very convenient for further coating with paint or plaster. Gray color is faded, so it will not stand out even against the background of a thin layer of paint or plaster. This option is appropriate if, according to the author, it is necessary to create a peculiar surface with the effect of “unfinishedness” or an old abandoned factory in the loft style. Now this technique is often used in the arrangement of art spaces or galleries.

In order not to be mistaken when choosing in the store, look for the dark-blue factory marking GKL. You should not think that this type of drywall is of poor quality and can only be used in the construction of temporary structures such as cabins or common areas.They simply should not design external walls or rooms with extreme temperature changes such as saunas. In fact, it is even possible to decorate a children's room with an ordinary GKL sheet, without fear for the health and safety of your child.

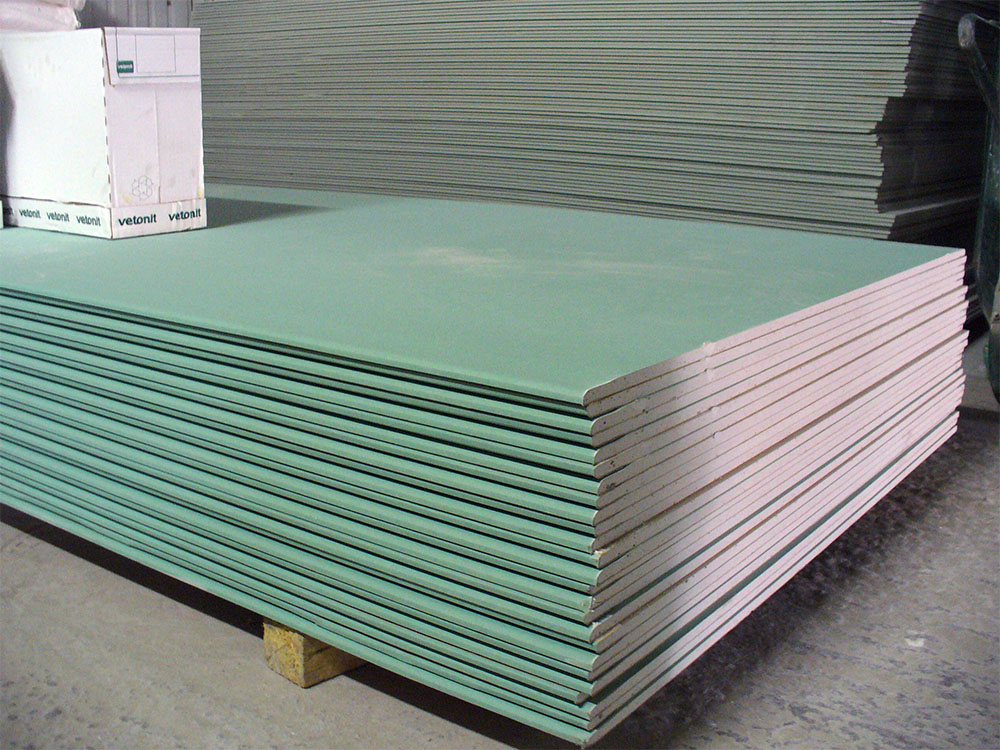
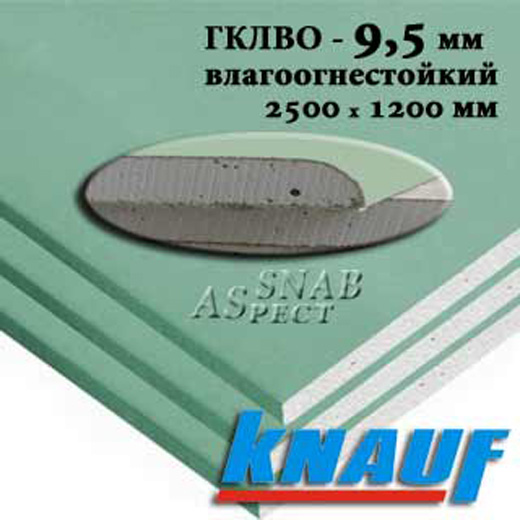
If you meet on the shelf of the store GKLV sheet, then it is moisture resistant plasterboard. The temperature in the room when finishing this kind of material, as well as in the situation with the previous type, should not exceed standard standards. But here humidity is allowed higher than 70%. However, this does not mean that with such material it is possible to veneer external walls or a shower stall, because the essence of cardboard is unchanged - with prolonged exposure to water, it soaks.

An important advantage of the moisture-proof function is, as it were, antifungal components based on silicon or its oxides — crystal, quartz, silica — that can draw in the entire bactericidal medium, which are sealed into the sheet. Yes, and the cardboard itself is different from the previous GCR option - binders with the effect of impregnated additives are sewn here, i.e., impregnated with protective antiseptics.
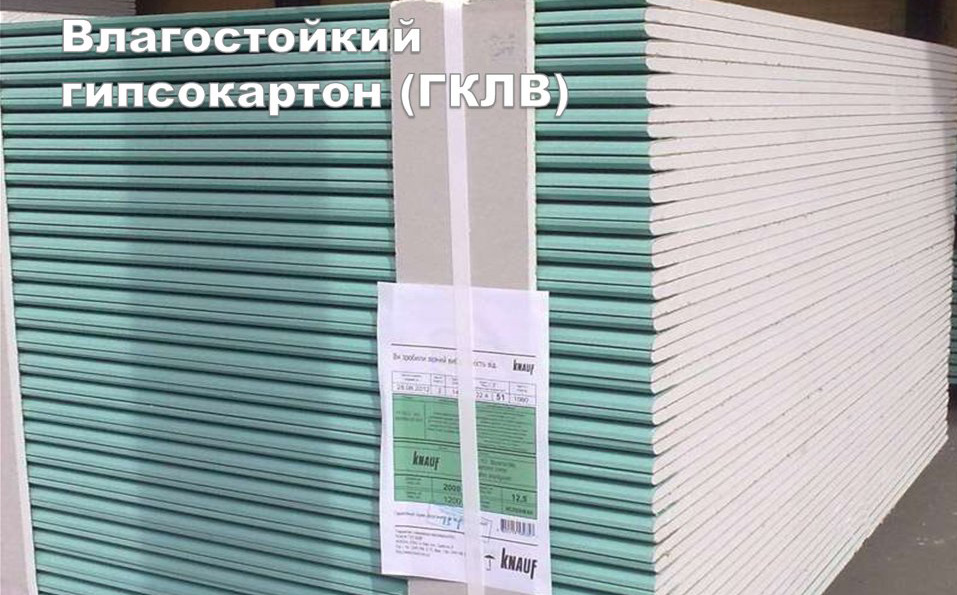

The factory marking of GKLV sheets is of the same bright blue color as that of ordinary gypsum cardboard, but to distinguish it, the surface itself is no longer gray, but pale green.At the price of such a finish will already be many times more expensive, so you need to think about, is it really necessary to add the cherished moisture-proof function.
As mentioned above, in the nursery, you can easily lay the usual drywall. If the floors and walls are often washed here, or the child is busy with creativity, which is associated with the ability to pour water from the paint onto the floor, then a plasterboard sheet may be useful. It is also useful for not very good microclimate in the house itself, if there is a tendency to the formation of mold fungi in the building.
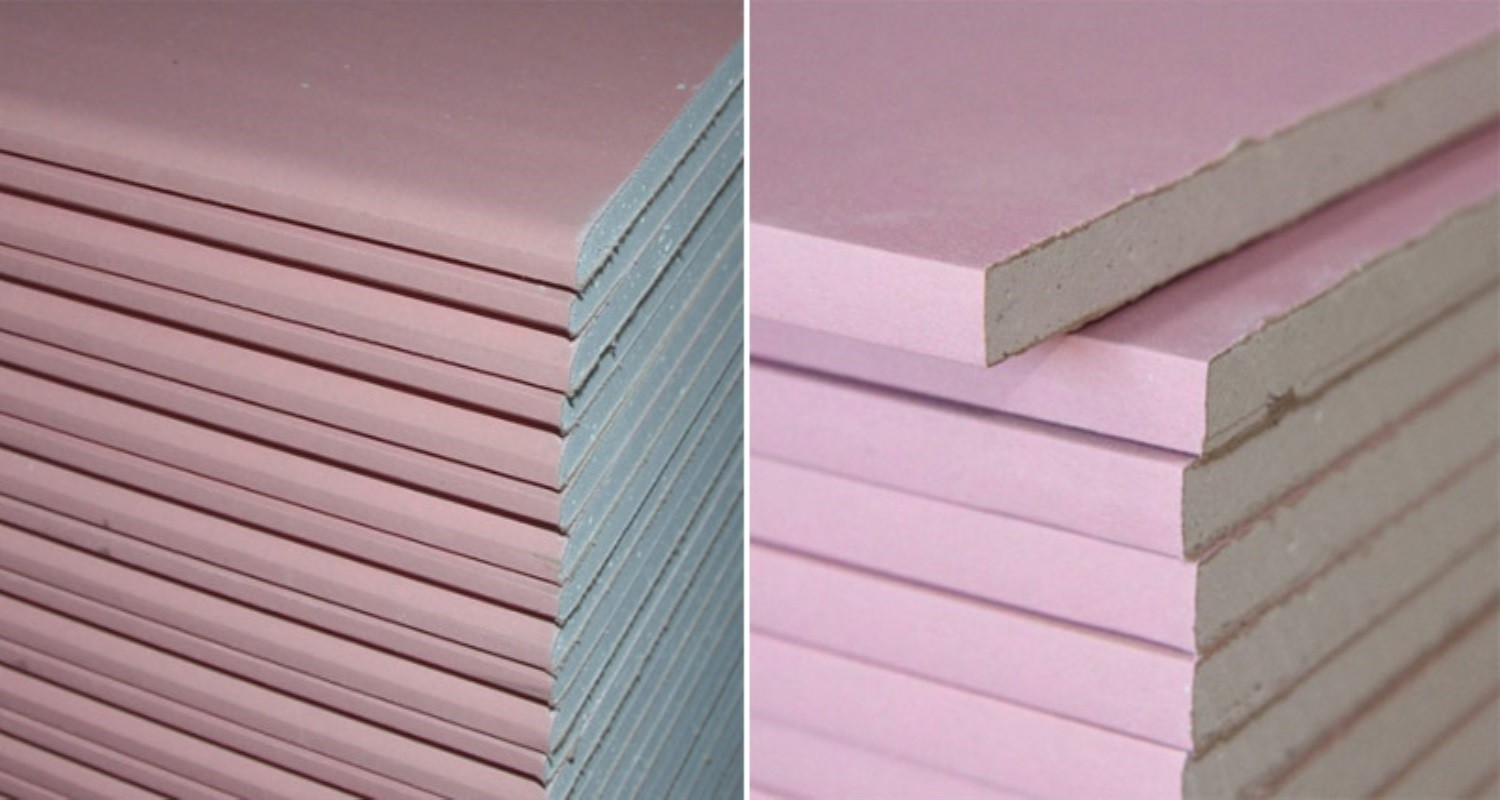
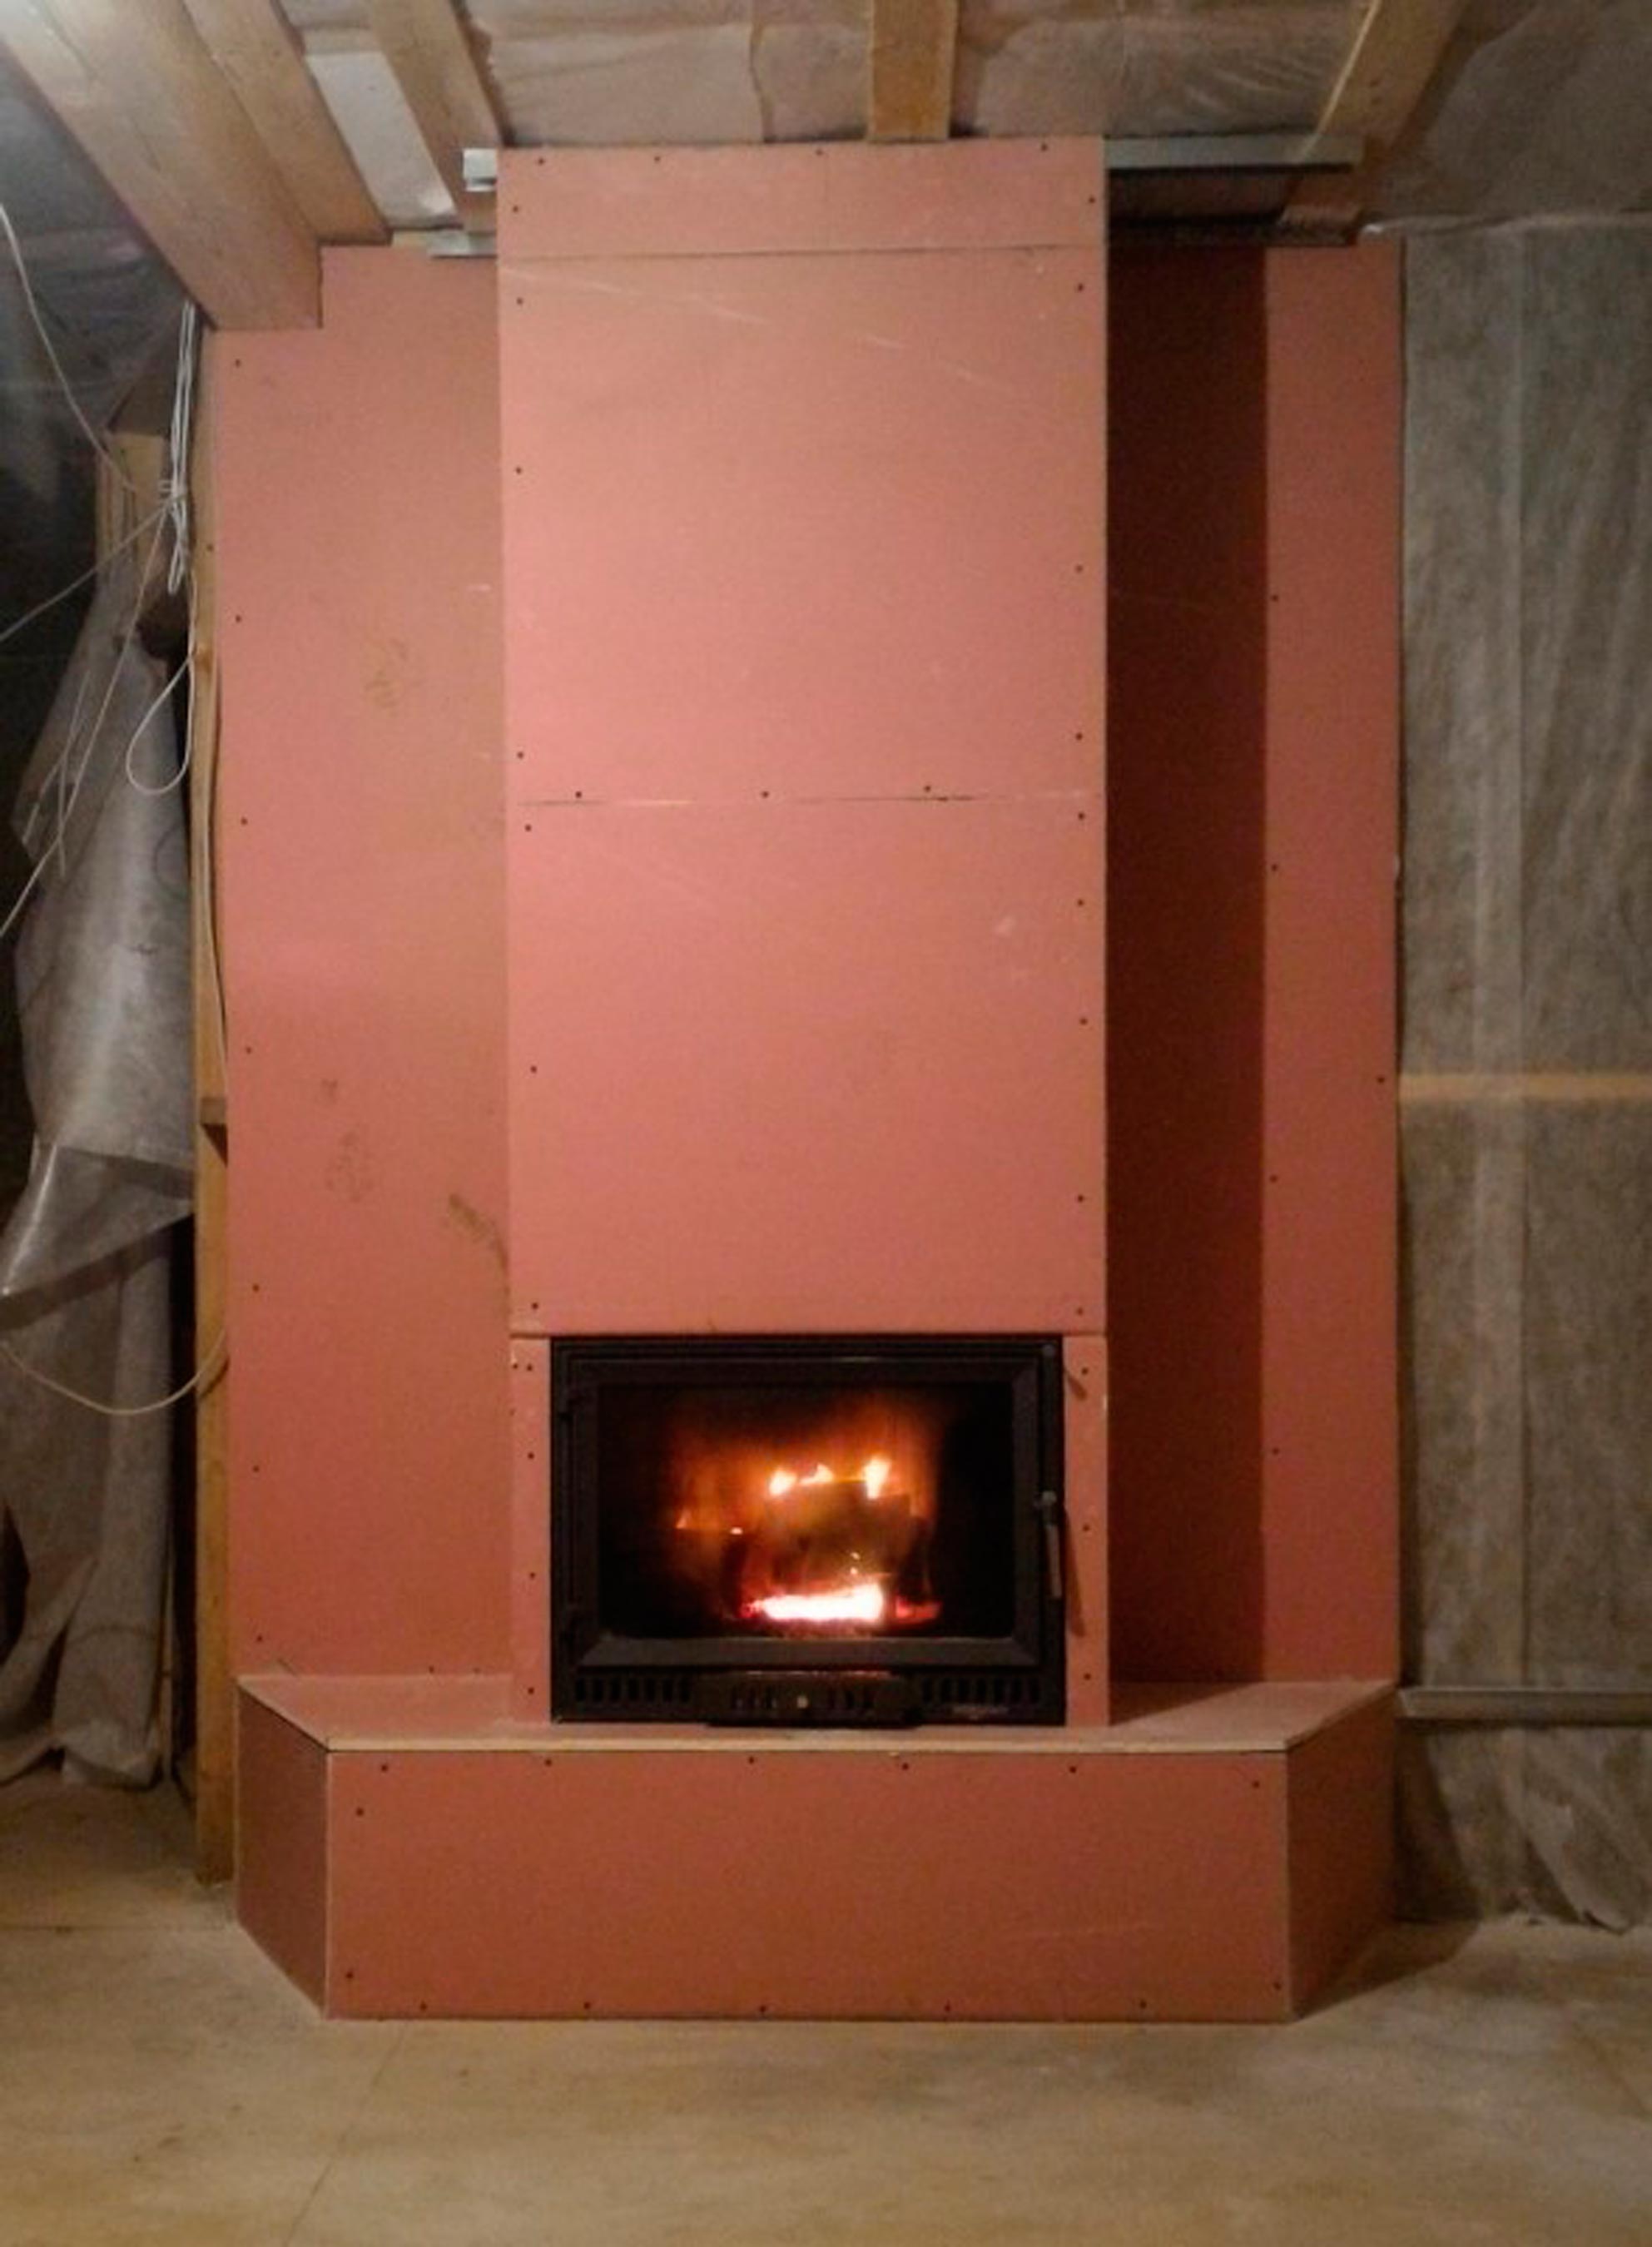
GKLO is a new abbreviation for drywall with a fire resistant function. This designation does not mean that such sheets can be used to decorate a bathhouse and similar rooms. Only a short contact with an open fire and a short period of collision with an elevated temperature is all that such material is capable of. However, the so-called anti-fire function can sometimes save human life, for example, in case of fire. If ordinary drywall starts to burn almost immediately, then in a room lined with GKLO sheets, a person will have 5-7 minutes left to get out of the fire-hazardous zone.
Resistance to high temperatures is achieved due to the inclusion of fibers with reinforcement elements in the middle part of the sheet interspersed with cardboard in the composition. The outer layer of the drywall is impregnated with anti-inflammatory or flame retardant liquid.
In appearance, drywall with a flame retardant function is not much different from the simple version of the material - it is the same gray. But the factory marking of the red “fiery” hue will immediately indicate for what purposes the finishing sheet is used. In terms of cost, it is several times greater than even moisture-resistant drywall, but this is the reverse side of the inclusion in its composition of expensive in the production of reinforcing fibers. In homes where fires frequently occur due to the leakage of domestic gas or old electrical wiring that fails, this option may be the most appropriate, despite the high cost.
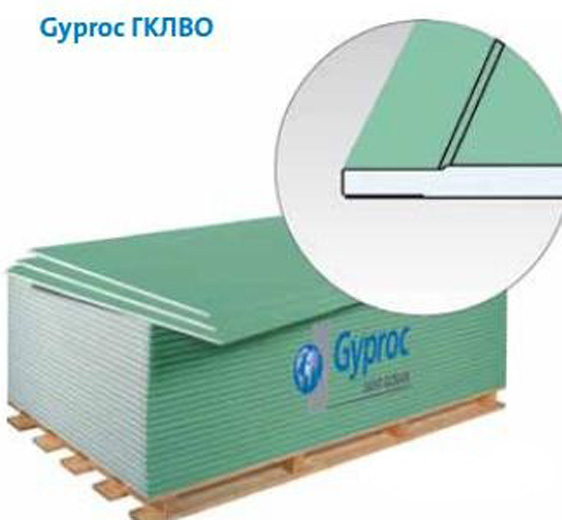
Universal drywall for all occasions - at the same time with moisture resistant and refractory functions, is designated as GKLVO. Such a finishing material can not be found in any hardware store, because of the high price it is almost never used in the decoration of residential and office space.Combining both protective reinforcing fibers and water-repellent inserts, this sheet weighs many times more - not every wall will withstand.

Often, this plant and industrial premises are trimmed with a similar gypsum plasterboard, where the risk of fire and flooding is high enough. In private houses, where in the extensions equip, for example, carpentry or pottery mini-workshops, GKLVO sheets will also be useful.
In order to still find this type of drywall in the store, the developers came up with an interesting marker - they combined color characteristics and water-repellent and fire-resistant sheets. So, its surface is painted in a pale green color, as befits a cardboard with a waterproof marker. The inscription, on the contrary, is bright red in color, as in the fire-resistant variant. In any case, if you get confused, feel free to ask the advice of the seller. He will quickly find the right option, because the choice of universal drywall with a full functional spectrum is not so great even in the capital's shops.
Also, drywall is divided into the following categories according to the place of installation.
- Wall plasterboard - the most popular option.In principle, if it is properly cut, it can be used for plating almost any more or less straight surface. This sheet is also great when installing partitions, both in offices and inside a small living room. Its thickness may be different depending on a set of additional functions such as fire resistance, but the average GCR sheet is 10 to 13 millimeters thick.
- Ceiling plasterboard not much different from the wall, especially the composition of cardboard or texture. The main feature is a lightweight version of the design in terms of filling with various materials and interspersed to increase strength and other indicators, since the heavy sheet of the ceiling simply can not stand. The ceiling version should be thin so that it can be cut safely even after fasteners for subsequent insertion of lighting devices. The average thickness of the ceiling sheet is 8-10 millimeters.
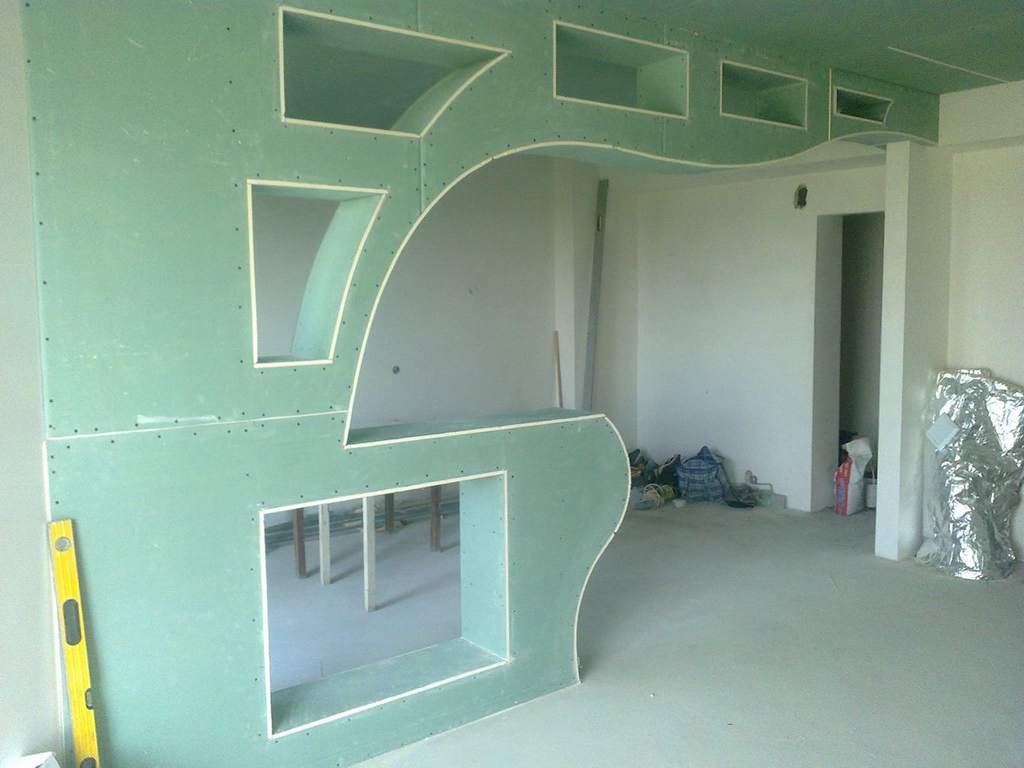
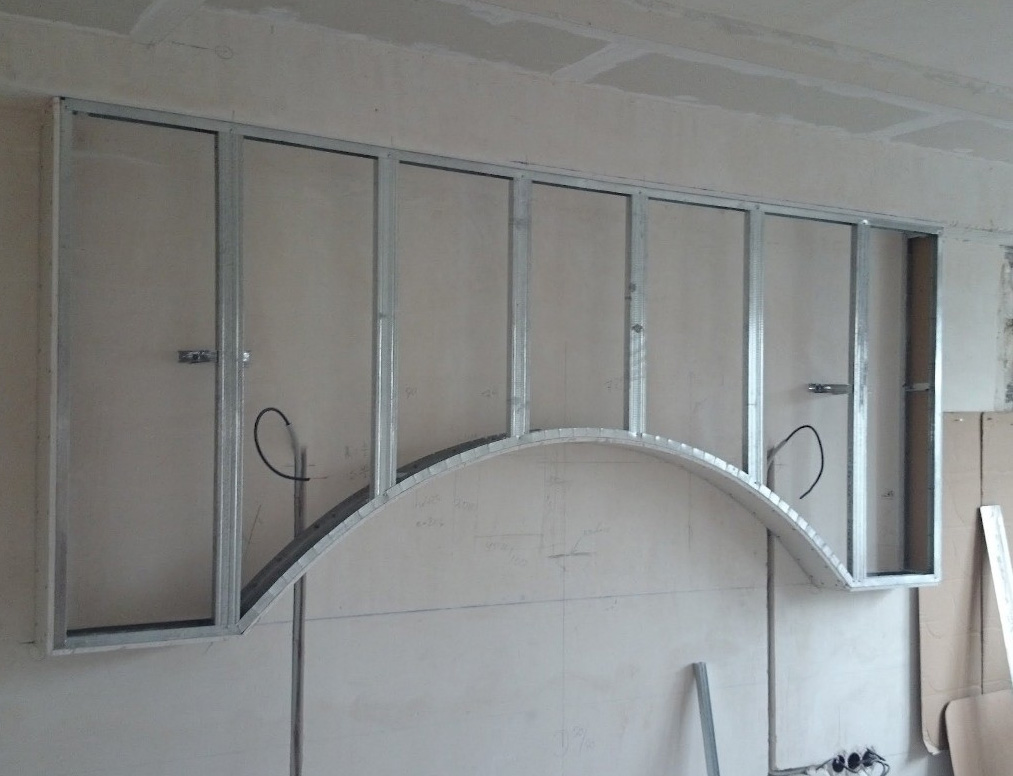
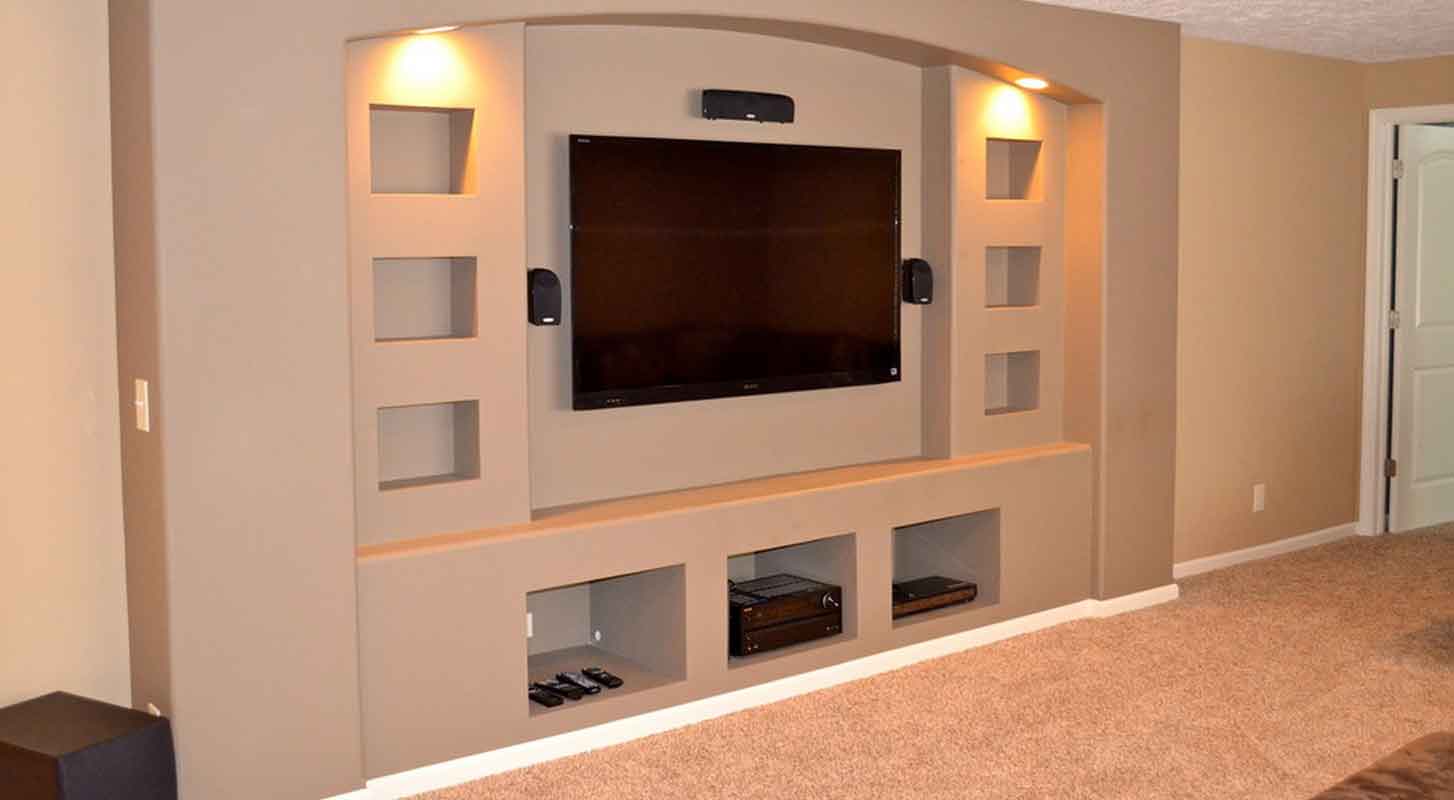
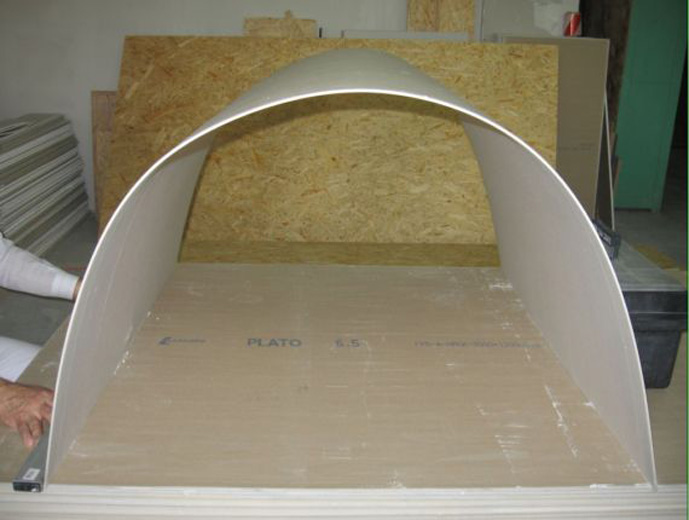
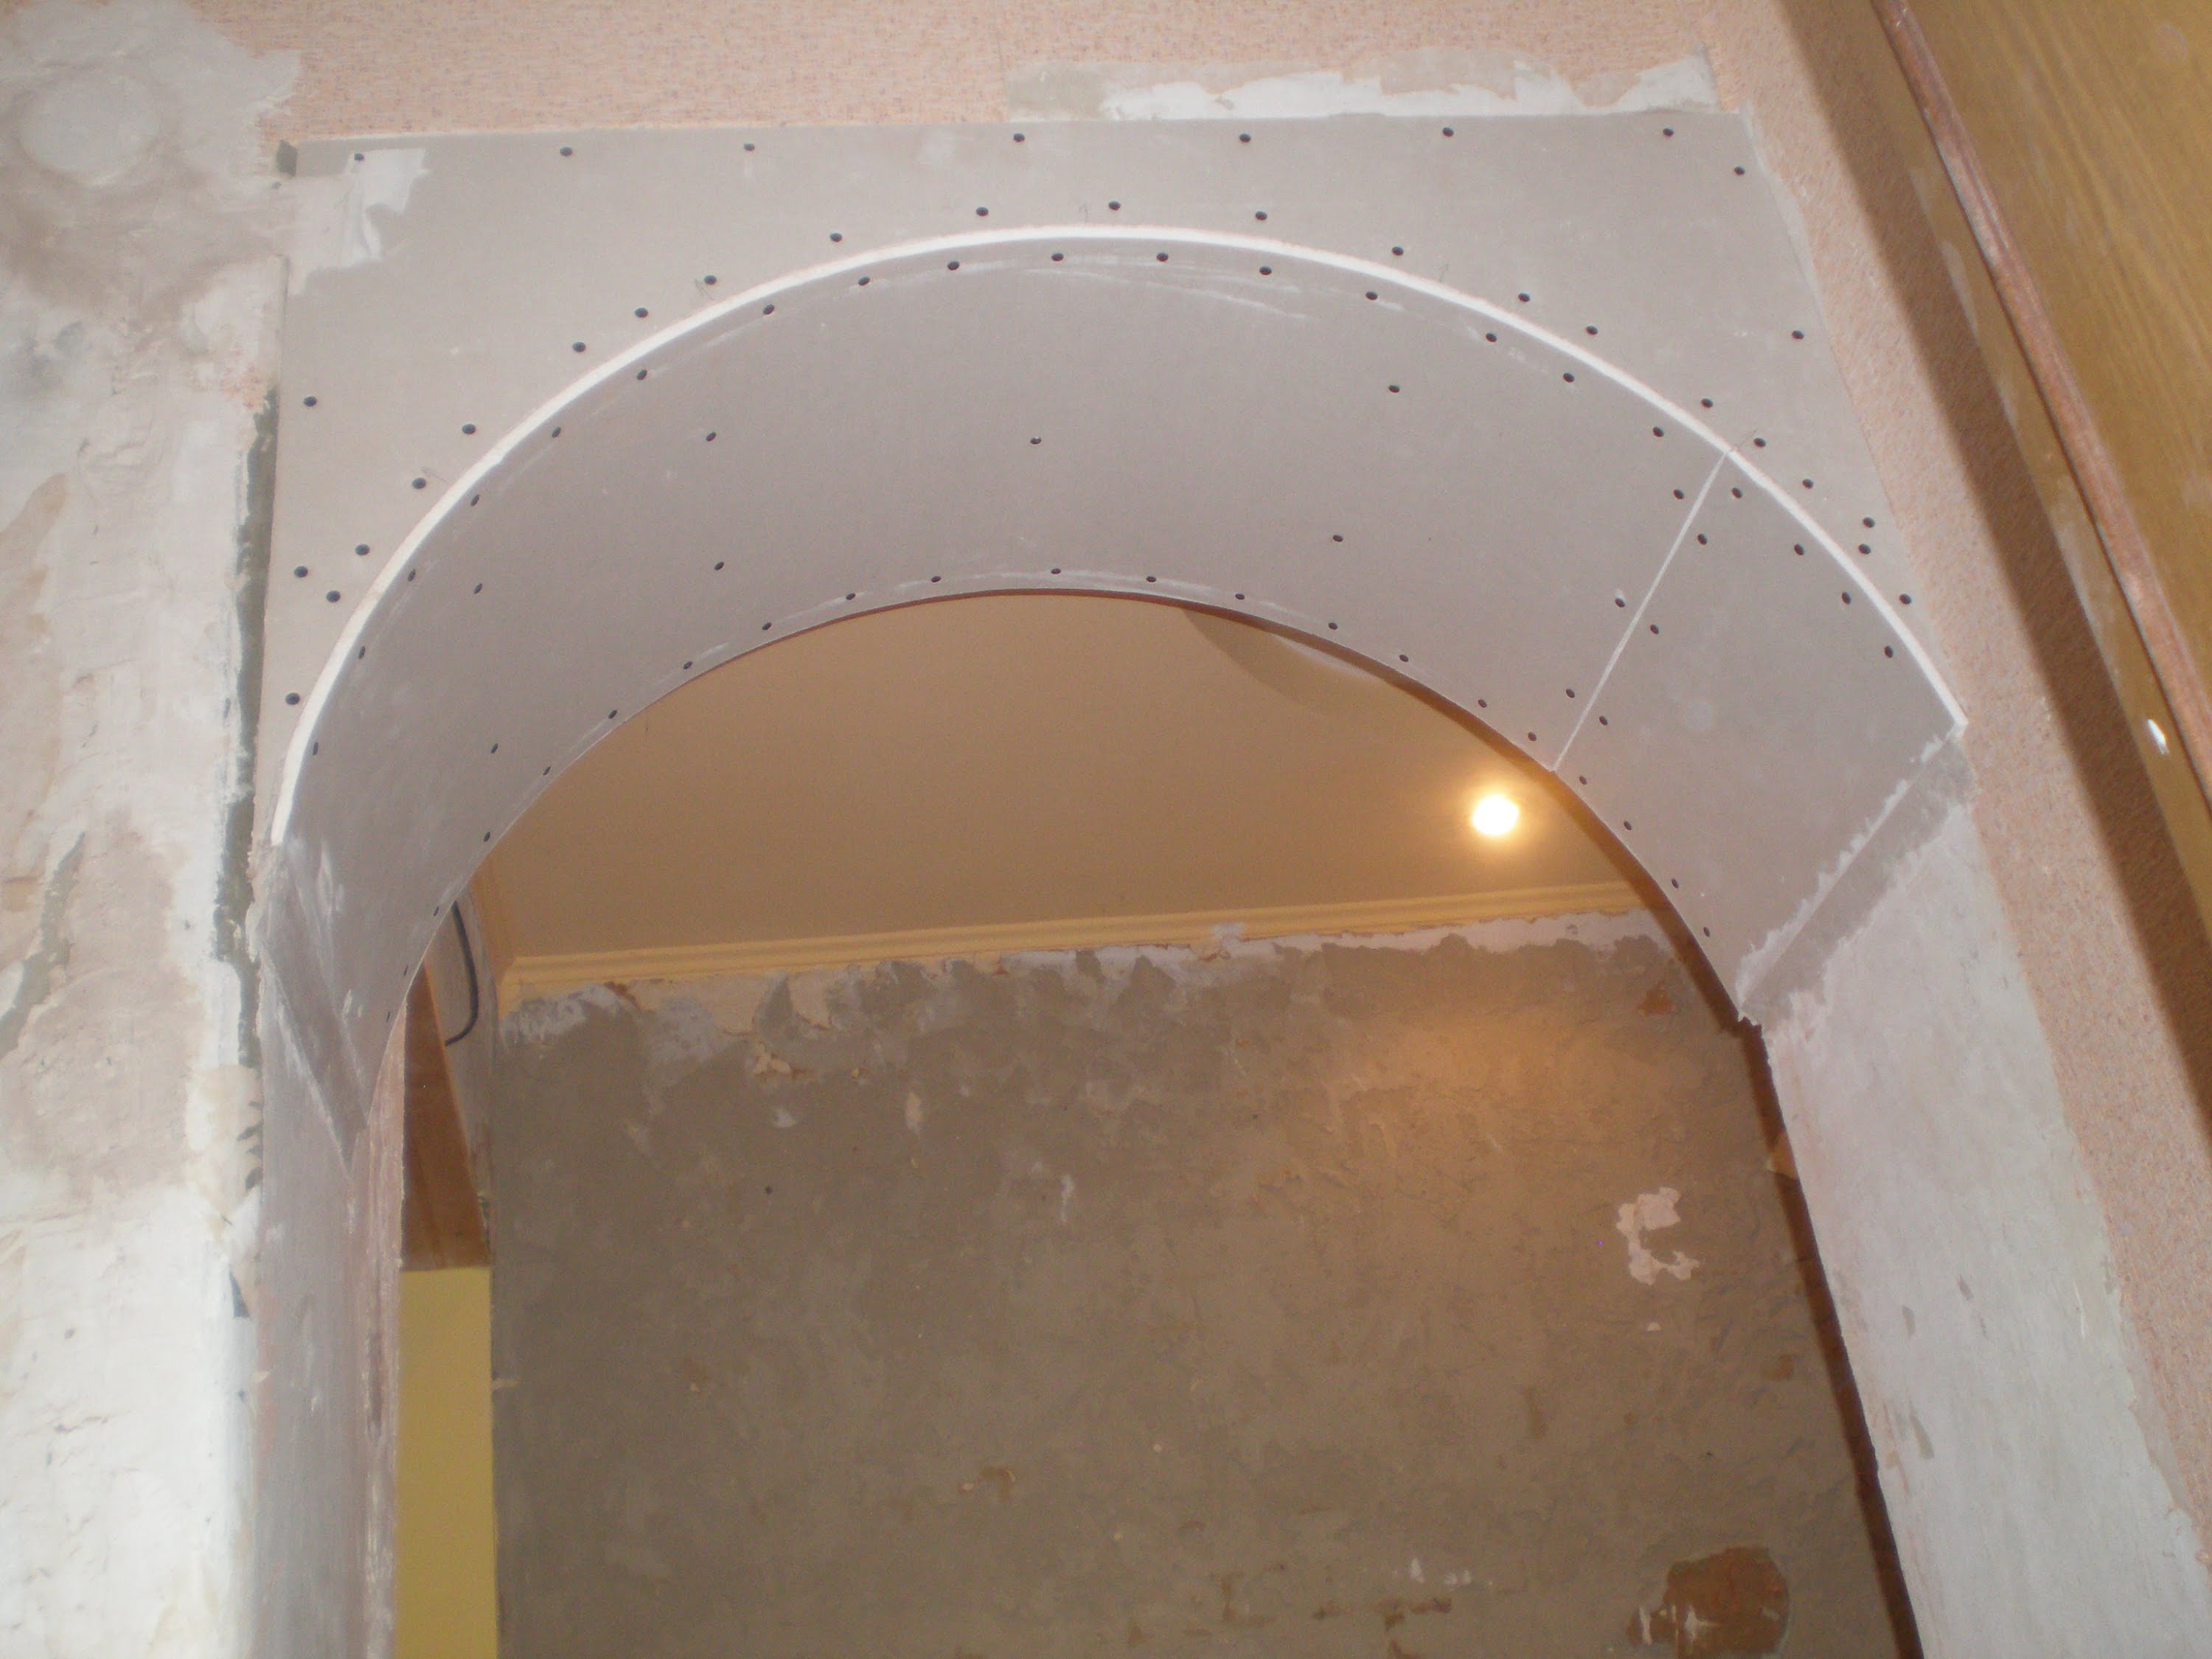
- Not so common, but no less popular than the previous two names. arched drywall. The name speaks for itself - this type of finishing material must bend in different directions in order to lay it in a twisted form in the manner of an arch,niche and other rounding or just in the room of irregular shape.
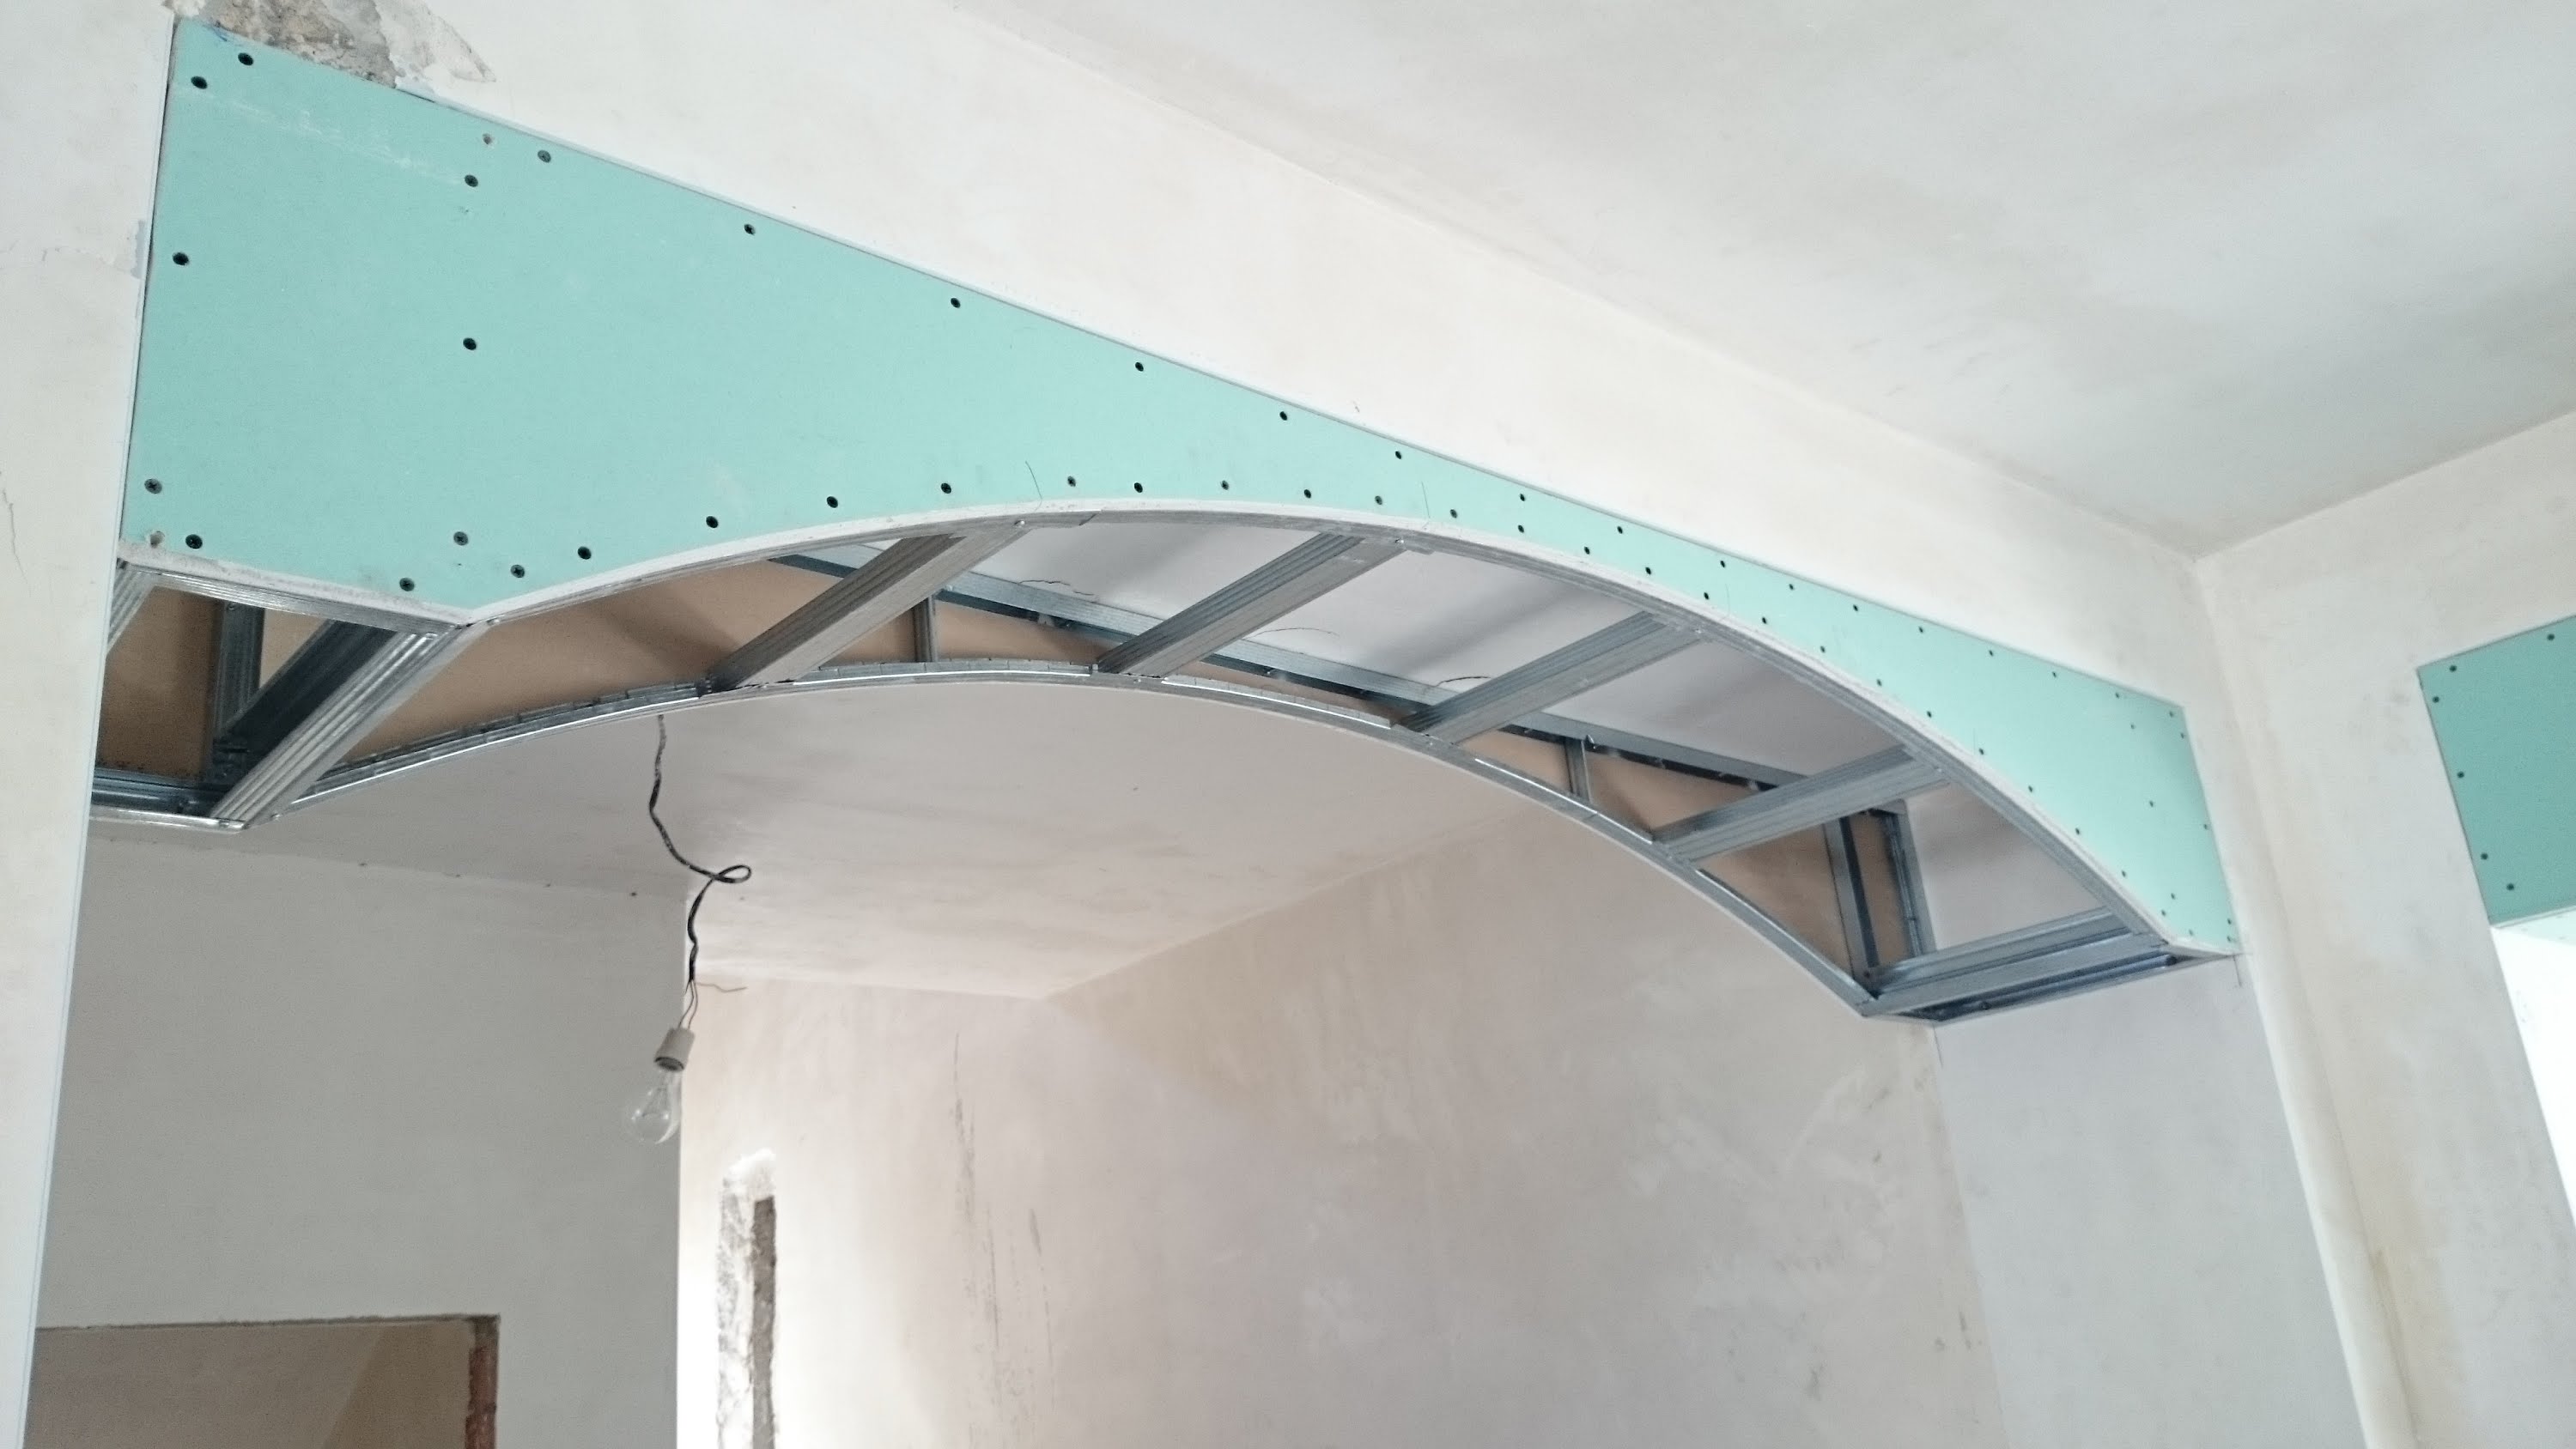
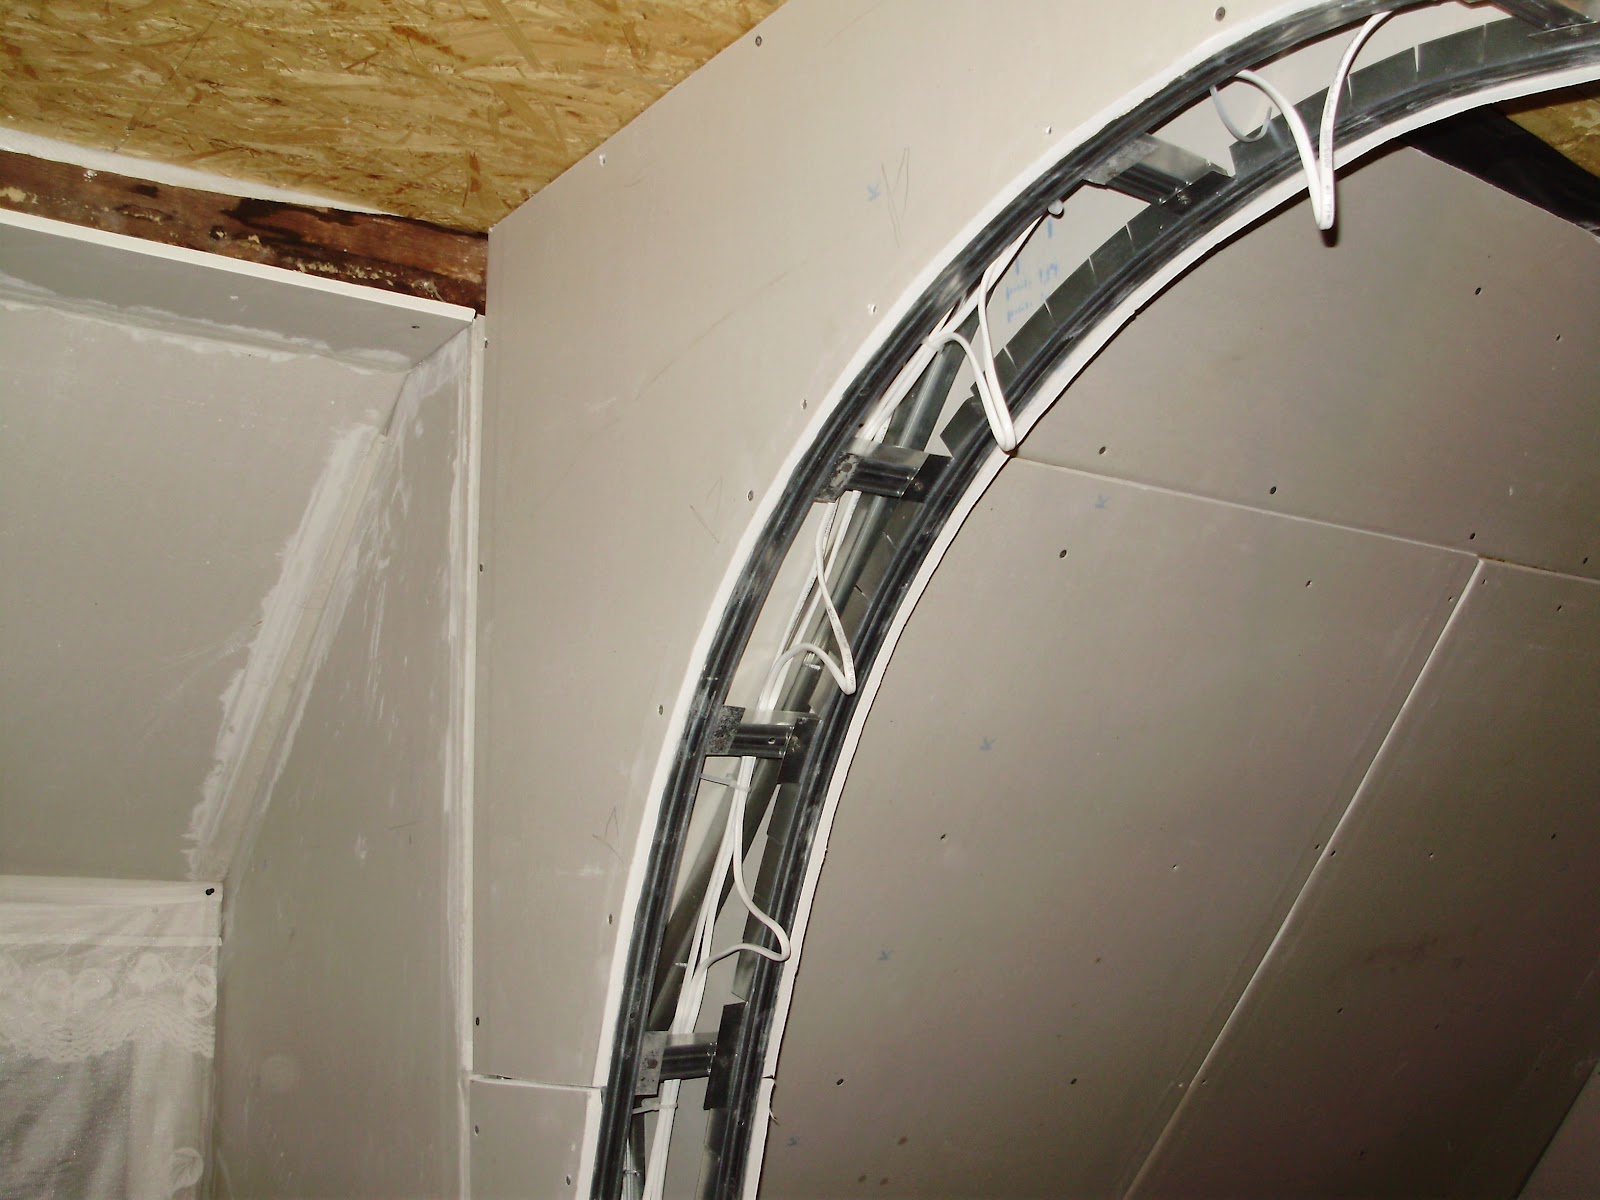
A sheet that is able to take on a variety of shapes most often contains reinforcing fibers., due to which you can bend it and make it freeze in this position. In fact, almost any arched drywall is fire resistant, so its price is noticeably higher than normal ceiling or wall. As practice shows, only small areas in the room need a similar type of finish, so the arched drywall is bought in addition to ordinary small sheets, 1-2 meters in length. Naturally, in order to bend, the material must be not very thick - no more than 6-7 millimeters.


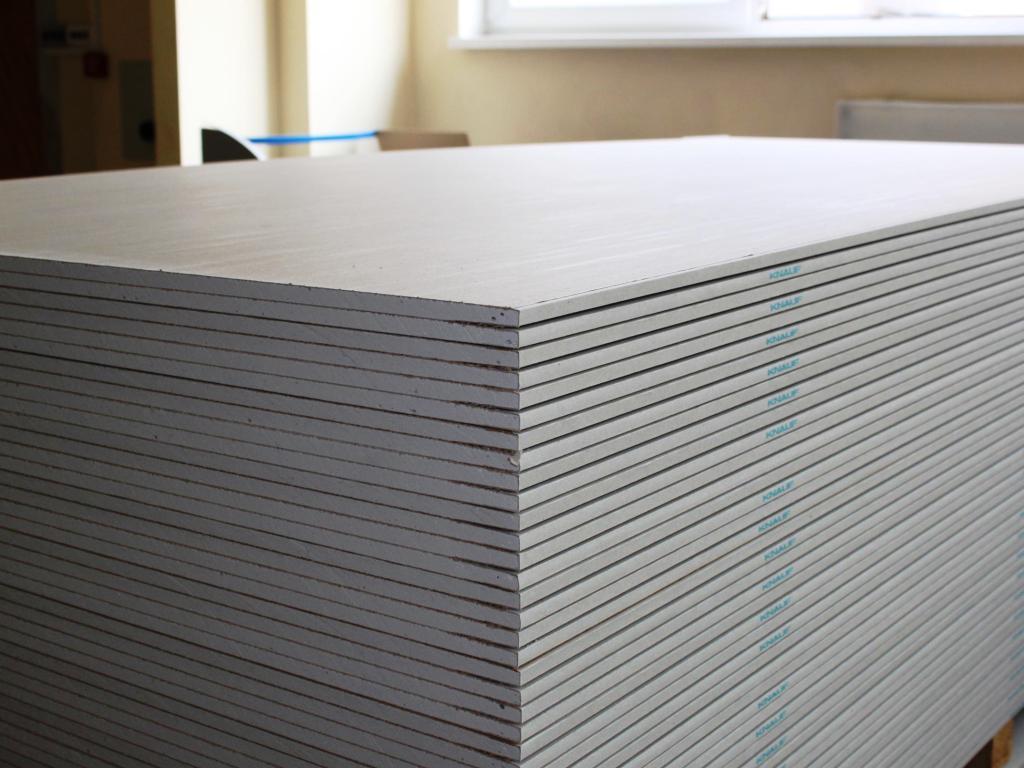
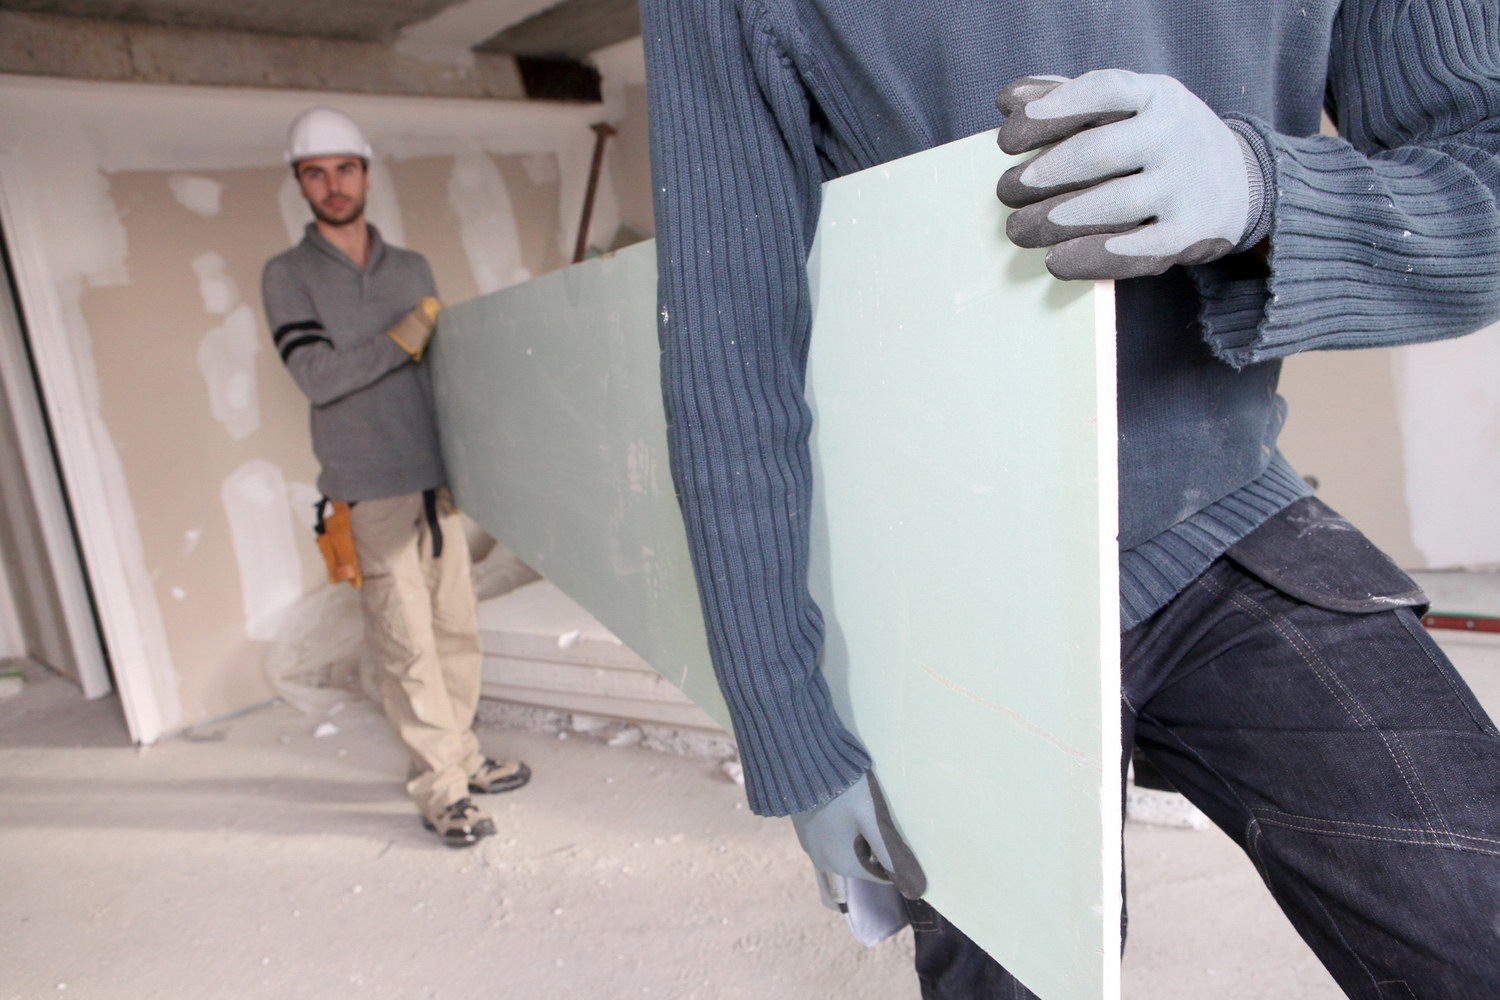
The most popular ordering in stores is an ordinary HL list with parameters of 1.2 x 2.5 meters. Its weight is about 30 kg. This information must be taken into account when going for drywall - you should call a partner and rent a truck or order a store delivery.

Instruments
For installation of drywall in residential or commercial premises do not need any complex professional tools. It is enough that there is already a case in the mezzanine on the mezzanine of every home "jack of all trades."This is the indisputable advantage of drywall - ease of installation and a minimum of fixtures for it.
Be sure to need the following tools.
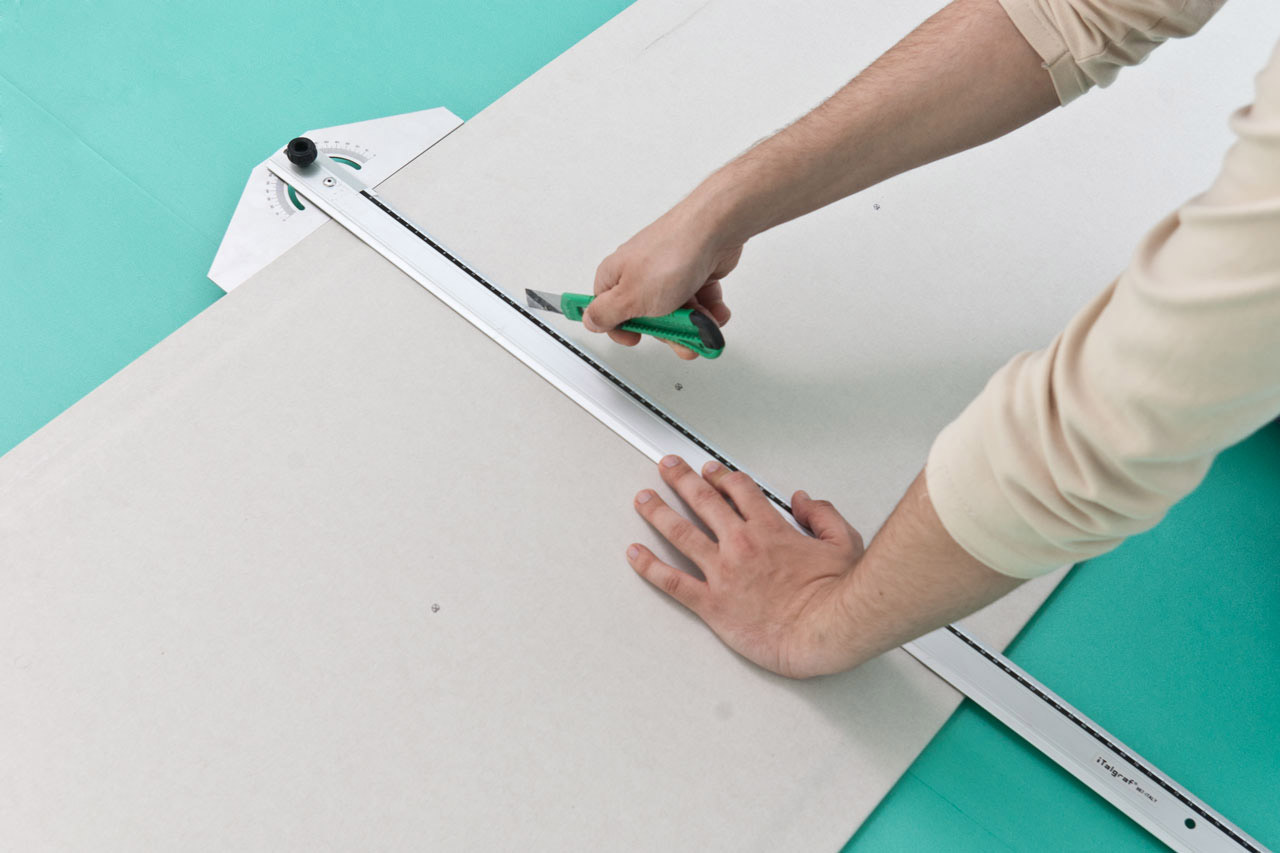
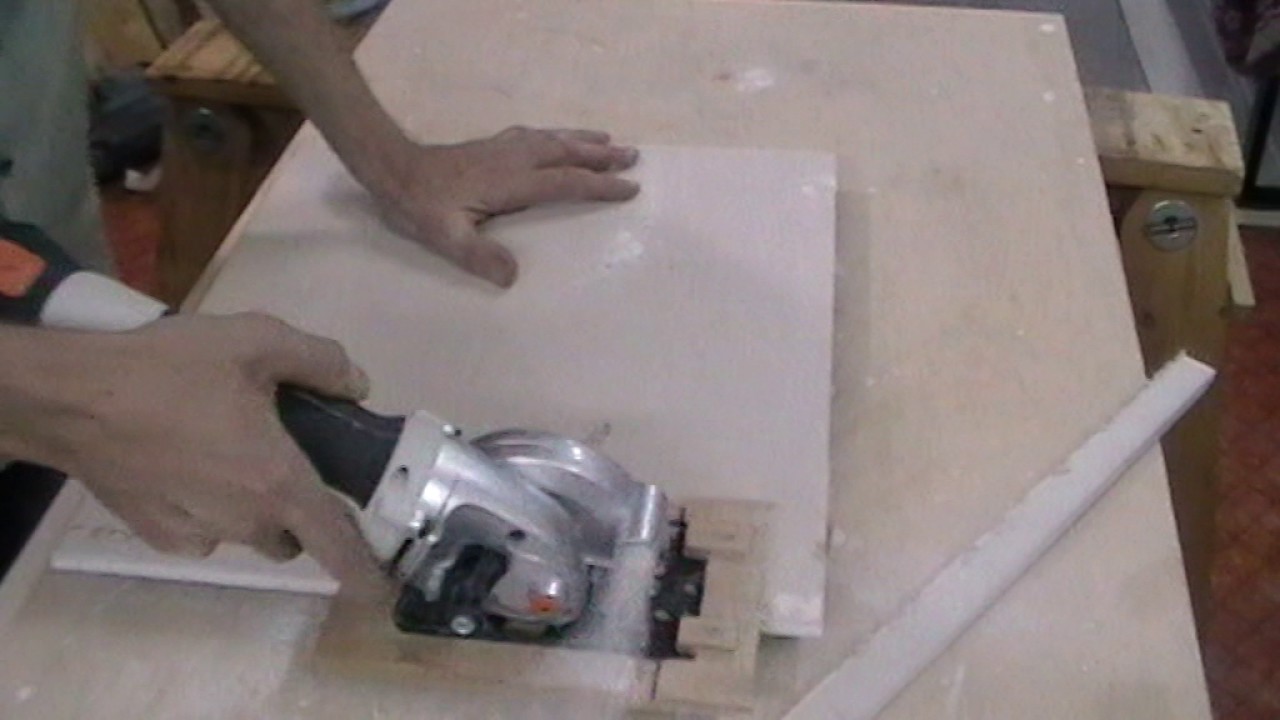
- Saw or hacksaw. Suitable for cutting wood and synthetic polymeric materials. Such a saw is needed when dividing whole GCR sheets into separate pieces of the required size and shape. In addition to the usual saw, it is better to stock up on her disk variety, since it will be more convenient for her to make long and straight cuts, separating parts of drywall from each other.

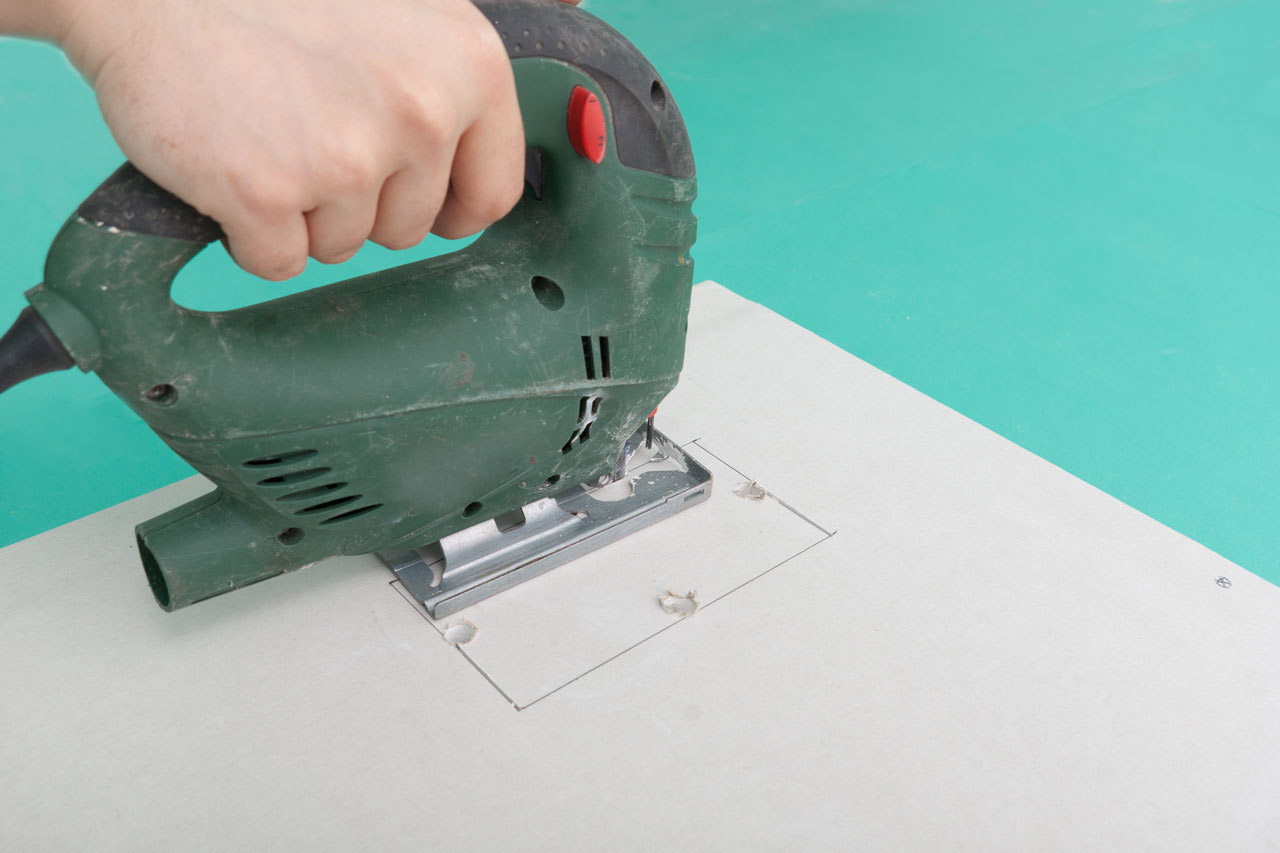
- Electric jigsaw and drill. The first tool is needed for cutting parts of complex shape, especially if it is not sheets of soft drywall, but parts of a metal frame. Drill, respectively, need for fastening sheets to the frame and their coupling with each other. If possible, you can purchase a special nozzle on the drill for mixing dry mixes, since with frameless mounting on glue, all this will be needed.
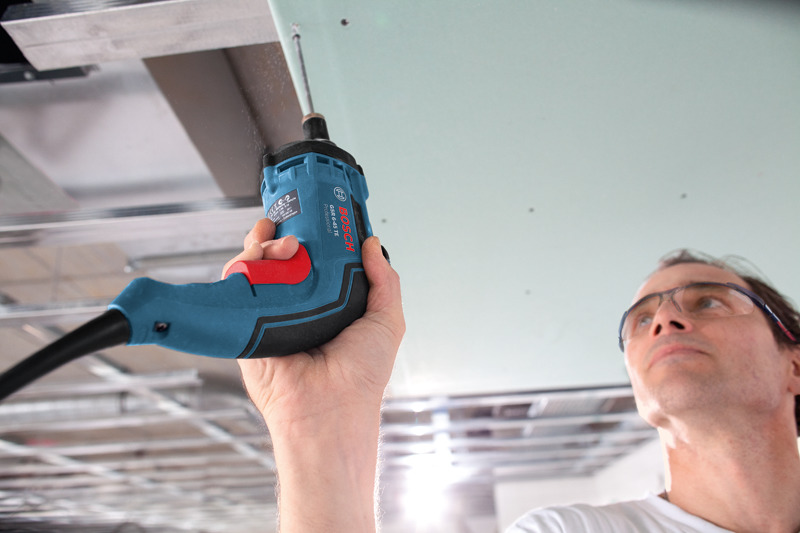
- Screwdriver already become a familiar tool in any apartment. It is needed to install fasteners when fixing parts of drywall at the time of assembly of the frame, most often from metal profiles.In principle, the same manipulations can be carried out with the help of a drill and a screwdriver, but the screwdriver is softer, so the chances of breaking a rather fragile plasterboard structure are reduced by several times.

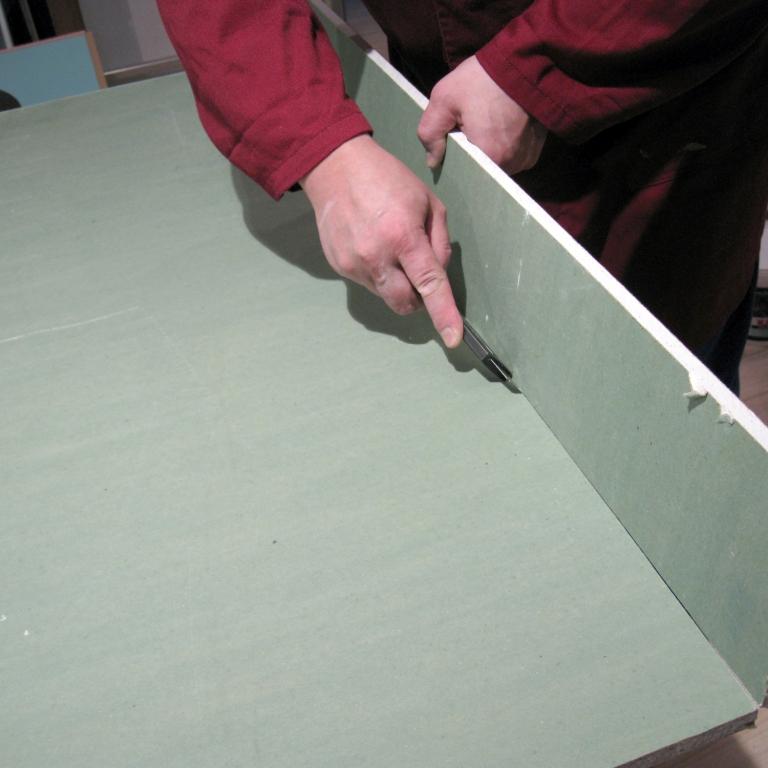
- Knife it is better to take a special construction, in order to trim the edges of the parts after cutting. However, if you do not want to spend extra money, use the skill of a well-sharpened ordinary kitchen knife with a thin long blade.
- Roulette. Suitable both automatic and laser. You can also use just ordinary metal, which is well suited for measuring the profile after marking and cutting into separate parts.

- Construction Plumb It is not obligatory, but it is very convenient in work at the time of inspecting the position of the GKL sheet in space during the installation of the walls.
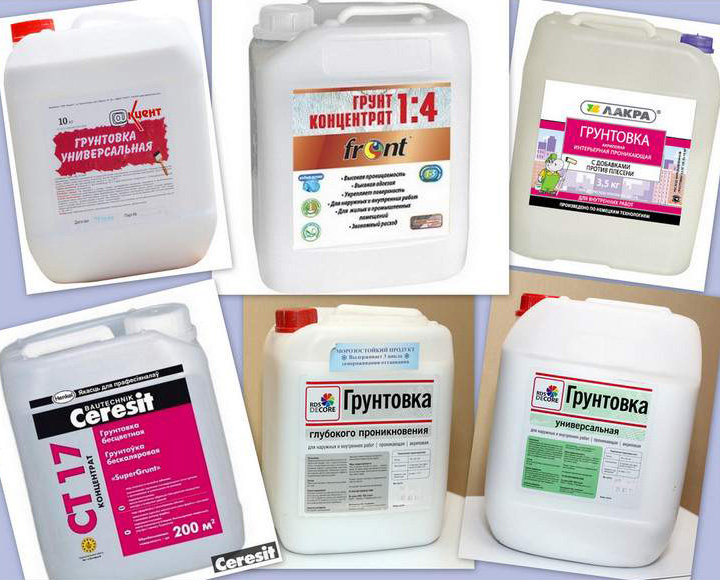
- Paint brush, rollers of various shapes and a universal set of spatulas - all that is needed for the correct application of the primer after the installation of drywall.
- Directly ground mix or acrylic putty, necessary for applying the top layer on a drywall sheet in order to prepare for the subsequent coating with varnish, paint, wallpaper or decorative plaster.
- Plastic containers large capacity, where the primer or glue will be mixed. It is desirable for each type of mixture to have a separate disposable container, which then do not mind throwing away.
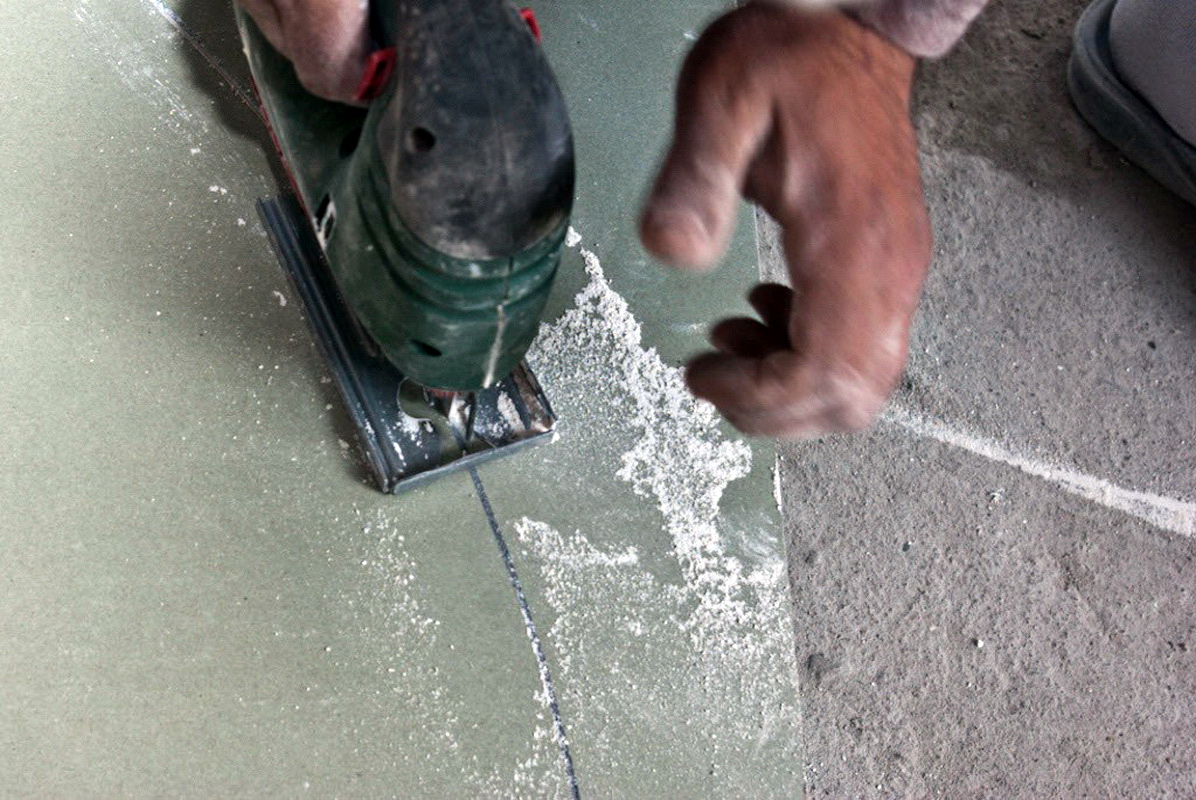
- Emery cloth for mashing irregularities so that each next layer lays smoothly and without gaps, because in the future this may affect both the strength of the structure and the formation of mold fungus in places of poor grouting.
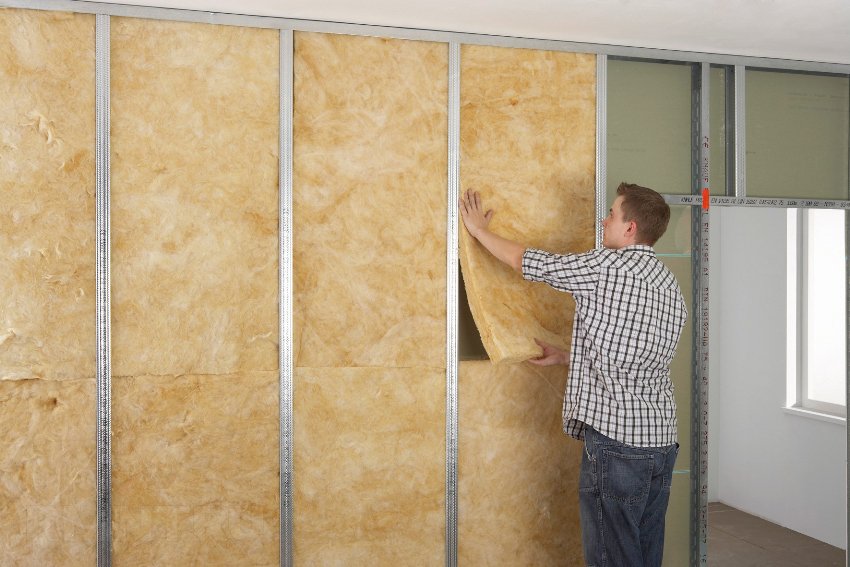
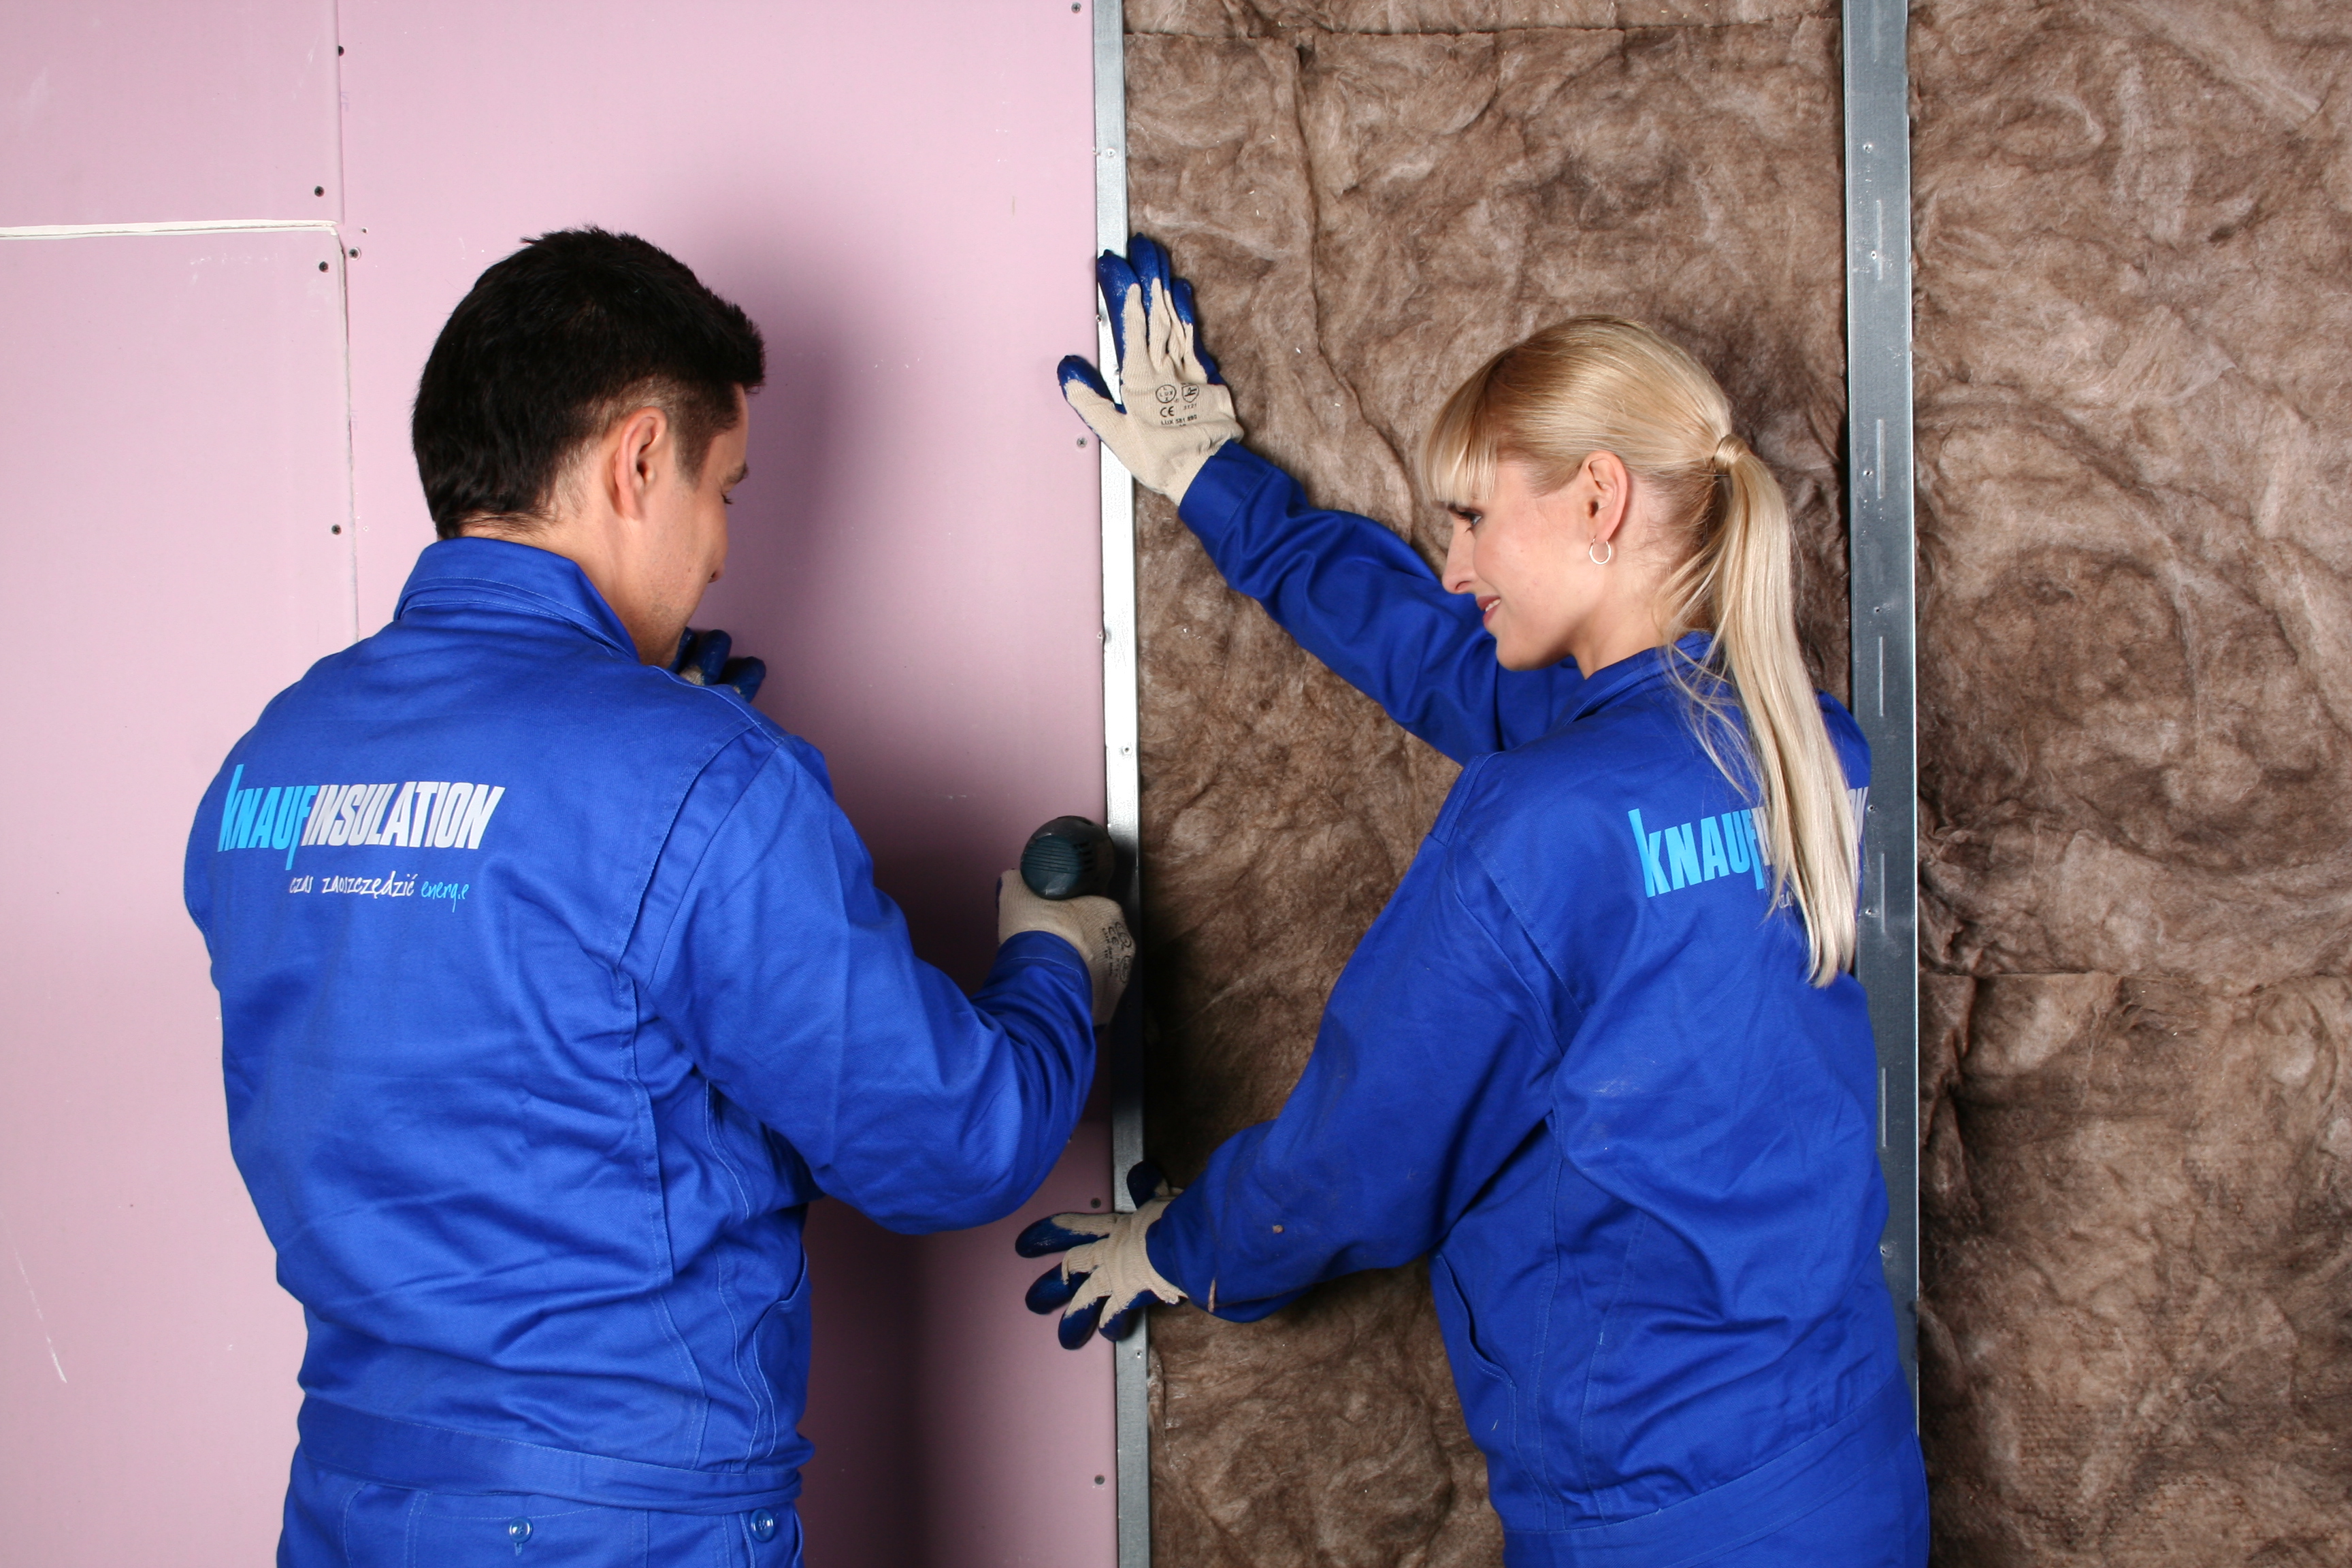
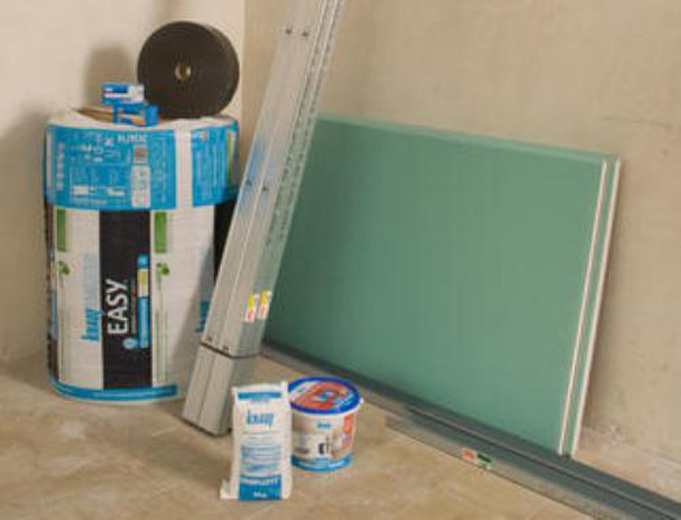
- Heater, placed directly between the wall and the sheet of drywall during the construction of partitions or wall decoration for the purpose of insulation and sound insulation. It can be both mineral, created specifically for interaction with drywall, and ordinary glass wool, which also keeps warmth well.
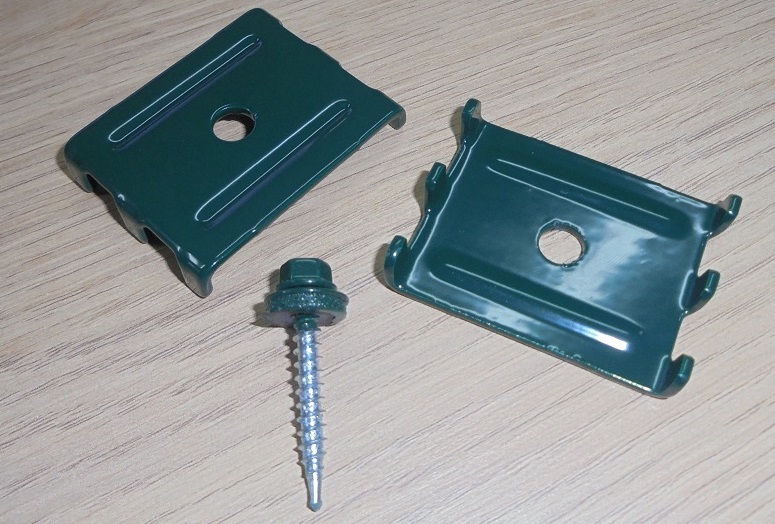
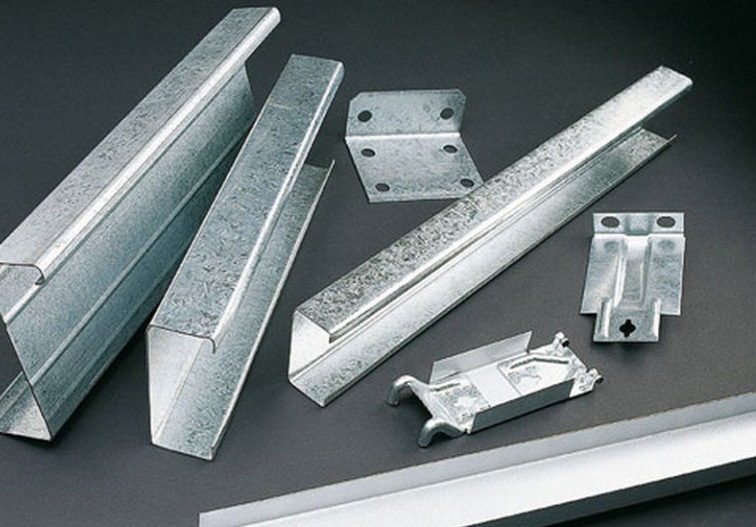
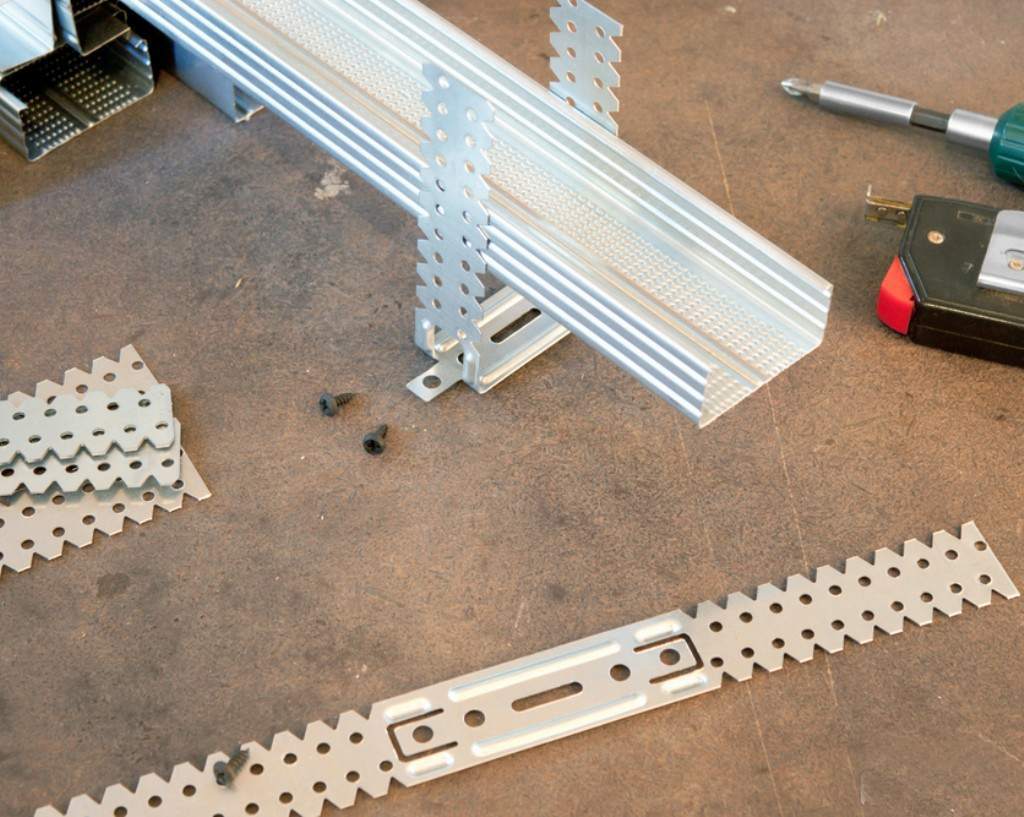
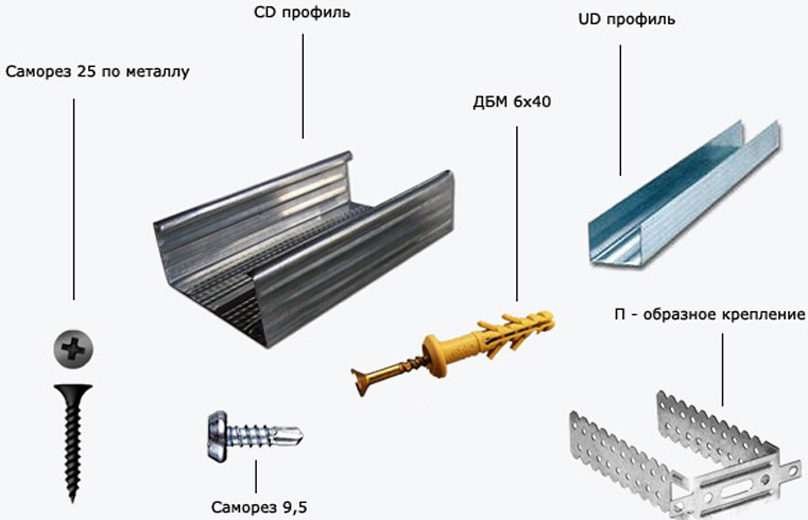
- Rack and horizontal profiles, brackets, fasteners and screws - absolutely indispensable things when installing a metal frame and stitching individual gypsum sheets together.

How to calculate the flow?
Before the start of repair work, it is necessary to thoroughly measure the area of the finished premises, so as not to buy extra sheets of drywall. The calculation of the area of the walls, as well as the ceiling, takes place traditionally - the length of the surface is multiplied by the height.Window and doorways do not need finishing, so you first need to calculate their total area in the same way, and then subtract the whole wall from the area.


Drywall is most often sold in whole sheets. - this should be considered when buying the so-called surplus "in reserve". Usually they take no more than one-fourth of the required space of the room so that it does not work out that there is just a huge expensive GKL sheet, which then simply has nowhere to store. However, if there is a room for repairing a non-standard shape, there are roundings or niches for which you can’t precisely cut the necessary shapes the first time, it’s better to be able to redo the work with the help of spare drywall.
When calculating the amount of purchased material, it is usually assumed that the width of almost any sheet is standard - 1200 millimeters. Only length, weight and thickness vary here. In length, the sheet is gaining from two to three meters in increments of half a meter. The thickness of the gypsum board sheet is chosen depending on the functional accessories - 6 mm is suitable for finishing arches, slopes and other non-standard elements where drywall is necessary to bend.The thickness of 9.5 mm is ideal for ceilings - it does not make the whole structure heavier, but it also protects from the noise of its neighbors. For walls, most often they buy a sheet of 12 mm thickness, which, together with a lining of insulation, retains heat and creates good sound insulation.
As mentioned above, some of the material can go to the trash., if poorly cut sheets or incorrectly calculate the dimensions. The self-tapping screw can also come off and ruin a piece of sheet, so take 1-5 meters better than you need to minimize the overlapping of the room. For example, horizontal profiles for mounting a frame with a standard section of 28x27 mm are mounted on 4 pieces for each intersection of frame beams - two at the top and two at the bottom. These profiles consist of a main body and whips, the total length of which is equal to the perimeter of the room multiplied by two.

Another integral element in the frame installation of drywall - is rack-mount profiles with a cross section of 27x60 mm. They are mounted along the entire length of the wall with a distance of about 500-600 mm between the individual parts. In order to correctly calculate the required number of such components, you need to divide the length of the wall by 0.4 and multiply by the height of the room.
An average of 5 brackets are prepared for each rack profile, but buy extra 10-15 pieces just in case. Part of such a fastener may be lost in the process of transportation and preparation for repair, and some simply break down during installation.
Self-tapping screws are the main expendable material therefore it is better to be bought by them thoroughly. On a room with an area of 20 square meters. m purchase them at least 400-500 pcs. Nowadays, even in regional stores, such a trifle is almost everywhere, so if necessary, they can always be quickly purchased.
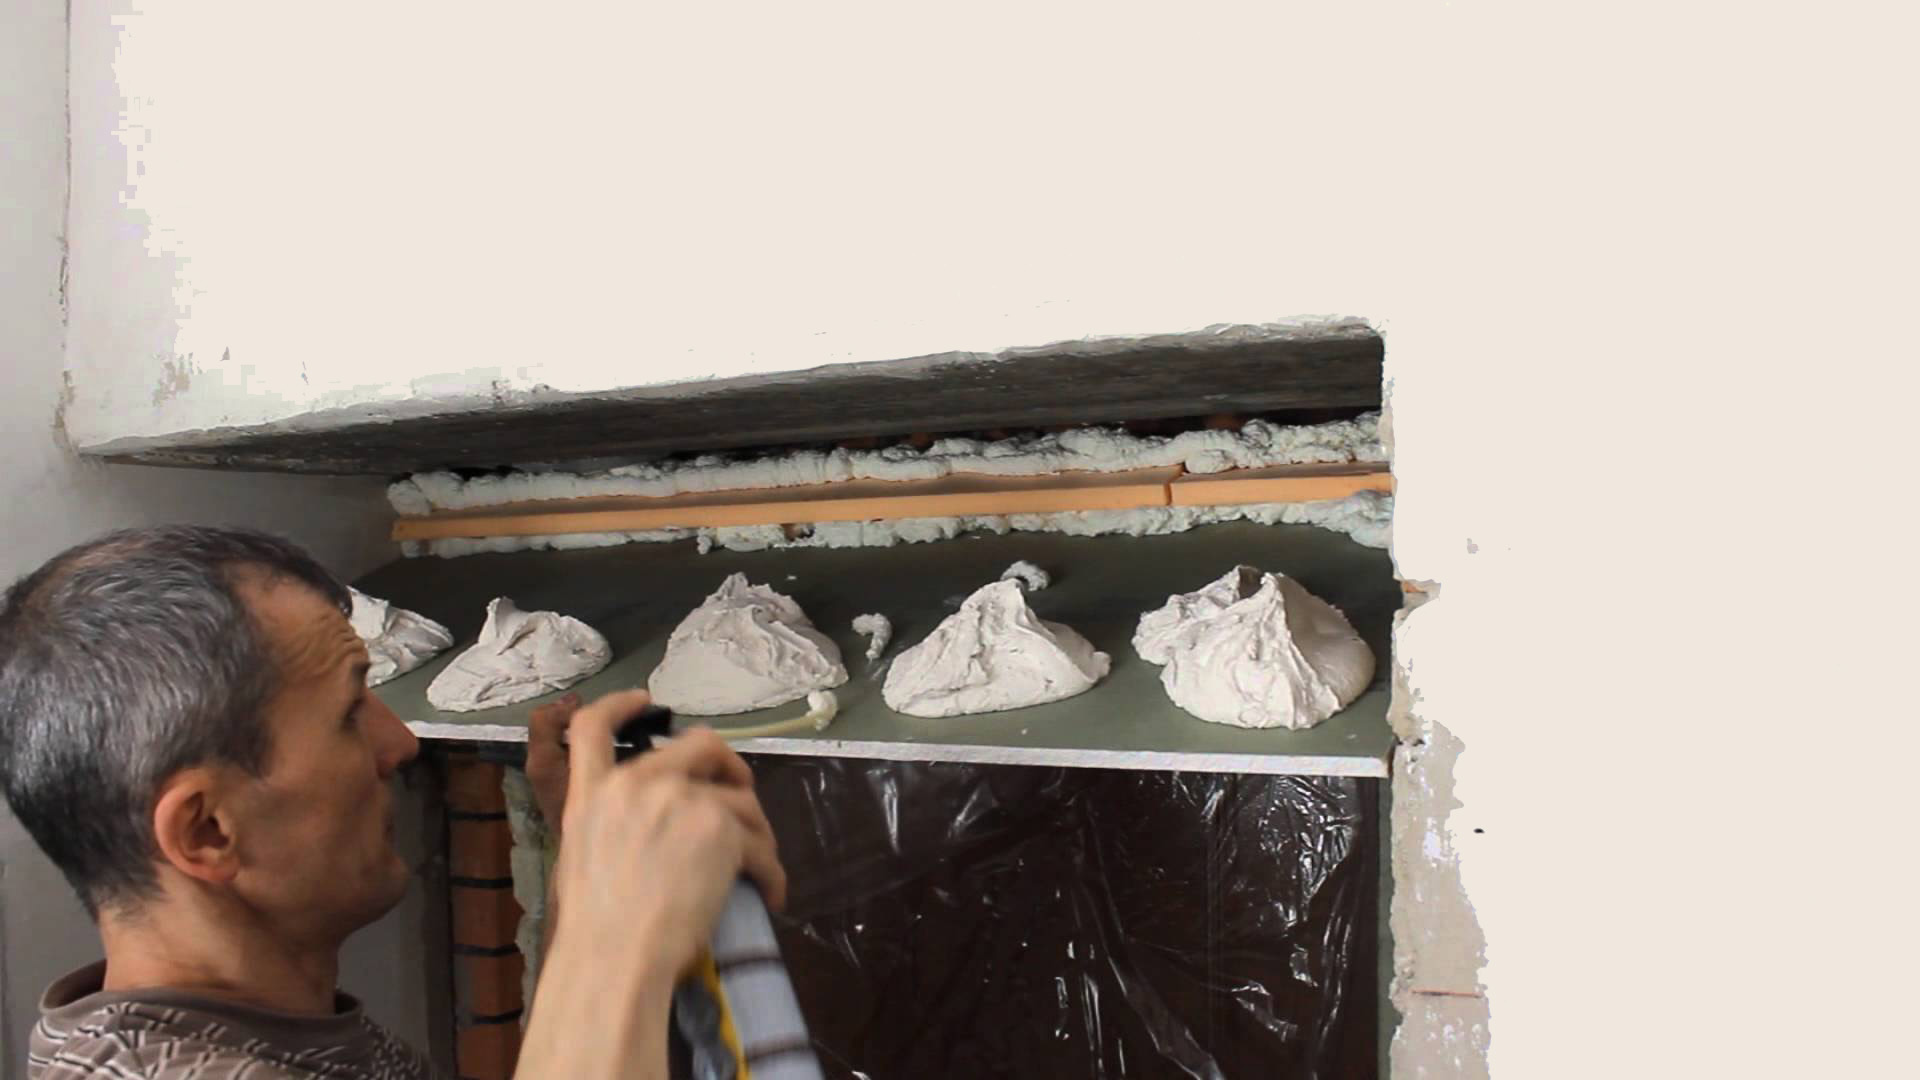
When the method of frameless mounting for fixing drywall to the walls and ceiling need a special construction adhesive. Its consumption is calculated on the basis of 1 square. m wall, and for each type of glue it is individual. A brief instruction on consumption is usually given on the package. Even if you plan to finish only a small section of the wall, stock up on a second bag of glue. It is not uncommon for craftsmen to part with a quick-hardening glue or they don’t have time to use it, and then they have to throw it away.

Room layout
Before you begin the installation of drywall, it should be noted on the plane of the wall or ceiling, where what element will be, as in a children's application.The borders of the individual sheets and the places of the joints between them can be drawn with a simple pencil. He also marks the contours of the door and window openings at the level where the gypsum sheet will be attached.
For proper installation of the frame, it is also best to first mark the boundaries.where each horizontal and vertical beam will be. This marking is a straight line with the same distance from each other, most often in increments of 50-60 cm.

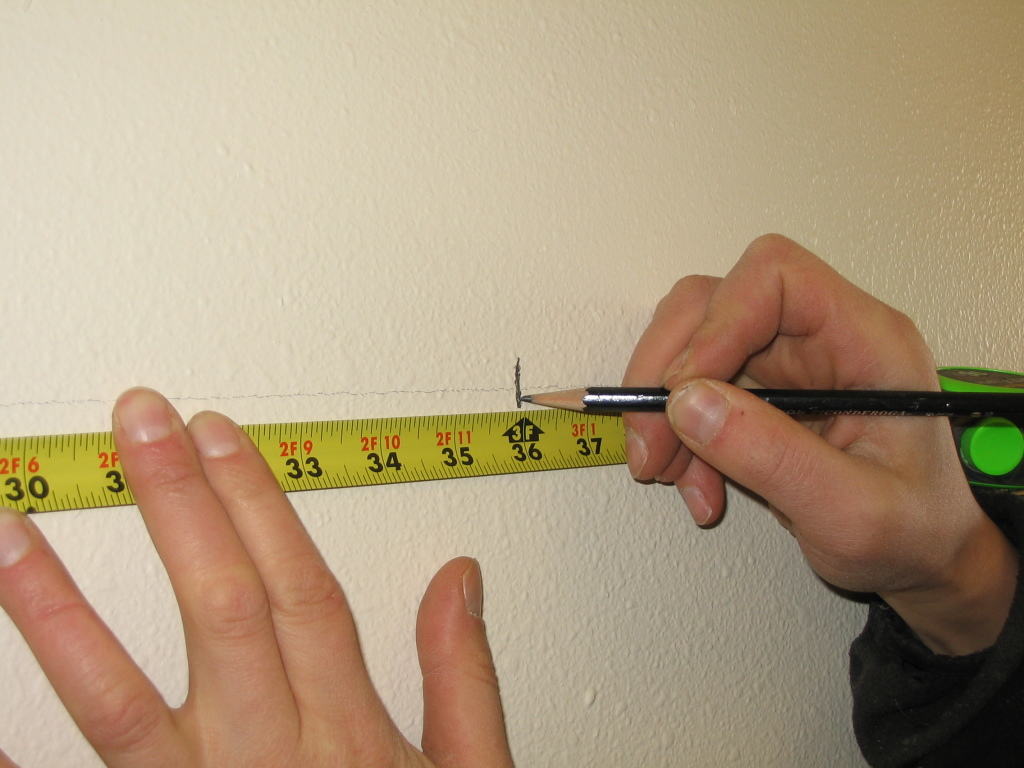
To make a better markup of the room, you can use a device such as an electronic or laser tape measure. It automatically measures the distance from edge to edge, if you attach it to one end of the wall and point the beam at the other, helping to avoid errors when calculating the necessary material.

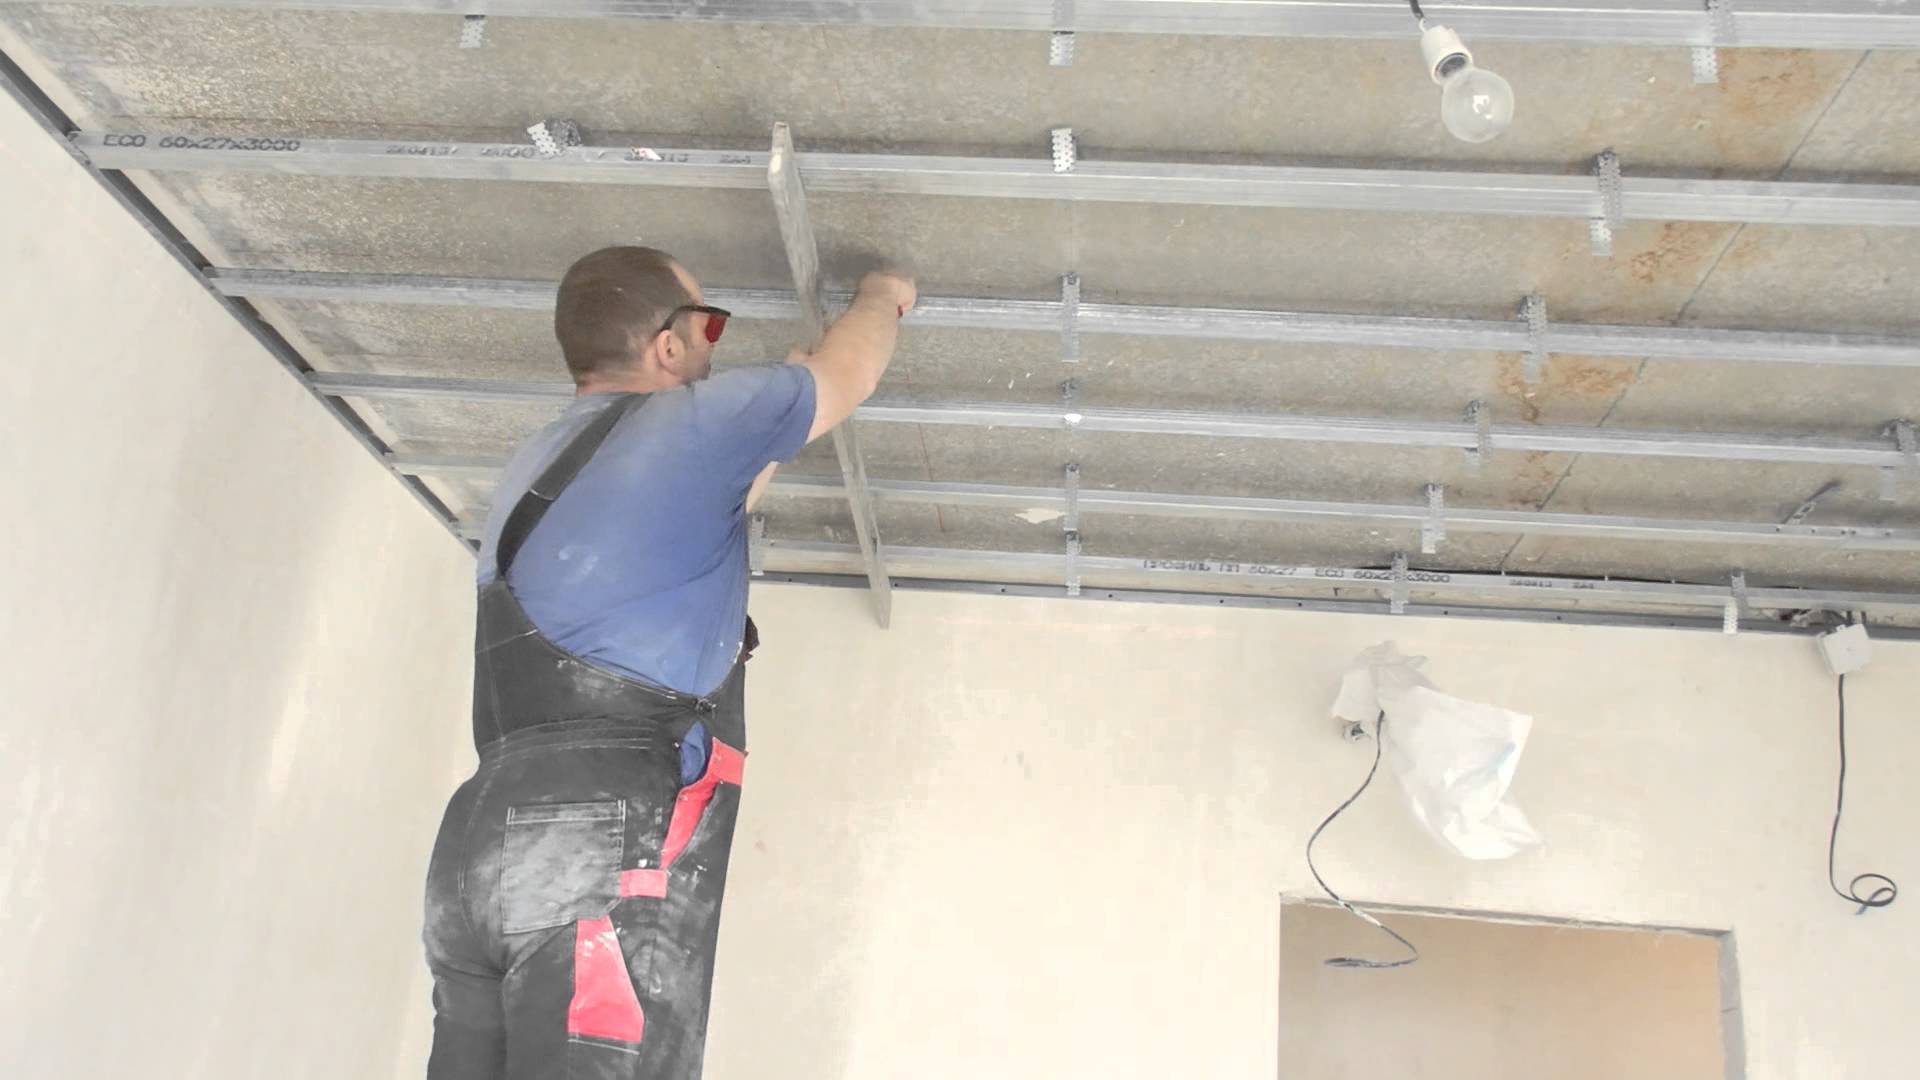
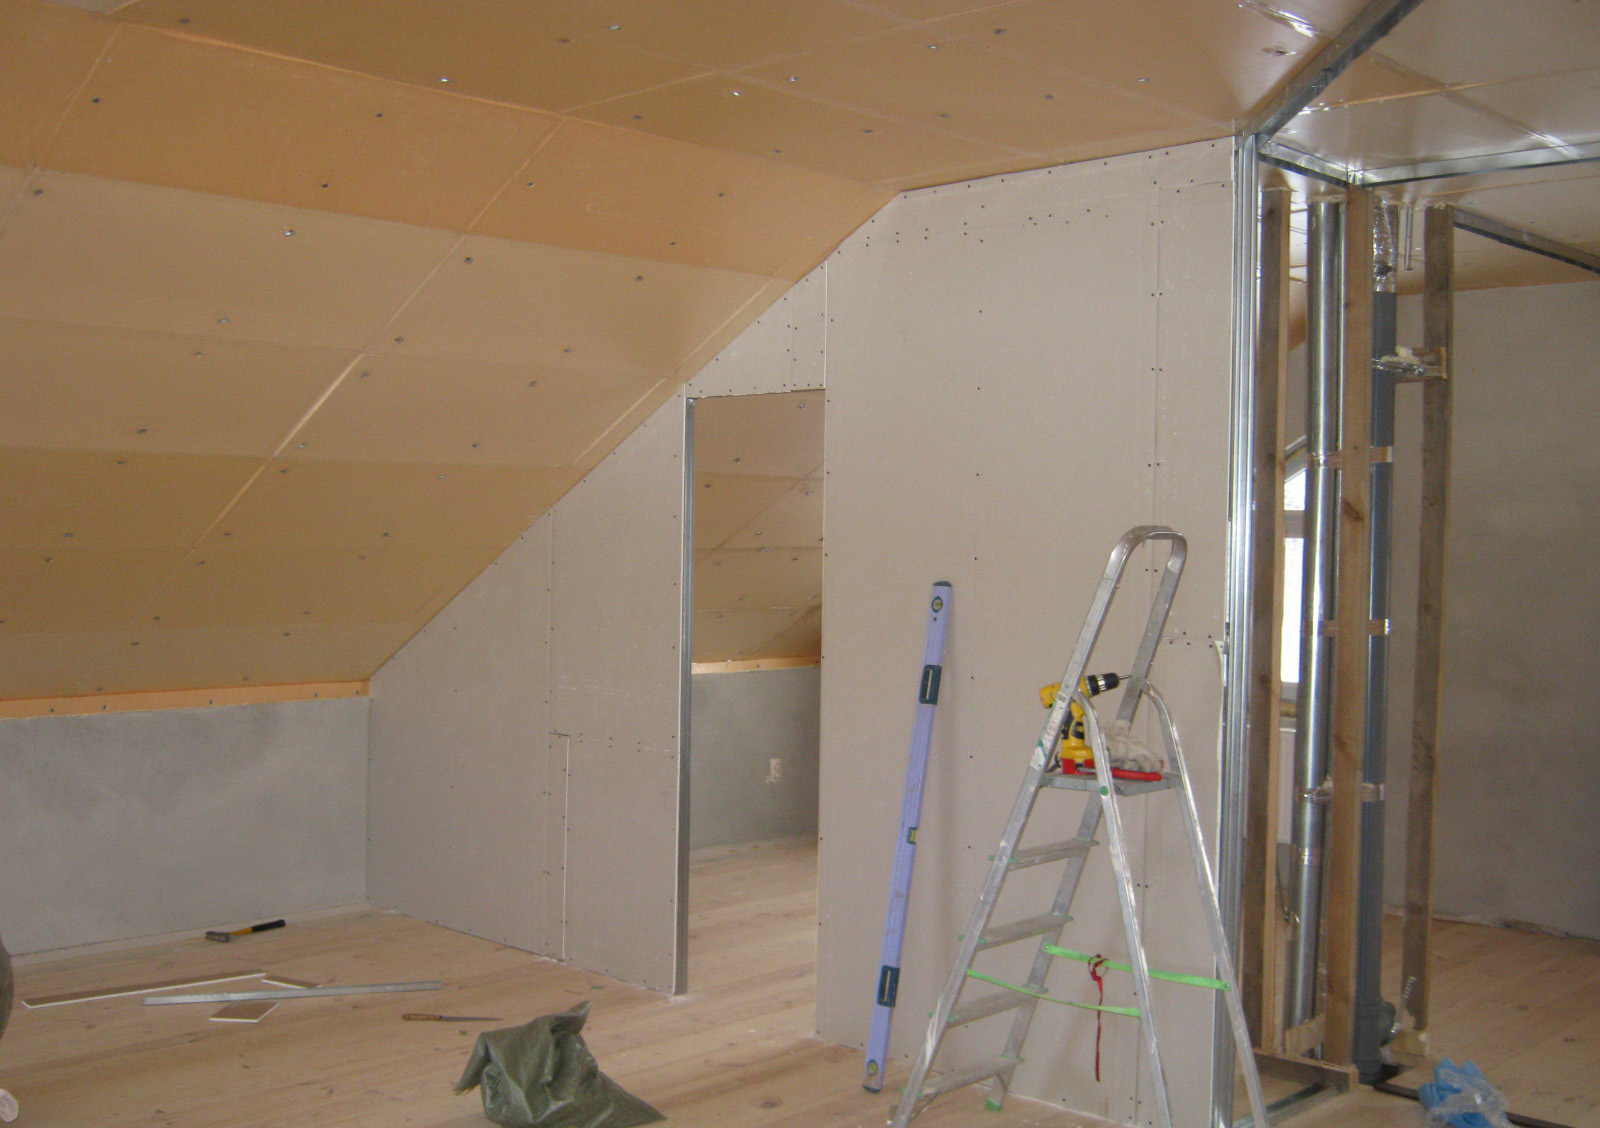
Frame
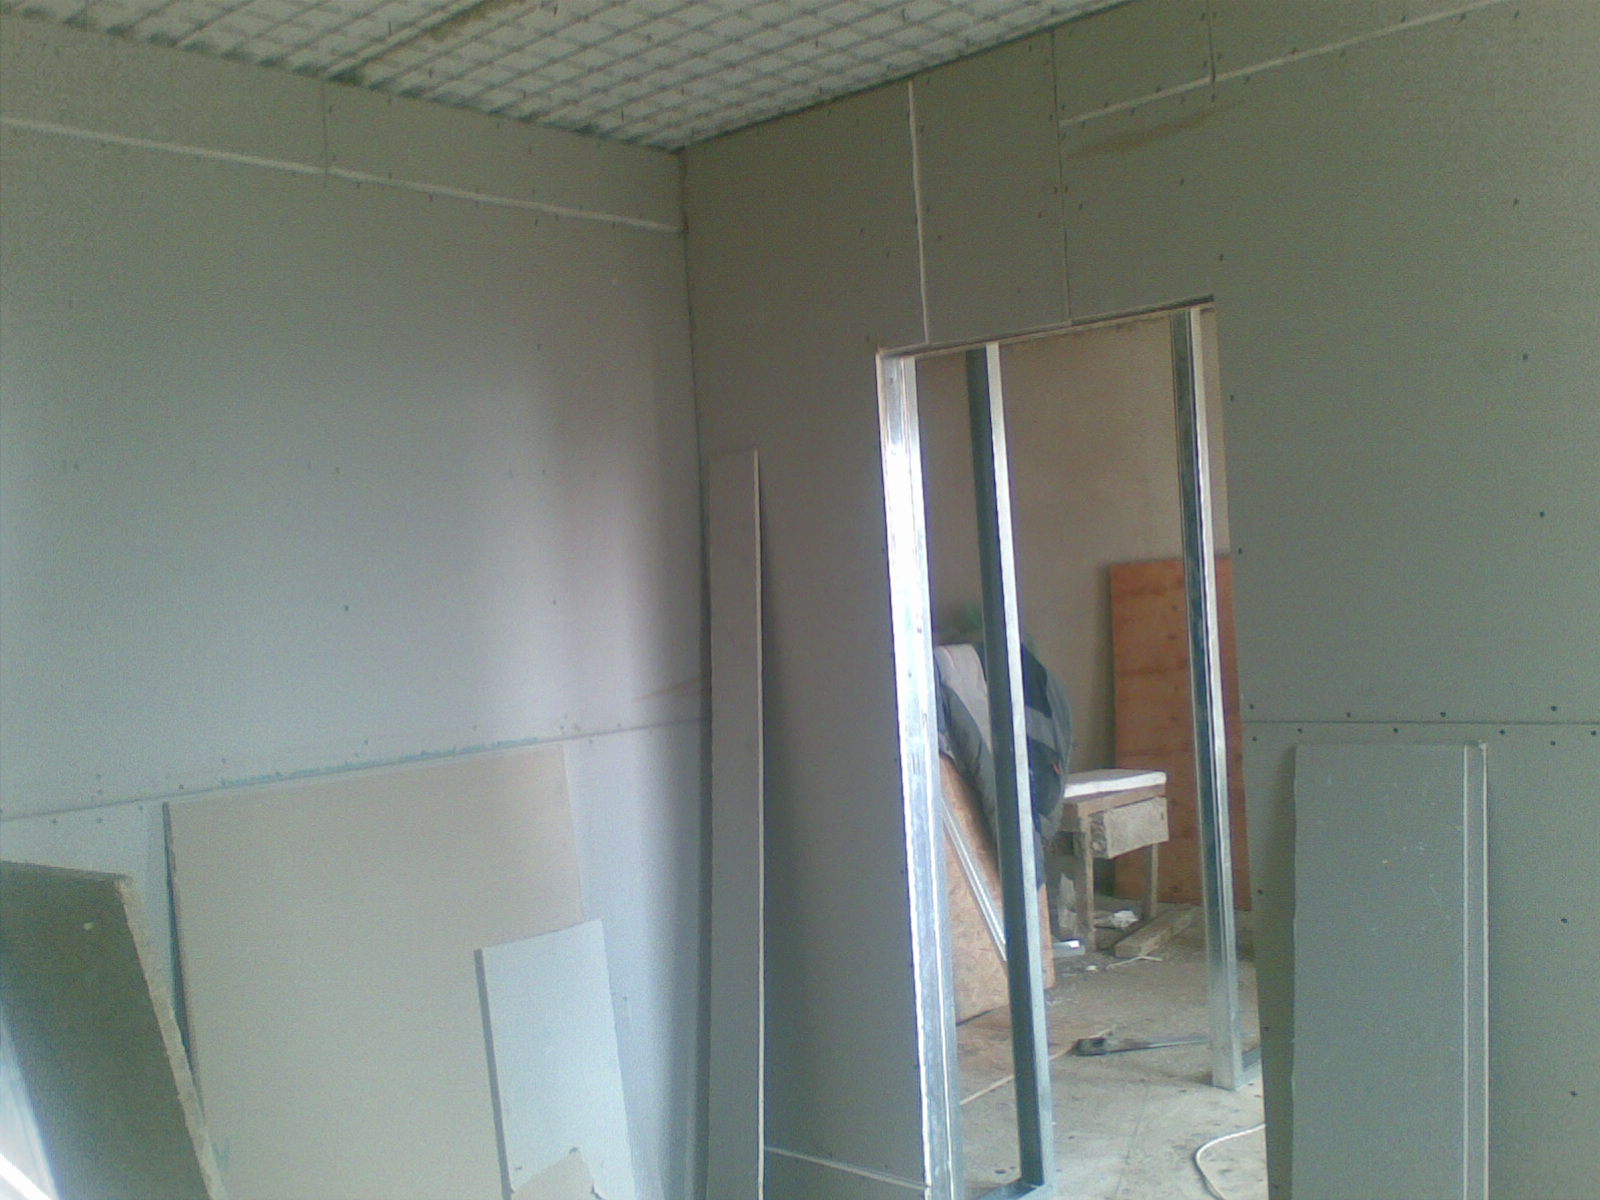
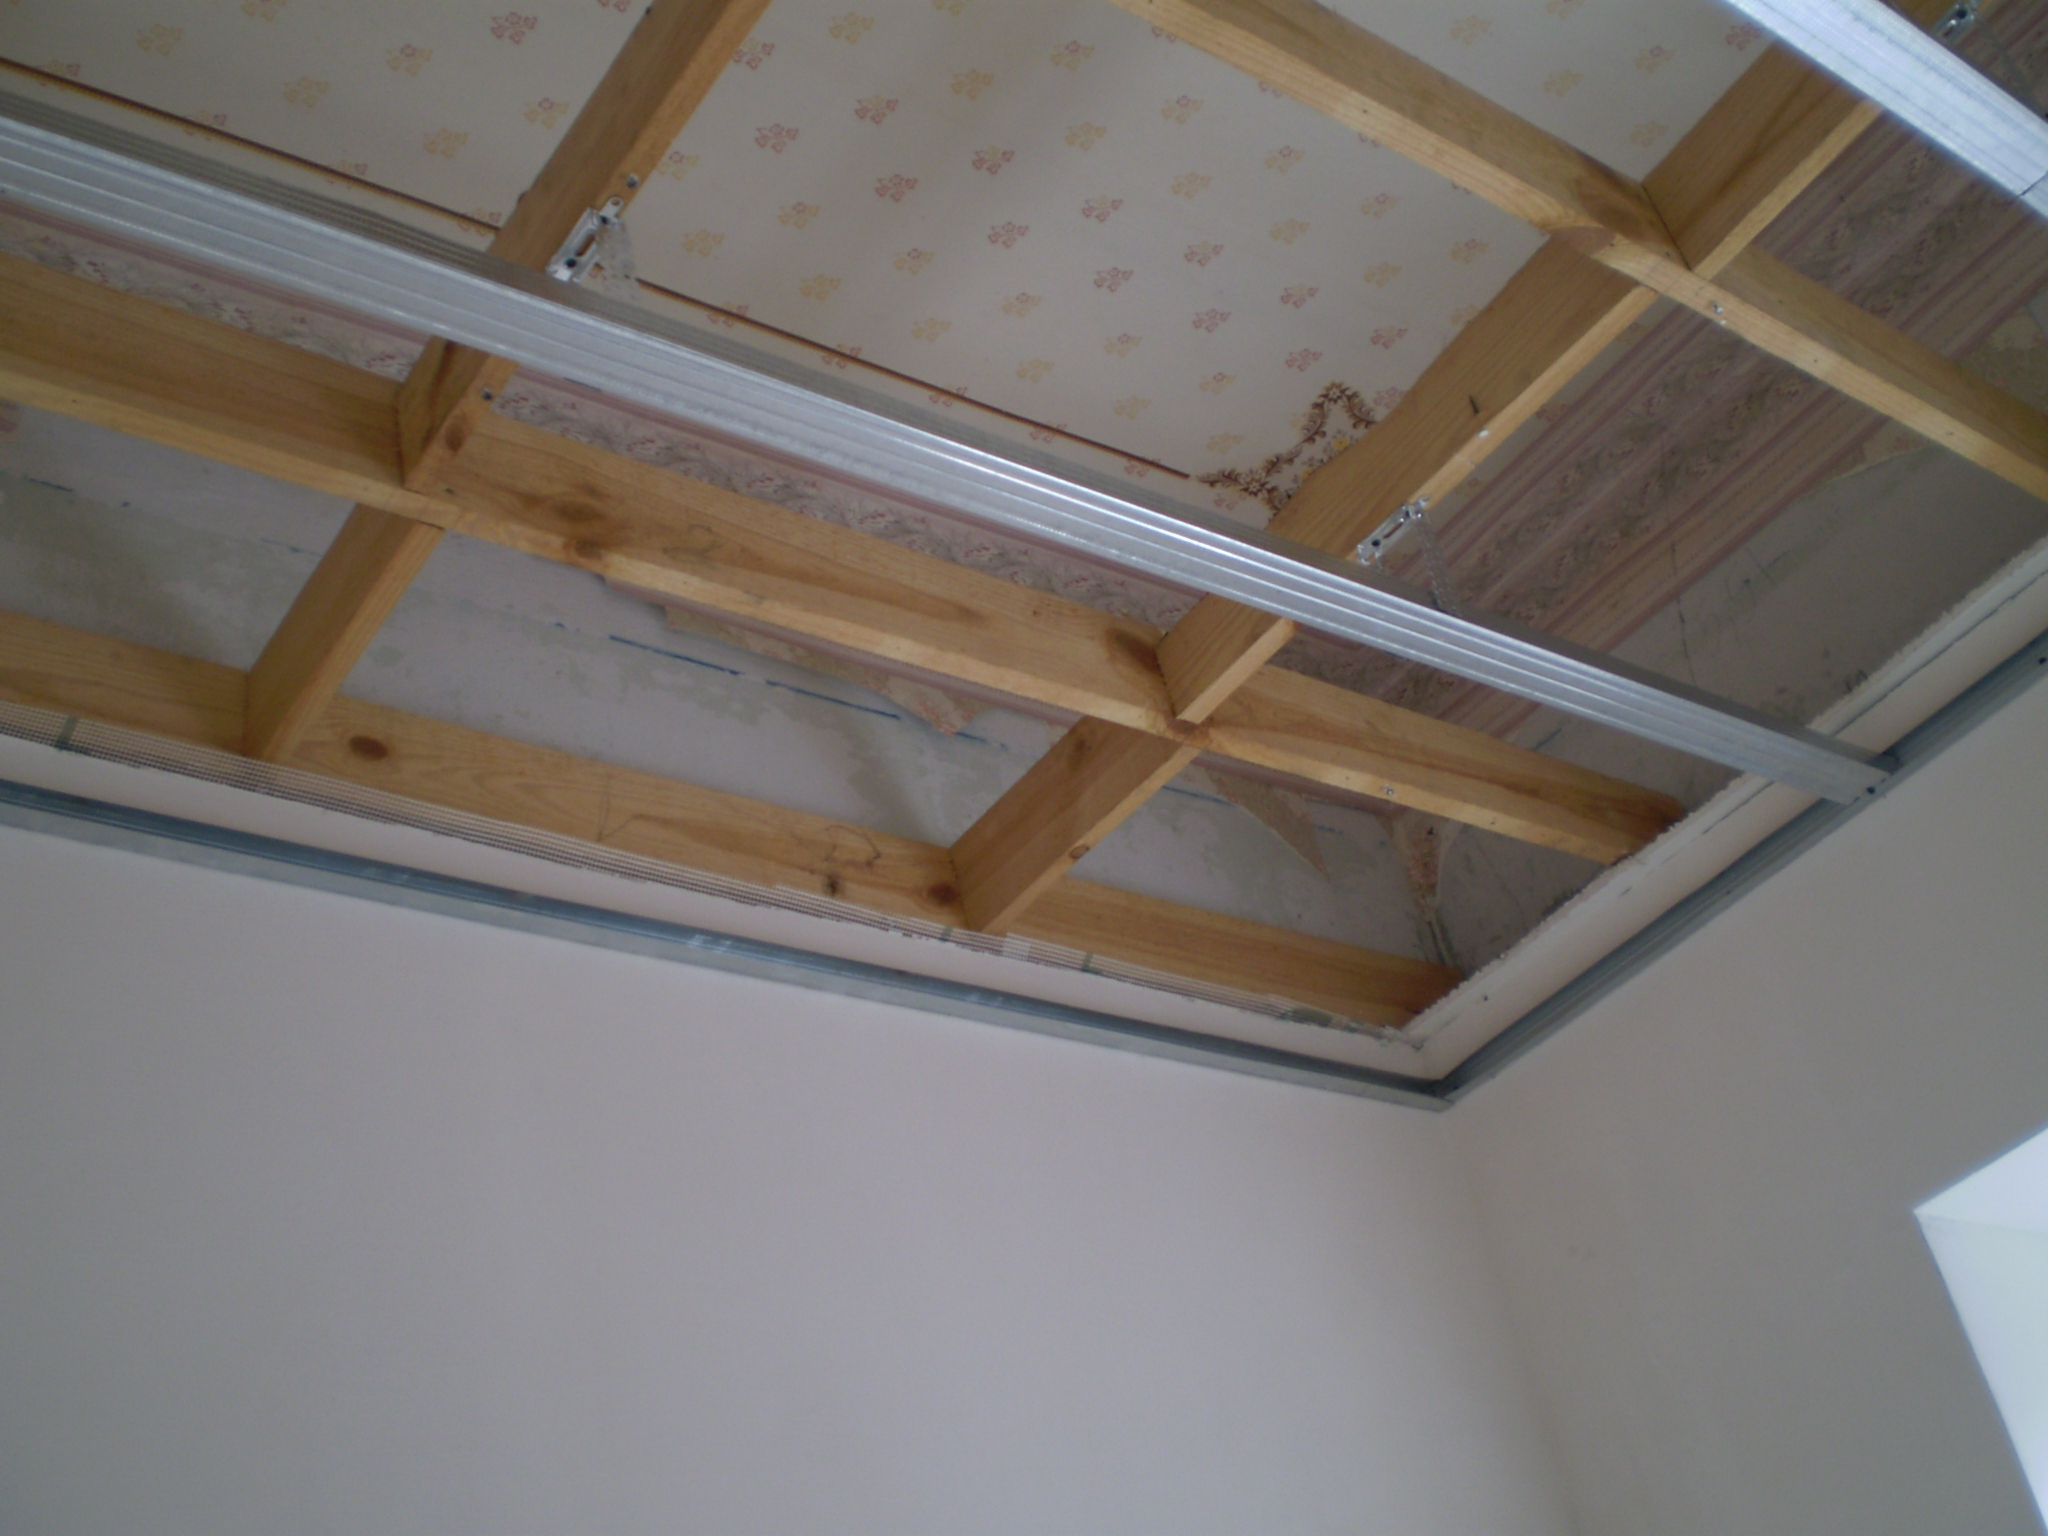
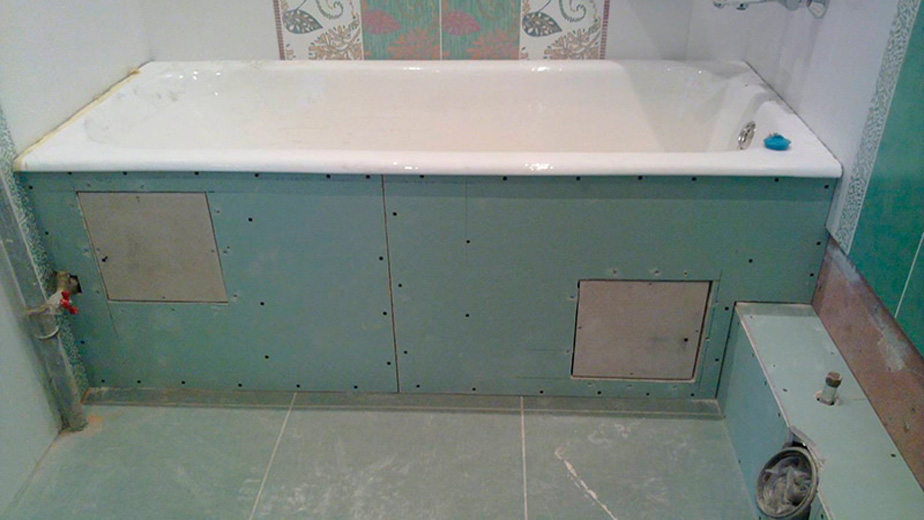
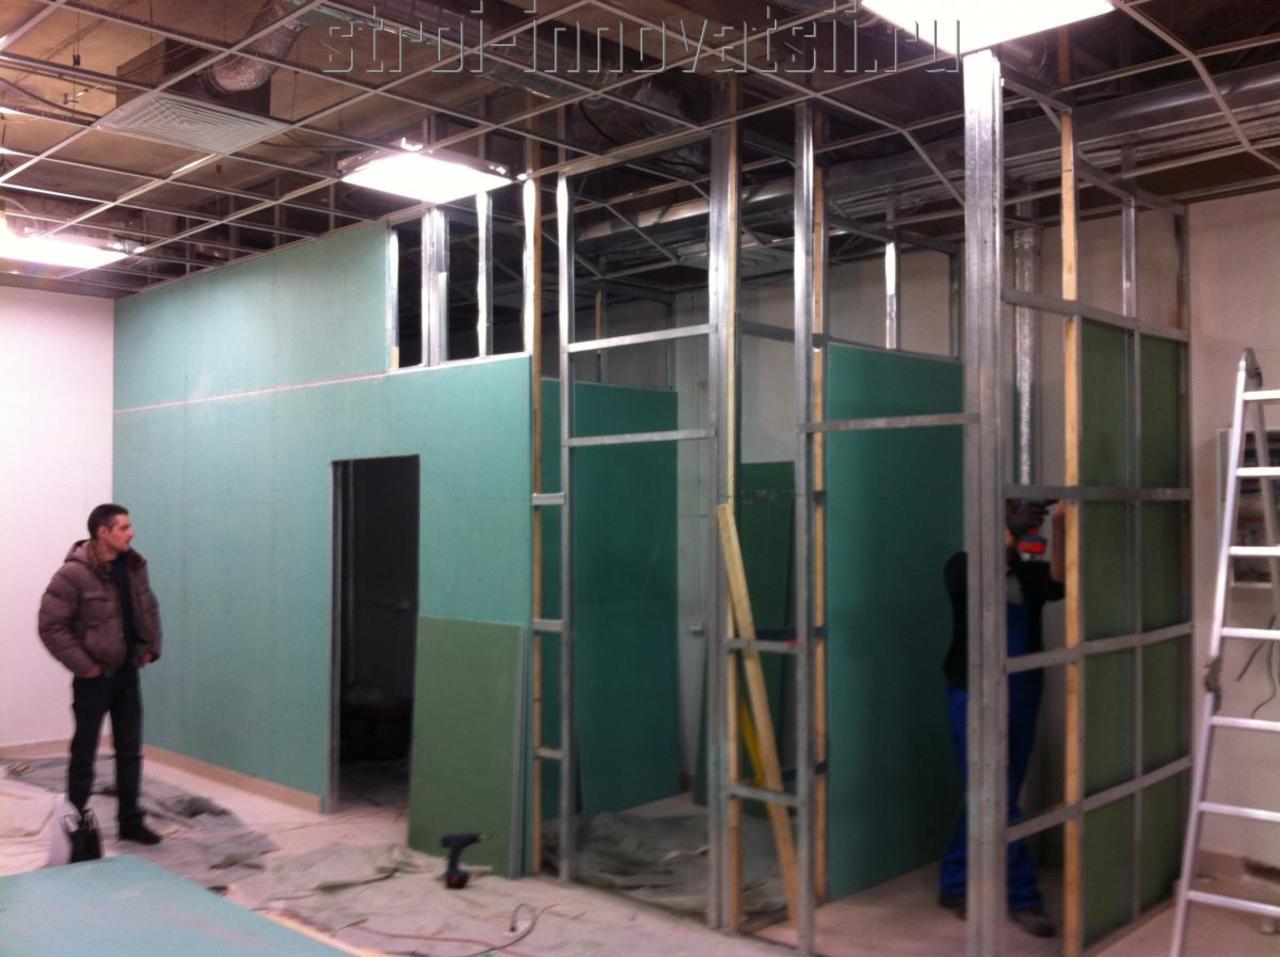
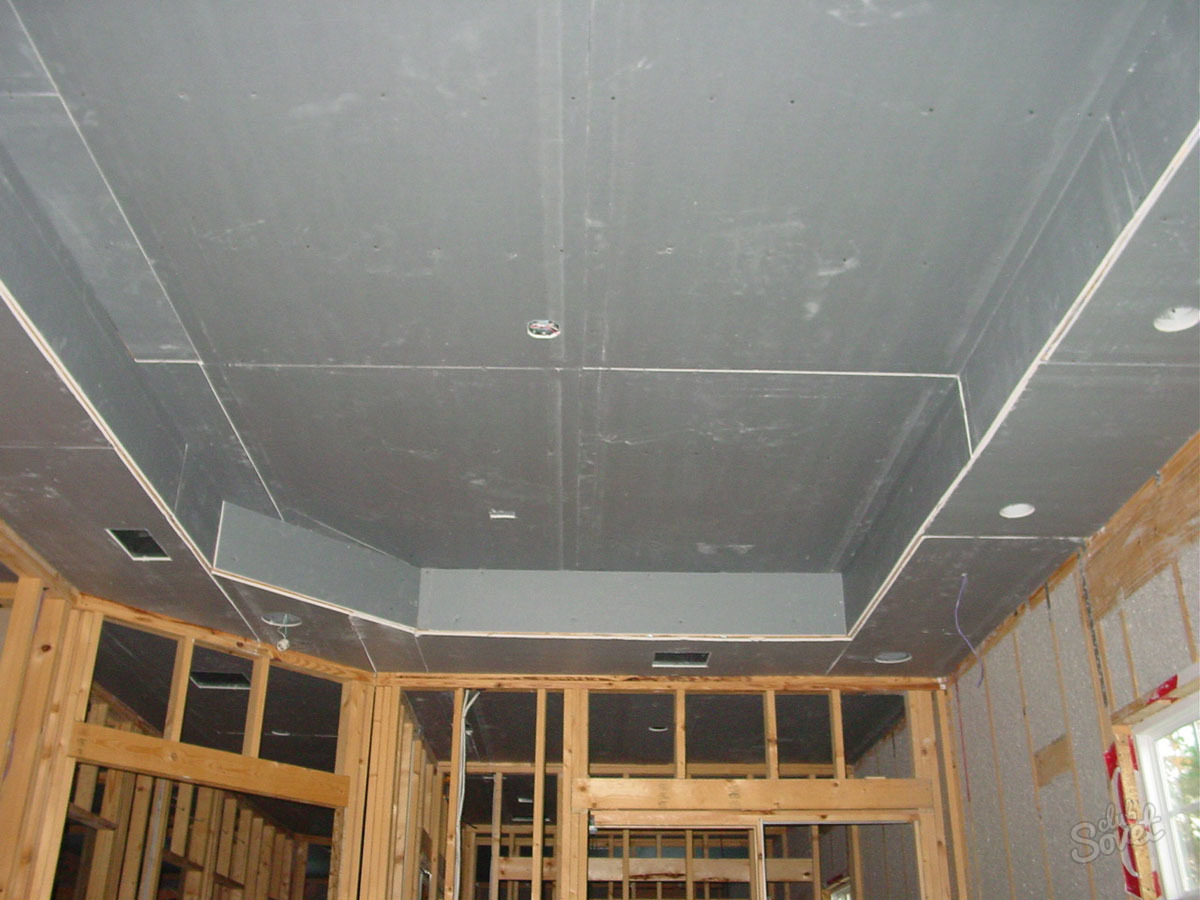
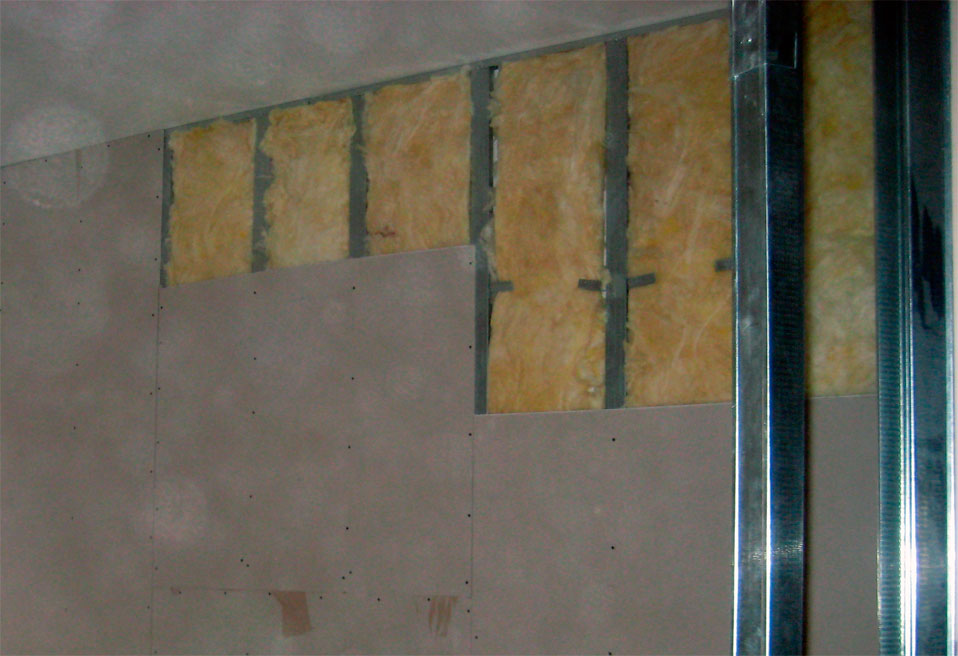
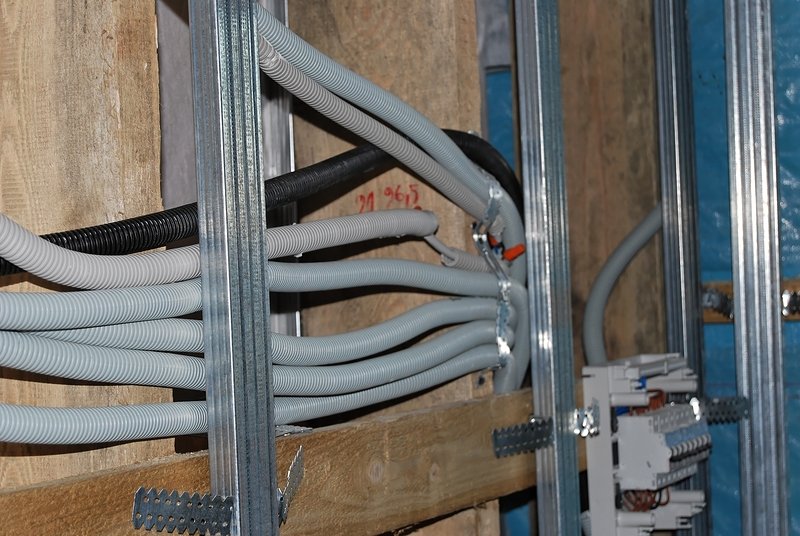
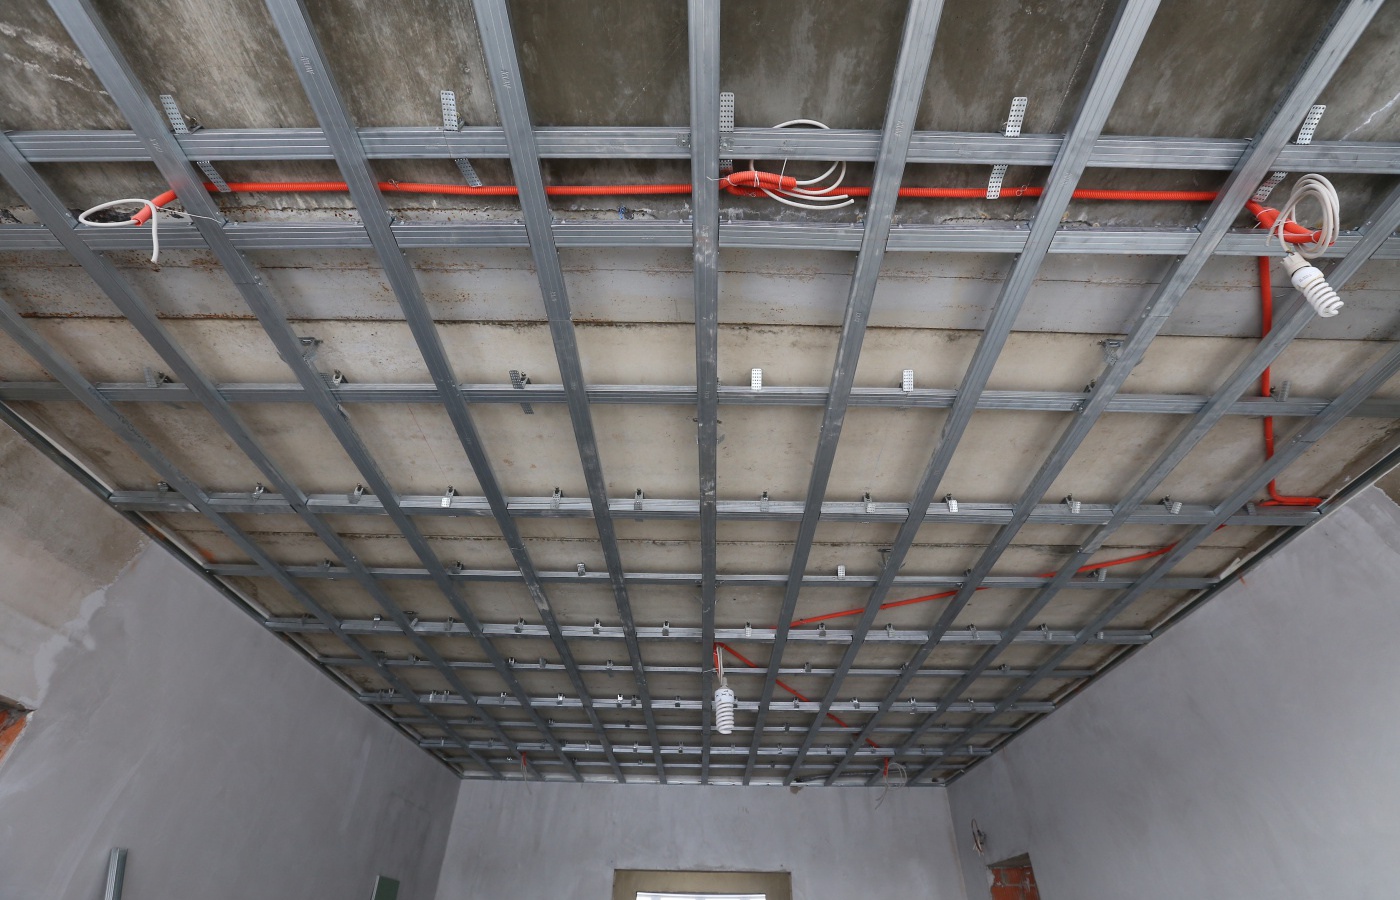
The most popular method of mounting drywall is to place the gypsum board sheets on a prefabricated and installed frame. Its main advantage over the frameless method is the ability to perfectly join sheets even on uneven and inclined surfaces, hiding all the roughness. In addition, a rather large gap is formed between the frame and drywall,where it is possible to install electrical wires, lighting devices and other equipment in a hidden form, the inside of which should not be visible to the occupant of the house. In the same gap often lay a layer of internal insulation or soundproof material.

The distance between the wall and cladding material can narrow an already small area. rooms in a small high-rise building. This problem for a country house or an apartment with a sufficient area does not seem to be a problem at all. Yes, and change or repair a part of the plasterboard coating, removing it from the frame, it is easier than trying to tear off a sheet mounted on a glue sheet. If the neighbors flooded and water flows through the gypsum boards, then the only way to quickly restore a suitable appearance of the housing is to have a repair based on the frame mounting of sheets quickly separating from the wall.
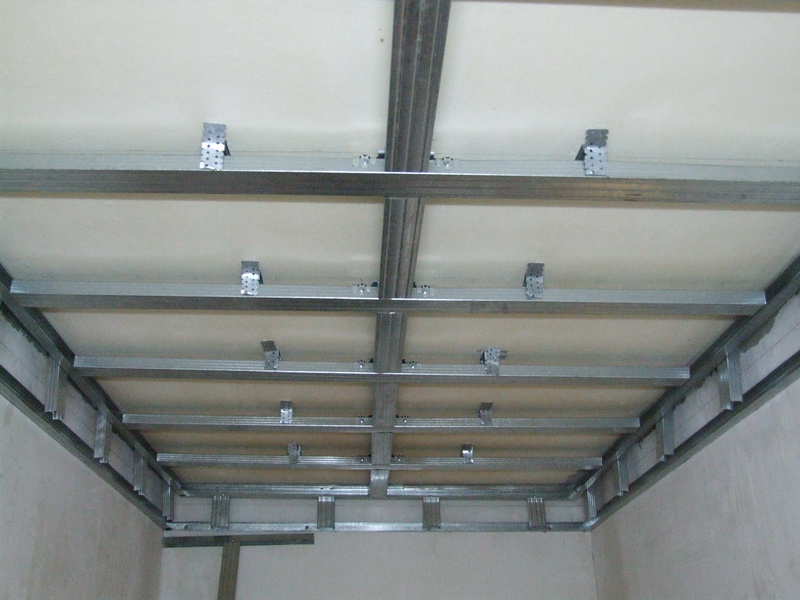
Frameworks are of two main types - metal and wood. The assembly technology they have is identical - wooden bars or metal beams are fastened in the manner of a grid with each other. The first material is certainly more environmentally friendly, and at a price it will be cheaper, but, nevertheless, not as popular as metal.The fact is that wood requires additional treatment with refractory, moisture-resistant and antifungal impregnations. However, even with these precautions, such a frame may simply rot before the plasterboard cladding.


If there is a desire to install hidden wiring between wooden bars, then the wires will have to be hidden in an additional protective box, which in the end will be quite expensive for the budget. But the most uncomfortable situation can occur when there is a sharp temperature difference in the room, because the tree tends to expand in such situations. The wall swells in adverse conditions, and drywall begins to lag behind the surface of the frame. Often such a misunderstanding can be found in the dacha huts, where the owners come infrequently - the house stood in the winter in the cold, then people arrived - they heated it, and the process started.

All the above disadvantages of wooden frames do not mean that in no case should not install them. With proper assembly, processing the necessary compositions, and most importantly, the successful choice of wood species dry, it turns out no less wear-resistant frame, able to hold drywall for decades.
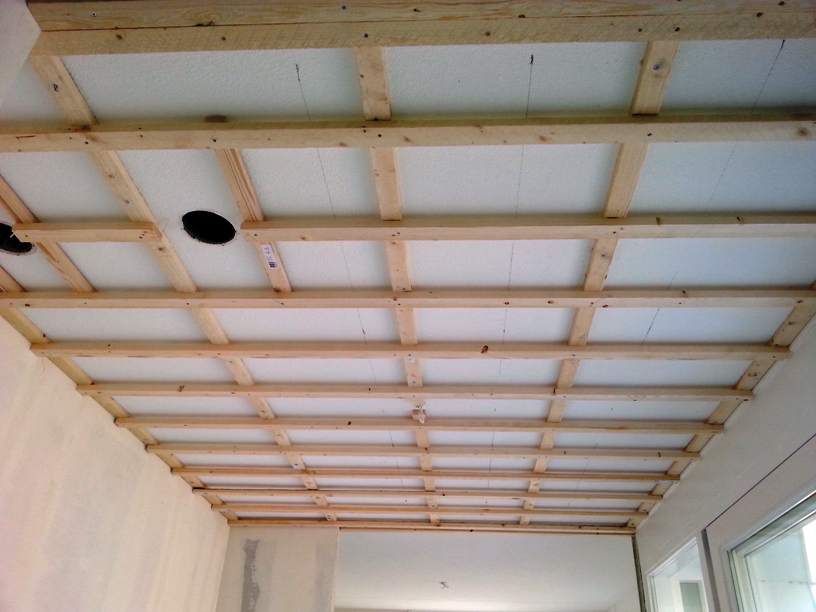

So, it's time to proceed directly to the installation of the frame. This process can be divided into several stages.
- Preparation of the premises for installation, that is, release from furniture, floor covering with a protective film, cleaning walls from previous layers in the form of wallpaper or plaster. Frame beams are a structure that occupies almost the entire free space of a room, so bringing them into the room makes it difficult to produce any kind of manipulation different from the installation.
- If the wiring and other communications in the form of wires will be sewn into the wall under the frame, they must be drawn, bundled, and possibly removed into the box before installation.
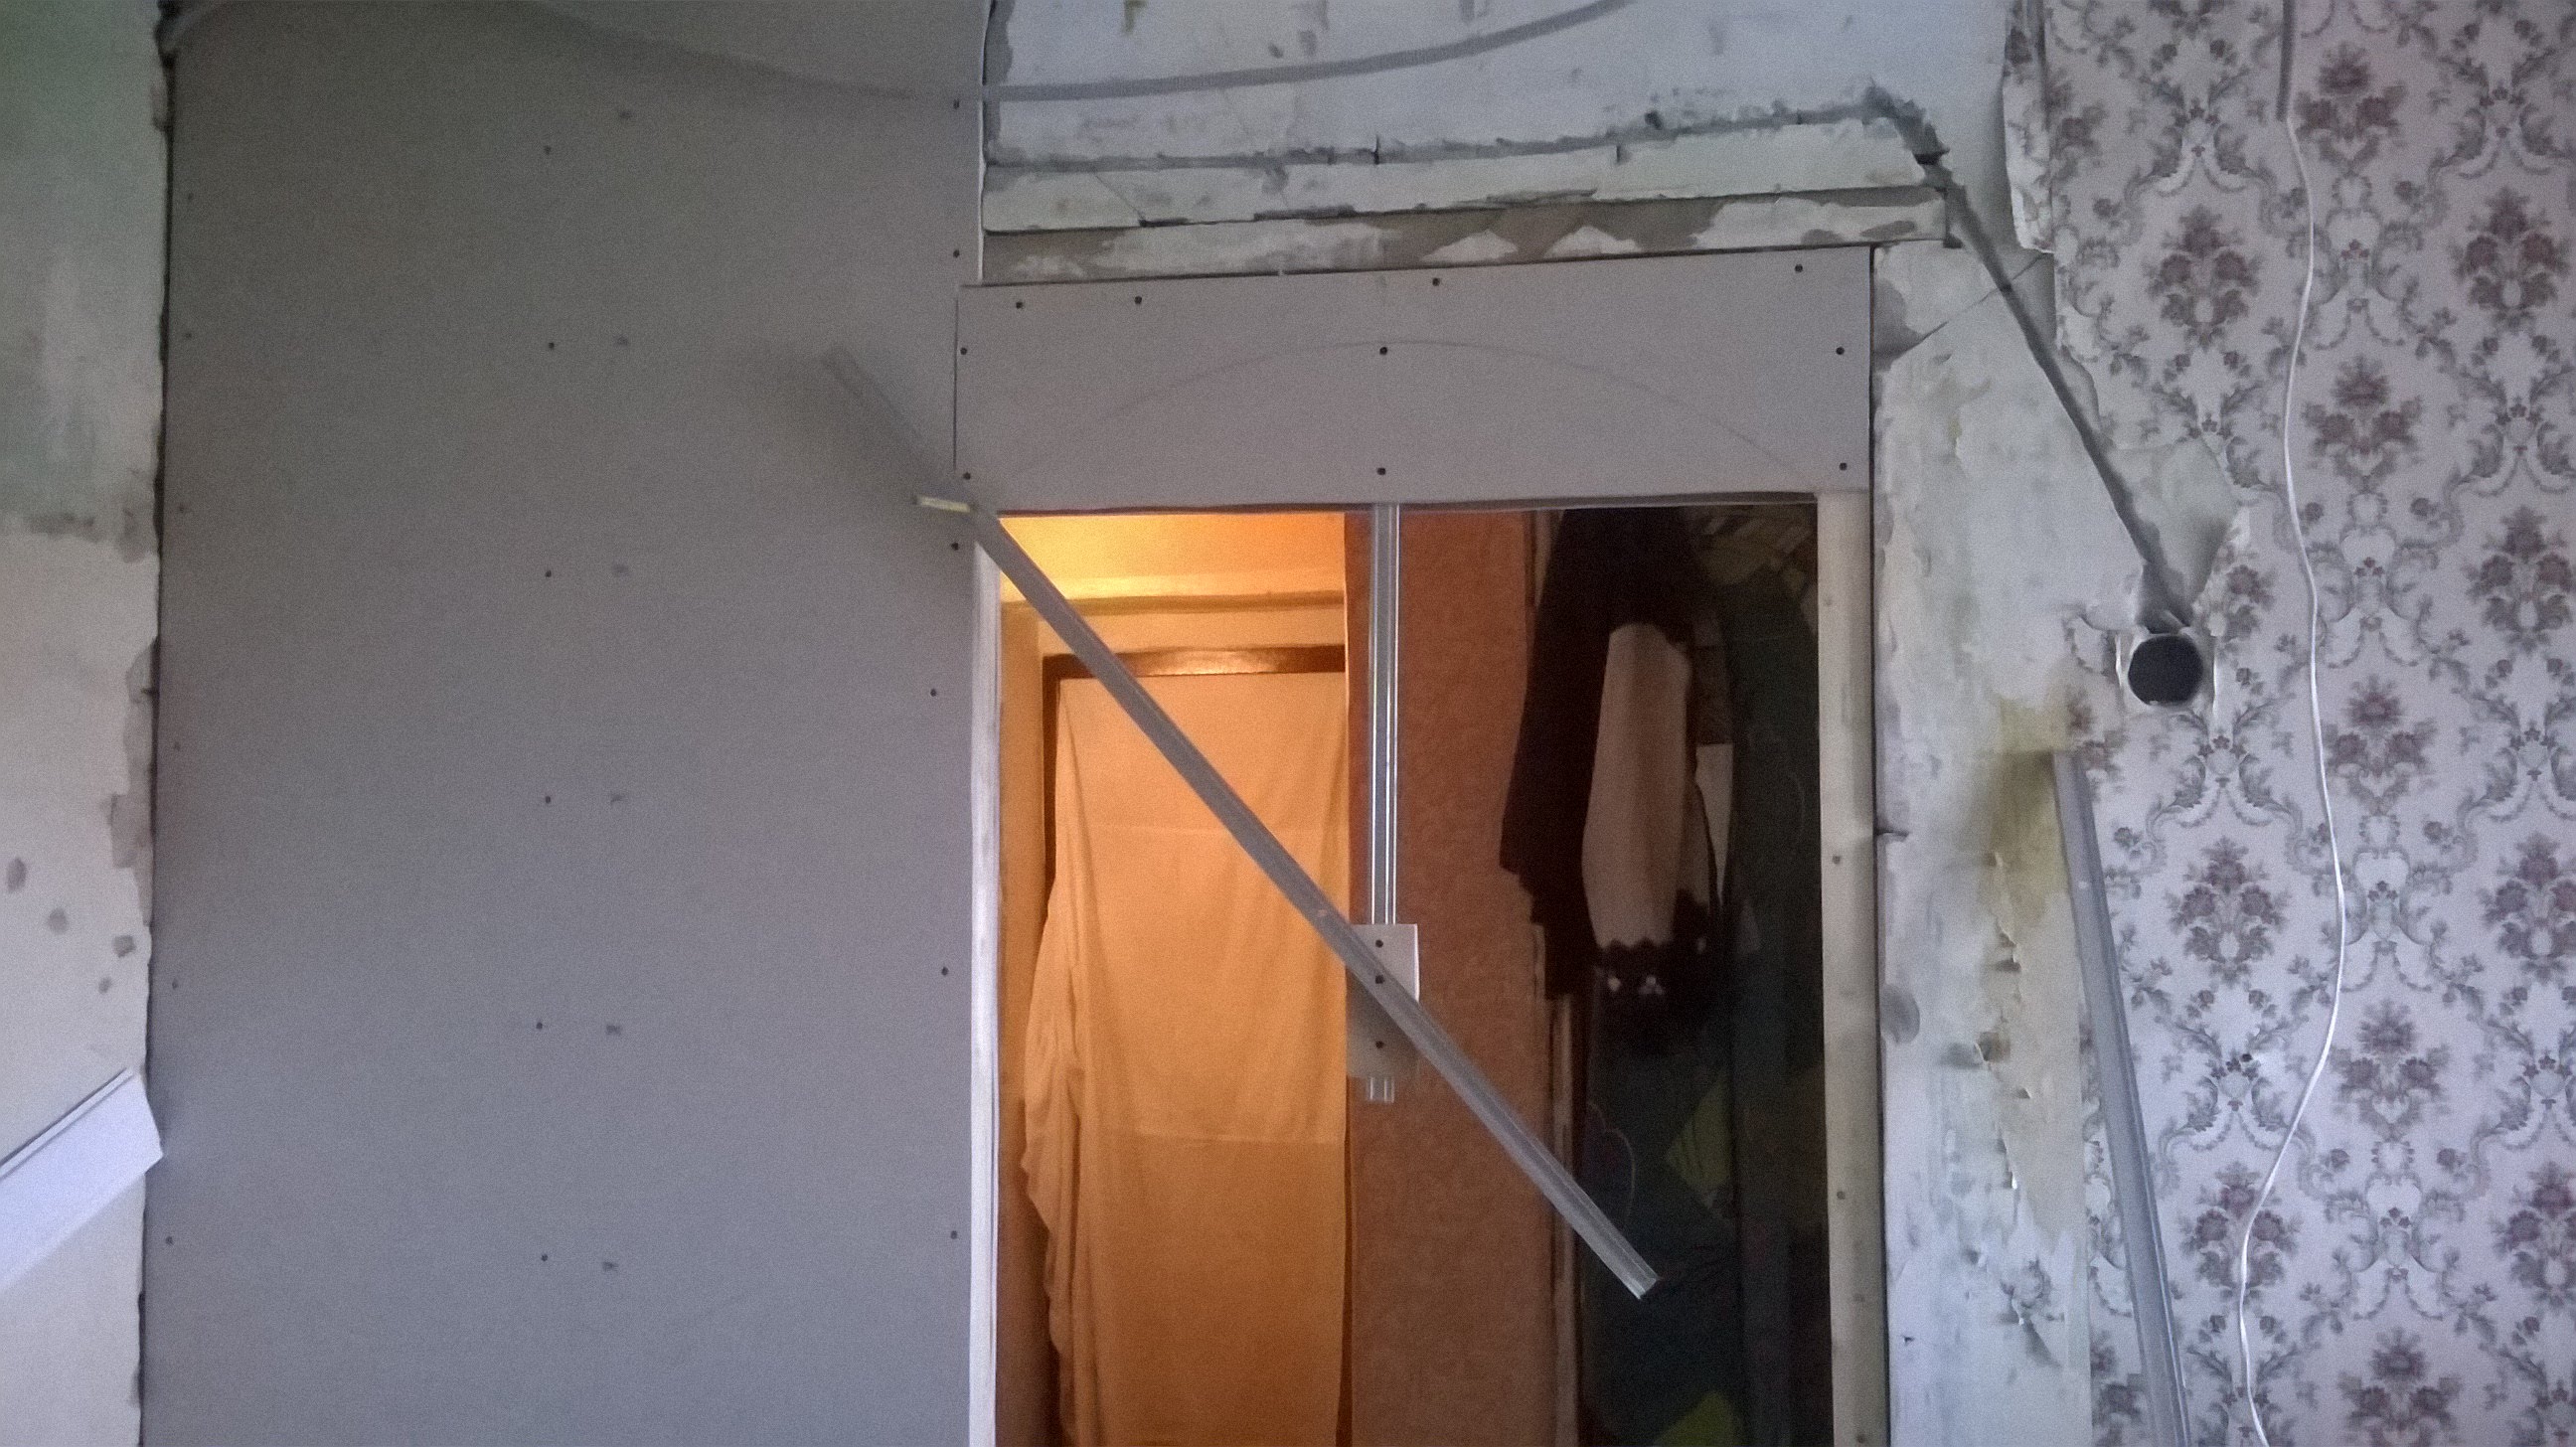
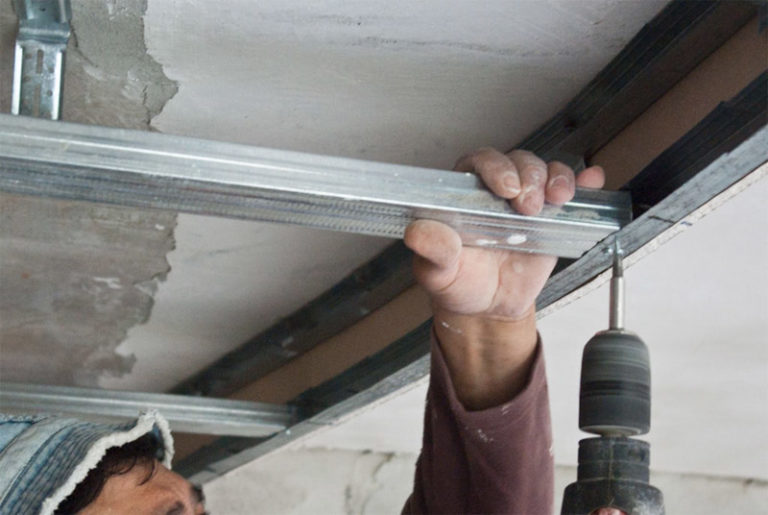
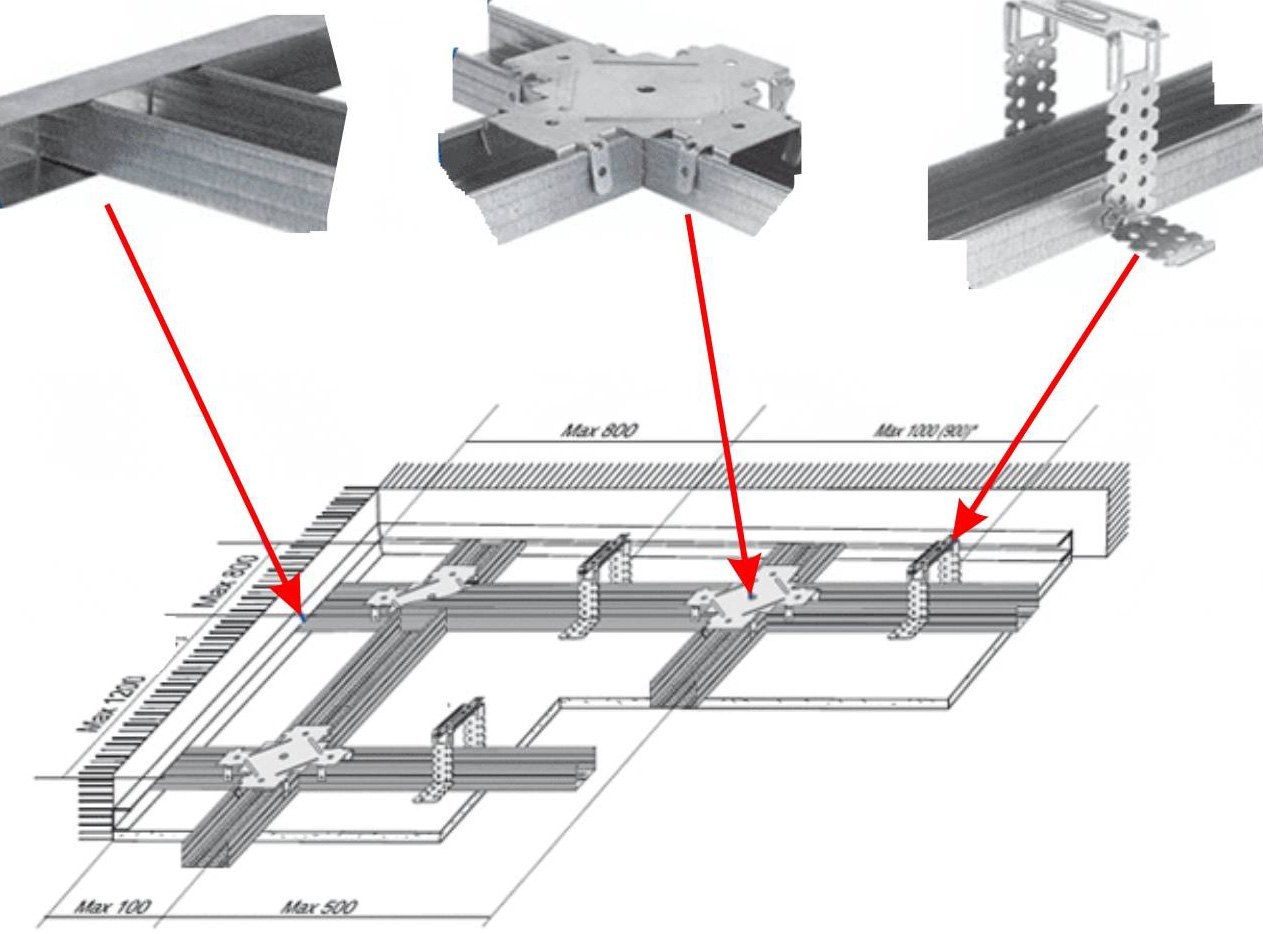
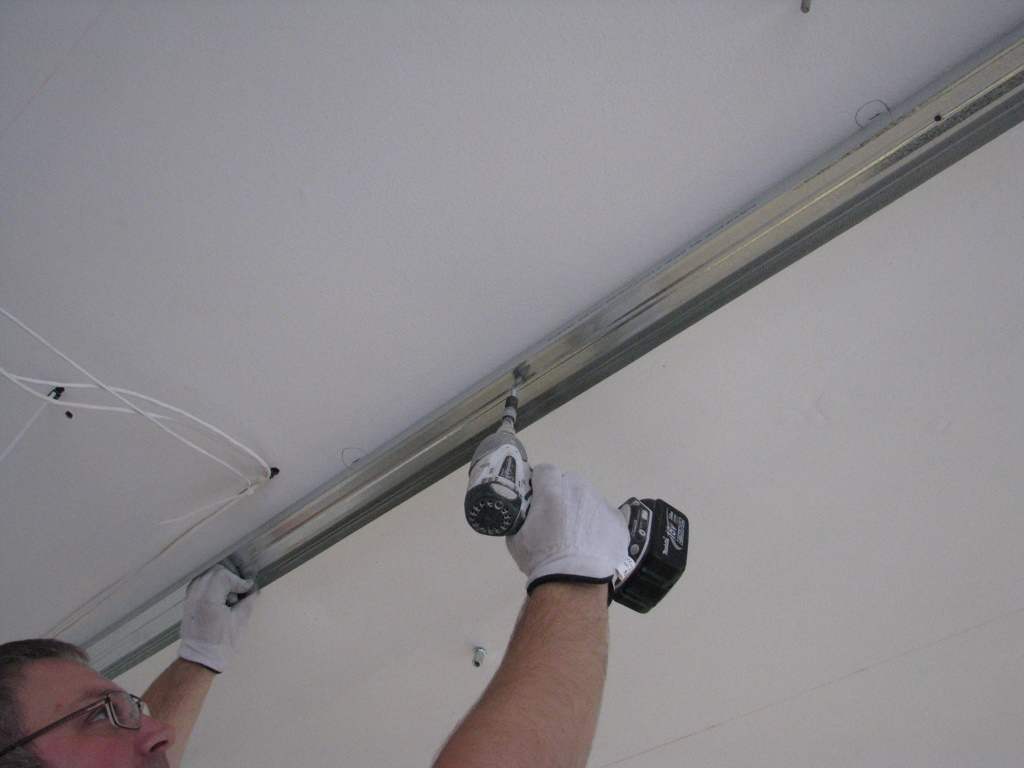
- According to the rules, first the installation of both the upper and lower metal beams or profiles, directed in the horizontal direction. With the help of screws, these profiles are installed immediately around the perimeter of the room. The first beam goes from wall to wall, and the subsequent beams go to the joint with the neighboring ones. The upper profile is screwed to the ceiling, and the lower, respectively, to the floor.

The best way to ensure that both U-shaped profiles are fastened exactly is to stretch the building cord like an improvised ruler.Watch also for the plumb line that is mentally lowered from the longitudinal centerline of the upper profile. Ideally, it should coincide with the same line of the lower beam - this means that everything is set correctly, without deviations and curved lines.
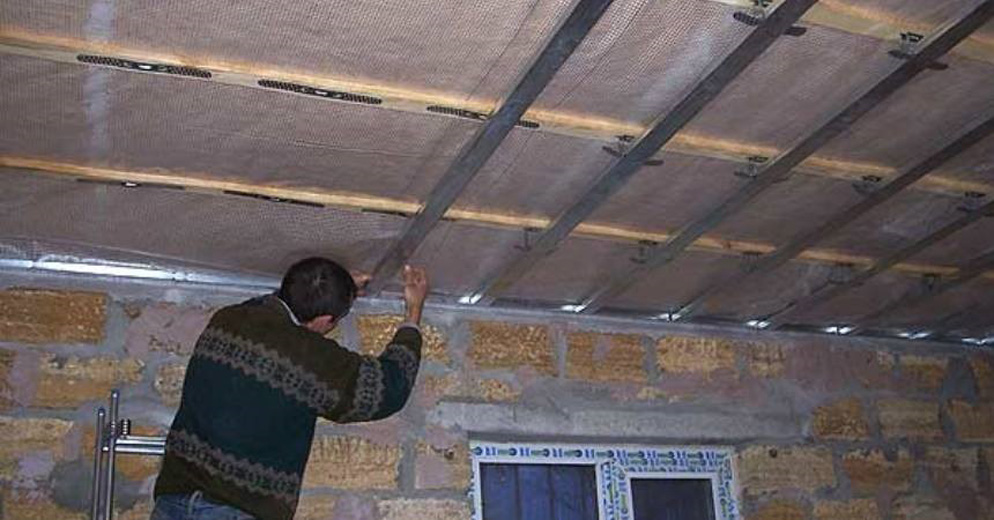
- Now you can fix vertical profiles from above - either close to the wall also with the help of self-tapping screws, or separating them from the wall with additional brackets. It all depends on the degree of flatness of the wall - if it is almost straight, that is, irregularities protrude within 5-10 mm, then we fasten horizontal and vertical metal rods almost close to the base. When the wall is uneven or goes under an inclination, it is better to attach the beams vertically with the help of brackets.
Do not fasten these additional parts close to the ceiling or floor. - brackets should be lifted at least 300-600 mm from the edge. Close to each other they also should not be sculpted - follow the minimum step of 10 cm.
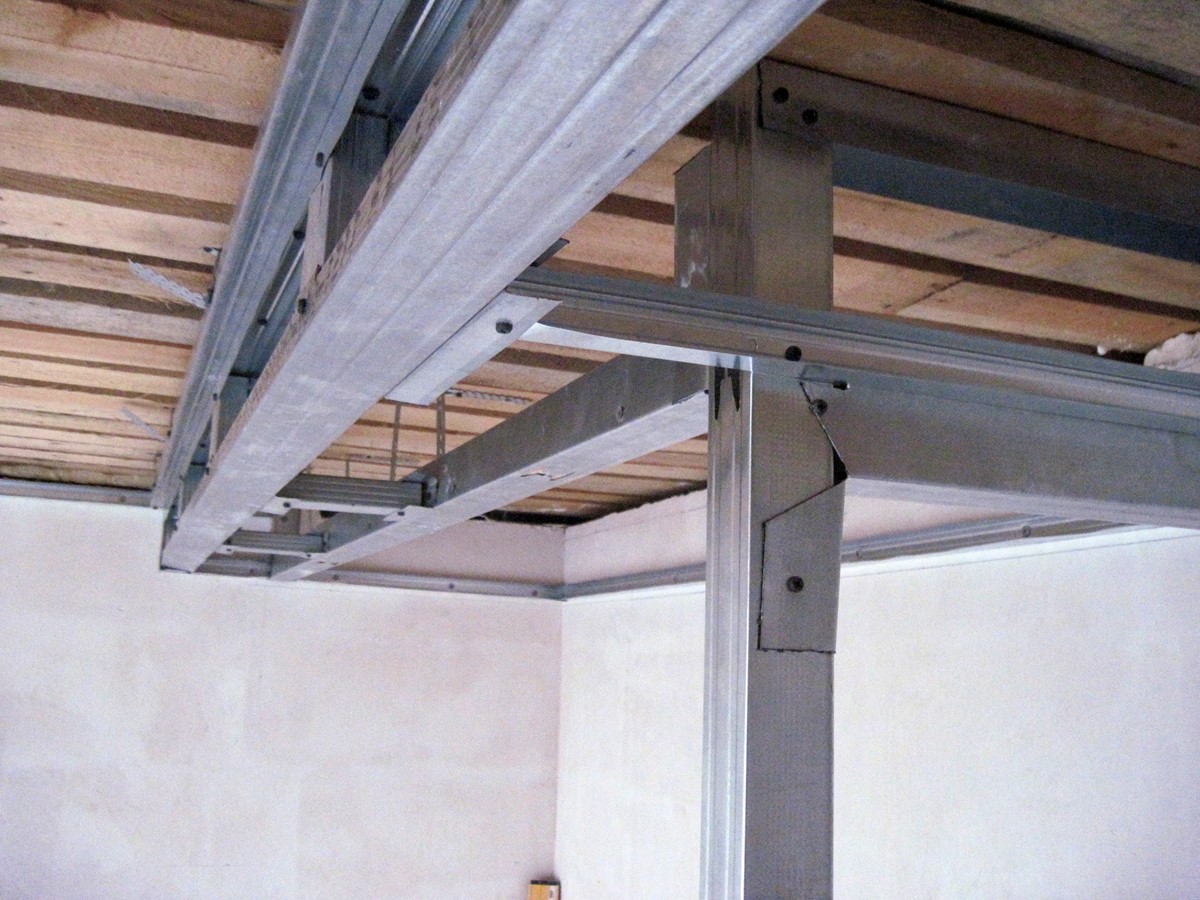

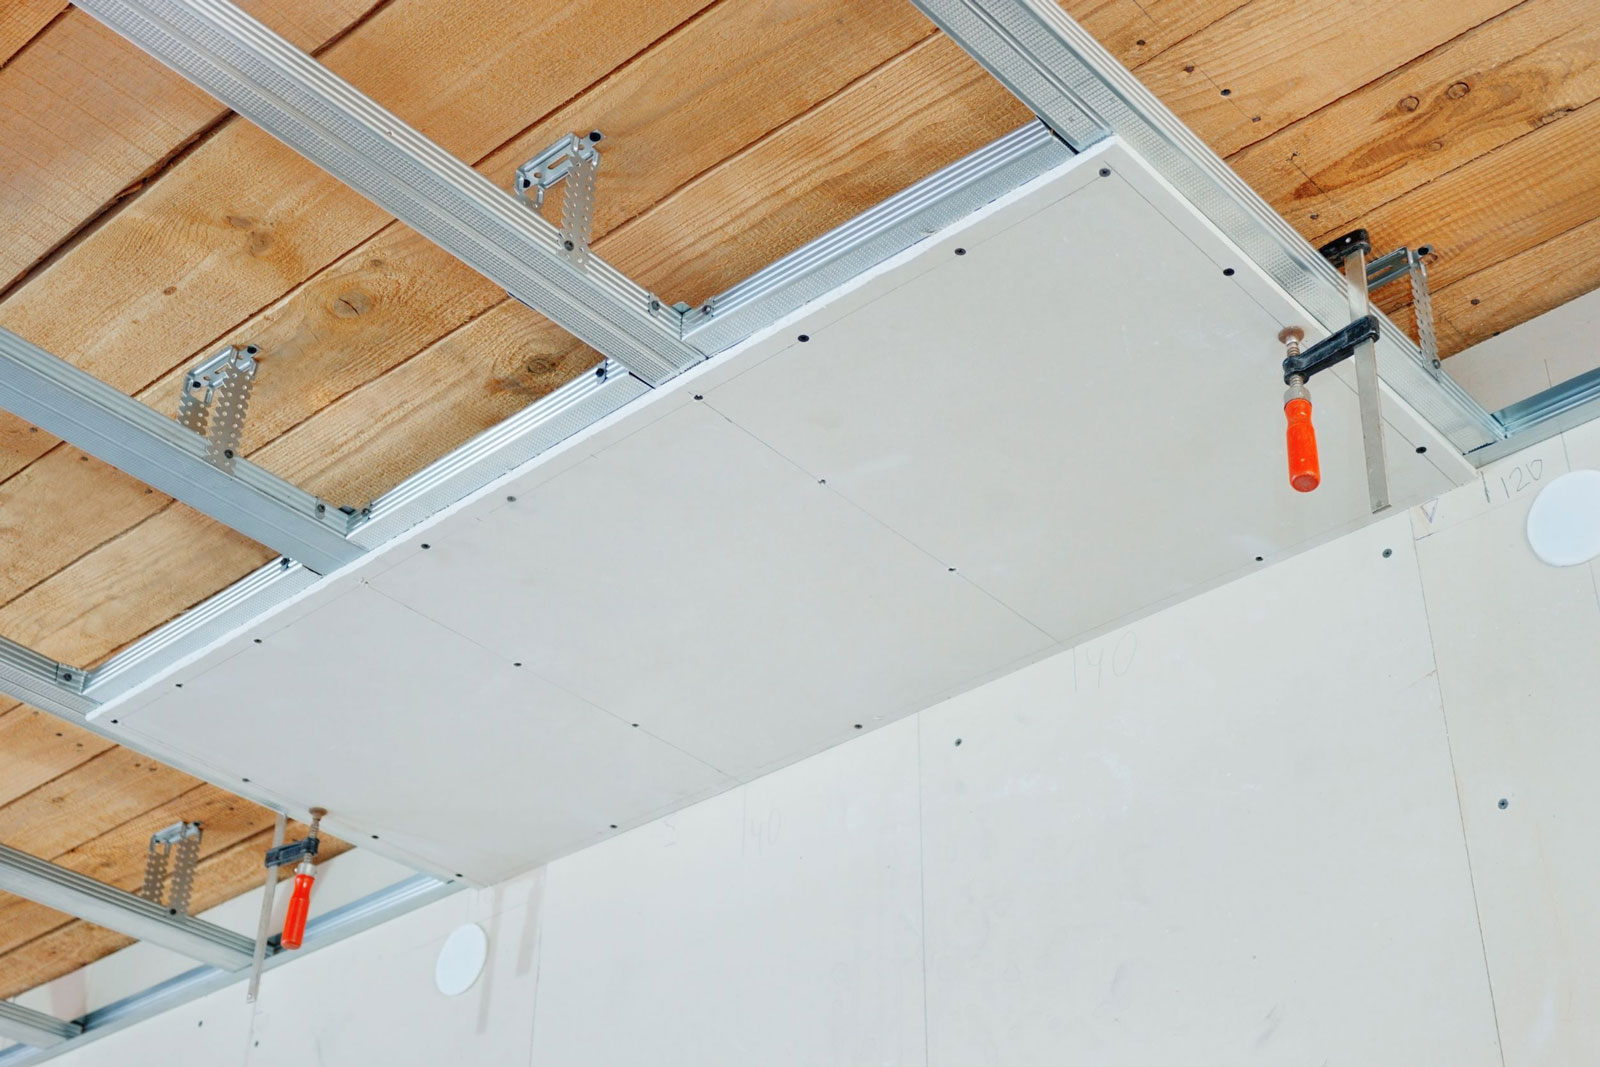
The last stage is the installation of rack profiles, which need to be adjusted in size to the distance from the floor to the ceiling, having previously measured and cut equal parts into the Bulgarian.All beams are fastened together with special U-shaped holders with feet, which, in turn, are screwed into a single design with self-tapping screws. The pads of the holders at one end hug the tie horizontal and vertical profiles, and the other - are attached to the wall. Excess and protruding parts of the holders after bonding can be cut with special scissors.
Frameless design
Having a small apartment, not everyone can afford to install a bulky frame for wall decoration with plasterboard, eating up a lot of useful space for furniture. Low ceilings also do not imply frame mounting, since it is simply inexpedient to fasten a chandelier at a level where it can be touched with a head. For such cases, just fit frameless drywall installation, when the sheet is attached directly to the wall or on a thin substrate.
There are several ways to directly fasten the plasterboard construction to the walls and ceiling, depending on what kind of adhesive will be inside - between the wall and the sheet.

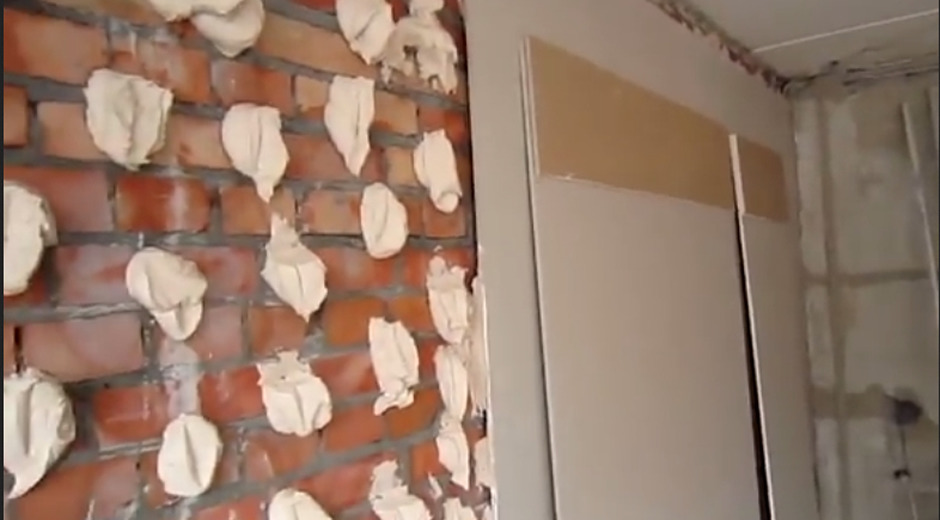
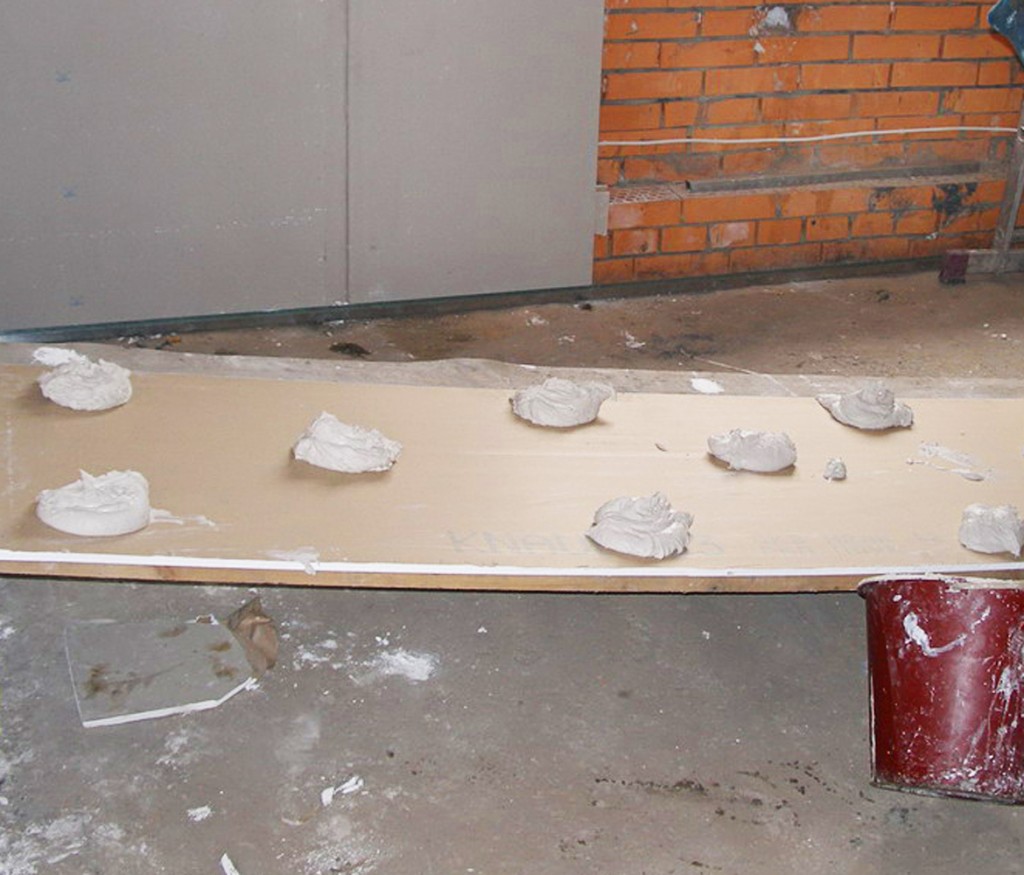
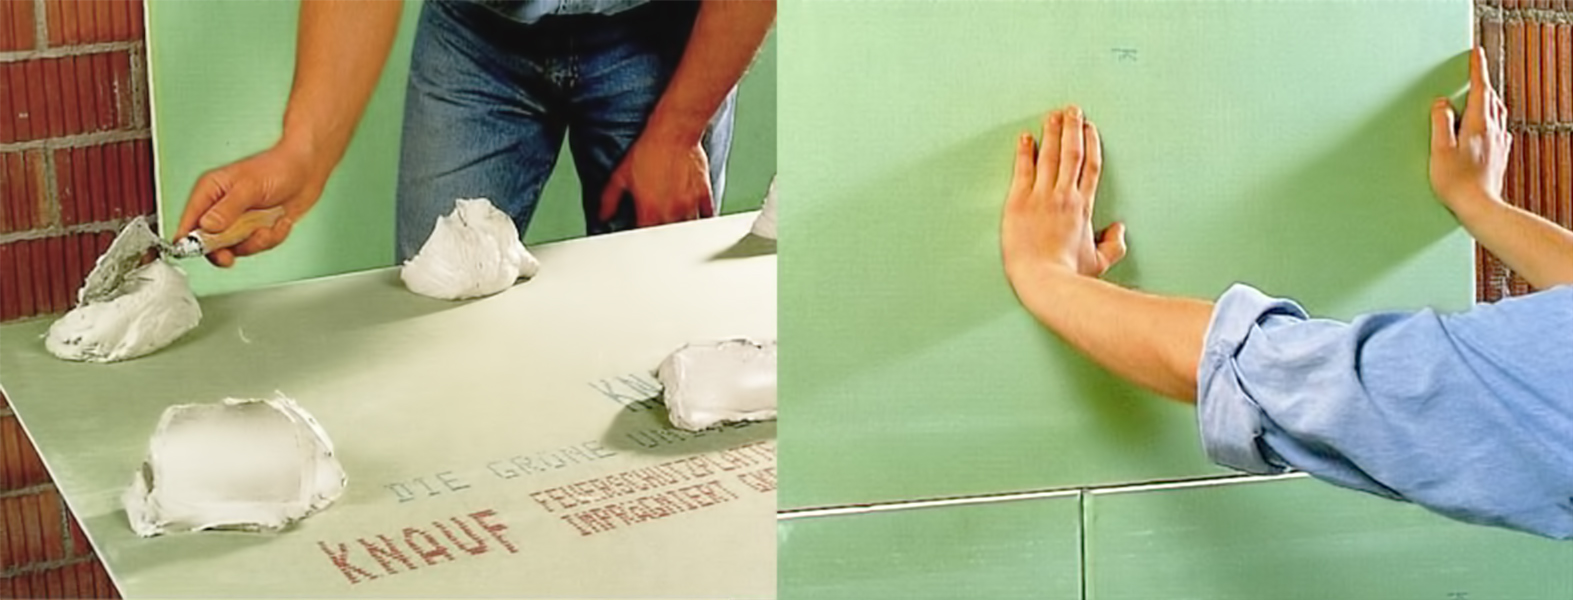
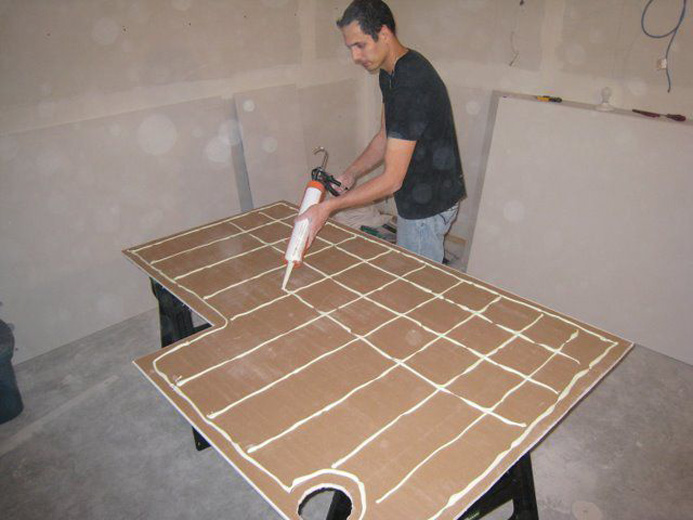
The most popular method is, in fact, the bonding of sheets with building glue. It is sold in the form of a dry mixture, which is diluted directly before installation. The glue hardens quickly enough, so before diluting the composition it is necessary to prepare all the necessary tools - a stirring stick or a special nozzle on the drill, as well as a disposable container.
Depending on the degree of unevenness of the wall, the adhesive is applied by different technologies. For example, if the surface is almost smooth or there are small notches up to 10 mm, then glue can be applied as on a regular carton for application. First, you need to smudge it with a thin strip around the perimeter of the sheet, and then do a few circular applications dotted in the center. When the roughness of the wall is visible to the naked eye, that is, in a volume of about 20 mm, the glue is applied dotted around the perimeter with a thick layer in the form of semicircles.
If the wall in the room has frank potholes or destruction, then it is better to pre-close them with inserts of cut pieces of the same drywall, and then mount the main sheet. When large irregularities are not found only once, but distributed over the entire surface, it is worthwhile to attach entire strips of a spare crop the size of an average pothole and the distance between strips of 20-30 cm as a substrate.
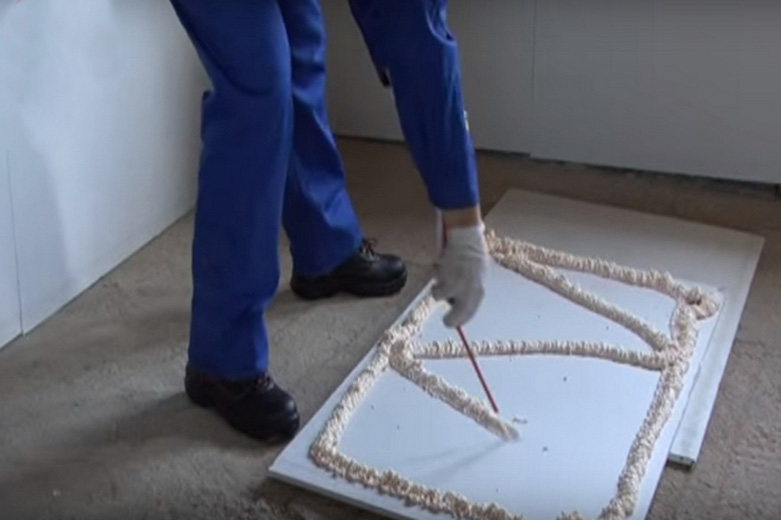
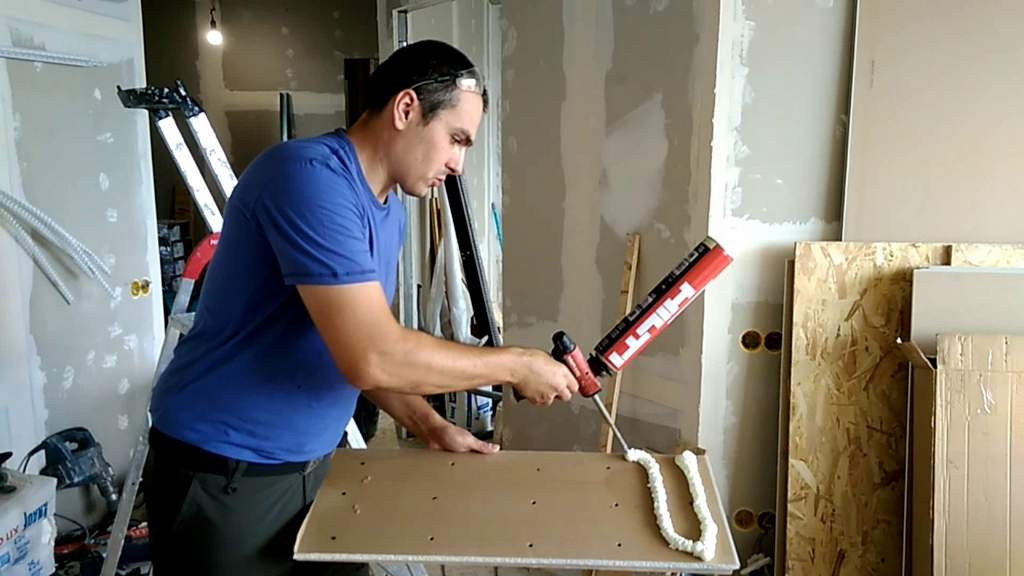
The second most popular way is to finish with foam. This option is more suitable for wooden walls, since the contact of these two materials is less likely to get a swelling of wood, especially if the foam with a low coefficient of expansion.
With any method of frameless installation of drywall, the algorithm of actions is as follows.
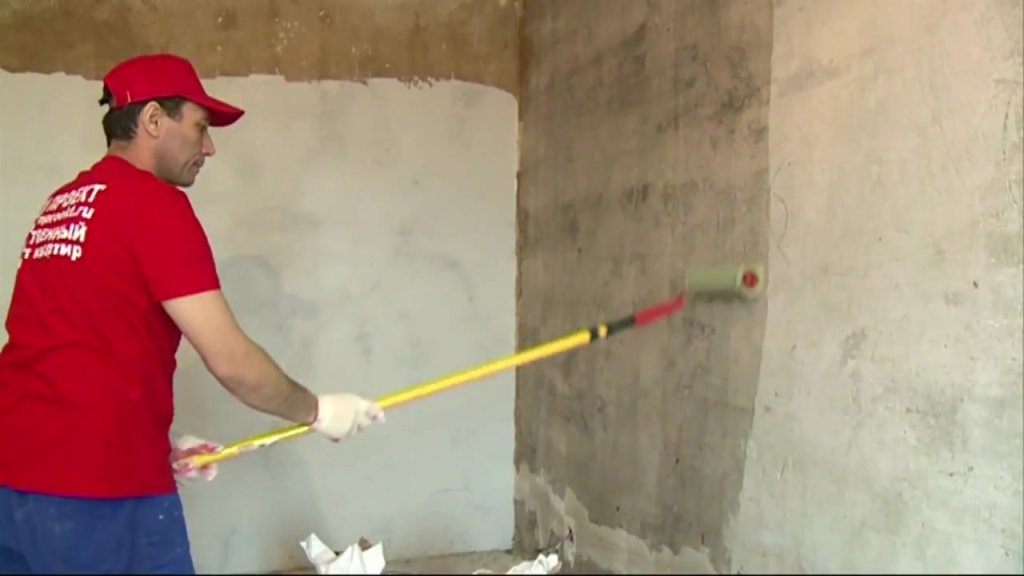
- To prepare the walls, that is, to clear from previous layers of paint or plaster, to impregnate with a special primer, it is better on a water-based basis.
- After careful measurement of the room, cut the drywall sheets of the desired size, number them. As well as walls, plasterboard sheet must be saturated with a primer and allowed to dry.
- After 1-2 hours, apply foam or glue to both surfaces, carefully applying the joint to other parts. Pressing the sheets to the wall, you must hold them in this condition until the glue dries. It is better to carry out such an operation at least in four hands or for reliability, in addition to glue, to fasten parts along the edges with self-tapping screws.
- The pieces of foam or glue protruding in the corners after hardening can be cut with a special knife and sand the surface in areas of joints and irregularities.
Installation
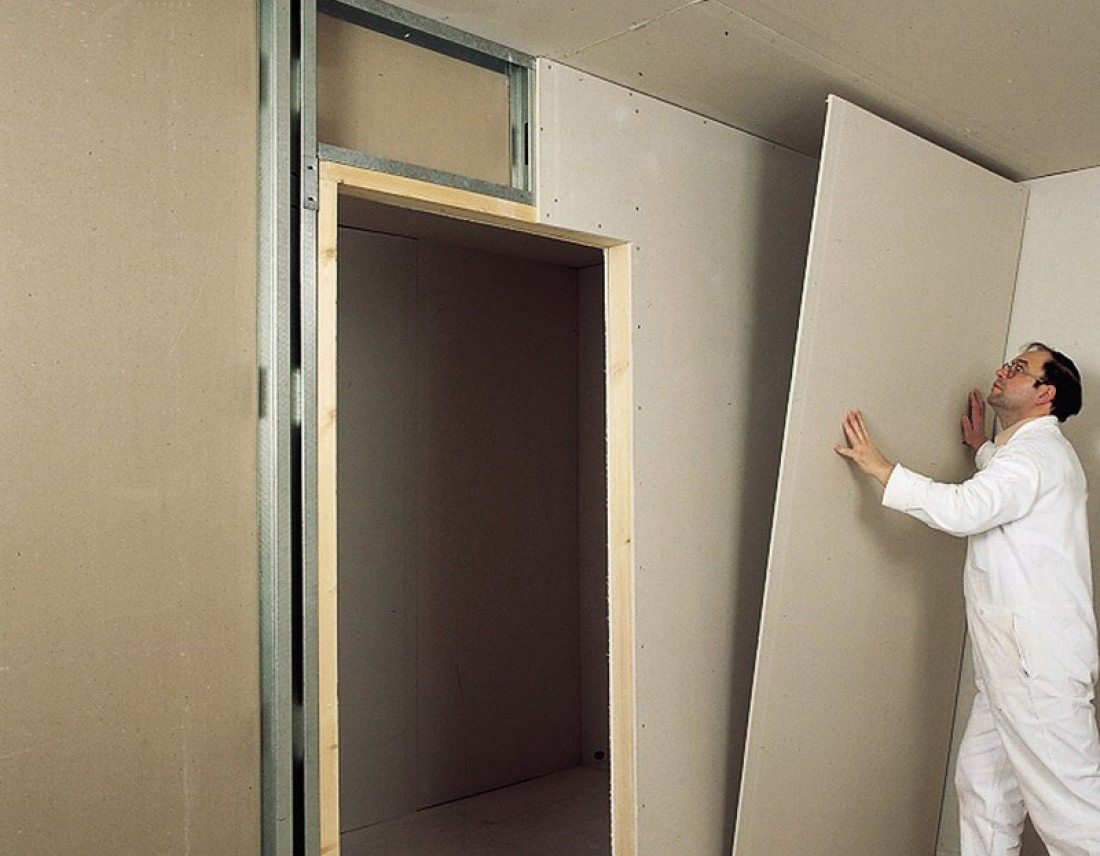
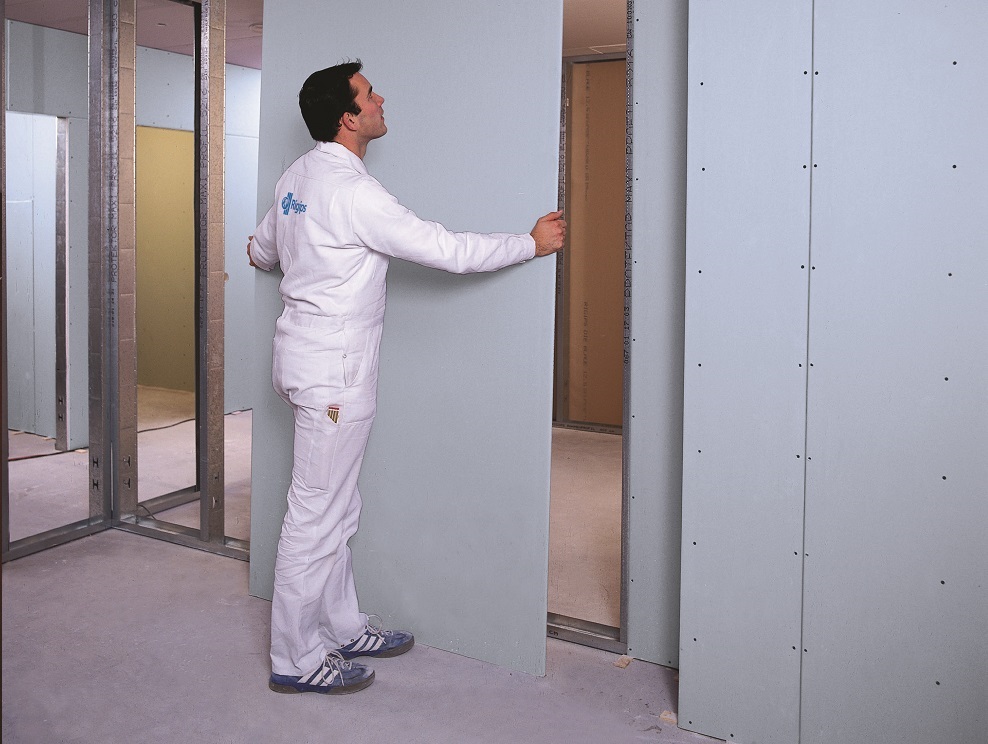
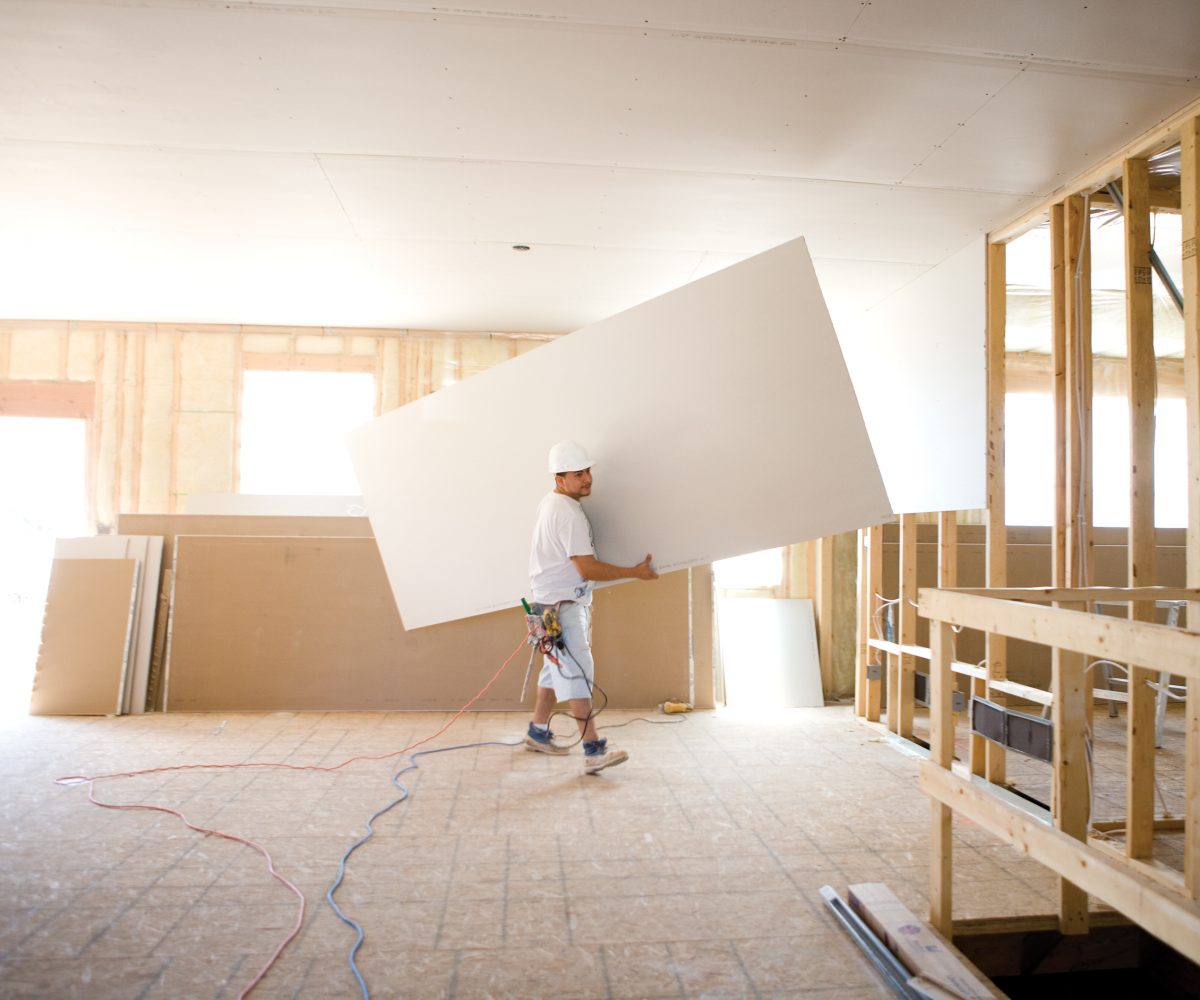
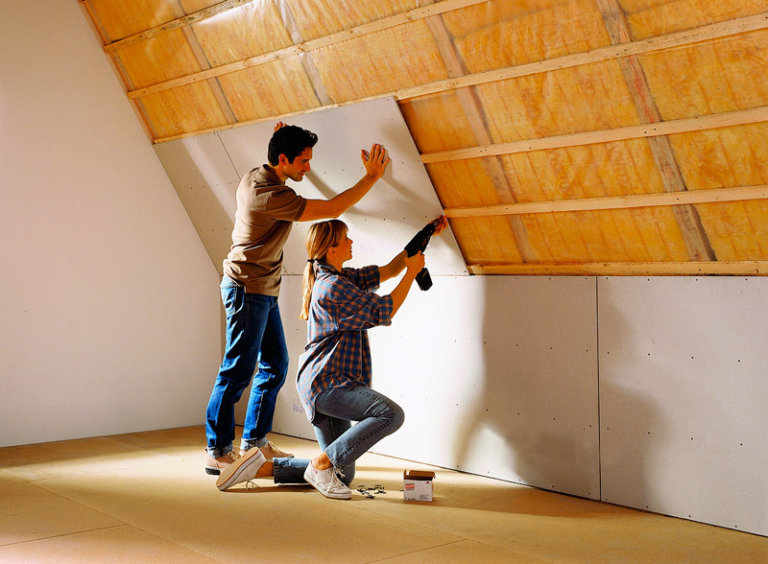
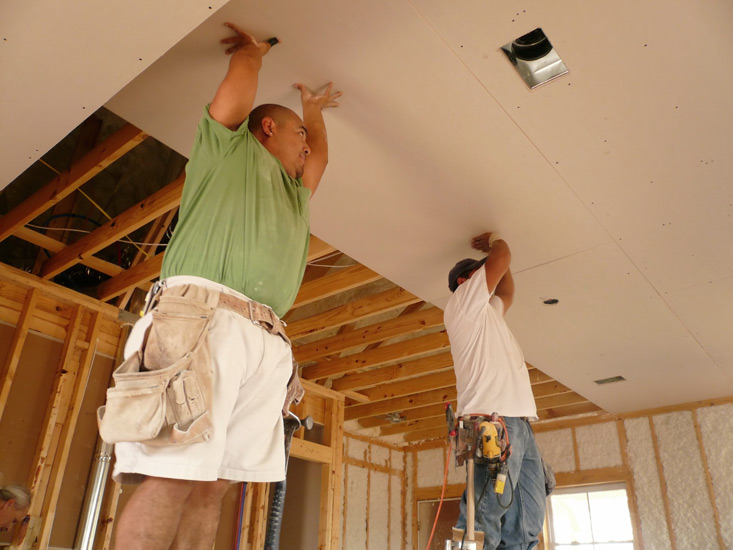
In order to sheathe the walls with drywall, you will need not so many skills and tools - self-tapping screws, rack-mount profiles and a screwdriver from the main set. Pre-prepared sheets should be cut to the size of the room so that ideally you can cover the entire wall from floor to ceiling with one element without joints in the middle. It is better to work with a partner so that you can fully hold a sheet a few meters long. During the lining of door and window openings, it is most convenient when one person presses the sheet of drywall to the desired hole, and the second draws the contours of the window or door, then to cut everything along the line.

The simple process of assembling HL sheets takes place in several stages.
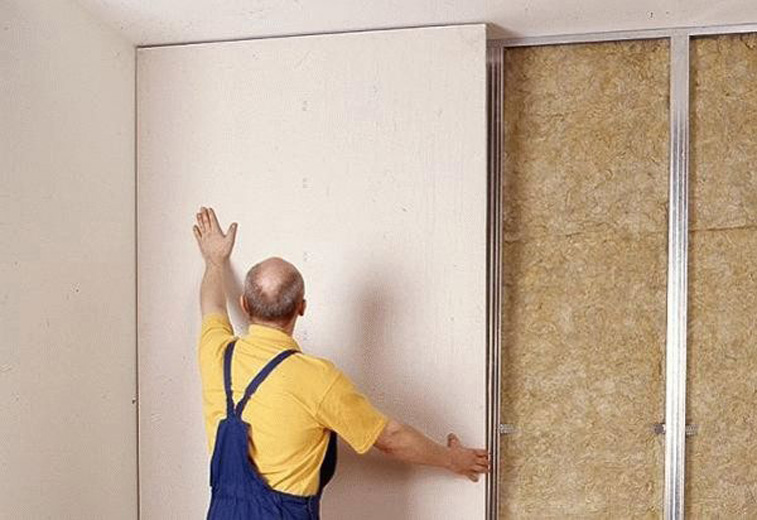
- The first sheet when installing drywall plating is placed clearly in the corner of the room, clinging to the edges in the opposite wall, floor and ceiling, respectively. If the first is to finish the wall with a window or door, then the sheet in question is pressed against the corners of this space like on struts.
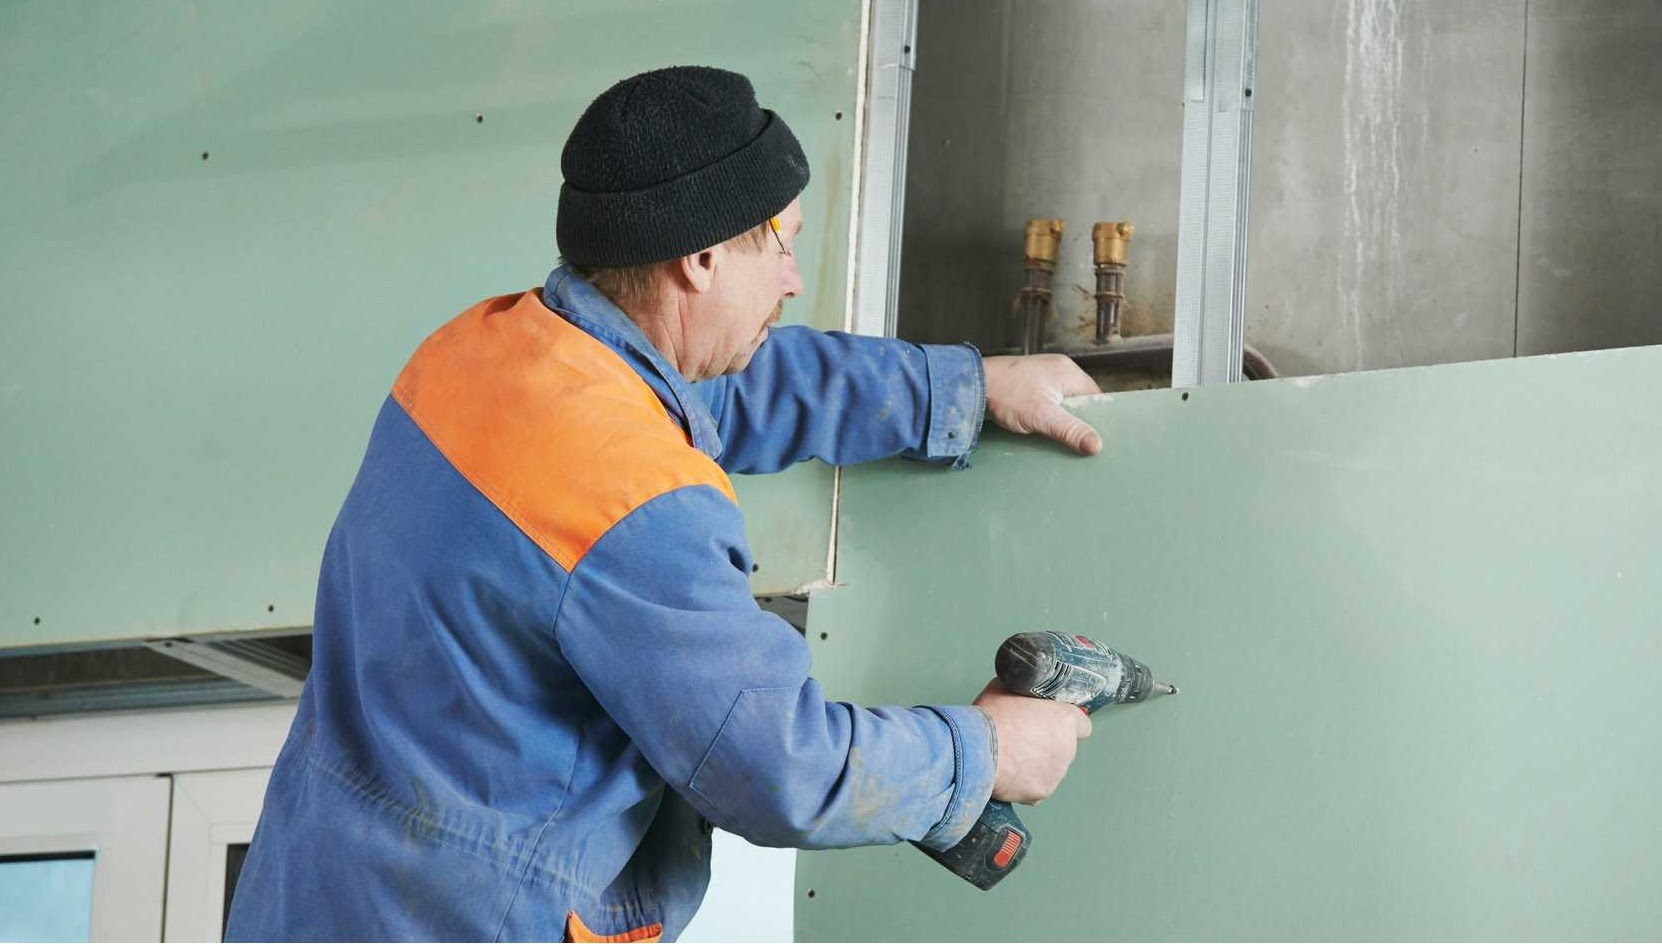
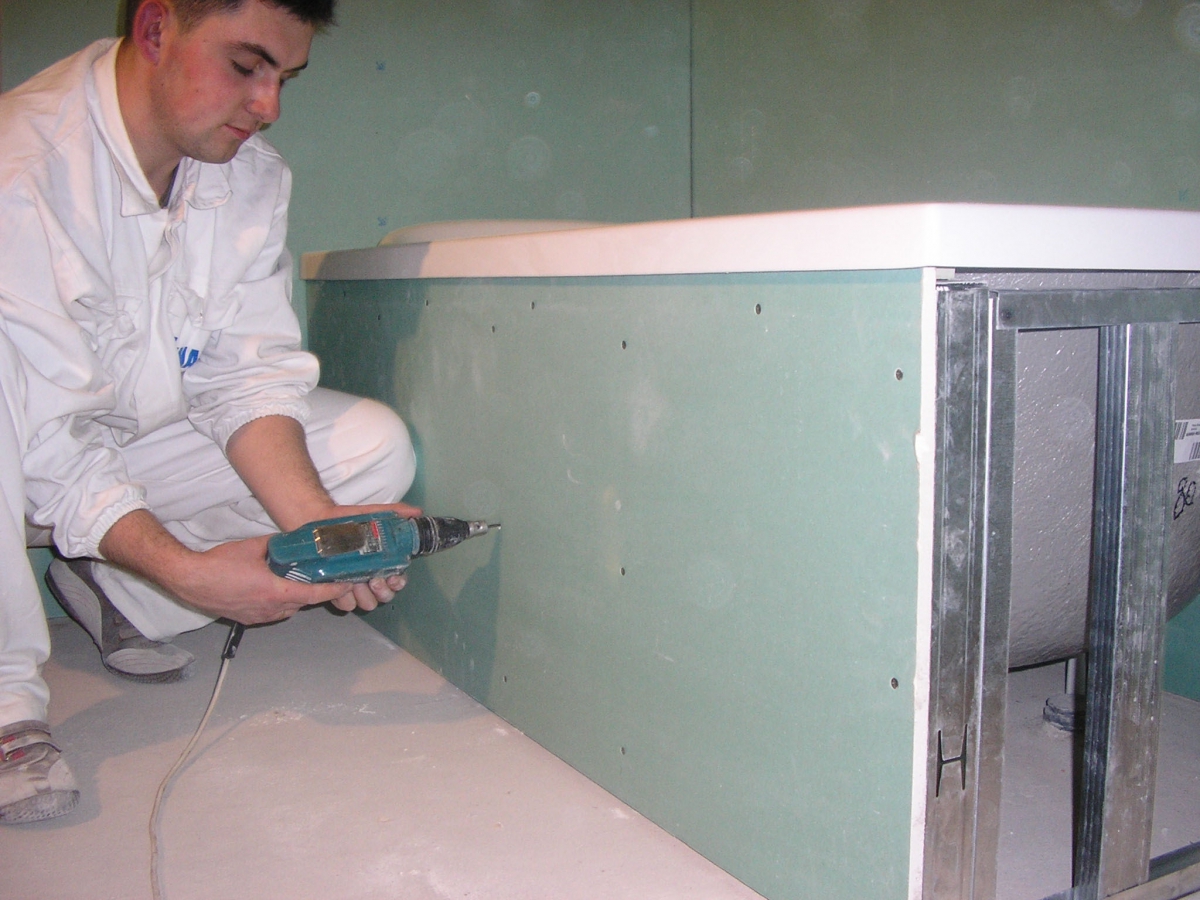
- Aligning the sheet with the details of the frame and tightly pressed to it, you first need to fasten the surface to the vertical profile with screws.The screwdriver must be set to not the most powerful mode, so that the screw does not damage the sufficiently thin drywall. It is better if the cap is not lower than 1 mm recessed into the surface of the sheet. The distance between the screwed elements should be approximately 20 cm - this is the optimal gap with a standard sheet width of 120 cm.
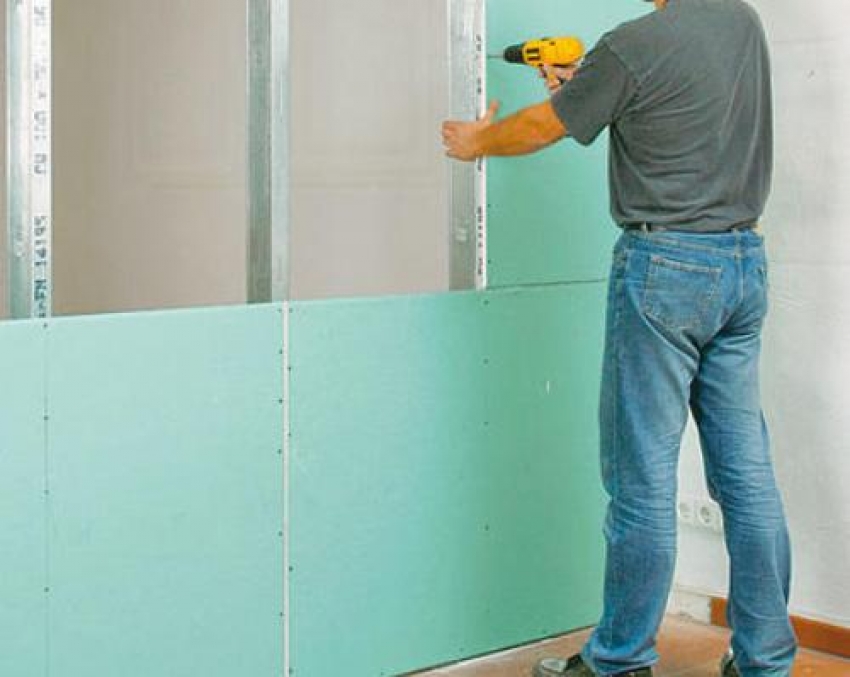
- Having made sure that the sheet has had a tight installation in the sinuses and that it keeps itself on vertical rack profiles, in the same way you need to attach drywall to the horizontal jumpers with self-tapping screws.
- The second and all subsequent sheets should be pressed tightly to the neighboring sheets and oriented in the strict horizontal position of their location also on the basis of a visual comparison with the plates already installed, and not only along the plumb line.
- Windows and doors should be sheathed using the same algorithm as ordinary walls, but according to pre-calibrated and cut out forms. It is possible and even necessary to sew up door slopes at the last moment, since this is considered to be a fine decorative finish.

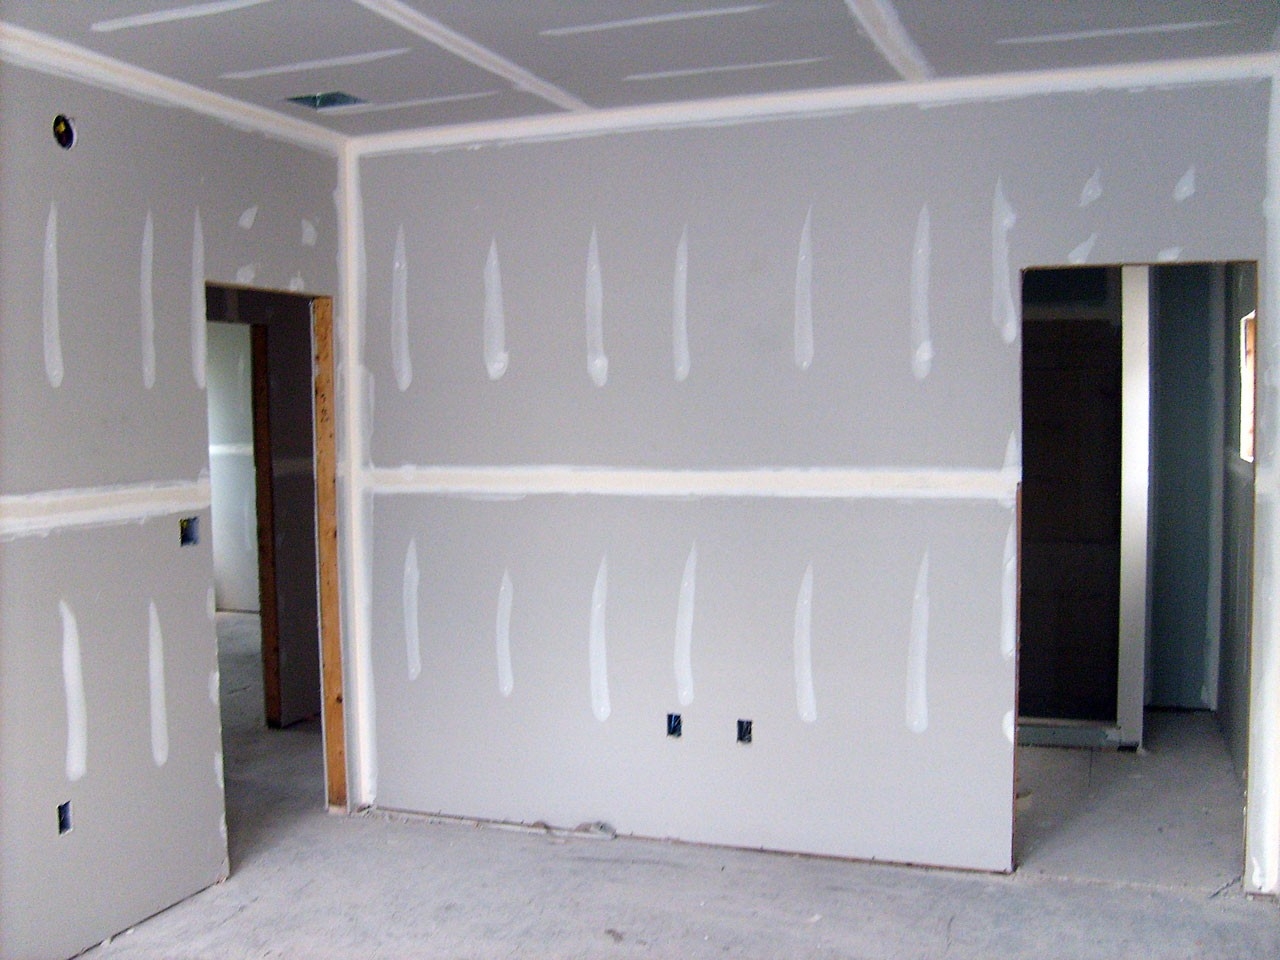
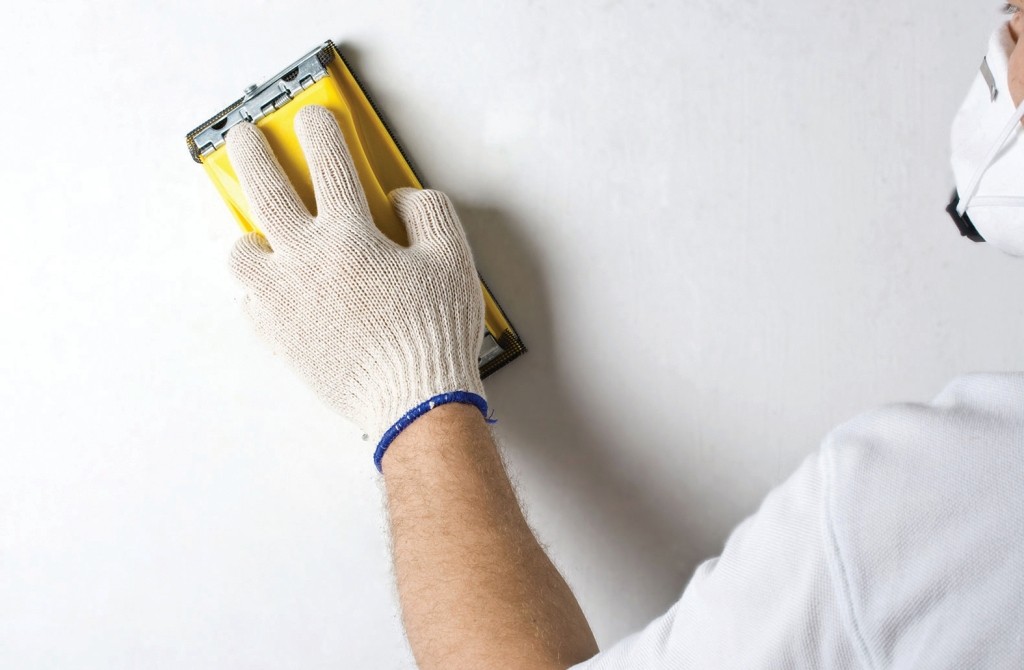
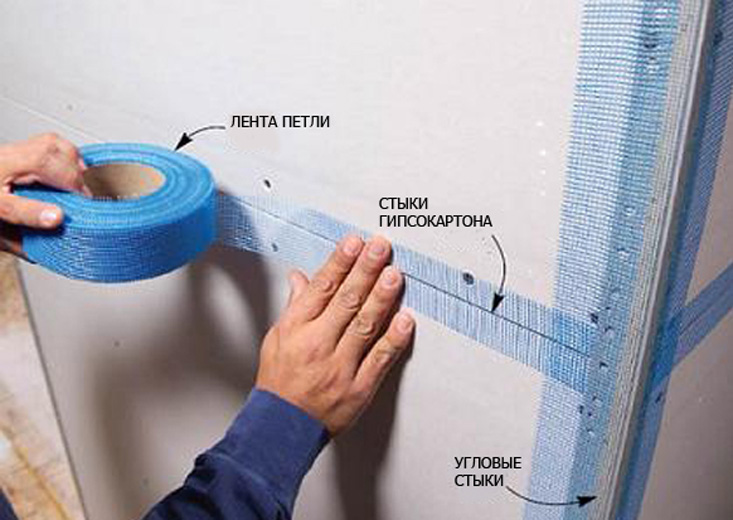
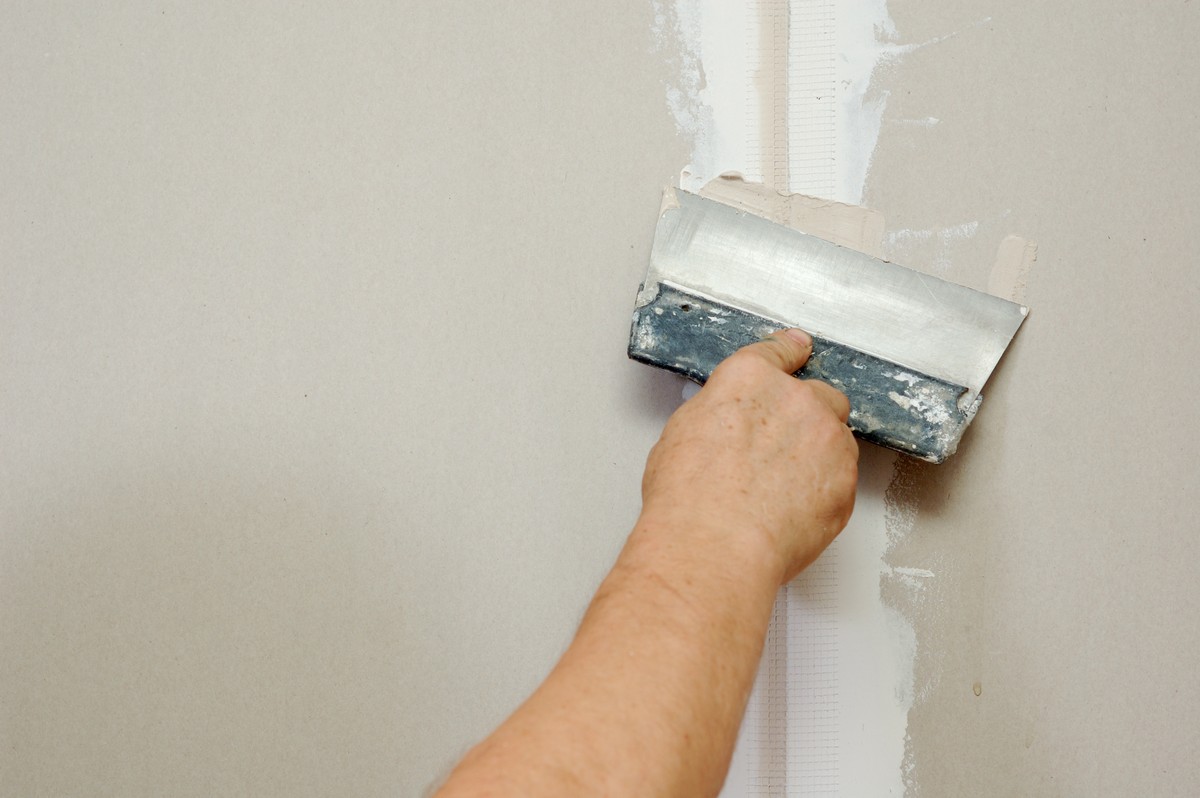
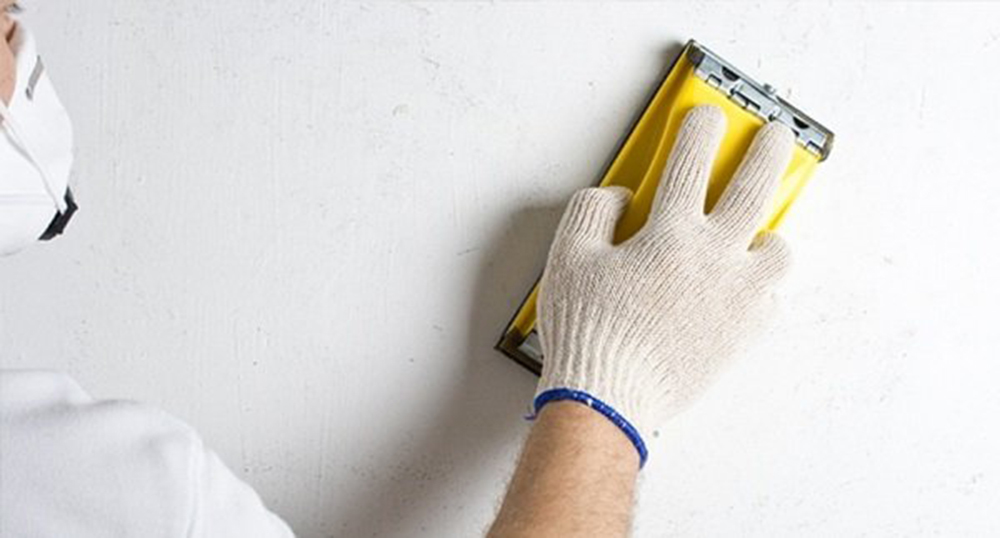
- And here GKL sheets are installed, but this does not mean that the repair is over. After all, we still need all the irregularities and joints, as well as the place of screwing the screws to putty, preferably with the addition of reinforced fiberglass.This kind of know-how will allow you to avoid diverging from earthquakes and other vibrations of the joints. It will also help the grid to contain the swelling of the wall from the inside with a sharp temperature drop. After applying the first layer of putty for reliability, it is better to smooth it with emery cloth and apply after drying one more time.

- If it is not only the external beauty of the walls that is important, but also their warming, then a special insulation material should be laid in the gaps of the framework before laying the plasterboard. The most commonly used mineral wool or glass wool - because these materials are good for sound insulation. In specialized rooms such as recording studios or dance halls for total sound insulation, special synthetic materials are purchased — pads, and fastened as usual insulation.
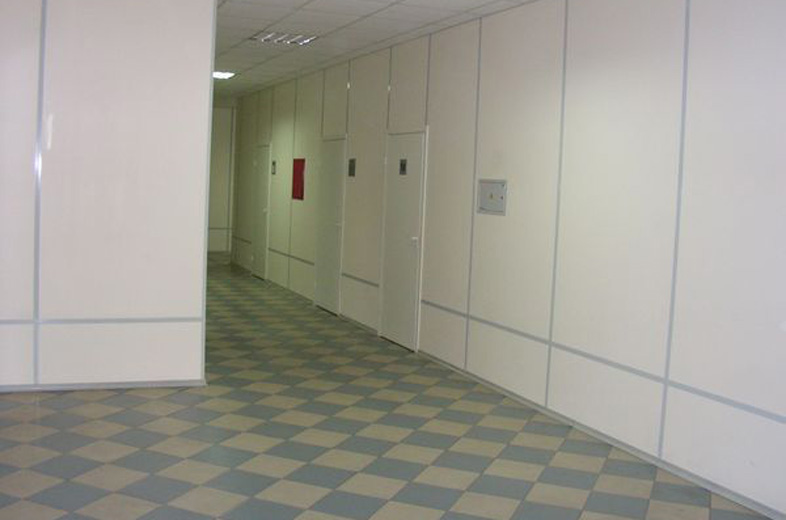
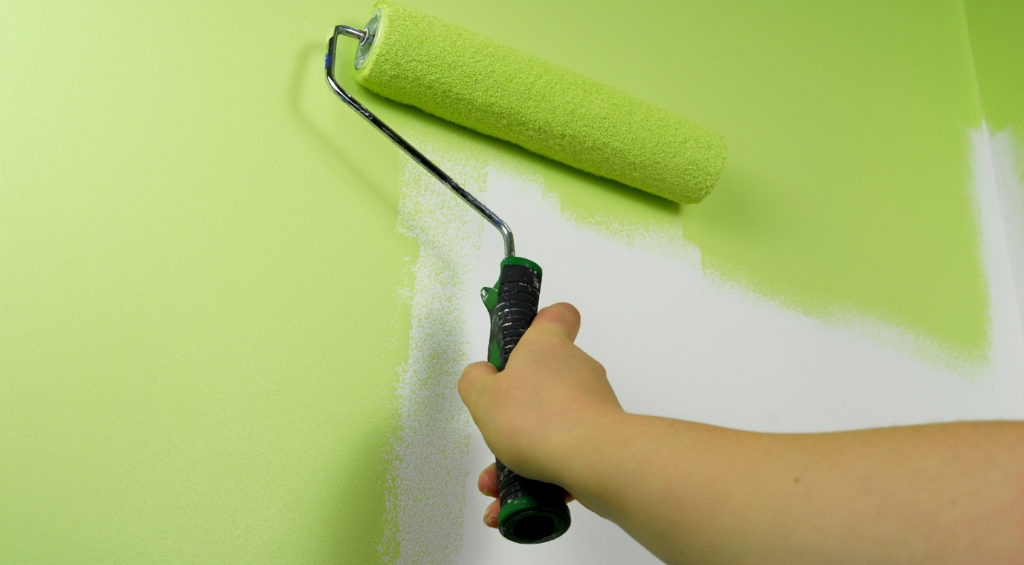
- After applying the second layer of plaster it is necessary to level the surface again with sandpaper, and then you can proceed to the exterior decor in the form of installations of tiles, mosaics, wallpaper, paintings and any other elements.
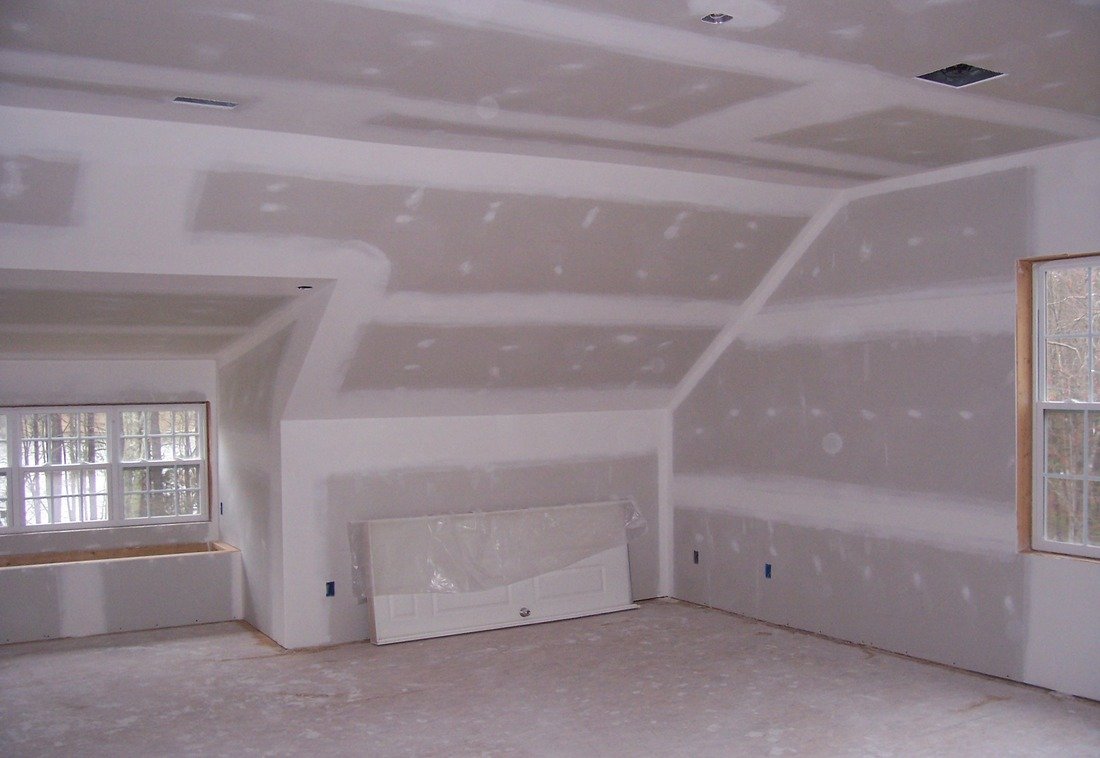
Finishing work
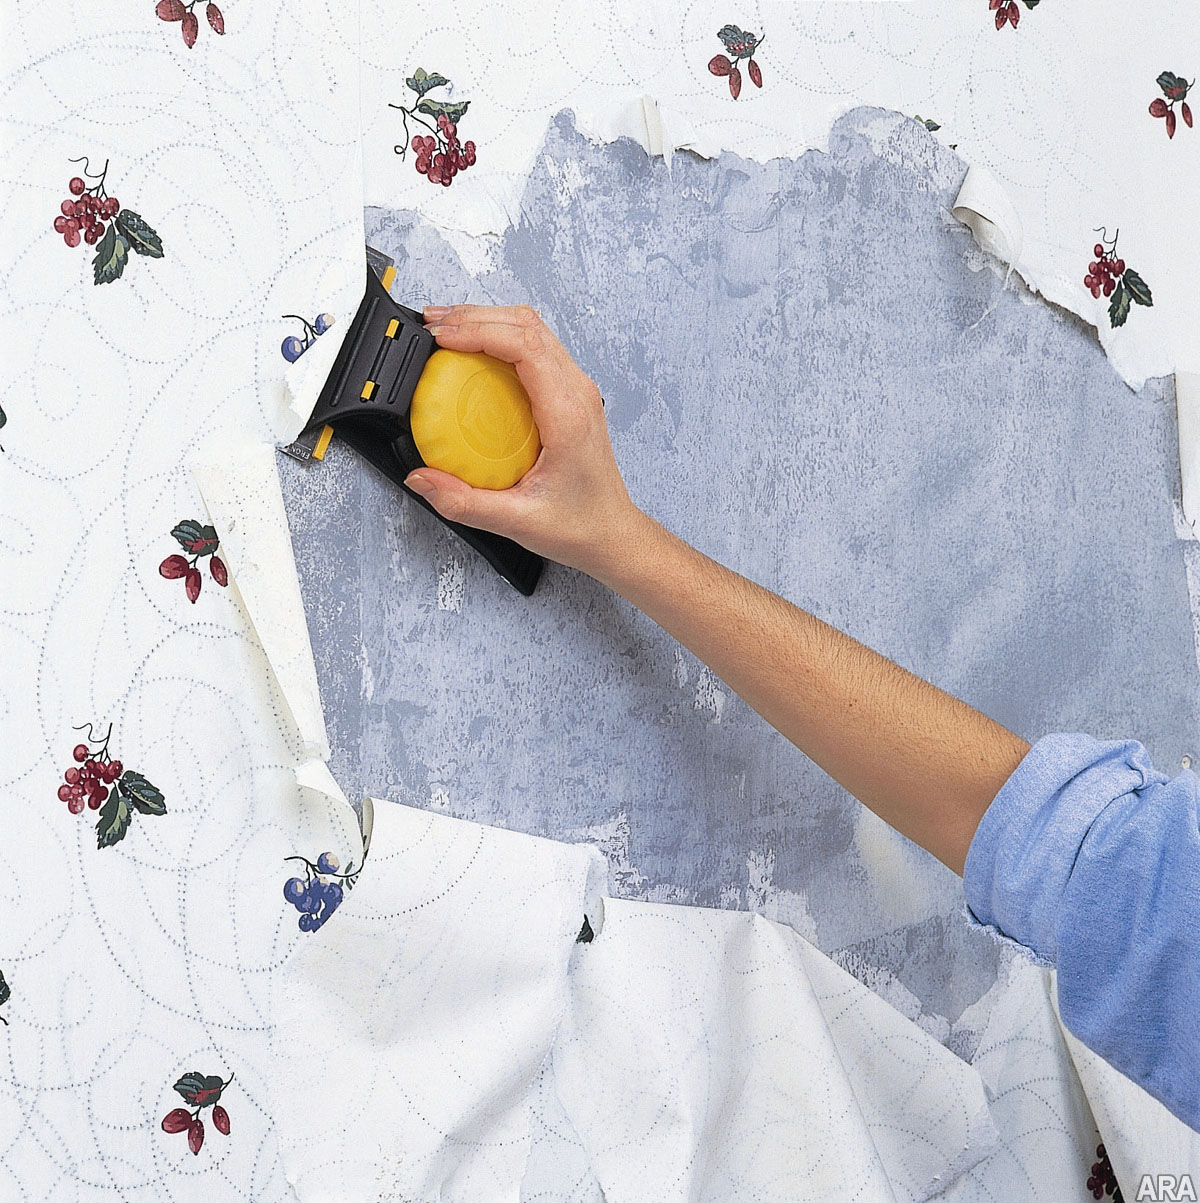
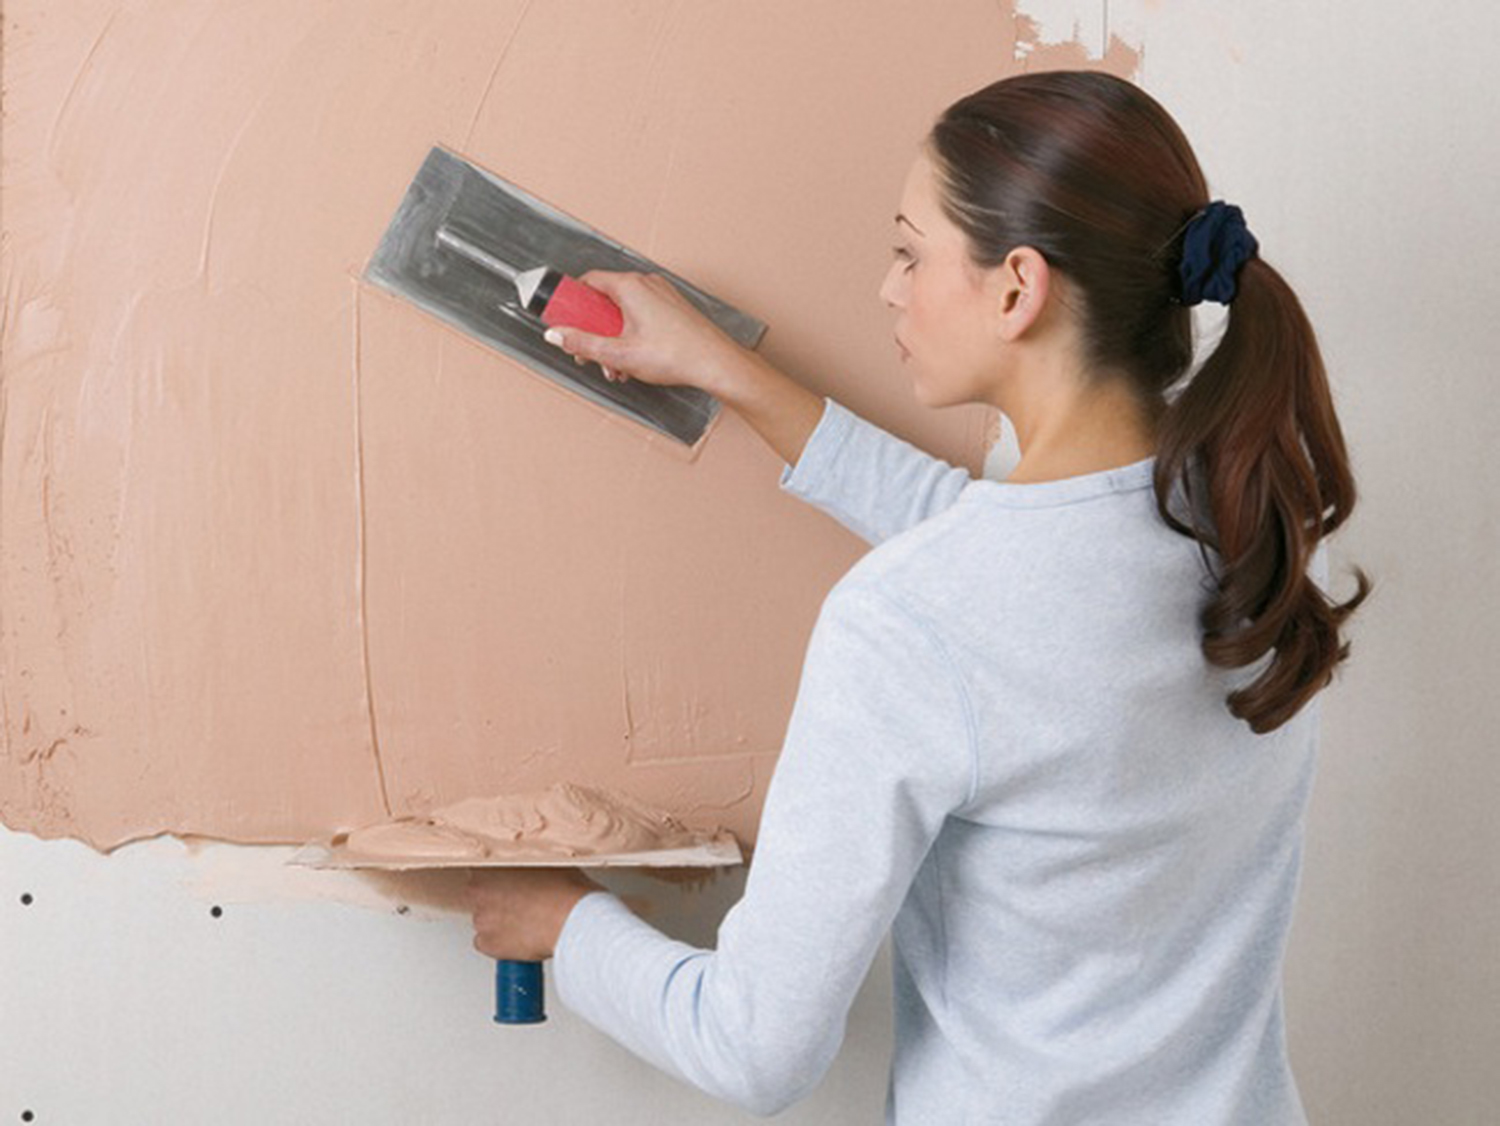
The final stage of the installation of a plasterboard is a fine finish.But before sticking wallpaper or applying decorative plaster, it is necessary to prepare a GCR sheet.
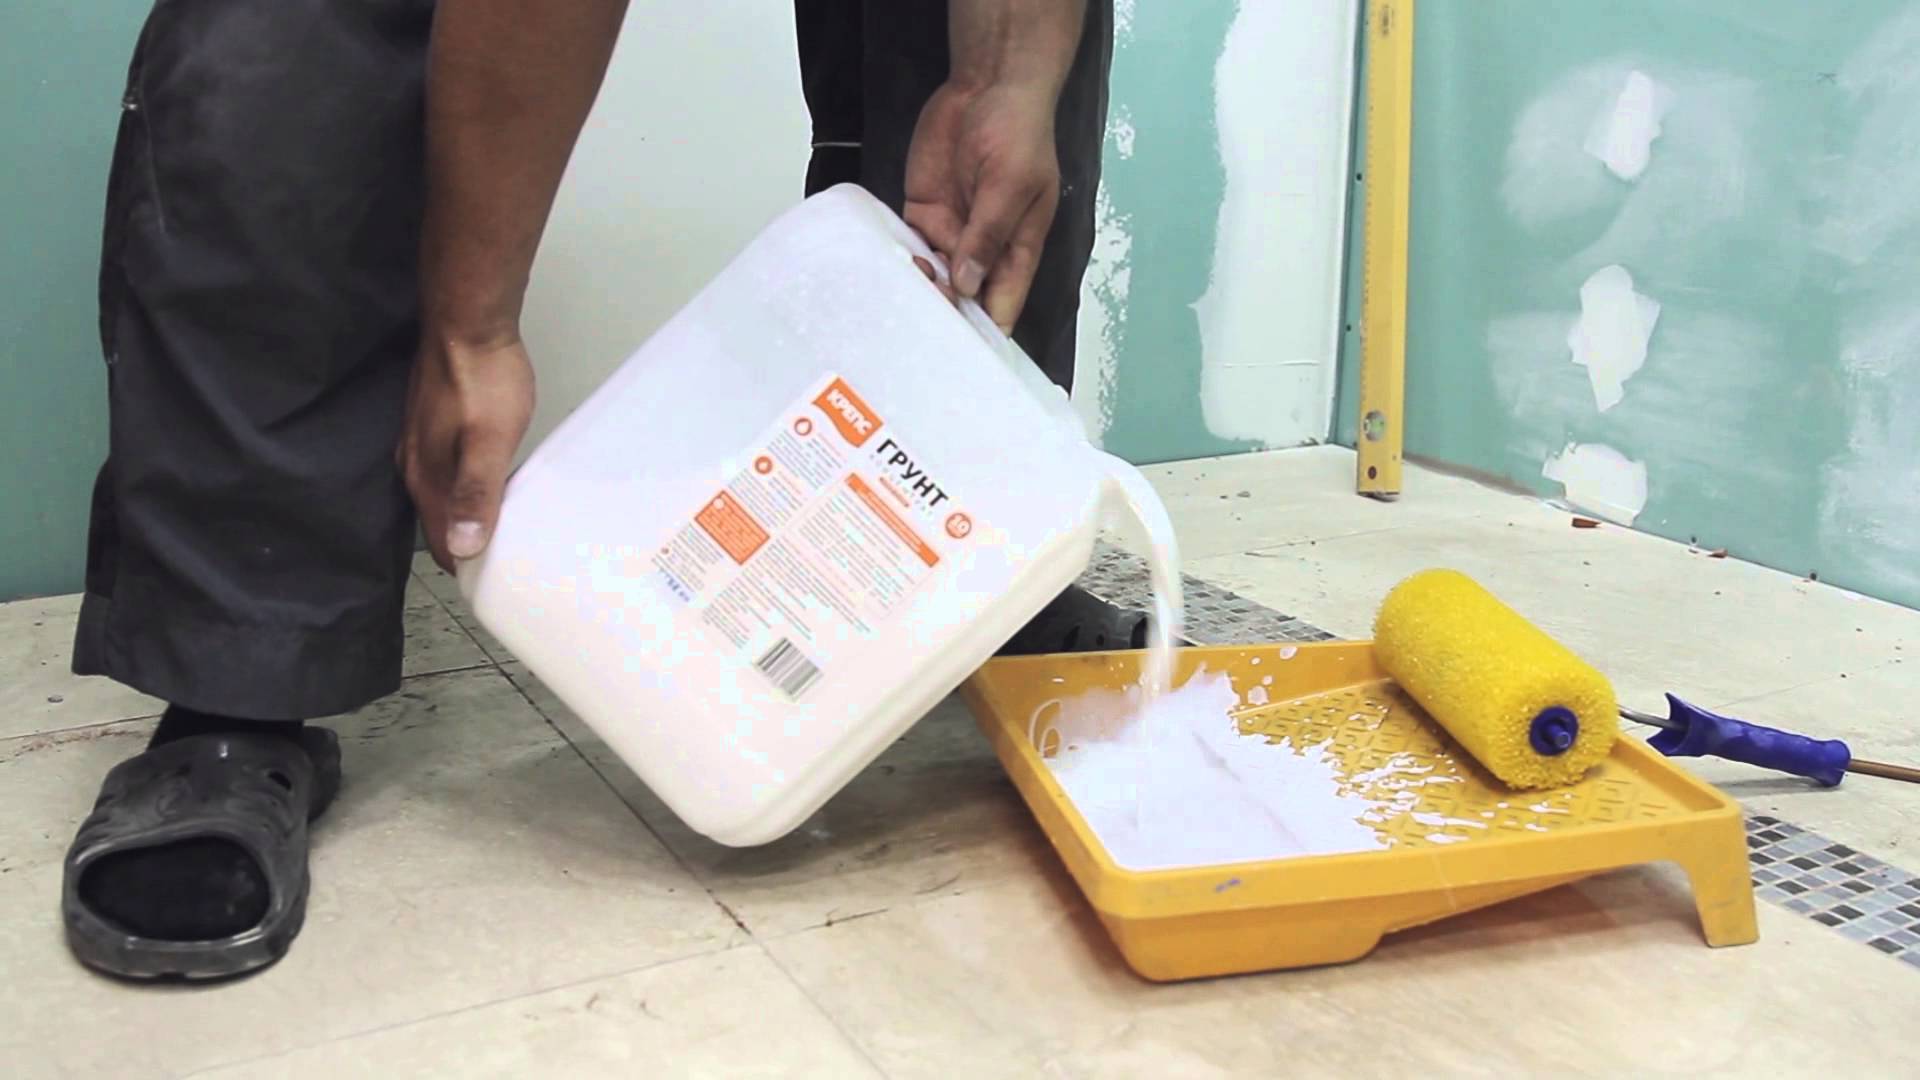
To begin with, run the emery cloth several times like on a smooth sheet surface., and with enhanced control over the joints of the plates, roughness, soldered screws or excess glue coming to the surface. Then you need to apply a layer of primer with water-repellent and antifungal functions and let this mixture dry and absorb at least a day.
To glue the wallpaper, glue is applied and the places of the joints of the individual wallpaper sheets are pre-marked. If the exterior is decorated with decorative plaster, then, as a rule, it already contains adhesives in its composition, so you do not need to mix it with anything.

If you wish only to paint drywall without applying additional finishing elements, it is better to apply this paint in several steps, allowing each layer to dry for at least 5-6 hours.
Tips and tricks
It is easy to mount a wall or a ceiling made of plasterboard on your own, but in order not to overpay for nothing and at the same time to choose the right quality material for your home, There are a number of recommendations.
- For residential and constantly heated premises, the usual GCR sheet will do - its characteristics will be enough to last long enough. The level of its environmental friendliness and low toxicity allows it to be mounted even in the nursery.
- For rooms with high humidity and a tendency to form a fungus, such as a bathroom or kitchen, it is better to take moisture-resistant drywall, although it costs more than usual
- If the private house has its own boiler room or boiler room, then in such a place it is better to work with fire-resistant gypsum plasterboard and not be afraid of temperature changes.
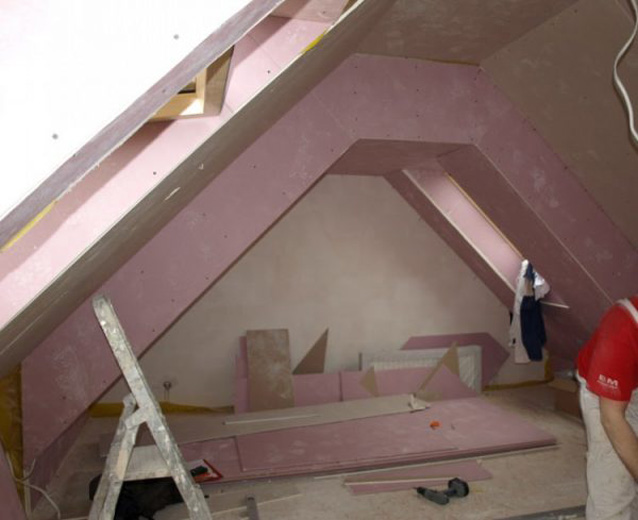
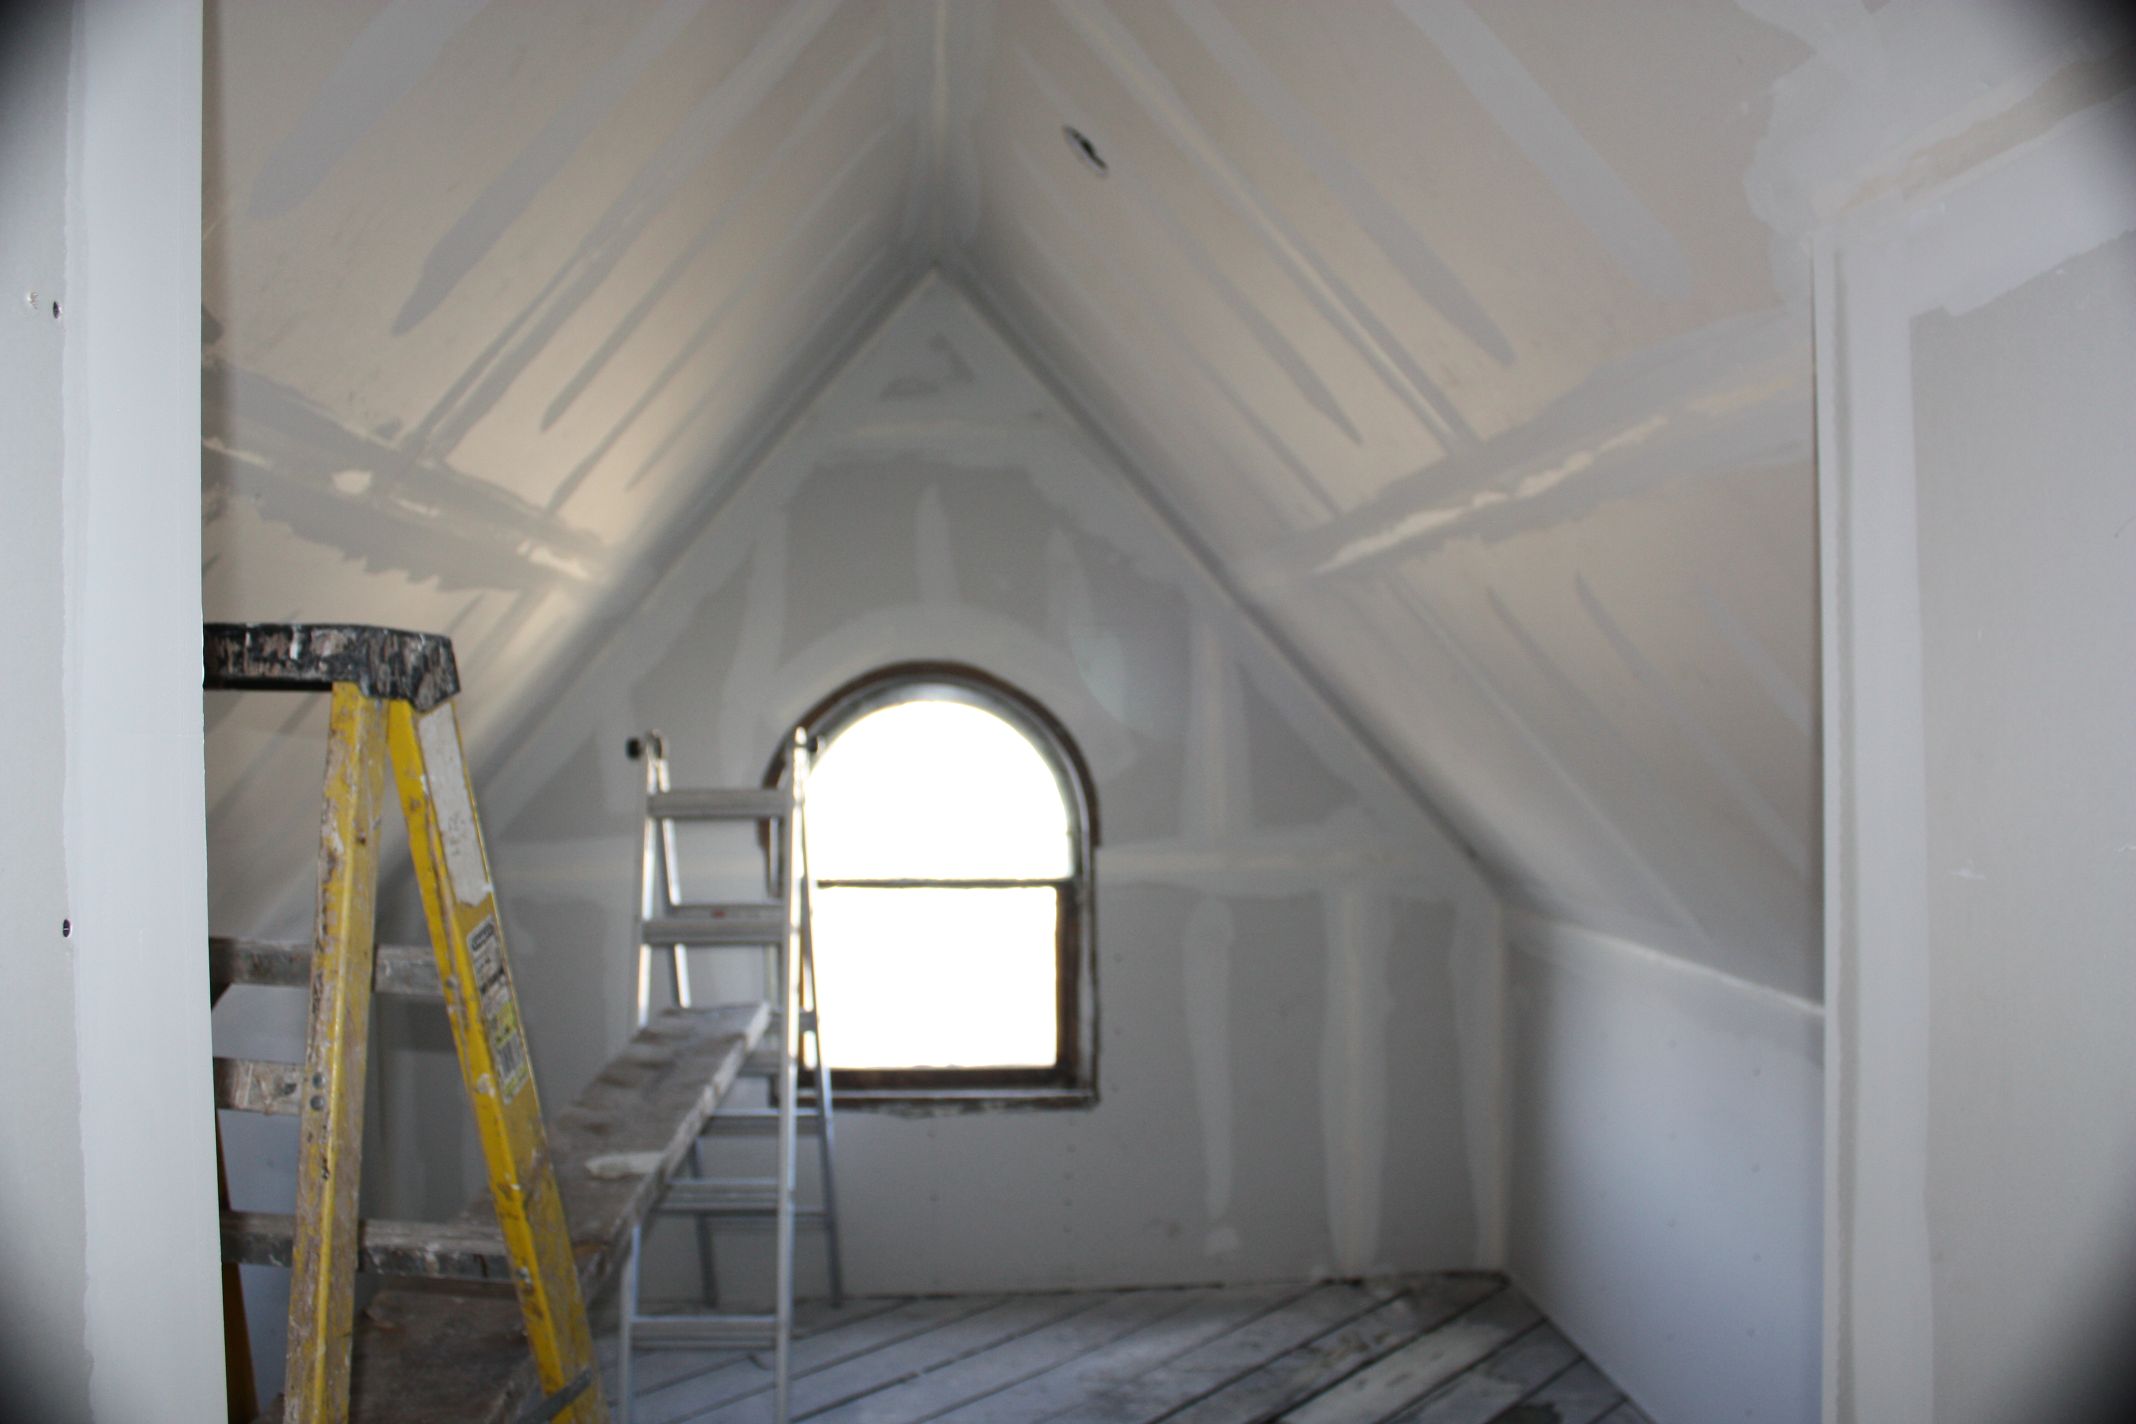
- Where you can invest heavily on a universal GKLVO sheet, so it is for the attic. If it is a half-open or slightly glazed type room, then there will be temperature drops, and high humidity, and fungus. Also, any installer will advise to attach here a good layer of mineral insulation.
- When the space of the room allows for a little, it is better to use the frame method of plasterboard finishing everywhere, since this is the only option in which the subsequent dismantling of the sheets will take place with the least damage.

Advantages and disadvantages
Giposkarton as a finishing material has a number of undoubted advantages:
- The low price in comparison with natural facing materials. So, in the building stores a sheet of GCR sheet costs from a few hundred rubles to several thousand, depending on its functional purpose.
- This material is easy to install, it does not require special training from the master and complex tools. To decorate a room with an area of 20-30 square meters in one day, it will take only 2 people.
- The smooth surface of the drywall is suitable for further finishing with almost any decor, whether it be wallpaper, plaster or paint.
Of the minuses can be called the following:
- The ability of drywall to eat space in small spaces due to the outstanding frame from the wall.
- In case of frameless installation in case of flooding or other reasons that would require the dismantling of the sheets, they will have to be torn out with the roots without the possibility of recovery.
- The relative fragility of drywall when cutting and mounting on screws. But when modeling individual parts, its ability to take different forms and bend can be attributed, rather, to advantages.
Everyone chooses the finishing material for the repair according to their tastes, abilities and wallet. However, drywall can be called a universal option with the greatest number of advantages at a very modest cost.
For a few more tips on installing drywall, see the video below.


