How to solder polypropylene pipes?
Polymer products are used in many areas. Plastic cup, laundry basket, heating radiators - all made on the basis of polymers.
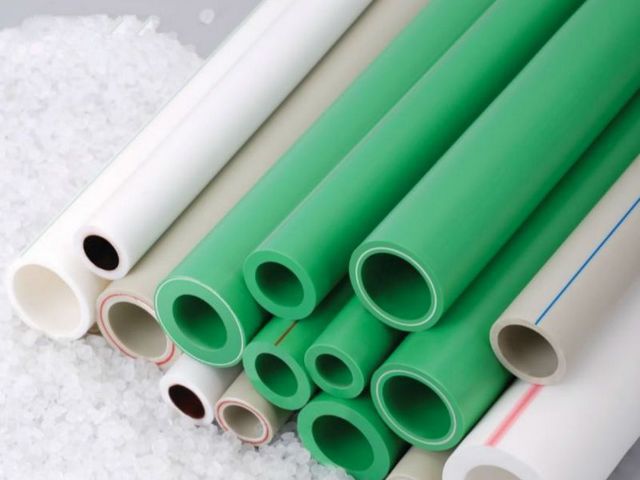
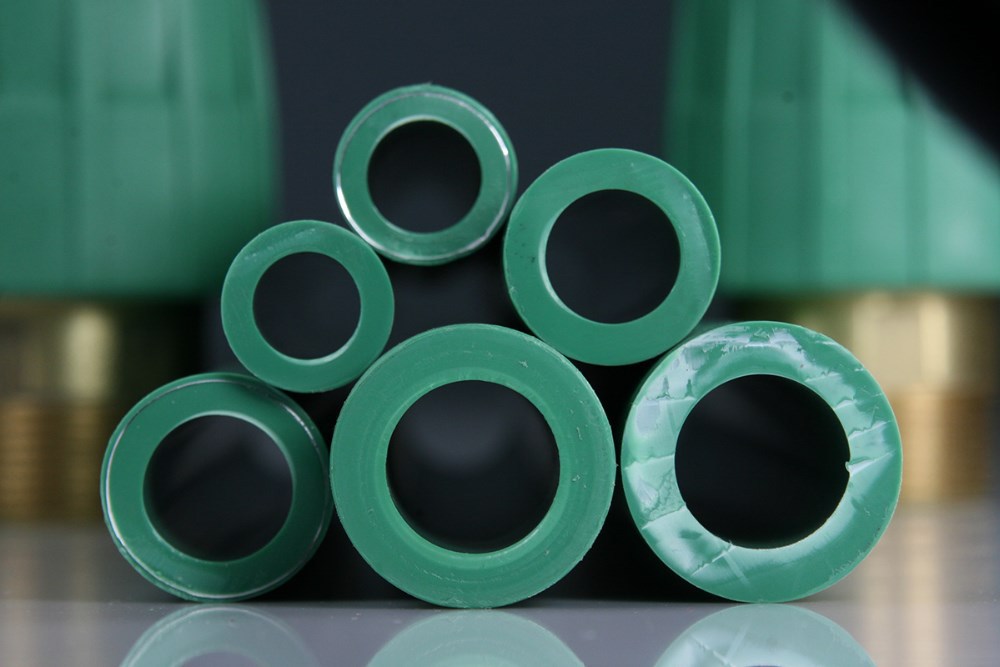
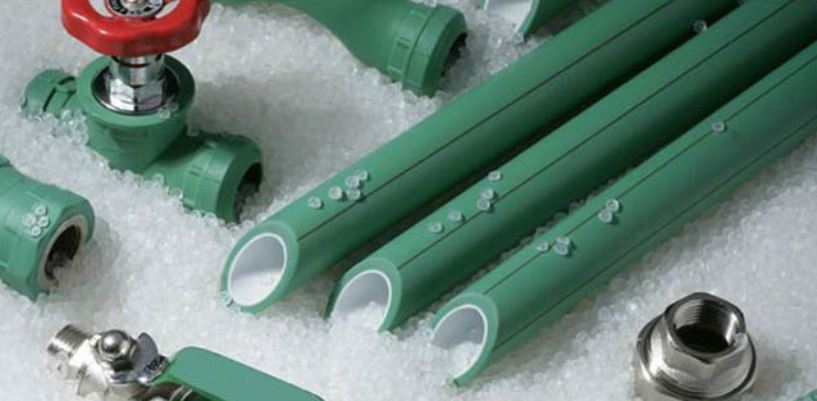
Polypropylene is considered universal. Pipes made of this material are used to install the pipeline, floor heating system, ventilation in the house. Mounting technology does not require special skills. You can figure out how to solder polypropylene pipes yourself in half an hour.

Special features
Polypropylene is a synthetic polymer with high physicomechanical properties. It is both durable, flexible and resistant to negative influences. He is not afraid of blows, temperature drops, chemistry. With such characteristics it is difficult to believe that the closest relative of polypropylene is polyethylene.
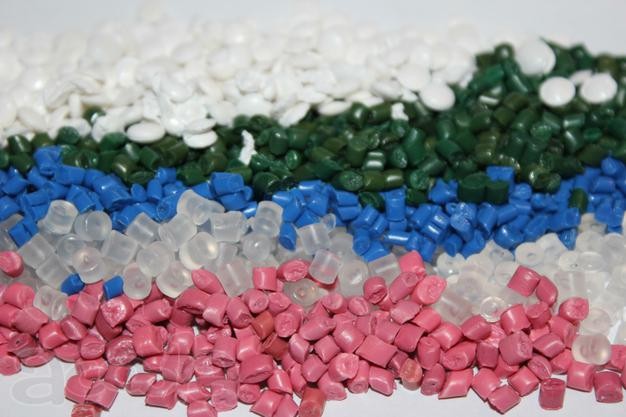
The material obtained by the method of polymerization of propylene. In order to have strength characteristics, catalysts are added to the raw materials. The product of the chemical reaction of substances is white powder or colored granules.
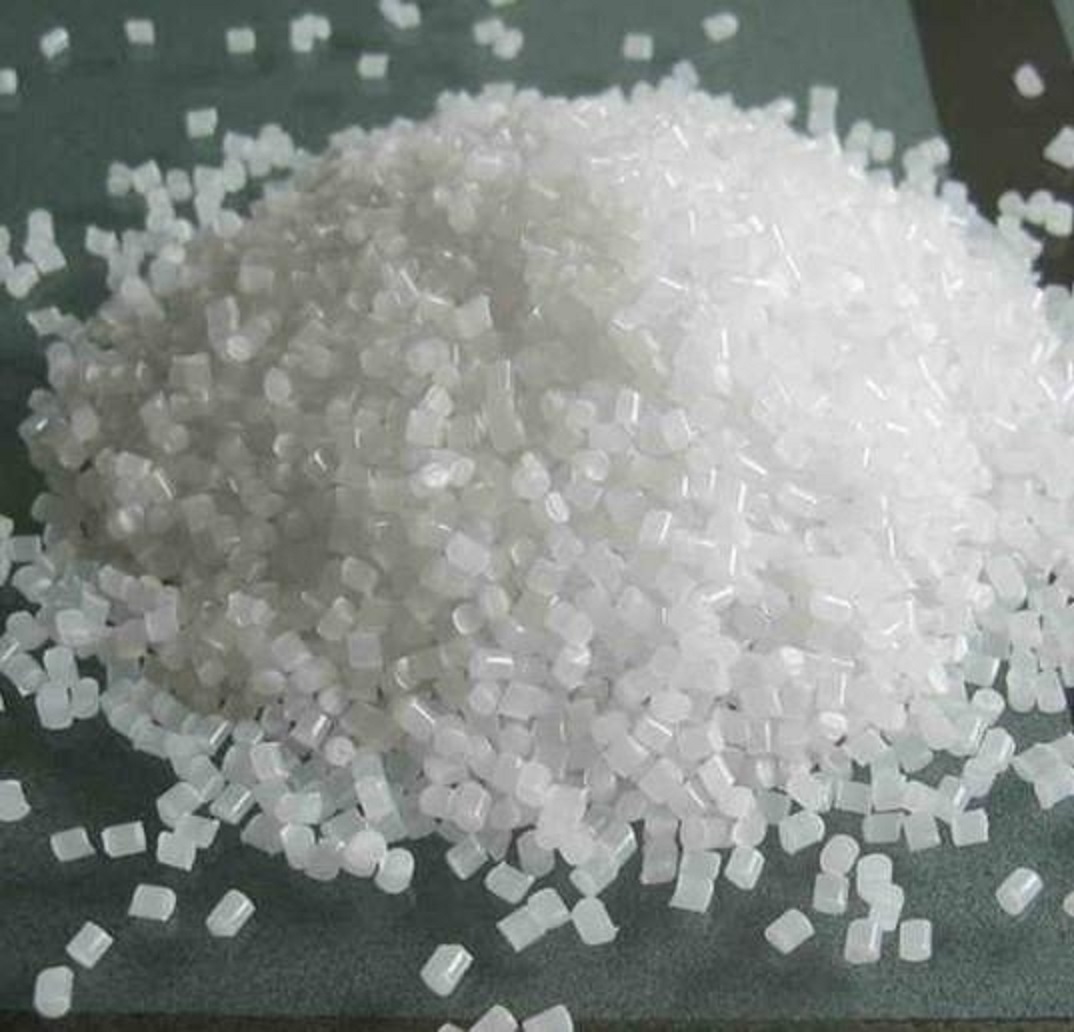
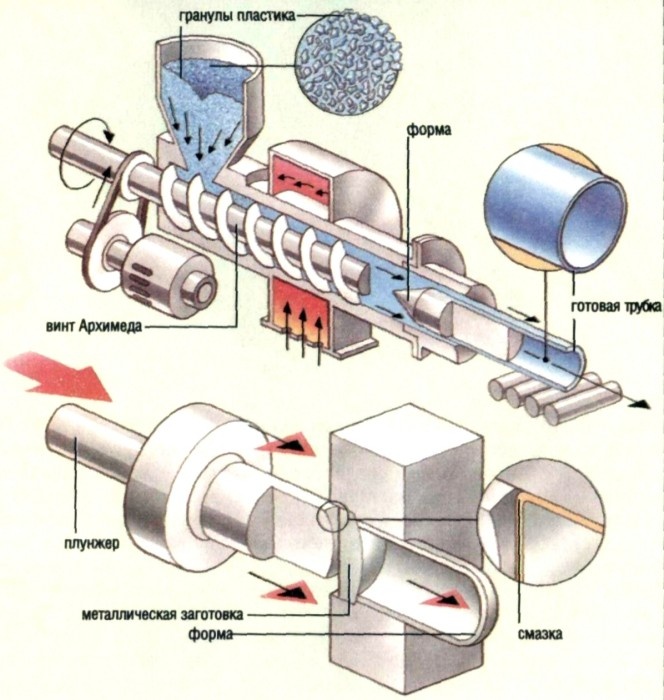
Granulated or powdered polypropylene is fed to the production, which takes place in six stages:
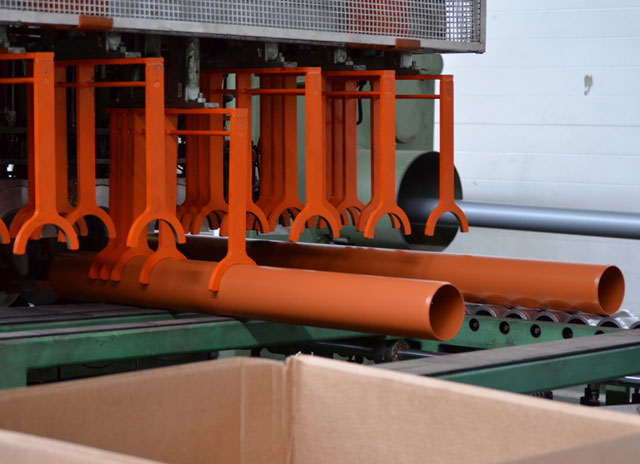
- Extrusion The first raw material goes into the extruder. Inside this device, the granules soften and become a plastic mass. To turn a solid raw material into a volatile mass, it is heated to 250 ° C. For white pipes, raw materials are used in pure form. If you need colored products, add the dyes of the desired shade to the extruder. The addition of pigment does not affect product quality.
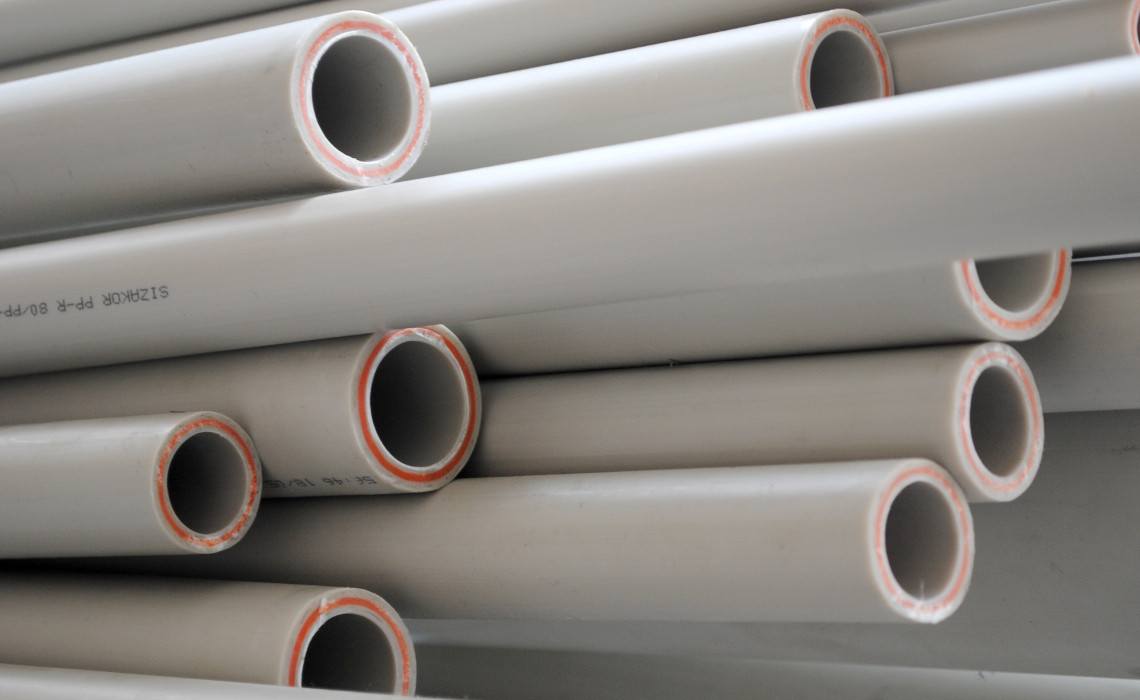
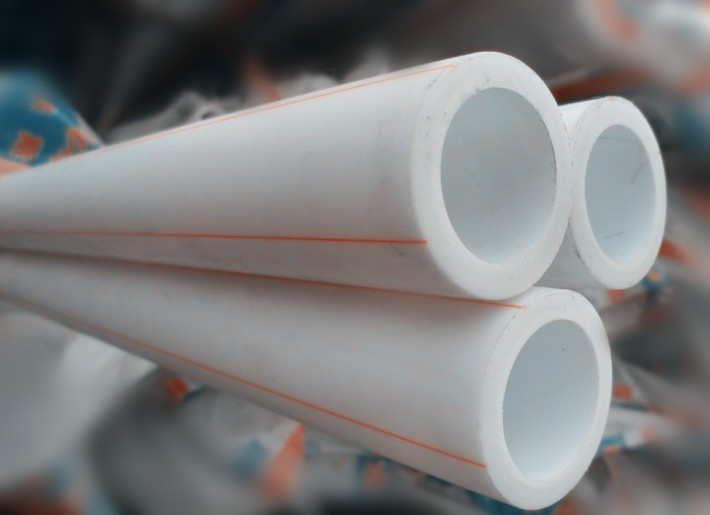
- Molding. In the next stage, the mass is profiled. The extruder “squeezes out” pipe blanks. According to the standard, the diameter of the pipes is 16, 20, 25, 30, 40, 50, 62, 75, 90, 110 mm for work in the house. For underground work (laying communications) use products of large diameter - up to 120 cm.
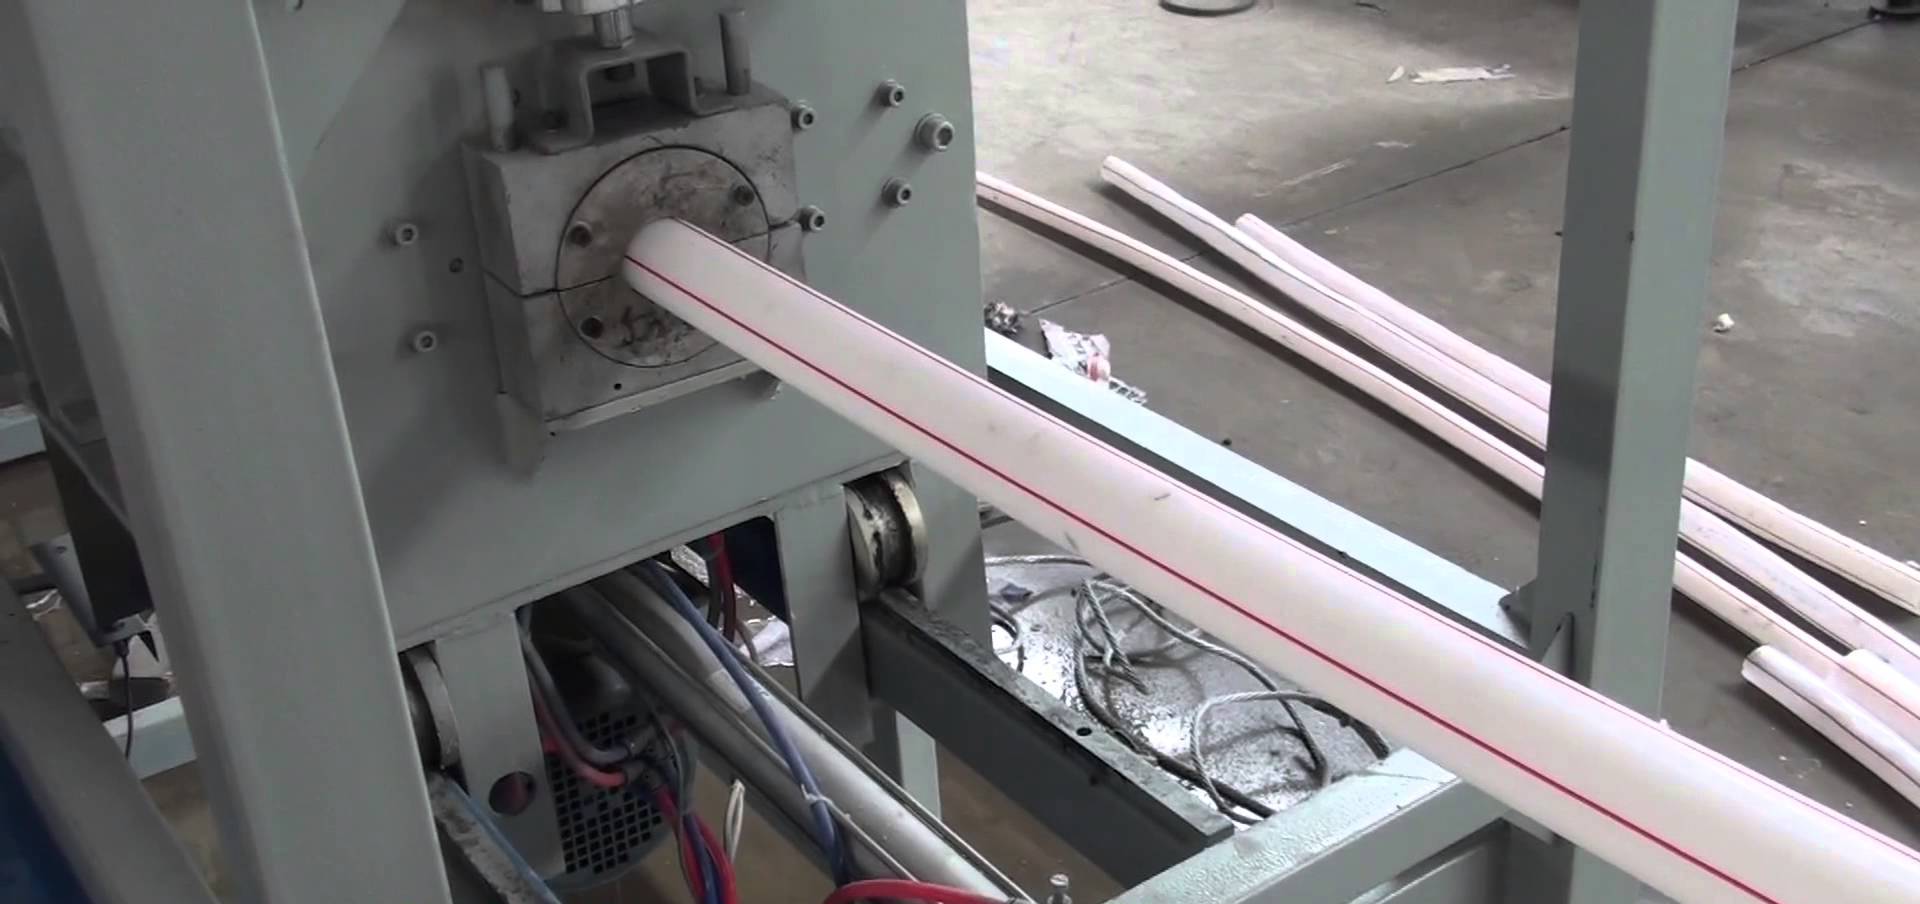
- Hardening. Hot preforms are cooled with cold water. For this product is immersed in a cooling bath.
- Applying a protective layer. Hardened pipes are passed through equipment that “wraps” the product in a thin layer of protective film. This foil film. It helps to keep materials suitable for use after long storage. Before installation, the film must be removed.
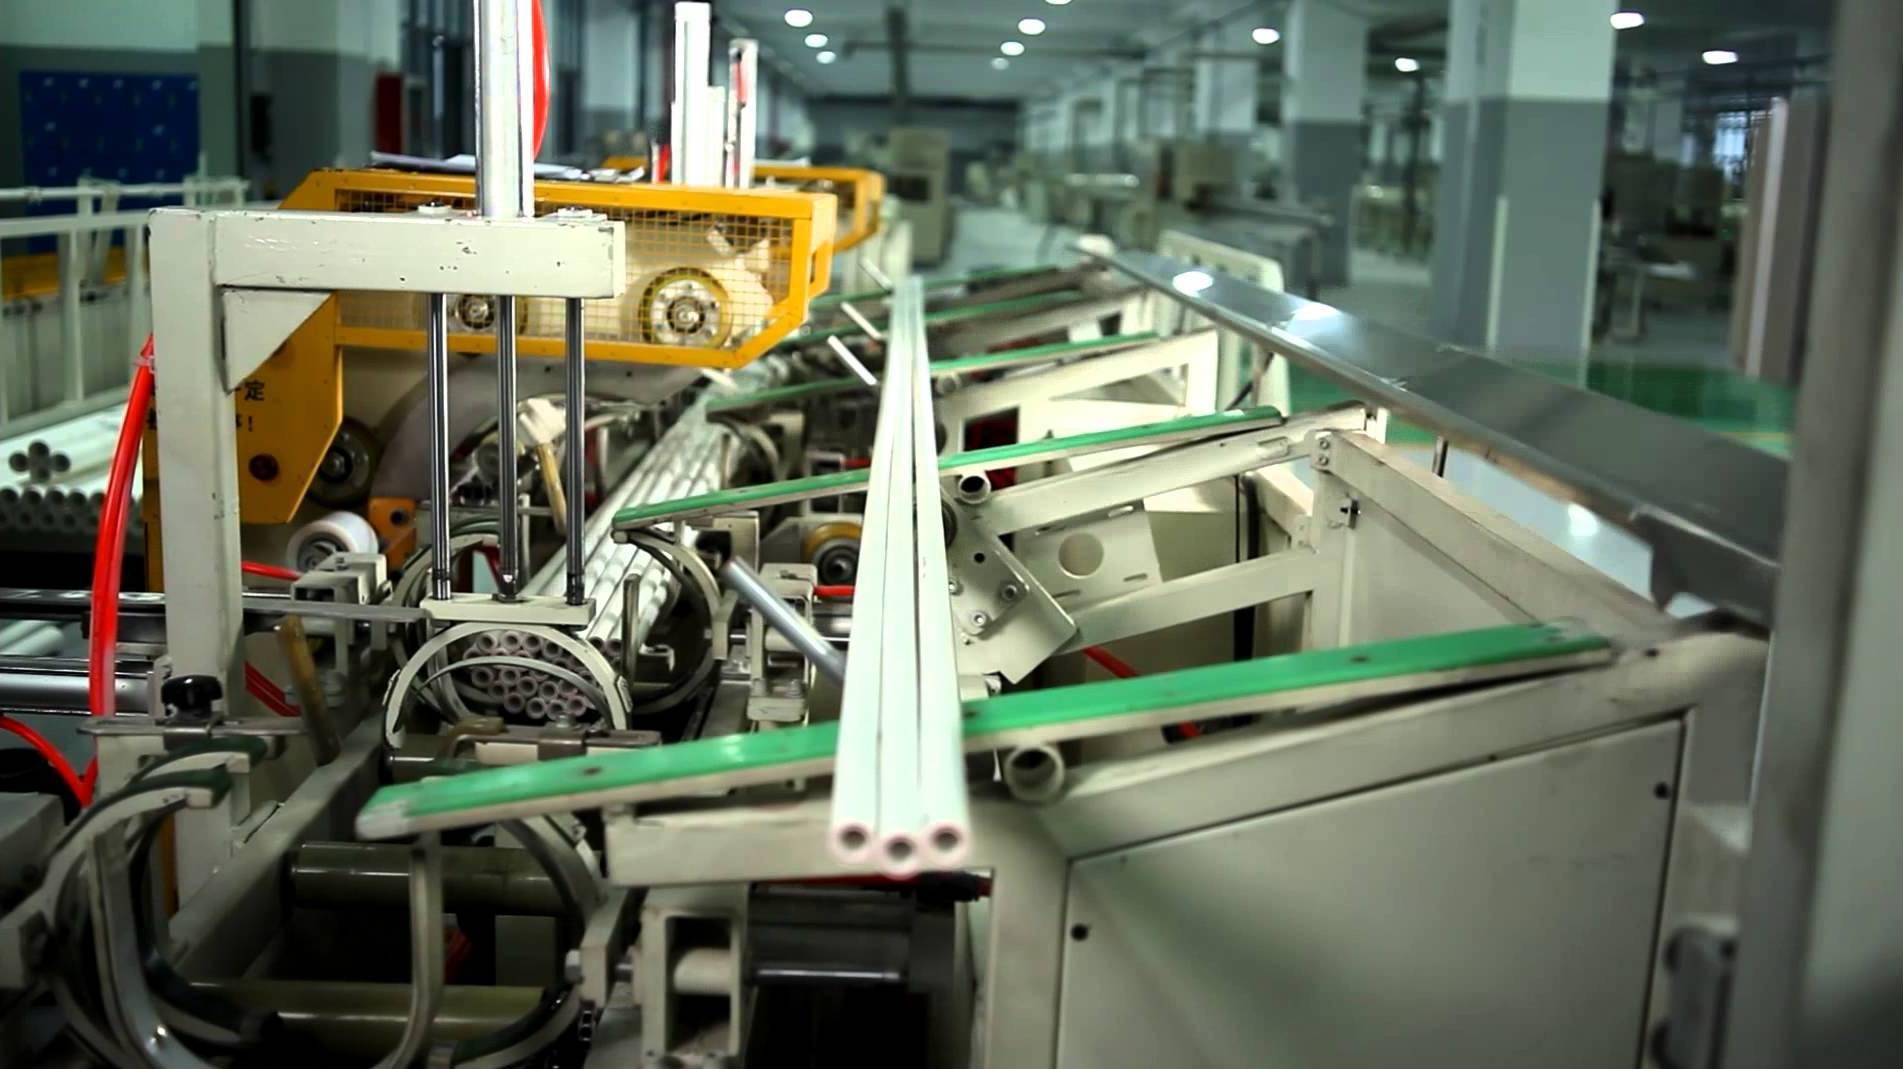
- Marking Basic information is applied to the foil. On it you can immediately determine for which works this or that type of pipe is intended.
- Cutting. This is the last production stage. The cut products come to the warehouse for packing and storage.
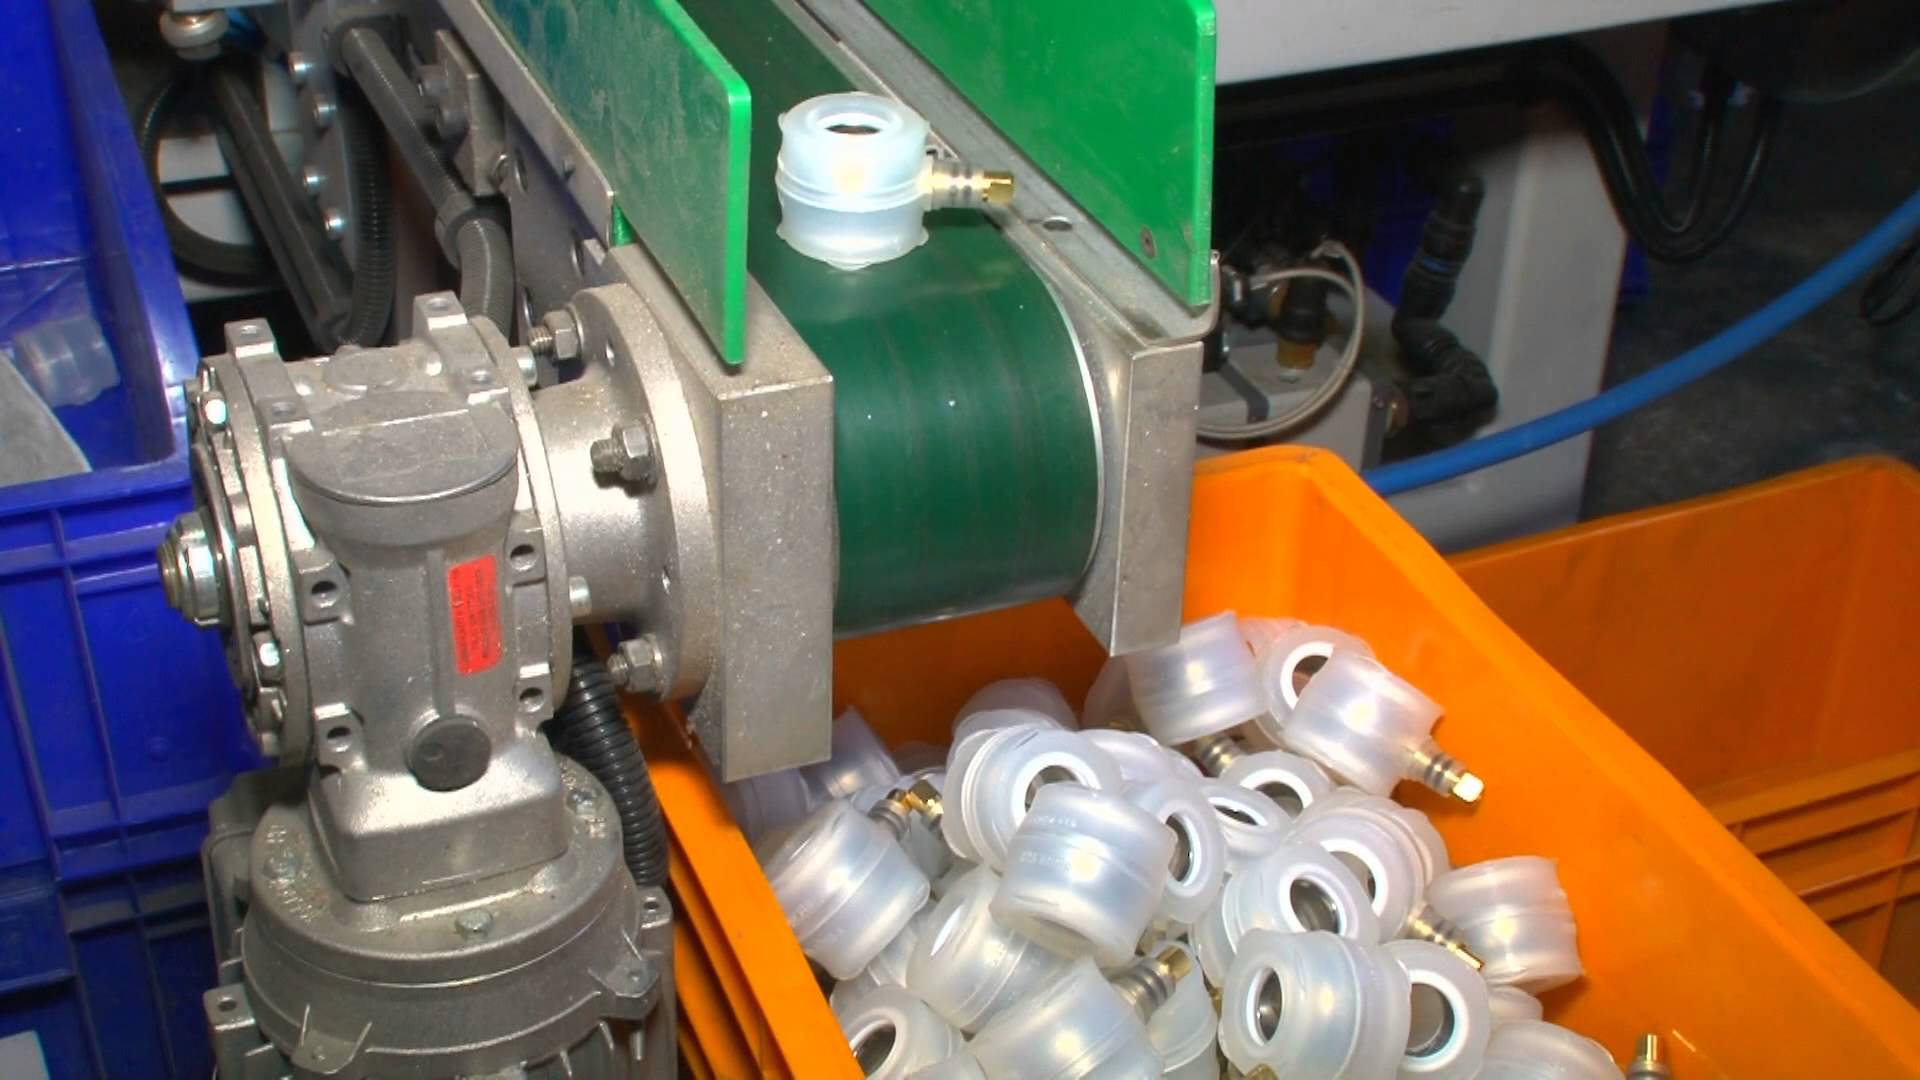
Small and shaped parts from the same raw materials (for example, fittings for pipes) are produced in the same way. After the extruder, the liquid mass is fed into the mold, where details of complex shape are cast. Cutting they do not need. Small fragments are made immediately by the piece.
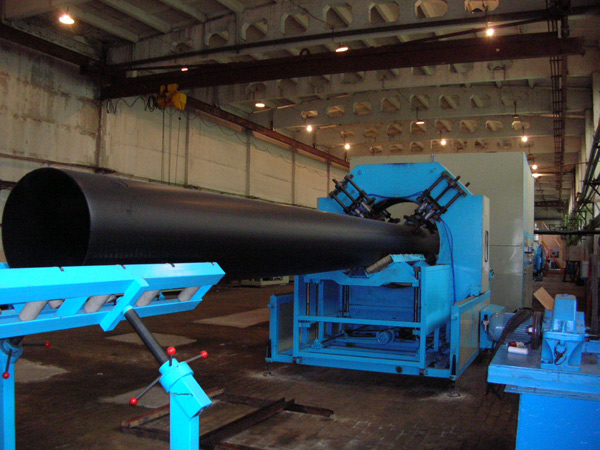
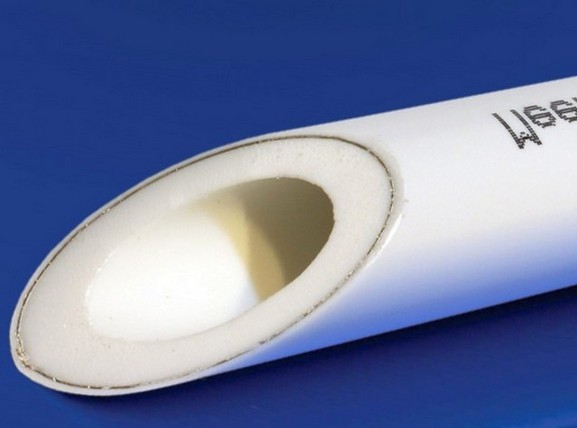
The production of reinforced pipes is somewhat more complicated. It implies an intermediate or outer layer of more durable materials. This layer is necessary in order to reduce the tension with increasing temperatures.
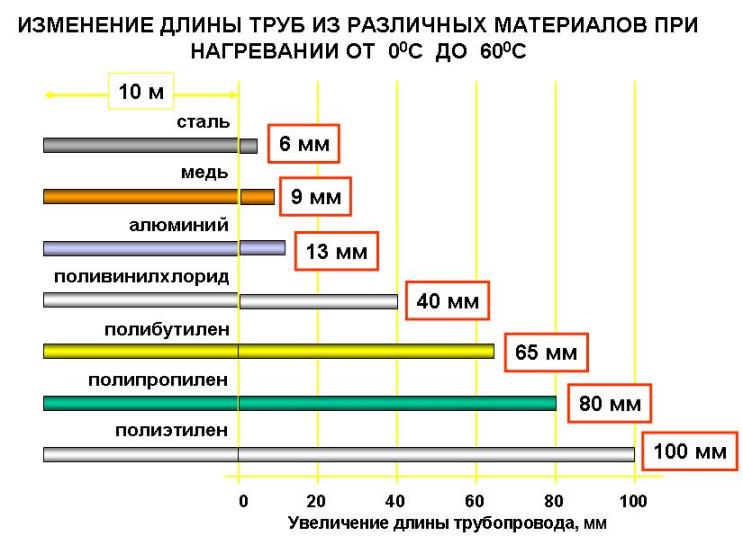
Since polypropylene is close to polyethylene — a stretching and plastic substance — it also has the property of increasing and decreasing in size as the temperature changes. At low, the material is compressed; at high, it is stretched.
The stretch ratio of polypropylene materials is significant. Thus, a pipe 10 m long at a temperature of 95-100 ° C can stretch by 150 mm. This is of great importance for utilities that use parts made of propylene.
Stretching is dangerous because the pipe is no longer as strong as before the temperature changes. Therefore, it must be prevented in all systems where the maximum heating temperature of the product exceeds 90 ° C.
The scope of polypropylene pipes is determined by their thickness: the thicker they are, the stronger. The stronger - the greater mechanical and physical stress they will withstand. The “hardier” the pipe in operation, the wider the range of use.
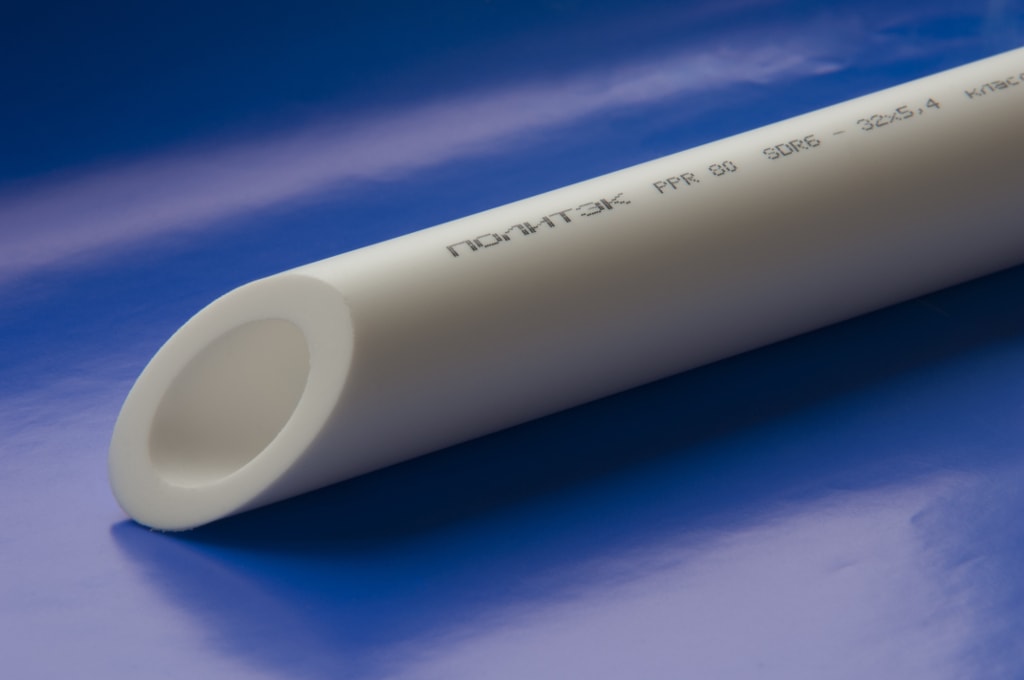
Manufacturers produce two types of products: thin-walled and thick-walled.
Thin-walled pipes are considered with markings PN10 and PN16. PN10 can withstand temperature drops up to 45 ° C and a pressure of no more than 10 atm. Wall thickness - 0.9-1 mm. The scope of their application is strongly limited by technical characteristics, so they are the cheapest. Apply them away from high temperatures.
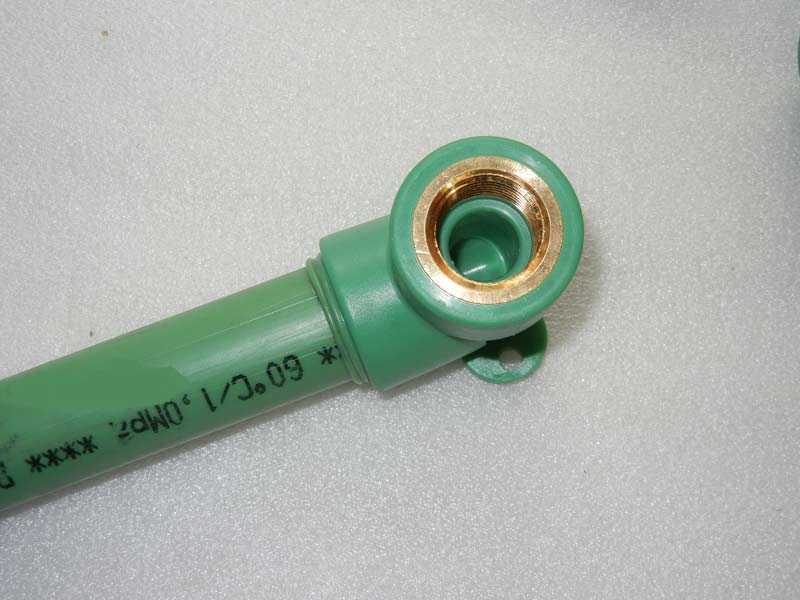
PN16 can withstand heat up to 60 ° C and pressure up to 16 atm.The walls are much thicker - 15 mm. At the same time, this type of pipe has a distinctive feature that makes it difficult to use the material in many areas. This is a large extensibility at temperatures above 60 ° C. In almost all heating systems where pipes are often used, the temperature is above this value.
For thick-walled are all brands, starting with PN20. This is a serious equipment with thick, solid walls up to 21 mm. It is universal for any kind of work.

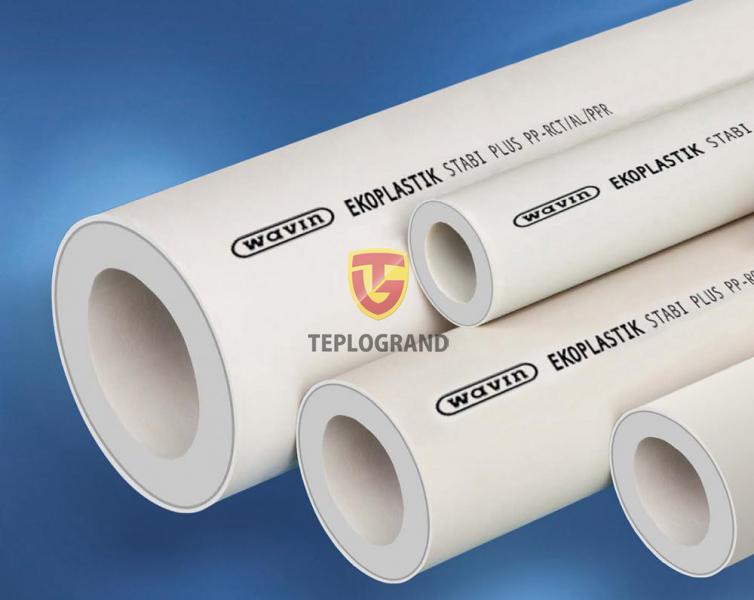
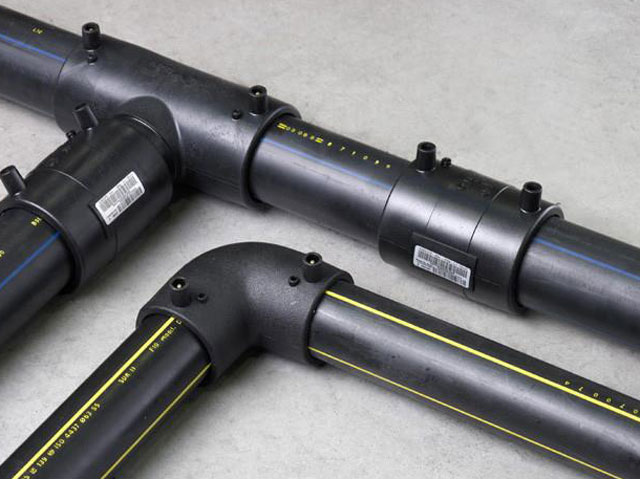
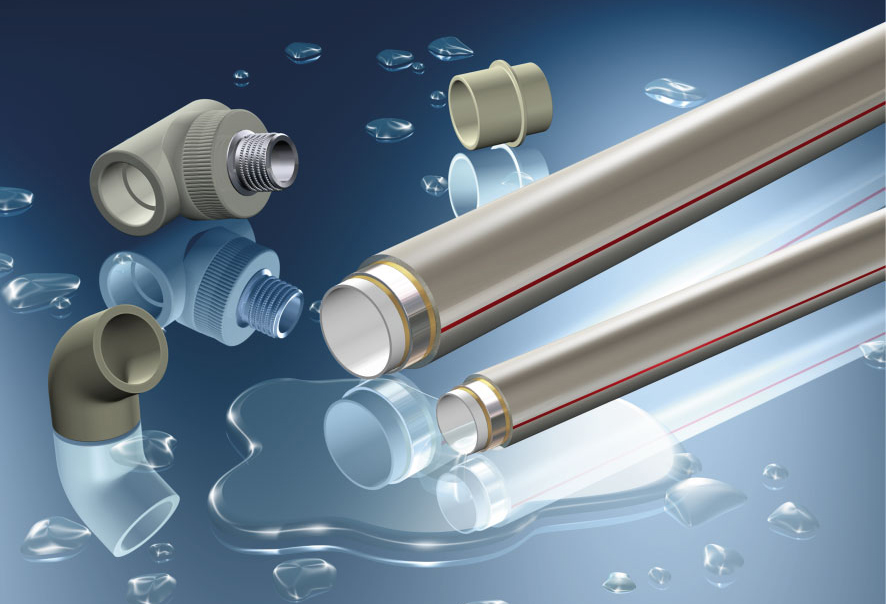
Thick-walled pipes are reinforced and non-reinforced.
The reinforcing layer is located inside the pipe, between the layers of propylene or outside the product, like a shell. It protects polymer products from stretching at high temperatures.
Made from different materials:
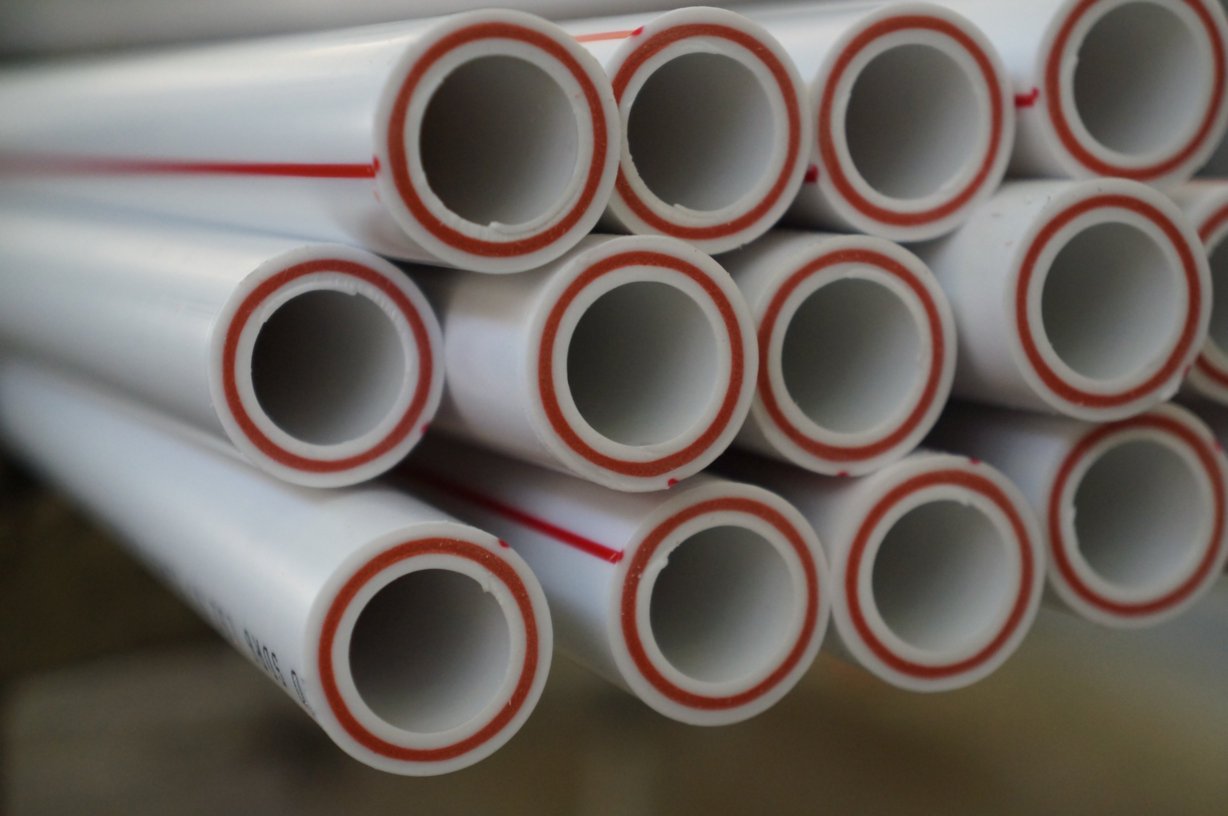
- fiberglass;
- foil;
- polyethylene;
- aluminum.
Pipes without reinforcement and with a fiberglass reinforcing layer are the easiest to install. They melt well and connect to fittings without obstructions. The connection is reliable.
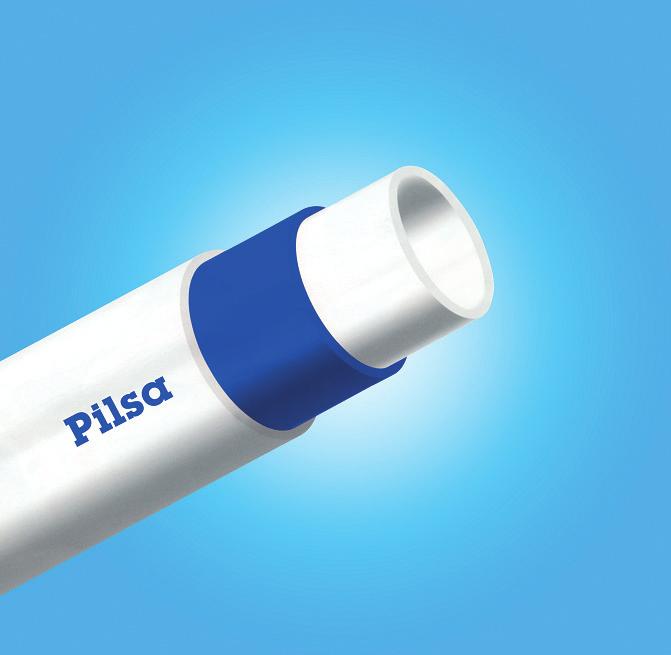

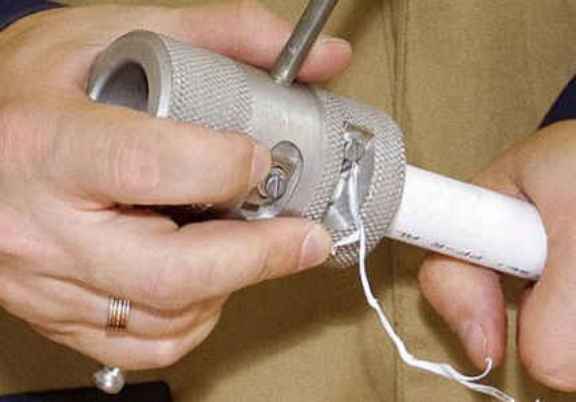
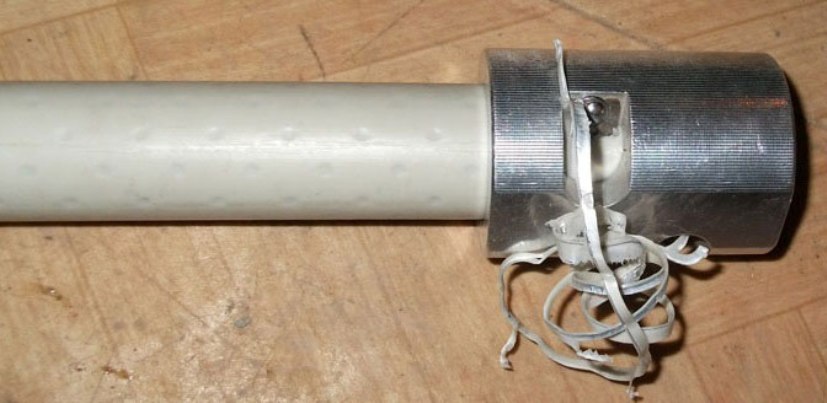
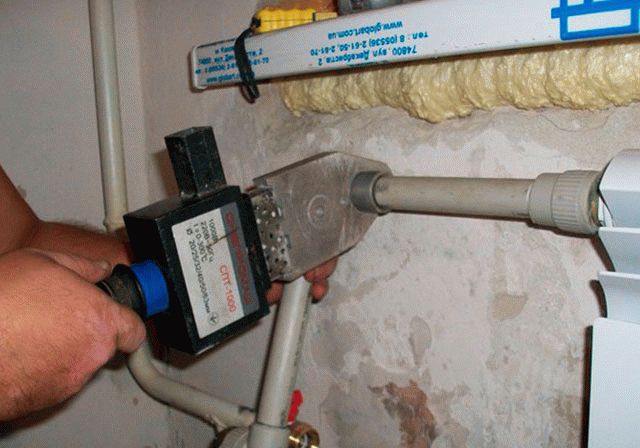
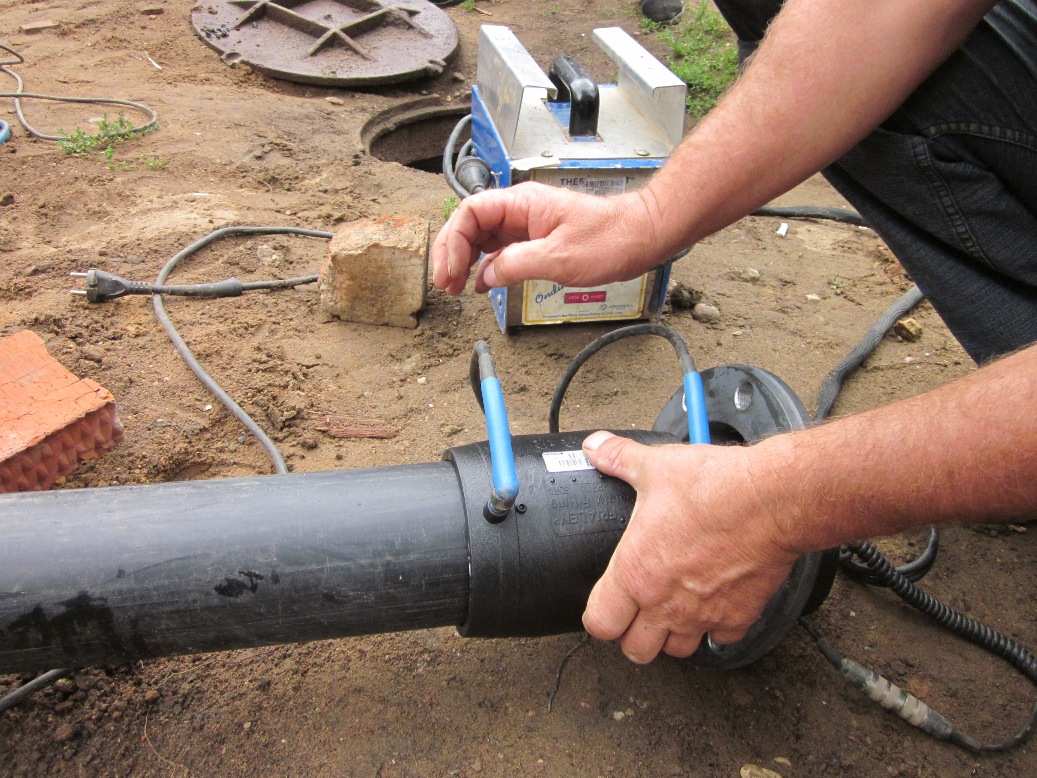
Pipes with aluminum and foil are more difficult to work with. If aluminum is outside the polypropylene layer, it should be trimmed to the full width of the connecting node. Without stripping, no soldering is possible.Because of the aluminum protection, it will not be possible to melt the propylene, and therefore there will not be a quality connection.
You need to clean the pipe with a special tool for pipes with aluminum reinforcement. This process is long and laborious, especially with a large diameter of the product.
If the aluminum layer is inside the propylene pipe, cleaning it is even more difficult. But it is necessary. When installing, the inner and outer layers of propylene should be fused together and “soldered” aluminum, so that no water gets on it.
Aluminum does not rust, but if water gets between the layers, the pipe may burst.
Combined products and pipes with an aluminum plate inside the product are the most difficult to install, but not the most effective.
Advantages and disadvantages
The advantages of the material quite a lot:
- Relatively light weight. Polypropylene pipes weigh 9 times less than metal. They are easier to transport and assemble.
- The price of one pipe 4 m - within 30-110 rubles.
- Installation does not require professional skills. It is worth working out on spare parts, but it will not take much time.
- Reliable and tight connection of parts of the pipeline and any other design.It is provided by soldering. The joints are protected from water and leaks and are as strong as the pipe itself.
- The material can be processed. You can make straight and oblique cuts, cut them into fragments from 1 cm in width to any desired length. This is convenient when pipes have to be installed in hard-to-reach places.
- The material meets the requirements of GOST. In the production of materials used that may be in contact with drinking water.
- Technical specifications meet the requirements of SNiP for installation of pipes in different operating conditions. Suppose installation inside and outside (underground).
- Polypropylene does not rust. In the composition there are no materials that are amenable to corrosive processes.
- Products do not need to be painted. They already have a white or other color and semi-matt surface. The dye is added to the raw materials at the first stage of production, so the pigment is firmly fixed. After 10 years of service, the product will have the same color.
- For each task - its own solution. If you need to hold cold water, there is PN10, for boiling water - PN25.
- Water flows silently through the pipes. The silence is ensured by the thickness and density of the material.
- Inside the pipe does not appear sediment from the direct current of water.
- Service life - up to 50 years.
- Waste-free use. From the remains of pipes you can make useful and beautiful things for home and life.
But there are still disadvantages:
- Pipes are subject to stretching at high temperatures. Even reinforced.
- Products can not be bent. To change the direction of the pipe (turn the corner, down and further), you need to use fittings.
- Soldering requires special tools.
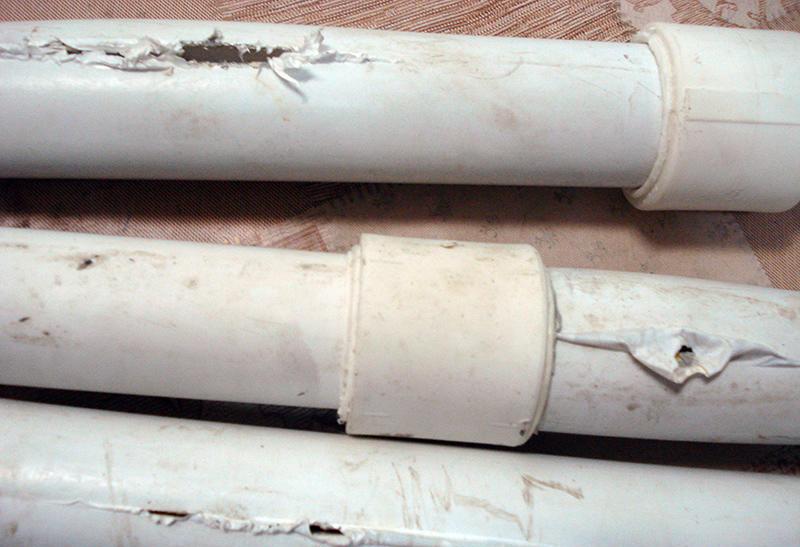
- On the surface of the pipe may be scratches from mechanical damage. Integrity is not harmful, but the appearance will suffer.
- Reinforced pipes require preparation before soldering. Only products with fiberglass can be soldered immediately, and aluminum and foil need to be cleaned.

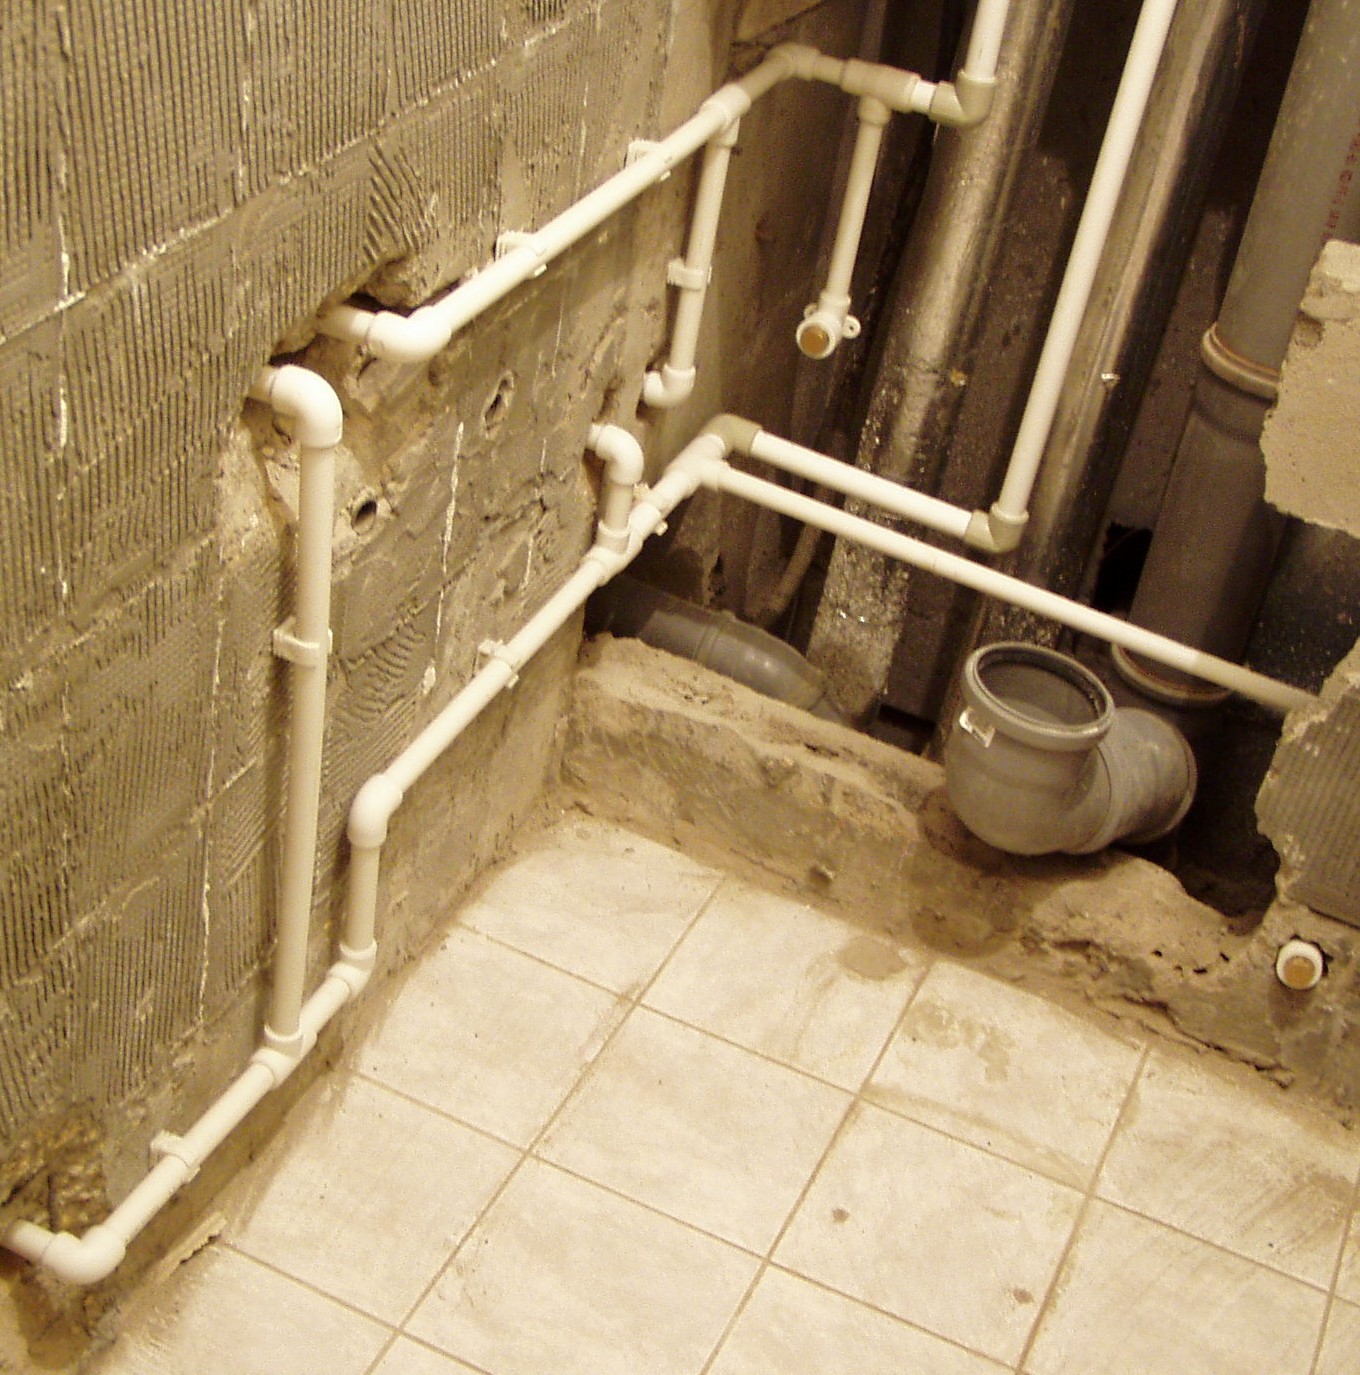
Where to apply?
Polypropylene pipes - a multifunctional thing in the household.
Here are some of them:
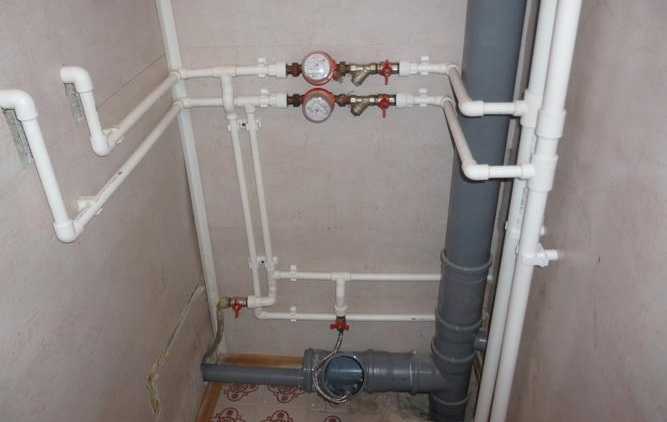
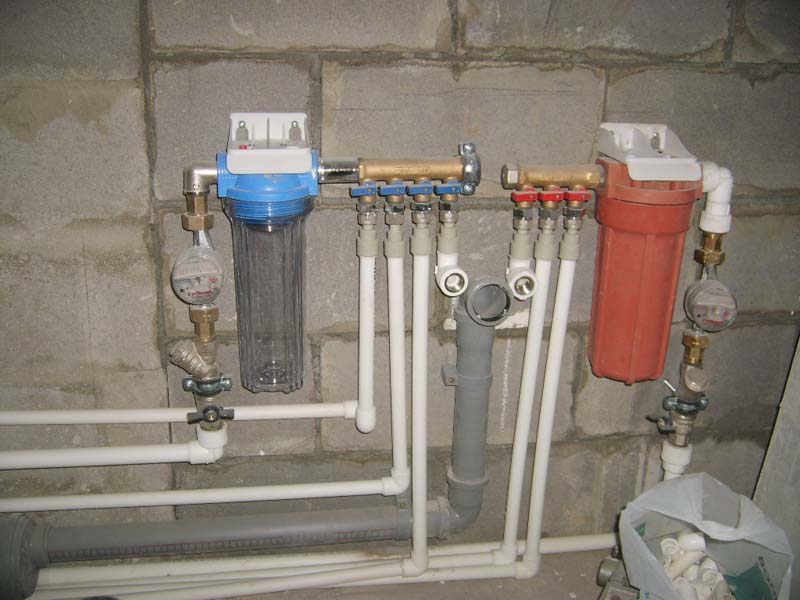
- Plumbing system. For cold water supply suitable unreinforced thin-walled or thick-walled pipe. It is cheap, easy to install, copes with the transportation of water up to 45 degrees.
- Hot water system. Pipes labeled with NP20 or NP25 can safely supply boiling water. Propylene begins to melt only at 170 degrees.
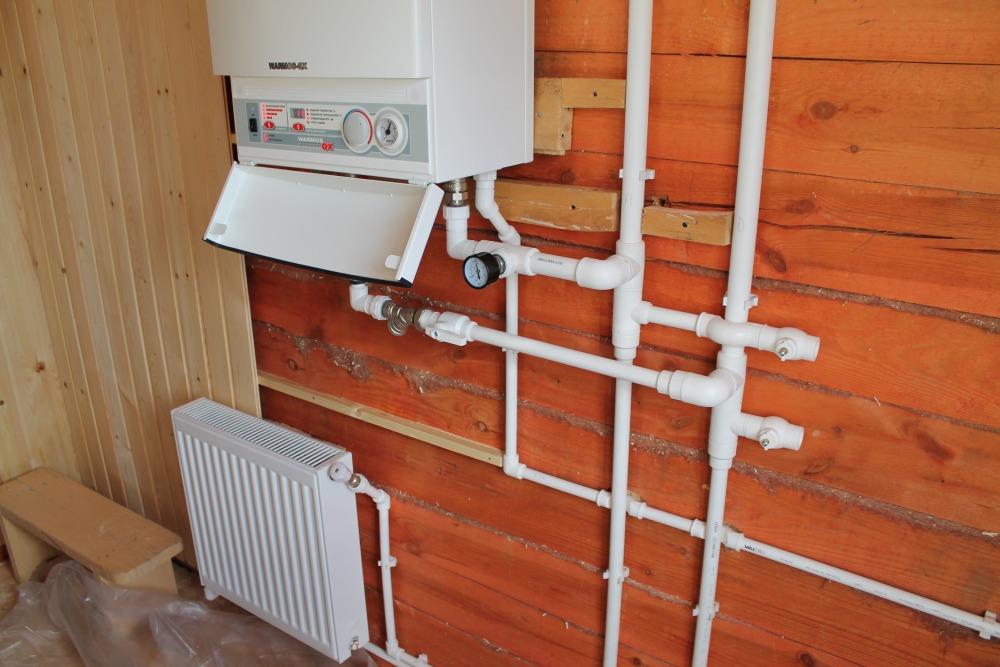
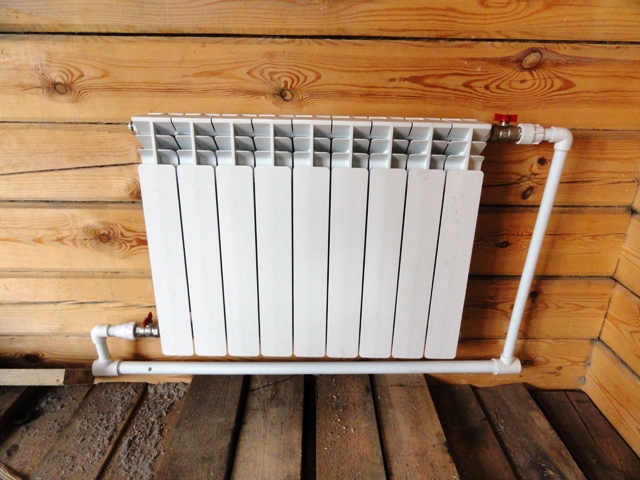
- Centralized heating system in the cottage, house or cottage. To do this, choose a pipe of large diameter with fiberglass. They are reliable and do not require complex stripping. The soldering of such pipes passes with a bang. Thermal conduction elongation of pipes with fiberglass is 10 times less than without it - only 1.5 cm. Due to this, the pipes do not sag and do not deform.
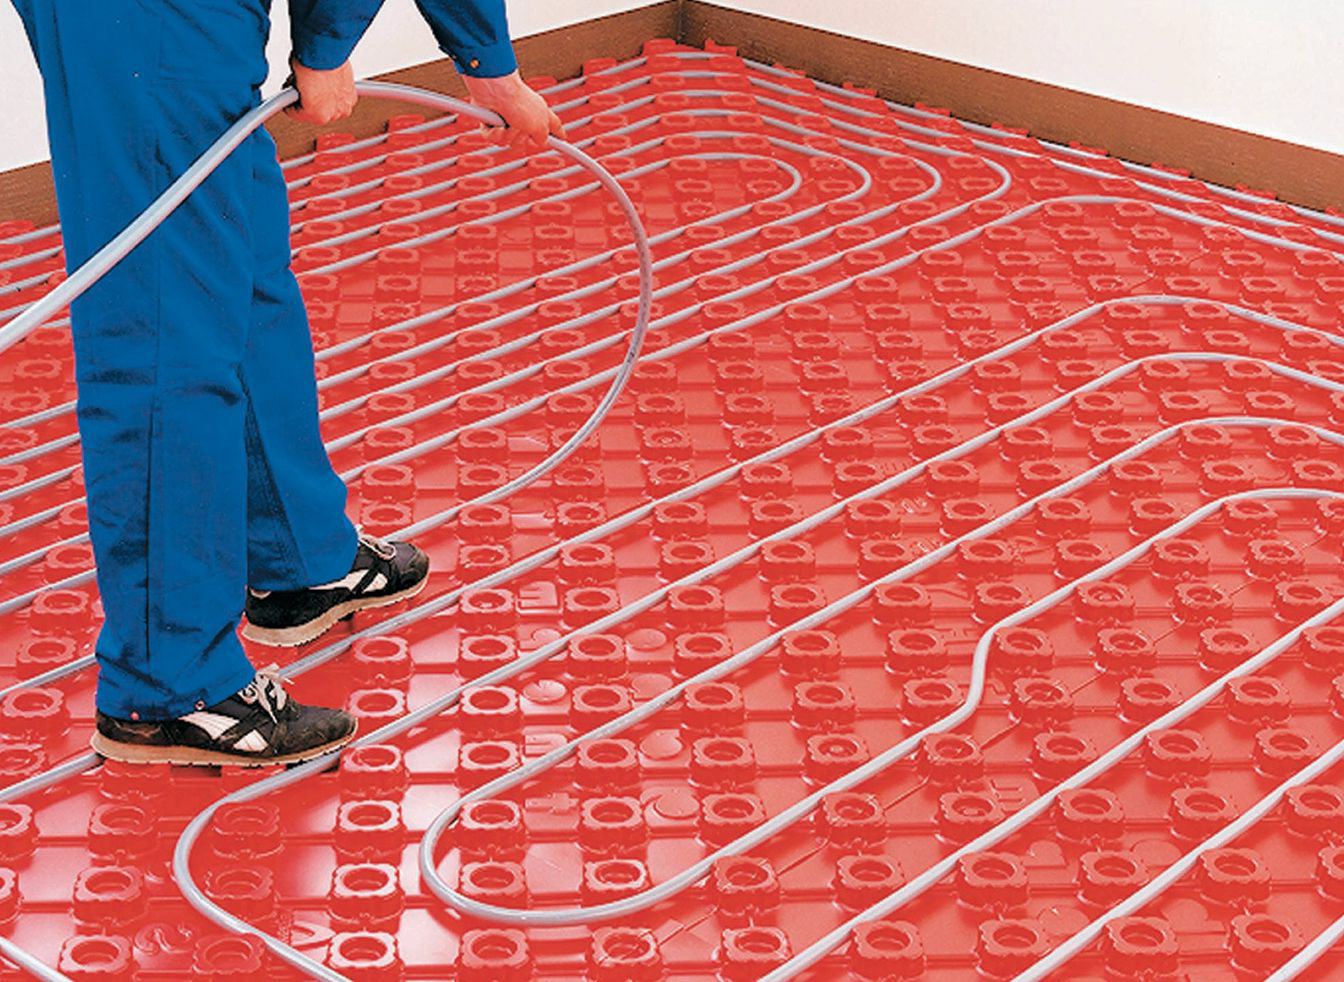
- Water floor heating. If there is not enough heat from the hot water pipelines, install a floor heating system. The disadvantage of such a floor is that it is impossible to roll the pipe with a small step. Plus - in the cost of maintaining the system and its service life. The lifespan of a water-heated floor is about 50 years. At the same time the system can be mounted directly on the floor screed.
- Auxiliary systems: ventilation and sewage.
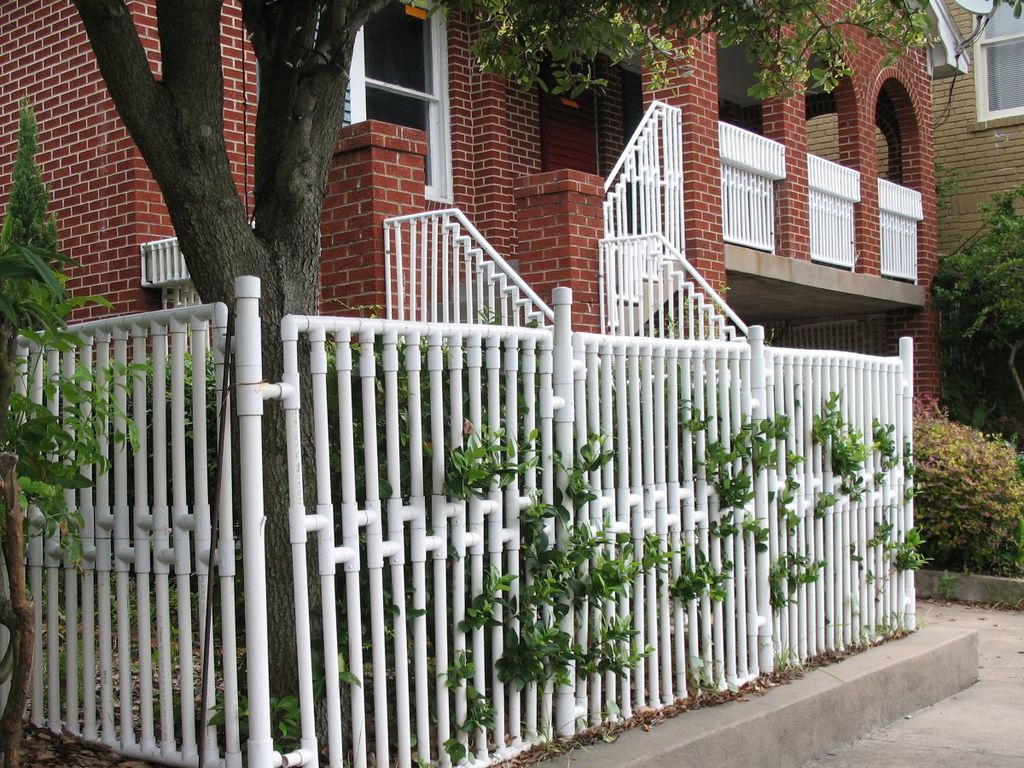
- The fence in the country. It will not protect against uninvited guests, but it can delineate the territory with its neighbors. On the protected suburban areas is one of the simplest and budget options.
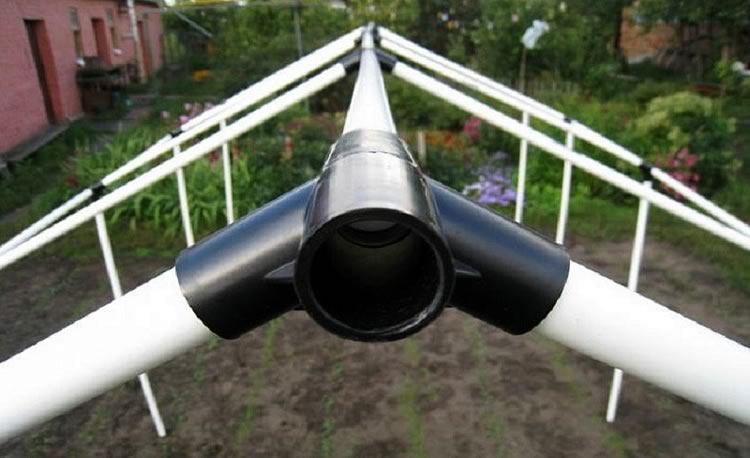
- Greenhouse or greenhouse. The pipes are durable and tolerate snow load in winter. Of these, it is convenient to assemble a simple greenhouse 1.5-2 m tall.
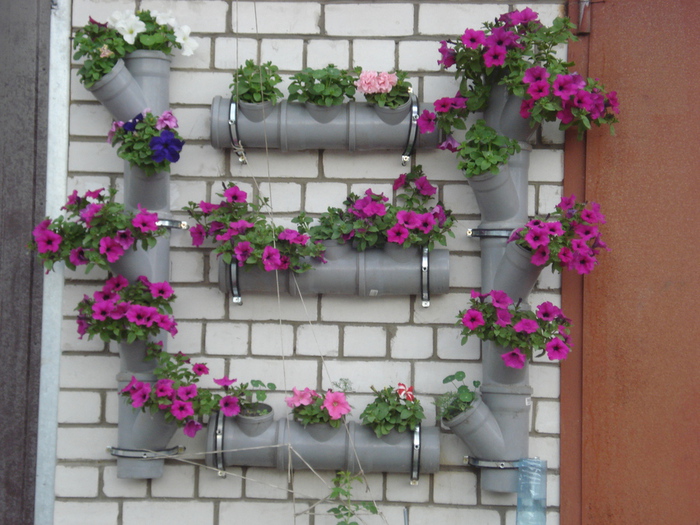
- Tiered flower bed for garden plants.
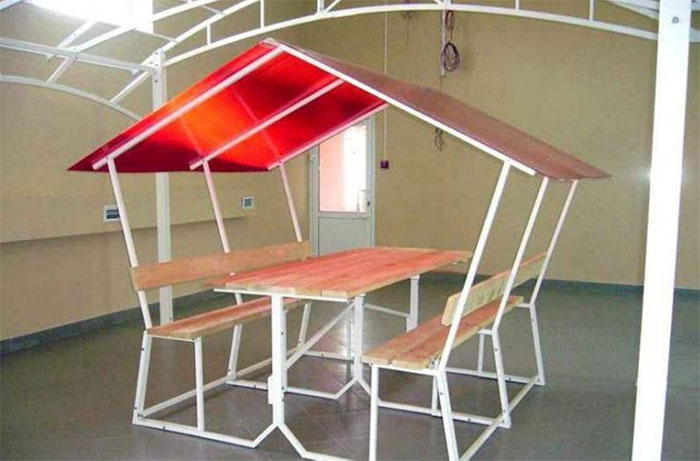
- Gazebo and garden furniture.Chairs, fireboxes, awnings, portable tables, deck chairs.
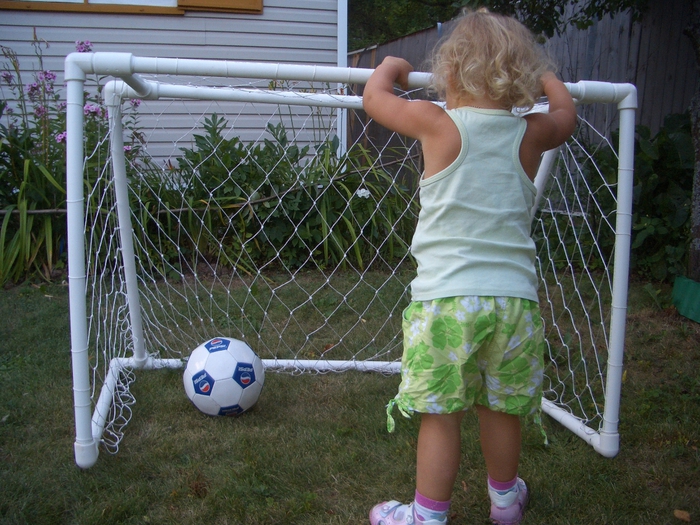
- Houseware. Useful things can be made from scraps of pipes for a hall, a balcony, a garage, a workshop, a children's room. With the help of tees, couplings and pipe fragments, any object of a geometric shape is assembled - a shoe rack, a flower stand, a clothes hanger, a dryer or a wastebasket. All that is enough fantasy and remnants of material. It is convenient to collect playgrounds, swings, and houses for small children. If you add a net, you get excellent gates for children's football.
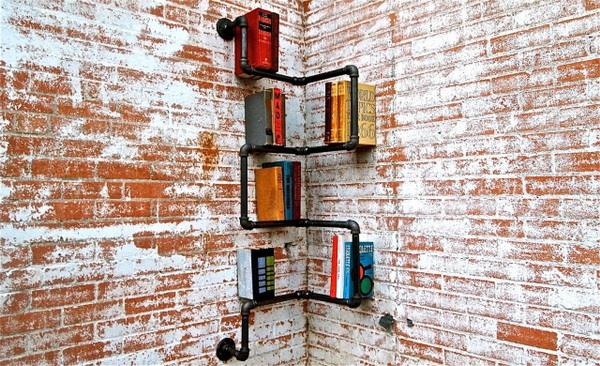
- Elements of decor. Using corners and adapters, you can assemble a bookshelf in a loft-style. Short scraps of different diameters will go to create a photo frame or a mirror, lamps, flower pots and vases.

What is required?
When working with polypropylene pipes will need several groups of tools.
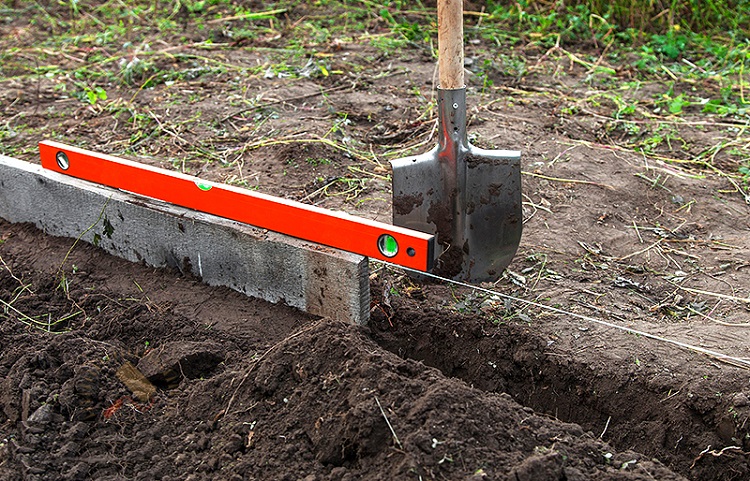
The first group is necessary for measurements. It includes roulette, rulers, markers, construction levels. In complex cases, it is necessary to resort to mathematical calculations. For example, when using propylene pipes to supply water from a source outside to a house.
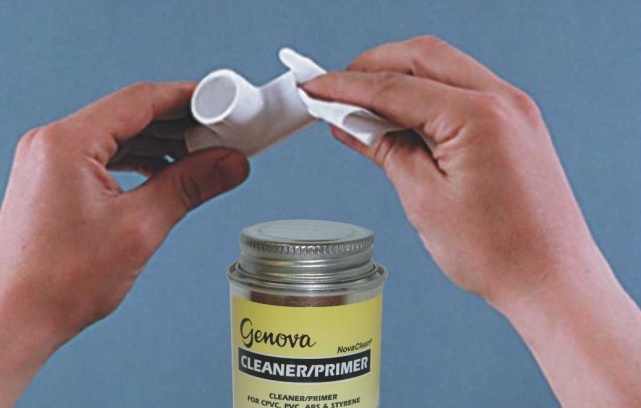
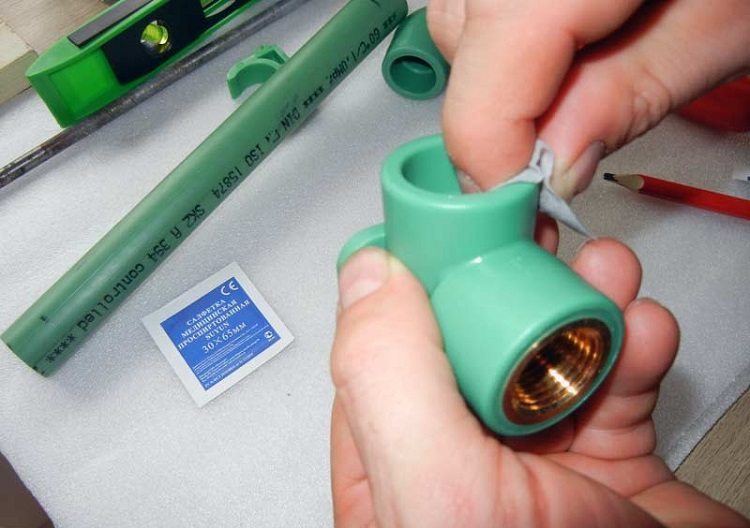
In addition to drawing and measuring tools, you will need alcohol and trimming cotton fabric. They are needed for degreasing the surface of pipes. On the degreased surface layouts better lay down and it is more convenient for soldering.
The second group of devices is necessary for cutting. The length of one pipe is on average 4 meters. From it you need to cut short fragments, adjusting them to the size of the site where the pipes will be installed.
Cutting the pipe with scrap materials is not recommended. This is a long, inconvenient, and the cut is obtained poor quality. Its edge "flies", it turns out with burrs. It must be cleaned with sandpaper or cut with a thin knife.
Tools for a single cut (can be used to cut 1-2 fragments, when others were not at hand):
- hacksaw;
- jigsaw;
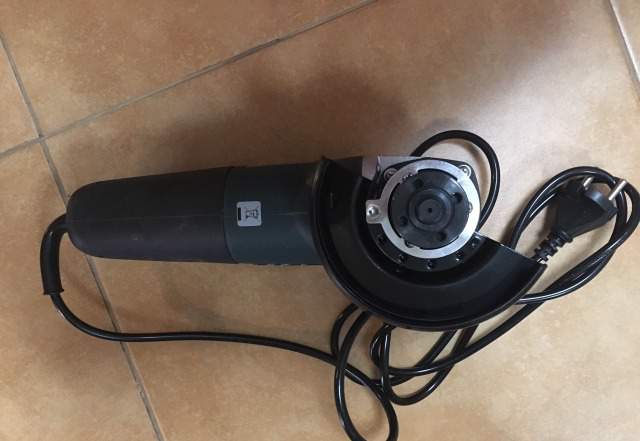
- saw-Bulgarian;
- self-sharpening knife.
Propylene is soft, so these tools will do the job. If you have to use them in the absence of others, it is important to consider that the cut will be uneven, and chips will get inside the pipe. This chip must be removed so that it does not “walk” through the water supply system or underfloor heating system.
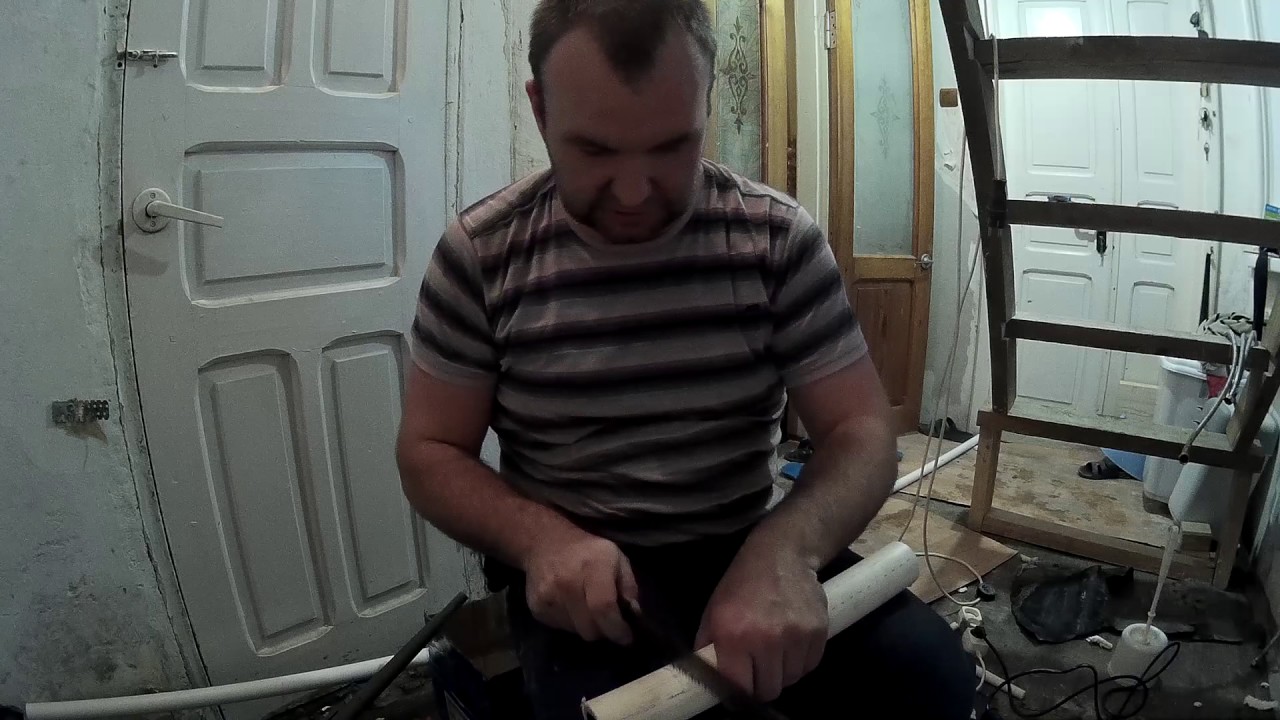
Electrical devices (jigsaw, saw) require accuracy in operation. It is necessary to control the force with which the pressure on the pipe occurs and turn the pipe several times during cutting. This helps to make the cut straight and not at an angle.
These tools need to be used correctly - do not cut, but try to fix the product in place and press it down with a tool. In this case, the cut will be as close to the ideal as possible and the chips will be smaller. But this method is only suitable for thin-walled and small-diameter pipes. With reinforced products will have to tinker.
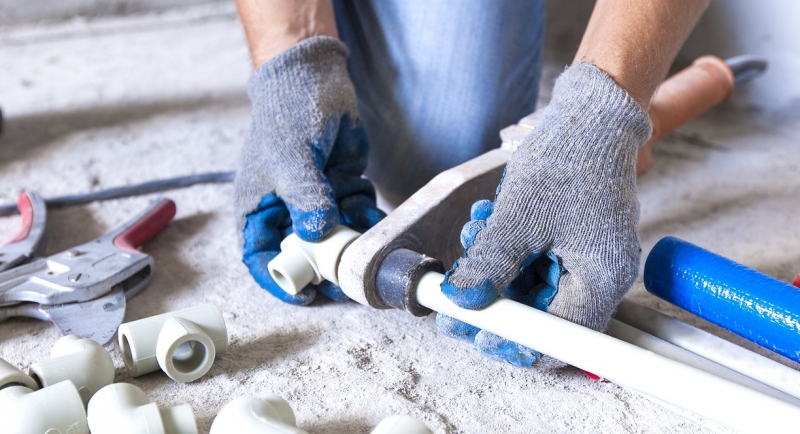
Tools for high-quality pipe cutting:
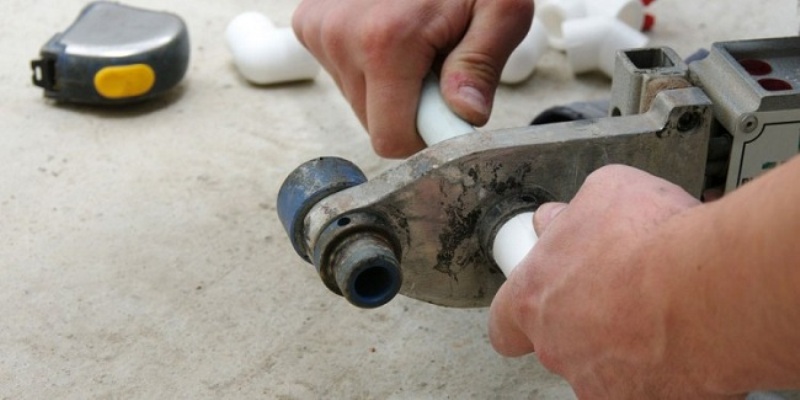
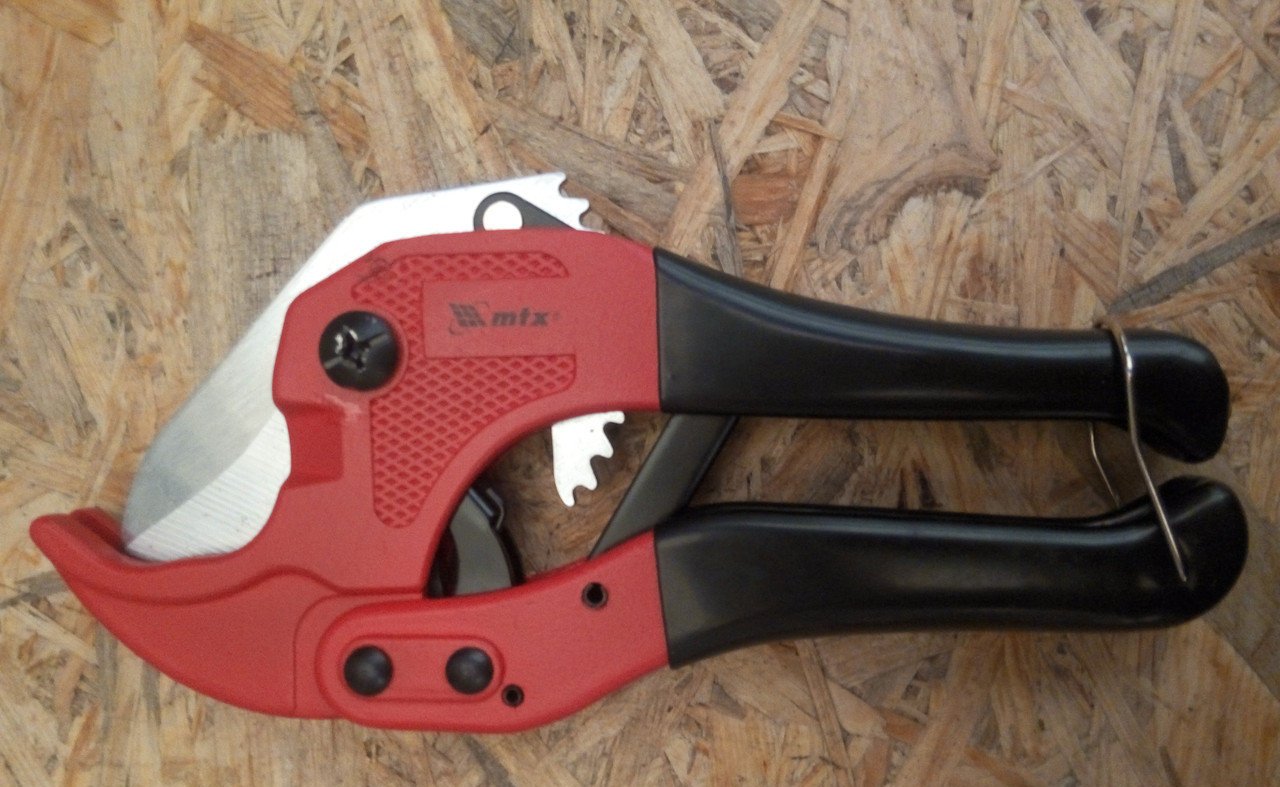
- special scissors for plastic pipes, including propylene;
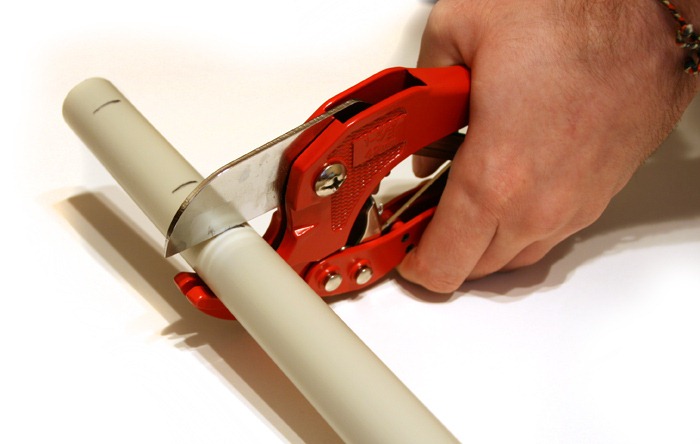
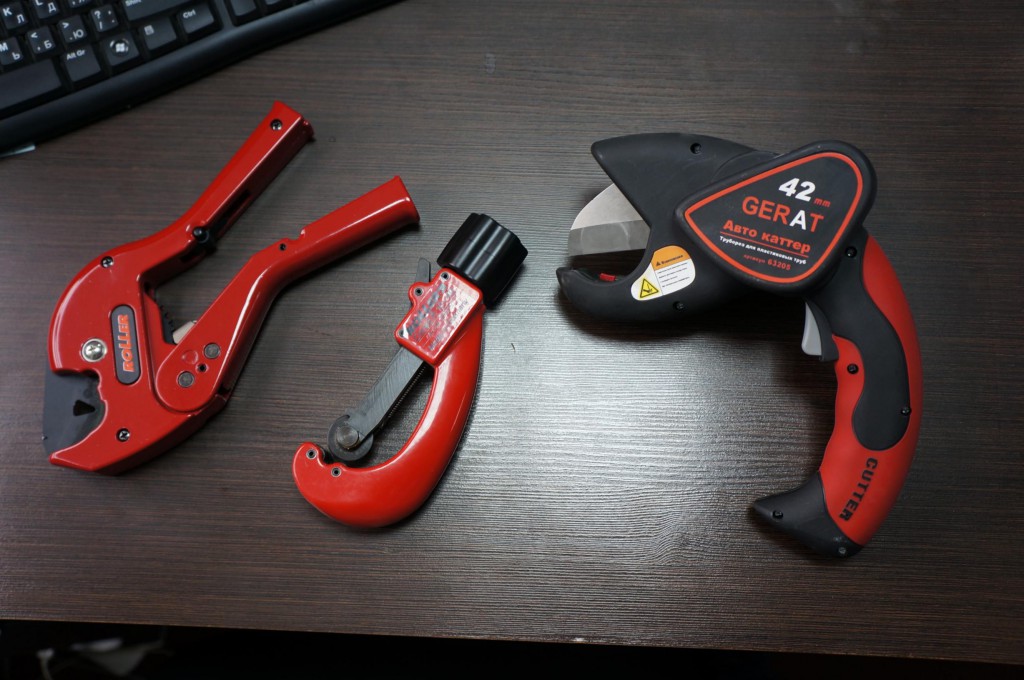
- roller pipe cutter;
- electric pipe cutter;
- guillotine pipe cutter.

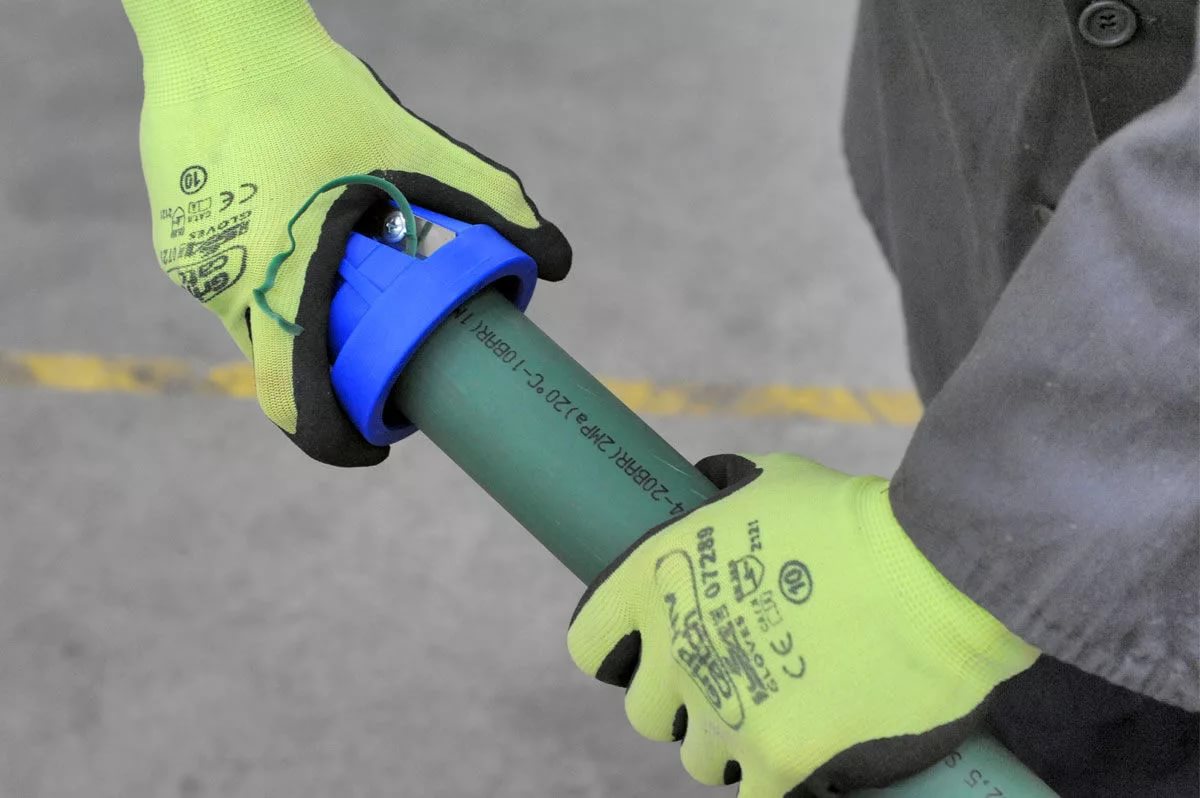
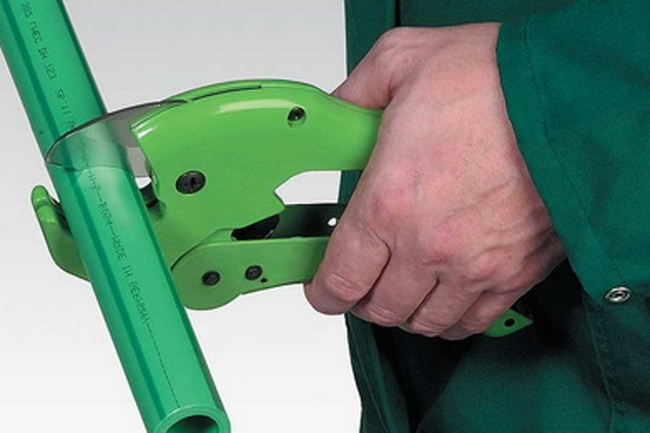
Pipe shears are very different from ordinary ones. The sharp blade is fixed on one side only. In place of the second is a wide metal base. Inside the base there is a groove. The sharp edge of the blade enters this groove when cutting plastic products. The edge of the pipe is even and suitable for installation.
To work with such scissors need only muscular strength.To cut the pipe, you need to close the scissors' arms so that the blade passes through the plastic.
The advantage of these scissors is that they are light, cheap, easily moved from place to place. The downside is that the distance between the blade and the base cannot be increased. Only thin tubes (up to 45mm) pass into it.
Large-diameter products (for sewage, heating) can not be cut manually.
Also, some masters consider the disadvantage that the effectiveness of the instrument is directly related to physical effort.
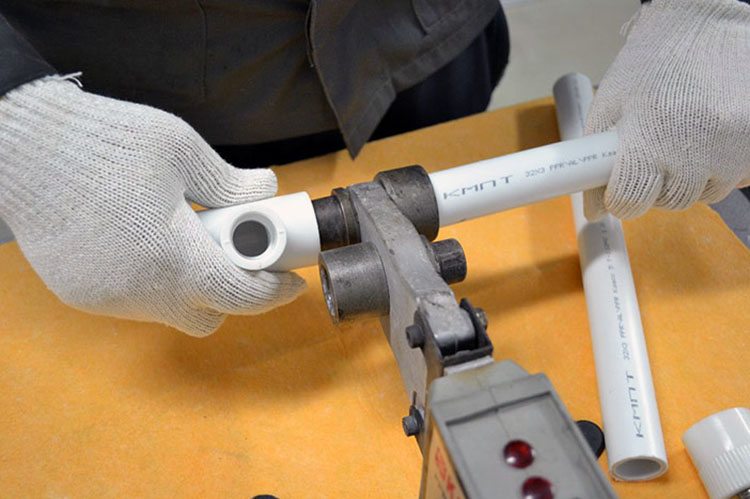
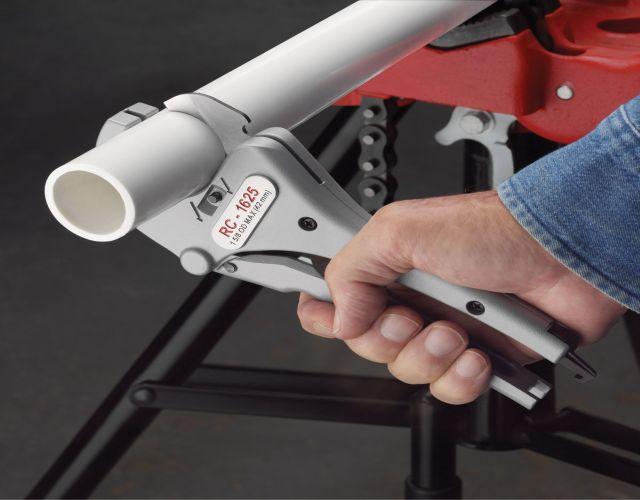
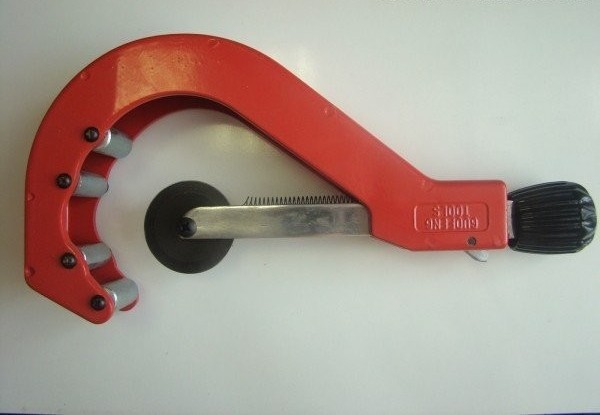
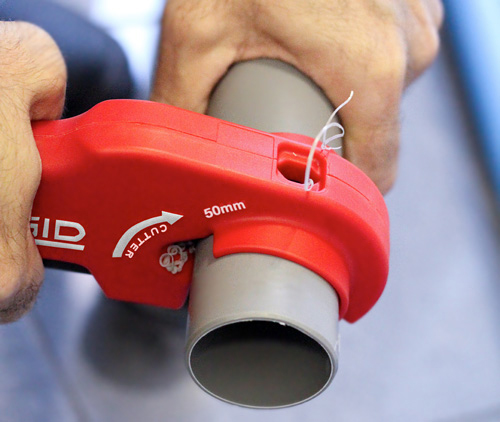
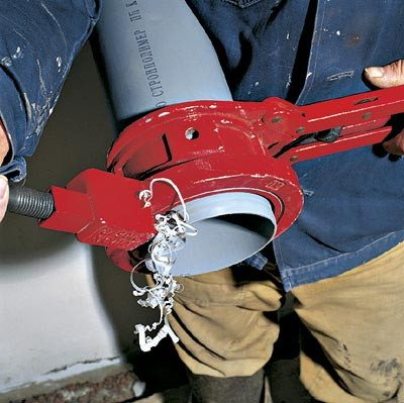
Roller pipe cutter, on the contrary, is more focused on work with large diameters. Outwardly, it looks like a clamp. The cutting blade is located on the end of the clamp.
Even easier to imagine this tool, if we recall the manual machine for rolling cans. The fixture is installed on the pipe and tightened with a bolt. It is important not to drag, so that the product does not go cracks. After that, you need to take the handle of the blade and rotate it clockwise. The result is a circular cut with a smooth edge.
The advantage of the tool is in convenient use and high-quality result. In size and weight, it is larger than scissors.By the principle of action is also associated with physical effort.
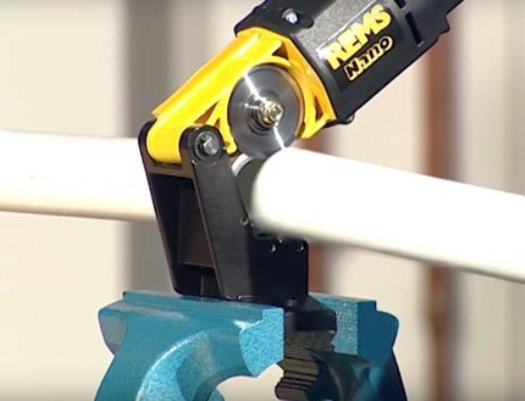
Electric (or battery) pipe cutter powered by an electric motor. He quickly and effortlessly cope with the task. However, the diameter of the product is also limited, as with manual scissors.
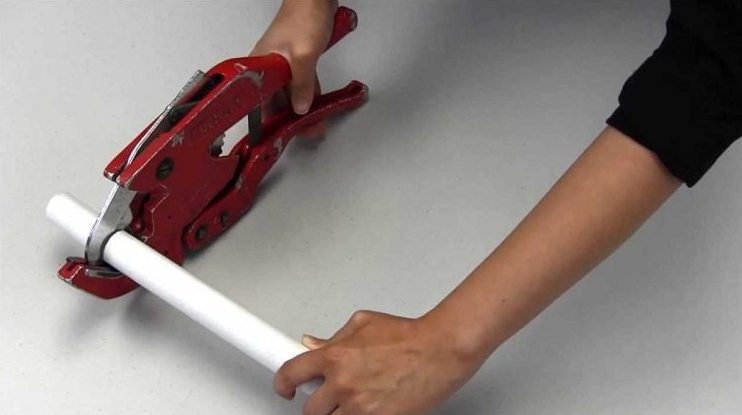
Guillotine pipe cutter refers to hand tools. Its design is fundamentally different from scissors and pipe cutters, and the possibilities are somewhat larger. They can cut pipes with a diameter of 5-35 cm. At the same time, it is not necessary to clamp the pipe with clamps. The cut is smooth without the risk of plastic cracking.
It is not recommended to use the "circular" and band saws. They are dangerous to the integrity of the pipe from the inside and to humans.
The third group of tools is useful for stripping pipes.
It includes only two tools, but they are very important:
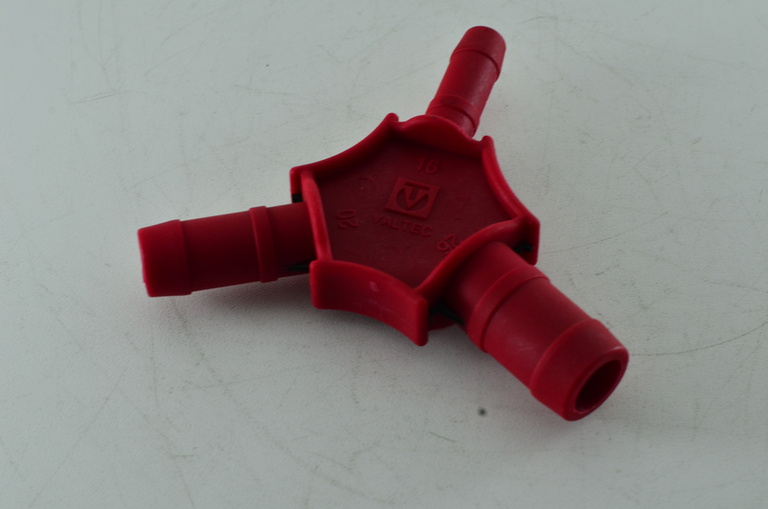
- fasksomilator;
- calibrator.
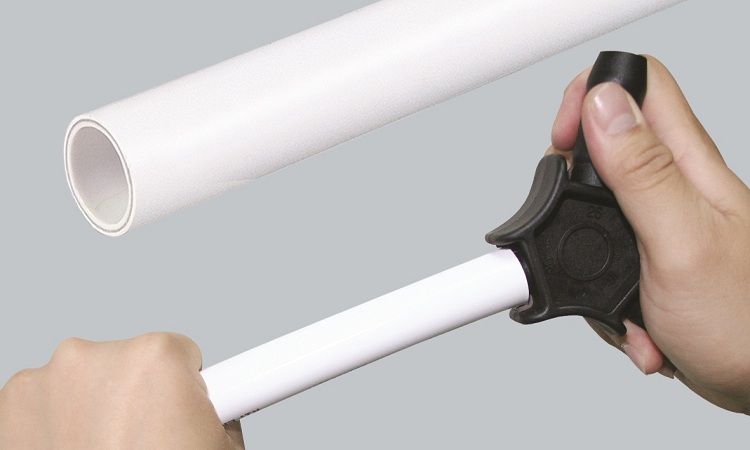
The purpose of the phaser is to remove the edge and the top layer of plastic around the cut pipe. This improves the quality of the soldering.
The fasteners vary in diameter. They are also mechanical and automatic. The tool is not universal, so it’s important not to lose the characteristics.
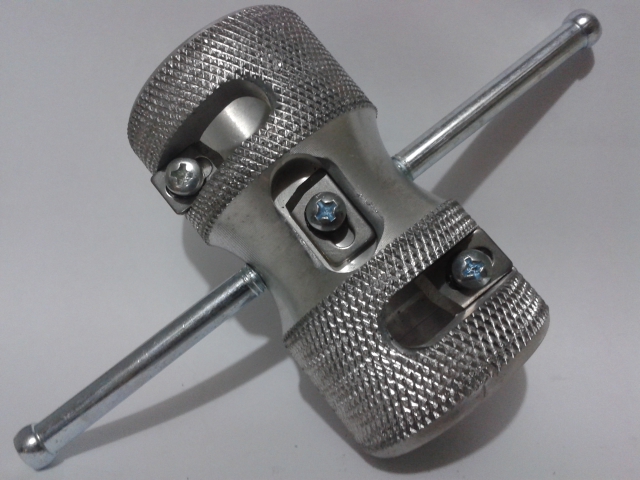
Calibrator is needed for processing reinforced pipes. Use it to remove the aluminum layer or foil. He is also able to eliminate burrs and irregularities in the cut. Some calibrators can perform the functions of a phaser.
A useful function of the calibrator is to return a perfectly round shape to the cut-off, if the pipe is slightly wrinkled during the cutting process.
The main disadvantage of these tools is that for each diameter you need your own calibrator and faskosimitel.
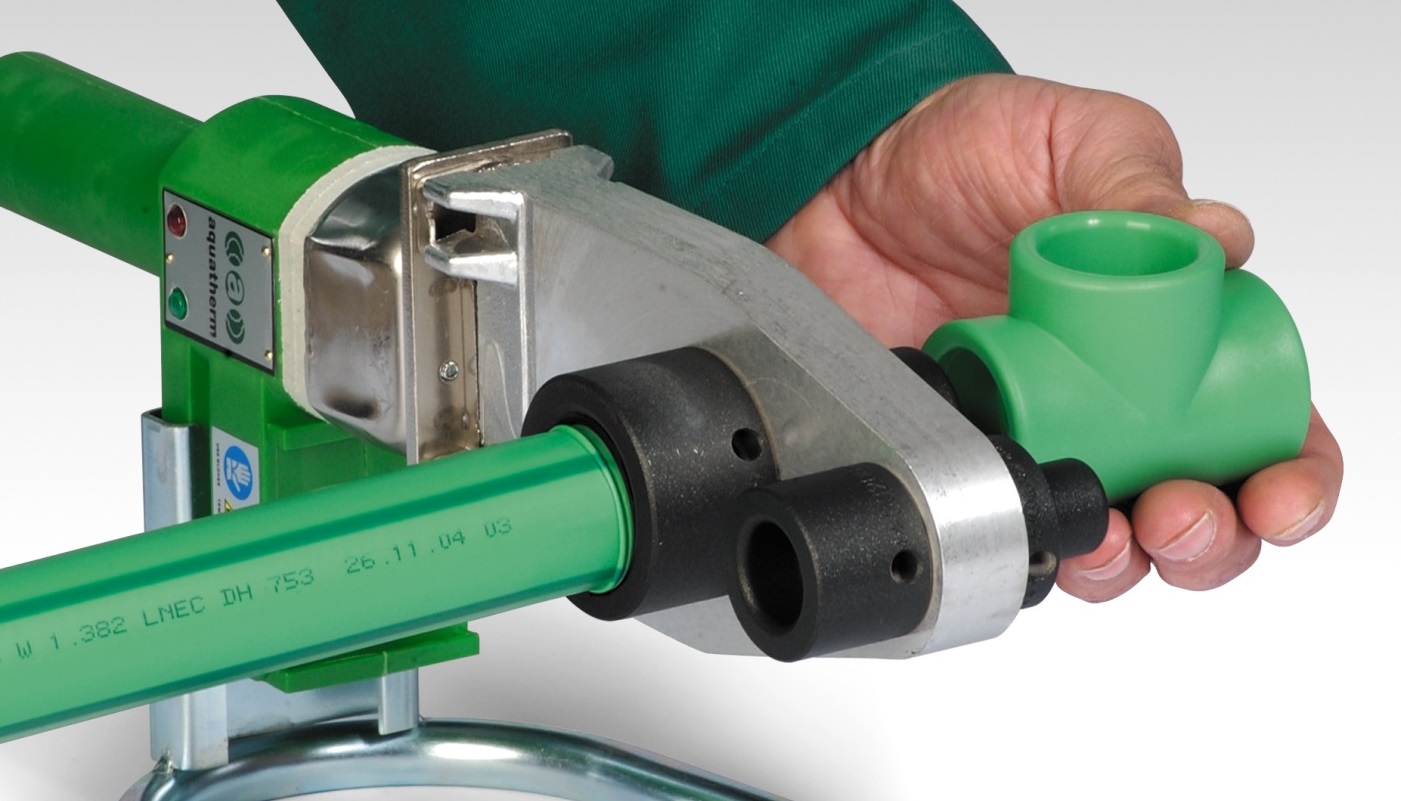
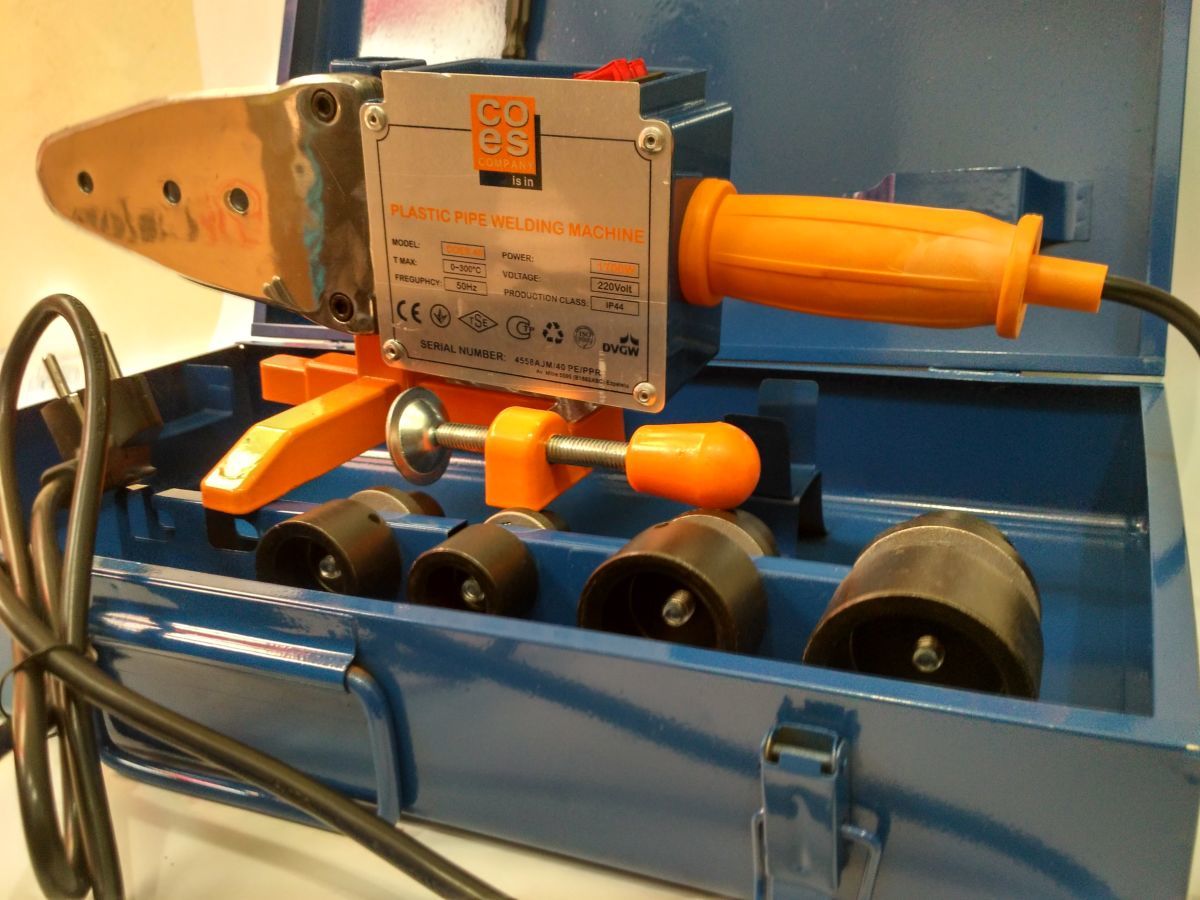
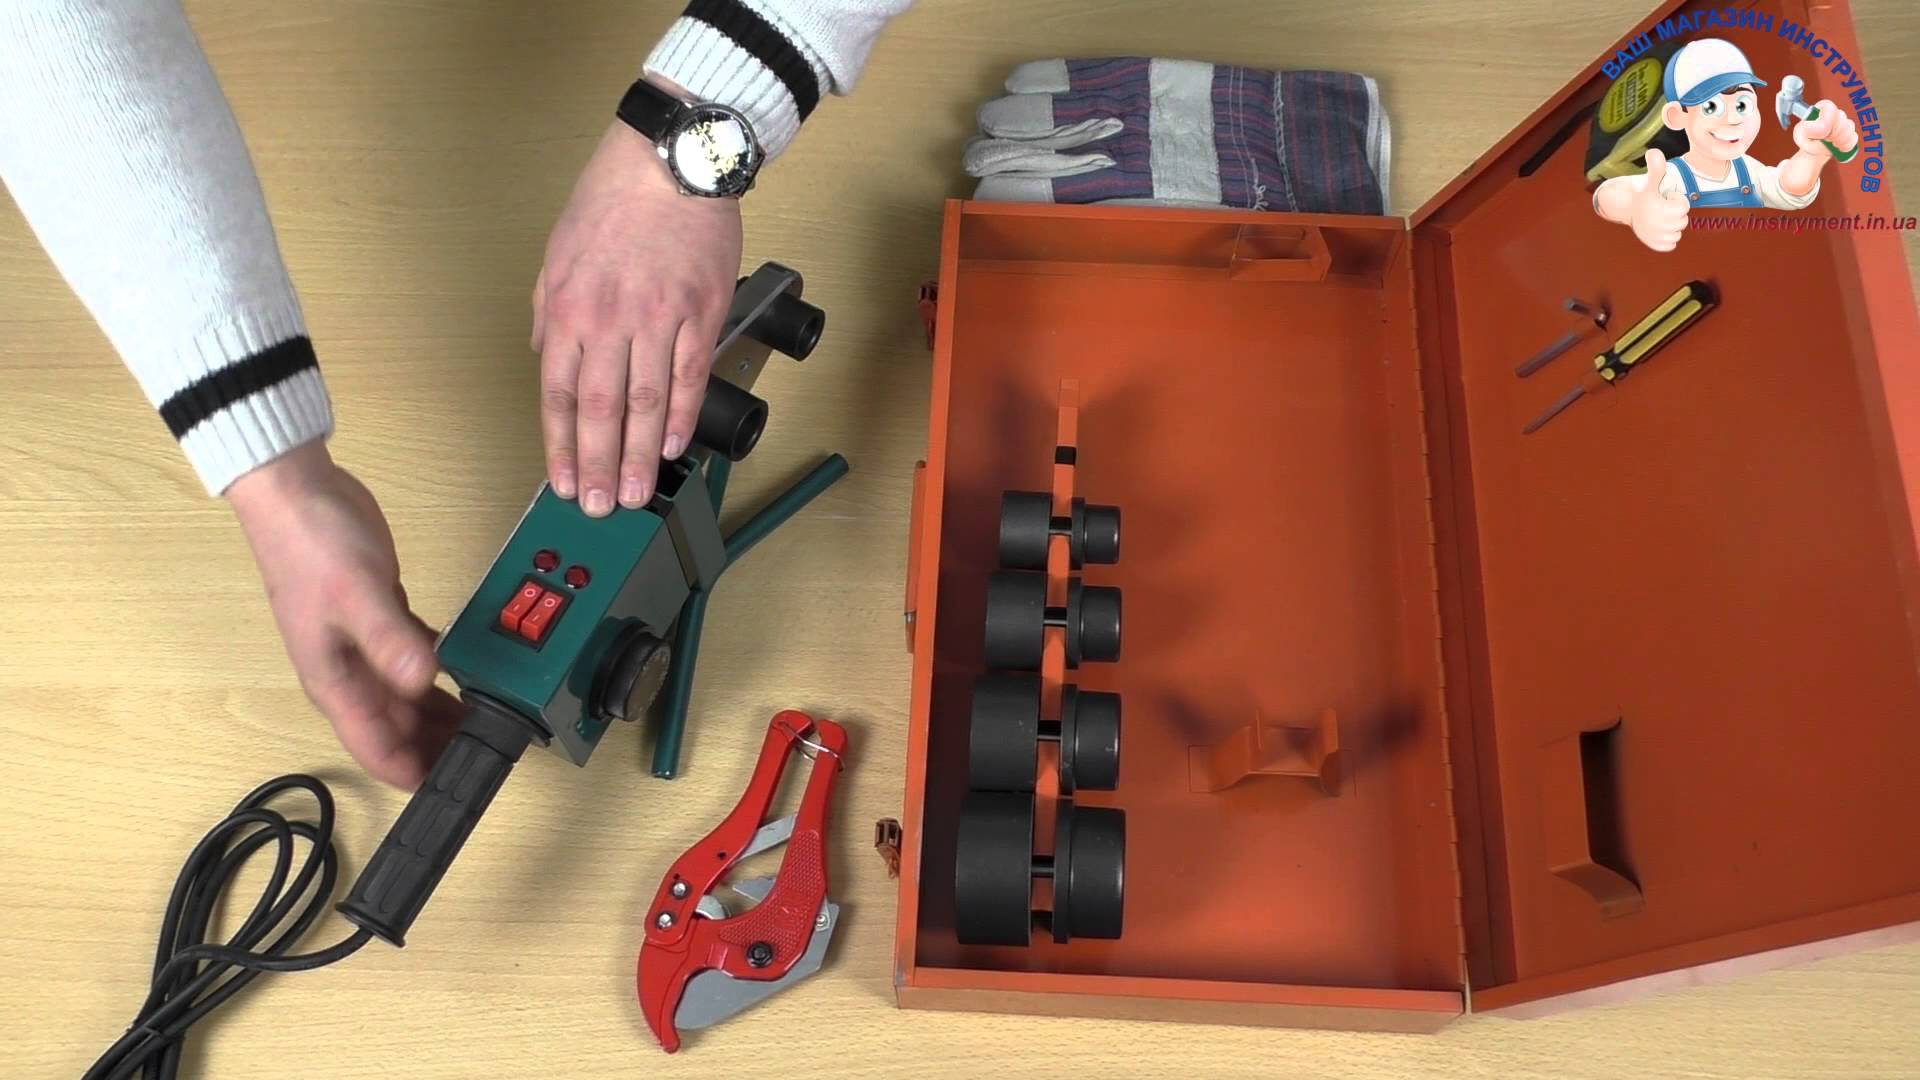
The fourth group of devices needed for, in fact, soldering. Welding or soldering pipes carried soldering iron with interchangeable nozzles. Working with this unit requires caution and safety measures.
Since the soldering iron heats up to a high temperature, there is a risk of burns when working with it. In the shopping list for soldering in the first place should be a good tight gloves, preferably with a heat-resistant coating.
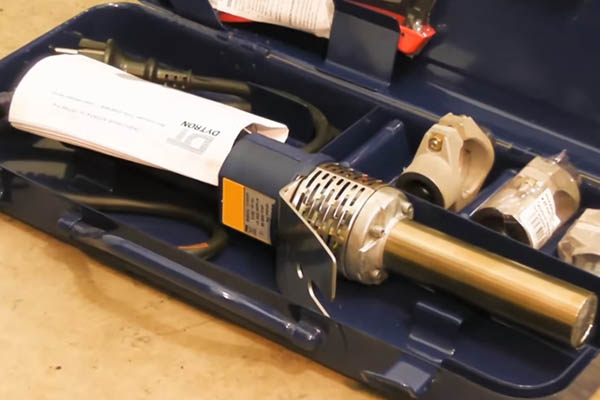
Included soldering iron should be replaceable nozzles for pipes of different diameters. It is possible to change a nozzle by means of a key hexagon.
A toggle switch for temperature adjustment is located on the side or top of the case. An instruction manual with a detailed description of the tool and all the manipulations that can be made with it is attached to any soldering iron.
Instruction
In general, for a professional pipe welding looks simple: heated, connected, fixed. The key word here is for the professional. For novice professionals and simply homely hosts, the procedure consists of more steps. And it is more difficult to carry them out.
There are two ways of welding - end-to-end and to the socket.
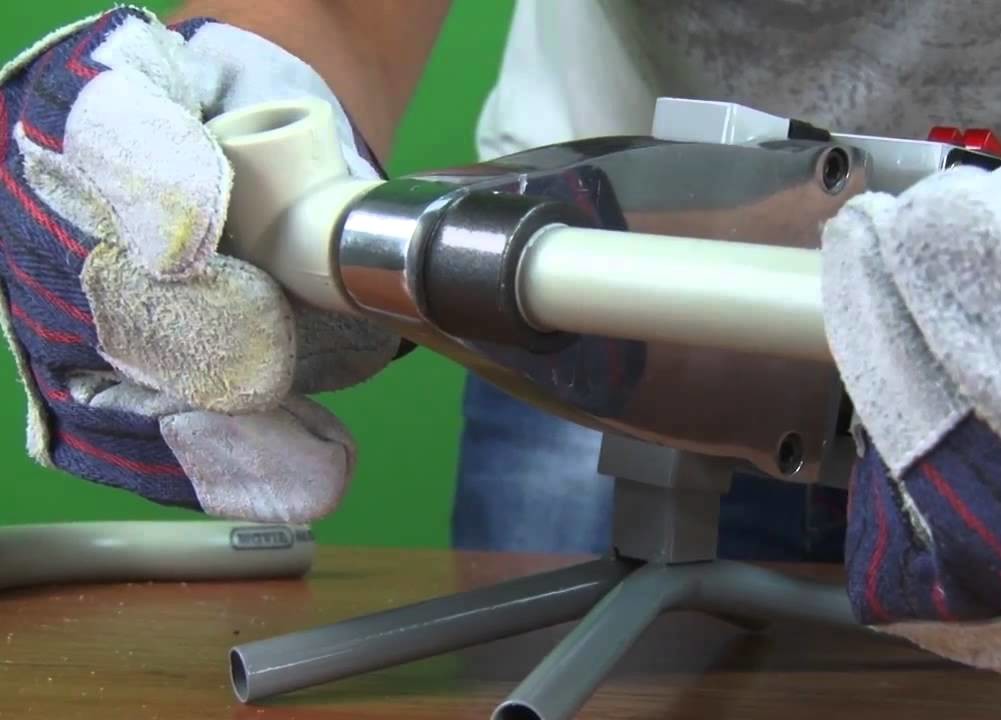
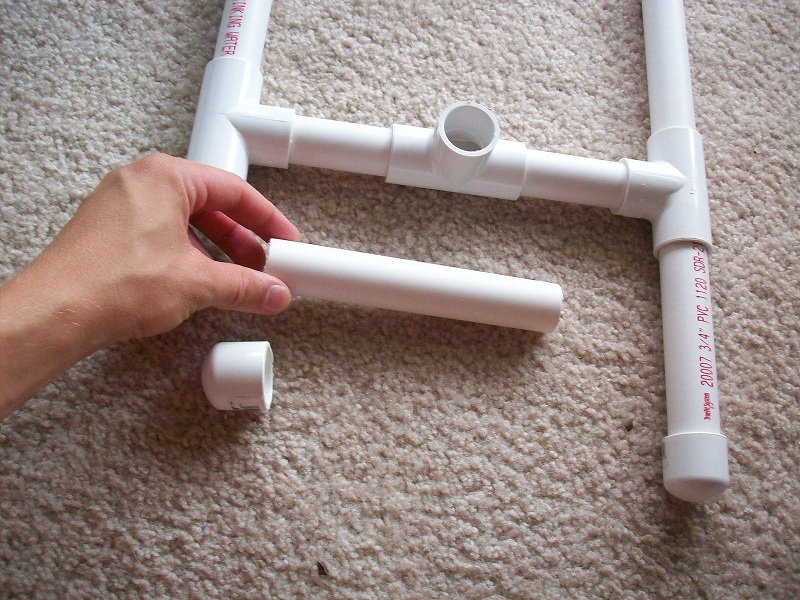
When the two parts of the pipe are butt-joint, no additional parts are used. The pipe of smaller diameter is inserted into the product of larger diameter. This is the easiest, but not the most effective way. Thus it is difficult to connect pipe rolling, if it does not go only in a straight line.
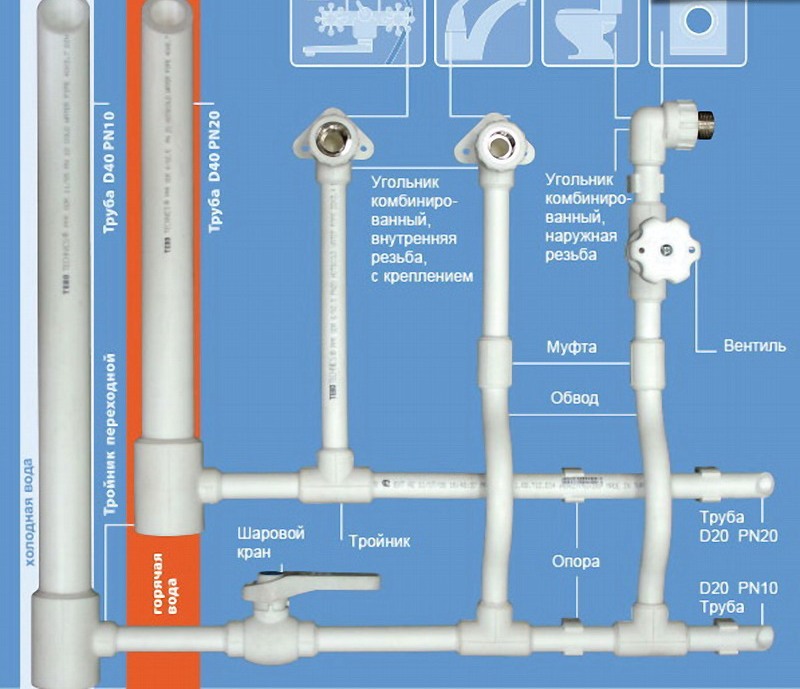
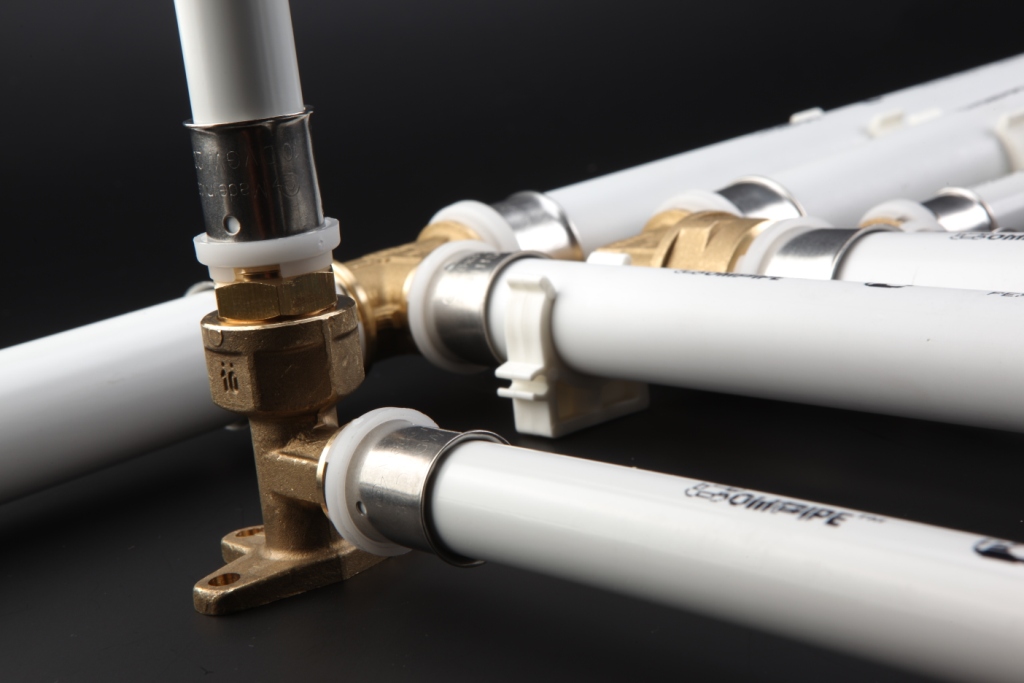
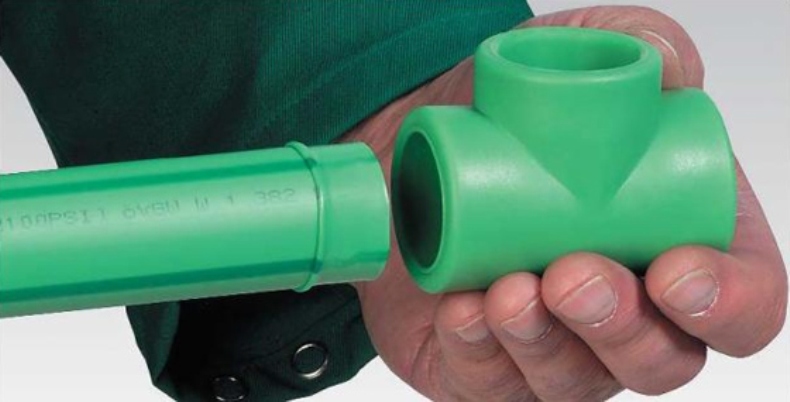
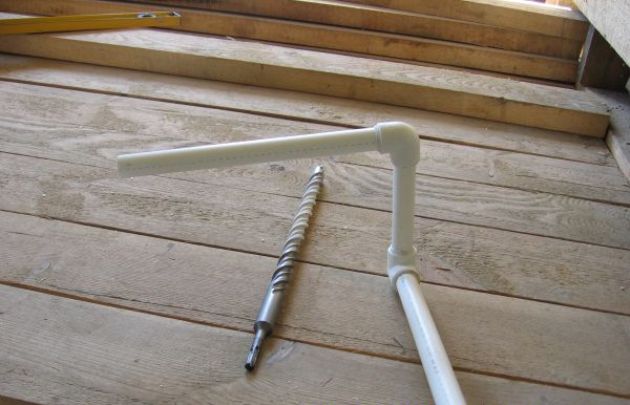
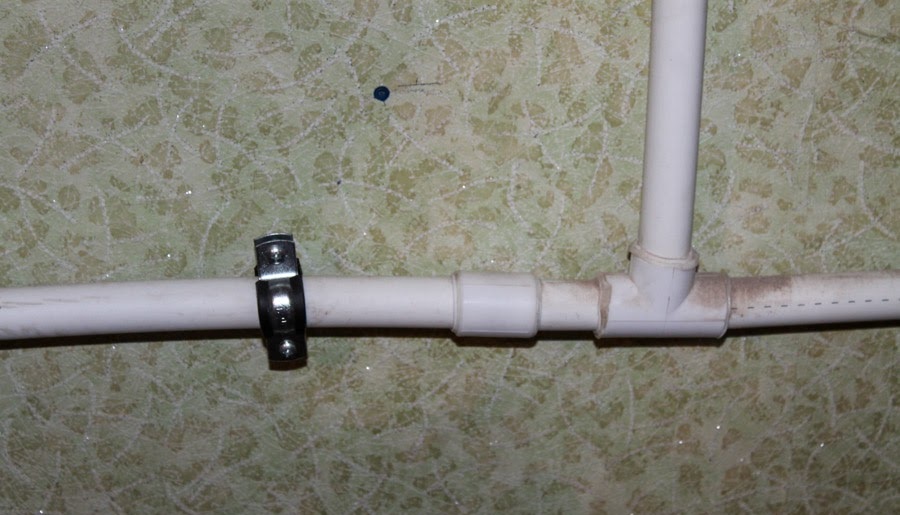
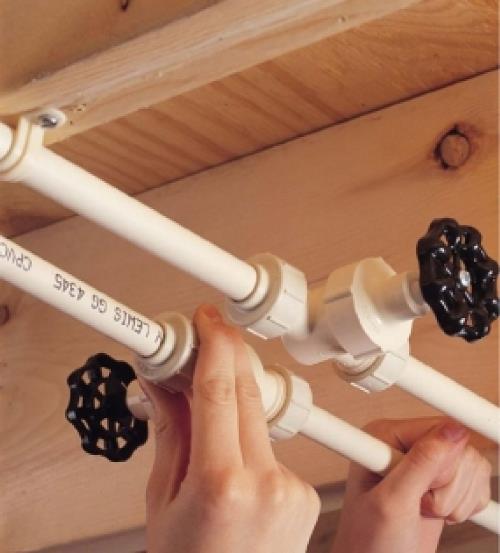
The method of the socket is much more reliable. It involves the connection of parts using fittings of various configurations. With the help of fittings, you can easily change the direction of the pipeline, make branching and complex water supply systems.

In both cases, welding or brazing is the docking of two heated parts. Due to the fact that the parts from both ends are soft and flexible for deformation, diffusion occurs (mutual penetration of materials). A solid connection is formed. According to its characteristics, the pipeline at the junction does not differ from the characteristics of the factory propylene product.
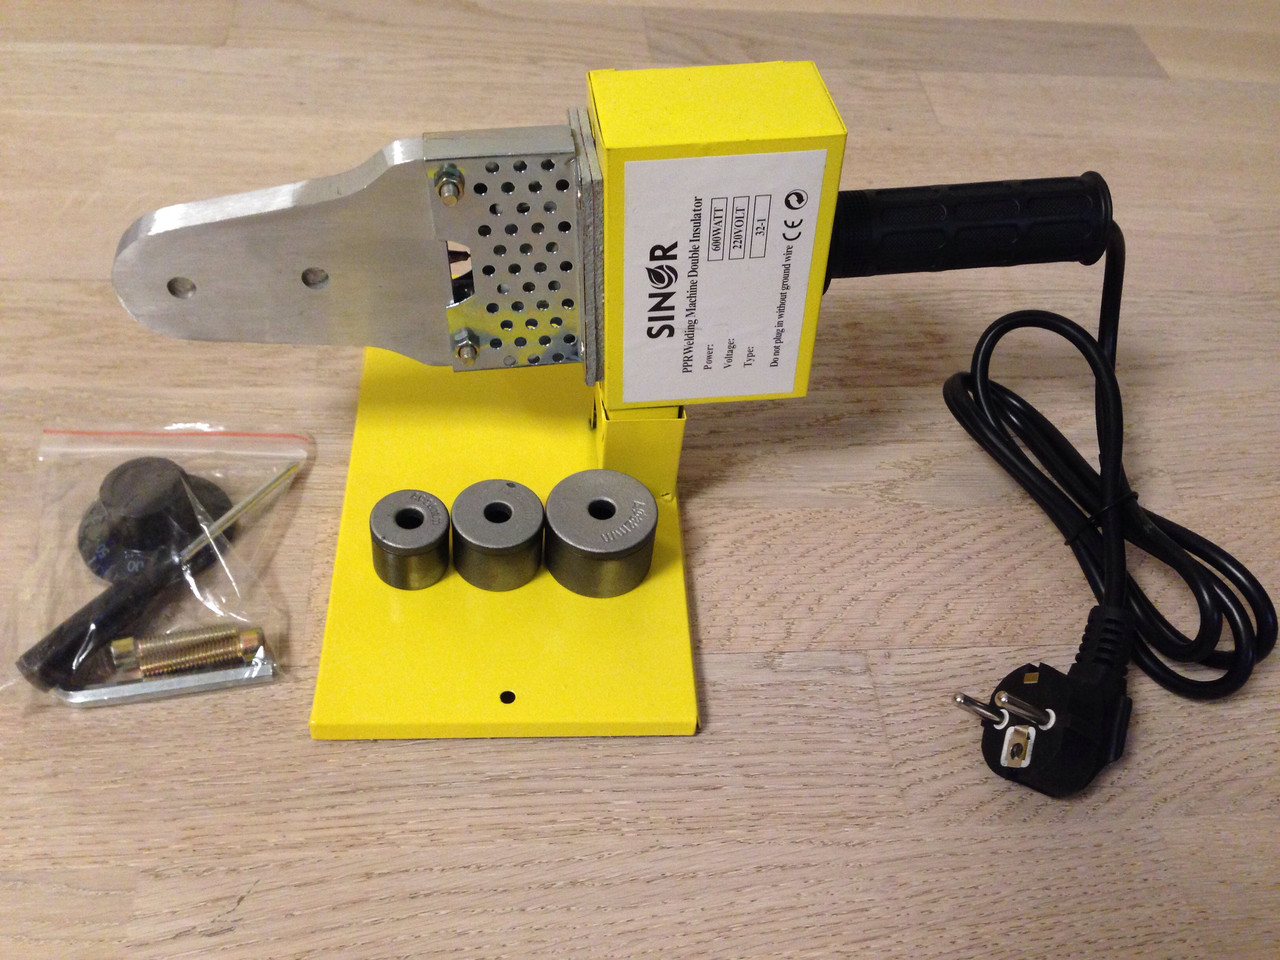
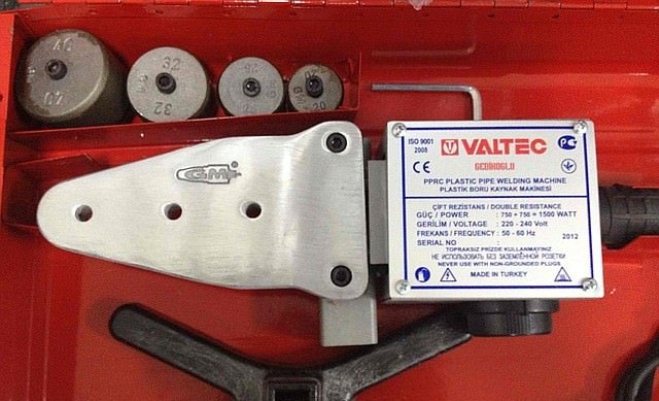
There are many models of soldering irons for PP-pipes, but their structure is the same:
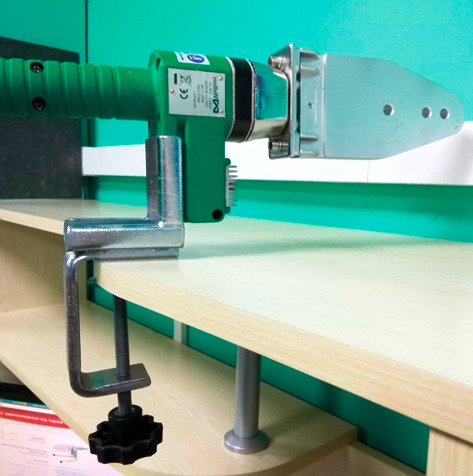
- HousingIt has a stable lower part, stand and handle.
- A heating element. The maximum heating temperature is 260 degrees. Top has a protective cover.
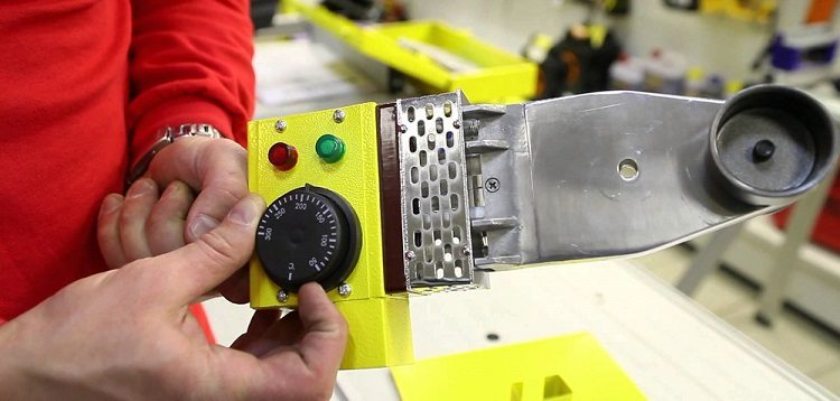
- Temperature regulator. May be mechanical or electronic. There are light indicators.
- A set of nozzles of different diameters. Part of the nozzles is designed for pipes, part - for fittings. Nozzles have a Teflon coating. It provides uniform heating of polypropylene parts and easy cleaning.
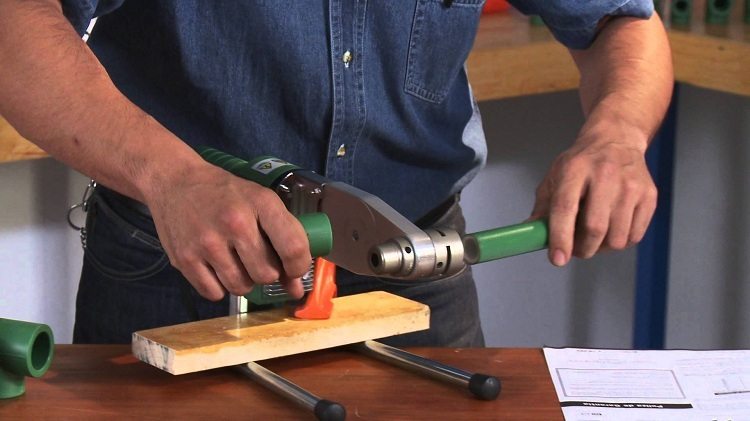
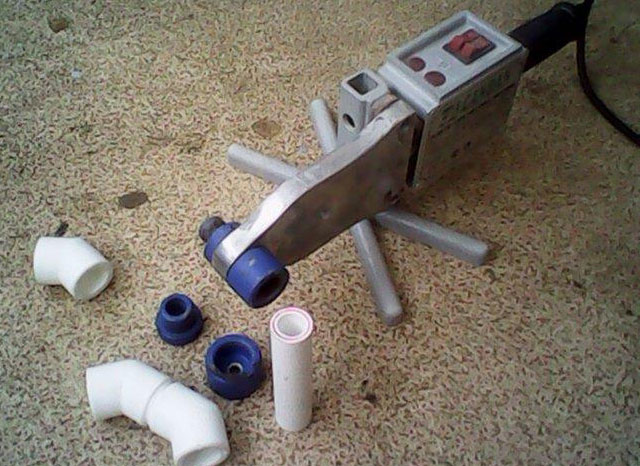
Types of soldering irons differ in the shape of the heating element or tip. Two types are popular: “iron” and “rod”.
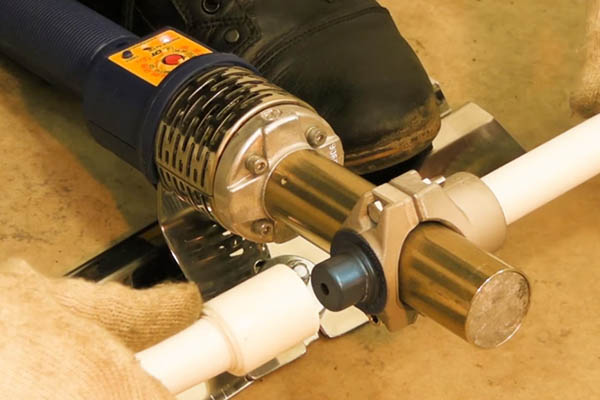
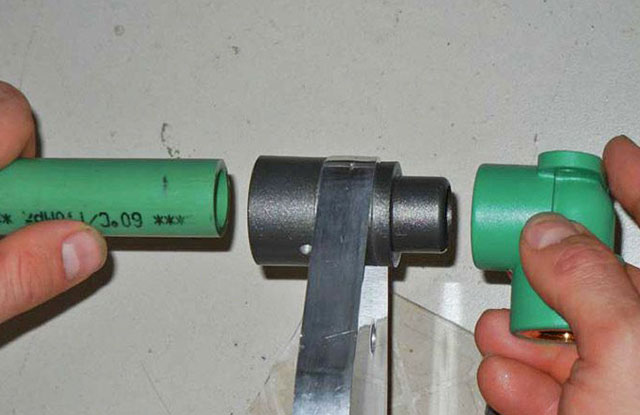
Rod soldering iron appeared earlier. His sting is a cylinder a few centimeters in diameter. On the cylinder is fixed nozzle. On the one hand, it is adapted for heating the pipe, on the other - for the fitting.
The fitting is heated from the inside. It is worn on top of the nozzle. The pipe, in turn, heats up outside. It is inserted into the hole of the nozzle.
In the process of working from the temperature effect, the attachment of the nozzles on the rod may become “loose”. They have to twist, so the rod soldering iron is less convenient than in the form of an iron.
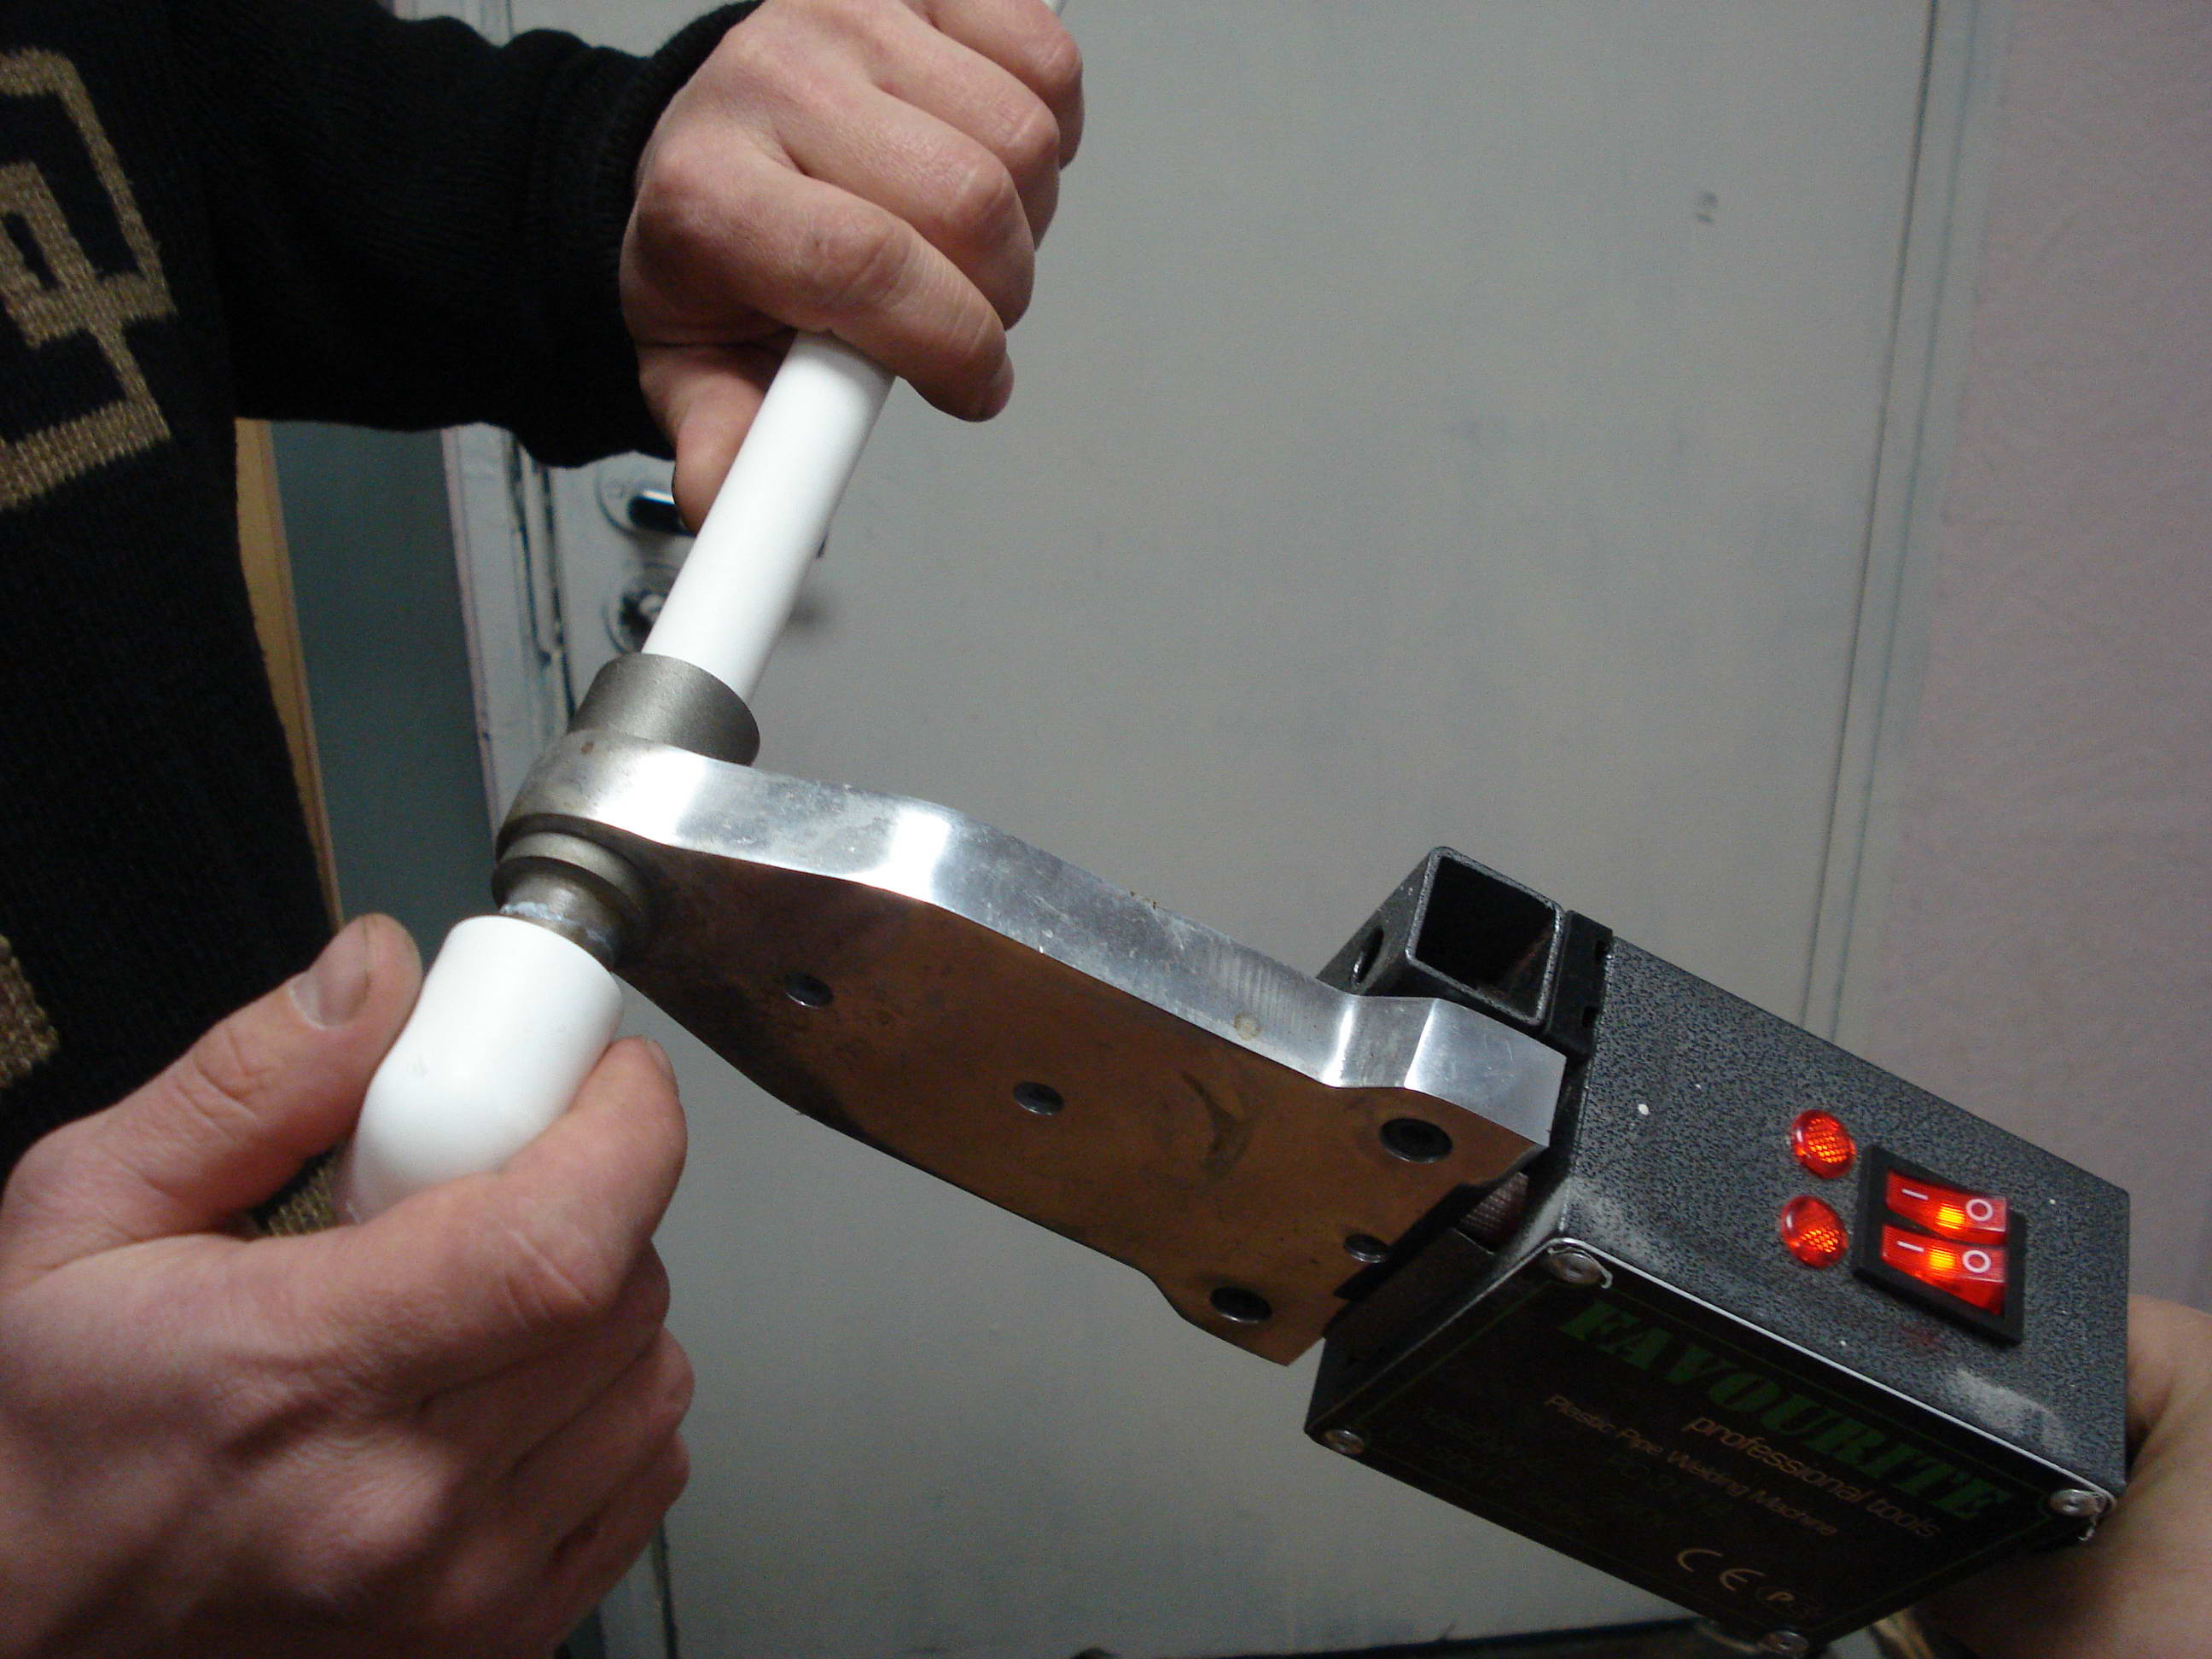
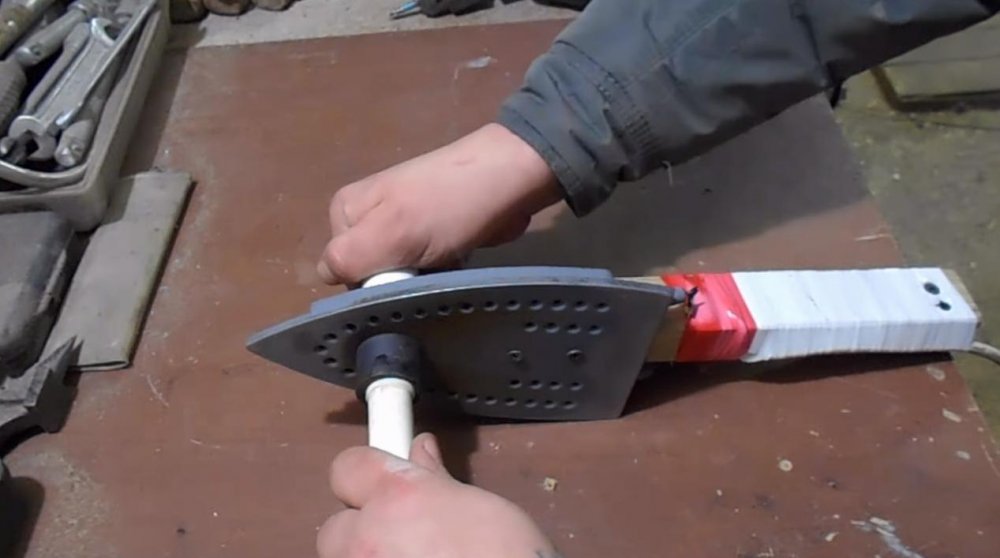
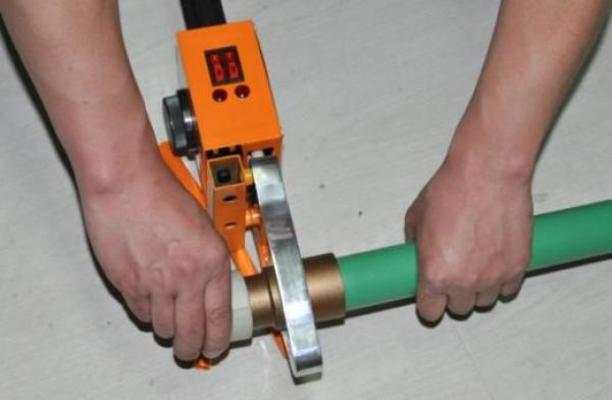
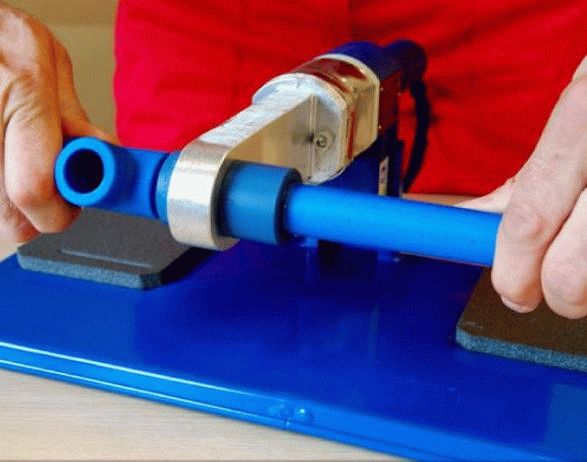
The sting iron represents a vertical plate with three openings for installation of nozzles. Plate thickness varies within a few centimeters. Her “nose” is pointed, and on the whole the plate resembles an iron sole located vertically. Hence the name of this type of sting.
On the one hand, nozzles for pipes are fixed, on the other - for fittings. In the process of soldering, they do not become loose, which is much more convenient than the rod one.
Also, the width from the edge of the left nozzle to the edge of the right nozzle is smaller than on a soldering iron rod, so it is more convenient for working in hard-to-reach places.
An important role is played by the number of nozzles with different diameters and the quality of their coating. The larger the range, the more types of pipes can be used in plumbing work.
In standard sets of 3 or 4 nozzles. For domestic use, a soldering iron is enough. But for professional use in plumbing work you need to purchase a few more varieties.
Even when choosing a soldering iron must take into account the power tool. To choose it according to the principle “the more powerful, the more effective” is wrong.Such a tool will only waste energy, and not improve the result of work.
To select a soldering iron for specific needs, there is a simple rule. The diameter of the pipe (in millimeters) must be multiplied by 10 watts. The resulting number is the required power. When working with products of different diameters and polypropylene, you need to focus on the largest.
The melting technology of PP-pipes is not difficult. But there is a catch in working with them: it’s impossible to determine the quality of the soldering immediately. All oversights and leaky connections can be identified only during the operation of the pipeline. Therefore, it is important to study the nuances of work in advance and properly solder the pipeline system.
Detailed instructions for beginners:
- Wipe the tips of the soldering iron with a clean, dry cloth.
- Install the soldering iron on a special stand.
- Install on the sting two nozzles of the desired diameter. Nozzles have not in a row, but one against the other. The pipe weighs more than the fitting, so the nozzle for it is installed from the side of the working hand. For right-handers - on the right side, for left-handers - on the left.
- Connect the soldering iron to a network of 220 volts. When connecting it is important to ensure that the heating elements do not touch the soldering iron cord.
- Adjust the welding machine to a maximum temperature of 260 degrees.
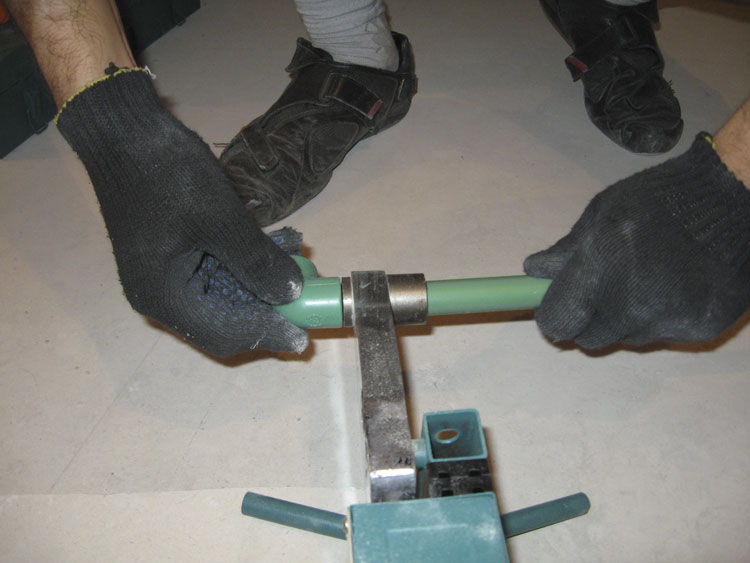
- Wear heat-resistant gloves. All manufacturers of soldering machines for PP-pipes indicate that in order to comply with safety, it is prohibited to touch the hot parts of the soldering iron to unprotected parts of the body. Also, the soldering iron should not have access in children and animals.
- Heat up plastic parts. In the process it is important to monitor the safety of the angle of the joint.
- Take out the hot propylene parts one by one, connect with each other.
- To cool the soldering apparatus in a natural way. Do not cool it with water or cold air. From such manipulations, the product will fail before the warranty period.
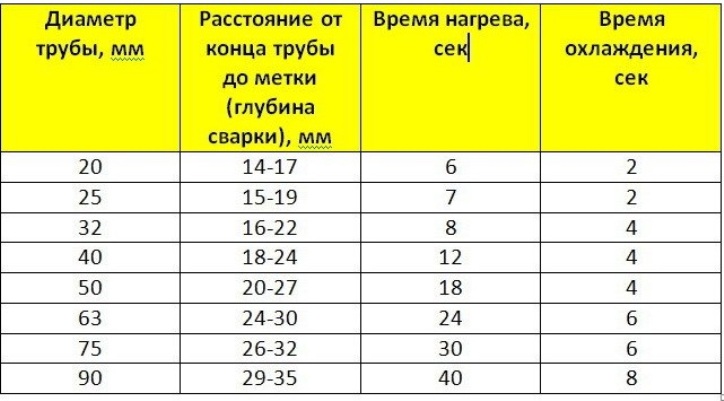
Manufacturers do not indicate universal heating time for different types of pipes. For thin-walled products of small diameter and thick-walled wide pipes, temperature and time may vary.
Professional installers determine the degree of heating by experience and based on intuition. Beginners are helped by the table that each manufacturer puts in the instruction. It takes into account the time with the pipe, depending on its diameter and the length of the connecting seam.
Tables from different manufacturers may vary.
The exact time is determined by the power of the soldering iron and its model.
Installation
Soldering or welding PP-pipes is an integral part of the installation process. You can not first solder the entire water supply system into one, and then freely install it in the space provided. Some areas will still have to be soldered on weight. Therefore, soldering and installation are parallel.
The work is carried out in stages.

The first stage is organizational.
The organization consists of two important events: the choice of materials and the creation of a drawing.
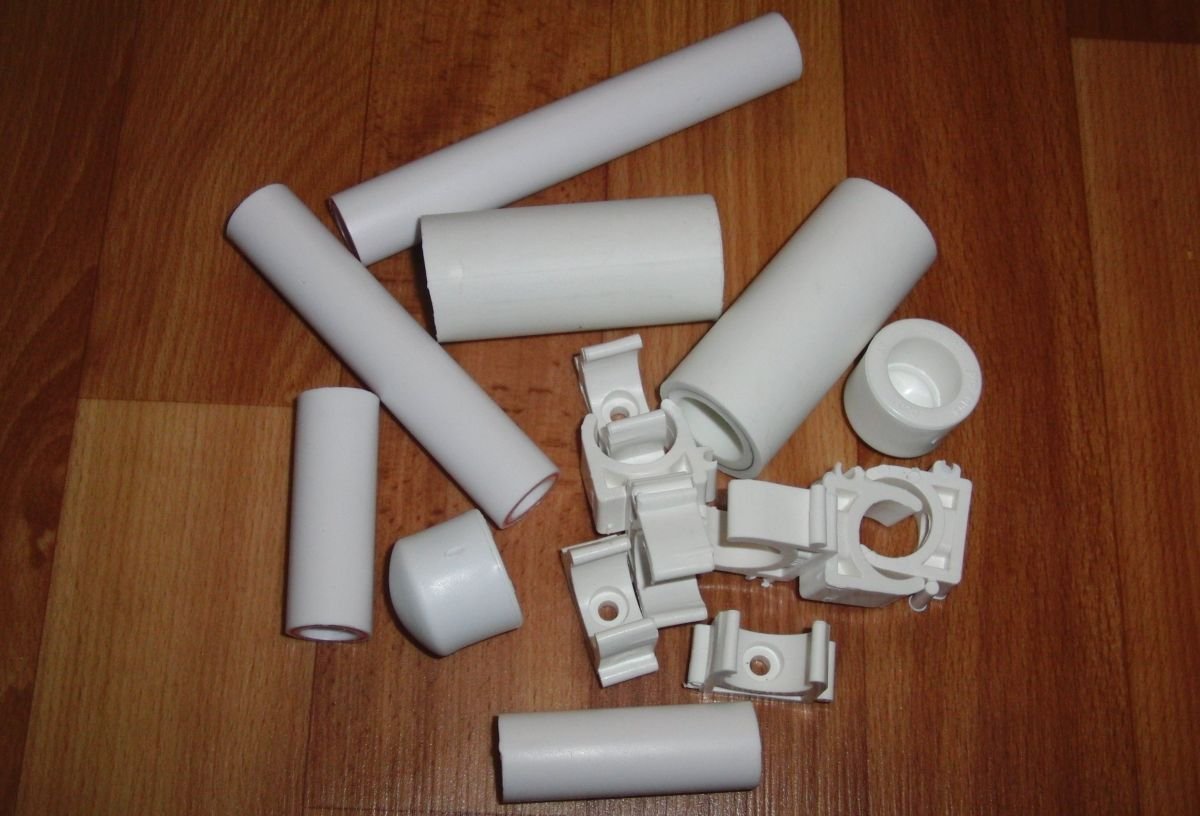
Polypropylene pipes must comply with their technical characteristics of the system in which they will operate. If this is a cold water system, you can stop at the pipes PN16. For hot need at least PN20. In addition to the pipes themselves, you will need connecting fittings and holders (loops).
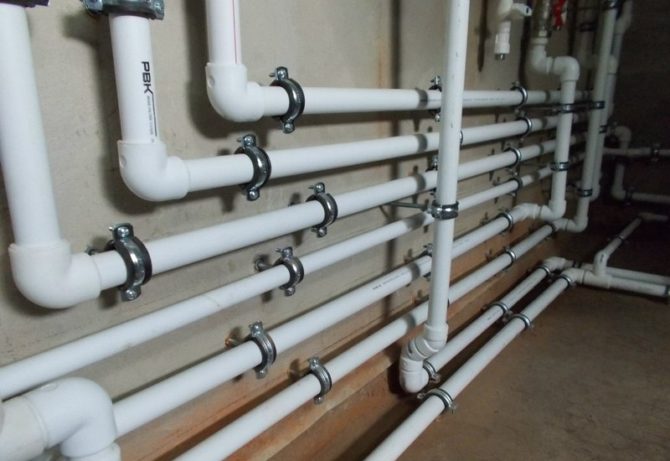
A drawing is a circuit for laying a pipeline. It should reflect all elements, starting with the source of water supply and ending with the objects of water consumption. On the scheme it is important to indicate all parts of the system that will be laid in the ground and in the room, at what depth they will be and at what height to raise the water.Fasteners must be provided for every 40-50 cm. Also note the location of adapters, branches, couplings, taps, radiators.
Plumbing is mounted in two ways: open and closed. Open easier to do it yourself. A novice can handle it. Closed more laborious and complex. It is better to entrust experts.
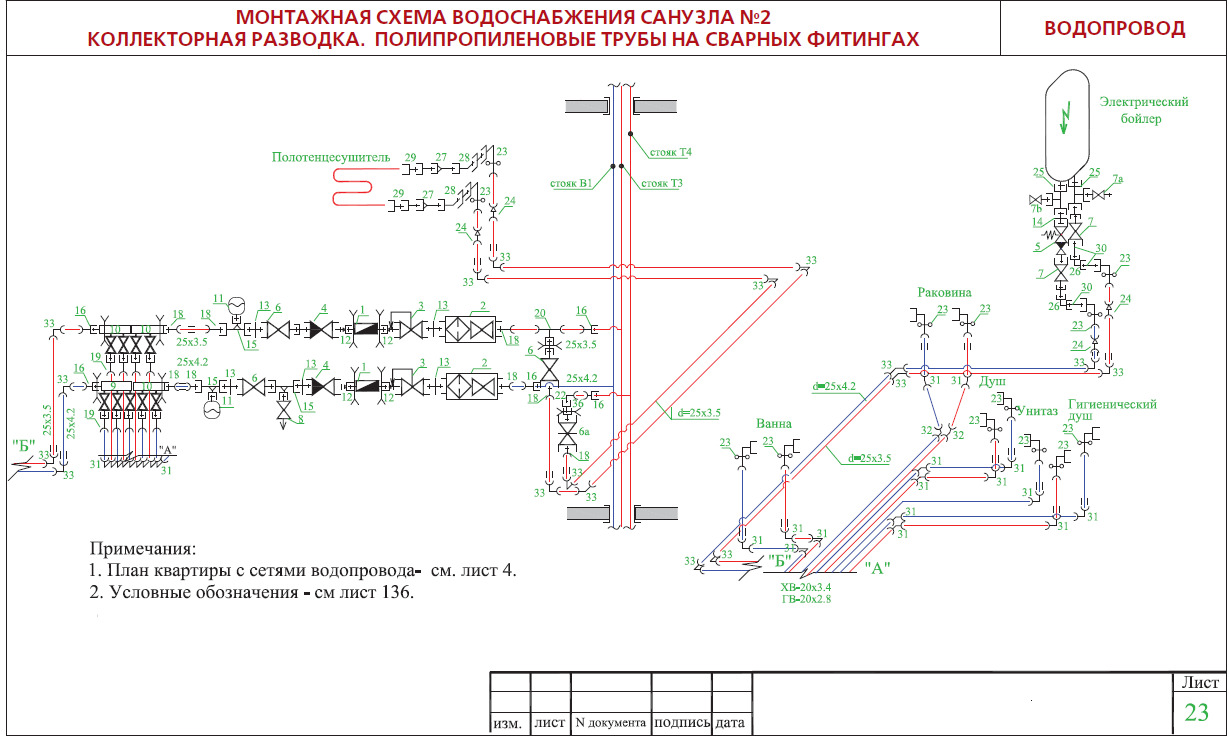
Besides the fact that the drawing gives a visual representation of the location of the pipes, it helps to calculate the amount of materials.
Polypropylene is virtually waste-free material. But no one is insured against mistakes when first working with him, so you need to purchase material with a small margin. 5-10% will be enough.
Of the remaining pipes and fittings, you can always make useful things for the house, so this is not a waste of money.
The second stage - preparatory
To make installation quick and easy, it is necessary to prepare sections on the street and in the room through which the pipeline will be laid.
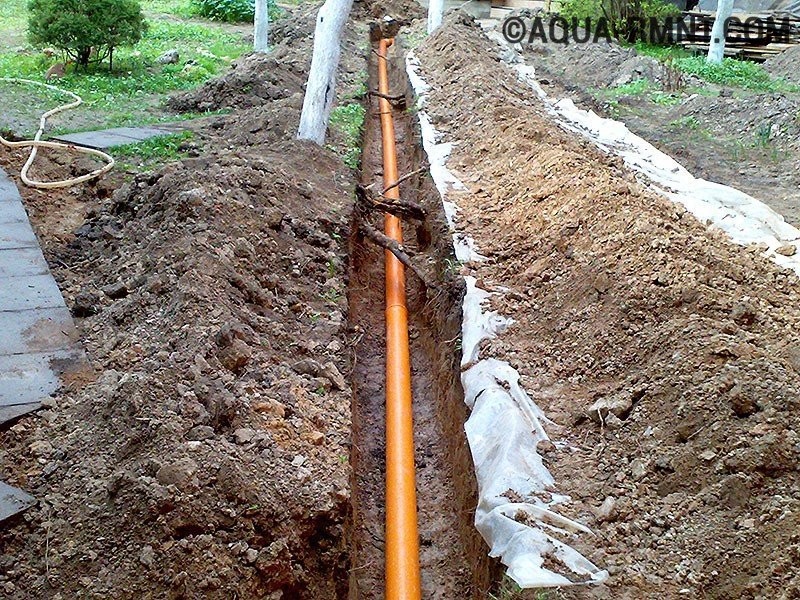
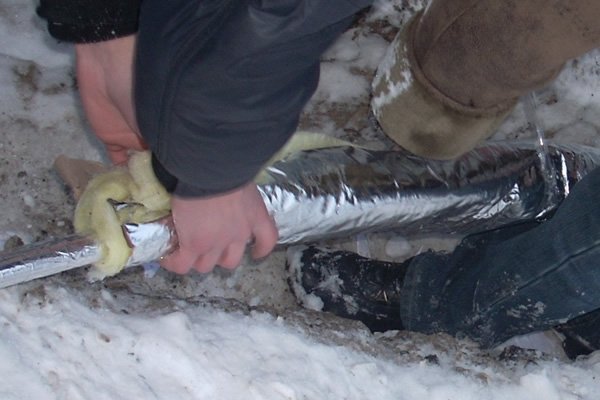
If some of the pipes need to be installed in the ground, then a trench is dug under them. So that they do not freeze over in winter, you need to make a well below the freezing level. As an additional protection is recommended to use insulation.They turn around PP-pipe before diving into the ground.
The best option for insulation is mineral wool or foil-based materials.
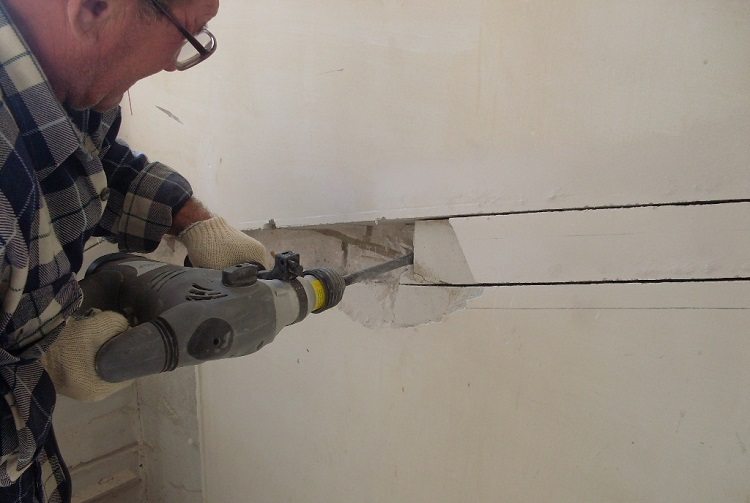
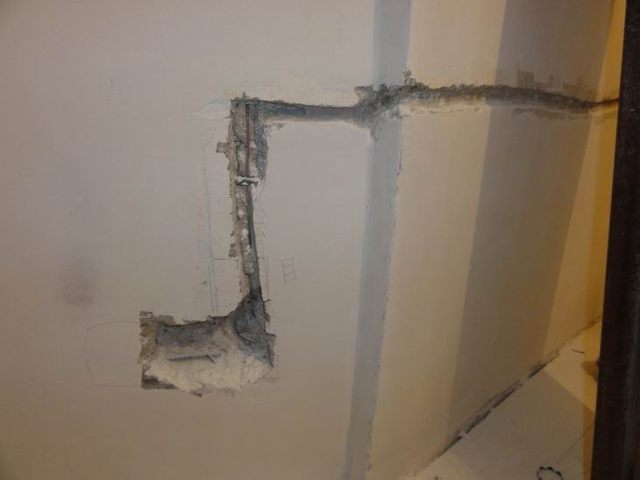
Inside the house you need to install fasteners along the pipeline. Their location relative to the horizontal line and each other is determined by the construction level. Best suited for this laser device. You also need to punch holes in the walls through which the pipeline will pass.
In the process of preparation it is easy to identify hard-to-reach areas for installation. It is important to think in advance how best to install pipes on these sections - use finished parts that are welded on the table, or do it on weight.
The temperature of the soldering iron is high to cause damage to any object in the immediate vicinity. Before installation, you need to clear the path that you have to move during installation so as not to run into obstacles.
The third stage - analysis of pipeline sections by complexity
At this stage, you need to work on the scheme to bypass the entire installation path and note which elements of the pipeline can be mounted on the desktop, and which can be welded only on weight.
The resulting sections should be noted on the diagram. Some of them may be too short, so they can be combined. Some, by contrast, may be too long. They need to be equipped with an additional fastening on the wall or divided into several parts so that the pipe does not sag or stretch.
Fourth Stage - Pipe Cutting
Thin-walled products are well cut with scissors for PP materials and pipe cutters. In rare cases, jigsaw fit.
For thick-walled pipes with reinforcement of aluminum and foil before cutting need cleaning. It is handled by a multi-function facer or shaver.
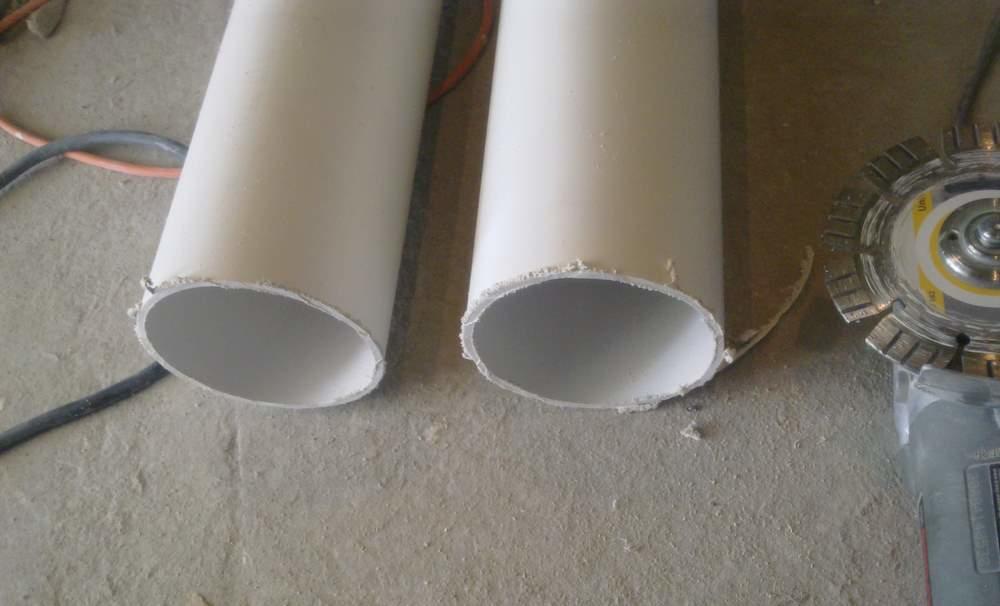
If there were no special tools and the cut turned out uneven, it needs to be sanded. It is more efficient to use two types of sandpaper - first with a larger grain, then fine-grained.
When cutting pipes it is important to consider that 15-30 mm of length will go to the connecting seam. They need to be added to the length of the pipe, which is applied to the pipeline scheme. If the fittings are located at both ends of the pipe, then 15-30 mm should be added twice.
Excess can always be cut off, but to increase the missing a few centimeters will not work.In order not to be mistaken, you should not cut all the elements of the pipeline at once, including difficult sections.
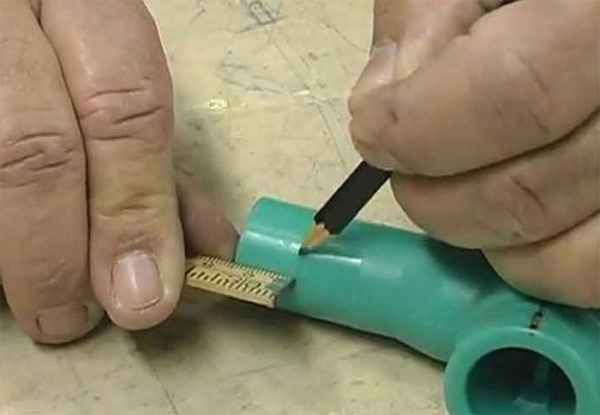
The sections of pipes that will be heated by a soldering iron should be marked with a marker.
The end of the pipe should enter the nozzle up to the mark.


The fifth stage - welding (soldering) parts on the desktop
As mentioned above, in practice the spike of pipes consists of more steps than heating and joining.
To make the seam reliable, and the system functioned correctly, you need to solder step by step:
- Degrease the nozzle of the soldering machine, the inner surface of the fittings and the ends of the PP-pipes. Alcohol can erase markup marked with a marker. If necessary, it can be updated by specifying measurements on the line.
- Install the soldering iron on the stand. It must be heat-resistant, and the working surface is flat and stable.
- Wear heat-resistant gloves.
- Secure attachments of suitable size.
- Connect the tool to the mains, adjust the temperature to 260 degrees.
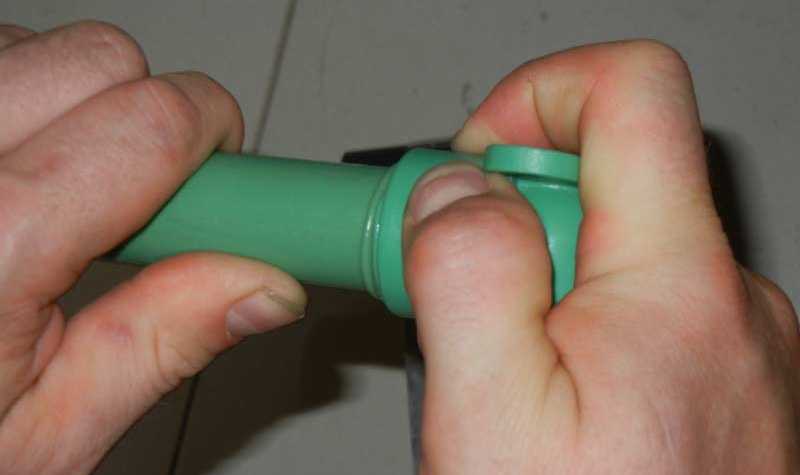
- The fitting is put on the nozzle and the tube is inserted into it. This heats up the inner side of the connecting element and the outer part of the pipe.It is important to observe the recommendations on the heating time (in seconds) given by the manufacturer. The larger the diameter of the pipe and the thicker the wall, the longer the time. Usually after 6-8 seconds it is already possible to solder (connect the parts together).
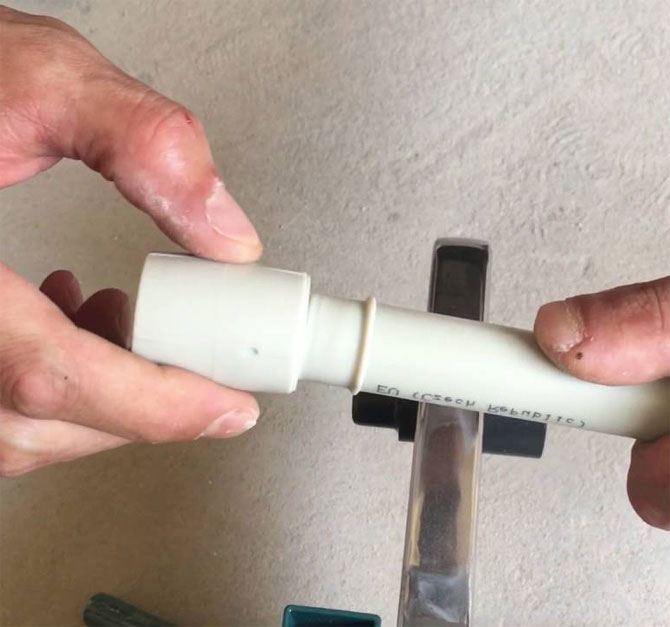
- Connect the heated parts. Insert the pipe into the fitting, hold for a few seconds to start the diffusion process, and then set aside until it cools down.
- Check the connection. This can be done not earlier than 2 hours after welding. You can mechanically test a part by moving the parts with your hands, or let water flow through them. If the pipe does not flow, and the water passes well, the connection succeeds.
- Solder all the parts that can be connected on the table.
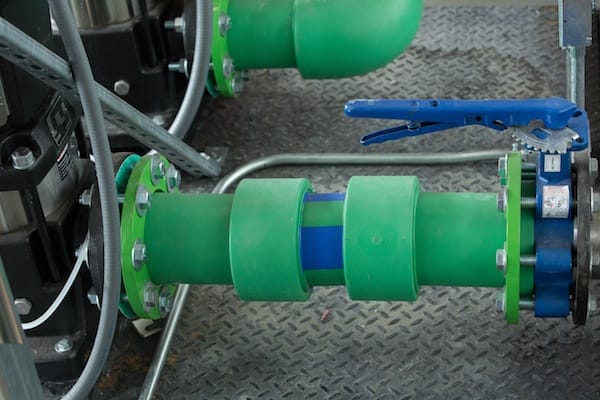
The sixth stage - laying the pipeline
In essence, this is the installation of all the elements in the places assigned to them. To connect some of them, in the process will have to weld parts on weight. This is done as stepwise as on the work surface.
Seventh stage - system check
A few hours after welding, the parts grab and cool. The efficiency and reliability of the system is checked by running water through pipes.
Typical mistakes
Beginners in plumbing and self-taught master, who want to save on the services of professional installers, often make the same mistakes. At first glance, these are trifles, but they lead to the fact that the system quickly fails.
What you should not do when installing PP-pipes with your own hands:
- Over rush. Welding PP-pipes requires some efficiency. But this only applies to the speed of connection of parts, while they are still hot. The rest of the rush has negative consequences. Most often, novice wizards simply do not allow the soldering iron to heat to the desired temperature. As a result, the "adhesion" of parts is bad.
Slow installers have another problem - they heat the parts to the right temperature, and then adjust for a long time before inserting the pipe into the fitting. In these few seconds, the temperature of the products falls, and with it the quality of diffusion also falls.
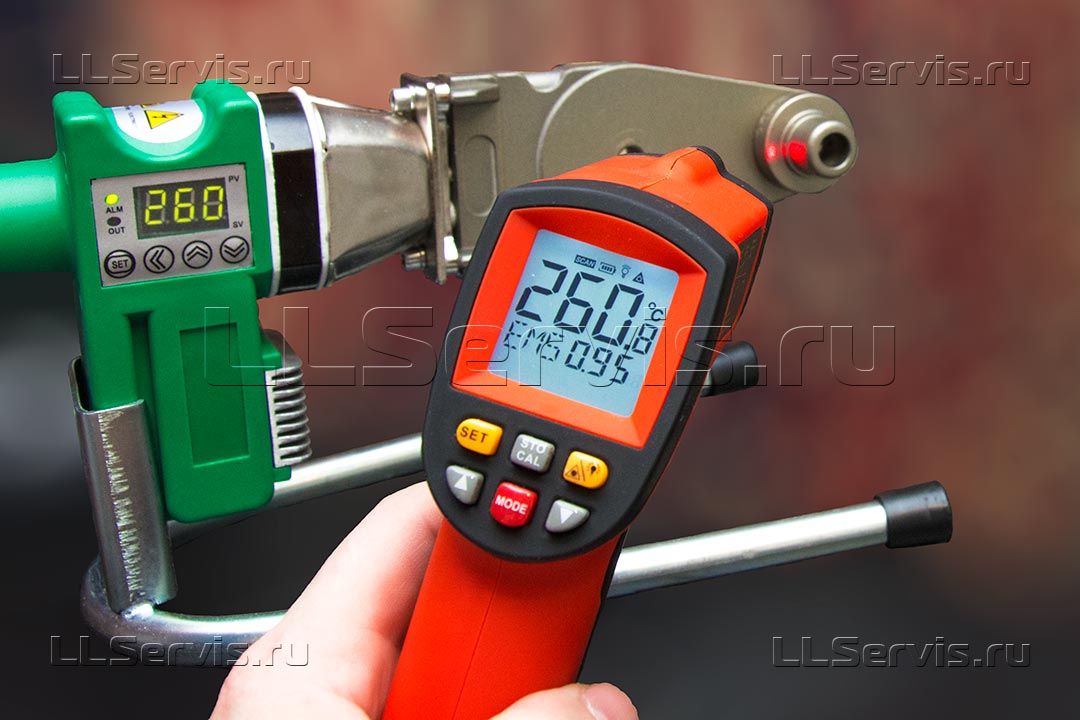
- Rely on the temperature readings of the thermometer built into the soldering iron. If the equipment is old or from an unfair manufacturer, the necessary 260-270 degrees on the display may appear due to a malfunction. The actual temperature of the nozzles is often below this parameter.For insurance, it must be checked with a contact thermometer. It is such a device is inexpensive, and in the household is useful not only for working with a soldering iron.
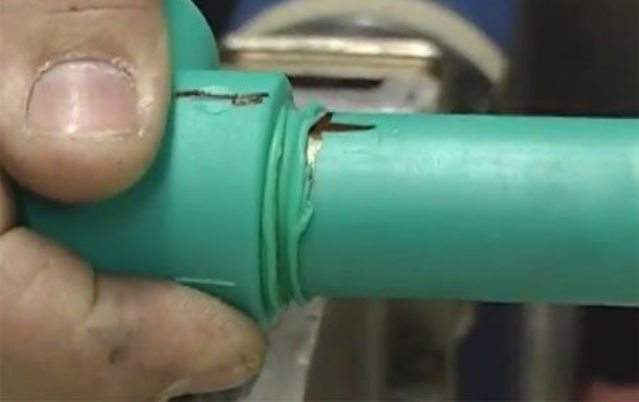
- Overheat propylene products. It may seem to beginners that the longer it takes to warm, the better the connection will be. In fact, it is not. If you melt the plastic too much, then there is an influx in the pipe. It will impede the free flow of fluid through the pipeline or completely block the pipe section.
- Welding pipes outside in cold weather. At low temperatures, the parts cool down too quickly, as does the joint. They do not have time to firmly grab.
- Do not clean pipes and nozzles from dust and grease. It also adversely affects the quality of the connection.
- Do not face the pipes with aluminum reinforcement. The temperature and time of melting of aluminum and propylene are different. Although aluminum is an anti-corrosion material, pipes can leak from it.
- Install all pipeline elements on the floor (table, ground) at once. Such a constructor can no longer be installed according to the scheme.
- Use thin-walled pipes for hot piping.They will not withstand high temperatures, will stretch out and eventually burst.
- Cut the pipe with a hacksaw or jigsaw without subsequent stripping of the cut with emery cloth.
- Try to speed up the process of cooling the pipe with cold water or air.
Tips
It is not enough not to make mistakes, it is also necessary to take into account the tricks of welding that have been developed by professional installers over the years. Conventionally, they can be divided into “life hacks” at the choice of materials and tools, and useful tips for work.
How to choose a pipe:
- Make it a rule that thin-walled pipes can only be used for cold water and decorative products. For work with hot water it is worth choosing only the reinforced thick-walled. For ventilation, you need pipes labeled PHP.
- Products with fiberglass as a reinforcing layer are universal. They are suitable for beginners who are just learning to use a soldering iron, and serve up to 50 years. You should not be led to the stories of consultants about the best quality of pipes with aluminum.
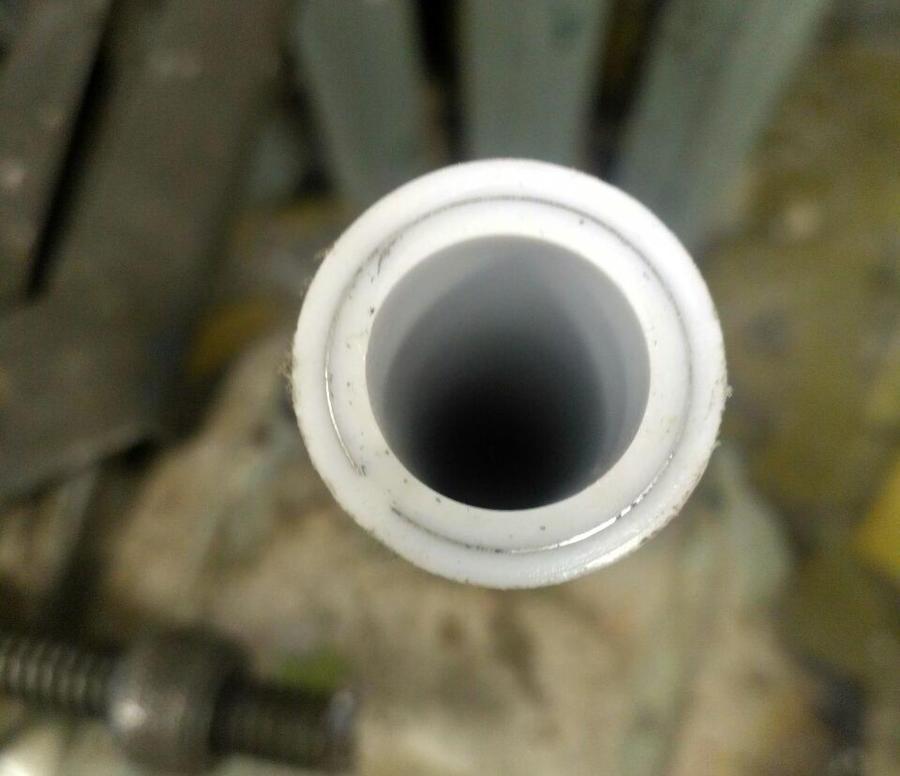
- The appearance of the pipes can also tell a lot. If the product has a uniform color, an even round cut and smooth walls inside and outside - it is of high quality.If the color is stained, the cut is not round, and the walls are rough - the product will fail during operation.
- Pipe need to smell. Only pipes from low-grade raw materials have the characteristic sharp smell of plastic. The product of high quality propylene almost does not smell.
- The pipe should enter the fitting tightly and only in a hot condition. If there is a gap between the walls at least a millimeter - this is a marriage.
- All components must be purchased from one manufacturer.
The tricks of welding and installation is much more. They come with experience, and each master has his own tricks. But there are some universal tips.
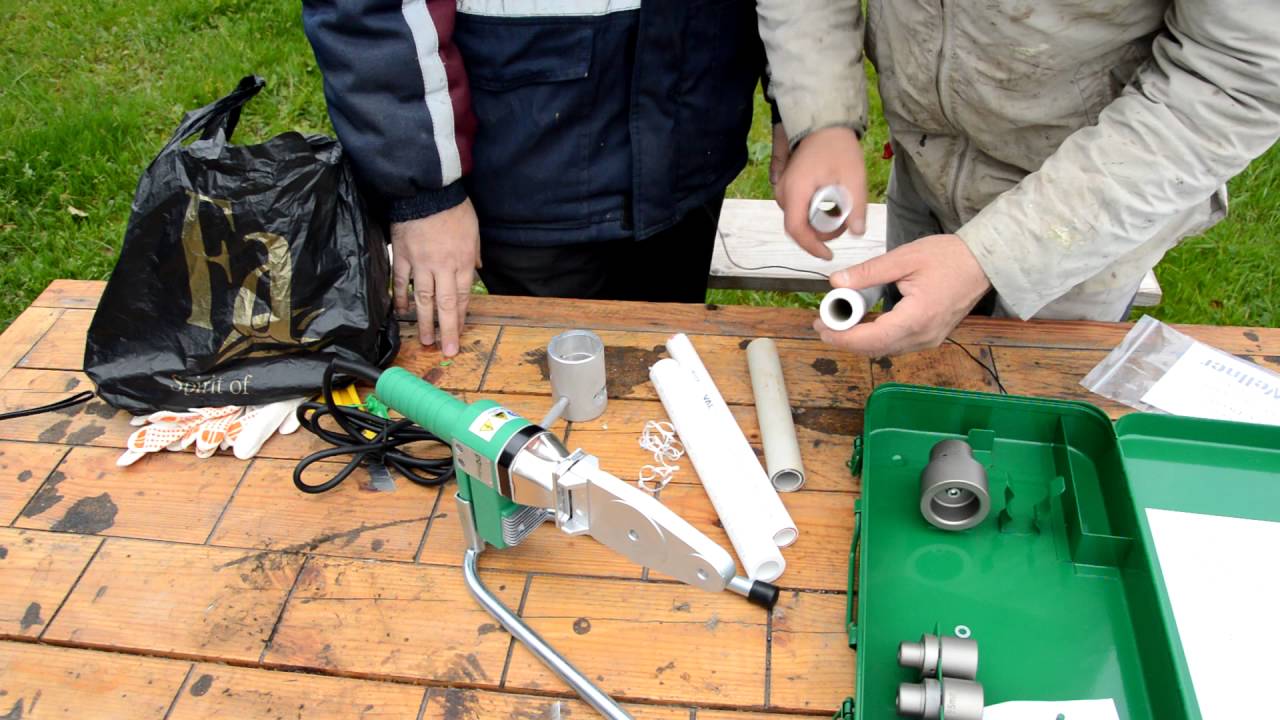
So, every master knows that the nozzles of the soldering apparatus are treated with a special solution in production. It protects the instrument against negative environmental influences before use. The protective layer evaporates when you first turn on the soldering iron with nozzles. With evaporation, there is a characteristic smell and light soot. Therefore, you need to run the device on the street for the first time and let it warm up to full evaporation. Only then proceed to soldering.
The second secret concerns the processing of pipes and soldering iron degreasing agent. It is better to choose pure alcohol.It evaporates quickly and leaves no odor inside the pipes, unlike acetone and solvent.
If the ambient temperature is close to zero, slow down the cooling of the joint. To do this, use a napkin made of warm fabric.
Wipe the parts with a cloth that does not leave a nap. Inside the nozzle of the soldering iron, it will glow.
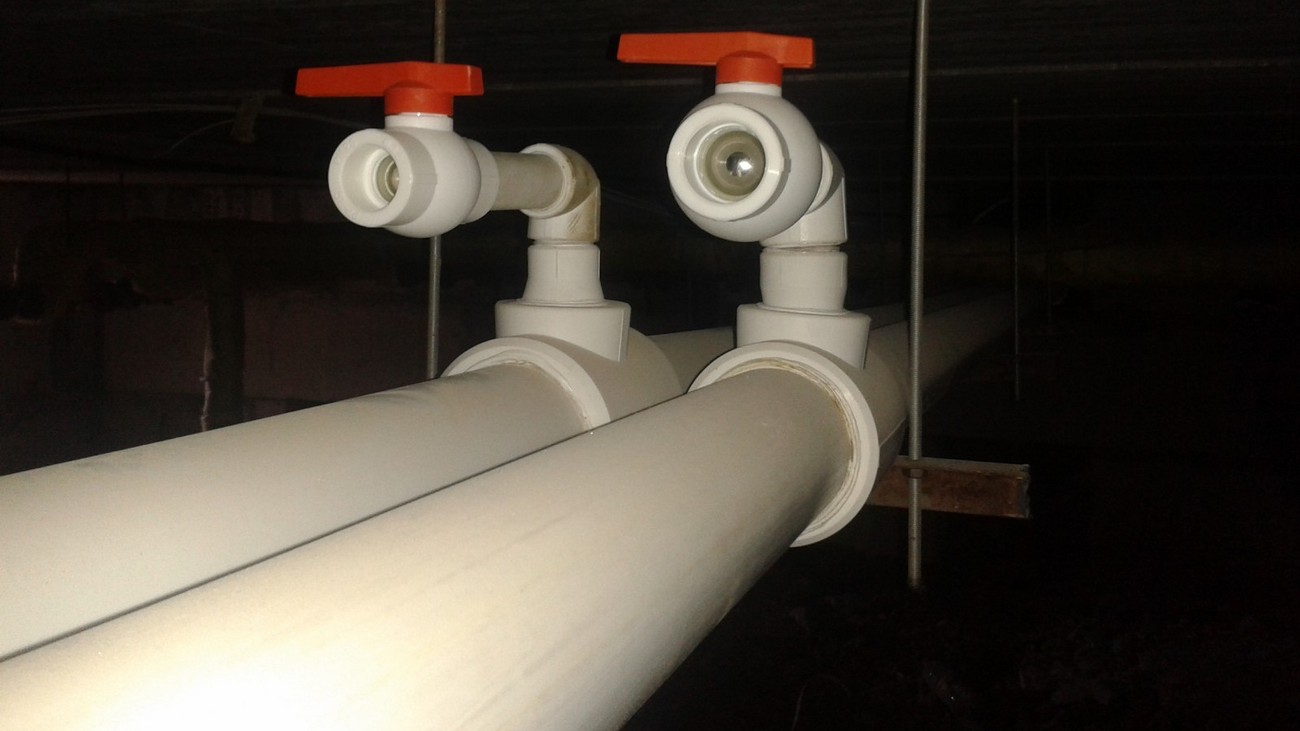
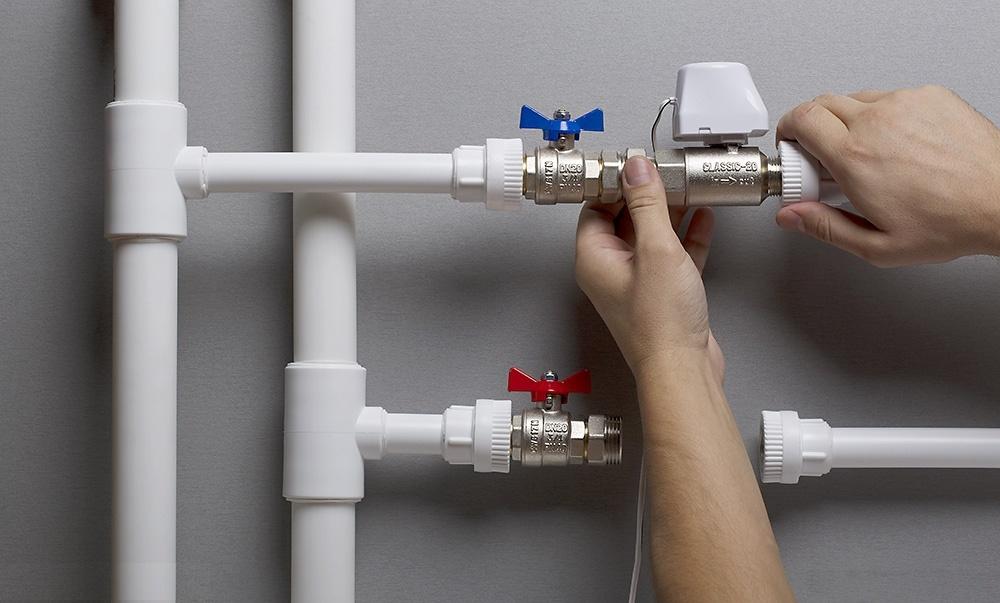
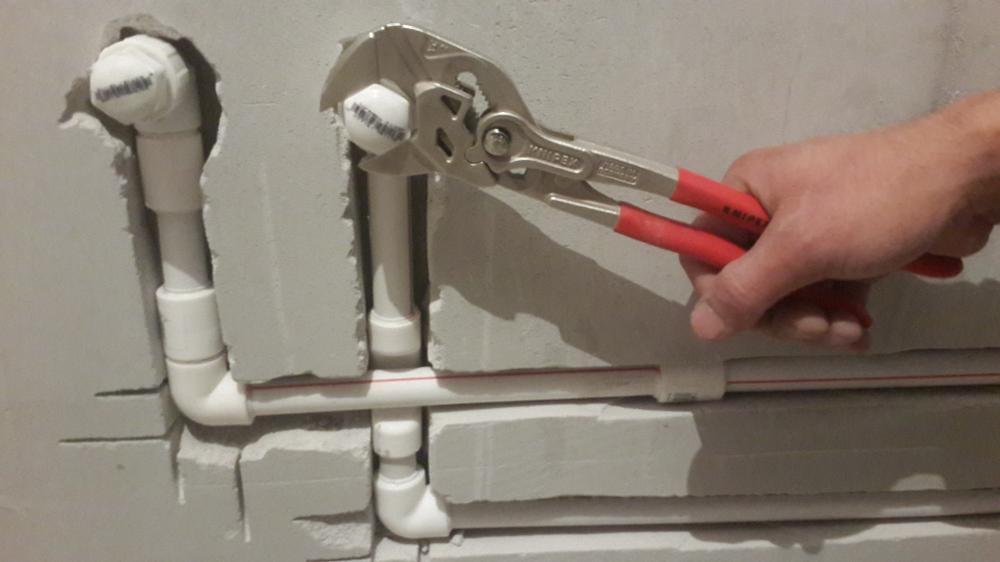
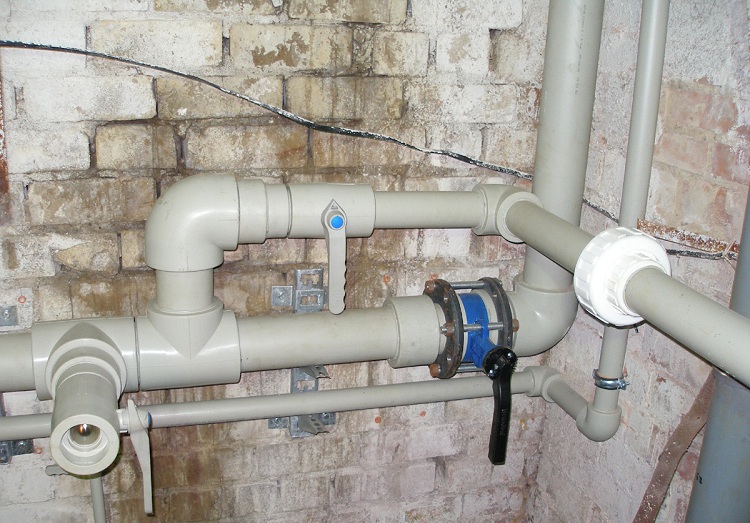
For double-contour pipes (hot water and cold), it is preferable to arrange the hot contour above the cold one. This will not cause condensation to form on the pipes. Connecting parts in places of transition from horizontal to vertical can only be at an angle of 90 degrees.
If you follow these recommendations, the installation will be successful, and communications from polypropylene pipes will last several decades.

For how to solder polypropylene pipes, see the following video.


